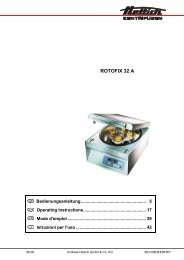
ROTINA 35 ROTINA 35 R - DJB Labcare
ROTINA 35 ROTINA 35 R - DJB Labcare
ROTINA 35 ROTINA 35 R - DJB Labcare

You also want an ePaper? Increase the reach of your titles
YUMPU automatically turns print PDFs into web optimized ePapers that Google loves.
EN<br />
3 Warning symbols<br />
Caution! Follow instructions carefully.<br />
Load centrifuge rotor evenly.<br />
All positions on rotor must be filled.<br />
Do not fill centrifuge containers inside the centrifuge.<br />
4 Delivery checklist<br />
1 Connecting cable<br />
1 Hex. pin driver<br />
1 Release pin<br />
1 Lubricating grease for supporting lugs<br />
1 Operating instructions<br />
1 Notes on moving the equipment safely<br />
The rotor(s) and associated accessories are included in the delivery in the quantity ordered.<br />
5 Unpacking the centrifuge<br />
• Lift the carton upward and remove the padding.<br />
• Lift the centrifuge on both sides with an appropriate number of helpers and place it on the laboratory table.<br />
Do not lift by the front panel.<br />
6 Initial operation<br />
• According to the laboratory instrument standards EN 61010-2-20 an emergency switch to separate power supply<br />
in the event of a failure must be installed in the building electrical system.<br />
This switch has to be placed remote from the centrifuge, prefered outside of the room in which the centrifuge is<br />
installed or near by the exit of this room.<br />
• Position the centrifuge in a stable and level manner in a suitable place. When setting up the equipment, care<br />
should be taken to provide the required safety area of 300 mm around the centrifuge in accordance with IEC<br />
1010-2-2.<br />
While the centrifuge is in operation no individuals and hazardous materials are allowed to be in the safety<br />
zone.<br />
• Do not place any object in front of the ventiduct.<br />
Keep a ventilation area of 300 mm around the ventiduct.<br />
• Check whether the mains voltage tallies with the statement on the type plate.<br />
• Connect the centrifuge with the connection cable to a standard mains socket.<br />
• Turn on the mains switch. Switch position "Ι".<br />
The type of machine and programme version will be displayed, and after 8 seconds the last utilised centrifuging<br />
data will be displayed.<br />
• Open the lid.<br />
• Remove the transport safety device (see instruction sheet on “Moving the equipment safely”).<br />
7 Opening and closing the lid<br />
7.1 Opening the lid<br />
• Swing handle rail on the lid upwards. The LED will now go off.<br />
• Open the lid.<br />
The lid can only be opened when the centrifuge is switched on and the rotor is at rest. If it cannot be<br />
opened under these circumstances, see the section on “Emergency release”.<br />
7.2 Closing the lid<br />
• Place the lid and swing handle rail on the lid downward. The LED will come on.<br />
Do not bang the lid shut.<br />
12/56