ROTINA 420 ROTINA 420 R - Hettich Instruments
ROTINA 420 ROTINA 420 R - Hettich Instruments
ROTINA 420 ROTINA 420 R - Hettich Instruments
Create successful ePaper yourself
Turn your PDF publications into a flip-book with our unique Google optimized e-Paper software.
EN<br />
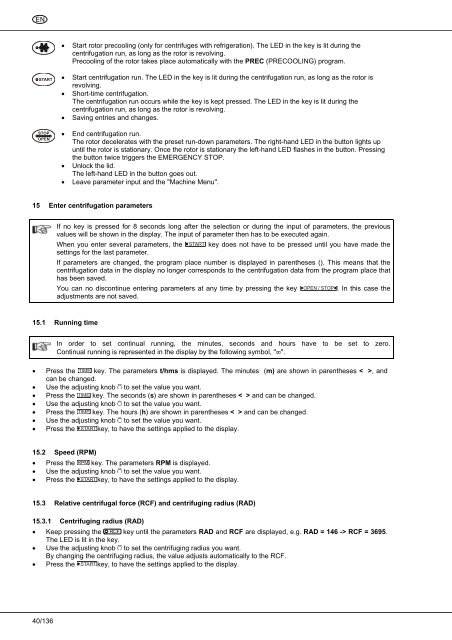
• Start rotor precooling (only for centrifuges with refrigeration). The LED in the key is lit during the<br />
centrifugation run, as long as the rotor is revolving.<br />
Precooling of the rotor takes place automatically with the PREC (PRECOOLING) program.<br />
START • Start centrifugation run. The LED in the key is lit during the centrifugation run, as long as the rotor is<br />
revolving.<br />
• Short-time centrifugation.<br />
The centrifugation run occurs while the key is kept pressed. The LED in the key is lit during the<br />
centrifugation run, as long as the rotor is revolving.<br />
• Saving entries and changes.<br />
STOP<br />
OPEN<br />
• End centrifugation run.<br />
The rotor decelerates with the preset run-down parameters. The right-hand LED in the button lights up<br />
until the rotor is stationary. Once the rotor is stationary the left-hand LED flashes in the button. Pressing<br />
the button twice triggers the EMERGENCY STOP.<br />
• Unlock the lid.<br />
The left-hand LED in the button goes out.<br />
• Leave parameter input and the "Machine Menu".<br />
15 Enter centrifugation parameters<br />
If no key is pressed for 8 seconds long after the selection or during the input of parameters, the previous<br />
values will be shown in the display. The input of parameter then has to be executed again.<br />
When you enter several parameters, the START key does not have to be pressed until you have made the<br />
settings for the last parameter.<br />
If parameters are changed, the program place number is displayed in parentheses (). This means that the<br />
centrifugation data in the display no longer corresponds to the centrifugation data from the program place that<br />
has been saved.<br />
You can no discontinue entering parameters at any time by pressing the key OPEN / STOP . In this case the<br />
adjustments are not saved.<br />
15.1 Running time<br />
In order to set continual running, the minutes, seconds and hours have to be set to zero.<br />
Continual running is represented in the display by the following symbol, "∞".<br />
• Press the TIME key. The parameters t/hms is displayed. The minutes (m) are shown in parentheses < >, and<br />
can be changed.<br />
• Use the adjusting knob to set the value you want.<br />
• Press the TIME key. The seconds (s) are shown in parentheses < > and can be changed.<br />
• Use the adjusting knob to set the value you want.<br />
• Press the TIME key. The hours (h) are shown in parentheses < > and can be changed.<br />
• Use the adjusting knob to set the value you want.<br />
• Press the START key, to have the settings applied to the display.<br />
15.2 Speed (RPM)<br />
• Press the RPM key. The parameters RPM is displayed.<br />
• Use the adjusting knob to set the value you want.<br />
• Press the START key, to have the settings applied to the display.<br />
15.3 Relative centrifugal force (RCF) and centrifuging radius (RAD)<br />
15.3.1 Centrifuging radius (RAD)<br />
• Keep pressing the RCF key until the parameters RAD and RCF are displayed, e.g. RAD = 146 -> RCF = 3695.<br />
The LED is lit in the key.<br />
• Use the adjusting knob to set the centrifuging radius you want.<br />
By changing the centrifuging radius, the value adjusts automatically to the RCF.<br />
• Press the START key, to have the settings applied to the display.<br />
40/136


