RPH12000 CE.qxp - Ramsey Winch
RPH12000 CE.qxp - Ramsey Winch
RPH12000 CE.qxp - Ramsey Winch

Create successful ePaper yourself
Turn your PDF publications into a flip-book with our unique Google optimized e-Paper software.
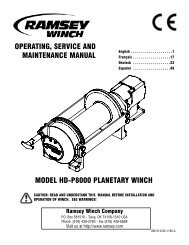
INSTRUCTIONS FOR OVERHAUL RPH-12000 SERIES WINCH<br />
Take note of mounting configurations for proper mounting of parts during re-assembly. Replace all gaskets, o-rings,<br />
and seals during re-assembly.<br />
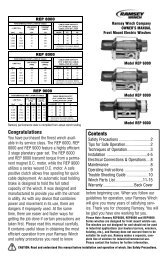
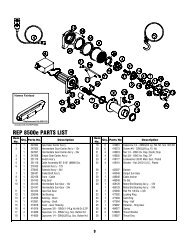
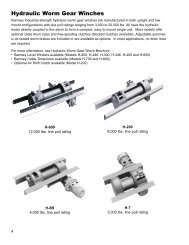
Disconnect tube (item #44) from elbows (item #24) on bottom<br />
of brake (item #6) and valve (item #45). Remove motor<br />
(item #31) from brake housing (item #6) by unscrewing<br />
capscrews (item #15). Tap motor lightly to disengage.<br />
Replace all gaskets, o-rings and seals with new ones during<br />
re-assembly.<br />
Remove coupling (item #23) from brake housing. Examine<br />
coupling for signs of wear, replace if necessary. If necessary,<br />
remove valve (item #45) from motor by removing capscrews<br />
(item #19) and lockwashers (item #49). If valve is removed<br />
make sure two square cross section o-rings remain seated in<br />
their counter bores in valve.<br />
15<br />
31<br />
15<br />
22<br />
24<br />
49<br />
18<br />
45<br />
22<br />
28<br />
23<br />
44<br />
6<br />
SQUARE CROSS<br />
SECTION O-RING<br />
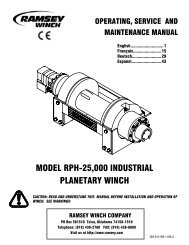
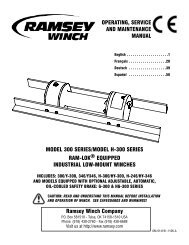
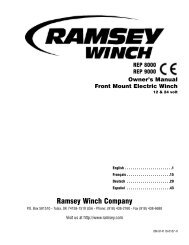
Remove brake housing (item #6) from end bearing (item #4)<br />
by unscrewing (6) capscrews (item #14) in a criss-cross<br />
pattern (2 turns each) until all capscrews are removed from<br />
brake housing. Remove brake parts from brake housing.<br />
Examine brake discs (item #26) for signs of wear, and<br />
replace if necessary. Examine o-rings (items #34 & #35)<br />
and backup rings (items #36 & #37) for signs of wear.<br />
Remove o-rings and backup rings from grooves in brake piston<br />
(item #3).<br />
Remove and examine springs (items #42 & #43) for damage,<br />
replace if necessary.<br />
30<br />
25<br />
43<br />
6<br />
27<br />
39<br />
14<br />
26<br />
43<br />
3<br />
7<br />
36<br />
42<br />
34<br />
35<br />
7 37<br />
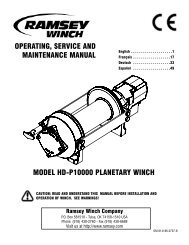
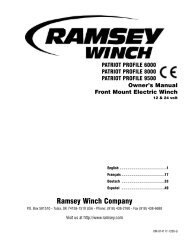
Examine fitting (item #30) to assure that fittings are in proper<br />
working condition, replace if necessary.<br />
4<br />
9<br />
Remove tie plates (item #9) from end bearings (items #4 &<br />
#5) by unscrewing capscrews (item #16), as shown.<br />
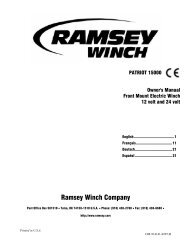
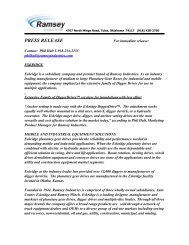
Remove snap ring (item #41) and thrust washer (item #48)<br />
from shaft. Slide motor end bearing (item #4) from drum<br />
(item #1) and drum from gear housing end bearing (item<br />
#5).<br />
41<br />
48<br />
4<br />
8<br />
16<br />
Remove input shaft (item #8) and thrust washer (item #47)<br />
from end bearing. Inspect gear teeth and splined end of shaft<br />
for signs of wear. If damaged, it will be necessary to replace<br />
shaft.<br />
16<br />
9<br />
1<br />
47<br />
5<br />
8