KTS 340 - Bosch-kts340.com
KTS 340 - Bosch-kts340.com
KTS 340 - Bosch-kts340.com

Create successful ePaper yourself
Turn your PDF publications into a flip-book with our unique Google optimized e-Paper software.
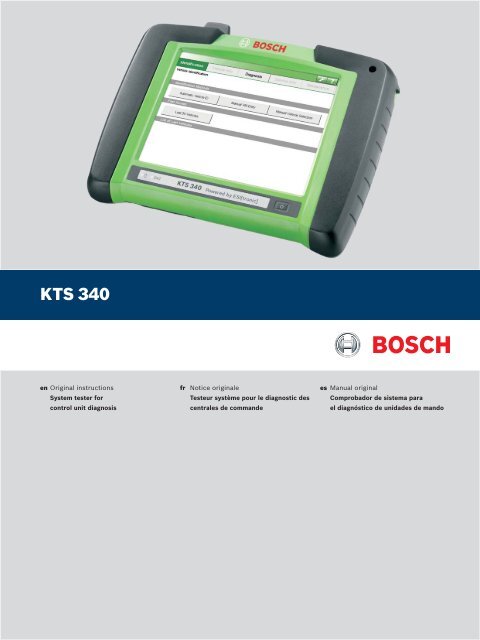
<strong>KTS</strong> <strong>340</strong><br />
en Original instructions<br />
System tester for<br />
control unit diagnosis<br />
fr<br />
Notice originale<br />
Testeur système pour le diagnostic des<br />
centrales de commande<br />
es Manual original<br />
Comprobador de sistema para<br />
el diagnóstico de unidades de mando
| TS TS | 3<br />
de<br />
Contents English<br />
<br />
Sommaire Français 20<br />
Índice Español<br />
6<br />
Robert <strong>Bosch</strong> LLC<br />
1 689 989 072 | 2010-04-06
en<br />
4 | <strong>KTS</strong> <strong>340</strong> |<br />
Contents<br />
1. Symbols used 5<br />
1.1 Documentation 5<br />
1.2 <strong>KTS</strong> <strong>340</strong> 5<br />
2. User information 5<br />
2.1 Important notes 5<br />
2.2 Safety instructions 5<br />
2.3 Electromagnetic compatibility (EMC) 5<br />
2.4 Disposal 5<br />
2.5 Open Source Software 5<br />
2.6 J2534 Reprogramming, web browser 5<br />
2.7 WLAN (Wireless Local Area Network) 6<br />
2.7.1 Important information on WLAN 6<br />
2.7.2 Information on access points 6<br />
2.7.3 Information on WLAN for USA and<br />
Canada 6<br />
3. Product description 7<br />
3.1 Use 7<br />
3.2 System requirements 7<br />
3.3 Scope of delivery 7<br />
3.4 Special accessories 7<br />
3.5 Description of the unit 8<br />
3.6 LED status 8<br />
3.6.1 Battery charge LED 8<br />
3.6.2 WLAN LED 8<br />
6. Maintenance 16<br />
6.1 Cleaning 16<br />
6.2 Rechargeable battery replacement 16<br />
6.3 Spare and wearing parts 16<br />
7. Technical data 17<br />
7.1 General data 17<br />
7.2 Interface protocols 17<br />
7.3 Power supply unit 17<br />
7.4 Multimeter specifications 17<br />
7.4.1 DC measurement (CH1 and CH2) 17<br />
7.4.2 Measurement of AC and rms value<br />
(CH1 and CH2) *) 17<br />
7.4.3 Resistance measurement (CH1) 17<br />
7.4.4 Current measurement (CH1 and CH2) 18<br />
7.4.5 Continuity tester (CH1) 18<br />
7.4.6 Diode measurement (CH1) 18<br />
7.5 WLAN 18<br />
4. Commissioning 9<br />
4.1 Connection 9<br />
4.2 Licensing with the ESI[tronic] Startcenter 9<br />
4.2.1 Installing the ESI[tronic] Startcenter 9<br />
4.2.2 Licensing the <strong>KTS</strong> <strong>340</strong> online 11<br />
4.2.3 Licensing the <strong>KTS</strong> <strong>340</strong> by fax 13<br />
4.2.4 <strong>KTS</strong> <strong>340</strong> fax licensing procedure 13<br />
5. Operation 13<br />
5.1 Connection to the vehicle 13<br />
5.2 Switching on 14<br />
5.3 Switching off 14<br />
5.4 Notes on multimeter 14<br />
5.5 Touchscreen with stylus 14<br />
5.6 Program description 14<br />
5.7 Software update 15<br />
5.7.1 Online software update<br />
(from ESI[tronic] Startcenter<br />
version 2010/2) 15<br />
5.7.2 Software update using the<br />
ESI[tronic] DVD 15<br />
5.8 Faults 15<br />
1 689 989 072 | 2010-04-06<br />
Robert <strong>Bosch</strong> LLC
Symbols used | TS TS | 5 en<br />
1. Symbols used<br />
1.1 Documentation<br />
Pictograms linked with the key words Danger, Warning<br />
and Caution are warnings and always indicate an immediate<br />
or potential hazard to the user.<br />
Danger!<br />
Immediate danger that could cause serious<br />
personal injury or death.<br />
Warning!<br />
Potentially dangerous situation that could<br />
cause serious personal injury or death.<br />
Caution!<br />
Potentially dangerous situation that could<br />
cause personal injury or damage to property.<br />
!!<br />
Important – warns of a potentially hazardous situation<br />
in which the <strong>KTS</strong> <strong>340</strong>, the test sample or other<br />
object in the vicinity could be damaged.<br />
In addition to these warnings, the following symbols are<br />
also used:<br />
iiInfo – Details for the application and further useful<br />
information.<br />
<br />
Single-step procedure – instructions for a procedure<br />
that can be completed in just one step.<br />
??<br />
Intermediate result – an intermediate result is displayed<br />
during a procedure.<br />
""<br />
Final result – the final result is displayed at the end<br />
of the procedure.<br />
1.2 <strong>KTS</strong> <strong>340</strong><br />
Disposal<br />
Old electrical and electronic devices, including<br />
cables and accessories or batteries must be<br />
disposed of separate to household waste.<br />
Caution – Hot charging contacts<br />
Risk of burns if touched.<br />
<br />
Do not touch charging contacts.<br />
2. User information<br />
2.1 Important notes<br />
Important information on copyright, liability and warranty<br />
provisions, as well as on equipment users and company<br />
obligations, can be found in the separate manual "Important<br />
notes on and safety instructions for <strong>Bosch</strong> Test Equipment".<br />
These instructions must be carefully studied prior to startup,<br />
connection and operation of the <strong>KTS</strong> <strong>340</strong> and must<br />
always be heeded.<br />
2.2 Safety instructions<br />
All the pertinent safety instructions can be found in the<br />
separate manual "Important notes on and safety instructions<br />
for <strong>Bosch</strong> Test Equipment". These instructions<br />
must be carefully studied prior to start-up, connection<br />
and operation of the <strong>KTS</strong> <strong>340</strong> and must always be heeded.<br />
2. Electromagnetic compatibility (EMC)<br />
The <strong>KTS</strong> <strong>340</strong> is a class B product as per EN 61 326.<br />
2.4 Disposal<br />
This <strong>KTS</strong> <strong>340</strong> is subject to European guidelines<br />
2002/96/EG (WEEE).<br />
Old electrical and electronic devices, includingcables<br />
and accessories or batteries must be<br />
disposed of separate to household waste.<br />
<br />
Please use the return and collection systems<br />
in place for disposal in your area.<br />
<br />
Damage to the environment and hazards to<br />
personal health are prevented by properly<br />
disposing of <strong>KTS</strong> <strong>340</strong>.<br />
2.5 Open Source Software<br />
A list of the open source software licenses for the<br />
<strong>KTS</strong> <strong>340</strong> can be found in an Adobe PDF document on<br />
the “ESI[tronic] Startcenter” DVD.<br />
2.6 J2534 Reprogramming, web browser<br />
i i The " (Info) >> Help" menu in the Online Help<br />
contains all the necessary information on J2534<br />
Reprogramming and the web browser.<br />
Robert <strong>Bosch</strong> LLC<br />
1 689 989 072 | 2010-04-06
en<br />
6 | <strong>KTS</strong> <strong>340</strong> | Symbols used<br />
2.7 WLAN (Wireless Local Area Network)<br />
2.7.1 Important information on WLAN<br />
WLAN stands for Wireless Local Area Network. As<br />
with Bluetooth, WLAN provides a radio link on the free<br />
2.4 GHz ISM band (ISM: Industrial, Scientific, Medical).<br />
This frequency range is subject to government regulations,<br />
but may be used without a license in most countries.<br />
Consequently a large number of applications and<br />
devices employ this frequency band for transmission.<br />
This can result in frequency interference.<br />
Depending on ambient conditions, the WLAN link may<br />
therefore deteriorate, e.g. in the case of Bluetooth links,<br />
cordless telephones, radio-controlled thermometers,<br />
radio-controlled garage door openers, radio-controlled<br />
light switches or radio-controlled alarm systems.<br />
iiBluetooth can lead to interference in the bandwidth<br />
of the WLAN network. The antennas of Bluetooth<br />
and WLAN devices should be at least 30 centimeters<br />
apart. Do not plug Bluetooth USB adapters and WLAN<br />
sticks into adjacent USB slots on PCs/laptops. Use<br />
the USB extension cable (special accessory) to maintain<br />
a distance between the Bluetooth USB adapter<br />
and the WLAN stick on the PC/laptop.<br />
iiExercise extreme caution if wearing pacemakers<br />
or other vital electronic devices when using radio<br />
systems, as proper functioning of these items could<br />
be impaired.<br />
Note the following to ensure the best possible connectivity:<br />
RR<br />
The WLAN radio signal always tries to find the most<br />
direct path. When setting up the PC/laptop and access<br />
point (see section 2.6.2), make sure there are<br />
as few obstacles as possible (e.g. steel doors and<br />
concrete walls), which could interfere with the radio<br />
signal from and to the <strong>KTS</strong> <strong>340</strong>. Inside buildings, the<br />
range of the WLAN is also greatly influenced by the<br />
construction materials used. Conventional masonry,<br />
wooden walls and certain types of dry construction<br />
wall scarcely impede radio waves. Thin gypsum<br />
walls can however cause problems, as considerable<br />
amounts of moisture may accumulate in the gypsum<br />
and result in the absorption of radio signals. Concrete<br />
(and in particular reinforced concrete) largely blocks<br />
out radio waves. Cellar ceilings are often impenetrable.<br />
Generally speaking, walls with a lot of installed<br />
metal (e.g. pipes, wires) obstruct radio waves.<br />
RR<br />
Radio reception is also impeded by large metal<br />
objects such as radiators and window frames as<br />
well as active sources of interference such as DECT<br />
telephones and microwave ovens.<br />
RR<br />
Have your network infrastructure installed and<br />
tested in advance by a data systems expert.<br />
RR<br />
RR<br />
RR<br />
RR<br />
RR<br />
Keep the SSID and the codes for the radio link in a<br />
safe place. Make sure these data are readily to hand<br />
in case faults occur.<br />
We recommend a thorough inspection of the premises<br />
on commissioning: Establish where in the<br />
building the <strong>KTS</strong> <strong>340</strong> works properly and where the<br />
operating limits are.<br />
If the <strong>KTS</strong> <strong>340</strong> is to be used in a vehicle (Faraday<br />
cage), radio communication can be severely limited.<br />
The radio link is affected by weather conditions. The<br />
reception signal may therefore vary.<br />
Please contact your network administrator with any<br />
queries.<br />
2.7.2 Information on access points<br />
A wireless access point is an electronic device, which<br />
acts as an interface between a radio network and a<br />
cable-connected computer network. It provides a wireless<br />
connection between the <strong>KTS</strong> <strong>340</strong>, the PC/laptop<br />
with ESI[tronic] Startcenter and a printer, for example.<br />
iiWe recommend using WLAN standard IEEE 802.11g<br />
(data transmission rate max. 54 Mbps) for the access<br />
point. The "extended range" function is not supported.<br />
Please note the following:<br />
RR<br />
The access point should be located as centrally and<br />
high up as possible, ideally under the ceiling.<br />
RR<br />
The access point antenna should face downwards<br />
towards the floor.<br />
RR<br />
In the event of a poor connection it may be useful to<br />
change the set channel on the access point. If possible,<br />
avoid using neighboring channels to channels<br />
that are already in use.<br />
RR<br />
We recommend that encryption of radio communications<br />
is configured at the access point.<br />
2.7.3 Information on WLAN for USA and Canada<br />
USA:<br />
Changes or modifications not expressly approved by<br />
the party responsible for compliance could void the<br />
user’s authority to operate the equipment.<br />
Canada:<br />
Operation is subject to the following two conditions:<br />
RR<br />
this device may not cause interference, and<br />
RR<br />
this device must accept any interference, including<br />
interference that may cause undesired operation of<br />
the device.<br />
This Class [B] digital apparatus complies with Canadian<br />
ICES-003.<br />
1 689 989 072 | 2010-04-06<br />
Robert <strong>Bosch</strong> LLC
Product description | TS TS | 7 en<br />
3. Product description<br />
3.1 Use<br />
The <strong>KTS</strong> <strong>340</strong> is a system tester for control unit diagnosis,<br />
trouble-shooting, repair and service in automotive<br />
workshops. The functions of the <strong>KTS</strong> <strong>340</strong> with<br />
licensed ESI[tronic] are as follows:<br />
RR<br />
Vehicle identification<br />
RR<br />
Vehicle information<br />
RR<br />
Diagnosis<br />
RR<br />
Service information<br />
RR<br />
Maintenance<br />
iiThe <strong>KTS</strong> <strong>340</strong> is designed for operation in the WLAN<br />
2.4 GHz for USA, Canada and Mexico.<br />
The device satisfies the requirements of the R&TTE<br />
(Radio Equipment and Telecommunications Terminal<br />
Equipment) Directive, as confirmed by the CE mark.<br />
!!<br />
The <strong>KTS</strong> <strong>340</strong> is a precision device, which is not to<br />
be subjected to sources of heat (e.g. direct sunlight),<br />
impact, vibration, magnetic fields and excessive<br />
soiling. The <strong>KTS</strong> <strong>340</strong> may only be opened for<br />
changing the battery (the battery referred to in this<br />
manual is a rechargeable battery).<br />
3.2 System requirements<br />
A PC/laptop with WIN XP (SP2), WIN Vista TM Home<br />
Premium, WIN Vista TM Business or WIN 7 (32 Bit) operating<br />
system and at least one free USB port is required<br />
for <strong>KTS</strong> <strong>340</strong> licensing using the ESI[tronic] Startcenter<br />
and the software update for <strong>KTS</strong> <strong>340</strong> control unit diagnosis.<br />
The USB port must support the USB 2.0 or USB 1.1<br />
protocol.<br />
3.3 Scope of delivery<br />
Description<br />
Order number<br />
<strong>KTS</strong> <strong>340</strong><br />
Power supply unit<br />
Power supply lead<br />
1 687 022 890<br />
1 684 461 161<br />
USB connecting cable, 3 m 1 684 465 562<br />
OBD diagnostic cable, 3 m 1 684 465 557<br />
UNI connecting cable, 4 core 1 684 463 539<br />
Stylus (3x) 1 683 083 007<br />
ESI[tronic] Startcenter DVD 1 987 P12 034<br />
<strong>KTS</strong> <strong>340</strong> Getting Started DVD 1 687 370 308<br />
Case 1 685 438 626<br />
Measuring lead, red 1 684 430 065<br />
Measuring lead, blue 1 684 430 066<br />
Measuring lead, yellow 1 684 430 067<br />
Ground cable, black 1 684 430 068<br />
Test prod, red (2x) 1 684 485 035<br />
Connection terminal, black 1 684 480 022<br />
Important information and safety instructions 1 689 985 000<br />
<strong>KTS</strong> <strong>340</strong> operating instructions 1 689 989 072<br />
<strong>KTS</strong> <strong>340</strong> Quick Start Guide 1 689 989 075<br />
EU Declaration of conformity 1 689 974 307<br />
!!<br />
Always store the <strong>KTS</strong> <strong>340</strong> and accessories in the<br />
case when not in use.<br />
3.4 Special accessories<br />
Information on special accessories, such as vehiclespecific<br />
connecting cables, can be obtained from your<br />
authorized <strong>Bosch</strong> dealer.<br />
Robert <strong>Bosch</strong> LLC<br />
1 689 989 072 | 2010-04-06
en<br />
8 | <strong>KTS</strong> <strong>340</strong> | Product description<br />
3.5 Description of the unit<br />
The <strong>KTS</strong> <strong>340</strong> is a modular, portable diagnostic system<br />
that can be used anywhere. The <strong>KTS</strong> <strong>340</strong> features a<br />
computer unit with memory card and an 8.4 inch LCD<br />
touchscreen. ESI[tronic] is pre-installed on the memory<br />
card at the factory.<br />
The operator has a choice of a stylus for the LCD<br />
touchscreen and an on-screen keyboard.<br />
The <strong>KTS</strong> <strong>340</strong> and accessories are supplied in a protective<br />
case.<br />
8<br />
7<br />
6<br />
<strong>KTS</strong> <strong>340</strong> Powered by ESI tronic<br />
1<br />
2<br />
3.6 LED status<br />
3.6.1 Battery charge LED<br />
Battery charge LED<br />
Green light<br />
Flashing green<br />
Yellow light<br />
Flashing yellow<br />
Red light<br />
Flashing red<br />
Status<br />
Battery fully charged, external<br />
power supply connected.<br />
Battery fully charged, external<br />
power supply not connected.<br />
Battery being charged, external<br />
power supply connected.<br />
Battery almost flat, connect<br />
external power supply.<br />
Fault on charging.<br />
Battery flat (<strong>KTS</strong> <strong>340</strong> will be<br />
switched off within 2 minutes),<br />
connect external power supply.<br />
5<br />
max. 28 V<br />
4<br />
Fig. 1: <strong>KTS</strong> <strong>340</strong><br />
3<br />
459843-5K<br />
1 Stylus holder<br />
2 Stylus<br />
3 On/Off button<br />
4 Power supply unit connection<br />
5 USB port<br />
6 WLAN LED<br />
7 Battery charge LED<br />
8 LCD touchscreen<br />
3.6.2 WLAN LED<br />
WLAN LED<br />
Status<br />
Green light WLAN is configured and <strong>KTS</strong> <strong>340</strong><br />
is connected to an access point,<br />
field strength good.<br />
Yellow light WLAN is configured and <strong>KTS</strong> <strong>340</strong><br />
is connected to an access point,<br />
field strength poor.<br />
Red light<br />
WLAN is configured, <strong>KTS</strong> <strong>340</strong> is<br />
not connected to an access point.<br />
Off<br />
WLAN is not configured.<br />
!!<br />
There is a risk of injury from glass splinters should<br />
the LCD glass cover break.<br />
CH2<br />
CH1<br />
K<br />
max. 60 V<br />
DIAG<br />
459843_1Ko<br />
1 2 3 4 5 6<br />
7<br />
Fig. 2: Rear view of <strong>KTS</strong> <strong>340</strong><br />
1 Stylus compartment<br />
2 CH2 measurement input<br />
3 Ground connection<br />
4 CH1(-) measurement input<br />
5 CH1(+) measurement input<br />
6 Diagnostic cable connection (DIAG)<br />
7 Connection for Kensington security lock<br />
1 689 989 072 | 2010-04-06<br />
Robert <strong>Bosch</strong> LLC
Commissioning | TS TS | 9 en<br />
4. Commissioning<br />
4.1 Connection<br />
Prior to commissioning, make sure the mains voltage<br />
matches the voltage specified on the power supply unit<br />
(use the power supply lead provided).<br />
4.2 Licensing with the<br />
ESI[tronic] Startcenter<br />
The <strong>KTS</strong> <strong>340</strong> is supplied pre-installed and pre-licensed<br />
and can be used immediately for control unit diagnosis.<br />
The <strong>KTS</strong> <strong>340</strong> has to be re-licensed to be able to utilize<br />
the functions detailed in the purchase contract and to<br />
implement further updates. The customer number and<br />
password required for this can be found on the delivery<br />
note.<br />
iiThe selected installation language will also be the<br />
language used in the ESI[tronic] Startcenter.<br />
7. Follow the on-screen instructions.<br />
iiSelect the country in which the <strong>KTS</strong> <strong>340</strong> is to be<br />
used in the "Country selection" installation menu.<br />
The dialog box does not appear if a country was<br />
already selected during an earlier installation of<br />
Startcenter (e.g. with <strong>KTS</strong> 200).<br />
iiIf Adobe Reader is not yet installed on the PC/laptop,<br />
it will be installed at the end of the ESI[tronic] Startcenter<br />
installation routine. Adobe Reader is required<br />
to display the <strong>KTS</strong> <strong>340</strong> control unit diagnosis logs on<br />
the PC/laptop.<br />
!!<br />
Do not connect the <strong>KTS</strong> <strong>340</strong> to the PC/laptop until<br />
prompted to do so during the installation routine.<br />
4.2.1 Installing the ESI[tronic] Startcenter<br />
Procedure:<br />
1. Close all open applications.<br />
2. Insert the "ESI[tronic] Startcenter" DVD.<br />
3. Open the "Windows Explorer".<br />
4. Start D:\setup.exe (D = DVD drive).<br />
??<br />
Setup commences.<br />
??<br />
The following message appears with WIN Vista:<br />
An unidentified program is attempting<br />
to access the computer.<br />
??<br />
The following message appears with WIN 7:<br />
Do you wish to allow changes to be<br />
made to this computer by the following<br />
program?<br />
5. Confirm the message with "Allow" or "Yes".<br />
iiWe recommend that you only install the <strong>KTS</strong> data<br />
packet on the hard disk if you wish to update several<br />
<strong>KTS</strong> units. Then, the ESI[tronic] Startcenter DVD will<br />
not be required for update.<br />
? ? The following message appears with WIN Vista:<br />
Do you wish to install this device<br />
software?<br />
8. Confirm the message with "Install".<br />
6. Select the installation language and confirm with .<br />
Robert <strong>Bosch</strong> LLC<br />
1 689 989 072 | 2010-04-06
en<br />
10 | <strong>KTS</strong> <strong>340</strong> | Commissioning<br />
9. Disconnect the USB link to the <strong>KTS</strong> <strong>340</strong>.<br />
??<br />
The following message then appears with WIN 7:<br />
Windows can't verify the publisher of<br />
this driver software.<br />
??<br />
The following message appears with WIN XP:<br />
This wizard helps you install software<br />
for: <strong>KTS</strong>-embedded.<br />
10. Confirm the message with "Install this driver software<br />
anyway".<br />
??<br />
The following message appears with WIN Vista:<br />
Windows needs to install driver<br />
software for your <strong>KTS</strong> embedded.<br />
11. Switch on the <strong>KTS</strong> <strong>340</strong>.<br />
iiThe <strong>KTS</strong> <strong>340</strong> always starts up in English (US) when<br />
first switched on. The language can be changed<br />
under " (Service) >> User setting >> Language<br />
setting".<br />
iiThe ESI[tronic] Startcenter installation routine automatically<br />
installs the USB driver to permit communication<br />
between the <strong>KTS</strong> <strong>340</strong> and the PC/laptop.<br />
The "Connect USB" dialog box does not appear if the<br />
USB driver was already installed during an earlier<br />
installation of Startcenter (e.g. with <strong>KTS</strong> 200).<br />
12. Close the message with "Cancel".<br />
??<br />
The following message then appears with WIN<br />
Vista and WIN 7: Windows can't verify<br />
the publisher of this driver software.<br />
13. Confirm the message with "Install this driver software<br />
anyway".<br />
14. To successfully conclude installation, restart the<br />
PC/laptop.<br />
??<br />
ESI[tronic] Startcenter has been installed.<br />
1 689 989 072 | 2010-04-06<br />
Robert <strong>Bosch</strong> LLC
Commissioning | TS TS | 11 en<br />
15. Start the "ESI[tronic] Startcenter".<br />
4.2.2 Licensing the <strong>KTS</strong> <strong>340</strong> online<br />
!!<br />
A PC/laptop with Internet access is required for<br />
online licensing.<br />
1. Connect the <strong>KTS</strong> <strong>340</strong> to the mains voltage via the<br />
supplied power supply unit, and switch on.<br />
??<br />
The <strong>KTS</strong> <strong>340</strong> starts up.<br />
2. Connect the <strong>KTS</strong> <strong>340</strong> to a PC/laptop by means of the<br />
USB connecting cable.<br />
3. Select the "Licensing >> Online" menu in the Startcenter.<br />
??<br />
The "Online licensing" input box opens.<br />
iiThe " (Info) >> Help" menu opens the online<br />
help. This contains all essential information on the<br />
ESI[tronic] Startcenter.<br />
16. Perform <strong>KTS</strong> <strong>340</strong> licensing by fax or online.<br />
4. Step 1: Enter the customer number/password and<br />
select .<br />
??<br />
The Internet connection for online licensing is<br />
established.<br />
i i If "Login" is not possible, check proxy settings under<br />
" (Service) >> User settings".<br />
Robert <strong>Bosch</strong> LLC<br />
1 689 989 072 | 2010-04-06
en<br />
12 | <strong>KTS</strong> <strong>340</strong> | Commissioning<br />
5. Step 2: Select the contract ID, then .<br />
??<br />
The license key is requested.<br />
""<br />
The <strong>KTS</strong> <strong>340</strong> is now licensed and ready for operation.<br />
iiThe request for the license key can take several<br />
seconds.<br />
!!<br />
While the license key is being transferred, the USB<br />
link and the power supply to the <strong>KTS</strong> <strong>340</strong> must not<br />
be interrupted.<br />
6. Select .<br />
??<br />
The license key is transferred to the <strong>KTS</strong> <strong>340</strong>.<br />
??<br />
If licensing is successful, the <strong>KTS</strong> <strong>340</strong> is restarted.<br />
1 689 989 072 | 2010-04-06<br />
Robert <strong>Bosch</strong> LLC
CH2<br />
max. 60 V<br />
CH1<br />
DIAG<br />
K<br />
Commissioning | TS TS | 13 1 1 en<br />
4.2.3 Licensing the <strong>KTS</strong> <strong>340</strong> by fax<br />
1. Select the "Licensing >> Fax" menu in the Startcenter.<br />
??<br />
The "License request" input box is opened.<br />
2. Step 1: Enter company data.<br />
3. Step 2: Select country for license request.<br />
4. Step 3: Enter ID number and print out licensing<br />
form.<br />
5. Sign licensing form and submit by fax.<br />
4.2.4 <strong>KTS</strong> <strong>340</strong> fax licensing procedure<br />
Once you have received the license key by fax, you need<br />
to perform the actual licensing.<br />
1. Connect the <strong>KTS</strong> <strong>340</strong> to the mains voltage via the<br />
supplied power supply unit, and switch on.<br />
??<br />
The <strong>KTS</strong> <strong>340</strong> starts up.<br />
2. Connect the <strong>KTS</strong> <strong>340</strong> to a PC/laptop by means of the<br />
USB connecting cable.<br />
3. Click the "Licensing >> Licensing procedure" menu<br />
in the Startcenter.<br />
??<br />
The "License request" input box opens.<br />
4. Enter the customer number, ID number and license<br />
key.<br />
5. Perform licensing.<br />
??<br />
The license key is transferred.<br />
??<br />
If licensing is successful, the <strong>KTS</strong> <strong>340</strong> is restarted.<br />
""<br />
The <strong>KTS</strong> <strong>340</strong> is now licensed and can be used for control<br />
unit diagnosis.<br />
5. Operation<br />
5.1 Connection to the vehicle<br />
The <strong>KTS</strong> <strong>340</strong> is designed for operation on vehicles with<br />
a battery voltage of 12 V and 24 V.<br />
!!<br />
Make sure the OBD diagnostic cable is properly connected<br />
to the <strong>KTS</strong> <strong>340</strong> and firmly attached. Incorrect<br />
connection could cause the pins of the connector<br />
to bend or break off. Only use the OBD diagnostic<br />
cable contained in the scope of delivery.<br />
8<br />
7<br />
9<br />
10<br />
11<br />
12<br />
13<br />
14<br />
15<br />
16<br />
1<br />
2<br />
3<br />
4<br />
5<br />
6<br />
7<br />
8<br />
3<br />
1<br />
4<br />
2<br />
5<br />
<strong>KTS</strong> <strong>340</strong> Powered by ESI tronic<br />
6<br />
459843<br />
Fig. 3: <strong>KTS</strong> <strong>340</strong> connection diagram<br />
1 OBD diagnostic socket in vehicle<br />
2 OBD diagnostic cable<br />
3 UNI connecting cable<br />
4 USB connecting cable<br />
5 Connecting cable for cigarette lighter socket (special accessory)<br />
6 Power supply unit<br />
7 <strong>KTS</strong> <strong>340</strong><br />
8 Measuring leads<br />
Placing the <strong>KTS</strong> <strong>340</strong> on the steering wheel<br />
will lead to a risk of injury due to triggering<br />
of the airbag.<br />
Robert <strong>Bosch</strong> LLC<br />
1 689 989 072 | 2010-04-06
en<br />
14 | <strong>KTS</strong> <strong>340</strong> | Operation<br />
The <strong>KTS</strong> <strong>340</strong> is connected to the diagnostic interface in<br />
the vehicle by means of:<br />
RR<br />
The OBD diagnostic cable (Fig. 3, Pos. 2), or<br />
RR<br />
The OBD diagnostic cable and also the UNI connecting<br />
cable (Fig. 3, Pos. 3; special accessory), or<br />
RR<br />
The OBD diagnostic cable and also a vehicle-specific<br />
adapter cable (special accessory), or<br />
RR<br />
A vehicle-specific adapter cable<br />
(special accessory).<br />
5.2 Switching on<br />
<br />
Switch on the <strong>KTS</strong> <strong>340</strong> with the On/Off button.<br />
""<br />
After the system has started, the <strong>KTS</strong> <strong>340</strong> remains<br />
in the "Vehicle identification" start screen. The start<br />
screen is always displayed after switch-on.<br />
!!<br />
If the <strong>KTS</strong> <strong>340</strong> is supplied with power via the power<br />
supply unit, always use the power supply unit<br />
provided. Do not use power supply units with less<br />
power than 15V/3A, such as those supplied with the<br />
<strong>KTS</strong> 200 or <strong>KTS</strong> 5xx, for example.<br />
The <strong>KTS</strong> <strong>340</strong> is usually supplied with power via the<br />
OBD diagnostic socket in the vehicle. If you do not<br />
know where in the vehicle the OBD diagnostic socket is<br />
located, we recommend finding it by means of <strong>KTS</strong> <strong>340</strong><br />
control unit diagnosis.<br />
iiIn some vehicles, the cigarette lighter socket only<br />
supplies power when the ignition is turned on.<br />
iiIf a test step involves starting the engine, the battery<br />
voltage may drop to such an extent that supply via<br />
the vehicle is no longer guaranteed. In such cases<br />
it may be necessary to supply the <strong>KTS</strong> <strong>340</strong> via the<br />
power supply unit.<br />
iiIn some vehicles, the ignition must be switched on in<br />
order for power to be supplied via the OBD interface.<br />
If the <strong>KTS</strong> <strong>340</strong> is connected to a PC/laptop via the USB<br />
connecting cable, we recommend supplying it with<br />
power via the power supply unit provided.<br />
5.3 Switching off<br />
<br />
Press the On/Off button for approx. three seconds.<br />
""<br />
The <strong>KTS</strong> <strong>340</strong> is switched off.<br />
If it is only being run off the battery, the <strong>KTS</strong> <strong>340</strong> is<br />
switched off if the battery voltage drops below 8 V or if<br />
the device has not been used for ten minutes (factory<br />
setting).<br />
If the <strong>KTS</strong> <strong>340</strong> is being supplied via an external power<br />
source (e.g. OBD diagnostic cable or power supply<br />
unit) and is not used for a lengthy period, the brightness<br />
of the LCD touchscreen is reduced.<br />
5.4 Notes on multimeter<br />
Danger from high voltage!<br />
There is a risk of potentially fatal voltage if<br />
measurements are taken without a ground<br />
cable.<br />
<br />
If no diagnostic cable is connected, use the<br />
ground cable provided to make a ground<br />
connection between the <strong>KTS</strong> <strong>340</strong> and vehicle<br />
ground before taking U, R or I measurements.<br />
<br />
Connect the ground cable as close as possible<br />
to the object to be measured.<br />
<br />
Only use the <strong>KTS</strong> <strong>340</strong> on the vehicle and not<br />
for measurements involving voltages > 60 V.<br />
<br />
Do not perform any measurements on ignition<br />
systems.<br />
<br />
Only use the test cables provided (with<br />
contact protection).<br />
<br />
Always plug in the test cables at the<br />
<strong>KTS</strong> <strong>340</strong> first and then on the vehicle.<br />
<br />
Do not lay unshielded test cables close<br />
to sources of major interference such as<br />
ignition cables.<br />
5.5 Touchscreen with stylus<br />
The touchscreen of the <strong>KTS</strong> <strong>340</strong> is operated with the<br />
stylus. Touch the application you require with the<br />
stylus.<br />
iiYou can perform "Touchscreen calibration" in the<br />
Service menu via "User settings >> Customer<br />
Service". To avoid errors, your eyes must be vertically<br />
above the calibration points. Click on the calibration<br />
points as accurately as possible.<br />
5.6 Program description<br />
You can open the online help for the <strong>KTS</strong> <strong>340</strong> in the<br />
header bar under .<br />
You can find basic information on the <strong>KTS</strong> <strong>340</strong> and<br />
the ESI[tronic] Startcenter in the "ESI[tronic] trainer".<br />
1 689 989 072 | 2010-04-06<br />
Robert <strong>Bosch</strong> LLC
Operation | TS TS | 15 en<br />
5.7 Software update<br />
The software update is performed either using the<br />
"ESI[tronic] Startcenter" DVD or "Online".<br />
!!<br />
Only perform the software update for a licensed<br />
<strong>KTS</strong> <strong>340</strong>. The USB link and the power supply to the<br />
<strong>KTS</strong> <strong>340</strong> must not be interrupted during the software<br />
update. In addition, Standby mode on the PC/laptop<br />
must be deactivated.<br />
iiThe ESI[tronic] Startcenter DVD 1 (annual basic version)<br />
must be installed using the "Software update<br />
by way of DVD" function.<br />
iiYou can find the online help for the software update<br />
in the ESI[tronic] Startcenter under "Help >> Help".<br />
iiIf the software update of the <strong>KTS</strong> <strong>340</strong> was aborted<br />
(e.g. USB link was interrupted) or installation was<br />
incomplete, you can perform a recovery in the<br />
ESI[tronic] Startcenter under "Help >> Customer<br />
Service" in the menu "Restore <strong>KTS</strong> software" (see<br />
ESI[tronic] Startcenter online help).<br />
5.7.1 Online software update (from ESI[tronic]<br />
Startcenter version 2010/2)<br />
1. Start the "ESI[tronic] Startcenter".<br />
2. Open the "Settings >>Online updates" input box.<br />
3. Enter the customer number and password and select<br />
.<br />
iiIf "Login" is not possible, check proxy settings under<br />
"Settings >> User settings".<br />
4. Select an available update and start the software<br />
update.<br />
5. Follow the on-screen instructions.<br />
iiTo successfully conclude installation, restart the<br />
PC/laptop.<br />
<strong>KTS</strong> <strong>340</strong> software update<br />
1. Disconnect the power supply unit and USB connecting<br />
cable from the <strong>KTS</strong> <strong>340</strong>.<br />
2. Start the "ESI[tronic] Startcenter".<br />
3. Supply power to the <strong>KTS</strong> <strong>340</strong> once more with the<br />
power supply unit.<br />
??<br />
The <strong>KTS</strong> <strong>340</strong> starts up.<br />
??<br />
The start screen "Vehicle identification" appears.<br />
4. Connect the <strong>KTS</strong> <strong>340</strong> to a PC/laptop by means of the<br />
USB connecting cable.<br />
5. ESI[tronic] Startcenter: Open "<strong>KTS</strong> <strong>340</strong> >> Device<br />
information".<br />
6. Select an available update<br />
7. Select .<br />
""<br />
The system software is installed on the <strong>KTS</strong> <strong>340</strong>.<br />
5.7.2 Software update using the ESI[tronic] DVD<br />
Step 1: Installing ESI[tronic] Startcenter<br />
1. Close all open applications.<br />
2. Insert the "ESI[tronic] Startcenter" DVD.<br />
3. Open the "Windows Explorer".<br />
4. Start D:\setup.exe (D = DVD drive).<br />
??<br />
Setup commences.<br />
5. Follow the on-screen instructions (see section 4.2.1).<br />
iiTo successfully conclude installation, restart the<br />
PC/laptop.<br />
Step 2: <strong>KTS</strong> <strong>340</strong> software update<br />
1. Disconnect the power supply unit and USB connecting<br />
cable from the <strong>KTS</strong> <strong>340</strong>.<br />
2. Start the "ESI[tronic] Startcenter".<br />
3. Supply power to the <strong>KTS</strong> <strong>340</strong> once more with the<br />
power supply unit.<br />
??<br />
The <strong>KTS</strong> <strong>340</strong> starts up.<br />
??<br />
The "Vehicle identification" dialog box appears.<br />
4. Connect the <strong>KTS</strong> <strong>340</strong> to a PC/laptop by means of the<br />
USB connecting cable.<br />
5. ESI[tronic] Startcenter: Open "<strong>KTS</strong> <strong>340</strong> >> Device<br />
information".<br />
6. Select an available update<br />
iiIf no "available update" is displayed, the <strong>KTS</strong> <strong>340</strong><br />
already has the current software and does not need<br />
to be updated.<br />
7. Select .<br />
""<br />
The system software is installed on the <strong>KTS</strong> <strong>340</strong>.<br />
5.8 Faults<br />
No communication with the control unit<br />
The fault message "No system found" appears during<br />
control unit diagnosis.<br />
Possible causes<br />
Incorrect cable<br />
connected.<br />
Wrong pin selected in<br />
pin selection menu.<br />
Action to be taken<br />
Check that the correct cable has been<br />
used.<br />
Check which pin must be used in "Diagnostic<br />
socket".<br />
i i If problems of a different nature occur, please contact<br />
the ESI[tronic] Service Hotline directly.<br />
Robert <strong>Bosch</strong> LLC<br />
1 689 989 072 | 2010-04-06
F(Hz):<br />
en<br />
16 | <strong>KTS</strong> <strong>340</strong> | Maintenance<br />
6. Maintenance<br />
1<br />
6.1 Cleaning<br />
Only clean the housing and display of the <strong>KTS</strong> <strong>340</strong> with<br />
a soft cloth and neutral cleaning agents. Do not use<br />
abrasive cleaning agents or coarse workshop cloths.<br />
6.2 Rechargeable battery replacement<br />
Best.-Nr.: 0 684 400 <strong>340</strong><br />
Typ: <strong>KTS</strong> <strong>340</strong><br />
Serien-:Nr.<br />
BOSCH<br />
FD: 2008-04 U(V);8-28 DC<br />
P(W): 20<br />
430003520<br />
PMade in Germany Robert <strong>Bosch</strong> GmbH D-73207 Plochingen<br />
BOSCH<br />
Best.-Nr.: 1 687 023 436<br />
FD; 2008-04<br />
2<br />
Danger due to high voltage!<br />
If the <strong>KTS</strong> <strong>340</strong> is open and the cover (Fig. 4,<br />
Pos. 5) of the LCD background illumination<br />
has been removed, life-threatening high voltage<br />
may occur.<br />
<br />
Never remove the cover of the background<br />
illumination.<br />
5<br />
4<br />
4<br />
3<br />
3<br />
max. 28 V<br />
Incorrect handling carries a risk of ignition,<br />
bursting or combustion!<br />
Batteries must not be heated, burned, shortcircuited,<br />
mechanically damaged or charged<br />
with excessively high currents or reverse<br />
polarity.<br />
<br />
Suitable extinguishing agents: Water,<br />
CO 2<br />
, sand.<br />
Fig. 4:<br />
Rechargeable battery replacement<br />
6.3 Spare and wearing parts<br />
459843-3Ko<br />
!!<br />
Only use the nickel-metal hydride batteries specified<br />
for the <strong>KTS</strong> <strong>340</strong>. We recommend batteries with a<br />
battery capacity of 2000 mAh to 2300 mAh. Always<br />
replace all the batteries. Dispose of old batteries in<br />
accordance with the applicable legislation.<br />
1. Switch off the <strong>KTS</strong> <strong>340</strong>.<br />
2. Slacken the screws (5x, Fig. 4, Pos. 1) on the back<br />
of the unit and detach the housing cover (Fig. 4,<br />
Pos. 2).<br />
3. Take out the battery compartments on the left and<br />
right and set down on the metal housing (Fig. 4,<br />
Pos. 3).<br />
4. Take out the old batteries (Fig. 4, Pos. 4).<br />
5. Insert new batteries (8x), taking care to ensure<br />
correct polarity.<br />
6. Re-insert the battery compartments in the unit.<br />
Description<br />
Order number<br />
System tester <strong>KTS</strong> <strong>340</strong> (green) 1 687 023 549<br />
Power supply unit<br />
Power supply lead<br />
1 687 022 890<br />
1 684 461 161<br />
USB connecting cable, 3 m 1 684 465 562<br />
OBD diagnostic cable, 3 m
Technical data | TS TS | 17 en<br />
7. Technical data<br />
7.1 General data<br />
Property<br />
Operating voltage<br />
Power consumption<br />
Value/Range<br />
11 VDC — 34 VDC<br />
approx. 50 W<br />
LCD 8.4"<br />
800 x 600 pixels<br />
Dimensions (L x W x H)<br />
235 x 290 x 67 mm<br />
9.25 x 11.42 x 2.64 inch<br />
Weight (without connecting cables) 2100 g<br />
4.6 lb<br />
Operating temperature 5 °C – 40 °C<br />
41 °F – 104 °F<br />
Relative humidity<br />
90 % (at 25 °C)<br />
Degree of protection IP 40<br />
7.2 Interface protocols<br />
The following interfaces and their associated protocols<br />
are supported for control unit diagnosis in compliance<br />
with ISO 15031:<br />
RR<br />
ISO/DIS 15765-4 (CAN) - baud rates: 250 kbit/s and<br />
500 kbit/s)<br />
RR<br />
ISO 9141-2 Fast<br />
RR<br />
ISO/DIS 14230-4 (keyword protocol 2000) 5 bauds<br />
RR<br />
ISO/DIS 14230-4 (keyword protocol 2000) Fast<br />
RR<br />
ISO/DIS 11519-4 (SAE J1850) PWM<br />
RR<br />
ISO/DIS 11519-4 (SAE J1850) VPW<br />
7.3 Power supply unit<br />
Property<br />
Value/Range<br />
Input voltage<br />
100 VAC — 240 VAC<br />
Input frequency<br />
50 Hz — 60 Hz<br />
Output voltage<br />
15 V<br />
Operating temperature 0 °C — 40 °C<br />
7.4 Multimeter specifications<br />
RR<br />
CH1 zero potential (blue input may be connected to<br />
live measurement points). Input resistance<br />
> 900 kohms.<br />
RR<br />
CH2 non-floating (black ground input must be<br />
connected to vehicle ground). Input resistance<br />
> 900 kohms.<br />
7.4.1 DC measurement (CH1 and CH2)<br />
Property<br />
Measuring range<br />
Accuracy of CH1<br />
Accuracy of CH2<br />
Resolution<br />
Value/Range<br />
200 mV — 60 V<br />
±0.75 % of measured value,<br />
plus ±0.25 % of measuring range<br />
±2 % of measured value,<br />
plus ±0.5 % of measuring range<br />
100 µV — 100 mV<br />
(depending on measuring range)<br />
7.4.2 Measurement of AC and rms value<br />
(CH1 and CH2) *)<br />
Property<br />
AC frequency range<br />
Measuring range<br />
AC accuracy at 100 Hz<br />
rms accuracy at ≤ 100 H<br />
Resolution<br />
Value/Range<br />
10 Hz — 400 Hz (-3 dB)<br />
200 mV — 60 V<br />
±2 % of measured value, plus<br />
±0.5 % of measuring range<br />
100 µV — 100 mV (depending<br />
on measuring range)<br />
*)<br />
The measuring ranges in measurement modes "U" and "I" are<br />
specified as peak-to-peak values. Consequently, the digital<br />
display box is "grayed out" if the set measuring range is briefly<br />
exceeded (overload).<br />
7.4.3 Resistance measurement (CH1)<br />
Property<br />
Measuring range<br />
Accuracy up to 200 K<br />
Accuracy up to 1 M<br />
Resolution<br />
Input resistance<br />
Value/Range<br />
100 — 1 M<br />
±0.75 % of measured value<br />
plus ±0.25 % of measuring range<br />
±2 % of measured value<br />
plus ±0.25 % of measuring range<br />
0.1 — 1000 (depending on<br />
measuring range)<br />
> 9 M<br />
Robert <strong>Bosch</strong> LLC<br />
1 689 989 072 | 2010-04-06
en<br />
18 | <strong>KTS</strong> <strong>340</strong> | Technical data<br />
7.4.4 Current measurement (CH1 and CH2)<br />
Sensor<br />
Measuring range<br />
Shunt (CH1 only)<br />
±600 mA<br />
30 A clamp (CH1 only) ±30 A<br />
100 A clamp ±100 A<br />
600 A clamp ±600 A<br />
1000 A clamp (CH1 only) ±1000 A<br />
7.4.5 Continuity tester (CH1)<br />
Property<br />
Value/Range<br />
Measurement current 2 mA<br />
No-load voltage ≤ 5 V<br />
Continuity<br />
< 10 (with acoustic check-back)<br />
7.4.6 Diode measurement (CH1)<br />
Property<br />
Value/Range<br />
Measurement current 2 mA<br />
No-load voltage<br />
≤ 5 V<br />
Maximum diode voltage 2 V<br />
7.5 WLAN<br />
Standard: IEEE 802.11g (54 Mbit/s), compatible with<br />
IEEE 802.11b (11 Mbit/s), data encryption: OPEN, WPA,<br />
WPA-PSK, WPA2, WPA2-PSK, WEP (64/128/256 bits),<br />
antenna: -3dBi.<br />
Radio link<br />
<strong>KTS</strong> <strong>340</strong> to PC/laptop<br />
Workshop environment with clear view<br />
of access point<br />
In vehicle interior with vehicle door or<br />
window open and engine running<br />
Minimum range<br />
30 meters<br />
10 meters<br />
The range of the WLAN varies considerably.<br />
20–40 m can normally be achieved indoors and up to<br />
100 m outdoors.<br />
Under adverse conditions the effective range may only<br />
be 10–15 m or even less.<br />
The <strong>KTS</strong> <strong>340</strong> automatically adapts the transmission<br />
rate in the WLAN to the transmission conditions. In the<br />
event of a poor radio link the data are transmitted<br />
more slowly than with a good link.<br />
1 689 989 072 | 2010-04-06<br />
Robert <strong>Bosch</strong> LLC
fr<br />
20 | <strong>KTS</strong> <strong>340</strong> |<br />
Sommaire<br />
1. Symboles utilisés 21<br />
1.1 Documentation 21<br />
1.2 <strong>KTS</strong> <strong>340</strong> 21<br />
2. Consignes d'utilisation 21<br />
2.1 Remarques importantes 21<br />
2.2 Consignes de sécurité 21<br />
2.3 Compatibilité électromagnétique (CEM) 21<br />
2.4 Elimination 21<br />
2.5 Logiciel Open Source 21<br />
2.6 J2534 Reprogramming, browser Web 21<br />
2.7 WLAN (Wireless Local Area Network) 22<br />
2.7.1 Remarques importantes sur WLAN 22<br />
2.7.2 Remarques sur la borne d'accès 22<br />
2.7.3 Remarques sur WLAN pour le Canada 22<br />
3. Description du produit 23<br />
3.1 Application 23<br />
3.2 Conditions préalables 23<br />
3.3 Fournitures 23<br />
3.4 Accessoires spéciaux 23<br />
3.5 Description de l'appareil 24<br />
3.6 Etat des LED 24<br />
3.6.1 LED état de charge de l'accumulateur 24<br />
3.6.2 LED WLAN 24<br />
6. Maintenance 2<br />
6.1 Nettoyage 32<br />
6.2 Remplacement des accumulateurs 32<br />
6.3 Pièces de rechange et d'usure 32<br />
7. Caractéristiques<br />
techniques<br />
<br />
7.1 Caractéristiques générales 33<br />
7.2 Protocoles d'interface 33<br />
7.3 Bloc d’alimentation 33<br />
7.4 Spécifications du multimètre 33<br />
7.4.1 Mesure CC (CH1 et CH2) 33<br />
7.4.2 Mesure CA et de la valeur efficace<br />
(CH1 et CH2) *) 33<br />
7.4.3 Mesure de la résistance (CH1) 33<br />
7.4.4 Mesure du courant (CH1 et CH2) 34<br />
7.4.5 Testeur de continuité (CH1) 34<br />
7.4.6 Mesure des diodes (CH1) 34<br />
7.5 WLAN 34<br />
4. Première mise en service 25<br />
4.1 Raccordement 25<br />
4.2 Enregistrement de la licence avec<br />
ESI[tronic] Startcenter 25<br />
4.2.1 Installation de ESI[tronic] Startcenter 25<br />
4.2.2 Enregistrement de la licence<br />
du <strong>KTS</strong> <strong>340</strong> en ligne 27<br />
4.2.3 Enregistrement de la licence<br />
du <strong>KTS</strong> <strong>340</strong> par télécopie 29<br />
4.2.4 Enregistrer la licence du <strong>KTS</strong> <strong>340</strong><br />
par télécopie 29<br />
5. Utilisation 29<br />
5.1 Raccordement au véhicule 29<br />
5.2 Mise en marche 30<br />
5.3 Mise à l’arrêt 30<br />
5.4 Remarques relatives au multimètre 30<br />
5.5 Ecran tactile avec stylo tactile 30<br />
5.6 Description du programme 30<br />
5.7 Mise à jour du logiciel 31<br />
5.7.1 Mise à jour du logiciel en ligne<br />
(à partir de la version 2010/2<br />
d'ESI[tronic] Startcenter) 31<br />
5.7.2 Mise à jour du logiciel avec<br />
le DVD ESI[tronic] 31<br />
5.8 Remarques en cas de défauts 31<br />
1 689 989 072 | 2010-04-06<br />
Robert <strong>Bosch</strong> LLC
Symboles utilisés | TS TS | 21 fr<br />
1. Symboles utilisés<br />
1.1 Documentation<br />
Les pictogrammes associés aux termes Danger, Avertissement<br />
et Prudence sont des messages d'avertissement<br />
et signalent toujours un danger direct ou potentiel<br />
pour l'utilisateur.<br />
Danger !<br />
Danger direct qui peut provoquer des blessures<br />
corporelles graves ou entraîner la mort.<br />
Avertissement !<br />
Situation potentiellement dangereuse qui<br />
peut provoquer des blessures corporelles<br />
graves ou entraîner la mort.<br />
Prudence !<br />
Situation potentiellement dangereuse qui peut<br />
provoquer des blessures corporelles légères<br />
ou des dommages matériels importants.<br />
!!<br />
Attention – Signale les situations potentiellement<br />
risquées pouvant entraîner une détérioration du<br />
<strong>KTS</strong> <strong>340</strong>, du spécimen ou d‘un objet situé à<br />
proximité.<br />
Outre les messages d'avertissement, les symboles<br />
suivants sont utilisés :<br />
iiInfo – Consignes d‘utilisation et autres informations<br />
utiles.<br />
<br />
Procédure à étape unique – Procédure constituée<br />
d'une seule étape.<br />
??<br />
Résultat intermédiaire – Un résultat intermédiaire<br />
est présenté pendant la procédure.<br />
""<br />
Résultat final – Le résultat final est présenté à la fin<br />
de la procédure.<br />
1.2 <strong>KTS</strong> <strong>340</strong><br />
Elimination<br />
Les appareils électriques et électroniques<br />
usagés, y compris leurs câbles, accessoires,<br />
piles et batteries, doivent être éliminés séparément<br />
des déchets ménagers.<br />
2. Consignes d'utilisation<br />
2.1 Remarques importantes<br />
Vous trouverez des remarques importantes sur ce qui a<br />
été convenu en matière de droits d'auteur, de responsabilité<br />
et de garantie, sur le groupe d'utilisateurs et les<br />
obligations incombant à l'entrepreneur, dans le manuel<br />
séparé "Remarques importantes et consignes de sécurité<br />
pour <strong>Bosch</strong> Test Equipment". Avant la mise en service,<br />
le raccordement et l'utilisation du <strong>KTS</strong> <strong>340</strong>, il est<br />
impératif de lire et d'appliquer ces consignes.<br />
2.2 Consignes de sécurité<br />
Vous trouverez toutes les consignes de sécurité dans le<br />
manuel séparé "Remarques importantes et consignes<br />
de sécurité pour <strong>Bosch</strong> Test Equipment". Avant la mise<br />
en service, le raccordement et l'utilisation du <strong>KTS</strong> <strong>340</strong>,<br />
il est impératif de lire et d'appliquer ces remarques.<br />
2. Compatibilité électromagnétique (CEM)<br />
Le <strong>KTS</strong> <strong>340</strong> est un produit de la classe B selon EN 61 326.<br />
2.4 Elimination<br />
Le <strong>KTS</strong> <strong>340</strong> est soumis à la directive<br />
européenne 2002/96/CE (DEEE).<br />
Les appareils électriques et électroniques<br />
usagés, y compris leurs câbles, accessoires,<br />
piles et batteries, doivent être mis au rebut<br />
séparément des déchets ménagers.<br />
<br />
A cette fin, recourir aux systèmes de<br />
reprise et de collecte mis à disposition.<br />
<br />
L'élimination en bonne et due forme<br />
du <strong>KTS</strong> <strong>340</strong> permet d‘éviter de nuire à<br />
l'environnement et de mettre en danger la<br />
santé publique.<br />
2.5 Logiciel Open Source<br />
Un récapitulatif des licences Open Source pour le<br />
<strong>KTS</strong> <strong>340</strong> figure sur le DVD "ESI[tronic] Startcenter"<br />
sous forme de document PDF Adobe.<br />
2.6 J2534 Reprogramming, browser Web<br />
i i Dans le menu " (Info) >> Aide", vous trouverez<br />
dans l’aide en ligne toutes les informations importantes<br />
sur le J2534 Reprogramming et le browser<br />
Web.<br />
Prudence – Contacts de charge brûlants !<br />
Danger de brûlure en cas de contact.<br />
<br />
Ne pas toucher les contacts de charge.<br />
Robert <strong>Bosch</strong> LLC<br />
1 689 989 072 | 2010-04-06
fr<br />
22 | <strong>KTS</strong> <strong>340</strong> | Symboles utilisés<br />
2.7 WLAN (Wireless Local Area Network)<br />
2.7.1 Remarques importantes sur WLAN<br />
WLAN (Wireless Local Area Network) désigne un réseau<br />
radio local "sans fil". Tout comme Bluetooth, WLAN est<br />
une liaison radio dans la bande ISM libre de 2,4 GHz<br />
(ISM : Industrial, Scientific, Medical). Cette gamme de<br />
fréquences fait l'objet de réglementations officielles<br />
mais peut être utilisée sans licence dans la plupart des<br />
pays. De ce fait, de nombreux appareils émettent dans<br />
cette bande de fréquences. Des chevauchements et des<br />
perturbations sont donc possibles.<br />
Selon les conditions environnantes, la liaison WLAN<br />
risque par conséquent d'être perturbée, par ex. par les<br />
liaisons Bluetooth, les téléphones sans fil, les radiothermomètres,<br />
les radiotélécommandes d'ouverture de<br />
porte de garage, les radiocommutateurs d'éclairage ou<br />
les centrales d'alarme radio.<br />
iiLe Bluetooth peut entraîner une perturbation de la<br />
largeur de bande dans un réseau WLAN. Les antennes<br />
des appareils Bluetooth et WLAN doivent être distantes<br />
d'au moins 30 centimètres. Ne pas enficher un<br />
adaptateur USB-Bluetooth et un stick WLAN dans des<br />
emplacements USB voisins du PC ou de l'ordinateur<br />
portable. Utiliser la rallonge USB (accessoire spécial)<br />
pour séparer physiquement l'adaptateur USB-Bluetooth<br />
du stick WLAN sur le PC ou l'ordinateur portable.<br />
iiLes personnes porteuses d'un pacemaker ou tout<br />
autre appareil électronique vital doivent se montrer<br />
prudentes lors de l'utilisation de techniques sans fil ;<br />
une altération du fonctionnement de ces appareils<br />
ne peut être exclue.<br />
Respecter les consignes suivantes pour obtenir une<br />
liaison optimale :<br />
RR<br />
Le signal WLAN recherche toujours le chemin direct.<br />
Disposer le PC ou l'ordinateur portable et la borne<br />
d'accès (voir le chapitre 2.6.2) en évitant autant que<br />
possible les obstacles tels que les portes en acier et<br />
les murs de béton qui peuvent gêner le signal radio<br />
émis et reçu par le <strong>KTS</strong> <strong>340</strong>. En outre, la portée du<br />
WLAN à l'intérieur d'un bâtiment dépend fortement<br />
de la nature de la construction. Les maçonneries<br />
conventionnelles, le bois et les différentes cloisons<br />
sèches ne gênent pratiquement pas les ondes radio.<br />
En revanche, les cloisons fines en plâtre peuvent<br />
être problématiques car le plâtre peut accumuler<br />
suffisamment d'humidité pour absorber les signaux<br />
radio. Le béton (et en particulier le béton armé)<br />
s'oppose fortement au passage des ondes radio. Les<br />
plafonds des caves leur sont souvent imperméables.<br />
D'une manière générale, les murs contenant une<br />
grande quantité de métal (par ex. des tubes, câbles,<br />
etc.) représentent des obstacles pour les ondes radio.<br />
RR<br />
RR<br />
RR<br />
RR<br />
RR<br />
RR<br />
RR<br />
La réception radio est également perturbée par<br />
d'autres corps métalliques de taille importante tels<br />
que les radiateurs et les cadres de fenêtres de même<br />
que par les sources actives de parasites tels que les<br />
téléphones DECR et les fours à micro-ondes.<br />
Faites installer et tester votre réseau par un spécialiste.<br />
Conservez la SSID et les codes du système radio<br />
en lieu sûr. Faites en sorte que ces données soient<br />
disponibles en cas de dérangement.<br />
Nous vous conseillons de parcourir votre site lors de<br />
la mise en service : vérifiez où le <strong>KTS</strong> <strong>340</strong> fonctionne<br />
dans votre bâtiment et où se situent les limites de la<br />
transmission radio.<br />
La transmission radio peut être fortement limitée si<br />
le <strong>KTS</strong> <strong>340</strong> est utilisé à l'intérieur d'un véhicule (cage<br />
de Faraday).<br />
La liaison radio subit les influences de la météo. Des<br />
variations du signal reçu sont donc possibles.<br />
Veuillez adresser toute question à votre responsable<br />
réseau.<br />
2.7.2 Remarques sur la borne d'accès<br />
Un Wireless Access Point ou borne d'accès est un appareil<br />
électronique qui fait l'interface entre un réseau<br />
radio et un réseau informatique filaire. C'est au travers<br />
de cette borne que le <strong>KTS</strong> <strong>340</strong>, le PC ou l'ordinateur<br />
portable peuvent avec ESI[tronic] Startcenter être reliés<br />
sans fil par ex. à une imprimante.<br />
iiNous recommandons d'utiliser pour la borne d'accès<br />
le standard WLAN IEEE 802.11g (vitesse de transmission<br />
maximale 54 Mbps). La fonction "extended<br />
range" n'est pas supportée.<br />
Observer les points suivants :<br />
RR<br />
Installer la borne d'accès en un point central, si possible<br />
en hauteur, de préférence au plafond du local.<br />
RR<br />
Diriger l'antenne vers le bas, vers le sol.<br />
RR<br />
Si la liaison est mauvaise, il peut être judicieux de modifier<br />
le canal réglé sur la borne. Eviter si possible d'utiliser<br />
des canaux adjacents aux canaux déjà utilisés.<br />
RR<br />
Nous recommandons de configurer le cryptage de<br />
l'échange radio sur la borne d'accès.<br />
2.7.3 Remarques sur WLAN pour le Canada<br />
Canada :<br />
L'utilisation de ce dispositif est autorisée seulement<br />
aux deux conditions suivantes :<br />
RR<br />
il ne doit pas produire de brouillage, et<br />
RR<br />
l'utilisateur du dispositif doit être prêt à accepter<br />
tout brouillage radioélectrique reçu, même si ce<br />
brouillage est susceptible de compromettre le fonctionnement<br />
du dispositif.<br />
Cet appareil numérique de la classe [B] est conforme à<br />
la norme NMB-003 du Canada.<br />
1 689 989 072 | 2010-04-06<br />
Robert <strong>Bosch</strong> LLC
Description du produit | TS TS | 23 2 2 fr<br />
3. Description du produit<br />
3.1 Application<br />
Le <strong>KTS</strong> <strong>340</strong> est un testeur système pour le diagnostic<br />
des centrales de commande, la recherche des défauts,<br />
la réparation et la maintenance dans les ateliers auto.<br />
Le <strong>KTS</strong> <strong>340</strong> avec un ESI[tronic] dont la licence est<br />
enregistrée offre les fonctions suivantes :<br />
RR<br />
Identification<br />
RR<br />
Informations sur le véhicule<br />
RR<br />
Diagnostic<br />
RR<br />
Recherche des défauts<br />
RR<br />
Entretien<br />
iiLe <strong>KTS</strong> <strong>340</strong> est conçu pour fonctionner en WLAN 2.4<br />
GHz pour les USA, le Canada et le Mexique.<br />
Le <strong>KTS</strong> <strong>340</strong> peut être utilisé en WLAN dans les pays<br />
suivants :<br />
L'appareil remplit les conditions requises de la<br />
directive R&TTE (Radio Equipment and Telecommunications<br />
Terminal Equipment), ce que confirme<br />
l'estampille CE.<br />
!!<br />
Le <strong>KTS</strong> <strong>340</strong> est un appareil de précision qui ne doit<br />
pas être exposé à la chaleur (par ex. exposition<br />
directe au soleil), aux chocs, aux vibrations, aux<br />
champs magnétiques et à un encrassement excessif.<br />
Le <strong>KTS</strong> <strong>340</strong> ne doit être ouvert que pour remplacer<br />
les accumulateurs.<br />
3.2 Conditions préalables<br />
L'enregistrement de la licence du <strong>KTS</strong> <strong>340</strong> via<br />
ESI[tronic] Startcenter et la mise à jour du logiciel pour<br />
le diagnostic des centrales de commande <strong>KTS</strong> <strong>340</strong> nécessitent<br />
un PC ou un ordinateur portable équipé du<br />
système d'exploitation WIN XP (SP2), WIN Vista TM Home<br />
Premium WIN Vista TM Business ou WIN 7 (32 Bit) et d'au<br />
moins un port USB libre.<br />
Le port USB doit supporter le protocole USB 2.0 ou le<br />
protocole USB 1.1.<br />
3.3 Fournitures<br />
Désignation<br />
Référence<br />
<strong>KTS</strong> <strong>340</strong><br />
Bloc d'alimentation<br />
Cordon secteur<br />
1 687 022 890<br />
1 684 461 161<br />
Câble de liaison USB 3 m 1 684 465 562<br />
Câble de diagnostic OBD 3 m 1 684 465 557<br />
Câble de raccordement UNI 4 pôles 1 684 463 539<br />
Stylo tactile (3x) 1 683 083 007<br />
DVD ESI[tronic] Startcenter 1 987 P12 034<br />
<strong>KTS</strong> <strong>340</strong> Getting Started DVD 1 687 370 308<br />
Mallette 1 685 438 626<br />
Câble de mesure rouge 1 684 430 065<br />
Câble de mesure bleu 1 684 430 066<br />
Câble de mesure jaune 1 684 430 067<br />
Câble de masse noir 1 684 430 068<br />
Pointe d'essai rouge (2x) 1 684 485 035<br />
Borne de raccordement noire 1 684 480 022<br />
Remarques importantes et consignes<br />
1 689 985 000<br />
de sécurité<br />
Notice d'utilisation du <strong>KTS</strong> <strong>340</strong> 1 689 989 072<br />
<strong>KTS</strong> <strong>340</strong> Quick Start Guide 1 689 989 075<br />
Déclaration de conformité 1 689 974 307<br />
!!<br />
Conservez toujours le <strong>KTS</strong> <strong>340</strong> et les accessoires<br />
dans la mallette lorsqu'ils ne sont pas utilisés.<br />
3.4 Accessoires spéciaux<br />
Pour plus d'informations sur les accessoires spéciaux<br />
tels que les câbles de raccordement spécifiques aux<br />
véhicules, consultez votre revendeur <strong>Bosch</strong>.<br />
Robert <strong>Bosch</strong> LLC<br />
1 689 989 072 | 2010-04-06
fr<br />
24 | <strong>KTS</strong> <strong>340</strong> | Description du produit<br />
3.5 Description de l'appareil<br />
Le <strong>KTS</strong> <strong>340</strong> est un système de diagnostic modulaire,<br />
portable, mobile. Le <strong>KTS</strong> <strong>340</strong> comprend une unité centrale<br />
avec une carte mémoire et un écran tactile à cristaux<br />
liquides de 8,4 pouces. ESI[tronic] est pré-installé<br />
d'origine sur la carte mémoire.<br />
L'utilisation se fait à l'aide d'un stylo tactile pour l'écran<br />
tactile à cristaux liquides ou par un clavier virtuel.<br />
Le <strong>KTS</strong> <strong>340</strong> et les accessoires sont rangés et protégés<br />
dans une mallette.<br />
8<br />
7<br />
6<br />
<strong>KTS</strong> <strong>340</strong> Powered by ESI tronic<br />
1<br />
2<br />
3.6 Etat des LED<br />
3.6.1 LED état de charge de l'accumulateur<br />
LED état de charge de<br />
l'accumulateur<br />
S'allume en vert<br />
Clignote en vert<br />
S'allume en jaune<br />
Clignote en jaune<br />
S'allume en rouge<br />
Clignote en rouge<br />
Etat<br />
Accu chargé, tension d’alimentation<br />
externe raccordée.<br />
Accu chargé, tension d’alimentation<br />
externe pas raccordée.<br />
Accu en charge, tension d’alimentation<br />
externe raccordée.<br />
Accu presque vide, raccorder la<br />
tension d’alimentation externe.<br />
Erreur lors de la charge.<br />
Accu vide (le <strong>KTS</strong> <strong>340</strong> se met à l’arrêt<br />
dans les 2 minutes), raccorder<br />
la tension d’alimentation externe.<br />
5<br />
max. 28 V<br />
4<br />
Fig. 1: <strong>KTS</strong> <strong>340</strong><br />
3<br />
459843-5K<br />
1 Support de stylo tactile<br />
2 Stylo tactile<br />
3 Touche Marche/Arrêt<br />
4 Connexion pour bloc d'alimentation<br />
5 Port USB<br />
6 LED WLAN<br />
7 LED état de charge de l'accumulateur<br />
8 Ecran tactile à cristaux liquides<br />
3.6.2 LED WLAN<br />
LED WLAN<br />
Etat<br />
S'allume en vert WLAN est configuré et le <strong>KTS</strong> <strong>340</strong><br />
en liaison avec une borne d'accès,<br />
l'intensité du champ est bonne.<br />
S'allume en jaune WLAN est configuré et le <strong>KTS</strong> <strong>340</strong><br />
en liaison avec une borne d'accès,<br />
l'intensité du champ est mauvaise.<br />
S'allume en rouge WLAN est configuré, le <strong>KTS</strong> <strong>340</strong><br />
n'est pas en liaison avec une borne<br />
d'accès.<br />
Eteinte<br />
WLAN n'est pas configuré.<br />
!!<br />
Risque de blessure par les éclats de verre en cas de<br />
bris de l'écran à cristaux liquides.<br />
CH2<br />
CH1<br />
K<br />
max. 60 V<br />
DIAG<br />
459843_1Ko<br />
1 2 3 4 5 6<br />
7<br />
Fig. 2: Arrière du <strong>KTS</strong> <strong>340</strong><br />
1 Rangement pour stylos tactiles<br />
2 Entrée de mesure CH2<br />
3 Borne de masse<br />
4 Entrée de mesure CH1(-)<br />
5 Entrée de mesure CH1(+)<br />
6 Connexion pour câble de diagnostic (DIAG)<br />
7 Connexion pour serrure Kensington<br />
1 689 989 072 | 2010-04-06<br />
Robert <strong>Bosch</strong> LLC
Première mise en service | TS TS | 25 fr<br />
4. Première mise en service<br />
4.1 Raccordement<br />
Avant la mise en service, assurez-vous que la tension<br />
du secteur correspond à la tension spécifiée sur le bloc<br />
d’alimentation (utiliser le cordon secteur joint).<br />
4.2 Enregistrement de la licence avec<br />
ESI[tronic] Startcenter<br />
Le <strong>KTS</strong> <strong>340</strong> est livré pré-installé, licence pré-enregistrée,<br />
et peut être utilisé directement pour le diagnostic<br />
des centrales de commande. Pour pouvoir utiliser les<br />
fonctions prévues dans le contrat de vente et effectuer<br />
d’autres mises à jour, il est nécessaire de ré-enregistrer<br />
la licence du <strong>KTS</strong> <strong>340</strong>. Vous trouverez le numéro de<br />
client et le mot de passe nécessaires à cet effet sur le<br />
bordereau de livraison.<br />
!!<br />
Ne raccorder le <strong>KTS</strong> <strong>340</strong> au PC ou à l’ordinateur portable<br />
qu’à l’invite du programme lors de l’installation.<br />
4.2.1 Installation de ESI[tronic] Startcenter<br />
Marche à suivre :<br />
1. Fermer toutes les applications ouvertes.<br />
2. Insérer le DVD "ESI[tronic] Startcenter".<br />
3. Ouvrir "Windows Explorer".<br />
4. Lancer D:\setup.exe (D = lettre désignant le lecteur<br />
de DVD).<br />
??<br />
L'installation commence.<br />
??<br />
Le message suivant s'affiche sous WIN Vista :<br />
Un programme non identifié tente<br />
d'accéder à l'ordinateur.<br />
??<br />
Le message suivant s'affiche sous WIN 7 :<br />
Autorisez-vous le programme suivant<br />
à effectuer des modifications sur cet<br />
ordinateur ?<br />
5. Confirmer le message avec "Autoriser" ou "Oui".<br />
iiLa langue d'installation sélectionnée est également<br />
la langue d'ESI[tronic] Startcenter.<br />
7. Observer les indications qui s'affichent à l'écran et<br />
suivre les instructions.<br />
iiSélectionner dans le menu d'installation "Choix du<br />
pays" le pays dans lequel sera utilisé le <strong>KTS</strong> <strong>340</strong>. Le<br />
dialogue n'apparaît pas si un pays a déjà été sélectionné<br />
lors d'une précédente installation de Startcenter<br />
(par ex. pour <strong>KTS</strong> 200).<br />
iiSi Adobe Reader n’est pas encore installé sur le PC<br />
ou sur l’ordinateur portable, ce logiciel est installé<br />
à l’issue de l’installation d'ESI[tronic]-Startcenter.<br />
Adobe Reader est nécessaire pour l’affichage des<br />
procès-verbaux du diagnostic des centrales de commande<br />
<strong>KTS</strong> <strong>340</strong> sur le PC ou l’ordinateur portable.<br />
iiNous vous recommandons de n'installer le pack de<br />
données <strong>KTS</strong> sur le disque dur que lorsque vous<br />
souhaitez effectuer une mise à jour de plusieurs <strong>KTS</strong>.<br />
Le DVD ESI[tronic] Startcenter est alors inutile lors<br />
de la mise à jour.<br />
? ? Le message suivant s'affiche sous WIN Vista :<br />
Voulez-vous installer ce logiciel de<br />
périphérique ?<br />
8. Confirmer le message avec "Installer".<br />
6. Choisir la langue d'installation et confirmer avec .<br />
Robert <strong>Bosch</strong> LLC<br />
1 689 989 072 | 2010-04-06
fr<br />
26 | <strong>KTS</strong> <strong>340</strong> | Première mise en service<br />
9. Supprimer la liaison USB avec le <strong>KTS</strong> <strong>340</strong>.<br />
??<br />
Le message suivant s'affiche sous WIN 7 : Windows<br />
ne peut pas vérifier l'éditeur de<br />
ce pilote.<br />
??<br />
Le message suivant s'affiche sous WIN XP :<br />
Cet assistant vous aide à installer<br />
le logiciel pour : <strong>KTS</strong>-embedded.<br />
10. Confirmer le message avec "Installer ce pilote<br />
quand même".<br />
??<br />
Le message suivant s'affiche sous WIN Vista :<br />
Windows doit installer le pilote logiciel<br />
de votre "<strong>KTS</strong> embedded".<br />
11. Mettre le <strong>KTS</strong> <strong>340</strong> en marche.<br />
iiA la première mise en marche, la langue du <strong>KTS</strong> <strong>340</strong><br />
est toujours l'anglais (US). La langue peut être modifiée<br />
sous " (Service) >> Réglages utilisateur >><br />
Réglages langues".<br />
iiLe pilote USB qui permet la communication entre le<br />
<strong>KTS</strong> <strong>340</strong> et le PC ou l'ordinateur portable est installé<br />
automatiquement lors de l'installation d'ESI[tronic]<br />
Startcenter. Le dialogue "Raccorder USB" n'apparaît pas<br />
si le pilote USB a déjà été installé lors d'une précédente<br />
installation de Startcenter (par ex. pour <strong>KTS</strong> 200).<br />
12. Fermer le message avec "Annuler".<br />
??<br />
Sous Windows Vista et WIN 7, le message suivant<br />
apparaît alors : Windows ne peut pas<br />
vérifier l'éditeur de ce pilote.<br />
13. Confirmer le message avec "Installer ce pilote<br />
quand même".<br />
14. Pour terminer l'installation, redémarrer le PC ou<br />
l'ordinateur portable.<br />
??<br />
ESI[tronic] Startcenter est installé.<br />
1 689 989 072 | 2010-04-06<br />
Robert <strong>Bosch</strong> LLC
Première mise en service | TS TS | 27 fr<br />
15. Lancer "ESI[tronic]-Startcenter".<br />
4.2.2 Enregistrement de la licence du <strong>KTS</strong> <strong>340</strong><br />
en ligne<br />
!!<br />
L'enregistrement en ligne peut être effectué uniquement<br />
sur un PC ou un ordinateur portable ayant<br />
accès à Internet.<br />
1. Alimenter le <strong>KTS</strong> <strong>340</strong> avec le bloc secteur fourni et le<br />
mettre en marche.<br />
??<br />
Le <strong>KTS</strong> <strong>340</strong> démarre.<br />
2. Relier le <strong>KTS</strong> <strong>340</strong> au PC ou à l'ordinateur portable<br />
à l'aide du câble de liaison USB.<br />
3. Sélectionner le menu "Enregistrement de licence >><br />
En ligne" dans le Startcenter.<br />
??<br />
La fenêtre de saisie "Attribution de licence online"<br />
s'ouvre.<br />
iiOuvrir l'aide en ligne dans le menu " (Info) >><br />
Aide". Toutes les informations importantes sur<br />
ESI[tronic] y figurent.<br />
16. Enregistrer la licence du <strong>KTS</strong> <strong>340</strong> par télécopie ou<br />
en ligne.<br />
4. Etape 1 : Indiquer le n° de client / mot de passe et<br />
sélectionner .<br />
??<br />
La connexion à Internet en vue de l’enregistrement<br />
de la licence en ligne s’établit.<br />
i i Si le "Login" est impossible, vérifier les réglages<br />
Proxy sous " Réglages >> Réglages de l'utilisateur".<br />
Robert <strong>Bosch</strong> LLC<br />
1 689 989 072 | 2010-04-06
fr<br />
28 | <strong>KTS</strong> <strong>340</strong> | Première mise en service<br />
5. Etape 2 : Sélectionner l'ID du contrat puis<br />
.<br />
??<br />
Le code de la licence est demandé.<br />
" " La licence du <strong>KTS</strong> <strong>340</strong> est enregistrée et celui-ci est<br />
opérationnel.<br />
iiLa demande du code peut durer quelques secondes.<br />
!!<br />
La liaison USB et l’alimentation électrique du<br />
<strong>KTS</strong> <strong>340</strong> ne doivent pas être coupées pendant la<br />
transmission du code de la licence.<br />
6. Sélectionner .<br />
??<br />
Le code de la licence est transmis au <strong>KTS</strong> <strong>340</strong>.<br />
??<br />
Lorsque la licence est bien enregistrée, redémarrer<br />
le <strong>KTS</strong> <strong>340</strong>.<br />
1 689 989 072 | 2010-04-06<br />
Robert <strong>Bosch</strong> LLC
CH2<br />
max. 60 V<br />
CH1<br />
DIAG<br />
K<br />
Première mise en service | TS TS | 29 fr<br />
4.2.3 Enregistrement de la licence du <strong>KTS</strong> <strong>340</strong><br />
par télécopie<br />
1. Sélectionner le menu "Enregistrement de licence >><br />
Télécopie" dans le Startcenter.<br />
??<br />
La fenêtre de saisie "Demande de licence" s'ouvre.<br />
2. Etape 1 : Saisir les données de l'entreprise<br />
3. Etape 2 : Sélectionner le pays pour la demande de<br />
licence.<br />
4. Etape 3 : Saisir le numéro ID et imprimer le formulaire<br />
d'enregistrement de licence.<br />
5. Signer le formulaire d'enregistrement de licence et le<br />
transmettre par télécopie.<br />
5. Utilisation<br />
5.1 Raccordement au véhicule<br />
Le <strong>KTS</strong> <strong>340</strong> est prévu pour être utilisé sur un véhicule<br />
dont la batterie délivre une tension de 12 volts et<br />
24 volts.<br />
!!<br />
Assurez-vous que le câble de diagnostic OBD est<br />
correctement branché sur le <strong>KTS</strong> et bien vissé. Les<br />
broches du connecteur peuvent se plier ou casser si<br />
elles sont mal enfichées. N'utiliser que le câble de<br />
diagnostic OBD fourni.<br />
4.2.4 Enregistrer la licence du <strong>KTS</strong> <strong>340</strong><br />
par télécopie<br />
Après avoir reçu le code de la licence par télécopie,<br />
procéder à l'enregistrement de la licence.<br />
1. Alimenter le <strong>KTS</strong> <strong>340</strong> avec le bloc secteur fourni et le<br />
mettre en marche.<br />
??<br />
Le <strong>KTS</strong> <strong>340</strong> démarre.<br />
2. Relier le <strong>KTS</strong> <strong>340</strong> au PC ou à l'ordinateur portable<br />
à l'aide du câble de liaison USB.<br />
3. Cliquer sur le menu "Enregistrement de licence >><br />
Enregistrer la licence" dans le Starcenter.<br />
??<br />
La fenêtre de saisie "Demande de licence" s'ouvre.<br />
4. Indiquer le numéro de client, le numéro d’ID et le<br />
code de la licence.<br />
5. Effectuer l’enregistrement de la licence.<br />
??<br />
Le code de la licence est transmis.<br />
??<br />
Lorsque la licence a été correctement enregistrée,<br />
redémarrer le <strong>KTS</strong> <strong>340</strong>.<br />
""<br />
La licence du <strong>KTS</strong> <strong>340</strong> est maintenant enregistrée et un<br />
diagnostic de centrale de commande peut être effectué.<br />
8<br />
9 1<br />
10 2<br />
11 3<br />
12 4<br />
13 5<br />
14 6<br />
15<br />
7<br />
16<br />
8<br />
3<br />
7<br />
459843<br />
<strong>KTS</strong> <strong>340</strong> Powered by ESI tronic<br />
1<br />
6<br />
4<br />
2<br />
5<br />
Fig. 3: Schéma de raccordement du <strong>KTS</strong> <strong>340</strong><br />
1 Prise de diagnostic OBD dans le véhicule<br />
2 Câble de diagnostic OBD<br />
3 Câble de raccordement UNI<br />
4 Câble de liaison USB<br />
5 Câble de raccordement pour prise de l'allume-cigare (accessoire<br />
spécial)<br />
6 Bloc d'alimentation<br />
7 <strong>KTS</strong> <strong>340</strong><br />
8 Câbles de mesure<br />
Risque de blessure par déclenchement de<br />
l’airbag lors de la mise en place du <strong>KTS</strong> <strong>340</strong><br />
sur le volant !<br />
Robert <strong>Bosch</strong> LLC<br />
1 689 989 072 | 2010-04-06
fr<br />
30 | <strong>KTS</strong> <strong>340</strong> | Utilisation<br />
Le raccordement à l’interface de diagnostic dans le<br />
véhicule se fait par :<br />
RR<br />
le câble de diagnostic OBD (fig. 3, pos. 2) ou<br />
RR<br />
le câble de diagnostic OBD et le câble de raccordement<br />
UNI (fig. 3, pos. 3 ; accessoire spécial) ou<br />
RR<br />
le câble de diagnostic OBD et un câble adaptateur<br />
spécifique au véhicule (accessoire spécial) ou<br />
RR<br />
un câble adaptateur spécifique au véhicule<br />
(accessoire spécial).<br />
5.2 Mise en marche<br />
<br />
Mettre le <strong>KTS</strong> <strong>340</strong> en marche avec la touche Marche/<br />
Arrêt.<br />
""<br />
Après le démarrage du système, le <strong>KTS</strong> <strong>340</strong> reste sur<br />
l'écran de démarrage "Identification du véhicule".<br />
L'écran de démarrage apparaît après chaque mise en<br />
marche.<br />
!!<br />
Si le <strong>KTS</strong> <strong>340</strong> est alimenté via un bloc d'alimentation,<br />
utiliser toujours le bloc d'alimentation fourni. Ne pas<br />
utiliser de bloc d'alimentation de moins de 15V/3A<br />
tel que par ex. celui fourni avec le <strong>KTS</strong> 200 ou le<br />
<strong>KTS</strong> 5xx.<br />
Le <strong>KTS</strong> <strong>340</strong> est généralement alimenté en tension via<br />
la prise de diagnostic OBD du véhicule. Si la localisation<br />
de la prise de diagnostic OBD dans le véhicule est<br />
inconnue, il est recommandé de rechercher la prise de<br />
diagnostic OBD à l'aide du diagnostic des centrales de<br />
commande <strong>KTS</strong> <strong>340</strong>.<br />
iiSur certains véhicules, le contact doit être mis pour<br />
que la prise de l’allume-cigare soit sous tension.<br />
iiLors des étapes de contrôle où il est nécessaire de<br />
démarrer le moteur, la tension batterie peut chuter<br />
si fortement que l'alimentation par le véhicule n'est<br />
plus garantie. Dans ce cas, il peut s'avérer nécessaire<br />
d'alimenter le <strong>KTS</strong> <strong>340</strong> par le bloc d'alimentation.<br />
iiSur certains véhicules, l'alimentation électrique via l'interface<br />
OBD ne peut être assurée que lorsque le contact<br />
est mis.<br />
Si le <strong>KTS</strong> <strong>340</strong> est relié à un PC ou un ordinateur portable<br />
via le câble de liaison USB, il est recommandé<br />
d'alimenter le <strong>KTS</strong> <strong>340</strong> avec le bloc d'alimentation<br />
fourni.<br />
5.3 Mise à l’arrêt<br />
<br />
Enfoncer la touche Marche/Arrêt pendant env. 3 secondes.<br />
""<br />
Le <strong>KTS</strong> <strong>340</strong> s’arrête.<br />
Si le <strong>KTS</strong> <strong>340</strong> est alimenté uniquement via l'accumulateur,<br />
le <strong>KTS</strong> <strong>340</strong> se met à l'arrêt lorsque la tension de<br />
l'accumulateur est < 8 volts ou lorsque le <strong>KTS</strong> <strong>340</strong> n'a pas<br />
été utilisé pendant dix minutes (réglage usine).<br />
Si le <strong>KTS</strong> <strong>340</strong> est alimenté par une source de tension<br />
externe (par ex. le câble de diagnostic OBD ou le bloc<br />
d'alimentation) et s'il reste inutilisé un certain temps, la<br />
luminosité de l'écran tactile à cristaux liquides diminue.<br />
5.4 Remarques relatives au multimètre<br />
Danger : haute tension !<br />
Lors des mesures effectuées sans câble de<br />
masse, des charges peuvent être à l'origine de<br />
tensions potentiellement mortelles.<br />
<br />
Si aucun câble de diagnostic n'est raccordé,<br />
établir une mise à la masse à l'aide du câble<br />
de masse fourni entre le <strong>KTS</strong> <strong>340</strong> et la masse<br />
du véhicule avant les mesures de U, R ou I.<br />
<br />
Brancher le câble de masse le plus près<br />
possible de l'objet à mesurer.<br />
<br />
N'utiliser le <strong>KTS</strong> <strong>340</strong> que sur le véhicule et<br />
pas pour mesurer des tensions > 60 volts.<br />
<br />
Ne pas effectuer de mesure sur les systèmes<br />
d'allumage.<br />
<br />
N'utiliser que les câbles de mesure fournis,<br />
équipés d'une protection.<br />
<br />
Toujours raccorder les câbles de mesure<br />
d'abord au <strong>KTS</strong> <strong>340</strong>, puis au véhicule !<br />
<br />
Ne pas faire passer un câble de mesure non<br />
blindé à proximité immédiate de sources<br />
de fortes perturbations, comme un câble<br />
d'allumage.<br />
5.5 Ecran tactile avec stylo tactile<br />
L’écran tactile du <strong>KTS</strong> <strong>340</strong> s’utilise avec le stylo tactile.<br />
Touchez avec le stylo tactile l'application que vous souhaitez<br />
utiliser.<br />
iiUn "Calibrage de l'écran tactile" peut être effectué<br />
dans le menu Service sous "Réglages utilisateur<br />
>> Service clientèle". Pour éviter les erreurs,<br />
vos yeux doivent se trouver à la perpendiculaire des<br />
points de calibrage. Cliquez sur les points de calibrage<br />
le plus précisément possible.<br />
5.6 Description du programme<br />
L'aide en ligne du <strong>KTS</strong> <strong>340</strong> s'ouvre dans la barre supérieure<br />
sous .<br />
Vous trouverez les bases pour <strong>KTS</strong> <strong>340</strong> et ESI[tronic]<br />
Startcenter dans ESI[tronic] Startcenter dans<br />
"ESI[tronic] trainer".<br />
1 689 989 072 | 2010-04-06<br />
Robert <strong>Bosch</strong> LLC
Utilisation | TS TS | 31 1 1 fr<br />
5.7 Mise à jour du logiciel<br />
La mise à jour du logiciel se fait soit avec le DVD<br />
"ESI[tronic] Startcenter" soit "en ligne".<br />
!!<br />
N'effectuer la mise à jour du logiciel qu'avec un<br />
<strong>KTS</strong> <strong>340</strong> dont la licence est enregistrée. La liaison<br />
USB et l'alimentation électrique du <strong>KTS</strong> <strong>340</strong> ne doivent<br />
pas être interrompues pendant la mise à jour du<br />
logiciel. En outre, le mode Standby doit être activé<br />
sur le PC ou l'ordinateur portable.<br />
iiL'installation du DVD ESI[tronic] Startcenter 1 (version<br />
de base annuelle) doit être effectuée par "Mise à<br />
jour du logiciel par DVD".<br />
iiVous trouverez l'aide en ligne pour la mise à jour du logiciel<br />
dans ESI[tronic] Startcenter sous "Aide >> Aide".<br />
iiSi la mise à jour du logiciel du <strong>KTS</strong> <strong>340</strong> a été arrêtée<br />
(par ex. en cas de débranchement de la liaison USB)<br />
ou si l'installation n'a pas été effectuée complètement,<br />
une restauration peut être effectuée dans ESI[tronic]<br />
Startcenter sous "Aide >> Service après-vente" dans<br />
le menu "Restaurer le logiciel <strong>KTS</strong>" (voir l'aide en<br />
ligne ESI[tronic] Startcenter).<br />
5.7.1 Mise à jour du logiciel en ligne (à partir de la<br />
version 2010/2 d'ESI[tronic] Startcenter)<br />
1. Lancer "ESI[tronic] Startcenter".<br />
2. Ouvrir la fenêtre de saisie "Réglages >>Mises à jour<br />
en ligne".<br />
3. Saisir le n° de client et le mot de passe et sélectionner<br />
.<br />
iiSi le "Login" est impossible, vérifier les réglages<br />
Proxy sous "Réglages >> Réglages de l'utilisateur".<br />
4. Sélectionner la mise à jour disponible et lancer la<br />
mise à jour.<br />
5. Observer les indications qui s'affichent à l'écran et<br />
suivre les instructions.<br />
iiPour terminer l'installation, redémarrer le PC ou<br />
l'ordinateur portable.<br />
Mise à jour du logiciel du <strong>KTS</strong> <strong>340</strong><br />
1. Débrancher le bloc d'alimentation et le câble de<br />
liaison USB du <strong>KTS</strong> <strong>340</strong>.<br />
2. Lancer "ESI[tronic] Startcenter".<br />
3. Alimenter de nouveau le <strong>KTS</strong> <strong>340</strong> avec le bloc secteur<br />
et le mettre en marche.<br />
??<br />
Le <strong>KTS</strong> <strong>340</strong> démarre.<br />
??<br />
La boîte de dialogue "Identification véhicule"<br />
apparaît.<br />
4. Relier le <strong>KTS</strong> <strong>340</strong> au PC ou à l'ordinateur portable<br />
à l'aide du câble de liaison USB.<br />
5. ESI[tronic]-Startcenter : Ouvrir "<strong>KTS</strong> <strong>340</strong> >> Information<br />
sur l'appareil".<br />
Robert <strong>Bosch</strong> LLC<br />
6. Sélectionner la mise à jour disponible.<br />
7. Sélectionner .<br />
""<br />
Le logiciel système est installé sur le <strong>KTS</strong> <strong>340</strong>.<br />
5.7.2 Mise à jour du logiciel avec le DVD ESI[tronic]<br />
Etape 1 : Installation d'ESI[tronic] Startcenter<br />
1. Fermer toutes les applications ouvertes.<br />
2. Insérer le DVD "ESI[tronic] Startcenter".<br />
3. Ouvrir "Windows Explorer".<br />
4. Lancer D:\setup.exe (D = lettre désignant le lecteur<br />
de DVD).<br />
??<br />
L'installation commence.<br />
5. Observer les indications qui s'affichent à l'écran et<br />
suivre les instructions (voir le chapitre 4.2.1).<br />
iiPour terminer l'installation, redémarrer le PC ou<br />
l'ordinateur portable.<br />
Etape 2 : Mise à jour du logiciel du <strong>KTS</strong> <strong>340</strong><br />
1. Débrancher le bloc d'alimentation et le câble de<br />
liaison USB du <strong>KTS</strong> <strong>340</strong>.<br />
2. Lancer "ESI[tronic] Startcenter" .<br />
3. Alimenter de nouveau le <strong>KTS</strong> <strong>340</strong> avec le bloc secteur<br />
et le mettre en marche.<br />
??<br />
Le <strong>KTS</strong> <strong>340</strong> démarre.<br />
??<br />
La boîte de dialogue "Identification véhicule" apparaît.<br />
4. Relier le <strong>KTS</strong> <strong>340</strong> au PC ou à l'ordinateur portable<br />
à l'aide du câble de liaison USB.<br />
5. ESI[tronic]-Startcenter : Ouvrir "<strong>KTS</strong> <strong>340</strong> >> Information<br />
sur l'appareil".<br />
6. Sélectionner la mise à jour disponible.<br />
iiSi aucune "mise à jour disponible" n'est affichée, le<br />
logiciel du <strong>KTS</strong> <strong>340</strong> est déjà le plus récent et une<br />
mise à jour est inutile.<br />
7. Sélectionner .<br />
""<br />
Le logiciel système est installé sur le <strong>KTS</strong> <strong>340</strong>.<br />
5.8 Remarques en cas de défauts<br />
Pas de communication avec la centrale de commande<br />
Le message de défaut "Aucun système trouvé" s'affiche<br />
pendant le diagnostic de centrale de commande.<br />
Causes possibles<br />
Câble incorrect<br />
raccordé.<br />
Sélection de la mauvaise<br />
broche dans le menu<br />
de sélection des<br />
broches.<br />
Solution possible<br />
Vérifier si le câble adéquat a été utilisé.<br />
Vérifier sous "Prise de diagnostic"<br />
quelle broche doit être utilisée.<br />
i i En cas d'autres problèmes, contacter directement la<br />
hotline de service ESI[tronic].<br />
1 689 989 072 | 2010-04-06
F(Hz):<br />
fr<br />
32 | <strong>KTS</strong> <strong>340</strong> | Maintenance<br />
6. Maintenance<br />
1<br />
6.1 Nettoyage<br />
N’utiliser pour nettoyer le boîtier et l’écran du <strong>KTS</strong> <strong>340</strong><br />
qu’un chiffon doux et un produit de nettoyage neutre.<br />
Ne pas utiliser de produits de nettoyage abrasifs ou de<br />
chiffons rugueux.<br />
Best.-Nr.: 0 684 400 <strong>340</strong><br />
Typ: <strong>KTS</strong> <strong>340</strong><br />
Serien-:Nr.<br />
BOSCH<br />
FD: 2008-04 U(V);8-28 DC<br />
P(W): 20<br />
430003520<br />
PMade in Germany Robert <strong>Bosch</strong> GmbH D-73207 Plochingen<br />
BOSCH<br />
Best.-Nr.: 1 687 023 436<br />
FD; 2008-04<br />
2<br />
6.2 Remplacement des accumulateurs<br />
Danger : haute tension !<br />
Lorsque le <strong>KTS</strong> <strong>340</strong> est ouvert et que le<br />
cache (fig. 4, pos. 5) pour le rétro-éclairage<br />
de l'écran à cristaux liquides a été retiré, des<br />
tensions mortelles peuvent être présentes.<br />
<br />
Ne jamais retirer le cache du rétro-éclairage.<br />
5<br />
3<br />
4<br />
4<br />
max. 28 V<br />
3<br />
Une fausse manipulation expose à un risque<br />
d'inflammation, d'éclatement et de brûlure !<br />
Ne pas chauffer, brûler, court-circuiter, endommager<br />
mécaniquement les accumulateurs<br />
et ne pas les charger avec un courant plus<br />
fort ou en inversion de polarité !<br />
<br />
Produits d'extinction appropriés : eau,<br />
CO 2<br />
, sable.<br />
!!<br />
N'utiliser pour le <strong>KTS</strong> <strong>340</strong> que les accumulateurs<br />
hybrides nickel-métal prescrits ! Nous recommandons<br />
les accumulateurs d'une capacité de 2000 mAh<br />
à 2300 mAh. Remplacer toujours tous les accumulateurs.<br />
Les accumulateurs usagés doivent être mis au<br />
rebut dans le respect des règlements en vigueur.<br />
1. Mettre le <strong>KTS</strong> <strong>340</strong> à l’arrêt.<br />
2. Dévisser les 5 vis (fig. 4 ; pos. 1) au dos de l'appareil<br />
et retirer le couvercle (fig. 4 ; pos. 2).<br />
3. Retirer les logements d'accumulateurs à gauche et à<br />
droite et les poser sur le boîtier métallique (fig. 4 ;<br />
pos. 3).<br />
4. Retirer les accumulateurs usagés (fig. 4 ; pos. 4).<br />
5. Insérer les huit accumulateurs neufs en respectant la<br />
polarité.<br />
6. Remettre en place les logements dans l'appareil.<br />
Fig. 4:<br />
Remplacement des accumulateurs<br />
6.3 Pièces de rechange et d'usure<br />
Désignation<br />
459843-3Ko<br />
Référence<br />
Testeur système <strong>KTS</strong> 430 (vert) 1 687 023 549<br />
Bloc d'alimentation<br />
Cordon secteur<br />
1 687 022 890<br />
1 684 461 161<br />
Câble de liaison USB 3 m 1 684 465 562<br />
Câble de diagnostic OBD 3 m
Caractéristiques techniques | TS TS | 33 fr<br />
7. Caractéristiques<br />
techniques<br />
7.1 Caractéristiques générales<br />
Propriété<br />
Valeur/plage<br />
Tension de service<br />
11 VCC — 34 VCC<br />
Puissance absorbée<br />
env. 50 watts<br />
Ecran à cristaux liquides 8,4"<br />
800 x 600 pixels<br />
Dimensions (L x l x H)<br />
235 x 290 x 67 mm<br />
9.25 x 11.42 x 2.64 inch<br />
Poids (sans câbles de<br />
raccordement)<br />
2100 g<br />
4.6 lb<br />
Température de service 5 °C – 40 °C<br />
41 °F – 104 °F<br />
Humidité relative de l’air<br />
90 % (à 25 °C)<br />
Degré de protection IP 40<br />
7.2 Protocoles d'interface<br />
Pour le diagnostic des centrales de commande, les interfaces<br />
suivantes sont prises en charge avec les protocoles<br />
correspondants selon ISO 15031 :<br />
RR<br />
ISO/DIS 15765-4 (CAN) - vitesses de transmission :<br />
250 kbit/s et 500 kbit/s)<br />
RR<br />
ISO 9141-2 Fast<br />
RR<br />
ISO/DIS 14230-4 (protocole Keyword 2000) 5 bauds<br />
RR<br />
ISO/DIS 14230-4 (protocole Keyword 2000) Fast<br />
RR<br />
ISO/DIS 11519-4 (SAE J1850) PWM<br />
RR<br />
ISO/DIS 11519-4 (SAE J1850) VPW<br />
7.3 Bloc d’alimentation<br />
Propriété<br />
Valeur/plage<br />
Tension d'entrée<br />
100 VCA — 240 VCA<br />
Fréquence d'entrée<br />
50 Hz — 60 Hz<br />
Tension de sortie<br />
15 V<br />
Température de service 0 °C — 40 °C<br />
7.4 Spécifications du multimètre<br />
RR<br />
CH1 sans potentiel (l'entrée bleue peut être raccordée<br />
aux points de mesure conducteurs). Résistance<br />
d'entrée > 900 kohms.<br />
RR<br />
CH2 avec potentiel (l'entrée de masse noire doit<br />
être raccordée à la masse du véhicule). Résistance<br />
d'entrée > 900 kohms.<br />
7.4.1 Mesure CC (CH1 et CH2)<br />
Propriété<br />
Plage de mesure<br />
Précision CH1<br />
Précision CH2<br />
Résolution<br />
Valeur/plage<br />
200 mV — 60 V<br />
±0,75 % de la valeur mesurée,<br />
plus ±0,25 % de la plage de mesure<br />
±2 % de la valeur mesurée,<br />
plus ±0,5 % de la plage de mesure<br />
100 µV — 100 mV<br />
(selon la plage de mesure)<br />
7.4.2 Mesure CA et de la valeur efficace (CH1 et<br />
CH2) *)<br />
Propriété<br />
Plage de fréquence CA<br />
Plage de mesure<br />
Précision CA à 100 Hz<br />
Précision EFF à ≤ 100 H<br />
Résolution<br />
Valeur/plage<br />
10 Hz — 400 Hz (-3 dB)<br />
200 mV — 60 V<br />
±2 % de la valeur mesurée, plus<br />
±0,5 % de la plage de mesure<br />
100 µV — 100 mV<br />
(selon la plage de mesure)<br />
*)<br />
Les plages de mesure des types de mesure "U" et "I" sont des<br />
valeurs de pointe à pointe. Dès lors, le champ d'affichage numérique<br />
est grisé dès que la plage de mesure réglée a été dépassée<br />
brièvement (Overload).<br />
7.4.3 Mesure de la résistance (CH1)<br />
Propriété<br />
Plage de mesure<br />
Précision jusqu'à 200 K<br />
Précision jusqu'à 1 M<br />
Résolution<br />
Résistance d'entrée<br />
Valeur/plage<br />
100 — 1 M<br />
±0,75 % de la valeur mesurée<br />
plus ±0,25 % de la plage de mesure<br />
±2 % de la valeur mesurée<br />
plus ±0,25 % de la plage de mesure<br />
0,1 — 1000 (selon la plage<br />
de mesure)<br />
> 9 M<br />
Robert <strong>Bosch</strong> LLC<br />
1 689 989 072 | 2010-04-06
fr<br />
34 | <strong>KTS</strong> <strong>340</strong> | Caractéristiques techniques<br />
7.4.4 Mesure du courant (CH1 et CH2)<br />
Capteur<br />
Shunt (CH1 uniquement)<br />
Pince 30 A (CH1 uniquement)<br />
Pince 100 A<br />
Pince 600 A<br />
Pince 1000 A<br />
(CH1 uniquement)<br />
Plage de mesure<br />
±600 mA<br />
±30 A<br />
±100 A<br />
±600 A<br />
±1000 A<br />
7.4.5 Testeur de continuité (CH1)<br />
Propriété<br />
Courant de mesure<br />
Tension à vide<br />
Continuité<br />
Valeur/plage<br />
2 mA<br />
≤ 5 V<br />
7.4.6 Mesure des diodes (CH1)<br />
Propriété<br />
Courant de mesure<br />
Tension à vide<br />
Tension maximale<br />
des diodes<br />
< 10 (avec confirmation acoustique)<br />
Valeur/plage<br />
2 mA<br />
≤ 5 V<br />
2 V<br />
7.5 WLAN<br />
Standard : IEEE 802.11g (54 Mbit/s), compatible<br />
avec IEEE 802.11b (11 Mbit/s), cryptage des données<br />
: OPEN, WPA, WPA-PSK, WPA2, WPA2-PSK, WEP<br />
(64/128/256 bits), antenne : -3dBi.<br />
Liaison radio entre <strong>KTS</strong> <strong>340</strong> et<br />
PC/ordinateur portable<br />
Environnement d'atelier avec vue dégagée<br />
sur la borne d'accès<br />
Portière du véhicule ouverte ou vitre ouverte<br />
et moteur en marche, module dans<br />
l'habitacle du véhicule<br />
Portée minimale<br />
30 mètres<br />
10 mètres<br />
La portée du WLAN est très variable.<br />
Dans un local fermé, elle peut atteindre 20 à 40 m et en<br />
champ libre jusqu'à 100 m.<br />
Dans un environnement difficile, la portée peut chuter à<br />
10–15 m, voire moins.<br />
Le <strong>KTS</strong> <strong>340</strong> adapte automatiquement la vitesse de<br />
transmission en WLAN aux conditions de transmission.<br />
Si la liaison radio est mauvaise, le transfert des données<br />
sera plus lent qu'avec de bonnes conditions.<br />
1 689 989 072 | 2010-04-06<br />
Robert <strong>Bosch</strong> LLC
es<br />
36 | <strong>KTS</strong> <strong>340</strong> |<br />
Índice<br />
1. Símbolos empleados 7<br />
1.1 Documentación 37<br />
1.2 <strong>KTS</strong> <strong>340</strong> 37<br />
2. Indicaciones para el usuario 7<br />
2.1 Indicaciones importantes 37<br />
2.2 Indicaciones de seguridad 37<br />
2.3 Compatibilidad electromagnética (EMV) 37<br />
2.4 Eliminación 37<br />
2.5 Software Open Source 37<br />
2.6 J2534 Reprogramming, navegador Web 37<br />
2.7 WLAN (Wireless Local Area Network) 38<br />
2.7.1 Indicaciones importantes sobre WLAN 38<br />
2.7.2 Indicaciones sobre el punto de acceso 38<br />
3. Descripción del producto 9<br />
3.1 Utilización 39<br />
3.2 Requisitos 39<br />
3.3 Volumen de suministro 39<br />
3.4 Accesorio especial 39<br />
3.5 Descripción del equipo 40<br />
3.6 LED estado 40<br />
3.6.1 LED estado de carga acumulador 40<br />
3.6.2 LED WLAN 40<br />
6. Mantenimiento 8<br />
6.1 Limpieza 48<br />
6.2 Sustitución del acumulador 48<br />
6.3 Piezas de repuesto y de desgaste 48<br />
7. Datos técnicos 9<br />
7.1 Datos generales 49<br />
7.2 Protocolo de interfaces 49<br />
7.3 Fuente de alimentación 49<br />
7.4 Especificación multímetro 49<br />
7.4.1 Medición de CC CH1 > CH2 49<br />
7.4.2 Medición CA y de valor efectivo<br />
(CH1 y CH2) *) 49<br />
7.4.3 Medición de resistencia (CH1) 49<br />
7.4.4 Medición de corriente (CH1 y CH2) 50<br />
7.4.5 Verificador de paso (CH1) 50<br />
7.4.6 Medición de diodos (CH1) 50<br />
7.5 WLAN 50<br />
4. Primera puesta en servicio 1<br />
4.1 Conexión 41<br />
4.2 Activar licencia con<br />
ESI[tronic] Startcenter 41<br />
4.2.1 Instalación del ESI[tronic] Startcenter 41<br />
4.2.2 Activación de licencia del<br />
<strong>KTS</strong> <strong>340</strong> online 43<br />
4.2.3 Activar la licencia del <strong>KTS</strong> <strong>340</strong> por fax 45<br />
4.2.4 Llevar a cabo la activación de licencia<br />
del <strong>KTS</strong> <strong>340</strong> por fax 45<br />
5. Manejo 5<br />
5.1 Conexión al vehículo 45<br />
5.2 Encender 46<br />
5.3 Apagar 46<br />
5.4 Indicaciones sobre el multímetro 46<br />
5.5 Pantalla táctil con lápiz táctil 46<br />
5.6 Descripción del programa 46<br />
5.7 Actualización del software 47<br />
5.7.1 Actualización de software online<br />
(desde ESI[tronic] Startcenter<br />
versión 2010/2) 47<br />
5.7.2 Actualización de software a través<br />
del DVD ESI[tronic] 47<br />
5.8 Instrucciones en caso de avería 47<br />
1 689 989 072 | 2010-04-06<br />
Robert <strong>Bosch</strong> LLC
Símbolos empleados | TS TS | 37 7 7 es<br />
1. Símbolos empleados<br />
1.1 Documentación<br />
Los pictogramas relacionados con las palabras de alerta<br />
peligro, advertencia y cuidado son indicaciones de<br />
aviso y siempre indican un peligro indirecto o posible<br />
para el usuario.<br />
¡Peligro!<br />
Un peligro inminente que podría producir lesiones<br />
físicas de carácter grave o la muerte.<br />
¡Advertencia!<br />
Una situación potencialmente peligrosa que<br />
podría producir lesiones físicas de carácter<br />
grave o la muerte.<br />
¡Cuidado!<br />
Una situación potencialmente peligrosa que<br />
podría producir lesiones físicas de carácter<br />
leve o importantes daños materiales.<br />
!!<br />
Atención – Advierte de situaciones potencialmente<br />
perjudiciales, en las cuales se podría perjudicar el<br />
<strong>KTS</strong> <strong>340</strong>, la probeta o algún objeto del entorno.<br />
Además de las indicaciones de aviso se utilizan los<br />
siguientes símbolos:<br />
iiInformación – Indicaciones para la aplicación y otras<br />
informaciones útiles.<br />
<br />
Instrucción de actuación de un paso – Instrucción de<br />
actuación compuesta por un solo paso.<br />
??<br />
Resultado intermedio – Dentro de una instrucción<br />
de actuación se puede ver un resultado intermedio.<br />
""<br />
Resultado final – Al final de una instrucción de actuación<br />
se puede ver el resultado final.<br />
1.2 <strong>KTS</strong> <strong>340</strong><br />
Eliminación<br />
Los aparatos eléctricos y electrónicos usados,<br />
incluyendo los cables y accesorios tales<br />
como pilas y baterías, no se deben tirar a la<br />
basura doméstica.<br />
2. Indicaciones para el usuario<br />
2.1 Indicaciones importantes<br />
Encontrará indicaciones importantes relativas al acuerdo<br />
sobre los derechos de autor, la responsabilidad, la<br />
garantía, el grupo de usuarios y las obligaciones de la<br />
empresa, en las instrucciones separadas "Indicaciones<br />
importantes e indicaciones de seguridad para <strong>Bosch</strong><br />
Test Equipment". Es obligatorio prestarles atención y<br />
leerlas cuidadosamente antes de la puesta en funcionamiento,<br />
la conexión y el manejo del <strong>KTS</strong> <strong>340</strong>.<br />
2.2 Indicaciones de seguridad<br />
Encontrará todas las indicaciones de seguridad en las<br />
instrucciones separadas "Indicaciones importantes e<br />
indicaciones de seguridad para <strong>Bosch</strong> Test Equipment".<br />
Es obligatorio prestarles atención y leerlas cuidadosamente<br />
antes de la puesta en funcionamiento, la conexión<br />
y el manejo del <strong>KTS</strong> <strong>340</strong>.<br />
2. Compatibilidad electromagnética (EMV)<br />
<strong>KTS</strong> <strong>340</strong> es un producto de la clase B según EN 61 326.<br />
2.4 Eliminación<br />
Este <strong>KTS</strong> <strong>340</strong> está sujeto a la normativa<br />
europea 2002/96/CE (WEEE).<br />
Los aparatos eléctricos y electrónicos usados,<br />
incluyendo los cables y accesorios tales<br />
como pilas y baterías, no se pueden tirar a la<br />
basura doméstica.<br />
<br />
Para su eliminación, utilice los sistemas de<br />
recogida y recuperación existentes.<br />
<br />
Con la eliminación adecuada del <strong>KTS</strong> <strong>340</strong><br />
evitará daños medioambientales y riesgos<br />
para la salud personal.<br />
2.5 Software Open Source<br />
La relación de las licencias del software Open Source<br />
para el <strong>KTS</strong> <strong>340</strong> está guardada en el DVD "ESI[tronic]<br />
Startcenter" como archivo PDF.<br />
2.6 J25 Reprogramming, navegador Web<br />
i i En el menú " (Info) >> Ayuda" encontrará en la<br />
Ayuda online toda la información importante sobre el<br />
J2534 reprogramming y sobre el navegador Web.<br />
Atención – ¡Contactos de carga calientes!<br />
Peligro de quemaduras en caso de contacto.<br />
<br />
No tocar los contactos de carga.<br />
Robert <strong>Bosch</strong> LLC<br />
1 689 989 072 | 2010-04-06
es<br />
38 | <strong>KTS</strong> <strong>340</strong> | Símbolos empleados<br />
2.7 WLAN (Wireless Local Area Network)<br />
2.7.1 Indicaciones importantes sobre WLAN<br />
WLAN (Wireless Local Area Network) es la denominación<br />
de una red inalámbrica de radiocomunicaciones<br />
local. En WLAN se trata, al igual que en Bluetooth, de<br />
una comunicación por radio en la banda libre ISM de<br />
2,4 GHz (ISM: Industrial, Scientific, Medical). Este rango<br />
de frecuencia está sujeto a regulaciones estatales<br />
pero, no obstante, puede usarse en la mayoría de países<br />
sin necesidad de licencias. Sin embargo, la consecuencia<br />
es que en esta frecuencia se realizan muchas<br />
emisiones. Pueden producirse superposiciones de frecuencias<br />
que den lugar a interferencias.<br />
En función de las condiciones del entorno pueden<br />
surgir, por tanto, perturbaciones de la conexión WLAN<br />
como, p. ej., si existen también conexiones Bluetooth,<br />
teléfonos inalámbricos, termómetros por radio, abrepuertas<br />
de garajes con mando a distancia, interruptores<br />
de luz con mando a distancia o instalaciones de alarma<br />
con mando a distancia.<br />
iiEn la red WLAN se puede producir una caída del ancho<br />
de banda mediante el Bluetooth. Las antenas de<br />
los aparatos Bluetooth y WLAN deben estar separadas<br />
por lo menos 30 centímetros entre sí. No inserte<br />
adaptadores Bluetooth-USB y WLAN-Sticks en ranuras<br />
USB de PC/portátil que se hallen una al lado de otra.<br />
Utilice el cable alargador USB (accesorios especiales)<br />
para separar con espacio el adaptador Bluetooth-USB<br />
del PC/portátil del WLAN-Stick.<br />
iiLas personas que llevan marcapasos u otros aparatos<br />
electrónicos vitales deben ser prudentes al<br />
utilizar radiotécnica, ya que se pueden producir<br />
perturbaciones.<br />
Para conseguir la mejor conexión posible, observe los<br />
siguiente puntos:<br />
RR<br />
La señal de radio WLAN busca siempre el camino<br />
directo. Instale el PC/ordenador portátil y el punto<br />
de acceso (ver cap. 2.6.2) de forma que haya el menor<br />
número de obstáculos posible, p. ej. puertas de<br />
acero y paredes de hormigón, que obstruyan la señal<br />
de y hacia el <strong>KTS</strong> <strong>340</strong>. Además, el alcance de WLAN<br />
dentro de los edificios depende en gran medida de<br />
su material de construcción. Los ladrillos usuales,<br />
la madera y las paredes construidas en seco casi no<br />
impiden el paso de las ondas de radio. Las paredes<br />
finas de yeso, sin embargo, pueden traer problemas,<br />
ya que en el yeso se puede acumular mucha humedad<br />
del aire que tiende a absorber las señales de<br />
radio. El hormigón (sobre todo el hormigón armado)<br />
bloquea en gran medida las ondas de radio. En<br />
muchos casos no se pueden traspasar los techos de<br />
RR<br />
RR<br />
RR<br />
RR<br />
RR<br />
RR<br />
RR<br />
los sótanos. Por lo general las paredes que contienen<br />
mucho metal (p. ej., tubos, cables, etc.) son un<br />
obstáculo para las ondas de radio.<br />
La recepción de ondas de radio resulta perturbada<br />
también por cuerpos metálicos grandes, tales como<br />
calefacciones y marcos de ventanas, así como por<br />
fuentes perturbadoras activas como, p. ej., teléfonos<br />
DECT y hornos de microondas.<br />
Encargue a un especialista informático que instale y<br />
pruebe previamente su infraestructura de red.<br />
Conserve la SSID y la clave para el trayecto de radiocomunicaciones<br />
en un lugar seguro. Cerciórese de<br />
tener a mano esos datos en caso de fallo.<br />
Antes de la puesta en servicio le recomendamos que<br />
recorra la ubicación. Compruebe en qué lugares del<br />
edificio funciona el <strong>KTS</strong> <strong>340</strong> y dónde están los límites<br />
de las radiocomunicaciones.<br />
Si el <strong>KTS</strong> <strong>340</strong> se utiliza dentro de un vehículo (jaula<br />
de Faraday), el tráfico de radiocomunicaciones puede<br />
quedar bastante limitado.<br />
El trayecto de radiocomunicaciones está sujeto a las<br />
influencias climáticas. Por tanto, la señal de recepción<br />
puede variar.<br />
Si tiene preguntas, póngase en contacto con el responsable<br />
de su red.<br />
2.7.2 Indicaciones sobre el punto de acceso<br />
Un punto de acceso inalámbrico (Wireless Access<br />
Point) es un equipo electrónico que funciona como interfaz<br />
entre una red de radiocomunicaciones y una red<br />
de ordenadores cableada. Con él se pueden conectar<br />
el <strong>KTS</strong> <strong>340</strong>, el PC/portátil con ESI[tronic] Startcenter y,<br />
p. ej., una impresora de forma inalámbrica.<br />
iiRecomendamos utilizar para el punto de acceso el<br />
estándar WLAN IEEE 802.11g (tasa de transmisión<br />
de datos máxima de 54 Mbps). La función "extended<br />
range" no se soporta.<br />
Debe tenerse en cuenta lo siguiente:<br />
RR<br />
Colocar el punto de acceso en la posición más central<br />
y alta posible; el mejor sitio es debajo del techo<br />
de la sala.<br />
RR<br />
La antena del punto de acceso debe señalar hacia<br />
abajo, en dirección al suelo.<br />
RR<br />
Si la conexión es deficiente puede resultar adecuado<br />
cambiar el canal ajustado en el punto de acceso.<br />
De ser posible, no utilizar canales vecinos de otros<br />
canales ya utilizados.<br />
RR<br />
Recomendamos configurar en el punto de acceso<br />
una codificación del tráfico de radiocomunicaciones.<br />
1 689 989 072 | 2010-04-06<br />
Robert <strong>Bosch</strong> LLC
Descripción del producto | TS TS | 39 9 9 es<br />
3. Descripción del producto<br />
3.1 Utilización<br />
El <strong>KTS</strong> <strong>340</strong> es un comprobador de sistema para el<br />
diagnóstico de unidades de mando, la búsqueda de<br />
fallos, la reparación y el servicio técnico en los talleres<br />
de vehículos automotores. El <strong>KTS</strong> <strong>340</strong> con un<br />
ESI[tronic] con licencia tiene las siguientes funciones:<br />
RR<br />
Identificación<br />
RR<br />
Informaciones del vehículo<br />
RR<br />
Diagnóstico<br />
RR<br />
Búsqueda de fallos<br />
RR<br />
Mantenimiento<br />
iiEl <strong>KTS</strong> <strong>340</strong> está diseñado para funcionar en la<br />
WLAN 2.4 GHz para EE.UU., Canadá y México.<br />
El equipo cumple las condiciones necesarias de la<br />
directriz R&TTE (Radio Equipment and Telecommunications<br />
Terminal Equipment), lo que se confirma<br />
mediante la marca CE.<br />
!!<br />
El <strong>KTS</strong> <strong>340</strong> es un equipo de precisión y no debe<br />
someterse a calor excesivo (p. ej. radiación directa<br />
del sol), golpes o vibraciones, campos magnéticos y<br />
ensuciamiento excesivo. El <strong>KTS</strong> <strong>340</strong> sólo debe abrirse<br />
para cambiar el acumulador.<br />
3.2 Requisitos<br />
Para activar la licencia del <strong>KTS</strong> <strong>340</strong> a través de<br />
ESI[tronic] Startcenter y para actualizar el software<br />
para el diagnóstico de unidades de mando del <strong>KTS</strong> <strong>340</strong><br />
debe disponerse de un PC/portátil con el sistema<br />
operativo WIN XP (SP2), WIN Vista TM Home Premium ,<br />
WIN Vista TM Business o WIN 7 (32 Bit) y, como mínimo,<br />
una interfaz USB libre.<br />
La interfaz USB debe soportar el protocolo USB 2.0 o<br />
el protocolo USB 1.1.<br />
3.3 Volumen de suministro<br />
Denominación<br />
Número de<br />
pedido<br />
<strong>KTS</strong> <strong>340</strong><br />
Fuente de alimentación<br />
Cable de conexión a la red<br />
1 687 022 890<br />
1 684 461 161<br />
Cable de conexión USB 3 m 1 684 465 562<br />
Cable de diagnóstico OBD 3 m 1 684 465 557<br />
Cable de conexión UNI de 4 polos 1 684 463 539<br />
Lápiz táctil (3x) 1 683 083 007<br />
DVD ESI[tronic] Startcenter 1 987 P12 034<br />
DVD <strong>KTS</strong> <strong>340</strong> Getting Started 1 687 370 308<br />
Maletín 1 685 438 626<br />
Cable de medición rojo 1 684 430 065<br />
Cable de medición azul 1 684 430 066<br />
Cable de medición amarillo 1 684 430 067<br />
Cable de masa negro 1 684 430 068<br />
Punta de comprobación roja (2x) 1 684 485 035<br />
Borne de conexión negro 1 684 480 022<br />
Advertencias de seguridad e indicaciones 1 689 985 000<br />
importantes<br />
Instrucciones de uso <strong>KTS</strong> <strong>340</strong> 1 689 989 072<br />
<strong>KTS</strong> <strong>340</strong> Quick Start Guide 1 689 989 075<br />
Declaración de conformidad CE 1 689 974 307<br />
!!<br />
Cuando no se utilizan el <strong>KTS</strong> <strong>340</strong> y los accesorios,<br />
deben conservarse siempre en el maletín.<br />
3.4 Accesorio especial<br />
Si desea información sobre accesorios especiales,<br />
como p. ej. cables de conexión específicos del vehículo,<br />
diríjase a su distribuidor oficial <strong>Bosch</strong>.<br />
Robert <strong>Bosch</strong> LLC<br />
1 689 989 072 | 2010-04-06
es<br />
40 | <strong>KTS</strong> <strong>340</strong> | Descripción del producto<br />
3.5 Descripción del equipo<br />
El <strong>KTS</strong> <strong>340</strong> es un sistema de diagnóstico modular,<br />
portátil e independiente del lugar de uso. El <strong>KTS</strong> <strong>340</strong><br />
contiene una unidad de ordenador con una tarjeta de<br />
memoria y una pantalla táctil LCD de 8,4 pulgadas. La<br />
tarjeta de memoria ESI[tronic] está preinstalada de<br />
fábrica.<br />
Para el manejo se dispone, además del lápiz táctil para<br />
la pantalla táctil LCD, de un teclado de pantalla.<br />
El <strong>KTS</strong> <strong>340</strong> y sus accesorios se almacenan en un<br />
maletín.<br />
8<br />
7<br />
6<br />
5<br />
max. 28 V<br />
4<br />
Fig. 1: <strong>KTS</strong> <strong>340</strong><br />
<strong>KTS</strong> <strong>340</strong> Powered by ESI tronic<br />
3<br />
459843-5K<br />
1 Soporte de lápiz táctil<br />
2 Lápiz táctil<br />
3 Tecla de conexión/desconexión<br />
4 Conexión de fuente de alimentación<br />
5 Conexión USB<br />
6 LED WLAN<br />
7 LED estado de carga acumulador<br />
8 Pantalla táctil LCD<br />
!!<br />
Si se quiebra el vidrio LCD existe peligro de lesiones<br />
por fragmentos de vidrio.<br />
1<br />
2<br />
3.6 LED estado<br />
3.6.1 LED estado de carga acumulador<br />
LED estado de carga<br />
acumulador<br />
Estado<br />
Se enciende en verde Acumulador totalmente cargada,<br />
alimentación de tensión externa<br />
conectada.<br />
Parpadea en verde<br />
Acumulador totalmente cargada,<br />
alimentación de tensión externa<br />
no conectada.<br />
Se enciende en amarillo Acumulador cargándose, alimentación<br />
de tensión externa conectada.<br />
Parpadea en amarillo Acumulador casi agotado, conectar<br />
la alimentación de tensión<br />
externa.<br />
Encendido en rojo<br />
Fallo al cargar.<br />
Parpadea en rojo Acumulador agotado (el <strong>KTS</strong> <strong>340</strong><br />
se desconectará en el transcurso<br />
de 2 minutos), conectar alimentación<br />
de tensión externa.<br />
3.6.2 LED WLAN<br />
LED WLAN<br />
Se enciende en verde<br />
Se enciende en amarillo<br />
Encendido en rojo<br />
Apagado<br />
Estado<br />
La WLAN está configurada, el<br />
<strong>KTS</strong> <strong>340</strong> está conectado con un<br />
punto de acceso, la intensidad de<br />
campo es buena.<br />
La WLAN está configurada, el<br />
<strong>KTS</strong> <strong>340</strong> está conectado con un<br />
punto de acceso, la intensidad de<br />
campo es deficiente.<br />
La WLAN está configurada, el<br />
<strong>KTS</strong> <strong>340</strong> no está conectado con<br />
un punto de acceso.<br />
WLAN no está configurada.<br />
CH2<br />
CH1<br />
K<br />
max. 60 V<br />
DIAG<br />
459843_1Ko<br />
1 2 3 4 5 6<br />
7<br />
Fig. 2: Lado posterior del <strong>KTS</strong> <strong>340</strong><br />
1 Compartimiento del lápiz táctil<br />
2 Entrada de medición CH2<br />
3 Conexión de masa<br />
4 Entrada de masa CH1(-)<br />
5 Entrada de medición CH1(+)<br />
6 Conexión línea de diagnóstico (DIAG)<br />
7 Conexión para el cierre Kensington<br />
1 689 989 072 | 2010-04-06<br />
Robert <strong>Bosch</strong> LLC
Primera puesta en servicio | TS TS | 41 1 1 es<br />
4. Primera puesta en servicio<br />
4.1 Conexión<br />
Antes de la primera puesta en servicio, cerciórese de que<br />
la tensión de la red coincida con la indicada en la fuente de<br />
alimentación (utilizar el cable de conexión a la red adjunto).<br />
4.2 Activar licencia con<br />
ESI[tronic] Startcenter<br />
El <strong>KTS</strong> <strong>340</strong> se suministra preinstalado y con una licencia<br />
provisional, y puede emplearse de inmediato para<br />
el diagnóstico de unidades de control. Para utilizar las<br />
funciones acordadas en el contrato de compra y poder<br />
llevar a cabo más actualizaciones, es necesario obtener<br />
una licencia definitiva para el <strong>KTS</strong> <strong>340</strong>. El número de<br />
cliente y la contraseña necesarios para ello se encuentran<br />
en la nota de entrega.<br />
!!<br />
El <strong>KTS</strong> <strong>340</strong> debe conectarse sólo tras la solicitud<br />
correspondiente durante el proceso de instalación<br />
en el PC/portátil.<br />
4.2.1 Instalación del ESI[tronic] Startcenter<br />
Cómo proceder:<br />
1. Cerrar todas las aplicaciones abiertas.<br />
2. Insertar el DVD "ESI[tronic] Startcenter".<br />
3. Abrir el "Windows Explorer".<br />
4. Iniciar D:\setup.exe (D = letra de la unidad de DVD).<br />
??<br />
Se inicia la instalación.<br />
??<br />
El siguiente mensaje aparece en WIN Vista:<br />
Un programa no identificado intenta<br />
acceder al PC.<br />
??<br />
El siguiente mensaje aparece en WIN 7:<br />
¿Desea permitir que el siguiente programa<br />
realice cambios en este PC?<br />
5. Confirmar el mensaje con "Permitir" o "Sí".<br />
iiEl idioma de instalación seleccionado es también el<br />
idioma de ESI[tronic] Startcenter.<br />
7. Tener en cuenta las indicaciones en pantalla y seguir las<br />
instrucciones.<br />
iiEn el menú de instalación "Selección de país" debe<br />
seleccionarse el país en el que se hará funcionar<br />
el <strong>KTS</strong> <strong>340</strong>. El diálogo no aparece cuando ya se ha<br />
seleccionado un país a través de una instalación anterior<br />
de Startcenter (p. ej., en el caso del <strong>KTS</strong> 200).<br />
iiSi no hay aún ninguna versión del Adobe Reader disponible<br />
en el PC/portátil, se instala ese software<br />
al finalizar la instalación de ESI[tronic] Startcenter.<br />
Adobe Reader se requiere para visualizar los protocolos<br />
del diagnóstico de unidades de mando del<br />
<strong>KTS</strong> <strong>340</strong> en el PC/portátil.<br />
iiRecomendamos instalar el paquete de datos <strong>KTS</strong><br />
en el disco duro solamente si se desea realizar una<br />
actualización en varios <strong>KTS</strong>. El DVD ESI[tronic] Startcenter<br />
no se necesita para la actualización.<br />
? ? El siguiente mensaje aparece en WIN Vista:<br />
¿Desea instalar este software de dispositivo?<br />
8. Confirmar el mensaje con "Instalar".<br />
6. Seleccionar el idioma de la instalación y confirmar<br />
con .<br />
Robert <strong>Bosch</strong> LLC<br />
1 689 989 072 | 2010-04-06
es<br />
42 | <strong>KTS</strong> <strong>340</strong> | Primera puesta en servicio<br />
9. Separar la conexión USB al <strong>KTS</strong> <strong>340</strong>.<br />
??<br />
En WIN 7 aparece a continuación el mensaje:<br />
Windows no puede comprobar el editor<br />
de este software de controlador.<br />
??<br />
El siguiente mensaje se presenta en WIN XP:<br />
Este asistente le ayudará a instalar<br />
software para: <strong>KTS</strong>-embedded.<br />
10. Confirmar el mensaje con "Instalar este software<br />
de controlador de todas formas".<br />
??<br />
El siguiente mensaje aparece en WIN Vista:<br />
DWindows necesita instalar software<br />
de controlador para "<strong>KTS</strong>-embedded".<br />
11. Encender el <strong>KTS</strong> <strong>340</strong>.<br />
iiCuando se enciende por primera vez, el <strong>KTS</strong> <strong>340</strong><br />
siempre se inicia en inglés (EE.UU.) Se puede cambiar<br />
el idioma en " (Servicio) >> Preferencias de<br />
usuario >> Preferencias de idioma".<br />
iiLa rutina de instalación del ESI[tronic] Startcenter instala<br />
automáticamente el controlador USB que permite<br />
la comunicación entre el <strong>KTS</strong> <strong>340</strong> y el PC/portátil. El<br />
diálogo "Conectar USB" no aparece cuando el controlador<br />
USB se ha instalado ya a través de una instalación<br />
anterior de Startcenter (p. ej., en el caso del <strong>KTS</strong> 200).<br />
12. Cerrar el mensaje con "Cancelar".<br />
??<br />
En WIN Vista o WIN 7 aparece a continuación el<br />
mensaje: Windows no puede comprobar el<br />
editor de este software de controlador.<br />
13. Confirmar el mensaje con "Instalar este software<br />
de controlador de todas formas".<br />
14. Para finalizar la instalación correctamente debe<br />
reiniciarse el PC/portátil.<br />
??<br />
ESI[tronic] Startcenter está instalado.<br />
1 689 989 072 | 2010-04-06<br />
Robert <strong>Bosch</strong> LLC
Primera puesta en servicio | TS TS | 43 es<br />
15. Iniciar el "ESI[tronic] Startcenter".<br />
4.2.2 Activación de licencia del <strong>KTS</strong> <strong>340</strong> online<br />
!!<br />
La activación de licencia online sólo se puede realizar<br />
mediante un PC/portátil con acceso a Internet.<br />
1. Abastecer de tensión el <strong>KTS</strong> <strong>340</strong> mediante la fuente<br />
de alimentación suministrada y encenderlo.<br />
??<br />
El <strong>KTS</strong> <strong>340</strong> se enciende<br />
2. Conectar el <strong>KTS</strong> <strong>340</strong> mediante el cable de conexión<br />
USB con el PC/portátil.<br />
3. Seleccionar en el Startcenter el menú "Conces.<br />
licencia >> Online".<br />
??<br />
Se abre la ventana de introducción "Trámite de licencia<br />
en línea".<br />
iiEn el menú " (Info) >> Ayuda" se abre la ayuda<br />
online. Allí encontrará informaciones importantes<br />
sobre el ESI[tronic] Startcenter.<br />
16. Activar la licencia del <strong>KTS</strong> <strong>340</strong> por fax u online.<br />
4. Paso 1: Introducir el número de cliente/contraseña y<br />
seleccionar .<br />
??<br />
Se establece la conexión de Internet para la activación<br />
de licencia online.<br />
i i Si no está disponible "Login", comprobar la configuración<br />
Proxy en " (Servicio) >> Preferencias de<br />
usuario".<br />
Robert <strong>Bosch</strong> LLC<br />
1 689 989 072 | 2010-04-06
es<br />
44 | <strong>KTS</strong> <strong>340</strong> | Primera puesta en servicio<br />
5. Paso 2: Seleccionar la ID del contrato y seleccionar<br />
.<br />
??<br />
Se solicita la clave de licencia.<br />
" " La licencia está activada y el <strong>KTS</strong> <strong>340</strong> está listo para<br />
funcionar.<br />
iiLa solicitud de la clave de licencia puede tardar unos<br />
segundos.<br />
!!<br />
Durante la transmisión de la clave de licencia no se<br />
deben interrumpir la conexión USB ni la alimentación<br />
del <strong>KTS</strong> <strong>340</strong>.<br />
6. Seleccionar .<br />
??<br />
La clave de licencia se transmite al <strong>KTS</strong> <strong>340</strong>.<br />
??<br />
Cuando la licencia se activa con éxito, se reinicia<br />
el <strong>KTS</strong> <strong>340</strong>.<br />
1 689 989 072 | 2010-04-06<br />
Robert <strong>Bosch</strong> LLC
CH2<br />
max. 60 V<br />
CH1<br />
DIAG<br />
K<br />
Primera puesta en servicio | TS TS | 45 5 5 es<br />
4.2.3 Activar la licencia del <strong>KTS</strong> <strong>340</strong> por fax<br />
1. Seleccionar en el Startcenter el menú "Activar licencia<br />
>> Fax".<br />
??<br />
Se abre la ventana de introducción "Solicitar<br />
licencia".<br />
2. Paso 1: Introducir los datos de la empresa.<br />
3. Paso 2: Seleccionar el país para solicitar la licencia.<br />
4. Paso 3: Introducir el número de ID e imprimir el<br />
formulario de activación de licencia.<br />
5. Firmar el formulario de activación de licencia y enviarlo<br />
por fax.<br />
4.2.4 Llevar a cabo la activación de licencia del<br />
<strong>KTS</strong> <strong>340</strong> por fax<br />
Una vez que haya recibido la clave de licencia por fax,<br />
debe activar la licencia.<br />
1. Abastecer de tensión el <strong>KTS</strong> <strong>340</strong> mediante la fuente<br />
de alimentación suministrada y encenderlo.<br />
??<br />
El <strong>KTS</strong> <strong>340</strong> se enciende<br />
2. Conectar el <strong>KTS</strong> <strong>340</strong> mediante el cable de conexión<br />
USB con el PC/portátil.<br />
3. Hacer clic en el Startcenter el menú "Activación<br />
licencia >> Ejecutar activación licencia".<br />
??<br />
Se abre la ventana de introducción "Ejecutar<br />
solicitud licencia".<br />
4. Introducir el número de cliente, el número de ID y la<br />
clave de licencia.<br />
5. Ejecutar la activación de licencia.<br />
??<br />
La clave de licencia se transmite.<br />
??<br />
Cuando la licencia se activa con éxito, se reinicia<br />
el <strong>KTS</strong> <strong>340</strong>.<br />
""<br />
La licencia del <strong>KTS</strong> <strong>340</strong> está activada y se puede llevar<br />
a cabo un diagnóstico de unidad de mando.<br />
5. Manejo<br />
5.1 Conexión al vehículo<br />
El <strong>KTS</strong> <strong>340</strong> está diseñado para funcionar en el vehículo<br />
con una tensión de batería de 12 voltios y 24 voltios.<br />
!!<br />
Cerciorarse de que el cable de diagnóstico OBD en<br />
el <strong>KTS</strong> <strong>340</strong> esté enchufado en la posición correcta y<br />
atornillado firmemente. Si la conexión es incorrecta,<br />
las clavijas del conector se pueden doblar o romper.<br />
Emplear únicamente el cable de diagnóstico OBD<br />
suministrado.<br />
8<br />
7<br />
459843<br />
9<br />
10<br />
11<br />
12<br />
13<br />
14<br />
15<br />
16<br />
1<br />
2<br />
3<br />
4<br />
5<br />
6<br />
7<br />
8<br />
3<br />
<strong>KTS</strong> <strong>340</strong> Powered by ESI tronic<br />
1<br />
6<br />
4<br />
2<br />
5<br />
Fig. 3: Esquema de conexión del <strong>KTS</strong> <strong>340</strong><br />
1 Conector hembra de diagnóstico OBD en el vehículo<br />
2 Cable de diagnóstico OBD<br />
3 Cable de conexión UNI<br />
4 Cable de conexión USB<br />
5 Cable de conexión para el encendedor de cigarrillos del coche<br />
(accesorio especial)<br />
6 Fuente de alimentación<br />
7 <strong>KTS</strong> <strong>340</strong><br />
8 Cables de medición<br />
Al colocar el <strong>KTS</strong> <strong>340</strong> en el volante existe<br />
peligro de lesiones debido a una posible<br />
activación del airbag.<br />
Robert <strong>Bosch</strong> LLC<br />
1 689 989 072 | 2010-04-06
es<br />
46 | <strong>KTS</strong> <strong>340</strong> | Manejo<br />
La conexión a la interfaz de diagnóstico del vehículo se<br />
realiza a través del<br />
RR<br />
cable de diagnóstico OBD (fig. 3, pos. 2) o<br />
RR<br />
del cable de diagnóstico OBD y adicionalmente a<br />
través del cable de conexión UNI (fig. 3, pos. 3;<br />
accesorios especiales) o<br />
RR<br />
del cable de diagnóstico OBD y, adicionalmente, un<br />
cable adaptador específico del vehículo (accesorio<br />
especial) o<br />
RR<br />
de un cable adaptador específico del vehículo<br />
(accesorio especial).<br />
5.2 Encender<br />
<br />
El <strong>KTS</strong> <strong>340</strong> se enciende con la tecla ON/OFF.<br />
""<br />
Tras el inicio del sistema, el <strong>KTS</strong> <strong>340</strong> permanece en la<br />
figura de inicio "Identificación vehículo". Esta figura de<br />
inicio se mostrará siempre tras la conexión.<br />
!!<br />
Cuando el <strong>KTS</strong> <strong>340</strong> se alimenta mediante la fuente<br />
de alimentación, debe utilizarse siempre la fuente<br />
de alimentación suministrada. No deben utilizarse<br />
fuentes de alimentación con una potencia inferior a<br />
15V/3A, como p. ej., la fuente de alimentación suministrada<br />
con el <strong>KTS</strong> 200 o el <strong>KTS</strong> 5xx.<br />
El <strong>KTS</strong> <strong>340</strong> se alimenta, generalmente, a través del conector<br />
hembra de diagnóstico OBD del vehículo. Si se<br />
desconoce la posición del conector hembra de diagnóstico<br />
OBD del vehículo, recomendamos buscar el conector<br />
hembra de diagnóstico OBD a través del diagnóstico<br />
de unidades de mando del <strong>KTS</strong> <strong>340</strong>.<br />
iiEn algunos vehículos el encendedor de cigarrillos<br />
sólo tiene tensión cuando el encendido está conectado.<br />
iiEn los pasos de comprobación en los que es necesario<br />
poner en marcha el motor, la tensión de la batería<br />
puede reducirse hasta que ya no se pueda garantizar<br />
la alimentación a través del vehículo. En esos casos,<br />
puede ser necesario alimentar el <strong>KTS</strong> <strong>340</strong> con la<br />
fuente de alimentación.<br />
iiEn algunos vehículos la alimentación de tensión mediante<br />
la interfaz OBD sólo es posible con el encendido<br />
conectado.<br />
Cuando el <strong>KTS</strong> <strong>340</strong> se conecta con un PC/portátil<br />
mediante el cable de conexión USB, resulta adecuado<br />
alimentar el <strong>KTS</strong> <strong>340</strong> a través de la fuente de alimentación<br />
suministrada.<br />
5.3 Apagar<br />
<br />
Pulsar la tecla ON/OFF aprox. tres segundos.<br />
""<br />
El <strong>KTS</strong> <strong>340</strong> se desconecta.<br />
Si el <strong>KTS</strong> <strong>340</strong> se alimenta sólo a través del acumulador,<br />
el <strong>KTS</strong> <strong>340</strong> se apaga cuando la tensión del acumulador<br />
es < 8 voltios o cuando el <strong>KTS</strong> <strong>340</strong> no se utiliza durante<br />
diez minutos (ajuste de fábrica).<br />
Si el <strong>KTS</strong> <strong>340</strong> se alimenta a través de una fuente de<br />
tensión externa (p. ej. cable de diagnóstico OBD o<br />
fuente de alimentación) y no se hace funcionar durante<br />
un periodo prolongado, disminuye la luminosidad de la<br />
pantalla táctil LCD.<br />
5.4 Indicaciones sobre el multímetro<br />
Peligro por alta tensión<br />
En las mediciones sin línea de masa pueden<br />
aparecer tensiones que pueden poner en peligro<br />
la vida debido a las cargas.<br />
<br />
Si no se ha conectado ningún cable de diagnóstico,<br />
antes de realizar mediciones U, R<br />
o I, establecer con el cable de masa adjunto<br />
una conexión de masa de los módulos<br />
<strong>KTS</strong> <strong>340</strong> a la masa del vehículo<br />
<br />
Conectar la línea de masa lo más cerca<br />
posible del objeto que se va a medir.<br />
<br />
Utilizar el <strong>KTS</strong> <strong>340</strong> sólo en el vehículo y no<br />
para mediciones de tensiones > 60 voltios.<br />
<br />
No realizar mediciones en el sistema de<br />
encendido.<br />
<br />
Utilizar sólo las líneas de medición suministradas<br />
con protección contra contacto.<br />
<br />
Enchufar las líneas de medición siempre<br />
primero en el <strong>KTS</strong> <strong>340</strong> y, a continuación, en<br />
el vehículo.<br />
<br />
No conducir las líneas de medición sin<br />
blindar cerca de grandes elementos perturbadores,<br />
como p. ej., cables de encendido.<br />
5.5 Pantalla táctil con lápiz táctil<br />
La pantalla táctil del <strong>KTS</strong> <strong>340</strong> se maneja con el lápiz<br />
táctil. Toque con el lápiz táctil la aplicación con la que<br />
desea trabajar.<br />
iiSe puede realizar una "calibración de la pantalla táctil"<br />
en el menú de servicio bajo "Preferencias<br />
de usuario >> Servicio al cliente". Para evitar errores,<br />
deben mantenerse los ojos perpendiculares a<br />
los puntos de calibrado. Hacer clic sobre los puntos<br />
de calibrado lo más exactamente posible.<br />
5.6 Descripción del programa<br />
La ayuda online para el <strong>KTS</strong> <strong>340</strong> se abre en el barra<br />
de encabezado bajo . Encontrará información básica<br />
sobre el <strong>KTS</strong> <strong>340</strong> y ESI[tronic] Startcenter en<br />
ESI[tronic] Startcenter en el "ESI[tronic] trainer".<br />
1 689 989 072 | 2010-04-06<br />
Robert <strong>Bosch</strong> LLC
Manejo | TS TS | 47 7 7 es<br />
5.7 Actualización del software<br />
La actualización del software puede llevarse a cabo a<br />
través del DVD "ESI[tronic] Startcenter" u "Online".<br />
!!<br />
La actualización del software sólo debe llevarse a cabo<br />
con la licencia del <strong>KTS</strong> <strong>340</strong> activada. Durante la actualización<br />
del software no se deben interrumpir la conexión<br />
USB ni la alimentación del <strong>KTS</strong> <strong>340</strong>. Además, debe estar<br />
desactivado el modo standby del PC/portátil.<br />
iiLa instalación de ESI[tronic] Startcenter DVD 1<br />
(versión básica anual) debe llevarse a cabo mediante<br />
"Actualización del software a través de DVD".<br />
iiLa ayuda online para la actualización del software se<br />
encuentra en ESI[tronic] Startcenter bajo "Ayuda >><br />
Ayuda".<br />
iiSi la actualización del software del <strong>KTS</strong> <strong>340</strong> se cancela<br />
(p. ej., se desenchufa la conexión USB) o no se instala<br />
por completo, se puede realizar una recuperación<br />
en ESI[tronic] Startcenter bajo "Ayuda >> Servicio<br />
postventa" en el menú "Restablecer el software <strong>KTS</strong>"<br />
(ver ayuda online ESI[tronic] Startcenter).<br />
5.7.1 Actualización de software online (desde<br />
ESI[tronic] Startcenter versión 2010/2)<br />
1. Iniciar "ESI[tronic] Startcenter".<br />
2. Abrir la ventana de introducción "Configuración<br />
>>Actualizaciones online".<br />
3. Introducir el número de cliente y la contraseña y seleccionar<br />
.<br />
iiSi no está disponible "Login", comprobar la configuración<br />
Proxy en "Configuración >> Configuración de usuario".<br />
4. Seleccionar las actualizaciones disponibles e iniciar<br />
la actualización del software.<br />
5. Tener en cuenta las indicaciones en pantalla y seguir las<br />
instrucciones.<br />
iiPara finalizar la instalación correctamente debe reiniciarse<br />
el PC/portátil.<br />
Actualización de software del <strong>KTS</strong> <strong>340</strong><br />
1. Desenchufar la fuente de alimentación y el cable de<br />
conexión USB del <strong>KTS</strong> <strong>340</strong>.<br />
2. Iniciar "ESI[tronic] Startcenter" .<br />
3. Abastecer nuevamente de tensión el <strong>KTS</strong> <strong>340</strong> mediante<br />
la fuente de alimentación y encenderlo.<br />
??<br />
El <strong>KTS</strong> <strong>340</strong> se enciende<br />
??<br />
Aparece la ventana de diálogo "Identificación<br />
vehículo".<br />
4. Conectar el <strong>KTS</strong> <strong>340</strong> mediante el cable de conexión<br />
USB con el PC/portátil.<br />
5. ESI[tronic]-Startcenter: Abrir "<strong>KTS</strong> <strong>340</strong> >><br />
Información del equipo".<br />
Robert <strong>Bosch</strong> LLC<br />
6. Seleccionar las actualizaciones disponibles.<br />
7. Seleccionar .<br />
""<br />
Se instala el software del sistema en el <strong>KTS</strong> <strong>340</strong>.<br />
5.7.2 Actualización de software a través del DVD<br />
ESI[tronic]<br />
Paso 1: Instalación del ESI[tronic] Startcenter<br />
1. Cerrar todas las aplicaciones abiertas.<br />
2. Insertar el DVD "ESI[tronic] Startcenter".<br />
3. Abrir el "Windows Explorer".<br />
4. Iniciar D:\setup.exe (D = letra de la unidad de DVD).<br />
??<br />
Se inicia la instalación.<br />
5. Tener en cuenta las indicaciones en pantalla y seguir las<br />
instrucciones (ver el cap. 4.2.1).<br />
iiPara finalizar la instalación correctamente debe<br />
reiniciarse el PC/portátil.<br />
Paso 2: Actualización de software del <strong>KTS</strong> <strong>340</strong><br />
1. Desenchufar la fuente de alimentación y el cable de<br />
conexión USB del <strong>KTS</strong> <strong>340</strong>.<br />
2. Iniciar "ESI[tronic] Startcenter" .<br />
3. Abastecer nuevamente de tensión el <strong>KTS</strong> <strong>340</strong> mediante<br />
la fuente de alimentación y encenderlo.<br />
??<br />
El <strong>KTS</strong> <strong>340</strong> se enciende<br />
??<br />
Aparece la ventana de diálogo "Identificación<br />
vehículo".<br />
4. Conectar el <strong>KTS</strong> <strong>340</strong> mediante el cable de conexión<br />
USB con el PC/portátil.<br />
5. ESI[tronic]-Startcenter: Abrir "<strong>KTS</strong> <strong>340</strong> >> Información<br />
del equipo".<br />
6. Seleccionar las actualizaciones disponibles.<br />
iiSi se muestra "ninguna actualización disponible",<br />
el <strong>KTS</strong> <strong>340</strong> dispone ya del software actual y no es<br />
necesario actualizarlo.<br />
7. Seleccionar .<br />
""<br />
Se instala el software del sistema en el <strong>KTS</strong> <strong>340</strong>.<br />
5.8 Instrucciones en caso de avería<br />
Sin comunicación con la unidad de mando<br />
Durante el diagnóstico de la unidad de mando aparece<br />
el mensaje de fallo "No se encontró ningún sistema".<br />
Posibles causas<br />
Cable incorrecto<br />
conectado.<br />
Pin incorrecto seleccionado<br />
en el menú de selección<br />
de pins.<br />
¿Qué puede hacer?<br />
Comprobar si se ha utilizado el cable correcto.<br />
Consultar bajo "Conector hembra de<br />
diagnóstico" qué pin debe utilizarse.<br />
i i En caso de otros problemas, por favor diríjase a la<br />
línea directa de ESI[tronic].<br />
1 689 989 072 | 2010-04-06
F(Hz):<br />
es<br />
48 | <strong>KTS</strong> <strong>340</strong> | Mantenimiento<br />
6. Mantenimiento<br />
1<br />
6.1 Limpieza<br />
La carcasa y la pantalla del <strong>KTS</strong> <strong>340</strong> sólo pueden limpiarse<br />
con paños suaves y detergentes neutros. No<br />
utilizar productos de limpieza abrasivos ni trapos de<br />
limpieza bastos del taller.<br />
Best.-Nr.: 0 684 400 <strong>340</strong><br />
Typ: <strong>KTS</strong> <strong>340</strong><br />
Serien-:Nr.<br />
BOSCH<br />
FD: 2008-04 U(V);8-28 DC<br />
P(W): 20<br />
430003520<br />
PMade in Germany Robert <strong>Bosch</strong> GmbH D-73207 Plochingen<br />
BOSCH<br />
Best.-Nr.: 1 687 023 436<br />
FD; 2008-04<br />
2<br />
6.2 Sustitución del acumulador<br />
Peligro por alta tensión<br />
Cuando el <strong>KTS</strong> <strong>340</strong> está abierto y se ha retirado<br />
la cubierta (fig. 4, pos. 5) para la iluminación<br />
de fondo de la pantalla LCD, pueden producirse<br />
tensiones que pueden ser mortales.<br />
<br />
No quitar nunca la tapa de la iluminación<br />
de fondo.<br />
5<br />
4<br />
4<br />
3<br />
3<br />
max. 28 V<br />
En caso de manejo incorrecto, existe peligro<br />
de inflamación, explosión y quemaduras.<br />
No calentar, quemar, conectar en cortocircuito,<br />
dañar mecánicamente, cargar con corrientes<br />
excesivas ni cargar con la polaridad<br />
inversa los acumuladores.<br />
<br />
Medios de extinción adecuados: Agua, CO 2<br />
,<br />
arena.<br />
!!<br />
Utilizar sólo los acumuladores híbridos de níquelmetal<br />
prescritos para el <strong>KTS</strong> <strong>340</strong>. Recomendamos<br />
acumuladores con una capacidad entre 2000 mAh<br />
y 2300 mAh. Sustituir siempre todos los acumuladores.<br />
Los acumuladores usados deberán eliminarse<br />
según las directrices vigentes.<br />
1. Desconectar el <strong>KTS</strong> <strong>340</strong>.<br />
2. Aflojar los tornillos (5x; fig. 4; pos. 1) en el lado<br />
posterior del equipo y retirar la cubierta del equipo<br />
(fig. 4; pos. 2).<br />
3. Quitar los compartimientos de los acumuladores a<br />
la izquierda y a la derecha y depositarlos sobre la<br />
carcasa de metal (fig. 4; pos. 3).<br />
4. Retirar los acumuladores usados (fig.4, pos. 4).<br />
5. Colocar los nuevos acumuladores (8x) con los polos<br />
en la posición correcta.<br />
6. Colocar de nuevo los compartimientos de los acumuladores<br />
en el equipo.<br />
Fig. 4:<br />
Sustitución del acumulador<br />
459843-3Ko<br />
6.3 Piezas de repuesto y de desgaste<br />
Denominación<br />
Comprobador del sistema<br />
<strong>KTS</strong> <strong>340</strong> (verde)<br />
Fuente de alimentación<br />
Cable de conexión a la red<br />
Número de pedido<br />
1 687 023 549<br />
1 687 022 890<br />
1 684 461 161<br />
Cable de conexión USB 3 m 1 684 465 562<br />
Cable de diagnóstico OBD 3 m
Datos técnicos | TS TS | 49 9 9 es<br />
7. Datos técnicos<br />
7.1 Datos generales<br />
Propiedad<br />
Tensión de servicio<br />
Consumo de potencia<br />
Valor/rango<br />
11 V CC — 34 V CC<br />
aprox. 50 vatios<br />
Pantalla LCD 8,4"<br />
800 x 600 píxeles<br />
Dimensiones (largo x ancho x alto) 235 x 290 x 67 mm<br />
9.25 x 11.42 x 2.64 inch<br />
Peso (sin cables)<br />
2100 g<br />
4.6 lb<br />
Temperatura de servicio 5 °C – 40 °C<br />
41 °F – 104 °F<br />
Humedad relativa del aire<br />
90 % (a 25 °C)<br />
Clase de protección IP 40<br />
7.2 Protocolo de interfaces<br />
En los diagnósticos de unidades de mando se soportan<br />
según ISO 15031 las siguientes interfaces con los protocolos<br />
correspondientes:<br />
RR<br />
ISO/DIS 15765-4 (CAN) – tasas binarias: 250 kBit/s<br />
y 500 kBit/s)<br />
RR<br />
ISO 9141-2 Fast<br />
RR<br />
ISO/DIS 14230-4 (protocolo Keyword 2000) 5-Baud<br />
RR<br />
ISO/DIS 14230-4 (Keyword-Protokoll 2000) Fast<br />
RR<br />
ISO/DIS 11519-4 (SAE J1850) PWM<br />
RR<br />
ISO/DIS 11519-4 (SAE J1850) VPW<br />
7.3 Fuente de alimentación<br />
Propiedad<br />
Valor/rango<br />
Tensión de entrada<br />
100 V CA — 240 V CA<br />
Frecuencia de entrada<br />
50 Hz — 60 Hz<br />
Tensión inicial<br />
15 V<br />
Temperatura de servicio 0 °C — 40 °C<br />
7.4 Especificación multímetro<br />
RR<br />
CH1 sin potencial (la entrada azul se puede conectar<br />
a los puntos de medición que conducen tensión).<br />
Resistencia de entrada > 900 kOhm.<br />
RR<br />
CH2 con potencial (entrada negra de masa, debe<br />
estar conectada a la masa del vehículo). Resistencia<br />
de entrada > 900 kOhm.<br />
7.4.1 Medición de CC CH1 > CH2<br />
Propiedad<br />
Rango de medición<br />
Precisión CH1<br />
Precisión CH2<br />
Resolución<br />
Valor/rango<br />
200 mV — 60 V<br />
±0,75 % del valor de medición,<br />
adicionalmente ±0.25 % del rango de medición<br />
±2 % del valor de medición,<br />
adicionalmente ±0,5 % del rango<br />
de medición<br />
100 µV — 100 mV<br />
(en función del rango de medición)<br />
7.4.2 Medición CA y de valor efectivo (CH1 y CH2) *)<br />
Propiedad<br />
Rango de frecuencias CA<br />
Rango de medición<br />
Precisión CA a 100 Hz<br />
Precisión EFF a ≤ 100 H<br />
Resolución<br />
Valor/rango<br />
10 Hz — 400 Hz (-3 dB)<br />
200 mV — 60 V<br />
±2 % del valor de medición,<br />
adicionalmente,<br />
±0,5 % del rango de medición<br />
100 µV — 100 mV<br />
(en función del rango<br />
de medición)<br />
*)<br />
Los rangos de medición en los tipos de medición “U” e “I” son<br />
valores punta-punta. Como consecuencia, el campo de indicación<br />
digital aparece en gris tan pronto como el ámbito de medición<br />
configurado se sobrepase durante un tiempo (Overload).<br />
7.4.3 Medición de resistencia (CH1)<br />
Propiedad<br />
Rango de medición<br />
Precisión hasta 200 K<br />
Precisión hasta 1 M<br />
Resolución<br />
Resistencia de entrada<br />
Valor/rango<br />
100 — 1 M<br />
±0,75 % del valor de medición<br />
adicionalmente ±0.25 % del<br />
rango de medición<br />
±2 % del valor de medición<br />
adicionalmente ±0.25 % del<br />
rango de medición<br />
0,1 — 1000 (en función del<br />
rango de medición)<br />
> 9 M<br />
Robert <strong>Bosch</strong> LLC<br />
1 689 989 072 | 2010-04-06
es<br />
50 | <strong>KTS</strong> <strong>340</strong> | Datos técnicos<br />
7.4.4 Medición de corriente (CH1 y CH2)<br />
Sensor<br />
Rango de medición<br />
Cambio (sólo CH1)<br />
±600 mA<br />
Pinza 30 A (sólo CH1)<br />
±30 A<br />
Pinza 100 A<br />
±100 A<br />
Pinza 600 A<br />
±600 A<br />
Pinza 1000 A (sólo CH1) ±1.000 A<br />
7.4.5 Verificador de paso (CH1)<br />
Propiedad<br />
Valor/rango<br />
Corriente de medición 2 mA<br />
Tensión de ralentí ≤ 5 V<br />
Caudal<br />
< 10 (con respuesta acústica)<br />
7.4.6 Medición de diodos (CH1)<br />
Propiedad<br />
Valor/rango<br />
Corriente de medición 2 mA<br />
Tensión de ralentí<br />
≤ 5 V<br />
Tensión máxima de 2 V<br />
los diodos<br />
7.5 WLAN<br />
Estándar: IEEE 802.11g (54 Mbit/s), compatible con<br />
IEEE 802.11b (11 Mbit/s), codificación de datos: OPEN,<br />
WPA, WPA-PSK, WPA2, WPA2-PSK, WEP (64/128/256<br />
bits), antena: -3dBi.<br />
Conexión por radio <strong>KTS</strong> <strong>340</strong> al<br />
PC/ordenador portátil<br />
Entorno del taller con vista libre al<br />
punto de acceso<br />
Con la puerta del vehículo o la ventanilla<br />
abiertas y el motor en marcha en el habitáculo<br />
del vehículo<br />
Alcance mínimo<br />
30 metros<br />
10 metros<br />
El alcance de la WLAN varía considerablemente.<br />
En recintos cerrados se alcanzan generalmente<br />
20–40 m, al aire libre hasta 100 m.<br />
Puede ocurrir que el alcance efectivo en un entorno<br />
difícil sea sólo de 10–15 m o incluso menos.<br />
El <strong>KTS</strong> <strong>340</strong> adapta la velocidad de transmisión en la<br />
WLAN automáticamente a las condiciones de transmisión.<br />
Cuando la calidad de la conexión de radiocomunicaciones<br />
es mala, transmite los datos más lentamente.<br />
1 689 989 072 | 2010-04-06<br />
Robert <strong>Bosch</strong> LLC
Robert <strong>Bosch</strong> LLC<br />
Automotive Aftermarket Division<br />
2800 South 25th Avenue<br />
Broadview, IL 60155<br />
USA<br />
www.boschdiagnostics.com<br />
<br />
<br />
1 689 989 072 | 2010-04-06