UNITSYSTEM - Rhoss
UNITSYSTEM - Rhoss
UNITSYSTEM - Rhoss

Create successful ePaper yourself
Turn your PDF publications into a flip-book with our unique Google optimized e-Paper software.
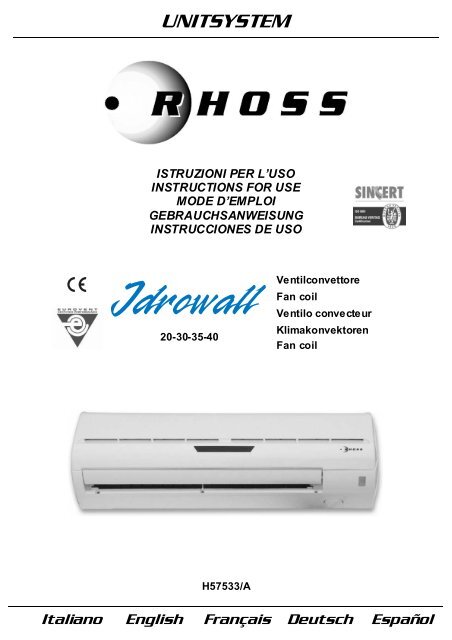
<strong>UNITSYSTEM</strong><br />
ISTRUZIONI PER L’USO<br />
INSTRUCTIONS FOR USE<br />
MODE D’EMPLOI<br />
GEBRAUCHSANWEISUNG<br />
INSTRUCCIONES DE USO<br />
Ventilconvettore<br />
Fan coil<br />
Ventilo convecteur<br />
20-30-35-40<br />
Klimakonvektoren<br />
Fan coil<br />
H57533/A<br />
Italiano English Français Deutsch Español
E’ vietata la riproduzione la memorizzazione e la tras missione anc he parziale della presente<br />
pubblicazione, i n qualsiasi forma, s enza la preventi va autorizzazione scritta della RH OSS S.p.A.<br />
I centri di assistenz a tecnica della RHOSS S.p.A. sono dis ponibili a risolvere qualunque dubbio<br />
inerente all’utilizzo dei suoi prodotti ove la manualistica fornita risulti non soddisfacente. La<br />
RHOSS S.p.A. si ritiene libera di variare s enza preavviso le c aratteristiche dei propri prodotti.<br />
RHOSS S.p.A. attuando una politica di costante s viluppo e miglioramento dei propri prodotti, si<br />
riserva il diritto di modificare specifiche, equipaggiamenti ed istruzioni r elative all’uso e alla<br />
manutenzione i n qualsiasi momento e senz a alcun preavvis o.<br />
Italiano<br />
Reproduction, data storage and transmission, even partial, of this publication, i n any form,<br />
without the prior written authorisation of RHOSS S.p.A., is prohi bited. RHOSS S.p.A. technical<br />
service centres c an be c ontacted for all queries regardi ng the use of its pr oducts, s hould the<br />
information in the manuals prove to be insufficient. RHOSS S.p.A. res er ves the right to alter<br />
features of its products without notice. RHOSS S.p.A. follows a polic y of continuous produc t<br />
devel opment and improvement and reser ves the right to modify specificati ons, equipment and<br />
instructions regarding us e and maintenance at any time, without notice.<br />
English<br />
La repr oduc tion, la mémorisation et la trans mission quand bien même parti elles de la présente<br />
publication s ont interdites, sous quelque forme que c e soit, sans l'autorisation préalable de<br />
RHOSS S.p.A. Les centres d'assistance technique de RHOSS S.p.A. s ont à la dispositi on de<br />
l'utilisateur pour fournir toute information suppl émentaire sur ses produits dans le cas où les<br />
notices fournies s'avèreraient ins uffisantes. RHOSS S.p.A. conser ve la faculté de modifier sans<br />
préavis les carac téristiques de ses produits. Mettant en œuvre des acti vités de développement<br />
et de c onstante amélioration de s es pr oduits, RHOSS S.p.A. se réser ve la faculté de modifier à<br />
tout moment et sans préavis aucun, spécifications, équipements et instructions d'utilisation et<br />
d'entreti en.<br />
Français<br />
Die auch teil weise Ver vielfältigung, Abspeic herung und Weitergabe der vorliegenden<br />
Veröffentlichung in jeder Form ist ohne vorherige schriftliche Genehmigung seitens des<br />
Herstellers RHOSS S.p.A. untersagt. Die technisc hen Kundendienststellen RHOSS S.p.A.<br />
helfen bei Zweifeln über die Anwendung der betriebs eigenen Produkte gern weiter, sollte di e<br />
beigestellte Dokumentation in dies er Hinsicht nicht ausreichend sein. RH OSS S.p.A. behält sic h<br />
das Recht vor, ohne Vorankündigung die Eigensc haften der Ger äte zu ändern. RHOSS S.p.A.<br />
behält sich weiter hin das Recht vor, im Zuge sei ner Gesc häftspoliti k ständiger Entwic klung und<br />
Verbess erung der eigenen Produkte jeder Zeit und ohne Vorankündigung die Beschrei bung, die<br />
Ausrüstung und die Gebrauchs- und Wartungsanweisungen z u ändern.<br />
Deutsch<br />
Se prohíbe la reproducción, memorización y tr ans misión inclus o parcial de esta publicación, de<br />
cualquier manera, si n la autorización previ a por escrito de RHOSS S.p.A. Los ser vicios técnicos<br />
de RH OSS S.p.A. están dis ponibles para sol ucionar cualquier duda ac erca del uso de l os<br />
produc tos, si el manual no fuese suficiente. RHOSS S.p.A. se r eser va el derecho de aportar<br />
modificaciones a los productos sin pr evio avis o. RHOSS S.p.A., siguiendo una política de<br />
constante desarrollo y mejora de s us productos, se r eser va el derecho de modificar<br />
especific aciones, equipamientos e ins trucciones referentes al us o y el mantenimiento en<br />
cualquier momento y si n previ o avis o.<br />
Español
Dichiarazione di conformità<br />
La s ocietà RHOSS S.p.A.<br />
con s ede ad Arquà Polesi ne (RO), via delle Industrie 211, dichiara,<br />
sotto la pr opria esclusiva responsabilità, che i prodotti della serie<br />
MPCV 20-30-35-40<br />
sono conformi ai requisiti essenziali di sicurezza di cui alla Direttiva<br />
Macchine 2006/42/CE.<br />
------------<br />
La macc hina è inoltre c onforme alle seguenti diretti ve:<br />
- 2006/95/CE (Bassa T ensione).<br />
- 2004/108/CE (Compatibilità Elettromagnetica).<br />
Statement of conformity<br />
RH OSS S.p.A.<br />
located in Arquà Polesine (RO), via delle Industrie 211, hereby states on its<br />
own excl usive res ponsi bility that the products in the<br />
MPCV 20-30-35-40<br />
are compliant with the ess ential safety r equirements as set forth in Machine<br />
Directive 2006/42/C E.<br />
------------<br />
The mac hine is also c ompliant with the following direc tives:<br />
- 2006/95/CE (Low Voltage).<br />
- 2004/108/CE (Electromagnetic Compatibility).<br />
Déclaration de conformité<br />
La s ociété RHOSS S.p.A.<br />
dont le siège se tr ouve à Arquà Polesine (RO), via delle Industrie 211,<br />
déclare, sous sa r esponsabilité exclusive, que les produits de la série<br />
MPCV 20-30-35-40<br />
sont c onformes aux car actéristiques de s écurité requises par la<br />
Directive Mac hines 2006/42/CE.<br />
------------<br />
L’appareil es t par ailleurs c onforme aux directi ves sui vantes :<br />
- 2006/95/CE (Basse T ension).<br />
- 2004/108/CE (Compatibilité Electromagnétique).<br />
Konformitätserklärung<br />
Der Hersteller RHOSS S.p.A.<br />
mit Geschäftssitz in Arquà Polesine (RO), via delle Industrie 211, erklärt<br />
eigenverantwortlich, dass die Geräte der Baureihe<br />
MPCV 20-30-35-40<br />
den grundsätzlichen Anforderungen an die Sic herheit in Übereinsti mmung<br />
mit der Maschinenrichtlini e 2006/42/EG entspr echen.<br />
------------<br />
Darüber hinaus entspricht di e Maschi ne folgenden Richtlinien:<br />
- 2006/95/EG, (Nieder Spannung).<br />
- 2004/108/EG (Elektromagnetische Verträglichkeit).<br />
Declaración de conformidad<br />
La empresa RHOSS S.p.A<br />
con s ede en Arquà Polesi ne (RO), via delle Industrie 211, declar a bajo<br />
su única res pons abilidad que los productos de la serie<br />
MPCV 20-30-35-40<br />
Se encuentr an en c onformi dad con los principales requisitos de<br />
seguridad i ndicados en la Directi va de máquinas 2006/42/C E.<br />
------------<br />
La máquina, además, s e encuentra en confor midad con las siguientes<br />
directivas:<br />
- 2006/95/CE, (Baja T ens òn).<br />
- 2004/108/C E (Compati bilidad elec tromagnétic a).<br />
Codroipo, lì 28 Aprile 2010<br />
Il direttor e generale / General manager / Directeur général / Generaldirektor / Director general<br />
Pierluigi Ceccolin<br />
3
INDICE<br />
INDICE<br />
SIMBOLOGIA UTILIZZATA<br />
Italiano pagina 4<br />
English page 19<br />
Français page 34<br />
Deutsch Seite 49<br />
Español página 64<br />
I SEZIONE I: UTENTE ............................................................................... 5<br />
I.1 Desc rizione della macchina..........................................................................5<br />
I.1.1 Condizioni di utilizzo previste...........................................................................5<br />
I.1.2 Identificazi one d ell a macchi na .........................................................................5<br />
I.1.3 Caratteristiche costruttive ...............................................................................5<br />
I.2 Limiti di funzionamento................................................................................5<br />
I.2.1 Informazioni sui rischi residui e pericoli che non possono essere eliminati.................5<br />
I.3 Accessori e ricambi .....................................................................................5<br />
I.3.1 Accessori (forniti separatamente) .....................................................................5<br />
I.4 Comandi e controlli.....................................................................................6<br />
I.4.1 Telecoma ndo (d i serie) ...................................................................................6<br />
I.4.2 Panne llo a fil o KPFI (fornito separatame nte) .......................................................6<br />
I.5 Istruzioni di utilizzazione..............................................................................6<br />
I.5.1 Funzioni di regolazione ..................................................................................6<br />
I.5.2 Funzioni di comfort ........................................................................................7<br />
I.5.3 Telecomando ...............................................................................................7<br />
I.5.4 Impostazion i di funzi onam ento.........................................................................8<br />
I.5.5 Reset del telecomando...................................................................................9<br />
I.5.6 Trasmissione dati all’unità Slave ......................................................................9<br />
I.5.7 Descrizi one d ispl ay unità ................................................................................9<br />
I.5.8 Funzionamento locale....................................................................................9<br />
I.5.9 Unità in allarme ............................................................................................9<br />
I.6 Pulizia dell’unità........................................................................................ 10<br />
I.6.1 Pulizia del filtro aria ..................................................................................... 10<br />
I.7 Avvertenze e suggerimenti ......................................................................... 10<br />
II SEZIONE II: INSTALLAZIONE E MANU TEN ZIONE ............................. 11<br />
SIMBOLO<br />
SIGNIFICAT O<br />
PERICOLO GENERICO!<br />
L’indicazion e PERICOLO GEN ERICO è u sata per<br />
informare l’operatore ed il per sonale add etto alla<br />
manutenzione di rischi ch e possono comportare la<br />
morte, danni fisici, malattie in qualsivoglia forma<br />
immediat a o latente.<br />
PERICOLO COMPONENTI IN TENSION E!<br />
L’indicazion e PERICOLO COMPONENTI IN<br />
TENSIONE è usata per informare l’oper atore ed il<br />
personale add etto alla manutenzione circa i rischi<br />
dovuti alla presenza di tensione.<br />
PERICOLO SUPERFICI T AGLIENTI!<br />
L’indicazion e PERICOLO SUPERFICI TAGLIENTI è<br />
usata per informar e l’op eratore ed il per sonale<br />
addetto alla manutenzione della pr esenz a di<br />
superfici potenzialm ente per icolo se.<br />
PERICOLO SUPERFICI CALDE!<br />
L’indicazion e PERICOLO SUPERFICI CALDE è<br />
usata per informar e l’op eratore ed il per sonale<br />
addetto alla manutenzione della pr esenz a di<br />
superfici calde potenzialmente pericolose.<br />
PERICOLO ORGANI IN MOVIMENTO!<br />
L’indicazion e PERICOLO ORGANI IN MOVIMENTO è<br />
usata per informar e l’op eratore ed il per sonale<br />
addetto alla manutenzione circa i rischi dovuti alla<br />
presenz a di org ani in movimento.<br />
AVVERTENZE IMPORT ANTI!<br />
L’indicazion e AVVERTENZE IMPORT ANTI è usata<br />
per rich iamare l’attenzione su azioni o pericoli ch e<br />
potrebbero creare danni all’unità o ai suoi<br />
equipaggiamenti.<br />
SALVAGUARDIA AMBIENTALE!<br />
L’indicazion e salvaguardia ambientale fornisce<br />
istruzioni per l’utilizzo d ella macchin a nel risp etto<br />
dell’ambiente.<br />
II.1 Istruzioni di trasporto ................................................................................ 11<br />
II.1.1 Imballo, componenti .................................................................................... 11<br />
II.1.2 Indicazioni per la movimentazione .................................................................. 11<br />
II.1.3 Cond izio ni di imm agazz inam ento ................................................................... 11<br />
II.1.4 Spazi di ris petto, posizi onam ento ................................................................... 11<br />
II.2 Istruzioni di installazione............................................................................ 12<br />
II.2.1 Predisp osizi one d ei col leg amenti i drau lici ......................................................... 12<br />
II.2.2 Fissaggi o del l’u nità...................................................................................... 12<br />
II.2.3 Coll egam enti idr aul ici ................................................................................... 13<br />
II.2.4 Coll egam enti el ettrici ................................................................................... 14<br />
II.2.5 Coll egam ento Master/Slav e .......................................................................... 15<br />
II.3 Istruzioni per l’avviamento ......................................................................... 16<br />
II.3.1 Controlli preliminari all’avviamento.................................................................. 16<br />
II.3.2 Messa fuori servizio..................................................................................... 16<br />
II.3.3 Riavvio dopo lunga inattività.......................................................................... 16<br />
II.4 Istruzioni di manutenzione......................................................................... 16<br />
II.4.2 Circuito elettrico.......................................................................................... 17<br />
II.5 Indicazioni per lo smantellamento dell’unità................................................. 17<br />
II.6 Anomalie di funzionamento........................................................................ 18<br />
ALLEGA TI<br />
A1 Dati tecnici……………………………………………………………………..……….79<br />
A2 Dimens ioni……………………………………………………………..……..……….. 84<br />
UNI EN 292<br />
UNI EN 294<br />
UNI EN 563<br />
UNI EN 1050<br />
UNI 10893<br />
EN 13133<br />
EN 12797<br />
EN 378-1<br />
PrEN 378-2<br />
CEI EN 60335-2-40<br />
UNI EN ISO 3744<br />
EN 50081-1:1992<br />
EN 61000<br />
Riferimenti normativi<br />
Sicurezza del macchinario. Concetti fondamentali,<br />
principi generali di progettazione<br />
Sicurezza del macchinario. Distanze di sicurezza per<br />
impedire il raggiungimento di zone pericolose con gli arti<br />
superiori.<br />
Sicurezza del macchinario. Temperature delle superfici<br />
di contatto. Dati ergonomici per stabilire i valori limiti di<br />
temperatura per superfici calde.<br />
Sicurezza del macchinario. Principi per la valutazione del<br />
rischio.<br />
Documentazione tecnica di prodotto. Istruzioni per l’uso<br />
Brazing. Brazer approval<br />
Brazing. Destructive tests of brazed joints<br />
Refrigeration systems and heat pumps – safety and<br />
environmental requirements. Basic requirements,<br />
definitions, classification and selection criteria<br />
Refrigeration systems and heat pumps – safety and<br />
environmental requirements. Design, construction,<br />
testing, installing, marking and documentation<br />
Sicurezza degli apparecchi elettrici d’uso domestico e<br />
similare. Parte 2: Norme particolari per le pompe di<br />
calore elettriche, per i condizionatori d’aria e per i<br />
deumidificatori.<br />
Determinazione dei livelli di potenza sonora delle<br />
sorgenti di rumore mediante pressione sonora. Metodo<br />
tecnico progettuale in un campo essenzialmente libero<br />
su un piano riflettente.<br />
Electromagnetic compatibility - Generic emission<br />
standard Part 1: Residential, commercial and light<br />
industry<br />
Electromagnetic compatibility (EMC)<br />
4
SEZIONE I: UTENTE<br />
I<br />
SEZIONE I: UTENTE<br />
I.1 DESCRIZIONE DELLA MACCHINA<br />
Idrowall si di vide in quattro grandezz e:<br />
MPCV 20-30-35-40: Unità base c on elettroval vol a ON/OFF.<br />
I.1.1 CONDIZIONI DI UTILIZZO PREVISTE<br />
Idrowall è un ventilconvettore destinato al trattamento dell’aria<br />
(climatizzazione estiva e invernale) all’interno di ambienti ad uso<br />
domestico o similare. L’unità non é destinata all’installazione in locali ad<br />
uso lavanderia (norma CEI EN 60335-2-40).<br />
I.2 LIMITI DI FUNZIONAMENTO<br />
IMPORTANTE!<br />
Il corretto e sicuro funzionamento dell’unità è<br />
garantito solo se vengono rispettati i limiti di<br />
funzionamento indicati di seguito.<br />
L’unità non deve funzionare con acqua entrante a temperatura<br />
superiore a 70°C e inferiore a 5°C.<br />
L’unità non deve funzionare continuamente nella modalità<br />
raffrescamento in ambienti c on umidità relati va elevata (superiore<br />
all’80%). In queste condizioni sulla bocca della mandata dell’aria<br />
potrebbe for marsi della condens a che potrebbe danneggiare oggetti<br />
sottos tanti, la pavi mentazione e l a parete sulla quale è fissata l’unità.<br />
PERICOLO!<br />
L’installazione d ella macchin a è prevista solo<br />
all’interno in ambienti ad u so domestico e similari.<br />
PERICOLO!<br />
E’ vietato introdurre oggetti attraverso le bocche di<br />
aspir azione e mand ata aria.<br />
75<br />
60<br />
30<br />
U.R.%<br />
IMPORTANTE!<br />
Il corretto funzionamento dell’unità è subordinato<br />
alla scrupolosa osservanza delle istruzioni d’uso, al<br />
rispetto degli spazi tecnici n ell’in stallazione e dei<br />
limiti di impiego riportati nel presente manuale.<br />
IMPORTANTE<br />
Un’installazione che non soddisfi gli spazi tecnici<br />
consigliati causerà difficolt à di manutenzione e una<br />
riduzione delle prestazioni.<br />
I.1.2 IDENTIFICAZIONE DELLA MACCHINA<br />
Le unità sono provviste di una targa matricola posta all’esterno.<br />
RHOSS Spa<br />
TECHNICAL CHARACTERISTICS<br />
I.2.1<br />
20<br />
5 10 15 60 65 70 t°C<br />
t = temperatura acqua ingresso unità<br />
U.R. = umidità relativa aria ambiente<br />
Temperatura aria ambiente: 8°C ÷ 32°C.<br />
INFORMAZIONI SUI RISCHI RESIDUI E<br />
PERICOLI CHE NON POSSONO ESSERE<br />
ELIMINATI<br />
IMPORTANTE!<br />
Prestare la m assima attenzione ai simboli e alle<br />
indicazioni posti sulla macchina.<br />
MODEL IDROWALL MPCV20<br />
Cooling<br />
Capacity<br />
Heating<br />
Power supply<br />
Frequency<br />
Power input<br />
Weight<br />
Nel caso i n cui permangano dei rischi malgrado tutte le dis posizioni<br />
adottate, ovvero si tratti di rischi potenziali e non evi denti, sono state<br />
applicate s ulla macchi na delle targhette adesive s econdo quanto<br />
indicato dalla norma ISO 3864.<br />
I.1.3<br />
Serial No.<br />
CARATTERIS TICHE COSTRUTTIVE<br />
I.3 ACCESSORI E RICAMBI<br />
IMPORTANTE!<br />
Utilizzare solo ed esclusivamente r icambi e<br />
accessori origin ali. RHOSS S.p.a. declina ogni<br />
responsabilità p er danni causati d a m anomissioni o<br />
interventi eseguiti da p ersonale non autorizzato o<br />
per disfunzioni dovute all’uso di ricambi o<br />
accessori non origin ali.<br />
1<br />
I.3.1<br />
ACCESSORI (FORNITI SEPARATAMENTE)<br />
3<br />
5<br />
2<br />
KGMOD – Interfaccia seriale R S485 per di alogo logico c on building<br />
automation e sistemi di super visione (Protocolli supportati: ModBuS ®<br />
RTU).<br />
4 7<br />
6<br />
1. Pannello frontale<br />
2. Deflettore<br />
3. Aletta direzionabile<br />
4. Filtri aria<br />
5. Ricevitor e e s egnalazi one con led<br />
6. Tasto emergenza<br />
7. Vano collegamenti elettrici<br />
KVAM – C assetta da i ncasso a mur o.<br />
5
SEZIONE I: UTENTE<br />
I.4 COMANDI E CONTROLLI<br />
I.4.1<br />
TELECOMANDO (DI SERIE)<br />
Telecomando a raggi infrarossi c ompleto di pile di alimentazione (colore<br />
RAL 9010).<br />
SLEEP<br />
MODE<br />
SWING<br />
R<br />
FAN<br />
TIME-ON<br />
TIME-OFF<br />
TIME-SET<br />
C<br />
TEMP<br />
NET WORK<br />
BATT<br />
(Dimensioni 57 x 137 x 18 mm)<br />
I.4.2 PANNELLO A FILO KPFI<br />
(FORNI TO SEPARATAMENTE)<br />
Pannello comando a filo con display a cristalli liquidi, a 10 tasti, per la<br />
regolazione manuale di tutte le funzioni dell’apparecchio in base alla<br />
temperatura ambiente presc elta. Il pannello è predispos to per il<br />
fissaggio a muro (colore RAL 9010).<br />
AIR CONDITIONER<br />
ENTER<br />
TIMER<br />
CLOCK<br />
TIME<br />
SWING<br />
TEMP<br />
MODE<br />
FAN<br />
SLEEP<br />
(Dimensioni 120 x 120 x18 mm)<br />
I.5 ISTRUZIONI DI UTILIZZAZIONE<br />
Tramite il telecom ando e/o il pannello comando a filo (KPFI) (vedi<br />
istruzioni per l’uso fornite con lo s tesso) è possibile eseguire le seguenti<br />
operazi oni:<br />
Accensione/spegni mento dell’unità.<br />
Scelta delle tre velocità del ventilatore.<br />
Regolazione del ter mostato e mantenimento in ambiente della<br />
temperatura desiderata.<br />
Commutazione del ciclo di funzionamento:<br />
raffrescamento/riscaldamento.<br />
Sull’unità sono presenti degli indicatori che forniscono infor mazioni sullo<br />
stato dell’unità o eventuali segnalazioni di allarme e, qualora non fosse<br />
temporaneamente disponibile il telecomando e/o il pannello comando<br />
(KPFI) cons entono, utilizzando il tasto MANUAL, di gestire l’unità in<br />
modalità manuale.<br />
I.5.1<br />
FUNZIONI DI REGOLAZIONE<br />
I.5.1.1 AUTO<br />
In AUTO l’unità termi nale rileva la temperatur a ambi ente e deci de quale<br />
modalità atti vare (riscaldamento, raffr escamento o deumidific azione) in<br />
base al Set-point impostato dall’utente.<br />
La modalità è descritta di s eguito.<br />
se la temperatura ambiente è i nferiore a 21°C: riscal damento;<br />
se la temperatura ambiente è c ompresa tra 21 e 25°C:<br />
deumidificazi one;<br />
se la temperatura ambiente è s uperiore a 25°C: raffr escamento;<br />
Ventilatore e valvola acqua s ono gestiti come in riscaldamento,<br />
raffrescamento o deumidific azione.<br />
Il contatto ausiliario AUX1 si chiude a ogni richiesta di riscaldamento.<br />
Il contatto ausiliario AUX2 si chiude a ogni richiesta di raffrescamento.<br />
Se l’unità è stata s penta da più di due ore, alla s uccessi va riaccensi one<br />
la modalità atti va dipende dalla temperatura ambiente.<br />
Il Set-point può ess ere variato da un mi nimo di 16°C a un massi mo di<br />
30°C.<br />
I.5.1.2 COOL<br />
COOL è la funzione “raffrescamento”. In questo modo di funzionamento<br />
si può impostare a piaci mento la regolazione che es prime i n maggior<br />
comfort attraverso:<br />
scelta del val ore di temperatura desider ato;<br />
modo di funzionamento del ventilatore c on impostazione manual e o<br />
automatica delle velocità (AUTO);<br />
posizionamento del defl ettor e in posizione fiss a o in funzione<br />
SWING;<br />
Il ventilatore è sempre in funzi one anche a Set-point raggiunto.<br />
Alla richiesta di raffrescamento, la val vola apre dopo un ritardo di<br />
30sec ; alla richi esta di spegnimento la val vola chiude dopo un ritardo di<br />
120s ec.<br />
Il contatto ausiliario AUX2 si chiude ad ogni richiesta di raffrescamento.<br />
Selezionando la funzi one COOL il ventilatore potrebbe non avviarsi<br />
subito perc hé presente la funzione TOO COOL ( vedi par agrafo<br />
dedic ato).<br />
Il Set-point può ess ere variato da un mi nimo di 16°C a un massi mo di<br />
30°C.<br />
I.5.1.3 DRY<br />
DRY è la funzi one “deumi dificazione”, ovvero quella funzione c he<br />
riduce l’umidità dell’ambiente. Dur ante questo modo di funzionamento<br />
la val vola on/off di intercettazione acqua viene comandata sec ondo cicli<br />
prestabiliti:<br />
se la temperatura ambiente è maggiore di 25°C : apre per 3min –<br />
chiude per 4 minuti;<br />
se la temperatura ambiente è c ompresa tra 16 e 25°C : apr e per 3<br />
minuti – c hiude per 6 minuti;<br />
se la temperatura ambiente è i nferiore a 16°C : chius a;<br />
6
SEZIONE I: UTENTE<br />
Anche in modalità DRY è possibile impos tare a pi acimento la<br />
regolazione che es prime i n maggior comfort attraverso:<br />
scelta del val ore di temperatura desider ato;<br />
modo di funzionamento del ventilatore c on impostazione manual e o<br />
automatica delle velocità (AUTO);<br />
posizionamento del defl ettor e in posizione fiss a o in funzione<br />
SWING;<br />
Il contatto ausiliario AUX2 si chiude ad ogni richiesta di<br />
deumidificazi one.<br />
Selezionando la funzi one DRY il ventilatore potrebbe non avvi arsi<br />
subito perc hé presente la funzione TOO COOL ( vedi par agrafo<br />
dedic ato).<br />
Il Set-point può ess ere variato da un mi nimo di 16°C a un massi mo di<br />
30°C.<br />
I.5.1.4 FAN<br />
FAN è la funzi one “ventilazione”. In questo modo di funzionamento si<br />
può impostare a piaci mento la vel ocità del ventilatore ( min-med-max-<br />
Auto) e la posizione del deflettore (fisso o in funzione SWING).<br />
I contatti ausiliari AUX1 e AUX2 sono aperti.<br />
I.5.1.5 HEAT<br />
HEAT è la funzione “riscaldamento”. Anche in ques to modo di<br />
funzionamento si può i mpostare a piacimento la regolazione c he<br />
esprime in maggior comfort attraverso:<br />
scelta del val ore di temperatura desider ato;<br />
modo di funzionamento del ventilatore c on impostazione manual e o<br />
automatica delle velocità (AUTO);<br />
posizionamento del defl ettor e in posizione fiss a o in funzione<br />
SWING;<br />
Alla richiesta di riscaldamento, la val vol a apre dopo un ritardo di 30<br />
secondi; alla richiesta di s pegnimento la val vol a chiude dopo un ritardo<br />
di 120sec.<br />
Il contatto ausiliario AUX1 si chiude a ogni richiesta di riscaldamento.<br />
Selezionando la funzi one HEAT il ventilatore potrebbe non avviarsi<br />
subito perc hé presente la funzione HOT START ( vedi paragrafo<br />
dedic ato).<br />
Il Set-point può ess ere variato da un mi nimo di 16°C a un massi mo di<br />
30°C.<br />
IMPORTANTE!<br />
Il ventilatore dell’unità si ferma al raggiungimento<br />
del valore di temperatura impostato. Ogni 3 minuti il<br />
ventilatore si riattiva per un minuto alla velocità<br />
minima p er evitar e fenomeni di str atificaz ione<br />
dell’aria in prossimità d ell’appar ecchio.<br />
I.5.2 FUNZIONI DI COMFORT<br />
TOO COOL<br />
Per i modi di funzionamento COOL e DRY è prevista la funzione TOO<br />
COOL che bl occa l’avvi amento del ventilatore s e la temper atura<br />
dell’acqua in ingresso allo scambiatore è al di sopra di 32°C per 15<br />
minuti (ripristino a 30°C).<br />
Il display vis ualizza “P2”.<br />
HOT START<br />
Per il modo di funzionamento HEAT è prevista l a funzione HOT START<br />
che blocca l’avviamento del ventilatore se la temperatura dell’acqua in<br />
ingresso allo sc ambiatore è al di sotto di 25°C (differ enziale di 3°C)<br />
evitando i n questo modo sgradevoli fl ussi di aria fredda. Questa<br />
situazione potrebbe verificarsi al primo avviamento dell’unità o dopo<br />
lunghe s oste.<br />
Il display vis ualizza “P4”.<br />
I.5.3 TELECOMANDO<br />
Il telec omando permette di i mpostare e visualizzare tutti i parametri di<br />
funzionamento dell’unità, facilitando così tutte le oper azioni di<br />
programmazione.<br />
Il telec omando é ali mentato c on 2 batterie R03 size AAA da 1,5 V.<br />
IMPORTANTE!<br />
E’ consigliab ile t estar e il funzionamento del<br />
telecomando per d eterminare la sua zona di<br />
ricezion e.<br />
I.5.3.1<br />
TASTO<br />
SLEEP<br />
TEMP<br />
MODE<br />
TIME-ON<br />
TIME-OFF<br />
TIME-SET<br />
NET WORK<br />
SWING<br />
FAN<br />
C<br />
R<br />
Descrizione telecomando e relative funzioni<br />
SLEEP<br />
MODE<br />
SWING<br />
R<br />
FAN<br />
TIME-ON<br />
TIME-OFF<br />
TIME-SET<br />
C<br />
TEMP<br />
NET WORK<br />
BATT<br />
DESCRIZIONE<br />
Permette di accendere e s pegnere l’unità. Premere il<br />
tasto per accendere, premere nuovamente per<br />
spegnere<br />
Indica gli stati e i modi di funzi onamento dell’unità<br />
Atti vazione dello SLEEP mode.<br />
Questi tasti permettono di i mpostar e la temper atura<br />
ambiente desiderata.<br />
Permette di s elezionare il tipo di funzionamento<br />
desiderato (AUTO, COOL, DRY, HEAT, FAN)<br />
Impostazi one timer di accensione.<br />
Impostazi one timer di s pegnimento.<br />
Permette di impostare l’or ario dell’orologio e dei timer<br />
Permette di i mpos tare i parametri della rete<br />
Master/Slave.<br />
Questo tasto per mette al deflettore di oscillare in<br />
maniera c ostante.<br />
Premere questo tasto per selezionare la velocità del<br />
ventilatore. Quando si sel eziona AUTO la vel ocità del<br />
ventilatore viene r egolata automaticamente a sec onda<br />
della temperatura dell’ambiente.<br />
Premere questo tasto per più s econdi per la<br />
regolazione dell’orologio.<br />
Premere questo pulsante per resettare le impostazioni<br />
del telecomando.<br />
POST HEAT<br />
Per il modo di funzionamento HEAT è prevista l a funzione POST HEAT<br />
che, una volta che l’unità raggiunge il Set-poi nt o viene s penta,<br />
mantiene il ventilatore acc eso al fi ne di abbass are la temperatura dello<br />
scambiator e fino alla temperatura di 25°C.<br />
Il display vis ualizza “P3”.<br />
MEMORY<br />
Dopo una manc anz a di tensione, un On/Off da telec omando o un<br />
allarme, l’apparecc hio riprender à a funzionare nel modo in cui si<br />
trovava al momento in cui è avvenuta l’interruzione. Se prima dell’<br />
interruzione er a attiva la funzione TIMER o SLEEP, ques ta vi ene<br />
disatti vata.<br />
7
SEZIONE I: UTENTE<br />
I.5.3.2<br />
Descrizione del display<br />
A<br />
A<br />
AM<br />
PM<br />
00:00<br />
00<br />
°C<br />
AM<br />
PM 00:00<br />
Simbolo Descriz ione<br />
00 °C Valore di temperatura i mpos tato.<br />
Trasmissione tra telec omando e macc hina.<br />
A<br />
Ventilatore.<br />
Funzionamento Sleep.<br />
Non utilizzato.<br />
Trasmissione agli slave.<br />
Funzionamento SWING.<br />
Funziona raffrescamento (COOL).<br />
Funzione deumidific azione (DRY).<br />
Funzione ventilazione (FAN).<br />
Funzione riscaldamento (HEAT).<br />
Funzionamento automatic o (AUTO).<br />
Regolazione orologio.<br />
I.5.3.3 Uso del telecomando<br />
Il telec omando utilizza due batterie alcaline da 1,5 V del tipo R03 size<br />
AAA (fornite i n dotazi one).<br />
Per inserire le batterie, sfilare completamente il coperchio del<br />
telecomando facendolo slittar e verso la parte i nferiore. Ins erire le<br />
batterie nell’apposito alloggiamento rispettando l e polarità i ndicate.<br />
Riposizionare il coperchio e s elezionare le funzioni desi derate. Stess a<br />
operazi one deve essere fatta per la sostituzione delle batterie sc ariche<br />
con altre batterie nuove. La durata media delle batterie é di circa un<br />
anno.<br />
Il telec omando é in grado di tras mettere fi no ad una distanz a di circa 8<br />
metri dal ricevitore.<br />
Evitare l’esposizione del telecomando all’umidità eccessi va, alla luce<br />
solare diretta o ad altre fonti di cal ore ed evitare gli urti. Proteggere il<br />
telecomando dall’acqua o altri liquidi.<br />
Se il ricevitore a raggi infrarossi dell’unità è esposto a luc e s olare diretta<br />
o a l uce intensa di una l ampada oppure s e nelle vicinanze è presente<br />
una lampada fluoresc ente c on accensione elettronica, l’unità potrebbe<br />
presentare anomalie di funzionamento o non funzionare.<br />
L’utilizzo di altri telec omandi nelle vicinanze o nello s tesso ambiente in<br />
cui é ins tallata l’unità potrebbe infl uenz arne il regolare funzionamento;<br />
evitare di rivolgere il trasmettitore di altri tel ecomandi vers o il ricevitore<br />
dell’unità.<br />
I.5.4<br />
IMPOSTAZIONI DI FUNZIONAMENTO<br />
I.5.4.1 Impostazione dell’orologio<br />
Nota: durante l’impostazione dell’orologio non rivolgere il telecomando<br />
vers o l’unità.<br />
Si consiglia di regolare l’orologio sul telecomando prima di avviare<br />
l’unità; per la regolazione operare nel seguente modo:<br />
Quando si inseriscono l e batterie nel tel ecomando o dopo aver premuto<br />
il tasto R (Res et), l’indicatore orario visualizza “AM 0:00” lampeggiante.<br />
C<br />
TIME-SET<br />
C<br />
I.5.4.2<br />
Mediante un oggetto appuntito premere il tasto “C”,<br />
l’indicatore orario lampeggia.<br />
Premendo il tasto T IME SET è possibile regolare<br />
l’orologio.<br />
Premere di nuovo il tasto “C” per confer mare l’ora<br />
impos tata.<br />
Accensione spegnimento dell’unità<br />
Premere il tas to ON/OFF per accendere o spegnere<br />
l’unità<br />
Nel pass aggio da ON a OFF viene interrotto qualsiasi modo di<br />
funzionamento, cancellate le temporizzazioni i n corso, memorizzati il<br />
modo di funzionamento dell’appar ecchio e del ventilatore ed il val ore di<br />
temperatura i mpostato.<br />
Nel pass aggio da OFF a ON l’unità ripristina automaticamente tutte le<br />
modalità di funzionamento memorizzate prima dello spegnimento.<br />
Ad unità acces a s ul displ ay compaiono tutte le i ndicazioni di<br />
funzionamento dell’unità: modo, temper atura impostata, velocità del<br />
ventilatore, ecc.<br />
Ad unità spenta il displ ay indic a sol amente l’ora e il modo di<br />
funzionamento che aveva l’unità prima di essere s penta.<br />
SLEEP TEMP<br />
MODE TIME-ON NET WORK<br />
I.5.4.3<br />
MODE<br />
Modo di funzionamento<br />
Premendo il tasto Mode è possibile cambiar e il modo di<br />
funzionamento dell’unità. Sul display compare l’indicazi one<br />
del modo di funzionamento s elezionato:<br />
SWING<br />
R<br />
FAN<br />
TIME-OFF<br />
TIME-SET<br />
C<br />
BATT<br />
- +<br />
- +<br />
Il telec omando rimane sempr e con il displ ay acc eso, il display del<br />
visualizza sempr e l’orario indipendentemente dal fatto che l’unità sia<br />
accesa o spenta.<br />
Rimuovere le batterie dal telec omando s e si prevede di non utilizzarlo<br />
per lunghi periodi.<br />
Rivolgere il telecomando verso il ricevitore dell’unità mentre si<br />
effettuano le impostazioni (eccetto durante l’impostazione dell’orologio).<br />
Se i segnali vengono ricevuti correttamente, l’unità emetterà un segnale<br />
acustico.<br />
A<br />
Funziona raffrescamento, l’unità funziona con set di<br />
temperatura libero, abbass ando la temperatura in<br />
ambiente.<br />
Funzione deumidific azione, l’unità funzi ona, con s et di<br />
temperatura libero, abbass ando c osì progressivamente la<br />
temperatura e l’umidità in ambiente.<br />
Funzione ventilazione, l’unità funziona s enz a set di<br />
temperatura, ventilando l’aria dell’ambiente.<br />
Funzione riscaldamento, l’unità funziona, c on s et di<br />
temperatura libero, alzando la temperatura i n ambi ente.<br />
Funzionamento automatic o, l’unità può operare i n<br />
RAFFRESCAMENTO ed in RISCALDAMENTO in base<br />
alla differenz a di temperatura esistente tra la temperatura<br />
ambiente e la temper atura selezi onata s ul tel ecomando.<br />
IMPORTANTE!<br />
Il ventilatore d ell’unità si ferma al raggiungimento<br />
del valore di temperatura impostato per poi<br />
riattivarsi automaticamente alla velocità minima per<br />
evitare fenomen i di stratificaz ione dell’aria in<br />
prossimità dell’apparecchio.<br />
8
SEZIONE I: UTENTE<br />
I.5.4.4<br />
TEMP<br />
Impostazione della temperatura desiderata<br />
Premendo ques ti tas ti nell e di vers e modalità di<br />
funzionamento (ad esclusione della modalità<br />
ventilazione) è possibile aumentare o diminuire il<br />
val ore della temperatura desi derata tra 16°C e 30°C.<br />
I.5.6<br />
NET WORK<br />
TRASMISSIONE DATI ALL’UNI TÀ SLAVE<br />
In pres enz a di una rete Master/Slave, tenere premuto<br />
questo tasto fino a quando compare il simbolo<br />
“Trasmissione agli Slave”. Al rilascio del tasto l’unità<br />
Master tras mette le nuove impostazioni agli Slave.<br />
I.5.4.5<br />
FAN<br />
I.5.4.6<br />
SWING<br />
Velocità del ventilatore<br />
Premendo ques to tasto è possibile scegliere la velocità del<br />
ventilatore: Velocità automatica, mi nima, medi a e<br />
massi ma.<br />
Impostazione del deflettore<br />
Premendo il tasto SW ING è possibile attivare l’oscillazione<br />
continua del defl ettore.<br />
PERICOLO!<br />
Muovere manualmente il deflettore motorizzato<br />
quando l’unità è accesa potrebbe causare dei<br />
problemi di funzionamento o danneggiare il sistema<br />
di regolazione.<br />
I.5.7 DESCRIZIONE DISPLAY UNITÀ<br />
Il display presente sulla parte centrale dell’unità fornisce le indicazioni<br />
sullo stato di funzionamento della macchina e sulla presenza di<br />
eventuali guasti che possono i mpedire il funzionamento della macchi na.<br />
h<br />
00 °C<br />
I.5.8 FUNZIONAMENTO LOCALE<br />
In cas o di mancanza o guasto del telec omando/pannello comando è<br />
possibile far funzionare l’unità mediante un tasto presente all’inter no<br />
della macc hina.<br />
I.5.4.7<br />
SLEEP<br />
Funzione SLEEP<br />
Premendo ques to tasto si atti va l a funzione SLEEP c he<br />
permette di ottener e un rispar mio energetico regolando<br />
automaticamente temperatura impos tata.<br />
La funzione SLEEP può essere atti vata nella modalità es tiva (il Setpoint<br />
dur ante le prime 2 ore di funzionamento viene gradual mente<br />
ridotto fino ad un massimo di 2°C) ed invernale (il Set-point durante le<br />
prime 2 ore di funzionamento viene gradual mente aumentato fino ad un<br />
massi mo di 2°C).<br />
Per uscire dalla funzi one SLEEP premere il tas to SLEEP o cambi are il<br />
modo di funzionamento dell’unità.<br />
I.5.4.8 Impostazione deI Timer<br />
È possi bile impostare un timer per l’acc ensione e lo spegni mento<br />
automatico dell’unità.<br />
IMPORTANTE!<br />
Affinché le impostazioni del timer abbiano effetto, il<br />
telecomando deve rimanere posizionato nei pressi<br />
dell’unità (ad una distanza massima di 8 metri) e<br />
rivolto verso la stessa.<br />
La funzione TIMER non è ripetitiva e deve essere i mpostata ogni<br />
qualvolta si desidera utilizzarla.<br />
TIME-ON<br />
TIME-SET<br />
TIME-ON<br />
TIME-OFF<br />
TIME-SET<br />
TIME-OFF<br />
Premendo ques to tasto è possibile impos tare l’ora di<br />
accensi one dell’unità.<br />
Utilizzare questo tasto per impostare l’ora.<br />
Per confer mare l a scelta.<br />
Premendo ques to tasto è possibile impos tare l’ora di<br />
spegnimento dell’unità.<br />
Utilizzare questo tasto per impostare l’ora.<br />
Per confer mare l a scelta.<br />
Premendo in successi one il tas to è possibile s pegner e e accendere<br />
l’unità in funzionamento automatico.<br />
I.5.9 UNITÀ IN ALLARME<br />
Se è pres ente un allarme a c aus a di un guasto che impedisce il<br />
funzionamento dell’apparecchio, sul display dell’unità e sul pannello<br />
viene vis ualizzato un codice di allar me.<br />
Descriz ione deg li allar mi:<br />
Allarme<br />
E0<br />
E1<br />
E3<br />
E4<br />
P0<br />
P1<br />
P2<br />
P3<br />
P4<br />
Descriz ione<br />
Sonda aria ambi ente non funzionante.<br />
Sonda acqua non funzionante.<br />
Sonde acqua e aria non funzi onante.<br />
Motore ventilatore non funzionante.<br />
Antigelo acqua in funzionamento esti vo.<br />
Il Set è di 2°C, il ripristino è a 5°C trascors o un<br />
tempo di 2 minuti. La val vola viene chi usa, il contatto<br />
AUX2 viene aperto e il ventilatore viene forzato alla<br />
media o massima vel ocità.<br />
Sovratemperatura acqua i n funzionamento<br />
invernale.<br />
Il set è 75°C, il ripristino è a 70°C. La valvola viene<br />
chiusa, il contatto AUX1 viene aperto e il ventilatore<br />
viene forzato alla massima vel ocità.<br />
Alta temperatura acqua i n funzionamento esti vo vedi<br />
paragrafo T OO COOL).<br />
Smalti mento calore scambiatore a Set i nvernale<br />
soddisfatto ( vedi paragrafo POST HEAT).<br />
Bassa temperatur a acqua in funzi onamento<br />
invernale (vedi paragrafo HOT START).<br />
TIME-ON<br />
TIME-OFF<br />
Se la funzione ti mer per l’accensione è attiva pr emere<br />
questo tasto per disattivarla.<br />
Se la funzione ti mer per lo s pegnimento è atti va premere<br />
questo tasto per disattivarla.<br />
Il ripristino delle normali c ondizioni oper ati ve dell’apparecchio avviene<br />
automaticamente.<br />
I.5.5<br />
R<br />
RESET DEL TELECOMANDO<br />
Premendo c on un oggetto appuntito il tasto RESET è possibile<br />
riportare il tel ecomando alle i mpostazioni di fabbrica.<br />
9
SLEEP TEMP<br />
SEZIONE I: UTENTE<br />
I.6 PULIZIA DELL’UNITÀ<br />
PERICOLO!<br />
Togliere sempre tensione prima di iniziare le<br />
operazioni di pulizia o manutenzione.<br />
Non versare acqu a sull’unità.<br />
Per la pulizia utilizzare un panno soffice leggermente imbevuto di acqua<br />
ed alcool. N on utilizzare acqua c alda, sostanz e abrasi ve o c orrosive, ne<br />
solventi.<br />
I.7 AVVERTENZE E SUGGERIMENTI<br />
Evitare sempre di ostruire il flusso dell’aria o di usare l’unità come piano<br />
d’appoggio. L’utilizzo di acqua o di bombolette spray in prossimità<br />
dell’unità possono c aus are scoss e elettriche e malfunzi onamenti.<br />
I.6.1<br />
PULIZIA DEL FILTRO ARIA<br />
PERICOLO!<br />
Prestare attenzione durante lo smontaggio del filtro,<br />
le alette dello scambiatore di calore possono<br />
tagliare.<br />
IMPORTANTE!<br />
Far funzionare l’unità sempre con i filtri installati.<br />
Per garantire una corretta aspirazione dell’aria il filtro deve essere pulito<br />
almeno un volta al mes e, o pi ù frequentemente se la macc hina è in<br />
funzione i n ambi enti molto pol verosi. Per essere pulito, il filtro deve<br />
essere s empre rimosso dall’unità. Il filtro aria può essere pulito<br />
mediante s offiatura c on aria compressa o lavandolo c on acqua. Prima<br />
di rimontare il filtro assicurarsi che sia pulito e completamente asciutto.<br />
Se il filtro è danneggiato deve ess ere sos tituito con un filtro originale<br />
RHOSS.<br />
Prima di inviare un s egnale dal tel ecomando assicurarsi c he questo si a<br />
puntato verso il ricevitore posto sull’unità. Se l’unità ha ricevuto<br />
correttamente il segnale inviato dal telecomando, viene emesso un<br />
segnale s onoro di c onferma: in manc anz a di tale s egnale ripetere<br />
l’operazione. Il tel ecomando non trasmette il segnale all’unità se tra<br />
esso e l’unità vengono interpos ti una parete o altri oggetti.<br />
Proteggere il telec omando da spruzzi d’acqua o di altri fluidi e da<br />
possibili urti.<br />
max 8 m<br />
SLEEP TEMP<br />
10
SEZIONE II: INST ALLAZIONE E M ANUTENZIONE<br />
II<br />
II.1<br />
II.1.1<br />
SEZIONE II: INSTALLAZIONE E<br />
MANUTENZIONE<br />
ISTRUZIONI DI TRASPORTO<br />
IMBALLO, COMPONENTI<br />
PERICOLO!<br />
NON APRIRE O MANOMETTERE L’IMBALLO FINO<br />
AL PUNTO DI INSTALL AZIONE.<br />
Gli interventi di movimentazione e so llevam ento<br />
vanno eseguiti d a per sonale sp ecializz ato e<br />
addestrato a tali operazioni.<br />
Controllare all’arrivo che l’unità non abbia subito danneggiamenti<br />
durante il tras porto e che la stessa sia completa nelle sue parti.<br />
Nel caso si presentassero danni visibili annotare immediatamente sul<br />
documento di tr asporto il danno riscontrato riportando la dicitura:<br />
“RITIRO CON RISERVA PER EVIDENTI DANNI ALL’IMBALLO”,<br />
riportando il numero di matricola s e si tr atta di più macc hine, in quanto<br />
la resa fr anco stabilimento comporta il risarcimento dei danni a c arico<br />
dell’assicurazione secondo quanto previsto dalla legge n°450 del<br />
22/08/85 “limite di risarcibilità”.<br />
II.1.3 CONDIZIONI DI IMMAGAZZINAMENTO<br />
Le unità imballate sono immagazzinabili sovrapponendo non più di<br />
quattro unità e devono essere stoccate all’asciutto ed al riparo dal sole<br />
e dalla pioggia.<br />
II.1.4 SPAZI DI RISPETTO, POSIZIONAMENTO<br />
IMPORTANTE!<br />
Il posizion amento o la non corretta installazion e<br />
dell’unità po ssono causare un’amplificazione della<br />
rumorosità o delle vibrazioni gen erate durante il<br />
suo funzionamento.<br />
Le unità Idrowall devono ess ere fiss ate rispettando gli spazi tec nici di<br />
posizionamento.<br />
100 mm<br />
100 mm 100 mm<br />
min 1900 mm<br />
max 2200 mm<br />
Per la rimoz ione dell’imb allo seguir e le seguenti istruzioni:<br />
Verificare la presenza di danni visibili;<br />
Aprire l’imballo;<br />
Eliminare il materiale d’imballaggio rispettando le vigenti normati ve,<br />
smaltendolo negli appositi c entri di raccolta o di riciclaggio.<br />
SALVAGUARDIA AMBIENTALE!<br />
Smaltir e i m ateriali d ell’imballo in conformità alla<br />
legislazione nazionale o locale vigente nel Vostro<br />
paese.<br />
PERICOLO!<br />
Non lasciar e gli imballi a portata di b ambini.<br />
II.1.2 INDICAZIONI PER LA MOVIMENTAZIONE<br />
PERICOLO!<br />
La movimentazione dell’unit à deve essere eseguita<br />
con cura onde evitare danni alla struttura estern a e<br />
alle parti m eccaniche ed elettriche interne.<br />
Assicurarsi inoltre che non vi siano ostacoli o<br />
persone lungo il tragitto, onde evitare pericoli di<br />
urti, schiacciamento o ribaltamento del mezzo di<br />
sollevamento.<br />
Tutte l e operazi oni di s eguito riportate devono esser e es eguite in<br />
conformità alle norme di sicurezza vigenti, sia per quanto riguarda le<br />
attrezzature usate, si a per quanto riguarda le modalità operative. Prima<br />
di dar c orso ad oper azioni di movimentazione assicurarsi che la<br />
capacità di s ollevamento sia adeguata al pes o dell’unità in ques tione.<br />
Le unità sono movimentabili/sollevabili manualmente o per mezzo di un<br />
apposito c arrello. Se devono ess ere movimentate pi ù macchi ne<br />
contemporaneamente si consiglia di inserire le macchine all’interno di<br />
un c ontenitore ed il sollevamento deve avvenire mediante una gru o<br />
similare.<br />
11
SEZIONE II: INST ALLAZIONE E M ANUTENZIONE<br />
II.2<br />
II.2.1<br />
ISTRUZIONI DI INSTALLAZIONE<br />
PERICOLO!<br />
L’installazione d eve essere eseguita<br />
esclusivam ente da tecnici esperti abilit ati ad<br />
operare su prodotti per il condizionamento e la<br />
refrigerazione. Un’installazione non corretta può<br />
determinare un cattivo funzionamento dell’unità<br />
con conseguenti sensibili cali di rendimento.<br />
PERICOLO!<br />
È fatto obbligo al personale di seguire le normative<br />
locali o nazion ali vigenti all’atto della messa in<br />
opera della macchina.<br />
PREDISPOSIZIONE DEI COLLEGAMENTI<br />
IDRAULICI<br />
IMPORTANTE!<br />
I collegamenti idraulici sono operazioni molto<br />
importanti da farsi con particolare cura da parte di<br />
personale sp ecializz ato.<br />
IMPORTANTE!<br />
Qualora ci si trovi in pr esenz a di acque<br />
particolar mente r icch e di calcare è con sigliabile<br />
l’utilizzo di un decalcificatore.<br />
Prima di installar e l’apparecchio è necessario scegliere il verso di uscita<br />
delle linee dall’unità, in funzione delle caratteristiche dell’installazione o<br />
ella predisposizione dei c ollegamenti idraulici pres ente nel punto<br />
d’installazione.<br />
Nella figura sono indicate le posizioni dei fori a parete per il passaggio<br />
delle tubazioni.<br />
1. Foro per uscita tubazioni idrauliche e di sc arico condens a con<br />
attravers amento diretto della parete<br />
2. Foro per uscita tubazioni idrauliche e/o di sc arico condensa<br />
3. Foro per uscita tubazioni idrauliche<br />
4. Dima di fissaggio<br />
I cavi el ettrici poss ono ess ere c ollegati all’unità s eguendo l o s viluppo<br />
delle tubazioni i drauliche, oppure utilizzando indifferentemente una<br />
delle tre uscite disponibili.<br />
In caso di attraversam ento diretto della parete:<br />
lo spess ore del muro (s) non deve essere s uperiore a 500 mm;<br />
il foro nella parete deve essere inclinato di al meno 15° ( a) per<br />
favorire il naturale deflusso dell’acqua di condensa.<br />
la tubazione di scarico c ondensa deve avere un’adeguata pendenz a<br />
per favorire la fuoriuscita dell’acqua.<br />
i cavi elettrici possono essere collegati all’unità seguendo lo s viluppo<br />
delle tubazioni i drauliche oppure, utilizzando indifferentemente una<br />
delle 3 uscite dis poni bili.<br />
II.2.2 FISSAGGIO DELL’UNITÀ<br />
Per fissare l’unità alla parete procedere c ome descritto di s eguito:<br />
rimuover e la dima di fiss aggio in acciaio pres ente sullo schienale<br />
dell’unità;<br />
posizionare la dima in acciaio nell’area in cui si vuole installare<br />
l’unità;<br />
verificarne la per pendicolarità utilizzando un filo a pi ombo o una<br />
livella;<br />
tracciare i punti i n cui si deve forare il muro per il fissaggio;<br />
forato il muro, procedere al fissaggio della di ma.<br />
S<br />
a<br />
4<br />
1<br />
2<br />
3<br />
4<br />
1<br />
2<br />
Viste posteriori.<br />
3<br />
Scelto il verso di uscita delle linee si può procedere alla foratura della<br />
parete sulla quale verrà fissata l’unità, seguendo le i ndicazioni pres enti<br />
sulla di ma in carta. Di seguito vengono illustrate le posizioni indicative<br />
dei fori in funzione del verso scelto per l’uscita delle linee.<br />
12
forare nei punti indi viduati c on la di ma in carta;<br />
fissare la dima in acciaio alla parete utilizzando le viti fornite a<br />
corredo dell’unità (Fig. 25).<br />
SEZIONE II: INST ALLAZIONE E M ANUTENZIONE<br />
II.2.3 COLLEGAMENTI IDRAULICI<br />
Dopo aver fiss ato c orrettamente la dima alla parete è possibile<br />
collegare l’unità all’impianto d’acqua tramite gli attacchi entrata/uscita<br />
indicati dalle fr ecce presenti sui tubi dell’unità.<br />
Per verificare il c orretto fissaggio della dima alla parete proc eder e come<br />
descritto:<br />
avvicinare l’unità alla di ma fissata alla parete;<br />
unire l’unità alla di ma utilizzando gli appos ti ganci di s ostegno.<br />
Per il collegamento delle linee utilizzare attacchi rapidi. Pri ma di<br />
eseguire il collegamento idraulico dell’apparecchio smontare il raccor do<br />
rapido.<br />
Inserire nei tubi delle linee di collegamento i componenti del raccordo<br />
rapido precedentemente s montati.<br />
Connetter e i tubi dell’unità ai racc ordi rapi di inserendoli fino alla battuta<br />
predisposta. Avvitare manual mente tutti i raccordi, quindi c ompletare il<br />
serraggio mediante chiave dinamometrica con una forza di 34,3 Nm ed<br />
utilizzando un ulteriore c hiave per evitare che il tubo s ubisca una<br />
torsione.<br />
1: Chiave dinamometrica<br />
(34,3 Nm)<br />
2: Chiave<br />
Ad installazione avvenuta è necessario:<br />
Rivestire i tubi di collegamento con materiale anticondens a di 10 mm<br />
di spess ore.<br />
Versare acqua nella vaschetta raccolta c ondens a e verificare c he il<br />
liquido venga sc aricato regolarmente, s eguendo il percorso fino<br />
all’uscita dello scarico condensa. In caso contrario controllare la<br />
pendenza e ricercare eventuali ostruzi oni.<br />
Sfiatar e l’aria contenuta nel circuito.<br />
La batteria ad acqua, è provvista di val volina di sfiato aria e di val volina<br />
scarico acqua.<br />
13
SEZIONE II: INST ALLAZIONE E M ANUTENZIONE<br />
II.2.3.1 Creazione dello scarico condensa<br />
Il sistema di sc arico della c ondens a deve prevedere un’adeguata<br />
pendenza per favorire la fuoriuscita dell’acqua.<br />
3 cm/m<br />
II.2.3.2 Protezione antigelo<br />
IMPORTANTE!<br />
La miscelazione dell’acqua con il glicole modifica le<br />
prestazioni dell’unit à. Prestare attenzione alle<br />
indicazioni di sicurezza riguardanti il glicole<br />
riportate sulla confezione.<br />
Il mancato utilizzo dell’unità nel periodo i nvernale può causare il<br />
congelamento dell’acqua nell’impianto. Bisogna prevedere in tempo lo<br />
svuotamento del circuito acqua. Se l’operazione di scarico dell’acqua<br />
viene ritenuta onerosa, può essere miscelata all’acqua un’adeguata<br />
quantità di liquido antigelo.<br />
II.2.4 COLLEGAMENTI ELETTRICI<br />
IMPORTANTE!<br />
Il collegam ento elettrico dell’unità deve essere<br />
eseguito da personale compet ente in materia e nel<br />
rispetto delle normative vigenti n el p aese di<br />
installazione d ell’unità. Un allacciamento elettrico<br />
non conforme solleva RHOSS da responsabilità per<br />
danni alle cose ed alle persone.<br />
PERICOLO!<br />
Installare sempr e in zon a protetta ed in vicinanz a<br />
della macchina un interruttore automatico generale<br />
con curva caratter istica ritardata, di ad eguata<br />
portata e potere d’interruzione e con dist anza<br />
minima di apertura dei contatti di 3 mm.<br />
Il collegam ento a terr a dell’unità è obblig atorio per<br />
legge e salvaguarda la sicurezza dell’utente con la<br />
macch ina in funzione.<br />
Eseguire la sguainatura s olo in prossi mità dei morsetti. Utilizzare<br />
capicorda adatti per i morsetti in us o.<br />
Dopo aver ins erito il capicorda nel morsetto, s errare le viti c on un<br />
cacciavite s enz a premere con eccessi va forza: ad operazione concl usa<br />
tirare leggermente i cavi per verificarne il corretto serraggio.<br />
Utilizzare il pressa-cavo presente all’interno del vano scheda elettronica<br />
per blocc are i c avi.<br />
40 mm<br />
II.2.4.1 Collegamento alimentazione<br />
Controllare che la tensione e la frequenza dell’impianto elettrico<br />
corrispondano a 230V (±10%) monofas e a 50 Hz; che la potenz a<br />
installata disponi bile sia s ufficiente al funzionamento e c he i c avi della<br />
linea d’alimentazione siano di sezione adeguata alla corrente massi ma<br />
richiesta.<br />
Assicurarsi che l’impianto elettrico di alimentazione sia conforme alle<br />
vigenti nor me nazionali per la sic urezza.<br />
Per il collegamento dell’unità alla rete elettrica utilizzare cavo flessibile<br />
bipolare + terra, s ezione 1,5 mm² con guai na in policloroprene non più<br />
leggero di H05RN-F. Il conduttore di terra deve esser e più lungo degli<br />
altri conduttori in modo c he esso si a l’ultimo a tendersi in cas o di<br />
allentamento del dis positi vi di fissaggio del cavo.<br />
Gli allacciamenti devono ess ere eseguiti rispettando lo sc hema<br />
elettrico.<br />
L<br />
L<br />
N<br />
N<br />
L<br />
N<br />
6<br />
5<br />
FUSE<br />
7<br />
1 Tasto res et;<br />
2 Connettor e seriale 1 (Phone 1);<br />
3 Connettor e seriale 2 (Phone 2);<br />
4 Jumper JP0;<br />
5 Connettor e AUX1, richiesta c aldo (contatto pulito);<br />
6 Connettor e AUX2, richiesta freddo (contatto pulito);<br />
7 Fusibile, 5x20 F3,15A 250V;<br />
8 Connettor e CN9 per pannello a filo (KPFI);<br />
- - - Collegamento a cura dell’installatore.<br />
Per acc eder e ai morsetti rimuovere il coperchio di protezione dopo<br />
avere s ollevato il pannello frontale dell’unità.<br />
Far pass are il cavo di alimentazi one attraverso la feritoia presente<br />
dietro l’unità.<br />
2<br />
4<br />
3<br />
1<br />
8<br />
L<br />
N<br />
M4<br />
M4<br />
L<br />
1<br />
N<br />
50 mm<br />
M4<br />
Utilizzare il pressa-cavo presente all’interno del vano scheda elettronica<br />
per blocc are il cavo di alimentazione ed i c avi di interconnessione,<br />
eseguire la sguainatura s olo i n prossi mità dei mors etti di c ollegamento.<br />
Nel caso in cui l’unità venga fissata su una parete metallica, deve<br />
essere prevista l a messa a terra sec ondo le norme vigenti nel paes e<br />
d’installazione.<br />
14
SEZIONE II: INST ALLAZIONE E M ANUTENZIONE<br />
II.2.4.2 Collegamento contatti ausiliari (AUX 1-2)<br />
Sono dis poni bili 2 contatti ausiliari nor malmente aperti AUX 1 e AUX 2,<br />
per la gestione, ad esempio della caldaia o del chiller.<br />
Contatto Pulito<br />
JP0 AUX1 AUX2<br />
Contatto in tensione<br />
JP0 AUX1 AUX2<br />
1 2 3 4 5 6<br />
1 2 3 4 5 6<br />
24÷230 Vac<br />
Possono essere usati come c ontatti puliti o eventual mente messi in<br />
tensione ( 230Vac), il c arico massimo applicabile a ciascun contatto è di:<br />
0,5 A - 230 Vac AC1.<br />
AUX 1<br />
AUX 2<br />
Chiuso alla richiesta di caldo.<br />
Chiuso alla richiesta di fr eddo.<br />
Nella modalità riscaldamento AUX 1 apre se inter viene l’allarme<br />
protezione batteria.<br />
Nella modalità raffr escamento AUX 2 apre se interviene l’allarme<br />
protezione batteria.<br />
Nella modalità ventilazione AUX 1 e AUX 2 aprono quando il ventilatore<br />
è acc eso.<br />
II.2.5 COLLEGAMENTO MASTER/SLAVE<br />
E’ una funzione particol are per cui un apparecc hio definito Master<br />
(gestito da telec omando o pannello comando) invia alcune informazioni<br />
sul funzionamento in atto ad altri apparecc hi (massimo 31) definiti<br />
Slave (pri vi di telecomando o pannello c omando), attraverso un<br />
collegamento elettrico da effettuare in fas e di i nstallazi one (vedi sc hemi<br />
elettrici).<br />
Allarmi: Gli allar mi vengono gestiti indipendentemente in ogni scheda<br />
di controllo.<br />
Timeout: Gli Slave non poss ono continuare a funzionare in assenz a del<br />
Master (per mancanza di comunicazione, guasto o altro) in quanto non<br />
sarebbe possibile ness un comando alle macc hine (On/Off,…).<br />
Comunicazione Master/Slave:<br />
In cas o di mal funzionamento del Mas ter, riavviando gli Slave è<br />
possibile c omandarli singolarmente c on il telecomando. T utto questo<br />
senza inter venire s ui collegamenti e/o sc heda di controllo.<br />
Il telec omando è funzionante anc he sugli Slave dopo c he hanno<br />
instaurato una comunicazione con il Master. In questo c aso lo Sl ave ha<br />
un funzionamento autonomo ma sol o fino alla succ essiva ricezione di<br />
informazioni da parte del Master.<br />
La distanz a massi ma della r ete locale è di 30 m (è la distanza tra il<br />
Master e l’ulti mo Slave).<br />
La c onnessione tr a Master e Slave deve ess ere eseguita con cavo<br />
telefonico c ostituito da 6 c onduttori e c onnettori RJ12.<br />
FUSE<br />
FUSE<br />
L<br />
N<br />
L<br />
N<br />
MASTER SLAVE 1 SLAVE 2<br />
1<br />
2<br />
3<br />
4<br />
5<br />
6<br />
Bianco White Blanc Weiss Blanco<br />
Nero Black Noir Schwarz Negro<br />
Rosso Red Rouge Rot Rojo<br />
Verde Green Vert Grün Verde<br />
Giallo Yellow Jaune Gelb Amarillo<br />
Blu Blue Bleu Blau Azul marino<br />
1 Rx/Tx-<br />
2 Rx/Tx+<br />
3 GND<br />
4<br />
5<br />
6<br />
FUSE<br />
L<br />
N<br />
II.2.5.1 Collegamento Master/Slave con<br />
telecomando<br />
Per il collegamento Master/Slave utilizzando il Telecomando è<br />
necess ario ins erire un ponte sui morsetti 1 e 2 (con unità disconness a<br />
dalla rete elettrica) solo sull’unità definita Master.<br />
Master<br />
1 2<br />
3 4 5 6<br />
15
SEZIONE II: INST ALLAZIONE E M ANUTENZIONE<br />
II.3<br />
ISTRUZIONI PER L’AVVIAMENTO<br />
IMPORTANTE!<br />
La messa in funzione o primo avviamento della<br />
macch ina (dove previsto) deve esser e eseguito<br />
esclusivam ente da p ersonale abilit ato ad oper are<br />
su questa tipologia di prodotti.<br />
PERICOLO!<br />
Prima d ella messa in funzione assicurar si ch e<br />
l’installazione ed i collegam enti elettrici siano stati<br />
eseguiti conformemente a quanto riportato nel<br />
presente manuale. Assicurar si inoltre ch e non vi<br />
siano persone non autorizzate nei pressi della<br />
macch ina durante le suddette operazioni.<br />
II.3.1 CONTROLLI PRELIMINARI ALL’AVVIAMENTO<br />
Prima d ell’avviamento dell’unità assicur arsi che:<br />
1. l’unità sia posizionata in modo corretto;<br />
2. le tubazioni di mandata, ritorno e scarico condensa dell’impianto<br />
idraulico siano c ollegate correttamente;<br />
3. il circuito idraulico non presenti aria all’interno;<br />
4. lo scambiatore sia pulito;<br />
5. i collegamenti elettrici siano corretti;<br />
6. le viti c he fissano i c onduttori siano ben s errate;<br />
7. la tensione di alimentazione sia quella richiesta;<br />
8. l’assorbimento dell’unità sia c orretto e non superi quello massi mo<br />
consentito (vedi A1 Dati tec nici).<br />
Si raccomanda di f ar funzionare l’unità alla massima velocità p er<br />
alcune ore.<br />
II.3.2 MESSA FUORI SERVIZIO<br />
IMPORTANTE!<br />
Il man cato utilizzo dell’unità nel periodo invernale<br />
può causare il congelamento dell’acqua<br />
nell’impianto.<br />
Durante i lunghi periodi di fermo macchina bisogna is olare<br />
elettricamente l’unità apr endo l’interruttore gener ale dell’impianto ,<br />
posto dall’installatore.<br />
Il mancato utilizzo dell’unità nel periodo i nvernale può causare il<br />
congelamento dell’acqua nell’impianto. Bisogna prevedere in tempo lo<br />
svuotamento del circuito acqua. In alternativa miscelare all’acqua un’<br />
adeguata quantità di liquido antigelo ( massi ma percentuale inferiore al<br />
30%).<br />
II.3.3 RIAVVIO DOPO LUNGA INATTIVITÀ<br />
Prima d el r iavvio:<br />
Pulire o sostituire il filtro dell’aria.<br />
Pulire lo sc ambiatore.<br />
Pulire o liberare da possibili ostruzioni lo scarico della vaschetta<br />
raccolta c ondens a.<br />
Sfiatar e l’aria dall’impianto idraulico.<br />
Si raccomanda di far funzionare l’unità alla massi ma velocità per<br />
alcune ore.<br />
II.4.1.1<br />
Sostituzione delle batterie<br />
PERICOLO!<br />
Prendere precauzioni per impedire ai bambini l’uso<br />
improprio o accid entale d elle batterie.<br />
ATTENZIONE!<br />
Se non si utilizza il telecomando per un lungo<br />
periodo (per esempio ferma stagionale d ell’unità),<br />
estrarr e le batterie dalla loro sede al fine di evitar e<br />
eventuali perdit e del fluido interno con<br />
conseguente formazione d i ossido sui contatti.<br />
Per la sostituzione delle batterie togliere il coperchio del vano batterie,<br />
rimuover e le vecchie batterie ed inserire quelle nuove rispettando l a<br />
polarità indicata all’interno del vano.<br />
SLEEP<br />
MODE<br />
SWING<br />
R<br />
FAN<br />
TIME-ON<br />
TIME-OFF<br />
TIME-SET<br />
C<br />
TEMP<br />
NET WORK<br />
BATT<br />
- +<br />
- +<br />
Utilizzare solamente due batterie alcaline ministilo AAA da 1,5V. N on<br />
introdurre una batteria us ata assieme ad una nuova o due batterie di<br />
tipo diverso.<br />
Terminata l’operazione di sos tituzione delle batterie il telec omando si<br />
posiziona su OFF e tutte l e impostazioni vengono perse.<br />
II.4.1.2 Ispezione e pulizia dello scambiatore<br />
PERICOLO!<br />
Prestare attenzione durante lo smontaggio d el filtro,<br />
le alette dello scambiatore di calore po ssono<br />
tagliare.<br />
A unità s penta s ollevare lo s portello frontale e c ontrollare lo stato dello<br />
scambiator e.<br />
II.4<br />
ISTRUZIONI DI MANUTENZIONE<br />
PERICOLO!<br />
Agire sempre sull’interruttore generale per isolare<br />
l’unità dalla rete prima di qualunque operazione<br />
manutentiva su di essa anche se a car attere<br />
puramente ispettivo. Verificare che nessuno<br />
alimenti accidentalmente la macchina, bloccare<br />
l’interruttore generale in posizione di zero.<br />
PERICOLO!<br />
Gli interventi m anutentivi vanno eseguiti d a tecnici<br />
esperti, abilitati a operar e su prodotti per il<br />
condizionamento e la refrigerazione. Utilizzare<br />
idonei guanti di lavoro.<br />
PERICOLO!<br />
E’ vietato introdurre oggetti appuntiti attraverso le<br />
griglie di asp irazion e/mand ata ar ia.<br />
Se necessario:<br />
asportare dalla s uperficie alettata qualsiasi c orpo estraneo che<br />
possa ostruire il passaggio dell’aria;<br />
eliminare la pol vere depositata medi ante un getto d’ aria compress a;<br />
effettuare un blando l avaggio con acqua, unito ad un leggero<br />
spazzol amento;<br />
effettuare l’asciugatura c on aria compr essa.<br />
16
SEZIONE II: INST ALLAZIONE E M ANUTENZIONE<br />
II.4.1.3 Ispezione e pulizia dello scarico condensa<br />
A unità s penta, rimuovere il pannello frontale rimuovendo le viti di<br />
fissaggio e controllare lo s tato dello sc arico condensa.<br />
II.4.1.5 Svuotamento impianto acqua<br />
IMPORTANTE!<br />
La batteria ad acqua è p arzialmente dr enabile; per il<br />
completo dren aggio si consig lia d i soffiar e ar ia<br />
all’interno d ella batteria.<br />
Per particolari operazioni di manutenzi one o per evitare rotture dovute<br />
al congelamento dell’acqua presente nel circuito idraulico, è possibile<br />
scaricare l’acqua dell’impianto.<br />
Per scaricare l’acqua pro cedere come d escritto:<br />
aprire lo sportello frontale e rimuovere i filtri dell’aria;<br />
allentare la val volina di sc arico acqua.<br />
Se necess ario as portare dallo sc arico condensa eventuali ostr uzioni<br />
che possono impedire il normale deflusso dell’acqua.<br />
II.4.1.4 Sfiato circuito idraulico<br />
Se nel circuito idraulico è presente dell’aria questa deve essere sfiatata.<br />
Per sfiatare l’aria proced ere nel seguente modo:<br />
aprire lo sportello frontale e rimuovere i filtri dell’aria;<br />
allentare la val volina di sfi ato fac endo fuoriuscire l’aria;<br />
avvi are l’impianto per alcuni minuti;<br />
fermar e l’impianto;<br />
sfiatare nuovamente il circuito idraulico;<br />
Ripetere l’operazi one pi ù volte fino a quando non fuoriesc e più aria<br />
dall’impianto.<br />
L’acqua c he fuoriesc e dalla valvolina di sfiato vi ene fatta defluire dalla<br />
vaschetta r accogli condensa.<br />
L’acqua c he fuoriesc e dalla valvolina di scarico viene fatta defluire dalla<br />
vaschetta r accogli condensa.<br />
II.4.2 CIRCUI TO ELETTRICO<br />
Per la manutenzione del circuito elettrico s ono raccomandate le<br />
seguenti operazioni:<br />
verifica dell’assorbimento elettrico dell’unità mediante pinza<br />
amperometrica e confronto del valor e con quelli riportati sulla<br />
documentazione.<br />
ispezione e verifica s erraggio contatti el ettrici e relativi morsetti.<br />
II.5 INDICAZIONI PER LO SMANTELLAMENTO<br />
DELL’UNITÀ<br />
SALVAGUARDIA AMBIENTALE!<br />
RHOSS da sempr e è sen sibile alla salvaguardia<br />
dell’ambiente.<br />
E’ importante che le indicazioni seguenti vengano<br />
scrupolosamente seguite da chi effettuerà lo<br />
smantellamento dell’unità.<br />
Lo s mantellamento dell’unità va eseguito solo da parte di ditta<br />
autorizzata al ritiro di pr odotti/macc hine i n obsolesc enz a.<br />
La macchina nel suo complesso è costituita da materiali trattabili come<br />
MPS (materia prima s econdaria), con l’obbligo di rispettare l e<br />
prescrizioni seguenti:<br />
Se l’impianto è addizionato con liquido antigelo, quest’ultimo non va<br />
scaricato liberamente, perché inqui nante.<br />
Deve ess ere racc olto ed opportunamente s maltito;<br />
La c omponentistica elettronica (condens atori el ettrolitici) è da<br />
considerarsi rifiuto s peciale, come tal e va cons egnata ad un ente<br />
autorizzato alla racc olta;<br />
Il materiale di isolamento dei tubi, in gomma poliuretanic a es pansa,<br />
in polietilene es pans o reticolato,in poliuretano espanso e la spugna<br />
fonoassor bente c he ri ves te l a pannellatura, devono ess ere rimossi e<br />
trattati come rifiuti assimilabili agli urbani.<br />
17
SEZIONE II: INST ALLAZIONE E M ANUTENZIONE<br />
II.6<br />
ANOMALIE DI FUNZIONAMENTO<br />
Anomalia<br />
Probabile causa<br />
E’ inter venuto o è disattivato l’interruttore automatico di pr otezione dell’unità.<br />
C’è un i nterruzione di corrente.<br />
E’ inter venuto un allarme dell’unità.<br />
L’unità non funziona:<br />
Il valore di temperatura impos tato è inferiore (nel modo di funzionamento HEAT) o superiore (nel modo di<br />
funzionamento COOL o DRY) all a temperatura ambiente.<br />
Sono atti vi i blocc hi previsti dalle funzioni TOO COOL e HOT START.<br />
Il ricevitore di s egnale pos to s ull’unità nel funzionamento c on telec omando è direttamente es posto ad una<br />
sorgente l uminosa molto i ntensa quale quella solar e o quella di una lampada fluorescente.<br />
Filtro dell’aria intasato.<br />
Difficoltà di circolazione dell’aria nell’unità.<br />
Il valore di temperatura di l avoro non è correttamente i mpostato.<br />
L’unità non raffresca o non<br />
riscalda in maniera adegu ata:<br />
E’ stata sel ezionata una velocità del ventilatore non adeguata.<br />
L’apparecc hio non è alimentato c on acqua sufficientemente cal da o fredda, oppure non c’è circolazi one di<br />
acqua nelle tubazioni.<br />
Sono aperte porte o finestre.<br />
L’elettroval vola non funzi ona correttamente.<br />
L’apparecchio non è stato correttamente dimensionato per le specifiche esigenze dell’impianto.<br />
18
INDEX<br />
INDEX<br />
KEY TO SYMBOLS<br />
Italiano pagina 4<br />
English page 19<br />
Français page 34<br />
Deutsch Seite 49<br />
Español página 64<br />
I SECTION I: USER................................................................................. 20<br />
I.1 Description of the Machine......................................................................... 20<br />
I.1.1 Intended co nditions of use ............................................................................ 20<br />
I.1.2 Machine identification .................................................................................. 20<br />
I.1.3 Structural features....................................................................................... 20<br />
I.2 Operating limits........................................................................................ 20<br />
I.2.1 Information about residual risks that cannot be eliminated ................................... 20<br />
I.3 Accessories and spare parts ...................................................................... 20<br />
I.3.1 Accessories (supplied separately) .................................................................. 20<br />
I.4 Commands and controls............................................................................ 21<br />
I.4.1 Remote control (as per standard) ................................................................... 21<br />
I.4.2 KPFI wired pane l (suppl ied se parately) ........................................................... 21<br />
I.5 Instructions for use................................................................................... 21<br />
I.5.1 Adjustment functions ................................................................................... 21<br />
I.5.2 Comfort functions........................................................................................ 22<br />
I.5.3 Remote control........................................................................................... 22<br />
I.5.4 Functioning settings..................................................................................... 23<br />
I.5.5 Resetting the remote control.......................................................................... 24<br />
I.5.6 Data transmission to the Slave unit ................................................................. 24<br />
I.5.7 Description of unit display ............................................................................. 24<br />
I.5.8 Local operation........................................................................................... 24<br />
I.5.9 Unit in alarm condition.................................................................................. 24<br />
I.6 Cleaning the unit....................................................................................... 25<br />
I.6.1 Cleaning the air filter.................................................................................... 25<br />
I.7 Warnings and suggestions......................................................................... 25<br />
II SECTION II: INSTA LLA TION AND MAIN TEN ANCE............................. 26<br />
II.1 Transport instructions............................................................................... 26<br />
II.1.1 Packagi ng an d compo nents .......................................................................... 26<br />
II.1.2 Handling Instructions ................................................................................... 26<br />
II.1.3 Storage con ditio ns ...................................................................................... 26<br />
II.1.4 Clearances and positioning ........................................................................... 26<br />
II.2 Installation instructions............................................................................. 27<br />
II.2.1 Setting up the water co nnections .................................................................... 27<br />
II.2.2 Fixing the unit............................................................................................. 27<br />
II.2.3 Water connectio ns ...................................................................................... 28<br />
II.2.4 Electrical co nnections .................................................................................. 29<br />
II.2.5 Master/Slave connection .............................................................................. 30<br />
II.3 Instructions for START-UP......................................................................... 31<br />
II.3.1 Preliminary checks before START-UP ............................................................. 31<br />
II.3.2 Prolon ged sh utdow n .................................................................................... 31<br />
II.3.3 START-UP after prolonged shutdown.............................................................. 31<br />
II.4 Instructions for maintenance...................................................................... 31<br />
II.4.2 Electrical circuit .......................................................................................... 32<br />
II.5 Instructions for dismantling the unit............................................................ 32<br />
II.6 Troubleshooting........................................................................................ 33<br />
ATTACH MEN TS<br />
A1<br />
A2<br />
Technical data……………………………………… ………………………..……….80<br />
Dimens ions……………………………………………………………..……..………..84<br />
SYMBOL<br />
UNI EN 292<br />
UNI EN 294<br />
UNI EN 563<br />
UNI EN 1050<br />
UNI 10893<br />
EN 13133<br />
EN 12797<br />
EN 378-1<br />
PrEN 378-2<br />
IEC EN 60335-2-40<br />
UNI EN ISO 3744<br />
EN 50081-1:1992<br />
EN 61000<br />
MEANING<br />
DANGER!<br />
The DANGER sign warns the operator and<br />
maintenance personnel about risks that may cause<br />
death, ph ysical injury, or immediate or latent<br />
illnesses of an y kind.<br />
DANGER: LIVE COMPONENTS!<br />
The DANGER: LIVE COMPONENTS sign warns the<br />
operator and maintenan ce p ersonnel about risks<br />
due to the presence of live voltage.<br />
DANGER: SHAR P EDGES!<br />
The DANGER: SH ARP EDGES sign warns the<br />
operator and maintenan ce p ersonnel about the<br />
presen ce of potentially d angerous sharp edges.<br />
DANGER: HOT SURFACES!<br />
The DANGER: HOT SURFACES sign warns the<br />
operator and maintenan ce p ersonnel about the<br />
presen ce of potentially d angerous hot surfaces.<br />
DANGER: MOVING PARTS!<br />
The DANGER: MOVING PARTS sign warns the<br />
operator and maintenan ce p ersonnel about risks<br />
due to the presence of moving parts.<br />
IMPORTANT W ARNING!<br />
The IMPORTANT W ARNING sign indicates actions<br />
or hazards that could damage the unit or its<br />
equipment.<br />
SAFEGUARD THE EN VIRONMENT !<br />
The environmental safegu ard sign provides<br />
instructions on ho w to use the m achin e in an<br />
environmentally friendly manner.<br />
Reference standards<br />
Safety of machinery. Basic concepts, general design<br />
principles<br />
Safety of machinery. Safety distances to prevent<br />
reaching danger zones with upper limbs.<br />
Safety of machinery. Temperature of contact surfaces.<br />
Ergonomic data to establish limit values for temperatures<br />
of hot surfaces.<br />
Safety of machinery. Principles of risk assessment.<br />
Product technical documentation. User instructions<br />
Brazing. Brazer approval<br />
Brazing. Destructive tests of brazed joints<br />
Refrigeration systems and heat pumps – safety and<br />
environmental requirements. Basic requirements,<br />
definitions, classification and selection criteria<br />
Refrigeration systems and heat pumps – safety and<br />
environmental requirements. Design, construction,<br />
testing, installing, marking and documentation<br />
Safety of electrical equipment for domestic and similar<br />
use. Part 2: Specific regulations for electric heat pumps,<br />
air conditioners and dehumidifiers.<br />
Determination of the levels of strength of sound sources<br />
by means of sound pressure. Technical design method<br />
in an essentially open space on a reflective surface.<br />
Electromagnetic compatibility - Generic emission<br />
standard Part 1: Residential, commercial and light<br />
industry<br />
Electromagnetic compatibility (EMC)<br />
19
SECTION I: USER<br />
I<br />
SECTION I: USER<br />
I.1 DESCRIPTION OF THE MACHINE<br />
Idrowall is di vided i nto four sizes:<br />
MPCV 20-30-35-40: Base unit with ON/OFF electroval ve.<br />
I.1.1 INTENDED CONDITIONS OF USE<br />
The Idrowall is a fan coil intended for the treatment of air (summer and<br />
winter climatis ation) inside buildi ngs used for domestic or si milar<br />
purpos es. T he unit is not designed for ins tallation in rooms us ed for<br />
laundry purposes (IEC EN 60335- 2-40 Standard).<br />
DANGER!<br />
The mach ines are designed for indoor installation<br />
only, for use in domestic or similar environments.<br />
DANGER!<br />
Do not introduce objects through the air intake or<br />
deliver y gr illes.<br />
IMPORTANT !<br />
The unit will function correctly only if the<br />
instructions for use are scrupulously followed, if<br />
the specified clearan ces ar e comp lied with during<br />
installation and if the operating restrictions<br />
indicated in this m anual are strictly adh ered to.<br />
IMPORTANT<br />
If clearan ce distances are not maintain ed at<br />
installation, it could cau se m aintenan ce difficu lties<br />
and reduction in performance.<br />
I.1.2 MACHINE IDENTIFICATION<br />
The units have a s erial number plate affixed to the outside.<br />
I.2 OPERATING LIMITS<br />
IMPORTANT !<br />
The correct and safe functioning of the unit is only<br />
guaranteed if the functioning limits indicated belo w<br />
are r esp ected.<br />
The unit must not operate with inc oming water at a temperatur e higher<br />
than 70°C or lower than 5°C.<br />
The unit must not operate c ontinuousl y in cooling mode i n rooms with a<br />
high relati ve humidity (above 80%). In thes e conditions c ondens ation<br />
could form on the mouth of the air outlet which c ould damage objects<br />
below it, or the fl oor, or the wall to which the unit is attac hed.<br />
I.2.1<br />
75<br />
60<br />
30<br />
20<br />
U.R.%<br />
t = unit inc oming water temperature<br />
R.H. = room air relati ve humidity<br />
Room air temperature: 8°C ÷ 32°C.<br />
5<br />
10 15 60 65 70 t°C<br />
INFORMATION ABOUT RESIDUAL RISKS<br />
THAT CANNO T BE ELIMINATED<br />
IMPORTANT !<br />
Pay the utmost attention to the symbols and<br />
instructions lo cated on the appliance.<br />
I.1.3<br />
RHOSS Spa<br />
TECHNICAL CHARACTERISTICS<br />
MODEL IDROWALL MPCV20<br />
Cooling<br />
Capacity<br />
Heating<br />
Power supply<br />
Frequency<br />
Power input<br />
Weight<br />
Serial No.<br />
STRUCTURAL FEATURES<br />
1<br />
5<br />
3<br />
2<br />
If any risks r emain in spite of the pr ovisions adopted, or if there are any<br />
potential or hidden risks , thes e are indicated by adhesi ve labels<br />
attac hed to the mac hine in c omplianc e with standard ISO 3864.<br />
I.3 ACCESSORIES AND SPARE PARTS<br />
IMPORTANT !<br />
Use only original spare p arts and accessories.<br />
RHOSS S.p.a. sh all not be held liable for damage<br />
caused b y tampering or work carr ied out b y<br />
unauthorised personnel or malfunctions cau sed b y<br />
the use of non-original spare part s or accessories.<br />
I.3.1 ACCESSORIES (SUPPLIED SEPARATELY)<br />
KGMOD – RS485 s erial interface for logical di alogue with building<br />
automation and s upervision s ystems (Supported protocols: ModBus ®<br />
RTU).<br />
4 7<br />
6<br />
KVAM – Box for rec essed wall fitting.<br />
1. Front panel<br />
2. Deflector<br />
3. Directable vanes<br />
4. Air filters<br />
5. Receiver and i ndicati on with LEDs<br />
6. Emergenc y key<br />
7. Electrical connec tion compartment<br />
20
SECTION I: USER<br />
I.4 COMMANDS AND CONTROLS<br />
I.4.1<br />
REMOTE CONTROL (AS PER STANDARD)<br />
Infrared ray remote c ontrol c omplete with power suppl y batteries (RAL<br />
9010).<br />
SLEEP<br />
MODE<br />
SWING<br />
R<br />
FAN<br />
TIME-ON<br />
TIME-OFF<br />
TIME-SET<br />
C<br />
TEMP<br />
NET WORK<br />
BATT<br />
(Dimensions 57 x 137 x 18 mm)<br />
I.4.2 KPFI WIRED PANEL<br />
(SUPPLIED SEPARATELY)<br />
Wired c ontrol panel with 10- key LCD, for manual regul ation of all<br />
appliance functions on the basis of the pre-selected room temperature.<br />
The panel is set- up for wall fi xtur e (RAL 9010).<br />
AIR CONDITIONER<br />
ENTER<br />
TIMER<br />
CLOCK<br />
TIME<br />
SWING<br />
TEMP<br />
MODE<br />
FAN<br />
SLEEP<br />
(Dimensions 120 x 120 x18 mm)<br />
I.5 INSTRUCTIONS FOR USE<br />
Via the remote control and/or the wired control pan el (KPFI) (see<br />
user instruc tions s upplied with the s ame) the following operations can<br />
be perfor med:<br />
Starting up and s hutting down the unit<br />
Selection from the three fan speeds .<br />
Regulation of the thermostat and mai ntai ning the desired<br />
temperature i n the room.<br />
Switc hover of the functioning c ycle: c ooling/heati ng.<br />
Indictors are present on the unit that s upply information r egarding the<br />
state of the unit or any alarm signals and, whenever the remote control<br />
and/or control panel (KPF I) are not temporarily available, they allow to<br />
manage the unit in manual mode using the MANUAL key.<br />
I.5.1<br />
ADJUSTMENT FUNCTIONS<br />
I.5.1.1 AUTO<br />
In AUTO mode the terminal unit detec ts the room temperature and<br />
decides which mode to acti vate ( heating, cooling or dehumidific ation)<br />
on the basis of the Set-point set by the us er.<br />
The mode is described below.<br />
If the room temperatur e is below 21°C: heating;<br />
if the room temperature is between 21°C and 25°C:<br />
dehumi dification;<br />
If the room temperatur e is over 25°C: cooling;<br />
Fan and water val ve are managed as i n heati ng, cooling or<br />
dehumi dification mode.<br />
The auxiliary contact AUX1 closes at ever y heating request.<br />
The auxiliary contact AUX2 closes at ever y cooling request.<br />
If the unit has been off for more than 2 hours, on s uccessi ve s witch-on,<br />
the acti ve mode depends on the room temperature.<br />
The Set-point c an be varied from a mini mum of 16°C to a maximum of<br />
30°C.<br />
I.5.1.2 COOL<br />
COOL is the “cooling” functi on. In this operating mode, the adj ustment<br />
may be set at will in such a way as to bring about maximum comfort, by<br />
means of:<br />
choice of the desired temperature value;<br />
fan operating mode with manual or automatic s etting of the s peed<br />
(AUTO);<br />
positioning of the deflector in a fi xed position or in SWING mode.<br />
The fan runs c onstantl y also when the set-point has been reached.<br />
On cooling request, the val ve opens after a delay of 30 s econds. T he<br />
val ve clos es on s witch-off reques t after a delay of 120 secs.<br />
The auxiliary contact AUX2 closes at ever y cooling request.<br />
When COOL mode is s elected, the fan may not start immediately<br />
because the TOO COOL mode is operating (see dedicated par.).<br />
The Set-point c an be varied from a mini mum of 16°C to a maximum of<br />
30°C.<br />
I.5.1.3 DRY<br />
DRY is the “ dehumidification” function, i n other wor ds the functi on which<br />
reduces the humidity of the environment. During this func tioning mode,<br />
the water on/off i nterception val ve is controlled acc ording to the preestablished<br />
c ycles:<br />
If the room temperatur e is over 25: opens for 3min – closes for 4<br />
minutes;<br />
if the room temperature is between 16°C and 25°C: opens for 3min<br />
– closes for 6 mi nutes;<br />
If the room temperatur e is below 16: cl osed;<br />
21
SECTION I: USER<br />
In DRY mode also, the adjustment may be set at will in such a way as<br />
to bring about maxi mum comfort, by means of:<br />
choice of the desired temperature value;<br />
fan operating mode with manual or automatic s etting of the s peed<br />
(AUTO);<br />
positioning of the deflector in a fi xed position or in SWING mode.<br />
The auxiliary contact AUX2 closes at ever y dehumidification request.<br />
When DRY mode is s elected, the fan may not start immediatel y<br />
because the TOO COOL mode is operating (see dedicated par.).<br />
The Set-point c an be varied from a mini mum of 16°C to a maximum of<br />
30°C.<br />
I.5.1.4 FAN<br />
FAN is the “ventilation” functi on. In this operating mode, the fan speed<br />
(min-med-max-Auto) and the deflector positi on (fi xed position or<br />
SWING mode) may be set at will.<br />
The AUX1 and AUX2 auxiliary contacts are open.<br />
I.5.1.5 HEAT<br />
HEAT is the “heating” function. Also in this oper ating mode, the<br />
adjustment may be set at will in such a way as to bring about maximum<br />
comfort, by means of:<br />
choice of the desired temperature value;<br />
fan operating mode with manual or automatic s etting of the s peed<br />
(AUTO);<br />
positioning of the deflector in a fi xed position or in SWING mode.<br />
On heating request, the valve opens after a delay of 30 seconds. The<br />
val ve clos es on s witch-off reques t after a delay of 120 secs.<br />
The auxiliary contact AUX1 closes at ever y heating request.<br />
When HEAT mode is sel ected, the fan may not start i mmedi atel y<br />
because the HOT START mode is operati ng (see dedic ated par).<br />
The Set-point c an be varied from a mini mum of 16°C to a maximum of<br />
30°C.<br />
IMPORTANT !<br />
The unit fan stops on reaching the temperature<br />
value set. The fan is r e-activated ever y 3 m inutes<br />
for one minute at min imum sp eed in order to<br />
prevent stratification ph enomena of the air in<br />
proximit y of the appliance.<br />
I.5.2 COMFORT FUNCTIONS<br />
TOO COOL<br />
The TOO COOL function is provided for COOL and DRY operati ng<br />
modes, which prevents starting of the fan if the incoming water<br />
temperature at the exchanger is above 32 for 15 minutes, (restore at<br />
30°C).<br />
The dis play s hows “P2”.<br />
HOT START<br />
The HOT ST ART function is envisioned for the HEAT functioning mode,<br />
which bloc ks fan start-up if the temperature of the water entering the<br />
heat exc hanger is bel ow 25°C (differential of 3°C) thus pr eventing<br />
unpl easant flows of cold air. This situati on c ould occ ur at first start-up of<br />
the unit or after long breaks .<br />
The dis play s hows “P4”.<br />
POST HEAT<br />
The POST HEAT function is envisioned for the HEAT functioning mode<br />
which, once the unit reac hes the Set-point or is switc hed-off keeps the<br />
fan runni ng in order to l ower the temper ature of the heat exchanger to a<br />
temperature of 25°C.<br />
The dis play s hows “P3”.<br />
I.5.3 REMOTE CONTROL<br />
The remote c ontrol allows to set and display all unit functioning<br />
parameters, thus facilitating all programming operations.<br />
The remote c ontrol is power ed with 2 R 03 siz e AAA 1.5 V batteries.<br />
I.5.3.1<br />
KEY<br />
SLEEP<br />
TEMP<br />
MODE<br />
TIME-ON<br />
TIME-OFF<br />
TIME-SET<br />
NET WORK<br />
SWING<br />
FAN<br />
C<br />
R<br />
IMPORTANT !<br />
It is recommended to test the functioning of the<br />
remote control in order to determine its area of<br />
reception.<br />
Description of the remote control and<br />
relative functions<br />
SLEEP<br />
MODE<br />
SWING<br />
R<br />
FAN<br />
TIME-ON<br />
TIME-OFF<br />
TIME-SET<br />
C<br />
TEMP<br />
NET WORK<br />
BATT<br />
DESCRIPTION<br />
Allows to s witch the unit on and off.. Press the key to<br />
switch on and press agai n to switc h off<br />
Indicates the unit states and functioning modes.<br />
Activation of the SLEEP mode.<br />
These keys allow to s et the desired room temperature.<br />
Allows to s elect the desired func tioning mode (AUTO,<br />
COOL, DRY, H EAT, FAN)<br />
Setting the s witc h-on timer.<br />
Setting the s witc h-off timer.<br />
Allows to s et the cl oc k and timer times<br />
Allows to s et the parameters of the M aster/Sl ave<br />
networ k.<br />
This key allows the deflector to oscillate constantly.<br />
Press this key to sel ect the fan speed. When AUTO is<br />
selected, the fan speed is regulated automatic ally<br />
according to the room temperature.<br />
Press this key for sever al seconds to regulate the<br />
clock.<br />
Press this button to reset the remote c ontrol s etti ngs.<br />
MEMORY<br />
After a power cut, ON/OFF from the remote control or an alar m, the<br />
appliance will recommence operation in the mode in which it was<br />
operating at the moment the power c ut occurred. If the TIMER or<br />
SLEEP functi on was acti ve befor e the power c ut, this function is<br />
deac tivated.<br />
22
SECTION I: USER<br />
I.5.3.2<br />
Description of the display<br />
A<br />
A<br />
AM<br />
PM<br />
00:00<br />
00<br />
°C<br />
AM<br />
PM 00:00<br />
Symbol Description<br />
00 °C Temperature val ue s et.<br />
Transmission between remote control and machine.<br />
A<br />
Fan.<br />
Sleep Func tioni ng.<br />
Not us ed.<br />
Transmission to the slaves.<br />
SWING func tioni ng.<br />
Cooling func tion (COOL).<br />
Dehumidificati on func tion (DRY).<br />
Ventilation function (FAN).<br />
Heating function (HEAT).<br />
Automatic functioning (AUTO).<br />
Clock regulation.<br />
I.5.3.3 Using the remote control<br />
The remote c ontrol uses two 1.5 V R03 size AAA al kaline batteries<br />
(supplied).<br />
To insert the batteries , remove the lid of the remote control compl etel y,<br />
making it slide downwards , Ins ert the batteries i n the relevant housing,<br />
respecting the pol arity i ndicated. Reposition the lid and s elect the<br />
desired function. Same oper ation must be performed to repl ace the flat<br />
batteries with new ones. Average durati on of the batteries is about one<br />
ye ar.<br />
The remote c ontrol c an trans mit up to a distanc e of about 8 metres from<br />
the rec ei ver.<br />
Avoid exposing the remote control to excessi ve humidity, direct s unlight<br />
or other heat sourc es and also prevent blows. Pr otect the remote<br />
control fr om water or other liquids.<br />
If the unit infrared r ay recei ver is exposed to direct sunlight or intens e<br />
light from a bulb or there is a fluorescent light in the vicinity with<br />
electronic s witc h-on, the unit c ould have functi oning anomalies or not<br />
functi on at all.<br />
The us e of other remote controls in the vicinity or in the same room in<br />
which the unit is ins talled could affec t regular functi oning. do not aim the<br />
transmitter of other remote c ontrols towards the rec ei ver of the unit.<br />
I.5.4<br />
FUNCTIONING SETTINGS<br />
I.5.4.1 Setting the clock<br />
Note: do not ai m the remote c ontrol towards the unit when setting the<br />
clock.<br />
It is advised to regul ate the cloc k on the remote control before starting<br />
the unit. Operate as follows to regulate:<br />
When the batteries are ins erted into the remote c ontrol or when the R<br />
(Reset) key has been pressed, the time indicator s hows fl ashing “AM<br />
0:00”.<br />
C<br />
TIME-SET<br />
C<br />
I.5.4.2<br />
Use a pointed obj ect to press the "C" key, the ti me<br />
indicator flashes.<br />
The cloc k c an be regulated by pr essing the TIME SET<br />
key.<br />
Press “C” again to confirm the time set.<br />
Starting up and shutting dow n the unit<br />
Press the ON/OFF key to s witch the unit on/off<br />
In going from ON to OFF, any operati ng mode is i nterrupted, ti mer<br />
delays i n progress are cancelled, and the oper ating mode of the<br />
appliance and the fan and the pres et temperature are memorised.<br />
In going from OFF to ON, the unit automaticall y restores the operating<br />
modes memorised before shutdown.<br />
With the unit on, the display shows all unit functioning indic ations :<br />
mode, s et temperature, fan s peed, etc.<br />
With the unit off, the display onl y i ndicates the time and functioni ng<br />
mode that the unit had befor e being switc hed off.<br />
I.5.4.3<br />
Functioning mode<br />
SLEEP<br />
TEMP<br />
MODE<br />
By pressing the Mode key, it is possi ble to c hange the<br />
operating mode of the unit. T he operating mode s elected<br />
appears on the displ ay:<br />
MODE<br />
SWING<br />
R<br />
FAN<br />
TIME-ON<br />
TIME-OFF<br />
TIME-SET<br />
C<br />
NET WORK<br />
BATT<br />
- +<br />
- +<br />
The remote c ontrol always has the display on. The dis play s hows the<br />
time i ndependentl y whether the unit is on or off.<br />
Remove the batteries fr om the remote control if it is not to be us ed for<br />
prolonged periods.<br />
Aim the remote c ontrol towards the unit r ecei ver while the settings are<br />
being made (exc ept when setting the cloc k).<br />
If the signals are received correctly, the unit will emit an acoustic signal.<br />
A<br />
Cooling func tion, the unit func tions with free temperature<br />
set, lowering the temperatur e in the room.<br />
Dehumidificati on func tion, the unit func tions with free<br />
temperature s et, l owering the temperature and the<br />
humidity in the room progressively.<br />
Fan functi on, the unit functi ons without temperature s et,<br />
fanning to room air.<br />
Heating function, the unit functions with free temperatur e<br />
set, raising the temper ature in the r oom.<br />
Automatic functioning, the unit c an operate in COOLING<br />
and in HEAT ING mode on the basis of the differenc e in<br />
temperature existing between the room temperature and<br />
the temperature selec ted on the remote c ontr ol.<br />
IMPORTANT !<br />
The unit’s fan stops on reaching the preset<br />
temperature value and then restarts automatically<br />
at minimum speed to avoid stratification of the air<br />
in proximit y to the machine.<br />
23
SECTION I: USER<br />
I.5.4.4<br />
TEMP<br />
Setting the desired temperature<br />
By pressing thes e keys i n the differ ent functioni ng<br />
modes (excl uding fan mode) it is possi ble to increase<br />
or decrease the desired temperature between 16°C<br />
and 30°C.<br />
I.5.6<br />
NET WORK<br />
DATA TRANSMISSION TO THE SLAVE UNIT<br />
In the presence of a Master/Slave networ k, hold this key<br />
down until the “Transmission to Sl ave” s ymbol appears.<br />
On release of the key, the Master unit trans mits the new<br />
settings to the Sl ave.<br />
I.5.4.5<br />
FAN<br />
I.5.4.6<br />
SWING<br />
Fan speed<br />
By pressing this button it is possi ble to sel ect the fan<br />
speed: Automatic, mini mum, medium and maximum<br />
speed.<br />
Setting the deflector<br />
By pressing the SW ING key it is possi ble to acti vate the<br />
continuous oscillation of the deflector.<br />
DANGER!<br />
Moving the motorised deflector m anually wh en the<br />
unit is on could cause functioning problems or<br />
damage the regulation system.<br />
I.5.7 DESCRIPTION OF UNIT DISPLAY<br />
The dis play present on the central part of the unit s upplies the<br />
indications on the functioning state of the mac hine and regardi ng any<br />
faults that can pr event mac hine functioni ng.<br />
h<br />
00 °C<br />
I.5.8 LOCAL OPERATION<br />
In the event that the remote c ontrol/c ontr ol panel is missing or br oken, it<br />
is possible to operate the unit by means of a key l ocated i nside the<br />
appliance.<br />
I.5.4.7<br />
SLEEP<br />
SLEEP function<br />
By pressing this key the SLEEP function is ac tivated. T his<br />
allows to obtain energy s aving by automaticall y regulati ng<br />
the temperature set.<br />
The SLEEP functi on c an be acti vated in the summer mode (the Setpoint<br />
during the first 2 func tioning hours is graduall y reduced to a<br />
maxi mum of 2°C) and wi nter mode (the Set- point during the first 2<br />
functi oning hours is graduall y increased to a maxi mum of 2°C).<br />
To exit the SLEEP function, press SLEEP or c hange the unit functi oning<br />
mode.<br />
I.5.4.8 Setting the Timer<br />
It is possible to s et a timer to switc h the unit on or off automaticall y.<br />
IMPORTANT !<br />
For the timer settings to be effective, the remote<br />
control must be positioned in the vicinit y of a unit<br />
(at a maximum distance of 8 m etres) and aimed<br />
toward s the sam e.<br />
The TIMER functi on is not repetiti ve and must be set ever y time it is to<br />
be used.<br />
TIME-ON<br />
TIME-SET<br />
TIME-ON<br />
TIME-OFF<br />
TIME-SET<br />
TIME-OFF<br />
By pressing this key, it is possible to s et the unit switc h-on<br />
time.<br />
Use this key to set the ti me.<br />
To confirm the selection.<br />
By pressing this key, it is possible to s et the unit switc h-off<br />
time.<br />
Use this key to set the ti me.<br />
To confirm the selection.<br />
By pressing the key in s uccessi on it is possi ble to s witch the unit on and<br />
off in automatic functioni ng mode.<br />
I.5.9 UNIT IN ALARM CONDITION<br />
If an alar m is triggered as a res ult of a fault that prevents the device<br />
from wor king, an alarm code appears on the unit dis play and panel.<br />
Description of alarm s:<br />
Alarm<br />
E0<br />
E1<br />
E3<br />
E4<br />
P0<br />
P1<br />
P2<br />
P3<br />
P4<br />
Description<br />
Room air probe not functioning.<br />
Water probe not functioning.<br />
Water and air probes not func tioni ng.<br />
Fan motor not functi oning.<br />
Water anti-freeze in summer functi oning mode.<br />
The Set is 2°C, restore is at 5°C after a period of 2<br />
minutes. T he val ve is cl osed, the AUX2 c ontact is<br />
opened and the fan is forced to medium or maximum<br />
speed.<br />
Water over-heati ng in wi nter func tioni ng mode.<br />
The set is 75°C, the restore is at 70°C. The val ve is<br />
closed, the AUX1 contact is opened and the fan is<br />
forced to maxi mum s peed.<br />
High water temperatur e in s ummer functioni ng<br />
mode, s ee TOO COOL paragraph).<br />
Disposal of exc hanger heat at winter mode Set<br />
satisfied (see POST HEAT paragraph).<br />
Low water temperature in winter functi oning mode<br />
(see HOT START paragraph).<br />
TIME-ON<br />
TIME-OFF<br />
If the ti mer functi on for s witch-on is acti ve, press this key<br />
to deacti vate it.<br />
If the ti mer functi on for s witch-off is acti ve, press this key<br />
to deacti vate it.<br />
Restore of normal operati onal conditions of the appliance takes pl ace<br />
automaticall y.<br />
I.5.5<br />
R<br />
RESETTING THE REMOTE CONTROL<br />
By pressing the RESET key usi ng a pointed obj ect, take the<br />
remote c ontrol bac k to factory setti ngs.<br />
24
SLEEP TEMP<br />
SECTION I: USER<br />
I.6 CLEANING THE UNI T<br />
DANGER!<br />
Always switch off the electric po wer before<br />
beginning cleaning or maintenance operations.<br />
Do not spill wat er on the unit.<br />
For cleani ng, use a s oft cl oth dampened with water and alcohol. Do not<br />
use hot water, abrasi ve or c orrosive substances or sol vents .<br />
I.7 WARNINGS AND SUGGESTIONS<br />
Always avoi d obstructi ng the flow of air, or using the unit as a surface to<br />
lean on. The us e of water or aerosol s prays in proxi mity to the unit c an<br />
cause electric s hoc ks and malfunctions.<br />
I.6.1<br />
CLEANING THE AIR FILTER<br />
DANGER!<br />
Take car e wh en dism antling the filter: the heat<br />
exch anger fins can cut.<br />
IMPORTANT !<br />
Always have the filters installed when running the<br />
unit.<br />
To ens ure c orrect air intake, the air filter must be cl eaned at l east onc e<br />
a month, or more frequentl y if the unit is being us ed in ver y dusty<br />
environments. T he filter must always be removed from the unit for<br />
cleaning. T he air filter can be cleaned by bl owi ng it out with c ompressed<br />
air or washing it in water. Before r efitting the filter, make sure that it is<br />
clean and compl etel y dry.<br />
If the filter is damaged, it mus t be replaced with an original RHOSS<br />
filter.<br />
Befor e sending a signal from the r emote control, make sure that it is<br />
pointed towards the rec eiver located on the unit. If the unit has correctl y<br />
received the signal sent by the remote c ontrol, an audi ble confirmation<br />
signal is emitted: if this signal does not occ ur, repeat the operation. The<br />
remote control will not transmit the signal to the unit if a wall or any<br />
other obj ect is in the way.<br />
Protect the remote control fr om s plas hes of water or other fluids , and<br />
from being knoc ked.<br />
max 8 m<br />
SLEEP TEMP<br />
25
SECTION II: INST ALL ATION AND MAINTEN ANCE<br />
II<br />
II.1<br />
II.1.1<br />
SECTION II: INSTALLATION AND<br />
MAINTENANCE<br />
TRANSPORT INSTRUCTIONS<br />
PACKAGING AND COMPONENTS<br />
DANGER!<br />
DO NOT OPEN OR T AMPER W ITH THE PACK AGING<br />
UNTIL THE TIME OF INST ALLATION.<br />
The units should only be moved and lifted by<br />
specialised personnel trained in these operations.<br />
Chec k on arri val that the unit has not been damaged during trans port<br />
and that it is complete with all its parts.<br />
In the event that there is visible damage, make a note in writing<br />
immediatel y on the trans port doc ument of the damage obser ved,<br />
addi ng the statement: “ACCEPT ED WITH RESERVATIONS BECAUSE<br />
OF EVIDENT DAMAGE TO THE PACKAGING”, s tating the s erial<br />
number if there ar e several machi nes, since ex-works delivery i mplies<br />
entitlement to c ompensati on under the terms of the insur ance, in<br />
accordance with the provisions of Law no. 450 of 22/08/85 “limit of<br />
compens ation”.<br />
II.1.3 STORAGE CONDITIONS<br />
Units in their pac kaging may be stored by stac king them not more than<br />
four high; they must be stored in the dr y and sheltered from the s un and<br />
the rai n.<br />
II.1.4 CLEARANCES AND POSITIONING<br />
IMPORTANT !<br />
Incorrect positioning or in stallation of the unit may<br />
amplif y noise levels and vibrations generated<br />
during operation.<br />
Idrowall units must be positi oned i n compliance with the rec ommended<br />
clearanc e distanc es.<br />
100 mm<br />
100 mm 100 mm<br />
min 1900 mm<br />
max 2200 mm<br />
To remove the packaging, follo w these instructions:<br />
Chec k for visibl e damage;<br />
Open the pac kaging;<br />
Dispose of the pac kaging material in accordanc e with c urrent<br />
legislation, at the appropriate waste rec epti on or rec ycling site.<br />
SAFEGUARD THE EN VIRONMENT !<br />
Dispose of the p ackaging m aterials in compliance<br />
with the n ational or local legislation in force in your<br />
country.<br />
DANGER!<br />
Do not leave the packaging within reach of children.<br />
II.1.2 HANDLING INSTRUCTIONS<br />
DANGER!<br />
Movement of the unit should be performed with<br />
care, in ord er to avoid dam age to the extern al<br />
structure and to the internal mech anical and<br />
electrical components.<br />
Also make sure that ther e are no obst acles or<br />
people blocking the route, to avoid the danger of<br />
collisions or crushing or of the lifting device turning<br />
over.<br />
All the operations listed below must be carried out in accordanc e with<br />
current health and safety regul ations , both as regards the equi pment<br />
used and as regards the proc edur e followed. Before c ommencing<br />
moving operations , chec k that the lifting apparatus has the required<br />
capacity for the unit in ques tion.<br />
The units may be moved or lifted either by hand or by means of a<br />
suitabl e for klift truc k. If several units need to be moved at the s ame<br />
time, it is advisabl e to put the machines in a container and lift them by<br />
means of a crane or s omething similar.<br />
26
II.2<br />
II.2.1<br />
INSTALLATION INSTRUCTIONS<br />
DANGER!<br />
Installation must only b e carried out b y skilled<br />
technicians, qualified for working on air<br />
conditioning and refrigeration systems. Incorrect<br />
installation could cause the unit to run badly, with a<br />
consequent det erioration in performance.<br />
DANGER!<br />
The unit must be installed according to national or<br />
local rules in force at the tim e of inst allation.<br />
SETTING UP THE WATER CONNECTIONS<br />
IMPORTANT !<br />
It is most important that the water connections are<br />
made with great car e b y specialised fitters.<br />
SECTION II: INST ALL ATION AND MAINTEN ANCE<br />
If passing through the wall directly:<br />
the thic kness of the wall (s) must not be greater than 500 mm.<br />
The hole i n the wall must have a slope of at least 15° (a), to<br />
encourage the water of c ondens ation to flow away naturally.<br />
the c ondensate drai n s ystem must be s et up with an adequate fall, to<br />
ensure that the water escapes properly<br />
the electric cables c an be c onnec ted to the unit followi ng the route of<br />
the water pipewor k, or alternativel y usi ng one of the three exits<br />
availabl e.<br />
S<br />
IMPORTANT !<br />
In the case of a water supply with a particularly high<br />
content of hard water salts, it is advisable to fit a<br />
water softener.<br />
Befor e installing the appliance, choose the route for the lines coming<br />
from the unit, on the basis of the char acteristics of the ins tallation and<br />
the arrangement of the water connections which are ther e at the point<br />
of installation.<br />
The figure indicates the positi ons of the hol es in the wall for the<br />
passage of the pipes.<br />
1. Hole for outgoing hydraulic pipes and drain pipes passing directl y<br />
through the wall<br />
2. Hole for outgoing hydraulic pipes and/or condensate drain<br />
3. Hole for outgoing hydraulic pipes<br />
4. Fixing templ ate<br />
The el ectric cabl es can be c onnected to the unit following the route of<br />
the water pipewor k, or alternativel y usi ng one of the three exits<br />
availabl e.<br />
II.2.2 FIXING THE UNIT<br />
To fi x the unit to the wall, proc eed as described bel ow:<br />
remove the steel fixi ng bac kplate which is on the bac k of the unit;<br />
position the steel bac kplate in the area wher e the unit is to be<br />
installed;<br />
chec k perpendic ularity using a pl umb line or a spirit level;<br />
trace the points where the wall must be drilled for fixing;<br />
when the wall has been drilled, fi x the plate.<br />
a<br />
4<br />
1<br />
2<br />
3<br />
4<br />
1<br />
2<br />
Rear views.<br />
3<br />
On sel ection of the line outlet direction, rill the wall on which the unit will<br />
be fi xed, following the indicati ons present on the paper template. Below<br />
find the i ndicative positions of the holes depending on the direction<br />
chosen for outgoing lines.<br />
27
drill the wall at the positions given by the paper template;<br />
fix the steel bac kplate to the wall, using the screws s upplied with<br />
the unit (Fig. 25).<br />
SECTION II: INST ALL ATION AND MAINTEN ANCE<br />
II.2.3 WATER CONNECTIONS<br />
When the bac kplate has been c orrectly fi xed to the wall, the unit can be<br />
connected to the water s ystem by means of the inlet/outlet connec tions<br />
fitted to the pipes to the unit, indic ated by the arrows.<br />
To chec k that the bac kplate has been c orrectly fi xed to the wall,<br />
proceed as follows:<br />
place the unit up agai nst the bac kplate;<br />
connect the unit to the bac kpl ate using the s upporting hooks<br />
supplied.<br />
Use quick c ouplings to c onnect the lines . Before making the hydraulic<br />
connection of the appliance, remove the quic k coupling.<br />
Insert the components of the quick fitting previ ousl y removed i nto the<br />
pipes of the connec tion lines.<br />
Connect the pipes from the unit to the quick connec tors, pushi ng them<br />
in as far as the stop pr ovided. Tighten all the unions hand-tight, then<br />
finish the tightening using a torque wrenc h, tighteni ng them to 34.3 Nm<br />
and using a second spanner to avoid the pipe getting twisted.<br />
1: torque wrenc h<br />
(34.3 Nm)<br />
2: Wr ench<br />
When installation is complete, it is necessar y to:<br />
Cover the connection pi pes with anti-condens ate material with<br />
thickness of 10 mm.<br />
Pour water into the c ondensati on c ollector tr ay and c hec k that the<br />
liquid drains properl y, following it right through to the exit of the draintube.<br />
If it does not, check the fall and look for possible blockages.<br />
Bleed the air c ontained in the circuit.<br />
The water coil is fitted with an air bleed valve and a water dr ain val ve.<br />
28
SECTION II: INST ALL ATION AND MAINTEN ANCE<br />
II.2.3.1 Setting up the condensate drainage system<br />
The condens ation drai nage s ystem must be s et up with an adequate<br />
fall, to ens ure that the water esc apes pr operl y<br />
3 cm/m<br />
II.2.3.2 Anti-freezing protection<br />
IMPORTANT !<br />
Mixing the wat er with glycol modifies the<br />
performance of the unit. Pay attention to the safet y<br />
instructions regarding ethylene glycol which are<br />
printed on the container.<br />
If the unit is not used during the winter period, the water c ontained in<br />
the s ys tem may fr eeze. To prevent this, all the water contained in the<br />
circuit shoul d be emptied before the onset of wi nter. H owever, if the<br />
operation of draining the s ystem is felt to be too l aborious, a suitable<br />
quantity of antifreeze may be mixed with the water ins tead.<br />
II.2.4 ELECTRICAL CONNECTIONS<br />
IMPORTANT !<br />
Electrical connection of the unit must be carried out<br />
by qualified personnel in compliance with the<br />
regulations in effect in the country where the unit is<br />
installed. RHOSS shall not be h eld liable for<br />
damage to persons or propert y caused by incorrect<br />
electrical connection.<br />
DANGER!<br />
Always install a general automatic swit ch in a<br />
protected ar ea n ear the appliance with a<br />
characteristic d elayed curve, with sufficient<br />
capacit y and breaking power. There should be a<br />
minimum distan ce of 3 mm b et ween the contacts.<br />
Earth connection is compulsory by law to ensure<br />
user safet y while the machine is in use.<br />
Strip off the s heathing onl y in the immediate area of the termi nals. Use<br />
suitabl e cable-ends for the terminals invol ved.<br />
After ins erting the cable-end i nto the ter minal, tighten the screws with a<br />
screwdri ver without appl ying exc essive force: at the end of the<br />
operation, pull gentl y on the cabl es to chec k that they are properly tight.<br />
Use the cable clamp inside the electronic board c ompartment to loc k<br />
the c ables .<br />
40 mm<br />
L<br />
N<br />
M4<br />
M4<br />
II.2.4.1 Connecting the power supply<br />
Chec k that the voltage and the frequenc y of the electrical s uppl y<br />
correspond to 230V (±10%) single phas e at 50 Hz; that the available<br />
power is sufficient for the running the equi pment; and that the s upply<br />
cables are of adequate section for the maximum current which will be<br />
required.<br />
Make sure that the electrical s upply s ystem c omplies with c urrent<br />
national s afety regulati ons.<br />
For the connec tion of the unit to the electrical mains, us e a flexible<br />
bipolar + earth cabl e, s ection of 1.5 mm² with polyc hloroprene sheath<br />
no lighter than H05RN-F. The earth wire must be longer than the other<br />
wires in a way that it is the last one to become taught if the c abl e fi xing<br />
devices bec ome loose.<br />
The connections must be made in accordanc e with the wiring diagram.<br />
L<br />
L<br />
N<br />
N<br />
L<br />
N<br />
6<br />
5<br />
FUSE<br />
7<br />
1 Reset key;<br />
2 Serial connec tor 1 (Phone 1);<br />
3 Serial connec tor 2 (Phone 2);<br />
4 Jumper JP0;<br />
5 AUX1 c onnector, heating request ( volt-free contac t);<br />
6 AUX2 c onnector, cooling request ( volt-free contact);<br />
7 Fuse, 5x20 F3,15A 250V;<br />
8 CN9 connector for wired panel (KPFI);<br />
- - - Connection by i nstaller.<br />
To access the terminals, remove the protec tion lid after having lifted the<br />
unit front panel.<br />
Pass the s upply cable through the opening in the bac k of the unit.<br />
2<br />
4<br />
3<br />
1<br />
L<br />
1<br />
8<br />
N<br />
50 mm<br />
M4<br />
Use the cable clamp provided inside the circuit board compartment to<br />
secure the suppl y cable and the c onnecting c ables. Strip off the<br />
sheathing onl y in the immediate area of the terminals.<br />
In the event that the unit is mounted on a metal surface, earth<br />
connections must be made in c omplianc e with l ocal regulations.<br />
29
SECTION II: INST ALL ATION AND MAINTEN ANCE<br />
II.2.4.2 Connection of auxiliary contacts (AUX 1-2)<br />
There are 2 nor mally open AUX 1 and AUX 2 auxiliar y contacts<br />
availabl e for management, for example, of the boiler or chiller.<br />
Volt-free contact<br />
JP0 AUX1 AUX2<br />
Contact live<br />
JP0 AUX1 AUX2<br />
1 2 3 4 5 6<br />
1 2 3 4 5 6<br />
24÷230 Vac<br />
They can be used as volt-free contacts or eventuall y made li ve<br />
(230Vac). The maximum load applicable to eac h contac t is: 0,5 A - 230<br />
Vac AC 1.<br />
AUX 1 Closed on heating request.<br />
AUX 2 Closed on c ooling reques t.<br />
In the heating mode, AUX 1 opens if the c oil protection alar m<br />
inter venes.<br />
In the c ooling mode, AUX 2 opens if the c oil protection alar m<br />
inter venes.<br />
In fan mode AUX 1 and AUX 2 open when the fan is on.<br />
II.2.5 MASTER/SLAVE CONNECTION<br />
This is a special functi on whereby an appliance defined as<br />
Master(managed from a remote c ontrol or control panel) sends<br />
information on the operation in progress to other appliances ( maxi mum<br />
31) defined as Slave (which do not have a remote c ontrol or control<br />
panel), by means of an elec trical connecti on to be made at the time of<br />
installation (see wiring diagrams).<br />
Alarms: The al arms are managed independently on each c ontr ol<br />
board.<br />
Timeout: The Slaves cannot continue to operate in the abs enc e of the<br />
Master (bec aus e of failure of communic ation, fault or other cause),<br />
since no commands to the machines (On/Off etc.) would be possi ble.<br />
Master/Slave communication:<br />
In the event of malfunction of the Mas ter, by restarting the Slaves it<br />
is possible to c ontrol them indi viduall y with the remote control. All this<br />
without interfering with the c onnections and/or the c ontr ol board.<br />
The remote c ontrol func tions also on the Sl aves after<br />
communication has been made with the Mas ter. In this cas e, the Slave<br />
has autonomous func tioni ng but only until the succ essive rec eipt of<br />
information by the Master.<br />
The maxi mum distanc e in the local network is 30 m (the distance<br />
between the Master and the l ast Sl ave).<br />
The connection between M aster and Slave must be made using a<br />
telephone c able made up from 6 wires and RJ 12 c onnectors.<br />
FUSE<br />
FUSE<br />
L<br />
N<br />
L<br />
N<br />
MASTER SLAVE 1 SLAVE 2<br />
1<br />
2<br />
3<br />
4<br />
5<br />
6<br />
Bianco White Blanc Weiss Blanco<br />
Nero Black Noir Schwarz Negro<br />
Rosso Red Rouge Rot Rojo<br />
Verde Green Vert Grün Verde<br />
Giallo Yellow Jaune Gelb Amarillo<br />
Blu Blue Bleu Blau Azul marino<br />
1 Rx/Tx-<br />
2 Rx/Tx+<br />
3 GND<br />
4<br />
5<br />
6<br />
FUSE<br />
L<br />
II.2.5.1 Master/Slave connection w ith remote<br />
control<br />
For the Master/Slave c onnecti on using the Remote c ontr ol, a j umper<br />
must be inserted onto the ter minals 1 and 2 ( with unit disconnec ted<br />
from mai ns elec tricity) onl y on the unit defined as Master.<br />
N<br />
Master<br />
1 2<br />
3 4 5 6<br />
30
SECTION II: INST ALL ATION AND MAINTEN ANCE<br />
II.3<br />
II.3.1<br />
INSTRUCTIONS FOR START-UP<br />
IMPORTANT !<br />
Machine commissioning or the first start up (wh ere<br />
required) must be carried out by skilled personnel<br />
qualified to work on this t ype of product.<br />
DANGER!<br />
Before starting up, m ake sur e that the in stallation<br />
and electrical connections have been carried out in<br />
accord ance with the in structions in this manu al.<br />
Also make sure that ther e are no unauthorised<br />
persons in the vicinit y of the machine during the<br />
above operations.<br />
PRELIMINARY CHECKS BEFORE START-UP<br />
Before starting up the unit, make sure that:<br />
1. the unit is positi oned c orrectly;<br />
2. the flow, return and condensation drainage pi pes of the water<br />
system are c orrectl y connected;<br />
3. the water s ystem has no air in it;<br />
4. the exchanger is clean;<br />
5. the electrical c onnections are correct;<br />
6. the screws hol ding the cables are well tightened;<br />
7. the s upply voltage is as required;<br />
8. the power abs orption of the unit is c orrect and does not exceed the<br />
maxi mum permitt ed (see A1 Technical data).<br />
It is advisable to run the unit at maximum speed for several hours.<br />
II.3.2<br />
PROLONGED SHUTDOWN<br />
IMPORTANT !<br />
If the unit is not used during the winter period, the<br />
water contained in the system may freez e.<br />
If the mac hine is goi ng to be out of use for long periods of ti me, it is<br />
necess ary to disconnect the unit from the mains by opening the mai n<br />
switch ( whic h is required to be fitted by the installer).<br />
If the unit is not used during the winter period, the water c ontained in<br />
the s ys tem may fr eeze. To prevent this, all the water contained in the<br />
circuit shoul d be emptied before the onset of wi nter. Alternati vel y, a<br />
suitabl e quantity of anti-freez e shoul d be mixed with the water<br />
(maximum perc entage below 30%).<br />
II.3.3 START-UP AFTER PROLONGED SHUTDOWN<br />
Before starting up the unit again:<br />
Clean or change the air filter.<br />
Clean the heat-exc hanger.<br />
Clean the c ondensati on c ollector tray drai n tube or make sure it is<br />
clear.<br />
Bleed any air from the water s ystem.<br />
It is advisable to run the unit at maximum speed for s everal hours.<br />
II.4.1.1<br />
Replacing the batteries<br />
DANGER!<br />
Take pr ecautions to prevent improper or accidental<br />
use of the batteries b y children.<br />
ATTENTION !<br />
If the remote control is not used for a long period<br />
(for example, the unit being shut do wn at end-ofseason),<br />
take out the batteries from their housing to<br />
avoid leakage of the fluid inside, wh ich can form<br />
oxide on the contacts.<br />
To replac e the batteries, r emove the lid from the batter y c ompartment,<br />
take the old batteries out and i nsert the new ones, res pecti ng the<br />
polarity indicated insi de the compartment.<br />
SLEEP<br />
MODE<br />
SWING<br />
R<br />
FAN<br />
TIME-ON<br />
TIME-OFF<br />
TIME-SET<br />
C<br />
TEMP<br />
NET WORK<br />
BATT<br />
- +<br />
- +<br />
Only us e two AAA 1.5 V batteries . Do not use us ed batteries with new<br />
ones or batteries of a different type.<br />
At the end of the operation of r eplacing the batteries the remote control<br />
sets itself to OFF and all the settings are l ost.<br />
II.4.1.2<br />
Inspecting and cleaning the heat exchanger<br />
DANGER!<br />
Take car e wh en dism antling the filter: the heat<br />
exch anger fins can cut.<br />
With the unit switc hed off, lift the front c over and chec k the state of the<br />
heat exchanger.<br />
II.4<br />
INSTRUCTIONS FOR MAINTENANCE<br />
DANGER!<br />
Always disconnect the unit from the mains power<br />
supply at the isolator switch before carrying out<br />
an y m aintenance wor k, even if it is purely for<br />
inspection purposes. Make sure that no one<br />
accidentally supplies power to the machine – lock<br />
the master switch in the z ero position.<br />
DANGER!<br />
Maintenance work must only be carried out by<br />
qualified technicians authorised to work on airconditioning<br />
and refrigeration systems. U se<br />
suitable work gloves.<br />
DANGER!<br />
Do not introduce pointed objects through the air<br />
intake or outlet grilles.<br />
If necessar y:<br />
remove any foreign bodies from the fi nned s urface which may<br />
obstruct air flow;<br />
clean off the dust with a j et of compr essed air;<br />
was h and brush, gentl y, with water;<br />
dry with a j et of compressed air.<br />
31
SECTION II: INST ALL ATION AND MAINTEN ANCE<br />
II.4.1.3<br />
Inspecting and cleaning the condensate<br />
drain<br />
With the unit off, remove the fr ont panel by taking the screw fasteners<br />
out and control the s tate of the c ondensate drai n.<br />
II.4.1.5 Draining the water system<br />
IMPORTANT !<br />
The water coil can be partially drained through the<br />
drain valve. To drain it completely, blo w air through<br />
the coil.<br />
For particular mai ntenance operations or to prevent rupture due to the<br />
water in the hydr aulic circuit freezing, it is possible to drain the water<br />
from the s ystem.<br />
To drain the water, pro ceed as describ ed:<br />
open the front cover and remove the air filters;<br />
loosen the water drai n bl eed val ve.<br />
If necessar y, clear any obstruc tions from the c ondens ate drai n which<br />
could prevent the water draining away normally.<br />
II.4.1.4 Bleeding the hydraulic circuit<br />
If air is pres ent in the hydraulic circuit, it mus t be bl ed.<br />
Proceed as follo ws to bleed the air:<br />
open the front cover and remove the air filters;<br />
loosen the bleed val ve and allow the air to escape;<br />
start the s ystem and run for a few minutes;<br />
stop the system;<br />
bleed the hydraulic circuit again;<br />
Repeat the operation several ti mes until no mor e air comes out of the<br />
system.<br />
The water which c omes out of the bl eed val ve is drained away by the<br />
condens ate drain tray.<br />
The water which c omes out of the val ve is drai ned away by the<br />
condens ate drain tray.<br />
II.4.2 ELECTRICAL CIRCUIT<br />
The followi ng operations ar e recommended for the maintenanc e of the<br />
electrical circuit:<br />
chec k the unit’s electrical abs orption using a clip-on ammeter and<br />
compare the reading with the values shown on the doc umentati on;<br />
inspect and, if nec essar y, tighten the electrical contac ts and<br />
terminals.<br />
II.5 INSTRUCTIONS FOR DISMANTLING THE UNIT<br />
SAFEGUARD THE EN VIRONMENT !<br />
RHOSS cares about protecting the environment.<br />
When the unit is dismantled it is important to<br />
adhere scrupulou sly to the follo wing procedures.<br />
The unit s houl d onl y be dis mantled by a fir m authorised for the dispos al<br />
of scrap machiner y/products .<br />
The unit as a whole is composed of materials c onsidered as s econdary<br />
raw materials and the following c onditi ons mus t be obser ved:<br />
If the appliance c ontains antifreez e, this should not just be dumped,<br />
as it causes pollution;<br />
It should be collected and suitabl y dispos ed of;<br />
The el ectronic c omponents (el ectrol ytic condens ers) should be<br />
considered s pecial waste, and as s uch they should be deli vered to a<br />
firm authorised to collec t them;<br />
the expanded polyurethane rubber insulation on the pi pes and the<br />
expanded pol yethylene mesh, the expanded pol yurethane and s oundabsorbent<br />
sponge lini ng the bodywor k must be removed and proc essed<br />
as urban refus e.<br />
32
SECTION II: INST ALL ATION AND MAINTEN ANCE<br />
II.6<br />
TROUBLESHOOTING<br />
Symptom<br />
Probable cau se<br />
The unit’s automatic protection switch has been triggered or is disabled.<br />
There is a power cut.<br />
An al arm has been triggered on the unit.<br />
The unit does not run:<br />
The temperature value set is below ambi ent temperatur e (in HEAT operating mode) or above ambient<br />
temperature (in COOL or DRY operati ng mode).<br />
The loc kouts provided by the functions TOO COOL and HOT START are oper ating.<br />
The signal rec eiver located on the unit for us e with the remote control is directl y expos ed to a ver y intense<br />
light-source such as the sun or a fluorescent lamp.<br />
Air filter clogged.<br />
Difficult water circulation i n the unit.<br />
The wor king temperature value is not correctl y s et.<br />
The unit produces inadequate<br />
cooling or heating:<br />
An inadequate fan s peed has been s elected.<br />
The appliance is not being supplied with s ufficient hot or cold water, or there is no water circulation i n the<br />
pipes.<br />
There are doors or windows open.<br />
The el ectroval ve does not function c orrectly.<br />
The appliance has not been correctl y siz ed for the s pecific requirements of the s ystem.<br />
33
INDEX<br />
INDEX<br />
SYMBOLES UTILISÉS<br />
Italiano pagina 4<br />
English page 19<br />
Français page 34<br />
Deutsch Seite 49<br />
Español página 64<br />
I SECTION I: U TILISA TEUR ................................................................... 35<br />
I.1 Description de l'appareil............................................................................. 35<br />
I.1.1 Conditions de fonctionnement prévues ............................................................ 35<br />
I.1.2 Identificatio n de l' app arei l ............................................................................. 35<br />
I.1.3 Caractéristiques d e constructio n .................................................................... 35<br />
I.2 Limites de fonctionnement......................................................................... 35<br />
I.2.1 Informations sur les ris ques rés idu els et les da ngers n e pouv ant être élim inés ......... 35<br />
I.3 Accessoires et pièces détachées ................................................................ 35<br />
I.3.1 Accessoires (fournis séparément)................................................................... 35<br />
I.4 Commandes et contrôles ........................................................................... 36<br />
I.4.1 Télécomma nde (d e série) ............................................................................. 36<br />
I.4.2 Tableau mural KPFI (fourni séparément).......................................................... 36<br />
I.5 Instructions d'utilisation............................................................................. 36<br />
I.5.1 Fonctions de réglage ................................................................................... 36<br />
I.5.2 Fonctions de confort .................................................................................... 37<br />
I.5.3 Télécommande........................................................................................... 37<br />
I.5.4 Config uratio ns de fonctio nnem ent .................................................................. 38<br />
I.5.5 Réinitialisation de la télécommande ................................................................ 39<br />
I.5.6 Transmission des données à l'unité Esclave..................................................... 39<br />
I.5.7 Description DE L’AFFICHEUR DE L’unité ........................................................ 39<br />
I.5.8 Fonctionnement local................................................................................... 39<br />
I.5.9 Unité en alarme .......................................................................................... 39<br />
I.6 Nettoyage de l’unité................................................................................... 40<br />
I.6.1 Nettoyage d u filtre à air ................................................................................ 40<br />
I.7 Mises en garde et recomm andations........................................................... 40<br />
II SECTION II: INSTA LLA TION ET EN TRE TIEN ...................................... 41<br />
SYMBOLE DEFINITION<br />
DANGER GENERAL!<br />
L'indication DANGER GENER AL est utilisée pour<br />
informer l'opérateur et le personnel assurant<br />
l'entretien de la présence de dangers exposant à<br />
des risques de mort, d e blessur es ou de lésions<br />
aussi bien immédiates que latentes.<br />
DANGER COMPOSANTS SOUS TENSION!<br />
L'indication DANGER COMPOSANTS SOUS<br />
TENSION est utilisée pour informer l'opérateur et le<br />
personnel assurant l'entretien des risques dus à la<br />
présen ce d e tension.<br />
DANGER SURFACES COUPANTES!<br />
L'indication DANGER SURFACES COUPANTES est<br />
utilisée pour informer l'opérateur et le personnel<br />
assur ant l'entretien de la pr ésence de surfaces<br />
potentiellement dangereu ses.<br />
DANGER SURFACES CHAUDES!<br />
L'indication DANGER SURFACES CHAUDES est<br />
utilisée pour informer l'opérateur et le personnel<br />
assur ant l'entretien de la pr ésence de surfaces<br />
chaudes potentiellement dang ereuses.<br />
DANGER ORGANES EN MOUVEMENT !<br />
L'indication DANGER ORGANES EN MOUVEMENT<br />
est utilisée pour informer l'op érateur et le personnel<br />
assur ant l'entretien des risqu es du s à la pr ésence<br />
d'organes en mouvement.<br />
MISES EN GARDE IMPORTANTES!<br />
L'indication RECOMMANDATIONS IMPORTANTES<br />
est utilisée pour prévenir les risqu es d e dommag es<br />
de l'unité et autres équipements.<br />
PROTECTION DE L'ENVIRONNEMENT!<br />
L'indication protection de l'environnement<br />
accomp agne les instructions à r especter pour<br />
assur er une utilisation de l' appareil d ans le r espect<br />
de l'environnement.<br />
II.1 Instructions de transport............................................................................ 41<br />
II.1.1 Emball age et comp osants ............................................................................. 41<br />
II.1.2 Indicatio ns pour l a manutention ...................................................................... 41<br />
II.1.3 Conditions de stockage ................................................................................ 41<br />
II.1.4 Espaces techn iqu es et positio nnem ent ............................................................ 41<br />
II.2 Instructions d'installation........................................................................... 42<br />
II.2.1 Mise en pl ace des racc ordem ents hydra uli ques ................................................. 42<br />
II.2.2 Fixation de l’unité........................................................................................ 42<br />
II.2.3 Raccordements hydrauliques ........................................................................ 43<br />
II.2.4 Raccordements électriques........................................................................... 44<br />
II.2.5 Liaison Maître/Esclave ................................................................................. 45<br />
II.3 Instructions pour la Mise en service ............................................................ 46<br />
II.3.1 Contrôles préliminaires avant la mise en marche ............................................... 46<br />
II.3.2 Mise hors service........................................................................................ 46<br />
II.3.3 Remise e n marche a près un e lon gue p ério de d' arrêt .......................................... 46<br />
II.4 Instructions d'entretien.............................................................................. 46<br />
II.4.2 Circuit électrique......................................................................................... 47<br />
II.5 Indications pour la mise au rebut de l’unité.................................................. 47<br />
II.6 Anomalies de fonctionnement.................................................................... 48<br />
ANNEXES<br />
A1<br />
A2<br />
Données techniques…………………………………………………………….….....81<br />
Dimens ions………………………………………………………………..……………84<br />
UNI EN 292<br />
UNI EN 294<br />
UNI EN 563<br />
UNI EN 1050<br />
UNI 10893<br />
EN 13133<br />
EN 12797<br />
EN 378-1<br />
PrEN 378-2<br />
CEI EN 60335-2-40<br />
UNI EN ISO 3744<br />
EN 50081-1:1992<br />
EN 61000<br />
Normes de référence<br />
Sécurité de la machine. Concepts fondamentaux,<br />
principes généraux de conception.<br />
Sécurité de la machine. Distances de sécurité<br />
empêchant d'atteindre les zones dangereuses avec les<br />
membres supérieurs.<br />
Sécurité de la machine. Températures des surfaces de<br />
contact. Données ergonomiques de calcul des valeurs<br />
maximum de température des surfaces chaudes.<br />
Sécurité de la machine. Principes d'évaluation des<br />
risques.<br />
Documentation technique du produit. Instructions<br />
d'utilisation<br />
Brasage fort. Qualification des braseurs en brasage fort<br />
Brasage fort. Essais destructifs des assemblages<br />
réalisés en brasage fort<br />
Systèmes de réfrigération et pompes à chaleur –<br />
exigences de sécurité et d’environnement. Exigences de<br />
base, définitions, classification et critères de choix<br />
Systèmes de réfrigération et pompes à chaleur –<br />
exigences de sécurité et d’environnement. Conception,<br />
construction, essais, installation, marquage et<br />
documentation<br />
Sécurité des appareils électriques à usage domestique<br />
et assimilés. Section 2: Normes spécifiques pour<br />
pompes à chaleur électriques, appareils de climatisation<br />
et déshumidificateurs.<br />
Mesure des niveaux de puissance sonore des sources<br />
de bruit par mesure de la pression sonore. Méthode<br />
technique, sur champ libre et plan réfléchissant.<br />
Compatibilité électromagnétique – Normes génériques<br />
sur l’émission Partie 1: Environnements résidentiels,<br />
commerciaux et de l’industrie légère<br />
Compatibilité électromagnétique (EMC)<br />
34
SECTION I: UTILISATEUR<br />
I<br />
SECTION I: UTILISATEUR<br />
I.1 DESCRIPTION DE L'APPAREIL<br />
Idrowall est di visé en quatre grandeurs:<br />
MPCV 20-30-35-40: Unité de base avec électrovanne ON/OFF<br />
I.1.1 CONDITIONS DE FONCTIONNEMENT<br />
PREVUES<br />
Idrowall est un ventilo-convecteur destiné au traitement de l’air<br />
(climatisation été et hiver) à l’intérieur de locaux à usage domestique ou<br />
anal ogue. L’unité n’est pas des tinée à l’installation dans des locaux à<br />
usage de buanderie (norme CEI EN 60335-2-40).<br />
DANGER!<br />
L'appareil est exclusivement prévu pour être<br />
installé à l'intérieur de locau x à usag e domestique<br />
ou assimilés comme t els.<br />
DANGER!<br />
Il est rigoureusement interdit d'introduire des objets<br />
à travers les grilles d'asp iration et d e soufflage<br />
d'air.<br />
IMPORTANT !<br />
Le bon fonctionnement de l'unité dépend du strict<br />
respect des instructions d'utilisation, des espaces<br />
techniques d'in stallation et des limites d'utilisation<br />
indiquées dans la présente notice.<br />
IMPORTANT !<br />
Une installation qui ne respecte pas les espaces<br />
techniques n écessair es rend plus difficile les<br />
interventions d'entretien et diminue les<br />
performances de l'appareil.<br />
I.1.2 IDENTIFICATION DE L'APPAREIL<br />
Les unités sont munies d’ une pl aque signalétique située à l’extérieur.<br />
I.2 LIMITES DE FONCTIONNEMENT<br />
IMPORTANT !<br />
Le bon fonctionnement et en toute sécurité d e<br />
l'unité n'est garanti que si les limit es d e<br />
fonctionnement indiquées ci-dessou s sont<br />
respectées.<br />
L’unité ne doit pas fonc tionner avec une entrée d’eau à une<br />
température s upérieure à 70°C et inférieure à 5°C.<br />
L’unité ne doit pas fonc tionner de manière c onti nue en mode<br />
rafraîchissement dans des loc aux à forte humidité relati ve (supérieure à<br />
80%). Dans ces conditions, de l a condensation pourrait se for mer sur<br />
l’orifice de refoul ement d’air et endommager les objets y plac és<br />
dessous, le plancher ou le mur s ur lequel est fi xée l’unité.<br />
I.2.1<br />
75<br />
60<br />
30<br />
20<br />
U.R.%<br />
5<br />
10 15 60 65 70 t°C<br />
t = température eau entrée unité<br />
U.R. = humidité relati ve ambiante<br />
Température air ambiant: 8°C ÷ 32°C.<br />
INFORMATIONS SUR LES RISQUES<br />
RESIDUELS ET LES DANGERS NE POUVANT<br />
ETRE ELIMINES<br />
IMPORTANT !<br />
Accorder la plu s grand e attention au x symboles et<br />
aux indications apposées sur la machin e.<br />
I.1.3<br />
RHOSS Spa<br />
TECHNICAL CHARACTERISTICS<br />
MODEL IDROWALL MPCV20<br />
Cooling<br />
Capacity<br />
Heating<br />
Power supply<br />
Frequency<br />
Power input<br />
Weight<br />
Serial No.<br />
CARACTERIS TIQUES DE CONSTRUCTION<br />
1<br />
5<br />
3<br />
2<br />
Pour prévenir les risques résiduels, en dépit de toutes les dispositions<br />
de prévention adoptées - risques potentiels et non évidents - des<br />
adhésifs d'avertissement conformément à la nor me "ISO 3864" ont été<br />
apposés s ur l'appareil.<br />
I.3 ACCESSOIRES ET PIECES DETACHEES<br />
IMPORTANT !<br />
Veiller à utiliser exclusivement des pièces d étachées<br />
et des accessoires d'origine. RHOSS S.p.A. décline<br />
toute responsabilité en cas de dommages causés par<br />
des interventions non prévues et/ou des<br />
interventions effectuées par un personnel non<br />
autorisé à cet effet, ainsi qu'en cas de mauvais<br />
fonctionnement causé par l'utilisation de pièces<br />
détachées et/ou d'accessoires non d'origine.<br />
I.3.1 ACCESSOIRES (FOURNIS SEPAREMENT)<br />
KGMOD – Interfac e sérielle R S485 pour dialogue logique avec building<br />
automation et s ystèmes de super vision (Protoc oles s upportés :<br />
ModBuS ® RTU).<br />
4 7<br />
6<br />
KVAM – Boîtier à enc astrer au mur.<br />
1. Panneau fr ontal<br />
2. Déflecteur<br />
3. Ailette orientabl e<br />
4. Filtres à air<br />
5. Récepteur et signalisati on par voyant<br />
6. Touche d’ urgence<br />
7. Boîte des br anchements él ectriques<br />
35
SECTION I: UTILISATEUR<br />
I.4 COMMANDES ET CONTROLES<br />
I.4.1<br />
TELECOMMANDE (DE SERIE)<br />
Télécommande à rayons infrarouges doté de piles d'alimentation<br />
(couleur RAL 9010).<br />
SLEEP<br />
MODE<br />
SWING<br />
R<br />
FAN<br />
TIME-ON<br />
TIME-OFF<br />
TIME-SET<br />
C<br />
TEMP<br />
NET WORK<br />
BATT<br />
(Dimensions 57 x 137 x 18 mm)<br />
I.4.2 TABLEAU MURAL KPFI<br />
(FOURNI SEPAREMENT)<br />
Tableau de c ommande mural avec écran à cristaux liquides, à 10<br />
touc hes, pour le réglage manuel de toutes les foncti ons de l'appareil en<br />
foncti on de l a température ambiante s électionnée. Le tableau est prévu<br />
pour la fi xati on au mur (couleur RAL 9010).<br />
AIR CONDITIONER<br />
ENTER<br />
TIMER<br />
CLOCK<br />
TIME<br />
SWING<br />
TEMP<br />
MODE<br />
FAN<br />
SLEEP<br />
(Dimensions 120 x 120 x 18 mm)<br />
I.5 INSTRUCTIONS D'UTILISATION<br />
Grâce à la télécomm ande et/ou au tableau de command e mural<br />
(KPFI) (voir le mode d'emploi fourni avec c elui-ci) il est possible<br />
d'effec tuer l es opérati ons s ui vantes:<br />
Mise en marche/arrêt de l’unité.<br />
Choix des trois vitesses du ventil ateur.<br />
Réglage du ther mostat et maintien de la température ambiante<br />
souhaitée.<br />
Commutation du c ycle de fonctionnement:<br />
rafraîchissement/c hauffage.<br />
Des indicateurs s ont prés ents sur l'unité fournissant des i nfor mations<br />
concernant l'état de l'unité ou encore d'éventuelles signal ements<br />
d'alarme et, si toutefois la tél écommande et/ou l e tableau de c ommande<br />
(KPFI) n'était pas disponible, ils permettent, en utilisant la touche<br />
MANUAL de gérer l'unité en mode manuel.<br />
I.5.1<br />
FONCTIONS DE REGLAGE<br />
I.5.1.1 AUTO<br />
En AUTO, l'unité ter minale relève la température ambiante et déci de<br />
quelle modalité ac tiver (chauffage, rafr aîchissement ou<br />
déshumi dification) en fonction du point de consigne programmé par<br />
l'utilisateur.<br />
La modalité est décrite ci-dess ous.<br />
si la températur e ambi ante es t inférieure à 21°C: c hauffage;<br />
si la températur e ambi ante es t comprise entre 21 et 25°C:<br />
déshumi dification;<br />
si la températur e ambi ante es t supérieure à 25°C: rafraîchissement;<br />
Le ventilateur et la vanne d'eau s ont gérés comme en mode chauffage,<br />
rafraîchissement ou dés humidification.<br />
Le contact auxiliaire AUX1 se fer me à chaque demande de chauffage.<br />
Le contact auxiliaire AUX2 se fer me à chaque demande de<br />
rafraîchissement.<br />
Si l'unité a été étei nte depuis plus de deux heures , au proc hai n<br />
allumage, la modalité acti ve dépendra de la température ambi ante.<br />
Le point de consigne peut varier d'un mini mum de 16°C à un maximum<br />
de 30°C.<br />
I.5.1.2 COOL<br />
COOL es t la fonc tion “rafr aîchissement”. C e mode de fonc tionnement<br />
permet de s électionner le réglage qui exprime le meilleur c onfort<br />
personnel avec:<br />
choi x de la valeur de température désirée;<br />
mode de fonc tionnement du ventilateur avec réglage manuel ou<br />
automatique des vitesses (AUTO);<br />
positionnement du déflecteur en position fi xe ou en fonction<br />
SWING.<br />
Le ventilateur est toujours en foncti on même lorsque le poi nt de<br />
consigne est attei nt.<br />
Au moment de la demande de r afraîc hissement, la vanne ouvre après<br />
un retard de 30 s ec; au moment de la demande d'arrêt, la vanne s e<br />
ferme après un retard de 120 sec.<br />
Le contact auxiliaire AUX2 se fer me à chaque demande de<br />
rafraîchissement.<br />
En sél ectionnant l a fonction COOL, le ventilateur pourrait ne pas<br />
démarrer immédiatement à c aus e de la présence de la foncti on TOO<br />
COOL ( voir la paragraphe c orrespondant).<br />
Le point de consigne peut varier d'un mini mum de 16°C à un maximum<br />
de 30°C.<br />
I.5.1.3 DRY<br />
DRY est la fonction “dés humidification”, c’ est-à-dire la fonction qui<br />
réduit l’humi dité ambiante. Au cours de ce mode de fonctionnement, la<br />
vanne on/off d'arrêt de l'eau es t commandée sel on des c ycles<br />
préétablis:<br />
si la températur e ambi ante es t supérieure à 25°C: elle ouvr e<br />
pendant 3min – elle ferme pendant 4 minutes;<br />
si la températur e ambi ante es t comprise entre 16 et 25°C: elle<br />
ouvre pendant 3mi n – elle ferme pendant 6 mi nutes;<br />
si la températur e ambi ante es t inférieure à 16°C: fermée;<br />
36
SECTION I: UTILISATEUR<br />
Le mode DRY per met lui aussi de programmer le réglage qui exprime le<br />
meilleur c onfort personnel avec:<br />
choi x de la valeur de température désirée;<br />
mode de fonc tionnement du ventilateur avec réglage manuel ou<br />
automatique des vitesses (AUTO);<br />
positionnement du déflecteur en position fi xe ou en fonction<br />
SWING.<br />
Le contact auxiliaire AUX2 se fer me à chaque demande de<br />
déshumi dification.<br />
En sél ectionnant l a fonction DRY, l e ventilateur pourrait ne pas<br />
démarrer immédiatement à c aus e de la présence de la foncti on TOO<br />
COOL ( voir la paragraphe c orrespondant).<br />
Le point de consigne peut varier d'un mini mum de 16°C à un maximum<br />
de 30°C.<br />
I.5.1.4 FAN<br />
FAN est la fonction “ventilation”. Ce mode de fonctionnement per met de<br />
programmer au propre c hoi x la vitess e du ventilateur (mi n-moyen- max-<br />
Auto) et la position du déflecteur (fi xe ou en fonction SWING).<br />
Les contacts auxiliaires AUX1 et AUX2 sont ouverts.<br />
I.5.1.5 HEAT<br />
HEAT est la fonction “chauffage”. Ce mode de fonctionnement permet<br />
de s électionner le réglage qui exprime l e meilleur c onfort personnel<br />
avec:<br />
choi x de la valeur de température désirée;<br />
mode de fonc tionnement du ventilateur avec réglage manuel ou<br />
automatique des vitesses (AUTO);<br />
positionnement du déflecteur en position fi xe ou en fonction<br />
SWING.<br />
Au moment de la demande de c hauffage, la vanne ouvre après un<br />
retard de 30 s ec; au moment de la demande d'arrêt, la vanne se fer me<br />
après un retard de 120 s ec.<br />
Le contact auxiliaire AUX1 se fer me à chaque demande de chauffage.<br />
En sél ectionnant l a fonction HEAT, le ventilateur pourrait ne pas<br />
démarrer immédiatement à c aus e de la présence de la foncti on HOT<br />
START (voir paragraphe correspondant).<br />
Le point de consigne peut varier d'un mini mum de 16°C à un maximum<br />
de 30°C.<br />
IMPORTANT !<br />
Le ventilateur d e l'unité se ferme lorsque la valeur<br />
de température configurée est atteinte. Toutes les 3<br />
minutes, le ventilateur se réactive pendant une<br />
minute à la vitesse minimale pour éviter des<br />
phénomènes de stratification de l'air à proximité de<br />
l'appareil.<br />
I.5.2 FONCTIONS DE CONFORT<br />
TOO COOL<br />
Pour les modes de fonctionnement COOL et DRY, la fonction TOO<br />
COOL es t prévue pour bloquer la mise en marc he du ventilateur si la<br />
température d’entrée d’eau à l’échangeur est s upérieure à 32°C<br />
pendant 15 minutes (rétablissement à 30°C).<br />
L'écran affiche “P2”.<br />
HOT START<br />
Pour les modes de fonctionnement HEAT, la foncti on HOT START es t<br />
prévue pour bl oquer la mise en marche du ventilateur si la température<br />
d’entrée d’eau à l’échangeur est en-dessous de 25°C (différenti el de<br />
3°C), ce qui évite de dés agréables flux d’air froid. Cette situation<br />
pourrait s e pr oduire lors de la première mise en marc he de l’unité ou<br />
après de l ongues périodes d’arrêt.<br />
L'écran affiche “P4”.<br />
POST HEAT<br />
Pour le mode de fonctionnement HEAT, la foncti on POST HEAT es t<br />
prévue qui, dès que l'unité atteint le point de consigne ou qu'elle est<br />
éteinte, maintient le ventilateur allumé afin de baisser la tempér ature de<br />
l'échangeur j usqu'à la température de 25°C.<br />
L'écran affiche “P3”.<br />
I.5.3 TELECOMMANDE<br />
La télécommande permet de c onfigurer et de visualiser tous les<br />
paramètres de fonctionnement de l'unité, en facilitant ainsi toutes les<br />
opérations de programmation.<br />
La télécommande est alimentée avec 2 batteries R 03 size AAA d'1,5 V.<br />
IMPORTANT !<br />
Il est préférable d e test er le fonctionnement de la<br />
télécommande pour d éterminer sa zone d e<br />
réception.<br />
I.5.3.1<br />
TOUCHE<br />
SLEEP<br />
TEMP<br />
MODE<br />
TIME-ON<br />
TIME-OFF<br />
TIME-SET<br />
NET WORK<br />
SWING<br />
FAN<br />
C<br />
R<br />
Description de la télécommande et les<br />
fonctions relatives<br />
SLEEP<br />
MODE<br />
SWING<br />
R<br />
FAN<br />
TIME-ON<br />
TIME-OFF<br />
TIME-SET<br />
C<br />
TEMP<br />
NET WORK<br />
BATT<br />
DESCRIPTION<br />
Elle per met d'allumer et d'éteindre l'unité. Appuyer s ur<br />
la touche pour allumer, appuyer de nouveau pour<br />
éteindre<br />
Elle indique les états et l es modes de fonc tionnement<br />
de l'unité<br />
Activation du SLEEP mode.<br />
Ces touches permettent de c onfigurer la température<br />
ambiante s ouhaitée.<br />
Elle per met de sélec tionner le type de foncti onnement<br />
souhaité (AUTO, COOL, DRY, HEAT, FAN)<br />
Configuration du ti mer d'allumage.<br />
Configuration du ti mer d'arrêt.<br />
Elle per met de configurer l'horaire de l'horloge et des<br />
timers<br />
Elle per met de configurer les paramètr es du réseau<br />
Maître/Esclave.<br />
Cette touche per met au déflecteur d'osciller de façon<br />
constante.<br />
Appuyer sur c ette touche pour sélecti onner la vitesse<br />
du ventilateur. Quand on sél ectionner AUTO, la<br />
vitess e du ventilateur est réglée automatiquement<br />
selon l a température du milieu.<br />
Appuyer sur c ette touche pendant plusieurs secondes<br />
pour le réglage de l'horloge.<br />
Appuyer sur c e bouton pour réiniti aliser les<br />
configurations de la tél écommande.<br />
MEMORY<br />
Après une absenc e de c ourant, un On/Off depuis la téléc ommande ou<br />
une alar me, l’appareil reprendra à fonc tionner s ur le mode s électionné<br />
avant la c oupure de c our ant. Si, avant la c oupure de courant, l’appareil<br />
foncti onnait en mode T IMER ou SLEEP, ces fonctions seront alors<br />
désac tivées.<br />
37
SECTION I: UTILISATEUR<br />
I.5.3.2<br />
Description de l’afficheur<br />
A<br />
A<br />
AM<br />
PM<br />
00:00<br />
00<br />
°C<br />
AM<br />
PM 00:00<br />
Symbole Description<br />
00 °C Valeur de températur e configurée.<br />
Transmission entre la tél écommande et l a machi ne.<br />
A<br />
Ventilateur.<br />
Fonctionnement Sleep.<br />
Non utilisé.<br />
Transmission aux esclaves.<br />
Fonction SWING.<br />
Fonction rafraîchissement (COOL).<br />
Fonction déshumi dification (DRY).<br />
Fonction ventilation (FAN).<br />
Fonction chauffage (HEAT).<br />
Fonctionnement automatique (AUTO).<br />
Réglage de l'horloge.<br />
I.5.3.3 Utilisation de la télécommande<br />
La télécommande utiliser deux piles alcalines d'1,5 V de type R03 size<br />
AAA (fourni es).<br />
Pour introduire les piles, retirer c omplètement le c ouvercle de la<br />
télécommande en le faisant glisser vers la partie i nférieure. Introduire<br />
les piles dans le logement prévu à c et effet en res pectant les polarités<br />
indiquées. Repl acer le c ouvercle et sélec tionner les fonctions désirées.<br />
La même opération doit être effectuée pour le rempl acement des piles<br />
déchargées par d'autres piles neuves. La durée de vie moyenne des<br />
piles est d'environ un an.<br />
La télécommande est en mesur e de transmettre jusqu'à une distance<br />
d'environ 8 mètr es du récepteur.<br />
Eviter l'exposition de la télécommande à l'humidité excessi ve, à la lumière<br />
solaire directe ou aux autres sources de chaleur et éviter les chocs.<br />
Protéger la télécommande contre l'eau et les autres liquides. Si le<br />
récepteur à rayons infrarouges de l'unité est expos é à la lumière solaire<br />
directe ou à la lumière intens e d'une lampe si une lampe fluorescente à<br />
allumage électronique est présente à proximité, l'unité pourrait présenter<br />
des anomalies de fonctionnement ou ne pas fonctionner. L'utilisation des<br />
autres commandes à proximité ou dans le même milieu où l'unité est<br />
installée pourrait influencer son bon fonctionnement; éviter de tourner<br />
l'émetteur d'autres télécommandes vers le récepteur de l'unité.<br />
I.5.4<br />
CONFIGURATIONS DE FONCTIONNEMENT<br />
I.5.4.1 Réglage de l’horloge<br />
Note : pendant le réglage de l'horloge, ne pas tourner la télécommande<br />
vers l'unité. N ous c ons eillons de régler l'horloge s ur la télécommande<br />
avant de mettr e en marche l'unité; pour le réglage, proc éder de la<br />
manière s uivante:<br />
Quand on i ntroduit les piles dans la téléc ommande ou après avoir<br />
appuyé s ur la touc he R (Res et), l'indicateur horaire affic he “AM 0:00”<br />
clignotant.<br />
C<br />
TIME-SET<br />
C<br />
I.5.4.2<br />
A l'aide d'un objet pointu, appuyer s ur la touc he “C”,<br />
l'indicateur horaire clignote.<br />
En appuyant s ur la touc he TIME SET, il est possibl e de<br />
régler l'horloge.<br />
Appuyer de nouveau s ur la touche “C” pour confirmer<br />
l'heure configurée.<br />
Mise en marche et arrêt de l’unité<br />
La touc he ON/OFF permet de mettre en marche ou<br />
d'éteindre l’unité<br />
Le passage de ON à OFF interrompt tous l es modes de fonc tionnement<br />
et annule les temporisations en cours tandis que le mode de<br />
foncti onnement de l’appar eil et du ventilateur, la position du déflec teur<br />
et la valeur de températur e programmée s ont mémorisés.<br />
En passant de OFF à ON, la mac hine rétablit automatiquement tous les<br />
modes de fonc tionnement mémorisés avant l’extinction.<br />
Lorsque l'unité es t allumée, toutes l es indications de foncti onnement de<br />
l'unité s'affic hent à l'écran: mode, température c onfigurée, vitess e du<br />
ventilateur, etc.<br />
Lorsque l'unité es t éteinte, l'écran n'indique que l'heure et l e mode de<br />
foncti onnement réglé sur l'unité avant que celle-ci ne soit éteinte.<br />
SLEEP<br />
TEMP<br />
I.5.4.3<br />
MODE<br />
Mode de fonctionnement<br />
En appuyant sur la touche Mode, on peut c hanger le<br />
mode de fonc tionnement de l’unité. L’écr an affiche<br />
l’indication du mode de foncti onnement sél ectionné:<br />
MODE<br />
SWING<br />
R<br />
FAN<br />
TIME-ON<br />
TIME-OFF<br />
TIME-SET<br />
C<br />
NET WORK<br />
BATT<br />
- +<br />
- +<br />
La télécommande reste toujours avec l'afficheur allumé. L'écran affiche<br />
toujours l'horaire indépendamment du fait que l'unité est allumée ou<br />
éteinte.<br />
Retirer les piles de la télécommande si l'on pr évoit de ne pas l'utiliser<br />
pendant de longues périodes.<br />
Tourner la tél écommande vers le réc epteur de l'unité tandis que l'on<br />
effec tue les c onfigurations (sauf pendant l a configuration de l'horloge).<br />
Si les signaux sont reçus correctement, l'unité émettra un signal s onore.<br />
A<br />
Avec la fonction rafraîc hissement, l'unité foncti onne avec<br />
un s et de température libr e, en baissant la température<br />
dans le milieu.<br />
Avec la foncti on de déshumidification, l'unité fonctionne avec<br />
un set de température libre, en baissant ainsi<br />
progressivement la température et l'humidité dans le milieu.<br />
Avec la fonction ventilation, l'unité foncti onne s ans s et de<br />
température, en ventilant l'air du milieu.<br />
Avec la fonction chauffage, l'unité fonc tionne avec un set<br />
de température libr e, en augmentant la température dans<br />
le milieu.<br />
Avec le fonctionnement automatique, l'unité peut<br />
fonctionner en RAFRAICHISSEMENT et en CHAUFFAGE<br />
en foncti on de l a différence de températur e existante entre<br />
la températur e ambi ante et la température sélec tionnée<br />
sur la tél écommande.<br />
IMPORTANT !<br />
Le ventilateur d e l’unité s’arrête lorsqu e la valeur<br />
programmée de la temp érature est atteinte, puis il<br />
repart automatiquement à la vitesse minimale pour<br />
éviter les phénomèn es d e str atification d e l’air pr ès<br />
de l’app areil.<br />
38
SECTION I: UTILISATEUR<br />
I.5.4.4<br />
TEMP<br />
I.5.4.5<br />
FAN<br />
I.5.4.6<br />
SWING<br />
I.5.4.7<br />
SLEEP<br />
Réglage de la température désirée<br />
En appuyant s ur ces touc hes dans les di vers modes<br />
de foncti onnement (sauf en mode ventilation), il est<br />
possible d'aug menter ou de diminuer la valeur de la<br />
température s ouhaitée entr e 16°C et 30°C.<br />
Vitesse du ventilateur<br />
Appuyer sur c ette touche pour sélecti onner la vitesse du<br />
ventilateur: Vitess e automatique, mini male, moyenne et<br />
maxi male.<br />
Réglage du déflecteur<br />
En appuyant sur la touche SW ING, il est possi ble d'ac tiver<br />
l'oscillation continue du déflecteur.<br />
DANGER!<br />
Déplacer m anuellement le déflecteur motorisée<br />
quand l'unité est allumée pourrait causer de<br />
problèmes de fonctionnement ou endommager le<br />
système d e réglage.<br />
Fonction SLEEP<br />
En appuyant s ur cette touc he, on acti ve la fonc tion SLEEP<br />
qui permet d'obtenir une économie d'énergie en réglant<br />
automatiquement la température configurée.<br />
La foncti on SLEEP peut être acti vée en modalité d'été (le point de<br />
consigne durant les deux premi ères heures de fonctionnement est<br />
graduellement réduit jusqu'à un maximum de 2°C) et d'hi ver (le poi nt de<br />
consigne durant les deux premi ères heures de fonctionnement est<br />
graduellement augmenté jusqu'à un maxi mum de 2°C).<br />
Pour s ortir de la fonction SLEEP, appuyer s ur la touc he SLEEP ou<br />
changer le mode de foncti onnement de l'unité.<br />
I.5.4.8 Réglage du Timer<br />
Il est possible de configurer un timer pour l'allumage et l'arrêt<br />
automatique de l'unité.<br />
IMPORTANT !<br />
Afin que les configurations du timer soient<br />
efficaces, la télécommand e doit être placée à<br />
proximité d e l'unité (à une distance maxim ale d e 8<br />
mètres) et tournée vers celle- ci.<br />
La foncti on TIMER n'est pas r épétitive. Elle doit être c onfigurée à<br />
chaque fois que l'on souhaite l'utiliser.<br />
TIME-ON<br />
TIME-SET<br />
TIME-ON<br />
TIME-OFF<br />
TIME-SET<br />
TIME-OFF<br />
TIME-ON<br />
TIME-OFF<br />
I.5.5<br />
R<br />
En appuyant s ur cette touc he, on peut c onfigurer l’heure<br />
de mise en marc he de l'unité.<br />
Utiliser cette touche pour configurer l'heure.<br />
Pour c onfirmer le c hoi x.<br />
En appuyant s ur cette touc he, on peut c onfigurer l’heure<br />
d'arrêt de l'unité.<br />
Utiliser cette touche pour configurer l'heure.<br />
Pour c onfirmer le c hoi x.<br />
Si la fonction ti mer pour l'allumage est acti ve, appuyer sur<br />
cette touche pour la dés acti ver.<br />
Si la fonction ti mer pour l'arrêt est acti ve, appuyer sur cette<br />
touc he pour la désacti ver.<br />
REINITIALISATION DE LA TELECOMMANDE<br />
En appuyant avec un objet pointu sur la touche RESET, il es t<br />
possible de remettre la téléc ommande aux réglages d'usi ne.<br />
I.5.6<br />
NET WORK<br />
TRANSMISSION DES DONNEES A L'UNITE<br />
ESCLAVE<br />
En pr ésenc e d'un rés eau Maîtr e/Esclave, mai ntenir cette<br />
touc he appuyée jusqu'à c e que le s ymbole "Trans mission<br />
aux Escl aves" apparaisse. Lorsque l'on rel âche la touc he,<br />
l'unité Maîtr e transmet les nouvelles configurations aux<br />
Esclaves.<br />
I.5.7 DESCRIPTION DE L’AFFICHEUR DE L’UNITE<br />
L'afficheur prés ent sur la parti e centrale de l'unité fournit les i ndications<br />
sur l'état de fonc tionnement de l a machi ne et s ur la pr ésenc e de<br />
pannes éventuelles qui peuvent entraver le fonctionnement de la<br />
mac hine.<br />
h<br />
00 °C<br />
I.5.8 FONCTIONNEMENT LOCAL<br />
En cas d’absence ou de panne de la tél écommande/tabl eau de<br />
commande, on peut faire fonctionner l’unité à l’ai de de l a touche située<br />
à l'intérieur de la machine.<br />
En appuyant de façon répétée s ur la touc he, il est possibl e d'éteindre et<br />
d'allumer l'unité en fonctionnement automatique.<br />
I.5.9 UNITE EN ALARME<br />
Si une al arme se déclenche à cause d'une panne qui empêc he le<br />
foncti onnement de l'appareil, un c ode d'al arme appar aît s ur l'écran de<br />
l'unité et sur le panneau.<br />
Description d es alar mes :<br />
Alarmes:<br />
E0<br />
E1<br />
E3<br />
E4<br />
P0<br />
P1<br />
P2<br />
P3<br />
P4<br />
Description<br />
Sonde air ambiant inacti ve.<br />
Sonde eau inacti ve.<br />
Sondes eau et air inacti ves.<br />
Moteur ventilateur inactif.<br />
Antigel eau en fonc tionnement d'été.<br />
Le point de consigne est de 2°C, le r établissement<br />
est à 5°C, une fois que les 2 minutes sont éc oul ées.<br />
La vanne est fermée, l e contac t AUX2 es t ouvert et<br />
le ventilateur est forcé à la vitess e moyenne ou<br />
maxi male.<br />
Surtempératur e eau en fonctionnement d'hi ver.<br />
le set est de 75°C, le rétablissement est à 70°C. La<br />
vanne es t fermée, le contac t AUX1 es t ouvert et le<br />
ventilateur est forcé la vitesse maximale.<br />
Température él evée de l'eau en foncti onnement<br />
d'été, voir paragraphe TOO COOL).<br />
Eliminati on de l a chaleur de l'échangeur lorsque l e<br />
Set d'hiver est satisfait ( voir paragraphe POST<br />
HEAT).<br />
Température basse de l'eau en fonctionnement<br />
d'hiver (voir paragraphe HOT START).<br />
Le rétablissement des c onditions normal es de foncti onnement de<br />
l'appareil a lieu automatiquement.<br />
39
SLEEP TEMP<br />
SECTION I: UTILISATEUR<br />
I.6 NETTOYAGE DE L’UNITE<br />
DANGER!<br />
Veiller à toujours couper l'alimentation électrique<br />
avant de procéder à des opérations de nettoyage ou<br />
d'entretien.<br />
Ne jamais verser d'eau sur l'unité.<br />
Pour le nettoyage, utiliser un chiffon doux légèrement imbibé d'eau et<br />
d'alcool. N'utiliser ni d'eau chaude, ni de substances abrasives ou<br />
corrosives , ni de s ol vants.<br />
I.7 MISES EN GARDE ET RECOMMANDATIONS<br />
Veiller à ce que le flux d'air ne soit pas entravé et ne pas utiliser l'unité<br />
comme plan d'appui. L'utilisation d'eau ou de bombes spray à proximité<br />
de l'unité peut provoquer des déc harges élec triques et/ou entraîner un<br />
mauvais foncti onnement.<br />
I.6.1<br />
NETTOYAGE DU FILTRE A AIR<br />
DANGER!<br />
Prêter attention pendant le démontage du filtre car<br />
les ailettes de l’échangeur ont un profil coupant.<br />
IMPORTANT !<br />
Faire fonctionner les unités uniquement après avoir<br />
installé les filtres.<br />
Pour garantir une bonne aspiration d'air, le filtre doit être nettoyé au<br />
moins une fois par mois voire plus fr équemment si l'appareil est utilisé<br />
dans un milieu très poussiéreux. Pour le nettoyage du filtre, il est<br />
nécess aire de le r etirer de l'unité. Le filtre à air peut être nettoyé par<br />
souffl age d'air comprimé ou à l'aide d'eau. Avant de remonter l e filtre,<br />
s'assurer qu'il est parfaitement propre et s ec.<br />
Si le filtre est endommagé, il doit être remplacé par un filtre neuf<br />
d'origine RHOSS.<br />
Avant d’envoyer un signal par tél écommande, s’assurer qu’elle soit<br />
pointée vers le réc epteur placé sur l’unité. Si l’unité reçoit correctement<br />
le signal envoyé par téléc ommande, un signal sonore c onfirme la bonne<br />
réception: en l'absence de c e signal, r épéter l’opération. La<br />
télécommande ne transmet pas l e signal à l’unité si celui-ci est entravé<br />
par une cl oison ou d’autres objets.<br />
Protéger la téléc ommande de toute projection d’eau ou autres fluides et<br />
de tout choc.<br />
max 8 m<br />
SLEEP TEMP<br />
40
SECTION II: INST ALL ATION ET ENTRETIEN<br />
II<br />
II.1<br />
II.1.1<br />
SECTION II: INSTALLATION ET<br />
ENTRETIEN<br />
INSTRUCTIONS DE TRANSPORT<br />
EMBALLAGE ET COMPOSANTS<br />
DANGER!<br />
NE PAS OUVRIR NI N'EFFECTUER D'OPÉRATION<br />
SUR L'EMBALLAGE AVANT DE L'AVOIR AMENÉ<br />
SUR LE LIEU D'INSTALLATION.<br />
Les opérations de déplacement et de levage doivent<br />
être confiées à un personnel qualifié et disposant<br />
de l'équipement nécessaire à cet effet.<br />
À la réc eption de la marchandis e, s'assurer que celle-ci n'a subi aucun<br />
dommage durant son transport et qu'aucune partie ne manque à la<br />
fourniture.<br />
En cas de dommages évidents , les signal er immédiatement s ur le<br />
document de trans port en r eportant la mention: “RETRAIT SOUS<br />
RÉSERVE POUR DOMMAGES ÉVID ENTS À L’EMBALLAGE”, et en<br />
reportant aussi le numéro de matricul e s’il s’agit de plusieurs machines,<br />
car le retour franco usine comporte le dédommagement à la charge de<br />
l’assurance confor mément aux dispositi ons de l a loi n°450 du 22/08/85<br />
“limites de dédommagement”.<br />
II.1.3 CONDITIONS DE STOCKAGE<br />
Les unités emballées peuvent être stoc kées en superposant un<br />
maxi mum de quatre unités et elles doi vent être stoc kées en lieu sec, à<br />
l’abri du s oleil et de la pluie.<br />
II.1.4 ESPACES TECHNIQUES ET<br />
POSITIONNEMENT<br />
IMPORTANT !<br />
Le mauvais positionnement ou la mauvaise<br />
l'installation de l'unité peut entraîn er une<br />
amplification du bruit émis par celle- ci ou des<br />
vibrations durant son fonctionnement.<br />
Les unités Idrowall doi vent être fi xées en respectant l es es pac es<br />
techniques de positionnement.<br />
100 mm<br />
100 mm 100 mm<br />
min 1900 mm<br />
max 2200 mm<br />
Pour le d éballage, suivre les instruction s ci-dessou s:<br />
S'assurer de l'abs ence de dommages visibles;<br />
Ouvrir l'emballage;<br />
Veiller à éliminer les matériaux d'emballage dans le respect des<br />
normes en vigueur, en les remettant à cet effet à des centres de<br />
collecte ou de rec yclage.<br />
PROTECTION DE L'ENVIRONNEMENT!<br />
Veiller à éliminer les m atériaux d'emballage d ans le<br />
respect des dispositions en vigueur sur le lieu<br />
d'installation.<br />
DANGER!<br />
Ne pas laisser les emballag es à la portée d es<br />
enfants.<br />
II.1.2 INDICATIONS POUR LA MANUTENTION<br />
DANGER!<br />
Les opérations de déplacement de l'unité doivent<br />
être effectuées en pr enant soin d e ne pas<br />
endommager la structure extern e et les parties<br />
mécan iques et électriqu es internes.<br />
S'assurer également d e l'ab sence d'obstacles et d e<br />
personnes le long du trajet pour prévenir les<br />
risques de choc, d' écr asement et d e renver sem ent<br />
de l'appareil de levage.<br />
Toutes les opér ations décrites pl us bas doi vent être effec tuées en<br />
conformité aux normes de sécurité en vigueur, aussi bien en ce qui<br />
concerne les moyens utilisés que les modalités mises en œuvre. Avant<br />
de procéder aux opér ations de déplac ement, s'assur er que la portée du<br />
moyen de l evage est adaptée au poids de l'unité à trans porter.<br />
Les unités peuvent être déplacées/s oulevées aussi bien manuellement<br />
que par l'intermédiaire d'un c hariot prévu à c et effet. Si plusi eurs<br />
appareils doivent être déplac és simultanément, il est rec ommandé de<br />
les plac er à l'intérieur d'un conteneur et de l es dépl acer ensuite à l'aide<br />
d'une grue ou d'autre engin si milaire.<br />
41
II.2<br />
INSTRUCTIONS D'INSTALLATION<br />
DANGER!<br />
L'installation doit être confiée à des techniciens<br />
qualifiés et habilités à intervenir sur des appareils<br />
de conditionnement et de réfrigération. Une<br />
mauvaise installation est su sceptible d'entr aîner un<br />
mauvais fonctionnement de l'unité (baisses de<br />
rendement).<br />
DANGER!<br />
Les in stallateurs sont tenus de respecter la<br />
réglementation locale ou nationale en vigueur lors<br />
de l'installation de l'appareil.<br />
SECTION II: INST ALL ATION ET ENTRETIEN<br />
En cas de traversée directe de la p aroi:<br />
l’épaisseur du mur (s) ne doit pas être supérieure à 500 mm;<br />
le trou au mur doit avoir une inclinaison d’au moins 15° (a) pour<br />
faciliter l’écoulement naturel de l’eau de condensation.<br />
Le s ystème d'évacuation de la condensation doit se tr ouver à la<br />
bonne i nclinaison pour per mettr e l'écoul ement de l'eau.<br />
Les c âbles électriques peuvent être branc hés à l’unité en s uivant le<br />
trajet des tuyaux hydrauliques ou en utilisant indiffér emment une des<br />
trois sorties disponibles.<br />
S<br />
II.2.1<br />
MISE EN PLACE DES RACCORDEMENTS<br />
HYDRAULIQUES<br />
IMPORTANT !<br />
Les r accord ements h ydrauliques sont des<br />
opérations très importantes; aussi doivent-elles<br />
être confiées à un personnel qualifié.<br />
IMPORTANT !<br />
En présence d'eau particulièr ement calcair e, il est<br />
recommandé de procéder à l'inst allation d'un<br />
adoucisseur.<br />
Avant d’installer l’appareil, il faut choisir le s ens de sortie des lignes de<br />
l’unité, en fonction des caractéristiques de l’installation ou de la mise en<br />
place des r accordements hydrauliques présents au point d’installation.<br />
Les positions des trous au mur pour le passage des tuyauteries sont<br />
indiquées s ur la figure.<br />
1. Trou pour la s ortie des tuyauteries hydrauliques et d'évacuation de<br />
la condensati on avec traversée direc te de l a paroi<br />
2. Trou pour la s ortie des tuyauteries hydrauliques et/ou d'évac uation<br />
de la condensati on<br />
3. Trou pour la s ortie des tuyauteries hydrauliques<br />
4. Gabarit de fi xation<br />
II.2.2 FIXATION DE L’UNITE<br />
Pour fi xer l’unité au mur, proc éder comme décrit ci-dess ous:<br />
enlever le gabarit de fi xati on en acier pl acé au dos de l’unité;<br />
placer le gabarit en acier dans l a zone où l'on souhaite i nstaller<br />
l'unité;<br />
vérifier la perpendicularité en utilisant un fil à plomb ou un niveau;<br />
tracer les points où l'on doit perforer le mur pour l a fi xati on;<br />
après avoir perforé l e mur, pr océder à la fi xation du gabarit.<br />
a<br />
Les c âbles électriques peuvent être branc hés à l’unité en s uivant le<br />
trajet des tuyaux hydrauliques ou en utilisant indiffér emment une des<br />
trois sorties disponibles.<br />
4<br />
1<br />
2<br />
3<br />
4<br />
1<br />
2<br />
Vues arrière.<br />
3<br />
Après avoir choisi le sens de s ortie des lignes, on peut procéder au<br />
perçage du mur s ur lequel s era pl acée l’unité, en s uivant les indicati ons<br />
reportées sur l e gabarit en papier. Ci-dess ous , nous illustrons les<br />
positions indic ati ves des trous en fonction du sens c hoisi pour la s ortie<br />
des lignes.<br />
42
percer aux points détermi nés à l’aide du gabarit en papier;<br />
fixer l e gabarit en acier sur le mur en utilisant les vis fournies en<br />
dotation à l’unité (Fig. 25).<br />
SECTION II: INST ALL ATION ET ENTRETIEN<br />
II.2.3 RACCORDEMENTS HYDRAULIQUES<br />
Après avoir fixé correctement le gabarit au mur, on peut relier l’unité à<br />
l’installation hydr aulique à l‘aide des raccor ds entrée/sortie indiqués par<br />
les flèches pr ésentes sur les tubes de l’unité<br />
Pour vérifier la bonne fi xation du gabarit sur le mur, proc éder comme<br />
décrit:<br />
approc her l’unité au gabarit fi xé au mur;<br />
unir l’unité au gabarit en utilisant les cr ochets de support prévus à<br />
cet effet.<br />
Pour la connexion des lignes, utiliser des attaches rapides. Avant<br />
d’effectuer le racc ordement hydraulique de l’appareil, démonter l e<br />
raccord rapi de.<br />
Introduire dans les tuyaux des lignes de branc hement les composants<br />
du racc ord rapide précédemment démontés.<br />
Raccorder les tuyaux de l’unité aux raccords rapides en les insérant<br />
jusqu’à la butée prédis posée. Visser manuellement tous les racc ords,<br />
puis terminer le serrage à l’aide d’ une clé dynamométrique de force de<br />
34,3 Nm et en utilisant une autre clé afin d’éviter toute torsion sur le<br />
tuyau.<br />
1: Clé dynamométrique<br />
(34,3 Nm)<br />
2: Clé<br />
Une fois l'installation effectuée, il es t nécess aire de pr océder aux<br />
opérations sui vantes :<br />
Revêtir les tuyaux de raccordement avec un matériau anti<br />
condens ation de 10 mm d'épaisseur.<br />
Verser de l'eau dans le bac de récupération de la condensation et<br />
s'assurer de son éc oulement, en en sui vant l e parcours jusqu'au point<br />
d'évacuation de la c ondensati on. Si l'écoul ement ne s'effectue pas<br />
correctement, c ontrôl er l'inclinaison et rec hercher les éventuels points<br />
d'obstructi on.<br />
Évacuer l'air présent dans l e circuit.<br />
La batterie à eau est équipée d’ une petite vanne de purge de l’air et<br />
d’une petite vanne de vidange de l’eau.<br />
43
SECTION II: INST ALL ATION ET ENTRETIEN<br />
II.2.3.1 Création de l'évacuation de la condensation<br />
Le s ystème d'évacuation de la condensation doit se tr ouver à la bonne<br />
inclinaison pour permettre l'écoulement de l'eau.<br />
3 cm/m<br />
II.2.3.2 Protection antigel<br />
IMPORTANT !<br />
L'ajout de glycol à l'eau modifie les performances<br />
de l'unité. Respecter les recommandations de<br />
sécur ité relatives à l'utilisation du glyco l (celles<br />
figurant sur l'emb allage).<br />
La non- utilisation de l’unité pendant l’hiver peut pr ovoquer la<br />
congélation de l’eau présente dans l e circuit. Il est néc essaire de<br />
prévoir à temps l a vidange c omplète du circuit d'eau. Dans le c as où<br />
l'opération de vidange s erait trop onér euse, il est possi ble d'ajouter à<br />
l'eau une quantité appr oprié de liquide antigel.<br />
II.2.4 RACCORDEMENTS ELECTRIQUES<br />
IMPORTANT !<br />
Les bran chem ents électriqu es d e l'unité doivent<br />
être confiés à un personnel qualifié et effectués<br />
dans le respect des normes en vigueur dans le pays<br />
d'installation. Un raccordement électrique non<br />
conforme déch arge la société RHOSS de toute<br />
responsabilité en cas de domm ages matér iels et /ou<br />
physiques.<br />
DANGER!<br />
Installer toujours dans un endroit protégé et pro che<br />
de l'appareil un interrupteur général automatique à<br />
courbe de retardement, d'une portée et avec un<br />
pouvoir de coupure appropriés (l'ouverture des<br />
contacts doit êtr e au minimum d e 3 mm).<br />
La mise à la terre de l'unité est obligatoire<br />
conformément aux normes en vigueur, elle garantit<br />
la sécurit é de l'utilisateur durant le fonctionnement<br />
de l'appar eil.<br />
Dénuder les conducteurs uniquement à la proximité des bornes. Utiliser<br />
des cosses adaptées aux bor nes utilisées.<br />
Après avoir inséré la cosse dans la borne, serrer les vis avec un<br />
tournevis sans forc er excessi vement: une fois l’opérati on terminée, tirer<br />
légèrement sur les câbles pour vérifier qu’ils sont serrés correctement.<br />
Utiliser le serre-câble présent à l’intérieur du logement de la carte<br />
électronique pour bl oquer les c âbl es.<br />
40 mm<br />
L<br />
N<br />
M4<br />
M4<br />
II.2.4.1 Branchement au réseau électrique<br />
S'assurer que l a tension et la fréquenc e de l'installation électrique s ont<br />
de 230V (±10%) monophas é à 50 Hz; contrôler que la puiss ance<br />
disponible est s uffisante pour faire fonctionner l'appareil et que la<br />
section des câbles de la ligne d'alimentation est compatibl e avec le<br />
courant maximum requis.<br />
S'assurer que l e circuit d'ali mentati on électrique est conforme aux<br />
normes nationales de séc urité en vigueur.<br />
Le c âble d'alimentation doit être de type flexible avec gaine en<br />
pol ychloroprène et d'un poids non inférieur à cel ui du type H05RN-F. La<br />
longueur du c onduc teur de terre doit être s upérieure à celle des autres<br />
conducteurs de telle sorte qu'il soit le dernier à se décrocher en cas de<br />
desserrement du dispositif de fi xati on du c âbl e.<br />
Les branc hements doi vent être effec tués en respectant l e schéma<br />
électrique.<br />
L<br />
L<br />
N<br />
N<br />
L<br />
N<br />
6<br />
5<br />
FUSE<br />
7<br />
1 Touche de réinitialisation (reset);<br />
2 Connecteur série 1 (Phone 1);<br />
3 Connecteur série 2 (Phone 2);<br />
4 Jumper JP0;<br />
5 Connecteur AUX1, demande chaud (contact libre);<br />
6 Connecteur AUX2, demande froid (contact libre);<br />
7 Fusible, 5x20 F3,15A 250V;<br />
8 Connecteur CN9 pour panneau mural (KPFI);<br />
- - - Raccordement aux soins de l'installateur.<br />
Pour accéder aux bornes de la c arte électronique, retirer le couvercle<br />
de protec tion après avoir soulevé le panneau frontal de l’unité.<br />
Faire pass er le c âble d’alimentation à travers la fente située derrière<br />
l’unité.<br />
2<br />
4<br />
3<br />
1<br />
L<br />
1<br />
8<br />
N<br />
50 mm<br />
M4<br />
Utiliser le serre-câble présent sur le côté interne pour bloquer le câble<br />
d'alimentati on et les câble d'interconnexi on, ne dénuder les<br />
conducteurs qu'à proxi mité des bornes de branchement.<br />
En cas de fixation de l'unité à une paroi métallique, elle doit être reliée à<br />
la terre c onformément aux nor mes en vigueur dans le pays<br />
d'installation.<br />
44
SECTION II: INST ALL ATION ET ENTRETIEN<br />
II.2.4.2<br />
Raccordement des contacts auxiliaires<br />
(AUX 1-2)<br />
2 contacts auxiliaires nor malement ouverts AUX 1 et AUX 2 sont<br />
disponibles pour la gestion par exemple de l a chaudière ou du<br />
refroidisseur.<br />
Contact Libre<br />
JP0 AUX1 AUX2<br />
Contact sous tension<br />
JP0 AUX1 AUX2<br />
1 2 3 4 5 6<br />
1 2 3 4 5 6<br />
24÷230 Vac<br />
Ils peuvent être utilisés comme contacts libres ou éventuellement mis<br />
sous tension (230Vac), la c harge maxi male applicabl e à chaque contact<br />
est de: 0,5 A - 230 Vac AC1.<br />
AUX 1 Fermé à la demande de c haud.<br />
AUX 2 Fermé à la demande de froi d.<br />
En mode c hauffage AUX 1 s'ouvre si l'alarme de protection de l a<br />
batterie se décl enc he.<br />
En mode rafraîchiss ement AUX 2 s'ouvre si l'alarme de protection de l a<br />
batterie se décl enc he.<br />
En mode ventilation, AUX 1 et AUX 2 s'ouvrent quand le ventilateur est<br />
allumé.<br />
II.2.5 LIAISON MAITRE/ESCLAVE<br />
C’est une foncti on particulière où un appareil défini Maître (contr ôlé par<br />
télécommande ou par le panneau de commande) envoi e des<br />
informations sur l’état du fonc tionnement à d’ autres appar eils (31 au<br />
maxi mum) définis Esclave (privés de téléc ommande ou de panneau de<br />
commande), ceci par un br anc hement él ectrique qui doit être réalisé au<br />
moment de l’installation (voir schémas électriques).<br />
Alarmes: Les alar mes s ont gérées de manière indépendante s ur<br />
chaque c arte de contrôle.<br />
Timeout: Les Esclaves ne peuvent pas continuer à fonctionner en<br />
absence du Maître ( pour manque de communic ation, panne ou autre)<br />
étant donné qu’ auc une commande ne serait possibl e vers les machines<br />
(On/Off,…).<br />
Communication Maître/Esclave:<br />
En cas de mauvais fonctionnement du Maîtr e, en remettant en<br />
marche les Esclave on peut les commander séparément par la<br />
télécommande. Tout c eci sans aucune inter vention sur les connexi ons<br />
et/ou carte de c ontrôl e.<br />
La télécommande fonctionne même s ur les Esclaves après qu'ils<br />
aient instauré une communication avec le M aître. Dans c e c as,<br />
l'Esclave a un fonc tionnement autonome mais uniquement jusqu'à la<br />
réception s uccessi ve d'infor mati ons de l a part du Maître.<br />
La distanc e maxi mum du rés eau loc al est de 30 m (c’est la distance<br />
entre l e Maîtr e et le dernier Esclave).<br />
Le racc ordement entre Maître et Esclave doit être effectué avec un<br />
câble blindé constitué de 6 conducteurs et de connecteurs RJ12.<br />
FUSE<br />
FUSE<br />
FUSE<br />
L<br />
N<br />
L<br />
N<br />
L<br />
N<br />
MASTER SLAVE 1 SLAVE 2<br />
1<br />
2<br />
3<br />
4<br />
5<br />
6<br />
Bianco White Blanc Weiss Blanco<br />
Nero Black Noir Schwarz Negro<br />
Rosso Red Rouge Rot Rojo<br />
Verde Green Vert Grün Verde<br />
Giallo Yellow Jaune Gelb Amarillo<br />
Blu Blue Bleu Blau Azul marino<br />
1 Rx/Tx-<br />
2 Rx/Tx+<br />
3 GND<br />
4<br />
5<br />
6<br />
II.2.5.1 Liaison Maître/Esclave avec la<br />
télécommande<br />
Pour la liaison M aître/Esclave en utilisant la Télécommande, il est<br />
nécess aire d'introduire un pont s ur les bornes 1 et 2 (avec une unité<br />
déconnectée du rés eau él ectrique) uniquement s ur l'unité définie<br />
Maître.<br />
Master<br />
1 2<br />
3 4 5 6<br />
45
SECTION II: INST ALL ATION ET ENTRETIEN<br />
II.3<br />
II.3.1<br />
INSTRUCTIONS POUR LA MISE EN SERVICE<br />
IMPORTANT !<br />
La mise en service ou la pr emière m ise en m arch e<br />
de l'appareil doit être confiée exclusivement à un<br />
personnel qualifié et habilité pour intervenir sur ce<br />
type d'appar eil.<br />
DANGER!<br />
Avant de procéder à la mise en service s' assurer<br />
que l'installation et les branch ements électriques<br />
ont été effectués conformément aux indications<br />
reportées dans la pr ésente notice. S' assurer en<br />
outre de l'absence de personnes non autorisées à<br />
cet effet à proximit é de l'appareil durant les<br />
opérations ci-dessus.<br />
CONTROLES PRELIMINAIRES AVANT LA<br />
MISE EN MARCHE<br />
Avant la m ise en m arch e s' assurer:<br />
1. que l'unité est c orrectement positionnée;<br />
2. que le tuyaux de refoulement et de r etour du circuit hydraulique s ont<br />
raccordés;<br />
3. qu’il n’y ait point d’air dans le circuit hydraulique;<br />
4. que l’échangeur soit nettoyé;<br />
5. que les br anchements él ectriques sont c onformes;<br />
6. que les vis de fi xation des conducteurs sont bi en s errées;<br />
7. que la tension d'ali mentati on est c onforme à celle requise;<br />
8. que l’absor ption de l’unité soit correcte et qu’elle ne dépasse pas<br />
celle autorisée (voir A1 Données techni ques).<br />
Il est recommandé d e faire fonctionner l'unité à la vitesse<br />
maximum pendant quelqu es heures.<br />
II.3.2 MISE HORS SERVICE<br />
IMPORTANT !<br />
La non-utilisation de l’unité pendant l’hiver peut<br />
provoquer la congélation de l’eau présente dans le<br />
circuit.<br />
Pendant les l ongues périodes d'arrêt, l'utilisateur doit isoler l'appareil de<br />
l'alimentation élec trique en plaç ant l'interrupteur général s ur la position<br />
OFF.<br />
La non- utilisation de l’unité pendant l’hiver peut pr ovoquer la<br />
congélation de l’eau présente dans l e circuit. Il est néc essaire de<br />
prévoir à temps l a vidange c omplète du circuit d'eau. Différemment, il<br />
est nécess aire d'ajouter à l'eau une quantité s uffisante de liquide antigel<br />
(pourcentage maxi mal e inférieur à 30%).<br />
II.3.3 REMISE EN MARCHE APRES UNE LONGUE<br />
PERIODE D'ARRET<br />
Avant la r emise en marche:<br />
Nettoyer ou changer les filtres à air.<br />
Nettoyer l'échangeur.<br />
Nettoyer et/ou débarrasser des éventuelles obstruc tions le bac de<br />
récupér ation de la c ondensation.<br />
Purger le circuit hydraulique;<br />
Il est rec ommandé de faire foncti onner l'unité à l a vitess e maximum<br />
pendant quelques heures .<br />
II.4<br />
INSTRUCTIONS D'ENTRETIEN<br />
DANGER!<br />
Veiller à toujours actionner l'interrupteur situé<br />
monté en amont des câbles d’alimentation pour<br />
isoler l’unité du secteur avant toute intervention<br />
d’entretien, y compr is d ans le cas d'un simple<br />
contrôle. S'assurer que personne ne puisse mettre<br />
involontairement sous tension l'appareil; à cet effet<br />
verrouiller l'interrupteur gén éral sur la po sition Off.<br />
DANGER!<br />
Les interventions d ’entretien doivent être<br />
effectuées par d es t echniciens qualifiés et habilités<br />
à intervenir sur des appareils de conditionnement<br />
et de réfrig ération. Veiller à faire u sag e de g ants de<br />
travail appropriés.<br />
DANGER!<br />
Il est rigoureusement interdit d'introduire des objets<br />
pointus à travers les grilles d'aspiration et de<br />
refoulement d'air.<br />
II.4.1.1<br />
Remplacement des piles<br />
DANGER!<br />
Prendre d es mesur es de pr écaution afin<br />
d’empêch er l’usag e inapproprié ou accidentel d es<br />
piles p ar des enfants.<br />
ATTENTION !<br />
Si la télécommand e n’est pas utilisée pendant une<br />
longue durée (par exemple, arrêt saisonnier de<br />
l’unité), enlever les piles de leur log ement afin<br />
d’éviter toute éventuelle fuite du fluide interne<br />
susceptible d'oxyder les contacts.<br />
Pour le remplacement des batteries , enlever le couvercle du logement<br />
des piles, retirer les vieilles piles et insérer les neuves en respectant la<br />
polarité i ndiquée à l'intérieur du logement.<br />
SLEEP<br />
MODE<br />
SWING<br />
R<br />
FAN<br />
TIME-ON<br />
TIME-OFF<br />
TIME-SET<br />
C<br />
TEMP<br />
NET WORK<br />
BATT<br />
- +<br />
- +<br />
Utiliser uniquement deux piles alcalines AAA d'1,5V. Ne pas intr oduire<br />
une pile usée avec une neuve ou deux piles de type différent.<br />
Après avoir ter miné remplacé les piles, la téléc ommande s e pl ace s ur<br />
OFF et tous l es réglages sont perdus.<br />
II.4.1.2<br />
Contrôle et nettoyage de l’échangeur<br />
DANGER!<br />
Prêter attention pendant le démontage du filtre car<br />
les ailettes de l’échang eur ont un profil coupant.<br />
Éteindre l’unité, s oulever le volet frontal et contrôler l’état de<br />
l’échangeur.<br />
Au besoin:<br />
débarrasser la s urfac e à ailettes de tout corps étranger susceptibl e<br />
d'empêcher le pass age de l’air;<br />
éliminer les dépôts de poussi ère avec un jet d’ air comprimé;<br />
effec tuer un l éger lavage à l’eau accompagné d’un l éger brossage;<br />
sécher le tout à l’air comprimé.<br />
46
SECTION II: INST ALL ATION ET ENTRETIEN<br />
II.4.1.3<br />
Contrôle et nettoyage de l’évacuation de<br />
condensation<br />
Lorsque l'unité es t éteinte, retirer le tableau frontal en retirant les vis de<br />
fixation et contrôler l'état de l'évacuation de la condensation.<br />
II.4.1.5 Vidanger le circuit d'eau<br />
IMPORTANT !<br />
Les piles à eau peuvent êtr e partiellement drainées;<br />
pour procéder à leur drainage complet, il est<br />
recomm andé d'insuffler de l' air à l'intér ieur d e la<br />
batterie.<br />
Pour les opérations d’entretien particulières ou pour éviter toute ruptur e<br />
à cause de l a congélation de l’eau présente dans le circuit hydraulique,<br />
il est possible de vi danger l’eau de l’installation.<br />
Pour vidanger l’eau, procéd er comme d écr it:<br />
ouvrir la porte frontale et retirer les filtres de l'air;<br />
desserrer la vanne de décharge de l'eau.<br />
Si néc essaire, r etirer toute éventuelle obstr uction de l’évac uati on de<br />
condens ation susc epti ble d’empêc her l’éc oulement normal de l’eau.<br />
II.4.1.4 Purge du circuit hydraulique<br />
Si de l’air est pr ésent dans l e circuit hydraulique, il doit êtr e purgé.<br />
Pour purger l'air, pro céder de la manière suivante:<br />
ouvrir la porte frontale et retirer les filtres de l'air;<br />
desserrer la vanne de purge en faisant s ortir l'air;<br />
mettre en marche l'unité pendant quelques mi nutes;<br />
arrêter l'unité;<br />
purger de nouveau l e circuit hydraulique;<br />
Répéter l'opération jusqu'à ce que tout l'air ait été évacué hors du<br />
circuit.<br />
L’eau sortant de la petite vanne de purge est écoulée dans l e bac de<br />
récupér ation de la c ondensation.<br />
L’eau sortant de la petite vanne de purge est écoulée dans l e bac de<br />
récupér ation de la c ondensation.<br />
II.4.2 CIRCUI T ELECTRIQUE<br />
Pour l'entretien du circuit él ectrique, il es t recommandé de proc éder aux<br />
opérations sui vantes<br />
contrôler l a consommation él ectrique de l’unité au moyen d’une<br />
pince ampérométrique et la c omparer aux valeurs i ndiquées sur la<br />
documentation;<br />
contrôler l e serrage des c ontacts électriques et des bornes<br />
correspondantes.<br />
II.5 INDICATIONS POUR LA MISE AU REBUT DE<br />
L’UNITE<br />
PROTECTION DE L'ENVIRONNEMENT!<br />
RHOSS accorde depuis toujours une grande<br />
attention à la protection de l'environnement.<br />
Le ou les responsab les de la mise au rebut de<br />
l'unité doivent veiller au r espect scrupuleux des<br />
indications qui suivent.<br />
La mise au rebut de l'unité doit être confiée à une s ociété spécialisée et<br />
agréée pour l e retrait des machines et pr oduits destinés à l a décharge.<br />
L'appareil est cons titué de matièr es traitables telles que les MPS<br />
(matières premières s econdaires), et est s oumis aux prescriptions<br />
suivantes:<br />
Si le circuit contient un liquide antigel, ce derni er ne doit pas êtr e<br />
éliminé comme un déchet ordinaire (produit polluant).<br />
le liquide antigel doit êtr e collecté et éli miné selon les procédures<br />
prévues ;<br />
les compos ants élec troniques (condensateurs él ectrol ytique) doi vent<br />
être considérés comme des déc hets spéciaux, comme tels ils doivent<br />
être réc upér és et remis à un c entr e de collec te agréé;<br />
le matériau isolant des tuyaux en c aoutchouc pol yur éthane expansé<br />
et pol yuréthane expans é à trame ainsi que l a mouss e d'isolation<br />
acous tique de revêtement des panneaux doivent êtr e élimi nés et tr aités<br />
comme des déc hets urbains.<br />
47
SECTION II: INST ALL ATION ET ENTRETIEN<br />
II.6<br />
ANOMALIES DE FONCTIONNEMENT<br />
Anomalie<br />
Cause probab le<br />
Déclenchement ou désactivation de l’interrupteur automatique de pr otection de l’unité.<br />
État de coupure de courant.<br />
Déclenchement d’une alar me de l’unité.<br />
L’unité ne fonctionne pas:<br />
La valeur de tempér ature programmée est inférieure (en mode de fonctionnement HEAT) ou s upérieure (en<br />
mode de fonc tionnement COOL ou DRY) à la tempér ature ambiante.<br />
Activation des bl ocages prévus par l es fonctions TOO COOL et HOT START.<br />
Le réc epteur de signal plac é sur l’unité, en fonctionnement par téléc ommande es t expos é directement à une<br />
source lumineus e très i ntense comme celle du soleil ou d’une lampe fl uoresc ente.<br />
Filtre de l’air bouc hé:<br />
Difficulté de circulati on de l’air dans l’unité.<br />
La valeur de tempér ature de travail n’est pas réglée correctement.<br />
L’unité ne rafraîch it pas, ou ne<br />
réchauffe p as, d e façon<br />
appropriée:<br />
Sélection d’une val eur inappropriée de la vitesse du ventilateur.<br />
L’appareil n’ est pas alimenté en eau s uffisamment c haude, ou froide, ou abs enc e de circulati on d’eau dans<br />
les tuyaux.<br />
Portes ou fenêtres ouvertes .<br />
L’électrovanne ne fonctionne pas correctement.<br />
L’appareil n’a pas été correctement dimensionné par rapport aux exigences spécifiques de l’installation.<br />
48
INHALT<br />
INDICE<br />
VERWENDETE SYMBOLE<br />
Italiano pagina 4<br />
English page 19<br />
Français page 34<br />
Deutsch Seite 49<br />
Español página 64<br />
I ABSCHNITT I: BENU TZUN G................................................................ 50<br />
I.1 Maschinenbeschreibung............................................................................ 50<br />
I.1.1 Zulässig er Maschi nen gebr auch ...................................................................... 50<br />
I.1.2 Maschinenkennzeichnung............................................................................. 50<br />
I.1.3 Bauei gensc haften ....................................................................................... 50<br />
I.2 Einsatzgrenzen ......................................................................................... 50<br />
I.2.1 Hinweise zur Restgefährdung........................................................................ 50<br />
I.3 Zubehör und Ersatzteile............................................................................. 50<br />
I.3.1 Zubehör (se parat ge liefert) ............................................................................ 50<br />
I.4 Bedien- und Regelvorrichtungen................................................................. 51<br />
I.4.1 Fernbed ien ung (SERIENMÄSSIG) ................................................................. 51<br />
I.4.2 Bedie ntafel KPFI (separat gel iefert) ................................................................ 51<br />
I.5 Gebrauchsanweisungen............................................................................. 51<br />
I.5.1 Betriebsarten ............................................................................................. 51<br />
I.5.2 Komfortfunktionen....................................................................................... 52<br />
I.5.3 Fernbed ien ung ........................................................................................... 52<br />
I.5.4 Betriebseinstellungen................................................................................... 53<br />
I.5.5 Reset der Fernbedienung ............................................................................. 54<br />
I.5.6 Datenü bertrag ung a n die Sl ave-Ei nhe it............................................................ 54<br />
I.5.7 Beschreibung des Displays der Einheit ............................................................ 54<br />
I.5.8 Gerätebetrie bsschalter ................................................................................. 54<br />
I.5.9 Alarmmeldungen......................................................................................... 54<br />
I.6 Reinigen des Gerätes................................................................................. 55<br />
I.6.1 Reinigen des Luftfilters................................................................................. 55<br />
I.7 Warnungen und Hinweise........................................................................... 55<br />
SYMBOL<br />
BEDEUTUNG<br />
ALLGEMEINE GEF AHR !<br />
Die W arnung ALLGEMEINE GEFAHR weist die<br />
Bedienung und das W artungspersonal auf Gefahren<br />
hin, die zum Tod e, zu Verletzungen und zu<br />
dauernden oder latenten Krankh eiten führen<br />
können.<br />
GEFAHR – BAUTEILE UNTER SPANNUNG!<br />
Die W arnung GEFAHR – B AUTEILE UNTER<br />
SPANNUNG weist die Bedienung und das<br />
W artungspersonal auf Gefährdung durch unter<br />
Spannung stehende Maschinenteile hin.<br />
GEFAHR SCHARFE OBERFLÄCHEN!<br />
Die W arnung GEFAHR SCHARFE OBERFLÄCHEN<br />
weist die Bedienung und das W artungspersonal auf<br />
Risiken durch potentiell gefähr lich e Oberfläch en<br />
hin.<br />
GEFAHR HEISSE OBERFLÄCHEN!<br />
Die W arnung HEISSE OBERFLÄCHEN weist die<br />
Bedienung und das W artungspersonal auf<br />
Gefährdung durch potentiell heiß e Oberfläch en hin.<br />
GEFAHR MASCHINENTEILE IN BEW EGUNG!<br />
Die W arnung MASCHINENTEILE IN BEW EGUNG<br />
weist die Bedienung und das W artungspersonal auf<br />
Gefahren hin , die durch sich b eweg ende<br />
Maschinenorg ane entstehen können.<br />
W ICHTIGER W ARNHINW EIS!<br />
Die Angabe W ICHTIGER W ARNHINW EIS lenkt die<br />
Aufmerksamkeit der Bedienung und des Personals<br />
auf Eingriffe oder Gefahren hin, die zu Schäd en an<br />
der Maschine od er ihrer Ausrüstung führen können.<br />
UMW ELTSCHUTZ!<br />
Der Hin weis Umweltschutz liefert Anleitungen für<br />
den umweltfreundlichen Gebrauch der Maschine.<br />
II ABSCHNITT II: INSTALLA TI ON UND WAR TUNG................................ 56<br />
II.1 Transportanweisungen.............................................................................. 56<br />
II.1.1 Verpackung, Bauteile................................................................................... 56<br />
II.1.2 Hinweise zum Handling der Maschine ............................................................. 56<br />
II.1.3 Lager ung ................................................................................................... 56<br />
II.1.4 Mindestabständ e, Aufstellun g ........................................................................ 56<br />
II.2 Installation............................................................................................... 57<br />
II.2.1 Vorbere itung d er Wasseransc hlüss e ............................................................... 57<br />
II.2.2 Befestigung der Einheit ................................................................................ 57<br />
II.2.3 Wasseranschlüsse ...................................................................................... 58<br />
II.2.4 Elektrische Anschlüsse ................................................................................ 59<br />
II.2.5 Anschluss Master/Slave ............................................................................... 60<br />
II.3 Erste Inbetriebnahme................................................................................. 61<br />
II.3.1 Kontroll en vor der Inb etrieb nahm e .................................................................. 61<br />
II.3.2 AUSSERBETRIEBSETZEN.......................................................................... 61<br />
II.3.3 Wiederi nbetri ebn ahme n ach lä nger er Stillstan dzeit ............................................ 61<br />
II.4 Hinweise zur Wartung................................................................................ 61<br />
II.4.2 STROMKREIS........................................................................................... 62<br />
II.5 Hinweise für die Verschrottung der Einheit................................................... 62<br />
II.6 Betriebsstörungen..................................................................................... 63<br />
ALLEGA TI<br />
A1<br />
A2<br />
Technische Daten……………………………………………………………..……….82<br />
Abmessungen………………………………………………………..……..………….84<br />
UNI EN 292<br />
UNI EN 294<br />
UNI EN 563<br />
UNI EN 1050<br />
UNI 10893<br />
EN 13133<br />
EN 12797<br />
EN 378-1<br />
PrEN 378-2<br />
CEI EN 60335-2-40<br />
UNI EN ISO 3744<br />
EN 50081-1:1992<br />
EN 61000<br />
Bezugsnormen<br />
Maschinensicherheit. Grundsätze und allgemeine<br />
Konstruktionsprinzipien.<br />
Maschinensicherheit. Sicherheitsabstände zur<br />
Verhinderung, dass gefährliche Maschinenbereiche mit<br />
den oberen Gliedmaßen erreicht werden können.<br />
Maschinensicherheit. Temperaturen von<br />
Berührungsoberflächen. Ergonomische Daten zur<br />
Festlegung der Temperaturgrenzwerte für heiße<br />
Oberflächen.<br />
Maschinensicherheit. Grundsätze zur Risikobewertung.<br />
Technische Unterlagen. Gebrauchsanweisung<br />
Brazing. Brazer approval<br />
Brazing. Destructive tests of brazed joints<br />
Refrigeration systems and heat pumps – safety and<br />
environmental requirements. Basic requirements,<br />
definitions, classification and selection criteria<br />
Refrigeration systems and heat pumps – safety and<br />
environmental requirements. Design, construction,<br />
testing, installing, marking and documentation<br />
Sicherheit von elektrischen Haushaltsgeräten und<br />
ähnlichen Geräten. Teil 2: Sondernormen für elektrische<br />
Wärmepumpen, für Klimageräte und Luftentfeuchter.<br />
Bestimmung des Schallleistungspegels von<br />
Geräuschquellen mittels Schalldruck. Technisches<br />
Prüfverfahren im freien Feld auf einer reflektierenden<br />
Fläche.<br />
Elektromagnetische Verträglichkeit – Allgemeiner<br />
Emissionsstandard Teil 1: Wohn-, Gewerbebereich und<br />
Leichtindustrie<br />
Elektromagnetische Verträglichkeit (EMV)<br />
49
ABSCHNITT I: BENUTZUNG<br />
I<br />
ABSCHNITT I: BENUTZUNG<br />
I.1 MASCHINENBESCHREIBUNG<br />
Die Baur eihe Idrowall ist i n vier Baugrößen unterteilt:<br />
MPCV 20-30-35-40: Grundei nheit mit Magnetventil ON/OFF.<br />
I.1.1 ZULÄSSIGER MASCHINENGEBRAUCH<br />
Idrowall ist ein Klimakonvektor zur Luftbehandlung (Sommer- und<br />
Winter klimatisierung) in Innenräumen des Wohnbereichs oder<br />
ähnlichen R äumen. Die Einheit darf nicht in Waschküchen aufgestellt<br />
werden (Nor m CEI EN 60335-2-40).<br />
GEFAHR !<br />
Das Gerät darf nur in Innenräumen des<br />
Wohnbereichs oder ähnlichen B ereichen installiert<br />
werden.<br />
GEFAHR !<br />
Keine sp itzen Gegenstände durch das Gitter der<br />
Luftansaugung und des Luftauslasses einführen.<br />
W ICHTIGER HINW EIS<br />
Die ein wandfreie Arbeitsweise der Einheit hängt<br />
von der gewissenhaften B eachtung der<br />
Gebrauch sanweisungen im vorliegenden<br />
Handbuch, der Einhaltung der für die Aufstellung<br />
vorgesehenen Fr eibereiche und des zulässigen<br />
Einsatzber eichs ab.<br />
W ICHTIGER HINW EIS<br />
Eine In stallation, die nicht die empfohlenen<br />
Freiräum e berü cksichtigt, führt zu Sch wierig keit en<br />
bei der W artung und zu verringerten Leistungen.<br />
I.1.2 MASCHINENKENNZEICHNUNG<br />
Außen an den Einheiten ist ein T ypensc hild angebrac ht.<br />
RHOSS Spa<br />
TECHNICAL CHARACTERISTICS<br />
I.2 EINSATZGRENZEN<br />
W ICHTIGER HINW EIS<br />
Die ein wandfreie Arbeitsweise d er Einheit ist nur<br />
dann gewährleistet, wenn die im Folgenden<br />
genannten Ein satzgrenzen beachtet werd en.<br />
Die Einheit darf nic ht mit Wasseraustrittstemperaturen über 70°C und<br />
unter 5°C arbeiten.<br />
In Räumen mit hoher relati ver Luftfeuc htigkeit (über 80%) darf das<br />
Gerät nicht konti nuierlich i m Kühlbetrieb laufen. In dies em Fall kann<br />
sich am Luftaustritt Kondens wass er bilden, das darunter liegende<br />
Gegenstände, den Fuß boden und die Wand, an der das Gerät befes tigt<br />
ist, besc hädigen kann.<br />
I.2.1<br />
75<br />
60<br />
30<br />
20<br />
U.R.%<br />
5 10 15 60 65 70 t°C<br />
t = Wassertemperatur beim Eintritt in die Einheit<br />
R.L. = Relative Raumluftfeuchtigkeit<br />
Rauml ufttemperatur: 8°C ÷ 32°C.<br />
HINWEISE ZUR RESTGEFÄHRDUNG<br />
W ICHTIGER HINW EIS<br />
Beachten Sie mit größter Aufmerksam keit die auf<br />
der Maschine angebrachten Symbole und<br />
W arnschilder.<br />
An allen Stellen, an denen trotz aller Sc hutz vorrichtungen Restrisi ken<br />
oder potenti elle nic ht sichtbar e Gefährdungen bestehen können, sind<br />
auf der Masc hine entsprec hend der Nor m „ISO 3864“ s elbstklebende<br />
Warnsc hilder angebrac ht.<br />
I.1.3<br />
MODEL IDROWALL MPCV20<br />
Cooling<br />
Capacity<br />
Heating<br />
Power supply<br />
Frequency<br />
Power input<br />
Weight<br />
Serial No.<br />
BAUEIGENSCHAFTEN<br />
1<br />
I.3 ZUBEHÖR UND ERSATZTEILE<br />
W ICHTIGER HINW EIS<br />
Ausschließlich Origin alersatzteile und<br />
Originalzubehör benutzen. RHOSS S.p.A.<br />
übernimmt keinerlei Haftung für Sch äden durch<br />
Umbau bzw. Eingriffe seitens nicht autorisierten<br />
Person als od er für Betriebsstörungen durch Einbau<br />
von nicht Originalersatz- und Zubehörteilen.<br />
I.3.1 ZUBEHÖR (SEPARAT GELIEFERT)<br />
KGMOD – Serielle Schnittstelle RS485 für den Datenaustausch in<br />
Building Automation und Überwachungssystemen (unterstützte<br />
Protokolle: ModBuS ® RTU).<br />
3<br />
5<br />
2<br />
4 7<br />
6<br />
KVAM – Wandeinbaukasten.<br />
1. Frontpaneel<br />
2. Lüftungsklappe<br />
3. Ausrichtbare Umlenkklappe<br />
4. Luftfilter<br />
5. Empfänger und LED-Anzeige<br />
6. Not-Aus-Taste<br />
7. Fach el ektrische Anschlüsse<br />
50
ABSCHNITT I: BENUTZUNG<br />
I.4 BEDIEN- UND REGELVORRICHTUNGEN<br />
I.4.1<br />
FERNBEDIENUNG (SERIENMÄSSIG)<br />
Infrarot-Fernbedienung inkl usive Batterien (Farbe RAL 9010).<br />
I.4.2<br />
SLEEP<br />
MODE<br />
SWING<br />
R<br />
FAN<br />
TIME-ON<br />
TIME-OFF<br />
TIME-SET<br />
C<br />
TEMP<br />
NET WORK<br />
BATT<br />
(Abmessungen 57 x 137 x 18 mm)<br />
BEDIENTAFEL KPFI<br />
(SEPARAT GELIEFERT)<br />
Kabelgebundene Bedientafel mit Flüssigkristall-Display und 10 Tasten,<br />
zur manuellen Einstellung aller Gerätefunktionen auf der Grundlage der<br />
vor eingestellten Raumtemperatur. Die Bedientafel ist für<br />
Wandbefes tigung vorgerüstet (Farbe RAL 9010).<br />
AIR CONDITIONER<br />
ENTER<br />
TIMER<br />
CLOCK<br />
TIME<br />
SWING<br />
TEMP<br />
MODE<br />
FAN<br />
SLEEP<br />
(Abmessungen 120 x 120 x 18 mm)<br />
I.5 GEBRAUCHSANWEISUNGEN<br />
Über die F ernbedienung und/oder die Bedientafel (KPFI) (siehe mit<br />
dieser mitgelieferte Bedienungsanleitung) stehen folgende<br />
Bedienmöglichkeiten zur Verfügung:<br />
Ein-/Aussc halten der Ei nheit.<br />
Wähl en der drei Ventilatordrehzahl en.<br />
Einstellung des T her mostats und Halten der gewünsc hten<br />
Raumtemperatur.<br />
Umschalten der Betriebsart: Kühlen/Heizen.<br />
Die Einheit besitzt Anzeigen, die Infor mati onen z um Z ustand der Einheit<br />
bzw. Hinweise auf vorliegende Alarme liefern, und erlauben, s ollten die<br />
Fernbedienung und/oder die Bedientafel (KPFI) zeitweilig nicht zur<br />
Verfügung stehen, die manuelle Steuerung der Ei nheit über di e Taste<br />
MANUAL.<br />
I.5.1<br />
BETRIEBSARTEN<br />
I.5.1.1 AUTO<br />
In AUTO erhebt die Ei nheit di e Raumtemperatur und entscheidet die zu<br />
aktivi erende Betriebsart (Heizung, Kühlung oder Entfeuchtung),<br />
basierend auf dem vom Benutzer eingestellten Sollwert.<br />
Die Funktions weise ist nachfolgend beschrieben.<br />
Wenn die Raumtemperatur geringer als 21°C ist: Heizung;<br />
Wenn die Raumtemperatur z wischen 21 und 25°C liegt:<br />
Entfeuc htung;<br />
Wenn die Raumtemperatur höher als 25°C ist: Kühlung;<br />
Ventilator und Wasser ventil werden wie bei m Heizen, Kühl en oder<br />
Entfeuc hten gesteuert.<br />
Der Hilfskontakt AUX1 schließt sich bei jeder Heizanforderung.<br />
Der Hilfskontakt AUX2 schließt sich bei jeder Kühlanforderung.<br />
Wenn die Ei nheit länger als zwei Stunden abgeschaltet war, ist di e<br />
aktive Betriebs art beim Wiederei nschalten von der Raumtemperatur<br />
abhängig.<br />
Der Sollwert kann von 16°C bis maximal 30°C eingestellt werden.<br />
I.5.1.2 COOL<br />
COOL ist die Betriebs art “Kühlen”. In dies er Betriebs art können alle<br />
Einstellungen nac h Belieben und eigener Komfortempfi ndung wi e folgt<br />
vorgenommen werden:<br />
Aus wahl des gewünsc hten Temperaturwerts;<br />
Ventilatorbetrieb mit manueller oder automatischer<br />
Drehzahlregelung (AUTO);<br />
Stellung der Lüftungs klappe mit fester Einstellung oder<br />
Schwenkfunktion (Funkti on SWING);<br />
Der Ventilator bleibt i mmer in Betrieb, auc h wenn der Sollwert erreicht<br />
wurde.<br />
Bei einer Kühlanforderung öffnet sic h das Ventil nac h einer<br />
Verzögerung von 30 s ec; bei m Ausschalten schließt sic h das Ventil<br />
nach einer Verzögerung von 120 s ec.<br />
Der Hilfskontakt AUX2 schließt sich bei jeder Kühlanforderung.<br />
Bei Anwahl der Funktion COOL läuft der Ventilator mitunter nicht s ofort<br />
an, da die Betriebsart TOO COOL einges tellt ist (siehe bes onderen<br />
Abschnitt).<br />
Der Sollwert kann von 16°C bis maximal 30°C eingestellt werden.<br />
I.5.1.3 DRY<br />
DRY ist die Betriebsart “Luftentfeuchtung”, d.h. die F unktion, die die<br />
Luftfeuc htigkeit im Raum reduzi ert. Während dies er Betriebsart wird<br />
das On/Off-Wass ersperr ventil gemäß fes tgelegten Zykl en gesteuert:<br />
Wenn die Raumtemperatur höher als 25°C ist: Es öffnet 3 min und<br />
schließt 4 min;<br />
Wenn die Raumtemperatur z wischen 16 und 25°C liegt: Es öffnet 3<br />
Minuten und sc hließt 6 Minuten;<br />
Wenn die Raumtemperatur geringer als 16°C ist: geschloss en;<br />
51
ABSCHNITT I: BENUTZUNG<br />
Auch i n der Betriebsart DRY können die Ei nstellungen nac h Belieben<br />
und pers önlichem Wohlbefinden vorgenommen werden durch:<br />
Aus wahl des gewünsc hten Temperaturwerts;<br />
Ventilatorbetrieb mit manueller oder automatischer<br />
Drehzahlregelung (AUTO);<br />
Stellung der Lüftungsklappe mit fester Einstellung oder<br />
Schwenkfunktion (Funkti on SWING);<br />
Der Hilfskontakt AUX2 schließt sich bei jeder<br />
Entfeuc htungsanforderung.<br />
Bei Anwahl der Funktion DRY läuft der Ventilator mitunter nicht s ofort<br />
an, da die Betriebsart TOO COOL einges tellt ist (siehe bes onderen<br />
Abschnitt).<br />
Der Sollwert kann von 16°C bis maximal 30°C eingestellt werden.<br />
I.5.1.4 FAN<br />
FAN ist die Betriebsart “Belüftung”. In di eser Betriebs art können die<br />
Ventilatordrehzahl (Min-Med-Max-Auto) und di e Stellung der<br />
Lüftungs klappe (fest oder SWING) nac h Belieben eingestellt werden.<br />
Die Hilfskontakte AUX1 und AUX2 sind geöffnet.<br />
I.5.1.5 HEAT<br />
HEAT ist die Betriebsart “Heizen”. Diese Betriebsart gestattet<br />
ebenfalls die Ei nstellung nac h Belieben und persönlichem<br />
Komfortempfinden durc h:<br />
Aus wahl des gewünsc hten Temperaturwerts;<br />
Ventilatorbetrieb mit manueller oder automatischer<br />
Drehzahlregelung (AUTO);<br />
Stellung der Lüftungsklappe mit fester Einstellung oder<br />
Schwenkfunktion (Funkti on SWING);<br />
Bei einer Heizanforderung öffnet sic h das Ventil nac h einer<br />
Verzögerung von 30 Sekunden; beim Aussc halten sc hließt sich das<br />
Ventil nac h einer Verzögerung von 120 Sekunden.<br />
Der Hilfskontakt AUX1 schließt sich bei jeder Heizanforderung.<br />
Bei Anwahl der Funktion HEAT l äuft der Ventilator mitunter nicht sofort<br />
an, da die Betriebsart HOT START ei ngestellt ist (siehe bes onderen<br />
Abschnitt).<br />
Der Sollwert kann von 16°C bis maximal 30°C eingestellt werden.<br />
W ICHTIGER HINW EIS<br />
Der Geräteventilator stoppt nach Erreichen des<br />
vorgegebenen Temp eratur werts. Alle 3 Minuten<br />
wird er eine Minute lang mit Minimaldrehzahl<br />
eingeschaltet, um der Bildung von Luftschichten in<br />
Geräten ähe vorzubeugen.<br />
I.5.2 KOMFORTFUNKTIONEN<br />
TOO COOL<br />
Die Betriebsarten COOL und DRY verfügen über die Funktion TOO<br />
COOL, die das Anlaufen des Ventilators verhindert, wenn die<br />
Wassertemperatur am Eintritt des Wär metausc hers 15 Minuten lang<br />
über 32°C liegt (Rüc ks etzung bei 30°C).<br />
Am Display wird „P2“ angezeigt.<br />
HOT START<br />
Die Betriebsart HEAT verfügt über die Funktion HOT START, die das<br />
Anlaufen des Ventilators ver hindert, wenn die Wass ertemperatur am<br />
Eintritt des Wärmetauschers unter 25°C liegt (3°C Differential), und<br />
dadurch unangenehmen Kaltlufts trömungen vorbeugt. Dies e Situation<br />
könnte sich beim ersten Anl assen der Einheit oder nac h langen<br />
Stillstandz eiten ei nstellen.<br />
Am Display wird „P4“ angezeigt.<br />
POST HEAT<br />
Die Betriebsart HEAT verfügt über die Funktion POST H EAT, die den<br />
Ventilator, nac hdem die Einheit den Soll wert erreicht hat oder<br />
ausgeschaltet wird, eingesc haltet hält, um die Temperatur des<br />
Wärmetauschers bis auf 25°C abz usenken.<br />
Am Display wird „P3“ angezeigt.<br />
I.5.3 FERNBEDIENUNG<br />
Über die F ernbedienung können alle Betriebsparameter der Einheit<br />
eingestellt und angezeigt werden, s o wird di e Programmier ung star k<br />
erleichtert.<br />
Die Fernbedienung wird durch 2 Batterien T yp R03 Size AAA mit je 1,5<br />
V gespeist.<br />
I.5.3.1<br />
TASTE<br />
SLEEP<br />
TEMP<br />
MODE<br />
TIME-ON<br />
TIME-OFF<br />
TIME-SET<br />
NET WORK<br />
SWING<br />
FAN<br />
C<br />
R<br />
W ICHTIGER HINW EIS<br />
Die Funktion der F ernbedienung sollte g etestet<br />
werden, um ihren Empfangsbereich zu bestimmen.<br />
Beschreibung der Fernbedienung und ihrer<br />
Funktionen<br />
SLEEP<br />
MODE<br />
SWING<br />
R<br />
FAN<br />
TIME-ON<br />
TIME-OFF<br />
TIME-SET<br />
C<br />
TEMP<br />
NET WORK<br />
BATT<br />
BESCHREIBUNG<br />
Zum Ein- und Ausschalten der Einheit. Zum<br />
Einschalten Taste drücken, zum Ausschalten erneut<br />
drüc ken<br />
Zeigt Zustand und Betriebs arten der Einheit an<br />
Aktivi erung der SLEEP-Funktion.<br />
Über dies e Tasten kann die gewünschte<br />
Raumtemperatur eingestellt werden.<br />
Zum Wählen der gewünschten Betriebs art (AUTO,<br />
COOL, DRY, H EAT, FAN)<br />
Einstellung Einschalt-Timer.<br />
Einstellung Aussc halt-Timer.<br />
Zum Einstellen der Uhrzeit der Uhr und der Timer<br />
Zum Einstellen der Parameter des Master/Slave-<br />
Netzwerks.<br />
Mit dieser Taste kann ein kontinui erliches Sc hwenken<br />
der Lüftungskl appe eingestellt werden.<br />
Mit dieser Taste wird di e Ventilatordrehzahl gewählt.<br />
Bei Eins tellung von AUTO wird die Ventilatordrehz ahl<br />
automatisch j e nach R aumtemperatur geregelt.<br />
Zur Einstellung der U hr dies e Taste einige Sekunden<br />
lang drüc ken.<br />
Diese Taste drüc ken, um einen Res et der<br />
Einstellungen der Fernbedienung auszuführen.<br />
MEMORY<br />
Nach ei nem Str omausfall, dem On/Off über Fernbedi enung oder ei nem<br />
Alarm läuft das Gerät in der Betriebs art wieder an, in der es sich z um<br />
Zeitpunkt der Unterbrechung befand. Si nd i m Moment der<br />
Unterbrec hung die Betriebs arten TIMER oder SLEEP akti v, werden<br />
diese deakti viert.<br />
52
ABSCHNITT I: BENUTZUNG<br />
I.5.3.2<br />
Beschreibung des Displays<br />
A<br />
A<br />
AM<br />
PM<br />
00:00<br />
00<br />
°C<br />
AM<br />
PM 00:00<br />
Symbol Beschr eibung<br />
00 °C Eingestellte Temper atur.<br />
Signalübertragung zwisc hen Fernbedienung und Gerät.<br />
Ventilator.<br />
Betriebs art Sleep.<br />
Nicht verwendet.<br />
Übertragung an die Slave-Einheiten.<br />
Betriebs art SWING.<br />
Kühlfunkti on (COOL).<br />
Die Fernbedienung funktioni ert in einem Abstand von bis z u 8 Metern<br />
vom Empfänger.<br />
Fernbedienung kei ner starken Feuc htigkeit, direktem Sonnenlicht oder<br />
anderen Wärmequellen auss etzen und star ke Erschütter ungen<br />
ver meiden. Fernbedienung vor Wass er und anderen Flüssigkeiten<br />
schütz en.<br />
Wenn der Infrarot-Empfänger der Ei nheit dem direkten Sonnenlicht<br />
oder star kem Lic ht ei ner Lampe ausgesetzt wird oder sich in der Nähe<br />
eine Leuchts toffl ampe mit elektronischer Einschaltung befindet, könnte<br />
die Einheit nicht richtig oder gar nicht funktioni eren.<br />
Der Gebrauch anderer F ernbedienungen in der Nähe oder im selben<br />
Raum, in dem die Einheit installiert ist, könnte deren Betrieb<br />
beei nflussen; Sender anderer F ernbedienungen möglichst nicht auf den<br />
Empfänger der Ei nheit richten.<br />
I.5.4<br />
BETRIEBSEINSTELLUNGEN<br />
I.5.4.1 Einstellung der Uhr.<br />
Hinweis: Bei m Eins tellen der Uhr die Fernbedi enung nicht auf die<br />
Einheit richten.<br />
Wir empfehlen, di e Uhr an der Fernbedienung vor dem Ei nschalten der<br />
Einheit einz ustellen; die Einstellung erfolgt folgendermaßen:<br />
Nachdem die Batterien in die Fernbedienung ei ngesetzt oder di e Taste<br />
R (Reset) gedrüc kt wurden, blinkt auf der Uhrzeitanz eige „AM 0:00“.<br />
A<br />
Entfeuc htungsfunkti on (DRY).<br />
Belüftungsfunktion (FAN).<br />
Heizungsfunktion (HEAT).<br />
Automati kbetrieb (AUTO).<br />
Einstellung der Uhr.<br />
C<br />
TIME-SET<br />
C<br />
Mit einem spitz en Gegens tand die T aste „C“ drüc ken, die<br />
Uhrzeitanz eige blinkt.<br />
Durch Drücken der T aste TIME SET kann die Uhr<br />
eingestellt wer den.<br />
Erneut Taste „C“ drüc ken, um die eingestellte Uhrz eit zu<br />
bestätigen.<br />
I.5.3.3 Gebrauch der Fernbedienung<br />
Die Fernbedienung verwendet z wei 1,5-V-Alcaline-Batterien vom T yp<br />
R03 Size AAA (im Lieferumfang enthalten).<br />
Zum Einsetz en der Batterien den Dec kel der Fernbedi enung vollständig<br />
nach unten schieben. Batterien entsprec hend der angegebenen Polung<br />
in das Fach eins etzen. Dec kel wieder schließ en und die gewünsc hten<br />
Funktionen wähl en. Zum Austausch erschöpfter Batterien gegen frische<br />
ist genaus o vorzugehen. Die mittlere Lebens dauer der Batterie beträgt<br />
etwa ein Jahr.<br />
SLEEP<br />
MODE<br />
SWING<br />
TIME-ON<br />
TIME-OFF<br />
TEMP<br />
NET WORK<br />
I.5.4.2<br />
Ein-/Ausschalten der Einheit<br />
Taste ON/OFF drüc ken, um das Gerät ein- oder<br />
auszusc halten<br />
Nach dem Umsc halten von ON auf OFF werden der Betrieb<br />
unterbrochen, die l aufenden Zeitsc haltungen gelöscht, die Betriebsart<br />
des Gerätes und des Ventilators sowie der ei ngestellte Temperatur wert<br />
gespeichert.<br />
Beim U mschalten von OFF auf ON stellt die Einheit automatisch alle<br />
vor dem Abschalten gespeicherten Betriebsbedingungen wieder her.<br />
Nach dem Einsc halten z eigt das Display alle Betriebsinformationen der<br />
Einheit an: Betriebs art, eingestellte Temperatur, Ventilatordrehz ahl us w.<br />
Bei ausgeschalteter Einheit z eigt das Displ ay nur die Uhrzeit und die<br />
Betriebsart an, die an der Ei nheit vor dem Ausschalten eingestellt war.<br />
I.5.4.3<br />
MODE<br />
Betriebsart<br />
Taste Mode drüc ken, um die Betriebsart der Einheit zu<br />
ändern. D as Display blendet die angewählte Betriebs art<br />
ein:<br />
R<br />
FAN<br />
TIME-SET<br />
C<br />
BATT<br />
- +<br />
- +<br />
Das Display der Fernbedi enung blei bt i mmer eingesc haltet und z eigt<br />
immer die U hrzeit an, egal ob die Einheit ein- oder ausgeschaltet ist.<br />
Soll die F ernbedienung über einen längeren Zeitraum nicht benutzt<br />
werden, sollten di e Batterien entfernt werden.<br />
Währ end der Einstellungen ist di e Fernbedienung auf den Empfänger<br />
der Einheit z u richten (außer bei m Eins tellen der Uhrzeit).<br />
Werden die Signal ordnungsgemäß empfangen, bes tätigt di e Einheit<br />
dies durch ein akustisches Signal.<br />
A<br />
Kühlfunkti on: Die Einheit arbeitet mit fr eier<br />
Temperatureinstellung beim Senken der Raumtemperatur.<br />
Entfeuc htungsfunkti on: Die Einheit arbeitet mit freier<br />
Temperatureinstellung und s enkt so allmählich die<br />
Temperatur und Feuchtigkeit i m Raum.<br />
Belüftungsfunktion, die Einheit arbeitet ohne<br />
Temperatureinstellung und l üftet nur den R aum.<br />
Heizfunkti on: Die Einheit arbeitet mit fr eier<br />
Temperatureinstellung und erhöht die Raumtemperatur.<br />
Automati k-Betrieb: Die Einheit kann je nach<br />
Temperaturdiffer enz z wischen R aumtemperatur und mit<br />
der Fernbedienung gewählter Temperatur i n KÜHL- oder<br />
HEIZBETRIEB arbeiten.<br />
W ICHTIGER HINW EIS<br />
Der Ger äteventilator hält nach Erreich en des<br />
vorgegebenen Temp eraturwerts an und läuft<br />
anschließend automatisch wieder m it<br />
Minimaldrehzahl an, um der Bildung von<br />
Luftschichten in Geräten ähe vorzubeugen.<br />
53
I.5.4.4<br />
TEMP<br />
I.5.4.5<br />
FAN<br />
I.5.4.6<br />
SWING<br />
Einstellen der gew ünschten Temperatur<br />
Durch Drücken dies er Tasten in den verschiedenen<br />
Betriebs arten (auß er bei Betriebsart Belüftung) kann<br />
der gewünsc hte Temperatur wert z wischen 16°C und<br />
30°C erhöht bz w. gesenkt werden.<br />
Ventilatordrehzahl<br />
Durch Drücken dies er Taste kann die Ventilator drehz ahl<br />
gewählt werden: Automati k-, Mindest-, mittler e und<br />
Höchstdrehzahl.<br />
Einstellen der Lüftungsklappe<br />
Durch Drücken der T aste SW ING kann das kontinui erliche<br />
Schwenken der Lüftungsklappe ei ngeschaltet wer den.<br />
GEFAHR !<br />
Durch manuelles Bewegen der angetriebenen<br />
Lüftungsklappe bei eingeschalteter Einheit kann es<br />
zu Funktionsstörungen oder Besch ädigungen des<br />
Regelungssystems kommen.<br />
I.5.6<br />
NET WORK<br />
ABSCHNITT I: BENUTZUNG<br />
DATENÜBERTRAGUNG AN DIE SLAVE-<br />
EINHEIT.<br />
Ist ein Master/Slave-Netz werk vorhanden, dies e Tas te<br />
solange gedrüc kt halten bis das Symbol „Übertragung an<br />
die Slave-Einheiten“ erscheint. Beim Loslass en der T aste<br />
sendet die Master-Einheit di e neuen Einstellungen an die<br />
Slave-Einheiten.<br />
I.5.7 BESCHREIBUNG DES DISPLAYS DER<br />
EINHEIT<br />
Das Display im mittl eren T eil der Einheit liefert Infor mationen zum<br />
Betriebszustand des Geräts und zu gegebenenfalls vorliegenden<br />
Störungen, die den Betrieb des Geräts verhi nder n können.<br />
h<br />
00 °C<br />
I.5.8 GERÄTEBE TRIEBSSCHALTER<br />
Bei einem Verlust oder Ausfall der F ernbedienung/Bedi entafel kann di e<br />
Einheit mit einer Taste im Innern des Geräts in Betrieb gesetz t werden.<br />
I.5.4.7<br />
SLEEP<br />
Funktion SLEEP<br />
Durch Drücken dies er Taste wird die SLEEP-Funktion<br />
eingeschaltet, mit der Energie gespart werden kann,<br />
indem di e Temperatureinstellung automatisch geregelt<br />
wird.<br />
Die SLEEP-Funktion kann in der Betriebsart Sommer (während der<br />
ersten 2 Stunden des Betriebs wird der Soll wert allmählich um maxi mal<br />
2°C abgesenkt) und Winter ( während der ersten 2 Stunden des<br />
Betriebs wird der Sollwert allmählich um maximal 2°C angehoben)<br />
eingeschaltet werden.<br />
Zum Verlassen der SLEEP-Funktion die Tas te SLEEP drüc ken oder die<br />
Betriebs art der Einheit wechs eln.<br />
I.5.4.8 Einstellen des Timers<br />
Es kann je ein Ti mer für das automatische Ein- und Aussc halten der<br />
Einheit eingestellt werden.<br />
W ICHTIGER HINW EIS<br />
Damit die Einstellungen des Timers wirksam<br />
werden, muss die Fernbedienung in der N ähe der<br />
Einheit bleiben (in maximal 8 Meter Abstand) und<br />
auf diese ger ichtet sein.<br />
Die TIMER-Funktion wird nicht automatisch wiederholt, sondern muss<br />
jedes mal, wenn sie benutz t werden s oll, eingestellt werden.<br />
TIME-ON<br />
TIME-SET<br />
TIME-ON<br />
TIME-OFF<br />
TIME-SET<br />
TIME-OFF<br />
TIME-ON<br />
TIME-OFF<br />
Mit dieser Taste kann die Zeit für das Einsc halten der<br />
Einheit eingestellt werden.<br />
Mit dieser Taste wird di e Uhrzeit eingestellt.<br />
Zum Bestätigen der Wahl.<br />
Mit dieser Taste kann die Zeit für das Ausschalten der<br />
Einheit eingestellt werden.<br />
Mit dieser Taste wird di e Uhrzeit eingestellt.<br />
Zum Bestätigen der Wahl.<br />
Wenn die Timer-Funktion für das Einsc halten akti v ist,<br />
diese T aste drüc ken, um sie z u deaktivi eren.<br />
Wenn die Timer-Funktion für das Aussc halten akti v ist,<br />
diese T aste drüc ken, um sie z u deaktivi eren.<br />
Wird die Taste nacheinander in Folge gedrüc kt, kann di e Einheit i n<br />
Automati kbetrieb aus- und eingesc haltet werden.<br />
I.5.9 ALARMMELDUNGEN<br />
Wenn ein Al arm aufgrund ei ner Störung vorhanden ist, die den Betrieb<br />
des Geräts verhindert, wird auf dem Displ ay der Einheit und auf der<br />
Bedientafel ein Alarmcode angezeigt.<br />
Alarmbeschreibung:<br />
Alarm<br />
E0<br />
E1<br />
E3<br />
E4<br />
P0<br />
P1<br />
P2<br />
P3<br />
P4<br />
Beschr eibung<br />
Rauml uftfühler funktioniert nicht.<br />
Wasserfühler funktioni ert nicht.<br />
Wasser- und Luftfühler funkti onier en nicht.<br />
Ventilatormotor funktioni ert nic ht.<br />
Frostschutz bei Sommerbetrieb.<br />
Der Schwellenwert beträgt 2°C, di e Rüc kstellung<br />
erfolgt bei 5°C nach einer Zeit von 2 Minuten. Das<br />
Ventil wird geschl ossen, der Kontakt AUX2 wird<br />
geöffnet und der Ventilator wird auf mittlere oder<br />
höchs te Drehzahl gesc haltet.<br />
Wasser-Übertemperatur bei Wi nterbetrieb.<br />
Der Schwellenwert beträgt 75°C, die Rüc ks tellung<br />
erfolgt bei 70°C. Das Ventil wird gesc hlossen, der<br />
Kontakt AUX1 wird geöffnet und der Ventilator wird<br />
auf höc hste Drehzahl geschaltet.<br />
Hohe Wass ertemperatur i m Sommerbetrieb (siehe<br />
Abschnitt TOO COOL).<br />
Wärmeableitung Wär metausc her bei erreichtem<br />
Winter-Sollwert (siehe Absc hnitt POST HEAT).<br />
Niedrige Wassertemperatur im Winterbetrieb (siehe<br />
Abschnitt HOT START).<br />
Die Wiederherstellung der normal en Betriebsbedingungen des Geräts<br />
erfolgt automatisc h.<br />
I.5.5<br />
R<br />
RESET DER FERNBEDIENUNG<br />
Wird die Taste RESET mit einem spitzen Gegenstand<br />
gedrückt, kann die Fernbedi enung auf Wer kseins tellungen<br />
zurückgesetzt werden.<br />
54
SLEEP TEMP<br />
ABSCHNITT I: BENUTZUNG<br />
I.6 REINIGEN DES GERÄTES<br />
GEFAHR !<br />
Das Gerät vor Reinigungs- und W artungsarbeiten<br />
immer vom Stromnetz trenn en.<br />
Keine Flüssigkeiten auf das Gerät gießen.<br />
Verwenden Sie z ur Reinigung einen weichen mit Wass er und Alkohol<br />
angefeuchteten Lappen. Benutz en Sie kein war mes Wass er, kei ne<br />
Scheuer- oder ätzende oder Lösungsmittel.<br />
I.7 WARNUNGEN UND HINWEISE<br />
Verstellen Sie nie den Luftfluss z um Gerät und benutz en Sie es nie als<br />
Abstellfläc he. Bei Ver wendung von Wasser oder Spraydos en i n<br />
Gerätenähe bes teht di e Gefahr von Stromschl ägen oder<br />
Gerätes törungen.<br />
I.6.1<br />
REINIGEN DES LUFTFILTERS<br />
GEFAHR !<br />
Achten Sie beim F ilterau sbau auf die Rippen des<br />
W ärmetauschers, die sehr scharf sind.<br />
W ICHTIGER HINW EIS<br />
Setzen Sie d as Gerät nur mit eing ebauten Filtern in<br />
Betrieb.<br />
Zur Aufrec hter haltung einer korrekten Luftans augung sollte der Luftfilter<br />
mindestens einmal pro Monat gereinigt werden oder öfters, wenn das<br />
Gerät in star k staubhaltiger Umgebung installiert ist. Zur Reinigung ist<br />
der Filter immer aus dem Gerät herauszunehmen. Der Luftfilter kann<br />
mit Druc kluft gereinigt oder in Wass er gewaschen werden. Vor dem<br />
Wiedereinbau sicherstellen, dass der Filter sauber und vollständig<br />
trocken ist.<br />
Ein beschädigter Filter muss durch einen neuen RHOSS Originalfilter<br />
ersetzt wer den.<br />
Vergewissern Sie sic h bei Benutzung der Fer nbedienung, dass<br />
dieselbe auf den Empfänger auf der Einheit gerichtet ist. D er korrekte<br />
Empfang des von der F ernbedienung kommenden Signals wird durch<br />
ein akustisches Signal bes tätigt: wiederholen Sie bei fehlendem Signal<br />
den Schritt. Falls sich z wischen F ernbedienung und Ei nheit eine Wand<br />
oder andere Hinderniss e befinden, kann das Signal nicht übertragen<br />
werden.<br />
Schütz en Sie die F ernbedienung vor Wasserspritzern, anderen<br />
Flüssigkeiten und Stöß en.<br />
max 8 m<br />
SLEEP TEMP<br />
55
ABSCHNITT II: INSTALLATION UND W ARTUNG<br />
II<br />
II.1<br />
II.1.1<br />
ABSCHNITT II: INSTALLATION UND<br />
WARTUNG<br />
TRANSPORTANWEISUNGEN<br />
VERPACKUNG, BAUTEILE<br />
GEFAHR !<br />
DIE VERPACKUNG ERST AM AUFSTELLUNGSORT<br />
ÖFFNEN UND ENTFERNEN.<br />
Die Maschine darf nur durch Fachkräfte, die für<br />
solche Arb eiten ausgebildet sind, gehandhabt und<br />
angehoben werden.<br />
Die Einheit sofort nach Anli eferung auf eventuelle Transportschäden<br />
und auf Vollständigkeit kontrollieren.<br />
Bei sichtbaren Sc häden dies elben s ofort auf den Begleitpapieren<br />
ver mer ken mit folgender Anmer kung: “ANNAHME MIT VORBEHALT<br />
WEGEN OFFENSICHTLICHER VERPACKUNGSSCHÄDEN”; geben<br />
Sie bei Lieferung von mehreren Maschi nen die Seriennummer der<br />
betreffenden Masc hine an. Die Lieferbedingungen frei ab Wer k sehen<br />
laut Gesetz Nr. 450 vom 22.8.1985 („Grenz en des Schadenersatzes“)<br />
den Schadenersatz zu Lasten der Versicherung vor.<br />
II.1.3 LAGERUNG<br />
Die verpac kten Geräte sind an einem troc kenen gegen Regen und<br />
Sonneneinstr ahlung geschütz ten Ort z u lagern; es können bis zu vier<br />
Einheiten übereinander gestapelt werden.<br />
II.1.4 MINDESTABSTÄNDE, AUFSTELLUNG<br />
W ICHTIGER HINW EIS<br />
Die Positionierung und ein e nicht ordnungsgemäße<br />
Installation der Maschin e können d as<br />
Betriebsgeräusch und die erzeugten<br />
Maschinen sch wingungen verstärken.<br />
Bei Aufstellung der Geräte Idrowall müssen unbedi ngt die technischen<br />
Freiräume eingehalten wer den.<br />
100 mm<br />
100 mm 100 mm<br />
min 1900 mm<br />
max 2200 mm<br />
Die Verpackung wie folgt entfernen:<br />
Die Verpackung auf sichtbare Schäden kontrollieren.<br />
Die Verpac kung öffnen.<br />
Das Verpac kungsmaterial entspr echend den gültigen Besti mmungen<br />
bei den vorgesehenen Sammel- oder Wi ederverwertungsstellen<br />
ents orgen.<br />
UMW ELTSCHUTZ!<br />
Entsorgen Sie das Verpackungsmaterial<br />
entsprech end den gültigen nationalen oder lokalen<br />
Umweltschutzgesetzen Ihres Landes.<br />
GEFAHR !<br />
Lassen Sie das Verpackungsmaterial nicht in<br />
Reich weite von Kindern.<br />
II.1.2 HINWEISE ZUM HANDLING DER MASCHINE<br />
GEFAHR !<br />
Die Einheit immer sehr vorsichtig handhaben, um<br />
Beschäd igungen der Verkleidung sowie der innen<br />
liegenden mechanischen und elektrischen<br />
Komponenten zu vermeiden.<br />
Vergewissern Sie sich, dass längs der Strecke<br />
keine Personen oder Hindernisse vorhanden sind,<br />
die durch Stöße oder Umkippen des<br />
Transportmittels verletzt oder gequetscht werden<br />
könnten.<br />
Alle im F olgenden besc hriebenen Arbeiten müss en in Entsprec hung der<br />
einschlägigen Sic herheitsbestimmungen ausgeführt werden, s owohl in<br />
Hinsicht auf die eingesetzten Hilfsmittel wie auch auf die<br />
Verfahrens weis en. Vor dem Anheben der Ei nheit sollten Si e sich<br />
vergewissern, dass die Tragfähigkeit des Hebez eugs dem Gewicht des<br />
betreffenden Gerätes angemessen ist.<br />
Die Handhabung und das Anheben der Geräte können von Hand oder<br />
mit geeigneten Hubwagen erfolgen. Bei gleichz eitiger Handhabung von<br />
mehreren Einheiten sollten die Geräte in einen Behälter geladen und<br />
mit ei nem Kran oder einem ähnlichen Hilfsmittel angehoben werden.<br />
56
II.2<br />
II.2.1<br />
INSTALLATION<br />
GEFAHR !<br />
Die Installation darf ausschließlich von einem<br />
Fachmann ausgeführt werden, d er nach weislich zu<br />
Arbeit en an Kälte- und Klimaanlagen befähigt ist.<br />
Eine falsch e Inst allation kann Ur sach e für einen<br />
schlechten Gerätelauf mit entsprechender<br />
Leistungsreduzierung sein.<br />
GEFAHR !<br />
Der Installateur ist verpflichtet, alle zum Zeitpunkt<br />
der Aufst ellung gültigen lokalen und nationalen<br />
Bestimmungen einzuhalten.<br />
VORBEREITUNG DER<br />
WASSERANSCHLÜSSE<br />
W ICHTIGER HINW EIS<br />
Die W asser anschlü sse sind von größter W ichtigkeit<br />
und müssen sorgfältig durch F ach kräfte ausgeführt<br />
werden.<br />
W ICHTIGER HINW EIS<br />
Bei sehr kalkh altigem W asser sollten d em W asser<br />
Entkalkung smittel zugesetzt werden.<br />
ABSCHNITT II: INSTALLATION UND W ARTUNG<br />
Bei direkter Qu erung der W and:<br />
Die Wandstärke (s) darf maximal 500 mm betragen;<br />
Die Bohr ung in der Wand muss eine Mindestneigung von 15° (a) für<br />
den natürlichen Kondenswasserablauf aufweisen.<br />
Die Leitung des Kondens wasserablaufs muss ein ausreichendes<br />
Gefälle aufweisen, um den Wasser abfluss zu erleichtern.<br />
Die Elektrokabel z ur Einheit können längs der Wass erleitungen<br />
verlegt wer den oder durch einen beliebigen der 3 verfügbaren<br />
Ausgänge geführt werden.<br />
S<br />
a<br />
Wähl en Sie vor der Installation des Gerätes in Funktion der<br />
Montagebedi ngungen oder der vorgerüsteten Wasseranschlüss e am<br />
Standort die Richtung des Wass eraus tritts aus der Einheit.<br />
In der Abbildung sind die Positionen der Bohrlöcher zur<br />
Wanddurchführung der Rohrleitungen angegeben.<br />
1. Loch zum Austritt der Wasser- und Kondensatablaufl eitungen mit<br />
direkter Querung der Wand<br />
2. Loch zum Austritt der Wasser- und/oder Kondens atablaufleitungen<br />
3. Loch zum Austritt der Wasserleitungen<br />
4. Befestigungsschablone<br />
Die Elektrokabel z ur Einheit können längs der Wass erleitungen verlegt<br />
werden oder beliebig einen der drei verfügbaren Ausgänge benutzen.<br />
II.2.2 BEFESTIGUNG DER EINHEIT<br />
Die Einheit entspr echend der folgenden Beschreibung an der Wand<br />
befestigen:<br />
die Befestigungsschablone aus Stahl von der Geräterückseite<br />
entfernen;<br />
die Stahlsc habl one im Bereic h anordnen, in dem die Einheit<br />
installiert werden soll;<br />
mit einem Lot oder einer Wasserwaage die Senkrechte kontrollieren;<br />
Bohrlöc her für die Befestigung an der Wand vorzeic hnen;<br />
nach dem Bohren die Schablone befestigen.<br />
4<br />
1<br />
2<br />
3<br />
4<br />
1<br />
2<br />
Ansichten von hinten.<br />
3<br />
Nach Festl egung der Richtung des Leitungsaustritts können die<br />
Bohrungen z ur Wandbefestigung der Ei nheit ausgeführt werden;<br />
benutzen Si e dazu die Papierschablone. Im Folgenden wird die<br />
ungefähre Position der Bohrlöcher in Abhängigkeit vom gewählten<br />
Austritt der Leitungen gezeigt.<br />
57
die Bohrlöcher an den marki erten Stellen ausführen;<br />
die Stahlsc habl one mit den vi er Schrauben der Ausstattung an der<br />
Wand befestigen (Abb. 25).<br />
ABSCHNITT II: INSTALLATION UND W ARTUNG<br />
II.2.3 WASSERANSCHLÜSSE<br />
Nach Befes tigung der Sc hablone an der Wand kann die Einheit mithilfe<br />
der Eintritts-/Austrittsstutz en, die durch die Pfeilrichtung kenntlich<br />
gemacht sind, an die Wasser anlage angesc hlossen werden.<br />
Die sachgemäße Befestigung der Ei nheit an der Wand auf folgende<br />
Weise nac hprüfen:<br />
das Gerät der an der Wand befestigten Schablone annähern;<br />
die Einheit auf der Schabl one an den angebrachten Haken<br />
einhängen.<br />
Für den Anschluss der Leitungen Schnellanschlüss e verwenden. Vor<br />
dem Wasseranschluss des Ger ätes den Sc hnellansc hluss abbauen.<br />
Die zuvor vom Schnellansc hluss abgebauten Komponenten in die<br />
Rohre der Verbindungsleitungen eins etzen.<br />
Die Geräterohre mit den Sc hnellansc hlüssen ver binden und bis z um<br />
Anschlag einschieben. Die Ansc hlüsse von Hand festdr ehen;<br />
anschließ end dies elben mit einem Drehmomentsc hlüss el mit einer Kraft<br />
von 34,3 Nm festzi ehen; benutzen Sie dabei einen z weiten Schlüss el,<br />
um z u ver hindern, dass das R ohr mit dr eht.<br />
1: Drehmomentsc hlüssel<br />
(34,3 Nm)<br />
2: Sc hlüssel<br />
Nach der Ins tallation:<br />
Verbindungsrohr e mit einer 10 mm s tar ken Is olierung gegen<br />
Kondensatbildung verkleiden.<br />
Etwas Wasser i n die Kondens atwanne gießen und auf der gesamten<br />
Strecke kontr ollieren, ob die Flüssigkeit r egulär über die Abflussöffnung<br />
abfließt. Anderenfalls die Neigung kontr ollieren und den Ablauf auf<br />
Verstopfungen prüfen.<br />
Den Kreislauf entl üften.<br />
Der wass erseitige Wärmetauscher ist mit einem Entlüftungs- und einem<br />
Ablassventil ausgestattet.<br />
58
ABSCHNITT II: INSTALLATION UND W ARTUNG<br />
II.2.3.1 Installation des Kondensatablaufs<br />
Der Kondensatablauf muss die richtige Neigung aufweisen, um den<br />
Wasser abfluss zu erleichtern.<br />
3 cm/m<br />
II.2.3.2 Frostschutz<br />
W ICHTIGER HINW EIS<br />
Der Zusatz von Glykol ändert die physikalischen<br />
Eigenschaften des W asser s und infolgedessen die<br />
Leistungen der Einheit. Achten Sie auf die<br />
Sicherh eitshin weise auf den Glykolp ackung en.<br />
Der Stillstand der Einheit während der Wintersaison kann zum<br />
Einfrieren des in der Anlage vor handenen Wassers führen. Lass en Sie<br />
daher rechtz eitig die ges amte Wass erfüllung des Wass erkreislaufs ab.<br />
Sollte das Ablassen des Wassers zu kostspielig sein, kann stattdessen<br />
dem Wasser eine geeignete Menge Frostschutz mittel z ugesetzt<br />
werden.<br />
II.2.4 ELEKTRISCHE ANSCHLÜSSE<br />
W ICHTIGER HINW EIS<br />
Der elektrische An schlu ss d er Einheit darf nur von<br />
für solche Arbeiten nachweislich bef ähigten<br />
Fachkräften und unter Beachtung der einschlägigen<br />
gültigen Bestimmungen im Aufstellungsland des<br />
Gerätes au sgeführt werd en. Ein den Vor schr iften<br />
nicht konformer Anschluss enthebt die Firma<br />
RHOSS jeder Verant wortung für eventuelle<br />
Person enverletzungen und Sachschäden.<br />
GEFAHR !<br />
An geschützter Stelle und in Maschinennähe immer<br />
einen Leistungsschutzschalter mit verzögerter<br />
Kennlinie, ausreichender B elastungsfähigkeit und<br />
Ausschaltleistung und mit Mindestkontaktöffnung<br />
von 3 mm installier en.<br />
Der An schlu ss d er Maschine an eine<br />
Erdungsanlage ist gesetzlich vorgeschrieben und<br />
dient zum Schutz des Anwenders bei deren Betrieb.<br />
Die Kabel nur in Nähe der Klemmen abisolier en. Benutz en Sie i mmer<br />
für die Klemmen pass ende Kabelschuhe.<br />
Ziehen nach Einführung des Kabelschuhs i n die Klemme die Sc hraube<br />
sachgemäß, ohne übermäßigen Kraftaufwand an: zi ehen Si e danach<br />
leicht am Kabel, um den festen Sitz zu kontr ollieren.<br />
Benutzen Si e die Kabellasc he im F ach der Pl atine zur<br />
Kabelbefestigung.<br />
40 mm<br />
L<br />
N<br />
M4<br />
M4<br />
II.2.4.1 Netzanschluss<br />
Kontr ollieren Sie, dass die Netzspannung und -frequenz 230V ( ± 10%),<br />
1 Ph, 50Hz beträgt, die verfügbare installierte Leistung für den<br />
Gerätebetrieb ausreichend ist und die Netz kabel den für die maximal e<br />
Stromaufnahme erforderlichen Querschnitt aufweisen.<br />
Vergewissern Sie sic h, dass die elektrische Anl age den gültigen<br />
Sicherheitsbes timmungen des Aufs tellungslandes entspricht.<br />
Benutzen Si e ein flexibl es z weipoliges Netz kabel mit Er dung, einem<br />
Querschnitt von 1,5 mm2 und mit einer PCP-Schutzhülle, die nicht<br />
leichter als H 05RN-F sein darf. Der Erdleiter muss länger sein als alle<br />
anderen Leiter, so dass er bei einer Loc ker ung der Kabelbefes tigung<br />
als letzter gespannt wird.<br />
Die Anschl üsse si nd ents prechend dem elektrischen Schaltpl an<br />
auszuführ en.<br />
L<br />
L<br />
N<br />
N<br />
L<br />
N<br />
6<br />
5<br />
FUSE<br />
7<br />
1 Reset-Taste;<br />
2 Stec kver binder Seriell 1 (Phone 1);<br />
3 Stec kver binder Seriell 2 (Phone 2);<br />
4 Jumper JP0;<br />
5 Stec kver binder AUX1, Heizanforderung<br />
(potentialfreier Kontakt);<br />
6 Stec kver binder AUX2, Kühlanforderung<br />
(potentialfreier Kontakt);<br />
7 Sicherung, 5x20 F3,15A 250V;<br />
8 Stec kver binder CN9 für Bedientafel (KPFI);<br />
- - - Der Anschl uss muss durch den Installateur erfolgen.<br />
Heben Sie die Frontverklei dung der Ei nheit an und entfernen Sie die<br />
Schutz abdec kung, um Z ugang zu den Kl emmen zu erhalten.<br />
Das Netz kabel durch die Öffnung auf der Geräterüc kseite führen.<br />
2<br />
4<br />
3<br />
1<br />
L<br />
1<br />
8<br />
N<br />
50 mm<br />
M4<br />
Befes tigen Si e das Netz- und di e Verbindungs kabel im Plati nenfac h mit<br />
der Kabel klemme; die Kabel nur in der N ähe der Ansc hluss klemmen<br />
abisolieren.<br />
Falls das Gerät an einer Metall wand befestigt wird, muss es<br />
ents prechend den gültigen Bes timmungen des Aufstellungslandes<br />
geerdet werden.<br />
59
ABSCHNITT II: INSTALLATION UND W ARTUNG<br />
II.2.4.2 Anschluss der Hilfskontakte (AUX 1-2)<br />
Zur Steuerung z. B. eines Heiz kess els oder Kaltwass ersatzes stehen 2<br />
Hilfskontakte (AUX1 und AUX2, Arbeitskontakte) zur Verfügung.<br />
Potentialfreier Kontakt<br />
JP0 AUX1 AUX2<br />
Kontakt unter Spannung<br />
JP0 AUX1 AUX2<br />
1 2 3 4 5 6<br />
1 2 3 4 5 6<br />
24÷230 V AC<br />
Sie können als potentialfrei e Kontakte genutzt oder gegebenenfalls<br />
unter Spannung (230 V~) gesetzt werden; jeder Kontakt kann maximal<br />
belastet wer den mit: 0,5 A - 230 V~ AC1.<br />
AUX 1<br />
AUX 2<br />
Geschloss en bei<br />
Heizanforderung.<br />
Geschloss en bei<br />
Kühlanforderung.<br />
Im Heiz betrieb öffnet sich AUX 1, wenn der Alarm z um Schutz des<br />
Wärmetauschers ausgelöst wird.<br />
Im Kühl betrieb öffnet sich AUX 2, wenn der Alarm z um Schutz des<br />
Wärmetauschers ausgelöst wird.<br />
In der Betriebsart Bel üftung öffnen sich AUX 1 und AUX 2, wenn der<br />
Ventilator ei ngeschaltet ist.<br />
II.2.5 ANSCHLUSS MASTER/SLAVE<br />
Es handelt sich um eine bes ondere (über die Fernbedienung oder die<br />
Bedientafel gesteuerte) Betriebs art, bei der ein als Master<br />
bezeic hnetes Gerät einige Informationen über den aktuellen<br />
Betriebszustand an andere Slave genannte Geräte (maximal 31) ohne<br />
Fernbedienung und Bedientafel über eine Verbi ndungsleitung s endet,<br />
die während der Installation herzustellen ist (siehe Schaltpl äne).<br />
Alarme: Die Alarme werden unabhängig von j eder Steuerpl atine<br />
ver waltet.<br />
Timeout: Die Slave-Geräte können ohne Master (bei Ausfall der<br />
Kommuni kati on, Defekt oder s onstigen Störungen) den Betrieb nicht<br />
fortsetz en, da sie in dies em Fall keine Steuerbefehle mehr erhalten<br />
(On/Off,…).<br />
Kommunikation Master /Slave:<br />
Bei einer Störung des Masters ist es möglich, die Slave-Geräte<br />
beim Neustart mit der Fernbedi enung einz eln z u steuern. Das ist<br />
möglich, ohne Ei ngriffe an den Verbindungen und/oder der<br />
Steuerplati ne vorzunehmen.<br />
Die Fernbedienung funktioni ert auch an den Slave-Einheiten,<br />
nachdem diese die Kommuni kation mit der Master-Einheit hergestellt<br />
haben. In dies em Fall arbeitet die Slave-Einheit autonom, aber nur bis<br />
sie erneut Informationen von der Master-Einheit empfängt.<br />
Der Höchstabstand zum lokalen Netzwer k beträgt 30 m (entspricht dem<br />
Abstand zwisc hen dem M aster- und dem letzten Sl ave-Gerät).<br />
Die Verbindung zwischen M aster und Slave muss mit 6-adrigen<br />
Telefonkabeln und RJ12-Stec kern hergestellt werden.<br />
FUSE<br />
FUSE<br />
FUSE<br />
L<br />
N<br />
L<br />
N<br />
L<br />
N<br />
MASTER SLAVE 1 SLAVE 2<br />
1<br />
2<br />
3<br />
4<br />
5<br />
6<br />
Bianco White Blanc Weiss Blanco<br />
Nero Black Noir Schwarz Negro<br />
Rosso Red Rouge Rot Rojo<br />
Verde Green Vert Grün Verde<br />
Giallo Yellow Jaune Gelb Amarillo<br />
Blu Blue Bleu Blau Azul marino<br />
1 Rx/Tx-<br />
2 Rx/Tx+<br />
3 GND<br />
4<br />
5<br />
6<br />
II.2.5.1 Master/Slave-Verbindung mit<br />
Fernbedienung<br />
Zur Master/Slave-Verbi ndung bei Ver wendung der Fernbedi enung<br />
muss auf die Klemmen 1 und 2 (bei vom N etz wer k getrennter Einheit)<br />
eine Brüc ke ges etzt werden, jedoc h nur an der als Master definierten<br />
Einheit.<br />
Master<br />
1 2<br />
3 4 5 6<br />
60
ABSCHNITT II: INSTALLATION UND W ARTUNG<br />
II.3<br />
ERSTE INBETRIEBNAHME<br />
W ICHTIGER HINW EIS<br />
Die er ste Inbetriebnahm e oder das er ste Anfahren<br />
der Maschine (falls vorgesehen) darf ausschließlich<br />
durch Fach kräfte erfolgen, die nach weislich zu<br />
Arbeit en an solchen Geräten bef ähigt ist.<br />
GEFAHR !<br />
Vergewissern Sie sich vor der Inb etriebnahm e, dass<br />
die Installation und die elektrischen Anschlüsse<br />
entsprech end den Anweisungen des vorliegenden<br />
Handbuchs ausgeführt sind. Sorgen Sie außerdem<br />
dafür, dass sich keine unbefugten Personen<br />
während dieser Arbeiten in Maschinennähe<br />
aufhalten.<br />
II.3.1 KONTROLLEN VOR DER INBETRIEBNAHME<br />
Vor der Inb etriebnahme der Einheit sicherstellen, dass:<br />
1. die Einheit vorschrifts mäßig aufgestellt ist;<br />
2. die Druc k-, Rüc klauf- und Kondens atablaufleitungen der<br />
Wasser anlage vorschriftsmäßig angesc hlossen sind;<br />
3. der Wasser kreislauf kei ne Lufteinsc hlüsse aufweist;<br />
4. der Wärmetauscher sauber ist;<br />
5. die el ektrischen Anschlüss e vorsc hriftsmäßig ausgeführt sind;<br />
6. die Sc hrauben der Leiter fest angezogen sind;<br />
7. die Netzs pannung der vorgeschriebenen Spannung ents pricht;<br />
8. die Str omaufnahme des Gerätes korrekt ist und nicht den zul ässigen<br />
Höchstwert überschreitet (siehe A1 Tec hnische Daten).<br />
Das Gerät für einige Stunden mit Höchstdrehzahl laufen lassen.<br />
II.3.2 AUSSERBETRIEBSETZEN<br />
W ICHTIGER HINW EIS<br />
Der Stillstand der Einheit während der W intersaison<br />
kann zum Einfrieren des in der Anlage vorhandenen<br />
W assers führen.<br />
Vor längeren Stillstandz eiten des Gerätes durch Öffnen des<br />
Hauptsc halters der Anlage (Installation durch den Installateur) die<br />
Einheit vom Stromnetz trennen.<br />
Der Stillstand der Einheit während der Wintersaison kann zum<br />
Einfrieren des in der Anlage vor handenen Wassers führen. Lass en Sie<br />
daher rechtz eitig die ges amte Wass erfüllung des Wass erkreislaufs ab.<br />
Alternativ kann dem Wasser eine geeignete Menge Frostsc hutzlös ung<br />
zugesetzt werden (maximaler Frostschutz mittel anteil unter 30%).<br />
II.3.3 WIEDERINBETRIEBNAHME NACH<br />
LÄNGERER STILLSTANDZEI T<br />
Vor dem Einschalten:<br />
Die Luftfilter reinigen oder aus wechs eln.<br />
Den Wärmetauscher reinigen.<br />
Den Ablauf der Kondens at-Auffangwanne reinigen oder daraus<br />
eventuelle Abl agerungen entfernen.<br />
Den Wasser kreislauf entlüften<br />
Das Gerät für einige Stunden mit Höchs tdrehzahl laufen lassen.<br />
II.4.1.1<br />
Austausch der Batterien<br />
GEFAHR !<br />
Ergreifen Sie Vorsichtsmaßnahmen, um zu<br />
verhindern, dass Kinder die Batterien auf<br />
unzulässig e W eise b enutzen können.<br />
ACHTUNG!<br />
Nehmen Sie bei läng erer Nichtbenutzung der<br />
Fernbedienung (zum Beispiel saisonbed ingter<br />
Stillstand d er Einh eit) die Batter ien aus dem<br />
Batteriefach, um zu verhindern , dass ein<br />
eventuelles Austreten d er Batterieflüssigkeit zur<br />
Korrosionsbildung auf den Kontakten führt.<br />
Für den Batterieaustausc h den Dec kel vom Batteriefach abnehmen, die<br />
alten Batterien entfernen und die neuen einl egen, dabei die i m Fac h<br />
angegebene Polung beac hten.<br />
SLEEP<br />
MODE<br />
SWING<br />
R<br />
FAN<br />
TIME-ON<br />
TIME-OFF<br />
TIME-SET<br />
C<br />
TEMP<br />
NET WORK<br />
BATT<br />
- +<br />
- +<br />
Benutzen Si e nur Al kali-Mikrobatterien AAA mit 1,5V. Ver wenden Si e<br />
nie ei ne gebrauc hte mit einer neuen Batterie oder z wei Batterien eines<br />
unterschiedlichen T yps.<br />
Nach dem Aus tausch der Batterien sc haltet die Fernbedienung auf OFF<br />
und alle Einstellungen gehen verloren.<br />
II.4.1.2<br />
Sichtkontrolle und Reinigung des<br />
Wärmetauschers<br />
GEFAHR !<br />
Achten Sie beim F ilterau sbau auf die Rippen des<br />
W ärmetauschers, die sehr scharf sind.<br />
Heben Sie bei abgesc halteter Einheit di e Frontver kleidung an und<br />
kontrollieren Sie den Zustand des Wär metauschers.<br />
II.4<br />
HINWEISE ZUR WARTUNG<br />
GEFAHR !<br />
Vor allen W artungseingriffen - selbst vor einfachen<br />
Sichtprüfungen - die Maschine immer zuerst am<br />
Hauptschalter spannungslos schalt en.<br />
Vergewissern Sie sich, dass n iem and zufällig die<br />
Maschine ein schalten kann; blockier en Sie den<br />
Hauptschalter in Po sition „0“.<br />
GEFAHR !<br />
Alle W artungsarbeiten mü ssen von Fachkr äften<br />
ausgeführt werd en, die nach weislich zu Arbeiten an<br />
Kälte- und Klimaanlagen befähigt sind. Immer<br />
geeignete Schutzhandschuhe tragen.<br />
GEFAHR !<br />
Es ist untersagt, spitze Gegenstände durch das<br />
Ansaug- und Luftaustrittsgitter einzuführen.<br />
Gegeben enfalls:<br />
alle Fremdpartikel, di e den Luftstrom behi ndern, von den Rippen<br />
entfernen.<br />
mit ei nem Druc klufts trahl den Staub entfernen;<br />
vorsichtig mit Wasser unter leichtem Abbürsten<br />
Schmutz ablagerungen abwasc hen;<br />
anschließ end mit Druc kluft troc knen.<br />
61
ABSCHNITT II: INSTALLATION UND W ARTUNG<br />
II.4.1.3<br />
Sichtkontrolle und Reinigung des<br />
Kondensatablaufs<br />
Entfernen Sie bei abgesc halteter Einheit di e Frontplatte, entfernen Sie<br />
dazu die Befestigungsschrauben und kontrollieren Sie den Zustand des<br />
Kondensatablaufs.<br />
II.4.1.5 Entleerung der Wasseranlage<br />
W ICHTIGER HINW EIS<br />
Der wasserseitige W ärmetauscher kann t eilweise<br />
entleert werden; für eine vollständig e Entleerung<br />
Luft in das Innere des Registers blasen.<br />
Für bes ondere Wartungsarbeiten oder zur Vermeidung von Brüc hen<br />
durch Gefrieren des im Kreislauf enthaltenen Wassers kann das<br />
gesamte Wasser aus der Anlage abgelass en werden.<br />
Das W asser wie folgt ablassen:<br />
Frontklappe öffnen und die Luftfilter entfernen;<br />
Wasser ablass ventil lös en.<br />
Gegebenenfalls Verstopfungen aus dem Kondensatablauf, di e den<br />
normalen Wasserablauf behindern können, entfernen.<br />
II.4.1.4 Entlüften des Wasserkreislaufs<br />
Sollte sich Luft im Wasserkreislauf befinden, muss diese abgelassen<br />
werden.<br />
Zum Entlüften ist wie folgt vorzugehen:<br />
Frontklappe öffnen und die Luftfilter entfernen;<br />
Entlüftungsventil lös en und so die Luft austreten lassen;<br />
die Anlage für einige Minuten ei nschalten;<br />
die Anlage abschalten<br />
den Wasser kreislauf erneut entlüften;<br />
Diesen Sc hritt mehrmals wiederholen, bis keine Luft mehr aus der<br />
Anlage austritt.<br />
Das aus dem Entl üftungsventil austr etende Wasser fließt über di e<br />
Kondensatwanne ab.<br />
Das aus dem Ablass ventil austr etende Wasser fließt über di e<br />
Kondensatwanne ab.<br />
II.4.2 STROMKREIS<br />
Für die Instandhaltung des Stromkreis es sind folgende Arbeiten<br />
auszuführ en:<br />
Überprüfung der Stromaufnahme mit einer Stromzange und<br />
Vergleich mit den Vorgabewerten in den tec hnischen U nterlagen.<br />
Sichtkontrolle und Über prüfung des fes ten Sitzes der elektrischen<br />
Kontakte und zugehörigen Klemmen.<br />
II.5 HINWEISE FÜR DIE VERSCHROTTUNG DER<br />
EINHEIT<br />
UMW ELTSCHUTZ!<br />
RHOSS ist seit jeher auf den Umweltschutz<br />
bedacht.<br />
Es ist wichtig, dass die Verant wortlich en für die<br />
Entsorgung der Einh eit gewissenhaft die folgend en<br />
An weisungen b efolgen.<br />
Die Maschine darf nur von einem zur Annahme und Entsorgung<br />
derartiger Produkte/Geräte autorisierten Betrieb verschrottet wer den.<br />
Die Maschine besteht vorrangig aus wiederverwertbaren R ohstoffen.<br />
Bei der Entsorgung sind folgende Vorschriften z u beac hten:<br />
Falls die Anlage Frostsc hutz mittel enthält, muss dasselbe als<br />
Schadstoff behandelt werden;<br />
Es muss aufgefangen und vorschriftsmäßig ents orgt wer den.<br />
Die elektronischen Bauteile (Elektrol ytkondensator) sind Sondermüll<br />
und müssen als s olcher an den vorgesehenen Sammelstellen<br />
abgegeben wer den.<br />
Das Isoliermaterial aus geschäumtem PUR-Hartschaumgummi und<br />
Pol yäthylenhartsc haum s owie die schalldämmende Isolierung der<br />
Beplankung sind gemäß den Vorschriften für nor malen Hausabfall<br />
abzunehmen und z u entsorgen.<br />
62
ABSCHNITT II: INSTALLATION UND W ARTUNG<br />
II.6<br />
BETRIEBSSTÖRUNGEN<br />
Störung<br />
W ahrscheinlich e Ursache<br />
Der automatische Sc hutzsc halter des Ger ätes ist ausgelöst oder deakti viert worden.<br />
Stromunterbrec hung.<br />
Alarmmeldung der Einheit.<br />
Die Einheit funktioniert nicht:<br />
Der eingestellte Temperatur wert ist niedriger (in der Betriebs art HEAT) oder höher (in den Betriebsarten<br />
COOL oder DRY) als die Raumtemperatur.<br />
Die Sperren der Betriebsarten TOO COOL und HOT START sind aktivi ert.<br />
Der Empfänger des Signals der Fernbedienung ist direkt ei ner sehr star ken Lichtquelle wi e<br />
Sonneneinstr ahlung oder einer Leuchtstofflampe ausgesetzt.<br />
Luftfilter verstopft:<br />
Luftuml auf in der Einheit behindert.<br />
Der Wert der Betriebs temperatur ist nicht richtig eingestellt.<br />
Das Gerät läuft mit<br />
unzureichender Kühl- oder<br />
Heizleistung:<br />
Es ist eine falsche Ventilatordrehzahl ausgewählt worden.<br />
Das Gerät wird mit nicht ausr eichend mit warmem oder kaltem Wass er versorgt oder es bes teht kei n<br />
Wasser umlauf i n den Leitungen.<br />
Offene F enster oder Türen.<br />
Das Magnetventil ist defekt.<br />
Die Geräteleistung ist nicht ausreichend für die s pezifischen Anlagenerfor dernisse bemessen.<br />
63
ÍNDICE<br />
INDICE<br />
SIMBOLOGÍA UTILIZADA<br />
Italiano pagina 4<br />
English page 19<br />
Français page 34<br />
Deutsch Seite 49<br />
Español página 64<br />
I SECCIÓN I: USUARIO.......................................................................... 65<br />
I.1 Descripción de la máquina......................................................................... 65<br />
I.1.1 Condiciones de uso previstas ........................................................................ 65<br />
I.1.2 Identificaci ón de l a máqu ina .......................................................................... 65<br />
I.1.3 Características de fabricación........................................................................ 65<br />
I.2 Límites de funcionamiento......................................................................... 65<br />
I.2.1 Información sobre los peligros que no pueden ser eliminados .............................. 65<br />
I.3 Accesorios y repuestos ............................................................................. 65<br />
I.3.1 Accesorios (suministrados por separado)......................................................... 65<br />
I.4 Mandos y controles................................................................................... 66<br />
I.4.1 Mando a d istanci a (de seri e) ......................................................................... 66<br />
I.4.2 Panel d e cabl e KPFI (suministrado p or separ ado) .............................................. 66<br />
I.5 Instrucciones de uso................................................................................. 66<br />
I.5.1 Funciones de regulación............................................................................... 66<br />
I.5.2 Funciones de confort ................................................................................... 67<br />
I.5.3 Mando a d istanci a ....................................................................................... 67<br />
I.5.4 Config uraci ones d e funcio nami ento ................................................................ 68<br />
I.5.5 Restablecimiento del mando a distancia .......................................................... 69<br />
I.5.6 Transmisió n de datos a l a uni dad Sl ave ........................................................... 69<br />
I.5.7 Descripción del display de la unidad ............................................................... 69<br />
I.5.8 Funcionamiento local................................................................................... 69<br />
I.5.9 Unidad en alarma........................................................................................ 69<br />
I.6 Limpieza de la unidad................................................................................ 70<br />
I.6.1 Limpieza del filtro del aire ............................................................................. 70<br />
I.7 Advertencias y sugerencias........................................................................ 70<br />
II SECCIÓN II: INSTALACIÓN Y MAN TENI MIEN TO ............................... 71<br />
II.1 Instrucciones de transporte........................................................................ 71<br />
II.1.1 Embala je, compo nentes ............................................................................... 71<br />
II.1.2 Indicaci ones p ara el d espl azami ento............................................................... 71<br />
II.1.3 Condiciones de almacenamiento.................................................................... 71<br />
II.1.4 Espacio necesario, instalación....................................................................... 71<br />
II.2 Instrucciones de instalación....................................................................... 72<br />
II.2.1 Preparac ión d e las con exio nes hi dráu licas ....................................................... 72<br />
II.2.2 Fijación de la unidad.................................................................................... 72<br />
II.2.3 Conex ion es hidr ául icas ................................................................................ 73<br />
II.2.4 Conex ion es eléctric as .................................................................................. 74<br />
II.2.5 Conex ión Master/Sl ave ................................................................................ 75<br />
II.3 Instrucciones para el arranque.................................................................... 76<br />
II.3.1 Controles previos a la puesta en marcha ......................................................... 76<br />
II.3.2 Puesta fuera de servicio ............................................................................... 76<br />
II.3.3 Reactivac ión d espu és de un a prol ong ada i nactivi dad ......................................... 76<br />
II.4 Instrucciones de mantenimiento................................................................. 76<br />
II.4.2 Circuito eléctrico ......................................................................................... 77<br />
II.5 Indicaciones para la eliminación de la unidad............................................... 77<br />
II.6 Anomalías de funcionamiento..................................................................... 78<br />
ANEXOS<br />
A1<br />
A2<br />
Datos técnicos......................................................................................................83<br />
Dimensiones.........................................................................................................84<br />
SÍMBOLO<br />
UNI EN 292<br />
UNI EN 294<br />
UNI EN 563<br />
UNI EN 1050<br />
UNI 10893<br />
EN 13133<br />
EN 12797<br />
EN 378-1<br />
PrEN 378-2<br />
CEI EN 60335-2-40<br />
UNI EN ISO 3744<br />
EN 50081-1:1992<br />
EN 61000<br />
SIGNIFICADO<br />
PELIGRO GENÉRICO<br />
La indicación d e PELIGRO GENÉRICO se utiliz a<br />
para informar al operador y al personal en cargado<br />
del mantenimiento acerca d e lo s riesgos que<br />
pueden conllevar la muert e, daño s físicos,<br />
enfermedad es b ajo cualquier forma inmediata o<br />
latente.<br />
PELIGRO COMPON ENTES EN T ENSIÓN<br />
La indicación d e PELIGRO COMPONENTES EN<br />
TENSIÓN se utiliz a par a informar al op erador y al<br />
personal encargado d el mantenimiento acerca de<br />
los riesgos d ebidos a la presen cia d e ten sión.<br />
PELIGRO SUPERFICIES CORTANTES<br />
La indicación d e PELIGRO SU PERFICIES<br />
CORTANTES se utiliz a par a informar al operador y<br />
al personal encargado del manten imiento acerca de<br />
la presen cia d e sup erficies poten cialmente<br />
peligrosas.<br />
PELIGRO SUPERFICIES CALIENTES<br />
La indicación d e PELIGRO SU PERFICIES<br />
CALIENTES se utiliza para informar al operador y al<br />
personal encargado d el mantenimiento acerca de la<br />
presen cia de superficies calientes potencialm ente<br />
peligrosas.<br />
PELIGRO ÓRGANOS EN MOVIMIENTO<br />
La indicación d e PELIGRO ÓRGANOS EN<br />
MOVIMIENTO se utiliz a par a informar al op erador y<br />
al personal encargado del manten imiento acerca de<br />
los riesgos d ebidos a la presen cia d e órgano s en<br />
movimiento.<br />
ADVERTENCIAS IMPORTANTES<br />
La indicación ADVERTENCIAS IMPORT ANTES se<br />
utiliza par a llamar la aten ción sobr e accion es o<br />
peligros qu e pueden cau sar d años a la unidad o a<br />
sus equip amientos.<br />
PROTECCIÓN MEDIO AMBIENTE<br />
La indicación PROTECCIÓN MEDIO AMBIENTE<br />
proporciona información para utiliz ar la máquin a<br />
respetando el medio ambiente.<br />
Referencias normativas<br />
Seguridad de la maquinaria. Conceptos fundamentales,<br />
principios generales de diseño<br />
Seguridad de la maquinaria. Distancias de seguridad<br />
para impedir que se alcancen zonas peligrosas con los<br />
miembros superiores.<br />
Seguridad de la maquinaria. Temperaturas de las<br />
superficies de contacto. Datos ergonómicos para<br />
establecer los valores límite de temperatura para<br />
superficies a alta temperatura.<br />
Seguridad de la maquinaria. Principios para la valoración<br />
del riesgo.<br />
Documentación técnica de producto. Instrucciones para<br />
el uso<br />
Soldadura. Aprobación de la soldadora<br />
Soldadura. Pruebas destructivas de uniones soldadas<br />
Sistemas de refrigeración y bombas de calor - seguridad<br />
y requisitos medio ambientales. Requisitos básicos,<br />
definiciones, clasificación y criterios de selección.<br />
Sistemas de refrigeración y bombas de calor - seguridad<br />
y requisitos medio ambientales. Diseño, fabricación,<br />
pruebas, instalación, marcado y documentación.<br />
Seguridad de los aparatos eléctricos de uso doméstico y<br />
similar. Parte 2: Normas especiales para las bombas de<br />
calor eléctricas, para los acondicionadores de aire y para<br />
los deshumidificadores.<br />
Determinación de los niveles de potencia sonora de las<br />
fuentes de ruido mediante presión sonora. Método<br />
técnico de diseño en un campo esencialmente libre en<br />
un plano reflectante.<br />
Compatibilidad electromagnética - Emisiones estándar<br />
genéricas Parte 1: Residencial, comercial e industria<br />
ligera.<br />
Compatibilidad electromagnética (EMC)<br />
64
SECCIÓN I: USUARIO<br />
I<br />
SECCIÓN I: USUARIO<br />
I.1 DESCRIPCIÓN DE LA MÁQUINA<br />
Idrowall se di vide en cuatro tamaños:<br />
MPCV 20-30-35-40: Unidad bas e sin electrovál vula ON/OFF.<br />
I.1.1 CONDICIONES DE USO PREVISTAS<br />
Idrowall es un fan coil desti nado al tratamiento del aire (climatización en<br />
ver ano e i nvierno) en el interior de ambientes de us o doméstico o<br />
similar. La unidad no es tá des tinada a su instalación en local es de us o<br />
lavandería (norma CEI EN 60335-2- 40).<br />
I.2 LÍMITES DE FUNCIONAMIENTO<br />
IMPORTANTE<br />
El funcionamiento correcto y seguro d e la unidad<br />
se garantiza solo si se r espet an los límites de<br />
funcionamiento indicados a continuación.<br />
La unidad no debe funcionar con agua entrante a temperatura s uperior<br />
a los 70 ºC e inferior a los 5° C.<br />
La unidad no debe funcionar constantemente en la modalidad<br />
enfriamiento en ambientes con humedad rel ati va elevada (s uperior al<br />
80%). En estas c ondiciones en la boc a de i mpulsión del aire podría<br />
formars e condensaci ón, que podría dañar los objetos situados debajo,<br />
el suel o y la pared en l a que está fijada la uni dad.<br />
PELIGRO<br />
La instalación de la m áquina está pr evista sólo<br />
dentro de ambientes de uso doméstico y similar.<br />
PELIGRO<br />
Se prohíbe introducir objetos por las rejillas de<br />
aspir ación e impulsión del air e.<br />
75<br />
60<br />
30<br />
U.R.%<br />
IMPORTANTE<br />
El correcto funcionamiento de la unidad queda<br />
subordinado a la estricta aplicación de las<br />
instruccion es de uso, al mantenimiento de los<br />
espacios t écnicos en la instalación y d e los límit es<br />
de empleo indicados en este manual.<br />
IMPORTANTE<br />
Una instalación qu e no respete los espacios<br />
técnicos aconsejados dificultar á el mantenimiento<br />
de la máquina y reducirá su rendimiento.<br />
I.1.2 IDENTIFICACIÓN DE LA MÁQUINA<br />
Las unidades tienen una plac a de matríc ula col ocada en el exterior.<br />
I.2.1<br />
20<br />
5 10 15 60 65 70 t°C<br />
t = temperatura del agua en entrada en la unidad<br />
H.R. = humedad relati va del aire ambiente<br />
Temperatura del aire ambiente: 8 °C ÷ 32 °C.<br />
INFORMACIÓN SOBRE LOS PELIGROS QUE<br />
NO PUEDEN SER ELIMINADOS<br />
IMPORTANTE<br />
Preste la máxima atención a los símbolos e<br />
indicaciones puestos en la máquina.<br />
I.1.3<br />
RHOSS Spa<br />
TECHNICAL CHARACTERISTICS<br />
MODEL IDROWALL MPCV20<br />
Cooling<br />
Capacity<br />
Heating<br />
Power supply<br />
Frequency<br />
Power input<br />
Weight<br />
Serial No.<br />
CARACTERÍS TICAS DE FABRICACIÓN<br />
Si subsisten riesgos a pesar de todas las medidas aplicadas, o si se<br />
trata de riesgos potenci ales y no evidentes, la máquina c uenta con<br />
unas plac as adhesivas s egún lo previsto por la norma “ISO 3864”.<br />
I.3 ACCESORIOS Y REPUESTOS<br />
IMPORTANTE<br />
Utilice única y exclusivam ente repu estos y<br />
accesorio s origin ales. RHOSS S.p.a. d eclin a toda<br />
responsabilidad por daños cau sados por<br />
modificaciones o intervencion es r ealizad as por<br />
personal no autorizado o por funcionamientos<br />
anómalos debidos al u so de repuestos o<br />
accesorio s no origin ales.<br />
1<br />
3<br />
5<br />
2<br />
I.3.1 ACCESORIOS (SUMINISTRADOS POR<br />
SEPARADO)<br />
KGMOD – Interfaz s erial RS485 para comunicación lógica con edificios<br />
inteligentes y sistemas de super visión (Protoc olos s oportados:<br />
ModBuS ® RTU).<br />
4 7<br />
6<br />
KVAM – C aja de empotr ado en la pared.<br />
1. Panel frontal<br />
2. Deflector<br />
3. Aleta direccional<br />
4. Filtros del aire<br />
5. Receptor y señalamiento con led<br />
6. Botón de emergencia<br />
7. Espacio para las c onexiones eléctricas<br />
65
SECCIÓN I: USUARIO<br />
I.4 MANDOS Y CONTROLES<br />
I.4.1<br />
MANDO A DISTANCIA (DE SERIE)<br />
Mando a distancia por rayos infrarrojos con pilas de alimentación (color<br />
RAL 9010).<br />
SLEEP<br />
MODE<br />
SWING<br />
R<br />
FAN<br />
TIME-ON<br />
TIME-OFF<br />
TIME-SET<br />
C<br />
TEMP<br />
NET WORK<br />
BATT<br />
(Dimensiones 57 x 137 x 18 mm)<br />
I.4.2 PANEL DE CABLE KPFI<br />
(SUMINISTRADO POR SEPARADO)<br />
Panel de control de c able con displ ay de cristal líquido, con 10 botones,<br />
para la regulación manual de todas las funciones del aparato, en<br />
función de la temperatura ambiente elegida. El panel está preparado<br />
para s u fijación a pared (c olor RAL 9010).<br />
AIR CONDITIONER<br />
ENTER<br />
TIMER<br />
CLOCK<br />
TIME<br />
SWING<br />
TEMP<br />
MODE<br />
FAN<br />
SLEEP<br />
(Dimensiones 120 x 120 x18 mm)<br />
I.5 INSTRUCCIONES DE USO<br />
Mediante el mando a distan cia y/o el pan el de control de cab le<br />
(KPFI) (vea las instr ucciones de us o s umi nistradas con el mismo) es<br />
posible realizar las siguientes operaciones :<br />
Encendido/apagado de la unidad.<br />
Selección de las tres vel ocidades del ventilador.<br />
Regulación del termostato y manteni miento en ambiente de l a<br />
temperatura des eada.<br />
Conmutaci ón del ciclo de funcionamiento: enfriamiento/calefacción.<br />
En la uni dad hay indicadores que brindan i nfor maciones s obre el<br />
estado de l a mis ma o posibl es señalamientos de alar ma, y si no es tá<br />
disponible tempor almente el mando a distancia y/o el panel de control<br />
(KPFI) per miten utilizar la botón MANUAL para gestionar la unidad en<br />
modo manual.<br />
I.5.1<br />
FUNCIONES DE REGULACIÓN<br />
I.5.1.1 AUTO<br />
En AUTO l a unidad terminal detec ta l a temperatura ambiente y deci de<br />
qué modalidad acti var (calefacción, enfriami ento o des humidificaci ón)<br />
en base al valor de consigna c onfigurado por el usuario.<br />
La modalidad s e describe a c ontinuaci ón.<br />
si la temperatur a ambi ente es inferior a 21 °C: calefacción;<br />
si la temperatur a ambi ente es tá c omprendida entre 21 y 25 °C:<br />
deshumi dificación;<br />
si la temperatur a ambi ente es superior a 25 °C: enfriamiento;<br />
El ventilador y l a vál vula de agua s e gestionan como en calefacción,<br />
enfriamiento o deshumi dificación.<br />
El contacto auxiliar AUX1 se cierra cada vez que hay una solicitud de<br />
calefacci ón.<br />
El contacto auxiliar AUX2 se cierra cada vez que hay una solicitud de<br />
enfriamiento.<br />
Si hac e más de dos horas que s e apagó l a unidad, c uando se vuel va a<br />
encender la modalidad acti va depender á de la temperatura ambiente.<br />
El valor de consigna puede variar desde un míni mo de 16 °C hasta un<br />
máxi mo de 30 °C.<br />
I.5.1.2 COOL<br />
COOL es la función “enfriami ento”. En es te modo de funcionami ento se<br />
puede fijar a placer la regulación que expres a un mayor confort a través<br />
de:<br />
elección del valor de temper atura des eado;<br />
modo de funci onamiento del ventilador con programación manual o<br />
automática de l as vel ocidades (AUTO);<br />
colocación del deflector en posición fija o en función SWING;<br />
El ventilador está siempre en funcionami ento aunque se haya<br />
alcanz ado el valor de consigna.<br />
Cuando hay una solicitud de enfriamiento, se abre la vál vula después<br />
de 30 s; cuando hay una solicitud de apagado l a vál vula se cierra<br />
después de 120 s.<br />
El contacto auxiliar AUX2 se cierra cada vez que hay una solicitud de<br />
enfriamiento.<br />
Seleccionando la funci ón COOL el ventilador puede no arrancar<br />
enseguida ya que está pres ente la función TOO COOL ( véase el<br />
apartado correspondiente).<br />
El valor de consigna puede variar desde un míni mo de 16 °C hasta un<br />
máxi mo de 30 °C.<br />
I.5.1.3 DRY<br />
DRY es la funci ón “deshumi dificación”, es decir, la función que reduc e<br />
la humedad del ambi ente. D urante es te modo de funcionamiento la<br />
vál vula on/off de i nterceptación de agua se c ontr ola según los ciclos<br />
pre-establecidos:<br />
si la temperatur a ambi ente es superior a 25 °C: abre durante 3 min.<br />
- cierra durante 4 min.<br />
si la temperatur a ambi ente es tá c omprendida entre 16 y 25 °C:<br />
abre durante 3 min. - cierra durante 6 mi n;<br />
si la temperatur a ambi ente es inferior a 16°C: c errada;<br />
66
SECCIÓN I: USUARIO<br />
Tambi én en modalidad DRY se puede fijar a plac er la regulaci ón que<br />
mejor expres a el c onfort a través :<br />
elección del valor de temper atura des eado;<br />
modo de funci onamiento del ventilador con programación manual o<br />
automática de l as vel ocidades (AUTO);<br />
colocación del deflector en posición fija o en función SWING;<br />
El contacto auxiliar AUX2 se cierra cada vez que hay una solicitud de<br />
deshumi dificación.<br />
Seleccionando la funci ón DRY el ventilador puede no arrancar<br />
enseguida ya que está pres ente la función TOO COOL ( véase el<br />
apartado correspondiente).<br />
El valor de consigna puede variar desde un míni mo de 16 °C hasta un<br />
máxi mo de 30 °C.<br />
I.5.1.4 FAN<br />
FAN es la funci ón “ ventilación”. En es te modo de funcionamiento s e<br />
puede fijar a placer la veloci dad del ventilador (mín.-med-máx.- Auto) y<br />
la posición del deflector (fijo o en función SWING).<br />
Los contactos auxiliares AUX1 y AUX2 están abiertos.<br />
I.5.1.5 HEAT<br />
HEAT es la función “calefacción”. T ambién en es te modo de<br />
funcionamiento s e puede fijar a plac er la regulación que expr esa un<br />
mayor confort a través de:<br />
elección del valor de temper atura des eado;<br />
modo de funci onamiento del ventilador con programación manual o<br />
automática de l as vel ocidades (AUTO);<br />
colocación del deflector en posición fija o en función SWING;<br />
Cuando hay una solicitud de c alefacción, se abre la vál vula después de<br />
30 s; cuando hay una solicitud de apagado l a vál vul a se cierra después<br />
de 120 s.<br />
El contacto auxiliar AUX1 se cierra cada vez que hay una solicitud de<br />
calefacci ón.<br />
Seleccionando la funci ón HEAT el ventilador puede no arranc ar<br />
enseguida ya que está pres ente la función HOT START ( véase el<br />
apartado correspondiente).<br />
El valor de consigna puede variar desde un míni mo de 16 °C hasta un<br />
máxi mo de 30 °C.<br />
IMPORTANTE<br />
El ventilador de la unidad se detiene cuando se<br />
alcanza el valor de temperatura configurado. Cad a 3<br />
minutos el ventilador se vuelve a activar durante un<br />
minuto a la velocidad mínima para evitar<br />
fenómenos de estr atificación del air e cer ca d el<br />
aparato.<br />
I.5.2 FUNCIONES DE CONFORT<br />
TOO COOL<br />
Para los modos de funcionamiento COOL y DRY se ha previsto la<br />
función TOO COOL que bl oquea el arranque del ventilador si la<br />
temperatura del agua en entrada en el i ntercambi ador está por enci ma<br />
de los 32 °C durante 15 minutos (restablecimiento a 30 °C).<br />
El display vis ualiza “P2”.<br />
HOT START<br />
Para el modo de funcionamiento H EAT es tá prevista la función HOT<br />
START que bl oquea el arranque del ventilador si la temperatura del<br />
agua en entrada en el intercambiador está por debajo de los 25 °C<br />
(diferencial de 3 °C), evitando así des agradables flujos de aire frío. Esta<br />
situación podría tener lugar en el primer arranque de la uni dad o<br />
después de largas paradas.<br />
El display vis ualiza “P4”.<br />
POST HEAT<br />
Para el modo de funcionamiento H EAT es tá prevista la función POST<br />
HEAT, que c uando la unidad alcanza el valor de c onsigna o s e apaga,<br />
mantiene el ventilador enc endido con el objetivo de disminuir la<br />
temperatura del intercambi ador has ta la temperatura de 25 °C.<br />
El display vis ualiza “P3”.<br />
I.5.3 MANDO A DISTANCIA<br />
El mando a distancia per mite c onfigurar y vis ualizar todos los<br />
parámetros de funcionamiento de la unidad, facilitando así todas las<br />
operaci ones de programación.<br />
El mando a distancia s e alimenta con 2 baterías R03 siz e AAA de 1,5<br />
V.<br />
I.5.3.1<br />
BOTÓN<br />
SLEEP<br />
TEMP<br />
MODE<br />
TIME-ON<br />
TIME-OFF<br />
TIME-SET<br />
NET WORK<br />
SWING<br />
FAN<br />
C<br />
R<br />
IMPORTANTE<br />
Se recomienda probar el funcionamiento del mando<br />
a distan cia para determ inar su zona d e recep ción.<br />
Descripción del mando a distancia y<br />
respectivas funciones<br />
SLEEP<br />
MODE<br />
SWING<br />
R<br />
FAN<br />
TIME-ON<br />
TIME-OFF<br />
TIME-SET<br />
C<br />
TEMP<br />
NET WORK<br />
BATT<br />
DESCRIPCIÓN<br />
Permite encender y apagar la unidad. Puls e el botón<br />
para enc ender, púlselo nuevamente para apagar<br />
Indica los es tados y l os modos de funci onamiento de<br />
la uni dad<br />
Activación del modo SLEEP.<br />
Estos botones permiten c onfigurar la temperatura<br />
ambiente deseada.<br />
Permite selecci onar el tipo de funci onamiento deseado<br />
(AUTO, COOL, DRY, HEAT, FAN)<br />
Configuración del timer de encendido.<br />
Configuración del timer de apagado.<br />
Permite configurar el horario del reloj y de los ti mer<br />
Permite configurar los parámetros de la red<br />
Master/Slave.<br />
Este botón per mite que el deflector oscile<br />
constantemente.<br />
Pulse este botón para s eleccionar la velocidad del<br />
ventilador. Cuando s e s elecciona AUTO la vel ocidad<br />
del ventilador se r egula automáticamente en función<br />
de la temperatura ambi ente.<br />
Pulse este botón durante algunos s egundos para<br />
regular el reloj.<br />
Pulse este botón para restabl ecer las c onfiguraciones<br />
del mando a distancia.<br />
MEMORY<br />
Después de una falta de tensión, un On/Off desde el mando a distanci a<br />
o una alarma, el aparato vol verá a funcionar en el modo en el que<br />
estaba c uando tuvo lugar la interrupción. Si antes de la i nterrupción<br />
estaba acti va l a función TIMER o SLEEP, és ta s e desacti va.<br />
67
SECCIÓN I: USUARIO<br />
I.5.3.2<br />
Descripción del display<br />
A<br />
A<br />
AM<br />
PM<br />
00:00<br />
00<br />
°C<br />
AM<br />
PM 00:00<br />
Símbolo Descrip ción<br />
00 °C Valor de temperatura c onfigurado.<br />
Transmisión entre el mando a distanci a y la máquina.<br />
Ventilador.<br />
Funcionamiento Sl eep.<br />
No utilizado.<br />
Transmisión a l os slave.<br />
Funcionamiento SWING.<br />
Función enfriami ento (COOL).<br />
El mando a distancia puede transmitir hasta una distancia de 8 metros<br />
aproximadamente del rec eptor.<br />
No exponga el mando a distancia a una humedad exc esiva, a la l uz<br />
solar directa o a otras fuentes de calor y evite golpearlo. Proteja el<br />
mando a distancia c ontra el agua y otros líquidos.<br />
Si el receptor de r ayos infrarrojos s e expone a la l uz solar directa o a la<br />
luz intensa de una lámpara o bi en si hay c erca una lámpara<br />
fluorescente con encendido electrónico, la unidad podría pres entar<br />
anomalías de funci onamiento o dej ar de funcionar.<br />
El uso de otros mandos a distanci a en las c ercanías o en el mis mo<br />
ambiente de ins talaci ón de l a unidad podría infl uenciar el<br />
funcionamiento r egular; evite dirigir el trans misor de otros mandos a<br />
distanci a hacia el receptor de l a unidad.<br />
I.5.4<br />
CONFIGURACIONES DE FUNCIONAMIENTO<br />
I.5.4.1 Configuración del reloj<br />
Nota: durante la c onfiguración del reloj no dirija el mando a distancia<br />
hacia la unidad.<br />
Se recomienda regular el reloj del mando a distancia antes de<br />
encender la unidad; par a regularlo, actúe de la siguiente manera:<br />
Cuando s e introduc en las baterías en el mando a distanci a o des pués<br />
de presionar el botón R (Res et), el indicador horario vis ualiza “AM 0:00”<br />
parpadeante.<br />
Función deshumidificación (DRY).<br />
Función ventilación (FAN).<br />
C<br />
Pulse el botón "C" con un objeto punti agudo, el i ndicador<br />
horario parpadea.<br />
Función calefacción (HEAT).<br />
TIME-SET<br />
Pulsando el botón TIME SET es posible regular el rel oj.<br />
A<br />
Funcionamiento automático (AUTO).<br />
Regulación del reloj.<br />
C<br />
Pulse de nuevo el botón "C" para confirmar la hora<br />
configurada.<br />
I.5.3.3 Uso del mando a distancia<br />
El mando a distancia utiliza dos baterías alcalinas de 1,5 V del tipo R03<br />
size AAA (proporcionadas).<br />
Para introducir las baterías, extraiga compl etamente la tapa del mando<br />
a distancia deslizándola hacia la parte i nferior. Introduzc a las baterías<br />
en el alojamiento correspondiente res petando las polaridades<br />
indicadas. Vuel va a colocar la tapa y seleccione las funciones<br />
deseadas. Se debe realizar la misma operaci ón para s ustituir las<br />
baterías descargadas c on l as nuevas. La duración media de las<br />
baterías es de un año aproximadamente.<br />
SLEEP<br />
MODE<br />
SWING<br />
TIME-ON<br />
TIME-OFF<br />
TEMP<br />
NET WORK<br />
I.5.4.2<br />
Encendido y apagado de la unidad<br />
Pulse el botón ON/OFF para encender o apagar la<br />
unidad.<br />
En el pas o de ON a OFF s e interrumpe c ualquier modo de<br />
funcionamiento, se c anc elan las temporizaciones en curso, se<br />
memoriza el modo de funcionamiento del aparato y del ventilador, y el<br />
val or de temperatura configurado.<br />
En el pas o de OFF a ON s e restablec en automátic amente todas las<br />
modalidades de funcionamiento memorizadas antes del apagado.<br />
Cuando s e enciende la unidad en el dis play aparec en todas l as<br />
indicaciones de funci onami ento de la mis ma: modo, temperatura<br />
configurada, velocidad del ventilador, etc.<br />
Cuando s e apaga l a unidad el display indic a solo la hora y el modo de<br />
funcionamiento en el que estaba la unidad antes de apagarla.<br />
I.5.4.3<br />
MODE<br />
Modo de funcionamiento<br />
Pulsando el botón Mode s e puede cambiar el modo de<br />
funcionamiento de la unidad. En el dis play apar ece la<br />
indicación del modo de funcionamiento seleccionado:<br />
R<br />
FAN<br />
TIME-SET<br />
C<br />
BATT<br />
- +<br />
- +<br />
El display del mando a distancia está siempre enc endido, y visualiza el<br />
horario sin importar si la uni dad es tá enc endi da o apagada.<br />
Quite l as baterías del mando a distancia si no se utilizará dur ante<br />
períodos prolongados .<br />
Dirija el mando a distancia hacia el receptor de la unidad mientras s e<br />
realizan las configuraciones (con exc epción de la configuración del<br />
reloj).<br />
Si se reciben l as señales correctamente, l a unidad emite una s eñal<br />
acústica.<br />
A<br />
Función enfriami ento, la unidad funciona c on s et de<br />
temperatura libre, dis minuyendo la temperatura del<br />
ambiente.<br />
Función deshumidific ación, la unidad funciona con set de<br />
temperatura libre, dis minuyendo progresivamente l a<br />
temperatura y la humedad del ambiente.<br />
Función ventilación, la uni dad funciona sin set de<br />
temperatura, ventilando el aire del ambiente.<br />
Función calefacción, la unidad funciona c on s et de<br />
temperatura libre, aumentando la temperatura del<br />
ambiente.<br />
Funcionamiento automático, la unidad puede trabajar en<br />
ENFRIAMIENTO y en CALEFACCIÓN en funci ón de l a<br />
diferenci a de temperatura que existe entre la temperatura<br />
ambiente y l a temperatura s eleccionada en el mando a<br />
distanci a.<br />
IMPORTANTE<br />
El ventilador d e la unidad se d etiene cuando se<br />
alcanza el valor d e temperatura configurado, para<br />
después reactivarse automáticamente a la<br />
velocidad mín ima evitando así fenómenos de<br />
estratificación d el aire en pro ximidad del apar ato.<br />
68
SECCIÓN I: USUARIO<br />
I.5.4.4<br />
TEMP<br />
I.5.4.5<br />
FAN<br />
I.5.4.6<br />
SWING<br />
I.5.4.7<br />
SLEEP<br />
Configuración de la temperatura deseada<br />
Pulsando estos botones en las diversas modalidades<br />
de funcionamiento (con excepción de la modalidad de<br />
ventilación) es posibl e aumentar o dis minuir el valor<br />
de la temperatura deseada entre 16 °C y 30 °C.<br />
Velocidad del ventilador<br />
Pulsando este botón es posible s eleccionar la velocidad<br />
del ventilador: Velocidad automátic a, míni ma, media y<br />
máxi ma.<br />
Configuración del deflector<br />
Pulsando el botón SW ING se puede acti var la oscilaci ón<br />
continua del defl ector.<br />
PELIGRO<br />
Mover manualmente el deflector motorizado cu ando<br />
la unidad está encendida podría causar problemas<br />
de funcionamiento o dañar el sist ema de<br />
regulación.<br />
Función SLEEP<br />
Pulsando este botón s e ac tiva la función SLEEP, que<br />
permite obtener un ahorro energético regul ando<br />
automáticamente la temperatura c onfigurada.<br />
La función SLEEP s e puede acti var en la modalidad de verano (el valor<br />
de c onsigna durante las primeras 2 horas de funcionami ento se reduce<br />
gradualmente hasta un máxi mo de 2 °C) e invernal (el val or de<br />
consigna s e aumenta gradual mente durante las primeras 2 horas de<br />
funcionamiento has ta un máximo de 2 °C).<br />
Para s alir de la función SLEEP pulse el botón SLEEP o c ambie el modo<br />
de funcionamiento de la unidad.<br />
I.5.4.8 Configuración del Timer<br />
El posibl e programar un ti mer para el encendido y el apagado<br />
automático de l a unidad.<br />
IMPORTANTE<br />
Para que las configuraciones del timer tengan<br />
efecto, el mando a distancia debe estar siempre<br />
cerca de la unidad (a una distancia máxima de 8<br />
metros) y dirigido hacia la misma.<br />
La función TIMER no es repetiti va y se debe programar cada vez que<br />
se quiera usar.<br />
TIME-ON<br />
TIME-SET<br />
TIME-ON<br />
TIME-OFF<br />
TIME-SET<br />
TIME-OFF<br />
TIME-ON<br />
TIME-OFF<br />
Pulsando este botón es posible c onfigurar la hora de<br />
encendido de la unidad.<br />
Utilice este botón par a configurar la hora.<br />
Para confirmar la selección.<br />
Pulsando este botón es posible c onfigurar la hora de<br />
apagado de l a unidad.<br />
Utilice este botón par a configurar la hora.<br />
Para confirmar la selección.<br />
Si la función timer para el enc endido está ac tivada, pulse<br />
este botón par a desacti varla.<br />
Si la función timer para el apagado es tá acti vada, puls e<br />
este botón par a desacti varla.<br />
I.5.6<br />
NET WORK<br />
TRANSMISIÓN DE DATOS A LA UNIDAD<br />
SLAVE<br />
En pr esenci a de una red M aster/Sl ave, mantenga pulsado<br />
este botón has ta que aparezc a el símbol o "Trans misión a<br />
los Slave" . Cuando se suelta el botón la uni dad Master<br />
transmite las nuevas configuraciones a los Sl ave.<br />
I.5.7 DESCRIPCIÓN DEL DISPLAY DE LA UNIDAD<br />
El display presente en la parte central de la unidad suministra las<br />
indicaciones s obre el es tado de funci onamiento de la máqui na y s obre<br />
la presencia de posi bles averías que puedan impedir el funcionamiento<br />
de la máquina.<br />
h<br />
00 °C<br />
I.5.8 FUNCIONAMIENTO LOCAL<br />
En cas o de falta o avería del mando a distanci a / panel de c ontrol s e<br />
puede hac er funcionar la unidad con el botón que es tá dentro de l a<br />
máquina.<br />
Pulsando sucesi vamente el botón es posi ble apagar y enc ender la<br />
unidad en funci onami ento automático.<br />
I.5.9 UNIDAD EN ALARMA<br />
Si tiene lugar una alarma c aus ada por una avería que impide el<br />
funcionamiento del aparato, en el display de la unidad y en el panel s e<br />
muestra un c ódigo de alarma.<br />
Descrip ción de las alarm as:<br />
Alarma<br />
E0<br />
E1<br />
E3<br />
E4<br />
P0<br />
P1<br />
P2<br />
P3<br />
P4<br />
Descrip ción<br />
No funciona la s onda de aire ambiente.<br />
No funciona la s onda de agua.<br />
No funcionan l as sondas de agua y aire.<br />
No funciona el motor del ventilador.<br />
Antihiel o del agua en funcionamiento de verano.<br />
El Set es de 2 °C, el restableci miento es a 5 °C<br />
después de 2 minutos. La vál vula se cierra, el<br />
contacto AUX2 se abre y el ventilador s e fuerza a la<br />
media o máxima vel ocidad.<br />
Sobrec alentamiento del agua en funcionami ento<br />
invernal.<br />
El set es de 75 °C, el restableci miento es a 70 °C.<br />
La válvula s e cierra, el contac to AUX1 s e abre y el<br />
ventilador se fuerza a la máxi ma velocidad.<br />
Alta temperatura del agua en funcionami ento de<br />
ver ano (vea el apartado TOO COOL).<br />
Eliminación del cal or del i nterc ambiador con Set<br />
invernal s atisfec ho ( vea el apartado POST HEAT).<br />
Baja temper atura del agua en funcionamiento<br />
invernal ( vea el apartado HOT START).<br />
Las c ondiciones operati vas normal es del equipo se restablec en<br />
automáticamente.<br />
I.5.5<br />
R<br />
RESTABLECIMIENTO DEL MANDO A<br />
DISTANCIA<br />
Pulsando con un objeto punti agudo el botón RESET es posible<br />
restablec er las c onfiguraciones de fábrica del mando a<br />
distanci a.<br />
69
SLEEP TEMP<br />
SECCIÓN I: USUARIO<br />
I.6 LIMPIEZA DE LA UNIDAD<br />
PELIGRO<br />
Quite siempre la t ensión antes d e realiz ar las<br />
operacion es de limpieza o mantenimiento.<br />
No tire agua en la unidad.<br />
Para la limpieza, utilice un paño suave ligeramente mojado en agua y<br />
alcohol. No utilice agua caliente, sustancias abrasivas o corrosivas, ni<br />
disolventes.<br />
I.7 ADVERTENCIAS Y SUGERENCIAS<br />
Evite que se obstruya el flujo del aire o us ar la unidad c omo pl ano de<br />
apoyo. El uso de agua o de bombonas de s pray c erca de la uni dad<br />
puede c aus ar descargas el éctricas y un mal funci onamiento de la<br />
misma.<br />
I.6.1<br />
LIMPIEZA DEL FILTRO DEL AIRE<br />
PELIGRO<br />
Preste aten ción durante el d esmontaje del filtro, las<br />
aletas del intercambiador de calor pueden cortar.<br />
IMPORTANTE<br />
Haga funcionar siempre la unidad con los filtros<br />
instalado s.<br />
Para garantizar una c orrecta as piración del aire, el filtro debe limpi arse<br />
al menos una vez al mes , o con más frec uencia si la máquina funciona<br />
en ambientes c on muc ho polvo. Para s u limpieza, el filtro debe quitarse<br />
de la uni dad. El filtro del aire puede limpi arse soplando con aire<br />
comprimido o lavándolo con agua. Antes de vol ver a montar el filtro,<br />
asegúrese de que esté limpi o y completamente sec o.<br />
Si el filtro está dañado, debe sustituirse con un filtro original RHOSS.<br />
Antes de enviar una s eñal desde el mando a distancia asegúres e de<br />
que esté dirigido hacia el receptor c olocado en la unidad. Si la unidad<br />
ha recibi do c orrectamente la s eñal envi ada desde el mando a distancia,<br />
se emite una señal s onora de c onfirmación: si falta esta señal repita la<br />
operaci ón. El mando a distancia no tr ans mite l a señal a la unidad si<br />
entre éste y la uni dad se i nterponen una pared u otros objetos.<br />
Proteja el mando a distancia de s alpicaduras de agua o de otros fluidos<br />
y de posibl es golpes .<br />
max 8 m<br />
SLEEP TEMP<br />
70
SECCIÓN II: INST AL ACIÓN Y M ANTENIMIENTO<br />
II<br />
II.1<br />
II.1.1<br />
SECCIÓN II: INSTALACIÓN Y<br />
MANTENIMIENTO<br />
INSTRUCCIONES DE TRANSPORTE<br />
EMBALAJE, COMPONENTES<br />
PELIGRO<br />
NO ABRA NI MANIPULE EL EMBALAJE HASTA<br />
LLEGAR AL PUNTO DE INST ALACIÓN.<br />
Las oper acion es d e transporte y d esplazam iento<br />
deben ser ef ectuadas por personal especializado e<br />
instruido para tal fin.<br />
Controle al llegar que la unidad no haya sufrido daños durante el<br />
transporte y que todas sus partes es tén compl etas.<br />
Si se encuentr an daños visibl es, anote inmediatamente en el<br />
documento de transporte el daño detectado con el siguiente mens aje:<br />
“RETIRO CON RESERVAS POR EVIDENTES DAÑOS EN EL<br />
EMBALAJ E", indicando el número de matrícula si se tr ata de varias<br />
máquinas, ya que l a devoluci ón a pr ecio franco de almacén comporta el<br />
resarcimiento de los daños por parte del seguro según lo previsto por la<br />
ley n° 450 del 22/08/85 “límite de res arcimiento”.<br />
II.1.3 CONDICIONES DE ALMACENAMIENTO<br />
Las unidades embaladas s e pueden al mac enar s obreponiéndol as en<br />
grupos de cuatro unidades como máximo y deben guardarse en un<br />
lugar seco al reparo de la lluvia y del sol.<br />
II.1.4 ESPACIO NECESARIO, INSTALACIÓN<br />
IMPORTANTE<br />
La colocación o la instalación no corr ecta d e la<br />
unidad pueden causar una amplificación del ruido o<br />
de las vibraciones generadas durante su<br />
funcionamiento.<br />
Las unidades Idr owall deben fijarse respetando los espacios técnicos<br />
de colocación.<br />
100 mm<br />
100 mm 100 mm<br />
min 1900 mm<br />
max 2200 mm<br />
Para quitar el emb alaje siga las siguientes instrucciones:<br />
Controle l a pres enci a de daños visibles;<br />
Abra el embalaje;<br />
Elimine el material de embalaje r espetando las normati vas vigentes,<br />
llevándolo a los c orrespondi entes centros de recogida o de reciclaj e.<br />
PROTECCIÓN DEL MEDIO AMBIENTE<br />
Elimine los materiales d el embalaje conforme a la<br />
legislación nacional o local vigente en el país de<br />
utilización.<br />
PELIGRO<br />
No deje los emb alajes al alcan ce d e los niños.<br />
II.1.2 INDICACIONES PARA EL DESPLAZAMIENTO<br />
PELIGRO<br />
El desplazamiento de la unidad debe efectuarse con<br />
especial aten ción par a evitar daños a la estructura<br />
externa y a las p artes internas m ecán icas y<br />
eléctricas.<br />
Compruebe también que no haya ob stáculo s ni<br />
personas a lo largo del trayecto para evitar riesgos<br />
de choques, aplastamiento o vuelco del medio de<br />
elevación.<br />
Todas l as operaci ones señaladas a c ontinuaci ón deben ser realizadas<br />
en c onformidad c on l as normas de seguridad vigentes, tanto en lo que<br />
se refiere a las herramientas us adas como en lo que conci erne a las<br />
modalidades operati vas . Antes de efectuar operaci ones de<br />
despl azamiento, asegúres e de que la c apacidad de levantami ento s ea<br />
adec uada al peso de la unidad en c uesti ón.<br />
Las unidades se pueden des plazar / levantar tanto manualmente c omo<br />
con una carretilla elevadora. Para desplazar varias máquinas al mismo<br />
tiempo, es preferible introducir las máqui nas dentro de un c ontenedor y<br />
realizar el levantami ento con una grúa o con una máquina si milar.<br />
71
II.2<br />
II.2.1<br />
INSTRUCCIONES DE INSTALACIÓN<br />
PELIGRO<br />
La instalación debe ser efectuada única y<br />
exclusivamente por técnicos expertos y habilitados<br />
para trab ajar con productos para la climatización y<br />
la refrig eración. Una instalación no corr ecta pu ede<br />
causar un funcionamiento anómalo de la unidad y<br />
comportar fuertes reducciones de rendimiento.<br />
PELIGRO<br />
Es oblig atorio para el person al aplicar las<br />
normativas locales y nacionales vigentes en el<br />
momento de la puesta en marcha de la máquina.<br />
PREPARACIÓN DE LAS CONEXIONES<br />
HIDRÁULICAS<br />
IMPORTANTE<br />
Las con exion es hidr áulicas son oper aciones mu y<br />
importantes y deben ser realizadas con una<br />
atención particular por parte de personal<br />
especializado.<br />
IMPORTANTE<br />
Si el agua es particu larm ente rica en cal, se<br />
aconseja el u so de un a descalcificador a.<br />
SECCIÓN II: INST AL ACIÓN Y M ANTENIMIENTO<br />
Si se atr aviesa directam ente la par ed:<br />
el espesor de la pared (s) no debe s er superior a 500 mm;<br />
el agujero en l a pared debe estar inclinado al menos 15º (a), para<br />
favorec er el fluj o natur al del agua de condensaci ón.<br />
la tubería de descarga de condens ación debe tener una pendi ente<br />
adec uada para favorecer la salida del agua.<br />
Los c ables eléctricos pueden c onectars e a l a unidad siguiendo el<br />
desarrollo de l as tuberías hidráulicas , o utilizando indiferentemente una<br />
de las 3 s alidas disponibles .<br />
S<br />
a<br />
Antes de instalar el aparato es nec esario elegir el sentido de salida de<br />
las líneas de la uni dad, en funci ón de l as carac terísticas de la<br />
instalación o de la preparación de las c onexiones hi dráulicas presentes<br />
en el punto de instalación.<br />
En la figura se i ndican las posiciones de los aguj eros en la pared para<br />
el pas o de las tuberías .<br />
1. Agujero para la s alida de las tuberías hidráulicas y de descarga de<br />
condens ación que atravies an directamente la pared.<br />
2. Agujero para la s alida de tuberías hi dráulicas y/o de desc arga de<br />
condens ación<br />
3. Agujero para la s alida de tuberías hi dráulicas<br />
4. Plantilla de fijación<br />
II.2.2 FIJACIÓN DE LA UNIDAD<br />
Para fijar la unidad a la pared actúe de la siguiente manera:<br />
quite la plantilla de fijación de acero situada en la parte posterior de<br />
la uni dad;<br />
coloque la plantilla de acero en el ár ea en la que se quiere instalar la<br />
unidad;<br />
compruebe su perpendicularidad utilizando una plomada o un nivel;<br />
trace los puntos en los que se debe perforar el muro para la fijación;<br />
una vez perfor ada la pared, fije la plantilla.<br />
Los c ables eléctricos pueden c onectars e a l a unidad siguiendo el<br />
desarrollo de l as tuberías hidráulicas , o utilizando de manera<br />
indiferente una de l as tres s alidas disponibles .<br />
4<br />
1<br />
2<br />
3<br />
4<br />
1<br />
2<br />
Vistas posteriores.<br />
3<br />
Una vez elegido el sentido de s alida de l as líneas, haga los agujeros de<br />
la pared en la cual se fij ará la unidad, siguiendo las indic aciones<br />
presentes en la plantilla de papel. A continuación se ilustran las<br />
posiciones indicati vas de los agujeros en funci ón del s entido elegido<br />
para la salida de las líneas.<br />
72
perfore los puntos hechos con la plantilla de papel;<br />
fije la plantilla de acero a la pared utilizando los tornillos<br />
suministrado con la unidad (Fig. 25).<br />
SECCIÓN II: INST AL ACIÓN Y M ANTENIMIENTO<br />
II.2.3 CONEXIONES HIDRÁULICAS<br />
Después de haber fijado correctamente la plantilla a la pared se puede<br />
conec tar la unidad a l a instalación de agua a través de las c onexi ones<br />
de entrada/s alida indic adas por las flec has presentes en los tubos de la<br />
unidad.<br />
Para comprobar la correcta fijación de la plantilla a la pared actúe de la<br />
siguiente manera:<br />
acerque la unidad a la plantilla fijada a la pared;<br />
una la unidad a la plantilla utilizando los relativos ganchos de<br />
sostén.<br />
Para la conexión de las líneas utilice conexiones rápidas. Antes de<br />
realizar la conexión hidráulica del aparato, des monte el racor rápido.<br />
Introduzca en los tubos de las líneas de c onexión l os componentes del<br />
racor rápido desmontados c on anterioridad.<br />
Conecte los tubos de l a unidad a los empal mes rápidos<br />
introduci éndolos has ta el tope preparado. Ator nille manualmente todos<br />
los empal mes , compl ete el aj uste con una llave di namométrica con una<br />
fuerza de 34,3 Nm utilizando otra llave para evitar que el tubo se<br />
tuerza.<br />
1: Ll ave dinamométrica<br />
(34,3 Nm)<br />
2: Ll ave<br />
Una vez realizada la instalación, es necesario:<br />
Revestir los tubos de conexi ón c on material anticondens ación de 10<br />
mm de es pesor.<br />
Verter agua en la bandeja de r ecogida de c ondensación y c ontrol ar<br />
que el líquido se desc argue normalmente, siguiendo el rec orrido hasta<br />
la salida de la descarga de c ondensación. De no ser así, c ontrol ar la<br />
pendiente y la pr esencia de posibles obstrucciones.<br />
Purgar el aire c ontenido en el circuito.<br />
La batería de agua está provista de una vál vul a de purga de aire y de<br />
vál vula de desc arga de agua.<br />
73
SECCIÓN II: INST AL ACIÓN Y M ANTENIMIENTO<br />
II.2.3.1 Creación de la descarga de condensación<br />
El sistema de desc arga de l a condens ación debe prever una pendiente<br />
adec uada para favorecer la salida del agua.<br />
3 cm/m<br />
II.2.4.1 Conexión de la alimentación<br />
Controle que la tensión y la fr ecuencia de l a instalación el éctrica sean<br />
230 V (±10%) monofásicas a 50 Hz; que la potencia instalada<br />
disponible s ea s uficiente para el funcionamiento de la máquina y que<br />
los cabl es de la línea de alimentaci ón s ean de una s ección adec uada<br />
para la corriente máxi ma nec esaria.<br />
Asegúrese de que la instalación eléc trica de alimentación es té en<br />
conformidad c on l as normas nacionales vigentes para l a seguridad.<br />
Para la conexión de la unidad a la red eléctrica utilice un cable flexible<br />
bipolar + ti erra, de 1,5 mm2 c on vaina en policloropreno no más ligero<br />
que H05RN-F. El c onductor de tierra ti ene que s er más largo que l os<br />
otros conductor es para que éste sea el último en s alirse si se afloja el<br />
dispositi vo de fijación del cable.<br />
Las c onexi ones deben realizarse res petando el esquema el éctrico.<br />
6<br />
5<br />
2<br />
3<br />
1<br />
II.2.3.2 Protección anti-hielo<br />
IMPORTANTE<br />
Al mezclar el agua con glicol se modifican los<br />
rendimientos d e la unidad. Preste atención a las<br />
indicaciones de seguridad relacionadas con el<br />
glicol que se inclu yen en el envase.<br />
Si la unidad no se utiliza dur ante el invierno, el agua de la instalación<br />
puede c ongelars e. Es necesario vaciar s u contenido completamente<br />
con antelación. Si s e considera que la operaci ón de desc arga es<br />
demasiado c ompleja, puede mezcl arse el agua c on una c antidad<br />
adec uada de líqui do anti-hi elo.<br />
II.2.4 CONEXIONES ELÉCTRICAS<br />
IMPORTANTE<br />
La conexión eléctrica de la unidad debe ser<br />
efectuada por per sonal competente en mat eria y<br />
conforme a las normas vigentes en el lugar de<br />
instalación de la unidad. Una conexión eléctrica no<br />
conforme exime a RHOSS de toda responsabilidad<br />
por daños a cosas y personas.<br />
PELIGRO<br />
Instale siempre, en una zona protegid a y cer ca de la<br />
máquina, un interruptor automático general con<br />
curva caract erística retrasada, de cap acid ad y<br />
poder de interrupción adecuados, con una<br />
distancia mínim a de apertura de los contactos d e 3<br />
mm.<br />
La conexión a tierra de la unidad es obligatoria por<br />
ley y garantiza la seguridad del usuario durante el<br />
funcionamiento de la máquina.<br />
Quite l a vaina sólo cerca de los bornes. Utilice terminales de cables<br />
adec uados para los bornes que s e es tán us ando.<br />
Después de haber introducido los termi nales de cables en el bor ne,<br />
ajuste los tornillos con un destornillador si n apretar demasi ado: una vez<br />
concluida la operación tire ligeramente de l os cables para c omprobar<br />
que estén bien apretados .<br />
Utilice el sujeta-cable presente en el interior del compartimento de la<br />
tarjeta electrónica para bloquear los c abl es.<br />
40 mm<br />
L<br />
L<br />
N<br />
N<br />
L<br />
N<br />
FUSE<br />
7<br />
1 Botón de res tabl ecimiento (reset);<br />
2 Conector serial 1 (Phone 1);<br />
3 Conector serial 2 (Phone 2);<br />
4 Jumper JP0;<br />
5 Conector AUX1, solicitud de c alor (contacto libre);<br />
6 Conector AUX2, solicitud de frío (contac to libre);<br />
7 Fusible, 5x20 F3,15 A 250 V;<br />
8 Conector CN9 para panel de c able (KPFI);<br />
- - - Conexión a cargo del instalador.<br />
Para acceder a l os bornes quite la tapa de protección después de<br />
levantar el panel frontal de la unidad.<br />
Haga pas ar el cable de alimentación a través de l a ranura presente<br />
detrás de la unidad.<br />
4<br />
L<br />
1<br />
8<br />
L<br />
M4<br />
N<br />
N<br />
M4<br />
M4<br />
Utilice el sujeta-cables colocado en el interior del compartimento de la<br />
tarjeta electrónica para bloquear el c abl e de ali mentación y los cables<br />
de interconexión, quite la protecci ón de l os cables s ólo en proximidad<br />
de los bor nes de c onexión.<br />
50 mm<br />
Si se fija l a unidad a una pared metálica, debe preverse la toma a tierra<br />
según las nor mas vigentes en el país de i nstal ación.<br />
74
SECCIÓN II: INST AL ACIÓN Y M ANTENIMIENTO<br />
II.2.4.2<br />
Conexión de los contactos auxiliares (AUX<br />
1-2)<br />
Están disponibles 2 contactos auxiliares normalmente abiertos AUX 1 y<br />
AUX 2, par a gestionar, por ejemplo, la caldera y el chiller.<br />
Contacto libre<br />
JP0 AUX1 AUX2<br />
Contacto con tensión<br />
JP0 AUX1 AUX2<br />
1 2 3 4 5 6<br />
1 2 3 4 5 6<br />
24÷230 Vca<br />
Se pueden us ar como c ontactos libres o con tensión (230 Vca), y l a<br />
carga máxi ma que se puede aplicar a cada c ontacto es de: 0,5 A - 230<br />
Vca AC 1.<br />
AUX 1<br />
AUX 2<br />
Cerrado c on la solicitud de cal or.<br />
Cerrado c on la solicitud de frío.<br />
En la modalidad de calefacción AUX 1 se abre si inter viene la alar ma<br />
de protecci ón de l a batería.<br />
En la modalidad de enfriami ento AUX 2 s e abre si inter viene la alar ma<br />
de protecci ón de l a batería.<br />
En la modalidad de ventilación AUX 1 y AUX 2 se abren cuando s e<br />
enciende el ventilador.<br />
II.2.5 CONEXIÓN MASTER/SLAVE<br />
Es una función especi al en la que un aparato defi nido como Master<br />
(gestionado por mando a distancia o panel de mando) envía algunas<br />
informaciones sobre el funcionamiento en c urso a otr os aparatos<br />
(máximo 31) definidos como Slave (sin mando a distancia o panel de<br />
mando), a tr avés de una conexi ón eléctrica que hay que r ealizar en<br />
fase de i nstal ación ( véas e esquemas el éctricos).<br />
Alarmas: Las alar mas s e gestionan independientemente en cada<br />
tarjeta de control.<br />
Timeout: Los slave no pueden continuar funcionando en ausenci a del<br />
Master (por falta de comunicación, avería u otro) ya que no s ería<br />
posible efectuar ningún mando a l as máquinas (On/Off,...).<br />
Comunicación Master/Slave:<br />
En cas o de mal funci onami ento del Master, reiniciando los Sl ave es<br />
posible controlarlos indi vidualmente con el mando a distancia. Todo ello<br />
sin inter venir en las c onexi ones y/o tarjeta de c ontr ol.<br />
El mando a distancia funciona también en los Slave des pués que<br />
han instaurado una comunicación con el M aster. En este cas o el Slave<br />
tiene un funcionamiento autónomo pero s olo hasta que vuel ve a r ecibir<br />
informaciones de parte del Master.<br />
La distanci a máxima de la red local es de 30 m (es l a distancia entre el<br />
Master y el último Slave).<br />
La c onexi ón entr e Master y Slave se debe realizar c on un c able<br />
telefónico c ons tituido por 6 c onductores y c onector es RJ12.<br />
FUSE<br />
FUSE<br />
FUSE<br />
L<br />
N<br />
L<br />
N<br />
MASTER SLAVE 1 SLAVE 2<br />
L<br />
1<br />
2<br />
3<br />
4<br />
5<br />
6<br />
Bianco White Blanc Weiss Blanco<br />
Nero Black Noir Schwarz Negro<br />
Rosso Red Rouge Rot Rojo<br />
Verde Green Vert Grün Verde<br />
Giallo Yellow Jaune Gelb Amarillo<br />
Blu Blue Bleu Blau Azul marino<br />
1 Rx/Tx-<br />
2 Rx/Tx+<br />
3 GND<br />
4<br />
5<br />
6<br />
N<br />
II.2.5.1 Conexión Master/Slave con mando a<br />
distancia<br />
Para la conexión Master/Slave utilizando el mando a distancia es<br />
neces ario introducir un puente en los bornes 1 y 2 (con l a unidad<br />
desconectada de la red eléctrica) s olo en la uni dad definida Master.<br />
Master<br />
1 2<br />
3 4 5 6<br />
75
SECCIÓN II: INST AL ACIÓN Y M ANTENIMIENTO<br />
II.3<br />
II.3.1<br />
INSTRUCCIONES PARA EL ARRANQUE<br />
IMPORTANTE<br />
La puesta en marcha o el primer arranque de la<br />
máquina (cuando está previsto) lo debe realizar<br />
exclusivam ente per sonal h abilitado p ara trabajar<br />
con este tipo de productos.<br />
PELIGRO<br />
Antes d e la puesta en servicio hay que comprobar<br />
que la instalación y las conexiones eléctricas hayan<br />
sido efectuadas conforme a lo indicado en este<br />
manual. Compruebe además que no haya personas<br />
no autorizadas cerca de la máquina durante dich as<br />
operacion es.<br />
CONTROLES PREVIOS A LA PUESTA EN<br />
MARCHA<br />
Antes de poner en marcha la unidad asegúrese de que:<br />
1. la uni dad esté col ocada c orrectamente;<br />
2. las tuberías de impulsión, retorno y descarga de condens ación de la<br />
instalación hi dráulica estén c orrectamente conectadas;<br />
3. no haya aire dentro del circuito hidráulico;<br />
4. el intercambiador esté limpio;<br />
5. las conexiones eléctricas sean correctas;<br />
6. los tornillos que fijan los conductores estén bien ajustados;<br />
7. la tensión de alimentación sea la nec esaria;<br />
8. la abs orción de l a unidad s ea c orrecta y no supere el máximo<br />
permitido, ( vea A1 Datos técnicos).<br />
Se recomienda hacer funcionar la unidad a la máxima velocidad<br />
durante un par d e horas.<br />
II.3.2<br />
PUESTA FUERA DE SERVICIO<br />
IMPORTANTE<br />
Si la unidad no se utiliz a durante el invierno, el<br />
agua de la instalación puede congelarse.<br />
Durante los períodos prolongados de inacti vidad de la máquina es<br />
neces ario aislarla eléctricamente, abriendo para ello el interruptor<br />
general de la i nstal ación, coloc ado por el ins talador.<br />
Si la unidad no se utiliza dur ante el invierno, el agua de la instalación<br />
puede c ongelars e. Es necesario vaciar s u contenido completamente<br />
con antelación. Como alternati va, se puede mezclar el agua con una<br />
cantidad adecuada de líquido anticongelante (porcentaje máxi mo<br />
inferior al 30%).<br />
II.3.3 REACTIVACIÓN DESPUÉS DE UNA<br />
PROLONGADA INACTIVIDAD<br />
Antes d e volver a pon er en mar cha:<br />
Limpi e o s ustituya el filtro del aire.<br />
Limpi e el intercambi ador.<br />
Limpi e o libere de posibl es obstrucciones el desagüe de la bandeja<br />
de rec ogida de c ondens ación.<br />
Purgue el aire de la instalación hidráulica.<br />
Se recomienda hacer funcionar la unidad a la máxima velocidad<br />
durante un par de horas .<br />
II.4.1.1<br />
Sustitución de las baterías<br />
PELIGRO<br />
Tome las debid as precauciones para qu e los niños<br />
no puedan usar de manera in apropiada o accid ental<br />
las b aterías.<br />
¡ATENCIÓN !<br />
Si no se utiliz a el mando a distan cia durante un<br />
largo período (por ejemplo, la parada de temporad a<br />
de la unid ad), saque las b aterías d e su alojamiento,<br />
para evitar posibles p érdidas del fluido interno con<br />
la con siguiente formación d e óxido en lo s<br />
contactos.<br />
Para s ustituir las baterías quite la tapa del alojamiento de l as mismas ,<br />
quite las viejas baterías e i ntroduzca las nuevas res petando l a<br />
polaridad indicada dentro del al ojamiento.<br />
SLEEP<br />
MODE<br />
SWING<br />
R<br />
FAN<br />
TIME-ON<br />
TIME-OFF<br />
TIME-SET<br />
C<br />
TEMP<br />
NET WORK<br />
BATT<br />
- +<br />
- +<br />
Utilice solamente dos baterías alcalinas AAA de 1,5 V. No introduzca<br />
una batería us ada con una nueva o dos baterías diferentes .<br />
Una vez ter minada l a sustitución de las baterías el mando a distancia<br />
se pone en OFF y s e pi erden todas las c onfiguraciones.<br />
II.4.1.2<br />
Inspección y limpieza del intercambiador<br />
PELIGRO<br />
Preste aten ción durante el d esmontaje del filtro, las<br />
aletas del intercambiador de calor pueden cortar.<br />
Con la unidad apagada levante la puerta frontal y controle el estado del<br />
intercambiador.<br />
II.4<br />
INSTRUCCIONES DE MANTENIMIENTO<br />
PELIGRO<br />
Aísle la unid ad de la red, usando el interruptor<br />
general, antes de efectuar en ella cualquier<br />
operación d e mantenimiento, incluidas las<br />
operacion es de simple control. Controle que nadie<br />
conecte a la cor riente eléctrica accidentalm ente la<br />
máquina, bloquee el interruptor general en la<br />
posición de cero.<br />
PELIGRO<br />
Las operaciones de mantenimiento deben ser<br />
efectuadas por técnico s expertos, habilit ados para<br />
trabajar con productos para la climatización y la<br />
refrigeración. Utilice guantes d e trab ajo adecu ados.<br />
PELIGRO<br />
Se prohíbe introducir objetos puntiagudos por las<br />
rejillas de aspir ación e impulsión del aire.<br />
De ser necesario:<br />
quite de la s uperficie de aletas c ualquier cuerpo extraño que pueda<br />
obstruir el pas o del aire;<br />
elimine el pol vo depositado con un chorro de aire comprimido;<br />
realice un lavado ligero con agua y cepille suavemente;<br />
seque con aire comprimi do.<br />
76
SECCIÓN II: INST AL ACIÓN Y M ANTENIMIENTO<br />
II.4.1.3<br />
Inspección y limpieza de la descarga de<br />
condensación<br />
Con la unidad apagada, quite el panel frontal des ator nillando los<br />
tornillos de fijación y controle el estado de la descarga de<br />
condens ación.<br />
II.4.1.5 Vaciado de la instalación agua<br />
IMPORTANTE<br />
La batería de agua es parcialmente drenable; para<br />
realiz ar un dr enaje completo, se aconseja purgar el<br />
aire d entro de la batería.<br />
Para oper aciones es peci ales de mantenimiento o para evitar roturas<br />
debi das a la c ongelaci ón del agua presente en el circuito hidráulico s e<br />
puede desc argar el agua de la i nstalaci ón.<br />
Para descarg ar el agu a actúe de la siguiente man era:<br />
abra la puerta frontal y quite los filtros del aire;<br />
afloje l a vál vul a de descarga del agua.<br />
De ser neces ario, quite de la descarga de c ondensación posibles<br />
obstrucciones que puedan i mpedir el fluj o normal del agua.<br />
II.4.1.4 Purga del circuito hidráulico<br />
Hay que purgar el aire que es té presente en el circuito hidr áulico.<br />
Para purgar el aire actúe de la siguiente manera:<br />
abra la puerta frontal y quite los filtros del aire;<br />
afloje l a vál vul a de purga dejando s alir el aire;<br />
ponga en marcha l a instalación durante algunos minutos;<br />
detenga la instal ación;<br />
purgue de nuevo el circuito hidráulico;<br />
Repita l a operación varias vec es hasta que no s alga más aire de la<br />
instalación.<br />
El agua que sal e de la vál vula de purga fluye des de l a bandeja de<br />
recogida de condens ación.<br />
El agua que sal e de la vál vula de descarga fluye desde la bandeja de<br />
recogida de condens ación.<br />
II.4.2 CIRCUI TO ELÉCTRICO<br />
Para el manteni miento del circuito eléc trico se r ecomienda efectuar las<br />
siguientes operaciones:<br />
controle el c onsumo eléc trico de la uni dad mediante una pinza<br />
amperimétrica y c ompare el val or con los indicados en la<br />
documentación.<br />
inspeccione y controle el adec uado apriete de los c ontactos<br />
eléctricos y s us respecti vos bor nes.<br />
II.5 INDICACIONES PARA LA ELIMINACIÓN DE LA<br />
UNIDAD<br />
PROTECCIÓN DEL MEDIO AMBIENTE<br />
RHOSS desde siempre se preo cupa por la<br />
protección del med io ambiente.<br />
Es importante que quien efectúa la eliminación de<br />
la unidad siga meticu losam ente las indicacion es<br />
siguientes.<br />
El desguace de l a unidad debe s er efectuado sólo por una empresa<br />
autorizada par a el retiro de produc tos o máquinas obsoletas.<br />
En su conjunto, l a máquina está fabricada c on materiales tratables<br />
como MPS ( materia prima s ecundaria), c on la obligación de res petar<br />
las siguientes instrucciones:<br />
Si al equipo se le ha añadido liquido anti-hi elo, no s e debe<br />
descargar libremente, ya que es una s ustancia c ontami nante.<br />
Debe rec ogerse y eliminarse de una manera adec uada;<br />
Los c omponentes electrónicos (condens adores el ectrolíticos) deben<br />
considerarse como residuos especiales, y como tales deben entregarse<br />
a un ente autorizado para s u rec ogida;<br />
El material de aislamiento de los tubos de goma expandida de<br />
poliuretano y polietileno expandido reticulado, poliuretano expandido y<br />
el revesti miento de esponja fonoabs orbente del panel, deben quitarse y<br />
tratarse c omo residuos urbanos.<br />
77
SECCIÓN II: INST AL ACIÓN Y M ANTENIMIENTO<br />
II.6<br />
ANOMALÍAS DE FUNCIONAMIENTO<br />
Anomalía<br />
Causa probab le<br />
Ha inter venido o s e ha des acti vado el interruptor automático de protección de la uni dad.<br />
Hay una interrupción de c orriente.<br />
Ha inter venido una alarma de la unidad.<br />
La unidad no funciona:<br />
El valor de temperatura fijado es i nferior (en el modo de funcionamiento HEAT) o superior (en el modo de<br />
funcionamiento COOL o DRY) a l a temperatura ambiente.<br />
Están acti vos los bloqueos pr evistos por las funciones TOO COOL y HOT START.<br />
El receptor de la s eñal col ocado en la unidad en el funcionami ento con mando a distancia está directamente<br />
expuesto a una fuente l umi nosa muy intens a como la s olar o l a de una lámpar a fluorescente.<br />
Filtro del ac eite atascado.<br />
Dificultad de circulaci ón del aire en la unidad.<br />
El valor de temperatura de trabajo no está correctamente pr ogramado.<br />
La unidad no enfría o no<br />
calienta de manera adecu ada:<br />
Se ha s eleccionado una veloci dad del ventilador no adecuada.<br />
El aparato no está alimentado con agua suficientemente caliente o fría, o no hay circulaci ón de agua en las<br />
tuberías.<br />
Hay puertas o ventanas abiertas.<br />
La electroválvula no funciona correctamente.<br />
Las dimensiones del aparato no son adec uadas para l as necesidades es pec íficas de l a instalación.<br />
78
ALLEGATI<br />
A1<br />
DATI TECNICI<br />
Dati tecnici Modello 20 30 35 40<br />
min 1,42 1,92 2,28 2,69<br />
kW med 1,71 2,51 2,80 3,30<br />
max 1,89 2,95 3,35 3,87<br />
min 1,31 1,78 2,07 2,39<br />
kW med 1,61 2,29 2,58 2,91<br />
Potenzialità frigorifera nominale<br />
(calore totale) (*)<br />
Potenzialità frigorifera nominale<br />
(calore sensibile) (*)<br />
Portata acqua (*)<br />
Perdite di carico acqua (*)<br />
Potenzialità ter mica<br />
(acqua entrante 50°C) (**)<br />
Portata acqua (**)<br />
Perdite di carico acqua (**)<br />
Potenzialità ter mica<br />
(acqua entrante 70°C) (***)<br />
Portata acqua (***)<br />
Perdite di carico acqua (***)<br />
max 1,77 2,67 3,08 3,34<br />
min 243 330 392 463<br />
l/h med 294 432 482 568<br />
max 325 507 576 666<br />
min 15,4 11,0 15,1 21,1<br />
kPa med 21,3 18,4 21,9 31,2<br />
max 25,0 25,6 31,8 41,4<br />
min 2,06 2,71 3,17 3,84<br />
kW med 2,50 3,44 3,95 4,62<br />
max 2,78 4,01 4,64 5,36<br />
min 243 330 392 463<br />
l/h med 294 432 482 568<br />
max 325 507 576 666<br />
min 13,8 10,4 14,0 19,3<br />
kPa med 19,7 17,6 20,9 29,0<br />
max 22,4 24,1 29,2 39,2<br />
min 3,40 4,47 5,71 6,42<br />
kW med 4,04 5,57 6,54 7,64<br />
max 4,53 6,54 7,67 8,56<br />
min 292 384 491 552<br />
l/h med 348 479 563 657<br />
max 390 562 660 736<br />
min 14,1 11,9 21,3 26,6<br />
kPa med 19,3 18,4 27,9 37,8<br />
max 24,3 25,1 37,8 46,7<br />
min 310 350 480 530<br />
m³/h med 385 482 570 630<br />
Portata aria<br />
max 480 680 710 825<br />
Ventilatori n° 1 1 1 1<br />
min 39 41 43 44<br />
Potenza sonora<br />
dB(A) med 45 46 47 47<br />
max 50 53 53 54<br />
min 31 33 35 36<br />
Pressione sonora (*** *)<br />
dB(A) med 37 38 39 39<br />
max 42 45 45 46<br />
Contenuto acqua batteria l 0,81 1,18 1,30 1,30<br />
Attacc hi acqua Ø (mm) 12 12 12 12<br />
Massima pressione esercizio batteria bar 6 6 6 6<br />
Alimentazione elettrica V-ph-Hz 230-1- 50 230-1- 50 230-1- 50 230-1- 50<br />
min 35 36 49 50<br />
Potenza assor bita<br />
W med 39 42 55 56<br />
max 44 49 64 70<br />
Potenza massima ass orbita W 44 49 64 70<br />
Corrente massi ma assor bita A 0,20 0,22 0,28 0,31<br />
(*) Alle seguenti condizioni: temperatura ambiente 27°C B.S.; 19°C B.U.; temperatura acqua entrante 7°C con Δt 5°C.<br />
(**) Alle seguenti condizioni: temperatura ambiente 20°C;temperatura acqua entrante 50°C, portata acqua c ome (*).<br />
(***) Alle seguenti condizioni: temperatura ambiente 20°C;temperatura acqua entrante 70°C, con Δt 10°C.<br />
(****) Livello di pressione sonora espresso in dB(A) riferito ad una misura alla distanza di 1 m dal punto di uscita dell’aria<br />
(con fattore di direzionalità Q=2).<br />
79
ENCOLSED DOCUMENTS<br />
A1<br />
TECHNICAL DATA<br />
Technical dat a Model 20 30 35 40<br />
min 1,42 1,92 2,28 2,69<br />
kW med 1,71 2,51 2,80 3,30<br />
max 1,89 2,95 3,35 3,87<br />
min 1,31 1,78 2,07 2,39<br />
kW med 1,61 2,29 2,58 2,91<br />
Nominal cooling c apacity<br />
(total heat) (*)<br />
Nominal cooling c apacity<br />
(sensible heat) (*)<br />
Water flow (*)<br />
Water pressure drops (*)<br />
Heating capacity<br />
(incoming water 50°C) (**)<br />
Water flow (**)<br />
Water press ure drops (**)<br />
Heating capacity<br />
(incoming water 70°C) (***)<br />
Water flow (***)<br />
Water press ure drops (***)<br />
max 1,77 2,67 3,08 3,34<br />
min 243 330 392 463<br />
l/h med 294 432 482 568<br />
max 325 507 576 666<br />
min 15,4 11,0 15,1 21,1<br />
kPa med 21,3 18,4 21,9 31,2<br />
max 25,0 25,6 31,8 41,4<br />
min 2,06 2,71 3,17 3,84<br />
kW med 2,50 3,44 3,95 4,62<br />
max 2,78 4,01 4,64 5,36<br />
min 243 330 392 463<br />
l/h med 294 432 482 568<br />
max 325 507 576 666<br />
min 13,8 10,4 14,0 19,3<br />
kPa med 19,7 17,6 20,9 29,0<br />
max 22,4 24,1 29,2 39,2<br />
min 3,40 4,47 5,71 6,42<br />
kW med 4,04 5,57 6,54 7,64<br />
max 4,53 6,54 7,67 8,56<br />
min 292 384 491 552<br />
l/h med 348 479 563 657<br />
max 390 562 660 736<br />
min 14,1 11,9 21,3 26,6<br />
kPa med 19,3 18,4 27,9 37,8<br />
max 24,3 25,1 37,8 46,7<br />
min 310 350 480 530<br />
m³/h med 385 482 570 630<br />
Air flow<br />
max 480 680 710 825<br />
Fans n° 1 1 1 1<br />
min 39 41 43 44<br />
Sound power<br />
dB(A) med 45 46 47 47<br />
max 50 53 53 54<br />
min 31 33 35 36<br />
Sound pressure (****)<br />
dB(A) med 37 38 39 39<br />
max 42 45 45 46<br />
Coil water capacity l 0,81 1,18 1,30 1,30<br />
Water connec tions Ø (mm) 12 12 12 12<br />
Maxi mum permissible press ure water-side bar 6 6 6 6<br />
Electrical power suppl y V-ph-Hz 230-1- 50 230-1- 50 230-1- 50 230-1- 50<br />
min 35 36 49 50<br />
Absorbed power<br />
W med 39 42 55 56<br />
max 44 49 64 70<br />
Maxi mum absorbed power W 44 49 64 70<br />
Maximum absorbed current A 0,20 0,22 0,28 0,31<br />
(*) In the following conditions: ambient temperature 27°C D.B.; 19°C W.B.; inc omi ng water temperature 7°C with Δt 5°C.<br />
(**) In the following conditions: ambient temperature 20°C; i ncoming water temperatur e 50°C, water flow as (*).<br />
(***) In the following conditions: ambient temperature 20°C; i ncoming water temperatur e 70°C with Δt 10°C.<br />
(****) Sound l evel pr essure express ed in dB(A), in reference to a meas urement at a distance of 1 m from the air outlet<br />
(with directionality fac tor Q=2).<br />
80
ANNEXES<br />
A1<br />
DONNEES TECHNIQUES<br />
Données techniques Modèle 20 30 35 40<br />
min 1,42 1,92 2,28 2,69<br />
kW med 1,71 2,51 2,80 3,30<br />
max 1,89 2,95 3,35 3,87<br />
min 1,31 1,78 2,07 2,39<br />
kW med 1,61 2,29 2,58 2,91<br />
Puissance frigorifique nominale<br />
(chaleur totale) (*)<br />
Puissance frigorifique nominale<br />
(chaleur sensible) (*)<br />
Débit d'eau (*)<br />
Pertes de charge eau (*)<br />
Puissance thermique<br />
(eau en entrée 50°C) (**)<br />
Débit d'eau (**)<br />
Pertes de charge eau (**)<br />
Puissance thermique<br />
(eau en entrée 70°C) (***)<br />
Débit d'eau (***)<br />
Pertes de charge eau (***)<br />
Débit d'air<br />
max 1,77 2,67 3,08 3,34<br />
min 243 330 392 463<br />
l/h med 294 432 482 568<br />
max 325 507 576 666<br />
min 15,4 11,0 15,1 21,1<br />
kPa med 21,3 18,4 21,9 31,2<br />
max 25,0 25,6 31,8 41,4<br />
min 2,06 2,71 3,17 3,84<br />
kW med 2,50 3,44 3,95 4,62<br />
max 2,78 4,01 4,64 5,36<br />
min 243 330 392 463<br />
l/h med 294 432 482 568<br />
max 325 507 576 666<br />
min 13,8 10,4 14,0 19,3<br />
kPa med 19,7 17,6 20,9 29,0<br />
max 22,4 24,1 29,2 39,2<br />
min 3,40 4,47 5,71 6,42<br />
kW med 4,04 5,57 6,54 7,64<br />
max 4,53 6,54 7,67 8,56<br />
min 292 384 491 552<br />
l/h med 348 479 563 657<br />
max 390 562 660 736<br />
min 14,1 11,9 21,3 26,6<br />
kPa med 19,3 18,4 27,9 37,8<br />
max 24,3 25,1 37,8 46,7<br />
min 310 350 480 530<br />
m³/h med 385 482 570 630<br />
max 480 680 710 825<br />
Ventilateurs n° 1 1 1 1<br />
min 39 41 43 44<br />
Puissance sonore<br />
dB(A) med 45 46 47 47<br />
max 50 53 53 54<br />
min 31 33 35 36<br />
Pression sonore (****)<br />
dB(A) med 37 38 39 39<br />
max 42 45 45 46<br />
Capacité eau batterie l 0,81 1,18 1,30 1,30<br />
Raccords eau Ø (mm) 12 12 12 12<br />
Pression maxi mum admissible c ôté eau bar 6 6 6 6<br />
Alimentation électrique V-ph-Hz 230-1- 50 230-1- 50 230-1- 50 230-1- 50<br />
min 35 36 49 50<br />
Puissance absorbée<br />
W med 39 42 55 56<br />
max 44 49 64 70<br />
Max. puissance absorbée W 44 49 64 70<br />
Max. courant absorbé A 0,20 0,22 0,28 0,31<br />
(*) Aux conditi ons s uivantes : température ambiante 27°C B.S. ; 19°C B.U.; tempér ature eau en entrée 7°C avec Δt 5°C.<br />
(**) Aux conditi ons s uivantes : température ambiante 20°C ; température eau en entrée 50°C ; débit d'eau c omme en (*).<br />
(***) Aux conditi ons s uivantes : température ambiante 20°C ; température eau en entrée 70°C avec Δt 10°C.<br />
(****) Niveau de pression sonore exprimé en dB (A) et mes uré à 1 mètre du point de sortie de l'air (avec fac teur de<br />
direction égal à Q=2).<br />
81
ANLAG EN<br />
A1<br />
TECHNISCHE DATEN<br />
Technische Dat en Modello 20 30 35 40<br />
min 1,42 1,92 2,28 2,69<br />
Nenn-Kälteleistung (total) (*)<br />
kW med 1,71 2,51 2,80 3,30<br />
max 1,89 2,95 3,35 3,87<br />
min 1,31 1,78 2,07 2,39<br />
Nenn – Kälteleistung (sensibel) (*)<br />
kW med 1,61 2,29 2,58 2,91<br />
max 1,77 2,67 3,08 3,34<br />
min 243 330 392 463<br />
Wasser durchfl ussmenge (*)<br />
l/h med 294 432 482 568<br />
max 325 507 576 666<br />
min 15,4 11,0 15,1 21,1<br />
Wasserseitige Druckverluste (*)<br />
kPa med 21,3 18,4 21,9 31,2<br />
max 25,0 25,6 31,8 41,4<br />
min 2,06 2,71 3,17 3,84<br />
Wärmeleistung<br />
(Wassereintrittstemperatur 50°C) (**)<br />
kW med 2,50 3,44 3,95 4,62<br />
max 2,78 4,01 4,64 5,36<br />
min 243 330 392 463<br />
Wasser durchfl ussmenge (**)<br />
l/h med 294 432 482 568<br />
max 325 507 576 666<br />
min 13,8 10,4 14,0 19,3<br />
Wasserseitige Druckverluste (**)<br />
kPa med 19,7 17,6 20,9 29,0<br />
Wärmeleistung<br />
(Wassereintrittstemperatur 70°C) (***)<br />
Wasser durchfl ussmenge (***)<br />
Wasserseitige Druckverluste (***)<br />
Luftmenge<br />
max 22,4 24,1 29,2 39,2<br />
min 3,40 4,47 5,71 6,42<br />
kW med 4,04 5,57 6,54 7,64<br />
max 4,53 6,54 7,67 8,56<br />
min 292 384 491 552<br />
l/h med 348 479 563 657<br />
max 390 562 660 736<br />
min 14,1 11,9 21,3 26,6<br />
kPa med 19,3 18,4 27,9 37,8<br />
max 24,3 25,1 37,8 46,7<br />
min 310 350 480 530<br />
m³/h med 385 482 570 630<br />
max 480 680 710 825<br />
Ventilatoren n° 1 1 1 1<br />
min 39 41 43 44<br />
Schallleistungspegel<br />
dB(A) med 45 46 47 47<br />
max 50 53 53 54<br />
min 31 33 35 36<br />
Schalldruc kpegel (****)<br />
dB(A) med 37 38 39 39<br />
max 42 45 45 46<br />
Wasserinhalt H auptregister l 0,81 1,18 1,30 1,30<br />
Wasser anschl üsse Ø (mm) 12 12 12 12<br />
Zulässiger Höchstdr uck bar 6 6 6 6<br />
Betriebss pannung V-ph-Hz 230-1- 50 230-1- 50 230-1- 50 230-1- 50<br />
min 35 36 49 50<br />
Leistungsaufnahme<br />
W med 39 42 55 56<br />
max 44 49 64 70<br />
Max. Leistungsaufnahme W 44 49 64 70<br />
Max. Stromaufnahme A 0,20 0,22 0,28 0,31<br />
(*) Betriebs bedingungen: Raumtemperatur 27°C T .K.; 19°C F.K.; Wasserei ntrittstemperatur 7°C mit Δt 5°C.<br />
(**) Betriebs bedingungen: Raumtemperatur 20°C; Wassereintrittstemperatur 50°C, Wasserdurchfluss menge wie i m (*).<br />
(***) Betriebs bedingungen: Raumtemperatur 20°C; Wassereintrittstemperatur 70°C mit Δt 10°C;<br />
(****) Schalldruc kpegel in dB(A), bez ogen auf eine Mess ung in einem Abstand von 1 m vom Luftaustritts ( mit<br />
Richtungsfaktor Q=2).<br />
82
ANEXOS<br />
A1<br />
DATOS TÉCNICOS<br />
Datos técnicos Modello 20 30 35 40<br />
Potencia frigorífica nominal<br />
min 1,42 1,92 2,28 2,69<br />
(calor total) (*)<br />
kW med 1,71 2,51 2,80 3,30<br />
Potencia frigorífica nominal<br />
(calor sensible) (*)<br />
Caudal agua (*)<br />
Pérdidas de carga agua (*)<br />
Potencia térmica<br />
(agua entrante 50°C) (**)<br />
Caudal agua (**)<br />
Pérdidas de carga agua (**)<br />
Potencia térmica<br />
(agua en entrada 70°C) (***)<br />
Caudal agua (***)<br />
Pérdidas de carga agua (***)<br />
max 1,89 2,95 3,35 3,87<br />
min 1,31 1,78 2,07 2,39<br />
kW med 1,61 2,29 2,58 2,91<br />
max 1,77 2,67 3,08 3,34<br />
min 243 330 392 463<br />
l/h med 294 432 482 568<br />
max 325 507 576 666<br />
min 15,4 11,0 15,1 21,1<br />
kPa med 21,3 18,4 21,9 31,2<br />
max 25,0 25,6 31,8 41,4<br />
min 2,06 2,71 3,17 3,84<br />
kW med 2,50 3,44 3,95 4,62<br />
max 2,78 4,01 4,64 5,36<br />
min 243 330 392 463<br />
l/h med 294 432 482 568<br />
max 325 507 576 666<br />
min 13,8 10,4 14,0 19,3<br />
kPa med 19,7 17,6 20,9 29,0<br />
max 22,4 24,1 29,2 39,2<br />
min 3,40 4,47 5,71 6,42<br />
kW med 4,04 5,57 6,54 7,64<br />
max 4,53 6,54 7,67 8,56<br />
min 292 384 491 552<br />
l/h med 348 479 563 657<br />
max 390 562 660 736<br />
min 14,1 11,9 21,3 26,6<br />
kPa med 19,3 18,4 27,9 37,8<br />
max 24,3 25,1 37,8 46,7<br />
min 310 350 480 530<br />
m³/h med 385 482 570 630<br />
Caudal aire<br />
max 480 680 710 825<br />
Ventiladores n° 1 1 1 1<br />
min 39 41 43 44<br />
Potencia sonora<br />
dB(A) med 45 46 47 47<br />
max 50 53 53 54<br />
min 31 33 35 36<br />
Presión sonora (****)<br />
dB(A) med 37 38 39 39<br />
max 42 45 45 46<br />
Contenido de agua en batería l 0,81 1,18 1,30 1,30<br />
Conexiones de agua Ø (mm) 12 12 12 12<br />
Presión máxi ma admisible en la batería bar 6 6 6 6<br />
Alimentación eléctrica V-ph-Hz 230-1- 50 230-1- 50 230-1- 50 230-1- 50<br />
min 35 36 49 50<br />
Absorción de potencia<br />
W med 39 42 55 56<br />
max 44 49 64 70<br />
Máx. potencia absorbida W 44 49 64 70<br />
Máx. corriente absorbida A 0,20 0,22 0,28 0,31<br />
(*) En las siguientes condiciones: temperatur a ambi ente 27°C B.S.; 19°C B.H.; temperatura agua entrante 7°C c on Δt 5°C.<br />
(**) En las siguientes condiciones: temperatur a ambi ente 20°C; temper atura agua entrante 50°C; c audal de agua i déntico al (*).<br />
(***) En las siguientes condiciones: temperatur a ambi ente 20°C; temper atura agua entrante 70°C c on Δt 10°C.<br />
(****) Nivel de presión sonora expres ado en dB(A) referido a una medida a una distanci a de 1 m des de el punto de s alida del aire<br />
(con fac tor de dirección Q=2).<br />
83
ALLEGATI / ENCLOSED DOCUMENTS / ANL AGEN / ANNEXES / ANEXOS<br />
A2<br />
DIMENSIONI / DIMENSIONS / DIMENSIONS / ABMESSUNGEN / DIMENSIONES<br />
H<br />
L<br />
P<br />
Modello 20 30 35 40<br />
L mm 1010 1010 1090 1090<br />
H mm 320 320 330 330<br />
P mm 225 225 250 250<br />
Peso kg 14,0 14,0 14,5 14,5<br />
1010<br />
147 630<br />
233<br />
243<br />
265<br />
230 272<br />
Mod. 20-30<br />
208<br />
303 17<br />
320<br />
445 348<br />
1090<br />
103 827<br />
160<br />
390 362<br />
450<br />
40<br />
26<br />
35<br />
Mod. 30-35<br />
100<br />
233<br />
304<br />
330<br />
552<br />
423<br />
423<br />
84
NOTE<br />
NOTE<br />
………………………………………………………………………………………<br />
………………………………………………………………………………………<br />
………………………………………………………………………………………<br />
………………………………………………………………………………………<br />
………………………………………………………………………………………<br />
………………………………………………………………………………………<br />
………………………………………………………………………………………<br />
………………………………………………………………………………………<br />
………………………………………………………………………………………<br />
………………………………………………………………………………………<br />
………………………………………………………………………………………<br />
………………………………………………………………………………………<br />
………………………………………………………………………………………<br />
………………………………………………………………………………………<br />
………………………………………………………………………………………<br />
………………………………………………………………………………………<br />
………………………………………………………………………………………<br />
………………………………………………………………………………………<br />
……………………………………………………………………………………….<br />
85
NOTE<br />
NOTE<br />
………………………………………………………………………………………<br />
………………………………………………………………………………………<br />
………………………………………………………………………………………<br />
………………………………………………………………………………………<br />
………………………………………………………………………………………<br />
………………………………………………………………………………………<br />
………………………………………………………………………………………<br />
………………………………………………………………………………………<br />
………………………………………………………………………………………<br />
………………………………………………………………………………………<br />
………………………………………………………………………………………<br />
………………………………………………………………………………………<br />
………………………………………………………………………………………<br />
………………………………………………………………………………………<br />
………………………………………………………………………………………<br />
………………………………………………………………………………………<br />
………………………………………………………………………………………<br />
………………………………………………………………………………………<br />
……………………………………………………………………………………….<br />
86
IDROWALL 20-30-35-40<br />
RHOSS S.p.A.<br />
Via Oltre Ferrovia - 33033 Codroipo (UD) Italy - tel. 0432.911611 - fax 0432.911600 - rhoss@rhoss.it www.rhoss.it - www.rhoss.com<br />
H57533/A 12.10 PS/ET