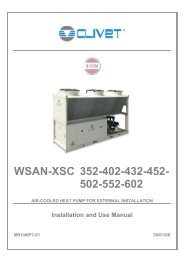
MSAT 102-122-142-162-182-202-242
MSAT 102-122-142-162-182-202-242
MSAT 102-122-142-162-182-202-242

Create successful ePaper yourself
Turn your PDF publications into a flip-book with our unique Google optimized e-Paper software.
START-UP<br />
ALL THE EQUIPMENT MUST BE STARTED BY AUTHORISED SERVICE CENTRES, IN ORDER TO VALIDATE THE<br />
CONTRACTUAL WARRANTY. THIS SERVICE ONLY INVOLVES THE START-UP OF THE SYSTEM AND NOT THE<br />
CONNECTIONS OR ANY OTHER WORK ON THE SYSTEM.<br />
PRELIMINARY CHECKS<br />
- Check that the unit is correctly positioned and that the connections to the indoor terminal unit have been performed<br />
correctly on the refrigerating side and the electrical side.<br />
- Check the mains voltage and frequency values:<br />
THESE MUST FALL WITHIN THE FOLLOWING VALUES<br />
230 ± 6% 400 ± 6%<br />
- Check that the screws fastening the wires to the electrical components in the panel are tight (vibrations during handling<br />
and transport may have caused these to loosen).<br />
EMPTYING<br />
After having checked, with the system under pressure, that there are no leaks (see the section on the refrigerant pipes),<br />
both in the connection pipes and the terminal unit, proceed as follows.<br />
- Empty the system with the <strong>MSAT</strong> valves always closed.<br />
- With the help of a pressure gauge, connect the vacuum pump to both fittings on the valves, making sure that any on-off<br />
devices (solenoid valves or cocks) are open, and then empty the system.<br />
- To ensure that the solenoid valve remains open, disconnect it from the terminals on the outdoor unit electrical panel<br />
(see the wiring diagram) and connect to a normal 220V outlet.<br />
- Stop the pump at a pressure of around 100Pa and leave the system in this condition for a few hours; a small initial rise<br />
in pressure is normal, after which it will stabilise. If the pressure continues to rise it means there are small leaks or<br />
moisture in the system. In the former case, repeat the operations described in the paragraph CHECKING FOR LEAKS in<br />
the refrigerant pipe manual. In the latter case, recharge the system with refrigerant to 100KPa and then repeat the<br />
emptying procedure, as described above. Once the pressure has stabilised, proceed to the subsequent charging phase.<br />
REFRIGERANT CHARGE<br />
The sizes in question are delivered with a refrigerant charge to be completed during start-up, according to the type of the<br />
indoor terminal unit and the layout of the pipes.<br />
- With the system empty, close the valves on the pressure gauge assembly and disconnect the vacuum pump.<br />
- Connect the bottle of refrigerant gas, venting the air in the pressure gauge assembly connection hose.<br />
- Open the valves on the pressure gauge assembly, introducing refrigerant in the gaseous state until there is equilibrium<br />
in the system / bottle pressure, and in any case at a pressure above atmospheric pressure.<br />
- Open the valves on the condensing units (the liquid valve first) to prepare the unit for operation.<br />
We recommend to use a square-section wrench of the same size as the valve<br />
stem and with a lever arm long enough to exert the necessary force.<br />
( * SEE FIGURE )<br />
Weight of refrigerant in the lines during operation (KG / 10m)<br />
Pipe OD Liquid<br />
at 38°C<br />
Intake<br />
SST+4.5°C<br />
10 0,60 --<br />
12 1,06 --<br />
14 1,41 0,025<br />
16 1,71 0,030<br />
18 2,36 0,043<br />
22 3,62 0,070<br />
28 6,61 0,120<br />
35 9,47 0,195<br />
42 -- 0,290<br />
OUTDOOR UNIT<br />
Gas valve<br />
Liquid valve<br />
INDOOR UNIT<br />
IMPORTANT:<br />
When starting the unit for the first time and after each period of extended shutdown, the compressor crankcase oil<br />
heating elements (if present) MUST be powered for at least 8 hours before starting the compressor.<br />
The start-up operations are performed in the following order:<br />
- Switch the isolating switch QS1 on the condensing unit, making sure that the green LED is off.<br />
40