MSAT 102-122-142-162-182-202-242
MSAT 102-122-142-162-182-202-242
MSAT 102-122-142-162-182-202-242

You also want an ePaper? Increase the reach of your titles
YUMPU automatically turns print PDFs into web optimized ePapers that Google loves.
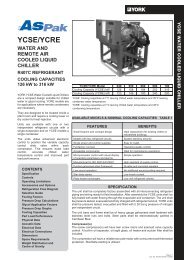
<strong>MSAT</strong> <strong>102</strong>-<strong>122</strong>-<strong>142</strong>-<strong>162</strong>-<strong>182</strong>-<strong>202</strong>-<strong>242</strong><br />
UNITA’ MOTOCONDENSANTI RAFFREDDATI AD ARIA<br />
(con ventilatori elicoidali)<br />
AIR-COOLED CONDENSING UNITS<br />
(with helical fans)<br />
LUFTGEKÜHLTE VERFLÜSSIGERSÄTZE<br />
(mit Axialventilatoren)<br />
GROUPES DE CONDENSATION REFROIDIS PAR AIR<br />
(avec ventilateurs hélicoïdes)<br />
UNIDADES MOTOCONDENSADORAS ENFRIADAS POR AIRE<br />
(con ventilador helicoidal)<br />
MANUALE DI INSTALLAZIONE USO E MANUTENZIONE<br />
INSTALLATION AND MAINTENANCE MANUAL<br />
ANLEITUNG ZUR INSTALLATION, BEDIENUNG UND WARTUNG<br />
MANUEL D’INSTALLATION ET D’ENTRETIEN<br />
MANUAL DE INSTALACION USO Y MANTENIMIENTO<br />
M69A60C3
SOMMARIO<br />
GENERALE......................................................................................................................................... 4<br />
AVVERTENZE GENERALI ..................................................................................................................................................4<br />
PRINCIPI DI INTEGRAZIONE DELLA SICUREZZA............................................................................................................4<br />
ACCESSORI ........................................................................................................................................................................4<br />
DATI TECNICI GENERALI...................................................................................................................................................5<br />
POSIZIONAMENTO.............................................................................................................................................................6<br />
SPAZI FUNZIONALI.............................................................................................................................................................6<br />
DIMENSIONE E DISTRIBUZIONE PESI .............................................................................................................................7<br />
TARATURE PROTEZIONI E CONTROLLI ..........................................................................................................................7<br />
LIVELLI SONORI .................................................................................................................................................................7<br />
RICEVIMENTO.................................................................................................................................... 8<br />
CONTROLLO AL RICEVIMENTO........................................................................................................................................8<br />
MOVIMENTAZIONE.............................................................................................................................................................8<br />
STOCCAGGIO .....................................................................................................................................................................9<br />
RIMOZIONE IMBALLO ........................................................................................................................................................9<br />
COLLEGAMENTI ELETTRICI ........................................................................................................... 10<br />
COLLEGAMENTI FUNZIONALI.........................................................................................................................................10<br />
COLLEGAMENTO ALLA RETE DI ALIMENTAZIONE.......................................................................................................10<br />
COLLEGAMENTI OPZIONALI ...........................................................................................................................................10<br />
COLLEGAMENTO A P.C.O B.M.S.....................................................................................................................................11<br />
MESSA IN FUNZIONE ...................................................................................................................... 12<br />
CONTROLLI PRELIMINARI...............................................................................................................................................12<br />
MESSA IN FUNZIONE.......................................................................................................................................................13<br />
REGOLAZIONE................................................................................................................................. 14<br />
MODALITA' DI FUNZIONAMENTO DEL MODULO PRINCIPALE.....................................................................................14<br />
ROTAZIONE DEI COMPRESSORI....................................................................................................................................14<br />
TEMPORIZZAZIONI COMPRESSORI...............................................................................................................................14<br />
REGOLATORE VENTILATORI BATTERIA .......................................................................................................................15<br />
PANNELLO DEL MODULO DI CONTROLLO PRINCIPALE .............................................................................................16<br />
IMPOSTAZIONE DEI PARAMETRI DI FUNZIONAMENTO...............................................................................................16<br />
ALLARMI............................................................................................................................................................................18<br />
RICERCA GUASTI ............................................................................................................................ 19<br />
BLOCCO ALTA PRESSIONE ............................................................................................................................................20<br />
BLOCCO BASSA PRESSIONE .........................................................................................................................................21<br />
INTERVENTO SICUREZZA COMPRESSORE..................................................................................................................22<br />
INTERVENTO TERMICA VENTILATORI...........................................................................................................................22<br />
UNITA’ RUMOROSA..........................................................................................................................................................23<br />
COMPRESSORE NON PARTE .........................................................................................................................................23<br />
MANUTENZIONE ORDINARIA......................................................................................................... 24<br />
UNITA'................................................................................................................................................................................24<br />
PARTE ELETTRICA...........................................................................................................................................................24<br />
TUBAZIONI REFRIGERANTI............................................................................................................ 25<br />
TUBAZIONE DI ASPIRAZIONE .........................................................................................................................................25<br />
TUBAZIONE LIQUIDO .......................................................................................................................................................25<br />
CONTROLLO PERDITE ....................................................................................................................................................26<br />
MODALITA’ - INDICAZIONI PER UN CORRETTO COLLEGAMENTO .............................................................................26<br />
RISCHI RESIDUI ............................................................................................................................... 27<br />
DEFINIZIONE ZONA PERICOLOSA .................................................................................................................................27<br />
RISCHI GENERICI.............................................................................................................................................................28<br />
SCHEDE SICUREZZA REFRIGERANTE ..........................................................................................................................28<br />
I dati contenuti nel presente manuale non sono impegnativi e possono essere cambiati dal costruttore senza obbligo di<br />
preavviso.<br />
Riproduzione anche parziale vietata.<br />
3
GENERALE<br />
AVVERTENZE GENERALI<br />
Il presente manuale è stato realizzato per permettere una corretta installazione, messa a punto e manutenzione dell’unità; è<br />
quindi di fondamentale importanza che:<br />
─ le seguenti istruzioni siano lette con la dovuta attenzione;<br />
─ l’unità sia installata, collaudata e assistita da personale qualificato (legge n.46 del 5/3/1990) in possesso dei requisiti di<br />
legge.<br />
• Viene declinata ogni responsabilità del produttore con decadimento della garanzia in caso di modifiche elettriche e/o<br />
meccaniche. Manomissioni in genere non espressamente autorizzate e che non rispettino quanto riportato nel presente<br />
manuale, fanno decadere la garanzia.<br />
• Osservare le norme di sicurezza locali vigenti al momento dell’installazione.<br />
• Verificare che le caratteristiche della rete elettrica siano conformi ai dati riportati sulla targhetta matricolare della unità che<br />
si trova all’interno presso il quadro elettrico.<br />
• Il presente manuale e lo schema elettrico dell’unità vanno conservati con cura e messi a disposizione dell’operatore per<br />
ogni ulteriore consultazione.<br />
• Il materiale di imballaggio (sacchetti in plastica, polistirolo espanso, chiodi, ecc.) in quanto potenziale fonte di pericolo deve<br />
essere tenuto fuori dalla portato dei bambini e correttamente riciclato secondo le norme locali in vigore.<br />
• L’unità motocondensante è destinata al condizionamento in abbinamento ad unità interna ad espansione del refrigerante.<br />
• Disattivare l’apparecchiatura in caso guasto o di cattivo funzionamento.<br />
• Per l’eventuale riparazione rivolgersi esclusivamente ad un centro di assistenza tecnica autorizzato dal costruttore e<br />
richiedere l’utilizzo di ricambi originali.<br />
Il mancato rispetto di quanto sopra può compromettere la sicurezza dell’apparecchiatura.<br />
La casa costruttrice declina ogni responsabilità per eventuali danni che possono direttamente o<br />
indirettamente derivare a persone o cose in conseguenza alla mancata osservanza delle presenti istruzioni.<br />
PRINCIPI DI INTEGRAZIONE DELLA SICUREZZA<br />
L’unità è progettata e costruita in modo tale da non esporre a rischio la salute e la sicurezza delle persone.<br />
A tale scopo sono state adottate soluzioni di progetto atte a eliminare le possibili cause di rischio ove possibile o a ridurre<br />
sensibilmente la probabilità dell’evento rischio. Qualora non fosse stato possibile intervenire in fase di progetto per prevenire<br />
e/o eliminare il rischio, si faccia riferimento alle prescrizioni comportamentali riportate nella sezione rischi residui.<br />
ACCESSORI<br />
Le unità posso essere dotate dei seguenti accessori (a richiesta):<br />
─ tensioni diverse dallo standard<br />
─ griglia protezione condensatore<br />
─ antivibranti<br />
─ contaore funzionamento compressori<br />
─ valvola solenoide<br />
─ Set di collegamento che comprende:<br />
valvola termostatica, valvola solenoide,<br />
linea liquido, filtro deidratore,<br />
indicatore passaggio liquido.<br />
─ unità con comando compressori separati<br />
─ collegamento a modulo di controllo remoto<br />
─ collegamento a PC o BMS<br />
4
DATI TECNICI GENERALI<br />
Modello <strong>MSAT</strong> <strong>102</strong> <strong>122</strong> <strong>142</strong> <strong>162</strong> <strong>182</strong> <strong>202</strong> <strong>242</strong><br />
Tensione standard 400 / 3 / 50<br />
Modello <strong>MSAT</strong> R-22<br />
Potenzialità frigorifera kW 31.3 36.4 41.3 48.7 53.8 63.9 77.9<br />
Potenza ass. compres. kW 8.5 10.3 11.3 13.5 15.8 17.5 22.3<br />
Modello <strong>MSAT</strong> R-407C<br />
Potenzialità frigorifera kW 29.8 34.1 39.2 44.1 50.3 62.8 72.8<br />
Potenza ass. compres. kW 9.4 11.2 12.6 14.7 17.8 20.3 25.2<br />
Dati riferiti a:<br />
Temperatura aria esterna+35°C<br />
Temperatura di aspirazione<br />
satura (SST) 7.5°C R-22,<br />
(SST) 9.5°C (dew point) R-407C<br />
Compressore tipo<br />
SCROLL<br />
n° giri al minuto rpm 2900<br />
Carica olio<br />
L<br />
2x 2x 2x<br />
1,55 1,65 2,5<br />
Gradini capacità 2<br />
Protezione motore<br />
NTC<br />
2x<br />
4<br />
Tipo olio<br />
SUNISO 3GS OIL<br />
Nota: se unità con R-407C<br />
tipo olio<br />
- MOBIL EAL ARTIC 22 CC<br />
- 32 MMMA POE<br />
Condensatore<br />
Materiale<br />
Tubi di rame/alette in alluminio<br />
Quantità 2<br />
Sup.Front. Tot. m 2 3 3,6 4,9<br />
Spaziatura alette mm 1,6 2,1 1,6 1,6<br />
n° ranghi 2<br />
∅ tubo mm 9,52<br />
Pressione prova kPa 3000<br />
Elettroventilatore assiale<br />
n° e diametro n° x ∅ 2x560 4x450 6x450<br />
N° giri al minuto rpm 680 840<br />
Portata aria L/s 3056 4125 6120<br />
Potenza nominale kW 2x0,22 4x0,16 6x0,16<br />
Connessioni Freon<br />
Rubinetto liquido ∅ 14 16 18 22<br />
Rubinetto aspirazione ∅ 22 28 28 35<br />
Refrigerante<br />
Carica R-22 kg 8.2 8,2 9 9 9.6 12 12<br />
Carica R-407C kg 9.2 9,2 10 10 10.6 13 13<br />
Dati riferiti a:<br />
─ Motore a rotore esterno<br />
─ Griglia antinfortunistica<br />
Note:<br />
Attacchi a saldare<br />
Nota:<br />
Carica da completare in fase<br />
di messa in funzione<br />
Pesi e Volumi<br />
Peso trasp. appross. kg 275 280 380 420 485 580 590<br />
Volume imballo appr. m 3 1,50 3,20 4,30<br />
Limiti di funzionamento<br />
Max. temp. aria<br />
ingresso condensatore<br />
R-22 49 47,5 47,5 47,5 45 49 46<br />
SST = +5 °C R-407C 47 45 45 44,5 43,5 46 43<br />
Min. temp. aria<br />
R-22 -4 -4 -4 -4 -8 -4 -8<br />
ingresso condensatore<br />
R-407C<br />
SST = +5 °C<br />
-5 -5 -5 -5 -9 -5 -9<br />
Max. Temp.<br />
R-22 12,5<br />
aspirazione gas<br />
Saturo °C<br />
R-407C 12,5<br />
Note:<br />
SST Temperatura di<br />
aspirazione satura.<br />
Surriscaldamento gas<br />
aspirato + 5°K<br />
5
POSIZIONAMENTO<br />
Le unità sono progettate per l’installazione all’esterno.<br />
• Verificare che il piano d’appoggio sia adatto a sopportare il peso dell’unità (vedere peso e distribuzione pesi a pag. 7) e<br />
che sia in piano.<br />
Interporre uno strato di gomma tra base appoggio unità e supporto (per evitare rumori e vibrazioni).<br />
• Rispettare gli spazi funzionali.<br />
• Se l’unità è installata su terrazzo o tetto ne è consigliabile il montaggio su appositi antivibranti, in questo caso le tubazioni<br />
di collegamento dovranno essere provviste di giunti elastici.<br />
• Posizionare l’unità in modo che non sia investita su lati lunghi da eventuali venti predominanti.<br />
• Ancorare l’unità al suolo.<br />
SPAZI FUNZIONALI<br />
La scelta della dislocazione delle unità è di fondamentale importanza per il suo buon funzionamento.<br />
Ostacoli al flusso dell’aria, sorgenti di calore (come scarichi, aria calda), difficoltà di ricambi d’aria nella zona d’installazione,<br />
foglie o atri corpi che possono ostruire le batterie di scambio, venti che contrastano o favoriscono eccessivamente il flusso<br />
d’aria sono causa di anomalie di funzionamento o blocchi.<br />
Le unità necessitano di spazi minimi per il funzionamento e per la manutenzione.<br />
Gli schizzi di seguito riportati riguardano alcune tipologie d’installazione, verificare caso per caso tenendo presente quanto<br />
riportato nel presente manuale.<br />
Nota: Le misure sono espresse in mm<br />
UNITA’ CIRCUITI INDIPENDENTI<br />
UNITA’ CON COMANDO COMPRESSORI SEPARATI<br />
ANTIVIBRANTI DI BASE<br />
(accessorio)<br />
(accessorio)<br />
A richiesta, è possibile fornire l’unità con comando compressori<br />
separati, predisposta per il collegamento con 2 distinte unità terminali.<br />
In comune rimane l’alimentazone elettrica.<br />
6
DIMENSIONE E DISTRIBUZIONE PESI<br />
Legenda:<br />
1 - Compressore<br />
2 - Attacco linea liquido Ø G1 primo circuito<br />
2’ - Attacco linea liquido Ø G1 secondo circuito<br />
3 - Attacco linea gas Ø G2 primo circuito<br />
3’ - Attacco linea gas Ø G2 secondo circuito<br />
4 - Quadro elettrico<br />
5 - Ventilatori elicoidali<br />
6 - Ingresso linea elettrica<br />
7 - Batterie condensante<br />
8 - Accesso quadro elettrico e compressore<br />
DIMENSIONI<br />
PESI<br />
Grand. A B C D E F G H I L O Ø Ø n° W1 W2 W3 W4 Tot.<br />
G1 G2 ventilatori<br />
<strong>102</strong> 1530 678 1400 128 73 75 628 42 1255 800 - 14 22 2 88 42 95 50 275<br />
<strong>122</strong> 1530 678 1400 128 73 75 628 42 1255 800 - 16 28 2 89 42 98 51 280<br />
<strong>142</strong> 1563 1107 1570 128 130 75 1058 42 1077 900 153 16 28 4 121 58 132 69 380<br />
<strong>162</strong>/<strong>182</strong> 1563 1107 1570 128 130 75 1058 42 1077 900 153 18 28 4 155 74 168 88 485<br />
<strong>202</strong>/<strong>242</strong> 2098 1107 1570 128 130 75 1058 42 1612 900 153 22 35 6 191 95 200 104 590<br />
Nota: Le dimensioni sono espresse in mm, i pesi in kg.<br />
TARATURE PROTEZIONI E CONTROLLI<br />
Apre Chiude<br />
Pressostato alta pressione (kPa) 2750 2000 Tappo fusibile sicurezza ( °C ) 120<br />
Pressostato bassa pressione(kPa) 230 360 Max avviamenti ora compressore ( n° ) 10<br />
Termostato sicurezza scarico ( °C ) 120<br />
Nota: Le sicurezze “pressostato alta<br />
pressione” e “termostato sicurezza<br />
scarico” sono resettabili<br />
manualmente dall’unità di controllo,<br />
La sicurezza “pressostato bassa<br />
pressione” è a ripristino automatico.<br />
LIVELLI SONORI<br />
Livello di potenza sonora (dB)<br />
Livello di<br />
pressione<br />
sonora<br />
Grand.<br />
Bande d’ottava (Hz)<br />
globale<br />
63 125 250 500 1000 2000 4000 8000 dB(A)<br />
<strong>102</strong> 80 84 75 73 69 63 60 42 59<br />
<strong>122</strong> 80 76 73 73 71 65 62 43 59<br />
<strong>142</strong> 87 80 74 73 71 69 66 63 60<br />
<strong>162</strong> 87 81 76 73 70 69 65 62 60<br />
<strong>182</strong> 84 78 78 74 69 70 62 55 60<br />
<strong>202</strong> 86 79 78 77 72 67 62 54 61<br />
<strong>242</strong> 86 82 81 75 70 73 63 65 62<br />
Nota:<br />
- I livelli sonori si riferiscono ad unità funzionali a<br />
pieno carico con massima velocità di rotazione dei<br />
ventilatori, aria entrante al condensatore a 35°C,<br />
temperatura aspirazione satura +5°C.<br />
- Livello di pressione sonora riferito a 1 metro di<br />
distanza dalla superficie esterna dell’unità.<br />
- Livelli di potenza sonora rif. : 1x10 -12 w<br />
- Livelli di pressione sonora rif. : 2 x 10 -5 Pa<br />
7
RICEVIMENTO<br />
CONTROLLO AL RICEVIMENTO<br />
Le unità sono spedite in appositi imballi di protezione. Controllare all’arrivo che l’unità non abbia subito danneggiamenti<br />
durante il trasporto e che la stessa sia completa nelle sue parti come da ordine. Nel caso di danni visibili annotare<br />
immediatamente sul documento relativo al trasporto il danno riscontrato riportando la dicitura:<br />
“RITIRO CON RISERVA PER EVIDENTI DANNI A IMBALLO” in quanto la resa franco stabilimento comporta il<br />
risarcimento dei danni a carico dell’assicurazione secondo quanto previsto dalla legge N° 450 del 22.08.85 “limite di<br />
risarcibilità“.<br />
IMPORTANTE<br />
TUTTE LE OPERAZIONI DI SEGUITO CITATE DEBBONO ESSERE ESEGUITE IN CONFORMITA’ ALLE NORME DI<br />
SICUREZZA VIGENTI, SIA PER QUANTO RELATIVO ALLA ATTREZZATURA USATA SIA PER QUANTO RELATIVO<br />
ALLE MODALITA’ OPERATIVE.<br />
ATTENZIONE<br />
PRIMA DI DAR CORSO A OPERAZIONI DI MOVIMENTAZIONE ASSICURARSI CHE LA CAPACITA’ DI SOLLEVAMENTO<br />
SIA ADEGUATA AL PESO DELL’ UNITA’ IN QUESTIONE.<br />
Grandezza <strong>102</strong> <strong>122</strong> <strong>142</strong> <strong>162</strong> <strong>182</strong> <strong>202</strong> <strong>242</strong><br />
Peso Kg 275 280 380 480 485 580 590<br />
MOVIMENTAZIONE<br />
MOVIMENTAZIONE con CARRELLO ELEVATORE o SIMILARE<br />
- Inserire le forche sul lato lungo della pedana in legno a corredo dell’unità.<br />
- Dar corso al sollevamento assicurandosi che l’unità sia in equilibrio stabile. Tenere in considerazione che la parte più<br />
pesante è quella ove installato il compressore.<br />
8
SOLLEVAMENTO con GRU o SIMILARE<br />
- Posizionare i tubi di sollevamento nei fori predisposti sul basamento dell’unità.<br />
- Portare le parti terminali dei tubi a sporgere in misura tale da permettere l’inserimento delle sicurezze e delle relative<br />
coppiglie.<br />
- Posizionare le cinghie di sollevamento sui tubi tra le coppiglie ed il basamento dell’unità (vedi disegno).<br />
- Posizionare in corrispondenza dei bordi superiori dell’unità delle strutture rigide a salvaguardia della sua integrità (solo<br />
se previsto un solo punto di forza).<br />
- Portare in tensione le cinghie di sollevamento in modo graduale assicurandosi del loro corretto posizionamento.<br />
- Dar corso al sollevamento.<br />
Struttura rigida<br />
Tavole di<br />
protezione<br />
Cinghia di<br />
sollevamento<br />
Sicurezza<br />
Coppiglia di<br />
sicurezza<br />
Tubo di<br />
sollevamento<br />
AVVERTENZE<br />
IL RISPETTO DELLE RACCOMANDAZIONI RIPORTATE SUL LATO ESTERNO DEL CARTONE DELL’IMBALLO E’<br />
GARANTE DI UNA INTEGRITA’ FISICA E FUNZIONALE DELL’ UNITA’ A TUTTO VANTAGGIO DELL’ UTILIZZATORE<br />
FINALE. VIENE RACCOMANDATO QUINDI DI :<br />
- MOVIMENTARE CON CURA<br />
- TENERE ALL’ ASCIUTTO<br />
- EVITARE NEL MODO PIÙ ASSOLUTO DI SOVRAPPORRE ALL’ UNITA’ ALTRI OGGETTI SE NON NEI LIMITI DEI<br />
PIANI DI SOVRAPPOSIZIONE RIPORTATI ( IL NUMERO RIPORTATO SPECIFICA I PIANI SOVRAPPONIBILI.<br />
Es. 1 = 1 PIANO SOVRAPPONIBILE SULL’ UNITA’ ).<br />
STOCCAGGIO<br />
− Tenere al riparo da: raggi solari, pioggia, sabbia e vento<br />
− Temperature: massime 60°C minime -10°C<br />
− Umidità massima: 90%<br />
RIMOZIONE IMBALLO<br />
- Tagliare con forbice le reggette di chiusura.<br />
- Sollevare il cartone di imballo (se presente).<br />
- Togliere le staffe che fissano l’unità alla pedana in legno con l’ausilio di una chiave fissa da 10mm.<br />
- Sollevare l’unità in modo da separarla dalla pedana.<br />
- Appoggiare l’unità a terra in corrispondenza del punto predestinato.<br />
- Verificare la presenza di danni visibili.<br />
- Smaltire i prodotti di imballo facendoli confluire ai centri di raccolta o di riciclaggio specializzati (attenersi alle norme<br />
vigenti).<br />
9
COLLEGAMENTI ELETTRICI<br />
IMPORTANTE<br />
ASSICURARSI CHE L’ UNITÀ NON SIA ALIMENTATA ELETTRICAMENTE PRIMA DI INIZIARE QUALSIASI LAVORO DI<br />
COLLEGAMENTO ELETTRICO<br />
COLLEGAMENTI FUNZIONALI<br />
Prima di dar corso alla messa in funzione dell’unità dovranno essere previsti i seguenti collegamenti:<br />
COLLEGAMENTO ALLA RETE DI ALIMENTAZIONE<br />
- Collegare la linea trifase agli appositi morsetti indicati sullo schema elettrico con L1 L2 L3 del dispositivo di protezione<br />
generale (sezionatore).<br />
- Collegare il conduttore di neutro al morsetto N del quadro elettrico.<br />
- Collegare il conduttore di terra al morsetto Pe del quadro elettrico.<br />
- Sarà particolare cura dell’installatore dimensionare i cavi di allacciamento alla rete di alimentazione tenendo presente i<br />
dati riportati sulla scheda tecnica dell’unità adesivata sulla porta del quadro elettrico. Sarà inoltre importante prevedere<br />
una protezione contro il corto circuito adeguata alla portata della linea. Tale protezione dovrà avere potere<br />
d’interruzione commisurato alla corrente di corto circuito presunta in quella parte dell’impianto.<br />
DATI ELETTRICI<br />
Grandezza <strong>102</strong> <strong>122</strong> <strong>142</strong> <strong>162</strong> <strong>182</strong> <strong>202</strong> <strong>242</strong><br />
Singolo<br />
230/3/50 19.7 22.9 25.3 24.1 31.2 35.8 45.2<br />
compressore (A) 400/3/50 9.8 11.3 13.6 14.7 17.5 20.0 25.2<br />
F.L.A. Ventilatori (A) 230/1/50 1.15x2 1.15x2 0.65 x 4 0.65 x 4 0.65 x 4 0.65 x 6 0.65 x 6<br />
Totale (A)<br />
230/3/50 41.6 48.1 53.9 51.4 65.6 76.4 85.8<br />
400/3/50 21.8 25.0 30.3 32.5 38.1 44.9 55.2<br />
L.R.A. Compressore (A)<br />
230/3/50 132.5 164 171 166 211 224 280<br />
400/3/50 66 74 <strong>102</strong> 94 117 128 159<br />
Compressore (kW) 11.3 13.2 15.2 16.8 20.7 23.8 29.2<br />
F.L.I. Ventilatore (kW) 0.22x2 0.22x2 0.17 x 4 0.17 x 4 0.17 x 4 0.17 x 6 0.17 x 6<br />
Totale (kW) 11.8 13.6 15.9 17.5 21.4 24.8 30.2<br />
M.IC. Totale (A)<br />
230/3/50 154.5 189.2 199.5 193.3 244.9 264.6 329.5<br />
400/3/50 78.1 87.6 118.8 111.9 137.2 152.3 189.0<br />
1) F.L.A. Corrente assorbita alle massime condizioni ammesse.<br />
2) L.R.A. Corrente di spunto del compressore.<br />
3) F.L.I. Potenza assorbita a pieno carico (alle massime condizioni ammesse).<br />
4) M.I.C. Massima corrente di spunto dell’unità.<br />
Sbilanciamento tensione: max 2%<br />
Tensione: 400/3/50 ± 6%<br />
230/3/50 ± 6%<br />
COLLEGAMENTI OPZIONALI<br />
COLLEGAMENTO A DISPOSITIVO DI SEGNALAZIONE ANOMALIA<br />
Facendo riferimento allo schema elettrico si individui il circuito di allarme cumulativo. Questo circuito permette<br />
l’inserimento di un dispositivo acustico o visivo per la segnalazione remota di anomalia intervenuta sull’unità.<br />
Il circuito va alimentato in bassa tensione (24V 300mA) come da schema elettrico.<br />
COLLEGAMENTO A MODULO DI CONTROLLO REMOTO<br />
Il modulo di controllo remoto è la fedele riproduzione della tastiera del modulo di controllo ENERGY LIGHT e consente da<br />
una posizione remota di eseguire tutte le operazioni eseguibili a bordo macchina.<br />
10
INSTALLAZIONE<br />
Prima di effettuare il collegamento del modulo di controllo remoto togliere tensione all’unità disarmando il sezionatore.<br />
Collegare la tastiera remota come rappresentato nella figura.<br />
Posteriore terminale remoto<br />
C512<strong>142</strong>3<br />
25<br />
24 26<br />
S + -<br />
CONN<br />
A<br />
CONN<br />
B<br />
- S +<br />
RELE' 1<br />
RELE' 2<br />
RELE' 3<br />
C512<strong>142</strong>0<br />
RELE' 4<br />
RELE' 5<br />
RELE' 6<br />
RELE' 7<br />
COMUNE<br />
ESPANSION<br />
E<br />
SERIAL<br />
E<br />
RELE' ALLARME<br />
La lunghezza massima del cavo di collegamento ENERGY LIGHT tastiera è di 80m.<br />
COLLEGAMENTO A P.C.O B.M.S.<br />
A CURA DEL CLIENTE<br />
Cavo di collegam ento RS232 9poli maschio-fem mina<br />
Lunghezza Max 10m t<br />
230 Vac<br />
PE1P0005<br />
N U<br />
N U<br />
RS 232<br />
ECHO<br />
DTR<br />
1 2 3 4<br />
Serial optocoupled adapter<br />
RS232/TTL<br />
RS 232/RS485 - RS485/TTL<br />
Micronet and ModBus Protocol<br />
OFF<br />
ON<br />
C512<strong>142</strong>5<br />
TTL<br />
10 12<br />
Alimentazione<br />
RS 485<br />
21 22 23 24<br />
N U<br />
N U<br />
RS 232<br />
ECHO<br />
DTR<br />
1 2 3 4<br />
Serial optocoupled adapter<br />
RS232/TTL<br />
RS 232/RS485 - RS485/TTL<br />
Micronet and ModBus Protocol<br />
OFF<br />
ON<br />
C512<strong>142</strong>5<br />
TTL<br />
10 12<br />
Alimentazione<br />
RS 485<br />
21 22 23 24<br />
+ - + -<br />
+ - + -<br />
A CURA DEL CLIENTE<br />
Cavo seriale RS485 Cavo; 2 fili twistati<br />
Lunghezza m ax della linea = 1000mt<br />
C5121248<br />
Cavo seriale 5vie 2molex<br />
Lunghezza Max =2mt<br />
SERIALE<br />
ESPANSIONE<br />
1 0 9 8 7 6 5 4 3 2 1<br />
RELE' ALLARME<br />
COMUNE<br />
RELE' 7<br />
RELE' 6<br />
RELE' 5<br />
RELE' 4<br />
RELE' 3<br />
RELE' 2<br />
RELE' 1<br />
C512<strong>142</strong>0<br />
+<br />
S<br />
-<br />
CONN B<br />
CONN A<br />
11
MESSA IN FUNZIONE<br />
TUTTE LE APPARECCHIATURE DEBBONO ESSERE AVVIATE DAI CENTRI DI ASSISTENZA AUTORIZZATI. SOLO<br />
COSI' VIENE RESA EFFETTIVA LA GARANZIA CONTRATTUALE. L'ASSISTENZA SI LIMITA ALLA SOLA MESSA IN<br />
FUNZIONE E NON ESEGUE COLLEGAMENTI O LAVORI PROPRI DELL'IMPIANTO.<br />
CONTROLLI PRELIMINARI<br />
- Controllare che l'unità sia posizionata in modo corretto e che gli allacciamenti con l'unità terminale interna siano<br />
perfettamente eseguiti sia dal lato frigorifero che elettrico.<br />
- Controllare il valore della tensione e della frequenza di rete:<br />
DEVONO RIENTRARE NEI VALORI RIPORTATI: 230 ± 6% 400 ± 6%<br />
- Controllare il corretto serraggio delle viti che fissano i conduttori ai componenti elettrici presenti nel quadro (durante la<br />
movimentazione ed il trasporto le vibrazioni potrebbero aver prodotto degli allentamenti).<br />
OPERAZIONE DI VUOTO<br />
Dopo avere accertato, con l'impianto in pressione, che non vi siano perdite (vedi manuale delle tubazioni refrigeranti) sia<br />
nelle tubazioni di collegamento che nell'unità terminale procedere come sotto indicato.<br />
- Scaricare l'impianto con rubinetti <strong>MSAT</strong> sempre chiusi.<br />
- Con l’ausilio di un gruppo manometrico allacciare la pompa del vuoto su entrambi gli attacchi dei rubinetti, avendo cura<br />
che eventuali organi di intercettazione (valvola solenoide o rubinetti intermedi) siano aperti e procedere al vuoto.<br />
- Per far si che la valvola solenoide rimanga aperta, scollegarla dai morsetti del quadro elettrico (vedi schema) dell’unità<br />
esterna e allacciarla ad una comune presa di corrente 220v.<br />
- Fermare la pompa alla pressione di circa 100Pa e lasciare per alcune ore in vuoto, una piccola risalita iniziale della<br />
pressione è normale per poi stabilizzarsi definitamente. Se la pressione continua a risalire è sintomo o di piccole perdite<br />
o di presenza di umidità. Nel primo caso ripetere le operazioni descritte nel paragrafo CONTROLLO PERDITE del<br />
manuale delle tubazioni refrigeranti. Nel secondo caso ricaricare l'impianto con refrigerante sino a 100KPa e rifare il<br />
vuoto come sopra descritto. Stabilizzata definitivamente la pressione passare alla fase successiva di carica.<br />
CARICA REFRIGERANTE<br />
Le grandezze in oggetto sono spedite con una carica da completare in fase di messa in funzione a seconda della<br />
tipologia dell’unità terminale interna e dello sviluppo delle tubazioni.<br />
- Con l'impianto in vuoto chiudere i rubinetti del gruppo manometrico e scollegare la pompa del vuoto.<br />
- Allacciare la bombola del gas refrigerante, facendo sfiatare l’aria nella gomma di collegamento con il gruppo<br />
manometrico.<br />
- Aprire i rubinetti del gruppo monometrico e lasciare entrare refrigerante allo stato gassoso sino all’equilibrio della<br />
pressione impianto / bombola, e comunque ad una pressione superiore alla pressione atmosferica.<br />
- Aprire i rubinetti dell’unità motocondensante (prima quello del liquido) per far si che l'unità sia pronta ad essere avviata.<br />
Si raccomanda di utilizzare una chiave adeguata, con sezione quadra,<br />
corrispondente alla dimensione dello stelo del rubinetto e con braccio-leva di<br />
lunghezza sufficiente per esercitare una forza elevata. ( * VEDI FIGURA )<br />
Peso di refrigerante nelle linee frigorifere durante il funzionamento ( KG / 10 m )<br />
Ø Esterno<br />
Tubazione<br />
Liquido<br />
a 38°<br />
Aspirazione<br />
SST+4,5°C<br />
10 0,60 --<br />
12 1,06 --<br />
UNITA’ ESTERNA<br />
14 1,41 0,025<br />
Rubinetto<br />
16 1,71 0,030<br />
gas<br />
18 2,36 0,043<br />
Rubinetto<br />
22 3,62 0,070<br />
Liquido<br />
28 6,61 0,120<br />
35 9,47 0,195<br />
42 -- 0,290<br />
UNITA’ INTERNA<br />
IMPORTANTE:<br />
alla prima messa in funzione dell'unità e dopo ogni periodo di sosta prolungata è IMPORTANTE alimentare le<br />
resistenze (se presenti) di riscaldamento dell'olio del carter del compressore per almeno 8 ore prima della partenza<br />
del compressore.<br />
L'operazione di attivazione si esegue secondo le fasi riportate:<br />
- agire sul sezionatorere QS1 del motocondensante facendo molta attenzione che il LED verde sia spento.<br />
12
MESSA IN FUNZIONE<br />
- Accertare il corretto funzionamento dell’unità interna.<br />
- Controllare il collegamento delle eventuali valvole solenoidi.<br />
- Localizzare sullo schema elettrico il comando SA2. Esso rappresenta il segnale proveniente dall’unità interna per la<br />
scelta del gradino di potenza e corrisponde all’attivazione del primo gradino, mentre il comando per l’attivazione del<br />
secondo gradino è rappresentato dal simbolo SA3 nello schema elettrico.<br />
- Il compressore che si avvia per primo è definito dal sistema di regolazione (vedi manuale regolazione).<br />
Contemporaneamente al compressore parte la ventilazione riguardante il solo circuito in funzione.<br />
- Accertare che ci sia richiesta dall'ambiente.<br />
- Per aggiungere gas refrigerante, utilizzare la presa di servizio dei rubinetti di intercettazione delle linee di aspirazione, e<br />
fare aspirare freon allo stato gassoso.<br />
Fare particolare attenzione in questa fase in quanto all'avviamento il pressostato di minima viene bypassato per 70<br />
secondi.<br />
Se si vuol fare la carica prima su un circuito e successivamente sull'altro agire sui rispettivi portafusibili per fermare il<br />
compressore non interessato in quanto il modulo principale a una sua logica di ciclicità di funzionamento.<br />
ATTENZIONE: dopo una qualsiasi fermata, il sistema conteggia 6 minuti dalla partenza precedente, (se questo tempo è già<br />
trascorso saranno conteggiati solamente i 30 secondi di ritardo) prima di un successivo avviamento.<br />
- La carica si può considerare completa quando:<br />
- La spia del liquido (se presente) non segnala bolle.<br />
- Il surriscaldamento del gas aspirato è di 4-8°K.<br />
- Il sottoraffeddamento del liquido è di 3-5°K.<br />
AGGIUNTA D' OLIO<br />
E' necessario sapere con esattezza la quantità di refrigerante aggiunto, alla carica di fabbrica, nell'impianto per potere<br />
definire la quantità di olio da aggiungere. La quantità deve essere pari a circa il 10% del peso del refrigerante aggiunto (il<br />
tipo di olio è specificato nel manuale generale). L’aggiunta di olio è indispensabile per rabbocchi di refrigerante superiori<br />
a 3Kg. Verificare comunque sulla presa schrader di livello olio del compressore, ove presente.<br />
VERIFICHE DI PRIMA MESSA IN FUNZIONE DOPO AVER AVVIATO L’ UNITA’ VERIFICARE:<br />
PARTE ELETTRICA<br />
Sbilanciamento delle fasi. Deve essere inferiore ad un valore massimo pari al 2% (vedi esempio di calcolo).<br />
Esempio di calcolo:<br />
L1 - L2 = 388V L2 - L3 = 379V L3 - L1 = 377V<br />
La media dei valori misurati è data da:<br />
388 + 379 + 377<br />
= 381<br />
3<br />
La massima deviazione dalla media è data da:<br />
388-381=7V<br />
Lo sbilanciamento è dato da:<br />
7<br />
x 100 =1,83% (accettabile)<br />
381<br />
Assorbimento compressore. Deve essere inferiore al valore riportato alla tabella allegata alla voce F.L.A.<br />
PARTE CIRCUITO FRIGORIFERO<br />
- Fare un ultima verifica delle perdite sugli attacchi rubinetti e prese di pressione presenti sull'impianto. Attenzione tutti i<br />
cappucci delle prese manometriche e dei rubinetti devono essere rimontati al loro posto.<br />
- Controllare spia del liquido (se presente).<br />
- Verificare con manometri collegati le pressioni di lavoro (bassa pressione da 400KPa a 560KPa corrispondenti a 0°C-<br />
+8°C SST) e temperatura di condensazione di circa 15-20°C superiore alla temperatura aria esterna (valori indicativi).<br />
- Controllare surriscaldamento facendo la differenza tra la temperatura letta sul manometro di bassa pressione, e la<br />
temperatura misurata, con termometro a contatto, direttamente sulla tubazione di aspirazione a monte del compressore.<br />
Se i valori sono da 4 a 8 gradi è sinonimo di corretto funzionamento, se decisamente al di fuori da queste tolleranze<br />
ricercare la causa con l'ausilio della sezione RICERCA GUASTI.<br />
- Controllo del sottoraffreddamento facendo la differenza tra la temperatura letta sul manometro di alta pressione, e la<br />
temperatura misurata, con termometro, direttamente sulla linea di liquido a valle del condensatore. Se i valori sono<br />
assestati su 3/5 gradi tutto va bene altrimenti come sopra ricercare la causa.<br />
- Per una corretta analisi dell'impianto controllare anche la temperatura di scarico del compressore che con i dati di<br />
surriscaldamento e sottoraffreddamento indicati deve essere di circa 30/40 gradi superiore alla temperatura di<br />
condensazione.<br />
• Facciamo presente inoltre che essendo l'unità dotata di regolazione velocità dei ventilatori. E‘ opportuno effettuare tutte<br />
queste verifiche di funzionamento con condizioni aria esterna - aria ambiente, molto vicine alle condizioni standard di<br />
progetto.<br />
• Ricordiamo inoltre che tutti i dati sopra riportati sono validi per unità con campo di lavoro per condizionamento e muniti di<br />
valvola termostatica.<br />
Per condizioni di progetto con temperature di evaporazione (SST) inferiori allo 0°C verificare di volta in volta sia i parametri di<br />
funzionamento che il dimensionamento delle tubazioni refrigeranti.<br />
Quanto sopra descritto presenta alcune delle problematiche con relative soluzioni che si possono verificare nella messa in<br />
funzione di una macchina motocondensante, resta comunque indispensabile, la serietà e qualifica del personale addetto.<br />
13
REGOLAZIONE<br />
MODALITA' DI FUNZIONAMENTO DEL MODULO PRINCIPALE<br />
ROTAZIONE DEI COMPRESSORI<br />
Il processore provvede a gestire in modo corretto il funzionamento globale dell’unità. E’ il caso per esempio della<br />
rotazione dei compressori. Tramite l’impostazione di opportuni parametri si abilita la funzione di rotazione compressori.<br />
Ciò significa che alla richiesta di funzionamento da parte del termoregolatore il compressore che partirà per primo sarà<br />
quello che avrà il minor numero di ore di funzionamento mentre a fermarsi per primo sarà il compressore con il numero<br />
maggiore di ore. Tale funzione permette di distribuire equamente le ore di funzionamento su entrambi i compressori.<br />
Esiste comunque la possibilità di fare funzionare sempre il primo compressore per primo ed il secondo per secondo<br />
questo per soddisfare alcune esigenze particolari, l’unità viene predisposta dal costruttore con la rotazione abilitata.<br />
TEMPORIZZAZIONI COMPRESSORI<br />
Per garantire una buona qualità di funzionamento dei compressori alcuni tipi di temporizzazioni si rendono necessarie.<br />
Può risultare utile la consultazione dei grafici di fig. 3-4 per meglio comprendere il significato delle temporizzazioni.<br />
Comp. 1<br />
ON<br />
Compressore<br />
OFF<br />
Comp. 2<br />
Secondi<br />
ON<br />
ON<br />
OFF<br />
OFF<br />
Secondi<br />
Tempo sicurezza<br />
accensione<br />
spegnimento C01<br />
Secondi*10<br />
Intervallo intervento<br />
primo secondo compressore C06<br />
Intervallo spegnimento<br />
primo secondo compressore C07<br />
Tempo sicurezza accensione..accensione<br />
C02<br />
Figura 3 Figura 4<br />
Nel grafico di fig. 4 sono raffigurati 2 parametri. TEMPO SICUREZZA SPEGNIMENTO ACCENSIONE e TEMPO<br />
SICUREZZA ACCENSIONE ACCENSIONE. Il primo parametro prevede che all’arresto del compressore debba<br />
trascorrere un determinato tempo per permettere il riavvio del medesimo. Questo tempo viene rispettato anche se vi è<br />
richiesta da parte del termoregolatore. Il secondo parametro prevede che debba trascorrere un determinato tempo tra<br />
un’accensione e la successiva. Nel caso di unità a due compressori vengono utilizzati altri due parametri INTERVALLO<br />
INTERVENTO PRIMO SECONDO COMPRESSORE e INTERVALLO SPEGNIMENTO PRIMO SECONDO<br />
COMPRESSORE. Il primo parametro evita la partenza simultanea dei due compressori questo principalmente per evitare<br />
degli spunti troppo elevati dell’unità. Il secondo prevede un intervallo di tempo tra lo spegnimento del primo e del<br />
secondo compressore. Questi due parametri fanno riferimento al grafico di figura 3.<br />
14
REGOLATORE VENTILATORI BATTERIA<br />
Nelle unità <strong>MSAT</strong> la regolazione della velocità dei ventilatori è di tipo termostatico di serie, può essere di tipo<br />
pressostatico su richiesta, quest’ ultima configurazione viene fornita con un kit. Il principio di funzionamento che andremo<br />
a descrivere rimane identico per le due regolazioni.<br />
- CONTROLLO VENTILATORI IN COOLING<br />
Di seguito proponiamo un grafico esplicativo per il modo di funzionamento cooling fig. 6.<br />
VENTILATORE ESTERNO IN MODALITA' COOL<br />
Figura 6<br />
Quando il compressore viene attivato si ha una ventilazione forzata cioè le ventole non seguono la regolazione dettata<br />
dal controllo ma girano per un tempo definito da un parametro alla massima velocità a meno che la temperatura non sia<br />
inferiore al valore di CUT-OFF nel qual caso le ventole girano alla minima velocità per il periodo sopra citato. Fatta<br />
questa premessa vediamo il funzionamento del regolatore.<br />
Il primo parametro da definire è il CUT-OFF che corrisponde ad un particolare valore di temperatura di condensazione<br />
sotto il quale le ventole sono ferme. L’ISTERESI CUT-OFF è un parametro che definisce il campo entro il quale avviene<br />
la commutazione tra lo stato di funzionamento delle ventole alla minima velocità e lo stato di quiete delle medesime.<br />
Riassumendo le ventole inizieranno a funzionare alla minima velocità ad un valore di temperatura pari al valore di CUT-<br />
OFF + ISTERESI CUT-OFF mentre la fermata viene determinata dalla differenza tra il valore di SET COOLING e DELTA<br />
CUT-OFF. Quando la temperatura di condensazione supera il valore SET FAN COOLING il regolatore inizia a regolare la<br />
velocità delle ventole proporzionalmente alla temperatura di condensazione. Nel caso delle unità Clivet contrariamente a<br />
quanto descritto sul grafico la regolazione viene mantenuta fino al raggiungimento del valore SET MAX FAN COOLING.<br />
Merita per completezza soffermarsi sulla descrizione dei parametri MAX SPEED SILENT e BANDA PROPORZIONALE<br />
COOLING. Il primo definisce una soglia massima di velocità dei ventilatori corrispondente ad un determinata temperatura<br />
di condensazione entro la quale avviene la regolazione della velocità mentre per BANDA PROPORZIONALE definisce<br />
l’inclinazione della retta entro la quale avviene la regolazione della velocità. Le unità CLIVET sono costruite per regolare<br />
la rotazione dei ventilatori fino alla massima velocità.<br />
15
PANNELLO DEL MODULO DI CONTROLLO PRINCIPALE<br />
LED 1 compressore 1<br />
• ON se il compressore 1é attivo<br />
• OFF se il compressore 1é spento<br />
• BLINK alla frequenza di 1 Hz se sono in corso temporizzazioni di sicurezza<br />
• BLINK a bassa frequenza se compressore in sbrinamento (solo pompa di calore)<br />
LED 3 compressore 2<br />
• ON se il compressore 1é attivo<br />
• OFF se il compressore 1é spento<br />
• BLINK alla frequenza di 1 Hz se sono in corso temporizzazioni di sicurezza<br />
• BLINK a bassa frequenza se compressore in sbrinamento. (solo pompa di calore)<br />
ON se controllore in modalità Cooling<br />
Se non é acceso il LED COOL il controllore è in modalità STAND-BY.<br />
Quando la macchina è in OFF rimane acceso solo il punto decimale.<br />
N.B. I LED 2 e 4 sono riferiti ad unità con 4 compressori e due circuiti frigoriferi.<br />
IMPOSTAZIONE DEI PARAMETRI DI FUNZIONAMENTO<br />
In questo paragrafo ci limitiamo ad elencare i soli parametri accessibili in modo diretto senza password. I parametri<br />
protetti da password sono pertinenza del personale dei centri autorizzati.<br />
SIGNIFICATO DEI TASTI<br />
Tasto ON-OFF<br />
Tasto MODE<br />
ON-OFF<br />
Tasto MODE<br />
ON-OFF<br />
Tasto MODE<br />
a) Se tenuto premuto per più di 2sec. il termoregolatore passa dallo stato ON a OFF e viceversa.<br />
b) Una pressione singola su questo tasto resetta tutti gli allarmi a riarmo manuale non attivi.<br />
Vengono resettati anche i contattori del numero interventi ora, anche se questi non sono attivi.<br />
c) Nella modalità menu diventa il tasto di scorrimento verso il basso.<br />
d) Permette di decrementare il valore del parametro selezionato.<br />
a) Premendo e rilasciando entrambi i tasti entro 2sec. si scende di un livello nel menu di configurazione.<br />
a) Tenendo premuto entrambi i tasti per più di 2 secondi si sale di 1 livello nel menu di configurazione.<br />
b) Se si sta visualizzando l’ultimo livello di un menu, la pressione simultanea e il rilascio entro due sec.,<br />
permette di risalire di un livello.<br />
a) In modalità menù tasto scorrimento verso l’alto.<br />
b) Permette di incrementare il valore del parametro selezionato.<br />
16
Tabella 1<br />
ELENCO DEI PARAMETRI ACCESSIBILI<br />
Codice Descrizione Unità di misura Set di fabbrica<br />
H46 Password unità 0<br />
Livello 0 Livello 1 Livello 2<br />
Livello 3<br />
Livello 4<br />
Sonda regolazione<br />
Allarme attivo<br />
Set Point : SEt Label Set Cooling: Coo Valore Set Cooling<br />
Label Set Heating: HEA<br />
Valore Set Heating<br />
Ing. Analogici: tP<br />
Codice ingressi: t01- t06<br />
Valore ingresso analogico<br />
Allarmi: Err<br />
Codice all.attivi: E00-E46<br />
Ing.Digitali: Id<br />
Codice ingressi: I01-I11<br />
Stato ingresso digitale<br />
Parametri: PAr<br />
Par. configurazione: CnF<br />
Indice par. H01-H69<br />
Valore parametro<br />
Par. compressore: CP<br />
Indice par. C01-C08<br />
Valore parametro<br />
Par. ventilazione: FAn<br />
Indice par. F01-F25<br />
Valore parametro<br />
Par. allarmi: ALL<br />
Indice par. A01-A26<br />
Valore parametro<br />
Par. pompa: PUP<br />
Indice par. P01-P03<br />
Valore parametro<br />
Par. antigelo: Fro<br />
Indice par. r01-r17<br />
Valore parametro<br />
Par. sbrinamento: dFr<br />
Indice par. d01-d11<br />
Valore parametro<br />
Par. espansione: ESP<br />
Indice par: N01-N07<br />
Valore parametro<br />
Password: PSS<br />
Valore password<br />
Ore funzionamento: OHr<br />
Ore comp: OH1-OH4<br />
Numero ore<br />
Ore pompa: OHP<br />
Numero ore<br />
Per muoversi all’interno dei livelli si utilizza la pressione simultanea dei tasti “Mode” e “on off”<br />
1 - Premendo e rilasciando entrambi i tasti entro 2 secondi, si scende di un livello nel menu di<br />
configurazione.<br />
2 - Tenendo premuto entrambi i tasti per più di 2 secondi si sale di un livello nel menu di<br />
configurazione.<br />
3 - Se si sta visualizzando l’ultimo livello di un menu, la pressione simultanea e il rilascio entro 2<br />
secondi, permette di risalire di livello.<br />
17
ALLARMI<br />
I codici di allarme compaiono sul display del terminale interfaccia utente quando un errore si verifica. Gli allarmi vengono<br />
visualizzati sul display quelli a ripristino automatico scompaiono non appena si risolve l’anomalia quelli a ripristino<br />
manuale devono essere ripristinati tramite l’intervento di un tecnico. Gli allarmi compaiono sul terminale di interfaccia<br />
utente seguendo la sequenza con cui sono stati inseriti nella tabella. E’ da precisare inoltre che se sono<br />
contemporaneamente presenti più allarmi verrà visualizzato soltanto il primo, quando questo sarà ripristinato appare il<br />
secondo e cosi via fino ad esaurimento.<br />
Attenzione: in fase di standby, oppure di OFF, non sono segnalati gli allarmi e non è attivato il relè di blocco cumulativo.<br />
Gli allarmi, se presenti, sono segnalati ed è attivato il relè di blocco cumulativo, al momento della selezione del modo di<br />
funzionamento.<br />
Tabella 2<br />
Codice Tipo di guasto Blocchi Ripristino<br />
E01 Massima Pressione circ. 1 Compressore MANUALE<br />
E02* Minima Pressione circ. 1 Compressore ventilatore AUTOMATICO<br />
E03 Termica Compressore 1 Compressore ventilatore MANUALE<br />
E04 Termica Ventole circ. 1 Compressore ventilatore MANUALE<br />
E07 Guasto Sonda BT3/BP3 Compressore ventilatore AUTOMATICO<br />
E21 Massima Pressione circ. 2 Compressore ventilatore MANUALE<br />
E22* Minima pressione circ. 2 Compressore ventilatore AUTOMATICO<br />
E24 Termica ventole circ. 2 Compressore ventilatore MANUALE<br />
E27 Guasto sonda BT5/BP5 Compressore ventilatore AUTOMATICO<br />
E45 Configurazione Compressore MANUALE<br />
* Dopo 5 segnalazioni diventa a ripristino manuale. Ogni allarme segnalato viene contato solo se fra una segnalazione e<br />
l'altra passano più di 225 secondi.<br />
18
RICERCA GUASTI<br />
Ciò che segue vuole essere indicativo di alcune possibili anomalie e loro soluzione. Le operazioni derivanti sono e restano a<br />
responsabilità totale di chi le esegue. E’ obbligatorio rivolgersi ad un tecnico autorizzato in possesso dei requisiti di legge per<br />
ogni operazione intervento necessario a ripristinare il funzionamento.<br />
L’ intervento di un dispositivo di sicurezza indica anomalia di funzionamento: prima di ripristinare verificare ed eliminare la<br />
causa dell’anomalia. Di seguito sono elencati possibili problemi con relative cause e rimedi.<br />
ATTENZIONE<br />
LE OPERAZIONI RIPORTATE SONO A TOTALE RESPONSABILITÀ DI CHI LE ESEGUE, È OBBLIGATORIO<br />
RIVOLGERSI AD UN CENTRO DI ASSISTENZA AUTORIZZATO IN POSSESSO DEI REQUISITI NECESSARI PER LE<br />
OPERAZIONI FINALIZZATE AL RIPRISTINO DELLA FUNZIONALITÀ.<br />
Ogni guasto o condizione anomala di funzionamento viene gestito dal modulo di controllo principale. Ad ogni condizione<br />
anomala o guasto, il modulo, oltre a porre in sicurezza l’unità, può visualizzare l’evento a distanza.<br />
19
BLOCCO ALTA PRESSIONE<br />
BLOCCO ALTA PRESSIONE<br />
SI<br />
Ventilazione efficiente ?<br />
NO<br />
Verifica batteria<br />
( 1 )<br />
Verifica ventilatore<br />
( 2 )<br />
Verifica modulo ventilatore<br />
( 3 )<br />
Verifica sonda<br />
( 4 )<br />
SI<br />
Temperatura aria esterna<br />
inferiore ai limiti di<br />
funzionamento ?<br />
NO<br />
Verificare i dati di progetto<br />
( 5 )<br />
SI<br />
Carica refrigerante corretta ?<br />
NO<br />
Verificare<br />
sottoraffreddamento liquido<br />
( 6 )<br />
SI<br />
Assenza di incondensabili ?<br />
NO<br />
Rifare vuoto e carica<br />
( 7 )<br />
SI<br />
Temperatura e/o pressione<br />
aspirazione regolare ?<br />
NO<br />
Verificare funzionamento<br />
unità interna ( 8 )<br />
Unità in funzione<br />
Verificare funzionabilità<br />
degli organi di<br />
intercettazione della linea<br />
liquido ( 9 )<br />
Note:<br />
1) Importantissimo che offra il massimo scambio termico, di conseguenza deve essere libera da sporco incrostazioni o da<br />
ostacoli al flusso d’aria.<br />
2) Verificare l’integrità del ventilatore se danneggiato sostituirlo.<br />
3) Verificare che la tensione in uscita dalla scheda, moduli in modo proporzionale la velocità dei ventilatori. Nel caso<br />
contrario sostituire il modulo.<br />
4) Verificare il posizionamento: deve essere in intimo contatto con il tubo sagomato della batteria di scambio. Deve avere un<br />
dato di resistenza perfettamente in linea con la temperatura, verificare con apposito Ohmmetro tale valore di resistenza.<br />
5) Verificare:<br />
- Limiti di funzionamento. (vedi sezione generale)<br />
- Che la batteria non sia esposta a raggi solari diretti o vicino a superfici riflettenti.<br />
- Che nelle immediate vicinanze non ci siano flussi di aria calda di qualsiasi genere.<br />
- Che non ci sia un ricircolo della stessa aria.<br />
6) Per modalità di controllo consultare la sezione di MESSA IN FUNZIONE. NB un eventuale allagamento dei circuiti della<br />
batteria di scambio sino al punto di alloggiamento della sonda, causa un funzionamento anomalo, del sistema di<br />
regolazione della velocità dei ventilatori.<br />
7) Una condizione che si può verificare è che la temperatura di condensazione sia molto alta (25/30 gradi al di sopra della<br />
temperatura dell’aria esterna) abbinata ad una resa frigorifera scadente. Può portare gli stessi sintomi di una carica<br />
refrigerante abbondate. Constatato che la carica è corretta valutare questa ipotesi e rifare tutte le operazioni di vuoto e<br />
carica.<br />
8) Verificare che la portata aria non sia esuberante, e che la temperatura dell’aria ambiente non sia troppo elevata.<br />
Condizioni queste che potrebbero inalzare la resa della macchina e conseguentemente il calore da smaltire al<br />
condensatore.<br />
9) Verificare che tutti gli organi di intercettazione sulla linea del liquido siano completamente aperti.<br />
20
BLOCCO BASSA PRESSIONE<br />
BLOCCO BASSA PRESSIONE<br />
SI<br />
Funzionamento regolare<br />
unità interna ?<br />
NO<br />
Verificare funzionamento<br />
unità interna ( 1 )<br />
Verificare condizioni di<br />
lavoro unità interna ( 2 )<br />
Verificare tubazioni di<br />
collegamento ( 3 )<br />
SI<br />
Filtro deidratore<br />
efficiente ?<br />
NO<br />
Controllare ∆t tra monte<br />
e valle ( 4 )<br />
SI<br />
Carica refrigerante<br />
regolare ?<br />
NO<br />
Controllare<br />
surriscaldamento ( 5 )<br />
SI<br />
Rubinetto aspirazione<br />
completamente aperto ?<br />
NO<br />
Verificare eventualmente<br />
aprire<br />
SI<br />
Temperatura e/o pressione<br />
aspirazione regolare ?<br />
NO<br />
Verificare funzionamento<br />
unità esterna ( 6 )<br />
Unità in funzione<br />
Note:<br />
1) Verificare:<br />
- Che ci sia sufficiente portata d’aria.<br />
- Che il senso di rotazione dei ventilatori sia corretto.<br />
- Che lo scambiatore non sia sporco o incrostato in quanto deve offrire il massimo dello scambio termico.<br />
- Che la valvola solenoide sia funzionante.<br />
- Che la valvola termostatica sia funzionante.<br />
2) Verificare che le condizioni di temperatura/umidità dell’aria trattata rientrino nelle condizioni di progetto.<br />
3) Verificare che lo sviluppo e il diametro delle tubazioni siano dimensionate correttamente (vedere la sezione delle<br />
TUBAZIONI REFRIGERANTI). In caso contrario potrebbero causare delle perdite di carico inaccettabili per il buon<br />
funzionamento dell’unità.<br />
4) Controllare con termometro a contatto la temperatura a monte e successivamente a valle del filtro deidratore. Se la<br />
differenza di temperatura è superiore a un 1°C è sintomo o di filtro non efficiente oppure di filtro sottodimensionato, in<br />
entrambi i casi sostituirlo.<br />
5) Per modalità di controllo consultare la sezione di MESSA IN FUNZIONE.<br />
6) Se la pressione di condensazione è al di sotto di 1200Kpa manometrici si può verificare una anomala alimentazione<br />
dell’organo di laminazione e di conseguenza una pressione di aspirazione troppo bassa.<br />
Verificare che la ventilazione dell’unità esterna sia perfettamente funzionante (cioè moduli o fermi i ventilatori).<br />
21
INTERVENTO SICUREZZA COMPRESSORE<br />
INTERVENTO SICUREZZA<br />
COMPRESSORE<br />
SI<br />
Temperatura scarico<br />
compressore nei limiti ?<br />
NO<br />
Verificare parametri tipo :<br />
surriscaldamento, carica<br />
refrigerante, ecc.<br />
SI<br />
Termostato a contatto<br />
funzionale ?<br />
NO<br />
Sostituire termostato<br />
Unità in funzione<br />
INTERVENTO TERMICA VENTILATORI<br />
INTERVENTO TERMICA<br />
VENTILATORE<br />
SI<br />
Motore integro ?<br />
NO<br />
Verificare possibili<br />
ostruzioni dello scambiatore<br />
Verificare ostruzioni<br />
sulle pale<br />
Verificare avvolgimenti<br />
elettrici<br />
Unità in funzione<br />
22
UNITA’ RUMOROSA<br />
UNITA’ RUMOROSA<br />
SI<br />
Gli ammortizzatori del<br />
compressore sono in buone<br />
condizioni ?<br />
NO<br />
Verificare ed<br />
eventualmente sostituire<br />
NO<br />
Le viti di fissaggio del<br />
compressore sono<br />
allentate ?<br />
SI<br />
Verificare ed<br />
eventualmente serrare<br />
NO<br />
Le tubazioni vibrano ?<br />
SI<br />
Verificare i punti di<br />
serraggio<br />
Unità in funzione<br />
COMPRESSORE NON PARTE<br />
COMPRESSORE NON PARTE<br />
NO<br />
Mancanza di tensione ai<br />
morsetti ?<br />
SI<br />
Intervento Klixon<br />
( 1 )<br />
Motore bruciato<br />
( 2 )<br />
Compressore bloccato<br />
( 3 )<br />
SI<br />
Magnetotermico inserito ?<br />
NO<br />
Inserire<br />
SI<br />
Relè funzionante ?<br />
NO<br />
Controllare che la bobina<br />
non sia bruciata e che i<br />
contatti non siano ossidati<br />
SI<br />
Modulo di controllo<br />
funzionante ?<br />
NO<br />
Verificare ed<br />
eventualmente sostituire<br />
Unità in funzione<br />
Note:<br />
1) L’intervento del Klixson si manifesta con una temperatura della carcassa del compressore piuttosto alta.<br />
Verificare la causa prima di riavviare l’unità.<br />
2) Verificare se gli avvolgimenti sono a massa. Eventualmente sostituire il compressore.<br />
3) Il blocco meccanico del compressore è manifestato da un sostenuto e tipico rumore. Nel caso sostituire il compressore.<br />
23
MANUTENZIONE ORDINARIA<br />
IMPORTANTE<br />
PRIMA DI DAR CORSO A QUALSIASI OPERAZIONE DI MANUTENZIONE O DI PULIZIA DELL'UNITA' ACCERTARSI<br />
CHE LA STESSA NON SIA IN TENSIONE.<br />
Questa sezione è dedicata all'utilizzatore finale ed è estremamente importante per il regolare funzionamento nel tempo<br />
dell'unità.<br />
Poche operazioni eseguite con scrupolo e periodicamente possono evitare di dover ricorrere a interventi di personale<br />
specializzato.<br />
Le operazioni da effettuare non richiedono conoscenze tecniche particolari e si riassumono in semplici controlli ai<br />
componenti dell'unità:<br />
- batteria di condensazione<br />
- elettroventilatori<br />
- struttura<br />
UNITA'<br />
BATTERIA DI CONDENSAZIONE<br />
ATTENZIONE: il contatto accidentale con le alette dello scambiatore può provocare delle piccole ferite da taglio. Per<br />
effettuare le operazioni sotto descritte utilizzare appositi guanti.<br />
E' importante che la batteria condensante sia in grado di offrire il massimo scambio termico. E' importante quindi che la<br />
sua superficie sia sempre libera da sporco o polveri che possono essersi depositate per effetto dell'azione degli<br />
elettroventilatori.<br />
- Rimuovere con l'ausilio di una spazzola tutte le impurità tipo carta, foglie, ecc. che possono essersi depositate sulla<br />
superficie della batteria.<br />
- Con l’ausilio di un getto di aria in pressione pulire la superficie in alluminio della batteria avendo cura di orientare il getto<br />
in senso parallelo all'andamento delle alette per non produrre danneggiamenti.<br />
- Verificare che la elette in alluminio non abbiano subito danneggiamenti o piegature, nel caso si riscontrino situazioni del<br />
genere "pettinare" con apposito attrezzo la batteria fino a ripristinare la situazione iniziale per un ottimale flusso d'aria.<br />
ELETTROVENTILATORI<br />
Al primo avviamento stagionale verificare la rumorosità.<br />
Se sostenuta e con presenza di vibrazioni può essere sintomo: o di sbilanciamento delle pale oppure di un allentamento<br />
delle viti di fissaggio.<br />
Nel caso di accertata anomalia chiamare il centro di assistenza autorizzato in quanto i ventilatori sono posizionati<br />
all'interno della macchina tra le batterie condensanti.<br />
- Verificare lo stato del fissaggio dell’elettro-ventilatore alla griglia di supporto.<br />
- Verificare lo stato del fissaggio della griglia di supporto dell’elettroventilatore alla struttura dell'unità.<br />
- Verificare, per quanto possibile, eventuali sbilanciamenti dell’elettroventilatore evidenziati da condizioni di rumore e<br />
vibrazioni anomale.<br />
STRUTTURA<br />
- Verificare lo stato delle parti costituenti la struttura.<br />
Particolare attenzione va posta alle parti in acciaio.<br />
- Trattare con vernici atte ad eliminare o ridurre il fenomeno di ossidazione quei punti dell'unità che dovessero<br />
manifestare il problema.<br />
- Verificare il fissaggio della pannellatura esterna dell’unità. Cattivi fissaggi sono origine di rumori e vibrazioni anomale.<br />
PARTE ELETTRICA<br />
Verificare che il cavo di alimentazione che collega l'unità al quadro di distribuzione non presenti lacerazioni, screpolature<br />
o alterazioni tali da comprometterne l’isolamento. Contattare un centro di assistenza autorizzato nel caso si renda<br />
necessaria della manutenzione.<br />
IMPORTANTE<br />
E' CONSIGLIABILE LA PRESENZA DI PERSONALE AUTORIZZATO AD OGNI AVVIAMENTO STAGIONALE<br />
DELL' UNITA' IN MODO DA DAR CORSO OLTRE CHE ALLE VERIFICHE DI CUI SOPRA ANCHE A<br />
VERIFICHE AL CIRCUITO FRIGORIFERO<br />
24
TUBAZIONI REFRIGERANTI<br />
Il dimensionamento delle linee refrigeranti di collegamento tra unità motocondensanti esterne e unità evaporanti interne è di<br />
primaria importanza. Per collegamenti con nostre unità, vedere la tabella sotto riportata dove per lunghezze specificate il<br />
diametro degli attacchi corrisponde al diametro da utilizzare per le tubazioni di collegamento.<br />
Per distanze superiori il diametro dovrà essere calcolato (vedere apposite bibliografie o nostro bollettino<br />
DIMENSIONAMENTO LINEE FRIGORIFERE NEGLI IMPIANTI A DUE SEZIONI). La tabella sotto indicata riporta inoltre il<br />
dislivello massimo consigliato sia nel caso che l'unità motocondensante sia più in basso rispetto alla unità terminale sia nel<br />
caso opposto.<br />
Usare solo tubo di rame per refrigerazione.<br />
Grand. ∅ Aspir. ∅ Liquido Max. Max. Dislivello massimo<br />
lunghezza m N° curve Fig. 4 Fig. 6<br />
<strong>102</strong> 22 14 10 6 9 9<br />
<strong>122</strong> 22 14 10 6 9 9<br />
<strong>142</strong> 28 16 16 8 12 12<br />
<strong>162</strong> 28 18 16 6 10 10<br />
<strong>182</strong> 28 18 12 6 10 10<br />
<strong>202</strong> 35 22 23 10 18 18<br />
<strong>242</strong> 35 22 20 10 14 14<br />
TUBAZIONE DI ASPIRAZIONE<br />
Per tutte le grandezze gli attacchi sono a saldare con l'unità viene fornito di serie<br />
l'apposito attacco ROTALOK.<br />
- Collegare la linea preparata al rubinetto di intercettazione con l'ausilio di due chiavi<br />
come indicato (in figura 1 per quanto riguarda il primo circuito, figura 2 per il<br />
secondo).<br />
Figura 1<br />
Figura 2<br />
Figura 3<br />
TUBAZIONE LIQUIDO<br />
Per tutte le grandezze gli attacchi sono a saldare con l'unità viene<br />
fornito di serie l'apposito attacco ROTALOK.<br />
- Collegare la linea preparata al rubinetto di intercettazione con l'ausilio<br />
di due chiavi come indicato (in figura 3 per quanto riguarda il primo<br />
circuito, figura 4 per il secondo).<br />
Figura 4<br />
NOTA:<br />
Tutte le tubazioni devono essere perfettamente pulite (eseguire una pulizia con azoto o aria secca prima di<br />
allacciare le tubazioni alle due unità) e prive di umidità' per permettere una operazione di vuoto ottimale.<br />
25
CONTROLLO PERDITE<br />
- Controllare accuratamente che i rubinetti dell’unità motocondensante siano chiusi.<br />
- Collegare il gruppo manometrico con gli attacchi di servizio dei rubinetti.<br />
- Eseguire la pressatura con refrigerante sino a 250KPa.<br />
- Chiudere i rubinetti del gruppo manometrico per effettuare lo scollegamento della<br />
bombola del refrigerante e successivamente collegare la bombola di azoto.<br />
- Aprire i rubinetti del gruppo manometrico.<br />
- Mettere in pressione l’impianto con azoto fino a 1200KPa.<br />
- Controllare accuratamente con lampada cerca fughe o altro strumento elettronico<br />
tutta la tubazione con particolare attenzione sulle saldature e giunzioni in genere.<br />
Se non in possesso della attrezzatura necessaria lasciare ispezionabili tutte quelle parti<br />
che potrebbero dar luogo a fughe di refrigerante (saldature, giunzioni ecc.).<br />
Bulbo<br />
termostatica<br />
Bulbo<br />
termostatica<br />
UNITA’ ESTERNA<br />
UNITA’ INTERNA<br />
Rubinetto<br />
gas<br />
Figura 5<br />
Rubinetto<br />
liquido<br />
MODALITA’ - INDICAZIONI PER UN CORRETTO COLLEGAMENTO<br />
TUBAZIONE ASPIRAZIONE<br />
- Pendenza verso il compressore nei tratti orizzontali (0.5%) per assicurare il ritorno<br />
dell'olio al compressore anche alle condizioni di carico mimino.<br />
- Isolare accuratamente la tubazione con polietilene anticondensa a celle chiuse<br />
spessore minimo 9mm.<br />
- Se l'unità motocondensante è posizionata più bassa rispetto all'unità evaporante<br />
(figura 5), prevedere un sifone di altezza pari al pacco della batteria per prevenire,<br />
durante il fermo macchina un ritorno di liquido al compressore.<br />
- Per evitare il sifone montare sulla linea del liquido una valvola solenoide (vedi Figura<br />
6) comunque sempre consigliata.<br />
- Se l'unità terminale è dotata di valvola termostatica oltre al sifone prevedere un<br />
pozzetto (vedi Figura 5) il più vicino possibile all'unità. Quanto detto per evitare che<br />
il bulbo della valvola termostatica, a macchina ferma, rimanga in contatto con del<br />
liquido (vedi figura 5).<br />
Nel caso di collegamento con nostra unità terminale CED-V il sifone è già<br />
predisposto all’intenso dell'unità.<br />
- Se l'unità motocondensante è posizionata più alta rispetto all'unità evaporante,<br />
prevedere un solo pozzetto (vedi Fig. 7) attenzione però se la distanza totale supera<br />
i 7-10 metri si rende necessario l'utilizzo della valvola solenoide sulla linea del<br />
liquido.<br />
- Per risalite verticali prevedere oltre al pozzetto alla base un sifone raccolta olio ogni<br />
6 metri (vedi Figura 8).<br />
- Utilizzare curve ad ampio raggio (non gomiti).<br />
- Evitare accuratamente schiacciamenti sulla tubazione.<br />
TUBAZIONE LIQUIDO<br />
- Se esposta al sole o attraversa zone a temperature superiore a quella esterna deve<br />
essere isolata altrimenti può essere libera.<br />
- Evitare diametri eccessivi per non causare eccesso di carica di refrigerante.<br />
Figura 6<br />
Figura 7<br />
Figura 8<br />
IMPORTANTE<br />
Con l'unità terminale interna dotata di valvola termostatica, se le tubazioni di collegamento sono di lunghezza superiore a<br />
circa 15/20 metri oppure se l'impianto è previsto per funzionare con condizioni climatiche variabili (ad esempio aria esterna<br />
molto diversa giorno/notte) è consigliabile 'installazione di un ricevitore di liquido di adeguata capacità vicino all’unità interna.<br />
Il ricevitore di liquido può assolvere le funzioni sotto descritte:<br />
- Evita che all'organo di laminazione arrivi freon allo stato gassoso.<br />
- Sopperisce alle variazioni di carica che si verificano nello impianto al variare delle condizioni di funzionamento.<br />
- Sopperisce in parte e per un certo tempo ad eventuali microperdite non rilevabili che nel tempo tendono a scaricare<br />
l'impianto.<br />
- Evita un eccessivo allagamento del condensatore con relativo innalzamento della temperatura/pressione di condensazione<br />
se l'impianto è stato caricato con una quantità maggiore di refrigerante, o se la carica fatta in condizioni climatiche anomale.<br />
Detto questo l'installazione del ricevitore di liquido è sempre consigliato quando le distanze di collegamento sono elevate.<br />
26
RISCHI RESIDUI<br />
ATTENZIONE<br />
VIENE SEGNALATA NEL PRESENTE FASCICOLO OGNI OPERAZIONE ATTA A GENERARE SITUAZIONE<br />
DI RISCHIO OLTRE ALLE MISURE CAUTELATIVE DA OSSERVARSI CASO PER CASO<br />
DEFINIZIONE ZONA PERICOLOSA<br />
La figura sottostante evidenzia l’area nella quale può agire solo un operatore autorizzato.<br />
- Zona pericolosa esterna è individuata da una precisa superficie attorno alla macchina ed alla proiezione a terra della stessa<br />
sulla verticale in caso di macchina sospesa.<br />
- Zona pericolosa interna è l’area accessibile soltanto mediante rimozione deliberata delle carenature o parti di esse.<br />
27
RISCHI GENERICI<br />
Zona considerata Rischio residuo Modalità Avvertenze<br />
Batterie di scambio Lesioni di lieve entità Contatto Evitare contatti accidentali<br />
Usare guanti protettivi<br />
Applicare griglie di protezione<br />
scambiatori (optional)<br />
Valvole di sicurezza<br />
Area circostante l’unità<br />
Area circostante l’unità<br />
Lesioni<br />
Intossicazioni<br />
Lesioni<br />
Intossicazioni<br />
Ustioni gravi<br />
Morte<br />
Morte per:<br />
Ustioni gravi<br />
Intossicazioni<br />
Espulsione gas<br />
refrigerante per intervento<br />
della protezione in oggetto<br />
Esplosione dovuta ad<br />
aumento della temperatura<br />
ambiente (incendio)<br />
Incendio dovuto a corto<br />
circuito o surriscaldamento<br />
dei cavi di alimentazione<br />
elettrica a monte dei<br />
sezionatori di macchina.<br />
Interno unità Ustioni Contatto con compressori<br />
e tubazioni di mandata.<br />
Evitare di entrare nella zona pericolosa<br />
Convogliare opportunamente gli scarichi<br />
della valvola di sicurezza<br />
Usare abbigliamento ed occhiali<br />
appropriati<br />
Non lasciare mai chiusi eventuali<br />
rubinetti di mandata e aspirazione<br />
compressori a macchina ferma<br />
Corretto dimensionamento dei cavi e dei<br />
dispositivi di protezione della linea di<br />
allacciamento alla rete elettrica.<br />
Evitare contatti accidentali<br />
Usare guanti protettivi.<br />
Interno unità Lesioni Contatto con spigoli vivi Utilizzare guanti di protezione<br />
Interno unità<br />
Morte per:<br />
Difetto di isolamento sui Accedere all’interno della unità solo<br />
Folgorazione cavi di alimentazione dopo che è stato aperto il sezionatore<br />
gravi<br />
elettrica a monte dei posto sulla linea di allacciamento<br />
sezionatori di macchina. elettrico alla unità. ( a cura del cliente )<br />
Zona pericolosa interna<br />
Zona pericolosa interna<br />
Morte per:<br />
Folgorazione<br />
Morte per:<br />
Folgorazione<br />
Ustioni gravi<br />
Masse metalliche sotto<br />
tensione<br />
Contatto con parti in<br />
tensione accessibili dopo<br />
rimozione dei ripari<br />
Curare in maniera particolarmente<br />
attenta l’esecuzione del collegamento<br />
all’impianto di terra delle masse<br />
metalliche della macchina.<br />
Provvedere ad aprire e luchettare il<br />
sezionatore generale prima di togliere i<br />
ripari.<br />
SCHEDE SICUREZZA REFRIGERANTE<br />
01 Elementi<br />
identificatori della<br />
sostanza<br />
02 Composizione<br />
informazione sui<br />
componenti<br />
03 Identificazione del<br />
rischio<br />
04 Misure di pronto<br />
soccorso<br />
Nome del prodotto: forane 407C<br />
N°SDS 01965/1<br />
Fornitore: ELF ATOCHEM ITALIA<br />
Via G.Murat 17, 20159 Milano tel. 02/668111<br />
Natura chimica del preparato<br />
Miscela a base di:<br />
• Forane 32(difluorometano) (N° CAS: 75-10-5)<br />
• Forane 125 (pentafluoroetano) (N° CAS: 354-33-6)<br />
• Forane 134a (1.1.1.2 tetrafluoroetano) (N° CAS:<br />
811-97-2)<br />
Maggiori pericoli fisici e chimici:<br />
Decomposizione termica in prodotti tossici e corrosivi<br />
Informazioni generali:<br />
Inalazione: Trasportare la vittima all’aria aperta.<br />
Ricorrere all’ossigeno o alla respirazione artificiale se<br />
necessario.<br />
Contatto con la pelle: I congelamenti devono essere<br />
curati come ustioni termiche.<br />
Contatto con gli occhi: Lavaggio immediato,<br />
abbondante con acqua. Qualora persista l’irritazione<br />
consultare un oftalmologo.<br />
Istruzioni per il medico: Non somministrare<br />
catecolammine<br />
(a causa della sensibilizzazione cardiaca provocata dal<br />
prodotto)<br />
Nome del prodotto: forane 22<br />
N°SDS 0005/7<br />
Fornitore: ELF ATOCHEM ITALIA<br />
4 Cours Michelet Cedex 42 92091 Paris France<br />
tel. 0033149008080<br />
Natura chimica del preparato<br />
Miscela a base di:<br />
Clorodifluorometano idrocarburo alogenato<br />
N° CAS 75-45-6<br />
EINECS 200-871-9<br />
Effetti per la salute: Praticamente non nocivo<br />
Maggiori pericoli fisici e chimici:<br />
Decomposizione termica in prodotti tossici e corrosivi<br />
Pericoli specifici /CEE: Pericoloso per lo strato<br />
d’ozono<br />
Informazioni generali:<br />
Inalazione: Trasportare la vittima all’aria aperta.<br />
Ricorrere all’ossigeno o alla respirazione artificiale<br />
se necessario.<br />
Contatto con la pelle: I congelamenti devono<br />
essere curati come ustioni termiche.<br />
Contatto con gli occhi: Lavaggio immediato,<br />
abbondante con acqua. Qualora persista l’irritazione<br />
consultare un oftalmologo.<br />
28
05 Misure antincendio Pericoli Specifici: Decomposizione termica in prodotti<br />
tossici e corrosivi. Acido fluoridrico. Ossidi di carbonio<br />
Metodi specifici d’intervento: Raffreddare i<br />
contenitori/cisterne con getti d’acqua. Proibire ogni fonte<br />
di scintille e di ignizione -<br />
Non FUMARE.<br />
Sistemi di protezione speciali per le squadre di<br />
soccorso: Portare un autorespiratore e indumenti di<br />
protezione<br />
06 Misure in caso di<br />
fuoriuscita<br />
accidentale<br />
07 Manipolazione e<br />
stoccaggio<br />
08 Controllo<br />
dell’esposizione/<br />
protezione<br />
individuale<br />
09 Proprietà fisiche e<br />
chimiche<br />
Precauzioni individuali: Evitare il contatto con la pelle,<br />
gli occhi e l’inalazione dei vapori. Usare mezzi di<br />
protezione personali.<br />
In un locale chiuso: ventilare o usare un autorespiratore<br />
(rischio di anossia).DIVIETO DI FUMARE<br />
Precauzioni per la protezione dell’ambiente: Limitare<br />
al massimo i rifiuti nell’ambiente.<br />
Misure /precauzioni tecniche<br />
Disposizioni di stoccaggio e di manipolazione applicabili<br />
ai prodotti: GAS SOTTO PRESSIONE<br />
Prevedere una ventilazione ed una evacuazione<br />
appropriata al livello delle apparecchiature.<br />
Consigli per l’utilizzo: Evitare le fonti d’ignizione e il<br />
contatto con le superfici calde. NON FUMARE<br />
Misure tecniche/Modalità di stoccaggio:<br />
Immagazzinare a temperatura ambiente nel contenitore<br />
originale. Tenere lontano da fiamme libere, superfici<br />
calde e sorgenti di ignizione. Conservare in un luogo<br />
fresco e ben ventilato. Proteggere i contenitori pieni dalle<br />
sorgenti di calore per evitare sovrapressioni.<br />
Raccomandati: Acciaio ordinario<br />
Da evitare: Lega contenente più di 2% di magnesio<br />
Materie plastiche<br />
Misure precauzionali da adottare: Assicurare un<br />
sufficiente ricambio d’aria e/o un’aspirazione negli<br />
ambienti di lavoro.<br />
Parametri di controllo<br />
Valori limite di esposizione: Non esiste valore limite F-<br />
USA<br />
Forane 134a valore limite raccomandato da Elf :<br />
VME=1000ppm<br />
Forane 32 valore limite raccomandato da Elf :<br />
VME=1000ppm Forane 125 valore limite raccomandato<br />
da Elf : VME=1000ppm<br />
Equipaggiamento di protezione individuale:<br />
Protezione Respiratoria: In caso di ventilazione<br />
insufficiente, portare una attrezzatura respiratoria adatta.<br />
Protezione delle mani: Guanti<br />
Protezione degli occhi: Occhiali di protezione<br />
Stato fisico (20°C): Gas liquefatto<br />
Colore: Incolore<br />
Odore: Leggermente simile all’etere. pH: Non<br />
applicabile<br />
Punto /intervallo d’ebollizione: -42,4 °C<br />
Punto di infiammabilità: Non si infiamma nelle<br />
condizioni di prova<br />
Tensione di vapore: (25°C): 1.13 Mpa (11,3 bar) a<br />
(50°C): 2.11 Mpa (21,1 bar) a (70°C): 3.26 Mpa (32,6<br />
bar)<br />
Densità di vapore: Al punto di ebollizione 4,54 kg/m3<br />
Densità: (25°C) 1133 kg/m3 a (50°C) 1004 kg/m3 a<br />
(70°C) 861 kg/m3<br />
10 Stabilità e reattività Condizioni da evitare: Evitare il contatto con fiamme e<br />
le superfici metalliche arroventate<br />
Prodotti di decomposizione pericolosi:<br />
Decomposizione termica in prodotti fluorurati tossici<br />
Fluoruro di idrogeno (acido fluoridrico)<br />
Altre Informazioni: Prodotto stabile nelle normali<br />
condizioni di stoccaggio e manipolazione<br />
Pericoli Specifici: Decomposizione termica in<br />
prodotti tossici e corrosivi. Acido fluoridrico. Acido<br />
Cloridrico gas. Fosgene Ossidi di carbonio CO<br />
Metodi specifici d’intervento: Raffreddare i<br />
contenitori/cisterne con getti d’acqua. Proibire ogni<br />
fonte di scintille e di ignizione -<br />
Non FUMARE.<br />
Sistemi di protezione speciali per le squadre di<br />
soccorso: Portare un autorespiratore e indumenti di<br />
protezione<br />
Precauzioni individuali: Evitare il contatto con la<br />
pelle, gli occhi e l’inalazione dei vapori.<br />
In un locale chiuso: ventilare o usare un<br />
autorespiratore (rischio di asfissia).DIVIETO DI<br />
FUMARE<br />
Allontanare tutte le fonti di ignizione<br />
Misure /precauzioni tecniche<br />
Disposizioni di stoccaggio e di manipolazione<br />
applicabili ai prodotti: GAS PRESSURIZZATI<br />
Prevedere una ventilazione ed una evacuazione<br />
appropriata al livello delle apparecchiature.<br />
Consigli per l’utilizzo: Proibire i punti d’ignizione e il<br />
contatto con le superfici calde. NON FUMARE<br />
Misure tecniche/Modalità di stoccaggio:<br />
Immagazzinare a temperatura ambiente nel<br />
contenitore originale. Tenere lontano da fiamme<br />
libere, superfici calde e sorgenti di ignizione.<br />
Conservare in un luogo fresco e ben ventilato.<br />
Proteggere i contenitori pieni dalle sorgenti di calore<br />
per evitare sovrapressioni.<br />
Raccomandati: Acciaio ordinario<br />
Da evitare: Lega contenente più di 2% di magnesio<br />
Materie plastiche<br />
Misure precauzionali da adottare: Assicurare un<br />
sufficiente ricambio d’aria e/o un’aspirazione negli<br />
ambienti di lavoro.<br />
Parametri di controllo<br />
Valori limite di esposizione:<br />
Francia 1989: VME = 1000 ppm<br />
USA 1992: TWA = 1000 ppm = 3500 mg/m3<br />
Equipaggiamento di protezione individuale:<br />
Protezione Respiratoria: In caso di ventilazione<br />
insufficiente, portare una attrezzatura respiratoria<br />
adatta.<br />
Protezione delle mani: Guanti<br />
Protezione degli occhi: Occhiali di protezione<br />
Misure d’igiene specifiche: Evitare il contatto con la<br />
pelle, gli occhi e l’inalazione dei vapori.<br />
Stato fisico (20°C): Gas liquefatto<br />
Colore: Incolore<br />
Odore: Leggermente simile all’etere. pH: Non<br />
applicabile<br />
Punto /intervallo d’ebollizione: -40,8 °C<br />
Temperature/intervallo di fusione: - 160 °C<br />
Temperatura di decomposizione: 480 °C<br />
Pressione di vapore: (20°C): 0,91 Mpa (9,1 bar) a<br />
(50°C): 1,91 Mpa (19,4 bar)<br />
Densità di vapore: ( 20 °C) 3,57 kg/m3<br />
Densità: (20°C) 1213 kg/m3 a (50°C) 1085 kg/m3<br />
Solubilità: acqua (25°C) 3g/l - Solvente solubile<br />
negli idrocarburi e solventi clorurati, Alcoli, Chetoni,<br />
Esteri<br />
Solubilità dell’acqua nel prodotto a 30°C : 0,15 % in<br />
peso.<br />
Condizioni da evitare: Evitare il contatto con<br />
fiamme e le superfici metalliche arroventate<br />
Prodotti di decomposizione pericolosi:<br />
Decomposizione termica in prodotti tossici e<br />
corrosivi: acido fluoridrico, acido cloridrico gas,<br />
fosgene, ossido di carbonio (CO)<br />
29
11 Informazioni<br />
tossicologiche<br />
12 Informazioni<br />
ecologiche<br />
13 Considerazioni<br />
sullo smaltimento<br />
14 Informazioni sul<br />
trasporto<br />
15 Informazione<br />
sulla<br />
regolamentazione<br />
Inalazione: Sperimentale per l’animale Forane 134a, 32, 125<br />
praticamente non nocivo per inalazione. Nessuna mortalità<br />
riscontrata nel ratto a 500000 ppm/4h. Come per gli altri<br />
componenti alogenati alifatici volatili, il prodotto può causare<br />
con l’accumulazione di vapori e/o con l’inalazione di quantità<br />
importanti: perdita di conoscenza e disturbi cardiaci aggravati<br />
dallo stress e dalla mancanza di ossigeno: rischio mortale.<br />
Contatto con la pelle: Congelamenti possibili per schizzi di<br />
gas liquefatto<br />
Tossicità cronica: Degli studi per inalazione prolungata<br />
sull’animale non hanno messo in evidenza alcun effetto<br />
tossico sub-cronico (ratto/3 mese(i)/ Inalazione:50000ppm)<br />
Effetti specifici: Genotossicità, secondo i dati sperimentali<br />
disponibili Forane 134a, 32, 125 NON Genotossico<br />
Cancerogenesi: Forane 134a la sperimentazione animale<br />
non ha messo in evidenza un effetto cancerogeno<br />
chiaramente dimostrato (ratto /Inalazione - via orale)<br />
Tossicità per la riproduzione: Sviluppo fetale Forane 134a,<br />
32, 125 secondo i dati disponibili assenza di effetti tossici per<br />
lo sviluppo del feto. Fertilità, secondo i dati limitati disponibili<br />
sull’animale: Forane 134a assenza di effetti sulla fertilità<br />
(topi/inalazione)<br />
Forane 32<br />
Persistenza /degradabilità: Nell’acqua non facilmente<br />
biodegradabile 5% dopo 28d<br />
Bioaccumolabile: Praticamente non bioaccumolabile log pow 0,21<br />
Forane 125<br />
Mobilità: Evaporazione veloce t ½ vita 3,2 h (stimato)<br />
Persistenza /degradabilità: Nell’acqua non facilmente<br />
biodegradabile 5% dopo 28d. Nell’aria degradazione nella<br />
troposfera t ½ vita 28,3 y (stimato). Potenziale di distruzione<br />
dell’ozono ODP (R-11 = 1)=0. Effetto serra potenziale (GWP):<br />
(HGWP) = 0,58. Nel suolo e nei sedimenti basso<br />
adsorbimento log Koc= 1,3-1,7<br />
Bioaccumolabile: Praticamente non bioaccumolabile log pow 1,48<br />
Forane 134a<br />
Mobilità: Evaporazione veloce t ½ vita 3 h (stimato)<br />
Persistenza /degradabilità: Nell’acqua non facilmente<br />
biodegradabile 3% dopo 28d. Nell’aria degradabile nella<br />
atmosfera 3% dopo 28d . Potenziale di distruzione dell’ozono<br />
ODP (R-11 = 1)=0. Effetto serra potenziale (GWP) 0,26.<br />
Bioaccumolabile: Praticamente non bioaccumolabile log pow<br />
1,06<br />
Eliminazione del prodotto: Riciclare o incenerire<br />
Consultare i servizi sicurezza della ELF ATOCHEM per<br />
informazioni complementari ed aggiornamenti<br />
Numero ONU 3163. RID\ADR classe 2 cifra (e lettera) 4°a<br />
Prescrizioni: Etichette 2 N°pericolo /N°materia 20/3163<br />
IMDG classe 2.2 N°ONU (IMDG) 3163<br />
Prescrizioni: Etichette 2.2<br />
IATA classe 2.2 N°ONU (IATA) o N°ID3163<br />
Prescrizioni: Etichette 2.2<br />
Direttiva CEE<br />
Schede di sicurezza: D.91/155/CEE modificata dalla D.<br />
93/112/CEE: Sostanze pericolose<br />
Classificazione/etichettatura CEE<br />
Preparati pericolosi: Non classificato come pericoloso<br />
Inventari: EINECS conforme<br />
16 Altre informazioni Utilizzi raccomandati: Refrigerante<br />
Referenze bibliografiche: Encyclopedie des gas (Air<br />
Liquide-ed.1976- ELSEVIER AMSTERDAM)<br />
Inalazione: Sperimentale per l’animale<br />
praticamente non nocivo per inalazione. Nessun<br />
effetto sotto i 50000 ppm.<br />
Come per gli altri componenti alogenati alifatici<br />
volatili, il prodotto può causare con<br />
l’accumulazione di vapori e/o con l’inalazione di<br />
quantità importanti: perdita di conoscenza e<br />
disturbi cardiaci aggravati dallo stress e dalla<br />
mancanza di ossigeno: rischio mortale.<br />
Contatto con la pelle: Congelamenti possibili per<br />
schizzi di gas liquefatto<br />
Contatto con gli occhi: Irritazioni passeggere<br />
Mobilità: Evaporazione veloce t ½ vita 2,7 h<br />
Persistenza /degradabilità: Nell’acqua non<br />
facilmente biodegradabile 0% dopo 28d . Nell’aria<br />
degradazione nella atmosfera ½ vita 14 anni.<br />
Potenziale di distruzione dell’ozono ODP (R-11 =<br />
1)=0,055. Effetto serra potenziale (HGWP) = 0,36.<br />
Nel suolo e nei sedimenti basso adsorbimento log<br />
Koc= 1,8<br />
Bioaccumolabile: Praticamente non<br />
bioaccumolabile log pow 1,08<br />
Tossicità acquatica: Tossicità acuta, pesci soglia di<br />
tossicità, 24/h = 180mg/l, Batteri anaerobi: soglia di<br />
tossicità, 24 h> 400mg/l<br />
Eliminazione del prodotto: Riciclare o incenerire<br />
Numero ONU 1018. RID\ADR classe 2 cifra (e<br />
lettera) 3°a<br />
Prescrizioni: Etichette 2 N°pericolo /N°materia 20/1018<br />
IMDG classe 2.2 N°ONU (IMDG) 1018<br />
Prescrizioni: Etichette NON INFIAMMABILE GAS/2<br />
IATA classe 2.2 N°ONU (IATA) o N°ID1018<br />
Prescrizioni: Etichette NON INFIAMMABILE GAS/2<br />
Codice prodotto: 00055/7<br />
Direttiva CEE<br />
Schede di sicurezza: D.91/155/CEE modificata dalla D.<br />
93/112/CEE: Sostanze e preparati pericolosi<br />
Preparati pericolosi: D. 67/548/CEE modificata dalla D.<br />
93/21/CEE: Guida all’etichettatura (18a APT)<br />
R59 Dannoso per lo strato d’ozono S59 Consultare il<br />
produttore /fornitore per informazioni relative al<br />
recupero riciclaggio<br />
S 61 Evitare di disperdere nell’ambiente. Consultare<br />
le istruzioni speciali/la scheda dei dati di sicurezza<br />
Utilizzi raccomandati: Refrigerante a bassa<br />
temperatura, Agente congelante, Condizionamento<br />
dell’aria<br />
Referenze bibliografiche: Encyclopedie des gas<br />
(Air Liquide-ed.1976- ELSEVIER AMSTERDAM).<br />
Scheda tossicologica INRS: N° <strong>142</strong><br />
CLORODIFLUOROMETANO<br />
Questo documento si riferisce al prodotto tale e quale, conforme alle specifiche fornite dalla ELF ATOCHEM.<br />
In caso di combinazioni o miscele, assicurarsi che non sopravvengano nuovi pericoli. Le informazioni riportate in questa scheda sono date<br />
in buona fede e sono basate sulle nostre ultime conoscenze relative al prodotto in questione, alla data di edizione della stessa. Si attira<br />
l’attenzione degli utilizzatori sugli eventuali rischi in cui si può incorrere qualora il prodotto venga impiegato in usi diversi da quelli ai quali è<br />
destinato. Questa scheda deve essere utilizzata e riprodotta solo per fini di prevenzione e sicurezza. L’elenco dei testi legislativi,<br />
regolamentari o amministrativi non deve essere considerato esauriente. E’ compito dell’utilizzatore del prodotto riferirsi all’insieme dei testi<br />
ufficiali riguardanti l’utilizzo, la conservazione e la manipolazione del prodotto per i quali egli è il solo responsabile. L’utilizzatore del prodotto<br />
deve inoltre portare a conoscenza le persone che possono venire a contatto con il prodotto di tutte le informazioni necessarie alla sicurezza<br />
del lavoro e alla protezione della salute e dell’ambiente, trasmettendo loro questa scheda di dati di sicurezza.<br />
30
CONTENTS<br />
GENERAL ............................................................................................................................................. 32<br />
GENERAL WARNINGS ..........................................................................................................................................................32<br />
ADDITIONAL SAFETY PRECAUTIONS .................................................................................................................................32<br />
ACCESSORIES ......................................................................................................................................................................32<br />
GENERAL TECHNICAL SPECIFICATIONS ...........................................................................................................................33<br />
POSITIONING.........................................................................................................................................................................34<br />
FUNCTIONAL CLEARANCES ................................................................................................................................................34<br />
DIMENSIONS AND WEIGHT DISTRIBUTION........................................................................................................................35<br />
PROTECTION AND CONTROL DEVICE SETTINGS.............................................................................................................35<br />
SOUND LEVELS.....................................................................................................................................................................35<br />
RECEPTION.......................................................................................................................................... 36<br />
INSPECTION UPON RECEIPT...............................................................................................................................................36<br />
HANDLING..............................................................................................................................................................................36<br />
STORAGE...............................................................................................................................................................................37<br />
REMOVING THE PACKAGING ..............................................................................................................................................37<br />
ELECTRICAL CONNECTIONS ............................................................................................................. 38<br />
FUNCTIONAL CONNECTIONS..............................................................................................................................................38<br />
CONNECTION TO THE MAINS POWER ...............................................................................................................................38<br />
OPTIONAL CONNECTIONS...................................................................................................................................................38<br />
CONNECTION TO A P.C. OR BMS........................................................................................................................................39<br />
START-UP............................................................................................................................................. 40<br />
PRELIMINARY CHECKS ........................................................................................................................................................40<br />
START-UP ..............................................................................................................................................................................41<br />
CONTROL............................................................................................................................................. 42<br />
OPERATION OF THE MAIN MODULE...................................................................................................................................42<br />
COMPRESSOR ROTATION...................................................................................................................................................42<br />
COMPRESSOR TIMERS........................................................................................................................................................42<br />
COIL FAN CONTROLLER ......................................................................................................................................................43<br />
MAIN CONTROL MODULE PANEL........................................................................................................................................44<br />
SETTING THE OPERATING PARAMETERS.........................................................................................................................44<br />
ALARMS .................................................................................................................................................................................46<br />
TROUBLESHOOTING........................................................................................................................... 47<br />
HIGH PRESSURE SHUTDOWN.............................................................................................................................................48<br />
LOW PRESSURE SHUTDOWN .............................................................................................................................................49<br />
COMPRESSOR CUT-OUT .....................................................................................................................................................50<br />
FAN OVERLOAD ....................................................................................................................................................................50<br />
NOISY UNIT............................................................................................................................................................................51<br />
COMPRESSOR DOESN’T START.........................................................................................................................................51<br />
ROUTINE MAINTENANCE ................................................................................................................... 52<br />
UNIT........................................................................................................................................................................................52<br />
ELECTRICAL PARTS .............................................................................................................................................................52<br />
REFRIGERANT PIPES.......................................................................................................................... 53<br />
INTAKE PIPE ..........................................................................................................................................................................53<br />
LIQUID PIPES.........................................................................................................................................................................53<br />
CHECKING FOR LEAKS ........................................................................................................................................................54<br />
INSTRUCTIONS FOR CORRECT CONNECTION .................................................................................................................54<br />
RESIDUAL RISKS................................................................................................................................. 55<br />
definition of dangerous area....................................................................................................................................................55<br />
GENERAL RISKS ...................................................................................................................................................................56<br />
COOLANT SAFETY DIAGRAMS............................................................................................................................................56<br />
All technical specifications presented in this manual are not binding and subject to change without notice.<br />
© Copyright - CLIVET S.p.A.- Feltre (BL) - Italy.<br />
All rights reserved.<br />
31
GENERAL<br />
GENERAL WARNINGS<br />
The contents of this manual are designed to assure the correct installation, adjustment and maintenance of the unit;<br />
therefore:<br />
− read the instructions with due care and attention;<br />
− the unit must be installed, tested and serviced by properly qualified personnel (law no. 45, 5/3/1990) licensed in<br />
accordance with established legislation.<br />
• The manufacturer declines all liability, and warranty cover is automatically waived, if electrical and/or mechanical<br />
modifications are made to the unit. Tampering and unauthorised repairs or modifications to the unit will automatically<br />
void the warranty.<br />
• Observe the safety regulations in force at the time of installation.<br />
• Make sure that the characteristics of the mains network conform to the data on the serial number plate inside the<br />
electrical panel.<br />
• Keep this manual and the wiring diagram with care. Make sure that they are available for reference by the operator<br />
whenever necessary.<br />
• Packing materials (plastic bags, polystyrene foam, nails, etc.) are potentially hazardous and must be kept out of the<br />
reach of children. Recycle packing materials in accordance with local standards.<br />
• The condensing unit is designed for air-conditioning in combination with the indoor refrigerant expansion unit.<br />
• Disconnect the unit in the case of breakdowns or malfunctions.<br />
• If repairs are necessary, only use service centres that are authorised by the manufacturer and always insist on original<br />
spare parts.<br />
The use of non-original parts and/or unauthorised service centres may result in unsafe operation of the unit.<br />
The manufacturer declines all liability for direct or indirect damage to property or injury<br />
to persons resulting from failure to adhere to the instructions in this manual.<br />
ADDITIONAL SAFETY PRECAUTIONS<br />
This unit has been especially designed and manufactured so to prevent any risk to persons and health hazard.<br />
For this reason, solutions designed to eliminate (where possible) any cause of risk and significantly reduce the probability of<br />
danger have been adopted.<br />
Please refer to the residual risks section of this manual and strictly observe the behaviour prescriptions listed there in order<br />
to prevent any possible risks that have not been possible to avoid in the design stage.<br />
ACCESSORIES<br />
The unit can be fitted with the following accessories (on request):<br />
─ voltages other than standard<br />
─ coil protection grid<br />
─ antivibration mounts<br />
─ compressor operation counter<br />
─ solenoid valve<br />
─ connection kit, which includes:<br />
thermostat, solenoid valve,<br />
liquid line, dewatering filter,<br />
liquid flow indicator.<br />
─ separate compressor control unit<br />
─ connection to remote control module<br />
─ connection to PC or BMS<br />
32
GENERAL TECHNICAL SPECIFICATIONS<br />
Model <strong>MSAT</strong> <strong>102</strong> <strong>122</strong> <strong>142</strong> <strong>162</strong> <strong>182</strong> <strong>202</strong> <strong>242</strong><br />
Standard voltage 400 / 3 / 50<br />
Model <strong>MSAT</strong> R-22<br />
Cooling capacity kW 31.3 36.4 41.3 48.7 53.8 63.9 77.9<br />
Compressor power input kW 8.5 10.3 11.3 13.5 15.8 17.5 22.3<br />
Model <strong>MSAT</strong> R-407C<br />
Cooling capacity kW 29.8 34.1 39.2 44.1 50.3 62.8 72.8<br />
Compressor power input kW 9.4 11.2 12.6 14.7 17.8 20.3 25.2<br />
The data refers to:<br />
Outside air temperature +35°C<br />
Saturated suction temperature<br />
(SST) 7.5°C R-22,<br />
(SST) 9.5°C (dew point) R-407C<br />
Compressor type<br />
SCROLL<br />
RPM rpm 2900<br />
Oil content<br />
L<br />
2x 2x 2x<br />
1,55 1,65 2,5<br />
Capacity steps 2<br />
Motor protection<br />
NTC<br />
2x<br />
4<br />
Type of oil<br />
SUNISO 3GS OIL<br />
Note: for units with R407C,<br />
type of oil<br />
- MOBIL EAL ARTIC 22 CC<br />
- 32 MMMA POE<br />
Condenser<br />
Material<br />
Copper pipes/aluminium fins<br />
Quantity 2<br />
Tot. front surf. m 2 3 3,6 4,9<br />
Fin spacing mm 1,6 2,1 1,6 1,6<br />
No. of rows 2<br />
Pipe dia. mm 9,52<br />
Test pressure kPa 3000<br />
Axial-flow fans<br />
No. and diameter no. x dia. 2x560 4x450 6x450<br />
RPM rpm 680 840<br />
Air flow-rate L/s 3056 4125 6120<br />
Rated power kW 2x0,22 4x0,16 6x0,16<br />
Freon connections<br />
Liquid valve ∅ 14 16 18 22<br />
Intake valve ∅ 22 28 28 35<br />
Refrigerant<br />
R-22 charge kg 8.2 8,2 9 9 9.6 12 12<br />
R-407C charge kg 9.2 9,2 10 10 10.6 13 13<br />
The data refers to:<br />
- Motor with external rotor<br />
- Safety grid<br />
Note:<br />
Welded fittings<br />
Note:<br />
Charge to be completed<br />
during start-up<br />
Weights and Volumes<br />
Approx. shipping weight kg 275 280 380 420 485 580 590<br />
Approx. packaging volume m 3 1,50 3,20 4,30<br />
Operating limits<br />
Max. condenser air R-22 49 47,5 47,5 47,5 45 49 46<br />
intake temp.<br />
SST = +5 °C R-407C 47 45 45 44,5 43,5 46 43<br />
Min. condenser air R-22 -4 -4 -4 -4 -8 -4 -8<br />
intake temp.<br />
SST = +5 °C<br />
R-407C -5 -5 -5 -5 -9 -5 -9<br />
Max. saturated gas R-22 12,5<br />
suction temperature °C R-407C 12,5<br />
Note:<br />
SST Saturated suction<br />
temperature<br />
Suction gas superheating<br />
+ 5°K<br />
33
POSITIONING<br />
The units are designed for outdoor installation.<br />
• Check that the support surface can bear the weight of the unit (see weights and weight distribution on page 35) and that<br />
both are level.<br />
Place a layer of rubber between the base of the unit and the support (to prevent noise and vibrations).<br />
• Respect the functional clearances.<br />
• If the unit is installed on a balcony or on the roof, it should be placed on special antivibration mounts; in this case, the<br />
connection tubing must be fitted with elastic joints.<br />
• Position the unit so that the long sides are not facing prevailing wind.<br />
• Anchor the unit to the ground.<br />
FUNCTIONAL CLEARANCES<br />
The choice of the location of the unit is of fundamental importance for correct operation.<br />
Obstacles that block the flow of air (such as drains, hot air), difficulty in air circulation, leaves or other objects that may block<br />
the exchanger coils, winds that contrast or excessively assist the air flow, can cause operating anomalies or shut-down the<br />
machine.<br />
The unit requires minimum spaces for operation and maintenance.<br />
The following drawings show some types of installation; check on a case-by-case basis, keeping in mind the information<br />
provided in this manual.<br />
Note: The measurements are in mm<br />
Free side<br />
UNITS WITH INDEPENDENT CIRCUITS<br />
UNITS WITH SEPARATE COMPRESSOR CONTROL<br />
BASE ANTIVIBRATION MOUNTS<br />
(accessory)<br />
(accessory)<br />
The units can be supplied upon request with separate compressor control,<br />
fitted for connection to two distinct terminal units.<br />
The power supply is still shared in common.<br />
34
DIMENSIONS AND WEIGHT DISTRIBUTION<br />
Key:<br />
1 - Compressor<br />
2 - Liquid line fitting dia. G1 first circuit<br />
2’ - Liquid line fitting dia. G1 second circuit<br />
3 - Gas line fitting dia. G2 first circuit<br />
3’ - Gas line fitting dia. G2 second circuit<br />
4 - Electrical panel<br />
5 - Helical fans<br />
6 - Electrical inlet<br />
7 - Condenser coil<br />
8 - Access to electrical panel and compressor<br />
DIMENSIONS<br />
WEIGHTS<br />
Size A B C D E F G H I L O dia. dia. no. of W1 W2 W3 W4 Tot.<br />
G1 G2 fans<br />
<strong>102</strong> 1530 678 1400 128 73 75 628 42 1255 800 - 14 22 2 88 42 95 50 275<br />
<strong>122</strong> 1530 678 1400 128 73 75 628 42 1255 800 - 16 28 2 89 42 98 51 280<br />
<strong>142</strong> 1563 1107 1570 128 130 75 1058 42 1077 900 153 16 28 4 121 58 132 69 380<br />
<strong>162</strong>/<strong>182</strong> 1563 1107 1570 128 130 75 1058 42 1077 900 153 18 28 4 155 74 168 88 485<br />
<strong>202</strong>/<strong>242</strong> 2098 1107 1570 128 130 75 1058 42 1612 900 153 22 35 6 191 95 200 104 590<br />
Note: The dimensions are expressed in mm, the weights in kg.<br />
PROTECTION AND CONTROL DEVICE SETTINGS<br />
Open Close<br />
High pressure switch (kPa) 2750 2000 Safety fuse plug ( °C ) 120<br />
Low pressure switch (kPa) 230 360 Max. compressor starts per hour ( n° ) 10<br />
Safety discharge thermostat ( °C ) 120<br />
Note:<br />
The “high pressure switch” and “safety<br />
discharge thermostat” safety devices can<br />
be manually reset by the control unit.<br />
The “low pressure switch” is<br />
automatically reset.<br />
SOUND LEVELS<br />
Sound power level (dB)<br />
Total<br />
sound<br />
press.<br />
Size<br />
Octave band (Hz)<br />
level<br />
63 125 250 500 1000 2000 4000 8000 dB(A)<br />
<strong>102</strong> 80 84 75 73 69 63 60 42 59<br />
<strong>122</strong> 80 76 73 73 71 65 62 43 59<br />
<strong>142</strong> 87 80 74 73 71 69 66 63 60<br />
<strong>162</strong> 87 81 76 73 70 69 65 62 60<br />
<strong>182</strong> 84 78 78 74 69 70 62 55 60<br />
<strong>202</strong> 86 79 78 77 72 67 62 54 61<br />
<strong>242</strong> 86 82 81 75 70 73 63 65 62<br />
Note:<br />
- The sound levels refer to units operating at full<br />
load with maximum fan speed, condenser air<br />
intake 35°C, saturated suction temperature + 5°C.<br />
- Sound pressure level at 1 metre from the external<br />
surface of the unit.<br />
- Sound power level ref.: 1x10 -12 w<br />
- Sound pressure level ref.: 2 x 10 -5 Pa<br />
35
RECEPTION<br />
INSPECTION UPON RECEIPT<br />
The units are shipped in special protective packaging. When it arrives, check the unit has not been damaged during<br />
transport and that it has been supplied complete with all the parts specified in the order. If there is any visible damage<br />
make a note of it on the transport document, accompanied by the words: “ACCEPTED WITH RESERVATIONS<br />
DUE TO OBVIOUS DAMAGE TO PACKING” since delivery free to factory includes cover for damage to be borne by the<br />
insurers, in compliance with Italian law no. 450 dated 22/08/85 “limite di risarcibilità”.<br />
IMPORTANT<br />
EVERY OPERATION DESCRIBED BELOW MUST BE CARRIED OUT IN COMPLIANCE WITH THE SAFETY<br />
REGULATIONS IN FORCE CONCERNING BOTH THE EQUIPMENT USED<br />
AND THE OPERATING PROCEDURES ADOPTED.<br />
WARNING<br />
ALWAYS MAKE SURE THE LIFTING CAPACITY OF THE EQUIPMENT USED IS SUITABLE FOR THE WEIGHT OF THE<br />
UNIT IN QUESTION BEFORE CARRYING OUT ANY HANDLING OPERATIONS.<br />
Size <strong>102</strong> <strong>122</strong> <strong>142</strong> <strong>162</strong> <strong>182</strong> <strong>202</strong> <strong>242</strong><br />
Weight Kg 275 280 380 480 485 580 590<br />
HANDLING<br />
HANDLING using a FORKLIFT or SIMILAR<br />
- Insert the forks in the long side of the wooden pallet supplied with the unit.<br />
- Start lifting the unit, making sure that it is balanced and stable. Keep in mind that the heaviest part is the part where the<br />
compressor is installed.<br />
36
HOISTING using a CRANE or SIMILAR<br />
- Position the lifting pipes in the holes on the base of the unit.<br />
- Make sure the ends of the pipes protrude enough to allow the safety pins and split pins to be fitted.<br />
- Position the hoisting straps on the pipes, between the split pins and the base of the unit (see the drawing).<br />
- Place rigid structures on the top edges of the unit to protect it (if one only lifting point is used).<br />
- Gradually tension the lifting straps, checking that they remain in position.<br />
- Start lifting.<br />
Rigid structure<br />
Protective<br />
boards<br />
Hoisting straps<br />
Safety pin<br />
Split pin<br />
Lifting pipes<br />
WARNING<br />
FOLLOWING THE ADVICE ON THE OUTSIDE OF THE CARDBOARD PACKING WILL ENSURE THE UNIT REMAINS IN<br />
PERFECT CONDITION AND OPERATES CORRECTLY, TO THE BENEFIT OF THE END USER. THIS ADVICE IS AS<br />
FOLLOWS:<br />
- HANDLE WITH CARE<br />
- KEEP DRY<br />
- UNDER NO CIRCUMSTANCES EVER PLACE OTHER OBJECTS ON TOP OF THE UNIT UNLESS WITHIN THE<br />
STACKING LIMIT SHOWN (THE NUMBER SPECIFIES THE NUMBER OF STACKING LAYERS.<br />
E.G. 1 = 1 STACKING LAYER PERMITTED ON THE UNIT).<br />
STORAGE<br />
− Store away from: direct sunlight, rain, sand and wind<br />
− Temperature: maximum 60°C minimum -10°C<br />
− Maximum humidity: 90%<br />
REMOVING THE PACKAGING<br />
- Cut the fastening straps with scissors.<br />
- Lift the carton (if present).<br />
- Remove the brackets that fasten the unit to the pallet, using a 10mm spanner.<br />
- Lift the unit so that is detached from the pallet.<br />
- Rest the unit on the ground in the chosen position.<br />
- Check for any visible damage.<br />
- Dispose of the packaging so that it is taken to specialist collection or recycling centres (observe the standards in force).<br />
37
ELECTRICAL CONNECTIONS<br />
IMPORTANT<br />
MAKE SURE THE UNIT IS NOT CONNECTED TO THE POWER SUPPLY BEFORE STARTING WORK ON ANY<br />
ELECTRICAL CONNECTIONS<br />
FUNCTIONAL CONNECTIONS<br />
The following devices will have to be connected up before the unit can be started:<br />
CONNECTION TO THE MAINS POWER<br />
- Connect the trhee-phase line to the terminals indicated on the electrical panel with L1 L2 L3 of the general cut-out<br />
switch.<br />
- Connect the NEUTRAL conductor to terminal N of the electrical panel.<br />
- Connect the EARTH conductor to the Pe terminal of the electrical panel.<br />
- The installer must take particular care in sizing the wires for connection to the mains power supply, taking into<br />
consideration the data on the unit’s technical datasheet sticker on the electrical panel door. It is also important to fit<br />
a short circuit protection device rated suitably for the power capacity of the line. The protection device must present<br />
appropriate breaking power in relation to the calculated short circuit current in that section of the system.<br />
ELECTRICAL DATA<br />
SIZE <strong>102</strong> <strong>122</strong> <strong>142</strong> <strong>162</strong> <strong>182</strong> <strong>202</strong> <strong>242</strong><br />
Single compressor 230/3/50 19.7 22.9 25.3 24.1 31.2 35.8 45.2<br />
(A) 400/3/50 9.8 11.3 13.6 14.7 17.5 20.0 25.2<br />
F.L.A. Fans (A) 230/1/50 1.15x2 1.15x2 0.65 x 4 0.65 x 4 0.65 x 4 0.65 x 6 0.65 x 6<br />
Total<br />
(A)<br />
230/3/50 41.6 48.1 53.9 51.4 65.6 76.4 85.8<br />
400/3/50 21.8 25.0 30.3 32.5 38.1 44.9 55.2<br />
L.R.A. Compressor (A)<br />
230/3/50 132.5 164 171 166 211 224 280<br />
400/3/50 66 74 <strong>102</strong> 94 117 128 159<br />
Compressor (kW) 11.3 13.2 15.2 16.8 20.7 23.8 29.2<br />
F.L.I. Fan (kW) 0.22x2 0.22x2 0.17 x 4 0.17 x 4 0.17 x 4 0.17 x 6 0.17 x 6<br />
Total (kW) 11.8 13.6 15.9 17.5 21.4 24.8 30.2<br />
M.IC. Total (A)<br />
230/3/50 154.5 189.2 199.5 193.3 244.9 264.6 329.5<br />
400/3/50 78.1 87.6 118.8 111.9 137.2 152.3 189.0<br />
1) F.L.A. Full Load Amperes.<br />
2) L.R.A. Compressor Locked Rotor Amperes.<br />
3) F.L.I. Full Load Input of compressor (at maximum rated operating conditions).<br />
4) M.I.C. Maximum Inrush Current of unit.<br />
Voltage unbalance: max 2%<br />
Voltage: 400/3/50 ± 6%<br />
230/3/50 ± 6%<br />
OPTIONAL CONNECTIONS<br />
CONNECTING AN ANOMALY SIGNAL DEVICE<br />
Referring to the electrical diagram, the summation shut-down signalling line can be equipped with an audible or visual<br />
alarm device to signal anomalies detected on the unit.<br />
The signalling device should be powered at low voltage (24V, 300mA) as per the wiring diagram.<br />
CONNECTION TO REMOTE CONTROL PANEL<br />
The remote control module is a faithful reproduction of the keypad on the ENERGY LIGHT control module and allows all<br />
the operations on the machine to be performed from a remote location.<br />
38
INSTALLATION<br />
Before connecting the remote control module, disconnect power from the unit by releasing main switch.<br />
Connect the remote keypad as shown in the figure.<br />
Remote Posteriore keypad terminale remoto - Rear<br />
C512<strong>142</strong>3<br />
25<br />
24 26<br />
S + -<br />
CONN<br />
A<br />
CONN<br />
B<br />
- S +<br />
RELE' 1<br />
RELE' 2<br />
RELE' 3<br />
C512<strong>142</strong>0<br />
RELE' 4<br />
RELE' 5<br />
RELE' 6<br />
RELE' 7<br />
COMUNE<br />
ESPANSION<br />
E<br />
SERIAL<br />
E<br />
RELE' ALLARME<br />
The maximum length of the connection cable between the ENERGY LIGHT and the keypad is 80m.<br />
CONNECTION TO A P.C. OR BMS<br />
TO BE PERFORMED BY THE CUSTOMER<br />
RS232 connection cable, 9 pin male-femaleMax length<br />
10m<br />
230 Vac<br />
PE1P0005<br />
RS 232<br />
N U<br />
N U<br />
ECHO<br />
DTR<br />
1 2 3 4<br />
OFF<br />
Serial optocoupled adapter<br />
RS232/TTL<br />
RS 232/RS485 - RS485/TTL<br />
Micronet and ModBus Protocol<br />
ON<br />
C512<strong>142</strong>5<br />
TTL<br />
10 12<br />
power supply<br />
RS 485<br />
21 22 23 24<br />
RS 232<br />
N U<br />
N U<br />
ECHO<br />
DTR<br />
1 2 3 4<br />
OFF<br />
ON<br />
C512<strong>142</strong>5<br />
Serial optocoupled adapter<br />
RS232/TTL<br />
RS 232/RS485 - RS485/TTL<br />
Micronet and ModBus Protocol<br />
TTL<br />
10 12<br />
power supply<br />
RS 485<br />
21 22 23 24<br />
+ - + -<br />
+ - + -<br />
TO BE PERFORMED BY THE CUSTOMER<br />
RS485 serial cableTwisted pair<br />
Maximum length of the line=1000m<br />
C5121248<br />
5 way 2 Molex serial<br />
cableMax length 2m<br />
SERIAL<br />
EXPANSION<br />
10 9 8 7 6 5 4 3 2 1<br />
ALARM RELAY<br />
COMMON<br />
RELAY 7<br />
RELAY 6<br />
RELAY 5<br />
RELAY 4<br />
RELAY 3<br />
RELAY 2<br />
RELAY 1<br />
C512<strong>142</strong>0<br />
+<br />
S<br />
-<br />
CONN B<br />
CONN A<br />
39
START-UP<br />
ALL THE EQUIPMENT MUST BE STARTED BY AUTHORISED SERVICE CENTRES, IN ORDER TO VALIDATE THE<br />
CONTRACTUAL WARRANTY. THIS SERVICE ONLY INVOLVES THE START-UP OF THE SYSTEM AND NOT THE<br />
CONNECTIONS OR ANY OTHER WORK ON THE SYSTEM.<br />
PRELIMINARY CHECKS<br />
- Check that the unit is correctly positioned and that the connections to the indoor terminal unit have been performed<br />
correctly on the refrigerating side and the electrical side.<br />
- Check the mains voltage and frequency values:<br />
THESE MUST FALL WITHIN THE FOLLOWING VALUES<br />
230 ± 6% 400 ± 6%<br />
- Check that the screws fastening the wires to the electrical components in the panel are tight (vibrations during handling<br />
and transport may have caused these to loosen).<br />
EMPTYING<br />
After having checked, with the system under pressure, that there are no leaks (see the section on the refrigerant pipes),<br />
both in the connection pipes and the terminal unit, proceed as follows.<br />
- Empty the system with the <strong>MSAT</strong> valves always closed.<br />
- With the help of a pressure gauge, connect the vacuum pump to both fittings on the valves, making sure that any on-off<br />
devices (solenoid valves or cocks) are open, and then empty the system.<br />
- To ensure that the solenoid valve remains open, disconnect it from the terminals on the outdoor unit electrical panel<br />
(see the wiring diagram) and connect to a normal 220V outlet.<br />
- Stop the pump at a pressure of around 100Pa and leave the system in this condition for a few hours; a small initial rise<br />
in pressure is normal, after which it will stabilise. If the pressure continues to rise it means there are small leaks or<br />
moisture in the system. In the former case, repeat the operations described in the paragraph CHECKING FOR LEAKS in<br />
the refrigerant pipe manual. In the latter case, recharge the system with refrigerant to 100KPa and then repeat the<br />
emptying procedure, as described above. Once the pressure has stabilised, proceed to the subsequent charging phase.<br />
REFRIGERANT CHARGE<br />
The sizes in question are delivered with a refrigerant charge to be completed during start-up, according to the type of the<br />
indoor terminal unit and the layout of the pipes.<br />
- With the system empty, close the valves on the pressure gauge assembly and disconnect the vacuum pump.<br />
- Connect the bottle of refrigerant gas, venting the air in the pressure gauge assembly connection hose.<br />
- Open the valves on the pressure gauge assembly, introducing refrigerant in the gaseous state until there is equilibrium<br />
in the system / bottle pressure, and in any case at a pressure above atmospheric pressure.<br />
- Open the valves on the condensing units (the liquid valve first) to prepare the unit for operation.<br />
We recommend to use a square-section wrench of the same size as the valve<br />
stem and with a lever arm long enough to exert the necessary force.<br />
( * SEE FIGURE )<br />
Weight of refrigerant in the lines during operation (KG / 10m)<br />
Pipe OD Liquid<br />
at 38°C<br />
Intake<br />
SST+4.5°C<br />
10 0,60 --<br />
12 1,06 --<br />
14 1,41 0,025<br />
16 1,71 0,030<br />
18 2,36 0,043<br />
22 3,62 0,070<br />
28 6,61 0,120<br />
35 9,47 0,195<br />
42 -- 0,290<br />
OUTDOOR UNIT<br />
Gas valve<br />
Liquid valve<br />
INDOOR UNIT<br />
IMPORTANT:<br />
When starting the unit for the first time and after each period of extended shutdown, the compressor crankcase oil<br />
heating elements (if present) MUST be powered for at least 8 hours before starting the compressor.<br />
The start-up operations are performed in the following order:<br />
- Switch the isolating switch QS1 on the condensing unit, making sure that the green LED is off.<br />
40
START-UP<br />
- Make sure the indoor unit is working correctly.<br />
- Check the connections of any solenoid valves.<br />
- Locate the command SA2 on the wiring diagram. This represents the signal from the indoor unit for the selection of the<br />
capacity-control step, and corresponds to the activation of the first step, while the command for the activation of the<br />
second step is represented by the symbol SA3 on the wiring diagram .<br />
- The first compressor to start is defined by the control system (see control manual).<br />
The fans in the circuit in operation only start at the same time as the compressor.<br />
- Make sure that there is demand from the system.<br />
- To add refrigerant gas, use the service test point on on-off valve in the suction line, and introduce freon in the gaseous<br />
state. Pay careful attention in this phase, as during start-up the minimum pressure switch is bypassed for 70 seconds.<br />
To charge one circuit first and then the other, use the corresponding fuse holders to stop the compressor on the circuit<br />
not being charged, as the control module features an operating cycle logic.<br />
IMPORTANT: after stopping, the system counts a period of 6 minutes from the previous start, (if this time has already<br />
elapsed only the 30 second delay will be counted) before starting again.<br />
- The charge is considered complete when:<br />
- No bubbles can be seen in the liquid inspection opening (if present).<br />
- The superheating of the suction gas is 4-8°K.<br />
- The subcooling of the liquid is 3-5°K.<br />
ADDING OIL<br />
The exact quantity of refrigerant added to the system, in addition to the factory charge, must be known in order to define<br />
the quantity of oil required. The quantity must be equal to around 10% of the weight of the refrigerant added (the type of<br />
oil is specified in the general manual). Oil must be added for refrigerant top-ups of over 3kg. In any case, check the<br />
compressor oil level using the Schrader fitting, where present.<br />
CHECKS ON FIRST START-UP<br />
AFTER HAVING STARTED THE UNIT, CHECK:<br />
ELECTRICAL PARTS<br />
The unbalance of the phases. This must be lower than a maximum value of 2% (see calculation example).<br />
Calculation example:<br />
L1 - L2 = 388V L2 - L3 = 379V L3 - L1 = 377V<br />
The average of the values measured is:<br />
388 + 379 + 377<br />
= 381<br />
3<br />
The maximum deviation from the average is:<br />
388-381=7 V<br />
The unbalance is therefore:<br />
7<br />
x 100 =1,83% (acceptable)<br />
381<br />
Compressor power input. Must be less than the value shown in the table enclosed, under the item F.L.A.<br />
REFRIGERANT CIRCUIT<br />
- Carry out a final check for leaks from the valves and pressure test points on the system. Make sure that all the caps are<br />
replaced on the test points and valves.<br />
- Check liquid inspection opening (if present).<br />
- Check the operating pressure using the pressure gauges connected (low pressure from 400KPa to 560Kpa,<br />
corresponding to 0°C -+8°C SST), and condensing temperature of around 15-20°C greater than the outside air<br />
temperature (typical values).<br />
- Check the superheating, by calculating the difference between the temperature read on the low pressure gauge, and<br />
the temperature measured using a thermometer in direct contact with the inlet tubing upstream of the compressor. Values<br />
between 4 and 8 degrees reflect correct operation, while in the event of values that differ greatly from these tolerances,<br />
refer to the TROUBLESHOOTING section.<br />
- Check the subcooling, by calculating the difference between the temperature read on the high pressure gauge, and the<br />
temperature measured using a thermometer directly on the fluid line downstream of the condenser. Values of around 3/5<br />
degrees mean correct operation, otherwise refer to the troubleshooting section as before.<br />
- For correct analysis of the system, also check the compressor discharge temperature, which with the superheating and<br />
subcooling data indicated must be around 30/40 degrees higher than the condensing temperature.<br />
• It should be noted that the units feature fan speed control, and that it is useful to perform all these operating checks with<br />
outside air - ambient air conditions similar to the standard design conditions.<br />
• It should also be noted that all the data indicated above is valid for units with a cooling field of operation and fitted with<br />
thermostats.<br />
For design conditions with an evaporation temperature (SST) lower than 0°C, check the operating parameters and the sizing<br />
of the refrigerant pipes on a case-by-case basis.<br />
- The indications provided above are some of the problems and corresponding solutions that may arise when the condensing<br />
unit is started; the professionalism and qualification of the personnel responsible are in any case essential.<br />
41
CONTROL<br />
OPERATION OF THE MAIN MODULE<br />
COMPRESSOR ROTATION<br />
The processor also features other functions for the overall management of the unit. One example of this is compressor<br />
rotation. The compressor rotation function is enabled by setting the corresponding parameters. This means than when<br />
compressor operation is requested by the thermoregulator, the compressor that will start first is the one with the lowest<br />
number of operating hours, while the one that will stop first is the compressor with the highest number of hours. This<br />
function allows the number of operating hours to be divided evenly between both compressors. In any case, the first<br />
compressor can always be started first and the second compressor second, in the case of specific needs; the unit is<br />
delivered by the manufacturer with rotation enabled.<br />
COMPRESSOR TIMERS<br />
To maximise the quality of compressor operation, a number timers are required. Refer to the graph in Fig. 3-4 to better<br />
understand the meaning of the timers.<br />
Figure 3 Figure 4<br />
Comp. 1<br />
Compressor<br />
ON<br />
ON<br />
OFF<br />
Comp. 2<br />
Seconds<br />
ON<br />
OFF<br />
Seconds<br />
OFF<br />
ON-OFF safety time<br />
C01<br />
Seconds*10<br />
First-second compressor on interval<br />
C06<br />
First-second compressor off interval C07<br />
ON-ON safety time C02<br />
The graph in Fig. 4 shows two parameters. OFF-ON SAFETY TIME and ON-ON SAFETY TIME. The first parameter<br />
means that when a compressor stops a certain time must elapse before it can start again. This time is respected even<br />
when there is a request from the thermoregulator. The second parameter means that a certain time must elapse between<br />
two successive starts. In the case of units with two compressors, a further two parameters are used, that is, FIRST-<br />
SECOND COMPRESSOR ON INTERVAL and FIRST-SECOND COMPRESSOR OFF INTERVAL. The first parameter<br />
avoids simultaneous starts of the two compressors, mainly to avoid excessive current peaks. The second represents an<br />
interval between the shut-down of the first and the second compressor. The function of these two parameters are shown<br />
in the graph in Figure 3.<br />
42
COIL FAN CONTROLLER<br />
In the <strong>MSAT</strong> units, as standard the fan speed is controlled according to the temperature, with pressure-based control<br />
available upon request; the latter configuration is supplied in a kit. The operating principle described below is the same<br />
for both type of control.<br />
- FAN CONTROL IN COOLING<br />
The following graph shows operation in cooling mode, Fig. 6.<br />
EXTERNAL FAN IN COOL OPERATION<br />
Speed<br />
Prop. Cooling band F09<br />
Figure 6<br />
Temperature<br />
Pressure<br />
When the compressor is started, the fans are forced on, that is, the fans are not managed directly by the controller but<br />
rather are switched on for a set time at maximum speed, according to the value of a parameter, unless the temperature is<br />
below the CUT-OFF value; in this case, the fans are started at minimum speed for the same period. That being stated,<br />
we will now describe the operation of the controller.<br />
The first parameter to be defined is the CUT-OFF, which corresponds to a special condensing temperature value below<br />
which the fans are off. The CUT-OFF HYSTERESIS is a parameter that defines the field within which the fans switch<br />
from operation at minimum speed to off, and vice-versa. In summary, the fans start operating at minimum speed when<br />
the temperature is equal to the CUT-OFF + CUT-OFF HYSTERESIS, while they stop based on the difference between<br />
the COOLING set point and the CUT-OFF DELTA. When the condensing temperature exceeds the COOLING FAN SET<br />
POINT, the controller starts to control the speed of the fans proportionally to the condensing temperature. In the case of<br />
Clivet units, contrary to the operation described in the graph, the control functions are maintained until the MAX<br />
COOLING FAN SET POINT is reached. For completion, the description of the parameters MAX SILENT SPEED and<br />
COOLING PROPORTIONAL BAND are also described. The first defines a maximum fan speed threshold corresponding<br />
to a certain condensing temperature, below which the speed is controlled, while the PROPORTIONAL BAND defines the<br />
gradient of the straight line corresponding to the speed control function. The CLIVET units are designed to control the<br />
fans up to the maximum speed.<br />
43
MAIN CONTROL MODULE PANEL<br />
LED 1 compressor 1<br />
• ON if compressor 1 is on<br />
• OFF if compressor 1 is off<br />
• BLINKING at a frequency of 1 Hz, is safety timers are in progress<br />
• BLINKING at low frequency if the compressor is defrosting (only heat pump)<br />
LED 3 compressor 2<br />
• ON if compressor 1 is on<br />
• OFF if compressor 1 is off<br />
• BLINKING at a frequency of 1 Hz, is safety timers are in progress<br />
• BLINKING at low frequency if the compressor is defrosting (only heat pump)<br />
ON if control in Cooling mode<br />
If neither the HEAT LED nor the COOL LED are on, the control is in STAND-BY mode.<br />
When the machine is OFF, only the decimal point remains on.<br />
N.B. LEDs 2 and 4 refer to units with 4 compressors and two refrigerant circuits.<br />
SETTING THE OPERATING PARAMETERS<br />
In this chapter we will simply list the parameters that can be accessed in direct mode, without password. The passwordprotected<br />
parameters are managed by personnel from the authorised service centres.<br />
MEANING OF THE KEYS<br />
ON-OFF button<br />
MODE button<br />
ON-OFF<br />
MODE button<br />
ON-OFF<br />
MODE button<br />
a) If pressed for more than 2 seconds, the thermoregulator switches from ON to OFF or vice-versa.<br />
b) Pressing this button once resets all the manual-reset alarms that are not active.<br />
The intervention counters are also reset, even if these are not active.<br />
c) In menu mode becomes the scroll down button.<br />
d) Decreases the value of the selected parameter.<br />
a) Pressing and releasing both buttons within 2 seconds goes up one level in the configuration menu.<br />
a) Keeping both buttons pressed for more than 2 seconds goes up 1 level in the configuration menu.<br />
b) If the last level of a menu is displayed, pressing together and releasing within two seconds moves<br />
back up one level.<br />
a) In menu mode becomes the scroll up button.<br />
b) Increases the value of the selected parameter.<br />
44
Table 1<br />
PARAMETERS WHICH CAN BE ACCESSED<br />
Code Description Unit of measurement Factory setting<br />
H46 Password unità 0<br />
Level 0 Level 1 Level 2<br />
Level 3<br />
Level 4<br />
Control probe<br />
Alarm active<br />
Set Point : SEt Label Set Cooling: Coo Cooling Set Value<br />
Label Set Heating: HEA<br />
Heating Set Value<br />
Analogical input: tP<br />
Input codes: t01- t06<br />
Analogical input values<br />
Alarms: Err<br />
Active alarm codes: E00-<br />
E46<br />
Digital inputs: Id<br />
Input codes: I01-I11<br />
Digital input status<br />
Parameters: PAr<br />
Configuration par.: CnF<br />
Par. index . H01-H69<br />
Parameter value<br />
Compressor Par.: CP<br />
Par. index C01-C08<br />
Parameter value<br />
Fan par.: FAn<br />
Par. index F01-F25<br />
Parameter value<br />
Alarm par.: ALL<br />
Par. index A01-A26<br />
Parameter value<br />
Pump par.: PUP<br />
Par. index P01-P03<br />
Parameter value<br />
Antifreeze par: Fro<br />
Par. index r01-r17<br />
Parameter value<br />
Defrost par.: dFr<br />
Par. index d01-d011<br />
Parameter value<br />
Expansion par.: ESP Par. index N01-N07 Parameter value<br />
Password: PSS<br />
Password value<br />
Operating hours: OHr<br />
Comp. hours: OH1-OH4<br />
Number of hours<br />
Pump hours: OHP<br />
Number of hours<br />
To move around the levels press the “Mode” and “on off” buttons together<br />
1 - Pressing and releasing both buttons within 2 seconds goes down one level in the<br />
configuration menu.<br />
2 - Holding both buttons for more than 2 seconds goes up one level in the configuration menu.<br />
3 - If the last level of a menu is displayed, pressing and releasing the buttons within 2 seconds<br />
goes back up a level.<br />
45
ALARMS<br />
The alarm codes appear on the display of the use interface terminal when errors occur. If the alarms displayed feature<br />
automatic reset, they will disappear as soon as the problem has been resolved, while those with manual reset must be<br />
reset by a service engineer. The alarms appear on the user interface terminal following the sequence shown in Table. It<br />
should also be highlighted that if more than one alarm is active, only the first will be displayed, and when this is reset the<br />
second will appear, and so on until no more alarms are active.<br />
Note: in standby mode, or alternatively when the unit is OFF, the alarms are not signalled and the cumulative fault relay<br />
is not activated. The alarms, if present, are signalled and the cumulative fault relay is activated when the operating mode<br />
is selected.<br />
Table 2<br />
Codice Tipo di guasto Blocchi Ripristino<br />
E01 Max pressure circ. 1 Compressor MANUAL<br />
E02 Min pressure circ. 1 Compressor fan AUTOMATIC (After 5 manual reset signals)<br />
E03 Compressor 1 thermal Compressor fan MANUAL<br />
E04 Fan thermal cut-out circ. 1 Compressor fan MANUAL<br />
E07 Probe fault BT3/BP3 Compressor fan AUTOMATIC<br />
E21 Max pressure circ. 2 Compressor fan MANUAL<br />
E22* Min pressure circ. 2 Compressor fan AUTOMATIC (After 5 manual reset signals)<br />
E24 Fan thermal cut-out circ. 2 Compressor fan MANUAL<br />
E27 Probe fault BT5/BP5 Compressor fan AUTOMATIC<br />
E45 Configuration Compressor MANUAL<br />
46
TROUBLESHOOTING<br />
The following provides indications on some possible anomalies and their corresponding solutions. The resulting operations<br />
are the full responsibility of the person performing them. An authorised technician possessing the legal requisites for each<br />
operation must be contacted to reset the operation of the unit.<br />
The activation of a safety device indicates an operating anomaly: before resetting the device, check and eliminate the causes<br />
of the anomaly. The following are possible problems and their corresponding causes and solutions.<br />
WARNING<br />
THE OPERATIONS SHOWN HERE ARE THE FULL RESPONSIBILITY OF THE PERSON PERFORMING THEM; AN<br />
AUTHORISED TECHNICIAN POSSESSING THE LEGAL REQUISITES FOR EACH OPERATION MUST BE CONTACTED<br />
TO RESET THE CORRESPONDING FUNCTION.<br />
All faults and anomalous operating conditions are handled by the main control module. When an anomalous condition or<br />
fault arises, the module, as well as placing the unit in safety mode, can display the event remotely.<br />
47
HIGH PRESSURE SHUTDOWN<br />
HIGH PRESSURE SHUT-DOWN<br />
YES<br />
Ventilation working<br />
efficiently?<br />
NO<br />
Check the coil<br />
( 1 )<br />
Check the fan<br />
( 2 )<br />
Check the fan module<br />
( 3 )<br />
Check the probe<br />
( 4 )<br />
YES<br />
Outside air temperature<br />
lower than the operating<br />
limits?<br />
NO<br />
Check the design data<br />
( 5 )<br />
YES<br />
Refrigerant charge correct?<br />
NO<br />
Check liquid subcooling<br />
( 6 )<br />
YES<br />
Absence of incondensables?<br />
NO<br />
Empty and recharge<br />
( 7 )<br />
YES<br />
Intake temperature and/or<br />
pressure correct?<br />
NO<br />
Check operation<br />
of the indoor unit ( 8 )<br />
Check operation of the<br />
liquid line on-off valve<br />
( 9 )<br />
Unit working<br />
Notes<br />
The condenser must provide the maximum heat exchange, and as a consequence must be free of dirt, deposits or obstacles<br />
to the flow of air.<br />
2) Check the condition of the fan and replace it if damaged.<br />
3) Check that the voltage output from the board proportionally modulates the fan speed. If not, replace the module.<br />
4) Check the positioning: it must be in close contact with the shaped exchanger coil pipe. The resistance values must be<br />
perfectly in line with the temperature; check the resistance values using a special ohmmeter.<br />
5) Check:<br />
- Operating limits. (see the general section)<br />
- That the coil not is exposed to direct sunlight or placed near reflecting surfaces.<br />
- That there are no hot air streams of any type in the immediate vicinity.<br />
- That the same air is not recirculated.<br />
6) For information on how to perform the checks, please refer to section on START-UP. NB the flooding of the exchanger coil<br />
circuits to the point of the probe socket will cause the anomalous operation of the fan speed controller.<br />
7) One condition that may arise is a very high condensing temperature (25/30 degrees above the air temperature) combined<br />
with low refrigerant efficiency. This may cause the same symptoms as an excessive refrigerant charge. Check the charge<br />
and, if correct, evaluate this possibility and perform all the emptying and charging operations again.<br />
8) Check that the air flow-rate not is too high and that the ambient air temperature is not too high. These conditions may<br />
increase the output of the machine and consequently the heat to be dispersed by the condenser.<br />
9) Check that all the on-off devices on the liquid line are completely open.<br />
48
LOW PRESSURE SHUTDOWN<br />
LOW PRESSURE SHUT-DOWN<br />
YES<br />
Indoor unit working<br />
correctly?<br />
NO<br />
Check operation<br />
of the indoor unit ( 1 )<br />
Check operating conditions<br />
of the indoor unit ( 2 )<br />
Check connection pipes<br />
( 3 )<br />
YES<br />
Dewatering filter<br />
working efficiently?<br />
NO<br />
Check ∆t from upstream<br />
to downstream ( 4 )<br />
YES<br />
Refrigerant charge<br />
correct?<br />
NO<br />
Check<br />
superheating ( 5 )<br />
YES<br />
Intake valve completely<br />
open?<br />
NO<br />
Check and open if<br />
necessary<br />
YES<br />
Intake temperature and/or<br />
pressure correct?<br />
NO<br />
Check operation<br />
of outdoor unit ( 6 )<br />
Unit working<br />
Notes<br />
1) Check:<br />
- That there is sufficient air flow.<br />
- That the direction of rotation of the fans is correct.<br />
- That the exchanger is not dirty or blocked, and can provide maximum heat exchange.<br />
- That the solenoid valve is working.<br />
- That the thermostat is working.<br />
2) Check that the temperature/humidity conditions of the air being treated falls within the design conditions.<br />
3) Check that the layout and the diameter of the pipes are correctly sized (see the section on REFRIGERANT PIPES). If not,<br />
unacceptable pressure drops may occur for the correct operation of the unit.<br />
4) Check, using a thermometer in direct contact, the temperature upstream and downstream of the dewatering filter. If the<br />
difference in temperature is higher than 1°C, the filter is not working efficiently or is under-rated; in both cases, replace the<br />
filter.<br />
5) For information on how to perform the checks, please refer to section on START-UP.<br />
6) If the condensing pressure is below 1200kPa there may be irregular supply to the expansion device and as a<br />
consequence too low inlet pressure.<br />
Check that the ventilation system for the outdoor unit is working perfectly (that is, modulates or stops the fans).<br />
49
COMPRESSOR CUT-OUT<br />
COMPRESSOR CUT-OUT<br />
YES<br />
YES<br />
Compressor discharge<br />
NO<br />
Check parameters, e.g.:<br />
superheating, refrigerant<br />
temperature within limits?<br />
charge, etc.<br />
Contact thermostat working? NO<br />
Replace the thermostat<br />
Unit working<br />
FAN OVERLOAD<br />
FAN OVERLOAD<br />
YES<br />
Motor intact?<br />
NO<br />
Check for possible<br />
blockages on exchanger<br />
Check the blades are not<br />
obstructed<br />
Check electric windings<br />
Unit working<br />
50
NOISY UNIT<br />
UNIT NOISY<br />
YES<br />
The shock absorbers on the<br />
compressor are in good<br />
condition?<br />
NO<br />
Check and replace if<br />
necessary<br />
NO<br />
The compressor fastening<br />
screws have come loose?<br />
YES<br />
Check and tighten if<br />
necessary<br />
NO<br />
The pipes vibrate?<br />
YES<br />
Check tightness<br />
Unit working<br />
COMPRESSOR DOESN’T START<br />
COMPRESSOR DOESN’T START<br />
NO<br />
No power at the terminals?<br />
YES<br />
Klixon activation<br />
( 1 )<br />
Motor burnt out<br />
( 2 )<br />
Compressor blocked<br />
( 3 )<br />
YES<br />
Overload switched?<br />
NO<br />
Switch<br />
YES<br />
Relay working?<br />
NO<br />
Check that the coil is not<br />
burnt out and the contacts<br />
are not oxidised<br />
YES<br />
Control module<br />
working?<br />
NO<br />
Check and replace if<br />
necessary<br />
Unit working<br />
Notes<br />
1) The Klixon is activated when the temperature of the compressor casing is quite high.<br />
Check the causes before re-starting the unit.<br />
2) Check if the windings are earthed. If necessary, replace the compressor.<br />
3) The mechanical blocking of the compressor is indicated by a constant and typical noise. In this case, replace the<br />
compressor.<br />
51
ROUTINE MAINTENANCE<br />
IMPORTANT<br />
MAKE SURE THE UNIT IS NOT CONNECTED TO THE POWER SUPPLY BEFORE STARTING ANY MAINTENANCE OR<br />
CLEANING OPERATIONS<br />
This section is intended for the end user and contains information that is extremely important to ensure the unit has a long,<br />
trouble free service life.<br />
Scrupulously carrying out the few simple operations described below at regular intervals can avoid the need for servicing by<br />
specialist personnel.<br />
The operations which need to be carried out do not require any special technical knowledge, involving the following simple<br />
checks on the components of the unit:<br />
- condenser coil<br />
- electrical fans<br />
- structure<br />
UNIT<br />
CONDENSER COIL<br />
IMPORTANT: accidentally touching the exchanger fins could cause minor cuts. This operation should be carried out<br />
using special gloves.<br />
The condenser coils must be able to provide the maximum heat exchange. It is therefore important for their surfaces to<br />
be free of dirt and dust that may be deposited due to the effect of the electrical fans.<br />
- Use a brush to remove any impurities, such as paper, leaves, etc. that may have deposited on the surface of the coil.<br />
- Use a jet of pressurised air to clean the aluminium surface of the coil, making sure to point the jet parallel to the<br />
direction of the fins, so as not to damage them.<br />
- Check that the aluminium fins are not damaged or bent. If there is any damage of this kind, “comb” them using the<br />
special tool for this purpose to return them to their initial positions, ensuring the coil operates with optimal air flow.<br />
FANS<br />
Before every seasonal start-up check the noise of the fans.<br />
Persistent noise and vibrations may be the symptom of either the unbalancing of the blades or the loosening of the<br />
fastening screws.<br />
In the event of anomalies, call the authorised service centre, as the fans are located inside the machine, between the<br />
condenser coils.<br />
- Check the fastening of the fans to the support grill.<br />
- Check the fastening of the fan support grill to the structure of the unit.<br />
- Check, where possible, for any unbalancing of the fans, highlighted by abnormal noises and vibrations.<br />
STRUCTURE<br />
- Check the condition of the parts forming the structure, paying special attention to its steel components.<br />
- Treat any rusted points of the unit with paints designed to eliminate or reduce this problem.<br />
- Make sure that the unit’s casing panels are mounted firmly in place. Poor mounting can cause abnormal vibrations and<br />
noise.<br />
ELECTRICAL PARTS<br />
Check that the power cable connecting the unit to the electrical panel is not cut, cracked or damaged in any way that may<br />
affect its insulation. Contact an authorised service centre should maintenance be required.<br />
IMPORTANT<br />
AUTHORISED PERSONNEL SHOULD BE CALLED OUT EVERY TIME THE UNIT IS STARTED UP<br />
AT THE BEGINNING OF THE SEASON, SO THAT THEY CAN NOT ONLY CARRY OUT THE ABOVE INSPECTIONS<br />
BUT ALSO CARRY OUT A THOROUGH CHECK ON THE REFRIGERANT CIRCUIT.<br />
52
REFRIGERANT PIPES<br />
The sizing of the refrigerant lines connecting the outdoor condensing unit and the indoor evaporating unit is of primary<br />
importance. For connections to our units, see the table below, where for the lengths specified, the diameter of the fittings<br />
corresponds to the diameter to be used for the connection pipes.<br />
For greater distances, the diameter must be calculated (see corresponding bibliographies or our bulletin SIZING THE<br />
REFRIGERANT LINES IN SPLIT SYSTEMS). The table below also describes the recommended maximum difference in<br />
height for standard pipes, in both the case where the condensing unit is lower than the terminal unit, and vice-versa.<br />
Only use copper pipes for refrigeration.<br />
Size Intake dia. Liquid dia. Max. Max. Max difference in<br />
height<br />
length m no. curves Fig. 4 Fig. 6<br />
<strong>102</strong> 22 14 10 6 9 9<br />
<strong>122</strong> 22 14 10 6 9 9<br />
<strong>142</strong> 28 16 16 8 12 12<br />
<strong>162</strong> 28 18 16 6 10 10<br />
<strong>182</strong> 28 18 12 6 10 10<br />
<strong>202</strong> 35 22 23 10 18 18<br />
<strong>242</strong> 35 22 20 10 14 14<br />
INTAKE PIPE<br />
For all sizes, the fittings are welded; the unit is supplied as standard with special<br />
ROTALOCK connections.<br />
- Connect the specific line to the on-off valve using two spanners as shown (Figure 1<br />
for the first circuit, Figure 2 for the second).<br />
Figure 1<br />
Figure 2<br />
LIQUID PIPES<br />
Figure 3<br />
For all sizes, the fittings are welded; the unit is supplied as standard with special<br />
ROTALOK connections.<br />
- Connect the line to the on-off valve using two spanners, as shown (Figure 3 for<br />
the first circuit, Figure 4 for the second).<br />
Figure 4<br />
NOTE:<br />
All the pipes must be perfectly clean (clean using nitrogen or dry air before connecting the pipes to the two units) and free<br />
of moisture for optimal emptying.<br />
53
CHECKING FOR LEAKS<br />
- Carefully check that the valves on the condensing units are closed.<br />
- Connect the pressure gauge assembly to the service test points on the valves.<br />
- Pressurise with refrigerant to 250KPa.<br />
- Close the valves on the pressure gauge assembly, then disconnect the<br />
refrigerant bottle and subsequently connect the nitrogen bottle.<br />
- Open the valves on the pressure gauge.<br />
- Pressurise the system with nitrogen to 1200KPa.<br />
- Carefully check all the pipes using a leak detector or other electronic<br />
instrument, with special attention to the welds and joints in general.<br />
If the necessary equipment is not available, make sure any parts that may give<br />
rise to refrigerant leaks (welds, joints etc.) are accessible.<br />
OUTDOOR UNIT<br />
INDOOR UNIT<br />
Thermostat bulb<br />
Max. height difference<br />
Thermostat bulb<br />
Gas valve<br />
Figure Figura 5 5<br />
Liquid valve<br />
INSTRUCTIONS FOR CORRECT CONNECTION<br />
INTAKE PIPE<br />
- Slope this towards the compressor in the horizontal sections (0.5 %) to ensure<br />
the return of oil to the compressor even under minimum load conditions.<br />
- Carefully insulate the pipe with anti-condensate, closed cell polyethylene,<br />
minimum thickness 9mm.<br />
- If the condensing unit is lower than the evaporating unit (figure 5), install a drain<br />
trap of equal height to the exchanger coil, so as to prevent the return of liquid to<br />
the compressor when the unit is off.<br />
- To avoid fitting a drain trap, install a solenoid valve on the liquid line (see<br />
Figure 6); this is always recommended in any case.<br />
- If the terminal unit is fitted with a thermostat as well as a drain trap, install a<br />
socket (see Figure 5) as near as possible to the unit. This will prevent the bulb of<br />
the thermostat from remaining in contact with the liquid when the unit is off (see<br />
Figure 5).<br />
In the case of connection to our CED-V terminal units, the drain trap is already<br />
fitted inside the unit.<br />
- If the condensing unit is higher than the evaporating unit, only install the socket<br />
(see Fig 7). Note that if the total distance exceeds 7-10 metres, the solenoid<br />
valve must be installed on the liquid line.<br />
- For vertical rises, as well as well the socket also fit an oil collection trap every 6<br />
metres (see Figure 8).<br />
- Use wide-radius curves (no elbows).<br />
- Carefully avoid choking the pipes.<br />
LIQUID PIPES<br />
- If exposed to the sun or passing through areas where the temperature is higher<br />
than the outside temperature, they must insulated, otherwise they can be free.<br />
- Avoid excessive diameters so as to prevent an excess refrigerant charge.<br />
Max. height difference<br />
Figure 6<br />
Figura 6<br />
Figure 7<br />
Figura 7<br />
8 metres<br />
Figure Figura 88<br />
IMPORTANT<br />
When the indoor terminal unit is fitted with a thermostat, if the connection pipes are longer than around 15/20 metres or<br />
alternatively if the system is expected to operate in variable climatic conditions (for example, very different Day/Night outside<br />
air temperature) a liquid receiver of suitable capacity should be installed near the indoor unit.<br />
The liquid receiver performs the following functions:<br />
- It prevents gaseous freon form reaching the expansion device.<br />
- It compensates for the variations in charge that occur in the system due to the change in operating conditions.<br />
- For a certain time it partly compensates for any immeasurable microscopic leaks that occur in the system over time.<br />
- It prevents the excessive flooding of the condenser with the corresponding raising of the condensing temperature/pressure<br />
if the system has been charged with a higher quantity of refrigerant, or if the system was charged in abnormal climatic<br />
conditions.<br />
Having said this, the liquid receiver should always be installed when the connections are very long.<br />
54
RESIDUAL RISKS<br />
WARNING<br />
THIS SPECIFIC SECTION OF THE MANUAL POINTS OUT EACH OPERATION WHICH BRINGS WITH IT A POSSIBLE<br />
RISKY SITUATION AS WELL AS ALL THE PARTICULAR PRECAUTIONS TO OBSERVE.<br />
DEFINITION OF DANGEROUS AREA<br />
The figure below points out the area which is accessible to authorised personnel only.<br />
- The external dangerous zone is a precise area all around the unit and its vertical projection on the ground in the case of<br />
hanging unit.<br />
- The internal dangerous zone is the area which one can enter only with previous and intentional removal of the protecting<br />
panels.<br />
55
GENERAL RISKS<br />
Particular area Danger Modality Instructions<br />
Heat exchanger coils Superficial wounds Contact Avoid incidental contacts.<br />
Wear protective gloves.<br />
LP Safety Valves<br />
Area surrounding the<br />
unit<br />
Area surrounding the<br />
unit<br />
Wounds<br />
Intoxication<br />
Wounds<br />
Intoxication<br />
Serious burns<br />
Death<br />
Death by:<br />
Serious burns<br />
Intoxication<br />
Refrigerant gas exhaust<br />
due to the intervention of<br />
the safety cut-out.<br />
Explosion due to a rise<br />
in ambient temperature<br />
(fire).<br />
Fire due to short-circuit<br />
or overheating of the<br />
power supply cables<br />
before the unit mains<br />
switch.<br />
Unit internal part Burns Contact with<br />
compressors and<br />
discharge pipes<br />
Unit internal part Wounds Contact with sharp<br />
corners<br />
Inner dangerous area Death by:<br />
Metal parts under<br />
Electrocution<br />
tension.<br />
Inner dangerous area Death by:<br />
Electrocution<br />
Serious burns<br />
COOLANT SAFETY DIAGRAMS<br />
01 Identifying elements for<br />
the substance<br />
02 Information concerning<br />
composition of<br />
components<br />
Product name: forane 407C<br />
N°SDS 01965/1<br />
Supplier: ELF ATOCHEM ITALIA<br />
Via G.Murat 17, 20159 Milano tel. 02/668111<br />
Contact with parts under<br />
tension which one can<br />
reach only after having<br />
removed the protective<br />
panels.<br />
Chemical nature of the compound<br />
Mixture based on:<br />
* Forane 32(difluoromethane) (N° CAS: 75-10-5)<br />
* Forane 125 (pentafluoroethan) (N° CAS: 354-33-6)<br />
* Forane 134a (1.1.1.2 tetrafluoroethan) (N° CAS: 811-97-2)<br />
03 Identification of risk Greatest physical and chemical dangers:<br />
Thermal decomposition in toxic and corrosive products<br />
04 First-aid measures General information:<br />
Inhalation: Carry the victim into the open air. Resort to oxygen or<br />
artificial respiration if necessary.<br />
Contact with skin: Frostbite must be treated in the same way as<br />
burns.<br />
Contact with the eyes: Immediate rinsing in abundant water. If<br />
irritation should continue, consult an ophthalmologist.<br />
Instructions for the physician: Do not administer<br />
catecolammine (due to the cardiac sensitisation provoked by the<br />
product)<br />
05 Fire prevention measures Specific dangers: Thermal decomposition into toxic and<br />
corrosive products. Hydrofluoric acid. Carbon oxides.<br />
Specific means of intervention: Cool containers/cisterns with<br />
jets of water. Prevent any sparks or flames.<br />
Do NOT smoke.<br />
Special protection systems for fire-fighting squads: Carry<br />
breathing apparatus and wear protective clothing<br />
06 Measures to take in case<br />
of accidental spillage<br />
Individual precautions: Avoid contact with the skin, eyes and<br />
inhalation of vapours. Use personal protection means.<br />
In an enclosed space: ventilate or use breathing apparatus (risk<br />
of anoxia). NO SMOKING ALLOWED<br />
Environment protection precautions: limit waste into<br />
environment with the greatest care.<br />
Install coil protective grills (optional).<br />
Avoid to enter the dangerous zone.<br />
Pipe in an appropriate way the safety<br />
exhaust valves.<br />
Wear appropriate clothes and gloves.<br />
Never shut the compressors inlet/outlet<br />
valves when the unit is off.<br />
Exact measurement of cables and safety<br />
cut-outs of the connections to the power<br />
supply line.<br />
Avoid incidental contacts<br />
Wear protective gloves<br />
Wear protective gloves<br />
Put scrupulously to earth the metal parts<br />
of the unit.<br />
Open the unit mains switch and lock it with<br />
a padlock before removing the panels.<br />
Product name: forane 22<br />
N°SDS 0005/7<br />
Supplier: ELF ATOCHEM ITALIA<br />
4 cours Michelet Cedex 42, 92091 Paris, France.<br />
Tel: 00331 49.00.80.80<br />
Chemical nature of the compound<br />
Mixture based on:<br />
Chlorodifluoromethane halogenated hydrocarbon<br />
N° CAS 75-45-6<br />
EINECS 200-871-9<br />
Effects on health: practically non-toxic<br />
Greatest physical and chemical dangers:<br />
Thermal decomposition in toxic and corrosive products<br />
Specific dangers/EEC: Dangerous for the ozone layer.<br />
General information:<br />
Inhalation: Carry the victim into the open air. Resort to oxygen or<br />
artificial respiration if necessary.<br />
Contact with skin: Frostbite must be treated in the same way as<br />
burns.<br />
Contact with the eyes: Immediate rinsing in abundant water. If<br />
irritation should continue, consult an ophthalmologist.<br />
Specific dangers: Thermal decomposition into toxic and<br />
corrosive products. Hydrofluoric acid. Hydrochloric acid in<br />
gaseous form. Phosgene Carbon monoxides (CO).<br />
Specific means of intervention: Cool containers/cisterns with<br />
jets of water. Prevent any sparks or flames.<br />
Do NOT smoke.<br />
Special protection systems for fire-fighting squads: Carry<br />
breathing apparatus and wear protective clothing.<br />
Individual precautions: Avoid contact with the skin, eyes and<br />
inhalation of vapours.<br />
In an enclosed space: ventilate or use breathing apparatus (risk<br />
of suffocation). NO SMOKING ALLOWED.<br />
Remove all risk of sparks or flames.<br />
56
07 Manipulation and storage Technical measures/precautions.<br />
Form of storage and manipulation applicable to the products:<br />
PRESSURIZED GAS.<br />
Ensure adequate ventilation and evacuation for the level of<br />
equipment.<br />
Advice for use: Prevent sparks and contact with hot surfaces.<br />
DO NOT SMOKE.<br />
Technical measures/Storage procedures: Store at room<br />
temperature in the original container. Keep away from flames, hot<br />
surfaces and sparks. Store in a cool, well-ventilated place.<br />
Protect full containers from sources of heat to avoid excessive<br />
pressures.<br />
Recommended: Ordinary steel.<br />
Avoid: Alloy containing more than 2% magnesium.<br />
Plastics.<br />
08 Control of individual<br />
exposure/protection<br />
09 Physical and chemical<br />
properties<br />
Precautionary measures to be taken: Ensure a sufficient<br />
exchange of air and/or suction in workplaces.<br />
Control parameters.<br />
Exposure limits: No limit value F-USA<br />
Forane 134a recommended limit value by Elf : VME=1000ppm<br />
Forane 32 recommended limit value by Elf : VME=1000ppm<br />
Forane 125 recommended limit value by Elf : VME=1000ppm<br />
Individual protective equipment:<br />
Respiratory protection: In case of insufficient ventilation, carry<br />
suitable breathing apparatus.<br />
Protection for the hands: Gloves<br />
Protection for the eyes: Protective eyewear<br />
Physical state (20°C): liquid gas<br />
Colour: colourless<br />
Smell: Slightly similar to ether; pH: not applicable.<br />
Boiling point/interval: -42,4 °C<br />
Flash point: No flare up at test conditions<br />
Vapour pressure: (25°C): 1.13 Mpa (11,3 bar) a (50°C): 2.11<br />
Mpa (21,1 bar) a (70°C): 3.26 Mpa (32,6 bar)<br />
Vapour density: At boiling point 4,54 kg/m3<br />
Density: (25°C) 1133 kg/m3 a (50°C) 1004 kg/m3 a (70°C) 861<br />
kg/m3<br />
10 Stability and reactivity Conditions to avoid: Avoid contact with flames and red-hot<br />
metal surfaces.<br />
Dangerous decomposition products: Thermal decomposition<br />
into toxic and corrosive products: (hydrofluoric acid)<br />
Other Information: Stable product at normal storage and<br />
handling conditions<br />
11 Toxicological information Inhalation: In experiments on animals Forane 134a, 32, 125<br />
practically non-toxic. No mortality noticed on rats at 500000<br />
ppm/4h. As with other volatile aliphatic halogenated compounds,<br />
with the accumulation of vapours and/or the inhalation of large<br />
quantities, the product can cause: loss of consciousness and<br />
heart problems aggravated by stress and lack of oxygen; risk of<br />
death.<br />
Contact with skin: Frostbite possible from splashes of liquefied<br />
gas.<br />
Chronic toxicity: Studies on animal protracted inhalation do not<br />
highlight any sub-chronic toxic effect (rat/3 month(s)/ Inhalation:<br />
50000ppm)<br />
Specifical effects: Genotoxicity according experimental available<br />
data Forane 134a, 32, 125 NOT Genotoxic<br />
Cancerogenesis: Forane 134a: experiments on animals do not<br />
highlight carcinogen effect clearly demonstrated (rat /Inhalation –<br />
for oral administration)<br />
Toxicity for reproduction: Foetal growth Forane 134a, 32, 125<br />
according to available data no toxic effect for foetal development.<br />
Fertility, according the limited data on animal: Forane 134a no<br />
effects on fertility (rats/inhalation)<br />
Technical measures/precautions.<br />
Form of storage and manipulation applicable to the products:<br />
PRESSURIZED GAS.<br />
Ensure adequate ventilation and evacuation for the level of<br />
equipment.<br />
Advice for use: Prevent sparks and contact with hot surfaces.<br />
DO NOT SMOKE.<br />
Technical measures/Storage procedures: Store at room<br />
temperature in the original container. Keep away from flames, hot<br />
surfaces and sparks. Store in a cool, well-ventilated place.<br />
Protect full containers from sources of heat to avoid excessive<br />
pressures.<br />
Recommended: Ordinary steel.<br />
Avoid: Alloy containing more than 2% magnesium.<br />
Plastics.<br />
Precautionary measures to be taken: Ensure a sufficient<br />
exchange of air and/or suction in workplaces.<br />
Control parameters.<br />
Exposure limits:<br />
France 1989: VME = 1000<br />
USA 1992: TWA = 1000 p.p.m. = 3500 mg/m3<br />
Individual protective equipment:<br />
Respiratory protection: In case of insufficient ventilation, carry<br />
suitable breathing apparatus.<br />
Protection for the hands: Gloves<br />
Protection for the eyes: Protective eyewear.<br />
Specific hygiene measures: avoid contact with the skin, eyes and<br />
inhalation of the vapours.<br />
Physical state (20°C): liquid gas<br />
Colour: colourless<br />
Smell: Slightly similar to ether; pH: not applicable.<br />
Boiling point/interval: -40.8 °C<br />
Melting point/interval: -160 °C<br />
Decomposition temperature: 480 °C<br />
Vapour pressure: (20 °C) 0.91 Mpa (9.1 bar); at 50 °C: 1.91<br />
Mpa (19.4 bar)<br />
Vapour density: (20° C) 3.57 kg/m3<br />
Solubility: water (25 °C) 3g/l - solvent soluble in hydrocarbons<br />
and chlorinated solvents, alcohols, ketones, esters.<br />
Solubility of water in the product at 30° C: 0.15% in weight.<br />
Conditions to avoid: Avoid contact with flames and red-hot<br />
metal surfaces.<br />
Dangerous decomposition products: Thermal decomposition<br />
into toxic and corrosive products: hydrofluoric acid, hydrochloric<br />
acid in gaseous form, phosgene, carbon monoxide (CO)<br />
Inhalation: Practically non-toxic in experiments conducted on<br />
animals. No effect below 50,000 p.p.m.<br />
As with other volatile aliphatic halogenated compounds, with the<br />
accumulation of vapours and/or the inhalation of large quantities,<br />
the product can cause: loss of consciousness and heart problems<br />
aggravated by stress and lack of oxygen; risk of death.<br />
Contact with skin: Frostbite possible from splashes of liquefied<br />
gas.<br />
Contact with the eyes: Temporary irritation.<br />
57
12 Ecological information Forane 32 ,<br />
Durability/degradability: Not easily biodegradable in water 5%<br />
after 28d<br />
Bioaccumulation: Practically non-absorbable by biological<br />
organisms log pow 0,21<br />
Forane 125<br />
Mobility: Rapid evaporation t ½ life 3,2 h (estimate)<br />
Durability/degradability: Not easily biodegradable in water 5%<br />
after 28d. In the troposphere degradation at rate t ½ life 28,3 y<br />
(estimate). Potential for destruction of ozone ODP (R-11 = 1)=0.<br />
Potential greenhouse effect (GWP): (HGWP) = 0,58. Low<br />
absorption in ground and sediments log Koc= 1,3-1,7<br />
Bioaccumulation: Practically non-absorbable by biological<br />
organisms log pow 1,48<br />
Forane 134a<br />
Mobility: Rapid evaporation t ½ vita 3 h (estimate)<br />
Durability/degradability: Not easily biodegradable in water 3%<br />
after 28d. 28d. In the atmosphere degradation at rate 3% after<br />
28d . Potential for destruction of ozone ODP (R-11 = 1)=0.<br />
Potential greenhouse effect (GWP) 0,26.<br />
Bioaccumulation: Practically non-absorbable by biological<br />
organisms log pow 1,06<br />
13 Notes concerning Disposal of product: recycle or incinerate.<br />
disposal<br />
14 Information on shipping Call ELF ATOCHEM safety services for updating and more<br />
information.<br />
ONU Number 3163. RID\ADR class 2 figure (and letter) 4°a<br />
Prescriptions: Labels 2 N° danger /N° material 20/3163<br />
IMDG class 2.2 N°ONU (IMDG) 3163<br />
Prescriptions: Labels 2.2<br />
IATA class 2.2 N°ONU (IATA) or N°ID3163<br />
Prescriptions: Labels 2.2<br />
15 Information on regulation EEC directives<br />
Security reports: D.91/155/EEC modified by D.93/112/EEC:<br />
Dangerous substances<br />
EEC classification and labelling<br />
Dangerous preparation: Not classified as dangerous<br />
Inventory: in accordance with EINECS<br />
16 Other information Recommended uses: Refrigerant fluid<br />
Bibliographical references: Encyclopedie des gas (Air Liquideed.1976-<br />
ELSEVIER AMSTERDAM)<br />
Mobility: Rapid evaporation: 1/2 life 2.7 h.<br />
Durability/degradability: Not easily biodegradable in water: 0%<br />
after 28 days. In the atmosphere degradation at rate of 1/2 life in<br />
14 years. Potential for destruction of ozone ODP (R-11 = 1) =<br />
0.055. Potential greenhouse effect (HGWP) - 0.36. Low<br />
absorption in ground and sediments log Koc = 1.8.<br />
Bioaccumulation: Practically non-absorbable by biological<br />
organisms: log pow 1.08.<br />
Aquatic toxicity: Acute toxicity, level of toxicity for fish over 24<br />
hours = 180 mg/l; for anaerobic bacteria, level of toxicity over 24<br />
hours > 400 mg/l.<br />
Disposal of product: recycle.<br />
ONU number 1018. RID/ADR class 2 figure (and letter) 3° a<br />
Regulations: No. danger/No. material 20/1018 label 2<br />
IMDG class 2.2 ONU (IMDG) 1018<br />
Regulations: NON INFLAMMABLE GAS/2 label<br />
IATA class 2.2 ONU (IATA) or No.ID1018<br />
Regulations: NON INFLAMMABLE GAS/2 label<br />
Product code: 00055/7<br />
EEC directives<br />
Security reports: D.91/155/EEC modified by D.93/112/EEC:<br />
Dangerous substances and manufactured compounds<br />
Dangerous manufactured compounds: D.67/548/CEE modified<br />
by D.93/21/CEE: Guide to labelling (18th APT).<br />
R59 Dangerous for the ozone layer S59 Consult<br />
producer/supplier for information concerning recovery and<br />
recycling.<br />
S61 Do not dump. Consult specific instructions and safety<br />
information.<br />
Recommended uses: low-temperature coolant, Freezing agent,<br />
Air conditioning.<br />
Bibliographical references: Encyclopédie des gas (Air liquideed.<br />
1976 - ELSEVIER AMSTERDAM).<br />
INRS toxicological report: No. <strong>142</strong><br />
CHLOROFLUOROMETHANE<br />
This document refers to the product as is and which conforms to the specifications supplied by ELF ATOCHEM.<br />
If combinations or mixtures are made, check that there are no new dangers resulting from this action. The information provided in this report<br />
has been provided in good faith and is based on our latest knowledge of the product in question as of the date of publication of the same.<br />
The attention of users is drawn to the potential risks of employing the product for any use other than that for which it is intended. This report<br />
must be used and reproduced solely for purposes of prevention and safety. The list of legislative, regulatory or administrative texts must not<br />
be considered exhaustive. The product user is under obligation to refer to all the official texts concerning the use, conservation and<br />
manipulation of the product for which he is sole responsible. The product user must also provide all those who might come into contact with<br />
the product with the information necessary for their safety at work and the protection of their health and that of the environment, giving them<br />
a copy of this safety information report.<br />
58
ZUSAMMENFASSUNG<br />
ALLGEMEINES................................................................................................................................... 60<br />
ALLGEMEINE HINWEISE.....................................................................................................................................................60<br />
ERGÄNZENDE SICHERHEITSPRINZIPIEN ........................................................................................................................60<br />
ZUBEHÖR.............................................................................................................................................................................60<br />
ALLGEMEINE TECHNISCHE DATEN ..................................................................................................................................61<br />
GERÄTEAUFSTELLUNG .....................................................................................................................................................62<br />
PLATZBEDARF.....................................................................................................................................................................62<br />
ABMESSUNGEN UND GEWICHTSVERTEILUNG...............................................................................................................63<br />
EINSTELLWERTE FÜR REGEL- UND SICHERHEITSEINRICHTUNGEN ..........................................................................63<br />
GERÄUSCHPEGEL ..............................................................................................................................................................63<br />
ÜBERNAHME ..................................................................................................................................... 64<br />
EINGANGSKONTROLLE......................................................................................................................................................64<br />
FLURTRANSPORT...............................................................................................................................................................64<br />
LAGERUNG ..........................................................................................................................................................................65<br />
AUSPACKEN ........................................................................................................................................................................65<br />
ELEKTRISCHE ANSCHLÜSSE .......................................................................................................... 66<br />
FUNKTIONSANSCHLÜSSE .................................................................................................................................................66<br />
NETZANSCHLUSS ...............................................................................................................................................................66<br />
MONTAGE VON OPTIONEN................................................................................................................................................66<br />
ANSCHLUSS AN PC ODER BMS ........................................................................................................................................67<br />
INBETRIEBNAHME ............................................................................................................................ 68<br />
VORAB-PRÜFUNGEN..........................................................................................................................................................68<br />
INBETRIEBNAHME ..............................................................................................................................................................69<br />
REGULIERUNG .................................................................................................................................. 70<br />
BETRIEBSEIGENSCHAFTEN DES HAUPTMODULS .........................................................................................................70<br />
SCHALTFOLGE DER verdichter...........................................................................................................................................70<br />
ZEITSCHALTUNGeN DER verdichter...................................................................................................................................70<br />
REGLER WÄRMETAUSCHER VENTILATOREN.................................................................................................................71<br />
KONTROLLMODULTASTATUR ...........................................................................................................................................72<br />
EINGABE DER BETRIEBSPARAMETER.............................................................................................................................72<br />
ALARME ...............................................................................................................................................................................74<br />
STÖRUNGSSUCHE ............................................................................................................................ 75<br />
HD-STÖRABSCHALTUNG ...................................................................................................................................................76<br />
ND-STÖRABSCHALTUNG ...................................................................................................................................................77<br />
AUSLÖSUNG VERDICHTERSICHERHEIT..........................................................................................................................78<br />
AUSLÖSUNG VENTILATORSCHUTZ..................................................................................................................................78<br />
LAUTER GERÄTEBETRIEB .................................................................................................................................................79<br />
KEIN VERDICHTERSTART..................................................................................................................................................79<br />
REGELMÄSSIGE WARTUNG............................................................................................................. 80<br />
EINHEIT ................................................................................................................................................................................80<br />
ELEKTRIK.............................................................................................................................................................................80<br />
KÄLTELEITUNGEN ............................................................................................................................ 81<br />
ANSAUGLEITUNG................................................................................................................................................................81<br />
KÄLTEMITTELLEITUNG.......................................................................................................................................................81<br />
LECKKONTROLLE ...............................................................................................................................................................82<br />
HINWEISE/ANLEITUNGEN FÜR EINEN ORDNUNGSGEMÄSSEN ANSCHLUSS.............................................................82<br />
RESTGEFAHREN ............................................................................................................................... 83<br />
DEFINITION GEFAHRENBEREICH .....................................................................................................................................83<br />
ALLGEMEINE GEFAHREN ..................................................................................................................................................84<br />
DATENBLÄTTER FÜR DIE SICHERHEIT BEI DER VERWENDUNG VON KÜHLMITTELN ...............................................84<br />
Die in dem vorliegenden Handbuch aufgeführten Daten sind nicht bindend und können vom Hersteller ohne<br />
Vorankündigung geändert werden.<br />
Vervielfältigung (auch teilweise) nicht gestattet.<br />
59
ALLGEMEINES<br />
ALLGEMEINE HINWEISE<br />
Das vorliegende Handbuch dient zur korrekten Installation, Einstellung und Wartung des Geräts; es ist demnach unerläßlich,<br />
daß:<br />
─ die folgenden Hinweise mit der entsprechenden Aufmerksamkeit gelesen werden;<br />
─ das Gerät von Fachpersonal mit entsprechender Ausbildung installiert, abgenommen und gewartet wird.<br />
• Elektrische bzw. mechanische Änderungen entbinden den Hersteller jeglicher Haftpflicht und haben außerdem den Verfall<br />
der Garantieleistung zur Folge. Bei nicht ausdrücklich genehmigten Eingriffen, die unter Mißachtung der vorliegenden<br />
Anleitung ausgeführt werden, erlischt die Garantie.<br />
• Bei der Installation sind die jeweils gültigen Sicherheitsnormen zu beachten.<br />
• Nachprüfen, ob die Eigenschaften des Stromnetzes mit den Daten auf dem Typenschild des Geräts im Schaltschrank<br />
übereinstimmen.<br />
• Die vorliegende Anleitung und der Schaltplan des Geräts sind mit entsprechender Sorgfalt aufzubewahren und dem<br />
Bedienungspersonal ggf. zur Verfügung zu stellen.<br />
• Das Verpackungsmaterial (Kunststoff, Styropor, Stifte usw.) ist als potentielle Gefahrenquelle außerhalb der Reichweite<br />
von Kindern aufzubewahren und gemäß den gültigen Normen einem entsprechenden Recyclingverfahren zuzuführen.<br />
• Der Verflüssiger ist in Verbindung mit einer Inneneinheit zur Expansion des Kältemittels für die Klimatisierung bestimmt.<br />
• Das Gerät bei Defekten oder Störungen abschalten.<br />
• Für eventuelle Reparaturen ausschließlich einen vom Hersteller autorisierten technischen Kundendienst beauftragen und<br />
Original-Ersatzteile anfordern.<br />
Die Nichtbeachtung der o.a. Hinweise kann die Sicherheit des Geräts beeinträchtigen.<br />
Der Hersteller übernimmt keinerlei Haftung für Personen- oder Sachschäden, die direkt bzw. indirekt aus der Nichtbeachtung<br />
der vorliegenden Anleitungen resultieren.<br />
ERGÄNZENDE SICHERHEITSPRINZIPIEN<br />
Die Maschine wurde im Hinblick auf die Bedienersicherheit entworfen und gebaut.<br />
Zu diesem Zweck wurden Planlösungen angewandt, welche die möglichen Gefahrenursachen so weit wie möglich<br />
beseitigen oder die Möglichkeit des Auftretens der Gefahr spürbar reduzieren. Sollte es in der Entwurfsphase nicht möglich<br />
gewesen sein, der Gefahr vorzubeugen oder sie zu beseitigen, wird auf die Verhaltensvorschriften im Abschnitt<br />
Restgefahren verwiesen.<br />
ZUBEHÖR<br />
Die Einheiten können mit folgendem Zubehör ausgestattet werden (auf Wunsch):<br />
─ sonderspannung<br />
─ verflüssigerschutzgitter<br />
─ magnetventil<br />
─ betriebsstundenzähler Verdichter<br />
─ schwingungsdämpfer<br />
─ anschlußsatz mit:<br />
Entfeuchtungsfilter,<br />
thermostatventil<br />
magnetventil Kaltwasserleitung<br />
durchflußanzeiger<br />
─ Einheit mit Steuerung separater Verdichter<br />
─ anschluß an ferngeschaltetes Kontrollmodul<br />
─ anschluß an PC oder BMS<br />
60
ALLGEMEINE TECHNISCHE DATEN<br />
Modell <strong>MSAT</strong> <strong>102</strong> <strong>122</strong> <strong>142</strong> <strong>162</strong> <strong>182</strong> <strong>202</strong> <strong>242</strong><br />
Nennspannung 400 / 3 / 50<br />
Daten beziehen sich auf:<br />
Modell <strong>MSAT</strong> R-22<br />
Außenlufttemperatur +35°C<br />
Saugtemperatur des Sattgases<br />
Kaelteleistung kW 31.3 36.4 41.3 48.7 53.8 63.9 77.9<br />
(SST) 7.5°C R-22,<br />
Leistungsaufnahme der<br />
8.5 10.3 11.3 13.5 15.8 17.5 22.3 (SST) 9.5°C (dew point) R-407C<br />
Verdichter kW<br />
Modell <strong>MSAT</strong> R-407C<br />
Kaelteleistung kW 29.8 34.1 39.2 44.1 50.3 62.8 72.8<br />
Leistungsaufnahme der<br />
Verdichter kW 9.4 11.2 12.6 14.7 17.8 20.3 25.2<br />
Verdichtertyp<br />
SCROLL<br />
Drehzahl rpm 2900<br />
Ölfüllung<br />
L<br />
2x 2x 2x<br />
1,55 1,65 2,5<br />
Leistungsabstufung 2<br />
Motorschutz<br />
NTC<br />
2x<br />
4<br />
Oeltyp<br />
SUNISO 3GS OIL<br />
Nota: Ölsorte bei Einheiten<br />
mit R-407C<br />
- MOBIL EAL ARTIC 22 CC<br />
- 32 MMMA POE<br />
Verflüssiger<br />
Material<br />
Kupferrohr mit aufgepreßten Aluminiumlamellen<br />
Anzahl 2<br />
Wärmetauschfläche m 2 3 3,6 4,9<br />
Lamellenabstand mm 1,6 2,1 1,6 1,6<br />
Anzahl Rohrreihen 2<br />
∅ Leitung mm 9,52<br />
Prüfdruck kPa 3000<br />
Axialventilator<br />
Anzahl u. Durchm Anz x ∅ 2x560 4x450 6x450<br />
Drehzahl rpm 680 840<br />
Luftmenge L/s 3056 4125 6120<br />
Installierte Leistung kW 2x0,22 4x0,16 6x0,16<br />
Anschlüsse Kältemittel<br />
Ventil Kältemittel ∅ 14 16 18 22<br />
Ansaugventil ∅ 22 28 28 35<br />
Kältemittel<br />
Füllmenge R-22 kg 8.2 8,2 9 9 9.6 12 12<br />
Füllmenge R-407C kg 9.2 9,2 10 10 10.6 13 13<br />
Merke:<br />
─ Motor mit Außenrotor<br />
─ Schutzgitter<br />
Merke:<br />
Schweißanschlüsse<br />
Merke:<br />
Füllung bei Inbetriebnahme<br />
vervollständigen<br />
Gewicht und Volumen<br />
Transportgewicht ca. kg 275 280 380 420 485 580 590<br />
Verpackungsvolumen ca. m 3 1,50 3,20 4,30<br />
Einsatzgrenzen<br />
Max.<br />
R-22 49 47,5 47,5 47,5 45 49 46<br />
Merke:<br />
Verflüssigerlufteintrittstemperatur<br />
SST = +5°C R-407C 47 45 45 44,5 43,5 46 43<br />
Min.<br />
R-22 -4 -4 -4 -4 -8 -4 -8<br />
Verflüssigerlufteintrittstemperatur<br />
SST = +5°C<br />
R-407C -5 -5 -5 -5 -9 -5 -9<br />
Max.<br />
R-22 12,5<br />
Ansaugtemperatur<br />
gesättigtes Gas °C R-407C 12,5<br />
SST Gesättigte<br />
Ansaugtemperatur<br />
Überhitzung Ansauggas<br />
+ 5°K<br />
61
GERÄTEAUFSTELLUNG<br />
Die Geräte sind zur Außeninstallation vorgesehen.<br />
• Nachprüfen, ob die Stellfläche das Gewicht des Geräts (s. Gewicht und Gewichtsverteilung auf S. 63) trägt und eben ist.<br />
Zur Vermeidung von Lärm und Vibrationen Gummistreifen zwischen Geräteboden und Stellfläche einfügen.<br />
• Platzbedarf für einwandfreien Betrieb beachten.<br />
• Bei Installation auf Terrassen oder Dächern wird die Montage auf Schwingungsdämpfern empfohlen; fener sind die<br />
Leitungen mit elastischen Verbindungselementen auszurüsten.<br />
• Gerät so positionieren, daß auf den Längsseiten keine Windlasten einwirken können.<br />
• Gerät am Boden verankern.<br />
PLATZBEDARF<br />
Zum einwandfreien Betrieb der Einheit ist ein geeigneter Stellplatz unerläßlich.<br />
Folgende Faktoren können den Betrieb beeinträchtigen oder eine Störabschaltung der Einheit verursachen: Behinderungen<br />
für Luftströmung, Wärmequellen (z.B. Ab-, Heißluft), unzureichender Luftaustausch im Stellbereich, den Wärmetauscher<br />
behindernde Blätter oder sonstige Fremdkörper, den Luftstrom hemmende oder begünstigende Winde.<br />
Ein Mindestplatzbedarf zum/r einwandfreien Betrieb/ Wartung der Einheiten muß gewährleistet sein.<br />
In folgenden Schizzen sind einige Einstellungsmodalitäten gezeigt; jede Installation ist gemäß der vorliegenden Anleitung zu<br />
überprüfen.<br />
Merke: Alle Maße in mm<br />
Freie Seite<br />
EINHEIT MIT SEPARATEN STEUERKREISEN<br />
EINHEIT MIT STEUERUNG SEPARATER VERDICHTER<br />
SCHWINGUNGSDÄMPER<br />
(Zubehör)<br />
(Zubehör)<br />
Auf Wunsch kann die Einheit mit Steuerung separater Verdichter<br />
und Vorrüstung für 2 getrennte Inneneinheiten geliefert werden.<br />
Es besteht weiterhin eine gemeinsame Stromversorgung.<br />
62
ABMESSUNGEN UND GEWICHTSVERTEILUNG<br />
Zeichenerklärung:<br />
1 - Verdichter<br />
2 - Anschluss Flüssigkeitsleitung Ø G1 1. Kreis<br />
2’ - Anschluss Flüssigkeitsleitung Ø G1 2. Kreis<br />
3 - Anschluss Gasleitung Ø G2 1. Kreis<br />
3’ - Anschluss Gasleitung Ø G2 2. Kreis<br />
4 - Schaltschrank<br />
5 - Axialventilatoren<br />
6 - Stromeinspeisung<br />
7 - Verflüssiger<br />
8 - Wartungspaneel (Zugang Schaltschrank und<br />
Verdichter)<br />
ABMESSUNGEN<br />
GEWICHTE<br />
Größe A B C D E F G H I L O Ø Ø Luefteranzahl W1 W2 W3 W4 Tot.<br />
G1 G2<br />
<strong>102</strong> 1530 678 1400 128 73 75 628 42 1255 800 - 14 22 2 88 42 95 50 275<br />
<strong>122</strong> 1530 678 1400 128 73 75 628 42 1255 800 - 16 28 2 89 42 98 51 280<br />
<strong>142</strong> 1563 1107 1570 128 130 75 1058 42 1077 900 153 16 28 4 121 58 132 69 380<br />
<strong>162</strong>/<strong>182</strong> 1563 1107 1570 128 130 75 1058 42 1077 900 153 18 28 4 155 74 168 88 485<br />
<strong>202</strong>/<strong>242</strong> 2098 1107 1570 128 130 75 1058 42 1612 900 153 22 35 6 191 95 200 104 590<br />
Merke: Abmessungen in mm, Gewichte in kg.<br />
EINSTELLWERTE FÜR REGEL- UND SICHERHEITSEINRICHTUNGEN<br />
Offen Geschl<br />
HD-Schalter (kPa) 2750 2000 Systemüberdrucksicherung ( °C ) 120<br />
ND-Schalter (kPa) 230 360 Max. Verdichterstarts/Stunde ( n° ) 10<br />
Heißgassicherheitsthermostat ( °C ) 120<br />
Merke: Die Sicherheiten “HD-<br />
Schalter” und “Heißgassicherheitsthermostat”<br />
können manuell<br />
rückgestellt werden, der ND-<br />
Schalter verfügt dagegen über eine<br />
automatische Rückstellung.<br />
GERÄUSCHPEGEL<br />
Größe<br />
Schalleistungspegel (dB)<br />
Oktav-Frequenzbandbereich (Hz)<br />
Schalldruck<br />
-pegel<br />
63 125 250 500 1000 2000 4000 8000 dB(A)<br />
<strong>102</strong> 80 84 75 73 69 63 60 42 59<br />
<strong>122</strong> 80 76 73 73 71 65 62 43 59<br />
<strong>142</strong> 87 80 74 73 71 69 66 63 60<br />
<strong>162</strong> 87 81 76 73 70 69 65 62 60<br />
<strong>182</strong> 84 78 78 74 69 70 62 55 60<br />
<strong>202</strong> 86 79 78 77 72 67 62 54 61<br />
<strong>242</strong> 86 82 81 75 70 73 63 65 62<br />
Merke:<br />
- Die Geräuschpegel beziehen sich auf Einheiten<br />
bei Vollast, maximaler Ventilatorendrehzahl, 35°C<br />
Außenlufttemperatur und +5°C gesättigter<br />
Ansaugtemperatur.<br />
- Schalldruckpegel in 1 m Abstand zur<br />
Gerätoberfläche, im Freifeld gemessen.<br />
- Schalleistungspegel bez. auf: 1x10 -12 w.<br />
- Schalldruckpegel bez. auf : 2 x 10 -5 Pa<br />
63
ÜBERNAHME<br />
EINGANGSKONTROLLE<br />
Die Geräte werden mit einer entsprechenden Schutzverpackung geliefert. Bei Eingang der Lieferung das Gerät auf<br />
Transportschäden und Vollständigkeit überprüfen. Sind Schäden erkennbar, ist auf dem Transportdokument<br />
umgehend der entsprechende Schaden mit folgender Anmerkung zu verzeichnen:<br />
“ÜBERNAHME MIT VORBEHALT WEGEN OFFENSICHTLICHER VERPACKUNGSSCHÄDEN”, da die Preisstellung<br />
ab Werk eine Schadenvergütung durch die Versicherung gemäß dem Gesetz Nr. 450 vom 22.08.85 “Begrenzung der<br />
Schadenerstattung“ einschließt.<br />
WICHTIG<br />
DIE HIERIN BESCHRIEBENEN ARBEITEN SIND ALLESAMT NACH DEN GÜLTIGEN SICHERHEITSNORMEN<br />
AUSZUFÜHREN, SOWOHL HINSICHTLICH DER AUSRÜSTUNG WIE DER VORGEHENSWEISE.<br />
ACHTUNG<br />
VOR JEDEM TRANSPORT SICHERSTELLEN, DASS DIE ANGEWANDTEN MITTEL EINE DEM JEWEILIGEN<br />
GERÄTEGEWICHT ENTSPRECHENDE HUBLEISTUNG AUFWEISEN.<br />
Größe <strong>102</strong> <strong>122</strong> <strong>142</strong> <strong>162</strong> <strong>182</strong> <strong>202</strong> <strong>242</strong><br />
Gewicht Kg 275 280 380 480 485 580 590<br />
FLURTRANSPORT<br />
TRANSPORT mit GABELSTAPLER oder ÄHNLICHEM MITTEL<br />
- Gabeln längs unter die Holzpalette des Gerätes einführen.<br />
- Beim Anheben auf die gleichmäßige Verteilung des Gerätegewichts achten, das auf Verdichterseite am größten ist.<br />
64
HEBEN mit KRAN oder ÄHNLICHEM HUBMITTEL<br />
- Hubrohre in die vorgesehenen Bohrungen am Geräteständer einführen.<br />
- Der beidseitige Überstand der Rohre muß die Anbringung der Sicherheitsbolzen mit Splinten gewährleisten.<br />
- Hubriemen zwischen Splinten und Geräteständer anlegen (siehe Zeichnung).<br />
- Zum Schutz des Gerätegehäuses die oberen Kanten mit einem Holzverschlag abdecken (bei nur 1 Hubpunkt).<br />
- Hubriemen langsam anspannen und dabei die korrekte Ausrichtung derselben überprüfen.<br />
- Anschließend das Gerät heben.<br />
Holzverschlag<br />
Hubriemen<br />
Bolzen<br />
Kantenschutz<br />
Sicherheitssplint<br />
Hubrohr<br />
ACHTUNG<br />
ZUR GEWÄHRLEISTUNG DER GERÄTESTRUKTUR UND -FUNKTION MUSS DER ANWENDER DIE ANLEITUNGEN<br />
AUF DER VERPACKUNG SORGFÄLTIG BEACHTEN. EMPFEHLUNGEN:<br />
- VORSICHTIG TRANSPORTIEREN.<br />
- KEINER FEUCHTIGKEIT ODER NÄSSE AUSSETZEN.<br />
- IN KEINEM FALL GEGENSTÄNDE AUF DEM GERÄT STAPELN, ES SEI DENN INNERHALB DER ZULÄSSIGEN<br />
GRENZEN (DIE ANGEGEBENE ZIFFER DEFINIERT DIE ANZAHL DER STAPELBAREN LAGEN.<br />
Z.B. 1 = 1 STAPELLAGE AUF DER EINHEIT).<br />
LAGERUNG<br />
− vor Sonneneinstrahlung, Regen, Sand und Wind schützen<br />
− Temperaturbereich: max. 60°C, min. -10°C<br />
− max. Feuchtigkeit: 90%<br />
AUSPACKEN<br />
- Mit einer Schere die Bandeisen durchtrennen.<br />
- Verpackungskarton abnehmen (dabei auch die Eckenschützer herausziehen).<br />
- Mit einem festen Schraubschlüssel SW 10 mm die Befestigungsbügel des Geräts mit der Holzpalette abnehmen.<br />
- Gerät anheben und Holzpalette entfernen.<br />
- Gerät am vorgesehenen Stellplatz auf den Boden absetzen.<br />
- Nachprüfen, ob sichtbare Schäden zu verzeichnen sind.<br />
- Verpackungsmaterial fach- und umweltgerecht entsorgen und dem Recycling zuführen (gemäß den gültigen<br />
Umweltbestimmungen).<br />
65
ELEKTRISCHE ANSCHLÜSSE<br />
ACHTUNG<br />
ALLE ANSCHLÜSSE ELEKTRISCHER GERÄTE MÜSSEN BEI AUSGESCHALTETER STROMVERSORGUNG<br />
DURCHGEFÜHRT WERDEN.<br />
FUNKTIONSANSCHLÜSSE<br />
Diese Anschlüsse müssen Sie vor Inbetriebnahme der Einheit herstellen.<br />
NETZANSCHLUSS<br />
- Die Drehstromlinie an die im Stromplan mit L1 L2 L3 bezeichneten Klemmen des Haupttrennschalters anschließen.<br />
- Den Nullleiter an Klemme N der Schalttafel anschließen.<br />
- Den Erdleiter an Klemme Pe der Schalttafel anschließen.<br />
- Der Installateur muss die Anschlusskabel an die Stromversorgung gemäß den Angaben des in der Schaltschranktür<br />
aufgekletben Datenblatts bemessen. Es ist außerdem für einen auf die Stromstärke der Leitung abgestimmten Schutz<br />
gegen Kurzschlüsse zu sorgen. Das Trennvermögen dieser Schutzeinrichtung muss dem in diesem Anlageteil<br />
angenommenen Kurzschlussstrom entsprechen.<br />
DATI ELETTRICI<br />
GRÖSSE <strong>102</strong> <strong>122</strong> <strong>142</strong> <strong>162</strong> <strong>182</strong> <strong>202</strong> <strong>242</strong><br />
Einzel Verdichter 230/3/50 19.7 22.9 25.3 24.1 31.2 35.8 45.2<br />
(A) 400/3/50 9.8 11.3 13.6 14.7 17.5 20.0 25.2<br />
F.L.A. Ventilatoren (A) 230/1/50 1.15x2 1.15x2 0.65 x 4 0.65 x 4 0.65 x 4 0.65 x 6 0.65 x 6<br />
Insgesamt (A)<br />
230/3/50 41.6 48.1 53.9 51.4 65.6 76.4 85.8<br />
400/3/50 21.8 25.0 30.3 32.5 38.1 44.9 55.2<br />
L.R.A. Verdichter (A)<br />
230/3/50 132.5 164 171 166 211 224 280<br />
400/3/50 66 74 <strong>102</strong> 94 117 128 159<br />
Verdichter (kW) 11.3 13.2 15.2 16.8 20.7 23.8 29.2<br />
F.L.I. Ventilatoren (kW) 0.22x2 0.22x2 0.17 x 4 0.17 x 4 0.17 x 4 0.17 x 6 0.17 x 6<br />
Insgesamt (kW) 11.8 13.6 15.9 17.5 21.4 24.8 30.2<br />
M.IC. Insgesamt (A)<br />
230/3/50 154.5 189.2 199.5 193.3 244.9 264.6 329.5<br />
400/3/50 78.1 87.6 118.8 111.9 137.2 152.3 189.0<br />
1) F.L.A. Stromaufnahme bei max. zulässigen Bedingungen.<br />
2) L.R.A. Anlaufstrom des Verdichters.<br />
3) F.L.I. Leistungsaufnahme bei Volllast (bei max. zulässigen Bedingungen).<br />
4) M.I.C. Anlaufstrom der Einheit.<br />
Spannungsabweichung: max 2%<br />
Spannung: 400/3/50 ± 6%<br />
230/3/50 ± 6%<br />
MONTAGE VON OPTIONEN<br />
ANSCHLUSS AN ALARMANZEIGE<br />
Im gleichen Bereich des Schaltplans finden Sie ebenfalls den gemeinsamen Alarmkreis. Sie können eine akustische bzw.<br />
visuelle Alarmanzeige für Störungsmeldungen der Einheit in diesen Kreis schalten.<br />
Die Versorgung der Alarmanzeige hat gemäß Schaltplan mit Niederspannung (12V 300mA) zu erfolgen.<br />
ANSCHLUSS AN FERNSTEUERMODUL<br />
Das Fernsteuermodul ist die genaue Kopie der Tastatur am Steuermodul ENERGY LIGHT und gestattet Ihnen, sämtliche<br />
am Gerät möglichen Bedienungen von fernliegender Position auszuführen.<br />
66
INSTALLAZIONE<br />
Bevor Sie das Fernsteuermodul anschließen, müssen Sie durch Auslösen des Schutzschalters den Haupttrennschalter<br />
unterbrechen.<br />
Die Ferntastatur gemäß Abbildung anschließen.<br />
Rückseite Posteriore Fernsteuerung<br />
terminale remoto<br />
C512<strong>142</strong>3<br />
25<br />
24 26<br />
S + -<br />
CONN<br />
A<br />
CONN<br />
B<br />
- S +<br />
RELE' 1<br />
RELE' 2<br />
RELE' 3<br />
C512<strong>142</strong>0<br />
RELE' 4<br />
RELE' 5<br />
RELE' 6<br />
RELE' 7<br />
COMUNE<br />
ESPANSION<br />
E<br />
SERIAL<br />
E<br />
RELE' ALLARME<br />
Die maximale Länge des Anschlusskabels ENERGY LIGHT – Tastatur beträgt 80 m.<br />
ANSCHLUSS AN PC ODER BMS<br />
KUNDENSEITIG<br />
Anschlusskabel RS232 9-polig Stecker-Buchse<br />
Höchstlänge 10 m<br />
230 Vac<br />
PE1P0005<br />
N U<br />
N U<br />
RS 232<br />
ECHO<br />
DTR<br />
1 2 3 4<br />
Serial optocoupled adapter<br />
RS232/TTL<br />
RS 232/RS485 - RS485/TTL<br />
Micronet and ModBus Protocol<br />
OFF<br />
ON<br />
C512<strong>142</strong>5<br />
TTL<br />
10 12<br />
Versorgung<br />
RS 485<br />
21 22 23 24<br />
N U<br />
N U<br />
RS 232<br />
ECHO<br />
DTR<br />
1 2 3 4<br />
Serial optocoupled adapter<br />
RS232/TTL<br />
RS 232/RS485 - RS485/TTL<br />
Micronet and ModBus Protocol<br />
OFF<br />
ON<br />
C512<strong>142</strong>5<br />
TTL<br />
10 12<br />
Versorgung<br />
RS 485<br />
21 22 23 24<br />
+ - + -<br />
+ - + -<br />
KUNDENSEITIG<br />
Serielles Kabel 5S485 Kabel, 2 getwistete Drähte<br />
Höchstlänge der Leitung = 1000 m<br />
Serielles Kabel 5-Wege<br />
2molex<br />
Höchstlänge = 2 m<br />
SERIELL<br />
AUSDEHNUNG<br />
10 9 8 7 6 5 4 3 2 1<br />
RELAIS ALARMSIGNAL<br />
MASSE<br />
RELAIS 7<br />
RELAIS 6<br />
RELAIS 5<br />
RELAIS 4<br />
RELAIS 3<br />
RELAIS 2<br />
RELAIS 1<br />
C512<strong>142</strong>0<br />
+<br />
S<br />
-<br />
VERB. B<br />
VERB. A<br />
67
INBETRIEBNAHME<br />
SÄMTLICHE GERÄTE SIND VON EINEM AUTORISIERTEN KUNDENDIENST IN BETRIEB ZU NEHMEN.<br />
ANDERENFALLS ERLISCHT DIE VERTRAGLICH FESTGELEGTE GARANTIE. DER KUNDENDIENST BESCHRÄNKT<br />
SICH AUF DIE INBETRIEBNAHME UND UMFASST WEDER ANSCHLÜSSE NOCH ARBEITEN AM GERÄT<br />
VORAB-PRÜFUNGEN<br />
- Vor jeder Prüfung sicherstellen, daß das Gerät einwandfrei waagrecht aufgestellt ist und die elektrischen wie<br />
kühltechnischen Anschlüsse an die Inneneinheit ordnungsgemäß ausgeführt sind.<br />
- Netzspannung und -Frequenz überprüfen:<br />
FOLGENDE RICHTWERTE SIND EINZUHALTEN<br />
230 ± 6% 400 ± 6%<br />
- Die vorgeschriebene Spannung der Fixierschrauben Leiter-Elektrokomponenten auf der Schalttafel überprüfen<br />
(transportbedingte Erschütterungen könnten zur Lockerung dieser Schrauben geführt haben).<br />
VAKKUMERZEUGUNG<br />
Nach Überprüfung etwaiger Leckstellen in den Anschlußleitungen und der Inneneinheit (s. Handbuch der Kälteleitungen)<br />
bei beaufschlagter Anlage ist wie folgt zu verfahren.<br />
- Die Anlage bei geschlossenen MCAT Ventilen entleeren.<br />
- Vakuumpumpe mithilfe eines Manometers an beide Ventilstutzen anschließen und hierbei darauf achten, daß etwaige<br />
Absperrelemente (Magnetventil oder Zwischenventile) geöffnet sind. Daraufhin Vakuum erzeugen.<br />
- Damit das Magnetventil geöffnet bleibt, muss es von den Klemmen im Schaltschrank (s. Stromplan) getrennt und eine<br />
gewöhnliche 220V Steckdose angeschlossen werden.<br />
- Die Pumpe bei einem Druck von ca. 100 Pa anhalten und einige Stunden auf Vakuum belassen. Der dann<br />
normalerweise eintretende Druckaufbau wird nach einiger Zeit wieder ausgeglichen. Sollte der Druck jedoch weiterhin<br />
ansteigen, so liegen geringfügige Leckagen bzw. Feuchtigkeitseinschlüsse vor. Im ersten Fall die Eingriffe unter<br />
Abschnitt LECKKONTROLLE im Handbuch Kälteleitungen wiederholen, im zweiten Fall die Anlage bis 100 Kpa mit<br />
Kältemittel R22 füllen und gemäß obigen Hinweisen erneut auf Vakuum fahren. Nach erreichter Druckstabilisierung zur<br />
Anlagenfüllung übergehen.<br />
KÄLTEMITTELFÜLLUNG<br />
Die Füllung der betreffenden Größen ist bei Inbetriebnahme je nach Ausführung der Inneneinheit und Leitungslänge zu<br />
vervollständigen.<br />
- Bei Anlagenvakuum die Manometerhähne schließen und die Vakuumpumpe abtrennen.<br />
- Die Kältegasflasche anschließen und die Entlüftung an der Gummiverbindung mit dem Manometer vornehmen.<br />
- Die Manometerhähne öffnen und gasförmiges bis zum Druckausgleich Anlage/Flasche bzw. zu einem höheren<br />
Druckwert als der Luftdruck einströmen lassen.<br />
- Die Hähne der Verdampfereinheit (zuerst den Flüssigkeitshahn) öffnen und die Einheit somit in Startbereitschaft setzen.<br />
Benuetzen Sie einen gemaessentsprechenden Schluessel, mit viereckigem<br />
Schaft. Der Schaft soll die gleiche Laenge des Hahn sowie eine angemessene<br />
Hebelkraft haben. ( * Siehe Zeichnung )<br />
Betriebsgewicht Kältemittel in den Kühlleitungen ( KG / 10 m )<br />
Außen ∅ Kältemittel Ansaugung<br />
Leitung a 38°C SST+4,5°C<br />
10 0,60 --<br />
12 1,06 --<br />
14 1,41 0,025<br />
16 1,71 0,030<br />
18 2,36 0,043<br />
22 3,62 0,070<br />
28 6,61 0,120<br />
35 9,47 0,195<br />
42 -- 0,290<br />
Außeneinheit<br />
UNITA’ ESTERNA<br />
Gasventil Rubinetto<br />
gas<br />
Kältemittel Rubinetto<br />
ventil Liquido<br />
UNITA’ Inneneinheit INTERNA<br />
WICHTIGER HINWEIS:<br />
Bei erstmaliger Inbetriebnahme der Einheit bzw. nach längerem Stillstand UNBEDINGT die Heizwiderstände (sofern<br />
vorhanden) des Öls im Verdichtergehäuse mindestens 8 Stunden vor dem Verdichterstart mit Strom versorgen.<br />
Zum Einschalten folgende Schritte ausführen:<br />
- Bei Betätigen des Trennschalters QS1 der Verflüssigereinheit muss die grüne LED erloschen sein.<br />
68
INBETRIEBNAHME<br />
- Einwandfreien Betrieb der Inneneinheit nachweisen.<br />
- Anschluß des etwaigen Magnetventils überprüfen.<br />
- Im Stromplan die Steuerung SA2 lokalisieren. Sie stellt das von der Raumeinheit stammende Signal zur Auswahl der<br />
Leistungsstufe dar und entspricht der Aktivierung der ersten Stufe. Die Steuerung zum Aktivieren der zweiten Stufe ist<br />
durch das Symbol SA3 im Stromplan gekennzeichnet.<br />
- Das Regelsystem bestimmt die Einschaltfolge der Verdichter (s. Handbuch Regulierung).<br />
Gleichzeitig zum Verdichterstart läuft auch die Ventilation im betreffenden Kreis an.<br />
- Raumseitigen Betriebsbedarf überprüfen (LED 1 erleuchtet bzw. blinkend).<br />
- Zur Nachfüllung von Kältemittel den Serviceanschluß des ansaugseitigen Sperrventils verwenden, hierbei Freon in<br />
gasförmigem Zustand ansaugen lassen. Dieser Vorgang bedarf größter Umsicht, da der ND-Schalter 70 s lang<br />
gebypasst wird.<br />
Soll erst ein Kreis und dann der andere gefüllt werden, den nicht betroffenen Verdichter durch Betätigung des<br />
Sicherungshalters stoppen, am Hauptmodul kann infolge der Betriebslogik die Abschaltung nicht vorgenommen werden.<br />
ACHTUNG: nach einem Stopp zählt das System 6 Minuten vom vorhergehenden Start (nach Verstreichen dieser Zeit<br />
werden nur die 30 s Verzögerung berechnet) vor der nächsten Wiedereinschaltung.<br />
- Der Füllvorgang ist beendet, wenn:<br />
- Die Kältemittellampe (soweit vorhanden) keine Luftbaslen anzeigt.<br />
- Die Heißgastemperatur 4-8 °K beträgt.<br />
- Die Unterkühlung des Kältemittels 3-5 °K beträgt.<br />
ÖLNACHFÜLLUNG<br />
Zur Ermittlung der erforderlichen Ölnachfüllmenge ist die Kenntnis der zur werkseitigen Füllung zusätzlich aufgefüllten<br />
Kältemittelmenge erforderlich. Die Menge soll ca. 10% des zugesetzten Kältemittelgewichts betragen (Ölsorten im<br />
Handbuch Abschnitt Allgmeines nachschlagen). Die Ölnachfüllung ist nur bei zusätzlicher Kältemittelfüllung über 3 kg<br />
notwendig. Am Schraderstutzen in jedem Fall den Ölstand des Verdichters überprüfen.<br />
PRÜFUNGEN BEI ERSTER INBETRIEBNAHME<br />
NACH EINSCHALTUNG DES GERÄTS FOLGENDE KONTROLLEN VORNEHMEN:<br />
ELEKTRIK<br />
Phasenasymmetrie. Sie muß stets unter dem Höchstwert von 2% liegen (siehe Rechenbeispiel).<br />
Rechenbeispiel:<br />
L1 - L2 = 388V L2 - L3 = 379V L3 - L1 = 377V<br />
Das Mittel der Meßwerte ergibt sich aus:<br />
388 + 379 + 377<br />
= 381<br />
3<br />
Die maximale Abweichung vom Mittel:<br />
388-381=7 V<br />
Die Phasenasymmetrie ergibt sich aus:<br />
7<br />
x 100 =1,83% (accettabile) (zulässig)<br />
381<br />
Stromaufnahme Verdichter. Sie muß unter dem in Tabelle mit F.L.A. angegebenen Wert liegen.<br />
KÜHLKREIS<br />
- Etwaige Leckstellen an den Ventilanschlüssen und Druckmeßstutzen feststellen. Achtung: Sämtliche Schraubkappen<br />
der Manometerstutzen und Ventile wieder einbauen.<br />
- Kontrollampe Kältemittel überprüfen (sofern vorhanden).<br />
- Über angeschlossene Manometer die Betriebs-drücke nachprüfen ( ND zwischen 400 und 560 KPa bei 0 °C -+8 °C<br />
SST und einer Verflüssigungstemperatur von ca. 15-20 °C über der Außenlufttemperatur (Richtwerte).<br />
- Durch Differenz zwischen der am ND-Manometer und der ansaugseitig vor dem Verdichter auf dem<br />
Kontaktthermometer abgelesenen Temperatur den Wert der Überhitzung überprüfen. Bei Werten im Bereich 4-8 Grad<br />
liegt ein störungsfreier Betrieb vor, anderenfalls die Ursachen der Störung anhand des Abschnitt STÖRUNGSSUCHE<br />
ermitteln.<br />
- Durch Differenz zwischen der am HD-Manometer und der auf der Kaltwasserleitung nach dem Verdichter auf dem<br />
Thermometer abgelesenen Temepratur den Wert der Unterkühlung ermitteln. Alles i.O. bei Werten im Bereich 3/5 Grad,<br />
anderenfalls Störungsursache gemäß obigen Hinweisen feststellen.<br />
- Bei einer vollständigen Ermittlung der Anlagenfunktion ist auch die Austrittstemperatur des Verdichters zu überprüfen,<br />
wobei diese unter Berücksichtigung der angeführten Überhitz- und Unterkühlwerte ca. 30/40 Grad über der<br />
Verflüssigungstemperatur liegen soll.<br />
• Angesichts der Drehzahlregelung der Ventilatoren sollten die genannten Betriebsprüfungen unter möglichst<br />
vorgabeähnlichen Außen- und Raumluftbedingungen durchgeführt werden.<br />
• Es wird darauf hingewiesen, daß die o.e. Daten für Einheiten mit Klimabetrieb und Thermostatventil gelten.<br />
Bei Projektbedingungen mit Verdampfungstemperaturen (SST) unter 0 °C sind die Funktionsparameter je nach Auslegung<br />
der Kälteleitungen zu überprüfen.<br />
Dies sind einige der bei Inbetriebnahme der Verflüssiger nicht auszuschließende Probleme, wobei jedoch in jedem Fall die<br />
Erfahrung und Qualifizierung des zuständigen Fachpersonals maßgeblich sind.<br />
69
REGULIERUNG<br />
BETRIEBSEIGENSCHAFTEN DES HAUPTMODULS<br />
SCHALTFOLGE DER VERDICHTER<br />
Zusätzlich zur Einstellung der Flüssigkeitstemperatur unterstützt der Mikroprozessor weitere Funktionen für die<br />
Betriebsoptimierung der gesamten Einheit. Es handelt sich beispielsweise um die Schaltfolge der Verdichter, die durch<br />
Eingabe entsprechender Parameter aktiviert wird. Mit anderen Worten startet auf Befehl des Temperaturreglers zuerst<br />
der Verdichter mit der geringsten Anzahl von Betriebsstunden, während der am längsten in Betrieb befindliche Verdichter<br />
als erster stoppt. Mit dieser Funktion werden die Betriebsstunden gleichmäßig zwischen beiden Verdichtern verteilt. Für<br />
besondere Anwendungen besteht immerhin die Möglichkeit, stets den ersten Verdichter zuerst und den zweiten<br />
Verdichter danach in Betrieb zu nehmen. Die Einheiten werden vom Hersteller mit aktivierter Schaltfolge eingerichtet.<br />
ZEITSCHALTUNGEN DER VERDICHTER<br />
Zum einwandfreien Betrieb der Verdichter sind bestimmte Zeitschaltungen erforderlich. Zum besseren Verständnis dieser<br />
Zeitschaltungen wird auf das Diagramm in Abb. 3 verwiesen.<br />
Verd. 1<br />
Verdichter<br />
EIN<br />
EIN<br />
AUS<br />
Verd. 2<br />
Sekunden<br />
EIN<br />
AUS<br />
Einschaltspanne 1. 2. Verdichter<br />
C06<br />
Ausschaltspanne 1. 2. Verdichter C07<br />
Sekunden<br />
AUS<br />
Sicherheitszeit<br />
Einschaltung<br />
Abschaltung C01<br />
Sicherheitszeit Einschaltung<br />
Einschaltung C02<br />
Sekunden*10<br />
Abbildung 3 Abbildung 4<br />
Im Diagramm von Abb. 4 sind 2 Parameter dargestellt. SICHERHEITSZEIT EINSCHALTUNG ABSCHALTUNG und<br />
SICHERHEITSZEIT EINSCHALTUNG EINSCHALTUNG. Durch den ersten Parameter wird festgelegt, dass nach dem<br />
Stopp des Verdichters eine bestimmte Zeit vor dessen erneuter Einschaltung verstreicht. Diese Zeit wird selbst bei<br />
Betriebsaufforderung durch den Temperaturregler berücksichtigt. Durch den zweiten Parameter wird festgelegt, dass<br />
zwischen zwei aufeinanderfolgenden Einschaltungen eine bestimmte Zeit vergehen muss. Bei Einheiten mit zwei<br />
Verdichtern werden zusätzlich zwei weitere Parameter verwendet, u.z. EINSCHALTSPANNE ERSTER ZWEITER<br />
VERDICHTER und ABSCHALTSPANNE ERSTER ZWEITER VERDICHTER. Mit dem ersten Parameter wird der<br />
gleichzeitige Start beider Verdichter verhindert, in erster Linie um übermäßige Anlaufströme der Einheit zu vermeiden.<br />
Der zweite Parameter legt eine Zeitspanne zwischen der Abschaltung des ersten und zweiten Verdichters fest. Diese<br />
zwei Parameter beziehen sich auf das Diagramm in Abbildung 3.<br />
70
REGLER WÄRMETAUSCHER VENTILATOREN<br />
Standardmäßig werden die Einheiten <strong>MSAT</strong> mit thermostatischem Regler gestellt, auf Anfrage mit Regelung über<br />
Druckschalter in einem entsprechenden Bausatz. Das nachstehend beschriebene Funktionsprinzip ist allerdings bei<br />
beiden Regelarten identisch.<br />
- LÜFTUNGSSTEUERUNG IM KÜHLBETRIEB<br />
Der Kühlbetrieb wird im nachstehenden Diagramm in Abb. 6 beschrieben.<br />
Abbildung 6<br />
Beim Start des Verdichters findet eine Zwangslüftung statt, d.h. die Ventilatoren drehen unabhängig von der gesteuerten<br />
Regelung für eine über Parameter festgelegte Zeit bei maximaler Drehzahl, sofern die Temperatur nicht unter dem<br />
ABSCHALTWERT liegt. In diesem Fall laufen die Ventilatoren hingegen die gleiche Zeit lang auf Mindestdrehzahl. Es soll<br />
nun die Funktion des Reglers näher betrachtet werden.<br />
Als ersten Parameter muss die ABSCHALTUNG festgelegt werden, also diejenige Verflüssigungstemperatur, unter der<br />
die Ventilatoren im Stillstand sind. Die ABSCHALTHYSTERESE definiert den Schaltbereich zwischen Mindestdrehzahl<br />
der Ventilatoren und ihrem Stillstand. Die Ventilatoren starten demnach mit Mindestdrehzahl bei einem Temperaturwert<br />
von ABSCHALTUNG + ABSCHALTHYSTERESE, während der Stopp durch die Differenz zwischen SOLLWERT<br />
KÜHLEN und ABSCHALTDIFFERENZ gegeben ist. Sobald die Verflüssigungstemperatur den SOLLWERT<br />
VENTILATOREN KÜHLEN übersteigt, stimmt der Regler die Ventilatordrehzahl mit proportionaler Regelung auf die<br />
Verflüssigungstemperatur ab. Bei Clivet Einheiten wird diese Regelung entgegen der vom Diagramm gezeigten<br />
Darstellung bis Erreichen des SOLLWERTS VENTILATOREN MAX KÜHLEN aufrecht gehalten. Der Vollständigkeit<br />
halber sollen auch die Parameter MAX DREHZAHL SCHALLGEDÄMPFT und PROPORTIONALBAND KÜHLEN<br />
erläutert werden. Mit dem ersten Parameter wird eine Höchstschwelle der Ventilatordrehzahl festgelegt, die einer der<br />
Drehzahlregelung unterliegenden Verflüssigungstemperatur entspricht. Das PROPORTIONALBAND KÜHLEN definiert<br />
hingegen den Steigungswinkel der Geraden, in welchem die Regelung der Drehzahl stattfindet. Die CLIVET Einheiten<br />
sind mit Regelung der Ventilatoren bis zur maximalen Drehzahl ausgerüstet.<br />
71
KONTROLLMODULTASTATUR<br />
LED 1 Verdichter 1<br />
• ON bei Einschaltung des 1. Verdichters<br />
• OFF bei Abschaltung des 1. Verdichters<br />
• BLINKEN mit Frequenz 1Hz bei zeitgesteuerten Sicherheitstakten<br />
• BLINKEN mit niedriger Frequenz bei Verdichter im Abtauvorgang (nur Wärmepumpe )<br />
LED 3 Verdichter 2<br />
• ON bei Einschaltung des 1. Verdichters<br />
• OFF bei Abschaltung des 1. Verdichters<br />
• BLINKEN mit Frequenz 1Hz bei zeitgesteuerten Sicherheitstakten<br />
• BLINKEN mit niedriger Frequenz bei Verdichter im Abtauvorgang (nur Wärmepumpe)<br />
ON bei Steuerung im Kühlbetrieb<br />
Bei erloschener Led KÜHLUNG befindet sich die Steuerung im Modus STAND-BY<br />
Bei abgeschalteter Maschine (OFF) ist nur die Dezimalstelle erleuchtet.<br />
HINWEIS: Die LED 2 und 4 beziehen sich auf Einheiten mit 4 Verdichtern und zwei Kältekreisen.<br />
EINGABE DER BETRIEBSPARAMETER<br />
In diesem Kapitel behandeln wir ausschließlich die unmittelbar ohne Kennwort aufrufbaren Parameter. Die Parameter mit<br />
Kennwortschutz sind dem Fachpersonal der autorisierten Kundendienststellen vorbehalten.<br />
BEDEUTUNG DER TASTEN<br />
Taste ON-OFF<br />
Taste MODE<br />
ON-OFF<br />
a) Bei längerem Druck als 2 Sekunden schaltet der Temperaturregler von ON auf OFF und umgekehrt.<br />
b) Mit einmaligem Drücken dieser Taste werden sämtliche nicht aktiven Alarme mit manueller<br />
Rückstellung zurückgesetzt. Es werden außerdem die Zähler der Auslösungen pro Stunde gelöscht,<br />
auch im deaktivierten Zustand.<br />
c) Abrolltaste im Modus Menü.<br />
d) Wertverringerung des ausgewählten Parameters.<br />
a) Werden beiden Tasten innerhalb von 2 Sekunden gedrückt und wieder losgelassen, wird die nächst<br />
höhere Ebene des Konfigurationsmenüs hinuntergegangen.<br />
Taste MODE a) Werden beiden Tasten länger als 2 Sekunden gedrückt, wird die nächst höhere Ebene des<br />
Konfigurationsmenüs aufgerufen.<br />
ON-OFF b) Bei Anzeige der letzten Menüebene wird durch gleichzeitiges Drücken und Loslassen innerhalb von 2<br />
Sekunden die nächst höhere Ebene aufgerufen.<br />
Taste MODE<br />
a) Aufrolltaste im Modus Menü.<br />
b) Wertvergrößerung des ausgewählten Parameters.<br />
72
Tabelle 1<br />
LISTE DER AUFRUFBAREN PARAMETER<br />
Code Beschreibung Maßeinheit Werkvorgabe<br />
H46 Kennwort Einheit 0<br />
Ebene 0 Ebene 1 Ebene 2<br />
Ebene 3<br />
Ebene 4<br />
Regelfühler aktiver<br />
Alarm<br />
Sollwert : SEt Etk. Sollwert Kühlen: Coo Sollwert Kühlen<br />
Etk. Sollwert Heizen: HEA<br />
Sollwert Heizen<br />
Analogeingänge: tP<br />
Code Eingänge: t01- t06<br />
Wert Analogeingang<br />
Alarme: Err<br />
Cod akt.Alarme: E00-E46<br />
Digitaleingänge: Id<br />
Code Eingänge: 01-I11<br />
Zustand Digitaleingang<br />
Parameter: PAr<br />
Konfig.Parameter: CnF<br />
Par.Index H01-H69<br />
Parameterwert<br />
Verdichterparameter: CP<br />
Par.Index C01-C08<br />
Parameterwert<br />
Lüftungsparameter: FAn<br />
Par.Index F01-F25<br />
Parameterwert<br />
Alarmparameter: ALL<br />
Par.Index A01-A26<br />
Parameterwert<br />
Pumpenparameter: PUP<br />
Indice par. P01-P03<br />
Parameterwert<br />
Frostschutzpar: Fro<br />
Par.Index r01-r17<br />
Parameterwert<br />
Abtauparameter: dFr<br />
Par.Index d01-d11<br />
Parameterwert<br />
Expansionsparameter: ESP<br />
Par.Index N01-N07<br />
Parameterwert<br />
Kennwort: PSS<br />
Wert Kennwort<br />
Betriebsstunden: OHr<br />
Verd.Stunden: OH1-OH4<br />
Stunden<br />
Pumpenstd.: OHP<br />
Stunden<br />
Zur Bewegung innerhalb der einzelnen Ebenen drücken Sie gleichzeitig die Tasten “Mode” und<br />
“on off”<br />
1 - Indem Sie beide Tasten weniger als 2 Sekunden drücken, steigen Sie um eine Ebene im<br />
Konfigurationsmenü abwärts<br />
2 - Indem Sie beide Tasten mehr als 2 Sekunden drücken, steigen Sie um eine Ebene im<br />
Konfigurationsmenü aufwärts<br />
3 - Auf der letzten Ebene eines Menüs verursacht das gleichzeitige Drücken und Loslassen der<br />
Tasten innerhalb von 2 Sekunden das Aufsteigen um eine Ebene.<br />
73
ALARME<br />
Auf dem Display des Bedienerterminals werden die Alarmschlüssel bei Eintreten eines Fehlers eingeblendet. Die<br />
Anzeige der Alarme mit automatischer Rückstellung erlischt bei Behebung der Störung, die Alarme mit manueller<br />
Rückstellung müssen dagegen durch technisches Fachpersonal zurückgesetzt werden. Bei der Alarmanzeige auf dem<br />
Bedienerterminal wird die Eingabefolge in Tabelle 4 berücksichtigt. Sollten mehrere Alarme gleichzeitig auftreten, wird<br />
auf jeden Fall nur der erste angezeigt, nach dem Löschen dann der zweite usw. bis sämtliche Alarme gelöscht sind.<br />
Achtung: Im Standby- bzw. ausgeschalteten Zustand erfolgt keine Alarmanzeige und das Alarmrelais ist deaktiviert. Erst<br />
bei Aufrufen des Betriebsmodus werden etwaige Alarme angezeigt und das Alarmrelais aktiviert.<br />
Tabelle 2<br />
Schlüssel Störung Blocke Reset<br />
E01 Höchstdruck Kreis 1 Verdichter MANUELL<br />
E02* Mindestdruck Kreis 1 Verdichter ventilator AUTOMATISCH (Nach 5 Meldungen manuelles<br />
Löschen)<br />
E03 Schutzschalter Verdichter 1 Verdichter ventilator MANUELL<br />
E04 Schutzschalter Lüfter Kreis 1 Verdichter ventilator MANUELL<br />
E07 Defekt Fühler BT3/BP3 Verdichter ventilator AUTOMATISCH<br />
E21 Höchstdruck Kreis 2 Verdichter ventilator MANUELL<br />
E22* Mindestdruck Kreis 2 Verdichter ventilator AUTOMATISCH (Nach 5 Meldungen manuelles<br />
Löschen)<br />
E24 Schutzschalter Lüfter Kreis 2 Verdichter ventilator MANUELL<br />
E27 Defekt Fühler BT5/BP5 Verdichter ventilator AUTOMATISCH<br />
E45 Konfiguration Verdichter MANUELL<br />
* Geht nach 5 Meldungen auf manuelle Rückstellung über. Die Alarmmeldungen werden nur dann gezählt, wenn zwischen<br />
zwei aufeinander folgenden Meldungen mehr als 225 Sekunden verstreichen.<br />
74
STÖRUNGSSUCHE<br />
Auf folgenden Seiten wird in übersichtlicher Form die Erkennung und Abhilfe einige Gerätestörungen beschrieben. Die<br />
Ausführung der hierin geschilderten Arbeiten unterliegt der vollen Eigenhaftung. Eingriffe zur Wiederherstellung der<br />
Gerätefunktion müssen daher unbedingt einem autorisierten Techniker mit den erforderlichen Sachkenntnis anvertraut<br />
werden.<br />
Die Auslösung einer Sicherheit deutet stets auf eine Betriebsstörung hin, deren Ursache vor Rücksetzen der<br />
angesprochenen Sicherheit identifiziert und behoben werden soll. Es folgt nun eine Auflistung der Störungen, Ursachen und<br />
entsprechenden Abhilfen.<br />
ACHTUNG<br />
DIE AUSFÜHRUNG DER BESCHRIEBENEN ARBEITEN UNTERLIEGT DER VOLLEN EIGENHAFTUNG. EINGRIFFE ZUR<br />
WIEDERHERSTELLUNG DER GERÄTEFUNKTION MÜSSEN DAHER UNBEDINGT EINER AUTORISIERTEN<br />
SERVICESTELLE MIT DEN ERFORDERLICHEN KENNTNISSEN ANVERTRAUT WERDEN.<br />
Fehler oder Betriebsstörungen werden ausnahmslos vom Hauptmodul verwaltet. Bei jedem Fehler bzw. Störzustand kann<br />
das Modul zusätzlich zur Sicherheitsabschaltung der Einheit den Vorfall ebenfalls auf Ferndisplay anzeigen.<br />
75
HD-STÖRABSCHALTUNG<br />
HD- STÖRABSCHALTUNG<br />
JA<br />
Belüftung wirksam ?<br />
NEIN<br />
Nachweis Verflüssiger<br />
( 1 )<br />
Nachweis Ventilator<br />
( 2 )<br />
Nachweis Ventilatormodul<br />
( 3 )<br />
Nachweis Fühler<br />
( 4 )<br />
JA<br />
Außenlufttemperatur unter<br />
Betriebsgrenzen ?<br />
NEIN<br />
Nachweis Projektdaten<br />
( 5 )<br />
JA<br />
Kältemittelfüllung i.O. ?<br />
NEIN<br />
Nachweis Unterkühlung<br />
Kältemittel<br />
( 6 )<br />
JA<br />
Keine Nichtkondensate ?<br />
NEIN<br />
Neues Vakuum und Füllen<br />
( 7 )<br />
JA<br />
Ansaugtemperatur bzw. -<br />
Druck i.O. ?<br />
NEIN<br />
Betriebsnachweis<br />
Inneneinheit ( 8 )<br />
Einheit in Betrieb<br />
Funktionsnachweis der<br />
Absperrelemente auf der<br />
Kältemittelleitung<br />
( 9 )<br />
Anmerkungen:<br />
1) Soll max. Luftaustausch sichern, es dürfen daher keine Schmutzreste, Ablagerungen oder den Luftstrom behindernde<br />
Elemente vorhanden sein.<br />
2) Ggf. beschädigten Ventilator ersetzen.<br />
3) Ausgangsspannung der Platine soll die Drehzahl der Ventilatoren proportional regeln; sonst Modul ersetzen.<br />
4) Einbauposition nachweisen: Muß mit dem Profilrohr des Austauschers stets in Berührung stehen. Der Widerstand soll<br />
einwandfrei auf die Temperatur abgestimmt sein, den Wert mit Ohmmeter nachmessen.<br />
5) Nachweisen:<br />
- Betriebsgrenzen (s. Handbuch Allgemeines).<br />
- Austauscher darf keiner direkten Sonne ausgesetzt sein bzw. in der Nähe abstrahlender Oberflächen stehen.<br />
- In unmittelbarer Nähe darf keine Warmluftströmung auftreten.<br />
- Es darf nicht die gleiche Luft umgewälzt werden.<br />
6) Prüfmodalitäten im Handbuch INBETRIEBNAHME nachschlagen. MERKE: Eine Überflutung bis zur Einbauposition des<br />
Fühlers verursacht eine Betriebs-störung des Regelsystems für die Drehzahl der Ventilatoren.<br />
7) Es kann eine extrem hohe Verflüssigungstemperatur (25/30 Grad über der Außenlufttemperatur) bei schwacher<br />
Kühlleistung eintreten. Die Merkmale sind die einer übermäßigen Kältemittelfüllung, sodaß nach Überprüfung dieser<br />
Möglichkeit die Anlage ggf. erneut auf Vakuum zu fahren und zu befüllen ist.<br />
8) Luftdurchfluß und Raumlufttemperatur dürfen nicht allzu hoch sein. Dies könnte die Ausbringung der Maschine steigern<br />
und somit den Verflüssiger durch Ableitung der Mehrwärme belasten.<br />
9) Sämtliche Absperrelemente auf der Kältemittelleitung müssen komplett geöffnet sein.<br />
76
ND-STÖRABSCHALTUNG<br />
ND-STÖRABSCHALTUNG<br />
JA<br />
Betrieb der Inneneinheit<br />
i.O. ?<br />
NEIN<br />
Betriebsnachweis<br />
Inneneinheit ( 1 )<br />
Betriebsbedingungen<br />
Inneneinheit prüfen ( 2 )<br />
Anschlußleitungen<br />
überprüfen ( 3 )<br />
JA<br />
Entfeuchtungsfilter<br />
funktionstüchtig ?<br />
NEIN<br />
∆t vor und nach Filter<br />
überprüfen ( 4 )<br />
JA<br />
Kältemittelfüllung<br />
korrekt ?<br />
NEIN<br />
Überhitzung<br />
nachweisen ( 5 )<br />
JA<br />
Ansaugventil komplett<br />
geöffnet ?<br />
NEIN<br />
Nachweisen und ggf.<br />
öffnen<br />
JA<br />
Ansaugtemperatur bzw. -<br />
Druck i.O. ?<br />
NEIN<br />
Betriebsnachweis<br />
Inneneinheit ( 6 )<br />
Einheit in Betrieb<br />
Anmerkungen:<br />
1) Nachweisen:<br />
- Ausreichenden Luftdurchfluß.<br />
- Richtigen Drehsinn der Ventilatoren.<br />
- Wärmetauscher auf Schmutzablagerungen oder Rückstände, da max. Austausch gefordert wird.<br />
- Funktionsbereitschaft des Magnetventils.<br />
- Funktionsbereitschaft des Thermostatventils.<br />
2) Die Temperatur-/Feuchtigkeitswerte der behandelten Luft sollen den Projektvorgaben entsprechen.<br />
3) Länge und Durchmesser der Leitungen sollen den Vorgaben entsprechen (s. Handbuch KÄLTE-LEITUNGEN). Die<br />
anderenfalls möglichen Leckagen könnten den ordnungsgemäßen Betrieb der einheit beeinträchtigen.<br />
4) Temperatur vor und nach dem Entfeuchtungsfilter mit Kontaktthermometer überprüfen. Übersteigt die Temperaturdifferenz<br />
1°C, ist der Filter nicht funktions-tüchtig bzw. zu klein bemessen. In beiden Fällen den Filter ersetzen.<br />
5) Prüfmodalitäten im Handbuch INBETRIEBNAHME nachschlagen.<br />
6) Bei Verflüssigungsdruck unter 1200kPa kann eine unregelmäßige Versorgung eintreten und hierdurch ein unzureichender<br />
Ansaugdruck vorliegen.<br />
Die Belüftung der Außeneinheit muß einwandfrei gewärhleistet sein (d.h. Regelung oder Abschaltung der Ventilatoren).<br />
77
AUSLÖSUNG VERDICHTERSICHERHEIT<br />
AUSLÖSUNG VERDICHTER-<br />
SICHERHEIT<br />
JA<br />
Austrittstemperatur<br />
innerhalb Grenzwerten ?<br />
NEIN<br />
Parameternachweis, wie:<br />
Überhitzung, Kältemittelfüllung<br />
usw.<br />
JA<br />
Kontaktthermostat<br />
funktionstüchtig ?<br />
NEIN<br />
Thermostat ersetzen<br />
Einheit in Betrieb<br />
AUSLÖSUNG VENTILATORSCHUTZ<br />
AUSLÖSUNG VENTILATOR-<br />
SCHUTZ<br />
JA<br />
Motor i.O. ?<br />
NEIN<br />
Behinderungen des<br />
Austauschers nachweisen<br />
Behinderungen der<br />
Schaufeln nachweisen<br />
Elektrische Wicklungen<br />
überprüfen<br />
Einheit in Betrieb<br />
78
LAUTER GERÄTEBETRIEB<br />
LAUTER GERÄTEBETRIEB<br />
JA<br />
Schwingungsdämpfer des<br />
Verdichters in gutem<br />
Zustand ?<br />
NEIN<br />
Überprüfen und ggf.<br />
ersetzen<br />
NEIN<br />
Befestigungsschrauben des<br />
Verdichters gelockert ?<br />
JA<br />
Überprüfen und ggf.<br />
anziehen<br />
NEIN<br />
Leitungen in Schwingung ?<br />
JA<br />
Die Fixierstellen<br />
nachweisen<br />
Einheit in Betrieb<br />
KEIN VERDICHTERSTART<br />
KEIN VERDICHTERSTART<br />
NEIN<br />
Liegt Spannung an den<br />
Klemmen an ?<br />
JA<br />
Klixon Auslösung<br />
( 1 )<br />
Motor durchgebrannt<br />
( 2 )<br />
Verdichterstörabschaltung<br />
( 3 )<br />
JA<br />
Schutzschalter eingerückt ?<br />
NEIN<br />
Einrücken<br />
JA<br />
Schütz funktionstüchtig ?<br />
NEIN<br />
Spule auf Durchbrennen<br />
und Kontaktoxidation<br />
überprüfen<br />
JA<br />
Kontrollmodul<br />
funktionstüchtig ?<br />
NEIN<br />
Überprüfen und ggf.<br />
ersetzen<br />
E in h e it in B etrieb<br />
Anmerkungen<br />
1) Die Klixon Auslösung wird von einer relativ hohen Gehäusetemperatur begleitet.<br />
Vor Neustart die Ursache ermitteln.<br />
2) Wicklungen auf Masseschluß überprüfen. Ggf. Verdichter ersetzen.<br />
3) Die mechanische Störabschaltung macht sich durch ein anhaltendes und typisches Geräusch erkennbar. Ggf. den<br />
Verdichter ersetzen.<br />
79
REGELMÄSSIGE WARTUNG<br />
WICHTIG<br />
VOR SÄMTLICHEN WARTUNGS- BZW. REINIGUNGSARBEITEN DIE EINHEIT SPANNUNGSLOS SETZEN.<br />
Dieser Abschnitt ist dem Benutzer gewidmet und folglich für die ordnungsgemäße Langzeitfunktion der Einheit von<br />
entscheidender Bedeutung.<br />
Die gründliche und regelmäßige Ausführung einiger weniger Arbeiten kann den Eingriff von Fachpersonal ohne weiteres<br />
ersparen.<br />
Die beschriebenen Arbeiten erfordern keine besonderen technischen Kenntnisse und sind als einfache Überprüfungen an<br />
den Komponenten der Einheit zu verstehen, d.h.:<br />
- Verdampfer<br />
- Elektroventilatoren<br />
- Struktur<br />
EINHEIT<br />
VERDAMPFER<br />
Es ist vor allen Dingen wichtig, daß der Verdampfer einen optimalen Wärmeaustausch gewährleistet. Aus diesem Grund<br />
darf seine Oberfläche weder Verschmutzungen noch Staubablagerungen ausweisen, die durch den Ventilatorbetrieb<br />
zugeführt werden können.<br />
- Die sich ggf. auf die Verdampferfläche abgesetzten Verunreinigungen, wie zum Beispiel Papier, Blätter usw., sind mit<br />
einer Bürste zu entfernen.<br />
- Die Alu-Fläche des Verdampfers sollte mit Druckluft abgeblasen werden, wobei der Luftstrahl zum Schutz vor<br />
Beschädigungen stets parallel zu den Lamellen zu richten ist.<br />
- Die Alu-Lamellen auf Schäden bzw. Verbiegung überprüfen. In einem derartigen Fall müssen die Lamellen mit<br />
geeignetem Werkzeug “gekämmt” werden, um den strömungsgünstigen Anfangszustand des Verdampfers<br />
wiederherzustellen.<br />
ELEKTROVENTILATOREN<br />
Bei saisonbedingtem Ersteinschalten das Betriebsgeräusch nachweisen.<br />
Ursachen für ein erhöhtes Betriebsgeräusch und Schwingungen: Unwucht der Flügel bzw. Lockern der<br />
Befestigungsschrauben.<br />
Bei einer erwiesenen Störung die autorisierte Kundendienststelle mit der Behebung beuaftragen, da die Ventilatoren im<br />
Verflüssigerbereich der Maschine angeordnet sind.<br />
- Die Befestigung des Elektroventilators am Stützgitter überprüfen.<br />
- Die Befestigung des Stützgitters an der Tragstruktur der Einheit überprüfen.<br />
- Soweit möglich, die durch lautes Betriebsgeräusch und übermäßige Schwingungen gekennzeichte Unwuchten des<br />
Elektroventilators nachweisen.<br />
STRUKTUR<br />
- Den Zustand der Strukturteile überprüfen.<br />
Hierbei besonders auf die Stahlkomponenten achtgeben.<br />
- Die rostbefallen Teile der Einheit mit geeignetem Schutzlack behandeln.<br />
- Die Befestigung der äußeren Verkleidung überprüfen. Lockere Teile verursachen störende Geräusche und<br />
Schwingungen.<br />
ELEKTRIK<br />
Das Netzkabel der Einheit zum Schaltschrank darf weder gerissen noch abgeschabt sein oder sonstige Beschädigungen<br />
aufweisen, wodurch die Isolation beeinträchtigt werden könnte. Für Wartungsarbeiten in diesem Sinne ist eine<br />
autorisierte Servicestelle zuständig.<br />
WICHTIG<br />
DAS SAISONBEDINGTE EINSCHALTEN DER EINHEIT SOLLTE STETS IM BEISEIN VON FACHPERSONAL<br />
ERFOLGEN, UM NACH ABSCHLUSS DER BESCHRIEBENEN ARBEITEN AUCH DIE ÜBERPRÜFUNG DES<br />
KÜHLKREISES VORNEHMEN ZU KÖNNEN.<br />
80
KÄLTELEITUNGEN<br />
Die Auslegung der Kälteleitungen zur Verbindung von externen Verflüssigereinheiten und internen Verdampfern ist von<br />
entscheidender Bedeutung. Für den Anschluß an unsere Einheiten die untenstehende Tabelle einsehen, in der zu den<br />
jeweiligen Längen die Zuordnung von Anschluß- und Außendurchmesser der Verbindungsleitungen angegeben ist.<br />
Bei größeren Leitungslängen ist der Durchmesser rechnerisch zu ermitteln (s. hierzu Fachliteratur bzw. unsere Broschüre<br />
AUSLEGUNG DER KÄLTELEITUNGEN IN DOPPELTEN ANLAGEN). Die Tabelle gibt außerdem Aufschluß über den<br />
empfohlenen Höhenunterschied bei Standardleitungen für den Fall einer tiefer gelegenen Verflüssigereinheit i.V. zum<br />
Endgerät und umgekehrt.<br />
Es dürfen ausschließlich Kälteleitungen aus Kupfer verwendet werden.<br />
Größe. ∅ Ansaug. ∅ Kältem Max. Max. Max. Höhenunter<br />
Länge m Bogenanz Abb. 4 Abb. 6<br />
<strong>102</strong> 22 14 10 6 9 9<br />
<strong>122</strong> 22 14 10 6 9 9<br />
<strong>142</strong> 28 16 16 8 12 12<br />
<strong>162</strong> 28 18 16 6 10 10<br />
<strong>182</strong> 28 18 12 6 10 10<br />
<strong>202</strong> 35 22 23 10 18 18<br />
<strong>242</strong> 35 22 20 10 14 14<br />
ANSAUGLEITUNG<br />
Bei sämtlichen Größen sind Schweißanschlüsse vorgesehen, wozu die Einheit<br />
serienmäßig mit speziellem ROTALOCK Anschluß beigestellt wird.<br />
- Die vorgerüstete Leitung anhand von zwei Schlüsseln an das Absperrventil<br />
anschließen (gem. Abb. 1 für 1. Steuerkreis, gem. Abb. 2 für 2. Steuerkreis).<br />
Abbildung 1<br />
Abbildung 2<br />
KÄLTEMITTELLEITUNG<br />
Abbildung 3<br />
Bei sämtlichen Größen sind Schweißanschlüsse vorgesehen, wozu die<br />
Einheit serienmäßig mit speziellem ROTALOCK Anschluß beigestellt wird.<br />
- Die vorgerüstete Leitung anhand von zwei Schlüsseln an das<br />
Absperrventil anschließen (gem. Abb. 3 für 1. Steuerkreis, gem. Abb.<br />
4 für 2. Steuerkreis).<br />
Abbildung 4<br />
HINWEIS:<br />
Sämtliche Leitungen müssen einwandfrei sauber (vor dem Anschluß sind sie mit Stickstoff oder Trockenluft zu<br />
reinigen) und feuchtigkeitsfrei sein, damit eine optimale Vakuumerzeugung gesichert wird.<br />
81
LECKKONTROLLE<br />
- Die Ventile der Verflüssigereinheit müssen geschlossen sein.<br />
- Das Manometer mit den Serviceanschlüssen der Ventile verbinden.<br />
- Mit Kältemittel bis auf 250Kpa beaufschlagen.<br />
- Die Hähne des Manometersatzes schließen, die Verbindung zur Kältemittelflasche<br />
trennen und daraufhin die Stickstoffflasche verbinden.<br />
- Manometerhähne öffnen.<br />
- Anlage bis 1200kPa mit Stickstoff beaufschlagen.<br />
- Mit Lecksuchlampe oder anderem Elektronikgerät den gesamten Leitungsverlauf,<br />
besonders die Schweißungen und Verbindungen, nach etwaigen Verlusten<br />
abchecken.<br />
Sollte man nicht über die geeignete Ausrüstung verfügen, sämtliche Leckstellen des<br />
Kältemittels inspektionieren lassen (Schweißungen, Verbindungen usw.).<br />
Thermostatkugel<br />
Thermostatkugel<br />
Außeneinheit<br />
Gasventil<br />
Inneneinheit<br />
Abbildung 5<br />
Figura 5<br />
Kältemittelventil<br />
HINWEISE/ANLEITUNGEN FÜR EINEN ORDNUNGSGEMÄSSEN<br />
ANSCHLUSS<br />
ANSAUGLEITUNG<br />
- Gefälle zum Verdichter in den waagrechten Leitungsabschnitten (0,5%), um den<br />
Ölrücklauf zum Verdichter auch unter min. Lastbedingungen zu sichern.<br />
- Leitung einwandfrei mit kondensatsperrendem PÄ geschlossener Poren in einer<br />
Mindeststärke von 9 mm isolieren.<br />
- Befindet sich der Verflüssiger auf einer geringeren Höhe als der Verdampfer<br />
(Abbildung 5), einen Siphon einbauen und somit bei Stillstand der Anlage den<br />
Rücklauf des Kältemittels zum Verdichter verhindern.<br />
- Als Ersatz des Siphons ein Magnetventil auf die Kältemittelleitung einbauen (s. Abb.<br />
6), wobei der Ventileinbau übrigens in jedem Fall ratsam ist.<br />
- Verfügt das Endgerät außer dem Siphon auch über Thermostatventil, einen<br />
Verschluß in größtmöglicher Nähe zur Einheit vorsehen (s. Abb. 5). Auf diese<br />
Weise soll verhindert werden, daß die Kugel des Thermostatventils bei stehender<br />
Anlage mit dem Kältemittel in Berührung bleibt (s. Abb. 5).<br />
Bei Anschluß an unser CED-V Gerät ist der Siphon bereits in die Einheit integriert.<br />
- Befindet sich der Verflüssiger dagegen auf größerer Höhe als der Verdampfer, nur<br />
den Verschluß (s. Abb. 7) vorsehen; sollte die Entfernung jedoch insgesamt über 7-<br />
10 m betragen, muß außerdem ein Magnetventil auf die Leitung des Kältemittels<br />
eingebaut werden.<br />
- Bei senkrechtem Gefälle außer dem bodenseitigen Verschluß ebenfalls alle 6 Meter<br />
einen Ölsiphon vorsehen (s. Abb. 8).<br />
- Weitläufige Leitungsbögen (keine Kniestücke) verwenden.<br />
- Die Leitung darf keine Quetschstellen aufweisen.<br />
KÄLTEMITTELLEITUNG<br />
- Kann normalerweise ungeschützt verlaufen, ist jedoch im Fall direkter Sonneneinstrahlung<br />
oder höherer Temperaturen entsprechend zu isolieren.<br />
- Gegen Überfüllung sollten größere Leitungsdurchmesser vermieden werden.<br />
Abbildung Figura 6 6<br />
Abbildung Figura 7 7<br />
Abbildung Figura 8 8<br />
WICHTIG<br />
Bei internem Endgerät mit Thermostatventil und Anschlußleitungen über ca. 15/20 m Länge bzw. bei Anlagenbetrieb unter<br />
schwankenden Klimabedingungen (z.B. starke Veränderungen der Außenluft bei Tag/Nacht und Sommer/Winter) sollte ein<br />
Kältemittelbehälter geeigneter Größe in Nähe der Inneneinheit installiert werden.<br />
Dem Kältemittelbehälter kommen untenstehende Funktionen zu:<br />
- Er verhindert den Eintritt gasförmigen Freons in den Lamellenbereich.<br />
- Er gleicht die Füllschwankungen der Anlage bei Änderung der Betriebsbedingungen aus.<br />
- Er gleicht teilweise und kurzzeitig nicht wahrnehmbare Kleinverluste aus, die auf Dauer zur Entleerung der Anlage führen<br />
können.<br />
- Verhindert das Überfluten des Verflüssigers mit darauffolgendem Anstieg von Verflüssigungsdruck/-Temperatur bei<br />
übermäßiger Kältemittelfüllung der Anlage bzw. Füllvorgängen unter ungünstiger Witterung.<br />
Bei großer Anschlußlänge sollte der Kältemittelbehälter jedoch auf jeden Fall eingebaut werden.<br />
82
RESTGEFAHREN<br />
ACHTUNG<br />
IM VORLIEGENDEN ABSCHNITT WERDEN MÖGLICHE, GEFAHRSITUATIONEN<br />
SOWIE DIE ZU BEACHTENDEN SICHERHEITSMASSNAHMEN AUFGEZEIGT.<br />
DEFINITION GEFAHRENBEREICH<br />
Die unten gezeigte Abbildung gibt den Bereich an, in welchem sich nur autorisiertes Fachpersonal aufhalten darf.<br />
- Der äußere Gefahrenbereich wird durch eine klar abgegrenzte Fläche um die Maschine herum und durch die vertikale<br />
Bodenprojektion bei schwebender Maschine bestimmt.<br />
- Der innere Gefahrenbereich ist der Bereich, der nur durch absichtliches Entfernen der Verkleidung oder von<br />
Verkleidungsteilen zugänglich ist.<br />
83
ALLGEMEINE GEFAHREN<br />
Betrachteter Bereich Gefahren Ursache Sicherheitshinweise<br />
Wärmetauscher Leichte Verletzungen Kontakt Unbeabsichtigte Kontakte vermeiden.<br />
Schutzhandschuhe tragen.<br />
Verflüssigerschutzgitter (Zubehör) anbringen.<br />
Hochdrucksicherheitsventil<br />
Bereich um das Gerät<br />
Bereich um das Gerät<br />
Verletzungen<br />
Vergiftungen<br />
Verletzungen<br />
Vergiftungen<br />
Schwere Verbrennungen<br />
Gefahr durch:<br />
Schwere Verbrennungen<br />
Vergiftungen<br />
Ausstoß von Kältemittel durch<br />
Ansprechen der betreffenden<br />
Sicherheitsvorrichtung<br />
Explosion aufgrund Erhöhung<br />
der Umgebungstemperatur<br />
(Brand)<br />
Brand infolge Kurzschluß oder<br />
Überhitzung Einspeisekabel vor<br />
dem Hauptschalter<br />
Eintreten in den Gefahrenbereich vermeiden.<br />
Schutzgitter am Verdichtergehäuse anbringen<br />
(optional).<br />
Den Ablaß des Sicherheitsventils in geeigneter<br />
Weise herausführen.<br />
Geeignete Kleidung und Schutzbrille tragen.<br />
Die Druck- und Ansaugventile der Verdichter bei<br />
stehender Maschine nie geschlossen lassen.<br />
Korrekte Bemessung der Kabel und der<br />
Schutzvorrichtungen der Anschlußleitung an das<br />
Stromnetz.<br />
Unbeabsichtigte Kontakte vermeiden<br />
Schutzhandschuhe tragen.<br />
Inneres der Einheit Verbrennungen Kontakt mit Druckleitungen und<br />
Verdichtern.<br />
Inneres der Einheit Verletzungen Kontakt mit Scharfenkanten Schutzhandschuhe tragen<br />
Inneres der Einheit<br />
Gefahr durch:<br />
Beschädigung der Isolation auf den<br />
Stromschlag<br />
Einspeisekabeln vor den<br />
Schwere Verbrennungen Haupttrennschalter<br />
Innere Gefahrenbereich<br />
Innere Gefahrenbereich<br />
Gefahr durch:<br />
Stromschlag<br />
Gefahr durch:<br />
Stromschlag<br />
Schwere Verbrennungen<br />
Unter Spannung stehende<br />
Metallteile.<br />
Kontakt mit Spannungsteilen, die<br />
nach Entfernung der<br />
Sicherheitsvorrichtungen<br />
zugänglich sind.<br />
DATENBLÄTTER FÜR DIE SICHERHEIT BEI DER VERWENDUNG VON KÜHLMITTELN<br />
Von Betreten Haupttrennschalter ausschalten,<br />
gegen Wiedereinschalten sichern.<br />
Anschluß der Maschine an den<br />
Potentialausgleichsleiter sicherstellen<br />
Vor der Entfernung der Schutzvorrichtungen den<br />
Haupttrennschalter gegen Wiedereinschalten<br />
sichern.<br />
01 Indentifizierungsele<br />
mente der Substanz<br />
02 Zusammensetzung<br />
Information bez. des<br />
Produkts<br />
03 Bestimmung des<br />
Risikos<br />
04 Erste-Hilfe<br />
Maßnahmen<br />
05 Feuerlöschmaßnah<br />
men<br />
Bezeichnung des Produkts: Forane 407C<br />
N°SDS 01965/1<br />
Lieferant: ELF ATOCHEM ITALIA<br />
Via G.Murat 17, 20159 Milano tel. 02/668111<br />
chemische Zusammensetzung des Produkts<br />
Mischung auf der Grundlage von:<br />
• Forane 32 (Difluormethan) (N° CAS: 75-10-5)<br />
• Forane 125 (Pentafluoräthan) (N° CAS: 354-33-6)<br />
• Forane 134a (1.1.1.2 Tetrafluoräthan) (N° CAS: 811-97-2)<br />
Größere physikalische und chemische Risiken:<br />
Thermische Zerlegung in toxische und ätzende Produkte.<br />
Allgemeine Hinweise:<br />
Bei Inhalation: Betroffene Person sofort an die frische Luft bringen.<br />
Sauerstoff bzw. künstliche Beatmung einsetzen, falls erforderlich.<br />
Hautkontakt: Erfrierungserscheinungen müssen wie<br />
Brandverletzungen behandelt werden.<br />
Kontakt mit den Augen: sofort mit reichlich Wasser waschen. Bei<br />
Andauern der Reizung einen Augenarzt aufsuchen.<br />
Anweisungen fuer den Arzt: Kein Katecolammine verschreiben<br />
(wegen der Herzreizungsgefahr durch den Produkt verursacht)<br />
Spezifische Gefahren: thermische Zerlegung in toxische und ätzende<br />
Produkte. Fluorwasserstoffsäure, Salzsäure, gasförmig, Phosgen<br />
Kohlenstoffoxyde CO.<br />
Spezifische Eingriffsmaßnahmen: Die Behälter/Tanks durch<br />
Wasserberieselung kühlen. Jegliche Funken- und Zündquelle muß<br />
ausgeschaltet werden.<br />
RAUCHEN VERBOTEN.<br />
Besondere Schutzsysteme für die Einsatzmannschaften:<br />
Atemgerät und Schutzkleidung<br />
Spezifische Gefahren: thermische Zerlegung in toxische und ätzende<br />
Produkte. Fluorwasserstoffsäure. Kohlenoxyde.<br />
Spezifische Eingriffsmaßnahmen: Die Behälter/Tanks durch<br />
Wasserberieselung kühlen. Jegliche Funken- und Zündquelle muß<br />
ausgeschaltet werden.<br />
RAUCHEN VERBOTEN.<br />
Besondere Schutzsysteme für die Einsatzmannschaften:<br />
Atemgerät und Schutzkleidung.<br />
Bezeichnung des Produkts: Forane 22<br />
Nr. SDS 005/7<br />
Lieferant: ELF ATOCHEM ITALIA<br />
4 Cours Michelet Cedex 42 92091 Paris Frankreich<br />
Tel. 0033149008080<br />
chemische Zusammensetzung des Produkts<br />
Mischung auf der Grundlage von:<br />
Chlordifluormethan, Halogenierter Kohlenwasserstoff<br />
Nr. CAS 75-45-6<br />
EINECS 200-871-9<br />
Risiko für die Gesundheit: praktisch unschädlich<br />
Größere physikalische und chemische Risiken:<br />
Thermische Zerlegung in toxische und ätzende Produkte.<br />
Spezifische Gefahren/EG: schädlich für die Ozonschicht<br />
Allgemeine Hinweise:<br />
Bei Inhalation: Betroffene Person sofort an die frische Luft<br />
bringen. Sauerstoff bzw. künstliche Beatmung einsetzen, falls<br />
erforderlich.<br />
Hautkontakt: Erfrierungserscheinungen müssen wie<br />
Brandverletzungen behandelt werden.<br />
Kontakt mit den Augen: sofort mit reichlich Wasser waschen.<br />
Bei Andauern der Reizung einen Augenarzt aufsuchen.<br />
Spezifische Gefahren: thermische Zerlegung in toxische und<br />
ätzende Produkte. Fluorwasserstoffsäure, Salzsäure, gasförmig,<br />
Phosgen Kohlenstoffoxyde CO.<br />
Spezifische Eingriffsmaßnahmen: Die Behälter/Tanks durch<br />
Wasserberieselung kühlen. Jegliche Funken- und Zündquelle<br />
muß ausgeschaltet werden.<br />
RAUCHEN VERBOTEN.<br />
Besondere Schutzsysteme für die Einsatzmannschaften:<br />
Atemgerät und Schutzkleidung.<br />
84
06 Maßnahmen bei<br />
unvorhergesehenem<br />
Ausströmen<br />
07 Handhabung und<br />
Lagerung<br />
08 Kontrolle der<br />
Exposition/Persö<br />
nliche<br />
Schutzmaßnahm<br />
en<br />
09 Physikalisch/che<br />
mische<br />
Eigenschaften<br />
10 Stabilität und<br />
Reaktivität<br />
11 Toxikologische<br />
Hinweise<br />
Persönliche Schutzmaßnahmen: Haut- und Augenkontakt sowie<br />
Einatmen der Dämpfe vermeiden. Persoenliche Schutzmittel<br />
verwenden.<br />
In geschlossenen Räumen: lüften oder ein Atemgerät benutzen<br />
(Magersuchtgefahr). RAUCHEN VERBOTEN<br />
Massnahmen fuer den Umweltschutz: Die Abfaelle moglichts<br />
einschraenken.<br />
technische Vorsichtsmaßnahmen<br />
Vorschriften zur Lagerung und Handhabung der Produkte:<br />
DRUCKGASE<br />
Der Geräteart entsprechende Lüftung und Evakuierung vorsehen.<br />
Hinweise zur Benutzung: Zündquellen und Kontakt mit heißen<br />
Oberflächen vermeiden. RAUCHEN VERBOTEN.<br />
Technische Maßnahmen/Lagerung: Bei Raumtemperatur im<br />
Originalbehälter lagern. Fern von freien Flammen, heißen Oberflächen<br />
und Zündquellen lagern. An kühlem, gut gelüfteten Ort aufbewahren.<br />
Volle Behälter vor Hitze schützen, um Überdruck zu vermeiden.<br />
Empfohlen: Normalstahl<br />
Zu vermeiden: Legierung mit mehr als 2% Magnesiumgehalt,<br />
Kunststoff<br />
Sicherheitsmaßnahmen: Für ausreichende Lüftung und/oder<br />
Luftabsaugung am Arbeitsplatz sorgen.<br />
Kontrollparameter<br />
Expositions-Grenzwerte: Kein Grenzwert vorhanden F-USA<br />
Forane 134a Grenzwert empfohlen von Elf : VME=1000ppm<br />
Forane 32 Grenzwert empfohlen von Elf : VME=1000ppm Forane 125<br />
Grenzwert empfohlen von Elf : VME=1000ppm<br />
Persönliche Schutzausrüstung:<br />
Atemschutz: Bei unzureichender Lüftung angemessenes Atemgerät<br />
benutzen.<br />
Händeschutz: Handschuhe<br />
Augenschutz: Schutzbrille<br />
Physikalischer Zustand (20° C): flüssiges Gas<br />
Farbe: farblos<br />
Geruch: erinnert an Äther. PH: trifft nicht zu<br />
Siedepunkt/-intervall: -40,8° C<br />
Entflammungspunkt: Bei Porbebedingungen nicht endzuendlich<br />
Dampfdruck: (25°C): 1.13 Mpa (11,3 bar) bei (50°C): 2.11 Mpa (21,1<br />
bar) bei (70°C): 3.26 Mpa (32,6 bar)<br />
Dampfdichte: bei Dampfpunkt 4,54 kg/m3<br />
Dichte: (25°C) 1133 kg/m3 bei (50°C) 1004 kg/m3 bei (70°C) 861<br />
kg/m3<br />
Condizioni da evitare: Evitare il contatto con fiamme e le superfici<br />
metalliche arroventate<br />
Gefährliche Zersetzungsprodukte: Thermische Zersetzung in<br />
Fluorwasserstoffe<br />
Andere Informationen: Stabiles Produkt bei normalen Lager- und<br />
Handhabungsbedingungen<br />
Inhalation: Im Tierversuch praktisch ungefährlich Forane 134a, 32,<br />
125. Keine Todfaelle bei Ratten festgestellt bei 500000 ppm/4h. Wie<br />
andere halogenierte haliphatische flüchtige Stoffe kann dieses Produkt<br />
durch Akkumulation von Dämpfen und/oder Inhalation von größeren<br />
Mengen: Bewußtseinsverlust und Herzstörungen verursachen, die<br />
durch Streß und Sauerstoffmangel erschwert werden: Lebensgefahr.<br />
Hautkontakt: Erfrierungserscheinungen durch flüssige Gasspritzer<br />
möglich.<br />
Chronische Toxizitaet: Studien durch Tierversuche fuer verlaengerte<br />
Inhalation haben kein subchronischer toxischer Effekt ergeben<br />
(Ratte/3 Monate)/ Inhalation:50000ppm)<br />
Spezifische Auswirkungen: Genotoxizitaet, aufgrund der<br />
vorhandenen experimentellen Daten Forane 134a, 32, 125 NON<br />
Genotoxisch<br />
Krebsgenesis: Forane 134a Tierversuche haben keinen klar<br />
beisbaren krebserregenden Effekt ergeben (Ratte /Inhalation -<br />
muendlich)<br />
Toxizitaet fuer die Reproduktion: kein Toxizitaet fuer die<br />
Entwicklung des Fetus Forane 134a, 32, 125 aufgrund der<br />
vorhandenen Daten sind keine toxischen Effekte fuer die Entwicklung<br />
des Fetus vorhanden. Fruchtbarkeit, aufgrund der vorhandenen Daten<br />
durch Tierversuche: Forane 134a Keine Effekte auf die Fruchtbarkeit<br />
(Ratten/ Inhalation)<br />
Persönliche Schutzmaßnahmen: Haut- und Augenkontakt<br />
sowie Einatmen der Dämpfe vermeiden.<br />
In geschlossenen Räumen: lüften oder ein Atemgerät benutzen<br />
(Erstickungsgefahr). RAUCHEN VERBOTEN.<br />
Jegliche Zündquelle vermeiden.<br />
technische Vorsichtsmaßnahmen<br />
Vorschriften zur Lagerung und Handhabung der Produkte:<br />
DRUCKGASE<br />
Der Geräteart entsprechende Lüftung und Evakuierung vorsehen.<br />
Hinweise zur Benutzung: Zündquellen und Kontakt mit heißen<br />
Oberflächen vermeiden. RAUCHEN VERBOTEN.<br />
Technische Maßnahmen/Lagerung: Bei Raumtemperatur im<br />
Originalbehälter lagern. Fern von freien Flammen, heißen<br />
Oberflächen und Zündquellen lagern. An kühlem, gut gelüfteten<br />
Ort aufbewahren. Volle Behälter vor Hitze schützen, um<br />
Überdruck zu vermeiden.<br />
Empfohlen: Normalstahl<br />
Zu vermeiden: Legierung mit mehr als 2% Magnesiumgehalt,<br />
Kunststoff<br />
Sicherheitsmaßnahmen: Für ausreichende Lüftung und/oder<br />
Luftabsaugung am Arbeitsplatz sorgen.<br />
Kontrollparameter<br />
Expositions-Grenzwerte:<br />
Frankreich 1989: VME=1000 ppm<br />
USA 1992: TWA=1000 ppm=3500 mg/m 3<br />
Persönliche Schutzausrüstung:<br />
Atemschutz: Bei unzureichender Lüftung angemessenes<br />
Atemgerät benutzen.<br />
Händeschutz: Handschuhe<br />
Augenschutz: Schutzbrille<br />
Spezifische Hygienemaßnahmen: Kontakt mit der Haut, den<br />
Augen und Inhalation vermeiden.<br />
Physikalischer Zustand (20° C): flüssiges Gas<br />
Farbe: farblos<br />
Geruch: erinnert an Äther. PH: trifft nicht zu<br />
Siedepunkt/-intervall: -40,8° C<br />
Schmelztemperatur/-intervall: -160° C<br />
Zersetzungstemperatur: 480° C<br />
Dampfdruck: (20° C): 0,91 Mpa (9,1 bar) bei (50° C): 1,91 Mpa<br />
(19,4 bar)<br />
Dampfdichte: (20 ° C) 3,57 kg/m 3<br />
Dichte: (20° C) 1213 kg/m 3 bei (50° C) 1085 kg/m 3<br />
Löslichkeit: Wasser (25° C) 3 g/l - In chlorierten<br />
Kohlenwasserstoffen und Lösemitteln, Alkohol, Chetonen, Estern<br />
lösliches Lösemittel<br />
Löslichkeit von Wasser in dem Produkt bei 30° C: 0,15% Gewicht<br />
Zu vermeidende Umstände: Kontakt mit Flammen und<br />
glühenden Metallflächen vermeiden.<br />
Gefährliche Zersetzungsprodukte: Thermische Zersetzung in<br />
toxische und ätzende Stoffe: Fluorwasserstoffsäure, Salzsäure,<br />
gasförmig, Phosgen Kohlenstoffoxyd (CO)<br />
Inhalation: Im Tierversuch praktisch ungefährlich. Keinerlei<br />
Wirkung unter 50 000 ppm.<br />
Wie andere halogenierte haliphatische flüchtige Stoffe kann<br />
dieses Produkt durch Akkumulation von Dämpfen und/oder<br />
Inhalation von größeren Mengen: Bewußtseinsverlust und<br />
Herzstörungen verursachen, die durch Streß und<br />
Sauerstoffmangel erschwert werden: Lebensgefahr.<br />
Hautkontakt: Erfrierungserscheinungen durch flüssige<br />
Gasspritzer möglich.<br />
Augenkontakt: vorübergehende Reizung<br />
85
12 Umweltbezüglich<br />
e Hinweise<br />
13 Betrachtung zur<br />
Entsorgung<br />
14 Hinweise zum<br />
Transport<br />
15 Hinweise zur<br />
Reglementierung<br />
Forane 32<br />
Persistenz/Abbaufähigkeit: In Wasser nicht leicht biologisch<br />
abbaubar 5% nach 28 Tagen<br />
Bioakkumulation: praktisch keine Bioakkumulation log pow 0,21<br />
Forane 125<br />
Mobilität: verdampft schnell; Halbwertzeit 3,2 Std. (geschaetzt)<br />
Persistenz/Abbaufähigkeit: In Wasser nicht leicht biologisch<br />
abbaubar 5% nach 28 Tagen. In der Luft beträgt die Abbaufähigkeit in<br />
der Troposphäre: Halbwertzeit 28,3 Jahre (geschaetzt). Potentielles<br />
Ozon-Zerstörungsvermögen ODP (R-11 = 1) = 0. Potentieller<br />
Treibhauseffekt (GWP): (HGWP) = 0,58. Geringe Adsorption in Boden<br />
und Sedimentationen log Koc = 1,3-1,7<br />
Bioakkumulation: praktisch keine Bioakkumulation log pow 1,48<br />
Forane 134a<br />
Mobilität: verdampft schnell; Halbwertzeit 3 Std. (geschaetzt)<br />
Persistenz/Abbaufähigkeit: In Wasser nicht leicht biologisch<br />
abbaubar 3% nach 28 Tagen. In der Luft beträgt die Abbaufähigkeit in<br />
der Atmosphäre: Halbwertzeit 3% nach 28 Tagen. Potentielles Ozon-<br />
Zerstörungsvermögen ODP (R-11 = 1)=0. Potentieller Treibhauseffekt<br />
(GWP) 0,26.<br />
Bioakkumulation: praktisch keine Bioakkumulation log pow 1,06<br />
Entsorgung des Produkts: recyclieren oder verbrennen<br />
Fuer weitere Auskuenfte und Abaenderungen wenden Sie sich bitte an<br />
den Sicherheitsdienst der ELF ATOCHEM UNO-Nr. 3163. RID\ADR<br />
Klasse 2, Ziffer (und Buchstabe) 4°a<br />
Vorscriften: 2 Etiketten Nr. Gefahr /Nr. Stoff 20/3163<br />
IMDG Klasse 2.2 Nr. UNO (IMDG) 3163<br />
Vorscriften: Etiketten 2.2<br />
IATA Klasse 2.2 Nr. UNO (IATA) oder Nr. ID3163<br />
Vorscriften: Etiketten 2.2<br />
EG-richtlinien<br />
Sicherheitsblätter: D.91/155/EG, abgeändert von D. 93/112/EG:<br />
Gefährliche Substanzen.<br />
Classificazione/etichettatura CEE<br />
Gefährliche Präparate: nicht als gefährlich eingestuft<br />
Inventare: gemäß EINECS<br />
16 Andere Hinweise Empfohlene Einsatzbereiche: Kühlmittel<br />
Literatur: Encyclopedie des gas (Air Liquide-ed.1976- ELSEVIER<br />
AMSTERDAM)<br />
Mobilität: verdampft schnell; Halbwertzeit: 2,7 Std.<br />
Persistenz/Abbaufähigkeit: In Wasser nicht leicht biologisch<br />
abbaubar 0% nach 28 Tagen. In der Luft beträgt die<br />
Abbaufähigkeit in der Atmosphäre: Halbwertzeit 14 Jahre.<br />
Potentielles Ozon-Zerstörungsvermögen ODP (R-11 = 1) = 0,055.<br />
Potentieller Treibhauseffekt (HGWP) = 0,36. Geringe Adsorption<br />
in Boden und Sedimentationen log Koc = 1,8.<br />
Bioakkumulation: praktisch keine Bioakkumulation log pow 1,08<br />
Toxizität in Wasser: akute Toxizität, Fische Toxizitätsschwelle,<br />
24 Std. = 180 mg/l, anaerobe Bakterien: Toxizitätsschwelle, 24 h<br />
> 400 mg/l<br />
Entsorgung des Produkts: recyclieren oder verbrennen<br />
UNO-Nr. 1018. RID/ADR Klasse 2, Ziffer (und Buchstabe) 3°a<br />
Vorschriften: 2 Etiketten Nr. Gefahr/Nr. Stoff 20/1018<br />
IMDG Klasse 2.2 Nr. UNO (IMDG) 1018<br />
Vorschriften: Etiketten NICHT BRENNBAR GAS/2<br />
IATA Klasse 2.2 Nr. UNO (IATA) oder Nr. ID1018<br />
Produktion: Etiketten NICHT BRENNBAR GAS/2<br />
Produktcode: 00055/7<br />
EG-richtlinien<br />
Sicherheitsblätter: D.91/155/EG, abgeändert von D. 93/112/EG:<br />
Gefährliche Substanzen und Präparate<br />
Gefährliche Präparate: D. 67/548/EG, abgeändert von D.<br />
93/21/EG: Hinweise zur Etikettierung (18a APT)<br />
R59 Schädlich für die Ozonschicht S59 Hersteller/Lieferanten für<br />
Informationen über Recycling ansprechen.<br />
S 61 Nicht in der Umwelt freilassen. Sonderhinweise/Datenblätter<br />
zur Sicherheit lesen.<br />
Empfohlene Einsatzbereiche: Niedertemperatur-Kühlmittel,<br />
Gefriermittel, Luftklimatisierung<br />
Literatur: Encyclopédie des gaz (Air Liquide-ed. 1976-<br />
ELSEVIER AMSTERDAM).<br />
Toxikologisches Kennblatt: INRS: Nr. <strong>142</strong><br />
CHLORDIFLUORMETHAN<br />
Dieses Dokument bezieht sich auf das unveränderte Produkt, gemäß den von ELF ATOCHEM mitgeteilten Spezifikationen.<br />
Im Falle von Kombination oder Vermischung von Produkten vergewissere man sich, daß keine weiteren Gefahren entstehen.<br />
Die in diesem Blatt angegebenen Informationen erfolgen in gutem Glauben gemäß dem neuesten uns bekannten<br />
Wissensstand über das betreffende Produkt zum Zeitpunkt der Herausgabe. Wir machen die Anwender auf eventuelle<br />
Risiken aufmerksam, die bei unsachgemäßer Verwendung des Produkts entstehen können. Dieses Blatt darf ausschließlich<br />
zur Verhütung und Sicherheit verwendet und vervielfältigt werden. Die Liste der gesetzlichen, reglementarischen oder<br />
administrativen Schriften erhebt keinen Anspruch auf Vollständigkeit. Der Anwender des Produkts hat die Aufgabe, auf die<br />
Gesamtheit der offiziellen Texte zur Verwendung, Aufbewahrung und Handhabung des Produkts zu verweisen, für die er<br />
ausschließlich verantwortlich ist. Der Anwender des Produkts muß außerdem allen Personen, die mit dem Produkt in<br />
Berührung kommen können, alle für die Unfallverhütung und die Sicherheit am Arbeitsplatz und der Umwelt erforderlichen<br />
Informationen mit diesem Datenblatt zur Verfügung stellen.<br />
86
SOMMAIRE<br />
GÉNÉRAL ........................................................................................................................................... 88<br />
AVERTISSEMENTS GÉNÉRAUX.........................................................................................................................................88<br />
PRINCIPES D'INTÉGRATION DE LA SÉCURITÉ................................................................................................................88<br />
ACCESSOIRES ....................................................................................................................................................................88<br />
CARACTÉRISTIQUES TECHNIQUES GÉNÉRALES...........................................................................................................89<br />
POSITIONNEMENT ..............................................................................................................................................................90<br />
ESPACES FONCTIONNELS ................................................................................................................................................90<br />
DIMENSION ET DISTRIBUTION DES POIDS......................................................................................................................91<br />
RÉGLAGES PROTECTION ET CONTRÔLES .....................................................................................................................91<br />
NIVEAUX SONORES............................................................................................................................................................91<br />
RÉCEPTION........................................................................................................................................ 92<br />
CONTRÔLE À LA RÉCEPTION............................................................................................................................................92<br />
MANUTENTION ....................................................................................................................................................................92<br />
STOCKAGE ..........................................................................................................................................................................93<br />
ENLÈVEMENT DE L'EMBALLAGE.......................................................................................................................................93<br />
RACCORDEMENTS ÉLECTRIQUES.................................................................................................. 94<br />
RACCORDEMENTS FONCTIONNELS ................................................................................................................................94<br />
RACCORDEMENT AU RÉSEAU D’ ALIMENTATION ..........................................................................................................94<br />
RACCORDEMENTS EN OPTION.........................................................................................................................................94<br />
RACCORDEMENT À UN PC OU À UNE GTC. ....................................................................................................................95<br />
MISE EN SERVICE ............................................................................................................................. 96<br />
CONTRÔLES PRÉLIMINAIRES ...........................................................................................................................................96<br />
MISE EN MARCHE ...............................................................................................................................................................97<br />
RÉGLAGE........................................................................................................................................... 98<br />
MODE DE FONCTIONNEMENT DU MODULE PRINCIPAL ................................................................................................98<br />
ROTATION DES COMPRESSEURS ....................................................................................................................................98<br />
TEMPORISATIONS DU COMPRESSEUR ...........................................................................................................................98<br />
REGULATEUR DES VENTILATEURS DE LA BATTERIE....................................................................................................99<br />
TABLEAU DU MODULE DE COMMANDE PRINCIPAL .....................................................................................................100<br />
PROGRAMMATION DES PARAMETRES DE FONCTIONNEMENT .................................................................................100<br />
ALARMES ...........................................................................................................................................................................<strong>102</strong><br />
DÉPANNAGE.....................................................................................................................................103<br />
BLOCAGE HAUTE PRESSION ..........................................................................................................................................104<br />
BLOCAGE BASSE PRESSION...........................................................................................................................................105<br />
DÉCLENCHEMENT SÉCURITÉ COMPRESSEUR ............................................................................................................106<br />
DÉCLENCHEMENT PROT. THERMIQUE VENTILATEURS..............................................................................................106<br />
GROUPE BRUYANT...........................................................................................................................................................107<br />
COMPRESSEUR NE DÉMARRANT PAS ..........................................................................................................................107<br />
ENTRETIEN ORDINAIRE...................................................................................................................108<br />
GROUPE.............................................................................................................................................................................108<br />
PARTIE ÉLECTRIQUE .......................................................................................................................................................108<br />
TUYAUTERIES FRIGORIFIQUES......................................................................................................109<br />
TUYAUTERIE D'ASPIRATION............................................................................................................................................109<br />
TUYAUTERIE LIQUIDE ......................................................................................................................................................109<br />
CONTRÔLE DES FUITES ..................................................................................................................................................110<br />
MODALITÉS - INDICATIONS POUR UN RACCORDEMENT CORRECT..........................................................................110<br />
RISQUES RESIDUELS ......................................................................................................................111<br />
DEFINITION ZONE DANGEREUSE ...................................................................................................................................111<br />
RISQUES GENERAUX .......................................................................................................................................................112<br />
FICHES DE SECURITE REFRIGERANT ...........................................................................................................................112<br />
Les données contenues dans ce manuel ne sont pas contractuelles, elles peuvent être modifiées par le constructeur sans<br />
obligation de préavis.<br />
Toute reproduction, même partielle, est interdite.<br />
87
GÉNÉRAL<br />
AVERTISSEMENTS GÉNÉRAUX<br />
Ce manuel a été réalisé afin de permettre une installation, une mise au point et un entretien corrects; il est par conséquent<br />
fondamental que:<br />
- les instructions qui suivent soient lues le plus attentivement possible;<br />
- le groupe soit installé, testé et assisté par du personnel qualifié (loi n° 46 du 5/3/1990) satisfaisant aux exigences de la loi.<br />
• Le producteur décline toute responsabilité et le bénéfice de la garantie cesse d'être accordé en cas de modifications<br />
électriques et/ou mécaniques. Toute modification en général non expressément autorisée et non conforme aux indications<br />
du présent manuel entraîne la perte du bénéfice de la garantie.<br />
• Respecter les normes de sécurité locales en vigueur au moment de l'installation.<br />
• Vérifier que les caractéristiques du réseau électrique sont conformes aux données figurant sur la plaquette de matricule du<br />
groupe se trouvant à l'intérieur, près du tableau électrique.<br />
• Le présent manuel et le schéma électrique du groupe doivent être conservés avec soin et mis à la disposition de<br />
l'opérateur pour toute consultation future.<br />
• Le matériel d'emballage (sachets en plastique, polystyrène expansé, clous, etc.) constitue une source potentielle de<br />
danger. Il doit par conséquent être conservé hors de portée des enfants et correctement recyclé, conformément aux normes<br />
locales en vigueur.<br />
• Le groupe de condensation est destiné au conditionnement en combinaison avec une unité intérieure à détente du<br />
réfrigérant.<br />
• Désactiver l'appareillage en cas de défaut ou de mauvais fonctionnement.<br />
• Pour une éventuelle réparation, s'adresser exclusivement à un centre d'assistance technique agréé par le constructeur et<br />
demander l'utilisation de pièces de rechange originales.<br />
Le non-respect des consignes susmentionnées peut compromettre la sécurité de l'appareillage.<br />
Le constructeur décline toute responsabilité en cas d'éventuels dommages causés, directement ou<br />
indirectement, à des personnes ou des biens suite au non-respect des présentes instructions.<br />
PRINCIPES D'INTÉGRATION DE LA SÉCURITÉ<br />
Le groupe est conçu et construit de manière à ne pas exposer la santé et la sécurité des personnes à des risques.<br />
Dans ce but, on a adopté des solutions de projet visant à éliminer les possibles causes de risque, lorsque cela était possible,<br />
ou à réduire sensiblement la probabilité d'un événement risque. Dans le cas où il n'aurait pas été possible d'intervenir au<br />
moment de la conception pour prévenir et/ou éliminer le risque, se référer aux prescriptions de comportement indiquées<br />
dans la section risques résiduels.<br />
ACCESSOIRES<br />
Les groupes peuvent être équipés des accessoires suivants (sur demande):<br />
─ tensions différentes de la tension standard<br />
─ grille de protection condenseur<br />
─ antivibratiles<br />
─ compteur horaire de fonctionnement compresseur<br />
─ vanne solénoïde<br />
─ set de raccordement comprenant:<br />
détendeur thermostatique, vanne solénoïde,<br />
ligne liquide, filtre déshydrateur,<br />
indicateur passage liquide.<br />
─ groupe avec commande compresseurs séparés<br />
─ raccordement à un module de contrôle déporté<br />
─ raccordement à un PC ou à un BMS<br />
88
CARACTÉRISTIQUES TECHNIQUES GÉNÉRALES<br />
Modèle <strong>MSAT</strong> <strong>102</strong> <strong>122</strong> <strong>142</strong> <strong>162</strong> <strong>182</strong> <strong>202</strong> <strong>242</strong><br />
Tension standard 400 / 3 / 50<br />
Données se rapportant à:<br />
Modèle <strong>MSAT</strong> R-22<br />
Température air extérieur +35°C<br />
Temperature d'aspiration du gaz<br />
Puissance frigorifique kW 31.3 36.4 41.3 48.7 53.8 63.9 77.9<br />
saturé (SST) 7.5°C R-22,<br />
Puissance abs. Compresseurs<br />
8.5 10.3 11.3 13.5 15.8 17.5 22.3 (SST) 9.5°C (dew point) R-407C<br />
kW<br />
Modèle <strong>MSAT</strong> R-407C<br />
Puissance frigorifique kW 29.8 34.1 39.2 44.1 50.3 62.8 72.8<br />
Puissance abs. compresseurs<br />
kW 9.4 11.2 12.6 14.7 17.8 20.3 25.2<br />
Compresseur type<br />
SCROLL<br />
Nbre de tours par minute tr/mn 2900<br />
Charge huile<br />
l<br />
2x 2x 2x<br />
1,55 1,65 2,5<br />
Étages capacité 2<br />
Protection moteur<br />
NTC<br />
2x<br />
4<br />
Type huile<br />
SUNISO 3GS OIL<br />
Remarque: si groupe avec<br />
R407C type huile<br />
- MOBIL EAL ARTIC 22 CC<br />
- 32 MMMA POE<br />
Condenseur<br />
Matériau<br />
Tubes en cuivre/ailettes en aluminium<br />
Quantité 2<br />
Surf. front. tot. m 2 3 3,6 4,9<br />
Espacement ailettes mm 1,6 2,1 1,6 1,6<br />
Nbre rangées 2<br />
∅ tube mm 9,52<br />
Pression essai kPa 3000<br />
Électroventilateur axial<br />
Nbre et diamètre nbre x ∅ 2x560 4x450 6x450<br />
Nbre de tours par minute tr/mn 680 840<br />
Débit air l/s 3056 4125 6120<br />
Puissance nominale kW 2x0,22 4x0,16 6x0,16<br />
Connessioni Freon<br />
Robinet liquide ∅ 14 16 18 22<br />
Robinet aspiration ∅ 22 28 28 35<br />
Réfrigérant<br />
Charge R-22 kg 8.2 8,2 9 9 9.6 12 12<br />
Charge R-407C kg 9.2 9,2 10 10 10.6 13 13<br />
Données se rapportant à:<br />
─ Moteur à rotor extérieur<br />
─ Grille de sécurité<br />
Remarques:<br />
Raccords à souder<br />
Remarque:<br />
Charge à compléter en<br />
phase de mise<br />
en service<br />
Poids et Volumes<br />
Poids transp. approx. kg 275 280 380 420 485 580 590<br />
Volume emballage appr. m 3 1,50 3,20 4,30<br />
Limites de fonctionnement<br />
Temp. maxi air<br />
R-22 49 47,5 47,5 47,5 45 49 46<br />
entrée condenseur<br />
SST = +5 °C R-407C 47 45 45 44,5 43,5 46 43<br />
Temp. mini. air<br />
R-22 -4 -4 -4 -4 -8 -4 -8<br />
entrée condenseur<br />
SST = +5 °C<br />
R-407C -5 -5 -5 -5 -9 -5 -9<br />
Temp. maxi aspiration R-22 12,5<br />
gaz saturé °C R-407C 12,5<br />
Remarques:<br />
SST Température<br />
d'aspiration saturée<br />
Surchauffe gaz aspiré + 5°K<br />
89
POSITIONNEMENT<br />
Les groupes sont conçus pour être installés à l'extérieur.<br />
• Vérifier que le plan d'appui est en mesure de supporter le poids du groupe (cf. poids et distribution des poids p. 91) et qu'il<br />
est bien horizontal.<br />
Interposer une épaisseur en caoutchouc entre la base d'appui du groupe et le support (afin d'éviter les bruits et les<br />
vibrations).<br />
• Respecter les espaces fonctionnels.<br />
• Si le groupe est installé sur une terrasse ou sur un toit, il est conseillé de le monter sur des antivibratiles appropriés; dans<br />
ce cas les tuyauteries de raccordement devront être munies de joints élastiques.<br />
• Placer le groupe de manière à ce qu'il ne soit pas frappé sur les côtés longs par d'éventuels vents prédominants.<br />
• Fixer le groupe au sol.<br />
ESPACES FONCTIONNELS<br />
Le choix de l'emplacement des groupes est d'une importance fondamentale pour leur bon fonctionnement.<br />
Des obstacles au passage de l'air, des sources de chaleur (telles que refoulements, air chaud), des difficultés de<br />
renouvellement de l'air dans la zone d'installation, des feuilles ou autres corps pouvant obstruer les batteries d'échange, des<br />
vents s'opposant au passage de l'air ou le favorisant excessivement sont à l'origine d'anomalies de fonctionnement ou<br />
d'arrêts.<br />
Les groupes n'ont besoin que d'espaces minimaux pour le fonctionnement et l'entretien.<br />
Les croquis ci-après concernent certaines typologies d'installation; vérifier au cas par cas en tenant compte de ce qui est<br />
indiqué dans le présent manuel.<br />
Remarque: Les mesures sont exprimées en mm<br />
GROUPE CIRCUITS INDÉPENDANTS<br />
GROUPE AVEC COMMANDE COMPRESSEURS SÉPARÉS<br />
ANTIVIBRATILES DE BASE<br />
(accessoire)<br />
(accessoire)<br />
Sur demande, on peut fournir le groupe avec une commande<br />
compresseurs séparés, prévue pour le raccordement à 2 unités terminales<br />
distinctes. L'alimentation électrique reste en commun.<br />
90
DIMENSION ET DISTRIBUTION DES POIDS<br />
Legenda:<br />
1 - Compresseur<br />
2 - Raccord ligne liquide Ø G1 premier circuit<br />
2’ - Raccord ligne liquide Ø G1 deuxième circuit<br />
3 - Raccord ligne gaz Ø G2 premier circuit<br />
3’ - Raccord ligne gaz Ø G2 deuxième circuit<br />
4 - Tableau électrique<br />
5 - Ventilateurs hélicoïdes<br />
6 - Entrée ligne électrique<br />
7 - Batteries de condensation<br />
8 - Accès tableau électrique et compresseur<br />
DIMENSIONS<br />
Taille A B C D E F G H I L O Ø<br />
G1<br />
Ø<br />
G2<br />
nbre<br />
ventilateurs<br />
POIDS<br />
W1 W2 W3 W4<br />
<strong>102</strong> 1530 678 1400 128 73 75 628 42 1255 800 - 14 22 2 88 42 95 50 275<br />
<strong>122</strong> 1530 678 1400 128 73 75 628 42 1255 800 - 16 28 2 89 42 98 51 280<br />
<strong>142</strong> 1563 1107 1570 128 130 75 1058 42 1077 900 153 16 28 4 121 58 132 69 380<br />
<strong>162</strong>/<strong>182</strong> 1563 1107 1570 128 130 75 1058 42 1077 900 153 18 28 4 155 74 168 88 485<br />
<strong>202</strong>/<strong>242</strong> 2098 1107 1570 128 130 75 1058 42 1612 900 153 22 35 6 191 95 200 104 590<br />
Remarque: les dimensions sont exprimées en mm, les poids en kg.<br />
Tot.<br />
RÉGLAGES PROTECTION ET CONTRÔLES<br />
Apre Chiude<br />
Pressostat HP (kPa) 2750 2000 Fusible sécurité (°C) 120<br />
Pressostat BP (kPa) 230 360 Démarrages maxi/heure compresseur (nbre) 10<br />
Thermostat sécurité refoulement (°C) 120<br />
Remarque:<br />
Les sécurités « pressostat HP » et<br />
« thermostat sécurité refoulement »<br />
peuvent être réarmées<br />
manuellement depuis l'unité de<br />
contrôle La sécurité « pressostat<br />
BP » est à réarmement automatique<br />
NIVEAUX SONORES<br />
Niveau de puissance sonore (dB)<br />
Niveau<br />
de<br />
sonore<br />
Taille<br />
Bandes d'octaves (Hz)<br />
global<br />
63 125 250 500 1000 2000 4000 8000 dB(A)<br />
<strong>102</strong> 80 84 75 73 69 63 60 42 59<br />
<strong>122</strong> 80 76 73 73 71 65 62 43 59<br />
<strong>142</strong> 87 80 74 73 71 69 66 63 60<br />
<strong>162</strong> 87 81 76 73 70 69 65 62 60<br />
<strong>182</strong> 84 78 78 74 69 70 62 55 60<br />
<strong>202</strong> 86 79 78 77 72 67 62 54 61<br />
<strong>242</strong> 86 82 81 75 70 73 63 65 62<br />
Remarques:<br />
- Les niveaux sonores se rapportent à des groupes<br />
fonctionnant à pleine charge avec vitesse<br />
maximale de rotation des ventilateurs, air entrant<br />
au condenseur à 35°C et température aspiration<br />
saturée de +5°C.<br />
- Niveau de pression sonore se rapportant à 1 mètre<br />
de distance de la surface extérieure du groupe.<br />
- Niveaux de puissance sonore réf. : 1x10 -12 W.<br />
- Niveaux de pression sonore réf. : 2 x 10 -5 Pa.<br />
91
RÉCEPTION<br />
CONTRÔLE À LA RÉCEPTION<br />
Les groupes sont expédiés dans des emballages de protection appropriés. À l'arrivée, contrôler que le groupe n'a pas<br />
subi de dommages pendant le transport et qu'il contient bien toutes les parties indiquées dans la commande. En cas de<br />
dommages visibles, noter immédiatement le dommage constaté sur le document relatif au transport, en indiquant la<br />
mention:<br />
« RETRAIT AVEC RÉSERVE POUR DOMMAGES ÉVIDENTS À L'EMBALLAGE » car la livraison franco établissement<br />
comporte le dédommagement des dégâts par l'assurance selon ce qui est prévu par la loi n° 450 du 22.08.85 « limite de<br />
dédommagement ».<br />
IMPORTANT<br />
TOUTES LES OPÉRATIONS INDIQUÉES CI-APRÈS DOIVENT ÊTRE EFFECTUÉES CONFORMÉMENT AUX NORMES<br />
DE SÉCURITÉ EN VIGUEUR, AUSSI BIEN POUR CE QUI CONCERNE L'ÉQUIPEMENT UTILISÉ QUE POUR LES<br />
MODALITÉS OPÉRATIONNELLES.<br />
ATTENTION<br />
AVANT DE COMMENCER DES OPÉRATIONS DE MANUTENTION, S'ASSURER QUE LA CAPACITÉ<br />
DE LEVAGE EST APPROPRIÉE AU POIDS DU GROUPE EN QUESTION.<br />
Taille <strong>102</strong> <strong>122</strong> <strong>142</strong> <strong>162</strong> <strong>182</strong> <strong>202</strong> <strong>242</strong><br />
Poids kg 275 280 380 480 485 580 590<br />
MANUTENTION<br />
MANUTENTION avec un CHARIOT ÉLÉVATEUR ou AUTRE<br />
- Introduire les fourches dans le côté le plus long de la palette en bois fournie avec le groupe.<br />
- Commencer le levage en s'assurant que l'équilibre du groupe est stable. Ne pas oublier que la partie la plus lourde est<br />
celle où le compresseur est installé.<br />
92
LEVAGE avec une GRUE ou AUTRE<br />
- Positionner les tubes de levage dans les trous prévus sur la base du groupe.<br />
- Faire dépasser les parties terminales des tubes d'une mesure permettant d'introduire les sécurités et les goupilles<br />
correspondantes.<br />
- Positionner les élingues de levage sur les tubes entre les goupilles et la base du groupe (cf. dessin).<br />
- Positionner des structures rigides de protection au niveau des bords supérieurs du groupe (uniquement si un seul point<br />
de force est prévu).<br />
- Tendre les élingues de levage de manière graduelle, en vérifiant que leur positionnement est correct.<br />
- Commencer le levage.<br />
Structure rigide<br />
Planches de<br />
protection<br />
Élingue de<br />
levage<br />
Sécurité<br />
Goupilles de<br />
sécurité<br />
Tube de levage<br />
AVERTISSEMENTS<br />
LE RESPECT DES RECOMMANDATIONS FIGURANT SUR LE CÔTÉ EXTERNE DU CARTON DE L'EMBALLAGE EST<br />
UNE GARANTIE D'INTÉGRITÉ PHYSIQUE ET FONCTIONNELLE DU GROUPE, CE QUI EST TOUT À L'AVANTAGE DE<br />
L'UTILISATEUR FINAL. IL EST DONC RECOMMANDÉ DE:<br />
- MANUTENTIONNER AVEC SOIN<br />
- CONSERVER À L'ABRI DE L'HUMIDITÉ<br />
- ÉVITER DE LA MANIÈRE LA PLUS ABSOLUE DE POSER SUR LE GROUPE D'AUTRES OBJETS SI CE N'EST<br />
DANS LES LIMITES DES ÉTAGES DE SUPERPOSITION INDIQUÉES (LE CHIFFRE INDIQUÉ SPÉCIFIE LES<br />
ÉTAGES SUPERPOSABLES.<br />
Par ex. 1 = 1 ÉTAGE SUPERPOSABLE SUR LE GROUPE).<br />
STOCKAGE<br />
− Conserver à l'abri de: rayons solaires, pluie, sable et vent.<br />
− Températures: maxi 60°C, mini -10°C.<br />
− Humidité maxi: 90%<br />
ENLÈVEMENT DE L'EMBALLAGE<br />
- Couper les feuillards de fermeture avec des ciseaux.<br />
- Soulever le carton d'emballage (s'il est présent).<br />
- Retirer les pattes fixant le groupe à la palette en bois à l'aide d'une clé fixe de 10 mm.<br />
- Lever le groupe pour le séparer de la palette.<br />
- Poser le groupe au sol au niveau du point choisi.<br />
- Vérifier la présence de dommages visibles.<br />
- Éliminer les produits d'emballage en les envoyant aux centres de récupération ou de recyclage spécialisés (se<br />
conformer aux normes en vigueur).<br />
93
RACCORDEMENTS ÉLECTRIQUES<br />
IMPORTANT<br />
S’ASSURER QUE L’UNITÉ N’EST PAS ALIMENTÉE ÉLECTRIQUEMENT AVANT DE COMMENCER TOUTE OPÉRATION<br />
DE RACCORDEMENT ÉLECTRIQUE<br />
RACCORDEMENTS FONCTIONNELS<br />
Avant de mettre en marche l’unité, prévoir les raccordements suivants:<br />
RACCORDEMENT AU RÉSEAU D’ ALIMENTATION<br />
- Raccorder la ligne triphasée aux bornes prévues à cet effet, indiquées sur le schéma électrique par L1 L2 L3 du<br />
dispositif de protection général.<br />
- Raccorder le neutre à la borne N sur le tableau électrique.<br />
- Connecter la TERRE à la borne PE sur le tableau électrique.<br />
- L'installateur attachera une attention particulière au dimensionnement des câbles de raccordement au réseau<br />
d'alimentation, en tenant compte des données figurant sur la fiche technique de l'unité, collée sur la porte du tableau<br />
électrique. Il est très important d’installer en début de ligne une protection contre les effets de court-circuit. Cette<br />
protection doit avoir un pouvoir de coupure proportionnel au courant de court-circuit présumé sur cette partie de<br />
l’installation.<br />
CARACTÉRISTIQUES ÉLECTRIQUES<br />
Taille <strong>102</strong> <strong>122</strong> <strong>142</strong> <strong>162</strong> <strong>182</strong> <strong>202</strong> <strong>242</strong><br />
Compresseur 230/3/50 19.7 22.9 25.3 24.1 31.2 35.8 45.2<br />
singulier (A) 400/3/50 9.8 11.3 13.6 14.7 17.5 20.0 25.2<br />
F.L.A. Ventilateurs (A) 230/1/50 1.15x2 1.15x2 0.65 x 4 0.65 x 4 0.65 x 4 0.65 x 6 0.65 x 6<br />
Total<br />
(A)<br />
230/3/50 41.6 48.1 53.9 51.4 65.6 76.4 85.8<br />
400/3/50 21.8 25.0 30.3 32.5 38.1 44.9 55.2<br />
L.R.A. Compresseur (A)<br />
230/3/50 132.5 164 171 166 211 224 280<br />
400/3/50 66 74 <strong>102</strong> 94 117 128 159<br />
Compresseur (kW) 11.3 13.2 15.2 16.8 20.7 23.8 29.2<br />
F.L.I. Ventilateurs (kW) 0.22x2 0.22x2 0.17 x 4 0.17 x 4 0.17 x 4 0.17 x 6 0.17 x 6<br />
Total (kW) 11.8 13.6 15.9 17.5 21.4 24.8 30.2<br />
M.IC. Total (A)<br />
230/3/50 154.5 189.2 199.5 193.3 244.9 264.6 329.5<br />
400/3/50 78.1 87.6 118.8 111.9 137.2 152.3 189.0<br />
1) F.L.A. Courant consommé dans les conditions maximums admises.<br />
2) L.R.A. Courant de démarrage du compresseur.<br />
3) F.L.I. Consommation à pleine charge (dans les conditions maximums admises).<br />
4) M.I.C. Courant de démarrage maximum de l’unité.<br />
Déséquilibre de tension: 2% maxi<br />
Tension: 400/3/50 ± 6%<br />
230/3/50 ± 6%<br />
RACCORDEMENTS EN OPTION<br />
RACCORDEMENT AU DISPOSITIF DE SIGNALISATION ANOMALIE<br />
En se référant au schéma électrique, identifier le circuit d'alarme. Ce circuit permet l'installation d'un dispositif sonore<br />
ou visuel pour la signalisation à distance d'une anomalie survenue dans l'unité.<br />
Le circuit doit être alimenté en basse tension (24 V 300 mA) conformément au schéma électrique.<br />
RACCORDEMENT AU MODULE DE COMMANDE À DISTANCE<br />
Le module de contrôle à distance est la reproduction fidèle du clavier du module de contrôle ENERGY LIGHT et permet,<br />
depuis une position déportée, d'effectuer toutes les opérations réalisables sur la machine.<br />
94
INSTALLATION<br />
Avant d'effectuer le raccordement du module de contrôle à distance, couper la tension de l'unité. Raccorder le clavier à<br />
distance comme illustré sur la figure.<br />
Arrière terminal à distance<br />
C512<strong>142</strong>3<br />
25<br />
24 26<br />
S + -<br />
CONN A<br />
CONN<br />
B<br />
- S +<br />
RELAIS 1<br />
RELAIS 2<br />
RELAIS 3<br />
C512<strong>142</strong>0<br />
RELAIS 4<br />
RELAIS 5<br />
RELAIS 6<br />
RELAIS 7<br />
COMMUN<br />
EXTENSION<br />
SÉRIE<br />
RELAIS ALARME<br />
La longueur maxi du câble de raccordement ENERGY LIGHT clavier est de 80 m.<br />
RACCORDEMENT À UN PC OU À UNE GTC.<br />
À LA CHARGE DU CLIENT<br />
Câble de raccordement RS232 9 pôles mâle-femelle.<br />
Longueur 10 m maxi<br />
230 Vac<br />
PE1P0005<br />
N U<br />
N U<br />
RS 232<br />
ECHO<br />
DTR<br />
1 2 3 4<br />
Serial optocoupled adapter<br />
RS232/TTL<br />
RS 232/RS485 - RS485/TTL<br />
Micronet and ModBus Protocol<br />
OFF<br />
ON<br />
C512<strong>142</strong>5<br />
TTL<br />
10 12<br />
Alim entation<br />
RS 485<br />
21 22 23 24<br />
N U<br />
N U<br />
RS 232<br />
ECHO<br />
DTR<br />
1 2 3 4<br />
Serial optocoupled adapter<br />
RS232/TTL<br />
RS 232/RS485 - RS485/TTL<br />
Micronet and ModBus Protocol<br />
OFF<br />
ON<br />
C512<strong>142</strong>5<br />
TTL<br />
10 12<br />
Alimentation<br />
RS 485<br />
21 22 23 24<br />
+ - + -<br />
+ - + -<br />
À LA CHARGE DU CLIENT<br />
Câble série RS485 Câble; 2 fils torsadés.<br />
Longueur maxi de la ligne = 1000 m<br />
C5121248<br />
Câble série 5 voies 2 molex.<br />
Longueur maxi = 2 m<br />
SÉRIE<br />
EXTENSION<br />
10 9 8 7 6 5 4 3 2 1<br />
RELAIS ALARME<br />
COMMUN<br />
RELAIS 7<br />
RELAIS 6<br />
RELAIS 5<br />
RELAIS 4<br />
RELAIS 3<br />
RELAIS 2<br />
RELAIS 1<br />
C512<strong>142</strong>0<br />
+<br />
S<br />
-<br />
CONN B<br />
CONN A<br />
95
MISE EN SERVICE<br />
TOUS LES APPAREILLAGES DOIVENT ÊTRE MIS EN MARCHE PAR LES CENTRES D'ASSISTANCE AGRÉÉS. C'EST<br />
LA SEULE MANIÈRE DE RENDRE EFFECTIVE LA GARANTIE CONTRACTUELLE. L'ASSISTANCE SE LIMITE À LA<br />
SEULE MISE EN MARCHE ET N'EFFECTUE AUCUN RACCORDEMENT OU TRAVAIL SPÉCIFIQUE SUR L'INSTALLATION.<br />
CONTRÔLES PRÉLIMINAIRES<br />
- Contrôler que le groupe est correctement positionné et que les raccordements à l'unité terminale intérieure sont<br />
parfaitement réalisés, aussi bien du côté frigorifique que du côté électrique.<br />
- Contrôler la valeur de la tension et de la fréquence de réseau:<br />
ELLES DOIVENT RENTRER DANS LES VALEURS INDIQUÉES: 230 ± 6% 400 ± 6%<br />
- Contrôler le serrage correct des vis fixant les conducteurs aux composants électriques présents dans le tableau<br />
(pendant la manutention et le transport, les vibrations pourraient les avoir desserrées).<br />
OPÉRATION DE VIDE<br />
Après avoir vérifié, avec l'installation sous pression, qu'il n'y a pas de fuites (cf. section des tuyauteries frigorifiques)<br />
aussi bien dans les tuyauteries de raccordement que dans l'unité terminale, procéder comme suit.<br />
- Vidanger l'installation avec les robinets <strong>MSAT</strong> toujours fermés.<br />
- Au moyen d'un groupe manométrique, brancher la pompe à vide sur les deux raccords des robinets, en veillant à ce<br />
que les éventuels organes d'arrêt (vanne solénoïde ou robinets intermédiaires) soient ouverts et procéder au vide.<br />
- Pour faire en sorte que la vanne solénoïde reste ouverte, la débrancher des bornes du tableau électrique (cf. schéma<br />
électrique) de l'unité extérieure et la brancher sur une prise de courant normale 220 V.<br />
- Arrêter la pompe à la pression de 100 Pa environ et laisser sous vide pendant quelques heures; une petite remontée<br />
initiale de la pression est normale pour qu'elle se stabilise ensuite définitivement. Si la pression continue à remonter, cela<br />
veut dire qu'il y a de petites fuites ou une présence d'humidité. Dans le premier cas, répéter les opérations décrites au<br />
paragraphe CONTRÔLE DES FUITES du manuel des tuyauteries frigorifiques. Dans le deuxième cas, remplir de<br />
nouveau l'installation avec du réfrigérant jusqu'à 100 kPa et refaire le vide comme indiqué ci-dessus. Lorsque la pression<br />
est définitivement stabilisée, passer à la phase suivante de charge.<br />
CHARGE RÉFRIGÉRANT<br />
Les tailles en question sont expédiées avec une charge à compléter lors de la mise en service selon la typologie de<br />
l'unité terminale intérieure et de la disposition des tuyauteries.<br />
- Avec l'installation sous vide, fermer les robinets du groupe manométrique et débrancher la pompe à vide.<br />
- Brancher la bouteille du gaz réfrigérant, en éventant l'air dans le tuyau de raccordement au groupe manométrique.<br />
- Ouvrir les robinets du groupe manométrique et laisser entrer du réfrigérant à l'état gazeux jusqu'à l'équilibre de la<br />
pression installation / bouteille, et dans tous les cas à une pression supérieure à la pression atmosphérique.<br />
- Ouvrir les robinets du groupe de condensation (d'abord celui du liquide) pour faire en sorte que le groupe soit prêt à<br />
être démarré.<br />
Utiliser une clé appropriée, de section carrée, correspondante à la dimension<br />
du tige du robinet et avec un bras de levier de longueur suffisante pour exercer<br />
une force elevée. ( * VOIR DESSIN )<br />
Poids de réfrigérant dans les lignes frigorifiques pendant le fonctionnement (kg/10 m)<br />
Ø Extérieur<br />
Tuyauterie<br />
Liquide<br />
à 38°C<br />
Aspiration<br />
SST +4,5°C<br />
10 0,60 --<br />
12 1,06 --<br />
UNITÉ EXTÉRIEURE<br />
14 1,41 0,025<br />
Robinet<br />
16 1,71 0,030<br />
gaz<br />
18 2,36 0,043<br />
Robinet<br />
22 3,62 0,070<br />
liquide<br />
28 6,61 0,120<br />
35 9,47 0,195<br />
42 -- 0,290<br />
UNITÉ INTÉRIEURE<br />
IMPORTANT:<br />
À la première mise en marche du groupe et après chaque période d'arrêt prolongé, il est IMPORTANT d'alimenter les<br />
résistances (si elles sont présentes) de chauffage de l'huile du carter du compresseur pendant 8 heures au moins avant la<br />
mise en marche du compresseur.<br />
L'opération d'activation s'effectue selon les phases indiquées:<br />
- Agir sur le sectionneur QS1 du groupe de condensation en faisant très attention que la LED verte soit éteinte.<br />
96
MISE EN MARCHE<br />
- Vérifier le fonctionnement correct de l'unité intérieure.<br />
- Contrôler le raccordement de l'éventuelle vanne solénoïde.<br />
- Localiser sur le schéma électrique la commande SA2. Elle représente le signal provenant de l'unité intérieure pour le<br />
choix de l’étage de puissance et corresponde à l'activation du premier étage, alors que la commande pour l'activation du<br />
deuxième étage est représentée par le symbole SA3 sur le schéma électrique.<br />
- Le compresseur qui démarre en premier est défini par le système de réglage (cf. manuel réglage).<br />
En même temps que le compresseur se met en route la ventilation concernant le seul circuit en marche.<br />
- Vérifier qu'il y a bien demande de l'ambiance.<br />
- Pour ajouter du gaz réfrigérant, utiliser la prise de service du robinet d'arrêt de la ligne d'aspiration, et faire aspirer du<br />
fréon à l'état gazeux.<br />
Faire particulièrement attention pendant cette phase, car au démarrage le pressostat BP est bypassé pendant 70<br />
secondes. Si on veut faire la charge d'abord sur un circuit puis sur l'autre, agir sur les tableau des fusibles respectifs pour<br />
arrêter le compresseur n'étant pas concerné car le module principal a sa propre logique de fonctionnement à caractère<br />
cyclique.<br />
ATTENTION: après tout arrêt, le système calcule 6 minutes à partir du démarrage précédent (si ce temps s'est déjà écoulé,<br />
seules les 30 secondes de retard seront comptées) avant un autre démarrage.<br />
- La charge peut être considérée comme complète quand:<br />
- Le voyant du liquide (s'il est présent) ne signale pas de bulles.<br />
- La surchauffe du gaz aspiré est de 4-8°K.<br />
- Le sous-refroidissement du liquide est de 3-5°K.<br />
AJOUT D'HUILE<br />
Il est nécessaire de connaître exactement la quantité de réfrigérant ajoutée dans l'installation par rapport à la charge<br />
d'usine pour pouvoir définir la quantité d'huile à ajouter. La quantité doit être égale à 10% environ du poids du réfrigérant<br />
ajouté (le type d'huile est spécifié dans le manuel général). L'ajout d'huile est indispensable pour des appoints de<br />
réfrigérant supérieurs à 3 kg. Vérifier de toute façon sur la prise schrader de niveau de l'huile du compresseur, lorsqu'elle<br />
est présente.<br />
VÉRIFICATIONS DE PREMIÈRE MISE EN MARCHE APRÈS AVOIR FAIT DÉMARRER LE GROUPE, VÉRIFIER:<br />
PARTIE ÉLECTRIQUE<br />
Déséquilibre des phases. Il doit être inférieur à une valeur maximale de 2% (cf. exemple de calcul).<br />
Exemple de calcul:<br />
L1 - L2 = 388 V L2 - L3 = 379 V L3 - L1 = 377 V<br />
La moyenne des valeurs mesurées est donnée par:<br />
388 + 379 + 377<br />
= 381<br />
3<br />
L'écart maximum par rapport à la moyenne est alors: 388-381=7 V<br />
Le déséquilibre qui en résulte est de:<br />
7<br />
x 100= 1,83% (acceptable)<br />
381<br />
Absorption compresseur. Doit être inférieure à la valeur indiquée dans le tableau joint à la rubrique F.L.A.<br />
PARTIE CIRCUIT FRIGORIFIQUE<br />
- Faire une dernière vérification des fuites sur les raccords des robinets et des prises de pression présents dans<br />
l'installation. Attention, tous les capuchons des prises manométriques et des robinets doivent être remis en place.<br />
- Contrôler le voyant du liquide (s'il est présent).<br />
- Vérifier, avec les manomètres raccordés, les pressions de travail (basse pression de 400 kPa à 560 kPa correspondant<br />
à 0°C -+8°C SST) et température de condensation d'environ 15-20°C supérieure à la température de l'air extérieur<br />
(valeurs indicatives).<br />
- Contrôler la surchauffe en faisant la différence entre la température lue sur le manomètre de basse pression et la<br />
température mesurée, avec un thermomètre à contact, directement sur la tuyauterie d'aspiration en amont du<br />
compresseur. Si les valeurs sont de 5 à 8 degrés, le fonctionnement peut être considéré comme correct; si elles se<br />
situent nettement hors de ces tolérances, en chercher la cause en s'aidant de la section DÉPANNAGE.<br />
- Contrôle du sous-refroidissement en faisant la différence entre la température lue sur le manomètre de haute pression<br />
et la température mesurée, avec un thermomètre, directement sur la ligne de liquide en aval du condenseur. Si les<br />
valeurs sont de 3/5 degrés, tout va bien, sinon rechercher la cause comme ci-dessus.<br />
- Pour une analyse correcte de l'installation, contrôler aussi la température à la sortie du compresseur qui, avec les<br />
données de surchauffe et de sous-refroidissement indiquées, doit être d'environ 30/40 degrés supérieure à la<br />
température de condensation.<br />
• Ne pas oublier en outre que si le groupe est équipée d'une régulation de la vitesse des ventilateurs, il convient d'effectuer<br />
toutes ces vérifications de fonctionnement avec des conditions d'air extérieur - air ambiant très proches des conditions<br />
standard de projet.<br />
• Nous rappelons également que toutes les données indiquées ci-dessus sont valables pour des groupes avec plage de<br />
travail pour conditionnement et équipées d'un détendeur thermostatique.<br />
Pour des conditions de projet avec des températures d'évaporation (SST) inférieures à 0°C, vérifier à chaque fois aussi bien<br />
les paramètres de fonctionnement que le dimensionnement des tuyauteries du réfrigérant.<br />
• Ce qui est dit ci-dessus présente certaines des problématiques (avec les solutions correspondantes) pouvant se produire à<br />
la mise en marche d'une machine; le sérieux et la qualification du personnel sont dans tous les cas toujours indispensables.<br />
97
RÉGLAGE<br />
MODE DE FONCTIONNEMENT DU MODULE PRINCIPAL<br />
ROTATION DES COMPRESSEURS<br />
Le processeur, non seulement régule de manière optimale la température du fluide, mais il remplit aussi d'autres<br />
fonctions pour gérer de manière correcte le fonctionnement global de l'unité. C'est le cas par exemple de la rotation des<br />
compresseurs. En programmant certains paramètres, on valide la fonction de rotation des compresseurs. Cela veut dire<br />
qu'à la demande de fonctionnement de la part du thermorégulateur, le compresseur qui démarrera en premier sera celui<br />
qui aura le moins grand nombre d'heures de fonctionnement et celui qui s'arrêtera en premier sera celui ayant le plus<br />
grand nombre d'heures de fonctionnement. Cette fonction permet de distribuer d'égale manière les heures de<br />
fonctionnement sur les deux compresseurs. L’unité est prévue par le constructeur avec la rotation validée.<br />
TEMPORISATIONS DU COMPRESSEUR<br />
Afin de garantir une bonne qualité de fonctionnement des compresseurs, certains types de temporisations sont<br />
nécessaires. Il peut être utile à ce propos de consulter le graphique de la fig. 3-4 pour mieux comprendre la signification<br />
des temporisations.<br />
Comp. 1<br />
Compresseur<br />
ON<br />
ON<br />
OFF<br />
Comp. 2<br />
Secondes<br />
ON<br />
OFF<br />
Intervalle intervention premier<br />
deuxième compresseur C06<br />
Intervalle arrêt premier deuxième<br />
compresseeur C07<br />
Secondes<br />
OFF<br />
Temps sécurité mise en<br />
marche-arrêt C01<br />
Temps sécurité mise en marche..mise en<br />
marche C02<br />
Secondes*10<br />
Figure 3 Figure 4<br />
Le graphique de la fig. 4 représente 2 paramètres. TEMPS SECURITE ARRET-MISE EN MARCHE et TEMPS<br />
SECURITE MISE EN MARCHE-MISE EN MARCHE. Le premier paramètre prévoit qu'après l'arrêt du compresseur, un<br />
temps donné doit s'écouler avant que son redémarrage soit autorisé. Ce temps est respecté même s'il y a une demande<br />
de la part du thermorégulateur. Le deuxième paramètre prévoit qu'un temps donné doit s'écouler entre une mise en<br />
marche et la suivante. En cas d'unités à deux compresseurs, deux autres paramètres sont utilisés: INTERVALLE<br />
INTERVENTION PREMIER DEUXIEME COMPRESSEUR et INTERVALLE ARRET PREMIER DEUXIEME<br />
COMPRESSEUR. Le premier paramètre permet d'éviter le démarrage simultané des deux compresseurs, cela<br />
principalement afin d'éviter des courants de démarrage trop élevés de l'unité. Le deuxième prévoit un intervalle de temps<br />
entre les arrêts du premier et du deuxième compresseur. Ces deux paramètres font référence au graphique de la figure<br />
3.<br />
98
REGULATEUR DES VENTILATEURS DE LA BATTERIE<br />
De série, dans les unités <strong>MSAT</strong>, la régulation de la vitesse des ventilateurs est du type thermostatique; elle peut être du<br />
type pressostatique sur demande, cette dernière configuration étant fournie avec un kit. Le principe de fonctionnement que<br />
nous allons décrire est le même pour les deux régulations.<br />
- CONTRÔLE DES VENTILATEURS EN FROID<br />
On trouvera ci-après un graphique expliquant le mode de fonctionnement en froid (fig. 6).<br />
Vitesse<br />
VENTILATORE ESTERNO IN MODALITA' COOL<br />
vitesse<br />
vitesse<br />
e<br />
e<br />
Figure 6<br />
Quand le compresseur est activé, on a une ventilation forcée, c'est-à-dire que les ventilateurs ne suivent pas la<br />
régulation dictée par le contrôleur mais tournent, pendant un temps défini par un paramètre, à la vitesse maximale à<br />
moins que la température ne soit inférieure à la valeur de COUPURE, auquel cas les ventilateurs tournent à la vitesse<br />
minimale pendant la période précitée. Ceci étant dit, voyons le fonctionnement du régulateur.<br />
Le premier paramètre à définir est la COUPURE qui correspond à une valeur particulière de température de<br />
condensation au-dessous de laquelle les ventilateurs sont à l'arrêt. L’HYSTÉRÉSIS COUPURE est un paramètre<br />
définissant la plage à l'intérieur de laquelle on a la commutation entre l'état de fonctionnement des ventilateurs à la<br />
vitesse minimale et l'état de repos de ces mêmes ventilateurs. Pour résumer, les ventilateurs commenceront à<br />
fonctionner à la vitesse minimale à une valeur de température égale à la valeur de COUPURE + HYSTÉRÉSIS<br />
COUPURE alors que l'arrêt est déterminé par la différence entre les valeurs de CONSIGNE FROID et de DELTA<br />
COUPURE. Quand la température de condensation dépasse la valeur CONSIGNE VENTILATEURS EN FROID, le<br />
régulateur commence à réguler la vitesse des ventilateurs proportionnellement à la température de condensation. Dans<br />
le cas des unités CLIVET, contrairement à ce qui est décrit sur le graphique, la régulation est maintenue jusqu'à<br />
l'obtention de la valeur CONSIGNE MAXI VENTILATEUR EN FROID. Par souci d'exhaustivité, il convient de s'arrêter sur<br />
la description des paramètres VITESSE MAXI SILENCIEUSE et BANDE PROPORTIONNELLE EN FROID. Le premier<br />
définit un seuil maximum de vitesse des ventilateurs correspondant à une température donnée de condensation pour<br />
laquelle on a la régulation de la vitesse tandis que la BANDE PROPORTIONNELLE définit la pente de la droite à<br />
l'intérieur de laquelle on a la régulation de la vitesse. Les unités CLIVET sont construites pour réguler le régime des<br />
ventilateurs jusqu'à la vitesse maximale.<br />
99
TABLEAU DU MODULE DE COMMANDE PRINCIPAL<br />
Voyant 1 compresseur 1<br />
• ALLUME si le compresseur 1 est en marche<br />
• ETEINT si le compresseur 1 est arrêté<br />
• CLIGNOTANT à la fréquence de 1 Hz si des temporisations sont en cours<br />
• CLIGNOTANT à basse fréquence si le compresseur est en dégivrage (seulement pompe à chaleur)<br />
Voyant 3 compresseur 2<br />
• ALLUME si le compresseur 1 est en marche<br />
• ETEINT si le compresseur 1 est éteint<br />
• CLIGNOTANT à la fréquence de 1 Hz si des temporisations sont en cours<br />
• CLIGNOTANT à basse fréquence si le compresseur est en dégivrage (seulement pompe à chaleur)<br />
•<br />
ALLUME si le contrôleur est en mode Froid<br />
Si aucun des deux voyants CHAUD ou FROID n'est allumé, le contrôleur est en mode ATTENTE.<br />
Quand la machine est en OFF, seul le point décimal reste allumé.<br />
N.B. Les voyants 2 et 4 se rapportent à une unité avec 4 compresseurs et deux circuits frigorifiques.<br />
PROGRAMMATION DES PARAMETRES DE FONCTIONNEMENT<br />
Dans ce chapitre, nous nous limitons à énumérer les seuls paramètres accessibles en mode direct sans mot de passe.<br />
Les paramètres protégés par un mot de passe sont du ressort du personnel des centres agréés.<br />
SIGNIFICATION DES TOUCHES<br />
Touche ON-OFF<br />
Touche MODE<br />
ON-OFF<br />
Touche MODE<br />
ON-OFF<br />
Touche MODE<br />
a) Maintenue appuyée pendant plus de 2 secondes, le thermorégulateur passe de ON à OFF et de OFF à<br />
ON.<br />
b) Une seule pression remet à zéro toutes les alarmes à réarmement manuel non actives; sont<br />
également remis à zéro les compteurs du nombre d'interventions/heure, même si ceux-ci ne sont pas<br />
actifs.<br />
c) Dans le mode menu, cette touche permet le défilement vers le bas.<br />
d) Permet de decrémenter la valeur du paramètre sélectionné.<br />
a) En appuyant et en lâchant ces deux touches dans les 2 secondes, on descend d'un niveau dans le<br />
menu de configuration.<br />
a) En appuyant et en lâchant ces deux touches dans les 2 secondes, on monte d'un niveau dans le menu<br />
de configuration.<br />
b) Si on est en train de visualiser le dernier niveau d'un menu, en appuyant dessus simultanément et en<br />
lâchant dans les 2 secondes, on remonte d'un niveau.<br />
a) Dans le mode menu, cette touche permet le défilement vers le haut.<br />
b) Permet d'incrémenter la valeur du paramètre sélectionné.<br />
100
Tableau 1<br />
LISTE DES PARAMETRES ACCESSIBLES<br />
Code Description Unité de mesure Consigne d'usine<br />
H46 Mot de passe unité 0<br />
Niveau 0 Niveau 1 Niveau 2<br />
Niveau 3<br />
Niveau 4<br />
Sonde réglage<br />
Alarme active<br />
Consigne : SEt Label Cons. Froid: Coo Valeur Consigne Froid<br />
Label Cons. Chaud: HEA<br />
Valeur Consigne Chaud<br />
Ent. Analogiques: tP<br />
Code Entrées: t01- t06<br />
Valeur Ent. Analogiques<br />
Alarmes: Err<br />
Code al. actives: E00-E46<br />
Ent. Numériques: Id<br />
Code entrées: I01-I11<br />
Etat éntrée numériques<br />
Paramètres: PAr<br />
Par. configuration: CnF<br />
Paramètres H01-H69<br />
Valeur paramètre<br />
Par. compresseur: CP<br />
Paramètres C01-C08<br />
Valeur paramètre<br />
Par. ventilation: FAn<br />
Paramètres F01-F25<br />
Valeur paramètre<br />
Par. alarmes: ALL<br />
Paramètres A01-A26<br />
Valeur paramètre<br />
Par. pompe: PUP<br />
Paramètres P01-P03<br />
Valeur paramètre<br />
Par. antigel: Fro<br />
Paramètres r01-r17<br />
Valeur paramètre<br />
Par. dégivrage: dFr<br />
Paramètres d01-d11<br />
Valeur paramètre<br />
Par. extension: ESP<br />
Paramètres N01-N07<br />
Valeur paramètre<br />
Mot de passe: PSS<br />
Valeur mot de passe<br />
Heures fonct.: OHr<br />
Heures comp: OH1-OH4<br />
Nombre heures<br />
Heures pompe: OHP<br />
Nombre heures<br />
Pour se déplacer à l'intérieur des niveaux, appuyer en même temps sur les touches «Mode» et<br />
«on off».<br />
1 - En appuyant et en lâchant les deux touches dans les 2 secondes, on descend d'un niveau<br />
dans le menu de configuration.<br />
2 - En gardant les deux touches appuyées pendant plus de 2 secondes, on monte d'un niveau<br />
dans le menu de configuration.<br />
3 - Si on est en train de visualiser le dernier niveau d'un menu, en appuyant dessus<br />
simultanément et en les lâchant dans les 2 secondes, on remonte d'un niveau.<br />
101
ALARMES<br />
Les codes d'alarme apparaissent sur l'afficheur du terminal interface utilisateur quand une erreur se produit. Les alarmes<br />
sont visualisées sur l'afficheur, celles à réarmement automatique disparaissent dès que l'anomalie a été résolue, celles à<br />
réarmement manuel doivent être réarmées par un technicien. Les alarmes apparaissent sur le terminal d'interface<br />
utilisateur selon la séquence avec laquelle elles ont été introduites dans le tableau 4. A préciser en outre que, si plusieurs<br />
alarmes sont présentes simultanément, seule la première sera visualisée; une fois celle-ci réarmée, on verra apparaître<br />
la deuxième et ainsi de suite jusqu'à la fin des alarmes.<br />
Attention: en phase de standby, ou de OFF, les alarmes ne sont pas signalées et le relais de blocage cumulatif n'est<br />
pas activé. Si elles sont présentes, les alarmes sont signalées et le relais de blocage cumulatif est activé au moment de<br />
la sélection du mode de fonctionnement.<br />
Tableau 2<br />
CODE TYPE DE DEFAUT ARRÊTS REARMEMENT<br />
E01 Pression maxi circ. 1 Compresseur MANUEL<br />
E02* Pression mini circ. 1 Compresseur ventilateur AUTOMATIQUE (Après 5 signalisations,<br />
devient à réarmement manuel)<br />
E03 Therm. compresseur 1 Compresseur ventilateur MANUEL<br />
E04 Prot. therm. ventilateurs Compresseur ventilateur MANUEL<br />
circ. 1<br />
E07 Défaut sonde BT3/BP3 Compresseur ventilateur AUTOMATIQUE<br />
E21 Pression maxi circ. 2 Compresseur ventilateur MANUEL<br />
E22* Pression mini circ. 2 Compresseur ventilateur AUTOMATIQUE (Après 5 signalisations,<br />
devient à réarmement manuel)<br />
E24 Prot. therm. ventilateurs Compresseur ventilateur MANUEL<br />
circ. 2<br />
E27 Défaut sonde BT5/BP5 Compresseur ventilateur AUTOMATIQUE<br />
E45 Configuration Compresseur MANUEL<br />
* Après 5 signalisations, elle devient à réarmement manuel. Chaque alarme signalée n'est comptée que si plus de 225 s<br />
s'écoulent entre une signalisation et la suivante.<br />
<strong>102</strong>
DÉPANNAGE<br />
Ce qui suit entend indiquer quelques possibles anomalies et leur solution. La responsabilité des opérations qui en découlent<br />
revient toujours et entièrement à celui qui les effectue. Il est obligatoire de s'adresser à un technicien agréé satisfaisant aux<br />
conditions requises par la loi pour chaque opération nécessaire au rétablissement du fonctionnement.<br />
Le déclenchement d'un dispositif de sécurité indique une anomalie de fonctionnement: avant de réarmer, vérifier et éliminer<br />
la cause de l'anomalie. On trouvera ci-après une liste de possibles problèmes avec leur cause et leurs solutions.<br />
ATTENTION<br />
LES OPÉRATIONS INDIQUÉES SONT ENTIÈREMENT SOUS LA RESPONSABILITÉ DE CELUI QUI LES EFFECTUE. IL<br />
EST OBLIGATOIRE DE S'ADRESSER À UN CENTRE D'ASSISTANCE AGRÉÉ SATISFAISANT AUX CONDITIONS<br />
NÉCESSAIRES POUR LES OPÉRATIONS DESTINÉES À RÉTABLIR LA FONCTIONNALITÉ.<br />
Tous les défauts et toutes les conditions anormales de fonctionnement sont gérés par le module de contrôle principal. Pour<br />
chaque condition anormale ou de défaut, le module, non seulement met le groupe en sécurité, mais il peut aussi visualiser<br />
l'événement à distance.<br />
103
BLOCAGE HAUTE PRESSION<br />
BLOCAGE HAUTE PRESSION<br />
OUI<br />
Ventilation efficace ?<br />
NON<br />
Vérifier batterie<br />
( 1 )<br />
Vérifier ventilateur<br />
( 2 )<br />
Vérifier module ventilateur<br />
( 3 )<br />
Vérifier sonde<br />
( 4 )<br />
OUI<br />
Température air extérieur<br />
inférieure aux limites de<br />
fonctionnement ?<br />
NON<br />
Vérifier les données de<br />
projet ( 5 )<br />
OUI<br />
Charge réfrigérant correcte ?<br />
NON<br />
Vérifier sousrefroidissement<br />
liquide<br />
( 6 )<br />
OUI<br />
Absence d'incondensables?<br />
NON<br />
Refaire le vide et remplir<br />
( 7 )<br />
OUI<br />
Température et/ou pression<br />
d'aspiration régulières ?<br />
NON<br />
Vérifier fonctionnement<br />
unité intérieure ( 8 )<br />
Vérifier la fonctionnalité des<br />
organes d'arrêt de la ligne<br />
du liquide ( 9 )<br />
Unité en marche<br />
Remarques:<br />
1) Il est très important qu'il offre un échange thermique maximal, ce qui implique qu'il doit être libre de toute saleté,<br />
d'entartrages ou d'obstacles au passage de l'air.<br />
2) Vérifier l'intégrité du ventilateur; s'il est endommagé, le remplacer.<br />
3) Vérifier que la tension à la sortie de la carte module en mode proportionnel la vitesse des ventilateurs. Dans le cas<br />
contraire, remplacer le module.<br />
4) Vérifier le positionnement: il doit être en contact étroit avec le tube profilé de la batterie d'échange. Il doit avoir une donnée<br />
de résistance parfaitement en accord avec la température, vérifier avec un ohmmètre cette valeur de résistance.<br />
5) Vérifier :<br />
- Limites de fonctionnement. (cf. section générale).<br />
- Que la batterie n'est pas exposée à des rayons solaires directs et qu'elle ne se trouve pas près de surfaces<br />
réfléchissantes.<br />
- Qu'il n'y a aucun flux d'air chaud, d'aucun type, à proximité immédiate.<br />
- Qu'il n'y a pas de recyclage du même air.<br />
6) Pour les modalités de contrôle, consulter le manuel de MISE EN MARCHE. N.B.: une éventuelle inondation des circuits<br />
de la batterie d'échange jusqu'au point de logement de la sonde provoque un fonctionnement anormal du système de<br />
régulation de la vitesse des ventilateurs.<br />
7) Une condition pouvant se produire est que la température de condensation soit très élevée (25/30 degrés au-dessus de la<br />
température de l'air extérieur) associée à un mauvais rendement frigorifique. Cela peut provoquer les mêmes symptômes<br />
qu'une charge de réfrigérant abondante. Après avoir constaté que la charge est correcte, évaluer cette hypothèse et refaire<br />
toutes les opérations de vidange et de remplissage.<br />
8) Contrôler que le débit d'air n'est pas excessif, et que la température de l'air ambiant n'est pas trop élevée. Ces conditions<br />
pourraient augmenter le rendement de la machine et par conséquent la chaleur à éliminer au condenseur.<br />
9) Vérifier que tous les organes d'arrêt sur la ligne du liquide sont complètement ouverts.<br />
104
BLOCAGE BASSE PRESSION<br />
BLOCAGE BASSE PRESSION<br />
OUI<br />
Fonctionnement unité<br />
intérieure régulier ?<br />
NON<br />
Vérifier fonctionnement<br />
unité intérieure ( 1 )<br />
Vérifier conditions de<br />
travail unité int. ( 2 )<br />
Vérifier tuyauteries de<br />
raccordement ( 3 )<br />
OUI<br />
Filtre déshydrateur efficace ?<br />
NON<br />
Contrôler ∆t entre amont<br />
et aval ( 4 )<br />
OUI<br />
Charge réfrigérant<br />
correcte?<br />
NON<br />
Contrôler<br />
surchauffe ( 5 )<br />
OUI<br />
Robinet aspiration<br />
complètement ouvert ?<br />
NON<br />
Vérifier, éventuellement<br />
ouvrir<br />
OUI<br />
Température et/ou pression<br />
d'aspiration régulières ?<br />
NON<br />
Vérifier fonctionnement<br />
unité extérieure ( 6 )<br />
Unité en marche<br />
Remarques:<br />
1) Vérifier :<br />
- que le débit d'air est suffisant;<br />
- que le sens de rotation des ventilateurs est correct;<br />
- que l'échangeur n'est pas sale ou entartré afin qu'il puisse offrir un échange thermique maximal;<br />
- que la vanne solénoïde fonctionne.<br />
- que le détendeur thermostatique fonctionne.<br />
2) Vérifier que les conditions de température/humidité de l'air traité se situent dans les conditions de projet.<br />
3) Vérifier que la disposition et le diamètre des tuyauteries sont corrects (cf. section TUYAUTERIES FRIGORIFIQUES).<br />
Dans le cas contraire, on pourrait avoir des pertes de charge inacceptables pour le bon fonctionnement du groupe.<br />
4) Contrôler avec un thermomètre à contact la température en amont, puis en aval du filtre déshydrateur. Si la différence de<br />
température est supérieure à un 1°C, cela veut dire que le filtre n'est pas en bon état de marche ou qu'il est sousdimensionné;<br />
dans les deux cas, le remplacer.<br />
5) Pour les modes de contrôle, consulter la section MISE EN MARCHE.<br />
6) Si la pression de condensation est inférieure à 1200kPa manométriques, on peut avoir une alimentation anormale du<br />
détendeur et par conséquent une pression d'aspiration trop basse.<br />
Vérifier que la ventilation de l'unité extérieure fonctionne parfaitement (c'est-à-dire module ou arrête les ventilateurs).<br />
105
DÉCLENCHEMENT SÉCURITÉ COMPRESSEUR<br />
DÉCLENCHEMENT SÉCURITÉ<br />
COMPRESSEUR<br />
OUI<br />
Température refoulement<br />
compresseur dans les limites ?<br />
NON<br />
Vérifier paramètres type :<br />
surchauffe, charge<br />
réfrigérant, etc<br />
OUI<br />
Le thermostat à contact<br />
fonctionne-t-il ?<br />
NON<br />
Remplacer le thermostat<br />
Unité en marche<br />
DÉCLENCHEMENT PROT. THERMIQUE VENTILATEURS<br />
DÉCLENCHEMENT PROTECTION<br />
THERMIQUE VENTILATEUR<br />
OUI<br />
Moteur intact ?<br />
NON<br />
Vérifier possibles<br />
obstructions de l'échangeur<br />
Vérifier obstructions<br />
sur les pales<br />
Vérifier enroulements<br />
électriques<br />
Unité en marche<br />
106
GROUPE BRUYANT<br />
UNITÉ BRUYANTE<br />
OUI<br />
Les amortisseurs du<br />
compresseur sont-ils en bon<br />
état ?<br />
NON<br />
Vérifier et éventuellement<br />
remplacer<br />
NON<br />
Les vis de fixation du<br />
compresseur sont-elles<br />
desserrées?<br />
OUI<br />
Vérifier et éventuellement<br />
serrer<br />
NON<br />
Les tuyauteries<br />
vibrent-elles ?<br />
OUI<br />
Vérifier les points de<br />
serrage<br />
Unité en marche<br />
COMPRESSEUR NE DÉMARRANT PAS<br />
COMPRESSEUR NE<br />
DÉMARRANT PAS<br />
NON<br />
Absence de tension aux<br />
bornes ?<br />
OUI<br />
Intervention Klixon<br />
( 1 )<br />
Moteur brûlé<br />
( 2 )<br />
Compresseur bloqué<br />
( 3 )<br />
OUI<br />
Disj. magnétothermique<br />
branché ?<br />
NON<br />
Brancher<br />
OUI<br />
Le relais fonctionne-t-il ?<br />
NON<br />
Contrôler que la bobine<br />
n'est pas brûlée et que les<br />
contacts ne sont pas<br />
oxydés<br />
OUI<br />
Le module de contrôle<br />
fonctionne-t-il ?<br />
NON<br />
Vérifier et éventuellement<br />
remplacer<br />
Unité en marche<br />
Remarques:<br />
1) L'intervention du Klixon se produit en cas de température plutôt élevée de la carcasse du compresseur.<br />
Vérifier la cause avant de faire redémarrer le groupe.<br />
2) Vérifier si les enroulements sont à la masse. Éventuellement remplacer le compresseur.<br />
3) Le blocage mécanique du compresseur se manifeste par un bruit soutenu et typique. Si nécessaire, remplacer le<br />
compresseur.<br />
107
ENTRETIEN ORDINAIRE<br />
IMPORTANT<br />
AVANT DE COMMENCER TOUTE OPÉRATION D'ENTRETIEN OU DE NETTOYAGE DU GROUPE, S'ASSURER QUE<br />
CELUI-CI N'EST PAS SOUS TENSION.<br />
Cette section est consacrée à l'utilisateur final et elle est extrêmement importante pour le fonctionnement régulier dans le<br />
temps du groupe.<br />
Quelques opérations effectuées scrupuleusement et périodiquement permettent d'éviter de devoir recourir à des<br />
interventions de personnel spécialisé.<br />
Les opérations à effectuer ne nécessitent pas de connaissances techniques particulières et se résument à de simples<br />
contrôles des composants du groupe.<br />
- batterie de condensation<br />
- électroventilateurs<br />
- structure<br />
GROUPE<br />
BATTERIE DE CONDENSATION<br />
ATTENTION: un contact accidentel avec les ailettes de l'échangeur peut provoquer de petites blessures par coupure.<br />
Pour effectuer les opérations décrites ci-dessous, utiliser des gants appropriés.<br />
Il est important que l'échangeur soit en mesure d'offrir l'échange thermique maximal. Il est donc important que sa surface<br />
soit toujours exempte de saletés ou de poussières qui pourraient s'être déposées sous l'effet de l'action des<br />
électroventilateurs.<br />
- Éliminer, à l'aide d'une brosse, toute les impuretés qui pourraient s'être déposées sur la surface de la batterie.<br />
- À l'aide d'un jet d'air sous pression, nettoyer la surface en aluminium de la batterie en ayant soin d'orienter le jet<br />
parallèlement aux ailettes pour ne pas les endommager.<br />
- Vérifier que les ailettes en aluminium n'ont pas été endommagées ou pliées; si on constate des situations de ce genre,<br />
« peigner » la batterie avec un outil approprié jusqu'à ce qu'on ait rétabli la situation initiale pour un passage optimal de<br />
l'air.<br />
ÉLECTROVENTILATEURS<br />
Au premier démarrage saisonnier, vérifier le niveau sonore.<br />
S'il est élevé et qu'on a des vibrations, cela peut être le signe: soit d'un déséquilibre des pales soit d'un desserrement<br />
des vis de fixation.<br />
En cas d'anomalie effective, appeler le centre d'assistance agréé car les ventilateurs sont positionnés à l'intérieur de la<br />
machine entre les batteries de condensation.<br />
- Vérifier l'état de fixation de l'électroventilateur à la grille de support.<br />
- Vérifier l'état de fixation de la grille de support de l'électroventilateur à la structure du groupe.<br />
- Vérifier, pour autant que faire se peut, les éventuels déséquilibres de l'électroventilateur, qui se manifestent par des<br />
conditions de bruit et de vibrations anormales.<br />
STRUCTURE<br />
- Vérifier l'état des parties constituant la structure.<br />
Attacher une attention particulière aux parties en acier.<br />
- Traiter avec des peintures en mesure d'éliminer ou de réduire le phénomène d'oxydation les points du groupe qui<br />
présenteraient ce problème.<br />
- Vérifier la fixation du panneautage externe du groupe. De mauvaises fixations sont à l'origine de vibrations et de bruits<br />
anormaux.<br />
PARTIE ÉLECTRIQUE<br />
Vérifier que le câble d'alimentation qui raccorde le groupe au tableau de distribution ne présente pas de lacérations, de<br />
craquelures ou d'altérations de nature à compromettre l'isolement. Contacter un centre d'assistance agréé dans le cas où<br />
une intervention serait nécessaire.<br />
IMPORTANT<br />
LA PRÉSENCE DE PERSONNEL AUTORISÉ EST CONSEILLÉE À CHAQUE DÉMARRAGE SAISONNIER<br />
DU GROUPE DE MANIÈRE À COMMENCER, NON SEULEMENT LES VÉRIFICATIONS PRÉCITÉES, MAIS AUSSI<br />
LES VÉRIFICATIONS DU CIRCUIT FRIGORIFIQUE.<br />
108
TUYAUTERIES FRIGORIFIQUES<br />
Le dimensionnement des lignes frigorifiques de raccordement entre groupes de condensation et unités d'évaporation<br />
intérieures est d'une importance fondamentale. Pour les raccordements à nos groupes, consulter le tableau ci-dessous où,<br />
pour des longueurs spécifiées, le diamètre des raccords correspond au diamètre à utiliser pour les tuyauteries de<br />
raccordement.<br />
Pour des distances supérieures, le diamètre devra être calculé (cf. bibliographies appropriées ou notre Catalogue<br />
DIMENSIONNEMENT DES LIGNES FRIGORIFIQUES DANS LES INSTALLATIONS À DEUX SECTIONS). Le tableau cidessous<br />
indique en outre la dénivellation maximum conseillée, avec des tuyauteries standard aussi bien dans le cas où le<br />
groupe de condensation est plus bas que l'unité terminale que dans le cas contraire.<br />
Utiliser uniquement du tube de cuivre pour réfrigération.<br />
Taille ∅ Aspir. ∅ Liquide Longueur Nbre Dénivellation maxi<br />
courbes<br />
Maxi m maxi Fig. 4 Fig. 6<br />
<strong>102</strong> 22 14 10 6 9 9<br />
<strong>122</strong> 22 14 10 6 9 9<br />
<strong>142</strong> 28 16 16 8 12 12<br />
<strong>162</strong> 28 18 16 6 10 10<br />
<strong>182</strong> 28 18 12 6 10 10<br />
<strong>202</strong> 35 22 23 10 18 18<br />
<strong>242</strong> 35 22 20 10 14 14<br />
TUYAUTERIE D'ASPIRATION<br />
Pour toutes les tailles, les raccords sont à souder; le raccord spécial ROTALOCK<br />
est fourni de série avec le groupe.<br />
- Raccorder la ligne préparée au robinet d'arrêt à l'aide de deux clés comme<br />
indiqué (figure 1 pour ce qui concerne le premier circuit, figure 2 pour le<br />
deuxième).<br />
Figure 1<br />
Figure 2<br />
TUYAUTERIE LIQUIDE<br />
Figure 3<br />
Pour toutes les tailles, les raccords sont à souder; le raccord spécial<br />
ROTALOCK est fourni de série avec l'unité.<br />
- Raccorder la ligne préparée au robinet d'arrêt à l'aide de deux clés<br />
comme indiqué (figure 3 pour ce qui concerne le premier circuit,<br />
figure 4 pour le deuxième).<br />
Figure 4<br />
REMARQUE:<br />
Toutes les tuyauteries doivent être parfaitement propres (effectuer un nettoyage avec de l'azote ou de l'air sec<br />
avant de brancher les tuyauteries sur les deux unités) et exemptes d'humidité afin de permettre une opération de<br />
vide optimale.<br />
109
CONTRÔLE DES FUITES<br />
- Contrôler soigneusement que les robinets du groupe de condensation sont fermés.<br />
- Brancher le groupe manométrique sur les raccords de service des robinets.<br />
- Effectuer la mise sous pression avec le réfrigérant jusqu'à 250 kPa.<br />
- Fermer les robinets du groupe manométrique pour débrancher la bouteille du<br />
réfrigérant puis brancher la bouteille d'azote.<br />
- Ouvrir les robinets du groupe manométrique.<br />
- Mettre l'installation sous pression avec de l'azote jusqu'à 1200 kPa.<br />
- Contrôler soigneusement toute la tuyauterie avec une lampe de détection des fuites<br />
ou un autre instrument électronique, en faisant particulièrement attention aux<br />
soudures et aux jonctions en général.<br />
Si on ne dispose pas de l'équipement nécessaire, laisser toutes les parties qui<br />
pourraient donner lieu à des fuites de réfrigérant (soudures, jonctions, etc.) en<br />
mesure d'être inspectées.<br />
BULBE DÉT.<br />
THERMOSTAT.<br />
BULBE DÉT.<br />
THERMOSTAT.<br />
UNITÉ EXTÉRIEURE<br />
Robinet<br />
gaz<br />
UNITÉ INTÉRIEURE<br />
Figure Figura 5 5<br />
Robinet<br />
liquide<br />
MODALITÉS - INDICATIONS POUR UN RACCORDEMENT CORRECT<br />
TUYAUTERIE ASPIRATION<br />
- Pente vers le compresseur dans les portions horizontales (0,5%) pour assurer le<br />
retour de l'huile au compresseur même dans des conditions de charge minimale.<br />
- Isoler soigneusement la tuyauterie avec du polyéthylène anti-condensation à cellules<br />
fermées d'une épaisseur minimale de 9 mm.<br />
- Si le groupe de condensation est placé plus bas que l'unité d'évaporation (cf. figure<br />
5), prévoir un siphon d'une hauteur égale à la batterie afin de prévenir, pendant<br />
l'arrêt machine, tout retour de liquide au compresseur.<br />
- Pour éviter le siphon, monter sur la ligne du liquide une vanne solénoïde (cf. Figure<br />
6) qui, de toute façon, est toujours conseillée.<br />
- Si l'unité terminale est équipé d'un détendeur thermostatique, en plus du siphon,<br />
prévoir un siphon (cf. Figure 5) le plus près possible du groupe. Cela afin d'éviter<br />
que, lorsque la machine est à l'arrêt, le bulbe du détendeur thermostatique ne reste<br />
en contact avec du liquide (cf. figure 5).<br />
En cas de raccordement à notre unité terminale CED-V, le siphon est déjà prévu à<br />
l'intérieur du groupe.<br />
- Si le groupe de condensation est positionné plus haut que l'unité d'évaporation,<br />
prévoir un seul siphon vers le bas (cf. Fig. 7) Faire toutefois attention: si la distance<br />
totale dépasse 7-10 mètres, il est nécessaire d'utiliser la vanne solénoïde sur la<br />
ligne du liquide.<br />
Pour les remontées verticales, prévoir outre le siphon vers le bas à la base un<br />
siphon de récupération de l'huile tous les 6 mètres (cf. Figure 8).<br />
- Faire des courbes à rayon ample (et non pas des coudes).<br />
- Éviter soigneusement tout écrasement de la tuyauterie.<br />
TUYAUTERIE LIQUIDE<br />
- Si elle est exposée au soleil ou qu'elle traverse des zones à des températures<br />
supérieures à la température extérieure, elle doit être isolée, sinon elle peut être<br />
libre.<br />
- Éviter les diamètres excessifs pour ne pas provoquer un excès de charge de<br />
réfrigérant.<br />
IMPORTANT<br />
Figure Figura 6 6<br />
Figure Figura 77<br />
Figure Figura 88<br />
Avec l'unité terminale intérieure munie d'un détendeur thermostatique, si les tuyauteries de raccordement sont d'une<br />
longueur supérieure à environ 15/20 mètres ou si l'installation est prévue pour fonctionner dans des conditions climatiques<br />
variables (par exemple air extérieur très différent entre le jour et la nuit), il est conseillé d'installer un réservoir de liquide<br />
d'une capacité appropriée près de l'unité intérieure.<br />
Le réservoir de liquide peut remplir les fonctions suivantes:<br />
- Éviter que du fréon à l'état gazeux arrive au détendeur thermostatique.<br />
- Remédier aux variations de charge qui se produisent dans l'installation lorsque les conditions de fonctionnement varient.<br />
- Remédier en partie et pour un certain temps à d'éventuelles micro-fuites non détectables, qui dans le temps tendent à<br />
décharger l'installation.<br />
- Éviter une inondation excessive du condenseur et l'élévation de la température/pression de condensation qui en résulterait<br />
si l'installation a été chargée avec une quantité supérieure de réfrigérant, ou si la charge est faite dans des conditions<br />
climatiques anormales.<br />
Ceci dit, l'installation du réservoir de liquide est toujours conseillée quand les distances de raccordement sont élevées.<br />
110
RISQUES RESIDUELS<br />
ATTENTION<br />
ON INDIQUE DANS CE FASCICULE TOUTES LES OPERATIONS POUVANT ETRE A L’ORIGINE DE SITUATIONS<br />
DE RISQUE, AINSI QUE LES MESURES DE PRECAUTION A PRENDRE AU CAS PAR CAS<br />
DEFINITION ZONE DANGEREUSE<br />
La figure ci-dessous met en évidence la zone dans laquelle ne peut agir qu’un seul opérateur autorisé.<br />
- Par zone dangereuse extérieure, on entend une surface précise autour du groupe et la projection à la verticale sur le sol de<br />
cette même surface en cas de groupe suspendu.<br />
- Par zone dangereuse intérieure, on entend la zone à laquelle on ne peut accéder qu’en enlevant délibérément les<br />
carrosseries ou des parties de celles-ci.<br />
111
RISQUES GENERAUX<br />
Zone considérée Risque résiduel Modalités Avertissements<br />
Batteries d’échange Blessures légères Contact Eviter tout contact accidentel<br />
Utiliser des gants de protection<br />
Appliquer des grilles de protection batteries d’échange (en<br />
option)<br />
Soupapes de sûreté<br />
Zone autour de l’unité<br />
Zone autour de l’unité<br />
Intoxications<br />
Blessures<br />
Intoxications<br />
Blessures<br />
Brûlures graves<br />
Mort<br />
Mort par:<br />
Brûlures graves<br />
Foudroiement<br />
Expulsion du gaz réfrigérant par<br />
intervention de la protection en<br />
question.<br />
Explosion due à une augmentation<br />
de la température ambiante<br />
(incendie).<br />
Incendie dû à un court-circuit ou une<br />
surchauffe des câbles d’alimentation<br />
électrique en amont des<br />
sectionneurs du groupe.<br />
Eviter d’entrer dans la zone dangereuse<br />
Collecter correctement les décharges de la soupape de sûreté<br />
Utiliser des vêtements et des lunettes appropriés<br />
Ne jamais laisser les robinets de refoulement et d’aspiration des<br />
compresseurs fermés lorsque le groupe est à l’arrêt<br />
Dimensionnement correct des câbles et des dispositifs de<br />
protection de la ligne de raccordement au réseau électrique<br />
Intérieur unité Brûlures Contact avec les compresseurs et<br />
tuyauterie de refoulement<br />
Eviter tout contact accidentel<br />
Utiliser des gants de protection<br />
Intérieur unité Blessures Contact avec arête vive Utiliser des gants de protection<br />
Intérieur unité<br />
Mort due à une électrocution<br />
grave<br />
Défaut d'isolation sur les câbles<br />
d'alimentation électrique en amont<br />
des sectionneurs de machine<br />
Ne glisser les mains à l'intérieur de l'unité qu'après avoir ouvert<br />
le sectionneur situé sur la ligne de raccordement électrique de<br />
l'unité (à la charge du client)<br />
Zone dangereuse intérieure<br />
Zone dangereuse intérieure<br />
Mort par:<br />
Foudroiement<br />
Mort par:<br />
Brûlures graves<br />
Foudroiement<br />
FICHES DE SECURITE REFRIGERANT<br />
01 Eléments<br />
identificateurs de<br />
la substance<br />
02 Composition<br />
information sur<br />
les composants<br />
03 Identification du<br />
risque<br />
Nom du produit: forane 407C<br />
N°SDS 01965/1<br />
Fournisseur: ELF ATOCHEM ITALIA<br />
Via G.Murat 17, 20159 Milano tel. 02/668111<br />
Masses métalliques sous tension.<br />
Contact avec des parties sous<br />
tension accessibles après<br />
enlèvement des protections.<br />
Nature chimique de la préparation<br />
Mélange à base de:<br />
Forane 32(difluoromethane) (N° CAS: 75-10-5)<br />
Forane 125 (pentafluoroethane) (N° CAS: 354-33-6)<br />
Forane 134a (1.1.1.2 tetrafluoroethane) (N° CAS: 811-97-2)<br />
Risques physiques et chimiques principaux:<br />
Décomposition thermique en produits toxiques et corrosifs<br />
04 Premiers soins Informations générales:<br />
Inhalation: transporter la victime à l'air frais. Si nécessaire, donner<br />
de l'oxygène ou appliquer la respiration artificielle.<br />
Contact avec la peau: les engelures doivent être soignées comme<br />
des brûlures thermiques.<br />
Contact avec les yeux: lavage immédiat et abondant à l'eau. Si<br />
l'irritation persiste, contacter un ophtalmologue.<br />
Instructions pour le médecin: ne pas administrer catecolammine<br />
(vu la sensibilisation cardiaque provoqué par le produit)<br />
05 Mesures antiincendie<br />
06 Mesures en cas<br />
de fuite<br />
accidentelle<br />
Risques spécifiques: décomposition thermique en produits<br />
toxiques et corrosifs. Acide fluorhydrique. Oxydes de carbone.<br />
Méthodes spécifiques d'intervention: refroidir les<br />
contenants/citernes avec des jets d'eau. Interdire toute source<br />
d'étincelles et d'ignition.<br />
NE PAS FUMER.<br />
Systèmes spéciaux de protection pour les équipes de secours:<br />
porter un appareil respiratoire autonome et des vêtements de<br />
protection.<br />
Précautions individuelles: éviter tout contact avec la peau, les<br />
yeux et l'inhalation des vapeurs. Utiliser moyens de protection<br />
personnels.<br />
Dans une pièce close: aérer ou utiliser un appareil respiratoire<br />
autonome (risque d’anoxie). INTERDICTION DE FUMER.<br />
Précautions pour la protection de l’ambiance :<br />
Limiter au maximum les déchets dans l’ambiance.<br />
Soigner de façon particulièrement attentive la réalisation du<br />
raccordement à l’installation de terre des masses métalliques du<br />
groupe.<br />
Ouvrir et cadenasser le sectionneur général avant de retirer les<br />
protections<br />
Nom du produit: forane 22<br />
N° SDS 0005/7<br />
Fournisseur: ELF ATOCHEM ITALIA<br />
4 Cours Michelet Cedex 42 92091 Paris France<br />
Tél. 00331 49008080<br />
Nature chimique de la préparation<br />
Mélange à base de:<br />
Chlorodifluoromethane hydrocarbure halogéné<br />
N° CAS 75-45-6<br />
EINECS 200-871-9<br />
Effets sur la santé: pratiquement non nocif<br />
Risques physiques et chimiques principaux:<br />
Décomposition thermique en produits toxiques et corrosifs<br />
Risques spécifiques / CEE: dangereux pour la couche d'ozone<br />
Informations générales:<br />
Inhalation: transporter la victime à l'air frais. Si nécessaire, donner de<br />
l'oxygène ou appliquer la respiration artificielle.<br />
Contact avec la peau: les engelures doivent être soignées comme<br />
des brûlures thermiques.<br />
Contact avec les yeux: lavage immédiat et abondant à l'eau. Si<br />
l'irritation persiste, contacter un ophtalmologue.<br />
Risques spécifiques: décomposition thermique en produits toxiques<br />
et corrosifs. Acide fluorhydrique. Acide Chlorhydrique gaz. Phosgène,<br />
Oxydes de carbone CO.<br />
Méthodes spécifiques d'intervention: refroidir les<br />
contenants/citernes avec des jets d'eau. Interdire toute source<br />
d'étincelles et d'ignition.<br />
NE PAS FUMER.<br />
Systèmes spéciaux de protection pour les équipes de secours:<br />
porter un appareil respiratoire autonome et des vêtements de<br />
protection.<br />
Précautions individuelles: éviter tout contact avec la peau, les yeux<br />
et l'inhalation des vapeurs.<br />
Dans une pièce close: aérer ou utiliser un appareil respiratoire<br />
autonome (risque d'asphyxie). INTERDICTION DE FUMER.<br />
Eloigner toutes les sources d'ignition.<br />
112
07 Manipulation et<br />
stockage<br />
08 Contrôle de<br />
l’exposition/prote<br />
ction individuelle<br />
09 Propriétés<br />
physiques et<br />
chimiques<br />
10 Stabilité et<br />
réactivité<br />
11 Informations<br />
toxicologiques<br />
Mesures/précautions techniques<br />
Dispositions de stockage et de manipulation applicables aux<br />
produits: GAZ PRESSURISES.<br />
Prévoir une aération et une évacuation appropriées au niveau des<br />
appareils.<br />
Conseils pour l’utilisation: interdire les points d’ignition et le<br />
contact avec les surfaces chaudes. NE PAS FUMER.<br />
Mesures techniques/Modalités de stockage: emmagasiner à<br />
température ambiante dans le contenant d’origine. Tenir loin de<br />
flammes libres, surfaces chaudes et sources d’ignition. Conserver<br />
dans un endroit frais et bien aéré. Protéger les contenants pleins<br />
contre les sources de chaleur pour éviter toute surpression.<br />
Recommandés: acier ordinaire<br />
A éviter: alliage contenant plus de 2% de magnésium, matières<br />
plastiques<br />
Mesures de précaution à prendre: assurer un renouvellement<br />
d’air et/ou une aspiration suffisants dans les ambiances de travail.<br />
Paramètres de contrôle<br />
Valeurs limite d’exposition: valeur limite non existante F-USA<br />
Forane 134a valeur limite recommandée par Elf: VME = 1000ppm<br />
Forane 32 valeur limite recommandée par Elf: VME = 1000ppm<br />
Forane 125 valeur limite recommandée par Elf: VME = 1000ppm<br />
Equipement de protection individuelle:<br />
Protection Respiratoire: en cas d’aération insuffisante, porter un<br />
équipement respiratoire approprié.<br />
Protection des mains: gants.<br />
Protection des yeux: lunettes de protection.<br />
Etat physique (20°C): gaz liquéfié<br />
Couleur: Incolore.<br />
Odeur: légèrement semblable à l’éther. PH: non applicable<br />
Point/intervalle d’ébullition: -42,4 °C<br />
Point de inflammabilité: Ne s’enflamme pas aux conditions de test<br />
Pression de vapeur: (25°C): 1.13 Mpa (11,3 bar) a (50°C): 2.11<br />
Mpa (21,1 bar) a (70°C): 3.26 Mpa (32,6 bar)<br />
Densité de vapeur: Au point d’ébullition 4,54 kg/m3<br />
Densité: (25°C) 1133 kg/m 3 à (50°C) 1004 kg/m 3 à (70°C) 861<br />
kg/m 3<br />
Conditions à éviter: éviter tout contact avec des flammes et des<br />
surfaces métalliques brûlantes.<br />
Produits de décomposition dangereux: décomposition thermique<br />
en produits fluorés toxiques (acide fluorhydrique)<br />
Autres informations : Produit stable aux conditions normales de<br />
stockage et manipulation<br />
Inhalation: expérimentale pour l’animal Forane 134a, 32, 125<br />
pratiquement non nocif par inhalation. Aucune mortalité relevé sur le<br />
rat à a 500000 ppm/4h. Comme pour les autres composants<br />
halogénés aliphatiques volatils, par accumulation de vapeurs et/ou<br />
par inhalation de quantités importantes, ce produit peut causer:<br />
perte de connaissances et troubles cardiaques aggravés par le<br />
stress et le manque d’oxygène: risque mortel.<br />
Contact avec la peau: engelures possibles par projection de gaz<br />
liquéfié.<br />
Toxicité chronique : Etudes sur l’inhalation prolongé sur l’animal<br />
n’ont pas mis en évidence aucun éffet toxique sub-chronique (rat / 3<br />
mois / inhalation: 50000ppm).<br />
Effects spécifiques : Génotoxicité selon les données<br />
expérimentales disponibles : Forane 134a, 32, 125 PAS<br />
Génotoxique<br />
Cancérogenèse :: Forane 134a les expériments n’ont pas mis en<br />
évidence aucun effet cancérogène demonstré clairement (rat /<br />
inhalation – via orale)<br />
Toxicité pour la réproduction : Développement fœtal Forane<br />
134a, 32, 125 : selon les données disponibles, absence d’effets<br />
toxiques pour le développement du foetus. Fertilité : selon les<br />
données limitées disponibles sur l’animal : Forane 134a absence<br />
d’effets sur la fertilité (rats / inhalation)<br />
Mesures/précautions techniques<br />
Dispositions de stockage et de manipulation applicables aux produits:<br />
GAZ PRESSURISES.<br />
Prévoir une aération et une évacuation appropriées au niveau des<br />
appareils.<br />
Conseils pour l’utilisation: interdire les points d’ignition et le contact<br />
avec les surfaces chaudes. NE PAS FUMER.<br />
Mesures techniques/Modalités de stockage: emmagasiner à<br />
température ambiante dans le contenant d’origine. Tenir loin de<br />
flammes libres, surfaces chaudes et sources d’ignition. Conserver<br />
dans un endroit frais et bien aéré. Protéger les contenants pleins<br />
contre les sources de chaleur pour éviter toute surpression.<br />
Recommandés: acier ordinaire<br />
A éviter: alliage contenant plus de 2% de magnésium<br />
Matières plastiques<br />
Mesures de précaution à prendre: assurer un renouvellement d’air<br />
et/ou une aspiration suffisants dans les ambiances de travail.<br />
Paramètres de contrôle<br />
Valeurs limite d’exposition:<br />
France 1989: VME = 1000 ppm<br />
USA 1992: TWA = 1000 ppm = 3500 mg/m 3<br />
Equipement de protection individuelle:<br />
Protection Respiratoire: en cas d’aération insuffisante, porter un<br />
équipement respiratoire approprié.<br />
Protection des mains: gants.<br />
Protection des yeux: lunettes de protection.<br />
Mesures d’hygiène spécifiques: éviter tout contact avec la peau, les<br />
yeux et l’inhalation des vapeurs.<br />
Etat physique (20°C): gaz liquéfié<br />
Couleur: Incolore.<br />
Odeur: légèrement semblable à l’éther. PH: non applicable<br />
Point/intervalle d’ébullition: -40,8°C<br />
Température/intervalle de fusion: -160°C<br />
Température de décomposition: 480°C<br />
Pression de vapeur: (20°C): 0,91 Mpa (9,1 bars) à (50°C): 1,91 Mpa<br />
(19,4 bars)<br />
Densité de vapeur: (20°C) 3,57 kg/m 3<br />
Densité: (20°C) 1213 kg/m 3 à (50°C) 1085 kg/m 3<br />
Solubilité: eau (25°C) 3 g/l – Solvant soluble dans les hydrocarbures<br />
et solvants chlorurés, Alcools, Cétones, Esters<br />
Solubilité de l’eau dans le produit à 30°C: 0,15% en poids.<br />
Conditions à éviter: éviter tout contact avec des flammes et des<br />
surfaces métalliques brûlantes.<br />
Produits de décomposition dangereux: décomposition thermique en<br />
produits toxiques et corrosifs: acide fluorhydrique, acide chlorhydrique<br />
gaz, phosgènes, oxyde de carbone (CO).<br />
Inhalation: expérimentale pour l’animal pratiquement non nocif par<br />
inhalation. Aucun effet sous 50000 ppm.<br />
Comme pour les autres composants halogénés aliphatiques volatils,<br />
par accumulation de vapeurs et/ou par inhalation de quantités<br />
importantes, ce produit peut causer: perte de connaissances et<br />
troubles cardiaques aggravés par le stress et le manque d’oxygène:<br />
risque mortel.<br />
Contact avec la peau: engelures possibles par projection de gaz<br />
liquéfié.<br />
Contact avec les yeux: irritations passagères<br />
113
12 Informations<br />
écologiques<br />
13 Considérations<br />
sur l'élimination<br />
14 Informations sur<br />
le transport<br />
15 Information sur la<br />
réglementation<br />
16 Autres<br />
informations<br />
Forane 32<br />
Persistance/dégradabilité: dans l'eau, non facilement<br />
biodégradable 5% après 28j<br />
Bio-accumulable: pratiquement non bio-accumulable log pow 0,21<br />
Forane 125<br />
Mobilité: évaporation rapide t ½ vie 3,2 h (estimation)<br />
Persistance/dégradabilité: dans l'eau, non facilement<br />
biodégradable 5% dopo 28d. Dans l'air, dégradation dans la<br />
troposphère t ½ vie 28,3 y (estimation). Potentiel de destruction de<br />
l'ozone ODP (R-11 = 1)=0. Effet de serre potentiel (GWP): (HGWP)<br />
= 0,58. Dans le sol et dans les sédiments basse absorption log<br />
Koc= 1,3-1,7<br />
Bio-accumulable: pratiquement non bio-accumulable log pow 1,48<br />
Forane 134a<br />
Mobilité: évaporation rapide t ½ vie 3 h (estimation)<br />
Persistance/dégradabilité: dans l'eau, non facilement<br />
biodégradable 3% dopo 28j. Dans l'air, dégradation dans<br />
l’atmosphètre 3% après 28j . Potentiel de destruction de l'ozone<br />
ODP (R-11 = 1)=0. Effet de serre potentiel (GWP) 0,26.<br />
Bio-accumulable: pratiquement non bio-accumulable log pow 1,06<br />
Elimination du produit: recycler ou incinérer<br />
Consulter les services de sécurité de ELF ATOCHEM pour<br />
informations complémentaires et mises à jour<br />
Numéro ONU 3163. RID\ADR classe 2 chiffre (et lettre) 4°a<br />
Prescriptions: Etiquettes 2 N° risque /N° matière 20/3163<br />
IMDG classe 2.2 N°ONU (IMDG) 3163<br />
Prescriptions: Etiquettes 2.2<br />
IATA classe 2.2 N°ONU (IATA) o N°ID3163<br />
Prescriptions: Etiquettes 2.2<br />
Directive CEE<br />
Fiches de sécurité: D. 91/155/CEE modifié par la D. 93/112/CEE:<br />
Substances dangereuses<br />
Classification / étiquette CEE<br />
Préparations dangereuses: Pas classifiés comme dangereux<br />
Inventaire: EINECS conforme<br />
Utilisations recommandées: Réfrigérant<br />
Références bibliographiques: Encyclopedie des gas (Air Liquideed.1976-<br />
ELSEVIER AMSTERDAM)<br />
Mobilité: évaporation rapide t ½ vie 2,7 h<br />
Persistance/dégradabilité: dans l'eau, non facilement biodégradable<br />
0% après 28d. Dans l'air, dégradation dans l'atmosphère ½ vie 14<br />
ans. Potentiel de destruction de l'ozone ODP (R-11 = 1) = 0,055. Effet<br />
de serre potentiel (HGWP) = 0,36. Dans le sol et dans les sédiments<br />
basse absorption log Koc = 1,8.<br />
Bio-accumulable: pratiquement non bio-accumulable log pow 1,08.<br />
Toxicité aquatique: toxicité aiguë, poissons seuil de toxicité, 24/h =<br />
180 mg/l, Bactéries anaérobies seuil de toxicité 24h > 400 mg/l.<br />
Elimination du produit: recycler ou incinérer<br />
Numéro ONU 1018. RID\ADR classe 2 chiffre (et lettre) 3°a<br />
Prescriptions: Etiquettes 2 N° risque /N° matière 20/1018<br />
IMDG classe 2.2 N° ONU (IMDG) 1018<br />
Prescriptions: Etiquettes NON INFLAMMABLE GAZ/2<br />
IATA classe 2.2 N° ONU (IATA) ou N° ID1018<br />
Prescriptions: Etiquettes NON INFLAMMABLE GAZ/2<br />
Code produit: 00055/7<br />
Directive CEE<br />
Fiches de sécurité: D. 91/155/CEE modifié par la D. 93/112/CEE:<br />
Substances et préparations dangereuses.<br />
Préparations dangereuses: D. 67/548/CEE modifiée par la D.<br />
93/21/CEE: Guide à l'étiquetage (18a APT)<br />
R59 Nuisible pour la couche d'ozone S59. Consulter le producteur<br />
/fournisseur pour informations relatives à la récupération et au<br />
recyclage<br />
S 61 Eviter de jeter dans la nature. Consulter les instructions<br />
spéciales/la fiche des données de sécurité<br />
Utilisations recommandées: Réfrigérant à basse température, Agent<br />
congelant, Climatisation de l'air<br />
Références bibliographiques: Encyclopédie des gaz (Air Liquide -<br />
ed. 1976 - ELSEVIER AMSTERDAM).<br />
Fiche toxicologique INRS: N° <strong>142</strong> CHLORODIFLUOROMETHANE<br />
Ce document se réfère au produit tel quel, conforme aux spécifications fournies par ELF ATOCHEM.<br />
En cas de combinaisons ou de mélanges, s'assurer qu'aucun risque nouveau ne puisse survenir. Les informations contenues dans cette fiche sont<br />
fournies de bonne foi et se basent sur nos dernières connaissances relatives au produit en question, à la date d'édition de ladite fiche. On attire<br />
l'attention des utilisateurs sur les éventuels risques qu'ils peuvent courir si ce produit est employé pour des utilisations différentes de celles auxquelles il<br />
est destiné. Cette fiche ne doit être utilisée et reproduite qu'à des fins de prévention et de sécurité. La liste des textes de loi, réglementaires ou<br />
administratifs ne doit pas être considérée comme exhaustive. L'utilisateur du produit a le devoir de se référer à l'ensemble des textes officiels<br />
concernant l'utilisation, la conservation et la manipulation du produit, pour lesquels il est le seul responsable. L'utilisateur du produit doit en outre fournir<br />
aux personnes pouvant entrer en contact avec ledit produit toutes les informations nécessaires à la sécurité du travail et à la protection de la santé et<br />
de l'environnement, en leur transmettant cette fiche de données de sécurité.<br />
114
SUMARIO<br />
GENERAL......................................................................................................................................... 116<br />
ADVERTENCIAS GENERALES.......................................................................................................................................116<br />
PRINCIPIOS DE SEGURIDAD PARA LA INTEGRIDAD .................................................................................................116<br />
ACCESORIOS .................................................................................................................................................................116<br />
DATOS TECNICOS GENERALES...................................................................................................................................117<br />
UBICACION .....................................................................................................................................................................118<br />
ESPACIOS FUNCIONALES ............................................................................................................................................118<br />
DIMENSIONES Y DISTRIBUCION PESOS.....................................................................................................................119<br />
REGULACIONES DE PROTECCION Y CONTROLES ...................................................................................................119<br />
LIVELLI SONORI .............................................................................................................................................................119<br />
RECEPCION ..................................................................................................................................... 120<br />
CONTROL EN LA RECEPCION ......................................................................................................................................120<br />
TRASLADO......................................................................................................................................................................120<br />
ALMACENAJE .................................................................................................................................................................121<br />
DESEMBALAJE ...............................................................................................................................................................121<br />
CONEXIONES ELECTRICAS.............................................................................................................. <strong>122</strong><br />
CONEXIONES FUNCIONALES.......................................................................................................................................<strong>122</strong><br />
CONEXIÓN A LA RED DE ALIMENTACIÓN ...................................................................................................................<strong>122</strong><br />
CONEXIONES OPCIONALES .........................................................................................................................................<strong>122</strong><br />
CONEXIÓN CON P.C. O B.M.S.......................................................................................................................................123<br />
PUESTA EN MARCHA....................................................................................................................... 124<br />
CONTROLES PRELIMINARES .......................................................................................................................................124<br />
PUESTA EN MARCHA ....................................................................................................................................................125<br />
REGULACION................................................................................................................................... 126<br />
MODALIDAD DE FUNCIONAMIENTO DEL MÓDULO PRINCIPAL................................................................................126<br />
ROTACIÓN DE LOS COMPRESORES ...........................................................................................................................126<br />
TEMPORIZACIONES DE LOS COMPRESORES ..........................................................................................................126<br />
REGULADOR VENTILADORES DE LA BATERIA ..........................................................................................................127<br />
PANEL DEL MÓDULO DE CONTROL PRINCIPAL.........................................................................................................128<br />
PROGRAMACIÓN DE LOS PARÁMETROS DE FUNCIONAMIENTO............................................................................128<br />
ALARMAS ........................................................................................................................................................................130<br />
BUSQUEDA DE AVERIAS.................................................................................................................. 131<br />
BLOQUEO ALTA PRESION ............................................................................................................................................132<br />
BLOQUEO BAJA PRESION ...........................................................................................................................................133<br />
INTERVENCIÓN SEGURIDAD COMPRESOR................................................................................................................134<br />
INTERVENCION TERMICA VENTILADORES.................................................................................................................134<br />
UNIDAD RUIDOSA ..........................................................................................................................................................135<br />
COMPRESOR QUE NO SE PONE EN MARCHA ...........................................................................................................135<br />
MANTENIMIENTO ORDINARIO .......................................................................................................... 136<br />
UNIDAD ...........................................................................................................................................................................136<br />
PARTE ELECTRICA ........................................................................................................................................................136<br />
CIRCUITOS FRIGORÍFICOS............................................................................................................... 137<br />
CIRCUITO DE ASPIRACION...........................................................................................................................................137<br />
CIRCUITO LIQUIDO ........................................................................................................................................................137<br />
PRUEBA DE FUGAS .......................................................................................................................................................138<br />
MODALIDAD - INDICACIONES PARA UNA CORRECTA CONEXION...........................................................................138<br />
RIESGOS RESIDUALES .................................................................................................................... 139<br />
DEFINICION DE ZONA PELIGROSA ..............................................................................................................................139<br />
RIESGOS GENERICOS ..................................................................................................................................................140<br />
FICHA DE SEGURIDAD DEL REFRIGERANTE .............................................................................................................140<br />
Todos los datos contenidos en este manual no son vinculantes y pueden ser cambiados por el fabricante sin preaviso.<br />
Cualquier reproducción total o parcial queda terminantemente prohibida.<br />
115
GENERAL<br />
ADVERTENCIAS GENERALES<br />
Este manual ha sido concebido para ayudar a realizar una correcta instalación, puesta a punto y mantenimiento de la<br />
unidad; por lo que es de fundamental importancia:<br />
─ leer atentamente estas instrucciones;<br />
─ la instalación, puesta en servicio y asistencia de la unidad sea realizada por personal competente (ley n.46 del 5/3/1990)<br />
bajo requisitos legales.<br />
• Será rechazada cualquier responsabilidad con vencimiento de la garantía en caso de modificaciones eléctricas y/o<br />
eléctricas. En general intervenciones que no sean expresamente autorizadas y no respetan el manual, invalidan la<br />
garantía.<br />
• al instalar la unidad hay que tener presente las normas vigentes de seguridad locales.<br />
• Verificar que las características de la red eléctrica sean conforme a los datos recogidos en la placa de la unidad, que<br />
aparece en el interior del cuadro eléctrico.<br />
• Este manual y el esquema eléctrico deben ser bien conservados y puestos a disposición del operador para futuras<br />
consultas.<br />
• Todo el material de embalaje (bolsas de plástico, poliestireno, clavos, etc.) al ser potenciales fuentes de peligro deben<br />
mantenerse fuera del alcance de los niños y reciclarlo según la normativa local en vigor.<br />
• La unidad motocondensante esta destinada al acondicionamiento combinada a una unidad interna por expansión del<br />
refrigerante.<br />
• En caso de avería o mal funcionamiento hay que desactivar el aparato.<br />
• En caso de posibles reparaciones hay que dirigirse única y exclusivamente a un centro técnico de asistencia autorizado<br />
por el fabricante, y solicitar piezas de recambio originales. El no respetar las anteriores advertencias puede poner en riesgo<br />
la seguridad del aparato.<br />
La empresa constructora declina cualquier responsabilidad en caso de eventuales daños que directa o indirectamente<br />
puedan derivar a personas o cosas como consecuencia de la falta de atención de estas instrucciones.<br />
PRINCIPIOS DE SEGURIDAD PARA LA INTEGRIDAD<br />
La unidad esta protegida y construida para no poner en riesgo la salud y seguridad de las personas.<br />
Por ese motivo se han adoptado soluciones aptas para eliminar, dentro de lo posible, las posibles causas de riesgo o reducir<br />
sensiblemente la probabilidad del mismo. En caso de que no se hubiese podido prever o eliminar tal riesgo en fase de<br />
proyecto, véase la sección riesgos residuales.<br />
ACCESORIOS<br />
Las unidades pueden ir dotadas de los siguientes accesorios (bajo pedido):<br />
─ tensiones diferentes del estándar<br />
─ reja de protección batería<br />
─ Amortiguadores<br />
─ contador funcionamiento compresor<br />
─ válvula solenoide<br />
─ set de conexión compuesto de:<br />
válvula termostática, filtro deshidratador, válvula solenoide línea liquido, visor de liquido<br />
─ conexión a modulo de control a distancia<br />
─ conexión con PC o BMS<br />
116
DATOS TECNICOS GENERALES<br />
Modello <strong>MSAT</strong> <strong>102</strong> <strong>122</strong> <strong>142</strong> <strong>162</strong> <strong>182</strong> <strong>202</strong> <strong>242</strong><br />
Tension estandar 400 / 3 / 50<br />
Modelo <strong>MSAT</strong> R-22<br />
Potencia frigorífica kW 31.3 36.4 41.3 48.7 53.8 63.9 77.9<br />
Potencia abs. compres. kW 8.5 10.3 11.3 13.5 15.8 17.5 22.3<br />
Modelo <strong>MSAT</strong> R-407C<br />
Potencia frigorifica kW 29.8 34.1 39.2 44.1 50.3 62.8 72.8<br />
Potencia abs. compres. kW 9.4 11.2 12.6 14.7 17.8 20.3 25.2<br />
Datos referidos a:<br />
Temperatura aire externo +35°C<br />
Temperatura aspiración de gas<br />
saturado (SST) 7.5°C R-22,<br />
(SST) 9.5°C (dew point) R-407C<br />
Compresor tipo<br />
SCROLL<br />
n° vueltas por minuto rpm 2900<br />
Carga aceite<br />
L<br />
2x 2x 2x<br />
1,55 1,65 2,5<br />
Etapas de capacidad 2<br />
Protecion motor<br />
NTC<br />
2x<br />
4<br />
Tipo aceite<br />
SUNISO 3GS OIL<br />
Nota: si la unidad es con R-<br />
407C tipo aceite<br />
- MOBIL EAL ARTIC 22 CC<br />
- 32 MMMA POE<br />
Condensador<br />
Material<br />
Tubo de cobre/aletas en aluminio<br />
Cantidad 2<br />
Sup.Front. Tot. m 2 3 3,6 4,9<br />
Separacion entre aletas mm 1,6 2,1 1,6 1,6<br />
n° rangos 2<br />
∅ tubo mm 9,52<br />
Presion prueba kPa 3000<br />
Electroventilador axial<br />
n° e diametro n° x ∅ 2x560 4x450 6x450<br />
N° vueltas por minuto rpm 680 840<br />
Caudal de aire L/s 3056 4125 6120<br />
Potencia nominal kW 2x0,22 4x0,16 6x0,16<br />
Conexiones Freon<br />
Toma de líquido ∅ 14 16 18 22<br />
Toma de aspiración ∅ 22 28 28 35<br />
Refrigerante<br />
Carga R-22 kg 8.2 8,2 9 9 9.6 12 12<br />
Carga R-407C kg 9.2 9,2 10 10 10.6 13 13<br />
Datos referidos a:<br />
─ Motore con rotor externo<br />
─ Griglia antinfortunistica<br />
Note:<br />
Conexiones para soldar<br />
Nota:<br />
Carga a completar en fase de<br />
puesta en marcha<br />
Pesos y Volúmenes<br />
Peso transp. aproxim. kg 275 280 380 420 485 580 590<br />
Volumen embal. aprox. m 3 1,50 3,20 4,30<br />
Limites de funcionamiento<br />
Max. temp. aire<br />
entrada condensador<br />
R-22 49 47,5 47,5 47,5 45 49 46<br />
SST = +5 °C R-407C 47 45 45 44,5 43,5 46 43<br />
Min. temp. aire<br />
R-22 -4 -4 -4 -4 -8 -4 -8<br />
entrada Condensador<br />
R-407C<br />
SST = +5 °C<br />
-5 -5 -5 -5 -9 -5 -9<br />
Max. temp. aspiración R-22 12,5<br />
gas saturado °C R-407C 12,5<br />
Note:<br />
SST Temperatura de<br />
aspiración de saturación.<br />
Sobrecalentamiento del gas<br />
aspirado + 5°K<br />
117
UBICACION<br />
Las unidades están proyectadas para ser instaladas al exterior.<br />
• Verificar que el plano de apoyo sea plano e idóneo para soportar el peso de la unidad (véase peso y distribución pesos en<br />
la pag. 119).<br />
Poner un estrato de goma entre la base de apoyo de la unidad y el plano (para evitar ruidos y vibraciones).<br />
• Respetar los espacios funcionales.<br />
• Si la unidad es instalada en una terraza o sobre tejado es aconsejable que se monte sobre soporte antivibraciones, en<br />
este caso las tuberías de conexión tendrán que ir dotadas de juntas elásticas.<br />
• Colocar la unidad de modo que quede protegida en sus lados principales de posibles vientos.<br />
• Fijar la unidad al suelo.<br />
ESPACIOS FUNCIONALES<br />
La elección de la localización de la unidad es de fundamental importancia para su buen funcionamiento.<br />
Obstáculos en el flujo de aire, fuentes de calor (como descargas, aire caliente), dificultad del cambio de aire en la zona de<br />
instalación, hojas u otros cuerpos extraños que pueden obstruir la batería, vientos que favorecen excesivamente o se<br />
oponen al flujo de aire causan anomalías de funcionamiento o bloqueos.<br />
Las unidades necesitan de espacios mínimos de funcionamiento y de mantenimiento.<br />
Los siguientes esquemas muestran algunas formas de instalación, verificar caso por caso observando todo el contenido de<br />
este manual.<br />
Lado libre<br />
Nota: Las medidas son en mm<br />
UNIDAD CON CIRCUITOS INDEPENDIENTES<br />
UNIDAD CON MANDO DE COMPRESORES SEPARADOS<br />
AMORTIGUADORES DE BASE<br />
(accesorio)<br />
(accesorio)<br />
Bajo pedido, es posible suministrar la unidad con mando de compresores<br />
separados, preparada para la conexión con 2 unidades terminales distintas<br />
La alimentación eléctrica será común.<br />
118
DIMENSIONES Y DISTRIBUCION PESOS<br />
Leyenda:<br />
1 - Compresor<br />
2 - Conexión linea liquido Ø G1 primer circuito<br />
2’ - Conexion linea liquido Ø G1 segundo circuito<br />
3 - Conexión linea gas Ø G2 primer circuito<br />
3’ - Conexión linea gas Ø G2 segundo circuito<br />
4 - Cuadro electrico<br />
5 - Ventilador helicoidal<br />
6 - Entrada linea eléctrica<br />
7 - Bateria condensadora<br />
8 - Acceso cuadro electrico y compresor<br />
DIMENSIONES<br />
PESOS<br />
Tamañ. A B C D E F G H I L O Ø Ø n° W1 W2 W3 W4 Tot.<br />
G1 G2 ventilador.<br />
<strong>102</strong> 1530 678 1400 128 73 75 628 42 1255 800 - 14 22 2 88 42 95 50 275<br />
<strong>122</strong> 1530 678 1400 128 73 75 628 42 1255 800 - 16 28 2 89 42 98 51 280<br />
<strong>142</strong> 1563 1107 1570 128 130 75 1058 42 1077 900 153 16 28 4 121 58 132 69 380<br />
<strong>162</strong>/<strong>182</strong> 1563 1107 1570 128 130 75 1058 42 1077 900 153 18 28 4 155 74 168 88 485<br />
<strong>202</strong>/<strong>242</strong> 2098 1107 1570 128 130 75 1058 42 1612 900 153 22 35 6 191 95 200 104 590<br />
Nota: Las dimensiones están expresadas en mm, el peso en kg.<br />
REGULACIONES DE PROTECCION Y CONTROLES<br />
Apre Chiude<br />
Presostato alta presion (kPa) 2750 2000 Tapón fusible de seguridad (°C) 120<br />
Presostato baja presion (kPa) 230 360<br />
Nº máximo de arranques horarios del 10<br />
compresor<br />
(n°)<br />
Termostato seguridad descarga (°C) 120<br />
Nota:<br />
Los ajustes de seguridad de<br />
“presostato alta presión” y<br />
“termostato seguridad descarga” se<br />
pueden rearmar manualmente en la<br />
unidad de control. La seguridad<br />
“presostato baja presión” es por de<br />
LIVELLI SONORI<br />
Nivel de potencia sonora (dB)<br />
Nivel de<br />
presión<br />
Sooraivell<br />
Tamañ.<br />
Sonora<br />
Bandas de octava (Hz)<br />
Global<br />
63 125 250 500 1000 2000 4000 8000 dB(A)<br />
<strong>102</strong> 80 84 75 73 69 63 60 42 59<br />
<strong>122</strong> 80 76 73 73 71 65 62 43 59<br />
<strong>142</strong> 87 80 74 73 71 69 66 63 60<br />
<strong>162</strong> 87 81 76 73 70 69 65 62 60<br />
<strong>182</strong> 84 78 78 74 69 70 62 55 60<br />
<strong>202</strong> 86 79 78 77 72 67 62 54 61<br />
<strong>242</strong> 86 82 81 75 70 73 63 65 62<br />
Nota:<br />
- Los niveles sonoros se refieren a unidad en<br />
función a máxima potencia con máxima velocidad<br />
de rotación de los ventiladores, aire de entrada en<br />
el condensador de 35°C, temperatura saturada de<br />
aspiración + 5°C.<br />
- Nivel de presión sonora referido a 1 metro de<br />
distancia de la superficie externa de la unidad<br />
funcionando a campo abierto.<br />
- Nivel de potencia sonora ref. : 1x10 -12 w.<br />
- Nivel de presión sonora ref. : 2 x 10 -5 Pa.<br />
119
RECEPCION<br />
CONTROL EN LA RECEPCION<br />
Las unidades se envían en embalajes de protección. Controlar que la unidad a su llegada no haya sufrido ningún daño<br />
durante el transporte y que la misma llegue completa como en el pedido. En el caso de visibles daños anote<br />
inmediatamente en el documento de transporte el tipo de daño que se ha encontrado, con la indicación: “RETIRO CON<br />
RESERVA POR EVIDENTES DAÑOS EN EL EMBALAJE" en cuanto a la entrega directa en fabrica conlleva un<br />
resarcimiento por daños a cargo de la compañía aseguradora según ley N° 450 del 22.08.85 “limite de resarcimiento“.<br />
IMPORTANTE<br />
TODAS LAS OPERACIONES CITADAS HAN DE EFECTUARSE SEGUN LAS NORMAS DE SEGURIDAD VIGENTES,<br />
SEA EN LO RELATIVO AL MATERIAL UTILIZADO COMO AL MODO DE OPERAR.<br />
ATENCION<br />
ANTES DE EMPEZAR LA OPERACION DE MOVIMIENTO DE LA UNIDAD ASEGURARSE QUE LA CAPACIDAD DE<br />
ELEVACION SEA ADECUADA AL PESO DE LA UNIDAD EN CUESTION.<br />
Tamaño <strong>102</strong> <strong>122</strong> <strong>142</strong> <strong>162</strong> <strong>182</strong> <strong>202</strong> <strong>242</strong><br />
Peso Kg 275 280 380 480 485 580 590<br />
TRASLADO<br />
TRANSPORTE con CARRETILLA ELEVADORA o SIMILAR<br />
- Introducir las pinzas por la parte más larga del pallet que forma parte del embalaje.<br />
- Asegurarse antes de empezar la elevación que la unidad este en equilibrio estable. Hay que tener en cuenta que la<br />
parte mas pesada es donde va instalado el compresor.<br />
120
ELEVAR con GRUA o SIMILAR<br />
- Poner los tubos de elevación en los huecos situados en la base de la unidad.<br />
- Los extremos de los tubos deben sobresalir en modo tal que permitan introducir las seguridades y sus respectivos<br />
enganches.<br />
- Situar las cintas de elevación en los tubos entre las seguridades y la base de la unidad (véase el diseño).<br />
- Situar en los bordes superiores de la unidad estructuras rígidas para proteger la unidad (solo si se ha previsto un único<br />
punto de elevación).<br />
- Poner gradualmente en tensión la cintas de elevación y asegurarse de su correcto montaje.<br />
- Iniciar la elevación.<br />
Estructura rigida<br />
Tablas de<br />
protección<br />
Cinta de<br />
elevación<br />
Seguridad<br />
Enganches<br />
de seguridad<br />
Tubo de<br />
elevación<br />
ADVERTENCIAS<br />
EL RESPETO DE LAS INSTRUCCIONES SITUADAS AL LADO EXTERNO DEL CARTON DE EMBALAJE ES PARA EL<br />
USUARIO FINAL GARANTIA DE INTEGRIDAD FISICA Y FUNCIONAL DE LA UNIDAD. SE ACONSEJA:<br />
- TRASLADAR CON PRECAUCION<br />
- MANTENER EN LUGAR SECO<br />
- SE ACONSEJA NUNCA APOYAR OBJETOS SOBRE LA UNIDAD, SOLO DENTRO DE LOS LIMITES DE LOS<br />
PLANOS DE CARGA INDICADOS (EL NUMERO INDICADO ESPECIFICA LA CANTIDAD DE PLANOS QUE PUEDEN<br />
SOBREPONERSE. Es. 1 = 1 PLANO SOBREPUESTO EN LA UNIDAD).<br />
ALMACENAJE<br />
− Mantener la unidad reparada de: rayos solares, lluvia, arena y viento<br />
− Temperatura: máxima 60°C mínima -10°C<br />
− Máxima humedad: 90%<br />
DESEMBALAJE<br />
- Cortar con tijeras las cintas de embalaje.<br />
- Elevar el cartón de embalaje (si existiera).<br />
- Quitar las abrazaderas que fijan la unidad al pallet con la ayuda de llave de 10mm.<br />
- Elevar la unidad para que quede separada del pallet.<br />
- Apoyar la unidad en el punto donde ira destinada.<br />
- Verificar la presencia de daños visibles.<br />
- Deshacerse del material de embalaje en centros de reciclaje especializados (respetar la normativa vigente).<br />
121
CONEXIONES ELECTRICAS<br />
IMPORTANTE<br />
COMPROBAR QUE LA UNIDAD NO ESTÉ CONECTADA ELÉCTRICAMENTE ANTES DE EMPEZAR OPERACIONES EN<br />
LA PARTE ELÉCTRICA<br />
CONEXIONES FUNCIONALES<br />
Antes de poner en marcha la unidad deben realizarse las siguientes conexiones:<br />
CONEXIÓN A LA RED DE ALIMENTACIÓN<br />
- Conectar la línea trifasica a los bornes del dispositivo de protección general (seccionador) indicados en el esquema<br />
eléctrico como L1 L2 L3.<br />
- Conectar el conductor de neutro al borne N del cuadro eléctrico.<br />
- Conectar el conductor de toma de tierra al borne Pe del cuadro eléctrico.<br />
- El personal que realizará la instalación prestará especial atención al seleccionar los cables de conexión con la red de<br />
alimentación, siguiendo los datos contenidos en la ficha técnica de la unidad; adhesivo situado en la puerta del cuadro<br />
eléctrico. También tiene importancia prever una protección contra posibles cortocircuitos que sea adecuada a la línea de<br />
alimentación. Dicha protección debe poder cortar la posible corriente de cortocircuito en la zona de la instalación donde<br />
se localice.<br />
DATOS ELECTRICOS<br />
TAMAÑO <strong>102</strong> <strong>122</strong> <strong>142</strong> <strong>162</strong> <strong>182</strong> <strong>202</strong> <strong>242</strong><br />
Unico compresor 230/3/50 19.7 22.9 25.3 24.1 31.2 35.8 45.2<br />
(A) 400/3/50 9.8 11.3 13.6 14.7 17.5 20.0 25.2<br />
F.L.A. Ventiladores (A) 230/1/50 1.15x2 1.15x2 0.65 x 4 0.65 x 4 0.65 x 4 0.65 x 6 0.65 x 6<br />
Total<br />
(A)<br />
230/3/50 41.6 48.1 53.9 51.4 65.6 76.4 85.8<br />
400/3/50 21.8 25.0 30.3 32.5 38.1 44.9 55.2<br />
L.R.A. Compresor (A)<br />
230/3/50 132.5 164 171 166 211 224 280<br />
400/3/50 66 74 <strong>102</strong> 94 117 128 159<br />
Compresor (kW) 11.3 13.2 15.2 16.8 20.7 23.8 29.2<br />
F.L.I. Ventilador (kW) 0.22x2 0.22x2 0.17 x 4 0.17 x 4 0.17 x 4 0.17 x 6 0.17 x 6<br />
Total (kW) 11.8 13.6 15.9 17.5 21.4 24.8 30.2<br />
M.IC. Total (A)<br />
230/3/50 154.5 189.2 199.5 193.3 244.9 264.6 329.5<br />
400/3/50 78.1 87.6 118.8 111.9 137.2 152.3 189.0<br />
1) F.L.A. Corriente absorbida en condiciones máximas permitidas.<br />
2) L.R.A. Corriente en la puesta en marcha del compresor.<br />
3) F.L.I. Potencia absorbida a plena carga (en condiciones máximas permitidas).<br />
4) M.I.C. Máxima corriente en la puesta en marcha de la unidad.<br />
Desequilibrio tensión: máx 2%<br />
Tensión: 400/3/50 ± 6%<br />
230/3/50 ± 6%<br />
CONEXIONES OPCIONALES<br />
CONEXIÓN AL DISPOSITIVO DE SEÑALIZACIONES DE ANOMALÍAS<br />
Siempre en la misma sección del esquema eléctrico se puede observar el circuito de alarma acumulativa. Con este<br />
circuito se puede introducir un dispositivo acústico o visual de señalización de anomalías en la unidad.<br />
El dispositivo de señalización tiene una alimentación de 12V 300mA en baja tensión según esquema eléctrico.<br />
CONEXIÓN AL MÓDULO DE CONTROL A DISTANCIA<br />
El módulo de control a distancia es un duplicado perfecto del teclado del módulo de control ENERGY LIGHT que permite<br />
efectuar a distancia todas las operaciones que se realizan desde la unidad.<br />
<strong>122</strong>
INSTALACIÓN<br />
Antes de realizar la conexión del módulo de control a distancia hay que abrir el seleccionador para eliminar la tensión de<br />
la unidad. Conectar el teclado a distancia como se indica a continuación.<br />
Lado posterior del terminal a distancia<br />
C512<strong>142</strong>3<br />
25<br />
24 26<br />
S + -<br />
CONN<br />
A<br />
CONN<br />
B<br />
- S +<br />
RELE' 1<br />
RELE' 2<br />
RELE' 3<br />
C512<strong>142</strong>0<br />
RELE' 4<br />
RELE' 5<br />
RELE' 6<br />
RELE' 7<br />
COMUNE<br />
ESPANSION<br />
E<br />
SERIAL<br />
E<br />
RELE' ALLARME<br />
La longitud máxima del cable de conexión ENERGY LIGHT para teclado es de 80m.<br />
CONEXIÓN CON P.C. O B.M.S.<br />
A CARGO DEL CLIENTE<br />
Cable de conexión RS232 9 polos macho-hembra<br />
Longitud máx 10 mt<br />
230 Vac<br />
PE1P0005<br />
N U<br />
N U<br />
RS 232<br />
ECHO<br />
DTR<br />
1 2 3 4<br />
Serial optocoupled adapter<br />
RS232/TTL<br />
RS 232/RS485 - RS485/TTL<br />
Micronet and ModBus Protocol<br />
OFF<br />
ON<br />
C512<strong>142</strong>5<br />
TTL<br />
10 12<br />
Alimentación<br />
RS 485<br />
21 22 23 24<br />
N U<br />
N U<br />
RS 232<br />
ECHO<br />
DTR<br />
1 2 3 4<br />
Serial optocoupled adapter<br />
RS232/TTL<br />
RS 232/RS485 - RS485/TTL<br />
Micronet and ModBus Protocol<br />
OFF<br />
ON<br />
C512<strong>142</strong>5<br />
TTL<br />
10 12<br />
Alimentación<br />
RS 485<br />
21 22 23 24<br />
+ - + -<br />
+ - + -<br />
A CARGO DEL CLIENTE<br />
Cable serial RS485 Cable 2 hilos twist<br />
Longitud máx de la línea :1000 mt<br />
C5121248<br />
Cable serial 5 vias 2molex<br />
Longitud máx: 2 mt<br />
SERIALE<br />
ESPANSIONE<br />
10 9 8 7 6 5 4 3 2 1<br />
RELE' ALLARME<br />
COMUNE<br />
RELE' 7<br />
RELE' 6<br />
RELE' 5<br />
RELE' 4<br />
RELE' 3<br />
RELE' 2<br />
RELE' 1<br />
C512<strong>142</strong>0<br />
+<br />
S<br />
-<br />
CONN B<br />
CONN A<br />
123
PUESTA EN MARCHA<br />
TODAS LAS UNIDADES HAN DE SER PUESTAS EN MARCHA POR CENTROS DE ASISTENCIA AUTORIZADOS. SOLO<br />
DE ESTE MODO SE HACE EFECTIVA LA GARANTIA. LA ASISTENCIA SE LIMITA UNICAMENTE A LA PUESTA EN<br />
MARCHA Y NO INCLUYE CONEXIONES U TAREAS PROPIAS DE INSTALACION.<br />
CONTROLES PRELIMINARES<br />
- Controlar que la unidad este ubicada correctamente y que las conexiones con la unidad terminal estén perfectamente<br />
efectuadas sea en el lado frigorífico como en el eléctrico.<br />
- Controlar el valor de la tensión y de la frecuencia de alimentación:<br />
DEBEN CORRESPONDER A LOS VALORES<br />
230 ± 6% 400 ± 6%<br />
- Controlar que los tornillos que fijan los cables a los componentes eléctricos presentes en el cuadro estén bien<br />
ancorados (durante el traslado y transporte las vibraciones podrían haberlos aflojado).<br />
OPERACION DE VACIO<br />
Una vez comprobado, con la instalación en presión, que no haya perdidas (véase sección "circuitos refrigerantes") tanto<br />
en los circuitos de conexión como en la unidad terminal, hay que proceder como se indica a continuación.<br />
- Descargar la instalación con llaves <strong>MSAT</strong> cerradas.<br />
- Ayudándose de un grupo manométrico, conectar la bomba de vacío en las dos conexiones auxiliares de las llaves,<br />
comprobar que eventuales elementos de interceptación, como válvula solenoide o llaves intermedias, estén abiertas y<br />
realizar el vacío.<br />
- Para que la válvula solenoide permanezca abierta, desconectarla de las bornas del panel eléctrico de la unidad externa<br />
(véase esquema eléctrico) y conectarla a una presa de corriente de 220V.<br />
- Parar la bomba de vacío cuando la presión es de cerca de 100Pa y dejar la instalación durante algunas horas en vacío;<br />
una pequeña subida inicial de la presión es normal para luego estabilizarse definitivamente. Si la presión continua a<br />
subir es porque hay pequeñas fugas o humedad. En el primer caso hay que repetir la operación descrita en la sección<br />
PRUEBA DE FUGAS del manual "circuitos refrigerantes". En el segundo caso recargar la instalación con refrigerante<br />
hasta 100KPa y volver a efectuar el vacío como anteriormente descrito. Una vez que la presión se estabiliza<br />
definitivamente pasar a la fase sucesiva de carga.<br />
CARGA REFRIGERANTE<br />
Estas unidades son entregadas con una carga a completar en la fase de puesta en marcha, en base al tipo de unidad<br />
terminal interna y a las dimensiones de los circuitos.<br />
- Con la instalación en vacío cerrar las llaves del grupo manométrico y desconectar la bomba de vacío.<br />
- Conectar la bombona de gas refrigerante, haciendo salir el aire del tubo de conexión con el grupo manométrico.<br />
- Abrir las llaves del grupo manométrico y dejar entrar refrigerante en estado gaseoso hasta que la presión de la<br />
instalación y bombona estén equilibradas, y en cualquier modo con una presión superior a la atmosférica.<br />
- Abrir las llaves de la unidad motocondensadora (antes la del líquido) para que la unidad este preparada para ser<br />
puesta en marcha.<br />
Se recomienda utilizar una llave adecuada, con sección cuadrada, correspondiente<br />
a la dimensión del vastago de la valvula y con un brazon elevador del longitud<br />
suficiente para ejercitar una fuerza de elevación. ( * VER FIGURA )<br />
Cantidad de refrigerante en las líneas frigoríficas durante el funcionamiento (KG / 10 m)<br />
Ø Exterior<br />
tubería<br />
Líquido<br />
a 38°C<br />
Aspiración<br />
SST+4,5°C<br />
10 0,60 --<br />
12 1,06 --<br />
UNIDAD EXTERNA<br />
14 1,41 0,025<br />
llave<br />
16 1,71 0,030<br />
gas<br />
18 2,36 0,043<br />
llave<br />
22 3,62 0,070<br />
Liquido<br />
28 6,61 0,120<br />
35 9,47 0,195<br />
42 -- 0,290<br />
UNIDAD INTERNA<br />
IMPORTANTE:<br />
En la primera puesta en marcha de la unidad y después de cada periodo de prolongada parada es IMPORTANTE alimentar<br />
las resistencias (si las hay) de calentamiento de aceite del cárter del compresor mínimo 8 horas antes de la puesta en<br />
funcionamiento del compresor.<br />
Las operaciones de activación se efectúan siguiendo las siguientes fases:<br />
- Accionar el interruptor QS1 de la motocondensadora prestando atención que el LED verde este apagado.<br />
124
PUESTA EN MARCHA<br />
- Comprobar que el funcionamiento de la unidad interna sea correcto.<br />
- Controlar la conexión de la eventual válvula solenoide.<br />
- Localizar el comando SA2 en el esquema eléctrico. Éste representa la señal procedente de la unidad interna para la<br />
elección del grado de potencia y corresponde a la activación del primer grado, mientras que el comando para la<br />
activación del segundo grado aparece representado por el símbolo SA3 en el esquema eléctrico.<br />
- El compresor que se pone en funcionamietno primero está definido por el sistema de regulación (ver manual<br />
regulación).<br />
Al mismo tiempo que el compresor se pone en marcha el ventilador relativo al funcionamiento con un solo circuito.<br />
- Verificar que la señal de puesta en marcha llegue de la unidad interna.<br />
- Para añadir gas refrigerante, hay que utilizar la conexión auxiliar en la llave de interceptación de la línea de aspiración,<br />
y hacer aspirar freon en estado gaseoso.<br />
Prestar mucha atención en esta fase porque durante la puesta en marcha el presostato de mínima es inactivo por 70<br />
segundos.<br />
Si se quiere hacer la carga sobre un circuito primero y así sucesivamente sobre los otros actuar sobre los<br />
correspondientes portafusibles para parar el compresor que no interesa en cuanto al módulo principal de uno según su<br />
lógica de ciclo de funcionamiento.<br />
ATENCION: Después de producirse una parada, el sistema calcula 6 minutos desde la anterior puesta en marcha antes de<br />
la sucesiva puesta en marcha (si este lapso de tiempo ha transcurrido solo se contaran 30 segundos de retraso).<br />
- La carga es completa cuando:<br />
- No aparecen burbujas en el visor de líquido (si es presente).<br />
- El recalentamiento del gas aspirado es de 4-8°K.<br />
- El subenfriamiento del líquido es de 3-5°K.<br />
AÑADIDO DE ACEITE<br />
Es necesario saber con exactitud la cantidad de refrigerante añadido en la instalación a la carga de fabrica, para poder<br />
definir la cantidad de aceite a añadir. La cantidad ha de ser mas o menos igual al 10% del peso del refrigerante añadido<br />
(el tipo de aceite se especifica en el manual general). El añadido de aceite es indispensable para añadidos de<br />
refrigerante superiores a 3Kg. En cualquier caso verificar el nivel de aceite del compresor con la conexión schrader,<br />
donde este presente.<br />
CONTROL DE PRIMERA PUESTA EN MARCHA UNA VEZ PUESTA EN MARCHA LA UNIDAD VERIFICAR:<br />
SECCION ELECTRICA<br />
Desequilibrio de las fases. Debe ser inferior al 2% (véase ejemplo de calculo).<br />
Ejemplo de calculo:<br />
L1 - L2 = 388V L2 - L3 = 379V L3 - L1 = 377V<br />
La media de los valores medidos se obtiene de:<br />
388 + 379 + 377<br />
= 381<br />
3<br />
La máxima desviación de la media se obtiene de:<br />
388-381=7 V<br />
El desequilibrio se obtiene de:<br />
7<br />
x 100 =1,83% (aceptable)<br />
381<br />
Corriente absorbida del compresor. Debe ser inferior al valor recogido en la tabla adenda en F.L.A.<br />
SECCION CIRCUITO FRIGORIFICO<br />
- Verificar una vez mas que no haya fugas en las junturas de las llaves y conexión de presión de la instalación. Atención:<br />
todas las capuchas de las conexiones manométricas y de las llaves deben volverse a montar.<br />
- Controlar el visor de líquido (si es presente).<br />
- Verificar con los manómetros las presiones de funcionamiento (baja presión de 400KPa a 560KPa corresponden a 0°C-<br />
+8°C SST) y que la temperatura de condensación sea de 15-20°C superior a la temperatura del aire externa (valores<br />
indicativos).<br />
- Controlar el recalentamiento, diferenciando la temperatura del manómetro de baja presión y la temperatura medida,<br />
con termómetro a contacto, directamente en el circuito de aspiración antes del compresor. Hay un correcto<br />
funcionamiento si los valores son entre 4 y 8 grados; si el recalentamiento esta fuera de estos valores hay que buscar la<br />
causa con la ayuda de la sección BUSQUEDA DE AVERIAS.<br />
- Controlar el subenfriamiento, diferenciando la temperatura del manómetro de alta presión y la temperatura medida, con<br />
termómetro, directamente en la línea de líquido después del condensador. Hay un correcto funcionamiento si los valores<br />
son de 3/5 grados sino hay que buscar la causa.<br />
- Para un correcto análisis de la instalación hay que controlar también la temperatura de descarga del compresor, que<br />
con los valores de recalentamiento y de subenfriamiento indicados debe ser de 30/40 grados superior a la temperatura<br />
de condensación.<br />
• Se hace presente que, estando dotada la unidad de regulación de velocidad de los ventiladores, es oportuno efectuar todas estas<br />
verificaciones de funcionamiento con temperaturas de aire externa y aire ambiente muy cercanas a las condiciones estándar de<br />
proyecto.<br />
• Se recuerda que todos los datos aquí recogidos son validos para unidades de acondicionamiento y con válvula termoestática.<br />
Para condiciones de proyecto con temperaturas de evaporación (SST) inferiores a 0°C hay que verificar tanto los parámetros de<br />
funcionamiento como la dimensión de los circuitos refrigerantes.<br />
Estas informaciones presentan algunos problemas y sus soluciones que se pueden verificar en la puesta en marcha de la unidad<br />
motocondensadora. Es siempre indispensable la seriedad y la especialización de los operadores.<br />
125
REGULACION<br />
MODALIDAD DE FUNCIONAMIENTO DEL MÓDULO PRINCIPAL<br />
ROTACIÓN DE LOS COMPRESORES<br />
El microprocesador controla correctamente el funcionamiento global de la unidad. Por ejemplo, la rotación de los<br />
compresores. A través de la programación de los parámetros dedicados, se habilita la función de rotación de los<br />
compresores. Lo que significa que con una orden de funcionamiento por parte del control, el compresor que funcionará<br />
en primer lugar, será el que tenga el menor número de horas de funcionamiento, mientras que el compresor que es el<br />
primero en pararse es el que tenga el mayor número de horas. Esta función permite distribuir equitativamente las horas<br />
de funcionamiento entre los dos compresores. También se puede hacer funcionar el primer compresor siempre en<br />
primer lugar y el segundo en segundo lugar para que se sigan ciertas particulares exigencias; la unidad es preparada<br />
con rotación habilitada por el constructor.<br />
TEMPORIZACIONES DE LOS COMPRESORES<br />
Para garantizar una buena calidad de funcionamiento de los compresores, se necesitan ciertos tipos de<br />
temporizaciones. Puede resultar útil consultar los gráficos de la fig. 3-4 para comprender mejor el significado de las<br />
temporizaciones.<br />
Figura 3 Figura 4<br />
Comp. 1<br />
Compresor<br />
ON<br />
ON<br />
OFF<br />
Comp. 2<br />
Segundos<br />
ON<br />
OFF<br />
Temporización entre arranque<br />
primero y segundo compresor C06<br />
Temporización entre parada primero y<br />
segundo compresor C07<br />
Segundos<br />
OFF<br />
Tiempo de seguridad<br />
entre parada y<br />
arranques C01<br />
Tiempo de seguridad entre<br />
arranques sucesivos C02<br />
Segundos*10<br />
En el gráfico de la fig. 4 se representan 2 parámetros. TIEMPO DE SEGURIDAD PARADA - ARRANQUE Y TIEMPO DE<br />
SEGURIDAD ARRANQUE - ARRANQUE. El primer parámetro prevé que cuando se para un compresor tiene que<br />
transcurrir un determinado tiempo para que éste pueda volver a encenderse. Este tiempo es respetado incluso cuando el<br />
termorregulador demanda más potencia. El segundo parámetro prevé que tenga que transcurrir un determinado tiempo<br />
entre un encendido y el sucesivo. En el caso de unidad con dos compresores, se hace uso de otros dos parámetros<br />
INTERVALO INTERVENCIÓN PRIMERO SEGUNDO COMPRESOR e INTERVALO PARADA PRIMERO SEGUNDO<br />
COMPRESOR. El primer parámetro es para evitar el arranque simultáneo de los dos compresores, que sirve<br />
principalmente para evitar corrientes demasiado altas durante el arranque de la unidad. El segundo prevé un intervalo de<br />
tiempo entre el apagado del primero y del segundo compresor. Estos dos parámetros se representan en el gráfico de la<br />
figura 3.<br />
126
REGULADOR VENTILADORES DE LA BATERIA<br />
En las unidades <strong>MSAT</strong> la regulación de la velocidad de los ventiladores es de serie de tipo termostático, puede ser bajo<br />
pedido de tipo presostático, esta última configuración va suministrada con kit. El principio de funcionamiento que<br />
describimos a continuación permanece igual para las dos regulaciones.<br />
- CONTROL VENTILADORES EN ENFRIAMIENTO<br />
A continuación proponemos un gráfico que explica el modo de funcionamiento en enfriamiento fig. 6.<br />
Speed<br />
VENTILADOR EXTERNO EN MODALIDAD ENFRIAMIENTO<br />
Pressure<br />
e<br />
Figura 6<br />
Cuando el compresor es activado hay ventilación forzada, es decir los ventiladores no siguen la regulación indicada por<br />
el control sino que funcionan durante un tiempo definido por el parámetro a máxima velocidad, excepto cuando la<br />
temperatura es inferior al valor de CUT-OFF. En tal caso los ventiladores funcionan a velocidad mínima durante el<br />
tiempo antes mencionado. Tras este paréntesis, veamos como funciona el regulador.<br />
El primer parámetro a definir es el CUT-OFF que corresponde a un especial valor de temperatura de condensación bajo<br />
el cual los ventiladores están parados. La HISTÉRESIS CUT-OFF es un parámetro que define el campo dentro del que<br />
se produce la conmutación entre el estado de funcionamiento de los ventiladores a velocidad mínima y el no<br />
funcionamiento de los mismos. Resumiendo, los ventiladores empiezan a funcionar a velocidad mínima con valor de<br />
temperatura igual al valor de CUT-OFF + HISTÉRESIS CUT-OFF mientras que la parada se determina por la diferencia<br />
entre el valor de SET EN ENFRIAMIENTO y DELTA CUT-OFF. Cuando la temperatura de condensación supera el valor<br />
SET VENTILADOR EN ENFRIAMIENTO el regulador comienza a regular la velocidad de los ventiladores<br />
proporcionalmente a la temperatura de condensación. Para las unidades Clivet en contraposición a aquello descrito en el<br />
gráfico se mantiene la regulación hasta que se alcanza el valor SET MÁX VENTILACIÓN EN ENFRIAMIENTO. Además<br />
existen los parámetros MÁX VELOCIDAD SILENCIADA y BANDA PROPORCIONAL EN ENFRIAMIENTO. El primero<br />
define el nivel máximo de velocidad de los ventiladores que corresponde a una determinada temperatura de<br />
condensación dentro de la que se efectúa la regulación de la velocidad, mientras que la BANDA PROPORCIONAL<br />
define la inclinación de la línea recta donde se realiza la regulación de la velocidad. Las unidades CLIVET son realizadas<br />
para regular la rotación de los ventiladores hasta alcanzar la máxima velocidad.<br />
127
PANEL DEL MÓDULO DE CONTROL PRINCIPAL<br />
LED 1 compresor 1<br />
• ON sí el compresor 1 es activo<br />
• OFF sí el compresor 1 está apagado<br />
• BLINK a frecuencia de 1 Hz si están activas las temporizaciones de seguridad<br />
• BLINK a baja frecuencia si el compresor está en desescarchado (sólo bomba de calor)<br />
LED 3 compresor 2<br />
• ON sí el compresor 1 es activo<br />
• OFF sí el compresor 1 está apagado<br />
• BLINK a frecuencia de 1 Hz si están activas las temporizaciones de seguridad<br />
• BLINK a baja frecuencia si el compresor está en desescarchado (sólo bomba de calor)<br />
ON si el control está en Enfriamiento<br />
Si el LED COOL no está encendido el control está en STAND-BY<br />
Cuando la unidad está en OFF solo permanece encendido el punto decimal.<br />
NOTA: Los LED 2 y 4 sirven para unidades compuestas de 4 compresores y de dos circuitos frigoríficos.<br />
PROGRAMACIÓN DE LOS PARÁMETROS DE FUNCIONAMIENTO<br />
En este capítulo solo nos limitamos a indicar los parámetros con acceso directo sin password. Los parámetros<br />
protegidos con password solo pueden ser utilizados por personal de servicio técnico autorizado.<br />
SIGNIFICADO DE LAS TECLAS<br />
Tecla ON-OFF<br />
Tecla MODE<br />
ON-OFF<br />
Tecla MODE<br />
ON-OFF<br />
Tecla MODE<br />
a) Si se pulsa por más de 2seg. el termorregulador pasa de ON a OFF y viceversa.<br />
b) Pulsando esta tecla solo una vez se obtiene el reset de todas las alarmas con rearme manual que no<br />
están activas.<br />
También se ponen a cero los contadores del número de intervenciones por hora, aunque no estén<br />
activos.<br />
c) En modalidad menú, la tecla funciona como flecha hacia abajo.<br />
d) Permite disminuir el valor del parámetro seleccionado.<br />
a) Pulsando y soltando ambas teclas antes de 2 seg. se baja en el menú de configuración de un nivel.<br />
a) Teniendo pulsadas ambas teclas por más de 2 seg. se sube en el menú de configuración de 1 nivel.<br />
b) Si se está visualizando el último nivel de un menú, pulsando simultáneamente y soltando antes de dos<br />
seg., se puede subir un nivel.<br />
a) En modalidad menú, la tecla funciona como flecha hacia arriba.<br />
b) Permite aumentar el valor del parámetro seleccionado.<br />
128
Tabla 1<br />
LISTADO DE LOS PARÁMETROS ACCESIBLES<br />
Código Description Unidad de medida Set de fabricacion<br />
H46 Password unidad 0<br />
Nivel 0 Nivel 1 Nivel 2<br />
Nivel 3<br />
Nivel 4<br />
Sonda regulación<br />
Alarma activa<br />
Set Point : Set Label Set Cooling: Coo Valor Set Cooling<br />
Label Set Heating: HEA<br />
Valor Set Heating<br />
Entradas Analógicas: tP<br />
Código entradas: t01- t06<br />
Valor entrada analógica<br />
Alarmas: Err<br />
Código alar. activas: E00-E46<br />
Entradas Analógicas: Id<br />
Código entradas: I01-I11<br />
Estado entrada digital<br />
Parámetros: PAr<br />
Par. configuración : CnF<br />
Indice par. H01-H69<br />
Valor parámetro<br />
Par. compresor: CP<br />
Indice par. C01-C08<br />
Valor parámetro<br />
Par. ventilación: FAn<br />
Indice par. F01-F25<br />
Valor parámetro<br />
Par. alarmas: ALL<br />
Indice par. A01-A26<br />
Valor parámetro<br />
Par. bomba: PUP<br />
Indice par. P01-P03<br />
Valor parámetro<br />
Par. antihielo: Fro<br />
Indice par. r01-r17<br />
Valor parámetro<br />
Par. desescarchado: dFr<br />
Indice par. d01-d11<br />
Valor parámetro<br />
Par. expansión: ESP<br />
Indice par. N01-N07<br />
Valor parámetro<br />
Password: PSS<br />
Valor password<br />
Horas de funcionamiento: Hr<br />
Horas compr: OH1-OH4<br />
Número horas<br />
Horas bomba: OHP<br />
Número horas<br />
Hay que pulsar simultáneamente las teclas “Mode” y “on off” para ir de un nivel a otro<br />
1 – Pulsando y soltando ambas teclas antes de 2 segundos, en el menú de configuración se<br />
desciende de un nivel<br />
2 – Pulsando ambas teclas por más de dos segundos, en el menú de configuración se sube de<br />
un nivel<br />
3 – Si se está visualizando el último nivel de un menú, se puede subir de un nivel pulsando<br />
simultáneamente y soltando antes de 2 segundos.<br />
129
ALARMAS<br />
Los códigos de alarma aparecen en la pantalla del terminal interfase usuario cuando se verifica un error. Las alarmas se<br />
visualiza en la pantalla, aquellas por rearme automático desaparecen cuando es resuelta la anomalía, aquellas por<br />
rearme manual necesitan para su reset la intervención del servicio técnico. Las alarmas aparecen en el terminal de<br />
interfase usuario siguiendo el orden con que han sido incluidas en la tabla 4. Además si hay más de una alarma al<br />
mismo tiempo, se visualizará sólo la primera, cuando está sea rearmada, aparecerá la segunda y así hasta que no que<br />
se termine la sucesión.<br />
Atención: en fase de standby, o de OFF, no se señalan las alarmas y no se activa el relé de bloqueo acumulativo. Si<br />
hay alarma se señalan y el relé de bloqueo es activado, cuando se selecciona el modo de funcionamiento.<br />
Tabla 2<br />
Código Tipo de avería Bloqueos Rearme<br />
E01 Máxima Presión circ. 1 Compresor MANUAL<br />
E02 Mínima Presión circ. 1 Compresor ventilador AUTOMÁTICO (Tras 5 señalizaciones necesita<br />
de rearme manual)<br />
E03 Térmica Compresor 1 Compresor ventilador MANUAL<br />
E04 Térmica Ventilador circ. 1 Compresor ventilador MANUAL<br />
E07 Avería Sonda BT3/BP3 Compresor ventilador AUTOMÁTICO<br />
E21 Máxima Presión circ. 2 Compresor ventilador MANUAL<br />
E22 Mínima presión circ. 2 Compresor ventilador AUTOMÁTICO (Tras 5 señalizaciones necesita<br />
rearme manual)<br />
E24 Térmica Ventilador circ. 2 Compresor ventilador MANUAL<br />
E27 Avería sonda BT5/BP5 Compresor ventilador AUTOMÁTICO<br />
E45 Configuración Compresor MANUAL<br />
130
BUSQUEDA DE AVERIAS<br />
A continuación se hacen presentes algunas posibles anomalías con sus respectivas soluciones. Las operaciones que se<br />
deriven quedan bajo la responsabilidad de quien las efectúa. Es obligatorio dirigirse a personal técnico especializado que<br />
cumpla los requisitos legales para cualquier operación necesaria para volver a establecer el funcionamiento.<br />
La intervención de un dispositivo de seguridad indica cualquier anomalía de funcionamiento: antes de volver a establecer el<br />
funcionamiento hay que verificar y eliminar la causa de la anomalía. A continuación se enumeran los posibles problemas<br />
con sus respectivas causas y soluciones.<br />
ATENCION<br />
LAS OPERACIONES INDICADAS SON RESPONSABILIDAD DE QUIEN LAS EFECTUA, ES OBLIGATORIO DIRIGIRSE A<br />
CENTRO DE ASISTENCIA AUTORIZADO QUE CUMPLA REQUISITOS NECESARIOS PARA EFECTUAR<br />
OPERACIONES CON EL FIN DE REACTIVAR EL FUNCIONAMIENTO.<br />
Cualquier avería o condición anómala de funcionamiento es controlada por el módulo principal de control. Por cada<br />
condición anómala o de avería, el módulo, además de poner en seguridad la unidad, puede visualizarla a distancia.<br />
131
BLOQUEO ALTA PRESION<br />
BLOQUEO ALTA PRESION<br />
SI<br />
NO<br />
¿ Ventilación eficiente ? Verificar batería<br />
( 1 )<br />
Verificar ventilador<br />
( 2 )<br />
Verificar módulo ventilador<br />
( 3 )<br />
Verificar sonda<br />
( 4 )<br />
SI<br />
¿ Temperatura aire externa<br />
inferior a los límites de<br />
funcionamiento ?<br />
NO<br />
Controlar datos de<br />
proyecto<br />
( 5 )<br />
SI<br />
¿ Carga refrigerante correcta ?<br />
NO<br />
Verificar<br />
subenfriamiento líquido<br />
( 6 )<br />
SI<br />
¿ Ausencia de no<br />
condensables ?<br />
NO<br />
Repetir vacío y carga<br />
( 7 )<br />
SI<br />
¿ Temperatura y/o presión<br />
de aspiración regular ?<br />
NO<br />
Verificar el funcionamiento<br />
de la<br />
unidad interna ( 8 )<br />
Unidad en función<br />
Verificar el funcionamiento<br />
de los elementos que<br />
interceptan la línea líquido<br />
( 9 )<br />
Notas:<br />
1) Muy importante es que ofrezca el máximo intercambio térmico, por tanto tiene que estar libre de suciedad, incrustaciones u<br />
obstáculos que impidan el flujo de aire.<br />
2) Verificar la integridad del ventilador, si estuviese dañado hay que sustituirlo. Controlar que la protección térmica del<br />
ventilador (si la tuviese) no haya actuado.<br />
3) Verificar que la tensión de salida del módulo de control regule proporcionalmente la velocidad de los ventiladores. En<br />
caso contrario hay que sustituir el módulo.<br />
4) Verificar la ubicación: debe estar en estrecho contacto con el tubo de la batería de condensación. Tiene que haber un<br />
dato de resistencia perfectamente en línea con la temperatura, controlar con el ohmímetro tal valor de resistencia.<br />
5) Verificar:<br />
- Los limites de funcionamiento (véase sección general).<br />
- Que la batería no este expuesta directamente a los rayos solares o cerca de superficies que reflejen.<br />
- Que en las cercanías no haya ningún flujo de aire caliente.<br />
- Que no hayan corrientes de retorno del aire.<br />
6) Para modalidad de control consultar el manual de PUESTA EN MARCHA. Nota: posibles inundaciones de los circuitos de<br />
la batería de condensación hasta donde esta ubicada la sonda pueden provocar un anómalo funcionamiento del sistema<br />
de regulación de la velocidad de los ventiladores.<br />
7) Una condición que puede producirse es que la temperatura de condensación sea muy alta (25/30 grados por encima de<br />
la temperatura del aire externo) combinada con un rendimiento frigorífico insuficiente. Puede aportar los mismos<br />
resultados de una carga refrigerante abundante. Constatar que la carga es correcta, valorar esta hipótesis y volver a<br />
efectuar todas las operaciones de vaciado y carga.<br />
8) Controlar que el aporte de aire no sea excesivo, y que la temperatura del aire ambiente no sea demasiado elevada. Estas<br />
condiciones podrían aumentar el rendimiento de la maquina y consecuentemente el calor a eliminar en el condensador.<br />
9) Controlar que todos los órganos de interceptación de la línea de liquido estén completamente abiertos.<br />
132
BLOQUEO BAJA PRESION<br />
BLOQUEO BAJA PRESION<br />
SI<br />
¿ Funcionamiento regular de<br />
la unidad interna ?<br />
NO<br />
Verificar el funcionamiento<br />
de la unidad interna (1)<br />
Verificar condiciones de<br />
funcionamiento de la<br />
unidad interna ( 2 )<br />
Verificar conexiones de<br />
tubos ( 3 )<br />
SI<br />
¿ Filtro deshidratador<br />
eficiente ?<br />
NO<br />
Control ∆t antes y después<br />
del filtro ( 4 )<br />
SI<br />
¿ Carga refrigerante<br />
regular ?<br />
NO<br />
Controlar el<br />
re-calentamiento ( 5 )<br />
SI<br />
¿ Llave aspiración<br />
completamente abierta ?<br />
NO<br />
Verificar y eventualmente<br />
abrir<br />
SI<br />
¿ Temperatura y/o presión<br />
de aspiración regular ?<br />
NO<br />
Verificar el funcionamiento<br />
de la unidad externa ( 6 )<br />
Unidad en función<br />
Notas:<br />
1) Verificar:<br />
- Que haya suficiente aporte de aire.<br />
- Que el sentido de rotación de los ventiladores sea correcto.<br />
- Que la batería no este sucia o con incrustaciones ya que debe ofrecer el máximo intercambio térmico.<br />
- Que la válvula solenoide este funcionando.<br />
- Que la válvula termoestatica este funcionando.<br />
2) Verificar que las condiciones de temperatura y humedad del aire tratado estén dentro de las condiciones de proyecto.<br />
3) Verificar que la instalación y diámetro de las tuberías estén correctamente dimensionadas (véase la sección "TUBERIAS<br />
REFRIGERANTES"). En caso contrario podrían causar pérdidas de carga inadmisibles para un correcto funcionamiento<br />
de la unidad.<br />
4) Controlar con un termómetro a contacto la temperatura antes y después del filtro deshidratador. Si la diferencia de<br />
temperatura es superior a un 1°C es signo de filtro no eficiente o de filtro bajo dimensionado, en ambos casos hay que<br />
sustituirlo.<br />
5) Para modalidad de control consultar la sección de PUESTA EN FUNCION.<br />
6) Si la presión de condensación esta por debajo de 1200Kpa manométricos se puede verificar una anomalía de<br />
funcionamiento del órgano de la termoestatica y como consecuencia presión de aspiración demasiado baja.<br />
Verificar que la ventilación de la unidad externa funcione perfectamente (es decir controla o para los ventiladores).<br />
133
INTERVENCIÓN SEGURIDAD COMPRESOR<br />
INTERVENCION SEGURIDAD<br />
COMPRESOR<br />
SI<br />
Temperatura de salida del<br />
compresor, ¿ dentro de los<br />
limites previstos ?<br />
NO Verificar parámetros tipo :<br />
re-calentamiento, carga<br />
refrigerante, etc.<br />
Unidad en función<br />
INTERVENCION TERMICA VENTILADORES<br />
INTERVENCION TERMICA<br />
VENTILADOR<br />
SI<br />
¿ Motor integro ?<br />
NO<br />
Verificar posibles<br />
obstrucciones del<br />
condensador<br />
Verificar obstrucciones<br />
en las aletas<br />
Verificar bobinas eléctricas<br />
Unidad en función<br />
134
UNIDAD RUIDOSA<br />
UNIDAD RUIDOSA<br />
SI<br />
¿ Los amortiguadores del<br />
compresor están en buenas<br />
condiciones ?<br />
NO<br />
Verificar y eventualmente<br />
sustituir<br />
NO<br />
¿ Los tornillos de fijación<br />
del compresor se han<br />
aflojado ?<br />
SI<br />
Verificar y eventualmente<br />
apretar<br />
NO<br />
¿ Las tuberías vibran ?<br />
SI<br />
Verificar los puntos de<br />
fijación<br />
Unidad en función<br />
COMPRESOR QUE NO SE PONE EN MARCHA<br />
COMPRESOR QUE NO SE PONE<br />
EN MARCHA<br />
NO<br />
¿ Falta de tensión en las<br />
bornas ?<br />
SI<br />
Intervención Klixon<br />
( 1 )<br />
Motor quemado<br />
( 2 )<br />
Compresor bloqueado<br />
( 3 )<br />
SI<br />
Interruptor, ¿ cerrado ?<br />
NO<br />
Rearmar<br />
SI<br />
Relee, ¿ funciona ?<br />
NO<br />
Controlar que la bovina no<br />
este quemada y que los<br />
contactos no estén<br />
oxidados<br />
SI<br />
Modulo de controlo,<br />
¿ funciona ?<br />
NO<br />
Verificar y eventualmente<br />
sustituir<br />
Unidad en función<br />
Notas:<br />
1) La intervención del Klixon se manifiesta con una temperatura externa del compresor más bien alta.<br />
Verificar la causa antes de volver a poner en marcha la unidad.<br />
2) Verificar que los bobinas del motor están a tierra. Eventualmente sustituir el compresor.<br />
3) EI bloqueo mecánico del compresor se presenta con ruido constante. En tal caso hay que sustituir el compresor.<br />
135
MANTENIMIENTO ORDINARIO<br />
IMPORTANTE<br />
ANTES DE INICIAR CUALQUIER OPERACION DE MANTENIMIENTO O DE LIMPIEZA DE LA UNIDAD HAY QUE<br />
ASEGURARSE QUE LA MISMA NO ESTE BAJO TENSION<br />
Esta sección esta dedicada al usuario final y es de extrema importancia para un regular funcionamiento de la unidad a lo<br />
largo del tiempo.<br />
Pocas operaciones realizadas con atención y periódicamente pueden evitar recurrir a la intervención de personal<br />
especializado.<br />
Las operaciones a ejecutar no requieren conocimientos técnicos especiales y se resumen en sencillos controles de los<br />
componentes de la unidad:<br />
- batería de condensación<br />
- electroventiladores<br />
- estructura<br />
UNIDAD<br />
BATERIA DE CONDENSACION<br />
ATENCION: Un contacto accidental con las aletas del condensador puede provocar pequeñas heridas por corte. Para<br />
efectuar las operaciones descritas mas abajo se aconseja utilizar guantes.<br />
Es importante que la batería condensante ofrezca el máximo intercambio térmico. Es importante que la superficie no<br />
tenga ni suciedad ni polvo que pueden depositarse por efecto de la acción de los electroventiladores.<br />
- Retirar con la ayuda de un cepillo todas las impurezas como papeles, hojas etc. que puedan depositarse en la<br />
superficie de la batería.<br />
- Limpiar la superficie de aluminio de la batería con la ayuda de un chorro de aire a presión teniendo cuidado en orientar<br />
el chorro paralelamente a la dirección de las aletas evitando provocar daños.<br />
- Verificar que las aletas de aluminio no hayan sufrido daños ni se hayan plegado, en el caso se produjeran situaciones<br />
de ese tipo, "enderezar" con el instrumento necesario la batería hasta volver a la situación inicial y obtener un perfecto<br />
flujo de aire.<br />
ELECTROVENTILADORES<br />
Con el primer encendido de la temporada hay que verificar la rumorosidad.<br />
Si es elevada y con vibraciones puede ser causada por: desequilibrio de las aletas o sino los tornillos de fijación se han<br />
aflojado.<br />
Si hay anomalías hay que llamar al centro de asistencia autorizado ya que los ventiladores están situados en el interior<br />
de la maquina entre las baterías de condensación.<br />
- Verificar que el electroventilador este perfectamente fijado a la reja de soporte.<br />
- Verificar que la reja de soporte del electroventilador este perfectamente fijada a la estructura de la unidad.<br />
- Verificar dentro de lo posible, desequilibrios del electroventilador que se evidencian al crearse condiciones de ruido y<br />
vibraciones anómalas.<br />
ESTRUCTURA<br />
- Verificar el perfecto estado de las partes que componen la estructura.<br />
Prestar especial atención a las partes en acero.<br />
- Tratar con barnices adaptas a eliminar o reducir el oxido aquellas zonas de la unidad donde se produjera.<br />
- Verificar que el panel externo de la unidad este perfectamente fijado. Erróneas fijaciones pueden originar rumores y<br />
vibraciones anómalas.<br />
PARTE ELECTRICA<br />
Verificar que el cable de alimentación que conecta la unidad al cuadro de distribución no presente laceraciones, grietas o<br />
alteraciones que puedan reducir el aislamiento. En caso de necesidad de mantenimiento, contactar un centro de<br />
asistencia autorizado.<br />
IMPORTANTE<br />
SE ACONSEJA LA PRESENCIA DE PERSONAL CUALIFICADO AUTORIZADO PARA CUALQUIER ENCENDIDO DE<br />
TEMPORADA DE LA UNIDAD, DE ESE MODO SE VERIFICA EL CIRCUITO FRIGORIFICO Y TODOS LOS PUNTOS<br />
ARRIBA MENCIONADOS<br />
136
CIRCUITOS FRIGORÍFICOS<br />
La dimensión de las líneas refrigerantes de conexión entre la unidad motocondensadora externa y las unidades de<br />
evaporación internas es de gran importancia. Para realizar conexiones con nuestra unidad, véase el esquema de debajo<br />
donde por longitudes especificadas el diámetro de las conexiones corresponde al diámetro a utilizar para los circuitos de<br />
conexión. Para distancias superiores el diámetro tendrá que ser calculado (véase bibliografías o nuestro boletín<br />
DIMENSION LINEAS FRIGORIFICAS EN INSTALACIONES A DOS SECCIONES). Además, el esquema de debajo indica<br />
el desnivel máximo aconsejado con circuitos estándar, sea cuando la unidad motocondensadora es mas baja respecto a la<br />
unidad terminal como a la inversa.<br />
Usar solo tuberías de cobre para la refrigeración.<br />
Modelo ∅ Aspir. ∅ Líquido Max. Max. Desnivel Max<br />
longitud m N° curvas Fig. 4 Fig. 6<br />
<strong>102</strong> 22 14 10 6 9 9<br />
<strong>122</strong> 22 14 10 6 9 9<br />
<strong>142</strong> 28 16 16 8 12 12<br />
<strong>162</strong> 28 18 16 6 10 10<br />
<strong>182</strong> 28 18 12 6 10 10<br />
<strong>202</strong> 35 22 23 10 18 18<br />
<strong>242</strong> 35 22 20 10 14 14<br />
CIRCUITO DE ASPIRACION<br />
Para todos los modelos las conexiones son para soldar, con la unidad es<br />
suministrada de serie la conexión ROTALOCK.<br />
Conectar la reducción de salida de la unidad a la toma con la ayuda de dos<br />
llaves como se indica a continuación (en la figura 1 por cuanto se refiere al<br />
primer circuito, figura 2 para el segundo).<br />
Figura 1<br />
Figura 2<br />
CIRCUITO LIQUIDO<br />
Figura 3<br />
Para toda la serie todas las conexiones son para soldar y de serie es<br />
suministrada la conexión ROTALOCK.<br />
Conectar la reducción de salida de la unidad a la toma con la ayuda de<br />
dos llaves como se indica a continuación (en la figura 3 por cuanto se<br />
refiere al primer circuito, figura 4 para el segundo).<br />
Figura 4<br />
NOTA:<br />
Todos los circuitos deben estar perfectamente limpios y sin humedad para permitir una operación de vacío perfecto (la<br />
limpieza se realiza con nitrógeno o aire seca antes de conectar los circuitos a las dos unidades).<br />
137
PRUEBA DE FUGAS<br />
- Controlar atentamente que las válvulas de servicio de la unidad<br />
motocondensadora estén cerradas.<br />
- Conectar el grupo manométrico a las conexiones auxiliares de las válvulas.<br />
- Poner el sistema en presión con refrigerante hasta 250KPa.<br />
- Cerrar las llaves del grupo manométrico para efectuar la desconexión de la<br />
bombona de refrigerante y acto seguido conectar la bombona de nitrógeno.<br />
- Abrir las llaves del grupo manométrico.<br />
- Poner en presión la instalación con nitrógeno hasta 1200KPa.<br />
- Controlar atentamente con aparato detector de fugas u otro instrumento<br />
electrónico todo el circuito con especial atención a las soldaduras y junturas en<br />
general.<br />
Si no se posee el equipo necesario, dejar accesibles todas aquellas partes que<br />
pudiesen causar fugas de refrigerante (soldaduras, juntas etc.).<br />
BULBO<br />
TERMOESTATICA<br />
Max. Desnivel<br />
BULBO<br />
TERMOESTATICA<br />
UNDAD EXTERNA<br />
Llave<br />
gas<br />
U NIDAD IN T ERN A<br />
Figura 5<br />
Llave<br />
liquido<br />
MODALIDAD - INDICACIONES PARA UNA CORRECTA CONEXION<br />
CIRCUITO DE ASPIRACION<br />
- Inclinación hacia el compresor en los trechos horizontales (0.5%) parar asegurar<br />
que vuelva el aceite al compresor incluso en condiciones de carga mínima.<br />
- Aislar con cuidado el circuito con polietileno anticondensación de células cerradas<br />
espesor mínimo 9mm.<br />
- Si la unidad motocondensadora esta situada mas baja respecto a la unidad de<br />
evaporación (véase figura 5), prever un sifón con la misma altura de la batería para<br />
prevenir, durante la parada de la unidad, el retorno de líquido al compresor.<br />
- Para evitar el sifón, montar en la línea del líquido una válvula solenoide (véase<br />
Figura 6), siempre aconsejada.<br />
- Si la unidad terminal esta dotada de válvula termoestatica, además del sifón<br />
prever una curva a U (véase Figura 5) lo mas cerca de la unidad. Todo esto para<br />
evitar que el bulbo de la válvula termoestatica, con la unidad parada, permanezca<br />
en contacto con el líquido. (véase figura 5).<br />
En el caso de conexiones con nuestra unidad terminal CED-V el sifón viene ya<br />
instalado al interno de la unidad.<br />
- Si la unidad motocondensadora esta situada mas alta respecto a la unidad de<br />
evaporación, prever solo una curva a U (véase Fig. 7). Hay que prestar atención si<br />
la distancia total supera los 7-10 metros entonces es necesario utilizar la válvula<br />
solenoide en la línea del líquido.<br />
- Para subidas en vertical prever además de la curva a U en la base, un sifón de<br />
recogida de aceite cada 6 metros (véase Figura 8).<br />
- Utilizar curvas de amplio radio (sin codos).<br />
- Evitar deformaciones en las tuberías de los circuitos.<br />
CIRCUITO LIQUIDO<br />
- Si esta expuesto al sol o cruza zonas con temperatura superior a la externa debe<br />
ser aislado, en caso contrario puede ir sin aislamiento.<br />
- Evitar diámetros demasiado grandes para no causar un exceso de carga de<br />
refrigerante.<br />
Figura 6<br />
Max. Desnivel<br />
Figura 7<br />
Figura 8<br />
IMPORTANTE<br />
Con la unidad terminal interna dotada de válvula termoestatica, si los circuitos de conexión tienen una longitud superior a<br />
15/20 metros o si la instalación esta prevista para funcionar en condiciones climáticas variables (por ejemplo el aire externo<br />
es muy diferente del día a la noche) se aconseja instalar cerca de la unidad interna un recipiente del líquido con capacidad<br />
adecuada.<br />
El recipiente del líquido puede realizar estas funciones:<br />
- Evita que llegue freon en estado gaseoso a la válvula termoestatica.<br />
- Compensa las variaciones de carga que se verifican en la instalación al variar las condiciones de funcionamiento.<br />
- Compensa en parte y por un cierto tiempo eventuales microperdidas que no se detectan y que en el tiempo tienden a<br />
descargar la instalación.<br />
- Evita la excesiva inundación del condensador con relativa subida de la temperatura/presión de condensación si la<br />
instalación esta cargada con mayor cantidad de refrigerante, o si la carga se ha efectuado en condiciones climatológicas<br />
anómalas.<br />
Siempre se aconseja la instalación del recipiente del líquido cuando las distancias de conexión son elevadas.<br />
138
RIESGOS RESIDUALES<br />
ATENCION<br />
EN ESTE FASCICULO SE SEÑALA TODA OPERACION QUE PUEDA GENERAR SITUACIONES DE RIESGO Y<br />
MEDIDAS DE CAUTELA QUE HAN DE OBSERVARSE CASO POR CASO<br />
DEFINICION DE ZONA PELIGROSA<br />
La figura de debajo evidencia el área donde solo puede operar el operador autorizado.<br />
- La zona peligrosa externa es determinada por una superficie en torno a la maquina y a la proyección en el suelo de la<br />
misma en la vertical si la maquina esta suspendida.<br />
- La zona peligrosa interna es el área donde solo se accede mediante abertura deliberada de todos los paneles o partes del<br />
los mismo.<br />
139
RIESGOS GENERICOS<br />
Zona considerada Riesgo residual Modalidad Advertencias<br />
Baterías de condensación Lesiones leves Por contacto Evitar contactos accidentales<br />
Usar guantes de protección<br />
Aplicar rejas de protección para<br />
condensadores (opcional)<br />
Válvulas de seguridad<br />
Area circundante a la<br />
unidad<br />
Area circundante a la<br />
unidad<br />
Lesiones<br />
Intoxicación<br />
Lesiones<br />
Intoxicación<br />
Quemaduras graves<br />
Muerte<br />
Muerte por:<br />
Quemaduras graves<br />
Intoxicación<br />
Expulsión gas refrigerante<br />
por funcionamiento de la<br />
protección<br />
Explosión originada por el<br />
aumento de la temperatura<br />
ambiente (incendio)<br />
Incendio originado por<br />
cortocircuito o<br />
calentamiento de cables<br />
eléctricos antes de los<br />
interruptores de la unidad<br />
Zona interna unidad Quemaduras Contacto con compresores<br />
y tuberías de descarga<br />
Evitar entrar en la zona peligrosa<br />
Provocar oportunamente las descargas<br />
de las válvulas de seguridad<br />
Usar indumentos y gafas apropiados<br />
Nunca dejar cerradas las llaves de<br />
descarga ni de aspiración compresores<br />
con la unidad parada<br />
Correcta dimensión de los cables y sus<br />
dispositivos de protección de la línea de<br />
conexión con la red eléctrica.<br />
Evitar contactos accidentales<br />
Usar guantes de protección<br />
Zona interna unidad Lesiones Contacto con ángulos<br />
puntiagudos<br />
Zona interna unidad Muerte por:<br />
Defecto de aislamiento en<br />
Electrocución los cables eléctricos antes<br />
Grave<br />
de los interruptores de la<br />
unidad<br />
Zona interna unidad<br />
Zona interna unidad<br />
Muerte por:<br />
Electrocución<br />
Muerte por:<br />
Electrocución<br />
Quemaduras graves<br />
Elementos metálicos bajo<br />
tensión<br />
Contacto con partes bajo<br />
tensión de fácil alcance al<br />
levantar los paneles<br />
Utilizar guantes de protección<br />
Acceder al interior de la unidad solo<br />
después de que se haya abierto el<br />
interruptor situado en la línea de<br />
conexión eléctrica con la unidad (a<br />
cargo del cliente)<br />
Realizar cuidadosamente la conexión a<br />
tierra de los elementos metálicos de la<br />
unidad<br />
Proceder a abrir y bloquear el interruptor<br />
general antes de quitar los paneles<br />
FICHA DE SEGURIDAD DEL REFRIGERANTE<br />
01 Elementos de<br />
identificación<br />
de la sustancia<br />
02 Composición e<br />
información<br />
de los<br />
componentes<br />
03 Identificación<br />
del riesgo<br />
04 Medidas de<br />
primeros<br />
auxilios<br />
Nombre del producto: forane 407C<br />
N°SDS 01965/1<br />
Proveedor: ELF ATOCHEM ITALIA<br />
Via G.Murat 17, 20159 Milano Italia<br />
tel. 02/668111<br />
Composición química del preparado<br />
Mezcla a base de:<br />
• Forane 32 (difluorometano) (N° CAS: 75-10-5)<br />
• Forane 125 (pentafluoroetano) (N° CAS: 354-33-6)<br />
• Forane 134a (1.1.1.2 tetrafluoroetano) (N° CAS: 811-97-<br />
2)<br />
Principales peligros físicos y químicos:<br />
Descomposición térmica en productos tóxicos y corrosivos<br />
Informaciones generales:<br />
Inhalación: Transportar la víctima al aire libre. Recurrir al<br />
oxigeno o a la respiración artificial en caso fuese necesario.<br />
Contacto con la piel: EI congelamiento ha de ser curado<br />
como las quemaduras térmicas.<br />
Contacto con los ojos: Lavar inmediatamente con<br />
abundante agua. En el caso persistiera la irritación hay que<br />
consultar un oftalmólogo.<br />
Nombre del producto: forane 22<br />
N°SDS 0005/7<br />
Proveedor: ELF ATOCHEM ITALIA<br />
4 Cours Michelet Cedex 42 92091 París Francia<br />
tel. 0033149008080<br />
Composición química del preparado<br />
Mezcla a base de:<br />
HC halogenado Clorodifluorometano<br />
N° CAS 75-45-6<br />
EINECS 200-871-9<br />
Efectos para la salud: Prácticamente no es<br />
nocivo<br />
Principales peligros físicos y químicos:<br />
Descomposición térmica en productos tóxicos y<br />
corrosivos<br />
Peligros específicos /CEE: Nocivo para la capa<br />
de ozono<br />
Informaciones generales:<br />
Inhalación: Transportar la víctima al aire libre.<br />
Recurrir al oxigeno o a la respiración artificial en<br />
caso fuese necesario.<br />
Contacto con la piel: EI congelamiento ha de<br />
ser curado como las quemaduras térmicas.<br />
Contacto con los ojos: Lavar inmediatamente<br />
con abundante agua. En el caso persistiera la<br />
irritación hay que consultar un oftalmólogo.<br />
140
05 Medidas<br />
antincendios<br />
06 Medidas en caso<br />
de fuga accidental<br />
07 Manipulación y<br />
almacenamiento<br />
08 Control de la<br />
exposición/<br />
protección<br />
individual<br />
09 Propiedades físicas<br />
y químicas<br />
10 Estabilidad y<br />
reactividad<br />
Peligros específicos: Descomposición térmica en<br />
productos tóxicos y corrosivos. Acido fluorhidrico. Oxidos<br />
de carbono<br />
Métodos específicos de intervención: Enfriar los<br />
contenedores/cisternas con chorros de agua. Prohibir<br />
cualquier fuente de chispas e ignición -<br />
No FUMAR.<br />
Sistemas de protección especiales para las<br />
escuadras de socorro: Llevar un respirador e<br />
indumentos de protección<br />
Precauciones individuales: Evitar el contacto con la<br />
piel, los ojos e inhalaciones de vapores. Usar indumentos<br />
de protección personal.<br />
En un local cerrado: ventilar o usar respirador (riesgo de<br />
axfisia). PROHIBIDO FUMAR<br />
Precauciones para la protección del medio ambiente:<br />
Limitar al máximo los residuos en el ambiente.<br />
Medidas /precauciones técnica<br />
Disposiciones para almacenamiento y manipulaciones<br />
aplicables a los productos: GAS EN PRESION<br />
Prever una apropiada ventilación y evacuación al nivel de<br />
los aparatos.<br />
Consejos para el uso: Evitar fuentes de ignición y el<br />
contacto con superficies calientes. NO FUMAR<br />
Medidas técnicas/ Modalidad de almacenamiento:<br />
Almacenar a temperatura ambiente en el contenedor<br />
original. Mantener lejos de las llamas, superficies<br />
calientes y fuentes inflamables. Conservar en lugar fresco<br />
y bien ventilado. Proteger los contenedores llenos de<br />
fuentes de calor para evitar sobrepresiones.<br />
Recomendaciones: Acero normal<br />
A evitar: Aleación que contenga mas del 2% de<br />
magnesio<br />
Materias plásticas<br />
Medidas de precaución a ejecutar: Asegurar suficiente<br />
renovación de aire y/o aspiración en ambientes de<br />
trabajo.<br />
Parámetros de control<br />
Valores limites de exposición: No hay valor limite F-USA<br />
Forane 134a valor limite aconsejado por Elf :<br />
VME=1000ppm<br />
Forane 32 valor limite aconsejado por Elf :<br />
VME=1000ppm Forane 125 valor limite aconsejado por<br />
Elf : VME=1000ppm<br />
Equipo de protección individual:<br />
Protección Respiratoria: En caso de insuficiente<br />
ventilación, llevar aparatos respiración artificial.<br />
Protección para las manos: Guantes<br />
Protección para los ojos: Gafas de protección<br />
Estado físico (20°C): Gas licuado<br />
Color: Incoloro<br />
Olor: Ligeramente parecido al éter. pH: No aplicable<br />
Punto /intervalo de ebullición: -42,4 °C<br />
Punto de inflamabilidad: No se inflama en condiciones<br />
de prueba<br />
Presión de vapor: (25°C): 1.13 Mpa (11,3 bar) a<br />
(50°C): 2.11 Mpa (21,1 bar) a (70°C): 3.26 Mpa (32,6<br />
bar)<br />
Densidad de vapor: En el punto de ebullición 4,54 kg/m3<br />
Densidad: (25°C) 1133 kg/m3 a (50°C) 1004 kg/m3 a<br />
(70°C) 861 kg/m3<br />
Condiciones a evitar: Evitar el contacto con llamas y<br />
con superficies metálicas incandescentes<br />
Productos de descomposición peligrosa:<br />
Descomposición térmica en productos fluorados<br />
tóxicos ácido fluorhidrico<br />
Otras Informaciones: Producto estable en normales<br />
condiciones de almacenamiento y manipulación<br />
Peligros específicos: Descomposición térmica en<br />
productos tóxicos y corrosivos. Acido fluorhidrico.<br />
Acido Clorhídrico gas. Fosgeno. Monóxido de<br />
carbono (CO)<br />
Enfriar los contenedores/cisternas con chorros de<br />
agua. Prohibir cualquier fuente de chispas e<br />
ignición -<br />
No FUMAR.<br />
Sistemas de protección especiales para las<br />
escuadras de socorro: Llevar un respirador e<br />
indumentos de protección<br />
Precauciones individuales: Evitar el contacto con<br />
la piel, los ojos e inhalaciones de vapores.<br />
En un local cerrado: ventilar o usar un respirador<br />
(riesgo de asfixia). PROHIBIDO FUMAR<br />
Alejar toda fuente de ignición<br />
Medidas /precauciones técnica<br />
Disposiciones de almacenamiento y<br />
manipulaciones aplicables a los productos: GASES<br />
PRESURIZADOS<br />
Prever una apropiada ventilación y evacuación al<br />
nivel de los aparatos.<br />
Consejos para el uso: Evitar fuentes de ignición y<br />
el contacto con superficies calientes. NO FUMAR<br />
Medidas técnicas/ Modalidad de<br />
almacenamiento: Almacenar a temperatura<br />
ambiente en el contenedor original. Mantener lejos<br />
de las llamas, superficies calientes y fuentes<br />
inflamables. Conservar en lugar fresco y bien<br />
ventilado. Proteger los contenedores llenos de<br />
fuentes de calor para evitar sobrepresiones.<br />
Recomendaciones: Acero normal<br />
A evitar: Aleación que contenga mas del 2% de<br />
magnesio<br />
Materias plásticas<br />
Medidas de precaución a ejecutar: Asegurar<br />
suficiente renovación de aire y/o aspiración en<br />
ambientes de trabajo.<br />
Parámetros de control<br />
Valores limites de exposición:<br />
Francia 1989: VME = 1000 ppm<br />
USA 1992: TWA = 1000 ppm = 3500 mg/m3<br />
Equipo de protección individual:<br />
Protección Respiratoria: En caso de insuficiente<br />
ventilación, llevar aparatos respiración artificial.<br />
Protección para las manos: Guantes<br />
Protección para los ojos: Gafas de protección<br />
Medidas especificas de higiene: Evitar el contacto<br />
con piel, ojos e inhalación de vapores.<br />
Estado físico (20°C): Gas licuado<br />
Color: Incoloro<br />
Olor: Ligeramente parecido al éter. pH: No<br />
aplicable<br />
Punto /intervalo de ebullición: -40,8 °C<br />
Temperaturas/intervalo de fusión: - 160 °C<br />
Temperatura de descomposición: 480 °C<br />
Presión de vapor: (20°C): 0,91 Mpa (9,1 bar) a<br />
(50°C): 1,91 Mpa (19,4 bar)<br />
Densidad de vapor: ( 20 °C) 3,57 kg/m3<br />
Densidad: (20°C) 1213 kg/m3 a (50°C) 1085<br />
kg/m3<br />
Solubilidad: agua (25°C) 3g/l - Solvente soluble<br />
en hidrocarburos y disolventes clorados, Alcohol,<br />
Quetonas, Eteres<br />
Solubilidad del agua en el producto a 30°C : 0,15 %<br />
de peso.<br />
Condiciones a evitar: Evitar el contacto con<br />
llamas y con superficies metálicas<br />
incandescentes<br />
Productos de descomposición peligrosa:<br />
Descomposición térmica en productos tóxicos y<br />
corrosivos: ácido fluorhidrico, ácido clorhídrico<br />
gas, fosgeno, monóxido de carbono (CO)<br />
141
11 Informaciones<br />
sobre la<br />
toxicidad<br />
12 Informaciones<br />
ecológicas<br />
13 Consideración<br />
para<br />
eliminación<br />
14 Información<br />
sobre el<br />
transporte<br />
15 Información<br />
sobre la<br />
legislación<br />
16 Otras<br />
informaciones<br />
Inhalación: Experimental en animales Forane 134a, 32, 125<br />
no es casi nocivo por inhalación. No hay señal de mortalidad<br />
encontrada en ratas de 500000 ppm/4h. Como para otros<br />
componentes volátiles alifáticos halogenados, el producto<br />
puede causar por acumulación de vapores y/o por inhalación<br />
de cantidades considerables: perdida de consciencia y<br />
trastornos cardiacos agravados por estrés y falta de oxigeno:<br />
riesgo mortal.<br />
Contacto con la piel: Posible congelamiento por salpicadura<br />
de gas licuado<br />
Toxicidad crónica: De estudios realizados por inhalación<br />
prolongada en animales no se ha puesto en evidencia algún<br />
efecto tóxico subcronico (rata/3 mes(es)/<br />
Inhalación:50000ppm)<br />
Efectos específicos: Genotoxicidad, según datos<br />
experimentales disponibles Forane 134a, 32, 125 NO<br />
Genotoxico<br />
Cancerígenos: Forane 134a la experimentación animal no<br />
ha puesto en evidencia un efecto canceroso claramente<br />
demostrado (rata /Inhalación - vía oral)<br />
Toxicidad por reproducción: Desarrollo fetal Forane 134a,<br />
32, 125 según datos disponibles ausencia de efectos tóxicos<br />
en el desarrollo del feto. Fertilidad, según datos limitados<br />
disponibles en animales: Forane 134a ausencia de efectos<br />
en la fertilidad (ratas/inhalación)<br />
Forane 32<br />
Persistencia /degradabilidad: En el agua no de fácil<br />
biodegradabilidad 5% después de 28d<br />
Bioacumulable: No es prácticamente bioacumulable log pow 0,21<br />
Forane 125<br />
Movilidad: Evaporación veloz t ½ vida 3,2 h (estimada)<br />
Persistencia /degradabilidad: En el agua no es fácilmente<br />
biodegradable 5% después de 28d. En el aire se degrada en<br />
la troposfera t ½ vida 28,3 y (estimado). Potencial de<br />
destrucción del ozono ODP (R-11 = 1)=0. Efecto invernadero<br />
potencial (GWP): (HGWP) = 0,58. Baja absorción en el suelo<br />
y en los sedimentos log Koc= 1,3-1,7<br />
Bioacumulable: Practicamente no bioacumulable log pow 1,48<br />
Forane 134a<br />
Movilidad: Evaporación veloz t ½ vida 3 h (estimado)<br />
Persistencia /degradabilidad: En el agua no es de<br />
fácilmente biodegradable 3% después de28d. En el aire se<br />
degrada en la atmósfera 3% después de 28d . Potencial de<br />
destrucción del ozono ODP (R-11 = 1)=0. Efecto invernadero<br />
potencial (GWP) 0,26.<br />
Bioacumulable: Prácticamente no bioacumulable log pow 1,06<br />
Eliminación del producto: Reciclar o incinerar<br />
Para mas información complementaria y actualización<br />
consultar los servicios de seguridad de ELF ATOCHEM<br />
Numero ONU 3163. RID\ADR clase 2 cifra (y letra) 4°a<br />
Prescripciones: Placa 2 N°peligro /N°materia 20/3163<br />
IMDG clase 2.2 N°ONU (IMDG) 3163<br />
Prescripciones: Placas 2.2<br />
IATA clase 2.2 N°ONU (IATA) o N°ID3163<br />
Prescripciones: Placas 2.2<br />
Directiva CEE<br />
Ficha de seguridad: D.91/155/CEE modificada por D.<br />
93/112/CEE: Sustancias peligrosas<br />
Clasificación/ ficha CEE<br />
Preparados peligrosos: No es clasificado como peligroso<br />
Inventarios: EINECS conformes<br />
Usos aconsejados: Refrigerante<br />
Referencias bibliográficas: Encyclopedie des gas (Air<br />
Liquide-ed.1976- ELSEVIER AMSTERDAM)<br />
<strong>142</strong><br />
Inhalaciones: Experimental en animales no es<br />
prácticamente nocivo por inhalación. Ningún<br />
efecto por debajo de 50000 ppm.<br />
Como para otros componentes volátiles alifáticos<br />
halogenados, el producto puede causar por<br />
acumulación de vapores y/o por inhalación de<br />
cantidades considerables: perdida de consciencia<br />
y trastornos cardiacos agravados por estrés y falta<br />
de oxigeno: riesgo mortal.<br />
Contacto con la piel: Posible congelamiento por<br />
salpicadura de gas licuado<br />
Contacto con los ojos: Irritaciones pasajeras<br />
Movilidad: Evaporación veloz t ½ vida 2,7 h<br />
Persistencia /degradabilidad: En el agua no es de<br />
fácilmente biodegradable 0% después de 28d. En<br />
el aire se degrada en la troposfera ½ vida 14<br />
años. Potencial de destrucción del ozono ODP (R-<br />
11 = 1)=0,055. Efecto invernadero potencial<br />
(HGWP) = 0,36. Baja absorción en el suelo y en<br />
los sedimentos log Koc= 1,8<br />
Bioacumulable: Prácticamente no bioacumulable<br />
log pow 1,08<br />
Toxicidad acuática: Toxicidad aguda, peces nivel<br />
de toxicidad 24/h = 180mg/l, Bacterias anaerobias:<br />
nivel de toxicidad, 24 h> 400mg/l<br />
Eliminación del producto: Reciclar o incinerar<br />
Numero ONU 1018. RID\ADR clase 2 cifra (y<br />
letra) 3°a<br />
Prescripciones: Placa 2 N°peligro /N°materia<br />
20/1018<br />
IMDG clase 2.2 N°ONU (IMDG) 1018<br />
Prescripciones: Placa NO INFLAMABLE GAS/2<br />
IATA clase 2.2 N°ONU (IATA) o N°ID1018<br />
Prescripciones: Placa NO INFLAMABLE GAS/2<br />
Código producto: 00055/7<br />
Directiva CEE<br />
Ficha de seguridad: D.91/155/CEE modificada por<br />
D. 93/112/CEE: Sustancias y preparados peligrosos<br />
Preparados peligrosos: D. 67/548/CEE modificada<br />
por D. 93/21/CEE: Guía de las placas (18a APT)<br />
R59 Dañino para la capa de ozono S59 Consultar<br />
el productor /proveedor para mas información<br />
relativa al reciclado<br />
S 61 No diseminar en el ambiente. Consultar las<br />
instrucciones especiales y la ficha de seguridad.<br />
Usos aconsejados: Refrigerante a baja temperatura,<br />
Agente congelante, Acondicionamiento del aire<br />
Referencia bibliográfica: Encyclopedie des gas<br />
(Air Liquide-ed.1976- ELSEVIER AMSTERDAM).<br />
Ficha toxicología INRS: N° <strong>142</strong><br />
CLORODIFLUOROMETANO<br />
Este documento se refiere al producto conforme a las especificas suministradas por ELF ATOCHEM.<br />
En caso de mezclas, hay que asegurarse que no acontezcan nuevos peligros. Las informaciones de esta ficha se consideran correctas basándose en nuestros<br />
últimos conocimientos relativos al producto en cuestión, en la fecha de edición de la misma. Es importante para el usuario conocer los posibles riesgos en los<br />
que se pudiese incurrir si el producto fuese utilizado para usos distintos de aquellos a los que es destinado. Esta ficha solo debe ser utilizada y reproducida a<br />
fines de prevención y seguridad. La lista de textos legislativos, regulaciones o administrativos no debe considerarse completa. Es responsabilidad del usuario<br />
del producto remitirse a textos oficiales para la utilización, conservación y manipulación del producto de lo que es único responsable. Además el usuario del<br />
producto debe informar a las personas que puedan estar involucradas en el manejo del producto de todas las informaciones necesarias sobre la seguridad en<br />
el trabajo, protección de la salud y del medio ambiente, dándoles esta ficha de datos de seguridad.
CLIVET S.P.A.<br />
Via Camp Lonc, 25 Z.I. Villapaiera<br />
32030 FELTRE (BL)<br />
Tel. 0439 3131 Fax. 0439 313300<br />
www.clivet.com<br />
info@clivet.it