
You also want an ePaper? Increase the reach of your titles
YUMPU automatically turns print PDFs into web optimized ePapers that Google loves.
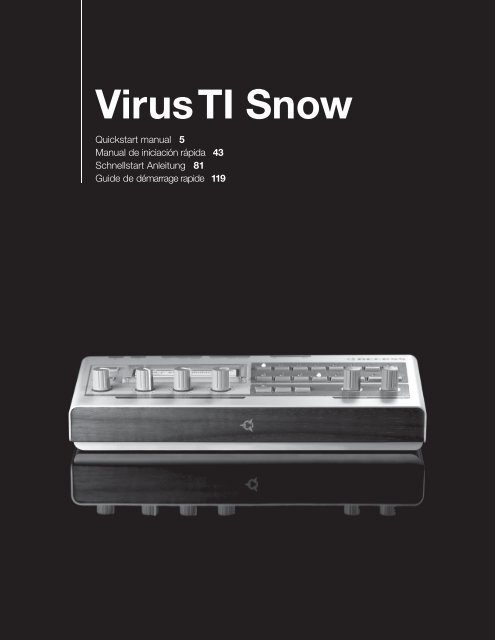
<strong>Virus</strong> <strong>TI</strong> <strong>Snow</strong><br />
Quickstart manual 5<br />
Manual de iniciación rápida 43<br />
Schnellstart Anleitung 81<br />
Guide de démarrage rapide 119
<strong>Virus</strong> <strong>TI</strong> <strong>Snow</strong><br />
Quickstart manual 5<br />
Manual de iniciación rápida 43<br />
Schnellstart Anleitung 81<br />
Guide de démarrage rapide 119<br />
www.access-music.de
Quickstart<br />
manual
6<br />
QUICKSTART MANUAL
TABLE OF CONTENTS<br />
Table Of Contents<br />
11 Introduction<br />
Welcome<br />
Health and Safety<br />
Maintenance<br />
Where do I find ...<br />
15 Basic Operation<br />
Power On/Off<br />
Connect it to your other equipment<br />
Audio I/O<br />
17 Choose Your Weapon<br />
<strong>Virus</strong> Control vs MIDI?<br />
What Is Total Integration?<br />
Host Software<br />
19 Modus Operandi<br />
Mode / Exit Button<br />
Tap Tempo / Panic Button<br />
Part Button<br />
Preset Sounds<br />
Knob Functions<br />
Edit Menu Buttons<br />
Easy / Expert Edit Mode<br />
25 Edit Pages<br />
OSC 1 Menu (Classic Oscillator)<br />
OSC 1 Menu (HyperSaw Oscillator)<br />
OSC 1 Menu (Wavetable Oscillator)<br />
OSC 1 Menu (Formant Complex Oscillator)<br />
OSC 2 Menu<br />
Filters Menu
8<br />
QUICKSTART MANUAL<br />
Mod Menu<br />
Envelopes Menu<br />
Effects Menu<br />
Arp Menu<br />
Common Menu<br />
Multi Menu<br />
Audition<br />
Store Menu<br />
Store to RAM<br />
Naming Your Patch<br />
SysEx Dump<br />
Storing in Multi Mode<br />
Utility functions<br />
Cancel Store Mode<br />
Config Menu<br />
35 About Polyphony<br />
Maximising Polyphony<br />
Optimising Your Patches<br />
Conclusion<br />
39 Compliance and Warranty<br />
FCC information (USA)<br />
FCC information (Canada)<br />
Other standards (rest of world)<br />
Declaration of conformity<br />
Warranty regulations
TABLE OF CONTENTS<br />
Legal Notice<br />
© Copyright 2008 Kemper Digital GmbH. All rights reserved.<br />
This manual, as well as the software and hardware described in it, is furnished under license and may be<br />
used or copied only in accordance with the terms of such license. The content of this manual is furnished for<br />
informational use only, is subject to change without notice and should not construed as a commitment by<br />
Kemper Digital GmbH.<br />
Kemper Digital GmbH assumes no responsibility or liability for any errors or inaccuracies that may appear in<br />
this book. Except as permitted by such license, no part of this publication may be reproduced, stored in a<br />
retrieval system, or transmitted in any form or by any means, electronic, mechanical, recording, by smoke<br />
signals or otherwise without the prior written permission of Kemper Digital GmbH.<br />
<strong>Virus</strong> is a trademark of Kemper Digital GmbH. All other trademarks contained herein are the property of their<br />
respective owners. All features and specifications subject to change without notice.<br />
www.access-music.de<br />
support@access-music.de
10<br />
QUICKSTART MANUAL
INTRODUC<strong>TI</strong>ON<br />
Introduction<br />
Welcome<br />
The <strong>Virus</strong> <strong>TI</strong> <strong>Snow</strong> is the entire sound-engine of the multiple award-winning <strong>Virus</strong> <strong>TI</strong> synthesizer, all squished<br />
into a teeny-tiny powerhouse of fun! The single DSP architecture is capable of delivering plenty of polyphony,<br />
with 4-part multi-timbral capability. Simplicity is the key here - the direct access menu buttons take you<br />
straight to the most important parameters of each section, which you can tweak in realtime with the 3 ‘soft’<br />
knobs beneath the LCD display. For those who like to delve more deeply into their sounds, Expert mode<br />
gives you access to every single one of the <strong>Virus</strong> <strong>TI</strong>’s myriad sound-shaping possibilities.<br />
The “<strong>TI</strong>” stands for “Total Integration”, and this is where we have redefined what it means to integrate a hardware<br />
synth with your computer and sequencer software. All audio and MIDI data can be streamed into and<br />
out of your compatible software host via USB, with the <strong>Virus</strong> Control plugin making your <strong>Virus</strong> <strong>TI</strong> <strong>Snow</strong> appear<br />
as a VST/AU/RTAS multi-channel instrument, complete with patch browsing and full editing capabilities.<br />
All this means that the lines between hardware and software are so elegantly blurred, that from here on in<br />
you’ll find it hard to imagine how it could be any other way.
12<br />
QUICKSTART MANUAL<br />
Health and Safety<br />
Please read the following carefully. Some of this advice concerns your health as well as that of your instrument!<br />
· Avoid exposing your <strong>Virus</strong> to moisture, dust or dirt. Do not place open liquids anywhere near the unit. If any<br />
substances get into the <strong>Virus</strong> housing contact Access support (www.access-music.de).<br />
· Avoid exposing the unit to excessive heat or direct sunlight. Please ensure that relatively cool air can circulate<br />
freely around the unit.<br />
· Avoid exposing the unit to physical shock or vibrations. Make sure it is placed firmly on a flat surface.<br />
· This <strong>Virus</strong> model requires a 12V DC external power supply. Only use the one that was included with the<br />
unit. Never connect the <strong>Virus</strong> to a power outlet that does not fully comply with national safety regulations.<br />
Never use an external power supply which wasn’t designed to match the local voltage requirements.<br />
· Disconnect the power whenever you are unlikely to use the <strong>Virus</strong> for a long period of time. Always pull on<br />
the plug itself, not on the cord.<br />
· The <strong>Virus</strong> is capable of generating levels that can cause irreversible damage to your ears, either via an external<br />
amplifier or when using headphones connected directly to the unit. Please keep levels reasonable at<br />
all times! Make sure that the equipment you connect the <strong>Virus</strong> <strong>TI</strong> to matches the <strong>Virus</strong>’ requirements (+4dB<br />
Outputs etc.)<br />
· In addition to the above, please consider the following advice carefully: Please do not hide the <strong>Virus</strong> <strong>TI</strong><br />
<strong>Snow</strong> in the oven, in case you later forget and cook it by accident. Please do not place the <strong>Virus</strong> <strong>TI</strong> <strong>Snow</strong> on<br />
top of your car whilst fastening the kids into their seats, in case you forget and drive off with it still there.<br />
Maintenance<br />
••<br />
Updating the OS<br />
Access Music is famous for improving their products via free updates to the operating system. We recommend<br />
that you visit www.access-music.de regularly and download the latest OS.<br />
••<br />
Cleaning<br />
Only use a soft, dry cloth or soft brush to clean the panel - do not apply any liquids. Note that industrial or<br />
household solvents can cause severe damage to surfaces.
INTRODUC<strong>TI</strong>ON<br />
••<br />
Repair<br />
Never open the <strong>Virus</strong> yourself - there are no user-servicable parts inside. If your <strong>Virus</strong> ever needs repairing,<br />
please contact Access support (www.access-music.de).<br />
Where do I find ...<br />
This quick start manual takes references to the following, additional resources:<br />
Information<br />
Patch parameter<br />
reference<br />
Location<br />
· Click on the “?” in <strong>Virus</strong> Control and open the patch parameter reference.<br />
· PC: Start > All programs > Access Music > <strong>Virus</strong> <strong>TI</strong> > Documentation > Manuals<br />
· Mac: Applications/Access Music/<strong>Virus</strong> <strong>TI</strong>/Documens/Manuals/<br />
Multi parameter<br />
reference<br />
· Click on the “?” in <strong>Virus</strong> Control and open the multi parameter reference.<br />
· PC: Start > All programs > Access Music > <strong>Virus</strong> <strong>TI</strong> > Documentation > Manuals<br />
· Mac: Applications/Access Music/<strong>Virus</strong> <strong>TI</strong>/Documens/Manuals/<br />
Config menu<br />
reference<br />
· Click on the “?” in <strong>Virus</strong> Control and open the configuration menu reference.<br />
· PC: Start > All programs > Access Music > <strong>Virus</strong> <strong>TI</strong> > Documentation > Manuals<br />
· Mac: Applications/Access Music/<strong>Virus</strong> <strong>TI</strong>/Documens/Manuals/<br />
Addendum<br />
· Click on the “?” in <strong>Virus</strong> Control and open the manual addendum.<br />
· PC: Start > All programs > Access Music > <strong>Virus</strong> <strong>TI</strong> > Documentation > Addenda<br />
· Mac: Applications/Access Music/<strong>Virus</strong> <strong>TI</strong>/Documens/Addenda/<br />
Tutorials for <strong>Virus</strong><br />
Control<br />
· Click on the “?” in <strong>Virus</strong> Control and open the <strong>Virus</strong> Control tutorials.<br />
· PC: Start > All programs > Access Music > <strong>Virus</strong> <strong>TI</strong> > Documentation > Tutorials<br />
· Mac: Applications/Access Music/<strong>Virus</strong> <strong>TI</strong>/Documens/Tutorials/<br />
Tutorial for <strong>Virus</strong><br />
Control Center<br />
· Click on the “?” in <strong>Virus</strong> Control and open the <strong>Virus</strong> Control Center tutorial.<br />
· PC: Start > All programs > Access Music > <strong>Virus</strong> <strong>TI</strong> > Documentation > Tutorials<br />
· Mac: Applications/Access Music/<strong>Virus</strong> <strong>TI</strong>/Documens/Tutorials/<br />
Tutorials for<br />
Sequencers<br />
· Click on the “?” in <strong>Virus</strong> Control and open the <strong>Virus</strong> Control Sequencer tutorial.<br />
· PC: Start > All programs > Access Music > <strong>Virus</strong> <strong>TI</strong> > Documentation > Addenda<br />
· Mac: Applications/Access Music/<strong>Virus</strong> <strong>TI</strong>/Documens/Addenda/<br />
Tutorial videos<br />
· Click on the “?” in <strong>Virus</strong> Control and open the Videos folder<br />
· PC: Start > All programs > Access Music > <strong>Virus</strong> <strong>TI</strong> > Documentation > Videos<br />
· Mac: Applications/Access Music/<strong>Virus</strong> <strong>TI</strong>/Documents/Videos/<br />
Tutorial songs<br />
· PC: Start > All programs > Access Music > <strong>Virus</strong> <strong>TI</strong> > Documentation > Turorials<br />
· Mac: Applications/Access Music/<strong>Virus</strong> <strong>TI</strong>/Documents/Tutorials/<br />
Additional resources can be found on the Access Music website.
14<br />
QUICKSTART MANUAL
BASIC OPERA<strong>TI</strong>ON<br />
Basic Operation<br />
The following is intended as a walkthrough guide to show you how simple it is to use the <strong>Virus</strong> <strong>TI</strong> <strong>Snow</strong>.<br />
Please read through it carefully, with the <strong>Virus</strong> in front of you.<br />
Power On/Off<br />
Plug the supplied power adaptor into to the mains, and connect it to the 12V DC IN socket on the rear of<br />
the <strong>Virus</strong> <strong>TI</strong> <strong>Snow</strong>. The first time you do this, the unit should power up straight away*. press the EDIT/SHIFT<br />
and PART keys together for 3 seconds to put the <strong>Virus</strong> into standby. Press the same two keys again to<br />
power it back on.<br />
*If you unplug the mains when the <strong>Virus</strong> is in standby, it will still be in standby when you reconnect it.<br />
Connect it to your other equipment<br />
••<br />
USB<br />
Important: You must install the <strong>TI</strong> Software and drivers before connecting the <strong>Virus</strong> to your computer via<br />
USB.<br />
To install: Go to www.access-music.de and download the latest build of the <strong>Virus</strong> <strong>TI</strong> <strong>Snow</strong> installer package<br />
for your chosen computer platform.<br />
Once downloaded, extract the archive and run the installer. Follow the onscreen instructions carefully, and<br />
connect the USB cable when told to do so.<br />
Connect the USB port on the <strong>Virus</strong> to a dedicated port on your computer using the cable provided or one<br />
similar. DO NOT USE A HUB! Sorry to have to shout, but the importance of this cannot be overstated - the<br />
<strong>Virus</strong> needs a USB port all of its own if the large amounts of data involved are to flow freely!<br />
Windows Users: Once the <strong>TI</strong> Software Suite and drivers have been installed, the Updater application will<br />
launch automatically. Please complete the firmware update proceedure to ensure that the internal OS of the<br />
the <strong>Virus</strong> is bang up-to-date.<br />
Mac Users: The firmware of the <strong>Virus</strong> <strong>TI</strong> <strong>Snow</strong> will be updated automatically as part of the installation process.
16<br />
QUICKSTART MANUAL<br />
••<br />
MIDI<br />
For those of you who simply cannot wait even a couple of minutes to hear your new baby make its first<br />
sounds (don’t worry - we sympathise completely), then you can simply connect the out port of any MIDI<br />
compatible keyboard to the IN port of the <strong>Virus</strong> <strong>TI</strong> <strong>Snow</strong> and start playing.<br />
Audio I/O<br />
••<br />
Outputs<br />
If you’re scratching your head at this point and wondering why you aren’t hearing anything, that’s because<br />
the <strong>Virus</strong> <strong>TI</strong> <strong>Snow</strong> does not come with built-in speakers. If you wish to hear all the wonderful noises you<br />
are making, then you need to connect output left and right to the inputs of a suitable stereo amplification<br />
system (preferably via a mixer), or a pair of headphones to the output left socket. Do not connect it directly<br />
to a home stereo/hi-fi as it may damage your equipment. Please turn the Master Volume knob down before<br />
you play anything through headphones, as we really don’t want you to break your ears before you’ve even<br />
started.<br />
••<br />
Inputs<br />
Connect your external audio equipment to input left/right if you wish to route it through the <strong>Virus</strong> <strong>TI</strong> <strong>Snow</strong>.<br />
With these inputs you can use the <strong>Virus</strong> as a soundcard for your computer, or you can use them to do all<br />
sorts of naughty things to your other equipment by running it through the <strong>Virus</strong>’ filters and effects.<br />
If you want the audio to pass straight through the <strong>Virus</strong> to the audio outputs, then simply adjust the Input<br />
Thru parameter in the CONFIG menu to the desired level.<br />
Now you have installed the <strong>Virus</strong> <strong>TI</strong> <strong>Snow</strong> on your computer and connected it to your equipment, you can<br />
start to explore the full potential of your new favourite synthesizer.
CHOOSE YOUR WEAPON<br />
Choose Your Weapon<br />
<strong>Virus</strong> Control vs MIDI?<br />
There are three main ways you can work with the <strong>Virus</strong> <strong>TI</strong> <strong>Snow</strong>:<br />
· As we’ve already mentioned, you can simply plug a MIDI controller keyboard into the MIDI IN port and start<br />
playing.<br />
· You can use a software sequencer host to route up to 4 different channels of MIDI to the <strong>Virus</strong> <strong>TI</strong> <strong>Snow</strong>. All<br />
you need to do is select the appropriate MIDI port in your host, which is labelled “<strong>Virus</strong> <strong>TI</strong> Synth”, and put<br />
the <strong>Virus</strong> into Sequencer Mode. Program changes can be made as normal on the <strong>Virus</strong> itself, or via your<br />
sequencer.<br />
· You can enjoy Total Integration between your compatible sequencer host and the <strong>Virus</strong> <strong>TI</strong> <strong>Snow</strong> by using<br />
<strong>Virus</strong> Control.<br />
What Is Total Integration?<br />
Just like it’s cousins in the “<strong>TI</strong>” range, the <strong>Virus</strong> <strong>TI</strong> <strong>Snow</strong> comes bundled with the <strong>Virus</strong> Control software - the<br />
hub of the Total Integration concept. <strong>Virus</strong> Control allows the <strong>TI</strong> <strong>Snow</strong> to appear as a multi-channel VST/Audio<br />
Unit/RTAS plugin, streaming audio and MIDI data discreetly over USB in 3 stereo channels, with sampleaccurate<br />
timing and delay-compensation. Every parameter of the <strong>Virus</strong> <strong>TI</strong> synth engine is represented in the<br />
graphical user interface, with automation of all relevant parameters possible within suitable host software.<br />
The Browser page allows comprehensive patch library management, including a powerful search tool, and<br />
total recall of all your settings means the <strong>Virus</strong> <strong>TI</strong> <strong>Snow</strong> will always be exactly as you last saved it with each<br />
project.<br />
For detailed information on how to use <strong>Virus</strong> Control, please refer to the relevant section in the <strong>Virus</strong> Control<br />
tutorials, which can be accessed directly by clicking on the ‘?’ button in <strong>Virus</strong> Control itself, along with several<br />
other useful resources.
18<br />
QUICKSTART MANUAL<br />
Host Software<br />
At this stage, it’s worth mentioning that to make full use of the <strong>Virus</strong> <strong>TI</strong> <strong>Snow</strong>, it is recommended that you<br />
have one of the compatible software sequencers installed on your computer, a list of which can be found at<br />
www.access-music.de/?go=compato. Whilst it is still perfectly possible to use the <strong>Virus</strong> <strong>TI</strong> <strong>Snow</strong> in ‘standalone’<br />
mode, a compatible sequencer will allow you to record your work in minute detail, and experience<br />
Total Integration as it was intended.<br />
Since all the compatible hosts have a unique working method, it is recommended that you take a little time<br />
out at this point to watch the tutorial video specific to your host, which can be found on your computer’s<br />
hard drive. You can also view these at any time by clicking on the ‘?’ symbol in <strong>Virus</strong> Control and selecting<br />
the relevant option. Please note that a video tutorial might not be available for every supported host.
MODUS OPERANDI<br />
Modus Operandi<br />
Mode / Exit Button<br />
Depending on what you want to achieve with your <strong>Virus</strong> <strong>TI</strong> <strong>Snow</strong>, there are three different ‘modes’ to choose<br />
from.Pressing the MODE button brings up a menu from which you can select one of three modes: Single,<br />
Multi or Sequencer. Select the one you want using the Value 1 knob or the Value +/- keys, then press MODE<br />
again to confirm the selection.<br />
••<br />
Single Mode<br />
This is the default mode, in which the <strong>Virus</strong> will only play one sound at a time across the whole length of your<br />
MIDI controller keyboard.<br />
••<br />
Multi Mode<br />
In Multi mode, you can have up to 4 different sounds playing at a time. Each of these 4 sounds is handled<br />
by a ‘Part’, and each Part has its own performance settings, such as volume, pan position, transpose etc.<br />
By assigning the same MIDI channel to each Part, you can easily create fantastic combinations of any of the<br />
available presets, which can be arranged in layers or split into different key zones.<br />
The <strong>Virus</strong> <strong>TI</strong> <strong>Snow</strong> has 64 slots for storing your Multi setups. These are ‘embedded’ Multis, by which we<br />
mean that they store all the data for the patches they use, so any edits you make to the sounds can be<br />
stored along with the Multi itself, without having to worry about affecting the original copies of the Single presets<br />
themselves.<br />
••<br />
Sequencer Mode<br />
Sequencer mode is a simplified version of Multi mode designed for use with a software sequencer. Each of<br />
the 4 Parts is set to its equivalent MIDI channel, and the performance settings are mostly hidden, as it is expected<br />
that you would rather use your sequencer to control these things.<br />
Please note that you cannot store your settings in Sequencer mode - if it is important to do so, you should<br />
use Multi mode instead.<br />
••<br />
Exit<br />
Pressing this button from within any of the edit menus will bring you back out into the top page of the currently<br />
selected mode.
20<br />
QUICKSTART MANUAL<br />
Tap Tempo / Panic Button<br />
••<br />
Tap Tempo<br />
Tap this button repeatedly to set the tempo. This will set the rate of the clock to which any ‘clocked’ parameters<br />
will sync, for instance the LFOs (in clock mode), the Arpeggiator, the Delay (clock mode) etc. Please<br />
bear in mind that only one global tempo can be set when working in Multi mode. Alternatively, you can find<br />
Tempo in the COMMON edit menu, should you wish to choose a more precise tempo.<br />
••<br />
Panic (EDIT/SHIFT+TAP TEMPO)<br />
Hit this combo to kill any hanging notes, which can be caused by incoming MIDI errors, such as when your<br />
sequencer decides to crash, for instance.<br />
Part Button<br />
To focus the user interface on a particular Part when you are in Multi or Sequencer modes, press or hold the<br />
PART button followed by button 1, 2, 3 or 4 on the lower row. The number displayed in the top right hand<br />
corner of the display tells you which Part you are currently editing.<br />
Preset Sounds<br />
••<br />
RAM/ROM?<br />
The <strong>Virus</strong> <strong>TI</strong> <strong>Snow</strong> has 8 banks of RAM patches and 8 banks of ROM patches, each bank comprising 64<br />
patches. ‘RAM’ stands for ‘Random Access Memory’, which means all of these locations can be overwritten<br />
with your own patches, as often as you like. ‘ROM’ stands for ‘Read Only Memory’, meaning these locations<br />
are permanent, and you cannot store your edited sounds here.<br />
The <strong>Virus</strong> <strong>TI</strong> <strong>Snow</strong>’s RAM Banks contain a showcase of patches selected from the ROM banks, so you<br />
needn’t worry about replacing any of them. Should you wish to restore them to the original state at any time,<br />
we have saved them as libraries in the Patches folder, which you can access with the Browser in <strong>Virus</strong> Control.<br />
Since the <strong>Virus</strong> <strong>TI</strong> <strong>Snow</strong> uses banks of 64 presets, they are always displayed in pairs within the Browser<br />
pane of <strong>Virus</strong> Control, e.g. Banks 1 + 2, 3 + 4 etc.<br />
••<br />
Selecting Single Presets<br />
Any of the patches stored in the <strong>Virus</strong> <strong>TI</strong> <strong>Snow</strong> can be selected with a maximum of 4 button clicks.
MODUS OPERANDI<br />
To select the desired Bank, first press the BANK button. The <strong>Virus</strong> will now prompt you to select a patch<br />
bank. Alternatively, you can hold the BANK button down and select the desired bank without this screen appearing.<br />
Now press any of the top row of buttons, labelled ROM 1-8 to select a ROM bank, or one of buttons labelled<br />
RAM 1-8 on the bottom row to select a RAM bank.<br />
Now the bank has been selected, choose the specific preset by simply typing the patch number using the<br />
upper row for the first digit and the lower row for the second.<br />
The patches within each bank are numbered like this:<br />
1-1 to 1-8, 2-1 to 2-8, 3-1 to 3-8, 4-1 to 4-8, 5-1 to 5-8, 6-1 to 6-8, 7-1 to 7-8, 8-1 to 8-8<br />
Tip: It is only necessary to press BANK if you actually need to select a different bank. Once you are in the<br />
bank you wish to browse, you can directly select each of the 8 presets in each ‘batch’ with the lower row,<br />
and select a different batch with the upper row. As an example, let’s select the patch ‘Tutorial 1’, which is<br />
located in RAM8 8-1.<br />
Why not have a try on your own first? Solution below. In case your stuck, here’s how to do it’:<br />
Press BANK -> Lower Row 8 -> Upper Row 8 -> Lower Row 1<br />
••<br />
Selecting Multi Presets<br />
Since there is only one bank of 64 Multis, it is not necessary to select a Bank first; apart from this the proceedure<br />
is exacly the same as in Single mode.<br />
To select which Single preset you want to assign to a particular Part, you need to press EDIT followed by<br />
Multi, and then select the preset using the Bank and Program parameters.
22<br />
QUICKSTART MANUAL<br />
Knob Functions<br />
Before we proceed with this walkthrough of the basic functions of the <strong>Virus</strong> <strong>TI</strong> <strong>Snow</strong>, please select patch<br />
RAM8 8-1 “Tutorial 1”.<br />
••<br />
Volume<br />
As boring as it is important, the Volume knob controls the overall levels of the Output L/R socket. If you have<br />
your <strong>Virus</strong> connected to a mixing desk, it is probably best to leave Volume at maximum (127), and adjust the<br />
levels on your mixer to suit. This will give you the best signal-to-noise ratio. Always turn Volume right down<br />
when first connecting a pair of headphones.<br />
Please note, this will not have any effect when you are using the USB outs in <strong>Virus</strong> Control.<br />
••<br />
Patch Volume (SHIFT+Value 1)<br />
Use this to adjust the overall volume of the currently selected patch. Be careful not to set this too high, as it<br />
may result in ‘clipping’ a highly-undesirable kind of distortion that never sounds good.<br />
••<br />
Transpose (SHIFT+Value 2)<br />
Use this to adjust the pitch of the currently selected patch in octaves.<br />
••<br />
Panorama (SHIFT+Value 3)<br />
Panorama is the parameter which controls where you perceive the sound to be positioned in a stereo speaker<br />
system. The default value of +0 will make the sound appear to come from directly in between, negative<br />
values push it to the left, and positive values push it to the right.<br />
••<br />
Cutoff<br />
This is where the fun with synths really begins. Turn the knob all the way up to 127 and hold a note down on<br />
your keyboard. Now, slowly sweep the knob down to 0 and back again - you should notice the buzzy sound<br />
of the “Tutorial 1” patch get increasingly dull, until it disappears altogether, and then open back up to full<br />
buzziness as you return to 127. You have just heard a ‘lowpass’ filter in action.<br />
••<br />
Resonance<br />
Set this knob at around 12 o’ clock, and then sweep the Cutoff knob in exactly the same way as before.<br />
Increasing the resonance of the filter amplifies frequencies around the cutoff frequency, making it ‘speak’ as<br />
you throw the cutoff knob around. A little caution is advised when applying high values of resonance, as the<br />
resulting sound can damage your speakers if you are not careful, especially as you sweep the cutoff around<br />
the lower values!<br />
••<br />
Filter Envelope (SHIFT+Cutoff)<br />
Hold down the SHIFT button, and turn the Cutoff knob to adjust the Decay and Release parameters of the<br />
Filter Envelope at the same time. The higher the value you choose here, the longer the cutoff of the filter will
MODUS OPERANDI<br />
take to sweep to the Sustain level set in the Filter Envelope. Please note that this will only have an audible effect<br />
on sounds which use the Filter Envelope in some way.<br />
••<br />
Amp Envelope (SHIFT+Resonance)<br />
Hold down the SHIFT button and turn the Resonance knob to adjust the Decay and Release of the Amp Envelope<br />
simultaneously. The higher the value you choose here, the longer each note will take to decay to the<br />
sustain level and fade to silence once you release the key.<br />
Edit Menu Buttons<br />
In the upper row of buttons, you will find all the menus for editing the currently selected patch, whilst the<br />
lower row contains the navigation buttons and ‘administration’ menus for patch management and system<br />
configuration.<br />
To enter any of the Edit menus, press the EDIT/SHIFT button, followed by the relevant menu button.<br />
Once within a menu, use the Value 1, 2 and 3 knobs to adjust the values. If you wish to make incremental<br />
changes to a value, you can use the VALUE -/+ keys. You can use the PARAMETERS keys to select the<br />
parameter you wish to edit, or just twist the Value knob underneath it.<br />
To choose another edit menu, you need only press the relevent menu button - it is not necessary to press<br />
EDIT/SHIFT again.<br />
To return to the main play page again, press MODE/EXIT.<br />
Easy / Expert Edit Mode<br />
As the <strong>Virus</strong> <strong>TI</strong> <strong>Snow</strong> has so many parameters in the sound-engine, we have provided an Easy edit mode<br />
(default) which only displays 3 parameters per edit menu, carefully selected to make an immediate difference<br />
to the current patch. These parameters are selected dynamically, meaning they may change depending on<br />
certain factors, such as the current oscillator model, for instance.<br />
If you wish to adjust parameters other than those presented in Easy edit mode, you can switch the <strong>Virus</strong><br />
into Expert edit mode. To make a temporary switch within a specific edit menu, simply hold EDIT/SHIFT<br />
while you tap the relevant edit menu key. Once you exit that particular menu, the <strong>Virus</strong> will return to Easy edit<br />
mode.<br />
If you want to switch to Expert edit mode permanently, then you can do this in the Edit CONFIG Menu (System<br />
> Edit-Mode).
24<br />
QUICKSTART MANUAL
EDIT PAGES<br />
Edit Pages<br />
This is a basic patch using the Classic oscillator. We will only be looking at the parameters available in Easy<br />
edit mode. For a comprehensive list of parameters in expert mode, refer to the parameter reference chapters.<br />
For this walkthrough dial up the patch “Tutorial 1” (RAM8 8-1).<br />
OSC 1 Menu (Classic Oscillator)<br />
Press this button to enter the menu for Oscillator 1, the part of the <strong>Virus</strong> sound-engine which is generating<br />
that buzzing noise this patch makes. The <strong>Virus</strong> <strong>TI</strong> <strong>Snow</strong> has 8 different oscillator modes - if you want to<br />
learn more about them, please check out the video tutorials on the access website, where each mode is<br />
explained in detail.<br />
Soft Knob Parameter Meaning<br />
#1 Shape Use Shape to determine the shape of the wave generated by Oscillator 1,<br />
which in turn determines the basic tone or timbre. Turn Value 1 fully anticlockwise<br />
to hear a sine wave. As you turn it towards the centre position,<br />
you will hear the sound become brighter until it plays a pure sawtooth wave<br />
at dead-centre. Continue to turn fully clockwise to hear the sound become<br />
more hollow as it gradually becomes a pure pulse wave.<br />
#2<br />
Case #1<br />
Pulse Width<br />
The parameter controlled by the Value 2 knob varies according the current<br />
setting of Osc1 Shape.<br />
When Osc1 Shape is set to the left of centre, the parameter will be “Wave<br />
Select”, and to the right of centre, “Pulse Width”.<br />
With Pulse Width at 50% (default) the pulse wave will have a hollow sound,<br />
but as you increase this percentage, the sound will become thinner and<br />
reedier, until it disappears completely at 100%.<br />
When Osc1 Shape is set to Spectral Wave, the parameter will be:<br />
#2<br />
Case #2<br />
Wave Select<br />
You can now select any waveform from a selection of 64. Wave 1 (default)<br />
is Sine, which can best be described as the purest tone a synthesizer can<br />
make. Wave 2 is Triangle, which is a little brighter than a sine wave, and was<br />
available on many analog synthesizers as a complement to the saw and<br />
pulse waves. The rest of the selection comprises a wide variety of digital<br />
waves, particularly useful for emulating some of the brighter timbres of the<br />
kinds of digital synthesizers from the 80s and 90s.<br />
#3 Osc Balance This determines the balance between the outputs of Oscillator 1 and<br />
Oscillator 2. At centre position (default), you will hear both oscillators. Adjust<br />
towards -64 to hear just the output of Oscillator 1, and towards +63 to hear<br />
just the output of Oscillator 2.
26<br />
QUICKSTART MANUAL<br />
OSC 1 Menu (HyperSaw Oscillator)<br />
For this walkthrough dial up the patch “Tutorial 2” (RAM8 8-2). This is a basic patch using the HyperSaw<br />
oscillator.<br />
Soft Knob Parameter Meaning<br />
#1 Density Use Density to determine the number of saws per voice - anything from 1 up<br />
to 9!<br />
#2 Local Detune Use Local Detune to determine the level of detuning between the saws. At<br />
zero, the saws will be in perfect tune, and phase-cancellation will occur as<br />
a result (this is normally undesirable) and at the maximum value of 127, the<br />
saws will be detuned by a semitone.<br />
#3 Osc Balance This determines the balance between the outputs of Oscillator 1 and<br />
Oscillator 2. At centre position (default), you will hear both oscillators. Adjust<br />
towards -64 to hear just the output of Oscillator 1, and towards +63 to hear<br />
just the output of Oscillator 2.<br />
OSC 1 Menu (Wavetable Oscillator)<br />
For this walkthrough dial up the patch “Tutorial 3” (RAM8 8-3). This is a basic patch using the Wavetable<br />
oscillator.<br />
Soft Knob Parameter Meaning<br />
#1 Index Adjust Index to sweep through the wavetable.<br />
#2 Interpolation Use Interpolation to determine how smoothly you can sweep through the<br />
wavetable. Try setting this at 127, and have another play with Index on<br />
Value 1. Moderate values can yield a nice, ‘bumpy’ effect.<br />
#3 Osc Balance This determines the balance between the outputs of Oscillator 1 and<br />
Oscillator 2. At centre position (default), you will hear both oscillators. Adjust<br />
towards -64 to hear just the output of Oscillator 1, and towards +63 to hear<br />
just the output of Oscillator 2.<br />
OSC 1 Menu (Formant Complex Oscillator)<br />
For this walkthrough dial up the patch “Tutorial 4” (RAM8 8-4). This is a basic patch using the Formant Complex<br />
oscillator.
EDIT PAGES<br />
Soft Knob Parameter Meaning<br />
#1 Index Adjust Index to sweep through the wavetable.<br />
#2 F-Shift This determines how far the formants are shifted in semitones. When set to<br />
+0, the formants are tuned to C3 (middle C). Radical pitch-shifting and sync<br />
effects are possible by sweeping this parameter.<br />
#3 Osc Balance This determines the balance between the outputs of Oscillator 1 and<br />
Oscillator 2. At centre position (default), you will hear both oscillators. Adjust<br />
towards -64 to hear just the output of Oscillator 1, and towards +63 to hear<br />
just the output of Oscillator 2.<br />
OSC 2 Menu<br />
Press this button to enter the menu for Oscillator 2. Nearly all of the parameters for are the same as those<br />
of Oscillator 1, so here we will focus solely on the difference, which is the parameter displayed in HyperSaw<br />
mode for Value 3.<br />
Don’t forget to set Osc Balance (OSC1 Menu) to +0 or higher if you want to hear the effects of these parameters!<br />
••<br />
Value 3 (Classic, Wavetable, Grain and Formant modes)<br />
FM Amount: FM is an abbreviation of Frequency Modulation, a process by which the frequency (pitch)<br />
Oscillator 2 is modulated by the frequency of Oscillator 1. The resulting effect is often a dramatic distortion<br />
of the affected oscillator, but there are also ‘sweet-spots’ to be found, where the effect is more subtle and<br />
harmonious.<br />
Experiment with different values for Osc1 and 2 Semitone and FM Amount - for old-skool sci-fi effects, try<br />
setting Osc1 Semitone to the lowest possible value. If you want a purer, less distorted sound, use a sine<br />
wave for both oscillators.<br />
••<br />
Value 3 (HyperSaw mode)<br />
Sync: Use Sync to sweep the pitch of the HyperSaw’s internal sync oscillator.
28<br />
QUICKSTART MANUAL<br />
Filters Menu<br />
We use filters in synthesizers for changing and shaping the timbre of a sound. The <strong>Virus</strong> <strong>TI</strong> <strong>Snow</strong> has two<br />
filters, which can be run in series or parallel. ‘Series’ means that the output of Filter 1 goes straight into Filter<br />
2, and it is the output of Filter 2 that you hear.<br />
Soft Knob Parameter Meaning<br />
#1 Filt 2 Offset/<br />
Cutoff2<br />
This determines the offset of Filter 2, relative to that of Filter 1. Filter 2 Cutoff<br />
is set by default to follow Filter 1 Cutoff at the same frequency.<br />
By adjusting this parameter, you cause Filter 2 to operate at a different<br />
frequency from Filter 1, which will change the perceived depth of the filters.<br />
Please note this parameter is highly dependent on other parameters within<br />
the filter section, and may not always have an audible effect.<br />
In certain patches, this parameter will be displayed as ‘Cutoff 2’. This is<br />
when the Cutoff Link parameter is set to Off.<br />
#2 Saturation Type Choose a distortion/lo-fi effect for the output of Filter 1. Adjust the intensity<br />
of the effect with the Value 3 knob (see below).<br />
Try out all the different saturations, which vary from standard overdrives to<br />
more exotic digital varieties. There are also a couple of 1-pole filters in there,<br />
should you need one of these instead.<br />
#3 Osc Volume<br />
(Saturation)<br />
From -64 to 0 (default) this controls the volume of the oscillators. From<br />
0 to +63 this determines the level of saturation for Filter1, so long as the<br />
Saturation parameter (Value 2 knob) is enabled. ‘Saturation’ is the term used<br />
to describe the effect of increasing the input signal to a level beyond that<br />
which is healthy, thereby creating distortion or additional overtones, which in<br />
many cases sound really great.<br />
Please be aware that certain Saturation types will have an audible effect<br />
even with Saturation at +0.<br />
‘Parallel’ means the oscillator signal is divided into two channels, one of which goes into Filter 1, the other<br />
into Filter 2. In this case, you hear a mixture of the outputs of both filters. The following parameters are available<br />
to edit via the 3 Value knobs.<br />
Mod Menu<br />
Please select patch “Tutorial 5” RAM8 8-5). Press EDIT/SHIFT + MOD to enter the Modulation menu.<br />
‘Modulation’ is the term used to describe a function which changes the value of another parameter over<br />
time. Specifically for this purpose, the <strong>Virus</strong> has 3 LFOs or ‘Low Frequency Oscillators’. These are different<br />
from the oscillators used to generate the sound, as they operate at much lower speeds.<br />
The LFOs have been designed to run at an independent rate, or to slave to the overall tempo of the current<br />
patch or Multi. If they are set to Rate, then you can choose a value between 0 - 127, and if they are set to<br />
Clock, you can choose a divider setting, based on a whole bar of 4/4, whereby 1/4 represents a rate equivalent<br />
to quarter notes or crotchets.
EDIT PAGES<br />
You can adjust the following 3 parameters via the Value knobs beneath the display:<br />
Soft Knob Parameter Meaning<br />
#1 LFO1 Rate or<br />
Clock 1<br />
#2 LFO2 Rate or<br />
Clock 2<br />
#3 LFO3 Rate or<br />
Clock 3<br />
Select patch RAM A-64 ‘Tutorial 5’ and listen carefully to the sound as you<br />
adjust this parameter. In this patch, LFO1 is modulating the amount of filter<br />
resonance.<br />
Listen carefully to the sound as you adjust this parameter. In this patch,<br />
LFO2 is modulating the stereo positioning of the sound, or ‘panorama’.<br />
Listen carefully to the sound as you adjust this parameter. In this patch,<br />
LFO3 is modulating the pitch of both oscillators.<br />
Envelopes Menu<br />
Please select patch “Tutorial 6” (RAM8 8-6). This is where you can determine the overall shape of a sound,<br />
both in volume and timbre. The value knobs are assigned as follows:<br />
Soft Knob Parameter Meaning<br />
#1 Amp Attack This determines how long it takes for the sound to reach full volume after a<br />
key is pressed. The higher the value, the longer it takes.<br />
#2 Filter Attack This determines how long it takes for the filter to reach the maximum value<br />
as determined by the current setting for Cutoff 1 or 2 (Offset), coupled with<br />
the Filter Env 1/2 Amount value. No effect will be heard here unless Filter<br />
1/2 Env Amt is set to a value other than zero.<br />
#3 Filter Env Amt This determines the degree to which the filter envelope will affect the cutoff<br />
of the filters. For this to have any audible effect, you will need to turn the<br />
Cutoff knob down - a value of around 30 should be suitable. Now, keep<br />
playing notes as you gradually increase the value of Env Amount. Notice<br />
how the beginning of the notes (the attack) gets sharper and brighter,<br />
the higher the value of Env Amount? That’s because the filter envelope is<br />
sweeping the cutoff right up, then right down again at the start of every<br />
note (this is why you needed to turn Cutoff down, so that the envelope had<br />
somewhere to go).<br />
Effects Menu<br />
Please select patch “Tutorial 7” (RAM8 8-7).<br />
Enter the Effects menu. Effects are used for further processing of the entire output of the synth engine. You<br />
can adjust 3 parameters relevant to the current patch via the Value knobs beneath the display:
30<br />
QUICKSTART MANUAL<br />
Soft Knob Parameter Meaning<br />
#1 Delay Send This determines how much of the sound is sent through the Delay, which is<br />
used to create an echo effect. At a value of 127, all you will hear is the output<br />
of the Delay itself.<br />
#2 Reverb Send This determines how much of the sound is sent through the Reverb, an<br />
effect used to create an illusion of physical space around the sound. At a<br />
value of 127, all you will hear is the output of the Reverb itself.<br />
Please be aware that using Reverb on several Parts at a time can place<br />
a heavy burden on the DSP, and may result in a significant reduction in<br />
available polyphony.<br />
#3 Phaser Mix This determines how much of the sound is sent through the Phaser, an<br />
effect which adds a lot of movement and colour - kind of like a time-machine<br />
to the Summer Of Love.<br />
Arp Menu<br />
Press this button to enter the Arpeggiator menu. The Arpeggiator is a very powerful performance tool which<br />
automatically turns a single note into a rhythm, or a chord into an arpeggio (broken chord).<br />
Please select patch “Tutorial 8” (RAM8 8-8). You can adjust the following 3 parameters:<br />
Soft Knob Parameter Meaning<br />
#1 Arp Mode With this you can select the play order for the notes in a chord. For this to<br />
have any noticable effect, please play at least 3 simultaneous notes. Select<br />
from:<br />
- Off (no arpeggiator)<br />
- Up<br />
- Down<br />
- Up&Down<br />
- As Played (notes played sequentially in the order they were played)<br />
- Random<br />
- Chord (notes are played simultaneously in the rhythm of the arp pattern)<br />
#2 Pattern Choose the rhythmic pattern you want from a selection of 64. The default<br />
pattern ‘User’ can be edited in the Arp page of <strong>Virus</strong> Control, and is stored<br />
with each patch. Please see the <strong>Virus</strong> Control tutorials for information on<br />
how to make your own patterns.<br />
#3 Length Use this to adjust the length of each step. Experiment with lower values to<br />
achieve a more ‘staccato’ or choppy effect, and higher values for a more<br />
continuous, ‘legato’ effect.
EDIT PAGES<br />
Common Menu<br />
Press this button to enter the Common menu. Here you can adjust 3 parameters from the Oscillator section<br />
which affect the basic performance of the patch.<br />
Soft Knob Parameter Meaning<br />
#1 Key Mode When set to ‘Poly’ (default), the patch will play many simultaneous voices<br />
or chords. Select any of the ‘Mono’ modes if you want the patch to play<br />
monophonically (only one note will sound, no matter how many keys you<br />
press). Mono mode is generally desirable for leads and bass patches. Please<br />
refer to the parameter reference manual for full details on the different Mono<br />
modes.<br />
If you set Key Mode to ‘Hold’. the notes will hold indefinitely, even after you<br />
release the key.<br />
#2 Portamento Use Portamento to create a ‘glissando’ or pitch glide between different<br />
notes. The higher the value, the longer it will take for each new note to reach<br />
its correct pitch.<br />
#3 Transpose Use Transpose to adjust the overall pitch in semitones. Use steps of 12 if you<br />
just want to change the octave, or better still, use SHIFT+Value 2, which is<br />
only scaled in octaves.<br />
Multi Menu<br />
This is where you will find all the parameters relating to each Part in Multi mode. Use the Parameter < > keys<br />
to move through the different pages.<br />
For detailed information on these parameters, please refer to the relevant chapter in the reference manual.<br />
••<br />
Creating a layered/split Multi<br />
The main thing to remember here is to make sure that each of the Parts is responding to the same MIDI<br />
channel (usually you’ll want this to be channel 01). Having selected the patches you want on each Part with<br />
the Bank and Program parameters, you can create layered performances by leave the Low Key and High<br />
Key parameters at their defaults, or you can split the keyboard into ‘zones’ by adjusting these values accordingly.<br />
Of course it is possible to have a mixture of layers and splits within the same Multi, should you<br />
wish it.
32<br />
QUICKSTART MANUAL<br />
Audition<br />
Press this button to hear the currently selected sound played at C3. If you hold the button for a while, the<br />
note will latch - simply press Audition again to stop it.<br />
Store Menu<br />
If you wish to save a patch you have created or edited, you first need to press the STORE button on the<br />
lower row. If you are not already in edit mode, you must press EDIT/SHIFT followed by STORE.<br />
There are several options to choose from:<br />
Store To RAM: This is the option to choose when saving a patch to the internal memory of the <strong>Virus</strong>. A<br />
back-up battery ensures that this memory is still retained when the power is off.<br />
Compare: Choose this option to compare your edited patch with the original.<br />
Sysex Dump: Choose this if you want to send the patch to another MIDI device, such as another <strong>Virus</strong> <strong>TI</strong>,<br />
or a MIDI sequencer for backup purposes.<br />
Store Single Menu/Multi Edit Buffer: When not in Single mode choose this option for patch-management<br />
functions - for details see the description below.<br />
Press STORE to confirm the function you require.<br />
Store to RAM<br />
The next step is to choose the specific RAM location in which to store your patch.<br />
••<br />
Destination<br />
Select the specific Bank you wish to store you patch to.<br />
••<br />
Patch No.<br />
Select the specific patch number you wish to overwrite.<br />
••<br />
Patch Name<br />
As an alternative to selecting the patch to overwrite by number, you can locate it by name.
EDIT PAGES<br />
Naming Your Patch<br />
Once you have selected the right location for your new patch, you may want to give it a new name. To access<br />
the naming page, press STORE again. Use the Value knobs or buttons to select the desired letter or<br />
symbol, and move through the characters with the PARAMETER buttons. Once you are satisfied with the<br />
name, press STORE again to complete the process.<br />
SysEx Dump<br />
If you are in Single mode, press STORE to send the Single patch to your external device. If you are in Multi<br />
mode, press STORE to send the Arrangement (this contains all the patch information for each Part). If you<br />
only want to send the Single patch of the currently selected Part, select “Dump Single” instead of “Arrangement”<br />
and press STORE to send it.<br />
Storing in Multi Mode<br />
If you are in Multi Mode when you enter the Store menu, it will be assumed that you wish to store the current<br />
Multi setup. Select the Multi slot you wish to use and follow the same proceedure as when storing a Single<br />
patch.<br />
Utility functions<br />
If you are in Multi mode and want to store the single patch of the current Part, select “Store Single Menu”<br />
from the list of options under “Function”.<br />
If you are in Sequencer mode (or <strong>Virus</strong> Control mode) and wish to copy all of the single patches to the Multi<br />
mode edit buffer, select “Multi Edit Buffer” from the list of options under “Function”.<br />
Cancel Store Mode<br />
If you suddenly realise that you are about to overwrite your favourite patch and decide to bail out, press EXIT<br />
at any time to get straight back out of the Store menu.
34<br />
QUICKSTART MANUAL<br />
Config Menu<br />
In this menu, you will find all the global parameters which determine the overall behaviour and feel of the <strong>Virus</strong><br />
<strong>TI</strong> <strong>Snow</strong>, such as the brightness of the LEDs or the behaviour of the knobs etc.<br />
Please refer to the reference manual for details on the different functions within this menu. Don’t worry -<br />
none of them is the equivalent of a self-destruct button, and you can always reset them all to their default<br />
values by pressing and holding TAP TEMPO while you power up the <strong>Virus</strong>, should you feel you’ve messed<br />
something up.
ABOUT POLYPHONY<br />
About Polyphony<br />
So, how many voices (notes) can you expect from the <strong>Virus</strong> <strong>TI</strong> <strong>Snow</strong> at a time? The answer is that since the<br />
<strong>Virus</strong> <strong>TI</strong> sound engine is highly dynamic, the voice count can vary dramatically from one sound to the next,<br />
depending on which features are being used.<br />
To help give you a rough idea of how many voices you can expect to achieve with your chosen patch, we<br />
have provided a patch complexity meter in the top right hand side of the display.<br />
There are five levels of complexity, with level 1 being the least complex, and hence allowing for the highest<br />
voice-counts. Since it would be too complicated to explain all the different scenarios, we have provided the<br />
following three examples*:<br />
*The examples below assume Single mode operation, or playing one part at a time in Multi mode. Using additional<br />
parts simultaneously might affect the amount of voices you can achieve.<br />
••<br />
Level 1<br />
Patches using e.g. 1 or 2 simple oscillators, one or two mod routings and one or two effects can achieve<br />
upwards of around 32 voices. With the very simplest of patches you can achieve far more than this - for<br />
example, please check out RAM1- 78, a nice, warm PWM pad with Delay and Chorus, capable of being<br />
played with more than 50 simultaneous voices.<br />
••<br />
Level 3<br />
Patches using e.g. 3 simple oscillators, 3 or 4 mod routings and several effects can achieve upwards of<br />
around 20 voices.<br />
••<br />
Level 5<br />
Patches using e.g. the Grain or Formant oscillators, several mod routings, lots of effects and the Analog<br />
1-4pole filter can achieve between about 10 - 14 voices.<br />
Maximising Polyphony<br />
The <strong>Virus</strong> <strong>TI</strong> <strong>Snow</strong> has several features which are considerably more demanding of the available DSP power<br />
than others, and this can become apparent much more quickly in Multi Mode. Once you hit the upper limit<br />
by playing more notes than the <strong>Virus</strong> can play at one time, then consdidered ‘note-stealing’ can occur, an<br />
effect which can be quite noticeable in certain arrangements.
36<br />
QUICKSTART MANUAL<br />
If you find you are running out voices too quickly, you could take a closer look at the patches you are using,<br />
and seeing if they can be optimised in any way. The following features should be considered prime suspects<br />
in this situation:<br />
••<br />
Unison Mode (Common Menu)<br />
Unison Mode tells the <strong>Virus</strong> to play multiple instances of the same voice for each key you press, and therefore<br />
should be considered ‘polyphony-killer No.1’! With Unison Mode = Twin, the <strong>Virus</strong> plays two notes for<br />
every key, but since Unison can be set as high as 8 voices per key, you can see why this can be a potential<br />
problem, especially in an arrangement! Often, it can be that reducing the number of voices has little or no<br />
detriment to the sound once it is in a mix, so please try reducing to Twin if it is set to a higher value. You<br />
should be able to compensate for any decrease in volume with either the Patch Volume (Common Menu) or<br />
Part Volume (Multi Menu) parameters.<br />
Unison Mode is a legacy feature from the days of the <strong>Virus</strong> A B and C, none of which featured the HyperSaw<br />
oscillator or the Local Detune parameter available in some of the newer oscillator types. Where appropriate,<br />
using the HyperSaw on one oscillator will yield considerably more voices than a similar patch using 3 separate<br />
saw oscillators.<br />
••<br />
Analog 1-4pole (Filter Menu)<br />
Each voice takes approximately double the calculation power.<br />
••<br />
WavePWM or Grain /Formant Complex (Osc1/2 Menu)<br />
Each voice takes approximately double the calculation power. Only use these oscillators if you are taking<br />
advantage of the F-Shift, F-Spread or Local Detune parameters (OSC1/2 Menus) - especially in the case of<br />
Grain Complex, which sounds exactly the same as the Wavetable oscillator when all these parameters are<br />
set to their default value of +0.<br />
Alternatively, try the Simple variants of Grain and Formant, as these are far less demanding of the DSP.<br />
••<br />
Oscillator 3 (Osc1/2 Menu)<br />
Each voice takes approximately 30% additional calculation power.<br />
••<br />
Reverb<br />
This is the most ‘expensive’ effect, so we strongly advise to avoid using it on more than one or two Parts at<br />
a time. A delay will have far less impact on resources, and may often be just as effective - alternatively, don’t<br />
forget you can use external plug-in effects if you are using Total Integration.
ABOUT POLYPHONY<br />
Optimising Your Patches<br />
If you find your patch is making use of any of the above features, try alternatives to reduce the CPU load.<br />
Remember that a feature is active and consuming calculation power even when set to a very small value, so<br />
in certain cases it can be wise to switch something off rather than have something which is barely audible<br />
but still using up resources. For instance, if Osc Balance is set to -63, you will almost certainly be unable to<br />
hear Oscillator 2, so try turning it to -64, at which point Oscillator 2 will be switched off altogether, thereby<br />
freeing up resources. If an effect’s Mix or Send parameter is set to Off or Dry, then it will not use any resources,<br />
so again, if a patch is using only tiny amounts of a particular effect, then it may be advisable to switch it<br />
off entirely.<br />
The <strong>Virus</strong> also has to work a little harder when both filters are used. If you only need a gentle, 2-pole filter<br />
for a particular sound, then by turning Filter Balance fully left (-64) you switch off Filter 2, thereby freeing up<br />
some voices.<br />
Another factor that can be easily overlooked is the length of release tails. These can cause the voice count<br />
to stack up much more quickly than you may think, and in an arrangement you can often reduce them a certain<br />
amount without having a detrimental effect to the overall mix. Please check the Priority parameter (Multi<br />
Menu), which you can use to prioritise certain Parts against note-stealing. In other words, setting the most<br />
crucial Parts to Priority = High will push those Parts remaining on Priority = Low to the front of the queue<br />
when the <strong>Virus</strong> needs to steal voices.<br />
Try not to use the mod matrix to apply an effect than be achieved by using one of the hardwired slots - e.g. if<br />
you want LFO to modulate Cutoff 1, use the LFO2>Cutoff1 parameter, which is always on anyway; by using<br />
the mod matrix instead, you will be using unnecessary additional resources.<br />
Some controller sources you may choose to apply in the mod matrix take more calculation power than others<br />
- this is because some have to be calculated per-voice, whereas some are only applied globally. For<br />
instance, the modwheel applies to all voices on a given part simulaneously, thereby only needing one calculation<br />
per change of position, whereas KeyFollow or Filter Envelope apply to each individual voice, which can<br />
result in an increase in calculation power. If you are playing a polyphonic patch, this can make quite a difference,<br />
especially if you are using several mod routings of this kind at the same time.<br />
It is also advisable to switch off any redundant mod slots, i.e. don’t just turn them down to zero, switch the<br />
source and/or destination parameters to Off.<br />
Finally, remember that every single feature you can turn on and off can have an effect on the polyphony, even<br />
if it’s only by a single voice, but sometimes you may only need to find yourself that one extra voice to achieve<br />
the result you desire, so think efficient!
38<br />
QUICKSTART MANUAL<br />
Conclusion<br />
So, there it is: the end of the quick start guide - we hope it has been of some use to you. If you don’t feel<br />
ready to fly solo at this point, fear not, as you are not alone - there are resources available to you, should you<br />
run into any problems.<br />
Please consult the support documents on your hard drive (they are installed as part of the <strong>TI</strong> software suite),<br />
where every feature is covered in fine detail.<br />
There are video tutorials which show you how to setup <strong>Virus</strong> Control with your favourite sequencer and how<br />
to use Total Integration.<br />
There is also person-to-person support available via the support forms at www.access-music.de<br />
Don’t forget that ALL of the above can be accessed simply by clicking on the ‘?’ symbol on the <strong>Virus</strong> Control<br />
plugin!
COMPLIANCE AND WARRANTY<br />
Compliance and Warranty<br />
FCC information (USA)<br />
Important notice: Do not modify this unit. This product, when installed as indicated in the instructions contained<br />
in this manual, meets FCC requirements. Modifications not expressly approved by Kemper Digital<br />
GmbH may void your authority, granted by the FCC, to use this product.<br />
When connecting this product to accessories and/or another product use only high quality shielded cables.<br />
Cables supplied with this product MUST be used. Follow all installation instructions. Failure to follow instructions<br />
could void your FCC authorisation to use this product in the USA.<br />
NOTE: This product has been tested and found to comply with the requirements listed in FCC Regulations,<br />
Part 15 for Class „B“ digital devices. Compliance with these requirements provides a reasonable level of<br />
assurance that your use of this product in residental environment will not result in harmful interference with<br />
other electronic devices. This equipment generates/uses radio frequencies and, if not installed and used<br />
according to the instructions found in the user manual, may cause interference harmful to the operation of<br />
other electronic devices, Compliance with FCC regulations does not guarantee that interference will not<br />
occur in all installations. If this product is found to be the source of interference, which can be determinated<br />
by turning the unit „OFF“ and „ON“, please try to eliminate the problem by using one of the following<br />
measures: Relocate either this product or the device that is being affected by the interference. Utilise power<br />
outlets that are on branch (Circuitbreaker or fuse) circuits or install AC line filter/s. In the case of radio or TV<br />
interference, relocate/reorient the antenna. If the antenna lead-in is 300 ohm ribbon lead, change the lead- in<br />
to coaxialtype cable. If these corrective measures do not produce satisfactory results, please contact the<br />
local retailer authorised to distribute this type of product. The statements above apply ONLY to products<br />
distributed in the USA.<br />
FCC information (Canada)<br />
The digital section of this apparatus does not exceed the „Class B“ limits for radio noise emmissions from<br />
digital apparatus set out in the radio interference regulation of the Canadian Department of Communications.<br />
This only applies to products distributed in Canada.<br />
Le présent appareil numérique n’émet pas de bruit radio-électrique dépassant les limites applicables aux<br />
appareils numériques de la “Classe B” prescrites par la réglementation sur les interférences radio-électriques<br />
du Ministère Canadien des Communications. Ceci ne s’applique qu’aux produits distribués au Canada.
40<br />
QUICKSTART MANUAL<br />
Other standards (rest of world)<br />
This product complies with the radio frequency interference requirements of the Council Directive 89/336/EC.<br />
Cet appareil est conforme aux prescriptions de la directive communautaire 89/336/EC.<br />
Dieses Gerät entspricht der EG-Richtlinie 89/336/EC.<br />
Declaration of conformity<br />
This device is designed exclusively for generating low frequency audio signals. Any other use is not permitted,<br />
and automatically invalidates the warranty supplied by Kemper Digital GmbH. The following devices<br />
<strong>Virus</strong> <strong>TI</strong> <strong>Snow</strong> is hereby declared to conform with the requirements of Council Directive 89/336/FWG for<br />
radio frequency interference. They also comply with regulations dated August 30th, 1995 concerning radio<br />
interference generated by electronic devices. The following standards have been applied: EM 50 082-1 :<br />
1992 , EN 50 081-1 : 1992 , EN60065 : 1993 This declaration has been given responsibly on behalf of the<br />
manufacturer: Kemper Digital GmbH, Recklinghausen, Germany.<br />
Warranty regulations<br />
The Kemper Digital GmbH warranty covers all defects in material and workmanship for a period of 24<br />
months from the date of original purchase. This warranty does not cover defects due to abuse, faulty connections<br />
or operation under other than specified conditions. Warranty coverage is also voided when the<br />
device is repaired by unauthorized persons or tampered with in any way. Kemper Digital reserves the right to<br />
refuse warranty claims, if the product was not sold from an Authorised Base Dealer to the respective endcustomer.<br />
This warranty is limited to replacement or repair of the product. It does not limit the customers’<br />
rights according to the current product liability regulations of the country where the product was purchased.<br />
The warranty is only valid, if a completely filled in warranty card, including serial no., date of sale, company<br />
stamp, signature of the Authorised Base Dealer, as well as name and address of the customer is returned to<br />
the address given below. If a defect occurs during the warranty period, contact the Autorised Base Dealer<br />
from whom you bought the synthesizer or write an email to info@kemper-digital.com. The synthesizer can<br />
only be returned upon prior approval and the following requirements have to be fulfilled:<br />
- The unit is sent in its original package or one of equal quality.<br />
- A detailed description of the defect and a copy of the purchase receipt is included.
Manual de<br />
iniciación rápida
44<br />
MANUAL DE INICIACIÓN RÁPIDA
TABLA DE CONTENIDOS<br />
Tabla de contenidos<br />
49 Introducción<br />
Bienvenido/a<br />
Riesgos para la salud y seguridad<br />
Mantenimiento<br />
¿Donde puede encontrar ...<br />
53 Manejo básico<br />
Power On/Off<br />
Conéctelo al resto de su equipo<br />
Audio I/O<br />
55 Elija su arma<br />
¿<strong>Virus</strong> Control vs MIDI?<br />
¿Qué es Total Integration?<br />
Software anfitrión<br />
57 Modus Operandi<br />
Botón Mode / Exit<br />
Botón Tap Tempo / Panic<br />
Sonidos Preset<br />
Funciones de los Knobs<br />
Botones del menú Edición<br />
Modos de edición Easy / Expert<br />
63 Páginas de edición<br />
OSC 1 Menu (Classic Oscillator)<br />
Menú OSC 1 (HyperSaw Oscillator)<br />
Menú OSC 1 (Wavetable Oscillator)<br />
Menú OSC 1 (Formant Complex Oscillator)<br />
Menú OSC 2<br />
Menú Filters<br />
MOD Menu
46<br />
MANUAL DE INICIACIÓN RÁPIDA<br />
Envelopes Menu<br />
Effects Menu<br />
ARP Menu<br />
Common Menu<br />
Multi Menu<br />
Audition<br />
Store Menu<br />
Store to RAM<br />
Darle un nombre a su Patch<br />
SysEx Dump<br />
Almacenamiento en el modo Multi<br />
Funciones de utilidades<br />
Cancel Store Mode<br />
Config Menu<br />
73 Acerca de la Polifonía<br />
Conseguir más polifonía<br />
Optimización de sus Patches<br />
Conclusión<br />
77 Garantía<br />
FCC information (USA)<br />
FCC information (Canada)<br />
Other standards (rest of world)<br />
Declaration of conformity<br />
Warranty regulations
TABLA DE CONTENIDOS<br />
© Copyright 2008 Kemper Digital GmbH. Todos los derechos reservados.<br />
Este manual, así como el software y el hardware descritos en él, se entregan bajo licencia y pueden usarse<br />
o copiarse sólo de acuerdo con las condiciones especificadas en dicha licencia. El contenido de este manual<br />
se proporciona sólo para uso informativo, está sujeto a cambios sin previo aviso y no debe interpretarse<br />
como una obligación por parte de Kemper Digital GmbH. Kemper Digital GmbH no asume ninguna responsabilidad<br />
por cualesquiera errores o imprecisiones que puedan aparecer en este libro.<br />
Excepto cuando la licencia lo permita, ninguna parte de esta publicación puede reproducirse, almacenarse<br />
en un sistema de recuperación, o transmitirse de cualquier forma o por los medios que fuera, ya sean electrónicos,<br />
mecánicos, de grabación u otros sin el previo permiso por escrito de Kemper Digital GmbH.<br />
<strong>Virus</strong> es una marca registrada de Kemper Digital GmbH. Todas las otras marcas que aparezcan en el manual<br />
son propiedad de sus respectivos propietarios. Todas las características y especificaciones están sujetas<br />
a cambio sin previo aviso.<br />
www.access-music.de<br />
support@access-music.de
48<br />
MANUAL DE INICIACIÓN RÁPIDA
INTRODUCCIÓN<br />
Introducción<br />
Bienvenido/a<br />
El <strong>Virus</strong> <strong>TI</strong> <strong>Snow</strong> es todo el completo motor de sonido del varias veces galardonado sintetizador <strong>Virus</strong> <strong>TI</strong>,<br />
¡todo comprimido en una pequeñita y minúscula fuente inagotable de diversión! Su arquitectura de un único<br />
DSP proporciona un montón de polifonía, con cuatro partes multitímbricas. Aquí la clave es la simplicidad<br />
- los botones de acceso directo al menú le llevan directamente a los parámetros más importantes de cada<br />
sección, que puede manipular en tiempo real con los 3 ‘soft’ knobs de debajo del panel LCD. Para aquellos<br />
que quieren profundizar más en sus sonidos, el modo Experto les permite acceder a cada uno de los millares<br />
de posibilidades de conformación de sonido del <strong>Virus</strong> <strong>TI</strong>.<br />
Las iniciales “<strong>TI</strong>” son las siglas de “Total Integration”, y aquí es donde hemos redefinido lo que significa integrar<br />
un sinte hardware con su ordenador y su secuenciador software. Todos los datos de audio y MIDI pueden<br />
introducirse y sacarse de su software anfitrión compatible por medio de una conexión USB, encargándose<br />
el plugin <strong>Virus</strong> Control de hacer que su <strong>Virus</strong> <strong>TI</strong> <strong>Snow</strong> aparezca como un instrumento VST/AU/RTAS<br />
multicanal, completo con navegador de patches y total capacidad de edición.<br />
Todo esto significa que las fronteras entre el hardware y el software se han difuminado de forma elegante, y<br />
que a partir de este momento le será difícil imaginar cómo podía ser de otra forma.
50 MANUAL DE INICIACIÓN RÁPIDA<br />
Riesgos para la salud y seguridad<br />
Por favor lea lo que viene a continuación detalladamente. ¡Algunos de estos consejos tienen que ver tanto<br />
con su salud como con la de su instrumento!<br />
· Evite la exposición de su <strong>Virus</strong> a la humedad, polvo o suciedad. Evite colocar recipientes liquidos abiertos cerca de la unidad.<br />
Si cualquier sustancia se introdujera en el chasis del <strong>Virus</strong> contacte con el soporte técnico de Access (www.accessmusic.de).<br />
· Evite exponer la unidad al calor excesivo o a la luz directa del sol. Por favor asegúrese de que aire relativamente fresco<br />
pueda circular libremente alrededor de la unidad.<br />
· Evite exponer la unidad a choques o vibraciones físicas. Asegúrese de que está firmemente colocado sobre una superficie<br />
plana.<br />
· Este modelo de <strong>Virus</strong> requiere una toma de corriente externa de 12V DC. Utilice sólo la que se incluyó con la unidad. No<br />
conecte nunca el <strong>Virus</strong> a una toma de corriente que no cumpla al completo la normativa nacional sobre seguridad. No utilice<br />
nunca un suministrador de corriente que no esté diseñado para cumplir los requisitos de voltaje en ese momento.<br />
· Desconecte la corriente siempre que no vaya a utilizar el <strong>Virus</strong> por un periodo largo de tiempo. Tire siempre del enchufe y<br />
no del cable.<br />
· El <strong>Virus</strong> puede generar niveles que pueden causar daños irreversibles a sus oídos, bien por medio de un amplificador<br />
externo o cuando use auriculares conectados directamente a la unidad. ¡Por favor mantenga siempre el volumen a niveles<br />
razonables! Asegúrese de que el equipo al que conecta el <strong>Virus</strong> <strong>TI</strong> cumple con los requisitos del <strong>Virus</strong> (+4dB Outputs etc.)<br />
· Además de lo anteriormente dicho, por favor tenga en cuenta el siguiente consejo de forma especial: Por favor no esconda<br />
el <strong>Virus</strong> <strong>TI</strong> <strong>Snow</strong> en el horno, en caso de que se olvide y lo hornee por accidente. Por favor no coloque el <strong>Virus</strong> <strong>TI</strong> <strong>Snow</strong><br />
en el capó o techo de su coche mientras les ata el cinturón de seguridad a los niños, en caso de que se olvide y ponga en<br />
marcha el coche con él todavía encima.<br />
Mantenimiento<br />
••<br />
Actualización del SO<br />
Access Music es famosa por mejorar sus productos mediante actualizaciones gratuitas de su sistema operativo.<br />
Le recomendamos que visite www.access-music.de regularmente y se descargue el SO más reciente.<br />
••<br />
Limpieza<br />
Utilice sólo un paño suave y seco o un cepillo suave para limpiar el panel - no aplique ningún tipo de líquido.<br />
Tenga en cuenta que los limpiadores industriales o domésticos pueden causar graves daños a las superficies.
INTRODUCCIÓN<br />
••<br />
Reparación<br />
Nunca abra usted mismo el <strong>Virus</strong> - no hay piezas dentro que puedan ser reparadas por los usuarios. Si su<br />
<strong>Virus</strong> necesita alguna vez ser reparado, por favor contacte con el soporte técnico de Access.<br />
¿Donde puede encontrar ...<br />
Este manual de iniciación rápida hace referencia a los siguientes recursos adicionales:<br />
Información<br />
Referencia del<br />
parámetro del<br />
Patch<br />
Ubicación<br />
· Pulse sobre “?” en <strong>Virus</strong> Control y abra la referencia de parámetro del patch.<br />
· PC: Inicio > Todos los programas > Access Music > <strong>Virus</strong> <strong>TI</strong> > Documentation > Manuals<br />
· Mac: Aplicaciones/Access Music/<strong>Virus</strong> <strong>TI</strong>/Documens/Manuals/<br />
Referencia<br />
a múltiples<br />
parámetros<br />
· Pulse sobre “?” en <strong>Virus</strong> Control y abra la referencia a los multiparámetros.<br />
· PC: Inicio > Todos los programas > Access Music > <strong>Virus</strong> <strong>TI</strong> > Documentation > Manuals<br />
· Mac: Aplicaciones/Access Music/<strong>Virus</strong> <strong>TI</strong>/Documens/Manuals/<br />
Referencia del<br />
menú Config<br />
· Pulse sobre “?” en <strong>Virus</strong> Control y abra la referencia al menú Config.<br />
· PC: Inicio > Todos los programas > Access Music > <strong>Virus</strong> <strong>TI</strong> > Documentation > Manuals<br />
· Mac: Aplicaciones/Access Music/<strong>Virus</strong> <strong>TI</strong>/Documens/Manuals/<br />
Apéndice<br />
· Pulse sobre “?” en <strong>Virus</strong> Control y abra el apéndice del manual.<br />
· PC: Inicio > Todos los programas > Access Music > <strong>Virus</strong> <strong>TI</strong> > Documentation > Addenda<br />
· Mac: Aplicaciones/Access Music/<strong>Virus</strong> <strong>TI</strong>/Documens/Addenda/<br />
Tutoriales<br />
sobre el <strong>Virus</strong><br />
Control<br />
· Pulse sobre “?” en <strong>Virus</strong> Control y abra los tutoriales del <strong>Virus</strong> Control.<br />
· PC: Inicio > Todos los programas > Access Music > <strong>Virus</strong> <strong>TI</strong> > Documentation > Tutorials<br />
· Mac: Aplicaciones/Access Music/<strong>Virus</strong> <strong>TI</strong>/Documens/Tutorials/<br />
Video<br />
tutoriales<br />
· Pulse sobre “?” en <strong>Virus</strong> Control y abra la carpeta Videos<br />
· PC: Inicio > Todos los programas > Access Music > <strong>Virus</strong> <strong>TI</strong> > Documentation > Videos<br />
· Mac: Aplicaciones/Access Music/<strong>Virus</strong> <strong>TI</strong>/Documents/Videos/<br />
Tutoriales<br />
sobre el <strong>Virus</strong><br />
Control Center<br />
· Pulse sobre “?” en <strong>Virus</strong> Control y abra el apéndice del manual.<br />
· PC: Inicio > Todos los programas > Access Music > <strong>Virus</strong> <strong>TI</strong> > Documentation > Tutorials<br />
· Mac: Aplicaciones/Access Music/<strong>Virus</strong> <strong>TI</strong>/Documens/Tutorials/<br />
Tutoriales<br />
sobre el<br />
secuenciador<br />
software<br />
· Pulse sobre “?” en <strong>Virus</strong> Control y abra el apéndice del manual.<br />
· PC: Inicio > Todos los programas > Access Music > <strong>Virus</strong> <strong>TI</strong> > Documentation > Tutorials<br />
· Mac: Aplicaciones/Access Music/<strong>Virus</strong> <strong>TI</strong>/Documens/Tutorials/<br />
Canciones<br />
tutoriales<br />
· PC: Inicio > Todos los programas > Access Music > <strong>Virus</strong> <strong>TI</strong> > Documentation > Tutorials<br />
· Mac: Aplicaciones/Access Music/<strong>Virus</strong> <strong>TI</strong>/Documents/Tutorials/
52 MANUAL DE INICIACIÓN RÁPIDA
MANEJO BÁSICO<br />
Manejo básico<br />
Lo que viene a continuación quiere ser una guía para mostrarle lo fácil que es el uso del <strong>Virus</strong> <strong>TI</strong> <strong>Snow</strong>. Por<br />
favor lealo detenidamente, con el <strong>Virus</strong> delante de usted.<br />
Power On/Off<br />
Enchufe el adaptador de corriente que se suministra a las tomas de corriente, y conéctelo a la entrada 12V<br />
DC IN en la parte posterior del <strong>Virus</strong> <strong>TI</strong> <strong>Snow</strong>. La primera vez que haga esto, la unidad debería encenderse<br />
inmediatamente*. pulse las teclas EDIT/SHIFT y PART a la vez durante 3 segundos para colocar el <strong>Virus</strong> en<br />
standby. Pulse de nuevo las mismas dos teclas para volverlo a encender.<br />
*Si lo desenchufa de la toma de corriente cuando el <strong>Virus</strong> está en standby, todavía estará en standby cuando<br />
lo vuelva a conectar.<br />
Conéctelo al resto de su equipo<br />
••<br />
USB<br />
Importante: Debe instalar el <strong>TI</strong> Software y los controladores antes de conectar el <strong>Virus</strong> a su ordenador via<br />
USB.<br />
Para instalar: Diríjase a www.access-music.de y descargue la última actualización del paquete instalador del<br />
<strong>Virus</strong> <strong>TI</strong> <strong>Snow</strong> para la plataforma de ordenador de su elección.<br />
Una vez descargado, extraiga el archivo y ejecute el instalador. Siga cuidadosamente las instrucciones en<br />
pantalla, y conecte el cable USB cuando se le indique.<br />
Conecte el puerto USB en el <strong>Virus</strong> a un puerto dedicado en su ordenador utilizando el cable proporcionado<br />
o uno similar. ¡NO U<strong>TI</strong>LICE UN HUB! ¡Lamentamos tener que gritar, pero no se puede exagerar la importancia<br />
de esto - ¡el <strong>Virus</strong> necesita un puerto USB sólo para él si la gran cantidad de datos involucrados tiene<br />
que fluir libremente!<br />
Usuarios de Windows: Una vez se hayan instalado el <strong>TI</strong> Software Suite y los controladores, se ejecutará<br />
automáticamente la aplicación de actualización. Por favor complete el proceso de actualización del firmware<br />
para asegurarse de que el SO interno del <strong>Virus</strong> está actualizado a lo último de lo último.
54 MANUAL DE INICIACIÓN RÁPIDA<br />
Usuarios de Mac: El firmware del <strong>Virus</strong> <strong>TI</strong> <strong>Snow</strong> se actualizará automáticamente como parte del proceso<br />
de instalación.<br />
••<br />
MIDI<br />
Para aquellos de ustedes que no pueden ni esperar un par de minutos para escuchar a su pequeño producir<br />
sus primeros sonidos (no se preocupe - le entendemos perfectamente), simplemente conecte el puerto<br />
out de cualquier teclado compatible con MIDI al puerto in del <strong>Virus</strong> <strong>TI</strong> <strong>Snow</strong> y comience a tocar.<br />
Audio I/O<br />
••<br />
Salidas / Outputs<br />
Si en este punto se está rascando la cabeza y preguntándose porque no escucha nada, es porque el <strong>Virus</strong><br />
<strong>TI</strong> <strong>Snow</strong> no viene con altavoces incorporados. Si quiere escuchar todos los ruidos maravillosos que está haciendo,<br />
entonces deberá conectar el output left y right a las entradas de un sistema de amplificación estéreo<br />
adecuado (preferiblemente mediante un mezclador), o un par de auriculares a la entrada output left. No lo<br />
conecte directamente a un home stereo/hi-fi puesto que esto puede dañar su equipo. Por favor baje el knob<br />
Master Volume antes de tocar cualquier cosa a través de los auriculares, porque de verdad no queremos<br />
que se destroce los oidos antes incluso de empezar.<br />
••<br />
Entradas / Inputs<br />
Conecte su equipo de audio externo a input left/right si quiere encaminarlo a través del <strong>Virus</strong> <strong>TI</strong> <strong>Snow</strong>. Con<br />
estas entradas puede usar el <strong>Virus</strong> como tarjeta de sonido para su ordenador, o puede usarlos para hacer<br />
todo tipo de diabluras a sus otros equipos pasándolos a través de los filtros y efectos del <strong>Virus</strong>.<br />
Si quiere que el audio pase directamente a través del <strong>Virus</strong> hacia las salidas del audio, simplemente ajuste el<br />
parámetro Input Thru en el menú CONFIG al nivel deseado.<br />
Ahora ya ha instalado el <strong>Virus</strong> <strong>TI</strong> <strong>Snow</strong> en su ordenador y lo ha conectado a su equipo, puede comenzar a<br />
explorar todo el potencial de su nuevo sintetizador favorito.
ELIJA SU ARMA<br />
Elija su arma<br />
¿<strong>Virus</strong> Control vs MIDI?<br />
Hay tres maneras principales con las que puede trabajar con el <strong>Virus</strong> <strong>TI</strong> <strong>Snow</strong>:<br />
· Como ya hemos mencionado, puede simplemente conectar un teclado controlador MIDI al puerto MIDI IN<br />
y comenzar a tocar.<br />
· Puede usar un secuenciador software anfitrión para encaminar hasta 4 canales MIDI diferentes hacia el<br />
<strong>Virus</strong> <strong>TI</strong> <strong>Snow</strong>. Todo lo que necesita hacer es seleccionar el puerto MIDI apropiado en su anfitrión, denominado<br />
“<strong>Virus</strong> <strong>TI</strong> Synth”, y poner el <strong>Virus</strong> en el Modo Sequencer. Los cambios de Programa pueden realizarse<br />
de la forma normal en el mismo <strong>Virus</strong>, o por medio de su secuenciador.<br />
· Puede disfrutar de una Integración Total entre su secuenciador compatible y el <strong>Virus</strong> <strong>TI</strong> <strong>Snow</strong> utilizando<br />
<strong>Virus</strong> Control.<br />
¿Qué es Total Integration?<br />
Al igual que sus primos en el rango “<strong>TI</strong>”, el <strong>Virus</strong> <strong>TI</strong> <strong>Snow</strong> viene con el software <strong>Virus</strong> Control incluido en el<br />
paquete - el hub del concepto Total Integration. <strong>Virus</strong> Control le permite al <strong>TI</strong> <strong>Snow</strong> aparecer como un plugin<br />
VST/AudioUnit/RTAS multicanal, haciendo fluir datos de audio y MIDI de forma discreta a través de USB en<br />
3 canales, con una temporalización de precisión de muestra y compensación de retardo (delay-compensation).<br />
Cada uno de los parámetros del motor del sinte del <strong>Virus</strong> <strong>TI</strong> se representa en el interfaz de usuario<br />
gráfico, con automatización de todos los parámetros relevantes que sea posible dentro del software anfitrión<br />
adecuado. La página del navegador (Browser) permite una completísima administración de la librería de patches,<br />
incluyendo una potente herramienta de búsqueda, y la total rellamada de todos sus ajustes significa<br />
que el <strong>Virus</strong> <strong>TI</strong> <strong>Snow</strong> siempre estará exactamente como lo guardó con cada proyecto.<br />
Para una información detallada sobre cómo usar el <strong>Virus</strong> Control, por favor consulte la sección relevante en<br />
los tutoriales sobre el <strong>Virus</strong> Control, a los que puede acceder directamente pulsando sobre el botón ‘?’ en el<br />
mismo <strong>Virus</strong> Control, junto con varios otros recursos útiles.
56 MANUAL DE INICIACIÓN RÁPIDA<br />
Software anfitrión<br />
En este punto, vale la pena mencionar que para utilizar a tope el <strong>Virus</strong> <strong>TI</strong> <strong>Snow</strong>, se recomienda que tenga<br />
uno de los secuenciadores software compatibles instalado en su ordenador, puede encontrar un listado<br />
de estos en www.access-music.de/?go=compato. Mientras que es perfectamente posible usar el <strong>Virus</strong> <strong>TI</strong><br />
<strong>Snow</strong> en modo ‘standalone’, un secuenciador compatible le permitirá grabar su trabajo con todo detalle, y<br />
experimentar la Total Integración para lo que se concibió.<br />
Puesto que todos los anfitriones compatibles tienen su propio método de trabajo, se recomienda que se<br />
tome algo de tiempo en este punto para ver el video tutorial específico de su anfitrión, que puede encontrar<br />
en el disco duro de su ordenador. También puede ver estos en cualquier momento pulsando sobre el símbolo<br />
‘?’ en <strong>Virus</strong> Control y seleccionando la opción relevante. Por favor tenga en cuenta que no hay disponible<br />
un video tutorial para todos los anfitriones soportados.
MODUS OPERANDI<br />
Modus Operandi<br />
Botón Mode / Exit<br />
••<br />
Mode<br />
Dependiendo de lo que quiera conseguir con su <strong>Virus</strong> <strong>TI</strong> <strong>Snow</strong>, hay tres ‘modos’ diferentes de entre los que<br />
elegir.<br />
Pulsando sobre el botón MODE se llama a un menú desde el que puede seleccionar uno de los tres modos:<br />
Single, Multi o Sequencer. Seleccione el que usted quiera utilizando el knob Value 1 o las telcas Value +/-,<br />
luego vuelva a pulsar MODE para confirmar la selección.<br />
••<br />
Single Mode<br />
Este es el modo por defecto, en el que el <strong>Virus</strong> sólo reproducirá un sonido a la vez a lo largo de todo el rango<br />
de su teclado controlador MIDI.<br />
••<br />
Multi Mode<br />
En el modo Multi, puede tener hasta 4 sonidos diferentes sonando a la vez. Cada uno de estos 4 sonidos<br />
es manejado por un ‘Part’, y cada Parte lleva sus propios ajustes de interpretación (performance), como el<br />
volumen, posición de panoramización, transposición etc. Si se asigna el mismo canal MIDI a cada parte,<br />
puede crear fácilmente fantásticas combinaciones de cualquiera de los presets disponibles, que podrán organizarse<br />
en capas o dividirse en diferentes zonas de teclado.<br />
El <strong>Virus</strong> <strong>TI</strong> <strong>Snow</strong> posee 64 slots para el almacenamiento de sus configuraciones Multi. A estos se les denomina<br />
‘embedded’ Multis, lo cual significa que almacenan todos los datos de los patches que usan, de forma<br />
que cualquier edición que usted realice sobre los sonidos puede almacenarse junto con el mismo Multi, sin<br />
tener que preocuparse por que afecte a las copias originales de los mismos Single presets.<br />
••<br />
Sequencer Mode<br />
El modo Sequencer es una versión simplificada del modo Multi diseñada para usarla con un secuenciador<br />
software. Cada una de las 4 Partes se configura a su canal MIDI equivalente, y los ajustes de interpretación<br />
están ocultos en su mayor parte, ya que se espera que usted preferirá utilizar su secuenciador para controlar<br />
estas cosas.<br />
Por favor tenga en cuenta que no puede almacenar sus configuraciones en el modo Sequencer - si esto<br />
fuera importante, debería utilizar el modo Multi en vez de este.
58 MANUAL DE INICIACIÓN RÁPIDA<br />
••<br />
Exit<br />
Pulsando este botón desde cualquiera de los menús de edición le llevará de nuevo hasta el nivel superior de<br />
la página del modo seleccionado en ese momento.<br />
Botón Tap Tempo / Panic<br />
••<br />
Tap Tempo<br />
Golpee este botón repetidamente para ajustar el tempo. Esto ajustará la velocidad del reloj a la que se sincronizarán<br />
todos los parámetros ‘ajustados a reloj’, por ejemplo los LFOs (en el modo clock), el Arpeggiator,<br />
el Delay (modo clock) etc. Por favor tenga en cuenta que sólo se puede configurar un tempo global cuando<br />
se trabaja en el modo Multi. Opcionalmente, puede encontrar Tempo en el menú de edición COMMON, en<br />
el caso de que quisiera elegir un tempo más preciso.<br />
••<br />
Panic (EDIT/SHIFT+TAP TEMPO)<br />
Pulse esta combinación para finalizar cualquier nota colgada, que puede ser originada por errores en el MIDI<br />
entrante, como cuando su secuenciador decide colgarse, por ejemplo.<br />
••<br />
Botón PART<br />
Para enfocar o realzar una Parte en particular del interfaz de usuario cuando se encuentra en los modos<br />
Multi o Sequencer, pulse o mantenga pulsado el botón PART seguido del botón 1, 2, 3 ó 4 en la fila inferior.<br />
El número que se muestra en la esquina superior derecha del visor le indica la Parte que está editando en<br />
ese momento.<br />
Sonidos Preset<br />
••<br />
¿RAM/ROM?<br />
El <strong>Virus</strong> <strong>TI</strong> <strong>Snow</strong> tiene 8 bancos de patches en RAM y 8 bancos de patches en ROM, cada banco está<br />
compuesto por 64 patches. ‘RAM’ son las siglas de ‘Random Access Memory’, que significa que todas<br />
estas ubicaciones de memoria pueden sobrescribirse con los patches que usted cree, siempre que quiera.<br />
‘ROM’ son las siglas de ‘Read Only Memory’, que significa que estas ubicaciones de memoria son permanentes,<br />
y no puede almacenar sus sonidos editados aquí.<br />
Los bancos RAM del <strong>Virus</strong> <strong>TI</strong> <strong>Snow</strong> contienen una muestra de patches seleccionados de los bancos ROM,<br />
por lo que no necesita preocuparse por si los borra o reemplaza por otros nuevos. En el caso en que quisiera<br />
restablecerlos a su estado original en cualqier momento, los hemos guardado en forma de librerías en<br />
la carpeta Patches, a la que puede acceder por el Navegador en <strong>Virus</strong> Control. Puesto que el <strong>Virus</strong> <strong>TI</strong> <strong>Snow</strong>
MODUS OPERANDI<br />
utiliza bancos de 64 presets, siempre se muestran en pares dentro del panel del Navegador del <strong>Virus</strong> Control,<br />
e.g. Banks 1 + 2, 3 + 4 etc.<br />
••<br />
Selección de Presets individuales<br />
Cualquiera de los patches almacenados en el <strong>Virus</strong> <strong>TI</strong> <strong>Snow</strong> pueden seleccionarse con un máximo de 4<br />
pulsaciones de botón.<br />
Para seleccionar el Banco deseado, pulse primero sobre el botón BANK. Ahora el <strong>Virus</strong> le pedirá que seleccione<br />
un banco de patches. Opcionalmente, puede mantener pulsado el botón BANK y seleccionar el<br />
banco deseado sin que aparezca esta pantalla.<br />
Ahora, pulse cualquiera de los botones de la fila superior, etiquetados ROM 1-8 para seleccionar un banco<br />
ROM, o uno de los botones etiquetados con RAM 1-8 en la fila inferior para seleccionar un banco RAM.<br />
Ahora que ya se ha seleccionado el banco, elija el preset específico tecleando simplemente el número de<br />
patch utilizando la fila superior para el primer dígito y la fila inferior para el segundo.<br />
Los patches dentro de cada banco se han numerado de la siguiente forma:<br />
1-1 a 1-8, 2-1 a 2-8, 3-1 a 3-8, 4-1 a 4-8, 5-1 a 5-8, 6-1 a 6-8, 7-1 a 7-8, 8-1 a 8-8<br />
Consejo: Sólo es necesario pulsar BANK si de hecho necesita seleccionar una banco diferente. Una vez<br />
que está en el banco por el que quiere navegar, puede seleccionar directamente cada uno de los 8 presets<br />
en cada ‘lote’ con la fila inferior, y seleccionar un lote diferente con la fila superior. Como ejemplo, vamos a<br />
seleccionar el patch ‘Tutorial 1’, que se encuentra en RAM8 8-1.<br />
¿Por que no lo intenta usted solo primero? La solución más abajo. En el caso de que se atranque, aquí tiene<br />
cómo hacerlo’:<br />
Pulse BANK -> Fila inferior 8 -> Fila superior 8 -> Fila inferior 1<br />
••<br />
Selección de Multi Presets<br />
Puesto que sólo hay un banco de 64 Multis, no es necesario seleccionar primero un Banco; aparte de esto<br />
el procedimiento es exactamente el mismo que para el modo Single.<br />
Para seleccionar qué Single preset quiere asignar a una Parte en particular, tiene que pulsar EDIT seguido<br />
de Multi, y luego seleccionar el preset utilizando los parámetros Bank y Program.
60 MANUAL DE INICIACIÓN RÁPIDA<br />
Funciones de los Knobs<br />
Antes de continuar con este paseo por las funciones básicas del <strong>Virus</strong> <strong>TI</strong> <strong>Snow</strong>, por favor seleccione el<br />
patch RAM8 8-1 “Tutorial 1”.<br />
••<br />
Volume<br />
Tan importante como aburrido, el knob Volume controla los niveles generales del conector Output L/R. Si<br />
tiene su <strong>Virus</strong> conectado a una mesa de mezclas, probablemente lo mejor es dejar el volumen al máximo<br />
(127), y ajustar los niveles a su gusto desde el mezclador. Esto le proporcionará el mejor ratio señal-ruido.<br />
Baje siempre el Volumen a tope cuando conecte los auriculares por primera vez.<br />
Por favor tenga en cuenta que esto no tendrá ningún efecto cuando esté usando las salidas USB en <strong>Virus</strong><br />
Control.<br />
••<br />
Patch Volume (SHIFT+Value 1)<br />
Use éste para ajustar el volumen general del patch seleccionado en ese momento. Tenga cuidado en no<br />
ajustarlo demasiado alto, ya que puede producir ‘clipping’ un tipo de distorsión nada deseado que nunca<br />
suena bien.<br />
••<br />
Transpose (SHIFT+Value 2)<br />
Use éste para ajustar la altura tonal en octavas del patch seleccionado en ese momento.<br />
••<br />
Panorama (SHIFT+Value 3)<br />
Panorama es el parámetro que controla el lugar donde usted percibe la posición del sonido en un sistema<br />
de altavoces estéreo. El valor por defecto de +0 hará que el sonido aparezca directamente desde el centro,<br />
los valores negativos lo empujan hacia la izquierda, y los valores positivos hacia la derecha.<br />
••<br />
Cutoff<br />
Aquí es donde verdaderamente empieza la diversión con los sintes. Gire el knob completamente hasta 127<br />
y mantenga sostenida una nota en su teclado. Ahora, lentamente realice un barrido con el knob hasta 0 y<br />
de nuevo hacia arriba - debería notar el sonido zumbante del patch “Tutorial 1” volviéndose cada vez más<br />
apagado, hasta que desaparece del todo, y volviéndose a abrir hacia un zumbido completo a medida que<br />
retorna hacia el valor de 127. Acaba de escuchar un filtro ‘lowpass’ (paso-bajo) en acción.<br />
••<br />
Resonance<br />
Ajuste este botón hacia las 12, y luego realice un barrido con el knob Cutoff de igual forma que antes. Incrementando<br />
la resonancia del filtro se amplifican las frecuencias alrededor de la frecuencia de corte, haciéndole<br />
que ‘hable’ a medida que mueve el knob cutoff. Se recomienda tener un poco de precaución cuando se<br />
apliquen valores altos de resonancia, puesto que el sonido resultante puede dañar sus altavoces si no tiene<br />
cuidado, ¡especialmente mientras realiza un barrido del corte por los valores más bajos!
MODUS OPERANDI<br />
••<br />
Filter Envelope (SHIFT+Cutoff)<br />
Mantenga pulsado el botón SHIFT, y gire el knob Cutoff para ajustar los parámetros Decay y Release de Filter<br />
Envelope (Envolvente del filtro) al mismo tiempo. Cuanto más alto sea el valor que elija aquí, más tardará<br />
el corte del filtro en barrer hasta el nivel de Sustain ajustado en el Filter Envelope. Por favor tenga en cuenta<br />
que esto sólo tendrá un efecto audible en sonidos que de alguna manera utilicen el Filter Envelope.<br />
••<br />
Amp Envelope (SHIFT+Resonance)<br />
Mantenga pulsado el botón SHIFT y gire el knob Resonance para ajustar el Decay y Release de la Amp<br />
Envelope (Envolvente del ampli) simultáneamente. Cuanto más alto sea el valor que elija aquí, más tardará<br />
cada nota en decaer hasta el nivel de sostenido y desvanecerse hasta el silencio una vez que libere la tecla.<br />
Botones del menú Edición<br />
En la fila superior de botones, encontrará todos los menús para editar el patch seleccionado en ese momento,<br />
mientras que la fila inferior contiene los botones de navegación y los menús de ‘administración’ para<br />
la gestión del patch y configuración del sistema.<br />
Para entrar en cualquiera de los menús Edit, pulse el botón EDIT/SHIFT, seguido del botón de menú relevante.<br />
Una vez dentro de un menú, use los knobs Value 1, 2 y 3 para ajustar los valores. Si desea realizar cambios<br />
en incrementos sobre un valor, puede utilizar las teclas VALUE -/+. Puede usar las teclas PARAMETERS <br />
para seleccionar el parámetro que desee editar, o simplemente girar el knob Value debajo de este.<br />
Para elegir otro menú de edición, sólo necesita pulsar el botón de menú relevante - no es necesario volver a<br />
pulsar EDIT/SHIFT.<br />
Para retornar de nuevo a la página principal, pulse MODE/EXIT.
62 MANUAL DE INICIACIÓN RÁPIDA<br />
Modos de edición Easy / Expert<br />
Puesto que el <strong>Virus</strong> <strong>TI</strong> <strong>Snow</strong> tiene tantos parámetros en el motor de sonido, hemos incorporado un modo<br />
de edición Easy (por defecto) que sólo muestra 3 parámetros por cada menú de edición, cuidadosamente<br />
seleccionados para que marquen una diferencia inmediata al patch seleccionado en ese momento. Estos<br />
parámetros se seleccionan de forma dinámica, lo que significa que pueden cambiar dependiendo de ciertos<br />
factores, cómo el modelo de oscilador activo en ese momento, por ejemplo.<br />
Si desea ajustar parámetros diferentes de los que se muestran en el modo de edición Easy, puede cambiar<br />
el <strong>Virus</strong> al modo de edición Expert. Para realizar un cambio temporal dentro de un menú de edición específico,<br />
sólo tiene que mantener pulsado EDIT/SHIFT mientras pulsa la tecla de menú adecuada. Una vez que<br />
sale de ese menú en particular, el <strong>Virus</strong> retornará al modo de edición Easy.<br />
Si quiere cambiar al modo de edición Expert de forma permanente, puede hacerlo en el menú de edición<br />
CONFIG (System > Edit-Mode).
PÁGINAS DE EDICIÓN<br />
Páginas de edición<br />
Este es un patch básico que utiliza el oscilador Classic. Sólo vamos a ver los parámetros disponibles en el<br />
modo de edición Easy. Para una lista completa de parámetros en el modo expert, consulte los capítulos dedicados<br />
al manual de referencia de parámetros. Para este paseo guiado cargue el patch “Tutorial 1” (RAM8 8-1).<br />
OSC 1 Menu (Classic Oscillator)<br />
Pulse este botón para entrar en el menú para el OscillatorĘ1, la parte del motor de sonido del <strong>Virus</strong> que está<br />
generando ese ruido zumbante que hace este patch. El <strong>Virus</strong> <strong>TI</strong> <strong>Snow</strong> tiene 8 modos de osciladores diferentes<br />
- si quiere saber más acerca de estos, por favor vea los video tutoriales en la página web de Access, en<br />
donde se explica cada modo en detalle.<br />
Soft Knob Parámetro Significado<br />
#1 Shape Utilice Shape para determinar el contorno o forma de la onda generada por<br />
OscillatorĘ1, que a su vez determina el tono básico o timbre. Gire Value 1<br />
completamente al contrario de las agujas del reloj para escuchar una onda senoidal. A<br />
medida que lo gira hacia su posición central, escuchará como el sonido se vuelve más<br />
brillante hasta que reproducirá una onda de diente de sierra pura justo en el centro.<br />
Continúe girando completamente en el sentido de las agujas del reloj para escuchar<br />
como el sonido se vuelve más ahuecado a medida que se va convirtiendo gradualmente<br />
en una onda de pulso pura.<br />
#2<br />
Caso #1<br />
Pulse<br />
Width<br />
El parámetro controlado por el knob Value 2 varía según el ajuste en ese momento de<br />
Osc1 Shape.<br />
Cuando Osc1 Shape está ajustado a la izquierda del centro, el parámetro será “Wave<br />
Select”, y a la derecha del centro, “Pulse Width”.<br />
Con Pulse Width (ancho de pulso) al 50% (por defecto) la onda de pulso tendrá un<br />
sonido hueco, pero a medida que incremente este porcentaje, el sonido se hará más<br />
delgado y aflautado, hasta que desaparece completamente al 100%.<br />
Cuando Osc1 Shape está ajustado a Spectral Wave, el parámetro será:<br />
#2<br />
Caso #2<br />
Wave<br />
Select<br />
Ahora puede seleccionar cualquier forma de onda de entre una selección de 64. Wave<br />
1 (por defecto) es Sine, a la que se puede describir mejor como el tono más puro que<br />
puede hacer un sintetizador. Wave 2 es Triangle, que es un poco más brillante que<br />
una onda senoidal, y estaba disponibles en muchos sintetizadores analógicos como<br />
complemento de las ondas de sierra y pulso. El resto de la selección comprende una<br />
amplia variedad de ondas digitales, particularmente útiles para emular algunos de los<br />
timbres más brillantes de los tipos de sintetizadores digirales de los 80s y 90s.<br />
#3 Osc<br />
Balance<br />
Esto determina el balance entre las salidas de OscillatorĘ1 y OscillatorĘ2. En la posición<br />
central (por defecto), escuchará ambos osciladores. Ajuste a unos -64 para escuchar<br />
sólo la salida de OscillatorĘ1, y hacia +63 para escuchar sólo la salida de OscillatorĘ2.
64 MANUAL DE INICIACIÓN RÁPIDA<br />
Menú OSC 1 (HyperSaw Oscillator)<br />
Para esta visita guiada cargue el patch “Tutorial 2” (RAM8 8-2). Este es un patch básico que usa el oscilador<br />
HyperSaw.<br />
Soft Knob Parámetro Significado<br />
#1 Density Utilice Density (densidad) para determinar el número de dientes de sierra por voz -<br />
¡cualquier cosa desde 1 hasta 9!<br />
#2 Local Detune Utilice Local Detune para determinar el nivel de desafinación entre las dientes de<br />
sierra. A cero, los dientes de sierra estarán perfectamente afinados, y entoncres<br />
tendremos cancelación de fase como consecuencia de esto (esto es por lo general<br />
nada deseable) y al valor máximo de 127, las dientes de sierra estarán desafinadas en<br />
un semitono.<br />
#3 Osc Balance Esto determina el balance entre las salidas de OscillatorĘ1 y OscillatorĘ2. En la<br />
posición central (por defecto), escuchará ambos osciladores. Ajuste a unos -64 para<br />
escuchar sólo la salida de OscillatorĘ1, y hacia +63 para escuchar sólo la salida de<br />
OscillatorĘ2.<br />
Menú OSC 1 (Wavetable Oscillator)<br />
Para esta visita guiada cargue el patch “Tutorial 3” (RAM8 8-3). Este es un patch básico que usa el oscilador<br />
Wavetable.<br />
Soft Knob Parámetro Significado<br />
#1 Index Ajuste Index para que realice un barrido por la tabla de ondas o wavetable.<br />
#2 Interpolation Utilice Interpolation para determinar con que suavidad puede barrer a tavés de la<br />
tabla de ondas. Pruebe a ajustar este a 127, y vuelva a utilizar Index sobre Value 1.<br />
Valores moderados puede producir un agradable efecto de ‘bombeo’.<br />
#3 Osc Balance Esto determina el balance entre las salidas de OscillatorĘ1 y OscillatorĘ2. En la<br />
posición central (por defecto), escuchará ambos osciladores. Ajuste a unos -64 para<br />
escuchar sólo la salida de OscillatorĘ1, y hacia +63 para escuchar sólo la salida de<br />
OscillatorĘ2.
PÁGINAS DE EDICIÓN<br />
Menú OSC 1 (Formant Complex Oscillator)<br />
Para esta visita guiada cargue el patch “Tutorial 4” (RAM8 8-4). Este es un patch básico que usa el oscilador<br />
Formant Complex.<br />
Soft Knob Parámetro Significado<br />
#1 Index Ajuste Index para barrer por la tabla de ondas.<br />
#2 F-Shift Este determina hasta donde pueden llegar las formantes en semitonos. Cuando<br />
se ajusta a +0, las formantes se afinan a C3 (Do central). Pueden conseguirse<br />
efectos radicales de sincronización y pitch-shifting realizando un barrido sobre este<br />
parámetro.<br />
#3 Osc Balance Esto determina el balance entre las salidas de OscillatorĘ1 y OscillatorĘ2. En la<br />
posición central (por defecto), escuchará ambos osciladores. Ajuste a unos -64 para<br />
escuchar sólo la salida de OscillatorĘ1, y hacia +63 para escuchar sólo la salida de<br />
OscillatorĘ2.<br />
Menú OSC 2<br />
Pulse este botón para entrar en el menú para OscillatorĘ2. Casi que todos los parámetros de OscillatorĘ2<br />
son los mismos que los de OscillatorĘ1, por lo que aquí nos fijaremos solamente en la diferencia, que es el<br />
parámetro que se muestra en el modo HyperSaw para Value 3.<br />
¡No olvide ajustar Osc Balance (OSC1 Menu) a +0 o superior si quiere escuchar los efectos de estos parámetros!<br />
••<br />
Value 3 (modos Classic, Wavetable, Grain y Formant)<br />
FM Amount: FM es una abreviación de Frequency Modulation, un proceso por el cual la frecuencia (pitch)<br />
de OscillatorĘ2 es modulada por la frecuencia de OscillatorĘ1. El efecto resultante es a menudo una drmática<br />
distorsión del oscilador afectado, pero también se pueden encontrar ‘puntos dulces’, en donde el efecto<br />
es más sutíl y armonioso.<br />
Experimente con diferentes valores para Osc1 y 2 Semitone y FM Amount - para efectos sci-fi de la vieja<br />
escuela, pruebe a ajustar Osc1 Semitone al menor valor posible. Si quiere un sonido más puro, menos distorsionado,<br />
utilice una onda senoidal para ambos osciladores.<br />
••<br />
Value 3 (HyperSaw mode)<br />
Sync: Use Sync para barrer el tono (pitch) de la sincronización interna de HyperSaw.
66 MANUAL DE INICIACIÓN RÁPIDA<br />
Menú Filters<br />
En los sintetizadores utilizamos los filtros para cambiar y conformar el timbre de un sonido. El <strong>Virus</strong> <strong>TI</strong> <strong>Snow</strong><br />
lleva dos filtros, que pueden funcionar en serie o en paralelo. ‘Series’ significa que la salida de Filter 1 va directa<br />
al Filter 2, y es la salida de Filter 2 lo que usted oye.<br />
Soft Knob Parámetro Significado<br />
#1 Filt 2 Offset/<br />
Cutoff2<br />
#2 Saturation<br />
Type<br />
#3 Osc Volume<br />
(Saturation)<br />
Este determina el offset (desfase) de Filter 2, en relación a Filter 1. el corte de filtro<br />
de Filter 2 se ajusta por defecto para que siga al corte del filtro de Filter 1 a la misma<br />
frecuencia.<br />
Ajustando este parámetro, hace que Filter 2 opere a una frecuencia diferente de la de<br />
Filter 1, lo que cambiará la percepción de profundidad de los filtros. Por favor tenga<br />
en cuenta que este parámetro depende mushísimo de otros parámetros dentro de la<br />
sección del filtro, y puede que no siempre se escuche su efecto.<br />
En ciertos patches, este parámetro se mostrará como ‘Cutoff 2’. Esto es cuando el<br />
parámetro Cutoff Link está ajustado en Off.<br />
Elija un efecto de distorsión/lo-fi para la salida de Filter 1. Ajuste la intensidad del<br />
efecto con el knob Value 3 (véase abajo).<br />
Pruebe todas las posibles saturaciones, que van desde los overdrives estándar hasta<br />
las más exóticas variedades digitales. También hay un par de filtros de 1-polo ahí, en<br />
el caso de que necesitara uno de estos.<br />
Desde -64 hasta 0 (por defecto) esto controla el volumen de los osciladores. Desde<br />
0 hasta +63 esto determina el nivel de saturación para Filter1, siempre que el<br />
parámetro Saturation (knob Value 2) esté activado. ‘Saturation’ es el término utilizado<br />
para describir el efecto de ir aumentando la señal de entrada hasta un nivel por<br />
encima de lo que es sano, creándose así distorsión o armónicos adicionales, que en<br />
muchos casos suena realmente fabuloso.<br />
Por favor, tenga en cuenta que ciertos tipos de Saturation tendrán un efecto audible<br />
incluso con Saturation a +0.<br />
‘Parallel’ quiere decir que la señal del oscilador se divide en dos canales, uno de los cuales se dirige al Filter<br />
1, y el otro al Filter 2. En este caso, usted escucha una mezcla de las salidas de ambos filtros. Los siguientes<br />
parámetros están disponibles para editarlos con los 3 knobs Value.<br />
MOD Menu<br />
Por favor seleccione el patch “Tutorial 5” (RAM8 8-5). Pulse EDIT/SHIFT + MOD para entrar en el menú de<br />
Modulación.<br />
‘Modulation’ es el término que se usa para describir una función que cambia el valor de otro parámetro a lo<br />
largo de un periodo de tiempo. Especialmente para este cometido, el <strong>Virus</strong> tiene 3 LFOs o ‘Low Frequency<br />
Oscillators’. Estos son diferentes de los osciladores utilizados para generar el sonido, ya que operan a velocidades<br />
mucho menores.
PÁGINAS DE EDICIÓN<br />
Los LFOs se han diseñado para funcionar a una frecuencia independiente, o para funcionar como esclavos<br />
del tempo general del Patch o Multi activo en ese momento. Si se han configurado en Rate, entonces puede<br />
elegir un valor entre 0 - 127, y si se han configurado en Clock, puede elegir un ajuste de división, basado<br />
en un compás de 4/4, por lo que 1/4 representa un ratio equivalente a negras.<br />
Puede ajustar los siguientes 3 parámetros mediante los knobs Value de debajo del display:<br />
Soft Knob Parámetro Significado<br />
#1 LFO1 Rate o<br />
Clock 1<br />
#2 LFO2 Rate o<br />
Clock 2<br />
#3 LFO3 Rate o<br />
Clock 3<br />
Seleccione el patch RAM A-64 ‘Tutorial 5’ y escuche atentamente el sonido<br />
al tiempo que ajusta este parámetro. En este patch, LFO1 está modulando la<br />
cantidad de resonancia del filtro.<br />
Escuche atentamente al sonido al tiempo que ajusta este parámetro. En este<br />
patch, LFO2 está modulando la posición estéreo del sonido, o ‘panorama’.<br />
Escuche atentamente al sonido al tiempo que ajusta este parámetro. En este<br />
patch, LFO3 está modulando la altura tonal (pitch) de ambos osciladores.<br />
Envelopes Menu<br />
Por favor seleccione el patch “Tutorial 6” (RAM8 8-6). Con esté es donde puede determinar la forma general<br />
de un sonido, tanto en volumen como en el timbre. Los knobs Value se han asignado de la siguiente forma:<br />
Soft Knob Parámetro Significado<br />
#1 Amp Attack Esto determina lo que tarda el sonido en alcanzar el volumen máximo tras pulsar una<br />
tecla. Cuanto más alto sea el valor, más tardará.<br />
#2 Filter Attack Este determina lo que tarda el filtro en alcanzar el máximo valor tal y como viene<br />
determinado por el ajuste actual de Cutoff 1 ó 2 (Offset), emparejado con el valor de<br />
Filter Env 1/2 Amount. No se escuchará ningún efecto aquí a menos que Filter 1/2<br />
Env Amt esté ajustado a un valor diferente de cero.<br />
#3 Filter Env Amt Este determina el grado en el que la envolvente del filtro afectará al corte de los<br />
filtros. Para que esto tenga un efecto audible, será necesario girar el knob Cutoff<br />
hacia la izquierda - un valor de unos 30 debería ser adecuado. Ahora, siga tocando<br />
notas a medida que va incrementando gradualmente el valor de Env Amount. Fijese<br />
en cómo el comienzo de las notas (el ataque) se vuelve más cortante y brillante,<br />
cuanto más alto es el valor de Env Amount. Eso se debe a que la envolvente del<br />
filtro está barriendo el corte de abajo arriba, luego otra vez hacia abajo al comienzo<br />
de cada nota (por esto es por lo que es necesario que baje el Cutoff, para que la<br />
envolvente tenga algún lugar donde ir).
68 MANUAL DE INICIACIÓN RÁPIDA<br />
Effects Menu<br />
Por favor seleccione el patch “Tutorial 7” (RAM8 8-7).<br />
Entre en el menú Effects. Los efectos se usan para procesar todavía más la salida al completo del motor<br />
del sinte. Puede ajustar 3 parámetros relevantes del patch actual mediante los knobs Value de debajo del<br />
display:<br />
Soft Knob Parámetro Significado<br />
#1 Delay Send Este determina la cantidad del sonido que se envía a través del Delay, que se utiliza<br />
para crear un efecto de eco. A un valor de 127, todo lo que escuchará es la salida del<br />
mismo Delay.<br />
#2 Reverb<br />
Send<br />
Este determina la cantidad de sonido que se envía a través de Reverb, un efecto<br />
utilizado para crear una ilusión de espacio físico alrededor del sonido. A un valor de<br />
127, todo lo que escuchará es la salida de la misma Reverb.<br />
Por favor tenga en cuenta que usando Reverb en varias partes al mismo tiempo puede<br />
suponer una gran carga sobre los DSP, y puede ocasionar una apreciable reducción de<br />
la polifonía disponible.<br />
#3 Phaser Mix Este determina que cantidad de sonido se envía a través del Phaser, un efecto que<br />
añade mucho movimiento y color - una especie de máquina del tiempo hacia el<br />
Summer Of Love (verano del amor, aka psicodelia).<br />
ARP Menu<br />
Pulse este botón para entrar en el menú del Arpeggiator. El Arpeggiator es una herramienta muy potente de<br />
interpretación que convierte automáticamente una única nota en un ritmo, o un acorde en un arpegio (acorde<br />
roto).<br />
Por favor seleccione el patch “Tutorial 8” (RAM8 8-8). Puede ajustar los 3 parámetros siguientes:<br />
Soft Knob Parámetro Significado<br />
#1 Arp Mode Con este puede seleccionar el orden de reproducción de las notas en un acorde. Paar<br />
que esto tenga un efecto apreciable, por favor toque al menos 3 notas simultáneamente.<br />
Seleccione entre:<br />
- Off (sin arpegiandor)<br />
- Up<br />
- Down<br />
- Up&Down<br />
- As Played (las notas se reproducen secuencialmente en el orden en que se tocaron)<br />
- Random<br />
- Chord (las notas se reproducen simultáneamente en el ritmo del patrón del arpegiador)
PÁGINAS DE EDICIÓN<br />
Soft Knob Parámetro Significado<br />
#2 Pattern Elija el patrón rítmico que quiera de una selección de 64. El patrón por defecto ‘User’<br />
puede editarse en la página Arp del <strong>Virus</strong> Control, y se guarda con cada patch. Por favor<br />
vea los tutoriales <strong>Virus</strong> Control para más información sobre cómo construir sus propios<br />
patrones.<br />
#3 Length Use este para ajustar la longitud o duración de cada paso. Experimente con valores<br />
menores para conseguir un efecto más ‘staccato’ o entrecortado, y valores mayores<br />
para un efecto ‘legato’ más contínuo.<br />
Common Menu<br />
Pulse este botón para entrar en el menú Common. Aquí puede ajustar 3 parámetros de la sección Oscillator<br />
que afectan a la interpretación básica del patch.<br />
Soft Knob Parámetro Significado<br />
#1 Key Mode Cuando está ajustado en ‘Poly’ (por defecto), el patch reproducirá muchas voces<br />
simultáneas o acordes. Seleccione uno de los modos ‘Mono’ si quiere que el patch<br />
reproduzca sonidos monofónicos (sólo sonará una nota, sin importar el número de<br />
teclas que pulse). El modo Mono generalmente es preferible para patches de leads<br />
y bajos. Por favor consulte el manual de referencia de los parámetros para todos los<br />
detalles acerca de los diferentes modos Mono.<br />
Si ajusta el modo Key en ‘Hold’. las notas se mantendrán indefinidamente, incluso<br />
después de liberar la tecla.<br />
#2 Portamento Use el Portamento para crear un ‘glissando’ o deslizamiento de tono entre diferentes<br />
notas. Cuanto más alto sea el valor, más tardará cada nueva nota en alcanzar su altura<br />
tonal correcta.<br />
#3 Transpose Use Transpose para ajustar la altura tonal general en semitonos. Utilice pasos de 12<br />
si sólo quiere cambiar la octava, o mejor todavía, use SHIFT+Value 2, que sólo está<br />
escalado en octavas.
70 MANUAL DE INICIACIÓN RÁPIDA<br />
Multi Menu<br />
Aquí es donde encontrará todos los parámetros relacionados con cada Parte en el modo Multi. Use las teclas<br />
Parameter < > para moverse a través de las diferentes páginas.<br />
Para una información más detallada sobre estos parámetros, por favor consulte el capítulo relevante en el<br />
manual de referencia.<br />
••<br />
Creación de un Multi capas/división<br />
Lo más importante que hay que recordar aquí es asegurarse de que cada una de las Partes está respondiendo<br />
al mismo canal MIDI (usualmente querrá que sea el canal 01). Habiendo seleccionado los patches<br />
que quiere para cada Parte con los parámetros Bank y Program, puede crear performances a capas dejando<br />
los parámetros Low Key y High Key en sus valores por defecto, o puede dividir el teclado en ‘zonas’<br />
ajustando estos valores según sea necesario. Por supuesto es posible tener una mezcla de capas y divisiones<br />
dentro del mismo Multi, en caso de que así lo desee.<br />
Audition<br />
Pulse este botón para escuchar el sonido seleccionado en ese momento reproduciendose en C3. Si mantiene<br />
pulsado el botón durante un momento, la nota se quedará activada - pulse simplemente Audition de<br />
nuevo para detener la reproducción.<br />
Store Menu<br />
Si quiere guardar un patch que ha creado o editado, primero tiene que pulsar el botón STORE en la fila inferior.<br />
Si todavía no está en el modo Edit, debe pulsar EDIT/SHIFT seguido de STORE.<br />
Hay varias opciones entre las que elegir:<br />
Store To RAM: Esta es la opción a elegir cuando se guarda un patch en la memoria interna del <strong>Virus</strong>. Una<br />
batería de seguridad asegura que esta memoria se mantiene cuando se desconecta el dispositivo.<br />
Compare: Elija esta opción para comparar su patch editado con el original.<br />
Sysex Dump: Elija este si quiere enviar el patch a otro dispositivo MIDI, como por ejemplo otro <strong>Virus</strong> <strong>TI</strong>, o<br />
un secuenciador MIDI para tener una copia de seguridad.<br />
Store Single Menu/Multi Edit Buffer: Cuando no esté en el modo Single elija esta opción para funciones<br />
de administración de patch - para más detalles vea la descripción de más abajo.<br />
Pulse STORE para confirmar la función que usted requiere.
PÁGINAS DE EDICIÓN<br />
Store to RAM<br />
El siguiente paso es elegir la ubicación de RAM específica en donde quiere almacenar su patch.<br />
••<br />
Destination<br />
Selecciona el Banco específico en el que quiere almacenar su patch.<br />
••<br />
Patch No.<br />
Selecciona el número de patch específico que quiere sobreescribir.<br />
••<br />
Patch Name<br />
Como alternativa a la selección del patch que va a sobreescribir por su número, puede localizarlo por el<br />
nombre.<br />
Darle un nombre a su Patch<br />
Una vez ha seleccionado la ubicación correcta para su nuevo patch, querrá darle un nuevo nombre. Para<br />
acceder a la página de texto, pulse STORE de nuevo. Utilice los knobs o botones Value para seleccionar la<br />
letra o símbolo deseado, y muévase por entre los caracteres con los botones PARAMETER. Una vez esté<br />
satisfecho con el nombre, pulse de nuevo STORE para completar el proceso.<br />
SysEx Dump<br />
Si está en el modo Single, pulse STORE para enviar el Single patch a su dispositivo externo. Si está en el<br />
modo Multi, pulse STORE para enviar el Arrangement (este contiene toda la información de patch para cada<br />
Parte). Si sólo quiere enviar el Single patch de la Parte seleccionada en ese momento, seleccione “Dump<br />
Single” en vez de “Arrangement” y pulse STORE para enviarlo.
72 MANUAL DE INICIACIÓN RÁPIDA<br />
Almacenamiento en el modo Multi<br />
Si está en el modo Multi cuando entra en el menú Store, se asumirá que quiere almacenar la configuración<br />
Multi de ese momento. Seleccione el slot o ranura Multi que desea usar y siga el mismo procedimiento que<br />
cuando almacenó un Single patch.<br />
Funciones de utilidades<br />
Si está en el modo Multi y quiere almacenar el single patch de la Parte activa en ese momento, seleccione<br />
“Store Single Menu” desde la lista de opciones en “Function”.<br />
Si está en el modo Sequencer (o en el modo <strong>Virus</strong> Control) y desea copiar todos los patches single al búfer<br />
de edición del modo Multi, seleccione “Multi Edit Buffer” desde la lista de opciones en “Function”.<br />
Cancel Store Mode<br />
Si de repente se da cuenta que está a punto de sobreescribir su patch favorito y decide salir del apuro, pulse<br />
EXIT en cualquier momento para salir deirectamente del menú Store.<br />
Config Menu<br />
En este menú, encontrará todos los parámetros globales que determinan el comportamiento general y sentimiento<br />
del <strong>Virus</strong> <strong>TI</strong> <strong>Snow</strong>, como el brillo de los LEDs o el comportamiento de los knobs etc.<br />
Por favor consulte el manual de referencia para más detalles sobre las diferentes funciones denro de este<br />
menú. No se preocupe - ninguna de ellas equivale a un botón de autodestrucción, y siempre puede reajustarlos<br />
todos a los valores por defecto pulsando y manteniendo la pulsación de TAP TEMPO mientras enciende<br />
el <strong>Virus</strong>, en el caso que viera que ha estropeado algo.
ACERCA DE LA POLIFONÍA<br />
Acerca de la Polifonía<br />
Así que, ¿cuantas voces (notas) puede esperar del <strong>Virus</strong> <strong>TI</strong> <strong>Snow</strong> a la vez? La respuesta es que puesto que<br />
el motor de sonido del <strong>Virus</strong> <strong>TI</strong> es muy dinámico, el número de voces puede variar dramáticamente de un<br />
sonido al siguiente, dependiendo de que características se estén usando.<br />
Para ayudarle a tener una idea aproximada de cuantas voces puede esperar conseguir con el patch que<br />
haya elegido, hemos proporcionado un medidor de complejidad de patch en la esquina superior derecha<br />
del display.<br />
Hay cinco niveles de complejidad, con el nivel 1 siendo el menos complejo, y por lo tanto permitiendo el<br />
mayor número de voces. Pueto que sería muy complicado explicar todos los diferentes escenarios, hemos<br />
proporcionado los siguientes tres ejemplos*:<br />
*Los ejemplos de abajo asumen que se está funcionando en el modo Single, o tocando una parte cada vez<br />
en el modo Multi. Utilizando partes adicionales simultáneamente puede afectar a la cantidad de voces que<br />
puede conseguir.<br />
••<br />
Level 1<br />
Patches que utilizan e.g. 1 ó 2 osciladores simples, uno o dos encaminamientos de modulación y uno o dos<br />
efectos pueden conseguir hasta más de unas 32 voces. Con los patches más simples puede conseguir mucho<br />
más que esto - por ejemplo, por favor pruebe el RAM1- 78, un rico y cálido colchón PWM con Delay y<br />
Chorus, capaz de tocarse con más de 50 voces simultáneas.<br />
••<br />
Level 3<br />
Patches que utilizan e.g. 3 osciladores simples, 3 ó 4 encaminamientos de modulación y varios efectos pueden<br />
conseguir hasta más de 20 voces.<br />
••<br />
Level 5<br />
Patches que utilizan e.g. los osciladores Grain o Formant, varios encaminamientos de modulación, montones<br />
de efectos y el filtro Analog 1-4pole puede conseguir entre unas 10 - 14 voces.
74 MANUAL DE INICIACIÓN RÁPIDA<br />
Conseguir más polifonía<br />
El <strong>Virus</strong> <strong>TI</strong> <strong>Snow</strong> tiene varias características que demandan mucha más potencia DSP disponible que otras,<br />
y esto puede apreciarse mucho más rápidamente en el modo Multi. Una vez que ha alcanzado el límite<br />
reproduciendo más notas de lo que el <strong>Virus</strong> puede hacer a la vez, puede ocurrir lo que se conoce como<br />
‘note-stealing’, un efecto que puede ser bastante perceptible en ciertos arreglos.<br />
Si ve que se está quedando sin voces demasiado rápido, podría echarle un vistazo más profundo a los patches<br />
que está usando, y ver si los puede optimizar de alguna manera. Las siguientes características deberían<br />
considerarse como principales sospechosos en esta situación:<br />
••<br />
Unison Mode (Common Menu)<br />
El modo Unison le indica al <strong>Virus</strong> que reproduzca múltiples instancias de la misma voz por cada tecla que<br />
pulse, ¡y por lo tanto debería considerarse como el ‘asesino de polifonía No.1’! Con el modo Unison = Twin,<br />
el <strong>Virus</strong> reproduce dos notas para cada tecla, pero puesto que Unison puede configurarse con hasta 8 voces<br />
por tecla, podrá entender porqué este puede ser un potencial problema, ¡especialmente en un arreglo!<br />
A menudo, puede ser que reduciendo el número de voces no causa casi que ningún deterioro en el sonido<br />
una vez que está en una mezcla, por lo tanto por favor pruebe a reducir a Twin si estaba en un valor superior.<br />
Debería de poder compensar cualquier disminución del volumen bien con el parámetro Patch Volume<br />
(Common Menu) o con el parámetro Part Volume (Multi Menu).<br />
El modo Unison es un legado de los días del <strong>Virus</strong> A B y C, ninguno de los cuales tenía el oscilador Hyper-<br />
Saw o el parámetro Local Detune disponibles en algunos de los tipos de osciladores más nuevos. Allí donde<br />
sea apropiado, utilizando el HyperSaw en un oscilador proporcionará considerablemente más voces que un<br />
patch similar utilizando 3 osciladores distintos de diente de sierra.<br />
••<br />
Analog 1-4pole (Filter Menu)<br />
Cada voz requiere aproximadamente el doble de potencia de cálculo.<br />
••<br />
WavePWM o Grain /Formant Complex (Osc1/2 Menu)<br />
Cada voz requiere aproximadamente el doble de potencia de cálculo. Use estos osciladores sólo si se está<br />
aprovechando de los parámetros F-Shift, F-Spread o Local Detune (OSC1/2 Menus) - especialmente en el<br />
caso de Grain Complex, que suena justo igual que el oscilador Wavetable cuando todos estos parámetros<br />
están ajustados a sus valores por defecto de +0.<br />
Opcionalmente, pruebe las variantes Simple de Grain y Formant, puesto que estas requieren mucha menos<br />
potencia de DSP.<br />
••<br />
Oscillator 3 (Osc1/2 Menu)<br />
Cada voz requiere aproximadamente un 30% de potencia de cálculo adicional.
ACERCA DE LA POLIFONÍA<br />
••<br />
Reverb<br />
Este es el efecto más ‘caro’, por lo que sugerimos encarecidamente que evite utilizarlo en más de una o<br />
dos Partes a la vez. Un delay tendrá mucho menos impacto en los recursos, y a menudo puede ser igual de<br />
efectivo - opcionalmente, no olvide que puede usar efectos plugin externos si está usando Total Integration.<br />
Optimización de sus Patches<br />
Si ve que su patch está haciendo uso de cualquiera de las funciones de arriba, pruebe alternativas para<br />
reducir la carga de CPU. Recuerde que una característica está activa y consumiendo potencia de cálculo incluso<br />
cuando se ha ajustado a un valor muy pequeño, por o que en ciertos casos sería muy certero el desactivar<br />
alguno de estos en vez de tener algo que apenas se oye pero que todavía está usando recursos. Por<br />
ejemplo, si Osc Balance está ajustado a -63, casi seguro que no podrá oir el OscillatorĘ2, por lo que pruebe<br />
a ponerlo a -64, en cuyo punto OscillatorĘ2 quedará desactivado, liberando así recursos. Si el parámetro<br />
Mix o Send de un efecto se ajusta en Off o Dry, entonces no utilizará ningún recurso, así que insistiendo,<br />
si un patch está usando sólo muy pequeñas cantidades de un efecto en particular, podría ser aconsejable<br />
desactivarlo por completo.<br />
El <strong>Virus</strong> también tiene que trabajar un poco más cuando se usan ambos filtros. Si sólo necesita un suave<br />
filtro de 2-polos para un sonido en particular, girando Filter Balance completamente a la izquierda (-64) desactiva<br />
el Filter 2, liberando así algunas voces.<br />
Otro factor que a veces se puede pasar por alto es la duración de colas de liberación. Estás pueden hacer<br />
que el cómputo de voces se acumule mucho más rápidamente de lo que piensa, y en un arreglo a menudo<br />
puede reducirlas hasta cierto punto sin detrimento de la mezcla general. Por favor compruebe el parámetro<br />
Priority (Multi Menu), que puede usar para priorizar ciertas Partes contra el efecto de ‘note-stealing’. En<br />
otras palabras, configurando las Partes más cruciales a Priority = High hará que las partes que queden con<br />
Priority = Low estén las primeras en la cola cuando el <strong>Virus</strong> necesite robar voces.<br />
Intente no usar la matriz de modulación para aplicar un efecto que puede conseguirse utilizando una de las<br />
ranuras fijadas - e.g. si quiere que LFO module al Cutoff 1, utilice el parámetro LFO2>Cutoff1, ya que de<br />
todas formas este siempre está activado; si en vez de esto utiliza la matriz de modulación estará utilizando<br />
innecesariamente recursos adicionales.<br />
Algunas fuentes de control que puede que quiera aplicar en la matriz de modulación necesitan más potencia<br />
de cálculo que otras - esto se debe a que algunas tienen que calcularse por-voz, mientras que otras sólo<br />
se aplican globalmente. Por ejemplo, la rueda de modulación se aplica a todas las voces simultáneamente<br />
en una parte dada, por lo tanto necesita un solo cálculo por cambio de posición, mientras que KeyFollow<br />
o Filter Envelope se aplican a cada nota individual, lo que puede producir un incremento en la potencia de<br />
cálculo. Si está tocando un patch polifónico, esto puede marcar una significativa diferencia, especialmente<br />
si está usando varios encaminamientos de modulación de este tipo al mismo tiempo.<br />
También es aconsejable desactivar cualquier ranura de modulación redundante, i.e. no las ponga a cero<br />
simplemente, ajuste los parámetros fuente y/o destino en Off.
76 MANUAL DE INICIACIÓN RÁPIDA<br />
Finalmente, recuerde que cada una de las funciones que puede activar y desactivar pueden afectar a la polifonía,<br />
incluso aunque sea por una sola voz, pero a veces puede que sólo necesite tener esa voz extra para<br />
conseguir el resultado deseado, ¡así que sea eficiente!<br />
Conclusión<br />
Así que, aquí está: el final de la guía de iniciación rápida - esperamos que le haya sido de alguna utilidad. Si<br />
no se encuentra listo/a para volar en solitario en este punto, no tema, ya que no está solo/a - tiene recursos<br />
disponibles a su alcance, en el caso de que tuviera problemas.<br />
Por favor consulte la documentación de ayuda que encontrará en su disco duro (se instala como parte del<br />
paquete software del <strong>TI</strong>), en donde todas las funciones y características son tratadas al detalle.<br />
También hay video tutoriales que le muestran cómo configurar <strong>Virus</strong> Control con su secuenciador favorito y<br />
cómo usar Total Integration.<br />
También hay disponible soporte persona a persona mediante los formularios disponibles en www.accessmusic.de<br />
¡No olvide que puede acceder a TODO lo anterior simplemente pulsando sobre el símbolo ‘?’ en el plugin<br />
del <strong>Virus</strong> Control!
GARANTÍA<br />
Garantía<br />
FCC information (USA)<br />
Important notice: Do not modify this unit. This product, when installed as indicated in the instructions contained<br />
in this manual, meets FCC requirements. Modifications not expressly approved by Kemper Digital<br />
GmbH may void your authority, granted by the FCC, to use this product.<br />
When connecting this product to accessories and/or another product use only high quality shielded cables.<br />
Cables supplied with this product MUST be used. Follow all installation instructions. Failure to follow instructions<br />
could void your FCC authorisation to use this product in the USA.<br />
NOTE: This product has been tested and found to comply with the requirements listed in FCC Regulations,<br />
Part 15 for Class „B“ digital devices. Compliance with these requirements provides a reasonable level of<br />
assurance that your use of this product in residental environment will not result in harmful interference with<br />
other electronic devices. This equipment generates/uses radio frequencies and, if not installed and used<br />
according to the instructions found in the user manual, may cause interference harmful to the operation of<br />
other electronic devices, Compliance with FCC regulations does not guarantee that interference will not<br />
occur in all installations. If this product is found to be the source of interference, which can be determinated<br />
by turning the unit „OFF“ and „ON“, please try to eliminate the problem by using one of the following measures:<br />
Relocate either this product or the device that is being affected by the interference. Utilise power outlets<br />
that are on branch (Circuitbreaker or fuse) circuits or install AC line filter/s. In the case of radio or TV interference,<br />
relocate/reorient the antenna. If the antenna lead-in is 300 ohm ribbon lead, change the lead- in to<br />
coaxialtype cable. If these corrective measures do not produce satisfactory results, please contact the local<br />
retailer authorised to distribute this type of product. The statements above apply ONLY to products distributed<br />
in the USA.<br />
FCC information (Canada)<br />
The digital section of this apparatus does not exceed the „Class B“ limits for radio noise emmissions from<br />
digital apparatus set out in the radio interference regulation of the Canadian Department of Communications.<br />
This only applies to products distributed in Canada.<br />
Le présent appareil numérique n’émet pas de bruit radio-électrique dépassant les limites applicables aux<br />
appareils numériques de la “Classe B” prescrites par la réglementation sur les interférences radio-électriques<br />
du Ministère Canadien des Communications. Ceci ne s’applique qu’aux produits distribués au Canada.
78 MANUAL DE INICIACIÓN RÁPIDA<br />
Other standards (rest of world)<br />
This product complies with the radio frequency interference requirements of the Council Directive 89/336/EC.<br />
Cet appareil est conforme aux prescriptions de la directive communautaire 89/336/EC.<br />
Dieses Gerät entspricht der EG-Richtlinie 89/336/EC.<br />
Declaration of conformity<br />
This device is designed exclusively for generating low frequency audio signals. Any other use is not permitted,<br />
and automatically invalidates the warranty supplied by Kemper Digital GmbH. The following devices<br />
<strong>Virus</strong> <strong>TI</strong> <strong>Snow</strong> is hereby declared to conform with the requirements of Council Directive 89/336/FWG for<br />
radio frequency interference. They also comply with regulations dated August 30th, 1995 concerning radio<br />
interference generated by electronic devices. The following standards have been applied: EM 50 082-1 :<br />
1992 , EN 50 081-1 : 1992 , EN60065 : 1993 This declaration has been given responsibly on behalf of the<br />
manufacturer: Kemper Digital GmbH, Recklinghausen, Germany.<br />
Warranty regulations<br />
The Kemper Digital GmbH warranty covers all defects in material and workmanship for a period of 24<br />
months from the date of original purchase. This warranty does not cover defects due to abuse, faulty connections<br />
or operation under other than specified conditions. Warranty coverage is also voided when the<br />
device is repaired by unauthorized persons or tampered with in any way. Kemper Digital reserves the right to<br />
refuse warranty claims, if the product was not sold from an Authorised Base Dealer to the respective endcustomer.<br />
This warranty is limited to replacement or repair of the product. It does not limit the customers’<br />
rights according to the current product liability regulations of the country where the product was purchased.<br />
The warranty is only valid, if a completely filled in warranty card, including serial no., date of sale, company<br />
stamp, signature of the Authorised Base Dealer, as well as name and address of the customer is returned to<br />
the address given below. If a defect occurs during the warranty period, contact the Autorised Base Dealer<br />
from whom you bought the synthesizer or write an email to info@kemper-digital.com. The synthesizer can<br />
only be returned upon prior approval and the following requirements have to be fulfilled:<br />
- The unit is sent in its original package or one of equal quality.<br />
- A detailed description of the defect and a copy of the purchase receipt is included.
Schnellstart<br />
Anleitung
82<br />
SCHNELLSTART ANLEITUNG
INHALTSVERZEICHNIS<br />
Inhaltsverzeichnis<br />
87 Einleitung<br />
Willkommen<br />
Gesundheit und Sicherheit<br />
Pflege und Instandhaltung<br />
Wo finde ich ...<br />
91 Grundlegende Bedienung<br />
Power On/Off<br />
Verbinden mit anderem Equipment<br />
Audio I/O<br />
93 Die Qual Der Wahl<br />
<strong>Virus</strong> Control oder MIDI?<br />
Was ist Total Integration?<br />
Host Software<br />
95 Modus Operandi<br />
Modus / Exit-Taster<br />
Tap Tempo / Panic-Taster<br />
Preset Sounds<br />
Funktionen der Taster und Regler<br />
Edit Menu-Taster<br />
Easy / Expert Edit-Modus<br />
101 Die Edit-Seiten<br />
OSC 1 Menu (Classic Oszillator)<br />
OSC 1-Menu (HyperSaw Oszillator)<br />
OSC 1-Menu (Wavetable Oszillator)<br />
OSC 1 Menu (Formant Complex Oszillator)<br />
OSC 2 Menu<br />
Filter-Menu<br />
Mod-Menu
84<br />
SCHNELLSTART ANLEITUNG<br />
Envelopes-Menu<br />
Effects-Menu<br />
Arp-Menu<br />
Common-Menu<br />
Multi-Menu<br />
Vorhörfunktion/Audition<br />
Store-Menu<br />
Store to RAM<br />
Benennen eines Patches<br />
SysEx Dump<br />
Speichern im Multi-Modus<br />
Utility-Funktionen<br />
Cancel Store-Modus<br />
Config-Menu<br />
111 Über Polyphonie<br />
Maximierung der Simmenanzahl<br />
Optimieren der Patches<br />
Fazit<br />
115 Garantiebestimmungen<br />
FCC information (USA)<br />
FCC information (Canada)<br />
Other standards (rest of world)<br />
EG Konformitätserklärung<br />
Garantiebestimmungen<br />
Warranty regulations
INHALTSVERZEICHNIS<br />
Rechtliche Hinweise<br />
© Copyright 2008 Kemper Digital GmbH. Alle Rechte vorbehalten.<br />
Dieses Handbuch, sowie alle in dieser Publikation genannten Hard- und Software Produkte obliegen einem<br />
speziellen Lizenzvertrag. Diese Vertragsbestimmungen wurden bei bei der Erstellung dieses Handbuches<br />
eingehalten. Der Inhalt dieses Handbuchs ist rein informell und kann zu jeder Zeit, ohne Vorankündigung von<br />
Kemper Digital GmbH geändert werden. Kemper Digital GmbH haftet weder für inhaltliche- noch für Druckfehler.<br />
Ohne schriftliche Genehmigung der Kemper Digital GmbH ist es nicht zulässig, diese Publikation oder<br />
Teile davon zu reproduzieren und/oder in schriftlicher- und/oder elektronischer Form zu veröffentlichen noch<br />
anderweitig zugänglich zu machen.<br />
<strong>Virus</strong> ist ein eingetragenes Warenzeichen der Kemper Digital GmbH. Alle weiteren, in diesem Buch erwähnten<br />
Firmen- und Produktnamen sind Warenzeichen oder eingetragene Warenzeichen der betreffenden Eigentümer.<br />
Änderungen der technischen Daten und Funktionen ohne vorherige Ankündigung vorbehalten.<br />
www.access-music.de<br />
support@access-music.de
86<br />
SCHNELLSTART ANLEITUNG
EINLEITUNG<br />
Einleitung<br />
Willkommen<br />
Der <strong>Virus</strong> <strong>TI</strong> <strong>Snow</strong> basiert auf der gleichen Sound-Engine, wie der mehrfach ausgezeichnete <strong>Virus</strong> <strong>TI</strong> Synthesizer,<br />
lediglich in seiner Größe reduziert auf ein kleines aber feines Kraftpaket! Die Single DSP-Architektur<br />
ermöglicht einen 4-Part multi-timbralen Betrieb, mit ausreichender Stimmenanzahl. Einfach ist das Stichwort<br />
- über die Menu-Taster haben Sie in jeder Sektion direkten Zugriff auf die wichtigsten Parameter, die Sie in<br />
Echtzeit mit den 3 „Soft“-Reglern unterhalb des LCD-Displays einstellen können. Für diejenigen, die tiefer in<br />
die Klangarchitektur eingreifen wollen, gibt es den Expert-Modus, mit dem Sie Zugriff auf jeden Einzelnen,<br />
der unzähligen Parameter des <strong>Virus</strong> <strong>TI</strong>, haben.<br />
Die Abkürzung „<strong>TI</strong>“ steht für „Total Integration“ und bezeichnet die Art und Weise, wie wir bei Access die<br />
Verbindung zwischen einem Hardware-Synthesizer, einem Computer und einem Softwaresequenzer realisieren.<br />
Alle Audio- und MIDI-Daten werden von und zu jeder kompatiblen Software über USB übertragen und<br />
mit dem <strong>Virus</strong> Control-Plugin erscheint Ihr <strong>Virus</strong> <strong>TI</strong> <strong>Snow</strong> als ein VST/AU/RTAS Multi-Channel-Instrument,<br />
inklusive Patch Browsing und vollständigen Editierungsmöglichkeiten, auf dem Bildschirm Ihres Rechners.<br />
Das alles lässt die Grenze zwischen Hardware und Software soweit verschwinden, dass Sie sich fragen werden,<br />
wie Sie vorher gearbeitet haben.
88<br />
SCHNELLSTART ANLEITUNG<br />
Gesundheit und Sicherheit<br />
Bitte lesen Sie den folgenden Abschnitt sehr sorgfältig. Einige der dort genannten Hinweise betreffen Ihre<br />
Gesundheit und den einwandfreien Zustand des Gerätes!<br />
· Vermeiden Sie den direkten Kontakt des <strong>Virus</strong> <strong>Snow</strong> mit Flüssigkeiten oder Schmutz. Stellen Sie keine<br />
Flüssigkeiten in die Nähe des Gerätes. Sollten dennoch Substanzen in das Gehäuse des <strong>Virus</strong> gelangen,<br />
kontaktieren Sie den Access Support (www.access-music.de).<br />
· Setzen Sie das Gerät nicht hohen Temperaturen oder längere Zeit direktem Sonnenlicht aus. Stellen Sie<br />
sicher, daß eine ausreichende Belüftung des Gerätes gewährleistet ist.<br />
· Vermeiden Sie starke Erschütterungen, wie sie durch Sturz oder Fall geschehen können. Stellen Sie das<br />
Gerät immer auf eine ebene Fläche.<br />
· Dieses <strong>Virus</strong> Modell verwendet ein externes 12V DC Netzteil. Verwenden Sie nur das mitgelieferte Netzteil.<br />
Schließen Sie den <strong>Virus</strong> nie an eine Steckdose an, die nicht der allgemeinen europäischen Sicherheitsnorm<br />
entspricht. Verwenden Sie niemals ein Netzteil, das nicht für das europäische Stromnetz geeignet ist.<br />
· Wenn Sie den <strong>Virus</strong> über einen längeren Zeitraum nicht verwenden, sollten Sie die Netzverbindung trennen.<br />
Ziehen Sie dazu immer am Stecker und niemals am Kabel.<br />
· Der <strong>Virus</strong> ist in der Lage einen Schallpegel zu erzeugen, der sich nachteilig auf Ihr Gehör auswirken kann,<br />
wenn Sie ihn mit einem externen Verstärker oder Kopfhörer betreiben. Bitte achten Sie darauf, immer mit<br />
einem moderaten Pegel zu arbeiten. Achten Sie außerdem darauf, dass das verwendete Equipment den Anforderungen<br />
des <strong>Virus</strong> entspricht (+4dB Ausgänge etc.)<br />
· Zusätzlich zu den bereits genannten Sicherheitsvorkehrungen, bitten wir Sie das Folgende zu beachten:<br />
Verstecken Sie den <strong>Virus</strong> <strong>TI</strong> <strong>Snow</strong> niemals im Backofen, für den Fall, dass Sie ihn dort vergessen und später<br />
aus Versehen mitbraten. Stellen Sie den <strong>Virus</strong> <strong>TI</strong> <strong>Snow</strong> auch niemals auf das Dach Ihres Autos, während Sie<br />
Ihre Kinder festschnallen, für den Fall, dass Sie ihn dort vergessen und losfahren.<br />
Pflege und Instandhaltung<br />
••<br />
Aktualisierungen des Betriebssystems<br />
Access Music ist bekannt dafür, seine Produkte durch kostenlose Betriebssystem-Updates stetig zu verbessern.<br />
Wir empfehlen Ihnen daher, regelmässig die Webseite www.access-music.de zu besuchen, um sich<br />
dort die neueste Version des Operating Systems herunterzuladen.
EINLEITUNG<br />
••<br />
Säubern<br />
Verwenden Sie ausschließlich ein weiches, trockenes Tuch oder eine weiche Bürste, um das Panel zu reinigen<br />
– verwenden Sie auf keinen Fall irgendwelche Flüssigkeiten. Handelsüblicher Haushaltsreiniger kann zu<br />
dauerhaften Schäden des Produktes führen.<br />
••<br />
Reparatur<br />
Öffnen Sie niemals das Gehäuse des <strong>Virus</strong>- es gibt dort keinerlei Bauteile, die Sie als Anwender warten können.<br />
Wenn Ihr <strong>Virus</strong> repariert werden muss, kontaktieren Sie als Erstes den Access Support.<br />
Wo finde ich ...<br />
Dieses Quick Start Manual bezieht sich auf die folgenden Referenzquellen:<br />
Information<br />
Standort<br />
Patch Parameter<br />
Referenz<br />
· Klicken Sie auf”?” in <strong>Virus</strong> Control und öffnen Sie die Parameter Referenz.<br />
· PC: Start > Alle Programme > Access Music > <strong>Virus</strong> <strong>TI</strong> > Documentation > Manuals<br />
· Mac: Programme/Access Music/<strong>Virus</strong> <strong>TI</strong>/Documents/Manuals/<br />
Multi Parameter<br />
Referenz<br />
· Klicken Sie auf”?” in <strong>Virus</strong> Control und öffnen Sie die Multi Parameter Referenz.<br />
· PC: Start > Alle Programme > Access Music > <strong>Virus</strong> <strong>TI</strong> > Documentation > Manuals<br />
· Mac: Programme/Access Music/<strong>Virus</strong> <strong>TI</strong>/Documens/Manuals/<br />
Config Menu<br />
Referenz<br />
· Klicken Sie auf”?” in <strong>Virus</strong> Control und öffnen Sie die configuration Menu-Referenz.<br />
· PC: Start > Alle Programme > Access Music > <strong>Virus</strong> <strong>TI</strong> > Documentation > Manuals<br />
· Mac: Programme/Access Music/<strong>Virus</strong> <strong>TI</strong>/Documents/Manuals/<br />
Addendum<br />
· Klicken Sie auf”?” in <strong>Virus</strong> Control und öffnen Sie das Handbuch-Addendum.<br />
· PC: Start > Alle Programme > Access Music > <strong>Virus</strong> <strong>TI</strong> > Documentation > Addenda<br />
· Mac: Programme/Access Music/<strong>Virus</strong> <strong>TI</strong>/Documents/Addenda/<br />
Tutorials für <strong>Virus</strong><br />
Control<br />
· Klicken Sie auf”?” in <strong>Virus</strong> Control und öffnen Sie die <strong>Virus</strong> Control Tutorials.<br />
· PC: Start > Alle Programme > Access Music > <strong>Virus</strong> <strong>TI</strong> > Documentation > Tutorials<br />
· Mac: Programme/Access Music/<strong>Virus</strong> <strong>TI</strong>/Documents/Tutorials/<br />
Tutorial videos<br />
· Klicken Sie auf”?” in <strong>Virus</strong> Control und öffnen Sie den Video-Ordner<br />
· PC: Start > Alle Programme > Access Music > <strong>Virus</strong> <strong>TI</strong> > Documentation > Videos<br />
· Mac: Programme/Access Music/<strong>Virus</strong> <strong>TI</strong>/Documents/Tutorials/<br />
Tutorial für <strong>Virus</strong><br />
Control Center<br />
· Klicken Sie auf”?” in <strong>Virus</strong> Control und öffnen Sie die <strong>Virus</strong> Control Tutorials.<br />
· PC: Start > Alle Programme > Access Music > <strong>Virus</strong> <strong>TI</strong> > Documentation > Tutorials<br />
· Mac: Programme/Access Music/<strong>Virus</strong> <strong>TI</strong>/Documents/Tutorials/<br />
Tutorials für<br />
Ihren Software<br />
Sequencer<br />
· Klicken Sie auf”?” in <strong>Virus</strong> Control und öffnen Sie die <strong>Virus</strong> Control Tutorials.<br />
· PC: Start > Alle Programme > Access Music > <strong>Virus</strong> <strong>TI</strong> > Documentation > Tutorials<br />
· Mac: Programme/Access Music/<strong>Virus</strong> <strong>TI</strong>/Documents/Tutorials/
90<br />
SCHNELLSTART ANLEITUNG<br />
Information<br />
Tutorial songs<br />
Standort<br />
· PC: Start > Alle Programme > Access Music > <strong>Virus</strong> <strong>TI</strong> > Documentation > Turorials<br />
· Mac: Programme/Access Music/<strong>Virus</strong> <strong>TI</strong>/Documents/Tutorials/
GRUNDLEGENDE BEDIENUNG<br />
Grundlegende Bedienung<br />
Im folgenden Abschnitt erfahren Sie, wie einfach und intuitiv der Umgang mit dem <strong>Virus</strong> <strong>TI</strong> <strong>Snow</strong> ist. Bitte<br />
lesen Sie ihn sorgfältig, am Besten mit dem eingeschalteten <strong>Virus</strong> vor Ihnen.<br />
Power On/Off<br />
Verbinden Sie den mitgelieferten Netzadapter mit einer Steckdose und verbinden Sie ihn dann mit der 12V<br />
DC IN Buchse auf der Rückseite des <strong>Virus</strong> <strong>TI</strong> <strong>Snow</strong>. Beim ersten Mal sollte das Gerät sofort hochfahren*.<br />
Drücken Sie EDIT/SHIFT und den PART-Taster zusammen für 3 Sekunden, um den <strong>Virus</strong> in den Standby-<br />
Modus zu versetzen. Drücken Sie die gleiche Tastenkombination, wenn Sie das Gerät wieder einschalten<br />
wollen.<br />
*Wenn Sie die Stromverbindung trennen, während der <strong>Virus</strong> im Standby-Modus ist, wird er wieder in den<br />
Standby-Modus gehen, wenn er erneut mit dem Netzadapter verbunden wird.<br />
Verbinden mit anderem Equipment<br />
••<br />
USB<br />
Wichtig: Sie müssen unbedingt die <strong>TI</strong> Software und die Treiber auf Ihrem Computer installieren, BEVOR Sie<br />
den <strong>Virus</strong> mit Ihrem Computer über USB verbinden.<br />
Um zu Installieren: Gehen Sie auf www.access-music.de und laden Sie sich die aktuellste Version des <strong>Virus</strong><br />
<strong>TI</strong> <strong>Snow</strong> Installer Pakets für Ihre Computerplattform herunter.<br />
Nach dem Download müssen Sie das Archiv entpacken und den Installer starten. Befolgen Sie die Anweisungen<br />
auf dem Bildschirm sorgfältig und stellen Sie die USB-Verbindung erst dann her, wenn Sie dazu<br />
aufgefordert werden.<br />
Verbinden Sie den USB Port am <strong>Virus</strong> mit einem freien USB Port an Ihrem Computer mit dem mitgelieferten<br />
oder einem ähnlichen Kabel. VERWENDEN SIE AUF KEINEN FALL EINEN HUB! Entschuldigen Sie die<br />
Lautstärke, aber dieser Punkt kann nicht genug betont werden - der <strong>Virus</strong> braucht unbedingt einen eigenen<br />
USB-Port, um sicherzustellen, dass der immense Datenverkehr zwischen Hardware und Computer zu jedem<br />
Zeitpunkt unterbrechungsfrei gewährleistet ist!
92<br />
SCHNELLSTART ANLEITUNG<br />
Windows User: Sobald die <strong>TI</strong> Software-Suite und die Treiber installiert sind, wird die Updater-Applikation<br />
automatisch gestartet. Achten Sie darauf, dass die Firmware Update-Prozedur komplett abgeschlossen ist,<br />
um sicherzustellen, dass das interne Betriebssystem des <strong>Virus</strong> auf dem aktuellen Stand ist.<br />
Mac Users: Die Firmware des <strong>Virus</strong> <strong>TI</strong> <strong>Snow</strong> wird automatisch, als Bestandteil des Installationprozesses, auf<br />
den aktuellsten Stand gebracht.<br />
••<br />
MIDI<br />
Für Diejenigen unter Ihnen, die nicht warten wollen, bist der Rechner hochgefahren und die Software installiert<br />
ist, sondern sofort hören wollen, wie der neue <strong>Virus</strong> klingt, verbinden Sie einfach den MIDI-Ausgang<br />
eines handelsüblichen MIDI-Keyboards mit dem MIDI-Eingang am <strong>Virus</strong> <strong>TI</strong> <strong>Snow</strong> und Sie können sofort anfangen<br />
zu spielen.<br />
Audio I/O<br />
••<br />
Ausgänge<br />
Wenn Sie sich zu diesem Zeitpunkt kopfkratzenderweise fragen, warum Sie nichts hören, liegt das daran,<br />
dass der <strong>Virus</strong> <strong>TI</strong> <strong>Snow</strong> keinen eingebauten Lautsprecher hat. Um die wundervollen Sounds, die Sie grade<br />
erzeugen, zu hören, müssen Sie entweder den linken und rechten Ausgang des <strong>Virus</strong> mit einem geeigneten<br />
Verstärker verbinden oder einen Kopfhörer an die linke Ausgangsbuchse am <strong>Virus</strong> anschließen. Verbinden<br />
Sie den <strong>Virus</strong> besser nicht direkt mit einer normalen Stereoanlage, da dass unter Umständen zu einer Beschädigung<br />
der Anlage führen kann. Stellen Sie auf jeden Fall den Master Volume-Regler auf einen möglichst<br />
niedrigen Wert, um zu vermeiden, dass Sie Ihrem Gehör einen Schaden zufügen, bevor der eigentliche Spaß<br />
angefangen hat.<br />
••<br />
Eingänge<br />
Verbinden Sie externes Audio Equipment mit den Input Left/Right-Buchsen, für den Fall, dass Sie Audiomaterial<br />
mit dem <strong>Virus</strong> <strong>TI</strong> <strong>Snow</strong> bearbeiten wollen. Mit diesen Eingängen, können Sie den <strong>Virus</strong> auch als<br />
normale Soundkarte für Ihren Computer verwenden, oder Sie können die abgefahrensten Klänge erzeugen,<br />
indem Sie das Audiomaterial mit den <strong>Virus</strong>filtern und Effekten bearbeiten.<br />
Wenn Sie das Audiosignal einfach unverändert durch den <strong>Virus</strong> zu den Audio-Ausgängen leiten wollen, stellen<br />
Sie den Input Thru-Parameter im CONFIG-Menu einfach auf den gewünschten Wert.<br />
Nachdem Sie den <strong>Virus</strong> <strong>TI</strong> <strong>Snow</strong> erfolgreich mit Ihrem Computer und anderem Equipment verbunden haben,<br />
können Sie damit anfangen das ganze Potential Ihres neuen Lieblingsynthesizers zu erkunden.
DIE QUAL DER WAHL<br />
Die Qual Der Wahl<br />
<strong>Virus</strong> Control oder MIDI?<br />
Es gibt drei verschiedene Möglichkeiten mit dem <strong>Virus</strong> <strong>TI</strong> <strong>Snow</strong> zu arbeiten:<br />
· Wie bereits erwähnt, können Sie einfach ein beliebiges MIDI Controller Keyboard mit dem MIDI Eingang am<br />
<strong>Virus</strong> verbinden und loslegen.<br />
· Sie können einen Software Sequenzer verwenden, um bist zu 4 Kanäle im <strong>Virus</strong> <strong>TI</strong> <strong>Snow</strong> gleichzeitig zu<br />
benutzen. Dazu müssen Sie lediglich als MIDI Ausgangs-Port „<strong>Virus</strong> <strong>TI</strong> Synth“ in Ihrem Sequenzer auswählen<br />
und den <strong>Virus</strong> in den Sequencer-Modus versetzen. Programmwechsel können am <strong>Virus</strong> oder Softwaresequenzer<br />
vorgenommen werden.<br />
· Sie können sämtliche Vorzüge der Total Integration zwischen einem kompatiblen Sequenzer und dem <strong>Virus</strong><br />
<strong>TI</strong> <strong>Snow</strong> erleben, indem Sie das <strong>Virus</strong> Control-Plugin verwenden.<br />
Was ist Total Integration?<br />
Genau wie die anderen Mitglieder der <strong>TI</strong> <strong>Virus</strong>familie, wird auch der <strong>Virus</strong> <strong>TI</strong> <strong>Snow</strong> mit der <strong>Virus</strong> Control<br />
Software ausgeliefert – das Kernstück des Total Integration Konzepts. <strong>Virus</strong> Control ermöglicht es den <strong>TI</strong><br />
<strong>Snow</strong> als ein Multichannel VST/AudioUnit/RTAS Plugin in die Rechnerumgebung zu integrieren, inklusive des<br />
eleganten Datenaustausches von Audio und MIDI-Daten über USB auf 3 Stereokanälen, mit samplegenauen<br />
Timing und Latenzkompensation. Jeder Parameter in der <strong>Virus</strong> <strong>TI</strong> Synth Engine wird auf der grafischen Benutzeroberfläche<br />
des Plugins abgebildet, inklusive der Möglichkeit, Parameterverläufe im Softwaresequenzer<br />
zu automatisieren. Die Browser Seite ermöglicht die Verwaltung einer umfangreichen Klangbibliothek, inklusive<br />
einer leistungsfähigen Suchfunktion und Total Recall sämtlicher Einstellungen, was bedeutet, dass der<br />
<strong>Virus</strong> <strong>TI</strong> <strong>Snow</strong> immer genau in dem Zustand hochfährt, den Sie für ein Projekt abgespeichert haben.<br />
Mehr Informationen zum Umgang mit <strong>Virus</strong> Control, finden Sie im entsprechenden <strong>Virus</strong> Control-Tutorial, das<br />
Sie erreichen, wenn Sie auf den „?“-Taster in der <strong>Virus</strong> Control-Software klicken,
94<br />
SCHNELLSTART ANLEITUNG<br />
Host Software<br />
Um das volle Potential des <strong>Virus</strong> <strong>TI</strong> <strong>Snow</strong> auszunutzen, empfiehlt sich unbedingt der Einsatz eines kompatiblen<br />
Softwaresequenzers und eines Computers. Eine Liste kompatibler Systeme finden Sie unter www.<br />
access-music.de/?go=compato. Obwohl nichts dagegen spricht, den <strong>Virus</strong> <strong>TI</strong> <strong>Snow</strong> im „Standalone“ Modus<br />
zu verwenden, ermöglicht ein kompatibler Sequenzer ein viel detailierteres Arbeiten und gibt Ihnen Gelegenheit,<br />
Total Integration in der reinsten Form zu erleben.<br />
Da jede Computerumgebung eine jeweils eigene Vorgehensweise erfordert, empfiehlt es sich an dieser Stelle<br />
das Video Tutorial anzuschauen, das sich speziell dem, von Ihnen verwendeten Betriebssystem widmet. Sie<br />
finden diese Videos auf der Festplatte Ihres Computers. Sie können sie jederzeit ansehen, in dem Sie auf<br />
das „?“-Symbol in der <strong>Virus</strong> Control-Software klicken und die entsprechende Option auswählen. Leider kann<br />
es vorkommen, dass für einzelne Host-Systeme noch keine Tutorialvideos vorhanden sind.
MODUS OPERANDI<br />
Modus Operandi<br />
Modus / Exit-Taster<br />
Abhängig davon, was Sie mit Ihrem <strong>Virus</strong> <strong>TI</strong> <strong>Snow</strong> machen wollen, gibt es drei verschiedene Betriebsarten,<br />
im englischen als „Modes“ bezeichnet, aus denen Sie auswählen können. Wenn Sie den Taster drücken,<br />
erscheint ein Menu, aus dem Sie eine der folgenden Optionen auswählen können: Single, Multi oder Sequencer.<br />
Wählen Sie eine davon mit dem Value 1-Regler oder den Value +/- Tastern und drücken Sie MODE<br />
erneut, um die Auswahl zu bestätigen.<br />
••<br />
Single Mode<br />
Das ist der Default-Modus, in dem der <strong>Virus</strong> einen einzigen Sound auf der gesamten Tastatur des MIDI-<br />
Keyboards wiedergibt.<br />
••<br />
Multi Mode<br />
Im Multi Mode kann der <strong>Virus</strong> <strong>TI</strong> <strong>Snow</strong> bis zu vier verschiedene Sounds gleichzeitig wiedergeben. Jeder dieser<br />
vier Sounds wird durch einen so genannten „Part“ repräsentiert und jeder Part verfügt über eigene Performance-Einstellungen<br />
für die Lautstärke, Stereoposition, Transpose etc. Wenn Sie jedem Part den gleichen<br />
MIDI-Kanal zuweisen, können Sie beeindruckend klingende Kombinationen aus den mitgelieferten Presets<br />
erstellen, in dem Sie diese neben- oder übereinander auf der Tastatur verteilen.<br />
Der <strong>Virus</strong> <strong>TI</strong> <strong>Snow</strong> verfügt über 64 Speicherplätze für diese Multi Setups. Diese Speicherplätze sind „embedded“,<br />
was bedeutet, dass alle Änderungen, die Sie gegebenenfalls an den in einem Multi enthaltenen<br />
Sounds vornehmen, nur das Multi Setup betreffen. Die eigentlichen Originalpresets sind davon nicht betroffen.<br />
••<br />
Sequencer Mode<br />
Der Sequencer-Modus ist eine vereinfachte Version des Multi-Modus, optimiert für den Einsatz mit einem<br />
Softwaresequenzer. Jeder der 4 Parts arbeitet mit einem eigenen MIDI-Kanal und die meisten Performance-<br />
Einstellungen werden über den Sequenzer geregelt.<br />
Bitte beachten Sie, dass Sie im Sequencer-Modus keine Einstellungen speichern können - wenn Sie das<br />
unbedingt machen wollen, sollten Sie stattdessen den Multi-Modus verwenden.<br />
••<br />
Exit<br />
Wenn Sie den Exit-Taster drücken, kehren Sie von jedem Edit-Menu auf die Hauptseite des zuvor verwendeten<br />
Modus zurück.
96<br />
SCHNELLSTART ANLEITUNG<br />
Tap Tempo / Panic-Taster<br />
••<br />
Tap Tempo<br />
Drücken Sie diesen Taster in rhythmischen Abständen, um das Tempo einzugeben. Damit bestimmen<br />
Sie die Geschwindigkeit, mit der alle synchronisierbaren Parameter wie z.B. LFOs (im Clock- Modus), der<br />
Arpeggiator, das Delay (Clock-Modus) etc. arbeiten. Bitte beachten Sie, dass nur ein globales Tempo im<br />
Multi-Modus verwendet werden kann. Alternativ dazu können Sie das Tempo im COMMON Edit Menu als<br />
Zahlenwert eingeben.<br />
••<br />
Panic (EDIT/SHIFT+TAP TEMPO)<br />
Verwenden Sie diese Tastenkombination, um hängende Noten abzuschalten, was durch Fehler im MIDI Datenstrom<br />
passieren kann, wenn z.B. Ihr Sequenzerprogramm abstürzt.<br />
••<br />
PART-Taster<br />
Um die Benutzeroberfläche im Multi oder Sequencer-Modus fest mit einem Part zu verbinden, drücken oder<br />
halten Sie den PART-Taster, gefolgt von einem Taster 1, 2, 3 oder 4 in der unteren Reihe. Die Zahl, die in<br />
der oberen rechten Ecke des Displays dargestellt wird, repräsentiert den aktuell zur Editierung aufgerufenen<br />
Part.<br />
Preset Sounds<br />
••<br />
RAM/ROM?<br />
Der <strong>Virus</strong> <strong>TI</strong> <strong>Snow</strong> wird mit 8 Bänken mit RAM-Patches und 8 Bänken mit ROM- Patches ausgeliefert, wobei<br />
jede Bank aus 64 Patches besteht. „RAM“ ist die Abkürzung für „Random Access Memory“ und bedeutet,<br />
dass Sie diese Patches so oft Sie wollen mit eigenen Kreationen überschreiben können. „ROM“ steht für<br />
„Read Only Memory“ und bedeutet, dass diese Speicherplätze nicht überschrieben oder gelöscht werden<br />
können.<br />
Die <strong>Virus</strong> <strong>TI</strong> <strong>Snow</strong> RAM-Bänke sind mit Kopien der Patches aus den ROM-Bänken belegt, so dass Sie keine<br />
Angst haben müssen, diese zu verändern oder zu löschen. Sollten Sie die RAM-Patches wieder in ihren<br />
Originalzustund versetzen wollen, finden Sie diese im Patches-Ordner, den Sie mit dem Browser in der<br />
<strong>Virus</strong> Control-Software erreichen können. Da eine Bank im <strong>Virus</strong> <strong>TI</strong> <strong>Snow</strong> aus 64 Presets besteht, werden im<br />
Browser-Fenster der <strong>Virus</strong> Control immer zwei benachbarte Bänke gleichzeitig dargestellt, z.B. Bank 1 + 2,<br />
3 + 4 etc.<br />
••<br />
Auswählen eines Single Presets<br />
Jedes Preset im <strong>Virus</strong> <strong>TI</strong> <strong>Snow</strong> kann mit maximal 4 Klicks aufgerufen werden.
MODUS OPERANDI<br />
Um die gewünschte Bank auszuwählen, drücken Sie zuerst den BANK-Taster. Der <strong>Virus</strong> fordert Sie auf eine<br />
Patch-Bank auszuwählen. Wenn Sie den BANK-Taster gedrückt halten, können Sie die gewünschte Bank<br />
direkt auswählen, ohne dass der Dialog im Display erscheint.<br />
Drücken Sie nun einen der Taster in der oberen Reihe, die als ROM 1-8 bezeichnet sind, um eine ROM-Bank<br />
aufzurufen, oder einen der Taster mit der Bezeichnung RAM 1-8 in der unteren Reihe, um eine RAM-Bank<br />
auszuwählen.<br />
Nachdem die Bank ausgewählt wurde, wählen Sie das gewünschte Preset, in dem Sie die erste Zahl der<br />
Patch-Nummer mit den Tastern der oberen Reihe eingeben und die zweite Zahl mit den Tastern der unteren<br />
Reihe bestimmen.<br />
Die Patches in jeder Bank sind folgendermaßen nummeriert:<br />
1-1 bis 1-8, 2-1 bis 2-8, 3-1 bis 3-8, 4-1 bis 4-8, 5-1 bis 5-8, 6-1 bis 6-8, 7-1 bis 7-8, 8-1 bis 8-8<br />
Tipp: Sie brauchen BANK nur zu drücken, wenn Sie tatsächlich zu einer anderen Bank wechseln möchten.<br />
Solange Sie sich innerhalb einer Bank bewegen, können Sie die 8 Presets in einem Batch mit den Tastern<br />
der unteren Reihe aufrufen und die verschiedenen Batches mit den Tastern der oberen Reihe umschalten.<br />
Um z.B. das Patch „Tutorial 1“ auszuwählen, das unter RAM8 8-1 gespeichert wurde, gehen Sie wie folgt<br />
vor:<br />
Drücken Sie BANK -> Untere Reihe 8 -> Obere Reihe 8 -> Untere Reihe 1<br />
••<br />
Auswählen von Multi Presets<br />
Da es nur eine Bank mit 64 Multis gibt, entfällt die Notwendigkeit zuerst eine Bank auszuwählen. Ansonsten<br />
entspricht das Prozedere der Anwahl von Patches im Single-Modus.<br />
Um zu bestimmen, welches Single Preset Sie einem bestimmten Part zuweisen wollen, drücken Sie EDIT,<br />
gefolgt von Multi und wählen Sie das Preset mit den Bank und Program-Parametern.
98<br />
SCHNELLSTART ANLEITUNG<br />
Funktionen der Taster und Regler<br />
Bevor wir mit der Erklärung der grundsätzlichen Bedienung fortfahren, wählen Sie bitte das Patch RAM8 8-1<br />
„Tutorial 1“.<br />
••<br />
Volume<br />
Der Volume-Regler kontrolliert die Gesamtlautstärke des Stereoausgangs. Wenn Sie den <strong>Virus</strong> mit einem<br />
Mischpult verbinden, ist es meistens empfehlenswert, das Volume auf den maximalen Wert (127) einzustellen<br />
und den endgültigen Pegel am Mischpult zu regeln. Dadurch erreichen Sie den bestmöglichen Rauschspannungsabstand.<br />
Beim Betrieb mit Kopfhörern sollten Sie den Volume-Regler allerdings immer zuerst auf<br />
die niedrigste Position stellen.<br />
Bitte beachten Sie, dass das keinerlei Auswirkungen hat, wenn Sie den <strong>Virus</strong> über USB mit der <strong>Virus</strong> Control<br />
betreiben.<br />
••<br />
Patch Volume (SHIFT+Value 1)<br />
Verwenden Sie diese Reglerkombination, um die Lautstärke des aktuell angewählten Patches zu regulieren.<br />
Achten Sie darauf diesen Wert nicht zu hoch einzustellen, da das unter Umständen zu unschönen Verzerrungen<br />
führen kann.<br />
••<br />
Transpose (SHIFT+Value 2)<br />
Hier mit können Sie die Tonhöhe des aktuell angewähltenPatches in Oktaven transponieren.<br />
••<br />
Panorama (SHIFT+Value 3)<br />
Panorama platziert den Klang im Stereobild. Der voreingestellte Wert von +0 entspricht genau der Stereomitten,<br />
negative Werte bewegen ihn nach links und positive nach rechts.<br />
••<br />
Cutoff<br />
Jetzt fängt der Spaß richtig an. Drehen Sie diesen Regler ganz nach rechts, um einen Wert von 127 einzustellen<br />
und halten Sie eine Taste auf Ihrem Keyboard. Drehen Sie den Regler nach links in Richtung 0 und<br />
zurück - der Klang des „Tutorial 1“ Patch verändert seinen Frequenzgang, je nach Reglerstellung von dumpf<br />
bis brilliant. Sie haben grade erlebt, wie ein „Lowpass Filter arbeitet.<br />
••<br />
Resonance<br />
Stellen Sie diesen Regler auf 12 Uhr und drehen Sie den Cutoff-Regler, wie gerade eben beschrieben. Ein<br />
Anheben der Resonanz im Filter verstärkt die Frequenzen im Bereich der Cutoff-Frequenz und bringt den Filter<br />
zum sprechen, während Sie den Cutoff-Regler bewegen. Seien Sie aber vorsichtig - zu hohe Resonanzwerte<br />
können, in Verbindung mit niedrigen Cutoff-Werten, Ihre Lautsprecher beschädigen.
MODUS OPERANDI<br />
••<br />
Filter Envelope (SHIFT+Cutoff)<br />
Halten Sie den SHIFT-Taster und drehen Sie den Cutoff-Regler, um die Decay- und Release-Parameter der<br />
Filter-Hüllkurve gleichzeitig zu verändern. Je höher der Wert, je länger wird der Cutoff des Filters brauchen,<br />
um auf das Sustainlevel der Filterhüllkurve abzusacken. Bitte beachten Sie, dass das nur einen hörbaren Effekt<br />
hat, bei Klängen, die die Filterhüllkurve auch verwenden.<br />
••<br />
Amp Envelope (SHIFT+Resonance)<br />
Halten Sie den SHIFT-Taster und drehen Sie den Resonance-Regler, um die Decay- und Release-Zeiten der<br />
Amp-Hüllkurve gleichzeitig zu verändern. Höhere Werte bewirken, dass die Töne länger brauchen, um bist<br />
auf das Sustainlevel der Hüllkurve abzusacken und nach dem Loslassen der Taste länger ausklingen.<br />
Edit Menu-Taster<br />
Mit der oberen Tasterreihe erreichen Sie alle Menus zur Editierung des aktuell angewählten Patches, während<br />
die Taster in der unteren Reihe dazu da sind, die Administrations-Menus für das Patch-Management<br />
und die Systemkonfiguartion aufzurufen.<br />
Um eines der Edit Menus aufzurufen, drücken Sie den EDIT/SHIFT-Taster, gefolgt vom entsprechenden<br />
Menu-Taster.<br />
Verwenden Sie innerhalb eines Menus die Value 1, 2 und 3-Regler, um die Werte zu verändern. Wenn Sie<br />
einen Wert in Einserschritten verändern wollen, können Sie die VALUE -/+ Taster verwenden. Mit den PARA-<br />
METER -Tastern können Sie die Parameter auswählen, die Sie editieren wollen oder drehen Sie einfach<br />
den Regler unterhalb des Parameters, um seinen Wert zu verändern.<br />
Um in ein anderes Menu zu wechseln, drücken Sie einfach den entsprechenden Menu-Taster. Ein erneutes<br />
Drücken von EDIT/SHIFT ist nicht erforderlich.<br />
Um zur Play-Anzeige zurückzukehren, drücken Sie MODE/EXIT.
100<br />
SCHNELLSTART ANLEITUNG<br />
Easy / Expert Edit-Modus<br />
Damit Sie nicht ständig sämtliche, der zahlreichen Parameter des <strong>Virus</strong> <strong>TI</strong> <strong>Snow</strong> vor Augen haben, gibt es<br />
einen Easy Edit-Modus (default), der pro Menu die drei wichtigsten Parameter für ein Patch bereitstellt. Die<br />
Auswahl der Parameter hängt von verschiedenen Faktoren, wie z.B. den verwendeten Oszillatortypen ab.<br />
Um andere Parameter, als die im Easy Edit-Modus angebotenen, zu editieren, können Sie in den Expert<br />
Edit-Modus wechseln. Für einen vorübergehenden Wechsel halten Sie einfach EDIT/SHIFT, während Sie den<br />
entsprechenden Edit Menu-Taster drücken. Sobald Sie das betreffende Menu verlassen, kehrt der <strong>Virus</strong> wieder<br />
in den Easy Edit-Modus zurück.<br />
Wenn Sie dauerhaft in den Expert Edit-Modus wechseln wollen, können Sie das im Edit CONFIG-Menu tun<br />
(System > Edit-Mode).
DIE EDIT-SEITEN<br />
Die Edit-Seiten<br />
In diesem Basis-Patch kommt der Classic-Oszillator zum Einsatz. Wir konzentrieren uns auf die Parameter,<br />
die im Easy Edit-Modus zur Verfügung stehen. Eine komplette Liste aller Parameter im Expert-Modus finden<br />
Sie in den Parameter Referenz-Kapiteln. Wählen Sie jetzt das Patch „Tutorial 1“ (RAM8 8-1).<br />
OSC 1 Menu (Classic Oszillator)<br />
Drücken Sie diesen Taster, um das Menu für Oszillator 1 aufzurufen, der in diesem Patch für den typischen<br />
Grundsound sorgt. Der <strong>Virus</strong> <strong>TI</strong> <strong>Snow</strong> verfügt über 8 verschiedene Oszillatortypen – mehr Informationen<br />
dazu finden Sie in den Video-Tutorials auf der Access Webseite, in denen jeder Typ genau erklärt wird.<br />
Soft Regler Parameter Bedeutung<br />
#1 Shape Der Shape-Parameter bestimmt die Form der Welle, die von Oszillator 1 erzeugt<br />
wird und damit die eigentliche Klangfarbe. Drehen Sie Value 1 komplett gegen den<br />
Uhrzeigersinn, um eine Sinuswelle zu hören. In der mittleren Position wird die Welle<br />
zu einem Sägezahn. Wenn Sie den Regler weiter in Richtung Uhrzeigersinn drehen<br />
wird der Klang zu einer nasalklingenden Pulswelle.<br />
#2<br />
Case #1<br />
Pulse Width<br />
Dieser Parameter wird durch den Value 2-Regler kontrolliert und hat verschiedene<br />
Funktionen je nach dem, wie der Wert für Osc1 Shape eingestellt wurde.<br />
Wenn Osc1 Shape links neben der Centerposition steht, wird der Parameter zu<br />
“Wave Select”, steht OSC1 Shape rechts neben der Centerposition, wird der<br />
Parameter zu “Pulse Width”.<br />
Bei einem Pulse Width-Wert von 50% (default) hat die Pulswelle einen nasalen<br />
Klang. Je höher der Prozentsatz desto dünner wird der Klang bist er bei 100%<br />
komplett verschwindet.<br />
Wenn Osc1 Shape auf Spectral Wave steht, wird der Parameter zu Wave Select:<br />
#2<br />
Case #2<br />
Wave Select<br />
Sie können jetzt eine von 64 Wellenformen auswählen. Wave 1 (default) ist ein<br />
Sinus, der reinste Klang, den ein Synthesizer erzeugen kann. Wave 2 ist eine<br />
Dreieckswellenform, die etwas schärfer als ein Sinus klingt und in vielen analogen<br />
Synthesizern als Ergänzung zu Sägezahn und Pulswelle enthalten war. Die<br />
restlichen 62 Wellenformen sind digitaler Natur und eignen sich hervorragend zur<br />
Programmierung typischer Digitalsynthesizerklänge der 80er und 90er Jahre.<br />
#3 Osc Balance Dieser Parameter regelt das Lautstärkeverhältnis zwischen Oszillator 1 und<br />
Oszillator 2. In der Centerposition hören Sie beide Oszillatoren. Bei einem Wert von<br />
-64 hören Sie nur Oszillator 1 und bei einem Wert von +63 hören Sie Oszillator 2.
102<br />
SCHNELLSTART ANLEITUNG<br />
OSC 1-Menu (HyperSaw Oszillator)<br />
Wählen Sie jetzt das Patch „Tutorial 2“ (RAM8 8-2). Dieses Patch verwendet den HyperSaw Oszillator.<br />
Soft Regler Parameter Bedeutung<br />
#1 Density Regelt die Anzahl der simulierten Sägezähne zwischen 1 und 9!<br />
#2 Local Detune Verwenden Sie diesen Parameter, um die Verstimmung der simulierten<br />
Sägezähne untereinander zu regeln. Bei Zero sind alle simulierten<br />
Sägezähne perfekt gestimmt, was zu unerwünschten Phasenauslöschungen<br />
führt. Bei einem maximalen Wert von 127 sind die simulierten Sägezähne um<br />
einen Halbton verstimmt.<br />
#3 Osc Balance Dieser Parameter regelt das Lautstärkeverhältnis zwischen Oszillator 1 und<br />
Oszillator 2. In der Centerposition hören Sie beide Oszillatoren. Bei einem<br />
Wert von -64 hören Sie nur Oszillator 1 und bei einem Wert von +63 hören<br />
Sie Oszillator 2.<br />
OSC 1-Menu (Wavetable Oszillator)<br />
Wählen Sie jetzt das Patch „Tutorial 3“ (RAM8 8-3). Dieses Patch verwendet den Wavetable-Oszillator.<br />
Soft Regler Parameter Bedeutung<br />
#1 Index Regelt den Index, um durch den Wavetable zu fahren.<br />
#2 Interpolation Regelt wie weich durch den Wavetable gefahren wird. Stellen Sie diesen<br />
Wert auf 127 und verändern Sie den Index mit Value 1. Mittlere Werte sorgen<br />
für interessante Klangergebnisse.<br />
#3 Osc Balance Dieser Parameter regelt das Lautstärkeverhältnis zwischen Oszillator 1 und<br />
Oszillator 2. In der Centerposition hören Sie beide Oszillatoren. Bei einem<br />
Wert von -64 hören Sie nur Oszillator 1 und bei einem Wert von +63 hören<br />
Sie Oszillator 2.
DIE EDIT-SEITEN<br />
OSC 1 Menu (Formant Complex Oszillator)<br />
Wählen Sie jetzt das Patch „Tutorial 4“ (RAM8 8-4). Dieses Patch verwendet den Formant Complex-Oszillator.<br />
Soft Regler Parameter Bedeutung<br />
#1 Index Regelt den Index, um durch den Wavetable zu fahren.<br />
#2 F-Shift Regelt die Formantverschiebung in Halbtonschritten. Bei einem Wert von +0,<br />
sind die Formanten auf C3 (mittleres C) gestimmt. Radikale Pitch-shifting<br />
und Sync-Effekte können durch die Modulation dieses Parameters erzeugt<br />
werden.<br />
#3 Osc Balance Dieser Parameter regelt das Lautstärkeverhältnis zwischen Oszillator 1 und<br />
Oszillator 2. In der Centerposition hören Sie beide Oszillatoren. Bei einem<br />
Wert von -64 hören Sie nur Oszillator 1 und bei einem Wert von +63 hören<br />
Sie Oszillator 2.<br />
OSC 2 Menu<br />
Drücken Sie diesen Taster, um das Menu für Oszillator 2 aufzurufen. Die meisten Parameter entsprechen denen<br />
für Oszillator 1, mit Ausnahme des Parameters im HyperSaw-Modus für Value 3.<br />
Stellen Sie Osc Balance (OSC1 Menu) auf +0 oder höher, um den Effekt dieses Parameters zu hören!<br />
••<br />
Value 3 (Classic, Wavetable, Grain und Formant-Modi)<br />
FM Amount: FM ist die Abkürzung für Frequency Modulation, ein Vorgang bei dem die Tonhöhe (Pitch) von<br />
Oszillator 2 durch die Tonhöhe von Oszillator 1 moduliert wird. Dabei enstehen oft drastische Verzerrungen<br />
aber es gibt immer wieder „sweet-spots“ die harmonisch interessant klingen.<br />
Experimenten Sie mit verschiedenen Werten für Osc1 und 2 Semitone und FM Amount - Für Old-skool Sci-fi<br />
Effekte, wählen Sie einen sehr niedrigen Wert für Osc1 Semitone. Für einen möglichst unverzerrten Klang,<br />
wählen Sie für beide Oszillatoren eine Sinuswelle.<br />
••<br />
Value 3 (HyperSaw Modus)<br />
Sync: Verwenden Sie Sync, um die Tonhöhe des internen Sync Oszillators des HyperSaw Oszillators zu modulieren.
104<br />
SCHNELLSTART ANLEITUNG<br />
Filter-Menu<br />
In einem Synthesizer wird das Filter zur Klangformung verwendet. Der <strong>Virus</strong> <strong>TI</strong> <strong>Snow</strong> verfügt über zwei Filter,<br />
die in Serie oder parallel betrieben werden können. In der seriellen Betriebsart wird der Ausgang von Filter 1<br />
mit dem Eingang von Filter 2 verbunden und Sie hören das Signal am Ausgang von Filter 2.<br />
Soft Regler Parameter Bedeutung<br />
#1 Filt 2 Offset/<br />
Cutoff2<br />
Regelt den Offset von Filter 2 in Relation zu Filter 1. Filter 2 Cutoff ist<br />
werkseitig so eingestellt, dass er dem Filter 1 Cutoff folgt.<br />
Mit diesem Parameter können Sie Filter 2 zwingen, auf einer anderen<br />
Frequenz als Filter 1 zu arbeiten, was sich auf den Klang der Filter auswirkt.<br />
Bitte beachten Sie, dass dieser Parameter extrem von den Werten anderer<br />
Parameter in der Filtersektion abhängt und daher manchmal keinen hörbaren<br />
Effekt erzeugt.<br />
In einigen Patches taucht dieser Parameter als „Cutoff 2“ auf. Das ist der<br />
Fall, wenn der Cutoff Link-Parameter auf Off steht.<br />
#2 Saturation Type Wählen Sie einen Distortion/Lo-fi-Effekt für den Ausgang von Filter 1. Regeln<br />
Sie die Stärke des Effekts mit dem Value 3-Regler (siehe unten).<br />
Die verschiedenen Verzerrungstypen reichen von subtiler Sättigung, bis hin<br />
zu exotischen Digitalverzerrungen. Sie finden hier auch 1-pole Filter, für den<br />
Fall, dass Sie diese brauchen.<br />
#3 Osc Volume<br />
(Saturation)<br />
Von -64 bis 0 (default) kontrolliert dieser Parameter die Lautstärke<br />
des Oszillators. Von 0 bis +63 regelt er den Sättigungsgrad für Filter1,<br />
vorausgesetzt der Saturation-Parameter (Value 2-Regler) ist aktiviert.<br />
„Saturation“ ist der englische Fachausdruck für die Übersteuerung der<br />
Lautstärke eines Oszillators, die in der Regel interessante Obertöne<br />
hinzufügt.<br />
Einige Saturationsvarianten erzeugen einen hörbaren Effekt, selbst wenn<br />
Saturation auf +0 steht.<br />
In der parallelen Betriebsart wird das Oszillator-Signal auf zwei Kanäle verteilt, von denen der eine zum Filter<br />
1 und der andere zum Filter 2 gesendet wird. In diesem Fall erklingt am Ausgang eine Mixtur der beiden Filter.<br />
Die folgenden Parameter können mit den 3 Value Reglern verändert werden.<br />
Mod-Menu<br />
Wählen Sie jetzt das Patch „Tutorial 5“ RAM8 8-5). Drücken Sie EDIT/SHIFT + MOD, um das Modulation-<br />
Menu aufzurufen.<br />
„Modulation“ ist ein Begriff, der die Funktion beschreibt, die einen Parameterwert im Laufe der Zeit verändert.Der<br />
<strong>Virus</strong> bietet dazu 3 LFOs oder „Low Frequency Oszillatoren“. Diese unterscheiden sich von den<br />
Oszillatoren, die den eigentlichen Klang erzeugen in der Form, dass sie mit sehr viel niedrigeren Frequenzen<br />
schwingen.
DIE EDIT-SEITEN<br />
Die LFOs können mit unabhängigen Geschwindigkeiten schwingen oder bei Bedarf zum Tempo des Patches<br />
oder Multis synchronisiert werden. Sie haben die Wahl zwischen einer Rate von 0 - 127 oder in der Clock-<br />
Betriebsart, zwischen verschiedenen Notenwerten, wobei 1/4 einer Viertelnote entspricht.<br />
Die folgenden 3 Parameter können, mittels der Value-Regler unterhalb des Displays, geregelt werden:<br />
Soft Regler Parameter Bedeutung<br />
#1 LFO1 Rate oder<br />
Clock 1<br />
#2 LFO2 Rate oder<br />
Clock 2<br />
#3 LFO3 Rate oder<br />
Clock 3<br />
Rufen Sie das Patch RAM A-64 „Tutorial 5“ auf und verändern Sie diesen<br />
Parameter. In diesem Patch, moduliert LFO1 die Filter Resonance.<br />
Verändern Sie diesen Parameter. In diesem Patch, moduliert LFO2 die<br />
Stereo-Position des Klangs.<br />
Verändern Sie diesen Parameter. In diesem Patch moduliert LFO3 die<br />
Tonhöhe der beiden Oszillatoren.<br />
Envelopes-Menu<br />
Wählen Sie jetzt das Patch „Tutorial 6“ (RAM8 8-6). Hier können Sie den Klang in seiner Klangfarbe und seinem<br />
Lautstärkeverlauf beeinflussen. Die Value-Regler sind wie folgt belegt:<br />
Soft Regler Parameter Bedeutung<br />
#1 Amp Attack Dieser Parameter regelt die Zeitdauer die verstreicht, bis der Klang seine<br />
höchste Lautstärke nach dem Anschlagen einer Taste erreicht hat. Je höher<br />
der Wert, desto länger der Zeitraum.<br />
#2 Filter Attack Regelt die Zeitdauer, die das Filter benötigt, um den Wert von Cutoff 1 oder<br />
2 (Offset) in Verbindung mit dem Wert für Filter Env 1/2 Amount zu erreichen.<br />
Sie hören nur dann einen Effekt, wenn Filter 1/2 Env Amt auf einen anderen<br />
Wert als Zero eingestellt ist.<br />
#3 Filter Env Amt Regelt die Auswirkung der Filter-Hüllkurve auf die Cutoff-Frequenz der Filter.<br />
Um die Auswirkung zu hören, sollte der Cutoff-Regler auf einen Wert um<br />
30 eingestellt werden. Spielen Sie einige Noten und erhöhen Sie den Wert<br />
für Env Amount. Achten Sie darauf, wie die Einschwingphase des Klangs<br />
(der Attack) schärfer und obertonreicher wird, je höher der Wert für Env<br />
Amount ist! Der Grund dafür ist, dass die Filter-Hüllkurve den Cutoff-Wert so<br />
moduliert, dass am Anfang jeder Note das Filter weit geöffnet ist und dann<br />
im Laufe der Decayzeit die Frequenz absinkt (Nur wenn der Wert für Cutoff<br />
von vorneherein relativ niedrig ist, kann sich die Hüllkurve entsprechend<br />
auswirken).
106<br />
SCHNELLSTART ANLEITUNG<br />
Effects-Menu<br />
Wählen Sie jetzt das Patch „Tutorial 7“ (RAM8 8-7).<br />
Rufen Sie das Effects-Menu auf. Mit den Effekten können Sie das Synthesizersignal weiter bearbeiten. Unterhalb<br />
des Displays können Sie mit den drei Value-Reglern 3 patchrelevante Parameter bedienen:<br />
Soft Regler Parameter Bedeutung<br />
#1 Delay Send Bestimmt den Pegel des Signalanteils, der zum Echoeffekt gesendet wird.<br />
Bei einem Wert von 127 hören Sie nur noch das Effektsignal.<br />
#2 Reverb Send Bestimmt den Pegel des Signalanteils, der zum Halleffekt gesendet wird. Bei<br />
einem Wert von 127 hören Sie nur noch das Effektsignal.<br />
Die gleichzeitige Verwendung mehrer Halleffekte für die einzelnen Parts<br />
belastet den DSP des <strong>Virus</strong> und reduziert die Anzahl der gleichzeitig<br />
spielbaren Stimmen.<br />
#3 Phaser Mix Bestimmt den Pegel des Signalanteils, der zum Phaser-Effekt gesendet wird.<br />
Der Phaser animiert den Klang auf eine angenehme, leicht psychedelische<br />
Art.<br />
Arp-Menu<br />
Drücken Sie diesen Taster, um das Arpeggiator-Menu aufzurufen. Der Arpeggiator ist ein leistungsfähiges<br />
Performance-Werkzeug, mit dem Sie eine einzelne Note in eine Sequenz, oder einen Akkord in ein Arpeggio<br />
(gebrochener Akkord) verwandeln können.<br />
Wählen Sie jetzt das Patch „Tutorial 8“ (RAM8 8-8). Sie können die folgenden 3 Parameters bedienen:<br />
Soft Regler Parameter Bedeutung<br />
#1 Arp Mode Mit diesem Parameter bestimmen Sie die Abspielreihenfolge von Noten in einem<br />
Akkord. Spielen Sie mindestens 3 Noten, um diesen Effekt zu hören. Sie haben die<br />
Wahl zwischen:<br />
- Off (kein Arpeggiator)<br />
- Up (Von unten nach oben)<br />
- Down (von oben nach unten)<br />
- Up&Down (rauf und runter)<br />
- As Played (Noten werden in der Reihenfolge verwendet, in der Sie gespielt wurden)<br />
- Random (Zufällige Reihenfolge)<br />
- Chord (Noten werden im Rhythmus des Arp Pattern simultan wiedergegeben)<br />
#2 Pattern Wählen Sie aus einem von 64 Arpeggio-Mustern. Das werkseitig voreingestellte Pattern<br />
“User” kann auf der Arp Seite in der <strong>Virus</strong> Control-Software editiert werden und wird<br />
mit dem Patch abgespeichert. Mehr Informationen zu diesem Thema finden Sie in den<br />
<strong>Virus</strong> Control- Tutorials.
DIE EDIT-SEITEN<br />
Soft Regler Parameter Bedeutung<br />
#3 Length Regelt die Länge der Arpeggionoten. Niedrige Werte erzeugen kurze “Staccatos”,<br />
während höhere Werte einen gebundenen “Legato”- Sound erzeugen.<br />
Common-Menu<br />
Drücken Sie diesen Taster, um das Common-Menu aufzurufen. Sie können 3 Parameter der Oszillator-Sektion,<br />
die die grundsätzliche Verhaltensweise eines Patches betreffen, regeln.<br />
Soft Regler Parameter Bedeutung<br />
#1 Key Mode Wenn der Key Mode auf „Poly“ eingestellt ist (default), können in einem<br />
Patch mehrere Noten gleichzeitig gespielt werden. Wählen Sie eine der<br />
„Mono“-Betriebsarten, wenn Sie ein Patch einstimmig spielen wollen (egal<br />
wieviele Noten gleichzeitig gespielt werden, es erklingt immer nur eine).<br />
Der Mono-Modus eignet sich in erster Linie für Solosounds und Bässe.<br />
Im Parameter Reference Manual finden Sie mehr Informationen zu den<br />
verschiedenen Mono-Betriebsarten.<br />
Wenn Sie den Key Mode auf „Hold“ einstellen, werden die Noten unendlich<br />
ausgehalten, auch nachdem Sie die Tasten losgelassen haben.<br />
#2 Portamento Verwenden Sie Portamento, um einen „Glissando“-Effekt zwischen zwei<br />
verschiedenen Noten zu erzeugen. Je höher der Wert, desto länger braucht<br />
jede neue Note, bis sie ihren Zielwert erreicht hat.<br />
#3 Transpose Mit Transpose kontrollieren Sie die Tonhöhe eines Patches in<br />
Halbtonschritten. Ein Wert von 12 transponiert die Tonhöhe um eine<br />
Oktave. Alternativ dazu können Sie mit SHIFT+Value 2, das Patch direkt in<br />
Oktavschritten transponieren.
108<br />
SCHNELLSTART ANLEITUNG<br />
Multi-Menu<br />
Hier finden Sie alle Parameter, die die Parts im Multi-Modus betreffen. Verwenden Sie die Parameter<br />
< >-Taster, um zwischen den verschiedenen Seiten zu navigieren. Mehr Informationen zu diesen Parametern<br />
finden Sie in den entsprechenden Kapiteln im Referenz-Handbuch.<br />
••<br />
Erzeugen eines Layer/Split-Multis<br />
Wichtig ist, das alle zum Einsatz kommenden Parts auf den gleichen MIDI-Kanal reagieren (normalerweise<br />
Kanal 01). Wenn Sie die gewünschten Patches, die Sie für jeden Part verwenden wollen, mit den Bank- und<br />
Program-Parametern ausgewählt haben, können Sie mehrere Klänge übereinanderlegen (Layer), in dem<br />
Sie die Low Key- und High Key-Parameter einfach unverändert lassen. Sie können die Tastatur aber auch<br />
in verschiedene Bereiche, auch als „Zonen“ bezeichnet, unterteilen, in dem Sie diese Werte entsprechend<br />
verändern. Sie können darüber hinaus beide Ansätze in einem Multi kombinieren, um eine Mixtur aus Layer<br />
und Split zu erzeugen.<br />
Vorhörfunktion/Audition<br />
Drücken Sie diesen Taster, um den aktuell angewählten Sound mit einer C3-Note zu hören. Wenn Sie den<br />
Taster eine Weile halten, wird der Klang unendlich lange wiedergegeben – drücken Sie Audition erneut, um<br />
die Wiedergabe abzubrechen.<br />
Store-Menu<br />
Um ein Patch, das Sie erzeugt oder verändert haben, abzuspeichern, müssen Sie zuerst den STORE-Taster<br />
in der unteren Reihe drücken. Wenn Sie sich nicht im Edit-Modus befinden, drücken Sie EDIT/SHIFT gefolgt<br />
von STORE.<br />
Sie haben die Wahl zwischen den folgenden Möglichkeiten:<br />
Store To RAM: Das Patch wird im internen Speicher des <strong>Virus</strong> gesichert. Eine Back-up Batterie sorgt dafür,<br />
dass der Speicherinhalt auch nach dem Ausschalten nicht verloren geht.<br />
Compare: Sie können zwischen dem Original und der editierten Version hin und her wechseln.<br />
Sysex Dump: Das Patch wird als Sysex-Datei zu einem anderen <strong>Virus</strong> oder einem Software-Sequenzer gesendet.<br />
Store Single Menu/Multi Edit Buffer: Wenn Sie sich nicht im Single-Modus befinden, wählen Sie diese Option<br />
für die Patch-Management-Funktionen - weitere Details finden Sie weiter unten.<br />
Drücken Sie STORE, um den Speichervorgang abzuschließen.
DIE EDIT-SEITEN<br />
Store to RAM<br />
Im nächsten Schritt müssen Sie einen Speicherplatz auswählen, auf den Sie das Patch abspeichern wollen.<br />
••<br />
Destination<br />
Wählen Sie eine bestimmte Bank, in der Sie das Patch abspeichern wollen.<br />
••<br />
Patch No.<br />
Wählen Sie eine Patchnummer, die Sie überschreiben wollen.<br />
••<br />
Patch Name<br />
Anstatt eine Patchnummer auszuwählen, können Sie auch nach einem bestimmten Patchnamen suchen.<br />
Benennen eines Patches<br />
Sobald Sie einen geeigneten Speicherplatz für Ihr Patch gefunden haben, müssen Sie es benennen. Die<br />
entsprechende Seite erreichen Sie, in dem Sie STORE erneut drücken. Verwenden Sie die Value-Regler oder<br />
die Taster, um die gewünschten Buchstaben oder Symbole einzugeben und navigieren Sie mit den PARA-<br />
METER-Tastern. Drücken Sie STORE erneut, um den Vorgang abzuschließen.<br />
SysEx Dump<br />
Drücken Sie STORE im Single-Modus, um ein einzelnes Patch zu einem externen Gerät zu senden. Drücken<br />
Sie STORE im Multi-Modus, um ein komplettes Arrangement (das sämtliche Patch Informationen für jeden<br />
Part enthält) zu senden. Wenn Sie nur das Single Patch des aktuell angewählten Parts senden wollen, wählen<br />
Sie „Dump Single“ anstelle von „Arrangement“ und drücken Sie STORE, um den Sendevorgang auszulösen.<br />
Speichern im Multi-Modus<br />
Wenn Sie das Store-Menu im Multi-Modus aufrufen, wollen Sie wahrscheinlich das aktuelle Multi Setup<br />
abspeichern. Wählen Sie einen geeigneten Multi-Speicherplatz und befolgen Sie die gleichen Anweisungen,<br />
wie bei der Speicherung eines Single Patches.
110<br />
SCHNELLSTART ANLEITUNG<br />
Utility-Funktionen<br />
Wenn Sie sich im Multi-Modus befinden und nur das einzelne Patch des aktuell angewählten Parts abspeichern<br />
wollen, wählen Sie „Store Single Menu“ in der Liste der Optionen im Bereich „Function“.<br />
Wenn Sie sich im Sequencer-Modus befinden (oder <strong>Virus</strong> Control-Modus) und sämtliche Single Patches in<br />
den Multi Mode Edit Buffer kopieren wollen, wählen Sie „Multi Edit Buffer“ in der Liste der Optionen im Bereich<br />
„Function“.<br />
Cancel Store-Modus<br />
Wenn Sie plötzlich feststellen, dass Sie grade dabei sind ihr Lieblingspatch versehentlich zu überschreiben,<br />
drücken Sie EXIT, um direkt in das Store-Menu zurückzukehren.<br />
Config-Menu<br />
In diesem Menu finden Sie alle globalen Parameter, mit denen Sie das Verhalten und Erscheinungsbild des<br />
<strong>Virus</strong> <strong>TI</strong> <strong>Snow</strong>, wie die Helligkeit des Displays oder das Verhalten der Regler etc.einstellen können.<br />
Mehr Informationen zu den verschiedenen Funktionen in diesem Menu finden Sie im Referenz-Handbuch.<br />
Keine Angst – keine dieser Funktionen führt zur Selbstzerstörung des Gerätes. Sie könne den Originalzustand<br />
jederzeit wieder herstellen, in dem Sie den TAP TEMPO-Taster gedrückt halten, während Sie den <strong>Virus</strong><br />
einschalten.
ÜBER POLYPHONIE<br />
Über Polyphonie<br />
Sie fragen sich vielleicht: Wieviele Stimmen kann der <strong>Virus</strong> <strong>TI</strong> <strong>Snow</strong> eigentlich gleichzeitig wiedergeben? Aufgrund<br />
der dynamischen Struktur der Stimmenarchitektur im <strong>Virus</strong>, hängt die tatsächliche Anzahl gleichzeitig<br />
spielbarer Stimmen von vielen Faktoren ab.<br />
Um Ihnen aber zumindestens einen Anhaltspunkt zu geben, wie viele Stimmen Sie ungefähr mit dem jeweiligen<br />
Patch erzielen können, haben wir im Display eine Patch Compexity-Anzeige integriert.<br />
Es gibt fünf verschiedene Komplexitätsstufen. Patches mit Level 1 sind am einfachsten strukturiert und<br />
bieten daher die maximale Anzahl von Stimmen. Da es ansonsten sehr aufwändig wäre alle Möglichkeiten<br />
durchzuspielen, haben wir hier drei typische Beispiele entwickelt*:<br />
*Die folgenden Beispiele gehen davon aus, dass Sie sich im Single-Modus bewegen, bzw. einen einzelnen<br />
Part im Multi-Modus verwenden. Die Verwendung zusätzlicher Parts reduziert die Anzahl der gleichzeitig<br />
spielbaren Stimmen.<br />
••<br />
Level 1<br />
Patches die 1 oder 2 einfache Oszillatoren verwenden und sich auf ein oder zwei Modulationsroutings und<br />
ein oder zwei Effekte beschränken, können bis zu 32-stimmig gespielt werden. Noch einfachere Patches wie<br />
z.B. RAM1- 78, ein schönes warmes PWM Pad mit Delay und Chorus, ermöglicht sogar mehr als 50 gleichzeitig<br />
spielbare Stimmen.<br />
••<br />
Level 3<br />
Patches mit 3 einfachen Oszillatoren, 3 oder 4 Modulationsroutings und mehreren Effekten sind in der Regel<br />
20-stimmig spielbar.<br />
••<br />
Level 5<br />
Patches, die Grain- oder Formant-Oszillatoren verwenden, mehrere Modulationsroutings, viele Effekte und<br />
den Analog 1-4pole Filter einsetzen, erreichen ca 10 - 14 Stimmen.
112<br />
SCHNELLSTART ANLEITUNG<br />
Maximierung der Simmenanzahl<br />
Der <strong>Virus</strong> <strong>TI</strong> <strong>Snow</strong> verfügt über Funktionen, die den DSP unterschiedlich stark belasten, was besonders<br />
im Multi-Modus zu Buche schlägt. Sobald Sie das obere Limit der gleichzeitig spielbaren Stimmen erreicht<br />
haben, kommt es zum sogenannten „Note-Stealing“, ein unschöner Effekt, der in manchen Fällen verstärkt<br />
auffällt.<br />
Sollte dieser Effekt auftreten, schauen Sie sich die verwendeten Patches genauer an und untersuchen Sie<br />
sie darauf, ob sie in irgendeiner Art und Weise optimiert werden können. Achten Sie dabei besonders auf die<br />
folgenden Dinge:<br />
••<br />
Unison Mode (Common-Menu)<br />
Im Unison-Modus spielt der <strong>Virus</strong> jede Note mit mehreren Stimmen und ist daher der Polyphoniekiller Nr.1!<br />
Wenn der Unison Mode auf den Wert Twin eingestellt ist, verbraucht der <strong>Virus</strong> zwei Stimmen pro gespielter<br />
Note, wenn der Wert auf 8 steht, entsprechend mehr! In vielen Fällen können Sie den Wert auf Twin reduzieren,<br />
ohne dass es zu eklatanten Veränderungen im Klangbild kommt. Das gilt vor allen Dingen in einem<br />
kompletten Stereomix. Den dabei auftretenden Pegelabfall, können Sie in der Regel leicht durch Anheben<br />
des Patch Volume-Wertes (Common-Menu) oder des Part Volumes (Multi-Menu) kompensieren.<br />
Unison Mode ist ein Überbleibsel aus den Tagen des <strong>Virus</strong> A B and C, die damals noch nicht über den HyperSaw<br />
Oszillator oder den Local Detune-Parameter verfügten. In den meisten Fällen verbraucht ein Hyper-<br />
Saw Oszillator weniger Stimmen, als ein Patch mit drei separaten Sägezahn-Oszillatoren.<br />
••<br />
Analog 1-4pole (Filter Menu)<br />
Dieser Filtertyp verdoppelt ungefähr die DSP-Belastung pro gespielter Note.<br />
••<br />
WavePWM oder Grain /Formant Complex (Osc1/2 Menu)<br />
Diese Oszillatortypen verdoppeln ungefähr die DSP-Belastung pro gespielter Note. Verwenden Sie diese<br />
Oszillatoren nur, wenn Sie auch von den F-Shift, F-Spread oder Local Detune Parametern Gebrauch machen<br />
(OSC1/2 Menus) – das gilt besonders für den Grain Complex, der ansonsten eigentlich genau wie ein<br />
Wavetable Oszillator klingt, wenn all diese Parameter einen Wert von +0 haben.<br />
Alternativ dazu, können Sie auch die einfachen Varianten von Grain und Formant verwenden, da diese den<br />
DSP sehr viel weniger belasten.<br />
••<br />
Oscillator 3 (Osc1/2 Menu)<br />
Der Einsatz des dritten Oszillators erhöht die DSP-Belastung um ca. 30%.<br />
••<br />
Reverb<br />
Dieser Effekt belastet den DSP am stärksten. Verwenden Sie ihn daher nur für maximal 1 bis 2 Parts gleichzeitig.<br />
Der Delay-Effekt ist sehr viel genügsamer. Wenn Sie Total Integration verwenden, können Sie natürlich<br />
auch Effekt-Plugins aus dem Rechner einsetzen.
ÜBER POLYPHONIE<br />
Optimieren der Patches<br />
Falls ein Patch einige oder alle der eben genannten Möglichkeiten nutzt, versuchen Sie die DSP-Belastung<br />
zu reduzieren, in dem Sie z.B. Parameter, die mit sehr niedrigen Werten arbeiten und daher den Klang nur<br />
minimal beeinflussen, lieber gleich ganz abschalten. Jeder aktive Parameter belastet den DSP, auch wenn<br />
der Wert relativ gering eingestellt ist. Wenn z.B. Osc Balance auf -63 steht, ist der Oszillator 2 kaum zu hören,<br />
stellen Sie also besser einen Wert von –64 ein, denn dadurch wird der Oszillator 2 komplett abgeschaltet<br />
und verbraucht keine DSP Resourcen mehr. Wenn der Mix- oder Send-Parameter eines Effektes auf Off<br />
oder Dry steht, verbraucht er ebenfalls keine Resourcen. Überprüfen Sie daher, ob es im Einzelfall nicht Sinn<br />
macht einen Effekt, der nur mit minimalem Pegel genutzt wird, besser gleich ganz auszuschalten.<br />
Der Einsatz beider Filter verbraucht ebenfalls mehr DSP. Wenn Sie für einen Klang nur einen 2-pole Filter benötigen,<br />
können Sie das zweite Filter abschalten, in dem Sie den Wert für Filter Balance auf –64 stellen.<br />
Die Zeitdauer der Releasephase eines Klanges belastet ebenfalls den DSP, da durch die Überlappungen<br />
zusätzliche Stimmen verbraucht werden. In vielen Fällen können Sie die Releasezeiten verkürzen, ohne dass<br />
sich das negativ auf den Gesamtklang auswirkt. Überprüfen Sie bitte den Priority-Parameter (Multi-Menu),<br />
mit dem Sie das Note-stealing für bestimmte Parts einschränken können. Wählen Sie für wichige Parts eine<br />
hohen Priority-Wert, um sicher zustellen, dass die Note-stealing–Funktion hier zuletzt zum Einsatz kommt.<br />
Verwenden Sie nicht die Mod Matrix, um einen Effekt zu erzielen, den Sie genauso gut mit einer der voreingestellten<br />
Modulationsroutings erreichen können. Um z.B. Cutoff 1 mit einem LFO zu modulieren, verwenden<br />
Sie den LFO2>Cutoff1-Parameter, anstatt ein eigenes Routing in der Mod Matrix zu erstellen, das<br />
zusätzliche Resourcen verbrauchen würde.<br />
Einige Controller, die Sie in der Mod Matrix verwenden können, verbrauchen mehr DSP als andere – das<br />
liegt daran, dass einige Controller pro Stimme berechnnet werden, während andere global wirken. So wirkt<br />
z.B. das Modwheel auf alle Stimmen eines Parts gleichzeitig, was dazu führt, dass eine Werteveränderung<br />
nur einmal berechnet werden muss, während Dinge wie KeyFollow oder Filter Envelope für jede Stimme<br />
separat ausgerechnet werden müssen. Bei polyphon gespielten Patches wirkt sich das teilweise eklatant auf<br />
die DSP Belastung aus, besonders, wenn mehrere Modulationsroutings gleichzeitig zum Einsatz kommen.<br />
Schalten Sie nicht verwendete Mod Slots ganz ab. Drehen Sie also nicht nur den Amount auf Null, sondern<br />
wählen Sie für die Source- und/oder Destination-Parameter den Wert Off.<br />
Wie Sie sehen, gibt es viele Möglichkeiten die DSP-Belastung zu optimieren. Manchmal reichen schon wenige<br />
Schritte aus, um die eine entscheidene zusätzliche Stimme freizuschaufeln.
114<br />
SCHNELLSTART ANLEITUNG<br />
Fazit<br />
Damit sind wir am Ende unseres kurzen Quick Start-Manuals angelangt. Wir hoffen Sie haben einige für Sie<br />
verwertbare Informationen darin gefunden. Wenn Sie weiterführende Fragen haben, finden Sie zusätzliche<br />
Informationen in den Supportdokumenten auf Ihr Festplatte, die zusammen mit der <strong>TI</strong> Software dort installiert<br />
worden sind und in denen jedes einzelne Detail genau beleuchtet wird.<br />
Schauen Sie sich auf jeden Fall die Video-Tutorials an, die Ihnen genau erklären, wie Sie die <strong>Virus</strong> Control<br />
Software am besten mit dem Sequenzer Ihrer Wahl einsetzen können und wie Sie Total Integration am effiziensten<br />
nutzen können.<br />
Bei weiteren Fragen und Problemen wenden Sie sich bitte an den Support auf www.access-music.de<br />
Und vergessen Sie nicht - alles was Sie bisher erfahren haben, können Sie nachlesen, wenn Sie auf das „?“-<br />
Symbol in der <strong>Virus</strong> Control klicken!
GARAN<strong>TI</strong>EBES<strong>TI</strong>MMUNGEN<br />
Garantiebestimmungen<br />
FCC information (USA)<br />
Important notice: Do not modify this unit. This product, when installed as indicated in the instructions contained<br />
in this manual, meets FCC requirements. Modifications not expressly approved by<br />
Kemper Digital GmbH may void your authority, granted by the FCC, to use this product.<br />
Important: When connecting this product to accessories and/or another product use only high quality<br />
shielded cables. Cables supplied with this product MUST be used. Follow all installation instructions. Failure<br />
to follow instructions could void your FCC authorisation to use this product in the USA.<br />
Note: This product has been tested and found to comply with the requirements listed in FCC Regulations,<br />
Part 15 for Class „B“ digital devices. Compliance with these requirements provides a reasonable level of<br />
assurance that your use of this product in residental environment will not result in harmful interference with<br />
other electronic devices. This equipment generates/uses radio frequencies and, if not installed and used<br />
according to the instructions found in the user manual, may cause interference harmful to the operation of<br />
other electronic devices, Compliance with FCC regulations does not guarantee that interference will not occur<br />
in all installations. If this product is found to be the source of interference, which can be determinated by<br />
turning the unit „OFF“ and „ON“, please try to eliminate the problem by using one of the following measures:<br />
Relocate either this product or the device that is being affected by the interference. Utilise power outlets that<br />
are on branch (Circuitbreaker or fuse) circuits or install AC line filter/s. In the case of radio or TV interference,<br />
relocate/reorient the antenna. If the antenna lead-in is 300 ohm ribbon lead, change the lead- in to coaxialtype<br />
cable. If these corrective measures do not produce satisfactory results, please contact the local retailer<br />
authorised to distribute this type of product. The statements above apply ONLY to products distributed in<br />
the USA.<br />
FCC information (Canada)<br />
The digital section of this apparatus does not exceed the „Class B“ limits for radio noise emmissions from<br />
digital apparatus set out in the radio interference regulation of the Canadian Department of Communications.<br />
This only applies to products distributed in Canada.<br />
Le present appareil numerique n’emet pas debruit radioelectriques depassant les limites applicables aux appareils<br />
numerique de la „Class B“ prescrites dans la reglement sur le brouillageradioelectrique edicte par le<br />
Ministre Des Communication du Canada.Ceci ne s’applique qu’aux produits distribues dans Canada.
116<br />
SCHNELLSTART ANLEITUNG<br />
Other standards (rest of world)<br />
This product complies with the radio frequency interference requirements of the Council Directive 89/336/EC.<br />
Cet appareil est conforme aux prescriptions de la directive communitaire 89/336/EC.<br />
Dieses Gerät entspricht der EG-Richtlinie 89/336/EC.192<br />
EG Konformitätserklärung<br />
Für das folgend bezeichnete Erzeugnis/ For the following named product ACCESS <strong>Virus</strong> <strong>TI</strong> <strong>Snow</strong> - wird<br />
hiermit bestätigt, dass es den Schutzanforderungen entspricht, die in der Richtlinie 89/336/FWG des Rates<br />
zur Angleichung der Rechtsvorschriften der Mitgliedstaaten über die elektromagnetische Verträglichkeit festgelegt<br />
sind; außerdem entspricht es den Vorschriften des Gesetzes über die elektromagnetische Verträglichkeit<br />
von Geräten (EMVG) vom 30. August 1995;/ - is hereby declared that it conforms to the requirements<br />
of the Council Directive 89/336/FWG for radio frequency interference; it also complies with the regulations<br />
about radio interference of electronic devices dated on August 30th, 1995. Zur Beurteilung des Erzeugnisses<br />
hinsichtlich der elektromagnetischen Verträglichkeit wurden folgende harmonisierte Normen herangezogen:<br />
/The following standards have been applied to declare conformity: EM 50 082-1 : 1992 , EN 50 081-1 :<br />
1992, EN60065 : 1993<br />
Diese Erklärung wird verantwortlich für den folgenden Hersteller abgegeben:This declaration has been given<br />
responsibly on behalf of the manufacturer: Kemper Digital GmbH, Recklinghausen, Germany.<br />
Garantiebestimmungen<br />
Die Kemper Digital GmbH leistet Garantie für alle nachweisbaren Material- und Fertigungsfehler für eine<br />
Dauer von 24 Monaten ab erstmaligem Verkauf bzw. Ablieferungsdatum an den Endverbraucher. Von der<br />
Garantie ausgenommen sind alle Schäden, die durch falsche oder unsachgemäße Bedienung, durch falsche<br />
Verbindungen mit anderen Geräten oder durch nicht bestimmungsgemäße Verwendung des Gerätes<br />
entstehen. Außerdem erlischt jeder Garantieanspruch bei Fremdeingriffen oder eigenmächtigen Änderungen<br />
am Gerät. Kemper Digital behält sich das Recht vor, die Garantieforderungen abzulehnen, wenn das Produkt<br />
nicht von einem Autorisierten Stützpunkthändler an den jeweiligen Endkunden verkauft wurde. Die Garantie<br />
beschränkt sich auf den Ersatz oder die Instandsetzung des Produktes. Hierdurch werden jedoch die Rechte<br />
des Kunden, die ihm gemäß der geltenden Produkthaftungsgesetze im Land des Kaufs zustehen, nicht<br />
eingeschränkt. Voraussetzung für die Garantieleistung ist die Rücksendung der ausgefüllten Garantiekarte<br />
mit Serien-Nr., Verkaufsdatum, Firmenstempel, Unterschrift des Autorisierten Stützpunkthändlers, Name und<br />
Anschrift des Käufers sowie eine Kopie des Kaufbelegs. Wenn Defekte innerhalb der Garantiezeit auftreten<br />
sollten, wenden Sie sich bitte an den autorisierten Stützpunkthändler, bei dem Sie das Gerät gekauft haben<br />
oder senden uns eine Email an info@kemper-digital.de. Soll das Gerät eingeschickt werden, kann dies nur<br />
nach vorheriger Absprache geschehen und es müssen folgende Voraussetzungen erfüllt sein:
GARAN<strong>TI</strong>EBES<strong>TI</strong>MMUNGEN<br />
- Das Gerät befindet sich in der Originalverpackung oder zumindest gleichwertiger Verpackung.<br />
- Dem Gerät liegt eine genaue Fehlerbeschreibung und eine Kopie des Kaufbelegs bei.<br />
Warranty regulations<br />
The Kemper Digital GmbH warranty covers all defects in material and workmanship for a period of 24<br />
months from the date of original purchase. This warranty does not cover defects due to abuse, faulty connections<br />
or operation under other than specified conditions. Warranty coverage is also voided when the<br />
device is repaired by unauthorized persons or tampered with in any way. Kemper Digital reserves the right to<br />
refuse warranty claims, if the product was not sold from an Authorised Base Dealer to the respective endcustomer.<br />
This warranty is limited to replacement or repair of the product. It does not limit the customers’<br />
rights according to the current product liability regulations of the country where the product was purchased.<br />
The warranty is only valid, if a completely filled in warranty card, including serial no., date of sale, company<br />
stamp, signature of the Authorised Base Dealer, as well as name and address of the customer is returned to<br />
the address given below. If a defect occurs during the warranty period, contact the Autorised Base Dealer<br />
from whom you bought the synthesizer or write an email to info@kemper-digital.com. The synthesizer can<br />
only be returned upon prior approval and the following requirements have to be fulfilled:<br />
- The unit is sent in its original package or one of equal quality.<br />
- A detailed description of the defect and a copy of the purchase receipt is included.
Guide de<br />
démarrage rapide
120<br />
GUIDE DE DÉMARRAGE RAPIDE
TABLE DES MA<strong>TI</strong>ÈRES<br />
Table des matières<br />
125 Introduction<br />
Bienvenue<br />
Sain et Sauf<br />
Maintenance<br />
Où trouver...<br />
129 Utilisation<br />
Mise sous-tension<br />
Branchements<br />
Entrées/Sorties Audio<br />
131 Le Choix Des Armes<br />
<strong>Virus</strong> Control vs MIDI?<br />
Que Signifie Total Integration?<br />
Logiciel Hôte<br />
133 Modus Operandi<br />
Bouton Mode/Exit<br />
Bouton Tap Tempo/Panic<br />
Les Presets<br />
Fonctions des Boutons Rotatifs<br />
Les Boutons du Menu Edit<br />
Mode d’Edition Easy/Expert<br />
139 Les Pages D’édition<br />
Menu OSC 1 (Oscillateur Classic)<br />
Menu OSC 1 (Oscillateur HyperSaw)<br />
Menu OSC 1 (Oscillateur Wavetable)<br />
Menu OSC 1 (Oscillateur Formant Complex)<br />
Menu OSC 2<br />
Le Menu Filters<br />
Le Menu Mod
122<br />
GUIDE DE DÉMARRAGE RAPIDE<br />
Le Menu Envelopes<br />
Le Menu Effects<br />
Le Menu Arp<br />
Le Menu Common<br />
Le Menu Multi<br />
Audition<br />
Le Menu Store<br />
Nommer Votre Patch<br />
Enregistrer un Patch en Mode Multi<br />
Le Menu Config<br />
149 A Propos De Polyphonie<br />
Maximiser la Polyphonie<br />
Optimiser Vos Patches<br />
Conclusion<br />
153 Garantie<br />
FCC information (USA)<br />
FCC information (Canada)<br />
Other standards (rest of world)<br />
Declaration of conformity<br />
Warranty regulations
TABLE DES MA<strong>TI</strong>ÈRES<br />
Informations<br />
© Copyright 2008 Kemper Digital GmbH. Tous droits réservés.<br />
Ce manuel ainsi que le logiciel et le matériel décrits sont fournis sous licence et peuvent être utilisés ou copiés<br />
uniquement s’ils respectent les conditions de la licence. Le contenu de ce manuel est fourni à titre d’information<br />
uniquement. Il peut faire l’objet de modifications sans préavis et ne constitue en aucun cas un engagement<br />
de la part de Kemper Digital GmbH. Kemper Digital GmbH ne saurait être tenu pour responsable<br />
en cas d’erreurs ou d’imprécisions contenues dans ce document. A l’exception des autorisations contenues<br />
dans les dispositions de la licence, aucune partie de ce document ne pourra être reproduite, enregistrée sur<br />
un système de récupération ou encore transmise, quelle que soit la forme ou le moyen, électronique, mécanique<br />
ou enregistrement, sans l’autorisation préalable de Kemper Digital GmbH.<br />
<strong>Virus</strong> est une marque de Kemper Digital GmbH. Toutes les marques citées dans ce manuel appartiennent à<br />
leurs détenteurs respectifs. Toutes les fonctions et spécifications sont soumises à modifications sans préavis.<br />
www.access-music.de<br />
support@access-music.de
124<br />
GUIDE DE DÉMARRAGE RAPIDE
INTRODUC<strong>TI</strong>ON<br />
Introduction<br />
Bienvenue<br />
Le <strong>Virus</strong> <strong>TI</strong> <strong>Snow</strong> reprend l’intégralité du générateur de son du <strong>Virus</strong> <strong>TI</strong>, synthétiseur aux multiples récompenses,<br />
concentré dans une minuscule centrale dédiée au pur fun ! L’architecture à simple DSP garantit une<br />
grande polyphonie, avec la possibilité d’avoir jusque 4 parties multi-timbrales. Simplicité est le mot d’ordre<br />
ici – les boutons de menu à accès direct vous mènent directement aux paramètres les plus importants de<br />
chaque section, que vous pouvez modifier en temps réel grâce aux 3 potentiomètres situés sous l’écran<br />
LCD. Pour ceux qui désirent éditer leurs sons plus en profondeur, le mode Expert vous permet d’accéder à<br />
absolument toutes les possibilités de synthèse sonore du <strong>Virus</strong> <strong>TI</strong>.<br />
“<strong>TI</strong>” signifie “Total Integration”, et c’est précisément là où nous avons redéfini le concept d’intégration du<br />
synthétiseur hardware aux DAW (stations de travail numériques). Toutes les données audio et MIDI peuvent<br />
être transmises vers et depuis votre logiciel hôte via USB, grâce au plug-in <strong>Virus</strong> Control qui fait de votre<br />
<strong>Virus</strong> <strong>TI</strong> <strong>Snow</strong> un instrument multi-canal VST/AudioUnit/RTAS complet, avec la possibilité de parcourir les<br />
patches, et d’accéder à toutes les fonctions d’édition de l’instrument.<br />
La frontière qui sépare le hardware du software a été approchée avec une telle élégance que dorénavant il<br />
sera difficile d’imaginer comment il pourrait en être autrement.
126<br />
GUIDE DE DÉMARRAGE RAPIDE<br />
Sain et Sauf<br />
Lisez très attentivement ce qui suit. Certains de ces conseils concernent autant votre santé que celle de<br />
votre instrument !<br />
· Evitez d’exposer votre <strong>Virus</strong> à l’humidité, la poussière ou la saleté. Ne placez aucun liquide susceptible<br />
d’être renversé à proximité de l’appareil (ex : tasse de café). Si par mégarde une quelconque substance<br />
venait à infiltrer l’appareil, éteignez-le immédiatement, déconnectez l’alimentation et contactez un centre de<br />
réparation qualifié.<br />
· Ne pas exposer directement l’appareil au soleil ou à toute autre source de chaleur excessive. Assurez-vous<br />
qu’un flux d’air suffisant circule librement autour de l’appareil.<br />
· Ne pas soumettre l’appareil à des chocs physiques ou à des vibrations. Placez-le sur une surface plane, et<br />
assurez-vous qu’il soit bien stable.<br />
· Ce modèle du <strong>Virus</strong> nécessite un bloc d’alimentation externe de 12V DC. Utilisez exclusivement le bloc<br />
d’alimentation fourni avec l’appareil. Ne jamais brancher le <strong>Virus</strong> à un transformateur qui ne réponde pleinement<br />
aux règles de sécurité du pays en vigueur. Ne jamais utiliser de bloc d’alimentation qui ne soit spécifiquement<br />
adapté au voltage du pays dans lequel vous vous trouvez.<br />
· Débranchez l’alimentation secteur chaque fois que vous êtes susceptible de ne pas utiliser votre <strong>Virus</strong><br />
pendant une longue période. Débranchez la toujours en saisissant la prise, et non en tirant sur le cordon. Ne<br />
jamais toucher la prise secteur avec des mains humides.<br />
· Le <strong>Virus</strong> est capable de générer des niveaux sonores qui peuvent nuire à votre acuité auditive de façon irrémédiable,<br />
soit via une amplification externe, soit lorsque vous utilisez un casque audio directement connecté<br />
à l’instrument. Soyez vigilent à toujours utiliser un niveau raisonnable ! Vérifiez également que l’équipement<br />
auquel vous connectez votre <strong>Virus</strong> corresponde aux spécificités de l’instrument (+4dB en sortie, etc.).<br />
· En plus de tous ces avertissements, merci de considérer un dernier point très important : s’il vous plaît, ne<br />
cachez pas votre <strong>Virus</strong> <strong>TI</strong> <strong>Snow</strong> dans votre four, car au cas où vous l’oubliiez sa cuisson serait irrémédiable.<br />
De même ne posez jamais votre <strong>Virus</strong> <strong>TI</strong> <strong>Snow</strong> sur le toit de votre voiture pendant que vous attachez la ceinture<br />
de sécurité des enfants, au cas où vous l’oubliiez et preniez la route en l’état.<br />
Maintenance<br />
• Mise à jour de l’OS<br />
Access Music est reconnu pour constamment améliorer ses produits via des mises à jour gratuites de leur<br />
système d’exploitation (OS). Nous vous invitons à consulter régulièrement notre site internet www.accessmusic.de<br />
pour y télécharger la dernière version disponible.
INTRODUC<strong>TI</strong>ON<br />
• Entretien<br />
Pour nettoyer votre <strong>Virus</strong>, utilisez exclusivement un chiffon sec et doux, ou bien une brosse souple. N’utilisez<br />
aucun détergent ni autre liquide. Sachez que les solvants industriels ou domestiques peuvent sérieusement<br />
endommager les surfaces de votre instrument.<br />
• Réparation<br />
N’ouvrez jamais votre <strong>Virus</strong> vous-même. Le <strong>Virus</strong> ne contient aucun composant qui soit réparable par les<br />
utilisateurs. Si votre <strong>Virus</strong> avait un jour besoin d’une réparation, contactez le support technique d’Access<br />
(www.access-music.de) . Vous trouverez toutes les informations sur notre site internet.<br />
Où trouver...<br />
Ce manuel fait référence aux ressources additionnelles suivantes :<br />
Information<br />
Référence<br />
paramètre de<br />
Patch<br />
Emplacement<br />
· Cliquer sur le “?” dans <strong>Virus</strong> Control et sélectionner Patch parameter reference.<br />
· PC : Démarrer > Tous les Programmes > Access Music > <strong>Virus</strong> <strong>TI</strong> > Documentation > Manuals<br />
· Mac : Applications/Access Music/<strong>Virus</strong> <strong>TI</strong>/Documents/Manuals/<br />
Référence<br />
paramètre de<br />
Multi<br />
· Cliquer sur le “?” dans <strong>Virus</strong> Control et sélectionner Multi parameter reference.<br />
· PC : Démarrer > Tous les Programmes > Access Music > <strong>Virus</strong> <strong>TI</strong> > Documentation > Manuals<br />
· Mac : Applications/Access Music/<strong>Virus</strong> <strong>TI</strong>/Documents/Manuals/<br />
Référence<br />
menu Config<br />
· Cliquer sur le “?” dans <strong>Virus</strong> Control et sélectionner Configuration menu reference.<br />
· PC : Démarrer > Tous les Programmes > Access Music > <strong>Virus</strong> <strong>TI</strong> > Documentation > Manuals<br />
· Mac : Applications/Access Music/<strong>Virus</strong> <strong>TI</strong>/Documents/Manuals/<br />
Addendum<br />
· Cliquer sur le “?” dans <strong>Virus</strong> Control et sélectionner Manual addendum.<br />
· PC : Démarrer > Tous les Programmes > Access Music > <strong>Virus</strong> <strong>TI</strong> > Documentation > Addenda<br />
· Mac : Applications/Access Music/<strong>Virus</strong> <strong>TI</strong>/Documents/Addenda/<br />
Tutoriaux sur le<br />
<strong>Virus</strong> Control<br />
· Cliquer sur le “?” dans <strong>Virus</strong> Control et sélectionner <strong>Virus</strong> Control tutorials.<br />
· PC : Démarrer > Tous les Programmes > Access Music > <strong>Virus</strong> <strong>TI</strong> > Documentation > Tutorials<br />
· Mac : Applications/Access Music/<strong>Virus</strong> <strong>TI</strong>/Documents/Tutorials/<br />
Tutoriaux<br />
vidéos<br />
· Cliquer sur le “?” dans <strong>Virus</strong> Control et sélectionner Videos.<br />
· PC : Démarrer > Tous les Programmes > Access Music > <strong>Virus</strong> <strong>TI</strong> > Documentation > Videos<br />
· Mac : Applications/Access Music/<strong>Virus</strong> <strong>TI</strong>/Documents/Videos/<br />
Tutoriaux sur le<br />
<strong>Virus</strong> Control<br />
Center<br />
· Cliquer sur le “?” dans <strong>Virus</strong> Control et sélectionner <strong>Virus</strong> Control tutorials.<br />
· PC : Démarrer > Tous les Programmes > Access Music > <strong>Virus</strong> <strong>TI</strong> > Documentation > Tutorials<br />
· Mac : Applications/Access Music/<strong>Virus</strong> <strong>TI</strong>/Documents/Tutorials/<br />
Tutoriaux sur le<br />
Sequencer<br />
· Cliquer sur le “?” dans <strong>Virus</strong> Control et sélectionner <strong>Virus</strong> Control tutorials.<br />
· PC : Démarrer > Tous les Programmes > Access Music > <strong>Virus</strong> <strong>TI</strong> > Documentation > Tutorials<br />
· Mac : Applications/Access Music/<strong>Virus</strong> <strong>TI</strong>/Documents/Tutorials/
128<br />
GUIDE DE DÉMARRAGE RAPIDE<br />
Information<br />
Tutoriaux<br />
songs<br />
Emplacement<br />
· PC : Démarrer > Tous les Programmes > Access Music > <strong>Virus</strong> <strong>TI</strong> > Documentation > Turorials<br />
· Mac : Applications/Access Music/<strong>Virus</strong> <strong>TI</strong>/Documents/Tutorials/<br />
Vous trouverez également des ressources supplémentaires sur notre site internet.
U<strong>TI</strong>LISA<strong>TI</strong>ON<br />
Utilisation<br />
Cette section se veut être un guide ludique pour démontrer la simplicité extrême d’utilisation du <strong>Virus</strong> <strong>TI</strong><br />
<strong>Snow</strong>. Nous vous invitons à lire attentivement ce guide, à proximité de votre <strong>Virus</strong>.<br />
Mise sous-tension<br />
Branchez le bloc d’alimentation fourni avec l’instrument sur une prise secteur, puis connectez le à la fiche<br />
d’alimentation 12V DC IN située à l’arrière du <strong>Virus</strong> <strong>TI</strong> <strong>Snow</strong>. La première fois que vous réalisez cette opération,<br />
l’appareil devrait se mettre immédiatement sous-tension*. Appuyez simultanément sur les touches<br />
EDIT/SHIFT et PART pendant 3 secondes pour mettre l’instrument en veille (standby). Appuyez de nouveau<br />
sur ces mêmes touches pour remettre l’instrument sous-tension.<br />
*Si vous débranchez la prise secteur pendant que le <strong>Virus</strong> est en veille, il sera toujours en veille lorsque vous<br />
le rebrancherez.<br />
Branchements<br />
• USB<br />
Important : Vous devez installer le logiciel <strong>TI</strong> et les pilotes du <strong>Virus</strong> avant de le connecter à votre ordinateur<br />
via USB.<br />
Pour procéder à l’installation, connectez-vous sur notre site internet www.access-music.de et téléchargez la<br />
dernière version disponible du programme d’installation du <strong>Virus</strong> <strong>TI</strong> <strong>Snow</strong>, pour la plateforme de votre choix.<br />
Une fois téléchargé, lancez l’extraction du fichier d’archive et lancez le programme d’installation. Suivez les<br />
instructions à l’écran avec attention, et connectez le câble USB lorsqu’il vous le sera demandé.<br />
Connectez le port USB du <strong>Virus</strong> à un port USB dédié de votre ordinateur, à l’aide du câble fourni ou d’un<br />
autre câble USB similaire. NE PAS U<strong>TI</strong>LISER DE HUB ! Désolés d’avoir à crier, mais nous ne saurions le<br />
répéter suffisamment. Le <strong>Virus</strong> nécessite un port USB à lui tout seul, afin de permettre à toute la quantité<br />
d’informations requises de véhiculer librement.<br />
Utilisateurs Windows : Une fois le logiciel <strong>TI</strong> et les pilotes installés, l’application Updater se lance automatiquement.<br />
Il est important que vous procédiez à la mise à jour du firmware afin de vous assurer d’avoir la<br />
toute dernière version du système d’exploitation installée dans votre <strong>Virus</strong>.
130<br />
GUIDE DE DÉMARRAGE RAPIDE<br />
Utilisateurs Mac : Le firmware du <strong>Virus</strong> <strong>TI</strong> <strong>Snow</strong> se met automatiquement à jour pendant l’installation du<br />
logiciel.<br />
• MIDI<br />
Pour ceux d’entre vous qui ne sauraient attendre quelques minutes supplémentaires avant d’écouter votre<br />
nouveau bébé faire ses premiers sons (ne vous en faites pas, nous vous comprenons fort bien), vous pouvez<br />
tout simplement connecter le port MIDI OUT d’un clavier MIDI au port MIDI IN de votre <strong>Virus</strong> <strong>TI</strong> <strong>Snow</strong> et<br />
commencer à jouer.<br />
Entrées/Sorties Audio<br />
• Sorties<br />
Si vous êtes à présent en train de vous gratter la tête à vous demander pourquoi vous n’entendez aucun<br />
son, c’est parce que le <strong>Virus</strong> <strong>TI</strong> <strong>Snow</strong> n’est pas équipé de haut-parleurs intégrés. Pour entendre tous les<br />
merveilleux sons de votre magnifique bébé, vous devez connecter les sorties audio OUTPUT LEFT et RIGHT<br />
aux entrées audio d’un système d’amplification externe (de préférence une table de mixage), ou encore<br />
connecter un casque audio à la sortie OUTPUT LEFT. Ne connectez pas directement votre <strong>Virus</strong> <strong>TI</strong> <strong>Snow</strong> à<br />
une chaîne hi-fi stéréo car vous risqueriez d’endommager votre matériel. Baissez le volume général du <strong>Virus</strong><br />
avant de l’écouter au casque. Nous ne voudrions pas que vous vous endommagiez les oreilles avant même<br />
d’avoir commencé.<br />
• Entrées<br />
Il est possible de connecter une source audio externe au <strong>Virus</strong>. Pour cela, connectez votre équipement<br />
audio externe aux entrées INPUT LEFT et RIGHT du <strong>Virus</strong>. Le <strong>Virus</strong> peut ainsi servir de carte son pour votre<br />
ordinateur. Vous pouvez également utiliser ces entrées audio pour faire toutes sortes de vilaines choses à<br />
vos autres équipements audio en les traitant avec les filtres et les effets du <strong>Virus</strong>.<br />
Vous trouverez davantage d’informations sur le routing audio à travers le moteur de synthèse du <strong>Virus</strong> dans<br />
le mode d’emploi de l’instrument.<br />
Si vous voulez uniquement faire passer la source audio externe à travers les sorties audio du <strong>Virus</strong>, il suffit<br />
d’ajuster le paramètre Input Thru dans le menu CONFIG au niveau désiré.<br />
Maintenant que vous avez installé le <strong>Virus</strong> <strong>TI</strong> <strong>Snow</strong> sur votre ordinateur et l’avez connecté à votre équipement,<br />
vous pouvez commencer à explorer tout le potentiel de votre nouveau synthétiseur préféré.
LE CHOIX DES ARMES<br />
Le Choix Des Armes<br />
<strong>Virus</strong> Control vs MIDI?<br />
Il existe principalement trois façons d’utiliser le <strong>Virus</strong> <strong>TI</strong> <strong>Snow</strong> :<br />
• Comme nous l’avons déjà mentionné, vous pouvez tout simplement connecter un clavier de commande<br />
MIDI au port MIDI IN du <strong>Virus</strong> et commencer à jouer.<br />
• Vous pouvez utiliser un séquenceur hôte pour router jusque 4 canaux MIDI différents au <strong>Virus</strong> <strong>TI</strong> <strong>Snow</strong>.<br />
Pour cela, la seule chose que vous ayez à faire, c’est de sélectionner le port MIDI adéquat dans votre séquenceur,<br />
libellé “<strong>Virus</strong> <strong>TI</strong> Synth”, et mettre le <strong>Virus</strong> en mode Séquenceur. Les changements de programmes<br />
peuvent être effectués sur le <strong>Virus</strong> comme depuis le séquenceur.<br />
• Vous pouvez profiter pleinement du Total Integration entre votre séquenceur hôte compatible et le <strong>Virus</strong> <strong>TI</strong><br />
<strong>Snow</strong> grâce à <strong>Virus</strong> Control.<br />
Que Signifie Total Integration?<br />
Tout comme ses cousins de la gamme “<strong>TI</strong>”, le <strong>Virus</strong> <strong>TI</strong> <strong>Snow</strong> est livré avec le logiciel <strong>Virus</strong> Control – le noyau<br />
du concept Total Integration. <strong>Virus</strong> Control permet d’exploiter le <strong>Virus</strong> <strong>TI</strong> <strong>Snow</strong> comme plug-in multi-canal<br />
VST/AudioUnit/RTAS, de véhiculer les données MIDI et audio sur 3 paires stéréo via un port USB, avec une<br />
précision à l’échantillon près, et une compensation de délai. Chaque paramètre du moteur de synthèse du<br />
<strong>Virus</strong> <strong>TI</strong> est représenté sur l’interface graphique du plug-in, avec automation possible de tous les paramètres<br />
pertinents, dans la limite des capacités de votre séquenceur hôte. Le Browser (page de navigation des Patches)<br />
permet une gestion globale de la banque de sons, et dispose d’un outil de recherche puissant, ainsi<br />
que d’un total recall de tous les paramètres. Ainsi, vous retrouverez toujours le <strong>Virus</strong> <strong>TI</strong> <strong>Snow</strong> tel que vous<br />
l’aviez sauvegardé dans chacun de vos projets.<br />
Vous trouverez de plus amples informations sur l’utilisation de <strong>Virus</strong> Control dans la section adéquate du<br />
mode d’emploi, auquel vous pouvez accéder directement en cliquant sur le bouton ‘?’ dans <strong>Virus</strong> Control<br />
(ainsi que plusieurs autres ressources utiles).
132<br />
GUIDE DE DÉMARRAGE RAPIDE<br />
Logiciel Hôte<br />
A ce stade, il convient de mentionner que pour utiliser le <strong>Virus</strong> <strong>TI</strong> <strong>Snow</strong> de façon optimale, il est recommandé<br />
de l’utiliser conjointement à l’un des séquenceurs logiciels compatibles. Vous pouvez consulter une liste<br />
des logiciels compatibles sur notre site internet, à l’adresse www.access-music.de/?go=compato. Bien qu’il<br />
soit tout à fait possible d’utiliser le <strong>Virus</strong> <strong>TI</strong> <strong>Snow</strong> en mode ‘standalone’ (mode autonome), un séquenceur<br />
compatible vous permettra d’enregistrer votre travail en un lapse de temps exceptionnel et d’avoir une expérience<br />
inégalée du Total Integration.<br />
Chaque logiciel hôte ayant une méthode de fonctionnement unique, nous vous recommandons à présent de<br />
prendre un instant pour regarder le tutorial vidéo dédié à votre séquenceur. Vous trouverez ce tutorial sur le<br />
disque dur de votre ordinateur. Vous pouvez également y accéder à n’importe quel moment en cliquant sur<br />
le symbole ‘?’ dans <strong>Virus</strong> Control, puis en sélectionnant l’option adéquate.
MODUS OPERANDI<br />
Modus Operandi<br />
Bouton Mode/Exit<br />
En fonction de ce que vous voulez accomplir avec votre <strong>Virus</strong> <strong>TI</strong> <strong>Snow</strong>, vous pouvez choisir parmi trois modes<br />
de fonctionnement différents. Une pression sur le bouton MODE fait apparaître un menu dans lequel<br />
vous pouvez sélectionner l’un des trois modes : Single, Multi ou Sequencer. Sélectionnez le mode de votre<br />
choix à l’aide du potentiomètre Value 1 ou des touches Value+/-. Appuyez à nouveau sur le bouton MODE<br />
pour confirmer votre sélection.<br />
• Mode Single<br />
Mode par défaut du <strong>Virus</strong> dans lequel il ne peut jouer qu’un seul son à la fois, réparti sur toute l’étendue du<br />
clavier de commande.<br />
• Mode Multi<br />
En mode Multi, vous pouvez jouer jusque 4 sons différents simultanément. Chacun de ces 4 sons est géré<br />
par une ‘Part’, et chaque Part bénéficie de ses propres réglages de performance, tels que le volume, le<br />
panoramique, l’accordage, etc. En assignant le même canal MIDI à chacune des Parts, vous pouvez facilement<br />
créer de fantastiques combinaisons à partir de n’importe quels presets disponibles, et les superposer<br />
ou les assigner à des zones différentes sur votre clavier de commande.<br />
Le <strong>Virus</strong> <strong>TI</strong> <strong>Snow</strong> dispose de 64 emplacements mémoire pour enregistrer vos configurations Multi. Ces Multis<br />
enregistrent toutes les données des patches utilisés. Ainsi, toutes les modifications apportées aux sons<br />
peuvent être directement sauvegardées au sein même du Multi, sans avoir à se soucier de devoir sauvegarder<br />
individuellement chaque patch modifié.<br />
• Mode Sequencer<br />
Le mode Sequencer est une version simplifiée du mode Multi. Il est conçu pour être utilisé conjointement à<br />
un séquenceur hôte. Chacune des 4 Parts est assignée à un canal MIDI distinct, et les réglages de performance<br />
sont pour la plupart cachés, car l’intérêt de ce mode est de contrôler le <strong>Virus</strong> <strong>TI</strong> <strong>Snow</strong> depuis votre<br />
séquenceur.<br />
Sachez qu’il n’est pas possible d’enregistrer vos réglages en mode Sequencer – si vous avez besoin de<br />
pouvoir sauvegarder vos réglages, utilisez plutôt le mode Multi.<br />
• Exit<br />
Vous pouvez appuyer sur ce bouton à tout moment pour revenir à la page sommaire du mode sélectionné.
134<br />
GUIDE DE DÉMARRAGE RAPIDE<br />
Bouton Tap Tempo/Panic<br />
••<br />
Tap Tempo<br />
Ce bouton permet de définir un tempo en tapant dessus successivement. Cela aura pour effet de régler la<br />
vitesse d’horloge à laquelle tous les paramètres ‘clocked’ seront synchronisés, les LFOs par exemple (en<br />
mode clock), l’Arpeggiator, le Délai (mode clock), etc. Ne perdez pas d’esprit qu’en mode Multi on ne peut<br />
définir qu’un seul tempo global.<br />
Si vous voulez choisir un tempo avec plus de précision, vous pouvez également le faire en<br />
ajustant le paramètre Tempo dans le menu d’édition COMMON.<br />
• Panic (EDIT/SHIFT+TAP TEMPO)<br />
Cette combinaison de touches permet de couper toutes les notes qui seraient restées bloquées suite à des<br />
erreurs de message MIDI, pouvant intervenir par exemple lors d’un plantage de votre séquenceur.<br />
• Bouton PART<br />
Pour afficher une Part sur l’interface utilisateur lorsque vous êtes en mode Multi ou Sequencer, appuyez, ou<br />
maintenez enfoncé le bouton PART suivi des boutons 1, 2, 3 ou 4 de la rangée inférieure. Le chiffre affiché à<br />
l’angle supérieur droit de l’écran désigne quelle Part est en cours d’édition.<br />
Les Presets<br />
• RAM/ROM ?<br />
Le <strong>Virus</strong> <strong>TI</strong> <strong>Snow</strong> dispose de 8 banques de patches RAM ainsi que 8 banques de patches ROM, chacune<br />
des banques comprenant 64 patches. ‘RAM’ signifie ‘Random Access Memory’ (mémoire vive de l’instrument).<br />
Chacun de ces emplacements peut être effacé pour y enregistrer vos propres patches, autant de<br />
fois que vous le désirez. ‘ROM’ signifie ‘Read Only Memory’ (mémoire morte de l’instrument), et les patches<br />
enregistrés en ROM sont permanents. Vous ne pouvez pas y enregistrer vos propres sons.<br />
Les banques RAM du <strong>Virus</strong> <strong>TI</strong> <strong>Snow</strong> sont un doublon des banques ROM. Vous pouvez donc les remplacer<br />
par vos propres sons sans aucun souci. Au cas où vous voudriez restaurer votre <strong>Virus</strong> <strong>TI</strong> <strong>Snow</strong> dans sa<br />
configuration d’usine, nous les avons sauvegardés en bibliothèque dans le dossier Patches, auquel vous<br />
pouvez accéder depuis le Browser dans <strong>Virus</strong> Control. Le <strong>Virus</strong> <strong>TI</strong> <strong>Snow</strong> utilisant des banques de 64 presets,<br />
celles-ci sont toujours affichées par paire dans le Browser de <strong>Virus</strong> Control (ex : 1 + 2, 3 + 4, etc.).
MODUS OPERANDI<br />
• Sélectionner des Presets Single<br />
Chacun des patches enregistrés dans le <strong>Virus</strong> <strong>TI</strong> <strong>Snow</strong> peut être sélectionné avec un maximum de 4 clics de<br />
bouton. Pour sélectionner la banque désirée, appuyez tout d’abord sur le bouton BANK. Le <strong>Virus</strong> vous demande<br />
à présent de sélectionner un numéro de banque. Vous pouvez également maintenir le bouton BANK<br />
appuyé et sélectionner directement le numéro de banque sans faire apparaître ce message.<br />
Appuyez sur n’importe lequel des boutons de la rangée supérieure, libellés ROM 1-8 pour sélectionner une<br />
banque ROM, ou l’un des boutons de la rangée inférieure libellés RAM 1-8 pour sélectionner une banque<br />
RAM.<br />
Maintenant qu’une banque a été sélectionnée, choisissez un preset en tapant simplement son numéro de<br />
patch à l’aide de la rangée supérieure pour le premier chiffre, et de la rangée inférieure pour le second chiffre.<br />
Les patches de chaque banque sont numérotés comme suit :<br />
11-18, 21-28, 31-38, 41-48, 51-58, 61-68, 71-78, 81-88<br />
Astuce : il est nécessaire d’appuyer sur le bouton BANK uniquement si vous voulez sélectionner une banque<br />
différente. Une fois que vous avez sélectionné la banque que vous voulez parcourir, vous pouvez sélectionner<br />
directement chacun des 8 presets de chaque ‘batch’ en appuyant sur les boutons respectifs de la rangée<br />
inférieure, et sélectionner un batch différent avec les boutons de la rangée supérieure. A titre d’exemple,<br />
sélectionnons le patch ‘Tutorial 1’, enregistré en RAM 8-81.<br />
Pourquoi ne pas essayer par vous-même pour commencer ? Vous trouverez la solution ci-dessous… vous<br />
coincez ? OK – voilà comment faire :<br />
Appuyez sur BANK -> Rangée inférieure 8 -> Rangée Supérieure 8 -> Rangée Inférieure 1<br />
• Sélectionner des Presets Multi<br />
Comme il n’y a qu’une seule banque de 64 Multis, il n’est pas nécessaire de sélectionner un numéro de<br />
banque ; en dehors de cela, la procédure est strictement identique à celle appliquée en mode Single.<br />
Pour sélectionner un preset Single dans un Multi, appuyez sur les boutons EDIT puis Multi, et ensuite sélectionnez<br />
le preset à l’aide des numéros de banque et de patches.
136<br />
GUIDE DE DÉMARRAGE RAPIDE<br />
Fonctions des Boutons Rotatifs<br />
Avant d’aller plus loin dans ce guide des fonctions basiques du <strong>Virus</strong> <strong>TI</strong> <strong>Snow</strong>, veuillez sélectionner le patch<br />
RAM 8-81 “Tutorial 1”.<br />
• Volume<br />
Aussi ennuyeux qu’important, le bouton de volume contrôle le niveau général des sorties audio OUTPUT L/R<br />
du <strong>Virus</strong> <strong>TI</strong> <strong>Snow</strong>. Si votre <strong>Virus</strong> est connecté à une table de mixage, il est judicieux de laisser le Volume à<br />
son maximum (127), et d’ajuster les niveaux directement sur votre console de mixage. Vous obtiendrez ainsi<br />
un meilleur rapport signal-bruit.<br />
Réduisez toujours le volume de l’instrument à son minimum avant de brancher un casque.<br />
Notez que le bouton de volume n’a aucun effet lorsque vous utilisez les sorties audio via USB dans <strong>Virus</strong><br />
Control.<br />
• Volume de Patch (SHIFT+Value 1)<br />
Le bouton rotatif Value 1 combiné à la touche SHIFT permet d’ajuster le niveau général du patch actuellement<br />
sélectionné. Veillez à ne pas le régler sur une valeur trop élevée car le signal pourrait saturer ce qui<br />
provoquerait une distorsion jamais très agréable à l’audition.<br />
• Transpose (SHIFT+Value 2)<br />
Le bouton rotatif Value 2 combiné à la touche SHIFT permet de transposer le patch sélectionné par octaves.<br />
• Panoramique (SHIFT+Value 3)<br />
Le Panoramique contrôle le positionnement du son dans l’image stéréo de votre système d’écoutes stéréo.<br />
La valeur par défaut est +0 ce qui correspond à une position centrale du son dans l’image stéréo. Des valeurs<br />
négatives déplaceront le signal vers le canal gauche tandis que des valeurs positives le déplaceront<br />
vers le canal droit.<br />
• Cutoff<br />
C’est ici que le fun avec les synthés commence vraiment. Tournez le bouton au maximum (127) et jouez une<br />
touche sur votre clavier (maintenez la touche enfoncée). A présent, diminuez lentement la valeur de Cutofff<br />
jusqu’à 0, puis remontez progressivement jusque 127. Vous devriez entendre le son du patch “Tutorial 1”<br />
devenir de plus en plus terne et sourd, jusqu’à ce qu’il disparaisse complètement, pour s’ouvrir à nouveau<br />
avec une brillance maximale à la valeur 127. Vous venez tout juste d’entendre un filtre ‘passe-bas’ en action.<br />
• Resonance<br />
Réglez ce potentiomètre sur environ 12 heures puis balayez la plage de valeurs du paramètre Cutoff, exactement<br />
comme vous venez de le faire à l’instant. Augmenter la résonance du filtre amplifie les fréquences<br />
voisines de la fréquence de coupure du filtre, et le fait ‘parler’ tandis que vous jouez avec le potentiomètre<br />
Cutoff. Un petite précaution est de mise ici lorsque vous appliquez de fortes valeurs de résonance, car si
MODUS OPERANDI<br />
vous ne faites pas attention, le son résultant peut endommager vos enceintes, tout particulièrement lorsque<br />
vous balayez la fréquence de coupure dans les basses fréquences!<br />
• Filter Envelope (SHIFT+Cutoff)<br />
Maintenez le bouton SHIFT appuyé, puis tournez le bouton Cutoff pour ajuster simultanément les paramètres<br />
Decay et Release de l’enveloppe du filtre. Plus la valeur est élevée, plus la fréquence de coupure prend<br />
de temps pour atteindre son niveau de maintien (Sustain) défini dans l’enveloppe du filtre. Notez que ceci<br />
n’est audible que pour les sons qui utilisent l’enveloppe du filtre d’une certaine façon.<br />
• Amp Envelope (SHIFT+Resonance)<br />
Maintenez le bouton SHIFT appuyé, puis tournez le bouton Resonance pour ajuster simultanément les paramètres<br />
Decay et Release de l’enveloppe d’amplitude. Plus la valeur est élevée, plus le déclin d’amplitude<br />
des notes est long à atteindre son niveau de maintien (Sustain), avant de s’évanouir en silence une fois la<br />
note relâchée.<br />
Les Boutons du Menu Edit<br />
Les boutons rotatifs de la rangée supérieure permettent d’accéder aux différents menus d’édition du patch<br />
sélectionné en mémoire, tandis que la rangée inférieure contient les boutons de navigation et de menus<br />
d’administration pour la gestion des patches et la configuration système.<br />
Pour entrer dans l’un des menus d’édition, appuyez sur le bouton EDIT/SHIFT, puis sur un des boutons de<br />
menu. Une fois dans le menu, utilisez les potentiomètres Value 1, 2 et 3 pour ajuster les valeurs. Si vous désirez<br />
incrémenter la valeur d’un paramètre, vous pouvez aussi utiliser les touches VALUE +/-. Vous pouvez<br />
utiliser les touches PARAMETERS pour sélectionner le paramètre à éditer, ou bien simplement tourner le<br />
bouton situé juste en dessous.<br />
Pour choisir un autre menu d’édition, il suffit d’appuyer sur le bouton de menu adéquat – il n’est pas utile<br />
d’appuyer à nouveau sur le bouton EDIT/SHIFT.<br />
Pour retourner à la page sommaire, appuyez sur le bouton MODE/EXIT.
138<br />
GUIDE DE DÉMARRAGE RAPIDE<br />
Mode d’Edition Easy/Expert<br />
Le générateur de sons du <strong>Virus</strong> <strong>TI</strong> <strong>Snow</strong> disposant d’un très grand nombre de paramètres, nous avons<br />
développé un mode d’édition Easy (mode d’édition par défaut) qui n’affiche que trois paramètres par menu<br />
d’édition, soigneusement sélectionnés pour avoir un impact immédiat sur le patch sélectionné. Ces paramètres<br />
sont sélectionnés dynamiquement, ce qui signifie qu’ils peuvent changer, en fonction de certains<br />
facteurs, tel que le modèle d’oscillateur sélectionné dans le patch par exemple.<br />
Si vous désirez pouvoir contrôler d’autres paramètres que ceux proposés par défaut dans le mode d’édition<br />
Easy, vous pouvez utiliser le <strong>Virus</strong> <strong>TI</strong> <strong>Snow</strong> en mode d’édition Expert. Pour changer temporairement<br />
de mode au sein d’un menu spécifique, appuyez simplement sur le bouton EDIT/SHIFT pendant que vous<br />
appuyez sur la touche du menu d’édition désiré. Dès que vous quitterez précisément ce menu, le <strong>Virus</strong> rebasculera<br />
automatiquement en mode d’édition Easy.<br />
Vous pouvez également passer en mode Expert de façon permanente depuis le menu d’édition CONFIG<br />
(System > Edit-Mode).
LES PAGES D’ÉDI<strong>TI</strong>ON<br />
Les Pages D’édition<br />
Pour suivre cette section, sélectionnez le patch “Tutorial 1”. C’est un patch simple qui utilise l’oscillateur<br />
Classique. Nous ne nous attacherons qu’aux paramètres accessibles depuis le mode d’édition Easy. Pour<br />
une liste exhaustive des paramètres disponibles en mode Expert, consultez les chapitres en référence aux<br />
paramètres.<br />
Menu OSC 1 (Oscillateur Classic)<br />
Appuyez sur ce bouton pour accéder au menu de l’Oscillateur 1, partie du générateur de son du <strong>Virus</strong> qui<br />
génère le bruit délivré par ce patch. Le <strong>Virus</strong> <strong>TI</strong> <strong>Snow</strong> contient 8 modes d’oscillateur différents – si vous désirez<br />
en savoir davantage sur leur spécificité, consultez les tutoriaux vidéos sur notre site web, où chacun des<br />
modes y est expliqué en détail.<br />
Bouton # Paramètre Fonction<br />
1 Shape Shape détermine la forme de l’onde générée par l’Oscillateur 1, qui en retour<br />
détermine le son de base, ou le timbre. Tournez le bouton Value 1 complètement à<br />
gauche pour entendre une sinusoïde. Tournez à présent le bouton progressivement<br />
jusqu’à sa position centrale, vous entendrez le son devenir de plus en plus brillant<br />
jusqu’à ce qu’il joue une onde à dent-de-scie. Continuez à tourner le bouton vers la<br />
droite, le son devient alors de plus en plus creux, jusqu’à jouer une onde à impulsion.<br />
2.1 Pulse Width<br />
cas # 1<br />
2.2 Wave Select<br />
cas # 2<br />
Le paramètre contrôlé par le bouton Value 2 varie en fonction du réglage de Osc1<br />
Shape.<br />
Quand le bouton Osc1 Shape est positionné sur la gauche, le paramètre est “Wave<br />
Select”, et quand il est réglé sur la droite, il devient “Pulse Width”.<br />
Avec le Pulse Width réglé à 50% (valeur par défaut) l’onde à impulsion à une sonorité<br />
creuse, mais en augmentant sa valeur, le son devient plus mince et fluet, jusqu’à ce<br />
qu’il disparaisse complètement à 100%.<br />
Lorsque Osc1 Shape est réglé sur Spectral Wave, le paramètre devient Wave Select :<br />
Vous pouvez choisir n’importe quelle forme d’onde parmi une sélection de 64. Wave<br />
1 (valeur par défaut) est une Sinusoïde, qui est le signal le plus pur qu’un synthétiseur<br />
puisse produire. Wave 2 est un Triangle, qui est un peu plus brillant qu’une sinusoïde,<br />
et que l’on trouvait sur de nombreux synthétiseurs analogiques en complément des<br />
formes d’onde à dent-de-scie ou à impulsion. Le reste de la sélection comprend toute<br />
une variété de formes d’ondes numériques, particulièrement utiles pour l’émulation de<br />
certains timbres très spécifiques aux synthétiseurs numériques des années 80 et 90.<br />
3 Osc Balance Ce paramètre détermine la balance des niveaux entre les Oscillateurs 1 et 2. Au centre<br />
(valeur par défaut), vous entendez les deux oscillateurs. A l’extrême gauche (-64)<br />
vous n’entendez que l’oscillateur 1, et à l’extrême droite (+63) vous n’entendez que<br />
l’oscillateur 2.
140<br />
GUIDE DE DÉMARRAGE RAPIDE<br />
Menu OSC 1 (Oscillateur HyperSaw)<br />
Pour suivre cette section, sélectionnez le patch “Tutorial 2”. C’est un patch simple qui utilise l’oscillateur HyperSaw.<br />
Bouton # Paramètre Fonction<br />
1 Density Ce paramètre détermine le nombre d’ondes à dent-de-scie par voix – de 1 jusque 9!<br />
2 Local Detune Détermine le niveau de désaccordage entre les ondes à dent-de-scie. A zéro, elles<br />
sont parfaitement accordées et l’on obtient par conséquent un effet de phase (effet<br />
normalement indésirable). Avec une valeur maximale de 127, elles sont désaccordées<br />
d’un demi-ton.<br />
3 Osc Balance Ce paramètre détermine la balance des niveaux entre les Oscillateurs 1 et 2. Au centre<br />
(valeur par défaut), vous entendez les deux oscillateurs. A l’extrême gauche (-64)<br />
vous n’entendez que l’oscillateur 1, et à l’extrême droite (+63) vous n’entendez que<br />
l’oscillateur 2.<br />
Menu OSC 1 (Oscillateur Wavetable)<br />
Pour suivre cette section, sélectionnez le patch “Tutorial 3”. C’est un patch simple qui utilise l’oscillateur Wavetable.<br />
Bouton<br />
#<br />
Paramètre<br />
Fonction<br />
1 Index Ajuste la valeur d’index parcourant la table d’onde.<br />
2 Interpolation L’interpolation détermine la douceur avec laquelle la table d’onde est parcourue.<br />
Essayez avec une valeur de 127, puis avec une valeur de 1. Des valeurs modérées<br />
peuvent avoir un rendu chaotique assez intéressant.<br />
3 Osc Balance Ce paramètre détermine la balance des niveaux entre les Oscillateurs 1 et 2. Au centre<br />
(valeur par défaut), vous entendez les deux oscillateurs. A l’extrême gauche (-64)<br />
vous n’entendez que l’oscillateur 1, et à l’extrême droite (+63) vous n’entendez que<br />
l’oscillateur 2.
LES PAGES D’ÉDI<strong>TI</strong>ON<br />
Menu OSC 1 (Oscillateur Formant Complex)<br />
Pour suivre cette section, sélectionnez le patch “Tutorial 4”. C’est un patch simple qui utilise l’oscillateur Formant<br />
Complex.<br />
Bouton # Paramètre Fonction<br />
1 Index Ajuste la valeur d’index parcourant la table d’onde.<br />
2 F-Shift Définit le désaccordage des formants par pas de demi-tons. La valeur par défaut (+0)<br />
est accordée sur C3 (Do médium). Vous pouvez obtenir des effets radicaux de pitch<br />
shift et sync en modulant ce paramètre.<br />
3 Osc Balance Ce paramètre détermine la balance des niveaux entre les Oscillateurs 1 et 2. Au centre<br />
(valeur par défaut), vous entendez les deux oscillateurs. A l’extrême gauche (-64)<br />
vous n’entendez que l’oscillateur 1, et à l’extrême droite (+63) vous n’entendez que<br />
l’oscillateur 2.<br />
Menu OSC 2<br />
Appuyez sur ce bouton pour accéder au menu de l’Oscillateur 2. Les paramètres sont quasi identiques à<br />
ceux de l’Oscillateur 1, aussi nous ne nous attarderons que sur leurs différences, en l’occurrence le paramètre<br />
affiché en Value 3 du mode HyperSaw.<br />
N’oubliez pas d’ajuster la balance des oscillateurs de sorte à pouvoir entendre l’oscillateur 2 (Menu OSC 1 ><br />
Osc Balance).<br />
• Les Modes Classic, Wavetable, Grain et Formant<br />
FM Amount : FM est une abréviation pour Frequency Modulation (modulation de fréquence), un procédé<br />
par lequel la fréquence de l’oscillateur 2 est modulée par la fréquence de l’oscillateur 1. L’effet obtenu est<br />
très souvent une distorsion dramatique de l’oscillateur affecté, mais il y a également quelques points subtils<br />
à chercher, où l’effet de modulation est beaucoup plus nuancé et harmonieux.<br />
Expérimentez avec différentes valeurs Semitone et FM Amount pour les oscillateurs 1 et 2 – pour des vieux<br />
effets de type science-fiction, essayez de régler Semitone pour Osc 1 sur la valeur la plus petite possible. Si<br />
vous voulez un son plus pur, avec moins de distorsion, utilisez une sinusoïde pour les deux oscillateurs.<br />
• Value 3 (mode HyperSaw)<br />
Sync : Utilisez ce paramètre pour moduler le pitch de l’oscillateur Sync interne du mode HyperSaw.
142<br />
GUIDE DE DÉMARRAGE RAPIDE<br />
Le Menu Filters<br />
Les filtres d’un synthétiseur servent à changer et modeler le timbre d’un son. Le <strong>Virus</strong> <strong>TI</strong> <strong>Snow</strong> possède<br />
deux filtres, qui peuvent fonctionner en série ou en parallèle. Lorsque les filtres sont branchés en série, la<br />
sortie du Filtre 1 alimente directement le Filtre 2, et ce que vous entendez est uniquement la sortie du Filtre<br />
2. Lorsqu’ils sont en parallèle, le signal de l’oscillateur est divisé en deux canaux. Le premier alimente le Filtre<br />
1, tandis que le second alimente le Filtre 2. Dans ce cas, vous obtenez un mélange de la sortie des deux<br />
filtres. Les paramètres éditables via les trois boutons Value sont les suivants :<br />
Bouton # Paramètre Fonction<br />
1 Filt 2 Offset/<br />
Cutoff2<br />
Ce paramètre détermine l’offset du Filtre 2, de façon relative à celui du Filtre 1. Par<br />
défaut, la fréquence de coupure du Filtre 2 suit à l’identique celle du Filtre 1. En<br />
ajustant ce paramètre, vous pouvez décaler la fréquence de coupure du Filtre 2 par<br />
rapport à celle du Filtre 1, ce qui changera la perception de profondeur des filtres.<br />
Gardez à l’esprit que ce paramètre est très dépendant d’autres paramètres de la<br />
section filtre, et peut ne pas toujours avoir un effet audible.<br />
Dans certains patches, ce paramètre peut être libellé ‘Cutoff 2’. Ceci arrive lorsque<br />
le paramètre Cutoff Link est réglé sur Off.<br />
2 Saturation Type Choisissez un effet de distorsion/lo-fi pour la sortie du Filtre 1. Ajustez l’intensité de<br />
l’effet avec le bouton Value 3 (voir ci-dessous). Essayez ensuite toutes les différentes<br />
saturations, qui varient d’un overdrive standard à des variétés digitales beaucoup<br />
plus exotiques. Et si vous préférez, vous trouverez également deux filtres 1-pôle.<br />
3 Osc Volume<br />
(Saturation)<br />
Entre -64 et 0 (valeur par défaut), ce paramètre contrôle le volume des oscillateurs.<br />
Entre 0 et +63, il détermine le niveau de saturation du Filtre 1, pourvu que le<br />
paramètre Saturation (bouton Value 2) soit activé. La ‘saturation’ est le terme<br />
employé pour décrire l’effet obtenu lorsque le signal d’entrée dépasse le<br />
niveau optimal, et créé par conséquent une distorsion par l’ajout de nouvelles<br />
harmoniques, qui dans bien des cas sonnent vraiment très bien.<br />
Notez que certains types de Saturation sont audibles même avec un niveau de<br />
Saturation à +0.<br />
Le Menu Mod<br />
Pour cette section, sélectionnez le patch “Tutorial 5”. Appuyez sur les boutons EDIT/SHIFT+MOD pour<br />
accéder au menu Modulation. ‘Modulation’ est le terme employé pour décrire une fonction qui change la<br />
valeur d’un autre paramètre dans le temps. Et justement à ce titre, le <strong>Virus</strong> possède 3 LFOs (Low Frequency<br />
Oscillators). Ils sont différents des oscillateurs utilisés pour générer du son car ils opèrent à de très basses<br />
fréquences. Les LFOs ont été conçus pour fonctionner à une fréquence indépendante, ou pour être asservis<br />
au tempo global du Patch ou du Multi. S’ils fonctionnent indépendamment, vous pouvez leur assigner une<br />
valeur entre 0 et 127. S’ils sont asservis à l’horloge (Clock), vous pouvez choisir une valeur rythmique, basée<br />
sur une mesure entière en 4/4 (par exemple, 1/4 représente une valeur de noire).
LES PAGES D’ÉDI<strong>TI</strong>ON<br />
Les paramètres éditables via les trois boutons Value sont les suivants :<br />
Bouton<br />
#<br />
Paramètre<br />
Fonction<br />
1 LFO1 Rate ou<br />
Clock 1<br />
2 LFO2 Rate ou<br />
Clock 2<br />
3 LFO3 Rate ou<br />
Clock 3<br />
Sélectionnez le patch RAM A-64 ‘Tutorial 5’ et écoutez attentivement le résultat<br />
obtenu tandis que vous modifiez la valeur de ce paramètre. Dans ce patch, le LFO1<br />
module le niveau de résonance du filtre.<br />
Ecoutez attentivement le son pendant que vous ajustez ce paramètre. Dans ce<br />
patch, le LFO2 module le positionnement stéréophonique du son (panoramique).<br />
Ecoutez attentivement le son pendant que vous ajustez ce paramètre. Dans ce<br />
patch, le LFO3 module le pitch des deux oscillateurs.<br />
Le Menu Envelopes<br />
Pour cette section, sélectionnez le patch “Tutorial 6”. C’est ici que vous déterminez la forme globale du volume<br />
et du timbre d’un son. Les paramètres éditables via les trois boutons Value sont les suivants :<br />
Bouton # Paramètre Fonction<br />
1 Amp Attack Ce paramètre définit le temps nécessaire au son pour atteindre son amplitude<br />
maximale, quand une note est jouée. Plus la valeur est élevée, plus long est le temps<br />
d’attaque.<br />
2 Filter Attack Ce paramètre définit le temps nécessaire au filtre pour atteindre la valeur maximale<br />
telle que définit par le paramètre Cutoff 1 ou Cutoff 2 (Offset), couplé avec la valeur<br />
du paramètre Filter Env 1/2 Amount. Pour que l’effet soit audible, le paramètre Filter<br />
Env 1/2 doit avoir une valeur différente de zéro.<br />
3 Filter Env Amt Ce paramètre définit le degré d’impact avec lequel l’enveloppe de filtre affecte la<br />
fréquence de coupure des filtres. Pour que son effet soit audible, vous devez ajuster<br />
le bouton Cutoff - une valeur de 30 devrait convenir. A présent, jouez des notes sur<br />
votre clavier, et augmentez progressivement la valeur de ce paramètre. Remarquez<br />
comment le début des notes (l’attaque) devient plus tranchant et brillant au fur et à<br />
mesure que vous augmentez la valeur du paramètre. Le fait est qu’à l’enclenchement<br />
de chaque note, l’enveloppe de filtre influe sur la fréquence de coupure pour<br />
atteindre une valeur maximale juste avant de revenir à sa valeur minimale (c’est pour<br />
cela qu’il fallait diminuer la valeur du paramètre Cutoff, afin de donner à l’enveloppe<br />
une marge de manoeuvre).
144<br />
GUIDE DE DÉMARRAGE RAPIDE<br />
Le Menu Effects<br />
Pour cette section, sélectionnez le patch “Tutorial 7”. Appuyez sur le bouton EFFECTS pour accéder au<br />
menu des effets. Les effets servent à traiter l’ensemble du signal audio du générateur de son.<br />
Les paramètres éditables via les trois boutons Value sont les suivants :<br />
Bouton # Paramètre Fonction<br />
1 Delay Send Ce paramètre définit la quantité de signal envoyé dans le délai, utilisé pour créer un<br />
effet d’écho. Avec une valeur de 127, vous n’entendez que le signal traité par le délai.<br />
2 Reverb Send Ce paramètre définit la quantité de signal envoyé dans la réverb, effet utilisé pour<br />
créer une illusion d’ambiance acoustique autour du son. Avec une valeur de 127, vous<br />
n’entendez que le signal traité par la réverb.<br />
Sachez que le fait d’utiliser de la réverb simultanément sur plusieurs Parts peut<br />
considérablement alourdir le traitement DSP, et peut en voie de conséquence<br />
sérieusement réduire le nombre de voix de polyphonie disponible.<br />
3 Phaser Mix Ce paramètre définit la quantité de signal traité par le Phaser, effet qui ajoute<br />
beaucoup de mouvement et de couleur.<br />
Le Menu Arp<br />
Appuyez sur le bouton ARP pour accéder au menu de l’Arpeggiator. L’Arpeggiator est un outil de performance<br />
très puissant qui transforme une simple note en figure rythmique, ou un accord en arpège (accord<br />
rompu).<br />
Pour cette section, sélectionnez le patch “Tutorial 8”. Les paramètres éditables via les trois boutons Value<br />
sont les suivants :<br />
Bouton<br />
#<br />
Paramètre<br />
Fonction<br />
1 Arp Mode Ce paramètre permet de sélectionner l’ordre dans lequel doit être joué l’arpège de<br />
l’accord. Pour que cette fonction ait un quelconque effet, vous devez jouer au moins 3<br />
notes simultanément. Les différentes options possibles sont :<br />
- Off (pas d’arpeggiator)<br />
- Up (haut)<br />
- Down (bas)<br />
- Up&Down (haut puis bas)<br />
- As Played (notes jouées séquentiellement, dans l’ordre respectif de leur jeu)<br />
- Random (aléatoire)<br />
- Chord (notes jouées simultanément dans un rythme définit par le paramètre Pattern)
LES PAGES D’ÉDI<strong>TI</strong>ON<br />
Bouton<br />
#<br />
Paramètre<br />
Fonction<br />
2 Pattern Vous pouvez choisir parmi 64 figures rythmiques différentes. Le pattern ‘User’ est<br />
le pattern par défaut. Il peut être édité depuis la page ARP du <strong>Virus</strong> Control, et est<br />
sauvegardé avec chaque patch.<br />
Pour savoir comment créer ses propres patterns, consultez la section <strong>Virus</strong> Control du<br />
mode d’emploi.<br />
3 Length Ce paramètre contrôle la durée de chaque pas. Pour obtenir un effet ‘staccato’ ou<br />
percussif, réglez-le sur une valeur faible, et pour obtenir des effets plus continus, de type<br />
‘legato’, réglez-le sur une valeur élevée.<br />
Le Menu Common<br />
Appuyez sur le bouton COMMON pour accéder au menu du même nom. Vous pouvez contrôler ici trois paramètres<br />
de la section Oscillateur, qui ont un effet direct sur la performance du patch.<br />
Les paramètres éditables via les trois boutons Value sont les suivants :<br />
Bouton # Paramètre Fonction<br />
1 Key Mode Lorsque ce paramètre est réglé sur ‘Poly’ (valeur par défaut), le patch peut jouer<br />
plusieurs voix simultanément. Sélectionnez un des modes ‘Mono’ si vous voulez que<br />
le patch soit monophonique (une seule note peut être jouée à la fois, peu importe le<br />
nombre de notes jouées simultanément). Le mode Mono est généralement préférable<br />
pour les sons leads ou les sons de basses. Consultez le mode d’emploi du <strong>Virus</strong> pour<br />
toutes les explications sur les différents modes Mono disponibles.<br />
Lorsque ce paramètre est réglé sur ‘Hold’, les notes sont tenues indéfiniment, même<br />
après avoir relâché les notes.<br />
2 Portamento Utilisez le Portamento pour créer un effet de ‘glissando’ entre différentes notes. Plus<br />
la valeur est élevée, plus l’effet est lent.<br />
3 Transpose Ce paramètre permet de régler l’accordage global du patch par pas de demi-tons.<br />
Une valeur de 12 transpose le patch d’une octave. Pour transposer directement par<br />
pas d’octave, utilisez SHIFT+Value2.
146<br />
GUIDE DE DÉMARRAGE RAPIDE<br />
Le Menu Multi<br />
C’est ici que vous trouverez tous les paramètres relatifs à chaque Part en mode Multi. Utilisez les touches<br />
Parameter < > pour naviguer à travers les différentes pages du menu.<br />
Vous trouverez plus d’informations sur ces paramètres dans le chapitre concerné du mode d’emploi.<br />
• Créer un Multi layer/split<br />
Une chose importante à se rappeler ici, est de s’assurer que chaque Part réponde au même canal MIDI<br />
(vous utiliserez généralement le canal MIDI 01). Après avoir sélectionné les patches que vous vouliez pour<br />
chacune des Parts, vous pouvez créer des performances superposées en laissant les paramètres Low<br />
Key et High Key à leur valeur par défaut. Vous pouvez également scinder le clavier en plusieurs ‘zones’ en<br />
ajustant respectivement ces valeurs. Il est également possible au sein d’un même Multi de mélanger layers<br />
(superposition de Parts) et splits (division du clavier en différentes zones).<br />
Audition<br />
Ce bouton vous permet d’auditionner le son sélectionné. La note jouée pour l’audition est le Do3. Maintenez<br />
le bouton appuyé quelques instants pour bloquer la note, et appuyez à nouveau sur le bouton pour stopper<br />
l’audition.<br />
Le Menu Store<br />
Si vous désirez enregistrer un patch que vous avez créé ou modifié, vous devez tout d’abord appuyer sur le<br />
bouton STORE de la rangée inférieure. Si vous n’êtes déjà en mode d’édition, appuyez d’abord sur le bouton<br />
EDIT/SHIFT puis sur le bouton STORE. Plusieurs options s’offrent alors à vous :<br />
• Store To RAM<br />
C’est l’option qu’il faut choisir pour sauvegarder un patch.<br />
• Compare<br />
Choisissez cette option pour comparer le patch que vous avez édité avec sa version originale.<br />
• Sysex Dump<br />
Choisissez cette option si vous voulez envoyer le patch vers un autre périphérique MIDI, tel qu’un autre <strong>Virus</strong><br />
<strong>TI</strong>, ou un séquenceur MIDI dans le but d’une sauvegarde.
LES PAGES D’ÉDI<strong>TI</strong>ON<br />
• Utility<br />
Choisissez cette option pour accéder aux fonctions de gestion de patches.<br />
Appuyez sur le bouton STORE pour confirmer la fonction choisie. Ensuite, vous devez définir à quel emplacement<br />
RAM vous voulez enregistrer votre patch.<br />
• Patch No.<br />
Sélectionnez le numéro du patch que vous voulez écraser.<br />
• Patch Name<br />
Vous pouvez également sélectionner le patch à écraser par son nom, plutôt que par son numéro.<br />
Nommer Votre Patch<br />
Une fois que vous avez sélectionné le bon emplacement où enregistrer votre nouveau patch, vous devez lui<br />
donner un nom. Pour accéder à la page nécessaire à cette étape, appuyez à nouveau sur le bouton STORE.<br />
Utilisez les boutons Value pour sélectionner les lettres et symboles désirés, et déplacez vous à travers les<br />
caractères à l’aide des boutons PARAMETER.<br />
Une fois satisfait du nom attribué à votre patch, appuyez encore une fois sur le bouton STORE pour finaliser<br />
l’opération.<br />
Si vous réalisez soudainement que vous êtes sur le point d’écraser un de vos patches favoris et voulez annuler<br />
l’opération, appuyez simplement sur le bouton EXIT pour quitter le menu Store.<br />
Enregistrer un Patch en Mode Multi<br />
Si vous êtes en mode Multi lorsque vous accédez au menu Store, il sera présumé que c’est l’ensemble du<br />
Multi que vous désirez sauvegarder. Sélectionnez l’emplacement dans lequel vous voulez enregistrer votre<br />
Multi, puis suivez la procédure d’enregistrement de patch, telle que décrite précédemment. Si plutôt que<br />
d’enregistrer le Multi complet, vous désirez n’enregistrer que le patch de la part active, sélectionnez “Store<br />
Single Menu” dans la liste d’options du menu “Function”.
148<br />
GUIDE DE DÉMARRAGE RAPIDE<br />
Le Menu Config<br />
Ce menu regroupe tous les paramètres globaux qui définissent le fonctionnement général du <strong>Virus</strong> <strong>TI</strong> <strong>Snow</strong>,<br />
tels que la brillance des LEDs, ou le comportement des boutons de contrôle, etc.<br />
Veuillez consulter le mode d’emploi pour une explication en détail des différentes fonctions de ce menu.<br />
N’ayez crainte, aucune d’elles ne risque d’atomiser votre <strong>Virus</strong> <strong>TI</strong> <strong>Snow</strong>, et de plus, au cas où cela soit nécessaire,<br />
vous pouvez toujours le réinitialiser à ses valeurs par défaut en maintenant appuyé le bouton TAP<br />
TEMPO pendant la mise sous tension de l’instrument.
A PROPOS DE POLYPHONIE<br />
A Propos De Polyphonie<br />
Combien de voix (notes) pouvez-vous espérer pouvoir jouer simultanément sur votre <strong>Virus</strong> <strong>TI</strong> <strong>Snow</strong>? En fait, le<br />
moteur de synthèse du <strong>Virus</strong> <strong>TI</strong> étant particulièrement dynamique, le nombre de voix peut énormément varier<br />
d’un son à l’autre, selon les caractéristiques qui le composent.<br />
Pour vous aider à donner un ordre d’idée sur le nombre de voix de polyphonie possible, nous avons intégré à<br />
l’angle supérieur droit de l’écran un outil de mesure de complexité de patch.<br />
Il y a cinq niveaux de complexité, le niveau 1 étant le moins complexe et permettant la plus grande polyphonie.<br />
Il serait bien trop fastidieux d’expliquer tous les différents scénarios possibles, aussi nous nous limiterons<br />
aux trois exemples suivants*:<br />
*Les exemples qui suivent présument que le <strong>Virus</strong> <strong>TI</strong> est en mode d’opération Single, ou en mode Multi mais<br />
ne jouant qu’une Part à la fois. Jouer davantage de Parts simultanément peut affecter le nombre de voix totales<br />
disponibles.<br />
• Niveau 1<br />
Les patches qui utilisent par exemple 1 ou 2 oscillateurs simples, un ou deux modulateurs, et un ou deux effets<br />
peuvent permettre facilement 32 voix de polyphonie voire plus.<br />
Avec des patches encore bien plus simples vous pouvez obtenir davantage de polyphonie – par exemple,<br />
essayez le patch RAM 1-78, une très belle nappe PWM avec un délai et un chorus, qui permet jusque plus<br />
de 50 voix de polyphonie.<br />
• Niveau 3<br />
Les patches qui utilisent par exemple 3 oscillateurs simples, 3 ou 4 modulateurs et plusieurs effets peuvent<br />
permettre une bonne vingtaine de voix de polyphonie.<br />
• Niveau 5<br />
Les patches qui utilisent les oscillateurs Grain ou Formant, plusieurs modulateurs, de nombreux effets et le<br />
filtre analogique 1-4 pôle permettent environ 10 à 14 voix de polyphonie.
150<br />
GUIDE DE DÉMARRAGE RAPIDE<br />
Maximiser la Polyphonie<br />
Certaines caractéristiques du <strong>Virus</strong> <strong>TI</strong> <strong>Snow</strong> sont beaucoup plus exigeantes en ressources DSP que<br />
d’autres, et cela peut devenir bien plus rapidement apparent en mode Multi. Une fois que vous avez atteint<br />
la limite de polyphonie et jouez simultanément un plus grand nombre de notes que le <strong>Virus</strong> ne peut délivrer,<br />
la coupure des notes peut se faire plus ou moins entendre, selon le type d’arrangement musical.<br />
Si vous arrivez trop rapidement à court de polyphonie, vous pouvez jeter un œil aux patches utilisés et voir<br />
s’il y a un quelconque moyen de les optimiser. Les fonctionnalités suivantes sont alors à considérer comme<br />
principales suspectes :<br />
• Le Mode Unison (Menu Common)<br />
Le Mode Unison informe le <strong>Virus</strong> de jouer plusieurs instances de la même voix, pour chaque note jouée, et<br />
a par conséquent l’inconvénient de réduire d’autant la polyphonie totale de l’instrument. En mode Unison<br />
‘Twin’, le <strong>Virus</strong> joue deux voix pour chaque note jouée, mais le mode Unison pouvant jouer jusque 8 voix<br />
par note, vous comprenez le problème potentiel face auquel on se trouve, et tout particulièrement dans un<br />
arrangement ! Souvent, réduire le nombre de voix du mode Unison n’a aucune ou très peu d’incidence sur<br />
la qualité du son une fois mixé dans l’arrangement. Aussi, pensez tout d’abord à réduire le nombre de voix<br />
du mode Unison à ‘Twin’ s’il était réglé sur une valeur plus importante. Vous devriez facilement pouvoir compenser<br />
la perte de volume avec les paramètres Patch Volume (Menu Common) ou Part Volume (Menu Multi).<br />
Le Mode Unison est hérité des <strong>Virus</strong> A, B et C. Mais aucun d’eux ne bénéficiait de l’oscillateur HyperSaw ou<br />
du paramètre Local Detune disponible à présent avec certains des nouveaux types d’oscillateurs. Dans certains<br />
cas, le fait d’utiliser l’oscillateur HyperSaw sur un oscillateur peut permettre d’avoir une polyphonie bien<br />
plus importante qu’avec un patch similaire utilisant 3 oscillateurs à dent-de-scie distincts.<br />
• Analog 1-4 pole (Menu Filtre)<br />
Chaque voix requiert approximativement le double de puissance de calcul.<br />
• WavePWM ou Grain/Formant Complex (Menu Osc1/2)<br />
Chaque voix requiert approximativement le double de puissance de calcul. N’utilisez ces oscillateurs que si<br />
vous tirez profit des paramètres F-Shift, F-Spread ou Local Detune (Menus OSC1/2) – et particulièrement<br />
dans le cas de l’oscillateur Grain Complex, qui sonne exactement comme l’oscillateur Wavetable lorsque<br />
tous les paramètres de ce dernier sont à leur valeur par défaut (+0).<br />
Alternativement, essayez les variantes ‘Simple’ de Grain et Formant, celles-ci consommant beaucoup moins<br />
de ressources DSP.<br />
• Oscillateur 3 (Menu Osc1/2)<br />
Chaque voix requiert approximativement 30% de puissance de calcul supplémentaire.
A PROPOS DE POLYPHONIE<br />
• Reverb<br />
La réverb est l’effet le plus ‘gourmand’. Aussi nous vous recommandons vivement d’éviter de l’utiliser sur<br />
plus d’une ou deux Parts à la fois. Un délai aura un impact beaucoup plus discret sur la charge du DSP, et<br />
peut bien souvent s’avérer tout aussi efficace – n’oubliez pas non plus que vous pouvez utiliser des plug-ins<br />
d’effets si vous utilisez le Total Integration.<br />
Optimiser Vos Patches<br />
Si vous voyez qu’un patch recourt à plusieurs des fonctionnalités citées ci-dessus, essayez différentes alternatives<br />
pour réduire la charge CPU. N’oubliez pas qu’une fonctionnalité est active et consomme de la puissance<br />
de calcul même si elle est réglée sur une très petite valeur. Aussi, dans certains cas il peut être opportun<br />
de condamner une fonctionnalité plutôt que de l’utiliser alors qu’elle ne fait aucune différence audible.<br />
Par exemple, si le paramètre Osc Balance est réglé sur -63, il est très probable que vous soyez incapable<br />
d’entendre l’oscillateur 2, et pourtant il est actif. Essayez dans ce cas, de régler le paramètre sur -64, dans<br />
quel cas en désactivant l’oscillateur 2 vous libérez des ressources CPU. Si le paramètre Mix ou Send d’un<br />
effet est réglé sur Off ou Dry, alors l’effet en question n’utilisera aucune ressource CPU. Ainsi, si un patch<br />
utilise un effet avec un très faible niveau, il peut être judicieux de désactiver complètement l’effet. Le <strong>Virus</strong><br />
requiert également davantage de ressources CPU lorsque les deux filtres sont activés. Si pour un son particulier<br />
vous avez uniquement besoin d’un filtre à 2-pôles, alors vous pouvez désactiver le filtre 2 en réglant le<br />
paramètre Filter Balance sur -64. Vous libérez ainsi davantage de ressources pour la polyphonie.<br />
Un autre facteur souvent négligé est la longueur des queues de relâchement (release). Cela peut cumuler le<br />
nombre de voix joué simultanément bien plus rapidement qu’on ne le pense. Dans un arrangement, il est<br />
souvent possible de réduire légèrement le temps de relâchement sans que cela affecte l’équilibre du mix.<br />
Vérifiez également le paramètre Priority (menu Multi) qui permet d’assigner la priorité à certaines Parts, pour<br />
éviter que celles-ci ne subissent les coupures de notes. En réglant le paramètre Priority sur High pour les<br />
Parts critiques, les autres Parts sont considérées comme Priority Low, et sont seules sujettes aux coupures<br />
de notes lorsque la polyphonie maximale est dépassée.<br />
Evitez d’utiliser la matrice de modulation pour appliquer un effet déjà existant par défaut (ex : si vous voulez<br />
moduler Cutoff 1 par le LFO, utilisez plutôt le paramètre LFO2>Cutoff1, qui est par ailleurs toujours activé).<br />
Si à la place vous utilisez la matrice de modulation, vous gaspillerez inutilement des ressources CPU.<br />
Certaines sources de contrôleurs MIDI applicables dans la matrice de modulation requièrent davantage de<br />
puissance de calcul que d’autres – ceci est dû au fait que certaines doivent être calculées par voix, tandis<br />
que d’autres sont calculées de façon globale. Par exemple, la molette de modulation s’applique simultanément<br />
à toutes les voix d’une part donnée. Cela implique un seul calcul pour chaque changement de position<br />
de la molette. Mais d’autres sources telles que KeyFollow ou Filter Envelope s’appliquent à chaque voix individuelle.<br />
Il en résulte une charge DSP bien plus importante. Si vous jouez un patch polyphonique, cela peut<br />
faire une vraie différence, en particulier si vous utilisez plusieurs modulateurs de ce type en même temps.<br />
Il est également conseillé de désactiver tous les modulateurs redondants (ne les réglez pas simplement sur<br />
une valeur de 0, mais réglez les paramètres de source et/ou destination sur Off).
152<br />
GUIDE DE DÉMARRAGE RAPIDE<br />
Enfin, souvenez-vous que chaque fonctionnalité qui peut être activée/désactivée peut avoir un impact sur<br />
la polyphonie, même si cela se joue à une voix près. Vous pourriez vous trouver parfois dans cette situation<br />
où cette voix est tout ce qu’il vous manque pour accomplir le résultat que vous recherchiez. Pensez donc<br />
‘efficace’ !<br />
Conclusion<br />
Voilà ! la visite guidée est terminée – nous espérons que ce guide vous aura bien aidé. Si vous ne vous sentez<br />
pas encore prêt à voler de vos propres ailes, ne vous inquiétez pas, vous n’êtes pas seul – il y a tout un<br />
tas de ressources mises à votre disposition, au cas où vous rencontreriez quelque difficulté que ce soit.<br />
Nous vous invitons à consulter les documents de support installés sur votre disque dur (dans la suite du logiciel<br />
<strong>TI</strong>). Chaque fonctionnalité du <strong>Virus</strong> <strong>TI</strong> <strong>Snow</strong> y est traitée en détail.<br />
Il y a également des tutoriaux vidéos qui expliquent comment configurer <strong>Virus</strong> Control avec votre séquenceur<br />
favori, et comment utiliser Total Integration.<br />
Vous pouvez aussi bénéficier d’une assistance technique personnelle via les formulaires de support technique<br />
accessibles sur notre site internet www.access-music.de<br />
Et n’oubliez pas non plus que vous pouvez accéder à toute cette documentation directement en cliquant sur<br />
le symbole ‘?’ dans le plug-in <strong>Virus</strong> Control !
GARAN<strong>TI</strong>E<br />
Garantie<br />
FCC information (USA)<br />
Important notice: Do not modify this unit. This product, when installed as indicated in the instructions contained<br />
in this manual, meets FCC requirements. Modifications not expressly approved by Kemper Digital<br />
GmbH may void your authority, granted by the FCC, to use this product.<br />
When connecting this product to accessories and/or another product use only high quality shielded cables.<br />
Cables supplied with this product MUST be used. Follow all installation instructions. Failure to follow instructions<br />
could void your FCC authorisation to use this product in the USA.<br />
NOTE: This product has been tested and found to comply with the requirements listed in FCC Regulations,<br />
Part 15 for Class „B“ digital devices. Compliance with these requirements provides a reasonable level of<br />
assurance that your use of this product in residental environment will not result in harmful interference with<br />
other electronic devices. This equipment generates/uses radio frequencies and, if not installed and used<br />
according to the instructions found in the user manual, may cause interference harmful to the operation of<br />
other electronic devices, Compliance with FCC regulations does not guarantee that interference will not<br />
occur in all installations. If this product is found to be the source of interference, which can be determinated<br />
by turning the unit „OFF“ and „ON“, please try to eliminate the problem by using one of the following<br />
measures: Relocate either this product or the device that is being affected by the interference. Utilise power<br />
outlets that are on branch (Circuitbreaker or fuse) circuits or install AC line filter/s. In the case of radio or TV<br />
interference, relocate/reorient the antenna. If the antenna lead-in is 300 ohm ribbon lead, change the lead- in<br />
to coaxialtype cable. If these corrective measures do not produce satisfactory results, please contact the<br />
local retailer authorised to distribute this type of product. The statements above apply ONLY to products<br />
distributed in the USA.<br />
FCC information (Canada)<br />
The digital section of this apparatus does not exceed the „Class B“ limits for radio noise emmissions from<br />
digital apparatus set out in the radio interference regulation of the Canadian Department of Communications.<br />
This only applies to products distributed in Canada.<br />
Le présent appareil numérique n’émet pas de bruit radio-électrique dépassant les limites applicables aux<br />
appareils numériques de la “Classe B” prescrites par la réglementation sur les interférences radio-électriques<br />
du Ministère Canadien des Communications. Ceci ne s’applique qu’aux produits distribués au Canada.
154<br />
GUIDE DE DÉMARRAGE RAPIDE<br />
Other standards (rest of world)<br />
This product complies with the radio frequency interference requirements of the Council Directive 89/336/EC.<br />
Cet appareil est conforme aux prescriptions de la directive communautaire 89/336/EC.<br />
Dieses Gerät entspricht der EG-Richtlinie 89/336/EC.<br />
Declaration of conformity<br />
This device is designed exclusively for generating low frequency audio signals. Any other use is not permitted,<br />
and automatically invalidates the warranty supplied by Kemper Digital GmbH. The following devices<br />
<strong>Virus</strong> <strong>TI</strong> <strong>Snow</strong> is hereby declared to conform with the requirements of Council Directive 89/336/FWG for<br />
radio frequency interference. They also comply with regulations dated August 30th, 1995 concerning radio<br />
interference generated by electronic devices. The following standards have been applied: EM 50 082-1 :<br />
1992 , EN 50 081-1 : 1992 , EN60065 : 1993 This declaration has been given responsibly on behalf of the<br />
manufacturer: Kemper Digital GmbH, Recklinghausen, Germany.<br />
Warranty regulations<br />
The Kemper Digital GmbH warranty covers all defects in material and workmanship for a period of 24<br />
months from the date of original purchase. This warranty does not cover defects due to abuse, faulty connections<br />
or operation under other than specified conditions. Warranty coverage is also voided when the<br />
device is repaired by unauthorized persons or tampered with in any way. Kemper Digital reserves the right to<br />
refuse warranty claims, if the product was not sold from an Authorised Base Dealer to the respective endcustomer.<br />
This warranty is limited to replacement or repair of the product. It does not limit the customers’<br />
rights according to the current product liability regulations of the country where the product was purchased.<br />
The warranty is only valid, if a completely filled in warranty card, including serial no., date of sale, company<br />
stamp, signature of the Authorised Base Dealer, as well as name and address of the customer is returned to<br />
the address given below. If a defect occurs during the warranty period, contact the Autorised Base Dealer<br />
from whom you bought the synthesizer or write an email to info@kemper-digital.com. The synthesizer can<br />
only be returned upon prior approval and the following requirements have to be fulfilled:<br />
- The unit is sent in its original package or one of equal quality.<br />
- A detailed description of the defect and a copy of the purchase receipt is included.
GARAN<strong>TI</strong>E
Enjoy making tunes :)<br />
5 Quickstart Manual<br />
43 Manual de iniciación rápida<br />
81 Schnellstart Anleitung<br />
119 Guide de Démarrage Rapide
© 2008 Kemper Digital GmbH, Germany. All rights reserved. Product features, specifi cations, system requirements and availability are subject to<br />
change without notice. All trademarks contained herein are the property of their respective owners. Printed in Germany. V<strong>TI</strong>SQG 01/08 Revision A