DET 3371 DET 3372 DET 3373 DET 3374 - Switel.com
DET 3371 DET 3372 DET 3373 DET 3374 - Switel.com
DET 3371 DET 3372 DET 3373 DET 3374 - Switel.com

You also want an ePaper? Increase the reach of your titles
YUMPU automatically turns print PDFs into web optimized ePapers that Google loves.
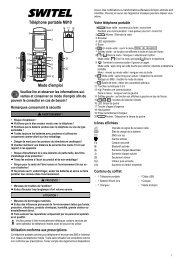
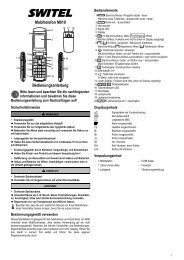
Schnurlostelefon • Téléphone sans fil • Telefono senza fili • Cordless telephone<br />
<strong>DET</strong> <strong>3371</strong><br />
<strong>DET</strong> <strong>3372</strong><br />
<strong>DET</strong> <strong>3373</strong><br />
<strong>DET</strong> <strong>3374</strong><br />
D<br />
F<br />
I<br />
GB<br />
Bedienungsanleitung • Mode d’emploi • Istruzioni per l’uso • Operating Instructions
1<br />
14 15 16 17<br />
2<br />
3<br />
<strong>DET</strong><strong>3371</strong><br />
4<br />
10<br />
PIN<br />
5<br />
11<br />
18<br />
6<br />
MEMO<br />
19<br />
7<br />
8<br />
9<br />
12<br />
13<br />
23<br />
22<br />
21<br />
20
1 Sicherheitshinweise<br />
Lesen Sie diese Bedienungsanleitung sorgfältig durch.<br />
Bestimmungsgemäße Verwendung<br />
Dieses Telefon ist geeignet zum Telefonieren innerhalb eines Telefonnetzes.<br />
Jede andere Verwendung gilt als nicht bestimmungsgemäß. Eigenmächtige<br />
Veränderungen oder Umbauten sind nicht zulässig. Öffnen Sie das Gerät in<br />
keinem Fall selbst und führen Sie keine eigenen Reparaturversuche durch.<br />
Aufstellungsort<br />
Vermeiden Sie Belastungen durch Rauch, Staub, Erschütterungen, Chemikalien,<br />
Feuchtigkeit, Hitze oder direkte Sonneneinstrahlung. Verwenden Sie<br />
das Mobilteil nicht in explosionsgefährdeten Bereichen.<br />
Netzteil<br />
a Achtung: Verwenden Sie nur das mitgelieferte Steckernetzteil, da<br />
andere Netzteile das Telefon beschädigen können. Sie dürfen den Zugang<br />
zum Steckernetzteil nicht durch Möbel oder andere Gegenstände versperren.<br />
Akkus<br />
a Achtung: Werfen Sie Akkus nicht ins Feuer. Verwenden Sie nur<br />
Akkus des gleichen Typs! Achten Sie auf die richtige Polung! Bei verkehrter<br />
Polung der Akkus besteht beim Aufladen Explosionsgefahr.<br />
Stromausfall<br />
Bei Stromausfall kann mit dem Telefon nicht telefoniert werden. Halten Sie<br />
für Notfälle ein schnurgebundenes Telefon bereit, welches ohne externe<br />
Stromversorgung arbeitet.<br />
Strahlungsreduzierung (ECO-Mode)<br />
Im Gesprächsmodus wird die Strahlung abhängig von der Entfernung des<br />
Mobilteils zur Basis verringert.<br />
Strahlungsreduzierung (MAXI ECOmode)<br />
Im „MAXI ECOmode“ ist die Strahlung (DECT−Sendeleistung) von Basis<br />
und Mobilteil im Ruhezustand ausgeschaltet. Dies funktioniert auch mit<br />
mehreren Mobilteilen, sofern sie alle den „MAXI ECOmode“ unterstützen.<br />
Medizinische Geräte<br />
a Achtung: Benutzen Sie das Telefon nicht in der Nähe von medizinischen<br />
Geräten. Eine Beeinflussung kann nicht völlig ausgeschlossen werden.<br />
DECT-Telefone können in Hörgeräten einen unangenehmen Brummton verursachen<br />
(Digital Enhanced Cordless Tele<strong>com</strong>munication = Standard für<br />
kabellose Telefone).<br />
Entsorgung<br />
Wollen Sie Ihr Gerät entsorgen, bringen Sie es zur Sammelstelle<br />
Ihres kommunalen Entsorgungsträgers (z. B. Wertstoffhof).<br />
Das nebenstehende Symbol bedeutet, dass Sie<br />
das Gerät auf keinen Fall in den Hausmüll werfen dürfen!<br />
Nach dem Elektro- und Elektronikgerätegesetz sind Besitzer<br />
von Altgeräten gesetzlich gehalten, alte Elektro- und Elektronikgeräte<br />
einer getrennten Abfallerfassung zuzuführen.<br />
Akkus entsorgen Sie beim batterievertreibenden Handel<br />
sowie bei zuständigen Sammelstellen, die entsprechende<br />
Behälter bereitstellen.<br />
Verpackungsmaterialien entsorgen Sie entsprechend den<br />
lokalen Vorschriften.<br />
2 Telefon in Betrieb nehmen<br />
Sicherheitshinweise<br />
a Achtung: Lesen Sie vor der Inbetriebnahme unbedingt die Sicherheitshinweise<br />
in Kapitel 1.<br />
Basisstation anschließen<br />
a Achtung: Stellen Sie die Basisstation mit einem Mindestabstand von<br />
1 m zu anderen elektronischen Geräten auf, da es sonst zu gegenseitigen<br />
Störungen kommen kann.<br />
Schließen Sie die Basisstation wie auf der Skizze abgebildet an. Verwenden<br />
Sie aus Sicherheitsgründen nur das mitgelieferte Netzteil sowie das<br />
beigefügte Telefonanschlusskabel.<br />
Telefonanschluss<br />
Netzsteckdose<br />
a Achtung: Verwenden Sie für die Basisstation nur das mitgelieferte<br />
Netzteil!<br />
1<br />
D
Ladestation anschließen 2<br />
Schließen Sie die Ladestation mit dem fest angeschlossenen Netzteil an<br />
eine Netzsteckdose an. Achten Sie darauf, dass die Netzsteckdose frei<br />
zugänglich ist.<br />
2<br />
Gilt nur für Telefonsets mit mindestens zwei Mobilteilen.<br />
Akkus einlegen<br />
Öffnen Sie das Akkufach. Legen Sie die Akkus in das Akkufach ein.<br />
Schließen Sie das Akkufach.<br />
a Achtung: Verwenden Sie nur NiMH-Akkus vom Typ AAA<br />
(Microzellen), 400 mAh! Niemals Batterien/Primärzellen verwenden!<br />
Achten Sie auf die richtige Polarität!<br />
Akkus aufladen<br />
☞ Stellen Sie das Mobilteil bei der ersten Inbetriebnahme für<br />
mindestens 16 Stunden in die Basisstation / Ladestation.<br />
Das Mobilteil erwärmt sich beim Laden. Dies ist normal und ungefährlich.<br />
Laden Sie das Mobilteil nicht mit fremden Aufladegeräten. Der Akkuladezustand<br />
wird im Display angezeigt. Wenn die Ladung der Akkus die untere<br />
Grenze erreicht hat, blinkt das Akkusymbol im Display. Beenden Sie Ihr<br />
Gespräch und stellen Sie das Mobilteil zum Laden in die Basisstation oder<br />
die Ladestation.<br />
Nach kurzer Zeit wird das Akkusymbol den Zustand „voll“ anzeigen. Dies<br />
entspricht aber aufgrund der geringen Ladezeit nicht dem tatsächlichen<br />
Zustand und die Akkuladung wird sich nun beim Gebrauch sehr schnell verringern.<br />
Um die Akkus wieder voll aufzuladen belassen Sie das Mobilteil<br />
bitte mindestens für 16 Stunden in der Basisstation / Ladestation.<br />
Stromverbrauch<br />
Die Leistungsaufnahme der Basisstation (6 V, 500 mA DC) beträgt:<br />
- im Betrieb (Bereitschaft/Gespräch): ca. 0,6 / 0,75 W.<br />
- während der Ladung des Mobilteils: ca. 1,2 W.<br />
Die Nulllast des Netzteils beträgt ca. 0,1 W.<br />
Die durchschnittliche Effizienz beträgt ca. 71,2 %.<br />
Die Leistungsaufnahme der Ladestation (7 V, 420 mA DC) beträgt:<br />
- ohne Mobilteil: ca. 0,1 W.<br />
- während der Ladung des Mobilteils: ca. 0,6 W.<br />
Die Nulllast des Netzteils beträgt ca. 0,1 W.<br />
Die durchschnittliche Effizienz beträgt ca. 72,5 %.<br />
3 Bedienelemente (Umschlag vorn)<br />
Mobilteil<br />
1 Hörkapsel<br />
2 Display<br />
3 Wahlwiederholung/Pause<br />
4 Freisprechen<br />
5 Abhebetaste<br />
6 Anrufliste / Flashtaste (R)<br />
7 Zifferntasten<br />
8 Intern-Taste<br />
Basis<br />
14 Paging-Taste (Mobilteil suchen)<br />
15 Lautstärke − / Klingelverzögerung<br />
einstellen<br />
16 Display<br />
17 Lautstärke + / Sicherheitscode ändern<br />
18 Löschen<br />
9 Stumm-Taste (Mikrofon aus) /<br />
Löschtaste<br />
10 Telefonbuch<br />
11 Auflegetaste<br />
12 Lautstärke-Taste / Ruftonmelodie,<br />
Ruftonlautstärke<br />
13 Mikrofon<br />
19 Vor / Memo aufzeichnen<br />
20 Abspielen / Pause<br />
21 Anrufbeantworter Ein/Aus / Stopp<br />
22 Zurück / Ansage abspielen/<br />
aufzeichnen<br />
23 Ladeschale für Mobilteil<br />
2
4 Telefonieren<br />
Anruf annehmen<br />
Ihr Telefon klingelt.<br />
/ Drücken Sie die Abhebetaste oder die Freisprechtaste.<br />
Anrufen<br />
Geben Sie die Rufnummer ein.<br />
Fehler bei der Eingabe mit korrigieren.<br />
/ Rufnummer wird gewählt.<br />
☞ Sie können auch zuerst die Abhebetaste drücken und erhalten<br />
damit den Wählton. Die eingegebenen Ziffern Ihrer gewünschten Rufnummer<br />
werden sofort gewählt. Eine Korrektur einzelner Ziffern der<br />
Rufnummer ist bei dieser Form des Gesprächsaufbaus nicht möglich.<br />
Gespräch beenden<br />
/ Auflegetaste drücken oder Mobilteil in die Basis stellen.<br />
Anzeige der Gesprächsdauer<br />
Während eines Gesprächs wird die Gesprächsdauer angezeigt.<br />
Hörer-/Lautsprecherlautstärke einstellen<br />
Sie können während eines Gesprächs die Lautstärke in 5 Stufen einstellen<br />
(bei Hörerbetrieb -> Hörerlautstärke, bei Freisprechen -> Lautsprecherlautstärke).<br />
Mikrofon ausschalten (Mute)<br />
Sie können während eines Gesprächs das Mikrofon ausschalten, so<br />
dass Ihr Gesprächspartner Sie nicht hören kann. Im Display wird<br />
angezeigt.<br />
Zum Einschalten des Mikrofons drücken Sie die Taste erneut.<br />
Wahlwiederholung<br />
☞ Ihr Telefon speichert die 3 zuletzt gewählten Rufnummern.<br />
Rufnummer anzeigen / wählen<br />
Das Telefon ist im Ruhezustand.<br />
…ggf. mehrfach drücken, bis die gewünschte Rufnummer angezeigt<br />
wird.<br />
/ …Rufnummer wird gewählt.<br />
☞ Haben Sie bereits die Abhebetaste gedrückt und hören<br />
Sie den Wählton, wird mit der Wahlwiederholungstaste die<br />
zuletzt gewählte Nummer erneut gewählt.<br />
Rufnummer speichern<br />
… die gewünschte Rufnummer wird angezeigt (s. o.)<br />
… für ca. 2 Sekunden drücken. Sie können ggf. die Rufnummer bearbeiten.<br />
Drücken Sie die Taste kurz um die letzte Ziffer zu löschen<br />
oder lang, um die gesamte Rufnummer zu löschen. Eine Wahlpause<br />
(ca. 3 s) geben Sie mit der Taste ein.<br />
… erneut drücken und den Speicherplatz eingeben (0…9).<br />
… noch einmal drücken um zum Ruhezustand zurück zu kehren.<br />
Anrufliste<br />
☞ Ihr Telefon speichert die letzten 20 Anrufe in der Anrufliste. Die<br />
Speicherung kann nur erfolgen, wenn die Funktion „Rufnummernübertragung<br />
(CLIP)“ an Ihrem Anschluss verfügbar ist und die Rufnummer<br />
vom Anrufer nicht unterdrückt oder aus anderen Gründen nicht übertragen<br />
wurde. Ist die Liste leer wird nO angezeigt.<br />
Neue Anrufe werden durch das blinkende Symbol<br />
angezeigt.<br />
im Display<br />
Rufnummer anzeigen / wählen<br />
Das Telefon ist im Ruhezustand.<br />
Anrufliste öffnen. Die Rufnummer des letzten Anrufs wird angezeigt. Ist<br />
die Nummer länger als 12 Stellen, drücken Sie die Taste um die<br />
weiteren Stellen zu sehen.<br />
Drücken Sie die Taste um Datum und Uhrzeit des Anrufs zu<br />
sehen (nur möglich, wenn diese Information mit der Rufnummer<br />
zusammen gesendet wurde / netzabhängig).<br />
… wiederholt drücken, um zu weiteren Einträgen zu gelangen.<br />
/ Die angezeigte Rufnummer wird gewählt.<br />
Rufnummer löschen<br />
… die gewünschte Rufnummer wird angezeigt (s. o.)<br />
… für ca. 3 Sekunden drücken. Der Eintrag wird gelöscht.<br />
Rufnummer speichern<br />
… die gewünschte Rufnummer wird angezeigt (s. o.)<br />
… für ca. 2 Sekunden drücken. Sie können ggf. die Rufnummer bearbeiten.<br />
Drücken Sie die Taste kurz um die letzte Ziffer zu löschen<br />
oder lang, um die gesamte Rufnummer zu löschen. Eine Wahlpause<br />
(ca. 3 s) geben Sie mit der Taste ein.<br />
… erneut drücken und den Speicherplatz eingeben (0…9).<br />
… noch einmal zur Bestätigung drücken.<br />
3<br />
D
Das Telefonbuch<br />
☞ Das Telefonbuch kann 10 Einträge aufnehmen.<br />
Rufnummer speichern<br />
Das Telefon ist im Ruhezustand.<br />
… für ca. 2 Sekunden drücken. Das Symbol erscheint im Display.<br />
Rufnummer eingeben. kurz drücken um die letzte Ziffer zu<br />
löschen oder lang, um die gesamte Rufnummer zu löschen. Eine<br />
Wahlpause (ca. 3 s) geben Sie mit der Taste ein.<br />
… erneut drücken.<br />
… Speicherplatz (0 … 9) eingeben.<br />
… noch einmal drücken um zum Ruhezustand zurück zu kehren.<br />
Zum Speichern weiterer Rufnummern verfahren Sie bitte wie beschrieben.<br />
Rufnummer wählen<br />
Das Telefon ist im Ruhezustand.<br />
… kurz drücken.<br />
… Speicherplatz (0 … 9) eingeben. Der entsprechende Eintrag wird<br />
angezeigt.<br />
/ Die angezeigte Rufnummer wird gewählt.<br />
Rufnummer ändern<br />
Das Telefon ist im Ruhezustand.<br />
… kurz drücken.<br />
… Speicherplatz (0 … 9) eingeben. Der entsprechende Eintrag wird<br />
angezeigt.<br />
… für ca. 2 Sekunden drücken. kurz drücken um die letzte Ziffer<br />
zu löschen oder lang, um die gesamte Rufnummer zu löschen. Eine<br />
Wahlpause (ca. 3 s) geben Sie mit der Taste ein.<br />
…noch einmal drücken um die Änderung zu speichern.<br />
Intern telefonieren<br />
☞ Interne Gespräche, Vermitteln und Konferenzgespräche<br />
sind nur möglich, wenn mehrere Mobilteile angemeldet sind.<br />
Internes Gespräch führen<br />
… drücken und die interne Rufnummer (1 … 5) des gewünschten Mobilteils<br />
eingeben.<br />
/ Zum Annehmen des Gesprächs am gerufenen Mobilteil drücken Sie die<br />
Gesprächstaste oder die Freisprechtaste. Sie beenden das Gespräch<br />
wie gewohnt.<br />
Externes Gespräch vermitteln<br />
Während eines Externgespräches . . .<br />
… drücken und die interne Rufnummer (1 … 5) des gewünschten Mobilteils<br />
eingeben. Das externe Gespräch wird gehalten.<br />
Wenn das gerufene Mobilteil eingeschaltet wird ggf. Gespräch ankündigen.<br />
Drücken Sie die Auflegetaste. Das Gespräch ist übergeben.<br />
Konferenz<br />
Während eines Externgespräches . . .<br />
… drücken und die interne Rufnummer (1 … 5) des gewünschten Mobilteils<br />
eingeben. Das externe Gespräch wird gehalten.<br />
Wenn das gerufene Mobilteil eingeschaltet wird ggf. Gespräch ankündigen.<br />
Drücken Sie die Taste INT für ca. 3 Sekunden. Die Konferenz ist aufgebaut.<br />
☞ Legt einer der beteiligten Konferenzteilnehmer auf, bleiben<br />
die beiden anderen miteinander verbunden.<br />
5 Weitere Leistungsmerkmale<br />
Tastensperre<br />
☞ Die Tastensperre verhindert ein unbeabsichtigtes Betätigen<br />
der Tasten. Eintreffende Anrufe können wie gewohnt entgegengenommen<br />
werden.<br />
… drücken und halten bis im Display das Symbol für die Tastensperre<br />
erscheint. Zum Entsperren der Tastatur drücken und halten Sie die<br />
Raute-Taste erneut bis das Symbol wieder erlischt.<br />
Tonruf ausschalten (Mobilteil)<br />
☞ Sie können den Tonruf für das Mobilteil auch über eine<br />
Programmierung ausschalten (s. Abschnitt „Tonruf“).<br />
… drücken und halten bis im Display das Symbol für den ausgeschalteten<br />
Tonruf erscheint. Zum Wiedereinschalten des Tonrufs drücken<br />
und halten Sie die Stern-Taste erneut bis das Symbol wieder erlischt.<br />
4
Mobilteil anmelden<br />
☞ An einer Basisstation können bis zu 5 Mobilteile angemeldet werden.<br />
Die mit Ihrem Telefon ausgelieferten Mobilteile sind bereits an der<br />
Basis angemeldet. Um ein „fremdes“ Mobilteil anzumelden beachten<br />
Sie bitte auch dessen Bedienungsanleitung.<br />
Trennen Sie zuerst die Basis von der Stromversorgung und stecken<br />
Sie sie wieder ein. Danach ist die Basis für die Dauer von 3 Minuten<br />
im Anmelde-Modus.<br />
… am anzumeldenden Mobilteil für ca. 3 Sekunden drücken bis<br />
und blinken.<br />
… für ca. 3 Sekunden drücken.<br />
Nummer für die Basisstation eingeben (1 … 5).<br />
PIN der Basisstation eingeben (an der Basis DE 337x im Auslieferungszustand<br />
„0 0 0 0“).<br />
Ist die Anmeldung erfolgreich zeigt das Display HS und die interne<br />
Rufnummer des Mobilteils.<br />
Mobilteil abmelden<br />
☞ Sie können ein Mobilteil abmelden, um z. B. den „Platz“ für ein<br />
anderes Mobilteil freizugeben. Beachten Sie bitte, dass Sie das Mobilteil,<br />
das Sie aktuell für diesen Zweck benutzen, nicht abmelden können.<br />
Drücken Sie die Taste für ca. 3 Sekunden.<br />
Drücken Sie die Taste für ca. 3 Sekunden.<br />
Geben Sie die PIN der Basisstation ein (an der Basis DE 337x im Auslieferungszustand<br />
„0 0 0 0“).<br />
Geben Sie die interne Rufnummer des Mobilteils ein, das Sie abmelden<br />
möchten (1 … 5).<br />
Ist die Abmeldung erfolgreich geht das Mobilteil in den Ruhezustand.<br />
Tonrufmelodie Mobilteil<br />
… drücken und halten für ca. 3 s. Die aktuelle Melodie ertönt.<br />
… gewünschte Melodie auswählen.<br />
Zum Speichern drücken.<br />
Tonruflautstärke Mobilteil<br />
… kurz drücken. Die aktuelle Melodie wird mit der aktuellen Lautstärke<br />
gespielt.<br />
… gewünschte Lautstärke auswählen. Im Display erscheint , wenn<br />
der Tonruf ausgeschaltet ist.<br />
Zum Speichern drücken.<br />
Flashzeit (R-Taste)<br />
☞ Die Flashzeit zur Nutzung von Netz-Dienstmerkmalen oder zum<br />
Betrieb an einer Telefonanlage kann auf 100 ms (üblich für Netz-<br />
Dienstmerkmale / Lieferzustand) oder 300 ms eingestellt werden.<br />
Wenden Sie sich ggf. an Ihren Netzbetreiber oder den Administrator<br />
Ihrer Telefonanlage.<br />
… drücken und für ca. 3 s halten. Im Display erscheint S (100 ms)<br />
oder L (300 ms). Zum Umschalten der Flashzeit drücken Sie<br />
erneut für ca. 3 s.<br />
Wahlverfahren (Tonwahl DTMF / Impulswahl)<br />
☞ Sie können das Wahlverfahren umschalten. Für moderne<br />
Anschlüsse ist das Tonwahlverfahren (MFV / DTMF = Lieferzustand)<br />
üblich.<br />
… drücken und für ca. 3 s halten. Im Display erscheint t (Tonwahl)<br />
oder P (Impulswahl). Zum Umschalten des Wahlverfahrens drücken<br />
Sie erneut für ca. 3 s.<br />
6 Anrufbeantworter<br />
Die Bedienung des Anrufbeantworters erfolgt an der Basis.<br />
Anrufbeantworter ein-/ausschalten<br />
… drücken. Der Anrufbeantworter ist eingeschaltet.<br />
… erneut drücken. Der Anrufbeantworter ist ausgeschaltet.<br />
Anrufbeantwortersprache einstellen<br />
Sie können die Sprachausgabe des Anrufbeantworters in folgende Sprachen<br />
einstellen: Deutsch, Englisch, Französisch.<br />
… drücken und halten für ca. 10 s, um die gewünschte Sprache auszuwählen.<br />
Es ertönt ein Bestätigungston und das Display der Basis zeigt das<br />
Sprachkürzel an.<br />
Ansagemodus<br />
Sie haben die Möglichkeit, zwischen „Ansage mit Nachrichtenaufzeichnung“<br />
und „Nur-Hinweisansage“ zu wählen.<br />
☞ Der Anrufbeantworter ist werkseitig mit voreingestellten Ansagen<br />
versehen. Diese Ansagen werden abgespielt, wenn Sie keine eigenen<br />
Ansagen aufgenommen haben.<br />
5<br />
D
Ansage mit Nachrichtenaufzeichnung (Ansage 1)<br />
Es wird ein Ansagetext abgespielt und eingehende Nachrichten werden aufgezeichnet<br />
(max. Dauer ca. drei Minuten). Der Anrufbeantworter kann bis<br />
zu 55 eingehende Nachrichten, mit einer Aufzeichnungsdauer von insgesamt<br />
bis zu 11 Minuten, speichern.<br />
Nur-Hinweisansage (Ansage 2)<br />
Es wird ein Ansagetext abgespielt und danach die Verbindung getrennt.<br />
Dieser Modus wird automatisch aktiviert, wenn der Nachrichtenspeicher voll<br />
ist.<br />
. . . 2 Sekunden drücken. Zwischen Ansage 1 und Ansage 2 wechseln.<br />
Ansage aufnehmen/anhören<br />
. . . 2 Sekunden drücken.<br />
Nach dem Piepton: Sprechen Sie Ihren Text laut und deutlich in die<br />
Richtung des Anrufbeantworters.<br />
. . . drücken, um die Aufzeichnung zu beenden.<br />
. . . drücken, um die aktuelle Ansage zu prüfen.<br />
☞ Sie können die Aufzeichnung beliebig oft wiederholen. Eine neue<br />
Aufnahme ersetzt die alte Ansage. Sie brauchen die alte Ansage nicht zu<br />
löschen.<br />
Ansage löschen<br />
Ihre eigene Ansage wird gelöscht und der voreingestellte Ansagetext wiederhergestellt.<br />
. . . drücken, um die aktuelle Ansage zu hören.<br />
. . . während der Wiedergabe gedrückt halten, um die Ansage zu<br />
löschen.<br />
☞ Die voreingestellten Ansagen können nicht gelöscht werden.<br />
Klingelverzögerung einstellen<br />
Um ausreichend Zeit zu haben, eingehende Anrufe entgegenzunehmen,<br />
bevor sich der Anrufbeantworter einschaltet, können Sie hier entsprechende<br />
Einstellungen wählen. Zur Auswahl steht die Rufannahme nach 2 bis 9<br />
Klingelzeichen oder die Gebührensparfunktion. Diese Einstellung ist besonders<br />
für den Fernabfragebetrieb hilfreich. In dieser Einstellung schaltet sich<br />
der Anrufbeantworter nach 5 Klingelzeichen ein, sofern keine neue Nachricht<br />
aufgezeichnet wurde. Gibt es jedoch neue aufgezeichnete Nachrichten,<br />
so schaltet sich der Anrufbeantworter bereits nach 2 Klingelzeichen<br />
ein. Bei allen anderen Einstellungen schaltet sich der Anrufbeantworter nach entsprechender<br />
Anzahl der Klingelzeichen ein.<br />
… 2 Sekunden drücken, um den Einstellungsmodus zu aktivieren.<br />
Mit den Tasten und die gewünschte Verzögerung wählen.<br />
… drücken. Einstellung gespeichert.<br />
… drücken, um die aktuelle Einstellung anzuzeigen.<br />
Memos aufzeichnen<br />
Sie können auf dem Anrufbeantworter Memos aufzeichnen und später wieder<br />
abspielen.<br />
… 2 Sekunden drücken. Nach dem Piepton: Sprechen Sie Ihren Text laut und<br />
deutlich in die Richtung des Anrufbeantworters.<br />
. . . drücken, um die Aufzeichnung zu beenden.<br />
Eingegangene Nachrichten<br />
Die LED-Anzeige blinkt, wenn neue Nachrichten eingegangen sind.<br />
Nachrichten/Memos abspielen<br />
… drücken, um die Nachrichten abzuspielen. Neue Nachrichten werden<br />
zuerst abgespielt.<br />
Während der Wiedergabe haben Sie die Möglichkeit weitere Funktionen durchzuführen.<br />
wiederholt die aktuelle Nachricht<br />
2x spielt die vorherige Nachricht<br />
stoppt die Wiedergabe<br />
Wiedergabe pausieren / fortsetzen<br />
spielt die nächste Nachricht<br />
Lautstärke +<br />
Lautstärke −<br />
Nachrichten löschen<br />
Aktuelle Nachricht löschen<br />
Um die Nachricht zu löschen, die aktuell abgespielt wird, drücken und halten Sie<br />
während der Wiedergabe die Taste .<br />
6
Alle Nachrichten löschen<br />
Sie können alle alten Nachrichten löschen.<br />
… 2 Sekunden drücken. Im Display erscheint dL.<br />
… drücken. Nachrichten gelöscht.<br />
Fernabfrage<br />
Die Voraussetzung fur die Fernabfrage ist, dass Sie den PIN-Code für<br />
diese Funktion kennen. Der voreingestellte PIN-Code ist 321. Sie können<br />
einen individuellen PIN-Code eingeben.<br />
PIN−Code ändern<br />
… 2 Sekunden drücken. Im Display blinkt die Ziffer für die erste Position<br />
des PIN-Codes.<br />
Mit den Tasten und die gewünschte Ziffer wählen.<br />
… drücken um die nächste Position einzustellen. Für die Einstellung<br />
der zweiten und dritten Position verfahren Sie identisch.<br />
☞ Für die Fernabfrage bzw. Fernsteuerung Ihres Anrufbeantworters müssen Sie<br />
die entsprechenden Tasten auf dem Telefon betätigen.<br />
Taste Funktion<br />
1 aktuelle Nachricht erneut abspielen<br />
2x 1 vorherige Nachricht abspielen<br />
2 Nachrichten abspielen / pausieren<br />
3 nächste Nachricht abspielen<br />
4 Ansage wiedergeben<br />
5 Ansage aufzeichnen<br />
6 Wiedergabe oder Aufzeichnung stoppen / Fernabfrage beenden<br />
7 aktuelle Nachricht löschen<br />
8 Anrufbeantworter ausschalten<br />
9 Anrufbeantworter einschalten / Ansage 1 oder 2 auswählen<br />
0 alle alten Nachrichten löschen<br />
✱ Ansage überspringen<br />
# Memo aufzeichnen<br />
Anrufbeantworter fernabfragen bzw. fernsteuern<br />
Sie können Ihren Anrufbeantworter von einem MFV-fähigen (Mehrfrequenz-<br />
Wahlverfahren) Telefon aus abfragen und fernsteuern, d. h., Sie können<br />
Nachrichten abhören und/oder Nachrichten löschen.<br />
Rufen Sie Ihr(en) Telefon/Anrufbeantworter von einem MFV-fähigen<br />
Telefon aus an. Es gelten die von Ihnen vorgenommenen Einstellungen<br />
(siehe Klingelverzögerung).<br />
☞ Wenn Ihr Anrufbeantworter nicht eingeschaltet ist, schaltet er sich nach<br />
dem zehnten Klingelzeichen automatisch ein.<br />
☞ Wollen Sie nur neue Nachrichten abhören und haben die Gebührensparfunktion<br />
gewählt, können Sie nach dem 3. Klingelzeichen die Verbindung<br />
unterbrechen. Wären neue Nachrichten vorhanden, so hätte sich der<br />
Anrufbeantworter bereits nach dem 2. Klingelzeichen eingeschaltet. Somit<br />
entstehen Ihnen keine Kosten.<br />
D<br />
Geben Sie nach der Ansage den Fernabfrage−PIN−Code (Werkseinstellung<br />
ist 321) ein. Wenn Sie den richtigen PIN-Code eingegeben<br />
haben, hören Sie zwei Signaltöne. Nach Eingabe des richtigen PIN-<br />
Codes erwartet das Gerät umgehend weitere Tasteneingaben. Wenn<br />
keine Tasteneingabe erfolgt, wird die Verbindung unterbrochen.<br />
7
Anhang<br />
Konformitätserklärung<br />
Dieses Gerät erfüllt die Anforderungen der EU-Richtlinien:<br />
- 1999/5/EG Richtlinie über Funkanlagen und Telekommunikationsendeinrichtungen<br />
und die gegenseitige Anerkennung ihrer Konformität.<br />
- 2005/32/EG Richtlinie „Energiebetriebene Produkte“.<br />
- Verordnung 1275/2008 „Stromverbrauch im Bereitschafts- und im<br />
Auszustand“.<br />
- Verordnung 278/2009 „Netzteile bei Nulllast sowie ihre durchschnittliche<br />
Effizienz im Betrieb“.<br />
Die Konformität mit den o. a. Richtlinien wird durch das CE-Zeichen auf<br />
dem Gerät bestätigt.<br />
Für die komplette Konformitätserklärung nutzen Sie bitte den kostenlosen<br />
Download von unserer Website www.switel.<strong>com</strong>.<br />
Pflegehinweise<br />
Reinigen Sie die Gehäuseoberflächen mit einem weichen und fusselfreien Tuch.<br />
Verwenden Sie keine Reinigungs- oder Lösungsmittel.<br />
Garantie<br />
SWITEL-Geräte werden nach den modernsten Produktionsverfahren hergestellt und<br />
geprüft. Ausgesuchte Materialien und hoch entwickelte Technologien sorgen für einwandfreie<br />
Funktion und lange Lebensdauer.<br />
Ein Garantiefall liegt nicht vor, wenn die Ursache einer Fehlfunktion des Gerätes bei<br />
dem Telefonnetzbetreiber oder einer eventuell zwischengeschalteten Nebenstellenanlage<br />
liegt. Die Garantie gilt nicht für die in den Produkten verwendeten Batterien,<br />
Akkus oder Akkupacks.<br />
Die Garantiezeit beträgt 24 Monate, gerechnet vom Tage des Kaufs.<br />
Innerhalb der Garantiezeit werden alle Mängel, die auf Material- oder Herstellungsfehler<br />
zurückzuführen sind, kostenlos beseitigt. Der Garantieanspruch erlischt bei<br />
Eingriffen durch den Käufer oder durch Dritte. Schäden, die durch unsachgemässe<br />
Behandlung oder Bedienung, natürliche Abnutzung, durch falsches Aufstellen oder<br />
Aufbewahren, durch unsachgemässen Anschluss oder Installation sowie durch höhere<br />
Gewalt oder sonstige äussere Einflüsse entstehen, fallen nicht unter die Garantieleistung.<br />
Wir behalten uns vor, bei Reklamationen die defekten Teile auszubessern, zu ersetzen<br />
oder das Gerät auszutauschen.<br />
Ausgetauschte Teile oder ausgetauschte Geräte gehen in unser Eigentum über.<br />
Schadenersatzansprüche sind ausgeschlossen, soweit sie nicht auf Vorsatz oder grober<br />
Fahrlässigkeit des Herstellers beruhen.<br />
Sollte Ihr Gerät dennoch einen Defekt innerhalb der Garantiezeit aufweisen, wenden<br />
Sie sich bitte unter Vorlage Ihrer Kaufquittung ausschliesslich an das Geschäft, in<br />
dem Sie Ihr SWITEL-Gerät gekauft haben. Alle Gewährleistungsansprüche nach diesen<br />
Bestimmungen sind ausschliesslich gegenüber Ihrem Fachhändler geltend zu<br />
machen. Nach Ablauf von zwei Jahren nach Kauf und Übergabe unserer Produkte<br />
können Gewährleistungsrechte nicht mehr geltend gemacht werden.<br />
8
1 Consignes de sécurité<br />
Lisez très attentivement ce mode d’emploi.<br />
Utilisation conforme aux prescriptions<br />
Ce téléphone convient pour téléphoner à l’intérieur d’un réseau téléphonique.Tout<br />
autre utilisation est considérée <strong>com</strong>me non conforme à l’usage.<br />
Des modifications ou changements effectués d’un propre gré ne sont pas<br />
autorisés. N’ouvrez en aucun cas l’appareil et n’effectuez aucun essai de<br />
réparation vous-même.<br />
Lieu d’installation<br />
Évitez toute nuisance par la fumée, la poussière, les vibrations, les produits<br />
chimiques, l’humidité, la grande chaleur ou l’ensoleillement direct. Ne vous<br />
servez pas du <strong>com</strong>biné dans des endroits exposés aux explosions.<br />
Bloc secteur<br />
a Attention: N’utilisez que le bloc secteur fourni avec l’appareil, d’autres<br />
pouvant endommager votre téléphone. Vous ne devez pas bloquer l’accès<br />
au bloc secteur par des meubles ou d’autres objets.<br />
Piles rechargeables<br />
a Attention: Ne jetez pas les piles rechargeables dans le feu. N’utilisez<br />
que des piles rechargeables du même type ! Veillez à une polarisation correcte<br />
! Risque d’explosion lors de leur chargement si la polarisation est<br />
incorrecte.<br />
Panne de courant<br />
En cas de panne de courant, vous ne pouvez pas téléphoner avec le téléphone.<br />
Tenez à votre disposition, pour parer à de telles situations, un téléphone<br />
filaire fonctionnant sans alimentation externe en courant.<br />
Réduction du rayonnement (mode ÉCO)<br />
En mode de <strong>com</strong>munication, le rayonnement est réduit en fonction de l’éloignement<br />
du <strong>com</strong>biné par rapport à la base.<br />
Réduction du rayonnement grâce au MAXI ECOmode<br />
En “MAXI ECOmode“, le rayonnement (puissance de sortie DECT) de la<br />
base et du <strong>com</strong>biné est débranché au repos. Ceci fonctionne également<br />
avec d’autres <strong>com</strong>binés dans la mesure où ils supportent le “MAXI ECOmode“.<br />
Appareils médicaux<br />
a Attention: N’utilisez pas ce téléphone à proximité d’appareils médicaux.<br />
Leur influence ne peut pas être entièrement exclue.<br />
Les téléphones DECT peuvent causer un bourdonnement désagréable<br />
dans les prothèses auditives.<br />
Élimination<br />
Si vous ne voulez plus vous servir de votre appareil, veuillez l’apporter<br />
au centre de collecte de l’organisme d’élimination des<br />
déchets de votre <strong>com</strong>mune (par ex. centre de recyclage). L’icône<br />
ci-contre signifie que vous ne devez en aucun cas jeter votre<br />
appareil dans les ordures ménagères ! D’après la loi relative aux<br />
appareils électriques et électroniques, les propriétaires d’appareils<br />
usagés sont tenus de mettre tous les appareils électriques<br />
et électroniques usagés dans un collecteur séparé.<br />
Éliminez les piles rechargeables auprès d’un revendeur de<br />
piles ainsi que dans des centres de collecte <strong>com</strong>pétents qui<br />
tiennent à votre disposition les collecteurs appropriés correspondants.<br />
Éliminez les fournitures d’emballage conformément au règlement<br />
local.<br />
2 Mettre votre téléphone en service<br />
Remarques concernant la sécurité<br />
a Attention: Avant de mettre votre appareil en service, lisez impérativement<br />
les consignes de sécurité mentionnées au chapitre 1.<br />
Raccorder la base<br />
a Attention: Posez la base à une distance minimum d’1 m par rapport à<br />
d’autres appareils électroniques, une distance inférieure pouvant provoquer<br />
des interactions.<br />
Raccordez la base <strong>com</strong>me représenté sur le croquis. Pour des raisons de<br />
sécurité, n’utilisez que le bloc d’alimentation fourni avec l’appareil ainsi<br />
que le câble de raccordement téléphonique ci-joint.<br />
Prise de<br />
raccordement téléphonique<br />
Prise réseau<br />
a Attention: N’utilisez pour la base que le bloc d’alimentation fourni<br />
avec l’appareil !<br />
1<br />
F
Raccorder le chargeur 2<br />
Branchez fermement l'alimentation sur le chargeur et branchez-le à une<br />
prise de courant. Assurez-vous que la prise de courant soit librement<br />
accessible.<br />
2<br />
N’est valable que pour les kits téléphoniques avec au moins deux <strong>com</strong>binés<br />
Mettre en place les piles rechargeables<br />
Ouvrez le <strong>com</strong>partiment à piles. Introduisez les piles dans le <strong>com</strong>partiment.<br />
Fermez le <strong>com</strong>partiment à piles.<br />
a Attention: N’utilisez que des piles rechargeables de type AAA Ni-MH<br />
1,2 V/400 mAh. Observez une polarisation correcte ! Ne jamais utiliser de<br />
piles ou piles primaires !<br />
Recharger les piles rechargeables<br />
☞ Pour la première mise en service, posez le <strong>com</strong>biné sur la base / le<br />
chargeur pour une durée d’au moins 16 heures.<br />
Le <strong>com</strong>biné chauffe lors du chargement. C’est normal et ce n’est pas dangereux.<br />
Ne chargez pas le <strong>com</strong>biné avec des chargeurs d’un autre fabricant.<br />
L’état de charge des piles rechargeables est indiqué sur l’écran. Lorsque le<br />
chargement des piles rechargeables a atteint la limite inférieure, le symbole<br />
de la pile clignote sur l’écran. Terminez votre conversation, puis posez le<br />
<strong>com</strong>biné sur la station de base ou sur le chargeur pour le faire charger.<br />
Au bout d’un court moment, l’icône des batteries affichera l’état «chargé».<br />
Cependant, en raison de la courte durée de chargement, cela ne correspond<br />
pas à la réalité et la charge diminuera rapidement lors de l'utilisation.<br />
Afin de charger <strong>com</strong>plètement les batteries, il faut laisser charger le <strong>com</strong>biné<br />
pendant au moins 16 heures sur la station de base / le chargeur.<br />
Puissance absorbée<br />
Puissance absorbée de la station de base (6 V, 500 mA DC) :<br />
- en mode de fonctionnement (disponible/conversation) : env. 0,6 / 0,75 W.<br />
- pendant le chargement du <strong>com</strong>biné : env. 1,2 W.<br />
Sans charge, le courant d’alimentation à découpage entrant s‘élève à env.<br />
0,1 W. Le rendement moyen est d’env. 71,2 %.<br />
Puissance absorbée de la station de chargement (7 V, 420 mA DC) :<br />
- sans le <strong>com</strong>biné : env. 0,1 W.<br />
- pendant le chargement du <strong>com</strong>biné : env. 0,6 W.<br />
Sans charge, le courant d’alimentation à découpage entrant s‘élève à env.<br />
0,1 W. Le rendement moyen est d’env. 72,5 %.<br />
3 Éléments de manipulation (Jacquette avant)<br />
Combiné<br />
1 Haut-parleur<br />
2 Ècran<br />
3 Renumérotation / pause<br />
4 Mains-libres<br />
5 Touche de prise de ligne<br />
6 Liste d’appels / Touche R (Flash)<br />
7 Pavé numérique<br />
8 Touche interne<br />
Base<br />
14 Touche de paging<br />
15 Volume sonore − /<br />
Régler la temporisation sonnerie<br />
16 Écran<br />
17 Volume sonore + /<br />
Modifier le code de sécurité<br />
18 Effacer<br />
9 Touche muet (micro muet) /<br />
Effacer<br />
10 Répertoire<br />
11 Touche « Raccrocher »<br />
12 Touche de volume / sonnerie<br />
d’appel / volume de la sonnerie<br />
13 Microphone<br />
19 Vers l’avant / Enregistrer un mémo<br />
20 Lecture / Pause<br />
21 Répondeur activé / désactivé /<br />
Arrêt<br />
22 Retour / Écouter l’annonce /<br />
L’enregistrer<br />
23 Contacts pour support chargeur<br />
2
4 Téléphoner<br />
Prendre l’appel<br />
Votre téléphone sonne.<br />
/ Appuyez sur la touche de <strong>com</strong>munication ou la touche mains-libres.<br />
Appeler<br />
Entrez le numéro de téléphone. Corrigez une erreur d’entrée avec .<br />
/ Le numéro de téléphone est <strong>com</strong>posé.<br />
☞ Vous pouvez aussi appuyer d’abord sur la touche <strong>com</strong>munication et<br />
vous obtenez ainsi la tonalité. Les chiffres entrés du numéro de téléphone<br />
choisi sont aussitôt <strong>com</strong>posés. Il n’est pas possible de corriger les chiffres<br />
du numéro de de téléphone dans cette forme de mise en <strong>com</strong>munication.<br />
Terminer la <strong>com</strong>munication<br />
/ Appuyer sur la touche « Raccrocher » ou poser le <strong>com</strong>biné sur la base.<br />
Affichage de la durée de la <strong>com</strong>munication<br />
Pendant une <strong>com</strong>munication, sa durée est affichée.<br />
Régler le volume sonore de l’écouteur<br />
Vous disposez de 5 niveaux pour régler le volume pendant une <strong>com</strong>munication<br />
(sous fonctionnement de l’écouteur-> Volume sonore de<br />
l’écouteur, en mains-libres -> volume sonore du haut-parleur).<br />
Débranchement du microphone du <strong>com</strong>biné<br />
Vous pouvez désactiver le microphone pendant une <strong>com</strong>munication<br />
afin que votre interlocuteur ne puisse pas vous déranger. s’affiche<br />
sur l’écran.<br />
Pour activer le microphone, appuyez de nouveau sur la touche .<br />
Répétition des derniers numéros<br />
☞ Votre téléphone mémorise les 3 derniers numéros de téléphone <strong>com</strong>posés.<br />
Afficher / sélectionner le numéro d'appel<br />
Le téléphone est en veille.<br />
…le cas échéant, appuyez plusieurs fois afin d'afficher le numéro<br />
désiré.<br />
/ …le numéro est <strong>com</strong>posé.<br />
☞ Si vous avez déjà appuyé sur la touche d’appel et que vous entendez<br />
la tonalité, la touche de renumérotation appelle le dernier numéro appelé.<br />
Sauvegarder le numéro d’appel<br />
… le numéro d’appel désiré s’affiche (voir en haut)<br />
… appuyez pendant env. 2 secondes. Le cas échéant, vous pouvez<br />
modifier le numéro d’appel. Appuyez brièvement sur la touche<br />
pour effacer le dernier chiffre ou longuement pour effacer le numéro<br />
entier. Avec la touche vous pouvez effectuer une pause pendant<br />
la <strong>com</strong>position (env. 3 s.)<br />
… appuyez à nouveau et sélectionnez la position de sauvegarde (0…9).<br />
… appuyez à nouveau pour retourner en mode veille.<br />
Liste d’appels<br />
☞ Votre téléphone mémorise les 10 derniers appels dans la liste d’appels.<br />
L’enregistrement ne peut avoir lieu que si la fonction „transfert d’appel<br />
(CLIP)“ est disponible sur votre raccordement et le numéro de l’appelant<br />
n’a pas étéretenu ou rendu non transmissible pour d’autres raisons.<br />
Si la liste est vide, NO s’affiche.<br />
Les nouveaux appels sont affichés par l’icône clignotante sur<br />
l’affichage.<br />
Afficher / sélectionner le numéro d'appel<br />
Le téléphone est en veille.<br />
Ouvrir la liste d’appels. Le numéro du dernier appel s'affiche. Si le<br />
numéro dépasse 12 positions, appuyez sur la touche pour afficher<br />
le reste du numéro.<br />
Appuyez sur la touche pour voir la date et l’heure de l’appel (uniquement<br />
possible si cette information a été envoyée avec le numéro<br />
d’appel / dépendant du réseau).<br />
… appuyez à nouveau pour accéder à d’autres entrées.<br />
/ Le numéro d’appel affiché est appelé.<br />
Effacer le numéro d’appel<br />
… le numéro d’appel désiré s’affiche (voir en haut)<br />
… appuyez pendant env. 3 secondes. L’entrée est effacée.<br />
Sauvegarder le numéro d’appel<br />
… le numéro d’appel désiré s’affiche (voir en haut)<br />
… appuyez pendant env. 2 secondes. Le cas échéant, vous pouvez<br />
modifier le numéro d’appel. Appuyez brièvement sur la touche<br />
pour effacer le dernier chiffre ou longuement pour effacer le numéro<br />
entier. Avec la touche vous pouvez effectuer une pause pendant<br />
la <strong>com</strong>position (env. 3 s.)<br />
… appuyez à nouveau et sélectionnez la position de sauvegarde (0…9).<br />
… appuyez à nouveau pour confirmer.<br />
3<br />
F
Répertoire<br />
☞ L’annuaire a une capacité des 10 entrées.<br />
Sauvegarder le numéro d’appel<br />
Le téléphone est en veille.<br />
… appuyez pendant env. 2 secondes. L’icône apparaît sur l’affichage.<br />
Composez le numéro d'appel. Appuyez brièvement sur la touche<br />
pour effacer le dernier chiffre ou longuement pour effacer le numéro<br />
d’appel entier. Avec la touche vous pouvez effectuer une pause<br />
pendant la <strong>com</strong>position (env. 3 s.)<br />
… appuyez à nouveau.<br />
… entrez la position de sauvegarde (0 … 9).<br />
… appuyez à nouveau pour confirmer.<br />
Pour enregistrer d’autres numéros, veuillez re<strong>com</strong>mencer les différentes<br />
étapes.<br />
Composer un numéro<br />
Le téléphone est en veille.<br />
… appuyez brièvement.<br />
… entrez la position de sauvegarde (0 … 9). L’entrée correspondante<br />
est affichée.<br />
/ Le numéro d’appel affiché est appelé.<br />
Modifier le numéro d’appel<br />
Le téléphone est en veille.<br />
… appuyez brièvement.<br />
… entrez la position de sauvegarde (0 … 9). L’entrée correspondante<br />
est affichée.<br />
… appuyez pendant env. 2 secondes. Appuyez brièvement sur la<br />
touche pour effacer le dernier chiffre ou longuement pour effacer<br />
le numéro d’appel entier. Avec la touche vous pouvez effectuer<br />
une pause pendant la <strong>com</strong>position (env. 3 s.)<br />
…appuyez à nouveau pour sauvegarder la modification.<br />
Communication internes<br />
☞ Communication internes, transferts et <strong>com</strong>munications en conférence<br />
sont possibles uniquement si plusieurs <strong>com</strong>binés sont déclarés.<br />
Téléphoner en interne<br />
… appuyez et <strong>com</strong>posez le numéro d’appel interne (1 …5) du <strong>com</strong>biné<br />
souhaité.<br />
/ Pour accepter l’appel sur le <strong>com</strong>biné appelé, appuyez sur la touche d’appel<br />
ou sur la touche mains libres. Pour mettre fin à la <strong>com</strong>munication,<br />
procédez <strong>com</strong>me d’habitude.<br />
4<br />
Transfert d’une <strong>com</strong>munication externe<br />
Pendant une <strong>com</strong>munication externe. . .<br />
… appuyez et <strong>com</strong>posez le numéro d’appel interne (1 …5) du <strong>com</strong>biné<br />
souhaité. La <strong>com</strong>munication externe est maintenue.<br />
Si le <strong>com</strong>biné appelé est activé, annoncer la <strong>com</strong>munication le cas<br />
échéant.<br />
Appuyez sur la touche « Raccrocher ». La <strong>com</strong>munication est transmise.<br />
Conférence<br />
Pendant une <strong>com</strong>munication externe. . .<br />
… appuyez et <strong>com</strong>posez le numéro d’appel interne (1 …5) du <strong>com</strong>biné<br />
souhaité. La <strong>com</strong>munication externe est maintenue.<br />
Si le <strong>com</strong>biné appelé est activé, annoncer la <strong>com</strong>munication le cas<br />
échéant.<br />
Appuyez sur la touche INT pendant env. 3 secondes. La conférence est<br />
établie.<br />
☞ i l’un des participants à la conférence raccroche, les deux autres<br />
restent en <strong>com</strong>munication.<br />
5 Fonctions spéciales<br />
Verrouillage du clavier<br />
☞ La touche verrouillage empêche une manipulation involontaire des<br />
touches. Les appels peuvent être reçus <strong>com</strong>me d’habitude.<br />
… maintenir enfoncée jusqu’à ce que l’icône pour verrouillage du clavier<br />
s’affiche sur l’écran. Pour déverrouiller le clavier, maintenir<br />
enfoncée la touche dièse jusqu'à ce que l'icône s'éteigne.<br />
Désactiver la sonnerie du <strong>com</strong>biné<br />
☞ Vous pouvez également désactiver la sonnerie du <strong>com</strong>biné au moyen<br />
d’une programmation (voir alinéa « sonnerie »).<br />
… maintenir enfoncée jusqu’à ce que l’icône silencieux s’affiche sur<br />
l’écran. Pour remettre en marche la sonnerie, maintenir enfoncée la<br />
touche étoile jusqu'à ce que l'icône s'éteigne.
Déclarer un autre <strong>com</strong>biné<br />
☞ Sur une base, vous pouvez déclarer jusqu’à 5 <strong>com</strong>binés. Les <strong>com</strong>binés<br />
livrés avec votre téléphone sont déjà déclarés sur la base. Pour déclarer<br />
un <strong>com</strong>biné „étranger“, consultez aussi la notice d’utilisation de ce <strong>com</strong>biné.<br />
Débranchez d’abord la base de l’alimentation électrique, puis rebranchez-la.<br />
Ensuite, pendant 3 minutes, la base se trouve en mode inscription.<br />
… appuyez sur le <strong>com</strong>biné pendant env. 3 secondes jusqu'à ce que<br />
et clignotent.<br />
…appuyez pendant env. 3 secondes.<br />
Composez le numéro pour la station de base (1 ... 5).<br />
Composez le code PIN de la station de base (a la livraison, le PIN sur<br />
la base DE 337x est « 0 0 0 0 »). Si l’inscription a abouti, l’écran<br />
affiche HS et le numéro d’appel interne du <strong>com</strong>biné.<br />
Retirer le <strong>com</strong>biné<br />
☞ Vous pouvez annuler l’inscription d’un <strong>com</strong>biné pour libérer p. ex. la<br />
«position» pour un autre <strong>com</strong>biné. Veuillez s.v.p. noter que vous ne pouvez<br />
pas annuler l'inscription du <strong>com</strong>biné que vous utilisez à cet effet.<br />
Appuyez sur la touche pendant env. 3 secondes.<br />
Appuyez sur la touche pendant env. 3 secondes.<br />
Composez le code PIN de la station de base (a la livraison, le PIN sur<br />
la base DE 337x est « 0 0 0 0 »).<br />
Composez le numéro d’appel interne du <strong>com</strong>biné dont vous désirez<br />
annuler l'inscription (1 ... 5).<br />
Si l’annulation de l’inscription a abouti, le <strong>com</strong>biné se met en veille.<br />
Sonnerie <strong>com</strong>biné<br />
… maintenir enfoncée pour 3 s. env. La sonnerie actuelle retentit.<br />
… sélectionnez la sonnerie désirée.<br />
Pour sauvegarder, appuyez sur .<br />
Volume de la sonnerie du <strong>com</strong>biné<br />
… appuyez brièvement. La mélodie actuelle est restituée avec le<br />
volume actuellement réglé.<br />
… sélectionnez le volume désiré. L’écran affiche , lorsque la sonnerie<br />
est désactivée<br />
Pour sauvegarder, appuyez sur .<br />
Réglez le temps de flash<br />
☞ Le temps flash pour l’utilisation des services réseau ou pour l’utilisation<br />
sur un central téléphonique peut être réglé sur 100 ms (habituellement pour<br />
services de réseau / par défaut) ou sur 300 ms.<br />
Le cas échéant, contactez votre opérateur ou l’administrateur de votre<br />
central téléphonique.<br />
… maintenir enfoncée pendant env. 3 s. Sur l’écran s’affiche S (100<br />
ms) ou L (300 ms). Pour la <strong>com</strong>mutation du temps flash, appuyez à<br />
nouveau sur pendant env. 3 s.<br />
Régler le processus de numérotation<br />
☞ Vous pouvez <strong>com</strong>muter la signalisation. Pour les raccordements<br />
modernes, la signalisation par tonalité (deux fréquences / multifréquence de<br />
bout à bout) est usuelle.<br />
… maintenir enfoncée pendant env. 3 s. Sur l’écran s’affiche t (tonalité)<br />
ou P (impulsion). Pour la <strong>com</strong>mutation du mode de numérotation,<br />
appuyez à nouveau sur pendant env. 3 s.<br />
6 Répondeur<br />
La <strong>com</strong>mande du répondeur s’effectue sur la base.<br />
Activer / Desactiver le répondeur<br />
… appuyez. Votre répondeur est activé.<br />
… appuyez de nouveau. Votre répondeur est désactivé.<br />
Régler la langue du répondeur<br />
Vous pouvez régler le message vocal du répondeur dans les langues suivantes<br />
: allemand, anglais, français.<br />
… maintenir enfoncée pour 10 s. env. pour sélectionner la langue voulue.<br />
Vous entendez un signal de confirmation et l’écran de la base affiche<br />
le sigle de la langue.<br />
Mode de l’annonce<br />
Vous avez la possibilité de choisir entre “Annonce avec enregistrement de<br />
message" et “Annonce simple".<br />
☞ Le répondeur contient des annonces préréglées en usine. Celles−ci<br />
sont reproduites si vous vous n’avez pas enregistré vos propres annonces.<br />
F<br />
5
Annonce avec enregistrement de message (annonce 1)<br />
Pas de lecture du texte d’annonce et les messages entrants sont enregistrés<br />
(durée max. env. trois minutes). Le répondeur peut enregistrer jusqu’à<br />
55 messages entrants d’une durée totale d’enregistrement de 11 minutes.<br />
Annonce simple (annonce 2)<br />
Un texte d’annonce est reproduit et la <strong>com</strong>munication coupée. Ce mode est<br />
automatiquement activé lorsque la mémoire des messages est pleine.<br />
. . . appuyez 2 secondes. Basculer de l’annonce 1 à l’annonce 2..<br />
Enregistrer / Écouter l’annonce<br />
. . . appuyez 2 secondes.<br />
Après le bip : dictez votre texte à voix haute et distincte en direction de<br />
votre répondeur.<br />
. . . appuyez pour terminer l’enregistrement.<br />
. . . appuyez pour contrôler l’annonce actuelle.<br />
☞ Vous pouvez répéter cette action autant de fois que vous le désirez.<br />
Un nouvel enregistrement remplace l’ancien. Vous n’avez pas besoin de<br />
l’effacer.<br />
Effacer l’annonce<br />
Votre propre annonce est effacée et le texte d’annonce préréglé est réétabli.<br />
. . . appuyez pour écouter l’annonce actuelle.<br />
. . . appuyez pendant la lecture pour effacer l’annonce.<br />
☞ Vous ne pouvez pas effacer les annonces préréglées.<br />
Régler la temporisation de la sonnerie<br />
Afin d’avoir suffisamment de temps pour prendre des appels entrants avant<br />
que le répondeur ne se mette en marche, vous pouvez choisir les réglages<br />
vous convenant. Vous avez le choix entre la prise d’appel après 2, 3,... jusqu’à<br />
9 appels ou la fonction économie de redevances. Ce réglage est particulièrement<br />
utile en mode consultation à distance. Avec ce réglage, le<br />
répondeur s’active au bout de 5 sonneries dans la mesure où un nouveau<br />
message n’a pas été enregistré. Dans le cas de nouveaux messages, le<br />
répondeur s’active déjà au bout de 2 sonneries. Pour tous les autres réglages,<br />
le répondeur s’active au bout du nombre de sonneries sélectionné.<br />
… appuyez pendant 2 secondes pour activer le mode de réglage.<br />
Sélectionnez la temporisation voulue avec les touches et .<br />
… appuyez. Le réglage est enregistré.<br />
… appuyez pour voir s’afficher le réglage actuel.<br />
Enregistrer des mémos<br />
Vous pouvez enregistrer des mémos sur le répondeur et les écouter ultérieurement.<br />
… appuyez 2 secondes. Après le bip : dictez votre texte à voix haute<br />
et distincte en direction de votre répondeur.<br />
. . . appuyez pour terminer l’enregistrement.<br />
Messages reçus<br />
La DEL clignote si vous avez de nouveaux messages.<br />
Lire des messages / Mémos<br />
… appuyez pour lire les messages. Les nouveaux messages sont lus<br />
en premier.<br />
Vous pouvez effectuer d’autres fonctions pendant la lecture.<br />
Répète le message actuel<br />
2x Lit le message précédent<br />
Arrête la lecture<br />
Pause de lecture / Suite de lecture<br />
Lit le prochain message<br />
Volume sonore +<br />
Volume sonore −<br />
Effacer des messages<br />
Effacer le message actuel<br />
Pour effacer le message actuellement lu, appuyez longuement sur la touche<br />
.<br />
Supprimer tous les messages<br />
Vous pouvez effacer tous les anciens messages.<br />
… appuyez pendant 2 secondes. Sur l’écran s’affiche dL.<br />
6
… appuyez. Les messages sont effacés.<br />
Consultation à distance<br />
Vous pouvez utiliser cette fonction seulement si vous en connaissez son<br />
code PIN. Le code PIN préréglé est le 321, mais vous pouvez en entrer un<br />
personnel.<br />
Entrer un code PIN<br />
… appuyez pendant 2 secondes. Le chiffre pour la première position<br />
du code PIN clignote.<br />
Sélectionnez le chiffre voulu avec les touches et .<br />
… appuyez pour régler la prochaine position.<br />
Procédez de façon identique pour le deuxième et le troisième chiffre.<br />
Consultation ou <strong>com</strong>mande à distance du répondeur<br />
Vous pouvez consulter ou <strong>com</strong>mander votre répondeur à distance à partir<br />
d’un téléphone à signalisation multifréquences, ce qui veut dire que vous<br />
pouvez écouter et / ou effacer des messages.<br />
☞ Vous devez appuyer sur les touches adéquates de votre téléphone<br />
pour <strong>com</strong>mander ou consulter votre répondeur à distance.<br />
Touche Fonction<br />
1 Réécouter le message actuel<br />
2x 1 Réécouter le message précédent<br />
2 Écouter les messages / Insérer une pause<br />
3 Écouter le message suivant<br />
4 Lire l’annonce<br />
5 Enregistrer l’annonce<br />
6 Arrêter la lecture ou l’enregistrement /<br />
Terminer la consultation à distance<br />
7 Effacer le message actuel<br />
8 Désactiver le répondeur<br />
9 Activer le répondeur / Sélectionner l’annonce 1 ou 2<br />
0 Effacer tous les anciens messages<br />
✱ Sauter l’annonce<br />
# Enregistrer un mémo<br />
Appelez votre téléphone / répondeur d’un téléphone à signalisation<br />
multifréquences. Ce sont vos réglages qui sont valables (voir temporisation<br />
sonnerie).<br />
☞ Si votre répondeur n’est pas activé, il s’active automatiquement au<br />
bout de la dixième sonnerie.<br />
☞ Si vous voulez uniquement écouter vos messages et si vous avez<br />
choisi la fonction économie de redevances, vous pouvez interrompre la<br />
<strong>com</strong>munication au bout de la troisième sonnerie. Si vous aviez eu de<br />
nouveaux messages, le répondeur se serait mis en marche dès la<br />
deuxième sonnerie. De ce fait, vous n’avez pas de frais.<br />
Après l’annonce, entrez le code PIN de la consultation à distance (réglage<br />
usine : 321). Si vous avez entré le code PIN correct, vous entendez<br />
deux bips. Après la saisie du code PIN correct, l’appareil attend<br />
d’autres saisies de touches immédiates. Si vous n’appuyez pas sur<br />
une touche quelconque, la <strong>com</strong>munication est interrompue.<br />
F<br />
7
Annexe<br />
Déclaration de conformité<br />
Cet appareil répond aux exigences des directives de l’union européenne<br />
(UE) :<br />
- 1999/5/CE Directive sur les installations de radio et de télé<strong>com</strong>munication<br />
et la reconnaissance réciproque de leur conformité.<br />
- 2005/32/CE Directive « Produits consommateurs d'énergie ».<br />
- Règlement 1275/2008 « Consommation d’électricité en mode veille et en<br />
mode arrêt ».<br />
- Règlement 278/2009 « Sources d’alimentation hors charge et leur<br />
rendement moyen en mode actif ».<br />
La conformité avec les directives mentionnées ci-dessus est confirmée sur<br />
l’appareil par la marque CE.<br />
Pour obtenir toute la déclaration de conformité, veuillez utiliser le téléchargement<br />
gratuit de notre site Internet www.switel.<strong>com</strong>.<br />
Remarques d’entretien<br />
Nettoyez les surfaces du boîtier avec un chiffon doux et non pelucheux.<br />
N’utilisez pas de produits d’entretien ou de solvants.<br />
Garantie<br />
Les appareils SWITEL sont fabriqués selon les procédes les plus modernes et sont<br />
contrôlés. Des matériels sélectionnés et des technologies de pointe ont pour effet un<br />
fonctionnement irréprochable et une longue durée de vie. La garantie ne rentre pas<br />
en jeu si l’exploitant du réseau téléphonique ou une installation à postes supplémentaires<br />
éventuellement intercalée est responsable du dysfonctionnement de l’appareil.<br />
La garantie n’est pas valable pour les piles, piles rechargeables ou packs de piles<br />
utilisés dans le produits. La durée de la garantie est de 24 mois, à partir de la date<br />
d’achat.<br />
Pendant la durée de la garantie, tous les défauts, dus à des vices de matériel ou de<br />
fabrication, seront éliminés gratuitement. Le droit à la garantie expire en cas d’intervention<br />
de l’acheteur ou de tiers. Les dommages provenant d’un maniement ou d’une<br />
manipulation incorrects, d’une mauvaise mise en place ou d’une mauvaise conservation<br />
de l’appareil, d’un raccordement non conforme ainsi que d’un cas de force<br />
majeure ou autres influences extérieures, sont exclus de la garantie.<br />
Nous nous reservons le droit, en cas de réclamations, de réparer ou de remplacer<br />
les <strong>com</strong>posants défectueux ou d’échanger l’appareil. Les <strong>com</strong>posants remplacés ou<br />
les appareils échangés deviennent notre propriété.<br />
Les demandes de dommages et intérêts sont exclues tant qu’elles ne reposent pas<br />
sur l’intention ou une négligence grossière du fabricant.<br />
Si votre appareil devait malgré tout présenter une défectuosité pendant la période de<br />
garantie, veuillez vous adressez, muni de la quittance d’achat, exclusivement au<br />
magasin où vous avez acheté votre appareil SWITEL. Vous ne pouvez faire valoir<br />
vos droits à la garantie selon ces dispositions qu’auprès de votre revendeur exclusivement.<br />
Deux ans après l’achat et la remise de nos produits, il n’est plus possible de<br />
faire valoir les droits à la garantie.<br />
8
1 Indicazioni di sicurezza<br />
Leggere attentamente le presenti istruzioni per l’uso.<br />
Impiego conforme agli usi previsti<br />
Il presente telefono consente di svolgere telefonate all’interno di una rete<br />
telefonica. Qualsiasi altro impiego è considerato <strong>com</strong>e non conforme agli<br />
usi previsti. Non sono consentite modifiche o trasformazioni non autorizzate.<br />
Non aprire per nessuna ragione l’apparecchio autonomamente, né <strong>com</strong>piere<br />
riparazioni di propria iniziativa.<br />
Luogo di installazione<br />
Evitare l’esposizione a fumo, polvere, vibrazioni, sostanze chimiche, umidità,<br />
eccessivo calore o irradiazioni solari dirette.<br />
Non utilizzare l’unità portatile in aree esposte al rischio di deflagrazione.<br />
Alimentatore di rete<br />
a Attenzione: Utilizzare solo l’alimentatore a spina fornito in dotazione<br />
visto che altri alimentatori di rete potrebbero addirittura danneggiare il<br />
telefono. Non ostacolare il libero accesso all’alimentatore a spina con mobili<br />
o altri oggetti simili.<br />
Accumulatore ricaricabile<br />
a Attenzione: Non gettare batterie ricaricabili nel fuoco. Utilizzare solo<br />
batterie ricaricabili dello stesso tipo! Osservare la corretta polarità! Pericolo<br />
di esplosione durante il caricamento della batteria in caso di errata polarità.<br />
Caduta di tensione<br />
In caso di caduta di tensione non è possibile <strong>com</strong>piere chiamate con il telefono.<br />
Si consiglia di ricorrere in caso di emergenza ad un telefono con filo<br />
in grado di funzionare anche senza alimentazione elettrica esterna.<br />
Riduzione delle radiazioni (modalità ECO)<br />
In modalità di conversazione le radiazioni sono ridotte in base alla distanza<br />
dell’unità portatile rispetto alla base.<br />
Riduzione delle radiazioni in MAXI ECOmode<br />
La “MAXI ECOmode“ consente di disattivare le radiazioni (potenza di tras -<br />
missione DECT) emesse da base e unità portatile in stand−by. Ciò funziona<br />
anche con più unità portatili, purché queste supportino la “MAXI ECOmode“.<br />
Apparecchiature mediche<br />
a Attenzione: Non utilizzare il telefono in prossimità di apparecchiature<br />
mediche. Non è possibile escludere il subentro di eventuali interferenze.<br />
Telefoni DECT possono causare un fastidioso ronzio in apparecchi acustici.<br />
DECT: Digital Enhanced Cordless Tele<strong>com</strong>munication = Standard per<br />
telefoni senza cavo.<br />
Smaltimento<br />
Procedere allo smaltimento dell’apparecchio esaurito consegnandolo<br />
presso uno dei punti di raccolta istituiti dalla propria società<br />
di smaltimento rifiuti <strong>com</strong>unale (per es. centro di riciclo materiali).<br />
Il simbolo riportato qui a lato indica che non è assolutamente consentito<br />
smaltire l’apparecchio assieme ai normali rifiuti domestici!<br />
Secondo quanto previsto dalla legge sugli apparecchi elettrici<br />
ed elettronici, i proprietari di apparecchi esauriti sono per legge<br />
tenuti alla consegna di tutti gli apparecchi elettrici ed elettronici<br />
presso un centro di rilievo rifiuti in raccolta differenziata.<br />
Consegnare le batterie ricaricabili per lo smaltimento presso<br />
rivenditori al dettaglio di batterie o centri di raccolta che mettono<br />
a disposizione appositi contenitori.<br />
Smaltire confezioni ed imballaggi in base a quanto indicato<br />
dalle norme in vigore a livello locale.<br />
2 Mettere in funzione il telefono<br />
Indicazioni di sicurezza<br />
a Attenzione: Prima della messa in funzione, leggere attentamente<br />
le indicazioni di sicurezza riportate al capitolo 1.<br />
Collegare la stazione base<br />
a Attenzione: Montare la stazione base con una distanza minima di 1 m<br />
da altri apparecchi elettronici in modo da evitare interferenze reciproche.<br />
Procedere al collegamento della stazione base seguendo quanto raffigurato<br />
nella figura. Utilizzare per motivi di sicurezza solo l’alimentatore di rete oltre<br />
che il cavo di collegamento telefonico forniti in dotazione.<br />
Presa di collegamento telefonico<br />
Presa elettrica<br />
a Attenzione: Utilizzare per la stazione base, solo l’alimentatore fornito<br />
in dotazione!<br />
1<br />
I
2<br />
Collegare la stazione di carica 2<br />
Collegare la stazione di carica con l’alimentatore saldamente inserito ad<br />
una presa elettrica. Verificare che la presa elettrica sia liberamente accessibile.<br />
2<br />
Vale solo per set telefonici con minimo due unità portatili.<br />
Inserire l’accumulatore ricaricabile<br />
Inserire le batterie ricaricabili nel vano batterie precedentemente aperto.<br />
Chiudere infine il vano accumulatore.<br />
a Attenzione: Utilizzare a tale scopo solo batterie ricaricabili del tipo<br />
AAA Ni-MH da 1,2 V/400 mAh. Osservare la corretta polarità!<br />
Non utilizzare mai batterie/celle primarie!<br />
Caricare le batterie<br />
☞ Riporre l’unità portatile in sede di prima messa in funzione per minimo<br />
16 ore nella stazione base / stazione di carica.<br />
L’unità portatile si surriscalda durante il processo di carica. Questo è un fenomeno<br />
normale e non pericoloso. Evitare di caricare l’unità portatile con dispositivi<br />
di carica differenti o estranei. L’avviso di batteria scarica verrà visualizzato<br />
sul display. Quando il livello di carica della batteria è sceso al limite, sul<br />
display lampeggia il simbolo della batteria. Terminare la conversazione e<br />
riporre l’unità portatile in carica sulla stazione base o sulla stazione di carica.<br />
Dopo un breve lasso di tempo il simbolo della batteria mostrerà lo stato di<br />
"carica". Ciò non corrisponde, però, al reale stato della batteria, dato il<br />
breve tempo di ricarica intercorso, e tale carica, con l’uso, si ridurrà velocemente.<br />
Per un ciclo <strong>com</strong>pleto di ricarica delle batterie, lasciare l'unità portatile<br />
per almeno 16 ore sulla stazione base / stazione di carica.<br />
Potenza assorbita<br />
La potenza assorbita dalla stazione base ammonta (6 V, 500 mA DC) a:<br />
- in servizio (stand-by/conversazione): ca. 0,6 W / 0,75 W.<br />
- durante la carica dell'unità mobile: ca. 1,2 W.<br />
Il carico nullo de circuito di alimentazione rete è pari a circa 0,1 W.<br />
L'efficienza media è pari a circa il 71,2 %.<br />
La potenza assorbita dalla stazione di carica ammonta (7 V, 420 mA DC) a:<br />
- senza unità mobile: ca. 0,1 W.<br />
- durante la carica dell'unità mobile: ca. 0,6 W.<br />
Il carico nullo de circuito di alimentazione rete è pari a circa 0,1 W.<br />
L'efficienza media è pari a circa il 72,5 %.<br />
3 Elementi di <strong>com</strong>ando (Copertina davanti)<br />
Unità portatile<br />
1 Altoparlante<br />
2 Display<br />
3 Riselezione/Pausa<br />
4 Tasto Viva-voce<br />
5 Tasto conversazione<br />
6 Elenco chiamate / Tasto R (Flash)<br />
7 Tasti numerici<br />
8 Tasto interno<br />
9 Tasto Muto (microfono spento) /<br />
Cancellare<br />
10 Rubrica<br />
11 Tasto termina chiamata<br />
12 Tasto volume / Melodia suoneria /<br />
Volume suoneria<br />
13 Microfono<br />
Stazione base<br />
14 Tasto di paging<br />
20 Riproduci / Pausa<br />
15 Volume − / Imposta ritardo di squillo 21 Segreteria telefonica ON/OFF /<br />
16 Display<br />
Stop<br />
17 Volume + / Modifica codice di sicurezza 22 Indietro / Riproduci/Registra<br />
18 Cancella<br />
annuncio<br />
19 Avanti / Registra promemoria 23 Contatti di carica
4 Compiere telefonate<br />
Ricevere una chiamata<br />
Il telefono suona.<br />
/ Premere il tasto conversazione o il vivavoce.<br />
Telefonare<br />
Immettere un numero di chiamata.<br />
In caso di immissione errata, correggere .<br />
/ Il numero di chiamata viene selezionato.<br />
☞ E’ altresì possibile premere prima il tasto conversazione e ricevere il<br />
segnale di linea libera. Le cifre immesse per la <strong>com</strong>posizione del numero<br />
desiderato verranno così selezionate. Con questo tipo di funzione chiamata<br />
non è possibile correggere le singole cifre che <strong>com</strong>pongono il numero di<br />
chiamata.<br />
Concludere una chiamata<br />
/ Premere il asto termina chiamata o riporre l’unità portatile sull’unità<br />
base.<br />
Visualizzazione della durata di conversazione<br />
Durante lo svolgimento di una chiamata, la durata della telefonata è<br />
visualizzata.<br />
Impostare il volume del ricevitore<br />
Il volume è regolabile durante lo svolgimento di una chiamata in 5 livelli<br />
(dal ricevitore -> volume ricevitore, dal vivavoce -> volume altoparlante).<br />
Silenziamento del microfono nell’unità portatile<br />
Durante la conversazione è possibile disattivare il microfono, per fare in<br />
modo che il vostro interlocutore non vi possa sentire. Sul display apparirà<br />
. Per attivare il microfono premere il tasto ripristina.<br />
Ripetizione di selezione<br />
☞ Il telefono memorizza gli ultimi 3 numeri <strong>com</strong>posti.<br />
Mostrare / scegliere il numero di telefono<br />
Il telefono è in stand-by.<br />
… premere evt. più volte finché non appaia il numero di telefono desiderato.<br />
/ … il numero di chiamata viene selezionato.<br />
☞ Se si è già premuto il tasto di chiamata e si è sentito il tono di chiamata,<br />
con il tasto di riselezione viene selezionato l'ultimo numero digitato.<br />
Memorizzare i numeri telefonici<br />
… viene indicato il numero telefonico desiderato (v.sopra)<br />
… premere per ca. 2 secondi. È possibile evt. modificare il numero.<br />
Premere brevemente il tasto per cancellare l’ultima cifra o più a<br />
lungo per cancellare l’intero numero telefonico. Con il tasto inserisce<br />
una breve pausa di selezione (ca 3 s).<br />
… premere nuovamente ed inserire la posizione di memoria (0...9).<br />
… premere nuovamente per tornare di nuovo in stato di stand-by.<br />
Elenco chiamate<br />
☞ Il vostro telefono memorizza le ultime 20 chiamate nell’elenco chiamate.<br />
La memorizzazione può avvenire solo, se sulla vostra connessione è<br />
disponibile “l’identificazione del numero di chiamata (CLIP)” e se il numero<br />
di chi telefona non è trattenuto o non è trasmesso per altri motivi.<br />
Se la lista è vuota, <strong>com</strong>pare NO.<br />
Le nuove chiamate vengono indicate dal simbolo lampeggiante<br />
sul display.<br />
Mostrare / scegliere il numero di telefono<br />
Il telefono è in stand-by.<br />
Aprire la lista delle chiamate. Viene indicato il numero telefonico dell’ultima<br />
chiamata. Se il numero è <strong>com</strong>posto da oltre 12 cifre, premere il<br />
tasto per vedere le rimanenti.<br />
Premere il tasto per vedere data e ora della chiamata (possibile<br />
solo se tali informazioni sono state inviate unitamente al numero /<br />
dipende dall’operatore di rete).<br />
… premere ripetutamente per passare alla registrazione successiva.<br />
/ Viene selezionato il numero telefonico indicato.<br />
Cancellare i numeri telefonici<br />
… viene indicato il numero telefonico desiderato (v.sopra)<br />
… premere per ca. 3 secondi. La registrazione viene cancellata.<br />
Memorizzare i numeri di chiamata<br />
… viene indicato il numero telefonico desiderato (v.sopra)<br />
… premere per ca. 2 secondi. È possibile evt. modificare il numero.<br />
Premere brevemente il tasto per cancellare l’ultima cifra o più a<br />
lungo per cancellare l’intero numero telefonico. Con il tasto si<br />
inserisce una breve pausa di selezione (ca 3 s).<br />
… premere nuovamente ed inserire la posizione di memoria (0...9).<br />
… premere nuovamente per confermare.<br />
3<br />
I
Rubrica<br />
☞ La rubrica telefonica può contenere 10 registrazioni.<br />
Memorizzare i numeri telefonici<br />
Il telefono è in stand-by.<br />
… premere per ca. 2 secondi. Appare il simbolo sul display.<br />
Inserire il numero telefonico. Premere brevemente per cancellare<br />
l’ultima cifra o più a lungo per cancellare l’intero numero telefonico.<br />
Con il tasto si inserisce una breve pausa di selezione (ca 3 s).<br />
… premere nuovamente.<br />
… inserire la posizione di memoria (0 ... 9).<br />
… premere nuovamente per confirmare.<br />
Per memorizzare altri numeri telefonici procedere <strong>com</strong>e descritto.<br />
Selezionare i numeri telefonici<br />
Il telefono è in stand-by.<br />
… premere brevemente.<br />
… inserire la posizione di memoria (0 ... 9). Viene indicata la registrazione<br />
corrispondente.<br />
/ Viene selezionato il numero telefonico indicato.<br />
Modificare i numeri telefonici<br />
Il telefono è in stand-by.<br />
… premere per ca. 2 secondi.<br />
… inserire la posizione di memoria (0 ... 9). Viene indicata la registrazione<br />
corrispondente.<br />
… premere per ca. 2 secondi.Premere brevemente per cancellare<br />
l’ultima cifra o più a lungo per cancellare l’intero numero telefonico.<br />
Con il tasto si inserisce una breve pausa di selezione (ca 3 s).<br />
… premere nuovamente per memorizzare la modifica.<br />
Compiere chiamate interne<br />
☞ Le conversazioni interne, trasferimenti di chiamata e teleconferenze<br />
sono possibili solo quando sono registrate più unità portatili.<br />
Effettuare chiamate interne<br />
… premere ed inserire il numero telefonico interno (1 … 5) dell’unità<br />
mobile desiderata.<br />
/ Per accettare la conversazione sull’unità portatile chiamata premere il<br />
tasto di conversazione o il tasto viva-voce. Terminare la conversazione<br />
<strong>com</strong>e di consueto.<br />
Trasferire chiamate esterne<br />
Nel corso di una chiamata esterna. . .<br />
… premere ed inserire il numero telefonico interno (1 … 5) dell’unità<br />
mobile desiderata. La chiamata esterna verrà trattenuta.<br />
Se l’unità portatile chiamata è accesa, verrà eventualmente annunciata<br />
la <strong>com</strong>unicazione.<br />
Premere il tasto termina chiamata. La chiamata è stata trasmessa.<br />
Teleconferenza<br />
Nel corso di una chiamata esterna. . .<br />
… premere ed inserire il numero telefonico interno (1 … 5) dell’unità<br />
mobile desiderata. La chiamata esterna verrà trattenuta.<br />
Se l’unità portatile chiamata è accesa, verrà eventualmente annunciata<br />
la <strong>com</strong>unicazione.<br />
Premere il tasto INT per ca. 3 secondi. La conferenza è attiva.<br />
☞ Se uno dei partecipanti alla teleconferenza riattacca, gli altri partecipanti<br />
rimangono connessi fra di loro.<br />
5 Funzioni speciali<br />
Blocco tastiera<br />
☞ Il blocco tastiera impedisce la digitazione involontaria dei tasti.<br />
Le chiamate in arrivo possono essere ricevute <strong>com</strong>e di consueto.<br />
… premere e mantenere premuto finché sul display non appaia il simbolo<br />
di blocco tastiera. Per sbloccare la tastiera premere e mantenere<br />
premuto il tasto cancelletto finché non s<strong>com</strong>paia di nuovo il simbolo.<br />
Disattivare il tono chiamata sull’unità portatile<br />
☞ È possibile disattivare la suoneria dell'unità portatile anche tramite una<br />
programmazione (v. capitolo “Suoneria”).<br />
… premere e mantenere premuto finché non appaia sul display il simbolo<br />
della suoneria disattivata. Per riattivare la suoneria premere e<br />
tenere premuto il tasto asterisco finché non s<strong>com</strong>paia di nuovo il simbolo.<br />
4
Registrare unità mobile<br />
☞ Su una stazione base possono essere registrate fino a 5 unità portatili.<br />
Le unità portatili fornite con il vostro telefono sono già registrate con l’unità<br />
base. Per registrare un’unità mobile „estranea“ si prega di consultare il<br />
manuale di istruzioni.<br />
Prima staccare la base dall'alimentazione di rete e poi ricollegarla.<br />
Dopo questa operazione la base è, per 3 minutos, in modalità di log-in.<br />
… premere sull’unità portatile da collegare per ca. 3 secondi finché<br />
e non lampeggino.<br />
…premere per ca. 3 secondi.<br />
Inserire il numero per la stazione base (1 … 5).<br />
Inserire il PIN della stazione base (nella modalità predefinita il pin per<br />
la base DE 337x è „0 0 0 0“).<br />
Se il log-in avviene con successo il display mostrerà HS e il numero<br />
interno dell’unità portatile.<br />
Cancellare unità mobile<br />
☞ È possibile scollegare un’unità portatile, ad es. per liberare “spazio” per<br />
un’altra unità portatile. Da notare che l’unità portatile, attualmente in uso<br />
per tale scopo, non può essere scollegata.<br />
Premere il tasto per ca. 3 secondi<br />
Premere il tasto per ca. 3 secondi<br />
Inserire il PIN della stazione base (nella modalità predefinita il pin per<br />
la base DE 337x è „0 0 0 0“).<br />
Inserire il numero interno dell’unità portatile che si desidera scollegare<br />
(1 … 5).<br />
Se la disconnessione avviene con successo, l’unità portatile va in<br />
stand-by.<br />
Melodia suoneria unità portatile<br />
… premere e tenere premuto per ca. 3 s. Viene riprodotta la melodia<br />
attuale.<br />
… selezionare la melodia desiderata.<br />
Per memorizzare premere .<br />
Volume suoneria unità portatile<br />
… premere brevemente. Viene riprodotta la melodia attuale con il volume<br />
attuale.<br />
… selezionare il volume desiderato. Se la suoneria è disattivata, sul<br />
display appare . Per memorizzare premere .<br />
Impostazione tempo flash<br />
☞ Il tempo di flash per l’utilizzo delle caratteristiche di servizio della rete o<br />
per il funzionamento su un impianto telefonico può essere impostato a 100<br />
ms (standard per caratteristiche di servizio di rete / impostazioni di fabbrica)<br />
o a 300 ms. Rivolgersi al proprio operatore di rete o all’amministratore del<br />
proprio impianto telefonico.<br />
… premere e tenere premuto per ca. 3 s. Sul display appare S (100<br />
ms) o L (300 ms). Per <strong>com</strong>mutare il tempo di Flash premere di nuovo<br />
per ca. 3 s.<br />
Impostazione modalità di selezione<br />
☞ È possibile impostare la modalità di selezione. Per gli impianti moderni<br />
la modalità consueta è quella della selezione a toni (DTMF = impostazione<br />
di fabbrica).<br />
… premere e tenere premuto per ca. 3 s. Sul display appare t (selezione<br />
a toni) o P (selezione a impulsi). Per <strong>com</strong>mutare la modalità di<br />
selezione premere di nuovo per ca. 3 s.<br />
6 Segreteria telefonica<br />
L’esercizio della segreteria telefonica avviene presso la base.<br />
Attivare / Disattivare la segreteria telefonica<br />
… premere. La segreteria telefonica risulta attivata.<br />
… premere di nuovo. La segreteria telefonica risulta disattivata.<br />
Impostare la lingua della segreteria telefonica<br />
Per l’uscita voce della segreteria telefonica è possibile scegliere tra le lingue<br />
tedesco, inglese, francese.<br />
… premere e tenere premuto per ca. 10 s per selezionare la lingua<br />
desiderata.<br />
Il dispositivo emette un segnale acustico di conferma mentre sul display<br />
della base è visualizzata la sigla relativa alla lingua impostata.<br />
Modalità di annuncio<br />
È possibile scegliere tra “Annuncio con registrazione di messaggi" e “Solo<br />
annuncio".<br />
☞ Nella versione standard, la segreteria telefonica è dotata di messaggi<br />
di annuncio preimpostati. Questi messaggi sono infatti riprodotti in caso di<br />
mancata registrazione di messaggi di annuncio personali.<br />
5<br />
I
6<br />
Annuncio con registrazione di messaggi (messaggio di annuncio 1)<br />
Il dispositivo riproduce un messaggio di annuncio registrando gli eventuali<br />
messaggi in arrivo (max. durata ca. 3 minuti). La segreteria telefonica è in<br />
grado di salvare fino a 55 messaggi in attivo con una durata di registrazione<br />
<strong>com</strong>plessiva di fino a 11 minuti.<br />
Solo annuncio (messaggio di annuncio 2)<br />
Il dispositivo riproduce un messaggio di annuncio e interrompe quindi il collegamento.<br />
La modalità è attivata automaticamente non appena la memoria<br />
dei messaggi è piena.<br />
. . . premere 2 secondi. Passare da messaggio di annuncio 1 a messaggio<br />
di annuncio 2 e viceversa.<br />
Registrare/Riprodurre il messaggio di annuncio<br />
. . . premere 2 secondi. Dopo il segnale acustico di conferma: parlare<br />
in modo forte e chiaro in direzione della segreteria telefonica.<br />
. . . premere per concludere la registrazione.<br />
. . . premere per verificare il messaggio di annuncio attuale.<br />
☞ La registrazione può essere ripetuta a piacere. Un nuovo annuncio<br />
sostituisce il messaggio di annuncio vecchio senza bisogno che questo<br />
venga cancellato.<br />
Cancellare il messaggio di annuncio<br />
Il messaggio di annuncio personale è cancellato e il messaggio di annuncio<br />
predefinito è ripristinato.<br />
. . . premere per ascoltare il messaggio di annuncio attuale.<br />
. . . tenere premuto durante la riproduzione per cancellare il messaggio<br />
di annuncio.<br />
☞ I messaggi di annuncio preimpostati non possono essere cancellati.<br />
Impostare il ritardo di squillo<br />
La funzione consente di impostare tempo a sufficienza per rispondere alla<br />
chiamata, prima ancora che la segreteria telefonica si attivi. È possibile<br />
scegliere di accettare la chiamata dopo 2 − 9 squilli o di attivare la funzione<br />
salvagettone. Questa impostazione è particolarmente utile in caso di interrogazione<br />
a distanza. L’impostazione consente un’attivazione della segreteria<br />
telefonica dopo 5 squilli, sempre che non vi siano messaggi nuovi. In<br />
presenza invece di messaggi nuovi, la segreteria telefonica è inserita già<br />
dopo 2 squilli. Nelle altre modalità, la segreteria telefonica si attiva dopo il<br />
numero di squilli rispettivamente impostato.<br />
… premere 2 secondi per attivare la modalità di impostazione.<br />
Selezionare con i tasti e il ritardo desiderato.<br />
… premere. L’impostazione è salvata.<br />
… premere per visualizzare l’impostazione attuale.<br />
Registrare promemoria<br />
La segreteria telefonica consente la registrazione e la successiva riproduzione<br />
di promemoria.<br />
… premere 2 secondi. Dopo il segnale acustico di conferma: parlare<br />
in modo forte e chiaro in direzione della segreteria telefonica.<br />
. . . premere per concludere la registrazione.<br />
Messaggi ricevuti<br />
La spia LED lampeggia non appena si è in presenza di messaggi nuovi.<br />
Riprodurre messaggi/promemoria<br />
… premere per riprodurre i messaggi. I messaggi nuovi sono riprodotti<br />
per primi.<br />
Durante la riproduzione è dato modo di effettuare ulteriori funzioni.<br />
Riprodurre il messaggio attuale<br />
2x Riprodurre il messaggio precedente<br />
Interrompere la riproduzione<br />
Interrompere / Proseguire la riproduzione<br />
Riprodurre il messaggio successivo<br />
Volume +<br />
Volume −<br />
Cancellare i messaggi<br />
Cancellare il messaggio attuale<br />
Per cancellare il messaggio appena riprodotto, premere e tenere premuto il<br />
tasto durante la riproduzione.<br />
Cancellare tutti i messaggi<br />
Tutti i messaggi vecchi possono essere cancellati.<br />
… premere 2 secondi. Sul display è visualizzato dL.
… premere. Il messaggio è cancellato.<br />
Interrogazione a distanza<br />
Per poter svolgere l’interrogazione a distanza è necessario conoscere il<br />
codice PIN per questa funzione. Il codice PIN preimpostato è 321. Il dispositivo<br />
consente anche l’impostazione di un codice PIN individuale.<br />
Modificare il codice PIN<br />
… premere 2 secondi. Sul display lampeggia la cifra per la prima posizione<br />
del codice PIN.<br />
Selezionare con i tasti e la cifra richiesta.<br />
… premere per impostare la posizione successiva. Per l’impostazione<br />
della seconda e terza posizione, procedere allo stesso modo.<br />
Interrogazione a distanza della segreteria telefonica<br />
Se chiamata da un telefono <strong>com</strong>patibile MF (procedura di selezione multifrequenza),<br />
la segreteria telefonica può essere interrogata e impostata a<br />
distanza, ad es. per riprodurre e/o cancellare messaggi.<br />
☞ L’interrogazione a distanza della segreteria telefonica richiede l’uso dei<br />
rispettivi tasti sul telefono utilizzato.<br />
Tasto Funzione<br />
1 Riprodurre di nuovo il messaggio attuale<br />
2x 1 Riprodurre il messaggio precedente<br />
2 Riprodurre / Interrompere il messaggio<br />
3 Riprodurre il messaggio successivo<br />
4 Riprodurre il messaggio di annuncio<br />
5 Registrare il messaggio di annuncio<br />
6 Interrompere la riproduzione o registrazione /<br />
Concludere l’interrogazione a distanza<br />
7 Cancellare il messaggio attuale<br />
8 Disattivare la segreteria telefonica<br />
9 Attivare la segreteria telefonica / Selezionare il<br />
messaggio di annuncio 1 o 2<br />
0 Cancellare tutti i messaggi vecchi<br />
✱ Saltare il messaggio di annuncio<br />
# Registrare un promemoria<br />
Chiamare il telefono/la segreteria telefonica da un dispositivo <strong>com</strong>patibile<br />
MF e tenere conto delle impostazioni individuali precedentemente<br />
eseguite (vedi Ritardo di squillo).<br />
☞ Con segreteria telefonica disattivata, questa è inserita<br />
automaticamente dopo 10 squilli.<br />
☞ Per riprodurre solo i messaggi nuovi e avendo attivato precedentemente<br />
la funzione salvagettone, dopo il 3° squillo è possibile interrompere il<br />
collegamento. In presenza di nuovi messaggi, la segreteria telefonica<br />
avrebbe risposto già dopo il 2° squillo. In questo modo vi evita l’addebito di<br />
spese telefoniche.<br />
Immettere dopo il messaggio di annuncio il codice di interrogazione a<br />
distanza (configurazione iniziale: 321). Una volta inserito il codice PIN<br />
corretto, si avvertono due segnali acustici. A questo punto, il dispositivo<br />
rimane in attesa di ulteriori immissioni. Se non segue alcuna immissione<br />
di dati, il collegamento è interrotto.<br />
I<br />
7
Appendice<br />
Dichiarazione di conformità<br />
Questo apparecchio risponde a quanto disposto dalla Direttiva UE:<br />
- 1999/5/CE Direttiva concernente le apparecchiature radio, le<br />
apparecchiature terminali di tele<strong>com</strong>unicazioni e il reciproco<br />
riconoscimento della loro conformità.<br />
- 2005/32/CE Direttiva “Prodotti che consumano energia“.<br />
- Regolamento 1275/2008 “Consumo di energia elettrica nei modi<br />
stand-by e spento “.<br />
- Regolamento 278/2009 “I <strong>com</strong>ponenti di rete in caso di peso nullo,<br />
nonché la loro efficienza media in funzionamento“.<br />
La conformità con la direttiva di cui sopra viene confermata dal marchio CE<br />
applicato sull’apparecchio.<br />
Per la dichiarazione di conformità <strong>com</strong>pleta si prega di voler usufruire del<br />
servizio gratuito di download dal nostro sito Internet www.switel.<strong>com</strong>.<br />
Consigli per la cura<br />
Pulire le superfici degli apparecchi con un panno morbido e antipilling.<br />
Non utilizzare mai detergenti o solventi.<br />
Garanzia<br />
Gli apparecchi SWITEL sono costruiti e collaudati in osservanza dei processi di produzione<br />
più moderni. L’impiego di materiali selezionati e tecnologie altamente sviluppate<br />
sono garanti di una perfetta funzionalità e lunga durata in vita. La garanzia non<br />
viene considerata esecutiva qualora la causa del malfunzionamento dell’apparecchio<br />
è dovuta al gestore della rete telefonica oppure se questa è da attribuirsi ad un<br />
impianto telefonico interno interposto. La garanzia non si estende a batterie, accumulatori<br />
o batterie ricaricabili utilizzati all’interno degli apparecchi. Il periodo di garanzia<br />
ricopre 24 mesi a partire dalla data di acquisto.<br />
Entro il periodo di garanzia si procederà all’eliminazione gratuita di tutti i guasti dovuti<br />
a difetti di materiale o produzione. Il diritto di garanzia cessa in caso di interventi da<br />
parte dell’acquirente o di terzi. Danni derivanti da un impiego o esercizio non conforme<br />
agli usi previsti, a naturale usura, a errato montaggio o errata conservazione, a<br />
collegamento o installazione impropri, dovuti a forza maggiore o ad altri influssi esterni<br />
non sono coperti da garanzia. In qualità di produttore ci riserviamo il diritto, in caso<br />
di reclami, di riparare o sostituire le parti difettose o di rimpiazzare l’apparecchio.<br />
Parti o apparecchi sostituiti passano di nostra proprietà. Sono esclusi diritti di risarcimento<br />
per danni qualora non siano dovuti a intenzione o colpa grave del costruttore.<br />
Nel caso in cui il presente apparecchio dovesse ciò nonostante presentare un difetto<br />
durante il periodo di garanzia, si prega di rivolgersi esclusivamente al negozio di<br />
rivendita dell’apparecchio SWITEL assieme al relativo scontrino di acquisto. In base<br />
alle presenti disposizioni, tutti i diritti di garanzia dovranno essere fatti valere esclusivamente<br />
nei confronti del rivenditore autorizzato. Decorso il termine di due anni dalla<br />
data di acquisto e consegna dei nostri prodotti non sarà più possibile fare valere<br />
alcun diritto di garanzia.<br />
8
1 Safety Information<br />
Please read this operating instruction manual thoroughly.<br />
Intended use<br />
The telephone is suitable for telephoning within a public telephone network<br />
system. Any other use is considered unintended use. Unauthorised modification<br />
or reconstruction is not permitted. Under no circumstances open the<br />
device or <strong>com</strong>plete any repair work yourself.<br />
Installation location<br />
Prevent excessive exposure to smoke, dust, vibration, chemicals, moisture,<br />
heat and direct sunlight.<br />
Do not use the handset in potentially explosive areas.<br />
Power adapter plug<br />
a Attention: Only use the power adapter plug supplied because other<br />
power supplies could damage the telephone. Ensure access to the power<br />
adapter plug is not obstructed by furniture or such.<br />
Rechargeable batteries<br />
a Attention: Never throw batteries into a fire. Only use batteries of the<br />
same type. Pay attention to the correct polarity. Incorrect polarity of the<br />
batteries represents a risk of explosion during charging.<br />
Power failure<br />
The telephone cannot be used to make calls in the event of a power failure.<br />
Always keep a cord connected telephone which operates without an external<br />
power supply available in case of emergency situations.<br />
Low-radiation operation (ECO mode)<br />
In talk mode, radiation is reduced (depending on the distance between the<br />
handset and base station).<br />
Low-radiation operation by MAXI ECOmode<br />
In “MAXI ECOmode“, the radiation (DECT transmission power) of both<br />
base station and handset is turned off in stand-by. This will also work if multiple<br />
handsets are connected, given that they all support “MAXI ECOmode“.<br />
Medical equipment<br />
a Attention: Never use the telephone in the vicinity of medical equipment.<br />
Effects on such equipment cannot be fully ruled out.<br />
DECT telephones can cause an unpleasant humming sound in hearing<br />
aids. DECT: Digital Enhanced Cordless Tele<strong>com</strong>munication = Standard for<br />
cordless telephones.<br />
Disposal<br />
In order to dispose of your device, take it to a collection<br />
point provided by your local public waste authorities (e.g.<br />
recycling centre). The adjacent symbol indicates that the<br />
device must not be disposed of in normal domestic waste!<br />
According to laws on the disposal of electronic and electrical<br />
devices, owners are obliged to dispose of old electronic<br />
and electrical devices in a separate waste container.<br />
Batteries must be disposed of at the point of sale or at the<br />
appropriate collection points provided by the public waste<br />
authorities.<br />
Packaging materials must be disposed of according to<br />
local regulations.<br />
2 Preparing the Telephone<br />
Safety information<br />
a Attention: It is essential to read the Safety Information in Chapter 1<br />
before starting up.<br />
Connecting the base station<br />
a Attention: Position the base station at least 1 m away from other<br />
electronic devices, otherwise there is a risk of mutual disturbance.<br />
Connect the base station as illustrated in the diagram. For reasons of<br />
safety, only use the power adapter plug and telephone connection line<br />
supplied.<br />
Telephone line socket<br />
Mains power outlet<br />
a Attention: Use only the power adapter plug supplied with the base<br />
station!<br />
1<br />
GB
Connecting the charging station 2<br />
Connect the charging station to the mains. Ensure access to the power<br />
adapter plug is not obstructed by furniture or such.<br />
2<br />
Only applies to telephone sets with at least two handsets<br />
Inserting the batteries<br />
Open the battery <strong>com</strong>partment cover. Put in the batteries. Close the battery<br />
<strong>com</strong>partment cover.<br />
a Attention: Use only type AAA NiMH 1.2 V / 400 mAh rechargeable<br />
batteries. Never use normal batteries / primary cell batteries.<br />
Observe the correct polarity!<br />
Charging the batteries<br />
☞ Before the handset is used for the first time, insert it in the base<br />
station / charging station for at least 16 hours.<br />
The handset warms up during the charging process. This is normal and<br />
does not represent a risk. The battery status is shown on the display. When<br />
the battery capacity is nearly exhausted, the battery symbol will flash in the<br />
display. End your call and place the handset into the base or charging station<br />
for charging.<br />
After a short time, the battery symbol will appear to be fully charged but this<br />
is actually not the case. The battery capacity will decrease rapidly. We<br />
advise you to put the handset on the base unit for 16 hours so that it can<br />
be recharged <strong>com</strong>pletely.<br />
Electrical consumption<br />
The electrical consumption of the base (6 V, 500 mA DC) is:<br />
- in operation mode (idle/call): approx. 0.6 / 0.75 W.<br />
- during charging of the handset: approx. 1.2 W.<br />
The adaptor input power without load is approx. 0.1 W. The average efficiency<br />
is approx. 71.2 %.<br />
The electrical consumption of the charger (7 V, 420 mA DC) is:<br />
- without handset charging: approx. 0.1 W.<br />
- during charging of the handset: approx. 0.6 W.<br />
The adaptor input power without load is approx. 0.1 W. The average efficiency<br />
is approx. 72.5 %.<br />
3 Operating elements (front coverpage)<br />
Handset<br />
1 Earpiece<br />
2 Display<br />
3 Redial key/Pause<br />
4 Hands-free<br />
5 Off Hook key<br />
6 Call list / Flash key (R)<br />
7 Digit keys<br />
8 Internal key<br />
Base station<br />
14 Paging button<br />
15 Volume − / Set ring delay<br />
16 Display<br />
17 Volume + / Change security code<br />
18 Delete<br />
19 Wind forward / Record memo<br />
9 Mute key (microphone off) / Delete<br />
10 Phonebook<br />
11 On Hook key<br />
12 Volume key / ringtone melody,<br />
ringtone volume<br />
13 Microphone<br />
20 Play / Pause<br />
21 Answering machine on/off / Stop<br />
22 Wind back / Play/Record outgoing<br />
message<br />
23 Charging contacts<br />
2
4 Telephoning<br />
Taking a call<br />
Your phone is ringing.<br />
/ Press the Off Hook key or the hands-free key.<br />
Making a call<br />
Enter the phone number.<br />
Delete wrong characters by pressing .<br />
/ The phone number is being dialled.<br />
☞ You can also press the Off Hook key and you will hear the dialling<br />
tone. The entered number will be dialled immediately. It is not possible to<br />
correct wrong digits individually using this dialling procedure.<br />
Ending a call<br />
/ Press the On Hook key or replace the handset in the base station.<br />
Call timer<br />
Your handset automatically times the duration of every call.<br />
Setting the earpiece/loudspeaker volume<br />
During a call you can adjust the volume in 5 levels (if telephoning “normally“<br />
-> earpiece volume, with hands-free -> loudspeaker volume).<br />
Muting the microphone<br />
During a call you can switch your handset’s microphone off. The display<br />
shows .<br />
To unmute press again.<br />
Redial<br />
☞ Your handset saves the last 3 dialled telephone numbers.<br />
Viewing/dialling telephonenumbers<br />
The handset is in idle state.<br />
… press repeated (if necessary) until the desired telephone number is<br />
displayed.<br />
/ … the phone number is being dialled.<br />
☞ Did you already pressed the Off Hook key and can hear the dialling<br />
tone, the very last dialled telephone number is dialled by pressing the<br />
redial key.<br />
Storing telephone numbers<br />
… the desired telephone number is displayed (see above).<br />
… press and hold for about 2 seconds. You can edit the telephone<br />
number. Press briefly to delete the last character or press and<br />
hold to delete the whole entry. You can enter a dialling pause (approx.<br />
3 s) by pressing .<br />
… press again and enter the memory location (0…9).<br />
… press again to return to idle state.<br />
Call list<br />
☞ Your handset saves the numbers of the last 20 in<strong>com</strong>ing calls in the<br />
call list. Saving can only take place if the function “Phone number transmission<br />
(CLIP)” is available at your connection and caller ID is not suppressed<br />
by the caller or was not transmitted for any other reason.<br />
If the list is empty, nO is shown on the display.<br />
New calls are signalled with the flashing<br />
icon.<br />
Viewing/dialling telephonenumbers<br />
The handset is in idle state.<br />
Open the call list. The telephone number of the very last call is displayed.<br />
For numbers longer than 12 digits press to display the<br />
hidden digits.<br />
Press to view date and time of the call (Only when the network<br />
sends the time/date together with the telephone number / depending<br />
on your network provider).<br />
… press repeated, to get to other entries.<br />
/ … the displayed telephone number is being dialled.<br />
Deleting telephone numbers<br />
… the desired telephone number is displayed (see above).<br />
… press and hold for about 3 seconds. The entry will be deleted.<br />
Storing telephone numbers<br />
… the desired telephone number is displayed (see above).<br />
… press and hold for about 2 seconds. You can edit the telephone<br />
number. Press briefly to delete the last character or press and<br />
hold to delete the whole entry. You can enter a dialling pause (approx.<br />
3 s) by pressing .<br />
… press again and enter the memory location (0…9).<br />
… press again to confirm.<br />
GB<br />
3
Phonebook<br />
☞ You can store up to 10 entries in the phonebook.<br />
Storing an entry<br />
The handset is in idle state.<br />
… press and hold for about 2 sec. The icon appears in the display.<br />
Enter the telephone number. Press briefly to delete the last character<br />
or press and hold to delete the whole entry. You can enter a<br />
dialling pause (approx. 3 s) by pressing .<br />
… press again.<br />
… enter the memory location (0…9).<br />
… press again to confirm.<br />
For storing more entries please refer to the steps mentioned above.<br />
Dialling a telephone number<br />
The handset is in idle state.<br />
… press briefly.<br />
… enter the memory location (0…9). The respective entry will be displayed.<br />
/ … the displayed telephone number is being dialled.<br />
Editing an entry<br />
The handset is in idle state.<br />
… press briefly.<br />
… enter the memory location (0…9). The respective entry will be displayed.<br />
… press and hold for about 2 sec. Press briefly to delete the last<br />
character or press and hold to delete the whole entry. You can enter a<br />
dialling pause (approx. 3 s) by pressing .<br />
…press again to store the edited entry.<br />
Internal calls<br />
☞ Internal calls, transfers and conference calls are only possible if<br />
multiple handsets are registered.<br />
Making an internal call<br />
… press INT and enter the internal telephone number (1…5) of the<br />
desired handset.<br />
/ For taking the call on the other handset press the call key or the handsfree<br />
key. End the call as usual.<br />
Transferring an external call<br />
During an external call . . .<br />
… press INT and enter the internal telephone number (1…5) of the<br />
desired handset. The external call is put on hold.<br />
When the called handset answers you can announce the call transfer.<br />
Press the On Hook key. The call will be transferred.<br />
3-Party conference<br />
During an external call . . .<br />
… press INT and enter the internal telephone number (1…5) of the<br />
desired handset. The external call is put on hold.<br />
When the called handset answers you can announce the call transfer.<br />
Press and hold INT for approx. 3 seconds. The conference is established.<br />
☞ Any subscriber hangs up during a conference call will leave the other<br />
subscribers still in connection.<br />
5 Other features<br />
Key lock<br />
☞ The key lock prevents functions assigned to buttons being activated<br />
inadvertently. In<strong>com</strong>ing calls can still be taken in the normal way even<br />
when the key lock function is activated.<br />
… press and hold until the icon appears in the display. For unlocking<br />
the keypad press and hold the #-key until the icon disappears.<br />
Switching the handset ringer on/off<br />
☞ You can turn off the handset ringer via a procedure as well (refer to<br />
chapter “Ringtone“).<br />
… press and hold until the icon appears in the display. For turning<br />
the ringer on again press and hold the star-key until the icon disappears.<br />
4
Registering a handset<br />
☞ Five handsets can be registered to a base station. The handsets delivered<br />
with your telephone are already registered. To register a “foreign“<br />
handset please refer to it’s user manual.<br />
First of all disconnect the base station from the mains and re-connect<br />
it. After this the base station will be in registration mode for 3 minutes.<br />
… press and hold for approx. 3 seconds until and flash.<br />
… press and hold for approx. 3 seconds.<br />
Enter a number for the base station (1 … 5) to subscribe to.<br />
Enter the PIN for the base station (default setting for DE 337x base<br />
station “0 0 0 0“).<br />
If the handset is registered the display will show HS and the handset’s<br />
internal telephone number.<br />
Deleting a handset<br />
☞ You can delete a handset from a base to allow another handset to be<br />
registered. Note: you can only remove other handset in your system but<br />
you are not able to remove the handset you are using.<br />
… press and hold for approx. 3 seconds.<br />
… press and hold for approx. 3 seconds.<br />
Enter the PIN for the base station (default setting for DE 337x base<br />
station “0 0 0 0“).<br />
Enter the internal telephone number (1…5) of the handset you want to<br />
remove.<br />
The handset will go back to standby is the removal is successfully.<br />
Ringtone melody (handset)<br />
… press and hold for approx. 3 seconds. The current melody sounds.<br />
… select the desired melody.<br />
Press to confirm the setting.<br />
Ringtone volume (handset)<br />
… press briefly. The handset will ring in the current volume.<br />
… select the desired volume. When the volume is “0“ (ringer off),<br />
appears in the display.<br />
Press to confirm the setting.<br />
Setting the flash time<br />
☞ You can set the flash time to 100 ms (usually for special services of<br />
your telephone provider/delivery state) or 300 ms (e. g. for a telephone<br />
exchange). In case of questions please contact your telephone provider or<br />
the system administator of your PBX.<br />
… press and hold for approx. 3 seconds. S (100 ms) or L (300 ms)<br />
appears in the display. For switching the flash time press and hold<br />
again for approx. 3 seconds.<br />
Setting the dial mode (tone / pulse)<br />
☞ You can switch the dial mode. In most situations the TONE option<br />
should be selected.<br />
… press and hold for approx. 3 seconds. t (tone) or P (pulse) appears<br />
in the display. For switching the dial mode press and hold again<br />
for approx. 3 seconds.<br />
6 Answering Machine<br />
The answering machine is operated via the base station.<br />
Switching the answering machine on/off<br />
… press. The answering machine is switched on.<br />
… press again. The answering machine is switched off.<br />
Setting the answering machine language<br />
The language used by the answering machine can be set to one of the following<br />
languages: German, English, French.<br />
… press and hold for approx. 10 seconds to set the required language.<br />
An acoustic confirmation signal is issued and the language abbreviation<br />
appears in the base station display.<br />
Answering mode<br />
You can select between “answer with message recording" and “answer<br />
only" modes.<br />
☞ The answering machine is provided with pre−recorded outgoing<br />
messages at the factory. These outgoing messages are played if you do<br />
not record your own outgoing messages.<br />
GB<br />
5
Answer with message recording (OGM 1)<br />
An outgoing message is played to the callers after which they can leave a<br />
message (max. length approx. three minutes). The answering machine can<br />
save up to 55 in<strong>com</strong>ing messages with a total recording time of up to 11<br />
minutes.<br />
Answer only (OGM 2)<br />
An outgoing message is played to the caller after which the connection is<br />
ended. This mode is automatically answered when the message memory is<br />
full.<br />
. . . press button for 2 seconds. Switch between OGM 1 and OGM 2.<br />
Recording/Playing outgoing message<br />
. . . press for 2 seconds.<br />
After the acoustic signal: Speak your text loud and clear towards the<br />
answering machine.<br />
. . . press to end recording.<br />
. . . press to play back the current outgoing message.<br />
☞ You can repeat this procedure as often as required. A new recording<br />
dubs over the old recording. Therefore, the old recording need not be<br />
deleted.<br />
Deleting an outgoing message<br />
Your own outgoing message will be deleted and the pre−recorded outgoing<br />
message is restored.<br />
. . . press to play back the current outgoing message.<br />
. . . press and hold during playback to delete the outgoing message.<br />
☞ The pre−recorded messages cannot be deleted.<br />
Setting the ring delay<br />
This setting enables you to ensure you have enough time to take an in<strong>com</strong>ing<br />
call before the answering machine switches on and takes it. You can<br />
select between 2 and 9 rings before the call is taken or the you can select<br />
the tollsaver function. This setting is particularly useful in conjunction with<br />
the remote access function. When this function is set, the answering machine<br />
takes an in<strong>com</strong>ing call after 5 rings as long as no new messages have<br />
been recorded. If new messages have been recorded, however, the answering<br />
machine switches on after 2 rings. In the case of all other settings, the<br />
answering machine switches on after the set number of rings.<br />
… press for 2 seconds to activate programming mode.<br />
Use the and buttons to select the required delay.<br />
… press. The setting is saved.<br />
… press to display the current setting.<br />
Recording memos<br />
You can record memos on the answering machine and play them back later.<br />
… press for 2 seconds. After the acoustic signal: Speak your text loud and<br />
clear towards the answering machine.<br />
… press to end recording.<br />
In<strong>com</strong>ing messages<br />
The LED indicator flashes when new messages have been received.<br />
Playing messages/memos<br />
… press to play back messages. New messages are played back first.<br />
Other functions are available while the message is being played.<br />
Repeat playback of current message<br />
2x Play the previous message<br />
Stop playback<br />
Pause/Resume playback<br />
Play the next message<br />
Increase volume<br />
Reduce volume<br />
Deleting messages<br />
Deleting the current message<br />
To delete messages while they are being played, press and hold the<br />
during playback.<br />
Deleting all messages<br />
You can delete all messages in one operation.<br />
… press for 2 seconds. dL appears in the display.<br />
… press. The messages are deleted.<br />
button<br />
6
Remote access<br />
A condition for using remote access is that you know the PIN code assigned<br />
to the function.<br />
The preset PIN code is 321. You can set your own individual PIN code.<br />
Changing the PIN code<br />
… press for 2 seconds. The digit for the first number in the PIN code<br />
flashes.<br />
Use the and buttons to select the required digit.<br />
… press to set the next digit.<br />
The procedure to set the second and third digit is identical.<br />
Remote access/control of the answering machine<br />
You can access the answering machine from a distant phone which uses<br />
tone dialling (multi−frequency dialling mode) and execute functions, i.e.,<br />
you can play messages and/or delete messages.<br />
☞ Press the relevant keys on the phone to initiate the remote access or<br />
remote control functions on the answering machine.<br />
Key Function<br />
1 Play the current message again<br />
2x 1 Play the previous message<br />
2 Play message / Pause in playback<br />
3 Play the next message<br />
4 Play the outgoing message<br />
5 Record an outgoing message<br />
6 Stop playback or recording / End remote access<br />
7 Delete the message currently playing<br />
8 Switch off the answering machine<br />
9 Switch on the answering machine / Select OGM 1 or 2<br />
0 Delete all the old messages<br />
✱ Skip the outgoing message<br />
# Record a memo<br />
Call your phone/answering machine from an external phone in tone<br />
dialling mode. The settings defined you defined are valid (refer to<br />
“Ring delay").<br />
☞ If your answering machine is not switched on, it switches on automatically<br />
after the tenth ring.<br />
☞ If you only want to play new messages and have activated the tollsaver<br />
function, you can put the receiver down after the third ring to interrupt the<br />
call. If new calls have been recorded, the answering machine would have<br />
taken your call after two rings. As a result, no costs ensue.<br />
After you have listened to the outgoing message enter the remote<br />
access PIN code (the default setting is 321). Two signal tones confirm<br />
the correct PIN code has been entered. After the correct PIN code has<br />
been entered, the machine awaits <strong>com</strong>mands via the digit keys to execute<br />
the corresponding functions. If there is no key input, the connection<br />
is automatically ended.<br />
GB<br />
7
Appendix<br />
Declaration of Conformity<br />
This device fulfils the requirements stipulated in the EU directives:<br />
- 1999/5/EU directive on radio equipment and tele<strong>com</strong>munications terminal<br />
equipment and the mutual recognition of their conformity.<br />
- 2005/32/EU directive “Energy-using products“.<br />
- Regulation 1275/2008 “Electric power consumption in standby- and offstate“.<br />
- Regulation 278/2009 “External power supplies without load and their<br />
average efficiency in use“.<br />
Conformity with the above mentioned directives is confirmed by the CE<br />
symbol on the device. To view the <strong>com</strong>plete Declaration of Conformity,<br />
please refer to the free download available on our web site www.switel.<strong>com</strong>.<br />
Maintenance<br />
Clean the housing surfaces with a soft, fluff-free cloth.<br />
Do not use any cleaning agents or solvents.<br />
Guarantee<br />
SWITEL equipment is produced and tested according to the latest production methods.<br />
The implementation of carefully chosen materials and highly developed technologies<br />
ensure trouble-free functioning and a long service life. The terms of guarantee<br />
do not apply where the cause of equipment malfunction is the fault of the telephone<br />
network operator or any interposed private branch extension system. The<br />
terms of guarantee do not apply to the batteries or power packs used in the products.<br />
The period of guarantee is 24 months from the date of purchase.<br />
All deficiencies related to material or manufacturing errors within the period of guarantee<br />
will be redressed free of charge. Rights to claims under the terms of guarantee<br />
are annulled following tampering by the purchaser or third parties. Damage caused<br />
as the result of improper handling or operation, normal wear and tear, incorrect positioning<br />
or storage, improper connection or installation or Acts of God and other external<br />
influences are excluded from the terms of guarantee. In the case of <strong>com</strong>plaints,<br />
we reserve the right to repair defect parts, replace them or replace the entire device.<br />
Replaced parts or devices be<strong>com</strong>e our property. Rights to <strong>com</strong>pensation in the case<br />
of damage are excluded where there is no evidence of intent or gross negligence by<br />
the manufacturer.<br />
If your device shows signs of defect during the period of guarantee, please return it<br />
to the sales outlet in which you purchased the SWITEL device together with the purchase<br />
receipt. All claims under the terms of guarantee in accordance with this agreement<br />
can only be asserted at the sales outlet.<br />
No claims under the terms of guarantee can be asserted after a period of two years<br />
from the date of purchase and hand-over of the product.<br />
8
Dieses Gerät entspricht der europäischen R&TTE Richtlinie.<br />
Für die komplette Konformitätserklärung nutzen Sie bitte den kostenlosen Download von unserer Website www.switel.<strong>com</strong>.<br />
Cet équipement est conforme à la directive européenne R&TTE.<br />
Pour obtenir la déclaration de conformité intégrale, veuillez vous servir du téléchargement gratuit de notre site Internet www.switel.<strong>com</strong>.<br />
Quest’apparecchiatura è conforme alla direttiva europea R&TTE.<br />
Per la dichiarazione di conformità <strong>com</strong>pleta si prega di voler usufruire del servizio gratuito di download dal nostro sito Internet www.switel.<strong>com</strong>.<br />
This equipment <strong>com</strong>plies with the European R&TTE directive.<br />
To view the <strong>com</strong>plete Declaration of Conformity, please refer to the free download available at our web site: www.switel.<strong>com</strong>.<br />
Service Hotline<br />
Bei technischen Problemen können Sie sich an unsere Service-Hotline unter Tel. 0900 00 1675 innerhalb der Schweiz<br />
(Kosten Swiss<strong>com</strong> bei Drucklegung: CHF 2.60/min) wenden.<br />
S’il s’agit de problèmes techniques, vous pouvez vous adresser à notre hotline de service en Suisse en appelant le numéro 0900 00 1675<br />
(frais Swiss<strong>com</strong> à la date d’impression de ce manuel : CHF 2.60/min).<br />
In caso di problemi tecnici è possibile rivolgersi alla nostra hotline di assistenza tecnica chiamando al numero 0900 00 1675 valido per la Svizzera<br />
(spese da rete Swiss<strong>com</strong> alla data di stampa: CHF 2.60 / min).<br />
In the event of technical problems, you can contact our hotline service, Tel. 0900 00 1675<br />
within Switzerland (cost via Swiss<strong>com</strong> at time of going to print: CHF 2.60/min).<br />
Version 1.1 • 09.10.2012