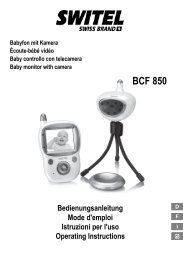
DCT 587x Combo - Switel.com
DCT 587x Combo - Switel.com
DCT 587x Combo - Switel.com

Create successful ePaper yourself
Turn your PDF publications into a flip-book with our unique Google optimized e-Paper software.
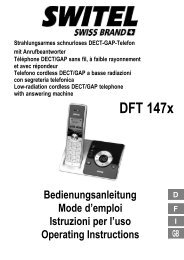
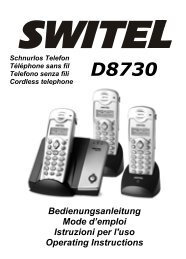
Strahlungsarmes schnurloses DECT−/GAP−Telefon<br />
Téléphone DECT/GAP sans fil, à faible rayonnement<br />
Telefono cordless DECT/GAP a basse radiazioni<br />
Low−radiation cordless DECT/GAP telephone<br />
<strong>DCT</strong> <strong>587x</strong> <strong>Combo</strong><br />
Bedienungsanleitung<br />
Mode d’emploi<br />
Istruzioni per l’uso<br />
Operating Instructions
Bedienungsanleitung . . . . . . . . . . . . . 3<br />
Mode d’emploi . . . . . . . . . . . . . . . . 53<br />
Istruzioni per l’uso . . . . . . . . . . . . . 103<br />
Operating Instructions . . . . . . . . . . 153<br />
Declaration of Conformity . . . . . . . . 204
1<br />
Inhaltsverzeichnis<br />
1 Sicherheitshinweise . . . . . . . . . . . . . . . . . 4<br />
2 Inbetriebnahme . . . . . . . . . . . . . . . . . . . . 6<br />
3 Bedienelemente . . . . . . . . . . . . . . . . . . . 9<br />
4 Einführende Informationen . . . . . . . . . . . . 12<br />
5 Menüstruktur . . . . . . . . . . . . . . . . . . . . . . 14<br />
6 Bedienung . . . . . . . . . . . . . . . . . . . . . . . 21<br />
7 Anrufbeantworter . . . . . . . . . . . . . . . . . . . 33<br />
8 Erweitern des Telefonsystems . . . . . . . . . 40<br />
9 Nebenstellenanlagen / Zusatzdienste . . . . 42<br />
10 Technische Eigenschaften . . . . . . . . . . . . 44<br />
11 Probleme . . . . . . . . . . . . . . . . . . . . . . . . 45<br />
12 Pflegehinweise / Garantie . . . . . . . . . . . . . 47<br />
13 Stichwortverzeichnis . . . . . . . . . . . . . . . . 48<br />
3
Sicherheitshinweise<br />
1 Sicherheitshinweise<br />
Lesen Sie diese Bedienungsanleitung sorgfältig durch.<br />
Bestimmungsgemäße Verwendung<br />
Dieses Telefon mit Mobilteil ist geeignet zum Telefonieren innerhalb eines Telefonnetzes. Jede andere<br />
Verwendung gilt als nicht bestimmungsgemäß. Eigenmächtige Veränderungen oder Umbauten<br />
sind nicht zulässig. Öffnen Sie das Gerät in keinem Fall selbst und führen Sie keine eigenen<br />
Reparaturversuche durch.<br />
Stromausfall<br />
Bei Stromausfall kann mit diesem Telefon nicht telefoniert werden. Halten Sie für Notfälle ein<br />
schnurgebundenes Telefon bereit, welches ohne externe Stromversorgung arbeitet.<br />
Aufstellungsort 2<br />
Der Aufstellort hat einen entscheidenden Einfluss auf einen einwandfreien Betrieb des Telefons.<br />
Vermeiden Sie Belastungen durch Rauch, Staub, Erschütterungen, Chemikalien, Feuchtigkeit,<br />
Hitze oder direkte Sonneneinstrahlung. Verwenden Sie das Telefon nicht in explosionsgefährdeten<br />
Bereichen.<br />
Stellen Sie das Telefon nicht in die unmittelbare Umgebung von anderen elektronischen Geräten<br />
wie z. B. Fernsehgeräten, Mikrowellen, Kühlschränke usw., da es sonst zu gegenseitiger Beeinflussung<br />
kommen kann. Stellen Sie das Telefon nicht in die Nähe eines anderen Telefons. Achten<br />
Sie darauf, dass sich keine großen metallischen Gegenstände, z. B. ein Kühlschrank oder ein<br />
Spiegel, zwischen Basisgerät und Mobilteil befinden. Auch Wände können Einfluss auf die Verbindung<br />
zwischen Basisgerät und Mobilteil haben.<br />
Stellen Sie das Telefon in der Nähe einer geeigneten Steckdose und in der Nähe des Telefonanschlusses<br />
auf. Achten Sie darauf, dass man über das Kabel nicht stolpern kann!<br />
Achtung: Die Kabel dürfen nicht verlängert werden!<br />
Stellen Sie das Telefon auf eine ebene und rutschfeste Fläche. Normalerweise hinterlassen die<br />
Gerätefüße keine Spuren auf der Aufstellfläche. Wegen der Vielzahl der verwendeten Lacke und<br />
Oberflächen kann es jedoch nicht ausgeschlossen werden, dass durch die Gerätefüße Spuren auf<br />
der Aufstellfläche entstehen.<br />
Je höher das Basisgerät steht (auch innerhalb eines Gebäudes), desto besser ist ihre Reichweite.<br />
Netzteil<br />
Achtung: Verwenden Sie nur das mitgelieferte Netzteil, da andere Netzteile das Telefon<br />
beschädigen können. Sie dürfen den Zugang zum Netzteil nicht durch Möbel oder<br />
andere Gegenstände versperren.<br />
4
Aufladbare Akkus<br />
Medizinische Geräte<br />
Sicherheitshinweise<br />
Achtung: Werfen Sie Akkus nicht ins Feuer. Verwenden Sie nur Akkus des gleichen<br />
Typs! Achten Sie auf die richtige Polung! Bei verkehrter Polung der Akkus besteht beim<br />
Aufladen Explosionsgefahr.<br />
Achtung: Verwenden Sie nur die vorgeschriebenen Akkus. Verwenden Sie keine Batterien.<br />
Explosionsgefahr!<br />
Achtung: Benutzen Sie das Telefon nicht in der Nähe von medizinischen Geräten.<br />
Eine Beeinflussung kann nicht völlig ausgeschlossen werden.<br />
Hörgerätekompatibel<br />
Das Telefon ist mit den meisten am Markt befindlichen Hörgeräten kompatibel. Eine einwandfreie<br />
Funktion mit jedem Hörgerät kann jedoch nicht garantiert werden.<br />
DECT 1 −Telefone können in Hörgeräten einen unangenehmen Brummton verursachen.<br />
Entsorgung<br />
Wollen Sie Ihr Gerät entsorgen, bringen Sie es zur Sammelstelle Ihres kommunalen<br />
Entsorgungsträgers (z. B. Wertstoffhof). Nach dem Elektro− und Elektronikgerätegesetz<br />
sind Besitzer von Altgeräten gesetzlich verpflichtet, alte Elektro− und Elektronikgeräte<br />
einer getrennten Abfallerfassung zuzuführen. Das nebenstehende Symbol<br />
bedeutet, dass Sie das Gerät auf keinen Fall in den Hausmüll werfen dürfen!<br />
Gefährdung von Gesundheit und Umwelt durch Akkus und Batterien!<br />
Akkus und Batterien nie öffnen, beschädigen, verschlucken oder in die Umwelt gelangen<br />
lassen. Sie können giftige und umweltschädliche Schwermetalle enthalten.<br />
Sie sind gesetzlich verpflichtet, Akkus und Batterien beim batterievertreibenden<br />
Handel sowie bei zuständigen Sammelstellen, die entsprechende Behälter bereitstellen,<br />
sicher zu entsorgen. Die Entsorgung ist unentgeltlich. Die Symbole bedeuten,<br />
dass Sie Akkus und Batterien auf keinen Fall in den Hausmüll werfen dürfen<br />
und sie über Sammelstellen der Entsorgung zugeführt werden müssen.<br />
Verpackungsmaterialien entsorgen Sie entsprechend den lokalen Vorschriften.<br />
1 DECT: Digital Enhanced Cordless Tele<strong>com</strong>munication = Standard für kabellose Telefone.<br />
5
Inbetriebnahme<br />
2 Inbetriebnahme<br />
Sicherheitshinweise<br />
Achtung: Lesen Sie vor der Inbetriebnahme unbedingt die Sicherheitshinweise in Kapitel<br />
1.<br />
Verpackungsinhalt prüfen<br />
Zum Lieferumfang gehören:<br />
Inhalt<br />
3<br />
<strong>DCT</strong> 587X−Modell<br />
<strong>DCT</strong> 5871 <strong>DCT</strong> 5872 1 <strong>DCT</strong> 5873 1 <strong>DCT</strong> 5874 1<br />
Basisgerät 1 1 1 1<br />
Netzteil 1 1 1 1<br />
Hörer 1 1 1 1<br />
Hörerspiralkabel 1 1 1 1<br />
Telefonanschlusskabel 1 1 1 1<br />
Ladestation mit Netzteil 1 2 3 4<br />
Mobilteil 1 2 3 4<br />
Akkus (AAA 1.2 V NiMH) 2 4 6 8<br />
Bedienungsanleitung 1 1 1 1<br />
6<br />
1 Unter www.switel.<strong>com</strong> erfahren Sie, ob dieses Telefon/Telefonset bereits erhältlich ist.
Inbetriebnahme<br />
Gerät in Betrieb nehmen<br />
Basisgerät anschließen<br />
Schließen Sie das Basisgerät wie auf der Skizze abgebildet an. Verwenden Sie aus Sicherheitsgründen<br />
nur das mitgelieferte Netzteil.<br />
Beachten Sie unbedingt die Ausführungen zum Aufstellungsort Seite 4.<br />
Steckdose<br />
Telefonanschlussdose<br />
Telefonanschlusskabel<br />
Netzteil<br />
Basisgerät<br />
Hörer<br />
Hörerspiralkabel<br />
Verwenden Sie für das Basisgerät das Netzteil mit den Ausgangsdaten 100−240 Vac<br />
6 Vdc 500 mA.<br />
Ladestation anschließen<br />
Schließen Sie die Ladestation an eine Steckdose an.<br />
7
Inbetriebnahme<br />
Akkus in Mobilteil einsetzen<br />
Das Akkufach befindet sich auf der Rückseite Ihres Mobilteils.<br />
Öffnen Sie das Akkufach und setzen Sie 2 Akkus vom<br />
Typ AAA NiMH, 1.2 V 500 mAh ein. Achten Sie auf die richtige<br />
Polung! Schließen Sie das Akkufach.<br />
Akkus aufladen 4<br />
Stellen Sie das Mobilteil bei der ersten Inbetriebnahme<br />
für mindestens 8 Stunden in die Ladestation.<br />
Haben Sie das Mobilteil richtig in die Ladestation gestellt, ertönt<br />
ein Hinweissignal. Das Mobilteil erwärmt sich beim Laden.<br />
Dies ist normal und ungefährlich. Laden Sie das Mobilteil nicht<br />
mit fremden Aufladegeräten. Der aktuelle Akkuladezustand<br />
wird im Display angezeigt:<br />
<br />
<br />
Voll<br />
Leer<br />
Display−Sprache einstellen<br />
Wählen Sie die entsprechende Sprache aus. Auf den Seiten<br />
18 und 20 finden Sie die Position im Menü.<br />
MT: > MT−Einstell. > Sprache >...<br />
BS: > Basis−Einst. > Sprache >...<br />
Es stehen 9 Sprachen zur Auswahl: Deutsch, Französisch, Italienisch, Englisch, Spanisch, Portugiesisch,<br />
Niederländisch, Polnisch und Türkisch.<br />
Datum und Uhrzeit einstellen<br />
Datum und Uhrzeit stellen Sie über das Menü ein (Zeit einst.) Seite 17.<br />
Bestätigen Sie die Eingabe von Jahr, Monat, Tag, Stunde und Minute jeweils mit der Taste <br />
bzw. . Beachten Sie das eingestellte Zeit− und Datumsformat Seite 17. Ist das 12 Stunden<br />
Format eingestellt, wählen Sie mit den Tasten / aus, ob die eingestellte Zeit vor Mittag (A)<br />
oder nach Mittag (P) bedeutet.<br />
Nebenstellenanlagen<br />
Auf Seite 42 erhalten Sie weitere Informationen, falls Sie Ihr Telefon an eine Nebenstellenanlage<br />
anschließen möchten.<br />
Strahlungsreduzierung (ECO−Mode)<br />
Die Strahlung wird im Vergleich zu Standard−DECT−Schnurlostelefonen im Bereitschaftsmodus<br />
erheblich verringert, wenn das Mobilteil in der Ladestation steht. Im Gesprächsmodus<br />
wird die Strahlung abhängig von der Entfernung des Mobilteils zum Telefon<br />
(zur Basisstation) verringert.<br />
8
3 Bedienelemente 5<br />
Bedienelemente<br />
Die Tasten werden in dieser Bedienungsanleitung nachfolgend mit vereinheitlichten umrandeten<br />
Symbolen dargestellt. Leichte Abweichungen der Tastensymbole Ihres Telefons gegenüber den<br />
hier verwendeten Tastensymbolen sind daher möglich.<br />
Basisgerät<br />
1 Hörer 11 Vorwärts−Taste <br />
2 OK−/Menü−Taste 12 optische Rufanzeige (Anruf−LED)<br />
3 Display 13 Mikrofon<br />
4 Zurück−Taste 14 Freisprech−Taste <br />
5 Direktwahl−Tasten 15 Raute−Taste <br />
6 Ein−/Aus−Taste Anrufbeantworter 16 R−/Lösch−Taste <br />
7 Aufwärts−Taste, Anruferliste 17 Wahlwiederholung−Taste <br />
8 Wiedergabe−/Stopp−Taste 18 INT−Taste <br />
9 Abwärts−Taste, Telefonbuch 19 Stern−Taste <br />
10 Rückwärts−Taste 20 Nummerische Tasten , , usw.<br />
9
Bedienelemente<br />
Mobilteil<br />
1 optische Rufanzeige (Anruf−LED)<br />
2 Hörmuschel<br />
3 LC−Display<br />
4 Direktwahl−Tasten <br />
5 Auflegen−/Ein−/Aus−Taste <br />
6 Nummerische Tasten , ... bis <br />
7 Raute−Taste / Rufton aus / Wahlpause <br />
8 R−Taste / Zurück <br />
9 Mikrofon<br />
10 Wahlwiederholung <br />
11 Stern−Taste <br />
12 Menü−/OK−/Stumm−Taste <br />
13 Gespräch−Taste / Freisprechen <br />
14 Pfeil−Taste runter / Telefonbuch <br />
15 Pfeil−Taste rauf / Anrufliste <br />
10
Symbole und Texte in den Displays<br />
Symbol<br />
<br />
Beschreibung<br />
Bedienelemente<br />
Anzeige der Akkukapazität (voll, halbvoll, fast leer).<br />
Leer: Die Akkus müssen geladen werden.<br />
Durchlaufende Segmente: Die Akkus werden geladen Seite 8.<br />
Konstant angezeigte Segmente: Die Akkus sind voll geladen.<br />
Verbindung zur Basisstation.<br />
Blinkend: Schwache bzw. keine Verbindung.<br />
Konstant: Gute Verbindung.<br />
Blinkend: Ein Anruf geht ein Seite 21.<br />
Konstant: Sie führen ein Gespräch Seite 21.<br />
<br />
<br />
Verpasste Anrufe.<br />
Es sind neue Anrufe in der Anrufliste Seite 29.<br />
Sie befinden sich im Telefonbuch Seite 25.<br />
<br />
Der Eintrag bzw. die Anzeige geht zur rechten Seite weiter Seite 26.<br />
<br />
Der Eintrag bzw. die Anzeige geht zur linken Seite weiter Seite 26.<br />
Konstant: Anrufbeantworter ist an Seite 33.<br />
Blinkend: Neue Nachrichten auf dem Anrufbeantworter Seite 35. Oder: Die<br />
Speicherkapazität des Anrufbeantworters ist erschöpft. Löschen Sie Nachrichten<br />
Seite 36<br />
Der Rufton ist ausgeschaltet Seite 24.<br />
<br />
<br />
Das Mikrofon ist stummgeschaltet Seite 25.<br />
<br />
Das Freisprechen ist aktiviert Seite 25.<br />
<br />
Die Tastensperre ist aktiviert Seite 21.<br />
<br />
Der Wecker ist eingeschaltet Seite 31.<br />
<br />
Anrufbeantworter im Telefonnetz. VMWI − Zusatzdienst Ihres Netzbetreibers<br />
Seite 43.<br />
11
Einführende Informationen<br />
4 Einführende Informationen<br />
In diesem Kapitel finden Sie grundlegende Informationen zur Handhabung der Bedienungsanleitung.<br />
Darstellungsweisen in der Bedienungsanleitung<br />
Darstellung Beschreibung<br />
Darstellung von Tasten<br />
Abgebildete Taste kurz drücken<br />
Beliebige Taste kurz drücken<br />
2 Sek. Abgebildete Taste 2 Sekunden drücken<br />
1<br />
<br />
Ziffern oder Buchstaben eingeben<br />
Mobilteil klingelt<br />
Telefon klingelt<br />
<br />
<br />
Sprache<br />
<br />
MT1, MT2<br />
BS<br />
Hörer abnehmen bzw. Mobilteil aus der Ladestation nehmen<br />
Hörer auflegen bzw. Mobilteil in die Ladestation stellen<br />
Darstellung von Display−Texten<br />
Darstellung von Display−Symbolen<br />
Mobilteil 1, Mobilteil 2 usw.<br />
Basisgerät<br />
Bereitschaftsmodus (Stand−by−Modus) 6<br />
Alle Beschreibungen in dieser Bedienungsanleitung gehen davon aus, dass sich Telefon (Basisstation)<br />
und Mobilteil im Bereitschaftsmodus (Stand−by−Modus) befinden. Telefon (Basisstation) und<br />
Mobilteil sind im Bereitschaftsmodus, wenn kein Gespräch geführt wird und kein Menü geöffnet ist.<br />
Navigation im Menü 7<br />
Alle Funktionen sind über unterschiedliche Menüs zu erreichen. Den Weg zur gewünschten Funktion<br />
entnehmen Sie der Menüstruktur Seite 14.<br />
<br />
/ <br />
Jeder Vorgang wird automatisch abgebrochen, wenn innerhalb von 20 Sekunden keine<br />
Eingabe erfolgt.<br />
Hauptmenü öffnen<br />
Gewünschtes Untermenü auswählen<br />
12<br />
1 Die Zifferntasten sind mit Buchstaben beschriftet. Durch mehrmaliges Drücken der entsprechenden<br />
Taste können Buchstaben, Ziffern und Sonderzeichen eingegeben werden.
Einführende Informationen<br />
<br />
/ <br />
<br />
/ <br />
<br />
<br />
<br />
<br />
Untermenü öffnen<br />
Gewünschte Funktion auswählen<br />
Funktion öffnen<br />
Gewünschte Einstellung auswählen<br />
Über Zifferntastenblock Ziffern oder Buchstaben<br />
eingeben<br />
Eingaben bestätigen<br />
Eine Ebene zurück im Menü<br />
Programmier− und Speichervorgänge abbrechen und<br />
in den Bereitschaftsmodus zurückkehren<br />
Viele Eingaben, die mit Taste abgeschlossen werden, werden durch einen aktustischen<br />
Signalton bestätigt.<br />
Telefonbucheinträge erstellen − Beispiel 8<br />
Wie Sie in den Menüs navigieren und Einstellungen vornehmen, ist hier anhand des Beispiels Telefonbucheinträge<br />
erstellen (Mobilteil) erklärt. Verfahren Sie bei allen Einstellungen wie in diesem<br />
Beispiel.<br />
<br />
Hauptmenü öffnen<br />
/ Telefonbuch Telefonbuch öffnen<br />
Hinzufügen Untermenü auswählen und bestätigen<br />
Name eing. , <br />
Namen eingeben (max. 12 Stellen) und bestätigen<br />
Nummer , Rufnummer 1 (Handy−Nummer) eingeben<br />
(max. 24 Ziffern) und bestätigen<br />
Nummer , Rufnummer 2 (Festnetz−Nummer) eingeben<br />
(max. 24 Ziffern) und bestätigen<br />
VIP−Melodie , / , Klingelton zuweisen<br />
<br />
Zurück in den Bereitschaftsmodus<br />
Pro Namen bzw. Eintrag können 2 Telefonnummern gespeichert werden. Dem ersten<br />
Speicherplatz ist ein Handy−Symbol vorangestellt, dem zweiten Speicherplatz ein<br />
Haus−Symbol. Wir empfehlen deshalb, bei dem ersten Speicherplatz nur Handy−Nummern<br />
zu programmieren und beim zweiten Speicherplatz nur Festnetz−Nummern.<br />
13
Menüstruktur<br />
5 Menüstruktur 910<br />
In das Hauptmenü gelangen Sie, wenn Sie die Taste bzw. drücken. Danach wählen Sie<br />
mit den Tasten / einen Eintrag aus und bestätigen Sie Ihre Auswahl mit der Taste <br />
bzw. . Weitere Informationen zum Menü und zur Bedienung Kapitel 4.<br />
AB<br />
AB−Modus<br />
Alte löschen<br />
Memo aufn.<br />
Ansage 1<br />
Ansage 2<br />
Antw.+Aufn.<br />
Nur antw.<br />
Aus<br />
Ansage anh.<br />
Löschen<br />
Ansage aufn.<br />
Ansage anh.<br />
Löschen<br />
Ansage aufn.<br />
11<br />
Mithören<br />
Rufannahme<br />
Ein / Aus<br />
Gebührsparer<br />
08 Klingeln<br />
06 Klingeln<br />
04 Klingeln<br />
02 Klingeln<br />
14
Nachr.länge<br />
Spracheinst.<br />
Fernabf.−PIN<br />
180 Sekunden<br />
150 Sekunden<br />
120 Sekunden<br />
90 Sekunden<br />
DEUTSCH<br />
FRANÇAIS<br />
NEDERLANDS<br />
ITALIANO<br />
Menüstruktur<br />
12<br />
Inter<strong>com</strong><br />
Mobilteil 01 − 06 1<br />
1 Anzeige gemäß der Anzahl von angemeldeten Mobilteilen<br />
15
Menüstruktur<br />
Telefonbuch<br />
Hinzufügen<br />
Bearbeiten<br />
Löschen<br />
Alle löschen<br />
Kopieren auf<br />
SPEICHER<br />
Name eing. 1<br />
Nummer<br />
<br />
Nummer<br />
<br />
VIP−Melodie 01 / 02 / ... / Aus<br />
Name eing. 1<br />
Nummer<br />
<br />
Nummer<br />
<br />
VIP−Melodie 01 / 02 / ... / Aus<br />
Direktwahl 1<br />
Direktwahl 2<br />
16<br />
1 Die Zifferntasten sind mit Buchstaben beschriftet. Durch mehrmaliges Drücken der entsprechenden<br />
Taste können Buchstaben, Ziffern und Sonderzeichen eingegeben werden.
Menüstruktur<br />
Zeit/Wecker<br />
Wecker st.<br />
Einmal<br />
Aus<br />
13<br />
Ein<br />
Zeit eing. <br />
Täglich<br />
Aus<br />
Ein<br />
Zeit eing. <br />
Datumsformat<br />
TT.MM<br />
MM−TT<br />
Zeitformat<br />
24 Stunden<br />
12 Stunden<br />
Zeit einst. 1<br />
<br />
14<br />
1 Über diesen Menüpunkt werden Datum und Zeit eingestellt.<br />
17
Menüstruktur<br />
Nur an einem Mobilteil verfügbar:<br />
MT−Einstell. 1<br />
Rufton (MT)<br />
Equalizer<br />
Ruftonlautst<br />
05 / ... / 01 / Aus<br />
Rufton (ext) 12 / ... / 01<br />
Rufton (int) 12 / ... / 01<br />
Tastenton<br />
Aus / Ton ein / Rufton<br />
Akku schwach Ein / Aus<br />
Reichw.alarm Ein / Aus<br />
Natürlich<br />
Tiefen<br />
Höhen<br />
15<br />
16<br />
17<br />
18<br />
19<br />
LCD−Kontrast 06 / ... / 01<br />
MT−Name 2<br />
Auto.Annahme<br />
Ein / Aus<br />
Babyruf<br />
Aus<br />
Ein<br />
Nr. eing. <br />
20<br />
21<br />
22<br />
23<br />
Tastensperre<br />
Sprache<br />
Ein / Aus<br />
(9 Sprachen)<br />
24<br />
25<br />
18<br />
1 Dieser Menüpunkt wird nur im Mobilteil angezeigt.<br />
2 Die Zifferntasten sind mit Buchstaben beschriftet. Durch mehrmaliges Drücken der entsprechenden<br />
Taste können Buchstaben, Ziffern und Sonderzeichen eingegeben werden.
Menüstruktur<br />
Nur an einem Mobilteil verfügbar:<br />
Basis−Einst. 1<br />
VMWI löschen<br />
Anmelden<br />
Basis wählen<br />
Erw. Einst.<br />
Basis 1 PIN? 2<br />
Basis 2 PIN? 2<br />
Basis 3 PIN? 2<br />
Basis 4 PIN? 2<br />
Basis 1<br />
Basis 2<br />
Basis 3<br />
Basis 4<br />
Automatisch<br />
Wahlverf.<br />
Flashzeit<br />
Vorwahlnr.<br />
Anrufsperre<br />
Notruf−Nr.<br />
Abmelden<br />
PIN ändern<br />
Zurücksetzen<br />
MFV / IWV<br />
Kurz / Mittel / Lang<br />
<br />
04 / ... / 01 <br />
Nr. eing. <br />
04 / ... / 01 <br />
Nr. eing. <br />
Mobilteil<br />
PIN? <br />
Bestätigen?<br />
26<br />
27<br />
28<br />
29<br />
30<br />
31<br />
32<br />
33<br />
34<br />
1 Dieser Menüpunkt wird mit genau den Untermenüs nur im Mobilteil angezeigt.<br />
2 Die PIN ist werkseitig auf 0000" eingestellt.<br />
19
Menüstruktur<br />
Nur am Basisgerät verfügbar:<br />
Basis−Einst. 1<br />
Rufton<br />
Ruftonlautst<br />
05 / ... / 01 / Aus<br />
Rufton (ext) 12 / ... / 01<br />
Rufton (int) 12 / ... / 01<br />
Tastenton<br />
LCD−Kontrast 06 / ... / 01<br />
VMWI löschen 06 / ... / 01<br />
Sprache<br />
Anmelden<br />
Erw. Einst.<br />
(9 Sprachen)<br />
Basis 1 PIN? 2<br />
Basis 2 PIN? 2<br />
Basis 3 PIN? 2<br />
Basis 4 PIN? 2<br />
Wahlverf.<br />
Flashzeit<br />
Vorwahlnr.<br />
Anrufsperre<br />
Notruf−Nr.<br />
Abmelden<br />
PIN ändern<br />
Zurücksetzen<br />
Aus / Ton ein / Rufton<br />
MFV / IWV<br />
Kurz / Mittel / Lang<br />
<br />
04 / ... / 01 <br />
Nr. eing. <br />
04 / ... / 01 <br />
Nr. eing. <br />
Mobilteil<br />
PIN? <br />
Bestätigen?<br />
35<br />
36<br />
37<br />
38<br />
39<br />
40<br />
41<br />
42<br />
43<br />
44<br />
45<br />
46<br />
47<br />
48<br />
1 Dieser Menüpunkt wird mit genau den Untermenüs nur im Basisgerät angezeigt.<br />
2 Der PIN−Code ist werkseitig auf 0000" eingestellt.<br />
20
6 Bedienung<br />
Bedienung<br />
Viele Funktionen können sowohl vom Basisgerät als auch vom Mobilteil aus bedient werden. Beachten<br />
Sie, dass viele der nachfolgend dargestellten Tasten sowohl am Basisgerät als auch am<br />
Mobilteil zu finden sind Seite 9.<br />
Sie können während einer Bedienabfolge nicht zwischen der Bedienung am Basisgerät<br />
und der Bedienung am Mobilteil wechseln. Entscheiden Sie vor Beginn einer Bedienabfolge,<br />
ob Sie diese am Basisgerät oder am Mobilteil durchführen wollen.<br />
Mobilteil ein− und ausschalten<br />
Wenn das Mobilteil ausgeschaltet ist, gehen am Mobilteil keine Anrufe ein.<br />
Bei ausgeschaltetem Mobilteil wird keine Akkuleistung verbraucht.<br />
Bei ausgeschaltetem Mobilteil können von diesem keine Notrufe durchgeführt werden.<br />
Zuvor muss das Mobilteil eingeschaltet werden, was einige Zeit dauern kann.<br />
2 Sek. Mobilteil einschalten (in den Bereitschaftsmodus)<br />
2 Sek. Mobilteil ausschalten<br />
Tastensperre 49<br />
Die Tastensperre soll verhindern, dass versehentlich Funktionen ausgelöst werden.<br />
1 Sek. Tastensperre einschalten<br />
Bei eingeschalteter Tastensperre können eingehende Anrufe wie gewohnt angenommen<br />
werden. Auch Notrufe (über die Notruf−Nummern) können bei aktivierter Tastensperre<br />
durchgeführt werden.<br />
1 Sek. Tastensperre ausschalten<br />
Ist die Tastensperre eingeschaltet, wird im Display das Symbol angezeigt.<br />
Das Telefon kann so eingestellt werden, dass sich die Tastensperre automatisch nach 90 Sekunden<br />
einschaltet Seite 31.<br />
Telefonieren<br />
Anruf annehmen<br />
Neben dem Rufsignal leuchtet bei jedem Anruf auch die optische Rufanzeige. 50<br />
, oder <br />
Anruf annehmen<br />
Halten Sie das klingelnde Mobilteil nicht zu dicht an Ihre Ohren, es besteht die Gefahr<br />
eines Hörschadens!<br />
Wenn Sie die automatische Rufannahme aktiviert haben, nehmen Sie einen Anruf an, indem Sie<br />
das Mobilteil aus der Ladestation herausnehmen Seite 31.<br />
Gespräch beenden<br />
oder <br />
Gespräch beenden<br />
Zum Beenden eines Gesprächs können Sie das Mobilteil auch in die Ladestation stellen.<br />
21
Bedienung<br />
Anrufen<br />
<br />
<br />
oder oder <br />
Rufnummer eingeben (max. 48 Ziffern)<br />
Bei Falscheingabe letzte Ziffer löschen<br />
Rufnummer wählen<br />
Sie können auch zuerst am Mobilteil die Taste drücken bzw. am Basisgerät den<br />
Hörer abnehmen oder die Taste drücken und erhalten damit das Freizeichen. Die<br />
eingegebenen Ziffern Ihrer gewünschten Rufnummer (max. 48 Ziffern) werden sofort<br />
gewählt. Eine Korrektur einzelner Ziffern der Rufnummer ist bei dieser Form des Gesprächsaufbaus<br />
nicht möglich.<br />
Wahlwiederholung 51<br />
Ihr Telefon speichert die 5 zuletzt gewählten Rufnummern mit Anrufdatum und −uhrzeit. Möchten<br />
Sie diese Rufnummern noch einmal wählen, z. B. weil der Anschluss zuvor besetzt war oder Sie<br />
niemanden erreichen konnten, nutzen Sie die Wahlwiederholung:<br />
, / Wahlwiederholungsliste öffnen und Eintrag auswählen<br />
oder oder <br />
Verbindung herstellen<br />
Die gespeicherte Rufnummer wird automatisch gewählt und die Verbindung wird hergestellt.<br />
Eingegangene Anrufe zurückrufen 52<br />
Ihr Telefon speichert 40 Rufnummern in einer Anrufliste.<br />
, / Anrufliste öffnen und Eintrag auswählen<br />
oder oder <br />
Verbindung herstellen<br />
Rufnummern aus dem Telefonbuch wählen<br />
Sie müssen Rufnummern im Telefonbuch gespeichert haben Seite 26.<br />
, / Telefonbuch öffnen und Eintrag auswählen<br />
oder oder <br />
Verbindung herstellen<br />
Um auf einen Telefonbucheintrag schneller zugreifen zu können, drücken Sie im geöffneten<br />
Telefonbuch die Taste mit dem Anfangsbuchstaben des Eintrags. Der erste Eintrag<br />
mit diesem Anfangsbuchstaben wird nun im Display angezeigt und ist markiert.<br />
Rufnummern über Direktwahltaste wählen 53<br />
Sie müssen Rufnummern auf den Direktwahltasten gespeichert haben Seite 27.<br />
oder <br />
Verbindung herstellen<br />
Die gespeicherte Rufnummer wird automatisch gewählt.<br />
Intern telefonieren 54<br />
Sie müssen mindestens ein Mobilteil an dem Basisgerät angemeldet haben, um intern kostenlos<br />
zu telefonieren.<br />
22
Interne Gespräche führen<br />
MT1: oder BS: ,<br />
/ Inter<strong>com</strong> , oder <br />
MT1/BS: / , oder <br />
MT2: <br />
MT1/BS / MT2: <br />
Internes Telefonieren einleiten<br />
Bedienung<br />
Gewünschtes Mobilteil bzw. Basisgerät auswählen<br />
Internes Gespräch am anderen Mobilteil annehmen<br />
Internes Gespräch beenden<br />
Wenn das Mobilteil, das Sie intern anrufen wollen, ein externes Telefongespräch führt,<br />
hören Sie einen Signalton und im Display sehen Sie Ltg. belegt.<br />
Externe Gespräche während eines internen Telefonats annehmen<br />
Wenn ein externer Anruf eingeht, während Sie ein internes Telefongespräch führen,<br />
wird eine Meldung im Display angezeigt.<br />
<br />
Externes Gespräch annehmen<br />
Am Mobilteil, das das externe Gespräch nicht angenommen hat, die Taste drücken, um das<br />
interne Gespräch zu beenden.<br />
Externe Gespräche intern weiterleiten<br />
MT1: oder BS: ,<br />
/ , Inter<strong>com</strong> , oder Während des externen Gesprächs<br />
/ , oder <br />
Gewünschtes Mobilteil bzw. Basisgerät auswählen<br />
MT2: <br />
Internes Gespräch am anderen Mobilteil annehmen<br />
MT1: oder BS: <br />
Gespräch weiterleiten (Auflegen)<br />
Rücksprache / Makeln<br />
MT1: oder BS: <br />
/ , Inter<strong>com</strong> , oder Während des externen Gesprächs<br />
/ , oder <br />
Gewünschtes Mobilteil bzw. Basisgerät auswählen<br />
MT2: <br />
Internes Gespräch am anderen Mobilteil annehmen<br />
MT1: oder BS: , / Makeln<br />
oder <br />
Gesprächspartner wechseln<br />
Konferenzgespräche führen<br />
Ein externes Gespräch kann mit einem weiteren internen Gesprächspartner zum Konferenzgespräch<br />
geschaltet werden.<br />
MT1: oder BS: ,<br />
/ , Inter<strong>com</strong> , <br />
Während des externen Gesprächs<br />
/ , <br />
Gewünschtes Mobilteil bzw. Basisgerät auswählen<br />
MT2: <br />
Internes Gespräch am anderen Mobilteil annehmen<br />
MT1 oder BS: 2 Sek. , Konferenz Konferenzgespräch starten<br />
MT1 oder BS und MT2: <br />
Konferenz beenden<br />
23
Bedienung<br />
Anzeige der Gesprächsdauer<br />
Einige Sekunden nach Beginn eines Gesprächs zeigt Ihnen das Display die aktuelle Gesprächsdauer<br />
in Minuten und Sekunden an.<br />
Hörerlautstärke einstellen<br />
Sie können während eines Gesprächs die Hörerlautstärke in 5 Stufen anpassen.<br />
/ <br />
Hörerlautstärke erhöhen / verringern<br />
Ruftonlautstärke<br />
Sie können jeweils separat für das Mobilteil und für das Basisgerät die Lautstärke des Ruftons verändern.<br />
Es stehen 5 Lautstärken zur Verfügung sowie die Möglichkeit, den Rufton auszuschalten.<br />
Ruftonlautstärke des Mobilteils einstellen<br />
<br />
Menü öffnen<br />
/ MT−Einstell. MT−Einstell. auswählen<br />
/ Rufton (MT) <br />
Rufton (MT) auswählen<br />
/ Ruftonlautst <br />
/ <br />
<br />
Ruftonlautst auswählen<br />
Ruftonautstärke erhöhen / verringern<br />
Einstellung speichern<br />
Ruftonlautstärke des Basisgeräts einstellen<br />
<br />
Menü öffnen<br />
/ Basis−Einst. Basis−Einst. auswählen<br />
/ Rufton Rufton auswählen<br />
/ Ruftonlautst <br />
/ <br />
<br />
Ruftonlautst auswählen<br />
Ruftonautstärke erhöhen / verringern<br />
Einstellung speichern<br />
Rufton aus− und einschalten 55<br />
3 Sek. Rufton ausschalten<br />
3 Sek. Rufton einschalten<br />
Ist der Rufton ausgeschaltet, wird im Display das Symbol angezeigt.<br />
Sie können den Rufton auch über das Menü ausschalten.<br />
24
Bedienung<br />
Freisprechen 56<br />
Nutzen Sie diese Funktion, um den Gesprächspartner über den Lautsprecher zu hören.<br />
bzw. <br />
Während eines Gesprächs: Freisprechen einschalten<br />
bzw. <br />
Während eines Gesprächs: Freisprechen ausschalten<br />
Ist das Freisprechen aktiviert, wird im Display das Symbol angezeigt.<br />
Mikrofon stummschalten 57<br />
Sie können während eines Telefongesprächs das Mikrofon des Mobilteils bzw. des Basisgeräts<br />
aus− und einschalten, so dass Ihr Gesprächspartner am Telefon Sie nicht hört, z. B. wenn Sie mit<br />
einer anderen Person im Raum Rücksprache halten wollen.<br />
2 Sek. bzw. Während eines Gesprächs: Mikrofon ausschalten<br />
(stummschalten)<br />
2 Sek. bzw. Während eines Gesprächs: Mikrofon einschalten<br />
Ist das Mikrofon stumm geschaltet, wird im Display das Symbol angezeigt.<br />
Telefonbuch 58<br />
Im Telefonbuch können Sie 50 Gesprächspartner mit bis zu jeweils 2 Telefonnummern speichern.<br />
Geben Sie bei allen Rufnummern immer die Vorwahl mit ein, damit auch eingehende<br />
Ortsgespräche einem Telefonbucheintrag zugeordnet werden können.<br />
Ist die Speicherkapazität erschöpft, zeigt das Display beim nächsten Speichern die Meldung<br />
Sp. voll! . Um wieder Platz zu schaffen, müssen Sie zuerst einen anderen Eintrag<br />
löschen.<br />
Die Telefonbucheinträge sind alphabetisch geordnet.<br />
Befinden Sie sich im Telefonbuch, wird im Display das Symbol angezeigt.<br />
Auf das Telefonbuch kann vom Basisgerät und vom Mobilteil zugegriffen werden.<br />
Namen eingeben<br />
Die Zifferntasten sind mit Buchstaben beschriftet. Durch mehrmaliges Drücken der entsprechenden<br />
Taste können Buchstaben, Ziffern und Sonderzeichen eingegeben werden.<br />
<br />
Leerzeichen eingeben<br />
<br />
Sonderzeichen eingeben<br />
<br />
Löschen<br />
/ <br />
Cursor bewegen<br />
Um den gleichen Buchstaben zweimal einzugeben, drücken Sie die entsprechende Taste.<br />
Warten Sie, bis der Cursor eine Stelle weitergesprungen ist. Geben Sie den Buchstaben<br />
erneut ein.<br />
25
Bedienung<br />
Telefonbucheinträge erstellen<br />
auch Seite 13<br />
<br />
bzw. Hinzufügen<br />
bzw. <br />
Name eing. , bzw. <br />
Nummer , bzw. <br />
59<br />
Telefonbuch öffnen<br />
Untermenü auswählen und bestätigen<br />
Namen eingeben (max. 12 Stellen) und bestätigen<br />
Rufnummer 1 (Handy−Nummer) eingeben<br />
(max. 24 Ziffern) und bestätigen<br />
Nummer , bzw. <br />
Rufnummer 2 (Festnetz−Nummer) eingeben<br />
(max. 24 Ziffern) und bestätigen<br />
VIP−Melodie , / , bzw. Klingelton zuweisen<br />
Sind die Einträge länger, als sie im Display dargestellt werden können, werden im Display die<br />
Symbole und angezeigt. Sie zeigen an, dass der Eintrag nach links oder rechts über das<br />
Display hinausgeht.<br />
Ist die Speicherkapazität erschöpft, zeigt das Display beim nächsten Speichern die Meldung<br />
Sp. voll! . Um wieder Platz zu schaffen, müssen Sie zuerst einen anderen Eintrag löschen.<br />
Ist ein Name bereits vorhanden, unter dem Sie einen neuen Eintrag abspeichern wollen, zeigt das<br />
Display beim Speichern die Meldung Name doppelt .<br />
Telefonbucheinträge ändern 60<br />
<br />
Telefonbuch öffnen<br />
/ , bzw. <br />
Eintrag auswählen und bestätigen<br />
/ , Bearbeiten bzw. Untermenü auswählen und bestätigen<br />
Name eing. , bzw. <br />
Nummer , bzw. <br />
Namen ändern (max. 12 Stellen) und bestätigen<br />
Rufnummer 1 (Handy−Nummer) ändern<br />
(max. 24 Ziffern) und bestätigen<br />
Nummer , bzw. <br />
Rufnummer 2 (Festnetz−Nummer) ändern<br />
(max. 24 Ziffern) und bestätigen<br />
VIP−Melodie , / , bzw. Klingelton zuweisen<br />
26
Telefonbucheinträge löschen<br />
Einen Eintrag löschen<br />
<br />
Telefonbuch öffnen<br />
/ , bzw. <br />
Eintrag auswählen und bestätigen<br />
/ , Löschen bzw. Untermenü auswählen und bestätigen<br />
Bedienung<br />
Um auf einen Telefonbucheintrag schneller zugreifen zu können, drücken Sie im geöffneten<br />
Telefonbuch die Taste mit dem Anfangsbuchstaben des Eintrags. Der erste Eintrag<br />
mit diesem Anfangsbuchstaben wird nun im Display angezeigt und ist markiert.<br />
Alle Einträge löschen<br />
<br />
Telefonbuch öffnen<br />
bzw. <br />
Menü öffnen<br />
/ , Alle löschen bzw. Untermenü auswählen und bestätigen<br />
Bestätigen? , bzw. <br />
Kein Eintr.<br />
oder<br />
Bestätigen? , oder <br />
Löschvorgang bestätigen<br />
Löschvorgang abbrechen<br />
Telefonbuchkapazität prüfen<br />
Lassen Sie sich anzeigen, wie viele der 50 Speicherplätze belegt sind.<br />
<br />
Telefonbuch öffnen<br />
bzw. <br />
Menü öffnen<br />
/ , SPEICHER bzw. Untermenü auswählen und bestätigen<br />
Direktwahl−Tasten programmieren 61<br />
Sie haben die Möglichkeit, 2 Telefonnummern aus dem Telefonbuch so abzuspeichern, dass diese<br />
jeweils nur durch den Druck von Taste oder gewählt werden (Direktwahl).<br />
<br />
Telefonbuch öffnen<br />
/ , bzw. <br />
Eintrag auswählen und bestätigen<br />
/ , Kopieren auf bzw. Untermenü auswählen und bestätigen<br />
Direktwahl 1 , / , bzw. Direktwahltaste auswählen und bestätigen<br />
bzw. <br />
Angezeigte Telefonnummer bestätigen<br />
Rufnummer über Direktwahltaste wählen<br />
Seite 22<br />
27
Bedienung<br />
Wahlwiederholungsliste<br />
Ihr Telefon speichert die 5 zuletzt gewählten Rufnummern mit Anrufdatum und −uhrzeit.<br />
Rufnummer aus der Wahlwiederholungsliste im Telefonbuch abspeichern<br />
<br />
Wahlwiederholungsliste öffnen<br />
/ , bzw. <br />
Eintrag auswählen und bestätigen<br />
/ , Nr.speichern bzw. Untermenü auswählen und bestätigen<br />
Name eing. , bzw. <br />
Namen eingeben (max. 12 Stellen) und bestätigen<br />
Nr. eing. , bzw. <br />
Rufnummer gegebenenfalls ändern (max. 24 Ziffern)<br />
und bestätigen<br />
/ , bzw. <br />
Festlegen, ob die Rufnummer eine Handy−Nummer<br />
oder eine Festnetz−Nummer ist und bestätigen<br />
Rufnummer aus der Wahlwiederholungsliste löschen<br />
<br />
Wahlwiederholungsliste öffnen<br />
/ , bzw. <br />
Eintrag auswählen und bestätigen<br />
/ , Löschen bzw. Untermenü auswählen und bestätigen<br />
Gesamte Wahlwiederholungsliste löschen<br />
<br />
Wahlwiederholungsliste öffnen<br />
bzw. <br />
Menü öffnen<br />
/ , Alle löschen bzw. Untermenü auswählen und bestätigen<br />
Bestätigen? , bzw. <br />
Kein Eintr.<br />
oder<br />
Bestätigen? , oder <br />
Löschvorgang bestätigen<br />
Löschvorgang abbrechen<br />
Rufnummer aus der Wahlwiederholungsliste wählen<br />
Seite 22<br />
28
Bedienung<br />
Anrufliste 62<br />
Während Ihrer Abwesenheit werden alle eingehenden Anrufe in einer Anrufliste gesammelt. Insgesamt<br />
können dort bis zu 40 Rufnummern gespeichert werden. Für jeden Anruf werden Datum und<br />
Uhrzeit des Eingangs festgehalten.<br />
Befinden Sie sich in der Anrufliste, wird im Display das Symbol angezeigt.<br />
In der Anrufliste wird der zuletzt eingegangene Anruf zuerst aufgelistet.<br />
Wurden während Ihrer Abwesenheit Anrufe registriert, blinkt die optische Rufanzeige und im Display<br />
das Symbol . Im Display wird außerdem bis zum ersten Öffnen der Anrufliste ein Hinweis<br />
angezeigt, wie viele Anrufe Ihnen entgangen sind.<br />
Rufnummern aus der Anrufliste anzeigen<br />
, / Anrufliste öffnen und Eintrag auswählen<br />
Rufnummer aus der Anrufliste im Telefonbuch speichern<br />
Eine Rufnummer kann direkt aus der Anrufliste im Telefonbuch gespeichert werden.<br />
, / Anrufliste öffnen und Eintrag auswählen<br />
bzw. <br />
Menü öffnen<br />
/ Nr.speichern , bzw. Untermenü auswählen und bestätigen<br />
Name eing. , bzw. <br />
Namen eingeben (max. 12 Stellen) und bestätigen<br />
Nr. eing. , bzw. <br />
Rufnummer gegebenenfalls ändern (max. 24 Ziffern)<br />
und bestätigen<br />
/ , bzw. <br />
Festlegen, ob die Rufnummer eine Handy−Nummer<br />
oder eine Festnetz−Nummer ist und bestätigen<br />
Rufnummern aus der Anrufliste löschen<br />
Einzelne Rufnummer löschen<br />
, / Anrufliste öffnen und Eintrag auswählen<br />
bzw. <br />
Menü öffnen<br />
/ Löschen , bzw. Untermenü auswählen und bestätigen<br />
Alle Rufnummern löschen<br />
<br />
Anrufliste öffnen<br />
bzw. <br />
Menü öffnen<br />
/ , Alle löschen bzw. Untermenü auswählen und bestätigen<br />
Bestätigen? , bzw. <br />
oder<br />
Bestätigen? , oder <br />
Eingegangene Anrufe zurückrufen<br />
Seite 22<br />
Kein Eintr.<br />
Löschvorgang bestätigen<br />
Löschvorgang abbrechen<br />
29
Bedienung<br />
Ton− und Anzeigeeinstellungen<br />
Sie können verschiedene Einstellungen vornehmen, um das Telefon Ihren Bedürfnissen entsprechend<br />
einzurichten:<br />
Rufton einstellen<br />
Legen Sie für externe und für interne Anrufe den grundsätzlich zu verwendenden Rufton fest. Es<br />
stehen insgesamt 12 polyphone Ruftöne zur Verfügung.<br />
Rufton einstellen Menü Seite 18<br />
Tastentöne<br />
Tastentöne geben Ihnen eine Bestätigung, dass Sie eine Taste wirklich gedrückt haben. Das Telefon<br />
kann so eingestellt werden, dass beim Drücken einer beliebigen Taste immer der gleiche Tastenton<br />
ertönt (Einstellung Ton ein), oder dass unterschiedliche Tastentöne erzeugt werden (Einstellung<br />
Rufton). Außerdem können die Tastentöne ausgeschaltet werden.<br />
Tastentöne einstellen Menü Seite 18<br />
Warnton Akkukapazität<br />
Ein Warnton macht darauf aufmerksam, dass die Kapazität der Akkus schwach ist.<br />
Warnton Akkukapazität (Akku schwach) einstellen Menü Seite 18<br />
Warnton Reichweite<br />
Ein Warnton macht darauf aufmerksam, dass Sie sich mit dem Mobilteil aus der Reichweite des<br />
Basisgeräts entfernen.<br />
Warnton Reichweite (Reichw.alarm) einstellen Menü Seite 18<br />
Equalizer<br />
Passen Sie den Klang des Lautsprechers Ihren Wünschen an. Belassen Sie den Klang Natürlich<br />
oder heben Sie Tiefen oder Höhen hervor.<br />
Equalizer einstellen Menü Seite 18<br />
Display−Kontrast<br />
Der Kontrast des Displays (LCD−Kontrast) von Basisgerät und von Mobilteil kann in 6 Stufen verändert<br />
werden Menü Seiten 18 und 20<br />
Mobilteilname<br />
Sie können dem Mobilteil einen individuellen Namen geben (MT−Name) Menü Seite 18<br />
Zeit− und Datumsformat<br />
Legen Sie fest, in welchem Format und in welcher Reihenfolge Zeit und Datum angezeigt werden<br />
sollen Menü Seite 17<br />
30
Bedienung<br />
Sonstige Einstellungen<br />
Automatische Rufannahme 63<br />
Haben Sie diese Funktion aktiviert, wird ein Anruf automatisch beim Herausnehmen des Mobilteils<br />
aus der Ladestation angenommen. Die automatische Anrufannahme wird über das Menü aktiviert<br />
oder deaktiviert.<br />
Automatische Rufannahme aktivieren Menü Seite 18<br />
Der Menüpunkt Auto.Annahme kann nur über das Menü eines Mobilteils aufgerufen<br />
werden.<br />
Tastensperre 64<br />
Ist diese Einstellung aktiviert, schaltet sich automatisch die Tastensperre ein, wenn 90 Sekunden<br />
keine Taste gedrückt wurde. Ist die Tastensperre eingeschaltet, wird im Display das Symbol angezeigt.<br />
Tastensperre aktivieren Menü Seite 18<br />
Vorwahlnummer 65<br />
Sie können eine Vorwahlnummer hinterlegen (Vorwahlnr.). Durch langes Drücken der Taste <br />
bevor oder nachdem Sie die Rufnummer eingegeben haben, wird die Vorwahlnummer der Rufnummer<br />
vorangestellt. Durch Betätigen der Taste wird diese Rufnummer gewählt.<br />
Vorwahlnummer ändern Menü Seite 19<br />
PIN ändern 66<br />
Die PIN wird zum Anmelden von Mobilteilen benötigt. Sie ist werkseitig auf 0000" eingestellt. PIN<br />
ändern Menü Seite 19 (Menü des Basisgeräts)<br />
Zurücksetzen 67<br />
Mit dieser Funktion haben Sie die Möglichkeit, Ihr Telefon auf Werkseinstellungen zurückzusetzen.<br />
Zurücksetzen Menü Seiten 19 und 20<br />
Mobilteil suchen (Paging)<br />
Wenn Sie Ihr Mobilteil verlegt haben, können Sie es leicht wiederfinden, indem Sie das Mobilteil<br />
vom Basisgerät aus anrufen.<br />
Bedingungen: Das Mobilteil ist angeschaltet, befindet sich in Reichweite des Basisgeräts,<br />
die Akkus sind nicht leer und der Rufton des Mobilteils ist nicht ausgeschaltet.<br />
Letzteres bedeutet, im Display des Mobilteils darf das Symbol NICHT angezeigt<br />
sein.<br />
BS: <br />
Internes Anrufen einleiten<br />
BS: / <br />
zu suchendes Mobilteil auswählen<br />
BS: <br />
Suchanruf starten<br />
Besondere Funktionen<br />
Wecker 68<br />
Mit dieser Funktion können Sie sich zu einer bestimmten Zeit von Ihrem Mobilteil wecken bzw. erinnern<br />
lassen. Ist der Wecker eingeschaltet, wird im Display das Symbol angezeigt. Zur eingestellten<br />
Weckzeit wird der gewählte Rufton für 1 Minute abgespielt. Im Display wird der Hinweis<br />
31
Bedienung<br />
Wecker angezeigt.<br />
Wecker stellen<br />
Sie können wählen, ob Sie den Wecker nur für eine Weckaktion stellen wollen (Einmal) oder ob<br />
Sie Ihr Telefon täglich zur gleichen Zeit wecken soll (Täglich).<br />
Wecker einstellen (Wecker st.) Menü Seite 17<br />
Weckruf vorzeitig beenden<br />
<br />
Weckruf beenden<br />
Babyruf<br />
Mit dieser Funktion haben Sie die Möglichkeit, eine bestimmte Rufnummer (max. 24 Ziffern) zu<br />
speichern, die bei Betätigen einer beliebigen Taste (außer den Tasten und ) automatisch<br />
mit der Freisprechfunktion angerufen wird.<br />
Ist die Funktion eingeschaltet, blinkt im Display dauerhaft die Anzeige Babyruf .<br />
Babyruf aktivieren Menü Seite 18<br />
Anrufsperre<br />
Die Anrufsperre hindert Mobilteile daran, Rufnummern zu wählen, die mit den von Ihnen hinterlegte<br />
Ziffern beginnen. Sie können 4 Sperrnummern mit jeweils max. 8 Ziffern hinterlegen.<br />
Anrufsperre aktivieren Menü Seite 19<br />
Wird eine gesperrte Rufnummer gewählt, wird keine Verbindung hergestellt. Das Gerät gibt einen<br />
Warnton ab und kehrt in den Bereitschaftsmodus zurück.<br />
Notruf−Nummer<br />
Sie können bis zu 4 Rufnummern hinterlegen, die trotz aktivierter Anrufsperre gewählt werden können.<br />
Auf Seite 19 finden Sie die Position im Menü.<br />
Wahlverfahren<br />
Sie können Ihr Mobilteil sowohl an den analogen Vermittlungsstellen (Impulswahl−Verfahren / IWV)<br />
als auch an den neuen digitalen Vermittlungsstellen (Tonwahl−Verfahren / MFV) betreiben. Das<br />
Wahlverfahren wird über das Menü eingestellt. Auf Seite 19 finden Sie die Position im Menü.<br />
Wenn Sie das Telefon im Impulswahl−Verfahren betreiben, können Sie während eines<br />
Gesprächs durch Drücken der Taste für den Rest des Gesprächs in das Tonwahl−<br />
Verfahren umschalten.<br />
Rufnummernanzeige (CLIP)<br />
Die Rufnummernanzeige (CLIP) sowie die Anzeige von Datum und Uhrzeit sind optionale<br />
Dienste Ihres Netzbetreibers. Bitte fragen Sie diesen nach weiteren Informationen.<br />
Steht Ihrer Telefonanlage die CLIP−Funktion zur Verfügung (CLIP = Calling Line Identification Presentation),<br />
zeigt das Display bei einem eingehenden Anruf die Rufnummer des Anrufers an, soweit<br />
dieser der Rufnummerübertragung zugestimmt hat.<br />
Nehmen Sie einen Anruf nicht an, bleibt die Anzeige für ca. 6 Sekunden im Display,<br />
bevor anschließend wieder die aktuelle Uhrzeit und das Datum angezeigt werden.<br />
32
7 Anrufbeantworter<br />
Anrufbeantworter<br />
Der Anrufbeantworter speichert bis zu 57 Nachrichten (59 Nachrichten inklusive Ansagetexte). Die<br />
maximale Aufnahmezeit beträgt 15 Minuten (inklusive Ansagetexte).<br />
Ist die Speicherkapazität für neue Nachrichten erschöpft, wird kein Anruf mehr aufgezeichnet. Der<br />
Anrufbeantworter wechselt dann automatisch in den Nur−Ansage−Modus.<br />
Der Anrufbeantworter kann vom Basisgerät und vom Mobilteil aus bedient werden.<br />
Anrufbeantworter ein−/ausschalten 69<br />
Ist der Anrufbeantworter eingeschaltet, ist die Wiedergabe−/Stopp−Taste am Basisgerät rot beleuchtet.<br />
Außerdem wird im Display vom Basisgerät und den angemeldeten Mobilteilen das Symbol<br />
dauerhaft angezeigt.<br />
Werkseitig ist der Anrufbeantworter eingeschaltet.<br />
Anrufbeantworter vom Basisgerät ein−/ausschalten<br />
<br />
Anrufbeantworter ein−/ausschalten<br />
Anrufbeantworter vom Mobilteil einschalten<br />
, / AB , , / AB−Modus , ,<br />
/ Antw.+Aufn. oder Nur antw. <br />
Menü Seite 14<br />
Anrufbeantworter vom Mobilteil ausschalten<br />
, / AB , , / AB−Modus , ,<br />
/ Aus , <br />
Menü Seite 14<br />
Antwortmodi<br />
Ihr Anrufbeantworter stellt Ihnen zwei Antwortmodi zur Verfügung: Den Ansage−und−Aufnahme−<br />
Modus (Antw.+Aufn.) und den Nur−Ansage−Modus (Nur antw.). Im Ansage−und−Aufnahme−Modus<br />
kann eine Nachricht hinterlassen werden. Beim Nur−Ansage−Modus kann keine Nachricht hinterlassen<br />
werden.<br />
Antwortmodus wählen<br />
Wählen Sie den gewünschten Modus aus Menü Seite 14. Siehe auch Abschnitt Anrufbeantworter<br />
ein−/ausschalten" auf Seite 33.<br />
Werkseitig ist bei dem Anrufbeantworter der Ansage−und−Aufnahme−Modus aktiv.<br />
33
Anrufbeantworter<br />
Ansagetext<br />
Ihr Anrufbeantworter stellt Ihnen zwei voreingestellte Ansagetexte zur Verfügung. Sie können<br />
beide Ansagetexte durch eigene Texte ersetzen.<br />
Im Ansage−und−Aufnahme−Modus wird Ansagetext Ansage 1 verwendet, im Nur−Ansage−Modus<br />
wird Ansagetext Ansage 2 verwendet.<br />
Sobald Sie einen eigenen Ansagetext aufzeichnen, wird nur noch dieser Ansagetext<br />
verwendet.<br />
Ist der Speicher des Anrufbeantworters voll, wird automatisch der Ansagetext des Nur−Ansage−<br />
Modus wiedergegeben.<br />
Sprache der Ansagetexte<br />
Sie können die Sprachausgabe der Standardansagetexte des Anrufbeantworters ändern. Es stehen<br />
4 Sprachen zur Verfügung.<br />
oder , / AB ,<br />
oder , / Spracheinst. ,<br />
oder <br />
Untermenü öffnen<br />
/ <br />
, oder Sprache auswählen und bestätigen<br />
Ansagetext anhören<br />
Menü Seite 14 (Ansage anh.)<br />
Eigenen Ansagetext aufzeichnen<br />
Ein selbst aufgezeichneter Ansagetext darf maximal 2 Minuten lang sein.<br />
oder , / AB ,<br />
oder ,<br />
Untermenü auswählen<br />
/ Ansage 1<br />
oder Ansage 2 oder Ansagetext auswählen<br />
, / Ansage aufn. ,<br />
oder <br />
Aufzeichnung beginnen<br />
, Ansagetext aufsprechen<br />
oder <br />
Aufzeichnung beenden und speichern<br />
Sprechen Sie den von Ihnen gewünschten Text klar und deutlich in das Mikrofon von Basisgerät<br />
(an der Vorderseite des Geräts) oder von Mobilteil. Nach Beendigung wird Ihre Ansage laut wiederholt.<br />
Achten Sie darauf, die Ansagetexte ausreichend lang aufzusprechen (max. 2 Minuten),<br />
wenn Sie die Funktionen der Fernabfrage nutzen möchten Fernabfrage"<br />
Seite 38.<br />
34
Anrufbeantworter<br />
Standardansagetext wieder aktivieren<br />
Das Löschen des selbst aufgesprochenen Ansagetextes aktiviert den Standardansagetext.<br />
Das Löschen eines Ansagestextes erfolgt über das Menü Menü Seite 14 (Löschen).<br />
Standardansagetexte können nicht gelöscht werden.<br />
Aufgezeichnete Nachrichten wiedergeben 70<br />
Sind neue Nachrichten vorhanden, blinken am Basisgerät und den angemeldeten Mobilteilen die<br />
optischen Rufanzeigen und im jeweiligen Display das Symbol . Im Display von Basisgerät und<br />
den angemeldeten Mobilteilen wird zusätzlich ein textlicher Hinweis auf die Anzahl neuer Nachrichten<br />
angezeigt.<br />
Die eingegangenen Nachrichten werden in der Reihenfolge des Eingangs nummeriert.<br />
Die eingegangenen Nachrichten werden in umgekehrter Reihenfolge wiedergegeben: die zuletzt<br />
aufgezeichnete Nachricht wird zuerst abgespielt.<br />
Während der Wiedergabe wird die Nummer der Nachricht sowie das Datum und die Zeit der Aufnahme<br />
angezeigt.<br />
Es werden erst nur die neuen Nachrichten wiedergegeben. Zum Anhören der alten<br />
Nachrichten starten Sie die Wiedergabe der Nachrichten ein weiteres Mal.<br />
Nachrichten am Basisgerät wiedergeben (über Lautsprecher)<br />
<br />
Nachrichten abhören/stoppen<br />
<br />
Nachricht wiederholen<br />
2x <br />
Vorherige Nachricht<br />
<br />
Nächste Nachricht<br />
Nachrichten am Mobilteil wiedergeben<br />
, / Anhören ,<br />
Bitte warten<br />
Nachrichten wiedergeben (über Lautsprecher)<br />
Optionen während der Wiedergabe:<br />
<br />
Menü öffnen<br />
/ Löschen Gelöscht! Nachricht löschen<br />
/ Stopp <br />
Wiedergabe stoppen<br />
/ Weiter Nächste Nachricht<br />
/ Wiederholen Aktuelle Nachricht von vorne wiedergeben<br />
/ Zurück <br />
Vorherige Nachricht<br />
35
Anrufbeantworter<br />
Alternativ können diese Funktionen auch über das Drücken bestimmter Tasten erzeugt werden:<br />
<br />
Nachricht löschen<br />
<br />
Aktuelle Nachricht von vorne wiedergeben<br />
2x <br />
Vorherige Nachricht<br />
<br />
Wiedergabe stoppen (Pause)<br />
<br />
Nächste Nachricht<br />
Lautstärke für Nachrichtenwiedergabe einstellen<br />
Sie können die Lautstärke am Basisgerät während einer Wiedergabe in 5 Stufen einstellen.<br />
/ <br />
Lautstärke erhöhen / verringern<br />
Sie können die Lautstärke am Mobilteil während einer Wiedergabe in 5 Stufen einstellen.<br />
/ <br />
Lautstärke erhöhen / verringern<br />
Eine Nachricht löschen 71<br />
Während der Wiedergabe einer Nachricht:<br />
BS: <br />
oder<br />
MT: <br />
MT: / Löschen <br />
Gelöscht!<br />
oder<br />
MT: <br />
Alle Nachrichten löschen 72<br />
Es werden alle alten Nachrichten gelöscht.<br />
Nachricht löschen<br />
Menü öffnen<br />
Nachricht löschen<br />
Nachricht löschen<br />
Gelöschte Nachrichten können nicht wiederhergestellt werden!<br />
36<br />
oder , / Alte löschen ,<br />
oder , Bestätigen? , oder <br />
Mithören<br />
Sie können eingehende Anrufe am Basisgerät über den Lautsprecher mithören, ohne den Anruf<br />
anzunehmen. Dazu müssen Sie das Mithören im Menü aktivieren Menü Seite 14 (Mithören).<br />
Um die Lautstärke während des Mithörens zu verändern drücken Sie die Tasten <br />
und .<br />
Anruf übernehmen<br />
Wenn der Anrufbeantworter bereits einen Anruf entgegengenommen hat, können Sie diesen übernehmen.<br />
Die Aufzeichnung der Nachricht wird in diesem Fall abgebrochen.<br />
oder oder <br />
Anruf übernehmen
Anrufbeantworter<br />
Verzögerung der Anrufannahme<br />
Legen Sie über das Menü fest, wie oft das Telefon klingeln soll, bevor ein Ansagetext zu hören ist.<br />
Sie können zwischen 2, 4, 6 oder 8 Tonrufen wählen Menü Seite 14 (Rufannahme).<br />
Werkseitig ist der Anrufbeantworter auf 4 Tonrufe eingestellt.<br />
Zusätzlich können Sie die Einstellung Gebührsparer für die gebührenfreie Vor−/Fernabfrage verwenden.<br />
Mit dieser Vor−/Fernabfrage können Sie gebührenfrei feststellen, ob sich neue Nachrichten<br />
auf Ihrem Anrufbeantworter befinden. Befinden sich neue Nachrichten auf Ihrem Anrufbeantworter,<br />
wird Ihr Anruf spätestens nach 2 Tonrufen angenommen. Befinden sich keine neuen<br />
Nachrichten auf Ihrem Anrufbeantworter, wird Ihr Anruf erst nach 6 Tonrufen angenommen. Legen<br />
Sie vor dem 6. Tonruf auf. So fallen keine Gebühren an.<br />
Weitere Informationen über die Fernabfrage Seite 38.<br />
Maximale Aufnahmezeit je Nachricht<br />
Es stehen 4 Aufnahmezeiten zur Verfügung Menü Seite 15 (Nachr.länge)<br />
Memo aufzeichnen<br />
Ein Memo ist eine Mitteilung, die Sie für eine andere Person hinterlassen können und die wie eine<br />
eingegangene Nachricht abgehört werden kann. Ein Memo darf maximal 3 Minuten lang sein und<br />
wird am Mobilteil aufgesprochen.<br />
Memos können auch bei ausgeschaltetem Anrufbeantworter aufgezeichnet werden.<br />
oder , / AB ,<br />
oder ,<br />
oder , / Memo aufn. ,<br />
oder ,<br />
Untermenü auswählen<br />
Aufzeichnung beginnen<br />
, Memo aufsprechen<br />
oder <br />
Aufzeichnung beenden und speichern<br />
Memoaufzeichnung abbrechen<br />
BS: <br />
oder<br />
MT: oder <br />
Aufzeichnung abbrechen und zurück zum Untermenü<br />
Aufzeichnung abbrechen und zurück zum Untermenü<br />
37
Anrufbeantworter<br />
Fernabfrage 73<br />
Sie können Ihren Anrufbeantworter anrufen, um ihn einzuschalten oder um Nachrichten abzuhören<br />
und weitere Funktionen durchzuführen. Voraussetzung dafür ist ein Telefon mit Tonwahlfunktion.<br />
PIN−Code für die Fernabfrage 74<br />
Die Fernabf.−PIN ist werkseitig auf "1234" eingestellt. Es ist empfehlenswert die Fernabf.−PIN<br />
zu ändern, damit keine unbefugten Personen Zugriff auf Ihren Anrufbeantworter haben.<br />
PIN−Code für die Fernabfrage ändern Menü Seite 15.<br />
Wenn Sie den PIN−Code für die Fernabfrage geändert und anschließend vergessen<br />
haben, können Sie den PIN−Code für die Fernabfrage im Menü nachschauen Menü<br />
Seite 19 (Fernabf.−PIN).<br />
Fernabfrage starten<br />
Das Telefon, das Sie für die Fernabfrage nutzen, muss auf Tonwahl−Verfahren eingestellt sein.<br />
<br />
Von einem externen Telefonanschluss die eigene<br />
Rufnummer wählen.<br />
<br />
Ist der Anrufbeantworter eingeschaltet, wird der Ansagetext nach der eingestellten Anzahl<br />
Tonrufe abgespielt.<br />
Ist der Anrufbeantworter nicht eingeschaltet, schaltet sich das Telefon nach dem<br />
10. Tonruf automatisch ein und es ertönt ein langer Signalton.<br />
Fernabfrage einleiten.<br />
Danach ertönt ein langer Signalton.<br />
Ist der Anrufbeantworter eingeschaltet, müssen Sie die Fernabfrage einleiten, solange<br />
der Ansagetext abgespielt wird. Deshalb ist es wichtig, dass der Ansagetext ausreichend<br />
lang ist.<br />
<br />
Jetzt haben Sie die Möglichkeit, weitere Funktionen durchzuführen<br />
Tabelle Tastenfunktionen der Fernabfrage auf Seite 39.<br />
<br />
4−stelligen PIN−Code für die Fernabfrage eingeben.<br />
Danach ertönt ein langer Signalton.<br />
Taste drücken, um die gewünschte Funktion<br />
auszuführen. Danach ertönt ein langer Signalton.<br />
Sie können mehrere Funktionen hintereinander durchführen.<br />
Fernabfrage beenden<br />
<br />
Fernabfrage beenden<br />
38
Anrufbeantworter<br />
Tastenfunktionen der Fernabfrage 75<br />
Die folgende Tabelle verschafft Ihnen eine Übersicht über die verfügbaren Funktionen und welche<br />
Taste gedrückt werden muss, um die jeweilige Funktion auszuführen.<br />
Taste Wenn keine Nachrichten abgespielt werden Wenn Nachrichten abgespielt werden<br />
<br />
Nachricht löschen<br />
<br />
Nachricht wiederholen<br />
Nachricht wiedergeben, Wiedergabe fortsetzen Wiedergabe stoppen (Pause)<br />
<br />
Nächste Nachricht abhören<br />
Anrufbeantworter ein−/ausschalten<br />
Memo aufzeichnen 1<br />
<br />
Wiedergabe beenden<br />
Anrufbeantworter 76<br />
via Fernabfrage einschalten<br />
<br />
Von einem externen Telefonanschluss die eigene<br />
Rufnummer wählen. Nach dem 10. Tonruf schaltet<br />
das Telefon ein und es ertönt ein langer Signalton.<br />
<br />
Fernabfrage einleiten.<br />
Danach ertönt ein langer Signalton.<br />
<br />
4−stelligen PIN−Code für die Fernabfrage eingeben.<br />
Danach ertönt ein langer Signalton.<br />
<br />
Anrufbeantworter einschalten.<br />
Danach ertönt ein langer Signalton.<br />
Der Ansagetext wird wiedergegeben.<br />
<br />
Auflegen / Verbindung beenden<br />
1 Beenden Sie die Aufzeichnung eines Memos durch Beenden der Fernabfrage.<br />
39
Erweitern des Telefonsystems<br />
8 Erweitern des Telefonsystems<br />
Über den international genormten GAP 1 −Standard ist die Kompatibilität von Mobilteilen und Telefonen<br />
(Basisstationen) unterschiedlicher Hersteller geregelt. So ist es möglich, SWITEL−Geräte und<br />
Geräte anderer Hersteller zusammen in ein Telefonsystem zu integrieren. Es ist jedoch möglich,<br />
dass einige Funktionen nicht zur Verfügung stehen.<br />
Mehrere Mobilteile<br />
Sie können insgesamt 6 Mobilteile an dem Basisgerät anmelden.<br />
Anmelden von Mobilteilen<br />
Mobilteile werden über das Menü angemeldet Menü Seiten 19 und 20.<br />
Am Basisgerät:<br />
, / , Basis−Einst. , Menü öffnen<br />
/ , Anmelden , ,<br />
Bestätigen? , , Suche Menü öffnen<br />
Am anzumeldenden Mobilteil:<br />
, / , Basis−Einst. , Menü öffnen<br />
/ , Anmelden ,<br />
, Basis x Menü öffnen<br />
/ , Basis x , gewünschte Basis auswählen<br />
PIN? , <br />
PIN 2 eingeben und bestätigen<br />
Durch Drücken von Taste können Sie falsch eingegebene Ziffern löschen.<br />
Das Mobilteil sucht das Basisgerät. Dieser Vorgang kann bis zu 2 Minuten dauern.<br />
Nach dem Anmelden wird dem Mobilteil eine interne Rufnummer zugeteilt. Diese interne Rufnummer<br />
wird im Display angezeigt.<br />
Um Mobilteile anderer Hersteller anzumelden, lesen Sie bitte deren Bedienungsanleitungen.<br />
40<br />
1 GAP: Generic Access Profile = Standard für das Zusammenwirken von Mobilteilen und Basisstationen<br />
unterschiedlicher Hersteller.<br />
2 Die PIN ist werkseitig auf 0000" eingestellt.
Abmelden von Mobilteilen<br />
Erweitern des Telefonsystems<br />
Sie können ein Mobilteil nur vom Basisgerät oder von einem weiteren am Basisgerät<br />
angemeldeten Mobilteil abmelden. Ein Mobilteil kann sich nicht selber abmelden.<br />
Mobilteile werden über das Menü abgemeldet Menü Seiten 19 und 20.<br />
Am Basisgerät:<br />
, / , Basis−Einst. , Menü öffnen<br />
/ , Erw. Einst. , Menü öffnen<br />
/ , Abmelden , Menü öffnen<br />
Mobilteil 0x / ,<br />
Bitte warten Mobilteil auswählen und Abmeldevorgang starten<br />
Mehrere Basisstationen 1 /Basisgeräte 2 77<br />
Sie können die Reichweite Ihres Mobilteils vergrößern, wenn Sie es an mehrere Telefone (Basisstationen<br />
1 /Basisgeräte 2 ) anmelden. Es kann gleichzeitig an 4 verschiedenen Telefonen (Basisstationen<br />
1 /Basisgeräten 2 ) angemeldet sein. Jedes Telefon (jede(s) Basisstation 1 /Basisgerät 2 ) benötigt<br />
eine eigene Telefonanschlussdose. Es können Anschlüsse mit derselben und auch mit<br />
unterschiedlichen Rufnummern sein.<br />
Laufende Gespräche können nicht von einem zum anderen Telefon (von einer zur anderen<br />
Basisstation bzw. von einem zum anderen Basisgerät) übertragen werden.<br />
1 Die Basis des DC 58x wird als Basisstation bezeichnet.<br />
2 Die Basis des <strong>DCT</strong> <strong>587x</strong> wird als Basisgerät bezeichnet.<br />
41
Nebenstellenanlagen / Zusatzdienste<br />
9 Nebenstellenanlagen / Zusatzdienste 78<br />
R−Taste und Zusatzdienste<br />
Ihr Telefon unterstützt Zusatzdienste Ihres Netzbetreibers, wie z. B. Makeln, Anklopfen und Konferenz.<br />
Über die Taste können Sie diese Zusatzdienste nutzen. Bitte fragen Sie Ihren Netzbetreiber,<br />
welche Flash−Zeit Sie zur Nutzung von Zusatzdiensten einstellen müssen. Zur Freischaltung<br />
von Zusatzdiensten wenden Sie sich bitte an Ihren Netzbetreiber. Die Flash−Zeit stellen Sie<br />
über das Menü ein Seite 19.<br />
R−Taste an Nebenstellenanlagen<br />
Ist Ihr Telefon an einer Nebenstellenanlage angeschlossen, können Sie über die Taste Funktionen,<br />
wie z. B. Anrufe weiterleiten und automatischen Rückruf, nutzen. Lesen Sie bitte in der Bedienungsanleitung<br />
Ihrer Nebenstellenanlage, welche Flash−Zeit Sie zur Nutzung dieser Funktionen<br />
einstellen müssen. Ob Ihr Telefon an Ihrer Nebenstellenanlage einwandfrei funktioniert, erfahren<br />
Sie bei dem Händler, bei dem die Anlage gekauft wurde. Die Flash−Zeit stellen Sie über das Menü<br />
ein Seite 19.<br />
Zugangscode (Amtskennzahl)<br />
Bei Nebenstellenanlagen ist es erforderlich, eine Amtskennzahl vorzuwählen, um ein Freizeichen<br />
zu bekommen. Oftmals ist die Amtskennzahl eine 0" oder eine 9". Tippen Sie zuerst diese Amtskennziffer<br />
ein und warten Sie das Freizeichen ab. Jetzt können Sie die eigentliche Rufnummer eingeben.<br />
Wenn Sie die Direktwahlfunktionen Ihres Telefons auch an einer Nebenstellenanlage<br />
nutzen möchten, beachten Sie bitte, dass Sie beim Programmieren der Direktwahltasten<br />
die Amtskennziffer der eigentlichen Rufnummer voranstellen.<br />
Zwischen Amtskennziffer und Rufnummer können Sie gegebenenfalls auch noch<br />
eine Wahlpause einprogrammieren Abschnitt Wahlpause".<br />
Wahlpause<br />
Bei Nebenstellenanlagen ist es erforderlich, eine Amtskennzahl vorzuwählen, um ein Freizeichen<br />
zu bekommen. Bei wenigen älteren Nebenstellenanlagen dauert es einige Zeit, bis das Freizeichen<br />
zu hören ist. Für diese Nebenstellenanlagen kann nach der Amtskennzahl eine Wahlpause eingefügt<br />
werden, um direkt weiterwählen zu können, ohne das Freizeichen abzuwarten. Die Wahlpause<br />
fügen Sie durch Drücken und 3 Sek. Halten der Taste ein.<br />
Nach der Amtskennzahl erfolgt die Wahl der eigentlichen Rufnummer nach einer bestimmten Zeit.<br />
Die Wahlpause kann auch bei der Eingabe von Rufnummern im Telefonbuch gespeichert<br />
werden.<br />
42
Rufnummernanzeige (CLIP 1 )<br />
Nebenstellenanlagen / Zusatzdienste<br />
Die Rufnummernanzeige ist ein Zusatzdienst Ihres Netzbetreibers. Fragen Sie Ihren<br />
Netzbetreiber nach weiteren Informationen.<br />
Wenn diese Funktion an Ihrer Telefonleitung zur Verfügung steht, wird Ihnen bereits die Rufnummer<br />
des Anrufers angezeigt, wenn das Telefon klingelt. Hat der Anrufer das Übertragen seiner<br />
Rufnummer unterdrückt, wird eine entsprechende Meldung angezeigt. Die Rufnummer kann nicht<br />
angezeigt und somit auch nicht in der Anrufliste gespeichert werden.<br />
Anrufbeantworter im Telefonnetz 79<br />
Der Anrufbeantworter im Telefonnetz ist ein Zusatzdienst vieler Netzbetreiber. Wenn Ihr Netzbetreiber<br />
einen Anrufbeantworter im Telefonnetz für Sie bereitstellt, werden Sie mit einem Symbol<br />
über neue Nachrichten informiert (VMWI 2 ). Über diese Funktion können Sie nur dann verfügen,<br />
wenn Ihr Netzbetreiber diesen Zusatzdienst anbietet. Bitte fragen Sie Ihren Netzbetreiber nach<br />
weiteren Informationen.<br />
1 CLIP: Calling Line Identification Presentation = Anzeige der Rufnummer eines Anrufers.<br />
2 VMWI: Visual Message Waiting Indication = Optische Anzeige neuer Nachrichten.<br />
43
Technische Eigenschaften<br />
10 Technische Eigenschaften<br />
Merkmal<br />
Wert<br />
Standard DECT 1 −GAP 2<br />
Stromversorgung (Basisgerät)<br />
Eingang: 100−240 V, 50−60 Hz<br />
Ausgang: 6 V, 500 mA<br />
Stromversorgung (Ladestation)<br />
Eingang: 100−240 V, 50−60 Hz<br />
Ausgang: 6 V, 150 mA<br />
Aufladbare Akkus<br />
2 x 1.2 V 500 mAh NiMH, Größe: AAA<br />
Reichweite Mobilteil<br />
Außen: ca. 300 m<br />
Innen: ca. 50 m<br />
Stand−by−Zeit Mobilteil<br />
Bis zu 110 h<br />
Max. Gesprächsdauer Mobilteil<br />
Bis zu 11 h<br />
Max. Hörerlautstärke<br />
30 dB<br />
Wahlverfahren<br />
Tonwahl−Verfahren (MFV)<br />
Impulswahl−Verfahren (IWV)<br />
Flash−Zeit<br />
Kurz, Mittel, Lang<br />
Menüsprachen<br />
Deutsch, Französisch, Italienisch, Englisch, Spanisch,<br />
Portugiesisch, Niederländisch, Polnisch,<br />
Türkisch<br />
PIN (Werkseinstellung) 0000<br />
Anzahl Ruftöne<br />
12 (polyphone)<br />
Max. Anzahl Einträge Telefonbuch 50<br />
Max. Anzahl Einträge Anrufliste 40<br />
Max. Anzahl Einträge Wahlwiederholung 5<br />
Max. Anzahl Nachrichten Anrufbeantworter 57<br />
Max. Aufzeichnungsdauer Anrufbeantworter 15 min (inklusive Ansagetexte)<br />
Sprachen Standardansagetexte<br />
Deutsch, Französisch, Italienisch, Englisch<br />
PIN−Code für Fernabfrage (Werkseinstellung) 1234<br />
44<br />
1 DECT: Digital Enhanced Cordless Tele<strong>com</strong>munication = Standard für kabellose Telefone.<br />
2 GAP: Generic Access Profile = Standard für das Zusammenwirken von Mobilteilen und Basisstationen<br />
unterschiedlicher Hersteller.
Probleme<br />
Konformitätserklärung<br />
Dieses Gerät erfüllt die Anforderungen der EU−Richtlinie:<br />
1999/5/EG Richtlinie über Funkanlagen und Telekommunikationsendeinrichtungen<br />
und die gegenseitige Anerkennung ihrer Konformität. Die Konformität mit der o. a.<br />
Richtlinie wird durch das CE−Zeichen auf dem Gerät bestätigt.<br />
Service−Hotline<br />
Haben Sie Probleme mit Ihrem Telefon, kontrollieren Sie zuerst die folgenden Hinweise. Bei technischen<br />
Problemen können Sie sich an unsere Service−Hotline unter Tel. 0900 00 1675 innerhalb der<br />
Schweiz (Kosten Swiss<strong>com</strong> bei Drucklegung: CHF 2.60/min) wenden. Bei Garantieansprüchen<br />
wenden Sie sich an Ihren Fachhändler. Die Garantiezeit beträgt 2 Jahre.<br />
11 Probleme<br />
Fragen<br />
Antworten<br />
Kein Telefongespräch möglich − Das Telefon bzw. Basisgerät ist nicht korrekt angeschlossen<br />
oder gestört. Verwenden Sie nur das mitgelieferte Telefonanschlusskabel.<br />
− Das Netzteil ist nicht eingesteckt oder es liegt ein totaler Stromausfall<br />
vor.<br />
− Testen Sie mit einem anderen Telefon, ob Ihr Telefonanschluss<br />
in Ordnung ist.<br />
− Falscher Aufstellungsort des Basisgeräts.<br />
− Die aufladbaren Akkus sind leer oder defekt.<br />
− Sie haben sich mit einem Mobilteil zu weit vom Basisgerät entfernt.<br />
Zur Vergrößerung der Reichweite können Sie ein Mobilteil<br />
auch an mehrere Basisgeräte/Basisstationen anmelden<br />
Seite 41.<br />
− Wahlverfahren falsch eingestellt Seite 19<br />
− Wenn mehrere Mobilteile angemeldet sind: An einem anderen<br />
Mobilteil wird ein Gespräch geführt.<br />
− Bei internen Telefongesprächen: Das angerufene Mobilteil ist<br />
außerhalb der Reichweite des Basisgeräts.<br />
− Die Tastensperre ist aktiviert.<br />
− Das Mobilteil ist nicht eingeschaltet.<br />
Keine Verbindung zum Basisgerät<br />
möglich<br />
Verbindung abgehackt, fällt<br />
aus<br />
Während eines Telefongesprächs<br />
ertönen Signaltöne<br />
− Prüfen Sie, ob Sie ein Mobilteil am Basisgerät angemeldet ist<br />
bzw. ob das Mobilteil mit der richtigen PIN am Basisgerät angemeldet<br />
wurde Seite 19.<br />
− Sie haben sich zu weit vom Basisgerät entfernt.<br />
− Falscher Aufstellungsort des Basisgeräts.<br />
− Sie haben sich zu weit von dem Basisgerät entfernt.<br />
− Die aufladbaren Akkus sind fast leer.<br />
45
Probleme<br />
Fragen<br />
Das System reagiert nicht<br />
mehr<br />
Die Akkus sind in kürzester<br />
Zeit leer<br />
Die Akkus lassen sich nicht<br />
mehr aufladen<br />
Die Rufnummernanzeige<br />
(CLIP) funktioniert nicht<br />
Der Anrufbeantworter nimmt<br />
keine Nachrichten auf<br />
Der Anrufbeantworter lässt<br />
sich nicht in den Ansage− und<br />
Aufnahme−Modus schalten<br />
Sie können keine Fernabfrage<br />
durchführen<br />
Antworten<br />
− Setzen Sie alle Funktionen auf Werkseinstellungen zurück<br />
Seite 19.<br />
− Ziehen Sie kurzzeitig das Netzteil aus der Steckdose.<br />
− Die Akkus sind leer oder defekt.<br />
− Stellen Sie das Mobilteil richtig auf die Basis−/Ladestation. Reinigen<br />
Sie die Kontaktflächen am Mobilteil und an der Basis−/Ladestation<br />
mit einem weichen trockenen Tuch.<br />
− Stellen Sie das Mobilteil für 8 Stunden in die Basis−/Ladestation.<br />
− Die Akkus sind defekt.<br />
− Die Rufnummernanzeige ist ein Zusatzdienst Ihres Netzbetreibers.<br />
Bitte fragen Sie Ihren Netzbetreiber nach weiteren Informationen.<br />
− Der Anrufer hat das Übertragen seiner Rufnummer unterdrückt.<br />
− Prüfen Sie, ob der Anrufbeantworter eingeschaltet ist.<br />
− Prüfen Sie, ob der Speicher des Anrufbeantworters voll ist.<br />
Löschen Sie ggf. Nachrichten.<br />
− Prüfen Sie, ob der Speicher des Anrufbeantworters voll ist. Der<br />
Anrufbeantworter schaltet dann automatisch in den Nur−Ansage−Modus,<br />
bei dem keine Nachrichten hinterlassen werden<br />
können. Löschen Sie ggf. Nachrichten.<br />
− Das Telefon, das Sie für die Fernabfrage nutzen, muss auf<br />
Tonwahl−Verfahren eingestellt sein.<br />
− Prüfen Sie, ob der Anrufbeantworter eingeschaltet ist.<br />
− Prüfen Sie, ob Sie den richtigen PIN−Code für die Fernabfrage<br />
benutzen Seite 38. Haben Sie den PIN−Code für die Fernabfrage<br />
vergessen, können Sie den PIN−Code für die Fernabfrage<br />
im Menü nachschauen oder das Telefon und den PIN−Code für<br />
die Fernabfrage in Werkseinstellung zurücksetzen.<br />
− Drücken Sie die Tasten langsam und ausreichend fest.<br />
− Starten Sie die Fernabfrage noch während der Ansagetext wiedergegeben<br />
wird. Ist die Dauer der Wiedergabe des Ansagetextes<br />
zu kurz, nehmen Sie einen längeren Ansagetext auf.<br />
46
12 Pflegehinweise / Garantie<br />
Pflegehinweise / Garantie<br />
Pflegehinweise<br />
Reinigen Sie die Gehäuseoberflächen mit einem weichen und fusselfreien Tuch.<br />
Verwenden Sie keine Reinigungs− oder Lösungsmittel.<br />
Außer einer gelegentlichen Gehäusereinigung ist keine weitere Pflege erforderlich.<br />
Garantie<br />
SWITEL − Geräte werden nach den modernsten Produktionsverfahren hergestellt und geprüft.<br />
Ausgesuchte Materialien und hoch entwickelte Technologien sorgen für einwandfreie Funktion und<br />
lange Lebensdauer. Ein Garantiefall liegt nicht vor, wenn die Ursache einer Fehlfunktion des Geräts<br />
bei dem Telefonnetzbetreiber oder einer eventuell zwischengeschalteten Nebenstellenanlage<br />
liegt. Die Garantie gilt nicht für die in den Produkten verwendeten Batterien, Akkus oder Akkupacks.<br />
Die Garantiezeit beträgt 24 Monate, gerechnet vom Tage des Kaufs.<br />
Innerhalb der Garantiezeit werden alle Mängel, die auf Material− oder Herstellungsfehler zurückzuführen<br />
sind, kostenlos beseitigt. Der Garantieanspruch erlischt bei Eingriffen durch den Käufer<br />
oder durch Dritte. Schäden, die durch unsachgemäße Behandlung oder Bedienung, natürliche Abnutzung,<br />
durch falsches Aufstellen oder Aufbewahren, durch unsachgemäßen Anschluss oder<br />
Installation sowie durch höhere Gewalt oder sonstige äußere Einflüsse entstehen, fallen nicht<br />
unter die Garantieleistung. Wir behalten uns vor, bei Reklamationen die defekten Teile auszubessern,<br />
zu ersetzen oder das Gerät auszutauschen. Ausgetauschte Teile oder ausgetauschte Geräte<br />
gehen in unser Eigentum über. Schadenersatzansprüche sind ausgeschlossen, soweit sie nicht auf<br />
Vorsatz oder grober Fahrlässigkeit des Herstellers beruhen.<br />
Sollte Ihr Gerät dennoch einen Defekt innerhalb der Garantiezeit aufweisen, wenden Sie sich bitte<br />
unter Vorlage Ihrer Kaufquittung ausschließlich an das Geschäft, in dem Sie Ihr SWITEL − Gerät<br />
gekauft haben. Alle Gewährleistungsansprüche nach diesen Bestimmungen sind ausschließlich<br />
gegenüber Ihrem Fachhändler geltend zu machen. Nach Ablauf von zwei Jahren nach Kauf und<br />
Übergabe unserer Produkte können Gewährleistungsrechte nicht mehr geltend gemacht werden.<br />
47
Stichwortverzeichnis<br />
13 Stichwortverzeichnis<br />
A<br />
Abmelden, 41<br />
Abwärts−Taste, 9<br />
Akkuladezustand, 8<br />
Akkus, 5, 44<br />
Akkus aufladen, 8<br />
Akkus in Mobilteil einsetzen, 8<br />
Alle Einträge löschen, 27<br />
Alle Nachrichten löschen, 36<br />
Alle Rufnummern löschen, 29<br />
Amtskennzahl, 42<br />
Anmelden, 40<br />
Anruf annehmen, 21<br />
Anruf−LED, 9, 10<br />
Anrufbeantworter, 33<br />
Anrufbeantworter im Telefonnetz, 43<br />
Anrufbeantworter<br />
via Fernabfrage einschalten, 39<br />
Anrufe in Abwesenheit, 29<br />
Anrufen, 22<br />
Anruferliste, 9<br />
Anrufliste, 10, 29<br />
Anrufsperre, 32<br />
Anrufübernahme, 36<br />
Ansagetext, 34<br />
Ansagetext anhören, 34<br />
Ansagetext aufzeichnen, 34<br />
Antwortmodus wählen, 33<br />
Anzahl Einträge Anrufliste, 44<br />
Anzahl Einträge Telefonbuch, 44<br />
Anzahl Einträge Wahlwiederholung, 44<br />
Anzahl Nachrichten Anrufbeantworter, 44<br />
Auflegen−/Ein−/Aus−Taste, 10<br />
Aufnahmezeit je Nachricht, 37<br />
Aufstellungsort, 4<br />
Aufwärts−Taste, 9<br />
Aufzeichnungsdauer Anrufbeantworter, 44<br />
Ausschalten, 33<br />
Automatische Rufannahme, 31<br />
B<br />
Babyruf, 32<br />
Basisgerät, 9<br />
Basisgerät anschließen, 7<br />
Basisgeräte, 41<br />
Basisstationen, 41<br />
Bedienelemente, 9<br />
Bedienung, 21<br />
Bereitsschaftsmodus, 12<br />
Besondere Funktionen, 31<br />
Bestimmungsgemäße Verwendung, 4<br />
C<br />
CLIP, 32, 43<br />
D<br />
Darstellungsweisen<br />
in der Bedienungsanleitung, 12<br />
Datum einstellen, 8<br />
DECT, 44<br />
Direktwahl, 22<br />
Direktwahl−Tasten, 9, 10<br />
Direktwahl−Tasten programmieren, 27<br />
Display, 9, 11<br />
Display−Kontrast, 30<br />
Display−Sprache einstellen, 8<br />
Display−Symbole, 11<br />
E<br />
ECO−Mode, 8<br />
Ein−/Aus−Taste Anrufbeantworter, 9<br />
Einen Eintrag löschen, 27<br />
Eingegangene Anrufe zurückrufen, 22, 29<br />
Einschalten, 33<br />
Einzelne Rufnummer löschen, 29<br />
Entsorgung, 5<br />
Equalizer, 30<br />
Erweitern des Telefonsystems, 40<br />
Externe Gespräche intern weiterleiten, 23<br />
Externe Gespräche während eines internen<br />
Telefonats annehmen, 23<br />
48
F<br />
Fernabfrage, 38<br />
Fernabfrage beenden, 38<br />
Fernabfrage starten, 38<br />
Flash−Zeit, 42, 44<br />
Freisprech−Taste, 9<br />
Freisprechen, 10, 25<br />
G<br />
GAP, 44<br />
Garantie, 47<br />
Gebührensparer, 37<br />
Gespräch beenden, 21<br />
Gespräch−Taste, 10<br />
Gesprächsdauer, 24, 44<br />
Gesprächsweiterleitung, 23<br />
H<br />
Hauptmenü, 14<br />
Hörer, 9<br />
Hörerlautstärke einstellen, 24<br />
Hörerlautstärke maximale, 44<br />
Hörgerätekompatibel, 5<br />
Hörmuschel, 10<br />
I<br />
Inbetriebnahme, 6<br />
INT−Taste, 9<br />
Intern telefonieren, 22<br />
Interne Gespräche führen, 23<br />
K<br />
Konferenzgespräche, 23<br />
Konformitätserklärung, 45<br />
L<br />
Ladestation anschließen, 7<br />
Lautstärke für Nachrichtenwiedergabe<br />
einstellen, 36<br />
LC−Display, 10<br />
Stichwortverzeichnis<br />
M<br />
Makeln, 23<br />
Maximale Aufnahmezeit, 33<br />
Medizinische Geräte, 5<br />
Mehrere Basisstationen, 41<br />
Mehrere Mobilteile, 40<br />
Memo aufzeichnen, 37<br />
Memoaufzeichnung abbrechen, 37<br />
Menü−/OK−/Stumm−Taste, 10<br />
Menüführung, 12<br />
Menüsprachen, 44<br />
Menüstruktur, 14<br />
Mikrofon am Basisgerät, 9<br />
Mikrofon am Mobilteil, 10<br />
Mikrofon stummschalten, 25<br />
Mithören, 36<br />
Mobilteil, 10<br />
Mobilteil abmelden, 41<br />
Mobilteil anmelden, 40<br />
Mobilteilname, 30<br />
N<br />
Nachrichten abhören, 35<br />
Nachrichten am Basisgerät wiedergeben, 35<br />
Nachrichten am Mobilteil wiedergeben, 35<br />
Nachrichten löschen, 36<br />
Namen eingeben, 25<br />
Nebenstellenanlagen, 8, 42<br />
Netzteil, 4<br />
Notruf, 32<br />
Nummerische Tasten, 9, 10<br />
O<br />
OK−/Menü−Taste, 9<br />
Optionen während der Wiedergabe, 35<br />
optische Rufanzeige, 10<br />
optische Rufanzeige (Anruf−LED), 9, 10<br />
49
Stichwortverzeichnis<br />
P<br />
Paging, 31<br />
Pfeil−Taste rauf, 10<br />
Pfeil−Taste runter, 10<br />
Pflegehinweise, 47<br />
PIN, 40, 44<br />
PIN ändern, 31<br />
PIN−Code für die Fernabfrage, 38<br />
PIN−Code für Fernabfrage<br />
(Werkseinstellung), 44<br />
Probleme, 45<br />
R<br />
R−Taste, 9, 10, 42<br />
Raute−Taste, 9<br />
Raute−Taste / Rufton aus / Wahlpause, 10<br />
Reichweite, 44<br />
Reinigen, 47<br />
Rückruf, 22<br />
Rücksprache, 23<br />
Rückwärts−Taste, 9<br />
Rufnummer aus der Wahlwiederholungsliste<br />
im Telefonbuch abspeichern, 28<br />
Rufnummer aus der Wahlwiederholungsliste<br />
löschen, 28<br />
Rufnummer aus der Wahlwiederholungsliste<br />
wählen, 28<br />
Rufnummern aus der Anrufliste anzeigen, 29<br />
Rufnummern aus der Anrufliste löschen, 29<br />
Rufnummernanzeige, 43<br />
Rufnummernanzeige (CLIP), 32<br />
Rufton aus− und einschalten, 24<br />
Rufton einstellen, 30<br />
Ruftöne, 44<br />
Ruftonlautstärke des Basisgeräts einstellen, 24<br />
Ruftonlautstärke des Mobilteils einstellen, 24<br />
S<br />
Service−Hotline, 45<br />
Sicherheitshinweise, 4<br />
Speichern im Telefonbuch, 28, 29<br />
Sprache der Ansagetexte, 34<br />
Sprachen Standardansagetexte, 44<br />
Stand−by−Modus, 12<br />
Stand−by−Zeit, 44<br />
Stern−Taste, 9, 10<br />
Strahlungsreduzierung, 8<br />
Stromausfall, 4<br />
Stromversorgung, 44<br />
Stummschaltung, 25<br />
Suchen des Mobilteils, 31<br />
Symbole, 11<br />
T<br />
Tastenfunktionen der Fernabfrage, 39<br />
Tastensperre, 21, 31<br />
Tastentöne, 30<br />
Telefonbuch, 9, 10, 22, 25<br />
Telefonbucheinträge, 13<br />
Telefonbucheinträge ändern, 26<br />
Telefonbucheinträge erstellen, 26<br />
Telefonbucheinträge löschen, 27<br />
Telefonbuchkapazität prüfen, 27<br />
Telefonieren, 21<br />
Texteingabe, 25<br />
Ton− und Anzeigeeinstellungen, 30<br />
U<br />
Uhrzeit einstellen, 8<br />
Untermenüs auswählen, 13<br />
50
V<br />
Verpackungsinhalt, 6<br />
VMWI, 43<br />
Vorwahlnummer, 31<br />
Vorwärts−Taste, 9<br />
W<br />
Wählen, 22<br />
Wahlpause, 42<br />
Wahlverfahren, 32, 44<br />
Wahlwiederholung, 10, 22<br />
Wahlwiederholung−Taste, 9<br />
Wahlwiederholungsliste, 28<br />
Wahlwiederholungsliste löschen, 28<br />
Warnton Akkukapazität, 30<br />
Warnton Reichweite, 30<br />
Wecker, 31<br />
Wecker stellen, 32<br />
Weckruf vorzeitig beenden, 32<br />
Weiterleitung, 23<br />
Wiedergabe−/Stopp−Taste, 9<br />
Z<br />
Zeit− und Datumsformat, 30<br />
Zugangscode, 42<br />
Zurück−Taste, 9<br />
Zurücksetzen, 31<br />
Zusatzdienste, 42<br />
Stichwortverzeichnis<br />
51
Notizen<br />
Notizen<br />
52
80<br />
Table des matières<br />
1 Consignes de sécurité . . . . . . . . . . . . . . . 54<br />
2 Mise en service . . . . . . . . . . . . . . . . . . . . 56<br />
3 Éléments de manipulation . . . . . . . . . . . . 59<br />
4 Introduction . . . . . . . . . . . . . . . . . . . . . . . 62<br />
5 Structure de menu . . . . . . . . . . . . . . . . . . 64<br />
6 Utilisation . . . . . . . . . . . . . . . . . . . . . . . . 71<br />
7 Répondeur . . . . . . . . . . . . . . . . . . . . . . . 83<br />
8 Élargir le système téléphonique . . . . . . . . 90<br />
9 Installations PABX / Services confort . . . . . 92<br />
10 Caractéristiques techniques . . . . . . . . . . . 94<br />
11 Problèmes . . . . . . . . . . . . . . . . . . . . . . . 95<br />
12 Remarques d’entretien / Garantie . . . . . . . 97<br />
13 Index . . . . . . . . . . . . . . . . . . . . . . . . . . . 98<br />
53
Consignes de sécurité<br />
1 Consignes de sécurité<br />
Lisez très attentivement ce mode d’emploi.<br />
Utilisation conforme aux prescriptions<br />
Ce téléphone avec <strong>com</strong>biné convient pour téléphoner à l’intérieur d’un réseau téléphonique. Toute<br />
autre utilisation est considérée <strong>com</strong>me non conforme aux prescriptions. Des modifications ou<br />
transformations effectuées de façon arbitraire sont interdites. N’ouvrez en aucun cas l’appareil et<br />
n’essayez pas de le réparer vous−même.<br />
Panne de courant<br />
Dans le cas d’une panne de courant, il n’est pas possible de téléphoner avec cet appareil. En cas<br />
d’urgence, prévoyez un téléphone avec fil fonctionnant sans alimentation externe en courant.<br />
Lieu d’installation 81<br />
L’endroit où vous le déposez a une influence décisive sur son bon fonctionnement.<br />
Évitez les nuisances causées par la fumée, la poussière, les vibrations, les produits chimiques,<br />
l’humidité, la grande chaleur ou un ensoleillement direct. Ne vous servez pas du téléphone dans<br />
des endroits exposés aux explosions.<br />
Ne le placez pas à proximité immédiate d’appareils électroniques tels que téléviseurs, radios, microondes,<br />
réfrigérateurs, etc., ceci pourrait provoquer une interaction entre votre téléphone et les<br />
appareils. Ne le placez pas non plus à proximité d’un autre téléphone. Veillez à ce que des objets<br />
métalliques de grande taille tels que réfrigérateur ou miroir ne se trouvent pas entre la base et le<br />
<strong>com</strong>biné. Les murs peuvent également exercer une influence sur leur connexion.<br />
Placez le téléphone à proximité d’une prise de courant appropriée et du raccordement téléphonique.<br />
Posez le câble de telle sorte que personne ne puisse trébucher à cause de lui.<br />
Attention : ne pas lui mettre de rallonge !<br />
Posez le téléphone sur une surface plane sur laquelle il ne pourra pas glisser. Les pieds du téléphone<br />
ne laissent généralement pas de traces sur la surface où il est posé. Cependant, étant<br />
donné le nombre de laques et de surfaces utilisées, il se peut qu’ils en laissent.<br />
Plus la base est haut placée (même en intérieur), meilleure est la portée.<br />
Bloc d’alimentation<br />
Attention : N’utilisez que le bloc d’alimentation fourni avec l’appareil, d’autres pouvant<br />
endommager le téléphone. Veillez à ce qu’aucun meuble ou autre objet ne bloque l’accès<br />
au bloc d’alimentation.<br />
54
Accus rechargeables<br />
Appareils médicaux<br />
Consignes de sécurité<br />
Attention : Ne jetez jamais les accus dans le feu. N’utilisez que des accus du même<br />
type ! Veillez à ce que la polarité soit correcte ! Risque d’explosion lors de la charge<br />
si celle−ci est incorrecte.<br />
Attention : N’utilisez que les accus rechargeables prescrits. N’utilisez pas de piles.<br />
Risque d’explosion !<br />
Attention : N’utilisez pas le téléphone à proximité d’appareils médicaux. Il n’est pas<br />
entièrement exclu qu’il pourrait avoir une influence sur ceux−ci.<br />
Compatibilité avec les prothèses auditives<br />
Ce téléphone est <strong>com</strong>patible avec la plupart des aides auditives en vente sur le marché. Cependant,<br />
un fonctionnement irréprochable ne peut être garanti pour chacune d’entre elles.<br />
DECT 1 peuvent causer un bourdonnement désagréable dans les aides auditives.<br />
Traitement des appareils hors d’usage<br />
Si vous ne voulez plus servir de votre appareil, veuillez l’apporter au centre de collecte<br />
de l’organisme de traitement des déchets de votre <strong>com</strong>mune (par ex. centre<br />
de recyclage). D’après la loi relative aux appareils électriques et électroniques, les<br />
propriétaires d’appareils électriques et électroniques hors d’usage sont tenus de<br />
les déposer dans un collecteur séparé. L’icône ci−contre signifie que vous ne devez<br />
en aucun cas jeter votre appareil dans les ordures ménagères !<br />
Risque pour l’homme et l’environnement lié aux piles et accus !<br />
Ne jamais ouvrir, endommager, avaler les piles et accus ou faire pénétrer leur<br />
contenu dans l’environnement. Ils peuvent contenir des métaux lourds toxiques et<br />
nuisibles pour celui−ci. Vous êtes tenus par la loi d’apporter vos piles et accus à un<br />
revendeur de piles ainsi qu’à un centre de collecte responsables de leur traitement<br />
qui mettent des conteneurs adéquats à disposition. Ce geste écoresponsable est<br />
gratuit. L’icône ci−contre signifie que vous ne devez en aucun cas jeter les piles et<br />
accus dans les ordures ménagères, mais que vous devez les apporter à un centre<br />
de collecte.<br />
Eliminez les fournitures d’emballage conformément au règlement local.<br />
1 DECT : Digital Enhanced Cordless Tele<strong>com</strong>munication = Norme de téléphonie numérique<br />
sans fil optimisée.<br />
55
Mise en service<br />
2 Mise en service<br />
Consignes de sécurité<br />
Attention : Avant de mettre votre téléphone en service, lisez impérativement les<br />
consignes de sécurité mentionnées au chapitre 1.<br />
Vérifier le contenu du coffret<br />
Son contenu :<br />
Contenu<br />
82<br />
Modèle <strong>DCT</strong> 587X<br />
<strong>DCT</strong> 5871 <strong>DCT</strong> 5872 1 <strong>DCT</strong> 5873 1 <strong>DCT</strong> 5874 1<br />
Appareil de base 1 1 1 1<br />
Bloc secteur 1 1 1 1<br />
Combiné 1 1 1 1<br />
Cordon spiralé du <strong>com</strong>biné 1 1 1 1<br />
Câble téléphonique 1 1 1 1<br />
Station d’accueil avec bloc secteur 1 2 3 4<br />
Combiné 1 2 3 4<br />
Accus (AAA 1.2 V NiMH) 2 4 6 8<br />
Guide de l’utilisateur 1 1 1 1<br />
56<br />
1 À l’adresse www.switel.<strong>com</strong>, vous apprendrez si ce téléphone / kit téléphonique est déjà disponible<br />
à la vente.
Mise en service<br />
Mettre l’appareil en service<br />
Raccorder l’appareil de base<br />
Raccordez l’appareil de base <strong>com</strong>me représenté sur le croquis. Pour des raisons de sécurité, n’utilisez<br />
que le bloc secteur fourni avec l’appareil.<br />
Tenez absolument <strong>com</strong>pte des informations contenues dans le passage «Lieu d’installation»<br />
page 54.<br />
Prise de courant<br />
Prise téléphonique<br />
Câble téléphonique<br />
Bloc secteur<br />
Appareil de base<br />
Combiné<br />
Cordon spiralé du<br />
<strong>com</strong>biné<br />
Utilisez pour l’appareil de base le bloc d’secteur présentant les données de sortie<br />
100−240 VCA 6 VCC 500 mA.<br />
Raccorder la station d’accueil<br />
Raccordez la station d’accueil à une prise de courant.<br />
57
Mise en service<br />
Insérer les accus dans le <strong>com</strong>biné<br />
Le <strong>com</strong>partiment accus se trouve au dos du <strong>com</strong>biné. Ouvrez<br />
celui−ci et insérez 2 accus de type AAA NiMH, 1.2 V 500 mAh.<br />
Veillez à ce que la polarité soit correcte ! Refermez le <strong>com</strong>partiment.<br />
Recharger les accus 83<br />
Lors de la première mise en service, laissez le<br />
<strong>com</strong>biné pendant au moins 8 heures dans sa<br />
station d’accueil.<br />
Si vous avez placé correctement le <strong>com</strong>biné dans celle−ci,<br />
vous entendez un bip de confirmation. Le <strong>com</strong>biné chauffe<br />
pendant la charge. Ceci est normal et sans danger. Utilisez<br />
uniquement les chargeurs fournis. L’état de charge actuel<br />
des accus est affiché à l’écran :<br />
<br />
<br />
Plein<br />
Vide<br />
Régler la langue affichée<br />
Sélectionnez votre langue. Le pages 68 et 70 vous donneront<br />
la position dans le menu.<br />
CB : > Conf. <strong>com</strong>b. > Langue >...<br />
BS : > Config. base > Langue >...<br />
9 langues sont disponibles : allemand, français, italien, anglais, espagnol, portugais, néerlandais,<br />
polonais et turc.<br />
Régler la date et l’heure<br />
Vous réglez la date et l’heure dans le menu (Régl. heure) page 67.<br />
Validez la saisie de l’année, du mois, du jour, de l’heure et de la minute avec la touche ou .<br />
Tenez <strong>com</strong>pte du format de la date et de l’heure que vous avez réglé page 67. Si vous avez réglé<br />
le format 12 heures sélectionnez avec les touches / si l’heure réglée signifie avant<br />
midi (A) ou après−midi (P).<br />
Installations PABX<br />
La page 92 vous fournit de plus amples informations au cas où vous désireriez raccorder votre téléphone<br />
à une installation PABX.<br />
Réduction du rayonnement (mode ÉCO)<br />
Comparé aux téléphones sans fil DECT standard, le rayonnement est considérablement<br />
réduit en mode veille quand le <strong>com</strong>biné repose sur la station d’accueil. En mode<br />
de <strong>com</strong>munication, le rayonnement est réduit en fonction de l’éloignement du <strong>com</strong>biné<br />
par rapport au téléphone (à la base).<br />
58
3 Éléments de manipulation 84<br />
Éléments de manipulation<br />
Dans ce guide de l’utilisateur, les touches du téléphone sont représentées par des icônes standardisées<br />
encadrées. Il peut donc y avoir de légères différences entre les icônes des touches de votre<br />
téléphone et celles des touches utilisées ici.<br />
Appareil de base<br />
1 Combiné 11 Touche «vers l’avant» <br />
2 Touche OK/Menu 12 Signalisation optique d’appel (LED appel)<br />
3 Écran 13 Microphone<br />
4 Touche «Retour» 14 Touche «mains−libres» <br />
5 Touches de sélection directe 15 Touche «dièse» <br />
6 Touche «Activer/Desactiver» le répondeur 16 Touche R/Effacement <br />
7 Touche «vers le haut», journal des appels 17 Touche<br />
«Répétition des derniers numéros» <br />
8 Touche «Lecture/Stop» 18 Touche INT <br />
9 Touche «vers le bas», d’accès au répertoire 19 Touche «Étoile» <br />
10 Touche «Retour» 20 Clavier numérique , , etc.<br />
59
Éléments de manipulation<br />
Combiné<br />
1 Signalisation optique d’appel (LED appel)<br />
2 Écouteur<br />
3 Écran graphique<br />
4 Touches de sélection directe <br />
5 Touche «Raccrocher»/Allumer/Éteindre <br />
6 Clavier numérique , ... à <br />
7 Touche «dièse» / Sonn. désact. /<br />
Pause numérotation <br />
8 Touche R / Retour <br />
9 Microphone<br />
10 Répétition des derniers numéros <br />
11 Touche «Étoile» <br />
12 Touche Menu/OK/<br />
Couper le microphone <br />
13 Touche «Décrocher» /<br />
Mode mains−libres <br />
14 Touche fléchée «vers le bas» /<br />
Répertoire <br />
15 Touche fléchée «vers le haut» /<br />
Journal des appels<br />
60
Icônes et textes affichés<br />
Icône<br />
<br />
Description<br />
Éléments de manipulation<br />
État de charge de l’accu (plein, à moitié plein, presque vide).<br />
Vide : les accus doivent être rechargés.<br />
Segments continus : les accus se rechargent page 58.<br />
Segments constants : les accus sont totalement rechargés<br />
Connexion à la base.<br />
Clignote : connexion faible ou aucune connexion.<br />
Constante : bonne connexion.<br />
Clignote : appel en cours page 71.<br />
Continue : vous téléphonez page 71.<br />
<br />
<br />
Appels en absence.<br />
Vous avez de nouveaux appels dans le journal des appels page 79.<br />
Vous vous trouvez dans le répertoire page 75.<br />
<br />
Le contact ou l’affichage continue vers la droite page 76.<br />
<br />
Le contact ou l’affichage continue vers la gauche page 76.<br />
Constante : répondeur activé page 83.<br />
Clignote : nouveaux messages sur le répondeur page 85. Ou : la capacité<br />
de la mémoire du répondeur est épuisée. Effacez des messages page 86<br />
La sonnerie est désactivée page 74.<br />
<br />
<br />
Le microphone est programmé sur muet page 75.<br />
<br />
Le mode mains−libres est activé page 75.<br />
<br />
Le verrouillage du clavier est activé page 71.<br />
<br />
Le réveil est activé page 81.<br />
<br />
Répondeur dans le réseau téléphonique. VMWI − Service confort de votre<br />
opérateur page 93.<br />
61
Introduction<br />
4 Introduction<br />
Dans ce chapitre, vous trouverez des informations de base vous expliquant <strong>com</strong>ment vous servir<br />
du guide de l’utilisateur.<br />
Représentations dans le guide<br />
Représentation Description<br />
Représentation des touches<br />
Appuyer brièvement sur la touche représentée<br />
Appuyer brièvement sur une touche quelconque<br />
2 sec. Appuyer 2 secondes sur la touche représentée<br />
1<br />
<br />
Saisir des chiffres ou des lettres<br />
Le <strong>com</strong>biné sonne<br />
Le téléphone sonne<br />
<br />
<br />
Langue<br />
<br />
CB1 / CB2<br />
BS<br />
Décrocher le téléphone ou retirer le <strong>com</strong>biné de la station d’accueil<br />
Raccrocher ou poser le <strong>com</strong>biné dans sa station d’accueil<br />
Représentation des textes affichés<br />
Rreprésentation des icônes affichées<br />
Combiné 1, Combiné 2 etc.<br />
Base<br />
Mode veille 85<br />
Toutes les descriptions contenues dans ce guide partent du principe que le téléphone (la base) et<br />
le <strong>com</strong>biné se trouvent en mode veille. Le téléphone (la base) et le <strong>com</strong>biné se trouvent en mode<br />
veille quand vous ne téléphonez pas et quand aucun menu n’est ouvert.<br />
Navigation dans le menu 86<br />
Vous pouvez accéder à toutes les fonctions dans différents menus. La structure de menu vous<br />
montre <strong>com</strong>ment accéder à la fonction voulue page 64.<br />
<br />
/ <br />
Chaque opération est automatiquement interrompue si vous n’effectuez pas de saisie<br />
dans les 20 secondes.<br />
Ouvrir le menu principal<br />
Sélectionner l’option voulue<br />
62<br />
1 Des lettres sont gravées sur les touches numériques. En appuyant plusieurs fois sur la touche<br />
adéquate, vous pouvez saisir des lettres, des chiffres et des caractères spéciaux.
Introduction<br />
<br />
/ <br />
<br />
/ <br />
<br />
<br />
<br />
<br />
Ouvrir le sous−menu<br />
Sélectionner la fonction voulue<br />
Ouvrir la fonction<br />
Sélectionner le réglage voulu<br />
Saisir des chiffres ou des lettres via le pavé<br />
numérique<br />
Confirmer les entrées<br />
Reculer d’un niveau<br />
Annuler les actions de programmation et de<br />
sauvegarde et retourner en mode veille<br />
De nombreuses saisies terminées avec la touche sont confirmée par un bip sonore.<br />
Ajouter un contact dans le répertoire − exemple 87<br />
L’exemple Ajouter des contacts dans le répertoire (<strong>com</strong>biné) vous explique ici <strong>com</strong>ment naviguer<br />
dans les menus et effectuer des réglages. Procédez <strong>com</strong>me dans cet exemple pour tous les<br />
réglages.<br />
<br />
Ouvrir le menu principal<br />
/ Répertoire Ouvrir le répertoire<br />
Ajouter Sélectionner le sous−menu et valider<br />
Entrez nom , <br />
Numéro , <br />
Numéro , <br />
Saisir le nom (max. 12 caractères) et valider<br />
Saisir le numéro d’appel 1 (portable) (max.<br />
24 chiffres) et valider<br />
Saisir le numéro 2 (fixe) (max. 24 chiffres) et valider<br />
Mélodie VIP , / , Attribuer une mélodie de sonnerie<br />
<br />
Retourner au mode veille<br />
Vous pouvez sauvegarder 2 numéros de téléphone par nom ou contact. L’icône d’un<br />
portable précède la première place de mémoire, l’icône d’une maison précède la<br />
deuxième. C’est pourquoi nous re<strong>com</strong>mandons de programmer seulement des numéros<br />
de portable pour la première place de mémoire et seulement des numéros de fixe<br />
pour la deuxième.<br />
63
Structure de menu<br />
5 Structure de menu<br />
88 89<br />
Vous parvenez au menu principal en appuyant sur la touche ou . Ensuite sélectionnez<br />
avec les touches / un contact et validez votre sélection avec la touche ou . Pour<br />
d’autres informations relatives au menu et à la manipulation, se reporter au chapitre 4.<br />
Répondeur<br />
Mode répond.<br />
Supp.anciens<br />
Enreg. mémo<br />
Annonce 1<br />
Annonce 2<br />
Rép. &enreg.<br />
Rép. seule<br />
Désactivé<br />
Écouter ann.<br />
Suppr. MSG<br />
Enreg. ann.<br />
Écouter ann.<br />
Suppr. MSG<br />
Enreg. ann.<br />
90<br />
Écran appels<br />
1ere. sonn.<br />
Activé / Désactivé<br />
Économie<br />
08 Sonneries<br />
06 Sonneries<br />
04 Sonneries<br />
02 Sonneries<br />
64
Durée mess.<br />
Langue<br />
PIN distance<br />
180 Sec<br />
150 Sec<br />
120 Sec<br />
90 Sec<br />
Français<br />
FRANÇAIS<br />
NEDERLANDS<br />
ITALIANO<br />
Structure de menu<br />
91<br />
Interphone<br />
Combiné 01 à 06 1<br />
1 Affichage selon le nombre de <strong>com</strong>binés déclairés<br />
65
Structure de menu<br />
Répertoire<br />
Ajouter<br />
Modifier<br />
Supprimer<br />
Tout suppr.<br />
Copier dans<br />
MÉMOIRE<br />
Entrez nom 1<br />
Numéro<br />
<br />
Numéro<br />
<br />
Mélodie VIP 01 / 02 / ... / Désactivé<br />
Entrez nom 1<br />
Numéro<br />
<br />
Numéro<br />
<br />
Mélodie VIP 01 / 02 / ... / Désactivé<br />
M1<br />
M2<br />
66<br />
1 Des lettres sont gravées sur les touches numériques. En appuyant plusieurs fois sur la touche<br />
adéquate, vous pouvez saisir des lettres, des chiffres et des caractères spéciaux.
Structure de menu<br />
Horl./Réveil<br />
Régl. réveil<br />
Une fois<br />
Désactivé<br />
92<br />
Activé<br />
Entrez heure <br />
Chaque jour<br />
Désactivé<br />
Activé<br />
Entrez heure <br />
Format date<br />
JJ/MM<br />
MM/JJ<br />
Format heure<br />
24 heures<br />
12 heures<br />
Régl. heure 1<br />
<br />
93<br />
1 Vous réglez la date et l’heure dans ce menu.<br />
67
Structure de menu<br />
Disposnible seulement sur un <strong>com</strong>biné :<br />
Conf. <strong>com</strong>b.<br />
Sons <strong>com</strong>b.<br />
Égaliseur<br />
Volume <strong>com</strong>b.<br />
Sonn. ext. 12 / ... / 01<br />
Sonn. int. 12 / ... / 01<br />
Bip touches<br />
Pile faible<br />
Hors portée<br />
Naturel<br />
Basses<br />
Aigus<br />
05 / ... / 01 /Désactivé<br />
Désactivé / Bip /Mélod.<br />
sonn.<br />
Activé / Désactivé<br />
Activé / Désactivé<br />
94<br />
95<br />
96<br />
97<br />
98<br />
Contrast.LCD 06 / ... / 01<br />
Nom <strong>com</strong>b 2<br />
Décroch.auto<br />
Activé / Désactivé<br />
Appel bébé<br />
Désactivé<br />
Activé<br />
Entrez num. <br />
99<br />
100<br />
101<br />
102<br />
Verrou. auto<br />
Langue<br />
Activé / Désactivé<br />
(9 langues)<br />
103<br />
104<br />
68<br />
1 Cette option est affichée seulement sur le <strong>com</strong>biné.<br />
2 Des lettres sont gravées sur les touches numériques. En appuyant plusieurs fois sur la touche<br />
adéquate, vous pouvez saisir des lettres, des chiffres et des caractères spéciaux.
Structure de menu<br />
Disposnible seulement sur un <strong>com</strong>biné :<br />
Config. base 1<br />
Effac. VMWI<br />
Associer<br />
Sélect. base<br />
Avancé<br />
Base 1 PIN ? PIN ? 2<br />
Base 2 PIN ? PIN ? 2<br />
Base 3 PIN ? PIN ? 2<br />
Base 4 PIN ? PIN ? 2<br />
Base 1<br />
Base 2<br />
Base 3<br />
Base 4<br />
Auto<br />
Mode numér.<br />
Délai flash<br />
Préfixe<br />
Blocage app.<br />
Numéro SOS<br />
Annuler <strong>com</strong><br />
Changer PIN<br />
Fréq. voc. / Impulsions<br />
Court / Moyen / Long<br />
<br />
04 / ... / 01 <br />
Entrez num. <br />
04 / ... / 01 <br />
Entrez num. <br />
Combiné<br />
PIN ? <br />
Réinit. Confirmer ?<br />
105<br />
106<br />
107<br />
108<br />
109<br />
110<br />
111<br />
112<br />
113<br />
1 Cette option est affichée avec exactement les sous−menus seulement sur le <strong>com</strong>biné.<br />
2 Le code PIN est configuré en usine sur 0000".<br />
69
Structure de menu<br />
Disponible seulement sur l’appareil de base :<br />
Config. base 1<br />
Mélodie<br />
Volume <strong>com</strong>b.<br />
Sonn. ext. 12 / ... / 01<br />
Sonn. int. 12 / ... / 01<br />
Bip touches<br />
05 / ... / 01 /Désactivé<br />
Désactivé / Bip /Mélod.<br />
sonn.<br />
114<br />
115<br />
Contrast.LCD 06 / ... / 01<br />
Effac. VMWI 06 / ... / 01<br />
116<br />
117<br />
Langue<br />
Associer<br />
Avancé<br />
(9 langues)<br />
Base 1 PIN ? PIN ? 2<br />
Base 2 PIN ? PIN ? 2<br />
Base 3 PIN ? PIN ? 2<br />
Base 4 PIN ? PIN ? 2<br />
Mode numér. Fréq. voc. / Impulsions<br />
Délai flash<br />
Court / Moyen / Long<br />
Préfixe<br />
<br />
Blocage app.<br />
04 / ... / 01 <br />
Entrez num. <br />
Numéro SOS<br />
04 / ... / 01 <br />
Entrez num. <br />
Annuler <strong>com</strong> Combiné<br />
Changer PIN PIN ?<br />
Réinit. Confirmer ?<br />
118<br />
119<br />
120<br />
121<br />
122<br />
123<br />
124<br />
125<br />
126<br />
127<br />
1 Cette option est affichée avec exactement les sous−menus seulement sur l’appareil de base.<br />
2 Le code PIN est configuré en usine sur 0000".<br />
70
6 Utilisation<br />
Utilisation<br />
Vous pouvez utiliser de nombreuses fonctions aussi bien de l’appareil de base que du <strong>com</strong>biné.<br />
Veuillez tenir <strong>com</strong>pte que beaucoup des touches représentées par la suite se trouvent tant sur<br />
l’appareil de base que sur le <strong>com</strong>biné page 59.<br />
Vous ne pouvez pas basculer d’un déroulement d’une utilisation de l’appareil de base<br />
sur celui du <strong>com</strong>biné. Avant de <strong>com</strong>mencer le déroulement d’une utilisation, décidez−<br />
vous si vous voulez le faire sur l’appareil de base ou sur le <strong>com</strong>biné.<br />
Allumer et éteindre le <strong>com</strong>biné<br />
Vous ne pouvez pas recevoir d’appels sur le <strong>com</strong>biné quand celui−ci est éteint.<br />
Les accus ne s’usent pas quand celui−ci est éteint.<br />
Vous ne pouvez pas passer d’appel d’urgence avec le <strong>com</strong>biné quand celui−ci est<br />
éteint. Il faut d’abord l’allumer, ce qui peut prendre un certain temps.<br />
2 sec. Allumer le <strong>com</strong>biné (en mode veille)<br />
2 sec. Éteindre le <strong>com</strong>biné<br />
Verrouillage du clavier 128<br />
Le verrouillage du clavier est censé empêcher que des fonctions soient déclenchées par inadvertance.<br />
1 sec. Activer le verrouillage du clavier<br />
Lorsque le verrouillage du clavier est activé, vous pouvez <strong>com</strong>me d’habitude réceptionner<br />
des appels entrants. Vous pouvez également effectuer des appels d’urgence (avec<br />
les numéros d’urgence), même si le clavier est verrouillé.<br />
1 sec. Désactiver le verrouillage du clavier<br />
Si le verrouillage du clavier est activé, l’icône s’affiche.<br />
Vous pouvez programmer le téléphone de la sorte que le verrouillage du clavier soit activé automatiquement<br />
au bout de 90 secondes page 81.<br />
Téléphoner<br />
Prendre un appel<br />
En plus de la sonnerie, la signalisation optique d’appel s’allume à chaque appel. 129<br />
, ou <br />
Prendre l’appel<br />
Ne placez pas le <strong>com</strong>biné qui sonne trop près de votre oreille, vous pourriez endommager<br />
votre audition !<br />
Si vous avez activé la prise d’appel automatique, il vous suffit de retirer le <strong>com</strong>biné de la station<br />
d’accueil pour prendre cet appel page 81.<br />
Terminer la <strong>com</strong>munication<br />
ou <br />
Raccrocher<br />
Pour terminer la <strong>com</strong>munication, reposer le <strong>com</strong>biné sur la station d’accueil.<br />
71
Utilisation<br />
Émettre un appel<br />
<br />
<br />
ou ou <br />
Composer le numéro d’appel (max. 48 chiffres)<br />
Si la saisie est erronée, effacer le dernier chiffre<br />
Composer le numéro<br />
Vous pouvez également appuyer d’abord sur la touche du <strong>com</strong>biné ou décrocher<br />
le <strong>com</strong>biné de l’appareil de base ou bien encore appuyer sur la touche , vous obtiendrez<br />
la tonalité. Les chiffres saisis de votre numéro d’appel (max. 48 chiffres) sont immédiatement<br />
<strong>com</strong>posés. La correction individuelle des chiffres du numéro d’appel<br />
n’est pas possible quand la <strong>com</strong>munication est établie de cette manière.<br />
Répétition des derniers numéros 130<br />
Votre <strong>com</strong>biné enregistre les 5 derniers numéros <strong>com</strong>posés avec date et heure de l’appel. Si vous<br />
souhaitez <strong>com</strong>poser une nouvelle fois les numéros, p. ex. parce que la ligne était occupée ou<br />
parce que vous n’avez pas pu atteindre votre correspondant, utilisez la touche de répétition des<br />
derniers numéros :<br />
, / Ouvrir la liste de répétition des derniers numéros et<br />
sélectionner un contact<br />
ou ou <br />
Établir la <strong>com</strong>munication<br />
Le numéro enregistré est automatiquement <strong>com</strong>posé et la <strong>com</strong>munication établie.<br />
Rappeler des appels entrés 131<br />
Votre téléphone enregistre 40 numéros dans un journal des appels.<br />
, / Ouvrir le journal des appels et sélectionner un contact<br />
ou ou <br />
Établir la <strong>com</strong>munication<br />
Composer des numéros à partir du répertoire<br />
Vous devez avoir enregistré des numéros dans le répertoire page 76.<br />
, / Ouvrir le répertoire et sélectionner le contact<br />
ou ou <br />
Établir la <strong>com</strong>munication<br />
Pour avoir accès plus rapidement à un contact du répertoire, appuyez, répertoire ouvert,<br />
sur la touche avec l’initiale du contact. Le premier contact ayant cette initiale s’affiche<br />
et est en surbrillance.<br />
Composer des numéros avec les touches de sélection directe 132<br />
Vous devez avoir mémorisé des numéros sur ces touches page 77.<br />
ou<br />
Établir la <strong>com</strong>munication<br />
Le numéro enregistré est <strong>com</strong>posé automatiquement.<br />
Téléphoner en interne 133<br />
Vous devez avoir déclaré au moins un <strong>com</strong>biné à l’appareil de base pour téléphoner gratuitement<br />
en interne.<br />
72
Téléphoner en interne<br />
CB 1 : ou BS : ,<br />
/ Interphone , ou <br />
CB1/BS : / , ou <br />
CB2 : <br />
CB1/BS / CB2 : <br />
Activer une <strong>com</strong>munication en interne<br />
Utilisation<br />
Sélectionner le <strong>com</strong>biné voulu ou l’appareil de base<br />
Prendre une <strong>com</strong>munication interne sur un autre<br />
<strong>com</strong>biné<br />
Terminer une <strong>com</strong>munication interne<br />
Si le <strong>com</strong>biné que vous voulez appeler téléphone en externe, vous entendez un bip et<br />
vous voyez sur l’écran Ligne occup..<br />
Prendre des appels externes pendant une <strong>com</strong>munication interne<br />
Si un appel externe entre pendant que vous téléphonez en interne, un message s’affiche<br />
à l’écran.<br />
<br />
Prendre la <strong>com</strong>munication externe<br />
Sur le <strong>com</strong>biné qui n’a pas pris la <strong>com</strong>munication, appuyez sur la touche our terminer la <strong>com</strong>munication<br />
interne.<br />
Transférer des <strong>com</strong>munications externes en interne<br />
CB 1 : ou BS : ,<br />
/ , Interphone , ou Pendant la <strong>com</strong>munication externe<br />
/ , ou <br />
Sélectionner le <strong>com</strong>biné voulu ou l’appareil de base<br />
CB2 : <br />
Prendre une <strong>com</strong>munication interne sur un autre<br />
<strong>com</strong>biné<br />
CB1 : ou BS : <br />
Transférer la <strong>com</strong>munication (raccrocher)<br />
Inter<strong>com</strong>munication / Va−et−vient<br />
CB 1 : ou BS : ,<br />
/ , Interphone , ou <br />
/ , ou <br />
CB2 : <br />
Pendant la <strong>com</strong>munication externe<br />
Sélectionner le <strong>com</strong>biné voulu ou l’appareil de base<br />
Prendre une <strong>com</strong>munication interne sur un autre<br />
<strong>com</strong>biné<br />
CB 1 : ou BS : , / Vat et vient<br />
ou <br />
Changer de correspondant<br />
Mener des conférences téléphoniques<br />
Une <strong>com</strong>munication externe peut être transformée en conférence téléphonique avec un autre correspondant<br />
interne.<br />
CB 1 : ou BS : ,<br />
/ , Interphone , <br />
Pendant la <strong>com</strong>munication externe<br />
/ , <br />
Sélectionner le <strong>com</strong>biné voulu ou l’appareil de base<br />
73
Utilisation<br />
CB2 : <br />
Prendre une <strong>com</strong>munication interne sur un autre<br />
<strong>com</strong>biné<br />
CB1 ou BS : 2 sec. Conférence Conférences téléphoniques<br />
CB1 ou BS et CB2 : <br />
Terminer la conférence<br />
Affichage de la durée de la <strong>com</strong>munication<br />
Quelques secondes après le début de la <strong>com</strong>munication l’écran affiche la durée actuelle de la<br />
<strong>com</strong>munication en minutes et secondes.<br />
Régler le volume sonore de l’écouteur<br />
Pendant une <strong>com</strong>munication vous pouvez régler le volume sonore sur 5 sensibilités.<br />
/ <br />
Augmenter / Diminuer le volume de l’écouteur<br />
Volume de la sonnerie d’appel<br />
Vous pouvez modifier séparément le volume de la sonnerie de l’appareil de base et du <strong>com</strong>biné.<br />
Vous pouvez régler le volume sonore sur 5 sensibilités et couper le son.<br />
Réglage du volume de la sonnerie du <strong>com</strong>biné<br />
<br />
Ouvrir le menu<br />
/ Conf. <strong>com</strong>b. Conf. <strong>com</strong>b.<br />
/ Sons <strong>com</strong>b. <br />
Sons <strong>com</strong>b.<br />
/ Volume <strong>com</strong>b. Volume <strong>com</strong>b.<br />
/ <br />
<br />
Activer et désactiver la sonnerie 134<br />
3 sec. Désactiver la sonnerie<br />
3 sec. Activer la sonnerie<br />
Si la sonnerie est désactivée, l’icône s’affiche.<br />
Vous pouvez également désactiver la sonnerie via le menu.<br />
Augmenter / Diminuer le volume de la sonnerie<br />
Enregistrer le réglage<br />
Régler le volume de la sonnerie de l’appareil de base<br />
<br />
Ouvrir le menu<br />
/ Config. base Config. base<br />
/ Mélodie Mélodie<br />
/ Volume <strong>com</strong>b. Volume <strong>com</strong>b.<br />
/ <br />
<br />
Augmenter / Diminuer le volume de la sonnerie<br />
Enregistrer le réglage<br />
74
Utilisation<br />
Mode mains−libres 135<br />
Utilisez cette fonction pour entendre le correspondant par l’intermédiaire du haut−parleur.<br />
ou <br />
Activer le mode mains−libres pendant une<br />
<strong>com</strong>munication<br />
ou <br />
Désactiver le mode mains−libres pendant une<br />
<strong>com</strong>munication<br />
Si le mode mains−libres est activé, l’icône s’affiche.<br />
Mettre le microphone en mode Muet 136<br />
Vous pouvez désactiver et activer le microphone de l’appareil ou du <strong>com</strong>biné pendant une <strong>com</strong>munication<br />
de sorte que votre correspondant ne vous entend pas quand, p. ex., vous désirez parler<br />
avec une autre personne se trouvant dans la pièce.<br />
2 sec. ou Désactiver le microphone pendant une<br />
<strong>com</strong>munication (mode Muet)<br />
2 sec. ou Activer le microphone pendant une <strong>com</strong>munication<br />
Si le microphone est désactivé, l’icône s’affiche.<br />
Répertoire 137<br />
Vous pouvez sauvegarder 50 contacts avec 2 numéros de téléphone chacun dans le répertoire.<br />
Saisissez toujours les numéros d’appel avec l’indicatif afin que le téléphone puisse aussi<br />
attribuer les <strong>com</strong>munications locales entrantes à un contact du répertoire.<br />
Si la capacité de mémoire est épuisée, l’écran affiche le message suivant Mém. pleine .<br />
Pour créer de la place, vous devez effacer un autre contact.<br />
Les contacts du répertoire sont classés par ordre alphabétique.<br />
Si vous vous trouvez dans le répertoire, l’icône s’affiche.<br />
Vous avez accès au répertoire depuis l’appareil de base et le <strong>com</strong>biné.<br />
Saisir un nom<br />
Des lettres sont gravées sur les touches numériques. En appuyant plusieurs fois sur la touche<br />
adéquate, vous pouvez saisir des lettres, des chiffres et des caractères spéciaux.<br />
<br />
Entrer des espaces<br />
<br />
Entrer des caractères spéciaux<br />
<br />
Effacer<br />
/ <br />
Déplacer le curseur<br />
Pour saisir deux fois la même lettre, appuyez sur la touche correspondante. Attendez<br />
que le curseur soit passé derrière la lettre. Puis tapez celle−ci une nouvelle fois.<br />
75
Utilisation<br />
Ajouter des contacts dans le répertoire<br />
également page 63<br />
<br />
ou Ajouter<br />
ou <br />
Entrez nom , ou <br />
138<br />
Ouvrir le répertoire<br />
Sélectionner le sous−menu et valider<br />
Saisir le nom (max. 12 caractères) et valider<br />
Numéro , ou Saisir le numéro d’appel 1 (portable)<br />
(max. 24 chiffres) et valider<br />
Numéro , ou Saisir le numéro d’appel 2 (fixe) (max. 24 chiffres) et<br />
valider<br />
Mélodie VIP , / , ou Attribuer une mélodie de sonnerie<br />
Si les contacts sont plus longs que l’écran peut les afficher, les icônes et s’affichent. Elles<br />
montrent que le contact dépasse l’écran vers la gauche ou vers la droite.<br />
Si la capacité de mémoire est épuisée, l’écran affiche le message suivant Mém. pleine . Pour<br />
créer de la place, vous devez effacer un autre contact.<br />
Si un nom existe déjà sous lequel vous voulez enregistrer un nouveau contact, l’écran affiche le<br />
message suivant lors de l’enregistrement : Nom existe .<br />
Modifier des contacts du répertoire 139<br />
<br />
Ouvrir le répertoire<br />
/ , ou <br />
Sélectionner le contact et valider<br />
/ Modifier ou Sélectionner le sous−menu et valider<br />
Entrez nom , ou <br />
Modifier le nom (max. 12 caractères) et valider<br />
Numéro , ou Modifier le numéro d’appel 1 (portable) (max.<br />
24 chiffres) et valider<br />
Numéro , ou Modifier le numéro d’appel 2 (fixe) (max. 24 chiffres)<br />
et valider<br />
Mélodie VIP , / , ou Attribuer une mélodie de sonnerie<br />
76
Effacer des contacts du répertoire<br />
Effacer un contact<br />
<br />
Ouvrir le répertoire<br />
/ , ou <br />
Sélectionner le contact et valider<br />
/ Supprimer ou sélectionner le sous−menu et valider<br />
Utilisation<br />
Pour avoir accès plus rapidement à un contact du répertoire, appuyez, répertoire ouvert,<br />
sur la touche avec l’initiale du contact. Le premier contact ayant cette initiale s’affiche<br />
et est en surbrillance.<br />
Effacer tous les contacts<br />
<br />
Ouvrir le répertoire<br />
ou Ouvrir le menu<br />
/ Tout suppr. ou sélectionner le sous−menu et valider<br />
Confirmer ? , ou <br />
Vide<br />
ou<br />
Confirmer ? , ou <br />
Confirmer l’effacement<br />
Annuler l’effacement<br />
Vérifier la capacité du répertoire<br />
Consultez <strong>com</strong>bien de contacts sont encore libres sur les 50.<br />
<br />
Ouvrir le répertoire<br />
ou Ouvrir le menu<br />
/ , MÉMOIRE ou sélectionner le sous−menu et valider<br />
Programmer les touches de sélection directe 140<br />
Vous avez la possibilité de mémoriser 2 numéros du répertoire de la sorte que vous puissiez les<br />
<strong>com</strong>poser en n’appuyant que sur la touche ou (sélection directe).<br />
<br />
Ouvrir le répertoire<br />
/ , ou <br />
Sélectionner le contact et valider<br />
/ Copier dans ou sélectionner le sous−menu et valider<br />
M1 i / , ou <br />
ou <br />
Sélectionner la touche de sélection directe et valider<br />
Confirmer le numéro affiché<br />
Composer un numéro avec la touche de sélection directe<br />
Page72.<br />
77
Utilisation<br />
Liste de répétition des derniers numéros<br />
Votre <strong>com</strong>biné enregistre les 5 derniers numéros <strong>com</strong>posés avec date et heure de l’appel.<br />
Enregistrer dans le répertoire un numéro de la liste de répétition des derniers<br />
numéros <strong>com</strong>posés<br />
<br />
Ouvrir la liste des derniers numéros <strong>com</strong>posés<br />
/ , ou <br />
Sélectionner le contact et valider<br />
/ , Enreg. num. ou sélectionner le sous−menu et valider<br />
Entrez nom , ou <br />
Saisir le nom (max. 12 caractères) et valider<br />
Entrez num. , ou Modifier le cas échéant le numéro d’appel (max. 24<br />
chiffres) et valider<br />
/ , ou <br />
Constater si le numéro est un numéro de portable ou<br />
de fixe et valider<br />
Effacer un numéro de la liste de répétition des derniers numéros <strong>com</strong>posés<br />
<br />
Ouvrir la liste des derniers numéros <strong>com</strong>posés<br />
/ , ou <br />
Sélectionner le contact et valider<br />
/ , Supprimer ou Sélectionner le sous−menu et valider<br />
Effacer toute la liste de répétition des derniers numéros <strong>com</strong>posés<br />
<br />
Ouvrir la liste de répétition des derniers numéros<br />
<strong>com</strong>posés<br />
ou <br />
Ouvrir le menu<br />
/ , Tout suppr. ou Sélectionner le sous−menu et valider<br />
Confirmer ? , ou <br />
Vide<br />
ou<br />
Confirmer ? , ou <br />
Confirmer l’effacement<br />
Annuler l’effacement<br />
Composer un numéro de la liste de répétition des derniers numéros <strong>com</strong>posés<br />
page 72<br />
78
Utilisation<br />
Journal des appels 141<br />
Tous les appels entrant pendant votre absence sont rassemblés dans un journal des appels. Vous<br />
pouvez y enregistrer jusqu’à 40 numéros. La date et l’heure de chaque appel sont conservées.<br />
Si vous vous trouvez dans le journal des appels, l’icône s’affiche.<br />
Le dernier numéro <strong>com</strong>posé s’affiche en premier dans le journal des appels.<br />
Si, pendant votre absence, de nouveaux numéros d’appel ont été enregistrés, la signalisation optique<br />
d’appel clignote ainsi que l’icône à l’écran. L’écran affiche en outre <strong>com</strong>bien vous avez eu<br />
d’appels en absence tant que vous n’avez pas ouvert le journal des appels.<br />
Faire afficher des numéros du journal des appels<br />
, / Ouvrir le journal des appels et sélectionner un contact<br />
Sauvegarder dans le répertoire des numéros du journal des appels<br />
Vous pouvez enregistrer un numéro dans le répertoire directement de la liste des appels.<br />
, / Ouvrir le journal des appels et sélectionner un contact<br />
ou <br />
Ouvrir le menu<br />
/ Enreg. num. ou Sélectionner le sous−menu et valider<br />
Entrez nom , ou <br />
Saisir le nom (max. 12 caractères) et valider<br />
Entrez num. , ou Modifier le cas échéant le numéro d’appel (max.<br />
24 chiffres) et valider<br />
/ , ou <br />
Constater si le numéro est un numéro de portable ou<br />
de fixe et valider<br />
Effacer des numéros du journal des appels<br />
Effacer des numéros individuels<br />
, / Ouvrir le journal des appels et sélectionner un contact<br />
ou <br />
Ouvrir le menu<br />
/ Supprimer ou Sélectionner le sous−menu et valider<br />
Effacer tous les numéros d’appel<br />
ou <br />
/ Tout suppr. ou <br />
Ouvrir le journal des appels<br />
Ouvrir le menu<br />
Sélectionner le sous−menu et valider<br />
Confirmer ? , ou Vide Confirmer l’effacement<br />
ou<br />
Confirmer ? , ou <br />
Annuler l’effacement<br />
Rappel des appels entrés<br />
page 72<br />
79
Utilisation<br />
Réglages du son et de l’affichage<br />
Vous pouvez effectuer différents réglages pour installer le téléphoner selon vos besoins :<br />
Régler la sonnerie<br />
Fixez pour les appels externes et internes la sonnerie devant toujours utilisée. 12 sonneries polyphoniques<br />
sont disponibles.<br />
Programmer la sonnerie Menu page 68<br />
Son des touches<br />
Le son des touches vous confirme que vous avez bien appuyé sur la touche. Vous pouvez programmer<br />
le téléphone de la sorte qu’en appuyant sur une touche quelconque, vous entendiez toujours<br />
le même son (réglage Bip) ou des sons différents (réglage Mélodie). Le son des touches<br />
peut également être désactivé.<br />
Programmer le son des touches Menu page 68<br />
Signal d’avertissement de la faible capacité des accus<br />
Un signal d’avertissement vous informe que la capacité des accus est faible.<br />
Programmer le signal d’avertissement de la faible capacité des accus (Pile faible)<br />
Menu page 68<br />
Signal sonore d’avertissement hors de portée :<br />
Un signal d’avertissement vous informe que vous vous écartez avec votre <strong>com</strong>biné de la portée de<br />
l’appareil de base.<br />
Régler le signal d’avertissement (Hors portée) Menu page 68<br />
Égaliseur<br />
Adaptez le son du haut−parleur à votre convenance. Laissez le son Naturel ou soulignez les Basses<br />
ou les Aigus.<br />
Régler l’égaliseur Menu page 68<br />
Régler le contraste de l’écran<br />
Vous pouvez modifier le contraste de l’écran (Contrast.LCD ) de l’appareil de base et du <strong>com</strong>biné<br />
sur 6 niveaux Menu page 68 et 70<br />
Nom du <strong>com</strong>biné<br />
Vous pouvez donner un nom à votre <strong>com</strong>biné (Nom <strong>com</strong>b). Menu page 68<br />
Format de l’heure et de la date<br />
Fixez le format et l’ordre dans lesquels vous voulez voir s’afficher la date et l’heure<br />
Menu page 67<br />
80
Utilisation<br />
Autres réglages<br />
Prise d’appel automatique 142<br />
Si vous avez activé cette fonction, l’appel sera automatiquement pris lorsque vous retirerez le<br />
<strong>com</strong>biné de la base. La prise d’appel automatique s’active ou se désactive via le menu.<br />
Activer la prise d’appel automatique Menu page 68<br />
Vous pouvez appeler l’option de menu Décroch.auto uniquement dans le menu d’un<br />
<strong>com</strong>biné.<br />
Verrouillage du clavier 143<br />
Si ce réglage est activé, le verrouillage du clavier est automatiquement activé si vous n’appuyez<br />
pas sur une touche quelconque pendant 90 secondes. Si le verrouillage du clavier est activé,<br />
l’icône s’affiche.<br />
Activer le verrouillage du clavier Menu page 68<br />
Préfixe 144<br />
Vous pouvez enregistrer un préfixe (Préfixe). Si vous appuyez un temps long sur la touche <br />
avant ou après avoir entré le numéro, il sera précédé de son préfixe. En appuyant sur la touche<br />
vous <strong>com</strong>posez le numéro.<br />
Modifier le préfixe Menu page 69<br />
Modifier le code PIN 145<br />
Vous avez besoin du code PIN pour déclarer vos <strong>com</strong>binés. Celui−ci est réglé à l’usine sur le<br />
"0000". Modifier le code PIN Menu page 69 (Menu de l’appareil de base)<br />
Remise à zéro 146<br />
Cette fonction vous permet de remettre votre téléphone aux réglages en usine.<br />
Réinitialisation Menu page 69 et 70<br />
Chercher le <strong>com</strong>biné (Paging)<br />
Si vous avez égaré votre <strong>com</strong>biné, vous pouvez le retrouver facilement en l’appelant de l’appareil<br />
de base.<br />
Conditions : le <strong>com</strong>biné est allumé, se trouve à l’intérieur de la portée de l’appareil de<br />
base, les accus ne sont pas vides et la sonnerie du <strong>com</strong>biné n’est pas désactivée. Le<br />
dernier signifie qu’à l’écran du <strong>com</strong>biné l’icône ne doit PAS être affichée.<br />
BS : <br />
Activer un appel interne<br />
BS : / <br />
Sélectionner le <strong>com</strong>biné à rechercher<br />
BS : <br />
Lancer l’appel de recherche<br />
Fonctions spéciales<br />
Réveil 147<br />
Cette fonction permet que votre <strong>com</strong>biné vous réveille ou vous rappelle quelque chose à un moment<br />
précis. Si le réveil est activé, l’icône s’affiche. À l’heure de réveil programmée, vous entendrez<br />
la sonnerie sélectionnée pendant une minute. Le message Réveil s’affiche.<br />
81
Utilisation<br />
Régler le réveil<br />
Vous pouvez choisir si vous désirez que le réveil vous réveille une seule fois (Une fois) ou si vous<br />
voulez qu’il vous réveille tous les jours (Chaque jour).<br />
Programmer le réveil (Régl. réveil) Menu page 67<br />
Terminer prématurément la sonnerie du réveil<br />
<br />
Terminer la sonnerie du réveil<br />
Appel bébé<br />
Cette fonction vous permet de sauvegarder un numéro d’appel précis (max. 24 chiffres) qui sera<br />
automatiquement appelé en mode mains−libres quand vous appuierez sur une touche quelconque<br />
(sauf et ).<br />
Si cette fonction est activée, l’affichage clignote en permanence à l’écran Appel bébé .<br />
Activer l’appel bébé Menu page 68<br />
Blocage d’appel<br />
Le blocage d’appel empêche les <strong>com</strong>binés de <strong>com</strong>poser des numéros qui <strong>com</strong>mencent avec les<br />
chiffres que vous avez enregistrés. Vous pouvez enregistrer 4 numéros bloqués de chacun 8 chiffres.<br />
Activer le blocage d’appel Menu page 69<br />
Si vous <strong>com</strong>posez un numéro bloqué, la <strong>com</strong>munication ne sera pas établie. L’appareil émet un<br />
son d’avertissement et retourne en mode veille.<br />
Numéro d’appel d’urgence<br />
Vous pouvez enregistrer jusqu’à 4 numéros d’appel pouvant être <strong>com</strong>posés malgré le blocage<br />
d’appel activé. La page 69 vous donnera la position dans le menu.<br />
Système de numérotation<br />
Vous pouvez utiliser votre téléphone tant avec les centrales téléphoniques analogiques (numérotation<br />
par impulsions / DC) qu’avec les nouvelles centrales téléphoniques numériques (numérotation<br />
par tonalité / FV). Le système de numérotation est programmé via le menu. La page 69 vous donnera<br />
la position dans le menu.<br />
Si vous utilisez le téléphone en mode de numérotation par impulsions, vous pouvez<br />
pendant une <strong>com</strong>munication basculer sur le mode numérotation par tonalité en appuyant<br />
sur la touche .<br />
Affichage du numéro d’appel (CLIP)<br />
L’affichage des numéros d’appel (CLIP) ainsi que celui de la date et de l’heure sont des<br />
services optionnels de votre opérateur. Veuillez lui demander de plus amples informations.<br />
Si votre installation téléphonique dispose de la fonction CLIP (CLIP = Calling Line Identification<br />
Presentation), l’écran indique le numéro d’appel du correspondant à l’arrivée d’un appel dans la<br />
mesure où ce correspondant est favorable à la transmission de son numéro.<br />
Si vous ne prenez pas l’appel, l’affichage est conservé sur l’écran pendant 6 secondes<br />
env. avant de retourner à l’affichage de l’heure et de la date.<br />
82
7 Répondeur<br />
Répondeur<br />
Le répondeur enregistre 57 messages maximum (59 messages, y <strong>com</strong>pris les textes d’annonce).<br />
La durée d’enregistrement maximum est de 15 minutes (y <strong>com</strong>pris les textes d’annonce).<br />
Si la capacité de la mémoire est saturée et ne permet plus de recevoir de nouveaux messages,<br />
plus aucun appel ne sera enregistré. Le répondeur bascule alors automatiquement en mode «Annonce<br />
simple».<br />
Vous pouvez utiliser le répertoire depuis l’appareil de base et le <strong>com</strong>biné.<br />
Activer / Désactiver le répondeur 148<br />
Si le répondeur est activé, la touche «Lecture/Stop» de l’appareil de base est allumée en rouge.<br />
De plus, l’icône est affichée en permanence à l’écran de l’appareil de base et des <strong>com</strong>binés<br />
déclarés.<br />
En réglage usine, le répondeur est activé.<br />
Activer / Désactiver le répondeur de l’appareil de base<br />
<br />
Activer / Désactiver le répondeur<br />
Activer le répondeur du <strong>com</strong>biné<br />
, / Répondeur , , / Mode répond. , ,<br />
/ Rép. &enreg. ou Rép. seule <br />
Menu page 64<br />
Désactiver le répondeur du <strong>com</strong>biné<br />
, / Répondeur , , / Mode répond. , ,<br />
/ Désactivé , <br />
Menu page 64<br />
Modes de réponse<br />
Votre répondeur met deux modes de réponse à votre disposition : le mode répondeur−enregistreur<br />
(Rép. &enreg.) et le mode annonce simple (Rép. seule). En mode répondeur−enregistreur l’appelant<br />
peut laisser un message. En mode annonce seule il ne peut pas laisser de message.<br />
Sélectionner le mode de réponse<br />
Sélectionnez le mode de votre choix Menu page 64. Voir également le passage «Activer / Désactiver<br />
le répondeur» à la page 83.<br />
En réglage usine, le mode répondeur−enregistreur est actifé.<br />
83
Répondeur<br />
Texte d’annonce<br />
Votre répondeur met à votre disposition deux textes d’annonce prédéfinis. Vous pouvez remplacer<br />
les deux textes d’annonce par vos propres textes.<br />
En mode «répondeur−enregistreur», c’est le texte Annonce 1 qui est utilisé, en mode «annonce<br />
simple», c’est le texte Annonce 2 qui est utilisé.<br />
Dès que vous enregistrez votre propre texte d’annonce, le répondeur n’utilise plus que<br />
celui−ci.<br />
Si la mémoire du répondeur est pleine, c’est le texte d’annonce sans enregistrement qui se fera<br />
automatiquement entendre.<br />
Langue des textes d’annonce<br />
Vous pouvez modifier la réponse vocale des textes d’annonces préréglés. Vous disposez de 4 langues.<br />
, ou / / Répondeur ,<br />
ou , / Langue ,<br />
ou <br />
Ouvrir le sous−menu<br />
/ , ou Sélectionner la langue et valider<br />
Écouter le texte d’annonce<br />
Menu page 64 (Écouter ann.)<br />
Enregistrer un texte d’annonce<br />
Votre propre annonce ne peut pas dépasser 2 minutes.<br />
, ou / / Répondeur ,<br />
ou <br />
Ouvrir le sous−menu<br />
/ Annonce 1<br />
ou Annonce 2 ou Sélectionner le texte d’annonce<br />
, / Enreg. ann. ,<br />
ou <br />
Commencer l’enregistrement<br />
, Dicter le texte d’annonce<br />
ou <br />
Terminer l’enregistrement et enregistrer<br />
Enregistrez le texte désiré en parlant clairement et distinctement dans le microphone de l’appareil<br />
de base (à l’avant de l’appareil) ou de votre <strong>com</strong>biné. Quand vous aurez terminé, l’annonce sera<br />
diffusée à voix haute.<br />
Veillez à dicter des textes d’annonce de longueur suffisante (max. 2 minutes) si vous<br />
voulez utiliser les fonctions de la consultation à distance "Consultation à distance"<br />
page 88.<br />
84
Répondeur<br />
Activer à nouveau le texte d’annonce standard<br />
Si vous effacez votre propre texte d’annonce, le texte d’annonce standard sera réactivé.<br />
L’effacement du texte d’annonce s’effectue au menu Menu page 64 (Suppr. MSG).<br />
Vous ne pouvez pas effacer les textes d’annonce standard.<br />
Diffuser les messages enregistrés 149<br />
Si vous avez de nouveaux messages, les signalisations optiques d’appel de l’appareil de base et<br />
des <strong>com</strong>binés déclarés clignotent et sur leur écran s’affiche l’icône . Sur l’écran de l’appareil de<br />
base et des <strong>com</strong>binés déclarés s’affiche de plus une information signalant le nombre de nouveaux<br />
messages.<br />
Les messages entrés sont numérotés dans l’ordre de leur réception.<br />
Ils sont diffusés dans le sens inverse : le message enregistré en dernier est diffusé en premier.<br />
Le numéro du message ainsi que la date et l’heure de son enregistrement sont affichés pendant<br />
sa diffusion.<br />
Les nouveaux messages sont d’abord diffusés. Pour écouter les anciens, lancez la diffusion<br />
des messages encore une fois.<br />
Diffuser les messages sur l’appareil de base (via le haut−parleur)<br />
<br />
Écouter / Arrêter les messages<br />
<br />
Réentendre un message<br />
2x <br />
Message précédent<br />
<br />
Message suivant<br />
Diffuser les messages sur le <strong>com</strong>biné<br />
, / Écouter msg. ,<br />
Attendez Diffuser les messages (via haut−parleur)<br />
Options pendant la diffusion :<br />
<br />
Ouvrir le menu<br />
/ Suppr. MSG <br />
Supprimé<br />
Effacer le message<br />
/ Stop Arrêter l’écoute<br />
/ Renvoyer MSG Message suivant<br />
/ Répéter MSG Diffuser le message actuel depuis le début<br />
/ MSG préc. <br />
Message précédent<br />
85
Répondeur<br />
Vous pouvez également créer ces fonctions en appuyant sur des touches déterminées :<br />
<br />
Effacer le message<br />
<br />
Diffuser le message actuel depuis le début<br />
2x <br />
Message précédent<br />
<br />
Arrêter la diffusion (Pause)<br />
<br />
Message suivant<br />
Régler le volume de la diffusion des messages<br />
Pendant une diffusion vous pouvez programmer le volume sur l’appareil de base sur 5 sensibilités.<br />
/ <br />
Augmenter / diminuer le volume<br />
Pendant une diffusion vous pouvez programmer le volume sur le <strong>com</strong>biné sur 5 sensibilités.<br />
/ <br />
Augmenter / diminuer le volume<br />
Effacer un message 150<br />
Pendant la diffusion d’un message :<br />
BS : <br />
ou<br />
CB : <br />
CB : / Suppr. MSG <br />
Supprimé<br />
ou<br />
CB : <br />
Effacer tous les messages 151<br />
Tous les anciens messages s’effacent.<br />
Effacer le message<br />
Ouvrir le menu<br />
Effacer le message<br />
Effacer le message<br />
Les messages effacés ne peuvent pas être restaurés !<br />
86<br />
ou , / Supp.anciens ,<br />
ou , Confirmer ? , ou <br />
Écoute amplifiée<br />
Vous pouvez écouter des appels entrants sur l’appareil de base via le haut−parleur sans avoir besoin<br />
de décrocher. Pour cela vous devez avoir activé l’écoute amplifiée au menu<br />
Menu page 64 (Écran appels).<br />
Pour modifier le volume pendant l’écoute amplifiée, appuyez sur les touches et<br />
.<br />
Intercepter un appel<br />
Si le répondeur a déjà répondu à un appel, vous pouvez intercepter celui−ci. L’enregistrement du<br />
message est, dans ce cas, interrompu.<br />
ou ou <br />
Intercepter l’appel
Répondeur<br />
Report de la prise d’appel<br />
Définissez le nombre de fois que le téléphone doit sonner avant que l’appelant n’entende le texte<br />
d’annonce. Vous pouvez choisir entre 2, 4, 6 ou 8 sonneries d’appel Menu page 64 (1ere.<br />
sonn.).<br />
En réglage usine, le répondeur est réglé sur 4 sonneries.<br />
De plus, vous pouvez utiliser le paramètre Économie pour la consultation préalable à distance<br />
gratuite. Cette consultation préalable à distance vous permet de constater gratuitement si de nouveaux<br />
messages se trouvent sur votre répondeur. Si vous avez de nouveaux messages, votre appel<br />
sera pris au plus tard après la 2ème sonnerie. Si vous n’en avez pas, votre appel ne sera pris<br />
qu’après la 6ème sonnerie. Raccrochez avant la 6ème sonnerie. Ainsi, la <strong>com</strong>munication ne sera<br />
pas facturée.<br />
Autres informations relatives à la consultation à distance page 88<br />
Durée maximale d’enregistrement pour chaque message<br />
Vous disposez de 4 durées d’enregistrement Menu page 65 (Durée mess.)<br />
Enregistrer un mémo<br />
Un mémo est un message que vous pouvez laisser pour une autre personne et qui peut s’écouter<br />
<strong>com</strong>me un message reçu. Un mémo ne peut pas dépasser 3 minutes et est dicté sur le <strong>com</strong>biné.<br />
Vous pouvez aussi enregistrer des mémos lorsque le répondeur est débranché.<br />
, ou , / Répondeur ,<br />
ou <br />
, ou , / Enreg. mémo ,<br />
ou <br />
Ouvrir le sous−menu<br />
Commencer l’enregistrement<br />
, Dicter le mémo<br />
ou <br />
Terminer l’enregistrement et enregistrer<br />
Annuler l’enregistrement d’un mémo<br />
BS: <br />
ou<br />
CB : ou <br />
Annuler l’enregistrement et revenir au sous−menu<br />
Annuler l’enregistrement et revenir au sous−menu<br />
87
Répondeur<br />
Consultation à distance 152<br />
Vous pouvez appeler votre répondeur pour l’activer ou pour écouter des messages et vous servir<br />
d’autres fonctions à condition que votre téléphone soit équipé de la fonctionnalité de numérotation<br />
par tonalité.<br />
Code PIN pour la consultation à distance 153<br />
Le PIN distance est configuré en usine sur le 1234". Il est re<strong>com</strong>mandé de modifier le PIN distance<br />
afin qu’une personne non autorisée ne puisse avoir accès au répondeur.<br />
Code PIN pour la consultation à distance Menu page 65.<br />
Si vous avez modifié le code Pin pour la consultation à distance et qu’ensuite vous<br />
l’ayez oublié, vous pouvez consulter ce dernier dans le menu Menu page 69 (PIN<br />
distance).<br />
Démarrer la consultation à distance<br />
Le téléphone que vous utilisez pour la consultation à distance doit être réglé sur la numérotation<br />
par tonalité.<br />
<br />
<br />
Composer le propre numéro d’un raccordement<br />
téléphonique externe.<br />
Si le répondeur est activé, le texte d’annonce sera diffusé après le nombre de sonneries<br />
réglé.<br />
Si le répondeur n’est pas activé, le téléphone s’active automatiquement au bout de 10<br />
sonneries et un long signal d’avertissement se fait entendre.<br />
Activer la consultation à distance.<br />
Ensuite un long signal d’avertissement se fait<br />
entendre.<br />
Si le répondeur est activé, vous devez activer la consultation à distance tant que le<br />
texte d’annonce est diffusé. C’est pourquoi il est important que le texte d’annonce soit<br />
suffisamment long.<br />
<br />
Entrer le code PIN à 4 chiffres pour la consultation à<br />
distance Ensuite un long signal d’avertissement se<br />
fait entendre.<br />
Vous avez maintenant la possibilité d’exécuter d’autres fonctions<br />
Tableau «Fonctions des touches de la consultation à distance» à la page 89.<br />
<br />
Appuyez sur la touche l pour exécuter la fonction<br />
désirée. Ensuite un long signal d’avertissement se fait<br />
entendre.<br />
Vous pouvez exécuter plusieurs fonctions l’une après l’autre.<br />
Terminer la consultation à distance<br />
<br />
Terminer la consultation à distance<br />
88
Répondeur<br />
Fonctions des touches de la consultation à distance 154<br />
Le tableau suivant vous donne une vue d’ensemble des fonctions disponibles et sur quelle touche<br />
vous devez appuyer pour exécuter la fonction.<br />
Touche<br />
Quand aucun message n’est diffusé Pendant la diffusion de messages<br />
<br />
Effacer le message<br />
<br />
Réentendre un message<br />
Diffuser le message, continuer la diffusion Arrêter la diffusion (Pause)<br />
<br />
Écouter le message suivant<br />
Brancher / Débrancher le répondeur<br />
Enregistrer un mémo 1<br />
<br />
Terminer la diffusion<br />
Activer 155 le répondeur via la consultation à distance<br />
<br />
Composer le propre numéro d’un raccordement<br />
téléphonique externe. Le téléphone s’active au bout<br />
de 10 sonneries et un long signal d’avertissement se<br />
fait entendre.<br />
<br />
Activer la consultation à distance.<br />
Ensuite un long signal d’avertissement se fait<br />
entendre.<br />
<br />
Entrer le code PIN à 4 chiffres pour la consultation à<br />
distance. Ensuite un long signal d’avertissement se<br />
fait entendre.<br />
<br />
Activer le répondeur<br />
Ensuite un long signal d’avertissement se fait<br />
entendre.<br />
Le texte d’annonce est diffusé.<br />
<br />
Raccrocher / Terminer la <strong>com</strong>munication<br />
1 Terminez l’enregistrement d’un mémo en terminant la consultation à distance.<br />
89
Élargir le système téléphonique<br />
8 Élargir le système téléphonique<br />
Le mode standard international normé GAP 1 règle de façon standard la <strong>com</strong>patibilité entre les<br />
<strong>com</strong>binés et les téléphones (bases) de fabricants différents. Il est ainsi possible d’intégrer ensemble<br />
des appareils SWITEL et des appareils d’autres fabricants dans un système téléphonique. Il<br />
est toutefois possible que certaines fonctions ne soient pas disponibles.<br />
Plusieurs <strong>com</strong>binés<br />
Vous pouvez déclarer 6 <strong>com</strong>binés sur votre base.<br />
Déclarer des <strong>com</strong>binés<br />
Vous pouvez déclarer les <strong>com</strong>binés au menu Menu page 69 et 70.<br />
Sur l’appareil de base :<br />
, / , Config. base , Ouvrir le menu<br />
/ , Associer , ,<br />
Confirmer ? , , Recherche Ouvrir le menu<br />
Sur le <strong>com</strong>biné à déclarer :<br />
, / , Config. base , Ouvrir le menu<br />
/ , Associer ,<br />
, Base Ouvrir le menu<br />
/ , Base , Sélectionner la base voulue<br />
PIN ? , <br />
Entrer le code PIN 2 et valider<br />
L’appui sur la touche vous permet d’effacer des chiffres saisis incorrectement.<br />
Le <strong>com</strong>biné cherche l’appareil de base Ceci peut durer jusqu’à 2 minutes.<br />
Après la déclaration, un numéro d’appel interne est attribué au <strong>com</strong>biné. Ce numéro interne s’affiche.<br />
Pour déclarer des <strong>com</strong>binés d’autres fabricants, veuillez lire leur mode d’emploi.<br />
90<br />
1 GAP : Generic Access Profile = Standard pour l’action conjointe de <strong>com</strong>binés et de bases de<br />
fabricants différents.<br />
2 Le code PIN est configuré en usine sur 0000".
Annuler des <strong>com</strong>binés<br />
Élargir le système téléphonique<br />
Vous pouvez annuler un <strong>com</strong>biné uniquement depuis l’appareil de base ou depuis un<br />
autre <strong>com</strong>biné déclaré sur ce dernier. Un <strong>com</strong>biné ne peut pas s’annuler lui−même.<br />
Vous pouvez annuler les <strong>com</strong>binés au menu Menu page 69 et 70.<br />
Sur l’appareil de base :<br />
, / , Config. base , Ouvrir le menu<br />
/ Avancé , Ouvrir le menu<br />
/ Annuler <strong>com</strong> , Ouvrir le menu<br />
Combiné 0x / ,<br />
Attendez<br />
Sélectionner le <strong>com</strong>biné et lancer l’annulation<br />
Plusieurs stations de base 1 /appareil de base 2 156<br />
Vous pouvez étendre la portée de votre <strong>com</strong>biné si vous le déclarer à plusieurs téléphones (bases<br />
1 /appareils de base 2 ). Il peut être déclaré sur 4 téléphones différents (bases 1 /appareils de<br />
base 2 ). Chaque téléphone (chaque base 1 /appareil de base 2 ) nécessite sa propre prise téléphonique.<br />
Ces raccordements peuvent porter le même numéro d’appel ou bien des numéros différents.<br />
Des <strong>com</strong>munications en cours ne peuvent pas être transférés d’un téléphone à un autre<br />
(d’une base à une autre, d’un appareil de base à un autre).<br />
1 La base du DC 58x est désignée <strong>com</strong>me «base».<br />
2 La base du DC <strong>587x</strong> est désignée <strong>com</strong>me «appareil de base».<br />
91
Installations PABX / Services confort<br />
9 Installations PABX / Services confort 157<br />
Touche R et services confort<br />
Votre téléphone supporte des services confort de votre opérateur tels que le va−et−vient, la signalisation<br />
d’appel en instance et la conférence. Vous pouvez les utiliser via la touche . Demandez<br />
à votre opérateur le temps de flash à paramétrer pour les utiliser. Contactez ce dernier pour activer<br />
ces services. Vous réglez le temps de flash au page 69.<br />
Touche R sur des installations PABX<br />
Si votre téléphone est raccordé à une installation PABX, vous pouvez, via la touche , bénéficier<br />
de certaines fonctions <strong>com</strong>me par ex. le transfert d’appels et le rappel automatique. Veuillez lire<br />
dans le mode d’emploi de votre installation PABX le temps de flash à paramétrer pour pouvoir utiliser<br />
ces fonctions. Le revendeur auprès duquel vous avez acheté l’installation vous informera si votre<br />
téléphone fonctionne parfaitement sur celle−ci. Vous réglez le temps de flash au page 69.<br />
Code d’accès (Code réseau)<br />
Dans le cas d’installations PABX, il faut <strong>com</strong>poser auparavant un code réseau pour obtenir la tonalité.<br />
Souvent, le code réseau est «0» ou «9». Tapez d’abord le code d’accès au réseau et attendez<br />
la tonalité. Vous pouvez maintenant entrer le numéro.<br />
Si vous désirez également utiliser les fonctions de sélection directe de votre téléphone<br />
sur une installation PABX, assurez−vous que lors de la programmation des<br />
touches prévues à cet effet, vous les avez bien fait précéder du code réseau du<br />
numéro.<br />
Vous pouvez programmer en outre une pause de numérotation entre le code réseau<br />
et le numéro Passage «Pause de numérotation».<br />
Pause de numérotation<br />
Dans le cas d’installations PABX, il faut <strong>com</strong>poser auparavant un code réseau pour obtenir la tonalité.<br />
Sur quelques installations plus anciennes, vous devez attendre quelques instants avant de<br />
pouvoir entendre la tonalité. Pour ces installations PABX, une pause de numérotation peut être insérée<br />
après le code réseau afin de pouvoir continuer à <strong>com</strong>poser le numéro directement sans attendre<br />
la tonalité. Vous insérez la pause de numérotation en appuyant 3 sec. sur la touche .<br />
Après le code réseau, le numéro d’appel proprement dit est <strong>com</strong>posé au bout d’un temps déterminé.<br />
La pause peut également être enregistrée lors de la saisie de numéros d’appel dans<br />
le répertoire.<br />
92
Installations PABX / Services confort<br />
Affichage du numéro d’appel (CLIP 1 )<br />
L’affichage du numéro d’appel est un service confort de votre opérateur. Veuillez lui<br />
demander de plus amples informations.<br />
Si cette fonction est disponible sur votre ligne téléphonique, le numéro d’appel du correspondant<br />
sera affiché dès que le téléphone sonnera. Si votre correspondant a bloqué la transmission de son<br />
numéro, un message correspondant sera affiché. Le numéro ne peut pas être affiché et ne peut<br />
donc être enregistré dans la liste d’appels.<br />
Répondeur dans le réseau téléphonique 158<br />
Le répondeur dans le réseau téléphonique est un service confort offert par de nombreux opérateurs.<br />
Si votre opérateur met à votre disposition un répondeur dans le réseau téléphonique, vous<br />
serez informé par une icône de l’arrivée de nouveaux messages (VMWI 2). Vous ne pouvez disposer<br />
de cette fonction que si votre opérateur offre ce service confort. Veuillez lui demander de plus<br />
amples informations.<br />
1 CLIP : Calling Line Identification Presentation = Affichage du numéro d’appel d’un correspondant.<br />
2 VMWI : Visual Message Waiting Indication = Affichage optique de nouveaux messages.<br />
93
Caractéristiques techniques<br />
10 Caractéristiques techniques<br />
Caractéristique<br />
Valeur<br />
Standard DECT 1 −GAP 2<br />
Alimentation en courant (appareil de base) Entrée : 100−240 V, 50−60 Hz<br />
Sortie : 6 V, 500 mA<br />
Alimentation en courant (station d’accueil) Entrée : 100−240 V, 50−60 Hz<br />
Sortie : 6 V, 150 mA<br />
Accus rechargeables<br />
2 x 1.2 V 500 mAh NiMH, taille : AAA<br />
Portée du <strong>com</strong>biné<br />
En extérieur : env. 300 m<br />
En intérieur : env. 50 m<br />
Mode veille <strong>com</strong>biné<br />
Jusqu’à 110 h<br />
Autonomie max. en <strong>com</strong>munication du <strong>com</strong>biné Jusqu’à 11 h<br />
Volume sonore max. de l’écouteur<br />
30 dB<br />
Système de numérotation<br />
Numérotation par tonalité (FV)<br />
ou par impulsions (DC)<br />
Temps de flash<br />
Court, moyen, long<br />
Langues des menus<br />
Allemand, français, italien, anglais, espagnol,<br />
portugais, néerlandais, polonais et turc.<br />
Code PIN (réglage usine) 0000<br />
Nombre de sonneries<br />
12 (polyphoniques)<br />
Nombre max. de contacts dans le répertoire 50<br />
Nombre max. de contacts dans le journal des 40<br />
appels<br />
Nombre max. de contacts dans la répétition des 5<br />
derniers numéros<br />
Nombre max. de messages sur le répondeur 57<br />
Durée max. d’enregistrement sur le répondeur 15 min (y <strong>com</strong>pris le texte d’annonce)<br />
Langues des textes d’annonce standard Allemand, français, italien, anglais<br />
Code PIN pour la consultation à distance (réglage<br />
1234<br />
en<br />
usine)<br />
94<br />
1 DECT : Digital Enhanced Cordless Tele<strong>com</strong>munication = Norme de téléphonie numérique<br />
sans fil optimisée.<br />
2 GAP: Generic Access Profile = Standard pour l’action conjointe de <strong>com</strong>binés et de bases de<br />
fabricants différents.
Problèmes<br />
Déclaration de conformité<br />
Cet appareil répond aux exigences de la directive de l’Union européenne :<br />
1999/5/CE : Directive sur les installations de radio et de télé<strong>com</strong>munication et la reconnaissance<br />
réciproque de leur conformité. La conformité avec la directive mentionnée<br />
ci−dessus est confirmée sur l’appareil par le symbole CE.<br />
Ligne d’assistance directe<br />
Si vous avez des problèmes avec votre téléphone, observez d’abord les remarques suivantes. S’il<br />
s’agit de problèmes techniques, vous pouvez vous adresser à notre ligne d’assistance directe en<br />
Suisse au numéro de tél.<br />
0900 00 1675 (frais Swiss<strong>com</strong> à la date d’impression de ce manuel : CHF 2,60/min). Si vous jouissez<br />
de droits de garantie, adressez−vous à votre revendeur. La durée de la garantie est de 2 ans.<br />
11 Problèmes<br />
Questions<br />
Pas de <strong>com</strong>munication téléphonique<br />
possible<br />
Pas de connexion possible à<br />
l’appareil de base<br />
Réponses<br />
− Le <strong>com</strong>biné ou l’appareil de base n’est pas raccordé correctement<br />
ou est en dérangement. N’utilisez que le câble de raccordement<br />
téléphonique fourni avec l’appareil.<br />
− Le bloc secteur n’est pas branché ou il y a une panne totale de<br />
courant.<br />
− Testez avec un autre téléphone si votre raccordement téléphonique<br />
fonctionne.<br />
− Mauvais lieu d’installation de l’appareil de base<br />
− Les accus rechargeables sont vides ou défectueux.<br />
− Vous vous êtes trop éloigné de l’appareil de base avec un <strong>com</strong>biné.<br />
Vous pouvez augmenter la portée en déclarant un <strong>com</strong>biné<br />
à plusieurs appareils de base/bases page 91.<br />
− Réglage erroné du système de numérotation page 69.<br />
− Quand plusieurs <strong>com</strong>binés sont déclarés : une <strong>com</strong>munication<br />
est passée sur un autre <strong>com</strong>biné.<br />
− Dans le cas de <strong>com</strong>munications internes : le <strong>com</strong>biné appelé<br />
est en dehors de la portée de l’appareil de base.<br />
− Le verrouillage du clavier est activé.<br />
− Le <strong>com</strong>biné n’est pas allumé.<br />
−<br />
Vérifiez si vous avez déclaré un <strong>com</strong>biné sur l’appareil de base<br />
ou si vous avez bien déclaré ce <strong>com</strong>biné avec le code PIN correct<br />
page 69.<br />
La liaison est hachée, coupée − Vous vous êtes trop éloigné de l’appareil de base.<br />
− Mauvais lieu d’installation de l’appareil de base.<br />
Vous entendez des bips pendant<br />
− Vous vous êtes trop éloigné de l’appareil de base.<br />
une <strong>com</strong>munication télé-<br />
phonique<br />
− Les accus sont presque vides.<br />
95
Problèmes<br />
Questions<br />
Réponses<br />
Le système ne réagit plus − Remettez toutes les fonctions en configuration usine<br />
page 69.<br />
− Retirez le bloc secteur de la prise de courant pendant un court<br />
instant.<br />
Les accus se déchargent très − Ceux−ci sont vides ou défectueux.<br />
rapidement<br />
− Posez le <strong>com</strong>biné correctement sur la base / station d’accueil.<br />
Nettoyez les surfaces de contact du <strong>com</strong>biné et de la base /<br />
station d’accueil avec un chiffon doux et sec.<br />
− Posez le <strong>com</strong>biné sur la base / station d’accueil pendant 8 heures.<br />
Vous ne pouvez plus recharger<br />
− Les accus sont défectueux.<br />
les accus<br />
L’affichage du numéro d’appel<br />
(CLIP) ne fonctionne pas<br />
− L’affichage du numéro d’appel est un service confort de votre<br />
opérateur. Veuillez lui demander de plus amples informations.<br />
− Le correspondant a bloqué la transmission de son numéro.<br />
Le répondeur n’enregistre pas − Contrôlez si le répondeur est activé.<br />
de messages<br />
− Contrôlez si la mémoire du répondeur est pleine. Supprimez des<br />
messages, le cas échéant.<br />
Vous ne pouvez pas <strong>com</strong>muter<br />
votre répondeur sur le<br />
mode annonce et enregistrement<br />
− Contrôlez si la mémoire du répondeur est pleine. Le répondeur<br />
bascule alors automatiquement en mode «Annonce simple»<br />
dans lequel vous ne pouvez pas enregistrer de message. Supprimez<br />
des messages, le cas échéant.<br />
Vous ne pouvez pas consulter<br />
le répondeur à distance<br />
− Le téléphone que vous utilisez pour la consultation à distance<br />
doit être réglé sur la numérotation par tonalité.<br />
− Contrôlez si le répondeur est activé.<br />
− Contrôlez si vous utilisez bien le code PIN correct pour la<br />
consultation à distance page 88. Si vous avez oublié le code<br />
PIN pour la consultation à distance, vous pouvez consulter ce<br />
dernier dans le menu ou remettre le téléphone ou le code PIN<br />
en réglage usine pour la consultation à distance page .<br />
− Appuyez sur les touches lentement et suffisamment fort.<br />
− Lancez la consultation à distance pendant que le texte d’annonce<br />
est reproduit. Si la durée de la reproduction du texte<br />
d’annonce est trop courte, enregistrez un texte plus long.<br />
96
Remarques d’entretien / Garantie<br />
12 Remarques d’entretien / Garantie<br />
Remarques concernant l’entretien<br />
Nettoyez les surfaces du boîtier avec un chiffon doux et non pelucheux.<br />
N’utilisez pas de produits d’entretien ni de solvants.<br />
Á part un nettoyage occasionnel du boîtier, le téléphone ne nécessite pas d’entretien.<br />
Garantie<br />
Les appareils SWITEL sont fabriqués et contrôlés selon les procédés les plus modernes. Des matériaux<br />
sélectionnés et des technologies de haut niveau garantissent un fonctionnement irréprochable<br />
et une longue durée de vie. La garantie n’est pas valable si l’exploitant du réseau téléphonique<br />
ou une installation PABX éventuellement intercalée est responsable du dysfonctionnement de<br />
l’appareil. La garantie ne s’applique pas aux piles et accumulateurs ou packs d’accumulateurs utilisés<br />
dans les produits. La durée de la garantie est de 24 mois à partir de la date d’achat.<br />
Pendant la période de garantie, tous les défauts dus à des vices de matériel ou de fabrication seront<br />
éliminés gratuitement. Le droit à la garantie expire en cas d’intervention de l’acheteur ou de<br />
tiers. Les dommages provenant d’un maniement ou d’une manipulation incorrects, d’une usure naturelle,<br />
d’une mauvaise mise en place ou d’une mauvaise conservation, d’un raccordement ou<br />
d’une installation incorrects ainsi que d’un cas de force majeure ou autres influences extérieures<br />
sont exclus de la garantie. En cas de réclamations, nous nous réservons le droit de réparer, de<br />
remplacer les pièces défectueuses ou d’échanger l’appareil. Les <strong>com</strong>posants remplacés ou les appareils<br />
échangés deviennent notre propriété. Les demandes de dommages−intérêts sont exclues<br />
tant qu’elles ne reposent pas sur l’intention ou une négligence grossière du fabricant.<br />
Si votre appareil devait malgré tout présenter une défectuosité pendant la période de garantie,<br />
veuillez vous adresser, muni de votre reçu, exclusivement au magasin où vous avez acheté votre<br />
appareil SWITEL. Vous ne pouvez faire valoir vos droits à la garantie selon ces dispositions qu’ exclusivement<br />
auprès de votre revendeur. Deux ans après l’achat et la remise de nos produits, il<br />
n’est plus possible de faire valoir les droits en matière de garantie.<br />
97
Index<br />
13 Index<br />
A<br />
Accus, 94<br />
Accus rechargeables, 55<br />
Activer, 83<br />
Activer et désactiver la sonnerie, 74<br />
Activer le répondeur via la consultation à<br />
distance, 89<br />
Affichage du numéro d’appel, 93<br />
Affichage du numéro d’appel (CLIP), 82<br />
Ajouter des contacts dans le répertoire, 76<br />
Alimentation en courant, 94<br />
Annuler l’enregistrement d’un mémo, 87<br />
Annuler un <strong>com</strong>biné, 91<br />
Appareil de base, 59<br />
Appareils de base, 91<br />
Appareils médicaux, 55<br />
Appel bébé, 82<br />
Appel d’urgence, 82<br />
Appels en absence, 79<br />
Autonomie en veille, 94<br />
B<br />
Bases, 91<br />
Bloc d’alimentation, 54<br />
Blocage d’appel, 82<br />
C<br />
Charger les accus, 58<br />
Clavier numérique, 59, 60<br />
CLIP, 82, 93<br />
Code d’accès, 92<br />
Code PIN pour la consultation à distance, 88<br />
Code PIN pour la consultation à distance<br />
(réglage en usine), 94<br />
Code réseau, 92<br />
Combiné, 59, 60<br />
Compatibilité avec les prothèses auditives, 55<br />
Composer des numéros, 72<br />
Composer un numéro de la liste de répétition<br />
des derniers numéros <strong>com</strong>posés, 78<br />
Conférences téléphoniques, 73<br />
Consignes de sécurité, 54<br />
Consultation à distance, 88<br />
Contacts dans le répertoire, 63<br />
Contenu du coffret, 56<br />
98
D<br />
Déclaration de conformité, 95<br />
DECLARER, 90<br />
Déclarer un <strong>com</strong>biné, 90<br />
DECT, 94<br />
Démarrer la consultation à distance, 88<br />
Désactivation du microphone (Muet), 75<br />
Désactiver, 83<br />
Désactiver le microphone, 75<br />
Diffuser les messages sur l’appareil de base, 85<br />
Diffuser les messages sur le <strong>com</strong>biné, 85<br />
Durée d’enregistrement<br />
pour chaque message, 87<br />
Durée de la <strong>com</strong>munication, 74, 94<br />
Durée max. d’enregistrement<br />
sur le répondeur, 94<br />
Durée maximum d’enregistrement, 83<br />
Index<br />
E<br />
Économiseur de taxes, 87<br />
Écoute amplifiée, 86<br />
Écouter le texte d’annonce, 84<br />
Écouter les messages, 85<br />
Écouteur, 60<br />
Écran, 59, 61<br />
Écran graphique, 60<br />
Effacer des contacts du répertoire, 77<br />
Effacer des messages, 86<br />
Effacer des numéros du journal des appels, 79<br />
Effacer des numéros individuels, 79<br />
Effacer tous les contacts, 77<br />
Effacer tous les messages, 86<br />
Effacer tous les numéros d’appel, 79<br />
Effacer toute la liste de répétition des derniers<br />
numéros <strong>com</strong>posés, 78<br />
Effacer un contact, 77<br />
Effacer un numéro de la liste de répétition des<br />
derniers numéros <strong>com</strong>posés, 78<br />
Égaliseur, 80<br />
Élargir le système téléphonique, 90<br />
Eléments de manipulation, 59<br />
Émettre un appel, 72<br />
Enregistrer dans le répertoire, 78, 79<br />
Enregistrer dans le répertoire un numéro de la<br />
liste des derniers numéros <strong>com</strong>posés, 78<br />
Enregistrer un mémo, 87<br />
Enregistrer un texte d’annonce, 84<br />
Entretien, 97<br />
État de charge, 58<br />
F<br />
Faire afficher des numéros du journal des<br />
appels, 79<br />
Fonctions des touches de la consultation à<br />
distance, 89<br />
Fonctions spéciales, 81<br />
Format de l’heure et de la date, 80<br />
G<br />
GAP, 94<br />
Garantie, 97<br />
99
Index<br />
I<br />
Icônes, 61<br />
Icônes affichées, 61<br />
Insérer les accus dans le <strong>com</strong>biné, 58<br />
Installations PABX, 58, 92<br />
Interception d’appel, 86<br />
Inter<strong>com</strong>munication, 73<br />
J<br />
Journal des appels, 59, 60, 79<br />
L<br />
Langue des textes d’annonce, 84<br />
Langues des menus, 94<br />
Langues des textes d’annonce standard, 94<br />
LED appel, 59, 60<br />
Lieu d’installation, 54<br />
Ligne d’assistance directe, 95<br />
Liste de répétition des derniers numéros<br />
<strong>com</strong>posés, 78<br />
M<br />
Menu principal, 64<br />
Microphone, 59, 60<br />
Mise en service, 56<br />
Mode ÉCO, 58<br />
Mode mains−libres, 60, 75<br />
Mode veille, 62<br />
Modifier des contacts du répertoire, 76<br />
Modifier le code PIN, 81<br />
N<br />
Navigation dans le menu, 62<br />
Nom du <strong>com</strong>biné, 80<br />
Nombre de contacts dans la répétition des<br />
derniers numéros, 94<br />
Nombre de contacts dans le journal<br />
des appels, 94<br />
Nombre de contacts dans le répertoire, 94<br />
Nombre max. de messages<br />
sur le répondeur, 94<br />
O<br />
Options pendant la diffusion, 85<br />
P<br />
Paging, 81<br />
Panne de courant, 54<br />
Pause de numérotation, 92<br />
PIN, 90, 94<br />
Plusieurs bases, 91<br />
Plusieurs <strong>com</strong>binés, 90<br />
Portée, 94<br />
Préfixe, 81<br />
Prendre des appels externes pendant<br />
une <strong>com</strong>munication interne, 73<br />
Prendre un appel, 71<br />
Prise d’appel automatique, 81<br />
Problèmes, 95<br />
Programmer les touches<br />
de sélection directe, 77<br />
100
Q<br />
Que faire des appareils hors d’usage ?, 55<br />
R<br />
Raccorder l’appareil de base, 57<br />
Raccorder la station d’accueil, 57<br />
Rappel, 72<br />
Rappeler des appels entrés, 72, 79<br />
Rechercher le <strong>com</strong>biné, 81<br />
Réduction du rayonnement, 58<br />
Réglage du volume de la sonnerie<br />
du <strong>com</strong>biné, 74<br />
Réglages du son et de l’affichage, 80<br />
Régler l’heure, 58<br />
Régler la date, 58<br />
Régler la langue affichée, 58<br />
Régler la sonnerie, 80<br />
Régler le contraste de l’écran, 80<br />
Régler le réveil, 82<br />
Régler le volume de la diffusion<br />
des messages, 86<br />
Régler le volume de la sonnerie<br />
de l’appareil de base, 74<br />
Régler le volume sonore de l’écouteur, 74<br />
Réinitialiser, 81<br />
Remarques concernant l’entretien, 97<br />
Répertoire, 59, 60, 72, 75<br />
Répétition des derniers numéros, 60, 72<br />
Répondeur, 83<br />
Répondeur dans le réseau téléphonique, 93<br />
Représentations dans le guide, 62<br />
Réveil, 81<br />
Index<br />
S<br />
Saisie de texte, 75<br />
Saisir un nom, 75<br />
Sélection directe, 72<br />
Sélectionner le mode de réponse, 83<br />
Sélectionner les sous−menus, 63<br />
Services confort, 92<br />
Signal d’avertissement «hors de portée» :, 80<br />
Signal d’avertissement de la faible capacité des<br />
accus, 80<br />
Signalisation optique d’appel, 60<br />
Signalisation optique d’appel<br />
(LED appel), 59, 60<br />
Son des touches, 80<br />
Sonneries, 94<br />
Structure de menu, 64<br />
Système de numérotation, 82, 94<br />
101
Index<br />
T<br />
Téléphoner, 71<br />
Téléphoner en interne, 72, 73<br />
Temps de flash, 92, 94<br />
Terminer la <strong>com</strong>munication, 71<br />
Terminer la consultation à distance, 88<br />
Terminer prématurément<br />
la sonnerie du réveil, 82<br />
Texte d’annonce, 84<br />
Touche «Activer/Desactiver» le répondeur, 59<br />
Touche «Décrocher», 60<br />
Touche «dièse», 59<br />
Touche «dièse» / Sonn. désact. / Pause<br />
numérotation, 60<br />
Touche «Étoile», 59, 60<br />
Touche «Lecture/Stop», 59<br />
Touche «mains−libres», 59<br />
Touche «Raccrocher»/Allumer/Éteindre, 60<br />
Touche «Répétition des derniers numéros», 59<br />
Touche «Retour», 59<br />
Touche «vers l’avant», 59<br />
Touche «vers le bas», 59<br />
Touche «vers le haut», 59<br />
Touche fléchee «vers le bas» , 60<br />
Touche fléchée «vers le haut» , 60<br />
Touche INT, 59<br />
Touche Menu/OK/Couper le microphone, 60<br />
Touche OK/Menu , 59<br />
Touche R, 59, 60, 92<br />
Touches de sélection directe, 59, 60<br />
Transférer des <strong>com</strong>munications externes<br />
en interne, 73<br />
Transfert de <strong>com</strong>munication, 73<br />
U<br />
Utilisation, 71<br />
Utilisation conforme aux prescriptions, 54<br />
V<br />
Va−et−vient, 73<br />
Vérifier la capacité du répertoire, 77<br />
Verrouillage du clavier, 71, 81<br />
VMWI, 93<br />
Volume sonore max. de l’écouteur, 94<br />
102
159<br />
Contenuto<br />
1 Indicazioni di sicurezza . . . . . . . . . . . . . . 104<br />
2 Messa in funzione . . . . . . . . . . . . . . . . . . 106<br />
3 Elementi di <strong>com</strong>ando . . . . . . . . . . . . . . . . 109<br />
4 Informazioni introduttive . . . . . . . . . . . . . . 112<br />
5 Struttura di menu . . . . . . . . . . . . . . . . . . . 114<br />
6 Funzionamento . . . . . . . . . . . . . . . . . . . . 121<br />
7 Segreteria telefonica . . . . . . . . . . . . . . . . 133<br />
8 Ampliare il sistema telefonico . . . . . . . . . . 140<br />
9 Impianti telefonici interni / Servizi addizionali 142<br />
10 Specifiche tecniche . . . . . . . . . . . . . . . . . 144<br />
11 Problemi . . . . . . . . . . . . . . . . . . . . . . . . . 145<br />
12 Consigli per la cura/Garanzia . . . . . . . . . . 147<br />
13 Indice alfabetico . . . . . . . . . . . . . . . . . . . 148<br />
103
Indicazioni di sicurezza<br />
1 Indicazioni di sicurezza<br />
Leggere attentamente le presenti istruzioni per l’uso.<br />
Scopo d’impiego<br />
Il telefono munito di unità portatile consente di eseguire chiamate in una rete telefonica. Qualsiasi<br />
altro impiego è considerato non conforme agli usi previsti. Non sono consentite modifiche o trasformazioni<br />
non autorizzate. Non aprire per nessuna ragione l’apparecchio autonomamente, né <strong>com</strong>piere<br />
riparazioni di propria iniziativa.<br />
Caduta di tensione<br />
In caso di caduta di tensione, il telefono non consente di eseguire chiamate. Ricorrere in caso<br />
d’emergenza ad un telefono a filo in grado di funzionare anche senza alimentazione elettrica<br />
esterna.<br />
Luogo di installazione 160<br />
Il luogo di istallazione influisce in modo decisivo sul corretto funzionamento del telefono.<br />
Evitare un’esposizione a fumo, polvere, vibrazioni, sostanze chimiche, umidità, calore e raggi solari<br />
diretti. Non utilizzare il telefono in aree esposte al rischio di esplosioni.<br />
Non posizionare il telefono nelle immediate vicinanze di altri dispositivi elettronici <strong>com</strong>e ad es. televisori,<br />
forni microonde, frigoriferi e così via in modo da escludere eventuali interferenze reciproche.<br />
Evitare di posizionare il telefono in prossimità di un altro telefono. Assicurarsi che grossi oggetti<br />
metallici, <strong>com</strong>e ad es. un frigorifero o uno specchio, non si trovino tra unità base e unità portatile.<br />
Anche eventuali pareti possono influire sulla qualità di collegamento tra unità base e unità portatile.<br />
Posizionare il telefono in prossimità di una presa elettrica idonea e nelle vicinanze della presa telefonica.<br />
Fare attenzione a non inciampare sul cavo!<br />
Attenzione: Non è consentito prolungare i cavi!<br />
Poggiare il telefono su una superficie piana e antiscivolo. In generale, i piedini del dispositivo non<br />
lasciano tracce sulla superficie di appoggio. Vista la molteplicità di vernici e superfici non è <strong>com</strong>unque<br />
possibile escludere che i piedini del dispositivo lascino tracce sulla superficie di appoggio.<br />
Più in alto si posiziona l’unità base (anche all’interno di uno stesso edificio), migliore è la sua portata.<br />
Alimentatore di rete<br />
Attenzione: Utilizzare solo l’alimentatore di rete fornito visto che altri alimentatori di<br />
rete potrebbero addirittura danneggiare il telefono. Non ostacolare il libero accesso<br />
all’alimentatore di rete con mobili o altri oggetti simili.<br />
104
Batterie ricaricabili<br />
Apparecchiature mediche<br />
Indicazioni di sicurezza<br />
Attenzione: Non gettare le batterie ricaricabili nel fuoco. Utilizzare solo batterie ricaricabili<br />
dello stesso tipo. Osservare la corretta polarità! Pericolo di esplosione in caso<br />
di inversione della polarità durante la carica delle batterie ricaricabili.<br />
Attenzione: Utilizzare solo le batterie ricaricabili consigliate. Non utilizzare altre batterie<br />
o pile. Pericolo di esplosione!<br />
Attenzione: Non utilizzare il telefono in prossimità di apparecchiature mediche. Non<br />
è possibile escludere il rischio di possibili interferenze.<br />
Compatibilità con apparecchi acustici<br />
Il telefono è <strong>com</strong>patibile con il maggior numero di apparecchi acustici presenti sul mercato. Ciò nonostante<br />
non è possibile garantire un perfetto funzionamento con qualsiasi tipo di apparecchio acustico.<br />
Telefoni DECT 1 possono causare un fastidioso ronzio in apparecchi acustici.<br />
Smaltimento<br />
Smaltire l’apparecchio consegnandolo in uno dei punti di raccolta istituiti dalla propria<br />
società di smaltimento rifiuti <strong>com</strong>unale (ad es. centro di riciclo materiali). La<br />
legge sugli apparecchi elettrici ed elettronici prescrive ai proprietari di apparecchi<br />
esauriti la consegna di tutti gli apparecchi elettrici ed elettronici in un centro di rilievo<br />
rifiuti in raccolta differenziata. Il simbolo riportato qui a lato indica che non è<br />
assolutamente consentito smaltire l’apparecchio gettandolo nei rifiuti domestici!<br />
Batterie ricaricabili e pile possono provocare danni alla salute e all’ambiente!<br />
Non aprire, danneggiare, ingerire o disperdere nell’ambiente batterie ricaricabili e<br />
pile. Queste possono contenere metalli pesanti nocivi e dannosi per l’ambiente.<br />
Per legge sussiste l’obbligo di smaltire correttamente batterie ricaricabili e pile utilizzando<br />
gli appositi contenitori di raccolta in uso presso i rivenditori di batterie. Lo<br />
smaltimento è gratuito. I simboli indicano che non è assolutamente consentito gettare<br />
batterie ricaricabili e pile nei rifiuti domestici, consegnandoli ai fini dello smaltimento<br />
nei rispettivi punti di raccolta.<br />
Smaltire confezioni ed imballaggi secondo quanto indicato dalle norme in vigore a<br />
livello locale.<br />
1 DECT: Digital Enhanced Cordless Tele<strong>com</strong>munication = Standard per telefoni senza cavo<br />
105
Messa in funzione<br />
2 Messa in funzione<br />
Indicazioni di sicurezza<br />
Attenzione: Prima della messa in funzione, leggere attentamente le indicazioni di sicurezza<br />
nel capitolo 1.<br />
Verificare il contenuto della confezione<br />
La confezione include:<br />
Contenuto<br />
161<br />
Modello <strong>DCT</strong> 587X<br />
<strong>DCT</strong> 5871 <strong>DCT</strong> 5872 1 <strong>DCT</strong> 5873 1 <strong>DCT</strong> 5874 1<br />
Unità base 1 1 1 1<br />
Alimentatore di rete 1 1 1 1<br />
Ricevitore 1 1 1 1<br />
Cavo a spirale per ricevitore 1 1 1 1<br />
Cavo di collegamento telefonico 1 1 1 1<br />
Stazione di carica con alimentatore 1 2 3 4<br />
di rete<br />
Unità portatile 1 2 3 4<br />
Batterie ricaricabili<br />
2 4 6 8<br />
(AAA 1,2 V NiMH)<br />
Istruzioni per l’uso 1 1 1 1<br />
106<br />
1 Per maggiori informazioni sulla disponibilità del telefono/set telefonico si prega di visitare il sito<br />
www.switel.<strong>com</strong>.
Messa in funzione<br />
Mettere in funzione l’apparecchio<br />
Collegare l’unità base<br />
Procedere al collegamento dell’unità base secondo quanto raffigurato sul disegno. Per motivi di sicurezza<br />
si prega di utilizzare solo l’alimentatore di rete fornito in dotazione.<br />
Osservare necessariamente le indicazioni relative al luogo di installazione pagina 104.<br />
Presa elettrica<br />
Presa telefonica<br />
Cavo di collegamento<br />
telefonico<br />
Alimentatore<br />
di rete<br />
Unità base<br />
Ricevitore<br />
Cavo a spirale<br />
per ricevitore<br />
Utilizzare per l’unità base l’alimentatore di rete con dati di output 100−240 Vac 6 Vdc<br />
500 mA.<br />
Collegare la stazione di carica<br />
Collegare la stazione di carica ad una presa elettrica.<br />
107
Messa in funzione<br />
Inserire le batterie ricaricabili nell’unità portatile<br />
Il vano batterie si trova sul retro dell’unità portatile. Aprire il vano<br />
batterie e inserire 2 batterie ricaricabili tipo AAA NiMH, 1.2 V<br />
500 mAh. Osservare la corretta polarità! Chiudere quindi il vano<br />
batterie.<br />
Caricare le batterie 162<br />
Riporre l’unità portatile in sede di prima messa<br />
in funzione per minimo 8 ore nella stazione di<br />
carica.<br />
Un segnale acustico indica il corretto posizionamento dell’unità<br />
portatile nella stazione di carica. L’unità portatile si surriscalda<br />
durante il processo di carica. Questo è un fenomeno normale<br />
e non pericoloso. Evitare di caricare l’unità portatile con dispositivi<br />
di carica differenti o estranei. L’attuale stato di carica<br />
delle batterie è visualizzato sul display:<br />
<br />
<br />
Carico<br />
Scarico<br />
Impostare la lingua di display<br />
Selezionare la lingua richiesta. Alle pagine 118 e 120 si trova<br />
la posizione da scorrere nel menu.<br />
UP: > Imp. Ricev. > Lingua >...<br />
UB: > Impost.base> Lingua >...<br />
È possibile scegliere tra 9 lingue: tedesco, francese, italiano, inglese, spagnolo, portoghese, olandese,<br />
polacco e turco.<br />
Impostare la data e l’ora<br />
Data e ora si lasciano impostare tramite menu (Imposta ora) pagina 117.<br />
Confermare l’immissione di anno, mese, giorno, ora e minuto rispettivamente con il tasto o<br />
. Osservare per ora e data il formato impostato pagina 117. Con formato 12 ore, selezionare<br />
con i tasti / se l’ora impostata è intesa <strong>com</strong>e ora antimeridiana (A) o pomeridiana<br />
(P).<br />
Impianti telefonici interni<br />
A pagina 142 sono riportate ulteriori informazioni riguardo l’eventuale collegamento del telefono ad<br />
un impianto telefonico interno.<br />
Riduzione delle radiazioni (modalità ECO)<br />
Le radiazioni in modalità di stand−by sono state considerevolmente ridotte se paragonate<br />
a quelle emesse da telefoni cordless a standard DECT con unità portatile inserita<br />
nella stazione di carica. In modalità di conversazione le radiazioni sono ridotte in relazione<br />
alla distanza dell’unità portatile dal telefono (dall’unità base).<br />
108
3 Elementi di <strong>com</strong>ando 163<br />
Elementi di <strong>com</strong>ando<br />
I tasti riportati nelle presenti istruzioni per l’uso sono raffigurati <strong>com</strong>e simboli racchiusi in un riquadro. Sono<br />
possibili lievi scostamenti dei simboli dei tasti sul telefono rispetto ai simboli qui raffigurati.<br />
Unità base<br />
1 Ricevitore 11 Tasto avanti <br />
2 Tasto OK/Menu 12 Segnalazione ottica di chiamata<br />
(LED di chiamata)<br />
3 Display 13 Microfono<br />
4 Tasto indietro 14 Tasto vivavoce <br />
5 Tasti di selezione diretta 15 Tasto cancelletto <br />
6 Tasto On/Off segreteria 16 Tasto R/Cancella <br />
7 Tasto su, elenco chiamate 17 Tasto ripetizione di chiamata <br />
8 Tasto riproduzione/stop 18 Tasto INT <br />
9 Tasto giù, rubrica telefonica 19 Tasto asterisco <br />
10 Tasto indietro 20 Tasti numerici , , ecc.<br />
109
Elementi di <strong>com</strong>ando<br />
Unità portatile<br />
1 Segnalazione ottica di chiamata (LED di chiamata)<br />
2 Ricevitore<br />
3 Display LC<br />
4 Tasti di selezione diretta <br />
5 Tasto riaggancio / On / Off <br />
6 Tasti numerici , ... − <br />
7 Tasto cancelletto / Segnale di chiamata off /<br />
Pausa di selezione <br />
8 Tasto R / Indietro <br />
9 Microfono<br />
10 Ripetizione di chiamata <br />
11 Tasto asterisco <br />
12 Tasto Menu / OK / Silenziamento <br />
13 Tasto conversazione / Vivavoce <br />
14 Tasto freccia giù / Rubrica telefonica <br />
15 Tasto freccia su / Elenco chiamate <br />
110
Simboli e testi di display<br />
Simbolo<br />
<br />
Descrizione<br />
Elementi di <strong>com</strong>ando<br />
Indicazione dello stato di carica delle batterie (cariche, cariche a metà, quasi<br />
scariche).<br />
Scariche: caricare le batterie.<br />
Segmenti che scorrono: le batterie sono in fase di ricarica pagina 108.<br />
Segmenti visualizzati in modo costante: le batterie ricaricabili sono <strong>com</strong>pletamente<br />
cariche.<br />
Collegamento con l’unità base.<br />
Lampeggiante: collegamento scarso o assente.<br />
Costante: collegamento buono.<br />
Lampeggiante: chiamata in arrivo pagina 121.<br />
Costante: chiamata in corso pagina 121.<br />
<br />
<br />
Chiamate perse.<br />
Presenza di nuove chiamate nell’elenco chiamate pagina 129.<br />
Si è nella rubrica telefonica pagina 125.<br />
<br />
La voce o indicazione continua ulteriormente a destra pagina 126.<br />
<br />
La voce o indicazione continua ulteriormente a sinistra pagina 126.<br />
Costante: segreteria telefonica inserita pagina 133.<br />
Lampeggiante: presenza di nuovi messaggi in segreteria pagina 135.<br />
Oppure: la capacità di memoria della segreteria è esaurita. Cancellare dei<br />
messaggi pagina 136<br />
Il segnale di chiamata è disattivato pagina 124.<br />
<br />
<br />
Microfono in modalità silenziamento pagina 125.<br />
<br />
Funzione vivavoce attivata pagina 125.<br />
<br />
Blocco tastiera attivato pagina 121.<br />
<br />
Sveglia attivata pagina 131.<br />
<br />
Segreteria telefonica integrata nella rete telefonica. VMWI − Servizio addizionale<br />
del proprio gestore di rete pagina 143.<br />
111
Informazioni introduttive<br />
4 Informazioni introduttive<br />
Il capitolo informa sulle modalità d’uso del presente manuale.<br />
Modi di rappresentazione nelle istruzioni per l’uso<br />
Rappresentazione<br />
<br />
<br />
<br />
Descrizione<br />
Rappresentazione dei tasti<br />
Premere brevemente il tasto raffigurato<br />
Premere brevemente un tasto a piacere<br />
2 sec. Premere il tasto raffigurato per 2 secondi<br />
1<br />
<br />
Immettere cifre o lettere<br />
Unità portatile squilla<br />
Telefono squilla<br />
<br />
<br />
Lingua<br />
<br />
UP1, UP2<br />
UB<br />
Sollevare il ricevitore o estrarre il portatile dalla stazione di carica<br />
Riagganciare il ricevitore o riporre il portatile nella stazione di carica<br />
Rappresentazione di testi sul display<br />
Rappresentazione di simboli sul display<br />
Unità portatile 1, unità portatile 2 ecc.<br />
Unità base<br />
Modalità di stand−by 164<br />
Nella descrizione d’uso si considerano sempre il telefono (unità base) e l’unità portatile in modalità<br />
di stand−by. Telefono (unità base) e unità portatile sono in modalità di stand−by quando non si conduce<br />
alcuna conversazione e tutti i menu sono chiusi.<br />
Navigare nel menu 165<br />
I vari menu consentono di accedere alle funzioni del telefono. Il percorso da seguire per giungere<br />
alla funzione desiderata è indicato dalla struttura di menu pagina 114.<br />
<br />
/ <br />
Ogni processo viene automaticamente interrotto se entro 20 secondi non si procede<br />
con una immissione.<br />
Aprire il menu principale<br />
Selezionare il sottomenu richiesto<br />
112<br />
1 I tasti numerici riportano altresì delle lettere. Premendo ripetutamente il relativo tasto si ha<br />
modo di selezionare lettere, cifre e caratteri speciali.
<br />
/ <br />
<br />
<br />
<br />
<br />
Informazioni introduttive<br />
Aprire il sottomenu<br />
Selezionare la funzione richiesta<br />
Aprire la funzione<br />
Selezionare l’impostazione richiesta<br />
Immettere cifre o lettere attraverso il tastierino<br />
Confermare le immissioni<br />
Tornare indietro di un livello<br />
Interrompere le procedure di programmazione e<br />
memorizzazione e tornare indietro alla modalità di<br />
stand−by<br />
Molte immissioni concluse con il tasto sono ulteriormente confermate da un segnale<br />
acustico.<br />
Creare voci in rubrica − Esempio 166<br />
La navigazione nei menu e la procedura da seguire per <strong>com</strong>piere impostazioni è indicata a titolo<br />
esemplificativo in Creare voci di rubrica (unità portatile). Si consiglia di seguire quanto riportato<br />
nell’esempio per tutte le impostazioni richieste.<br />
<br />
Aprire il menu principale<br />
/ Rubrica Aprire la rubrica telefonica<br />
Aggiungi Selezionare il sottomenu e confermare<br />
Inser. nome , <br />
Numero , <br />
Numero , <br />
Suon.VIP , / , <br />
<br />
Immettere un nome (max. 12 segni) e confermare<br />
Immettere il numero di chiamata 1 (numero cellulare)<br />
(max. 24 cifre) e confermare<br />
Immettere il numero di chiamata 2 (numero fisso)<br />
(max. 24 cifre) e confermare<br />
Assegnare uno squillo<br />
Tornare indietro alla modalità di stand−by<br />
Per ogni nome o voce è possibile memorizzare 2 numeri telefonici. Il primo spazio memoria<br />
è preceduto dal simbolo di un cellulare, il secondo spazio memoria dal simbolo<br />
di una casa. Si consiglia pertanto di programmare per il primo spazio memoria un numero<br />
di cellulare, per il secondo spazio memoria un numero di rete fissa.<br />
113
Struttura di menu<br />
5 Struttura di menu<br />
167 168<br />
Per passare al menu principale, premere il tasto o . Selezionare quindi con i tasti /<br />
una voce e confermare la selezione con il tasto o . Maggiori informazioni su menu ed<br />
esercizio capitolo 4.<br />
Segr.telef<br />
Mod. Risp.<br />
Elim tut.vec<br />
Reg. memo<br />
Msg in usc.1<br />
Msg in usc.2<br />
Risp. e Reg.<br />
Solo risp.<br />
Off<br />
Esegui OGM<br />
Elim. MSG<br />
Registr.OGM<br />
Esegui OGM<br />
Elim. MSG<br />
Registr.OGM<br />
169<br />
Scher.chiam<br />
Rit.suon.<br />
On / Off<br />
Salva gett.<br />
08 Squilli<br />
06 Squilli<br />
04 Squilli<br />
02 Squilli<br />
114
Lungh ICM<br />
Voce ling<br />
PIN remoto<br />
180 Sec<br />
150 Sec<br />
120 Sec<br />
90 Sec<br />
DEUTSCH<br />
FRANÇAIS<br />
NEDERLANDS<br />
ITALIANO<br />
Struttura di menu<br />
170<br />
Inter<strong>com</strong><br />
Cuffie 01 − 06 1<br />
1 Visualizzazione in base al numero di unità portatili registrate<br />
115
Struttura di menu<br />
Rubrica<br />
Aggiungi<br />
Modifica<br />
Elimina<br />
Elim. tutto<br />
Copia su<br />
USO<br />
Inser. nome 1<br />
Numero<br />
<br />
Numero<br />
<br />
Suon.VIP<br />
01 / 02 / ... / Off<br />
Inser. nome 1<br />
Numero<br />
<br />
Numero<br />
<br />
Suon.VIP<br />
01 / 02 / ... / Off<br />
M1<br />
M2<br />
116<br />
1 I tasti numerici riportano altresì delle lettere. Premendo ripetutamente il relativo tasto si ha<br />
modo di selezionare lettere, cifre e caratteri speciali.
Struttura di menu<br />
Orolog/Svegl<br />
Imp. sveglia<br />
Una volta<br />
Off<br />
171<br />
On<br />
Inser. ora <br />
Giornalmente<br />
Off<br />
On<br />
Inser. ora <br />
Formato data<br />
GG/MM<br />
MM/GG<br />
Formato ora<br />
24 ore<br />
12 ore<br />
Imposta ora 1<br />
<br />
172<br />
1 La voce di menu consente di impostare data e ora.<br />
117
Struttura di menu<br />
Disponibile solo su un’unità portatile:<br />
Imp. Ricev. 1<br />
Suono Ricev<br />
Equalizzat.<br />
Volume Suon. 05 / ... / 01 / Off<br />
Suon. est. 12 / ... / 01<br />
Suon. inter 12 / ... / 01<br />
Tono tasti<br />
Off / Tono / Tono suon.<br />
Batt scarica On / Off<br />
Fuori portat<br />
On / Off<br />
Naturale<br />
Bassi<br />
Acuti<br />
173<br />
174<br />
175<br />
176<br />
177<br />
Contrast.LCD 06 / ... / 01<br />
Nome ricev. 2<br />
Auto risp.<br />
On / Off<br />
Chiam.bamb.<br />
Off<br />
On<br />
Inser.Numeri <br />
178<br />
179<br />
180<br />
181<br />
Bloc.tas.aut<br />
Lingua<br />
On / Off<br />
(9 lingue)<br />
182<br />
183<br />
118<br />
1 La voce di menu è visualizzata solo sull’unità portatile.<br />
2 I tasti numerici riportano altresì delle lettere. Premendo ripetutamente il relativo tasto si ha<br />
modo di selezionare lettere, cifre e caratteri speciali.
Struttura di menu<br />
Disponibile solo su un’unità portatile:<br />
Impost.base 1<br />
Canc. VMWI<br />
Registra<br />
Selez.base<br />
Avanzato<br />
Base<br />
Base<br />
Base<br />
Base<br />
Base<br />
Base<br />
Base<br />
Base<br />
Auto<br />
Mod.<strong>com</strong>posiz<br />
Tempo flash<br />
Prefisso<br />
Filtro Chiam<br />
Numero SOS<br />
Canc.registr<br />
Cambia Pin<br />
Reimposta<br />
PIN?2<br />
PIN?2<br />
PIN?2<br />
PIN?2<br />
Toni / Impulsi<br />
Breve / Medio / Lungo<br />
<br />
04 / ... / 01 <br />
Inser.Numeri <br />
04 / ... / 01 <br />
Inser.Numeri <br />
Cuffie<br />
PIN?<br />
Confermi?<br />
184<br />
185<br />
186<br />
187<br />
188<br />
189<br />
190<br />
191<br />
192<br />
1 La voce di menu è visualizzata solo sull’unità portatile con esattamente gli stessi sottomenu.<br />
2 La configurazione iniziale del PIN corrisponde a 0000".<br />
119
Struttura di menu<br />
Disponibile solo sull’unità base:<br />
Impost.base 1<br />
Suoneria<br />
Volume Suon.<br />
05 / ... / 01 / Off<br />
Suon. est. 12 / ... / 01<br />
Suon. inter 12 / ... / 01<br />
Tono tasti<br />
Contrast.LCD 06 / ... / 01<br />
Canc. VMWI 06 / ... / 01<br />
Lingua<br />
Registra<br />
Avanzato<br />
(9 lingue)<br />
Base<br />
Base<br />
Base<br />
Base<br />
Mod.<strong>com</strong>posiz<br />
Tempo flash<br />
Prefisso<br />
Filtro Chiam<br />
Numero SOS<br />
Canc.registr<br />
Cambia Pin<br />
Reimposta<br />
Off / Tono / Tono suon.<br />
PIN?2<br />
PIN?2<br />
PIN?2<br />
PIN?2<br />
Toni / Impulsi<br />
Breve / Medio / Lungo<br />
<br />
04 / ... / 01 <br />
Inser.Numeri <br />
04 / ... / 01 <br />
Inser.Numeri <br />
Cuffie<br />
PIN?<br />
Confermi?<br />
193<br />
194<br />
195<br />
196<br />
197<br />
198<br />
199<br />
200<br />
201<br />
202<br />
203<br />
204<br />
205<br />
206<br />
1 La voce di menu è visualizzata solo sull’unità base con esattamente gli stessi sottomenu.<br />
2 Il codice PIN è impostato in fabbrica su 0000".<br />
120
6 Funzionamento<br />
Funzionamento<br />
Numerose funzioni sono <strong>com</strong>andabili sia tramite unità base sia tramite unità portatile. Si tenga presente<br />
che alcuni dei tasti raffigurati qui di seguito sono presenti sia sull’unità base sia sull’unità portatile<br />
pagina 109.<br />
Con immissione in corso non è possibile passare dall’unità base all’unità portatile e viceversa.<br />
È pertanto indispensabile definire all’inizio della sequenza di <strong>com</strong>andi, se si<br />
intende utilizzare l’unità base oppure l’unità portatile.<br />
Accendere e spegnere l’unità portatile<br />
Con unità portatile disinserita non è possibile ricevere chiamate sull’unità portatile.<br />
L’unità portatile spenta non consuma batterie.<br />
Con unità portatile spenta non è però neanche possibile svolgere delle chiamate<br />
d’emergenza. Prima di poter fare ciò è indispensabile inserire l’unità portatile, cosa che<br />
può richiedere del tempo.<br />
2 sec. Accendere l’unità portatile (in modalità di stand−by)<br />
2 sec. Spegnere l’unità portatile<br />
Blocco dei tasti 207<br />
Il blocco dei tasti impedisce l’attivazione inavvertita di determinate funzioni.<br />
1 sec. Attivare il blocco dei tasti<br />
L’attivazione del blocco dei tasti consente di ricevere telefonate in arrivo <strong>com</strong>e di consueto.<br />
Con blocco dei tasti attivato è possibile svolgere delle chiamate d’emergenza<br />
(tramite i numeri di chiamata d’emergenza).<br />
1 sec. Disattivare il blocco dei tasti<br />
Con blocco dei tasti attivato, sul display <strong>com</strong>pare il simbolo .<br />
Il telefono può essere impostato in modo da attivare il blocco dei tasti automaticamente dopo<br />
90 secondi pagina 131.<br />
Telefonare<br />
Ricevere una chiamata<br />
Oltre allo squillo, ogni telefonata è altresì segnalata da una segnalazione ottica di chiamata. 208<br />
, oppure <br />
Accettare la chiamata<br />
Non avvicinare l’unità portatile che squilla troppo all’orecchio visto il pericolo di danni<br />
all’udito!<br />
Con ricezione automatica delle chiamate attivata, per accettare la chiamata è sufficiente estrarre<br />
l’unità portatile dalla stazione di carica pagina 131.<br />
Concludere la chiamata<br />
oppure <br />
Concludere la chiamata<br />
Per concludere una chiamata è anche possibile riporre l’unità portatile nella stazione di carica.<br />
121
Funzionamento<br />
Compiere telefonate<br />
<br />
<br />
oppure oppure <br />
Immettere un numero di chiamata (max. 48 cifre)<br />
In caso di immissione errata, cancellare l’ultima cifra<br />
Selezionare il numero di chiamata<br />
È altresì possibile premere prima il tasto sull’unità portatile o sollevare il ricevitore<br />
sull’unità base o premere il tasto e ottenere un segnale di linea libera. Il telefono<br />
seleziona immediatamente le cifre immesse per la <strong>com</strong>posizione del numero di chiamata<br />
desiderato (max. 48 cifre). Nel corso di una simile chiamata non è possibile eseguire<br />
la correzione di singole cifre che <strong>com</strong>pongono il numero di chiamata.<br />
Ripetizione di chiamata 209<br />
Il telefono memorizza gli ultimi 5 numeri di chiamata selezionati assieme alla data e all’ora della telefonata.<br />
Per riselezionare questo numero telefonico, ad es. perché la linea è risultata precedentemente<br />
occupata o perché non si è raggiunto nessuno, è possibile utilizzare la funzione ripetizione<br />
di chiamata:<br />
, / Aprire l’elenco di ripetizione di chiamata e selezionare<br />
una voce<br />
oppure oppure <br />
Instaurare un collegamento<br />
Il numero telefonico memorizzato è selezionato automaticamente instaurando un collegamento.<br />
Richiamare una chiamata persa 210<br />
Il telefono memorizza 40 numeri telefonici in un elenco chiamate.<br />
, / Aprire l’elenco chiamate e selezionare una voce<br />
oppure oppure <br />
Instaurare un collegamento<br />
Selezionare numeri telefonici dalla rubrica<br />
Per fare questo è necessario aver precedentemente memorizzato dei numeri nella rubrica telefonica<br />
pagina 126.<br />
, / Aprire la rubrica e selezionare una voce<br />
oppure oppure <br />
Instaurare un collegamento<br />
Per poter accedere più velocemente ad una voce in rubrica, premere con rubrica aperta<br />
la lettera iniziale della voce richiesta. Sul display <strong>com</strong>pare la prima voce con la lettera<br />
indicata.<br />
Selezionare numeri telefonici tramite tasti di selezione diretta 211<br />
La funzione prevede la precedente memorizzazione di numeri telefonici sui tasti di selezione diretta<br />
pagina 127.<br />
oppure <br />
Instaurare un collegamento<br />
Il numero di chiamata memorizzato è selezionato automaticamente.<br />
Compiere chiamate interne 212<br />
Per poter <strong>com</strong>piere telefonate interne gratuite è indispensabile aver registrato minimo un’unità portatile<br />
all’unità base.<br />
122
Compiere chiamate interne<br />
UP1: oppure UB: ,<br />
/ Inter<strong>com</strong> , oppure <br />
UP1/UB: / , oppure <br />
UP2: <br />
UP1/UB / UP2: <br />
Avviare la chiamata interna<br />
Funzionamento<br />
Selezionare il portatile o la base richiesti<br />
Accettare una telefonata interna presso l’altra unità<br />
portatile<br />
Concludere la chiamata interna<br />
In caso l’unità portatile che si intende chiamare stia svolgendo una telefonata, nella linea<br />
si avverte un segnale acustico e sul display <strong>com</strong>pare Linea occup..<br />
Accettare una chiamata esterna con telefonata interna in corso<br />
In caso di arrivo di una telefonata esterna durante lo svolgimento di una chiamata interna,<br />
sul display viene visualizzato un messaggio.<br />
<br />
Accettare una chiamata esterna<br />
Per concludere la chiamata interna sul portatile che ha accettato la telefonata esterna, premere il<br />
tasto .<br />
Trasferire internamente chiamate interne<br />
UP1: oppure UB: ,<br />
/ , Inter<strong>com</strong> , oppure Con chiamata esterna in corso<br />
/ , oppure <br />
Selezionare l’unità portatile o l’unità base richiesti<br />
UP2: <br />
Accettare una telefonata interna presso l’altra unità<br />
portatile<br />
UP1: oppure UB: <br />
Inoltrare la chiamata (riagganciare)<br />
Riscontro / Chiamata in attesa<br />
UP1: oppure UB: <br />
/ , Inter<strong>com</strong> , oppure Con chiamata esterna in corso<br />
/ , oppure <br />
Selezionare l’unità portatile o l’unità base richiesti<br />
UP2: <br />
Accettare una telefonata interna presso l’altra unità<br />
portatile<br />
UP1: oppure UB: , / Alternare<br />
oppure <br />
Cambiare il partner di chiamata<br />
Condurre chiamate in conferenza<br />
Questa funzione consente di condurre una conferenza con una chiamata esterna e un ulteriore interlocutore<br />
interno.<br />
UP1: oppure UB: ,<br />
/ , Inter<strong>com</strong> , <br />
Con chiamata esterna in corso<br />
/ , <br />
Selezionare l’unità portatile o l’unità base richiesti<br />
123
Funzionamento<br />
UP2: <br />
Accettare una telefonata interna presso l’altra unità<br />
portatile<br />
UP1 o UB: 2 sec. , Conferenza Avviare una chiamata in conferenza<br />
UP1 o UB e UP2: <br />
Concludere la conferenza<br />
Visualizzare la durata di conversazione<br />
Trascorsi alcuni secondi dall’inizio di una conversazione, sul display viene visualizzata la durata di<br />
conversazione attuale in minuti e secondi.<br />
Impostare il volume del ricevitore<br />
Anche con chiamata in corso è possibile regolare il volume del ricevitore in 5 livelli.<br />
/ <br />
Aumentare/Ridurre il volume del ricevitore<br />
Volume dello squillo di chiamata<br />
Il volume dello squillo di chiamata può essere impostato in 5 livelli separatamente sia per l’unità<br />
portatile sia per l’unità base.<br />
Impostare il volume di squillo dell’unità portatile<br />
<br />
Aprire il menu<br />
/ Imp. Ricev. Selezionare Imp. Ricev.<br />
/ Suono Ricev Selezionare Suono Ricev<br />
/ Volume Suon. <br />
/ <br />
<br />
Selezionare Volume Suon.<br />
Aumentare/Ridurre il volume dello squillo di chiamata<br />
Salvare le impostazioni<br />
Impostare il volume di squillo dell’unità base<br />
<br />
Aprire il menu<br />
/ Impost.base <br />
Selezionare Impost.base<br />
/ Suoneria <br />
/ Volume Suon. <br />
/ <br />
<br />
Selezionare Suoneria<br />
Selezionare Volume Suon.<br />
Aumentare/Ridurre il volume dello squillo di chiamata<br />
Salvare le impostazioni<br />
Disattivare e attivare lo squillo di chiamata 213<br />
3 sec. Disattivare lo squillo di chiamata<br />
3 sec. Attivare lo squillo di chiamata<br />
Con squillo di chiamata disattivato, sul display <strong>com</strong>pare il simbolo .<br />
Lo squillo di chiamata si lascia disattivare tramite menu.<br />
124
Funzionamento<br />
Funzione vivavoce 214<br />
Utilizzare questa funzione per ascoltare il partner di chiamata attraverso l’altoparlante.<br />
ovvero <br />
Con chiamata in corso: attivare la funzione vivavoce<br />
ovvero <br />
Con chiamata in corso: disattivare la funzione<br />
vivavoce<br />
Con funzione vivavoce attivata, sul display <strong>com</strong>pare il simbolo .<br />
Silenziamento del microfono 215<br />
Con chiamata in corso è possibile attivare o disattivare il microfono dell’unità portatile o dell’unità<br />
base, di modo che l’interlocutore non vi senta in caso di consultazione di un’altra persona presente<br />
nella stessa stanza.<br />
2 sec. ovvero Con chiamata in corso: disattivare il microfono<br />
(silenziamento)<br />
2 sec. ovvero Con chiamata in corso: attivare il microfono<br />
Con microfono muto, sul display <strong>com</strong>pare il simbolo .<br />
Rubrica telefonica 216<br />
Nella rubrica telefonica è possibile memorizzare 50 interlocutori con ciascuno 2 numeri telefonici.<br />
Assegnare a tutti i numeri di chiamata sempre un prefisso in modo da poter riconoscere<br />
anche una chiamata urbana in arrivo ed abbinarla ad una voce presente nella rubrica<br />
telefonica.<br />
Con capacità di memoria esaurita, sul display <strong>com</strong>pare l’indicazione Mem piena dopo<br />
aver memorizzato l’ultimo messaggio. Per poter disporre di nuovo spazio memoria,<br />
cancellare prima una voce già presente.<br />
Le voci della rubrica telefonica sono elencate in ordine alfabetico.<br />
Se ci si trova nella rubrica telefonica, sul display <strong>com</strong>pare il simbolo .<br />
La segreteria telefonica è accessibile sia dall’unità base sia dall’unità portatile.<br />
Inserire nomi<br />
I tasti numerici riportano altresì delle lettere. Premendo ripetutamente il relativo tasto si ha modo di<br />
selezionare lettere, cifre e caratteri speciali.<br />
<br />
Immettere spazi vuoti<br />
<br />
Immettere caratteri speciali<br />
<br />
Cancellare<br />
/ <br />
Spostare il cursore<br />
Per immettere la stessa lettera una seconda volta, premere il rispettivo tasto. Attendere<br />
finché il cursore si sposta di una posizione. Immettere quindi la lettera una seconda<br />
volta.<br />
125
Funzionamento<br />
Creare voci in rubrica 217<br />
anche pagina 113<br />
<br />
ovvero Aggiungi<br />
ovvero <br />
Aprire la rubrica telefonica<br />
Selezionare il sottomenu e confermare<br />
Inser. nome , ovvero Immettere il nome (max. 12 lettere) e confermare<br />
Numero , ovvero Immettere il numero telefonico 1 (numero cellulare)<br />
(max. 24 cifre) e confermare<br />
Numero , ovvero Immettere il numero telefonico 2 (numero fisso)<br />
(max. 24 cifre) e confermare<br />
Suon.VIP , / , ovvero Assegnare uno squillo<br />
Se le voci sono più lunghe dello spazio di display disponibile, sul display sono visualizzati i simboli<br />
e . In questo modo si viene informati che la voce continua oltre il display a sinistra o a destra.<br />
Con capacità di memoria esaurita, sul display <strong>com</strong>pare l’indicazione Mem piena dopo aver<br />
memorizzato l’ultimo messaggio. Per poter disporre di nuovo spazio memoria, cancellare prima<br />
una voce già presente.<br />
Se il nome immesso è già presente in rubrica, sul display <strong>com</strong>pare l’indicazione<br />
Doppio nome .<br />
Modificare voci in rubrica 218<br />
<br />
Aprire la rubrica telefonica<br />
/ , ovvero <br />
Selezionare la voce e confermare<br />
/ , Modifica ovvero Selezionare il sottomenu e confermare<br />
Inser. nome , ovvero Modificare il nome (max. 12 cifre) e confermare<br />
Numero , ovvero Modificare il numero telefonico 1 (numero cellulare)<br />
(max. 24 cifre) e confermare<br />
Numero , ovvero Modificare il numero telefonico 2 (numero fisso)<br />
(max. 24 cifre) e confermare<br />
Suon.VIP , / , ovvero Assegnare uno squillo<br />
126
Funzionamento<br />
Cancellare voci in rubrica<br />
Cancellare una voce<br />
<br />
Aprire la rubrica telefonica<br />
/ , ovvero <br />
Selezionare la voce e confermare<br />
/ , Elimina ovvero Selezionare il sottomenu e confermare<br />
Per poter accedere più velocemente ad una voce in rubrica, premere con rubrica aperta<br />
la lettera iniziale della voce richiesta. Sul display <strong>com</strong>pare la prima voce con la lettera<br />
indicata.<br />
Cancellare tutte le voci<br />
<br />
Aprire la rubrica telefonica<br />
ovvero <br />
Aprire il menu<br />
/ , Elim. tutto ovvero Selezionare il sottomenu e confermare<br />
Confermi?<br />
, ovvero <br />
Vuoto<br />
Confermare la procedura di cancellazione<br />
oppure<br />
Confermi? , oppure Interrompere la procedura di cancellazione<br />
Verificare la memoria di rubrica<br />
Il dispositivo visualizza il numero di posizioni di memoria libere dei 50 posti disponibili.<br />
<br />
Aprire la rubrica telefonica<br />
ovvero <br />
Aprire il menu<br />
/ , USO ovvero Selezionare il sottomenu e confermare<br />
Programmare i tasti di selezione diretta 219<br />
2 numeri telefonici presenti in rubrica possono essere programmati in modo da venire selezionati<br />
premendo semplicemente il tasto oppure (selezione diretta).<br />
<br />
Aprire la rubrica telefonica<br />
/ , ovvero <br />
Selezionare la voce e confermare<br />
/ , Copia su ovvero Selezionare il sottomenu e confermare<br />
M1 , / , ovvero Selezionare il tasto di selezione diretta e confermare<br />
ovvero <br />
Confermare il numero telefonico visualizzato<br />
Selezionare numeri telefonici tramite tasti di selezione diretta<br />
pagina 122<br />
127
Funzionamento<br />
Elenco di ripetizione di chiamata<br />
Il telefono memorizza gli ultimi 5 numeri di chiamata selezionati assieme alla data e all’ora della telefonata.<br />
Memorizzare in rubrica un numero dall’elenco di ripetizione di chiamata<br />
<br />
Aprire l’elenco di ripetizione di chiamata<br />
/ , ovvero <br />
Selezionare la voce e confermare<br />
/ , Salva numero <br />
ovvero <br />
Selezionare il sottomenu e confermare<br />
Inser. nome , ovvero <br />
Immettere il nome (max. 12 lettere) e confermare<br />
Inser.Numeri , ovvero Modificare se occorre il numero telefonico (max.<br />
24 cifre) e confermare<br />
/ , ovvero <br />
Definire se si tratta di un numero cellulare o di un<br />
numero fisso e confermare<br />
Cancellare un numero dall’elenco di ripetizione di chiamata<br />
<br />
Aprire l’elenco di ripetizione di chiamata<br />
/ , ovvero <br />
Selezionare la voce e confermare<br />
/ , Elimina ovvero Selezionare il sottomenu e confermare<br />
Cancellare tutto l’elenco di ripetizione di chiamata<br />
<br />
Aprire l’elenco di ripetizione di chiamata<br />
ovvero <br />
Aprire il menu<br />
/ , Elim. tutto ovvero Selezionare il sottomenu e confermare<br />
Confermi?<br />
, ovvero <br />
Vuoto<br />
oppure<br />
Confermi? , oppure <br />
Confermare la procedura di cancellazione<br />
Interrompere la procedura di cancellazione<br />
Selezionare un numero dall’elenco di ripetizione di chiamata<br />
pagina 122<br />
128
Funzionamento<br />
Elenco chiamate 220<br />
In caso di assenza tutte le chiamate giunte sono memorizzate in un apposito elenco chiamate. In<br />
tutto è possibile memorizzare fino a 40 numeri di chiamata. Con ogni numero telefonico sono altresì<br />
memorizzate data e ora della chiamata.<br />
Se ci si trova nell’elenco chiamate, sul display <strong>com</strong>pare il simbolo .<br />
Nell’elenco chiamate, l’ultimo numero perso è indicato <strong>com</strong>e primo numero in lista.<br />
In presenza di chiamate perse, la segnalazione ottica di chiamata lampeggia e sul display <strong>com</strong>pare<br />
il simbolo . Sul display risulta in più anche un’indicazione relativa al numero di chiamate perse,<br />
perlomeno fintanto che non si apre la prima volta l’elenco chiamate.<br />
Visualizzare numeri dall’elenco chiamate<br />
, / Aprire l’elenco chiamate e selezionare una voce<br />
Memorizzare in rubrica un numero dall’elenco chiamate<br />
È possibile memorizzare un numero di chiamata direttamente dall’elenco chiamate nella rubrica telefonica.<br />
, / Aprire l’elenco chiamate e selezionare una voce<br />
ovvero <br />
Aprire il menu<br />
/ Salva numero , <br />
ovvero <br />
Selezionare il sottomenu e confermare<br />
Inser. nome , ovvero <br />
Immettere il nome (max. 12 lettere) e confermare<br />
Inser.Numeri , ovvero Modificare se occorre il numero telefonico (max.<br />
24 cifre) e confermare<br />
/ , ovvero <br />
Definire se si tratta di un numero cellulare o di un<br />
numero di telefono fisso e confermare<br />
Cancellare numeri dall’elenco chiamate<br />
Cancellare singoli numeri di chiamata<br />
, / Aprire l’elenco chiamate e selezionare una voce<br />
ovvero <br />
Aprire il menu<br />
/ Elimina , ovvero Selezionare il sottomenu e confermare<br />
Cancellare tutti i numeri di chiamata<br />
<br />
ovvero <br />
/ , Elim. tutto ovvero <br />
Aprire l’elenco chiamate<br />
Aprire il menu<br />
Selezionare il sottomenu e confermare<br />
Confermi? , ovvero Vuoto Confermare la procedura di cancellazione<br />
oppure<br />
Confermi? , oppure Interrompere la procedura di cancellazione<br />
129
Funzionamento<br />
Richiamare chiamate ricevute<br />
pagina 122<br />
Impostare toni e indicazioni<br />
Varie opzioni di impostazione consentono di adattare il telefono alle proprie esigenze:<br />
Impostare lo squillo di chiamata<br />
Si prega di definire uno squillo per chiamate esterne e interne. In tutto è possibile scegliere tra 12<br />
squilli polifonici.<br />
Impostare lo squillo di chiamata Menu pagina 118<br />
Suono dei tasti<br />
I suoni dei tasti danno conferma di aver effettivamente premuto il tasto interessato. Il telefono si lascia<br />
impostare in modo che premendo un qualsiasi tasto si avverta sempre lo stesso tono (impostazione<br />
Tono), oppure toni sempre diversi (impostazione Suoneria). In più è anche possibile disattivare<br />
il suono dei tasti.<br />
Impostare il suono dei tasti Menu pagina 118<br />
Suono di avviso del livello di carica delle batterie<br />
Un segnale acustico informa sul basso livello di carica delle batterie.<br />
Impostare il segnale acustico del livello di carica delle batterie (Batt scarica) Menu pagina 118<br />
Suono di avviso di portata<br />
Un segnale acustico informa che l’unità portatile si trova fuori della portata dell’unità base.<br />
Impostare il segnale acustico di portata (Fuori portat) Menu pagina 118<br />
Equalizzatore<br />
La qualità del suono dell’altoparlante può essere adattata alle proprie esigenze. Lasciare il suono<br />
Naturale oppure mettere in evidenza i Bassi o gli Acuti.<br />
Impostare l’equalizzatore Menu pagina 118<br />
Contrasto di display<br />
Il contrasto di display (Contrast.LCD ) di unità base e unità portatile è regolabile in 6 livelli<br />
Menu pagine 118 e 120<br />
Nome del portatile<br />
All’unità portatile può essere assegnato un nome individuale (Nome ricev.) Menu pagina 118<br />
Formato di ora e data<br />
Il telefono consente di definire il formato e l’ordine di immissione riferiti a ora e data<br />
Menu pagina 117<br />
130
Funzionamento<br />
Impostazioni varie<br />
Ricezione automatica di chiamate 221<br />
L’attivazione di questa funzione consente di ricevere automaticamente una chiamata estraendo<br />
semplicemente l’unità portatile dalla stazione di carica. L’accettazione di chiamata automatica è attivata<br />
o disattivata nel menu.<br />
Attivare l’accettazione automatica di chiamata Menu pagina 118<br />
La voce di menu Auto risp. può essere richiamata solo attraverso il menu dell’unità<br />
portatile.<br />
Blocco dei tasti 222<br />
Con impostazione attivata, il blocco dei tasti si attiva automaticamente se non si preme alcun tasto<br />
per 90 secondi. Con blocco dei tasti attivato, sul display <strong>com</strong>pare il simbolo .<br />
Attivare il blocco dei tasti Menu pagina 118<br />
Prefisso 223<br />
È possibile impostare un prefisso (Prefisso). Premendo a lungo il tasto <br />
prima o dopo l’immissione di un numero di chiamata, il prefisso andrà a precedere il numero interessato.<br />
Premendo il tasto il numero di chiamata è selezionato.<br />
Modificare il prefisso Menu pagina 119<br />
Modificare il PIN 224<br />
Il codice PIN è necessario alla registrazione di unità portatili. La configurazione iniziale del codice è<br />
0000". Modificare il PIN Menu pagina 119 (menu dell’unità base)<br />
Reset 225<br />
La funzione consente di ripristinare la configurazione iniziale del telefono.<br />
Reset Menu pagine 119 e 120<br />
Cercare l’unità portatile (funzione di paging)<br />
Avendo perso d’occhio la propria unità portatile è possibile ritrovarla facilmente grazie all’emissione<br />
di un tono di ricerca emesso dall’unità base.<br />
Requisiti: l’unità portatile è inserita, si trova entro la portata dell’unità base, le batterie<br />
non sono scariche e lo squillo dell’unità portatile non risulta disattivato. Significa che<br />
sul display dell’unità portatile NON è consentito che risulti visualizzato il simbolo .<br />
UB: <br />
Avviare la chiamata interna<br />
UB: / <br />
Selezionare l’unità portatile che si intende cercare<br />
UB: <br />
Avviare la chiamata di paging<br />
Funzioni speciali<br />
Sveglia 226<br />
Con la funzione è possibile farsi svegliare/rilasciare un allarme dalla propria unità portatile all’orario<br />
precedentemente impostato. Con sveglia attivata, sul display <strong>com</strong>pare il simbolo . Una volta raggiunto<br />
l’orario di sveglia, il telefono emette lo squillo di chiamata per 1 minuto. Sul display <strong>com</strong>pare<br />
l’indicazione Allarme .<br />
131
Funzionamento<br />
Impostare la sveglia<br />
È possibile definire se utilizzare la sveglia per un solo giorno (Una volta) oppure se si vuole essere<br />
svegliati allo stesso orario più volte (Giornalmente).<br />
Impostare la sveglia (Imp. sveglia). Menu pagina 117<br />
Disattivare la sveglia anzitempo<br />
<br />
Disattivare la sveglia<br />
Funzione baby controllo<br />
La funzione consente di memorizzare un determinato numero telefonico (max. 24 cifre) chiamato<br />
automaticamente attraverso il vivavoce non appena si aziona un qualsiasi tasto (tranne i tasti <br />
e ).<br />
Con funzione attivata, sul display lampeggia in modo permanente l’indicazione<br />
Chiam.bamb. .<br />
Attivare il baby controllo Menu pagina 118<br />
Blocco di chiamata<br />
Il blocco di chiamata impedisce di selezionare sull’unità portatile numeri telefonici che iniziano con<br />
le cifre predefinite. È prevista la memorizzazione di 4 numeri bloccabili <strong>com</strong>posti da rispettivamente<br />
max. 8 cifre.<br />
Attivare il blocco di chiamata Menu pagina 119<br />
Avendo selezionato un numero telefonico bloccato, il dispositivo non instaura alcun collegamento.<br />
Il dispositivo emette un segnale di avvertimento e torna alla modalità di stand−by.<br />
Numero d’emergenza<br />
È prevista la memorizzazione di fino a 4 numeri di chiamata selezionabili nonostante la precedente<br />
attivazione del blocco di chiamata. A pagina 119 è indicata la posizione da scorrere nel menu.<br />
Procedura di selezione<br />
L’unità portatile è utilizzabile sia in sistemi telefonici analogici (procedura di selezione a impulsi<br />
/ IWV) sia se integrata in moderni sistemi telefonici digitali (procedura di selezione a toni / MFV).<br />
La procedura di selezione è impostata tramite menu. A pagina 119 è indicata la posizione da scorrere<br />
nel menu.<br />
Utilizzando il telefono con modalità di selezione a impulsi, durante lo svolgimento di una<br />
chiamata è possibile premere il tasto per passare alla modalità di selezione a toni<br />
per il resto della conversazione.<br />
Visualizzare il numero di chiamata (CLIP)<br />
La visualizzazione del numero di chiamata (CLIP) e la visualizzazione di data e ora<br />
sono servizi del proprio gestore di rete. Si consiglia di rivolgersi direttamente al proprio<br />
gestore di rete per ulteriori informazioni a riguardo.<br />
Se il proprio impianto telefonico è abilitato alla funzione CLIP (CLIP = Calling Line Identification<br />
Presentation), il display visualizza in caso di chiamata in arrivo il numero di chiamata dell’interlocutore,<br />
qualora questi abbia acconsentito alla trasmissione del proprio numero telefonico.<br />
Se non si accetta una chiamata, il display rimane illuminato per ca. 6 secondi, prima<br />
che vengano quindi di nuovo visualizzati data e ora attuali.<br />
132
7 Segreteria telefonica<br />
Segreteria telefonica<br />
La segreteria telefonica memorizza fino a 57 messaggi (59 messaggi inclusi i messaggi di risposta).<br />
La durata di registrazione max. è di 15 minuti (inclusi i messaggi di risposta).<br />
Non appena la capacità di memoria risulta esaurita non è più possibile registrare dei messaggi<br />
nuovi. La segreteria telefonica passa quindi automaticamente alla modalità di sola risposta.<br />
La segreteria telefonica può essere <strong>com</strong>andata sia dall’unità base sia dall’unità portatile.<br />
Attivare / Disattivare la segreteria 227<br />
Con segreteria telefonica inserita, il tasto riproduzione / stop sull’unità base lampeggia di rosso. In<br />
più, sul display dell’unità base e sull’unità portatile registrata viene visualizzato in modo permanente<br />
il simbolo .<br />
La configurazione iniziale prevede che la segreteria telefonica sia inserita.<br />
Attivare/Disattivare la segreteria dall’unità base<br />
<br />
Attivare/Disattivare la segreteria telefonica<br />
Attivare la segreteria dall’unità portatile<br />
, / Segr.telef , , / Mod. Risp. , ,<br />
/ Risp. e Reg. o Solo risp. <br />
Menu pagina 114<br />
Disattivare la segreteria dall’unità portatile<br />
, / Segr.telef , , / Mod. Risp. , ,<br />
/ Off , <br />
Menu pagina 114<br />
Modalità di risposta<br />
La segreteria telefonica prevede due modalità di risposta: la modalità di risposta e registrazione<br />
(Risp. e Reg.) e la modalità di sola risposta (Solo risp.). In modalità di risposta e registrazione è<br />
dato modo di lasciare un messaggio. In modalità di sola risposta non è invece possibile lasciare alcun<br />
messaggio.<br />
Selezionare la modalità di risposta<br />
Selezionare la modalità desiderata Menu pagina 114. Vedi anche la sezione Attivare/Disattivare<br />
la segreteria" a pagina 133.<br />
La configurazione iniziale della segreteria telefonica prevede che sia inserita la modalità<br />
di risposta e registrazione.<br />
133
Segreteria telefonica<br />
Messaggio di risposta<br />
La segreteria telefonica offre due messaggi di risposta preimpostati. Entrambi i messaggi di risposta<br />
possono essere sostituiti da messaggi individuali.<br />
In modalità di risposta e registrazione, il messaggio di risposta utilizzato è Msg in usc.1, in modalità<br />
di solo annuncio il messaggio di risposta utilizzato è Msg in usc.2.<br />
Una volta registrato il messaggio di risposta personale, questo viene subito utilizzato<br />
<strong>com</strong>e messaggio di risposta.<br />
Con memoria della segreteria telefonica piena, l’apparecchio riproduce automaticamente il messaggio<br />
di risposta della modalità di sola risposta.<br />
Lingua dei messaggi di risposta<br />
L’uscita vocale del messaggio di risposta standard della segreteria telefonica è modificabile. È possibile<br />
scegliere tra 4 lingue.<br />
oppure , / Segr.telef ,<br />
oppure , / Voce ling ,<br />
oppure <br />
Aprire il sottomenu<br />
/ , oppure Selezionare la lingua e confermare<br />
Riprodurre il messaggio di risposta<br />
Menu pagina 114 (Esegui OGM)<br />
Registrare un messaggio di risposta personale<br />
Un messaggio di risposta personale può avere una lunghezza max. di 2 minuti.<br />
oppure , / Segr.telef ,<br />
oppure ,<br />
Selezionare il sottomenu<br />
/ Msg in usc.1<br />
o Msg in usc.2 oppure Selezionare il messaggio di risposta<br />
, / Registr.OGM ,<br />
oppure <br />
Procedere alla registrazione<br />
, Registrare il messaggio di risposta<br />
oppure <br />
Concludere e memorizzare la registrazione<br />
L’annuncio che si desidera registrare va parlato in modo chiaro e forte nel microfono della propria<br />
unità base (sulla parte anteriore del dispositivo) o dell’unità portatile. Una volta conclusa, la risposta<br />
è ripetuta ad alta voce.<br />
Per usufruire della funzione di interrogazione a distanza è importante registrare dei<br />
messaggi di risposta abbastanza lunghi (max. 2 minuti)<br />
Interrogazione a distanza" pagina 138.<br />
134
Segreteria telefonica<br />
Riattivare la risposta standard<br />
Se si cancella il messaggio di risposta personale, si attiva automaticamente il messaggio di risposta<br />
standard.<br />
Per cancellare un messaggio di risposta, navigare nel menu Menu pagina 114 (Elim. MSG).<br />
I messaggi di risposta standard non sono cancellabili.<br />
Riprodurre messaggi registrati 228<br />
In presenza di nuovi messaggi, sull’unità base e l’unità portatile registrata lampeggiano le indicazioni<br />
ottiche e sul rispettivo display, in più, il simbolo . Sul display dell’unità base e delle unità<br />
portatili registrate è anche visualizzato un’indicazione testuale relativa al numero di nuovi messaggi.<br />
I messaggi ricevuti sono numerati nell’ordine in cui sono registrati.<br />
I messaggi ricevuti sono quindi riprodotti in ordine inverso: il messaggio registrato per ultimo è riprodotto<br />
per primo.<br />
Durante la riproduzione sono visualizzati la data e l’ora della registrazione.<br />
Il dispositivo riproduce solo i messaggi nuovi. Per riprodurre i messaggi vecchi, avviare<br />
la riproduzione dei messaggi una seconda volta.<br />
Riprodurre messaggi sull’unità base (tramite altoparlante)<br />
<br />
Riprodurre/Interrompere i messaggi<br />
<br />
Ripetere il messaggio<br />
2x <br />
Messaggio precedente<br />
<br />
Messaggio successivo<br />
Riprodurre messaggi sull’unità portatile<br />
, / Esegui msg ,<br />
Attesa Riprodurre messaggi (tramite altoparlante)<br />
Opzioni durante la riproduzione:<br />
<br />
Aprire il menu<br />
/ Elim. MSG <br />
Eliminato<br />
Cancellare un messaggio<br />
/ Arresta Interrompere la riproduzione<br />
/ Inoltra MSG Messaggio successivo<br />
/ Ripeti MSG Riprodurre il messaggio attuale dall’inizio<br />
/ Riavv. MSG Messaggio precedente<br />
135
Segreteria telefonica<br />
In alternativa è possibile richiamare queste funzioni premendo una certa <strong>com</strong>binazione di tasti:<br />
<br />
Cancellare il messaggio<br />
<br />
Riprodurre il messaggio attuale dall’inizio<br />
2x <br />
Messaggio precedente<br />
<br />
Interrompere la riproduzione (Pausa)<br />
<br />
Messaggio successivo<br />
Impostare il volume per la riproduzione di messaggi<br />
Con riproduzione in corso, sull’unità base è possibile impostare il volume in 5 livelli.<br />
/ <br />
Aumentare/Ridurre il volume<br />
Con riproduzione in corso, sull’unità portatile è possibile impostare il volume attraverso 5 livelli.<br />
/ <br />
Aumentare/Ridurre il volume<br />
Cancellare un messaggio 229<br />
Durante la riproduzione di un messaggio:<br />
UB: <br />
oppure<br />
UP: <br />
UP: / Elim. MSG <br />
Eliminato<br />
oppure<br />
UP: <br />
Cancellare tutti i messaggi 230<br />
Tutti i vecchi messaggi sono cancellati.<br />
Cancellare il messaggio<br />
Aprire il menu<br />
Cancellare un messaggio<br />
Cancellare il messaggio<br />
Una volta cancellati i messaggi non sarà più possibile ripristinarli!<br />
136<br />
oppure , / Elim tut.vec ,<br />
oppure , Confermi? , oppure <br />
Intercettazione<br />
È possibile ascoltare chiamate in arrivo sull’unità base attraverso il diffusore acustico, senza bisogno<br />
di accettare la chiamata. Allo scopo è necessario attivare nel menu la funzione di intercettazione<br />
Menu pagina 114 (Scher.chiam).<br />
Per modificare il volume con intercettazione in corso, premere i tasti e .<br />
Accettare una chiamata<br />
Anche se la segreteria telefonica ha già risposto ad una chiamata è <strong>com</strong>unque possibile riprendere<br />
la telefonata. La registrazione del messaggio viene in tal caso interrotta.<br />
oppure oppure <br />
Accettare la chiamata
Segreteria telefonica<br />
Ritardo nell’accettazione di chiamata<br />
Il menu consente di definire la frequenza con cui fare squillare il telefono prima di ascoltare un<br />
messaggio di risposta. È possibile scegliere tra 2, 4, 6 o 8 segnalazioni di chiamata Menu pagina<br />
114 (Rit.suon.).<br />
La configurazione iniziale prevede che la segreteria telefonica sia inserita squillando<br />
4 volte.<br />
In più è possibile servirsi della funzione Salva gett. per <strong>com</strong>piere interrogazioni a distanza/preliminari<br />
senza addebito di scatti. Con questa funzione di interrogazione a distanza/preliminare è possibile<br />
verificare gratuitamente la presenza di nuovi messaggi sulla propria segreteria telefonica. Se ci<br />
sono messaggi nuovi sulla segreteria telefonica, l’apparecchio accetta la telefonata dopo massimo<br />
2 segnalazioni di chiamata. Se non ci sono messaggi nuovi sulla segreteria telefonica, l’apparecchio<br />
accetta la telefonata solo dopo 6 segnalazioni di chiamata. Riagganciare prima del 6° squillo.<br />
In tal modo si evita l’addebito di scatti telefonici.<br />
Ulteriori informazioni sull’interrogazione a distanza pagina 138.<br />
Durata di registrazione massima per messaggio<br />
È possibile scegliere tra 4 durate di registrazione Menu pagina 115 (Lungh ICM)<br />
Registrare un promemoria<br />
Un promemoria è un messaggio che è possibile riprodurre e quindi ascoltare allo stesso modo di<br />
un messaggio ricevuto. Un promemoria può avere una lunghezza max. di 3 minuti ed è registrato<br />
sull’unità portatile.<br />
I promemoria si possono registrare anche con segreteria telefonica disattivata.<br />
oppure , / Segr.telef ,<br />
oppure ,<br />
Selezionare il sottomenu<br />
oppure , / Reg. memo ,<br />
oppure ,<br />
Avviare la registrazione<br />
, Registrare un promemoria<br />
oppure <br />
Concludere e memorizzare la registrazione<br />
Interrompere la registrazione del promemoria<br />
UB: <br />
Interrompere la registrazione e tornare indietro al<br />
sottomenu<br />
oppure<br />
UP: oppure <br />
Interrompere la registrazione e tornare indietro al<br />
sottomenu<br />
137
Segreteria telefonica<br />
Interrogazione a distanza 231<br />
È dato modo di chiamare la propria segreteria telefonica per attivarla, ascoltare messaggi ricevuti<br />
e <strong>com</strong>piere una serie di funzioni accessorie. Requisito per questa operazione è un telefono abilitato<br />
alla selezione a toni.<br />
Codice PIN per l’interrogazione a distanza 232<br />
Il PIN remoto è impostato in fabbrica e corrisponde a "1234". Si consiglia di modificare il PIN remoto<br />
in modo da escludere l’accesso di persone non autorizzate alla propria segreteria telefonica.<br />
Modificare il codice PIN per l’interrogazione a distanza Menu pagina 115.<br />
Se in seguito a modifica del codice PIN per l’interrogazione a distanza questo si dovesse<br />
dimenticare, consultare il menu relativo al codice PIN per l’interrogazione a distanza<br />
Menu pagina 119 (PIN remoto).<br />
Avviare l’interrogazione a distanza<br />
Sul telefono utilizzato per l’interrogazione a distanza deve risultare impostata la procedura di selezione<br />
a toni.<br />
<br />
<br />
Selezionare da una linea telefonica esterna il proprio<br />
numero telefonico.<br />
Con segreteria telefonica inserita, il messaggio di risposta è riprodotto dopo il numero<br />
di squilli precedentemente impostato.<br />
Con segreteria telefonica disattivata, il telefono si inserisce automaticamente dopo il<br />
10° squillo e si avverte un segnale acustico lungo.<br />
Avviare l’interrogazione a distanza.<br />
Fatto questo si avverte un segnale acustico lungo.<br />
Con segreteria telefonica inserita, l’interrogazione a distanza va avviata mentre il dispositivo<br />
riproduce il messaggio di risposta previsto. Pertanto è importante che il messaggio<br />
di risposta risulti sufficientemente lungo.<br />
<br />
Immettere il codice PIN a 4 cifre per l’interrogazione a<br />
distanza. Fatto questo si avverte un segnale acustico<br />
lungo.<br />
A questo punto è dato modo di svolgere ulteriori funzioni<br />
Tabella delle funzioni a tasti dell’interrogazione a distanza a pagina 139.<br />
<br />
È anche possibile eseguire più funzioni una dopo l’altra.<br />
Concludere l’interrogazione a distanza<br />
<br />
Premere il tasto per eseguire la funzione richiesta.<br />
Fatto questo si avverte un segnale acustico lungo.<br />
Concludere l’interrogazione a distanza<br />
138
Segreteria telefonica<br />
Funzioni a tasti dell’interrogazione a distanza 233<br />
La seguente tabella offre una vista panoramica delle funzioni disponibili e dei tasti abbinati alle rispettive<br />
funzioni.<br />
Tasto Se non viene riprodotto nessun messaggio Durante la riproduzione di messaggi<br />
<br />
Cancellare un messaggio<br />
<br />
Ripetere il messaggio<br />
Riprodurre il messaggio, proseguire la riproduzione<br />
Interrompere la riproduzione (Pausa)<br />
<br />
Riprodurre il messaggio successivo<br />
Attivare / Disattivare la segreteria telefonica<br />
Registrare un promemoria 1<br />
<br />
Concludere la riproduzione<br />
Attivare 234 la segreteria tramite interrogazione a distanza<br />
<br />
Selezionare da una linea telefonica esterna il proprio<br />
numero telefonico. Dopo il 10° squillo il telefono si<br />
inserisce automaticamente e si avverte un segnale<br />
acustico lungo.<br />
<br />
Avviare l’interrogazione a distanza.<br />
Fatto questo si avverte un segnale acustico lungo.<br />
<br />
Immettere il codice PIN a 4 cifre per l’interrogazione a<br />
distanza. Fatto questo si avverte un segnale acustico<br />
lungo.<br />
<br />
Attivare la segreteria telefonica.<br />
Fatto questo si avverte un segnale acustico lungo.<br />
Il messaggio di risposta è riprodotto.<br />
<br />
Riagganciare / Concludere il collegamento<br />
1 Concludere la registrazione di un promemoria in seguito a interruzione dell’interrogazione a distanza.<br />
139
Ampliare il sistema telefonico<br />
8 Ampliare il sistema telefonico<br />
Lo standard internazionale GAP 1 regola la <strong>com</strong>patibilità di unità portatili e telefoni (stazioni base) di<br />
costruttori differenti. In tal modo è possibile adoperare apparecchi SWITEL in <strong>com</strong>binazione con<br />
apparecchi di altri costruttori all’interno di un unico sistema telefonico. Ciò nonostante può <strong>com</strong>unque<br />
anche verificarsi che determinate funzioni non siano disponibili.<br />
Più unità portatili<br />
L’unità base consente la registrazione di <strong>com</strong>plessivamente 6 unità portatili.<br />
Registrare unità portatili<br />
Le unità portatili sono registrate tramite menu Menu pagine 119 e120.<br />
Sull’unità base:<br />
, / , Impost.base , Aprire il menu<br />
/ , Registra , ,<br />
Confermi? , , In ricerca Aprire il menu<br />
Sull’unità portatile da registrare:<br />
, / , Impost.base , Aprire il menu<br />
/ , Registra ,<br />
, Base Aprire il menu<br />
/ , Base , <br />
Selezionare la base richiesta<br />
PIN? , Immettere e confermare il PIN 2<br />
Premendo il tasto è possibile cancellare le cifre immesse per errore.<br />
L’unità portatile cerca l’unità base. Questa procedura può richiedere fino a 2 minuti.<br />
Una volta eseguita la registrazione, all’unità portatile è assegnato un numero di chiamata interno.<br />
Questo numero di chiamata interno è visualizzato sul display.<br />
Per registrare unità portatili di altri costruttori, leggere prima le rispettive istruzioni per<br />
l’uso.<br />
140<br />
1 GAP: Generic Access Profile = Standard per l’interazione di unità portatili e stazioni base di<br />
altri costruttori.<br />
2 La configurazione iniziale del PIN corrisponde a 0000".
Annullare la registrazione di unità portatili<br />
Ampliare il sistema telefonico<br />
L’annullamento della registrazione di un’unità portatile è possibile solo dall’unità base<br />
o da un’altra unità portatile anch’essa registrata alla stessa unità base. L’unità portatile<br />
non può annullare la registrazione autonomamente.<br />
Le unità portatili sono registrate tramite menu Menu pagine 119 e120.<br />
Sull’unità base:<br />
, / , Impost.base , Aprire il menu<br />
/ , Avanzato , Aprire il menu<br />
/ , Canc.registr , Aprire il menu<br />
Cuffie 0x / ,<br />
Attesa Selezionare l’unità portatile e avviare la procedura di<br />
annullamento della registrazione<br />
Più stazioni base 1 /Unità base 2 235<br />
La portata dell’unità portatile può essere aumentata registrando il dispositivo su più telefoni (stazioni<br />
base 1 /unità base 2 ). La registrazione è possibile su 4 telefoni (stazioni base 1 /unità base 2 ) differenti.<br />
Ogni telefono (ogni stazione base 1 /unità base 2 ) richiede una presa telefonico autonoma. Si<br />
può trattare di allacciamenti con lo stesso o differente numero di chiamata.<br />
Chiamate in corso sono trasferibili da un telefono all’altro (da una stazione o unità base<br />
all’altra).<br />
1 La base del DC 58x è indicata <strong>com</strong>e stazione base.<br />
2 La base del <strong>DCT</strong> <strong>587x</strong> è indicata <strong>com</strong>e unità base.<br />
141
Impianti telefonici interni / Servizi addizionali<br />
9 Impianti telefonici interni / Servizi addizionali 236<br />
Tasto R e servizi addizionali<br />
Il telefono supporta servizi addizionali offerti dal proprio gestore di rete telefonica <strong>com</strong>e ad es. le<br />
funzioni di chiamata in attesa, avviso di chiamata e chiamata in conferenza. Il tasto consente<br />
di accedere ai servizi addizionali. Il proprio gestore di rete telefonica fornisce informazioni sul<br />
tempo flash necessario all’utilizzo dei servizi addizionali e sui requisiti di abilitazione ai servizi addizionali.<br />
Il tempo flash è impostato tramite menu pagina 119.<br />
Tasto R in impianti telefonici interni<br />
Con telefono integrato in un impianto telefonico interno, premendo il tasto è possibile usufruire<br />
di funzioni <strong>com</strong>e ad es. inoltro di chiamate e richiamata automatica. Consultare le istruzioni per<br />
l’uso del proprio impianto telefonico interno per individuare il tempo flash richiesto. Il rivenditore autorizzato<br />
è in grado di indicare se il telefono acquistato funzionerà senza alcun problema nel proprio<br />
impianto telefonico interno. Il tempo flash è impostato tramite menu pagina 119.<br />
Codice di accesso (numero di accesso alla rete esterna)<br />
In presenza di impianti telefonici interni è necessario preselezionare un numero di accesso alla<br />
rete esterna per ottenere un segnale di linea libera prima di <strong>com</strong>piere una telefonata. Spesso il numero<br />
di accesso alla rete esterna è uno 0" o un 9". Digitare prima il numero di accesso alla rete<br />
esterna, attendere il segnale di linea libera. A questo punto è possibile inserire il numero di chiamata<br />
vero e proprio.<br />
Volendo utilizzare la funzione di selezione diretta anche in un impianto telefonico<br />
interno, tenere conto durante la programmazione dei tasti di selezione diretta del<br />
numero di accesso alla rete esterna che è necessario inserire prima del numero<br />
telefonico.<br />
Tra numero di accesso alla rete e numero telefonico è altresì possibile prevedere<br />
una pausa di selezione sezione Pausa di selezione".<br />
Pausa di selezione<br />
In presenza di impianti telefonici interni è necessario preselezionare un numero di accesso alla<br />
rete esterna per ottenere un segnale di linea libera prima di <strong>com</strong>piere una telefonata. Alcuni impianti<br />
telefonici interni di vecchia data richiedono del tempo prima di trasmettere il segnale di linea<br />
libera. Per questi impianti telefonici interni è possibile inserire una pausa di selezione dopo il numero<br />
di accesso alla linea esterna in modo da poter proseguire con la selezione del numero senza<br />
dover attendere il segnale di libero. Per inserire la pausa di selezione, premere e tenere premuto<br />
per 3 sec. il tasto .<br />
Dopo il numero di accesso alla rete esterna si procede, trascorso un determinato intervallo di<br />
tempo, con la selezione del numero di chiamata vero e proprio.<br />
La pausa di selezione si può memorizzare anche durante l’immissione di numeri di<br />
chiamata nella rubrica telefonica.<br />
142
Impianti telefonici interni / Servizi addizionali<br />
Visualizzare il numero di chiamata (CLIP 1 )<br />
La visualizzazione del numero di chiamata è un servizio addizionale offerto dal proprio<br />
gestore di rete telefonica. Per informazioni rivolgersi al proprio gestore di rete telefonica.<br />
A condizione che il collegamento telefonico disponga di questa funzione, l’apparecchio visualizza il<br />
numero telefonico del chiamante non appena il telefono squilla. Se il chiamante ha soppresso la<br />
trasmissione del proprio numero di chiamata, il telefono visualizza un’apposita indicazione. Se il<br />
numero di chiamata non è visualizzabile, questo non sarà memorizzato nell’elenco chiamate.<br />
Segreteria integrata nella rete telefonica 237<br />
Sono numerosi i gestori di rete telefonica che offrono <strong>com</strong>e servizio addizionale una segreteria telefonica<br />
integrata nella stessa rete. Se il gestore di rete telefonica mette a disposizione una segreteria<br />
telefonica all’interno della propria rete, un simbolo informa sulla presenza di nuovi messaggi<br />
(VMWI 2 ). Questa funzione è disponibile solo nel caso di abilitazione al servizio da parte del gestore<br />
di rete telefonica. Per maggiori dettagli rivolgersi al proprio gestore di rete telefonica.<br />
1 CLIP: Calling Line Identification Presentation = Visualizzazione del numero telefonico del<br />
chiamante.<br />
2 VMWI: Visual Message Waiting Indication = Segnalazione ottica di nuovi messaggi.<br />
143
Specifiche tecniche<br />
10 Specifiche tecniche<br />
Caratteristica<br />
Valore<br />
Standard DECT 1 −GAP 2<br />
Alimentazione elettrica (unità base)<br />
Ingresso: 100−240 V, 50−60 Hz<br />
Uscita: 6 V, 500 mA<br />
Alimentazione elettrica (stazione di carica) Ingresso: 100−240 V, 50−60 Hz<br />
Uscita: 6 V, 150 mA<br />
Batterie ricaricabili<br />
2 x 1.2 V 500 mAh NiMH, tipo: AAA<br />
Portata dell’unità portatile<br />
Esterno: ca. 300 m<br />
Interno: ca. 50 m<br />
Autonomia di stand−by unità portatile<br />
fino a 110 ore<br />
Max. durata di conversazione unità portatile fino a 11 ore<br />
Max. volume ricevitore<br />
30 dB<br />
Procedura di selezione<br />
Selezione a toni (MFV)<br />
Selezione a impulsi (IWV)<br />
Tempo flash<br />
breve, medio, lungo<br />
Lingue di menu<br />
Tedesco, francese, italiano, inglese, spagnolo,<br />
portoghese, olandese, polacco, turco<br />
PIN (configurazione iniziale) 0000<br />
Numero di squilli<br />
12 (polifonici)<br />
Max. numero di voci in rubrica 50<br />
Max. numero di voci nell’elenco chiamate 40<br />
Max. numero di voci per ripetizione di chiamata 5<br />
Max. numero di messaggi in segreteria 57<br />
Max. durata di registrazione in segreteria 15 min (inclusi i messaggi di annuncio)<br />
Lingue delle risposte standard<br />
Tedesco, francese, italiano, inglese<br />
Codice PIN per interrogazione a distanza (configurazione<br />
1234<br />
iniziale)<br />
144<br />
1 DECT: Digital Enhanced Cordless Tele<strong>com</strong>munication = Standard per telefoni senza cavo<br />
2 GAP: Generic Access Profile = Standard per l’interazione di unità portatili e stazioni base di<br />
altri costruttori.
Problemi<br />
Dichiarazione di conformità<br />
Questo apparecchio risponde a quanto disposto dalla Direttiva UE<br />
1999/5/CE concernente le apparecchiature radio, le apparecchiature terminali di tele<strong>com</strong>unicazioni<br />
e il reciproco riconoscimento della loro conformità. La conformità con<br />
la direttiva di cui sopra viene confermata dal marchio CE applicato sull’apparecchio.<br />
Linea diretta di assistenza<br />
In presenza di problemi con il telefono, seguire le indicazioni riportate qui di seguito. In caso di problemi<br />
tecnici è possibile rivolgersi alla linea di assistenza chiamando al numero 0900 00 1675 valido<br />
per la Svizzera (spese da rete Swiss<strong>com</strong> alla data di stampa: 2.60 CHF/min). In caso di reclami<br />
entro il periodo di garanzia, rivolgersi al rivenditore autorizzato. Il periodo di garanzia ricopre<br />
2 anni.<br />
11 Problemi<br />
Domande<br />
Non è possibile condurre una<br />
chiamata telefonica<br />
Non è possibile instaurare un<br />
collegamento con l’unità base<br />
Collegamento disturbato, interrotto<br />
Durante la telefonata si avvertono<br />
segnali acustici<br />
Risposte<br />
− Il telefono ovvero l’unità base non è collegato correttamente<br />
oppure presenta un guasto. Utilizzare esclusivamente il cavo di<br />
collegamento telefonico fornito.<br />
− L’alimentatore di rete non è inserito oppure si è in presenza di<br />
una caduta di tensione totale.<br />
− Provare con un altro telefono se l’allacciamento telefonico in<br />
questione è funzionante.<br />
− Errata ubicazione dell’unità base.<br />
− Le batterie ricaricabili sono scariche o difettose.<br />
− La distanza dell’unità portatile dall’unità base è troppo grande.<br />
Per aumentare la portata è possibile registrare un’unità portatile<br />
a più unità base pagina 141.<br />
− Procedura di selezione impostata erratamente pagina 119<br />
− Con più unità portatili registrate: chiamata in corso su un’altra<br />
unità portatile.<br />
− Con chiamate telefoniche interne: l’unità portatile chiamata è<br />
fuori della portata dell’unità base.<br />
− Il blocco tastiera è attivato.<br />
− L’unità portatile non è inserita.<br />
− Verificare se l’unità portatile è registrata presso l’unità base<br />
ovvero se l’unità portatile è stata registrata presso l’unità base<br />
utilizzando il codice PIN corretto pagina119.<br />
− La distanza dall’unità base è troppo grande.<br />
− Errata ubicazione dell’unità base.<br />
− La distanza dall’unità base è troppo grande.<br />
− Le batterie sono quasi scariche.<br />
145
Problemi<br />
Domande<br />
Risposte<br />
Il sistema non reagisce più − Ripristinare la configurazione iniziale per tutte le funzioni pagina<br />
119.<br />
− Estrarre brevemente l’alimentatore di rete dalla presa di corrente.<br />
Le batterie si scaricano piuttosto<br />
− Le batterie sono scariche o difettose.<br />
subito<br />
− Riporre l’unità portatile correttamente nella stazione base/sta-<br />
zione di carica. Pulire le superfici di contatto su unità portatile e<br />
stazione base (stazione di carica con un panno morbido e<br />
asciutto.<br />
− Posizionare l’unità portatile per 8 ore nella stazione base/stazione<br />
di carica.<br />
Le batterie non si lasciano più − Le batterie sono difettose.<br />
ricaricare<br />
La visualizzazione del numero<br />
di chiamata (CLIP) non funziona<br />
− La visualizzazione del numero di chiamata è un servizio addizionale<br />
offerto dal proprio gestore di rete telefonica. Per maggiori<br />
dettagli rivolgersi al proprio gestore di rete telefonica.<br />
− Il chiamante ha disattivato la trasmissione del proprio numero di<br />
chiamata.<br />
La segreteria telefonica non<br />
registra alcun messaggio<br />
La segreteria non passa alla<br />
modalità riproduzione del<br />
messaggio di annuncio e registrazione<br />
Non è possibile <strong>com</strong>piere<br />
un’interrogazione a distanza<br />
− Verificare se la segreteria telefonica è inserita.<br />
− Verificare che la memoria della segreteria telefonica non sia<br />
piena. Cancellare se occorre messaggi dalla memoria.<br />
− Verificare che la memoria della segreteria telefonica non sia<br />
piena. La segreteria passa automaticamente alla modalità di<br />
solo annuncio che non prevede la possibilità di lasciare un messaggio.<br />
Cancellare se occorre messaggi dalla memoria.<br />
− Sul telefono utilizzato per l’interrogazione a distanza deve risultare<br />
impostata la procedura di selezione a toni.<br />
− Verificare se la segreteria telefonica è inserita.<br />
− Verificare se il codice PIN per l’interrogazione a distanza utilizzato<br />
è corretto pagina 138. Avendo dimenticato il codice PIN<br />
per l’interrogazione a distanza, il menu può essere consultato in<br />
questo senso oppure è anche possibile resettare il telefono e<br />
ripristinare quindi la configurazione iniziale del PIN.<br />
− Premere i tasti lentamente e con sufficiente pressione.<br />
− Avviare l’interrogazione a distanza mentre il messaggio di annuncio<br />
è ancora riprodotto. Se dalla riproduzione risulta che il<br />
messaggio di annuncio è troppo breve, registrare un messaggio<br />
di annuncio più lungo.<br />
146
12 Consigli per la cura/Garanzia<br />
Consigli per la cura/Garanzia<br />
Consigli per la cura<br />
Pulire le superfici degli apparecchi con un panno morbido e antipelucchi.<br />
Non utilizzare mai detergenti o solventi.<br />
Al di là di una occasionale pulizia dell’involucro esterno non è necessario <strong>com</strong>piere alcuna operazione<br />
di pulizia.<br />
Garanzia<br />
Gli apparecchi SWITEL sono costruiti e collaudati in osservanza dei processi di produzione più<br />
moderni. L’impiego di materiali selezionati e tecnologie altamente sviluppate sono garanti di una<br />
perfetta funzionalità e lunga durata in vita. La garanzia non viene considerata esecutiva qualora la<br />
causa del malfunzionamento dell’apparecchio sia riconducibile al gestore della rete telefonica oppure<br />
se questa è da attribuirsi ad un impianto telefonico interno interposto. La garanzia non si<br />
estende a pile, batterie ricaricabili o pacchi batteria utilizzati all’interno degli apparecchi. Il periodo<br />
di garanzia ricopre 24 mesi a partire dalla data di acquisto.<br />
Entro il periodo di garanzia si procederà all’eliminazione gratuita di tutti i guasti dovuti a difetti di<br />
materiale o produzione. Il diritto di garanzia cessa in caso di interventi da parte dell’acquirente o di<br />
terzi. Danni derivanti da un impiego o esercizio non conforme agli usi previsti, a naturale usura, a<br />
errato montaggio o errata conservazione, a collegamento o installazione impropri, dovuti a forza<br />
maggiore o ad altri influssi esterni non sono coperti da garanzia. In qualità di produttore ci riserviamo<br />
il diritto, in caso di reclami, di riparare o sostituire le parti difettose o di rimpiazzare l’apparecchio.<br />
Parti o apparecchi sostituiti passano di nostra proprietà. Sono esclusi diritti di risarcimento<br />
per danni qualora non siano dovuti a intenzione o colpa grave del costruttore.<br />
Nel caso in cui il presente apparecchio dovesse ciò nonostante presentare un difetto durante il periodo<br />
di garanzia, si prega di rivolgersi esclusivamente al negozio di rivendita dell’apparecchio SWI-<br />
TEL assieme al relativo scontrino di acquisto. In base alle presenti disposizioni, tutti i diritti di garanzia<br />
dovranno essere fatti valere esclusivamente nei confronti del rivenditore autorizzato.<br />
Decorso il termine di due anni dalla data di acquisto e consegna dei nostri prodotti non sarà più<br />
possibile fare valere alcun diritto di garanzia.<br />
147
Indice alfabetico<br />
13 Indice alfabetico<br />
A<br />
Accettare una chiamata, 136<br />
Accettare una chiamata esterna con telefonata<br />
interna in corso, 123<br />
Alimentatore di rete, 104<br />
Alimentazione elettrica, 144<br />
Ampliare il sistema telefonico, 140<br />
Annullare la registrazione, 141<br />
Annullare la registrazione<br />
di un’unità portatile, 141<br />
Apparecchiature mediche, 105<br />
Attivare, 133<br />
Attivare la segreteria tramite interrogazione a<br />
distanze, 139<br />
Autonomia di stand−by, 144<br />
Avviare l’interrogazione a distanza, 138<br />
B<br />
Batterie ricaricabili, 105, 144<br />
Blocco dei tasti, 121, 131<br />
Blocco di chiamata, 132<br />
C<br />
Caduta di tensione, 104<br />
Cancellare i messaggi, 136<br />
Cancellare l’elenco di ripetizione<br />
di chiamata, 128<br />
Cancellare numeri dall’elenco chiamate, 129<br />
Cancellare singoli numeri di chiamata, 129<br />
Cancellare tutte le voci, 127<br />
Cancellare tutti i messaggi, 136<br />
Cancellare tutti i numeri di chiamata, 129<br />
Cancellare un numero dall’elenco di ripetizione<br />
di chiamata, 128<br />
Cancellare una voce, 127<br />
Cancellare voci in rubrica, 127<br />
Caricare le batterie, 108<br />
Cercare l’unità portatile, 131<br />
Chiamata d’emergenza, 132<br />
Chiamata in attesa, 123<br />
Chiamate in conferenza, 123<br />
Chiamate perse, 129<br />
CLIP, 132, 143<br />
Codice di accesso, 142<br />
Codice PIN per interrogazione a distanza<br />
(configurazione iniziale), 144<br />
Codice PIN per l’interrogazione a distanza, 138<br />
Collegare l’unità base, 107<br />
Collegare la stazione di carica, 107<br />
Compatibilità con apparecchi acustici, 105<br />
Compiere chiamate interne, 122, 123<br />
Compiere telefonate, 122<br />
Concludere l’interrogazione a distanza, 138<br />
Concludere la chiamata, 121<br />
Consigli per la cura, 147<br />
Contenuto della confezione, 106<br />
Contrasto di display, 130<br />
Creare voci in rubrica, 126<br />
148
D<br />
DECT, 144<br />
Dichiarazione di conformità, 145<br />
Disattivare, 133<br />
Disattivare e attivare lo squillo di chiamata, 124<br />
Disattivare la sveglia anzitempo, 132<br />
Display, 109, 111<br />
Display LC, 110<br />
Durata di conversazione, 124, 144<br />
Durata di registrazione in segreteria, 144<br />
Durata di registrazione per messaggio, 137<br />
E<br />
Elementi di <strong>com</strong>ando, 109<br />
Elenco chiamate, 109, 110, 129<br />
Elenco di ripetizione di chiamata, 128<br />
Equalizzatore, 130<br />
F<br />
Formato di ora e data, 130<br />
Funzionamento, 121<br />
Funzione baby controllo, 132<br />
Funzione vivavoce, 125<br />
Funzioni a tasti dell’interrogazione<br />
a distanza, 139<br />
Funzioni speciali, 131<br />
G<br />
GAP, 144<br />
Garanzia, 147<br />
Indice alfabetico<br />
I<br />
Impianti telefonici interni, 108, 142<br />
Impostare il volume del ricevitore, 124<br />
Impostare il volume<br />
di squillo dell’unità base, 124<br />
Impostare il volume<br />
di squillo dell’unità portatile, 124<br />
Impostare il volume per la riproduzione di<br />
messaggi, 136<br />
Impostare l’ora, 108<br />
Impostare la data, 108<br />
Impostare la lingua di display, 108<br />
Impostare la sveglia, 132<br />
Impostare lo squillo di chiamata, 130<br />
Impostare toni e indicazioni, 130<br />
Indicazioni di sicurezza, 104<br />
Inoltrare la chiamata, 123<br />
Inoltro di chiamata, 123<br />
Inserire le batterie ricaricabili<br />
nell’unità portatile, 108<br />
Inserire nomi, 125<br />
Inserire testo, 125<br />
Intercettazione, 136<br />
Interrogazione a distanza, 138<br />
Interrompere la registrazione<br />
del promemoria, 137<br />
L<br />
LED di chiamata, 109, 110<br />
Linea diretta di assistenza, 145<br />
Lingua dei messaggi di risposta, 134<br />
Lingue dei messaggi di annuncio standard, 144<br />
Lingue di menu, 144<br />
Luogo di installazione, 104<br />
149
Indice alfabetico<br />
M<br />
Max. durata di registrazione, 133<br />
Max. volume del ricevitore, 144<br />
Memorizzare in rubrica un numero dall’elenco di<br />
ripetizione di chiamata, 128<br />
Menu principale, 114<br />
Messa in funzione, 106<br />
Messaggio di risposta, 134<br />
Microfono sull’unità base, 109<br />
Microfono sull’unità portatile, 110<br />
Modalità di stand−by, 112<br />
Modalità ECO, 108<br />
Modi di rappresentazione nelle istruzioni<br />
per l’uso, 112<br />
Modificare il PIN, 131<br />
Modificare voci in rubrica, 126<br />
N<br />
Navigare nel menu, 112<br />
Nome del portatile, 130<br />
Numero di accesso alla rete esterna, 142<br />
Numero di messaggi presenti in segreteria, 144<br />
Numero di voci in rubrica, 144<br />
Numero di voci nell’elenco chiamate, 144<br />
Numero di voci per ripetizione di chiamata, 144<br />
O<br />
Opzioni durante la riproduzione, 135<br />
P<br />
Paging, 131<br />
Pausa di selezione, 142<br />
PIN, 140, 144<br />
Più stazioni base, 141<br />
Più unità portatili, 140<br />
Portata, 144<br />
Prefisso, 131<br />
Problemi, 145<br />
Procedura di selezione, 132, 144<br />
Programmare i tasti di selezione diretta, 127<br />
Pulizia, 147<br />
150
R<br />
Registrare, 140<br />
Registrare il messaggio di risposta, 134<br />
Registrare un promemoria, 137<br />
Registrare un’unità portatile, 140<br />
Reset, 131<br />
Ricevere una chiamata, 121<br />
Ricevitore, 109, 110<br />
Ricezione automatica di chiamate, 131<br />
Richiamare chiamate ricevute, 122, 130<br />
Richiamata, 122<br />
Riduzione delle radiazioni, 108<br />
Ripetizione di chiamata, 110, 122<br />
Riprodurre il messaggio di risposta, 134<br />
Riprodurre messaggi, 135<br />
Riprodurre messaggi sull’unità base, 135<br />
Riprodurre messaggi sull’unità portatile, 135<br />
Riscontro, 123<br />
Risparmio di addebiti, 137<br />
Rubrica telefonica, 109, 110, 122, 125<br />
Indice alfabetico<br />
S<br />
Salvare in rubrica, 128, 129<br />
Scopo d’impiego, 104<br />
Segnalazione ottica di chiamata, 110<br />
Segnalazione ottica di chiamata (LED di<br />
chiamata), 109, 110<br />
Segreteria integrata nella rete telefonica, 143<br />
Segreteria telefonica, 133<br />
Selezionare, 122<br />
Selezionare la modalità di risposta, 133<br />
Selezionare un numero dall’elenco di ripetizione<br />
di chiamata, 128<br />
Selezionare un sottomenu, 113<br />
Selezione diretta, 122<br />
Servizi addizionali, 142<br />
Silenziamento, 125<br />
Silenziamento del microfono, 125<br />
Simboli, 111<br />
Simboli di display, 111<br />
Smaltimento, 105<br />
Squilli, 144<br />
Stato di carica delle batterie, 108<br />
Stazioni base, 141<br />
Struttura di menu, 114<br />
Suono dei tasti, 130<br />
Suono di avviso del livello di carica delle<br />
batterie, 130<br />
Suono di avviso di portata, 130<br />
Sveglia, 131<br />
151
Indice alfabetico<br />
T<br />
Tasti di selezione diretta, 109, 110<br />
Tasti numerici, 109, 110<br />
Tasto asterisco, 109, 110<br />
Tasto avanti, 109<br />
Tasto cancelletto, 109<br />
Tasto cancelletto / Segnale di chiamata off /<br />
Pausa di selezione, 110<br />
Tasto conversazione, 110<br />
Tasto freccia giù, 110<br />
Tasto freccia su, 110<br />
Tasto indietro, 109<br />
Tasto INT, 109<br />
Tasto Menu / OK / Silenziamento, 110<br />
Tasto OK/Menu, 109<br />
Tasto On/Off segreteria, 109<br />
Tasto R, 109, 110, 142<br />
Tasto riaggancio / On / Off, 110<br />
Tasto ripetizione di chiamata, 109<br />
Tasto riproduzione/stop, 109<br />
Tasto su, 109<br />
Tasto vivavoce, 109<br />
Telefonare, 121<br />
Tempo flash, 142, 144<br />
Trasferire internamente chiamate esterne, 123<br />
U<br />
Unità base, 109, 141<br />
Unità portatile, 110<br />
V<br />
Verificare la memoria di rubrica, 127<br />
Visualizzare il numero di chiamata, 143<br />
Visualizzare il numero di chiamata (CLIP), 132<br />
Visualizzare numeri dall’elenco chiamate, 129<br />
Vivavoce, 110<br />
VMWI, 143<br />
Voci di rubrica, 113<br />
152
238<br />
Contents<br />
1 Safety Information . . . . . . . . . . . . . . . . . . 154<br />
2 Starting Up . . . . . . . . . . . . . . . . . . . . . . . 156<br />
3 Operating Elements . . . . . . . . . . . . . . . . . 159<br />
4 Preliminary Information . . . . . . . . . . . . . . 162<br />
5 Menu Structure . . . . . . . . . . . . . . . . . . . . 164<br />
6 Operation . . . . . . . . . . . . . . . . . . . . . . . . 171<br />
7 Answering Machine . . . . . . . . . . . . . . . . . 183<br />
8 Extending the Telephone System . . . . . . . 190<br />
9 PBX / Supplementary Services . . . . . . . . . 192<br />
10 Technical Properties . . . . . . . . . . . . . . . . 194<br />
11 In Case of Problems . . . . . . . . . . . . . . . . 195<br />
12 Maintenance / Guarantee . . . . . . . . . . . . . 197<br />
13 Index . . . . . . . . . . . . . . . . . . . . . . . . . . . 198<br />
153
Safety Information<br />
1 Safety Information<br />
Please read this operating instruction manual thoroughly.<br />
Intended use<br />
The telephone with handset and charging station is suitable for telephoning within a public telephone<br />
network system. Any other use is considered unintended use. Unauthorised modification or<br />
reconstruction is not permitted. Under no circumstances open the devices or <strong>com</strong>plete any repair<br />
work yourself.<br />
Power failure<br />
The telephone cannot be used to make calls in the event of a power failure. Always keep a corded<br />
telephone which operates without an external power supply available in case of emergency situations.<br />
Installation location 239<br />
The installation location is a decisive factor to ensure trouble−free operation.<br />
Prevent excessive exposure to smoke, dust, vibration, chemicals, moisture, heat and direct sunlight.<br />
Do not use the telephone in potentially explosive areas.<br />
Do not place the telephone in the direct vicinity of other electronic devices such as TV sets, microwave<br />
ovens, refrigerators etc., because they can mutually affect each other. Do not place the telephone<br />
near another phone. Ensure that no large metallic objects, such as a refrigerator or a mirror,<br />
are located between the base unit and handset. Walls, too, can impair the connection between the<br />
base unit and handset.<br />
Position the telephone near a suitable power socket and telephone line socket. Pay attention that<br />
the cable cannot be tripped over!<br />
Attention: The cables must not be extended!<br />
Place the telephone on a level, non−slip surface. Normally, the device footpads do not leave any<br />
marks on the surface where it is located. However, due to the diverse types of paints and surfaces<br />
which <strong>com</strong>e into question, it cannot be fully ruled out that the footpads will leave marks on the surface<br />
on which it is located.<br />
The higher the base unit is located (even inside a building), the further its range.<br />
Power adapter plug<br />
Attention: Only use the power adapter plug supplied because other power adapter<br />
plugs could damage the telephone.<br />
Ensure access to the power adapter plug is not obstructed by furniture or such.<br />
154
Rechargeable batteries<br />
Medical equipment<br />
Safety Information<br />
Attention: Never throw batteries into a fire. Only use batteries of the same type.<br />
Pay attention to the correct polarity. Incorrect polarity of the battery represents a risk<br />
of explosion during charging.<br />
Attention: Only use the rechargeable batteries prescribed. Never use standard batteries.<br />
Risk of explosion!<br />
Attention: Never use the telephone in the vicinity of medical equipment. Effects on<br />
such equipment cannot be fully ruled out.<br />
Hearing aid <strong>com</strong>patibility<br />
The telephone is <strong>com</strong>patible with most popular hearing aids on the market. However, it cannot be<br />
guaranteed that all hearing aids will work perfectly.<br />
DECT 1 telephones can cause an unpleasant humming sound in hearing aids.<br />
Disposal<br />
In order to dispose of your device, take it to a collection point provided by your local<br />
public waste authorities (e.g. recycling centre). According to laws on the disposal of<br />
electronic and electrical devices, owners are obliged to dispose of old electronic<br />
and electrical devices in a separate waste container. The adjacent symbol indicates<br />
that the device must not be disposed of in normal domestic waste!<br />
Risks to health and the environment from batteries!<br />
Never open, damage or swallow batteries or allow them to pollute the environment.<br />
They could contain toxic and ecologically harmful heavy metals. You are legally<br />
obliged to dispose of power packs and batteries at the point of sale or in the corresponding<br />
containers provided at collection points by local public waste authorities.<br />
Disposal is free of charge. The above symbols indicate that the batteries must not<br />
be disposed of in domestic waste and that they must be disposed of at an authorised<br />
collection point.<br />
Packaging materials must be disposed of according to local regulations.<br />
1 DECT: Digital Enhanced Cordless Tele<strong>com</strong>munication = Standard for cordless telephones.<br />
155
Starting Up<br />
2 Starting Up<br />
Safety information<br />
Attention: It is essential to read the Safety Information in Chapter 1 before starting<br />
up.<br />
Checking the package contents<br />
The package contains:<br />
Content<br />
240<br />
<strong>DCT</strong> 587X model<br />
<strong>DCT</strong> 5871 <strong>DCT</strong> 58721 <strong>DCT</strong> 58731 <strong>DCT</strong> 58741<br />
Base unit 1 1 1 1<br />
Power adapter plug 1 1 1 1<br />
Receiver 1 1 1 1<br />
Helix cable for receiver 1 1 1 1<br />
Telephone connection cable 1 1 1 1<br />
Charging station with power adapter 1 2 3 4<br />
plug<br />
Handset 1 2 3 4<br />
Batteries (AAA 1.2 V NiMH) 2 4 6 8<br />
Operating manual 1 1 1 1<br />
156<br />
1 Visit www.switel.<strong>com</strong> to find out whether the telephone set is already available.
Starting Up<br />
Putting the units into operation<br />
Connecting the base unit<br />
Connect the base unit as illustrated in the diagram. For safety reasons, only use the power<br />
adapter plug supplied.<br />
It is essential to observe the information regarding the installation location; Page 154.<br />
Power<br />
socket<br />
Telephone line socket<br />
Telephone connection<br />
cable<br />
Power<br />
adapter plug<br />
Base unit<br />
Receiver<br />
Helix cable for<br />
receiver<br />
With regard to the base unit, only use the power adapter plug supplied with the output<br />
data 100−240 Vac, 6 Vdc 500 mA.<br />
Connecting the charging station<br />
Connect the charging station to a power socket.<br />
157
Starting Up<br />
Inserting the batteries in the handset<br />
The battery <strong>com</strong>partment is located on the rear side of the<br />
handset. Open the battery <strong>com</strong>partment and insert the two 2<br />
rechargeable batteries of the type AAA NiMH, 1.2 V 500 mAh.<br />
Pay attention to the correct polarity.<br />
Close the battery <strong>com</strong>partment.<br />
Charging the batteries 241<br />
Before the handset is used for the first time, insert<br />
it in the charging station for at least 8 hours.<br />
When the handset is inserted in the charging station properly,<br />
you will hear a confirmation signal. The handset warms up during<br />
the charging process. This is normal and does not represent<br />
a risk. Do not charge the handset with charging units from<br />
other manufacturers. The current battery charge status is<br />
indicated in the display:<br />
<br />
<br />
Full<br />
Empty<br />
Setting the display language<br />
Select the language required. Refer to Pages 168 and 170 for<br />
the sequence of menu option selections.<br />
HS: > HS setting > Language>...<br />
BS: > Base setting > Language>...<br />
There are 9 languages available for selection: German, French, Italian, English, Spanish, Portuguese,<br />
Dutch, Polish and Turkish.<br />
Setting the date and time<br />
The date and time are set using the menu; (Set time) Page 167.<br />
Confirm each entry for year, month, day, hour and minute individually by pressing the or <br />
key. Pay attention to the time and date format set; Page 167. If the 12−hour format is set, use<br />
the / key to select whether the time set is before midday (A) or after midday (P).<br />
Private branch exchanges<br />
The information on Page 192 explains how to install your telephone in a private branch exchange.<br />
Low−radiation operation (ECO mode)<br />
The level of radiation is considerably lower than that of standard DECT cordless telephones<br />
in Standby mode when the handset is in the base unit. In talk mode, radiation is<br />
reduced according to the distance between the handset and base unit.<br />
158
3 Operating Elements 242<br />
Operating Elements<br />
The telephone keys in this operating manual are subsequently depicted with a uniform contour.<br />
Therefore, slight deviations in the appearance of the symbols on the telephone keys <strong>com</strong>pared to<br />
those depicted here are possible.<br />
Base unit<br />
1 Receiver 11 Forwards key <br />
2 OK/Menu key 12 Visual call indicator (Call LED)<br />
3 Display 13 Microphone<br />
4 Back key 14 Handsfree button <br />
5 One−touch dialling keys 15 Hash key <br />
6 On/Off button, answering machine 16 R / Delete key <br />
7 Scroll up / Call list key 17 Redialling key <br />
8 Play/Stop key 18 INT key <br />
9 Scroll down / Phone book key 19 Star key <br />
10 Reverse key 20 Digit keys , , etc.<br />
159
Operating Elements<br />
Handset<br />
1 Visual call indicator (Call LED)<br />
2 Earpiece<br />
3 LC display<br />
4 One−touch dialling keys <br />
5 On/Off / On−hook key <br />
6 Digit keys , ... to <br />
7 Hash key / Ringing tone off /<br />
Dialling pause <br />
8 R−key / Back <br />
9 Microphone<br />
10 Redialling <br />
11 Star key <br />
12 Menu/OK/Muting key <br />
13 Call key / Handsfree facility <br />
14 Phone book / Arrow down key <br />
15 Arrow up / Call list key <br />
160
Icons and texts in the display<br />
Icon<br />
<br />
Description<br />
Operating Elements<br />
Indicates the battery capacity (full, half empty, almost empty).<br />
Segments empty: The batteries must be charged.<br />
Run−through segments: The batteries are being charged; Page 158.<br />
Segments on: The batteries are fully charged.<br />
Connection to the base unit.<br />
Flashing: Poor or no connection.<br />
On: Good connection.<br />
Flashing: A call has been received; Page 171.<br />
On: A call is currently in progress; Page 171.<br />
<br />
<br />
Missed calls.<br />
New calls have been registered in the call list; Page 179.<br />
You have opened the phone book; Page 175.<br />
<br />
The entry or display has more characters to the right; Page 176.<br />
<br />
The entry or display has more characters to the left; Page 176.<br />
On: The answering machine is on; Page 183.<br />
Flashing: New messages recorded on the answering machine; Page 185.<br />
Or: The memory capacity of the answering machine is full.<br />
Delete messages; Page 186<br />
The ringing tone has been switched off; Page 174.<br />
<br />
<br />
The microphone is deactivated (muted); Page 175.<br />
<br />
The handsfree facility is activated; Page 175.<br />
<br />
The key lock function is activated; Page 171.<br />
<br />
The alarm clock is switched on; Page 181.<br />
<br />
Answering machine provided in the telephone network.<br />
VMWI − Supplementary service offered by telephone network providers;<br />
Page 193.<br />
161
Preliminary Information<br />
4 Preliminary Information<br />
This chapter provides basic information on using the operating instruction manual.<br />
Notation in the manual<br />
Display<br />
<br />
<br />
<br />
Description<br />
Displays the contour of keys<br />
Press the key depicted briefly<br />
Press any key briefly<br />
2 sec. Press the key depicted for 2 seconds<br />
1<br />
<br />
Enter digits or letters<br />
Handset rings<br />
Phone rings<br />
<br />
<br />
Language<br />
<br />
HS1, HS2<br />
BS<br />
Pick up the receiver or remove the handset from the charging station<br />
Replace the receiver or place the handset in the charging station<br />
Depicts text in the display<br />
Depicts icons in the display<br />
Handset 1, handset 2 etc.<br />
Base unit<br />
Standby mode 243<br />
All the descriptions in this manual assume that the telephone (base unit) and handset are in<br />
Standby mode. The telephone (base unit) and handset are in Standby mode when no call is in<br />
progress and no menu is open.<br />
Navigating in the menu 244<br />
All the functions can be accessed by means of the various menus. Refer to the Menu Structure<br />
Page 164 for information on how to access each respective function.<br />
Every process is automatically cancelled if there is no input within 20 seconds.<br />
<br />
/ <br />
Open the main menu<br />
Select the required submenu<br />
162<br />
1 Letters are also imprinted on the digit keys. Letters, digits and special characters are entered<br />
by pressing the relevant key the respective number of times.
<br />
/ <br />
<br />
<br />
<br />
<br />
Preliminary Information<br />
Open the submenu<br />
Select the required function<br />
Open the function<br />
Select the required setting<br />
Use the digit keys to enter numbers or letters<br />
Confirm the input<br />
Return to the previous menu level<br />
Cancel all programming and saving and return the<br />
handset to Standby mode<br />
Many entries which are concluded by pressing the key are confirmed by an ac<strong>com</strong>panying<br />
acoustic signal.<br />
Creating phone book entries − example 245<br />
The way in which to navigate through the menus and select settings is explained by means of the<br />
example Creating phone book entries (handset). Proceed as in this example for all the settings.<br />
<br />
Open the main menu<br />
/ Phonebook Open the phone book<br />
Add Select the submenu and confirm it<br />
Enter name , <br />
Enter the name (max. 12 characters) and confirm it<br />
Number , Enter phone number 1 (mobile number)<br />
(max. 24 digits) and confirm it<br />
Number , Enter phone number 2 (landline number)<br />
(max. 24 digits) and confirm it<br />
VIP melody , / , Assign a ringing tone<br />
<br />
Return to Standby mode<br />
Two phone numbers can be stored per name or entry. The first memory location is preceded<br />
by a mobile phone icon, the second memory location a house icon. Therefore,<br />
we re<strong>com</strong>mend only programming mobile phone numbers for the first memory location<br />
and only landline numbers to the second memory location.<br />
163
Menu Structure<br />
5 Menu Structure<br />
246 247<br />
Press the or key to open the main menu. Then use the / keys to select an entry<br />
and confirm your selection by pressing the or key. Further information on the menu and<br />
operation: Chapter 4.<br />
Ans machine<br />
Answer mode<br />
Del all old<br />
Record memo<br />
OGM1<br />
OGM2<br />
Ans and Rec<br />
Answer only<br />
Off<br />
Play OGM<br />
Delete MSG<br />
Record OGM<br />
Play OGM<br />
Delete MSG<br />
Record OGM<br />
248<br />
Call screen<br />
Ring delay<br />
On / Off<br />
Toll saver<br />
08 Rings<br />
06 Rings<br />
04 Rings<br />
02 Rings<br />
164
ICM length<br />
Voice lang<br />
Remote PIN<br />
180 Sec<br />
150 Sec<br />
120 Sec<br />
90 Sec<br />
DEUTSCH<br />
FRANÇAIS<br />
NEDERLANDS<br />
ITALIANO<br />
Menu Structure<br />
249<br />
Inter<strong>com</strong><br />
Handset 01 − 06 1<br />
1 Display according to the number of the handsets registered<br />
165
Menu Structure<br />
Phonebook<br />
Add<br />
Edit<br />
Delete<br />
Delete all<br />
Copy to<br />
Usage<br />
Enter name 1<br />
Number<br />
<br />
Number<br />
<br />
VIP melody<br />
01 / 02 / ... / Off<br />
Enter name 1<br />
Number<br />
<br />
Number<br />
<br />
VIP melody<br />
01 / 02 / ... / Off<br />
M1<br />
M2<br />
166<br />
1 Letters are also imprinted on the digit keys. Letters, digits and special characters are entered<br />
by pressing the relevant key the respective number of times.
Menu Structure<br />
Clock/Alarm<br />
Set alarm<br />
Once<br />
Off<br />
250<br />
On<br />
Enter time <br />
Daily<br />
Off<br />
On<br />
Enter time <br />
Date format<br />
DD/MM<br />
MM/DD<br />
Time format<br />
24−hour<br />
12−hour<br />
Set time 1<br />
<br />
251<br />
1 The date and time are set using this menu option.<br />
167
Menu Structure<br />
Only available on a handset:<br />
HS setting 1<br />
HS sound<br />
Equalizer<br />
Ring volume 05 / ... / 01 / Off<br />
Ext. ring 12 / ... / 01<br />
Int. ring 12 / ... / 01<br />
Key tone<br />
Off / Tone / Ring tone<br />
Low batt<br />
On / Off<br />
Out−of−range On / Off<br />
Natural<br />
Bass<br />
Treble<br />
252<br />
253<br />
254<br />
255<br />
256<br />
LCD contrast 06 / ... / 01<br />
Handset Name 2<br />
Auto Answer<br />
On / Off<br />
Baby call<br />
Off<br />
On<br />
Enter Number <br />
257<br />
258<br />
259<br />
260<br />
Auto keylock<br />
Language<br />
On / Off<br />
(9 languages)<br />
261<br />
262<br />
168<br />
1 This menu option is only displayed on the handset.<br />
2 Letters are also imprinted on the digit keys. Letters, digits and special characters are entered<br />
by pressing the relevant key the respective number of times.
Menu Structure<br />
Only available on a handset:<br />
Base setting 1<br />
Clear VMWI<br />
Register<br />
Select base<br />
Advance<br />
Base 1 PIN? 2<br />
Base 2 PIN? 2<br />
Base 3 PIN? 2<br />
Base 4 PIN? 2<br />
Base 1<br />
Base 2<br />
Base 3<br />
Base 4<br />
Auto<br />
Dial mode<br />
Recall time<br />
Prefix<br />
Call barring<br />
SOS number<br />
Deregister<br />
Change pin<br />
Reset<br />
Tone / Pulse<br />
Short / Medium / Long<br />
<br />
04 / ... / 01 <br />
Enter Number <br />
04 / ... / 01 <br />
Enter Number <br />
Handset<br />
PIN? <br />
Confirm?<br />
263<br />
264<br />
265<br />
266<br />
267<br />
268<br />
269<br />
270<br />
271<br />
1 This menu with precisely these submenus are only displayed on the handset.<br />
2 The default PIN code is "0000".<br />
169
Menu Structure<br />
Only available on the base unit:<br />
Base setting 1<br />
Melody<br />
Ring volume<br />
05 / ... / 01 / Off<br />
Ext. ring 12 / ... / 01<br />
Int. ring 12 / ... / 01<br />
Key tone<br />
LCD contrast 06 / ... / 01<br />
Clear VMWI 06 / ... / 01<br />
Language<br />
Register<br />
Advance<br />
(9 languages)<br />
Base 1 PIN? 2<br />
Base 2 PIN? 2<br />
Base 3 PIN? 2<br />
Base 4 PIN? 2<br />
Dial mode<br />
Recall time<br />
Prefix<br />
Call barring<br />
SOS number<br />
Deregister<br />
Change pin<br />
Reset<br />
Off / Tone / Ring tone<br />
Tone / Pulse<br />
Short / Medium / Long<br />
<br />
04 / ... / 01 <br />
Enter Number <br />
04 / ... / 01 <br />
Enter Number <br />
Handset<br />
PIN? <br />
Confirm?<br />
272<br />
273<br />
274<br />
275<br />
276<br />
277<br />
278<br />
279<br />
280<br />
281<br />
282<br />
283<br />
284<br />
285<br />
1 This menu with precisely these submenus is only displayed on the base unit.<br />
2 The default PIN code is 0000".<br />
170
6 Operation<br />
Operation<br />
Many functions can be operated from both the base unit as well as the handset. Please note that<br />
many of the keys depicted below are provided on both the base unit as well as the handset;<br />
Page 159.<br />
However, when <strong>com</strong>pleting an operating sequence, you may not switch between operation<br />
on the base unit and operation on the handset. Before beginning with an operating<br />
sequence, decide whether you want to <strong>com</strong>plete it using the base unit or handset.<br />
Switching the handset on / off<br />
No calls are received on the handset when it is switched off.<br />
No battery power is used when the handset is switched off.<br />
No emergency calls can be made from the handset when it is switched off. The handset<br />
must be switched on beforehand, which can take a little time.<br />
2 sec. Switch the handset on (in Standby mode)<br />
2 sec. Switch the handset off<br />
Key lock 286<br />
The key lock feature prevents functions assigned to keys being activated accidentally.<br />
1 sec. Activate the key lock function<br />
In<strong>com</strong>ing calls can still be taken in the normal way even when the key lock function is<br />
activated. Emergency (SOS) calls can still be made when the key lock function is active<br />
(via the SOS call numbers).<br />
1 sec. Deactivate the key lock function<br />
When the key lock is activated, the icon appears in the display.<br />
The phone can be set−up so that the key lock is automatically activated after 90 seconds;<br />
Page 181.<br />
Telephoning<br />
Taking a call<br />
In addition to the ringing tone, the visual call indicator lights up when a call is received. 287<br />
, or <br />
Take the call<br />
Do not hold the handset too close to your ear when it rings as doing so could cause<br />
hearing damage!<br />
If the automatic answering function is activated, the call is taken by simply removing the handset<br />
from the charging station; Page 181.<br />
Ending a call<br />
or <br />
End the call<br />
You can also end the call by replacing the handset in the charging station.<br />
171
Operation<br />
Making a call<br />
<br />
<br />
or or <br />
Enter the phone number (max. 48 digits)<br />
Delete the last digit if it is wrong<br />
Dial the phone number<br />
It is also possible to make a call by first pressing the key on the handset or taking<br />
the receiver from the base unit or pressing the key and then waiting for the dialling<br />
tone. The digits then entered for the phone number (max. 48 digits) are dialled immediately.<br />
It is not possible to correct wrong digits individually using this dialling procedure.<br />
Redialling 288<br />
The handset stores the last 5 phone numbers dialled together with the date and time of call. If you<br />
want to dial a number again, e.g. because the connection was engaged or the call was not taken,<br />
use the redialling function:<br />
, / Open the redialling list and select the entry required<br />
or or <br />
Dial the phone number<br />
The phone number stored is automatically dialled and a connection established.<br />
Calling back missed calls 289<br />
Your telephone stores 40 phone numbers in a call list.<br />
, / Open the call list and select an entry<br />
or or <br />
Dial the phone number<br />
Dialling numbers from the phone book<br />
Phone numbers must have been stored in the phone book for this function; Page 176.<br />
, / Open the phone book and select an entry<br />
or or <br />
Dial the phone number<br />
In order to access phone book entries more quickly, open the phone book and enter<br />
the first letters of the entry required. The first entry beginning with these letters appears<br />
in the displayed and is marked.<br />
Dialling phone numbers using the one−touch dialling keys 290<br />
Phone numbers must have been assigned to the one−touch dialling keys; Page 177.<br />
or <br />
Dial the number<br />
The phone number stored is automatically dialled.<br />
Internal calls 291<br />
You must have at least one handset registered on the base unit in order to be able to make internal<br />
calls free of charge.<br />
172
Making internal calls<br />
HS1: or BS: ,<br />
/ Inter<strong>com</strong> , or <br />
HS1/BS: / , or <br />
HS2: <br />
HS1/BS / HS2: <br />
Initiate an internal call<br />
Select the handset or base unit required<br />
Operation<br />
Internal call is taken on the other handset<br />
End the internal call<br />
If the handset you have dialled for an internal call is involved in an external call, you<br />
will hear an acoustic signal and Line busy appears in the display.<br />
Taking external calls when an internal call is in progress<br />
When an external call is received while you are involved in an internal call, a message<br />
appears in the display.<br />
<br />
Take the external call<br />
With regard to the handset which did not take the external call, press the key on it to end the<br />
internal call.<br />
Transferring external calls internally<br />
HS1: or BS: ,<br />
/ , Inter<strong>com</strong> , or While the external call is in progress<br />
/ , or <br />
Select the handset or base unit required<br />
HS2: <br />
Internal call is taken on the other handset<br />
HS1: or BS: <br />
Forward the call<br />
Holding a call / brokering<br />
HS1: or BS: <br />
/ , Inter<strong>com</strong> , or While the external call is in progress<br />
/ , or <br />
Select the handset or base unit required<br />
HS2: <br />
Internal call is taken on the other handset<br />
HS1: or BS: , / Switching<br />
or <br />
Switch between the callers<br />
Making conference calls<br />
An external call can be transferred to another internal handset for a conference call.<br />
HS1: or BS: ,<br />
/ , Inter<strong>com</strong> , <br />
While the external call is in progress<br />
/ , <br />
Select the handset or base unit required<br />
HS2: <br />
Internal call is taken on the other handset<br />
HS1 or BS: 2 sec. , Conference Start the conference call<br />
HS1 or BS and HS2: <br />
End the conference call<br />
173
Operation<br />
Displaying the duration of a call<br />
A few seconds after a call has begun, the current duration of the call appears in the display in minutes<br />
and seconds.<br />
Setting the receiver volume<br />
The volume at the receiver can be adjusted to one of 5 levels during a call.<br />
/ <br />
Raise/Lower the receiver volume<br />
Ringing volume<br />
You can alter the volume of the ringing tone for the handset and base unit separately. The are 5<br />
volumes available for selection as well as the option to switch it off.<br />
Adjusting the ringing volume of the handset<br />
<br />
Open the menu<br />
/ HS setting Select HS setting<br />
/ HS sound Select HS sound<br />
/ Ring volume Select Ring volume<br />
/ <br />
<br />
Raise/Lower the ringing tone volume<br />
Save the settings<br />
Adjusting the ringing volume of the base unit<br />
<br />
Open the menu<br />
/ Base setting <br />
Select Base setting<br />
/ Melody <br />
Select Melody<br />
/ Ring volume Select Ring volume<br />
/ <br />
<br />
Raise/Lower the ringing tone volume<br />
Save the settings<br />
Switching the ringing tone on and off 292<br />
3 sec. Switch the ringing tone off<br />
3 sec. Switch the ringing tone on<br />
When the ringing tone is switched off, the icon appears in the appears in the display.<br />
You can also deactivate the ringing tone using the menu.<br />
174
Operation<br />
Handsfree 293<br />
This function is used to listen to the caller via the loudspeaker.<br />
or <br />
During a call: Activate the handsfree facility<br />
or <br />
During a call: Deactivate the handsfree facility<br />
When the handsfree function is activated, the icon appears in the display.<br />
Muting function 294<br />
You can switch the microphone in the handset or base unit off during a call so that the caller cannot<br />
hear you, e.g. if you need to consult someone else nearby, and then switch it on again.<br />
2 sec. or During a call: Switch the microphone off (muting)<br />
2 sec. or During a call: Switch the microphone on<br />
When the microphone is muted, the icon appears in the display.<br />
Phone book 295<br />
You can store up to 50 contacts in the phone book, each with up to 2 phone numbers.<br />
Always enter the area access code with the phone numbers so that in<strong>com</strong>ing local calls can<br />
also be assigned to a phone book entry.<br />
When the memory capacity is used up, the message Mem Full appears if an attempt is<br />
made to store another number. To create space, an existing entry must first be deleted.<br />
The phone book entries are arranged alphabetically.<br />
When the phone book is open, the icon appears in the display.<br />
The phone book can be accessed from the base unit and handset.<br />
Entering names<br />
Letters are also imprinted on the digit keys. Letters, digits and special characters are entered by<br />
pressing the relevant key the respective number of times.<br />
<br />
Enter a space<br />
<br />
Enter a special character<br />
<br />
Delete<br />
/ <br />
Move the cursor<br />
To enter the same letter twice, press the key to enter the letter. Wait until the cursor<br />
skips one position forwards. Enter the letter again.<br />
175
Operation<br />
Creating phone book entries<br />
Also refer to Page 163<br />
<br />
or Add<br />
or <br />
Enter name , or <br />
296<br />
Open the phone book<br />
Select the submenu and confirm it<br />
Enter the name (max. 12 characters) and confirm it<br />
Number , or Enter phone number 1 (mobile number)<br />
(max. 24 digits) and confirm it<br />
Number , or Enter phone number 2 (landline number )<br />
(max. 24 digits) and confirm it<br />
VIP melody , / , or Assign a ringing tone<br />
If the entries are longer than can be shown in the display, the and icons appear in the display.<br />
They indicate that the entry continues to the left or right of the display, respectively.<br />
When the memory capacity is used up, the message Mem Full appears if an attempt is made<br />
to store another number. To create space, an existing entry must first be deleted.<br />
If a name already exists under which you want to store a new entry, the message<br />
Double name icon also appears in the display.<br />
Editing phone book entries 297<br />
<br />
Open the phone book<br />
/ , or <br />
Select an entry and confirm it<br />
/ , Edit or Select the submenu and confirm it<br />
Enter name , or <br />
Edit the name (max. 12 characters) and confirm it<br />
Number , or Edit phone number 1 (mobile number)<br />
(max. 24 digits) and confirm it<br />
Number , or Edit phone number 2 (landline number )<br />
(max. 24 digits) and confirm it<br />
VIP melody , / , or Assign a ringing tone<br />
176
Deleting phone book entries<br />
Deleting an entry<br />
<br />
Open the phone book<br />
/ , or <br />
Select an entry and confirm it<br />
/ , Delete or Select the function and confirm it<br />
Programming one−touch dialling keys 298<br />
You have the possibility of assigning two numbers already stored in the phone book to the keys<br />
and respectively, so that they are dialled immediately on pressing the keys (one−touch<br />
dialling).<br />
<br />
Open the phone book<br />
/ , or <br />
Select an entry and confirm it<br />
/ , Copy to or Select the submenu and confirm it<br />
Dialling 299 phone numbers via one−touch dialling key<br />
Page 172.<br />
Operation<br />
In order to access phone book entries more quickly, open the phone book and enter<br />
the first letters of the entry required. The first entry beginning with these letters appears<br />
in the displayed and is marked.<br />
Deleting all entries<br />
<br />
Open the phone book<br />
or <br />
Open the menu<br />
/ , Delete all or Select the function and confirm it<br />
Confirm? , or <br />
Empty<br />
or<br />
Confirm? , or <br />
Confirm the deleting process<br />
Cancel the deleting process<br />
Checking the phone book capacity<br />
You can display how many of the 50 memory locations are already assigned.<br />
<br />
Open the phone book<br />
or <br />
Open the menu<br />
/ , Usage or Select the submenu and confirm it<br />
M1 , / , or <br />
or <br />
Select a one−touch dialling key and confirm it<br />
Confirm the phone number displayed<br />
177
Operation<br />
Redialling list<br />
The telephone stores the last 5 phone numbers dialled together with the date and time of call.<br />
Saving a number in the redialling list in the phone book<br />
<br />
Open the redialling list<br />
/ , or <br />
Select an entry and confirm it<br />
/ , Save Number or Select the submenu and confirm it<br />
Enter name , or <br />
Enter the name (max. 12 characters) and confirm it<br />
Enter Number , or Edit the phone number if necessary (max. 24 digits)<br />
and confirm it<br />
/ , or <br />
Define whether the number is a mobile phone number<br />
or a landline number and confirm it<br />
Deleting phone numbers from the redialling list<br />
<br />
Open the redialling list<br />
/ , or <br />
Select an entry and confirm it<br />
/ , Delete or Select the function and confirm it<br />
Deleting the entire redialling list<br />
<br />
Open the redialling list<br />
or <br />
Open the menu<br />
/ , Delete all or Select the function and confirm it<br />
Confirm? , or <br />
Empty<br />
Confirm the deleting process<br />
or<br />
Confirm? , or Cancel the deleting process<br />
Dialling phone numbers from the redialling list<br />
Page 172<br />
178
Operation<br />
Call list 300<br />
All in<strong>com</strong>ing calls received in your absence are recorded in a call list. The call list can contain up to<br />
40 phone numbers. The time and date of receipt are recorded for each call.<br />
When the call list is open, the icon appears in the display.<br />
The last call received appears at the top of the call list.<br />
If calls have been received in your absence, the visual call indicator flashes and the icon appears<br />
in the display. Until the call list is actually opened, the display also indicates how many calls<br />
have been received.<br />
Displaying phone numbers in the call list<br />
, / Open the call list and select an entry<br />
Storing a phone number in the call list in the phone book<br />
A phone number in the call list can be stored in the phone book directly.<br />
, / Open the call list and select an entry<br />
or <br />
Open the menu<br />
/ Save Number , or Select the submenu and confirm it<br />
Enter name , or <br />
Enter the name (max. 12 characters) and confirm it<br />
Enter Number , or Edit the phone number if necessary (max. 24 digits)<br />
and confirm it<br />
/ , or <br />
Define whether the number is a mobile phone number<br />
or a landline number and confirm it<br />
Deleting phone numbers in the call list<br />
Deleting individual phone numbers<br />
, / Open the call list and select an entry<br />
or <br />
Open the menu<br />
/ Delete , or Select the submenu and confirm it<br />
Deleting all phone numbers<br />
<br />
or <br />
/ , Delete all or <br />
Open the call list<br />
Open the menu<br />
Select the submenu and confirm it<br />
Confirm? , or Empty Confirm the deleting process<br />
or<br />
Confirm? , or <br />
Cancel the deleting process<br />
Calling back calls received<br />
Page 172<br />
179
Operation<br />
Acoustic and visual settings<br />
You can define various settings in order to adapt the telephone to your specific needs:<br />
Setting the ringing tone<br />
It is re<strong>com</strong>mended to set different ringing tones to distinguish between internal and external calls.<br />
There are a total of 12 polyphone ringing tones available.<br />
Setting the ringing tone; Menu Structure, Page 168.<br />
Key tones<br />
The key tones provide confirmation that a key has actually been pressed. The phone can be<br />
set−up so that the same tone is issued regardless of the key pressed (Setting: Tone) or different<br />
key tones are produced (Setting: Melody). It is also possible to switch the key tone function off.<br />
Setting the key tones; Menu Structure, Page 168.<br />
Acoustic warning signal, battery capacity<br />
The acoustic warning signal alerts you to the fact that the battery capacity is low.<br />
Setting the battery capacity acoustic warning signal; (Low batt); Menu Structure, Page 168.<br />
Acoustic warning signal, range<br />
The acoustic warning signal alerts you to the fact that the handset is out of range of the base unit.<br />
Setting the range acoustic warning signal (Out−of−range); Menu Structure, Page 168.<br />
Equalizer<br />
You can adapt the tone of the loudspeaker to your individual needs. You can leave the tone in its<br />
Natural setting or increase the Bass or Treble tone.<br />
Setting the equalizer; Menu Structure, Page 168.<br />
Display contrast<br />
The contrast of the display (LCD contrast) of the base unit and handset can be set to one of 6<br />
different levels; Menu Structure, Pages 168 and 170.<br />
Handset name<br />
You can assign individual names to each handset (Handset Name); Menu Structure, Page 168<br />
Time and date format<br />
You can define the format and the sequence in which the time and date should be displayed;<br />
Menu Structure, Page 167.<br />
180
Operation<br />
Other settings<br />
Automatic answering 301<br />
If this function is activated, an in<strong>com</strong>ing call is taken when the handset is removed from the charging<br />
station. The automatic answering function is activated and deactivated using the menu.<br />
Activating automatic answering; Menu Structure, Page 168<br />
The Auto Answer menu option can only be opened in the menu of a handset.<br />
Key lock 302<br />
When this setting is activated, the key lock function is automatically enabled when no key has<br />
been pressed for a period of 90 seconds. When the key lock is activated, the icon appears in the<br />
display.<br />
Activating the key lock; Menu Structure, Page 168<br />
Prefix number 303<br />
You can store a prefix number (Prefix). By pressing and holding the key before or after entering<br />
a phone number, the prefix number is set to precede the phone number. Press the key to<br />
dial this phone number.<br />
Changing the prefix; Menu Structure, Page 169<br />
Changing the PIN 304<br />
The PIN code is required in order to register handsets. The PIN set at the factory is 0000".<br />
Changing the PIN; Menu Structure, Page 169 (menu on the base unit)<br />
Reset 305<br />
This function enables you to reset the phone to its default settings defined at the factory.<br />
Resetting; Menu Structure, Pages 169 and 170<br />
Searching for the handset (Paging)<br />
If you have mislaid your handset you can find it again easily by simply calling the handset from the<br />
base unit.<br />
Conditions: The handset is switched on, is within range of the base unit, the batteries<br />
are not empty and the handset ringing tone has not been switched off. The latter condition<br />
means that the icon must NOT appear in the handset display.<br />
BS: <br />
Initiate an internal call<br />
BS: / <br />
Select the handset to be searched for<br />
BS: <br />
Start paging<br />
Special functions<br />
Alarm clock 306<br />
The Alarm clock" function can be used so that you are woken or alerted by the handset at a specific<br />
time. When the alarm clock function is activated, the icon appears in the appears in the<br />
display. The selected tone is played for 1 minute at the set time. The message Alarm appears<br />
in the display.<br />
181
Operation<br />
Setting the alarm clock function<br />
You can define whether the alarm clock function should only be set for a one−off alert (Once) or<br />
whether the alarm should alert you every day at the same time (Daily).<br />
Setting the alarm; (Set alarm); Menu Structure, Page 167<br />
Stopping the alarm prematurely<br />
<br />
Stop the alarm<br />
Baby call<br />
Use this function to store a specific phone number (max. 24 digits) that will be dialled and the<br />
handsfree function activated automatically when any key (except and ) is pressed.<br />
If the function is activated, the Baby call message flashes continually in the display.<br />
Activating baby call; Menu Structure, Page 168<br />
Call barring<br />
The call barring function prevents handsets dialling phone numbers which begin with digits previously<br />
defined and stored. Up to 4 barring numbers with max. 8 digits can be stored.<br />
Activating call barring; Menu Structure, Page 169<br />
If a phone number which has been barred is dialled, no connection is established. The device issues<br />
an acoustic warning signal and returns to Standby mode.<br />
Emergency call numbers (SOS numbers)<br />
You can store up to 4 phone numbers which can still be dialled even when the call barring function<br />
is activated. Refer to Page 169 for the sequence of menu option selections.<br />
Dialling mode<br />
The handset can be operated in analogue exchanges (pulse dialling mode) as well in newer digital<br />
exchanges (tone dialling mode / DTMF). The dialling mode is controlled via the menu. Refer to<br />
Page 169 for the sequence of menu option selections.<br />
If you operate the phone using pulse dialling mode, you can switch to tone dialling mode<br />
during a call by pressing the key and use this mode for the remainder of the call.<br />
Caller number display (CLIP)<br />
The caller number display (CLIP) and display of date and time are optional services<br />
offered by your telephone network provider. Contact them for any further information.<br />
If the CLIP function is available for your telephone system (CLIP = Calling Line Identification Presentation),<br />
the number of the caller appears in the display when a call is received − as long as<br />
callers have agreed to transmission of their phone number.<br />
If you do not take a call received, the information remains in the display for approx. 6<br />
seconds before the current time and date reappear.<br />
182
7 Answering Machine<br />
Answering Machine<br />
The answering machine can store up to 57 messages (59 messages including the outgoing messages).<br />
The maximum recording time is 15 minutes (including the outgoing messages).<br />
When the memory capacity for new messages is exhausted, no further messages are recorded.<br />
The answering machine then automatically switches to Answer Only mode.<br />
The answering machine can be operated from the base unit and the handset.<br />
Switching the answering machine on/off 307<br />
When the answering machine is switched on, the Play/Stop key on the base unit lights up red. In<br />
addition, the icon appears permanently in the displays of the base unit and registered<br />
handsets.<br />
The answering machine is switched on by default.<br />
Switching the answering machine on/off from the base unit<br />
<br />
Switch the answering machine on/off<br />
Switching the answering machine on from the handset<br />
, / Ans machine , , / Answer mode , ,<br />
/ Ans and Rec or Answer only <br />
Menu Structure, Page 164<br />
Switching the answering machine off from the handset<br />
, / Ans machine , , / Answer mode , ,<br />
/ Off , <br />
Menu Structure, Page 164<br />
Answering modes<br />
The answering machine provides two answering modes: Answer and Record mode (Ans and<br />
Rec) and Answer Only mode (Answer only). When Answer and Record mode is active, a message<br />
can be left by the caller. If Answer Only mode is active, no message can be left.<br />
Selecting the answering mode<br />
Select the answering mode required; Menu Structure, Page 164. Refer to the section Switching<br />
the answering machine on/off" on Page 183.<br />
The answering machine is set to Answer and Record mode by default.<br />
183
Answering Machine<br />
Outgoing message<br />
The answering machine is provided with two, pre−recorded outgoing messages (OGM). Both pre−<br />
recorded outgoing messages can be replaced by ones of your own.<br />
When Answer and Record mode is activated, the outgoing message OGM1 is used, when<br />
Answer Only mode is activated, outgoing message OGM2 is used.<br />
As soon as your own outgoing message is recorded, only that version is played.<br />
When the answering machine memory space is full, the outgoing message of Answer Only mode<br />
is automatically played.<br />
Language of outgoing messages<br />
You can change the language of the pre−recorded outgoing messages on the answering machine.<br />
There are 4 languages available for selection.<br />
or , / Ans machine ,<br />
or , / Voice lang ,<br />
or <br />
Open the submenu<br />
/ , or Select the language and confirm it<br />
Playing the outgoing message<br />
Menu Structure, Page 164 (Play OGM)<br />
Recording your own outgoing message<br />
A self−recorded outgoing message may be maximally 2 minutes long.<br />
or , / Ans machine ,<br />
or ,<br />
Select the menu<br />
/ OGM1<br />
or OGM2 or Select the outgoing message<br />
, / Record OGM ,<br />
or <br />
Initiate the recording function<br />
, Speak your outgoing message<br />
or <br />
End and store the recording<br />
Speak your message clearly and distinctly into the microphone on the base unit (at the front of the<br />
unit) or on the handset. On ending the message, it is played back.<br />
Pay attention that the outgoing message recorded is long enough (max. 2 minutes) to<br />
be able to use the remote access function should you want to; Remote access",<br />
Page 188.<br />
184
Answering Machine<br />
Reactivating the pre−recorded message<br />
Deleting the outgoing message you recorded yourself automatically reactivates the pre−recorded,<br />
default message.<br />
The outgoing message can be deleted by means of the menu; Menu Structure, Page 164 (Delete<br />
MSG).<br />
The pre−recorded messages cannot be deleted.<br />
Playing recorded messages 308<br />
If new messages have been recorded, the visual call indicator flashes on the base unit and on the<br />
registered handsets and the icon appears in the respective display. A message in plain text<br />
also appears in the displays of the base unit and registered handsets indicating the number of new<br />
messages.<br />
The in<strong>com</strong>ing messages recorded are numbered in the order they were received.<br />
The messages received are played back in the opposite sequence: the message last recorded is<br />
played first.<br />
While the message is being played back, the number of the message is displayed together with the<br />
date and time of recording.<br />
Initially, only the new messages are played. To play the old messages, start playback<br />
of the messages once again.<br />
Playing messages on the base unit (via the loudspeaker)<br />
<br />
Play/Stop messages<br />
<br />
Play message again<br />
2x <br />
Skip to previous message<br />
<br />
Skip to next message<br />
Playing messages on the handset<br />
, / Play message ,<br />
Wait Play messages (via the loudspeaker)<br />
Playback options:<br />
<br />
Open the menu<br />
/ Delete MSG <br />
Deleted<br />
Delete the message<br />
/ Stop Stop playback<br />
/ Forward MSG Play the next message<br />
/ Repeat MSG Repeat current message from the beginning<br />
/ Backward MSG Skip to previous message<br />
185
Answering Machine<br />
Alternatively, these functions can be performed by pressing the respective keys:<br />
<br />
Delete message<br />
<br />
Repeat current message from the beginning<br />
2x <br />
Skip to previous message<br />
<br />
Stop playback (Pause)<br />
<br />
Skip to next message<br />
Setting the volume for playing messages<br />
You can adjust the volume on the base unit to one of 5 levels while the message is playing.<br />
/ <br />
Raise/Lower the volume<br />
You can adjust the volume on the handset to one of 5 levels while the message is playing.<br />
/ <br />
Raise/Lower the volume<br />
Deleting a message 309<br />
Delete a message during playback:<br />
BS: <br />
or<br />
HS: <br />
HS: / Delete MSG <br />
Deleted<br />
or<br />
HS: <br />
Deleting all messages 310<br />
All the old messages are deleted.<br />
Delete the message<br />
Open the menu<br />
Delete the message<br />
Delete the message<br />
Messages which have been deleted cannot be restored!<br />
186<br />
or , / Del all old ,<br />
or , Confirm? , or <br />
Screening calls<br />
You can use the loudspeaker on the base unit to listen to in<strong>com</strong>ing calls without actually answering<br />
them. In this case, the Call Screen function must be activated in the menu; Menu Structure,<br />
Page 164 (Call screen).<br />
To alter the volume while screening a call, press the and keys.<br />
Taking a call being recorded<br />
It is possible to take a call even if the answering machine has already begun to record it. Recording<br />
of the message is stopped in this case.<br />
or or <br />
Take the call
Answering Machine<br />
Delaying answering a call<br />
Use the menu to define how often the telephone should ring before an outgoing message is played<br />
to the caller. You can select between 2, 4, 6 or 8 ringing tones; Menu Structure, Page 164<br />
(Ring delay).<br />
The answering machine is set to 4 rings by default.<br />
In addition, the Toll saver setting is also available for pre−remote access free of charge. The toll−<br />
saving pre−remote access feature can be used to check whether new messages have been received<br />
on your answering machine from a distant telephone. If new messages have been recorded<br />
on your answering machine, your call is taken after 2 rings at the latest. If no new messages have<br />
been recorded on your answering machine, your call is taken after 6 rings. Place the receiver on−<br />
hook before the 6th ring. This means that no charges ensue.<br />
For further information on remote access, refer to Page 188.<br />
Maximum recording time per in<strong>com</strong>ing message<br />
There are 4 recording times available for selection; Menu Structure, Page 165 (ICM length)<br />
Recording a memo<br />
A memo is a message which you leave on the answering machine for other users and is played<br />
back in the same way as a message left by other callers. A memo may be maximally 3 minutes<br />
long and recorded on the handset.<br />
Memos can also be recorded when the answering machine is switched off.<br />
or , / Ans machine ,<br />
or ,<br />
or , / Record memo ,<br />
or ,<br />
Select the submenu<br />
Initiate the recording function<br />
, Record the memo<br />
or <br />
End and store the recording<br />
Interrupting recording a memo<br />
BS: <br />
or<br />
HS: or <br />
Stop recording and return to the submenu<br />
Stop recording and return to the submenu<br />
187
Answering Machine<br />
Remote access 311<br />
You can call your answering machine from another telephone to switch it on or to play messages<br />
and execute other functions. Remember that the calling telephone must support tone dialling.<br />
PIN code for remote access 312<br />
The Remote PIN is set to 1234" by default. It is re<strong>com</strong>mended to change the Remote PIN to<br />
ensure that no unauthorised persons gain access to your answering machine.<br />
Changing the PIN code for remote access; Menu Structure, Page 165.<br />
If you have changed the PIN code for the remote access function and subsequently<br />
forgotten it, refer to the PIN code for remote access in the menu; Menu Structure,<br />
Page 169 (Remote PIN).<br />
Starting remote access<br />
The telephone used for remote access must be set to tone dialling.<br />
<br />
Dial your number from an external telephone.<br />
<br />
If the answering machine is switched on, the outgoing message is played after the defined<br />
number of rings.<br />
If the answering machine is not switched on, the telephone is automatically activated<br />
after the 10th ring and a longer acoustic signal is issued.<br />
Initiate the remote access function.<br />
A longer acoustic signal is then issued.<br />
When the answering machine is switched on, you must initiate the remote access function<br />
while the outgoing message is being played. Therefore, it is important that the outgoing<br />
message is sufficiently long.<br />
<br />
Enter the 4−digit PIN for remote access. A longer<br />
acoustic signal is then issued.<br />
You can now execute other functions<br />
Remote access key function assignment table on Page 189.<br />
<br />
You can execute several functions in succession.<br />
Press the key to activate the required function . A<br />
longer acoustic signal is issued.<br />
Ending remote access<br />
<br />
Stop the remote access function<br />
188
Answering Machine<br />
Remote access, key function assignment 313<br />
The following table provides an overview of the functions available and the key to press to initiate<br />
the respective function.<br />
Key If no messages are played If messages are played<br />
<br />
Delete message<br />
<br />
Play message again<br />
Play message, resume playback Stop playback (Pause)<br />
<br />
Play the next message<br />
Switch the answering machine on/off<br />
Record memo 1<br />
<br />
Stop playback<br />
Switching 314 on the answering machine via remote access<br />
<br />
Dial your phone number from an external telephone.<br />
The telephone is switched on after the 10th ring and<br />
a longer acoustic signal is issued.<br />
<br />
Activate the remote access function.<br />
A longer acoustic signal is then issued.<br />
<br />
Enter the 4−digit PIN for remote access. A longer<br />
acoustic signal is issued.<br />
Activate the answering machine .<br />
A longer acoustic signal is issued.<br />
The outgoing message is played.<br />
<br />
End the call<br />
1 End recording a memo by ending remote access.<br />
189
Extending the Telephone System<br />
8 Extending the Telephone System<br />
The internationally approved GAP 1 regulates the <strong>com</strong>patibility of handsets and telephones (base<br />
stations/units) from different manufacturers. As a result, it is possible to integrate SWITEL devices<br />
and devices from other manufacturers together in one telephone system. It is possible, however,<br />
that some functions are not available.<br />
Multiple handsets<br />
Up to 6 handsets can be registered on the base unit.<br />
Registering handsets<br />
Handsets are registered via the menu; Menu Structure, Pages 169 and 170.<br />
On the base unit:<br />
, / , Base setting , Open the menu<br />
/ , Register , ,<br />
Confirm? , , Searching Open the menu<br />
On the handset to be registered:<br />
, / , Base setting , Open the menu<br />
/ , Register ,<br />
, Base Open the menu<br />
/ , Base , Select the base unit required<br />
PIN? , <br />
Enter the PIN 2 and confirm it<br />
Incorrect digits entered can be deleted by briefly pressing the key.<br />
The handset searches for the base unit. This process can take up to 2 minutes.<br />
The handset is automatically assigned an internal call number following registration. The internal<br />
call number appears in the display.<br />
To register handsets from other manufacturers, please refer to the operating manual<br />
supplied with them.<br />
190<br />
1 GAP: Generic Access Profile = Standard for the interoperation of handsets and base stations/<br />
units from different manufacturers.<br />
2 The default PIN code is 0000".
Deregistering handsets<br />
Extending the Telephone System<br />
You can only deregister a handset from the base unit or another base unit by using<br />
another handset registered on the respective base unit. A handset cannot deregister<br />
itself.<br />
Handsets are deregistered via the menu; Menu Structure, Pages 169 and 170.<br />
On the base unit:<br />
, / , Base setting , Open the menu<br />
/ , Advance , Open the menu<br />
/ , Deregister , Open the menu<br />
Handset 0x / ,<br />
Wait<br />
Select the handset and start the deregistration<br />
process<br />
Several base stations 1 /base units 2 315<br />
You can increase the range of your handset by registering it on several telephones (base stations<br />
1 /base units 2 ). It can be registered on up to 4 different telephones (base stations 1 /base<br />
units 2 ) simultaneously . Each telephone (each base station 1 /base unit 2 ) requires its own telephone<br />
line socket. Connections can be used with the same call number or with different ones.<br />
Calls in progress cannot be transferred from one telephone (one base station/base<br />
unit) to another.<br />
1 The base of a DC 58x is referred to as a base station.<br />
2 The base of a <strong>DCT</strong> <strong>587x</strong> is referred to as a base unit.<br />
191
PBX / Supplementary Services<br />
9 PBX / Supplementary Services 316<br />
R−key and recall time, supplementary services<br />
Your telephone supports supplementary services provided by your telephone network provider,<br />
such as brokering, call waiting and conference facilities. Press the to use these supplementary<br />
services. Please contact your telephone network provider regarding which Recall (Flash) time must<br />
be set to use the supplementary services. Also contact your telephone network provider with regard<br />
to enabling supplementary services. The recall (flash) time is set using the menu;<br />
Page 169.<br />
R−key on private branch exchanges<br />
If the telephone is connected to a private branch exchange, functions such as transferring calls<br />
and automatic call back can be used via the key. Refer to the operating manual provided with<br />
your private branch exchange as to which recall (flash) time must be set in order to use these<br />
functions. The sales outlet where you purchased the exchange can provide information as to<br />
whether the telephone will work properly with the exchange. The recall (flash) time is set using the<br />
menu; Page 169.<br />
Number for an outside line (access code)<br />
When using private branch exchanges, it is necessary to dial an access code to obtain the dialling<br />
tone for an outside line. The number for an outside line is often 0" or 9". Dial this number first and<br />
wait for the dialling tone. You can then dial the actual phone number.<br />
If one−touch dialling keys are to be used when the phone is connected to a private<br />
branch exchange, please take this into consideration and enter the access code<br />
before the actual phone number when programming the one−touch dialling keys.<br />
It is also possible to program a dialling pause between the number for an outside<br />
line and the actual phone number; Section Dialling pause".<br />
Dialling pause<br />
When using private branch exchanges, it is necessary to dial an access code to obtain the dialling<br />
tone for an outside line. When using some older private branch exchanges, it takes a little time before<br />
the dialling tone be<strong>com</strong>es audible. In the case of such private branch exchanges, a dialling<br />
pause can be inserted after the number for an outside line in order to continue dialling directly without<br />
having to wait for the dialling tone. The dialling pause is inserted by pressing and holding the<br />
key for 3 seconds.<br />
The actual phone number is dialled a certain time after the number for an outside line.<br />
The dialling pause can also be entered with the phone numbers in the phone book.<br />
192
Caller number display (CLIP 1 )<br />
PBX / Supplementary Services<br />
The caller number display (CLIP) is a supplementary service offered by your telephone<br />
network provider. Contact your network provider for further information.<br />
If this function is available with your telephone line, the number of the caller appears in the display<br />
when the phone rings. If the caller has suppressed transmission of their phone number, the corresponding<br />
message appears in the display. The phone number is not displayed and, as a result, is<br />
not stored in the call list.<br />
Answering machine in the telephone network 317<br />
An answering machine in the telephone network is a supplementary service offered by many telephone<br />
network providers. If your telephone network provider offers an answering machine in the<br />
telephone network for you, an icon in the display informs you of new messages received (VMWI 2 ).<br />
This function can only be used when your telephone network provider actually offers the service.<br />
Contact your network provider for further information.<br />
1 CLIP: Calling Line Identification Presentation = Displays the caller’s phone number.<br />
2 VMWI: Visual Message Waiting Indication = Visual indicator that new messages have been recorded.<br />
193
Technical Properties<br />
10 Technical Properties<br />
Feature<br />
Value<br />
Standard DECT 1 −GAP 2<br />
Power supply (base unit)<br />
Input: 100−240 V, 50−60 Hz<br />
Output: 6 V, 500 mA<br />
Power supply (charging station)<br />
Input: 100−240 V, 50−60 Hz<br />
Output: 6 V, 150 mA<br />
Rechargeable batteries<br />
2 x 1.2 V 500 mAh NiMH, Size: AAA<br />
Range, handset<br />
Outdoors: Approx. 300 m<br />
Indoors: Approx. 50 m<br />
Standby time, handset<br />
Up to 110 h<br />
Max. duration of call, handset<br />
Up to 11 h<br />
Max. receiver volume<br />
30 dB<br />
Dialling mode<br />
Tone dialling mode (DTMF)<br />
Pulse dialling mode<br />
Recall (Flash) time<br />
Short, Medium, Long<br />
Menu languages<br />
German, French, Italian, English, Spanish,<br />
Portuguese, Dutch, Polish, Turkish<br />
PIN (default setting) 0000<br />
Number of ringing melodies<br />
12 (polyphone)<br />
Max. number of phone book entries 50<br />
Max. number of call list entries 40<br />
Max. number of redialling list entries 5<br />
Max. number of messages, answering machine 57<br />
Max. recording time, answering machine 15 min (including outgoing messages)<br />
Languages, pre−recorded messages<br />
German, French, Italian, English<br />
PIN code for remote access (default setting) 1234<br />
194<br />
1 DECT: Digital Enhanced Cordless Tele<strong>com</strong>munication = Standard for cordless telephones.<br />
2 GAP: Generic Access Profile = Standard for the interoperation of handsets and base units<br />
from different manufacturers.
In Case of Problems<br />
Declaration of Conformity<br />
This device fulfils the requirements stipulated in the EU directive:<br />
1999/5/EC directive on radio equipment and tele<strong>com</strong>munications terminal<br />
equipment and the mutual recognition of their conformity. Conformity with<br />
the above mentioned directive is confirmed by the CE mark on the device.<br />
Service hotline<br />
Should problems arise with the telephone, please refer to the following information first. In the case<br />
of technical problems, you can contact our hotline service, Tel. 0900 00 1675 within Switzerland<br />
(Swiss<strong>com</strong> fees at time of going to print: CHF 2.60/min). In the case of claims under the terms of<br />
guarantee, please contact your sales outlet. There is a 2 year period of guarantee.<br />
11 In Case of Problems<br />
Problems<br />
Solutions<br />
No telephone calls possible − The telephone or base unit is not connected properly or is defective.<br />
Only use the telephone connection cable supplied.<br />
− The power adapter plug is not plugged in or there is a <strong>com</strong>plete<br />
power failure.<br />
− Test whether the telephone connection is in order by using<br />
another telephone.<br />
− Unfavourable installation location of base unit.<br />
− The rechargeable batteries are empty or defective.<br />
− You have moved the handset too far from the base unit. To<br />
increase the range, you can register a handset on several base<br />
units/base stations; Page 191.<br />
− The wrong dialling mode is set; Page 169<br />
− If several handsets are registered: A call is in progress on<br />
another handset.<br />
− In the case of internal phone calls: The handset called is out of<br />
range of the base unit.<br />
− The key lock is activated.<br />
− The handset is not switched on.<br />
No connection to the is base<br />
unit possible<br />
Connection is disturbed or cut<br />
off<br />
Acoustic signals can be heard<br />
during a phone call<br />
− Check whether a handset is registered on the base unit or<br />
whether the handset was registered on the base unit with the<br />
correct PIN; Page 169.<br />
− You have moved too far from the base unit.<br />
− Unfavourable installation location of base unit.<br />
− You have moved too far from the base unit.<br />
− The rechargeable batteries are almost empty.<br />
195
In Case of Problems<br />
Problems<br />
The system no longer<br />
responds<br />
The batteries are empty within<br />
a short time<br />
The batteries can no longer<br />
be charged<br />
The caller number display<br />
(CLIP) does not function<br />
The answering machine does<br />
not record any messages<br />
The answering machine<br />
cannot be switched to Answer<br />
and Record mode<br />
No remote access functions<br />
can be executed<br />
Solutions<br />
− Reset all functions to their default settings; Page 169.<br />
− Briefly disconnect the power adapter plug from the power<br />
socket.<br />
− The batteries are empty or defective.<br />
− Place the handset in the base unit / charging station properly.<br />
Clean the contact surfaces on the handset and base unit /<br />
charging station with a soft, dry cloth.<br />
− Place the handset in the base unit / charging station for 8 hours.<br />
− The batteries are defective.<br />
− The caller number display (CLIP) is a supplementary service<br />
offered by your telephone network provider. Contact your network<br />
provider for further information.<br />
− The caller has suppressed the transmission of their phone<br />
number.<br />
− Check that the answering machine is activated.<br />
− Check whether the answering machine memory is full. Delete<br />
messages, if necessary.<br />
− Check whether the answering machine memory is full. The<br />
answering machine then switches automatically to Answer Only<br />
mode in which case no messages can be left. Delete messages,<br />
if necessary.<br />
− The telephone used for remote access must be set to tone<br />
dialling.<br />
− Check that the answering machine is activated.<br />
− Check that the correct PIN code has been entered for remote<br />
access; Page 188. If you have forgotten the PIN code for<br />
remote access, you can refer to the PIN code for remote access<br />
in the menu or reset the phone and PIN code for remote<br />
access to the default setting.<br />
− Press the keys slowly firmly enough.<br />
− Start remote access while the outgoing message is being<br />
played. If the length of the outgoing message is too short, record<br />
another outgoing message which is longer.<br />
196
12 Maintenance / Guarantee<br />
Maintenance / Guarantee<br />
Maintenance<br />
Clean the housing surfaces with a soft, fluff−free cloth.<br />
Do not use any cleaning agents or solvents.<br />
Apart from occasionally cleaning the housing, no other upkeep is necessary.<br />
Guarantee<br />
SWITEL equipment is produced and tested according to the latest production methods. The implementation<br />
of carefully chosen materials and highly developed technologies ensure trouble−free<br />
functioning and a long service life. The terms of guarantee do not apply where the cause of equipment<br />
malfunction is the fault of the telephone network operator or any interposed private branch<br />
extension system. The terms of guarantee do not apply to the batteries or power packs used in the<br />
products. The period of guarantee is 24 months from the date of purchase.<br />
All deficiencies related to material or manufacturing errors within the period of guarantee will be redressed<br />
free of charge. Rights to claims under the terms of guarantee are annulled following<br />
tampering by the purchaser or third parties. Damage caused as the result of improper handling or<br />
operation, normal wear and tear, incorrect positioning or storage, improper connection or installation<br />
or Acts of God and other external influences are excluded from the terms of guarantee. In the<br />
case of <strong>com</strong>plaints, we reserve the right to repair defective parts, replace them or replace the entire<br />
device. Replaced parts or devices be<strong>com</strong>e our property. Rights to <strong>com</strong>pensation in the case of<br />
damage are excluded where there is no evidence of intent or gross negligence by the manufacturer.<br />
If your device does show signs of a defect within the period of guarantee, please contact the sales<br />
outlet where you purchased the SWITEL device, producing the purchase receipt as evidence. All<br />
claims under the terms of guarantee in accordance with this agreement can only be asserted at<br />
the sales outlet. No claims under the terms of guarantee can be asserted after a period of two<br />
years from the date of purchase and hand−over of the product.<br />
197
Index<br />
13 Index<br />
A<br />
Access code, 192<br />
Acoustic and visual settings, 180<br />
Acoustic warning signal, battery capacity, 180<br />
Acoustic warning signal, range, 180<br />
Adjusting the ringing volume<br />
of the base unit, 174<br />
Adjusting the ringing volume<br />
of the handset, 174<br />
Alarm clock, 181<br />
Answering machine, 183<br />
Answering machine<br />
in the telephone network, 193<br />
Arrow down button, 160<br />
Arrow up button, 160<br />
Automatic answering, 181<br />
B<br />
Baby call, 182<br />
Back key, 159<br />
Base stations, 191<br />
Base unit , 159<br />
Base units, 191<br />
Batteries, 155, 194<br />
Battery charge status, 158<br />
Brokering, 173<br />
C<br />
Call barring, 182<br />
Call key, 160<br />
Call LED, 159, 160<br />
Call list, 159, 160, 179<br />
Call screening, 186<br />
Callback , 172<br />
Caller number display, 193<br />
Caller number display (CLIP), 182<br />
Calling back calls received, 172, 179<br />
Calls missed, 179<br />
Changing the PIN, 181<br />
Charging the batteries, 158<br />
Checking the phone book capacity, 177<br />
Cleaning, 197<br />
CLIP, 182, 193<br />
Conference calls, 173<br />
Connecting the base unit , 157<br />
Connecting the charging station, 157<br />
Creating phone book entries, 176<br />
198
D<br />
Deactivating the microphone, 175<br />
Declaration of Conformity, 195<br />
DECT, 194<br />
Deleting all entries, 177<br />
Deleting all messages, 186<br />
Deleting all phone numbers, 179<br />
Deleting an entry, 177<br />
Deleting individual phone numbers, 179<br />
Deleting messages, 186<br />
Deleting phone book entries, 177<br />
Deleting phone numbers<br />
from the redialling list, 178<br />
Deleting phone numbers in the call list , 179<br />
Deleting the redialling list, 178<br />
Deregistering, 191<br />
Deregistering handsets, 191<br />
Dialling, 172<br />
Dialling mode, 182, 194<br />
Dialling pause, 192<br />
Digit keys, 159, 160<br />
Display, 159, 161<br />
Display contrast, 180<br />
Display icons, 161<br />
Displaying phone numbers in the call list, 179<br />
Disposal, 155<br />
Duration of call, 194<br />
Index<br />
E<br />
Earpiece, 160<br />
ECO mode, 158<br />
Editing phone book entries, 176<br />
Emergency calls, 182<br />
Ending a call, 171<br />
Ending remote access, 188<br />
Entering names, 175<br />
Entering text, 175<br />
Equalizer, 180<br />
Extending the telephone system, 190<br />
F<br />
Flash time, 194<br />
Forwarding calls, 173<br />
Forwards key, 159<br />
G<br />
GAP, 194<br />
Guarantee, 197<br />
H<br />
Handset, 160<br />
Handset name, 180<br />
Handsfree, 175<br />
Handsfree button, 159<br />
Handsfree calling, 160<br />
Hash key, 159<br />
Hash key / Ringing tone off / Dialling pause, 160<br />
Hearing aid <strong>com</strong>patibility, 155<br />
Holding a call, 173<br />
199
Index<br />
I<br />
Icons, 161<br />
Inserting the batteries in the handset, 158<br />
Installation location, 154<br />
INT key, 159<br />
Intended use, 154<br />
Internal calls, 172<br />
Interrupting recording a memo, 187<br />
K<br />
Key lock, 171, 181<br />
Key tones, 180<br />
L<br />
Language of outgoing messages, 184<br />
Languages, pre−recorded messages, 194<br />
LC display, 160<br />
Low−radiation, 158<br />
M<br />
Main menu, 164<br />
Maintenance, 197<br />
Making a call, 172<br />
Making internal calls, 173<br />
Max. receiver volume, 194<br />
Maximum recording time, 183<br />
Medical equipment, 155<br />
Menu guidance, 162<br />
Menu languages, 194<br />
Menu structure, 164<br />
Menu/OK/Muting key, 160<br />
Microphone on the base unit , 159<br />
Microphone on the handset, 160<br />
Multiple handsets , 190<br />
Muting function, 175<br />
N<br />
No. of call list entries, 194<br />
No. of phone book entries, 194<br />
No. of redialling list entries, 194<br />
Notation in the manual, 162<br />
Number of messages, answering machine, 194<br />
O<br />
OK/Menu key, 159<br />
On/Off / On−hook key, 160<br />
On/Off button, answering machine, 159<br />
One−touch dialling, 172<br />
One−touch dialling keys, 159, 160<br />
Operating elements, 159<br />
Operation, 171<br />
Outgoing message, 184<br />
200
P<br />
Package contents, 156<br />
Paging, 181<br />
Phone book, 159, 160, 172, 175<br />
Phone book entries, 163<br />
PIN, 190, 194<br />
PIN code for remote access, 188<br />
PIN code for remote access<br />
(default setting), 194<br />
Play/Stop key, 159<br />
Playback options, 185<br />
Playing messages, 185<br />
Playing messages on the base unit , 185<br />
Playing messages on the handset, 185<br />
Playing the outgoing message, 184<br />
Power adapter plug, 154<br />
Power failure, 154<br />
Power supply, 194<br />
Prefix number, 181<br />
Private branch exchanges, 158, 192<br />
Problems, 195<br />
Programming one−touch dialling keys, 177<br />
R<br />
R−key, 159, 160, 192<br />
Range, 194<br />
Recall time, 192<br />
Receiver, 159<br />
Recording a memo, 187<br />
Recording an outgoing message, 184<br />
Recording time per message, 187<br />
Recording time, answering machine, 194<br />
Redialling, 160, 172<br />
Redialling key, 159<br />
Redialling list, 178<br />
Registering, 190<br />
Registering handsets, 190<br />
Remote access, 188<br />
Remote access, key function assignment, 189<br />
Reset, 181<br />
Reverse key, 159<br />
Ringing tones, 194<br />
Index<br />
S<br />
Safety information, 154<br />
Saving a number in the redialling list in the<br />
phone book, 178<br />
Saving numbers in the phone book, 178, 179<br />
Scroll down key, 159<br />
Scroll up key, 159<br />
Searching for the handset, 181<br />
Selecting submenus, 163<br />
Selecting the answering mode, 183<br />
Service hotline, 195<br />
Setting the alarm clock, 182<br />
Setting the date, 158<br />
Setting the display language, 158<br />
Setting the receiver volume, 174<br />
Setting the ringing tone, 180<br />
Setting the time, 158<br />
Setting the volume for playing messages, 186<br />
Several base stations, 191<br />
Special functions, 181<br />
Standby mode, 162<br />
Standby time, 194<br />
Star key, 159, 160<br />
Starting remote access, 188<br />
Starting Up, 156<br />
Stopping the alarm prematurely, 182<br />
Supplementary services, 192<br />
Switching off, 183<br />
Switching on, 183<br />
Switching on the answering machine via remote<br />
access, 189<br />
Switching the ringing tone on and off , 174<br />
201
Index<br />
T<br />
Taking a call, 171<br />
Taking a call being recorded, 186<br />
Taking external calls when an internal call<br />
is in progress, 173<br />
Talk time, 174<br />
Telephoning, 171<br />
Time and date format, 180<br />
Tollsaver, 187<br />
Transferring calls, 173<br />
Transferring external calls internally, 173<br />
V<br />
Visual call indicator, 160<br />
Visual call indicator (Call LED), 159, 160<br />
VMWI, 193<br />
202
Wichtiger Hinweis<br />
Die Basisstation Ihres Telefons ist mit einem energieeffizienten Schaltnetzteil (Input 100~240 V AC ,<br />
Output 6 V DC , 500 mA) ausgestattet. Die Nulllast beträgt ca. 0,15 W. Die durchschnittliche Effizienz<br />
beträgt 71 %. Die Leistungsaufnahme der Basisstation beträgt max. 0,78 W.<br />
Die mit einem Telefonset gelieferte(n) Ladestation(en) ist/sind mit einem energieeffizienten Schaltnetzteil<br />
(Input 100~240 V AC , Output 6 V DC , 150 mA) ausgestattet. Die Nulllast beträgt ca. 0,17 W.<br />
Die durchschnittliche Effizienz beträgt 67 %. Die Leistungsaufnahme der Ladestation beträgt max.<br />
0,22 W.<br />
Note importante<br />
La base de votre téléphone est équipée d’une alimentation à découpage à efficience énergétique<br />
(entrée 100~240 V AC , sortie 6 V DC , 500 mA). La puissance nulle est d’env. 0,15 W. L’efficience<br />
moyenne est 71 %. La puissance absorbée de la base est max. 0,78 W.<br />
La (les) station(s) d’accueil fournies avec un kit téléphonique est/sont équipée(s) d’une alimentation<br />
à découpage à efficience énergétique (tension d’entrée 100~240 V AC , tension de sortie 6 V DC ,<br />
150 mA). La puissance nulle est d’env. 0,17 W. L’efficience moyenne est 67 %. La puissance absorbée<br />
de la station d’accueil est max. 0,22 W.<br />
Avvertimento importante<br />
La stazione base del telefono è dotata di alimentatore (input 100~240 V AC , output 6 V DC , 500 mA)<br />
particolarmente efficiente in termini di consumo energetico. La potenza a vuoto corrisponde a ca.<br />
0,15 W. L’efficienza media è 71 %. L’assorbimento di corrente della stazione base corrisponde a<br />
max. 0,78 W.<br />
La(e) stazione(i) di carica fornita(e) con il set telefonico è/sono dotata(e) di alimentatore (input<br />
100~240 V AC , output 6 V DC , 150 mA) particolarmente efficiente in termini di consumo energetico.<br />
La potenza a vuoto corrisponde a ca. 0,17 W. L’efficienza media è 67 %. L’assorbimento di corrente<br />
della stazione di carica corrisponde a max. 0,22 W.<br />
Important note<br />
The telephone base station is equipped with an energy−efficient switching power supply (input<br />
100~240 V AC , output 6 V DC , 500 mA). The zero load is approx. 0.15 W. The average efficiency is<br />
71%. The power consumption of the base station max. 0,78 W.<br />
The charging unit(s) supplied with the telephone set is/are equipped with an energy−efficient switching<br />
power supply (input 100~240 V AC , output 6 V DC , 150 mA). The zero load is approx. 0.17 W.<br />
The average efficiency is 67%. The power consumption of the charging station max. 0.22 W.<br />
203
Declaration of Conformity 318<br />
Diese Anlage entspricht der europäischen R&TTE Richtlinie.<br />
Für die komplette Konformitätserklärung nutzen Sie bitte den kostenlosen Download von unserer<br />
Website www.switel.<strong>com</strong>.<br />
Cet équipement est conforme à la directive européenne R&TTE.<br />
Pour obtenir la déclaration de conformité intégrale, veuillez vous servir du téléchargement gratuit de<br />
notre site Internet www.switel.<strong>com</strong>.<br />
Quest’apparecchiatura è conforme alla direttiva europea R&TTE.<br />
Per la dichiarazione di conformità <strong>com</strong>pleta si prega di voler usufruire del servizio gratuito di download<br />
dal nostro sito Internet www.switel.<strong>com</strong>.<br />
This equipment <strong>com</strong>plies with the European R&TTE directive.<br />
To view the <strong>com</strong>plete Declaration of Conformity, please refer to the free<br />
download available at our web site: www.switel.<strong>com</strong>.<br />
Service Hotline<br />
Bei technischen Problemen können Sie sich an unsere Service−Hotline unter Tel. 0900 00 1675<br />
innerhalb der Schweiz (Kosten Swiss<strong>com</strong> bei Drucklegung: CHF 2,60/min) wenden.<br />
S’il s’agit de problèmes techniques, vous pouvez vous adresser à notre<br />
hotline de service en Suisse en appelant le numéro 0900 00 1675<br />
(frais Swiss<strong>com</strong> à la date d’impression de ce manuel : CHF 2,60/min).<br />
In caso di problemi tecnici è possibile rivolgersi alla nostra hotline di<br />
assistenza tecnica chiamando al numero 0900 00 1675 valido per la Svizzera (spese da rete Swiss<strong>com</strong><br />
alla data di stampa: CHF 2,60 / min).<br />
In the event of technical problems, you can contact our hotline service, Tel. 0900 00 1675 within<br />
Switzerland (cost via Swiss<strong>com</strong> at time of going to print: CHF 2.60/min).<br />
Version 1.0 − 20.06.2012