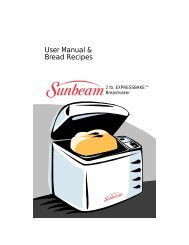
5825-33 IM 2-Lb. Bread Text - Household Appliance Inc.
5825-33 IM 2-Lb. Bread Text - Household Appliance Inc.
5825-33 IM 2-Lb. Bread Text - Household Appliance Inc.

You also want an ePaper? Increase the reach of your titles
YUMPU automatically turns print PDFs into web optimized ePapers that Google loves.
MAKE A<br />
2-LB. LOAF<br />
FAITES<br />
UN PAIN<br />
DE 2 LB.<br />
Homemade<br />
<strong>Bread</strong><br />
at the Push<br />
of a Button!<br />
Deluxe 2-Pound<br />
<strong>Bread</strong> & Dough<br />
Maker<br />
Machine à Pain et<br />
à Pâte De Luxe<br />
de 2 lb.<br />
Homemade<br />
du Pain de<br />
Ménage en<br />
Appuyant sur<br />
un Simple<br />
Bouton!
CONGRATULATIONS!<br />
Fresh, warm homemade bread is just a few,<br />
easy steps away with your new Sunbeam ®<br />
Deluxe 2-Pound <strong>Bread</strong> and Dough Maker.<br />
We’ve done everything we can to make bread<br />
baking a breeze. We’ve streamlined the<br />
instructions; designed a simple, easy-to-read<br />
control panel; and developed a host of great<br />
recipes for breads, doughs, pastas, jams and<br />
jellies, spreads and glazes and quick breads.<br />
First review the Safety Guidelines, then turn<br />
to Page 12 for the easy step-by-step directions!<br />
Along the way, feel free to ask questions.<br />
You can call us toll-free at 1-800-667-8623.
2 YEAR L<strong>IM</strong>ITED WARRANTY<br />
Sunbeam Products <strong>Inc</strong>. warrants to the original purchaser, subject to the limitations and exclusions<br />
set forth below, that this product shall be free, in all material respects, of mechanical and electrical<br />
defects in material and workmanship from the date of purchase for two years. This warranty does not<br />
cover normal wear of parts or damage resulting from any of the following: negligent use or misuse<br />
of the product, use on improper voltage or current, use contrary to operating instructions or<br />
disassembly, repair or alteration by any person other than an authorized service center.<br />
Our obligation hereunder is limited to repair or replacement, at manufacturer’s option, of the<br />
product during the warranty period, provided that the product, along with the model number and<br />
original dated proof of purchase, is sent postage prepaid, directly to the following address:<br />
For products purchased in the United States:<br />
For products purchased in Canada:<br />
SUNBEAM APPLIANCE SERVICE STATION<br />
117 Central Industrial Row<br />
Purvis, MS 39475<br />
SUNBEAM APPLIANCE SERVICE STATION (KND)<br />
Please call 1-800-667-8623 or email us at<br />
consumeraffairs@consumer.sunbeam.com<br />
Do not return this product to the place of purchase or to the manufacturer; doing so may delay<br />
the processing of your warranty claim.<br />
Answers to questions regarding this warranty or for your nearest authorized service location may<br />
be obtained by calling toll-free 1-800-597-5978 or by writing to Sunbeam – Consumer Affairs,<br />
at P.O. Box 948389, Maitland, FL 32794-8389. Answers to questions regarding this warranty or for<br />
your nearest Canadian authorized service location may be obtained by calling toll-free in Canada<br />
1-800-667-8623. For warranty information or for an authorized service location outside of the<br />
United States and Canada, please see the warranty service card inserted in the product packaging.<br />
DISCLA<strong>IM</strong>ER<br />
Product repair or replacement as provided under this warranty is your exclusive remedy.<br />
SUNBEAM PRODUCTS, INC. SHALL NOT BE LIABLE FOR ANY INCIDENTAL OR<br />
CONSEQUENTIAL DAMAGES FOR BREACH OF ANY EXPRESS OR <strong>IM</strong>PLIED<br />
WARRANTY ON THIS PRODUCT OR ANY PART THEREOF EXCEPT TO THE EXTENT<br />
PROHIBITED BY APPLICABLE LAW. SUNBEAM PRODUCTS, INC., DISCLA<strong>IM</strong>S ANY<br />
<strong>IM</strong>PLIED WARRANTY OF MERCHANTABILITY OR FITNESS FOR A PARTICULAR<br />
PURPOSE OF THIS PRODUCT OR ANY PART THEREOF. Some states and provinces<br />
do not allow the exclusion or limitation of incidental or consequential damages, or allow<br />
limitations on how long an implied warranty lasts, so the above limitations or exclusions<br />
may not apply to you. This warranty gives you specific legal rights, and you may also have<br />
other rights, which vary from State to State or Province to Province.
GARANTIE L<strong>IM</strong>ITÉE 2 ANS<br />
Sunbeam Products <strong>Inc</strong>. garantit à l’acheteur initial, sous couvert des limitations et exclusions stipulées<br />
ci-après, que ce produit est exempt, sous tous les aspects matériels, de tout défaut mécanique et électrique<br />
de matériel ou de fabrication pendant deux ans à compter de la date d’achat. Cette garantit ne couvre pas l’usure<br />
normale des pièces ni les dommages résultant des situations suivantes: usage négligent ou abusif du produit,<br />
courant ou tension d’alimentation inadaptés, utilisation en contradiction avec le mode d’emploi ou démontage,<br />
réparation ou modification par toute personne autre que le personnel d’un centre de réparation agréé.<br />
Nos obligations dans le cadre de cette garantie se limitent à la réparation et au remplacement, au choix du<br />
fabricant, du produit pendant la durée de la garantie, à condition que le produit soit renvoyé en port payé,<br />
accompagné de son numéro de modèle et de l’original du justificatif d’achat daté, à l’adresse suivante:<br />
Produits achetés aux États-Unis:<br />
Produits achetés au Canada:<br />
SUNBEAM APPLIANCE SERVICE STATION<br />
117 Central Industrial Row<br />
Purvis, MS 39475<br />
SUNBEAM APPLIANCE SERVICE STATION (KND)<br />
Please call 1-800-667-8623 or email us at<br />
consumeraffairs@consumer.com<br />
Ne pas renvoyer l’appareil au revendeur ou au fabricant; ceci aurait pour effet de retarder le traitement de la<br />
demande de garantie.<br />
Pour toute question relative à cette garantie ou pour obtenir l’adresse du centre de réparation agréé le plus<br />
proche, appeler sans frais le 1-800-597-5978 ou écrire à Sunbeam – Consumer Affairs, P.O. Box 948389,<br />
Maitland, FL 32794-8389.<br />
Au Canada, pour toute question relative à cette garantie ou pour obtenir l’adresse du centre de réparation agréé<br />
canadien le plus proche, appeler sans frais le 1-800-667-8623. Pour toutes questions relatives à cette garantie<br />
ou pour obtenir l’adresse du centre de réparation agréé le plus proche en-dehors des États-Unis et du Canada,<br />
consulter la carte de service de la garantie jointe à l’emballage du produit.<br />
AVERTISSEMENT<br />
La réparation ou le remplacement du produit suivant les termes de cette garantie constituent votre unique<br />
recours. SUNBEAM PRODUCTS, INC. NE POURRA ÊTRE TENUE RESPONSABLE DE DOMMAGES<br />
ACCESSOIRES OU INDIRECTS POUR RUPTURE D’UNE QUELCONQUE GARANTIE EXPRESSE OU<br />
<strong>IM</strong>PLICITE CONCERNANT CE PRODUIT OU UNE PARTIE DE CE PRODUIT. DANS LES L<strong>IM</strong>ITES DE<br />
LA RÉGLEMENTATION EN VIGUEUR, SUNBEAM PRODUCTS, INC. N’OFFRE AUCUNE GARANTIE<br />
<strong>IM</strong>PLICITE QUANT À L’ADÉQUATION DE CE PRODUIT OU D’UNE PARTIE DE CE PRODUIT À UN<br />
USAGE PARTICULIER OU À LA COMMERCIALISATION. Certains états ou provinces n’autorisant pas<br />
l’exclusion ou la limitation des dommages accessoires ou indirects ou autorisant uniquement des limitations<br />
sur la durée de validité d’une garantie implicite, les limitations et exclusions ci-dessus peuvent ne pas<br />
s’appliquer à votre situation. Cette garantie vous accorde des droits juridiques particuliers et il est possible que<br />
vous ayez d’autres droits, différents d’un état ou d’une province à l’autre.<br />
118
TABLE OF CONTENTS<br />
<strong>IM</strong>PORTANT SAFEGUARDS . . . . . . . . . . . . . . . . . . . . . . . . . . . . . . . . . . . 4<br />
A SYMPHONY OF INGREDIENTS . . . . . . . . . . . . . . . . . . . . . . . . . . . . . . . 5<br />
Before You Start . . . . . . . . . . . . . . . . . . . . . . . . . . . . . . . . . . . . . . . . . . . . . 6<br />
Basic Ingredients . . . . . . . . . . . . . . . . . . . . . . . . . . . . . . . . . . . . . . 7<br />
Yeast . . . . . . . . . . . . . . . . . . . . . . . . . . . . . . . . . . . . . . . . . . . . . . 7<br />
Sweeteners . . . . . . . . . . . . . . . . . . . . . . . . . . . . . . . . . . . . . . . . . 7<br />
Flour . . . . . . . . . . . . . . . . . . . . . . . . . . . . . . . . . . . . . . . . . . . . . . 7<br />
Liquids . . . . . . . . . . . . . . . . . . . . . . . . . . . . . . . . . . . . . . . . . . . . 8<br />
Salt . . . . . . . . . . . . . . . . . . . . . . . . . . . . . . . . . . . . . . . . . . . . . . . 8<br />
Fats . . . . . . . . . . . . . . . . . . . . . . . . . . . . . . . . . . . . . . . . . . . . . . . 8<br />
Eggs . . . . . . . . . . . . . . . . . . . . . . . . . . . . . . . . . . . . . . . . . . . . . . 8<br />
Important Measuring Tips . . . . . . . . . . . . . . . . . . . . . . . . . . . . . . . . 9<br />
GETTING TO KNOW YOUR BREAD MAKER<br />
The Control Panel . . . . . . . . . . . . . . . . . . . . . . . . . . . . . . . . . . . . . . 10<br />
Settings . . . . . . . . . . . . . . . . . . . . . . . . . . . . . . . . . . . . . . . . . . . . . 11<br />
Step-by-Step Directions On How to Use Your <strong>Bread</strong> Maker . . . . . . . 12<br />
Cycle Times . . . . . . . . . . . . . . . . . . . . . . . . . . . . . . . . . . . . . . . . . . 15<br />
Display Information. . . . . . . . . . . . . . . . . . . . . . . . . . . . . . . . . . . . . 15<br />
Tips for the Gourmet Baker . . . . . . . . . . . . . . . . . . . . . . . . . . . . . . . 16<br />
BREAD RECIPES<br />
White <strong>Bread</strong> . . . . . . . . . . . . . . . . . . . . . . . . . . . . . . . . . . . . . . . . . . 18<br />
Whole Wheat <strong>Bread</strong> . . . . . . . . . . . . . . . . . . . . . . . . . . . . . . . . . . . . 23<br />
Rye <strong>Bread</strong>. . . . . . . . . . . . . . . . . . . . . . . . . . . . . . . . . . . . . . . . . . . . 25<br />
Sweet <strong>Bread</strong> . . . . . . . . . . . . . . . . . . . . . . . . . . . . . . . . . . . . . . . . . . 28<br />
Gluten-Free <strong>Bread</strong> . . . . . . . . . . . . . . . . . . . . . . . . . . . . . . . . . . . . . . 29<br />
Quick <strong>Bread</strong> . . . . . . . . . . . . . . . . . . . . . . . . . . . . . . . . . . . . . . . . . . 32<br />
Dough Instructions . . . . . . . . . . . . . . . . . . . . . . . . . . . . . . . . . . . . . 36<br />
Variations for Shaping Dough . . . . . . . . . . . . . . . . . . . . . . . . . . . . . 37<br />
Pizza Recipes . . . . . . . . . . . . . . . . . . . . . . . . . . . . . . . . . . . . . . . . . 41<br />
Bagel Recipes . . . . . . . . . . . . . . . . . . . . . . . . . . . . . . . . . . . . . . . . . 43<br />
Pasta Recipes . . . . . . . . . . . . . . . . . . . . . . . . . . . . . . . . . . . . . . . . . 43<br />
Glazes and Spreads. . . . . . . . . . . . . . . . . . . . . . . . . . . . . . . . . . . . . 48<br />
Jams and Marmalades . . . . . . . . . . . . . . . . . . . . . . . . . . . . . . . . . . 51<br />
Adjusting Recipes . . . . . . . . . . . . . . . . . . . . . . . . . . . . . . . . . . . . . . 52<br />
TROUBLESHOOTING<br />
Troubleshooting the Machine. . . . . . . . . . . . . . . . . . . . . . . . . . . . . . 54<br />
Troubleshooting the Recipes . . . . . . . . . . . . . . . . . . . . . . . . . . . . . . 55<br />
Commonly Asked Questions . . . . . . . . . . . . . . . . . . . . . . . . . . . . . . 56<br />
How to Test Yeast . . . . . . . . . . . . . . . . . . . . . . . . . . . . . . . . . . . . . . 56<br />
Care and Cleaning Guidelines . . . . . . . . . . . . . . . . . . . . . . . . . . . . . 57<br />
Baking at High Altitudes . . . . . . . . . . . . . . . . . . . . . . . . . . . . . . . . . 58<br />
INDEX OF RECIPES. . . . . . . . . . . . . . . . . . . . . . . . . . . . . . . . . . . . . . . . 59<br />
3
<strong>IM</strong>PORTANT SAFEGUARDS<br />
When using electrical appliances, basic safety precautions should always<br />
be followed including the following:<br />
1.READ ALL INSTRUCTIONS, PRODUCT LABELS AND WARNINGS<br />
BEFORE USING THE BREAD MAKER.<br />
2. Do not touch hot surfaces. Always use oven mitts when handling hot<br />
materials, and allow metal parts to cool before cleaning. Allow the <strong>Bread</strong><br />
Maker to cool thoroughly before putting in or taking off parts.<br />
3. When unit is not in use and before cleaning, unplug the <strong>Bread</strong> Maker<br />
from wall outlet.<br />
4. To protect against risk of electrical shock, do not immerse the appliance<br />
or plugs in water or other liquids.<br />
5.Close supervision is always necessary when this or any appliance is used<br />
by or near children, or incapacitated persons.<br />
6. Do not allow anything to rest on the power cord. Do not plug in cord<br />
where people may walk or trip on it.<br />
7. Do not operate this or any appliance with a frayed or damaged cord,<br />
or plug, or after the appliance malfunctions or is dropped or has been<br />
damaged in any manner. Return appliance to the nearest authorized service<br />
facility for examination, repair or electrical or mechanical adjustment.<br />
8. Do not let the cord dangle over the edge of a table or counter or touch<br />
hot surfaces. Do not place on an unsteady or cloth-covered surface.<br />
9. Avoid contact with moving parts.<br />
10.Do not use attachments not recommended by the manufacturer;<br />
they may cause fire, electric shock or injury.<br />
11.Do not use outdoors or for commercial purposes.<br />
12.Do not place the appliance near a hot gas or electric burner,<br />
or in a heated oven.<br />
4
13.To unplug, press and hold the “STOP” button, grip plug and pull from<br />
wall outlet. Never pull on the cord.<br />
14.Use of extension cords: A short power supply cord has been provided to<br />
reduce the risk of injury resulting from becoming entangled in or tripping<br />
over a longer cord. Extension cords are available from hardware stores<br />
and may be used with care. The cord should be arranged so that it will not<br />
drape over the counter or tabletop where it can be pulled by children<br />
or tripped over accidentally. If the appliance is of the grounded type,<br />
the extension cord should be a grounding-type 3-wire cord.<br />
15.Electrical power: If electric circuit is overloaded with other appliances,<br />
your <strong>Bread</strong> Maker may not operate properly. The <strong>Bread</strong> Maker should be<br />
operated on a separate electrical circuit from other operating appliances.<br />
THIS UNIT IS INTENDED FOR HOUSEHOLD ONLY<br />
READ AND SAVE THESE INSTRUCTIONS<br />
A SYMPHONY OF INGREDIENTS<br />
Like the instruments in an orchestra, the ingredients in basic bread are<br />
very simple: flour, sugar, salt, a liquid (such as water or milk), possibly<br />
a fat (such as butter or oil), and yeast. And, like each musical instrument,<br />
each ingredient performs a specific job, and each lends a special flavor<br />
to the final masterpiece.<br />
That’s why it’s important to use the right ingredients in exactly the right<br />
proportions to ensure you get the most delicious results!<br />
5
BEFORE YOU START<br />
We have designed the Sunbeam ® Deluxe <strong>Bread</strong> and Dough Maker to be easy<br />
to use. But, like any kitchen appliance, it requires proper use and handling.<br />
BEFORE USE<br />
1. READ AND KEEP ALL INSTRUCTIONS.<br />
2. Make sure to remove all foreign matter from<br />
the baking pan.<br />
3. Plug the <strong>Bread</strong> Maker into a properly wired outlet.<br />
WHILE IN USE<br />
Keep the <strong>Bread</strong> Maker out of the reach of children – IT’S HOT!<br />
1. The temperature is very hot during operation. Be careful to keep your hands<br />
and face away from the unit.<br />
2. Do not open the lid or remove the bread pan during operation.<br />
3. Do not place anything on the <strong>Bread</strong> Maker lid. Do not cover vents.<br />
4. If any buttons are accidentally touched during operation, baking may stop.<br />
5. If a power outage occurs, you can restart the machine if it has not begun<br />
the bake cycle. If it’s at the bake cycle, then remove bread pan<br />
and place into an oven to finish cooking.<br />
WHERE TO USE<br />
1. Use only on a stable, heat-resistant surface.<br />
2. Do not use the <strong>Bread</strong> Maker where it will be exposed to direct sunlight<br />
or other heat sources, such as a stove or oven.<br />
3. Place the unit at least two inches away from walls. If you do not,<br />
walls may become discoloured.<br />
AFTER USE<br />
1. Use oven mitts or a pot holder when taking out the bread pan after baking.<br />
2. Make sure to disconnect the power by unplugging the unit.<br />
Allow the <strong>Bread</strong> Maker to cool down before storing.<br />
3. Read instructions before cleaning. Do not immerse the unit in water.<br />
This will cause electric shock and/or damage to the unit.<br />
6
YEAST<br />
BASIC INGREDIENTS<br />
Yeast is actually a microscopic plant – a living organism.<br />
Simply stated, without yeast, your bread will not rise.<br />
When moistened by a liquid, fed by sugar and carefully<br />
warmed, yeast produces gases which power the dough to rise.<br />
If the temperature is too cold, the yeast will not be activated; if it's too warm, it will die.<br />
If there is too much sugar, the yeast will die. The Deluxe <strong>Bread</strong> and Dough Maker takes<br />
care of this worry for you by maintaining just the right temperature in the baking chamber<br />
at all times. Our recipes have been tested with quick-rise yeast; however, bread machine<br />
yeast may also be used for larger volume. We suggest that you buy it in the bottle or can<br />
(check for freshness on the label) for ease of measuring; reseal after use and refrigerate.<br />
SWEETENERS<br />
Sweeteners feed the yeast, sweeten the bread, brown the crust<br />
and lend tenderness to the texture. Our recipes have been<br />
developed using granulated white sugar unless otherwise<br />
stated. White and brown sugar are interchangeable.<br />
FLOUR<br />
Use fresh, Canadian bleached or unbleached all-purpose flour<br />
which comes from hard wheat and contains a high proportion<br />
of protein or gluten or whole wheat flour. Our recipes have been<br />
tested with all-purpose flour and regular whole wheat flour.<br />
The newer, white and whole wheat bread flours may also be<br />
used, resulting in a slightly larger volume and coarser texture.<br />
DO NOT use cake flour or self-rising flour. Whole wheat flour<br />
is a very good source of vitamins and fibre due to the presence<br />
of wheat germ and bran and adds a nutty taste to the breads;<br />
however, it can also inhibit the rising, and as a result, whole wheat breads take longer<br />
to rise and may be heavier in texture and smaller in size. Whole wheat flour should be<br />
used within 3 months or it should be stored in airtight plastic containers in the freezer<br />
to extend its shelf life. Other flours and grains are used for flavour and texture such<br />
as rye, cornmeal, bran, cracked wheat or rolled oats (regular or old fashioned) etc.,<br />
and have smaller proportions of gluten so are used in smaller quantities<br />
or with addition of gluten flour.<br />
7
LIQUIDS<br />
Tepid or room temperature tap water that is<br />
neither hot nor cold is used for most recipes,<br />
however, other liquids such as milk, beer, juice<br />
and fruit purées can be used for flavour and<br />
variety. Beer can be leftover flat or with bubbles.<br />
Milk gives a more tender crumb than water as<br />
well as adding nutrients. Our recipes have been<br />
developed using skim milk powder (regular or<br />
instant) which is convenient to have on hand<br />
and can always be used on delay cycles, unlike<br />
fresh milk which could spoil on delay cycles.<br />
Fresh milk can be used in place of water, then omit the milk powder and do not use on<br />
delay cycle. For allergies to milk use water and omit the milk powder.<br />
SALT<br />
Salt strengthens the gluten and controls the yeast and makes<br />
the dough more elastic. However, it also inhibits rising,<br />
so use ordinary table salt and be very careful in measuring.<br />
For dietary reasons, it can be omitted but it will affect size<br />
and texture. In some cases you can use a vegetable seasoning<br />
substitute for flavour.<br />
FATS<br />
Many breads use fats to enhance the flavour and<br />
retain moisture; thus, it keeps longer. Since vegetable<br />
oil is more convenient to measure and may be<br />
required by some diets, you may substitute it for<br />
butter or margarine in any of the recipes.<br />
EGGS<br />
Eggs add richness and colour to breads,<br />
but due to health and safety precautions,<br />
do not use with the delay cycle.<br />
8
<strong>IM</strong>PORTANT MEASURING TIPS<br />
Because each ingredient plays such a specific role in<br />
relationship to the other, it is very important to measure<br />
them very carefully and exactly. It is a good idea to invest<br />
in a double set of whatever you are using so you will have<br />
one for dry and wet ingredients.<br />
FOR DRY INGREDIENTS:<br />
Use standard imperial OR metric dry measures or spoons<br />
(see photo). For flour, be sure to spoon the flour into<br />
the measuring cup and level off with a flat knife.<br />
For salt, sugar and yeast, dip a clean, dry measuring<br />
spoon into the ingredient and level off with a flat knife.<br />
NEVER measure these over the pan.<br />
FOR LIQUIDS:<br />
Fill a glass standard measure or spoons to the level<br />
indicated (see photos). Place the glass measure<br />
on a flat surface and kneel down to check the level<br />
at eye level. Add or subtract as necessary to make<br />
sure it is exact. Even a tablespoon too little or<br />
too much will make a difference.<br />
FOR FATS:<br />
Fill a standard measure to the level required<br />
and level off with a flat knife.<br />
9
GETTING TO KNOW YOUR DELUXE BREAD AND DOUGH MAKER<br />
The best way to get there is to use this map. Soon you’ll know the electronic bread-baking<br />
territory the way you know your own kitchen. In the meantime, here are some<br />
easy-to-follow directions to get you started.<br />
THE CONTROL PANEL<br />
<strong>IM</strong>PORTANT: When using the touch pad controls,<br />
be sure to press the pad until you<br />
hear a beep.<br />
1. Display Window. The display will indicate<br />
the cycle selected (Number from 1 to 8) and<br />
the crust colour (L, P or H) until the Start<br />
button is pressed. Then the display shows<br />
minute-by-minute countdown during the cycle.<br />
The display will show “0:00” when cycle<br />
is complete.<br />
2. Timer. Use the Timer to delay baking.<br />
The timer can be set up to 13 hours in advance.<br />
The panel has forward and reverse arrows.<br />
Arrows move time forward or backward in<br />
10-minute increments. Holding the buttons<br />
down continuously will advance or decrease<br />
time more quickly.<br />
3. Crust Colour. Choose from light (L),<br />
medium (P) or dark (H) crust settings; select “L”<br />
for the lowest setting to yield “light” crust; “P”<br />
for the default program setting to yield “medium”<br />
crust; and “H” for the highest setting to yield<br />
“dark” crust. Unit will automatically bake on the<br />
medium setting unless another is selected.<br />
L – Light<br />
P – Medium<br />
H – Dark<br />
Basic<br />
Rapid<br />
Sweet<br />
French<br />
Quick<br />
Whole Wheat<br />
Dough/Pasta<br />
Bake<br />
Delay Timer<br />
Start<br />
Stop<br />
Crust<br />
Color<br />
Select<br />
1<br />
5<br />
2<br />
4<br />
3<br />
4. Select. Press the Select button to choose the setting you desire.<br />
Each time you press the button you will hear a “beep” and the setting<br />
will advance in the following sequence;<br />
1 BASIC: 3:00; 2 RAPID: 2:20; 3 SWEET: 2:50; 4 FRENCH: 3:50; 5 QUICK BREAD: 1:50;<br />
6 WHOLE WHEAT: 3:40; 7 DOUGH/PASTA: 1:30; 8 BAKE 1:00;<br />
Holding the button down continuously will advance the settings more quickly.<br />
10
5. Start/Stop. Press the “START/STOP” button to start operation or begin the Timer<br />
countdown for delayed completion. (A signal tone will sound to indicate that the<br />
breadmaking cycle has begun). To stop the operation or cancel a timer setting,<br />
press and hold 2 – 3 seconds until you hear a “Beep.” The unit will return to its<br />
ready condition showing the time for the cycle you had selected.<br />
NOTE: Do not press “STOP” when you are just checking the progress of your bread<br />
as this will cancel the cycle.<br />
SETTINGS<br />
Below are brief descriptions of the many different types of bread, doughs, pizzas, pastas,<br />
jellies and jams you can make with your new Sunbeam ® Deluxe <strong>Bread</strong> and Dough Maker.<br />
• Basic (1)<br />
This setting is probably used more often than any other because it gives the best<br />
results with almost any recipe (standard white bread, raisin bread and more).<br />
Total cycle time is 3 hours.<br />
• Rapid (2)<br />
The Rapid setting will make bread faster than other cycles. We suggest that you use the<br />
Classic White <strong>Bread</strong> recipe and increase the water by 1 to 2 Tbsp. This setting reduces<br />
the second knead and final rise times. Total cycle time is 2 hours and 20 minutes.<br />
• Sweet (3)<br />
This setting is made for breads containing high amounts of sugar, fats or protein<br />
(cheese, eggs, etc.), all of which increase browning. It produces a finished loaf<br />
in 2 hours and 50 minutes.<br />
• French (4)<br />
This setting is used for the preparation of French white bread. Due to the longer<br />
kneading, rising and baking times, the bread has a heartier crust. This entire cycle<br />
needs 3 hours and 50 minutes.<br />
• Quick <strong>Bread</strong> (5)<br />
Recipes for this setting will use a quick-acting leavening agent, usually baking powder<br />
or baking soda, rather than yeast. Total cycle time is 1 hour and 50 minutes.<br />
• Whole Wheat (6)<br />
This setting offers longer rise times to accommodate the slower rising action of bread<br />
containing more than 50% whole wheat flour. Total cycle time is 3 hours and 40 minutes.<br />
• Dough/Pasta (7)<br />
This setting is used to prepare dough for rolls, specialty breads, pizza, pasta, etc.,<br />
which are shaped by hand, allowed to rise for a final time and then baked or cooked<br />
conventionally. Total cycle time is 1 hour and 30 minutes. When cycle is complete,<br />
remove the dough and proceed with hand shaping, rolling, etc.<br />
• Bake (8)<br />
This setting is for baking doughs or making jams or jellies. Total cycle time is 1 hour.<br />
11
STEP-BY-STEP DIRECTIONS ON HOW TO USE YOU BREAD MAKER<br />
1. OPEN THE LID AND REMOVE THE BAKING PAN by twisting the pan<br />
counter-clockwise and pulling it out. It is important to remove the Baking Pan<br />
from the unit before putting the ingredients into the pan to avoid accidentally<br />
spilling ingredients into the inner case.<br />
Twist Pan<br />
Counter-Clockwise<br />
While Lifting Up<br />
2. ATTACH THE KNEADING BLADE onto the shaft inside the Baking Pan<br />
by lining up the flat side of the blade with the flat side on the shaft.<br />
Make sure the Kneading Blade is placed securely on the shaft.<br />
3. MEASURE ALL INGREDIENTS carefully and accurately. Inaccurate measurements,<br />
even if only slightly off, can make a difference in results. Add ingredients into the bread<br />
pan in the order they are listed. Yeast is always added last and must not come in contact<br />
with any liquid. (Before adding yeast, remember to dig a small hole in the flour so that the<br />
yeast doesn’t prematurely come into contact with the liquids or salt. This is especially<br />
important when you are using the Delay Bake Timer.)<br />
4. WIPE WATER AND OTHER SPILLS from the outside of the pan;<br />
then rotate the pan counter-clockwise and reinsert the bread pan at an angle<br />
with the right end of the handle in the upper right hand corner of the unit and the<br />
left end of the handle in the lower left hand corner; turn clockwise, applying pressure<br />
to each corner of the pan to make sure it is snapped tightly into the retaining brackets.<br />
5. CLOSE THE LID AND PLUG IN THE BREAD MAKER. You will hear a “beep”<br />
and the LED display window will show “1P” for “Basic” setting, “Medium” crust.<br />
6. CHOOSE YOUR PROGRAM. Select the appropriate setting for your recipe<br />
by pressing the “SELECT” button on the control panel. Each time “SELECT” is pressed<br />
the red LED light will scroll down to the next setting.<br />
7. SELECT CRUST COLOUR. Your bread maker will automatically produce<br />
a “medium” crust colour (“P”= the default program) unless another is chosen;<br />
select crust colour by pressing the “Crust Colour” button; “L” = low setting (light crust);<br />
and “H” = high setting (dark crust).<br />
12
8. PRESS THE “START/STOP” BUTTON firmly once you have selected your bread<br />
type and crust colour. A signal tone will sound to indicate that you have begun!<br />
The baking time in hours and minutes will appear in the display. It will count down the<br />
remaining bake time in one-minute increments until the bread is done. This bread maker<br />
has a convenient Viewing Window so that you may watch the progress of the bread as it<br />
is mixed, kneaded and baked. DO NOT OPEN THE LID DURING THE BAKING CYCLES.<br />
NOTE: Once the “START/STOP” button is pressed, the selected function(s) cannot be altered.<br />
To make any changes at this point, the unit must be stopped, reset and restarted.<br />
To stop, press the “START/STOP” button and hold until signal sounds and screen<br />
reverts to initial display setting.<br />
9. WHEN THE BREAD IS DONE. When the baking time is completed,<br />
a signal tone will sound and the display window will show “0:00” (the “Colon” in<br />
the time display will continue flashing). The “Keep Warm” setting will automatically<br />
continue to keep the bread warm for one hour after the cycle ends (except when<br />
using the dough setting). For best results, remove the bread as soon as possible<br />
to keep the crust from getting soggy. Remove the pan using potholders and take<br />
the bread out of the pan by turning the pan upside down and shaking it. If you<br />
have difficulty removing the bread from the pan, slide a flat rubber or plastic<br />
spatula along the sides of the pan to loosen the loaf. If the kneading paddle<br />
remains in the bottom of the loaf, use the end of a plastic utensil to remove it.<br />
Once removed from the <strong>Bread</strong> Pan, it’s best to let your bread cool 15 minutes<br />
before slicing. Enjoy!<br />
10. KEEP WARM CYCLE automatically begins when the bake time is done.<br />
At the end of the 60 minutes, the heater will turn off. NOTE: You may remove the<br />
Baking Pan at any time during the “Keep Warm” cycle. To turn off the “Keep Warm”<br />
feature, simply press the “STOP” button and hold it for 2 – 3 seconds.<br />
CAUTION: Steam will escape when the cover is opened. Be sure to use pot<br />
holders or oven mitts to avoid steam burns.<br />
NOTE: Your <strong>Bread</strong> Maker includes an auto cycle recall feature. When a cycle<br />
is completed and the “START/STOP” button is pressed, the unit will automatically<br />
revert to the last setting selected.<br />
NOTE: If you wish to make another loaf of bread right away, allow the <strong>Bread</strong> Maker<br />
to cool down for 10 to 15 minutes with the cover open and the pan removed. If you<br />
attempt to use the unit too soon, it will signal and the display will read “H:HH”.<br />
Press “START/STOP” until the screen reverts to the setting display and wait until<br />
the unit has cooled.<br />
13
11. USING THE DELAY T<strong>IM</strong>ER – You can add the ingredients into your<br />
bread pan and set the timer to delay the baking. Baking can be delayed up to 13 hours.<br />
NOTE: Do not use the timer if your recipe includes fresh eggs, milk or other<br />
ingredients that may spoil.<br />
• Follow Steps 1 – 7 on the previous page to make sure to measure ingredients<br />
into the bread pan in the sequence specified in the recipe. Take special care<br />
not to let the yeast contact the liquid ingredients or the salt.<br />
• Then calculate the number of hours and minutes until you want fresh baked bread.<br />
EXAMPLE: If it is 8:00 and you want the bread to finish baking at 2:00,<br />
the timer should be set at 6 hours.<br />
• Press the timer button once. The cycle length will appear in the display window.<br />
BAKING CYCLE<br />
CYCLE LENGTH<br />
1 Basic 3:00 hours<br />
2 Rapid 2:20 hours<br />
3 Sweet 2:50 hours<br />
4 French 3:50 hours<br />
BAKING CYCLE<br />
CYCLE LENGTH<br />
5 Quick <strong>Bread</strong> 1:50 hours<br />
6 Whole Wheat 3:40 hours<br />
7 Dough/Pasta 1:30 hours<br />
8 Bake 1:00 hour<br />
• Use the Timer button to advance the time in 10 minute increments. (Use Timer<br />
button to subtract time, if necessary). EXAMPLE: You have chosen the Sweet Setting and<br />
2:50 appears in the display window. If you wish your bread to begin cooking in 6 hours,<br />
you will press the Timer button until 6:00 appears in the display window.<br />
• Press “START/STOP” to begin the Timer. The colon (:) in the time display begins to flash,<br />
indicating that the Timer is engaged.<br />
• When unit beeps three times and 0:00 appears in the display window, press “START/STOP”<br />
to cancel the “KEEP-WARM” cycle and remove the bread.<br />
• If you make an error while setting the timer and wish to start over, press “START/STOP”<br />
and hold until a beep sounds and the screen reverses to the original setting.<br />
Timer is canceled and you may begin again.<br />
NOTE: If you forget to press “START/STOP”, the Timer will not function.<br />
• When using the Timer Cycle for more than a couple of hours during times of high humidity<br />
or hot weather, reduce the liquid by one or two Tbsp. to reduce the possibility of overrising.<br />
Salt may be increased by 1/8 to 1/4 tsp. to keep the dough from rising too quickly<br />
and falling. Sugar can also be reduced by up to half the amount called for in the recipe.<br />
12. REMOVABLE LID – Your new <strong>Bread</strong> Maker is equipped with a removable lid<br />
for easy cleaning and storage. To remove the lid, simply raise the lid just short of the<br />
vertical position (approx. 70° angle); while holding the base of the unit with one hand,<br />
gently hold the front edge of the lid and pull it to the right side so as to pop the left hinge<br />
pin out (you will hear a loud “pop” sound when the hinge pops out). Then simply slide<br />
the lid to the left to remove the right hinge pin.<br />
14
CYCLE T<strong>IM</strong>ES<br />
QUICK WHOLE<br />
BASIC RAPID SWEET FRENCH BREAD WHEAT DOUGH BAKE<br />
(MIN:SEC) (MIN:SEC) (MIN:SEC) (MIN:SEC) (MIN:SEC) (MIN:SEC) (MIN:SEC) (MIN:SEC)<br />
PR<strong>IM</strong>ARY KNEAD 10:00 10:00 10:00 18:00 14:00 10:00 20:00 ––<br />
PR<strong>IM</strong>ARY RISE 20:00 5:00 5:00 40:00 –– 25:00 –– ––<br />
SECONDARY KNEAD 15:00 15:00 20:00 22:00 –– 20:00 –– ––<br />
SECONDARY RISE 20:00 –– 30:00 20:00 –– 30:00 20:00 ––<br />
PUNCH DOWN 00:30 –– 00:30 00:30 –– 00:30 00:30 ––<br />
FINAL RISE 55:00 55:00 55:00 65:00 41:00 70:00 50:00 ––<br />
BAKE 60:00 55:00 50:00 65:00 55:00 55:00 –– 60:00<br />
T<strong>IM</strong>E TO FRUIT/NUT SIGNAL 40:00 25:00 –– 75:00 –– 50:00 –– ––<br />
TOTAL CYCLE T<strong>IM</strong>E 03:00 02:20 02:50 03:50 01:50 03:40 01:30 01:00<br />
NOTES: The audible signal indicating that it is time to add raisins or other dried fruits applies<br />
to the following settings only: Basic, Whole Wheat, French and Rapid.<br />
DISPLAY INFORMATION<br />
Always use the <strong>Bread</strong> Maker in a room that is free of drafts and is at least 55°F/13°C,<br />
but not warmer than 90°F/32°C. Do not use <strong>Bread</strong> Maker in an unheated garage,<br />
outdoors, near a heat vent or in direct sunlight.<br />
Generally, the display window will tell you what is happening with your <strong>Bread</strong> Maker.<br />
Here are some points to consider:<br />
DISPLAY MESSAGE PROBLEM HOW TO FIX<br />
0:00 Colon Flashing Cycle is complete. Press “START/STOP” button<br />
Keep-Warm is engaged. to cancel.<br />
H:HH Signal Beeping Unit is too hot to begin Press “START/STOP” button to cancel.<br />
new breadmaking operation. Open cover, remove bread pan and<br />
allow unit to cool with cover open.<br />
L:LL Signal Beeping Room Temperature is Press “START/STOP” button to cancel.<br />
too low. (Below 59°F/15°C) Place <strong>Bread</strong> Maker in a warm room<br />
and allow to warm up.<br />
Display Blank Power has been interrupted. Unplug unit and plug back into outlet. Unit<br />
must be reset. (See P. 6 “While in Use” #5)<br />
E:EE Signal Beeping Room temperature is too high. Press “START/STOP” button to cancel.<br />
(Above 86°F/30°C) Place <strong>Bread</strong> Maker in a cooler location<br />
and allow it to adjust before using.<br />
15
REMOVABLE LID<br />
Your new <strong>Bread</strong> Maker is equipped with a removable lid for easy cleaning and storage.<br />
To remove the lid, simply raise the lid just short of the vertical position (approx. 70° angle);<br />
while holding the base of the unit with one hand, gently hold the front edge of the lid<br />
and pull it to the right side so as to pop the left hinge pin out (you will hear a loud “pop”<br />
sound when the hinge pops out). Then simply slide the lid to the left to remove the<br />
right hinge pin.<br />
PROBLEM<br />
THE UNIT DOES NOT OPERATE AFTER<br />
PUSHING THE “START/STOP” BUTTON<br />
THE BREAD ROSE TOO HIGH<br />
THE BREAD DID NOT RISE HIGH ENOUGH<br />
CHECK THIS:<br />
• Unplugged<br />
• Setting was not selected<br />
• Did not push “START/STOP” button<br />
to clear display after last cycle<br />
• Too much yeast or moisture<br />
• Too much flour – not enough yeast<br />
For Additional Troubleshooting Tips, See Pages 54 - 55.<br />
TIPS FOR THE<br />
GOURMET BAKER<br />
LAST THINGS LAST<br />
You’ll see this tip in several places in this book, but it bears repeating: Always put the<br />
liquids in first, the dry ingredients in next, and the yeast last (fruits and nuts are added<br />
later, after the machine has completed the first knead). Dig a shallow hole in the dry<br />
ingredients and place the yeast in the hole so that there is absolutely no contact between<br />
the yeast and any liquids or salt. This is especially important when you’re using the<br />
Delay Bake option. You don’t want the yeast to be activated too soon in the process!<br />
PLACEMENT COUNTS!<br />
Place dried fruits, vegetables, and dried spices away from the liquid ingredients<br />
in the bread pan. If they soak up water, they can undermine the bread’s chemistry.<br />
FRESHNESS FIRST<br />
Avoid using perishable ingredients – milk, yogurt, eggs or cheese – with the<br />
Delay Bake function.<br />
JUST WAIT FIFTEEN<br />
For best results, wait fifteen minutes before slicing; the bread needs time to cool.<br />
DEEP FREEZE<br />
To freeze fresh bread, let it cool completely and double-bag in plastic.<br />
16
®<br />
<strong>Bread</strong> Recipes<br />
17
WHITE BREAD RECIPES<br />
DELUXE WHITE BREAD<br />
(BASIC/RAPID SETTING, T<strong>IM</strong>ER OPTIONAL)<br />
1-1/2 cups Water<br />
2 Tbsp. Butter or margarine<br />
2 tsp. Salt<br />
4 cups All-purpose flour<br />
2 Tbsp. Skim milk powder<br />
2 tsp. Sugar<br />
2 tsp. Quick-rise yeast<br />
Measure all ingredients into bread pan in order listed. Select desired setting<br />
(Basic or Rapid). Select crust setting if other than medium. Press the Start/Stop<br />
button to begin. A Fruit/Nut signal will sound 25 - 40 minutes into cycle.<br />
<strong>Bread</strong> is finished when the unit signals and the display reads 0:00.<br />
Press Start/Stop button and remove.<br />
NOTE: If button is not pressed right away the unit will keep bread warm<br />
for 60:00 minutes.<br />
CLASSIC WHITE BREAD<br />
(BASIC/RAPID SETTING, T<strong>IM</strong>ER OPTIONAL)<br />
1 cup + 2 Tbsp. Water<br />
1-1/2 Tbsp. Butter or margarine<br />
1 tsp. Salt<br />
3-1/4 cups All-purpose flour<br />
1 Tbsp. Skim milk powder<br />
1 Tbsp. Sugar<br />
1-1/2 tsp. Quick-rise yeast<br />
Measure all ingredients into bread pan in order listed. Select desired setting<br />
(Basic or Rapid). Select crust setting if other than medium. Press the Start/Stop<br />
button to begin. A Fruit/Nut signal will sound 25 - 40 minutes into cycle.<br />
<strong>Bread</strong> is finished when the unit signals and the display reads 0:00.<br />
Press Start/Stop button and remove.<br />
NOTE: If button is not pressed right away the unit will keep bread warm<br />
for 60:00 minutes.<br />
18
COUNTRY WHITE BREAD<br />
(BASIC/RAPID SETTING, NOT FOR T<strong>IM</strong>ER)<br />
1-1/4 cups Water<br />
1-1/2 tsp. Salt<br />
1 Large egg<br />
1-1/2 Tbsp. Butter or margarine<br />
4 cups All-purpose flour<br />
1 Tbsp. Sugar<br />
1 tsp. Quick-rise yeast<br />
Measure all ingredients into bread pan in order listed. Select desired setting<br />
(Basic or Rapid). Select crust setting if other than medium. Press the Start/Stop<br />
button to begin. A Fruit/Nut signal will sound 25 – 40 minutes into cycle.<br />
<strong>Bread</strong> is finished when the unit signals and the display reads 0:00.<br />
Press Start/Stop button and remove.<br />
NOTE: If button is not pressed right away the unit will keep bread warm<br />
for 60:00 minutes.<br />
HEARTY GARLIC BREAD<br />
(BASIC/RAPID SETTING, T<strong>IM</strong>ER OPTIONAL)<br />
1-1/2 cups + 1 Tbsp. Water<br />
3 Tbsp. Butter or margarine<br />
1-1/2 tsp. Salt<br />
3 cups All-purpose flour<br />
1 cup Instant potato flakes<br />
1-1/2 Tbsp. Sugar<br />
2 tsp. Dried dillweed or chives (optional)<br />
1 – 2 Crushed garlic cloves<br />
1-1/2 tsp. Quick-rise yeast<br />
Measure all ingredients into bread pan in order listed. Select desired setting<br />
(Basic or Rapid). Select crust setting if other than medium. Press the Start/Stop<br />
button to begin. A Fruit/Nut signal will sound 25 – 40 minutes into cycle.<br />
<strong>Bread</strong> is finished when the unit signals and the display reads 0:00.<br />
Press Start/Stop button and remove.<br />
NOTE: If button is not pressed right away the unit will keep bread warm<br />
for 60:00 minutes.<br />
VARIATION: Chunky Cheese; At the Fruit/Nut signal add 3/4 cup cold cubed<br />
Cheddar cheese.<br />
19
HERB BREAD<br />
(BASIC/RAPID SETTING, T<strong>IM</strong>ER OPTIONAL)<br />
1-1/4 cups Water<br />
1-1/2 Tbsp. Butter or margarine<br />
1-1/2 tsp. Salt<br />
3-1/2 cups All-purpose flour<br />
2 Tbsp. Skim milk powder<br />
1-1/2 tsp. Sugar<br />
1/2 tsp. Italian seasoning<br />
1/2 tsp. Dried parsley (optional)<br />
1-1/2 tsp. Caraway seeds (optional)<br />
1-1/2 tsp. Quick-rise yeast<br />
Measure all ingredients into bread pan in order listed. Select desired setting<br />
(Basic or Rapid). Select crust setting if other than medium. Press the Start/Stop<br />
button to begin. A Fruit/Nut signal will sound 25 – 40 minutes into cycle.<br />
<strong>Bread</strong> is finished when the unit signals and the display reads 0:00.<br />
Press Start/Stop button and remove.<br />
NOTE: If button is not pressed right away the unit will keep bread warm<br />
for 60:00 minutes.<br />
ITALIAN BREAD<br />
(FRENCH SETTING, T<strong>IM</strong>ER OPTIONAL)<br />
1 cup Water<br />
1 tsp. Salt<br />
1-1/2 Tbsp. Vegetable oil<br />
3 cups All-purpose flour<br />
1/4 cup Grated Parmesan cheese<br />
2 tsp. Sugar<br />
2 tsp. Dried onion flakes<br />
1 Tbsp. Dried parsley (optional)<br />
1 tsp. Dried basil or Italian seasoning<br />
1/2 tsp. Garlic powder<br />
1 tsp. Quick-rise yeast<br />
Measure all ingredients into bread pan in order listed. Select French setting.<br />
Select crust setting if other than medium. Press the Start/Stop button to begin.<br />
A Fruit/Nut signal will sound 25–40minutes into cycle. <strong>Bread</strong> is finished when<br />
the unit signals and the display reads 0:00. Press Start/Stop button and remove.<br />
NOTE: If button is not pressed right away the unit will keep bread warm<br />
for 60:00 minutes.<br />
20
FRENCH BREAD<br />
(FRENCH SETTING, T<strong>IM</strong>ER OPTIONAL)<br />
1-1/3 cups Water<br />
1-1/2 tsp. Salt<br />
1-1/2 Tbsp. Vegetable oil<br />
4 cups All-purpose flour<br />
1 Tbsp. Sugar<br />
1 tsp. Quick-rise yeast<br />
Measure all ingredients into bread pan in order listed. Select French setting.<br />
Select crust setting if other than medium. Press the Start/Stop button to begin.<br />
A Fruit/Nut signal will sound 25 – 40 minutes into cycle. <strong>Bread</strong> is finished when<br />
the unit signals and the display reads 0:00. Press Start/Stop button and remove.<br />
NOTE: If button is not pressed right away the unit will keep bread warm<br />
for 60:00 minutes.<br />
YOGURT BREAD<br />
(BASIC SETTING, NOT FOR T<strong>IM</strong>ER)<br />
1/2 cup + 3 Tbsp. Water<br />
1/2 cup Yogurt<br />
1-1/2 Tbsp. Butter or margarine<br />
1-1/2 tsp. Salt<br />
3 cups All-purpose flour<br />
1-1/2 Tbsp. Skim milk powder<br />
3 Tbsp. Sesame seeds (optional)<br />
1-1/2 tsp. Quick-rise yeast<br />
Measure all ingredients into bread pan in order listed. Select Basic setting.<br />
Select crust setting if other than medium. Press the Start/Stop button to begin.<br />
A Fruit/Nut signal will sound 25 - 40 minutes into cycle. <strong>Bread</strong> is finished when<br />
the unit signals and the display reads 0:00. Press Start/Stop button and remove.<br />
NOTE: If button is not pressed right away the unit will keep bread warm<br />
for 60:00 minutes.<br />
21
ONION AND CHEESE BREAD<br />
(BASIC SETTING, NOT FOR T<strong>IM</strong>ER)<br />
1-1/3 cups Water<br />
1 tsp. Salt<br />
4 cups All-purpose flour<br />
1/4 cup Grated Parmesan cheese<br />
2 tsp. Sugar<br />
1 Tbsp. Dried onion flakes<br />
2 tsp. Quick-rise yeast<br />
Measure all ingredients into bread pan in order listed. Select Basic setting.<br />
Select crust setting if other than medium. Press the Start/Stop button to begin.<br />
A Fruit/Nut signal will sound 25 – 40 minutes into cycle. <strong>Bread</strong> is finished when<br />
the unit signals and the display reads 0:00. Press Start/Stop button and remove.<br />
NOTE: If button is not pressed right away the unit will keep bread warm<br />
for 60:00 minutes.<br />
COTTAGE CHEESE AND CHIVE BREAD<br />
(SWEET SETTING, NOT FOR T<strong>IM</strong>ER)<br />
1/2 cup Water<br />
1 cup Cottage cheese<br />
1 Large egg<br />
1-1/2 tsp. Salt<br />
2 Tbsp. Butter or margarine<br />
3-3/4 cups All-purpose flour<br />
2-1/2 Tbsp. Skim milk powder<br />
3 Tbsp. Dried chives<br />
1-1/4 tsp. Quick-rise yeast<br />
Measure all ingredients into bread pan in order listed. Select Sweet setting.<br />
Select crust setting if other than medium. Press the Start/Stop button to begin.<br />
A Fruit/Nut signal will sound 25 - 40 minutes into cycle. <strong>Bread</strong> is finished when<br />
the unit signals and the display reads 0:00. Press Start/Stop button and remove.<br />
NOTE: If button is not pressed right away the unit will keep bread warm<br />
for 60:00 minutes.<br />
22
WHOLE WHEAT AND GRAIN BREADS<br />
50% WHOLE WHEAT BREAD<br />
(WHOLE WHEAT SETTING, T<strong>IM</strong>ER OPTIONAL)<br />
1-1/2 cups Water<br />
2 Tbsp. Butter or margarine<br />
2 tsp. Salt<br />
2 cups Whole wheat flour<br />
2 cups All-purpose flour<br />
3 Tbsp. Skim milk powder<br />
1/3 cup Brown sugar<br />
2 tsp. Quick-rise yeast<br />
Measure all ingredients into bread pan in order listed. Select Whole Wheat setting.<br />
Select crust setting if other than medium. Press the Start/Stop button to begin.<br />
A Fruit/Nut signal will sound 40 minutes into cycle. <strong>Bread</strong> is finished when<br />
the unit signals and the display reads 0:00. Press Start/Stop button and remove.<br />
NOTE: If button is not pressed right away the unit will keep bread warm<br />
for 60:00 minutes.<br />
100% WHOLE WHEAT BREAD<br />
(WHOLE WHEAT SETTING, T<strong>IM</strong>ER OPTIONAL)<br />
1-1/2 cups Water<br />
2 Tbsp. Butter or margarine<br />
2 tsp. Salt<br />
4 cups Whole wheat flour<br />
4 tsp. Gluten flour<br />
1/3 cup Brown sugar<br />
3 Tbsp. Skim milk powder<br />
2 tsp. Quick-rise yeast<br />
Measure all ingredients into bread pan in order listed. Select Whole Wheat setting.<br />
Select crust setting if other than medium. Press the Start/Stop button to begin.<br />
A Fruit/Nut signal will sound 40 minutes into cycle. <strong>Bread</strong> is finished when<br />
the unit signals and the display reads 0:00. Press Start/Stop button and remove.<br />
NOTE: If button is not pressed right away the unit will keep bread warm<br />
for 60:00 minutes.<br />
23
BRAN AND SUNFLOWER SEED BREAD<br />
(BASIC/RAPID SETTING, T<strong>IM</strong>ER OPTIONAL)<br />
1-1/4 cups Water<br />
1-1/2 Tbsp. Butter or margarine<br />
1-1/2 tsp. Salt<br />
2-1/2 cups All-purpose flour<br />
1/4 cup Whole wheat flour<br />
1/4 cup Natural bran<br />
2 Tbsp. Sugar<br />
1 Tbsp. Skim milk powder<br />
1/1-2 tsp. Quick-rise yeast<br />
1/4 cup Sunflower seeds<br />
Measure all ingredients except sunflower seeds into bread pan in order listed.<br />
Select desired setting (Basic or Rapid). Select crust setting if other than medium.<br />
Press the Start/Stop button to begin. At Fruit/Nut signal, 25–40minutes into<br />
cycle, add sunflower seeds. <strong>Bread</strong> is finished when the unit signals and the<br />
display reads 0:00. Press Start/Stop button and remove.<br />
NOTE: If button is not pressed right away the unit will keep bread warm<br />
for 60:00 minutes.<br />
MULTI-GRAIN BREAD<br />
(WHOLE WHEAT SETTING, T<strong>IM</strong>ER OPTIONAL)<br />
1 cup + 2 Tbsp. Water<br />
1-1/2 Tbsp. Butter or margarine<br />
1-1/2 tsp. Salt<br />
3 Tbsp. Honey<br />
1-1/2 cups All-purpose flour<br />
1-1/2 cups Whole wheat flour<br />
3/4 cup 7 – 9 Grain cereal*<br />
1-1/2 tsp. Quick-rise yeast<br />
Measure all ingredients into bread pan in order listed. Select Whole Wheat setting.<br />
Select crust setting if other than medium. Press the Start/Stop button to begin.<br />
A Fruit/Nut signal will sound 40 minutes into cycle. <strong>Bread</strong> is finished when<br />
the unit signals and the display reads 0:00. Press Start/Stop button and remove.<br />
NOTE: If button is not pressed right away the unit will keep bread warm<br />
for 60:00 minutes.<br />
*This is a mixture of cracked wheat, cracked rye, barley grits, millet,<br />
cornmeal, soy grits, flax seeds and triacle or use Red River ® cereal.<br />
VARIATION: Substitute 1/4 cup brown sugar for honey<br />
and add 2 Tbsp. additional water.<br />
24
CRACKED WHEAT BREAD<br />
(WHOLE WHEAT SETTING, T<strong>IM</strong>ER OPTIONAL)<br />
1-1/4 cups Water<br />
1-1/2 Tbsp. Vegetable oil<br />
1-1/2 tsp. Salt<br />
1-1/2 cups All-purpose flour<br />
1-1/2 cups Whole wheat flour<br />
3/4 cup Cracked wheat<br />
1-1/2 Tbsp. Sugar<br />
1-1/2 tsp. Quick-rise yeast<br />
Measure all ingredients into bread pan in order listed. Select Whole Wheat setting.<br />
Select crust setting if other than medium. Press the Start/Stop button to begin.<br />
A Fruit/Nut signal will sound 40 minutes into cycle. <strong>Bread</strong> is finished when<br />
the unit signals and the display reads 0:00. Press Start/Stop button and remove.<br />
NOTE: If button is not pressed right away the unit will keep bread warm<br />
for 60:00 minutes.<br />
RYE BREADS<br />
PUMPERNICKEL BREAD<br />
(WHOLE WHEAT SETTING, T<strong>IM</strong>ER OPTIONAL)<br />
1 cup Water<br />
1/4 cup Molasses<br />
2 Tbsp. Butter or margarine<br />
1 tsp. Salt<br />
1 tsp. Instant coffee<br />
1-1/2 Tbsp. Cocoa powder<br />
1-1/2 cups All-purpose flour<br />
3/4 cup Whole wheat flour<br />
3/4 cup Rye flour<br />
1 Tbsp. Caraway seeds (optional)<br />
1-1/2 tsp. Quick-rise yeast<br />
Measure all ingredients into bread pan in order listed. Select Whole Wheat setting.<br />
Select crust setting if other than medium. Press the Start/Stop button to begin.<br />
A Fruit/Nut signal will sound 40 minutes into cycle. <strong>Bread</strong> is finished when<br />
the unit signals and the display reads 0:00. Press Start/Stop button and remove.<br />
NOTE: If button is not pressed right away the unit will keep bread warm<br />
for 60:00 minutes.<br />
25
LIGHT RYE BREAD<br />
(BASIC SETTING, T<strong>IM</strong>ER OPTIONAL)<br />
1-1/4 cups + 2 Tbsp. Water<br />
1-1/2 tsp. Salt<br />
1-1/2 Tbsp. Vegetable oil<br />
2 Tbsp. Packed brown sugar<br />
3 cups All-purpose flour<br />
1 cup Rye flour<br />
1 tsp. Quick-rise yeast<br />
Measure all ingredients into bread pan in order listed. Select Basic setting.<br />
Select crust setting if other than medium. Press the Start/Stop button to begin.<br />
A Fruit/Nut signal will sound 40 minutes into cycle. <strong>Bread</strong> is finished when<br />
the unit signals and the display reads 0:00. Press Start/Stop button and remove.<br />
NOTE: If button is not pressed right away the unit will keep bread warm<br />
for 60:00 minutes.<br />
DELI RYE BREAD<br />
(BASIC OR WHOLE WHEAT SETTING, NOT FOR T<strong>IM</strong>ER)<br />
1 cup Buttermilk<br />
2 Tbsp. Water<br />
1-1/4 tsp. Salt<br />
1 Large egg<br />
1 Tbsp. Vegetable oil<br />
2 Tbsp. Molasses<br />
2 cups All-purpose flour<br />
1-1/2 cups Rye flour<br />
1-1/2 tsp. Gluten flour<br />
1/4 tsp. Baking soda<br />
1-1/2 tsp. Quick-rise yeast<br />
Measure all ingredients into bread pan in order listed. Select Basic or Whole Wheat<br />
setting. Select crust setting if other than medium. Press the Start/Stop button to begin.<br />
A Fruit/Nut signal will sound 25–40minutes into cycle. <strong>Bread</strong> is finished when<br />
the unit signals and the display reads 0:00. Press Start/Stop button and remove.<br />
NOTE: If button is not pressed right away the unit will keep bread warm<br />
for 60:00 minutes.<br />
26
MUSTARD RYE BREAD<br />
(WHOLE WHEAT SETTING, T<strong>IM</strong>ER OPTIONAL)<br />
1 cup + 2 Tbsp. Water<br />
1-1/2 Tbsp. Vegetable oil<br />
1-1/2 tsp. Salt<br />
1/4 cup Dijon mustard<br />
2 cups All-purpose flour<br />
1-1/2 cups Rye flour<br />
1-1/2 tsp. Gluten flour<br />
1 Tbsp. Brown sugar<br />
2 tsp. Caraway or dill seeds (optional)<br />
1/4 cup Dried onion flakes (optional)<br />
1-1/2 tsp. Quick-rise yeast<br />
Measure all ingredients into bread pan in order listed. Select Whole Wheat setting.<br />
Select crust setting if other than medium. Press the Start/Stop button to begin.<br />
A Fruit/Nut signal will sound 40 minutes into cycle. <strong>Bread</strong> is finished when<br />
the unit signals and the display reads 0:00. Press Start/Stop button and remove.<br />
NOTE: If button is not pressed right away the unit will keep bread warm<br />
for 60:00 minutes.<br />
27
1-1/4 cups Water<br />
1-1/2 Tbsp. Butter or margarine<br />
1-1/2 tsp. Salt<br />
3-1/2 cups All-purpose flour<br />
1/2 cup Natural bran<br />
2 Tbsp. Brown sugar<br />
SWEET BREADS<br />
CINNAMON FRUIT LOAF<br />
(SWEET SETTING, T<strong>IM</strong>ER OPTIONAL)<br />
1 Tbsp. Skim milk powder<br />
2 tsp. Ground cinnamon<br />
1 tsp. Pumpkin pie spice*<br />
1-1/2 tsp. Quick-rise yeast<br />
1/4 cup Chopped, dried apricots<br />
1/4 cup Raisins<br />
Measure all ingredients except dried fruit into bread pan in order listed. Select<br />
Sweet setting. Select crust setting if other than medium. Press the Start/Stop button<br />
to begin. Add the dried apricots and raisins at the Fruit/Nut signal, 40 minutes<br />
into cycle. <strong>Bread</strong> is finished when the unit signals and the display reads 0:00.<br />
Press Start/Stop button and remove.<br />
NOTE: If button is not pressed right away the unit will keep bread warm<br />
for 60:00 minutes.<br />
*Substitute 1/2 tsp. nutmeg and 1/4 tsp. each nutmeg and ginger for pumpkin pie spice<br />
APPLE WALNUT BREAD<br />
(SWEET SETTING, NOT FOR T<strong>IM</strong>ER)<br />
3/4 cup Unsweetened applesauce<br />
1/2 cup + 1 Tbsp. Apple juice<br />
1 tsp. Salt<br />
3 Tbsp. Butter or margarine<br />
1 Large egg<br />
4 cups All-purpose flour<br />
1/4 cup Packed brown sugar<br />
1-1/4 tsp. Cinnamon<br />
1/2 tsp. Baking soda<br />
1 tsp. Quick-rise yeast<br />
1/2 cup Chopped walnuts<br />
Measure all ingredients except nuts into bread pan in order listed. Select Sweet<br />
setting. Select crust setting if other than medium. Press the Start/Stop button to begin.<br />
Add nuts at the Fruit/Nut signal, 40 minutes into cycle. <strong>Bread</strong> is finished when<br />
the unit signals and the display reads 0:00. Press Start/Stop button and remove.<br />
NOTE: If button is not pressed right away the unit will keep bread warm<br />
for 60:00 minutes.<br />
28
GLUTEN-FREE BREADS<br />
The consistency of dough for gluten free breads is similar to that of quick breads.<br />
A finished loaf will be flat across the top and the texture will be a little coarse.<br />
This is normal and does not alter the flavour.<br />
GLUTEN-FREE WHITE BREAD<br />
(WHOLE WHEAT SETTING, NOT FOR T<strong>IM</strong>ER)<br />
3 Large eggs<br />
1-2/3 cups Water<br />
3 Tbsp. Vegetable oil<br />
1 tsp. White or cider vinegar<br />
2-1/4 tsp. Active dry yeast<br />
3-1/4 cups White rice flour<br />
2-1/2 tsp. Xanthan gum<br />
1-1/2 tsp. Salt<br />
1/2 cup Skim milk powder<br />
3 Tbsp. Sugar<br />
In a medium bowl combine all wet ingredients; whisk together and pour into bread<br />
pan. In a large bowl combine all dry ingredients; mix well. Add to bread pan.<br />
Insert pan in machine. Select Whole Wheat Setting; press Start/Stop button.<br />
During the first kneading cycle, scrape down the sides of pan with a rubber spatula.<br />
<strong>Bread</strong> is finished when unit signals and display reads 0:00; remove pan and place<br />
on heat resistant surface. Cool bread in pan for 10 – 15 minutes. Remove and cool<br />
on rack before slicing.<br />
29
GLUTEN-FREE CHEDDAR CHEESE BREAD<br />
(WHOLE WHEAT SETTING, NOT FOR T<strong>IM</strong>ER)<br />
3 Large eggs<br />
1-3/4 cups Water<br />
2 Tbsp. Vegetable oil<br />
2 cups White rice flour<br />
1 cup Brown rice flour<br />
2-1/2 tsp. Active dry yeast<br />
1/4 cup Skim milk powder<br />
2 Tbsp. Sugar<br />
1 Tbsp. Dried onion flakes<br />
1 Tbsp. Poppy seeds (optional)<br />
3-1/2 tsp. Xanthan gum<br />
1-1/2 tsp. Celery seeds (optional)<br />
1-1/2 tsp. Dried dillweed (optional)<br />
1 tsp. Salt<br />
1-1/2 cups Shredded Cheddar cheese<br />
In a medium bowl combine all wet ingredients; whisk together and pour into bread<br />
pan. In a large bowl combine all dry ingredients; mix well. Add to bread pan.<br />
Insert pan in machine. Select Whole Wheat Setting; press Start/Stop button.<br />
During the first kneading cycle, scrape down the sides of pan with a rubber spatula.<br />
<strong>Bread</strong> is finished when unit signals and display reads 0:00; remove pan and place<br />
on heat resistant surface. Cool bread in pan for 10 – 15 minutes. Remove and cool<br />
on rack before slicing.<br />
30
GLUTEN-FREE CINNAMON RAISIN BREAD<br />
(WHOLE WHEAT SETTING, NOT FOR T<strong>IM</strong>ER)<br />
3 Large eggs<br />
1-2/3 cups Water<br />
3 Tbsp. Vegetable oil<br />
1 tsp. White or cider vinegar<br />
2 cups White rice flour<br />
2/3 cup Potato starch<br />
1/3 cup Tapioca flour<br />
2-1/4 tsp. Active dry yeast<br />
2-1/2 tsp. Xanthan gum<br />
1-1/2 tsp. Salt<br />
3 Tbsp. Sugar<br />
2 tsp. Ground cinnamon<br />
1/2 cup Raisins<br />
In a medium bowl combine all wet ingredients; whisk together and pour into bread pan.<br />
In a large bowl combine all dry ingredients except raisins; mix well. Add to bread pan.<br />
Insert pan in machine. Select Whole Wheat Setting; press Start/Stop button.<br />
During the first kneading cycle, scrape down the sides of pan with a rubber spatula.<br />
Add raisins at Fruit/Nut signal, 40 minutes into cycle. <strong>Bread</strong> is finished when unit<br />
signals and display reads 0:00; remove pan and place on heat resistant surface.<br />
Cool bread in pan for 10 – 15 minutes. Remove and cool on rack before slicing.<br />
31
QUICK BREAD INSTRUCTIONS<br />
Unlike yeast breads, quick breads do not use yeast as the rising agent. Therefore,<br />
the knead and rise cycles have been omitted. Instead, quick breads use baking<br />
powder and/or baking soda along with steam to act as a leavening agent.<br />
INSTRUCTIONS FOR MAKING QUICK BREAD:<br />
1. Measure all ingredients into bread pan. Position pan in baking chamber.<br />
2. Select Quick <strong>Bread</strong> Setting. Press “Start/Stop”; let ingredients mix for 5 minutes.<br />
Using rubber spatula, scrape down sides of the bread pan to eliminate flour<br />
pockets in the corners.<br />
3. When the quick bread has finished baking, press “Start/Stop” to cancel the<br />
“Keep-Warm” feature. Remove pan to a heatproof surface and let cool in pan<br />
5 minutes to allow bread to “set.” Remove bread from pan to wire rack<br />
and cool completely before slicing.<br />
32
<strong>33</strong><br />
QUICK BREAD RECIPES<br />
BANANA CHOCOLATE CHIP BREAD<br />
(QUICK BREAD SETTING, NOT FOR T<strong>IM</strong>ER)<br />
1 cup Mashed ripe banana<br />
1/3 cup Melted butter or margarine or oil<br />
2 Eggs, slightly beaten<br />
3 Tbsp. Sour milk*<br />
2 cups All-purpose flour<br />
1/2 cup Sugar<br />
1 tsp. Baking soda<br />
1-1/4 tsp. Baking powder<br />
1/2 tsp. Salt<br />
1/2 cup Chopped walnuts or pecans<br />
1/2 cup Chocolate chips<br />
*Instead of sour milk, mix 2 Tbsp. milk with 1 Tbsp.vinegar<br />
Measure all wet ingredients into bread pan. In a medium mixing bowl, combine dry<br />
ingredients, stir together and add to bread pan. Select Quick <strong>Bread</strong> setting and dark<br />
crust (H). Press Start/Stop button. About 5 minutes into mixing cycle scrape down<br />
sides of pan, using a rubber spatula. <strong>Bread</strong> is finished when unit signals and the<br />
display reads 0:00. Press Start/Stop button. Remove pan to heat resistant surface and<br />
cool 10 minutes before removing from pan. Cool completely on rack before slicing..<br />
,,,,,<br />
,,,,,<br />
,,,,,,<br />
,,,,,,<br />
,,,,,,<br />
,,,,<br />
@@@@@<br />
@@@@@<br />
@@@@@@<br />
@@@@@@<br />
@@@@@@<br />
@@@@<br />
€€€€€<br />
€€€€€<br />
€€€€€€<br />
€€€€€€<br />
€€€€€€<br />
€€€€<br />
ÀÀÀÀÀ<br />
ÀÀÀÀÀ<br />
ÀÀÀÀÀÀ<br />
ÀÀÀÀÀÀ<br />
ÀÀÀÀÀÀ<br />
ÀÀÀÀ<br />
,,,,,<br />
,,,,,<br />
,,,,,,<br />
,,,,,,<br />
,,,,,,<br />
,,,,<br />
@@@@@<br />
@@@@@<br />
@@@@@@<br />
@@@@@@<br />
@@@@@@<br />
@@@@<br />
€€€€€<br />
€€€€€<br />
€€€€€€<br />
€€€€€€<br />
€€€€€€<br />
€€€€<br />
ÀÀÀÀÀ<br />
ÀÀÀÀÀ<br />
ÀÀÀÀÀÀ<br />
ÀÀÀÀÀÀ<br />
ÀÀÀÀÀÀ<br />
ÀÀÀÀ<br />
,,,,,<br />
,,,,,<br />
,,,,,,<br />
,,,,,,<br />
,,,,,,<br />
,,,,<br />
@@@@@<br />
@@@@@<br />
@@@@@@<br />
@@@@@@<br />
@@@@@@<br />
@@@@<br />
€€€€€<br />
€€€€€<br />
€€€€€€<br />
€€€€€€<br />
€€€€€€<br />
€€€€<br />
ÀÀÀÀÀ<br />
ÀÀÀÀÀ<br />
ÀÀÀÀÀÀ<br />
ÀÀÀÀÀÀ<br />
ÀÀÀÀÀÀ<br />
ÀÀÀÀ<br />
,,,,,<br />
,,,,,<br />
,,,,,,<br />
,,,,,,<br />
,,,,,,<br />
,,,,<br />
@@@@@<br />
@@@@@<br />
@@@@@@<br />
@@@@@@<br />
@@@@@@<br />
@@@@<br />
€€€€€<br />
€€€€€<br />
€€€€€€<br />
€€€€€€<br />
€€€€€€<br />
€€€€<br />
ÀÀÀÀÀ<br />
ÀÀÀÀÀ<br />
ÀÀÀÀÀÀ<br />
ÀÀÀÀÀÀ<br />
ÀÀÀÀÀÀ<br />
ÀÀÀÀ<br />
,,,,,<br />
,,,,,<br />
,,,,,,<br />
,,,,,,<br />
,,,,,,<br />
,,,,<br />
@@@@@<br />
@@@@@<br />
@@@@@@<br />
@@@@@@<br />
@@@@@@<br />
@@@@<br />
€€€€€<br />
€€€€€<br />
€€€€€€<br />
€€€€€€<br />
€€€€€€<br />
€€€€<br />
ÀÀÀÀÀ<br />
ÀÀÀÀÀ<br />
ÀÀÀÀÀÀ<br />
ÀÀÀÀÀÀ<br />
ÀÀÀÀÀÀ<br />
ÀÀÀÀ<br />
,,,,,<br />
,,,,,<br />
,,,,,,<br />
,,,,,,<br />
,,,,,,<br />
,,,,<br />
@@@@@<br />
@@@@@<br />
@@@@@@<br />
@@@@@@<br />
@@@@@@<br />
@@@@<br />
€€€€€<br />
€€€€€<br />
€€€€€€<br />
€€€€€€<br />
€€€€€€<br />
€€€€<br />
ÀÀÀÀÀ<br />
ÀÀÀÀÀ<br />
ÀÀÀÀÀÀ<br />
ÀÀÀÀÀÀ<br />
ÀÀÀÀÀÀ<br />
ÀÀÀÀ<br />
,,,,,<br />
,,,,,<br />
,,,,,,<br />
,,,,,,<br />
,,,,,,<br />
,,,,<br />
@@@@@<br />
@@@@@<br />
@@@@@@<br />
@@@@@@<br />
@@@@@@<br />
@@@@<br />
€€€€€<br />
€€€€€<br />
€€€€€€<br />
€€€€€€<br />
€€€€€€<br />
€€€€<br />
ÀÀÀÀÀ<br />
ÀÀÀÀÀ<br />
ÀÀÀÀÀÀ<br />
ÀÀÀÀÀÀ<br />
ÀÀÀÀÀÀ<br />
ÀÀÀÀ<br />
,,,,,<br />
,,,,,<br />
,,,,,,<br />
,,,,,,<br />
,,,,,,<br />
,,,,<br />
@@@@@<br />
@@@@@<br />
@@@@@@<br />
@@@@@@<br />
@@@@@@<br />
@@@@<br />
€€€€€<br />
€€€€€<br />
€€€€€€<br />
€€€€€€<br />
€€€€€€<br />
€€€€<br />
ÀÀÀÀÀ<br />
ÀÀÀÀÀ<br />
ÀÀÀÀÀÀ<br />
ÀÀÀÀÀÀ<br />
ÀÀÀÀÀÀ<br />
ÀÀÀÀ<br />
,,,,,<br />
,,,,,<br />
,,,,,,<br />
,,,,,,<br />
,,,,,,<br />
,,,,<br />
@@@@@<br />
@@@@@<br />
@@@@@@<br />
@@@@@@<br />
@@@@@@<br />
@@@@<br />
€€€€€<br />
€€€€€<br />
€€€€€€<br />
€€€€€€<br />
€€€€€€<br />
€€€€<br />
ÀÀÀÀÀ<br />
ÀÀÀÀÀ<br />
ÀÀÀÀÀÀ<br />
ÀÀÀÀÀÀ<br />
ÀÀÀÀÀÀ<br />
ÀÀÀÀ<br />
,,,,,<br />
,,,,,<br />
,,,,,,<br />
,,,,,,<br />
,,,,,,<br />
,,,,<br />
@@@@@<br />
@@@@@<br />
@@@@@@<br />
@@@@@@<br />
@@@@@@<br />
@@@@<br />
€€€€€<br />
€€€€€<br />
€€€€€€<br />
€€€€€€<br />
€€€€€€<br />
€€€€<br />
ÀÀÀÀÀ<br />
ÀÀÀÀÀ<br />
ÀÀÀÀÀÀ<br />
ÀÀÀÀÀÀ<br />
ÀÀÀÀÀÀ<br />
ÀÀÀÀ<br />
,,,,,<br />
,,,,,<br />
,,,,,,<br />
,,,,,,<br />
,,,,,,<br />
,,,,<br />
@@@@@<br />
@@@@@<br />
@@@@@@<br />
@@@@@@<br />
@@@@@@<br />
@@@@<br />
€€€€€<br />
€€€€€<br />
€€€€€€<br />
€€€€€€<br />
€€€€€€<br />
€€€€<br />
ÀÀÀÀÀ<br />
ÀÀÀÀÀ<br />
ÀÀÀÀÀÀ<br />
ÀÀÀÀÀÀ<br />
ÀÀÀÀÀÀ<br />
ÀÀÀÀ<br />
,,,,,<br />
,,,,,<br />
,,,,,,<br />
,,,,,,<br />
,,,,,,<br />
,,,,<br />
yyyyy<br />
yyyyy<br />
yyyyyy<br />
yyyyyy<br />
yyyyyy<br />
yyyy<br />
,<br />
,,,,,,<br />
,,,,,,,<br />
,,,,,,<br />
,,,,,,<br />
,,,,,,<br />
,,,,,,<br />
,,<br />
@<br />
@@@@@@<br />
@@@@@@@<br />
@@@@@@<br />
@@@@@@<br />
@@@@@@<br />
@@@@@@<br />
@@<br />
€<br />
€€€€€€<br />
€€€€€€€<br />
€€€€€€<br />
€€€€€€<br />
€€€€€€<br />
€€€€€€<br />
€€<br />
À<br />
ÀÀÀÀÀÀ<br />
ÀÀÀÀÀÀÀ<br />
ÀÀÀÀÀÀ<br />
ÀÀÀÀÀÀ<br />
ÀÀÀÀÀÀ<br />
ÀÀÀÀÀÀ<br />
ÀÀ<br />
,<br />
,,,,,,<br />
,,,,,,,<br />
,,,,,,<br />
,,,,,,<br />
,,,,,,<br />
,,,,,,<br />
,,<br />
y<br />
yyyyyy<br />
yyyyyyy<br />
yyyyyy<br />
yyyyyy<br />
yyyyyy<br />
yyyyyy<br />
yy<br />
,,,,<br />
,,,,,<br />
,,,,,<br />
,,,,,<br />
,,,,,<br />
,,,,<br />
,,,,,<br />
,,,<br />
@@@@<br />
@@@@@<br />
@@@@@<br />
@@@@@<br />
@@@@@<br />
@@@@<br />
@@@@@<br />
@@@<br />
€€€€<br />
€€€€€<br />
€€€€€<br />
€€€€€<br />
€€€€€<br />
€€€€<br />
€€€€€<br />
€€€<br />
ÀÀÀÀ<br />
ÀÀÀÀÀ<br />
ÀÀÀÀÀ<br />
ÀÀÀÀÀ<br />
ÀÀÀÀÀ<br />
ÀÀÀÀ<br />
ÀÀÀÀÀ<br />
ÀÀÀ<br />
,,,,<br />
,,,,,<br />
,,,,,<br />
,,,,,<br />
,,,,,<br />
,,,,<br />
,,,,,<br />
,,,<br />
yyyy<br />
yyyyy<br />
yyyyy<br />
yyyyy<br />
yyyyy<br />
yyyy<br />
yyyyy<br />
yyy<br />
,,,<br />
,,,<br />
,,,<br />
,,,<br />
@@@<br />
@@@<br />
@@@<br />
@@@<br />
€€€<br />
€€€<br />
€€€<br />
€€€<br />
ÀÀÀ<br />
ÀÀÀ<br />
ÀÀÀ<br />
ÀÀÀ<br />
,,,<br />
,,,<br />
,,,<br />
,,,<br />
@@@<br />
@@@<br />
@@@<br />
@@@<br />
€€€<br />
€€€<br />
€€€<br />
€€€<br />
ÀÀÀ<br />
ÀÀÀ<br />
ÀÀÀ<br />
ÀÀÀ<br />
,,,<br />
,,,<br />
,,,<br />
,,,<br />
@@@<br />
@@@<br />
@@@<br />
@@@<br />
€€€<br />
€€€<br />
€€€<br />
€€€<br />
ÀÀÀ<br />
ÀÀÀ<br />
ÀÀÀ<br />
ÀÀÀ<br />
,,,<br />
,,,<br />
,,,<br />
,,,<br />
@@@<br />
@@@<br />
@@@<br />
@@@<br />
€€€<br />
€€€<br />
€€€<br />
€€€<br />
ÀÀÀ<br />
ÀÀÀ<br />
ÀÀÀ<br />
ÀÀÀ<br />
,,,<br />
,,,<br />
,,,<br />
,,,<br />
@@@<br />
@@@<br />
@@@<br />
@@@<br />
€€€<br />
€€€<br />
€€€<br />
€€€<br />
ÀÀÀ<br />
ÀÀÀ<br />
ÀÀÀ<br />
ÀÀÀ<br />
,,,<br />
,,,<br />
,,,<br />
,,,<br />
@@@<br />
@@@<br />
@@@<br />
@@@<br />
€€€<br />
€€€<br />
€€€<br />
€€€<br />
ÀÀÀ<br />
ÀÀÀ<br />
ÀÀÀ<br />
ÀÀÀ<br />
,,,<br />
,,,<br />
,,,<br />
,,,<br />
@@@<br />
@@@<br />
@@@<br />
@@@<br />
€€€<br />
€€€<br />
€€€<br />
€€€<br />
ÀÀÀ<br />
ÀÀÀ<br />
ÀÀÀ<br />
ÀÀÀ<br />
,,,<br />
,,,<br />
,,,<br />
,,,<br />
@@@<br />
@@@<br />
@@@<br />
@@@<br />
€€€<br />
€€€<br />
€€€<br />
€€€<br />
ÀÀÀ<br />
ÀÀÀ<br />
ÀÀÀ<br />
ÀÀÀ<br />
,,,<br />
,,,<br />
,,,<br />
,,,<br />
yyy<br />
yyy<br />
yyy<br />
yyy<br />
,,,<br />
,,,,,<br />
,,,,,<br />
,,,,,<br />
,,,,,<br />
,,,,,<br />
,,,,,<br />
,,,<br />
@@@<br />
@@@@@<br />
@@@@@<br />
@@@@@<br />
@@@@@<br />
@@@@@<br />
@@@@@<br />
@@@<br />
€€€<br />
€€€€€<br />
€€€€€<br />
€€€€€<br />
€€€€€<br />
€€€€€<br />
€€€€€<br />
€€€<br />
ÀÀÀ<br />
ÀÀÀÀÀ<br />
ÀÀÀÀÀ<br />
ÀÀÀÀÀ<br />
ÀÀÀÀÀ<br />
ÀÀÀÀÀ<br />
ÀÀÀÀÀ<br />
ÀÀÀ<br />
,,,<br />
,,,,,<br />
,,,,,<br />
,,,,,<br />
,,,,,<br />
,,,,,<br />
,,,,,<br />
,,,<br />
@@@<br />
@@@@@<br />
@@@@@<br />
@@@@@<br />
@@@@@<br />
@@@@@<br />
@@@@@<br />
@@@<br />
€€€<br />
€€€€€<br />
€€€€€<br />
€€€€€<br />
€€€€€<br />
€€€€€<br />
€€€€€<br />
€€€<br />
ÀÀÀ<br />
ÀÀÀÀÀ<br />
ÀÀÀÀÀ<br />
ÀÀÀÀÀ<br />
ÀÀÀÀÀ<br />
ÀÀÀÀÀ<br />
ÀÀÀÀÀ<br />
ÀÀÀ<br />
,,,<br />
,,,,,<br />
,,,,,<br />
,,,,,<br />
,,,,,<br />
,,,,,<br />
,,,,,<br />
,,,<br />
@@@<br />
@@@@@<br />
@@@@@<br />
@@@@@<br />
@@@@@<br />
@@@@@<br />
@@@@@<br />
@@@<br />
€€€<br />
€€€€€<br />
€€€€€<br />
€€€€€<br />
€€€€€<br />
€€€€€<br />
€€€€€<br />
€€€<br />
ÀÀÀ<br />
ÀÀÀÀÀ<br />
ÀÀÀÀÀ<br />
ÀÀÀÀÀ<br />
ÀÀÀÀÀ<br />
ÀÀÀÀÀ<br />
ÀÀÀÀÀ<br />
ÀÀÀ<br />
,,,<br />
,,,,,<br />
,,,,,<br />
,,,,,<br />
,,,,,<br />
,,,,,<br />
,,,,,<br />
,,,<br />
@@@<br />
@@@@@<br />
@@@@@<br />
@@@@@<br />
@@@@@<br />
@@@@@<br />
@@@@@<br />
@@@<br />
€€€<br />
€€€€€<br />
€€€€€<br />
€€€€€<br />
€€€€€<br />
€€€€€<br />
€€€€€<br />
€€€<br />
ÀÀÀ<br />
ÀÀÀÀÀ<br />
ÀÀÀÀÀ<br />
ÀÀÀÀÀ<br />
ÀÀÀÀÀ<br />
ÀÀÀÀÀ<br />
ÀÀÀÀÀ<br />
ÀÀÀ<br />
,,,<br />
,,,,,<br />
,,,,,<br />
,,,,,<br />
,,,,,<br />
,,,,,<br />
,,,,,<br />
,,,<br />
@@@<br />
@@@@@<br />
@@@@@<br />
@@@@@<br />
@@@@@<br />
@@@@@<br />
@@@@@<br />
@@@<br />
€€€<br />
€€€€€<br />
€€€€€<br />
€€€€€<br />
€€€€€<br />
€€€€€<br />
€€€€€<br />
€€€<br />
ÀÀÀ<br />
ÀÀÀÀÀ<br />
ÀÀÀÀÀ<br />
ÀÀÀÀÀ<br />
ÀÀÀÀÀ<br />
ÀÀÀÀÀ<br />
ÀÀÀÀÀ<br />
ÀÀÀ<br />
,,,<br />
,,,,,<br />
,,,,,<br />
,,,,,<br />
,,,,,<br />
,,,,,<br />
,,,,,<br />
,,,<br />
@@@<br />
@@@@@<br />
@@@@@<br />
@@@@@<br />
@@@@@<br />
@@@@@<br />
@@@@@<br />
@@@<br />
€€€<br />
€€€€€<br />
€€€€€<br />
€€€€€<br />
€€€€€<br />
€€€€€<br />
€€€€€<br />
€€€<br />
ÀÀÀ<br />
ÀÀÀÀÀ<br />
ÀÀÀÀÀ<br />
ÀÀÀÀÀ<br />
ÀÀÀÀÀ<br />
ÀÀÀÀÀ<br />
ÀÀÀÀÀ<br />
ÀÀÀ<br />
,,,<br />
,,,,,<br />
,,,,,<br />
,,,,,<br />
,,,,,<br />
,,,,,<br />
,,,,,<br />
,,,<br />
@@@<br />
@@@@@<br />
@@@@@<br />
@@@@@<br />
@@@@@<br />
@@@@@<br />
@@@@@<br />
@@@<br />
€€€<br />
€€€€€<br />
€€€€€<br />
€€€€€<br />
€€€€€<br />
€€€€€<br />
€€€€€<br />
€€€<br />
ÀÀÀ<br />
ÀÀÀÀÀ<br />
ÀÀÀÀÀ<br />
ÀÀÀÀÀ<br />
ÀÀÀÀÀ<br />
ÀÀÀÀÀ<br />
ÀÀÀÀÀ<br />
ÀÀÀ<br />
,,,<br />
,,,,,<br />
,,,,,<br />
,,,,,<br />
,,,,,<br />
,,,,,<br />
,,,,,<br />
,,,<br />
@@@<br />
@@@@@<br />
@@@@@<br />
@@@@@<br />
@@@@@<br />
@@@@@<br />
@@@@@<br />
@@@<br />
€€€<br />
€€€€€<br />
€€€€€<br />
€€€€€<br />
€€€€€<br />
€€€€€<br />
€€€€€<br />
€€€<br />
ÀÀÀ<br />
ÀÀÀÀÀ<br />
ÀÀÀÀÀ<br />
ÀÀÀÀÀ<br />
ÀÀÀÀÀ<br />
ÀÀÀÀÀ<br />
ÀÀÀÀÀ<br />
ÀÀÀ<br />
,,,<br />
,,,,,<br />
,,,,,<br />
,,,,,<br />
,,,,,<br />
,,,,,<br />
,,,,,<br />
,,,<br />
@@@<br />
@@@@@<br />
@@@@@<br />
@@@@@<br />
@@@@@<br />
@@@@@<br />
@@@@@<br />
@@@<br />
€€€<br />
€€€€€<br />
€€€€€<br />
€€€€€<br />
€€€€€<br />
€€€€€<br />
€€€€€<br />
€€€<br />
ÀÀÀ<br />
ÀÀÀÀÀ<br />
ÀÀÀÀÀ<br />
ÀÀÀÀÀ<br />
ÀÀÀÀÀ<br />
ÀÀÀÀÀ<br />
ÀÀÀÀÀ<br />
ÀÀÀ<br />
,,,<br />
,,,,,<br />
,,,,,<br />
,,,,,<br />
,,,,,<br />
,,,,,<br />
,,,,,<br />
,,,<br />
@@@<br />
@@@@@<br />
@@@@@<br />
@@@@@<br />
@@@@@<br />
@@@@@<br />
@@@@@<br />
@@@<br />
€€€<br />
€€€€€<br />
€€€€€<br />
€€€€€<br />
€€€€€<br />
€€€€€<br />
€€€€€<br />
€€€<br />
ÀÀÀ<br />
ÀÀÀÀÀ<br />
ÀÀÀÀÀ<br />
ÀÀÀÀÀ<br />
ÀÀÀÀÀ<br />
ÀÀÀÀÀ<br />
ÀÀÀÀÀ<br />
ÀÀÀ<br />
,,,<br />
,,,,,<br />
,,,,,<br />
,,,,,<br />
,,,,,<br />
,,,,,<br />
,,,,,<br />
,,,<br />
@@@<br />
@@@@@<br />
@@@@@<br />
@@@@@<br />
@@@@@<br />
@@@@@<br />
@@@@@<br />
@@@<br />
€€€<br />
€€€€€<br />
€€€€€<br />
€€€€€<br />
€€€€€<br />
€€€€€<br />
€€€€€<br />
€€€<br />
ÀÀÀ<br />
ÀÀÀÀÀ<br />
ÀÀÀÀÀ<br />
ÀÀÀÀÀ<br />
ÀÀÀÀÀ<br />
ÀÀÀÀÀ<br />
ÀÀÀÀÀ<br />
ÀÀÀ<br />
,,,<br />
,,,,,<br />
,,,,,<br />
,,,,,<br />
,,,,,<br />
,,,,,<br />
,,,,,<br />
,,,<br />
yyy<br />
yyyyy<br />
yyyyy<br />
yyyyy<br />
yyyyy<br />
yyyyy<br />
yyyyy<br />
yyy<br />
,,,<br />
,,,<br />
,,,<br />
,,<br />
,,<br />
@@@<br />
@@@<br />
@@@<br />
@@<br />
@@<br />
€€€<br />
€€€<br />
€€€<br />
€€<br />
€€<br />
ÀÀÀ<br />
ÀÀÀ<br />
ÀÀÀ<br />
ÀÀ<br />
ÀÀ<br />
,,,<br />
,,,<br />
,,,<br />
,,<br />
,,<br />
@@@<br />
@@@<br />
@@@<br />
@@<br />
@@<br />
€€€<br />
€€€<br />
€€€<br />
€€<br />
€€<br />
ÀÀÀ<br />
ÀÀÀ<br />
ÀÀÀ<br />
ÀÀ<br />
ÀÀ<br />
,,,<br />
,,,<br />
,,,<br />
,,<br />
,,<br />
@@@<br />
@@@<br />
@@@<br />
@@<br />
@@<br />
€€€<br />
€€€<br />
€€€<br />
€€<br />
€€<br />
ÀÀÀ<br />
ÀÀÀ<br />
ÀÀÀ<br />
ÀÀ<br />
ÀÀ<br />
,,,<br />
,,,<br />
,,,<br />
,,<br />
,,<br />
@@@<br />
@@@<br />
@@@<br />
@@<br />
@@<br />
€€€<br />
€€€<br />
€€€<br />
€€<br />
€€<br />
ÀÀÀ<br />
ÀÀÀ<br />
ÀÀÀ<br />
ÀÀ<br />
ÀÀ<br />
,,,<br />
,,,<br />
,,,<br />
,,<br />
,,<br />
@@@<br />
@@@<br />
@@@<br />
@@<br />
@@<br />
€€€<br />
€€€<br />
€€€<br />
€€<br />
€€<br />
ÀÀÀ<br />
ÀÀÀ<br />
ÀÀÀ<br />
ÀÀ<br />
ÀÀ<br />
,,,<br />
,,,<br />
,,,<br />
,,<br />
,,<br />
@@@<br />
@@@<br />
@@@<br />
@@<br />
@@<br />
€€€<br />
€€€<br />
€€€<br />
€€<br />
€€<br />
ÀÀÀ<br />
ÀÀÀ<br />
ÀÀÀ<br />
ÀÀ<br />
ÀÀ<br />
,,,<br />
,,,<br />
,,,<br />
,,<br />
,,<br />
@@@<br />
@@@<br />
@@@<br />
@@<br />
@@<br />
€€€<br />
€€€<br />
€€€<br />
€€<br />
€€<br />
ÀÀÀ<br />
ÀÀÀ<br />
ÀÀÀ<br />
ÀÀ<br />
ÀÀ<br />
,,,<br />
,,,<br />
,,,<br />
,,<br />
,,<br />
@@@<br />
@@@<br />
@@@<br />
@@<br />
@@<br />
€€€<br />
€€€<br />
€€€<br />
€€<br />
€€<br />
ÀÀÀ<br />
ÀÀÀ<br />
ÀÀÀ<br />
ÀÀ<br />
ÀÀ<br />
,,,<br />
,,,<br />
,,,<br />
,,<br />
,,<br />
yyy<br />
yyy<br />
yyy<br />
yy<br />
yy<br />
,,,,,<br />
,,,,,,<br />
,,,,,,<br />
,,,,,,<br />
,,,,,,<br />
,,,,,,<br />
,,,,<br />
@@@@@<br />
@@@@@@<br />
@@@@@@<br />
@@@@@@<br />
@@@@@@<br />
@@@@@@<br />
@@@@<br />
€€€€€<br />
€€€€€€<br />
€€€€€€<br />
€€€€€€<br />
€€€€€€<br />
€€€€€€<br />
€€€€<br />
ÀÀÀÀÀ<br />
ÀÀÀÀÀÀ<br />
ÀÀÀÀÀÀ<br />
ÀÀÀÀÀÀ<br />
ÀÀÀÀÀÀ<br />
ÀÀÀÀÀÀ<br />
ÀÀÀÀ<br />
,,,,,<br />
,,,,,,<br />
,,,,,,<br />
,,,,,,<br />
,,,,,,<br />
,,,,,,<br />
,,,,<br />
yyyyy<br />
yyyyyy<br />
yyyyyy<br />
yyyyyy<br />
yyyyyy<br />
yyyyyy<br />
yyyy<br />
, ,,,,<br />
,,,<br />
,,,<br />
,,,<br />
@ @@@@<br />
@@@<br />
@@@<br />
@@@<br />
€ €€€€<br />
€€€<br />
€€€<br />
€€€<br />
À ÀÀÀÀ<br />
ÀÀÀ<br />
ÀÀÀ<br />
ÀÀÀ<br />
, ,,,,<br />
,,,<br />
,,,<br />
,,,<br />
@ @@@@<br />
@@@<br />
@@@<br />
@@@<br />
€ €€€€<br />
€€€<br />
€€€<br />
€€€<br />
À ÀÀÀÀ<br />
ÀÀÀ<br />
ÀÀÀ<br />
ÀÀÀ<br />
, ,,,,<br />
,,,<br />
,,,<br />
,,,<br />
@ @@@@<br />
@@@<br />
@@@<br />
@@@<br />
€ €€€€<br />
€€€<br />
€€€<br />
€€€<br />
À ÀÀÀÀ<br />
ÀÀÀ<br />
ÀÀÀ<br />
ÀÀÀ<br />
, ,,,,<br />
,,,<br />
,,,<br />
,,,<br />
@ @@@@<br />
@@@<br />
@@@<br />
@@@<br />
€ €€€€<br />
€€€<br />
€€€<br />
€€€<br />
À ÀÀÀÀ<br />
ÀÀÀ<br />
ÀÀÀ<br />
ÀÀÀ<br />
, ,,,,<br />
,,,<br />
,,,<br />
,,,<br />
@ @@@@<br />
@@@<br />
@@@<br />
@@@<br />
€ €€€€<br />
€€€<br />
€€€<br />
€€€<br />
À ÀÀÀÀ<br />
ÀÀÀ<br />
ÀÀÀ<br />
ÀÀÀ<br />
, ,,,,<br />
,,,<br />
,,,<br />
,,,<br />
@ @@@@<br />
@@@<br />
@@@<br />
@@@<br />
€ €€€€<br />
€€€<br />
€€€<br />
€€€<br />
À ÀÀÀÀ<br />
ÀÀÀ<br />
ÀÀÀ<br />
ÀÀÀ<br />
, ,,,,<br />
,,,<br />
,,,<br />
,,,<br />
@ @@@@<br />
@@@<br />
@@@<br />
@@@<br />
€ €€€€<br />
€€€<br />
€€€<br />
€€€<br />
À ÀÀÀÀ<br />
ÀÀÀ<br />
ÀÀÀ<br />
ÀÀÀ<br />
, ,,,,<br />
,,,<br />
,,,<br />
,,,<br />
@ @@@@<br />
@@@<br />
@@@<br />
@@@<br />
€ €€€€<br />
€€€<br />
€€€<br />
€€€<br />
À ÀÀÀÀ<br />
ÀÀÀ<br />
ÀÀÀ<br />
ÀÀÀ<br />
, ,,,,<br />
,,,<br />
,,,<br />
,,,<br />
y yyyy<br />
yyy<br />
yyy<br />
yyy
ZUCCHINI BREAD<br />
(QUICK BREAD SETTING, NOT FOR T<strong>IM</strong>ER)<br />
2 cups Shredded zucchini (about 2 – 3)<br />
1/2 cup Vegetable oil<br />
2 Eggs, slightly beaten<br />
2 tsp. Vanilla<br />
1-1/2 cups All-purpose flour<br />
1 cup Sugar<br />
3/4 tsp. Baking soda<br />
1/2 tsp. Ground cinnamon (optional)<br />
1/2 tsp. Baking powder<br />
1/2 cup Chopped walnuts or pecans<br />
Measure all wet ingredients into bread pan. In a medium mixing bowl, combine dry<br />
ingredients, stir together and add to bread pan. Select Quick <strong>Bread</strong> setting and dark<br />
crust (H). Press Start/Stop button. About 5 minutes into mixing cycle scrape down<br />
sides of pan, using a rubber spatula. <strong>Bread</strong> is finished when unit signals and the<br />
display reads 0:00. Press Start/Stop button. Remove pan to heat resistant surface and<br />
cool 10 minutes before removing from pan. Cool completely on rack before slicing<br />
34
APRICOT NUT BREAD<br />
(QUICK BREAD SETTING, NOT FOR T<strong>IM</strong>ER)<br />
1 tsp. Grated orange rind (optional)<br />
3/4 cup Orange juice<br />
1 Large egg<br />
2 Tbsp. Butter or margarine<br />
2 cups All-purpose flour<br />
3/4 cup Sugar<br />
2 tsp. Baking powder<br />
1/4 tsp. Baking soda<br />
1 tsp. Salt<br />
1 cup Chopped dried apricots<br />
3/4 cup Slivered almonds<br />
Measure all wet ingredients into bread pan. In a medium mixing bowl, combine dry<br />
ingredients, stir together and add to bread pan. Select Quick <strong>Bread</strong> setting and dark<br />
crust (H). Press Start/Stop button. About 5 minutes into mixing cycle scrape down<br />
sides of pan, using a rubber spatula. <strong>Bread</strong> is finished when unit signals and the<br />
display reads 0:00. Press Start/Stop button. Remove pan to heat resistant surface and<br />
cool 10 minutes before removing from pan. Cool completely on rack before slicing.<br />
GRAPE NUT BREAD<br />
(QUICK BREAD SETTING, NOT FOR T<strong>IM</strong>ER)<br />
1/2 cup Grape Nut Cereal<br />
1 cup + 2 Tbsp. Buttermilk<br />
2 Tbsp. Melted butter or margarine or oil<br />
3 /4 cup Sugar<br />
1 Large egg<br />
1 tsp. Baking soda<br />
1/4 tsp. Baking powder<br />
1/4 tsp. Salt<br />
1-1/2 cups All-purpose flour<br />
Measure Grape Nut Cereal and all wet ingredients into bread pan. In a medium<br />
mixing bowl, combine dry ingredients, stir together and add to bread pan. Select<br />
Quick <strong>Bread</strong> setting and dark crust (H). Press Start/Stop button. About 5 minutes<br />
into mixing cycle scrape down sides of pan, using a rubber spatula. <strong>Bread</strong> is<br />
finished when unit signals and the display reads 0:00. Press Start/Stop button.<br />
Remove pan to heat resistant surface and cool 10 minutes before removing from<br />
pan. Cool completely on rack before slicing.<br />
35
DOUGH INSTRUCTIONS<br />
1. Follow General Operating Instructions.<br />
2. Press the Select button to reach the dough setting.<br />
3. Press “START/STOP”. The read-out on the display will begin counting down<br />
the time on the Dough setting. When dough is ready, the unit will signal<br />
and the display will read 0:00.<br />
4. Press “Start/Stop,” holding it down until you hear a “beep” and the display clears.<br />
5. To remove the bread pan, grasp handle firmly and lift pan out.<br />
NOTE: The pan does not get hot when using the dough setting.<br />
PREPARING DOUGH FOR BAKING<br />
1. Lightly sprinkle all-purpose flour onto a pastry mat or board. Using a rubber<br />
spatula or wooden spoon, remove dough from the bread pan and place on<br />
lightly floured surface. Knead by hand 2 or 3 times to release the air. If the<br />
dough is easy to handle without flour, shape on a lightly oiled, clean countertop.<br />
2. Shape dough into your favorite rolls, coffee cake, etc., (suggestions follow).<br />
Place on greased baking pan. Cover dough with a clean cloth and let rise<br />
until almost doubled in size, about 1 hour.<br />
3. Bake as directed in the recipe. Remove from pan and cool on a wire rack<br />
or serve warm.<br />
CRUST TREATMENTS AND GLAZES<br />
After rolls rise, just before baking, gently apply desired glaze with a pastry brush.<br />
Bake as directed in the recipe.<br />
• For a shiny golden crust, use Egg Glaze or Egg Yolk Glaze.<br />
• For a shiny chewy crust, use Egg White Glaze (crust will be lighter in colour).<br />
DOUGH RISING TIPS<br />
To ensure a warm place for rising, choose a sunny window, place on top of the refrigerator<br />
or turn on the oven to 200°F/100°C for one minute and turn it off; place covered bread or<br />
rolls in oven or fill a large, shallow pan with boiling water and place pan of rolls on a rack<br />
over the water.<br />
EGG GLAZE EGG YOLK GLAZE EGG WHITE GLAZE<br />
Mix 1 slightly beaten egg Mix 1 slightly beaten egg yolk Mix 1 slightly beaten egg<br />
with 1 Tbsp. water or milk with 1 Tbsp. water or milk white with 1 Tbsp. water<br />
NOTE: To keep unused egg yolk fresh for several days, cover with cold water and<br />
store in refrigerator in a covered container.<br />
36
VARIATIONS FOR SHAPING DOUGH<br />
Easy Dinner Rolls<br />
Divide dough into 12 equal pieces, shape into<br />
balls and place in greased muffin cups.<br />
Cover, let rise and bake as directed.<br />
MAKES 12<br />
Cloverleaves<br />
Lightly grease 12 muffin cups. Divide dough into<br />
36 1-inch (2.5-cm) pieces. Pull edges under,<br />
smoothing tops to shape into balls. Place 3 balls<br />
in each muffin cup, smooth-side-up.<br />
Cover, let rise and bake as directed.<br />
MAKES 12<br />
Simple Pan Rolls<br />
Lightly grease 8- or 9-inch (20- or 22-cm),<br />
round baking pan. Divide dough into 12 pieces.<br />
Shape each piece into a ball, pulling edges under to<br />
make a smooth top. Arrange rolls smooth-side-up in<br />
prepared pan. Cover, let rise and bake as directed.<br />
MAKES 12<br />
Swirls<br />
Lightly grease baking sheet. Divide dough into<br />
10 equal pieces. On a lightly floured surface, using<br />
your hand, roll each piece into a pencil-like strand<br />
about 9 inches (22 cm) long. Beginning at the<br />
centre, continue wrapping each piece around the<br />
centre to form a swirl. Place rolls 2 – 3 inches apart<br />
on prepared baking sheet. Cover, let rise and bake<br />
as directed.<br />
MAKES 10<br />
Butterhorns<br />
Lightly grease baking sheet and set aside.<br />
On lightly floured surface, roll dough into a 9-inch<br />
(22-cm) circle. Brush dough with melted butter.<br />
Cut into 12 wedges. To shape rolls, begin at wide<br />
end of wedge and roll toward point. Place rolls<br />
point side down, 2 to 3 inches apart, on prepared<br />
baking sheet. Cover, let rise and bake as directed.<br />
MAKES 12<br />
37
RISING<br />
TO REDUCE RISING T<strong>IM</strong>E OF DOUGH<br />
• Preheat conventional oven to 200°F/93°C for 5 minutes, then turn off oven.<br />
Shape dough, place on baking pan as directed and cover with a clean kitchen towel.<br />
Place dough in oven until doubled in size. This will surely reduce rising time by<br />
about one-half.<br />
• Recipes using whole grain or unrefined flours contain less gluten and may not rise<br />
as much as those using white bread flour. As a result, these heavier breads may fall<br />
slightly in the centre. This is normal and will not affect the taste of the bread.<br />
Wheat gluten can also be added to improve the shape and volume of bread<br />
made with low gluten flours.<br />
STORING<br />
KEEPING YOUR BREAD FRESH<br />
• There are no preservatives in your home made bread, so store cooled loaf in a tightly<br />
sealed plastic bag. If desired, enclose a stalk of celery in the bag to keep bread fresh<br />
longer. Do not store in the refrigerator as this causes bread to dry out faster.<br />
38
WHITE ROLLS<br />
(DOUGH SETTING, T<strong>IM</strong>ER OPTIONAL)<br />
3/4 cup Water<br />
1 Large egg<br />
3 Tbsp. Butter or margarine<br />
1 tsp. Salt<br />
3 cups All-purpose flour<br />
2 Tbsp. Milk powder<br />
2 tsp. Sugar<br />
2 tsp. Quick-rise yeast<br />
Measure all ingredients into bread pan in order listed. Select Dough setting; press<br />
Start/Stop button. When unit signals and display reads 0:00, press Start/Stop and<br />
remove dough. Shape as desired (see Page 37); cover and let rise in a warm place<br />
until doubled in size. Brush with egg glaze and sprinkle with sesame seeds, poppy<br />
seeds or dried herbs if desired (see Page 36). Bake at 375°F/190°C.<br />
MAKES 12 ROLLS<br />
HONEY AND WHEAT ROLLS<br />
(DOUGH SETTING, T<strong>IM</strong>ER OPTIONAL)<br />
1 cup Water<br />
1 tsp. Salt<br />
1/4 cup Honey<br />
1 Large egg<br />
2 cups All-purpose flour<br />
1-1/4 cups Whole wheat flour<br />
1 tsp. Quick-rise yeast<br />
Measure all ingredients into bread pan in order listed. Select Dough setting; press<br />
Start/Stop button. When unit signals and display reads 0:00, press Start/Stop and<br />
remove dough. Shape as desired (see Page 37); cover and let rise in a warm place<br />
until doubled in size. Brush with egg glaze and sprinkle with sesame seeds, poppy<br />
seeds or dried herbs if desired (see Page 36). Bake at 375°F/190°C.<br />
MAKES 12 ROLLS<br />
39
WHOLE WHEAT ROLLS<br />
(DOUGH SETTING, T<strong>IM</strong>ER OPTIONAL)<br />
3/4 cup + 2 Tbsp. Water<br />
1 Egg<br />
3 Tbsp. Butter or margarine<br />
1 tsp. Salt<br />
2-1/4 cups All-purpose flour<br />
1 cup Whole wheat flour<br />
2 tsp. Sugar<br />
2 tsp. Quick-rise yeast<br />
Measure all ingredients into bread pan in order listed. Select Dough setting; press<br />
Start/Stop button. When unit signals and display reads 0:00, press Start/Stop and<br />
remove dough. Shape as desired (see Page 37); cover and let rise in a warm place<br />
until doubled in size. Brush with egg glaze and sprinkle with sesame seeds, poppy<br />
seeds or dried herbs if desired (see Page 36). Bake at 375°F/190°C.<br />
MAKES 12 ROLLS<br />
BRAN ROLLS<br />
(DOUGH SETTING, T<strong>IM</strong>ER OPTIONAL)<br />
3/4 cup Water<br />
3/4 tsp. Salt<br />
1/3 cup Butter or margarine<br />
1 Large egg<br />
2-3/4 cups All-purpose flour<br />
1/3 cup Bran<br />
3 Tbsp. Sugar<br />
1 tsp. Quick-rise yeast<br />
Measure all ingredients into bread pan in order listed. Select Dough setting; press<br />
Start/Stop button. When unit signals and display reads 0:00, press Start/Stop and<br />
remove dough. Shape as desired (see Page 37); cover and let rise in a warm place<br />
until doubled in size. Brush with egg glaze and sprinkle with sesame seeds,<br />
poppy seeds or dried herbs if desired (see Page 36). Bake at 375°F/190°C.<br />
MAKES 12 ROLLS<br />
40
PIZZA<br />
Large Batch<br />
1-1/2 cups Water<br />
2 Tbsp. Olive oil<br />
2 tsp. Salt<br />
2 tsp. Sugar<br />
4 cups All-purpose flour<br />
4 tsp. Quick-rise yeast<br />
Small Batch<br />
3/4 cup Water<br />
1 Tbsp. Olive oil<br />
1 tsp. Salt<br />
1 tsp. Sugar<br />
2 cups All-purpose flour<br />
2 tsp. Quick-rise yeast<br />
Measure all ingredients into bread pan in order listed. Select Dough setting.<br />
Press Start/Stop. When unit signals and display reads 0:00, press Start/Stop.<br />
Remove dough to lightly floured surface and cover with plastic wrap; let sit<br />
5 minutes. Press a small batch or 1/2 large batch into 14 inch (35 cm)<br />
pizza pan. Press 2 Tbsp. cornmeal onto surface if desired. Spread with<br />
sauce and toppings (below). Bake at 425°F/220°C for 20 – 30 minutes<br />
or until crisp and browned on the bottom. For a slightly thicker crust,<br />
let rise 30 minutes before spreading with sauce, etc.<br />
TOPPINGS:<br />
TRADITIONAL – 1/2 cup pizza sauce and top with 1/2 cup each<br />
sliced pepperoni, mushrooms, peppers, onion and 1 cup<br />
shredded Mozzarella cheese.<br />
MEXICAN – 1/2 cup thick salsa, 2 cups chopped yellow and<br />
green peppers. Sprinkle with chili powder or minced jalapeño<br />
peppers and top with 1 cup shredded Monterey Jack cheese.<br />
PESTO – 1/2 cup pesto sauce OR 1/2 cup pizza sauce and<br />
3 Tbsp. pesto sauce. Top with 1 cup each shredded<br />
Cheddar and Mozzarella cheese.<br />
41
VARIATIONS: Baked Calzone – Use 1/2 whole wheat flour for small<br />
batch of pizza dough and add 3/4 tsp. anise or fennel seed<br />
to the dry ingredients. Press dough as directed in pizza pan.<br />
Spread 1/2 cup pizza sauce on 1/2 of the dough. Arrange<br />
3/4 cup diced, cooked meat such as pepperoni, salami,<br />
chicken or ham and 3/4 cup chopped, partially cooked<br />
broccoli on top of the sauce. Sprinkle 1 cup shredded<br />
Mozzarella cheese on top of broccoli. Moisten edges with<br />
water and fold dough over the cheese, stretching as<br />
necessary. Press the edges together to seal. Brush with egg<br />
glaze (Page 48) and sprinkle with 1 Tbsp. grated Parmesan<br />
cheese. Bake at 425°F (220°C) for 15 – 20 minutes or until<br />
browned and crisp. Serve with additional pizza sauce,<br />
if desired.<br />
Focaccia – Use ingredients for small batch of pizza dough<br />
and add 3 Tbsp. dried onion flakes and 1 minced clove<br />
garlic to the dry ingredients. On a lightly greased baking<br />
sheet, press dough into a 12 x 10 inch (30 x 25 cm)<br />
rectangle. Cover and let rise in a warm place* for<br />
30 minutes. Meanwhile, mix 2 Tbsp. olive oil, 1 minced<br />
clove garlic and 1 tsp. each dried rosemary and basil<br />
together. Brush on dough and sprinkle with 2 Tbsp.<br />
grated Parmesan cheese. If desired, press pieces of black<br />
or green olives or softened, sun dried tomatoes into dough.<br />
Bake at 400°F (220°C) for 15 – 20 minutes or until browned.<br />
Cut into squares and serve warm.<br />
*See Page 36 for Rising Tips<br />
42
Large Batch<br />
1-1/2 cups Water<br />
4 cups All-purpose flour<br />
2 tsp. Salt<br />
1 Tbsp. Sugar<br />
1 tsp. Quick-rise yeast<br />
2 Tbsp. Poppy, caraway or<br />
sesame seeds*<br />
(Optional)<br />
* Don't add to bread pan; reserve for garnish.<br />
Small Batch<br />
3/4 cup Water<br />
2 cups All-purpose flour<br />
1 tsp. Salt<br />
2 tsp. Sugar<br />
1/2 tsp. Quick-rise yeast<br />
1 Tbsp. Poppy, caraway or<br />
sesame seeds*<br />
(Optional)<br />
Measure all ingredients into bread pan in order listed. Select Dough setting.<br />
Press Start/Stop. When unit signals and display reads 0:00, press Start/Stop.<br />
Remove to lightly floured surface and cover and let rise 5 minutes.<br />
Shape dough into 8 balls for small batch and 15 for large batch;<br />
make a hole in the centre of each ball with your thumbs, about the size of<br />
a quarter. Place on greased baking sheet; cover and let rise in a warm place*<br />
about 20 minutes. Fill a large, deep saucepan with water and 1 Tbsp. sugar<br />
and bring to a boil. Force holes open again if they begin to close. Cook bagels<br />
in water for about 30 seconds each side; remove with slotted spoon and drain<br />
on wire rack. Return to greased baking sheet; brush with Egg Glaze (Page 36)<br />
and sprinkle with seeds, if desired. Bake at 400°F/200°C for 25 – 30 minutes<br />
or until browned. Serve warm.<br />
TIP: Bagels are best eaten the same day.<br />
*See Page 36 for Rising Tips<br />
BAGELS<br />
43
PASTA RECIPES<br />
BASIC PASTA<br />
(Dough Setting – Not for Timer)<br />
All ingredients at room temperature (70°F-80°F/21°C-27°C)<br />
2 cups All-purpose flour<br />
1 cup Semolina flour<br />
1 tsp. Salt<br />
1 Tbsp. Olive oil or vegetable oil<br />
3/4 cup + 2 Tbsp. Water<br />
Measure all ingredients into bread pan. Select Dough setting. Press “START/STOP”,<br />
and allow to mix 8 to 10 minutes; then press “START/STOP” to cancel. Remove dough<br />
and roll out on lightly floured surface. Roll to 1/8-inch (3-mm) thickness.<br />
Dust with flour if dough is sticky. Cut into 1/8-inch (3-mm) strips for narrow pasta<br />
or 1/4-inch (6-mm) for medium pasta. Cook pasta in a large pot of boiling,<br />
salted water for 1 to 2 minutes or until it is al dente. Drain in colander.<br />
EGG PASTA<br />
(Dough Setting – Not for Timer)<br />
All ingredients at room temperature (70°F-80°F/21°C-27°C)<br />
2 cups All-purpose flour<br />
1 cup Semolina flour<br />
1 tsp. Salt<br />
1 Tbsp. Olive oil or vegetable oil<br />
4 large Egs, slightly beaten<br />
3 Tbsp. Water<br />
Measure all ingredients into bread pan. Select Dough setting. Press “START/STOP”,<br />
and allow to mix 8 to 10 minutes; then press “START/STOP” to cancel. Remove dough<br />
and roll out on lightly floured surface. Roll to 1/8-inch (3-mm) thickness.<br />
Dust with flour if dough is sticky. Cut into 1/8-inch (3-mm) strips for narrow pasta<br />
or 1/4-inch (6-mm) for medium pasta. Cook pasta in a large pot of boiling,<br />
salted water for 1 to 2 minutes or until it is al dente. Drain in colander.<br />
NOTE: Pasta dough may be rolled with a pasta machine to achieve<br />
desired thickness.<br />
44
BASIC SWEET DOUGH<br />
Large Batch<br />
1 cup Water<br />
2 large Eggs<br />
1/4 cup Butter or margarine<br />
2 tsp. Salt<br />
4 cups All-purpose flour<br />
1/2 cup Sugar<br />
3 Tbsp. Skim milk powder<br />
2 tsp. Quick-rise yeast<br />
Small Batch<br />
1/2 cup Water<br />
1 large Egg<br />
2 Tbsp. Butter or margarine<br />
1 tsp. Salt<br />
2 cups All-purpose flour<br />
1/4 cup Sugar<br />
1-1/2 Tbsp. Skim milk powder<br />
1 tsp. Quick-rise yeast<br />
DIRECTIONS: Measure all ingredients into pan in the order listed. Select Dough<br />
setting. Press Start/Stop button to begin. Dough is finished when<br />
the unit signals and the display reads 0:00. Press Start/Stop button<br />
and remove. Shape, rise and bake according to the following recipes.<br />
TIP – Make large batch and then use to make 2 different recipes<br />
or double the recipes and freeze one batch.<br />
TIP – Prepared dough may be kept in refrigerator for a few hours;<br />
bring to room temperature before shaping.<br />
TIP – When letting the dough rise, cover loosely with plastic wrap,<br />
wax paper or a clean tea towel.<br />
45
CINNAMON PINWHEEL ROLLS<br />
Use SWEET DOUGH from small or 1/2 large batch. Mix 2/3 cup brown sugar,<br />
2 tsp. cinnamon, and 1/4 cup softened butter or margarine together. On a lightly<br />
floured surface roll dough into 12 x 9 inch (30 x 22 cm) rectangle. Spread mixture<br />
on the dough. If desired, sprinkle 1/3 cup raisins OR chopped pecans over the top.<br />
Roll up from the long side jelly-roll style; pinch edges together to seal. Cut into<br />
12 slices and place cut side up in large greased muffin tins. Cover and let rise in<br />
a warm place until almost doubled in size, about 30 – 40 minutes. Bake at 375°F<br />
(190°C) for 20 minutes or until done. Remove and cool upside down.<br />
VARIATION: Substitute the following delicious filling for the filling above.<br />
3 Tbsp. Sugar<br />
1 Lemon rind, grated<br />
1/4 cup Walnuts<br />
3/4 cup Raisins<br />
1 tsp. Cinnamon<br />
2 Tbsp. Soft butter<br />
PEANUT BUTTER SWIRLS<br />
Use SWEET DOUGH from small or 1/2 large batch. Mix 1/2 cup chunky peanut butter,<br />
1/3 cup brown sugar and 3 Tbsp. milk together. Prepare dough as directed for<br />
cinnamon rolls, substituting this filling. Continue as directed above.<br />
Mix 1/2 tsp. cinnamon and 2 Tbsp. sugar together. When rolls are baked,<br />
brush with 1 Tbsp. melted butter or margarine and sprinkle with cinnamon mixture.<br />
46
SPICED GRANOLA BUNS<br />
Make small batch SWEET DOUGH with 1/2 whole wheat flour, brown sugar and<br />
add 1/2 tsp each cinnamon and nutmeg to the flour. Mix 1/4 cup honey,<br />
2/3 cup granola or tossed oats*, 1/3 cup raisins, 1/4 chopped nuts, 2 Tbsp.<br />
melted butter or margarine and 1 tsp. cinnamon together. Prepare dough as<br />
directed for cinnamon rolls, substituting this filling. Continue as directed above.<br />
*For toasted oats, place in a shallow baking pan and bake in 350°F (190°C) oven<br />
until browned.<br />
CHELSEA BUNS<br />
Use SWEET DOUGH from small or 1/2 large batch. Mix 1/2 cup brown sugar,<br />
2 tsp. cinnamon and 1/3 cup softened butter or margarine together. Place 1/3<br />
mixture in 8 inch square pan; blend in 2 tsp. water. On a lightly floured surface,<br />
roll dough into 12 x 9 inch (30 x 22 cm) rectangle. Spread remaining mixture on<br />
the dough. Sprinkle 1/2 cup raisins or walnuts on top. Roll up along the short<br />
side jelly-roll style; pinch edges together to seal. Cut into 9 slices and place cut<br />
side up on top of the mixture in the pan. Cover and let rise in a warm place*<br />
until almost doubled in size about 40 – 50 minutes. Bake at 375°F (190°C)<br />
for 30 – 35 minutes. Turn out upside down onto serving dish while warm.<br />
VARIATION: Place 9 pecan or cherry halves in three rows in the mixture.<br />
Place slices on top of each nut or cherry.<br />
*See Page 36 for Rising Tips<br />
SWEDISH TEA RING<br />
Use SWEET DOUGH from small or 1/2 large batch or use whole wheat dough<br />
variation for Spiced Granola Rolls.<br />
Roll dough into 8 x 16 inch (20 x 40 cm) rectangle. Spread with 1 Tbsp. softened<br />
butter or margarine. Mix 3 Tbsp. chopped nuts, raisins and glacé fruit together.<br />
Sprinkle over dough. Roll up dough from long side jelly roll style; pinch edges<br />
together to seal. On a large, greased baking sheet, shape the roll into a circle,<br />
overlapping and joining the ends. Cut 2/3 of the way into ring at 1 inch (2.5 cm)<br />
intervals. Turn each slice on its side, cut side up. Cover and let rise in a warm<br />
place* until doubled in size, about 45 minutes. Bake at 375°F (190°C)<br />
for 25 – 35 minutes. Cool on wire rack. Drizzle with sugar glaze (Page 48).<br />
*See Page 36 for Rising Tips<br />
47
GLAZES AND SPREADS<br />
EGG GLAZES<br />
Beat 1 egg white OR 1 egg yolk OR 1 whole egg with 1 Tbsp. water. Brush on<br />
unbaked bread or rolls to give a shine. (A darker colour results if yolk is used).<br />
MILK OR BUTTER GLAZE<br />
Brush just baked bread with milk or melted butter for a softer crust.<br />
SUGAR GLAZE<br />
Mix 1 cup icing sugar, 1 Tbsp. milk, 1/4 tsp. vanilla or almond extract together<br />
until smooth. Drizzle on Swedish Tea Ring or Chelsea Buns.<br />
VARIATION: Lemon – Substitute lemon juice for milk and lemon rind for extract.<br />
HONEY GLAZE<br />
Mix 2 Tbsp. honey, 2 Tbsp. softened butter or margarine together until smooth.<br />
Brush on sweet rolls.<br />
CHEVRE SPREAD<br />
Mix 3 oz. (90 g) chevre, 4 oz. (125 g) cream cheese, 1 Tbsp. olive oil, 1 Tbsp.<br />
chopped, sundried tomatoes* and 1/4 tsp.pepper until smooth in food processor<br />
or by hand until smooth.<br />
VARIATION: COTTAGE CHEESE – Substitute milk for oil and add 1 tsp. dried basil<br />
and 1/4 tsp. dried tarragon. Delicious on French <strong>Bread</strong>.<br />
*Use sundried tomatoes in oil or dried ones soaked in hot water and drained.<br />
BLUE CHEESE SPREAD<br />
Mix 2 oz. (60 g) blue cheese, 4 oz. (125 g) cream cheese and 1 Tbsp. brandy or<br />
milk in food processor or by hand until smooth. Delicious on Crunchy Whole<br />
Wheat or Multi-Grain <strong>Bread</strong>.<br />
AVOCADO SPREAD<br />
Mix 1 ripe, large peeled and cubed avocado, 1/2 cup ricotta cheese, 2 Tbsp.<br />
lime or lemon juice, 2 Tbsp. minced cilantro, 1/2 tsp. salt and hot pepper sauce<br />
(to taste) in food processor or by hand until smooth. Delicious on Cracked Wheat<br />
or French <strong>Bread</strong>.<br />
48
SALMON SPREAD<br />
Mix 7.75 oz. (220 g) can drained red salmon, 1/2 cup cream or ricotta cheese,<br />
1/2 tsp. Worcestershire sauce, and 1 tsp. lemon juice in food processor<br />
or by hand until smooth. Delicious on Herb or Hearty Potato Dill <strong>Bread</strong>.<br />
GREEK SPREAD<br />
Mix 3 oz. (90 g) feta cheese, 4 oz. (125 g) cream cheese, 3 Tbsp. plain yogurt<br />
and 1 clove minced garlic in food processor or by hand until smooth. Stir in 4<br />
minced, pitted black olives and 1 Tbsp. minced parsley. Delicious on Herb or<br />
Sesame Yogurt <strong>Bread</strong>.<br />
LOW-CALORIE GARDEN SPREAD<br />
Purée 1/2 cup cottage cheese, 1/2 cup light cream cheese and 1 minced clove<br />
garlic in food processor or by hand until smooth. Stir in 1/2 cup grated carrot,<br />
1/3 cup grated zucchini, 2 minced green onions and 1/4 tsp. salt. Delicious on<br />
Bran and Sunflower <strong>Bread</strong> or Pumpernickel <strong>Bread</strong>.<br />
MEXICAN CHEESE SPREAD<br />
Mix 1/4 cup cottage cheese and 4 oz. (125 g) light cream cheese, 1 minced clove<br />
garlic, 1/4 tsp. each chili powder, salt and cumin in food processor or by hand<br />
until smooth. Stir in 2 minced green onions. Delicious on French or White <strong>Bread</strong>.<br />
TAPENADE SPREAD<br />
Process 1/2 cup pitted, black olives, 1 minced clove garlic, 1 Tbsp. olive oil,<br />
1/4 tsp. each salt, pepper, dried thyme and rosemary with 1-1/2 tsp. dried basil<br />
and 1/8 tsp. red chili pepper flakes in food processor. Delicious on fresh<br />
Baguette or Focaccia.<br />
CHEDDAR CHEESE SPREAD<br />
Mix 1-1/2 cups shredded Cheddar Cheese, 2-1/2 Tbsp. sweet German or<br />
Russian mustard, 2 Tbsp. milk and 1/4 cup ricotta or cream cheese until smooth.<br />
Delicious on Herb <strong>Bread</strong>.<br />
SMOKED SALMON DIP<br />
Mix 1 cup each yogurt and light mayonnaise, 1/2 cup chopped smoked salmon<br />
and 1/2 pkg. (87 g) creamy vegetable soup mix. Cut a cap off a small<br />
Pumpernickel, Whole Wheat, Heritage or Beer Rye <strong>Bread</strong>. Cut the cap into<br />
bite-size pieces and hollow out bottom of loaf leaving a 1/2-inch (1 cm) shell.<br />
Serve dip in bread shell with bread pieces around it to use for dipping.<br />
49
CHUTNEY SPREAD<br />
Mix 1/4 cup cream cheese and 2 Tbsp. chutney in food processor until smooth.<br />
Add a pinch of curry if desired. Delicious on Pumpernickel <strong>Bread</strong>.<br />
CHEESE BRUSCHETTA<br />
Mix 1/4 cup cream cheese, 1/4 cup ricotta cheese, 2 Tbsp. grated Parmesan<br />
Cheese, 1 Tbsp. mayonnaise, 2 small cloves minced garlic, 1 tsp. dried basil<br />
in food processor or by hand until smooth. Stir in 1 Tbsp. minced green pepper.<br />
Spread on thick, toasted slices of French <strong>Bread</strong>. Sprinkle with diced tomato,<br />
if desired and shredded Mozzarella or Cheddar cheese. Broil until cheese melts.<br />
SWEET FRUIT SPREADS<br />
Mix 1/2 cup softened cream cheese OR butter with 2 – 3 Tbsp. of your<br />
favourite jam or marmalade until smooth. Delicious on White,<br />
Whole Wheat, Oatmeal Raisin <strong>Bread</strong> or toast.<br />
HONEY-ORANGE CHEESE SPREAD<br />
Mix 1/2 cup cream cheese, 2 Tbsp. orange juice, 1 tsp. grated orange rind and<br />
2 Tbsp. honey together until smooth. Delicious on Oatmeal and Raisin <strong>Bread</strong><br />
or sweet rolls.<br />
VARIATION: Honey Ginger – Substitute 2 tsp. minced preserved ginger for<br />
orange juice and rind.<br />
MAPLE NUT CREAM SPREAD<br />
Mix 1/4 cup ricotta cheese, 1/4 cup cream cheese and 3 Tbsp. maple syrup<br />
until smooth. Stir in 2 Tbsp. chopped walnuts. Delicious on Apple or<br />
Oatmeal Raisin <strong>Bread</strong>.<br />
PEANUT BUTTER CREAM SPREAD<br />
Mix 1/4 cup ricotta cheese, 2 Tbsp. peanut butter and 2 tsp. butter or margarine<br />
until smooth. Delicious on toast.<br />
HONEY BUTTER<br />
Mix 1/4 cup softened butter or margarine, 1 Tbsp. honey, 1/8 tsp. each<br />
cinnamon and nutmeg.<br />
VARIATION: Maple Butter – Substitute 2 Tbsp. maple syrup for honey<br />
and omit the spices. Delicious on Apple Walnut <strong>Bread</strong>.<br />
50
JAM & MARMALADE RECIPES<br />
STRAWBERRY JAM<br />
(Basic Setting – Not for Timer)<br />
3 cups Fresh strawberries, sliced<br />
2 cups Sugar<br />
4 tsp. Lemon juice<br />
2 Tbsp. Low-sugar fruit pectin crystals<br />
Combine all ingredients into bread pan. Select Basic setting. Press “Start/Stop”.<br />
Allow to mix 5 – 6 minutes, scraping sides of pan with rubber spatula. When unit<br />
signals and display reads 0:00, press “Start/Stop”. Using oven mitts, remove bread<br />
pan. Pour jam into containers and cover or seal in sterilized jars. Cool and then<br />
refrigerate to set.<br />
MAKES ABOUT 2-1/2 CUPS<br />
ORANGE MARMALADE<br />
(Basic and Bake Setting – Not for Timer)<br />
3 Large oranges<br />
1-1/4 cups Sugar<br />
1 Lemon<br />
2 Tbsp. Low-sugar fruit pectin crystals<br />
With a vegetable peeler, shave off the bright layer of peel from one orange and lemon;<br />
chop finely. Remove remaining white peel from orange and lemon, discard.<br />
Peel remaining oranges, discard peels. Slice fruit into 1/2-inch pieces.<br />
Combine chopped peels, fruit, sugar and pectin in bread pan. Select Basic setting.<br />
Press “Start/Stop”. Allow to mix 5 – 6 minutes, scraping sides of pan with rubber<br />
spatula. Press “Start/Stop” to cancel. Select Bake Setting. Press “Start/Stop” to<br />
begin. When unit signals and display reads 0:00, press “Start/Stop”. Using oven<br />
mitts, remove bread pan. Pour marmalade into containers and cover or seal in<br />
sterilized jars. Cool and then refrigerate to set. MAKES ABOUT 1-1/2 CUPS<br />
BERRY JAM<br />
(Basic and Bake Setting – Not for Timer)<br />
1 package Unsweetened, frozen berries, thawed<br />
(300 g) (strawberries, raspberries and blueberries or a mixture)<br />
1 Tbsp. Lemon juice<br />
1-3/4 cups Sugar<br />
2-1/2 Tbsp. Liquid fruit pectin<br />
Combine ingredients into bread pan. Select Basic setting. Press “Start/Stop”.<br />
Allow to mix 5 – 6 minutes, scraping sides of pan with rubber spatula. Press<br />
“Start/Stop” to cancel. Select Bake Setting. Press “Start/Stop”. When unit signals<br />
and display reads 0:00, press “Start/Stop”. Using oven mitts, remove bread pan.<br />
Pour marmalade into containers and cover or seal in sterilized jars. Cool and then<br />
refrigerate to set.<br />
TIP: Double recipe to use full pouch of liquid pectin<br />
51<br />
MAKES ABOUT 2 CUPS
ADJUSTING RECIPES<br />
Weather conditions, storage of ingredients, the temperature of<br />
ingredients and exactness of measuring ingredients can alter the<br />
size, shape or texture of the bread. Once you recognize the cause,<br />
adjustments can be made to compensate for variables.<br />
About 5 minutes after you press Start, lift the cover and check the<br />
contents of the bread pan. The ingredients will be mixing and<br />
staring to form a ball. The dough ball should have an even<br />
consistency, if not, an adjustment may be necessary.<br />
When making bread by hand, the old-fashioned way, the amount<br />
of flour is the control for adjusting. For example, most conventional<br />
bread recipes read: 6 – 7 cups flour. That 1 cup difference is<br />
the allowance to adjust the dough to the correct consistency.<br />
We recommend using the liquid amount to make the adjustment.<br />
Start with the suggested amount of liquid in your recipe.<br />
Make the adjustment, adding 1 Tbsp. at a time, during the<br />
first knead cycle while the machine is still kneading.<br />
If adjusted ingredient did not completely mix into the dough,<br />
press Start/Stop (hold down the button until the display reverts to<br />
setting). Restart by pressing the Select button to reach the desired<br />
setting, then press Start/Stop.<br />
If the baked loaf falls while baking, too much liquid was used.<br />
Next time, reduce liquid by 1 or 2 Tbsp. If the bread is small,<br />
heavy or has a dense, moist texture, the dough was too dry.<br />
Next time, increase liquid.<br />
Not all recipes will produce the same size loaf. When using<br />
whole grain flours, wheats and grains, the loaf will be smaller.<br />
52
DRY DOUGH<br />
If your <strong>Bread</strong> Maker begins to “knock” while kneading, the dough<br />
is too dry. This may occur during cold months. Simply add warm<br />
water 126°F – 135°F/38°C – 43°C, 1 Tbsp. at a time, until the<br />
dough looks soft and smooth.<br />
A dough that is dry will remain in a dense ball, irregularly shaped,<br />
instead of a soft ball. When baked, dry doughs will have an<br />
uneven or irregular top, possibly cracked, and the finished loaf<br />
will be short.<br />
At the end of the kneading, the dough should be soft enough<br />
to very slowly relax toward the corners of the bread pan.<br />
As the dough rises, it wells into the corners.<br />
When using the dough cycle, the dough can be a little wetter than<br />
when you bake bread in the machine. Because it will be removed<br />
and shaped by hand, the dough should be manageable, not sticky.<br />
MOIST DOUGH<br />
If the dough contains too much liquid, it will look more like a<br />
batter rather than a dough. If too wet, the dough may rise well,<br />
but then fall during the bake cycle. Or, it could over-rise and<br />
“mushroom” over the bread pan, or hit the cover.<br />
If the dough looks too wet and sticky, add flour during the<br />
initial mix cycle, 1 Tbsp. at a time, until the dough forms<br />
a soft, pliable ball.<br />
Flour also absorbs moisture from the air, so you may need<br />
to adjust the liquid to compensate for humidity and altitude.<br />
53
PLEASE CHECK<br />
THE FOLLOWING:<br />
CONTROL<br />
PANEL:<br />
TROUBLESHOOTING THE MACHINE<br />
Machine Malfunctions<br />
Unplugged<br />
<strong>Bread</strong> pan not<br />
inserted correctly<br />
Ingredient spilled on<br />
heater element<br />
Kneading blade not<br />
installed in bread pan<br />
Top lid was repeatedly<br />
open during operation<br />
or left open<br />
Menu selection<br />
was wrong<br />
Mode selection<br />
was wrong<br />
(DOUGH mode<br />
was chosen)<br />
Stop/Reset pad<br />
was pressed<br />
after starting<br />
<strong>Bread</strong> left in<br />
bread pan too long<br />
after baking<br />
<strong>Bread</strong>s sliced just after<br />
baking (steam was not<br />
allowed to escape)<br />
Water added after<br />
kneading flour<br />
Power outage<br />
Open cavity too hot/<br />
Must wait to cool<br />
✧<br />
✧<br />
SMOKE<br />
EMITTED<br />
FROM<br />
SIDES<br />
STEAM OF BROWNED SIDES<br />
VENT BREAD BREAD AND BROWN<br />
LED (ON BACK TAKES COLLAPSE BREAD CENTRE BUT SLICES<br />
DISPLAY LED OF UNIT) TOO AND RISES STICKY FLOUR UNEVENLY DOES<br />
DOES NOT READS BURNING LONG BOTTOM TOO UNDER AND COATED NOT AND IS NOT<br />
TURN ON ‘H:HH’ SMELL TO BAKE IS DAMP MUCH BROWNED RAW BOTTOM BAKED STICKY MIX<br />
✧<br />
✧<br />
*If a power outage occurs, you can restart the machine if it has not begun the bake cycle. If it<br />
is at the bake cycle, then remove bread pan and place the pan into the oven to finish cooking.<br />
Questions? Please call us toll-free at<br />
1-800-667-8623.<br />
54<br />
✧<br />
✧ ✧ ✧<br />
✧<br />
✧<br />
✧ ✧<br />
✧<br />
✧ ✧ ✧ ✧<br />
✧<br />
✧<br />
✧
TROUBLESHOOTING THE RECIPES<br />
Baking Results<br />
MEASUREMENT ERRORS<br />
PLEASE CHECK<br />
THE FOLLOWING:<br />
FLOUR<br />
YEAST<br />
WATER<br />
or LIQUID<br />
SUGAR<br />
SALT<br />
FLOUR:<br />
YEAST:<br />
Not enough<br />
Too much<br />
Not enough<br />
Too much<br />
Not enough<br />
Too much<br />
Omitted<br />
Too much<br />
Omitted<br />
Old or bad<br />
flour used<br />
All-purpose flour<br />
Old yeast used<br />
Wrong type of<br />
yeast used<br />
Hot water was used instead of<br />
cold or room temperature<br />
BROWNED<br />
OPEN BREAD AND FLOURED<br />
HEAVY NOT COARSE BREAD DOES NOT SIDES<br />
DENSE BAKED IN OR HOLEY RISES TOO RISE FLOURED OVER CENTRE STICKY<br />
TEXTURE CENTRE TEXTURE COLLAPSE MUCH ENOUGH TOP BROWNED AND RAWZ<br />
✧<br />
✧<br />
✧<br />
✧<br />
✧<br />
✧ ✧<br />
✧<br />
✧<br />
✧ ✧ ✧ ✧ ✧<br />
✧<br />
✧ ✧<br />
✧ ✧ ✧<br />
✧<br />
✧<br />
✧<br />
✧<br />
✧<br />
Questions? Please call us toll-free at<br />
1-800-667-8623.<br />
55
COMMONLY ASKED QUESTIONS<br />
WHY DID MY BREAD TURN OUT LIKE LEAD, RESEMBLING A HOCKEY PUCK?<br />
Perhaps you forgot the yeast (we can all error!) or you used stale yeast, extra salt<br />
or sugar or hot liquids that may have killed the yeast and inhibited rising.<br />
WHY DOES MY LOAF LOOK CAVED IN ON TOP?<br />
Perhaps there was too much liquid or moisture from fruits or vegetables or cheese.<br />
It may have risen too fast due to too much yeast. You’ll be surprised to find when<br />
you cut the top off that you will have a tasty loaf with a coarse texture.<br />
WHY DOES MY LOAF LOOK LUMPY OR HAVE AN UNEVEN SHAPE ON TOP?<br />
Perhaps there wasn’t enough moisture. Sometimes heavier textured breads<br />
appear this way.<br />
WHY DOES MY LOAF HAVE LARGE HOLES?<br />
There was probably too much yeast or moisture.<br />
WHY DOES MY RECIPE TURN OUT PERFECT MOST OF THE T<strong>IM</strong>E BUT<br />
OCCASIONALLY DOES NOT?<br />
Perhaps the humidity in the air or the moisture in the flour varied causing<br />
the dough to be stickier or drier OR the room temperature was cold or very hot.<br />
Remember the machine cannot make judgment calls for those variables.<br />
WHY ARE THERE DEPOSITS OF FLOUR ON THE SIDE OF THE BAKED LOAF?<br />
Perhaps with a heavier bread all the dry ingredients did not get mixed in the kneading;<br />
the next time you could try using a rubber spatula to push down ingredients on the<br />
sides of the pan, after the first kneading cycle.<br />
WHY DO THE RAISINS AND DATES SEEM TO BE CLUMPED TOGETHER<br />
AT THE BOTTOM OR THE LOAF?<br />
The raisins and dates were too sticky. Try air-drying them overnight on the counter<br />
or buying date pieces that have a dextrose coating on the outside.<br />
HOW TO TEST YEAST<br />
The following instructions can be used to determine the freshness and quality<br />
of your yeast. To test, follow these instructions:<br />
1. Place 1/2 cup of lukewarm water into a small bowl or cup.<br />
2. Stir 1 tsp. of sugar into the water.<br />
3. Sprinkle 2 tsp. of yeast over the surface.<br />
4. Place bowl or cup in a warm area and allow it to sit for 10 minutes undisturbed.<br />
5. The mixture should foam and produce a strong yeast aroma. If this does not occur,<br />
the yeast is inactive and stale and new yeast should be purchased.<br />
56
CARE AND CLEANING INSTRUCTIONS<br />
Cleaning the Sunbeam ® Deluxe <strong>Bread</strong> & Dough Maker<br />
Before cleaning the <strong>Bread</strong> Maker, unplug it and allow it to cool. To clean, wipe manually:<br />
Do not immerse in water! And make sure to use only a mild kitchen detergent – benzine,<br />
cleaners, scrubbing brushes and chemical cleaners will damage the unit.<br />
Before re-using the unit, make sure it is completely dry.<br />
Body and Lid<br />
1. Remove all bread crumbs by wiping gently with a slightly damp cloth.<br />
2. As you wipe, take care not to bend the temperature sensor, which is located<br />
on the inside wall of the <strong>Bread</strong> Maker.<br />
Baking Pan and Kneading Blade<br />
1. Wipe clean with a damp cloth and dry thoroughly.<br />
2. Do not wash the pan or removable parts in the dishwasher.<br />
CARING FOR YOUR SUNBEAM ® BREAD MAKER<br />
Non-Stick Pan and Blade<br />
1. Keep your <strong>Bread</strong> Maker clean.<br />
2. Do not use metal utensils. These will damage the non-stick coating on the pan<br />
and kneading blade.<br />
3. Don’t worry if the non-stick coating changes colour over time. The colour change<br />
is the result of steam and other moisture and in no way affects the performance.<br />
4. If you experience difficulty in removing the kneading blade, place warm water<br />
in the bread pan for 10-15 minutes to allow the kneading blade to loosen out.<br />
Storage<br />
1. Make sure that the unit is completely cool and dry before storing.<br />
2. Store the <strong>Bread</strong> Maker with the lid closed.<br />
3. Do not place heavy objects on the top lid.<br />
57
BAKING AT HIGH ALTITUDES<br />
At High Altitudes above 3,000 feet, dough rises faster. Therefore, when<br />
baking in high altitudes some experimentation is required. Follow the<br />
suggested guidelines. Use one suggestion at a time and remember to<br />
write down which suggestions work best for you.<br />
Guidelines:<br />
1. Reduce the amount of yeast by 25%.<br />
This will inhibit the bread from over-rising.<br />
2. <strong>Inc</strong>rease salt by 25%. The bread will rise<br />
slower and have less of a tendency to sink.<br />
3. Watch your dough as it mixes. Flour stored<br />
at High Altitudes tends to be drier.<br />
You might have to add a few tablespoons<br />
of water, until the dough forms a nice ball.<br />
Along the way, feel free to ask questions.<br />
You can call us toll free at<br />
1-800-667-8623.<br />
58
INDEX OF RECIPES<br />
BREAD RECIPES<br />
Deluxe White <strong>Bread</strong> . . . . . . . . . . . . . . . 18<br />
Classic White <strong>Bread</strong> . . . . . . . . . . . . . . . 18<br />
Country White <strong>Bread</strong> . . . . . . . . . . . . . . 19<br />
Hearty Garlilc <strong>Bread</strong> . . . . . . . . . . . . . . . 19<br />
Herb <strong>Bread</strong>. . . . . . . . . . . . . . . . . . . . . . 20<br />
Italian <strong>Bread</strong>. . . . . . . . . . . . . . . . . . . . . 20<br />
French <strong>Bread</strong> . . . . . . . . . . . . . . . . . . . . 21<br />
Yogurt <strong>Bread</strong> . . . . . . . . . . . . . . . . . . . . 21<br />
Onion and Cheese <strong>Bread</strong>. . . . . . . . . . . . 22<br />
Cottage Cheese and Chive <strong>Bread</strong>. . . . . . 22<br />
50% Whole Wheat <strong>Bread</strong> . . . . . . . . . . . 23<br />
100% Whole Wheat <strong>Bread</strong> . . . . . . . . . . 23<br />
Bran and Sunflower Seed <strong>Bread</strong> . . . . . . 24<br />
Multi-Grain <strong>Bread</strong>. . . . . . . . . . . . . . . . . 24<br />
Cracked Wheat <strong>Bread</strong> . . . . . . . . . . . . . . 25<br />
Pumpernickel <strong>Bread</strong> . . . . . . . . . . . . . . . 25<br />
Light Rye <strong>Bread</strong> . . . . . . . . . . . . . . . . . . 26<br />
Deli Rye <strong>Bread</strong> . . . . . . . . . . . . . . . . . . . 26<br />
Mustard Rye <strong>Bread</strong>. . . . . . . . . . . . . . . . 27<br />
SWEET BREAD RECIPES<br />
Cinnamon Fruit Loaf. . . . . . . . . . . . . . . 28<br />
Apple Walnut <strong>Bread</strong> . . . . . . . . . . . . . . . 28<br />
GLUTEN-FREE BREAD RECIPES<br />
Gluten-Free White <strong>Bread</strong>. . . . . . . . . . . . 29<br />
Gluten-Free Cheddar Cheese <strong>Bread</strong> . . . . 30<br />
Gluten-Free Cinnamon Raisin <strong>Bread</strong> . . . 31<br />
QUICK BREAD RECIPES<br />
Banana Chocolate Chip <strong>Bread</strong> . . . . . . . . <strong>33</strong><br />
Zucchini <strong>Bread</strong> . . . . . . . . . . . . . . . . . . . 34<br />
Apricot Nut <strong>Bread</strong>. . . . . . . . . . . . . . . . . 35<br />
Grape Nut <strong>Bread</strong>. . . . . . . . . . . . . . . . . . 35<br />
DOUGH INSTRUCTIONS . . . . . . . . . . . . . . 36<br />
VARIATIONS FOR SHAPING DOUGH . . . . . . 37<br />
DOUGH RECIPES<br />
White Rolls . . . . . . . . . . . . . . . . . . . . . 39<br />
Honey and Wheat Rolls . . . . . . . . . . . . 39<br />
Whole Wheat Rolls . . . . . . . . . . . . . . . . 40<br />
Bran Rolls . . . . . . . . . . . . . . . . . . . . . . 40<br />
PIZZA . . . . . . . . . . . . . . . . . . . . . . . . . . . 41<br />
BAGELS. . . . . . . . . . . . . . . . . . . . . . . . . . 43<br />
PASTA RECIPES<br />
Basic Pasta . . . . . . . . . . . . . . . . . . . . . 44<br />
Egg Pasta. . . . . . . . . . . . . . . . . . . . . . . 44<br />
BASIC SWEET DOUGH . . . . . . . . . . . . . . . 45<br />
Cinnamon Pinwheel Rolls . . . . . . . . . . . 46<br />
Spiced Granola Buns . . . . . . . . . . . . . . 47<br />
Chelsea Buns . . . . . . . . . . . . . . . . . . . . 47<br />
Swedish Tea Ring. . . . . . . . . . . . . . . . . 47<br />
GLAZE AND SPREAD RECIPES<br />
Egg Glaze. . . . . . . . . . . . . . . . . . . . . . . 48<br />
Milk or butter Glaze . . . . . . . . . . . . . . . 48<br />
Sugar Glaze . . . . . . . . . . . . . . . . . . . . . 48<br />
Honey Glaze . . . . . . . . . . . . . . . . . . . . . 48<br />
Chevre Spread . . . . . . . . . . . . . . . . . . . 48<br />
Blue Cheese Spread . . . . . . . . . . . . . . . 48<br />
Avocado Spread . . . . . . . . . . . . . . . . . . 48<br />
Salmon Spread. . . . . . . . . . . . . . . . . . . 49<br />
Greek Spread . . . . . . . . . . . . . . . . . . . . 49<br />
Low-Calorie Garden Spread . . . . . . . . . 49<br />
Mexican Cheese Spread . . . . . . . . . . . . 49<br />
Tapenade Spread . . . . . . . . . . . . . . . . . 49<br />
Cheddar Cheese Spread . . . . . . . . . . . . 49<br />
Smoked Salmon Dip. . . . . . . . . . . . . . . 49<br />
Chutney Spread . . . . . . . . . . . . . . . . . . 50<br />
Cheese Bruschetta . . . . . . . . . . . . . . . . 50<br />
Sweet Fruit Spread . . . . . . . . . . . . . . . . 50<br />
Honey-Orange Cheese Spread. . . . . . . . 50<br />
Maple Nut Cream Spread . . . . . . . . . . . 50<br />
Peanut Butter Cream Spread. . . . . . . . . 50<br />
Honey Butter . . . . . . . . . . . . . . . . . . . . 50<br />
JAM & MARMALADE RECIPES<br />
Strawberry Jam . . . . . . . . . . . . . . . . . . 51<br />
Orange Marmalade . . . . . . . . . . . . . . . . 51<br />
Berry Jam . . . . . . . . . . . . . . . . . . . . . . 51<br />
59
FÉLICITATIONS!<br />
Du pain de ménage frais et tiède en<br />
quelques opérations faciles avec votre<br />
Machine à Pain et à Pâte De Luxe<br />
de 2 lb. Sunbeam .<br />
®<br />
Nous avons tout fait pour simplifier au<br />
maximum les activités de boulangerie;<br />
les instructions ont été simplifiées;<br />
le tableau de commande est simple<br />
et facile – lire et nous avons crée de<br />
nombreuses recettes délicieuses.<br />
Lisez d’abord les directives de sécurité,<br />
puis passez aux instructions faciles –<br />
suivre de la Page 71.<br />
Si vous avez des questions. Appelez le<br />
numéro vert suivant: 1-800-667-8623.<br />
60
TABLE DES MATIÈRES<br />
PRÉCAUTIONS <strong>IM</strong>PORTANTES . . . . . . . . . . . . . . . . . . . . . . . . . . . . . . . 62<br />
Une Symphonie d’Ingrédients . . . . . . . . . . . . . . . . . . . . . . . . . . . . 63<br />
AVANT DE COMMENCER . . . . . . . . . . . . . . . . . . . . . . . . . . . . . . . . . . . 64<br />
Ingrédients de Base . . . . . . . . . . . . . . . . . . . . . . . . . . . . . . . . . . . 65<br />
Levure . . . . . . . . . . . . . . . . . . . . . . . . . . . . . . . . . . . . . . . . . . . . 65<br />
Le Sucre . . . . . . . . . . . . . . . . . . . . . . . . . . . . . . . . . . . . . . . . . . 65<br />
La Farine . . . . . . . . . . . . . . . . . . . . . . . . . . . . . . . . . . . . . . . . . . 65<br />
Les Liquides . . . . . . . . . . . . . . . . . . . . . . . . . . . . . . . . . . . . . . . 66<br />
Le Sel . . . . . . . . . . . . . . . . . . . . . . . . . . . . . . . . . . . . . . . . . . . . 66<br />
La Matière Grasse . . . . . . . . . . . . . . . . . . . . . . . . . . . . . . . . . . . 66<br />
Les Oeufs . . . . . . . . . . . . . . . . . . . . . . . . . . . . . . . . . . . . . . . . . 66<br />
Conseils de Mesure Importants . . . . . . . . . . . . . . . . . . . . . . . . . . 67<br />
FAITES CONNAISSANCE AVEC VOTRE MACHINE<br />
Tableau de Commandes . . . . . . . . . . . . . . . . . . . . . . . . . . . . . . . . 68<br />
Programmations . . . . . . . . . . . . . . . . . . . . . . . . . . . . . . . . . . . . . 69<br />
Mode d’Emploi Détaillé du Machine à Pain et à Pâte De Luxe . . . . 70<br />
Temps de Cycle . . . . . . . . . . . . . . . . . . . . . . . . . . . . . . . . . . . . . . 73<br />
Affichage d’Information . . . . . . . . . . . . . . . . . . . . . . . . . . . . . . . . 74<br />
Conseils pour le Boulanger Gourmet . . . . . . . . . . . . . . . . . . . . . . 75<br />
RECETTES DE PAIN BLANC<br />
Pain Blanc De Luxe . . . . . . . . . . . . . . . . . . . . . . . . . . . . . . . . . . . 77<br />
Pains au Blé Entier et au Grains . . . . . . . . . . . . . . . . . . . . . . . . . . 82<br />
Pains de Seigle . . . . . . . . . . . . . . . . . . . . . . . . . . . . . . . . . . . . . . 84<br />
Recettes de Pains Doux . . . . . . . . . . . . . . . . . . . . . . . . . . . . . . . . 87<br />
Pains sans Gluten . . . . . . . . . . . . . . . . . . . . . . . . . . . . . . . . . . . . 88<br />
Instructions pour le Pain Éclair . . . . . . . . . . . . . . . . . . . . . . . . . . . 91<br />
Instructions pour la Pâte . . . . . . . . . . . . . . . . . . . . . . . . . . . . . . . 94<br />
Variations pour le Façonnage de la Pâte . . . . . . . . . . . . . . . . . . . . 95<br />
Pizza . . . . . . . . . . . . . . . . . . . . . . . . . . . . . . . . . . . . . . . . . . . . . 99<br />
Bagels . . . . . . . . . . . . . . . . . . . . . . . . . . . . . . . . . . . . . . . . . . . . . 101<br />
Recettes de Pâtes . . . . . . . . . . . . . . . . . . . . . . . . . . . . . . . . . . . . 102<br />
Pâte Sucrée de Base . . . . . . . . . . . . . . . . . . . . . . . . . . . . . . . . . . 103<br />
Glaçages et Tartinades . . . . . . . . . . . . . . . . . . . . . . . . . . . . . . . . . 106<br />
Recettes de Confitures et Gelées . . . . . . . . . . . . . . . . . . . . . . . . . . 109<br />
Ajustement des Recettes . . . . . . . . . . . . . . . . . . . . . . . . . . . . . . . 110<br />
DÉPANNAGE<br />
Dépannage de l’Appareil . . . . . . . . . . . . . . . . . . . . . . . . . . . . . . . . 112<br />
Solutions aux Problèmes de Recettes . . . . . . . . . . . . . . . . . . . . . . 113<br />
Questions Fréquemment Posées . . . . . . . . . . . . . . . . . . . . . . . . . . 114<br />
Comment Essayer la Levure . . . . . . . . . . . . . . . . . . . . . . . . . . . . . 114<br />
Directives de Nettoyage et d’Entretien . . . . . . . . . . . . . . . . . . . . . . 115<br />
La Boulangerie-Haute Altitude . . . . . . . . . . . . . . . . . . . . . . . . . . . . 116<br />
INDEX DE RECETTES . . . . . . . . . . . . . . . . . . . . . . . . . . . . . . . . . . . . . 117<br />
61
PRÉCAUTIONS <strong>IM</strong>PORTANTES<br />
Quand on utilise des appareils ménagers électriques, il faut toujours observer<br />
des mesures de sécurité élémentaires, et en particulier:<br />
1. LIRE TOUS LES MODES D’EMPLOI, LES ÉTIQUETTES ET LES<br />
AVERTISSEMENTS AVANT DE SE SERVIR DU ROBOT BOULANGER.<br />
2. Ne pas toucher les surfaces chaudes. Utiliser toujours des manicles quand<br />
on manipule des matériaux chauds, et laisser refroidir les pièces en métal<br />
avant de les nettoyer. Laisser le robot refroidir complètement avant d’y<br />
ajouter ou d’en retirer des pièces.<br />
3. Quand l’appareil n’est pas en service et avant de le nettoyer,<br />
dépriser le robot du mur.<br />
4. Pour éviter les risques d’électrocution, ne pas immerger l’appareil<br />
ou les fiches dans l’eau ou d’autres liquides.<br />
5. On exercera toujours une surveillance étroite quand cet appareil<br />
est utilisé par ou – proximité d’enfants ou de personnes<br />
affligées d’un handicap quelconque.<br />
6. Ne rien poser sur le cordon d’alimentation. Ne pas enficher le cordon dans un<br />
lieu ou il peut risquer de faire trébucher des personnes évoluant – proximité.<br />
7. Ne pas utiliser cet appareil ni aucun autre si son cordon d’alimentation est<br />
effiloché ou si la fiche est endommagée, après une panne, après une chute<br />
ou après tout autre forme d’endommagement. Renvoyer l’appareil au centre<br />
de service agrée le plus proche – fin d’inspection, de réparation ou de<br />
réglage mécanique ou électrique.<br />
8. Ne pas laisser le cordon pendre d’une table ou d’un comptoir ni entrer<br />
en contact avec des surfaces chaudes. Ne pas placer sur des surfaces<br />
instables recouvertes de textile.<br />
9. Éviter de toucher les pièces en mouvement.<br />
10. Ne pas utiliser d’accessoires non recommandés par le fabricant; ils<br />
peuvent entraîner des incendies, des électrocutions ou des blessures.<br />
11. Ne pas utiliser – l’extérieur ou – des fins commerciales.<br />
12. Ne pas placer l’appareil – proximité d’un brûleur – gaz, d’un élément<br />
chauffant électrique ou d’un four chaud.<br />
62
13. Pour dépriser, appuyer sur le bouton “STOP” et le maintenir enfoncé,<br />
saisir la fiche et la tirer de la prise murale. Ne jamais tirer sur le cordon.<br />
14. UTILISATION DE RALLONGES: Un cordon d’alimentation court a été prévu<br />
dans le but de réduire le risque de blessure résultant de toute chute causée<br />
par un cordon trop long. Les rallonges disponibles en quincaillerie doivent<br />
être utilisées avec précaution. Le cordon doit être disposé de façon – ne<br />
pas pendre du comptoir ou de la table ou des enfants pourraient le tirer<br />
et ou il pourrait faire trébucher une personne passant – proximité.<br />
15. AL<strong>IM</strong>ENTATION: Si le circuit électrique est surchargé par d’autres appareils,<br />
le robot ne fonctionnera pas normalement. Le robot doit être branché sur<br />
un circuit distinct de tout autre appareil ménager en service.<br />
CET APPAREIL EST PRÉVU POUR USAGE MÉNAGER UNIQUEMENT<br />
LIRE ET CONSERVER CES INSTRUCTIONS<br />
UNE SYMPHONIE D’INGRÉDIENTS<br />
Tels les instruments d’un orchestre, les ingrédients de base du pain<br />
sont très simples: farine, sucre, sel, un liquide (eau ou lait), une<br />
matière grasse – l’occasion (du beurre ou de l’huile) et de la levure.<br />
Comme chaque instrument musical, chaque ingrédient accomplit<br />
une tâche particulière et chacun apporte sa saveur au – final.<br />
C’est pourquoi il est important d’utiliser les bons ingrédients<br />
dans les bonnes proportions si l’on veut être sûr d’obtenir<br />
les résultats les plus délicieux!<br />
63
AVANT DE COMMENCER<br />
Nous avons conçu la Machine à Pain et à Pâte De Luxe, 900 g (2 lb.) de façon – faciliter<br />
son utilisation. Toutefois, et – l’instar de tout appareil ménager, il exige une utilisation<br />
et une manipulation adéquates.<br />
AVANT L’EMPLOI<br />
1. LIRE ET CONSERVER TOUS LES MODES D’EMPLOI.<br />
2. S’assurer qu’on a retiré toutes les matières étrangères<br />
du moule de cuisson.<br />
3. Priser Le Robot dans une prise adéquatement cûblée.<br />
PENDANT L’EMPLOI<br />
Maintenir Le Robot hors de portée des enfants – IL EST CHAUD!<br />
1. La température est très élevée pendant la cuisson. Veiller – ne pas approcher les mains<br />
ou le visage de l’appareil.<br />
2. Ne pas ouvrir le couvercle et retirer le moule pendant le fonctionnement.<br />
3. Ne rien placer sur le couvercle du robot.<br />
4. Ne pas couvrir les évents.<br />
5. En cas de panne d’électricité, si le cycle de cuisson ne démarre pas, il est possible de<br />
remettre l’appareil en marche. Si la cuisson est déjà commencée, la terminer au four.<br />
OU L’UTILISER<br />
1. Utiliser exclusivement sur une surface stable et résistant – la chaleur.<br />
2. Ne pas utiliser Le Robot dans un lieu ou il sera exposé – la lumière directe du soleil<br />
ou de toute autre source de chaleur, comme une cuisinière ou un four.<br />
3. Placer l’appareil – 5 cm au moins des murs. Si défaut, les murs seront décolorés<br />
par la chaleur.<br />
APRÈS L’EMPLOI<br />
1. Utiliser des gants de cuisine ou des manicles pour retirer le pain du moule<br />
après la cuisson.<br />
2. Veiller – couper l’alimentation de l’appareil en le déprisant. Laisser refroidir Le Robot<br />
avant de le ranger.<br />
3. Lire les instructions avant de nettoyer. Ne pas immerger l’appareil dans l’eau.<br />
Cela entraînera l’électrocution et/ou endommagera l’appareil.<br />
64
LEVURE<br />
INGRÉDIENTS DE BASE<br />
La levure est en fait une plante microscopique. En un mot,<br />
sans levure votre pain ne lèvera pas. Quand elle est humectée par<br />
un liquide, alimentée par du sucre et soigneusement réchauffée,<br />
la levure produit des gaz qui font lever la pâte. Si la température est<br />
trop basse, la levure n’est pas activée; si elle est trop élevée, la levure périt. La Machine<br />
à Pain et à Pâte De Luxe contourne ces obstacles en veillant – maintenir en permanence<br />
la bonne température dans la chambre de cuisson. On peut utiliser soit de la “levure sèche<br />
activeé, soit de la “levure – action rapideé soit de la levure”– montée rapideé soit encore<br />
l’une des nouvelles “levures – robot boulangeré avec le Robot boulanger et pétrisseur.<br />
Important: La quantité de levure pour les recettes de très grands pains peut être la même<br />
ou moindre que la quantité nécessaire pour les grands pains. Nous suggérons que vous<br />
vous le procuriez en bouteille ou en boîte (vérifiez la fraîcheur sur l’étiquette) pour faciliter<br />
l’opération de mesure; refermer hermétiquement après usage et placer dans le réfrigérateur.<br />
LA FARINE<br />
LE SUCRE<br />
Le sucre fait fermenter la levure, sucre le pain, permet à la croûte<br />
de dorer et rend la texture moelleuse. Toutes nos recettes sont<br />
à base de sucre blanc cristallisé. Nous précisons lorsqu’il s’agit<br />
de sucre roux. Il est possible de remplacer le sucre blanc<br />
par du sucre roux et vice versa.<br />
Utiliser de la farine canadienne de blé dur, tout-usage, blanchie ou<br />
non blanchie, qui contient une proportion élevée de protéines ou de<br />
la farine de gluten ou de la farine complète. La nouvelle farine à pain<br />
tout-usage ou la farine complète fournissent davantage de pâte et<br />
une texture plus légère; la farine tout-usage courante et la farine<br />
complète fournissent une plus petite quantité de pâte et une texture plus compacte.<br />
NE PAS UTILISER de farine à gâteaux ou de farine auto-levante. La farine complète<br />
est riche en vitamines et en fibres parce qu’elle contient du germe de blé et du son.<br />
Elle donne au pain un petit goût de noisette. La farine complète donne une plus petite<br />
quantité de pain. La pâte lève plus lentement, et sa texture est plus compacte.<br />
La farine complète doit être utilisée dans les trois mois ou doit être conservée au<br />
congélateur dans un récipient en plastique hermétique pour en prolonger la conservation.<br />
La farine de seigle ou de maïs, le son, le blé concassé ou les flocons d’avoine<br />
(normaux ou à l’ancienne), etc., qui sont ajoutés pour donner du goût, contiennent<br />
moins de gluten et sont utilisés en plus petites quantités ou avec de la farine de gluten.<br />
65
LES LIQUIDES<br />
Dans la plupart des recettes, on utilise de l’eau<br />
tiède ou à température ambiante. Cependant,<br />
il est possible d’utiliser d’autres liquides tels<br />
que du lait, de la bière, du jus de fruit ou de<br />
la purée de fruit pour parfumer ou varier les<br />
recettes. La bière peut provenir d’une bouteille<br />
qui vient d’être ouverte ou d’un restant. Le lait<br />
donne une mie plus tendre que l’eau et apporte<br />
des éléments nutritifs. Nos recettes sont à base<br />
de lait en poudre écrémé (normal ou instantané),<br />
plus pratique parce que toujours à portée de<br />
main, qui peut être utilisé pour une cuisson différée, contrairement au lait frais qui<br />
peut gâcher la cuisson. Il est possible de remplacer l’eau par du lait frais. Dans ce cas,<br />
ne pas utiliser de lait en poudre et ne pas faire cuire en différé. Les personnes allergiques<br />
au lait (frais ou en poudre) peuvent remplacer celui-ci par de l’eau.<br />
LE SEL<br />
Le sel renforce le gluten, contrôle la levure et rend la pâte plus<br />
élastique. Cependant, il ralentit la levée. Utiliser du sel de table<br />
ordinaire en très petite quantité. Il n’est pas indispensable et,<br />
dans certains cas, il est possible de donner du goût avec un<br />
produit de remplacement épicé.<br />
LA MATIÈRE GRASSE<br />
La matière grasse est souvent utilisée pour accentuer<br />
le goût et permettre au pain de rester moelleux, ce qui<br />
augmente sa durée de conservation. L’huile végétale<br />
étant plus facile à doser et recommandée pour<br />
certains régimes, il est possible de l’utiliser pour<br />
remplacer le beurre ou la margarine.<br />
LES OEUFS<br />
Les œufs améliorent la pâte et donnent une belle<br />
couleur dorée à la croûte du pain mais, pour des<br />
raisons sanitaires, ils ne peuvent pas être utilisés<br />
pour la cuisson différée.<br />
66
CONSEILS DE MESURE <strong>IM</strong>PORTANTS<br />
Chaque ingrédient ayant son importance, il est très important<br />
d’en respecter les proportions. Bien respecter le système<br />
choisi tout au long de la recette. Il est bon d’avoir deux jeux<br />
de doseurs, un pour les ingrédients secs et l’autre pour<br />
les liquides, quel que soit le système choisi.<br />
POUR LES INGRÉDIENTS SECS:<br />
Utiliser les doseurs pour mesure impériale OU pour système<br />
métrique ou encore une cuiller (voir la photographie).<br />
Les tasses de farine doivent être arasées avec une lame de<br />
couteau. Le sel, le sucre et la levure doivent être prélevés avec<br />
une cuiller sèche qui sera arasée avec la lame d’un couteau.<br />
NE JAMAIS mesurer au-dessus du moule.<br />
POUR LES LIQUIDES:<br />
Remplir un verre doseur normal ou une cuiller<br />
doseuse jusqu’au niveau désiré (voir la<br />
photographie). Placer le verre doseur sur<br />
une surface bien plane et vérifier le niveau<br />
qui doit être à hauteur des yeux.<br />
Bien respecter les quantités indiquées<br />
dans la recette. Une cuiller à soupe en moins<br />
ou en plus peut faire une grande différence.<br />
POUR LES MATIÈRES<br />
GRASSES SOLIDES:<br />
Remplir une cuiller de mesure au niveau indiqué<br />
et égaliser avec un ustensile de cuisine plat.<br />
67
FAITES CONNAISSANCE AVEC VOTRE MACHINE À PAIN ET À PÂTE DE LUXE<br />
La meilleure façon d’y arriver est d’utiliser ce diagramme. Bientôt, vous connaîtrez le monde<br />
de la cuisson électronique du pain de la même façon que vous connaissez votre propre<br />
cuisine. En attendant, voici quelques instructions faciles à suivre pour vous aider à démarrer.<br />
TABLEAU DE COMMANDES<br />
<strong>IM</strong>PORTANT: Lorsque vous utilisez les touches<br />
de réglage à effleurement, soyez sûr<br />
d’appuyer sur la touche jusqu’à ce<br />
que vous entendiez un bip.<br />
1. Fenêtre d’Affichage. L’affichage à cristaux<br />
liquides indiquera le programme sélectionné<br />
(Nombres de 1 à 8) et la couleur de la croûte<br />
(L, P ou H) jusqu’à ce que le bouton marche<br />
«Start» soit appuyé. Puis l’affichage indiquera<br />
minute par minute le compte à rebours durant<br />
le programme. «0:00» sera affiché lorsque<br />
le cycle est terminé.<br />
2. Minuterie. Utiliser la minuterie «Timer»<br />
pour retarder la cuisson. La minuterie peut être<br />
paramétrée jusqu’à 13 heures à l’avance. Le tableau<br />
de commandes possède des flèches avant<br />
et arrière. Les flèches permettent d’avancer ou de<br />
reculer le temps par intervalles de 10 minutes.<br />
Maintenir les boutons enfoncés en continu<br />
avancera ou diminuera le temps plus rapidement.<br />
3. Couleur de la Croûte. Choisir parmi les<br />
réglages suivants: (L) pour une croûte claire, (P)<br />
pour une croûte moyenne, et (H) pour une croûte<br />
foncée. Sélectionner L pour le réglage le plus bas<br />
et obtenir une croûte «claire»; P pour le réglage<br />
par défaut du programme pour obtenir une croûte<br />
«moyenne» et H pour le réglage le plus fort et<br />
obtenir une croûte «foncée». L’appareil effectuera<br />
automatiquement la cuisson en réglage moyen<br />
si aucun autre réglage n’est sélectionné.<br />
L – Light<br />
P – Medium<br />
H – Dark<br />
Basic<br />
Rapid<br />
Sweet<br />
French<br />
Quick<br />
Whole Wheat<br />
Dough/Pasta<br />
4. Sélection. Appuyer sur le bouton sélection «Select» pour choisir le réglage. A chaque fois<br />
que vous appuyez sur le bouton, vous entendrez un «bip» sonore et le réglage se positionnera<br />
de la façon suivante: 1 Normal 3:00; 2 Rapide 2:20; 3 Sucré 2:50; 4 Baguette 3:50;<br />
5 Pain Éclair 1:50; 6 Blé Complet 3:40; 7 Pâte 1:30; 8 Cuisson 1:00.<br />
Maintenir le bouton enfoncé permettra d’avancer sur les réglages plus rapidement.<br />
Bake<br />
Delay Timer<br />
Start<br />
Stop<br />
Crust<br />
Color<br />
Select<br />
1<br />
5<br />
2<br />
4<br />
3<br />
68
5. Marche/Arrêt. Appuyer sur le bouton marche/arrêt «Start/Stop» pour démarrer l’opération<br />
ou lancer le compte à rebours de la minuterie pour une cuisson différée. (Un signal sonore<br />
indiquera que le cycle de cuisson du pain a démarré). Pour stopper l’opération ou annuler la<br />
programmation de la minuterie, appuyer et maintenir enfoncé pendant 2 à 3 secondes jusqu’à<br />
ce que vous entendiez un «Bip». L’appareil se remettra en position d’attente en présentant<br />
l’heure du cycle sélectionné.<br />
REMARQUE: Ne pas appuyer sur arrêt «STOP» lorsque vous ne faites que vérifier l’état<br />
de progression de votre pain, car cela annulera le cycle.<br />
PROGRAMMATIONS<br />
Ci-dessous sont présentées de brèves descriptions des différents types de pain,<br />
pâtes à pain, pizzas, pâtes alimentaires, gelées et confitures que vous pouvez créer<br />
avec votre Machine à Pain et à Pâte De Luxe Sunbeam ® .<br />
• Normal (1)<br />
Ce réglage est probablement celui utilisé le plus souvent car il permet de réussir<br />
pratiquement toutes les recettes (pain blanc classique, pain aux raisins et autres).<br />
Le cycle total de cuisson est de 3 heures.<br />
• Rapide (2)<br />
Le réglage Rapide fabriquera le pain plus rapidement que les autres réglages.<br />
Nous suggérons que vous utilisiez la recette du Pain Blanc Classique et augmentez l’eau<br />
d’1 à 2 cuillers à soupe. Cette programmation réduit le temps d’un second pétrissage<br />
et celui de la levée finale. Le temps du cycle total est de 2 heures et 20 minutes.<br />
• Sucré (3)<br />
Ce réglage est fait pour les pains qui contiennent des quantités élevées de sucre,<br />
gras ou protéine (fromage, œufs, etc.), tout cela augmentant le brunissage.<br />
Le pain sera fini en 2 heures et 50 minutes.<br />
• Baguette (4)<br />
Ce réglage est utilisé pour la préparation du pain blanc à la française (baguette).<br />
En raison de temps prolongés de pétrissage, levée et cuisson, le pain a une croûte<br />
plus à point. Le cycle complet est de 3 heures et 50 minutes.<br />
• Pain Éclair (5)<br />
Les recettes de cette programmation utiliseront un agent de levage à action rapide,<br />
en général de la levure chimique ou du bicarbonate de potassium, plutôt que<br />
de la levure de boulangerie. Le temps total du cycle est d’1 heure et 50 minutes.<br />
• Blé Complet (6)<br />
Ce réglage offre des temps de levée plus longs afin d’accommoder l’action de levée<br />
plus lente du pain contenant plus de 50% de farine de blé complet. Le temps total<br />
du cycle est de 3 heures et 40 minutes.<br />
• Pâte(s) (7)<br />
Ce réglage est utilisé pour préparer la pâte pour les pains mollet, les pains spéciaux,<br />
les pizzas, les pâtes alimentaires, etc., qui sont pétris à la main, sont placés pour<br />
une levée finale, puis sont cuits de façon conventionnelle. Le cycle total est d’une heure<br />
et 30 minutes. Lorsque le cycle est terminé, retirer la pâte et procéder avec le façonnage<br />
à la main, le roulage, etc.<br />
• Cuisson (8)<br />
Ce réglage est pour la cuisson de pâte(s) ou de confitures. Le cycle de temps total<br />
est d’une heure.<br />
69
MODE D’EMPLOI DÉTAILLÉ DE LA MACHINE À PAIN ET À PÂTE DE LUXE<br />
1. OUVRIR LE COUVERCLE ET SORTIR LE MOULE DE CUISSON en tirant tout<br />
droit sur la poignée. Il est important de retirer le moule de l’appareil avant d’y mettre<br />
les ingrédients. On évite ainsi de renverser les ingrédients – l’intérieur du boîtier.<br />
2. MONTER LA LAME DE PÉTRISSAGE sur l’arbre – l’intérieur du moule de<br />
cuisson en alignant le côté plat de la lame de pétrissage sur le côté plat de l’arbre.<br />
S’assurer que cette dernière est fermement assujettie sur l’arbre.<br />
3. MESURER TOUS LES INGRÉDIENTS soigneusement et précisément.<br />
Des mesures imprécises, même légèrement, peuvent influencer les résultats.<br />
Ajouter les ingrédients dans le moule-pain dans l’ordre dans lequel ils sont énumérés.<br />
La levure est toujours ajoutée en dernier et ne doit entrer en contact avec aucun liquide.<br />
(Avant d’ajouter la levure, ne pas oublier de creuser un petit trou dans la farine de sorte<br />
que la levure n’entre pas prématurément en contact avec un liquide. Ceci est<br />
particulièrement important quand on utilise la minuterie de Retard de cuisson).<br />
4. ESSUYER L’EAU ET TOUT AUTRE DÉVERSEMENT – l’extérieur du moule<br />
puis introduire le moule fermement au fond de l’appareil, en exerçant une pression sur<br />
les quatre coins du moule pour s’assurer qu’il est bien pris dans les supports de retenue.<br />
5. FERMER LE COUVERCLE ET PRISER LE ROBOT. On entendra un «bip»<br />
et la fenêtre de l’affichage – cristaux liquides indiquera «1P» pour pain «Normal»,<br />
croûte «Moyen».<br />
6. CHOISIR LE TYPE DE PAIN. Sélectionner le réglage convenant – votre recette<br />
en appuyant sur le bouton «SELECT» du panneau de commande. Chaque fois qu’on<br />
appuie sur «SELECT», le numéro de la fenêtre d’affichage passe sur le réglage suivant.<br />
7. SÉLECTION DE LA COULEUR DE LA PÂTE. Votre machine à fabriquer le pain<br />
produira automatiquement une couleur de croûte «moyenne» (P = programme<br />
par défaut), à moins d’une autre sélection; sélectionner la couleur de la croûte<br />
en appuyant sur le bouton couleur croûte «Crust Colour»; L = faible réglage<br />
(croûte claire) et H = haut réglage (croûte foncée).<br />
70<br />
Tirant Tout Droit<br />
sur la Poignée.
8. APPUYER A FOND SUR LE BOUTON MARCHE/ARRÊT «START/STOP» une fois<br />
que vous avez effectué la sélection de votre type de pain et de la couleur de la croûte.<br />
Un signal sonore retentit pour vous indiquer que cela commence! Le temps de cuisson<br />
en heures et minutes apparaîtra sur l’affichage. Un compte à rebours sera effectué par<br />
intervalle d’une minute, jusqu’à ce le pain soit prêt. Cette machine à pain possède une<br />
Fenêtre d’affichage pratique qui vous permet de voir le progrès du pain alors qu’il est mixé,<br />
pétri et cuit. NE PAS OUVRIR LE COUVERCLE DURANT LES CYCLES DE CUISSON.<br />
REMARQUE: Une fois que le bouton marche/arrêt «Start/Stop» est appuyé, la ou les fonctions<br />
de sélection ne peuvent être changées. Si vous souhaitez effectuer des modifications à ce<br />
niveau, l’appareil doit être stoppé, reprogrammé et redémarré. Pour arrêter l’appareil, appuyer<br />
sur le bouton marche/arrêt «Start/Stop» et le maintenir dans cette position jusqu’à ce qu’un<br />
signal retentisse et que l’écran présente l’affichage de programmation initiale.<br />
9. LORSQUE LE PAIN EST PRÊT. Lorsque le temps de cuisson a été effectué, un signal<br />
sonore retentit et la fenêtre d’affichage présentera «0:00» (les «deux points» de l’affichage<br />
du temps continueront à clignoter). Le réglage «Maintien au Chaud» continuera automatiquement<br />
à maintenir le pain au chaud pendant une heure après le fin du cycle (sauf lors de<br />
l’utilisation du réglage pour pâte). Pour de meilleurs résultats, retirer le pain dès que<br />
possible pour éviter que la pâte ne devienne lourde. Retirer le moule à l’aide de poignées<br />
et enlever le pain du moule en le renversant et en le secouant. Si vous avez du mal à retirer<br />
le pain du moule, glisser une spatule plate en caoutchouc ou en plastique le long des côtés<br />
du moule pour libérer le pain. Si la lame de pétrissage reste au fond du moule, la retirer avec<br />
l’extrémité d’un ustensile en plastique. Une fois retiré du moule à pain, il est recommandé<br />
de laisser votre pain se refroidir 15 minutes avant de le découper en tranches. Profitez-en!<br />
10. CYCLE DE MAINTIEN AU CHAUD. Ce cycle débute automatiquement après<br />
que le temps de cuisson ait été effectué. A la fin des 60 minutes, le chauffage s’arrêtera.<br />
REMARQUE: Vous pouvez retirer le moule de cuisson à tout moment durant le cycle<br />
de «Maintien au Chaud». Pour stopper cette fonction de «Maintien au chaud»,<br />
appuyer simplement sur le bouton arrêt «Stop» et le maintenir dans cette position<br />
pendant 2 à 3 secondes.<br />
ATTENTION: De la vapeur s’échappera lorsque le couvercle est ouvert. Soyez sûr<br />
d’utiliser des poignées ou des gants de cuisine pour éviter les brûlures dues à la vapeur.<br />
REMARQUE: Votre Machine à Pain contient une fonction de rappel d’auto cycle.<br />
Lorsqu’un cycle est terminé et que le bouton marche/arrêt «Start/Stop» est appuyé,<br />
l’appareil reviendra automatiquement à la dernière programmation sélectionnée.<br />
REMARQUE: Si vous souhaitez cuire immédiatement un autre pain, permettre à la Machine<br />
à Pain de se refroidir pendant 10 à 15 minutes avec le couvercle ouvert et le moule retiré.<br />
Si vous tentez de l’utiliser trop tôt, un signal se fera entendre et l’affichage donnera<br />
«H:HH». Appuyer sur marche/arrêt «Start/Stop» jusqu’à ce que l’écran revienne<br />
à l’affichage de programmation et attendre jusqu’au refroidissement de l’appareil.<br />
71
11. UTILISATION DU RETARD DE CUISSON - Vous pouvez ajouter les<br />
ingrédients dans votre moule à pain et régler la minuterie pour retarder la cuisson.<br />
La cuisson peut être retardée jusqu’à 13 heures.<br />
REMARQUE: Ne pas se servir de la minuterie si votre recette contient des œufs frais,<br />
du lait ou d’autres ingrédients qui peuvent tourner.<br />
• Suivre les étapes 1 à 7 sur la page précédente, en faisant attention de bien mesurer<br />
les ingrédients dans le moule à pain dans l’ordre précisé dans la recette. Faire<br />
particulièrement attention à ne pas laisser la levure en contact avec les ingrédients<br />
liquides ou le sel.<br />
• Puis calculer le nombre d’heures et de minutes jusqu’au moment où vous souhaitez<br />
votre pain frais. PAR EXEMPLE: S’il est 8:00 heures et que vous souhaitez que le pain<br />
soit cuit à 2:00 heures, la minuterie devra être mise à 6 heures.<br />
• Appuyer une fois sur la minuterie. La longueur du cycle apparaîtra sur la fenêtre d’affichage.<br />
CYCLE DE CUISSON<br />
LONGUEUR DE CUISSON<br />
CYCLE DE CUISSON<br />
LONGUEUR DE CUISSON<br />
1 Normal 3:00 heures<br />
2 Rapide 2:20 heures<br />
3 Sucré 2:50 heures<br />
4 Baguette 3:50 heures<br />
5 Pain Éclair 1:50 heures<br />
6 Blé Complet 3:40 heures<br />
7 Pâte 1:30 heures<br />
8 Cuisson 1:00 heure<br />
• Utiliser le bouton de minuterie pour avancer le temps en intervalles de 10 minutes.<br />
(Utiliser le bouton de minuterie pour soustraire du temps si nécessaire).<br />
PAR EXEMPLE: Vous avez choisi le réglage «Sucré» et 2:50 apparaît dans<br />
la fenêtre d’affichage. Si vous souhaitez que votre pain soit prÍt dans 6 heures,<br />
vous appuierez sur le bouton de minuterie «Timer» jusqu’à ce que 6:00 apparaisse<br />
sur la fenêtre d’affichage.<br />
• Appuyer sur marche/arrêt «Start/Stop» pour lancer la minuterie «Timer».<br />
Les «deux points» (:) dans l’affichage du temps commence à clignoter pour<br />
indiquer que la minuterie est engagée.<br />
• Lorsque l’appareil commence à émettre trois bips et que 0:00 apparaît dans<br />
la fenêtre d’affichage, appuyer sur marche/arrêt «Start/Stop» pour annuler<br />
le cycle de «Maintien au Chaud» et enlever le pain.<br />
72
• Si vous faites une erreur alors que vous paramétrez la minuterie et que vous souhaitez<br />
la reprogrammer, appuyer sur marche/arrêt «Start/Stop» et maintenir dans cette<br />
position jusqu’à l’émission d’un bip et que l’écran se remette à son paramétrage<br />
précédent. La minuterie est annulée et vous pouvez à nouveau recommencer<br />
la programmation.<br />
REMARQUE: Si vous oubliez d’appuyer sur marche/arrêt «Start/Stop»,<br />
la minuterie ne fonctionnera pas.<br />
• Si vous utilisez le cycle de minuterie pendant plusieurs heures lors d’un temps très<br />
humide ou très chaud, réduire le liquide d’une ou deux cuillers à soupe pour réduire<br />
le risque de débordement. La quantité de sel peut être augmentée de 1/8 à 1/4 cuiller<br />
à café pour empêcher que la pâte ne lève trop rapidement et retombe. Le sucre peut<br />
aussi être réduit jusqu’à la moitié de ce qui est indiqué dans la recette.<br />
12. COUVERCLE AMOVIBLE – Votre nouvelle Machine à Pain est équipée d’un<br />
couvercle amovible pour un nettoyage et un rangement faciles. Pour enlever le couvercle,<br />
simplement le relever un peu au-dessus de la position verticale (approximativement en un<br />
angle de 70°). Tout en maintenant le socle de l’appareil avec l’autre main, tenir délicatement<br />
le rebord avant du couvercle et le tirer vers la droite de façon à faire sortir l’axe de la charnière<br />
du côté gauche (vous entendrez un fort claquement lorsque la charnière se déboîtera).<br />
Puis glisser simplement le couvercle vers la gauche pour enlever l’axe droit de la charnière.<br />
TEMPS DE CYCLE<br />
PAIN BLÉ<br />
NORMAL RAPIDE SUCRÉ BAGUETTE ÉCLAIR COMPLET PÂTE CUISSON<br />
(MIN:SEC) (MIN:SEC) (MIN:SEC) (MIN:SEC) (MIN:SEC) (MIN:SEC) (MIN:SEC) (MIN:SEC)<br />
PREMIER PÉTRISSAGE 10:00 10:00 10:00 18:00 14:00 10:00 20:00 ––<br />
PREMIÈRE LEVÉE 20:00 5:00 5:00 40:00 –– 25:00 –– ––<br />
SECOND PÉTRISSAGE 15:00 15:00 20:00 22:00 –– 20:00 –– ––<br />
SECONDE LEVÉE 20:00 –– 30:00 20:00 –– 30:00 20:00 ––<br />
DÉGONFLEMENT 00:30 –– 00:30 00:30 –– 00:30 00:30 ––<br />
LEVÉE FINALE 55:00 55:00 55:00 65:00 41:00 70:00 50:00 ––<br />
CUISSON 60:00 55:00 50:00 65:00 55:00 55:00 –– 60:00<br />
TEMPS JUSQU’AU SIGNAL<br />
FRUITS/NOIX 40:00 25:00 –– 75:00 –– 50:00 –– ––<br />
TEMPS TOTAL DE CUISSON 03:00 02:20 02:50 03:50 01:50 03:40 01:30 01:00<br />
REMARQUES: Le signal sonore indiquant qu’il est temps d’ajouter les raisins secs ou autres fruits<br />
secs ne fonctionne que pour les réglages suivants: Normal, Blé Complet, Baguette et Rapide.<br />
73
AFFICHAGE D’INFORMATION<br />
Toujours utiliser la Machine à Pain dans une pièce sans courants d’air et à au moins 55°F/13°C,<br />
mais pas plus chaude que 90°F/32°C. Ne pas se servir de la Machine à Pain dans un garage<br />
non chauffé, dehors, près d’un système de chauffage ou en exposition directe au soleil.<br />
Généralement, la fenêtre d’affichage vous signalera ce qui se passe avec votre Machine à Pain.<br />
Voici quelques points à retenir.<br />
MESSAGE AFFICHÉ PROBLÈME COMMENT LE RÉSOUDRE<br />
0:00 Deux Points Le cycle est terminé. Appuyer sur le bouton marche/arrêt<br />
Clignotants Le maintien au chaud «Start/Stop» pour annuler.<br />
est engagé.<br />
H:HH Bips de L’appareil est trop chaud Appuyer sur le bouton marche/arrêt<br />
Signalement pour commencer une «Start/Stop» pour annuler.<br />
nouvelle fabrication de pain. Ouvrir le couvercle, ôter le moule à pain<br />
et laisser l’appareil se refroidir avec<br />
le couvercle ouvert.<br />
L:LL Bips de Température de le pièce Appuyer sur le bouton marche/arrêt<br />
Signalement trop élevée. (En-dessous «Start/Stop» pour annuler.<br />
59°F/15°C).<br />
Placer la Machine à Pain dans<br />
une pièce chaude et attendre se réchauffe.<br />
Affichage Vide Interruption du courant. Débrancher l’appareil et le rebrancher.<br />
L’appareil doit être reprogrammé).<br />
(Voir P. 64 «Pendent l’Emploi» N° 5)<br />
E:EE Bips de Température de le pièce Appuyer sur le bouton marche/arrêt<br />
Signalement trop élevée. (Au-dessous «Start/Stop» pour annuler.<br />
86°F/30°C).<br />
Placer la Machine à Pain dans un endroit<br />
plus frais et la laisser s’ajuster avant<br />
utilisation.<br />
PROBLÈME<br />
L’APPAREIL NE FONCTIONNE PAS<br />
APRÈS VOIR APPUYÉ SUR LE BOUTON<br />
MARCHE/ARRÊT «START/STOP»<br />
LE PAIN LÈVE TROP HAUT<br />
LE PAIN N’A PAS ASSEZ LÈVE<br />
À VÉRIFIER:<br />
• Débranchement<br />
• Réglage non sélectionné<br />
• Bouton marche/arrêt «Start/Stop»<br />
non poussé pour annuler l’affichage<br />
après le dernier cycle<br />
• Trop de levure ou d’humidité<br />
• Trop de farine – pas assez de levure<br />
Pour des conseils sur des problèmes supplémentaires, se reporter aux Pages 112 - 113.<br />
74
CONSEILS POUR LE BOULANGER GOURMET<br />
LE MEILLEUR POUR LA FIN<br />
Ce conseil revient souvent mais le répéter a son importance:<br />
commencer toujours pas les liquides, continuer par les<br />
ingrédients secs et terminer par la levure (les fruits et les noix<br />
sont ajoutés plus tard, après le premier pétrissage).<br />
Creuser un trou peu profond dans les ingrédients secs et placer<br />
la levure dans le trou de façon à éviter tout contact entre la<br />
levure et les liquides ou le sel. Cela est spécialement important<br />
lorsque vous utilisez l’option Retard de cuisson. Vous ne voulez<br />
pas que la levure prenne trop rapidement durant la procédure!<br />
RESPECTEZ L’ORDRE!<br />
Placer dans le moule à pain les fruits secs, les légumes et les<br />
épices secs loin des ingrédients liquides. S’ils sont imbibés<br />
d’eau, ils peuvent ruiner la chimie du pain.<br />
LA FRAICHEUR AVANT TOUT<br />
Éviter l’utilisation d’ingrédients périssables – lait, yogourt,<br />
œufs ou fromage – avec la fonction de Retard de cuisson.<br />
UNE ATTENTE DE QUINZE MINUTES<br />
Pour de meilleurs résultats, attendre quinze minutes avant<br />
de découper des tranches; le pain a besoin de temps pour<br />
se refroidir.<br />
SURCONGÉLATION<br />
Pour congeler du pain frais, le laisser complètement se refroidir<br />
et le mettre dans un double sac de plastique.<br />
75
RECETTES DE PAIN BLANC<br />
PAIN BLANC DE LUXE<br />
(RÉGLAGE NORMAL/RAPIDE, MINUTERIE OPTIONNEL)<br />
1-1/2 tasses Eau<br />
2 cu. à soupe Beurre ou de margarine<br />
2 cu. à café Sel<br />
4 tasses Farine tout-usage<br />
2 cu. à soupe Lait en poudre écrémé<br />
2 cu. à café Sucre<br />
2 cu. à café Levure à action rapide<br />
Mesurer tous les ingrédients dans le moule-pain dans l’ordre indiqué.<br />
Sélectionner la programmation souhaitée (Normal ou Rapide). Sélectionner le réglage<br />
du mixage si autre que moyen. Appuyer sur le bouton marche/arrêt «Start/Stop».<br />
Un signal pour les Fruits/Noix se fera entendre après un cycle de 25-40 minutes.<br />
Le pain est prêt lorsque l’appareil émet un signal et que l’on peut lire sur l’affichage 0:00.<br />
Appuyer sur le bouton marche/arrêt «Start/Stop» et retirer le pain.<br />
REMARQUE: Si le bouton n’est pas immédiatement appuyé, l’appareil laissera le pain<br />
au chaud pendant 1 heure (60:00 minutes).<br />
PAIN BLANC CLASSIQUE<br />
(RÉGLAGE NORMAL/RAPIDE, MINUTERIE OPTIONNEL)<br />
1 tasse + 2 cu. à soupe Eau<br />
1-1/2 cu. à soupe Beurre ou de margarine<br />
1 cu. à café Sel<br />
3-1/4 tasses Farine tout-usage<br />
1 cu. à soupe Lait en poudre écrémé<br />
1 cu. à soupe Sucre<br />
1-1/2 cu. à café Levure à action rapide<br />
Mesurer tous les ingrédients dans le moule-pain dans l’ordre indiqué.<br />
Sélectionner la programmation souhaitée (Normal ou Rapide). Sélectionner le réglage<br />
du mixage si autre que moyen. Appuyer sur le bouton marche/arrêt «Start/Stop».<br />
Un signal pour les Fruits/Noix se fera entendre après un cycle de 25-40 minutes.<br />
Le pain est prêt lorsque l’appareil émet un signal et que l’on peut lire sur l’affichage 0:00.<br />
Appuyer sur le bouton marche/arrêt «Start/Stop» et retirer le pain.<br />
REMARQUE: Si le bouton n’est pas immédiatement appuyé, l’appareil laissera le pain<br />
au chaud pendant 1 heure (60:00 minutes).<br />
76
PAIN BLANC DE CAMPAGNE<br />
(RÉGLAGE NORMAL/RAPIDE, PAS POUR MINUTERIE)<br />
1-1/4 tasses Eau<br />
1-1/2 cu. à café Sel<br />
1 Oeuf de calibre gros<br />
1-1/2 cu. à soupe Beurre ou de margarine<br />
4 tasses Farine tout-usage<br />
1 cu. à soupe Sucre<br />
1 cu. à café Levure à action rapide<br />
Mesurer tous les ingrédients dans le moule-pain dans l’ordre indiqué.<br />
Sélectionner la programmation souhaitée (Normal ou Rapide). Sélectionner le réglage<br />
du mixage si autre que moyen. Appuyer sur le bouton marche/arrêt «Start/Stop».<br />
Un signal pour les Fruits/Noix se fera entendre après un cycle de 25-40 minutes.<br />
Le pain est prêt lorsque l’appareil émet un signal et que l’on peut lire sur l’affichage 0:00.<br />
Appuyer sur le bouton marche/arrêt «Start/Stop» et retirer le pain.<br />
REMARQUE: Si le bouton n’est pas immédiatement appuyé, l’appareil laissera le pain<br />
au chaud pendant 1 heure (60:00 minutes).<br />
PAINÀL’AIL<br />
(RÉGLAGE NORMAL/RAPIDE, MINUTERIE OPTIONNEL)<br />
1-1/2 tasses + 1 cu. à soupe Eau<br />
3 cu. à soupe Beurre ou de margarine<br />
1-1/2 cu. à café Sel<br />
3 tasses Farine tout-usage<br />
1 tasse Flocons de pommes de terre instantanés<br />
1-1/2 cu. à soupe Sucre<br />
2 cu. à café Aneth séchée ou ciboulettes secs (facultatif)<br />
1 – 2 Ail émincée<br />
1-1/2 cu. à café Levure à action rapide<br />
Mesurer tous les ingrédients dans le moule-pain dans l’ordre indiqué.<br />
Sélectionner la programmation souhaitée (Normal ou Rapide). Sélectionner le réglage<br />
du mixage si autre que moyen. Appuyer sur le bouton marche/arrêt «Start/Stop».<br />
Un signal pour les Fruits/Noix se fera entendre après un cycle de 25-40 minutes.<br />
Le pain est prêt lorsque l’appareil émet un signal et que l’on peut lire sur l’affichage 0:00.<br />
Appuyer sur le bouton marche/arrêt «Start/Stop» et retirer le pain.<br />
REMARQUE: Si le bouton n’est pas immédiatement appuyé, l’appareil laissera le pain<br />
au chaud pendant 1 heure (60:00 minutes).<br />
VARIATION: Morceaux de Fromage; au signal pour les Fruits/Noix ajouter 3/4 de tasse<br />
de Cheddar en cubes.<br />
77
PAIN AUX HERBES<br />
(RÉGLAGE NORMAL/RAPIDE, MINUTERIE OPTIONNEL)<br />
1-1/4 tasses Eau<br />
1-1/2 cu. à soupe Beurre ou de margarine<br />
1-1/2 cu. à café Sel<br />
3-1/2 tasses Farine tout-usage<br />
2 cu. à soupe Lait en poudre écrémé<br />
1-1/2 cu. à café Sucre<br />
1/2 cu. à café Assaisonnement à l’italienne<br />
1/2 cu. à café Persil sec (facultatif)<br />
1-1/2 cu. à café Graines de carvi (facultatif)<br />
1-1/2 cu. à café Levure à action rapide<br />
Mesurer tous les ingrédients dans le moule-pain dans l’ordre indiqué.<br />
Sélectionner la programmation souhaitée (Normal ou Rapide). Sélectionner le réglage<br />
du mixage si autre que moyen. Appuyer sur le bouton marche/arrêt «Start/Stop».<br />
Un signal pour les Fruits/Noix se fera entendre après un cycle de 25-40 minutes.<br />
Le pain est prêt lorsque l’appareil émet un signal et que l’on peut lire sur l’affichage 0:00.<br />
Appuyer sur le bouton marche/arrêt «Start/Stop» et retirer le pain.<br />
REMARQUE: Si le bouton n’est pas immédiatement appuyé, l’appareil laissera le pain<br />
au chaud pendant 1 heure (60:00 minutes).<br />
PAINÀL’ITALIENNE<br />
(RÉGLAGE BAGUETTE, MINUTERIE OPTIONNEL)<br />
1 tasse Eau<br />
1 cu. à café Sel<br />
1-1/2 Tbsp. Huile végétale<br />
3 tasses Farine tout-usage<br />
1/4 tasse Fromage Parmesan râpé<br />
2 cu. à café Sucre<br />
2 cu. à café Flocons d’oignon séché<br />
1 cu. à soupe Persil sec (facultatif)<br />
1 cu. à café Basilic sec ou l’assaisonnement à l’Italienne<br />
1/2 cu. à café Poudre d’Ail<br />
1 cu. à café Levure à action rapide<br />
Mesurer tous les ingrédients dans le moule-pain dans l’ordre indiqué. Sélectionner le<br />
Réglage Baguette. Sélectionner le réglage du mixage si autre que moyen. Appuyer sur le<br />
bouton marche/arrêt «Start/Stop». Un signal pour les Fruits/Noix se fera entendre après un<br />
cycle de 25-40 minutes. Le pain est prêt lorsque l’appareil émet un signal et que l’on peut<br />
lire sur l’affichage 0:00. Appuyer sur le bouton marche/arrêt «Start/Stop» et retirer le pain.<br />
REMARQUE: Si le bouton n’est pas immédiatement appuyé, l’appareil laissera le pain<br />
au chaud pendant 1 heure (60:00 minutes).<br />
78
BAGUETTE<br />
(RÉGLAGE BAGUETTE, MINUTERIE OPTIONNEL)<br />
1-1/3 tasses Eau<br />
1-1/2 cu. à café Sel<br />
1-1/2 cu. à soupe Huile végétale<br />
4 tasses Farine tout-usage<br />
1 cu. à soupe Sucre<br />
1 cu. à café Levure à action rapide<br />
Mesurer tous les ingrédients dans le moule-pain dans l’ordre indiqué. Sélectionner le<br />
Réglage Baguette. Sélectionner le réglage du mixage si autre que moyen. Appuyer sur<br />
le bouton marche/arrêt «Start/Stop». Un signal pour les Fruits/Noix se fera entendre<br />
après un cycle de 25-40 minutes. Le pain est prêt lorsque l’appareil émet un signal et<br />
que l’on peut lire sur l’affichage 0:00. Appuyer sur le bouton marche/arrêt «Start/Stop»<br />
et retirer le pain.<br />
REMARQUE: Si le bouton n’est pas immédiatement appuyé, l’appareil laissera le pain<br />
au chaud pendant 1 heure (60:00 minutes).<br />
GÂTEAU AU YOGOURT<br />
(RÉGLAGE NORMAL, PAS POUR MINUTERIE)<br />
1/2 tasse + 3 cu. à soupe Eau<br />
1/2 tasse Yogourt<br />
1-1/2 cu. à soupe Beurre ou de margarine<br />
1-1/2 cu. à café Sel<br />
3 tasses Farine tout-usage<br />
1-1/2 cu. à soupe Lait en poudre écrémé<br />
3 cu. à soupe Grains de sésame (facultatif)<br />
1-1/2 cu. à café Levure à action rapide<br />
Mesurer tous les ingrédients dans le moule-pain dans l’ordre indiqué. Sélectionner<br />
la programmation souhaitée (Normal). Sélectionner le réglage du mixage si autre que<br />
moyen. Appuyer sur le bouton marche/arrêt «Start/Stop». Un signal pour les Fruits/Noix<br />
se fera entendre après un cycle de 25-40 minutes. Le pain est prêt lorsque l’appareil<br />
émet un signal et que l’on peut lire sur l’affichage 0:00. Appuyer sur le bouton<br />
marche/arrêt «Start/Stop» et retirer le pain.<br />
REMARQUE: Si le bouton n’est pas immédiatement appuyé, l’appareil laissera le pain<br />
au chaud pendant 1 heure (60:00 minutes).<br />
79
PAINÀL’OIGNON ET AU FROMAGE<br />
(RÉGLAGE NORMAL, PAS POUR MINUTERIE)<br />
1-1/3 tasses Eau<br />
1 cu. à café Sel<br />
4 tasses Farine tout-usage<br />
1/4 tasse Fromage Parmesan râpé<br />
2 cu. à café Sucre<br />
1 cu. à soupe Flocons d’oignon séché<br />
2 cu. à café Levure à action rapide<br />
Mesurer tous les ingrédients dans le moule-pain dans l’ordre indiqué. Sélectionner<br />
la programmation souhaitée (Normal). Sélectionner le réglage du mixage si autre que<br />
moyen. Appuyer sur le bouton marche/arrêt «Start/Stop». Un signal pour les Fruits/Noix<br />
se fera entendre après un cycle de 25-40 minutes. Le pain est prêt lorsque l’appareil<br />
émet un signal et que l’on peut lire sur l’affichage 0:00. Appuyer sur le bouton<br />
marche/arrêt «Start/Stop» et retirer le pain.<br />
REMARQUE: Si le bouton n’est pas immédiatement appuyé, l’appareil laissera le pain<br />
au chaud pendant 1 heure (60:00 minutes).<br />
PAIN AU FROMAGE COTTAGE ET À LA CIBOULETTE<br />
(RÉGLAGE SUCRÉ, PAS POUR MINUTERIE)<br />
1/2 tasse Eau<br />
1 tasse Fromage cottage<br />
1 Oeuf de calibre gros<br />
1-1/2 cu. à café Sel<br />
2 cu. à soupe Beurre ou de margarine<br />
3-3/4 tasses Farine tout-usage<br />
2-1/2 cu. à soupe Lait en poudre écrémé<br />
3 cu. à soupe Ciboulettes secs<br />
1-1/4 cu. à café Levure à action rapide<br />
Mesurer tous les ingrédients dans le moule-pain dans l’ordre indiqué. Sélectionner le<br />
Réglage Sucré. Sélectionner le réglage du mixage si autre que moyen. Appuyer sur le<br />
bouton marche/arrêt «Start/Stop». Un signal pour les Fruits/Noix se fera entendre après<br />
un cycle de 25-40 minutes. Le pain est prêt lorsque l’appareil émet un signal et que l’on<br />
peut lire sur l’affichage 0:00. Appuyer sur le bouton marche/arrêt «Start/Stop» et retirer<br />
le pain.<br />
REMARQUE: Si le bouton n’est pas immédiatement appuyé, l’appareil laissera le pain<br />
au chaud pendant 1 heure (60:00 minutes).<br />
80
PAINS AU BLÉ ENTIER ET AU GRAINS<br />
PAIN 50% AU BLÉ ENTIER<br />
(RÉGLAGE BLÉ COMPLET, MINUTERIE OPTIONNEL)<br />
1-1/2 tasses Eau<br />
2 cu. à soupe Beurre ou de margarine<br />
2 cu. à café Sel<br />
2 tasses Farine complète<br />
2 tasses Farine tout-usage<br />
3 cu. à soupe Lait en poudre écrémé<br />
1/3 tasse Sucre brun<br />
2 cu. à café Levure à action rapide<br />
Mesurer tous les ingrédients dans le moule-pain dans l’ordre indiqué. Sélectionner le<br />
Réglage Blé Complet. Sélectionner le réglage du mixage si autre que moyen. Appuyer<br />
sur le bouton marche/arrêt «Start/Stop». Un signal pour les Fruits/Noix se fera entendre<br />
après un cycle de 25-40 minutes. Le pain est prêt lorsque l’appareil émet un signal et<br />
que l’on peut lire sur l’affichage 0:00. Appuyer sur le bouton marche/arrêt «Start/Stop»<br />
et retirer le pain.<br />
REMARQUE: Si le bouton n’est pas immédiatement appuyé, l’appareil laissera le pain<br />
au chaud pendant 1 heure (60:00 minutes).<br />
PAIN COMPLET<br />
(RÉGLAGE BLÉ COMPLET, MINUTERIE OPTIONNEL)<br />
1-1/2 tasses Eau<br />
2 cu. à soupe Beurre ou de margarine<br />
2 cu. à café Sel<br />
4 tasses Farine complète<br />
4 cu. à café Farine de Gluten<br />
1/3 tasse Sucre brun<br />
3 cu. à soupe Lait en poudre écrémé<br />
2 cu. à café Levure à action rapide<br />
Mesurer tous les ingrédients dans le moule-pain dans l’ordre indiqué. Sélectionner le<br />
Réglage Blé Complet. Sélectionner le réglage du mixage si autre que moyen. Appuyer<br />
sur le bouton marche/arrêt «Start/Stop». Un signal pour les Fruits/Noix se fera entendre<br />
après un cycle de 25-40 minutes. Le pain est prêt lorsque l’appareil émet un signal et<br />
que l’on peut lire sur l’affichage 0:00. Appuyer sur le bouton marche/arrêt «Start/Stop»<br />
et retirer le pain.<br />
REMARQUE: Si le bouton n’est pas immédiatement appuyé, l’appareil laissera le pain<br />
au chaud pendant 1 heure (60:00 minutes).<br />
81
PAIN AU SON ET AU TOURNESOL<br />
(RÉGLAGE NORMAL/RAPIDE, MINUTERIE OPTIONNEL)<br />
1-1/4 tasses Eau<br />
1-1/2 cu. à soupe Beurre ou de margarine<br />
1-1/2 cu. à café Sel<br />
2-1/2 tasses Farine tout-usage<br />
1/4 tasse Farine complète<br />
1/4 tasse Son d’avoine<br />
2 cu. à soupe Sucre<br />
1 cu. à soupe Lait en poudre écrémé<br />
1/1-2 cu. à café Levure à action rapide<br />
1/4 tasse Grains de tournesol<br />
Mesurer tous les ingrédients sauf les graines de tournesol dans le moule-pain et dans l’ordre<br />
indiqué. Sélectionner la programmation souhaitée (Normal ou Rapide). Sélectionner le<br />
réglage du mixage si autre que moyen. Appuyer sur le bouton marche/arrêt «Start/Stop».<br />
Un signal pour les Fruits/Noix se fera entendre après un cycle de 25-40 minutes, ajouter<br />
les graines de tournesol. Le pain est prêt lorsque l’appareil émet un signal et que l’on peut<br />
lire sur l’affichage 0:00. Appuyer sur le bouton marche/arrêt «Start/Stop» et retirer le pain.<br />
REMARQUE: Si le bouton n’est pas immédiatement appuyé, l’appareil laisserale pain au chaud<br />
pendant 1 heure (60:00 minutes).<br />
PAIN MULTI-GRAINS<br />
(RÉGLAGE BLÉ COMPLET, MINUTERIE OPTIONNEL)<br />
1 tasse + 2 cu. à soupe Eau<br />
1-1/2 cu. à soupe Beurre ou de margarine<br />
1-1/2 cu. à café Sel<br />
3 cu. à soupe Liquid honey<br />
1-1/2 tasses Farine tout-usage<br />
1-1/2 tasses Farine complète<br />
3/4 tasse 7 – 9 Céréales*<br />
1-1/2 cu. à café Levure à action rapide<br />
Mesurer tous les ingrédients sauf les graines de tournesol dans le moule-pain et<br />
dans l’ordre indiqué. Sélectionner le Réglage Blé Complet. Sélectionner le réglage du<br />
mixage si autre que moyen. Appuyer sur le bouton marche/arrêt «Start/Stop». Un signal<br />
pour les Fruits/Noix se fera entendre après un cycle de 25-40 minutes, ajouter les graines<br />
de tournesol. Le pain est prêt lorsque l’appareil émet un signal et que l’on peut lire<br />
sur l’affichage 0:00. Appuyer sur le bouton marche/arrêt «Start/Stop» et retirer le pain.<br />
REMARQUE: Si le bouton n’est pas immédiatement appuyé, l’appareil laissera le pain au chaud<br />
pendant 1 heure (60:00 minutes).<br />
*Le mélange de blé et seigle concassés, grits d’orge, millet, semoule de maïs, grits de<br />
soja, graines de lin est vendu dans le commerce. Sinon, utiliser Red River ® cereal.<br />
VARIANTE: Remplacer 1/4 de tasse de cassonade par du miel et ajouter 2 cu. à soupe<br />
d’eau en supplément.<br />
82
PAIN DE BLÉ CONCASSÉ<br />
(RÉGLAGE BLÉ COMPLET, MINUTERIE OPTIONNEL)<br />
1-1/4 tasses Eau<br />
1-1/2 cu. à soupe Huile végétale<br />
1-1/2 cu. à café Sel<br />
1-1/2 tasses Farine tout-usage<br />
1-1/2 tasses Farine complète<br />
3/4 tasse Blé concassé<br />
1-1/2 cu. à soupe Sucre<br />
1-1/2 cu. à café Levure à action rapide<br />
Mesurer tous les ingrédients dans le moule-pain dans l’ordre indiqué.<br />
Sélectionner le Réglage Blé Complet. Sélectionner le réglage du mixage si autre que<br />
moyen. Appuyer sur le bouton marche/arrêt «Start/Stop». Un signal pour les Fruits/Noix<br />
se fera entendre après un cycle de 25-40 minutes. Le pain est prêt lorsque l’appareil<br />
émet un signal et que l’on peut lire sur l’affichage 0:00. Appuyer sur le bouton<br />
marche/arrêt «Start/Stop» et retirer le pain.<br />
REMARQUE: Si le bouton n’est pas immédiatement appuyé, l’appareil laissera le pain<br />
au chaud pendant 1 heure (60:00 minutes).<br />
PAINS DE SEIGLE<br />
PUMPERNICKEL<br />
(RÉGLAGE BLÉ COMPLET, MINUTERIE OPTIONNEL)<br />
1 tasse Eau<br />
1/4 tasse Mélasse<br />
2 cu. à soupe Beurre ou de margarine<br />
1 cu. à café Sel<br />
1 cu. à café Café instantané<br />
1-1/2 cu. à soupe Cacao en poudre<br />
1-1/2 tasses Farine tout-usage<br />
3/4 tasse Farine complète<br />
3/4 tasse Farine de seigle<br />
1 cu. à soupe Graines de carvi (facultatif)<br />
1-1/2 cu. à café Levure à action rapide<br />
Mesurer tous les ingrédients dans le moule-pain dans l’ordre indiqué.<br />
Sélectionner le réglage Blé Complet. Sélectionner le réglage du mixage si autre que<br />
moyen. Appuyer sur le bouton marche/arrêt «Start/Stop». Un signal pour les Fruits/Noix<br />
se fera entendre après un cycle de 25-40 minutes. Le pain est prêt lorsque l’appareil<br />
émet un signal et que l’on peut lire sur l’affichage 0:00. Appuyer sur le bouton<br />
marche/arrêt «Start/Stop» et retirer le pain.<br />
REMARQUE: Si le bouton n’est pas immédiatement appuyé, l’appareil laissera le pain<br />
au chaud pendant 1 heure (60:00 minutes).<br />
83
PAIN DE SEIGLE ALLÉGÉ<br />
(RÉGLAGE NORMAL, MINUTERIE OPTIONNEL)<br />
1-1/4 tasses + 2 cu. à soupe Eau<br />
1-1/2 cu. à café Sel<br />
1-1/2 cu. à soupe Huile végétale<br />
2 cu. à soupe Sucre brun<br />
3 tasses Farine tout-usage<br />
1 tasse Farine de seigle<br />
1 cu. à café Levure à action rapide<br />
Mesurer tous les ingrédients dans le moule-pain dans l’ordre indiqué.<br />
Sélectionner la programmation souhaitée (Normal). Sélectionner le réglage<br />
du mixage si autre que moyen. Appuyer sur le bouton marche/arrêt «Start/Stop».<br />
Un signal pour les Fruits/Noix se fera entendre après un cycle de 25-40 minutes.<br />
Le pain est prêt lorsque l’appareil émet un signal et que l’on peut lire sur l’affichage<br />
0:00. Appuyer sur le bouton marche/arrêt «Start/Stop» et retirer le pain.<br />
REMARQUE: Si le bouton n’est pas immédiatement appuyé, l’appareil laissera le pain<br />
au chaud pendant 1 heure (60:00 minutes).<br />
PAIN DE SEIGLE ALLÉGÉ À LA DELI<br />
(RÉGLAGE NORMAL, PAS POUR MINUTERIE)<br />
1 tasse Babeurre<br />
2 cu. à soupe Eau<br />
1-1/4 cu. à café Sel<br />
1 Oeuf de calibre gros<br />
1 cu. à soupe Huile végétale<br />
2 cu. à soupe Mélasse<br />
2 tasses Farine tout-usage<br />
1-1/2 tasses Farine de seigle<br />
1-1/2 cu. à café Farine de Gluten<br />
1/4 cu. à café Bicarbonate de soude<br />
1-1/2 cu. à café Levure à action rapide<br />
Mesurer tous les ingrédients dans le moule-pain dans l’ordre indiqué.<br />
Sélectionner le réglage Normal ou le réglage Blé Complet. Sélectionner le réglage<br />
du mixage si autre que moyen. Appuyer sur le bouton marche/arrêt «Start/Stop».<br />
Un signal pour les Fruits/Noix se fera entendre après un cycle de 25-40 minutes.<br />
Le pain est prêt lorsque l’appareil émet un signal et que l’on peut lire sur l’affichage<br />
0:00. Appuyer sur le bouton marche/arrêt «Start/Stop» et retirer le pain.<br />
REMARQUE: Si le bouton n’est pas immédiatement appuyé, l’appareil laissera le pain<br />
au chaud pendant 1 heure (60:00 minutes).<br />
84
PAIN DE SEIGLE À LA MOUTARDE<br />
(RÉGLAGE BLÉ COMPLET, MINUTERIE OPTIONNEL)<br />
1 tasse + 2 cu. à soupe Eau<br />
1-1/2 cu. à soupe Huile végétale<br />
1-1/2 cu. à café Sel<br />
1/4 tasse Moutarde de Dijon<br />
2 tasses Farine tout-usage<br />
1-1/2 tasses Farine de seigle<br />
1-1/2 cu. à café Farine de Gluten<br />
1 cu. à soupe Sucre brun<br />
2 cu. à café Graines de cumin ou d’aneth (facultatif)<br />
1/4 tasse Flocons d’oignon séché (facultatif)<br />
1-1/2 cu. à café Levure à action rapide<br />
Mesurer tous les ingrédients dans le moule-pain dans l’ordre indiqué.<br />
Sélectionner le Réglage Blé Complet. Sélectionner le réglage du mixage si<br />
autre que moyen. Appuyer sur le bouton marche/arrêt «Start/Stop». Un signal<br />
pour les Fruits/Noix se fera entendre après un cycle de 25-40 minutes. Le pain<br />
est prêt lorsque l’appareil émet un signal et que l’on peut lire sur l’affichage 0:00.<br />
Appuyer sur le bouton marche/arrêt «Start/Stop» et retirer le pain.<br />
REMARQUE: Si le bouton n’est pas immédiatement appuyé, l’appareil laissera le pain<br />
au chaud pendant 1 heure (60:00 minutes).<br />
85
1-1/4 tasses Eau<br />
1-1/2 cu. à soupe Beurre ou de margarine<br />
1-1/2 cu. à café Sel<br />
3-1/2 tasses Farine tout-usage<br />
1/2 tasse Son d’avoine<br />
RECETTES DE PAINS DOUX<br />
PAINÀLACANNELLE ET AUX FRUITS<br />
(RÉGLAGE SUCRÉ, MINUTERIE OPTIONNEL)<br />
1 cu. à soupe Lait en poudre écrémé<br />
2 cu. à café Cannelle<br />
1 cu. à café Tarte au potiron et aux épices*<br />
1-1/2 cu. à café Levure à action rapide<br />
1/4 tasse Abricots secs hachés<br />
2 Tbsp. Sucre brun<br />
1/4 tasse Raisins secs<br />
Mesurer tous les ingrédients dans le moule-pain et dans l’ordre indiqué, à l’exception des<br />
fruits séchés. Sélectionner Réglage Sucré. Sélectionner le réglage du mixage si autre que<br />
moyen. Appuyer sur le bouton marche/arrêt «Start/Stop». Ajouter les fruits au signal pour<br />
les Fruits/Noix, après 40 minutes . Le pain est prêt lorsque l’appareil émet un signal et<br />
que l’on peut lire sur l’affichage 0:00. Appuyer sur le bouton marche/arrêt «Start/Stop»<br />
et retirer le pain.<br />
REMARQUE: Si le bouton n’est pas immédiatement appuyé, l’appareil laissera le pain<br />
au chaud pendant 1 heure (60:00 minutes).<br />
*Remplacer 1/2 c. à café de noix de muscade et 1/4 c. à café de noix de muscade<br />
et de gingembre pour la tarte au potiron et aux épices<br />
PAIN AUX POMMES ET AUX NOIX<br />
(RÉGLAGE SUCRÉ, PAS POUR MINUTERIE)<br />
3/4 cup Unsweetened applesauce<br />
1/2 tasse + 1 cu. à soupe Apple juice<br />
1 cu. à café Sel<br />
3 cu. à soupe Beurre ou de margarine<br />
1 Oeuf de calibre gros<br />
4 tasses Farine tout-usage<br />
1/4 tasse Sucre brun<br />
1-1/4 cu. à café Cannelle<br />
1/2 cu. à café Bicarbonate de soude<br />
1 cu. à café Levure à action rapide<br />
1/2 tasse Noix hachées<br />
Mesurer tous les ingrédients sauf les noix dans le moule-pain dans l’ordre indiqué.<br />
Sélectionner Réglage Sucré. Sélectionner le réglage du mixage si autre que moyen.<br />
Appuyer sur le bouton marche/arrêt «Start/Stop». Ajouter les noix au signal pour<br />
les Fruits/Noix, après 40 minutes. Le pain est prêt lorsque l’appareil émet un signal<br />
et que l’on peut lire sur l’affichage 0:00. Appuyer sur le bouton marche/arrêt «Start/Stop»<br />
et retirer le pain.<br />
REMARQUE: Si le bouton n’est pas immédiatement appuyé, l’appareil laissera le pain<br />
au chaud pendant 1 heure (60:00 minutes).<br />
86
PAINS SANS GLUTEN<br />
La consistance de la pâte des pains sans gluten est similaire à celle des pains éclair.<br />
Un pain fini sera plat jusqu’au sommet et la texture sera un peu lourde.<br />
Ceci est normal et ne modifie pas le goût.<br />
PAIN BLANC SANS GLUTEN<br />
(RÉGLAGE BLÉ COMPLET, PAS POUR MINUTERIE)<br />
3 Oeufs de calibre gros<br />
1-2/3 tasses Eau<br />
3 cu. à soupe Huile végétale<br />
1 cu. à café Vinaigre de cidre ou vinaigre blanc<br />
2-1/4 cu. à café Levure chimique<br />
3-1/4 tasses Farine de riz blanche<br />
2-1/2 cu. à café Gomme Xantham<br />
1-1/2 cu. à café Sel<br />
1/2 tasse Lait en poudre écrémé<br />
3 cu. à soupe Sucre<br />
Dans un bol de taille moyenne, combiner tous les ingrédients humides; mélanger et<br />
verser dans le moule à pain. Dans un bol large, combiner tous les ingrédients secs;<br />
bien remuer. Ajouter au moule à pain. Insérer le moule dans la machine.<br />
Sélectionner le réglage Blé Complet; appuyer sur le bouton marche/arrêt «Start/Stop».<br />
Durant le premier cycle de pétrissage, gratter les parois du moule avec une spatule<br />
en caoutchouc. Le pain est fini lorsque l’appareil émet un signal et affiche 0:00;<br />
ôter le moule et placer sur une surface résistante à la chaleur. Refroidir le pain<br />
pendant 10 à 15 minutes. Enlever et laisser refroidir sur la grille avant de découper<br />
des tranches.<br />
87
PAIN AU CHEDDAR SANS GLUTEN<br />
(RÉGLAGE BLÉ COMPLET, PAS POUR MINUTERIE)<br />
3 Oeufs de calibre gros<br />
1-3/4 tasses Eau<br />
2 cu. à soupe Huile végétale<br />
2 tasses Farine de riz blanche<br />
1 tasse Farine de riz brun<br />
2-1/2 cu. à café Levure chimique<br />
1/4 tasse Lait en poudre écrémé<br />
2 cu. à soupe Sucre<br />
1 cu. à soupe Flocons d’oignon séché<br />
1 cu. à soupe Grains de pavot (facultatif)<br />
3-1/2 cu. à café Gomme Xantham<br />
1-1/2 cu. à café Grains de céleri (facultatif)<br />
1-1/2 cu. à café Aneth séchée (facultatif)<br />
1 cu. à café Sel<br />
1-1/2 tasses Cheddar fort râpé<br />
Dans un bol de taille moyenne, combiner tous les ingrédients humides; mélanger et<br />
verser dans le moule à pain. Dans un bol large, combiner tous les ingrédients secs;<br />
bien remuer. Ajouter au moule à pain. Insérer le moule dans la machine.<br />
Sélectionner le réglage Blé Complet; appuyer sur le bouton marche/arrêt «Start/Stop».<br />
Durant le premier cycle de pétrissage, gratter les parois du moule avec une spatule<br />
en caoutchouc. Le pain est fini lorsque l’appareil émet un signal et affiche 0:00;<br />
ôter le moule et placer sur une surface résistante à la chaleur. Refroidir le pain<br />
pendant 10 à 15 minutes. Enlever et laisser refroidir sur la grille avant de découper<br />
des tranches.<br />
88
PAINÀLACANNELLE ET AUX RAISINS SANS GLUTEN<br />
(RÉGLAGE BLÉ COMPLET, PAS POUR MINUTERIE)<br />
3 Oeufs de calibre gros<br />
1-2/3 tasses Eau<br />
3 cu. à soupe Huile végétale<br />
1 cu. à café Vinaigre de cidre ou vinaigre blanc<br />
2 tasses Farine de riz blanche<br />
2/3 tasse Levure de pomme de terre<br />
1/3 tasse Farine de tapioca<br />
2-1/4 cu. à café Levure chimique<br />
2-1/2 cu. à café Gomme Xantham<br />
1-1/2 cu. à café Sel<br />
3 cu. à soupe Sucre<br />
2 cu. à café Cannelle<br />
1/2 tasse Raisins<br />
Dans un bol de taille moyenne, combiner tous les ingrédients humides; mélanger<br />
et verser dans le moule à pain. Dans un bol large, combiner tous les ingrédients<br />
secs à l’exception des raisins; bien remuer. Ajouter au moule à pain. Insérer le<br />
moule dans la machine. Sélectionner le réglage Blé Complet; appuyer sur le<br />
bouton marche/arrêt «Start/Stop». Durant le premier cycle de pétrissage,<br />
gratter les parois du moule avec une spatule en caoutchouc. Ajouter les raisins<br />
au signal pour les Fruits/Noix, après 40 minutes. Le pain est fini lorsque l’appareil<br />
émet un signal et affiche 0:00; ôter le moule et placer sur une surface résistante<br />
à la chaleur. Refroidir le pain pendant 10 à 15 minutes. Enlever et laisser refroidir<br />
sur la grille avant de découper des tranches.<br />
89
INSTRUCTIONS POUR LE PAIN ÉCLAIR<br />
Contrairement aux pains à la levure, les pains éclair n’utilisent pas de levure en tant<br />
qu’agent de levage. De plus les cycles de pétrissage et de levée sont omis. A la place,<br />
les pains éclair se servent de levure chimique ou de bicarbonate de soude complétés<br />
par de la vapeur qui agira en tant qu’agent de levage.<br />
INSTRUCTIONS POUR FABRIQUER LE PAIN ÉCLAIR:<br />
1. Mesurer tous les ingrédients dans le moule. Positionner le moule<br />
dans une chambre de cuisson.<br />
2. Sélectionner le réglage Pain éclair. Appuyer sur marche/arrêt «Start/Stop»;<br />
laisser les ingrédients se mélanger pendant 5 minutes. A l’aide de la spatule<br />
en caoutchouc, gratter les parois du moule à pain pour éliminer les poches<br />
de farine dans les recoins.<br />
3. Lorsque le pain éclair a fini de cuire, appuyer sur marche/arrêt «Start/Stop»<br />
pour annuler la fonction «Maintien au Chaud». Placer le pain sur une surface<br />
résistante au chaud et laisser refroidir le moule 5 minutes pour permettre au pain<br />
de se reposer. Ôter le pain du moule et le placer sur une grille en le laissant<br />
complètement se refroidir avant de couper des tranches.<br />
90
RECETTES DE PAINS ÉCLAIR<br />
PAINÀLABANANE ET AUX PÉPITES DE CHOCOLAT<br />
(RÉGLAGE RAPIDE, PAS POUR MINUTERIE)<br />
1 tasse Banane mûre écrasée<br />
1/3 tasse Beurre dégels ou margarine ou huile végétale<br />
2 Oeufs, légèrement battus<br />
3 cu. à soupe Lait sur*<br />
2 tasses Farine tout-usage<br />
1/2 tasse Sucre<br />
1 cu. à café Bicarbonate de soude<br />
1-1/4 cu. à café Levure chimique<br />
1/2 cu. à café Sel<br />
1/2 tasse Noix hachées<br />
1/2 tasse Grains de chocolat<br />
*A la place de lait sur, mélanger 2 cu. à soupe de lait avec 1 cu. à soupe de vinaigre.<br />
Mesurer tous les ingrédients humides dans le moule à pain. Dans un bol de mélange<br />
de taille moyenne, combiner les ingrédients secs, les mélanger et les ajouter au moule<br />
à pain. Sélectionner le réglage pour Pain éclair et croûte foncée (H). Appuyer sur<br />
le bouton marche/arrêt «Start/Stop». Après environ 5 minutes de mixage,<br />
gratter les parois du moule avec une spatule en caoutchouc. Le pain est fini<br />
lorsqu’un signal se fait entendre et que l’affichage présente 0:00. Appuyer sur<br />
le bouton marche/arrêt «Start/Stop». Placer le pain sur une surface résistante<br />
à la chaleur et laisser refroidir 10 minutes avant de démouler. Laisser complètement<br />
refroidir sur une grille avant de couper des tranches.<br />
@@@ €€€ ÀÀÀ ,,, yyy<br />
@@@@ €€€€ ÀÀÀÀ ,,,, yyyy<br />
ÀÀÀÀÀÀ<br />
,,,,,,<br />
yyyyyy<br />
@@@@@@<br />
€€€€€€<br />
@@@@@ €€€€€ ÀÀÀÀÀ ,,,,, yyyyy<br />
ÀÀÀÀÀÀ<br />
,,,,,,<br />
yyyyyy<br />
@@@@@@<br />
€€€€€€<br />
@@@@@ €€€€€ ÀÀÀÀÀ ,,,,,<br />
ÀÀÀÀÀÀ<br />
,,,,,,<br />
yyyyyy<br />
@@@@@@<br />
€€€€€€<br />
ÀÀÀÀÀÀ<br />
,,,,,,<br />
yyyyyy<br />
@@@@@@<br />
€€€€€€<br />
,,,,,,,<br />
yyyyyyy<br />
@@@@@@@<br />
€€€€€€€<br />
ÀÀÀÀÀÀÀ<br />
@@@@@@<br />
€€€€€€<br />
ÀÀÀÀÀÀ<br />
,,,,,,<br />
yyyyyy<br />
@ € À , y<br />
@@@@@ €€€€€ ÀÀÀÀÀ ,,,,,<br />
@@@@@ €€€€€ ÀÀÀÀÀ ,,,,, yyyyy<br />
@@@@@ €€€€€ ÀÀÀÀÀ ,,,,, yyyyy<br />
yyyyy<br />
yyyy<br />
@@@@@ €€€€€ ÀÀÀÀÀ ,,,,, yyyyy<br />
yyyyy<br />
@@ €€<br />
ÀÀ ,,<br />
yy<br />
@@@@@@<br />
€€€€€€<br />
ÀÀÀÀÀÀ<br />
,,,,,,<br />
@@@@@@<br />
€€€€€€<br />
ÀÀÀÀÀÀ<br />
,,,,,,<br />
@@@@@ €€€€€ ÀÀÀÀÀ ,,,,,<br />
@@@ €€€ ÀÀÀ ,,, yyy<br />
@@@@@ €€€€€ ÀÀÀÀÀ ,,,,,<br />
@@@@@ €€€€€ ÀÀÀÀÀ ,,,,,<br />
@@@ €€€ ÀÀÀ ,,, yyy<br />
@@@@@ €€€€€ ÀÀÀÀÀ ,,,,, yyyyy<br />
yyyyy<br />
yyyyy<br />
yyyyy<br />
@@@@@@<br />
€€€€€€<br />
ÀÀÀÀÀÀ<br />
,,,,,,<br />
@@@@@@<br />
€€€€€€<br />
ÀÀÀÀÀÀ<br />
,,,,,,<br />
yyyyyy<br />
yyyyyy<br />
yyyyyy<br />
yyyyyy<br />
@@@ €€€ ÀÀÀ ,,, yyy<br />
@@@@@@<br />
€€€€€€<br />
ÀÀÀÀÀÀ<br />
,,,,,,<br />
yyyyyy<br />
@@@@ €€€€ ÀÀÀÀ ,,,, yyyy<br />
@@@@@ €€€€€ ÀÀÀÀÀ ,,,,, yyyyy<br />
@ @@@<br />
€ €€€<br />
À ÀÀÀ<br />
, ,,,<br />
y yyy<br />
@@@ €€€ ÀÀÀ ,,, yyy<br />
91
PAIN ZUCCHINI<br />
(RÉGLAGE RAPIDE, PAS POUR MINUTERIE)<br />
2 tasses Zucchini coupés fin (environ 2 à 3)<br />
1/2 tasse Huile végétale<br />
2 Oeufs, légèrement battus<br />
2 cu. à café Vanille<br />
1-1/2 tasses Farine tout-usage<br />
1 tasse Sucre<br />
3/4 cu. à café Bicarbonate de soude<br />
1/2 cu. à café Cannelle (facultatif)<br />
1/2 cu. à café Levure chimique<br />
1/2 tasse Noix hachées<br />
Mesurer tous les ingrédients humides dans le moule à pain. Dans un bol de mélange<br />
de taille moyenne, combiner les ingrédients secs, les mélanger et les ajouter au moule<br />
à pain. Sélectionner le réglage pour Pain éclair et croûte foncée (H).<br />
Appuyer sur le bouton marche/arrêt «Start/Stop». Après environ 5 minutes<br />
de mixage, gratter les parois du moule avec une spatule en caoutchouc.<br />
Le pain est fini lorsqu’un signal se fait entendre et que l’affichage présente 0:00.<br />
Appuyer sur le bouton marche/arrêt «Start/Stop». Placer le pain sur une surface<br />
résistante à la chaleur et laisser refroidir 10 minutes avant de démouler.<br />
Laisser complètement refroidir sur une grille avant de couper des tranches.<br />
92
PAIN AUX ABRICOTS ET AUX NOIX<br />
(RÉGLAGE RAPIDE, PAS POUR MINUTERIE)<br />
1 cu. à café Zeste d’orange râpé (facultatif)<br />
3/4 tasse Jus d’orange<br />
1 Oeuf de calibre gros<br />
2 cu. à soupe Beurre ou de margarine<br />
2 tasses Farine tout-usage<br />
3/4 tasse Sucre<br />
2 cu. à café Levure chimique<br />
1/4 cu. à café Bicarbonate de soude<br />
1 cu. à café Sel<br />
1 tasse Abricots secs hachés<br />
3/4 tasse Amandes effilées<br />
Mesurer tous les ingrédients humides dans le moule à pain. Dans un bol de mélange<br />
de taille moyenne, combiner les ingrédients secs, les mélanger et les ajouter au moule<br />
à pain. Sélectionner le réglage pour Pain éclair et croûte foncée (H). Appuyer sur le bouton<br />
marche/arrêt «Start/Stop». Après environ 5 minutes de mixage, gratter les parois du moule<br />
avec une spatule en caoutchouc. Le pain est fini lorsqu’un signal se fait entendre et que<br />
l’affichage présente 0:00. Appuyer sur le bouton marche/arrêt «Start/Stop». Placer le pain<br />
sur une surface résistante à la chaleur et laisser refroidir 10 minutes avant de démouler.<br />
Laisser complètement refroidir sur une grille avant de couper des tranches.<br />
PAIN À CÉRÉALE GRAPE NUTS<br />
(RÉGLAGE RAPIDE, PAS POUR MINUTERIE)<br />
1/2 tasse Céréale Grape Nuts<br />
1 tasse + 2 cu. à soupe Babeurre<br />
2 cu. à soupe Beurre dégels ou margarine ou huile végétale<br />
3 /4 tasse Sucre<br />
1 Oeuf de calibre gros<br />
1 cu. à café Bicarbonate de soude<br />
1/4 cu. à café Levure chimique<br />
1/4 cu. à café Sel<br />
1-1/2 tasses Farine tout-usage<br />
Mesurer dans le moule-pain le céréale Grape Nuts et tous les ingrédients liquides.<br />
Dans un bol de mélange de taille moyenne, combiner les ingrédients secs, les mélanger et<br />
les ajouter au moule à pain. Sélectionner le réglage pour Pain éclair et croûte foncée (H).<br />
Appuyer sur le bouton marche/arrêt «Start/Stop». Après environ 5 minutes de mixage,<br />
gratter les parois du moule avec une spatule en caoutchouc. Le pain est fini lorsqu’un<br />
signal se fait entendre et que l’affichage présente 0:00. Appuyer sur le bouton<br />
marche/arrêt «Start/Stop». Placer le pain sur une surface résistante à la chaleur et laisser<br />
refroidir 10 minutes avant de démouler. Laisser complètement refroidir sur une grille avant<br />
de couper des tranches.<br />
93
INSTRUCTIONS POUR LA PÂTE<br />
1. Suivre les Instructions de Fonctionnement Générales.<br />
2. Appuyer sur le bouton sélection «Select» pour atteindre le réglage pour la pâte.<br />
3. Appuyer sur marche/arrêt «Start/Stop». La lecture de l’affichage présentera un compte<br />
à rebours du réglage pour Pâte. Lorsque la pâte est prête, l’appareil émet un signal<br />
et l’on peut lire sur l’affichage 0:00.<br />
4. Appuyer sur marche/arrêt «Start/Stop» en maintenant vers le bas jusqu’à ce que<br />
vous entendiez un «bip» et que l’affichage disparaisse.<br />
5. Pour enlever le moule à pain, attraper fermement les poignées et retirer le moule.<br />
REMARQUE: Le moule ne devient pas chaud lors de l’utilisation du réglage pour pâte.<br />
PRÉPARATION DE LA PÂTE POUR CUISSON<br />
1. Saupoudrer légèrement de la farine tout usage sur un support pour pâte ou un marbre.<br />
Utiliser une spatule en caoutchouc ou une cuiller en bois pour retirer la pâte du moule à<br />
pain et la placer sur la surface recouverte de farine. Pétrir à la main par 2 ou 3 fois pour<br />
libérer l’air. Si la pâte est facile à manipuler sans la farine, la façonner sur un revêtement<br />
de comptoir propre, légèrement huileux.<br />
2. Modeler la pâte en vos pains mollet favoris, brioches, etc., (des suggestions suivent).<br />
Placer sur un moule à pain huilé. Couvrir la pâte avec un chiffon propre et laisser lever<br />
environ 1 heure jusqu’à ce la pâte ait presque doublée de volume.<br />
3. Cuire en suivant les instructions de la recette. Retirer du moule et laisser refroidir sur une<br />
grille et servir chaud.<br />
GLAÇAGE ET TRAITEMENT DE LA CROÛTE<br />
Quand les petits pains ont levé, et juste avant de les faire cuire, appliquez délicatement<br />
la glace désirée à l’aide d’un pinceau. Cuire au four comme l’indique la recette.<br />
• Pour obttenir une croûte dorée et luisante, utilisez de la glace à l’oeuf ou au jaune d’oeuf.<br />
• Pour une croûte moelleuse et luisante, utilisez de la glace au blanc d’oeuf (la croûte<br />
sera moins foncée).<br />
TRUCS POUR LA LEVÉE DE LA PÂTE<br />
Pour garantir un emplacement chaud pour la levée de la pâte, choisir une fenêtre ensoleillée,<br />
placer au-dessus du réfrigérateur ou faire chauffer le four à 200°F / 93°C pendant une minute<br />
et ensuite l’éteindre; placer le pain recouvert ou les pains mollet dans le four ou remplir<br />
un large moule peu profond avec de l’eau bouillante et placer le moule avec les pains mollet<br />
sur une grille au-dessus de l’eau.<br />
GLACE À L’OEUF GLACE AU JAUNE D’OEUF GLACE AU BLANC D’OEUF<br />
Mélanger 1 oeuf légèrement battu Mélanger 1 jaune d’oeuf légèrement Mélanger 1 blanc d’oeuf légèrement<br />
avec 1 c. tb. d’eau ou de lait battu avec 1 c. tb. d’eau ou de lait battu avec 1 c. tb. d’eau<br />
NOTE: Pour garder le jaune d’oeuf frais plusieurs jours, le recouvrir d’eau froide et le<br />
conserver au réfrigérateur dans un contenant fermé.<br />
94
VARIATIONS POUR LE FAÇONNAGE DE LA PÂTE<br />
PETITS PAINS FACILES À FAIRE<br />
Diviser la pâte en 12 morceaux égaux, modeler en forme<br />
de boules et les placer dans des moules à muffin huilés.<br />
Couvrer, laisser lever et cuire selon les instructions.<br />
EN FAIT 12<br />
TRÈFLES<br />
Graisser légèrement 12 moules à muffin. Diviser la pâte<br />
en 36 morceaux d’1 pouce chacun (2,5 cm). Étirer les<br />
côtés vers le bas, en lissant les dessus pour leur donner<br />
une forme de boules. Placer 3 boules dans chaque moule<br />
à muffin, face lisse sur le dessus. Couvrir, laisser lever<br />
et cuire selon les instructions. EN FAIT 12<br />
PAINS À MOLLET S<strong>IM</strong>PLES<br />
Graisser légèrement un moule à cuire rond de 8 ou 9 pouces<br />
(20 - 22 cm). Diviser la pâte en 12 morceaux. Former une<br />
boule avec chacun des 12 morceaux, étirant les côtés vers<br />
le bas pour rendre le dessus lisse. Arranger les pains dans<br />
le moule préparé, avec la face lisse au-dessus. Couvrir,<br />
laisser lever et cuire selon les instructions. EN FAIT 12<br />
SPIRALES<br />
Graisser légèrement une plaque à pâtisserie. Diviser la pâte<br />
en 10 morceaux égaux. Sur une surface légèrement enfarinée,<br />
rouler à la main chaque morceau en une forme de crayon<br />
d’environ 9 pouces (22 cm) de long. En commençant<br />
par le centre, continuer à enrouler chaque morceau<br />
autour du centre pour former une spirale. Placer les pains<br />
à une distance respective de 2 à 3 pouces (5 à7cm)<br />
sur la plaque de cuisson préparée. Couvrir,<br />
laisser lever et cuire selon les instructions. EN FAIT 10<br />
PAINS MOULÉS<br />
Graisser légèrement une plaque de cuisson et la mettre<br />
de côté. Sur une surface légèrement enfarinée, rouler<br />
la pâte en un cercle de 9 pouces. Badigeonner la pâte<br />
avec du beurre fondu. Découper en 12 triangles. Pour<br />
façonner les pains, démarrer à l’extrémité la plus large<br />
du triangle et rouler jusqu’à la pointe. Placer les pains<br />
sur la plaque de cuisson, à 2 et 3 pouces de distance<br />
la face pointant sur le bas. Couvrir, laisser lever<br />
et cuire selon les instructions. EN FAIT 12<br />
95
LEVÉE DE LA PÂTE<br />
Pour Réduire le Temps de Levée de la Pâte<br />
• Chauffer un four conventionnel à 200°F/93°C durant 5 minutes, puis éteindre le four.<br />
Façonner la pâte, la déposer dans un moule à cuisson au four en suivant les<br />
directives, et couvrir d’un linge propre. Mettre la pâte au four jusqu’à ce qu’elle<br />
ait doublé de volume. Cette méthode réduira sans aucun doute de moitié le temps<br />
de levée.<br />
• Les recettes utilisant des farines de céréales entières ou non raffinées contiennent<br />
moins de gluten et pourraient donner une pâte qui lève moins bien qu’avec les farines<br />
blanches. Par conséquent, ces pains sont plus lourds et ils peuvent s’affaiser<br />
légèrement au centre, ce qui est normal et n’affecte en rien leur goût. On peut aussi<br />
ajouter du gluten de blé pour améliorer la forme et le volume du pain fait à partir<br />
de farines faibles en gluten.<br />
CONSERVATION<br />
Pour Garder Votre Pain Frais<br />
• Votre pain maison ne contient aucun agent de conservation. Vous devez donc<br />
conserver le pain refroidi dans un sac en plastique bien scellé. Si vous le désirez,<br />
vous pouvez placer une branche de céleri dans le sac pour garder le pain frais plus<br />
longtemps. Ne le gardez pas au réfrigérateur, ce qui l’assècherait plus vite.<br />
96
PAINS MOLLET BLANCS<br />
(RÉGLAGE POUR LA PÂTE, MINUTERIE OPTIONNEL)<br />
3/4 tasse Eau<br />
1 Oeuf de calibre gros<br />
3 cu. à soupe Beurre ou de margarine<br />
1 cu. à café Sel<br />
3 tasses Farine tout-usage<br />
2 cu. à soupe Lait en poudre écrémé<br />
2 cu. à café Sucre<br />
2 cu. à café Levure à action rapide<br />
Mesurer tous les ingrédients dans le moule à pain dans l’ordre indiqué. Sélectionner<br />
le Réglage pour la Pâte; appuyer sur le bouton marche/arrêt «Start/Stop». Lorsque<br />
le signal retentit et que l’affichage lit 0:00, appuyer sur marche/arrêt «Start/Stop»<br />
et enlever la pâte. La modeler comme souhaité (voir Page 95); couvrir et laisser lever<br />
dans un endroit chaud jusqu’à ce qu’elle double de volume. Badigeonner avec<br />
le glaçage à l’œuf et saupoudrer de graines de sésame, de graines de pavot<br />
ou d’épices séchés si désiré (voir Page 94). Cuire à 375°F / 190°C.<br />
FAIT 12 PAINS<br />
PAINS MOLLET AU MIEL ET AU BLÉ<br />
(RÉGLAGE POUR LA PÂTE, MINUTERIE OPTIONNEL)<br />
1 tasse Eau<br />
1 cu. à café Sel<br />
1/4 tasse Miel<br />
1 Oeuf de calibre gros<br />
2 tasses Farine tout-usage<br />
1-1/4 tasses Farine complète<br />
1 cu. à café Levure à action rapide<br />
Mesurer tous les ingrédients dans le moule à pain dans l’ordre indiqué. Sélectionner<br />
le Réglage pour la Pâte; appuyer sur le bouton marche/arrêt «Start/Stop». Lorsque<br />
le signal retentit et que l’affichage lit 0:00, appuyer sur marche/arrêt «Start/Stop»<br />
et enlever la pâte. La modeler comme souhaité (voir Page 95); couvrir et laisser lever<br />
dans un endroit chaud jusqu’à ce qu’elle double de volume. Badigeonner avec<br />
le glaçage à l’œuf et saupoudrer de graines de sésame, de graines de pavot<br />
ou d’épices séchés si désiré (voir Page 94). Cuire à 375°F / 190°C.<br />
FAIT 12 PAINS<br />
97
PAINS MOLLET AU BLÉ<br />
(RÉGLAGE POUR LA PÂTE, MINUTERIE OPTIONNEL)<br />
3/4 tasse + 2 cu. à soupe Eau<br />
1 Oeuf<br />
3 cu. à soupe Beurre ou de margarine<br />
1 cu. à café Sel<br />
2-1/4 tasses Farine tout-usage<br />
1 tasse Farine complète<br />
2 cu. à café Sucre<br />
2 cu. à café Levure à action rapide<br />
Mesurer tous les ingrédients dans le moule à pain dans l’ordre indiqué.<br />
Sélectionner le Réglage pour la Pâte; appuyer sur le bouton marche/arrêt «Start/Stop».<br />
Lorsque le signal retentit et que l’affichage lit 0:00, appuyer sur marche/arrêt<br />
«Start/Stop» et enlever la pâte. La modeler comme souhaité (voir Page 95);<br />
couvrir et laisser lever dans un endroit chaud jusqu’à ce qu’elle double de volume.<br />
Badigeonner avec le glaçage à l’œuf et saupoudrer de graines de sésame, de graines<br />
de pavot ou d’épices séchés si désiré (voir Page 94). Cuire à 375°F / 190°C.<br />
FAIT 12 PAINS<br />
PAINS MOLLET AU SON<br />
(RÉGLAGE POUR LA PÂTE, MINUTERIE OPTIONNEL)<br />
3/4 tasse Eau<br />
3/4 cu. à café Sel<br />
1/3 tasse Beurre ou de margarine<br />
1 Oeuf de calibre gros<br />
2-3/4 tasses Farine tout-usage<br />
1/3 tasse Son d’avoine<br />
3 cu. à soupe Sucre<br />
1 cu. à café Levure à action rapide<br />
Mesurer tous les ingrédients dans le moule à pain dans l’ordre indiqué.<br />
Sélectionner le réglage pour la Pâte; appuyer sur le bouton marche/arrêt «Start/Stop».<br />
Lorsque le signal retentit et que l’affichage lit 0:00, appuyer sur marche/arrêt<br />
«Start/Stop» et enlever la pâte. La modeler comme souhaité (voir Page 95);<br />
couvrir et laisser lever dans un endroit chaud jusqu’à ce qu’elle double de volume.<br />
Badigeonner avec le glaçage à l’œuf et saupoudrer de graines de sésame, de graines<br />
de pavot ou d’épices séchés si désiré (voir Page 94). Cuire à 375°F / 190°C.<br />
FAIT 12 PAINS<br />
98
PIZZA<br />
Grande Quantité<br />
1-1/2 tasses Eau<br />
2 cu. à soupe Huile d’olive<br />
2 cu. à café Sel<br />
2 cu. à café Sucre<br />
4 tasses Farine tout-usage<br />
4 cu. à café Levure à action rapide<br />
Petite Quantité<br />
3/4 tasse Eau<br />
1 cu. à soupe Huile d’olive<br />
1 cu. à café Sel<br />
1 cu. à café Sucre<br />
2 tasses Farine tout-usage<br />
2 cu. à café Levure à action rapide<br />
Mesurer tous les ingrédients dans le moule à pain dans l’ordre indiqué. Sélectionner le<br />
Réglage pour la Pâte. Appuyer sur le bouton marche/arrêt «Start/Stop». Lorsque le signal<br />
retentit et que l’affichage lit 0:00, appuyer sur le bouton marche/arrêt «Start/Stop».<br />
Ôter la pâte pour fariner légèrement la surface et couvrir avec une pellicule de plastique;<br />
laisser reposer 5 minutes. Tapisser un moule à pizza de 14 pouces (35 cm) avec une<br />
petite quantité ou la moitié d’une grande quantité. Répartir 2 cuillers à soupe de semoule<br />
de maïs sur la surface si souhaité. Recouvrir de sauce et de garniture (voir ci-dessous).<br />
Cuire à 425°F / 220°C pendant 20 à 30 minutes ou jusqu’à ce que la pâte devienne<br />
croustillante et bronzée en dessous. Pour une croûte légèrement plus épaisse,<br />
laisser lever 30 minutes avant de recouvrir de sauce et autres.<br />
GARNITURES:<br />
TRADITIONNELLE - 1/2 tasse de sauce pizza recouverte avec des 1/2 tasses<br />
de pepperoni en tranche, de champignons, de poivrons, d’oignons et<br />
1 tasse de fromage Mozzarella râpé.<br />
MEXICAINE - 1/2 tasse de salsa épaisse, 2 tasses de poivrons jaunes et<br />
verts coupés en morceaux. Saupoudrer de poudre de chili ou de piment<br />
jalapeno surmonté d’une tasse de fromage Monterey Jack.<br />
PESTO - 1/2 tasse de sauce pesto OU 1/2 tasse de sauce pizza et 3 cuillers<br />
à soupe de sauce pesto. Terminer par une tasse de Cheddar râpé et une<br />
tasse de Mozzarella râpé.<br />
99
VARIANTES:<br />
CALZONE CUIT – Utiliser une 1/2 tasse de farine complète pour un<br />
petite quantité de pâte à pizza et ajouter 3/4 de cuiller à café de<br />
graine d’anis ou de fenouil pour les ingrédients secs. Tapisser le<br />
moule à pizza avec la pâte comme indiqué. Répartir 1/2 tasse de<br />
sauce pizza sur la moitié de la pâte. Répartir au-dessus de la sauce<br />
3/4 de tasse de viande cuite en morceaux telle que pepperoni,<br />
salami, poulet ou jambon et 3/4 de tasse de morceaux de brocoli<br />
partiellement cuits. Saupoudrer 1 tasse de fromage Mozzarella sur le<br />
brocoli. Humidifier les rebords avec de l’eau et recouvrir le fromage<br />
de pâte, en étirant au besoin. Réunir les rebords pour refermer.<br />
Badigeonner avec un Glaçage à l’Oeuf (Page 94) et saupoudrer<br />
avec 1 cuiller à soupe de fromage Parmesan. Cuire à 425°F (220°C)<br />
pendant 15 à 20 minutes ou jusqu’à ce que la pâte soit dorée et<br />
croustillante. Servir avec une sauce pizza supplémentaire, si souhaité.<br />
FOCACCIA – Utiliser les ingrédients pour une petite quantité de pâte<br />
à pizza et ajouter 3 cuillers à soupe de flocons d’oignons séchés et<br />
une gousse d’ail émincée aux ingrédients secs. Sur une plaque de<br />
cuisson légèrement graissé, aplanir la pâte dans un rectangle de<br />
12 x 10 pouces (30 x 25 cm). Couvrir et laisser lever dans un<br />
endroit chaud* pour 30 minutes. Pendant ce temps, mélanger<br />
2 cuillers à soupe d’huile d’olive, 1 gousse d’ail émincée et<br />
respectivement 1 cuiller à café de romarin et 1 de basilic.<br />
Badigeonner la pâte et saupoudrer avec 2 cuillers à soupe de<br />
fromage Parmesan râpé. Si désiré, mettre des morceaux d’olives<br />
noires ou vertes ou des tomates séchées dans la pâte. Cuire à une<br />
température de 400°F (220°C) pendant 15 à 20 minutes jusqu’à<br />
ce que la croûte devienne dorée. Couper en carrés et servir chaud.<br />
* Voir Trucs pour la Levée de la Pâte Page 94.<br />
100
Grande Quantité<br />
1-1/2 tasses Eau<br />
4 tasses Farine tout-usage<br />
2 cu. à café Sel<br />
1 cu. à soupe Sucre<br />
1 cu. à café Levure à action rapide<br />
2 cu. à soupe Grains de pavot, de carvi<br />
ou de sésame*<br />
(Facultatif)<br />
*N’ajouter pas à le moule, réserver pour le garniture.<br />
BAGELS<br />
Petite Quantité<br />
3/4 tasse Eau<br />
2 tasses Farine tout-usage<br />
1 cu. à café Sel<br />
2 cu. à café Sucre<br />
1/2 cu. à café Levure à action rapide<br />
1 cu. à soupe Grains de pavot, de carvi<br />
ou de sésame*<br />
(Facultatif)<br />
Mesurer tous les ingrédients dans le moule-pain dans l’ordre indiqué. Sélectionner le réglage<br />
Pâte. Appuyer sur marche/arrêt «Start/Stop». Lorsque l’appareil émet un signal et que l’on<br />
peut lire sur l’affichage 0:00, appuyer sur marche/arrêt «Start/Stop». Placer sur une surface<br />
légèrement enfarinée, couvrir et laisser lever 5 minutes. Faire 8 boules avec la pâte pour<br />
une petite fournée et 15 pour une grande; créer un trou dans le centre de chaque boule<br />
avec vos pouces, environ de la taille d’une pièce de 25 sous. Placer sur une plaque de<br />
cuisson graissée, couvrir et laisser lever dans un endroit chaud pendant environ 20 minutes.<br />
Remplir une large casserole d’eau, ajouter une cuiller à soupe de sucre et amener à ébullition.<br />
Reformer les trous s’ils commencent à se refermer. Plonger chaque face des bagels dans l’eau<br />
pendant environ 30 secondes; retirer avec une cuiller à fentes et faire égoutter sur une grille.<br />
Replacer sur la plaque de cuisson huilée, badigeonner avec du Glaçage à l’Oeuf (Page 94)<br />
et, si souhaité, saupoudrer avec des graines. Cuire à 400°F / 200°C pendant 25 à 30 minutes<br />
ou jusqu’à ce que les pains soient dorés. Servir chaud.<br />
CONSEIL: Les bagels sont meilleurs s’ils sont mangés le même jour.<br />
* Voir Trucs pour la Levée de la Pâte Page 94.<br />
101
RECETTES DE PÂTES<br />
PÂTES DE BASE<br />
(Réglage pour la Pâte, pas pour Minuterie)<br />
Tous les ingrédients sont maintenus à température ambiante (70°F-80°F/21°C-27°C)<br />
2 tasses Farine tout-usage<br />
1 tasse Semoule<br />
1 cu. à café Sel<br />
1 cu. à soupe Huile d’olive ou de végétale<br />
3/4 tasse + 2 cu. à soupe Eau<br />
Mesurer tous les ingrédients dans le moule-pain. Sélectionner le réglage Pâte. Appuyer sur<br />
marche/arrêt «Start/Stop» et laisser se mélanger pendant 8 à 10 minutes; puis appuyer sur<br />
marche/arrêt «Start/Stop» pour annuler. Enlever la pâte et l’étaler sur une surface légèrement<br />
enfarinée. Répartir la pâte alimentaire en 1/8 pouces (0,32 cm) d’épaisseur. Saupoudrer de<br />
farine si la pâte est collante. Mélanger avec de la farine pour empêcher de coller. Découper en<br />
bandes de 1/8 pouce (0,32 cm) pour des pâtes étroites et 1/4 (0,64 cm) pouce pour des pâtes<br />
de taille moyenne. Cuire les pâtes alimentaires dans une large casserole d’eau bouillante<br />
salée pendant 1 à 2 minutes ou jusqu’à les pâtes sont al dente. Égoutter dans une passoire.<br />
PÂTES AUX OEUFS<br />
(Réglage pour la Pâte, pas pour Minuterie)<br />
Tous les ingrédients sont maintenus à température ambiante (70°F-80°F/21°C-27°C)<br />
2 tasses Farine tout-usage<br />
1 tasse Semoule<br />
1 cu. à café Sel<br />
1 cu. à soupe Huile d’olive ou de végétale<br />
4 Oeufs de calibre gros, légèrement battus<br />
3 cu. à soupe Eau<br />
Mesurer tous les ingrédients dans le moule-pain. Sélectionner le réglage Pâte. Appuyer sur<br />
marche/arrêt «Start/Stop» et laisser se mélanger pendant 8 à 10 minutes; puis appuyer sur<br />
marche/arrêt «Start/Stop» pour annuler. Enlever la pâte et l’étaler sur une surface légèrement<br />
enfarinée. Répartir la pâte alimentaire en 1/8 pouces (0,32 cm) d’épaisseur. Saupoudrer de<br />
farine si la pâte est collante. Mélanger avec de la farine pour empêcher de coller. Découper en<br />
bandes de 1/8 pouce (0,32 cm) pour des pâtes étroites et 1/4 (0,64 cm) pouce pour des pâtes<br />
de taille moyenne. Cuire les pâtes alimentaires dans une large casserole d’eau bouillante<br />
salée pendant 1 à 2 minutes ou jusqu’à les pâtes sont al dente. Égoutter dans une passoire.<br />
REMARQUE: La pâte peut être roulée avec une machine à pâte pour atteindre<br />
l’épaisseur souhaitée.<br />
102
PÂTE SUCRÉE DE BASE<br />
Fournée Large<br />
1 tasse Eau<br />
2 Oeufs de calibre gros<br />
1/4 tasse Beurre ou de margarine<br />
2 cu. à café Sel<br />
4 tasses Farine tout-usage<br />
1/2 tasse Sucre<br />
3 cu. à soupe Lait en poudre écrémé<br />
2 cu. à café Levure à action rapide<br />
Fournée Petit<br />
1/2 tasse Eau<br />
1 Oeuf de calibre gros<br />
2 cu. à soupe Beurre ou de margarine<br />
1 cu. à café Sel<br />
2 tasses Farine tout-usage<br />
1/4 tasse Sucre<br />
1-1/2 cu. à soupe Lait en poudre écrémé<br />
1 cu. à café Levure à action rapide<br />
INSTRUCTIONS: Mesurer tous les ingrédients dans le moule à pain dans l’ordre indiqué.<br />
Sélectionner le réglage Pâte. Appuyer sur marche/arrêt «Start/Stop».<br />
Le pâte est fini lorsqu’un signal se fait entendre et que l’affichage présente<br />
0:00. Appuyer sur le bouton marche/arrêt «Start/Stop» et enlever la pâte.<br />
Façonner, faire lever et cuire en fonction des recettes qui suivent.<br />
TRUCS – Faire une grande quantité puis s’en servir avec 2 types de<br />
recettes différents ou doubler la quantité des recettes et en<br />
congeler une partie.<br />
TRUCS – La pâte préparée peut être conservée dans un réfrigérateur<br />
pendant quelques heures; mettre à la température ambiante<br />
de la pièce avant de façonner.<br />
TRUCS – Lorsque la pâte est en cours de levée, la recouvrir de façon<br />
légère avec un plastique, un papier ciré ou un torchon propre.<br />
103
BRIOCHES À LA CANNELLE<br />
Utiliser une petite portion ou la moitié d’une grande portion de PÂTE SUCRÉE.<br />
Mélanger 2/3 tasse de sucre brun, 2 cuillerées à café de cannelle et 1/4 tasse<br />
de beurre ou de margarine. Sur une surface légèrement farinée, rouler la pâte en<br />
un rectangle de (30 x 22 cm) 12 x 9 pouces. Étaler le mélange sur la pâte. Il est<br />
également possible de parsemer ensuite de 1/3 tasse de raisins secs OU de noix de<br />
pécan hachées. Enrouler suivant le grand côté comme un biscuit roulé; pincer les<br />
bordures pour fermer. Couper en 12 tranches et placer, section vers le haut, dans de<br />
grands moules à muffins graissés. Couvrir et faire lever dans un endroit chaud pendant<br />
30 à 40 minutes, jusqu’à ce que la taille ait presque doublé. Cuire à 375°F (190°C)<br />
pendant 20 minutes ou jusqu’à ce que les brioches soient cuites. Sortir et faire<br />
refroidir à l’envers.<br />
VARIANTE: Remplacer le remplissage ci-dessus par le délicieux remplissage qui suit.<br />
3 cu. à soupe Sucre<br />
1 Écorce de citron râpée<br />
1/4 tasse Noix<br />
3/4 tasse Raisins<br />
1 cu. à café Cinnamon<br />
2 cu. à soupe Beurre mou<br />
SPIRALES AU BEURRE D’ARACHIDE<br />
Utiliser une petite portion ou la moitié d’une grande portion de pâte sucrée.<br />
Mélanger 1/2 tasse de beurre d’arachide, 1/3 tasse de sucre brun et 3 cuillerées à<br />
soupe de lait. Préparer la pâte comme pour les brioches à la cannelle, en utilisant cette<br />
garniture. Continuer comme indiqué ci-dessus. Mélanger 1/2 cuillerée à café de<br />
cannelle et 2 cuillerées à soupe de sucre. Une fois que les brioches sont cuites, les<br />
badigeonner de 1 cuillerée à soupe de beurre ou margarine fondus et saupoudrer de<br />
sucre à la cannelle.<br />
104
BRIOCHES AU GRANOLA ÉPICÉES<br />
Préparer une petite portion de Pâte Sucrée en utilisant de la farine complète pour moitié,<br />
du sucre brun et en ajoutant à la farine 1/2 cu. à café de cannelle et 1/2 cu. à café de noix<br />
de muscade. Mélanger 1/4 tasse de miel liquide, 2/3 tasse de granola ou flocons d’avoine<br />
grillés*, 1/3 tasse de raisins secs, 1/4 tasse de noix hachées, 2 cu. à soupe de beurre ou<br />
margarine fondus et 1 cu. à café de cannelle. Préparer la pâte comme pour les brioches<br />
à la cannelle, en utilisant cette garniture. Continuer comme indiqué ci-dessus.<br />
*Pour faire griller les flocons d’avoine, les étaler sur une plaque à biscuits et les passer<br />
au four à 350°F (190°C) jusqu’à ce qu’ils soient dorés.<br />
BRIOCHES CHELSEA<br />
Utiliser une petite portion ou la moitié d’une grande portion de Pâte Sucrée. Mélanger<br />
1/2 tasse de sucre brun, 2 cu. à café de cannelle et 1/3 tasse de beurre ou margarine<br />
ramollis. Placer 1/3 de ce mélange dans un plat carré de 20 cm (8 pouces) de côté;<br />
mélanger 2 cu. à café d’eau. Sur une surface légèrement farinée, rouler la pâte en un<br />
rectangle de (30 x 22 cm) 12 x 9 pouces. Étaler le reste du mélange sur la pâte. Parsemer<br />
ensuite de 1/2 tasse de raisins secs ou de noix. Enrouler suivant le petit côté comme un<br />
biscuit roulé; pincer les bordures pour fermer. Couper en 9 tranches et placer, section vers<br />
le haut, sur la préparation dans le plat. Couvrir et faire lever dans un endroit chaud<br />
pendant 40 à 50 minutes environ, jusqu’à ce que la taille ait presque doublé. Cuire à<br />
375°F (190°C) pendant 30 à 35 minutes. Retourner encore chaud dans le plat de service.<br />
VARIANTE: Poser 9 noix de pécan ou moitiés de cerises sur trois rangées dans le mélanger.<br />
Poser chaque tranche sur une cerise ou noix.<br />
*Voir Trucs pour la Levée de la Pâte Page 94.<br />
COURONNE SUÉDOISE<br />
Utiliser une petite portion ou la moitié d’une grande portion de Pâte Sucrée ou utiliser<br />
la pâte complète des brioches au Granola Épicées à la Page 105. Rouler la pâte en<br />
rectangle de (20 x 40 cm) 8 x 16 pouces. Étaler 1 cu. à soupe de beurre ou margarine<br />
ramollis. Mélanger 3 cu. à soupe de noix hachées, de raisins secs et de fruits confits.<br />
En parsemer la pâte. Enrouler la pâte suivant le long côté comme un biscuit roulé et pincer<br />
les bords pour fermer. Sur une grande plaque à biscuits graissée, placer le rouleau en<br />
cercle en faisant se chevaucher les extrémités. Tous les (2,5 cm) 1 pouce, entailler la<br />
couronne sur les 2/3 de son épaisseur. Faire tourner chaque tranche section vers le haut.<br />
Couvrir et faire lever dans un endroit chaud pendant 45 minutes environ, jusqu’à ce<br />
que la taille ait presque doublé. Cuire à 190°C (375°F) pendant à 25 minutes.<br />
Faire refroidir sur une grille. Arroser de Glaçage au Sucre (Page 106).<br />
*Voir Trucs pour la Levée de la Pâte Page 94.<br />
105
GLAÇAGES ET TARTINADES<br />
GLAÇAGES À L’OeUF<br />
Battre 1 blanc d’œuf OU 1 jaune d’œuf OU 1 œuf entier avec 1 cu. à soupe d’eau.<br />
En badigeonner les pains ou petits pains avant cuisson pour les dorer (le jaune d’œuf<br />
produit une teinte plus sombre).<br />
GLAÇAGE AU LAIT OU AU BEURRE<br />
Badigeonner le pain tout juste sorti du four de lait ou de beurre fondu pour produire<br />
une croûte plus tendre.<br />
GLAÇAGE AU SUCRE<br />
Combiner 1 tasse de sucre glace, 1 cu. à soupe de lait, 1/4 cu. à café d’extrait de vanille<br />
ou d’amande pour obtenir un mélange homogène. En arroser la couronne suédoise<br />
ou les brioches Chelsea.<br />
VARIANTE: Citron – Remplacer le lait par du jus de citron et l’extrait par du zest de citron.<br />
GLAÇAGE AU MIEL<br />
Combiner 2 cu. à soupe de miel et 2 cu. à soupe de beurre ou margarine ramollis pour<br />
obtenir un mélange homogène. En badigeonner les petits pains sucrés.<br />
TARTINADE AU CHÈVRE<br />
Mélanger (90 g) 3 oz de fromage de chèvre, (125 g) 4 oz de fromage à la crème,<br />
1 cu. à soupe d’huile d’olive, 1 cu. à soupe de tomates séchées hachées* et 1/4 cu. à café<br />
de poivre à la main ou au robot de cuisine jusqu’à obtenir une préparation homogène.<br />
VARIANTE: FROMAGE COTTAGE – Remplacer l’huile par du lait et ajouter 1 cu. à café de<br />
basilic séché et 1/4 cu. à café d’estragon séché. Délicieux sur de la baguette ou du pain<br />
au levain.<br />
* Utiliser des tomates séchées à l’huile ou trempées dans l’eau chaude et égouttées.<br />
TARTINADE AU BLEU<br />
Mélanger (60 g) 2 oz de bleu, (125 g) 4 oz de fromage à la crème et 1 cu. à soupe de<br />
brandy ou de lait au robot de cuisine ou à la main jusqu’à obtenir une préparation<br />
homogène. Délicieux sur du pain complet croustillant ou du pain multigrains.<br />
TARTINADE À L’AVOCAT<br />
Mélanger 1 gros avocat mûr, épluché et coupé en dés, 1/2 tasse de ricotta, 2 cu. à soupe<br />
de jus de citron ou de lime, 2 cu. à soupe de coriandre haché, 1/2 cu. à café de sel et<br />
de la sauce au piment (au goût) au robot de cuisine ou à la main jusqu’à obtenir une<br />
préparation homogène. Délicieux sur du pain au blé concassé ou sur de la baguette.<br />
106
TARTINADE AU SAUMON<br />
Mélanger 1 boîte (220 g/7,75 oz) de saumon rouge, 1/2 tasse de fromage à la crème ou<br />
de ricotta, 1/2 cu. à café de sauce Worcestershire et 1 cu. à café de jus de citron au robot<br />
de cuisine ou à la main jusqu’à obtenir une préparation homogène. Délicieux sur du pain<br />
aux herbes ou du pain de pommes de terre à l’aneth.<br />
TARTINADE GRECQUE<br />
Mélanger (90 g) 3 oz de feta, (125 g) 4 oz de fromage à la crème, 3 cu. à soupe<br />
de yogourt nature et 1 gousse d’ail hachée au robot de cuisine ou à la main jusqu’à<br />
obtenir une préparation homogène. <strong>Inc</strong>orporer 4 olives noires dénoyautées et hachées<br />
et 1 cu. à soupe de persil haché. Délicieux sur le pain aux fines herbes au yogourt<br />
ou son et au tournesol.<br />
TARTINADE POTAGÈRE BASSES CALORIES<br />
Passer en purée 1/2 tasse de fromage cottage, 1/2 tasse de fromage à la crème allégé<br />
et 1 gousse d’ail hachée au robot de cuisine ou à la main jusqu’à obtenir une préparation<br />
homogène. <strong>Inc</strong>orporer 1/2 tasse de carotte râpée, 1/3 tasse de courgette râpée, 2 oignons verts<br />
hachés et 1/4 cu. à café de sel. Délicieux sur du pain de son d’avoine ou du pumpernickel.<br />
TARTINADE AU FROMAGE À LA MEXICAINE<br />
Mélanger 1/4 tasse de fromage cottage, (125 g) 4 oz de fromage à la crème allégé,<br />
1 gousse d’ail hachée, 1/4 cu. à café chacun de chili en poudre, sel et cumin au robot<br />
de cuisine ou à la main jusqu’à obtenir une préparation homogène. <strong>Inc</strong>orporer 2 oignons<br />
verts hachés. Délicieux sur de la baguette ou pain blanc classique.<br />
TAPENADE<br />
Passer au robot de cuisine 1/2 tasse d’olives noires dénoyautées, 1 gousse d’ail hachée,<br />
1 cu. à café d’huile d’olive, 1/4 cu. à café chacun de sel, poivre, thym et romarin séchés<br />
avec 1-1/2 cu. à café de basilic séché et 1/8 cu. à café de piment rouge en flocons.<br />
Délicieux sur la baguette fraîche ou la focaccia.<br />
TARTINADE AU CHEDDAR<br />
Mélanger 1-1/2 tasse de vieux cheddar râpé, 2-1/2 cu. à soupe de moutarde douce<br />
allemande ou russe, 2 cu. à soupe de lait et 1/4 tasse de ricotta ou de fromage à la crème<br />
jusqu’à obtenir une préparation homogène. Délicieux sur le pain aux fines herbes.<br />
TREMPETTE AU SAUMON FUMÉ<br />
Mélanger 1 tasse de yogourt, 1 tasse de mayonnaise allégée, 1/2 tasse de saumon fumé<br />
haché et 1/2 sachet (87 g) de préparation pour soupe aux légumes. Découper un<br />
couvercle dans un petit pain complet, pumpernickel, Héritage ou pain de seigle à la bière.<br />
Couper ce couvercle en bouchées et évider le pain en laissant une enveloppe<br />
de 1/2 pouce (1 cm) d’épaisseur. Servir la trempette dans le pain,<br />
accompagnée des bouchées de pain pour tremper.<br />
107
TARTINADE AU CHUTNEY<br />
Combiner 1/4 tasse de fromage à la crème et 2 cu. à soupe de chutney au robot de<br />
cuisine ou à la main jusqu’à obtenir une préparation homogène. Ajouter une pincée de<br />
curry (facultatif). Délicieux sur du pumpernickel.<br />
BRUSCHETTA AU FROMAGE<br />
Mélanger 1/4 tasse de fromage à la crème, 1/4 tasse de ricotta, 2 cu. à soupe de<br />
fromage parmesan râpé, 1 cu. à soupe de mayonnaise, 2 petites gousses d’ail hachées,<br />
1 cu. à café de basilic séché au robot de cuisine ou à la main jusqu’à obtenir<br />
une préparation homogène. <strong>Inc</strong>orporer 1 cu. à café de poivron vert haché.<br />
Tartiner sur d’épaisses rôties de baguette. Parsemer de tomate en dés (facultatif)<br />
et de mozzarella ou cheddar râpés. Passer au gril pour faire fondre le fromage.<br />
TARTINADES SUCRÉES AUX FRUITS<br />
Mélanger 1/2 tasse de fromage à la crème OU de beurre avec 2 à 3 cu. à soupe<br />
de confiture ou de marmelade au choix jusqu’à obtenir une préparation homogène.<br />
Délicieux sur du pain blanc, complet, pain d’avoine aux raisins ou sur des rôties.<br />
TARTINADE FROMAGE-ORANGE-MIEL<br />
Mélanger 1/2 tasse de fromage à la crème, 2 cu. à soupe de jus d’orange, 1 cu. à café de<br />
zest d’orange et 2 cu. à soupe de miel liquide jusqu’à obtenir une préparation homogène.<br />
Délicieux sur du pain d’avoine aux raisins ou petits pains sucrés.<br />
VARIANTE: Miel-Gingembre – Remplacer le jus et le zest d’orange par 2 cu. à café<br />
de gingembre haché en conserve.<br />
TARTINADE NOIX ET SIROP D’ÉRABLE<br />
Mélanger 1/4 tasse de ricotta, 1/4 tasse de fromage à la crème, 3 cu. à soupe de sirop<br />
d’érable jusqu’à obtenir une préparation homogène. <strong>Inc</strong>orporer 2 cu. à soupe de noix<br />
hachées. Délicieux sur du pain de son aux pommes et ou pain d’avoine aux raisins.<br />
TARTINADE AU BEURRE D’ARACHIDE<br />
Mélanger 1/4 tasse de ricotta, 2 cu. à soupe de beurre d’arachide et 2 cu. à café de beurre<br />
ou de margarine jusqu’à obtenir une préparation homogène. Délicieux sur des rôties.<br />
BEURRE DE MIEL<br />
Mélanger 1/4 tasse de beurre ou margarine ramollis, 1 cu. à soupe de miel,<br />
1/8 cu. à café de cannelle et 1/8 cu. à café de muscade.<br />
VARIANTE: Beurre d’Érable – Remplacer le miel par 2 cu. à soupe de sirop d’érable<br />
et ne pas utiliser d’épices. Délicieux sur le pain de son aux pommes.<br />
108
RECETTES DE CONFITURES ET GELÉES<br />
CONFITURE DE FRAISES<br />
(Réglage Normal, pas pour Minuterie)<br />
3 tasses Fraises surgelées, dégelées et égouttées<br />
2 tasses Sucre<br />
4 cu. à café Jus de citron<br />
2 cu. à soupe Cristaux de pectine de fruits à faible teneur en sucre<br />
Combiner tous les ingrédients dans un moule-pain. Sélectionner le réglage Normal. Appuyer sur<br />
marche/arrêt «Start/Stop». Permettre un mélange durant 5 à 6 minutes, gratter les parois du moule<br />
avec une spatule de caoutchouc. Lorsque l’appareil émet un signal et que l’affichage montre 0:00,<br />
appuyer sur marche/arrêt «Start/Stop». A l’aide des gants de cuisine, retirez le moule-pain.<br />
Mettre la confiture dans des récipients et couvrir ou sceller dans des récipients stérilisés.<br />
Laisser refroidir et réfrigérer pour faire prendre.<br />
FAIT 2-1/2 TASSES<br />
MARMELADE D’ORANGE<br />
(Réglage Normal et Réglage de Cuisson, pas pour Minuterie)<br />
3 Oranges de calibre gros<br />
1-1/4 tasses Sucre<br />
1 Citron<br />
2 cu. à soupe Cristaux de pectine de fruits à faible teneur en sucre<br />
Avec l’éplucheur à légumes, peler la couche brillante de la pelure d’une orange et d’un citron; hacher<br />
finement. Enlever ce qui reste de pelure blanche sur l’orange et le citron et jeter. Peler les oranges<br />
restantes et jeter les pelures. Répartir les fruits en morceaux de 1/2 pouces (1,30 cm). Combiner les<br />
pelures hachées, les fruits, le sucre et la pectine dans le moule-pain. Sélectionner le réglage Normal.<br />
Appuyer sur marche/arrêt «Start/Stop». Laisser mélanger 5 à 6 minutes, gratter les parois du moule<br />
avec une spatule en caoutchouc. Appuyer sur marche/arrêt «Start/Stop» pour annuler. Sélectionner le<br />
réglage de Cuisson. Appuyer sur marche/arrêt «Start/Stop» pour démarrer. Lorsque l’appareil émet un<br />
signalement et que l’affichage présente 0:00, appuyer sur marche/arrêt «Start/Stop». A l’aide des gants<br />
de cuisine, retirer le moule-pain. Verser la marmelade dans des récipients, couvrir et sceller dans des<br />
récipients stérilisés. Laisser refroidir et mettre au réfrigérateur pour faire prendre. FAIT 1-1/2 TASSES<br />
CONFITURE DE BAIES<br />
(Réglage Normal et Réglage de Cuisson, pas pour Minuterie)<br />
1 paquet Baies surgelés, sans sucre, dégelés<br />
(300 g) (fraises, framboises et myrtilles ou un mélange)<br />
1 cu. à soupe Lemon juice<br />
1-3/4 tasses Sucre<br />
2-1/2 cu. à soupe Liquide de pectine de fruits<br />
Combiner tous les ingrédients dans un moule-pain. Sélectionner le réglage Normal. Appuyer sur<br />
marche/arrêt «Start/Stop». Permettre un mélange durant 5 à 6 minutes, gratter les parois du moule<br />
avec une spatule de caoutchouc. Appuyer sur marche/arrêt «Start/Stop» pour annuler. Sélectionner<br />
le réglage de Cuisson. Appuyer sur marche/arrêt «Start/Stop» pour démarrer. Lorsque l’appareil<br />
émet un signalement et que l’affichage présente 0:00, appuyer sur marche/arrêt «Start/Stop».<br />
A l’aide des gants de cuisine, retirer le moule-pain. Verser la marmelade dans des récipients,<br />
couvrir et sceller dans des récipients stérilisés. Laisser refroidir et mettre au<br />
réfrigérateur pour faire prendre.<br />
FAIT 2 TASSES<br />
TRUC: Doubler la quantité pour utiliser un sachet complet de pectine de fruits liquide.<br />
109
AJUSTEMENT DES RECETTES<br />
Le temps, la conservation et la température des ingrédients ainsi que<br />
l’exactitude dans la mesure des ingrédients peuvent altérer la taille,<br />
forme ou texture du pain. Une fois que vous en avez reconnu la cause,<br />
des mises au point peuvent être faites pour compenser des divers<br />
changements.<br />
Environ 5 minutes après avoir appuyé sur marche “Start”, soulever<br />
le couvercle et vérifier le contenu du moule-pain. Les ingrédients seront<br />
en train de se mélanger et commenceront à former une boule.<br />
La boule de pâte devra avoir une consistance égale. Si cela<br />
n’est pas le cas, des ajustements seront nécessaires.<br />
Lorsque vous fabriquez le pain à la main, à l’ancienne façon, la quantité<br />
de farine contrôle l’ajustement. Par exemple, les recettes de pain plus<br />
classiques stipulent 6 à 7 tasses de farine. Cette tasse de différence est<br />
ce qui permet d’ajuster la pâte à une consistance correcte. Nous vous<br />
recommandons d’ajuster avec la quantité de liquide. Démarrer avec la<br />
quantité indiquée dans la recette. Ajuster en ajoutant 1 cuiller à soupe<br />
à la fois, durant le premier cycle de pétrissage, alors que la machine<br />
continue à pétrir.<br />
Si l’ingrédient ajusté n’est pas complètement mélangé dans la pâte,<br />
appuyer sur marche/arrêt «Start/Stop» (maintenir le bouton enfoncé<br />
jusqu’à ce que l’affichage revienne au réglage). Redémarrer en appuyant<br />
sur le bouton de sélection pour atteindre le réglage souhaité, puis<br />
appuyer sur marche/arrêt «Start/Stop».<br />
Si le pain s’effondre alors qu’il cuit, cela signifie que trop de liquide a<br />
été utilisé. La prochaine fois, réduire le liquide d’1 à 2 cuiller à soupe.<br />
Si le pain est petit, lourd ou possède une texture dense et humide,<br />
la pâte était trop sèche. La prochaine fois, augmenter le liquide.<br />
Toutes les recettes n’aboutiront pas un pain de taille similaire.<br />
Lors de l’utilisation de farines de grains complets, de blés et de grains,<br />
le pain sera plus petit.<br />
110
PÂTE SÈCHE<br />
Si votre Machine à Pain fait entendre des bruits de coups lors du<br />
pétrissage, cela signifie que la pâte est trop sèche. Cela peut se<br />
produire durant les mois froids. Ajouter simplement de l’eau chaude<br />
à 126°F - 135°F /38°C - 43°C, une cuiller à soupe à la fois,<br />
jusqu’à ce que la pâte paraisse molle et lisse.<br />
Une pâte sèche se présentera sous forme de boule compacte,<br />
de forme irrégulière, au lieu d’une boule molle. Après la cuisson,<br />
les pâtes sèches auront un dessus inégal et irrégulier,<br />
probablement craquelé et le pain terminé sera aplati.<br />
A la fin du pétrissage, la pâte devra être assez molle pour se positionner<br />
très lentement dans les angles du moule-pain. Durant la levée de la pâte,<br />
les côtés en feront de même.<br />
Lors de l’utilisation du cycle de pâte, la pâte pourra être un peu<br />
plus mouillée que lors de la cuisson du pain dans la machine.<br />
Parce qu’elle sera ôtée et façonnée à la main, la pâte devra<br />
pouvoir être manipulée et non collante.<br />
PÂTE HUMIDE<br />
Si la pâte contient trop de liquide, elle ressemblera plus à de la pâte à<br />
frire que de la pâte à pain. Si la pâte à pain est trop mouillée, elle pourra<br />
bien lever mais ensuite retombera durant le cycle de cuisson. Elle pourra<br />
également former un “champignon” et déborder du moule ou toucher<br />
le couvercle.<br />
Si la pâte à pain parait trop mouillée et collante, ajouter de la farine par<br />
1 cuiller à soupe à la fois durant le cycle de mélange initial, jusqu’à ce<br />
que la pâte forme une boule molle et souple.<br />
La farine absorbe également l’humidité de l’air, donc il est possible<br />
qu’il vous faille ajuster la quantité de liquide pour compenser<br />
de l’humidité et de l’altitude.<br />
111
VEUILLEZ VÉRIFIER<br />
CE QUI SUIT:<br />
DÉPANNAGE DE L’APPAREIL<br />
Défaillances de l’Appareil<br />
Déprisé<br />
Le moule à pain n’est pas<br />
introduit correctement<br />
Ingrédients répandus<br />
sur l’élément chauffant<br />
La lame de pétrissage<br />
n’est pas installée dans<br />
le moule à pain<br />
Le couvercle a été ouvert de façon<br />
répétée pendent le foncionnement<br />
ou il a été laissé ouvert<br />
PANNEAU DE<br />
COMMANDE<br />
Mauvaise sélection<br />
de menu<br />
Mauvaise sélection<br />
de mode (le mode<br />
PÂTE a été choisi)<br />
La touche Stop/Repeat<br />
a été touchée aprés<br />
la mise en service<br />
La pain a été laissé<br />
trop longtemps dans la<br />
moule aprés la cuisson<br />
Pain coupé juste aprés<br />
la cuisson (la vapeur n’a pas<br />
eu le temps de s’échapper)<br />
Eau ajoutée aprés<br />
le pétrissage de la farine<br />
Panne de courant<br />
Cavité de four trop chaude/<br />
attendre qu’elle refroidisse<br />
L’AFFICHAGE À DEL<br />
NE S’ALLUME PAS<br />
✧<br />
LA DEL INDIQUE «H:HH»<br />
✧<br />
DE LAFUMÉE SORT DES<br />
ÉVENTS DE VAPEUR (DERRIÈRE<br />
L’APPAREIL) ODEUR DE BRÛLE<br />
✧<br />
LA CUISSON DU PAIN PREND<br />
TROP LONGTEMPS<br />
LES CÔTÉS DU PAIN<br />
S’AFFAISSENT ET LE FOND<br />
EST PÂTEUX<br />
*En cas de panne de courant, on peut remettre l’appareil en marche tant que le cycle de cuisson<br />
n’a pas commenceé. Si le cycle de cuisson a commencé, retirer le moule à pain et le placer<br />
dans le four pour finir la cuisson.<br />
Des questions? Vous pouvez nous appeler gratuitement au<br />
1-800-667-8623.<br />
✧<br />
112<br />
LE PAIN – LÉVE TROP<br />
✧<br />
BRUNISSAGE INSUFFISANT<br />
BRUNI MAIS CENTRE<br />
PÂTEUX ET CRU<br />
CÔTÉ BRUNIS MAIS<br />
FOND FARINEUX<br />
PAS CUIT<br />
✧ ✧ ✧<br />
✧<br />
✧<br />
✧ ✧<br />
✧<br />
✧ ✧ ✧ ✧<br />
SE DÉCOUPE DE FAÇON<br />
IRRÉGULIÈRE ET COLLANT<br />
✧<br />
NE MÉLANGE PAS<br />
✧<br />
✧
SOLUTIONS AUX PROBLÈMES DE RECETTES<br />
Résultats de Cuisson<br />
ERREURS DE MESURE<br />
VEUILLEZ VÉRIFIER<br />
CE QUI SUIT:<br />
FARINE<br />
LEVURE<br />
EAU ou<br />
LIQUIDE<br />
SUCRE<br />
SEL<br />
FARINE:<br />
Insuffisant<br />
Excessif<br />
Insuffisant<br />
Excessif<br />
Insuffisant<br />
Excessif<br />
Omis<br />
Excessif<br />
Omis<br />
Vielle ou mauvaise<br />
farine utilisée<br />
Farine tout-usage<br />
TEXTURE LOURDE<br />
ET DENSE<br />
✧<br />
✧<br />
✧<br />
PAS CUIT AU<br />
MILIEU<br />
TEXTURE OUVERT,<br />
GROSSSIÉRE OU<br />
PLEINE DE TROUS<br />
EFFONDREMENT<br />
LE PAIN LÉVE<br />
TROP<br />
LE PAIN DE LEEVE<br />
PAS SUFFISAMENT<br />
DESSUS FARINEUX<br />
BRUNISSAGE<br />
EXCESSIF<br />
CÔTÉS BRUNIS ET<br />
FARINÉS CENTRE<br />
PÂTEUX ET CRU<br />
✧<br />
✧<br />
✧<br />
✧<br />
✧<br />
✧<br />
✧ ✧ ✧ ✧ ✧<br />
✧<br />
✧ ✧<br />
✧ ✧ ✧<br />
✧<br />
✧<br />
LEVURE:<br />
Vielle levure<br />
utilisée<br />
Mauvais type<br />
de levure utilisé<br />
✧<br />
✧<br />
Eau chaude utilisée au<br />
lieu d’eau froide ou<br />
à la température ambiante<br />
✧<br />
Des questions? Vous pouvez nous appeler gratuitement au<br />
1-800-667-8623.<br />
113
QUESTIONS FRÉQUEMMENT POSÉES<br />
POURQUOI MON PAIN A-T-IL LA CONSISTANCE DU PLOMB ET RESSEMBLE-T-IL-UNE<br />
RONDELLE DE HOCKEY?<br />
Vous avez peut-être oublié la levure (nous faisons tous des erreurs!) ou vous avez utilisé<br />
de la levure trop vieille, trop de sel ou de sucre ou de l’eau chaude qui peut avoir neutralisé<br />
la levure et empêché la fermentation.<br />
POURQUOI MON PAIN EST-IL EFFONDRÉ SUR LE HAUT?<br />
Peut-être y avait-il trop de liquide ou d’humidité apportée par les fruits, les légumes<br />
ou le fromage. Il peut avoir levé trop vite-cause d’une quantité excessive de levure.<br />
Vous serez surpris, après avoir coupé le haut, de découvrir que vous avez cuit<br />
un pain délicieux de consistance grossière.<br />
POURQUOI MON PAIN EST-IL D’ASPECT GROSSIER ET DE FORME IRRÉGULIÈRE<br />
SUR LE DESSUS?<br />
Peut-être l’humidité était-elle insuffisante. Les pains de consistance plus lourde apparaissent<br />
parfois ainsi.<br />
POURQUOI MON PAIN PRÉSENTE-T-IL DE GRANDS TROUS?<br />
Il y avait sans doute trop de levure et d’humidité.<br />
POURQUOI MA RECETTE RÉUSSIT-ELLE LA PLUPART DU TEMPS MAIS PAS TOUJOURS?<br />
Peut-être l’humidité de l’air ou celle de la farine a-t-elle varié ce qui a rendu la pâte plus<br />
collante ou plus sèche OU peut-être la température ambiante était-elle froide ou trop chaude.<br />
N’oubliez pas que la machine ne peut ni discerner ni compenser ces facteurs.<br />
POURQUOI Y-A-T-IL DES DÉPÔTS DE FARINE SUR LE CÔTÉ DU PAIN CUIT?<br />
Peut-être avec un pain plus lourd tous les ingrédients n’ont-ils pas été mélangés lors<br />
du pétrissage; la prochaine fois vous devriez tenter d’utiliser une spatule en caoutchouc<br />
pour repousser les ingrédients du bord du moule après le premier cycle de pétrissage.<br />
POURQUOI LES RAISINS SECS ET LES DATES SONT-ILS TOUS COLLÉS ENSEMBLE<br />
AU FOND DU PAIN?<br />
Les raisins secs et les dates étaient trop collants. Essayez de les faire sécher-l’air libre en<br />
les laissant une nuit sur le comptoir ou acheter des dates en morceaux revêtues de dextrose.<br />
COMMENT ESSAYER LA LEVURE<br />
Les instructions suivantes permettent de déterminer la fraîcheur et la qualité de la farine.<br />
Pour cet essai procéder comme suit:<br />
1. Placer 1/2 tasse d’eau tiède dans un petit bol ou une tasse.<br />
2. Mélanger 1 cuiller-café de sucre dans l’eau.<br />
3. Saupoudrer 2 cuillers-café de levure-la surface.<br />
4. Placer le bol ou la tasse dans un lieu tiède et laisser reposer 10 minutes sans perturber.<br />
5. Le mélange doit mousser et produire une forte odeur de levure. Si cela ne se produit pas,<br />
la levure est inactive et il faut acheter de la levure fraîche.<br />
114
DIRECTIVES DE NETTOYAGE ET D’ENTRETIEN<br />
Nettoyage du Machine à Pain et à Pâte De Luxe Sunbeam ®<br />
Avant de nettoyer le Machine à Pain et à Pâte De Luxe, le dépriser et le laisser<br />
refroidir. Pour le nettoyer, l’essuyer manuellement; ne pas l’immerger dans l’eau!<br />
Et veiller-n’utiliser qu’un détergent doux de cuisine – le benzène, les nettoyants,<br />
les brosses et les nettoyants chimiques endommageront l’appareil.<br />
Avant de réutiliser l’appareil, s’assurer qu’il est complètement sec.<br />
Corps et Couvercle<br />
1. Enlever toutes les miettes de pain en les essuyant délicatement<br />
avec un chiffon légèrement humide.<br />
2. Tandis qu’on essuie, veiller-ne pas tordre le capteur de température,<br />
lequel est situé sur la paroi intérieure du robot.<br />
Moule-Pain et Lame de Pétrissage<br />
1. Essuyer avec un chiffon humide et sécher complètement.<br />
2. Ne pas laver en machine le moule ou les pièces démontables.<br />
SOIN DU MACHINE À PAIN ET À PÂTE DE LUXE SUNBEAM ®<br />
Moule Antiadhérent et Lame<br />
1. Maintenir votre Machine à Pain et à Pâte De Luxe propre.<br />
2. Ne pas utiliser d’ustensiles en métal. Cela endommagerait le revêtement<br />
antiadhérent du moule et de la lame de pétrissage.<br />
3. Ne pas s’inquiéter si le revêtement change de couleur avec le temps. Cette<br />
décoloration, causée par la vapeur et l’humidité, n’influe pas sur les résultats.<br />
4. Si on rencontre des difficultés pour retirer la lame de pétrissage,<br />
placer de l’eau chaude dans le moule-pain pendant 10 – 15 minutes<br />
afin de laisser la lame se décoincer.<br />
Rangement<br />
1. S’assurer que l’appareil est complètement froid et sec avant de le ranger.<br />
2. Ranger le Machine à Pain et à Pâte De Luxe avec le couvercle fermé.<br />
3. Ne pas placer d’objet pesant sur le couvercle.<br />
115
LA BOULANGERIE-HAUTE ALTITUDE<br />
 haute altitude, au-dessus de 1 000 mètres, la pâte lève plus vite.<br />
Quand on fait de la boulangerie-haute altitude, il faut donc<br />
expérimenter un peu. Se conformer aux directives suggérées.<br />
Appliquer une suggestion-la fois et n’oubliez pas de noter la<br />
suggestion qui donne les meilleurs résultats en ce qui vous concerne.<br />
DIRECTIVES:<br />
1. Réduire la quantité de levure de 25%.<br />
Cela empêchera le pain de lever<br />
de façon excessive.<br />
2. Augmenter le sel de 25%. Le pain<br />
lévera plus lentement et aura moins<br />
tendance-s’effondrer.<br />
3. Surveiller la pâte lors du mélange.<br />
La farine stockée-haute altitude<br />
tend-être plus sèche. Il pourra être<br />
nécessaire d’ajouter quelques<br />
cuillers-soupe díeau, jusqu’ce<br />
que la pâte forme une belle boule.<br />
N’hésitez pas à nous poser des questions.<br />
Vous pouvez nous appeler sans frais au<br />
1-800-667-8623.<br />
116
INDEX DE RECETTES<br />
RECETTES DE PAIN BLANC<br />
Pain Blanc De Luxe. . . . . . . . . . . . . . . . . . . 76<br />
Pain Blanc Classique. . . . . . . . . . . . . . . . . . 76<br />
Pain Blanc de Campagne. . . . . . . . . . . . . . . 77<br />
Pain à l’Ail . . . . . . . . . . . . . . . . . . . . . . . . . 77<br />
Pain aux Herbes . . . . . . . . . . . . . . . . . . . . . 78<br />
Pain à l’Italienne . . . . . . . . . . . . . . . . . . . . . 78<br />
Baguette. . . . . . . . . . . . . . . . . . . . . . . . . . . 79<br />
Gâteau au Yogourt . . . . . . . . . . . . . . . . . . . 79<br />
Pain à l’Oignon et au Fromage. . . . . . . . . . . 80<br />
Pain au Fromage Cottage<br />
et à la Ciboulette. . . . . . . . . . . . . . . . . . . . 80<br />
PAINS AU BLÉ ENTIER ET AU GRAINS<br />
Pain 50% au Blé Entier . . . . . . . . . . . . . . . . 81<br />
Pain Complet . . . . . . . . . . . . . . . . . . . . . . . 81<br />
Pain au Son et au Tournesol . . . . . . . . . . . . 82<br />
Pains Multi-Grains . . . . . . . . . . . . . . . . . . . 82<br />
Pain de Blé Concassé . . . . . . . . . . . . . . . . . 83<br />
PAINS DE SEIGLE<br />
Pumpernickel . . . . . . . . . . . . . . . . . . . . . . . 83<br />
Pain de Seigle Allégé . . . . . . . . . . . . . . . . . 84<br />
Pain de Seigle Allégé à la Deli . . . . . . . . . . . 84<br />
Pain de Seigle à la Moutarde. . . . . . . . . . . . 85<br />
RECETTES DE PAINS DOUX<br />
Pain à la Cannelle et aux Fruits . . . . . . . . . . 86<br />
Pain aux Pommes et aux Noix. . . . . . . . . . . 86<br />
PAINS SANS GLUTEN<br />
Pain Blanc sans Gluten . . . . . . . . . . . . . . . . 87<br />
Pain au Cheddar sans Gluten . . . . . . . . . . . 88<br />
Pain à la Cannelle et<br />
aux Raisins sans Gluten. . . . . . . . . . . . . . 89<br />
RECETTES DE PAINS ÉCLAIR<br />
Pain à la Banane et aux<br />
Pépites de Chocolat . . . . . . . . . . . . . . . . 91<br />
Pain Zucchini . . . . . . . . . . . . . . . . . . . . . . 92<br />
Pain aux Abricots et aux Noix. . . . . . . . . . . 93<br />
Pain à Céréale Grape Nuts . . . . . . . . . . . . . 93<br />
INSTRUCTIONS POUR LA PÂTE . . . . . . . 94<br />
Variations pour le Façonnage de la Pâte . . . 95<br />
Pains Mollet Blancs . . . . . . . . . . . . . . . . . . 97<br />
Pains Mollet au Miel et au Blé . . . . . . . . . . 97<br />
Pains Mollet au Blé . . . . . . . . . . . . . . . . . . 98<br />
Pains Mollet au Son. . . . . . . . . . . . . . . . . . 98<br />
Pizza . . . . . . . . . . . . . . . . . . . . . . . . . . . . . 99<br />
Bagels . . . . . . . . . . . . . . . . . . . . . . . . . . . . 101<br />
RECETTES DE PÂTES<br />
Pâtes de Base . . . . . . . . . . . . . . . . . . . . . . 102<br />
Pâtes aux Oeufs. . . . . . . . . . . . . . . . . . . . . 102<br />
Pâte Sucrée de Base . . . . . . . . . . . . . . . . . 103<br />
Brioches à la Cannelle . . . . . . . . . . . . . . . . 104<br />
Spirales au Beurre d’Arachide . . . . . . . . . . 104<br />
Brioches au Granola Épicées . . . . . . . . . . . 105<br />
Brioches Chelsea . . . . . . . . . . . . . . . . . . . . 105<br />
Couronne Suédoise . . . . . . . . . . . . . . . . . . 105<br />
GLAÇAGES ET TARTINADES . . . . . . . . . . 106<br />
RECETTES DE CONFITURES ET GELÉES<br />
Confiture de Fraises . . . . . . . . . . . . . . . . . . 109<br />
Marmelade d’Orange . . . . . . . . . . . . . . . . . 109<br />
Confiture de Baies . . . . . . . . . . . . . . . . . . . 109<br />
117
DELUXE 2-LB BREAD & DOUGH MAKER<br />
P. N. 101025<br />
©1998 Sunbeam Corporation or its affiliated companies.<br />
All rights reserved.<br />
Sunbeam ® is a registered trademark of<br />
Sunbeam Corporation or its affiliated companies.<br />
Distributed by Sunbeam Products, <strong>Inc</strong>.,<br />
Delray Beach, Florida <strong>33</strong>445.<br />
MACHINE À PAIN ET À PÂTE DE LUXE DE 2 LB<br />
P. N. 101025<br />
© 1998 Sunbeam Corporation ou ses sociétés affiliées.<br />
Tous droits réservés.<br />
Sunbeam ® est une marque déposée de<br />
Sunbeam Corporation ou de ses sociétés affiliées.<br />
Distribué par Sunbeam Products <strong>Inc</strong>.,<br />
Delray Beach, Florida <strong>33</strong>445.