1 - Sportolino.de
1 - Sportolino.de
1 - Sportolino.de

You also want an ePaper? Increase the reach of your titles
YUMPU automatically turns print PDFs into web optimized ePapers that Google loves.
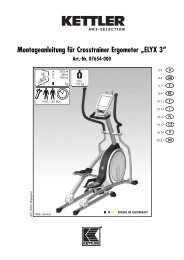
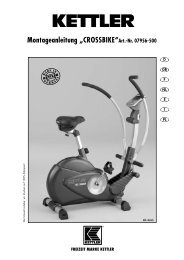
Montage- und Trainingsanleitung Rückentrainer<br />
Art.-Nr. 07824-900<br />
D<br />
GB<br />
F<br />
NL<br />
E<br />
Der Umwelt zuliebe: Wir drucken auf 100% Altpapier!<br />
A<br />
C<br />
A B C<br />
140 62 108<br />
B cm<br />
24<br />
kg<br />
150 kg<br />
max.<br />
Abbildung ähnlich<br />
I<br />
PL
D<br />
Inhalt<br />
Seite<br />
E<br />
Indice<br />
página<br />
Wichtige Hinweise . . . . . . . . . . . . . . . . . . . . . . . . . . . . . .3<br />
Checkliste (Packungsinhalt) . . . . . . . . . . . . . . . . . . . . . . .13<br />
Meßhilfe für Verschraubungsmaterial . . . . . . . . . . . . . . . . .14<br />
Montageanleitung . . . . . . . . . . . . . . . . . . . . . . . . . . . . . .14<br />
Trainingsanleitung . . . . . . . . . . . . . . . . . . . . . . . . . . . . . .17<br />
Dehnübungen . . . . . . . . . . . . . . . . . . . . . . . . . . . . . . . . .18<br />
Übungsbeschreibung . . . . . . . . . . . . . . . . . . . . . . . . . . . .19<br />
Ersatzteilzeichnung und –liste . . . . . . . . . . . . . . . . . . . . . .44<br />
Informaciones importantes . . . . . . . . . . . . . . . . . . . . . . . . .8<br />
Lista <strong>de</strong> control (contenido <strong>de</strong>l paquete) . . . . . . . . . . . . . .13<br />
Ayuda para la medición <strong>de</strong> los tornillos . . . . . . . . . . . . . .14<br />
Instrucciones para el montaje . . . . . . . . . . . . . . . . . . . . . .14<br />
Instrucciones <strong>de</strong> entrenamiento . . . . . . . . . . . . . . . . . . . . .32<br />
Ejercicios <strong>de</strong> estiramiento . . . . . . . . . . . . . . . . . . . . . . . .33<br />
Descripción <strong>de</strong>l ejercicio . . . . . . . . . . . . . . . . . . . . . . . . .34<br />
Designación y lista <strong>de</strong> las piezas <strong>de</strong> recambio . . . . . . . . .44<br />
GB<br />
Contents<br />
page<br />
I<br />
Contenuto<br />
pag.<br />
Important information . . . . . . . . . . . . . . . . . . . . . . . . . . . .4<br />
Checklist (contents of packaging) . . . . . . . . . . . . . . . . . . .13<br />
Measuring help for screw connections . . . . . . . . . . . . . . . .14<br />
Assembly instructions . . . . . . . . . . . . . . . . . . . . . . . . . . . .14<br />
Training Instructions . . . . . . . . . . . . . . . . . . . . . . . . . . . .21<br />
Stretching exercises . . . . . . . . . . . . . . . . . . . . . . . . . . . . .22<br />
Exercise <strong>de</strong>scription . . . . . . . . . . . . . . . . . . . . . . . . . . . .23<br />
Spare parts drawing and list . . . . . . . . . . . . . . . . . . . . . .44<br />
Indicazioni importanti . . . . . . . . . . . . . . . . . . . . . . . . . . .10<br />
Lista di controllo (contenuto <strong>de</strong>l pacco) . . . . . . . . . . . . . . .13<br />
Misure per i materiali di avvitamento . . . . . . . . . . . . . . . .14<br />
Istruzioni di montaggio . . . . . . . . . . . . . . . . . . . . . . . . . .14<br />
Istruzioni per l’allenamento . . . . . . . . . . . . . . . . . . . . . . .36<br />
Esercizi di stiramento . . . . . . . . . . . . . . . . . . . . . . . . . . .37<br />
Descrizione di esercizio . . . . . . . . . . . . . . . . . . . . . . . . .38<br />
Disegno ed elenco <strong>de</strong>i pezzi di ricambio . . . . . . . . . . . . .44<br />
F<br />
Contenu<br />
page<br />
PL<br />
Spis treści<br />
Observations importantes . . . . . . . . . . . . . . . . . . . . . . . . .5<br />
Liste <strong>de</strong> vérification (contenu <strong>de</strong> l’emballage) . . . . . . . . . . .13<br />
Gabarit pour système <strong>de</strong> serrage . . . . . . . . . . . . . . . . . . .14<br />
Instructions d’assemblage . . . . . . . . . . . . . . . . . . . . . . . .14<br />
Notice d’utilisation . . . . . . . . . . . . . . . . . . . . . . . . . . . . .25<br />
Exercices d'étirement . . . . . . . . . . . . . . . . . . . . . . . . . . . .26<br />
Description <strong>de</strong>s exercices . . . . . . . . . . . . . . . . . . . . . . . . .27<br />
Dessin et liste <strong>de</strong>s pièces <strong>de</strong> rechange . . . . . . . . . . . . . . .44<br />
Ważne informacje . . . . . . . . . . . . . . . . . . . . . . . . . . . . .11<br />
Lista kontrolna (zawartość opakowania) . . . . . . . . . . . . . .13<br />
Wzornik do połączeń śrubowych . . . . . . . . . . . . . . . . . . .14<br />
Instrukcja montażu . . . . . . . . . . . . . . . . . . . . . . . . . . . . .14<br />
Instrukcja treningowa siłowni . . . . . . . . . . . . . . . . . . . . . .40<br />
Ćwiczenia rozciągające . . . . . . . . . . . . . . . . . . . . . . . . .41<br />
Opis ćwiczeń . . . . . . . . . . . . . . . . . . . . . . . . . . . . . . . . .42<br />
Rysunek i lista części zamiennych . . . . . . . . . . . . . . . . . . .44<br />
NL<br />
Inhoud<br />
bladzij<strong>de</strong><br />
Belangrijke instructies . . . . . . . . . . . . . . . . . . . . . . . . . . . .7<br />
Checklijst (verpakkingsinhoud) . . . . . . . . . . . . . . . . . . . . .13<br />
Meethulp voor schroefmateriaal . . . . . . . . . . . . . . . . . . . .14<br />
Montageaanwijzing . . . . . . . . . . . . . . . . . . . . . . . . . . . .14<br />
Trainingshandleiding . . . . . . . . . . . . . . . . . . . . . . . . . . . .29<br />
Rekoefeningen . . . . . . . . . . . . . . . . . . . . . . . . . . . . . . . .30<br />
Oefeningen . . . . . . . . . . . . . . . . . . . . . . . . . . . . . . . . . .31<br />
Reserveon<strong>de</strong>r<strong>de</strong>eltekening en -lijst . . . . . . . . . . . . . . . . . . .44<br />
2
D<br />
Wichtige Hinweise<br />
Bitte lesen Sie diese Anleitung vor <strong>de</strong>r Montage und <strong>de</strong>r ersten Benutzung aufmerksam durch. Sie erhalten wichtige Hinweise<br />
für Ihre Sicherheit sowie <strong>de</strong>n Gebrauch und die Wartung <strong>de</strong>s Fitnessgerätes. Bewahren Sie die Anleitung zur Information<br />
bzw. für Wartungsarbeiten o<strong>de</strong>r Ersatzteilbestellungen sorgfältig auf.<br />
Zu Ihrer Sicherheit<br />
■ Das Gerät darf nur für seinen bestimmungsgemäßen Zweck verwen<strong>de</strong>t<br />
wer<strong>de</strong>n, d.h. für das Körpertraining erwachsener Personen.<br />
■ Jegliche an<strong>de</strong>re Verwendung ist unzulässig und möglicherweise<br />
gefährlich. Der Hersteller kann nicht für Schä<strong>de</strong>n verantwortlich<br />
gemacht wer<strong>de</strong>n, die durch nicht bestimmungsgemäßen Gebrauch<br />
verursacht wur<strong>de</strong>n.<br />
■ Sie trainieren mit einem Gerät, das sicherheitstechnisch nach<br />
neuesten Erkenntnissen konstruiert wur<strong>de</strong>. Mögliche Gefahrenstellen,<br />
die Verletzungen verursachen könnten, sind bestmöglich<br />
vermie<strong>de</strong>n und abgesichert.<br />
■ Das Gerät entspricht <strong>de</strong>r Klasse H <strong>de</strong>r Sicherheitsnorm DIN EN<br />
957-1/-2/-4 und ist damit nicht für <strong>de</strong>n therapeutischen Einsatz<br />
geeignet.<br />
■ Das Produkt ist nicht für Personen mit einem Körpergewicht von<br />
mehr als 150 kg geeignet.<br />
■ Durch unsachgemäße Reparaturen und bauliche Verän<strong>de</strong>rungen<br />
(Demontage von Originalteilen, Anbau von nicht zulässigen<br />
Teilen, usw.) können Gefahren für <strong>de</strong>n Benutzer entstehen.<br />
■ Beschädigte Bauteile können Ihre Sicherheit und die Lebensdauer<br />
<strong>de</strong>s Gerätes beeinträchtigen. Tauschen Sie <strong>de</strong>shalb beschädigte<br />
o<strong>de</strong>r verschlissene Bauteile sofort aus und entziehen<br />
Sie das Gerät bis zur Instandsetzung <strong>de</strong>r Benutzung. Verwen<strong>de</strong>n<br />
Sie im Bedarfsfall nur Original KETTLER–Ersatzteile.<br />
■ Führen Sie bei regelmäßigem und intensivem Trainingsbetrieb<br />
ca. alle 1 – 2 Monate Kontrollen aller Geräteteile, insbeson<strong>de</strong>re<br />
<strong>de</strong>r Schrauben und Muttern durch.<br />
■ Um das konstruktiv vorgegebene Sicherheitsniveau dieses Gerätes<br />
langfristig garantieren zu können, sollte das Gerät regelmäßig<br />
vom Spezialisten (Fachhan<strong>de</strong>l) geprüft und gewartet wer<strong>de</strong>n<br />
(einmal im Jahr).<br />
■ Weisen Sie anwesen<strong>de</strong> Personen (insbeson<strong>de</strong>re Kin<strong>de</strong>r) auf<br />
mögliche Gefährdungen während <strong>de</strong>r Übungen hin. Nur für<br />
Geräte mit Gewichten o<strong>de</strong>r Hantelscheiben: Dies gilt im beson<strong>de</strong>rem<br />
Maße für <strong>de</strong>n Bewegungsbereich <strong>de</strong>r Gewichte und<br />
Hantelscheiben.<br />
■ Lassen Sie vor Aufnahme <strong>de</strong>s Trainings durch Ihren Hausarzt<br />
klären, ob Sie gesundheitlich für das Training mit diesem Gerät<br />
tauglich sind. Der ärztliche Befund sollte Grundlage für <strong>de</strong>n Aufbau<br />
Ihres Trainingsprogramms sein. Falsches o<strong>de</strong>r übermäßiges<br />
Training kann zu Gesundheitsschä<strong>de</strong>n führen.<br />
■ Alle hier nicht beschriebenen Eingriffe/Manipulationen am<br />
Gerät können eine Beschädigung hervorrufen o<strong>de</strong>r auch eine<br />
Gefährdung <strong>de</strong>r Person be<strong>de</strong>uten. Weitergehen<strong>de</strong> Eingriffe sind<br />
nur vom KETTLER–Service o<strong>de</strong>r von KETTLER geschultem Fachpersonal<br />
zulässig.<br />
■ Im Zweifelsfall und bei Fragen wen<strong>de</strong>n Sie sich bitte an Ihren<br />
Fachhändler.<br />
Zur Handhabung<br />
■ Achten Sie bei <strong>de</strong>r Wahl <strong>de</strong>s Aufstellungsortes auf eine ausreichend<br />
große Belastbarkeit <strong>de</strong>s Bo<strong>de</strong>ns!<br />
■ Stellen Sie sicher, dass <strong>de</strong>r Trainingsbetrieb nicht vor <strong>de</strong>r ordnungsgemäßen<br />
Ausführung und Überprüfung <strong>de</strong>r Montage aufgenommen<br />
wird.<br />
■ Achten Sie darauf, daß während <strong>de</strong>s Trainings alle notwendigen<br />
Sicherungselemente angelegt sind bzw. sich nicht lockern<br />
können. Kontrollieren Sie vor je<strong>de</strong>r Benutzung <strong>de</strong>s Gerätes immer<br />
alle Schraub– und Steckverbindungen sowie die jeweiligen<br />
Sicherungseinrichtungen auf ihren korrekten Sitz.<br />
■ Ein Aufstellen <strong>de</strong>s Geräts in stark begangenen Räumen bzw. in<br />
<strong>de</strong>r Nähe von Hauptlaufrichtungen (Türen, Durchgänge usw.) ist<br />
nicht zulässig.<br />
■ Eine Verwendung <strong>de</strong>s Gerätes in direkter Nähe von Feuchträumen<br />
ist wegen <strong>de</strong>r damit verbun<strong>de</strong>nen Rostbildung nicht zu<br />
empfehlen. Achten Sie auch darauf, dass keine Flüssigkeiten<br />
(Getränke, Schweiss, usw.) auf Teile <strong>de</strong>s Gerätes gelangen. Dies<br />
könnte zu Korrosionen führen.<br />
■ Das Gerät sollte auf einem ebenen, schlagfesten Untergrund aufgestellt<br />
wer<strong>de</strong>n. Legen Sie zur Stoßdämpfung geeignetes Puffermaterial<br />
unter (Gummimatten, Bastmatten o<strong>de</strong>r dgl.). Nur für Geräte<br />
mit Gewichten: Vermei<strong>de</strong>n Sie harte Aufschläge <strong>de</strong>r Gewichte.<br />
■ Das Gerät ist als Trainingsgerät für Erwachsene konzipiert und<br />
keinesfalls als Kin<strong>de</strong>rspielgerät geeignet. Be<strong>de</strong>nken Sie, daß<br />
durch das natürliche Spielbedürfnis und Temperament von Kin<strong>de</strong>rn<br />
oft unvorhergesehene Situationen entstehen können, die<br />
eine Verantwortung seitens <strong>de</strong>s Herstellers ausschließen. Wenn<br />
Sie <strong>de</strong>nnoch Kin<strong>de</strong>r an das Gerät lassen, sind diese auf die<br />
richtige Benutzung hinzuweisen und zu beaufsichtigen.<br />
■ Grundsätzlich bedarf das Gerät keiner beson<strong>de</strong>ren Wartung.<br />
■ Verwen<strong>de</strong>n Sie zur regelmäßigen Säuberung, Pflege und Wartung<br />
unser speziell für KETTLER-Sportgeräte freigegebenes<br />
Geräte-Pflege-Set (Art.-Nr. 07921-000), welches Sie über <strong>de</strong>n<br />
Sportfachhan<strong>de</strong>l beziehen können.<br />
■ Bewahren Sie die Originalverpackung <strong>de</strong>s Gerätes gut auf, damit<br />
sie später u. U. als Transportverpackung verwen<strong>de</strong>t wer<strong>de</strong>n<br />
kann. Warenretouren sind nur nach Absprache und mit transportsicherer<br />
(Innen-) Verpackung, möglichst im Originalkarton<br />
vorzunehmen. Wichtig ist eine <strong>de</strong>taillierte Fehlerbeschreibung/Scha<strong>de</strong>nsmeldung!<br />
■ Entsorgungshinweis: KETTLER-Produkte sind recycle bar. Führen<br />
Sie das Gerät am En<strong>de</strong> <strong>de</strong>r Nutzungsdauer einer sachgerechten<br />
Entsorgung zu (örtliche Sammelstelle).<br />
Montagehinweise<br />
■ Die Montage <strong>de</strong>s Gerätes muß sorgfältig und von einer erwachsenen<br />
Person vorgenommen wer<strong>de</strong>n. Nehmen Sie im<br />
Zweifelsfall die Hilfe einer weiteren, technisch begabten Person<br />
in Anspruch.<br />
■ Bitte prüfen Sie sofort nach Erhalt, ob alle zum Lieferumfang<br />
gehören<strong>de</strong>n Teile vorhan<strong>de</strong>n sind (s. Checkliste) und ob Trans-<br />
portschä<strong>de</strong>n vorliegen. Sollte es Anlaß für Beanstandungen geben,<br />
wen<strong>de</strong>n Sie sich bitte an Ihren Fachhändler.<br />
■ Das für einen Montageschritt notwendige Verschraubungsmaterial<br />
ist in <strong>de</strong>r dazugehörigen Bildleiste dargestellt. Setzen Sie das<br />
Verschraubungsmaterial exakt entsprechend <strong>de</strong>r Abbildungen<br />
ein. Alles erfor<strong>de</strong>rliche Werkzeug fin<strong>de</strong>n Sie im Kleinteilebeutel.<br />
3
D<br />
Wichtige Hinweise<br />
■ Beachten Sie, dass bei je<strong>de</strong>r Benutzung von Werkzeug und bei<br />
handwerklichen Tätigkeiten immer eine mögliche Verletzungsgefahr<br />
besteht. Gehen Sie daher sorgfältig und umsichtig bei<br />
<strong>de</strong>r Montage <strong>de</strong>s Gerätes vor!<br />
■ Sorgen Sie für eine gefahrenfreie Arbeitsumgebung, lassen Sie<br />
z. B. kein Werkzeug umherliegen. Deponieren Sie z. B. Verpackungsmaterial<br />
so, dass keine Gefahren davon ausgehen<br />
können. Bei Folien/Kunststofftüten für Kin<strong>de</strong>r Erstickungsgefahr!<br />
■ Sehen Sie sich die Zeichnungen in Ruhe an, und montieren Sie<br />
das Gerät entsprechend <strong>de</strong>r Bil<strong>de</strong>rfolge. Innerhalb <strong>de</strong>r einzelnen<br />
Abbildungen ist <strong>de</strong>r Montageablauf durch Großbuchstaben<br />
vorgegeben.<br />
■ Bitte verschrauben Sie zunächst alle Teile lose und kontrollieren<br />
Sie <strong>de</strong>ren richtigen Sitz. Drehen Sie die selbstsichern<strong>de</strong>n Muttern<br />
bis zum spürbaren Wi<strong>de</strong>rstand zuerst mit <strong>de</strong>r Hand auf,<br />
anschließend ziehen Sie sie gegen <strong>de</strong>n Wi<strong>de</strong>rstand (Klemmsicherung)<br />
mit einem Schraubenschlüssel richtig fest. Kontrollieren<br />
Sie alle Schraubverbindungen nach <strong>de</strong>m Montageschritt auf<br />
festen Sitz. Achtung: wie<strong>de</strong>r gelöste Sicherheitsmuttern wer<strong>de</strong>n<br />
unbrauchbar (Zerstörung <strong>de</strong>r Klemmsicherung) und sind durch<br />
Neue zu ersetzen.<br />
■ Aus fertigungstechnischen Grün<strong>de</strong>n behalten wir uns die Vormontage<br />
von Bauteilen (z.B. Rohrstopfen) vor.<br />
■ Bei Geräten mit Seilführungen: achten Sie darauf, dass alle Seile<br />
korrekt befestigt sind. Dies gilt insbeson<strong>de</strong>re für Latissimusstangen.<br />
Ersatzteilbestellung<br />
Geben Sie bei Ersatzteilbestellungen bitte die vollständige Artikelnummer,<br />
die Ersatzteilnummer, die benötigte Stückzahl sowie<br />
die Seriennummer (siehe Ersatzteilzeichnung) an.<br />
Bestellbeispiel: Art.-Nr. 07824-900/Ersatzteil-Nr. 10100016/<br />
Stück /Seriennummer: ........<br />
Wichtig: Zu verschrauben<strong>de</strong> Ersatzteile wer<strong>de</strong>n grundsätzlich<br />
ohne Verschraubungsmaterial berechnet und geliefert. Falls Bedarf<br />
an entsprechen<strong>de</strong>m Verschraubungsmaterial besteht, ist dieses<br />
durch <strong>de</strong>n Zusatz „mit Verschraubungsmaterial“ bei <strong>de</strong>r Ersatzteilbestellung<br />
anzugeben.<br />
D HEINZ KETTLER GmbH & Co. KG · Postfach 1020 · D–<br />
59463 Ense-Parsit<br />
A KETTLER Austria GmbH · Ginzkeyplatz 10 · 5020 Salzburg<br />
CH Trisport AG · Im Bösch · CH–6331 Hünenberg<br />
www.kettler.<strong>de</strong><br />
GB<br />
Assembly Instructions<br />
Before assembling or using this fitness product, please read the following instructions carefully. They contain important<br />
information for use and maintenance of the equipment as well as for your personal safety. Keep these instructions in a<br />
safe place for maintenance purposes or for or<strong>de</strong>ring spare parts.<br />
For Your Safety<br />
■ The unit should be used only for its inten<strong>de</strong>d purpose, i.e. for<br />
physical exercise by adult persons.<br />
■ Any other use of the equipment is prohibited and may be dangerous.<br />
The manufacturer cannot be held liable for damage or<br />
injury caused by improper use of the equipment.<br />
■ The unit has been <strong>de</strong>signed in accordance with the latest standards<br />
of safety. Any features which may have been a possible<br />
cause of injury have been avoi<strong>de</strong>d or ma<strong>de</strong> as safe as possible.<br />
■ The unit complies with class H of the standard EN 957-1/-2-4.<br />
It is therefore unsuitable for therapeutic use.<br />
■ The product is not suitable for use by persons weighing over<br />
150 kg.<br />
■ Incorrect repairs and structural modifications (e.g. removal or replacement<br />
of original parts) may endanger the safety of the user.<br />
■ Damaged components may endanger your safety or reduce the<br />
lifetime of the equipment. For this reason, worn or damaged<br />
parts should be replaced immediately and the equipment taken<br />
out of use until this has been done. Use only original KETTLER<br />
spare parts.<br />
■ If the equipment is in regular use, check all its components thoroughly<br />
every 1 – 2 months. Pay particular attention to the tightness<br />
of bolts and nuts.<br />
■ To ensure that the safety level is kept to the highest possible standard,<br />
<strong>de</strong>termined by its construction, this product should be serviced<br />
regulary (once a year) by specialist retailers.<br />
■ Instruct persons using the equipment (in particular children) on<br />
possible sources of danger during exercising. Only for appliances<br />
with weights or dumbbells. This especially applies to the<br />
area of movement of weights and dumbbells.<br />
■ Before beginning your program of exercise, consult your doctor<br />
to ensure that you are fit enough to use the equipment. Base<br />
your program of exercise on the advice given by your doctor.<br />
Incorrect or excessive exercise may damage your health.<br />
■ Any interference with parts of the product that are not <strong>de</strong>scribed<br />
within the manual may cause damage, or endanger the person<br />
using this machine. Extensive repairs must only be carried out by<br />
KETTLER service staff or qualified personnel trained by KETTLER.<br />
■ In case of enquiry, please contact your KETTLER <strong>de</strong>aler.<br />
Handling the equipment<br />
■ When choosing a place for the equipment please ensure that<br />
the floor can withstand the additional weight/load.<br />
■ Before using the equipment for exercise, check carefully to ensure<br />
that it has been correctly assembled.<br />
■ During exercise, ensure that all the necessary safety elements<br />
are in place and that they cannot work loose. Before use, always<br />
check all screws and plug-in connections as well as respective<br />
safety <strong>de</strong>vices fit correctly.<br />
4
GB<br />
Assembly Instructions<br />
■ Do not set the equipment up in rooms which are frequently used<br />
or close to doors, entries etc.<br />
■ It is not recommen<strong>de</strong>d to use or store the apparatus in a damp<br />
room as this may cause it to rust. Please ensure that no part of<br />
the machine comes in contact with liquids (drinks, perspiration<br />
etc.). This may cause corrosion.<br />
■ The surface on which the unit is placed must be firm and even.<br />
Place rubber or straw mats un<strong>de</strong>r it to <strong>de</strong>a<strong>de</strong>n any noise or impacts.<br />
Only for appliances with weights. Avoid powerful oscillations<br />
of the dumbbells!<br />
■ The unit is <strong>de</strong>signed for use by adults and children should not<br />
be allowed to play with it. Children at play behave unpredictably<br />
and dangerous situations may occur for which the<br />
manufacturer cannot be held liable. If, in spite of this, children<br />
are allowed to use the equipment, ensure that they are instructed<br />
in its proper use and supervised accordingly.<br />
■ Basically this equipment does not need any special maintenance.<br />
■ Use for your regular cleaning, maintenance and care our appliance<br />
maintenance set (Article no. 07921-000) specifically licensed<br />
for KETTLER Sports apparatus and available from the<br />
Sport specialized tra<strong>de</strong>.<br />
■ Please keep original packaging of this article, so that it may be used<br />
for transport at a later date, if necessary. Goods may only be returned<br />
after prior arrangement and in (internal) packaging, which is<br />
safe for transportation, in the original box if possible. It is important<br />
to provi<strong>de</strong> a <strong>de</strong>tailed <strong>de</strong>fect <strong>de</strong>scription / damage report!<br />
■ Waste Disposal: KETTLER products are recyclable. At the end of<br />
its useful life please dispose of this article correctly and safely<br />
(local refuse sites).<br />
Instructions for Assembly<br />
■ The equipment must be assembled with due care by an adult<br />
person. If in doubt call upon the help of a second person, if possible<br />
technically talented.<br />
■ Ensure that you have received all the parts required (see check<br />
list ) and that they are undamaged. Should you have any cause<br />
for complaint, please contact your KETTLER <strong>de</strong>aler.<br />
■ The fastening material required for each assembly step is shown<br />
in the diagram inset. Use the fastening material exactly as instructed.<br />
The required tools are supplied with the equipment.<br />
■ Please note that there is always a danger of injury when working<br />
with tools or doing manual work. Therefore please be careful<br />
when assembling this machine.<br />
■ Ensure that your working area is free of possible sources of danger,<br />
for example don’t leave any tools lying around. Always dispose<br />
packaging material in such a way that it may not cause<br />
any danger. There is always a risk of suffocation if children<br />
play with plastic bags!<br />
■ Before assembling the equipment, study the drawings carefully<br />
and carry out the operations in the or<strong>de</strong>r shown by the diagrams.<br />
The correct sequence is given in capital letters.<br />
■ Bolt all the parts together loosely at first, and check that they<br />
have been assembled correctly. Tighten the locknuts by hand until<br />
resistance is felt, then use spanner to finally tighten nuts completely<br />
against resistance (locking <strong>de</strong>vice). Then check that all<br />
screw connections have been tightened firmly. Attention: once<br />
locknuts have been unscrewed they no longer function correctly<br />
(the locking <strong>de</strong>vice is <strong>de</strong>stroyed), and must be replaced.<br />
■ For technical reasons, we reserve the right to carry out preliminary<br />
assembly work (e.g. addition of tubing plugs).<br />
■ For machines with rope systems: please ensure that all ropes are<br />
fixed correctly. This is especially important for latissimus bars.<br />
List of spare parts<br />
When or<strong>de</strong>ring spare parts, always state the full item number,<br />
spare-partnumber, the quantity required and the S/N of the product<br />
(see spare parts drawing).<br />
Example or<strong>de</strong>r: Item no. 07824-900 / spare-part no. 10100016<br />
/ 2 pieces / S/N......<br />
Important: spare part prices do not inclu<strong>de</strong> fastening material; if<br />
fastening material (bolts, nuts, washers etc.) is required, this<br />
should be clearly stated on the or<strong>de</strong>r by adding the words „with<br />
fastening material“.<br />
GB KETTLER GB Ltd. · KETTLER House, Merse Road · North<br />
Moons Moat · Redditch, Worcestershire B98 9HL<br />
USA KETTLER International Inc. · 1355, London Bridge Road ·<br />
Virginia Beach, VA 23453<br />
http://www.kettler.<strong>de</strong><br />
F<br />
Instructions <strong>de</strong> montage<br />
Lire attentivement les présentes instructions avant le montage et la première utilisation <strong>de</strong> l'appareil. Elles contiennent<br />
<strong>de</strong>s renseignements importants relatifs à la sécurité <strong>de</strong>s personnes ainsi qu'à l'emploi et à l'entretien <strong>de</strong> la station d'entraînement.<br />
Conserver soigneusement lesdites instructions pour d'éventuels renseignements ainsi que pour effectuer<br />
l'entretien <strong>de</strong> l'appareil ou comman<strong>de</strong>r <strong>de</strong>s pièces <strong>de</strong> rechange.<br />
Pour votre sécurité<br />
■ L'appareil ne doit être utilisée que pour les fins auxquelles elle<br />
est <strong>de</strong>stinée, c'est-à-dire pour l'entraînement <strong>de</strong>s adultes.<br />
■ Tout autre emploi est interdit, voire dangereux. Le fabricant ne<br />
pourra être rendu responsable <strong>de</strong> dommages causés par l'emploi<br />
inadéquat <strong>de</strong> l'appareil.<br />
■ Vous vous entraînez avec un appareil dont la technique et la sécurité<br />
correspon<strong>de</strong>nt aux exigences mo<strong>de</strong>rnes. Les sources possibles<br />
<strong>de</strong> danger qui pourraient entraîner <strong>de</strong>s blessures ont été<br />
soit supprimées, soit sécurisées.<br />
5
F<br />
Instructions <strong>de</strong> montage<br />
■ L´appareil est conforme à la classe H <strong>de</strong> la norme EN 957-1/-<br />
2/-4 et convient donc pour soins thérapeutiques.<br />
■ Cette article n'est pas approprié à <strong>de</strong>s personnes pesant plus<br />
<strong>de</strong> 150 kg.<br />
■ Les réparations inadéquates et les modifications apportées à la<br />
construction <strong>de</strong> l'appareil (démontage <strong>de</strong>s pièces d'origine,<br />
montage <strong>de</strong> pièces non autorisées, etc.) peuvent entraîner <strong>de</strong>s<br />
risques imprévus pour l'utilisateur.<br />
■ Les composants endommagés peuvent affecter votre sécurité et<br />
la durée <strong>de</strong> vie <strong>de</strong> l'appareil. On remplacera donc sans tar<strong>de</strong>r<br />
les composants usés ou endommagés et on interdira l'emploi<br />
<strong>de</strong> l'appareil aussi longtemps qu'ils n'auront pas été remplacés.<br />
N'utiliser que <strong>de</strong>s pièces <strong>de</strong> rechange KETTLER d'origine.<br />
■ En cas d'entraînement régulier et intensif, il y a lieu <strong>de</strong> contrôler,<br />
tous les mois ou tous les 2 mois, toutes les pièces <strong>de</strong> l'appareil<br />
et en particulier les vis et les écrous.<br />
■ Afin <strong>de</strong> garantir <strong>de</strong> sécurité indiqué par le construction à long<br />
terme, l’appareil <strong>de</strong>vrait être contrôlé et révisé réulièrement<br />
(une fois par ans) par un spécialiste (reven<strong>de</strong>ur spécialisé).<br />
■ Attirer l'attention <strong>de</strong>s personnes présentes, surtout <strong>de</strong>s enfants,<br />
sur les dangers qu'ils courent pendant les exercices. Uniquement<br />
pour les appareils dotés <strong>de</strong> lests ou poids d’haltères :<br />
Ceci s’applique notamment pour la zone <strong>de</strong> mouvement <strong>de</strong>s<br />
lests et poids d’haltères.<br />
■ Avant <strong>de</strong> commencer, consulter son mé<strong>de</strong>cin traitant pour s'assurer<br />
que l'entraînement avec l'appareil n'est pas nuisible à la<br />
santé. Son diagnostic <strong>de</strong>vrait servir <strong>de</strong> base pour la composition<br />
<strong>de</strong> son programme <strong>de</strong> travail. Un entraînement exagéré ou<br />
mal organisé peut être nuisible à la santé.<br />
■ Touts manipulation/modification á l’appareil peut provoquer<br />
<strong>de</strong>s dommage ou représenter un danger <strong>de</strong> la personne. Des<br />
modifications ne peuvent être apportées que par du personnel<br />
qualifié formé par la Ste. KETTLER.<br />
■ On cas <strong>de</strong> doute, on est prié <strong>de</strong> s'adresser à son concessionnaire<br />
KETTLER.<br />
Utilisation<br />
■ Avant le début du montage, prévoir une surface au sol importante!<br />
■ Veiller à ce que l'on ne commence pas à s'entraîner avant que<br />
le montage n'ait été effectué complètement et contrôlé.<br />
■ S'assurer que pendant l'entraînement, les dispositifs <strong>de</strong> sécurité<br />
nécessaires sont en fonction et qu'ils ne puissent se <strong>de</strong>sserrer.<br />
Avant chaque utilisation, vérifier toujour les vis et les parties emboîtables,<br />
afin que les éléments correspon<strong>de</strong>nt et soient sécurisés.<br />
■ Il n'est pas permis <strong>de</strong> monter l'appareil dans <strong>de</strong>s lieux très fréquentés<br />
ni dans les environs <strong>de</strong> passage <strong>de</strong> la circulation (tels<br />
que portes, passages, etc.).<br />
■ Il n’est pas recommandable d’utiliser cet appareil dans <strong>de</strong>s endroits<br />
humi<strong>de</strong>s, car à la longue, la rouille attaquerait en particulier<br />
la surface frottante du volant d’inertie. Veillez à ce qu'aucun<br />
liqui<strong>de</strong> (boisson, sueur etc.) n'entre en contact avec <strong>de</strong>s parties<br />
<strong>de</strong> l'appareil. Cela pourrait entraîner <strong>de</strong> la corrosion.<br />
■ L'appareil <strong>de</strong>vrait être monté sur un sol plat et ferme. Pour amortir<br />
les chocs poser sous l'appareil soit (un tapis <strong>de</strong> caoutchouc,<br />
<strong>de</strong> raphia ou autre semblable). Uniquement pour les appareils<br />
dotés <strong>de</strong> poids : Évitez la retombée brutale <strong>de</strong>s poids.<br />
■ L'appareil a été conçu pour l'entraînement <strong>de</strong>s adultes et ne doit<br />
pas servir <strong>de</strong> jouet aux enfants. On ne doit jamais perdre <strong>de</strong><br />
vue que <strong>de</strong> par leur tempérament et leurs besoins naturels <strong>de</strong><br />
jouer, les enfants peuvent être confrontés subitement à <strong>de</strong>s situations<br />
imprévues, lesquelles excluent toute responsabilité <strong>de</strong> la<br />
part du constructeur <strong>de</strong> l'appareil. Si, cependant, on autorise<br />
les enfants à se servir <strong>de</strong> l'appareil, il y a lieu <strong>de</strong> leur donner<br />
tous les renseignements nécessaires et <strong>de</strong> les surveiller.<br />
■ Pas d'entretien particulier sur l'appareil.<br />
■ Utilisez pour le nettoyage, l'entretien et la conservation <strong>de</strong> notre<br />
jeu d'entretien <strong>de</strong>s appareils homologués spécialement pour <strong>de</strong>s<br />
articles <strong>de</strong> sport KETTLER (Article no. 07921-000). Vous le pouvez<br />
<strong>de</strong>man<strong>de</strong>r au commerce spécialisé pour <strong>de</strong>s articles <strong>de</strong> sport.<br />
■ Conservez l’emballage d’origine du produit afin <strong>de</strong> pouvoir l’utiliser<br />
ultérieurement comme emballage <strong>de</strong> transport. Il ne faut<br />
effectuer <strong>de</strong>s retours <strong>de</strong> marchandises qu’après accord préalable<br />
et dans un emballage (intérieur) sûr pour le transport, si possible<br />
dans son carton original. Il est important d’établir une <strong>de</strong>scription<br />
<strong>de</strong> défaut détaillée / déclaration <strong>de</strong> dommages !<br />
■ Remarque relative à la gestion <strong>de</strong>s déchets : Les produits KETTLER<br />
sont recyclables. A la fin <strong>de</strong> sa durée d’utilisation, remettez l’appareil<br />
à un centre <strong>de</strong> gestion <strong>de</strong> déchets correct (collecte locale).<br />
Consignes <strong>de</strong> montage<br />
■ L'appareil doit être monté soigneusement par une personne<br />
adulte. Dans le doute, <strong>de</strong>man<strong>de</strong>z <strong>de</strong> l'ai<strong>de</strong> à une personne techniquement<br />
versée.<br />
■ S´assurer que toutes les pièces (liste récapitulative) ont été fournies<br />
et que l'envoi n'a subi aucun dommage pendant le transport.<br />
En cas <strong>de</strong> réclamation, on est prié <strong>de</strong> s'adresser á son<br />
concessionnaire.<br />
■ La visserie nécessaire à chacune <strong>de</strong>s opérations est représentée<br />
en bordure <strong>de</strong> chacune <strong>de</strong>s figures. Observer strictement l'ordre<br />
d'utilisation <strong>de</strong>s vis et écrous.L'outillage nécessaire se trouve<br />
dans le sachet avec les petites pièces.<br />
■ N'oubliez pas que toute utilisation d'outils et toute activité artisanale<br />
présente toujours <strong>de</strong>s risques <strong>de</strong> blessure. Travaillez<br />
avec soin et soyez pru<strong>de</strong>nts lors du montage <strong>de</strong> l'appareil!<br />
■ Assurez que la zone <strong>de</strong> travail ne présente aucun risque. Ne<br />
laissez pas traîner par exemple <strong>de</strong>s outils et rangez p. ex. le<br />
matériau d'emballage <strong>de</strong> manière à ce qu'il ne constitue pas <strong>de</strong><br />
dangers. Des feuilles / sacs plastiques présentent un risque<br />
d'étouffement pour les enfants!<br />
■ Etudier les illustrations et procé<strong>de</strong>r au montage dans l'ordre prévu<br />
par les différentes figures. Dans chacune d'elles l'ordre <strong>de</strong><br />
montage est marqué par <strong>de</strong>s majuscules.<br />
■ D'abord, assemblez toutes les parties sans serrer les vis et<br />
contrôlez leur bonne mise en place. Serrez à la main les écrous<br />
in<strong>de</strong>sserrables jusqu'à perception <strong>de</strong> la résistance. Ensuite, serrez-les<br />
à fond contre la résistance (sûreté <strong>de</strong> serrage) à l'ai<strong>de</strong><br />
d'une clé. Après cet étape <strong>de</strong> montage, contrôlez le serrage <strong>de</strong><br />
tous les assemblages à vis. Attention : <strong>de</strong>s écrous <strong>de</strong> sûreté <strong>de</strong>sserrés<br />
ne peuvent pas être réutilisés (<strong>de</strong>struction <strong>de</strong> la sûreté <strong>de</strong><br />
serrage) et sont à remplacer.<br />
■ Nous nous réservons le droit <strong>de</strong> monter certains composants<br />
(tels que les bouchons <strong>de</strong>s tubes), et ce, pour <strong>de</strong>s raisons techniques.<br />
■ Sur les appareils munis <strong>de</strong> câble, vérifier que tous les câbles<br />
soient bien fixés. Principalement sur la barre latissimus.<br />
6
F<br />
Instructions <strong>de</strong> montage<br />
Liste <strong>de</strong>s pièces <strong>de</strong> rechange<br />
En cas <strong>de</strong> comman<strong>de</strong> <strong>de</strong> pièces <strong>de</strong> rechange, nous vous prions<br />
<strong>de</strong> mentionner la référence article, le numéro <strong>de</strong> pièce <strong>de</strong> rechange,<br />
la quantité <strong>de</strong>mandée et le numéro <strong>de</strong> série <strong>de</strong> l’appareil<br />
(voir Dessin <strong>de</strong>s pièces <strong>de</strong> série).<br />
Exemple <strong>de</strong> comman<strong>de</strong> : no. d'art. 07824-900 / no. <strong>de</strong> pièce <strong>de</strong><br />
rechange 10100016 / no. <strong>de</strong> série ...<br />
Important : les pièces <strong>de</strong> rechange visser sont toujours facturèes<br />
et livrèes sans matèriel <strong>de</strong> vissage. Si vous avez besoin du matè -<br />
riel <strong>de</strong> vissage correspondant, ceci doit être indiquè par le sup -<br />
plèment «avec matèriel <strong>de</strong> vissage» lors <strong>de</strong> la comman<strong>de</strong> <strong>de</strong>s<br />
pièces <strong>de</strong> rechange.<br />
NL KETTLER Benelux B.V. · Indumastraat 18 · NL–5753 RJ Deurne<br />
B KETTLER Benelux B.V. filiaal België · Bran<strong>de</strong>kensweg 9 ·<br />
B–2627 Schelle<br />
F KETTLER France<br />
5, Rue du Chateau · Lutzelhouse · F–67133 Schirmeck Ce<strong>de</strong>x<br />
http://www.kettler.<strong>de</strong><br />
NL<br />
Montagehandleiding<br />
Lees vóór montage en ingebruikname van het apparaat eerst <strong>de</strong>ze instructies en bewaar ze zorgvuldig als informatiemateriaal,<br />
voor on<strong>de</strong>rhoudswerkzaamhe<strong>de</strong>n en voor het bestellen van on<strong>de</strong>r<strong>de</strong>len.<br />
Voor uw veiligheid<br />
■ Het apparaat dient alleen gebruikt te wor<strong>de</strong>n voor het doel, waarvoo<br />
het gemaakt is, n.l. voor <strong>de</strong> lichaamstraining van volwassen personen.<br />
■ Ie<strong>de</strong>r an<strong>de</strong>r gebruik is niet toegestaan en kan mogelijkerwijze gevaar<br />
opleveren. De fabrikant draagt generlei verantwoording voor<br />
scha<strong>de</strong>, die door onoor<strong>de</strong>elkundig gebruik is ontstaan.<br />
■ U traint met een apparaat dat veiligheidstechnisch volgens <strong>de</strong> nieuwste<br />
ontwikkelingen werd gekonstrueerd. Eventueel gevaarlijke <strong>de</strong>len,<br />
welke verwondingen zou<strong>de</strong>n kunnen veroorzaken, zijn zoveel mogelijk<br />
verme<strong>de</strong>n of beveiligd.<br />
■ Het apparaat komt met <strong>de</strong> klasse H van <strong>de</strong> norm EN 957-1/-2/-4<br />
overeen. Het apparaat is dan oak niet geschikt voor therapeutisch<br />
gebruikon<strong>de</strong>rhoudsvrij.<br />
■ Dit product is niet geschikt voor personen die zwaar<strong>de</strong>r zijn dan 150 kg.<br />
■ Onoor<strong>de</strong>elkundige reparatie en of wijzigingen aan het apparaat<br />
(<strong>de</strong>montage van originele on<strong>de</strong>r<strong>de</strong>len, aanbrengen van niet toegestane<br />
on<strong>de</strong>r<strong>de</strong>len enz.) kunnen gevaar voor <strong>de</strong> gebruiker opleveren.<br />
■ Beschadig<strong>de</strong> <strong>de</strong>len kunnen uw veiligheid in gevaar brengen en een<br />
negatieve invloed hebben op <strong>de</strong> levensduur van het apparaat). Verwissel<br />
daarom onmid<strong>de</strong>llijk beschadig<strong>de</strong> of versleten on<strong>de</strong>r<strong>de</strong>len en<br />
gebruik het apparaat niet meer totdat <strong>de</strong> nieuwe on<strong>de</strong>r<strong>de</strong>len zijn<br />
aangebracht.<br />
Handleidinag<br />
■ Let bij <strong>de</strong> keuze van <strong>de</strong> opstelplaats erop, dat <strong>de</strong> bo<strong>de</strong>m een grote<br />
belasting kan dragen.<br />
■ Overtuig u ervan dat alle belangrijke schroefverbindingen goed<br />
vastzitten en niet los kunnen raken.<br />
■ Controleer altijd voor elk gebruik van het apparaat of alle schroef–<br />
en steekverbindingen nog vast zitten en of <strong>de</strong> <strong>de</strong>sbetreffen<strong>de</strong> veiligheidsvoorzieningen<br />
nog voorhan<strong>de</strong>n zijn.<br />
■ Het apparaat mag niet daar, waar veel mensen langs komen, bijvoorbeeld<br />
in <strong>de</strong> buurt van looppa<strong>de</strong>n, <strong>de</strong>uren en doorgangen,<br />
wor<strong>de</strong>n opgesteld.<br />
■ Het it niet aan te ra<strong>de</strong>n het apparaat langdurig in een vochtige<br />
ruimte te gebruiken in verband met roestvorming. Let u erop, dat<br />
er geen vloeistoffen (drank, transpiratie etc.) op on<strong>de</strong>r<strong>de</strong>len van<br />
het apparaat terechtkomen. Dit kan tot roesten lei<strong>de</strong>n.<br />
■ Het apparaat dient op een geëgaliseer<strong>de</strong>, har<strong>de</strong> on<strong>de</strong>rgrond te<br />
wor<strong>de</strong>n opgesteld. Leg om <strong>de</strong> schokken te breken geschikt buffermateriaal<br />
(rubber of rieten matten en <strong>de</strong>rgelijke) on<strong>de</strong>r het apparaat.<br />
Alleen voor apparaten met gewichten: vermijd hard<br />
opslaan van <strong>de</strong> gewichten.<br />
■ Kontroleer bij regelmatig en intensief gebruik van het apparaat elke<br />
maand of elke twee maan<strong>de</strong>n alle on<strong>de</strong>r<strong>de</strong>len. Bijzon<strong>de</strong>re aandacht<br />
verdienen daarbij <strong>de</strong> bouten en moeren.<br />
■ Om het construktief bepaal<strong>de</strong> veililgheidsniveau van dit apparaat<br />
langdurig te kunnen garan<strong>de</strong>ren, dient het aparaat regelmatig door<br />
één specialist (vakhan<strong>de</strong>laar) gecontroleerd en on<strong>de</strong>rhou<strong>de</strong>n te wor<strong>de</strong>n<br />
(één keer per jaar).<br />
■ Wijs (vooral kin<strong>de</strong>ren) op mogelijk gevaar tij<strong>de</strong>ns <strong>de</strong> training. Alleen<br />
voor apparaten met gewichten of halterschijven. Dit geldt vooral<br />
voor <strong>de</strong> oefeningen met halters.<br />
■ Raadpleeg alvorens met <strong>de</strong> training te beginnen uw huisarts en<br />
vraag of <strong>de</strong> training met dit apparaat voor u geschikt is. Zijn diagnose<br />
is belangrijk voor het bepalen van <strong>de</strong> intensiviteit van uw training.<br />
Een verkeerd uitgevoer<strong>de</strong> of te intensieve training kan uw gezondheid<br />
negatief beïnvloe<strong>de</strong>n.<br />
■ Alle ingrepen en manipulaties aan het apparaat die hier niet beschreven<br />
wor<strong>de</strong>n kunnen een beschadiging veroorzaken of een gevaar<br />
voor <strong>de</strong> persoon opleveren. Grotere ingrepen mogen alleen<br />
door KETTLER–service of door KETTLER geschoold vakpersoneel uitgevoerd<br />
wor<strong>de</strong>n.<br />
■ Wend u in geval van twijfel tot uw vakhan<strong>de</strong>laar.<br />
■ Het apparaat is bedoeld voor training van volwassenen en is geen<br />
speelgoed. Door <strong>de</strong> natuurlijke speelsheid van kin<strong>de</strong>ren kunnen<br />
vaak situaties en gevaren ontstaan, die buiten <strong>de</strong> verantwoor<strong>de</strong>lijkheid<br />
van <strong>de</strong> fabrikant vallen. Wanneer u <strong>de</strong>sondanks kin<strong>de</strong>ren<br />
van het apparaat gebruik wilt laten maken, dient u hen op een juist<br />
gebruik te wijzen en ervoor te zorgen dat een volwassene toezicht<br />
houdt.<br />
■ Gebruik voor regelmatige reiniging en on<strong>de</strong>rhoud onze speciaal<br />
voor KETTLER sportapparaten ontwikkel<strong>de</strong> apparaat-on<strong>de</strong>rhoud-set<br />
(art.nr. 07921-000), dat u via uw vakhan<strong>de</strong>laar verkrijgbaar is.<br />
■ Bewaar <strong>de</strong> originele verpakking, zodat u <strong>de</strong>ze later indien nodig<br />
als transportverpakking kunt gebruiken. Retourgoe<strong>de</strong>ren mogen<br />
uitsluitend na afspraak opgestuurd wor<strong>de</strong>n in een voor transport<br />
<strong>de</strong>ug<strong>de</strong>lijke (binnen) verpakking. Bij voorkeur <strong>de</strong> originele doos.<br />
Stuur een goe<strong>de</strong>, ge<strong>de</strong>tailleer<strong>de</strong> beschrijving van <strong>de</strong> fout / scha<strong>de</strong><br />
mee!<br />
■ Verwij<strong>de</strong>ringsaanwijzing: KETTLER producten zijn recyclebaar.<br />
Breng het apparaat aan het ein<strong>de</strong> van <strong>de</strong> gebruiksduur naar en<br />
vaekkundig verzamelpunt voor recycling.<br />
7
NL<br />
Montagehandleiding<br />
Montagehandleiding<br />
■ Het apparaat dient door een volwassene gemonteerd te wor<strong>de</strong>n.<br />
In geval van twijfel <strong>de</strong> hulp van een extra, technisch aangeleg<strong>de</strong><br />
persoon inroepen.<br />
■ Controleer bij ontvangst of het apparaat kompleet is (zie checklijst)<br />
en of het toestel tij<strong>de</strong>ns het transport niet beschadigd is.<br />
Voor reklamaties gelieve u zich tot uw vakhan<strong>de</strong>laar te wen<strong>de</strong>n.<br />
■ Het voor een bepaal<strong>de</strong> han<strong>de</strong>ling benodig<strong>de</strong> schroefmateriaal<br />
wordt in het bijbehoren<strong>de</strong> ka<strong>de</strong>r afgebeeld. Gebruik het<br />
schroefmateriaal precies zoals aangegeven op <strong>de</strong> afbeeldingen.<br />
Het benodig<strong>de</strong> gereedschap vindt u in het bijgelever<strong>de</strong> gereedschapzakje.<br />
■ Let erop dat bij elk gebruik van gereedschap en bij han<strong>de</strong>narbeid<br />
er altijd kans op blessure is. Werk daarom zorgvuldig en<br />
voorzichtig bij het monteren van het apparaat!<br />
■ Zorg voor een gevarenvrije werkomgeving, laat bijvoorbeeld<br />
geen gereedschap slingeren. Deponeer bijv. verpakkingsmateriaal<br />
zo, dat geen gevaren daaruit voort kunnen kommen. Bij<br />
folies/plastic zakken bestaat verstikkingsgevaar!<br />
■ Bekijk eerst rustig <strong>de</strong> tekeningen en monteer vervolgens het apparaat<br />
in <strong>de</strong> volgor<strong>de</strong> van <strong>de</strong> afbeeldingen. Op <strong>de</strong> afzon<strong>de</strong>rlijke<br />
tekeningen wordt het montageverloop met hoofdletters<br />
aangegeven c.q. wordt er door mid<strong>de</strong>l van een verwijzing in<br />
<strong>de</strong> tekst op schriftelijke uitleg geatten<strong>de</strong>erd.<br />
■ Schroef eerst alle on<strong>de</strong>r<strong>de</strong>len losjes vast en controleer of ze op <strong>de</strong><br />
juist plek zitten. Draai <strong>de</strong> borgmoeren met <strong>de</strong> hand vast tot u weerstand<br />
voelt, vervolgens schroeft u ze met een sleutel tegen <strong>de</strong><br />
weerstand in (klemborg) goed vast. Controleer na elke montagestap<br />
of <strong>de</strong> schroefverbindingen goed vast zitten. Pas op: borgmoeren<br />
die weer los zijn gegaan zijn onbruikbaar (<strong>de</strong> klemborg<br />
is vernield) en moet door een nieuwe vervangen wor<strong>de</strong>n.<br />
■ Om productietechnische re<strong>de</strong>nen behou<strong>de</strong>n wij ons het recht voor<br />
sommige <strong>de</strong>len (bij-voorbeeld buisstoppen) vóór te monteren.<br />
■ Bij aparaaten met koor<strong>de</strong>n: let erop, dat alle kor<strong>de</strong>n goed bevestigd<br />
zijn. Dit geldt vooral voor <strong>de</strong> latissimusstangen.<br />
On<strong>de</strong>r<strong>de</strong>lenlijst<br />
Vermeld bij <strong>de</strong> on<strong>de</strong>r<strong>de</strong>lenbestellingen a.u.b. het volledige artikelnummer,<br />
het on<strong>de</strong>r<strong>de</strong>elnummer, het benodig<strong>de</strong> aantal en het<br />
serienummer van het apparaat (zie Reserveon<strong>de</strong>r<strong>de</strong>eltekening).<br />
Bestelvoorbeeld: artikelnr. 07824-900 / on<strong>de</strong>r<strong>de</strong>elnr. 10100016<br />
/ 2 stucks / serienummer........<br />
Belangrijk: Vast te schroeven on<strong>de</strong>r<strong>de</strong>len wor<strong>de</strong>n in principe zon<strong>de</strong>r<br />
schroefmateriaal berekend en geleverd. Indien er behoefte<br />
aan dit schroefmaterial bestaat, dan kan dit door <strong>de</strong> toevoeging<br />
„met schroefmateriaal“ bij <strong>de</strong> bestelling wor<strong>de</strong>n vermeld.<br />
NL KETTLER Benelux B.V. · Indumastraat 18 · NL–5753 RJ Deurne<br />
B KETTLER Benelux B.V.<br />
filiaal België · Bran<strong>de</strong>kensweg 9 · B–2627 Schelle<br />
http://www.kettler.<strong>de</strong><br />
E<br />
Indicaciones importantes<br />
Lea <strong>de</strong>tenidamente las presentes instrucciones antes <strong>de</strong> proce<strong>de</strong>r al montaje y utilizar por primera vez el producto. Estas<br />
instrucciones contienen importantes normas <strong>de</strong> seguridad, utilización y mantenimiento <strong>de</strong> este aparato <strong>de</strong> fitness. Guar<strong>de</strong><br />
este folleto cuidadosamente como información y para llevar a cabo los trabajos <strong>de</strong> mantenimiento necesarios y para<br />
pedir piezas <strong>de</strong> recambio.<br />
Para su seguridad<br />
■ Este aparato sólo <strong>de</strong>be ser utilizado con los fines especificados,<br />
es <strong>de</strong>cir, para el entrenamiento físico <strong>de</strong> una persona adulta.<br />
■ Cualquier otra utilización no está autorizada y pue<strong>de</strong> ser peligrosa.<br />
El fabricante <strong>de</strong>clina cualquier responsabilidad por los<br />
daños que pudieran resultar por la utilización no autorizada<br />
<strong>de</strong>l aparato.<br />
■ Este aparato <strong>de</strong> entrenamiento físico ha sido construido con las<br />
técnicas <strong>de</strong> seguridad más mo<strong>de</strong>rnas. Aquellos posibles puntos<br />
<strong>de</strong> peligro, que podrían provocar lesiones, se han evitado en<br />
la medida <strong>de</strong> lo posible.<br />
■ El aparato cumple con la norma <strong>de</strong> seguridad DIN EN 957-1/-<br />
2/-4, clase H, por lo que no pue<strong>de</strong> ser consi<strong>de</strong>rado como un<br />
aparato con fines terapéuticos.<br />
■ Artículo no es apropiada para personas con un peso corporal<br />
<strong>de</strong> más <strong>de</strong> 150 kg.<br />
Cualquier reparación o modificación <strong>de</strong>l aparato no autorizada<br />
(<strong>de</strong>smontaje <strong>de</strong> piezas originales, ampliación con piezas no autorizadas<br />
etc.) pue<strong>de</strong> representar un peligro para el usuario.<br />
■ Cualquier pieza <strong>de</strong>fectuosa pue<strong>de</strong> ser un riesgo para su seguridad<br />
y reducir la duración <strong>de</strong>l aparato. Por este motivo, cualquier<br />
pieza <strong>de</strong>fectuosa o <strong>de</strong>sgastada <strong>de</strong>be ser inmediatamente reemplazada.<br />
No utilice el aparato antes <strong>de</strong> haberlo reparado. Utilice<br />
exclusivamente piezas <strong>de</strong> recambio originales <strong>de</strong> KETTLER.<br />
■ Cuando el aparato es utilizado regularmente y se entrena intensamente<br />
con él, todas las piezas <strong>de</strong>ben ser controladas<br />
cada 1–2 meses, especialmente los tornillos y las tuercas.<br />
■ Con el fin <strong>de</strong> asegurar permanentemente el nivel <strong>de</strong> seguridad,<br />
este aparato <strong>de</strong>bería ser controlado y mantenido periódicamente<br />
(una vez al año) por un especialista (comercio especializado).<br />
■ Advierta a las personas presentes (sobre todo niños) <strong>de</strong> los posibles<br />
riesgos relacionados con la utilización <strong>de</strong>l aparato. Solamente<br />
para equipos con pesas o halteras: aplicable especialmente<br />
para espacio <strong>de</strong> movimiento <strong>de</strong> las pesas y halteras.<br />
■ Antes <strong>de</strong> utilizar el aparato, consulte con su médico <strong>de</strong> cabecera<br />
si su estado <strong>de</strong> salud permite un entrenamiento <strong>de</strong> este<br />
tipo. El diagnóstico médico <strong>de</strong>bería ser la base <strong>de</strong> su programa<br />
8
E<br />
Indicaciones importantes<br />
■ ¡Asegúrese <strong>de</strong> que el suelo sobre el que ha colocado el aparato<br />
tiene la resistencia suficiente!<br />
■ Asegúrese <strong>de</strong> que el aparato no sea utilizado antes <strong>de</strong> haber<br />
concluido completamente con el montaje y <strong>de</strong> haber controlado<br />
el correcto funcionamiento <strong>de</strong>l aparato.<br />
■ Asegúrese <strong>de</strong> que durante la utilización <strong>de</strong>l aparato todos los<br />
elementos <strong>de</strong> seguridad estén colocados y que no se puedan<br />
soltar. Antes <strong>de</strong> utilizar el aparato, asegúrese siempre <strong>de</strong> que<br />
todos los tornillos estén correctamente apretados y que los dispositivos<br />
<strong>de</strong> seguridad estén colocados como correspon<strong>de</strong>.<br />
■ No está permitido instalar el aparato en espacios muy concurridos<br />
o cerca <strong>de</strong> puertas, pasillos etc.<br />
■ No se recomienda instalar el aparato cerca <strong>de</strong> fuentes <strong>de</strong> humedad,<br />
ya que éste podría oxidarse. Evite que líquidos (refrescos,<br />
sudor etc.) puedan acce<strong>de</strong>r a piezas <strong>de</strong>l aparato, ya que<br />
éstas podrían corroerse.<br />
■ El aparato <strong>de</strong>be montarse sobre una superficie plana y resistente<br />
a los golpes. Para amortiguar los golpes, utilice un material<br />
apropiado (láminas <strong>de</strong> goma, alfombrillas <strong>de</strong> fibra etc.). 2.<br />
Solamente para equipos con pesas: evite impactos bruscos <strong>de</strong><br />
las pesas.<br />
■ Este aparato ha sido concebido como aparato <strong>de</strong> entrena<strong>de</strong><br />
entrenamiento. Un entrenamiento erróneo o exagerado pue<strong>de</strong><br />
representar un peligro para la salud.<br />
■ Cualquier intervención / manipulación <strong>de</strong>l aparato que no haya<br />
sido <strong>de</strong>scrita en el presente folleto pue<strong>de</strong> ocasionar daños materiales<br />
y físicos. Cualquier modificación en el aparato sólo <strong>de</strong>berá<br />
ser realizada por el servicio técnico <strong>de</strong> KETTLER o por personal<br />
<strong>de</strong>bidamente instruido por KETTLER.<br />
■ En caso <strong>de</strong> duda o <strong>de</strong> tener preguntas, póngase en contacto<br />
con su comerciante especializado.<br />
Manejo <strong>de</strong>l aparato<br />
miento <strong>de</strong> personas adultas y no como juego <strong>de</strong> niños. Tenga<br />
en cuenta que el temperamento y afán natural <strong>de</strong> jugar <strong>de</strong> los<br />
niños a veces pue<strong>de</strong> llevarlos a situaciones impre<strong>de</strong>cibles, <strong>de</strong><br />
las cuales no se pue<strong>de</strong> responsabilizar al fabricante. Si a pesar<br />
<strong>de</strong> ello usted <strong>de</strong>ja que los niños utilicen el aparato, instrúyalos<br />
antes y vigílelos mientras lo utilizan.<br />
■ En principio, este aparato no precisa un mantenimiento especial.<br />
■ Utililice para la limpieza, la conservación y el mantenimiento<br />
regular <strong>de</strong>l nostro set <strong>de</strong> conservación <strong>de</strong> los equipos (Articulo<br />
no. 07921-000), especialmente omologato para KETTLER aparatos<br />
<strong>de</strong> <strong>de</strong>porte. Los pue<strong>de</strong> comprar al comercio especializado<br />
para articulos <strong>de</strong> <strong>de</strong>porte.<br />
■ Guar<strong>de</strong> bien el embalaje original <strong>de</strong>l aparato para usarlo más<br />
tar<strong>de</strong> como embalaje <strong>de</strong> transporte en el caso dado. Las <strong>de</strong>voluciones<br />
<strong>de</strong> mercancía solamente son posibles previo acuerdo<br />
y con embalaje (interior) apto y seguro para el transporte, en<br />
lo posible en la caja original. Importante: ¡Descripción <strong>de</strong>tallada<br />
<strong>de</strong>l error / aviso <strong>de</strong> daños!<br />
■ Informaciones para la evacuación: Los productos <strong>de</strong> KETTLER<br />
son riciclables. Cuando se termina la vida útil <strong>de</strong> un aparato o<br />
una máquina, entréguelos a una empresa local <strong>de</strong> eliminación<br />
<strong>de</strong> residuos para su reciclaje.<br />
Instrucciones <strong>de</strong> montaje<br />
■ El montaje <strong>de</strong>be ser cuidadosamente llevado a cabo por una<br />
persona adulta. En caso <strong>de</strong> dudas, se recomienda consultar<br />
con otra persona con conocimientos técnicos.<br />
■ Controle inmediatamente <strong>de</strong>spués <strong>de</strong> la recepción, si el embalaje<br />
contiene todas las piezas (ver lista <strong>de</strong> chequeo) y si el aparato<br />
no ha sufrido daños durante el transporte. Si hay un problema,<br />
póngase en contacto con el comercio especializado.<br />
■ Los tornillos y las tuercas necesarias para el montaje <strong>de</strong>l aparato<br />
están representados en el dibujo correspondiente. Utilice<br />
los tornillos y las tuercas exactamente según las instrucciones indicadas.<br />
Encontrará todas las herramientas necesarias en la<br />
bolsa <strong>de</strong> pequeños accesorios.<br />
■ Tenga en cuenta que al realizar un trabajo manual y al utilizar<br />
cualquier herramienta siempre existe el riesgo <strong>de</strong> lesionarse.<br />
¡Sea cuidadoso durante el montaje <strong>de</strong>l aparato!<br />
■ Procure eliminar los riesgos durante el montaje. No <strong>de</strong>je las herramientas<br />
por el suelo, <strong>de</strong>seche el material <strong>de</strong>l embalaje <strong>de</strong> tal manera<br />
que no represente un riesgo. Recuer<strong>de</strong> que las bolsas <strong>de</strong> plástico<br />
representan un peligro para los niños (¡peligro <strong>de</strong> asfixia!).<br />
■ Estudie las ilustraciones <strong>de</strong>tenidamente y monte el aparato en<br />
la secuencia indicada en las figuras. En cada dibujo, la secuencia<br />
<strong>de</strong> montaje está indicada por letras mayúsculas.<br />
■ Haga primero las uniones sin apretar las tuercas, controlando<br />
la posición correcta <strong>de</strong> los elementos ensamblados. Apriete primero<br />
las tuercas <strong>de</strong> seguridad a mano hasta que note que ofrecen<br />
una cierta resistencia y seguidamente apriételas contra la<br />
resistencia (seguridad <strong>de</strong> apriete) con una llave apropiada. Una<br />
vez terminado el montaje <strong>de</strong>l aparato, controle otra vez si ha<br />
apretado todas las tuercas. Atención: Las tuercas sólo pue<strong>de</strong>n<br />
utilizarse una sola vez, ya que su dispositivo <strong>de</strong> seguridad queda<br />
<strong>de</strong>struido <strong>de</strong>spués <strong>de</strong> apretarlas. Utilice tuercas nuevas.<br />
■ Por razones <strong>de</strong> fabricación, nos reservamos suministrar ciertos<br />
elementos previamente montados (p. ej. los tapones <strong>de</strong> los tubos).<br />
■ En los aparatos con guías <strong>de</strong> cables: asegúrese <strong>de</strong> que todos<br />
los cables están correctamente montados, sobre todo las barras<br />
“latissimus”.<br />
Piezas <strong>de</strong> recambio<br />
Indicar con los pedidos <strong>de</strong> piezas <strong>de</strong> repuesto el número completo<br />
<strong>de</strong>l artículo, el número <strong>de</strong> la pieza <strong>de</strong> repuesto, las unida<strong>de</strong>s<br />
solicitadas y el número <strong>de</strong> serie <strong>de</strong>l aparato (ver Designación<br />
<strong>de</strong> las piezas <strong>de</strong> recambio).<br />
Ejemplo: Nº <strong>de</strong>l artículo: 07824-900 / Nº <strong>de</strong> la pieza <strong>de</strong> recambio:<br />
12802003 / 1 pieza / Nº <strong>de</strong> serie: ...<br />
Importante: las piezas <strong>de</strong> recambio que se <strong>de</strong>be atornillar siempre<br />
se suministran y facturan sin tornillos. Si necesita los tornillos<br />
correspondientes, indíquelo en el suplemento “con tornillos” cuando<br />
haga el pedido.<br />
E BM Sportech S.A. · C/ Terracina, 12 PLA-ZA · 50197 Zaragoza<br />
http://www.bmsportech.es<br />
9
I<br />
Informazioni importanti<br />
Leggere attentamente le presenti istruzioni prima <strong>de</strong>l montaggio e <strong>de</strong>ll'uso. Esse contengono importanti informazioni per<br />
la Vostra sicurezza nonché per l'uso e la manutenzione <strong>de</strong>ll'attrezzo ginnico. Custodire accuratamente queste istruzioni<br />
per informazione ossia per i lavori di manutenzione nonché per l'ordinazione di ricambi.<br />
Per la Vostra sicurezza<br />
■ L'attrezzo ginnico <strong>de</strong>ve essere impiegato esclusivamente per lo<br />
scopo previsto, vale a dire per l'allenamento fisico di persone<br />
adulte.<br />
■ Non è ammesso nessun altro impiego, anche perché altrimenti<br />
non sarebbero da esclu<strong>de</strong>re imminenti pericoli. Il costruttore<br />
non potrà essere reso responsabile per eventuali danni attribuibili<br />
ad un impiego non appropriato.<br />
■ Questo attrezzo ginnico è stato costruito secondo le nozioni tecniche<br />
più attuali ed è pertanto sicuro. I possibili punti di pericolo,<br />
che possono causare <strong>de</strong>lle lesioni, sono ampiamente protetti,<br />
per prevenire qualsiasi pericolo.<br />
■ L'attrezzo ginnico corrispon<strong>de</strong> alla classe H <strong>de</strong>lla norma di sicurezza<br />
DIN EN 957-1/-2/-4 e non è dunque adatto per applicazioni<br />
terapeutiche.<br />
■ Il articolo non è adatto per persone con un peso corporeo superiore<br />
a 150 kg.<br />
■ In seguito a riparazioni o trasformazioni costruttive non appropriate<br />
(smontaggio di componenti originali, applicazione di<br />
componenti non approvati, ecc.), non sono da esclu<strong>de</strong>re imminenti<br />
pericoli per l'utente.<br />
■ I componenti danneggiati possono pregiudicare la Vostra sicurezza<br />
e la durata <strong>de</strong>ll'attrezzo ginnico. Pertanto, si raccomanda<br />
di sostituire subito i componenti danneggiati esclusivamente con<br />
<strong>de</strong>i ricambi originali e di non utilizzare più l'attrezzo ginnico,<br />
finché non sono stati completati i necessari lavori di riparazione.<br />
Utilizzare esclusivamente ricambi originali <strong>de</strong>lla KETTLER.<br />
■ In un regolare allenamento fisico si raccomanda di controllare<br />
accuratamente almeno ogni 1–2 mesi tutti i componenti <strong>de</strong>ll'attrezzo<br />
ginnico, in particolare le viti e i dadi.<br />
■ Al fine di poter garantire a lungo il livello di sicurezza <strong>de</strong>ll'attrezzo<br />
ginnico, sarebbe opportuno incaricare uno specialista<br />
(commercio specializzato) ad eseguire periodicamente (una<br />
volta all'anno) i controlli e i necessari lavori di manutenzione.<br />
■ Avvisare anche le altre persone presenti circa i possibili pericoli<br />
a cui sono esposte durante l'allenamento fisico (in particolare i<br />
bambini). Soltanto per apparecchi con pesi o dischi per manubri:<br />
Ciò vale in modo particolare per la zona di movimento <strong>de</strong>i<br />
pesi e <strong>de</strong>i dischi per manubri.<br />
■ Prima di iniziare gli allenamenti fisici si raccomanda di consultare<br />
un medico, per chiarire se queste attività sono anche adatte<br />
dal punto di vista <strong>de</strong>lla salute. Il referto medico dovrebbe essere<br />
un fondamento per il programma d'allenamento. Un allenamento<br />
sbagliato oppure eccessivo può comunque causare <strong>de</strong>i<br />
danni alla salute.<br />
■ Tutti gli interventi / manipolazioni non qui <strong>de</strong>scritti per l'attrezzo<br />
ginnico possono causare <strong>de</strong>i danni nonché costituire imminenti<br />
pericoli per le persone. Gli interventi periodici <strong>de</strong>vono essere<br />
assolutamente effettuati solo da parte <strong>de</strong>l servizio di assistenza<br />
<strong>de</strong>lla KETTLER o dal personale appositamente ad<strong>de</strong>strato<br />
e specializzato <strong>de</strong>lla stessa.<br />
■ In caso di dubbi o altre questioni, non esitate a consultare il Vostro<br />
rivenditore di fiducia.<br />
Impiego<br />
■ Accertarsi che il pavimento su cui installare l'attrezzo ginnico mostri<br />
una sufficiente capacità di carico!<br />
■ Non iniziare le attività d'allenamento finché non sono stati eseguiti<br />
correttamente nonché controllati tutti i lavori di montaggio.<br />
■ Accertarsi durante l'allenamento che siano applicati correttamente<br />
tutti i necessari elementi di sicurezza e che non possano distaccarsi<br />
o allentarsi. Prima di utilizzare l'attrezzo ginnico si raccomanda<br />
di controllare sempre tutti i collegamenti a vite e ad innesto<br />
nonché i rispettivi dispositivi di sicurezza, affinché si possa essere<br />
certi che abbiano una se<strong>de</strong> fissa e sicura.<br />
■ Non è ammesso installare l'attrezzo ginnico in luoghi molto frequentati<br />
ovvero in prossimità di corridoi principali o vie di fuga<br />
(porte, passaggi, ecc.).<br />
■ Evitare di installare l'attrezzo ginnico in prossimità di ambienti umidi,<br />
a causa <strong>de</strong>lla formazione di ruggine. Evitare inoltre la penetrazione<br />
di liquidi (bevan<strong>de</strong>, sudore, ecc.) nei componenti <strong>de</strong>ll'attrezzo<br />
ginnico. Ciò potrebbe causare <strong>de</strong>lle notevoli corrosioni.<br />
■ L'attrezzo ginnico <strong>de</strong>ve essere sistemento su terreno piano e solido.<br />
Per l’ammortizzazione mettete sotto materiale tampone a<strong>de</strong>guato<br />
(stuoie di gomma, rafia o simili). Soltanto per apparecchi<br />
con pesi: Evitare forti urti <strong>de</strong>i pesi.<br />
■ L'attrezzo ginnico è stato concepito come attrezzo di allenamento<br />
per adulti e non è un giocattolo per bambini. Non dimenticate che,<br />
dato l'istinto naturale di giocco e il temperamento <strong>de</strong>i bambini,<br />
spesso si possono produrre situazioni che escludono la responsabilità<br />
<strong>de</strong>l costruttore. Se, ciononostante, i bambini usano l'attrezzo,<br />
bisogna informarli sull'uso corretto <strong>de</strong>llo stesso e sorvegliarli.<br />
■ L’attrezzo non ha bisogno di una manutenzione particolare.<br />
■ Impieghi per la pulitura, la cura e la manutenzione regolare <strong>de</strong>l<br />
nostro set di cura <strong>de</strong>gli attrezzi (Articolo no. 07921-000) specialmente<br />
omologato per KETTLER attrezzi sportivi. Lo può acquistare<br />
al commercio specializzato per articoli sportivi.<br />
■ Si prega di conservare l’imballo originale di questo articolo, cosicché<br />
possa essere utilizzato per il trasporto in futuro, se necessario.<br />
La merce può essere rspedita al mittente solo dietro previo<br />
accordo col me<strong>de</strong>simo, utilizzando un imballaggio adatto al trasporto<br />
e se possibile riutilizzando la scatola originale.<br />
È importante fornire una <strong>de</strong>scrizione <strong>de</strong>ttagliata <strong>de</strong>ll’errore o <strong>de</strong>l<br />
danno!<br />
■ Indicazione sullo smaltimento: I prodotti KETTLER sono reciclabill.<br />
Quando l’apparecchio non servirà più, portatelo in un apposito<br />
punto di raccolta <strong>de</strong>lla Vostra città (Punti di raccolta comunall).<br />
Istruzioni di montaggio<br />
■ L'attrezzo ginnico <strong>de</strong>ve essere montato accuratamente da parte<br />
di una persona adulta. In caso di dubbi, si raccomanda di<br />
farsi aiutare da un'altra persona, che sia in possesso <strong>de</strong>i necessari<br />
requisiti tecnici.<br />
■ Controllare immediatamente dopo la ricezione se sono presenti<br />
tutti i componenti appartenenti alla dotazione (si veda la lista<br />
di controllo) e se sono presenti <strong>de</strong>i danni di trasporto. In caso<br />
di eventuali contestazioni, Vi preghiamo di rivolgerVi al Vostro<br />
rivenditore di fiducia.<br />
■ Il materiale d'avvitatura necessario per il montaggio è illustrato<br />
10
I<br />
Informazioni importanti<br />
nella rispettiva barra <strong>de</strong>lle figure, e <strong>de</strong>ve essere impiegato<br />
come mostrato nelle rispettive illustrazioni. Tutti i necessari utensili<br />
si trovano nel sacchetto <strong>de</strong>i componenti più piccoli.<br />
■ Ogni volta che si utilizzano <strong>de</strong>gli utensili e durante l'esecuzione<br />
<strong>de</strong>i lavori non sono mai da esclu<strong>de</strong>re <strong>de</strong>i possibili pericoli di<br />
riscontrare <strong>de</strong>lle lesioni. Pertanto, si raccomanda di proce<strong>de</strong>re<br />
sempre con la massima pru<strong>de</strong>nza durante le operazioni di montaggio<br />
<strong>de</strong>ll'attrezzo ginnico!<br />
■ Lavorare sempre in ambienti esenti da qualsiasi pericolo e non<br />
lasciare ad esempio in giro inutilmente gli utensili di lavoro. Deporre<br />
ad esempio il materiale d'imballaggio in maniera tale da<br />
esclu<strong>de</strong>re qualsiasi pericolo. Mantenere al di fuori <strong>de</strong>lla portata<br />
<strong>de</strong>i bambini pellicole o sacchetti di materiale sintetico. Pericolo<br />
d'asfissia!<br />
■ Osservare attentamente e con calma i disegni e montare l'attrezzo<br />
ginnico secondo l'ordine <strong>de</strong>lle illustrazioni. Il procedimento<br />
di montaggio viene riprodotto nelle singole illustrazioni<br />
che sono inoltre evi<strong>de</strong>nziate in lettere maiuscole.<br />
■ Avvitare dapprima tutti i componenti, senza serrarli <strong>de</strong>finitivamente,<br />
e controllarne successivamente la se<strong>de</strong> fissa. Avvitare i<br />
dadi autobloccanti a mano fino ad un sensibile punto di resistenza<br />
e serrarli successivamente oltre questo punto di resistenza<br />
(sicura bloccante) con un'apposita chiave. Controllare tutti i<br />
raccordi filettati dopo il montaggio, per accertarsi che abbiano<br />
una se<strong>de</strong> fissa. Attenzione: i dadi di sicurezza allentati non<br />
sono più utilizzabili (distruzione <strong>de</strong>lla sicura bloccante) e <strong>de</strong>vono<br />
perciò essere sostituiti con <strong>de</strong>i nuovi.<br />
■ Per motivi tecnici di produzione ci riserviamo il premontaggio<br />
<strong>de</strong>i componenti costruttivi (ad esempio tappi per tubi).<br />
■ Negli attrezzi provvisti di gui<strong>de</strong> funicolari: accertarsi che tutte<br />
le funi siano correttamente fissate. Ciò vale in particolare per le<br />
aste da latissimus.<br />
Parti di ricambio<br />
Per l’ordinazione di parti di ricambio indicate il completo numero<br />
di articolo, <strong>de</strong>lla parte di ricambio, il numero di unit necessario<br />
nonchè il numero di serie <strong>de</strong>ll’apparecchio (vedasi “Disegno<br />
<strong>de</strong>i pezzi di ricambio”).<br />
Esempio di ordinazione: n. art. 07824-900 /n. parte di ricambio<br />
70121840 / 2 unit /n. di serie...<br />
Importante: le parti di ricambio da avvitare vengono fatturate e<br />
fornite di principio senza materiali di avvitamento. Qualora si dovesse<br />
necessitare <strong>de</strong>ll’apposito materiale di avvita-mento, questo<br />
va indicato in occasione <strong>de</strong>ll’ordinazione <strong>de</strong>lla parte di ricambio<br />
aggiungendo „con materiale di avvitamento“.<br />
I KETTLER SRL<br />
Strada Per Pontecurone 5 · I–15053 Castelnuovo Scriva (AL)<br />
http://www.kettler.<strong>de</strong><br />
PL<br />
Ważne informacje<br />
Przed montażem i pierwszym użyciem prosimy uważnie przeczytać niniejszą instrukcję. Zawiera<br />
ona ważne informacje dotyczące bezpieczeństwa, stosowania i konserwacji przyrządu. Instrukcję<br />
radzimy zachować, aby również później możliwe było skorzystanie z zawartych w niej informacji<br />
dotyczących choćby konserwacji lub zamawiania części zamiennych.<br />
Bezpieczeństwo<br />
■ Przyrząd wolno stosować wyłącznie zgodnie z jego przeznaczeniem,<br />
to znaczy do treningu fizycznego osób dorosłych.<br />
■ Każ<strong>de</strong> inne zastosowanie jest niedopuszczalne i może być niebezpieczne.<br />
Producenta nie można pociągać do odpowiedzialności<br />
za szkody spowodowane niewłaściwym stosowaniem.<br />
■ Trening wykonywany jest na przyrządzie skonstruowanym na<br />
podstawie najnowszej wiedzy z dziedziny techniki bezpieczeństwa.<br />
Ewentualne niebezpieczne elementy mogące być<br />
źródłem obrażeń zostały możliwie najlepiej wyeliminowane i<br />
zabezpieczone.<br />
■ Przyrząd odpowiada klasie H według norm bezpieczeństwa<br />
DIN EN 957-1/-2/-4. Nie nadaje się on zatem do stosowania<br />
terapeutycznego.<br />
■ Artykułu nie może być użytkowana przez osoby przekraczające<br />
wagę 150 kg.<br />
■ Nieprawidłowe naprawy i zmiany konstrukcyjne (<strong>de</strong>montaż<br />
oryginalnych części, montowanie niedozwolonych części itp.)<br />
spowodować mogą zagrożenia dla użytkownika.<br />
■ Uszkodzone części mogą zagrozić bezpieczeństwu i skrócić<br />
okres użytkowania przyrządu. Uszkodzone lub zużyte części<br />
należy zatem natychmiast wymienić, a przyrząd aż do naprawy<br />
wycofać z użytku. Stosować wyłącznie oryginalne części<br />
zamienne firmy KETTLER.<br />
■ W około jedno– lub dwumiesięcznych odstępach czasu należy<br />
kontrolować wszystkie elementy przyrządu, a zwłaszcza śruby,<br />
wkręty i nakrętki.<br />
■ Celem trwałego zapewnienia konstrukcyjnie określonego poziomu<br />
bezpieczeństwa przyrząd powinien być regularnie (raz<br />
do roku) sprawdzany i konserwowany przez specjalistę (specjalistyczne<br />
placówki handlowe).<br />
■ Obecne przy treningu osoby (zwłaszcza dzieci) należy uprzedzić<br />
o ewentualnych zagrożeniach. Tylko dla urządzeń z obciążnikami<br />
lub z krążkami do hantli: dotyczy to w szczególności<br />
miejsc ruchu obciążników i krążków.<br />
■ Przed rozpoczęciem treningu należy skonsultować się z lekarzem<br />
i wyjaśnić, czy nie ma przeciwwskazań zdrowotnych do treningu<br />
na tym przyrządzie. Opinia lekarza powinna stanowić<br />
podstawę dla opracowania indywidualnego programu treningowego.<br />
Niewłaściwy lub nadmierny trening może być szkodliwy<br />
dla zdrowia.<br />
■ Wszelkie nie opisane tu ingerencje / manipulacje na przyrządzie<br />
mogą prowadzić do uszkodzenia lub nawet stanowić zagrożenie<br />
dla osób. Dalej idących zmian dokonywać może tylko<br />
i wyłącznie serwis firmy KETTLER lub wyspecjalizowany personel<br />
przeszkolony przez firmę KETTLER.<br />
■ Wątpliwości i pytania należy kierować do specjalistycznej<br />
placówki handlowej.<br />
11
PL<br />
Ważne informacje<br />
Obsługa<br />
■ Przy wyborze miejsca ustawienia należy pamiętać o tym, aby<br />
podłoga miała dostateczną nośność!<br />
■ Natychmiast po otrzymaniu przyrządu sprawdzić, czy są wszystkie<br />
części należące do zakresu dostawy (patrz lista kontrolna)<br />
i czy nie nastąpiły szkody transportowe. W przypadku<br />
zastrzeżeń należy zwrócić się do specjalistycznej placówki<br />
handlowej, w której przyrząd został zakupiony.<br />
■ Proszę mieć na uwadze, że przy każdym używaniu narzędzi i<br />
pracy ręcznej zawsze zachodzi niebezpieczeństwo skaleczenia<br />
się. Przyrząd należy zatem montować starannie i z zachowaniem<br />
wszelkiej ostrożności!<br />
■ Ustawianie przyrządu w ruchliwych pomieszczeniach lub w pobliżu<br />
głównych tras ruchu (drzwi, przejścia itp.) nie jest dozwolone.<br />
■ Ze względu na możliwość rdzewienia nie zaleca się stosowania<br />
przyrządu w pobliżu wilgotnych pomieszczeń. Proszę też<br />
zwracać uwagę na to, by do elementów przyrządu nie przedostawały<br />
się płyny (napoje, pot itp.), gdyż może to doprowadzić<br />
do korozji.<br />
■ Przyrząd należy ustawiać na równym podłożu odpornym na<br />
u<strong>de</strong>rzenia. Do amortyzacji u<strong>de</strong>rzeń stosować odpowiedni podkład<br />
(maty gumowe lub z łyka, itp.). Tylko dla urządzeń z obciążnikami:<br />
unikać mocnych u<strong>de</strong>rzeń obciążników.<br />
Montaż<br />
■ Montaż przyrządu musi być wykonany starannie i przez osobę<br />
dorosłą. W przypadku wątpliwości zwrócić się o pomoc do<br />
osoby bardziej uzdolnionej technicznie.<br />
■ Natychmiast po otrzymaniu przyrządu sprawdzić, czy są wszystkie<br />
części należące do zakresu dostawy (patrz lista kontrolna)<br />
i czy nie nastąpiły szkody transportowe. W przypadku<br />
zastrzeżeń należy zwrócić się do specjalistycznej placówki<br />
handlowej, w której przyrząd został zakupiony.<br />
■ Materiał montażowy potrzebny do danej operacji montażowej<br />
przedstawiony jest na odpowiedniej ilustracji. Stosować materiał<br />
montażowy dokładnie według ilustracji. Potrzebne narzędzia<br />
znajdują się w torebce z drobnymi częściami.<br />
■ Proszę mieć na uwadze, że przy każdym używaniu narzędzi i<br />
pracy ręcznej zawsze zachodzi niebezpieczeństwo skaleczenia<br />
się. Przyrząd należy zatem montować starannie i z zachowaniem<br />
wszelkiej ostrożności!<br />
■ Należy zatroszczyć się o bezpieczne otoczenie miejsca pracy,<br />
na przykład nie rozkładać bezładnie narzędzi. Przykładowo<br />
opakowanie należy tak z<strong>de</strong>ponować, by nie stanowiło ono<br />
źródła zagrożeń. Uwaga: folie i torby z tworzywa sztucznego<br />
stwarzają dla dzieci niebezpieczeństwo uduszenia się!<br />
■ Przyrząd jest przeznaczony do treningu dla osób dorosłych i w<br />
żadnym razie nie jest zabawką dla dzieci. Z naturalnej potrzeby<br />
zabawy oraz temperamentu dzieci wyniknąć mogą nieprzewidywalne<br />
sytuacje, wykluczające odpowiedzialność producenta.<br />
Jeżeli mimo to pozwoli się dzieciom używać przyrządu,<br />
to należy je zapoznać z prawidłowym stosowaniem i nadzorować.<br />
■ Przyrząd nie wymaga w zasadzie żadnej szczególnej konserwacji.<br />
■ Do regularnego czyszczenia, piel gnacji i konserwacji stosuj<br />
nasz specjalny zestaw piel gnacyjny, dopuszczony dla urz d-<br />
ze sportowych firmy KETTLER (numer artykułu 07921 000), który<br />
mo esz naby poprzez specjalistyczny han<strong>de</strong>l sportowy.<br />
■ Radzimy zachować oryginalne opakowanie, by w razie potrzeby<br />
móc je wykorzystać do transportu. Zwrotów towarów należy<br />
dokonywać tylko po uzgodnieniu i przy użyciu opakowania<br />
(wewnętrznego) zabezpieczonego na czas transportu, w<br />
miarę możliwości w oryginalnym kartonie. Ważny jest szczegółowy<br />
opis usterki / zgłoszenie szkody!<br />
■ Wskazówka dotycząca usuwania odpadów: Produkty firmy<br />
KETTLER podlegają recyklingowi. Pod koniec okresu używalnoścl<br />
proszę oddać urządzenie do wlaściwego punktu usuwania<br />
odpadów (lokalny punkt zbiorczy).<br />
■ Należy dokładnie przypatrzyć się rysunkom i zmontować przyrząd<br />
zgodnie z kolejnością przedstawioną na ilustracji. Kolejność<br />
montażu zaznaczona jest na poszczególnych ilustracjach<br />
wielkimi literami.<br />
■ Na początku należy poprzykręcać wszystkie części luźno i<br />
sprawdzić ich prawidłowe osadzenie. Nakrętki samozakleszczające<br />
dokręcić ręcznie aż opór stanie się odczuwalny, a następnie<br />
mocno dokręcić je kluczem przeciwko oporowi (zabezpieczenie<br />
zaciskowe). Po tej fazie montażu skontrolować wszystkie<br />
połączenia śrubowe pod wzglę<strong>de</strong>m prawidłowego zamocowania.<br />
Uwaga: poluzowane ponownie nakrętki samozakleszczające<br />
stają się bezużyteczne (następuje zniszczenie<br />
zabezpieczenia zaciskowego) i należy je wymienić na nowe.<br />
■ Ze względów technologicznych zastrzegamy sobie wstępny<br />
montaż niektórych elementów (na przykład zatyczek rurowych).<br />
■ W przypadku przyrządów z prowadnicami linek należy zatroszczyć<br />
się o to, by wszystkie linki były prawidłowo zamocowane.<br />
Dotyczy to zwłaszcza sztang wyciągu górnego.<br />
Rysunek i lista części zamiennych<br />
Przy zamawianiu części zamiennych proszę podawać kompletny<br />
numer artykułu, numer części zamiennej i numer serii urządzenia<br />
(zobacs Rysunek części zamiennych).<br />
Przykład zamówienia: nr artykułu 07824-900 / nr części zamiennej<br />
67000170 / 2 sztuki / nr serii .........<br />
Uwaga: Przykręcane części zamienne zasadniczo rozlicza i dostarcza<br />
się bez materiału montażowego. Jeżeli potrzebny jest stosowny<br />
materiał montażowy należy przy zamawianiu części zamiennych<br />
zaznaczyć to dopiskiem "mit Verschraubungsmaterial"<br />
("z materiałem montażowym").<br />
PL KETTLER Polska · al. Piastow 3 · PL–64-920 Pila<br />
http://www.kettler.<strong>de</strong><br />
12
Checkliste (Packungsinhalt)<br />
GB<br />
Checklist (contents of packaging)<br />
E<br />
Lista <strong>de</strong> control (contenido <strong>de</strong>l paquete)<br />
F<br />
Liste <strong>de</strong> vérification (contenu <strong>de</strong> l’emballage)<br />
I<br />
Lista di controllo (contenuto <strong>de</strong>l pacco)<br />
NL<br />
Checklijst (verpakkingsinhoud)<br />
PL<br />
Lista kontrolna (zawartość opakowania)<br />
1<br />
1 ✓<br />
1<br />
3<br />
1<br />
1<br />
1<br />
1<br />
1<br />
1<br />
1<br />
1<br />
1<br />
M8x85<br />
M8x75<br />
M8x50<br />
M5x20<br />
ø16<br />
M8<br />
M16<br />
3<br />
2<br />
4<br />
1<br />
8<br />
11<br />
7<br />
3<br />
1<br />
2<br />
2<br />
1<br />
13
Messhilfe für Verschraubungsmaterial<br />
GB<br />
Measuring help for screw connections<br />
E<br />
Ayuda para la medición <strong>de</strong> los tornillos<br />
F<br />
Gabarit pour système <strong>de</strong> serrage<br />
I<br />
Misure per i materiali di avvitamento<br />
NL<br />
Meethulp voor schroefmateriaal<br />
PL<br />
Wzornik do połączeń śrubowych<br />
1<br />
klack<br />
klack<br />
klack<br />
klack<br />
14
2<br />
3<br />
A<br />
B<br />
C<br />
B<br />
C<br />
A<br />
B<br />
C<br />
M8x85<br />
M8x75<br />
4<br />
5<br />
A<br />
C<br />
B<br />
GB<br />
F<br />
NL<br />
M8x50<br />
5a Handhabungshinweis<br />
Handling<br />
Indications rel. à la manipulation<br />
Bedieningsinstrukties<br />
E<br />
I<br />
PL<br />
Instrucciones <strong>de</strong> manejo<br />
Avvertenze per il maneggio<br />
Wskazówki obsługowe<br />
A<br />
6<br />
C<br />
90°<br />
A<br />
B<br />
15
7 8<br />
B<br />
A<br />
A<br />
M8x75<br />
B<br />
4x<br />
M5x20<br />
9 10<br />
B<br />
A<br />
D<br />
C<br />
A<br />
B<br />
C<br />
M8x75<br />
D<br />
B<br />
4x<br />
M5x20<br />
B<br />
11<br />
Handhabungshinweis<br />
GB<br />
F<br />
NL<br />
Handling<br />
Indications rel. à la manipulation<br />
Bedieningsinstrukties<br />
E<br />
I<br />
PL<br />
Instrucciones <strong>de</strong> manejo<br />
Avvertenze per il maneggio<br />
Wskazówki obsługowe<br />
A<br />
B<br />
A<br />
B<br />
C<br />
MAX<br />
B<br />
16
D<br />
Trainingsanleitung<br />
Der Rückentrainer ist speziell für das wirbelsäulenschonen<strong>de</strong> Training <strong>de</strong>r<br />
Rückenmuskulatur entwickelt wor<strong>de</strong>n. Gera<strong>de</strong> in <strong>de</strong>r heutigen Zeit, wo<br />
häufiges Sitzen vielfach zu muskulären Schwächen im Rumpfmuskelbereich<br />
führt, ist ein regelmäßiges Training <strong>de</strong>r Rückenmuskulatur gesundheitlich<br />
wertvoll.<br />
Unter Vermeidung unphysiologischer Belastungsspitzen <strong>de</strong>r Wirbelsäule<br />
ermöglicht <strong>de</strong>r Rückentrainer ein gezieltes Training <strong>de</strong>r verschie<strong>de</strong>nen Bereiche<br />
<strong>de</strong>r Rückenmuskulatur, insbeson<strong>de</strong>re <strong>de</strong>s Rückenstreckers. Die abgerun<strong>de</strong>te<br />
Rumpfauflage gewährleistet einen korrekten Bewegungsablauf,<br />
bei <strong>de</strong>m das Becken in allen Bewegungsphasen optimal abgestützt ist.<br />
Eine Hohlkreuzhaltung wird dadurch vermie<strong>de</strong>n. Die 90°-Beugung in <strong>de</strong>n<br />
Kniegelenken und die aktive Fixierung <strong>de</strong>r unteren Extremitäten durch die<br />
abgewinkelte Trittplatte minimiert die Belastung <strong>de</strong>r Oberschenkelrückseitenmuskulatur<br />
und optimiert das Training <strong>de</strong>r Rücken- und Gesäßmuskulatur.<br />
Auch Personen mit verkürzter Muskulatur <strong>de</strong>r Oberschenkelrückseiten<br />
wird somit ein effektives Rückentraining ermöglicht.<br />
Wichtiger Hinweis<br />
Lassen Sie vor Aufnahme <strong>de</strong>s Trainings durch Ihren Hausarzt klären, ob<br />
Sie gesundheitlich für das Training mit diesem Gerät geeignet sind. Der<br />
ärztliche Befund sollte Grundlage für <strong>de</strong>n Aufbau Ihres Trainingsprogramms<br />
sein. Falsches o<strong>de</strong>r übermäßiges Training kann zu Gesundheitsschä<strong>de</strong>n<br />
führen.<br />
Die folgen<strong>de</strong>n Übungshinweise gelten nur für gesun<strong>de</strong> Personen.<br />
Aufwärmen/Stretching<br />
Beginnen Sie Ihr Training mit leichten gymnastischen Übungen. Nutzen<br />
Sie die Dehnübungen 1 – 5 zur Trainingsvor- und -nachbereitung. Dehnübungen<br />
gehören grundsätzlich zum Aufwärmprogramm <strong>de</strong>s Muskeltrainings.<br />
Hierdurch wer<strong>de</strong>n Spannungszustän<strong>de</strong> <strong>de</strong>r Muskulatur gelöst und<br />
die Blutversorgung <strong>de</strong>r Muskulatur optimiert. Wir möchten Ihnen einige<br />
Dehnübungen präsentieren, die Sie zur Trainingsvor- und -nachbereitung<br />
einsetzen sollten. Die Dehnübungen sind bestimmten Muskelbereichen zugeordnet,<br />
so daß Sie diese gezielt während Ihres Rückentrainings einsetzen<br />
können.<br />
Abb. 1<br />
Die Trainingsintensität läßt sich durch Einstellung <strong>de</strong>s Neigungswinkels<br />
(vgl. Abb. 2) variieren. Eine steile Einstellung be<strong>de</strong>utet eine relativ niedrige<br />
Trainingsintensität, ein flacher Neigungswinkel be<strong>de</strong>utet aufgrund <strong>de</strong>r<br />
höheren Gewichtskraft, die auf <strong>de</strong>n Oberkörper wirkt, eine relativ hohe<br />
Belastungsintensität. Anfänger sollten <strong>de</strong>mzufolge mit steilem Neigungswinkel<br />
beginnen.<br />
Grundsätzliches zu Dehnübungen:<br />
■ Langsam in die Dehnstellung begeben<br />
■ Maximale Dehnstellung unterhalb <strong>de</strong>r Schmerzgrenze einnehmen<br />
■ In <strong>de</strong>r Dehnstellung 10 – 20 Sekun<strong>de</strong>n verbleiben<br />
■ Während <strong>de</strong>r Dehnübung nicht „wippen“ o<strong>de</strong>r „fe<strong>de</strong>rn“<br />
Trainingshinweise/-planung:<br />
Trainieren Sie im Anfängerbereich die Rückenübungen 1 – 3 (Seite 19) in<br />
<strong>de</strong>n ersten 3 Wochen 3x wöchentlich mit individuell 8 - 12 Wie<strong>de</strong>rholungen.<br />
Im Fortgeschrittenenbereich trainieren Sie die Übungen 4 - 6 (Seiten<br />
19 – 20). Zwischen zwei Trainingseinheiten sollte ein trainingsfreier Tag<br />
geplant wer<strong>de</strong>n. In <strong>de</strong>n darauffolgen<strong>de</strong>n Wochen können Sie <strong>de</strong>n Trainingsumfang<br />
allmählich zuerst über die Wie<strong>de</strong>rholungszahl auf 12 – 15<br />
Wie<strong>de</strong>rholungen erhöhen und später auch über die Satzzahl (ein Satz beinhaltet<br />
eine <strong>de</strong>finierte Anzahl von Wie<strong>de</strong>rholungen) auf 2 – 3 Sätze mit<br />
jeweils 12 - 15 Wie<strong>de</strong>rholungen steigern. Pausieren Sie während <strong>de</strong>s Trainings<br />
nach je<strong>de</strong>m Satz ca. 60 – 90 Sekun<strong>de</strong>n und nutzen Sie die Pausen<br />
ebenfalls zu Lockerungs- und Dehnübungen.<br />
Führen Sie alle Bewegungen gleichmäßig, nicht ruckhaft und schnell<br />
durch. Eine Übungsausführung dauert ca. 6 Sekun<strong>de</strong>n: 2 Sekun<strong>de</strong>n Oberkörper<br />
rückheben, 2 Sekun<strong>de</strong>n halten, 2 Sekun<strong>de</strong>n Oberkörper senken.<br />
Achten Sie stets auf einen gleichmäßigen Atemrhythmus, vermei<strong>de</strong>n Sie in<br />
je<strong>de</strong>m Fall Preßatmung.<br />
Eine langsame Steigerung <strong>de</strong>s Trainingsumfangs gilt als wichtige Regel,<br />
<strong>de</strong>nn nur so vermei<strong>de</strong>n Sie Überlastungserscheinungen und unangenehme<br />
körperliche Reaktionen, wie z.B. Muskelkater.<br />
Variieren Sie, wenn Sie im späteren Verlauf mehrere Sätze pro Trainingseinheit<br />
durchführen, zwischen <strong>de</strong>n verschie<strong>de</strong>nen Übungsausführungen,<br />
die auf <strong>de</strong>n Seiten 19 – 20 beschrieben sind. Desweiteren können Sie<br />
durch Höhenverstellung <strong>de</strong>r Rumpfauflage (vgl. Abb. 1) unterschiedliche<br />
Bereiche <strong>de</strong>r Rückenmuskulatur verstärkt beanspruchen. Eine niedrige Einstellung<br />
trainiert insbeson<strong>de</strong>re die Muskulatur <strong>de</strong>s unteren Rückens, <strong>de</strong>n<br />
Rückenstrecker sowie die Gesäßmuskulatur. Eine hohe Einstellung beansprucht<br />
verstärkt die Muskulatur <strong>de</strong>s oberen Rückens.<br />
Abb. 2<br />
Eine gut trainierte Bauchmuskulatur trägt ebenfalls zur Stabilisierung <strong>de</strong>r<br />
Wirbelsäule bei. Ergänzen Sie daher Ihr Rückentraining durch Bauchmuskelübungen.<br />
Dazu bietet KETTLER mit <strong>de</strong>m Bauchtrainer Art. Nr. 7822-900 die i<strong>de</strong>alen<br />
Voraussetzungen. Weitere Informationen dazu erhalten Sie über Ihren<br />
Fachhändler.<br />
17
D<br />
Dehnübungen<br />
1. Dehnung für <strong>de</strong>n Rückenstrecker<br />
Aus <strong>de</strong>r Rückenlage die<br />
Beine anziehen und <strong>de</strong>n<br />
Kopf Richtung Knie führen.<br />
Die Hän<strong>de</strong> fassen die Unterschenkel.<br />
Wirkung: Rückenstrecker<br />
und Gesäßmuskulatur<br />
4. Dehnung für die Oberschenkelrückseite<br />
Stand frontal vor einem<br />
Hocker. Ein Bein mit <strong>de</strong>r<br />
Ferse auf <strong>de</strong>m Hocker abstützen.<br />
Um das Gleichgewicht<br />
zu halten, mit <strong>de</strong>r<br />
Hand evtl. an einer Wand<br />
abstützen. Das Kniegelenk<br />
<strong>de</strong>s aufgestützten Beines ist<br />
leicht gebeugt, die Fußspitze<br />
anziehen. Den Oberkörper<br />
bei gera<strong>de</strong>m<br />
Rücken langsam nach vorne<br />
beugen. Anschließend<br />
Seitenwechsel.<br />
Wirkung: Oberschenkelrückseite<br />
2. Dehnung für die Schultermuskulatur<br />
Im Stand o<strong>de</strong>r gera<strong>de</strong>m<br />
Sitz <strong>de</strong>n rechten Arm Richtung<br />
Bo<strong>de</strong>n ziehen. Den<br />
Kopf zur linken Seite neigen.<br />
Der Kopf bleibt dabei<br />
mit Blickrichtung nach<br />
vorn, so daß das linke Ohrläppchen<br />
Richtung Schulter<br />
zeigt. Anschließend Seitenwechsel.<br />
Wirkung: Nackenmuskulatur<br />
5. Dehnung für <strong>de</strong>n Hüftbeuger<br />
In weiter Schrittstellung einen<br />
Fuß auf einen Hocker<br />
stellen. Bei<strong>de</strong> Fußspitzen<br />
zeigen nach vorne. Zum<br />
Abstützen können die Hän<strong>de</strong><br />
auf das gebeugte Knie<br />
gelegt wer<strong>de</strong>n. Das gebeugte<br />
Knie zusammen mit<br />
<strong>de</strong>r Hüfte langsam nach<br />
vorne schieben. An -<br />
schließend Seitenwechsel.<br />
Wirkung: Hüftbeuger<br />
3. Dehnung für die Brustmuskulatur<br />
Seitlicher Stand zur Wand.<br />
Mit <strong>de</strong>r rechten Hand und<br />
leicht im Ellenbogen gebeugtem<br />
Arm an <strong>de</strong>r Wand<br />
abstützen. Die Fingerspitzen<br />
zeigen rückwärts.<br />
Langsam <strong>de</strong>n Oberkörper<br />
nach links drehen. An -<br />
schließend <strong>de</strong>n Arm wechseln.<br />
Griffhöhe variieren.<br />
Wirkung: Brustmuskulatur<br />
18
D<br />
Übungsbeschreibung<br />
1. Oberkörper rückheben mit Armunterstützung<br />
(geringste Intensität)<br />
3. Oberkörper rückheben (mittlere Intensität)<br />
Ausgangsposition: Neigungswinkel<br />
für gewünschte<br />
Belastungsintensität<br />
einstellen (vgl. Seite<br />
13, Abb. 2). Trittplatte<br />
entsprechend <strong>de</strong>r Unterschenkellänge<br />
justieren.<br />
Der Abstand muß so eingestellt wer<strong>de</strong>n, daß die Fußsohlen während<br />
<strong>de</strong>r Übungsausführung immer aktiv gegen die Trittplatte gedrückt wer<strong>de</strong>n<br />
können und so die Trainingshaltung stabilisieren.<br />
Auflagepolster entsprechend <strong>de</strong>r Oberschenkellänge bzw. <strong>de</strong>m Trainingsziel<br />
(vgl. Seite 13 Abb. 1) einstellen. Die Hän<strong>de</strong> fassen die Haltegriffe.<br />
Die Kniegelenke bil<strong>de</strong>n einen 90°-Winkel. Die Unterschenkel wer<strong>de</strong>n<br />
durch die Trittplatte fixiert. Oberschenkel und Becken gegen das<br />
Auflagepolster stützen.<br />
Bewegungsausführung: Den Oberkörper langsam nach vorne bis etwas<br />
unterhalb <strong>de</strong>r waagerechten Position beugen. Danach <strong>de</strong>n Oberkörper<br />
aufrichten - jedoch nur so weit, daß das Becken noch vom Auflagepolster<br />
abgestützt wird (vgl. Bewegungsausmaß Übung Nr. 3). Blickrichtung<br />
zum Bo<strong>de</strong>n.<br />
Wirkung: Rückenmuskulatur - insbeson<strong>de</strong>re <strong>de</strong>r Rückenstrecker; Gesäßmuskulatur<br />
Ausgangsposition: Wie<br />
Übung 1, jedoch liegen<br />
die Hän<strong>de</strong> im Nacken,<br />
die Ellenbogen befin<strong>de</strong>n<br />
sich auf Schulterhöhe.<br />
Bewegungsausführung:<br />
Wie Übung 1.<br />
Wirkung: Rückenmuskulatur - insbeson<strong>de</strong>re Rückenstrecker und oberer<br />
Rücken; Gesäßmuskulatur<br />
4. Oberkörper rückheben, Arme in Vorhalte<br />
(hohe Intensität)<br />
2. Oberkörper rückheben, Arme in Rückhalte<br />
(geringe Intensität)<br />
Ausgangsposition: wie<br />
Übung 1, jedoch befin<strong>de</strong>n<br />
sich die Arme in Vorhalteposition.<br />
Die Ellenbogen<br />
wer<strong>de</strong>n in Schulterhöhe gehalten<br />
und bil<strong>de</strong>n einen<br />
90°-Winkel. Die Unterarme<br />
wer<strong>de</strong>n seitlich neben <strong>de</strong>m Kopf in Verlängerung <strong>de</strong>r Wirbelsäule gehalten,<br />
die Handflächen zeigen zum Bo<strong>de</strong>n.<br />
Bewegungsausführung: Wie Übung 1.<br />
Wirkung: Rückenmuskulatur - insbeson<strong>de</strong>re Rückenstrecker und oberer<br />
Rücken; Gesäßmuskulatur<br />
Ausgangsposition: wie<br />
Übung 1, jedoch befin<strong>de</strong>n<br />
sich die Arme seitlich neben<br />
<strong>de</strong>m Körper in Rückhalte,<br />
die Handflächen<br />
zeigen nach innen.<br />
Bewegungsausführung:<br />
Wie Übung 1.<br />
Wirkung: Rückenmuskulatur - insbeson<strong>de</strong>re Rückenstrecker, Gesäßmuskulatur<br />
19
D<br />
Übungsbeschreibung<br />
5. Oberkörper rückheben mit Armeinsatz<br />
(hohe Intensität)<br />
6. Oberkörper rückheben mit Drehung<br />
(hohe Intensität)<br />
Ausgangsposition: Wie<br />
Übung 1, jedoch wer<strong>de</strong>n<br />
die Hän<strong>de</strong> vor <strong>de</strong>r Brust<br />
verschränkt.<br />
Bewegungsausführung:<br />
Wie Übung 1, jedoch<br />
beim Aufrichten <strong>de</strong>s Oberkörpers<br />
wechselseitig <strong>de</strong>n linken/rechten Arm in Hochhalte mitführen. Der<br />
Arm ist dabei leicht im Ellenbogen gebeugt, Daumen o<strong>de</strong>r Handrücken<br />
zeigen nach oben.<br />
Wirkung: Rückenmuskulatur - insbeson<strong>de</strong>re Rückenstrecker und oberer<br />
Rücken; Schultermuskulatur; Gesäßmuskulatur<br />
Ausgangsposition: wie<br />
Übung 3<br />
Bewegungsausführung:<br />
Wie Übung 1, jedoch beim<br />
Aufrichten <strong>de</strong>n Oberkörper<br />
langsam wechselseitig nach<br />
links und rechts drehen.<br />
Wirkung: Rückenmuskulatur - insbeson<strong>de</strong>re Rückenstrecker und Rückenrotatoren,<br />
Gesäßmuskulatur<br />
20
GB<br />
Training Instructions<br />
The back trainer has been <strong>de</strong>signed especially to exercise the muscles of<br />
the back without putting too much strain on the spine. Nowadays, where<br />
se<strong>de</strong>ntary occupations are wi<strong>de</strong>spread, regular exercise of the back muscles<br />
is especially important to avoid weakening of the lower torso muscles.<br />
The back trainer provi<strong>de</strong>s the i<strong>de</strong>al training for the different back muscles,<br />
in particular for the stretch muscles, whilst avoiding physiologically unsensible<br />
peak intensities on the spine. The bent torso pad guarantees an<br />
ergonomically correct movement with the pelvis being supported at all<br />
stages. This way you avoid an arch positioning of the back whilst raising.<br />
The 90° angle of the knee-joints and the active fixing of the lower extremities<br />
caused by the angled tread minimize the stress on the back thigh<br />
muscles and allows an effective training for back and buttock muscles.<br />
Even people with shortened back muscles can use the back trainer effectively.<br />
Important Indications<br />
Before beginning your training program, consult your doctor to ensure that<br />
you are fit enough to use the back trainer. Base your program on the result<br />
of his medical examination. Incorrect or excessive training may have<br />
an adverse affect on your health.<br />
The following training instructions are only suitable for healthy people.<br />
Warm up/Stretching<br />
Begin each training session with light gymnastic exercises.<br />
Stretch exercises 1 – 5 should be carried out before and after exercising.<br />
Stretch exercises are an essential part of the warm-up phase of fitness<br />
training. They release tension in the muscles and improve the circulation.<br />
We would like to suggest some stretch exercises that should be carried out<br />
before and after exercising. They are each inten<strong>de</strong>d to target a certain<br />
group of muscles and can be used during your back muscle training.<br />
Abb. 1<br />
The incline can be adjusted to achieve the required intensity (see Abb. 2).<br />
A high positioning of the back support provi<strong>de</strong>s a relatively low intensity.<br />
A low angle means a rather high intensity, due to the higher weight on the<br />
upper body. Beginners should therefore start with a high positioning of the<br />
back support.<br />
Important points concerning stretch exercises:<br />
■ Assume the stretch position gradually.<br />
■ The maximum stretch position should be well below the pain level.<br />
■ Hold the stretch position for 10 – 20 seconds.<br />
■ Do not „rock“ or „balance“ the body during the stretch phase.<br />
Training instructions/planning<br />
For the first three weeks as a beginner, carry out the back exercise 1 – 3<br />
(page 23) three times a week doing between 8 - 12 repetitions. When you<br />
are advanced you can carry out the back exercises 4 – 6 (pages 23 - 24).<br />
Between two training sessions there should be one resting day. After the<br />
first three weeks you can intensify the training gently. First by increasing<br />
the number of repetitions to 12 – 15 and later by increasing the number<br />
of sets (a set is a <strong>de</strong>fined number of repetitions carried out without a<br />
break) to 2 – 3 with 12 –15 repetitions each. After each set make sure<br />
you rest for about 60 – 90 seconds and use these breaks for relaxing<br />
and/or stretching.<br />
All movements should be carried out evenly, not rapidly or jerky. One repetition<br />
should take approximately 6 seconds: raising torso (2 seconds),<br />
holding that position (2 seconds), releasing torso into starting position (2<br />
seconds). Make sure you always breathe regularly. Excessive training that<br />
makes you gasp for breath is to be avoi<strong>de</strong>d in all instances.<br />
The amount of training done in a particular session should be increased<br />
gradually to avoid strain and other unpleasant physical complaints e.g.<br />
stiffness of the muscles.<br />
Having reached a stage where you are carrying out more than one set per<br />
session, you can vary between the different exercises <strong>de</strong>scribed on pages<br />
23 – 24. Furthermore you can reinforce intensity on different parts of your<br />
back muscles by simply adjusting the incline of the torso support. A low<br />
positioning of the torso support especially trains the lower back muscles,<br />
the stretch and buttock muscles. A high positioning is suitable when concentrating<br />
on the upper back muscles.<br />
Abb. 2<br />
The back and especially the spine are supported by well trained stomach<br />
muscles. Therefore your back training should be supplemented by stomach<br />
exercises.<br />
Therefore with the stomach trainer, article number 7822-900, Kettler offers<br />
the i<strong>de</strong>al suppositions. Your Kettler <strong>de</strong>aler will provi<strong>de</strong> you with further<br />
information.<br />
21
GB<br />
Stretching exercises<br />
1. Stretch exercise for the back muscles<br />
In a tucked position, pull<br />
the knees upwards and<br />
move the head towards the<br />
knees. The hands grasp the<br />
lower legs.<br />
Benefits: Back and buttock<br />
muscles<br />
4. Stretch exercise for the back of your thighs<br />
Stand in front of a stool.<br />
Place one heel on the stool,<br />
holding the leg slightly<br />
bent and pull the toes towards<br />
you. Now move<br />
your upper body slighty<br />
forward while keeping the<br />
back straight. Then change<br />
the leg.<br />
Benefits: back of your<br />
thighs<br />
2. Stretch exercise for the shoul<strong>de</strong>r muscles<br />
In a standing or upright<br />
seated position, pull the<br />
right arm towards the floor.<br />
Tilt the head to the left<br />
hand si<strong>de</strong>. The head is not<br />
turned, the eyes look<br />
straight ahead, so that the<br />
left ear moves towards the<br />
shoul<strong>de</strong>r.<br />
Benefits: Shoul<strong>de</strong>r and<br />
neck muscles<br />
5. Stretch exercise for the hips<br />
Place one foot flat on a<br />
stool in front of you using a<br />
wi<strong>de</strong> stance. Both feet<br />
pointing forward. For additional<br />
support the hands<br />
might rest on the bent<br />
knee. Now move the bent<br />
knee and the hips slowly<br />
forward. Then change the<br />
leg.<br />
Benefits: hips<br />
3. Stretch exercise for the chest muscles<br />
Stand with the wall on right<br />
hand si<strong>de</strong>. Lean against<br />
the wall with your right<br />
hand and the arm slightly<br />
bent at the elbow. The fingertips<br />
point backwards.<br />
Then turn the upper body<br />
slowly towards the left.<br />
Then repeat the exercise<br />
with the other arm.<br />
Benefits: chest muscles<br />
22
GB<br />
Exercise Description<br />
1. Torso Raising un<strong>de</strong>r support of the arms.<br />
(lowest intensity)<br />
3. Torso Raising (average intensity)<br />
Starting position: adjust incline<br />
to achieve the individually<br />
required intensity<br />
(see page 17, Abb. 2)<br />
and the leg pads to suit<br />
your calf length.<br />
Make sure the distance is<br />
adjusted in a way that the soles of your feet can always be pressed<br />
against the tread during the exercise and according to this are able to stabilize<br />
your training position.<br />
Please adjust torso support to suit the thigh length in or<strong>de</strong>r to achieve your<br />
personal targets (see page 17, Abb. 1). The hands grasp the hand grips.<br />
The knees are bent at 90°. The tread keeps the lower thighs in position.<br />
The upper thighs and the pelvis are pressed against the torso pad.<br />
Movement: Lower the upper body slowly until it reaches a slightly lower<br />
than horizontal position. Then raise the upper body again – make sure<br />
the pelvis remains supported during the whole movement (see extension<br />
of the movement of exercise 3). Line of sight to the floor.<br />
Benefits: back muscles – especially stretching muscles; buttock muscles.<br />
4. Torso Raising with arm lifting<br />
(high intensity)<br />
Starting position: as in<br />
exercise 1, but with hands<br />
on your nape, your elbows<br />
at shoul<strong>de</strong>r height.<br />
Movement: as in exercise 1.<br />
Benefits: back muscles, especially<br />
back stretching<br />
muscle and upper back<br />
muscles; buttock muscles<br />
2. Torso Raising with arms to your si<strong>de</strong><br />
(low intensity)<br />
Starting position: as in exercise<br />
1, but with arms held in<br />
front of you. The elbows are<br />
lifted to shoul<strong>de</strong>r height,<br />
building a 90˚ angle. Raise<br />
your arms above the head<br />
to extend the spinal column.<br />
Palms down.<br />
Movement: as in exercise 1<br />
Benefits: back muscles, especially back stretching muscle and upper back<br />
muscles; buttock muscles<br />
Starting position: as in<br />
exercise 1, but arms held<br />
to your si<strong>de</strong>.<br />
Movement: as in exercise<br />
1.<br />
Benefits: back muscles, especially<br />
stretching muscle;<br />
buttock muscles.<br />
23
GB<br />
Exercise <strong>de</strong>scription<br />
5. Torso Raising with using the arms<br />
(high intensity)<br />
6. Torso Raising with alternate twist<br />
(high intensity)<br />
Starting position: as in<br />
exercise 1, but with hands<br />
crossed in front of your<br />
chest<br />
Movement: as in exercise<br />
1, but move alternatively<br />
the left or the right arm while<br />
lifting the upper body. The elbows are slighltly bent, thumbs and the<br />
backs of the hands face upsi<strong>de</strong>.<br />
Benefits: back muscles – especially stretching muscles and upper back muscles;<br />
shoul<strong>de</strong>r muscles; buttock muscles<br />
Starting position: as exercise<br />
3<br />
Movement: as exercise 1,<br />
but twisting slowly alternatively<br />
to the left and to the<br />
right while lifting the upper<br />
body.<br />
Benefits: back muscles – especially stretching muscles and rotators; buttock<br />
muscles<br />
24
F<br />
Notice d’utilisation<br />
Le banc dorsal a été spécialement conçu pour l’entraînement <strong>de</strong>s muscles<br />
dorsaux en ménageant la colonne vertébrale. Les positions sé<strong>de</strong>ntaires<br />
(position assise) sont à la source <strong>de</strong>s déficiences musculaires et aujourd’hui,<br />
les muscles du bas du dos ne sont pas assez entraînés.<br />
Un exercice régulier ciblé contribuera à l’amélioration <strong>de</strong> votre tonicité et<br />
sera bénéfique pour votre santé. En évitant <strong>de</strong> solliciter la colonne vertébrale<br />
par <strong>de</strong>s mouvements trop intensifs, le banc dorsal permet un entraînement<br />
ciblé <strong>de</strong>s différents muscles dorsaux et notamment <strong>de</strong>s muscles extenseurs.<br />
Le dossier arrondi contribue à un bon déroulement du mouvement<br />
dans lequel le bassin est maintenu et protégé dans toutes les phases.<br />
Vous éviterez ainsi un arrondi du dos. L'angle d'inclinaison <strong>de</strong> 90° au niveau<br />
<strong>de</strong>s articulations <strong>de</strong>s genoux et la fixation active <strong>de</strong>s extrémités inférieures<br />
par le marchepied coudé, minimisent la sollicitation <strong>de</strong>s muscles<br />
<strong>de</strong>s cuisses et <strong>de</strong> l'assise et optimisent l'entraînement <strong>de</strong>s muscles dorsaux<br />
et d'assise. Le banc dorsal permet également un entraînement bénéfique<br />
pour les personnes ayant un raccourcissement <strong>de</strong>s muscles <strong>de</strong>s ischios<br />
jambiers.<br />
Remarque importante:<br />
Avant <strong>de</strong> débuter un entraînement, consultez votre mé<strong>de</strong>cin pour savoir si<br />
l’exercice avec le banc dorsal est compatible avec votre bilan <strong>de</strong> santé.<br />
L’avis et les conseils <strong>de</strong> votre mé<strong>de</strong>cin doivent être à la base <strong>de</strong> votre entraînement.<br />
Un entraînement mal adapté ou excessif peut nuire à votre<br />
santé.<br />
Les conseils d’utilisation indiqués ci-<strong>de</strong>ssous s’adressent à <strong>de</strong>s personnes<br />
en bonne santé.<br />
Exercices d’échauffement / Stretching.<br />
Débutez votre entraînement par <strong>de</strong> petits exercices <strong>de</strong> gymnastique. Utilisez<br />
les exercices d’étirement 1 - 5 en début et en fin d’entraînement. Ces<br />
exercices sont nécessaires pour un échauffement efficace avant votre entraînement<br />
<strong>de</strong> fitness. Le respect <strong>de</strong> ces règles éliminera les tensions musculaires<br />
et optimisera l’afflux sanguin. Nous souhaitons vous présenter<br />
quelques mouvements d’étirement, que vous pourrez appliquer en début<br />
et en fin d’entraînement. Ces mouvements sont spécifiques à certains<br />
groupes musculaires et peuvent faire partie <strong>de</strong> votre programme d’entraînement.<br />
Fig. 1<br />
Vous pouvez faire varier l’intensité <strong>de</strong> l’entraînement en réglant l’angle<br />
d’inclinaison (Fig. 2). Un angle prononcé correspond à une faible intensité<br />
d’entraînement, à l’inverse, une inclinaison moindre contribuera à un<br />
entraînement plus intensif (par le poids du corps).<br />
Nous conseillons aux débutants <strong>de</strong> démarrer leur entraînement avec un<br />
angle d’inclinaison élevé.<br />
Exercices d’étirement : généralités<br />
■ Mettez - vous progressivement en position d’étirement<br />
■ Atteignez la position maximale d’étirement avant la sensation <strong>de</strong> douleur<br />
■ Tenez la position durant 10-20 secon<strong>de</strong>s<br />
■ Ne vous cambrez pas et ne donnez pas d’à-coups pendant les mouvements.<br />
Instructions d’entraînement - Programmes<br />
Au début, entraînez-vous en suivant les exercices 1-3 (page 27) durant les<br />
trois premières semaines, à raison <strong>de</strong> trois fois par semaine, par série <strong>de</strong><br />
8 - 12. Dans un sta<strong>de</strong> avancé, faites les exercices 4 - 6 (page 27 - 28).<br />
Entre <strong>de</strong>ux entraînements il convient <strong>de</strong> respecter une journée <strong>de</strong> repos.<br />
Dans les semaines suivantes, vous pouvez intensifier votre entraînement en<br />
augmentant les séries à 12 - 15. Faites une pause <strong>de</strong> 60 - 90 secon<strong>de</strong>s<br />
après chaque série; utilisez ce temps pour détendre vos muscles. Effectuez<br />
tous vos mouvements avec progressivité et sans à-coups. Un mouvement<br />
dure 6 secon<strong>de</strong>s environs : relevé <strong>de</strong> buste 2 secon<strong>de</strong>s, maintien <strong>de</strong> la<br />
position 2 secon<strong>de</strong>s, abaissement du buste 2 secon<strong>de</strong>s. Veillez à avoir<br />
une respiration régulière (ne bloquez pas votre respiration) .<br />
Fixez vous comme règle une progression régulière et mesurée <strong>de</strong> l’exercice,<br />
vous éviterez ainsi toute élongation musculaire et réaction désagréable.<br />
Variez les exercices (<strong>de</strong>scription pages 27 - 28) lorsque vous<br />
faites plusieurs séries. Vous travaillerez différents groupes musculaires par<br />
simple réglage <strong>de</strong> la hauteur du dossier (voir Fig. 1). Un dossier réglé en<br />
position basse permet un entraînement <strong>de</strong>s muscles bas du dos, <strong>de</strong>s<br />
muscles extenseurs, <strong>de</strong>s muscles <strong>de</strong> l’assise. Un dossier réglé en position<br />
haute contribuera au renforcement <strong>de</strong>s muscles du haut du dos.<br />
Fig. 2<br />
Une bonne musculature <strong>de</strong> la sangle abdominale contribue également à<br />
la stabilité <strong>de</strong> la colonne vertébrale. Panachez ainsi votre entraînement<br />
dorsal avec un entraînement abdominal.<br />
L'entraîneur abdominal <strong>de</strong> KETTLER, N° d'article 7822-900 possè<strong>de</strong> les<br />
conditions idéales. Pour obtenir <strong>de</strong> plus amples informations, veuillez<br />
consulter votre spécialiste en la matière.<br />
25
F<br />
Exercices d'étirement<br />
1. Etirement <strong>de</strong>s muscles dorsaux<br />
Les jambes tendues, ramenez<br />
votre tête en direction<br />
<strong>de</strong>s genoux, vos mains<br />
s'agrippent <strong>de</strong>rrière vos<br />
cuisses.<br />
Muscles sollicités : Muscles<br />
dorsaux et muscles <strong>de</strong> l'assise<br />
4. Etirement <strong>de</strong>s muscles <strong>de</strong>s cuisses<br />
Placez vous face à une<br />
chaise, une jambe en appui<br />
sur l'assise, prenez<br />
éventuellement appui sur<br />
un mur pour conserver<br />
l'équilibre. Le genou <strong>de</strong><br />
votre jambe en appui est<br />
légèrement fléchi.<br />
La pointe <strong>de</strong>s pieds tendue<br />
vers vous, fléchissez lentement<br />
votre buste vers<br />
l'avant, votre dos reste<br />
bien droit.<br />
Muscles sollicités : muscles<br />
<strong>de</strong> l'arrière <strong>de</strong> la cuisse<br />
2. Etirement <strong>de</strong>s muscles <strong>de</strong>s épaules<br />
En positon <strong>de</strong>bout ou assis,<br />
ten<strong>de</strong>z votre bras droit vers<br />
le sol, inclinez la tête sur le<br />
côté gauche, le regard reste<br />
fixe vers l'avant, votre<br />
oreille gauche essaie <strong>de</strong><br />
toucher l'épaule.<br />
Changez <strong>de</strong> côté une fois<br />
le premier mouvement terminé.<br />
Muscles sollicités : Muscles<br />
<strong>de</strong> la nuque<br />
5. Etirement du fléchisseur <strong>de</strong>s hanches<br />
Toujours face à une chaise,<br />
placez un pied sur l'assise,<br />
les <strong>de</strong>ux pointes <strong>de</strong>s pieds<br />
vers l'avant.<br />
Les <strong>de</strong>ux mains peuvent venir<br />
en appui votre genou<br />
plié. Fléchissez votre genou<br />
et poussez votre<br />
hanche vers l'avant. Changez<br />
<strong>de</strong> côté<br />
Muscles sollicités : fléchisseur<br />
<strong>de</strong>s hanches<br />
3. Etirement <strong>de</strong>s muscles <strong>de</strong> la poitrine<br />
En position latérale contre<br />
un mur. Avec la main droite,<br />
le bras légèrement fléchis<br />
au niveau du cou<strong>de</strong>,<br />
prenez appui sur le mur.<br />
Vos doigts en appui, effectuez<br />
une rotation du buste<br />
vers la gauche. Changez<br />
<strong>de</strong> côté et variez la hauteur<br />
<strong>de</strong> la prise.<br />
Muscles sollicités : muscles<br />
<strong>de</strong> la poitrine<br />
26
F<br />
Description <strong>de</strong>s exercices<br />
1. Maintenir son buste à l'arrière en s'aidant<br />
<strong>de</strong> ses bras (faible intensité)<br />
3. Maintenir son buste à l'arrière<br />
(intensité moyenne)<br />
Position <strong>de</strong> départ: régler<br />
l'angle d'inclinaison pour<br />
le <strong>de</strong>gré d'effort (voir<br />
page 21, fig. 2). Ajuster<br />
le marchepied à la hauteur<br />
<strong>de</strong> jambe.<br />
L'écart doit être réglé <strong>de</strong><br />
sorte à ce que durant l'exercice d'entraînement la plante <strong>de</strong>s pieds puisse<br />
toujours être appuyée activement contre le marchepied et ainsi stabiliser<br />
la position d'entraînement.<br />
Régler le coussin d'appui en fonction <strong>de</strong> la longueur <strong>de</strong>s cuisses ou du but<br />
d'entraînement (voir page 21, fig. 1). Les mains sont posées sur les poignées<br />
d'appui. Les articulations <strong>de</strong>s genoux forment <strong>de</strong>s angles <strong>de</strong> 90°. Les<br />
jambes sont fixées sur le marchepied. Appuyer les cuisses et le bassin<br />
contre le coussin d'appui.<br />
Exécution du mouvement: plier légèrement le buste vers l'avant jusqu'à<br />
une position un peu près en <strong>de</strong>ssous <strong>de</strong> l'horizontale. Puis, redresser le<br />
buste mais uniquement <strong>de</strong> sorte à ce que le bassin soit encore soutenu<br />
par le coussin d'appui (comparaison étendue <strong>de</strong>s mouvements, exercice<br />
3). Diriger le regard vers le bas.<br />
Effet: muscles du dos - surtout <strong>de</strong>s muscles extenseurs; muscles <strong>de</strong> l'assise.<br />
Position <strong>de</strong> départ: semblable<br />
à l'exercice 1, cependant<br />
les mains sont <strong>de</strong>rrière<br />
la nuque et les cou<strong>de</strong>s<br />
se trouvent à hauteur<br />
d'épaule.<br />
Exécution du mouvement: semblable à l'exercice 1.<br />
Effet: muscles du dos - surtout <strong>de</strong>s muscles extenseurs et muscles du haut<br />
du dos; muscles <strong>de</strong> l'assise.<br />
4. Maintenir son buste à l'arrière, tenir les<br />
bras en avant (gran<strong>de</strong> intensité)<br />
2. Maintenir son buste à l'arrière, les bras en<br />
arrière (faible intensité)<br />
Position <strong>de</strong> départ: semblable<br />
à l'exercice 1, cependant<br />
les bras se trouvent en<br />
position avant. Les cou<strong>de</strong>s<br />
sont maintenus à hauteur<br />
d'épaule et forment un<br />
angle <strong>de</strong> 90°. Les avantbras<br />
sont maintenus le long <strong>de</strong> la tête en prolongation <strong>de</strong> la colonne vertébrale,<br />
les paumes <strong>de</strong> la main montrant le sol.<br />
Exécution du mouvement: semblable à l'exercice 1.<br />
Effet: muscles du dos - surtout <strong>de</strong>s muscles extenseurs et muscles du haut<br />
du dos; muscles <strong>de</strong> l'assise.<br />
Position <strong>de</strong> départ: semblable<br />
à l'exercice 1, cependant<br />
les bras sont positionnés<br />
le long du corps,<br />
les paumes <strong>de</strong> la main en<br />
arrière, tournées vers<br />
l'intérieur.<br />
Exécution du mouvement: semblable à l'exercice 1.<br />
Effet: muscles du dos - surtout <strong>de</strong>s muscles extenseurs; muscles <strong>de</strong> l'assise.<br />
27
F<br />
Description <strong>de</strong>s exercices<br />
5. Maintenir son buste à l'arrière à l'ai<strong>de</strong> <strong>de</strong><br />
ses bras (gran<strong>de</strong> intensité)<br />
6. Maintenir le buste à l'arrière en mouvement<br />
rotatif (gran<strong>de</strong> intensité)<br />
Position <strong>de</strong> départ: semblable<br />
à l’exercice 1; cependant<br />
les mains s’entrecroisent<br />
<strong>de</strong>vant le buste.<br />
Execution du mouvement:<br />
semblable à l'exercice 1,<br />
cependant lorsque vous redressez<br />
le buste, soulevez en même temps et à tour <strong>de</strong> rôle, le bras gauche<br />
puis le bras droit. Le cou<strong>de</strong> légèrement plié, les pouces ou le dos <strong>de</strong>s<br />
mains montrent vers le haut.<br />
Effet: muscles du dos - surtout <strong>de</strong>s muscles extenseurs et muscles du haut<br />
du dos; muscles <strong>de</strong> l'épaule; muscles <strong>de</strong> l'assise.<br />
Position <strong>de</strong> départ: semblable<br />
à l'exercice 3.<br />
Exécution du mouvement:<br />
semblable à l'exercice 1,<br />
cependant lorsque vous redressez<br />
le buste, faites doucement<br />
une rotation vers la<br />
gauche puis vers la droite.<br />
Effet: muscles du dos - surtout <strong>de</strong>s muscles extenseurs et <strong>de</strong>s muscles <strong>de</strong> rotation;<br />
muscles <strong>de</strong> l'assise.<br />
28
NL<br />
Trainingshandleiding<br />
De rugtrainer is speciaal ontwikkeld voor een training van <strong>de</strong> rugspieren,<br />
die <strong>de</strong> wervelkolom ontziet. Vooral in <strong>de</strong> huidige tijd, waarin veelvuldig<br />
zitten dikwijls tot spierverzwakking bij <strong>de</strong> rompspieren leidt, is een regelmatige<br />
training van <strong>de</strong> rugspieren waar<strong>de</strong>vol voor <strong>de</strong> gezondheid. Door<br />
<strong>de</strong> onfysiologische belastingspunten van <strong>de</strong> wervelkolom te vermij<strong>de</strong>n, is<br />
met <strong>de</strong> rugtrainer een doelgerichte training van <strong>de</strong> verschillen<strong>de</strong> bereiken<br />
van <strong>de</strong> rugspieren, vooral <strong>de</strong> rugstrekspieren, mogelijk. De afgeron<strong>de</strong> kussens<br />
zorgen voor een correcte bewegingsafloop, waarbij het bekken tij<strong>de</strong>ns<br />
<strong>de</strong> hele beweging optimaal gesteund wordt. Een holle rug wordt<br />
daardoor geme<strong>de</strong>n. De in een hoek van 90° gebogen knieën en <strong>de</strong> actieve<br />
fixatie van <strong>de</strong> on<strong>de</strong>rste le<strong>de</strong>maten door <strong>de</strong> in een hoek gezette treeplanken,<br />
minimaliseert <strong>de</strong> belasting van <strong>de</strong> achterste bovenbeenspieren<br />
en optimaliseert <strong>de</strong> training van <strong>de</strong> rug- en bilspieren. Ook personen met<br />
verkorte achterste bovenbeenspieren kunnen daardoor een effectieve rugtraining<br />
uitvoeren<br />
Belangrijke aanwijzingen:<br />
Raadpleeg voor begin van <strong>de</strong> training uw huisarts of training met dit apparaat<br />
voor u geschikt is. Zijn diagnose dient als basis voor <strong>de</strong> opbouw<br />
van uw trainingsprogramma. Verkeer<strong>de</strong> of te intensieve training kan<br />
scha<strong>de</strong>lijke gevolgen voor <strong>de</strong> gezondheid hebben.<br />
Volgen<strong>de</strong> trainingsadviezen gel<strong>de</strong>n alleen voor gezon<strong>de</strong> personen.<br />
Opwarmen/stretchen<br />
Begin uw training met lichte gymnastiekoefeningen. Benut <strong>de</strong> rekoefeningen<br />
1-5 voor <strong>de</strong> voorbereiding of afsluiting van <strong>de</strong> training. Rekoefeningen<br />
behoren tot het opwarmingsprogramma van <strong>de</strong> spiertraining. Hierdoor<br />
wor<strong>de</strong>n spanningen in <strong>de</strong> spieren los gemaakt en wordt <strong>de</strong> bloedverzorging<br />
van <strong>de</strong> spieren optimaal. Wij zullen enkele rekoefeningen voorstellen,<br />
die u voor <strong>de</strong> voorbereiding of afsluiting van <strong>de</strong> training kunt gebruiken.<br />
De rekoefeningen zijn bestemd voor bepaal<strong>de</strong> spiergroepen, zodat u <strong>de</strong><br />
rekoefeningen geduren<strong>de</strong> uw rugtraining specifiek kunt gebruiken.<br />
Fundamenteel bij rekoefeningen:<br />
■ Langzaam in <strong>de</strong> stretchpositie gaan.<br />
■ Maximale stretchpositie on<strong>de</strong>r <strong>de</strong> pijngrens innemen.<br />
■ De positie 10 - 20 secon<strong>de</strong>n aanhou<strong>de</strong>n.<br />
■ Tij<strong>de</strong>ns <strong>de</strong> stretchoefening niet "wippen" of "veren".<br />
Trainingsadviezen/-opbouw:<br />
Doe in het begin <strong>de</strong> rugoefeningen 1-3 (pag. 31) tij<strong>de</strong>ns <strong>de</strong> eerste 3 weken<br />
3 x per week met individueel 8 - 12 herhalingen. Later kunt u <strong>de</strong> oefeningen<br />
4-6 (pag. 31) proberen. Tussen twee trainingssessies dient u een<br />
rustdag in te plannen. In <strong>de</strong> daarop volgen<strong>de</strong> weken mag <strong>de</strong> training<br />
langzaam van 12 naar 15 herhalingen wor<strong>de</strong>n verhoogd en later ook het<br />
setaantal (een set is een bepaald aantal herhalingen) naar 2-3 sets met telkens<br />
12 - 15 herhalingen. Pauseer geduren<strong>de</strong> <strong>de</strong> training na ie<strong>de</strong>re set<br />
ca. 60 - 90 secon<strong>de</strong>n en gebruik <strong>de</strong> pauzes ook voor ontspannings- en<br />
rekoefeningen. Voer alle bewegingen gelijkmatig uit, niet rukkend en snel.<br />
Een beweging duur ca. 6 secon<strong>de</strong>n: 2 secon<strong>de</strong>n het bovenlichaam opheffen,<br />
2 secon<strong>de</strong>n vasthou<strong>de</strong>n, 2 secon<strong>de</strong>n ontspannen. Let steeds op<br />
een gelijkmatige a<strong>de</strong>mhaling, vermijd te allen tij<strong>de</strong> persa<strong>de</strong>ming.<br />
Als belangrijkste regel geldt een langzame opbouw van <strong>de</strong> training, alleen<br />
zo vermijdt u overbelastingsverschijnselen en onaangename lichamelijke<br />
reacties, zoals bijv. spierpijn.<br />
Als u later meer<strong>de</strong>re sets per trainingssessie uitvoert, varieer dan tussen <strong>de</strong><br />
verschillen<strong>de</strong> oefeningen die op bladzij<strong>de</strong> 31 beschreven zijn.<br />
Ver<strong>de</strong>r kunt u door een gevarieer<strong>de</strong> hoogteinstelling van <strong>de</strong> rugplank verschillen<strong>de</strong><br />
gebie<strong>de</strong>n van <strong>de</strong> rugspieren intensiever trainen. Met een lage<br />
instelling traint u vooral <strong>de</strong> spieren in <strong>de</strong> on<strong>de</strong>rrug, <strong>de</strong> rugstrekspieren en<br />
<strong>de</strong> bilspieren. Met een hoge instelling traint u vooral <strong>de</strong> spieren in <strong>de</strong> bovenrug.<br />
afb. 1<br />
De trainingsintensiteit van <strong>de</strong> buikspiertraining kan door <strong>de</strong> instelling van<br />
<strong>de</strong> hellingshoek (zie afb. 2) gevarieerd wor<strong>de</strong>n. Een steile instelling geeft<br />
een relatief lage trainingsintensiteit, een vlakke instelling geeft een relatief<br />
hoge belastingsintensiteit, doordat een groter gewicht op het bovenlichaam<br />
drukt. Daarom dienen beginners met een steile hellingshoek te beginnen.<br />
afb. 2<br />
Goed getrain<strong>de</strong> buikspieren zorgen eveneens voor stabilisatie van <strong>de</strong><br />
wervelkolom. Completeer daarom uw rugtraining met een buikspiertraining.<br />
Hiervoor heeft <strong>de</strong> Kettler <strong>de</strong> buiktrainer Art.nr. 7822-900 <strong>de</strong> juiste<br />
voorwaar<strong>de</strong>n. Meer informatie kunt u verkrijgen bij uw vakhan<strong>de</strong>laar.<br />
29
NL<br />
Rekoefeningen<br />
1. Rekken voor <strong>de</strong> rugstrekker<br />
uit <strong>de</strong> rugpositie <strong>de</strong> benen<br />
aantrekken en het hoofd in<br />
richting knie voeren.<br />
Effect: Rugstrekker en zitvlakspieren.<br />
4. Rekken voor <strong>de</strong> bovenbeenrugzij<strong>de</strong><br />
Stand frontaal tegenover<br />
een kruk. Een been met <strong>de</strong><br />
hiel op <strong>de</strong> kruk steunen.<br />
Om het evenwicht te hou<strong>de</strong>n,<br />
met <strong>de</strong> hand evtl. aan<br />
<strong>de</strong> muur vasthou<strong>de</strong>n. Het<br />
kniegewricht van het gesteund<br />
been is licht gebuigd,<br />
<strong>de</strong> voetspits aantrekken.<br />
Het bovenlichaam<br />
bij rechte rug langzaam<br />
naar voren buigen. Aansluitend<br />
zij<strong>de</strong> wisselen.<br />
Effect: bovenbeenrugzij<strong>de</strong>.<br />
2. Rekken voor <strong>de</strong> schou<strong>de</strong>rspieren<br />
Staan<strong>de</strong> of in rechte zitpositie<br />
<strong>de</strong> rechte arm richting<br />
bo<strong>de</strong>m trekken. Het hoofd<br />
naar <strong>de</strong> linke hand neigen.<br />
Het hoofd blijft daarbij met<br />
blikrichting naar voren zodat<br />
het linke oorlelletje<br />
richting schou<strong>de</strong>r wijst.<br />
Aansluitend zij<strong>de</strong> wisselen.<br />
Effect: nekspieren.<br />
5. Rekken voor <strong>de</strong> heupbuiger<br />
In wij<strong>de</strong> stappositie een<br />
voet op een kruk zetten.<br />
Bij<strong>de</strong> voetspitsen wijzen<br />
naar voren. Voor het evenwicht<br />
kunnen <strong>de</strong> han<strong>de</strong>n<br />
op <strong>de</strong> gebuig<strong>de</strong> knie wor<strong>de</strong>n<br />
gelegd. De gebuig<strong>de</strong><br />
knie tesamen met <strong>de</strong> heup<br />
lanzaam naar voren schuiven.<br />
Dan zij<strong>de</strong> wisselen.<br />
Effect: heupbuiger.<br />
3. Rekken voor <strong>de</strong> borstspieren<br />
Zij<strong>de</strong>lijk stand naast <strong>de</strong><br />
muur. Met <strong>de</strong> rechte hand<br />
en licht in <strong>de</strong> ellenboog gebuig<strong>de</strong><br />
arm zich aan <strong>de</strong><br />
muur afduwen. De vingertoppen<br />
wijzen achteruit.<br />
Langzaam het bovenlichaam<br />
naar links draaien.<br />
Dan <strong>de</strong> an<strong>de</strong>re arm nemen.<br />
Greephoogte varieren.<br />
Effect: borstspieren.<br />
30
NL<br />
Oefeningen<br />
1. Bovenlichaam heffen met armon<strong>de</strong>rsteuning<br />
(lage intensiteit)<br />
4. Bovenlichaam heffen, armen voor het lichaam<br />
(hoge intensiteit)<br />
Uitgangspositie: hellingshoek<br />
voor gewenste belastingsintensiteit<br />
instellen<br />
(zie pag. 25, afb. 2). Treeplanken<br />
instellen op on<strong>de</strong>rbeenlengte.<br />
De afstand<br />
moet zo ingesteld zijn, dat<br />
<strong>de</strong> voetzolen tij<strong>de</strong>ns <strong>de</strong> oefening altijd tegen <strong>de</strong> treeplanken gedrukt zijn<br />
en zo <strong>de</strong> houding tij<strong>de</strong>ns <strong>de</strong> training stabiliseren. Bank naar bovenbeenlengte<br />
c.q. trainingsdoel (zie pag. 25, afb.1) instellen. De han<strong>de</strong>n pakken<br />
<strong>de</strong> handgrepen vast. De knieën zijn 90° gebogen. bovenbeen en<br />
bekken tegen <strong>de</strong> bank drukken.<br />
Oefening: het bovenlichaam langzaam naar voren buigen tot bijna horizontale<br />
positie. Vervolgens het bovenlichaam opheffen – echter zover dat<br />
het bekken niet door het kussen gesteund wordt (zie bewegingsomvang<br />
oefening nr. 3). Het gezicht is naar <strong>de</strong> bo<strong>de</strong>m gericht.<br />
Werking: rugspieren – vooral <strong>de</strong> rugstrekspieren; bilspieren.<br />
Uitgangspositie: zie oefening<br />
1, echter bevin<strong>de</strong>n <strong>de</strong><br />
armen zich voor het lichaam.<br />
De ellebogen wor<strong>de</strong>n<br />
op schou<strong>de</strong>rhoogte gehou<strong>de</strong>n<br />
en zijn 90° gebogen.<br />
De on<strong>de</strong>rarmen wor<strong>de</strong>n<br />
langs het lichaam gehou<strong>de</strong>n, <strong>de</strong> handpalmen wijzen naar <strong>de</strong> bo<strong>de</strong>m.<br />
Oefening: zie oefening 1.<br />
Werking: rugspieren – vooral rugstrekspieren en bovenrug; bilspieren.<br />
5. Bovenlichaam heffen m.b.v. <strong>de</strong> armen<br />
(hoge intensiteit)<br />
2. Bovenlichaam heffen, armen op <strong>de</strong> rug<br />
(lage intensiteit)<br />
Uitgangspositie: zie oefening<br />
1, echter bevin<strong>de</strong>n <strong>de</strong><br />
armen zich iets achterwaarts<br />
langs het lichaam,<br />
<strong>de</strong> handpalmen zijn naar<br />
binnen gericht.<br />
Oefening: zie oefening 1.<br />
Werking: rugspieren – vooral rugstrekspieren; bilspieren.<br />
3. Bovenlichaam heffen (gemid<strong>de</strong>l<strong>de</strong> intensiteit)<br />
Uitgangspositie: zie oefening<br />
1, echter wor<strong>de</strong>n <strong>de</strong><br />
han<strong>de</strong>n voor <strong>de</strong> borst gehou<strong>de</strong>n.<br />
Oefening: zie oefening 1,<br />
echter bij het oprichten van<br />
het bovenlichaam afwisselend<br />
<strong>de</strong> linker/rechter arm meebewegen. De arm is vanuit <strong>de</strong> elleboog<br />
licht gebogen, <strong>de</strong> rug van <strong>de</strong> hand wijst naar boven.<br />
Werking: rugspieren – vooral rugstrekspieren en bovenrug; schou<strong>de</strong>rspieren;<br />
bilspieren.<br />
6. Bovenlichaam heffen met draaiing<br />
(hoge intensiteit)<br />
Uitgangspositie: zie oefening<br />
1, echter liggen <strong>de</strong><br />
han<strong>de</strong>n in <strong>de</strong> nek, <strong>de</strong> ellebogen<br />
bevin<strong>de</strong>n zich op<br />
schou<strong>de</strong>rhoogte.<br />
Oefening: zie oefening 1.<br />
Werking: rugspieren –<br />
vooral rugstrekspieren en bovenrug; bilspieren.<br />
Uitgangspositie: zie oefening<br />
3.<br />
Oefening: zie oefening 1,<br />
echter bij het oprichten van<br />
het bovenlichaam langzaam<br />
afwisselend naar<br />
rechts en links draaien.<br />
Werking: rugspieren – vooral rugstrekspieren en rugdraaispieren; bilspieren.<br />
31
E<br />
Instrucciones para el entrenamiento<br />
El entrenador dorsal ha sido especialmente <strong>de</strong>sarrollado para el entrenamiento<br />
<strong>de</strong> la musculatura dorsal, preventivo y protector <strong>de</strong> la columna vertebral.<br />
El entrenamiento <strong>de</strong> la musculatura dorsal, con regularidad, resulta<br />
muy importante para la salud <strong>de</strong>bido a que en la actualidad estamos<br />
frecuentemente sentados y dicha posición es muchas veces la causa<br />
<strong>de</strong> las <strong>de</strong>bilitaciones musculares en la zona muscular <strong>de</strong>l tronco.<br />
Evitando realizar máximos esfuerzos antifisiológicos, para la columna vertebral,<br />
el entrenador dorsal posibilita un entrenamiento directo <strong>de</strong> las diversas<br />
zonas <strong>de</strong> la musculatura dorsal y especialmente <strong>de</strong>l extensor dorsal.<br />
El redon<strong>de</strong>ado tapiz <strong>de</strong> apoyo garantiza un correcto <strong>de</strong>sarrollo <strong>de</strong><br />
los movimientos durante el cual se pue<strong>de</strong> apoyar la pelvis, óptimamente,<br />
en todas las fases <strong>de</strong> los movimientos. De esta forma se evita la formación<br />
<strong>de</strong> una curva lumbar. Las articulaciones <strong>de</strong> las rodillas están dobladas al<br />
90º y la fijación activa <strong>de</strong> las extremida<strong>de</strong>s inferiores mediante la placa<br />
reposapiés en ángulo minimiza el esfuerzo <strong>de</strong> la musculatura <strong>de</strong>l dorso<br />
<strong>de</strong> los muslos y optimiza el entrenamiento <strong>de</strong> la musculatura dorsal y <strong>de</strong><br />
los glúteos. Debido a ello también pue<strong>de</strong>n realizar un entrenamiento dorsal<br />
óptimo las personas con musculatura reducida.<br />
Nota importante<br />
Antes <strong>de</strong> iniciar el entrenamiento consulte su doctor <strong>de</strong> cabecera para saber<br />
ciertamente si el entrenamiento con este aparato es conveniente para<br />
su salud. Organice su programa <strong>de</strong> entrenamiento ateniéndose a los resultados<br />
<strong>de</strong> su reconocimiento médico. Un entrenamiento erróneo o excesivo<br />
pue<strong>de</strong> resultar nocivo para la salud.<br />
Las informaciones siguientes rigen exclusivamente para personas sanas.<br />
Calentamiento/Estiramiento<br />
Comience su entrenamiento con ejercicios <strong>de</strong> gimnasia fáciles. Aproveche<br />
los ejercicios <strong>de</strong> estiramiento 1 - 5 para el entrenamiento inicial y posterior.<br />
Por regla general, los ejercios <strong>de</strong> estiramiento forman parte <strong>de</strong>l programa<br />
<strong>de</strong> calentamiento para el entrenamiento <strong>de</strong> la musculatura. Con<br />
ellos se eliminan las tensiones musculares y se optima el abastecimiento<br />
sanguíneo <strong>de</strong> la musculatura. A continuación <strong>de</strong>seamos presentarles algunos<br />
ejercicios <strong>de</strong> estiramiento que <strong>de</strong>berían ser realizados antes y <strong>de</strong>spués<br />
<strong>de</strong>l entrenamiento. Los ejercicios <strong>de</strong> estiramiento están coordinados<br />
con <strong>de</strong>terminadas partes musculares y <strong>de</strong>bido a ello pue<strong>de</strong>n ser realizados<br />
directamente durante su entrenamiento dorsal.<br />
Informaciones fundamentales sobre los ejercicios <strong>de</strong> estiramiento:<br />
■ Colocarse lentamente en la posición <strong>de</strong> estiramiento<br />
■ La posición máxima <strong>de</strong> estiramiento no <strong>de</strong>be alcanzar el límite <strong>de</strong> dolor<br />
■ Permanecer 10 - 20 segundos en la posición <strong>de</strong> estiramiento<br />
■ No “balancear” ni “saltar” durante la realización <strong>de</strong> los ejercicios <strong>de</strong><br />
estiramiento<br />
Indicaciones / planificación <strong>de</strong>l entrenamiento:<br />
Durante el período <strong>de</strong> tiempo como principiante, realice los ejercicios<br />
para la espalda 1 – 3 (página 34), 3 x semanalmente durante las 3 primeras<br />
semanas con 8 – 12 repeticiones individuales. Cuando ya esté en<br />
el área <strong>de</strong> los avanzados, haga los ejercicios 4 – 6 (páginas 34 – 35).<br />
Entre dos ejercicios <strong>de</strong> entrenamiento se <strong>de</strong>bería proyectar un día libre <strong>de</strong><br />
entrenamiento. En las semanas siguientes se pue<strong>de</strong> aumentar el entrenamiento<br />
paulatinamente, aumentando primero el número <strong>de</strong> repeticiones<br />
<strong>de</strong> 12 - 15 y luego - a través <strong>de</strong>l número <strong>de</strong> series - (una serie se compone<br />
<strong>de</strong> un <strong>de</strong>finido número <strong>de</strong> repeticiones) aumentar a 2 - 3 series compuestas<br />
<strong>de</strong> 12 - 15 repeticiones respectivamente. Realice una pausa <strong>de</strong><br />
unos 60 - 90 segundos <strong>de</strong>spués <strong>de</strong> cada serie y aproveche las pausas<br />
para realizar ejercicios <strong>de</strong> relajamiento y dilatación.<br />
Realice todos los movimientos a un mismo ritmo. No los realice bruscamente<br />
y con rapi<strong>de</strong>z. La realización <strong>de</strong> un ejercicio dura unos 6 segundos:<br />
2 segundos para elevar el tronco, 2 segundos <strong>de</strong> <strong>de</strong>scanso, 2 segundos<br />
para <strong>de</strong>scen<strong>de</strong>r el tronco. Observe siempre un ritmo <strong>de</strong> respiración<br />
uniforme y evite siempre la respiración forzada.<br />
El aumento paulatino <strong>de</strong> los ejercicios <strong>de</strong> entrenamiento es una regla importante<br />
puesto que sólo así pue<strong>de</strong>n evitar síntomas <strong>de</strong> exceso y reacciones<br />
<strong>de</strong>sagradables para el cuerpo, tales como las agujetas.<br />
Aplique Ud. variaciones entre las diferentes ejecuciones <strong>de</strong> los ejercicios,<br />
<strong>de</strong>scritas en las página 34 – 35, cuando en los procedimientos posteriores<br />
realice varias series por unidad <strong>de</strong> entrenamiento. A<strong>de</strong>más, reajustando<br />
la altura <strong>de</strong>l tapiz <strong>de</strong> apoyo (ver figura 1) pue<strong>de</strong> intensificar el entrenamiento<br />
en distintas partes <strong>de</strong> la musculatura dorsal. El entrenamiento<br />
con regulación baja tiene especial efecto sobre la parte inferior <strong>de</strong> la<br />
musculatura dorsal, sobre el extensor dorsal y sobre la musculatura <strong>de</strong> los<br />
glúteos. La regulación alta intensifica el efecto en la parte superior <strong>de</strong> la<br />
musculatura dorsal.<br />
Figura 1<br />
La intensidad <strong>de</strong>l entrenamiento se pue<strong>de</strong> variar reajustando el ángulo <strong>de</strong><br />
inclinación (ver figura 2). Un ajuste ascen<strong>de</strong>nte significa una intensidad<br />
<strong>de</strong> entrenamiento relativamente baja. Un ángulo <strong>de</strong> inclinación plano significa<br />
- a causa <strong>de</strong> la gran fuerza <strong>de</strong> peso que recae sobre el tronco - una<br />
intensidad <strong>de</strong> esfuerzo relativamente alta. Por consecuencia, los principiantes<br />
<strong>de</strong>berían comenzar con un ángulo <strong>de</strong> inclinación ascen<strong>de</strong>nte.<br />
Figura 2<br />
Una musculatura bien entrenada <strong>de</strong>l abdomen igualmente contribuye a<br />
estabilizar la espina dorsal.<br />
Complete, por lo tanto, el entrenamiento dorsal mediante ejercicios <strong>de</strong><br />
musculación abdominal.<br />
Para ello, KETTLER, le ofrece las condiciones previas i<strong>de</strong>ales con el banco<br />
<strong>de</strong> musculación Art. Nº 7822-900. Su comerciante especializado le<br />
proporcionará más informaciones al respecto.<br />
32
E<br />
Ejercicios <strong>de</strong> estiramiento<br />
1. Estiramiento para el extensor dorsal<br />
En <strong>de</strong>cúbito llevar las piernas<br />
y la cabeza hacia las<br />
rodillas. Las manos arragadas<br />
a las piernas<br />
Efecto sobre: el extensor<br />
dorsal y la musculatura <strong>de</strong><br />
los glúteos<br />
4. Estiramiento para la parte posterior <strong>de</strong> los<br />
muslos<br />
En posición erecta frente a<br />
un taburete. Apoyarse al<br />
taburete con el talón <strong>de</strong> un<br />
pie. Para mantener el equilibrio<br />
apoyarse, en caso<br />
necesario, con una mano<br />
a la pared. La articulación<br />
<strong>de</strong> la rodilla <strong>de</strong>l pie apoyado<br />
está ligeramente doblada.<br />
Estirar la punta <strong>de</strong>l<br />
pie. Doblar el tronco lentamente<br />
hacia a<strong>de</strong>lante con<br />
la espalda <strong>de</strong>recha. A continuación,<br />
repetir el ejercicio<br />
con el otro lado.<br />
Efecto sobre: la parte posterior<br />
<strong>de</strong> los muslos.<br />
2. Estiramiento para la musculatura escapular<br />
En posición erecta o sentado<br />
rectamente estirar el<br />
brazo <strong>de</strong>recho hacia el<br />
suelo. Inclinar la cabeza<br />
hacia el lado izquierdo.<br />
Mantener la cabeza mirando<br />
hacia a<strong>de</strong>lante <strong>de</strong> forma<br />
que el lóbulo <strong>de</strong> la oreja<br />
izquierda indique hacia<br />
el hombro izquierdo. A<br />
continuación, repetir el<br />
ejercicio con el otro lado.<br />
Efecto sobre: la musculatura<br />
cervical.<br />
5. Estiramiento para el flexor <strong>de</strong> la ca<strong>de</strong>ra<br />
Colocar, con un paso largo,<br />
un pie sobre un taburete.<br />
Las dos puntas <strong>de</strong> los<br />
pies indican hacia a<strong>de</strong>lante.<br />
Para apoyarse se pue<strong>de</strong>n<br />
colocar las manos sobre<br />
la rodilla doblada. Empujar<br />
la rodilla doblada,<br />
con la ca<strong>de</strong>ra, lentamente<br />
hacia a<strong>de</strong>lante. A continuación,<br />
repetir el ejercicio<br />
con el otro lado.<br />
Efecto sobre: el flexor <strong>de</strong><br />
la ca<strong>de</strong>ra<br />
3. Estiramiento para la musculatura pectoral<br />
En posición erecta <strong>de</strong> lado<br />
hacia la pared. Apoyarse<br />
a la pared con la mano <strong>de</strong>recha<br />
y el brazo ligeramente<br />
doblado en el codo.<br />
Las puntas <strong>de</strong> los <strong>de</strong>dos indican<br />
hacia atrás. Girar<br />
lentamente el tronco hacia<br />
la izquierda. A continuación,<br />
repetir el ejercicio<br />
con el otro brazo. Variar la<br />
altura <strong>de</strong> apoyo.<br />
Efecto sobre: la musculatura<br />
pectoral.<br />
33
E<br />
Descripción <strong>de</strong> los ejercicios<br />
1. Elevación <strong>de</strong>l busto con apoyo <strong>de</strong> los brazos<br />
(intensidad mínima)<br />
3. Elevación <strong>de</strong>l busto hacia atrás (intensidad<br />
media)<br />
Posición <strong>de</strong> salida: Ajustar el<br />
ángulo <strong>de</strong> inclinación para<br />
la intensidad <strong>de</strong> esfuerzo<br />
<strong>de</strong>seada (véase página 28,<br />
fig. 2). Ajustar la placa reposapiés<br />
<strong>de</strong> acuerdo con la<br />
longitud <strong>de</strong> la caña.<br />
La distancia se <strong>de</strong>be ajustar <strong>de</strong> tal manera que sea posible apretar siempre<br />
activamente las plantas <strong>de</strong> los pies contra la placa reposapiés durante<br />
la ejecución <strong>de</strong> los ejercicios y estabilizan así la postura.<br />
Ajustar el cojín <strong>de</strong> acuerdo con la longitud <strong>de</strong> los muslos, o bien según<br />
el objetivo <strong>de</strong>l entrenamiento (véase página 28, fig. 1). Las manos agarrando<br />
los asi<strong>de</strong>ros. Las articulaciones <strong>de</strong> las rodillas forman un ángulo<br />
<strong>de</strong> 90º. La posición <strong>de</strong> las piernas se fija mediante la placa reposapiés.<br />
Apoyar los muslos y las ca<strong>de</strong>ras contra el cojín.<br />
Ejecución <strong>de</strong>l movimiento: Doblar el tronco lentamente hacía <strong>de</strong>lante hasta<br />
ligeramente por <strong>de</strong>bajo <strong>de</strong> la posición horizontal. Después erigir el<br />
tronco – pero únicamente hasta el punto don<strong>de</strong> las ca<strong>de</strong>ras aun sigan<br />
apoyadas por el cojín (véase alcance <strong>de</strong>l movimiento, ejercicio nº 3). La<br />
dirección <strong>de</strong> la vista hacia el suelo.<br />
Acción sobre: La musculatura dorsal – especialmente el estiramiento dorsal;<br />
la musculatura <strong>de</strong> los glúteos<br />
Posición <strong>de</strong> salida: Igual<br />
que el ejercicio 1, pero las<br />
manos se encuentran en la<br />
nuca, los codos a la altura<br />
<strong>de</strong> los hombros.<br />
Ejecución <strong>de</strong>l movimiento:<br />
Igual que en el ejercicio 1.<br />
Acción sobre: La musculatura dorsal – especialmente el estiramiento dorsal<br />
y la parte superior <strong>de</strong> la espalda; la musculatura <strong>de</strong> los glúteos<br />
4. Elevación <strong>de</strong>l busto hacia atrás, con los brazos<br />
al frente (intensidad alta)<br />
2. Elevación <strong>de</strong>l tronco hacia atrás, los brazos<br />
oblicuos atrás (poca intensidad)<br />
Posición <strong>de</strong> salida: Igual<br />
que en el ejercicio 1, pero<br />
los brazos están al frente.<br />
Los codos se mantienen a<br />
la altura <strong>de</strong> los hombros y<br />
forman un ángulo <strong>de</strong> 90º.<br />
Los antebrazos se mantienen<br />
lateralmente al lado <strong>de</strong> la cabeza como continuación <strong>de</strong> la espina<br />
dorsal, las palmas <strong>de</strong> las manos van dirigidas hacia el suelo.<br />
Ejecución <strong>de</strong>l movimiento: Igual que en el ejercicio 1.<br />
Acción sobre: La musculatura dorsal – especialmente el estiramiento dorsal<br />
y la parte superior <strong>de</strong> la espalda; la musculatura <strong>de</strong> los glúteos.<br />
Posición <strong>de</strong> salida: como el<br />
ejercicio 1, pero los brazos<br />
se encuentran al lado<br />
<strong>de</strong>l cuerpo hacia atrás, las<br />
palmas <strong>de</strong> las manos hacia<br />
<strong>de</strong>ntro.<br />
Ejecución <strong>de</strong>l movimiento:<br />
Igual que en el ejercicio 1.<br />
Acción sobre: La musculatura dorsal – especialmente el estiramiento dorsal,<br />
musculatura <strong>de</strong> los glúteos<br />
34
E<br />
Descripción <strong>de</strong> los ejercicios<br />
5. Elevación <strong>de</strong>l busto hacia atrás con utilización<br />
<strong>de</strong> los brazos (intensidad alta)<br />
6. Elevación <strong>de</strong>l tronco hacia atrás con giro<br />
(intensidad alta)<br />
Posición <strong>de</strong> salida: igual<br />
que en el ejercicio 1, pero<br />
las manos se mantienen<br />
cruzadas <strong>de</strong>lante <strong>de</strong>l pecho.<br />
Ejecución <strong>de</strong>l movimiento:<br />
Igual que en el ejercicio 1,<br />
pero al levantar el busto, seguir alternativamente con el brazo izquierdo<br />
y luego con el <strong>de</strong>recho hacia arriba. Los brazos están ligeramente doblados<br />
por las articulaciones. Los pulgares o el dorso <strong>de</strong> las manos van<br />
dirigidos hacia arriba.<br />
Acción sobre: La musculatura dorsal – especialmente el estiramiento dorsal<br />
y la parte superior <strong>de</strong> la espalda; la musculatura dorsal; la musculatura<br />
<strong>de</strong> los glúteos<br />
Posición <strong>de</strong> salida: Como<br />
en el ejercicio 3<br />
Ejecución <strong>de</strong>l movimiento:<br />
Igual que en el ejercicio 1,<br />
pero al levantar el tronco,<br />
girarlo lentamente y alternativamente<br />
hacia la izquierda<br />
y la <strong>de</strong>recha.<br />
Acción sobre: La musculatura dorsal – especialmente el estiramiento dorsal<br />
y la rotación <strong>de</strong> la espalda, la musculatura <strong>de</strong> los glúteos.<br />
35
I<br />
Istruzioni di allenamento<br />
L‘apparecchio per l‘allenamento <strong>de</strong>lla schiena è concepito specialmente<br />
per l‘allenamento <strong>de</strong>lla muscolatura <strong>de</strong>lla schiena senza affaticare la spina<br />
dorsale. Proprio ai tempi d‘oggi, dove la vita se<strong>de</strong>ntaria comporta molto<br />
spesso <strong>de</strong>bolezze fisiche nel settore <strong>de</strong>l muscolo <strong>de</strong>l tronco, un allenamento<br />
regolare <strong>de</strong>lla muscolatura <strong>de</strong>lla schiena è di gran<strong>de</strong> valore per la<br />
salute. Evitando sopraffaticamenti non fisiologici <strong>de</strong>lla spina dorsale, l‘apparecchio<br />
per l‘allenamento <strong>de</strong>lla schiena ren<strong>de</strong> possibile l‘allenamento<br />
appropriato <strong>de</strong>lle diverse zone <strong>de</strong>lla muscolatura <strong>de</strong>lla schiena, specialmente<br />
quelle <strong>de</strong>lla muscolatura di stiramento.<br />
L‘appoggio arrotondato per il tronco garantisce la sequenza corretta <strong>de</strong>i<br />
movimenti puntellando in modo ottimo il bacino durante tutte le fasi movimento.<br />
Così viene evitato l‘atteggiamento con il dorso infossato. Il piegamento<br />
di 90° nelle articolazioni <strong>de</strong>lle ginocchia e il bloccaggio attivo <strong>de</strong>lle<br />
estremità inferiori tramite la pedana piegata a gomito riduce al minimo<br />
l‘affaticamento <strong>de</strong>lla muscolatura posteriore <strong>de</strong>i femori e ottimizza l‘allenamento<br />
<strong>de</strong>lla muscolatura <strong>de</strong>lla schiena e <strong>de</strong>i glutei. In questo modo un<br />
allenamento effettivo è anche possibile per persone con corta muscolatura<br />
<strong>de</strong>lla parte posteriore <strong>de</strong>lla coscia.<br />
Nota importante<br />
Prima di cominciare con l‘allenamento consultate il Vostro medico per assicurarvi<br />
che le Vostre condizioni di salute siano adatte all‘allenamento<br />
con questo apparecchio. Il referto medico <strong>de</strong>ve essere la base per la composizione<br />
<strong>de</strong>l Vostro programma di allenamento. Un allenamento sbagliato<br />
o eccessivo può essere nocivo alla Vostra salute.<br />
Le seguenti istruzioni di allenamento valgono solo per le persone in salute.<br />
Esercizi di riscaldamento/Stretching<br />
Iniziate il vostro allenamento con leggeri esercizi ginnici. Usate gli esercizi<br />
di estensione 1-5 prima e dopo l‘allenamento. Gli esercizi di stiramento<br />
appartengono fondamentalmente al programma di riscaldamento<br />
<strong>de</strong>ll‘allenamento muscolare. Qui vengono sciolti stati di tensione <strong>de</strong>lla muscolatura<br />
e viene ottimizzata l‘alimentazione di sangue <strong>de</strong>lla muscolatura.<br />
Vorremmo presentarVi alcuni esercizi di stiramento che dovreste inserire<br />
prima e dopo l‘allenamento. Gli esercizi di stiramento sono riservati a<br />
specifiche zone <strong>de</strong>i muscoli così che Voi li possiate introdurre in modo mirato<br />
nell‘allenamento <strong>de</strong>lla schiena.<br />
Cenni fondamentali per gli esercizi di stiramento:<br />
■ Mettersi lentamente nella posizione di stiramento<br />
■ Assumere la massima posizione di stiramento senza superare la soglia<br />
<strong>de</strong>l dolore<br />
■ Rimanere nella posizione di stiramento 10 – 20 secondi<br />
■ Durante lo stiramento non “dondolare” né “molleggiare”<br />
Indicazioni e pianificazione <strong>de</strong>ll‘allenamento:<br />
Come principiante, eseguite gli esercizi per la schiena 1 – 3 (p. 38) tre<br />
volte alla settimana nelle prime tre settimane con 8 – 12 ripetizioni per<br />
ognuno. Gli avanzati eseguono gli esercizi 4 – 6 (pp.38 – 39). Ogni due<br />
unità di allenamento si dovrebbe programmare un giorno di pausa. Nelle<br />
settimane seguenti potete gradualmente aumentare il volume di allenamento<br />
dapprima nel numero <strong>de</strong>lle ripetizioni a 12 – 15 e, successivamente,<br />
nel numero <strong>de</strong>lle serie (una serie compren<strong>de</strong> un numero <strong>de</strong>finito di<br />
ripetizioni) a 2 – 3 con ogni volta 12 – 15 ripetizioni. È molto sensato<br />
fare 60 –90 secondi di pausa dopo ogni serie utilizzandoli per esercizi<br />
di stiramento e rilassamento.<br />
Eseguite tutti i movimenti in modo uniforme e non bruscamente. L‘esecuzione<br />
di un esercizio dura circa 6 secondi: 2 secondi sollevare il busto, 2<br />
secondi tenere il busto in posizione sollevata, 2 secondi riabbassare il busto.<br />
Badate sempre ad avere un ritmo di respirazione uniforme ed evitate<br />
in ogni caso una respirazione trattenuta.<br />
Aumentare lentamente il volume di allenamento è una regola molto importante,<br />
perché solo così evitate sopraffaticamenti e spiacevoli reazioni<br />
<strong>de</strong>l corpo, come p.e. dolori muscolari. Quando, più tardi, siete in grado<br />
di eseguire più serie durante un‘unità di allenamento, variate fra i diversi<br />
esercizi <strong>de</strong>scritti alle pagine 38 – 39. Aggiustando l‘altezza <strong>de</strong>ll‘appoggio<br />
<strong>de</strong>l dorso (vedi figura 1) è inoltre possibile allenare particolarmente<br />
diverse zone <strong>de</strong>lla muscolatura <strong>de</strong>lla schiena. Una posizione più bassa allena<br />
soprattutto la muscolatura <strong>de</strong>lla parte inferiore <strong>de</strong>lla schiena e <strong>de</strong>i<br />
glutei. Una posizione più alta allena particolarmente la muscolatura <strong>de</strong>lla<br />
parte superiore <strong>de</strong>lla schiena.<br />
Fig. 1<br />
L‘intensità <strong>de</strong>ll‘allenamento si può variare aggiustando l‘angolo d‘inclinazione<br />
(vedi Figura 2) <strong>de</strong>ll‘apparecchio per l‘allenamento <strong>de</strong>lla schiena.<br />
Un aggiustamento quasi verticale significa un‘intensità di allenamento relativamente<br />
bassa, mentre un angolo d‘inclinazione più dolce, a causa<br />
<strong>de</strong>lla più gran<strong>de</strong> forza di peso, significa un‘intensità di affaticamento relativamente<br />
alta. Ai principianti si consiglia pertanto di iniziare con un angolo<br />
d‘inclinazione molto gran<strong>de</strong>.<br />
Fig.2<br />
Anche l‘allenamento <strong>de</strong>lla muscolatura addominale aiuta a stabilizzare la<br />
spina dorsale. Perciò completate il Vostro allenamento <strong>de</strong>lla schiena con<br />
esercizi <strong>de</strong>lla muscolatura addominale. A questo scopo Kettler offre le premesse<br />
i<strong>de</strong>ali con l‘apparecchio per l‘allenamento <strong>de</strong>gli addominali Art.<br />
Nr. 7822-900. Per ulteriori informazioni rivolgetevi al Vostro rivenditore<br />
specializzato.<br />
36
I<br />
Esercizi di stiramento<br />
1. Stiramento <strong>de</strong>lla muscolatura di stiramento<br />
<strong>de</strong>lla schiena<br />
Dalla posizione supina ritirare<br />
le gambe e portare la<br />
testa in direzione <strong>de</strong>lle ginocchia.<br />
Le mani prendono<br />
le gambe.<br />
Effetto: muscolatura di stiramento<br />
<strong>de</strong>lla schiena e<br />
<strong>de</strong>l bacino.<br />
4. Stiramento <strong>de</strong>lla muscolatura <strong>de</strong>lla parte<br />
posteriore <strong>de</strong>l femore<br />
Posizione eretta davanti a<br />
un seggiolino. Appoggiare<br />
una gamba con il calcagno<br />
sul seggiolino. Per tenere<br />
l'equilibrio eventualmente<br />
appoggiarsi al<br />
muro. Il ginocchio <strong>de</strong>lla<br />
gamba appoggiata è leggermente<br />
piegato e le dita<br />
<strong>de</strong>l pie<strong>de</strong> puntano in su.<br />
Piegare lentamente in giù il<br />
busto con la schiena eretta.<br />
Poi cambiare il lato.<br />
Effetto: muscolatura <strong>de</strong>lla<br />
parte posteriore <strong>de</strong>l femore<br />
2. Stiramento <strong>de</strong>lla muscolatura <strong>de</strong>lle spalle<br />
In posizione eretta oppure<br />
stando seduto con le busto<br />
eretto tirare il braccio <strong>de</strong>stro<br />
verso il suolo. Abbassare<br />
la testa verso la sinistra.<br />
La direzione <strong>de</strong>llo<br />
sguardo rimane verso l'avanti<br />
così che il lobo <strong>de</strong>ll'orecchio<br />
sinistro indica<br />
verso la spalla sinistra. Poi<br />
cambiare il lato.<br />
Effetto: muscolatura <strong>de</strong>lla<br />
nuca<br />
5. Stiramento <strong>de</strong>lla muscolatura <strong>de</strong>ll'articolazione<br />
<strong>de</strong>l bacino<br />
Con un passo lungo appoggiare<br />
un pie<strong>de</strong> su un<br />
seggiolino. Ambedue le<br />
punta <strong>de</strong>i piedi puntano in<br />
avanti. Come aiuto si possono<br />
appoggiare le mani<br />
sul ginocchio piegato. Spostare<br />
lentamente in avanti il<br />
ginocchio piegato e i fianchi.<br />
Poi cambiare la gamba.<br />
Effetto: muscolatura <strong>de</strong>ll'articolazione<br />
<strong>de</strong>l bacino<br />
3. Stiramento <strong>de</strong>lla muscolatura <strong>de</strong>l petto<br />
Posizione eretta con un<br />
lato al muro. Appoggiarsi<br />
al muro con la mano <strong>de</strong>stra<br />
e il braccio leggermente<br />
piegato. Le punta<br />
<strong>de</strong>lle dita puntati all'indietro.<br />
Girare lentamente il<br />
busto verso la sinistra.<br />
Dopo cambiare il braccio.<br />
Variare l'altezza <strong>de</strong>lla<br />
mano.<br />
Effetto: muscolatura <strong>de</strong>l<br />
petto<br />
37
I<br />
Descrizione <strong>de</strong>ll’esercizio<br />
1. Sollevare indietro il busto con l‘appoggio<br />
<strong>de</strong>lle braccia (intensità minima)<br />
3. Sollevamento <strong>de</strong>l busto (intensità media)<br />
Posizione d‘uiscita: mettere<br />
a punto l‘angolo d‘inclinazione<br />
a seconda <strong>de</strong>ll‘intensità<br />
di affaticamento<br />
<strong>de</strong>si<strong>de</strong>rata (vedi p.32,<br />
fig.2) . Regolare la pedana<br />
a seconda <strong>de</strong>lla lunghezza<br />
<strong>de</strong>l polpaccio. La distanza <strong>de</strong>ve essere sistemata in modo tale<br />
che le piante <strong>de</strong>i piedi possano sempre essere premute attivamente contro<br />
la pedana durante l‘esecuzione <strong>de</strong>ll‘esercizio ren<strong>de</strong>ndo quindi stabile<br />
la posizione in allenamento. Aggiustare il cuscino d‘appoggio a seconda<br />
<strong>de</strong>lla lunghezza <strong>de</strong>lla coscia oppure <strong>de</strong>lla parte a cui è mirato l‘allenamento<br />
(vedi p.32, fig.1). Le mani afferrano le maniglie di appiglio.<br />
Le articolazioni <strong>de</strong>lle ginocchia formano un angolo di 90°. I polpacci<br />
vengono fissati dalla pedana. Coscie e bacino poggiano contro il cuscino<br />
di supporto.<br />
Esecuzione <strong>de</strong>l movimento: piegare il busto lentamente in avanti finchè<br />
non supera di un poco verso il basso la posizione orizzontale. Poi sollevare<br />
il busto, mantenendo però il bacino ancora puntellato dal cuscino<br />
d‘appoggio (vedi misura <strong>de</strong>l movimento esercizio N°3) con l9om sguardo<br />
rivolto a terra.<br />
Effetto: muscolatura <strong>de</strong>lla schiena - in particolare il muscolo estensore<br />
<strong>de</strong>lla schiena, i glutei.<br />
Posizione di partenza: come<br />
per l‘esercizio 1, le mani<br />
però <strong>de</strong>vono rimanere alla<br />
testa e i gomiti <strong>de</strong>vono essere<br />
all‘altezza <strong>de</strong>lle spalle.<br />
Movimento: come per<br />
l‘esercizio 1.<br />
Effetto: muscolatura <strong>de</strong>lla schiena – in modo particolare gli estensori dorsali<br />
e la parte alta <strong>de</strong>lla schiena; glutei<br />
4. Sollevamento <strong>de</strong>l busto, braccia in alto<br />
(intensità elevata)<br />
2. Sollevare indietro il busto, braccia in<br />
appoggio (intensità ridotta)<br />
Posizione di partenza:<br />
come per l‘esercizio 1 ma<br />
le braccia sono in alto e i<br />
gomiti a 90° all‘altezza<br />
<strong>de</strong>lle spalle. Gli avambracci<br />
sono laterali alla testa<br />
sul prolungamento <strong>de</strong>lla<br />
colonna vertebrale, palmo <strong>de</strong>lle mani rivolto a terra.<br />
Movimento: come per l‘esercizio 1<br />
Effetto: muscolatura <strong>de</strong>lla schiena – in modo particolare gli estensori dorsali<br />
e la parte superiore <strong>de</strong>l dorso;<br />
glutei<br />
Posizione d‘uscita: come<br />
esercizio 1, tuttavia le<br />
braccia si trovano a lato<br />
accanto al corpo in appoggio,<br />
i palmi <strong>de</strong>lle mani<br />
rivolti verso l‘interno.<br />
Esecuzione <strong>de</strong>l movimento:<br />
come esercizio 1.<br />
Effetto: muscolatura <strong>de</strong>lla schiena - soprattutto muscolo estensore <strong>de</strong>lla<br />
schiena, glutei.<br />
38
I<br />
Descrizione <strong>de</strong>ll’esercizio<br />
5. Sollevare il busto con l‘aiuto <strong>de</strong>lle braccia<br />
(intensità elevata)<br />
6. Sollevamento <strong>de</strong>l busto con torsione<br />
(intensità elevata)<br />
Posizione di partenza: come<br />
per l‘esercizio 1 ma con le<br />
mani incrociate sul petto.<br />
Movimento: come per<br />
l‘esercizio 1 portando in<br />
alto però alternativamente<br />
il braccio sinistro e <strong>de</strong>stro.<br />
L‘altro braccio resta con il gomito piegato e il pollice o il dorso <strong>de</strong>lla mano<br />
è rivolto verso l‘alto.<br />
Effetto: muscolatura <strong>de</strong>lla schiena – in modo particolare gli estensori dorsali<br />
e la parte superiore <strong>de</strong>lla schiena; muscolatura <strong>de</strong>lle spalle, glutei<br />
Posizione di partenza:<br />
come per esercizio 3<br />
Movimento: come per<br />
l‘esercizio 1 aggiungendo<br />
però una lenta torsione alternativamente<br />
verso <strong>de</strong>stra<br />
e sinistra quando si<br />
solleva il busto<br />
Effetto: muscolatura <strong>de</strong>lla schiena – in modo particolare estensori e rotatori<br />
dorsali, glutei<br />
39
PL<br />
Instrukcja treningowa siłowni<br />
Trenażer został opracowany specjalnie do ćwiczeń mięśni grzbietu nieobciążających<br />
kręgosłupa. Szczególnie w dzisiejszych czasach, kiedy<br />
większą część pracy wykonujemy w pozycji siedzącej osłabiając w ten<br />
sposób mięśnie tułowia, regularny trening mięśni grzbietu ma bardzo<br />
duże znaczenie dla zachowania zdrowia i kondycji.<br />
Dzięki wykluczeniu niefizjologicznych obciążeń szczytowych kręgosłupa<br />
trenażer umożliwia celowy trening różnych partii mięśni grzbietu, w szczególności<br />
mięśnia prostującego. Zaokrąglona podpórka pod plecy gwarantuje<br />
zachowanie prawidłowego układu ruchów, podczas których<br />
miednica jest stale optymalnie podparta. Zapobiega to także tworzeniu<br />
się wklęsłego nie podpartego wygięcia w odcinku krzyżowym.<br />
Zgięcie stawów kolanowych pod kątem 90o i aktywny system unieruchamiania<br />
kończyn dolnych przy pomocy umieszczonej pod kątem stopki minimalizuje<br />
obciążenie tylnych partii mięśni ud i optymalizuje trening mięśni<br />
grzbietu i pośladków. Umożliwia to efektywny trening także osobom z<br />
krótszymi mięśniami tylnych partii ud.<br />
Ważna wskazówka:<br />
Przed rozpoczęciem treningu należy skonsultować się z lekarzem, który<br />
stwierdzi, czy nie ma przeciwwskazań do wykonywania ćwiczeń na tym<br />
urządzeniu. Wynik badania lekarskiego powinien być podstawą do<br />
ułożenia programu treningowego. Nieprawidłowy lub zbyt intensywny<br />
trening może przynieść negatywne skutki zdrowotne.<br />
Poniższe wskazówki treningowe odnoszą się wyłącznie do osób zdrowych.<br />
Rozgrzewka / stretching<br />
Trening należy rozpocząć łagodnymi ćwiczeniami gimnastycznymi. Do<br />
przygotowania oraz zakończenia treningu najlepsze są ćwiczenia rozciągające.<br />
Ćwiczenia rozciągające są zasadniczym elementem rozgrzewki<br />
przed właściwym ćwiczeniem mięśni. Ćwiczenia te znoszą napięcia<br />
mięśni i polepszają ich ukrwienie. Chcielibyśmy zaprezentować Państwu<br />
kilka ćwiczeń rozciągających, które powinno się wykonywać bezpośrednio<br />
przed treningiem i po jego zakończeniu. Ćwiczenia rozciągające są<br />
przyporządkowane do określonej partii mięśni. Dlatego przed treningiem<br />
należy wybrać takie ćwiczenie, które przygotuje nam mięsień, który zamierzamy<br />
ćwiczyć.<br />
Rys. 1<br />
Intensywność treningu można zmieniać przez regulacje kąta nachylenia<br />
(porównaj rys. 2). Ustawienie strome oznacza relatywnie niską intensywność<br />
treningu, płaski kąt nachylenia ze względu na wyższą siłę ciążenia<br />
działającą na tułów powoduje, że trening będzie relatywnie intensywny.<br />
Osoby początkujące powinny zaczynać ćwiczenia od ostrego kąta<br />
nachylenia.<br />
Zasady wykonywania ćwiczeń rozciągających:<br />
■ powoli przyjąć pozycję rozciągnięcia<br />
■ rozciągnięcie powinno być maksymalne tzn. tuż poniżej granicy bólu<br />
■ wytrwać w pozycji 10 – 20 sekund<br />
■ podczas wykonywania pozycji nie huśtać się i nie „dociskać” pozycji<br />
Wskazówki do treningu / planowanie:<br />
Osoby początkujące w pierwszych 3 tygodniach powinny wykonywać<br />
ćwiczenia pleców 1 – 3 (strona 42) 3 x w tygodniu, wykonując w zależności<br />
od sprawności od 8 do 12 powtórzeń. Między dwoma jednostkami<br />
treningowymi należy zaplanować je<strong>de</strong>n dzień wolny od ćwiczeń. W<br />
następnych tygodniach możemy zwiększyć zakres treningu, początkowo<br />
przez zwiększenie ilości powtórzeń do 12 – 15 razy. Później można<br />
zwiększyć także ilość serii (1 seria składa się z określonej ilości powtórzeń)<br />
do 2 – 3 po 12 – 15 powtórzeń każda. Po wykonaniu pojedynczej<br />
serii należy zrobić 60 – 90 sekundową przerwę, którą najlepiej wykorzystać<br />
jest na ćwiczenia rozciągające i relaksujące.<br />
Wszystkie ruchy należy wykonywać łagodnie i równomiernie, nie gwałtownie<br />
i nie szybko. Czas wykonywania jednego ćwiczenia trwa około 6<br />
sekund: uniesienie tułowia – 2 sekundy, utrzymanie uniesionego tułowia<br />
– 2 sekundy, obniżenie tułowia – 2 sekundy. Należy stale pamiętać o równomiernym<br />
rytmie od<strong>de</strong>chów, koniecznie unikać gwałtownego wy<strong>de</strong>chu<br />
(z mocnym naciskiem przepony).<br />
Bardzo ważne jest powolne i stopniowe rozszerzanie zakresu treningu,<br />
ponieważ tylko w ten sposób unikniemy przeciążenia i tym samym nieprzyjemnych<br />
reakcji organizmu w postaci np. zakwasów.<br />
Jeśli podczas późniejszych treningów wykonujemy dziennie więcej serii,<br />
dobrze jest zmieniać rodzaje wykonywanych ćwiczeń, opisanych na stronach<br />
od 42 do 44. Ponadto dzięki możliwości pionowej regulacji podpórki<br />
tułowia (porównaj rys. 1) można zwiększać obciążenie różnych<br />
partii mięśni grzbietu. Ustawienie podpórki na niskiej wysokości ćwiczy<br />
prze<strong>de</strong> wszystkim dolne partie mięśni grzbietu, mięsień prostujący oraz<br />
mięśnie pośladkowe. Przy podpórce ustawionej na większej wysokości<br />
ćwiczymy w szczególności górną część grzbietu.<br />
Rys. 2<br />
Do stabilizacji kręgosłupa przyczyniają się także dobrze wyćwiczone<br />
mięśnie brzucha. Dlatego trening mięśni grzbietu należy uzupełniać ćwiczeniami<br />
brzucha. I<strong>de</strong>alnym do tego celu jest urządzenie firmy KETTLER o<br />
nazwie, nr art. 7822-900. Szczegółowe informacje można uzyskać w najbliższym<br />
punkcie sprzedaży produktów marki KETTLER.<br />
40
PL<br />
Ćwiczenia rozciągające<br />
1. Rozciąganie mięśni grzbietu<br />
Leżąc na plecach przyciągamy<br />
do siebie nogi, a<br />
głową staramy się dotknąć<br />
kolan. Chwytamy dłońmi<br />
podudzi.<br />
Ćwiczenie rozciąga mięśnie<br />
grzbietowe i pośladkowe.<br />
4. Rozciąganie tylnej strony mięśni ud<br />
Stajemy przo<strong>de</strong>m przed taboretem.<br />
Jedną nogę<br />
opieramy piętą na stołku.<br />
Aby zachować równowagę,<br />
można ewentualnie<br />
po<strong>de</strong>przeć się ręką o ścianę.<br />
Podparta noga jest<br />
lekko zgięta w kolanie, przyciągamy<br />
czubki palców<br />
do siebie. Pochylamy powoli<br />
tułów do przodu przy<br />
wyprostowanych plecach.<br />
Powtarzamy ćwiczenie dla<br />
drugiej nogi.<br />
Ćwiczenie rozciąga tylną<br />
stronę ud.<br />
2. Rozciąganie mięśni barkowych<br />
Stojąc lub siedząc prosto<br />
wyciągamy prawe ramię<br />
w kierunku podłogi. Głowę<br />
odchylamy na lewo.<br />
Twarz skierowana jest na<br />
wprost, staramy się dotknąć<br />
koniuszkiem ucha lewego<br />
ramienia. Wytrwać<br />
przez chwilę. Powtórzyć<br />
ćwiczenie dla drugiej<br />
strony.<br />
Ćwiczenie rozciąga mięśnie<br />
karku.<br />
5. Rozciąganie mięśni biodrowych<br />
W dalekim rozkroku postawić<br />
stopę na stołku. Obydwie<br />
stopy skierowane są<br />
do przodu. Rękami można<br />
po<strong>de</strong>przeć się o zgięte kolano.<br />
Zgięte kolano razem<br />
z biodrami przesuwać powoli<br />
do przodu. Powtórzyć<br />
ćwiczenie z drugą nogą.<br />
Ćwiczenie rozciąga mięśnie<br />
bio<strong>de</strong>r.<br />
3. Rozciąganie mięśni piersiowych<br />
Stajemy bokiem do ściany.<br />
Wyciągamy prawe ramię<br />
lekko zgięto w łokciu i<br />
podpieramy się dłonią o<br />
ścianę. Czubki placów<br />
skierowane są do tyłu. Powoli<br />
obracamy tułów na<br />
lewo. Powtarzamy ćwiczenie<br />
dla drugiej strony.<br />
Zmieniać wysokość podparcia<br />
ramienia.<br />
Ćwiczenie rozciąga mięśnie<br />
piersiowe.<br />
41
PL<br />
Opis ćwiczeń<br />
1. Unoszenie tułowia z podparciem rękami<br />
(stopień intensywności: najniższy)<br />
3. Unoszenie tułowia<br />
(stopień intensywności: średni)<br />
pozycja wyjściowa: ustawić<br />
kąt nachylenia na<br />
żądany stopień intensywności<br />
treningu (porównaj<br />
strona 13, rys. 2). Ustawić<br />
stopkę odpowiednio do<br />
długości ud.<br />
Odstęp należy ustawić tak, aby spody stóp podczas wykonywania ćwiczenia<br />
mogły stale aktywnie dociskać stopkę i tym samym stabilizować pozycję<br />
treningową.<br />
Podpórkę tapicerowaną ustawić stosownie do długości ud lub celu ćwiczeń<br />
(porównaj strona 13, rys. 1). Dłonie obejmują uchwyty. Stawy kolanowe<br />
tworzą kąt 90o. Podudzia unieruchomione są przez stopkę. Uda i<br />
miednicę oprzeć na podpórce.<br />
Wykonywanie ruchów: zginamy tułów do przodu nieco poniżej pozycji<br />
poziomej. Następnie prostujemy plecy – jednak tylko w takim stopniu,<br />
aby miednica pozostała wsparta na podpórce (porównaj: zasięg ruchów<br />
– ćwiczenie nr 3). Twarz skierowana jest do podłogi.<br />
To ćwiczenie rozwija mięśnie grzbietu – w szczególności mięsień prostujący<br />
i mięśnie pośladków.<br />
Pozycja wyjściowa: jak<br />
ćwiczenie 1, jednak ramiona<br />
złożone są na karku, łokcie<br />
znajdują się na wysokości<br />
ramion.<br />
Wykonywanie ruchów: jak<br />
ćwiczenie 1<br />
To ćwiczenie rozwija mięśnie grzbietu – w szczególności mięsień prostujący,<br />
górną partię mięśnie grzbietu i mięśnie pośladków.<br />
4. Unoszenie tułowia z rękoma skierowanymi<br />
do przodu (stopień intensywności: wysoki)<br />
2. Unoszenie tułowia z rękoma skierowanymi<br />
do tyłu (stopień intensywności: niski)<br />
Pozycja wyjściowa: jak<br />
ćwiczenie 1, jednak ramiona<br />
znajdują się przed<br />
tułowiem. Łokcie znajdują<br />
się na wysokości barków i<br />
tworzą kąt 90o. Przedramiona<br />
trzymane są z boku<br />
głowy i tworzą przedłużenie kręgosłupa, powierzchnie dłoni skierowane<br />
są do podłogi.<br />
Wykonywanie ruchów: jak ćwiczenie 1<br />
To ćwiczenie rozwija mięśnie grzbietu – w szczególności mięsień prostujący,<br />
górne części grzbietu i mięśnie pośladków.<br />
Pozycja wyjściowa: jak<br />
ćwiczenie 1, jednak ramiona<br />
znajdują się z boku tułowia<br />
i są skierowane do<br />
tyłu, powierzchnie dłoni<br />
skierowane są do wewnątrz.<br />
Wykonywanie ruchów: jak ćwiczenie 1<br />
To ćwiczenie rozwija mięśnie grzbietu – w szczególności mięsień prostujący<br />
i mięśnie pośladków.<br />
42
PL<br />
Opis ćwiczeń<br />
5. Unoszenie tułowia ze skrzyżowanymi rękami<br />
(stopień intensywności: wysoki)<br />
6. Unoszenie tułowia ze skrętem<br />
(stopień intensywności: wysoki)<br />
Pozycja wyjściowa: jak<br />
ćwiczenie 1, jednak ramiona<br />
skrzyżowane są na<br />
klatce piersiowej.<br />
Wykonywanie ruchów: jak<br />
ćwiczenie 1, jednak podczas<br />
prostowania tułowia<br />
wyciągać naprzemiennie raz prawe, raz lewe ramię do góry. Ramię jest<br />
przy tym lekko zgięte w łokciu, wierzch dłoni skierowany jest do góry.<br />
To ćwiczenie rozwija mięśnie grzbietu – w szczególności mięsień prostujący,<br />
górną partię mięśni grzbietu, mięśnie barków i mięśnie pośladków.<br />
Pozycja wyjściowa: jak<br />
ćwiczenie 3<br />
Wykonywanie ruchów: jak<br />
ćwiczenie 1, jednak podczas<br />
prostowania skręcać<br />
tułów naprzemiennie<br />
na prawo i na lewo.<br />
To ćwiczenie rozwija mięśnie<br />
grzbietu – w szczególności mięsień prostujący, mięśnie skrętne grzbietu<br />
i mięśnie pośladków.<br />
43
Ersatzteilzeichnung und –liste<br />
GB<br />
Spare parts drawing and list<br />
NL<br />
Reserveon<strong>de</strong>r<strong>de</strong>eltekening en -lijst<br />
I<br />
Disegno ed elenco <strong>de</strong>i pezzi di ricambio<br />
F<br />
Dessin et liste <strong>de</strong>s pièces <strong>de</strong> rechange<br />
E<br />
Designación y lista <strong>de</strong> las piezas <strong>de</strong> recambio<br />
PL<br />
Rysunek i lista części zamiennych<br />
1<br />
4 15 3 17 12 11 2<br />
6<br />
5<br />
9<br />
16<br />
8<br />
15<br />
14<br />
22<br />
23<br />
14<br />
10<br />
7<br />
19 13<br />
20<br />
21<br />
Beispiel Typenschild - Seriennummer<br />
Example Type label - Serial number<br />
Example Plaque signalétique - Numèro <strong>de</strong> serie<br />
Bij voorbeeld Typeplaatje - Seriennummer<br />
Ejemplo Placa i<strong>de</strong>ntificativa - Número <strong>de</strong> serie<br />
Esempio Targhetta tecnica - Numero di serie<br />
Przyklady Tabliczka i<strong>de</strong>ntyfikacyjna - Numer serii<br />
HEINZ KETTLER<br />
GmbH & Co. KG<br />
D-59463 Ense-Parsit<br />
Trainingsgerät nach<br />
DIN EN 957-1, 5<br />
Nicht für therapeutische Zwecke geeignet<br />
Art.-Nr. 07961-800<br />
Serien-Nr.: 1-334 O - 1801 00001<br />
max Belastung 130 kg<br />
Ma<strong>de</strong> in Germany<br />
1 2 3 4 5<br />
Teil Bezeichnung<br />
Stück Ersatzteil-Nr.<br />
Nr. für 7824-900<br />
Teil Bezeichnung<br />
Stück Ersatzteil-Nr.<br />
Nr. für 7824-900<br />
1 Rumpfpolster 1 91360135<br />
2 Kniepolster 1 91360136<br />
3 Einschubrohr (l=550mm) 1 97100142<br />
4 Griffbügel 1 94313478<br />
5 Griffschlauch 2 10118124<br />
6 Stopfen für ø25mm 2 10100016<br />
7 Einsteckrohr 1 97100267<br />
8 Einschubrohr (l=260mm) 1 97100144<br />
9 Fußstütze 1 94315157<br />
10 Kniepolsteraufnahme 1 94313479<br />
11 Gleiter für 60x40mm (ausgeklinkt) 1 94311071<br />
12 Ausgleichspuffer 1 10121117<br />
13 Bo<strong>de</strong>nrohr 1 94316977<br />
14 Gleiter für 60x40mm 2 10100092<br />
15 Stopfen für 55x34mm 2 10100139<br />
16 Stützstrebe 1 94313475<br />
17 Führungsrohr 1 94313482<br />
19 Bo<strong>de</strong>nschoner mit Höhenverstellung 1 91170501<br />
20 Bo<strong>de</strong>nschoner 3 70127561<br />
21 Einsteckteil 3 70127565<br />
22 Griffschraube M16 3 91170291<br />
23 Locking Pin ø8x77mm 1 13100002<br />
24 Schraubenbeutel 1 94380467<br />
docu 1063c/03.07