Dressmaker - Shark
Dressmaker - Shark
Dressmaker - Shark

You also want an ePaper? Increase the reach of your titles
YUMPU automatically turns print PDFs into web optimized ePapers that Google loves.
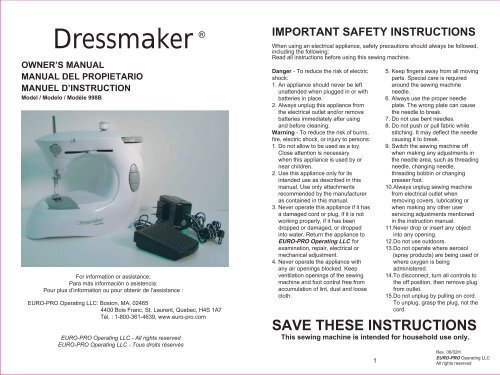
<strong>Dressmaker</strong> ®<br />
OWNER’S MANUAL<br />
MANUAL DEL PROPIETARIO<br />
MANUEL D’INSTRUCTION<br />
Model / Modelo / Modèle 998B<br />
For information or assistance:<br />
Para más información o asistencia:<br />
Pour plus d’information ou pour obtenir de l’assistance :<br />
EURO-PRO Operating LLC: Boston, MA, 02465<br />
4400 Bois Franc, St. Laurent, Quebec, H4S 1A7<br />
Tél. : 1-800-361-4639, www.euro-pro.com<br />
EURO-PRO Operating LLC - All rights reserved<br />
EURO-PRO Operating LLC - Tous droits réservés<br />
IMPORTANT SAFETY INSTRUCTIONS<br />
When using an electrical appliance, safety precautions should always be followed,<br />
including the following:<br />
Read all instructions before using this sewing machine.<br />
Danger - To reduce the risk of electric<br />
shock:<br />
1. An appliance should never be left<br />
unattended when plugged in or with<br />
batteries in place.<br />
2. Always unplug this appliance from<br />
the electrical outlet and/or remove<br />
batteries immediately after using<br />
and before cleaning.<br />
Warning - To reduce the risk of burns,<br />
fire, electric shock, or injury to persons:<br />
1. Do not allow to be used as a toy.<br />
Close attention is necessary<br />
when this appliance is used by or<br />
near children.<br />
2. Use this appliance only for its<br />
intended use as described in this<br />
manual. Use only attachments<br />
recommended by the manufacturer<br />
as contained in this manual.<br />
3. Never operate this appliance if it has<br />
a damaged cord or plug, if it is not<br />
working properly, if it has been<br />
dropped or damaged, or dropped<br />
into water. Return the appliance to<br />
EURO-PRO Operating LLC for<br />
examination, repair, electrical or<br />
mechanical adjustment.<br />
4. Never operate the appliance with<br />
any air openings blocked. Keep<br />
ventilation openings of the sewing<br />
machine and foot control free from<br />
accumulation of lint, dust and loose<br />
cloth.<br />
5. Keep fingers away from all moving<br />
parts. Special care is required<br />
around the sewing machine<br />
needle.<br />
6. Always use the proper needle<br />
plate. The wrong plate can cause<br />
the needle to break.<br />
7. Do not use bent needles.<br />
8. Do not push or pull fabric while<br />
stitching. It may deflect the needle<br />
causing it to break.<br />
9. Switch the sewing machine off<br />
when making any adjustments in<br />
the needle area, such as threading<br />
needle, changing needle,<br />
threading bobbin or changing<br />
presser foot.<br />
10.Always unplug sewing machine<br />
from electrical outlet when<br />
removing covers, lubricating or<br />
when making any other user<br />
servicing adjustments mentioned<br />
in the instruction manual.<br />
11.Never drop or insert any object<br />
into any opening.<br />
12.Do not use outdoors.<br />
13.Do not operate where aerosol<br />
(spray products) are being used or<br />
where oxygen is being<br />
administered.<br />
14.To disconnect, turn all controls to<br />
the off position, then remove plug<br />
from outlet.<br />
15.Do not unplug by pulling on cord.<br />
To unplug, grasp the plug, not the<br />
cord.<br />
SAVE THESE INSTRUCTIONS<br />
This sewing machine is intended for household use only.<br />
1<br />
Rev. 06/02H<br />
EURO-PRO Operating LLC<br />
All rights reserved
INSTRUCCION DE SEGURIDAD IMPORTANTE<br />
“Cuando usar una máquina eléctrica, la precaucion basica hay que slempre se<br />
seguido, incluiendo el sequito.” “Leer todas instrucción antes de usar esa máquina<br />
de coser.” “Esta máquina de coser esta diseñada por el uso casero.”<br />
“PELIGRO”<br />
“Reducir riesgo del choque eléctrico.”<br />
1. “Una máquina de coser debe nunca<br />
esta desligada cuando esta<br />
enchufada. Siempre no enchufar esta<br />
máquina de coser desde la salida<br />
eléctrica èn seguida déspues de usar<br />
y antes de limpiar.”<br />
2. “Usar esta máquina de coser<br />
solamente por el uso prometido como<br />
se describe en ese manual. Usar<br />
solamente los accessories<br />
recomendados por el fabricante que<br />
se contiene en ese manual.”<br />
3. “Nunca operar esta máquina de coser<br />
si la cuerda o el enchufe esta dañado,<br />
si la máquina de coser no trabaja<br />
oportunamente, si ella ha sido caida o<br />
dañada, o caido en aguá.”<br />
4. “Nunca dirigir la máquina de coser<br />
con la abertura del aire obstruido.<br />
Quedar la ebertura del aire fuera de<br />
hilas, pelo y ropa.”<br />
5. “Nunca caer o insertar alguno abjeto<br />
en alguna obertura.”<br />
6. “No usar al aire libre.”<br />
7. “No operar a dónde el productos<br />
pulverulentos están usados o<br />
oxygeno se administra.”<br />
8. “Para desconectar, carrar todos<br />
dominados a la posició “0”,<br />
entonces quit ar el enchufe desde la<br />
salida.”<br />
9. “No desenchufar por sacar sobre la<br />
cuerda. Agarrar el enchufe pero no<br />
agarrar la cuerda.”<br />
“CONSERVAR LOS<br />
INSTRUCCIONES DE LA<br />
ADVERTENCIA”<br />
A. La máquina de coser.<br />
a. “Reemplazar la bombilla con el<br />
tipo mísmo con is vatio.”<br />
b. “Tener dedos alejado desde<br />
tatas piezas motriz. Cuidado<br />
especial esta necesitado<br />
alrededor la aguja de la máquina<br />
de caser.”<br />
c. “Siempre usar el plato de la<br />
aguja propla. El plato falso<br />
puede causar la aguja romper.”<br />
d. “No usar la aguja forcida.”<br />
e. “No sacar o I peler la tela<br />
cuando coer. Ello puedo desviar<br />
la aguja romper.”<br />
f. “Desconectar la máquina de<br />
coser a “0” cuando hace alguno<br />
ajuste en la area de la aguja, tal<br />
como enhebrar la aguja, cambiar<br />
la aguja, enhebrar el carrete, o<br />
cambiar prensatelas.”<br />
g. “Siempre desenchufar la<br />
máquina de coser desde la<br />
salida cuando quitat la cubierta,<br />
lubricar o cuando ajustar.”<br />
RECOMMANDATIONS IMPORTANTES<br />
DANGER: lorsqu’on utilise un appareil électrique, certaines mesures de sécurité<br />
élémentaires s’imposent pour réduire le risque de choc électrique, notamment :<br />
Lire toutes les directives suivantes avant d’utiliser votre machine à coudre.<br />
DANGER : Pour éviter les risques de secousses électriques :<br />
1. Ne laissez jamais l’appareil branché sans surveillance.<br />
2. Débranchez toujours l’appareil immédiatement après vous en être servi ou<br />
avant de le nettoyer.<br />
AVERTISSEMENT – pour réduire le<br />
risque de brûlures, d’incendie, de<br />
décharge électrique ou de blessures :<br />
1. Ne laissez pas les enfants utiliser<br />
la machine à coudre comme un<br />
jouet. Surveillez attentivement<br />
tout appareil utilisé par un enfant<br />
ou à proximité d’enfants.<br />
2. N’utilisez cette machine à coudre<br />
que pour l’utilisation décrite dans<br />
ce manuel. N’utilisez que les<br />
accessoires recommandés par le<br />
manufacturier, décrits dans ce<br />
manuel.<br />
3. N’utilisez pas l’appareil si le<br />
cordon ou la prise ne sont pas en<br />
bon état, s’il ne fonctionne pas<br />
correctement, s’il a fait une chute,<br />
ou s’il a été en contact avec l’eau.<br />
Retournez-le chez EURO-PRO<br />
Operating LLC pour toute inspection,<br />
réparation ou réglage électrique ou<br />
mécanique.<br />
4. N’utilisez jamais l’appareil<br />
lorsqu’un de ses orifices de<br />
ventilation est obstrué. Gardez les<br />
orifices de ventilation et la pédale<br />
de commande libres de toutes<br />
peluches, poussières ou retailles<br />
de tissus.<br />
5. Tenez les doigts loin des parties<br />
mobiles de l’appareil. Portez une<br />
attention particulière autour<br />
de l’aiguille.<br />
6. Utilisez toujours la plaque à<br />
aiguille indiquée. L’utilisation<br />
d’une plaque à aiguille inadéquate<br />
peut causer le bris de l’aiguille.<br />
7. N’utilisez pas d’aiguille tordue.<br />
8. Ne tirez pas sur le tissu vers<br />
l’avant ou vers l’arrière lorsque<br />
vous cousez. Ceci pourrait faire<br />
dévier l’aiguille, qui pourrait se<br />
briser.<br />
9. Mettez la machine à coudre hors<br />
tension (position « 0 ») pour<br />
effectuer tout réglage, pour enfiler<br />
ou changer l’aiguille, remplir la<br />
canette ou changer le pied<br />
presseur, ou pour toute autre<br />
manipulation similaire.<br />
10.Débranchez toujours la machine à<br />
coudre pour retirer les couvercles,<br />
lubrifier, ou effectuer tout réglage<br />
ou réparation mentionnés dans le<br />
manuel d’instructions.<br />
11.N’échappez jamais d’objet à<br />
l’intérieur de l’appareil et<br />
n’essayez pas d’en insérer par les<br />
ouvertures.<br />
12.N’utilisez pas l’appareil à<br />
l’extérieur.<br />
13.N’utilisez pas l’appareil en<br />
présence de vapeurs d’aérosols,<br />
ni dans un endroit où on<br />
administre de l’oxygène.<br />
14.Pour débrancher la machine,<br />
mettez-la hors tension (position<br />
« 0 »), puis retirez la fiche de la<br />
prise.<br />
15.Ne débranchez pas l’appareil en<br />
tirant sur son cordon, saisissez<br />
plutôt sa fiche.<br />
CONSERVER CES DIRECTIVES<br />
Cette machine à coudre est conçue pour un usage domestique uniquement.<br />
2<br />
Rev. 06/02H<br />
EURO-PRO Operting LLC<br />
All rights reserved<br />
3<br />
Rev. 06/02H<br />
EURO-PRO Operating LLC<br />
Tous droits réservées
GETTING TO KNOW YOUR SEWING MACHINE<br />
GETTING TO KNOW YOUR SEWING MACHINE<br />
2<br />
4<br />
ENGLISH SPANISH FRENCH<br />
1 PRESSER FOOT LIFTER PALANCA ELEVADORA DEL RELEVEUR DU PIED<br />
PIE PRENSATELAS<br />
PRESSEUR<br />
2 THREAD GUIDE 1 GUIA 1 PARA EL HILO GUIDE-FIL 1<br />
3<br />
1<br />
5<br />
7<br />
9<br />
6<br />
3 THREAD GUIDE 2 GUIA 2 PARA EL HILO GUIDE-FIL 2<br />
4 THREAD CIRCLE LAZO METALICO PARA EL CERCLE DU FIL<br />
HILO<br />
5 THREAD GUIDE 3 GUIA 3 PARA EL HILO GUIDE-FIL 3<br />
6 NEEDLE CLAMP SCREW TORNILLO SUJETADOR DE VIS DU PINCE-AIGUILLE<br />
LA AGUJA<br />
7 NEEDLE AGUJA AIGUILLE<br />
8 NEEDLE PLATE PLATO GUIA DE LA AGUJA PLAQUE DE L'AGUILLE<br />
9 BOBBIN COVER PORTABOBINAS COUVERCLE DE LA<br />
CANETTE<br />
10 BOTTOM BOBBIN & CASE BOBINA Y PORTABOBINA CANETTE INFERIEURE ET<br />
INFERIOR<br />
BOITIER<br />
11 BOBBIN BOBINA CANETTE<br />
12 SPOOL PIN PERNO DE BOBINA PORTE-CANETTE<br />
12<br />
13 SCREW HOLE TORNILLO REGULAOR DEL ORIFICE DE LA VIS<br />
HILO<br />
14 HANDWHEEL RUEDA DE MANO VOLANT DE MANOEUVRE<br />
15<br />
8<br />
11<br />
13<br />
14<br />
16<br />
17<br />
18<br />
15 THREAD TENSION DIAL DIAL TENSIONADOR DEL CADRAN DE TENSION DU<br />
HILO<br />
FIL<br />
16 THREAD PULLING BAR BARRA EXTRACTORA DEL BARRE TIRE-FIL<br />
HILO<br />
17 ON/OFF BUTTON BOTON PARA PRENDIDO Y COMMUTATEUR MISE EN<br />
APAGADO (ON/OFF) MARCHE/ARRET<br />
18 AC/DC ADAPTER RECEPTACULO PRISE POUR ADAPTEUR<br />
RECEPTACLE ADAPTADOR PARA CA/CC CA/CC<br />
19 FOOT CONTROL RECEPTACULO PARA PRISE DE LA PEDALE<br />
RECEPTACLE<br />
CONTROL DEL PEDAL<br />
20 FOOT CONTROL PEDAL DE CONTROL PEDALE<br />
10<br />
19<br />
21 THREAD CLIP FOR CLIP PARA BOBINADO DE PINCE DE TENSION DU<br />
WINDING HILO BOBINEUR<br />
22 THREADER ENHEBRADOR ENFILEUR<br />
23 LARGE SPOOL PIN FOR PERNO LARGO PARA EL TIGE LONGUE POUR<br />
WINDING BOBINADO DEL CARRETEL BOBINEUR<br />
20<br />
24 BOBBIN PIN FOR PERNO DE BOBINA PARA TIGE DU BOBINEUR<br />
REWINDING<br />
REBOBINADO<br />
25 AC/DC ADAPTER ADAPTADOR PARA CA/CC ADAPTEUR CA/CC<br />
4<br />
5
ACCESSORIES<br />
PRIMEROS PASOS<br />
Bobbins<br />
Bobina<br />
Canatte<br />
Thread clip for winding<br />
Pinza del hilo para bobinar<br />
Pince à fil pour bobinage<br />
Large spool pin (for winding)<br />
Perno largo de bobina(Para bobinar)<br />
Tige grand format (pour bobinage)<br />
Asegúrese que el botón de conexión eléctrica se encuentre en la<br />
posición OFF. Coloque las baterías en la posición correcta, de<br />
acuerdo a la indicación de la máquina o conecte el enchufe<br />
adaptador para CA/CC en su receptáculo. Conecte el control del<br />
pedal en su receptáculo correspondiente.<br />
Foot control<br />
Pedal de control<br />
Pédale<br />
PREPARING THE MACHINE<br />
Threader<br />
Lazo metálico<br />
Enfileur<br />
Needle<br />
Aguja<br />
Aiguille<br />
Spool pin(for rewinding)<br />
Perno de la bobina(para bobinar0<br />
Tige de la bobine(pour bobinage)<br />
Make sure that the power switch is in the ‘OFF’ position. Insert the batteries with the<br />
polarities in the correct position as indicated on the machine or connect the AC/DC<br />
adapter plug into the AC/DC receptacle on the right side of the machine. Connect the<br />
foot control into the foot control receptacle.<br />
Sírvase notar lo siguiente:<br />
1.Tanto el botón de conexión eléctrica como el del pedal de control<br />
son usados para operar la máquina. Mientras que uno opera la<br />
máquina el otro no funciona.<br />
2.El movimiento inverso de la máquina no coloca puntadas a la<br />
tela. El movimiento inverso continuo o prologado podrá destruir<br />
la máquina.<br />
3.Coloque las baterías de acuerdo a la fotografía, o utilice un<br />
adaptador para 6 V, 1000 mA para CA/CC.<br />
- + - +<br />
+ - + -<br />
Note:<br />
*The sewing machine operates either with the<br />
power switch or the foot control. When one is in<br />
operation, the other one will not function.<br />
*Reverse movement of the sewing machine will not<br />
stitch the fabric. The continuous and prolong use of<br />
the reverse movement may destroy the machine.<br />
*Place the batteries as illustrated, or use 6V<br />
1000mA AC/DC adapter<br />
The plug polarities of the AC/DC adapter is as:<br />
+---------- .------------_<br />
POUR COMMENCER<br />
Assurez-vous que le commutateur est en position d’arrêt (OFF ). Insérez<br />
les piles selon les polarités indiquées ou branchez un adaptateur dans la<br />
prise CA/CC. Branchez la pédale dans sa prise.<br />
Veuillez noter :<br />
1. La machine fonctionne à l’aide du commutateur de mise en<br />
marche/arrêt ou de la pédale. Lorsqu’un de ces éléments contrôle<br />
la machine, l’autre ne fonctionne pas.<br />
2. Un mouvement inversé de la machine ne peut pas coudre le tissu.<br />
Un mouvement inversé continu et prolongé peut même détruire la<br />
machine.<br />
3. Insérez les piles tel qu’illustré ou utilisez un adaptateur CA/CC de<br />
6v 1000mA.<br />
La polarité de l’adaptateur CA/CC est la suivante :<br />
6<br />
7
BOBBIN WINDING<br />
Thread clip for winding<br />
Pinza del hilo para bobinar<br />
Pince à fil pour bobinage<br />
Large spool pin (for winding)<br />
Perno largo de bobina(Para bobinar)<br />
Tige grand format (pour bobinage)<br />
1. Remove the slide cover plate by sliding it toward you, and lift<br />
up the bobbin and the bobbin case from the machine.<br />
2. Put the bobbin pin into the hole on top of the hand wheel and<br />
place an empty bobbin on the bobbin pin (spindle).<br />
3. Lift the large spool pin from the back of the machine and<br />
place the spool of thread on the large spool pin.<br />
4. Place the bobbin winder tension clip into the hole in the back<br />
of the machine.<br />
5. Pull the thread to the left and pass it through the bobbin<br />
winder tension disc.<br />
Cut off here<br />
Corte aqui<br />
Coupez ici<br />
Spool pin(for rewinding)<br />
Perno de la bobina(para bobinar0<br />
Tige de la bobine(pour bobinage)<br />
Bobbin<br />
Spool pin<br />
Hand wheel<br />
Bobina<br />
Perno de la bobina<br />
Rueda de mano<br />
Bobine<br />
Tige de la bobine<br />
Volant<br />
BOBBIN<br />
HANDWHEEL<br />
BOBBIN<br />
PIN<br />
6. Insert the thread through the hole in the bobbin from the inside<br />
out and leave about 3” of thread out.<br />
7. Hold the end of the thread and start the machine, either by<br />
pressing on the start button or the foot control. After the<br />
bobbin winds a few turns, stop the machine and cut the thread<br />
close to the bobbin.<br />
8. Start the machine again and continue winding until the bobbin<br />
is full or the quantity of thread is enough for your needs.<br />
9. Stop the machine and cut the thread. Remove the bobbin from<br />
the bobbin pin.<br />
10.Take out the bobbin pin from the hand wheel and push back<br />
the large spool pin into the slot in the back of the machine.<br />
LLENADO DE LA BOBINA<br />
1. Corra la cubierta transparente de la bobina a su posición abierta y extraiga la bobina<br />
vacía junto al portabobina.<br />
2. Inserte el perno de la bobina en el orificio de la rueda de mano que se encuentra al<br />
tope y coloque la bobina vacía en el perno de la base.<br />
3. Prepare el carretel, el perno largo y coloque el carretel sobre el mismo.<br />
4. Coloque el clip de enhebrado en el orificio.<br />
5. Asegúrese de que el hilo del carretel se encuentre enhebrado a través del clip del hilo.<br />
6. Inserte, desde el interior, el hilo a través del pequeño orificio de la bobina, tirando del<br />
mismo hacia afuera aproximadamente unos 7 cm (3”) de hilo.<br />
7. Sujete firmemente el extremo del hilo, presione el botón de conexión eléctrica o bien<br />
presione el pedal de control. Deténgase luego de enrollar varias vueltas.<br />
8. Corte el extremo del hilo con el recortador ubicado por encima de la bobina, luego<br />
continúe bobinando hasta lograr la cantidad deseada.<br />
9. Corte el hilo a unos 10 cm (4”) de la bobina. Extraiga la bobina llena, del perno de la<br />
misma.<br />
10.Luego de bobinar, extraiga el clip de enhebrado. Guarde el perno largo de bobinar<br />
yel carretel.<br />
BOBINAGE DE LA CANETTE<br />
1. Ouvrez le couvercle transparent de la canette et retirez la canette et son boîtier.<br />
2. Insérez la tige de la canette dan l’orifice situé dans le haut du volant<br />
de manœuvre et placez la canette vide sur la tige.<br />
3. Mettez en place la tige pour bobines de fil grand format et placez une bobine de<br />
fil grand format sur la tige.<br />
4. Insérez la pince à fil dans l’orifice.<br />
5. Assurez-vous que le fil entre la bobine de fil et la canette passe par la pince à fil.<br />
6. Insérez le fil dans le petit orifice de la canette, à partir de l’intérieur, et tirez<br />
environ 3 po de fil de l’orifice.<br />
7. Tenez fermement l’extrémité du fil, appuyez sur le commutateur de mise en marche<br />
ou appuyez sur la pédale. Arrêter après quelques enroulements.<br />
8. Coupez le fil dans le haut de la canette, près du coupe-fil, et continuez à bobiner le fil<br />
jusqu’à ce que vous ayez bobiné suffisamment.<br />
9. Coupez le fil à 4 po de la canette. Retirez la canette bobinée de la tige de la canette.<br />
10.Après avoir terminé l’enroulement, retirez la pince à fil. Rangez la tige de la canette<br />
et la tige de la bobine.<br />
8<br />
9
THREAD TENSION DIAL<br />
DIAL TENSIONADOR DEL HILO<br />
CONTROLE DE LA TENSION<br />
THREAD PULLING BAR<br />
BARRA EXTRACTORA DEL HILO<br />
BARRE TIRE-FIL<br />
THREADING THE UPPER<br />
THREAD<br />
1. Place the upper bobbin or large spool of thread on the pin in front of the machine,<br />
with the thread unwinding clockwise. A large spool pin is included with the<br />
accessories for the large spool of thread.<br />
2. Pull the thread to the left and pass the thread between the two discs of the tension dial.<br />
3. Guide the thread to the left and draw the thread down through the thread guide #1,<br />
then through the pulling bar #2 downward, continue to draw the thread down through<br />
thread guide #3, and into the needle bar thread guide #4.<br />
4. Pass the thread through the eye of the needle from front to back. A needle threader is<br />
supplied with your machine to help you thread the eye of the needle. Pass the needle<br />
threader through the eye of the needle from the back to the front, insert the thread in<br />
the threader and gently pull the threader to the back.<br />
THREAD GUIDE<br />
GUÍA DEL HILO<br />
GUIDE-FIL<br />
ENHEBRADO DEL HILO SUPERIOR PARA COSER<br />
1.Asegúrese de que la bobina superior o el carretel con hilo se desenrosquen en<br />
sentido horario.<br />
2.Tire del hilo de la bobina o del carretel y córralo entre los dos discos del dial<br />
tensionador.<br />
3.Tire del hilo a través de los anillos de guía 1(abajo), la barra extractora del hilo<br />
(abajo), guía 2 (de izquierda a derecha) y la guía 3 (abajo).<br />
4.Levante la aguja, tire del hilo a través del ojo de la aguja desde el lado opuesto a su<br />
costado. Inserte a través del lazo metálico y tire, enhebrando hacia el otro lado. La<br />
aguja habrá quedado ahora enhebrada.<br />
10<br />
11
ENFILAGE DU FIL<br />
SUPÉRIEUR<br />
1. Assurez-vous que la canette supérieure ou que la bobine de fil grand format se<br />
déroule dans le bon sens.<br />
2. Tirez le fil de la canette ou de la bobine et glissez-le les anneaux du guide-fil 1<br />
(vers le bas)<br />
3. Tirez le fil entre les deux disques du cadran de tension, dans la barre tire-fil<br />
(vers le bas), dans le guide-fil 2 (de la droite à la gauche) et dans le guide-fil 3<br />
(vers le bas).<br />
4. Soulevez l’aiguille, passez l’enfileur dans le chas de l’aiguille, vers vous.<br />
Insérez le fil dans l’anneau et tirez l’enfileur vers l’autre coté.L’aiguille est<br />
maintenant enfilée.<br />
INSERTING THE BOBBIN<br />
1. Place the bobbin iniside the magnetized bobbin case with the thread unwinding<br />
in a clockwise direction.<br />
2. Pull on the thread, if you do not feel any tension on the thread bobbin, slightly<br />
lift the bobbin once or twice to activate the magnetism of the tension.<br />
3. Leave about 10 cm (4") of thread on top of the bobbin toward the needle plate.<br />
VERY IMPORTANT: Make sure to always use a metal bobbin. If not, the magnetized<br />
bobbin case will not be activated and there will be no tension on your bobbin thread.<br />
Magnification of Bobbin<br />
12<br />
13
INSERCIÓN DE LA BOBINA<br />
1. Coloque la bobina dentro de su caja magnética, con el hilo desenroscándose<br />
en dirección horaria.<br />
2. Tire del hilo, si usted no percibiese tensión alguna sobre la bobina del hilo,<br />
levante ligeramente la bobina una sola vez o dos, a fin de activar el magnetismo<br />
de la tensión.<br />
3. Deje libre aproximadante 10 cm (4") del hilo por encima de la bobina,<br />
orientado hacia la placa de la aguja.<br />
4. Vuelva a colocar el portabobinas a su posición.<br />
MUY IMPORTANTE: Asegúrese siempre de utilizar una bobina metálica. De no<br />
hacerlo, la caja magnética de la bobina no quedará activada y, por lo tanto, no<br />
habrá tensión en el hilo de su bobina.<br />
DRAWING UP THE BOBBIN<br />
THREAD<br />
1. Raise the presser foot<br />
2. Hold the upper thread loosely and<br />
turn the hand wheel clockwise until<br />
the needle comes down and comes<br />
up again to its highest position.<br />
3. Lightly draw the needle thread<br />
forming a loop with the bobbin<br />
thread. The upper thread should<br />
have caught the lower thread in a<br />
loop.<br />
4. Pull the needle thread toward you<br />
and the lower thread will come up<br />
from the lower bobbin in a large<br />
loop. Pull both threads to the back of<br />
the needle and slid the bobbin case<br />
cover into place. You are now ready<br />
to start sewing or mending.<br />
MISE EN PLACE DE LA CANETTE BOBINÉE INFÉRIEURE.<br />
1.Tenez une extrémité du fil de 3 po dans votre main gauche et placez la canette<br />
dans le boîtier magnétique. Assurez-vous que la canette se déroule dans le sens des<br />
aiguilles d’une montre.<br />
2.Tirez légèrement sur le fil et si aucune tension n'est ressenti, soulevez très légèrement<br />
la bobine une ou deux fois jusqu'à ce que vous ssentiez une résistance sur le fil.<br />
3.Laissez environ 4 po de fil sur le dessus de la canette en direction de la plaque de<br />
l’aiguille.<br />
TRÈS IMPORTANT : Assurez-vous de toujours utiliser des bobines de métal car le<br />
magnétisme dans le boîtier ne pourra être activé et ainsi produire la tension<br />
nécessaire pour votre fil inférieur.<br />
ELEVACIÓN DEL HILO DE<br />
LA BOBINA INFERIOR<br />
1.Levante el pie prensatelas tirando<br />
de su elevador hacia arriba.<br />
2.Sostenga el hilo de arriba y gire la<br />
rueda de mano en sentido horario<br />
para que la aguja vaya hacia abajo<br />
y hacia arriba, hasta formar el lazo<br />
con el hilo de la bobina.<br />
3. Abra el lazo para encontrar el<br />
extremo del hilo de la bobina.<br />
4.Tire de ambos extremos de los<br />
hilos hacia atrás de la máquina y<br />
coloque el portabobina en su sitio.<br />
Usted estará ahora listo para la<br />
costura.<br />
SOULEVEZ LE FIL DE LA<br />
CANETTE INFÉRIEURE<br />
1. Soulevez le pied presseur en<br />
tirant sur le releveur du pied<br />
presseur.<br />
2. Tenez le fil supérieur et faites<br />
tournez le volant de manœuvre<br />
dans le sens des aiguilles d’une<br />
montre pour faire monter et<br />
descendre l’aiguille. Vous verrez<br />
le fil de la canette former une<br />
boucle.<br />
3. Ouvrez la boucle pour trouver<br />
l’extrémité du fil de la canette.<br />
4. Tirez les deux extrémités de fils<br />
vers l’arrière de la machine et<br />
glissez en place le couvercle du<br />
boîtier d la canette. Vous êtes prêt<br />
à commencer à coudre.<br />
14<br />
15
MENDING A SEAM<br />
(a)<br />
(b)<br />
(c)<br />
(d)<br />
1. Raise the needle to its highest<br />
position by turning the hand wheel<br />
clockwise and lift the presser foot lever.<br />
2. Place both the upper and lower<br />
threads behind the presser foot. The<br />
threads should be approximately 4”<br />
long.<br />
3. Place the fabric under the presser<br />
and lower the needle into the existing<br />
old stitches. Then lower the presser<br />
foot. (fig. b)<br />
4. Press on the foot control or the<br />
on/off button to start mending until<br />
the new stitches overlap the old<br />
stitches by about 1”. Then stop<br />
sewing. ( fig. d)<br />
* IMPORTANT: AFTER FINISHING<br />
THE STITCHES, LOSEN THE<br />
UPPER THREAD BY PULLING THE<br />
THREAD BY HAND JUST ABOVE<br />
THE NEEDLE TO PREVENT THE<br />
NEEDLE FROM BENDING WHEN<br />
YOU ARE TAKING THE FABRIC<br />
TOWARD THE MACHINE.<br />
5. Raise the presser foot and pull the<br />
fabric toward the machine. Then cut<br />
both threads about 4” from the edge of<br />
the fabric. (fig. e)<br />
6. Pressing the ‘speed’ button will<br />
increase the speed of the sewing<br />
machine. To reduce the speed, press<br />
the ‘speed’ button again. (fig. c)<br />
7. Press the upper section of the on/off<br />
button will turn the light ‘on’. Press<br />
it again and the light will go ‘off’.<br />
(fig. c)<br />
PREPARACIÓN PARA LA COSTURA<br />
1.Levante la aguja girando la rueda de mano en sentido horario y levante la<br />
palanca elevadora del pie de prensatelas.<br />
2.Asegúrese de que ambos extremos de las hebras sean extraídos unos 10<br />
cm (4”) por detrás de la aguja.<br />
3.Coloque la tela debajo del pie prensatelas y baje la aguja sobre la vieja<br />
puntada. Luego baje el pie prensatelas.<br />
4.Presione el pedal de control para comenzar la costura hasta que las<br />
nuevas puntadas se instalen sobre las viejas en una extensión aproximada<br />
de 2,5 cm (1”). Luego retire el pie del pedal de control.<br />
5.MUY IMPORTANTE: luego de finalizar la puntada, tire del hilo suelto hacia<br />
arriba, tire a mano y hacia arriba del hilo suelto de forma de evitar que la<br />
aguja se doble al tiraR de la tela hacia fuera. Levante el pie prensatelas y<br />
tire de la tela hacia fuera de la máquina. Luego corte ambos hilos<br />
aproximadamente a 10 cm (4”) del borde de la tela.<br />
RÉPARER UNE COUTURE<br />
1. Soulevez l’aiguille en tournant le volant de manœuvre dans le sens des aiguilles<br />
d’une montre et soulevez le pied presseur.<br />
2. Assurez-vous que les deux extrémités de fil tirées d’environ 4 po derrière l’aiguille<br />
3. Placez le tissu sous le pied presseur et abaissez l’aiguille dans les points de couture<br />
existants. Abaissez le pied presseur.<br />
4. Appuyez sur la pédale pour commencer à coudre jusqu’à ce que les nouveaux points<br />
de couture chevauchent les anciens points de couture d’environ 1 po. Cessez<br />
d’appuyer sur la pédale.<br />
5.TRÈS IMPORTANT : APRÈS AVOIR TERMINÉ LE POINT DE COUTURE,<br />
RELÂCHEZ LE FIL SUPÉRIEUR À LA MAIN AFIN DE NE PAS PLIER<br />
L’AIGUILLE EN ENLEVANT LE TISSU.<br />
Soulevez le pied presseur et tirez vers la machine. Coupez ensuite les deux fils à<br />
environ 4 po du rebord du tissu.<br />
(e)<br />
16<br />
(f)<br />
17
(a)<br />
Test the stitch tension on a scrap piece of<br />
the same fabric you are going to use.<br />
When the thread tension is properly<br />
adjusted, the upper and lower threads<br />
tension is equal and strong enough to lock<br />
both threads in the center of the material.<br />
Upper thread lies<br />
Bottom thread lies<br />
If the upper tension is too tight, the upper<br />
thread lies straight along the surface of the<br />
fabric adjust the tension by turning the<br />
tension dial counterclockwise, as illustrated<br />
(a).<br />
Upper thread lies<br />
Fabric<br />
REGULACIÓN DE LA TENSIÓN DEL HILO<br />
Verifique la eficiencia de la puntada sobre<br />
una tela de material desechable del mismo<br />
que usted está utilizando. Una vez que la<br />
tensión del hilo queda adecuadamente<br />
ajustada, la tensión será igual y<br />
suficientemente fuerte para sostener ambos<br />
hilos en el centro del material.<br />
Ataduras superiores del hilo<br />
Tela<br />
Ataduras inferiores del hilo<br />
Si la tensión superior está demasiado tirante,<br />
las ataduras del hilo<br />
superior se tensan a lo largo de la tela<br />
superior; corríjalo girando el<br />
dial tensionador de acuerdo a lo ilustrado<br />
en (a).<br />
Ataduras superiores del hilo<br />
Bottom thread lies<br />
(b)<br />
If the upper tension is too loose, the bottom<br />
thread lies straight along the bottom of the<br />
fabric, adjust by turning the tension dial<br />
clockwise, as illustrated (b).<br />
Upper thread lies<br />
(b)<br />
Ataduras inferiores del hilo<br />
Si la tensión superior está demasiado floja,<br />
significa que el hilo de la<br />
base queda demasiado tirante a lo largo de<br />
la tela de inferior; corríjalo<br />
ajustando la tensión del dial de acuerdo a<br />
lo ilustrado en (b).<br />
Ataduras superiores del hilo<br />
Bottom thread lies<br />
Ataduras inferiores del hilo<br />
Please note:<br />
The bobbin thread tension has been<br />
adjusted at the factory and does not need<br />
readjustment. If the upper tension<br />
adjustment does correct the problem,<br />
remove the bobbin and reinsert it making<br />
sure that the magnetism of the bobbin case<br />
is activated.<br />
Sírvase notar que:<br />
La tensión del hilo ha sido regulada en la fábrica<br />
y que no requiere ser reajustada. Si la tensión<br />
superior no corrige el problema, extraiga la<br />
bobina y reinsértela, asegurándose de que el<br />
magnetismo de la bobina quede activado.<br />
18<br />
19
DIRECTIVES D’AJUSTEMENT DU FIL<br />
Faites l’essai des coutures sur un petit échantillon du<br />
tissu que vous comptez utiliser.<br />
Lorsque la tension du fil est bien ajustée, la tension du<br />
fil supérieur et inférieur est égale et est suffisamment<br />
solide pour coincer les deux fils au centre des deux<br />
épaisseurs de tissus.<br />
Fil supérieur<br />
tissu<br />
CHANGING THE NEEDLE<br />
Fil inférieur<br />
Si la tension supérieure est trop serrée, le fil supérieur<br />
court tout droit sur le dessus du tissu.<br />
Corrigez ce problème en réglant le cadran de tension tel<br />
qu’illustré à la figure A.<br />
Fil supérieur court ici<br />
1. Raise the needle to its highest position.<br />
2. Hold the needle and loosen the needle clamp screw. Then remove the old needle.<br />
3. Insert the new needle into the clamp with the flat side facing away from you,<br />
toward the rear of the machine. The eye of the needle should be facing the front of<br />
the machine. Push the needle up into the needle clamp as far as it will go.<br />
3. Tighten the needle clamp screw.<br />
Please note:<br />
After replacing the needle, turn the hand wheel by hand to check if the machine is<br />
stitching properly, then you can use the foot control or the on/off button ONLY IF<br />
THE NEEDLE IS IN THE RIGHT POSITION AND THE STITCHES ARE GOOD.<br />
Fil inférieur coudt ici<br />
(b)<br />
Si la tension supérieure est trop lâche, le fil inférieur<br />
court tout droit sous le tissu. Corrigez ce problème en<br />
réglant le cadran de tension tel qu ’illustré à la fig.B<br />
Fil supérieur court ici<br />
Fil inférieur court ici<br />
Remarque :<br />
La tension inférieure est reglée convenablement en<br />
usine. Si l'ajustement de la tension supérieure ne<br />
corrige pas le problème, vous devez retirer la bobine<br />
inférieure et la réinsérer en vous assurant que le<br />
magnétisme du boîtier est activée.<br />
20<br />
21
CAMBIO DE LA AGUJA<br />
1. Levante la aguja hasta su posición más elevada.<br />
2. Sostenga la aguja y afloje el tornillo del sujetador que la sostiene, luego<br />
extraiga la aguja vieja.<br />
3. Inserte la nueva aguja dentro del sujetador con el lado plano de la misma<br />
orientado hacia la parte trasera de la máquina, asegurándose que el ojo de<br />
la aguja quede en línea recta orientado hacia el frente de la máquina.<br />
Asegúrese de empujar la aguja hacia arriba hasta que haga tope en la<br />
barra porta agujas, antes de ajustar el tornillo del sujetador.<br />
4. Ajuste el tornillo del sujetador de la aguja.<br />
Sírvase notar que: Una vez reemplazada la aguja, deberá primero mover la<br />
rueda de la máquina a mano, con el objeto de verificar si se generan buenas<br />
puntadas,SOLAMENTE CUANDO LA AGUJA SE ENCUENTRE EN LA<br />
POSICIÓN CORRECTA Y SE FORMEN BUENAS PUNTADAS, VERIFICADAS<br />
MEDIANTE EL USO DE LA RUEDA DE MANO, se podrá luego operar la<br />
máquina eléctricamente.<br />
POSSIBILITY TO CAUSE A POOR STITCH<br />
1. The upper thread is not threaded correctly.<br />
2. The presser foot is not in the down position.<br />
3. The needle is not inserted correctly in the needle bar.<br />
4. The flat side of the needle is not inserted toward the back of the machine<br />
and the eye of the needle is not facing the front of the machine.<br />
5. The needle is bent.<br />
6. Lower threading is incorrect.<br />
7. The wrong bobbin is being use in the bobbin case.<br />
8. Upper tension is too loose.<br />
9. The bobbin case is not in the right position, which should prevent any<br />
counterclockwise movement.<br />
Copyright © 2002 EURO-PRO Operating LLC All rights reserved<br />
POSIBILIDADES QUE CAUSAN PUNTADAS POBRES<br />
CHANGEMENT DE L’AIGUILLE<br />
1. Soulevez l’aiguille à sa position la plus élevée.<br />
2. Tenez l’aiguille et desserrez la vis du pince-aiguille. Retirez ensuite l’aiguille<br />
défectueuse<br />
3. Insérez la nouvelle aiguille dans le pince-aiguille, côté plat faisant face à l’arrière<br />
de la machine, en vous assurant que le chas de l’aiguille fait face à l’avant de la<br />
machine. Assurez-vous de bien pousser l’aiguille dans la barre d’aiguille avant de<br />
resserrer la vis du pince-aiguille.<br />
4. Serrez la vis du pince-aiguille.<br />
Remarque : après avoir remplacé l’aiguille, commencez par activer la machine à<br />
l’aide du volant de manœuvre pour voir si les coutures se font bien. Utilisez ensuite<br />
la pédale ou le commutateur pour mettre en marche la machine, EN VOUS<br />
ASSURANT D’ABORD QUE L’AIGUILLE EST EN POSITION ET QUE LA<br />
VÉRIFICATOIN AVEC LE VOLANT DE MANŒUVRE VOUS A PERMIS DE<br />
VOIR QUE LES COUTURES SE FONT CORRECTEMENT.<br />
1. El enhebrado superior no está correcto.<br />
2. El pie prensatelas no se encuentra en su posición de apoyo.<br />
3. La aguja no se encuentra completamente insertada en la barra porta agujas.<br />
4. El ojo de la aguja no esta orientado hacia el frente de la máquina.<br />
5. La aguja está doblada.<br />
6. El enhebrado inferior no está correcto.<br />
7. Se ha usado una medida incorrecta de bobina inferior.<br />
8. El enhebrado superior está demasiado flojo.<br />
9. El portabobinas no se encuentra en la posición correcta, donde el<br />
portabobinas queda trabado por el movimiento antihorario.<br />
Copyright © 2002 EURO-PRO Operating LLC All rights reserved<br />
22<br />
23
CAUSE POSSIBLE DES MAUVAISES COUTURES<br />
1. L’enfilage supérieur est incorrect.<br />
2. Le pied presseur n’est pas en position abaissée.<br />
3. L’aiguille n’est pas insérée profondément dans la barre d’aiguille.<br />
4. Le chas de l’aiguille ne fait pas face à l’avant de la machine.<br />
5. L’aiguille est pliée.<br />
6. L’enfilage inférieur est incorrect.<br />
7. Une canette inférieure de mauvaise taille est utilisée.<br />
8. L’enfilage supérieur est trop lâche.<br />
9. Le boîtier de la canette n’est pas dans la position voulue (ce qui l’empêche de<br />
se déplacer dans le sens contraire des aiguilles d’une montre).<br />
Copyright© EURO-PRO Operating LLC Tous droits réservés<br />
Modèle 998B<br />
Guarantee Bond<br />
This guarantee applies to defects resulting from imperfections<br />
in manufacture of parts entering into the manufacture and<br />
assembly of the sewing machine which this bond<br />
accompanies, for a period of one (1) year, subject to the<br />
following conditions, exclusions and exceptions.<br />
This guarantee is enforceable if said sewing machine is given<br />
reasonably good care and proper maintenance in accordance<br />
with the accompanying printed instructions.<br />
Needles, lamp bulb, and bobbins which normally require<br />
replacement are not covered under this warranty.<br />
Your exclusive remedy for any losses or damages resulting<br />
from defects in both performance, workmanship and materials<br />
of this product shall be the repair or replacement of this<br />
product.<br />
The manufacturer shall not be liable for consequential or<br />
incidential damages for breach of any express or implied<br />
warranty of this product.<br />
This guarantee is extended only to the original purchaser of<br />
the machine and this guarantee excludes all other legal and/or<br />
conventional guarantees. The only responsibility of EURO-<br />
PRO Operating LLC, if any, is in relation to the specific obligations<br />
expressly assumed by it under the terms of this guarantee<br />
bond.<br />
For instructions please callcustomer service at<br />
1 (800) 361-4639 or visit our web site<br />
www.euro-pro.com.<br />
Please include proof of purchase and $8.95 to cover cost of<br />
return shipping & handling.<br />
24<br />
Printed in China
Modèle 998B<br />
Certificat de Garantie<br />
C’est garantie s’applique aux défectuosités résultant<br />
d’imperfections dans la fabrication de pièces entrant dans la<br />
fabrication et l’assemblage de la machine à coudre<br />
qu’accompagne ce certificat, pour une période d'un (1) an et<br />
sujet aux conditions, exclusions et exceptions suivantes.:<br />
Cette garantie n’est applicable que si ladite machine à coudre<br />
est utilisée pour la couture de façon et conformément aux<br />
directives imprimées ci-jointes<br />
Les aiguilles, les ampoules, et les canettes sont des pièces<br />
qui doivent normalement être remplacées de temps à autre et<br />
sont spécifiquement exclues de cette garantie.<br />
Votre seul recours pour les pertes ou dommages résultant de<br />
la défaillance dans la fabrication et les matériaux de ce produit<br />
sera la réparation ou le remplacement dudit produit.<br />
Le manufacturier ne sera tenu responsable pour des<br />
dommages-intérêts conséquent au manquement de toute<br />
garantie légale de ce produit.<br />
Cette garantie n’est accordée qu’au premier acheteur du<br />
produit, et cette garantie exclut toute autre garantie légale<br />
et/ou conventionnelle. La responsabilité de EURO-PRO<br />
Operating LLC., si responsabilité il y a, ne se rapporte qu’aux<br />
obligations spécifiques assumées de façon expresse par<br />
EURO-PRO Operating LLC en vertu des termes de<br />
ce certificat de garantie.<br />
Pour rejoindre le service à la clientèle, téléphonez au<br />
1 (800) 361-4639 ouvisitez notre site Web: www.euro-pro.com.<br />
S. V. P. inclure une preuve d'achat et un chèque au montant<br />
de $8.95 pour couvrir les frais de transport et manutention.<br />
Imprimé en Chine