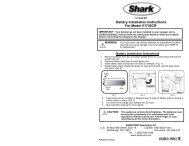
compact sewing machine máquina de coser compacta ... - Shark
compact sewing machine máquina de coser compacta ... - Shark
compact sewing machine máquina de coser compacta ... - Shark

You also want an ePaper? Increase the reach of your titles
YUMPU automatically turns print PDFs into web optimized ePapers that Google loves.
7. Setting the <strong>sewing</strong> speed<br />
This <strong>sewing</strong> <strong>machine</strong> has two <strong>sewing</strong> speeds. Press the “” button in for a faster<br />
<strong>sewing</strong> speed or press “” button to the “out” position for a slower <strong>sewing</strong> speed.<br />
8. Work light<br />
If additional light is nee<strong>de</strong>d, press the light switch “ “ in to turn the light “On”.<br />
Press it again if you wish to turn it “Off”.<br />
9. Starting to sew<br />
You can start to sew using either the power cord with the foot control or insert<br />
batteries into the battery compartment and use the controls on the <strong>sewing</strong> <strong>machine</strong>.<br />
1. Raise the needle to its highest position by turning the hand wheel counter<br />
clockwise and lift the presser foot.<br />
2. Place both the upper and lower threads behind the presser foot. The threads<br />
should be approximately 4-inches long.<br />
3. Place the fabric to be sewn un<strong>de</strong>r the presser foot. (Fig. 1) Lower the needle<br />
by turning the hand wheel counter clockwise and then lower the presser foot.<br />
(Fig. 2)<br />
4. Press the “►/ █” On/Off button to the “On” position and begin <strong>sewing</strong>. Do not<br />
pull the fabric. Gently gui<strong>de</strong> the fabric to keep the seam straight. (Fig. 3)<br />
5. After finishing <strong>sewing</strong>, press the “►/ █” On/Off button to the “Off” position to<br />
stop <strong>sewing</strong>. (Fig. 3)<br />
6. Turn the hand wheel counter clockwise to raise the needle to its highest<br />
position. (Fig. 4) Lift the presser foot and pull out the thread tension release<br />
bar. Then gently remove the fabric away from the <strong>sewing</strong> <strong>machine</strong>.<br />
7. Cut the thread using the thread cutter.<br />
Important: Do not touch the tension dial during <strong>sewing</strong> because it may cause the<br />
<strong>machine</strong> to jam.<br />
10. Sewing sleeves<br />
This <strong>sewing</strong> <strong>machine</strong> has been <strong>de</strong>signed to sew sleeves or any narrow openings in<br />
a garment.<br />
1. Lift the presser foot.<br />
2. Position the garment over the <strong>sewing</strong> arm.<br />
3. Lower the presser foot and follow the regular instructions.<br />
Fig. 1 Fig. 2<br />
Fig. 3 Fig. 4<br />
9<br />
10