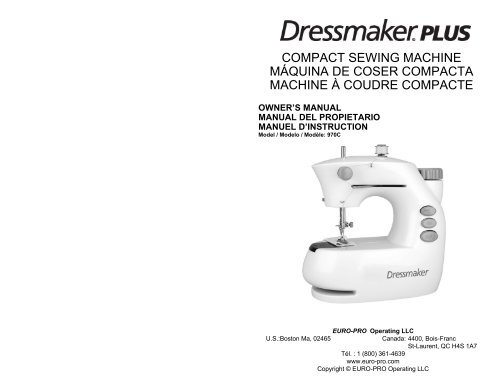
compact sewing machine máquina de coser compacta ... - Shark
compact sewing machine máquina de coser compacta ... - Shark
compact sewing machine máquina de coser compacta ... - Shark

Create successful ePaper yourself
Turn your PDF publications into a flip-book with our unique Google optimized e-Paper software.
COMPACT SEWING MACHINE<br />
MÁQUINA DE COSER COMPACTA<br />
MACHINE À COUDRE COMPACTE<br />
OWNER’S MANUAL<br />
MANUAL DEL PROPIETARIO<br />
MANUEL D’INSTRUCTION<br />
Mo<strong>de</strong>l / Mo<strong>de</strong>lo / Modèle: 970C<br />
EURO-PRO Operating LLC<br />
U.S.:Boston Ma, 02465<br />
Canada: 4400, Bois-Franc<br />
St-Laurent, QC H4S 1A7<br />
Tél. : 1 (800) 361-4639<br />
www.euro-pro.com<br />
Copyright © EURO-PRO Operating LLC
IMPORTANT SAFETY INSTRUCTIONS<br />
When using an electrical appliance, safety precautions should always be followed,<br />
including the following:<br />
Read all instructions before using this <strong>sewing</strong> <strong>machine</strong>.<br />
Danger - To reduce the risk of electric<br />
shock:<br />
1. An appliance should never be left<br />
unatten<strong>de</strong>d when plugged in or with<br />
batteries in place.<br />
2. Always unplug this appliance from<br />
the electrical outlet and/or remove<br />
batteries immediately after using<br />
and before cleaning.<br />
Warning - To reduce the risk of burns,<br />
fire, electric shock, or injury to persons:<br />
1. Do not allow to be used as a toy.<br />
Close attention is necessary<br />
when this appliance is used by or<br />
near children.<br />
2. Use this appliance only for its<br />
inten<strong>de</strong>d use as <strong>de</strong>scribed in this<br />
manual. Use only attachments<br />
recommen<strong>de</strong>d by the manufacturer<br />
as contained in this manual.<br />
3. Never operate this appliance if it<br />
has a damaged cord or plug, if it is<br />
not working properly, if it has been<br />
dropped or damaged, or dropped<br />
into water. Return the appliance to<br />
EURO-PRO Operating LLC for<br />
examination, repair, electrical or<br />
mechanical adjustment.<br />
4. Never operate the appliance with<br />
any air openings blocked. Keep<br />
ventilation openings of the <strong>sewing</strong><br />
<strong>machine</strong> and foot control free from<br />
accumulation of lint, dust and loose<br />
cloth.<br />
5. Keep fingers away from all moving<br />
parts. Special care is required<br />
around the <strong>sewing</strong> <strong>machine</strong><br />
needle.<br />
6. Always use the proper needle<br />
plate. The wrong plate can cause<br />
the needle to break.<br />
7. Do not use bent needles.<br />
8. Do not push or pull fabric while<br />
stitching. It may <strong>de</strong>flect the needle<br />
causing it to break.<br />
9. Switch the <strong>sewing</strong> <strong>machine</strong> off<br />
when making any adjustments in<br />
the needle area, such as threading<br />
needle, changing needle,<br />
threading bobbin or changing<br />
presser foot.<br />
10.Always unplug <strong>sewing</strong> <strong>machine</strong><br />
from electrical outlet when<br />
removing covers, lubricating or<br />
when making any other user<br />
servicing adjustments mentioned<br />
in the instruction manual.<br />
11.Never drop or insert any object<br />
into any opening.<br />
12.Do not use outdoors.<br />
13.Do not operate where aerosol<br />
(spray products) are being used or<br />
where oxygen is being<br />
administered.<br />
14.To disconnect, turn all controls to<br />
the off position, then remove plug<br />
from outlet.<br />
15.Do not unplug by pulling on cord.<br />
To unplug, grasp the plug, not the<br />
cord.<br />
SAVE THESE INSTRUCTIONS<br />
This <strong>sewing</strong> <strong>machine</strong> is inten<strong>de</strong>d for household use only.<br />
1. Getting to know your <strong>machine</strong><br />
Front view<br />
1. Upper Bobbin<br />
2. Bobbin Winding Spindle<br />
3. Hand Wheel<br />
4. Take Up Lever<br />
5. Light Switch<br />
6. Speed Button<br />
7. On/Off Button<br />
Illustrations may differ from actual product.<br />
8. Bobbin Cover<br />
9. Bottom Bobbin<br />
10. Needle Clamp Screw<br />
11. Light<br />
12. Thread Tension Release<br />
Disk<br />
13. Tension Dial<br />
14. Needle Bar<br />
1 Rev. 07/08<br />
2
Rear view<br />
2. Connecting the <strong>machine</strong> to the power supply<br />
Using the <strong>sewing</strong> <strong>machine</strong> with the power cord:<br />
1. Connect plug “A” to the AC/DC receptacle on the <strong>sewing</strong> <strong>machine</strong> and plug “B”<br />
to the electrical outlet.<br />
2. Push the ON/Off button in to turn the <strong>machine</strong> “On”.<br />
3. Connect the foot control “C” to the Foot Control Receptacle on the <strong>machine</strong>.<br />
4. The <strong>sewing</strong> <strong>machine</strong> can be controlled by applying pressure to the foot control.<br />
CAUTION: Always turn the <strong>sewing</strong> <strong>machine</strong> “Off” and unplug from the electrical<br />
outlet when the <strong>machine</strong> is not in use.<br />
1. Bobbin Spool Pin<br />
2. Thread Cutter<br />
3. Presser Foot Lifter<br />
4. Threading Gui<strong>de</strong><br />
Accessories<br />
Foot controller<br />
5. Needle<br />
6. Presser Foot<br />
7. AC/DC Receptacle<br />
8. Foot Control Receptacle<br />
Long spool<br />
pin<br />
Using the <strong>sewing</strong> <strong>machine</strong> with batteries:<br />
1. Open the battery compartment cover that is on the bottom of the <strong>sewing</strong><br />
<strong>machine</strong>.<br />
2. Insert 4 “AA” alkaline batteries making sure that the batteries are in the correct<br />
position as marked on the insi<strong>de</strong> of the battery compartment.<br />
3. Replace the battery compartment cover.<br />
CAUTION: Make sure that the On/Off button is in the “Off” position when changing<br />
or inserting batteries. If the <strong>machine</strong> is in the “On” position, it will start to sew when<br />
the batteries are inserted and may cause injuries.<br />
Needle<br />
Threa<strong>de</strong>d<br />
bobbins (x2)<br />
Needle threa<strong>de</strong>r<br />
Bobbin winding<br />
spindle<br />
Empty<br />
bobbins (x2)<br />
3<br />
4
3. Bobbin winding<br />
1. Place a spool of thread on the long spool pin.<br />
2. Insert the bobbin winding spindle into the central hole of the handwheel and<br />
push an empty bobbin onto the spindle.<br />
3. Wind the thread clockwise around the bobbin several times.<br />
4. Place your in<strong>de</strong>x finger gently un<strong>de</strong>rneath the thread between the spool of<br />
thread and the bobbin as shown in the illustration below.<br />
5. Press down on the On/Off button to start winding.<br />
6. Stop the <strong>sewing</strong> <strong>machine</strong> after the correct amount of thread is wound around<br />
the bobbin.<br />
7. Take the bobbin off the spindle and cut the thread.<br />
4. Threading the upper thread<br />
1. Place the upper bobbin or large spool of thread on the spool pin with the thread<br />
unwinding in a counter clockwise direction.<br />
2. Pull the thread to the left and pass through the first thread gui<strong>de</strong> (1).<br />
3. Pass the thread between the two discs of the tension dial (2).<br />
4. Thread it through the hole in the take-up lever (3) and then down through the<br />
second thread gui<strong>de</strong> (4) and then through the needle bar thread gui<strong>de</strong> (5).<br />
5. Pass the thread through the eye of the needle going from left to right (6). A<br />
needle threa<strong>de</strong>r is supplied with your <strong>machine</strong> to help you thread the eye of the<br />
needle. To use the needle threa<strong>de</strong>r, pass it through the eye of the needle<br />
going from right to left, insert the thread in the threa<strong>de</strong>r and gently pull the<br />
threa<strong>de</strong>r to the right.<br />
5<br />
6
5. Replacing the needle<br />
Caution: Always remove the batteries or disconnect the AC/DC adapter from the<br />
electrical outlet before starting to replace the needle.<br />
1. Turn the hand wheel in a counter clockwise direction to raise the needle to its<br />
highest position.<br />
2. Hold the old needle and loosen the needle clamp screw. Remove the old<br />
needle. (Fig. 1)<br />
3. Insert the new needle into the clamp with the flat si<strong>de</strong> facing towards the insi<strong>de</strong><br />
of the <strong>machine</strong>. The eye of the needle should be facing the si<strong>de</strong> of the<br />
<strong>machine</strong>.<br />
4. Push the needle up into the needle clamp as far as it will go. (Fig. 2)<br />
5. Tighten the needle clamp screw.<br />
6. Inserting or replacing the bobbin<br />
Caution: Always remove the batteries or disconnect the AC/DC adapter from the<br />
electrical outlet before replacing the bobbin.<br />
1. Remove the bobbin cover and take out the empty bobbin. (Fig. 1)<br />
2. Place the new bobbin in the bobbin case with the thread unwinding in a<br />
clockwise direction. (Fig. 2, Fig. 3)<br />
3. Leave about 4 inches of thread exten<strong>de</strong>d out from the bobbin case.<br />
4. Holding the upper bobbin thread loosely in one hand, turn the hand wheel<br />
counter clockwise. (Fig. 4) The needle will go down, picking up the lower<br />
bobbin thread. Keep turning the hand wheel until the needle has come down<br />
completely and then come up again to its highest point. Stop when the needle<br />
starts to come down again.<br />
5. Raise the presser foot and gently pull up the needle thread. You will see that it<br />
has caught the lower thread. Pull both threads towards the back of the needle<br />
and lay them un<strong>de</strong>r the presser foot.<br />
6. Sli<strong>de</strong> the bobbin cover back into place. (Fig. 5)<br />
Note: It is important that the threading of both the top and bottom bobbins is<br />
properly threa<strong>de</strong>d. Check carefully and do one practice stitch before beginning to<br />
sew. Improper threading will result in a thread jam or unbalanced stitch.<br />
Very Important: Always make sure to use a metal bobbin. If not, the magnetized<br />
bobbin case will not be activated and there will be no tension on your bobbin thread.<br />
Fig. 1 Fig. 2<br />
Please note:<br />
After replacing the needle, turn the hand wheel by hand to check if the <strong>machine</strong> is<br />
stitching properly, then you can use the foot control or the On/Off button ONLY IF<br />
THE NEEDLE IS IN THE RIGHT POSITION AND THE STITCHES ARE GOOD.<br />
Fig. 1 Fig. 2<br />
Fig. 3<br />
Fig. 4<br />
Fig. 5<br />
7<br />
8
7. Setting the <strong>sewing</strong> speed<br />
This <strong>sewing</strong> <strong>machine</strong> has two <strong>sewing</strong> speeds. Press the “” button in for a faster<br />
<strong>sewing</strong> speed or press “” button to the “out” position for a slower <strong>sewing</strong> speed.<br />
8. Work light<br />
If additional light is nee<strong>de</strong>d, press the light switch “ “ in to turn the light “On”.<br />
Press it again if you wish to turn it “Off”.<br />
9. Starting to sew<br />
You can start to sew using either the power cord with the foot control or insert<br />
batteries into the battery compartment and use the controls on the <strong>sewing</strong> <strong>machine</strong>.<br />
1. Raise the needle to its highest position by turning the hand wheel counter<br />
clockwise and lift the presser foot.<br />
2. Place both the upper and lower threads behind the presser foot. The threads<br />
should be approximately 4-inches long.<br />
3. Place the fabric to be sewn un<strong>de</strong>r the presser foot. (Fig. 1) Lower the needle<br />
by turning the hand wheel counter clockwise and then lower the presser foot.<br />
(Fig. 2)<br />
4. Press the “►/ █” On/Off button to the “On” position and begin <strong>sewing</strong>. Do not<br />
pull the fabric. Gently gui<strong>de</strong> the fabric to keep the seam straight. (Fig. 3)<br />
5. After finishing <strong>sewing</strong>, press the “►/ █” On/Off button to the “Off” position to<br />
stop <strong>sewing</strong>. (Fig. 3)<br />
6. Turn the hand wheel counter clockwise to raise the needle to its highest<br />
position. (Fig. 4) Lift the presser foot and pull out the thread tension release<br />
bar. Then gently remove the fabric away from the <strong>sewing</strong> <strong>machine</strong>.<br />
7. Cut the thread using the thread cutter.<br />
Important: Do not touch the tension dial during <strong>sewing</strong> because it may cause the<br />
<strong>machine</strong> to jam.<br />
10. Sewing sleeves<br />
This <strong>sewing</strong> <strong>machine</strong> has been <strong>de</strong>signed to sew sleeves or any narrow openings in<br />
a garment.<br />
1. Lift the presser foot.<br />
2. Position the garment over the <strong>sewing</strong> arm.<br />
3. Lower the presser foot and follow the regular instructions.<br />
Fig. 1 Fig. 2<br />
Fig. 3 Fig. 4<br />
9<br />
10
11. Adjusting the thread tension<br />
12. Troubleshooting<br />
Test the stitch tension on a scrap piece of the<br />
same fabric you are going to use. When the<br />
thread tension is properly adjusted, the upper and<br />
lower threads tension is equal and strong enough<br />
to lock both threads in the center of the material.<br />
Problem<br />
Probable Cause<br />
Batteries installed<br />
incorrectly.<br />
Solution<br />
Reinsert using the<br />
diagram provi<strong>de</strong>d insi<strong>de</strong><br />
the battery compartment.<br />
If the upper tension is too tight, the upper thread<br />
lies straight along the surface of the fabric. Adjust<br />
the tension by turning the tension dial counter<br />
clockwise. (Fig. 1)<br />
No power supply or<br />
<strong>machine</strong> runs slowly<br />
Battery power low.<br />
Used and new battery are<br />
used together.<br />
AC/DC adapter is not<br />
connected to the right<br />
position.<br />
Replace batteries with<br />
new ones.<br />
Replace batteries with<br />
new ones.<br />
Make sure that the AC/DC<br />
adapter is connected to<br />
the proper position on the<br />
<strong>machine</strong>.<br />
Needle is not properly<br />
inserted.<br />
Remove and reinsert the<br />
needle.<br />
Fig. 1<br />
Skipping stitches<br />
Needle is bent.<br />
Replace with a new<br />
needle.<br />
If the upper tension is too loose, the bottom thread<br />
lies straight along the bottom of the fabric. Adjust<br />
by turning the tension dial clockwise. (Fig. 2)<br />
Bobbin thread can<br />
not be drawn up<br />
Presser foot is too loose.<br />
No more thread in lower<br />
bobbin.<br />
Needle threa<strong>de</strong>d<br />
incorrectly.<br />
Tighten the presser foot.<br />
Replace with a new lower<br />
bobbin.<br />
Rethread the needle<br />
making sure the thread<br />
goes from left to right.<br />
Please note:<br />
The bobbin thread tension has been adjusted at<br />
the factory and does not need readjustment. If the<br />
upper tension adjustment does not correct the<br />
problem, then remove the bobbin and reinsert it<br />
making sure that the magnetism of the bobbin<br />
case is activated.<br />
Fig. 2<br />
Breaking thread<br />
Stitches too loose or<br />
uneven<br />
Upper thread is jamming<br />
un<strong>de</strong>r the presser foot.<br />
Needle is blunt.<br />
Needle not inserted<br />
corrected.<br />
Upper thread too tight or<br />
lower thread too loose.<br />
Rethread the upper and<br />
lower thread again.<br />
Replace with a new<br />
needle.<br />
Reinsert the needle<br />
making sure to push it up<br />
as high as it can go.<br />
Adjust the thread tension<br />
dial.<br />
Needle bent or <strong>de</strong>formed.<br />
Replace with a new<br />
needle.<br />
Breaking needle<br />
Presser foot too loose.<br />
Replace with w new<br />
needle and tighten the<br />
presser foot.<br />
Pulled the fabric when<br />
<strong>sewing</strong>.<br />
Do not pull the fabric. Let<br />
the <strong>machine</strong> feed by itself.<br />
11<br />
12
Mo<strong>de</strong>l<br />
970C<br />
1 Year Limited Warranty<br />
This warranty applies to <strong>de</strong>fects resulting from imperfections in manufacture of<br />
parts entering into the manufacture and assembly of the <strong>sewing</strong> <strong>machine</strong> which this<br />
warranty accompanies, for a period of one (1) year, subject to the following<br />
conditions, exclusions and exceptions.<br />
This warranty is enforceable if said <strong>sewing</strong> <strong>machine</strong> is given reasonably good care<br />
and proper maintenance in accordance with the accompanying printed instructions.<br />
Needles, lamp bulb, and bobbins which normally require replacement are not<br />
covered un<strong>de</strong>r this warranty.<br />
Your exclusive remedy for any losses or damages resulting from <strong>de</strong>fects in both<br />
performance, workmanship and materials of this product shall be the repair or<br />
replacement of this product.<br />
The manufacturer shall not be liable for consequential or inci<strong>de</strong>ntal damages for<br />
breach of any express or implied warranty of this product.<br />
This warranty is exten<strong>de</strong>d only to the original purchaser of the <strong>machine</strong> and this<br />
warranty exclu<strong>de</strong>s all other legal and/or conventional warranties. The only<br />
responsibility of EURO-PRO Operating LLC, if any, is in relation to the specific<br />
obligations expressly assumed by it un<strong>de</strong>r the terms of this warranty bond.<br />
Please inclu<strong>de</strong> proof of purchase. For Customer Service support, call 1 (800) 361-4639<br />
or visit our website at www.euro-pro.com.<br />
------------------------------------------------------------------------------------------------------------------------------<br />
OWNERSHIP REGISTRATION CARD<br />
Please fill out and mail the product registration card within ten (10) days of purchase. The<br />
registration will enable us to contact you in the unlikely event of a product safety notification.<br />
By returning this card you acknowledge to have read and un<strong>de</strong>rstood the instructions for use,<br />
and warnings set forth in the accompanying instructions.<br />
RETURN TO EURO-PRO OPERATING LLC, 4400 Bois Franc, St. Laurent, QC, H4S 1A7<br />
970C<br />
_________________________________________________________________________<br />
Appliance mo<strong>de</strong>l<br />
_________________________________________________________________________<br />
Date purchased Name of store<br />
_________________________________________________________________________<br />
Owner’s name<br />
_________________________________________________________________________<br />
Address City Prov. Postal Co<strong>de</strong><br />
INSTRUCCIONES IMPORTANTES DE SEGURIDAD<br />
Al usar artefactos eléctricos siempre <strong>de</strong>be tomar precauciones <strong>de</strong> seguridad, incluyendo<br />
las siguientes:<br />
Lea todas las instrucciones antes <strong>de</strong> utilizar esta máquina <strong>de</strong> <strong>coser</strong>.<br />
Peligro - Para reducir el riesgo <strong>de</strong><br />
<strong>de</strong>scarga eléctrica:<br />
1. Nunca <strong>de</strong>be <strong>de</strong>jar artefactos sin<br />
supervisión mientras los mismos<br />
permanezcan enchufados o con las<br />
baterías colocadas.<br />
2. Siempre <strong>de</strong>senchufe este artefacto<br />
<strong>de</strong>l tomacorriente y/o quítele las<br />
baterías inmediatamente <strong>de</strong>spués <strong>de</strong><br />
usarlo y antes <strong>de</strong> proce<strong>de</strong>r a su<br />
limpieza.<br />
Advertencia - Para reducir el riesgo <strong>de</strong><br />
quemaduras, incendio, <strong>de</strong>scarga eléctrica<br />
o daños personales:<br />
1. No permita que sea utilizado como un<br />
juguete. Tenga mucho cuidado al<br />
usar cualquier artefacto eléctrico<br />
cerca <strong>de</strong> niños.<br />
2. Utilice este artefacto únicamente para<br />
los fines indicados en este manual.<br />
Utilice únicamente los accesorios<br />
recomendados por el fabricante,<br />
indicados en este manual.<br />
3. Nunca utilice este artefacto si su<br />
cable o enchufe están dañados, si el<br />
artefacto no funciona correctamente o<br />
si sufrió algún golpe, daños o si se<br />
cayó al agua. Retórnelo a EURO-<br />
PRO Operating LLC para su<br />
examen, reparación o por cualquier<br />
ajuste eléctrico o mecánico que haya<br />
que realizarle.<br />
4. Nunca haga funcionar el artefacto<br />
con una rejilla <strong>de</strong> ventilación tapada.<br />
Mantenga las rejillas <strong>de</strong> ventilación <strong>de</strong><br />
la máquina <strong>de</strong> <strong>coser</strong> y <strong>de</strong>l pedal <strong>de</strong><br />
control, libres <strong>de</strong> acumulación <strong>de</strong><br />
pelusa, polvo y trozos <strong>de</strong> tela.<br />
5. Mantenga los <strong>de</strong>dos alejados <strong>de</strong><br />
todas las partes móviles. Tenga<br />
especial cuidado en las<br />
proximida<strong>de</strong>s <strong>de</strong> la aguja <strong>de</strong> la<br />
máquina <strong>de</strong> <strong>coser</strong>.<br />
6. Siempre utilice la placa <strong>de</strong> aguja<br />
a<strong>de</strong>cuada. La placa equivocada<br />
pue<strong>de</strong> hacer que se rompa la<br />
aguja.<br />
7. No utilice agujas dobladas.<br />
8. No tire o empuje la tela mientras<br />
cose. Podría <strong>de</strong>sviar la aguja y<br />
hacer que se rompa.<br />
9. Apague la máquina <strong>de</strong> <strong>coser</strong> antes<br />
<strong>de</strong> hacer cualquier ajuste en la<br />
zona <strong>de</strong> la aguja, tal como<br />
enhebrar o cambiar la aguja,<br />
enhebrar la bobina o cambiar el<br />
pie prénsatelas.<br />
10. Siempre <strong>de</strong>senchufe la máquina<br />
<strong>de</strong> <strong>coser</strong> <strong>de</strong>l tomacorriente al<br />
quitarle las cubiertas, lubricarla, o<br />
al hacer cualquier otro ajuste o<br />
mantenimiento mencionado en<br />
este manual.<br />
11. Nunca inserte ningún objeto en<br />
una <strong>de</strong> las ranuras.<br />
12. No la utilice en el exterior.<br />
13. No la utilice don<strong>de</strong> se usen<br />
productos en aerosol (sprays) o<br />
don<strong>de</strong> se esté administrando<br />
oxígeno.<br />
14. Para <strong>de</strong>sconectarla, gire todos los<br />
controles a la posición <strong>de</strong> apagado<br />
y luego quite el enchufe <strong>de</strong>l<br />
tomacorriente.<br />
15. No la <strong>de</strong>senchufe tirando <strong>de</strong>l<br />
cable. Para <strong>de</strong>senchufarla, tire <strong>de</strong>l<br />
enchufe, no <strong>de</strong>l cable.<br />
CONSERVE ESTAS INSTRUCCIONES<br />
Esta máquina <strong>de</strong> <strong>coser</strong> está diseñada solo para uso doméstico.<br />
Printed in China<br />
13<br />
14 Rev. 07/08
1. Conozca su máquina <strong>de</strong> <strong>coser</strong><br />
Vista posterior<br />
Vista frontal<br />
1. Bobina superior<br />
2. Eje <strong>de</strong>l <strong>de</strong>vanador <strong>de</strong> la bobina<br />
3. Manivela<br />
4. Palanca tensora<br />
5. Interruptor <strong>de</strong> la luz<br />
6. Botón <strong>de</strong> velocidad<br />
7. Botón <strong>de</strong> Encendido/Apagado<br />
El dibujo pue<strong>de</strong> no ser igual al producto real.<br />
8. Tapa <strong>de</strong> la bobina<br />
9. Bobina inferior<br />
10. Tornillo <strong>de</strong> sujeción <strong>de</strong> la aguja<br />
11. Luz<br />
12. Disco <strong>de</strong> liberación <strong>de</strong> la tensión<br />
<strong>de</strong>l hilo<br />
13. Perilla <strong>de</strong> tensión <strong>de</strong>l hilo<br />
14. Barra <strong>de</strong> la aguja<br />
1. Eje porta carretes <strong>de</strong> la bobina<br />
2. Corta-hilos<br />
3. Elevador <strong>de</strong>l pie prénsatelas<br />
4. Guía <strong>de</strong> enhebrado<br />
Accesorios<br />
Pedal <strong>de</strong> control<br />
Aguja<br />
Enhebrador<br />
Eje <strong>de</strong>l <strong>de</strong>vanador <strong>de</strong><br />
la bobina<br />
5. Aguja<br />
6. Pie prénsatelas<br />
7. Tomacorrientes <strong>de</strong> CA/CC<br />
8. Tomacorrientes <strong>de</strong> pedal <strong>de</strong><br />
control<br />
Eje porta<br />
carretes largo<br />
Bobinas con<br />
hilo (x2)<br />
Bobinas<br />
vacías (x2)<br />
15<br />
16
2. Conexión <strong>de</strong> la máquina a la corriente eléctrica.<br />
Empleo <strong>de</strong> la máquina <strong>de</strong> <strong>coser</strong> con el cable <strong>de</strong> alimentación:<br />
1. Conecte el enchufe “A” al conector <strong>de</strong> CA/CC en la máquina <strong>de</strong> <strong>coser</strong> y el<br />
enchufe “B” al tomacorrientes.<br />
2. Presione el botón <strong>de</strong> encendido (ON/Off) y encienda la máquina.<br />
3. Conecte el pedal <strong>de</strong> control a su respectivo conector en la máquina <strong>de</strong> <strong>coser</strong>.<br />
4. Se podrá controlar la máquina aplicando presión al pedal <strong>de</strong> control.<br />
CUIDADO: Siempre apague la máquina <strong>de</strong> <strong>coser</strong> y <strong>de</strong>senchúfela <strong>de</strong>l tomacorriente<br />
cuando la misma no esté en uso.<br />
3. Devanado <strong>de</strong> la bobina<br />
1. Coloque un carrete <strong>de</strong> hilo en el eje porta carretes largo.<br />
2. Inserte el eje <strong>de</strong>l <strong>de</strong>vanador <strong>de</strong> la bobina en el orificio central <strong>de</strong> la manivela y<br />
coloque a presión una bobina vacía en dicho eje.<br />
3. Enrosque varias vueltas <strong>de</strong> hilo en sentido horario alre<strong>de</strong>dor <strong>de</strong> la bobina.<br />
4. Coloque suavemente su <strong>de</strong>do índice <strong>de</strong>bajo <strong>de</strong>l hilo entre el carrete y la<br />
bobina, tal como se muestra en la siguiente ilustración.<br />
5. Presione el botón <strong>de</strong> encendido para iniciar el <strong>de</strong>vanado.<br />
6. Detenga la máquina <strong>de</strong> <strong>coser</strong> <strong>de</strong>spués <strong>de</strong> haber enrollado una cantidad<br />
a<strong>de</strong>cuada <strong>de</strong> hilo en la bobina,<br />
7. Retire la bobina <strong>de</strong>l eje y corte el hilo.<br />
Empleo <strong>de</strong> la máquina <strong>de</strong> <strong>coser</strong> con baterías:<br />
1. Abra el compartimiento <strong>de</strong> baterías, ubicado en la parte inferior <strong>de</strong> la máquina<br />
<strong>de</strong> <strong>coser</strong>.<br />
2. Inserte 4 baterías alcalinas “AA”, asegurándose <strong>de</strong> que las mismas están en la<br />
posición correcta, tal como está marcado a los costados <strong>de</strong>l compartimiento.<br />
3. Vuelva a colocar el tornillo <strong>de</strong> sujeción.<br />
CUIDADO: Verifique que el botón <strong>de</strong> encendido esté en la posición “Off” (Apagado)<br />
cuando cambie o coloque baterías nuevas. Si la máquina está en posición “On”<br />
(Encendido), arrancará inmediatamente al colocarle las baterías y podría provocar<br />
lesiones al operador.<br />
17<br />
18
4. Enhebrado <strong>de</strong>l hilo superior<br />
1. Coloque la bobina superior o un carrete gran<strong>de</strong> <strong>de</strong> hilo en el eje porta carretes,<br />
<strong>de</strong> tal manera que el hilo se <strong>de</strong>senrosque en sentido antihorario.<br />
2. Tire el hilo hacia la izquierda y páselo a través <strong>de</strong> la primer guía <strong>de</strong>l hilo (1).<br />
3. Pase el hilo a través <strong>de</strong> los dos discos <strong>de</strong> la perilla <strong>de</strong> tensión (2).<br />
4. Enhébrelo a través <strong>de</strong>l orificio <strong>de</strong> la palanca tensora (3) y luego hacia abajo a<br />
través <strong>de</strong> la segunda guía <strong>de</strong>l hilo (4) y finalmente a través <strong>de</strong> la guía <strong>de</strong>l hilo<br />
en la barra <strong>de</strong> la aguja (5).<br />
5. Pase el hilo a través <strong>de</strong>l ojo <strong>de</strong> la aguja, yendo <strong>de</strong> la izquierda al <strong>de</strong>recho (6).<br />
Con su máquina se provee un enhebrador para ayudarle a pasar el hilo por el<br />
ojo <strong>de</strong> la aguja. Para usar el enhebrador, páselo a través <strong>de</strong>l ojo <strong>de</strong> la aguja<br />
<strong>de</strong>l <strong>de</strong>recho <strong>de</strong> <strong>de</strong>jar, inserte el hilo en el enhebrador y luego tire con<br />
suavidad <strong>de</strong>l mismo hacia a la <strong>de</strong>recha.<br />
5. Reemplazo <strong>de</strong> la aguja<br />
Advertencia: Siempre quite las baterías o <strong>de</strong>sconecte el adaptador <strong>de</strong> CA/CC <strong>de</strong>l<br />
tomacorriente antes <strong>de</strong> comenzar a reemplazar la aguja.<br />
1. Gire la manivela en sentido antihorario para elevar la aguja hasta su posición<br />
más alta.<br />
2. Sostenga la aguja vieja y afloje el tornillo <strong>de</strong>l sujetador <strong>de</strong> la misma. Quite la<br />
aguja vieja. (Fig. 1)<br />
3. Inserte una nueva aguja en el sujetador, con su lado plano mirando hacia el<br />
interior <strong>de</strong> la máquina. El ojo <strong>de</strong> la aguja <strong>de</strong>bería estar mirando hacia el lateral<br />
<strong>de</strong> la máquina.<br />
4. Empuje la aguja hacia arriba <strong>de</strong>ntro <strong>de</strong>l sujetador tanto como le sea posible.<br />
(Fig. 2)<br />
5. Ajuste el tornillo <strong>de</strong> sujeción.<br />
Fig. 1 Fig. 2<br />
Observaciones:<br />
Después <strong>de</strong> reemplazar la aguja, gire manualmente la manivela para verificar que<br />
la máquina esté dando puntadas correctamente, y SOLO use el interruptor <strong>de</strong><br />
encendido o el pedal <strong>de</strong> control TRAS VERIFICAR QUE LA AGUJA ESTÁ BIEN<br />
POSICIONADA Y QUE LAS PUNTADAS ESTÁN BIEN.<br />
19<br />
20
6. Insertar o reemplazar la bobina<br />
Advertencia: Siempre quite las baterías o <strong>de</strong>sconecte el adaptador <strong>de</strong> CA/CC <strong>de</strong>l<br />
tomacorriente antes <strong>de</strong> reemplazar la bobina.<br />
1. Quite la tapa <strong>de</strong> la bobina y retire la bobina vacía. (Fig. 1)<br />
2. Coloque la bobina nueva en el porta bobinas, con el hilo <strong>de</strong>senroscándose en<br />
sentido horario. (Fig. 2 y Fig. 3).<br />
3. Deje aproximadamente 10 cm. <strong>de</strong> hilo libres fuera <strong>de</strong>l porta bobinas.<br />
4. Gire la manivela en sentido antihorario mientras sostiene suavemente la parte<br />
superior <strong>de</strong>l hilo <strong>de</strong> la bobina. (Fig. 4). La aguja <strong>de</strong>scen<strong>de</strong>rá, recogiendo el hilo <strong>de</strong><br />
la bobina inferior. Continúe girando la manivela hasta que la aguja haya terminado<br />
<strong>de</strong> <strong>de</strong>scen<strong>de</strong>r y vuelva ascen<strong>de</strong>r hasta su máxima altura. Deténgase cuando la<br />
aguja comience a <strong>de</strong>scen<strong>de</strong>r nuevamente.<br />
5. Suba el pie prénsatelas y tire suavemente <strong>de</strong>l hilo <strong>de</strong> la aguja. Verá que 'capturó’<br />
el hilo inferior. Tire <strong>de</strong> ambos hilos hacia la parte <strong>de</strong> atrás <strong>de</strong> la aguja y apóyelos<br />
<strong>de</strong>bajo <strong>de</strong>l pie prensatelas.<br />
6. Vuela a poner en posición la tapa <strong>de</strong> la bobina. (Fig. 5)<br />
Nota: Es importante que los hilos <strong>de</strong> ambas bobinas estén a<strong>de</strong>cuadamente<br />
enhebrados. Verifíquelo cuidadosamente y haga una puntada <strong>de</strong> prueba antes <strong>de</strong><br />
comenzar a <strong>coser</strong>. Un enhebrado incorrecto producirá el atascamiento <strong>de</strong> los hilos o<br />
puntadas <strong>de</strong>sbalanceadas.<br />
Muy importante: Siempre asegúrese <strong>de</strong> usar una bobina metálica. Caso contrario, no<br />
se activará el porta bobinas magnético y el hilo <strong>de</strong> la bobina no tendrá la tensión<br />
necesaria.<br />
7. Ajuste <strong>de</strong> la velocidad <strong>de</strong> costura<br />
Esta máquina <strong>de</strong> <strong>coser</strong> tiene dos velocida<strong>de</strong>s <strong>de</strong> costura. Presione el botón “” hacia<br />
a<strong>de</strong>ntro para lograr la mayor velocidad ó vuelva a presionar “” para liberarlo y lograr<br />
la velocidad más lenta.<br />
8. Lámpara <strong>de</strong> trabajo<br />
Si se necesita iluminación adicional, active el interruptor “<br />
Presiónelo nuevamente para apagarla.<br />
9. Comenzar a <strong>coser</strong><br />
“ para encen<strong>de</strong>r la luz.<br />
Pue<strong>de</strong> iniciar una costura empleando tanto el cable <strong>de</strong> alimentación y el pedal <strong>de</strong> control<br />
como insertando baterías en el respectivo compartimiento y usando los controles sobre<br />
la propia máquina <strong>de</strong> <strong>coser</strong>.<br />
1. Suba la aguja hasta su posición superior girando la manivela en sentido antihorario y<br />
luego libere el pie prénsatelas.<br />
2. Coloque ambos hilos, tanto el superior como el inferior, <strong>de</strong>bajo <strong>de</strong>l pie prénsatelas.<br />
Los hilos <strong>de</strong>ben tener unos 10 cm. <strong>de</strong> largo.<br />
3. Coloque la tela a <strong>coser</strong> <strong>de</strong>bajo <strong>de</strong>l pie prénsatelas. (Fig. 1) Baje la aguja girando la<br />
manivela en sentido antihorario y luego baje el pie prénsatelas. (Fig. 2)<br />
4. Presione el botón “►/ █” a su posición <strong>de</strong> encendido y comience a <strong>coser</strong>. No tire <strong>de</strong>l<br />
tejido. Guíe el tejido con suavidad para mantener la costura <strong>de</strong>recha. (Fig. 3)<br />
5. Después <strong>de</strong> finalizar la costura, presione el botón “►/ █” a la posición <strong>de</strong> apagado.<br />
(Fig. 3)<br />
6. Gire la manivela en sentido antihorario para elevar la aguja hasta su posición<br />
superior. (Fig. 4). Levante el pie prénsatelas y tire <strong>de</strong> la palanca <strong>de</strong> liberación <strong>de</strong> la<br />
tensión <strong>de</strong>l hilo. Retire con suavidad el tejido <strong>de</strong> la máquina <strong>de</strong> <strong>coser</strong>.<br />
7. Corte los hilos con un corta-hilos.<br />
Importante: No toque la perilla <strong>de</strong> tensión durante la costura porque producirá el<br />
atascamiento <strong>de</strong> la máquina.<br />
Fig. 1 Fig. 2<br />
Fig. 1 Fig. 2<br />
Fig. 3<br />
Fig. 4<br />
21<br />
Fig. 5<br />
Fig. 3 Fig. 4<br />
22
10. Costura <strong>de</strong> mangas<br />
Esta máquina <strong>de</strong> <strong>coser</strong> ha sido diseñada para <strong>coser</strong> mangas o cualquier abertura<br />
estrecha <strong>de</strong> una prenda.<br />
1. Levante el pie prénsatelas.<br />
2. Posicione la prenda sobre el brazo para realizar costuras libres.<br />
3. Baje el pie prénsatelas y prosiga con las instrucciones habituales.<br />
11. Ajuste <strong>de</strong> la tensión <strong>de</strong>l hilo.<br />
Verifique la tensión <strong>de</strong> las puntadas sobre un<br />
recorte <strong>de</strong> la misma tela que vaya a usar. Cuando<br />
la tensión <strong>de</strong> las puntadas esté correctamente<br />
ajustada, la tensión <strong>de</strong> los hilos superior e inferior<br />
serán iguales y lo suficientemente elevadas para<br />
que el ‘cruce’ entre ambos hilos que<strong>de</strong> trabado en<br />
el centro <strong>de</strong>l material.<br />
Hilo superior<br />
Tela<br />
Hilo inferior<br />
Si la tensión <strong>de</strong>l hilo superior es <strong>de</strong>masiada, el hilo<br />
inferior quedará <strong>de</strong>recho por sobre el tejido.<br />
Ajuste la tensión girando la perilla <strong>de</strong> tensión en<br />
sentido antihorario. (Fig. 1)<br />
Hilo superior<br />
Fig. 1<br />
Hilo inferior<br />
Si la tensión <strong>de</strong>l hilo superior es muy poca, el hilo<br />
inferior quedará <strong>de</strong>recho en la parte inferior <strong>de</strong>l<br />
tejido. Ajuste la tensión girando la perilla <strong>de</strong><br />
tensión en sentido horario. (Fig. 2)<br />
Hilo superior<br />
Hilo inferior<br />
Fig. 2<br />
Observaciones:<br />
La tensión <strong>de</strong>l hilo viene ajustada <strong>de</strong> fábrica y no<br />
necesita ser reajustada. Si el ajuste <strong>de</strong> la tensión<br />
<strong>de</strong>l hilo superior no corrige el problema, quite la<br />
bobina y reinsértela, asegurándose <strong>de</strong> que esté<br />
activado el magnetismo <strong>de</strong>l porta bobinas.<br />
23<br />
24
12. Solución <strong>de</strong> problemas<br />
Problema<br />
No hay energía<br />
eléctrica o la<br />
máquina funciona<br />
lentamente<br />
Se saltean puntadas<br />
No se pue<strong>de</strong> retirar<br />
más hilo <strong>de</strong> la<br />
bobina<br />
Rotura <strong>de</strong>l hilo<br />
Puntadas<br />
<strong>de</strong>masiado sueltas<br />
o <strong>de</strong>sparejas<br />
Rotura <strong>de</strong> agujas<br />
Causa probable<br />
Instalación incorrecta <strong>de</strong> las<br />
baterías.<br />
Batería baja.<br />
Se están usando baterías<br />
nuevas y usadas al mismo<br />
tiempo,<br />
El adaptador <strong>de</strong> CA/CC no<br />
está correctamente<br />
conectado.<br />
La aguja está<br />
incorrectamente instalada.<br />
La aguja está doblada.<br />
El pie prénsatelas está<br />
<strong>de</strong>masiado poco ajustado.<br />
No hay más hilo en la<br />
bobina inferior.<br />
La aguja está<br />
incorrectamente<br />
enhebrada.<br />
El hilo superior se está<br />
atascando <strong>de</strong>bajo <strong>de</strong>l pie<br />
prénsatelas.<br />
La aguja está <strong>de</strong>safilada.<br />
La aguja no está<br />
correctamente insertada.<br />
El hilo superior está<br />
<strong>de</strong>masiado tenso o el<br />
inferior <strong>de</strong>masiado suelto.<br />
Aguja doblada o<br />
<strong>de</strong>formada.<br />
El pie prénsatelas está<br />
<strong>de</strong>masiado poco ajustado.<br />
Se tiró <strong>de</strong>l tejido mientras<br />
se realizaba la costura.<br />
Solución<br />
Reinserte las baterías en su<br />
compartimiento, según se<br />
indica en el diagrama<br />
provisto.<br />
Reemplace las baterías por<br />
otras nuevas.<br />
Reemplace las baterías por<br />
otras nuevas.<br />
Asegúrese <strong>de</strong> que el<br />
adaptador <strong>de</strong> CA/CC esté<br />
bien conectado.<br />
Quite la aguja y reinsértela.<br />
Reemplácela por una nueva.<br />
Afirme el pie prénsatelas.<br />
Reemplace la bobina inferior<br />
por una nueva.<br />
Vuelva a enhebrar la aguja,<br />
asegurándose <strong>de</strong> que el hilo<br />
pasa <strong>de</strong> <strong>de</strong>jó al <strong>de</strong>recho.<br />
Vuelva a enhebrar los hilos<br />
superior e inferior.<br />
Reemplácela por una nueva.<br />
Reinserte la aguja,<br />
asegurándose <strong>de</strong> empujarla<br />
tan arriba como sea posible.<br />
Ajuste la perilla <strong>de</strong> tensión<br />
<strong>de</strong>l hilo.<br />
Reemplácela por una nueva.<br />
Reemplace la aguja por una<br />
nueva y vuelva a ajustar el<br />
pie prénsatelas.<br />
No tire <strong>de</strong>l tejido. Deje que<br />
la máquina se alimente a su<br />
propio ritmo.<br />
Mo<strong>de</strong>lo<br />
970C<br />
Garantía Limitada <strong>de</strong> 1 Año<br />
Esta garantía cubre los <strong>de</strong>fectos resultantes <strong>de</strong> imperfecciones involucradas en la<br />
fabricación y armado <strong>de</strong> la máquina <strong>de</strong> <strong>coser</strong> con la que se adjunta, por el período <strong>de</strong> un (1)<br />
año, y sujeta a las siguientes condiciones, exclusiones y excepciones.<br />
Esta garantía es ejecutable si la referida máquina <strong>de</strong> <strong>coser</strong> recibió cuidados razonables y un<br />
a<strong>de</strong>cuado mantenimiento, <strong>de</strong> acuerdo a las instrucciones impresas adjuntas.<br />
Esta garantía no cubre las agujas, lamparita y bobinas, que normalmente requieren ser<br />
reemplazadas con el paso <strong>de</strong>l tiempo.<br />
La única compensación ofrecida por cualquier pérdida o daño producidos por <strong>de</strong>fectos tanto<br />
en el rendimiento, mano <strong>de</strong> obra y materiales <strong>de</strong> este producto, será la reparación o<br />
reemplazo <strong>de</strong>l mismo.<br />
El fabricante no será responsable por las consecuencias o daños inci<strong>de</strong>ntales por<br />
incumplimiento <strong>de</strong> cualquier garantía implícita o explícita sobre este producto.<br />
Esta garantía es válida solo para el comprador original <strong>de</strong>l producto y excluye cualquier otra<br />
garantía legal y/o convencional. La única responsabilidad <strong>de</strong> EURO-PRO Operating LLC,<br />
<strong>de</strong> existir, es en relación a las obligaciones específicas asumidas expresamente bajo los<br />
términos <strong>de</strong>l vínculo <strong>de</strong> esta garantía.<br />
Por favor incluya el comprobante <strong>de</strong> compra. Para ser atendido por el servicio <strong>de</strong> ‘Atención<br />
al cliente’, llame al (800) 361-4639 o visite nuestro sitio Web en www.euro-pro.com.<br />
------------------------------------------------------------------------------------------------------------------------------<br />
TARJETA DE REGISTRO DEL CLIENTE<br />
Complete y envíe la tarjeta <strong>de</strong> registro <strong>de</strong>l producto <strong>de</strong>ntro <strong>de</strong> los diez (10) días posteriores a<br />
la compra. El registro nos permitirá contactarnos con usted en caso <strong>de</strong> existir alguna<br />
notificación <strong>de</strong> seguridad con respecto al producto. Retornando esta tarjeta usted reconoce<br />
haber leído y entendido las instrucciones <strong>de</strong> uso y advertencias incluidas en estas<br />
instrucciones.<br />
ENVIAR A EURO-PRO Operating LLC, 4400 Bois Franc, St. Laurent, QC, H4S 1A7<br />
_________________________________________________________________________<br />
970C<br />
Mo<strong>de</strong>lo <strong>de</strong>l artefacto<br />
_________________________________________________________________________<br />
Fecha <strong>de</strong> compra<br />
Nombre <strong>de</strong>l negocio<br />
_________________________________________________________________________<br />
Nombre <strong>de</strong>l dueño<br />
_________________________________________________________________________<br />
Dirección Ciudad Provincia Código postal<br />
25<br />
Impreso en China<br />
26
MESURES DE SÉCURITÉ IMPORTANTES<br />
Lorsque vous utilisez <strong>de</strong>s appareils électriques, vous <strong>de</strong>vez toujours respecter les<br />
précautions <strong>de</strong> sécurité élémentaires, notamment les suivantes:<br />
Lisez toutes les instructions avant d’utiliser cette <strong>machine</strong> à coudre.<br />
Danger – Pour réduire le risque<br />
d'électrocution:<br />
1. Ne laissez aucun appareil branché ou<br />
avec <strong>de</strong>s piles en place sans<br />
surveillance.<br />
2. Débranchez toujours l’appareil <strong>de</strong> la<br />
prise électrique et/ou enlevez les piles<br />
immédiatement après l'utilisation et<br />
avant <strong>de</strong> le nettoyer.<br />
Avertissement — Pour réduire le risque<br />
<strong>de</strong> brûlures, d’incendie, d’électrocution ou<br />
<strong>de</strong> blessure:<br />
1. Ne pas l’utiliser comme jouet. La<br />
pru<strong>de</strong>nce est <strong>de</strong> rigueur lorsque<br />
l’appareil est utilisé à proximité <strong>de</strong>s<br />
enfants.<br />
2. Utilisez cet appareil uniquement pour<br />
son utilisation prévue telle que décrite<br />
dans ce manuel. Utilisez seulement<br />
les accessoires recommandés par le<br />
fabricant, tel qu’il figure dans ce<br />
manuel.<br />
3. Ne faites jamais fonctionner cet<br />
appareil si le cordon ou la fiche est<br />
endommagé, s'il ne fonctionne pas<br />
correctement, s'il a été échappé ou<br />
endommagé ou échappé dans l'eau.<br />
Retournez l’appareil à EURO-PRO<br />
Operating LLC pour son examen, sa<br />
réparation ou sa mise au point<br />
mécanique ou électrique.<br />
4. N’utilisez jamais l’appareil si les<br />
ouvertures d’aération sont bloquées.<br />
Gar<strong>de</strong>z les orifices <strong>de</strong> ventilation <strong>de</strong> la<br />
<strong>machine</strong> à coudre et <strong>de</strong> la comman<strong>de</strong><br />
au pied libre <strong>de</strong> l’accumulation <strong>de</strong><br />
peluches, poussières et morceaux <strong>de</strong><br />
tissus.<br />
5. Tenez vos doigts à l’écart <strong>de</strong> toutes<br />
pièces mobiles. Faites<br />
spécialement attention à proximité<br />
<strong>de</strong> l'aiguille.<br />
6. Utilisez toujours la plaque à aiguille<br />
adéquate. Une mauvaise plaque<br />
peut casser l’aiguille.<br />
7. N’utilisez jamais une aiguille tordue.<br />
8. Ne pas tirer ou pousser le tissu en<br />
cousant. Cela peut entraver le<br />
fonctionnement <strong>de</strong> l’aiguille et<br />
causer sa rupture.<br />
9. Éteignez la <strong>machine</strong> à coudre lors<br />
<strong>de</strong>s réglages dans la zone <strong>de</strong><br />
l’aiguille, tels que l’enfilage, le<br />
changement d’aiguille, la mise en<br />
place <strong>de</strong> la canette ou le<br />
changement <strong>de</strong> pied presseur.<br />
10. Débranchez toujours la <strong>machine</strong> à<br />
coudre avant <strong>de</strong> retirer les plaques<br />
<strong>de</strong> protection, <strong>de</strong> la graisser ou<br />
avant d’effectuer toute modification<br />
accessible à l’utilisateur comme<br />
indiqué dans le présent manuel<br />
d’utilisation.<br />
11. Évitez <strong>de</strong> laisser tomber ou<br />
d'insérer un objet dans une<br />
ouverture.<br />
12. Ne pas utiliser à l'extérieur.<br />
13. Ne faites pas fonctionner la<br />
<strong>machine</strong> en cas d’utilisation <strong>de</strong><br />
produits en aérosol (vaporisateurs)<br />
ou d’administration d'oxygène.<br />
14. Pour débrancher, tournez les<br />
boutons <strong>de</strong> réglage à la position<br />
«Arrêt» puis retirez la fiche <strong>de</strong> la<br />
prise <strong>de</strong> courant.<br />
15. Ne pas débrancher en tirant sur le<br />
cordon. Tirer sur la prise et non la<br />
cor<strong>de</strong> pour débrancher.<br />
CONSERVER CES INSTRUCTIONS<br />
Cette <strong>machine</strong> à coudre a été conçue pour un usage domestique seulement.<br />
1. Apprendre à connaître votre <strong>machine</strong> à coudre<br />
Vue <strong>de</strong> face<br />
1. Bobine supérieure<br />
2. Tige <strong>de</strong> la bobineuse<br />
3. Manette<br />
4. Levier<br />
5. Interrupteur<br />
6. Bouton vitesse<br />
7. Bouton marche/arrêt<br />
Les illustrations peuvent différer du produit exact.<br />
8. Couverture <strong>de</strong> la bobine<br />
9. Bobine inférieure<br />
10. Vis <strong>de</strong> fixation <strong>de</strong> l’aiguille<br />
11. Lumière<br />
12. Disque <strong>de</strong> libération <strong>de</strong> la<br />
tension du fil<br />
13. Bouton <strong>de</strong> tension<br />
14. Barre à aiguille<br />
27 Rev. 07/08<br />
28
Vue arrière<br />
2. Branchez la <strong>machine</strong> dans la source d'alimentation<br />
Utilisation <strong>de</strong> la <strong>machine</strong> à coudre avec le cordon d’alimentation:<br />
1. Branchez la fiche « A » au réceptacle AC/DC <strong>de</strong> la <strong>machine</strong> à coudre et branchez<br />
« B » à la prise électrique.<br />
2. Appuyez sur le bouton MARCHE/ARRÊT pour mettre la <strong>machine</strong> en « Marche ».<br />
3. Branchez la comman<strong>de</strong> au pied « C » au réceptacle <strong>de</strong> la comman<strong>de</strong> au pied <strong>de</strong> la<br />
<strong>machine</strong>.<br />
4. La <strong>machine</strong> à coudre peut être contrôlée en appliquant <strong>de</strong> la pression sur la<br />
comman<strong>de</strong> au pied.<br />
MISE EN GARDE: Mettez toujours la <strong>machine</strong> à coudre en arrêt et débranchez la prise<br />
électrique lorsque la <strong>machine</strong> n'est pas en fonctionnement.<br />
1. Porte bobine<br />
2. Coupe fils<br />
3. Levier <strong>de</strong> pied presseur<br />
4. Gui<strong>de</strong>-fil<br />
Accessoires<br />
Comman<strong>de</strong> au pied<br />
5. Aiguille<br />
6. Pied presseur<br />
7. Réceptacle AC/DC<br />
8. Réceptacle <strong>de</strong> la comman<strong>de</strong><br />
au pied<br />
Porte bobine<br />
long<br />
Utilisation <strong>de</strong> la <strong>machine</strong> à coudre avec <strong>de</strong>s piles:<br />
1. Ouvrez le compartiment <strong>de</strong> la batterie qui se trouve en bas <strong>de</strong> la <strong>machine</strong> à<br />
coudre.<br />
2. Installez 4 piles alcalines « AA » en vous assurant que les piles sont dans la<br />
bonne position comme indiqué sur l'intérieur du compartiment <strong>de</strong>s batteries.<br />
3. Remplacez le couvercle du compartiment <strong>de</strong>s batteries.<br />
MISE EN GARDE: Assurez-vous que l’interrupteur Marche/Arrêt est sur la position<br />
« Arrêt » lorsque vous changez ou installez les piles. Lorsque les piles sont<br />
installées, et la <strong>machine</strong> est sur la position « Marche », elle va commencer à coudre<br />
et peut provoquer <strong>de</strong>s blessures.<br />
Aiguille<br />
Bobines<br />
enfilées (x2)<br />
Enfileur<br />
Bobines vi<strong>de</strong>s<br />
(x2)<br />
Tige <strong>de</strong> la bobineuse<br />
29<br />
30
3. Enroulage <strong>de</strong> la bobine<br />
1. Placez la bobine <strong>de</strong> fil sur le porte bobine long.<br />
2. Installez la tige <strong>de</strong> la bobineuse dans le trou central <strong>de</strong> la manivelle et poussez<br />
une bobine vi<strong>de</strong> sur la broche.<br />
3. Enroulez le fil en sens horaire autour <strong>de</strong> la bobine à plusieurs reprises.<br />
4. Placez votre in<strong>de</strong>x doucement sous le fil entre la bobine <strong>de</strong> fil et la bobine<br />
comme indiqué sur l’illustration ci-<strong>de</strong>ssous.<br />
5. Appuyez sur le bouton « Marche/Arrêt » pour commencer à embobiner.<br />
6. Arrêtez la <strong>machine</strong> à coudre lorsque le montant exact <strong>de</strong> fil est embobiné<br />
autour <strong>de</strong> la bobine.<br />
7. Enlevez la bobine <strong>de</strong> la tige et coupez le fil.<br />
4. Enfilage du fil du haut<br />
1. Placez la bobine supérieure ou la bobine <strong>de</strong> fil gran<strong>de</strong> sur le porte bobine avec<br />
le fil déroulé en sens antihoraire.<br />
2. Tirez le fil vers la gauche et passez-le autour du premier gui<strong>de</strong>-fil (1).<br />
3. Passez le fil entre les <strong>de</strong>ux disques du bouton <strong>de</strong> tension (2).<br />
4. Enfilez à travers le trou dans le levier <strong>de</strong> fil (3) puis en <strong>de</strong>ssous du <strong>de</strong>uxième<br />
gui<strong>de</strong>-fil (4) et puis à travers la barre à aiguille du gui<strong>de</strong>-fil (5).<br />
5. Passez le fil directement par le chas <strong>de</strong> l’aiguille <strong>de</strong> la gauche à la droite (6).<br />
Un enfile-aiguille est fourni avec votre <strong>machine</strong> pour vous ai<strong>de</strong>r à enfiler le chas<br />
<strong>de</strong> l’aiguille. Pour utiliser l’enfile-aiguille, passez-le par le chas <strong>de</strong> l’aiguille <strong>de</strong><br />
droite à gauche, insérez le fil dans l’enfileur et tirez doucement l’enfileur à<br />
droite.<br />
31<br />
32
5. Remplacement <strong>de</strong> l’aiguille<br />
Attention: Enlevez toujours les piles ou débranchez l’adaptateur AC/DC <strong>de</strong> la prise<br />
électrique avant <strong>de</strong> remplacer l’aiguille.<br />
1. Tournez la manivelle en sens antihoraire pour soulever l’aiguille à sa position<br />
plus élevée.<br />
2. Tenez la vieille aiguille et dévissez la vis <strong>de</strong> serrage <strong>de</strong> l’aiguille. Enlevez la<br />
vieille aiguille. (Fig. 1)<br />
3. Insérez la nouvelle aiguille dans la fixation avec le côté plat vers l’intérieur <strong>de</strong> la<br />
<strong>machine</strong>. La chas <strong>de</strong> l’aiguille doit être orientée sur le côté <strong>de</strong> la <strong>machine</strong>.<br />
4. Poussez l’aiguille dans la vis <strong>de</strong> serrage aussi loin que possible. (Fig. 2)<br />
5. Serrez la vis <strong>de</strong> serrage <strong>de</strong> l’aiguille.<br />
Fig. 1 Fig. 2<br />
Remarque:<br />
Après avoir remplacé l’aiguille, tournez la manivelle à la main pour vérifier si la<br />
<strong>machine</strong> est en train <strong>de</strong> coudre correctement, donc vous pouvez utiliser la<br />
comman<strong>de</strong> au pied ou le bouton « Marche/Arrêt » SEULEMENT SI L’AIGUILLE<br />
EST DANS LA BONNE POSITION ET LES POINTS SONT BONS.<br />
6. Installation ou remplacement <strong>de</strong> la bobine<br />
Attention : Enlevez toujours les piles ou débranchez l’adaptateur AC/DC <strong>de</strong> la prise<br />
électrique avant <strong>de</strong> remplacer l’aiguille.<br />
1. Enlevez la couverture <strong>de</strong> la bobine et retirez la bobine vi<strong>de</strong>. (Fig. 1)<br />
2. Placez la nouvelle bobine dans le boîtier <strong>de</strong> la canette avec le fil déroulé en sens<br />
horaire. (Figures 2 et 3)<br />
3. Laissez environ 10 cm (4 pouces) <strong>de</strong> fil étendu à partir du boîtier <strong>de</strong> la canette.<br />
4. En tenant la bobine supérieure dans une main, tournez la manivelle en sens<br />
antihoraire. (Fig. 4)<br />
L’aiguille <strong>de</strong>scendra en ramassant le fil <strong>de</strong> la bobine inférieure. Continuez à<br />
tourner la manivelle jusqu’à ce que l’aiguille soit complètement <strong>de</strong>scendue et<br />
remontée à nouveau. Arrêtez quand l’aiguille commence à <strong>de</strong>scendre à nouveau.<br />
5. Relevez le pied presseur et doucement glissez le fil <strong>de</strong> la bobine. Vous allez voir<br />
qu’il a pris le fil inférieur. Tirez les <strong>de</strong>ux fils vers l’arrière <strong>de</strong> l’aiguille et posez-les<br />
sous le pied presseur.<br />
6. Mettez la couverture <strong>de</strong> la bobine en place. (Fig. 5)<br />
Remarque: Il est important que l'enfilage <strong>de</strong>s <strong>de</strong>ux bobines, supérieure et inférieure,<br />
soit bien enfilé. Vérifiez attentivement et faites un point <strong>de</strong> pratique avant <strong>de</strong><br />
commencer à coudre. Un mauvais enfilage se traduira par un bourrage <strong>de</strong> fil ou un<br />
point déséquilibré.<br />
Très important: Assurez-vous d’utiliser toujours une bobine métallique. En cas<br />
contraire, le boîtier <strong>de</strong> la canette magnétisé ne sera pas activé et il n’y aura pas <strong>de</strong><br />
tension sur votre fil <strong>de</strong> bobine.<br />
Fig. 1 Fig. 2<br />
Fig. 3<br />
Fig. 4<br />
Fig. 5<br />
33<br />
34
7. Configuration <strong>de</strong> la vitesse<br />
Cette <strong>machine</strong> à coudre a 2 vitesses. Appuyez sur le bouton « » pour une vitesse<br />
<strong>de</strong> couture plus rapi<strong>de</strong> ou appuyez sur le bouton « » jusqu’à la position « sortie »<br />
pour une vitesse <strong>de</strong> couture plus lente.<br />
8. Lumière <strong>de</strong> travail<br />
Appuyez sur l'interrupteur " " pour mettre la lumière en « Marche » en cas <strong>de</strong><br />
besoin. Appuyez encore une fois si vous souhaitez la mettre en « Arrêt ».<br />
9. Commencer à coudre<br />
Vous pouvez commencer à coudre soit en utilisant le cordon d’alimentation avec la<br />
comman<strong>de</strong> au pied ou soit avec les batteries en utilisant les comman<strong>de</strong>s <strong>de</strong> la <strong>machine</strong> à<br />
coudre.<br />
1. Remontez l’aiguille en position supérieure en tournant la manivelle en sens<br />
antihoraire et soulevez le pied presseur.<br />
2. Placez les fils supérieurs et inférieurs à l’arrière du pied presseur. Les fils <strong>de</strong>vraient<br />
avoir autour <strong>de</strong> 10 cm (4 po) <strong>de</strong> longueur.<br />
3. Placez le tissu à coudre sous le pied presseur. (Fig. 1) Abaissez l’aiguille en<br />
tournant la manivelle en sens antihoraire et puis abaissez le pied presseur.<br />
(Fig. 2)<br />
4. Ajustez le bouton Marche/Arrêt « ►/ █ » à la position « Marche » et commencez à<br />
coudre. Ne tirez pas le tissu. Gui<strong>de</strong>z doucement le tissu pour maintenir la couture<br />
droite. (Fig. 3)<br />
5. Après avoir fini, ajustez le bouton Marche/Arrêt « ►/ █ » à la position « Arrêt » pour<br />
mettre la <strong>machine</strong> en arrêt. (Fig. 3)<br />
6. Tournez la manivelle en sens antihoraire pour soulever l’aiguille à sa position plus<br />
élevée. (Fig. 4) Soulevez le pied presseur et tirez <strong>de</strong> la barre <strong>de</strong> libération <strong>de</strong> la<br />
tension du fil. Puis retirez doucement le tissu <strong>de</strong> la <strong>machine</strong> à coudre.<br />
7. Coupez le fil à l’ai<strong>de</strong> du coupe fil.<br />
Important: Ne touchez pas le bouton <strong>de</strong> tension lorsque la <strong>machine</strong> est en marche<br />
puisque cela peut bloquer la <strong>machine</strong>.<br />
10. Manches <strong>de</strong> couture<br />
Cette <strong>machine</strong> à coudre a été conçue pour coudre <strong>de</strong>s manches ou toute ouverture<br />
étroite dans un vêtement.<br />
1. Soulevez le pied presseur.<br />
2. Placez le vêtement sur le bras <strong>de</strong> couture.<br />
3. Abaissez le pied presseur et suivez les instructions générales.<br />
Fig. 1 Fig. 2<br />
Fig. 3<br />
35<br />
Fig. 4<br />
36
11. Ajuster la tension du fil<br />
12. Dépannage<br />
Vérifiez la tension du point sur un mauvais morceau<br />
du même tissu que vous allez utiliser. Lorsque la<br />
tension du fil est bien réglée, la tension <strong>de</strong>s fils<br />
supérieurs et inférieurs est égale et assez forte pour<br />
verrouiller les <strong>de</strong>ux fils dans le centre du matériau.<br />
Fil supérieur<br />
Tissu<br />
Fil inférieur<br />
Si la tension supérieure est trop serrée, le fil<br />
supérieur se trouve directement sur la surface du<br />
tissu. Ajustez la tension en tournant le bouton <strong>de</strong><br />
tension en sens antihoraire. (Fig. 1)<br />
Fil supérieur<br />
Fil inférieur<br />
Fig. 1<br />
Problème<br />
Pas d’alimentation<br />
électrique ou la<br />
<strong>machine</strong> fonctionne<br />
lentement<br />
Sauter <strong>de</strong>s points<br />
Cause probable<br />
Batteries installées<br />
incorrectement.<br />
Faible puissance <strong>de</strong> la<br />
batterie.<br />
Les vieilles et les nouvelles<br />
batteries sont utilisées en<br />
même temps.<br />
L’adaptateur AC/DC n’est<br />
pas branché à la bonne<br />
position.<br />
L’aiguille n’est pas insérée<br />
correctement.<br />
L’aiguille est faussée.<br />
Solution<br />
Réinstallez en utilisant le<br />
schéma fourni dans le<br />
compartiment <strong>de</strong> piles.<br />
Remplacez les batteries<br />
avec <strong>de</strong>s nouvelles.<br />
Remplacez les batteries<br />
avec <strong>de</strong>s nouvelles.<br />
Assurez-vous que<br />
l’adaptateur AC/DC soit<br />
branché à la bonne position<br />
dans la <strong>machine</strong>.<br />
Enlevez puis réinsérez<br />
l’aiguille.<br />
Remplacez avec une<br />
nouvelle aiguille.<br />
Si la tension supérieure est trop lâche, le fil<br />
inférieur se trouve directement en <strong>de</strong>ssous du<br />
tissu. Ajustez-le en tournant le bouton <strong>de</strong> tension<br />
en sens horaire. (Fig. 2)<br />
Fil supérieur<br />
Le fil <strong>de</strong> bobine ne<br />
peut pas être établi.<br />
Le pied presseur n’est pas<br />
assez serré.<br />
Plus besoin <strong>de</strong> fil dans la<br />
bobine inférieure.<br />
L’aiguille n’est pas enfilée<br />
correctement.<br />
Serrez le pied presseur.<br />
Remplacez avec une<br />
nouvelle bobine inférieure.<br />
Renfilez l’aiguille en vous<br />
assurant que le fil va <strong>de</strong> la<br />
gauche à la droite.<br />
Fil inférieur<br />
Remarque:<br />
La tension du fil <strong>de</strong> la bobine a été ajustée à<br />
l’usine et ne nécessite généralement pas d’autre<br />
ajustement. Si l’ajustement <strong>de</strong> la tension<br />
supérieure ne corrige pas le problème, alors<br />
retirez la bobine puis réinstallez-la en vous<br />
assurant que le magnétisme du boîtier <strong>de</strong> la<br />
canette est activé.<br />
Fig. 2<br />
Le fil se casse<br />
Les points ne sont<br />
pas assez serrés ou<br />
sont irréguliers.<br />
Le fil supérieur est emmêlé<br />
en <strong>de</strong>ssous du pied<br />
presseur.<br />
L’aiguille est épointée.<br />
L’aiguille n’est pas insérée<br />
correctement.<br />
Le fil supérieur est trop<br />
serré ou le fil inférieur est<br />
trop relâché.<br />
Renfilez le fil supérieur et<br />
inférieur à nouveau.<br />
Remplacez avec une<br />
nouvelle aiguille.<br />
Réinstallez l’aiguille en vous<br />
assurant <strong>de</strong> la soulever à sa<br />
position la plus élevée.<br />
Ajuster le bouton <strong>de</strong> tension<br />
du fil.<br />
L’aiguille est faussée ou<br />
épointée.<br />
Remplacez avec une<br />
nouvelle aiguille.<br />
L’aiguille est cassée<br />
Le pied presseur n’est pas<br />
assez serré.<br />
Remplacez avec une<br />
nouvelle aiguille et serrez le<br />
pied presseur.<br />
Le tissu est trop tiré.<br />
Ne tirez pas le tissu.<br />
Laissez la <strong>machine</strong> entraîner<br />
le tissu.<br />
37<br />
38
Modèle<br />
970C<br />
Garantie Limitée d’un an<br />
Cette garantie s’applique aux défauts résultants d’imperfections dans la fabrication <strong>de</strong> pièces<br />
et l’assemblage <strong>de</strong> la <strong>machine</strong> à coudre qui accompagnent cette garantie, pour une pério<strong>de</strong><br />
d’un (1) an, sous réserve <strong>de</strong>s conditions, exclusions et exceptions suivantes.<br />
Cette garantie est applicable si telle <strong>machine</strong> à coudre a raisonnablement <strong>de</strong> bons soins et<br />
maintien adéquat conformément aux instructions imprimées évoquées dans le livret.<br />
Les aiguilles, l’ampoule et les bobines, qui en principe doivent être remplacées, ne sont pas<br />
couvertes par cette garantie.<br />
Votre seul recours pour les pertes ou dommages résultant <strong>de</strong> défauts <strong>de</strong> performance, <strong>de</strong><br />
main-d’œuvre et <strong>de</strong> matériaux <strong>de</strong> ce produit, sera la réparation ou le remplacement <strong>de</strong> ce<br />
produit.<br />
Le fabricant n’est pas responsable <strong>de</strong>s dommages circonstanciels ou conséquents pour le<br />
manquement <strong>de</strong> toute garantie expresse ou implicite <strong>de</strong> ce produit.<br />
Cette garantie s’adresse uniquement à l’acheteur d’origine <strong>de</strong> la <strong>machine</strong> et exclue toute<br />
autre garantie légale et/ou conventionnelle. La seule responsabilité d’EURO-PRO<br />
Operating LLC s’il y en a une, se limite aux obligations spécifiques exprimées sous cette<br />
obligation <strong>de</strong> garantie.<br />
Veuillez inclure la preuve d’achat. Pour le support au service à la clientèle, appelez le 1(800)<br />
361-4639 ou visitez notre site web au www.euro-pro.com.<br />
------------------------------------------------------------------------------------------------------------------------------<br />
CARTE D’ENREGISTREMENT DU PROPRIÉTAIRE<br />
S.V.P., remplir et poster cette carte d’enregistrement dans les 10 jours suivants la date<br />
d’achat. Cette carte d’enregistrement nous permettra <strong>de</strong> vous contactez dans le cas d’un<br />
événement concernant la sécurité. En retournant cette carte, vous reconnaissez avoir lu et<br />
compris les instructions d’utilisation et les avertissements évoqués dans le livret.<br />
RETOURNEZ À EURO-PRO OPERATING LLC, 4400 Bois Franc, St Laurent, QC H4S 1A7<br />
_________________________________________________________________________<br />
970C<br />
Modèle <strong>de</strong> l’Appareil<br />
_________________________________________________________________________<br />
Date d’Achat Nom du magasin<br />
_________________________________________________________________________<br />
Nom du propriétaire<br />
_________________________________________________________________________<br />
Adresse Ville Prov. Co<strong>de</strong> Postal<br />
Imprimé en Chine<br />
39