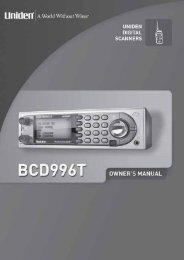
OPERATION MANUAL AM/FM/SHORTWAVE RADIO - TextFiles.com
OPERATION MANUAL AM/FM/SHORTWAVE RADIO - TextFiles.com
OPERATION MANUAL AM/FM/SHORTWAVE RADIO - TextFiles.com

You also want an ePaper? Increase the reach of your titles
YUMPU automatically turns print PDFs into web optimized ePapers that Google loves.
E10 <strong>OPERATION</strong> <strong>MANUAL</strong><br />
BASIC <strong>RADIO</strong> <strong>OPERATION</strong> continued<br />
BASIC <strong>RADIO</strong> <strong>OPERATION</strong> continued<br />
LISTENING IN <strong>FM</strong> STEREO<br />
<strong>FM</strong> stereo can be heard when using earphones/<br />
headphones. To hear <strong>FM</strong> in stereo, press the <strong>FM</strong><br />
STEREO button (14). ‘<strong>FM</strong>-STEREO’ will appear in<br />
the display.<br />
SETTING UP <strong>AM</strong> AND <strong>FM</strong><br />
OUTSIDE OF NORTH <strong>AM</strong>ERICA<br />
You can skip this section if you are in North<br />
America and just purchased the E10. It is already<br />
set-up in the factory for use in North America.<br />
Outside of North America, <strong>AM</strong> stations (MW in the<br />
E10’s display) are spaced in 9 KHz tuning steps.<br />
The <strong>FM</strong> frequency range may be different from that<br />
used in North America, e.g. like that used in Japan,<br />
76-108MHz. To make these changes, see the<br />
SYSTEM SET CODE TABLE and the instructions<br />
CHANGING SYSTEM SET CODES.<br />
TUNING IN STATIONS<br />
There are four ways to tune-in stations, described<br />
below. They are Manual Tuning, Auto-scan Tuning,<br />
Direct Frequency Entry and Fine Tuning.<br />
<strong>MANUAL</strong> TUNING<br />
Quick, short presses of the Up/Hour-Down/Min.<br />
buttons (9,10) enables tuning up or down frequency.<br />
AUTO-SCAN TUNING<br />
Pressing the Up/Hour or Down/Min. buttons (9, 10)<br />
for just over 1 second enables automatic scan-tuning.<br />
The radio will then automatically stop on the next<br />
station encountered. Use the Up/Hour button to<br />
auto-scan upward in frequency and the Down/Min.<br />
button to auto-scan downward in frequency.<br />
DIRECT FREQUENCY ENTRY<br />
When the desired frequency is known, it can be<br />
entered via the numeric keypad (17) and the ‘Enter’<br />
button (20). First, make sure that the correct band<br />
is selected - <strong>AM</strong>, <strong>FM</strong> or SW.<br />
Most <strong>AM</strong> and Shortwave frequencies are designated<br />
in kilohertz (KHz), e.g. 810 KHz or 9475 KHz. All<br />
<strong>FM</strong> frequencies are designated in megahertz<br />
(MHz), e.g. 102.9 MHz. To enter such frequencies:<br />
1. Press/release the ‘Enter’ (20) button.<br />
2. Enter the frequency using the numeric keypad (17).<br />
Sometimes Shortwave frequencies are designated<br />
in megahertz (MHz). If you encounter such a shortwave<br />
frequency and it has less than three digits<br />
after the decimal point (e.g. 15.10 MHz or 6.92<br />
MHz), then use the following method to enter it.<br />
However, if there are three digits after the decimal<br />
point (e.g. 15110 MHz or 5.975 MHz), use the<br />
method described previously.<br />
1. Press/release the ‘Enter’ (20) button.<br />
2. Enter the frequency using the numeric keypad<br />
(17).<br />
3. Press/release the ‘Enter’ button again.<br />
TUNING KNOB<br />
The TUNING knob control (28) is located on the<br />
right side of the radio. Use it to ‘fine-tune’ stations<br />
or as you would a tuning knob.<br />
LOCKING THE TUNING KNOB<br />
To prevent accidentally tuning off of the radio station,<br />
the tuning knob can be locked while the radio<br />
is turned on. To lock it, press and hold the TUNING<br />
MODE button for about three seconds. Notice that<br />
the key-lock symbol flashed twice in the lower right<br />
side of the display. The tuning knob is now locked.<br />
If turned, the frequency does not change and the<br />
key-lock symbol flashes. To unlock it, press the<br />
TUNING MODE button for about three seconds.<br />
TUNING MODE – FAST TUNING<br />
– SLOW TUNING<br />
The TUNING MODE button (8) allows selection of<br />
fast or slow tuning when using the tuning knob or<br />
the UP/HOUR and DOWN/MIN controls. FAST or<br />
SLOW appear in the display. When tuning with the<br />
tuning knob (28), fast tuning is usually appropriate.<br />
When tuning with the UP/HOUR and DOWN/MIN<br />
buttons, use slow tuning to tune in stations and<br />
fast tuning to move up or down frequency at a<br />
rapid rate. Then use slow to actually tune in stations.<br />
Experiment with this control to see which<br />
tuning mode that you prefer.<br />
USING THE BANDWIDTH<br />
BUTTON<br />
The BANDWIDTH button (14) is used when listening<br />
to <strong>AM</strong> and SW stations. Its purpose is to help<br />
minimize interference. The preferred setting is<br />
WIDE, which provides best audio fidelity. Use NAR-<br />
ROW when there is interference. W or N will<br />
appear in the display.<br />
USING THE SW IF SET<br />
CONTROL<br />
The SW IF SET control (13) shifts the intermediate<br />
frequency oscillator, which may help to minimize<br />
interference. This functions both for <strong>AM</strong> and shortwave.<br />
When activated, pIF shows in the display.<br />
CANCELLING TUNE-MUTE<br />
The tune-mute cancellation capability makes the<br />
E10 ‘feel’ more like an analog tuned radio, even<br />
though it’s a high-tech digital tuner. The difference<br />
is somewhat subtle and is mainly noticeable in<br />
slow tuning mode using the tuning knob. Note that<br />
it may be difficult for some to actually hear the<br />
difference. For those who can hear the difference,<br />
tuning may sound somewhat ‘smoother’ when<br />
using the tuning knob. To cancel Tune-Mute,<br />
press/release the SYSTEM SET button, then the<br />
TUNING MODE button. The display will read OFF.<br />
The Tune-Mute feature is now cancelled. To reactivate,<br />
do the same and the display will read ON.<br />
10<br />
11