EXR-5/EXR-3 - Roland
EXR-5/EXR-3 - Roland
EXR-5/EXR-3 - Roland

Create successful ePaper yourself
Turn your PDF publications into a flip-book with our unique Google optimized e-Paper software.
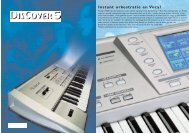
<strong>EXR</strong>-5/<strong>EXR</strong>-3<br />
Interactive Arranger<br />
Owner’s Manual<br />
Thank you for choosing a <strong>Roland</strong> <strong>EXR</strong>-5/<strong>EXR</strong>-3 Interactive<br />
Arranger, a novel keyboard with a superior <strong>Roland</strong> sound<br />
source, an intuitive user interface, a USB port, V-LINK compatibility<br />
and a host of other useful functions.<br />
To get the most out of the <strong>EXR</strong>-5/<strong>EXR</strong>-3 and to ensure<br />
many years of trouble-free service, we urge you to read<br />
through this Owner’s Manual thoroughly.<br />
To avoid confusion, let’s agree to use the word “button” for<br />
all keys on the front panel, and use “key” only when referring<br />
to the <strong>EXR</strong>-5/<strong>EXR</strong>-3’s keyboard.<br />
Before using this instrument, carefully read the “Important<br />
notes” (p. 10). They provide information concerning the<br />
proper operation of the <strong>EXR</strong>-5/<strong>EXR</strong>-3. Be sure to keep this<br />
manual in a safe place for future reference.<br />
Manual del Usuario<br />
Gracias por elegir un <strong>EXR</strong>-5/<strong>EXR</strong>-3 Interactive Arranger de<br />
<strong>Roland</strong>, un nuevo teclado con una fuente de sonido<br />
suprema de <strong>Roland</strong>, un interface de usuario intuitivo, un<br />
puerto USB, compatibilidad V-LINK y un muchas otras funciones<br />
de gran utilidad.<br />
Para obtener el máximo rendimiento del <strong>EXR</strong>-5/<strong>EXR</strong>-3 y<br />
para garantizar una utilización sin problemas durante<br />
muchos años, le aconsejamos que lea con atención y por<br />
completo este Manual del Usuario.<br />
Para evitar confusiones, utilizaremos la palabra “botón”<br />
para todas las teclas del panel frontal, y sólo utilizaremos la<br />
palabra “tecla” para referirnos al teclado del <strong>EXR</strong>-5/<strong>EXR</strong>-3.<br />
Antes de utilizar el instrumento, lea con atención las secciones<br />
tituladas “Notas importantes” (p. 10). Estas secciones<br />
le proporcionan información acerca de la correcta utilización<br />
del <strong>EXR</strong>-5/<strong>EXR</strong>-3. Conserve este manual en un lugar<br />
seguro para futuras consultas.<br />
Mode d’emploi<br />
Merci d’avoir porté votre choix sur l’<strong>EXR</strong>-5/<strong>EXR</strong>-3 Interactive<br />
Arranger <strong>Roland</strong>. Ce clavier arrangeur réunit un générateur<br />
de sons <strong>Roland</strong> de qualité exceptionnelle, une interface<br />
utilisateur intuitive, un port USB, la compatibilité V-<br />
LINK et bien d’autres atouts.<br />
Pour tirer parti de toutes les fonctions de votre <strong>EXR</strong>-5/<br />
<strong>EXR</strong>-3 et lui assurer de nombreuses années de bons et<br />
loyaux services, lisez entièrement le présent Mode d’emploi.<br />
Pour éviter toute confusion, convenons d’utiliser le mot<br />
“bouton” pour désigner les commandes en face avant et de<br />
réserver le mot “touche” au clavier de l’<strong>EXR</strong>-5/<strong>EXR</strong>-3.<br />
Avant d’utiliser cet instrument, lisez attentivement la section<br />
“Remarques importantes” (p. 10). Elle contient des<br />
informations vitales pour l’utilisation correcte de l’<strong>EXR</strong>-5/<br />
<strong>EXR</strong>-3. Rangez ce manuel en lieu sûr car il vous sera utile<br />
lors de références ultérieures.<br />
Copyright © 2003 ROLAND EUROPE. All rights reserved. No part of this publication<br />
may be reproduced in any form without the written permission of <strong>Roland</strong><br />
Europe S.p.a.<br />
Copyright © 2003 ROLAND EUROPE. Todos los derechos reservados. Ninguna parte<br />
de esta publicación podrá reproducirse de cualquier forma sin el permiso escrito de<br />
<strong>Roland</strong> Europe S.p.a.<br />
Copyright © 2003 ROLAND EUROPE. Tous droits réservés. Toute reproduction intégrale<br />
ou partielle de cette publication est interdite sous quelque forme que ce soit<br />
sans l’autorisation écrite de <strong>Roland</strong> Europe S.p.a.
<strong>EXR</strong>-5/<strong>EXR</strong>-3<br />
Features<br />
Superior sound source<br />
The <strong>EXR</strong>-5/<strong>EXR</strong>-3’s sounds are based on full-length (uncompressed)<br />
waveforms, which is unique in this price range. This<br />
produces vibrant, realistic sounds quite unlike anything you<br />
would expect from a budget-friendly arranger keyboard. The<br />
<strong>EXR</strong>-5/<strong>EXR</strong>-3’s tone generator is 64-voice polyphonic.<br />
Combined with the new amplification system and Digital<br />
Bass Enhancer function, the <strong>EXR</strong>-5/<strong>EXR</strong>-3 sounds truly<br />
amazing, with a clear high end and a powerful low range.<br />
Cover function<br />
The <strong>EXR</strong>-5/<strong>EXR</strong>-3 is <strong>Roland</strong>’s first arranger keyboard to sport<br />
the acclaimed Cover function found on the DisCover 5 and<br />
DisCover 5M. Simply by pressing one of the COVER buttons,<br />
you can change the orchestration of Standard MIDI Files –<br />
and now also of Music Styles.<br />
Flash memory and USB<br />
The <strong>EXR</strong>-5/<strong>EXR</strong>-3 comes with 84 Music Styles in ROM, 19<br />
additional Music Styles and several Standard MIDI Files. The<br />
additional Styles and SMFs reside in the <strong>EXR</strong>-5/<strong>EXR</strong>-3’s Flash<br />
memory area, whose contents can be expanded and managed<br />
via a USB connection with your PC or Macintosh computer.<br />
New concept<br />
The <strong>EXR</strong>-5/<strong>EXR</strong>-3 is 19-part multitimbral, with 3 parts that<br />
can be played via the keyboard (Main, Split and Dual). The<br />
Main part can be used to play melodies or for drumming,<br />
while the Split and Dual parts allow you to quickly add a second<br />
sound to your solo playing.<br />
Furthermore, the <strong>EXR</strong>-5/<strong>EXR</strong>-3 provides a new selection routine<br />
for Music Styles, Tones, songs, and User Programs: the<br />
FAMILY [√][®] buttons can be used for selecting specific<br />
groups, while the SELECT [√][®] buttons allow you to choose a<br />
setting within the selected group.<br />
Funciones<br />
Fuente de sonido suprema<br />
Los sonidos del <strong>EXR</strong>-5/<strong>EXR</strong>-3 se basan en formas de onda de<br />
longitud completa (no comprimidas), una característica única<br />
dentro de esta gama de precio. Esto produce sonidos vibrantes<br />
y realistas que no se esperarían de un teclado arranger<br />
económico. El generador de sonidos del <strong>EXR</strong>-5/<strong>EXR</strong>-3 tiene<br />
polifonía de 64 voces.<br />
Combinado con el nuevo sistema de amplificación y con la<br />
función Digital Bass Enhancer, el <strong>EXR</strong>-5/<strong>EXR</strong>-3 suena de<br />
forma sorprendente, con una gama alta nítida y una potente<br />
gama de bajos.<br />
Función Cover<br />
El <strong>EXR</strong>-5/<strong>EXR</strong>-3 es el primer teclado arranger de <strong>Roland</strong> que<br />
incorpora la aclamada función Cover incluida en el<br />
DisCover 5 y el DisCover 5M. Simplemente pulsando uno de<br />
los botones COVER, podrá cambiar la orquestación de archivos<br />
MIDI estándar, y ahora también de los Estilos Musicales.<br />
Memoria Flash y USB<br />
El <strong>EXR</strong>-5/<strong>EXR</strong>-3 se entrega con 84 Estilos Musicales en ROM,<br />
19 Estilos Musicales adicionales y varios archivos MIDI estándar.<br />
Los Estilos adicionales y los SMFs residen en el área de<br />
memoria Flash del <strong>EXR</strong>-5/<strong>EXR</strong>-3, el contenido de la cual<br />
puede extenderse y gestionarse mediante una conexión USB<br />
a un ordenador PC o Macintosh.<br />
Nuevo concepto<br />
El <strong>EXR</strong>-5/<strong>EXR</strong>-3 tiene funcionamiento multitímbrico de 19<br />
partes, con 3 partes que se pueden reproducir mediante el<br />
teclado (Main, Split y Dual). La parte Main se puede utilizar<br />
para reproducir melodías o para interpretar percusiones,<br />
mientras que las partes Split y Dual permiten añadir rápidamente<br />
un segundo sonido a una interpretación solista.<br />
Además, el <strong>EXR</strong>-5/<strong>EXR</strong>-3 proporciona una nueva forma de<br />
seleccionar los Estilos Musicales, los sonidos, las canciones y<br />
los Programas de Usuario: los botones FAMILY [√][®] se pueden<br />
utilizar para seleccionar grupos específicos, mientras que<br />
los botones SELECT [√][®] permiten elegir un ajuste dentro del<br />
grupo seleccionado.<br />
Caractéristiques<br />
Générateur de sons exceptionnel<br />
L’<strong>EXR</strong>-5/<strong>EXR</strong>-3 propose des sons basés sur des formes d’onde<br />
non comprimées, ce qui est inédit pour un instrument de<br />
cette gamme de prix. Il produit des sons vivants et réalistes,<br />
dépassant largement tout ce que vous pourriez attendre d’un<br />
clavier arrangeur abordable. Le générateur de sons de<br />
l’<strong>EXR</strong>-5/<strong>EXR</strong>-3 est polyphonique à 64 voix.<br />
Combiné au nouveau système d’amplification et à la fonction<br />
Digital Bass Enhancer, le générateur de l’<strong>EXR</strong>-5/<strong>EXR</strong>-3 produit<br />
des sonorités superbes aux aigus limpides et aux graves<br />
puissants.<br />
Fonction Cover<br />
L’<strong>EXR</strong>-5/<strong>EXR</strong>-3 est le premier clavier arrangeur <strong>Roland</strong> à proposer<br />
la fameuse fonction Cover équipant les DisCover 5 et<br />
DisCover 5M. Une simple pression sur un des boutons COVER<br />
permet de changer l’orchestration de fichiers Standard MIDI<br />
– et désormais aussi des styles musicaux.<br />
Mémoire Flash et USB<br />
L’<strong>EXR</strong>-5/<strong>EXR</strong>-3 est livré avec 84 styles musicaux en mémoire<br />
ROM, 19 styles musicaux ainsi que plusieurs fichiers Standard<br />
MIDI en supplément. Ces styles et fichiers SMF supplémentaires<br />
résident dans la mémoire Flash de l’<strong>EXR</strong>-5/<strong>EXR</strong>-3.<br />
Vous pouvez étendre la capacité de cette mémoire et en<br />
gérer le contenu avec un PC ou Macintosh via une connexion<br />
USB.<br />
Nouveau concept<br />
L’<strong>EXR</strong>-5/<strong>EXR</strong>-3 est multitimbral à 19 parties, dont 3 (Main,<br />
Split et Dual) peuvent être jouées via le clavier. Vous pouvez<br />
utiliser la partie Main pour jouer des mélodies ou de la batterie<br />
et les parties Split et Dual pour ajouter rapidement un<br />
deuxième son à votre jeu solo.<br />
L’<strong>EXR</strong>-5/<strong>EXR</strong>-3 propose en outre une nouvelle méthode de<br />
sélection des styles musicaux, sons, morceaux et programmes<br />
utilisateur: choisissez le groupe voulu avec les boutons<br />
FAMILY [√][®] et une entrée de ce groupe avec les boutons<br />
SELECT [√][®].<br />
2
<strong>EXR</strong>-5/<strong>EXR</strong>-3<br />
Excellent Arranger<br />
The <strong>EXR</strong>-5/<strong>EXR</strong>-3 comes loaded with 103 all-new Music<br />
Styles prepared by <strong>Roland</strong>’s legendary Style foundry. As<br />
usual, several patterns are available (INTRO, ORIGINAL, VARI-<br />
ATION, FILL and ENDING), with additional options via the<br />
BAND ORCHESTRATOR buttons.<br />
And much, much more…<br />
A metronome and several educational functions are provided,<br />
while three digital effects processors (Reverb, Chorus<br />
and MFX) can be used to further enhance the already amazing<br />
sound quality.<br />
The <strong>EXR</strong>-5/<strong>EXR</strong>-3 can play back GM, GM2, GS and XG song<br />
data, so that you can virtually use any Standard MIDI File<br />
available at your <strong>Roland</strong> dealer or on the Internet.<br />
Note: The <strong>EXR</strong>-5/<strong>EXR</strong>-3 supports XG Light and therefore only<br />
provides the basic set of compatible functions.<br />
The <strong>EXR</strong>-5 is also equipped with a floppy disk drive (2DD/<br />
2HD) for data management and importing Music Styles prepared<br />
for older <strong>Roland</strong> arranger instruments.<br />
Have fun!<br />
Arranger excelente<br />
El <strong>EXR</strong>-5/<strong>EXR</strong>-3 se entrega cargado con 103 Estilos Musicales<br />
totalmente nuevos preparados por la legendaria fundición de<br />
estilos de <strong>Roland</strong>. Como siempre, también están disponibles<br />
varios patrones (INTRO, ORIGINAL, VARIATION, FILL y<br />
ENDING), con opciones adicionales mediante los botones<br />
BAND ORCHESTRATOR.<br />
Y mucho, mucho más…<br />
Se incluyen un metrónomo y varias funciones educativas,<br />
mientras que pueden utilizarse tres procesadores de efectos<br />
digitales (Reverb, Chorus y MFX) para mejorar aún más la ya<br />
impresionante calidad de sonido.<br />
El <strong>EXR</strong>-5/<strong>EXR</strong>-3 puede reproducir información musical GM,<br />
GM2, GS y XG, con lo cual podrá utilizar prácticamente cualquier<br />
archivo MIDI estándar disponible en su distribuidor<br />
<strong>Roland</strong> o en Internet.<br />
Nota: El <strong>EXR</strong>-5/<strong>EXR</strong>-3 es compatible con XG Light y, por lo<br />
tanto, sólo proporciona el grupo básico de funciones compatibles.<br />
El <strong>EXR</strong>-5 también viene equipado con disquetera (2DD/2HD)<br />
para gestionar información e importar Estilos Musicales preparados<br />
para instrumentos arranger anteriores de <strong>Roland</strong>.<br />
¡Diviértase!<br />
Arrangeur hors pair<br />
L’<strong>EXR</strong>-5/<strong>EXR</strong>-3 contient 103 styles musicaux flambant neufs,<br />
issus du célèbre atelier de styles de <strong>Roland</strong>. Comme d’habitude,<br />
vous disposez de plusieurs motifs (INTRO, ORIGINAL,<br />
VARIATION, FILL et ENDING) et d’options supplémentaires<br />
accessibles via les boutons BAND ORCHESTRATOR.<br />
Et ce n’est pas tout…<br />
L’instrument propose un métronome et plusieurs fonctions<br />
pédagogiques; trois processeurs d’effets numériques (Reverb,<br />
Chorus et MFX) permettent d’affiner la qualité sonore exceptionnelle.<br />
L’<strong>EXR</strong>-5/<strong>EXR</strong>-3 peut lire les morceaux GM, GM2, GS et XG.<br />
Vous pouvez donc utiliser littéralement tout fichier Standard<br />
MIDI disponible chez votre revendeur <strong>Roland</strong> ou sur internet.<br />
Remarque: Compatible XG Light, l’<strong>EXR</strong>-5/<strong>EXR</strong>-3 n’exécute que<br />
les fonctions de base.<br />
L’<strong>EXR</strong>-5 comporte aussi un lecteur de disquettes (2DD/2HD)<br />
permettant de gérer les données et d’importer des styles<br />
musicaux conçus pour d’anciens instruments <strong>Roland</strong> disposant<br />
d’un arrangeur.<br />
Bon amusement!<br />
Microsoft and Windows are registered trademarks of Microsoft Corporation<br />
USA in the United States and other countries.<br />
Apple and Macintosh are registered trademarks of Apple Computer Corporation<br />
USA in the United states and other countries.<br />
Mac OS is a registered trademark of Apple Computer Corporation.<br />
Other names of companies, products, or standards are the trademarks or registered<br />
trademarks of their respective owners.<br />
Microsoft y Windows son marcas comerciales registradas de Microsoft<br />
Corporation USA en los Estados Unidos y otros países.<br />
Apple y Macintosh son marcas comerciales registradas de Apple Computer<br />
Corporation USA en los Estados Unidos y otros países.<br />
Mac OS es una marca comercial registrada de Apple Computer Corporation.<br />
El resto de los nombres de empresas, productos o estándares son marcas<br />
comerciales o marcas comerciales registradas de sus respectivos propietarios.<br />
Microsoft et Windows sont des marques déposées de Microsoft Corporation<br />
aux Etats-Unis et dans d’autres pays.<br />
Apple et Macintosh sont des marques déposées d’Apple Computer Corporation<br />
aux Etats-Unis et dans d’autres pays.<br />
Mac OS est une marque déposée d’Apple Computer Corporation.<br />
Les autres noms de sociétés, de produits ou de formats sont des marques<br />
commerciales ou déposées des détenteurs respectifs.<br />
3
<strong>EXR</strong>-5/<strong>EXR</strong>-3<br />
Used for instructions intended to alert<br />
the user to the risk of death or severe<br />
injury should the unit be used<br />
improperly.<br />
Used for instructions intended to alert<br />
the user to the risk of injury or material<br />
damage should the unit be used<br />
improperly.<br />
* Material damage refers to damage or<br />
other adverse effects caused with<br />
respect to the home and all its<br />
furnishings, as well to domestic<br />
animals or pets.<br />
The symbol alerts the user to important instructions<br />
or warnings.The specific meaning of the symbol is<br />
determined by the design contained within the<br />
triangle. In the case of the symbol at left, it is used for<br />
general cautions, warnings, or alerts to danger.<br />
The symbol alerts the user to items that must never<br />
be carried out (are forbidden). The specific thing that<br />
must not be done is indicated by the design contained<br />
within the circle. In the case of the symbol at left, it<br />
means that the unit must never be disassembled.<br />
The ● symbol alerts the user to things that must be<br />
carried out. The specific thing that must be done is<br />
indicated by the design contained within the circle. In<br />
the case of the symbol at left, it means that the powercord<br />
plug must be unplugged from the outlet.<br />
CONSIGNES DE SECURITÉ<br />
Using the unit safely<br />
Utilizar la unidad de forma segura<br />
Consignes de sécurité<br />
INSTRUCTIONS POUR LA PREVENTION D'INCENDIE, CHOC ÉLECTRIQUE OU BLESSURE<br />
A propos des symboles Avertissement et Précaution<br />
Sert aux instructions destinées à alerter<br />
l'utilisateur d'un risque mortel ou de<br />
AVERTISSEMENT blessure grave en cas d'utilisation<br />
incorrecte de l'unité.<br />
Sert aux instructions destinées à alerter<br />
l'utilisateur d'un risque de blessure ou<br />
de dommage matériel en cas d'emploi<br />
incorrect de l'unité.<br />
* Les dommages matériels se réfèrent<br />
PRUDENCE aux dommages ou autres effets<br />
négatifs causés au lieu d'utilisation et<br />
à tous ses éléments, ainsi qu'aux<br />
animaux domestiques.<br />
A propos des symboles<br />
Le symbole alerte l'utilisateur d'instructions importantes<br />
ou de mise en garde. La signification du symbole est<br />
déterminée par ce que contient le triangle. Dans le cas du<br />
symbole de gauche, il sert pour des précautions générales,<br />
des mises en garde ou alertes vis-à-vis d'un danger.<br />
Le symbole prévient l'utilisateur des interdits. Ce<br />
qui ne doit spécifiquement pas être fait est indiqué<br />
dans le cercle. Dans le cas du symbole de gauche, cela<br />
signifie que l'unité ne doit jamais être démontée.<br />
Le symbole ● alerte l'utilisateur de ce qui doit être<br />
fait. Ce qui doit être fait est indiqué par l'icône<br />
contenue dans le cercle. Dans le cas du symbole de<br />
gauche, cela signifie que le cordon d'alimentation doit<br />
être débranché de la prise murale.<br />
4
<strong>EXR</strong>-5/<strong>EXR</strong>-3<br />
• Before using this instrument, make sure to read the instructions<br />
below, and the Owner’s Manual.<br />
......................................................................................................................................<br />
• Do not open or perform any internal modifications on the unit.<br />
ATENCIÓN<br />
• Antes de utilizar este instrumento, lea las siguientes instrucciones y<br />
el Manual del Usuario.<br />
......................................................................................................................................<br />
• No abra ni realice modificaciones internas en el equipo.<br />
AVERTISSEMENT<br />
• Avant d’utiliser cet instrument, veillez à lire les instructions ci-dessous<br />
et dans le Mode d’emploi.<br />
......................................................................................................................................<br />
• N’ouvrez pas l’appareil et n’y faites aucune modification.<br />
......................................................................................................................................<br />
• Do not attempt to repair the <strong>EXR</strong>-5/<strong>EXR</strong>-3, or replace parts within<br />
it (except when this manual provides specific instructions directing<br />
you to do so). Refer all servicing to your retailer, the nearest <strong>Roland</strong><br />
Service Center, or an authorized <strong>Roland</strong> distributor, as listed on the<br />
“Information” page.<br />
......................................................................................................................................<br />
• Never use or store the <strong>EXR</strong>-5/<strong>EXR</strong>-3 in places that are:<br />
• Subject to temperature extremes (e.g., direct sunlight in an<br />
enclosed vehicle, near a heating duct, on top of heat-generating<br />
equipment); or are<br />
• Damp (e.g., baths, washrooms, on wet floors); or are<br />
• Humid; or are<br />
• Exposed to rain; or are<br />
• Dusty; or are<br />
• Subject to high levels of vibration.<br />
......................................................................................................................................<br />
• This unit should be used only with a rack or stand that is recommended<br />
by <strong>Roland</strong>.<br />
......................................................................................................................................<br />
007<br />
• Make sure you always have the unit placed in such a way that it is<br />
level and sure to remain stable. Never place it on stands that could<br />
wobble, or on inclined surfaces.<br />
......................................................................................................................................<br />
• The instrument should only be connected to a power supply of the<br />
type described in the operating instructions, or as marked on the<br />
adapter supplied with the <strong>EXR</strong>-5/<strong>EXR</strong>-3.<br />
......................................................................................................................................<br />
• Do not excessively twist or bend the adapter’s power cord, nor place<br />
heavy objects on it. Doing so can damage the cord, producing severed<br />
elements and short circuits. Damaged cords are fire and shock<br />
hazards!<br />
......................................................................................................................................<br />
......................................................................................................................................<br />
• No intente reparar el <strong>EXR</strong>-5/<strong>EXR</strong>-3, ni reemplazar sus elementos<br />
internos (excepto donde el manual lo indique específicamente). Para<br />
cualquier reparación, contacte con el establecimiento donde adquirió<br />
el equipo, el Centro de Servicio <strong>Roland</strong> más cercano, o un distribuidor<br />
<strong>Roland</strong> autorizado, que aparecen listados en la página “Información”.<br />
......................................................................................................................................<br />
• Nunca utilice ni guarde el <strong>EXR</strong>-5/<strong>EXR</strong>-3 en lugares:<br />
• Sujetos a temperaturas extremas (por ejemplo, a la luz directa<br />
del sol dentro de un vehículo cerrado, cerca de calefactores o<br />
encima de aparatos generadores de calor); o que estén<br />
• Mojados (por ejemplo, baños, servicios, suelos mojados); o<br />
• Húmedos; o<br />
• Expuestos a la lluvia; o<br />
• Con polvo; o<br />
• Sujetos a altos niveles de vibración.<br />
......................................................................................................................................<br />
• Este equipo sólo se debe utilizar con el estante o soporte recomendado<br />
por <strong>Roland</strong>.<br />
......................................................................................................................................<br />
• Coloque siempre el equipo en posición horizontal y sobre una<br />
superficie estable. No lo coloque nunca sobre soportes que puedan<br />
tambalearse, o sobre superficies inclinadas.<br />
......................................................................................................................................<br />
• El instrumento sólo debería conectarse a una fuente de alimentación<br />
del tipo descrito en las instrucciones de funcionamiento, o del<br />
indicado en el adaptador incluido con el <strong>EXR</strong>-5/<strong>EXR</strong>-3.<br />
......................................................................................................................................<br />
ATENCIÓN<br />
• No doble excesivamente el cable de alimentación del adaptador, ni<br />
coloque objetos pesados encima de él. Podría dañar el cable y causar<br />
desperfectos y corto circuitos. ¡Un cable dañado puede provocar<br />
incendios y descargas eléctricas!<br />
......................................................................................................................................<br />
......................................................................................................................................<br />
• N’essayez pas de réparer l’<strong>EXR</strong>-5/<strong>EXR</strong>-3 ou d’en remplacer des éléments<br />
(sauf si ce manuel vous donne des instructions spécifiques<br />
pour le faire). Confiez tout entretien ou réparation à votre revendeur,<br />
au service de maintenance <strong>Roland</strong> le plus proche ou à un distributeur<br />
<strong>Roland</strong> agréé (vous en trouverez la liste à la page “Information”).<br />
......................................................................................................................................<br />
• N’utilisez et ne rangez jamais l’<strong>EXR</strong>-5/<strong>EXR</strong>-3 dans des endroits:<br />
• soumis à des températures extrêmes (en plein soleil dans un<br />
véhicule fermé, à proximité d’une conduite de chauffage, audessus<br />
de matériel générateur de chaleur),<br />
• humides (salles de bain, toilettes, sur des sols ou supports<br />
mouillés),<br />
• à l’humidité ambiante élevée,<br />
• exposés aux précipitations,<br />
• poussiéreux,<br />
• soumis à de fortes vibrations.<br />
......................................................................................................................................<br />
• Utilisez l’instrument uniquement avec un rack ou un support<br />
recommandé par <strong>Roland</strong>.<br />
......................................................................................................................................<br />
007<br />
• Veillez à placer l’instrument sur une surface plane pour lui assurer<br />
une stabilité optimale. Evitez les supports qui vacillent ou les surfaces<br />
inclinées.<br />
......................................................................................................................................<br />
• Branchez l’instrument à un adaptateur secteur répondant aux spécifications<br />
énoncées dans le Mode d’emploi ou imprimées sur<br />
l’adaptateur fourni avec l’<strong>EXR</strong>-5/<strong>EXR</strong>-3.<br />
......................................................................................................................................<br />
AVERTISSEMENT<br />
• Evitez de tordre le cordon de l’adaptateur et de placer des objets<br />
lourds dessus. Vous risquez de l’endommager, ce qui provoquerait<br />
des courts-circuits et couperait l’alimentation de certains éléments.<br />
Un cordon endommagé peut provoquer une électrocution ou un<br />
incendie!<br />
......................................................................................................................................<br />
5
<strong>EXR</strong>-5/<strong>EXR</strong>-3<br />
• This instrument, either alone or in combination with an amplifier<br />
and headphones or speakers, may be capable of producing sound<br />
levels that could cause permanent hearing loss. Do not operate for a<br />
long period of time at a high volume level, or at a level that is<br />
uncomfortable. If you experience any hearing loss or ringing in the<br />
ears, you should immediately stop using the unit, and consult an<br />
audiologist.<br />
......................................................................................................................................<br />
• Do not allow any objects (e.g., flammable material, coins, pins); or<br />
liquids of any kind (water, soft drinks, etc.) to penetrate the unit.<br />
• Este instrumento, solo o en combinación con un amplificador y<br />
auriculares o altavoces, puede producir niveles de sonido capaces de<br />
provocar una pérdida de audición permanente. No debe utilizarlo<br />
durante mucho tiempo a altos niveles de volumen, o a niveles que<br />
no sean cómodos. Si experimenta cualquier pérdida de audición u<br />
oye zumbidos en los oídos, deje de utilizar el equipo inmediatamente<br />
y consulte con un médico especialista.<br />
.....................................................................................................................................<br />
• No permita que penetren objetos (por ejemplo, material inflamable,<br />
monedas, alfileres), ni líquidos de ningún tipo (agua, refrescos, etc.)<br />
en el interior del equipo.<br />
• Cet instrument, seul ou combiné à un amplificateur et un casque ou<br />
des enceintes, est en mesure de produire des signaux à des niveaux<br />
qui pourraient endommager l’ouïe de façon irréversible. Ne l’utilisez<br />
donc pas trop longtemps à volume élevé ou inconfortable. Si vous<br />
pensez avoir endommagé votre ouïe ou si vos oreilles bourdonnent,<br />
arrêtez immédiatement l’écoute et consultez un spécialiste.<br />
......................................................................................................................................<br />
• Evitez que des objets (du matériel inflammable, de la monnaie, des<br />
trombones) ou des liquides (eau, limonades, etc.) ne pénètrent à<br />
l’intérieur de l’instrument.<br />
......................................................................................................................................<br />
• In households with small children, an adult should provide supervision<br />
until the child is capable of following all rules essential for the<br />
safe operation of the <strong>EXR</strong>-5/<strong>EXR</strong>-3.<br />
......................................................................................................................................<br />
• Protect the unit from strong impact.<br />
(Do not drop it!)<br />
......................................................................................................................................<br />
• Do not force the <strong>EXR</strong>-5/<strong>EXR</strong>-3’s adapter to share an outlet with an<br />
unreasonable number of other devices. Be especially careful when<br />
using extension cords—the total power used by all devices you have<br />
connected to the extension cord’s outlet must never exceed the<br />
power rating (watts/amperes) for the extension cord. Excessive<br />
loads can cause the insulation on the cord to heat up and eventually<br />
melt through.<br />
......................................................................................................................................<br />
• Before using the <strong>EXR</strong>-5/<strong>EXR</strong>-3 in a foreign country, consult with<br />
your retailer, the nearest <strong>Roland</strong> Service Center, or an authorized<br />
<strong>Roland</strong> distributor, as listed on the “Information” page.<br />
......................................................................................................................................<br />
• The <strong>EXR</strong>-5/<strong>EXR</strong>-3 should be located so that its location or position<br />
does not interfere with its proper ventilation.<br />
......................................................................................................................................<br />
• This unit for use only with <strong>Roland</strong> keyboard stand KS-12. Use with<br />
other stands is capable of resulting in instability causing possible<br />
injury.<br />
......................................................................................................................................<br />
• Always grasp only the plug on the adapter when plugging into, or<br />
unplugging from, an outlet or this unit.<br />
......................................................................................................................................<br />
.....................................................................................................................................<br />
• En hogares con niños pequeños, un adulto deberá supervisar siempre<br />
la utilización del equipo hasta que el niño sea capaz de seguir<br />
todas las normas básicas para un uso seguro del <strong>EXR</strong>-5/<strong>EXR</strong>-3.<br />
.....................................................................................................................................<br />
• Proteja el equipo de golpes fuertes.<br />
(¡No lo deje caer!)<br />
.....................................................................................................................................<br />
• No comparta el adaptador del <strong>EXR</strong>-5/<strong>EXR</strong>-3 con una toma de<br />
corriente donde haya conectados un número excesivo de dispositivos.<br />
Tenga un cuidado especial cuando utilice cables alargadores: el<br />
consumo total de todos los aparatos conectados a la toma de<br />
corriente del cable alargador no debe sobrepasar la capacidad en<br />
vatios/amperios del mismo. Una carga excesiva puede provocar un<br />
sobrecalentamiento del aislamiento del cable, que incluso puede llegar<br />
a fundirse.<br />
.....................................................................................................................................<br />
ATENCIÓN<br />
• Antes de utilizar el <strong>EXR</strong>-5/<strong>EXR</strong>-3 en un país extranjero, consulte con<br />
el Centro <strong>Roland</strong> más cercano o con un distribuidor <strong>Roland</strong> autorizado,<br />
que aparecen listados en la página “Información”.<br />
.....................................................................................................................................<br />
• El <strong>EXR</strong>-5/<strong>EXR</strong>-3 debería colocarse de forma que su posición y su<br />
situación no impidan su correcta ventilación.<br />
.....................................................................................................................................<br />
• Este equipo debe utilizarse únicamente con el soporte de teclado<br />
KS-12 de <strong>Roland</strong>. La utilización de otros soportes puede provocar la<br />
inestabilidad del equipo y causar posibles accidentes.<br />
.....................................................................................................................................<br />
......................................................................................................................................<br />
• En présence de jeunes enfants, un adulte doit être présent jusqu’à<br />
ce que l’enfant puisse respecter les précautions nécessaires au<br />
maniement de l’<strong>EXR</strong>-5/<strong>EXR</strong>-3.<br />
......................................................................................................................................<br />
• Protégez l’instrument contre tout coup ou impact important.<br />
(Ne le laissez pas tomber!)<br />
......................................................................................................................................<br />
• Ne faites pas partager à l’adaptateur de l’<strong>EXR</strong>-5/<strong>EXR</strong>-3 une prise<br />
murale avec un nombre excessif d’autres appareils. Soyez particulièrement<br />
vigilant avec des multiprises. La puissance totale utilisée par<br />
tous les appareils connectés ne doit jamais excéder la puissance<br />
(watts/ampères) de la rallonge. Une charge excessive peut augmenter<br />
la température du câble et même entraîner une fusion.<br />
......................................................................................................................................<br />
AVERTISSEMENT<br />
• Avant d’utiliser l’<strong>EXR</strong>-5/<strong>EXR</strong>-3 dans un pays étranger, contactez<br />
votre revendeur, le service de maintenance <strong>Roland</strong> le plus proche ou<br />
un distributeur <strong>Roland</strong> agréé (vous en trouverez la liste à la page<br />
“Information”).<br />
......................................................................................................................................<br />
PRUDENCE<br />
• Placez l’<strong>EXR</strong>-5/<strong>EXR</strong>-3 de sorte à lui assurer une ventilation appropriée.<br />
......................................................................................................................................<br />
• Cet instrument ne peut être utilisé qu’avec le support pour clavier<br />
KS-12 de <strong>Roland</strong>. L’utilisation de tout autre support pourrait entraîner<br />
une instabilité et provoquer d’éventuelles blessures en cas de<br />
chute.<br />
......................................................................................................................................<br />
6
<strong>EXR</strong>-5/<strong>EXR</strong>-3<br />
• Try to prevent cords and cables from becoming entangled. Also, all<br />
cords and cables should be placed out of the reach of children.<br />
......................................................................................................................................<br />
• Never climb on top of, nor place heavy objects on the unit.<br />
......................................................................................................................................<br />
• Never handle the adapter’s power cord or its plugs with wet hands<br />
when plugging into, or unplugging from, an outlet or this unit.<br />
......................................................................................................................................<br />
• If you need to move the instrument, take note of the precautions<br />
listed below. Make sure to have a firm grip, to protect yourself from<br />
injury and the instrument from damage.<br />
• Disconnect the adapter.<br />
• Disconnect all cords coming from external devices.<br />
• Remove the music stand.<br />
......................................................................................................................................<br />
• Before cleaning the unit, turn off the power and unplug the<br />
adapter from the outlet.<br />
......................................................................................................................................<br />
• Whenever you suspect the possibility of lightning in your area, disconnect<br />
the adapter from the outlet.<br />
......................................................................................................................................<br />
• Should you remove screws, make sure to put them in a safe place<br />
out of children’s reach, so there is no chance of them being swallowed<br />
accidentally.<br />
......................................................................................................................................<br />
• Agarre siempre el conector del adaptador al conectarlo o desconectarlo<br />
de una toma de corriente o del equipo.<br />
......................................................................................................................................<br />
• No deje que los cables se enreden. Además, debería colocar todos los<br />
cables fuera del alcance de los niños.<br />
......................................................................................................................................<br />
• No suba nunca sobre el equipo, ni coloque objetos pesados sobre él.<br />
......................................................................................................................................<br />
• No maneje nunca el cable de alimentación del adaptador o sus<br />
conectores con las manos mojadas al conectarlos o desconectarlos<br />
de la toma de corriente o del equipo.<br />
......................................................................................................................................<br />
• Si necesita desplazar el instrumento, tenga en cuenta las siguientes<br />
precauciones. Asegúrese de sujetarlo firmemente, para evitar lesiones<br />
o que se dañe el instrumento.<br />
• Desconecte el adaptador.<br />
• Desconecte todos los cables de equipos externos.<br />
• Retire el atril.<br />
......................................................................................................................................<br />
• Antes de limpiar la unidad, desactívela y desconecte el adaptador de<br />
la toma de corriente.<br />
......................................................................................................................................<br />
• Si existe el riesgo de una tormenta eléctrica en la zona, desconecte<br />
el adaptador de la toma de corriente.<br />
......................................................................................................................................<br />
• Si necesita extraer los tornillos, asegúrese de que los coloca en un<br />
lugar seguro fuera del alcance de los niños, para que no puedan tragárselos<br />
por accidente.<br />
......................................................................................................................................<br />
• Saisissez toujours la fiche de l’adaptateur lors du branchement<br />
(débranchement) au secteur ou à l’instrument.<br />
......................................................................................................................................<br />
• Evitez que les cordons d’alimentation et les câbles ne s’emmêlent.<br />
De plus, tous les cordons et câbles doivent être placés hors de portée<br />
des enfants.<br />
......................................................................................................................................<br />
• Ne montez jamais sur l’instrument et évitez d’y déposer des objets<br />
lourds.<br />
......................................................................................................................................<br />
• Ne saisissez jamais le cordon de l’adaptateur ni ses fiches avec des<br />
mains humides lorsque vous le branchez ou débranchez d’une prise<br />
murale ou de l’instrument.<br />
......................................................................................................................................<br />
• Si vous désirez déplacer l’instrument, veuillez suivre les précautions<br />
ci-après. Assurez-vous d’une bonne prise afin d’éviter de vous blesser<br />
et d’endommager l’instrument.<br />
• Débranchez l’adaptateur secteur.<br />
• Déconnectez tous les câbles reliant l’instrument à d’autres appareils.<br />
• Enlevez le pupitre.<br />
......................................................................................................................................<br />
• Avant de nettoyer l’instrument, éteignez-le et débranchez l’adaptateur<br />
secteur de la prise murale.<br />
......................................................................................................................................<br />
• S’il y a risque d’orage, débranchez l’adaptateur secteur de la prise<br />
murale.<br />
......................................................................................................................................<br />
• Si vous devez retirer des vis, gardez-les en lieu sûr et hors de portée<br />
des enfants, pour éviter que ces derniers ne les avalent accidentellement.<br />
......................................................................................................................................<br />
7
<strong>EXR</strong>-5/<strong>EXR</strong>-3<br />
Contents<br />
1. Important notes . . . . . . . . . . . . . . . . . . . . . . . . . . . . . . . . . . 10<br />
2. Panel descriptions . . . . . . . . . . . . . . . . . . . . . . . . . . . . . . . . 14<br />
3. First steps . . . . . . . . . . . . . . . . . . . . . . . . . . . . . . . . . . . . . . . 21<br />
Setting up . . . . . . . . . . . . . . . . . . . . . . . . . . . . . . . . . . . . . .21<br />
Demo songs . . . . . . . . . . . . . . . . . . . . . . . . . . . . . . . . . . . .22<br />
Playing without accompaniment . . . . . . . . . . . . . . . . . .24<br />
4. Playing with accompaniment (Arranger). . . . . . . . . . . . . . 28<br />
Selecting Music Styles . . . . . . . . . . . . . . . . . . . . . . . . . . .31<br />
Balance . . . . . . . . . . . . . . . . . . . . . . . . . . . . . . . . . . . . . . . .33<br />
5. Playing back songs. . . . . . . . . . . . . . . . . . . . . . . . . . . . . . . . 34<br />
6. Changing the Music Style or song orchestration . . . . . . . 43<br />
Cover function . . . . . . . . . . . . . . . . . . . . . . . . . . . . . . . . . .43<br />
Using the Band Orchestrator function . . . . . . . . . . . . .45<br />
7. Recording your music . . . . . . . . . . . . . . . . . . . . . . . . . . . . . 47<br />
8. Additional Music Style functions . . . . . . . . . . . . . . . . . . . . 56<br />
One Touch. . . . . . . . . . . . . . . . . . . . . . . . . . . . . . . . . . . . . .56<br />
Using the Music Assistant . . . . . . . . . . . . . . . . . . . . . . . .57<br />
Melody Intelligence. . . . . . . . . . . . . . . . . . . . . . . . . . . . . .58<br />
Bass Inversion (Bass Inv). . . . . . . . . . . . . . . . . . . . . . . . . .59<br />
9. Keyboard part functions . . . . . . . . . . . . . . . . . . . . . . . . . . . 61<br />
Selecting sounds for the Main, Split and Dual parts. .61<br />
Drum sounds and sound effects (“SFX”) . . . . . . . . . . . .64<br />
Transpose . . . . . . . . . . . . . . . . . . . . . . . . . . . . . . . . . . . . . .65<br />
Octave settings . . . . . . . . . . . . . . . . . . . . . . . . . . . . . . . . .67<br />
10. Performance functions and effects . . . . . . . . . . . . . . . . . . 68<br />
Performance functions. . . . . . . . . . . . . . . . . . . . . . . . . . .68<br />
Using effects. . . . . . . . . . . . . . . . . . . . . . . . . . . . . . . . . . . .71<br />
V-LINK function . . . . . . . . . . . . . . . . . . . . . . . . . . . . . . . . .80<br />
11. Function menu . . . . . . . . . . . . . . . . . . . . . . . . . . . . . . . . . . . 83<br />
KB SET parameters . . . . . . . . . . . . . . . . . . . . . . . . . . . . . . . . . .84<br />
METRONOM parameters . . . . . . . . . . . . . . . . . . . . . . . . . . . . .87<br />
OCTAVE parameters . . . . . . . . . . . . . . . . . . . . . . . . . . . . . . . . .87<br />
VOLUME parameters . . . . . . . . . . . . . . . . . . . . . . . . . . . . . . . .88<br />
ARR SET parameters . . . . . . . . . . . . . . . . . . . . . . . . . . . . . . . .89<br />
EFFECTS parameters. . . . . . . . . . . . . . . . . . . . . . . . . . . . . . . . .90<br />
KB SCALE parameters . . . . . . . . . . . . . . . . . . . . . . . . . . . . . . .92<br />
Contenido<br />
1. Notas importantes. . . . . . . . . . . . . . . . . . . . . . . . . . . . . . . . 10<br />
2. Descripciones del panel. . . . . . . . . . . . . . . . . . . . . . . . . . . . 14<br />
3. Primeros pasos. . . . . . . . . . . . . . . . . . . . . . . . . . . . . . . . . . . 21<br />
Configurar. . . . . . . . . . . . . . . . . . . . . . . . . . . . . . . . . . . . . .21<br />
Canciones de demostración. . . . . . . . . . . . . . . . . . . . . . .22<br />
Tocar sin acompañamiento . . . . . . . . . . . . . . . . . . . . . . .24<br />
4. Interpretar con acompañamiento (Arranger). . . . . . . . . . 28<br />
Seleccionar estilos musicales. . . . . . . . . . . . . . . . . . . . . .31<br />
Balance . . . . . . . . . . . . . . . . . . . . . . . . . . . . . . . . . . . . . . . .33<br />
5. Reproducir canciones . . . . . . . . . . . . . . . . . . . . . . . . . . . . . 34<br />
6. Cambiar el Estilo musical o la orquestación de la canción43<br />
Función Cover . . . . . . . . . . . . . . . . . . . . . . . . . . . . . . . . . .43<br />
Utilizar la función Band Orchestrator . . . . . . . . . . . . . .45<br />
7. Grabar su música. . . . . . . . . . . . . . . . . . . . . . . . . . . . . . . . . 47<br />
8. Funciones adicionales del Estilo Musical . . . . . . . . . . . . . 56<br />
One Touch. . . . . . . . . . . . . . . . . . . . . . . . . . . . . . . . . . . . . .56<br />
Utilizar el Asistente Musical . . . . . . . . . . . . . . . . . . . . . .57<br />
Melody Intelligence. . . . . . . . . . . . . . . . . . . . . . . . . . . . . .58<br />
Bass Inversion (Bass Inv) . . . . . . . . . . . . . . . . . . . . . . . . .59<br />
9. Funciones de la parte del teclado . . . . . . . . . . . . . . . . . . . 61<br />
Seleccionar sonidos para las partes Main, Split y Dual61<br />
Sonidos de percusión y efectos de sonido (“SFX”) . . . .64<br />
Transposición . . . . . . . . . . . . . . . . . . . . . . . . . . . . . . . . . . .65<br />
Ajuste de octava . . . . . . . . . . . . . . . . . . . . . . . . . . . . . . . .67<br />
10. Funciones de interpretación y efectos . . . . . . . . . . . . . . . 68<br />
Funciones de interpretación . . . . . . . . . . . . . . . . . . . . . .68<br />
Utilizar efectos. . . . . . . . . . . . . . . . . . . . . . . . . . . . . . . . . .71<br />
Función V-LINK . . . . . . . . . . . . . . . . . . . . . . . . . . . . . . . . .80<br />
11. Menú Function . . . . . . . . . . . . . . . . . . . . . . . . . . . . . . . . . . 83<br />
Parámetros Kb Set . . . . . . . . . . . . . . . . . . . . . . . . . . . . . . . . . 84<br />
Parámetros Metronom. . . . . . . . . . . . . . . . . . . . . . . . . . . . . . 87<br />
Parámetros Octave . . . . . . . . . . . . . . . . . . . . . . . . . . . . . . . . . 87<br />
Parámetros Volume . . . . . . . . . . . . . . . . . . . . . . . . . . . . . . . . 88<br />
Parámetros Arr Set . . . . . . . . . . . . . . . . . . . . . . . . . . . . . . . . . 89<br />
Parámetros Efffects . . . . . . . . . . . . . . . . . . . . . . . . . . . . . . . . 90<br />
Parámetros Kb Scale. . . . . . . . . . . . . . . . . . . . . . . . . . . . . . . . 92<br />
Sommaire<br />
1. Remarques importantes. . . . . . . . . . . . . . . . . . . . . . . . . . . . 10<br />
2. Description des panneaux . . . . . . . . . . . . . . . . . . . . . . . . . . 14<br />
3. Prise en main . . . . . . . . . . . . . . . . . . . . . . . . . . . . . . . . . . . . 21<br />
Mise sous tension . . . . . . . . . . . . . . . . . . . . . . . . . . . . . . . 21<br />
Morceaux de démonstration. . . . . . . . . . . . . . . . . . . . . . 22<br />
Jeu sans accompagnement . . . . . . . . . . . . . . . . . . . . . . . 24<br />
4. Jeu avec accompagnement (arrangeur). . . . . . . . . . . . . . . 28<br />
Choix de styles musicaux. . . . . . . . . . . . . . . . . . . . . . . . . 31<br />
Balance . . . . . . . . . . . . . . . . . . . . . . . . . . . . . . . . . . . . . . . . 33<br />
5. Reproduire des morceaux . . . . . . . . . . . . . . . . . . . . . . . . . . 34<br />
6. Changer l’orchestration d’un style ou d’un morceau . . . . 43<br />
Fonction Cover. . . . . . . . . . . . . . . . . . . . . . . . . . . . . . . . . . 43<br />
Utiliser la fonction Band Orchestrator . . . . . . . . . . . . . 45<br />
7. Enregistrer votre jeu. . . . . . . . . . . . . . . . . . . . . . . . . . . . . . . 47<br />
8. Fonctions Music Style supplémentaires . . . . . . . . . . . . . . . 56<br />
One Touch . . . . . . . . . . . . . . . . . . . . . . . . . . . . . . . . . . . . . 56<br />
Travail avec le Music Assistant . . . . . . . . . . . . . . . . . . . . 57<br />
Melody Intelligence . . . . . . . . . . . . . . . . . . . . . . . . . . . . . 58<br />
Bass Inversion (Bass Inv) . . . . . . . . . . . . . . . . . . . . . . . . . 59<br />
9. Fonctions liées aux parties Keyboard . . . . . . . . . . . . . . . . . 61<br />
Choix des sons pour les parties Main, Split et Dual . . 61<br />
Sons de batterie et effets sonores (“SFX”). . . . . . . . . . . 64<br />
Transpose . . . . . . . . . . . . . . . . . . . . . . . . . . . . . . . . . . . . . . 65<br />
Réglages d’octave . . . . . . . . . . . . . . . . . . . . . . . . . . . . . . . 67<br />
10. Fonctions de jeu et effets . . . . . . . . . . . . . . . . . . . . . . . . . . 68<br />
Fonctions de jeu . . . . . . . . . . . . . . . . . . . . . . . . . . . . . . . . 68<br />
Utilisation des effets. . . . . . . . . . . . . . . . . . . . . . . . . . . . . 71<br />
Fonction V-LINK . . . . . . . . . . . . . . . . . . . . . . . . . . . . . . . . 80<br />
11. Menu Function . . . . . . . . . . . . . . . . . . . . . . . . . . . . . . . . . . . 83<br />
Paramètres Kb Set. . . . . . . . . . . . . . . . . . . . . . . . . . . . . . . . . . 84<br />
Paramètres Metronom. . . . . . . . . . . . . . . . . . . . . . . . . . . . . . 87<br />
Paramètres Octave . . . . . . . . . . . . . . . . . . . . . . . . . . . . . . . . . 87<br />
Paramètres Volume . . . . . . . . . . . . . . . . . . . . . . . . . . . . . . . . 88<br />
Paramètres Arr Set . . . . . . . . . . . . . . . . . . . . . . . . . . . . . . . . . 89<br />
Paramètres Effects . . . . . . . . . . . . . . . . . . . . . . . . . . . . . . . . . 90<br />
Paramètres Kb Scale. . . . . . . . . . . . . . . . . . . . . . . . . . . . . . . . 92<br />
8
<strong>EXR</strong>-5/<strong>EXR</strong>-3<br />
12. Working with User Programs . . . . . . . . . . . . . . . . . . . . . . . 94<br />
Writing your settings to a User Program . . . . . . . . . . . 94<br />
Selecting a User Program. . . . . . . . . . . . . . . . . . . . . . . . . . . . . . 96<br />
13. MIDI functions . . . . . . . . . . . . . . . . . . . . . . . . . . . . . . . . . . .97<br />
14. Data management . . . . . . . . . . . . . . . . . . . . . . . . . . . . . . .103<br />
Working with the Flash memory . . . . . . . . . . . . . . . . . 103<br />
Archiving data using a computer (USB). . . . . . . . . . . . . . . . . 108<br />
Disk functions [<strong>EXR</strong>-5 only] . . . . . . . . . . . . . . . . . . . . . . . . . . . 112<br />
15. Using the outputs and an optional footswitch. . . . . . . .119<br />
16. Miscellaneous . . . . . . . . . . . . . . . . . . . . . . . . . . . . . . . . . . .120<br />
Functions for educational purposes . . . . . . . . . . . . . . 120<br />
Initializing your <strong>EXR</strong>-5/<strong>EXR</strong>-3 (Factory) . . . . . . . . . . . 121<br />
17. Specifications . . . . . . . . . . . . . . . . . . . . . . . . . . . . . . . . . . .122<br />
18. Lists . . . . . . . . . . . . . . . . . . . . . . . . . . . . . . . . . . . . . . . . . . .124<br />
Tones selectable via the front panel . . . . . . . . . . . . . . 124<br />
Drum Kits . . . . . . . . . . . . . . . . . . . . . . . . . . . . . . . . . . . . . . . . . . 127<br />
Music Styles . . . . . . . . . . . . . . . . . . . . . . . . . . . . . . . . . . . . . . . . 130<br />
Chord Intelligence . . . . . . . . . . . . . . . . . . . . . . . . . . . . . . . . . . . 131<br />
MIDI Implementation Chart. . . . . . . . . . . . . . . . . . . . . . . . . . . 133<br />
12. Trabajar con Programas de Usuario. . . . . . . . . . . . . . . . . . 94<br />
Escribir ajustes en un Programa de Usuario . . . . . . . . 94<br />
Seleccionar un Programa de Usuario . . . . . . . . . . . . . . . . . . . . 96<br />
13. Funciones MIDI . . . . . . . . . . . . . . . . . . . . . . . . . . . . . . . . . . 97<br />
14. Gestión de la información . . . . . . . . . . . . . . . . . . . . . . . . 103<br />
Trabajar con la memoria Flash. . . . . . . . . . . . . . . . . . . 103<br />
Archivar información utilizando un ordenador (USB) . . . . . 108<br />
Funciones Disk [Sólo <strong>EXR</strong>-5] . . . . . . . . . . . . . . . . . . . . . . . . . .112<br />
15. Utilizar las salidas y un conmutador de pedal . . . . . . . . 119<br />
16. Miscelánea . . . . . . . . . . . . . . . . . . . . . . . . . . . . . . . . . . . . . 120<br />
Funciones para fines educativos . . . . . . . . . . . . . . . . . 120<br />
Inicializar el <strong>EXR</strong>-5/<strong>EXR</strong>-3 (Factory) . . . . . . . . . . . . . . 121<br />
17. Especificaciones. . . . . . . . . . . . . . . . . . . . . . . . . . . . . . . . . 122<br />
18. Listas . . . . . . . . . . . . . . . . . . . . . . . . . . . . . . . . . . . . . . . . . . 124<br />
Sonidos seleccionables mediante el panel frontal . . 124<br />
Grupos de percusión . . . . . . . . . . . . . . . . . . . . . . . . . . . . . . . . .127<br />
Estilos musicales. . . . . . . . . . . . . . . . . . . . . . . . . . . . . . . . . . . . .130<br />
Chord Intelligence . . . . . . . . . . . . . . . . . . . . . . . . . . . . . . . . . . .131<br />
Diagrama de Implementación MIDI . . . . . . . . . . . . . . . . . . . . 133<br />
12. Tirer parti des programmes utilisateur. . . . . . . . . . . . . . . . 94<br />
Mémorisation de vos réglages dans un programme<br />
utilisateur. . . . . . . . . . . . . . . . . . . . . . . . . . . . . . . . . . . . .94<br />
Sélection d’un programme utilisateur . . . . . . . . . . . . . . . . . . . 96<br />
13. Fonctions MIDI . . . . . . . . . . . . . . . . . . . . . . . . . . . . . . . . . . . 97<br />
14. Gestion des données. . . . . . . . . . . . . . . . . . . . . . . . . . . . . .103<br />
Utilisation de la mémoire Flash. . . . . . . . . . . . . . . . . . 103<br />
Archiver des données avec un ordinateur (USB). . . . . . . . . .108<br />
Fonctions Disk [<strong>EXR</strong>-5 uniquement] . . . . . . . . . . . . . . . . . . . .112<br />
15. Utilisation des sorties et d’un commutateur au pied . . . 119<br />
16. Divers . . . . . . . . . . . . . . . . . . . . . . . . . . . . . . . . . . . . . . . . . .120<br />
Fonctions pédagogiques. . . . . . . . . . . . . . . . . . . . . . . . 120<br />
Initialiser l’<strong>EXR</strong>-5/<strong>EXR</strong>-3 (Factory) . . . . . . . . . . . . . . . 121<br />
17. Fiche technique . . . . . . . . . . . . . . . . . . . . . . . . . . . . . . . . .122<br />
18. Listes . . . . . . . . . . . . . . . . . . . . . . . . . . . . . . . . . . . . . . . . . .124<br />
Sons disponibles en face avant . . . . . . . . . . . . . . . . . . 124<br />
Kits de batterie . . . . . . . . . . . . . . . . . . . . . . . . . . . . . . . . . . . . . .127<br />
Styles musicaux . . . . . . . . . . . . . . . . . . . . . . . . . . . . . . . . . . . . .130<br />
Chord Intelligence . . . . . . . . . . . . . . . . . . . . . . . . . . . . . . . . . . .131<br />
Tableau d’équipement MIDI . . . . . . . . . . . . . . . . . . . . . . . . . . .133<br />
9
<strong>EXR</strong>-5/<strong>EXR</strong>-3<br />
]<br />
1. Important notes<br />
]<br />
1. Notas importantes<br />
1. Remarques importantes<br />
In addition to the items listed under “Using the unit safely”<br />
(p. 4), please read and observe the following:<br />
Power supply<br />
• Do not use this instrument on the same power circuit with any<br />
device that will generate line noise (such as an electric motor or<br />
variable lighting system).<br />
• Before connecting the <strong>EXR</strong>-5/<strong>EXR</strong>-3 to other devices, turn off the<br />
power to all units. This will help prevent malfunctions and/or damage<br />
to speakers or other devices.<br />
Placement<br />
• Using the <strong>EXR</strong>-5/<strong>EXR</strong>-3 near power amplifiers (or other equipment<br />
containing large power transformers) may induce hum. To alleviate<br />
the problem, change the orientation of this instrument or move it<br />
further away from the source of interference.<br />
• This instrument may interfere with radio and television reception. Do<br />
not use it in the vicinity of such receivers.<br />
• Observe the following when using the unit’s floppy disk drive. For<br />
further details, refer to “Before using floppy disks (handling the<br />
floppy disk drive) [<strong>EXR</strong>-5 only]”.<br />
• Do not place the unit near devices that produce a strong magnetic<br />
field (e.g., loudspeakers).<br />
• Install the <strong>EXR</strong>-5/<strong>EXR</strong>-3 on a solid, level surface.<br />
• Do not move the unit or subject it to vibration while the drive is<br />
operating.<br />
• Do not expose the <strong>EXR</strong>-5/<strong>EXR</strong>-3 to direct sunlight, place it near<br />
devices that radiate heat, leave it inside an enclosed vehicle, or otherwise<br />
subject it to temperature extremes. Excessive heat can deform<br />
or discolor the instrument.<br />
• To avoid possible breakdown, do not use the unit in a wet area, such<br />
as an area exposed to rain or other moisture.<br />
• Do not allow objects to remain on top of the <strong>EXR</strong>-5/<strong>EXR</strong>-3. This can<br />
be the cause of malfunction.<br />
Además de los puntos indicados en la sección “Utilizar la<br />
unidad de forma segura” (p. 4), lea y tenga en cuenta lo<br />
siguiente:<br />
Alimentación<br />
• No utilice este instrumento en la misma derivación de circuito que<br />
otro dispositivo que pueda generar interferencias en la línea (como<br />
un motor eléctrico o un sistema de iluminación variable).<br />
• Antes de conectar el <strong>EXR</strong>-5/<strong>EXR</strong>-3 a otros dispositivos, desactive<br />
todas las unidades. Con ello evitará funcionamientos incorrectos y/o<br />
daños en los altavoces u otros dispositivos.<br />
Colocación<br />
• Si utiliza el <strong>EXR</strong>-5/<strong>EXR</strong>-3 cerca de amplificadores de potencia (u<br />
equipos que contengan transformadores de corriente de gran potencia)<br />
se pueden producir zumbidos. Para solucionar este problema,<br />
cambie la orientación de este instrumento, o aléjelo de la fuente de<br />
interferencias.<br />
• Este instrumento puede interferir con la recepción de radio y televisión.<br />
No lo utilice cerca de este tipo de receptores.<br />
• Tenga en cuenta lo siguiente cuando utilice la disquetera del equipo.<br />
Para más detalles, consulte la sección “Antes de utilizar disquetes (o<br />
de manejar la disquetera) [Sólo <strong>EXR</strong>-5]”.<br />
• No coloque la unidad cerca de aparatos que generen campos<br />
magnéticos muy potentes (como por ejemplo, altavoces).<br />
• Instale el <strong>EXR</strong>-5/<strong>EXR</strong>-3 en una superficie sólida y plana.<br />
• No mueva el equipo ni lo someta a vibraciones mientras la unidad<br />
esté en funcionamiento.<br />
• No exponga el <strong>EXR</strong>-5/<strong>EXR</strong>-3 a la luz solar directa, no lo coloque<br />
cerca de dispositivos que generen calor, no lo deje dentro de vehículos<br />
cerrados ni lo exponga a temperaturas extremas. Un calor excesivo<br />
puede deformar o decolorar el instrumento.<br />
• Para evitar posibles fallos, no utilice el equipo en zonas mojadas,<br />
como por ejemplo una zona expuesta a lluvia o humedad.<br />
• No deje objetos encima del <strong>EXR</strong>-5/<strong>EXR</strong>-3. Esto podría ser la causa del<br />
funcionamiento anómalo.<br />
Outre les informations de la section “Consignes de sécurité”<br />
(p. 4), veuillez lire et suivre les conseils suivants:<br />
Alimentation<br />
• Ne vous servez pas de cet instrument sur le même circuit qu’un<br />
appareil générateur de parasites (tel qu’un moteur électrique ou un<br />
système variateur de lumière).<br />
• Avant de brancher l’<strong>EXR</strong>-5/<strong>EXR</strong>-3 à d’autres appareils, mettez tous<br />
les appareils hors tension. Le non-respect de cette précaution pourrait<br />
entraîner des dysfonctionnements et/ou l’endommagement de<br />
vos enceintes ou d’autres appareils.<br />
Emplacement<br />
• L’usage de l’<strong>EXR</strong>-5/<strong>EXR</strong>-3 à proximité d’amplificateurs (ou de tout<br />
autre matériel contenant de grands transformateurs électriques)<br />
peut être source de bruit. Pour résoudre le problème, changez<br />
l’orientation de l’instrument ou éloignez-le de la source d’interférence.<br />
• Cet instrument peut causer des interférences lors de la réception<br />
radio ou télévisée. Ne vous en servez pas à proximité de tels<br />
récepteurs.<br />
• Observez les consignes suivantes quand vous utilisez le lecteur de<br />
disquettes de l’instrument. Pour en savoir plus, voyez “Avant d’utiliser<br />
des disquettes (maniement du lecteur de disquettes)<br />
[<strong>EXR</strong>-5 uniquement]”.<br />
• Ne placez pas l’instrument à proximité d’appareils générant un<br />
puissant champ magnétique (comme des enceintes, par exemple).<br />
• Installez l’<strong>EXR</strong>-5/<strong>EXR</strong>-3 sur une surface stable et de niveau.<br />
• Ne déplacez pas l’instrument et évitez toute vibration pendant<br />
l’utilisation du lecteur de disquettes.<br />
• N’exposez pas l’<strong>EXR</strong>-5/<strong>EXR</strong>-3 directement au soleil, ne le laissez pas<br />
près d’appareils irradiant de la chaleur, dans un véhicule fermé ou<br />
dans un endroit le soumettant à des températures excessives. Une<br />
chaleur excessive peut déformer ou décolorer l’instrument.<br />
• Pour éviter les risques de dysfonctionnements, n’utilisez jamais l’instrument<br />
dans des lieux humides, comme un endroit exposé aux précipitations<br />
ou à toute autre source d’humidité.<br />
• Ne posez jamais d’objet sur l’<strong>EXR</strong>-5/<strong>EXR</strong>-3. Cela pourrait provoquer<br />
des dysfonctionnements.<br />
10
<strong>EXR</strong>-5/<strong>EXR</strong>-3<br />
Maintenance<br />
• For everyday cleaning wipe the <strong>EXR</strong>-5/<strong>EXR</strong>-3 with a soft, dry cloth<br />
or one that has been slightly dampened with water. To remove stubborn<br />
dirt, use a mild, non-abrasive detergent. Afterwards, be sure to<br />
wipe the instrument thoroughly with a soft, dry cloth.<br />
• Never use benzene, thinner, alcohol or solvents of any kind, to avoid<br />
the possibility of discoloration and/or deformation.<br />
Repairs and data<br />
• Please be aware that all data contained in the instrument’s memory<br />
may be lost when it is sent for repairs. In certain cases (such as when<br />
circuitry related to memory itself is out of order), we regret that it<br />
may not be possible to restore the data. <strong>Roland</strong> assumes no liability<br />
concerning such loss of data.<br />
Additional precautions<br />
• Please be aware that the memory contents can be irretrievably lost<br />
as a result of a malfunction, or the improper operation of the instrument.<br />
• Use a reasonable amount of care when using the instrument’s buttons,<br />
other controls, and jacks/connectors. Rough handling can lead<br />
to malfunctions.<br />
• Never strike or apply strong pressure to the display.<br />
• When connecting/disconnecting cables, grasp the connector itself—<br />
never pull on the cable. This way you will avoid causing shorts, or<br />
damage to the cable’s internal elements.<br />
• A small amount of heat will radiate from the instrument during normal<br />
operation. This is perfectly normal.<br />
• To avoid disturbing your neighbors, try to keep the instrument’s volume<br />
at reasonable levels. You may prefer to use headphones, so you<br />
do not need to be concerned about those around you (especially late<br />
at night).<br />
• When you need to transport the instrument, package it in the box<br />
(including padding) that it came in. Otherwise, you will need to use<br />
equivalent packaging materials, or a flightcase.<br />
• Use only a recommended footswitch (DP-2, DP-6, sold separately).<br />
By connecting any other footswitch, you risk causing malfunction<br />
and/or damage to the <strong>EXR</strong>-5/<strong>EXR</strong>-3.<br />
• When the <strong>EXR</strong>-5/<strong>EXR</strong>-3 is used at excessive volumes, the protection<br />
system of its power amplifier stage may come on and mute the<br />
speakers. In that case, reduce the volume setting and wait a few seconds.<br />
Mantenimiento<br />
• Para una limpieza diaria, limpie el <strong>EXR</strong>-5/<strong>EXR</strong>-3 con un paño suave y<br />
seco o ligeramente humedecido con agua. Para eliminar la suciedad<br />
adherida, utilice un paño impregnado con un detergente suave no<br />
abrasivo. A continuación, asegúrese de limpiar concienzudamente el<br />
instrumento con una gamuza seca y suave.<br />
• No utilice nunca bencina, diluyentes, alcohol ni disolventes de cualquier<br />
tipo, para evitar el posible riesgo de deformación y/o decoloración.<br />
Reparaciones e información<br />
• Tenga en cuenta que toda la información contenida en la memoria<br />
del instrumento se puede perder durante una reparación. En algunos<br />
casos (como cuando se averíen los circuitos relacionados con la propia<br />
memoria), lamentablemente no será posible recuperar la información.<br />
<strong>Roland</strong> no asume ninguna responsabilidad por la pérdida de<br />
información.<br />
Precauciones adicionales<br />
• Tenga en cuenta que el contenido de la memoria se puede perder<br />
irremediablemente como resultado de un mal funcionamiento, o una<br />
utilización incorrecta del instrumento.<br />
• Tenga mucho cuidado cuando utilice los botones del instrumento, y<br />
el resto de controles y conectores/jacks. Un manejo brusco puede<br />
provocar funcionamientos incorrectos.<br />
• No golpee ni aplique una presión excesiva sobre la pantalla.<br />
• Cuando conecte y desconecte todos los cables, hágalo tirando del<br />
conector, nunca del cable. De este modo evitará cortocircuitos o<br />
daños en los elementos internos del cable.<br />
• El instrumento irradiará una pequeña cantidad de calor cuando esté<br />
funcionando. Esto es totalmente normal.<br />
• Para evitar molestar a los vecinos, intente mantener el nivel de volumen<br />
a unos niveles razonables. Quizá prefiera utilizar auriculares,<br />
con lo cual no deberá preocuparse por las personas de su alrededor<br />
(especialmente a altas horas de la noche).<br />
• Cuando necesite transportar el instrumento, póngalo dentro de la<br />
caja original (con los elementos de protección incluidos). De no ser<br />
así, necesitará materiales de embalaje equivalentes, o un contenedor<br />
especial.<br />
• Utilice sólo un conmutador de pedal recomendado (DP-2, DP-6, vendido<br />
por separado). Si conecta cualquier otro conmutador de pedal,<br />
corre el riesgo de provocar un funcionamiento anómalo y/o daños en<br />
el <strong>EXR</strong>-5/<strong>EXR</strong>-3.<br />
• Si utiliza el <strong>EXR</strong>-5/<strong>EXR</strong>-3 a un volumen excesivo, es posible que se<br />
active el sistema de protección de su amplificador de potencia y<br />
enmudezca los altavoces. En este caso, reduzca el ajuste de volumen<br />
y espere unos segundos.<br />
Entretien<br />
• Pour nettoyer l’<strong>EXR</strong>-5/<strong>EXR</strong>-3, utilisez un chiffon sec et doux ou à la<br />
rigueur légèrement humidifié avec de l’eau. Pour enlever des saletés<br />
plus tenaces, servez-vous d’un détergent doux. Ensuite, essuyez soigneusement<br />
l’instrument avec un chiffon doux et sec.<br />
• N’utilisez jamais d’essence, de diluant, de solvant ou d’alcool<br />
d’aucune sorte pour éviter le risque de décoloration et/ou de déformation.<br />
Réparations et données<br />
• N’oubliez pas que toutes les données contenues dans l’instrument<br />
sont perdues s’il doit subir une réparation. Dans certains cas (notamment<br />
lorsque les circuits touchant à la mémoire elle-même sont<br />
endommagés), il peut s’avérer impossible de récupérer des données.<br />
<strong>Roland</strong> rejette toute responsabilité concernant la perte de ces données.<br />
Précautions supplémentaires<br />
• N’oubliez jamais que le contenu de la mémoire peut être irrémédiablement<br />
perdu suite à un mauvais fonctionnement ou un mauvais<br />
maniement de l’instrument.<br />
• Maniez les boutons, les autres commandes et les prises avec un minimum<br />
d’attention. Un maniement trop brutal peut entraîner des dysfonctionnements.<br />
• Evitez les coups ou les pressions trop fortes sur l’écran.<br />
• Lorsque vous branchez/débranchez des câbles, prenez la fiche en<br />
main, jamais le câble. Vous éviterez ainsi d’endommager le câble ou<br />
de provoquer des court-circuits.<br />
• L’instrument dégage une faible quantité de chaleur durant son fonctionnement.<br />
C’est normal.<br />
• Pour ne pas déranger vos voisins, maintenez le volume à un niveau<br />
raisonnable. Il peut parfois être préférable d’utiliser le casque (surtout<br />
quand vous jouez la nuit).<br />
• Si vous devez transporter l’instrument, emballez-le dans sa boîte<br />
d’origine (avec les protections). A défaut, utilisez un emballage équivalent<br />
ou un flightcase.<br />
• Utilisez uniquement un commutateur au pied du type recommandé<br />
(DP-2, DP-6, disponible en option). Si vous branchez un autre commutateur<br />
au pied, vous risquez de provoquer un dysfonctionnement<br />
et/ou d’endommager l’<strong>EXR</strong>-5/<strong>EXR</strong>-3.<br />
• Quand vous jouez sur l’<strong>EXR</strong>-5/<strong>EXR</strong>-3 à un volume excessif, le système<br />
de protection de son amplificateur de puissance pourrait s’activer,<br />
coupant le son des enceintes. Dans ce cas, diminuez le volume et<br />
attendez quelques secondes.<br />
11
<strong>EXR</strong>-5/<strong>EXR</strong>-3<br />
Before using floppy disks (handling the floppy disk drive)<br />
[<strong>EXR</strong>-5 only]<br />
• Install the unit on a solid, level surface in an area free from vibration.<br />
If the unit must be installed at an angle, be sure the installation does<br />
not exceed the permissible range: upward, 2°; downward, 18°.<br />
• Avoid using the <strong>EXR</strong>-5 immediately after it has been moved to a<br />
location with a level of humidity that is greatly different than its<br />
former location. Rapid changes in the environment can cause condensation<br />
to form inside the drive, which will adversely affect the<br />
operation of the drive and/or damage floppy disks. When the <strong>EXR</strong>-5<br />
has been moved, allow it to become accustomed to the new environment<br />
(allow a few hours) before operating it.<br />
• To insert a disk, push it gently but firmly into the drive—it will click<br />
into place. To remove a disk, press the EJECT button firmly. Do not<br />
use excessive force to remove a disk which is lodged in the drive.<br />
• Never attempt to remove a floppy disk from the drive while the drive<br />
is operating (the indicator is lit); damage could result to both the<br />
disk and the drive.<br />
• Remove any disk from the drive before switching the instrument on<br />
or off.<br />
• To prevent damage to the disk drive’s heads, always try to hold the<br />
floppy disk in a level position (not tilted in any direction) while<br />
inserting it into the drive. Push it in firmly, but gently. Never use<br />
excessive force.<br />
• To avoid the risk of malfunction and/or damage, insert only floppy<br />
disks into the disk drive. Never insert any other type of disk. Avoid<br />
getting paper clips, coins, or any other foreign objects inside the<br />
drive.<br />
Handling floppy disks [<strong>EXR</strong>-5 only]<br />
• Floppy disks contain a plastic disk with a thin magnetic coating.<br />
Microscopic precision is required to enable storage of large amounts<br />
of data on such a small surface area. To preserve their integrity,<br />
please observe the following when handling floppy disks:<br />
• Never touch the magnetic medium inside the disk.<br />
• Do not use or store floppy disks in dirty or dusty areas.<br />
• Do not subject floppy disks to temperature extremes (e.g., direct<br />
sunlight in an enclosed vehicle). Recommended temperature<br />
range: 10°~50°C (50°~122°F).<br />
• Do not expose floppy disks to strong magnetic fields, such as<br />
those generated by loudspeakers.<br />
Antes de utilizar disquetes (o de manejar la disquetera)<br />
[Sólo <strong>EXR</strong>-5]<br />
• Coloque el equipo en una superficie sólida y nivelada en un área sin<br />
vibraciones. Si debe instalar el equipo en ángulo, asegúrese de que la<br />
instalación no exceda el rango permisible: superior, 2°; inferior, 18°.<br />
• Evite utilizar el <strong>EXR</strong>-5 inmediatamente después de haberlo desplazado<br />
hasta un lugar con un nivel de humedad mayor al del lugar original.<br />
Los cambios rápidos en el entorno pueden provocar condensación<br />
en el interior de la unidad, lo cual afectará negativamente al<br />
funcionamiento de la unidad y/o dañará los disquetes. Cuando el<br />
<strong>EXR</strong>-5 se ha desplazado, deje que se acostumbre al nuevo entorno<br />
(deje pasar unas cuantas horas) antes de activarlo de nuevo.<br />
• Para insertar un disco, empújelo suavemente pero con firmeza hacia<br />
el interior de la unidad. Hará clic cuando se haya colocado. Para retirar<br />
un disco, pulse firmemente el botón EJECT. No fuerce la salida de<br />
un disco que está bloqueado en la unidad.<br />
• No intente nunca extraer un disquete de la disquetera mientras la<br />
unidad esté en funcionamiento (el indicador está iluminado); podría<br />
dañar el disquete y la unidad.<br />
• Extraiga cualquier disco que pueda haber introducido en la unidad<br />
antes de activar o desactivar el instrumento.<br />
• Para evitar daños en los cabezales de los disquetes, intente siempre<br />
colocar el disquete en una posición nivelada (no lo incline en ninguna<br />
dirección) mientras lo inserte en la unidad. Empuje con firmeza,<br />
pero suavemente. No utilice nunca una fuerza excesiva.<br />
• Para evitar funcionamientos anómalos y/o daños, inserte sólo disquetes<br />
en la unidad de discos. No inserte nunca ningún otro tipo de<br />
disco. Evite introducir clips de papel, monedas o cualquier otro<br />
objeto en el interior de la unidad.<br />
Manejar los disquetes [Sólo <strong>EXR</strong>-5]<br />
• Los disquetes contienen un disco de plástico con un fino recubrimiento<br />
magnético. Es necesaria una precisión microscópica para<br />
permitir el almacenamiento de grandes cantidades de información<br />
en un área tan pequeña. Para preservar su integridad, tenga en<br />
cuenta lo siguiente al manipular los disquetes:<br />
• Nunca toque el soporte magnético del interior del disco.<br />
• No utilice ni guarde disquetes en lugares con mucha suciedad o<br />
polvo.<br />
• No exponga los disquetes a temperaturas extremas (por ejemplo,<br />
a la luz directa del sol dentro de un vehículo cerrado). Intervalo de<br />
temperatura recomendado: 10°~50°C (50°~122°F).<br />
• No exponga los disquetes a campos magnéticos muy potentes,<br />
como los generados por altavoces.<br />
Avant d’utiliser des disquettes (maniement du lecteur de<br />
disquettes) [<strong>EXR</strong>-5 uniquement]<br />
• Placez l’instrument sur une surface stable et de niveau, à l’abri de<br />
toute vibration. Si vous devez incliner l’instrument, veillez à respecter<br />
les limites de la plage d’inclinaison suivante: vers le haut, 2°; vers le<br />
bas, 18°.<br />
• N’utilisez pas l’<strong>EXR</strong>-5 directement lorsque vous le déplacez dans un<br />
lieu dont le degré d’humidité diffère considérablement de l’endroit<br />
où il se trouvait précédemment. Ces brusques changements d’humidité<br />
ambiante pourraient être source de condensation à l’intérieur<br />
du lecteur et compromettre son bon fonctionnement et/ou endommager<br />
les disquettes. Quand vous déplacez l’<strong>EXR</strong>-5, attendez (quelques<br />
heures) qu’il s’accoutume aux nouvelles conditions ambiantes<br />
avant de l’utiliser.<br />
• Pour insérer une disquette, poussez-la doucement mais fermement<br />
dans le lecteur, jusqu’à ce qu’un déclic indique qu’elle est en place.<br />
Pour éjecter une disquette, appuyez fermement sur le bouton EJECT.<br />
N’utilisez jamais de force excessive pour retirer une disquette qui se<br />
trouve dans le lecteur.<br />
• N’essayez jamais d’éjecter une disquette quand le lecteur fonctionne<br />
(tant que son témoin clignote). Cela risquerait d’endommager la disquette<br />
et le lecteur.<br />
• Avant de mettre l’instrument sous tension/hors tension, veillez toujours<br />
à éjecter la disquette.<br />
• Pour éviter d’endommager les têtes du lecteur de disquettes, tenez<br />
toujours la disquette bien horizontale quand vous l’insérez dans le<br />
lecteur. Poussez-la fermement mais en douceur. N’utilisez jamais de<br />
force excessive.<br />
• Pour éviter tout dysfonctionnement et/ou endommagement, insérez<br />
uniquement des disquettes dans le lecteur de disquettes. N’insérez<br />
jamais d’autre type de disque. Evitez que des trombones, de la monnaie<br />
ou tout autre objet ne pénètre dans le lecteur.<br />
Maniement des disquettes [<strong>EXR</strong>-5 uniquement]<br />
• Les disquettes sont constituées d’un disque plastic recouvert d’une<br />
fine couche magnétique. Une précision microscopique est nécessaire<br />
pour pouvoir sauvegarder de larges quantités de données sur une<br />
surface si petite. Pour les garder en bon état, veuillez suivre les conseils<br />
suivants de manipulation:<br />
• Ne touchez jamais le support magnétique de la disquette.<br />
• Evitez d’utiliser ou de stocker vos disquettes dans des endroits<br />
sales ou poussiéreux.<br />
• Ne soumettez jamais vos disquettes à des températures extrêmes<br />
(dans un véhicule fermé en plein soleil, par exemple). Plage de<br />
températures recommandée: 10°~50°C.<br />
12
<strong>EXR</strong>-5/<strong>EXR</strong>-3<br />
• Floppy disks have a “WRITE” tab which can protect the disk from<br />
accidental erasure. It is recommended that the tab be kept in the<br />
PROTECT position, and moved to the WRITE position only when<br />
you wish to write new data onto the disk.<br />
Rear side of the disk<br />
WRITE<br />
(you can save data to the disk)<br />
• Los disquetes disponen de un pestillo “WRITE” que protege el<br />
disco contra un borrado accidental. Se recomienda que este pestillo<br />
esté en la posición PROTECT, y desplazarlo a la posición WRITE<br />
sólo para escribir información nueva en el disquete.<br />
Parte posterior del disco<br />
WRITE (es posible guardar información<br />
en el disco)<br />
• N’exposez pas vos disquettes à des champs magnétiques puissants<br />
tels que ceux générés par des hauts-parleurs.<br />
• Les disquettes sont pourvues d’un volet de protection “WRITE”<br />
contre tout effacement accidentel. Nous vous conseillons de laisser<br />
ce volet en position PROTECT et de ne le placer en position<br />
WRITE que lorsque vous souhaitez sauvegarder de nouvelles données<br />
sur la disquette.<br />
Face arrière de la disquette<br />
WRITE<br />
(permet la sauvegarde de données)<br />
Protect tab<br />
PROTECT<br />
(you cannot save data)<br />
Pestillo de protección<br />
PROTECT<br />
(no es posible guardar información)<br />
• Disks containing important performance data for this instrument<br />
should always be locked (have their write protect tab slid to the<br />
PROTECT position) before you insert them into the drive of<br />
another instrument.<br />
• The identification label should be firmly affixed to the disk. If the<br />
label comes loose while the disk is in the drive, it may be difficult<br />
to remove the disk.<br />
• Put the disk back into its case for storage.<br />
Liability and copyright<br />
• Should data contained and stored on a floppy disk be lost, it is<br />
unfortunately impossible to restore them. <strong>Roland</strong> Europe S.p.a.<br />
assumes no liability concerning such loss of data.<br />
• Unauthorized recording, distribution, sale, lending, public performance,<br />
broadcasting, or the like in whole or in part, of a work (musical<br />
composition, video, broadcast, public performance, or the like)<br />
whose copyright is held by a third party is prohibited by law.<br />
• Do not use this unit for purposes that could infringe on a copyright<br />
held by a third party. <strong>Roland</strong> assumes no responsibility whatsoever<br />
with regard to any infringements of third-party copyrights arising<br />
through your use of this unit.<br />
• Los discos con información importante para el instrumento deben<br />
estar siempre bloqueados (en posición PROTECT) antes de insertarlos<br />
en la disquetera de otro instrumento.<br />
• La etiqueta de identificación debería estar pegada firmemente en<br />
el disco. Si la etiqueta se despega mientras el disco se encuentra<br />
en la unidad, ésta puede dificultar la extracción del disco.<br />
• Guarde de nuevo los disquetes en su caja.<br />
Responsabilidad y copyright<br />
• Si se pierde la información contenida y almacenada en un disquete,<br />
resulta imposible recuperarla. <strong>Roland</strong> Europe S.p.a. no asume ninguna<br />
responsabilidad por la pérdida de dicha información.<br />
• La grabación, distribución, venta, préstamo, reproducción pública,<br />
emisión, o similares no autorizadas, en la totalidad o en parte, de un<br />
trabajo (composición musical, vídeo, emisión, reproducción pública o<br />
similares) cuyo copyright es propiedad de un tercero, están prohibidos<br />
por la ley.<br />
• No utilice esta unidad para finalidades que podrían infringir el<br />
copyright de un tercero. <strong>Roland</strong> no se responsabiliza de lo referente<br />
a las infracciones de los copyrights de terceros que se produzcan por<br />
el uso de esta unidad.<br />
Volet de protection<br />
PROTECT<br />
(empêche la sauvegarde de données)<br />
• Les disquettes contenant d’importantes données pour cet instrument<br />
doivent toujours être verrouillées (en glissant leur volet de<br />
protection sur PROTECT) avant d’être insérées dans le lecteur d’un<br />
autre instrument.<br />
• L’étiquette d’identification de la disquette doit être bien collée sur<br />
la disquette. Si elle se détache alors que la disquette se trouve<br />
dans le lecteur, vous risquez d’avoir des difficultés à l’en extraire.<br />
• Remettez la disquette dans sa boîte pour la conserver.<br />
Responsabilités et droits d’auteur<br />
• Il est malheureusement impossible de récupérer des données que<br />
vous avez effacées d’une disquette. <strong>Roland</strong> Europe S.p.a. décline<br />
toute responsabilité en cas de perte de données.<br />
• Tout enregistrement, distribution, vente, location, interprétation en<br />
public, diffusion, etc. d’une œuvre (entière ou partielle) protégée par<br />
des droits d’auteur (composition musicale, vidéo, diffusion, interprétation<br />
en public, etc.) est illégal sans l’accord du détenteur des droits<br />
d’auteur.<br />
• N’utilisez jamais cet instrument à des fins qui risqueraient d’enfreindre<br />
les législations relatives aux droits d’auteur. <strong>Roland</strong> décline toute<br />
responsabilité pour toute violation de droits d’auteur résultant de<br />
l’utilisation de cet instrument.<br />
13
<strong>EXR</strong>-5/<strong>EXR</strong>-3<br />
2. Panel descriptions<br />
2. Descripciones del panel<br />
2. Description des<br />
panneaux<br />
A<br />
B<br />
D<br />
E<br />
F<br />
G<br />
H<br />
I J<br />
L<br />
M<br />
N<br />
K<br />
O<br />
P<br />
Q<br />
R<br />
S<br />
T<br />
U<br />
Y<br />
V<br />
W<br />
X<br />
C<br />
Z<br />
Front panel<br />
A [POWER ON] button<br />
Press this button to switch the <strong>EXR</strong>-5/<strong>EXR</strong>-3 on and off.<br />
B BENDER/MODULATION lever<br />
By performing left/right movements, you can bend your solo<br />
notes down (left) or up (right). Press this lever towards the<br />
rear of the instrument to add modulation (usually vibrato) to<br />
the notes you are playing.<br />
C PHONES 1/2 sockets [<strong>EXR</strong>-5 only]<br />
This is where you can connect two pairs of optional headphones<br />
(<strong>Roland</strong> RH-25 or RH-50). By doing so, you switch off<br />
the <strong>EXR</strong>-5’s speakers.<br />
D VOLUME knob<br />
Use this knob to set the global volume of your <strong>EXR</strong>-5/<strong>EXR</strong>-3.<br />
E BALANCE [ACCOMP] [KEYBOARD] buttons<br />
Use the BALANCE buttons to change the volume of the corresponding<br />
section (accompaniment/song, or the parts you<br />
play on the keyboard).<br />
Panel frontal<br />
A Botón [POWER ON]<br />
Pulse este botón para activar y desactivar el <strong>EXR</strong>-5/<strong>EXR</strong>-3.<br />
B Palanca BENDER/MODULATION<br />
Moviendo la palanca a izquierda o derecha, puede conseguir<br />
notas más agudas (izquierda) o graves (derecha). Pulse la<br />
palanca hacia la parte superior del instrumento para añadir<br />
modulación (normalmente vibrato) a las notas que está<br />
tocando.<br />
C Zócalos PHONES 1/2 [Sólo <strong>EXR</strong>-5]<br />
Aquí es donde puede conectar dos pares de auriculares<br />
opcionales (<strong>Roland</strong> RH-25 o RH-50). Al hacerlos se desconectan<br />
los altavoces del <strong>EXR</strong>-5.<br />
D Mando VOLUME<br />
Utilice este mando para ajustar el volumen global de su<br />
<strong>EXR</strong>-5/<strong>EXR</strong>-3.<br />
E Botones BALANCE [ACCOMP] [KEYBOARD]<br />
Utilice los botones BALANCE para cambiar el volumen de la<br />
sección correspondiente (acompañamiento/canción, o las<br />
partes que toque en el teclado).<br />
Panneau avant<br />
A Bouton [POWER ON]<br />
Appuyez sur ce bouton pour mettre l’<strong>EXR</strong>-5/<strong>EXR</strong>-3 sous/hors<br />
tension.<br />
B Levier BENDER/MODULATION<br />
En actionnant le levier à gauche/droite, vous pouvez diminuer<br />
(gauche) ou augmenter (droite) la hauteur des notes de<br />
vos solos. Pour appliquer de la modulation (généralement un<br />
vibrato) aux notes jouées, enfoncez ce levier vers l’arrière de<br />
l’instrument.<br />
C Prises PHONES 1/2 [<strong>EXR</strong>-5 uniquement]<br />
Vous pouvez brancher deux casques d’écoute en option (des<br />
modèles <strong>Roland</strong> RH-25 ou RH-50). En branchant un casque<br />
d’écoute, vous coupez le son des enceintes de l’<strong>EXR</strong>-5.<br />
D Commande VOLUME<br />
Cette commande sert à régler le volume général de votre<br />
<strong>EXR</strong>-5/<strong>EXR</strong>-3.<br />
E Boutons BALANCE [ACCOMP] [KEYBOARD]<br />
Servez-vous des boutons BALANCE pour changer le volume<br />
de la section correspondante (accompagnement/morceau ou<br />
les parties que vous jouez sur le clavier).<br />
14
<strong>EXR</strong>-5/<strong>EXR</strong>-3<br />
F [KEYBOARD TOUCH] button<br />
Press this button to switch the keyboard’s velocity sensitivity<br />
on or off. When it is switched off, you can specify the fixed<br />
velocity value that should be used for all notes you play.<br />
G [METRONOME] button<br />
This button allows you switch the metronome on and off.<br />
Holding it for more than one second calls up a FUNCTION<br />
parameter you can set.<br />
H [MELODY INTELLIGENCE] button<br />
This button allows you to switch the Melody Intelligence<br />
function on/off. Melody Intelligence is a function that adds a<br />
harmony part to your melody playing. See p. 58. Holding it<br />
for more than one second calls up a FUNCTION parameter<br />
you can set for selecting the harmony type.<br />
I [USB] button<br />
This button allows you to select the function of the USB<br />
port: mass storage (archiving and retrieving settings to/from<br />
a computer). See page 108 for details.<br />
Press it together with [ONE¥TOUCH] to select the <strong>EXR</strong>-5/<br />
<strong>EXR</strong>-3’s demo function (see p. 22).<br />
J [ONE TOUCH] button<br />
Press this button to select the desired One Touch settings.<br />
One Touch memories contain a number of settings that complement<br />
the currently selected Music Style. There are two<br />
One Touch memories per Music Style. See p. 56.<br />
K [V-LINK] button<br />
Press this button to take advantage of the <strong>EXR</strong>-5/<strong>EXR</strong>-3’s V-<br />
LINK functionality for controlling video material via certain<br />
performance functions and the right-most keys on the<br />
<strong>EXR</strong>-5/<strong>EXR</strong>-3’s keyboard. By using V-LINK-compatible video<br />
equipment, visual effects can be easily linked to, and made<br />
part of the expressive elements of a performance. By connecting<br />
the <strong>EXR</strong>-5/<strong>EXR</strong>-3 to an optional Edirol DV-7PR or<br />
V-4, you can switch images in synchronization with music, or<br />
use the <strong>EXR</strong>-5/<strong>EXR</strong>-3’s performance functions or right-most<br />
keys to switch clips, control playback speed, etc.<br />
During song and Music Style playback, this button<br />
flashes to indicate the tempo and beats (BEAT function).<br />
F Botón [KEYBOARD TOUCH]<br />
Pulse este botón para activar o desactivar la sensibilidad a la<br />
velocidad del teclado. Cuando está desactivado, puede especificar<br />
el valor de la velocidad fija que debería utilizarse para<br />
todas las notas que toque.<br />
G Botón [METRONOME]<br />
Este botón se utiliza para activar y desactivar el metrónomo.<br />
Si lo mantiene pulsado más de un segundo, accederá al parámetro<br />
FUNCTION que puede modificar.<br />
H Botón [MELODY INTELLIGENCE]<br />
Este botón le permite activar/desactivar la función Melody<br />
Intelligence. Melody Intelligence es una función que añade<br />
una parte de armonía a la interpretación de la melodía. Consulte<br />
la p. 58. Si lo mantiene pulsado más de un segundo,<br />
accederá al parámetro FUNCTION que puede ajustar para<br />
seleccionar el tipo de armonía.<br />
I Botón [USB]<br />
Este botón le permite seleccionar la función que debería llevar<br />
a cabo el puerto USB: almacenamiento en masa (archivar<br />
y recuperar ajustes en/desde un ordenador). Consulte p. 108<br />
para más detalles.<br />
Púlselo junto con [ONE¥TOUCH] para seleccionar la función<br />
demo del <strong>EXR</strong>-5/<strong>EXR</strong>-3 (consulte la página 22).<br />
J Botón [ONE TOUCH]<br />
Pulse este botón para seleccionar los ajustes One Touch. Las<br />
memorias One Touch contienen un número de ajustes que<br />
complementan el Estilo Musical actualmente seleccionado.<br />
Existen dos memorias One Touch por cada Estilo Musical.<br />
Consulte la p. 56.<br />
K Botón [V-LINK]<br />
Pulse este botón para aprovechar al máximo la funcionalidad<br />
V-LINK del <strong>EXR</strong>-5/<strong>EXR</strong>-3 para controlar material de vídeo<br />
mediante ciertas funciones de interpretación y los botones de<br />
más a la derecha en el teclado del <strong>EXR</strong>-5/<strong>EXR</strong>-3. Utilizando<br />
equipos de vídeo compatibles con V-LINK, los efectos visuales<br />
pueden enlazarse fácilmente, e integrarse en los elementos<br />
expresivos de una interpretación. Conectando el <strong>EXR</strong>-5/<br />
<strong>EXR</strong>-3 a un DV-7PR o V-4 de Edirol opcionales, puede introducir<br />
imágenes en sincronización con la música, o utilizar las<br />
funciones de interpretación o los botones de más a la derecha<br />
del <strong>EXR</strong>-5/<strong>EXR</strong>-3 para integrar clips, controlar la velocidad<br />
de reproducción, etc.<br />
F Bouton [KEYBOARD TOUCH]<br />
Appuyez sur ce bouton pour activer/couper la fonction de<br />
sensibilité au toucher du clavier. Quand cette fonction est<br />
désactivée, vous pouvez définir une valeur de toucher fixe<br />
qui est appliquée à toutes les notes que vous jouez.<br />
G Bouton [METRONOME]<br />
Ce bouton sert à activer et à couper le métronome. Vous<br />
pouvez l’enfoncer pendant plus d’une seconde pour activer<br />
un paramètre FUNCTION réglable.<br />
H Bouton [MELODY INTELLIGENCE]<br />
Ce bouton permet d’activer/de couper la fonction Melody<br />
Intelligence. Melody Intelligence sert à ajouter une partie<br />
d’harmonie à la mélodie que vous jouez. Voyez p. 58. En<br />
maintenant ce bouton enfoncé pendant plus d’une seconde,<br />
vous activez un paramètre FUNCTION permettant de choisir<br />
le type d’harmonie.<br />
I Bouton [USB]<br />
Ce bouton permet de définir la fonction du port USB: sauvegarde<br />
(archivage et chargement de réglages sur/depuis un<br />
ordinateur). Pour en savoir plus, voyez p. 108.<br />
Appuyez simultanément sur ce bouton et sur [ONE¥TOUCH]<br />
pour sélectionner la fonction de démonstration de l’<strong>EXR</strong>-5/<br />
<strong>EXR</strong>-3 (voyez p. 22).<br />
J Bouton [ONE TOUCH]<br />
Appuyez sur ce bouton pour choisir la mémoire One Touch<br />
voulue. Les mémoires One Touch contiennent un nombre de<br />
réglages qui sont complémentaires au style musical en question.<br />
Vous disposez de deux mémoires One Touch par style<br />
musical. Voyez p. 56.<br />
K Bouton [V-LINK]<br />
Appuyez sur ce bouton pour exploiter la fonction V-LINK de<br />
l’<strong>EXR</strong>-5/<strong>EXR</strong>-3. Celle-ci permet de piloter du matériel vidéo<br />
avec certaines fonctions de jeu et les touches les plus aiguës<br />
du clavier de l’<strong>EXR</strong>-5/<strong>EXR</strong>-3. Si vous utilisez du matériel vidéo<br />
compatible V-LINK, vous pouvez facilement lier des effets<br />
visuels aux effets sonores et conférer plus d’expression<br />
encore à votre exécution. En branchant l’<strong>EXR</strong>-5/<strong>EXR</strong>-3 au<br />
DV-7PR ou V-4 Edirol, vous pouvez synchroniser le changement<br />
d’images avec la musique ou vous servir des fonctions<br />
de jeu ou des touches les plus aiguës du clavier de l’<strong>EXR</strong>-5/<br />
<strong>EXR</strong>-3 pour changer de clips, contrôler la vitesse de<br />
défilement des images, etc.<br />
15
<strong>EXR</strong>-5/<strong>EXR</strong>-3<br />
L KEYBOARD CONTROL section<br />
Press the [SPLIT] button to play different sounds with your<br />
left and right hands. Press the [DUAL] button to play two<br />
sounds simultaneously.<br />
Press the [TRANSPOSE] button to transpose the keyboard (see<br />
p. 65).<br />
M BAND ORCHESTRATOR section<br />
Press one of these buttons to choose the desired orchestration<br />
for the selected Music Style. See page 45.<br />
N ARRANGER & SONG CONTROLS section<br />
[TAP¥TEMPO] button: Press this button at least twice to set<br />
the Arranger’s or Recorder’s playback tempo.<br />
[SYNC¥START/MARKER¥A–B] button: This button performs<br />
two functions: In Arranger mode (while using the automatic<br />
accompaniment), it allows you to switch the SYNC START<br />
function on and off.<br />
In Song mode, it can be used to specify the beginning (“A”)<br />
and end (“B”) of the passage that should be repeated.<br />
The remaining buttons in this section allow you to control<br />
Arranger or Recorder playback. See pages 28 and 34.<br />
O COVER section<br />
The buttons in this section provide access to pre-programmed<br />
templates that allow you to quickly modify Music<br />
Styles’ or Standard MIDI File’s character. See page 43.<br />
When the Minus One function is on, these buttons allow you<br />
to quickly mute several Standard MIDI File parts (these mute<br />
functions are not available while you are using the Arranger<br />
function).<br />
P KEYBOARD MODE section<br />
These two buttons allow you to quickly configure the <strong>EXR</strong>-5/<br />
<strong>EXR</strong>-3 for use with ([ARRANGER¥BAND]) or without<br />
([PIANO¥SOLO]) automatic accompaniment. At power-on, the<br />
<strong>EXR</strong>-5/<strong>EXR</strong>-3 selects the PIANO SOLO mode.<br />
Durante la reproducción de una canción y de un Estilo Musical,<br />
este botón parpadea para indicar el tempo y los compases<br />
(funicón BEAT).<br />
L Sección KEYBOARD CONTROL<br />
Pulse el botón [SPLIT] para reproducir sonidos diferentes con<br />
las manos izquierda y derecha. Pulse el botón [DUAL] para<br />
reproducir dos sonidos simultáneamente.<br />
Pulse el botón [TRANSPOSE] para transponer el teclado (consulte<br />
la página 65).<br />
M Sección BAND ORCHESTRATOR<br />
Pulse uno de estos botones para seleccionar la orquestación<br />
deseada para el Estilo Musical deseado. Consulte la<br />
página 45.<br />
N Sección ARRANGER & SONG CONTROLS<br />
Botón [TAP¥TEMPO]: Pulse este botón como mínimo dos<br />
veces para ajustar el tempo de la reproducción del Arranger o<br />
del grabador.<br />
Botón [SYNC¥START/MARKER¥A–B]: Este botón realiza dos<br />
funciones: En modo Arranger (mientras utiliza el acompañamiento<br />
automático), le permite activar y desactivar la función<br />
SYNC START.<br />
En modo Song, puede utilizarse para especificar el inicio (“A”)<br />
y el final (“B”) del pasaje que debería repetirse.<br />
El resto de los botones en esta sección le permiten controlar<br />
la reproducción del Arranger o del grabador. Consulte la<br />
páginas 28 y la 34.<br />
O Sección COVER<br />
Los botones en esta sección proporcionan acceso a plantillas<br />
preprogramadas que le permiten modificar rápidamente el<br />
carácter de los Estilos Musicales o del archivo MIDI estándar.<br />
Consulte la página 43.<br />
Si la función Minus One está activada, estos botones le permiten<br />
enmudecer rápidamente varias partes del archivo MIDI<br />
estándar (estas funciones de enmudecimiento no están disponibles<br />
mientras utiliza la función Arranger).<br />
P Sección KEYBOARD MODE<br />
Estos dos botones le permiten configurar rápidamente el<br />
<strong>EXR</strong>-5/<strong>EXR</strong>-3 para utilizarlo con ([ARRANGER¥BAND]) o sin<br />
([PIANO¥SOLO]) acompañamiento automático. Cuando se<br />
activa, el <strong>EXR</strong>-5/<strong>EXR</strong>-3 selecciona el modo PIANO SOLO.<br />
Pendant la reproduction de morceaux et de styles musicaux,<br />
ce bouton clignote pour indiquer le tempo et les battements<br />
(fonction BEAT).<br />
L Section KEYBOARD CONTROL<br />
Appuyez sur le bouton [SPLIT] pour jouer des sons différents<br />
de la main droite et de la main gauche. Appuyez sur le bouton<br />
[DUAL] pour jouer deux sons superposés.<br />
Appuyez sur le bouton [TRANSPOSE] pour transposer le clavier<br />
(voyez p. 65).<br />
M Section BAND ORCHESTRATOR<br />
Appuyez sur un de ces boutons afin de choisir le type<br />
d’orchestration voulue pour le style musical en question.<br />
Voyez page 45.<br />
N Section ARRANGER & SONG CONTROLS<br />
Bouton [TAP¥TEMPO]: Appuyez au moins deux fois sur ce<br />
bouton pour régler le tempo de reproduction de l’arrangeur<br />
ou de l’enregistreur.<br />
Bouton [SYNC¥START/MARKER¥A–B]: Ce bouton a deux fonctions:<br />
en mode Arranger (quand vous utilisez l’accompagnement<br />
automatique), il permet d’activer/de couper la fonction<br />
SYNC START.<br />
En mode Song, il sert à définir le début (“A”) et la fin (“B”) du<br />
passage à répéter.<br />
Les autres boutons de cette section servent à piloter la reproduction<br />
de l’arrangeur ou de l’enregistreur. Voyez pages 28 et<br />
34.<br />
O Section COVER<br />
Les boutons de cette section offrent l’accès à des modèles<br />
préprogrammés permettant de changer rapidement le caractère<br />
des styles musicaux ou fichiers Standard MIDI. Voyez<br />
page 43.<br />
Quand la fonction Minus One est active, ces boutons permettent<br />
d’étouffer rapidement plusieurs parties d’un fichier<br />
Standard MIDI (cette fonction n’est pas disponible quand<br />
vous utilisez la fonction arrangeur).<br />
P Section KEYBOARD MODE<br />
Ces deux boutons permettent de configurer rapidement<br />
l’<strong>EXR</strong>-5/<strong>EXR</strong>-3 en vue de l’utiliser avec ([ARRANGER¥BAND])<br />
ou sans ([PIANO¥SOLO]) accompagnement automatique. A la<br />
mise sous tension, l’<strong>EXR</strong>-5/<strong>EXR</strong>-3 active le mode PIANO SOLO.<br />
16
<strong>EXR</strong>-5/<strong>EXR</strong>-3<br />
Q [MUSIC ASSISTANT] button<br />
This button allows you to work with pre-programmed registrations<br />
(additional User Programs). See p. 57.<br />
R [SONG] button<br />
This button allows you to select the <strong>EXR</strong>-5/<strong>EXR</strong>-3’s Song<br />
mode and to specify that the [INTRO], [ORIGINAL], etc., buttons<br />
should be used to operate the on-board Recorder.<br />
S [STYLE] button<br />
Press this button if you want to select Music Styles. By activating<br />
this button, you also specify that the [INTRO],<br />
[ORIGINAL], etc., buttons are used for selecting a Style Division,<br />
while the numeric buttons can be used to select the<br />
desired Style memory.<br />
T [TONE] button<br />
Press this button if you want to use the [FAMILY] and<br />
numeric buttons for assigning a sound (“Tone”) or Drum Set<br />
to the Main, Split or Dual part. See p. 61.<br />
U DATA ENTRY buttons<br />
FAMILY and SELECT [√][®] buttons: The FAMILY and SELECT<br />
[√][®] buttons are used to select Tones, Styles, Music Assistant<br />
memories, Songs, and Function parameters. The FAMILY [√][®]<br />
buttons allow you to select a group. You can press them,<br />
hold them, or press one while holding the other to change<br />
the scrolling speed.<br />
The SELECT [√][®] buttons allow you to choose items within<br />
the selected group or family. You can press them, hold them,<br />
or press one while holding the other to change the scrolling<br />
speed. After selecting the last item of the currently selected<br />
group, pressing [®] again takes you to the first entry of the<br />
following group. Conversely, pressing [√] again after selecting<br />
the first entry of a group takes you to the last entry of<br />
the preceding group.<br />
Numeric key pad: These buttons allow you to enter numbers<br />
(for Tone, Style, Music Assistant memory, song, track selection),<br />
values and characters (for entering names).<br />
The TEMPO/DATA [–]/[+] buttons allow you to set the arranger<br />
or Song tempo and the value of the selected FUNCTION<br />
parameter.<br />
Q Botón [MUSIC ASSISTANT]<br />
Este botón le permite trabajar con registros preprogramados<br />
(Programas de Usuario adicionales). Consulte la p. 57.<br />
R Botón [SONG]<br />
Este botón le permite seleccionar el modo Song del <strong>EXR</strong>-5/<strong>EXR</strong>-3 y<br />
para especificar que los botones [INTRO], [ORIGINAL],<br />
etc.,deberían utilizarse para hacer funcionar el Grabador integrado.<br />
S Botón [STYLE]<br />
Pulse este botón si desea seleccionar Estilos Musicales. Activando<br />
este botón, también especifica que los botones [INTRO],<br />
[ORIGINAL], etc., se utilizan para seleccionar una División de<br />
Estilo, mientras que los botones numéricos se pueden utilizar para<br />
seleccionar la memoria de Estilo deseada.<br />
T Botón [TONE]<br />
Pulse este botón si desea utilizar los botones [FAMILY] y los botones<br />
numéricos para asignar un sonido (“Tono”) o un grupo de percusión<br />
a la parte Main, Split o Dual. Consulte la p. 61.<br />
U Botones DATA ENTRY<br />
Botones FAMILY y SELECT [√][®]: Los botones FAMILY y<br />
SELECT [√][®] se utilizan para seleccionar Tonos, Estilos,<br />
memorias del Asistente Musical, Canciones, y parámetros de<br />
Función. Los botones FAMILY [√][®] le permiten seleccionar un<br />
grupo. Puede pulsarlos, mantenerlos pulsados, o pulsar uno<br />
mientras mantiene pulsado el otro para cambiar la velocidad<br />
de desplazamiento.<br />
Los botones SELECT [√][®] le permiten seleccionar elementos dentro<br />
del grupo o familia seleccionado. Puede pulsarlos, mantenerlos<br />
pulsados, o pulsar uno mientras mantiene pulsado el otro para<br />
cambiar la velocidad de desplazamiento. Después de seleccionar el<br />
último elemento del grupo seleccionado, al volver a pulsar [®] se<br />
desplazará a la primera entrada del siguiente grupo. Contrariamente,<br />
al volver a pulsar [√] después de seleccionar la primera<br />
entrada de un grupo, se desplazará a la última entrada del grupo<br />
precedente.<br />
Teclado numérico: Estos botones le permiten introducir números<br />
(para el Tono, el Estilo, la memoria del Asistente Musical, la canción,<br />
la selección de pista), valores y caracteres (para introducir<br />
nombres).<br />
Los botones TEMPO/DATA [–]/[+] le permiten ajustar el arranger o<br />
el tempo de la canción y el valor del parámetro FUNCTION seleccionado.<br />
Q Bouton [MUSIC ASSISTANT]<br />
Ce bouton permet de travailler avec des réglages préprogrammés<br />
(des programmes utilisateur supplémentaires).<br />
Voyez p. 57.<br />
R Bouton [SONG]<br />
Ce bouton sert à choisir le mode Song de l’<strong>EXR</strong>-5/<strong>EXR</strong>-3 et à<br />
affecter les boutons [INTRO], [ORIGINAL], etc. au pilotage de<br />
la fonction d’enregistreur (Recorder) incorporée.<br />
S Bouton [STYLE]<br />
Sert à choisir les styles musicaux (Music Styles). En activant<br />
ce bouton, vous affectez les boutons [INTRO], [ORIGINAL], etc.<br />
au choix d’une division de style, tandis que les boutons<br />
numériques permettent de sélectionner la mémoire de style<br />
voulue.<br />
T Bouton [TONE]<br />
Appuyez sur ce bouton afin d’utiliser les boutons [FAMILY] et<br />
les boutons numériques pour assigner un son (“Tone”) ou un<br />
kit de batterie à la partie Main, Split ou Dual. Voyez p. 61.<br />
U Boutons DATA ENTRY<br />
Boutons FAMILY et SELECT [√][®]: Les boutons FAMILY et<br />
SELECT [√][®] servent au choix des sons, styles, mémoires<br />
Music Assistant, morceaux et paramètres Function. Les boutons<br />
FAMILY [√][®] permettent de choisir un groupe. Vous<br />
pouvez appuyer dessus, les maintenir enfoncés ou en maintenir<br />
un enfoncé tout en appuyant sur l’autre pour changer<br />
la vitesse de défilement.<br />
Les boutons SELECT [√][®] servent à sélectionner les éléments<br />
voulus au sein de la famille ou du groupe choisi. Vous pouvez<br />
appuyer dessus, les maintenir enfoncés ou en maintenir un<br />
enfoncé tout en appuyant sur l’autre pour changer la vitesse<br />
de défilement. Quand vous êtes arrivé à la dernière entrée du<br />
groupe actuel, une nouvelle pression sur [®] active la première<br />
entrée du groupe suivant. D’autre part, si vous appuyez<br />
sur [√] lorsque vous vous trouvez à la première entrée d’un<br />
groupe, vous activez la dernière entrée du groupe précédent.<br />
Pavé numérique: Ces boutons servent à entrer des chiffres<br />
(pour le choix des sons, styles, de la mémoire Music Assistant,<br />
des morceaux, pistes), des valeurs et des caractères (pour<br />
l’entrée de noms).<br />
Les boutons TEMPO/DATA [–]/[+] servent à régler le tempo de<br />
l’arrangeur ou du morceau et la valeur du paramètre<br />
FUNCTION choisi.<br />
17
<strong>EXR</strong>-5/<strong>EXR</strong>-3<br />
V [FUNCTION] button<br />
This button provides access to the FUNCTION menu. You can<br />
use the FAMILY and SELECT [√][®] buttons to select the<br />
desired function.<br />
W [DISK] button [<strong>EXR</strong>-5 only]<br />
Press this button to access the Disk functions. They are used<br />
for loading data from floppy, saving data to disk, and managing<br />
floppy disks. See p. 112.<br />
Note: You can also save and load data via USB.<br />
X [USER PROGRAM/WRITE] button<br />
Press this button whenever you want to select a User Program<br />
(a set of registrations). Press and hold it to save the<br />
current panel and parameter settings to a User Program. See<br />
page 94.<br />
Y TONE section<br />
These buttons allow you to select the “best” sound of the<br />
indicated family (i.e. the “best” piano, organ, guitar/bass, etc.<br />
sound). After selecting one of these favorites, you can use<br />
FAMILY [√][®] and SELECT [√][®] to select other families and<br />
other Tones within the active family.<br />
Z Disk drive [<strong>EXR</strong>-5 only], in the middle below the keyboard (not<br />
pictured)<br />
This is where you insert floppy disks with Standard MIDI Files<br />
or Music Styles you may already own. The drive accepts 2DD<br />
(720k) and 2HD (1.44MB) floppy disks.<br />
V Botón [FUNCTION]<br />
Éste botón le proporciona acceso al menú FUNCTION. Puede<br />
utilizar los botones FAMILY y SELECT [√][®] para seleccionar la<br />
función deseada.<br />
W Botón [DISK] [Sólo <strong>EXR</strong>-5]<br />
Pulse éste botón para acceder a las funciones Disk. Se utilizan<br />
para cargar información de los disquetes, guardar información<br />
en disco, y gestionar disquetes. Consulte la p. 112.<br />
Nota: También puede guardar y cargar información mediante<br />
USB.<br />
X Botón [USER PROGRAM/WRITE]<br />
Pulse este botón siempre que quiera seleccionar un Programa<br />
de Usuario (un conjunto de registros). Manténgalo pulsado<br />
para guardar los ajustes de parámetro y panel actual en un<br />
Programa de Usuario. Consulte la página 94.<br />
Y Sección TONE<br />
Estos botones le permiten seleccionar el “mejor” sonido de la<br />
familia indicada (por ejemplo, el “mejor” sonido de piano,<br />
órgano, guitarra/bajo, etc.). Después de seleccionar uno de<br />
estos favoritos, puede utilizar FAMILY [√][®] y SELECT [√][®]<br />
para seleccionar otras familias y otros Tonos dentro de la<br />
familia activa.<br />
Z Unidad de disco [Sólo <strong>EXR</strong>-5], en la parte central debajo del<br />
teclado (no aparece en la imagen)<br />
Aquí es donde se insertan los disquetes con archivos MIDI<br />
estándar o con Estilos Musicales que ya posee. La unidad<br />
acepta los disquetes 2DD (720 k) y 2HD (1,44 MB).<br />
V Bouton [FUNCTION]<br />
Ce bouton vous permet d’accéder au menu FUNCTION. Servez-vous<br />
des boutons FAMILY et SELECT [√][®] pour choisir le<br />
paramètre voulu.<br />
W Bouton [DISK] [<strong>EXR</strong>-5 uniquement]<br />
Appuyez sur ce bouton pour accéder aux fonctions Disk. Celles-ci<br />
servent à charger les données d’une disquette, à sauvegarder<br />
des données sur disquette et à effectuer d’autres opérations<br />
liées aux disquettes. Voyez p. 112.<br />
Remarque: Vous pouvez aussi archiver et charger des données<br />
via USB.<br />
X Bouton [USER PROGRAM/WRITE]<br />
Ce bouton sert à choisir un programme utilisateur (alias User,<br />
désignant un ensemble de réglages). Maintenez-le enfoncé<br />
pour mémoriser les réglages en face avant et les réglages de<br />
paramètres dans un programme utilisateur. Voyez page 94.<br />
Y Section TONE<br />
Ces boutons permettent de choisir le “meilleur” son de la<br />
famille en question (c.-à-d. le “meilleur” son de piano,<br />
d’orgue, de guitare/basse, etc.). Après avoir choisi un de ces<br />
sons favoris, vous pouvez utiliser les boutons FAMILY [√][®] et<br />
SELECT [√][®] pour choisir d’autres familles et d’autres sons au<br />
sein de la famille actuelle.<br />
Z Lecteur de disquettes [<strong>EXR</strong>-5 uniquement], au centre et en dessous<br />
du clavier (n’est pas repris sur l’illustration)<br />
Ce lecteur permet de charger une disquette contenant des<br />
fichiers Standard MIDI ou des styles musicaux (que vous possédez<br />
peut-être déjà). Ce lecteur accepte les disquettes de<br />
formats 2DD (720k) et 2HD (1,44Mo).<br />
18
<strong>EXR</strong>-5/<strong>EXR</strong>-3<br />
Rear panel<br />
Panel posterior<br />
A B C D E F<br />
Face arrière<br />
A OUTPUT R, L/MONO sockets<br />
These sockets allow you to connect the <strong>EXR</strong>-5/<strong>EXR</strong>-3 to your<br />
HiFi amplifier, a mixer, a cassette deck, a keyboard amplifier,<br />
etc. If the external amplifier is mono, be sure to connect it to<br />
the OUTPUT L/MONO socket.<br />
B PHONES 1/2 sockets [<strong>EXR</strong>-3 only]<br />
This is where you can connect two pairs of optional headphones<br />
(<strong>Roland</strong> RH-25 or RH-50). By doing so, you switch<br />
off the <strong>EXR</strong>-3’s speakers.<br />
C DC IN socket<br />
This is where you need to connect the supplied adapter<br />
(PSB-4U for the <strong>EXR</strong>-5, ACO for the <strong>EXR</strong>-3). After connecting<br />
the adapter cable, wind it around the cord hook to the<br />
socket’s right to prevent accidental power failures.<br />
Note: Be sure to only use the adapter supplied with your <strong>EXR</strong>-5/<br />
<strong>EXR</strong>-3. Other adapters may damage your Interactive Arranger.<br />
D FOOTSWITCH socket<br />
This is where you can connect an optional DP-2, DP-6, or<br />
BOSS FS-5U footswitch that allows you to hold (“sustain”)<br />
the notes you play with your right hand. It can also be used<br />
for controlling other parameters (see “FSW° (Footswitch<br />
Assign)” (p. 86)).<br />
E MIDI OUT/IN sockets<br />
Connect the MIDI OUT socket to the MIDI IN jack of your<br />
computer (or MIDI instrument) to transfer MIDI data from<br />
the <strong>EXR</strong>-5/<strong>EXR</strong>-3 to the computer or external MIDI instrument.<br />
Connect the MIDI IN socket of the <strong>EXR</strong>-5/<strong>EXR</strong>-3 to the<br />
computer’s MIDI OUT jack to receive data from the computer.<br />
A Zócalos OUTPUT R, L/MONO<br />
Estos zócalos le permite conectar el <strong>EXR</strong>-5/<strong>EXR</strong>-3 a su amplificador<br />
HiFi, un mezclador, una pletina de cassette, un amplificador<br />
de teclado etc. Si el amplificador externo es mono,<br />
asegúrese de conectarlo al zócalo OUTPUT L/MONO.<br />
B Zócalos PHONES 1/2 [Sólo <strong>EXR</strong>-3]<br />
Aquí es donde puede conectar dos pares de auriculares<br />
opcionales (<strong>Roland</strong> RH-25 o RH-50). Al hacerlo se desconectan<br />
los altavoces del <strong>EXR</strong>-3.<br />
C Zócalo DC IN<br />
Aquí es donde necesita conectar el adaptador incluido<br />
(PSB-4U para el <strong>EXR</strong>-5, ACO para el <strong>EXR</strong>-3). Después de<br />
conectar el cable adaptador, enróllelo en el gancho para el<br />
cable a la derecha del zócalo para prevenir cortes de<br />
corriente accidentales.<br />
Nota: Asegúrese de utilizar únicamente el adaptador incluido<br />
con el <strong>EXR</strong>-5/<strong>EXR</strong>-3. Otros adaptadores pueden dañar su Interactive<br />
Arranger.<br />
D Zócalo FOOTSWITCH<br />
Aquí es donde puede conectar un conmutador de pedal DP-2,<br />
DP-6, o BOSS FS-5U opcional que le permite mantener (“sostener”)<br />
las notas que toca con la mano derecha. También se<br />
puede utilizar para controlar ciertos parámetros (consulte<br />
“FSW° (Asignar conmutador de pedal)” (p. 86)).<br />
E Zócalos MIDI OUT/IN<br />
Conecte el zócalo MIDI OUT al jack MIDI IN del ordenador (o<br />
instrumento MIDI) para transferir la información MIDI desde<br />
el <strong>EXR</strong>-5/<strong>EXR</strong>-3 al ordenador o al instrumento MIDI externo.<br />
Conecte el zócalo MIDI IN del <strong>EXR</strong>-5/<strong>EXR</strong>-3 al jack MIDI OUT<br />
del ordenador para recibir la información del ordenador.<br />
A Prises OUTPUT R, L/MONO<br />
Ces prises servent à brancher l’<strong>EXR</strong>-5/<strong>EXR</strong>-3 à un ampli hi-fi,<br />
un mélangeur, une platine à cassette, un ampli pour clavier,<br />
etc. Si vous utilisez un ampli mono, veillez à le brancher à la<br />
prise OUTPUT L/MONO.<br />
B Prises PHONES 1/2 [<strong>EXR</strong>-3 uniquement]<br />
Vous pouvez brancher deux casques d’écoute en option (des<br />
modèles <strong>Roland</strong> RH-25 ou RH-50). En branchant un casque<br />
d’écoute, vous coupez le son des enceintes de l’<strong>EXR</strong>-3.<br />
C Prise DC IN<br />
C’est ici que vous branchez l’adaptateur secteur fourni<br />
(PSB-4U pour l’<strong>EXR</strong>-5, ACO pour l’<strong>EXR</strong>-3). Après avoir branché<br />
le câble de l’adaptateur, enroulez-le autour de la pince<br />
pour câble à droite de la prise pour éviter tout<br />
débranchement accidentel.<br />
Remarque: Veillez à utiliser exclusivement l’adaptateur secteur<br />
fourni avec votre <strong>EXR</strong>-5/<strong>EXR</strong>-3. L’utilisation de tout autre adaptateur<br />
pourrait endommager votre Interactive Arranger.<br />
D Prise FOOTSWITCH<br />
Cette prise sert à brancher un commutateur au pied DP-2,<br />
DP-6 ou BOSS FS-5U en option; vous pouvez l’utiliser pour<br />
maintenir (effet “sustain”) les notes jouées de la main droite.<br />
Ce commutateur peut aussi servir à piloter d’autres paramètres<br />
(voyez “FSW° (Footswitch Assign)” (p. 86)).<br />
E Prises MIDI OUT/IN<br />
Branchez la prise MIDI OUT à la prise MIDI IN de votre ordinateur<br />
(ou instrument MIDI) pour transférer des données MIDI<br />
de l’<strong>EXR</strong>-5/<strong>EXR</strong>-3 à l’ordinateur ou à l’instrument MIDI<br />
externe. Pour recevoir des données transmises par l’ordinateur,<br />
branchez la prise MIDI IN de l’<strong>EXR</strong>-5/<strong>EXR</strong>-3 à la prise<br />
MIDI OUT de l’ordinateur.<br />
19
<strong>EXR</strong>-5/<strong>EXR</strong>-3<br />
F USB port<br />
The USB port can be used for archiving purposes with a computer.<br />
F Puerto USB<br />
El puerto USB se puede utilizar para propósitos de archivo<br />
con un ordenador.<br />
F Port USB<br />
Vous pouvez vous servir du port USB pour archiver des données<br />
sur un ordinateur.<br />
20
<strong>EXR</strong>-5/<strong>EXR</strong>-3<br />
3. First steps<br />
Setting up<br />
3. Primeros pasos<br />
Configurar<br />
3. Prise en main<br />
Mise sous tension<br />
VOLUME<br />
POWER ON<br />
The first thing you need to do is connect the supplied PSB-4U<br />
(<strong>EXR</strong>-5) or ACO (<strong>EXR</strong>-3) adapter to a suitable wall outlet.<br />
(1) Unpack the <strong>EXR</strong>-5/<strong>EXR</strong>-3 and place it on a stable surface.<br />
(2) Connect the small end of the adapter cable to the <strong>EXR</strong>-5/<br />
<strong>EXR</strong>-3’s DC IN jack, and the other end to a suitable wall<br />
outlet.<br />
(3) Press the [POWER¥ON] button to switch on the <strong>EXR</strong>-5/<br />
<strong>EXR</strong>-3.<br />
(4) Use the [VOLUME] knob to set the <strong>EXR</strong>-5/<strong>EXR</strong>-3’s output<br />
volume.<br />
Note: When the <strong>EXR</strong>-5/<strong>EXR</strong>-3 is used at excessive volumes, the<br />
protection system of its power amplifier stage may come on and<br />
mute the speakers. In that case, reduce the volume setting and<br />
wait a few seconds.<br />
(5) Press [POWER¥ON] again to switch the <strong>EXR</strong>-5/<strong>EXR</strong>-3 back<br />
off again.<br />
If you wish to connect the <strong>EXR</strong>-5/<strong>EXR</strong>-3 to a keyboard or HiFi<br />
amplifier, do so before performing step (3) and switch on the<br />
amp before performing step (4).<br />
Lo primero que debe hacer es conectar el adaptador PSB-4U<br />
(<strong>EXR</strong>-5) o ACO (<strong>EXR</strong>-3)ACJ incluido a a una toma de corriente<br />
apropiada.<br />
(1) Desempaquete el <strong>EXR</strong>-5/<strong>EXR</strong>-3 y colóquelo sobre una<br />
superficie estable.<br />
(2) Conecte el extremo pequeño del cable del adaptador al<br />
jack DC IN del <strong>EXR</strong>-5/<strong>EXR</strong>-3, y el otro extremo a una toma<br />
de corriente apropiada.<br />
(3) Pulse el botón [POWER¥ON] para activar el <strong>EXR</strong>-5/<strong>EXR</strong>-3.<br />
(4) Utilice el mando [VOLUME] para ajustar el volumen de<br />
salida del <strong>EXR</strong>-5/<strong>EXR</strong>-3.<br />
Nota: Si utiliza el <strong>EXR</strong>-5/<strong>EXR</strong>-3 a un volumen excesivo, es posible<br />
que se active el sistema de protección de su amplificador de<br />
potencia y enmudezca los altavoces. En este caso, reduzca el<br />
ajuste de volumen y espere unos segundos.<br />
(5) Pulse de nuevo [POWER¥ON] para volver a desactivar el<br />
<strong>EXR</strong>-5/<strong>EXR</strong>-3.<br />
Si desea conectar el <strong>EXR</strong>-5/<strong>EXR</strong>-3 a un amplificador de<br />
teclado o HiFi, hágalo llevando a cabo el paso (3) y active el<br />
amplificador antes de llevar a cabo el paso (4).<br />
Avant tout, il faut brancher l’adaptateur PSB-4U (<strong>EXR</strong>-5) ou<br />
ACO (<strong>EXR</strong>-3) fourni à une prise de courant ad hoc.<br />
(1) Déballez l’<strong>EXR</strong>-5/<strong>EXR</strong>-3 et posez-le sur une surface stable.<br />
(2) Branchez la plus petite extrémité du câble de l’adaptateur<br />
à la prise DC IN de l’<strong>EXR</strong>-5/<strong>EXR</strong>-3 et l’autre bout à une<br />
prise de courant de tension appropriée.<br />
(3) Appuyez sur le bouton [POWER¥ON] pour mettre l’<strong>EXR</strong>-5/<br />
<strong>EXR</strong>-3 sous tension.<br />
(4) Réglez le volume de l’<strong>EXR</strong>-5/<strong>EXR</strong>-3 avec sa commande<br />
[VOLUME].<br />
Remarque: Quand vous jouez sur l’<strong>EXR</strong>-5/<strong>EXR</strong>-3 à un volume<br />
excessif, le système de protection de son amplificateur de puissance<br />
pourrait s’activer, coupant le son des enceintes. Dans ce<br />
cas, diminuez le volume et attendez quelques secondes.<br />
(5) Appuyez de nouveau sur [POWER¥ON] pour mettre l’<strong>EXR</strong>-5/<br />
<strong>EXR</strong>-3 hors tension.<br />
Si vous voulez brancher l’<strong>EXR</strong>-5/<strong>EXR</strong>-3 à une chaîne hi-fi ou<br />
un amplificateur de clavier, faites-le avant d’effectuer l’étape<br />
(3) et mettez l’amplificateur sous tension avant d’effectuer<br />
l’étape (4).<br />
21
<strong>EXR</strong>-5/<strong>EXR</strong>-3<br />
Demo songs<br />
Canciones de demostración<br />
Morceaux de démonstration<br />
=<br />
DemoSong 120 001<br />
TONE<br />
STYLE<br />
=<br />
DemStyle 146<br />
Your <strong>EXR</strong>-5/<strong>EXR</strong>-3 comes with 1 song demo, 8 Tone demos, various<br />
Style demos, and 1 Cover demo.<br />
• The song demo illustrates the possibilities of the <strong>EXR</strong>-5/<br />
<strong>EXR</strong>-3 as a whole.<br />
• Tone demos show off the <strong>EXR</strong>-5/<strong>EXR</strong>-3’s amazing sound<br />
quality.<br />
• Style demos give you an impression of the quality of the onboard<br />
Music Styles.<br />
• The Cover demo shows you how easily the orchestration of a<br />
Music Style can be changed.<br />
(1) Hold down the [USB] button while pressing [ONE¥TOUCH].<br />
(2) If necessary, use the [VOLUME] control to change the playback<br />
volume.<br />
(3) Press [START÷STOP] to stop playback.<br />
Playing back a Tone demo song<br />
(1) Press the [TONE] button.<br />
Playback of the Tone demo song starts automatically.<br />
You can now press [START÷STOP] to stop playback of the currently<br />
selected Tone song. If you press this button again, the<br />
next Tone demo song will be played back.<br />
(2) Press [START÷STOP] to stop Tone demo song playback.<br />
El <strong>EXR</strong>-5/<strong>EXR</strong>-3 se entrega con 1 canción de demostración, 8<br />
Tonos de demostración, varios Estilos de demostración, y 1<br />
Cover de demostración.<br />
• La canción de demostración ilustra las posibilidades del<br />
<strong>EXR</strong>-5/<strong>EXR</strong>-3 como un conjunto.<br />
• Los sonidos de demostración reflejan la sorprendente calidad<br />
de sonido del <strong>EXR</strong>-5/<strong>EXR</strong>-3.<br />
• Los estilos de demostración dan una idea de la calidad de<br />
los Estilos Musicales integrados.<br />
• La demostración Cover muestra con qué facilidad se puede<br />
cambiar la orquestación de un estilo musical.<br />
(1) Mantenga pulsado el botón [USB] pulsando [ONE¥TOUCH].<br />
(2) Si fuera necesario, utilice el control [VOLUME] para cambiar<br />
el volumen de la reproducción.<br />
(3) Pulse [START÷STOP] para detener la reproducción.<br />
Reproducir una canción de demostración de Tono<br />
(1) Pulse el botón [TONE].<br />
La reproducción de la canción de demostración de tono<br />
seleccionada se inicia automáticamente.<br />
Ahora puede pulsar [START÷STOP] para detener la reproducción<br />
de la canción seleccionada. Si vuelve a pulsar este botón,<br />
se reproducirá la siguiente canción de demostración de<br />
tonos.<br />
(2) Pulse [START÷STOP] para detener la reproducción de la<br />
canción de demostración de Tono.<br />
Votre <strong>EXR</strong>-5/<strong>EXR</strong>-3 contient 1 morceau de démonstration, 8<br />
démos de sons, une série de démos de styles et 1 démo Cover.<br />
• Le morceau de démonstration illustre l’ensemble des possibilités<br />
offertes par l’<strong>EXR</strong>-5/<strong>EXR</strong>-3.<br />
• Les démos de sons mettent en exergue le superbe son de<br />
l’<strong>EXR</strong>-5/<strong>EXR</strong>-3.<br />
• Les démos de styles donnent une idée de l’extraordinaire<br />
qualité des styles musicaux de l’instrument.<br />
• La démo Cover illustre la facilité avec laquelle vous pouvez<br />
changer l’orchestration d’un style musical.<br />
(1) Maintenez le bouton [USB] enfoncé et appuyez sur<br />
[ONE¥TOUCH].<br />
(2) Si nécessaire, servez-vous de la commande [VOLUME] pour<br />
régler le volume de reproduction.<br />
(3) Appuyez sur [START÷STOP] pour arrêter la reproduction.<br />
Reproduire une démo de sons<br />
(1) Appuyez sur le bouton [TONE].<br />
La reproduction du morceau de démonstration de sons<br />
démarre automatiquement.<br />
Appuyez sur le bouton [START÷STOP] pour arrêter la reproduction<br />
de la démo de sons actuelle. Appuyez à nouveau sur<br />
ce bouton pour lancer la reproduction de la démo de sons<br />
suivante.<br />
(2) Appuyez sur [START÷STOP] pour arrêter la reproduction de<br />
la démo de sons.<br />
22
<strong>EXR</strong>-5/<strong>EXR</strong>-3<br />
Playback of a Style demo song<br />
(1) Press the [STYLE] button.<br />
Playback of the Style demo song starts automatically.<br />
You can now press [START÷STOP] to stop playback of the currently<br />
selected Style demo song. If you press this button<br />
again, the next Style demo song will be played back.<br />
(2) Press [START÷STOP] to stop Style demo song playback.<br />
Playback of a Cover demo song<br />
Reproducción de una canción de demostración de Estilo<br />
(1) Pulse el botón [STYLE].<br />
La reproducción de la canción de demostración de estilo se<br />
inicia automáticamente.<br />
Ahora puede pulsar [START÷STOP] para detener la reproducción<br />
de la canción de demostración de estilo seleccionada. Si<br />
vuelve a pulsar este botón, se reproducirá la siguiente canción<br />
de demostración de Estilo.<br />
(2) Pulse [START÷STOP] para detener la reproducción de la<br />
canción de demostración de Estilo.<br />
Reproducción de una canción de demostración Cover<br />
Reproduire une démo de styles<br />
(1) Appuyez sur le bouton [STYLE].<br />
La reproduction du morceau de démonstration de styles<br />
démarre automatiquement.<br />
Appuyez sur le bouton [START÷STOP] pour arrêter la reproduction<br />
de la démo de styles actuelle. Appuyez à nouveau sur<br />
ce bouton pour lancer la reproduction de la démo de styles<br />
suivante.<br />
(2) Appuyez sur [START÷STOP] pour arrêter la reproduction de<br />
la démo de styles.<br />
Reproduire la démo Cover<br />
DemCover<br />
=<br />
86<br />
POP<br />
(1) Press one of the COVER buttons to select a Cover demo<br />
song.<br />
Playback of the Cover demo song starts automatically.<br />
(2) Use the COVER buttons to select other Cover settings.<br />
This is not really necessary, as the <strong>EXR</strong>-5/<strong>EXR</strong>-3 changes<br />
them automatically during this demo.<br />
(3) Press [START÷STOP] to stop Cover demo song playback.<br />
Leaving the Demo mode<br />
(1) Hold down the [USB] button while pressing [ONE¥TOUCH]<br />
to leave the Demo mode.<br />
(1) Pulse uno de los botones COVER para seleccionar una canción<br />
de demostración Cover.<br />
La reproducción de la canción de demostración Cover se inicia<br />
automáticamente.<br />
(2) Utilice los botones COVER para seleccionar otros ajustes<br />
Cover.<br />
Esto no es realmente necesario, ya que el <strong>EXR</strong>-5/<strong>EXR</strong>-3 los<br />
cambia automáticamente durante esta demostración.<br />
(3) Pulse [START÷STOP] para detener la reproducción de la<br />
canción de demostración Cover.<br />
Salir del modo Demo<br />
(1) Para salir del modo Demo, mantenga pulsado el botón<br />
[USB] pulsando [ONE¥TOUCH].<br />
(1) Appuyez sur un des boutons COVER pour sélectionner le<br />
morceau de démonstration Cover.<br />
La reproduction de la démo Cover démarre automatiquement.<br />
(2) Servez-vous des boutons COVER pour choisir d’autres<br />
réglages Cover.<br />
Cela n’est pas vraiment nécessaire, car l’<strong>EXR</strong>-5/<strong>EXR</strong>-3 change<br />
automatiquement ces réglages au cours de la démo.<br />
(3) Appuyez sur [START÷STOP] pour arrêter la reproduction de<br />
la démo Cover.<br />
Quitter le mode de démonstration<br />
(1) Maintenez le bouton [USB] enfoncé tout en appuyant sur<br />
[ONE¥TOUCH] pour quitter le mode de démonstration.<br />
23
<strong>EXR</strong>-5/<strong>EXR</strong>-3<br />
Playing without accompaniment<br />
When you switch on the <strong>EXR</strong>-5/<strong>EXR</strong>-3, it select the PIANO SOLO<br />
mode. This means that you can use the <strong>EXR</strong>-5/<strong>EXR</strong>-3 like a digital<br />
piano, or a synthesizer.<br />
The accompaniment function (called “Arranger”) and<br />
[ONE¥TOUCH] button are not available in PIANO SOLO mode,<br />
while only the Main part is active.<br />
The <strong>EXR</strong>-5/<strong>EXR</strong>-3 provides three parts for your live playing (and<br />
many more for Arranger backing and Song playback):<br />
Main<br />
Split<br />
Dual<br />
Using the Main part<br />
As its name suggests, this is the most important<br />
part. As long as the Split part is off, the Main part is<br />
assigned to the entire keyboard.<br />
When you switch on this part, it is assigned to the<br />
left half of the keyboard, while the Main part can<br />
be played with your right hand.<br />
This part can be added to the Main part and is also<br />
assigned to the entire keyboard. This allows you to<br />
play two sounds simultaneously.<br />
Tocar sin acompañamiento<br />
Cuando activa el <strong>EXR</strong>-5/<strong>EXR</strong>-3, se selecciona el modo PIANO<br />
SOLO. Esto significa que puede utilizar el <strong>EXR</strong>-5/<strong>EXR</strong>-3 como un<br />
piano digital, o un sintetizador.<br />
La función de acompañamiento (llamada “Arranger”) y el botón<br />
[ONE¥TOUCH] no están disponibles en modo PIANO SOLO,<br />
cuando sólo la parte Main está activa.<br />
El <strong>EXR</strong>-5/<strong>EXR</strong>-3 proporciona tres partes para sus interpretaciones<br />
en directo (y muchas más para el acompañamiento Arranger<br />
y para la reproducción de canciones):<br />
Main<br />
Split<br />
Dual<br />
Y como su nombre indica (Main part, o parte principal), es la<br />
parte más importante. Cuando la parte Split está desactivada,<br />
la parte Main se asigna a todo el teclado.<br />
Cuando se activa esta parte, se asigna a la parte izquierda del<br />
teclado, mientras que la parte Main se puede tocar con la<br />
mano derecha.<br />
Esta parte se puede añadir a la parte Main y también se<br />
asigna a todo el teclado. Esto le permite reproducir dos<br />
sonidos simultáneamente.<br />
Utilizar la parte Main<br />
Jeu sans accompagnement<br />
Quand vous mettez l’<strong>EXR</strong>-5/<strong>EXR</strong>-3 sous tension, il active son<br />
mode PIANO SOLO. Vous pouvez alors utiliser l’<strong>EXR</strong>-5/<strong>EXR</strong>-3<br />
comme piano numérique ou synthétiseur.<br />
La fonction d’accompagnement (baptisée “Arranger”) et le bouton<br />
[ONE¥TOUCH] ne sont pas disponibles en mode PIANO SOLO.<br />
En outre, seule la partie Main est active.<br />
L’<strong>EXR</strong>-5/<strong>EXR</strong>-3 propose trois parties pour jouer (et de nombreuses<br />
autres pour l’accompagnement fourni par l’arrangeur et la<br />
reproduction de morceau):<br />
Main<br />
Split<br />
Dual<br />
Il s’agit de la partie principale. Tant que la partie<br />
Split est désactivée, la partie Main est assignée au<br />
clavier entier.<br />
Quand vous l’activez, la partie Split est assignée à la<br />
moitié gauche du clavier, tandis que la partie Main<br />
reste disponible pour votre main droite.<br />
Vous pouvez superposer cette partie à la partie<br />
Main et l’assigner aussi au clavier entier. Cela permet<br />
de jouer simultanément deux sons superposés.<br />
Utilisation de la partie Main<br />
PIANO<br />
SOLO<br />
GUITAR/<br />
BASS<br />
BALANCE<br />
ACCOMP KEYBOARD<br />
TONE<br />
(1) To activate the Main part and assign it to the entire keyboard,<br />
press the [PIANO¥SOLO] button.<br />
The ARRANGER icon disappears, the Arranger stops (if it<br />
was playing), and the <strong>EXR</strong>-5/<strong>EXR</strong>-3 automatically selects a<br />
piano sound for you.<br />
(2) Play a few notes on the keyboard.<br />
(3) If necessary, select another sound by pressing one of the 8<br />
TONE buttons. See p. 61 for details.<br />
(1) Para activar la parte Main y asignarla a todo el teclado,<br />
pulse el botón [PIANO¥SOLO].<br />
Desaparece el icono ARRANGER , el Arranger se detiene (si<br />
estaba tocando), y el <strong>EXR</strong>-5/<strong>EXR</strong>-3 selecciona automáticamente<br />
un sonido de piano por usted.<br />
(2) Toque algunas notas en el teclado.<br />
(3) Si fuera necesario, seleccione otro sonido pulsando uno de<br />
los 8 botones TONE. Consulte la p. 61 para más información.<br />
(1) Pour activer la partie Main et l’assigner au clavier entier,<br />
appuyez sur le bouton [PIANO¥SOLO].<br />
L’icône ARRANGER disparaît, l’arrangeur s’arrête (s’il était<br />
activé) et l’<strong>EXR</strong>-5/<strong>EXR</strong>-3 active automatiquement un son de<br />
piano.<br />
(2) Jouez quelques notes sur le clavier.<br />
(3) Si nécessaire, choisissez un autre son en appuyant sur un<br />
des 8 boutons TONE. Voyez p. 61 pour en savoir plus.<br />
24
<strong>EXR</strong>-5/<strong>EXR</strong>-3<br />
(4) If necessary, you can hold down the [TONE] button and<br />
use BALANCE [ACCOMP] (softer) or [KEYBOARD] (louder)<br />
to change the Main part’s volume.<br />
Note: Unlike previous <strong>Roland</strong> arranger instruments, the <strong>EXR</strong>-5/<br />
<strong>EXR</strong>-3 no longer distinguishes between “melodic” parts and a<br />
Manual Drums part. You can therefore also play a Drum Kit with<br />
the Main part.<br />
Note: You can also press the [START÷STOP] button to add a<br />
rhythm accompaniment to your playing. This is based on the<br />
currently selected Music Style. See p. 31 for how to select a different<br />
one.<br />
Note: See p. 28 and “Automatic playback start (Sync Start)”<br />
(p. 30) for other ways to start Music Style playback (the drums,<br />
that is).<br />
Using the Main and Split parts<br />
(4) Si fuera necesario, puede mantener pulsado el botón<br />
[TONE] y utilizar BALANCE [ACCOMP] (más bajo) o<br />
[KEYBOARD] (más alto) para cambiar el volumen de la<br />
parte Main.<br />
Nota: A diferencia de instrumentos arranger anteriores de<br />
<strong>Roland</strong>, el <strong>EXR</strong>-5/<strong>EXR</strong>-3 no distingue entre las partes “melódicas”<br />
y una parte de percusión manual. Por ello, también puede tocar<br />
un equipo de percusión con la parte Main.<br />
Nota: También puede pulsar el botón [START÷STOP] para añadir<br />
un acompañamiento de percusión a su interpretación. Éste se<br />
basa en el Estilo Musical seleccionado. Consulte la p. 31 para<br />
saber cómo seleccionar un estilo diferente.<br />
Nota: Consulte la p. 28 y “Inicio de reproducción automática<br />
(Sync Start)” (p. 30) para conocer otras formas de iniciar la<br />
reproducción de un Estilo Musical (es decir, la percusión).<br />
Utilizar las partes Main y Split<br />
(4) Si nécessaire, maintenez le bouton [TONE] enfoncé et servez-vous<br />
du bouton BALANCE [ACCOMP] (moins fort) ou<br />
[KEYBOARD] (plus fort) pour changer le volume de la partie<br />
Main.<br />
Remarque: Contrairement aux instruments avec arrangeur<br />
antérieurs de <strong>Roland</strong>, l’<strong>EXR</strong>-5/<strong>EXR</strong>-3 ne fait plus de distinction<br />
entre les parties “mélodiques” et une partie Manual Drums. Vous<br />
pouvez donc aussi jouer un kit de batterie avec la partie Main.<br />
Remarque: Vous pouvez appuyer sur [START÷STOP] pour ajouter<br />
un accompagnement rythmique à votre jeu. Cet accompagnement<br />
est basé sur le style musical en vigueur. Voyez p. 31 pour<br />
savoir comment choisir un autre style musical.<br />
Remarque: D’autres méthodes de lancement de la reproduction<br />
du style musical (à savoir la batterie) sont décrites à la p. 28 et<br />
sous “Démarrage automatique du jeu (Sync Start)” (p. 30).<br />
Utilisation des parties Main et Split<br />
SPLIT<br />
SPLIT<br />
Split<br />
Main<br />
BALANCE<br />
ACCOMP KEYBOARD<br />
(1) If you wish to play different sounds with your left and<br />
right hands, press the [SPLIT] button.<br />
The SPLIT icon appears and the <strong>EXR</strong>-5/<strong>EXR</strong>-3 now automatically<br />
selects a sound for the Split part that complements the<br />
sound assigned to the Main part.<br />
(2) Play a few notes on the keyboard.<br />
At first, the keyboard is split at the G3 (note number “55”). If<br />
necessary, you can select a different split point. See<br />
“KeySplit* (Split point)” (p. 85).<br />
To change the balance between the Main and Split sounds,<br />
proceed as follows:<br />
(3) Hold down the [SPLIT] button and use BALANCE [ACCOMP]<br />
(decrease) or [KEYBOARD] (increase) to change the Split<br />
part’s volume.<br />
(1) Si desea reproducir sonidos diferentes con las manos<br />
izquierda y derecha, pulse el botón [SPLIT].<br />
El icono SPLIT aparece y el <strong>EXR</strong>-5/<strong>EXR</strong>-3 selecciona automáticamente<br />
un sonido para la parte Split que complemente el<br />
sonido asignado a la parte Main.<br />
(2) Toque algunas notas en el teclado.<br />
Al principio, el teclado se divide en la G3 (número de nota<br />
“55”). Si fuera necesario, puede seleccionar un punto de división<br />
diferente. Consulte la “KeySplit* (Punto de división)”<br />
(p. 85).<br />
Para cambiar el balance entre los sonidos Main y Split, proceda<br />
de la forma siguiente:<br />
(3) Mantenga pulsado el botón [SPLIT] y utilice BALANCE<br />
[ACCOMP] (disminuir) o [KEYBOARD] (aumentar) para<br />
cambiar el volumen de la parte Split.<br />
(1) Appuyez sur le bouton [SPLIT] si vous voulez jouer des sons<br />
différents de la main droite et de la main gauche.<br />
L’icône SPLIT s’affiche et l’<strong>EXR</strong>-5/<strong>EXR</strong>-3 affecte automatiquement<br />
un son à la partie Split (adapté au son de la partie<br />
Main).<br />
(2) Jouez quelques notes sur le clavier.<br />
Au départ, la touche G3 (numéro de note “55”) constitue le<br />
point de partage du clavier. Si nécessaire, vous pouvez changer<br />
le point de partage. Voyez “KeySplit* (point de partage)”<br />
(p. 85).<br />
Pour changer la balance entre les sons des parties Main et<br />
Split, procédez comme suit:<br />
(3) Maintenez le bouton [SPLIT] enfoncé et servez-vous du<br />
bouton BALANCE [ACCOMP] (moins fort) ou [KEYBOARD]<br />
(plus fort) pour changer le volume de la partie Split.<br />
25
<strong>EXR</strong>-5/<strong>EXR</strong>-3<br />
(4) To assign another sound to the Split part, hold down the<br />
[SPLIT] button and proceed like for the Main part<br />
(page 24).<br />
Alternatively, press and hold one of the eight TONE buttons<br />
(Main part) while pressing another TONE button (Split part).<br />
Note: You cannot assign Drum Kits to the Split part.<br />
Note: You can also add a monophonic bass part (“Auto Bass”) to<br />
the Split part. See “Auto Bass*: status and volume” (p. 88).<br />
Using the Main and Dual parts<br />
(4) Para asignar otro sonido a la parte Split, mantenga pulsado<br />
el botón [SPLIT] y proceda como con la parte Main<br />
(página 24).<br />
Alternativamente, mantenga pulsado uno de los ocho botones<br />
TONE (parte Main) mientras pulsa otro botón TONE (parte<br />
Split).<br />
Nota: No puede asignar equipos de percusión a la parte Split.<br />
Nota: También puede añadir una parte de bajo monofónica<br />
(“Auto Bass”) a la parte Split. Consulte la “Auto Bass*: estado y<br />
volumen” (p. 88).<br />
Utilizar las partes Main y Dual<br />
(4) Pour assigner un autre son à la partie Split, maintenez le<br />
bouton [SPLIT] enfoncé et procédez comme pour la partie<br />
Main (page 24).<br />
Vous pouvez aussi procéder en maintenant un des huit boutons<br />
TONE enfoncé (partie Main) tout en appuyant sur un<br />
autre bouton TONE (partie Split).<br />
Remarque: Vous ne pouvez pas assigner de kit de batterie à la<br />
partie Split.<br />
Remarque: Vous pouvez aussi ajouter une partie de basse<br />
monophonique (“Auto Bass”) à la partie Split. Voyez “Auto Bass*:<br />
statut et volume” (p. 88).<br />
Utilisation des parties Main et Dual<br />
DUAL<br />
METRONOME<br />
(1) If you wish to play two sounds simultaneously, press the<br />
[DUAL] button.<br />
The DUAL icon appears and the <strong>EXR</strong>-5/<strong>EXR</strong>-3 now automatically<br />
selects a sound for the Dual part that complements the<br />
sound assigned to the Main part.<br />
You can also activate the Dual mode by holding down one of<br />
the eight TONE buttons while pressing another. The first<br />
TONE button’s sound is then assigned to the Main part, while<br />
the second sound is assigned to the Dual part.<br />
(2) Play a few notes on the keyboard.<br />
To change the balance between the Main and Dual sounds,<br />
proceed as follows:<br />
(3) Hold down the [DUAL] button and use BALANCE [ACCOMP]<br />
(decrease) or [KEYBOARD] (increase) to change the Dual<br />
part’s volume.<br />
(4) To assign another sound to the Dual part, hold down the<br />
[DUAL] button and proceed like for the Main part<br />
(page 24).<br />
Note: You cannot assign Drum Kits to the Dual part.<br />
(1) Si desea reproducir dos sonidos simultáneamente, pulse el<br />
botón [DUAL].<br />
El icono DUAL aparece y el <strong>EXR</strong>-5/<strong>EXR</strong>-3 selecciona automáticamente<br />
un sonido para la parte Dual que complemente el<br />
sonido asignado a la parte Main.<br />
También puede activar el modo Dual manteniendo pulsado<br />
uno de los ocho botones TONE mientras pulsa otro. El primer<br />
sonido del botón TONE se asignará a la parte Main, mientras<br />
que el segundo sonido se asignará a la parte Dual.<br />
(2) Toque algunas notas en el teclado.<br />
Para cambiar el balance entre los sonidos Main y Dual, proceda<br />
de la forma siguiente:<br />
(3) Mantenga pulsado el botón [DUAL] y utilice BALANCE<br />
[ACCOMP] (disminuir) o [KEYBOARD] (aumentar) para<br />
cambiar el volumen de la parte Dual.<br />
(4) Para asignar otro sonido a la parte Dual, mantenga pulsado<br />
el botón [DUAL] y proceda como con la parte Main<br />
(página 24).<br />
Nota: No puede asignar equipos de percusión a la parte Dual.<br />
(1) Appuyez sur le bouton [DUAL] pour jouer deux sons superposés.<br />
L’icône DUAL s’affiche et l’<strong>EXR</strong>-5/<strong>EXR</strong>-3 affecte automatiquement<br />
un son à la partie Dual (adapté au son de la partie<br />
Main).<br />
Vous pouvez aussi activer le mode Dual en maintenant un<br />
des huit boutons TONE enfoncé tout en appuyant sur un<br />
autre. Le son du premier bouton TONE est alors assigné à la<br />
partie Main et le son de l’autre bouton à la partie Dual.<br />
(2) Jouez quelques notes sur le clavier.<br />
Pour changer la balance entre les sons des parties Main et<br />
Dual, procédez comme suit:<br />
(3) Maintenez le bouton [DUAL] enfoncé et servez-vous du<br />
bouton BALANCE [ACCOMP] (moins fort) ou [KEYBOARD]<br />
(plus fort) pour changer le volume de la partie Dual.<br />
(4) Pour assigner un autre son à la partie Dual, maintenez le<br />
bouton [DUAL] enfoncé et procédez comme pour la partie<br />
Main (page 24).<br />
Remarque: Vous ne pouvez pas assigner de kit de batterie à la<br />
partie Dual.<br />
26
<strong>EXR</strong>-5/<strong>EXR</strong>-3<br />
Using the metronome<br />
You can switch on the metronome when practising a new song.<br />
(1) Press the [METRONOME] button.<br />
The icon appears in the display and you hear the metronome<br />
sound.<br />
(2) Press and hold [METRONOME] to select the Metro TS<br />
function.<br />
(3) Use the [–]/[+] buttons to set another time signature.<br />
The possibilities are: 1/4, 2/4, 3/4, 4/4, 5/4, 6/4, 6/8, 9/8.<br />
(4) Press another “big” button in the DATA ENTRY section to<br />
leave this function.<br />
(5) Pres the [METRONOME] button again to switch the metronome<br />
off.<br />
Utilizar el metrónomo<br />
Puede activar el metrónomo si practica una nueva canción.<br />
(1) Pulse el botón [METRONOME].<br />
El icono aparece en la pantalla y oirá el sonido de metrónomo.<br />
(2) Pulse y mantenga pulsado [METRONOME] para seleccionar<br />
la función Metro TS.<br />
(3) Utilice los botones [–]/[+] para ajustar otro compás.<br />
Las posibilidades son: 1/4, 2/4, 3/4, 4/4, 5/4, 6/4, 6/8, 9/8.<br />
(4) Pulse otro botón “big” en la sección DATA ENTRY para salir<br />
de esta función.<br />
(5) Pulse de nuevo [METRONOME] para volver esactivar el<br />
metrónomo.<br />
Utilisation du métronome<br />
Si vous le voulez, vous pouvez activer le métronome quand vous<br />
répétez un morceau.<br />
(1) Appuyez sur le bouton [METRONOME].<br />
L’icône s’affiche à l’écran et le son du métronome retentit.<br />
(2) Maintenez [METRONOME] enfoncé pour choisir la fonction<br />
Metro TS.<br />
(3) Servez-vous des boutons [–]/[+] pour choisir l’armure de<br />
temps voulue.<br />
Voici les possibilités: 1/4, 2/4, 3/4, 4/4, 5/4, 6/4, 6/8, 9/8.<br />
(4) Appuyez sur un autre “gros” bouton de la section DATA<br />
ENTRY pour quitter cette fonction.<br />
(5) Appuyez de nouveau sur le bouton [METRONOME] pour<br />
désactiver le métronome.<br />
27
<strong>EXR</strong>-5/<strong>EXR</strong>-3<br />
4. Playing with accompaniment<br />
(Arranger)<br />
4. Interpretar con acompañamiento<br />
(Arranger)<br />
4. Jeu avec accompagnement<br />
(arrangeur)<br />
ARRANGER<br />
START / STOP<br />
BAND<br />
Let us now take advantage of the <strong>EXR</strong>-5/<strong>EXR</strong>-3’s accompaniment<br />
function. This function is called “Arranger”.<br />
Starting/using the Arranger<br />
(1) Press the [ARRANGER¥BAND] button.<br />
The ARRANGER icon appears in the display and the keyboard<br />
is split into two halves. The keys you press in the left<br />
half are used to specify the key of the accompaniment. The<br />
right half of the keyboard allows you to play a tune to the<br />
accompaniment.<br />
(2) Press the [START÷STOP] button to start Arranger playback.<br />
The [V-LINK] button now flashes to indicate the tempo and<br />
beats (BEAT function).<br />
Note: If the ARRANGER icon is displayed, playing in the left<br />
half of the keyboard while the Arranger is stopped, will sound a<br />
stereo string sound (to which you can add a monophonic bass<br />
sound, see “Auto Bass*: status and volume” (p. 88)). The left half<br />
of the keyboard is thus not muted (like on previous <strong>Roland</strong><br />
arranger instruments). This “EP Chord” function can be switched<br />
off, however (page 90).<br />
(3) Play a chord (or just one note) with your left hand.<br />
(4) Play another chord (or note) to change the Arranger’s key.<br />
Aprovechemos ahora las ventajas de la función de acompañamiento<br />
del <strong>EXR</strong>-5/<strong>EXR</strong>-3. Esta función se denomina “Arranger”.<br />
Activar/utilizar el Arranger<br />
(1) Pulse el botón [ARRANGER¥BAND].<br />
El icono ARRANGER aparece en la pantalla y el teclado se<br />
divide en dos mitades. Las teclas que pulsa en la mitad<br />
izquierda se utilizan para especificar la tecla del acompañamiento.<br />
La mitad derecha del teclado le permite reproducir<br />
una sintonía en el acompañamiento.<br />
(2) Pulse el botón [START÷STOP] para iniciar la reproducción<br />
del Arranger.<br />
El botón [V-LINK] parpadea para indicar el tempo y los tiempos<br />
(función BEAT).<br />
Nota: Si se visualiza el icono ARRANGER , al tocar en la mitad<br />
izquierda del teclado mientras el Arranger está detenido, sonará<br />
un sonido de cuerda estéreo (al que se le puede añadir un sonido<br />
de bajo monofónico, consulte “Auto Bass*: estado y volumen”<br />
(p. 88)). La mitad izquierda del teclado, de esta manera, no se<br />
enmudece (como en anteriores instrumentos de acompañamiento<br />
de <strong>Roland</strong>). No obstante, esta función “EP Chord” puede<br />
desactivarse (página 90).<br />
(3) Toque un acorde (o sólo una nota) con la mano izquierda.<br />
(4) Interprete otro acorde (o nota) para cambiar la tecla del<br />
Arranger.<br />
Voyons à présent comment exploiter la fonction d’accompagnement<br />
de l’<strong>EXR</strong>-5/<strong>EXR</strong>-3. Cette fonction s’appelle “Arranger”<br />
(arrangeur).<br />
Activation/utilisation de l’arrangeur<br />
(1) Appuyez sur le bouton [ARRANGER¥BAND].<br />
L’icône ARRANGER s’affiche à l’écran et le clavier est divisé<br />
en deux moitiés. Les touches que vous enfoncez dans la partie<br />
gauche permettent de spécifier la tonalité de l’accompagnement.<br />
La moitié droite du clavier permet de jouer une<br />
mélodie sur l’accompagnement.<br />
(2) Appuyez sur le bouton [START÷STOP] pour lancer le jeu de<br />
l’arrangeur.<br />
Le bouton [V-LINK] clignote alors pour indiquer le tempo et<br />
les battements (fonction BEAT).<br />
Remarque: Quand l’icône ARRANGER est affichée, tandis que<br />
l’arrangeur est à l’arrêt, vous entendrez un son de cordes stéréo<br />
(auquel vous pouvez ajouter une basse monophonique) lorsque<br />
vous jouez dans la moitié gauche du clavier. Voyez “Auto Bass*:<br />
statut et volume” (p. 88). La moitié gauche du clavier n’est donc<br />
pas étouffée (comme c’était le cas sur les anciens instruments<br />
<strong>Roland</strong> disposant d’un arrangeur). Vous pouvez toutefois désactiver<br />
cette fonction “EP Chord” (page 90).<br />
(3) Jouez un accord (ou juste une note) de la main gauche.<br />
(4) Jouez un autre accord (ou une autre note) pour changer la<br />
tonalité de l’arrangeur.<br />
28
<strong>EXR</strong>-5/<strong>EXR</strong>-3<br />
(5) Press the following buttons to use other patterns of the<br />
currently selected Music Style:<br />
(5) Pulse los siguientes botones para utilizar otros patrones<br />
del Estilo Musical actualmente seleccionado:<br />
(5) Appuyez sur les boutons ci-dessous pour utiliser d’autres<br />
motifs (“Pattern”) du style musical en vigueur:<br />
ARRANGER<br />
M<br />
Button<br />
INTRO<br />
ORIGINAL<br />
FILL<br />
VARIATION<br />
ENDING<br />
Function<br />
Playback of an introduction. Press this button<br />
before activating [START÷STOP].<br />
Simple accompaniment version.<br />
Transition (“Fill In”) to VARIATION or ORIGINAL.<br />
Slightly more complex accompaniment version.<br />
Phrase that indicates the end of the song. Use<br />
this button instead of [START÷STOP] to stop<br />
playback.<br />
These buttons select Music Style “patterns”. The icon corresponding<br />
to the button you press appears in the display.<br />
Also, the ARRANGER chord field in the display indicates the<br />
name of the chord you played last. This chord is used by the<br />
accompaniment.<br />
As soon as you feel comfortable with the Arranger, you<br />
should try to play a melody with your right hand while using<br />
your left for specifying Arranger chords.<br />
Botón Función<br />
INTRO Reproducción de una introducción. Pulse este<br />
botón antes de activar [START÷STOP].<br />
ORIGINAL Versión de acompañamiento simple.<br />
FILL Transición (“Relleno”) a VARIATION u<br />
ORIGINAL.<br />
VARIATION Versión de acompañamiento ligeramente más<br />
compleja.<br />
ENDING Frase que indica el final de la canción. Utilice<br />
este botón en lugar de [START÷STOP] para<br />
detener la reproducción.<br />
Estos botones seleccionan “patrones” del Estilo Musical. El<br />
icono correspondiente al botón que pulsó aparece en la pantalla.<br />
Además , el campo ARRANGER chord de la pantalla indica el<br />
nombre del acorde que reproduzco por última vez. Este<br />
acorde se utiliza mediante el acompañamiento.<br />
Tan pronto como se sienta cómodo con el Arranger, debería<br />
probar de tocar una melodía con la mano derecha mientras<br />
utiliza la izquierda para especificar los acordes del Arranger.<br />
Bouton Fonction<br />
INTRO Joue une introduction. Appuyez sur ce bouton<br />
avant d’activer [START÷STOP].<br />
ORIGINAL Version simple d’accompagnement.<br />
FILL Transition (“Fill In”) pour passer à VARIATION<br />
ou ORIGINAL.<br />
VARIATION Version d’accompagnement un peu plus<br />
sophistiquée.<br />
ENDING Phrase indiquant la fin du morceau. Vous pouvez<br />
utiliser ce bouton au lieu de [START÷STOP]<br />
pour arrêter le jeu.<br />
Ces boutons servent à choisir les “motifs” de style musical.<br />
L’écran affiche l’icône correspondant au bouton enfoncé.<br />
En outre, la zone d’accord ARRANGER de l’écran indique le<br />
nom du dernier accord joué. Il s’agit de l’accord utilisé par<br />
l’accompagnement.<br />
Une fois familiarisé avec l’arrangeur, essayez de jouer une<br />
mélodie de la main droite en pilotant les accords de l’arrangeur<br />
de la main gauche.<br />
29
<strong>EXR</strong>-5/<strong>EXR</strong>-3<br />
Changing the tempo<br />
Cambiar el tempo<br />
Changer le tempo<br />
TAP TEMPO<br />
NO<br />
YES<br />
SYNC<br />
START<br />
TEMPO / DATA<br />
(6) Use the TEMPO/DATA buttons to decrease ([–]) or increase<br />
([+]) the tempo (if necessary).<br />
To return to the Music Style’s default tempo, simultaneously<br />
press [–] and [+].<br />
You can also press the [TAP¥TEMPO] button several times at<br />
the desired tempo.<br />
Automatic playback start (Sync Start)<br />
Press [SYNC¥START] (the SYNC START icon appears). “Sync Start”<br />
means that the Arranger starts playing back the selected<br />
Music Style as you play a note or a chord with your left hand<br />
(to the left of the split point).<br />
Stopping Arranger playback<br />
(7) Press [START÷STOP] again to stop playback.<br />
You can also press [ENDING]. In that case, you first hear an<br />
ending phrase. When it is finished, Arranger playback stops<br />
automatically.<br />
(6) Utilice los botones TEMPO/DATA para disminuir ([–]) o<br />
aumentar ([+]) el tempo (si fuera necesario).<br />
Para volver al tempo original del Estilo Musical, pulse simultáneamente<br />
[–] y [+].<br />
También puede pulsar el botón [TAP¥TEMPO] varias veces<br />
para el tempo deseado.<br />
Inicio de reproducción automática (Sync Start)<br />
Pulse [SYNC¥START] (aparece el icono SYNC START ). “Sync Start”<br />
significa que el Arranger inicia la reproducción del Estilo<br />
Musical seleccionado al tocar una nota o un acorde con la<br />
mano izquierda (a la izquierda del punto de división).<br />
Detener la reproducción del Arranger<br />
(7) Pulse [START÷STOP] de nuevo para detener la reproducción.<br />
También puede pulsar [ENDING]. En este caso, oirá en primer<br />
lugar una frase final. Cuando termina, la reproducción del<br />
Arranger se detiene de forma automática.<br />
(6) Les boutons TEMPO/DATA permettent de diminuer ([–]) ou<br />
d’augmenter ([+]) le tempo (si nécessaire).<br />
Pour retourner au tempo par défaut du style musical, enfoncez<br />
simultanément les boutons [–] et [+].<br />
Vous pouvez aussi appuyer plusieurs fois sur le bouton<br />
[TAP¥TEMPO] au tempo voulu.<br />
Démarrage automatique du jeu (Sync Start)<br />
Appuyez sur [SYNC¥START] (l’icône SYNC START s’affiche). “Sync<br />
Start” signifie que l’arrangeur démarre le jeu du style musical<br />
choisi dès que vous jouez une note ou un accord de la main<br />
gauche (à gauche du point de partage).<br />
Arrêter le jeu de l’arrangeur<br />
(7) Appuyez à nouveau sur [START÷STOP] pour arrêter la reproduction.<br />
Vous pouvez aussi appuyer sur [ENDING]. Dans ce cas, vous<br />
entendrez d’abord la phrase finale. Quand elle est terminée,<br />
le jeu de l’arrangeur s’arrête automatiquement.<br />
30
Selecting Music Styles<br />
The <strong>EXR</strong>-5 provides three memory areas for Music Styles (the<br />
<strong>EXR</strong>-3 has two):<br />
USER STL: (Memory 000) This is where a Music Style loaded<br />
from the Flash memory or floppy disk (MSA, MSD and MSE<br />
series, optional [<strong>EXR</strong>-5 only]) is temporarily stored. The data in this<br />
RAM memory are erased when you switch off the <strong>EXR</strong>-5/<strong>EXR</strong>-3.<br />
(The <strong>EXR</strong>-3 doesn’t have a floppy disk drive.)<br />
ROCK (001~008), DANCE (009~024), 8 BEAT (025~039),<br />
16 BEAT (040~053), JAZZ (054~058), LATIN (059~066),<br />
TRADIT (067~073), BALLROOM (074~084): These are the<br />
Style families in the <strong>EXR</strong>-5/<strong>EXR</strong>-3’s internal ROM memory. These<br />
Styles cannot be erased (but you can modify them in realtime<br />
using the Cover and Band Orchestrator functions, see pages 43<br />
and 45).<br />
FLASH: (Memories 101~199) This is a Flash area inside the<br />
<strong>EXR</strong>-5/<strong>EXR</strong>-3 that already contains 19 Styles when the <strong>EXR</strong>-5/<br />
<strong>EXR</strong>-3 is shipped. You can expand the number of Styles in this<br />
area by copying more Styles from your computer (via USB) or by<br />
saving the Styles loaded from disk [<strong>EXR</strong>-5 only]. There are 99 Flash<br />
memory slots in all, but the actual number of Styles you can<br />
save there depends on the data size of the Styles.<br />
[<strong>EXR</strong>-5 only] DISK: (Memories 201~…) This area refers to a floppy<br />
disk you inserted into the <strong>EXR</strong>-5’s drive. The number of available<br />
Styles depends on the floppy disk, of course. The Style you select<br />
is transferred to the <strong>EXR</strong>-5’s USER STL memory (see above),<br />
which is why it takes a little longer before you can use it. (You<br />
could, however, save it to a Flash memory, see p. 103.)<br />
(1) Press the [ARRANGER/BAND] button.<br />
Check whether the ARRANGER and a<br />
INTRO ORIGINAL FILL VARIATION ENDING icon are displayed.<br />
(2) Press the [STYLE] button.<br />
Seleccionar estilos musicales<br />
El <strong>EXR</strong>-5 proporciona tres áreas de memoria para los Estilos<br />
Musicales (el <strong>EXR</strong>-3 dispone de dos):<br />
USER STL: (Memoria 000) Aquí es donde se guarda temporalmente<br />
un Estilo Musical cargado desde la memoria Flash o<br />
desde el disquete (series MSA, MSD y MSE, opcional [Sólo <strong>EXR</strong>-5]).<br />
Cuando desactiva el <strong>EXR</strong>-5/<strong>EXR</strong>-3 se borra la información de<br />
esta memoria RAM. (El <strong>EXR</strong>-3 no tiene unidad de disquete).<br />
ROCK (001~008), DANCE (009~024), 8 BEAT (025~039),<br />
16 BEAT (040~053), JAZZ (054~058), LATIN (059~066),<br />
TRADIT (067~073), BALLROOM (074~084): Estas son las<br />
familias de Estilos de la memoria RAM interna del <strong>EXR</strong>-5/<strong>EXR</strong>-3.<br />
Estos Estilos no se pueden borrar (pero puede modificarlos a<br />
tiempo real utilizando las funciones Cover y Band Orchestrator,<br />
consulte las páginas 43 y 45).<br />
FLASH: (Memorias 101~199) Ésta es un área Flash dentro del<br />
<strong>EXR</strong>-5/<strong>EXR</strong>-3 que ya contiene 19 Estilos cuando el <strong>EXR</strong>-5/<strong>EXR</strong>-3<br />
sale de fábrica. Puede ampliar el número de Estilos de este área<br />
copiando más Estilos desde el ordenador (a través de USB) o<br />
guardando los Estilos cargados desde el disco [Sólo <strong>EXR</strong>-5]. Hay 99<br />
ranuras de memoria Flash en total, pero el número real de Estilos<br />
que puede guardar allí depende del tamaño de la información de<br />
los Estilos.<br />
[Sólo <strong>EXR</strong>-5] DISK: (Memorias 201~…) Este área se refiere al disquete<br />
que insertó en la unidad del <strong>EXR</strong>-5. El número de Estilos<br />
disponibles depende del disquete, evidentemente. El Estilo que<br />
seleccione se transfiere a la memoria USER STL del <strong>EXR</strong>-5<br />
(consulte arriba), y por ello tarda un poco más antes de poder<br />
usarlo. (No obstante, podría guardarlo en una memoria Flash,<br />
consulte la p. 103.)<br />
(1) Pulse el botón [ARRANGER/BAND].<br />
Compruebe si se visualizan los iconos ARRANGER y<br />
INTRO ORIGINAL FILL VARIATION ENDING .<br />
(2) Pulse el botón [STYLE].<br />
<strong>EXR</strong>-5/<strong>EXR</strong>-3<br />
Choix de styles musicaux<br />
L’<strong>EXR</strong>-5 comporte trois zones de mémoire pour les styles musicaux<br />
(l’<strong>EXR</strong>-3 en compte deux):<br />
USER STL: (Mémoire 000) Cette mémoire sauvegarde temporairement<br />
le style musical chargé de la mémoire Flash ou<br />
d’une disquette (séries MSA, MSD et MSE en option<br />
[<strong>EXR</strong>-5 uniquement]). Les données contenues dans cette mémoire<br />
RAM sont supprimées quand vous mettez l’<strong>EXR</strong>-5/<strong>EXR</strong>-3 hors<br />
tension. (L’<strong>EXR</strong>-3 ne possède pas de lecteur de disquettes.)<br />
ROCK (001~008), DANCE (009~024), 8 BEAT (025~039),<br />
16 BEAT (040~053), JAZZ (054~058), LATIN (059~066),<br />
TRADIT (067~073), BALLROOM (074~084): Il s’agit des<br />
familles de styles résidant en mémoire ROM interne de l’<strong>EXR</strong>-5/<br />
<strong>EXR</strong>-3. Ces styles ne peuvent pas être supprimés (en revanche,<br />
vous pouvez les modifier en temps réel avec les fonctions Cover<br />
et Band Orchestrator, voyez pages 43 et 45).<br />
FLASH: (Mémoires 101~199) Cette zone de mémoire Flash de<br />
l’<strong>EXR</strong>-5/<strong>EXR</strong>-3 contient déjà 19 styles quand l’<strong>EXR</strong>-5/<strong>EXR</strong>-3 sort<br />
d’usine. Vous pouvez accroître le nombre de styles de cette zone<br />
en copiant d’autres styles depuis votre ordinateur (via USB) ou<br />
en sauvegardant des styles chargés d’une disquette<br />
[<strong>EXR</strong>-5 uniquement]. La mémoire Flash offre un total de 99 emplacements.<br />
Toutefois, le nombre de styles que vous pouvez y sauvegarder<br />
dépend du volume des données des styles musicaux.<br />
[<strong>EXR</strong>-5 uniquement] DISK: (Mémoires 201~…) Cette zone correspond<br />
à la disquette chargée dans le lecteur de l’<strong>EXR</strong>-5. Le nombre<br />
de styles disponibles dépend bien entendu de la disquette. Le<br />
style choisi est transféré dans la mémoire USER STL (voyez<br />
ci-dessus) de l’<strong>EXR</strong>-5. Il faut donc attendre un peu plus longtemps<br />
avant que le style soit prêt à l’emploi. (Par contre, vous<br />
pouvez le sauvegarder en mémoire Flash; voyez p. 103.)<br />
(1) Appuyez sur le bouton [ARRANGER/BAND].<br />
Vérifiez que l’écran affiche l’icône ARRANGER et une icône<br />
INTRO ORIGINAL FILL VARIATION ENDING .<br />
(2) Appuyez sur le bouton [STYLE].<br />
STYLE<br />
FAMILY<br />
31
<strong>EXR</strong>-5/<strong>EXR</strong>-3<br />
(3) If you want to use a style on floppy disk [<strong>EXR</strong>-5 only], insert<br />
the disk into the drive.<br />
(4) Use FAMILY [√][®] to select the memory area that contains<br />
the desired Music Style (see above).<br />
The FAMILY buttons allow you to jump to the desired “family”<br />
(which also include the Flash and USER STL areas).<br />
The display now shows the name of the selected family.<br />
(3) Si desea utilizar un estilo del disquete [Sólo <strong>EXR</strong>-5], inserte el<br />
disquete en la unidad.<br />
(4) Utilice FAMILY [√][®] para seleccionar el área de memoria<br />
que contenga los Estilos Musicales deseados (consulte<br />
arriba).<br />
Los botones FAMILY le permiten saltar a la “familia” deseada<br />
(que también incluyen las áreas Flash y USER STL).<br />
La pantalla muestra el nombre de la familia seleccionada.<br />
(3) Si vous voulez utiliser un style d’une disquette<br />
[<strong>EXR</strong>-5 uniquement], insérez cette dernière dans le lecteur.<br />
(4) Utilisez les boutons FAMILY [√][®] pour choisir la zone de<br />
mémoire contenant le style musical voulu (voyez ci-dessus).<br />
Les boutons FAMILY permettent de passer à la “famille” voulue<br />
(englobant aussi les zones Flash et USER STL).<br />
L’écran affiche à présent le nom de la famille sélectionnée.<br />
SELECT<br />
=<br />
=<br />
ROCK 73 FLASH 132<br />
(5) Use SELECT [√][®] to specify the desired Style within the<br />
selected group.<br />
The first press of SELECT [®] (or [√]) shows the name of the<br />
first Music Style within the selected group. It is already<br />
selected, so if you need the first Style, there is actually no<br />
need to press SELECT [®]. You must use SELECT [√] or [®], however,<br />
to select another Style within the same group. You can<br />
also use the numeric buttons to select Styles. See also “Working<br />
with the FAMILY, SELECT and numeric buttons” (p. 35).<br />
After selecting memory 101 (Flash) or 201 (first disk memory<br />
[<strong>EXR</strong>-5 only]), the display shows a flashing Yes message.<br />
Note: If you forgot to insert a floppy disk into the drive, the display<br />
shows “No Disk” when you attempt to select the “disk<br />
family”.<br />
(6) If necessary, confirm your selection by pressing the [+/YES]<br />
button.<br />
The display briefly shows “LOADING” (only after selecting<br />
a Style from the inserted floppy disk).<br />
[<strong>EXR</strong>-5 only] If you selected a Music Style on floppy disk, the<br />
icon now flashes, and the <strong>EXR</strong>-5 automatically selects<br />
the USER STL memory that now contains the Music Style<br />
you loaded from floppy disk.<br />
(5) Utilice SELECT [√][®] para especificar el Estilo deseado dentro<br />
del grupo seleccionado.<br />
Al pulsar SELECT por primera vez [®] (o [√]) se muestra el<br />
nombre del primer Estilo Musical dentro del grupo seleccionado.<br />
Ya está seleccionado, por lo que si necesita el primer<br />
Estilo en realidad no es necesario que pulse SELECT [®]. Debe<br />
utilizar SELECT [√] o [®], no obstante, para seleccionar otro<br />
Estilo dentro del mismo grupo. También puede utilizar los<br />
botones numéricos para seleccionar Estilos. Consulte también<br />
“Trabajar con FAMILY, SELECT y los botones numéricos”<br />
(p. 35).<br />
Después de seleccionar la memoria 101 (Flash) o la 201 (primera<br />
memoria en disco [Sólo <strong>EXR</strong>-5]), la pantalla muestra un<br />
mensaje Yes intermitente.<br />
Nota: Si se olvidó de insertar un disquete en la unidad, la pantalla<br />
muestra “No Disk” cuando intenta seleccionar la “familia<br />
del disco”.<br />
(6) Si fuera necesario, confirme la selección pulsando el botón<br />
[+/YES]<br />
La pantalla muestra brevemente “LOADING” (sólo después<br />
de seleccionar un Estilo desde el disquete insertado).<br />
[Sólo <strong>EXR</strong>-5] Si seleccionó un Estilo Musical en el disquete, el<br />
icono ahora parpadea, y el <strong>EXR</strong>-5 selecciona automáticamente<br />
la memoria USER STL que ahora contiene el<br />
Estilo Musical que cargó desde el disquete.<br />
(5) Utilisez SELECT [√][®] pour définir le style voulu au sein du<br />
groupe sélectionné.<br />
La première pression sur SELECT [®] (ou [√]) affiche le nom du<br />
premier style musical du groupe sélectionné. Vu que le premier<br />
style est déjà choisi, si vous comptez l’utiliser, vous ne<br />
devez pas appuyer sur le bouton SELECT [®]. En revanche,<br />
vous devez utiliser le bouton SELECT [√] ou [®] pour choisir un<br />
autre style du même groupe. Vous pouvez aussi vous servir<br />
des boutons numériques pour choisir les styles. Voyez aussi<br />
“Utilisation des boutons FAMILY, SELECT et des boutons<br />
numériques” (p. 35).<br />
Lorsque vous avez choisi la mémoire 101 (Flash) ou 201 (la<br />
première de la disquette [<strong>EXR</strong>-5 uniquement]), l’écran affiche le<br />
message clignotant Yes.<br />
Remarque: Si vous avez oublié d’insérer une disquette dans le<br />
lecteur, l’écran affiche le message “No Disk” quand vous<br />
tentez de choisir la “famille de la disquette”.<br />
(6) Si nécessaire, confirmez votre choix en appuyant sur le<br />
bouton [+/YES].<br />
L’écran affiche brièvement le message “LOADING” (uniquement<br />
après le choix d’un style de la disquette chargée).<br />
[<strong>EXR</strong>-5 uniquement] Si vous avez choisi un style musical de la disquette,<br />
l’icône clignote et l’<strong>EXR</strong>-5 sélectionne automatiquement<br />
la mémoire USER STL contenant le style<br />
musical chargé depuis la disquette.<br />
32
<strong>EXR</strong>-5/<strong>EXR</strong>-3<br />
If you press [+/YES] during Arranger playback, the new Style<br />
is used at the next downbeat (1st beat of the next measure).<br />
Otherwise, the <strong>EXR</strong>-5/<strong>EXR</strong>-3 displays its name and uses that<br />
Style when you press [START÷STOP].<br />
Note: [<strong>EXR</strong>-5 only] See page 104 for how to save the Music Style in<br />
the USER STL memory to the Flash memory.<br />
Balance<br />
Si pulsa [+/YES] durante la reproducción del Arranger, el<br />
nuevo Estilo se utiliza en el siguiente tiempo fuerte (primer<br />
tiempo del siguiente compás). Sino, el <strong>EXR</strong>-5/<strong>EXR</strong>-3 visualiza<br />
su nombre y utiliza ese Estilo cuando pulsa [START÷STOP].<br />
Nota: [Sólo <strong>EXR</strong>-5] Consulte la página 104 para saber cómo guardar<br />
el Estilo Musical en la memoria USER STL a la memoria<br />
Flash.<br />
Balance<br />
Si vous appuyez sur [+/YES] pendant le jeu de l’arrangeur, le<br />
nouveau style est activé au temps fort suivant (le premier<br />
temps de la mesure suivante). Sinon, l’<strong>EXR</strong>-5/<strong>EXR</strong>-3 affiche le<br />
nom du style et active ce dernier quand vous appuyez sur<br />
[START÷STOP].<br />
Remarque: [<strong>EXR</strong>-5 uniquement] Pour savoir comment sauvegarder le<br />
style musical résidant en mémoire USER STL dans la<br />
mémoire Flash, voyez page 104.<br />
Balance<br />
BALANCE<br />
ACCOMP KEYBOARD<br />
a10<br />
=<br />
Balance 80<br />
The BALANCE [√][®] buttons allow you to change the volume<br />
balance between the Arranger (or Song) parts and the Keyboard<br />
parts (the ones you can play yourself).<br />
(1) Press BALANCE [ACCOMP] if the Arranger (or Song parts)<br />
are too soft.<br />
(2) Press BALANCE [KEYBOARD] if you think your solo playing<br />
should be louder.<br />
By holding down [SPLIT] (or [DUAL]) while pressing these buttons,<br />
you can modify the volume of those Keyboard parts.<br />
Note: See p. 88 for setting the volume of individual parts.<br />
Los botones BALANCE [√][®] le permiten cambiar el balance de<br />
volumen entre las partes Arranger (o canción) y las partes del<br />
teclado (las que puede interpretar usted mismo).<br />
(1) Pulse BALANCE [ACCOMP] si el Arranger (o las partes de la<br />
canción) son demasiado suaves.<br />
(2) Pulse BALANCE [KEYBOARD] si cree que su interpretación<br />
solista debería sonar más alto.<br />
Si mantiene pulsado [SPLIT] (o [DUAL]) mientras pulsa estos<br />
botones, puede modificar el volumen de estas partes del<br />
Teclado.<br />
Nota: Consulte en la p. 88 el ajuste del volumen de las partes<br />
individuales.<br />
Les boutons BALANCE [√][®] permettent de changer la balance<br />
de volume entre les parties de l’arrangeur (ou parties du morceau)<br />
et les parties Keyboard (celles que vous jouez vous-même).<br />
(1) Appuyez sur le bouton BALANCE [ACCOMP] si le volume de<br />
l’arrangeur (ou des parties du morceau) est trop bas.<br />
(2) Appuyez sur BALANCE [KEYBOARD] si vous souhaitez augmenter<br />
le niveau de votre jeu solo.<br />
Maintenez [SPLIT] (ou [DUAL]) enfoncé tout en appuyant sur<br />
ces boutons pour modifier la balance entre ces parties Keyboard.<br />
Remarque: Pour en savoir plus sur le réglage de volume des<br />
parties individuelles, voyez p. 88 .<br />
33
<strong>EXR</strong>-5/<strong>EXR</strong>-3<br />
5. Playing back songs<br />
5. Reproducir canciones<br />
5. Reproduire des morceaux<br />
The <strong>EXR</strong>-5/<strong>EXR</strong>-3 allows you to play back commercially available<br />
music data files (called Standard MIDI Files) or your own<br />
songs you saved to disk or to the <strong>EXR</strong>-5/<strong>EXR</strong>-3’s Flash memory.<br />
Your own songs are saved as Standard MIDI Format 0 files and<br />
can also be played back using any other SMF compatible<br />
sequencer (or software).<br />
El <strong>EXR</strong>-5/<strong>EXR</strong>-3 le permite reproducir archivos de información<br />
musical disponibles en el mercado (llamados Archivos MIDI<br />
estándar) o sus propias canciones que guardó en el disco o en la<br />
memoria Flash del <strong>EXR</strong>-5/<strong>EXR</strong>-3. Sus propias canciones se guardan<br />
como archivos 0 formato MIDI estándar y también pueden<br />
reproducirse utilizando cualquier otro secuenciador (o software)<br />
compatible con SMF.<br />
L’<strong>EXR</strong>-5/<strong>EXR</strong>-3 peut reproduire des fichiers de données musicales<br />
disponibles dans le commerce (les fichiers Standard MIDI) ou<br />
vos morceaux sauvegardés sur disquette ou dans la mémoire<br />
Flash de l’<strong>EXR</strong>-5/<strong>EXR</strong>-3. Vos morceaux sont sauvegardés sous<br />
forme de fichiers Standard MIDI de format 0 et peuvent être<br />
joués par tout séquenceur (ou logiciel) compatible SMF.<br />
SONG<br />
FAMILY<br />
Basic song playback<br />
(1) Press the [SONG] button (it lights) to switch to Song mode.<br />
This is necessary because, otherwise, pressing the<br />
[START÷STOP] button will start Arranger playback. So be sure<br />
to check whether the [SONG] button lights and whether the<br />
ARRANGER and INTRO ORIGINAL FILL VARIATION ENDING icons are no<br />
longer displayed. Only then will the ARRANGER & SONG<br />
CONTROLS buttons allow you to control song playback (see<br />
above).<br />
(2) [<strong>EXR</strong>-5 only] If you want to play back a song from floppy<br />
disk, insert the disk into the drive (front right).<br />
(3) Use FAMILY [√][®] to select the memory area that contains<br />
the song you wish to play back.<br />
The <strong>EXR</strong>-5/<strong>EXR</strong>-3 provides three memory areas for songs:<br />
USERSONG: (Memory 000) This where the song data you<br />
record are temporarily stored. The data in this RAM memory<br />
are erased when you switch off the <strong>EXR</strong>-5/<strong>EXR</strong>-3.<br />
34<br />
Reproducción básica de canciones<br />
(1) Pulse el botón [SONG] (se ilumina) para cambiar a modo<br />
Song.<br />
Esto es necesario porque, en caso contrario, al pulsar el botón<br />
[START÷STOP] se iniciará la reproducción del Arranger. Así<br />
que debe asegurarse de comprobar si el botón [SONG] se ilumina<br />
y si los iconos ARRANGER y<br />
INTRO ORIGINAL FILL VARIATION ENDING ya no se visualizan. Sólo entonces<br />
los botones ARRANGER & SONG CONTROLS le permiten controlar<br />
la reproducción de la canción (consulte arriba).<br />
(2) [Sólo <strong>EXR</strong>-5] Si desea reproducir una canción desde el disquete,<br />
inserte el disco en la unidad (parte frontal derecha).<br />
(3) Utilice FAMILY [√][®] para seleccionar el área de memoria<br />
que contiene la canción que desea reproducir.<br />
El <strong>EXR</strong>-5/<strong>EXR</strong>-3 proporciona tres áreas de memoria para canciones:<br />
USERSONG: (Memoria 000) Aquí es donde se guarda temporalmente<br />
la información de las canciones que graba.<br />
Cuando desactiva el <strong>EXR</strong>-5/<strong>EXR</strong>-3 se borra la información de<br />
esta memoria RAM.<br />
Fonctions de base de reproduction<br />
(1) Appuyez sur le bouton [SONG] (il s’allume) pour activer le<br />
mode Song.<br />
Effectuez cette étape car sinon, quand vous enfoncez<br />
[START÷STOP], vous lancez la reproduction de l’arrangeur.<br />
Assurez-vous dès lors que le bouton [SONG] s’allume et que<br />
les icônes ARRANGER et INTRO ORIGINAL FILL VARIATION ENDING ne<br />
sont plus affichées. Ce n’est qu’alors que les boutons ARRAN-<br />
GER & SONG CONTROLS permettent de piloter la reproduction<br />
(voyez ci-dessus).<br />
(2) [<strong>EXR</strong>-5 uniquement] Si vous voulez reproduire un morceau<br />
d’une disquette, insérez cette dernière dans le lecteur<br />
(côté avant droit).<br />
(3) Utilisez les boutons FAMILY [√][®] pour choisir la zone de<br />
mémoire contenant le morceau voulu.<br />
L’<strong>EXR</strong>-5/<strong>EXR</strong>-3 comporte trois zones de mémoire pour les<br />
morceaux:<br />
USERSONG: (Mémoire 000) Cette zone sauvegarde temporairement<br />
les données de morceau que vous enregistrez. Les<br />
données contenues dans cette mémoire RAM sont supprimées<br />
quand vous mettez l’<strong>EXR</strong>-5/<strong>EXR</strong>-3 hors tension.
<strong>EXR</strong>-5/<strong>EXR</strong>-3<br />
FLASH: (Memories 101~199) This is the Flash area inside<br />
the <strong>EXR</strong>-5/<strong>EXR</strong>-3 that already contains several songs when<br />
the <strong>EXR</strong>-5/<strong>EXR</strong>-3 is shipped. You can expand the number of<br />
songs in this area by copying more songs from your computer<br />
(via USB). There are 99 Flash memory slots in all, but<br />
the actual number of songs you can save there depends on<br />
the data size of the songs.<br />
[<strong>EXR</strong>-5 only] DISK: (Memories 201~…) This area refers to a<br />
floppy disk you insert into the <strong>EXR</strong>-5’s drive. The number of<br />
available songs depends on the floppy disk, of course.<br />
(4) Use SELECT [√][®] or the numeric buttons to specify the<br />
desired song within the selected group.<br />
This is only necessary for the Flash memory or a floppy disk<br />
(there is only one USERSONG memory).<br />
The first press of SELECT [®] (or [√]) shows the name of the<br />
first song within the selected group. It is already selected, so<br />
if you need the first song, there is actually no need to press<br />
SELECT [®]. You must use SELECT [√] or [®], however, to select<br />
another song within the same group. After selecting memory<br />
101 (the first Flash memory), the display looks as follows.<br />
FLASH: (Memorias 101~199) Ésta es el área Flash dentro<br />
del <strong>EXR</strong>-5/<strong>EXR</strong>-3 que ya contiene varias canciones cuando el<br />
<strong>EXR</strong>-5/<strong>EXR</strong>-3 sale de fábrica. Puede ampliar el número de<br />
canciones en este área copiando más canciones desde el<br />
ordenador (a través de USB). Hay 99 ranuras de memoria<br />
Flash en total, pero el número real de canciones que puede<br />
guardar allí depende del tamaño de la información de las<br />
canciones.<br />
[Sólo <strong>EXR</strong>-5] DISK: (Memorias 201~…) Este área se refiere al<br />
disquete que inserte en la unidad del <strong>EXR</strong>-5. El número de<br />
canciones disponibles depende del disquete, evidentemente.<br />
(4) Utilice SELECT [√][®] o los botones numéricos para especificar<br />
la canción deseada dentro del grupo seleccionado.<br />
Esto sólo es necesario para la memoria Flash o un disquete<br />
(sólo hay una memoria USERSONG).<br />
Al pulsar SELECT por primera vez [®] (o [√]) se muestra el<br />
nombre de la primera canción dentro del grupo seleccionado.<br />
Ya está seleccionada, por lo que si necesita la primera canción<br />
en realidad no es necesario que pulse SELECT [®]. Debe<br />
utilizar SELECT [√] o [®], no obstante, para seleccionar otra<br />
canción dentro del mismo grupo. Después de seleccionar la<br />
memoria 101 (la primera memoria Flash), la pantalla muestra<br />
lo siguiente.<br />
FLASH: (Mémoires 101~199) Cette zone de mémoire Flash<br />
de l’<strong>EXR</strong>-5/<strong>EXR</strong>-3 contient déjà plusieurs morceaux quand<br />
l’<strong>EXR</strong>-5/<strong>EXR</strong>-3 sort d’usine. Vous pouvez accroître le nombre<br />
de morceaux de cette zone en copiant d’autres morceaux<br />
depuis votre ordinateur (via USB). La mémoire Flash offre un<br />
total de 99 emplacements. Toutefois, sa capacité totale en<br />
morceaux dépend du volume des données des morceaux.<br />
[<strong>EXR</strong>-5 uniquement] DISK: (Mémoires 201~…) Cette zone correspond<br />
à la disquette dans le lecteur de l’<strong>EXR</strong>-5. Le total de<br />
morceaux disponibles dépend bien entendu de la disquette.<br />
(4) Utilisez SELECT [√][®] ou les boutons numériques pour<br />
choisir le morceau voulu au sein du groupe sélectionné.<br />
Cette étape est uniquement nécessaire pour les morceaux de<br />
la mémoire Flash ou de la disquette (il n’y a qu’une mémoire<br />
USERSONG).<br />
La première pression sur SELECT [®] (ou [√]) affiche le nom du<br />
premier morceau du groupe choisi. Le premier morceau étant<br />
déjà choisi, si vous comptez l’utiliser, vous ne devez pas<br />
appuyer sur le bouton SELECT [®]. En revanche, utilisez le<br />
bouton SELECT [√] ou [®] pour choisir un autre morceau du<br />
même groupe. Une fois que vous avez choisi la mémoire 101<br />
(la première de la zone Flash), l’écran se présente comme suit.<br />
SELECT<br />
101<br />
1000Mils =<br />
You can also use numeric buttons to select songs.<br />
Working with the FAMILY, SELECT and numeric<br />
buttons<br />
You can press FAMILY [√] or [®] either repeatedly (brief<br />
presses) to go back or advance, or hold down [√] or [®] to<br />
quickly select another family. The fastest way to scroll<br />
through the available families is by holding down [√] while<br />
pressing [®] (go backwards), or by holding down [®] while<br />
pressing [√] (advance). The same methods are available for<br />
También puede utilizar los botones numéricos para seleccionar<br />
canciones.<br />
Trabajar con FAMILY, SELECT y los botones<br />
numéricos<br />
Puede pulsar FAMILY [√] o [®] tanto repetidamente (pulsaciones<br />
cortas) para retroceder o avanzar, como mantener pulsados [√]<br />
o [®] para seleccionar rápidamente otra familia. La forma más<br />
rápida de desplazarse por las familias disponibles es manteniendo<br />
pulsado [√] mientras pulsa [®] (hacia atrás), o manteniendo<br />
pulsado [®] mientras pulsa [√] (hacia delante). Los mis-<br />
Vous pouvez aussi vous servir des boutons numériques pour<br />
choisir les morceaux.<br />
Utilisation des boutons FAMILY, SELECT et des<br />
boutons numériques<br />
Procédez soit en appuyant plusieurs fois (par pressions brèves)<br />
sur le bouton FAMILY [√] ou [®] pour passer à l’entrée<br />
précédente ou suivante, soit en maintenant [√] ou [®] enfoncé<br />
pour choisir rapidement une autre famille. La manière la plus<br />
rapide de parcourir les familles disponibles consiste à maintenir<br />
[√] pendant que vous appuyez sur [®] (reculer); maintenez<br />
35
<strong>EXR</strong>-5/<strong>EXR</strong>-3<br />
the SELECT [√][®] buttons. As a reminder: the FAMILY buttons<br />
are used for selecting groups, while the SELECT buttons allow<br />
you to select items within a group.<br />
If you prefer to use the numeric buttons, enter three figures<br />
(e.g. “001” for entry “1”). If you only enter two figures (or<br />
only one), the <strong>EXR</strong>-5/<strong>EXR</strong>-3 takes slightly longer to accept<br />
your entry.<br />
Note: If the number you enter lies beyond the last available<br />
entry, the <strong>EXR</strong>-5/<strong>EXR</strong>-3 does not change.<br />
Note: Enter “000” (or “0”) to select the USERSONG memory.<br />
After selecting memory 101 (Flash) or 201 (first disk memory<br />
[<strong>EXR</strong>-5 only]), the display shows a flashing Yes message. You<br />
can ignore this if you like, and proceed with the next step (or<br />
you can press [YES/+] and then proceed).<br />
Note: If you forgot to insert a floppy disk into the drive, the display<br />
shows “No Disk” when you attempt to select a file on<br />
disk.<br />
(5) After making sure that the correct song has been selected,<br />
you can press [START÷STOP] (now called [®÷ª]) to load it and<br />
immediately start playback.<br />
mos métodos están disponibles para los botones SELECT [√][®].<br />
Como recordatorio: los botones FAMILY se utilizan para seleccionar<br />
grupos, mientras que los botones SELECT le permiten<br />
seleccionar elementos dentro de un grupo.<br />
Si prefiere utilizar los botones numéricos, introduzca tres<br />
números (por ejemplo, “001” para la entrada “1”). Si introduce<br />
sólo dos números (o sólo uno), el <strong>EXR</strong>-5/<strong>EXR</strong>-3 tarda un<br />
poco más en aceptar la entrada.<br />
Nota: Si el número que introduce se sitúa más allá de la última<br />
entrada disponible, el <strong>EXR</strong>-5/<strong>EXR</strong>-3 no cambia.<br />
Nota: Introduzca “000” (o “0”) para seleccionar la memoria<br />
USERSONG.<br />
Después de seleccionar la memoria 101 (Flash) o la 201 (primera<br />
memoria en disco [Sólo <strong>EXR</strong>-5]), la pantalla muestra un<br />
mensaje Yes intermitente. Puede ignorarlo si lo desea y continuar<br />
con el siguiente paso (o bien puede pulsar [YES/+] y<br />
continuar).<br />
Nota: Si se olvidó de insertar un disquete en la unidad, la pantalla<br />
muestra “No Disk” cuando intenta seleccionar un archivo<br />
del disco.<br />
(5) Después de asegurarse de que ha seleccionado la canción<br />
correcta, puede pulsar [START÷STOP] (ahora llamado [®÷ª])<br />
para cargarla e iniciar la reproducción inmediatamente.<br />
[®] et appuyez sur [√] pour avancer. Ces méthodes sont aussi<br />
disponibles pour les boutons SELECT [√][®]. Comme vous le<br />
savez, les boutons FAMILY servent à sélectionner des groupes,<br />
tandis que les boutons SELECT permettent de choisir une<br />
entrée d’un groupe.<br />
Si vous préférez utiliser les boutons numériques, entrez<br />
trois chiffres (“001” pour l’entrée “1”, par exemple). Si vous<br />
entrez seulement deux chiffres (voire un seul), l’<strong>EXR</strong>-5/<strong>EXR</strong>-3<br />
mettra plus de temps à “digérer” votre entrée.<br />
Remarque: Si le nombre défini dépasse la dernière entrée disponible,<br />
l’<strong>EXR</strong>-5/<strong>EXR</strong>-3 ne change pas.<br />
Remarque: Entrez “000” (ou “0”) pour choisir la mémoire<br />
USERSONG.<br />
Lorsque vous avez choisi la mémoire 101 (Flash) ou 201 (la<br />
première de la disquette [<strong>EXR</strong>-5 uniquement]), l’écran affiche le<br />
message clignotant Yes. Vous pouvez l’ignorer et passer à<br />
l’étape suivante (ou appuyer sur [YES/+] avant de continuer).<br />
Remarque: Si vous avez oublié d’insérer une disquette dans le<br />
lecteur, l’écran affiche le message “No Disk” quand vous<br />
tentez de choisir un fichier de la disquette.<br />
(5) Après avoir vérifié que le morceau voulu est choisi, vous<br />
pouvez appuyer sur [START÷STOP] (qui s’appelle maintenant<br />
[®÷ª]) pour charger le morceau et lancer directement<br />
sa reproduction.<br />
START / STOP<br />
The [V-LINK] button now flashes to indicate the tempo and<br />
beats (BEAT function).<br />
You can already select a new song while the current one is<br />
still playing back. If you want to listen to it before the current<br />
song is finished, stop playback by pressing [START÷STOP],<br />
then press that button again. Otherwise, wait until the current<br />
song is finished, then press the [START÷STOP] button to<br />
start playback of the new song.<br />
36<br />
El botón [V-LINK] parpadea para indicar el tempo y los tiempos<br />
(función BEAT).<br />
Puede seleccionar una nueva canción incluso cuando la<br />
actual aún se está reproduciendo. Si desea escucharla antes<br />
de que termine la canción actual, detenga la reproducción<br />
pulsando [START÷STOP], y a continuación pulse ese botón<br />
otra vez. Sino, espere hasta que termine la canción actual, y a<br />
continuación pulse el botón [START÷STOP] para iniciar la<br />
reproducción de la nueva canción.<br />
Le bouton [V-LINK] clignote alors pour indiquer le tempo et<br />
les battements (fonction BEAT).<br />
Vous pouvez déjà choisir le morceau suivant pendant la<br />
reproduction du morceau actuel. Pour écouter ce nouveau<br />
morceau sans attendre la fin du morceau actuel, arrêtez la<br />
reproduction en appuyant sur [START÷STOP], puis appuyez de<br />
nouveau sur ce bouton. Sinon, attendez la fin du morceau<br />
actuel puis appuyez sur le bouton [START÷STOP] pour lancer<br />
la reproduction du nouveau morceau.
<strong>EXR</strong>-5/<strong>EXR</strong>-3<br />
Note: Please bear in mind that starting playback of the selected<br />
song on disk will erase the song in the USERSONG memory.<br />
Be sure to save it to disk before proceeding (see p. 114).<br />
(6) You can change the song tempo with the [–]/[+] buttons or<br />
[TAP¥TEMPO].<br />
Doing so, however, means that the tempo will still change if<br />
the song you are playing back contains tempo change messages.<br />
Furthermore, every time you jump back to the beginning<br />
or another position of the song using [|√], [º] or [‰], the<br />
programmed song tempo is reset.<br />
(7) Feel free to experiment with the COVER function (see<br />
p. 43).<br />
Note: In Song mode, the <strong>EXR</strong>-5/<strong>EXR</strong>-3 automatically selects the<br />
PIANO SOLO keyboard mode. If you like, you can play along with<br />
the song (and even use the Split or Dual part).<br />
Note: In certain cases, the display may show the message XG<br />
Light or GM2 rather than a Tone name. Such a message<br />
means that the <strong>EXR</strong>-5/<strong>EXR</strong>-3 is using a Tone that cannot be<br />
selected via the front panel. There are 798 such “hidden” Tones<br />
whose sole purpose is to ensure XG/GM2 playback compatibility.<br />
Nota: Tenga en cuenta que al iniciar la reproducción de la canción<br />
seleccionada en el disco se eliminará la canción de la<br />
memoria USERSONG. Asegúrese de guardarla antes de continuar<br />
(consulte la página 114).<br />
(6) Puede cambiar el tempo de la canción con los botones [–]/<br />
[+] o [TAP¥TEMPO].<br />
No obstante, esto significa que el tempo también cambiará si<br />
la canción reproducida contiene mensajes de cambio de<br />
tempo. Además, cada vez que vuelva al principio de la canción<br />
mediante [|√], [º] o [‰], se ajustará el tempo de la canción<br />
programada.<br />
(7) Pruebe la función COVER (consulte la página 43).<br />
Nota: En modo Song, el <strong>EXR</strong>-5/<strong>EXR</strong>-3 selecciona automáticamente<br />
el modo del teclado PIANO SOLO. Si lo desea, puede tocar<br />
junto con la canción (e incluso utilizar las partes Split o Dual).<br />
Nota: En ciertos casos, la pantalla puede mostrar el mensaje XG<br />
Light o GM2 más que el nombre de un sonido. Este tipo de<br />
mensajes significa que el <strong>EXR</strong>-5/<strong>EXR</strong>-3 está utilizando un sonido<br />
que no se puede seleccionar mediante el panel frontal. Existen<br />
798 sonidos “ocultos” de este tipo cuyo único propósito es asegurar<br />
la compatibilidad con la reproducción XG/GM2.<br />
Remarque: Retenez que le fait de lancer la reproduction d’un<br />
morceau sur disquette écrase le morceau dans la mémoire<br />
USERSONG. Veillez donc à le sauvegarder sur disquette avant<br />
de poursuivre (voyez p. 114).<br />
(6) Vous pouvez changer le tempo du morceau avec les boutons<br />
[–]/[+] ou [TAP¥TEMPO].<br />
Toutefois, si vous changez le tempo et si le morceau reproduit<br />
contient des messages de changement de tempo, ce dernier<br />
change encore pendant la reproduction. En outre, chaque<br />
fois que vous sautez au début du morceau ou à une<br />
autre position avec [|√], [º] ou [‰], le tempo préprogrammé<br />
est rétabli.<br />
(7) Vous pouvez aussi essayer la fonction COVER (voyez p. 43).<br />
Remarque: En mode Song, l’<strong>EXR</strong>-5/<strong>EXR</strong>-3 choisit automatiquement<br />
le mode de clavier PIANO SOLO. Si vous le souhaitez, vous<br />
pouvez jouer sur les morceaux (et même utiliser la partie Split ou<br />
Dual).<br />
Remarque: Dans certains cas, l’écran pourrait afficher le message<br />
XG Light ou GM2 au lieu d’un nom de son. Ce message<br />
signifie que l’<strong>EXR</strong>-5/<strong>EXR</strong>-3 utilise un son que vous ne pouvez<br />
pas choisir avec les commandes en face avant. L’instrument<br />
comporte 798 de ces sons “cachés” dont le seul but est d’assurer<br />
la compatibilité de reproduction XG/GM2.<br />
37
<strong>EXR</strong>-5/<strong>EXR</strong>-3<br />
Additional playback functions<br />
The [INTRO], [ORIGINAL], etc. buttons have two functions: one in<br />
Style mode (printed above the buttons), and another one in<br />
Song mode (printed below the buttons).<br />
Selecting the Song mode<br />
The ARRANGER & SONG CONTROLS buttons have two functions:<br />
they can be used for selecting Music Style patterns (when the<br />
ARRANGER icon is displayed), or for Song navigation (when<br />
the [SONG] button lights).<br />
Funciones de reproducción<br />
adicionales<br />
Los botones [INTRO], [ORIGINAL], etc. tienen dos funciones: uno<br />
en el modo Style (impreso sobre los botones), y otro en el modo<br />
Song (impreso debajo de los botones).<br />
Seleccionar el modo Song<br />
Los botones ARRANGER & SONG CONTROLS tienen dos funciones:<br />
pueden utilizarse para seleccionar patrones de Estilo Musical<br />
(cuando se visualiza el icono ARRANGER ), o para navegación<br />
Song (cuando el botón [SONG] se ilumina).<br />
Fonctions supplémentaires de reproduction<br />
Les boutons [INTRO], [ORIGINAL], etc. ont deux fonctions: une en<br />
mode Style (imprimée au-dessus des boutons) et une autre en<br />
mode Song (imprimée en dessous des boutons).<br />
Choix du mode Song<br />
Les boutons ARRANGER & SONG CONTROLS ont deux fonctions:<br />
choix des motifs de styles musicaux (quand l’icône ARRANGER<br />
est affichée) ou navigation dans les morceaux (quand le bouton<br />
[SONG] est allumé).<br />
SONG<br />
To select the Song mode (and the SONG CONTROL functions),<br />
you need to press the [SONG] button. Only then will the following<br />
functions be available.<br />
Fast Forward, Rewind, and Reset<br />
• To fast forward (jump to a measure later in the song), press<br />
[‰].<br />
• To rewind (return to a measure that lies before the current<br />
position), press [º].<br />
The measure indication in the upper right corner of the display<br />
will help you locate the measure you need.<br />
• Press [|√] (Reset) to jump back to the first measure of the<br />
song. You need to stop playback before using the [|√] button.<br />
Note: In certain cases, [‰] and [º] may not be available. This is<br />
only the case for very large songs, however.<br />
Note: By pressing [|√], [º] or [‰], you also recall the song’s preprogrammed<br />
tempo value.<br />
Para seleccionar el modo Song (y las funciones SONG CON-<br />
TROL), debe pulsar el botón [SONG]. Sólo entonces las<br />
siguientes funciones estarán disponibles.<br />
Avance rápido, Rebobinado y Reinicio<br />
• Para avanzar rápido (pasar a un compás posterior en la canción),<br />
pulse [‰].<br />
• Para rebobinar (volver a un compás situado antes de la posición<br />
actual), pulse [º].<br />
La indicación de compás en el ángulo superior derecho de la<br />
pantalla le ayudará a localizar el compás deseado.<br />
• Pulse [|√] (Reinicio) para volver al primer compás de la canción.<br />
Es necesario detener la reproducción antes de utilizar el<br />
botón [|√].<br />
Nota: En ciertos casos, [‰] y [º] pueden no estar disponibles. No<br />
obstante, este Sólo es el caso de canciones muy largas.<br />
Nota: Cada vez que pulse [|√], [º] o [‰], se ajustará el tempo de<br />
la canción programada.<br />
Pour choisir le mode Song (et les fonctions SONG CONTROL),<br />
vous devez appuyer sur le bouton [SONG]. Ce n’est qu’ensuite<br />
que les fonctions suivantes sont disponibles.<br />
Avance, recul et retour au début<br />
• Pour avancer (sauter à une mesure plus loin dans le morceau),<br />
appuyez sur [‰].<br />
• Pour reculer (retourner à une mesure antérieure à l’emplacement<br />
actuel), appuyez sur [º].<br />
L’affichage de mesure dans le coin supérieur droit de l’écran<br />
vous aidera à trouver la mesure voulue.<br />
• Appuyez sur [|√] (Reset) pour retourner à la première mesure<br />
du morceau. Vous devez arrêter la reproduction pour pouvoir<br />
utiliser le bouton [|√].<br />
Remarque: Dans certains cas, [‰] et [º] ne seront pas disponibles.<br />
Cela ne se produit cependant que pour de très longs morceaux.<br />
Remarque: En appuyant sur [|√], [‰] ou [º], vous rechargez le<br />
tempo préprogrammé du morceau.<br />
38
<strong>EXR</strong>-5/<strong>EXR</strong>-3<br />
Loop playback (Repeat)<br />
Reproducción Loop (Repeat)<br />
Reproduction en boucle (Repeat)<br />
SYNC<br />
START<br />
INTRO<br />
MARKER<br />
A–B<br />
REPEAT<br />
A–B<br />
Another clever feature of the <strong>EXR</strong>-5/<strong>EXR</strong>-3’s Recorder is that<br />
you can program playback loops. You can do so during playback<br />
or while the Recorder is stopped.<br />
(1) Press [MARKER¥A–B] where you want the loop to begin<br />
(the A icon appears in the bottom right corner of the<br />
display).<br />
(2) Fast forward to the measure where you want the loop to<br />
end and press [MARKER¥A–B] again (the B icon appears).<br />
You can also program loops on the fly. Remember, however,<br />
that the Recorder always memorizes the beginning (downbeat)<br />
of the next measure.<br />
(3) If the icon isn’t already displayed, press the [REPEAT¥A–B]<br />
button to activate the loop you have just programmed.<br />
This button allows you to switch the <strong>EXR</strong>-5/<strong>EXR</strong>-3’s Repeat<br />
function on and off.<br />
(4) To play back the loop, press the [START÷STOP] button (now<br />
called [®÷ª]).<br />
The Recorder jumps to measure “A” and starts playing. At the<br />
end of measure “B”, the Recorder immediately jumps back to<br />
the beginning of measure “A” and continues playing back the<br />
passage.<br />
If necessary, repeat steps (1) and (2) to set other marker positions.<br />
Note: The playback tempo is reset every time the Recorder<br />
reaches the “A” measure.<br />
Note: In certain cases, the Marker function may not be available.<br />
This only happens with very large songs, however.<br />
Otra función muy interesante del Grabador del <strong>EXR</strong>-5/<strong>EXR</strong>-3 es<br />
la que permite programar loops de reproducción. Puede hacerlo<br />
durante la reproducción o con el Grabador detenido.<br />
(1) Pulse [MARKER¥A–B] donde desee que empiece el loop<br />
(aparece el icono A en el ángulo inferior derecho de la<br />
pantalla).<br />
(2) Avance rápido hasta el compás en el que desea terminar el<br />
loop, y vuelva a pulsar [MARKER¥A–B] (aparece el icono<br />
B ).<br />
También es posible programar loops al momento. No obstante,<br />
debe recordar que el Grabador siempre memoriza el<br />
principio (tiempo fuerte) del siguiente compás.<br />
(3) Si el icono aún no se visualiza, pulse el botón [REPEAT¥A–B]<br />
para activar el bucle que ha programado.<br />
Este botón le permite activar y desactivar la función Repeat<br />
del <strong>EXR</strong>-5/<strong>EXR</strong>-3.<br />
(4) Para volver a reproducir el loop, pulse el botón<br />
[START÷STOP] (ara denominado [®÷ª]).<br />
El Grabador salta al compás “A” y empezar a reproducir. Al<br />
final del compás “B”, el Grabador volverá de manera inmediata<br />
al principio del compás “A” y continuará reproduciendo<br />
el pasaje.<br />
Si fuera necessario, repita los passos (1) y (2) para programar<br />
otros posiciones.<br />
Nota: Cada vez que el grabador salta al compás “A”, el tempo se<br />
reinicia.<br />
Nota: En algunos casos, la función Marker puede no estar disponible.<br />
No obstante, esto sólo ocurre con canciones muy largas.<br />
La fonction Recorder (enregistreur) de l’<strong>EXR</strong>-5/<strong>EXR</strong>-3 propose<br />
une autre fonction bien futée qui permet de programmer des<br />
boucles de reproduction. Vous pouvez programmer ces boucles<br />
pendant la reproduction ou quand l’enregistreur est à l’arrêt.<br />
(1) Appuyez sur [MARKER¥A–B] à l’endroit où vous voulez<br />
démarrer la boucle (l’icône A s’affiche dans le coin inférieur<br />
droit de l’écran).<br />
(2) Avancez jusqu’à l’endroit où vous voulez arrêter la boucle<br />
et appuyez à nouveau sur [MARKER¥A–B] (l’icône<br />
s’affiche).<br />
Vous pouvez aussi programmer des boucles sur le vif. Souvenez-vous<br />
cependant que l’enregistreur mémorise toujours le<br />
début (temps fort) de la mesure suivante.<br />
(3) Si l’icône n’est pas déjà affichée, appuyez sur le bouton<br />
[REPEAT¥A–B] pour activer la boucle que vous venez de<br />
programmer.<br />
Ce bouton permet d’activer et de couper la fonction Repeat<br />
de l’<strong>EXR</strong>-5/<strong>EXR</strong>-3.<br />
(4) Pour reproduire la boucle, appuyez sur le bouton<br />
[START÷STOP] (qui s’appelle maintenant [®÷ª]).<br />
L’enregistreur passe à la mesure “A” et lance la reproduction.<br />
A la fin de la mesure “B”, l’enregistreur retourne immédiatement<br />
au début de la mesure “A” et continue la reproduction<br />
du passage en boucle.<br />
En cas de besoin, répétez les étapes (1) et (2) pour programmer<br />
d’autres positions.<br />
Remarque: A chaque fois que l’enregistreur atteint la position<br />
“A”, le tempo retourne à la valeur programmée.<br />
Remarque: Dans certains cas, la fonction Marker pourrait être<br />
indisponible. Cela ne se produit cependant que pour de très<br />
longs morceaux.<br />
B<br />
39
<strong>EXR</strong>-5/<strong>EXR</strong>-3<br />
Live performance with song backing (Minus One)<br />
Your <strong>EXR</strong>-5/<strong>EXR</strong>-3 allows you to mute parts you wish to play<br />
yourself or don’t need in a given situation. This is called “Minus<br />
One” playback.<br />
(1) Press the [SONG] button if it doesn’t light.<br />
You can now select a Song, if you like (see p. 35).<br />
(2) Press the [MINUS¥ONE] button (the “MinusOne” message<br />
appears in the display).<br />
Interpretaciones en vivo con acompañamiento de canción<br />
(Minus One)<br />
Su <strong>EXR</strong>-5/<strong>EXR</strong>-3 le permite enmudecer partes que desea reproducir<br />
usted mismo o innecesarias en una situación determinada.<br />
Se denomina la reproducción “Minus One”.<br />
(1) Pulse el botón [SONG] si no se ilumina.<br />
Puede seleccionar una canción, si lo desea (consulte la<br />
página 35).<br />
(2) Pulse el botón [MINUS¥ONE] (aparece en pantalla el mensaje<br />
“MinusOne”).<br />
Jeu “live” avec accompagnement de morceau<br />
(Minus One)<br />
Votre <strong>EXR</strong>-5/<strong>EXR</strong>-3 vous permet d’étouffer la partie que vous<br />
voulez jouer vous-même ou qui ne vous sert pas dans un contexte<br />
donné. C’est ce qu’on appelle la reproduction “Minus One”.<br />
(1) S’il n’est pas allumé, appuyez sur le bouton [SONG].<br />
Si vous le voulez, vous pouvez alors choisir un morceau<br />
(voyez p. 35).<br />
(2) Appuyez sur le bouton [MINUS¥ONE] (le message<br />
“MinusOne” s’affiche).<br />
ENDING<br />
MINUS<br />
ONE<br />
The 5 COVER buttons light to indicate that all tracks will be<br />
played back.<br />
(3) Press one of the COVER buttons to switch off the corresponding<br />
track(s). The assigned track icon flashes.<br />
(Example: if you switch off the [DRUMS] button, the [10] icon<br />
starts flashing.)<br />
When a button lights, the corresponding track(s) is/are audible<br />
(i.e. not muted). You can also mute several tracks by<br />
switching off the corresponding COVER buttons.<br />
The MINUS ONE icon appears and the selected part is muted.<br />
Note: The Main part does not automatically adopt the Tone and<br />
related settings of the melody part.<br />
If you like, you can also mute several parts.<br />
Los 5 botones COVER se iluminan para indicar que se reproducirán<br />
todas las pistas.<br />
(3) Pulse uno de los botones COVER para desactivar la(s)<br />
pista(s) correspondiente(s). El icono de la pista parpadea.<br />
(Ejemplo: si desactiva el btón [DRUMS], el icono [10] parpadea.)<br />
Cuando se ilumina un botón, se escucha(n) la(s) pista(s)<br />
correspondiente(s) (es decir, sin enmudecer). También puede<br />
enmudecer varias pistas desactivando los botones COVER<br />
correspondientes.<br />
Aparece el icono MINUS ONE y se enmudece la parte seleccionada.<br />
Nota: La parte Main no adopta automáticamente el Tono y los<br />
ajustes relacionados de la parte de melódica.<br />
Si lo desea, también puede enmudecer varias partes.<br />
Les 5 boutons COVER s’allument pour indiquer que toutes les<br />
pistes seront reproduites.<br />
(3) Appuyez sur un des boutons COVER pour étouffer la ou les<br />
pistes correspondantes. L’icône de piste correspondante se<br />
met à clignoter.<br />
(Exemple: si vous désactivez le bouton [DRUMS], l’icône [10]<br />
se met à clignoter.)<br />
Un bouton allumé indique que la ou les pistes en question<br />
sont audibles (et ne sont donc pas étouffées). Vous pouvez<br />
aussi étouffer plusieurs pistes en éteignant les boutons<br />
COVER correspondants.<br />
L’icône MINUS ONE s’affiche à l’écran et le son de la partie choisie<br />
est étouffé.<br />
Remarque: La partie Main n’adopte pas automatiquement le<br />
son et les réglages liés de la partie mélodique.<br />
Si vous le voulez, vous pouvez aussi étouffer plusieurs parties.<br />
40
<strong>EXR</strong>-5/<strong>EXR</strong>-3<br />
What are tracks?<br />
The term “track” is used only for your convenience. We borrowed<br />
it from tape recorders that allow for recording several<br />
musical parts by the same person (one part after the<br />
other).<br />
In the case of the <strong>EXR</strong>-5/<strong>EXR</strong>-3, the term is only used to<br />
indicate that we are dealing with separate musical parts.<br />
Here indeed (like with computer-based sequencers) what<br />
really counts are the MIDI channels.<br />
Songs you record with the <strong>EXR</strong>-5/<strong>EXR</strong>-3, and the Standard<br />
MIDI Files you play back can consist of up to 16 tracks (i.e.<br />
MIDI channels). In many instances, only certain tracks are<br />
used, but the following are almost certainly present in every<br />
Standard MIDI File:<br />
Track 2: bass<br />
Track 4: melody<br />
Track 10: drums<br />
The COVER buttons allow you to mute the following tracks:<br />
[RIGHT]–Refers to track “4” of the selected Standard MIDI<br />
File. Music data for educational purposes (especially piano<br />
music) use this track for the right-hand part. Mute this track<br />
to play the right hand yourself while listening to the lefthand<br />
part of the Standard MIDI File. The <strong>EXR</strong>-5/<strong>EXR</strong>-3 contains<br />
an excellent stereo piano Tone you could use.<br />
[LEFT]–Refers to track “3” of the selected Standard MIDI File.<br />
Music data for educational purposes (especially piano music)<br />
use this track for the left-hand part. See also above.<br />
[OTHERS]–Mutes all tracks that cannot be muted with the<br />
remaining COVER buttons, more specifically: 1, 3, 6~9,<br />
12~16.<br />
[BASS]–Mutes track “2”, which is assigned to the bass part of<br />
a Standard MIDI File.<br />
[DRUMS]–Mutes track “10”, which is assigned to the drum<br />
part of a Standard MIDI File.<br />
Note: You also switch off several buttons simultaneously.<br />
¿Qué son pistas?<br />
El término “pista” se utiliza sólo para su conveniencia. Lo<br />
hemos tomado prestado de grabadores de cinta que<br />
permiten grabar varias partes musicales por la misma<br />
persona (una parte después de otra).<br />
En el caso del <strong>EXR</strong>-5/<strong>EXR</strong>-3, el término se utiliza solamente<br />
para indicar que estamos tratando con partes musicales<br />
separadas. Aquí lo que realmente cuenta (al igual que en los<br />
secuenciadores de base informática) son los canales MIDI.<br />
Las canciones que graba con el <strong>EXR</strong>-5/<strong>EXR</strong>-3, y los Archivos<br />
MIDI Estándar que reproduce pueden estar formados por<br />
hasta 16 pistas (es decir, canales MIDI). En muchos casos, sólo<br />
se utilizan algunas pistas, pero las siguientes están prácticamente<br />
presentes en cada Archivo MIDI Estándar:<br />
Pista 2: bajo<br />
Pista 4: melodía<br />
Pista 10: batería<br />
Los botones COVER le permiten enmudecer las siguientes pistas:<br />
[RIGHT]–Hace referencia a la pista “4” del Archivo MIDI Estándar<br />
seleccionado. La información musical para finalidades<br />
educativas (especialmente música de piano) utiliza esta pista<br />
para la parte de la mano derecha. Enmudezca esta pista para<br />
reproducir con la mano derecha mientras escucha la parte de<br />
la mano izquierda del Archivo MIDI Estándar. El <strong>EXR</strong>-5/<strong>EXR</strong>-3<br />
contiene un excelente Tono de piano estéreo que puede utilizar.<br />
[LEFT]–Hace referencia a la pista “3” del Archivo MIDI Estándar<br />
seleccionado. La información musical para finalidades<br />
educativas (especialmente música de piano) utiliza esta pista<br />
para la parte de la mano izquierda. Consulte más arriba también.<br />
[OTHERS]–Enmudece todas las pistas que no se pueden<br />
enmudecer con los botones COVER restantes, más específicamente:<br />
1, 3, 6~9, 12~16.<br />
[BASS]–Enmudece la pista “2”, que se ha asignado a la parte<br />
de bajo de un Archivo MIDI Estándar.<br />
[DRUMS]–Enmudece la pista “10”, que se ha asignado a la<br />
parte de percusión de un Archivo MIDI Estándar.<br />
Nota: También puede desactivar varios botones simultáneamente.<br />
Que sont les pistes?<br />
Nous avons choisi d’utiliser le terme “piste” pour plus de<br />
facilité. Nous l’avons emprunté aux enregistreurs multipiste,<br />
qui permettent d’enregistrer plusieurs parties jouées par un<br />
même musicien (une partie après l’autre).<br />
Dans le cas de l’<strong>EXR</strong>-5/<strong>EXR</strong>-3, ce terme sert uniquement à<br />
indiquer que vous avez affaire à des parties musicales distinctes.<br />
En effet, ce qui compte ici (comme sur les logiciels<br />
de séquenceur), ce sont les canaux MIDI.<br />
Les morceaux que vous enregistrez avec l’<strong>EXR</strong>-5/<strong>EXR</strong>-3 et les<br />
fichiers Standard MIDI que vous reproduisez peuvent contenir<br />
jusqu’à 16 pistes (c.-à-d. des canaux MIDI). Très souvent,<br />
seules certaines pistes sont utilisées. Toutefois, les pistes suivantes<br />
figurent dans pratiquement chaque fichier Standard<br />
MIDI:<br />
Piste 2: basse<br />
Piste 4: mélodie<br />
Piste 10: batterie<br />
Les boutons COVER permettent d’étouffer les pistes suivantes:<br />
[RIGHT]–Correspond à la piste “4” du fichier Standard MIDI<br />
choisi. Les données musicales à vocation pédagogique (surtout<br />
pour le piano) utilisent cette piste pour la partie de main<br />
droite. Etouffez cette piste pour jouer vous-même la partie<br />
de main droite en écoutant la partie de main gauche du<br />
fichier Standard MIDI. L’<strong>EXR</strong>-5/<strong>EXR</strong>-3 propose un superbe<br />
son de piano stéréo qui tombe à pic pour ces applications.<br />
[LEFT]–Correspond à la piste “3” du fichier Standard MIDI<br />
choisi. Les données musicales à vocation pédagogique (surtout<br />
pour le piano) utilisent cette piste pour la partie de main<br />
gauche. Lisez aussi ci-dessus.<br />
[OTHERS]–Etouffe toutes les pistes que vous ne pouvez pas<br />
couper avec les boutons COVER restants, à savoir: 1, 3, 6~9,<br />
12~16.<br />
[BASS]–Etouffe la piste “2”, assignée à la partie de basse du<br />
fichier Standard MIDI.<br />
[DRUMS]–Etouffe la piste “10”, assignée à la partie de batterie<br />
du fichier Standard MIDI.<br />
Remarque: Vous pouvez aussi enfoncer plusieurs boutons<br />
simultanément.<br />
41
<strong>EXR</strong>-5/<strong>EXR</strong>-3<br />
(4) Press [|√] and [®÷ª] to start playback.<br />
(5) Press [®÷ª] again to stop playback.<br />
(6) Press [MINUS¥ONE] again (or one of the “big” DATA ENTRY<br />
buttons) to switch the function of the same name back off<br />
again.<br />
Note: The Minus One setting can be saved along with the<br />
selected song and its Cover settings. See page 103.<br />
Changing the track assignments<br />
If the song files you are using do not use the GM system (and<br />
therefore do not correspond to the RIGHT, LEFT, BASS or<br />
DRUM assignments of the Minus One function), you can proceed<br />
as follows to assign other tracks (MIDI channels) to the<br />
COVER [RIGHT], [LEFT], [BASS] and [DRUMS] buttons:<br />
(1) Press the [MINUS¥ONE] button to activate the function of<br />
the same name.<br />
(2) Press and hold the [RIGHT], [LEFT], [BASS] or [DRUM] button.<br />
(3) While holding that button, use the [–]/[+] buttons to assign<br />
the desired MIDI channel to the button you are holding.<br />
Example: To assign MIDI channel “10” to the [RIGHT] button,<br />
press DATA ENTRY [+] until the display looks as follows:<br />
RIGHT<br />
(4) Press [MINUS¥ONE] again (or one of the “big” DATA ENTRY<br />
buttons) to switch the function of the same name back off<br />
again.<br />
Note: The Minus One setting can be saved along with the<br />
selected song and its Cover settings. See page 103.<br />
(4) Pulse [|√] y [®÷ª] para iniciar la reproducción.<br />
(5) Pulse [®÷ª] de nuevo para detener la reproducción.<br />
(6) Pulse [MINUS¥ONE] de nuevo (o uno de los botones “grandes”<br />
DATA ENTRY) para volver a desactivar de nuevo la<br />
función del mismo nombre.<br />
Nota: El ajuste Minus One puede guardarse junto con la canción<br />
seleccionada y sus ajustes de Cover. Consulte la página 103.<br />
Cambiar las asignaciones de la pista<br />
Si los archivos de canción utilizados no emplean el sistema<br />
GM (y por lo tanto no corresponden a las asignaciones<br />
RIGHT, LEFT, BASS o DRUM de la función Minus One), puede<br />
proceder de la manera siguiente para asignar otras pistas<br />
(canales MIDI) a los botones COVER [RIGHT], [LEFT], [BASS] y<br />
[DRUMS]:<br />
(1) Pulse el botón [MINUS¥ONE] para activar la función del<br />
mismo nombre.<br />
(2) Mantenga pulsado el botón [RIGHT], [LEFT], [BASS] o<br />
[DRUM].<br />
(3) Mientras mantiene pulsado este botón, utilice los botones<br />
[–]/[+] para asignar el canal MIDI deseado al botón que<br />
mantiene pulsado.<br />
Ejemplo: Para asignar el canal MIDI “10” al botón [RIGHT],<br />
pulse DATA ENTRY [+] hasta que en la pantalla aparezca lo<br />
siguiente:<br />
RIGHT<br />
(4) Pulse [MINUS¥ONE] de nuevo (o uno de los botones “grandes”<br />
DATA ENTRY) para volver a desactivar de nuevo la<br />
función del mismo nombre.<br />
Nota: El ajuste Minus One puede guardarse junto con la canción<br />
seleccionada y sus ajustes de Cover. Consulte la página 103.<br />
(4) Utilisez [|√] et [®÷ª] pour lancer la reproduction.<br />
(5) Appuyez à nouveau sur [®÷ª] pour arrêter la reproduction.<br />
(6) Appuyez de nouveau sur [MINUS¥ONE] (ou sur un des<br />
“gros” boutons DATA ENTRY) pour désactiver la fonction<br />
du même nom.<br />
Remarque: Vous pouvez sauvegarder le réglage Minus One avec<br />
le morceau sélectionné et ses réglages Cover. Voyez page 103.<br />
Changer les assignations de pistes<br />
Si vos fichiers de morceau n’utilisent pas le système GM (et<br />
ne correspondent donc pas aux assignations RIGHT, LEFT,<br />
BASS ou DRUM de la fonction Minus One), vous pouvez exécuter<br />
la procédure ci-dessous pour assigner d’autres pistes<br />
(canaux MIDI) aux boutons COVER [RIGHT], [LEFT], [BASS] et<br />
[DRUMS]:<br />
(1) Appuyez sur le bouton [MINUS¥ONE] pour activer la fonction<br />
du même nom.<br />
(2) Maintenez le bouton [RIGHT], [LEFT], [BASS] ou [DRUM]<br />
enfoncé.<br />
(3) Gardez ce bouton enfoncé et utilisez les boutons [–]/[+]<br />
pour lui assigner le canal MIDI voulu.<br />
Exemple: Pour assigner le canal MIDI “10” au bouton [RIGHT],<br />
appuyez sur DATA ENTRY [+] jusqu’à ce que l’écran se présente<br />
comme ceci:<br />
RIGHT<br />
(4) Appuyez de nouveau sur [MINUS¥ONE] (ou sur un des<br />
“gros” boutons DATA ENTRY) pour désactiver la fonction<br />
du même nom.<br />
Remarque: Vous pouvez sauvegarder le réglage Minus One avec<br />
le morceau sélectionné et ses réglages Cover. Voyez page 103.<br />
42
<strong>EXR</strong>-5/<strong>EXR</strong>-3<br />
6. Changing the Music<br />
Style or song<br />
orchestration<br />
6. Cambiar el Estilo musical<br />
o la orquestación de la<br />
canción<br />
6. Changer l’orchestration<br />
d’un style ou d’un<br />
morceau<br />
Your <strong>EXR</strong>-5/<strong>EXR</strong>-3 is a novel arranger instrument and Standard<br />
MIDI File player with two functions for “customizing” the Styles<br />
or songs you play back via easy-to-use routines.<br />
El <strong>EXR</strong>-5/<strong>EXR</strong>-3 es un nuevo reproductor de Archivos MIDI<br />
Estándar e instrumento de acompañamiento con dos funciones<br />
para “personalizar” los estilos o canciones que reproduce a través<br />
de las rutinas fáciles de utilizar.<br />
Votre <strong>EXR</strong>-5/<strong>EXR</strong>-3 est un nouvel instrument arrangeur et lecteur<br />
de fichiers Standard MIDI proposant deux fonctions de<br />
“personnalisation” des styles musicaux ou des morceaux reproduits<br />
par le biais de routines simples à utiliser.<br />
Cover function<br />
The Cover function is derived from <strong>Roland</strong>’s revolutionary<br />
DisCover 5 keyboard. The <strong>EXR</strong>-5/<strong>EXR</strong>-3 provides five different<br />
templates you can select via the following buttons: [ACOUSTIC],<br />
[POP], [ROCK], [DANCE], and [ETHNIC].<br />
Función Cover<br />
La función Cover se deriva del revolucionario teclado del<br />
DisCover 5 de <strong>Roland</strong>. El <strong>EXR</strong>-5/<strong>EXR</strong>-3 proporciona cinco plantillas<br />
diferentes que puede seleccionar mediante los siguientes<br />
botones: [ACOUSTIC], [POP], [ROCK], [DANCE], y [ETHNIC].<br />
Fonction Cover<br />
La fonction Cover provient du clavier révolutionnaire DisCover 5<br />
de <strong>Roland</strong>. L’<strong>EXR</strong>-5/<strong>EXR</strong>-3 propose cinq modèles différents, disponibles<br />
via les boutons suivants: [ACOUSTIC], [POP], [ROCK],<br />
[DANCE] et [ETHNIC].<br />
START / STOP<br />
The Cover function is available both for Style (see p. 28) and<br />
song playback (see p. 34). It provides “masks” that change the<br />
instrumentation of the selected song. Simply by selecting<br />
another preset, you can cause a reggae song (or Style) to be<br />
played back by a heavy metal band, etc. Even though the<br />
arrangement (rhythm, riffs) does not change, the overall character<br />
can be modified beyond recognition.<br />
(1) Press one of the COVER buttons.<br />
That button now lights (there is no indication in the display).<br />
La función Cover está disponible tanto por la reproducción del<br />
estilo (consulte la página 28) como de la canción (consulte la<br />
página 34). Ofrece “máscaras” que cambian la instrumentación<br />
de la canción seleccionada. Simplemente seleccionando otro<br />
valor predefinido, puede hacer que una canción de reggae (o<br />
estilo) suene como un grupo de heavy metal, etc. Incluso si el<br />
arreglo (ritmos, riffs) no cambia, se puede modificar todo el<br />
carácter de tal manera que no resulte reconocible.<br />
(1) Pulse uno de los botones COVER.<br />
Ahora se ilumina ese botón (no hay ninguna indicación en la<br />
pantalla).<br />
La fonction Cover est disponible à la fois pour la reproduction de<br />
style (voyez p. 28) et de morceau (voyez p. 34). Elle propose des<br />
“masques” pour changer l’orchestration du morceau choisi. Le<br />
simple choix d’un autre préréglage permet ainsi de faire jouer un<br />
morceau (ou style) reggae par un groupe de Metal, etc. Bien que<br />
l’arrangement (rythme, riffs) ne change pas, vous pouvez transfigurer<br />
le caractère du jeu et le rendre méconnaissable.<br />
(1) Appuyez sur un des boutons COVER.<br />
Ce bouton s’allume alors (l’écran n’affiche aucune indication).<br />
43
<strong>EXR</strong>-5/<strong>EXR</strong>-3<br />
The COVER buttons have the following meanings. You may<br />
notice that their function is akin to the EQ presets found on a<br />
ghetto blaster or similar device (except that they change the<br />
sounds themselves rather than the tone color).<br />
Button<br />
ACOUSTIC<br />
POP<br />
ROCK<br />
DANCE<br />
ETHNIC<br />
Function<br />
Adds an “unplugged” touch to the song or<br />
Music Style.<br />
Uses an orchestration that resembles the hits<br />
you hear on the radio.<br />
Adds a rather “heavy” character to the song or<br />
Music Style.<br />
Produces an “electronic” character.<br />
Changes the song’s or Music Style’s mood to a<br />
something akin to world-music.<br />
(2) Press the [START÷STOP] button to start song (if the [SONG]<br />
button lights) or Arranger playback (if the [SONG] button<br />
is dark).<br />
(3) If you like the new version better than the original one,<br />
you can save the song in the <strong>EXR</strong>-5/<strong>EXR</strong>-3’s Flash memory<br />
(page 103).<br />
Cover changes to a Music Style need to be written to a User<br />
Program.<br />
Please note the following for the Cover settings and Style<br />
selection: Whenever you select another Music Style, it is used<br />
without Cover setting (COVER is reset).<br />
Note: It is also possible to switch off ALL Cover buttons to<br />
return to the original song or Music Style orchestration.<br />
Note: The COVER information is part of the song data only the<br />
<strong>EXR</strong>-5/<strong>EXR</strong>-3 understands. You can still play back the newly<br />
saved version of this song on another sequencer or SMF player<br />
(after transferring it to your computer via USB, for example), but<br />
the COVER information will be ignored.<br />
Los botones COVER tienen los significados siguientes. Verá<br />
que su función es flexible a los valores del EQ predefinidos<br />
encontrados en un ghetto blaster o en un dispositivo parecido<br />
(exceptuando que cambian sus propios sonidos en lugar<br />
del color del tono).<br />
Botón<br />
ACOUSTIC<br />
POP<br />
ROCK<br />
DANCE<br />
ETHNIC<br />
Función<br />
Añade una pulsación “desconectada” a la<br />
canción o al Estilo musical.<br />
Utiliza una orquestación que se parece a los hits<br />
que se oyen en la radio.<br />
Añade un carácter “heavy” a la canción o al<br />
Estilo musical.<br />
Produce un carácter “electrónico”.<br />
Cambia la adaptación del Estilo musical o de la<br />
canción a algo flexible para la música mundial.<br />
(2) Pulse el botón [START÷STOP] para iniciar la canción (si el<br />
botón [SONG] se ilumina) o para reproducir el Arranger (si<br />
el botón [SONG] está apagado).<br />
(3) Si le gusta más la nueva versión que la original, puede<br />
guardar la canción en la memoria Flash del <strong>EXR</strong>-5/<strong>EXR</strong>-3<br />
(página 103).<br />
Los cambios de la cubierta para un Estilo musical se tienen<br />
que escribir en un Programa de Usuario.<br />
Tenga en cuenta lo siguiente para los ajustes de la cubierta y<br />
la selección del estilo: Siempre que seleccione otro Estilo<br />
Musical, se utiliza sin el ajuste Cover (COVER se reinicia).<br />
Nota: También es posible desactivar TODOS los botones Cover<br />
para volver a la canción original o a la orquestación del Estilo<br />
Musical.<br />
Nota: La información COVER forma parte de la información de<br />
canción que sólo el <strong>EXR</strong>-5/<strong>EXR</strong>-3 entiende. Aún puede reproducir<br />
la nueva versión guardada de está canción en otro secuenciador<br />
o reproductor SMF (después de transferirlo a su ordenador<br />
mediante USB, por ejemplo), pero se ignorará la información<br />
COVER.<br />
Voici l’action des boutons COVER. Comme vous le remarquerez<br />
peut-être, leur rôle est semblable à celui des préréglages<br />
EQ (d’égalisation) sur certains radiocassettes portables ou<br />
appareils similaires (si ce n’est qu’ici, ils changent les sons<br />
mêmes plutôt que le timbre).<br />
Bouton<br />
ACOUSTIC<br />
POP<br />
ROCK<br />
DANCE<br />
ETHNIC<br />
Fonction<br />
Confère une ambiance “Unplugged” au morceau<br />
ou style musical.<br />
Utilise une orchestration semblable à celle des<br />
tubes à la radio.<br />
Confère un caractère assez “dur” au morceau ou<br />
style musical.<br />
Produit un caractère typiquement “électronique”.<br />
Change l’ambiance du morceau ou style musical<br />
et produit une atmosphère évoquant la musique<br />
du monde.<br />
(2) Appuyez sur le bouton [START÷STOP] pour lancer la reproduction<br />
du morceau (si le bouton [SONG] est allumé) ou le<br />
jeu de l’arrangeur (si le bouton [SONG] est éteint).<br />
(3) Si vous préférez la nouvelle version à l’originale, vous pouvez<br />
sauvegarder le morceau dans la mémoire Flash de<br />
l’<strong>EXR</strong>-5/<strong>EXR</strong>-3 (page 103).<br />
Les changements de réglages Cover apportés à un style musical<br />
doivent être sauvegardés dans un programme utilisateur.<br />
Notez cette remarque à propos des réglages Cover et de la<br />
sélection de style: chaque fois que vous sélectionnez un autre<br />
style musical, il est utilisé sans réglage Cover (COVER est initialisé).<br />
Remarque: Vous pouvez aussi désactiver TOUS les boutons<br />
Cover pour retrouver l’orchestration originale du morceau ou<br />
style musical.<br />
Remarque: Les réglages COVER font partie des données de morceau<br />
que seul l’<strong>EXR</strong>-5/<strong>EXR</strong>-3 comprend. Vous pouvez toujours<br />
reproduire la nouvelle version du morceau sur un autre séquenceur<br />
ou lecteur de fichiers SMF (après l’avoir transférée sur votre<br />
ordinateur via USB, par exemple) mais les données COVER sont<br />
ignorées.<br />
44
<strong>EXR</strong>-5/<strong>EXR</strong>-3<br />
Using the Band Orchestrator<br />
function<br />
Utilizar la función Band Orchestrator<br />
Utiliser la fonction Band<br />
Orchestrator<br />
BAND ORCHESTRATOR<br />
DRUM & BASS COMBO FULL BAND<br />
The Band Orchestrator function allows you to vary the accompaniment<br />
patterns played by the Arranger. You can leave out<br />
parts, thin out the drum part, etc. – in real-time (i.e. while you<br />
are playing).<br />
(1) Press the [ARRANGER÷BAND] button to select the Arranger<br />
mode.<br />
(2) Select the Music Style you wish to use for playing (or use<br />
the one that is currently selected).<br />
See page 31.<br />
(3) Press one of the following buttons to select the desired<br />
level of musical “complexity” (the corresponding icon is<br />
displayed):<br />
Obviously, these buttons should be used during Arranger<br />
playback.<br />
DRUM & BASS<br />
COMBO<br />
FULL BAND<br />
The simplest accompaniment that only contains<br />
the drum and bass lines.<br />
Accompaniment pattern with only a few<br />
instruments (i.e. a band).<br />
Accompaniment pattern with a lush<br />
arrangement (several melodic instrument<br />
lines).<br />
La función Band Orchestrator le permite variar los patrones de<br />
acompañamiento reproducidos por el Arranger. Es posible omitir<br />
partes, afinar la parte de percusión, etc. – a tiempo real (p.ej.<br />
mientras está tocando).<br />
(1) Pulse el botón [ARRANGER÷BAND] para seleccionar el<br />
modo Arranger.<br />
(2) Seleccione el Estilo musical que desee para utilizar en la<br />
reproducción (o utilice uno que esté actualmente seleccionado).<br />
Consulte la página 31.<br />
(3) Pulse uno de los siguientes botones para seleccionar el<br />
nivel deseado de “complejidad” musical (se visualiza el<br />
icono correspondiente):<br />
Obviamente, estos botones se deberían utilizar durante la<br />
reproducción del Arranger.<br />
DRUM & BASS<br />
COMBO<br />
FULL BAND<br />
El acompañamiento más simple que sólo<br />
contiene las líneas de percusión y bajo.<br />
Patrón de acompañamiento con sólo unos<br />
pocos instrumentos (p.ej. una banda).<br />
Patrón de acompañamiento con un arreglo<br />
sorprendente (varias líneas de instrumento<br />
melódicas).<br />
La fonction Band Orchestrator permet de varier les motifs<br />
d’accompagnement joués par l’arrangeur. Vous pouvez omettre<br />
des parties, élaguer la partie de batterie, etc. – en temps réel (c.-<br />
à-d. pendant que vous jouez).<br />
(1) Appuyez sur le bouton [ARRANGER÷BAND] pour choisir le<br />
mode Arranger.<br />
(2) Sélectionnez le style musical que vous souhaitez utiliser<br />
pour jouer (ou utilisez le style actuellement choisi).<br />
Voyez page 31.<br />
(3) Appuyez sur un des boutons suivants (l’icône correspondante<br />
s’affiche) pour choisir le degré souhaité de “sophistication”<br />
musicale:<br />
Il va de soi que vous utiliserez ces boutons pendant le jeu de<br />
l’arrangeur.<br />
DRUM & BASS<br />
COMBO<br />
FULL BAND<br />
La forme d’accompagnement la plus simple,<br />
avec seulement la batterie et la ligne de<br />
basse.<br />
Motif d’accompagnement comprenant seulement<br />
quelques instruments (c.-à-d. un<br />
groupe).<br />
Motif d’accompagnement d’arrangement<br />
étoffé (plusieurs lignes mélodiques d’instrument).<br />
45
<strong>EXR</strong>-5/<strong>EXR</strong>-3<br />
The corresponding icon appears in the display (only<br />
one of them can be displayed at any one time).<br />
Note: Immediately after switching on the <strong>EXR</strong>-5/<strong>EXR</strong>-3, the<br />
Orchestrator selects the “FULL BAND” level.<br />
Note: The effect of these three levels also depends on whether<br />
the [VARIATION] or [ORIGINAL] button was pressed. In effect, the<br />
combination of the [ORIGINAL]/[VARIATION] and [DRUM&BASS]/<br />
[COMBO]/[FULL¥BAND] buttons provides 6 accompaniment patterns<br />
per Music Style (3 x 2).<br />
The last selection you make can be saved to a User Program.<br />
See p. 94.<br />
Aparece el icono correspondiente en la pantalla (sólo<br />
uno de ellos se puede visualizar al mismo tiempo).<br />
Nota: Inmediatamente después de activar el <strong>EXR</strong>-5/<strong>EXR</strong>-3, el<br />
Orchestrator selecciona el nivel “FULL BAND”.<br />
Nota: El efecto de estos tres niveles también depende de si pulsó<br />
el botón [VARIATION] o [ORIGINAL]. En efecto, la combinación de<br />
los botones [ORIGINAL]/[VARIATION] y [DRUM&BASS]/[COMBO]/<br />
[FULL¥BAND] proporciona 6 patrones acompañamiento por Estilo<br />
Musical (3 x 2).<br />
Puede guardar la última selección realizada en un Programa<br />
de Usuario. Consulte la p. 94.<br />
L’icône correspondante apparaît à l’écran (une seule<br />
icône peut être affichée à la fois):<br />
Remarque: A la mise sous tension, l’<strong>EXR</strong>-5/<strong>EXR</strong>-3 choisit le<br />
niveau d’orchestration “FULL BAND”.<br />
Remarque: L’effet de ces trois niveaux varie aussi selon que<br />
vous avez enfoncé ou non le bouton [VARIATION] ou [ORIGINAL].<br />
La combinaison des boutons [ORIGINAL]/[VARIATION] et<br />
[DRUM&BASS]/[COMBO]/[FULL¥BAND] offre en réalité 6 motifs<br />
d’accompagnement par style musical (3 x 2).<br />
Vous pouvez mémoriser la dernière sélection effectuée dans<br />
un programme utilisateur (User). Voyez p. 94.<br />
46
<strong>EXR</strong>-5/<strong>EXR</strong>-3<br />
7. Recording your music<br />
Your <strong>EXR</strong>-5/<strong>EXR</strong>-3 contains a 16-track Recorder you can use for<br />
recording your own songs.<br />
7. Grabar su música<br />
El <strong>EXR</strong>-5/<strong>EXR</strong>-3 dispone de un Grabador de 16 pistas que puede<br />
utilizar para grabar sus propias canciones.<br />
7. Enregistrer votre jeu<br />
L’<strong>EXR</strong>-5/<strong>EXR</strong>-3 comporte un enregistreur (Recorder) 16 pistes<br />
qui vous permet d’enregistrer vos propres morceaux.<br />
Basic song recording<br />
Grabación básica de canciones<br />
Fonctions de base d’enregistrement<br />
ARRANGER<br />
● REC<br />
=<br />
ALL 120 001<br />
ORCHESTRATOR BEAT<br />
INTRO<br />
FULL<br />
BAND<br />
BAND<br />
1<br />
9<br />
2<br />
10<br />
3<br />
11<br />
4<br />
12<br />
5<br />
13<br />
6<br />
14<br />
7<br />
15<br />
8<br />
16<br />
Let us first look at the most straight-forward way of recording<br />
your renditions with Arranger backing.<br />
(1) Press the [ARRANGER/BAND] button.<br />
The ARRANGER icon appears. You can now use your left<br />
hand for transposing the Arranger’s key in realtime.<br />
(2) Press the [STYLE] button and select a Music Style (or select<br />
a Music Assistant memory).<br />
(3) Select the desired Arranger division by pressing [INTRO],<br />
[ORIGINAL] or [VARIATION].<br />
(4) Press the [START÷STOP] button.<br />
(5) Use [TAP¥TEMPO] or the [–]/[+] buttons to set desired<br />
tempo.<br />
(6) Press [START÷STOP] again to stop Arranger playback.<br />
(7) Assign the desired Tone to the right half of the keyboard.<br />
Press [TONE] and use the FAMILY & SELECT [√][®] buttons, the<br />
numeric buttons or the buttons in the TONE section. See also<br />
page 61.<br />
(8) Press the [REC≈∏] button.<br />
The display should look as shown above (if it doesn’t, use the<br />
FAMILY [√][®] buttons (“REC MODE”) to select REC All):<br />
Miremos primero la manera más directa de grabar sus interpretaciones<br />
con el acompañamiento Arranger.<br />
(1) Pulse el botón [ARRANGER/BAND].<br />
Aparece el icono ARRANGER . Puede utilizar su mano<br />
izquierda para transponer la tecla del Arranger a tiempo real.<br />
(2) Pulse el botón [STYLE] y seleccione un Estilo musical (o<br />
seleccione una memoria Music Assistant).<br />
(3) Seleccione la división Arranger deseada pulsando [INTRO],<br />
[ORIGINAL] o [VARIATION].<br />
(4) Pulse el botón [START÷STOP].<br />
(5) Utilice [TAP¥TEMPO] o los botones [–]/[+] para ajustar el<br />
tempo deseado.<br />
(6) Pulse [START÷STOP] de nuevo para detener la reproducción<br />
del Arranger.<br />
(7) Asigne el Tone deseado a la mitad derecha del teclado.<br />
Pulse [TONE] y utilice los botones FAMILY & SELECT[√][®], los<br />
botones numéricos o los botones de la sección TONE. Consulte<br />
también página 61.<br />
(8) Pulse el botón [REC≈∏].<br />
La pantalla debería mostrar lo anterior (en caso contrario,<br />
utilice los botones FAMILY [√][®] (“REC MODE”) para seleccionar<br />
REC All):<br />
Voyons d’abord la méthode la plus directe pour enregistrer votre<br />
jeu avec l’accompagnement de l’arrangeur.<br />
(1) Appuyez sur le bouton [ARRANGER/BAND].<br />
L’icône ARRANGER s’affiche. Vous pouvez à présent transposer<br />
la tonalité de l’arrangeur en temps réel avec votre main<br />
gauche.<br />
(2) Appuyez sur le bouton [STYLE] et choisissez un style musical<br />
(ou sélectionnez une mémoire Music Assistant).<br />
(3) Choisissez la division voulue de l’arrangeur en appuyant<br />
sur [INTRO], [ORIGINAL] ou [VARIATION].<br />
(4) Appuyez sur le bouton [START÷STOP].<br />
(5) Utilisez [TAP¥TEMPO] ou les boutons [–]/[+] pour régler le<br />
tempo voulu.<br />
(6) Appuyez à nouveau sur [START÷STOP] pour arrêter la reproduction<br />
de l’arrangeur.<br />
(7) Assignez le son voulu à la moitié droite du clavier.<br />
Appuyez sur [TONE] et utilisez les boutons FAMILY & SELECT<br />
[√][®], les boutons numériques ou les boutons de la section<br />
TONE. Voyez aussi page 61.<br />
(8) Appuyez sur le bouton [REC≈∏].<br />
Voici à quoi devrait ressembler l’écran (si ce n’est pas le cas,<br />
utilisez les boutons FAMILY [√][®] (“REC MODE”) pour choisir<br />
REC All):<br />
47
<strong>EXR</strong>-5/<strong>EXR</strong>-3<br />
(The [RECORD≈∏] and [1]~[16] icons flash.) You are now in ALL<br />
mode, which means that everything you and the <strong>EXR</strong>-5/<br />
<strong>EXR</strong>-3’s Arranger play will be recorded.<br />
Note: If you select “REC ALL” with the FAMILY buttons, the song<br />
in the <strong>EXR</strong>-5/<strong>EXR</strong>-3’s USERSONG memory is erased. You may<br />
want to save the current song first (see p. 103). If you only<br />
pressed [REC≈∏], the <strong>EXR</strong>-5/<strong>EXR</strong>-3 selects the Single mode if the<br />
USERSONG memory already contains data. See page 52 for<br />
details about that mode.<br />
(9) Start recording in one of the following ways:<br />
• Press the [START÷STOP] button to start Arranger playback<br />
with the selected Division.<br />
The [V-LINK] button now flashes to indicate the tempo and<br />
beats (BEAT function).<br />
Note: If you start recording without the Arranger and want to<br />
bring it in at a later stage, it would be a good idea to switch on<br />
the metronome by pressing the [METRONOME] button.<br />
• Activate the [SYNC¥START] button and press one or several<br />
keys to the left of the Split point.<br />
Note: It is also possible to record in PIANO SOLO mode (after<br />
pressing the button of the same name). In that case, you should<br />
definitely use the metronome. The song’s time signature can be<br />
set with the MetroTS function. See page 27.<br />
(10) Stop recording in one of the following ways:<br />
• Press [START÷STOP].<br />
(Los iconos [RECORD≈∏] y [1]~[16] parpadean.) Ahora se<br />
encuentra en el modo ALL, lo que significa que todo lo que<br />
usted y el Arranger del <strong>EXR</strong>-5/<strong>EXR</strong>-3 toquen, se grabará.<br />
Nota: Si selecciona “REC ALL” con los botones FAMILY, se<br />
borrará la canción en la memoria UserSong del <strong>EXR</strong>-5/<br />
<strong>EXR</strong>-3. Es posible que primero quiera guardar la canción actual<br />
(consulte la página 103). Si sólo ha pulsado [REC≈∏], el <strong>EXR</strong>-5/<br />
<strong>EXR</strong>-3 selecciona el modo Single siempre que la memoria<br />
UserSong aún contenga información. Consulte la página 52<br />
para más detalles acerca de este modo.<br />
(9) Empiece a grabar de una de las siguientes maneras:<br />
• Pulse el botón [START÷STOP] para iniciar la reproducción del<br />
Arranger con la Division seleccionada.<br />
El botón [V-LINK] parpadea para indicar el tempo y los tiempos<br />
(función BEAT).<br />
Nota: Si inicia la grabación sin el Arranger y desea introducirlo<br />
más adelante, sería una buena idea activar el metrónomo pulsando<br />
el botón [METRONOME].<br />
• Active el botón [SYNC¥START] y pulse una de las diferentes<br />
teclas a la izquierda del punto de Split.<br />
Nota: También es posible grabar en el modo PIANO SOLO (después<br />
de pulsar el botón del mismo nombre). En este caso, decididamente<br />
debería utilizar el metrónomo. El tipo de compás de la<br />
canción se puede ajustar con la función MetroTS. Consulte la<br />
página 27.<br />
(10) Finalice la grabación de una de las siguientes maneras.<br />
• Pulse [START÷STOP].<br />
(Les icônes [RECORD≈∏] et [1]~[16] clignotent.) Vous vous<br />
trouvez en mode ALL. L’<strong>EXR</strong>-5/<strong>EXR</strong>-3 enregistre donc tout ce<br />
que vous et son arrangeur jouez.<br />
Remarque: Si vous avez choisi “REC ALL” avec les boutons<br />
FAMILY, le morceau dans la mémoire UserSong de l’<strong>EXR</strong>-5/<br />
<strong>EXR</strong>-3 est effacé. Il serait donc peut-être une bonne idée de sauvegarder<br />
d’abord le morceau contenu en mémoire interne (voyez<br />
p. 103). Si vous avez appuyé uniquement sur [REC≈∏], l’<strong>EXR</strong>-5/<br />
<strong>EXR</strong>-3 choisit le mode Single (à condition que la mémoire<br />
UserSong contienne déjà des données. Pour en savoir plus<br />
sur ce mode, voyez page 52.<br />
(9) Lancez l’enregistrement avec une des méthodes suivantes:<br />
• Appuyez sur [START÷STOP] pour déclencher le jeu de l’arrangeur<br />
avec la division spécifiée.<br />
Le bouton [V-LINK] clignote alors pour indiquer le tempo et<br />
les battements (fonction BEAT).<br />
Remarque: Si vous lancez l’enregistrement sans l’arrangeur et si<br />
vous comptez lancer ce dernier plus tard, il vaut mieux activez le<br />
métronome en appuyant sur le bouton [METRONOME].<br />
• Activez le bouton [SYNC¥START] et enfoncez une ou plusieurs<br />
touches à gauche du point de partage.<br />
Remarque: Vous pouvez aussi enregistrer en mode PIANO SOLO<br />
(après avoir enfoncé le bouton du même nom). Il est alors impératif<br />
d’utiliser le métronome. Vous pouvez régler l’armure de<br />
temps du morceau avec la fonction MetroTS. Voyez page 27.<br />
(10) Arrêtez l’enregistrement en suivant une des méthodes cidessous:<br />
• Appuyez sur [START÷STOP].<br />
START / STOP<br />
ORIGINAL<br />
|√<br />
• Press the [ENDING] button to start the Ending phrase. As<br />
soon as it ends, Arranger playback and song recording stop.<br />
• Pulse el botón [ENDING] para empezar la frase final. Tan<br />
pronto como finalice, la reproducción del Arranger y la grabación<br />
de la canción se pararán.<br />
• Appuyez sur le bouton [ENDING] pour lancer la phrase de<br />
finale. Le jeu de l’arrangeur et l’enregistrement s’arrêtent dès<br />
que la finale se termine.<br />
48
<strong>EXR</strong>-5/<strong>EXR</strong>-3<br />
Listening to your song<br />
(1) Press the [SONG] button.<br />
(2) Press [START÷STOP] to start playback.<br />
(3) Press [START÷STOP] once again to stop playback.<br />
(4) Press [|√] to return to the beginning of the song.<br />
Other recording functions<br />
The <strong>EXR</strong>-5/<strong>EXR</strong>-3’s 16-track Recorder can be used in several<br />
ways. Let us therefore have a look at the other recording modes.<br />
About the recording modes<br />
●Modes<br />
The <strong>EXR</strong>-5/<strong>EXR</strong>-3 provides two modes for recording new<br />
music, and two for adding parts or correcting passages of<br />
existing music:<br />
Recording a new song:<br />
ALL In this mode, you can record everything you<br />
and the <strong>EXR</strong>-5/<strong>EXR</strong>-3 can play simultaneously:<br />
• Arranger (accompaniment).<br />
• Keyboard parts (Main and Split or Dual).<br />
• Changes to the COVER settings for the Music<br />
Style.<br />
Keyboard In this mode, you can record using the Keyboard<br />
parts. The track can be freely selected.<br />
• Main and Split or Dual<br />
Adding parts to an existing song<br />
Single In this mode you can record onto one track at a<br />
time. The track can be freely selected.<br />
Punch I/O This mode allows you to re-record a short section<br />
of an otherwise perfect part.<br />
Note: Every time you select the ALL or Keyboard mode, the data<br />
in the USERSONG memory are erased.<br />
Escuchar su canción<br />
(1) Pulse el botón [SONG].<br />
(2) Pulse [START÷STOP] para iniciar la reproducción.<br />
(3) Pulse [START÷STOP] de nuevo para detener la reproducción.<br />
(4) Pulse [|√] para volver al principio de la canción.<br />
Otras funciones de grabación<br />
El Grabador de 16 pistas del <strong>EXR</strong>-5/<strong>EXR</strong>-3 se puede utilizar de<br />
diversas maneras. Por lo tanto, ante todo miremos los otros<br />
modos de grabación.<br />
Acerca de los modos de grabación<br />
●Modos<br />
El <strong>EXR</strong>-5/<strong>EXR</strong>-3 dispone de dos métodos para grabar nueva<br />
música y dos para añadir partes o corregir pasajes de música<br />
ya existentes:<br />
Grabar una nueva canción:<br />
ALL En este modo, es posible grabar cualquier cosa<br />
y el <strong>EXR</strong>-5/<strong>EXR</strong>-3 puede reproducir<br />
simultáneamente:<br />
• Arranger (acompañamiento).<br />
• Partes del teclado (Main y Split o Dual).<br />
• Cambia a los ajustes COVER para el Estilo<br />
musical.<br />
Keyboard En este modo, puede grabar utilizando las<br />
partes del teclado. La pista se puede seleccionar<br />
libremente.<br />
• Main y Split o Dual<br />
Añadir partes a una canción existente<br />
Single En este modo puede grabar en una pista cada<br />
vez. La pista se puede seleccionar libremente.<br />
Punch I/O Este modo le permite volver a grabar una<br />
sección corta de una parte por lo demás<br />
perfecta.<br />
Nota: Cada vez que selecciona el modo ALL o Keyboard, la información<br />
de la memoria USERSONG se borra.<br />
Ecoute de votre morceau<br />
(1) Appuyez sur le bouton [SONG].<br />
(2) Appuyez sur [START÷STOP] pour lancer la reproduction.<br />
(3) Appuyez à nouveau sur [START÷STOP] pour arrêter la reproduction.<br />
(4) Appuyez sur [|√] pour retourner au début du morceau.<br />
Autres fonctions d’enregistrement<br />
L’<strong>EXR</strong>-5/<strong>EXR</strong>-3 possède un enregistreur 16 pistes que vous pouvez<br />
exploiter de diverses manières. Voyons à présent les autres<br />
méthodes d’enregistrement disponibles.<br />
A propos des modes d’enregistrement<br />
●Modes<br />
L’<strong>EXR</strong>-5/<strong>EXR</strong>-3 propose deux modes pour enregistrer de nouveaux<br />
extraits musicaux et deux autres modes pour ajouter<br />
des parties ou corriger des passages existants:<br />
Enregistrement d’un nouveau morceau:<br />
ALL Dans ce mode, vous pouvez enregistrer simultanément<br />
tout ce que vous et l’<strong>EXR</strong>-5/<strong>EXR</strong>-3<br />
jouez:<br />
• Arranger (accompagnement).<br />
• Parties Keyboard (Main et Split ou Dual).<br />
• Changements des réglages COVER du style<br />
musical.<br />
Keyboard Ce mode permet d’enregistrer avec les parties<br />
Keyboard. Vous pouvez choisir la piste voulue.<br />
• Main et Split ou Dual<br />
Ajout de parties à un morceau existant<br />
Single Ce mode permet d’enregistrer sur une seule<br />
piste à la fois. Vous pouvez choisir la piste voulue.<br />
Punch I/O Ce mode sert à retoucher un extrait dans un<br />
passage autrement parfait.<br />
Remarque: Chaque fois que vous choisissez le mode ALL ou<br />
Keyboard, le contenu de la mémoire USERSONG est effacé.<br />
49
<strong>EXR</strong>-5/<strong>EXR</strong>-3<br />
●Recorder memory<br />
The <strong>EXR</strong>-5/<strong>EXR</strong>-3 provides one “live” song memory, which<br />
can contain one song at a time. After completing a song, you<br />
should save it (see p. 114).<br />
To keep you from accidentally erasing the song in the <strong>EXR</strong>-5/<br />
<strong>EXR</strong>-3’s internal memory, the <strong>EXR</strong>-5/<strong>EXR</strong>-3 automatically<br />
selects Single after your first recording. Bear in mind<br />
that selecting “ALL” or “Keyboard” will erase the song in<br />
the USERSONG memory. Do not select “ALL” or “Keyboard”<br />
for adding parts to an existing song – use “Single” or “Punch<br />
I/O” instead.<br />
Conversely, you cannot select “Single” or “Punch I/O” if the<br />
USERSONG memory doesn’t yet contain data.<br />
And finally: playing back a Standard MIDI File erases the song<br />
in the <strong>EXR</strong>-5/<strong>EXR</strong>-3’s memory. In return, the SMF data will be<br />
available (and can be supplemented with your own renditions<br />
in “Single” or “Punch I/O” mode).<br />
More about ALL mode<br />
In addition to what you learned on p. 47, here are a few considerations:<br />
After pressing the [REC≈∏] button, the 16 track and [RECORD∏]<br />
icons start flashing, signalling that all 16 tracks are available for<br />
recording.<br />
=<br />
ALL 120 001<br />
ORCHESTRATOR BEAT<br />
FULL<br />
BAND<br />
INTRO<br />
1<br />
9<br />
2<br />
10<br />
3<br />
11<br />
4<br />
12<br />
5<br />
13<br />
6<br />
14<br />
7<br />
15<br />
8<br />
16<br />
●Memoria del grabador<br />
El <strong>EXR</strong>-5/<strong>EXR</strong>-3 proporciona una memoria de canción “en<br />
directo”, que a la vez puede contener una canción. Después<br />
de completar una canción, debería guardarla (consulte la<br />
página 114).<br />
Para evitar el borrado accidental de la canción en la memoria<br />
interna del <strong>EXR</strong>-5/<strong>EXR</strong>-3, el <strong>EXR</strong>-5/<strong>EXR</strong>-3 selecciona automáticamente<br />
Single después de la primera grabación. Tenga<br />
en cuenta que al seleccionar “ALL” o “Keyboard” se<br />
borrará la canción en la memoria USERSONG. No seleccione<br />
“ALL” ni “Keyboard” para añadir partes a una canción<br />
existente – utilice en su lugar “Single” o “Punch I/O”.<br />
Contrariamente, es imposible seleccionar “Single” o “Punch I/<br />
O” si la memoria USERSONG no contiene información.<br />
Y finalmente: al reproducir un Archivo MIDI Estándar elimina<br />
la canción en la memoria del <strong>EXR</strong>-5/<strong>EXR</strong>-3. A cambio, la<br />
información SMF estará disponible (y puede sustituirse con<br />
sus propias interpretaciones en el modo “Single” or “Punch I/<br />
O”).<br />
Más detalles acerca del modo ALL<br />
Además de lo que está aprendiendo en p. 47, a continuación<br />
tiene unas cuantas consideraciones:<br />
Después de pulsar el botón [REC≈∏], la pista 16 y los iconos<br />
[RECORD∏] empiezan a parpadear, indicando que todas las 16<br />
pistas están disponibles para grabar.<br />
=<br />
ALL 120 001<br />
ORCHESTRATOR BEAT<br />
FULL<br />
BAND<br />
INTRO<br />
1<br />
9<br />
2<br />
10<br />
3<br />
11<br />
4<br />
12<br />
5<br />
13<br />
6<br />
14<br />
7<br />
15<br />
8<br />
16<br />
●Mémoire de l’enregistreur<br />
L’<strong>EXR</strong>-5/<strong>EXR</strong>-3 offre une mémoire de morceau “live” qui peut<br />
contenir un morceau à la fois. Une fois votre morceau terminé,<br />
vous devez le sauvegarder (voyez p. 114).<br />
Pour éviter l’effacement accidentel du morceau contenu<br />
dans la mémoire interne de l’<strong>EXR</strong>-5/<strong>EXR</strong>-3, le mode<br />
Single est automatiquement activé par l’<strong>EXR</strong>-5/<strong>EXR</strong>-3<br />
après votre premier enregistrement. Souvenez-vous que le<br />
fait de choisir “ALL” ou “Keyboard” efface le morceau dans<br />
la mémoire USERSONG. Ne sélectionnez donc jamais “ALL”<br />
ni “Kyboard” pour ajouter des parties à un morceau existant –<br />
utilisez dans ce cas “Single” ou “Punch I/O”.<br />
D’autre part, vous ne pouvez pas choisir “Single” ni “Punch I/<br />
O” si la mémoire USERSONG ne contient pas encore de<br />
données.<br />
Un dernier mot: la reproduction d’un fichier Standard MIDI<br />
efface le morceau contenu dans la mémoire de l’<strong>EXR</strong>-5/<br />
<strong>EXR</strong>-3. Une fois le fichier SMF lu, ses données sont disponibles<br />
(et peuvent être ajoutées à vos propres parties en mode<br />
“Single” ou “Punch I/O”).<br />
Toujours à propos du mode ALL<br />
Voici quelques remarques en complément à ce que nous avons<br />
vu à la p. 47:<br />
Quand vous enfoncez [REC≈∏], les icônes des 16 pistes et<br />
[RECORD∏] se mettent à clignoter, signalant que les 16 pistes<br />
sont disponibles pour l’enregistrement.<br />
=<br />
ALL 120 001<br />
ORCHESTRATOR BEAT<br />
FULL<br />
BAND<br />
INTRO<br />
1<br />
9<br />
2<br />
10<br />
3<br />
11<br />
4<br />
12<br />
5<br />
13<br />
6<br />
14<br />
7<br />
15<br />
8<br />
16<br />
50
<strong>EXR</strong>-5/<strong>EXR</strong>-3<br />
Here is what the tracks correspond to (after recording a song<br />
with Arranger backing):<br />
1 Accomp 1<br />
9 Accomp 6<br />
2 Arranger bass<br />
10 Arranger drums<br />
3 Accomp 2<br />
11 kSplit*<br />
4 kMain<br />
12 kAuto Bass* (see p. 88)<br />
5 Accomp 3<br />
13<br />
6 kDual*<br />
14<br />
7 Accomp 4<br />
15 Melody Intell. (see p. 58)<br />
8 Accomp 5<br />
16 (kMain**)<br />
(*) Only one of these can be used alongside the Main part.<br />
(**) If you assign a Drum Kit to the Main part. In that case, track 4 is<br />
not used.<br />
For your convenience, the Keyboard parts are flagged with a<br />
“k” symbol in the above graphic.<br />
Parts you do not hear during recording are not recorded. The<br />
track icons [1]~[16] thus do not show you what will be<br />
recorded, but rather what can be recorded.<br />
Keyboard recording mode<br />
In Keyboard mode, you can record the Keyboard parts. The<br />
Arranger is not available. Essentially, this mode allows you to<br />
record either one layered part using up to two sounds (Main +<br />
Dual) or two parts (Split to the left, Main to the right). If you<br />
select a Drum Kit for the Main part, you can only record a drum<br />
part.<br />
Note: When you select the Keyboard mode, song data in the <strong>EXR</strong>-5/<br />
<strong>EXR</strong>-3’s internal memory will be overwritten by your new recording.<br />
(1) Press the [REC≈∏] button.<br />
(2) Press FAMILY [√][®] to make the display look as follows:<br />
=<br />
Keyboard 120 001<br />
ORCHESTRATOR BEAT<br />
FULL<br />
BAND<br />
INTRO<br />
The RECORD and track icons flash.<br />
(3) To create a split, press the [SPLIT] button.<br />
1<br />
9<br />
2<br />
10<br />
3<br />
11<br />
4<br />
12<br />
5<br />
13<br />
6<br />
14<br />
7<br />
15<br />
8<br />
16<br />
Esto es a lo que corresponden las pistas (después de grabar<br />
una canción con el acompañamiento Arranger):<br />
1 Accomp 1<br />
9 Accomp 6<br />
2 Arranger bass<br />
10 Arranger drums<br />
3 Accomp 2<br />
11 kSplit*<br />
4 kMain<br />
12 kAuto Bass* (consulte la página 88)<br />
5 Accomp 3<br />
13<br />
6 kDual*<br />
14<br />
7 Accomp 4<br />
15 Melody Intell. (consulte la página 58)<br />
8 Accomp 5<br />
16 (kMain**)<br />
(*) Sólo uno de estos se puede utilizar a lo largo de la parte Main.<br />
(**) Si asigna un grupo de percusión a la parte Main. En este caso,<br />
no se utiliza la pista 4.<br />
Para su conveniencia, las partes del teclado están señalizadas<br />
con un símbolo “k” en el gráfico anterior.<br />
Las partes que no se oyen durante la grabación no se graban.<br />
Los iconos de pista [1]~[16] por lo tanto no le muestran lo que<br />
se grabará, sino lo que se puede grabar.<br />
Modo de grabación Keyboard<br />
En el modo Keyboard, puede grabar las partes del teclado. El<br />
Arranger no está disponible. Esencialmente, este modo permite<br />
grabar bien una parte superpuesta utilizando más de dos sonidos<br />
(Main + Dual), o dos partes (Split hacia la izquierda, Main hacia<br />
la derecha). Si selecciona un Grupo de percusión para la parte<br />
Main, sólo puede grabar una parte de percusión.<br />
Nota: Cuando selecciona el modo de claqueta, la información de la<br />
canción en la memoria interna del <strong>EXR</strong>-5/<strong>EXR</strong>-3 se sobrescribirá con<br />
la grabación nueva.<br />
(1) Pulse el botón [REC≈∏].<br />
(2) Pulse FAMILY [√][®]de forma que en la pantalla se visualice<br />
lo siguiente:<br />
=<br />
Keyboard 120 001<br />
ORCHESTRATOR BEAT<br />
FULL<br />
BAND<br />
Los iconos de pista y RECORD parpadean.<br />
(3) Para crear una división, pulse el botón [SPLIT].<br />
INTRO<br />
1<br />
9<br />
2<br />
10<br />
3<br />
11<br />
4<br />
12<br />
5<br />
13<br />
6<br />
14<br />
7<br />
15<br />
8<br />
16<br />
Voici les parties auxquelles correspondent les pistes (après<br />
l’enregistrement d’un morceau avec accompagnement de<br />
l’arrangeur):<br />
1 Accomp 1<br />
9 Accomp 6<br />
2 Basse de l’arrangeur 10 Batterie de l’arrangeur<br />
3 Accomp 2<br />
11 kSplit*<br />
4 kMain<br />
12 kAuto Bass* (voyez p. 88)<br />
5 Accomp 3<br />
13<br />
6 kDual*<br />
14<br />
7 Accomp 4<br />
15 Melody Intell. (voyez p. 58)<br />
8 Accomp 5<br />
16 (kMain**)<br />
(*) Une seule de ces parties peut être utilisée avec la partie Main.<br />
(**) Si vous assignez un kit de batterie à la partie Main. Dans ce cas,<br />
la piste 4 n’est pas utilisée.<br />
Par souci de facilité, nous avons indiqué les parties Keyboard<br />
avec le symbole “k” dans le schéma ci-dessus.<br />
Les parties inaudibles pendant l’enregistrement ne sont pas<br />
enregistrées. Les icônes de pistes [1]~[16] n’indiquent donc<br />
pas ce qui est enregistré mais ce que vous pouvez enregistrer.<br />
Mode d’enregistrement Keyboard<br />
Le mode Keyboard permet d’enregistrer les parties Keyboard.<br />
L’arrangeur n’est pas disponible. Ce mode vous sera surtout utile<br />
pour enregistrer une partie superposée et composée de maximum<br />
deux sons (Main + Dual) ou deux parties (Split à gauche,<br />
Main à droite). Si vous choisissez un kit de batterie pour la partie<br />
Main, vous pouvez seulement enregistrer une partie de batterie.<br />
Remarque: Le choix du mode Count-In signifie que les données de<br />
morceau dans la mémoire de l’<strong>EXR</strong>-5/<strong>EXR</strong>-3 sont écrasées par votre<br />
nouvel enregistrement.<br />
(1) Appuyez sur le bouton [REC≈∏].<br />
(2) Appuyez sur FAMILY [√][®] de sorte que l’écran ressemble à<br />
ceci:<br />
=<br />
Keyboard 120 001<br />
ORCHESTRATOR BEAT<br />
L’icône RECORD et les icônes de pistes clignotent.<br />
(3) Pour créer un partage, appuyez sur le bouton [SPLIT].<br />
INTRO<br />
1<br />
9<br />
2<br />
10<br />
3<br />
11<br />
4<br />
12<br />
FULL<br />
BAND<br />
5<br />
13<br />
6<br />
14<br />
7<br />
15<br />
8<br />
16<br />
51
<strong>EXR</strong>-5/<strong>EXR</strong>-3<br />
(4) Activate the metronome (if necessary), and set the desired<br />
tempo with the [TAP¥TEMPO] button or [–]/[+].<br />
You can also record without metronome if you like.<br />
Note: If you assign a Drum Kit to the Main part, your drum performance<br />
is recorded onto track 16.<br />
Single recording mode<br />
This mode is only available if the <strong>EXR</strong>-5/<strong>EXR</strong>-3’s song memory<br />
already contains data. When you press [REC≈∏], the RECORD<br />
icon and the icon of the first empty track flash. You could therefore<br />
record a new part straight away. (If all tracks already contain<br />
data, Track 1 will be selected.)<br />
You can, however, also substitute an already recorded part with<br />
a new version.<br />
(1) Press the [REC≈∏] button.<br />
(2) Press FAMILY [√][®] to select “Single”.<br />
(3) Use the SELECT [√][®] or numeric buttons to select the<br />
track you wish to record to.<br />
(4) Active el metrónomo (si fuera necesario), y ajuste el tempo<br />
deseado con el botón [TAP¥TEMPO] o [–]/[+].<br />
También puede grabar sin el metrónomo si lo desea.<br />
Nota: Si asigna un Grupo de percusión a la parte Main, la interpretación<br />
de percusión se grabará en la pista 16.<br />
Modo de grabación Single<br />
Este modo sólo está disponible si la memoria de la canción del<br />
<strong>EXR</strong>-5/<strong>EXR</strong>-3 ya contiene información. Cuando pulse [REC≈∏], el<br />
icono RECORD y el icono de la primera pista vacía parpadean.<br />
Por lo tanto podría grabar una parte nueva directamente. (Si<br />
todas las pistas ya contienen información, se seleccionará Track<br />
1.)<br />
No obstante, también puede sustituir una parte ya grabada con<br />
una nueva versión.<br />
(1) Pulse el botón [REC≈∏].<br />
(2) Pulse FAMILY [√][®]para seleccionar “Single”.<br />
(3) Utilice los botones SELECT [√][®] o los numéricos para<br />
seleccionar la pista que desee grabar.<br />
SELECT<br />
(4) Activez le métronome (si nécessaire) et réglez le tempo<br />
comme bon vous semble avec le bouton [TAP¥TEMPO] ou<br />
[–]/[+].<br />
Si vous le voulez, vous pouvez aussi enregistrer sans<br />
métronome.<br />
Remarque: Si vous avez assigné un kit de batterie à la partie<br />
Main, votre partie de batterie est enregistrée sur la piste 16.<br />
Mode d’enregistrement Single<br />
Ce mode est uniquement disponible si la mémoire de morceau<br />
de l’<strong>EXR</strong>-5/<strong>EXR</strong>-3 contient déjà des données. Quand vous<br />
appuyez sur [REC≈∏], l’icône RECORD et l’icône de la première<br />
piste vide se mettent à clignoter. Vous pouvez donc enregistrer<br />
directement une nouvelle partie. (Si toutes les pistes contiennent<br />
déjà des données, la piste 1 est choisie.)<br />
Toutefois, vous pouvez aussi remplacer une partie déjà enregistrée<br />
par une nouvelle version.<br />
(1) Appuyez sur le bouton [REC≈∏].<br />
(2) Appuyez sur FAMILY [√][®] pour sélectionner “Single”.<br />
(3) Utilisez les boutons SELECT [√][®] ou les boutons numériques<br />
pour choisir la piste où vous voulez enregistrer.<br />
You can only select one track at a time (hence the name<br />
“Single”). If you select a track that already contains data, your<br />
new version will overwrite the existing one.<br />
(4) If necessary, assign the desired Tone to the part you are<br />
about to record (see p. 61).<br />
If you select track [10], you can select Drum Kits rather than<br />
Tones. Track 10 is reserved for drum parts.<br />
Note: If you use the Single recording mode for adding parts to a<br />
Standard MIDI File recorded with another instrument or<br />
sequencer, track 16 (or any other track defined as “second drum<br />
track”) may also use a Drum Kit that can be changed.<br />
Sólo puede seleccionar una pista cada vez (de aquí el nombre<br />
“Single”). Si selecciona una pista que ya contenga información,<br />
la nueva versión sobrescribirá la existente.<br />
(4) Si fuera necesario, asigne el Tone deseado a la parte que<br />
vaya a grabar(consulte la página 61).<br />
Si selecciona la pista [10], puede seleccionar Grupos de percusión<br />
en vez de Tones. La pista 10 está reservada para las partes<br />
de percusión.<br />
Nota: Si utiliza el modo de grabación Single para añadir partes a<br />
un Archivo MIDI Estándar grabado con otro instrumento o con<br />
un secuenciador, la pista 16 (o cualquier otra pista definida<br />
como “segunda pista de percusión”) también puede utilizar un<br />
Grupo de percusión que se puede cambiar.<br />
Nota: Aunque la parte Main se puede utilizar para grabar todas<br />
las pistas en el modo Single, el MFX sólo se aplica a la pista/canal<br />
MIDI 4.<br />
Vous pouvez choisir une seule piste à la fois (d’où le nom<br />
“Single”). Si vous choisissez une piste contenant déjà des<br />
données, la nouvelle version écrase l’ancienne.<br />
(4) Si nécessaire, assignez le son voulu à la partie que vous<br />
comptez enregistrer (voyez p. 61).<br />
Si vous choisissez la piste [10], vous pouvez sélectionner des<br />
kits de batterie au lieu de sons. La piste 10 est en effet réservée<br />
aux parties de batterie.<br />
Remarque: Si vous utilisez le mode d’enregistrement Single<br />
pour ajouter des parties à un fichier Standard MIDI enregistré<br />
sur un autre instrument ou séquenceur, la piste 16 (ou toute<br />
autre piste définie comme “deuxième piste de batterie”) peut<br />
aussi utiliser un kit de batterie que vous pouvez changer.<br />
52
<strong>EXR</strong>-5/<strong>EXR</strong>-3<br />
Note: Even though the Main part can be used for recording all<br />
tracks in Single mode, the MFX only applies to track/MIDI channel<br />
4.<br />
(5) Press [START÷STOP] to start recording.<br />
After a two-measure count-in (see p. 87), you will hear all<br />
parts that have already been recorded. Start playing (and<br />
recording) your new part.<br />
(6) Press [START÷STOP] to stop recording.<br />
(7) Return to step (3) to record additional parts.<br />
(5) Pulse [START÷STOP] para iniciar la grabación.<br />
Después de una claqueta de dos compases (consulte la<br />
página 87), escuchará todas las partes que se hayan grabado.<br />
Empiece a tocar (y grabar) la parte nueva.<br />
(6) Pulse [START÷STOP] para detener la grabación.<br />
(7) Vuelva al paso (3) para grabar partes adicionales.<br />
Remarque: Bien que la partie Main puisse être utilisée pour<br />
enregistrer toutes les pistes en mode Single, le MFX s’applique<br />
uniquement à la piste/au canal MIDI 4.<br />
(5) Appuyez sur [START÷STOP] pour lancer l’enregistrement.<br />
Après un décompte de deux mesures (voyez p. 87), vous<br />
entendez toutes les parties que vous avez déjà enregistrées.<br />
Jouez (et enregistrez) votre nouvelle partie.<br />
(6) Appuyez sur [START÷STOP] pour arrêter l’enregistrement.<br />
(7) Retournez à l’étape (3) pour enregistrer des parties supplémentaires.<br />
Punch I/O<br />
Punch I/O<br />
Punch I/O<br />
Original track/Pista original/Morceau original<br />
This passage is redone<br />
Este pasaje está hecho de nuevo<br />
Passage réenregistré<br />
=<br />
SELECT<br />
PunchI/O 120 001<br />
ORCHESTRATOR BEAT<br />
INTRO<br />
FULL<br />
BAND<br />
FILL VARIATION<br />
1<br />
√√<br />
®®<br />
In this mode, you can re-record part of a track (the second<br />
chorus, for example). The important aspect of this mode is<br />
that newly recorded material does not erase the material<br />
before or after the passage you redo.<br />
By contrast, in Single mode, the entire track you record is<br />
replaced by your new material. (So if you don’t play anything<br />
during recording, the entire track will be empty afterwards.)<br />
Like the Single mode, Punch I/O can only be selected if the<br />
<strong>EXR</strong>-5/<strong>EXR</strong>-3’s memory already contains song data.<br />
(1) Press the [REC≈∏] button.<br />
(2) Press FAMILY [√][®] to make the display look as shown<br />
above.<br />
En este modo, puede volver a grabar parte de una pista (el<br />
segundo chorus, por ejemplo). El aspecto importante de este<br />
modo es que el nuevo material grabado no elimina el material<br />
anterior o posterior al pasaje que rehaga.<br />
Por otro lado, en el modo Single, toda la pista que se graba se<br />
sustituye por el nuevo material. (Así que, si no reproduce<br />
nada durante la grabación, toda la pista se vaciará seguidamente.)<br />
Como en el modo Single, Punch I/O sólo se puede seleccionar<br />
si la memoria del <strong>EXR</strong>-5/<strong>EXR</strong>-3 ya contiene información de<br />
canción.<br />
(1) Pulse el botón [REC≈∏].<br />
(2) Pulse FAMILY [√][®]de forma que en la pantalla se visualice<br />
lo anterior.<br />
Ce mode permet de recommencer l’enregistrement d’un<br />
extrait de piste (le deuxième refrain, par exemple). L’aspect<br />
important de ce mode est que les nouvelles données enregistrées<br />
n’effacent rien des données situées avant et après<br />
l’extrait rejoué.<br />
En revanche, en mode Single, toutes les données contenues<br />
dans la piste enregistrée sont remplacées par le nouvel<br />
extrait. (Si vous ne jouez rien pendant l’enregistrement, vous<br />
obtenez à la fin une piste entièrement vide.)<br />
Comme pour le mode Single, il faut que la mémoire de<br />
l’<strong>EXR</strong>-5/<strong>EXR</strong>-3 contienne des données de morceau pour pouvoir<br />
activer le mode Punch I/O.<br />
(1) Appuyez sur le bouton [REC≈∏].<br />
(2) Appuyez sur FAMILY [√][®] de sorte que l’écran se présente<br />
comme illustré ci-dessus.<br />
53
<strong>EXR</strong>-5/<strong>EXR</strong>-3<br />
The flashing track icon (only one) depends on the first track<br />
that already contains data. In the above example, track 1<br />
contains data, which is why its icon flashes.<br />
(3) Use the SELECT [√][®] or numeric buttons to select the<br />
track you wish to record to.<br />
You can only select one track at a time.<br />
(4) Press [START÷STOP] to start playback of the (old) song data.<br />
The RECORD icon and the icon of the selected track flash.<br />
(5) When the Recorder reaches the measure where you wish<br />
to start recording, press [REC≈∏] again.<br />
The RECORD icon now lights steadily.<br />
(6) Play the passage you want to redo.<br />
(7) Press [REC≈∏] again to deactivate recording.<br />
Song playback still continues, so…<br />
(8) Press [START÷STOP] to stop playback.<br />
(9) Press [START÷STOP] to listen to the new version.<br />
If you are not satisfied, return to step (3) above.<br />
Return to step (3) to correct another track.<br />
El icono de pista parpadeante (sólo uno) depende de la primera<br />
pista que ya contiene información. En el anterior ejemplo,<br />
la pista 1 contiene información, motivo por el cual su<br />
icono parpadea.<br />
(3) Utilice los botones SELECT [√][®] o los numéricos para<br />
seleccionar la pista que desee grabar.<br />
Puede seleccionar sólo una pista al mismo tiempo.<br />
(4) Pulse [START÷STOP] para iniciar la reproducción de la (antigua)<br />
información de canción.<br />
El icono RECORD y el icono de la pista seleccionada parpadean.<br />
(5) Cuando el Grabador alcance el compás donde desee iniciar<br />
la grabación, pulse [REC≈∏] de nuevo.<br />
El icono RECORD se ilumina permanentemente.<br />
(6) Toque el pasaje que desee rehacer.<br />
(7) Pulse [REC≈∏] de nuevo para desactivar la grabación.<br />
La reproducción de la canción aún continúa, así que…<br />
(8) Pulse [START÷STOP] para detener la reproducción.<br />
(9) Pulse [START÷STOP] para escuchar la nueva versión.<br />
Si no está satisfecho, vuelva al paso (3) anterior.<br />
Vuelva al paso (3) para corregir otra pista.<br />
L’icône de piste clignotante (une seule) est celle de la première<br />
piste contenant déjà des données. Dans l’exemple cidessus,<br />
l’icône de la piste 1 clignote car celle-ci contient des<br />
données.<br />
(3) Utilisez les boutons SELECT [√][®] ou les boutons numériques<br />
pour choisir la piste où vous voulez enregistrer.<br />
Vous pouvez choisir une seule piste à la fois.<br />
(4) Appuyez sur le bouton [START÷STOP] pour lancer la reproduction<br />
des (vieilles) données de morceau.<br />
L’icône RECORD et l’icône de la piste choisie clignotent<br />
alors.<br />
(5) Quand l’enregistreur atteint la mesure où vous voulez lancer<br />
l’enregistrement, appuyez de nouveau sur [REC≈∏].<br />
L’icône RECORD cesse de clignoter et reste affichée.<br />
(6) Jouez l’extrait à recommencer.<br />
(7) Appuyez de nouveau sur [REC≈∏] pour arrêter l’enregistrement.<br />
La reproduction du morceau continue, donc…<br />
(8) Appuyez sur [START÷STOP] pour arrêter la reproduction.<br />
(9) Appuyez sur [START÷STOP] pour écouter la nouvelle version.<br />
Si vous n’êtes pas content, recommencez à l’étape (3).<br />
Pour corriger une autre piste, retournez à l’étape (3).<br />
Using a footswitch for punching in/out<br />
You can also use an optional footswitch for starting and<br />
stopping recording. Doing so has the advantage that you can<br />
use both hands for playing (or the left hand for Pitch Bend/<br />
Modulation effects and the right for playing the melody.)<br />
• Connect an optional DP-2, DP-6, or BOSS FS-5U footswitch<br />
to the FOOTSWITCH socket on the <strong>EXR</strong>-5/<strong>EXR</strong>-3’s rear panel.<br />
Utilizar un conmutador de pedal para el pinchado<br />
de entrada/de salida<br />
También puede utilizar un conmutador de pedal opcional<br />
para iniciar y detener la grabación. Esto tiene la ventaja que<br />
es posible utilizar ambas manos para interpretar (o la mano<br />
izquierda para los efectos Pitch Bend/Modulation y la derecha<br />
para interpretar la melodía.)<br />
• Conecte un conmutador de pedal DP-2, DP-6 o BOSS FS-5U<br />
opcional en el zócalo FOOTSWITCH en el panel posterior del<br />
<strong>EXR</strong>-5/<strong>EXR</strong>-3.<br />
Enregistrement Punch I/O avec un commutateur au<br />
pied<br />
Vous pouvez aussi utiliser un commutateur au pied en option<br />
pour lancer et arrêter l’enregistrement. Cette méthode est<br />
avantageuse car elle vous permet de garder les deux mains<br />
libres pour jouer sur le clavier (ou de piloter les effets Pitch<br />
Bend/Modulation de la main gauche tout en jouant la<br />
mélodie de la main droite.)<br />
• Branchez un commutateur au pied DP-2, DP-6 ou BOSS<br />
FS-5U en option à la prise FOOTSWITCH sur le panneau<br />
arrière de l’<strong>EXR</strong>-5/<strong>EXR</strong>-3.<br />
54
<strong>EXR</strong>-5/<strong>EXR</strong>-3<br />
• Press the [FUNCTION] button (it must light).<br />
• Pulse el botón [FUNCTION] (debe iluminarse).<br />
• Appuyez sur le bouton [FUNCTION] (il doit s’allumer).<br />
SELECT<br />
FUNCTION<br />
Sustain<br />
• Use FAMILY [√][®] to select “KB SET”.<br />
The <strong>EXR</strong>-5/<strong>EXR</strong>-3’s Function parameters are divided into 9<br />
logical “families”. For the following, we need to select the<br />
group that contains the global keyboard settings.<br />
• Use SELECT [√][®] to select the “FSW” parameter.<br />
Note: See also “Working with the FAMILY, SELECT and numeric<br />
buttons” (p. 35).<br />
• Use the [–]/[+] buttons to select “Punch I/O”.<br />
• Press [SONG] to return to the recording function.<br />
• Continue with step (1) under “Punch I/O”.<br />
In steps (5) and (7), press the footswitch (rather than the<br />
[REC≈∏] button).<br />
• Utilice FAMILY [√][®] para seleccionar “KB SET”.<br />
Los parámetros de funciones del <strong>EXR</strong>-5/<strong>EXR</strong>-3 se dividen en 9<br />
“familias” lógicas. Para la siguiente parte, es necesario seleccionar<br />
el grupo que contiene los ajustes de teclado globales.<br />
• Utilice SELECT [√][®] para seleccionar el parámetro “FSW”.<br />
Nota: Consulte también “Trabajar con FAMILY, SELECT y los<br />
botones numéricos” (p. 35).<br />
• Utilice los botones [–]/[+] para seleccionar “Punch I/O”.<br />
• Pulse [SONG] para volver a la función de grabación.<br />
• Continúe con el paso (1) en “Punch I/O”.<br />
En los pasos (5) y (7), pulse el conmutador de pedal (en lugar<br />
del botón [REC≈∏]).<br />
• Utilisez FAMILY [√][®] pour sélectionner “KB SET”.<br />
Les paramètres Function de l’<strong>EXR</strong>-5/<strong>EXR</strong>-3 sont divisés en 9<br />
“familles” selon une répartition logique. Dans le cas présent, il<br />
suffit de choisir le groupe contenant les réglages d’ensemble<br />
du clavier.<br />
• Utilisez SELECT [√][®] pour choisir le paramètre “FSW”.<br />
Remarque: Voyez aussi “Utilisation des boutons FAMILY, SELECT<br />
et des boutons numériques” (p. 35).<br />
• Utilisez les boutons [–]/[+] pour choisir “Punch I/O”.<br />
• Appuyez sur [SONG] pour retourner au mode d’enregistrement.<br />
• Reprenez l’étape (1) sous “Punch I/O”.<br />
Aux étapes (5) et (7), actionnez le commutateur au pied (au<br />
lieu d’enfoncer le bouton [REC≈∏]).<br />
55
<strong>EXR</strong>-5/<strong>EXR</strong>-3<br />
8. Additional Music Style<br />
functions<br />
Apart from the basic Music Style functions covered on page 28<br />
and following, your <strong>EXR</strong>-5/<strong>EXR</strong>-3 also provides the following<br />
functions. Most of the following functions are only available<br />
after pressing the [ARRANGER÷BAND] button (the ARRANGER<br />
icon must be displayed).<br />
One Touch<br />
8. Funciones adicionales<br />
del Estilo Musical<br />
Aparte de las funciones básicas de Estilo Musical explicadas en<br />
la página 28 y siguientes, el <strong>EXR</strong>-5/<strong>EXR</strong>-3 también proporciona<br />
las siguientes funciones. La mayoría de las funciones siguientes<br />
sólo están disponibles después de pulsar el botón<br />
[ARRANGER÷BAND] (debe visualizarse el icono ARRANGER ).<br />
One Touch<br />
8. Fonctions Music Style<br />
supplémentaires<br />
Outre les fonctions Music Style élémentaires présentées à la<br />
page 28 et aux pages suivantes, votre <strong>EXR</strong>-5/<strong>EXR</strong>-3 propose les<br />
fonctions décrites dans cette section. La plupart de ces fonctions<br />
ne sont disponibles que si vous appuyez sur le bouton<br />
[ARRANGER÷BAND] (l’icône ARRANGER doit être affichée).<br />
One Touch<br />
ONE<br />
TOUCH<br />
Piano 2<br />
The One Touch function automates quite a few tasks:<br />
• The Arranger selects the preset Style tempo.<br />
• Suitable Reverb and Chorus settings.<br />
• The <strong>EXR</strong>-5/<strong>EXR</strong>-3 selects sounds for the Main, Split and Dual<br />
parts that are is suitable for the selected Style.<br />
There are 2 One Touch memories per Style with different<br />
settings for the above parameters. Here is how to select one:<br />
(1) Select the desired Music Style (see p. 31).<br />
(2) Press the [ONE¥TOUCH] button.<br />
The number field in the upper left corner reads “OT”, followed<br />
by the number of the selected One Touch memory.<br />
If the DATA ENTRY [TONE] button lights, the display now<br />
shows a Tone name (“Piano 2” in the example above).<br />
(3) Press the [ONE¥TOUCH] button again if you need “OT2”.<br />
One Touch needs to be activated again every time you select<br />
a new Music Style.<br />
Note: One Touch is also available for USB and disk Styles, but it<br />
is less meaningful.<br />
La función One Touch permite automatizar algunas tareas:<br />
• El Arranger selecciona el tempo del Estilo predefinido.<br />
• Ajustes idóneos de Reverb y Chorus.<br />
• El <strong>EXR</strong>-5/<strong>EXR</strong>-3 selecciona sonidos para las partes Main, Split<br />
y Dual que son ideales para el Estilo seleccionado.<br />
Existen 2 memorias One Touch por Estilo con ajustes diferentes<br />
para los parámetros antes mencionados. A continuación,<br />
se describe cómo seleccionar uno:<br />
(1) Seleccione el Estilo Musical deseado (consulte la<br />
página 31).<br />
(2) Pulse el botón [ONE¥TOUCH].<br />
En el campo de número en el ángulo superior izquierdo se<br />
puede leer “OT”, seguido por el número de la memoria One<br />
Touch seleccionada.<br />
Si el botón DATA ENTRY [TONE] se ilumina, la pantalla muestra<br />
el nombre de un Tono (“Piano 2” en el ejemplo anterior).<br />
(3) Vuelva a pulsar el botón [ONE¥TOUCH] si necesita “OT2”.<br />
Deberá activar One Touch cada vez que seleccione un Estilo<br />
Musical nuevo.<br />
Nota: One Touch está también disponible para USB y Estilos de<br />
disco, pero es menos significativo.<br />
La fonction One Touch automatise plusieurs tâches:<br />
• L’arrangeur choisit le tempo préprogrammé du style musical.<br />
• Les effets Reverb et Chorus sont réglés de façon appropriée.<br />
• L’<strong>EXR</strong>-5/<strong>EXR</strong>-3 choisit des sons pour les parties Main, Split et<br />
Dual appropriés au style en vigueur.<br />
Chaque style comporte 2 mémoires One Touch offrant des<br />
réglages différents pour les paramètres ci-dessus. Voici comment<br />
choisir une de ces mémoires:<br />
(1) Choisissez le style musical voulu (voyez p. 31).<br />
(2) Appuyez sur le bouton [ONE¥TOUCH].<br />
La plage numérique dans le coin supérieur gauche de l’écran<br />
indique “OT”, suivi du numéro de la mémoire One Touch choisie.<br />
Si le bouton DATA ENTRY [TONE] s’allume, l’écran affiche un<br />
nom de son (“Piano 2” dans l’exemple ci-dessus).<br />
(3) Appuyez à nouveau sur le bouton [ONE¥TOUCH] pour choisir<br />
“OT2”.<br />
La fonction One Touch doit être activée après chaque sélection<br />
d’un nouveau style musical.<br />
Remarque: Vous pouvez aussi utiliser la fonction One Touch<br />
pour les styles sur disquette et disponibles via USB mais elle a<br />
moins d’utilité.<br />
56
<strong>EXR</strong>-5/<strong>EXR</strong>-3<br />
Using the Music Assistant<br />
Another practical function for quickly making the right settings<br />
for a song you want to play is to take advantage of the <strong>EXR</strong>-5/<br />
<strong>EXR</strong>-3’s novel MUSIC ASSISTANT function. It prepares everything<br />
for working with the Arranger (Style, Tones, effects, etc.).<br />
The Music Assistant is not available for song playback.<br />
Utilizar el Asistente Musical<br />
Otra función práctica para definir rápidamente los ajustes<br />
correctos para una canción que desee interpretar es aprovechar<br />
la nueva función MUSIC ASSISTANT del <strong>EXR</strong>-5/<strong>EXR</strong>-3. Lo prepara<br />
todo para trabajar con el Arranger (estilo, sonidos, efectos, etc.).<br />
El Asistente Musical no está disponible para la reproducción de<br />
canciones.<br />
Travail avec le Music Assistant<br />
L’<strong>EXR</strong>-5/<strong>EXR</strong>-3 propose une nouvelle fonction pratique baptisée<br />
MUSIC ASSISTANT. Elle permet d’effectuer rapidement les réglages<br />
appropriés du morceau que vous voulez jouer. Elle prépare<br />
tout pour le travail avec l’arrangeur (style, sons, effets, etc.). La<br />
fonction Music Assistant n’est pas disponible pour la reproduction<br />
de morceau.<br />
MUSIC<br />
ASSISTANT<br />
FAMILY =<br />
007 BALLROOM 102<br />
The following parameters are changed automatically when you<br />
select a Music Assistant memory:<br />
• Music Style<br />
• Tempo<br />
• Sounds for the Main, Split<br />
and Dual parts<br />
• Effect settings<br />
• Band Orchestrator<br />
• Keyboard Touch<br />
(1) Press the [MUSIC¥ASSISTANT] button.<br />
It lights and the display shows the name of the last Music<br />
Assistant setting you selected (or of the first Music Assistant<br />
memory).<br />
(2) Use FAMILY [√][®] to select the “family” (i.e. genre) that<br />
contains the desired Music Assistant settings.<br />
The following families are available: Ballad, Ballroom,<br />
Dancing, Easy List, Evrgreen, JazzSwng, PopHit and General.<br />
(3) Use SELECT [√][®] to specify the desired Music Assistant<br />
memory within the selected family.<br />
The first press of SELECT [®] (or [√]) shows the name of the<br />
first Music Assistant setting within the selected group. It is<br />
already selected, so if you need the first setting, there is<br />
actually no need to press SELECT [®]. You must use SELECT [√]<br />
or [®], however, to select another Music Assistant setting<br />
within the same group. You can also use the numeric buttons.<br />
See also “Working with the FAMILY, SELECT and<br />
numeric buttons” (p. 35).<br />
Los parámetros siguientes cambian automáticamente cuando<br />
selecciona una memoria del Asistente Musical:<br />
• Estilo Musical<br />
• Tempo<br />
• Sonidos para las partes Main,<br />
Split y Dual<br />
• Ajustes de efectos<br />
• Band Orchestrator<br />
• Tacto del teclado<br />
(1) Pulse el botón [MUSIC¥ASSISTANT].<br />
Se ilumina y la pantalla muestra el nombre del último ajuste<br />
del Asistente Musical que seleccionó (o de la primera memoria<br />
del Asistente Musical).<br />
(2) Utilice FAMILY [√][®] para selecciona la “familia” (es decir,<br />
el género) que contiene los ajustes del Asistente Musical<br />
deseados.<br />
Están disponibles las familias siguientes: Ballad, Ballroom,<br />
Dancing, Easy List, Evrgreen, JazzSwng, PopHit y General.<br />
(3) Utilice SELECT [√][®] para especificar la memoria del Asistente<br />
Musical deseada dentro de la familia seleccionada.<br />
Al pulsar SELECT por primera vez [®] (o [√]) se muestra el<br />
nombre del primer ajuste de Asistente Musical dentro del<br />
grupo seleccionado. Ya está seleccionado, por lo que si necesita<br />
el primer ajuste en realidad no es necesario que pulse<br />
SELECT [®]. Debe utilizar SELECT [√] o [®], no obstante, para<br />
seleccionar otro ajuste de Asistente Musical dentro del<br />
mismo grupo. También puede utilizar los botones numéricos.<br />
Consulte también “Trabajar con FAMILY, SELECT y los botones<br />
numéricos” (p. 35).<br />
Les paramètres suivants sont automatiquement modifiés quand<br />
vous choisissez une mémoire Music Assistant:<br />
• Style musical<br />
• Tempo<br />
• Sons des parties Main, Split<br />
et Dual<br />
• Réglages d’effets<br />
• Band Orchestrator<br />
• Keyboard Touch<br />
(1) Appuyez sur le bouton [MUSIC¥ASSISTANT].<br />
Il s’allume et l’écran affiche le nom du dernier réglage Music<br />
Assistant que vous avez sélectionné (ou de la première<br />
mémoire Music Assistant).<br />
(2) Utilisez FAMILY [√][®] pour choisir la “famille” (c.-à-d. le<br />
genre) contenant les réglages Music Assistant voulus.<br />
Voici les familles disponibles: Ballad, Ballroom, Dancing, Easy<br />
List, Evrgreen, JazzSwng, PopHit et General.<br />
(3) Utilisez SELECT [√][®] pour sélectionner la mémoire Music<br />
Assistant voulue dans la famille choisie.<br />
La première pression sur SELECT [®] (ou [√]) affiche le nom du<br />
premier paramètre Music Assistant du groupe sélectionné. Vu<br />
que le premier paramètre est déjà choisi, si vous comptez<br />
l’utiliser, vous ne devez pas appuyer sur le bouton SELECT [®].<br />
En revanche, vous devez utiliser le bouton SELECT [√] ou [®]<br />
pour choisir un autre paramètre Music Assistant du même<br />
groupe. Vous pouvez aussi utiliser les boutons numériques.<br />
Voyez aussi “Utilisation des boutons FAMILY, SELECT et des<br />
boutons numériques” (p. 35).<br />
57
<strong>EXR</strong>-5/<strong>EXR</strong>-3<br />
Note: If necessary, you can now change the settings you do not<br />
like (e.g. select another sound for the Main part, etc.) and then<br />
save your new version to a User Program (see p. 94).<br />
Nota: Si fuera necesario, puede cambiar los ajustes que no le<br />
gusten (por ejemplo,. seleccionar otro sonido para la parte Main,<br />
etc.) y después guardar su nueva versión en un Programa de<br />
Usuario (consulte la página 94).<br />
Remarque: Si nécessaire, vous pouvez alors modifier les réglages<br />
qui ne vous plaisent pas (choisir un autre son pour la partie<br />
Main, par exemple) et sauvegarder votre nouvelle version dans<br />
un programme utilisateur (voyez p. 94).<br />
Melody Intelligence<br />
The Melody Intelligence function adds a second voice (harmony<br />
notes) to the melodies you play with your right hand. In fact, the<br />
Melody Intelligence function uses both halves of the keyboard<br />
to determine which notes to play:<br />
• It looks at the melody notes in the right half; and…<br />
• It analyzes the chords you play in the left half to see which<br />
notes it must add to your melody.<br />
Press the [MELODY¥INTELLIGENCE] button so that the corresponding<br />
icon (see right illustration) appears in the display.<br />
Melody Intelligence<br />
La función Melody Intelligence añade una segunda voz (notas<br />
armónicas) a las melodías que se tocan con la mano derecha. En<br />
realidad, la función Melody Intelligence utiliza ambas partes del<br />
teclado para determinar las notas que debe tocar:<br />
• Estudia las notas de la melodía en la mitad derecha; y…<br />
• Analiza los acordes que usted toca en la mitad izquierda para<br />
determinar las notas que debe añadir a la melodía.<br />
Pulse el botón [MELODY¥INTELLIGENCE] de forma que aparezca<br />
el icono correspondiente (consulte la ilustración) en la pantalla.<br />
Melody Intelligence<br />
Melody Intelligence est une fonction qui ajoute une deuxième<br />
voix (des notes d’harmonie) aux mélodies que vous jouez de la<br />
main droite. En fait, la fonction Melody Intelligence se base sur<br />
les deux moitiés du clavier pour déterminer les notes à jouer:<br />
• Elle examine les notes de la mélodie dans la moitié droite et…<br />
• Elle analyse les accords que vous jouez dans la moitié gauche<br />
pour déterminer quelles notes elle doit ajouter à votre<br />
mélodie.<br />
Appuyez sur le bouton [MELODY¥INTELLIGENCE] de sorte que<br />
l’icône correspondante (voyez l’illustration de droite) s’affiche à<br />
l’écran.<br />
MELODY<br />
INTELLIGENCE<br />
=<br />
Traditnl 120<br />
ORCHESTRATOR BEAT<br />
FULL<br />
BAND<br />
00 001<br />
M<br />
INTRO<br />
1 Duet<br />
2 Organ<br />
3 Combo<br />
4 Strings<br />
5 Choir<br />
6 Block<br />
7 BigBand<br />
8 Country<br />
9 Traditnl<br />
10 Broadway<br />
11 Gospel<br />
12 Romance<br />
13 Latin<br />
14 CntrGuit<br />
15 CntrBald<br />
16 WltzOrg<br />
17 OctvTpe1<br />
18 OctvTpe2<br />
Changing the Melody Intelligence harmony type<br />
The <strong>EXR</strong>-5/<strong>EXR</strong>-3 contains 18 different voicings (harmony<br />
types) for the MELODY INTELLIGENCE function. These voicings<br />
specify the number of harmony notes and the way in<br />
which they are added to your melody.<br />
To select a different harmony type, press an hold the<br />
[MELODY¥INTELLIGENCE] button until the “MI” message<br />
appears in the upper left corner of the display. Then use the<br />
[–]/[+] buttons to select the desired voicing. See above for the<br />
available types (right).<br />
Note: The Melody Intelligence setting can be saved to a User<br />
Program memory.<br />
Cambiar el tipo de armonía de Melody Intelligence<br />
El <strong>EXR</strong>-5/<strong>EXR</strong>-3 contiene 18 voces diferentes (tipos de armonía)<br />
para la función MELODY INTELLIGENCE. Estas voces<br />
especifican el número de notas de armonía y la manera cómo<br />
se añaden a la melodía.<br />
Para seleccionar un tipo de armonía distinto, mantenga pulsado<br />
el botón [MELODY¥INTELLIGENCE] hasta que aparezca el<br />
mensaje “MI” en la parte superior izquierda de la pantalla. A<br />
continuación, utilice los botones [–]/[+] para seleccionar la voz<br />
deseada. Consulte más arriba para los tipos disponibles (derecha).<br />
Nota: El ajuste Melody Intelligence puede guardarse en una<br />
memoria de Programa de Usuario.<br />
Changer le type d’harmonie Melody Intelligence<br />
L’<strong>EXR</strong>-5/<strong>EXR</strong>-3 propose 18 voix (types d’harmonie) différentes<br />
pour la fonction MELODY INTELLIGENCE. Ces voix spécifient<br />
le nombre de notes d’harmonie et la manière dont ces<br />
notes sont ajoutées à votre mélodie.<br />
Pour choisir un autre type d’harmonie, maintenez enfoncé le<br />
bouton [MELODY¥INTELLIGENCE] jusqu’à ce que le message<br />
“MI” s’affiche dans le coin supérieur gauche de l’écran. Utilisez<br />
ensuite les boutons [–]/[+] pour choisir les voix désirées.<br />
Voyez ci-dessus (à droite) les types disponibles.<br />
Remarque: Vous pouvez sauvegarder le réglage Melody Intelligence<br />
dans un programme utilisateur.<br />
58
Bass Inversion (Bass Inv)<br />
Use this function to change the way in which the Arranger<br />
reads the chords you play.<br />
Bass Inversion (Bass Inv)<br />
Utilice esta función para cambiar la forma en que el Arranger<br />
lee los acordes que toca.<br />
<strong>EXR</strong>-5/<strong>EXR</strong>-3<br />
Bass Inversion (Bass Inv)<br />
Cette fonction permet de changer la manière dont l’arrangeur<br />
interprète les accords que vous jouez.<br />
FUNCTION<br />
FAMILY<br />
SELECT<br />
=<br />
BassInv 120<br />
ORCHESTRATOR BEAT<br />
FULL<br />
BAND<br />
00 001<br />
M<br />
INTRO<br />
When this function is off (default), the Acc Bass part plays the<br />
root of the chords that feed the Arranger. If you play a “C” (or C<br />
chord), the bass sounds a “C”; if you play an A minor chord (or if<br />
you press “A” and the “C” to its right), the bass sounds an A, etc.<br />
By activating Bass Inversion, you can specify the note played by<br />
the A. Bass part (the lowest note of your chords). Switch on Bass<br />
Inversion for songs that rely on bass rather than on chord patterns<br />
(for example C – C/B – C/Bb, etc.).<br />
(1) Press the [FUNCTION] button.<br />
(2) Use FAMILY [√][®] to select “ARR SET”.<br />
The <strong>EXR</strong>-5/<strong>EXR</strong>-3’s Function parameters are divided into 9<br />
logical “families”. As the Bass Inversion parameter is an<br />
Arranger function, you need to select the Arranger settings<br />
(hence ARR SET).<br />
(3) Use SELECT [√][®] to select the “BassInv” parameter.<br />
(4) Press the [+] button to select “ON” for “VALUE”.<br />
Note: See also “Working with the FAMILY, SELECT and numeric<br />
buttons” (p. 35).<br />
(5) Press another “big” button in the DATA ENTRY section to<br />
leave this function.<br />
Note: This setting can be saved to a User Program (see p. 94).<br />
Cuando está función está desactivada (por defecto), la parte Acc<br />
Bass interpreta los acordes básicos que alimentan el Arranger. Si<br />
toca una “C” (o acorde C), el bajo suena una “C”; si usted interpreta<br />
un acorde de A menor (o si usted pulsa “A” y la “C” de su<br />
derecha), el bajo suena una A, etc.<br />
Al activar Bass Inversion, puede especificar la nota interpretada<br />
por la parte A. Bass (la nota más baja de sus acordes). Active Bass<br />
Inversion para las canciones que se basan en el bajo en vez de en<br />
patrones de acorde (por ejemplo C – C/B – C/B,b, etc.).<br />
(1) Pulse el botón [FUNCTION].<br />
(2) Utilice FAMILY [√][®] para seleccionar “ARR SET”.<br />
Los parámetros de funciones del <strong>EXR</strong>-5/<strong>EXR</strong>-3 se dividen en 9<br />
“familias” lógicas. Debido a que el parámetro Bass Inversion<br />
es una función del Arranger, necesita seleccionar los ajustes<br />
del Arranger (de ahí ARR SET).<br />
(3) Utilice SELECT [√][®] para seleccionar el parámetro “BassInv”.<br />
(4) Pulse el botón [+] para seleccionar “ON” para “VALUE”.<br />
Nota: Consulte también “Trabajar con FAMILY, SELECT y los<br />
botones numéricos” (p. 35).<br />
(5) Pulse otro botón “big” en la sección DATA ENTRY para salir<br />
de esta función.<br />
Nota: Este ajuste puede guardarse en un Programa de Usuario<br />
(consulte la página 94).<br />
Quand cette fonction est coupée (réglage par défaut), la partie<br />
Acc Bass joue la tonique des accords pilotant l’arrangeur. Si vous<br />
jouez un Do (ou un accord de Do), la basse joue un Do; si vous<br />
jouez un accord de La mineur (ou si vous enfoncez le La et le Do<br />
à sa droite), la basse joue un La, etc.<br />
En activant la fonction Bass Inversion, vous pouvez définir la<br />
note jouée par la partie A. Bass (la note la plus grave de vos<br />
accords). Activez Bass Inversion pour des morceaux reposant<br />
plus sur la basse que sur des motifs d’accord (exemple: Do – Do/<br />
Si – Do/Sib, etc.).<br />
(1) Appuyez sur le bouton [FUNCTION].<br />
(2) Utilisez FAMILY [√][®] pour sélectionner “ARR SET”.<br />
Les paramètres Function de l’<strong>EXR</strong>-5/<strong>EXR</strong>-3 sont divisés en 9<br />
“familles” selon une répartition logique. Vu que le paramètre<br />
Bass Inversion est une fonction de l’arrangeur, vous devez<br />
choisir les réglages de l’arrangeur (et donc ARR SET).<br />
(3) Utilisez SELECT [√][®] pour choisir le paramètre “BassInv”.<br />
(4) Appuyez sur le bouton [+] afin de choisir “ON” pour<br />
“VALUE”.<br />
Remarque: Voyez aussi “Utilisation des boutons FAMILY, SELECT<br />
et des boutons numériques” (p. 35).<br />
(5) Appuyez sur un autre “gros” bouton de la section DATA<br />
ENTRY pour quitter cette fonction.<br />
Remarque: Vous pouvez sauvegarder ce réglage dans un programme<br />
utilisateur (voyez p. 94).<br />
59
<strong>EXR</strong>-5/<strong>EXR</strong>-3<br />
More Music Style functions<br />
Here are yet other functions related to Music Styles. These can<br />
be set via the FUNCTION menu, or are covered elsewhere:<br />
• Balance between the Keyboard parts and the Music Style<br />
parts (see p. 33)<br />
• Volume of certain Music Style parts (see p. 88)<br />
• Arranger split point (see p. 85)<br />
• Hold function for the Arranger notes (see p. 89).<br />
Más funciones del Estilo Musical<br />
A continuación, se nombran otras funciones relacionadas con<br />
los Estilos Musicales. Estas se pueden ajustar mediante el menú<br />
FUNCTION, o se cubren en otra parte:<br />
• Balance entre las partes del teclado y las partes del Estilo<br />
Musical (consulte la página 33)<br />
• Volumen de ciertas partes del Estilo Musical (consulte la<br />
página 88)<br />
• Punto de división del Arranger(consulte la página 85)<br />
• Función Hold para las notas del Arranger (consulte la<br />
página 89).<br />
Autres fonctions pour styles<br />
musicaux<br />
Vous disposez d’autres fonctions liées aux styles musicaux. Vous<br />
pouvez les régler avec le menu FUNCTION ou elles sont décrites<br />
ailleurs:<br />
• Balance entre les parties Keyboard et les parties Music Style<br />
(voyez p. 33)<br />
• Volume de certaines parties Music Style (voyez p. 88)<br />
• Point de partage de l’arrangeur (voyez p. 85)<br />
• Fonction Hold pour les notes de l’arrangeur (voyez p. 89).<br />
60
<strong>EXR</strong>-5/<strong>EXR</strong>-3<br />
9. Keyboard part functions<br />
Selecting sounds for the Main, Split and<br />
Dual parts<br />
The <strong>EXR</strong>-5/<strong>EXR</strong>-3 contains about 470 melodic sounds you can<br />
use for playing melodies (others are more like sound effects).<br />
Those sounds need to be assigned to a Keyboard part, of which<br />
there are three: Main, Split and Dual (see also p. 24).<br />
Selecting any of the available sounds<br />
9. Funciones de la parte<br />
del teclado<br />
Seleccionar sonidos para las partes Main,<br />
Split y Dual<br />
El <strong>EXR</strong>-5/<strong>EXR</strong>-3 contiene acerca de 470 sonidos melódicos que<br />
se pueden utilizar para reproducir melodias (los otros se parecen<br />
más a efectos de sonido). Estos sonidos se tienen que asignar a<br />
una parte del teclado, de las cuales hay tres: Main, Split y Dual<br />
(consulte también la p. 24).<br />
Seleccionar cualquiera de los sonidos disponibles<br />
9. Fonctions liées aux<br />
parties Keyboard<br />
Choix des sons pour les parties Main, Split<br />
et Dual<br />
L’<strong>EXR</strong>-5/<strong>EXR</strong>-3 offre environ 470 sons conçus pour le jeu de<br />
mélodies (les autres sons correspondent plus à des effets sonores).<br />
Vous devez assigner ces sons à une partie Keyboard. Cellesci<br />
sont au nombre de trois: Main, Split et Dual (voyez aussi<br />
p. 24).<br />
Sélection d’un des sons disponibles<br />
TONE<br />
FAMILY<br />
• PIANO (001~011)<br />
• E.PIANO (012~026)<br />
• KEYBOARD (027~033)<br />
• CHR PERC (034~063)<br />
• ORGAN (064~095)<br />
• ACCORDN (096~100)<br />
• A.GUITAR (101~118)<br />
• E.GUITAR (119~152)<br />
• BASS (153~206)<br />
• STRINGS (207~249)<br />
• VOCAL (250~261)<br />
• SAX (262~272)<br />
• WIND (273~286)<br />
• AC BRASS (287~313)<br />
• SYNBRASS (314~327)<br />
• SYNLEAD (328~364)<br />
• POLY SYN (365~375)<br />
• PAD (376~410)<br />
• ETHNIC (411~443)<br />
• PERCUSSION (444~468)<br />
• SFX (469~510)<br />
• DRUM KIT (511~530)<br />
Unlike previous arranger-type instruments, the <strong>EXR</strong>-5/<strong>EXR</strong>-3 no<br />
longer works with banks, numbers and variations: all available<br />
sounds can be selected via the same streamlined procedure.<br />
(1) Press the DATA ENTRY [TONE] button (it must light).<br />
(2) To assign another sound to the Split or Dual part, hold the<br />
[SPLIT] or [DUAL] button while performing the following<br />
steps.<br />
Note: Now skip to step (5) if you prefer to enter the Tone number<br />
using the numeric key pad ([0]~[9]). That is indeed the only<br />
way to select any available Tone.<br />
(3) Use FAMILY [√][®] to select the desired Tone family.<br />
See above for the available families. By selecting another<br />
family, you immediately jump to the first sound of that<br />
group.<br />
Note: See page 124 for a list of the available sounds.<br />
A diferencia de los instrumentos arranger anteriores, el <strong>EXR</strong>-5/<br />
<strong>EXR</strong>-3 no funciona con bancos, números y variaciones: todos los<br />
sonidos disponibles se pueden seleccionar mediante el mismo<br />
procedimiento eficaz.<br />
(1) Pulse el botón DATA ENTRY [TONE] (se debería iluminar).<br />
(2) Para asignar otro sonido a la parte Split o Dual, mantenga<br />
pulsado el botón [SPLIT] or [DUAL] mientras realiza los<br />
siguientes pasos.<br />
Nota: Ahora pase al punto (5) si prefiere introducir el número de<br />
Tono utilizando el teclado numérico ([0]~[9]). Esta es verdaderamente<br />
la única forma de seleccionar cualquier Tono seleccionado.<br />
(3) Utilice FAMILY [√][®] para seleccionar la familia de tonos<br />
deseada.<br />
Consulte más arriba para las familias disponibles. Si selecciona<br />
otra familia, pasará inmediatamente al primer sonido<br />
de dicho grupo.<br />
Nota: Consulte página 124 para ver la lista de sonidos disponibles.<br />
Contrairement aux instruments de type arrangeur plus anciens,<br />
l’<strong>EXR</strong>-5/<strong>EXR</strong>-3 n’utilise plus des banques, numéros et variations:<br />
une seule et même procédure logique permet de sélectionner<br />
tous les sons disponibles.<br />
(1) Appuyez sur le bouton DATA ENTRY [TONE] (il doit s’allumer).<br />
(2) Pour assigner un autre son à la partie Split ou Dual, maintenez<br />
le bouton [SPLIT] ou [DUAL] enfoncé et effectuez les<br />
étapes suivantes.<br />
Remarque: Passez à l’étape (5) si vous préférez entrer le numéro<br />
du son avec le pavé numérique ([0]~[9]). C’est en fait la seule<br />
méthode pour choisir un des sons disponibles.<br />
(3) Utilisez FAMILY [√][®] pour choisir la famille de sons.<br />
Voyez ci-dessus les familles disponibles. Quand vous sélectionnez<br />
une autre famille, le premier son du groupe en question<br />
est automatiquement choisi.<br />
Remarque: La liste des sons disponibles figure à la page 124.<br />
61
<strong>EXR</strong>-5/<strong>EXR</strong>-3<br />
(4) Use SELECT [√][®] to specify a sound within the selected<br />
family.<br />
The first press of SELECT [®] (or [√]) shows the name of the<br />
first Tone within the selected group. It is already selected, so<br />
if you need the first sound, there is actually no need to press<br />
SELECT [®]. You must use SELECT [√] or [®], however, to select<br />
another Tone within the same group.<br />
Note: This only selects the “best” sounds within the current<br />
family (the names printed in bold in the Tone list on p. 124).<br />
(5) Use the numeric buttons [0]~[9] to select other sounds<br />
within the current family that are skipped by the SELECT<br />
buttons.<br />
Note: This setting can be saved to a User Program (see p. 94).<br />
You can also use the numeric buttons. See also “Working<br />
with the FAMILY, SELECT and numeric buttons” (p. 35) and<br />
replace “song” with “sound” in the explanations.<br />
Using the TONE buttons<br />
The TONE buttons allow you to select 7 melodic sounds and one<br />
Drum Kit directly (without using [TONE], the FAMILY, SELECT<br />
and/or numeric buttons).<br />
(4) Utilice SELECT [√][®] para especificar un sonido dentro de la<br />
familia seleccionada.<br />
Al pulsar SELECT por primera vez [®] (o [√]) se muestra el<br />
nombre del primer Tono dentro del grupo seleccionado. Ya<br />
está seleccionado, por lo que si necesita el primer sonido en<br />
realidad no es necesario que pulse SELECT [®]. Debe utilizar<br />
SELECT [√] o [®], no obstante, para seleccionar otro Tono dentro<br />
del mismo grupo.<br />
Nota: Esto sólo selecciona los “mejores” sonidos dentro de la<br />
familia actual (los nombres impresos en negrita en la lista de<br />
Tonos de la p. 124).<br />
(5) Utilice los botones numéricos [0]~[9] para seleccionar otros<br />
sonidos dentro de la familia actual que se omiten<br />
mediante los botones SELECT.<br />
Nota: Este ajuste puede guardarse en un Programa de Usuario<br />
(consulte la página 94).<br />
También puede utilizar los botones numéricos. Consulte también<br />
“Trabajar con FAMILY, SELECT y los botones numéricos”<br />
(p. 35) y sustituya “canción” por “sonido” en las explicaciones.<br />
Utilizar los botones TONE<br />
Los botones TONE le permiten seleccionar 7 sonidos melódicos y<br />
un grupo de percusión directamente (sin utilizar los botones<br />
numéricos y/o los [TONE], los FAMILY, SELECT).<br />
(4) Utilisez SELECT [√][®] pour choisir le son voulu dans la<br />
famille sélectionnée.<br />
La première pression sur SELECT [®] (ou [√]) affiche le nom du<br />
premier son du groupe choisi. Le premier son étant déjà<br />
choisi, si vous comptez l’utiliser, vous ne devez pas appuyer<br />
sur le bouton SELECT [®]. En revanche, utilisez le bouton<br />
SELECT [√] ou [®] pour choisir un autre son du même groupe.<br />
Remarque: Cette opération choisit uniquement les “meilleurs”<br />
sons de la famille actuellement choisie (les noms imprimés en<br />
gras dans la liste de sons à la p. 124).<br />
(5) Utilisez les boutons numériques [0]~[9] pour choisir<br />
d’autres sons de la famille actuelle qui sont “sautés” par les<br />
boutons SELECT.<br />
Remarque: Vous pouvez sauvegarder ce réglage dans un programme<br />
utilisateur (voyez p. 94).<br />
Vous pouvez aussi utiliser les boutons numériques. Voyez<br />
aussi “Utilisation des boutons FAMILY, SELECT et des boutons<br />
numériques” (p. 35) et remplacez “morceau” par “son” dans<br />
les explications.<br />
Utilisation des boutons TONE<br />
Les boutons TONE permettent de choisir directement 7 sons<br />
mélodiques et un kit de batterie (sans utiliser les boutons [TONE],<br />
FAMILY, SELECT et/ou les boutons numériques).<br />
These buttons are assigned to our “favorite” sounds for the indicated<br />
categories, thus allowing you to quickly select “a piano”, “a<br />
string sound”, etc. The assignments to these buttons can be<br />
changed.<br />
Note: The TONE [DRUMS] button is only available for the Main part.<br />
Estos botones están asignados a nuestros sonidos “preferidos”<br />
para las categorías indicadas, permitiendo así seleccionar rápidamente<br />
“un piano”, “un sonido de cuerda”, etc. Las asignaciones a<br />
estos botones pueden cambiarse.<br />
Nota: El botón TONE [DRUMS] sólo está disponible para la parte<br />
Main.<br />
Nous avons affecté ces boutons à nos sons “favoris” pour les<br />
catégories en question, ce qui vous permet de choisir rapidement<br />
un son de piano, de cordes, etc. Vous pouvez changer les<br />
assignations de ces boutons.<br />
Remarque: Le bouton TONE [DRUMS] est uniquement disponible<br />
pour la partie Main.<br />
62
<strong>EXR</strong>-5/<strong>EXR</strong>-3<br />
Assigning another Tone to a TONE button<br />
To assign another sound to one of the 8 TONE buttons, first<br />
select it using the procedure described above, the press and hold<br />
the desired TONE button. The display briefly shows the message<br />
“Memrized”.<br />
Note: You can only assign Tones of the following families to the<br />
various buttons:<br />
[PIANO]: Piano, E.Piano, Keyboard, Chr Perc<br />
[ORGAN]: Organ, Accordion<br />
[GUITAR]: A. Guitar, E. Guitar, Bass<br />
[STRINGS]: Strings<br />
[VOCAL]: Vocal<br />
[SAX/BRASS]: Sax, Wind, Acc. Brass<br />
[SYNTH]: Syn Brass, Syn Lead, Poly Syn, Pad, Ethnic, Prcssion, SFX<br />
[DRUMS]: Drums.<br />
Note: These assignments are saved (and loaded) along with the<br />
User Program data (page 114).<br />
Asignar otro Tono a un botón TONE<br />
Para asignar otro sonido a uno de los 8 botones TONE, primero<br />
selecciónelo utilizando el procedimiento descrito anteriormente,<br />
y a continuación pulse y mantenga pulsado el botón TONE<br />
deseado. La pantalla muestra brevemente el mensaje<br />
“Memrized”.<br />
Nota: Sólo puede asignar Tonos de las familias indicadas para el<br />
botón:[PIANO]: Piano, E.Piano, Keyboard, Chr Perc<br />
[ORGAN]: Organ, Accordion<br />
[GUITAR]: A. Guitar, E. Guitar, Bass<br />
[STRINGS]: Strings<br />
[VOCAL]: Vocal<br />
[SAX/BRASS]: Sax, Wind, Acc. Brass<br />
[SYNTH]: Syn Brass, Syn Lead, Poly Syn, Pad, Ethnic, Prcssion, SFX<br />
[DRUMS]: Drums.<br />
Nota: Estas asignaciones se guardan (y cargan) junto con la información<br />
de User Program (página 114).<br />
Assigner un autre son à un bouton TONE<br />
Pour assigner un autre son à l’un des 8 boutons TONE, choisissez-le<br />
d’abord comme décrit ci-dessus puis appuyez sur le bouton<br />
TONE voulu et maintenez-le enfoncé. L’écran affiche brièvement<br />
le message “Memrized”.<br />
Remarque: Vous pouvez uniquement assigner des sons des familles<br />
suivantes aux différents boutons:<br />
[PIANO]: Piano, E.Piano, Keyboard, Chr Perc<br />
[ORGAN]: Organ, Accordion<br />
[GUITAR]: A. Guitar, E. Guitar, Bass<br />
[STRINGS]: Strings<br />
[VOCAL]: Vocal<br />
[SAX/BRASS]: Sax, Wind, Acc. Brass<br />
[SYNTH]: Syn Brass, Syn Lead, Poly Syn, Pad, Ethnic, Prcssion, SFX<br />
[DRUMS]: Drums.<br />
Remarque: Ces assignations sont sauvegardées (et chargées) avec<br />
les données de programme utilisateur (page 114).<br />
63
<strong>EXR</strong>-5/<strong>EXR</strong>-3<br />
Drum sounds and sound effects<br />
(“SFX”)<br />
Drum Kits<br />
The last 20 “sounds” (511~530) are so-called “Drum Kits”. When<br />
you select such a Kit, every key is assigned to a different sound.<br />
With the left-most key, you can play a bass drum sound (also<br />
called “kick”). The white key next to it triggers a snare drum<br />
sound, etc. Try it out by pressing several keys, either in succession<br />
or simultaneously.<br />
Sonidos de percusión y efectos de<br />
sonido (“SFX”)<br />
Grupos de percusión<br />
Los últimos 20 “sonidos” (511~530) se denominan “Grupos de<br />
percusión”. Cuando selecciona uno de estos grupos, cada tecla se<br />
asigna a un sonido diferente. Con la mayoría de las teclas de la<br />
izquierda, puede tocar un sonido de percusión de bajo (también<br />
denominado “bombo”). La tecla blanca de su lado dispara un<br />
sonido de caja etc. Pruébelo pulsando algunas teclas, bien de<br />
forma sucesiva o simultánea.<br />
Sons de batterie et effets sonores<br />
(“SFX”)<br />
Drum Kits<br />
Les 20 derniers “sons” (511~530) correspondent aux “Drum Kits”<br />
(kits de batterie). Quand vous choisissez un de ces kits, un son<br />
différent est affecté à chaque touche du clavier. La dernière touche<br />
à gauche pilote un son de grosse caisse (alias le “kick”). La<br />
touche blanche juste à côté pilote un son de caisse claire, etc.<br />
Essayez de jouer un rythme de batterie en enfonçant plusieurs<br />
touches simultanément ou tour à tour.<br />
IPopKik36<br />
IPopCStk37st<br />
IPopSn38st<br />
IPopGstS39st<br />
IPopSn40st<br />
IPopTomLFl41<br />
IPopHat1_42<br />
IPopTomL43<br />
IPopHat2_44<br />
IPopTomMFl45<br />
IPopHat3_46<br />
IPopTomM47<br />
IPopTomHFl48<br />
IPopCyml2_52<br />
IPopTomH50<br />
IPopKik36<br />
IPopCStk37st<br />
IPopSn38st<br />
IPopGstS39st<br />
IPopSn40st<br />
IPopTomLFl41<br />
IPopHat1_42<br />
IPopTomL43<br />
IPopHat2_44<br />
IPopTomMFl45<br />
IPopHat3_46<br />
IPopTomM47<br />
IPopTomHFl48<br />
IPopCyml2_52<br />
IPopTomH50<br />
IPopKik36<br />
IPopCStk37st<br />
IPopSn38st<br />
IPopGstS39st<br />
IPopSn40st<br />
IPopTomLFl41<br />
IPopHat1_42<br />
IPopTomL43<br />
IPopHat2_44<br />
IPopTomMFl45<br />
IPopHat3_46<br />
IPopTomM47<br />
IPopTomHFl48<br />
IPopCyml2_52<br />
IPopTomH50<br />
C2<br />
Drum Kits are collections of over 90 sounds, each assigned to a<br />
different key.<br />
Note: Drum Kits can only be assigned to the Main part (so neither<br />
to the Split, nor the Dual part).<br />
Note: One Kit (530) is actually a sound effects (SFX) kit that cannot<br />
be used for “drumming” but rather for triggering various sound<br />
effects.<br />
Note: This setting can be saved to a User Program (see p. 94).<br />
Sound effects (“SFX”)<br />
The <strong>EXR</strong>-5/<strong>EXR</strong>-3 also contains individual sound effects (like<br />
“Train, “Kitty”, “HrseGllp”, etc.) and individual drum and percussion<br />
sounds (449~470) that are assigned to the entire range of<br />
the part you select them for (Main, Split or Dual).<br />
Note that those sounds do not work like the Drum Kits: only one<br />
sound is assigned to the keyboard – and can be played melodically<br />
(though “Train” melodies are probably “interesting” at best).<br />
It might therefore be a good idea to proceed as follows:<br />
(1) Press the [SPLIT] button.<br />
(2) Decide whether you want to play the sound effect or percussion<br />
sound with your left or right hand.<br />
C3<br />
C2<br />
Los grupos de percusión son colecciones de más de 90 sonidos,<br />
cada uno de éstos asignado a una tecla diferente.<br />
Nota: Los grupos de percusión sólo se pueden asignar a la parte<br />
Main (por lo tanto, ni a la parte Split, ni a la Dual).<br />
Nota: One Kit (530) realmente es un grupo de efectos de sonido<br />
(SFX) que no se puede utilizar para “tamborilear” pero si para disparar<br />
varios efectos de sonido.<br />
Nota: Este ajuste puede guardarse en un Programa de Usuario<br />
(consulte la página 94).<br />
Efectos de sonido (“SFX”)<br />
El <strong>EXR</strong>-5/<strong>EXR</strong>-3 también contiene efectos de sonido individuales<br />
(como “Train, “Kitty”, HrseGllp”, etc.) y sonidos de batería y percusión<br />
individuales (449~470) que se asignan a toda la gama de<br />
la parte para la cual se han seleccionado (Main, Split o Dual)<br />
Tenga en cuenta que estos sonidos no funcionan con los Grupos<br />
de percusión: sólo se asigna un sonido al teclado – y se puede<br />
reproducir melódicamente (aunque las melodías “Train” en el<br />
mejor de los casos sean probablemente “interesantes”).<br />
Por lo tanto, sería buena idea proceder de la siguiente manera:<br />
(1) Pulse el botón [SPLIT].<br />
(2) Decida si quiere reproducir el efecto de sonido o el sonido<br />
de percusión con su mano derecha o izquierda.<br />
C3<br />
C2<br />
Les kits de batterie sont des ensembles comprenant plus de 90<br />
sons affectés chacun à une touche du clavier.<br />
Remarque: Vous pouvez assigner les kits de batterie uniquement à<br />
la partie Main (et donc pas aux parties Split et Dual).<br />
Remarque: “One Kit” (530) correspond en fait à un kit d’effets<br />
sonores (SFX) qui ne sert pas à “jouer de la batterie” mais plutôt à<br />
produire divers effets sonores.<br />
Remarque: Vous pouvez sauvegarder ce réglage dans un programme<br />
utilisateur (voyez p. 94).<br />
Effets sonores (“SFX”)<br />
L’<strong>EXR</strong>-5/<strong>EXR</strong>-3 contient aussi des effets sonores individuels<br />
(comme “Train, “Kitty”, “HrseGllp”, etc.) plus des sons de batterie<br />
et de percussion individuels (449~470). Ils sont affectés à la tessiture<br />
entière de la partie pour laquelle vous les choisissez (Main,<br />
Split ou Dual).<br />
Notez que ces sons ne fonctionnent pas comme les kits de batterie:<br />
ici, un seul son est assigné au clavier – et peut servir à jouer<br />
une mélodie (même si les mélodies “de train” ne produisent sans<br />
doute que des effets tout au plus “intéressants”).<br />
Nous vous conseillons donc de procéder comme suit:<br />
(1) Appuyez sur le bouton [SPLIT].<br />
(2) Déterminez si vous voulez jouer l’effet sonore ou le son de<br />
percussion de la main gauche ou de la main droite.<br />
C3<br />
64
<strong>EXR</strong>-5/<strong>EXR</strong>-3<br />
If you want to use your left hand, assign a sound between<br />
“449” and “510” to the Split part. To play the effect with your<br />
right hand, assign it to the Main part.<br />
(3) Change the split point (page 85) in such a way that only a<br />
few keys are assigned to the percussion sound/sound<br />
effect (“C6” for right-hand effect playing, “C3” for lefthand<br />
effect playing).<br />
(4) To obtain a meaningful effect, you may also have to<br />
change the MAIN Oct or SPLT Oct setting<br />
(page 87).<br />
If you assign a sound effect/percussion sound to the Split<br />
part, the key ranges could be set as shown below.<br />
Si quiere utilizar su mano izquierda, asigne un sonido entre<br />
“449” y “510” a la parte Split. Para reproducir el efecto con su<br />
mano derecha, asignelo a la parte Main.<br />
(3) Cambie el punto de división (página 85) de manera que<br />
sólo se asignen unas pocas teclas al efecto de sonido/<br />
sonido de percusión (“C6” para la reproducción de efectos<br />
con la mano derecha, “C3” para la reproducción de efectos<br />
con la mano izquierda).<br />
(4) Para obtener une fecto significativo, también debe cambiar<br />
el ajuste MAIN Oct o SPLT Oct (página 87).<br />
Si asigna un efecto de sonido/sonido de percusión a la parte<br />
Split, las gamas de teclas se deberían ajustar como se muestra<br />
a continuación.<br />
Pour le jouer de la main gauche, assignez un son entre “449”<br />
et “510” à la partie Split. Pour piloter l’effet de la main droite,<br />
assignez-le à la partie Main.<br />
(3) Changez le point de partage (page 85) de sorte que seules<br />
quelques touches soient assignées au pilotage du son de<br />
percussion/de l’effet sonore (“C6” pour jouer l’effet de la<br />
main droite et “C3” pour le jouer de la main gauche).<br />
(4) Pour produire un effet convaincant, vous devrez peut-être<br />
aussi modifier le réglage MAIN Oct ou SPLT Oct<br />
(page 87).<br />
Si vous assignez un effet sonore/son de percussion à la partie<br />
Split, voici les plages de clavier que vous pourriez obtenir.<br />
Transpose<br />
Split part (sound effect/percussion sound)<br />
Parte Split (efecto de sonido/sonido de percusión)<br />
Partie Split (effet sonore/son de percussion)<br />
Transposición<br />
Main part (melodic sound)<br />
Parte Main (sonido melódico)<br />
Partie Main (son mélodique)<br />
Transpose<br />
TRANSPOSE<br />
=<br />
Transpos 120<br />
ORCHESTRATOR BEAT<br />
00 001<br />
M<br />
FULL<br />
BAND<br />
NO<br />
YES<br />
INTRO<br />
TEMPO / DATA<br />
The Transpose function changes the pitch of the notes and<br />
chords you play. Instead of figuring out what other keys you<br />
need to press to accommodate the singer or an instrumentalist,<br />
you can set the required Transpose value and go on playing the<br />
song the way you practised it, while sounding in a different key.<br />
See the example above.<br />
(1) Press the [TRANSPOSE] button.<br />
The display now looks as shown in the middle.<br />
La función Transpose cambia la afinación de las notas y acordes<br />
que se interpretan. En lugar de suponer qué otras teclas deberá<br />
pulsar para adaptar el cantante o un instrumentalista, puede<br />
ajustar el valor Transpose necesario y continuar reproduciendo<br />
la canción como hacía mientras suena en un tono diferente.<br />
Consulte el ejemplo anterior.<br />
(1) Pulse el botón [TRANSPOSE].<br />
Ahora la pantalla tiene el aspecto mostrado en la parte central.<br />
La fonction Transpose change la hauteur des notes et des<br />
accords joués. Si vous devez changer de tonalité pour un chanteur<br />
ou un autre instrument, vous n’aurez aucun mal à trouver<br />
les notes à jouer: vous définissez simplement la valeur Transpose<br />
ad hoc et vous jouez votre morceau comme d’habitude,<br />
tout en sonnant dans la tonalité spécifiée. Voyez l’exemple cidessus.<br />
(1) Appuyez sur le bouton [TRANSPOSE].<br />
L’écran se présente alors comme sur l’illustration centrale.<br />
65
<strong>EXR</strong>-5/<strong>EXR</strong>-3<br />
(2) Use the [–]/[+] and/or numeric buttons ([0]~[9]) to set the<br />
desired transposition interval.<br />
The setting range is –12~12 semitones. A “semitone” is one<br />
step between a white and a black key (or two adjacent white<br />
keys, i.e. between “E”/“F” and “B”/“C”).<br />
Press [+] or [–] repeatedly to transpose the keyboard up or<br />
down. You can also directly enter the desired interval by<br />
pressing the corresponding numeric key.<br />
To transpose the keyboard down, hold down [–] while pressing<br />
[0]~[9] (in that case, you can transpose the pitch down by<br />
up to 9 semitones)<br />
Here’s an example: if you want to hear an “E” every time you<br />
play a “C”, select “4”. All other notes will be shifted by the<br />
same amount, so that you end up sounding in E major when<br />
you actually play in C major, etc.<br />
(2) Utilice el [–]/[+] y/o los botones numéricos ([0]~[9]) para<br />
ajustar el intervalo de transposición deseado.<br />
El intervalo de ajuste es de –12~12 semitonos. Un “semitono”<br />
es un paso entre una tecla blanca y otra negra (o dos teclas<br />
blancas adyacentes, es decir entre “E”/“F” y “B”/“C”).<br />
Pulse [+] o [–] repetidamente para transponer el teclado hacia<br />
arriba o hacia abajo. También puede introducir directamente<br />
el intervalo deseado pulsando la tecla numérica correspondiente.<br />
Para transponer el teclado hacia abajo, mantenga pulsado [–]<br />
mientras pulsa [0]~[9] (en este caso, puede transponer la afinación<br />
hacia abajo aumentando hasta 9 semitonos)<br />
Aquí le mostramos un ejemplo: si quiere escuchar un “E” cada<br />
vez que toque un “C”, seleccione “4”. El resto de notas cambiarán<br />
la misma cantidad de manera que acabe sonando en E<br />
mayor, cuando en realidad toca en C mayor, etc.<br />
(2) Utilisez [–]/[+] et/ou les boutons numériques ([0]~[9]) pour<br />
régler l’intervalle de transposition voulu.<br />
La plage de réglage va de –12~12 demi-tons. Un “demi-ton”<br />
correspond à l’écart entre une touche blanche et une touche<br />
noire (ou entre deux touches blanches adjacentes, à savoir<br />
“Mi”/“Fa” et “Si”/“Do”).<br />
Appuyez plusieurs fois sur [+] ou [–] pour transposer le clavier<br />
vers le haut ou vers le bas. Vous pouvez aussi définir directement<br />
l’intervalle de transposition voulu en appuyant sur le<br />
bouton numérique correspondant.<br />
Pour transposer le clavier vers le bas, maintenez le bouton [–]<br />
enfoncé en appuyant sur un bouton [0]~[9] (cela permet de<br />
transposer le clavier de maximum 9 demi-tons vers le bas).<br />
Voici un exemple: pour entendre un “E” (Mi) chaque fois que<br />
vous jouez un “C” (Do), choisissez “4”. Toutes les autres notes<br />
sont décalées du même intervalle, de sorte que vous sonnez<br />
en Mi majeur alors que vous jouez en fait en Do majeur, etc.<br />
No transposition (C major)<br />
Sin transposición (C mayor)<br />
Pas de transposition (Do majeur)<br />
Transpos= 4 (E major)<br />
Transpos= 4 (E mayor)<br />
Transpos= 4 (Mi majeur)<br />
The corresponding value and the TRANSPOSE icon appear in the<br />
display.<br />
(3) To switch the Transpose function back off, repeat steps (1)<br />
and (2), this time entering the value “0” (no transposition).<br />
Note: This setting can be saved to a User Program (see p. 94).<br />
Note: There is also a function that allows you to specify which<br />
section(s) the Transpose function should apply to. See “Trans-<br />
Mod*” (p. 85).<br />
El valor correspondiente y el icono TRANSPOSE aparecen en la<br />
pantalla.<br />
(3) Para volver a desactivar la función Transpose, repita los<br />
pasos (1) y (2), esta vez introduciendo el valor “0” (sin<br />
transposición).<br />
Nota: Este ajuste puede guardarse en un Programa de Usuario<br />
(consulte la página 94).<br />
Nota: También existe una función que le permite especificar a<br />
qué sección(es) se debe aplicar la función Transpose. Consulte<br />
“TransMod*” (p. 85).<br />
La valeur correspondante et l’icône TRANSPOSE s’affichent à<br />
l’écran.<br />
(3) Pour désactiver la fonction Transpose, répétez les étapes<br />
(1) et (2) en entrant la valeur “0” (pas de transposition).<br />
Remarque: Vous pouvez sauvegarder ce réglage dans un programme<br />
utilisateur (voyez p. 94).<br />
Remarque: Vous disposez aussi d’une fonction permettant de<br />
spécifier quelle(s) section(s) est/sont affectée(s) par la fonction<br />
Transpose. Voyez “TransMod*” (p. 85).<br />
66
<strong>EXR</strong>-5/<strong>EXR</strong>-3<br />
Octave settings<br />
Ajuste de octava<br />
Réglages d’octave<br />
NO<br />
YES<br />
TEMPO / DATA<br />
The <strong>EXR</strong>-5/<strong>EXR</strong>-3 allows you to transpose the Keyboard parts<br />
(Main, Split, Dual) up or down by 4 octaves.<br />
To change the octave transposition of a part, hold down [TONE]<br />
(Main part), [SPLIT] (Split part) or [DUAL] (Dual part), while pressing<br />
[–] (down) or [+] (up).<br />
El <strong>EXR</strong>-5/<strong>EXR</strong>-3 le permite transponer las partes del teclado<br />
(Main, Split, Dual) en 4 octavas más agudas o más graves.<br />
Para cambiar la transposición de la octava de una parte, mantenga<br />
pulsado [TONE] (parte Main), [SPLIT] (parte Split) o [DUAL]<br />
(parte Dual), mientras pulsa [–] (abajo) o [+] (arriba).<br />
L’<strong>EXR</strong>-5/<strong>EXR</strong>-3 vous permet de transposer les parties Keyboard<br />
(Main, Split, Dual) de 4 octaves vers le haut ou vers le bas.<br />
Pour changer la transposition d’octave d’une partie, maintenez<br />
enfoncé [TONE] (partie Main), [SPLIT] (partie Split) ou [DUAL]<br />
(partie Dual) en appuyant sur [–] (vers le bas) ou [+] (vers le haut).<br />
Other Keyboard part functions<br />
Here are yet other functions related to the Keyboard parts.<br />
These can be set via the FUNCTION menu, or are covered elsewhere:<br />
• Keyboard velocity (see p. 68)<br />
• Master Tune (see p. 84)<br />
• Volume of the Keyboard parts (see p. 88)<br />
• Intelligence function for the Split part (see p. 86)<br />
• Hold function for the Split part (see p. 86).<br />
Otras funciones de la parte del<br />
teclado<br />
A continuación, se nombran otras funciones relacionadas con<br />
las partes del teclado. Estas se pueden ajustar mediante el menú<br />
FUNCTION, o se cubren en otra parte:<br />
• Velocidad del teclado (consulte la página 68)<br />
• Master Tune (consulte la página 84)<br />
• Volumen de las partes del teclado (consulte la página 88)<br />
• Función Intelligence para la parte Split (consulte la<br />
página 86)<br />
• Función Hold para la parte Split (consulte la página 86)<br />
Autres fonctions liées aux parties<br />
Keyboard<br />
Voici d’autres fonctions concernant les parties Keyboard, c.-à-d.<br />
les parties que vous jouez. Vous pouvez les régler avec le menu<br />
FUNCTION ou elles sont décrites ailleurs:<br />
• Toucher du clavier (voyez p. 68)<br />
• Master Tune (voyez p. 84)<br />
• Volume des parties Keyboard (voyez p. 88)<br />
• Fonction Intelligence de la partie Split (voyez p. 86)<br />
• Fonction Hold de la partie Split (voyez p. 86)<br />
67
<strong>EXR</strong>-5/<strong>EXR</strong>-3<br />
10. Performance functions<br />
and effects<br />
Performance functions<br />
Keyboard Touch (velocity sensitivity)<br />
The <strong>EXR</strong>-5/<strong>EXR</strong>-3 is velocity sensitive, which means that the volume<br />
and brightness of the Main, Split and Dual notes depend on<br />
the force/speed with which you strike the keys.<br />
All acoustic instruments (piano, violin, flute, drums, etc.) are<br />
velocity sensitive. The harder you play, the louder and brighter<br />
the resulting notes will be, which creates a perfectly natural<br />
effect. (That explains why the KEYBOARD TOUCH function is on<br />
when you power on the <strong>EXR</strong>-5/<strong>EXR</strong>-3.)<br />
If the <strong>EXR</strong>-5/<strong>EXR</strong>-3 is your first musical instrument ever, you<br />
may feel distracted by the volume and timbre variations of the<br />
notes you play.<br />
10. Funciones de<br />
interpretación y efectos<br />
Funciones de interpretación<br />
Keyboard Touch (sensibilidad de velocidad)<br />
El <strong>EXR</strong>-5/<strong>EXR</strong>-3 es sensible a la velocidad, lo que significa que el<br />
volumen y el brillo de las notas Main, Split y Dual dependen de la<br />
fuerza/velocidad con que se pulsen las teclas.<br />
Todos los instrumentos acústicos (piano, violín, flauta, tambores,<br />
etc.) son sensibles a la velocidad. Como más fuerte toque, más<br />
altas y nítidas serán las notas resultantes, lo que crea un efecto<br />
completamente natural. (Esto explica porqué la función KEY-<br />
BOARD TOUCH está en on cuando activa el <strong>EXR</strong>-5/<strong>EXR</strong>-3.)<br />
Si el <strong>EXR</strong>-5/<strong>EXR</strong>-3 es su primer instrumento musical, pueden<br />
sorprenderle las variaciones de volumen y timbre de las notas<br />
que toque.<br />
10. Fonctions de jeu et<br />
effets<br />
Fonctions de jeu<br />
Sensibilité au toucher (Keyboard Touch)<br />
Vu que l’<strong>EXR</strong>-5/<strong>EXR</strong>-3 est sensible au toucher, le volume et la<br />
brillance des notes Main, Split et Dual dépendent de la force/de<br />
la vitesse avec lesquelles vous enfoncez les touches.<br />
Tous les instruments acoustiques (piano, violon, flûte, batterie,<br />
etc.) sont sensibles au toucher. Plus vous jouez fort, plus le<br />
volume et la brillance des notes produites augmentent, recréant<br />
un effet entièrement naturel. (C’est pourquoi la fonction KEY-<br />
BOARD TOUCH est activée à la mise sous tension de l’<strong>EXR</strong>-5/<br />
<strong>EXR</strong>-3.)<br />
Si l’<strong>EXR</strong>-5/<strong>EXR</strong>-3 est votre tout premier instrument de musique,<br />
vous serez peut-être un peu distrait par les variations de volume<br />
et de timbre des notes jouées.<br />
KEYBOARD<br />
TOUCH<br />
00KbdTouch<br />
(1) If the KEY TOUCH icon is not displayed, press the<br />
[KEYBOARD¥TOUCH] button to activate the <strong>EXR</strong>-5/<strong>EXR</strong>-3’s<br />
velocity sensitivity.<br />
(2) Press the button again to switch the KEYBOARD TOUCH<br />
function off, if you don’t need it.<br />
(3) To set a fixed velocity value, press and hold the<br />
[KEYBOARD¥TOUCH] button until the “KbdTouch” message<br />
is displayed.<br />
(4) Use the numeric buttons and/or [–]/[+] to set the velocity<br />
value that should be used for all notes you play (1~127).<br />
(1) Si no se visualiza el icono KEY TOUCH , pulse el botón<br />
[KEYBOARD¥TOUCH] para activar la sensibilidad de velocidad<br />
del <strong>EXR</strong>-5/<strong>EXR</strong>-3.<br />
(2) Pulse de nuevo el botón para desactivar la función KEY-<br />
BOARD TOUCH, si no la necesita.<br />
(3) Para ajustar un valor de velocidad fijo, pulse y mantenga<br />
pulsado el botón [KEYBOARD¥TOUCH] hasta que se visualice<br />
el mensaje “KbdTouch”.<br />
(4) Utilice los botones numéricos y/o [–]/[+] para ajustar el<br />
valor de velocidad que se debería utilizar para todas las<br />
notas que reproduzca (1~127).<br />
(1) Si l’icône KEY TOUCH n’est pas affichée, appuyez sur le bouton<br />
[KEYBOARD¥TOUCH] pour activer la fonction de sensibilité<br />
au toucher de l’<strong>EXR</strong>-5/<strong>EXR</strong>-3.<br />
(2) Appuyez à nouveau sur ce bouton pour désactiver la fonction<br />
KEYBOARD TOUCH une fois que vous n’en avez plus<br />
besoin.<br />
(3) Pour définir une valeur de toucher fixe, maintenez<br />
enfoncé le bouton [KEYBOARD¥TOUCH] jusqu’à ce que le<br />
message “KbdTouch” s’affiche.<br />
(4) Servez-vous des boutons numériques et/ou [–]/[+] pour<br />
définir la valeur de toucher qui sera utilisée pour toutes les<br />
notes que vous jouez (1~127).<br />
68
<strong>EXR</strong>-5/<strong>EXR</strong>-3<br />
“1” is very low (usually inaudible), while “127” corresponds to<br />
maximum striking force (loud, bright notes). The value is only<br />
used when the KEY TOUCH icon is not displayed (otherwise, all<br />
notes use the velocity values that correspond to the force<br />
with which you strike the keys).<br />
(5) Press another “big” button in the DATA ENTRY section to<br />
leave this function.<br />
Note: Some sounds use “velocity switching”. This means that by<br />
hitting the keys harder and softer, you alternate between two<br />
sounds. So only switch off this parameter if doing so makes you<br />
feel more comfortable.<br />
Note: This setting can be saved to a User Program (see p. 94).<br />
Note: Keyboard Touch applies to all parts you can play yourself<br />
(the “Keyboard parts”): Main, Split, and Dual.<br />
“1” es muy bajo (normalmente inaudible), mientras que “127”<br />
corresponde a la máxima fuerza de golpe (notas altas y nítidas).<br />
El valor sólo se utiliza cuando el icono KEY TOUCH no se<br />
visualiza (de lo contrario, todas las notas utilizan los valores<br />
de velocidad que corresponden a la fuerza con que golpea las<br />
teclas).<br />
(5) Pulse otro botón “big” en la sección DATA ENTRY para salir<br />
de esta función.<br />
Nota: Algunos sonidos utilizan “conmutación de velocidad”.<br />
Esto significa que golpeando las teclas más o menos fuerte, se<br />
alterna entre dos sonidos. Así que si desactiva este parámetro se<br />
sentirá mejor.<br />
Nota: Este ajuste puede guardarse en un Programa de Usuario<br />
(consulte la página 94).<br />
Nota: Keyboard Touch se aplica a todas las partes que puede<br />
tocar usted mismo (las “Partes del teclado”): Main, Split, y Dual.<br />
“1” produit un niveau très bas (souvent inaudible), tandis que<br />
“127” correspond au toucher maximum (produisant des<br />
notes fortes et brillantes). Cette valeur sert seulement quand<br />
l’icône KEY TOUCH n’est pas affichée (sinon, toutes les notes ont<br />
les valeurs de toucher correspondant à la force avec laquelle<br />
vous enfoncez les touches).<br />
(5) Appuyez sur un autre “gros” bouton de la section DATA<br />
ENTRY pour quitter cette fonction.<br />
Remarque: Certains sons bénéficient de la “commutation par<br />
toucher”. Dans ce cas, vous pouvez alterner entre deux sons en<br />
jouant plus ou moins fort sur le clavier. Ne désactivez donc ce<br />
paramètre que si cela permet d’augmenter votre confort de jeu.<br />
Remarque: Vous pouvez sauvegarder ce réglage dans un programme<br />
utilisateur (voyez p. 94).<br />
Remarque: La fonction Keyboard Touch concerne toutes les<br />
parties que vous pouvez jouer vous-même (les “parties Keyboard”):<br />
Main, Split et Dual.<br />
Pitch Bend and Modulation<br />
The BENDER/MODULATION lever to the left of the keyboard can<br />
be used to add two kinds of effects to the Keyboard-part notes.<br />
You can even use these effects simultaneously if you like.<br />
(1) Press the lever towards the rear of the <strong>EXR</strong>-5/<strong>EXR</strong>-3 to<br />
add a vibrato effect (“wobble”) to the notes you are playing.<br />
Pitch Bend y Modulación<br />
Puede utilizar la palanca BENDER/MODULATION de la izquierda<br />
del teclado para añadir dos tipos de efectos a las notas de la<br />
parte del teclado. Si lo desea, incluso puede utilizar estos efectos<br />
simultáneamente.<br />
(1) Pulse la palanca hacia la parte posterior del <strong>EXR</strong>-5/<strong>EXR</strong>-3<br />
para añadir un efecto de vibrato (“vacilación”) a las notas<br />
que esté tocando.<br />
Pitch Bend et Modulation<br />
Le levier BENDER/MODULATION à gauche du clavier permet<br />
d’ajouter deux types d’effets aux notes des parties Keyboard.<br />
Vous pouvez même utiliser simultanément ces effets si vous le<br />
voulez.<br />
(1) Poussez le levier vers l’arrière de l’<strong>EXR</strong>-5/<strong>EXR</strong>-3 pour ajouter<br />
un effet de vibrato (un “vacillement”) aux notes jouées.<br />
MODULATION<br />
Lowers the pitch<br />
Disminuye la afinación<br />
Diminue la hauteur<br />
Raises the pitch<br />
Aumenta la afinación<br />
Augmente la hauteur<br />
The Modulation axis can also be used for switching between<br />
the slow and fast Rotary speeds (if the “Rotary” effect is<br />
assigned to the MFX).<br />
(2) Turn the lever to the left to temporarily lower the pitch of<br />
the notes you are playing. Turn it to the right to raise the<br />
pitch of your notes.<br />
BENDER<br />
El eje de Modulation también puede utilizarse para cambiar<br />
entre la velocidad rápida y lenta de Rotary (si el efecto<br />
“Rotary” está asignado al MFX).<br />
(2) Gire la palanca hacia la izquierda para producir temporalmente<br />
una afinación más grave de las notas que está<br />
tocando. Gírela hacia la derecha para producir una afinación<br />
más aguda de las notas.<br />
L’axe de modulation permet aussi d’alterner entre les vitesses<br />
lente et rapide de l’effet Rotary (si le type “Rotary” est assigné<br />
au MFX).<br />
(2) Poussez le levier à gauche pour diminuer temporairement<br />
la hauteur des notes jouées. Poussez-le à droite pour augmenter<br />
la hauteur des notes.<br />
69
<strong>EXR</strong>-5/<strong>EXR</strong>-3<br />
(3) In either case, you can release the lever if you no longer<br />
need the effect.<br />
Note: If necessary, you can change the Pitch Bend interval. See<br />
“PB Range° (Pitch Bend Range)” (p. 85).<br />
Note: Modulation is not avalaible when the MFX type= “Rotary”.<br />
In that case, the modulation axis of the lever is used for switching<br />
between the fast and slow speeds.<br />
Footswitch<br />
The <strong>EXR</strong>-5/<strong>EXR</strong>-3’s FOOTSWITCH socket (rear panel) allows you<br />
to connect optional DP-2, DP-6, or BOSS FS-5U footswitch.<br />
The footswitch can be used for sustaining the notes you are<br />
playing (default), as Soft or Sostenuto pedal, to switch the<br />
Rotary effect speed (MFX), and more. See “FSW° (Footswitch<br />
Assign)” (p. 86) and “Using the outputs and an optional footswitch”<br />
(p. 119).<br />
To use it for holding the notes you are playing, proceed as follows:<br />
(1) Connect a DP-2, DP-6, or BOSS FS-5U footswitch to the<br />
FOOTSWITCH jack.<br />
(2) Play a note with your right hand.<br />
(3) Press the footswitch.<br />
(4) Release the key.<br />
The note(s) you played keep on sounding after you release<br />
the corresponding keys.<br />
(5) To stop the note(s) from sounding, release the footswitch.<br />
(3) En ambos casos, puede soltar la palanca si ya no necesita<br />
el efecto.<br />
Nota: Si es necesario, puede cambiar el intervalo de Pitch Bend.<br />
Consulte la “PB Range° (Pitch Bend Range)” (p. 85).<br />
Nota: La modulación no funciona cuando el tipo di MFX=<br />
“Rotary”.<br />
Conmutador de pedal<br />
El zócalo FOOTSWITCH del <strong>EXR</strong>-5/<strong>EXR</strong>-3 (panel posterior) permite<br />
conectar un conmutador de pedal opcional DP-2, DP-6 o<br />
BOSS FS-5U.<br />
Puede utilizar el conmutador de pedal para sostener las notas<br />
que está tocando (por defecto), como el pedal Soft o Sostenuto,<br />
para cambiar la velocidad del efecto Rotary (MFX), y más. Consulte<br />
la “FSW° (Asignar conmutador de pedal)” (p. 86) y la “Utilizar<br />
las salidas y un conmutador de pedal” (p. 119).<br />
Para utilizarlo mantenga pulsadas las notas que está tocando,<br />
proceda de la siguiente manera:<br />
(1) Conecte un conmutador de pedal DP-2, DP-6 o BOSS<br />
FS-5U al jack FOOTSWITCH.<br />
(2) Toque una nota con su mano derecha.<br />
(3) Pulse el conmutador de pedal.<br />
(4) Suelte la tecla.<br />
La(s) nota(s) que ha reproducido se sigue(n) oyendo después<br />
de haber soltado las teclas correspondientes.<br />
(5) Para que la(s) nota(s) dejen de sonar, suelte el conmutador<br />
de pedal.<br />
(3) Pour chacun de ces types d’effets, vous pouvez relâcher le<br />
levier quand vous n’avez plus besoin de l’effet.<br />
Remarque: Si nécessaire, vous pouvez changer l’intervalle de<br />
Pitch Bend. Voyez “PB Range° (Pitch Bend Range)” (p. 85).<br />
Remarque: La modulation n’est pas disponible lorsque “Rotary”<br />
est choisi comme type MFX. Dans ce cas, l’axe de modulation sert<br />
uniquement à alterner entre les vitesses lente et rapide de l’effet.<br />
Commutateur au pied<br />
La prise FOOTSWITCH de l’<strong>EXR</strong>-5/<strong>EXR</strong>-3 (sur le panneau arrière)<br />
permet de brancher un commutateur au pied DP-2, DP-6 ou<br />
BOSS FS-5U en option.<br />
Vous pouvez utiliser ce commutateur au pied pour maintenir les<br />
notes jouées (fonction par défaut), comme pédale douce ou<br />
pédale tonale, pour changer la vitesse de l’effet Rotary (MFX) et<br />
pour d’autres fonctions. Voyez “FSW° (Footswitch Assign)” (p. 86)<br />
et “Utilisation des sorties et d’un commutateur au pied” (p. 119).<br />
Pour utiliser le commutateur au pied afin de maintenir les notes<br />
jouées, procédez comme suit:<br />
(1) Branchez un commutateur au pied DP-2, DP-6 ou BOSS<br />
FS-5U à la prise FOOTSWITCH.<br />
(2) Jouez une note de la main droite.<br />
(3) Appuyez sur le commutateur au pied.<br />
(4) Relâchez la touche.<br />
Le son de la note ou des notes jouées continue après le relâchement<br />
des touches en question.<br />
(5) Pour couper le son de la note ou des notes, relâchez le<br />
commutateur au pied.<br />
70
Using effects<br />
The <strong>EXR</strong>-5/<strong>EXR</strong>-3 contains digital Reverb and Chorus effects<br />
processors. You can switch them on/off and select other types.<br />
You can also set the Send level (the amount of Reverb or Chorus)<br />
to be applied to the various Keyboard parts. Please bear in<br />
mind that the Chorus effect cannot be combined with the MFX<br />
(so you need to choose between Chorus or MFX for the Main<br />
part).<br />
Using the multi-effects processor (MFX)<br />
The multi-effects (MFX) processor can be used for processing<br />
the Main part. It can generate various effects (47), some of<br />
which are combinations of two effects, while the Reverb and<br />
Chorus processors only generate effects that are somehow<br />
related to ambiance (REV) or modulation (CHR).<br />
Utilizar efectos<br />
El <strong>EXR</strong>-5/<strong>EXR</strong>-3 contiene procesadores de efectos Reverb y Chorus<br />
digitales. Los puede activar y desactivar y seleccionar otros<br />
tipos. También puede ajustar el nivel Send (la cantidad de<br />
Reverb o Chorus) que se aplicará a las distintas partes del<br />
Teclado. Tenga en cuenta que el efecto Chorus no se puede combinar<br />
con el MFX (por lo tanto necesita elegir entre Chorus o<br />
MFX para la parte Main).<br />
Utilizar el procesador multiefectos (MFX)<br />
El procesador multiefectos (MFX) se puede utilizar para procesar<br />
la parte Main. Puede generar varios efectos (47), algunos de los<br />
cuales son combinaciones de dos efectos, mientras que los procesadores<br />
Reverb y Chorus sólo generan efectos que de alguna<br />
manera están relacionados con el ambiente (REV) o la modulación<br />
(CHR).<br />
<strong>EXR</strong>-5/<strong>EXR</strong>-3<br />
Utilisation des effets<br />
L’<strong>EXR</strong>-5/<strong>EXR</strong>-3 contient des processeurs d’effets numériques<br />
Reverb et Chorus. Vous pouvez activer/couper ces effets et choisir<br />
d’autres types. En outre, vous pouvez régler le niveau d’envoi<br />
Send (la quantité de Reverb ou de Chorus) appliqué aux différentes<br />
parties Keyboard. Retenez que l’effet Chorus ne peut pas<br />
être combiné avec le MFX (vous devez donc choisir entre Chorus<br />
et MFX pour la partie Main).<br />
Travail avec le processeur multi-effet (MFX)<br />
Vous pouvez appliquer le processeur multi-effet (MFX) à la partie<br />
Main. Contrairement aux processeurs Reverb et Chorus, qui produisent<br />
uniquement des effets liés à l’ambiance (REV) et à la<br />
modulation (CHR), le processeur MFX génère divers effets (47),<br />
dont certains sont des combinaisons de deux effets.<br />
FUNCTION<br />
00Off<br />
(1) Press the [FUNCTION] button (it must light).<br />
(2) Use FAMILY [√][®] to select “EFFECTS”.<br />
The <strong>EXR</strong>-5/<strong>EXR</strong>-3’s function parameters are divided into 9<br />
logical “families”. For the following, we need to select the<br />
effects group.<br />
(3) Use SELECT [√][®] to select the “MFX” parameter.<br />
Note: See also “Working with the FAMILY, SELECT and numeric<br />
buttons” (p. 35).<br />
The “Off” message means that the MFX is not being used.<br />
(4) To switch on the MFX, select one of the remaining 47<br />
types using the [–]/[+] buttons.<br />
Off: The MFX is off.<br />
Enhancer: An Enhancer controls the overtone structure of<br />
the high frequencies, adding sparkle and tightness to the<br />
sound.<br />
(1) Pulse el botón [FUNCTION] (debe iluminarse).<br />
(2) Utilice FAMILY [√][®] para seleccionar “EFFECTS”.<br />
Los parámetros de función del <strong>EXR</strong>-5/<strong>EXR</strong>-3 están divididos<br />
en 9 “familias”lógicas. Para la siguiente parte, es necesario<br />
seleccionar el grupo de efectos.<br />
(3) Utilice SELECT [√][®] para seleccionar el parámetro “MFX”.<br />
Nota: Consulte también “Trabajar con FAMILY, SELECT y los<br />
botones numéricos” (p. 35).<br />
El mensaje “Off” significa que el MFX no se utiliza.<br />
(4) Para activar el MFX, seleccione uno de los 47 tipos restantes<br />
utilizando los botones [–]/[+].<br />
Off: El MFX está desactivado.<br />
Enhancer: Un Enhancer controla la estructura de los armónicos<br />
de las frecuencias altas, añadiendo destellos y rigidez al<br />
sonido.<br />
(1) Appuyez sur le bouton [FUNCTION] (il doit s’allumer).<br />
(2) Utilisez FAMILY [√][®] pour sélectionner “EFFECTS”.<br />
Les paramètres Function de l’<strong>EXR</strong>-5/<strong>EXR</strong>-3 sont divisés en 9<br />
“familles” selon une répartition logique. Pour effectuer cette<br />
procédure, il faut choisir le groupe des effets.<br />
(3) Utilisez SELECT [√][®] pour choisir le paramètre “MFX”.<br />
Remarque: Voyez aussi “Utilisation des boutons FAMILY, SELECT<br />
et des boutons numériques” (p. 35).<br />
Le message “Off” indique que le MFX n’est pas actif.<br />
(4) Pour activer le MFX, choisissez un des 47 types avec les<br />
boutons [–]/[+].<br />
Off: Le MFX est désactivé.<br />
Enhancer: L’Enhancer contrôle la structure des harmoniques<br />
des hautes fréquences, rendant le son plus pétillant et serré.<br />
71
<strong>EXR</strong>-5/<strong>EXR</strong>-3<br />
Overdrv1~4: Overdrive creates a soft distortion similar to<br />
that produced by tube amplifiers. Several types of overdrive<br />
are available: (1) Small combo amp, (2) Combo amp, (3) Large<br />
double-stack amp (2 cabinets), (4) Large double-stack amp (3<br />
cabinets).<br />
Distort1~4: This effect produces a more intense distortion<br />
than Overdrive. The numbers refer to different kinds of distortion.<br />
Phaser: Adds a phase-shifted sound to the original sound,<br />
producing a twisting modulation that creates spaciousness<br />
and depth.<br />
AutoWah: The Auto Wah cyclically controls a filter to create<br />
cyclic change in timbre.<br />
Rotary: Simulates the sound of a classic rotary speaker. This<br />
effect is most suitable for electric organ. If you select this<br />
type, you can use the MODULATION axis of the BENDER/<br />
MODULATION lever for switching between the slow and fast<br />
modulation speeds: press the lever towards the back of the<br />
<strong>EXR</strong>-5/<strong>EXR</strong>-3 to alternate between slow and fast undulations.<br />
StFlangr: This is a stereo Flanger. It produces a metallic resonance<br />
that rises and falls like a jet airplane taking off or landing.<br />
SpFlangr: A Step Flanger is a Flanger effect with clearly<br />
noticeable steps rather than continuous pitch changes.<br />
Compress: A compressor reduces signal peaks and boosts<br />
low levels, smoothing out unevenness in volume.<br />
Limiter: A limiter prevents the volume from exceeding a certain<br />
level without boosting low levels.<br />
HexaCho: Hexa Chorus uses six layers of chorused sound to<br />
give richness and spatial spread to the sound.<br />
Trem Cho: Tremolo Chorus is a chorus effect with added<br />
Tremolo (cyclic modulation of the volume).<br />
StChorus: This is a stereo chorus.<br />
Space-D: A multiple Chorus that gives no impression of<br />
modulation, but produces a transparent Chorus effect (the<br />
perfect “stereo maker”).<br />
StDelay: Delay is an effect that allows you repeat the input<br />
signal, thus creating echoes (repetition).<br />
Mod Dly: This effect adds modulation to the delayed sound,<br />
producing an effect similar to a Flanger.<br />
72<br />
Overdrv1~4: El Overdrive crea una suave distorsión similar a<br />
la que producen los amplificadores de tubo de vacío. Hay distintos<br />
tipos de overdrive disponibles: (1) Pequeño amplificador<br />
integrado, (2) Amplificador integrado, (3) Gran amplificador<br />
apilable (2 muebles), (4) Gran amplificador apilable doble<br />
(3 muebles).<br />
Distort1~4: Este efecto produce una distorsión más intensa<br />
que el Overdrive. Los números hacen referencia a diferentes<br />
tipos de distorsión.<br />
Phaser: Añade un sonido con la fase desplazada al sonido<br />
original, produciendo una modulación ondulante que crea<br />
amplitud y profundidad.<br />
AutoWah: El Auto Wah controla cíclicamente un filtro para<br />
crear cambios cíclicos en el timbre.<br />
Rotary: Simula el sonido de un altavoz giratorio clásico. Este<br />
efecto es el más adecuado para órgano eléctrico. Si se selecciona<br />
este tipo, se puede utilizar el eje de MODULATION de la<br />
palanca BENDER/MODULATION para conmutar entre las<br />
velocidades de modulación lenta y rápida: pulse la palanca<br />
hacia la parte posterior del <strong>EXR</strong>-5/<strong>EXR</strong>-3 para alternar entre<br />
las ondulaciones lenta y rápida.<br />
StFlangr: Es un Flanger estéreo. Produce una resonancia<br />
metálica que sube y baja como un avión a reacción al despegar<br />
o al aterrizar.<br />
SpFlangr: Un Step Flanger es un efecto de Flanger con intervalos<br />
claramente perceptibles, en vez de cambios de afinación<br />
continuos.<br />
Compress: Un compresor reduce las señales pico y aumenta<br />
los niveles bajos, suavizando las irregularidades del volumen.<br />
Limiter: Un limitador evita que el volumen sobrepase un<br />
cierto nivel sin aumentar los niveles bajos.<br />
HexaCho: El Hexa Chorus utiliza seis capas de sonido con<br />
chorus para conseguir un sonido más rico y darle más amplitud<br />
espacial.<br />
Trem Cho: Tremolo Chorus es un efecto de chorus con Tremolo<br />
añadido (modulación cíclica del volumen).<br />
StChorus: Chorus estéreo.<br />
Space-D: Un Chorus múltiple que no da la impresión de<br />
modulación, pero produce un efecto de Chorus transparente<br />
(perfecto para dar efecto estéreo).<br />
StDelay: Delay es un efecto que le permite repetir la señal de<br />
entrada, creando ecos (repetición).<br />
Mod Dly: Este efecto añade modulación al sonido retardado,<br />
produciendo un efecto parecido al Flanger.<br />
Overdrv1~4: L’Overdrive crée une légère distorsion semblable<br />
à celle produite par des amplis à lampes. Divers types<br />
d’overdrive sont disponibles: (1) petit combo, (2) combo, (3)<br />
tour d’amplification (2 enceintes), (4) tour d’amplification (3<br />
enceintes).<br />
Distort1~4: Cet effet produit une distorsion plus intense<br />
qu’Overdrive. Les numéros correspondent à des types de distorsion.<br />
Phaser: Un phaser ajoute un son déphasé par rapport au son<br />
original et produit une modulation ondulante créant une<br />
impression d’espace et de profondeur.<br />
AutoWah: L’effet Auto Wah contrôle un filtre de manière<br />
cyclique pour créer des changements cycliques du timbre.<br />
Rotary: L’effet Rotary simule l’effet d’un haut-parleur rotatif<br />
classique. Effet idéal pour orgue électrique. Quand vous choisissez<br />
ce type, l’axe MODULATION du levier BENDER/MODU-<br />
LATION permet d’alterner entre les vitesses lente et rapide de<br />
modulation: poussez le levier vers l’arrière de l’<strong>EXR</strong>-5/<strong>EXR</strong>-3<br />
pour accélérer la vitesse des ondulations.<br />
StFlangr: Flanger stéréo. Il produit une résonance métallique<br />
qui monte et qui descend comme un avion décollant ou<br />
atterrissant.<br />
SpFlangr: Step Flanger est un effet dont les paliers de changement<br />
de hauteur du Flanger sont audibles.<br />
Compress: Un compresseur atténue les crêtes de signal,<br />
accentue les bas niveaux et aplanit le volume global.<br />
Limiter: Un limiteur empêche le volume de dépasser un certain<br />
niveau seuil (Threshold) sans accentuer les bas niveaux.<br />
HexaCho: Hexa Chorus se sert d’un chorus à 6 phases (six<br />
couches de son avec chorus) pour rendre le son plus riche et<br />
plus vaste.<br />
Trem Cho: Tremolo Chorus est un chorus avec du trémolo<br />
(modulation cyclique du volume).<br />
StChorus: Chorus stéréo.<br />
Space-D: Un chorus multiple qui ne donne pas une impression<br />
de modulation mais produit un chorus transparent (un<br />
parfait “faiseur de stéréo”).<br />
StDelay: Delay est un effet qui vous permet de répéter le<br />
signal d’entrée, créant par la même occasion des échos (répétitions).<br />
Mod Dly: Cet effet ajoute de la modulation au son retardé et<br />
produit un effet semblable à Flanger.
<strong>EXR</strong>-5/<strong>EXR</strong>-3<br />
3Tap Dly: The Triple Tap Delay produces three delay sounds;<br />
center, left and right.<br />
4Tap Dly: Delay with four repetition lines.<br />
TmCtrDly: This effect controls the delay time in realtime.<br />
Reverb: A nice Reverb effect.<br />
GteRevNr: Gate Reverb is a special type of Reverb in which<br />
the reverberant sound is suddenly cut off (and does not<br />
gradually decrease).<br />
GteRevRv: A gated Reverb effect that sounds “backwards”.<br />
GteRevS1: The reverberant sound moves from right to left.<br />
GteRevS2: The reverberant sound moves from left to right.<br />
2PtchShf: A Pitch Shifter changes the pitch of the original<br />
sound. This 2-voice effect has two pitch shifters, and adds<br />
two transposed copies to the original sound.<br />
FbPtchShf: Pitch Shifter with several echoes.<br />
OD®Chors: This effect connects an Overdrive and a Chorus<br />
in series. (“Series” means that the first effect is also processed<br />
by the second.)<br />
OD®Flger: This effect connects an Overdrive and a Flanger<br />
in series.<br />
OD®Delay: This effect connects an Overdrive and a Delay in<br />
series.<br />
DS®Chors: This effect connects distortion and a Chorus in<br />
series.<br />
DS®Flger: This effect connects distortion and a Flanger in<br />
series.<br />
DS®Delay: This effect connects distortion and a Delay in<br />
series.<br />
EH®Chors: This effect connects an Enhancer and a Chorus<br />
in series.<br />
EH®Flger: This effect connects an Enhancer and a Flanger<br />
in series.<br />
EH®Delay: This effect connects an Enhancer and a Delay in<br />
series.<br />
Cho®Dly: This effect connects a Chorus and a Delay in<br />
series.<br />
FL®Delay: This effect connects a Flanger and a Delay in<br />
series.<br />
Cho®Flgr: This effect connects a Chorus and a Flanger in<br />
series.<br />
3Tap Dly: El Triple Tap Delay produce tres sonidos delay; central,<br />
izquierda y derecha.<br />
4Tap Dly: Delay con cuatro líneas de repetición.<br />
TmCtrDly: Este efecto controla el tiempo de retardo en<br />
tiempo real.<br />
Reverb: Un bonito efecto de reverberación.<br />
GteRevNr: La reverberación de compuerta es un tipo especial<br />
de reverberación en que el sonido de reverberación se corta<br />
de golpe (no disminuye gradualmente).<br />
GteRevRv: Un efecto de reverberación de compuerta que<br />
suena “hacia atrás”.<br />
GteRevS1: El sonido de reverberación va de derecha a<br />
izquierda.<br />
GteRevS2: El sonido de reverberación va de izquierda a derecha.<br />
2PtchShf: Un Pitch Shifter cambia la afinación del sonido<br />
original. Este efecto de 2 voces dispone de dos desafinadores,<br />
y añade dos copias transpuestas al sonido original.<br />
FbPtchShf: Pitch Shifter con distintos ecos.<br />
OD®Chors: Este efecto conecta un Overdrive y un Chorus<br />
en serie. (“Serie” significa que el segundo efecto también procesa<br />
el primero.)<br />
OD®Flger: Este efecto conecta un Overdrive y un Flanger en<br />
serie.<br />
OD®Delay: Este efecto conecta un Overdrive y un Delay en<br />
serie.<br />
DS®Chors: Este efecto conecta la distorsión y un Chorus en<br />
serie.<br />
DS®Flger: Este efecto conecta la distorsión y un Flanger en<br />
serie.<br />
DS®Delay: Este efecto conecta la distorsión y un Delay en<br />
serie.<br />
EH®Chors: Este efecto conecta un Enhancer y un Chorus en<br />
serie.<br />
EH®Flger: Este efecto conecta un Enhancer y un Flanger en<br />
serie.<br />
EH®Delay: Este efecto conecta un Enhancer y un Delay en<br />
serie.<br />
Cho®Dly: Este efecto conecta un Chorus y un Delay en serie.<br />
FL®Delay: Este efecto conecta un Flanger y un Delay en serie.<br />
Cho®Flgr: Este efecto conecta un Chorus y un Flanger en serie.<br />
3Tap Dly: Le Triple Tap Delay produit trois sons retardés;<br />
centre, gauche, droite.<br />
4Tap Dly: Le Quadruple Tap Delay a quatre retards.<br />
TmCtrDly: Cet effet permet de contrôler le temps de retard<br />
en temps réel.<br />
Reverb: Un superbe effet de réverbération.<br />
GteRevNr: Gate Reverb est un type spécial de réverbération<br />
qui coupe brutalement le son réverbéré (au lieu de le faire<br />
diminuer progressivement).<br />
GteRevRv: Un effet Gate Reverb inversé.<br />
GteRevS1: Le son réverbéré passe de droite à gauche.<br />
GteRevS2: Le son réverbéré passe de gauche à droite.<br />
2PtchShf: Un Pitch Shifter change la hauteur du son original.<br />
Cet effet propose 2 lignes et permet d’ajouter deux<br />
copies transposées au signal entrant.<br />
FbPtchShf: Pitch Shifter avec plusieurs échos.<br />
OD®Chors: Overdrive et Chorus branchés en série. (“En<br />
série” signifie que le premier effet est aussi traité par le<br />
second.)<br />
OD®Flger: Overdrive et Flanger branchés en série.<br />
OD®Delay: Overdrive et Delay branchés en série.<br />
DS®Chors: Distorsion et Chorus branchés en série.<br />
DS®Flger: Distorsion et Flanger branchés en série.<br />
DS®Delay: Distorsion et Delay branchés en série.<br />
EH®Chors: Enhancer et Chorus branchés en série.<br />
EH®Flger: Enhancer et Flanger branchés en série.<br />
EH®Delay: Enhancer et Delay branchés en série.<br />
Cho®Dly: Chorus et Delay branchés en série.<br />
FL®Delay: Flanger et Delay branchés en série.<br />
Cho®Flgr: Chorus et Flanger branchés en série.<br />
73
<strong>EXR</strong>-5/<strong>EXR</strong>-3<br />
Cho/Dly: This effect connects a Chorus and a Delay in parallel.<br />
(“Parallel” means that the input signal is processed by two<br />
effects that do not interact.)<br />
FL/Delay: This effect connects a Flanger and a Delay in parallel.<br />
Cho/Flgr: This effect connects a Chorus and a Flanger in parallel.<br />
Note: This setting can be saved to a User Program (see p. 94).<br />
Note: By default, MFX type selection is linked to Tone selection<br />
for the Main part. This can be switched off, however, see “Tone<br />
MFX°” (p. 91). Note that this does not apply to all Tones.<br />
(5) While selecting an MFX type, play a few notes on the keyboard<br />
to audition the effect.<br />
(6) Press another “big” button in the DATA ENTRY section to<br />
leave this function.<br />
Note: If the MFX is on, the Main part is no longer processed by<br />
the Chorus effect. But the MFX also contains Chorus algorithms<br />
(either in isolation or in combination with other effects).<br />
Cho/Dly: Este efecto conecta un Chorus y un Delay en paralelo.<br />
(“Paralelo” significa que dos efectos que no interactúan procesan la<br />
señal de entrada.)<br />
FL/Delay: Este efecto conecta un Flanger y un Delay en paralelo.<br />
Cho/Flgr: Este efecto conecta un Chorus y un Flanger en<br />
paralelo.<br />
Nota: Este ajuste puede guardarse en un Programa de Usuario<br />
(consulte la página 94).<br />
Nota: Por defecto, la selección de tipo MFX se puede enlazar con<br />
la selección de Tono para la parte Main. Esta función puede desactivarse,<br />
de todas maneras, consulte “Tone MFX°” (p. 91). Tenga<br />
en cuenta que esto no se aplica a todos los Tonos.<br />
(5) Mientras se selecciona un tipo de MFX, reproduzca algunas<br />
notas en el teclado para escuchar el efecto.<br />
(6) Pulse otro botón “big” en la sección DATA ENTRY para salir<br />
de esta función.<br />
Nota: Si el MFX está activado, la parte Main ya no se procesa<br />
mediante el efecto Chorus. Pero el MFX también contiene algoritmos<br />
Chorus (tanto en el aislamiento o en la combinación con<br />
otros efectos).<br />
Cho/Dly: Chorus et Delay branchés en parallèle. (“En parallèle”<br />
signifie que le signal d’entrée est traité par deux effets<br />
qui n’ont aucune interaction.)<br />
FL/Delay: Flanger et Delay branchés en parallèle.<br />
Cho/Flgr: Chorus et Flanger branchés en parallèle.<br />
Remarque: Vous pouvez sauvegarder ce réglage dans un programme<br />
utilisateur (voyez p. 94).<br />
Remarque: Par défaut, le choix du type MFX est lié à la sélection<br />
de son pour la partie Main. Vous pouvez cependant désactiver ce<br />
lien. Voyez “Tone MFX°” (p. 91). Notez que cette remarque ne<br />
s’applique pas à tous les sons.<br />
(5) Choisissez un type MFX, jouez quelques notes sur le clavier<br />
et écoutez l’effet.<br />
(6) Appuyez sur un autre “gros” bouton de la section DATA<br />
ENTRY pour quitter cette fonction.<br />
Remarque: Quand le MFX est actif, la partie Main n’est plus traitée<br />
par l’effet Chorus. Toutefois, le MFX comporte aussi des algorithmes<br />
Chorus (indépendants ou combinés à d’autres effets).<br />
74
<strong>EXR</strong>-5/<strong>EXR</strong>-3<br />
Reverb<br />
Reverb is an effect that gives you the impression of playing in a<br />
concert hall, a room or another acoustic environment that<br />
reflects the sounds that are being produced.<br />
When you switch on the <strong>EXR</strong>-5/<strong>EXR</strong>-3, all three Keyboard parts<br />
(Main, Dual, Split) as well as the Arranger and Song parts are<br />
processed by the internal Reverb effect.<br />
Reverberación<br />
La reverberación es un efecto que da la impresión de estar tocando<br />
en una sala de conciertos, una habitación u otros entornos acústicos<br />
que reflejan el sonido que se está produciendo.<br />
Cuando se activa el <strong>EXR</strong>-5/<strong>EXR</strong>-3, las tres partes del teclado<br />
(Main, Dual, Split) así como las partes del Arranger y la Canción<br />
se procesan mediante el efecto Reverb interno.<br />
Reverb<br />
La réverbération (Reverb) est un effet qui donne l’impression que<br />
vous jouez dans une salle de concert, une pièce ou un autre<br />
décor acoustique réfléchissant les sons.<br />
A la mise sous tension de l’<strong>EXR</strong>-5/<strong>EXR</strong>-3, les trois parties Keyboard<br />
(Main, Dual, Split) ainsi que les parties de l’arrangeur et de<br />
morceau sont traitées par l’effet Reverb.<br />
FUNCTION<br />
00Hall 2<br />
If you don’t need that, you can either switch off the Reverb processor<br />
(in which case none of the <strong>EXR</strong>-5/<strong>EXR</strong>-3’s 19 parts are<br />
processed) or prevent just one Keyboard part from being processed.<br />
You cannot change the amount of Reverb that is added<br />
to the Arranger or pre-recorded Song parts.<br />
●Switching the Reverb on/off<br />
Use the following procedure if you want no Reverb at all (for<br />
none of the <strong>EXR</strong>-5/<strong>EXR</strong>-3’s parts), or to select another<br />
Reverb type.<br />
(1) Press the [FUNCTION] button (it must light).<br />
(2) Use FAMILY [√][®] to select “EFFECTS”.<br />
The <strong>EXR</strong>-5/<strong>EXR</strong>-3’s function parameters are divided into 9<br />
logical “families”. For the following, we need to select the<br />
effects group.<br />
(3) Use SELECT [√][®] to select the “REV” parameter.<br />
Note: See also “Working with the FAMILY, SELECT and numeric<br />
buttons” (p. 35).<br />
Si no lo necesita, puede desconectar el procesador de reverberación<br />
(en el cual no se procesan ninguna de las 19 partes del<br />
<strong>EXR</strong>-5/<strong>EXR</strong>-3) o tan sólo evitar que se procese una de las partes<br />
del teclado. No se puede cambiar la cantidad de reverberación<br />
que se ha añadido a las partes del Arranger o de la Canción previamente<br />
grabada.<br />
●Activar/desactivar la reverberación<br />
Utilice el siguiente procedimiento si no quiere nada de reverberación<br />
(para ninguna de las partes del <strong>EXR</strong>-5/<strong>EXR</strong>-3), o<br />
para seleccionar otro tipo de reverberación.<br />
(1) Pulse el botón [FUNCTION] (debe iluminarse).<br />
(2) Utilice FAMILY [√][®] para seleccionar “EFFECTS”.<br />
Los parámetros de función del <strong>EXR</strong>-5/<strong>EXR</strong>-3 están divididos<br />
en 9 “familias”lógicas. Para la siguiente parte, es necesario<br />
seleccionar el grupo de efectos.<br />
(3) Utilice SELECT [√][®] para seleccionar el parámetro “REV”.<br />
Nota: Consulte también “Trabajar con FAMILY, SELECT y los<br />
botones numéricos” (p. 35).<br />
Si vous ne comptez pas utiliser cet effet, vous pouvez couper le<br />
processeur Reverb (il ne traite alors plus aucune des 19 parties<br />
de l’<strong>EXR</strong>-5/<strong>EXR</strong>-3) ou désactiver son traitement seulement pour<br />
la partie Keyboard voulue. Vous ne pouvez pas modifier la quantité<br />
de réverbération ajoutée aux parties de l’arrangeur ou de<br />
morceaux préenregistrés.<br />
●Activer/couper l’effet Reverb<br />
Pour couper complètement la réverbération (pour toutes les<br />
parties de l’<strong>EXR</strong>-5/<strong>EXR</strong>-3) ou choisir un autre type de<br />
réverbération, procédez comme suit.<br />
(1) Appuyez sur le bouton [FUNCTION] (il doit s’allumer).<br />
(2) Utilisez FAMILY [√][®] pour sélectionner “EFFECTS”.<br />
Les paramètres Function de l’<strong>EXR</strong>-5/<strong>EXR</strong>-3 sont divisés en 9<br />
“familles” selon une répartition logique. Pour effectuer cette<br />
procédure, il faut choisir le groupe des effets.<br />
(3) Utilisez SELECT [√][®] pour choisir le paramètre “REV”.<br />
Remarque: Voyez aussi “Utilisation des boutons FAMILY, SELECT<br />
et des boutons numériques” (p. 35).<br />
75
<strong>EXR</strong>-5/<strong>EXR</strong>-3<br />
(4) Use the [–]/[+] buttons to select “Off” if you don’t need<br />
the Reverb processor. Otherwise, select one of the eight<br />
available types:<br />
Type Explanation<br />
Room 1~3 These types simulate the Reverb characteristics<br />
of a room. The higher the number (1, 2, or<br />
3), the “bigger” the room becomes.<br />
Hall 1, 2 These types simulate the Reverb of a small (1)<br />
or large (2) concert hall and thus sound far<br />
“bigger” than the Room types above.<br />
Plate Digital simulation of a metal plate that is<br />
sometimes used for creating Reverb effects.<br />
Works well for percussive sounds.<br />
Delay A Delay effect (no Reverb). Works a lot like an<br />
echo effect and thus repeats the sounds.<br />
Pan Delay This is a stereo version of the preceding Delay<br />
effect. It creates repetitions that alternate<br />
between the left and right channels.<br />
(5) Play a few notes on the keyboard to audition the effect.<br />
●Changing the amount of Reverb processing for<br />
the Keyboard parts<br />
To change the Reverb depth (i.e. how much Reverb is added<br />
to a part), proceed as follows:<br />
(6) If the [FUNCTION] button still lights, use SELECT [√][®] to<br />
select one of the following parameters.<br />
Rev MAIN<br />
Reverb depth of the Main part.<br />
Rev DUAL<br />
Reverb depth of the Dual part.<br />
Rev SPLIT<br />
Reverb depth of the Split part.<br />
(If [FUNCTION] doesn’t light, first perform steps (1) and (2)<br />
above.)<br />
(4) Utilice los botones [–]/[+] para seleccionar “Off” si no<br />
necesita el procesador de reverberación. De lo contrario,<br />
seleccione uno de los ocho tipos disponibles:<br />
Type<br />
Room 1~3<br />
Hall 1, 2<br />
Plate<br />
Delay<br />
Pan Delay<br />
Explicación<br />
Estos tipos simulan las características Reverb<br />
de una habitación. Cuánto más alto es el<br />
número (1, 2, o 3), más “amplio” será el<br />
espacio.<br />
Estos tipos simulan el Reverb de una sala de<br />
conciertos pequeña (1) o grande (2) y, por<br />
tanto, suenan más “amplios” que los tipos<br />
Room anteriores.<br />
Simulación digital de una placa metálica que<br />
a veces se utiliza para crear efectos Reverb.<br />
Funciona bien con sonidos de percusión.<br />
Un efecto Delay (sin Reverb). Funciona igual<br />
que un efecto de eco y, por tanto, repite los<br />
sonidos.<br />
Es una versión estéreo del efecto Delay<br />
anterior. Crea repeticiones que alternan entre<br />
los canales izquierdo y derecho.<br />
(5) Toque unas cuantas notas en el teclado para escuchar el<br />
efecto.<br />
●Cambiar la cantidad de Reverb procesada para las<br />
partes del teclado<br />
Para cambiar la profundidad de reverberación (es decir,<br />
cuanta reverberación se añade a una parte), proceda de la<br />
siguiente manera:<br />
(6) Si el botón [FUNCTION] aún está iluminado, utilice SELECT<br />
[√][®] para seleccionar uno de los siguientes parámetros.<br />
Rev MAIN<br />
Profundidad de reverberación de la parte Main.<br />
Rev DUAL<br />
Profundidad de reverberación de la parte Dual.<br />
Rev SPLIT<br />
Profundidad de reverberación de la parte Split.<br />
(4) Utilisez les boutons [–]/[+] pour choisir “Off” si vous ne<br />
comptez pas travailler avec le processeur Reverb. Sinon,<br />
choisissez un des huit types disponibles:<br />
Type Description<br />
Room 1~3 Ces types simulent la réverbération d’une<br />
pièce. Plus le numéro est élevé (1, 2 ou 3), plus<br />
la pièce est “grande”.<br />
Hall 1, 2 Ces types simulent la réverbération d’une<br />
petite (1) ou grande (2) salle de concert et<br />
produisent un espace nettement plus vaste<br />
que les types Room ci-dessus.<br />
Plate Simulation numérique d’une plaque métallique<br />
parfois utilisée pour créer des effets de<br />
réverbération. Bons résultats avec les sons de<br />
percussion.<br />
Delay Effet Delay (pas de réverb). Fonctionne un peu<br />
comme un écho et répète les sons.<br />
Pan Delay Version stéréo de l’effet précédent. Crée des<br />
répétitions qui alternent entre les canaux<br />
gauche et droit.<br />
(5) Jouez quelques notes sur le clavier et écoutez l’effet.<br />
●Changer la quantité de réverbération appliquée<br />
aux parties Keyboard<br />
Pour changer l’intensité de la réverbération (c.-à-d. la quantité<br />
de réverbération ajoutée à une partie), procédez comme<br />
suit:<br />
(6) Si le bouton [FUNCTION] est toujours allumé, utilisez<br />
SELECT [√][®] pour choisir un des paramètres suivants.<br />
Rev MAIN<br />
Intensité de réverbération de la partie Main.<br />
Rev DUAL<br />
Intensité de réverbération de la partie Dual.<br />
Rev SPLIT<br />
Intensité de réverbération de la partie Split.<br />
(Si [FUNCTION] n’est pas allumé, effectuez d’abord les étapes<br />
(1) et (2) ci-dessus.)<br />
76
<strong>EXR</strong>-5/<strong>EXR</strong>-3<br />
(7) Use [–]/[+] to select “0” if you don’t want the selected Keyboard<br />
part to be processed by the Reverb effect. Otherwise,<br />
set the desired value.<br />
If you selected an MFX type (see p. 71), the Rev MAIN<br />
parameter no longer affects the Main part directly, but<br />
rather the MFX signal.<br />
When the MFX is set to “Off”<br />
Main<br />
Reverb<br />
Rev MAIN=<br />
Reverb for Main<br />
MFX “Off”<br />
When the MFX is set to any other type<br />
(Si [FUNCTION] no se ilumina, lleve a cabo primero los<br />
siguientes pasos (1) y (2).)<br />
(7) Utilice [–]/[+] para seleccionar “0” si no quiere que se procese<br />
la parte del teclado seleccionada por el efecto Reverb.<br />
De lo contrario, ajuste el valor deseado.<br />
Si ha seleccionado un tipo de MFX (consulte la página 71), el<br />
parámetro Rev MAIN ya no afecta directamente a la<br />
parte Main, pero si a la señal MFX.<br />
Cuando el MFX está ajustado a “Off”<br />
Main<br />
Reverb<br />
Rev MAIN=<br />
Reverberación para Main<br />
MFX “Off”<br />
(7) Choisissez “0” avec [–]/[+] si vous ne voulez pas traiter la<br />
partie Keyboard sélectionnée avec l’effet Reverb. Sinon,<br />
choisissez la valeur voulue.<br />
Si vous avez choisi un type MFX (voyez p. 71), le paramètre<br />
Rev MAIN n’affecte pas directement la partie Main mais<br />
le signal du MFX.<br />
Quand le MFX est réglé sur “Off”<br />
Main<br />
Reverb<br />
Rev MAIN=<br />
Réverb pour Main<br />
MFX “Off”<br />
Quand vous avez choisi tout autre type MFX<br />
Main<br />
Reverb<br />
Cuando el MFX está ajustado a cualquier<br />
Main<br />
Reverb<br />
MFX<br />
Rev MAIN=<br />
Reverb for Main + MFX<br />
“Rev Main= 100” then means: Reverb depth of the processed<br />
Main signal coming out of the MFX. This can be used<br />
for a variety of interesting applications: Distortion (MFX) +<br />
Reverb (REV), Rotary (MFX) + Plate (REV), etc.<br />
(8) Play a few notes on the keyboard to audition the effect.<br />
Do not forget to activate the Split or Dual part if you wish to<br />
audition its Reverb depth.<br />
Note: This setting can be saved to a User Program (see p. 94).<br />
(9) Press another “big” button in the DATA ENTRY section to<br />
leave this function.<br />
Main<br />
MFX<br />
Reverb<br />
Rev MAIN=<br />
Reverberación para Main + MFX<br />
“Rev Main= 100” significa que: La profundidad de reverberación<br />
de la señal Main procesada proviene del MFX. Se<br />
puede utilizar para una variedad de aplicaciones interesantes:<br />
Distorsión (MFX) + Reverberación (REV), Giratorio (MFX) +<br />
Placa (REV), etc.<br />
(8) Toque unas cuantas notas en el teclado para escuchar el<br />
efecto.<br />
No se olvide de activar la parte Split o Dual si desea escuchar<br />
su profundidad de reverberación.<br />
Nota: Este ajuste puede guardarse en un Programa de Usuario<br />
(consulte la página 94).<br />
(9) Pulse otro botón “big” en la sección DATA ENTRY para salir<br />
de esta función.<br />
MFX<br />
Rev MAIN=<br />
Réverb pour Main + MFX<br />
“Rev Main= 100” désigne alors: l’intensité de réverbération<br />
du signal Main traité sortant du processeur MFX. Vous<br />
pouvez utiliser ce réglage pour une palette d’applications<br />
intéressantes: Distortion (MFX) + Reverb (REV), Rotary (MFX)<br />
+ Plate (REV), etc.<br />
(8) Jouez quelques notes sur le clavier et écoutez l’effet.<br />
N’oubliez pas d’activer la partie Split ou Dual si vous voulez<br />
vérifier l’intensité de son effet Reverb.<br />
Remarque: Vous pouvez sauvegarder ce réglage dans un programme<br />
utilisateur (voyez p. 94).<br />
(9) Appuyez sur un autre “gros” bouton de la section DATA<br />
ENTRY pour quitter cette fonction.<br />
77
<strong>EXR</strong>-5/<strong>EXR</strong>-3<br />
Chorus<br />
Chorus broadens the spatial image of the sound and creates a<br />
stereo impression. You can choose from 8 types.<br />
When you switch on the <strong>EXR</strong>-5/<strong>EXR</strong>-3, none of the three Keyboard<br />
parts (Main, Dual, Split) are processed by the internal Chorus<br />
effect. Note also that the Chorus effect doesn’t affect the<br />
Main part if the MFX is set to anything but “Off”.<br />
If you don’t need Chorus, you can either switch off the Chorus<br />
processor (in which case none of the <strong>EXR</strong>-5/<strong>EXR</strong>-3’s 19 parts are<br />
processed) or prevent just one Keyboard part from being processed.<br />
You cannot change the amount of Chorus that is added<br />
to the Arranger or pre-recorded Song parts.<br />
Chorus<br />
Chorus amplía la imagen espacial del sonido y crea una impresión<br />
estéreo. Puede elegir entre 8 tipos.<br />
Cuando activa el <strong>EXR</strong>-5/<strong>EXR</strong>-3, ninguna de las tres partes del<br />
teclado (Main, Dual, Split) se procesa por el efecto Chorus<br />
interno. Fíjese también de que el efecto Chorus no afecta a la<br />
parte Main si el MFX está ajustado a lo que sea menos “Off”.<br />
Si no necesita Chorus, puede desconectar el procesador de Chorus<br />
(en el cual no se procesa ninguna de las 19 partes del <strong>EXR</strong>-5/<br />
<strong>EXR</strong>-3) o tan sólo evitar que se procese una de las partes del<br />
teclado. No se puede cambiar la cantidad de Chorus que se ha<br />
añadido a las partes del Arranger o de la Canción previamente<br />
grabada.<br />
Chorus<br />
Le Chorus élargit l’image spatiale du son et produit ainsi une<br />
impression stéréo. Vous avez le choix entre 8 types.<br />
A la mise sous tension de l’<strong>EXR</strong>-5/<strong>EXR</strong>-3, aucune des trois parties<br />
Keyboard (Main, Dual, Split) n’est traitée par l’effet Chorus.<br />
Notez en outre que l’effet Chorus n’affecte pas la partie Main<br />
si le MFX est réglé sur tout type autre que “Off”.<br />
Si vous ne comptez pas utiliser cet effet, vous pouvez couper le<br />
processeur Chorus (il ne traite alors plus aucune des 19 parties<br />
de l’<strong>EXR</strong>-5/<strong>EXR</strong>-3) ou désactiver son traitement seulement pour<br />
la partie Keyboard voulue. Vous ne pouvez pas modifier la quantité<br />
de Chorus ajoutée aux parties de l’arrangeur ou de morceaux<br />
préenregistrés.<br />
FUNCTION<br />
00Chorus 3<br />
Chorus 1<br />
Chorus 2<br />
Chorus 3<br />
Chorus 4<br />
FB Chorus<br />
Flanger<br />
S-Delay<br />
SDelayFb<br />
●Switching the Chorus effect on/off<br />
Use the following procedure if you want no Chorus at all (for<br />
none of the <strong>EXR</strong>-5/<strong>EXR</strong>-3’s parts), or to select another Chorus<br />
type.<br />
(1) Press the [FUNCTION] button (it must light).<br />
(2) Use FAMILY [√][®] to select “EFFECTS”.<br />
(3) Use SELECT [√][®] to select the “CHR” parameter:<br />
Note: See also “Working with the FAMILY, SELECT and numeric<br />
buttons” (p. 35).<br />
(4) Use the [–]/[+] buttons to select “Off” if you don’t need<br />
the Chorus processor. Otherwise, select one of the eight<br />
available types (see the list above).<br />
(5) Play a few notes on the keyboard to audition the effect.<br />
●Activar/desactivar el efecto de Chorus<br />
Utilice el siguiente procedimiento si no quiere nada de Chorus<br />
(para ninguna de las partes del <strong>EXR</strong>-5/<strong>EXR</strong>-3), o para<br />
seleccionar otro tipo de Chorus.<br />
(1) Pulse el botón [FUNCTION] (debe iluminarse).<br />
(2) Utilice FAMILY [√][®] para seleccionar “EFFECTS”.<br />
(3) Utilice SELECT [√][®] para seleccionar el parámetro “CHR”:<br />
Nota: Consulte también “Trabajar con FAMILY, SELECT y los<br />
botones numéricos” (p. 35).<br />
(4) Utilice los botones [–]/[+] para seleccionar “Off” si no<br />
necesita el procesador de Chorus. De lo contrario, seleccione<br />
uno de los ocho tipos disponibles (consulte la anterior<br />
lista).<br />
(5) Toque unas cuantas notas en el teclado para escuchar el<br />
efecto.<br />
●Activer/couper l’effet Chorus<br />
Pour couper complètement le Chorus (pour toutes les parties<br />
de l’<strong>EXR</strong>-5/<strong>EXR</strong>-3) ou choisir un autre type de Chorus, procédez<br />
comme suit.<br />
(1) Appuyez sur le bouton [FUNCTION] (il doit s’allumer).<br />
(2) Utilisez FAMILY [√][®] pour sélectionner “EFFECTS”.<br />
(3) Utilisez SELECT [√][®] pour sélectionner le paramètre “CHR”:<br />
Remarque: Voyez aussi “Utilisation des boutons FAMILY, SELECT<br />
et des boutons numériques” (p. 35).<br />
(4) Utilisez les boutons [–]/[+] pour choisir “Off” si vous ne<br />
comptez pas travailler avec le processeur Chorus. Sinon,<br />
choisissez un des huit types disponibles (voyez la liste cidessus).<br />
(5) Jouez quelques notes sur le clavier et écoutez l’effet.<br />
78
<strong>EXR</strong>-5/<strong>EXR</strong>-3<br />
●Changing the amount of Chorus processing for<br />
the Keyboard parts<br />
To change the Chorus depth (i.e. how much Chorus is added<br />
to a part), proceed as follows:<br />
(6) If the [FUNCTION] button still lights, use SELECT [√][®] to<br />
select one of the following parameters.<br />
Chr MAIN<br />
Chorus depth of the Main part*.<br />
Chr DUAL<br />
Chorus depth of the Dual part.<br />
Chr SPLIT<br />
Chorus depth of the Split part.<br />
(*) Though this parameter is displayed even when MFX is set to something<br />
else than “Off”, the Main part is not processed by the Chorus effect.<br />
(If [FUNCTION] doesn’t light, first perform steps (1) and (2)<br />
above.)<br />
(7) Use [–]/[+] to select “0” if you don’t want the selected Keyboard<br />
part to be processed by the Chorus effect. Otherwise,<br />
set the desired value.<br />
If you selected an MFX type (see p. 71), the Chr MAIN<br />
parameter has no effect (even though it is displayed).<br />
When the MFX is set to “Off”<br />
Main<br />
Main<br />
MFX “Off”<br />
When the MFX is set to any other type<br />
MFX<br />
Reverb<br />
Chorus<br />
Reverb<br />
Chorus<br />
(8) Play a few notes on the keyboard to audition the effect.<br />
Do not forget to activate the Split or Dual part if you wish to<br />
audition its Chorus depth.<br />
●Cambiar la cantidad de Chorus procesado para las<br />
partes del teclado<br />
Para cambiar la profundidad de Chorus (es decir, cuanto<br />
Chorus se añade a una parte), proceda de la siguiente<br />
manera:<br />
(6) Si el botón [FUNCTION] aún está iluminado, utilice SELECT<br />
[√][®] para seleccionar uno de los siguientes parámetros.<br />
Chr MAIN<br />
Profundidad de Chorus de la parte Main*.<br />
Chr DUAL<br />
Profundidad de Chorus de la parte Dual.<br />
Chr SPLIT<br />
Profundidad de Chorus de la parte Split.<br />
(*) Aunque este parámetro se visualiza incluso cuando el MFX no está<br />
ajustado a “Off”, la parte Main no se procesa mediante el efecto Chorus.<br />
(Si [FUNCTION] no se ilumina, lleve a cabo primero los<br />
siguientes pasos (1) y (2).)<br />
(7) Utilice [–]/[+] para seleccionar “0” si no quiere que se procese<br />
la parte del teclado seleccionada por el efecto Chorus.<br />
De lo contrario, ajuste el valor deseado.<br />
Si ha seleccionado un tipo MFX (consulte la página 71), el<br />
parámetro Chr MAIN no tiene efecto (aunque se visualice).<br />
Cuando el MFX está ajustado a “Off”<br />
Reverb<br />
Main<br />
Chorus<br />
MFX “Off”<br />
Cuando el MFX está ajustado a cualquier otro tipo<br />
Main<br />
MFX<br />
Reverb<br />
Chorus<br />
(8) Toque unas cuantas notas en el teclado para escuchar el<br />
efecto.<br />
No se olvide de activar la parte Split o Dual si desea escuchar<br />
su profundidad de Chorus.<br />
●Changer la quantité de Chorus appliquée aux parties<br />
Keyboard<br />
Pour changer l’intensité du Chorus (c.-à-d. la quantité de<br />
Chorus ajoutée à une partie), procédez comme suit:<br />
(6) Si le bouton [FUNCTION] est toujours allumé, utilisez<br />
SELECT [√][®] pour choisir un des paramètres suivants.<br />
Chr MAIN<br />
Intensité de Chorus de la partie Main*.<br />
Chr DUAL<br />
Intensité de Chorus de la partie Dual.<br />
Chr SPLIT<br />
Intensité de Chorus de la partie Split.<br />
(*) Bien que ce paramètre soit aussi affiché quand le MFX est réglé sur un<br />
type autre que “Off”, la partie Main n’est dans ce cas pas traitée par l’effet<br />
Chorus.<br />
(Si [FUNCTION] n’est pas allumé, effectuez d’abord les étapes<br />
(1) et (2) ci-dessus.)<br />
(7) Choisissez “0” avec [–]/[+] si vous ne voulez pas traiter la<br />
partie Keyboard sélectionnée avec l’effet Chorus. Sinon,<br />
choisissez la valeur voulue.<br />
Si vous avez choisi un type MFX (voyez p. 71), le paramètre<br />
Chr MAIN n’a aucun effet (même s’il est affiché).<br />
Quand le MFX est réglé sur “Off”<br />
Main<br />
MFX “Off”<br />
Reverb<br />
Chorus<br />
Quand vous avez choisi tout autre type MFX<br />
Main<br />
MFX<br />
Reverb<br />
Chorus<br />
(8) Jouez quelques notes sur le clavier et écoutez l’effet.<br />
N’oubliez pas d’activer la partie Split ou Dual si vous voulez<br />
vérifier l’intensité de son effet Chorus.<br />
79
<strong>EXR</strong>-5/<strong>EXR</strong>-3<br />
Note: This setting can be saved to a User Program (see p. 94).<br />
(9) Press another “big” button in the DATA ENTRY section to<br />
leave this function.<br />
Nota: Este ajuste puede guardarse en un Programa de Usuario<br />
(consulte la página 94).<br />
(9) Pulse otro botón “big” en la sección DATA ENTRY para salir<br />
de esta función.<br />
Remarque: Vous pouvez sauvegarder ce réglage dans un programme<br />
utilisateur (voyez p. 94).<br />
(9) Appuyez sur un autre “gros” bouton de la section DATA<br />
ENTRY pour quitter cette fonction.<br />
V-LINK function<br />
V-LINK is a function that provides for the integration of music<br />
and visual material. By using V-LINK-compatible video devices<br />
(i.e. an Edirol DV-7PR), visual effects can be easily linked to, and<br />
made part of the expressive elements of a performance.<br />
By using the <strong>EXR</strong>-5/<strong>EXR</strong>-3 with an Edirol DV-7PR, you can:<br />
• Use the <strong>EXR</strong>-5/<strong>EXR</strong>-3’s keyboard (highest octave) to switch<br />
images (clips). Press and hold a key for longer transition<br />
(“fade”). Briefly press a key for fast transitions.<br />
• The numeric buttons [0]~[9] are used for switching palettes<br />
(only if the [USER¥PROGRAM] button lights).<br />
• Use the BENDER axis of the BENDER/MODULATION lever to<br />
change the playback speed of the picture material or to<br />
select a different color.<br />
• Use the COVER buttons to change the effect (VFX1~4).<br />
V-Link signals can be transmitted via MIDI OUT.<br />
Función V-LINK<br />
V-LINK es una función que proporciona la integración de material<br />
musical y visual. Utilizando dispositivos de vídeo compatibles<br />
con V-LINK (es decir, un Edirol DV-7PR), los efectos visuales<br />
pueden enlazarse fácilmente, e integrarse en los elementos<br />
expresivos de una interpretación.<br />
Utilizando el <strong>EXR</strong>-5/<strong>EXR</strong>-3 con un Edirol DV-7PR, puede:<br />
• Utilizar el teclado del <strong>EXR</strong>-5/<strong>EXR</strong>-3 (octava superior) para<br />
conmutar imágenes (clips). Pulse y mantenga pulsada una<br />
tecla para transiciones más lentas (“fade”). Pulse una tecla<br />
brevemente para transiciones rápidas.<br />
• Los botones numéricos [0]~[9] se utilizan para conmutar paletas<br />
(sólo si se ilumina el botón [USER¥PROGRAM]).<br />
• Utilizar el eje BENDER de la palanca BENDER/MODULATION<br />
para cambiar la velocidad de reproducción del material visual<br />
o para seleccionar un color diferente.<br />
• Utilizar los botones COVER para cambiar el efecto (VFX1~4).<br />
Las señales V-Link se pueden transmitir mediante MIDI OUT<br />
Fonction V-LINK<br />
V-LINK est une fonction qui permet de relier musique et vidéo. Si<br />
vous utilisez du matériel vidéo compatible V-LINK (c.-à-d. un<br />
DV-7P Edirol), vous pouvez lier des effets visuels aux effets<br />
sonores et conférer plus d’expression encore à votre exécution.<br />
Grâce à l’utilisation combinée de l’<strong>EXR</strong>-5/<strong>EXR</strong>-3 et d’un DV-7PR<br />
Edirol, vous pouvez:<br />
• Déclencher des changements d’images (clips) avec le clavier<br />
(l’octave la plus haute) de l’<strong>EXR</strong>-5/<strong>EXR</strong>-3. Maintenez une touche<br />
enfoncée pour allonger la transition (“fondu”). Enfoncez<br />
brièvement une touche pour produire une courte transition.<br />
• Les boutons numériques [0]~[9] servent à changer de palettes<br />
(à condition que le bouton [USER¥PROGRAM] soit allumé).<br />
• Utiliser l’axe BENDER du levier BENDER/MODULATION pour<br />
changer la vitesse de défilement des images ou choisir une<br />
couleur différente.<br />
• Utiliser les boutons COVER pour changer d’effet (VFX1~4).<br />
Les signaux V-Link peuvent être transmis par la prise MIDI OUT.<br />
REMOTE<br />
Edirol UM-1<br />
Edirol DV-7PR<br />
MIDI OUT<br />
BEAT<br />
80
<strong>EXR</strong>-5/<strong>EXR</strong>-3<br />
(1) Connect the <strong>EXR</strong>-5/<strong>EXR</strong>-3’s MIDI OUT socket to the MIDI<br />
IN socket of the external video processor (or to a UM-1<br />
interface).<br />
(2) .Press the [V-LINK] button (it lights blue).<br />
(3) Use the BENDER, the assigned buttons or “V-LINK” keys<br />
(highest octave) to manipulate the video pictures in sync<br />
with your music (see below).<br />
(4) Press [V-LINK] again to switch off this function (the button<br />
goes dark).<br />
V-LINK functions that the <strong>EXR</strong>-5/<strong>EXR</strong>-3 can control<br />
(and corresponding MIDI messages)<br />
The <strong>EXR</strong>-5/<strong>EXR</strong>-3 provides the following functions for controlling<br />
V-LINK compatible video equipment.<br />
• Keyboard: Clip 1~8→ Program Change: 00H~08H<br />
Press the keys in the highest octave to switch clips.<br />
• Keyboard velocity: Dissolve Time→ CC23<br />
The velocity of the keys in the highest octave controls the<br />
speed of transition between images.<br />
• [1]~[0] buttons (if the [USER¥PROGRAM] button lights): Palette<br />
1~10→ CC00 (Bank Select)/00H~09H<br />
While the [V-LINK] button lights, press buttons [1]~[0] to<br />
switch palettes 1~10. (The numeric buttons also perform<br />
their “normal” functions.)<br />
• BENDER axis of the BENDER/MODULATION lever: Playback<br />
Speed→ Pitch Bend<br />
Moving the lever toward the right will speed up playback,<br />
and moving it toward the left will slow down playback. At<br />
the center position, playback speed will be normal.<br />
• MODULATION axis of the BENDER/MODULATION lever: Clip<br />
color→ CC24 (Color CB), CC25 (Color CR)<br />
Press the lever towards the rear of the <strong>EXR</strong>-5/<strong>EXR</strong>-3 to<br />
change the color. There are five steps that can be selected by<br />
pressing the lever several times: green, violet, blue, red, original<br />
clip color.<br />
(1) Conecte el zócalo MIDI OUT del <strong>EXR</strong>-5/<strong>EXR</strong>-3 al zócalo<br />
MIDI IN del procesador de vídeo externo (o un interface<br />
UM-1).<br />
(2) Pulse el botón [V-LINK] (se iluminará en azul).<br />
(3) Utilice el BENDER, los botones asignados o las teclas<br />
“V-LINK” (octava superior) para manipular las imágenes<br />
del vídeo en la sincronización con su música (vea a continuación).<br />
(4) Pulse el botón [V-LINK] otra vez para desactivar esta función<br />
(el botón se oscurece).<br />
Funciones V-LINK que el <strong>EXR</strong>-5/<strong>EXR</strong>-3 puede controlar<br />
(y mensajes MIDI correspondientes)<br />
El <strong>EXR</strong>-5/<strong>EXR</strong>-3 proporciona las siguientes funciones para controlar<br />
los equipos de vídeo compatibles con V-LINK.<br />
• Teclado: Clip 1~8→ Program Change: 00H~08H<br />
Pulse las teclas de la octava superior para integrar clips.<br />
• Velocidad del teclado: Dissolve Time→ CC23<br />
La velocidad de las teclas en la octava superior controla la<br />
velocidad de transición entre imágenes.<br />
• [1]~Botones [0] (si se ilumina el botón [USER¥PROGRAM]):<br />
Palette 1~10→ CC00 (Bank Select)/00H~09H<br />
Mientras el botón [V-LINK] se ilumina, pulse los botones<br />
[1]~[0] para conmutar las paletas 1~10. (Los botones numéricos<br />
también realizan sus funciones “normales”.)<br />
• BENDER eje de la palanca BENDER/MODULATION: Velocidad<br />
de reproducción→ Pitch Bend<br />
Mover la palanca hacia la derecha acelerará la reproducción,<br />
y moverla hacia la izquierda la disminuirá. En la posición central,<br />
la velocidad de reproducción será normal.<br />
• MODULATION eje de la palanca BENDER/MODULATION: Clip<br />
color→ CC24 (Color CB), CC25 (Color CR)<br />
Pulse la palanca hacia la parte posterior del <strong>EXR</strong>-5/<strong>EXR</strong>-3<br />
para cambiar el color. Se pueden seleccionar cinco pasos pulsando<br />
la palanca varias veces: verde, violeta, azul, rojo, color<br />
original del clip.<br />
(1) Reliez la prise MIDI OUT de l’<strong>EXR</strong>-5/<strong>EXR</strong>-3 à la prise MIDI<br />
IN du processeur vidéo externe (ou une interface UM-1).<br />
(2) Appuyez sur le bouton [V-LINK] (il s’allume en bleu).<br />
(3) Servez-vous de l’axe BENDER, des boutons assignés ou des<br />
touches “V-LINK” (l’octave la plus haute) pour manipuler<br />
les images vidéo en synchronisation avec votre musique<br />
(voyez ci-dessous).<br />
(4) Appuyez à nouveau sur [V-LINK] pour désactiver cette<br />
fonction (le bouton s’éteint).<br />
Fonctions V-LINK pilotables par l’<strong>EXR</strong>-5/<strong>EXR</strong>-3 et<br />
messages MIDI correspondants<br />
L’<strong>EXR</strong>-5/<strong>EXR</strong>-3 offre les fonctions suivantes pour piloter du<br />
matériel vidéo compatible V-LINK.<br />
• Clavier: Clip 1~8→ Changement de programme: 00H~08H<br />
Enfoncez les touches de l’octave la plus haute pour changer<br />
de clip.<br />
• Dynamique du clavier: Dissolve Time→ CC23<br />
Le toucher appliqué aux touches de l’octave la plus haute<br />
pilote la vitesse de transition entre les images.<br />
• Boutons [1]~[0] (si le bouton [USER¥PROGRAM] est allumé):<br />
Palette 1~10→ CC00 (sélection de banque)/00H~09H<br />
Quand le bouton [V-LINK] est allumé, vous pouvez choisir les<br />
palettes 1~10 en appuyant sur les boutons [1]~[0]. (Les boutons<br />
numériques conservent leurs fonctions “normales”.)<br />
• Axe BENDER du levier BENDER/MODULATION: Vitesse de<br />
défilement→ Pitch Bend<br />
Déplacez le levier vers la droite pour accélérer le défilement<br />
des images ou vers la gauche pour le ralentir. En position<br />
centrale, la vitesse de défilement est normale.<br />
• Axe MODULATION du levier BENDER/MODULATION: Clip<br />
Color→ CC24 (Color CB), CC25 (Color CR)<br />
Poussez le levier vers l’arrière de l’<strong>EXR</strong>-5/<strong>EXR</strong>-3 pour changer<br />
la couleur. Chaque manipulation du levier sélectionne une<br />
des cinq couleurs disponibles: vert, violet, bleu, rouge, couleur<br />
originale du clip.<br />
81
<strong>EXR</strong>-5/<strong>EXR</strong>-3<br />
• COVER buttons: VFX1~4, None (ACOUSTIC= None,<br />
POP= V-FX 1, ROCK= V-FX 2, DANCE= V-FX 3,<br />
ETHNIC= V-FX 4)<br />
Use these buttons to change the video effects. This function<br />
is not available if the receiving video processor is already set<br />
to “Off”.<br />
Note: VFX2 is not supported by the DV-7.<br />
Note: All V-LINK messages are transmitted on MIDI channels 13<br />
and 14.<br />
• Botones COVER: VFX1~4, Ninguno (ACOUSTIC= Ninguno,<br />
POP= V-FX 1, ROCK= V-FX 2, DANCE= V-FX 3,<br />
ETHNIC= V-FX 4)<br />
Utilice estos botones para cambiar los efectos de vídeo. Esta<br />
función no está disponible si el procesador del vídeo de<br />
recepción ya está ajustado a “Off”.<br />
Nota: VFX2 no es compatible con DV-7.<br />
Nota: Todos los mensajes V-LINK se transmiten en los canales<br />
MIDI 13 y 14.<br />
• Boutons COVER: VFX1~4, None (ACOUSTIC= None,<br />
POP= V-FX 1, ROCK= V-FX 2, DANCE= V-FX 3,<br />
ETHNIC= V-FX 4)<br />
Utilisez ces boutons pour changer d’effet vidéo. Cette fonction<br />
n’est pas disponible si le processeur vidéo récepteur est<br />
déjà réglé sur “Off”.<br />
Remarque: Le DV-7 ne propose pas de VFX2.<br />
Remarque: Tous les messages V-LINK sont transmis sur les<br />
canaux MIDI 13 et 14.<br />
82
<strong>EXR</strong>-5/<strong>EXR</strong>-3<br />
11. Function menu<br />
The <strong>EXR</strong>-5/<strong>EXR</strong>-3’s Function mode contains more advanced settings<br />
you may not need every day. They allow you to fine-tune<br />
your instrument’s response. It would therefore be a good idea to<br />
familiarize yourself with these parameters. Most settings (“*”)<br />
can be written to a User Program (see p. 94). Other parameters<br />
(“°”) are saved to the Flash memory when you leave the Function<br />
mode.<br />
Editing parameters (general<br />
procedure)<br />
You can edit the <strong>EXR</strong>-5/<strong>EXR</strong>-3’s Function parameters via the<br />
display. Here is a general outline of the procedure for all parameters<br />
discussed below:<br />
11. Menú Function<br />
El modo Function del <strong>EXR</strong>-5/<strong>EXR</strong>-3 contiene más ajustes avanzados<br />
de los que posiblemente vaya a necesitar a diario. Éstos le<br />
permiten ajustar con gran precisión la respuesta del instrumento.<br />
Por lo tanto, es aconsejable que se familiarice con estos<br />
parámetros. La mayoría de ajustes (“*”) se pueden escribir en un<br />
programa de usuario (consulte la página 94). Otros parametros<br />
(“°”) se salvan al salir del modo Function.<br />
Editar parámetros (procedimiento<br />
general)<br />
Puede editar los parámetros Function del <strong>EXR</strong>-5/<strong>EXR</strong>-3 mediante<br />
la pantalla. A continuación, se describe el proceso general que se<br />
utilizará para todos los siguientes parámetros:<br />
11. Menu Function<br />
Le mode Function de l’<strong>EXR</strong>-5/<strong>EXR</strong>-3 contient des paramètres<br />
plus sophistiqués dont vous n’aurez sans doute pas besoin tous<br />
les jours. Ces paramètres servent à affiner la réponse de votre<br />
instrument. Nous vous recommandons donc de vous familiariser<br />
avec leur utilisation. Vous pouvez mémoriser la plupart des<br />
réglages (“*”) dans un programme utilisateur (voyez p. 94).<br />
D’autres paramètres (“°”) sont sauvegardés en mémoire Flash<br />
lorsque vous quittez le mode Function.<br />
Edition de paramètres (procédure<br />
générale)<br />
Vous pouvez éditer les paramètres Function de l’<strong>EXR</strong>-5/<strong>EXR</strong>-3 à<br />
l’écran. Voici la procédure générale que vous appliquerez à tous<br />
les paramètres dont il est question ici:<br />
SELECT<br />
FUNCTION<br />
FAMILY<br />
(1) Press [FUNCTION].<br />
(2) Use FAMILY [√][®] to select the Function group that contains<br />
the desired parameter:<br />
■ KB SET: KbdTouch, MsterTune, Transpos, TransMod, PB<br />
Range, KeySplit, SpltHold, SpltInt, FSW<br />
■ METRONOM: Mtro TS, MetroVol, Count-In<br />
■ OCTAVE: MAIN Oct, DUAL Oct, SPLT Oct<br />
■ VOLUME: Main Vol, Dual Vol, SplitVol, Auto Bass,<br />
AccDrums, AccBass, Accomp<br />
■ ARR SET: ArrChord, Arr Hold, IntMode, EP Chord, Bass Inv,<br />
MI (Melody Intelligence)<br />
■ EFFECTS: REV (Reverb), CHR (Chorus), MFX, Tone MFX, Rev<br />
MAIN, Chr MAIN, Pan MAIN, Rev DUAL, Chr DUAL, Pan DUAL,<br />
RevSPLIT, ChrSPLIT, PanSPLIT<br />
■ KB SCALE: Scale C/C#/D/Eb/E/F/F#/G/Ab/A/Bb/B, Scale<br />
Mode<br />
(1) Pulse [FUNCTION].<br />
(2) Utilice FAMILY [√][®] para seleccionar el grupo Function<br />
que contiene el parámetro deseado:<br />
■KB SET: KbdTouch, MsterTune, Transpos, TransMod, PB<br />
Range, KeySplit, SpltHold, SpltInt, FSW<br />
■METRONOM: Mtro TS, MetroVol, Count-In<br />
■OCTAVE: MAIN Oct, DUAL Oct, SPLT Oct<br />
■VOLUME: Main Vol, Dual Vol, SplitVol, Auto Bass, Acc-<br />
Drums, AccBass, Accomp<br />
■ARR SET: ArrChord, Arr Hold, IntMode, EP Chord, Bass Inv,<br />
MI (Melody Intelligence)<br />
■EFFFECTS: REV (Reverb), CHR (Chorus), MFX, Tone MFX, Rev<br />
MAIN, Chr MAIN, Pan MAIN, Rev DUAL, Chr DUAL, Pan DUAL,<br />
RevSPLIT, ChrSPLIT, PanSPLIT<br />
■KB SCALE: Scale C/C#/D/Eb/E/F/F#/G/Ab/A/Bb/B, Scale Mode<br />
(1) Appuyez sur [FUNCTION].<br />
(2) Utilisez FAMILY [√][®] pour choisir le groupe Function contenant<br />
le paramètre voulu:<br />
■ KB SET: KbdTouch, MsterTune, Transpos, TransMod, PB<br />
Range, KeySplit, SpltHold, SpltInt, FSW<br />
■ METRONOM: Mtro TS, MetroVol, Count-In<br />
■ OCTAVE: MAIN Oct, DUAL Oct, SPLT Oct<br />
■ VOLUME: Main Vol, Dual Vol, SplitVol, Auto Bass,<br />
AccDrums, AccBass, Accomp<br />
■ ARR SET: ArrChord, Arr Hold, IntMode, EP Chord, Bass Inv,<br />
MI (Melody Intelligence)<br />
■ EFFECTS: REV (Reverb), CHR (Chorus), MFX, Tone MFX, Rev<br />
MAIN, Chr MAIN, Pan MAIN, Rev DUAL, Chr DUAL, Pan DUAL,<br />
RevSPLIT, ChrSPLIT, PanSPLIT<br />
■ KB SCALE: Scale C/C#/D/Eb/E/F/F#/G/Ab/A/Bb/B, Scale<br />
Mode<br />
83
<strong>EXR</strong>-5/<strong>EXR</strong>-3<br />
■ MIDI: Local, MidiTxRx, Sync Rx, Style PC, LyricsTx,<br />
NTARx14, PicthBnd, Modulatn, ProgChng, Velo Rx, Clock Tx,<br />
StartStp, SongPosP<br />
■ UTILITY: InitFLASH, Resume<br />
■ WriteSNG (see p. 103)<br />
■ WriteSTL (see p. 104)<br />
■ RemoveSNG (see p. 106)<br />
■ Remove STL (see p. 107)<br />
(3) Use SELECT [√][®] to select the parameter you wish to edit<br />
(see below).<br />
Note: In FUNCTION mode, SELECT [√][®] do not allow you to<br />
jump from one family to the next.<br />
The “VALUE” message and a setting appear to signal that you<br />
can change (“edit”) the selected parameter.<br />
(4) Use the DATA ENTRY [–]/[+] or numeric buttons (only for<br />
values) to modify the setting of the selected parameter.<br />
Note: See also “Working with the FAMILY, SELECT and numeric<br />
buttons” (p. 35).<br />
Note: To return to the default value of the currently selected<br />
parameter, press [+] and [–] simultaneously.<br />
(5) Use FAMILY [√][®] to select another Function parameter.<br />
(6) Continue with step (3).<br />
(7) Press another “big” button in the DATA ENTRY section to<br />
leave this function.<br />
KB SET parameters<br />
■ Kbd Touch*<br />
(1~127, Default setting: 110) Use this parameter to set the<br />
<strong>EXR</strong>-5/<strong>EXR</strong>-3’s fixed velocity value that will be used when the<br />
KEY TOUCH icon is not displayed. See p. 68.<br />
Note: This parameter can also be selected by pressing and holding<br />
[KEYBOARD¥TOUCH].<br />
■ MstrTune° (Master Tune)<br />
(427.4~452.6, Default setting: 440.0) This parameter allows you<br />
to change the <strong>EXR</strong>-5/<strong>EXR</strong>-3’s overall tuning, which may be necessary<br />
when you accompany a singer, an acoustic instrument,<br />
or when you play to a recording on CD or cassette.<br />
■MIDI. Local, MidiTxRx, Sync Rx, Style PC, LyricsTx, NTARx14,<br />
PicthBnd, Modulatn, ProgChng, Velo Rx, Clock Tx, StartStp,<br />
SongPosP<br />
■UTILITY: InitFLASH, Resume<br />
■WriteSNG (consulte la página 103)<br />
■WriteSTL (consulte la página 104)<br />
■RemoveSNG (consulte la página 106)<br />
■Remove STL (consulte la página 107)<br />
(3) Utilice SELECT [√][®]para seleccionar el parámetro que<br />
desee editar (consulte a continuación).<br />
Nota: En el modo FUNCTION, SELECT [√][®] no permite pasar de<br />
una familia a la siguiente.<br />
Aparecen el mensaje “VALUE” y un ajuste para indicar que<br />
puede cambiar (“editar”) el parámetro seleccionado.<br />
(4) Utilice DATA ENTRY [–]/[+] o los botones numéricos (sólo<br />
para valores) para modificar el ajuste del parámetro seleccionado.<br />
Nota: Consulte también “Trabajar con FAMILY, SELECT y los<br />
botones numéricos” (p. 35).<br />
Nota: Para volver al valor por defecto del parámetro actualmente<br />
seleccionado, pulse [+] y [–] simultáneamente.<br />
(5) Utilice FAMILY [√][®] para seleccionar otro parámetro<br />
Function.<br />
(6) Continúe con el paso (3).<br />
(7) Pulse otro botón “big” en la sección DATA ENTRY para salir<br />
de esta función.<br />
Parámetros KB SET<br />
■Kbd Touch*<br />
(1~127, Ajuste por defecto: 110) Utilice este parámetro para<br />
ajustar el valor de la velocidad fijada del <strong>EXR</strong>-5/<strong>EXR</strong>-3 que se<br />
utilizará cuando no se visualice el icono KEY TOUCH . Consulte la<br />
p. 68.<br />
Nota: Este parámetro también puede seleccionarse pulsando y<br />
manteniendo pulsado [KEYBOARD¥TOUCH].<br />
■MstrTune° (Afinación Master)<br />
(427.4~452.6, Ajuste por defecto: 440.0) Este parámetro le permite<br />
cambiar la afinación general del <strong>EXR</strong>-5/<strong>EXR</strong>-3, lo cual<br />
puede ser necesario para acompañar a un cantante, a un instrumento<br />
acústico, o cuando toque en una grabación en CD o en<br />
cassette.<br />
■ MIDI: Local, MidiTxRx, Sync Rx, Style PC, LyricsTx,<br />
NTARx14, PicthBnd, Modulatn, ProgChng, Velo Rx, Clock Tx,<br />
StartStp, SongPosP<br />
■ UTILITY: InitFLASH, Resume<br />
■ WriteSNG (voyez p. 103)<br />
■ WriteSTL (voyez p. 104)<br />
■ RemoveSNG (voyez p. 106)<br />
■ Remove STL (voyez p. 107)<br />
(3) Utilisez SELECT [√][®] pour choisir le paramètre à éditer<br />
(voyez ci-dessous).<br />
Remarque: En mode FUNCTION, SELECT [√][®] ne permettent pas<br />
de passer d’une famille à l’autre.<br />
Le message “VALUE” et un réglage s’affichent, indiquant que<br />
vous pouvez modifier (“éditer”) le paramètre en question.<br />
(4) Utilisez DATA ENTRY [–]/[+] ou les boutons numériques<br />
(uniquement pour des valeurs) pour modifier le réglage du<br />
paramètre choisi.<br />
Remarque: Voyez aussi “Utilisation des boutons FAMILY, SELECT<br />
et des boutons numériques” (p. 35).<br />
Remarque: Pour retrouver la valeur par défaut du paramètre<br />
choisi, appuyez simultanément sur [+] et [–].<br />
(5) Utilisez FAMILY [√][®] pour sélectionner un autre paramètre<br />
Function.<br />
(6) Poursuivez avec l’étape (3).<br />
(7) Appuyez sur un autre “gros” bouton de la section DATA<br />
ENTRY pour quitter cette fonction.<br />
Paramètres KB SET<br />
■ Kbd Touch*<br />
(1~127, Réglage par défaut: 110) Ce paramètre permet de<br />
régler la valeur de toucher fixe de l’<strong>EXR</strong>-5/<strong>EXR</strong>-3 utilisée quand<br />
l’icône KEY TOUCH n’est pas affichée. Voyez p. 68.<br />
Remarque: Vous pouvez aussi choisir ce paramètre en maintenant<br />
enfoncé [KEYBOARD¥TOUCH].<br />
■ MstrTune° (Master Tune)<br />
(427.4~452.6, Réglage par défaut: 440.0) Ce paramètre permet<br />
de changer l’accord global de l’<strong>EXR</strong>-5/<strong>EXR</strong>-3, ce qui peut se<br />
révéler nécessaire quand vous accompagnez un chanteur, un<br />
instrument acoustique ou quand vous jouez en accompagnant<br />
une cassette ou un CD.<br />
84
<strong>EXR</strong>-5/<strong>EXR</strong>-3<br />
■ Transpos*<br />
(–12~12, Default setting: 0) Use this parameter to transpose<br />
the <strong>EXR</strong>-5/<strong>EXR</strong>-3 in semitones. If you’re not sure what transposition<br />
is, see p. 65. This parameter can also be selected by pressing<br />
the [TRANSPOSE] button.<br />
■ TransMod*<br />
(Default setting: Int+Song) This parameter allows you to specify<br />
which parts should be affected by the Transpose setting:<br />
Int: The Keyboard and Arranger parts will be transposed. Notes<br />
received via MIDI, however, will be played without change.<br />
Song: Only the Song parts will be transposed. This is only<br />
meaningful when you play back a Standard MIDI File or one of<br />
your own songs with the <strong>EXR</strong>-5/<strong>EXR</strong>-3’s Recorder.<br />
MIDI: Only the notes received via MIDI will be transposed.<br />
Int+Sng, Int+MIDI, Sng+MIDI, All: These are combinations of<br />
the above. Int could be useful to transpose only the Keyboard<br />
parts so that you can play to a Recorder song in “your” key but<br />
sound in the song’s key.<br />
■ PB Range° (Pitch Bend Range)<br />
(0~24, Default setting: 2) This parameter allows you to set the<br />
interval that will be used when you push the BENDER/MODU-<br />
LATION lever fully to the left or to the right (Pitch Bend effect).<br />
You can set this parameter in semitone steps, with a maximum<br />
of 24 semitones (2 octaves), the default value being “2”, which<br />
should be OK in most situations.<br />
Note: Pitch Bend is only available for the Main, Dual and Split<br />
parts. See also p. 69.<br />
■ KeySplit* (Split point)<br />
(48~84, Default setting: 60) Use this parameter to set the split<br />
point for the Arranger mode and the Split part. The note you<br />
set here is the lowest note you can play with the Main part. The<br />
number refers to a note. “60” corresponds to the note “C4”.<br />
Note: You can also select this parameter by pressing and holding<br />
the [ARRANGER/BAND] button.<br />
■Transpos*<br />
(–12~12, Ajuste por defecto: 0) Utilice este parámetro para<br />
transponer el <strong>EXR</strong>-5/<strong>EXR</strong>-3 en semitonos. Si no está seguro de<br />
lo que es la transposición, consulte p. 65. Este parámetro también<br />
puede seleccionarse pulsando el botón [TRANSPOSE].<br />
■TransMod*<br />
(Ajuste por defecto: Int+Song) Este parámetro le permite especificar<br />
qué partes deberían verse afectadas por el ajuste Transpose:<br />
Int: Se transpondrán las partes del Teclado y Arranger. No obstante,<br />
las notas recibidas mediante MIDI se reproducirán sin<br />
cambios.<br />
Song: Sólo se transpondrán las partes de la Canción. Éste sólo<br />
es significativo cuando reproduzca un Archivo MIDI Estándar o<br />
una de sus propias canciones con el Grabador del <strong>EXR</strong>-5/<strong>EXR</strong>-3.<br />
MIDI: Sólo se transpondrán las notas recibidas a través de MIDI.<br />
Int+Sng, Int+MIDI, Sng+MIDI, All: Estas son combinaciones<br />
de los anteriores. Int puede resultar útil para transponer sólo las<br />
partes del Teclado, de forma que puede tocar una canción del<br />
Grabador en “su” tono, pero sonando en el tono de la canción.<br />
■PB Range° (Pitch Bend Range)<br />
(0~24, Ajuste por defecto: 2) Este parámetro le permite establecer<br />
el intervalo que se utilizará al presionar la palanca BENDER/<br />
MODULATION completamente hacia la izquierda o hacia la<br />
derecha (efecto Pitch Bend). Puede ajustar este parámetro en<br />
intervalos de semitono, con un máximo de 24 semitonos (2<br />
octavas), el valor por defecto será “2”, el cual es aceptable en la<br />
mayoría de situaciones.<br />
Nota: Pitch Bend sólo está disponible para las partes Main, Dual y<br />
Split. Consulte también p. 69.<br />
■KeySplit* (Punto de división)<br />
(48~84, Ajuste por defecto: 60) Utilice este parámetro para<br />
ajustar el punto de división para el modo Arranger y la parte<br />
Split. La nota que se defina aquí es la nota más baja que puede<br />
tocar con la parte Main. El número hace referencia a una nota.<br />
“60” corresponde a la nota “C4”.<br />
Nota: También puede seleccionar este parámetro pulsando y manteniendo<br />
pulsado el botón [ARRANGER/BAND].<br />
■ Transpos*<br />
(–12~12, Réglage par défaut: 0) Utilisez ce paramètre pour<br />
transposer l’<strong>EXR</strong>-5/<strong>EXR</strong>-3 par demi-tons. Pour en savoir plus sur<br />
la transposition, voyez p. 65. Vous pouvez aussi choisir ce paramètre<br />
en appuyant sur le bouton [TRANSPOSE].<br />
■ TransMod*<br />
(Réglage par défaut: Int+Song) Ce paramètre permet de spécifier<br />
les parties affectées par le réglage de transposition:<br />
Int: Les parties Keyboard et Arranger sont transposées. Les<br />
notes reçues via MIDI, par contre, sont jouées sans changement.<br />
Song: Seules les parties de morceau sont transposées. Ce<br />
réglage n’a de sens que si vous reproduisez un fichier Standard<br />
MIDI ou un de vos propres morceaux avec l’enregistreur de<br />
l’<strong>EXR</strong>-5/<strong>EXR</strong>-3.<br />
MIDI: Seules les notes reçues via MIDI sont transposées.<br />
Int+Sng, Int+MIDI, Sng+MIDI, All: Il s’agit de combinaisons<br />
des réglages précédents. Int peut être utile pour transposer uniquement<br />
les parties Keyboard, de sorte à jouer un morceau de<br />
l’enregistreur dans “votre” tonalité tout en sonnant dans la<br />
tonalité du morceau.<br />
■ PB Range° (Pitch Bend Range)<br />
(0~24, Réglage par défaut: 2) Ce paramètre sert à spécifier<br />
l’intervalle obtenu en poussant le levier BENDER/MODULATION<br />
à fond à gauche ou à droite (effet Pitch Bend). Ce réglage<br />
s’effectue par pas de demi-ton, avec un maximum de 24 demitons<br />
(soit 2 octaves). Le réglage par défaut est de “2”, ce qui<br />
devrait convenir à la plupart des applications.<br />
Remarque: Le Pitch Bend est uniquement disponible pour les parties<br />
Main, Dual et Split. Voyez aussi p. 69.<br />
■ KeySplit* (point de partage)<br />
(48~84, Réglage par défaut: 60) Ce paramètre sert à régler le<br />
point de partage du mode Arranger et de la partie Split. La note<br />
que vous spécifiez ici est la note la plus grave que vous pouvez<br />
jouer avec la partie Main. Le numéro fait référence à une note.<br />
“60” correspond à la note “C4”.<br />
Remarque: Vous pouvez aussi choisir ce paramètre en appuyant<br />
sur le bouton [ARRANGER/BAND] et en le maintenant enfoncé.<br />
85
<strong>EXR</strong>-5/<strong>EXR</strong>-3<br />
■ SpltHold* (Hold function for the Split part)<br />
(On/Off, Default setting: Off) The SpltHold function memorizes<br />
the chords you play while the Split part is on and holds the corresponding<br />
notes until you play another chord.<br />
■ Splt Int* (Split Chord Intelligence)<br />
(On/Off, Default setting: Off) When you activate the [SPLIT] button,<br />
the <strong>EXR</strong>-5/<strong>EXR</strong>-3’s Split Chord Intelligence function allows<br />
you to play major chords by pressing just one key, minor chords<br />
by pressing two keys, and more complex chords by pressing<br />
three keys. This system thus follows Arranger control, which is<br />
why it would be a good idea to select “On” whenever you are<br />
using the Split part while the ARRANGER icon is displayed.<br />
■ FSW° (Footswitch Assign)<br />
Sustain<br />
(Default setting: Sustain) After connecting an optional DP-2,<br />
DP-6, or BOSS FS-5U to the FOOTSWITCH socket on the rear<br />
panel, you can use this parameter for assigning a function to<br />
the footswitch.<br />
Sustain: Also called “Hold” or “Damper”, this function allows<br />
you to use the footswitch to hold the notes you play on the<br />
keyboard in much the same way as on an acoustic piano.<br />
Sostenut: In this case, the footswitch functions as Sostenuto<br />
pedal (another pedal found on grand and digital pianos that<br />
allows you to sustain only those notes you played at the time<br />
you pressed the pedal).<br />
Note: This function only applies to the Keyboard parts.<br />
Soft: In this case, the footswitch functions as Soft pedal (a<br />
pedal found on grand and digital pianos that reduces the volume).<br />
Note: This function only applies to the Keyboard parts.<br />
Rotary S/F: Allows you to select the slow or fast speed of the<br />
Rotary effect. This only works, if the “Rotary” type is assigned to<br />
the MFX (see p. 71).<br />
UsrPrgUp: Selects the next User Program (i.e. “10” if “9” is currently<br />
active).<br />
■SpltHold* (Función Hold para la parte Split)<br />
(On/Off, Ajuste por defecto: Off) La función SpltHold memoriza<br />
los acordes interpretados mientras la parte Split está activada, y<br />
mantiene las notas correspondientes hasta que toca otro<br />
acorde.<br />
■Splt Int* (Split Chord Intelligence)<br />
(On/Off, Ajuste por defecto: Off) Si activa el botón [SPLIT], la<br />
función Split Chord Intelligence del <strong>EXR</strong>-5/<strong>EXR</strong>-3 le permite<br />
reproducir acordes mayores simplemente pulsando una tecla,<br />
acordes menores pulsando dos teclas, y acordes más complejos<br />
pulsando tres teclas. Este sistema sigue el control del Arranger,<br />
por lo cual es una buena idea seleccionar “On” siempre que esté<br />
utilizando la parte Split mientras se visualice el<br />
icono ARRANGER .<br />
■FSW° (Asignar conmutador de pedal)<br />
Sustain<br />
(Ajuste por defecto: Sustain) Después de conectar un DP-2,<br />
DP-6 o BOSS FS-5U opcional al zócalo FOOTSWITCH del panel<br />
posterior, puede utilizar este parámetro para asignar una función<br />
al conmutador de pedal.<br />
Sustain: También llamada “Hold” o “Damper”, esta función le<br />
permite utilizar el conmutador de pedal para mantener las<br />
notas que toca en el teclado de la misma forma que en un<br />
piano acústico.<br />
Sostenut: En este caso, el conmutador de pedal funciona como<br />
un pedal Sostenuto (otro pedal que se encuentra en los pianos<br />
de cola y digitales que permite sostener sólo las notas que tocó<br />
en el momento de pisar el pedal).<br />
Nota: Esta función sólo se aplica a las partes de Teclado.<br />
Soft: En este caso, el conmutador de pedal funciona como un<br />
pedal celeste (pedal que se encuentra en los pianos de cola y<br />
digitales que reduce el volumen).<br />
Nota: Esta función sólo se aplica a las partes de Teclado.<br />
Rotary S/F: Le permite seleccionar la velocidad rápida o lenta<br />
del efecto giratorio. Sólo funciona si el tipo “Rotary” está asignado<br />
al MFX (consulte la página 71).<br />
UsrPrgUp: Selecciona el siguiente Programa de Usuario (es<br />
decir, el “10” si el “9” está activo actualmente).<br />
■ SpltHold* (fonction Hold de la partie Split)<br />
(On/Off, Réglage par défaut: Off) La fonction SpltHold<br />
mémorise les accords que vous jouez quand la partie Split est<br />
active et maintient ces notes jusqu’à ce que vous jouiez un<br />
autre accord.<br />
■ Splt Int* (Split Chord Intelligence)<br />
(On/Off, Réglage par défaut: Off) Quand vous activez le bouton<br />
[SPLIT] , la fonction Split Chord Intelligence de l’<strong>EXR</strong>-5/<strong>EXR</strong>-3<br />
permet de jouer des accords majeurs d’une pression sur une<br />
seule touche, des accords mineurs en appuyant sur deux touches<br />
et des accords plus complexes en actionnant trois touches.<br />
Ce système suit donc le pilotage de l’arrangeur; aussi, il serait<br />
une bonne idée de choisir “On” dès que vous vous servez de la<br />
partie Split quand l’icône ARRANGER est affichée.<br />
■ FSW° (Footswitch Assign)<br />
Sustain<br />
(Réglage par défaut: Sustain) Après avoir branché un commutateur<br />
au pied DP-2, DP-6 ou BOSS FS-5U en option à la prise<br />
FOOTSWITCH du panneau arrière, vous pouvez utiliser ce paramètre<br />
pour assigner une fonction au commutateur au pied.<br />
Sustain: Cette fonction, aussi appelée “Hold” ou “Damper”, permet<br />
d’utiliser le commutateur au pied pour maintenir les notes<br />
jouées sur le clavier, pratiquement comme sur un piano.<br />
Sostenut: Le commutateur au pied fait office de pédale Sostenuto<br />
(autre pédale équipant les pianos à queue et numériques<br />
et qui permet de ne maintenir que les notes jouées quand on<br />
appuie sur la pédale).<br />
Remarque: Cette fonction n’est disponible que pour les parties<br />
Keyboard.<br />
Soft: Dans ce cas, le commutateur au pied fonctionne comme<br />
une pédale Soft (pédale pour pianos à queue et pianos numériques,<br />
qui réduit le volume).<br />
Remarque: Cette fonction n’est disponible que pour les parties<br />
Keyboard.<br />
Rotary S/F: Permet de choisir la vitesse lente ou rapide de<br />
l’effet Rotary. Cette fonction n’est disponible que si le type<br />
“Rotary” est assigné au MFX (voyez p. 71).<br />
UsrPrgUp: Sélectionne le programme utilisateur suivant (le<br />
“10” quand le “9” est actif, par exemple).<br />
86
<strong>EXR</strong>-5/<strong>EXR</strong>-3<br />
UsrPrgDw: Selects the previous User Program (i.e. “1” if “10” is<br />
currently active).<br />
Start/Stop: Starts and stops Arranger or Song playback. Same<br />
function as the [START÷STOP] button.<br />
Bass Inv: Switches the Bass Inversion function on and off (see<br />
p. 59).<br />
Punch I/O: The footswitch can be used to activate and switch<br />
off punch in/out recording (see p. 54).<br />
METRONOM parameters<br />
■ Metro TS° (metronome time signature)<br />
(1/4~6/4, 6/8, 9/8, Default setting: 4/4) This parameter allows<br />
you to set the metronome’s time signature (number of beats<br />
per bar). Please bear in mind that this setting changes whenever<br />
you select a Music Style with a different time signature.<br />
See also p. 27 for how to use the metronome. This parameter<br />
can also be selected by holding down the [METRONOME] button.<br />
■ Metro Vol° (metronome volume)<br />
(0~127, Default setting: 100) Use this parameter whenever you<br />
think the metronome is too loud/soft with respect to the music.<br />
The default value is usually an appropriate setting.<br />
■ Count-In<br />
(On/Off, Default setting: Off) This parameter allows you to<br />
switch the count-in function for punch-in and normal recording<br />
(see p. 53) on or off. When on, the metronome will count<br />
down two measures (8 beats for a song with a 4/4 time signature).<br />
OCTAVE parameters<br />
■ MAIN Oct*, DUAL Oct*, SPLIT Oct* (octave transposition)<br />
(–4~0~4, Default setting: 0) These three parameters allow you<br />
to shift the octave of the part in question (Main, Split, or Dual)<br />
up or down by up to four octaves. This can be useful for<br />
Techno/Dance songs where you need a piano sound that plays<br />
in two different octaves.<br />
To achieve this, assign two different (or the same) piano sounds<br />
to Main and Dual, activate the [DUAL] button, and set DUAL<br />
Octv to “–1” (or “1”).<br />
UsrPrgDw: Selecciona el anterior Programa de Usuario (es<br />
decir, el “1” si el “10” está activo actualmente).<br />
Start/Stop: Inicia y detiene el Arranger o la reproducción de la<br />
canción. La misma función que el botón [START÷STOP].<br />
Bass Inv: Activa y desactiva la función Bass Inversion(consulte<br />
la página 59).<br />
Punch I/O: Se puede usar el conmutador de pedal para activar<br />
y desactivar la grabación del pinchado de entrada/salida (consulte<br />
la página 54).<br />
Parámetros METRONOM<br />
■Metro TS° (tipo de compás del metrónomo)<br />
(1/4~6/4, 6/8, 9/8, Ajuste por defecto: 4/4) Este parámetro le<br />
permite ajustar el tipo de compás del metrónomo (número de<br />
tiempos por compás). Tenga en cuenta que este ajuste cambia<br />
siempre que seleccione un Estilo Musical con un tipo de compás<br />
diferente. Consulte también la p. 27 para más información<br />
acerca de cómo utilizar el metrónomo. Este parámetro también<br />
puede seleccionarse manteniendo pulsado el botón<br />
[METRONOME].<br />
■Metro Vol° (volumen del metrónomo)<br />
(0~127, Ajuste por defecto: 100) Utilice este parámetro siempre<br />
que piense que el metrónomo está demasiado alto/bajo con<br />
respecto a la música. El valor por defecto normalmente es un<br />
ajuste adecuado.<br />
■Count-In<br />
(On/Off, Ajuste por defecto: Off) Este parámetro permite activar<br />
o desactivar la función de claqueta para el inicio de pinchado y<br />
la grabación normal (consulte la página 53). Cuando está activado,<br />
el metrónomo contará dos compases (8 tiempos para una<br />
canción con un tipo de compás 4/4).<br />
Parámetros OCTAVE<br />
■MAIN Oct*, DUAL Oct*, SPLIT Oct* (transposición de octavas)<br />
(–4~0~4, Ajuste por defecto: 0) Estos tres parámetros le permiten<br />
cambiar a una octava más grave o más aguda de la parte en<br />
cuestión (Main, Split, o Dual) en hasta cuatro octavas. Esto<br />
puede resultar útil para canciones de Techno/Dance donde se<br />
necesita un sonido de piano que toque en dos octavas diferentes.<br />
Para conseguirlo, asigne dos sonidos de piano diferentes (o el<br />
mismo) a Main y Dual, active el botón [DUAL], y ajuste DUAL<br />
Octv a “–1” (o “1”).<br />
UsrPrgDw: Sélectionne le programme utilisateur précédent (le<br />
“1” quand le “10” est actif, par exemple).<br />
Start/Stop: Lance et arrête la reproduction de l’arrangeur ou de<br />
morceau. Même fonction que le bouton [START÷STOP].<br />
Bass Inv: Active et coupe la fonction Bass Inversion (voyez<br />
p. 59).<br />
Punch I/O: Le commutateur au pied peut activer et arrêter<br />
l’enregistrement Punch in/out (voyez p. 54) .<br />
Paramètres METRONOM<br />
■ Metro TS° (armure de temps du métronome)<br />
(1/4~6/4, 6/8, 9/8, Réglage par défaut: 4/4) Ce paramètre sert à<br />
régler l’armure de temps du métronome (le nombre de temps<br />
par mesure). N’oubliez pas que ce réglage change chaque fois<br />
que vous choisissez un style musical d’une armure de temps différente.<br />
Voyez p. 27 la manière de régler le métronome. Vous<br />
pouvez aussi activer ce paramètre en maintenant enfoncé le<br />
bouton [METRONOME].<br />
■ Metro Vol° (volume du métronome)<br />
(0~127, Réglage par défaut: 100) Servez-vous de ce paramètre<br />
s’il vous semble que le son du métronome est trop fort/faible<br />
par rapport à la musique. Le réglage par défaut convient dans la<br />
plupart des cas.<br />
■ Count-In<br />
(On/Off, Réglage par défaut: Off) Ce paramètre sert à activer/<br />
couper la fonction de décompte pour l’enregistrement normal<br />
et Punch I/O (voyez p. 53). Quand ce paramètre est sur “On”, le<br />
métronome décompte deux mesures (8 temps pour un morceau<br />
d’une armure de temps en 4/4).<br />
Paramètres OCTAVE<br />
■ MAIN Oct*, DUAL Oct*, SPLIT Octv* (transposition d’octave)<br />
(–4~0~4, Réglage par défaut: 0) Ces trois paramètres vous permettent<br />
de changer l’octave de la partie en question (Main,<br />
Split ou Dual) d’un maximum de quatre octaves vers le haut ou<br />
vers le bas. Cette fonction peut être utile pour les morceaux<br />
Techno/Dance, quand vous voulez un son de piano qui joue sur<br />
deux octaves différentes.<br />
Pour ce faire, affectez deux sons de piano différents (ou un<br />
même son) aux parties Main et Dual, activez le bouton [DUAL]<br />
et réglez DUAL Octv sur “–1” (ou “1”).<br />
87
<strong>EXR</strong>-5/<strong>EXR</strong>-3<br />
Note: When a Drum Kit is assigned to the Main part, the pitch of<br />
the drum/percussion sounds is not transposed. Instead, the keys are<br />
assigned to other drum/percussion sounds (“shifted”). Example:<br />
after setting “MAIN Oct” to “–1”, the bass drum can be played with<br />
the C3 key (rather than the C2), while other sounds are available to<br />
the left of the C3.<br />
VOLUME parameters<br />
■ Main Vol*, Dual Vol*, SpltVol*: volume<br />
Main Vol<br />
(0~127, Default setting: 127 Main/110 Dual/100 Split) These<br />
three parameters allow you to set the volume of the Main, Dual,<br />
and Split parts respectively. Please note that the settings you<br />
make here have no effect if you used BALANCE [ACCOMP] to<br />
set the maximum volume for the Arranger/Song parts.<br />
Note: The volume of the Dual part can also be set by holding down<br />
[DUAL] while pressing [ACCOMP] or [KEYBOARD]. The same is true<br />
of the Split part, except that you need to press and hold [SPLIT].<br />
■ Auto Bass*: status and volume<br />
(OFF, 0~127, Default setting: OFF) Whenever the Split part is<br />
active, this parameter allows you to set the volume of the Auto<br />
Bass part (in which case the Auto Bass part is switched on). This<br />
part sounds monophonic bass notes based on the chords you<br />
play. If the Bass Inversion function (see p. 59) is off, the Auto<br />
Bass part sounds the root notes (fundamentals) of the chords<br />
you play with your left hand (using the Split part).<br />
The Auto Bass part can also be added to the EP Chord part (see<br />
below), and then follows the same rules as that part. The Auto<br />
Bass’ volume and status can be set independently for “Split use”<br />
and “EP Chord use”.<br />
In either case, select off if you don’t need the Auto Bass part.<br />
■ AccDrums*, AccBass*, Accomp*: volume<br />
(0~127, Default setting: 100 AccDrums/100 AccBass/<br />
100 Accomp) These three parameters allow you to set the volume<br />
of three Music Style sections: the drums, the bass and the<br />
Accomp parts (1~6).<br />
Nota: Cuando se asigna un Grupo de percusión a la parte Main, no<br />
se transpone la afinación de los sonidos de batería/percusión. En su<br />
lugar, las teclas se asignan a otros sonidos de batería/percusión<br />
(“cambiados”). Ejemplo: después de ajustar “MAIN Oct” a “–1”, el<br />
sonidos de bombo se puede reproducir con la tecla C3 (en vez de la<br />
C2),mientras que los otros sonidos están disponibles a la izquierda<br />
de la C3.<br />
Parámetros VOLUME<br />
■Main Vol*, Dual Vol*, SpltVol*: volumen<br />
Main Vol<br />
(0~127, Ajuste por defecto: 127 Main/110 Dual/100 Split) Estos<br />
tres parámetros permiten ajustar el volumen de las partes Main,<br />
Dual y Split, respectivamente. Tenga en cuenta que los ajustes<br />
definidos aquí no tendrán efecto si utiliza BALANCE [ACCOMP]<br />
para ajustar el volumen máximo para las partes del Arranger/<br />
Canción.<br />
Nota: El volumen de la parte Dual también se puede ajustar manteniendo<br />
pulsado [DUAL] mientras pulsa [ACCOMP] o [KEYBOARD].<br />
Sucede lo mismo con la parte Split, pero hay que pulsar y mantener<br />
pulsado [SPLIT].<br />
■Auto Bass*: estado y volumen<br />
(OFF, 0~127, Ajuste por defecto: OFF) Siempre que la parte Split<br />
esté activada, este parámetro le permite ajustar el volumen de<br />
la parte Auto Bass (en el caso que la parte Auto Bass esté activada).<br />
Esta parte hace sonar notas de bajo monofónicas basadas<br />
en los acordes que toque. Si la función Bass Inversion (consulte<br />
la página 59) está desactivada, la parte Auto Bass hace sonar las<br />
notas fundamentales de los acordes que toque con la mano<br />
izquierda (utilizando la parte Split).<br />
La parte Auto Bass también se puede añadir a la parte EP Chord<br />
(consulte a continuación), y luego sigue las mismas reglas que<br />
esa parte. El volumen y el estado de Auto Bass se pueden ajustar<br />
independientemente para “Split use” y “EP Chord use”.<br />
En ambos casos, seleccione off si no necesita la parte Auto<br />
Bass.<br />
■AccDrums*, AccBass*, Accomp*: volume<br />
(0~127, Ajuste por defecto: 100 AccDrums, 100 AccBass,<br />
100 Accomp) Estos tres parámetros le permiten ajustar el volumen<br />
de las tres secciones de Estilo Musical: las partes de batería,<br />
bajo y la parte de Accomp (1~6).<br />
Remarque: Si un kit de batterie est assigné à la partie Main, la<br />
hauteur des sons de batterie/de percussion n’est pas transposée. En<br />
effet, les touches sont alors assignées à d’autres sons de batterie/de<br />
percussion (cela donne un “glissement”). Exemple: si vous réglez<br />
“MAIN Oct” sur “–1”, la touche C3 pilote la grosse caisse (au lieu de<br />
la touche C2) et les autres sons sont disponibles à gauche du C3.<br />
Paramètres VOLUME<br />
■ Main Vol*, Dual Vol*, SpltVol*: volume<br />
Main Vol<br />
(0~127, Réglage par défaut: 127 Main/110 Dual/100 Split) Ces<br />
trois paramètres permettent de régler respectivement le volume<br />
des parties Main, Dual et Split. Notez que les réglages effectués<br />
ici n’ont aucun effet si vous avez utilisé BALANCE [ACCOMP]<br />
pour régler au maximum le volume des parties de l’arrangeur/<br />
du morceau.<br />
Remarque: Vous pouvez aussi régler le volume de la partie Dual en<br />
maintenant [DUAL] enfoncé tout en appuyant sur [ACCOMP] ou<br />
[KEYBOARD]. Cette méthode s’applique aussi à la partie Split, sauf<br />
que dans ce cas, vous maintenez [SPLIT] enfoncé.<br />
■ Auto Bass*: statut et volume<br />
(OFF, 0~127, Réglage par défaut: OFF) Quand la partie Split est<br />
active, ce paramètre permet de régler le volume de la partie<br />
Auto Bass (qui est alors activée). Cette partie sonne des notes de<br />
basse monophoniques en se basant sur les accords que vous<br />
jouez. Si la fonction Bass Inversion (voyez p. 59) est coupée, la<br />
partie Auto Bass produit les toniques (fondamentales) des<br />
accords que vous jouez de la main gauche (avec la partie Split).<br />
La partie Auto Bass peut aussi être ajoutée à la partie EP Chord<br />
(voyez ci-dessous); elle obéit alors aux mêmes règles que cette<br />
partie. Vous pouvez régler le volume et le statut d’Auto Bass<br />
indépendamment pour “l’utilisation Split” et “l’utilisation EP<br />
Chord”.<br />
Dans les deux cas, choisissez off si vous n’avez pas besoin de la<br />
partie Auto Bass.<br />
■ AccDrums*, AccBass*, Accomp*: volume<br />
(0~127, Réglage par défaut: 100 AccDrums/100 AccBass/<br />
100 Accomp) Ces trois paramètres permettent de régler le<br />
volume des trois sections d’un style musical: la partie de batterie,<br />
de basse et celles d’accompagnement (1~6).<br />
88
<strong>EXR</strong>-5/<strong>EXR</strong>-3<br />
Note: The “Accomp” parameter does not have the same function<br />
as the BALANCE [ACCOMP] button. The button applies to all<br />
Arranger parts (thus also to the “AccDrums” and “AccBass” parameters).<br />
ARR SET parameters<br />
■ ChordInt* (Arranger Chord intelligence)<br />
(Md1, Md2, Off, Default setting: Md1) This parameter allows<br />
you to select the chord intelligence system to be used by the<br />
<strong>EXR</strong>-5/<strong>EXR</strong>-3: the <strong>Roland</strong> system (“Md1”, which makes more<br />
sense from an educational point of view, see page 131), or the<br />
“Md2” system, which can be used in the following way:<br />
Major chords<br />
Minor chords<br />
Seventh<br />
chords<br />
Minor seventh<br />
chords<br />
Press the key that corresponds to the chord’s<br />
fundamental.<br />
Fundamental + any black key to the left of the<br />
fundamental.<br />
Fundamental + any white key to the right of<br />
the fundamental.<br />
Fundamental + any black key to the left + any<br />
white key to the right.<br />
In either case, pressing just a few keys is therefore enough for<br />
obtaining full chords. If you are used to playing full chords, you<br />
can switch this function off.<br />
■ ArrHold* (Arranger Hold)<br />
(On/Off, Default setting: On) The Arranger Hold function memorizes<br />
the chords you play with your left hand and keeps playing<br />
the corresponding notes until you play another chord.<br />
If you switch off ArrHold, the melodic Arranger parts (A.Bass,<br />
Accomp) stop playing as soon as you release the key(s) in the<br />
left half of the keyboard, leaving you only with the drum<br />
accompaniment.<br />
For your convenience, this function is switched on every time<br />
you power on the <strong>EXR</strong>-5/<strong>EXR</strong>-3.<br />
Nota: El parámetro “Accomp” no tiene la misma función que el<br />
botón BALANCE [ACCOMP]. El botón se aplica a todas las partes del<br />
Arranger (y por lo tanto también a los parámetros “AccDrums” y<br />
“AccBass”).<br />
Parámetros ARR SET<br />
■ChordInt* (Arranger Chord intelligence)<br />
(Md1, Md2, Off, Ajuste por defecto: Md1) Este parámetro permite<br />
seleccionar el sistema “chord intelligence” que utilizará el<br />
<strong>EXR</strong>-5/<strong>EXR</strong>-3: el sistema <strong>Roland</strong> (“Md1”, que tiene más sentido<br />
desde un punto de vista educativo, consulte página 131), o el<br />
sistema “Md2”, que puede utilizarse de la siguiente forma:<br />
Acordes<br />
mayores<br />
Acordes<br />
menores<br />
Acordes de<br />
séptima<br />
Acordes de<br />
séptima<br />
menor<br />
Pulse la tecla correspondiente al fundamento<br />
del acorde.<br />
Fundamento + cualquier tecla negra a la<br />
izquierda del fundamento.<br />
Fundamento + cualquier tecla blanca a la<br />
derecha del fundamento.<br />
Fundamento + cualquier tecla negra a la<br />
izquierda + cualquier tecla blanca a la derecha.<br />
En cualquier caso, basta con pulsar unas cuantas teclas para<br />
obtener acordes completos. Si normalmente reproduce acordes<br />
completos, puede desactivar esta función.<br />
■ArrHold* (Arranger Hold)<br />
(On/Off, Ajuste por defecto: On) La función Arranger Hold<br />
memoriza los acordes interpretados con la mano izquierda y<br />
continua tocando las notas correspondientes hasta que toque<br />
otro acorde.<br />
Si desactiva ArrHold, las partes melódicas del Arranger (A.Bass,<br />
Accomp) dejan de tocar tan pronto como suelte la(s) tecla(s) de<br />
la mitad izquierda del teclado, dejándolo sólo con el acompañamiento<br />
de percusión.<br />
Para mayor comodidad, esta función se activa cada vez que<br />
ponga en marcha el <strong>EXR</strong>-5/<strong>EXR</strong>-3.<br />
Remarque: Le paramètre “Accomp” n’a pas la même fonction que<br />
le bouton BALANCE [ACCOMP]. Ce bouton affecte toutes les parties<br />
de l’arrangeur (et donc aussi les paramètres “AccDrums” et “Acc-<br />
Bass”).<br />
Paramètres ARR SET<br />
■ ChordInt* (Arranger Chord Intelligence)<br />
(Md1, Md2, Off, Réglage par défaut: Md1) Ce paramètre permet<br />
de choisir le système Chord Intelligence utilisé par l’<strong>EXR</strong>-5/<br />
<strong>EXR</strong>-3: le système <strong>Roland</strong> (“Md1”, plus adapté au contexte<br />
pédagogique, voyez page 131) ou le système “Md2”, qui fonctionne<br />
comme suit:<br />
Accords<br />
majeurs<br />
Accords<br />
mineurs<br />
Accords de<br />
septième<br />
Accords de<br />
septième<br />
mineure<br />
Appuyez sur la touche correspondant à la fondamentale<br />
de l’accord.<br />
Fondamentale + n’importe quelle touche noire<br />
à gauche de la fondamentale.<br />
Fondamentale + n’importe quelle touche blanche<br />
à droite de la fondamentale.<br />
Fondamentale + n’importe quelle touche noire<br />
à sa gauche + n’importe quelle touche blanche<br />
à sa droite.<br />
Dans les deux cas, il suffit donc d’enfoncer quelques touches<br />
pour produire des accords complets. Si vous avez l’habitude de<br />
jouer des accords complets, vous pouvez couper cette fonction.<br />
■ ArrHold* (Arranger Hold)<br />
(On/Off, Réglage par défaut: On) La fonction Arranger Hold<br />
mémorise les accords joués de la main gauche et continue à<br />
produire les notes correspondantes jusqu’à ce que vous jouiez<br />
un autre accord.<br />
Si vous coupez la fonction ArrHold, les parties mélodiques de<br />
l’arrangeur (A.Bass, Accomp) s’arrêtent de jouer dès que vous<br />
relâchez la ou les touche(s) dans la moitié gauche du clavier, ce<br />
qui ne vous laisse plus que l’accompagnement de batterie.<br />
Pour vous simplifier la vie, cette fonction est activée à la mise<br />
sous tension de l’<strong>EXR</strong>-5/<strong>EXR</strong>-3.<br />
89
<strong>EXR</strong>-5/<strong>EXR</strong>-3<br />
■ EP Chord° (left-hand St. Strings + bass)<br />
(On/Off, Default setting: On) The EP Chord function (for “Educational<br />
Purposes”) activates a stereo string sound and monophonic<br />
bass (if Auto Bass is set to “on”) whenever (a) the<br />
ARRANGER icon is displayed and (b) the Arranger is stopped.<br />
This allows you to play chords (and a bass line) with your left<br />
hand in Arranger mode – without using the <strong>EXR</strong>-5/<strong>EXR</strong>-3’s<br />
accompaniment function.<br />
If you select “Off”, however, the left half of the keyboard will be<br />
muted when conditions (a) and (b) are met and if the SPLIT icon<br />
is not displayed.<br />
■ Bass Inv*<br />
(On/Off) Use this parameter to change the way in which the<br />
Arranger reads the chords you play. See p. 59.<br />
■ MI* (Melody Intelligence harmony type)<br />
(Default setting: Traditnl) This parameter allows you to select<br />
the desired harmony type for the Melody Intelligence function.<br />
Note: This parameter can also be selected by pressing and holding<br />
the [MELODY¥INTELL] button. See p. 58.<br />
EFFECTS parameters<br />
■ Rev* (Reverb Type)<br />
(Default setting: Hall 2) Use this parameter to select the kind of<br />
Reverb that best suits your musical purposes, or to switch the<br />
Reverb processor “Off”. See p. 75.<br />
■ Chr* (Chorus Type)<br />
(Default setting: Chorus 3) This parameter allows you to specify<br />
the type of Chorus effect, or to switch the Chorus processor<br />
“Off”. See p. 78.<br />
■ MFX* (MFX type)<br />
(Default setting: Rotary) This parameter allows you to select the<br />
desired MFX type and to switch the MFX processor off. See p. 71<br />
for details about the MFX. Selecting “Off” means that the MFX is<br />
off.<br />
Note: MFX type selection can also be linked to Tone selection for<br />
the Main part.<br />
■EP Chord° (St. Strings con la mano izquierda + bajo)<br />
(On/Off, Ajuste por defecto: On) La función EP Chord activa (de<br />
“Educational Purposes”, Finalidades educativas) activa un<br />
sonido de cuerda estéreo y un bajo monofónico (cuando Auto<br />
Bass está ajustado a “on”) siempre que (a) se visualice el icono<br />
ARRANGER y (b) se pare el Arranger. Ésta le permite reproducir<br />
acordes (y una línea de bajo) con la mano izquierda en el<br />
modo Arranger – sin utilizar la función de acompañamiento del<br />
<strong>EXR</strong>-5/<strong>EXR</strong>-3.<br />
Si selecciona “Off”, sin embargo, la mitad izquierda del teclado<br />
se enmudecerá cuando se den las condiciones (a) y (b) y si no se<br />
visualiza el icono SPLIT.<br />
■Bass Inv*<br />
(On/Off) Utilice este parámetro para cambiar la manera cómo el<br />
Arranger lee los acordes que toca. Consulte la p. 59.<br />
■MI* (Tipo de armonía de Melody Intelligence)<br />
(Ajuste por defecto: Traditnl) Este parámetro le permite seleccionar<br />
el tipo de armonía deseado para la función Melody Intelligence.<br />
Nota: Este parámetro también puede seleccionarse pulsando y<br />
manteniendo pulsado el botón [MELODY¥INTELL]. Consulte la p. 58.<br />
Parámetros EFFFECTS<br />
■Rev* (Reverb Type)<br />
(Ajuste por defecto: Hall 2) Utilice este parámetro para seleccionar<br />
el tipo de Reverb que mejor se adapte a sus propósitos<br />
musicales, o para desactivar el procesador Reverb. Consulte la<br />
p. 75.<br />
■Chr* (Chorus Type)<br />
(Ajuste por defecto: Chorus 3) Este parámetro le permite especificar<br />
el tipo de efecto Chorus, o desactivar (“Off”) el procesador<br />
Chorus. Consulte la p. 78.<br />
■MFX* (tipo MFX)<br />
(Ajuste por defecto: Rotary) Este parámetro le permite seleccionar<br />
el tipo deseado de MFX y desactivar el procesador MFX.<br />
Consulte la p. 71 para más detalles del MFX. Si selecciona “Off”<br />
significa que MFX está desactivado.<br />
Nota: La selección de tipo MFX también se puede enlazar a la<br />
selección de Tono para la parte Main.<br />
■ EP Chord° (cordes stéréo + basse, main gauche)<br />
(On/Off, Réglage par défaut: On) La fonction EP Chord (des initiales<br />
de “Educational Purposes”) active un son de cordes stéréo<br />
et un son de basse monophonique (à condition qu’Auto Bass<br />
soit réglé sur “On”) quand (a) l’icône ARRANGER est affichée<br />
et (b) l’arrangeur est à l’arrêt. Cela vous permet de jouer des<br />
accords (et une ligne de basse) de la main gauche en mode<br />
Arranger – sans utiliser la fonction d’accompagnement de<br />
l’<strong>EXR</strong>-5/<strong>EXR</strong>-3.<br />
Par contre, si vous choisissez “Off”, la moitié gauche du clavier<br />
est étouffée si les conditions (a) et (b) sont remplies et si l’icône<br />
SPLIT n’est pas affichée.<br />
■ Bass Inv*<br />
(On/Off) Cette fonction permet de changer la manière dont<br />
l’arrangeur interprète les accords que vous jouez. Voyez p. 59.<br />
■ MI* (type d’harmonie Melody Intelligence)<br />
(Réglage par défaut: Traditnl) Ce paramètre permet d’assigner le<br />
type d’harmonie voulu à la fonction Melody Intelligence.<br />
Remarque: Vous pouvez aussi choisir ce paramètre en maintenant<br />
enfoncé le bouton [MELODY¥INTELL]. Voyez p. 58.<br />
Paramètres EFFECTS<br />
■ Rev* (type de réverbération)<br />
(Réglage par défaut: Hall 2) Utilisez ce paramètre pour choisir le<br />
type de réverbération le mieux adapté à vos besoins ou pour<br />
désactiver (“Off”) le processeur Reverb. Voyez p. 75.<br />
■ Chr* (type de Chorus)<br />
(Réglage par défaut: Chorus 3) Ce paramètre permet de spécifier<br />
le type d’effet Chorus ou de désactiver (“Off”) le processeur<br />
Chorus. Voyez p. 78.<br />
■ MFX* (type MFX)<br />
(Réglage par défaut: Rotary) Ce paramètre permet de choisir le<br />
type MFX voulu et de désactiver le processeur MFX. Pour en<br />
savoir plus sur le MFX, voyez p. 71. Le choix de “Off” signifie que<br />
le MFX est coupé.<br />
Remarque: Vous pouvez en outre lier le choix du type MFX au<br />
choix du son pour la partie Main.<br />
90
<strong>EXR</strong>-5/<strong>EXR</strong>-3<br />
■ Tone MFX°<br />
(On/Off, Default setting: On) This parameter allows you to link<br />
the selection of an MFX type to the Tone you assign to the<br />
Main part. That way, a Distortion/Overdrive effect will be<br />
selected for a rock guitar sound, Rotary for an organ, etc.<br />
■ Rev MAIN*<br />
(0~127, Default setting: 100) This parameter allows you to set<br />
the Reverb Send Level for the Main part (i.e. how much Reverb<br />
should be added to the Main notes). Select “0” if the Main part<br />
may not be processed by this effect.<br />
■ Chr MAIN*<br />
(0~127, Default setting: 0) This parameter allows you to set the<br />
Chorus Send Level for the Main part (i.e. how much Chorus<br />
should be added to the Main notes). If you want this part to be<br />
processed by the Chorus effect, you need to select a value different<br />
from “0”. This parameter is only used when the MFX<br />
parameter is set to “Off”.<br />
■ Pan MAIN*<br />
(Rnd, R63~0~L63, Default setting: 0) This parameter allows you<br />
to set the stereo position of the Main part (i.e. its placement<br />
between the left and right speakers). “Rnd” means that the stereo<br />
position changes randomly for each note you play. Values<br />
starting with “L” correspond to the left speaker. “0” refers to the<br />
center, and values starting with “R” correspond to the right<br />
speaker.<br />
■ Rev DUAL*<br />
(0~127, Default setting: 100) This parameter allows you to set<br />
the Reverb Send Level for Dual part (i.e. how much Reverb<br />
should be added to the Dual notes). Select “0” if the Dual part<br />
may not be processed by this effect.<br />
■ Chr DUAL*<br />
(0~127, Default setting: 0) This parameter allows you to set the<br />
Chorus Send Level for the Dual part (i.e. how much Chorus<br />
should be added to the Dual notes). If you want this part to be<br />
processed by the Chorus effect, you need to select a value different<br />
from “0”.<br />
■Tone MFX°<br />
(On/Off, Ajuste por defecto: On) Este parámetro le permite enlazar<br />
la selección de un tipo de MFX al Tono que asigne a la parte<br />
Main. De esta manera, se seleccionará un efecto de saturación/<br />
distorsión para sonido de guitarra de rock, giratorio para un<br />
órgano, etc.<br />
■Rev MAIN*<br />
(0~127, Ajuste por defecto: 100) Este parámetro le permite<br />
ajustar el Nivel de reverberación enviado por la parte Main (es<br />
decir, cuanta reverberación se debe añadir a las notas Main).<br />
Seleccione “0” si la parte Main no se puede procesar por este<br />
efecto.<br />
■Chr MAIN*<br />
(0~127, Ajuste por defecto: 0) Este parámetro le permite ajustar<br />
el Nivel de Chorus enviado por la parte Main (es decir, cuanto<br />
Chorus se debe añadir a las notas Main). Si desea que el efecto<br />
Chorus procese esta parte, debe seleccionar un valor diferente a<br />
“0”. Este parámetro sólo se utiliza cuando el parámetro MFX<br />
está desactivado.<br />
■Pan MAIN*<br />
(Rnd, R63~0~L63, Ajuste por defecto: 0) Este parámetro le permite<br />
ajustar la posición estéreo de la parte Main (es decir. su<br />
situación entre los altavoces izquierdo y derecho). “Rnd” significa<br />
que la posición estéreo cambia aleatoriamente para cada<br />
nota que toque. Los valores que empiezan con “L” corresponden<br />
al altavoz izquierdo. “0” hace referencia al centro, los valores<br />
que empiezan con “R” corresponden al altavoz derecho.<br />
■Rev DUAL*<br />
(0~127, Ajuste por defecto: 100) Este parámetro le permite<br />
ajustar el Nivel de reverberación enviado por la parte Dual (es<br />
decir, cuanta reverberación se debe añadir a las notas Dual).<br />
Seleccione “0” si la parte Dual no se puede procesar por este<br />
efecto.<br />
■Chr DUAL*<br />
(0~127, Ajuste por defecto: 0) Este parámetro le permite ajustar<br />
el Nivel de Chorus enviado por la parte Dual (es decir, cuanto<br />
Chorus se debe añadir a las notas Dual). Si desea que el efecto<br />
Chorus procese esta parte, debe seleccionar un valor diferente a<br />
“0”.<br />
■ Tone MFX°<br />
(On/Off, Réglage par défaut: On) Ce paramètre permet de lier le<br />
choix d’un type MFX au son assigné à la partie Main. Vous pouvez<br />
ainsi choisir un effet Distortion/Overdrive pour un son de<br />
guitare rock, un effet Rotary pour un son d’orgue, etc.<br />
■ Rev MAIN*<br />
(0~127, Réglage par défaut: 100) Ce paramètre règle le niveau<br />
d’envoi de réverb (Reverb Send) pour la partie Main (c.-à-d.<br />
combien de réverb est ajoutée aux notes Main). Choisissez “0” si<br />
vous ne voulez pas traiter la partie Main avec cet effet.<br />
■ Chr MAIN*<br />
(0~127, Réglage par défaut: 0) Ce paramètre règle le niveau<br />
d’envoi de chorus (Chorus Send) pour la partie Main (c.-à-d.<br />
combien de chorus est ajouté aux notes Main). Si vous voulez<br />
traiter cette partie avec l’effet Chorus, veillez à choisir une<br />
valeur autre que “0”. Ce paramètre est uniquement utilisé<br />
quand MFX est réglé sur “Off”.<br />
■ Pan MAIN*<br />
(Rnd, R63~0~L63, Réglage par défaut: 0) Ce paramètre détermine<br />
le panoramique de la partie Main (sa position entre les<br />
enceintes gauche et droite). Pour “Rnd”, la position stéréo<br />
change de manière aléatoire à chaque note jouée. Les valeurs<br />
commençant par “L” correspondent à l’enceinte gauche. “0”<br />
correspond au centre et les valeurs commençant par “R” à<br />
l’enceinte droite.<br />
■ Rev DUAL*<br />
(0~127, Réglage par défaut: 100) Ce paramètre règle le niveau<br />
d’envoi de réverb (Reverb Send) pour la partie Dual (c.-à-d.<br />
combien de réverb est ajoutée aux notes Dual). Choisissez “0” si<br />
vous ne voulez pas traiter la partie Dual avec cet effet.<br />
■ Chr DUAL*<br />
(0~127, Réglage par défaut: 0) Ce paramètre règle le niveau<br />
d’envoi de chorus (Chorus Send) pour la partie Dual (c.-à-d.<br />
combien de chorus est ajouté aux notes Dual). Si vous voulez<br />
traiter cette partie avec l’effet Chorus, veillez à choisir une<br />
valeur autre que “0”.<br />
91
<strong>EXR</strong>-5/<strong>EXR</strong>-3<br />
■ Pan DUAL*<br />
(Rnd, R63~0~L63, Default setting: 0) This parameter allows you<br />
to set the stereo position of the Dual part (i.e. its placement<br />
between the left and right speakers). “Rnd” means that the stereo<br />
position changes randomly for each note you play. Values<br />
starting with “L” correspond to the left speaker. “0” refers to the<br />
center, and values starting with “R” correspond to the right<br />
speaker.<br />
■ Rev SPLIT*<br />
(0~127, Default setting: 100) This parameter allows you to set<br />
the Reverb Send Level for the Split part. Select “0” if the Split<br />
part may not be processed by this effect.<br />
■ Chr SPLIT*<br />
(0~127, Default setting: 0) This parameter allows you to set the<br />
Chorus Send Level for the Split part. If you want this part to be<br />
processed by the Chorus effect, you need to select a value different<br />
from “0”.<br />
■ Pan SPLIT*<br />
(Rnd, R63~0~L63, Default setting: 0) This parameter allows you<br />
to set the stereo position of the Split part (i.e. its placement<br />
between the left and right speakers). “Rnd” means that the stereo<br />
position changes randomly for each note you play. Values<br />
starting with “L” correspond to the left speaker. “0” refers to the<br />
center, and values starting with “R” correspond to the right<br />
speaker.<br />
KB SCALE parameters<br />
■ Scale C*~Scale B* (Scale Tune)<br />
(–64~63, Default setting: 0 for all notes) These parameters<br />
allow you to stray away from the usual semitone-interval scale<br />
(used in western music) by changing the pitch of the notes so<br />
as to accommodate other musical cultures or tuning methods<br />
(oriental, baroque music, etc.).<br />
As you will notice, you can change the pitch of every note of<br />
one octave (C, C#, D, Eb, E…). The settings you make here apply<br />
to all notes of the same name (i.e. to every “C”, every “C#”, etc.).<br />
Most of the time, you will probably select the value “50” or “–<br />
50” as they correspond exactly to half a semitone up or down<br />
(quarter tone). Other settings may also be interesting, though.<br />
92<br />
■Pan DUAL*<br />
(Rnd, R63~0~L63, Ajuste por defecto: 0) Este parámetro le permite<br />
ajustar la posición estéreo de la parte Dual (es decir. su<br />
situación entre los altavoces izquierdo y derecho). “Rnd” significa<br />
que la posición estéreo cambia aleatoriamente para cada<br />
nota que toque. Los valores que empiezan con “L” corresponden<br />
al altavoz izquierdo. “0” hace referencia al centro, los valores<br />
que empiezan con “R” corresponden al altavoz derecho.<br />
■Rev SPLIT*<br />
(0~127, Ajuste por defecto: 100) Este parámetro le permite<br />
ajustar el nivel de envío de reverberación a la parte Split. Seleccione<br />
“0” si la parte Split no se puede procesar por este efecto.<br />
■Chr SPLIT*<br />
(0~127, Ajuste por defecto: 0) Este parámetro le permite ajustar<br />
el Nivel de Chorus enviado a la parte Split. Si desea que el<br />
efecto Chorus procese esta parte, debe seleccionar un valor<br />
diferente a “0”.<br />
■Pan SPLIT*<br />
(Rnd, R63~0~L63, Ajuste por defecto: 0) Este parámetro le permite<br />
ajustar la posición estéreo de la parte Split (es decir. su<br />
situación entre los altavoces izquierdo y derecho). “Rnd” significa<br />
que la posición estéreo cambia aleatoriamente para cada<br />
nota que toque. Los valores que empiezan con “L” corresponden<br />
al altavoz izquierdo. “0” hace referencia al centro, los valores<br />
que empiezan con “R” corresponden al altavoz derecho.<br />
Parámetros KB SCALE<br />
■Scale C*~Scale B* (Scale Tune)<br />
(–64~63, Ajuste por defecto: 0 para todas las notas) Estos parámetros<br />
le permiten alejarse de la escala usual de intervalos de<br />
semitono (usada en la música occidental) cambiando la afinación<br />
de las notas para acomodar otras culturas musicales o<br />
métodos de afinación (oriental, música barroca, etc.).<br />
Como verá, puede cambiar la afinación de cada nota en una<br />
octava (Do, Do#, Re, Mib, Mi…). Los ajustes que defina aquí se<br />
aplican a todas las notas del mismo nombre (es decir, a cada Do,<br />
cada Do#, #”, etc.). La mayor parte del tiempo, probablemente<br />
seleccionará el valor“50” o “–50” ya que corresponden exactamente<br />
a medio semitono arriba o abajo(negra). Sin embargo,<br />
otros ajustes también pueden ser interesantes.<br />
■ Pan DUAL*<br />
(Rnd, R63~0~L63, Réglage par défaut: 0) Ce paramètre détermine<br />
le panoramique de la partie Dual (sa position entre les<br />
enceintes gauche et droite). Pour “Rnd”, la position stéréo<br />
change de manière aléatoire à chaque note jouée. Les valeurs<br />
commençant par “L” correspondent à l’enceinte gauche. “0”<br />
correspond au centre et les valeurs commençant par “R” à<br />
l’enceinte droite.<br />
■ Rev SPLIT*<br />
(0~127, Réglage par défaut: 100) Ce paramètre sert à régler le<br />
niveau d’envoi de réverb (Reverb Send) pour la partie Split.<br />
Choisissez “0” si vous ne voulez pas traiter la partie Split avec<br />
cet effet.<br />
■ Chr SPLIT*<br />
(0~127, Réglage par défaut: 0) Ce paramètre sert à régler le<br />
niveau d’envoi de chorus (Chorus Send) pour la partie Split. Si<br />
vous voulez traiter cette partie avec l’effet Chorus, veillez à<br />
choisir une valeur autre que “0”.<br />
■ Pan SPLIT*<br />
(Rnd, R63~0~L63, Réglage par défaut: 0) Ce paramètre détermine<br />
le panoramique de la partie Split (sa position entre les<br />
enceintes gauche et droite). Pour “Rnd”, la position stéréo<br />
change de manière aléatoire à chaque note jouée. Les valeurs<br />
commençant par “L” correspondent à l’enceinte gauche. “0”<br />
correspond au centre et les valeurs commençant par “R” à<br />
l’enceinte droite.<br />
Paramètres KB SCALE<br />
■ Scale C*~Scale B* (Scale Tune)<br />
(–64~63, Réglage par défaut: 0 pour toutes les notes) Ces paramètres<br />
vous permettent de vous écarter de la gamme habituelle<br />
à intervalles de demi-ton (utilisée dans la musique occidentale)<br />
en changeant la hauteur des notes, pour adapter votre musique<br />
à d’autres cultures musicales ou méthodes d’accord (musique<br />
orientale, baroque, etc.).<br />
Vous pouvez changer la hauteur de toutes les notes d’une<br />
octave (Do, Do#, Ré, Mib, Mi…). Les réglages que vous effectuez<br />
ici s’appliquent à toutes les notes du même nom (c.-à-d. à chaque<br />
“Do”, chaque “Do#”, etc.). La plupart du temps, vous choisirez<br />
sans doute les valeurs “50” ou “–50” car elles correspondent<br />
exactement à une moitié de demi-ton (un quart de ton) vers le<br />
haut ou vers le bas. Notez que d’autres réglages produisent<br />
aussi des effets intéressants.
<strong>EXR</strong>-5/<strong>EXR</strong>-3<br />
■ Scl Mode*<br />
(MN, ALL, Default setting: MN) This parameter allows you to<br />
specify which parts the Scale settings (see above) should apply<br />
to: only the Main part (“MN”) or all parts (“ALL”). In some cases,<br />
choosing “ALL” may produce a more satisfactory result.<br />
MIDI parameters<br />
See page 97.<br />
UTILITY parameters<br />
■ InitFLSH (Flash initialization)<br />
This function initializes (formats) the <strong>EXR</strong>-5/<strong>EXR</strong>-3’s Flash<br />
memory, which is only necessary if the data in the Flash memory<br />
become unreadable.<br />
Note: Executing this function erases all Standard MIDI Files and<br />
Music Styles in the <strong>EXR</strong>-5/<strong>EXR</strong>-3’s Flash area.<br />
Press [YES/+] in response to the flashing Yes message. The<br />
“Sure?” message appears and the Yes message starts flashing.<br />
Press [YES÷+] to initialize the Flash area (or [NO/–] if you<br />
changed you mind).<br />
After showing the “Complete” message, the <strong>EXR</strong>-5/<strong>EXR</strong>-3<br />
leaves this function.<br />
■ Resume<br />
Select this function to recall the <strong>EXR</strong>-5/<strong>EXR</strong>-3’s factory Function<br />
settings.<br />
Note: Resume does not reset the MIDI parameters of the FUNC-<br />
TION mode (see p. 97).<br />
Press [YES/+] in response to the flashing Yes message. After<br />
showing the “Complete” message, the <strong>EXR</strong>-5/<strong>EXR</strong>-3 leaves<br />
this function.<br />
Note: There is no “Sure?” question that gives you time to think.<br />
Only press [YES/+] if you are certain you want to recall ALL factory<br />
Function settings.<br />
■Scl Mode*<br />
(MN, ALL, Ajuste por defecto: MN) Este parámetro permite<br />
especificar qué partes de los ajustes de Escala (consulte la explicación<br />
anterior) deberían aplicarse a: sólo la parte Main (“MN”)<br />
o todas las partes (“ALL”). En algunos casos, si selecciona “ALL”<br />
conseguirá un resultado más satisfactorio.<br />
Parámetros MIDI<br />
Consulte la página 97.<br />
Parámetros UTILITY<br />
■InitFLSH (inicialización de Flash)<br />
Esta función inicializa (formatea) la memoria Flash del <strong>EXR</strong>-5/<br />
<strong>EXR</strong>-3, lo cual sólo es necesario si no puede leerse la información<br />
de la memoria Flash.<br />
Nota: Al ejecutar esta función se borran todos los Archivos MIDI<br />
Estándar y los Estilos Musicales en el área Flash del <strong>EXR</strong>-5/<strong>EXR</strong>-3.<br />
Pulse [YES/+] en respuesta al mensaje parpadeante Yes. Aparece<br />
el mensaje “Sure?” y el mensaje Yes empieza a parpadear.<br />
Pulse [YES÷+] para inicializar el área Flash (o [NO/–] si ha<br />
cambiado de opinión).<br />
Después de mostrar el mensaje “Complete” el <strong>EXR</strong>-5/<strong>EXR</strong>-3<br />
sale de esta función.<br />
■Resume<br />
Seleccione esta función para recuperar los ajustes de Function<br />
originales del <strong>EXR</strong>-5/<strong>EXR</strong>-3.<br />
Nota: Resume no reajusta los parámetros MIDI del modo FUNC-<br />
TION (consulte la página 97).<br />
Pulse [YES/+] en respuesta al mensaje parpadeante Yes. Después<br />
de mostrar el mensaje “Complete” el <strong>EXR</strong>-5/<strong>EXR</strong>-3<br />
sale de esta función.<br />
Nota: No hay pregunta “¿Está seguro?” que le dé tiempo para pensar.<br />
Sólo pulse [YES/+] si está seguro de que quiere recuperar TODOS<br />
los ajustes originales de Function.<br />
■ Scl Mode*<br />
(MN, ALL, Réglage par défaut: MN) Ce paramètre permet de<br />
spécifier les parties auxquelles s’appliquent les réglages Scale<br />
(voyez ci-dessus): la partie Main (“MN”) uniquement ou toutes<br />
les parties (“ALL”). Parfois, le choix de “ALL” peut produire de<br />
meilleurs résultats.<br />
Paramètres MIDI<br />
Voyez page 97.<br />
Paramètres UTILITY<br />
■ InitFLSH (initialisation de la mémoire Flash)<br />
Cette fonction initialise (formate) la mémoire Flash de l’<strong>EXR</strong>-5/<br />
<strong>EXR</strong>-3. Cette opération est uniquement nécessaire si les données<br />
de la mémoire Flash deviennent illisibles.<br />
Remarque: L’exécution de cette fonction efface tous les fichiers<br />
standard MIDI et les styles musicaux dans la zone Flash de l’<strong>EXR</strong>-5/<br />
<strong>EXR</strong>-3.<br />
Appuyez sur [YES/+] en réponse au message clignotant Yes. Le<br />
message “Sure?” s’affiche et Yes se met à clignoter.<br />
Appuyez sur [YES÷+] pour initialiser la mémoire Flash (ou sur<br />
[NO/–] si vous changez d’avis).<br />
L’écran affiche le message “Complete”, après quoi, l’<strong>EXR</strong>-5/<br />
<strong>EXR</strong>-3 quitte cette fonction.<br />
■ Resume<br />
Choisissez cette fonction pour rappeler les réglages Function<br />
d’usine de l’<strong>EXR</strong>-5/<strong>EXR</strong>-3.<br />
Remarque: La fonction Resume n’initialise pas les paramètres MIDI<br />
du mode FUNCTION (voyez p. 97).<br />
Appuyez sur [YES/+] en réponse au message clignotant Yes.<br />
L’écran affiche le message “Complete”, après quoi, l’<strong>EXR</strong>-5/<br />
<strong>EXR</strong>-3 quitte cette fonction.<br />
Remarque: Vous ne rencontrerez pas de message “Sure?” vous<br />
donnant l’occasion de réfléchir à votre choix. Appuyez donc sur<br />
[YES/+] uniquement si vous êtes sûr de vouloir rappeler TOUS les<br />
réglages Function d’usine.<br />
93
<strong>EXR</strong>-5/<strong>EXR</strong>-3<br />
12. Working with User<br />
Programs<br />
The <strong>EXR</strong>-5/<strong>EXR</strong>-3 is equipped with 10 User Program memories<br />
that allow you to store almost all settings (or registrations) you<br />
make on the front panel and via the Function menu (see p. 83).<br />
Note: MIDI settings (see p. 97) are not saved to a User Program<br />
because the <strong>EXR</strong>-5/<strong>EXR</strong>-3 memorizes them automatically.<br />
12. Trabajar con<br />
Programas de Usuario<br />
El<strong>EXR</strong>-5/<strong>EXR</strong>-3 dispone de 10 memorias de Programas de Usuario<br />
que le permiten guardar prácticamente todos los ajustes (o<br />
registros) que defina en el panel frontal y mediante el menú<br />
Function (consulte p. 83).<br />
Nota: Los ajustes MIDI (consulte la página 97) no se guardan en un<br />
Programa de Usuario debido a que el <strong>EXR</strong>-5/<strong>EXR</strong>-3 los memoriza de<br />
forma automática.<br />
12. Tirer parti des programmes<br />
utilisateur<br />
L’<strong>EXR</strong>-5/<strong>EXR</strong>-3 comporte 10 mémoires de programme utilisateur<br />
permettant de conserver pratiquement tous les réglages que<br />
vous effectuez en face avant et avec le menu Function (voyez<br />
p. 83).<br />
Remarque: Les réglages MIDI (voyez p. 97) ne sont pas sauvegardés<br />
dans un programme utilisateur car l’<strong>EXR</strong>-5/<strong>EXR</strong>-3 les mémorise automatiquement.<br />
Writing your settings to a User<br />
Program<br />
It is a good idea to write your settings frequently, even if you<br />
still need to do some editing afterwards. Those intermediary<br />
saves allow you to return to the previous stage whenever you do<br />
not like your last modifications.<br />
Escribir ajustes en un Programa de<br />
Usuario<br />
Es una buena idea anotar los ajustes con frecuencia, aunque<br />
deba editarlos con posterioridad. Estos guardados intermediarios<br />
le permiten volver a la fase anterior siempre que no quede<br />
satisfecho con las últimas modificaciones.<br />
Mémorisation de vos réglages dans<br />
un programme utilisateur<br />
Nous vous recommandons de mémoriser souvent vos réglages,<br />
même s’il vous reste des changements à faire par la suite. Ces<br />
mémorisations intermédiaires permettent notamment de revenir<br />
à un stade préalable si vous n’aimez pas vos dernières modifications.<br />
USER<br />
PROGRAM<br />
(1) Press and hold the [USER¥PROGRAM/WRITE] button.<br />
The <strong>EXR</strong>-5/<strong>EXR</strong>-3 now displays “-Write ?”.<br />
(2) Keep holding the [USER¥PROGRAM/WRITE] button while<br />
pressing a numeric button [0]~[9] to select the memory.<br />
The display now responds with the “Complete” message.<br />
(3) Release the [USER¥PROGRAM/WRITE] button.<br />
(1) Pulse y mantenga pulsado el botón<br />
[USER¥PROGRAM÷WRITE].<br />
El <strong>EXR</strong>-5/<strong>EXR</strong>-3 ahora visualiza “-Write ?”.<br />
(2) Mantenga pulsado el botón [USER¥PROGRAM/WRITE]<br />
mientras pulsa un botón numérico [0]~[9] para seleccionar<br />
la memoria.<br />
La pantalla ahora responde con el mensaje “Complete”.<br />
(3) Libere el botón [USER¥PROGRAM/WRITE].<br />
(1) Maintenez le bouton [USER¥PROGRAM/WRITE] enfoncé.<br />
L’<strong>EXR</strong>-5/<strong>EXR</strong>-3 affiche à présent “-Write ?”.<br />
(2) Continuez d’enfoncer le bouton [USER¥PROGRAM/WRITE]<br />
et appuyez sur un bouton numérique [0]~[9] pour choisir la<br />
mémoire.<br />
L’écran affiche alors le message “Complete”.<br />
(3) Relâchez le bouton [USER¥PROGRAM/WRITE].<br />
94
<strong>EXR</strong>-5/<strong>EXR</strong>-3<br />
Notes about writing User Programs<br />
Leaving the User Program environment<br />
Press any other “big” DATA ENTRY button to leave the User<br />
Program environment.<br />
Meaning of the asterisk<br />
USERPROG<br />
At some stage, you may come across an asterisk message<br />
next to the User Program number.<br />
It means that the last User Program you selected is still in<br />
effect but that the current settings no longer correspond to<br />
the ones in that memory. Such changes may include the status<br />
of the Reverb or Chorus effect, a changed volume value,<br />
etc.<br />
Before selecting another User Program or switching off the<br />
<strong>EXR</strong>-5/<strong>EXR</strong>-3, you should therefore write these settings to<br />
the same (or a different) User Program if you want to keep<br />
them. Otherwise, you lose these changes.<br />
Mode selection<br />
The mode (Arranger, p. 28, Piano, p. 24) is also memorized<br />
when you write a User Program.<br />
User Programs and the USER STL memory<br />
The last Music Style you selected before writing a User Program<br />
is also memorized. This even applies to the USER<br />
STL memory that may contain a Style loaded from floppy<br />
disk [<strong>EXR</strong>-5 only] or the Flash memory (see p. 34).<br />
[<strong>EXR</strong>-5 only] The 10 User Programs can be saved to floppy disk<br />
as a set (see p. 114).<br />
Notas acerca de la escritura de Programas de Usuario<br />
Salir del entorno de Programa de Usuario<br />
Pulse cualquier otro botón “grande” DATA ENTRY para salir<br />
del entorno de Programa de Usuario.<br />
Significado del asterisco<br />
USERPROG<br />
En alguna de las etapas, puede encontrarse con un mensaje<br />
de asterisco al lado del número del Programa de Usuario.<br />
Significa que el último Programa de Usuario seleccionado<br />
sigue siendo efectivo, pero que los ajustes actuales ya no se<br />
corresponden con los de esta memoria. Dichos cambios pueden<br />
incluir el estado del efecto Reverb o Chorus, un valor de<br />
volumen cambiado, etc.<br />
Por lo tanto, antes de seleccionar otro Programa de Usuario o<br />
de desactivar el <strong>EXR</strong>-5/<strong>EXR</strong>-3, debería escribir estos ajustes<br />
en el mismo (u otro) Programa de Usuario si desea conservarlos.<br />
Si no lo hace se perderán los cambios.<br />
Selección de modo<br />
El modo (Arranger, p. 28, Piano, p. 24) también se memoriza<br />
al escribir un Programa de Usuario.<br />
Programas de Usuario y la memoria USER STL<br />
El último Estilo Musical seleccionado antes de escribir un<br />
Programa de Usuario también se memorizará. Esto también<br />
se aplica a la memoria USER STL que puede contener un<br />
Estilo cargado desde un disquete [Sólo <strong>EXR</strong>-5] o la memoria<br />
Flash (consulte la página 34).<br />
[Sólo <strong>EXR</strong>-5] Los 10 Programas de Usuario se pueden guardar en<br />
un disquete como un grupo (consulte la página 114).<br />
Remarques sur la sauvegarde des programmes utilisateur<br />
Quitter l’environnement User Program<br />
Appuyez sur tout autre “gros” bouton DATA ENTRY pour quitter<br />
l’environnement User Program.<br />
Signification de l’astérisque<br />
USERPROG<br />
Vous verrez parfois un astérisque à côté du numéro de programme<br />
utilisateur.<br />
Il indique que le dernier programme utilisateur sélectionné<br />
est toujours en vigueur mais que les réglages actuels ne correspondent<br />
plus à ceux contenus dans cette mémoire. De tels<br />
changements peuvent concerner l’état des effets Reverb et<br />
Chorus, une valeur Balance modifiée, etc.<br />
Avant de sélectionner un autre programme utilisateur ou de<br />
couper l’alimentation de l’<strong>EXR</strong>-5/<strong>EXR</strong>-3, sauvegardez ces<br />
réglages dans le programme utilisateur (ou dans un autre) si<br />
vous voulez les conserver. Sinon, vous perdrez ces modifications.<br />
Sélection de mode<br />
Le réglage de mode (Arranger, p. 28, Piano, p. 24) est aussi<br />
mémorisé dans le programme utilisateur.<br />
Programmes utilisateur et mémoire USER STL<br />
Le dernier style musical sélectionné avant la sauvegarde d’un<br />
programme utilisateur est aussi mémorisé. C’est aussi le cas<br />
de la mémoire USER STL, qui peut contenir un style<br />
chargé d’une disquette [<strong>EXR</strong>-5 uniquement] ou de la mémoire<br />
Flash (voyez p. 34).<br />
[<strong>EXR</strong>-5 uniquement] Vous pouvez sauvegarder les 10 programmes<br />
utilisateur sur disquette, sous forme d’un jeu de programmes<br />
(voyez p. 114).<br />
95
<strong>EXR</strong>-5/<strong>EXR</strong>-3<br />
Selecting a User Program<br />
Though the User Program memory you specified above is<br />
already selected, there will be times when you need to select<br />
another memory. In that case, here is what you need to do:<br />
(1) Briefly press [USER¥PROGRAM/WRITE] (it lights). Do not<br />
hold this button down because doing so will start the<br />
Write procedure (see above).<br />
Seleccionar un Programa de Usuario<br />
Aunque la memoria del Programa de Usuario especificado anteriormente<br />
ya está seleccionada, algunas veces deberá seleccionar<br />
otra memoria. En este caso, siga los pasos que se indican a<br />
continuación:<br />
(1) Pulse brevemente [USER¥PROGRAM/WRITE] (se ilumina). No<br />
lo mantenga pulsado, ya que si lo hace iniciará el procedimiento<br />
de Escritura (consulte las secciones anteriores).<br />
Sélection d’un programme utilisateur<br />
Bien que le programme utilisateur spécifié plus haut soit déjà<br />
sélectionné, il faut parfois en changer. Dans ce cas, voici comment<br />
procéder:<br />
(1) Appuyez brièvement sur le bouton<br />
[USER¥PROGRAM÷WRITE] (il s’allume). Ne maintenez pas ce<br />
bouton enfoncé car vous entameriez la procédure de sauvegarde<br />
(voyez plus haut).<br />
USER<br />
PROGRAM<br />
USERPROG<br />
The display now shows the number of the User Program you<br />
selected last, or “1” if you have not yet selected a User Program<br />
since switching on the <strong>EXR</strong>-5/<strong>EXR</strong>-3.<br />
The asterisk “*” indicates that the <strong>EXR</strong>-5/<strong>EXR</strong>-3 is still using<br />
the last manual changes you may have made before selecting<br />
the User Program function. The number to the left of the<br />
USERPROG message therefore only means “this is the last<br />
memory you selected”.<br />
None of its settings are being used for the time being. By<br />
pressing another “big” button in the DATA ENTRY section,<br />
you can leave the User Program mode without changing<br />
your manual settings. This may be important to remember if<br />
you were about to write your settings and accidentally<br />
pressed the wrong button (or didn’t press it long enough).<br />
To actually select a User Program…<br />
(2) Press one numeric button [0]~[9] to select the memory.<br />
The settings of the selected User Program will be recalled.<br />
Note: You can also use the FAMILY and SELECT [√][®] buttons to<br />
select User Programs.<br />
Note: As soon as you modify any setting (on the front panel or<br />
in the Function menu), the asterisk appears next to the User Program<br />
number.<br />
(3) Press any other “big” button in the DATA ENTRY section to<br />
leave this mode.<br />
96<br />
La pantalla ahora muestra el número del Programa de Usuario<br />
que haya seleccionado en último lugar, u “1” si aún no ha<br />
seleccionado ningún Programa de Usuario después de poner<br />
en marcha el <strong>EXR</strong>-5/<strong>EXR</strong>-3.<br />
El asterisco “*” indica que el <strong>EXR</strong>-5/<strong>EXR</strong>-3 todavía está utilizando<br />
los últimos cambios manuales que ha realizado antes<br />
de seleccionar la función User Program. El número de la<br />
izquierda del mensaje USERPROG, por lo tanto, sólo significa<br />
“ésta es la última memoria que ha seleccionado”.<br />
Pero actualmente ya no se utiliza ninguno de sus ajustes. Si<br />
pulsa otro botón “big” de la sección DATA ENTRY, podrá salir<br />
del modo de Programa de Usuario sin cambiar los ajustes<br />
manuales. Esto es importante recordarlo si desea escribir<br />
estos ajustes y pulsa accidentalmente el botón equivocado (o<br />
si no lo pulsa durante el tiempo suficiente).<br />
Para seleccionar realmente un Programa de Usuario…<br />
(2) Pulse un botón numérico [0]~[9] para seleccionar la memoria.<br />
Se recuperarán los ajustes del Programa de Usuario seleccionado.<br />
Nota: También puede utilizar los botones FAMILY y SELECT [√][®]<br />
para seleccionar los Programas de Usuario.<br />
Nota: Tan pronto como modifique cualquier ajuste (en el panel<br />
frontal o en el menú Function), aparecerá el asterisco al lado del<br />
número del Programa de Usuario.<br />
(3) Pulse cualquier otro botón “big” en la sección DATA ENTRY<br />
para salir de este modo.<br />
L’écran indique alors le numéro du programme utilisateur<br />
sélectionné en dernier lieu ou “1” si vous n’avez pas encore<br />
sélectionné de programme utilisateur depuis la mise sous<br />
tension de l’<strong>EXR</strong>-5/<strong>EXR</strong>-3.<br />
L’astérisque “*” vous avertit que l’<strong>EXR</strong>-5/<strong>EXR</strong>-3 se sert toujours<br />
des derniers changements manuels que vous avez peutêtre<br />
effectués avant de sélectionner la fonction User Program.<br />
Le numéro à gauche du message USERPROG ne<br />
signifie donc rien de plus que “ceci est la dernière mémoire<br />
sélectionnée”.<br />
Aucun de ses réglages n’est utilisé pour l’instant. En appuyant<br />
sur un autre “gros” bouton de la section DATA ENTRY, vous<br />
pouvez quitter le mode User Program sans changer vos<br />
réglages manuels. Cela peut être important si vous étiez sur<br />
le point d’enregistrer vos réglages et si vous avez appuyé<br />
accidentellement sur le mauvais bouton (ou que vous n’avez<br />
pas appuyé assez longtemps).<br />
Pour choisir un programme utilisateur…<br />
(2) Appuyez sur un bouton numérique [0]~[9] pour choisir la mémoire.<br />
Les réglages du programme utilisateur choisi sont rappelés.<br />
Remarque: Vous pouvez aussi utiliser les boutons FAMILY et<br />
SELECT [√][®] pour choisir les programmes utilisateur.<br />
Remarque: Dès que vous modifiez le moindre réglage (en face<br />
avant ou dans le menu Function), l’astérisque s’affiche à côté du<br />
numéro de programme utilisateur.<br />
(3) Appuyez sur tout autre “gros” bouton de la section DATA<br />
ENTRY pour quitter ce mode.
<strong>EXR</strong>-5/<strong>EXR</strong>-3<br />
13. MIDI functions<br />
MIDI is short for “Musical Instrument Digital Interface”. The<br />
word refers to many things, the most obvious being a connector<br />
type that is used by musical instruments and other devices to<br />
exchange messages relating to the act of making music.<br />
Each time you play on the <strong>EXR</strong>-5/<strong>EXR</strong>-3’s keyboard or start the<br />
Arranger (or Song), your instrument transmits MIDI data to its<br />
MIDI OUT. If you connect the MIDI OUT socket to the MIDI IN<br />
socket of another instrument, that instrument may play the<br />
same notes as one of the <strong>EXR</strong>-5/<strong>EXR</strong>-3’s parts, select sounds,<br />
etc.<br />
MIDI is a universal standard, which means that musical data can<br />
be sent to and received by instruments of different types and<br />
manufacturers. Furthermore, MIDI allows you to connect your<br />
<strong>EXR</strong>-5/<strong>EXR</strong>-3 to a computer or hardware sequencer.<br />
Connect your <strong>EXR</strong>-5/<strong>EXR</strong>-3 as shown below.<br />
13. Funciones MIDI<br />
MIDI es la abreviación de “Musical Instrument Digital Interface”<br />
(Interface Digital para Instrumentos Musicales). Este término se<br />
refiere a muchas cosas, siendo la más obvia un tipo de conector<br />
utilizado por instrumentos musicales y otros dispositivos para<br />
intercambiar mensajes relacionados con la creación de música.<br />
Cada vez que toque en el teclado del <strong>EXR</strong>-5/<strong>EXR</strong>-3 o que inicie el<br />
Arranger (o canción), el instrumento enviará información MIDI a<br />
su zócalo MIDI OUT. Si conecta el zócalo MIDI OUT al zócalo MIDI<br />
IN de otro instrumento, este instrumento podrá tocar las mismas<br />
notas que una de las partes del <strong>EXR</strong>-5/<strong>EXR</strong>-3, seleccionar sonidos,<br />
etc.<br />
El MIDI es un estándar universal, que significa que la información<br />
musical podrá enviarse y recibirse en instrumentos de diferentes<br />
tipos y fabricantes. Además, MIDI le permite conectar el<br />
<strong>EXR</strong>-5/<strong>EXR</strong>-3 a un ordenador o a un secuenciador de hardware.<br />
Conecte su <strong>EXR</strong>-5/<strong>EXR</strong>-3 como se muestra a continuación.<br />
13. Fonctions MIDI<br />
MIDI est l’acronyme de “Musical Instrument Digital Interface”. Le<br />
terme fait référence à de nombreuses choses mais avant tout à<br />
un type de connexion permettant à des instruments de musique<br />
et d’autres appareils électroniques d’échanger des messages<br />
concernant l’élaboration musicale.<br />
Chaque fois que vous jouez sur le clavier de l’<strong>EXR</strong>-5/<strong>EXR</strong>-3 ou<br />
que vous lancez l’arrangeur (ou un morceau), votre instrument<br />
transmet des données MIDI via sa prise MIDI OUT. Si vous reliez<br />
la prise MIDI OUT à la prise MIDI IN d’un autre instrument, ce<br />
dernier peut jouer les mêmes notes qu’une des parties de<br />
l’<strong>EXR</strong>-5/<strong>EXR</strong>-3, choisir des sons, etc.<br />
MIDI est une norme universelle: les données musicales peuvent<br />
donc être transmises et reçues par des instruments de types et<br />
fabricants différents. En outre, grâce au MIDI, vous pouvez brancher<br />
votre <strong>EXR</strong>-5/<strong>EXR</strong>-3 à un ordinateur ou un séquenceur.<br />
Branchez votre <strong>EXR</strong>-5/<strong>EXR</strong>-3 comme illustré ci-dessous.<br />
<strong>EXR</strong>-5/<strong>EXR</strong>-3<br />
The <strong>EXR</strong>-5/<strong>EXR</strong>-3 receives data<br />
El <strong>EXR</strong>-5/<strong>EXR</strong>-3 recibe información<br />
L’<strong>EXR</strong>-5/<strong>EXR</strong>-3 reçoit des données<br />
External MIDI instrument/computer<br />
Instrumento/ordenador MIDI externo<br />
Instrument MIDI externe/ordinateur<br />
The <strong>EXR</strong>-5/<strong>EXR</strong>-3 transmits data<br />
El <strong>EXR</strong>-5/<strong>EXR</strong>-3 transmite información<br />
L’<strong>EXR</strong>-5/<strong>EXR</strong>-3 transmet des données<br />
97
<strong>EXR</strong>-5/<strong>EXR</strong>-3<br />
Channels<br />
MIDI can simultaneously transmit and receive messages on<br />
16 channels, so that up to 16 instruments can be controlled.<br />
Nowadays, most instruments –like your <strong>EXR</strong>-5/<strong>EXR</strong>-3– are<br />
multitimbral, which means that they can play several musical<br />
parts with different sounds.<br />
Note: All <strong>EXR</strong>-5/<strong>EXR</strong>-3 parts are set to receive MIDI messages. If<br />
they do not seem to respond to the messages you send from the<br />
external controller, you should check whether the external controller’s<br />
MIDI OUT is connected to the MIDI INput of your <strong>EXR</strong>-5/<br />
<strong>EXR</strong>-3.<br />
The <strong>EXR</strong>-5/<strong>EXR</strong>-3’s transmit and receive channels of all parts<br />
have been set in keeping with a tacit <strong>Roland</strong> standard and<br />
are therefore shared by all recent EM, E, G, and RA series<br />
instruments. You cannot change them. They also correspond<br />
to the track assignments of the 16-track Recorder:<br />
1 Accomp 1<br />
9 Accomp 6<br />
2 Arranger bass<br />
10 Arranger drums<br />
3 Accomp 2<br />
11 kSplit<br />
4 kMain<br />
12 kAuto Bass<br />
5 Accomp 3<br />
13 V-Link<br />
6 kDual<br />
14 V-Link<br />
7 Accomp 4<br />
15 Melody Intell. (see p. 58)<br />
8 Accomp 5<br />
16 (kMain*)<br />
(*) If you assign a Drum Kit to the Main part.<br />
MIDI Function parameters<br />
See “Editing parameters (general procedure)” (p. 83) for how to<br />
select and set these Function parameters (they belong to the<br />
“MIDI” family).<br />
Note: With the exception of “Local”, all MIDI parameter settings<br />
are saved as soon as you leave the Function mode.<br />
■ Local<br />
(On/Off, Default setting: On) The Local parameter allows you to<br />
establish or remove the connection between the <strong>EXR</strong>-5/<strong>EXR</strong>-3’s<br />
keyboard/Recorder and the internal tone generator.<br />
Canales<br />
El MIDI puede transmitir y recibir mensajes de manera simultánea<br />
en 16 canales, con lo que pueden controlarse hasta 16<br />
instrumentos. Actualmente, la mayoría de instrumentos –<br />
como su <strong>EXR</strong>-5/<strong>EXR</strong>-3– son multitímbricos, lo que significa<br />
que pueden tocar diferentes partes musicales con diferentes<br />
sonidos.<br />
Nota: Todas las partes del <strong>EXR</strong>-5/<strong>EXR</strong>-3 están ajustadas para<br />
recibir mensajes MIDI. Si parecen no responder a los mensajes<br />
que envía desde el controlador externo, debería comprobar si<br />
MIDI OUT del controlador externo está conectado al MIDI INput<br />
del <strong>EXR</strong>-5/<strong>EXR</strong>-3.<br />
Los canales de transmisión y recepción del <strong>EXR</strong>-5/<strong>EXR</strong>-3 de<br />
todas las partes han sido ajustados cumpliendo con un<br />
estándar tácito de <strong>Roland</strong> y, por tanto, se comparten por<br />
todos los instrumentos más recientes de la serie EM, E, G y<br />
RA. No puede cambiarlos. También corresponden a las asignaciones<br />
de pista del Grabador de 16 pistas:<br />
1 Accomp 1<br />
9 Accomp 6<br />
2 Arranger bass<br />
10 Arranger drums<br />
3 Accomp 2<br />
11 kSplit<br />
4 kMain<br />
12 kAuto Bass<br />
5 Accomp 3<br />
13 V-Link<br />
6 kDual<br />
14 V-Link<br />
7 Accomp 4<br />
15 Melody Intell. (consulte la página 58)<br />
8 Accomp 5<br />
16 (kMain*)<br />
(*) Si asigna un grupo de percusión a la parte Main.<br />
Parámetros MIDI Function<br />
Consulte “Editar parámetros (procedimiento general)” (p. 83)<br />
para más información acerca de cómo seleccionar y ajustar estos<br />
parámetros Function (pertenecen a la familia “MIDI”).<br />
Nota: Exceptuando el “Local”, todos los ajustes del parámetro MIDI<br />
se guardan tan pronto como salga del modo Function.<br />
■Local<br />
(On/Off, Ajuste por defecto: On) El parámetro Local permite<br />
establecer o eliminar la conexión entre el teclado/Grabador del<br />
<strong>EXR</strong>-5/<strong>EXR</strong>-3 y el generador de sonidos interno.<br />
Canaux<br />
MIDI peut transmettre et recevoir des messages sur 16<br />
canaux simultanément, ce qui permet de piloter jusqu’à 16<br />
instruments. Actuellement, la plupart des instruments sont, à<br />
l’instar de l’<strong>EXR</strong>-5/<strong>EXR</strong>-3, multitimbraux. Cela signifie qu’ils<br />
peuvent jouer plusieurs parties musicales avec des sons différents.<br />
Remarque: Toutes les parties de l’<strong>EXR</strong>-5/<strong>EXR</strong>-3 peuvent recevoir<br />
des messages MIDI. Si elles ne semblent pas réagir aux messages<br />
venant d’un contrôleur externe, voyez si la prise MIDI OUT du<br />
contrôleur est correctement reliée à la prise MIDI IN de l’<strong>EXR</strong>-5/<br />
<strong>EXR</strong>-3.<br />
Les canaux de transmission et de réception de toutes les parties<br />
de l’<strong>EXR</strong>-5/<strong>EXR</strong>-3 répondent à une norme tacite de<br />
<strong>Roland</strong> utilisée par les instruments récents des séries EM, E, G<br />
et RA. Vous ne pouvez pas les modifier. Ils correspondent en<br />
outre aux assignations de pistes de l’enregistreur 16 pistes.<br />
1 Accomp 1<br />
9 Accomp 6<br />
2 Basse de l’arrangeur 10 Batterie de l’arrangeur<br />
3 Accomp 2<br />
11 kSplit<br />
4 kMain<br />
12 kAuto Bass<br />
5 Accomp 3<br />
13 V-Link<br />
6 kDual<br />
14 V-Link<br />
7 Accomp 4<br />
15 Melody Intell. (voyez p. 58)<br />
8 Accomp 5<br />
16 (kMain*)<br />
(*) Si vous assignez un kit de batterie à la partie Main.<br />
Paramètres Function MIDI<br />
Pour savoir comment choisir et régler ces paramètres Function,<br />
voyez “Edition de paramètres (procédure générale)” (p. 83) (ils<br />
font partie de la famille “MIDI”).<br />
Remarque: A l’exception de “Local”, tous les réglages des paramètres<br />
MIDI sont sauvegardés quand vous quittez le mode Function.<br />
■ Local<br />
(On/Off, Réglage par défaut: On) Le paramètre Local vous permet<br />
d’établir ou de couper le lien entre le clavier de l’<strong>EXR</strong>-5/<br />
<strong>EXR</strong>-3 et l’enregistreur d’une part et le générateur de sons<br />
interne d’autre part.<br />
98
<strong>EXR</strong>-5/<strong>EXR</strong>-3<br />
When set to “ON” (default), playing on the <strong>EXR</strong>-5/<strong>EXR</strong>-3’s keyboard<br />
or playing back a Recorder song will cause the corresponding<br />
notes to sound. If you select “OFF”, the corresponding<br />
MIDI messages are no longer sent to the internal tone generator<br />
– but they are still transmitted to the MIDI OUT port and<br />
hence to external MIDI instruments.<br />
Sound source<br />
Sound source<br />
Si está ajustado a “ON” (valor por defecto), al tocar el teclado<br />
del<strong>EXR</strong>-5/<strong>EXR</strong>-3o al reproducir una canción del Grabador, provocará<br />
que se escuchen las notas correspondientes. Si selecciona<br />
“OFF”, los correspondientes mensajes MIDI dejarán de<br />
enviarse al generador de sonido interno – pero se continuarán<br />
transmitiendo al puerto MIDI OUT y de aquí a los instrumentos<br />
MIDI externos.<br />
Fuente Sound de source sonido<br />
Fuente Sound de source sonido<br />
Avec un réglage “ON” (réglage d’usine), les notes jouées sur le<br />
clavier de l’<strong>EXR</strong>-5/<strong>EXR</strong>-3 et la reproduction d’un morceau de<br />
l’enregistreur sont audibles. Si vous choisissez “OFF”, les messages<br />
MIDI en question ne sont plus transmis au générateur de<br />
sons interne. Par contre, ils sont toujours transmis à la prise<br />
MIDI OUT (et donc aux instruments MIDI externes).<br />
Gén. Sound de source sons<br />
Gén. Sound de source sons<br />
MIDI OUT<br />
MIDI OUT<br />
MIDI OUT<br />
MIDI OUT<br />
LOCAL ON<br />
LOCAL OFF<br />
MIDI OUT<br />
MIDI OUT<br />
LOCAL ON<br />
LOCAL OFF<br />
LOCAL ON<br />
LOCAL OFF<br />
Note: The setting of this parameter is not memorized when you<br />
switch the <strong>EXR</strong>-5/<strong>EXR</strong>-3 off.<br />
■ MIDI TxRx° (MIDI transmission and reception)<br />
This parameter allows you to specify which <strong>EXR</strong>-5/<strong>EXR</strong>-3 parts<br />
should transmit and receive MIDI messages:<br />
Option Meaning<br />
ALL All parts.<br />
KBD Only the Keyboard parts (see k in the table above).<br />
STL Only the Arranger parts (AccDrums~Accomp 6).<br />
SNG Only the Song parts (1~16).<br />
OFF None of the <strong>EXR</strong>-5/<strong>EXR</strong>-3’s parts transmits/receives<br />
MIDI messages.<br />
■ Sync Rx° (MIDI synchronization)<br />
Use this parameter to specify how the <strong>EXR</strong>-5/<strong>EXR</strong>-3 should be<br />
synchronized (as slave) to an external MIDI sequencer, computer,<br />
drum machine, etc.<br />
“Synchronization” is a learned term for the fact that one device<br />
(or function) is set to start and stop at the same time as<br />
another device (or function), and to run at the same tempo<br />
(BPM).<br />
Please note that synchronization is only possible when you<br />
connect the external device’s MIDI OUT socket to the <strong>EXR</strong>-5/<br />
<strong>EXR</strong>-3’s MIDI IN socket (though you can also work the other<br />
way around; in that case, see the sequencer’s manual for<br />
details).<br />
Nota: El ajuste de este parámetro no se memoriza al desactivar el<br />
<strong>EXR</strong>-5/<strong>EXR</strong>-3.<br />
■MIDI TxRx° (transmisión y recepción MIDI)<br />
Este parámetro le permite especificar qué partes del <strong>EXR</strong>-5/<br />
<strong>EXR</strong>-3 deberían transmitir y recibir mensajes MIDI:<br />
Opción Significado<br />
ALL Todas las partes.<br />
KBD Sólo las partes del teclado (consulte k de la tabla<br />
anterior).<br />
STL Sólo las partes del Arranger (AccDrums~Accomp 6).<br />
SNG Sólo las partes del Recorder (1~16).<br />
OFF Ninguna de las partes del <strong>EXR</strong>-5/<strong>EXR</strong>-3 transmite/<br />
recibe mensajes MIDI.<br />
■Sync Rx° (sincronización MIDI)<br />
Utilice este parámetro para especificar cómo debería sincronizarse<br />
el <strong>EXR</strong>-5/<strong>EXR</strong>-3 (como esclavo) a un secuenciador MIDI<br />
externo, ordenador, unidad de ritmo, etc.<br />
La “Sincronización” se refiere al hecho que un dispositivo (o<br />
función) se inicie y se pare al mismo tiempo que otro dispositivo<br />
(o función), y que actúe al mismo tempo (BPM).<br />
Tenga en cuenta que la sincronización sólo es posible si conecta<br />
el zócalo MIDI OUT del dispositivo externo al zócalo MIDI IN del<br />
<strong>EXR</strong>-5/<strong>EXR</strong>-3 (aunque también es posible otro modo; en este<br />
caso, consulte el manual del secuenciador para más detalles).<br />
Remarque: Le réglage de ce paramètre n’est pas mémorisé quand<br />
vous mettez l’<strong>EXR</strong>-5/<strong>EXR</strong>-3 hors tension.<br />
■ MIDI TxRx° (transfert et réception MIDI)<br />
Ce paramètre définit quelles parties de l’<strong>EXR</strong>-5/<strong>EXR</strong>-3 peuvent<br />
transmettre et recevoir des messages MIDI:<br />
Option<br />
ALL<br />
KBD<br />
Signification<br />
Toutes les parties.<br />
Uniquement les parties Keyboard (voyez k dans le<br />
tableau ci-dessus).<br />
STL Uniquement les parties Arranger (AccDrums~Acc 6).<br />
SNG Uniquement les parties Song (1~16).<br />
OFF Aucune des parties de l’<strong>EXR</strong>-5/<strong>EXR</strong>-3 ne transmet/<br />
reçoit de messages MIDI.<br />
■ Sync Rx° (synchronisation MIDI)<br />
Ce paramètre permet de spécifier la façon dont l’<strong>EXR</strong>-5/<strong>EXR</strong>-3<br />
doit se synchroniser (comme esclave) à un séquenceur, ordinateur,<br />
boîte à rythmes MIDI, etc.<br />
Cette fonction permet de synchroniser un appareil (ou une<br />
fonction) sur un autre appareil (ou fonction) pour les faire<br />
démarrer et les arrêter simultanément et fonctionner sur le<br />
même tempo (BPM).<br />
Notez qu’il ne peut y avoir synchronisation que si vous avez<br />
branché la prise MIDI OUT de l’appareil externe à la prise MIDI<br />
IN de l’<strong>EXR</strong>-5/<strong>EXR</strong>-3 (vous pouvez aussi faire l’inverse; voyez<br />
alors le manuel de l’appareil externe pour en savoir plus).<br />
99
<strong>EXR</strong>-5/<strong>EXR</strong>-3<br />
Off<br />
On<br />
In this case, the <strong>EXR</strong>-5/<strong>EXR</strong>-3 is not synchronized with<br />
other MIDI devices. It is thus impossible to start/stop it<br />
via MIDI.<br />
Arranger playback and Song recording/playback are<br />
synchronized if the <strong>EXR</strong>-5/<strong>EXR</strong>-3 receives MIDI Start<br />
and Stop messages followed by MIDI Clock signals. If<br />
the <strong>EXR</strong>-5/<strong>EXR</strong>-3 receives only a Start message, it will<br />
wait a moment to see if there are also MIDI Clock messages<br />
coming.<br />
If there are, it will synchronize to them. If there are no<br />
MIDI Clock messages, it will follow its own tempo. In<br />
either case, you can stop playback or recording with a<br />
MIDI Stop message.<br />
■ Style PC° (Style Select TxRx Channel)<br />
(OFF, 1~16, Default setting: 10) As its name implies, the Style<br />
Select channel is used to receive and transmit program changes<br />
that cause the <strong>EXR</strong>-5/<strong>EXR</strong>-3 or the external instrument to<br />
select another Music Style.<br />
■ Lyrics Tx° (Transmit Lyrics messages)<br />
(On/Off, Default setting: Off) The <strong>EXR</strong>-5/<strong>EXR</strong>-3 can transmit<br />
Lyrics messages contained in Format 0 Standard MIDI Files you<br />
play back. It cannot display them, but it allows you to transmit<br />
them to a device capable of displaying Lyrics messages (such as<br />
the <strong>Roland</strong> LVC-1). This filter allows you to enable (On) or disable<br />
(Off) the transmission of Lyrics data.<br />
■ NTA Rx14° (Note-to-Arranger reception on/off)<br />
(On/Off, Default setting: On) NTA is short for “Note-to-<br />
Arranger”, or the notes you play in the left half of the keyboard<br />
to feed the Arranger with chord information. These notes can<br />
also be received via MIDI (from an accordion, a digital piano, an<br />
organ, for example). If you want to use the Arranger without<br />
playing on the <strong>EXR</strong>-5/<strong>EXR</strong>-3’s keyboard, you must transmit<br />
these notes on MIDI channel 14 (from your computer or external<br />
MIDI instrument to the <strong>EXR</strong>-5/<strong>EXR</strong>-3) and select “On” here.<br />
On<br />
On<br />
En este caso, el <strong>EXR</strong>-5/<strong>EXR</strong>-3 no se sincroniza con otros<br />
dispositivos MIDI. Por lo tanto, será imposible ponerlo<br />
en marcha y pararlo mediante MIDI.<br />
La reproducción del Arranger y la reproducción/<br />
grabación de la Canción se sincronizan si el <strong>EXR</strong>-5/<br />
<strong>EXR</strong>-3 recibe mensaje de Inicio y Parada MIDI seguidos<br />
por las señales MIDI Clock. Si el <strong>EXR</strong>-5/<strong>EXR</strong>-3 sólo recibe<br />
un mensaje de Inicio, esperará un momento para ver si<br />
también se están enviando mensajes MIDI Clock.<br />
Si los hay, se sincronizará con ellos. Si no existe ningún<br />
mensaje MIDI Clock, seguirá su propio tempo. En<br />
cualquier caso, puede detener la reproducción o<br />
grabación con un mensaje de Parada MIDI.<br />
■Style PC° (Style Select TxRx Channel)<br />
(OFF, 1~16, Ajuste por defecto: 10) Tal como su nombre indica,<br />
el canal Style Select se utiliza para recibir y transmitir cambios<br />
de programa que provocan que el <strong>EXR</strong>-5/<strong>EXR</strong>-3 o el instrumento<br />
externo seleccionen otro Estilo Musical.<br />
■Lyrics Tx° (Mensajes Transmit Lyrics)<br />
(On/Off, Ajuste por defecto: Off) El <strong>EXR</strong>-5/<strong>EXR</strong>-3 es capaz de<br />
transmitir mensajes de Letras de canción contenidos en los<br />
Archivos MIDI Estándar del Formato 0 que usted reproduce. No<br />
puede visualizarlos pero le permite transmitirlos a un dispositivo<br />
capaz de visualizar mensajes de Letras de canción (como el<br />
<strong>Roland</strong> LVC-1). Este filtro le permite activar (On) o desactivar<br />
(Off) la transmisión de información de Letras de canción.<br />
■NTA Rx14° (activar/desactivar la recepción de Note-to-Arranger)<br />
(On/Off, Ajuste por defecto: On) NTA es la abreviación de “Noteto-Arranger”,<br />
o las notas que interpreta en la mitad izquierda<br />
del teclado para alimentar al Arranger con información de acordes.<br />
Estas notas también se pueden recibir a través de MIDI<br />
(desde un acordeón, un piano digital, un órgano, por ejemplo).<br />
Si desea utilizar el Arranger sin tocar en el teclado del <strong>EXR</strong>-5/<br />
<strong>EXR</strong>-3, debe transmitir estas notas al canal MIDI 14 (desd su<br />
ordenador o instrumento MIDI externo al <strong>EXR</strong>-5/<strong>EXR</strong>-3) y seleccionar<br />
“On”.<br />
Off<br />
On<br />
Dans ce cas, l’<strong>EXR</strong>-5/<strong>EXR</strong>-3 n’est pas synchronisé avec<br />
d’autres appareils MIDI. Il est donc impossible de le faire<br />
démarrer/de l’arrêter via MIDI.<br />
Ce mode synchronise la reproduction de l’arrangeur et<br />
l’enregistrement/la reproduction de morceau lorsque<br />
l’<strong>EXR</strong>-5/<strong>EXR</strong>-3 reçoit des messages MIDI Start et Stop<br />
suivis d’un signal MIDI Clock. Si l’<strong>EXR</strong>-5/<strong>EXR</strong>-3 reçoit<br />
uniquement un message Start, il attend un peu pour<br />
voir si des messages MIDI Clock ne suivent pas.<br />
Si c’est le cas, il se synchronise sur ces messages. S’il n’y<br />
a pas de message MIDI Clock, l’instrument utilise son<br />
propre tempo. Dans les deux cas, vous pouvez arrêter la<br />
reproduction ou l’enregistrement avec un message MIDI<br />
Stop.<br />
■ Style PC (Style Select TxRx Channel)<br />
(OFF, 1~16, Réglage par défaut: 10) Comme son nom l’indique,<br />
le canal Style Select sert à la réception et à la transmission de<br />
changements de programme entraînant un changement de<br />
style sur l’<strong>EXR</strong>-5/<strong>EXR</strong>-3 ou l’instrument externe.<br />
■ Lyrics Tx (transmission de messages Lyrics)<br />
(On/Off, Réglage par défaut: Off) L’<strong>EXR</strong>-5/<strong>EXR</strong>-3 peut transmettre<br />
des données de paroles (Lyrics) contenues dans des fichiers<br />
Standard MIDI de Format 0. Il ne peut pas les afficher mais peut<br />
les transmettre à un appareil capable d’afficher des paroles<br />
(comme le <strong>Roland</strong> LVC-1). Ce filtre vous permet d’activer (On) et<br />
de couper (Off) la transmission de données de paroles.<br />
■ NTA Rx14 (activation/coupure de réception NTA)<br />
(On/Off, Réglage par défaut: On) NTA est l’abréviation de “Noteto-Arranger”<br />
et représente les notes jouées dans la moitié gauche<br />
du clavier pour alimenter l’arrangeur avec des informations<br />
d’accords. Ces notes peuvent aussi être transmises à l’instrument<br />
via MIDI (d’un accordéon, un piano numérique ou un<br />
orgue, par exemple). Si vous voulez utiliser l’arrangeur sans<br />
jouer sur le clavier de l’<strong>EXR</strong>-5/<strong>EXR</strong>-3, vous devez transmettre<br />
ces notes sur le canal MIDI 14 (de votre ordinateur ou instrument<br />
MIDI externe à l’<strong>EXR</strong>-5/<strong>EXR</strong>-3) et choisir “On” ici.<br />
100
<strong>EXR</strong>-5/<strong>EXR</strong>-3<br />
NTA notes can only be received (they are not transmitted). The<br />
notes you play on the <strong>EXR</strong>-5/<strong>EXR</strong>-3’s keyboard are indeed<br />
transmitted to the Arranger, from there to the Arranger parts,<br />
and used to play the accompaniment in the right key. Since all<br />
Music Style notes are transmitted via MIDI, there is no need to<br />
send the NTA notes separately.<br />
■ PitchBnd° (Pitch Bend)<br />
(On/Off, Default setting: On) This filter allows you to enable<br />
(On) or disable (Off) the transmission and reception of Pitch<br />
Bend messages. These messages are used to temporarily<br />
increase or decrease the pitch of the Keyboard-part notes<br />
(Main, Dual, Split).<br />
■ Modulatn° (Modulation)<br />
(On/Off, Default setting: On) This filter allows you to enable<br />
(On) or disable (Off) the transmission and reception of Modulation<br />
messages. These messages are used to add vibrato to the<br />
notes you play (control change CC01).<br />
■ ProgChng° (Program Change)<br />
(On/Off, Default setting: On) This filter allows you to enable<br />
(On) or disable (Off) the transmission and reception of Program<br />
Change messages. These messages are used to select Tones,<br />
Styles, or User Programs.<br />
■ Velo Rx° (Receive Velocity)<br />
(On, 1~127, Default setting: On) This filter allows you to enable<br />
(On) or disable the reception of velocity messages. This only<br />
applies to note messages received via MIDI. Choose the velocity<br />
value to be substituted for the actual values the <strong>EXR</strong>-5/<strong>EXR</strong>-3<br />
receives (1~127), or select “On” to use the velocity values as is.<br />
■ Clock Tx° (synchronization)<br />
(On/Off, Default setting: On) This parameter allows you to<br />
determine whether (On) or not (Off) the Arranger and Recorder<br />
send MIDI Clock messages when you start them. These messages<br />
are necessary for synchronizing external MIDI instruments/sequencers/software<br />
to the <strong>EXR</strong>-5/<strong>EXR</strong>-3.<br />
Las notas NTA sólo se pueden recibir (no se transmiten). Las<br />
notas que toca en el teclado del<strong>EXR</strong>-5/<strong>EXR</strong>-3 son transmitidas<br />
al Arranger, desde ahí a las partes del Arranger y utilizadas para<br />
tocar el acompañamiento en el tono adecuado. Puesto que<br />
todas las notas de los Estilos Musicales se transmiten vía MIDI,<br />
no hay necesidad de enviar las notas NTA por separado.<br />
■PitchBnd° (Pitch Bend)<br />
(On/Off, Ajuste por defecto: On) Este filtro le permite activar<br />
(On) o desactivar (Off) la transmisión y recepción de mensajes<br />
Pitch Bend. Estos mensajes se utilizan para incrementar o disminuir<br />
temporalmente la afinación de las notas de la parte del<br />
teclado (Main, Dual, Split).<br />
■Modulatn° (Modulation)<br />
(On/Off, Ajuste por defecto: On) Este filtro le permite activar<br />
(On) o desactivar (Off) la transmisión y recepción de mensajes<br />
Modulation. Estos mensajes se utilizan para añadir vibrato a las<br />
notas que toque (cambio de control CC01).<br />
■ProgChng° (Program Change)<br />
(On/Off, Ajuste por defecto: On) Este filtro le permite activar<br />
(On) o desactivar (Off) la transmisión y recepción de mensajes<br />
Program Change. Estos mensajes se usan para seleccionar<br />
Tonos, Estilos, o Programas de Usuario.<br />
■Velo Rx° (Receive Velocity)<br />
(On, 1~127, Ajuste por defecto: On) Este filtro le permite activar<br />
(On) o desactivar (Off) la recepción de mensajes Velocity. Esto<br />
sólo se aplica a mensajes de nota recibidos vía MIDI. Seleccione<br />
el valor de velocidad que debe sustituirse por los valores reales<br />
que el <strong>EXR</strong>-5/<strong>EXR</strong>-3 recibe (1~127), o seleccione “On” para usar<br />
los valores de velocidad tal como estan.<br />
■Clock Tx° (sincronización)<br />
(On/Off, Ajuste por defecto: On) Este parámetro le permite<br />
determinar si el Arranger y el Grabador enviarán (On) o no (Off)<br />
mensajes MIDI Clock cuando los ponga en marcha. Estos mensajes<br />
son necesarios para sincronizar instrumentos MIDI externos/secuenciadores/software<br />
en el <strong>EXR</strong>-5/<strong>EXR</strong>-3.<br />
Les notes NTA peuvent uniquement être reçues (elles ne sont<br />
pas transmises). Les notes jouées sur le clavier de l’<strong>EXR</strong>-5/<strong>EXR</strong>-3<br />
sont effectivement transmises à l’arrangeur et de là aux parties<br />
Arranger; elles sont utilisées pour produire l’arrangement dans<br />
la bonne tonalité. Comme toutes les notes des styles musicaux<br />
sont transmises via MIDI, il est inutile de transmettre les notes<br />
NTA séparément.<br />
■ PitchBnd° (Pitch Bend)<br />
(On/Off, Réglage par défaut: On) Ce filtre permet d’activer (On)<br />
ou de couper (Off) la transmission et la réception des messages<br />
Pitch Bend. Ceux-ci servent à augmenter ou diminuer temporairement<br />
la hauteur des notes des parties Keyboard (Main,<br />
Dual, Split).<br />
■ Modulatn° (Modulation)<br />
(On/Off, Réglage par défaut: On) Sert à activer (On) ou couper<br />
(Off) la transmission et la réception des messages Modulation.<br />
Ceux-ci ajoutent un effet de vibrato aux notes jouées (commande<br />
de contrôle CC01).<br />
■ ProgChng° (changement de programme)<br />
(On/Off, Réglage par défaut: On) Ce filtre sert à activer (On) ou<br />
couper (Off) la transmission et la réception des messages de<br />
changement de programme. Ceux-ci servent à la sélection des<br />
sons, des styles ou des programmes utilisateur.<br />
■ Velo Rx° (Receive Velocity)<br />
(On, 1~127, Réglage par défaut: On) Ce filtre sert à activer (On)<br />
ou couper la réception des messages Velocity (de toucher). Ce<br />
paramètre porte uniquement sur les messages de notes reçus<br />
via MIDI. Spécifiez la valeur de toucher à substituer aux valeurs<br />
reçues par l’<strong>EXR</strong>-5/<strong>EXR</strong>-3 (1~127) ou choisissez “On” pour utiliser<br />
les valeurs de toucher telles quelles.<br />
■ Clock Tx° (synchronisation)<br />
(On/Off, Réglage par défaut: On) Ce paramètre définit si l’arrangeur<br />
et l’enregistreur envoient (On) ou non (Off) des signaux<br />
d’horloge MIDI quand vous les démarrez. Ces signaux sont<br />
indispensables pour synchroniser des instruments, séquenceurs,<br />
logiciels MIDI externes avec l’<strong>EXR</strong>-5/<strong>EXR</strong>-3.<br />
101
<strong>EXR</strong>-5/<strong>EXR</strong>-3<br />
■ StartStp° (Start/Stop/Continue)<br />
(On/Off, Default setting: On) This option allows you to specify<br />
whether or not the Arranger and Recorder send Start/Stop/<br />
Continue messages when you start or stop them. Select “Off”<br />
when you wish to control the tone generator of a MIDI organ,<br />
etc., without starting or stopping its automatic accompaniment.<br />
■ Song PosP° (Song Position Pointer)<br />
(On/Off, Default setting: On) The <strong>EXR</strong>-5/<strong>EXR</strong>-3’s Recorder also<br />
sends and receives Song Position Pointer messages that indicate<br />
the exact location of the notes that are being played back.<br />
Select “OFF” if you don’t want the Recorder to send or receive<br />
these messages.<br />
■StartStp° (Start/Stop/Continue)<br />
(On/Off, Ajuste por defecto: On) Esta opción le permite determinar<br />
si el Arranger y el Grabador enviarán mensajes Start/Stop/<br />
Continue cuando los active o desactive. Seleccione “Off” cuando<br />
desee controlar el generador de tone de un órgano MIDI, etc.,<br />
sin iniciar o parar su acompañamiento automático.<br />
■Song PosP° (Song Position Pointer)<br />
(On/Off, Ajuste por defecto: On) El Grabador del <strong>EXR</strong>-5/<strong>EXR</strong>-3<br />
también envía y recibe mensajes Song Position Pointer que<br />
indican la localización exacta de las notas que se está reproduciendo.<br />
Seleccione “OFF” si no quiere que el Grabador envíe o<br />
reciba estos mensajes.<br />
■ StartStp° (Start/Stop/Continue)<br />
(On/Off, Réglage par défaut: On) Cette option permet de déterminer<br />
si l’arrangeur et l’enregistreur envoient des messages<br />
Start/Stop/ Continue lorsqu’ils fonctionnent. Sélectionnez “Off”<br />
si vous souhaitez piloter le générateur de sons d’un orgue MIDI,<br />
etc. sans démarrer son accompagnement automatique chaque<br />
fois que vous lancez la reproduction de l’arrangeur ou de l’enregistreur.<br />
■ Song PosP° (Song Position Pointer)<br />
(On/Off, Réglage par défaut: On) L’enregistreur de l’<strong>EXR</strong>-5/<br />
<strong>EXR</strong>-3 envoie et reçoit aussi des messages indiquant la position<br />
dans le morceau ou “Song Position Pointer”. Sélectionnez “OFF”<br />
si vous ne voulez pas que l’enregistreur envoie ou reçoive ces<br />
messages.<br />
102
<strong>EXR</strong>-5/<strong>EXR</strong>-3<br />
14. Data management<br />
Working with the Flash memory<br />
Let us first have a look at the remaining Function parameters.<br />
They allow you to save newly recorded songs and Styles loaded<br />
from a floppy disk [<strong>EXR</strong>-5 only] to the <strong>EXR</strong>-5/<strong>EXR</strong>-3’s Flash memory,<br />
and to remove such files.<br />
14. Gestión de la información<br />
Trabajar con la memoria Flash<br />
Ante todo miremos los parámetros Function restantes (UTILITY).<br />
Permiten guardar las canciones nuevamente grabadas y los<br />
estilos cargados desde un disquete [Sólo <strong>EXR</strong>-5] a la memoria Flash<br />
del <strong>EXR</strong>-5/<strong>EXR</strong>-3, y eliminar estos archivos.<br />
14. Gestion des données<br />
Utilisation de la mémoire Flash<br />
Examinons d’abord les paramètres Function restants. Ils permettent<br />
de sauvegarder des morceaux fraîchement enregistrés ou<br />
des styles chargés d’une disquette [<strong>EXR</strong>-5 uniquement] dans la<br />
mémoire Flash de l’<strong>EXR</strong>-5/<strong>EXR</strong>-3 et de supprimer ces fichiers.<br />
Saving songs to a Flash memory<br />
Guardar canciones en una memoria Flash<br />
Sauvegarder un morceau dans une mémoire Flash<br />
FUNCTION<br />
=<br />
SONG 001 yes<br />
_ ! # $ % & ’ - @ ^ ‘<br />
0 1 2 3 4 5 6 7 8 9<br />
A B C D E F G H I J K L M<br />
N O P Q R S T U V W X Y Z<br />
Songs you record or edit with the <strong>EXR</strong>-5/<strong>EXR</strong>-3’s Recorder (or<br />
that you modify using the Cover functions) can be saved to its<br />
Flash memory or floppy disk [<strong>EXR</strong>-5 only]. See page 114 for how to<br />
save them to floppy and page 34 for how to select songs in the<br />
Flash memory.<br />
(1) Press [FUNCTION].<br />
(2) Use FAMILY [√][®] to select the “WriteSNG” parameter.<br />
Wait until the display looks as shown above, then proceed<br />
with the following step.<br />
The <strong>EXR</strong>-5/<strong>EXR</strong>-3 automatically selects a Flash memory that<br />
doesn’t yet contain data. (The first character, “S”, flashes.)<br />
Note: If no vacant Flash memory remains or if the memory<br />
capacity is exhausted, the display shows the “Mem Full”<br />
message when you select this function. In that case, it will be<br />
impossible to save your song. You can, however, delete another<br />
song (“Remove”) and repeat step (2) and following.<br />
Note: The “No Song” message means that there are no song<br />
data that could be saved.<br />
(3) If necessary, use the SELECT [√][®] buttons to move the<br />
cursor to another character position (that character<br />
flashes).<br />
Las canciones que grabe o edite con el Grabador del <strong>EXR</strong>-5/<br />
<strong>EXR</strong>-3 (o que modifique utilizando las funciones Cover) se pueden<br />
guardar en su memoria Flash o en un disquete [Sólo <strong>EXR</strong>-5].<br />
Consulte la página 114 para saber como guardarlas en un disquete<br />
y página 34 como seleccionar canciones de la memoria<br />
Flash.<br />
(1) Pulse [FUNCTION].<br />
(2) Utilice FAMILY [√][®] para seleccionar el parámetro<br />
“WriteSNG”.<br />
Espere hasta que la pantalla tenga el siguiente aspecto, luego<br />
proceda con el siguiente paso.<br />
El <strong>EXR</strong>-5/<strong>EXR</strong>-3 automáticamente selecciona una memoria<br />
Flash que aún no contiene información. (El primer carácter,<br />
“S”, parpadea.)<br />
Nota: Si no queda memoria Flash vacante o si la capacidad de<br />
memoria está agotada, la pantalla mostrará el mensaje “Mem<br />
Full” cuando seleccione esta función. En este caso, será imposible<br />
guardar la canción. Sin embargo, puede eliminar otra canción<br />
(“Remove”) y repetir el paso (2) y seguir.<br />
Nota: El mensaje “No Song” significa que no existe información<br />
de canción que se pueda guardar.<br />
Vous pouvez sauvegarder les morceaux enregistrés ou édités<br />
avec la fonction Recorder de l’<strong>EXR</strong>-5/<strong>EXR</strong>-3 (ou modifiés avec les<br />
fonctions Cover) dans la mémoire Flash de l’instrument ou sur<br />
une disquette [<strong>EXR</strong>-5 uniquement]. Voyez page 114 pour savoir comment<br />
sauvegarder les morceaux sur disquette et page 34 pour<br />
savoir comment choisir un morceau en mémoire Flash.<br />
(1) Appuyez sur [FUNCTION].<br />
(2) Utilisez FAMILY [√][®] pour choisir le paramètre<br />
“WriteSNG”.<br />
Attendez que l’écran se présente comme sur l’illustration cidessus<br />
avant de passer à l’étape suivante.<br />
L’<strong>EXR</strong>-5/<strong>EXR</strong>-3 choisit automatiquement une mémoire Flash<br />
vide. (“S”, le premier caractère, clignote.)<br />
Remarque: S’il ne reste aucune mémoire Flash disponible ou si<br />
la capacité de la mémoire est épuisée, l’écran affiche le message<br />
“Mem Full” quand vous choisissez cette fonction. Dans ce<br />
cas, vous ne pourrez pas sauvegarder votre morceau. En revanche,<br />
vous pouvez effacer un autre morceau (“Remove”) et<br />
reprendre cette procédure à partir de l’étape (2).<br />
Remarque: Le message “No Song” signifie qu’il n’y a pas de<br />
données de morceau à sauvegarder.<br />
103
<strong>EXR</strong>-5/<strong>EXR</strong>-3<br />
(4) Use the numeric buttons to assign a character to that<br />
position.<br />
The available characters are as shown on the previous page.<br />
Note: Each time you press another numeric button (for entering<br />
characters), the cursor advances automatically to the next position.<br />
This works like a mobile phone.<br />
(5) Repeat steps (3) and (4) to assign the desired characters to<br />
the remaining positions.<br />
(6) After entering the name, press the [YES/+] button to save<br />
the song to the <strong>EXR</strong>-5/<strong>EXR</strong>-3’s Flash memory.<br />
The display now counts down:<br />
Writing<br />
At the end of the saving operation, the display briefly shows<br />
the “Complete” message.<br />
Note: Press [NO/–] if you do not wish to save the song after all.<br />
(7) Press another “big” button in the DATA ENTRY section to<br />
leave this function.<br />
Saving Styles to a Flash memory [<strong>EXR</strong>-5 only]<br />
Music Styles you load from floppy disk (and which are copied to<br />
the USER STL memory at that time) can be saved to a Flash<br />
memory.<br />
(1) Press [FUNCTION].<br />
(2) Use FAMILY [√][®] to select the “WriteSTL” parameter.<br />
Wait until the display looks as follows, then proceed with the<br />
next step:<br />
TANGO<br />
The <strong>EXR</strong>-5 automatically selects a Flash destination memory<br />
that doesn’t yet contain data. (The first character flashes.)<br />
=<br />
yes<br />
(3) Si es necesario, utilice los botones SELECT [√][®] para desplazar<br />
el cursor a la siguiente posición de carácter (ese<br />
carácter parpadea).<br />
(4) Utilice los botones numéricos para asignar un carácter a<br />
esa posición.<br />
Los caracteres disponibles se muestran en la anterior página.<br />
Nota: Cada vez que pulsa otro botón numérico (para introducir<br />
caracteres), el cursor avanza automáticamente a la siguiente<br />
posición. Funciona como un teléfono móvil.<br />
(5) Repita los pasos (3) y (4) para asignar los caracteres deseados<br />
a las posiciones restantes.<br />
(6) Después de introducir el nombre, pulse el botón [YES/+]<br />
para guardar la canción en la memoria Flash del <strong>EXR</strong>-5/<br />
<strong>EXR</strong>-3.<br />
Ahora la pantalla cuenta atrás:<br />
Writing<br />
Al final de la operación de guardado, la pantalla brevemente<br />
muestra el mensaje “Complete”.<br />
Nota: Pulse [NO/–] si no desea guardar la canción después de<br />
todo.<br />
(7) Pulse otro botón “big” en la sección DATA ENTRY para salir<br />
de esta función.<br />
Guardar estilos en una memoria Flash [Sólo <strong>EXR</strong>-5]<br />
Los estilos musicales que cargue desde un disquete (y que están<br />
copiados en la memoria USER STL al mismo tiempo) se pueden<br />
guardar en una memoria Flash.<br />
(1) Pulse [FUNCTION].<br />
(2) Utilice FAMILY [√][®] para seleccionar el parámetro<br />
“WriteSTL”.<br />
Espere hasta que la pantalla tenga el siguiente aspecto, luego<br />
proceda con el siguiente paso:<br />
TANGO<br />
El <strong>EXR</strong>-5 automáticamente selecciona una memoria de destino<br />
Flash que aún no contiene información. (El primer carácter<br />
parpadea.)<br />
=<br />
yes<br />
(3) Si nécessaire, utilisez les boutons SELECT [√][®] pour amener<br />
le curseur à l’emplacement d’un autre caractère (ce<br />
dernier clignote).<br />
(4) Utilisez les boutons numériques pour assigner un caractère<br />
à cet emplacement.<br />
Voyez la liste des caractères disponibles à la page précédente.<br />
Remarque: Chaque fois que vous appuyez sur un autre bouton<br />
numérique (pour entrer un caractère), le curseur avance automatiquement<br />
jusqu’à la position suivante. Cette procédure est<br />
semblable à l’entrée de caractères sur un téléphone portable.<br />
(5) Répétez les étapes (3) et (4) pour assigner les caractères<br />
voulus aux autres emplacements.<br />
(6) Après avoir entré le nom, appuyez sur le bouton [YES/+]<br />
pour sauvegarder le morceau dans la mémoire Flash de<br />
l’<strong>EXR</strong>-5/<strong>EXR</strong>-3.<br />
L’écran affiche alors un décompte:<br />
Writing<br />
A la fin de la sauvegarde, l’écran affiche brièvement le message<br />
“Complete”.<br />
Remarque: Appuyez sur [NO/–] si vous renoncez à sauvegarder<br />
le morceau.<br />
(7) Appuyez sur un autre “gros” bouton de la section DATA<br />
ENTRY pour quitter cette fonction.<br />
Sauvegarder des styles en mémoire Flash<br />
[<strong>EXR</strong>-5 uniquement]<br />
Les styles musicaux que vous chargez d’une disquette (et qui<br />
sont alors copiés vers la mémoire USER STL) peuvent être<br />
sauvegardés dans une mémoire Flash.<br />
(1) Appuyez sur [FUNCTION].<br />
(2) Utilisez FAMILY [√][®] pour choisir le paramètre<br />
“WriteSTL”.<br />
Attendez que l’écran se présente comme suit avant de passer<br />
à l’étape suivante:<br />
TANGO<br />
=<br />
yes<br />
L’<strong>EXR</strong>-5 choisit automatiquement une mémoire Flash vide<br />
comme destination. (Le premier caractère clignote.)<br />
104
<strong>EXR</strong>-5/<strong>EXR</strong>-3<br />
Note: If no vacant Flash memory remains or if the memory<br />
capacity is exhausted, the display shows the “Mem Full”<br />
message when you select this function. In that case, it will be<br />
impossible to save the Music Style. You can, however, delete<br />
another Style (“Remove”) and repeat step (2) and following.<br />
Note: The “No Style” message means that there are no<br />
Style data that could be saved.<br />
(3) If necessary, use the SELECT [√][®] buttons to move the<br />
cursor to another character position (that character<br />
flashes).<br />
(4) Use the numeric buttons to assign a character to that<br />
position.<br />
The available characters are:<br />
_ ! # $ % & ’ - @ ^ ‘<br />
0 1 2 3 4 5 6 7 8 9<br />
A B C D E F G H I J K L M<br />
N O P Q R S T U V W X Y Z<br />
(5) Repeat steps (3) and (4) to assign the desired characters to<br />
the remaining positions.<br />
Note: Each time you press another numeric button (for entering<br />
characters), the cursor advances automatically to the next position.<br />
This works like a mobile phone.<br />
(6) After entering the name, press the [YES/+] button to save<br />
the Style to the <strong>EXR</strong>-5’s Flash memory.<br />
The display now counts down:<br />
Writing<br />
At the end of the saving operation, the display briefly shows<br />
the “Complete” message.<br />
Note: Press [NO/–] if you do not wish to save the Music Style<br />
after all.<br />
(7) Press another “big” button in the DATA ENTRY section to<br />
leave this function.<br />
Nota: Si no queda memoria Flash vacante o si la capacidad de<br />
memoria está agotada, la pantalla mostrará el mensaje “Mem<br />
Full” cuando seleccione esta función. En este caso, será imposible<br />
guardar el estilo musical. Sin embargo, puede eliminar otro<br />
estilo (“Remove”) y repetir el paso (2) y seguir.<br />
Nota: El mensaje “No Style” significa que no existe información<br />
del estilo que se podría guardar.<br />
(3) Si es necesario, utilice los botones SELECT [√][®] para desplazar<br />
el cursor a la siguiente posición de carácter (ese<br />
carácter parpadea).<br />
(4) Utilice los botones numéricos para asignar un carácter a<br />
esa posición.<br />
Los caracteres disponibles son:<br />
_ ! # $ % & ’ - @ ^ ‘<br />
0 1 2 3 4 5 6 7 8 9<br />
A B C D E F G H I J K L M<br />
N O P Q R S T U V W X Y Z<br />
(5) Repita los pasos (3) y (4) para asignar los caracteres deseados<br />
a las posiciones restantes.<br />
Nota: Cada vez que pulsa otro botón numérico (para introducir<br />
caracteres), el cursor avanza automáticamente a la siguiente<br />
posición. Funciona como un teléfono móvil.<br />
(6) Después de introducir el nombre, pulse el botón [YES/+]<br />
para guardar el estilo en la memoria Flash del <strong>EXR</strong>-5.<br />
Ahora la pantalla cuenta atrás:<br />
Writing<br />
Al final de la operación de guardado, la pantalla brevemente<br />
muestra el mensaje “Complete”.<br />
Nota: Pulse [NO/–] si no desea guardar el estilo musical después<br />
de todo.<br />
(7) Pulse otro botón “big” en la sección DATA ENTRY para salir<br />
de esta función.<br />
Remarque: S’il ne reste aucune mémoire Flash disponible ou si<br />
la capacité de la mémoire est épuisée, l’écran affiche le message<br />
“Mem Full” quand vous choisissez cette fonction. Dans ce<br />
cas, vous ne pourrez pas sauvegarder le style musical. En revanche,<br />
vous pouvez effacer un autre style (“Remove”) et reprendre<br />
cette procédure à partir de l’étape (2).<br />
Remarque: Le message “No Style” signifie qu’il n’y a pas de<br />
données de style à sauvegarder.<br />
(3) Si nécessaire, utilisez les boutons SELECT [√][®] pour amener<br />
le curseur à l’emplacement d’un autre caractère (ce<br />
dernier clignote).<br />
(4) Utilisez les boutons numériques pour assigner un caractère<br />
à cet emplacement.<br />
Voici les caractères disponibles:<br />
_ ! # $ % & ’ - @ ^ ‘<br />
0 1 2 3 4 5 6 7 8 9<br />
A B C D E F G H I J K L M<br />
N O P Q R S T U V W X Y Z<br />
(5) Répétez les étapes (3) et (4) pour assigner les caractères<br />
voulus aux autres emplacements.<br />
Remarque: Chaque fois que vous appuyez sur un autre bouton<br />
numérique (pour entrer un caractère), le curseur avance automatiquement<br />
jusqu’à la position suivante. Cette procédure est<br />
semblable à l’entrée de caractères sur un téléphone portable.<br />
(6) Après avoir entré le nom, appuyez sur le bouton [YES/+]<br />
pour sauvegarder le style dans la mémoire Flash de<br />
l’<strong>EXR</strong>-5.<br />
L’écran affiche alors un décompte:<br />
Writing<br />
A la fin de la sauvegarde, l’écran affiche brièvement le message<br />
“Complete”.<br />
Remarque: Appuyez sur [NO/–] si vous renoncez à sauvegarder<br />
le style musical.<br />
(7) Appuyez sur un autre “gros” bouton de la section DATA<br />
ENTRY pour quitter cette fonction.<br />
105
<strong>EXR</strong>-5/<strong>EXR</strong>-3<br />
Removing songs from the Flash memory<br />
Eliminar canciones desde la memoria Flash<br />
Supprimer des morceaux de la mémoire Flash<br />
SELECT<br />
FUNCTION<br />
FAMILY<br />
Songs you no longer need can be deleted (which is called<br />
“Remov” here) to make room for new songs.<br />
(1) Press [FUNCTION].<br />
(2) Use FAMILY [√][®] to select the “RemovSNG” parameter.<br />
Wait until the display shows the name of the first song memory<br />
(101), then proceed with the following step.<br />
Note: The “No Song” message means that there are no song<br />
data that could be deleted.<br />
(3) Use the SELECT [√][®] buttons to select the song you wish<br />
to delete.<br />
(4) Press the [YES/+] button.<br />
The display now shows the “Sure?” message, while Yes<br />
starts flashing.<br />
(5) Press the [YES/+] button again to delete the song (or [NO÷–]<br />
if you do not want to delete it after all).<br />
The display now shows the following message:<br />
Removing<br />
Once the file has been deleted, the display briefly shows the<br />
“Complete” message.<br />
(6) Press another “big” button in the DATA ENTRY section to<br />
leave this function.<br />
Las canciones que ya no necesite se pueden eliminar (que aquí se<br />
denomina “Remov”) para hacer espacio para nuevas canciones.<br />
(1) Pulse [FUNCTION].<br />
(2) Utilice FAMILY [√][®] para seleccionar el parámetro<br />
“RemovSNG”.<br />
Espere hasta que la pantalla muestre el nombre de la primera<br />
memoria de la canción (101), y luego proceda con el<br />
siguiente paso.<br />
Nota: El mensaje “No Song” significa que no existe información<br />
de canción que se pueda eliminar.<br />
(3) Utilice los botones SELECT [√][®] para seleccionar la canción<br />
que desee eliminar.<br />
(4) Pulse el botón [YES/+].<br />
Ahora la pantalla muestra el mensaje “Sure?”, mientras<br />
Yes empieza a parpadear.<br />
(5) Pulse de nuevo el botón [YES/+] para eliminar la canción (o<br />
[NO÷–] si después de todo no quiere eliminarla).<br />
Ahora la pantalla muestra el siguiente mensaje:<br />
Removing<br />
Cuando se haya eliminado el archivo, la pantalla en breve<br />
muestra el mensaje “Complete”.<br />
(6) Pulse otro botón “big” en la sección DATA ENTRY para salir<br />
de esta función.<br />
Vous pouvez effacer (cette opération s’appelle “Remov”) des<br />
morceaux dont vous n’avez plus besoin afin de libérer de la place<br />
pour de nouveaux morceaux.<br />
(1) Appuyez sur [FUNCTION].<br />
(2) Utilisez FAMILY [√][®] pour choisir le paramètre<br />
“RemovSNG”.<br />
Attendez que l’écran affiche le nom de la première mémoire<br />
de morceau (101) avant de passer à l’étape suivante.<br />
Remarque: Le message “No Song” signifie qu’il n’y a pas de<br />
données de morceau à effacer.<br />
(3) Utilisez SELECT [√][®] pour choisir le morceau à effacer.<br />
(4) Appuyez sur le bouton [YES/+].<br />
L’écran affiche alors le message “Sure?” et le message Yes<br />
se met à clignoter.<br />
(5) Appuyez à nouveau sur le bouton [YES/+] pour effacer le<br />
morceau (ou sur [NO÷–] si vous décidez de ne pas le supprimer).<br />
L’écran affiche alors le message suivant:<br />
Removing<br />
Une fois le fichier effacé, l’écran affiche brièvement le message<br />
“Complete”.<br />
(6) Appuyez sur un autre “gros” bouton de la section DATA<br />
ENTRY pour quitter cette fonction.<br />
106
<strong>EXR</strong>-5/<strong>EXR</strong>-3<br />
Removing Styles from the Flash memory [<strong>EXR</strong>-5 only]<br />
Styles you no longer need can be deleted (which is called<br />
“Remov” here) to make room for new Styles.<br />
(1) Press [FUNCTION].<br />
(2) Use FAMILY [√][®] to select the “RemovSTL” parameter.<br />
Wait until the display shows the name of the first Style<br />
memory (101), then proceed with the following step.<br />
Note: The “No Style” message means that there are no<br />
Music Style data that could be deleted.<br />
(3) Use the SELECT [√][®] buttons to select the Music Style you<br />
wish to delete.<br />
(4) Press the [YES/+] button.<br />
The display now shows the “Sure?” message, while Yes<br />
starts flashing.<br />
(5) Press the [YES/+] button again to delete the Style (or<br />
[NO÷–] if you do not want to delete it after all).<br />
The display now shows the following message:<br />
Removing<br />
Once the file has been deleted, the display briefly shows the<br />
“Complete” message.<br />
(6) Press another “big” button in the DATA ENTRY section to<br />
leave this function.<br />
Eliminar estilos desde la memoria Flash [Sólo <strong>EXR</strong>-5]<br />
Los estilos que ya no necesite se pueden eliminar (que aquí se<br />
denomina “Remov”) para hacer espacio para nuevos estilos.<br />
(1) Pulse [FUNCTION].<br />
(2) Utilice FAMILY [√][®] para seleccionar el parámetro<br />
“RemovSTL”.<br />
Espere hasta que la pantalla muestre el nombre de la primera<br />
memoria del estilo (101), y luego proceda con el siguiente<br />
paso.<br />
Nota: El mensaje “No Style” significa que no existe información<br />
del estilo musical que se podía eliminar.<br />
(3) Utilice los botones SELECT [√][®] para seleccionar el estilo<br />
musical que desee eliminar.<br />
(4) Pulse el botón [YES/+].<br />
Ahora la pantalla muestra el mensaje “Sure?”, mientras<br />
Yes empieza a parpadear.<br />
(5) Vuelva a pulsar el botón [YES/+] para eliminar el estilo (o<br />
[NO÷–] si finalmente no quiere eliminarlo).<br />
Ahora la pantalla muestra el siguiente mensaje:<br />
Removing<br />
Cuando se haya eliminado el archivo, la pantalla en breve<br />
muestra el mensaje “Complete”.<br />
(6) Pulse otro botón “big” en la sección DATA ENTRY para salir<br />
de esta función.<br />
Supprimer des styles de la mémoire Flash<br />
[<strong>EXR</strong>-5 uniquement]<br />
Vous pouvez effacer (cette opération s’appelle “Remov”) des<br />
styles dont vous n’avez plus besoin afin de libérer de la place<br />
pour de nouveaux styles.<br />
(1) Appuyez sur [FUNCTION].<br />
(2) Utilisez FAMILY [√][®] pour choisir le paramètre<br />
“RemovSTL”.<br />
Attendez que l’écran affiche le nom de la première mémoire<br />
de style (101) avant de passer à l’étape suivante.<br />
Remarque: Le message “No Style” signifie qu’il n’y a pas de<br />
données de style à effacer.<br />
(3) Utilisez SELECT [√][®] pour choisir le style musical à effacer.<br />
(4) Appuyez sur le bouton [YES/+].<br />
L’écran affiche alors le message “Sure?” et le message Yes<br />
se met à clignoter.<br />
(5) Appuyez à nouveau sur le bouton [YES/+] pour effacer le<br />
style (ou sur [NO÷–] si vous décidez de ne pas le supprimer).<br />
L’écran affiche alors le message suivant:<br />
Removing<br />
Une fois le fichier effacé, l’écran affiche brièvement le message<br />
“Complete”.<br />
(6) Appuyez sur un autre “gros” bouton de la section DATA<br />
ENTRY pour quitter cette fonction.<br />
107
<strong>EXR</strong>-5/<strong>EXR</strong>-3<br />
Archiving data using a<br />
computer (USB)<br />
The <strong>EXR</strong>-5/<strong>EXR</strong>-3’s USB port can be used for for exchanging files<br />
with a computer.<br />
As long as the icon is not displayed, the USB port is not<br />
used.<br />
If the icon is displayed, however, your <strong>EXR</strong>-5/<strong>EXR</strong>-3 will appear<br />
as an external drive on your PC’s or Mac’s desktop:<br />
Archivar información utilizando un<br />
ordenador (USB)<br />
El puerto USB del <strong>EXR</strong>-5/<strong>EXR</strong>-3 se puede utilizar para intercambiar<br />
archivos con un ordenador.<br />
Mientras no se visualice el icono , el puerto USB no se<br />
utiliza.<br />
Sin embargo, si se visualiza el icono, el <strong>EXR</strong>-5/<strong>EXR</strong>-3 aparecerá<br />
como una unidad externa en el escritorio de su PC o Mac:<br />
Archiver des données avec un<br />
ordinateur (USB)<br />
Le port USB de l’<strong>EXR</strong>-5/<strong>EXR</strong>-3 permet l’échange de fichiers avec<br />
un ordinateur.<br />
Tant que l’icône n’est pas affichée, le port USB n’est<br />
pas utilisé.<br />
Par contre, si cette icône est affichée, l’<strong>EXR</strong>-5/<strong>EXR</strong>-3 apparaît<br />
comme un lecteur externe sur le bureau de votre PC ou Mac:<br />
The drive letter (“E:” in the above illustration) depends on the<br />
number of drives recognized by Windows (and is of no importance<br />
for MacOS).<br />
Note: Data transfer is possible with Windows 2000/Me/XP or later/<br />
Mac OS 9.04 or later. If you encounter problems with your system,<br />
please contact your nearest <strong>Roland</strong> service center for details.<br />
Once recognized, you can copy files to the “Song” or “Style”<br />
folder by dragging and dropping them using the usual routines.<br />
The “Style” and “Song” folders cannot be deleted and must<br />
not be renamed. You can empty them by dragging all files they<br />
contain to the trash, though.<br />
Proceed as follows (Windows XP):<br />
(1) Restart your PC.<br />
(2) Switch on your <strong>EXR</strong>-5/<strong>EXR</strong>-3.<br />
(3) Press the <strong>EXR</strong>-5/<strong>EXR</strong>-3’s [USB] button.<br />
The display shows the error message “No Cable” to signal<br />
that USB communication is impossible.<br />
(4) Connect the <strong>EXR</strong>-5/<strong>EXR</strong>-3’s USB port to a free USB port of<br />
your computer using the supplied cable.<br />
The icon appears and the display shows<br />
“PC<strong>EXR</strong>”.<br />
Note: If you do not connect a USB cable within 15 seconds, the<br />
<strong>EXR</strong>-5/<strong>EXR</strong>-3 returns to its normal mode.<br />
108<br />
La letra de la unidad (“E:” en la anterior ilustración) depende del<br />
número de unidades reconocidas por Windows (y no tiene<br />
importancia para MacOS).<br />
Nota: La transferencia de información es posible con Windows<br />
2000/Me/XP o posterior/Mac OS 9.04 o posterior. Si tiene problemas<br />
con el sistema, póngase en contacto con el centro de servicio<br />
<strong>Roland</strong> más cercano para más información.<br />
Una vez reconocido, puede copiar archivos a la carpeta “Song” o<br />
“Style” arrastrándolos y soltándolos utilizando las rutinas habituales.<br />
Las carpetas “Style” y “Song” no se pueden eliminar<br />
y no se deben renombrar. Aunque, se pueden vaciar arrastrando<br />
todos los archivos que contienen a la papelera.<br />
Siga los pasos que se describen a continuación (Windows XP):<br />
(1) Reinicie el ordenador.<br />
(2) Active su <strong>EXR</strong>-5/<strong>EXR</strong>-3.<br />
(3) Pulse el botón <strong>EXR</strong>-5/<strong>EXR</strong>-3’s [USB].<br />
La pantalla muestra el mensaje de error “No Cable” para<br />
indicar que la comunicación USB es imposible.<br />
(4) Conecte el puerto USB del <strong>EXR</strong>-5/<strong>EXR</strong>-3 a un puerto USB<br />
libre de su ordenador utilizando un cable suministrado.<br />
Aparece el icono y la pantalla muestra<br />
“PC<strong>EXR</strong>”.<br />
Nota: Si no conecte un cable USB, el <strong>EXR</strong>-5/<strong>EXR</strong>-3 vuelva en<br />
modo normal despues 15 secondos.<br />
La lettre du lecteur (“E:” dans l’illustration ci-dessus) dépend du<br />
nombre de lecteurs détectés par Windows (et n’a aucune importance<br />
pour le MacOS).<br />
Remarque: Le transfert de données est possible avec Windows<br />
2000/Me/XP (ou version ultérieure) ou avec le Mac OS 9.04 (ou version<br />
plus récente). En cas de problème avec votre système, adressezvous<br />
au service de maintenance <strong>Roland</strong> le plus proche.<br />
Une fois la détection effectuée, vous pouvez copier des fichiers<br />
vers le dossier “Song” ou “Style” en les glissant-déposant selon la<br />
méthode habituelle. Les dossiers “Style” et “Song” ne peuvent<br />
pas être effacés et ne doivent jamais être renommés.<br />
Toutefois, vous pouvez vider leur contenu en glissant tous les<br />
fichiers dans la corbeille.<br />
Marche à suivre (Windows XP):<br />
(1) Redémarrez votre PC.<br />
(2) Mettez l’<strong>EXR</strong>-5/<strong>EXR</strong>-3 sous tension.<br />
(3) Appuyez sur le bouton [USB] de l’<strong>EXR</strong>-5/<strong>EXR</strong>-3.<br />
L’écran affiche le message d’erreur “No Cable” pour<br />
signaler que la communication USB est impossible.<br />
(4) Reliez le port USB de l’<strong>EXR</strong>-5/<strong>EXR</strong>-3 à un port USB disponible<br />
de votre ordinateur avec le câble fourni.<br />
L’icône apparaît et l’écran affiche le message<br />
“PC<strong>EXR</strong>”.<br />
Remarque: Si vous ne connectez pas des câble USB, l’<strong>EXR</strong>-5/<br />
<strong>EXR</strong>-3 retourne en mode normal au bout de 15 secondes.
<strong>EXR</strong>-5/<strong>EXR</strong>-3<br />
Note: Never switch off the <strong>EXR</strong>-5/<strong>EXR</strong>-3 while the<br />
“Writing” message is displayed, because doing so would<br />
damage all data in the <strong>EXR</strong>-5/<strong>EXR</strong>-3’s Flash area. (See “InitFLSH<br />
(Flash initialization)” (p. 93) if you need to repair the Flash area<br />
after an erroneous operation.)<br />
Note: The “Wait… Connection Proceding” message<br />
may appear when you press the [USB] button.<br />
Nota: No desactive nunca el <strong>EXR</strong>-5/<strong>EXR</strong>-3 mientras se visualize<br />
el mensaje “Writing”, porque de lo contrario dañaría toda la<br />
información del área Flash del <strong>EXR</strong>-5/<strong>EXR</strong>-3. (Consulte “InitFLSH<br />
(inicialización de Flash)” (p. 93) si tiene que reparar el área Flash<br />
después de una operación errónea.)<br />
Nota: Puede que aparezca el mensaje “Wait…<br />
Connection Proceding” cuando pulse el botón [USB].<br />
Remarque: Ne mettez jamais l’<strong>EXR</strong>-5/<strong>EXR</strong>-3 hors tension tant<br />
qu’il affiche le message “Writing” car cela endommagerait<br />
toutes les données dans la zone Flash de l’<strong>EXR</strong>-5/<strong>EXR</strong>-3. (Voyez<br />
“InitFLSH (inicialización de Flash)” (p. 93) pour savoir comment<br />
réparer la zone Flash après une erreur de manipulation.)<br />
Remarque: Le message “Wait… Connection<br />
Proceding” pourrait s’afficher quand vous appuyez sur le<br />
bouton [USB].<br />
<strong>EXR</strong>-5/<strong>EXR</strong>-3<br />
Computer/Ordenador/Ordinateur<br />
Proceed as follows (other operating systems):<br />
(1) Switch on your Mac or PC if it isn’t on already.<br />
(2) Switch on your <strong>EXR</strong>-5/<strong>EXR</strong>-3 if it isn’t on already.<br />
(3) Press the <strong>EXR</strong>-5/<strong>EXR</strong>-3’s [USB] button.<br />
The display shows the error message “No Cable” to signal<br />
that USB communication is impossible.<br />
Note: If you do not connect a USB cable within 15 seconds, the<br />
<strong>EXR</strong>-5/<strong>EXR</strong>-3 returns to its normal mode.<br />
(4) Connect the <strong>EXR</strong>-5/<strong>EXR</strong>-3’s USB port to a free USB port of<br />
your computer using the supplied cable.<br />
The icon appears and the display shows<br />
“PC<strong>EXR</strong>”.<br />
If you prefer to use another cable, choose one with the correct<br />
USB jack types (a “square” one for the <strong>EXR</strong>-5/<strong>EXR</strong>-3 and<br />
probably a “flat” one for your computer).<br />
Note: Do not connect the <strong>EXR</strong>-5/<strong>EXR</strong>-3 to a USB hub. Always<br />
connect it directly to your computer.<br />
Siga los pasos que se describen a continuación (otros sistemas<br />
operativos):<br />
(1) Active su Mac o PC si aún no lo está.<br />
(2) Active su <strong>EXR</strong>-5/<strong>EXR</strong>-3 si aún no lo está.<br />
(3) Pulse el botón <strong>EXR</strong>-5/<strong>EXR</strong>-3’s [USB].<br />
La pantalla muestra el mensaje de error “No Cable” para<br />
indicar que la comunicación USB es imposible.<br />
Nota: Si no conecte un cable USB, el <strong>EXR</strong>-5/<strong>EXR</strong>-3 vuelva en<br />
modo normal despues 15 secondos.<br />
(4) Conecte el puerto USB del <strong>EXR</strong>-5/<strong>EXR</strong>-3 a un puerto USB<br />
libre de su ordenador utilizando un cable suministrado.<br />
Aparece el icono y la pantalla muestra<br />
“PC<strong>EXR</strong>”.<br />
Si prefiere utilizar otro cable, elija uno que tenga los tipos de<br />
jack USB adecuados (uno de “cuadrado” para el <strong>EXR</strong>-5/<strong>EXR</strong>-3<br />
y probablemente uno de “plano” para su ordenador).<br />
Nota: No conecte el <strong>EXR</strong>-5/<strong>EXR</strong>-3 a ningún concentrador USB.<br />
Conéctelo siempre directamente al ordenador.<br />
Marche à suivre (autres systèmes d’exploitation):<br />
(1) Démarrez votre Mac ou PC s’il est hors tension.<br />
(2) Si vous ne l’avez pas encore fait, mettez l’<strong>EXR</strong>-5/<strong>EXR</strong>-3<br />
sous tension.<br />
(3) Appuyez sur le bouton [USB] de l’<strong>EXR</strong>-5/<strong>EXR</strong>-3.<br />
L’écran affiche le message d’erreur “No Cable” pour<br />
signaler que la communication USB est impossible.<br />
Remarque: Si vous ne connectez pas des câble USB, l’<strong>EXR</strong>-5/<br />
<strong>EXR</strong>-3 retourne en mode normal au bout de 15 secondes.<br />
(4) Reliez le port USB de l’<strong>EXR</strong>-5/<strong>EXR</strong>-3 à un port USB disponible<br />
de votre ordinateur avec le câble fourni.<br />
L’icône apparaît et l’écran affiche le message<br />
“PC<strong>EXR</strong>”.<br />
Si vous préférez utiliser un autre câble, choisissez-en un doté<br />
des prises USB ad hoc (une “carrée” pour l’<strong>EXR</strong>-5/<strong>EXR</strong>-3 et<br />
sans doute une “plate” pour l’ordinateur).<br />
Remarque: Ne branchez pas l’<strong>EXR</strong>-5/<strong>EXR</strong>-3 à un hub USB.<br />
Reliez-le toujours directement à votre ordinateur.<br />
109
<strong>EXR</strong>-5/<strong>EXR</strong>-3<br />
Note: Never switch off the <strong>EXR</strong>-5/<strong>EXR</strong>-3 while the<br />
“Writing” message is displayed, because doing so would<br />
damage all data in the <strong>EXR</strong>-5/<strong>EXR</strong>-3’s Flash area. (See “InitFLSH<br />
(Flash initialization)” (p. 93) if you need to repair the Flash area<br />
after an erroneous operation.)<br />
For all operating systems:<br />
Note: If you press the [USB] button without connecting the USB<br />
cable, the display shows the error message “No Cable” to<br />
signal that USB communication is impossible. Connect a cable to<br />
cause this message to disappear.<br />
(5) Open the “My Computer” window (Windows) and check<br />
whether your computer has found an “<strong>EXR</strong>-5_DRV” (or<br />
“<strong>EXR</strong>-3_DRV”, or just “Removable Disk”).<br />
(6) Open that drive by double-clicking on its icon.<br />
(7) Open either the “Style” or the “Song” folder.<br />
This depends on whether you want to delete/rename/add<br />
Music Styles or Standard MIDI Files.<br />
(8) Do one of the following:<br />
• Copy the desired Music Styles from the “Style” folder to your<br />
computer’s hard disk using drag & drop.<br />
• Copy the desired songs from the “Song” folder to your computer’s<br />
hard disk using drag & drop.<br />
• Copy the desired Music Styles from your computer’s hard<br />
disk to the “Style” folder using drag & drop. (See also the<br />
explanation below step (10).)<br />
• Copy the desired songs from your computer’s hard disk to<br />
the “Song” folder using drag & drop.<br />
• Rename the desired Style or song files in the “Style” or<br />
“Song” folder.<br />
• Delete the files you no longer need.<br />
Note: While the “PC<strong>EXR</strong>” message is displayed, all of the<br />
<strong>EXR</strong>-5/<strong>EXR</strong>-3’s buttons and keys are blocked.<br />
(9) To disconnect the <strong>EXR</strong>-5/<strong>EXR</strong>-3 from your computer:<br />
• Macintosh: Drag the “<strong>EXR</strong>-5/<strong>EXR</strong>-3_DRV” (or “Removable<br />
Disk”) icon to the trash.<br />
—OR—<br />
Nota: No desactive nunca el <strong>EXR</strong>-5/<strong>EXR</strong>-3 mientras se visualize<br />
el mensaje “Writing”, porque de lo contrario dañaría toda la<br />
información del área Flash del <strong>EXR</strong>-5/<strong>EXR</strong>-3. (Consulte “InitFLSH<br />
(inicialización de Flash)” (p. 93) si tiene que reparar el área Flash<br />
después de una operación errónea.)<br />
Para todos los sistemas operativos :<br />
Nota: Si pulsa el botón [USB] sin conectar el cable USB, la pantalla<br />
mostrará el mensaje de error “No Cable” para indicar que<br />
la comunicación USB es imposible. Conecte un cable para que<br />
este mensaje desaparezca.<br />
(5) Abra la ventana “Mi PC” (Windows) y compruebe que su<br />
ordenador ha encontrado un “<strong>EXR</strong>-5_DRV” (o<br />
“<strong>EXR</strong>-3_DRV”, o tan solo “Removable Disk”).<br />
(6) Abra esta unidad haciendo doble clic en su icono.<br />
(7) Abra la carpeta “Style” o la “Song”.<br />
Depende de si quiere eliminar/renombrar/añadir Estilos musicales<br />
o archivos MIDI Estándar.<br />
(8) Siga uno de los siguientes pasos:<br />
• Copie los Estilos musicales deseados desde la carpeta “Style”<br />
al disco duro de su ordenador utilizando la función arrastrar<br />
y soltar.<br />
• Copie las canciones deseadas desde la carpeta “Song” al disco<br />
duro de su ordenador utilizando la función arrastrar y soltar.<br />
• Copie los Estilos musicales deseados desde el disco duro de su<br />
ordenador a la carpeta “Style” utilizando la función arrastrar<br />
y soltar. (Consulte también la explicación del siguiente paso<br />
(10).)<br />
• Copie las canciones deseadas desde el disco duro de su ordenador<br />
a la carpeta “Song” utilizando la función arrastrar y<br />
soltar.<br />
• Renombre el estilo o los archivos de canciones deseados de la<br />
carpeta “Style” o “Song”.<br />
• Elimine los archivos que ya no necesite.<br />
Nota: Mientras se visualiza el mensaje “PC<strong>EXR</strong>”, se bloquean<br />
todos los botones y teclas del <strong>EXR</strong>-5/<strong>EXR</strong>-3.<br />
(9) Para desconectar el <strong>EXR</strong>-5/<strong>EXR</strong>-3 desde su ordenador:<br />
• Macintosh: Arrastre el icono “<strong>EXR</strong>-5/<strong>EXR</strong>-3_DRV” (o “Removable<br />
Disk”) a la papelera.<br />
—O—<br />
Remarque: Ne mettez jamais l’<strong>EXR</strong>-5/<strong>EXR</strong>-3 hors tension tant<br />
qu’il affiche le message “Writing” car cela endommagerait<br />
toutes les données dans la zone Flash de l’<strong>EXR</strong>-5/<strong>EXR</strong>-3. (Voyez<br />
“InitFLSH (inicialización de Flash)” (p. 93) pour savoir comment<br />
réparer la zone Flash après une erreur de manipulation.)<br />
Pour tous les systèmes d’exploitation:<br />
Remarque: Si vous appuyez sur le bouton [USB] sans avoir branché<br />
le câble USB, l’écran affiche le message d’erreur “No<br />
Cable” pour signaler que la communication USB est impossible.<br />
Branchez un câble pour faire disparaître ce message de<br />
l’écran.<br />
(5) Ouvrez la fenêtre “Poste de travail” (Windows) et vérifiez<br />
si l’ordinateur a détecté un lecteur “<strong>EXR</strong>-5_DRV” (ou<br />
“<strong>EXR</strong>-3_DRV ou simplement “Disque amovible”).<br />
(6) Ouvrez ce lecteur en double-cliquant sur son icône.<br />
(7) Ouvrez le dossier “Style” ou “Song”.<br />
Ce choix dépend de l’opération visée: supprimer/renommer/<br />
ajouter des styles musicaux ou des fichiers Standard MIDI.<br />
(8) Effectuez une des opérations suivantes:<br />
• Copiez les styles musicaux voulus du dossier “Style” en les<br />
glissant-déposant vers le disque dur de l’ordinateur.<br />
• Copiez les morceaux voulus du dossier “Song” en les glissantdéposant<br />
vers le disque dur de l’ordinateur.<br />
• Copiez les styles musicaux voulus du disque dur de l’ordinateur<br />
en les glissant-déposant dans le dossier “Style”. (Lisez<br />
aussi l’explication en dessous de l’étape (10).)<br />
• Copiez les morceaux voulus du disque dur de l’ordinateur en<br />
les glissant-déposant dans le dossier “Song”.<br />
• Renommez les fichiers de style ou de morceau voulus du dossier<br />
“Style” ou “Song”.<br />
• Effacez les fichiers dont vous n’avez plus besoin.<br />
Remarque: Tant que le message “PC<strong>EXR</strong>” est affiché,<br />
tous les boutons et commandes de l’<strong>EXR</strong>-5/<strong>EXR</strong>-3 sont verrouillés.<br />
(9) Pour débrancher l’<strong>EXR</strong>-5/<strong>EXR</strong>-3 de l’ordinateur:<br />
• Macintosh: Glissez l’icône “<strong>EXR</strong>-5/<strong>EXR</strong>-3_DRV” (ou “Disque<br />
amovible”) dans la corbeille.<br />
—OU—<br />
110
<strong>EXR</strong>-5/<strong>EXR</strong>-3<br />
• Windows: Click on the removal icon on the task bar. Wait<br />
until a drop-down menu appears and select the entry that<br />
says something to the effect of “Stop USB disk <strong>EXR</strong>-5/<br />
<strong>EXR</strong>-3_DRV”. You should now see a window that says something<br />
to the effect of “The USB device XX can now be safely<br />
removed from the system”. Click on the [OK] button.<br />
—THEN—<br />
• Disconnect the USB cable from your computer and the<br />
<strong>EXR</strong>-5/<strong>EXR</strong>-3.<br />
(10) Press the [USB] button again.<br />
The display shows the “Sure?” message.<br />
(11) Press [YES/+] (the icon disappears).<br />
(Press [NO/–] to remain in USB mode.)<br />
If you copied Music Styles from your computer to the Flash<br />
area, the display now shows “Wait… Converting<br />
Styles” to indicate that files with the extension “.STL” are<br />
converted to the <strong>EXR</strong>-5/<strong>EXR</strong>-3’s Music Style format (“.STH”).<br />
Note that this conversion is only necessary for Music Styles<br />
in the <strong>EXR</strong>-5/<strong>EXR</strong>-3’s Flash area that do not yet have the<br />
“.STH” extension.<br />
Note: This operation adds a few bytes to every converted Music<br />
Style. In rare circumstances (when the Flash area is nearly full),<br />
this may lead to the impossibility to convert all Styles that still<br />
have the extension “.STL”. The <strong>EXR</strong>-5/<strong>EXR</strong>-3 then displays the<br />
“MemFull” message to signal that the conversion was<br />
aborted before reaching the last “.STL” file. All Styles up to that<br />
point have been converted, though, and can be used.<br />
• Windows: Haga clic en el icono de desconexión de la barra<br />
de tareas. Espere hasta que aparezca un menú desplegable y<br />
seleccione la entrada que tiene algo que ver con el efecto<br />
“Stop USB disk <strong>EXR</strong>-5/<strong>EXR</strong>-3_DRV”. Ahora debería aparecer<br />
una ventana relacionada con el efecto del “The USB device XX<br />
can now be safely removed from the system”. Haga clic en el<br />
botón [ACEPTAR].<br />
—A CONTINUACIÓN—<br />
• Desconecte el cable USB del ordenador y el <strong>EXR</strong>-5/<strong>EXR</strong>-3.<br />
(10) Pulse de nuevo el botón [USB].<br />
La pantalla mostrará “Sure?”.<br />
(11) Pulse [YES/+] (el icono desaparece).<br />
(Pulse [NO/–] para quedar en modo USB.)<br />
Si ha copiado Estilos musicales desde el ordenador al área<br />
Flash, la pantalla mostrará “Wait… Converting<br />
Styles” para indicar que los archivos con la extensión<br />
“.STL” pasan a tener el formato de Estilo musical del <strong>EXR</strong>-5/<br />
<strong>EXR</strong>-3 (“.STH”).<br />
Tenga en cuenta que esta conversión sólo es necesaria para<br />
los Estilos musicales del área Flash del <strong>EXR</strong>-5/<strong>EXR</strong>-3 que aún<br />
no tienen la extensión “.STH”.<br />
Nota: Esta operación añade algunos bytes a cada Estilo musical<br />
convertido. Raras veces, (cuando el área Flash está prácticamente<br />
llena), puede que resulte imposible convertir todos los<br />
Estilos que aún tienen la extensión “.STL”. Entonces el <strong>EXR</strong>-5/<br />
<strong>EXR</strong>-3 visualiza el mensaje “MemFull” para indicar que se<br />
anuló la conversión antes de llegar al último archivo “.STL”. Por<br />
lo tanto, todos los Estilos anteriores a ese punto se han convertido<br />
y ya se pueden utilizar.<br />
• Windows: Cliquez sur l’icône Supprimer dans la barre des<br />
tâches. Attendez qu’un menu déroulant s’affiche et choisissez-y<br />
l’option similaire à ceci: “Cesser d’utiliser le disque USB<br />
<strong>EXR</strong>-5/<strong>EXR</strong>-3_DRV”. En principe, une fenêtre devrait alors<br />
afficher un message similaire à ceci: “Le périphérique USB XX<br />
peut maintenant être enlevé du système en toute sécurité”.<br />
Cliquez sur le bouton [OK].<br />
—PUIS—<br />
• Débranchez le câble USB de l’ordinateur et de l’<strong>EXR</strong>-5/<strong>EXR</strong>-3.<br />
(10) Appuyez à nouveau sur le bouton [USB].<br />
L’écran affiche le message “Sure?”.<br />
(11) Appuyez sur [YES/+] (l’icône disparaît).<br />
(Appuyez sur [NO/–] pour rester en mode USB.)<br />
Si vous avez copié des styles musicaux de l’ordinateur vers la<br />
zone Flash, l’écran affiche à présent “Wait…<br />
Converting Styles”, vous signalant que les<br />
fichiers portant l’extension “.STL” sont convertis dans le format<br />
de style musical de l’<strong>EXR</strong>-5/<strong>EXR</strong>-3 (“.STH”).<br />
Notez que cette conversion est uniquement requise pour les<br />
styles musicaux en zone Flash de l’<strong>EXR</strong>-5/<strong>EXR</strong>-3 qui ne portent<br />
pas encore l’extension “.STH”.<br />
Remarque: Cette opération ajoute quelques octets à chaque<br />
style musical converti. Dans des cas exceptionnels (quand la<br />
mémoire Flash est presque remplie), cela pourrait empêcher la<br />
conversion de tous les styles portant toujours l’extension “.STL”.<br />
Dans ce cas, l’<strong>EXR</strong>-5/<strong>EXR</strong>-3 affiche le message “MemFull”<br />
pour vous signaler que l’opération a été interrompue avant la<br />
conversion du dernier fichier “.STL”. En revanche, tous les styles<br />
ont été convertis avant l’apparition de ce message et sont donc<br />
utilisables.<br />
111
<strong>EXR</strong>-5/<strong>EXR</strong>-3<br />
Disk functions [<strong>EXR</strong>-5 only]<br />
The <strong>EXR</strong>-5’s Disk functions allow you to save the Recorder Song<br />
in the USER SNG memory to disk, to save and load your files<br />
to and from disk, to delete files on a floppy disk, and format<br />
disks.<br />
Though you can use 2DD or 2HD floppies, 2HD disks have twice<br />
the capacity of 2DD disks, so use 2HDs whenever you can.<br />
Whenever the disk drive writes data to or reads data from disk,<br />
the Disk icon ( ) flashes in the display. Do not remove the<br />
floppy disk while this icon is displayed as that may damage<br />
both the disk drive and the disk (so that it becomes unreadable).<br />
Loading User Programs from disk<br />
Funciones Disk [Sólo <strong>EXR</strong>-5]<br />
Las funciones Disk del <strong>EXR</strong>-5 le permiten guardar la Canción del<br />
Grabador en la memoria USERSNG al disco, guardar y cargar<br />
los archivos en y desde el disco, eliminar archivos de un disquete,<br />
y formatear discos.<br />
Aunque pueda utilizar discos 2DD o 2HD, los discos 2HD tienen<br />
el doble de capacidad que los discos 2DD, por lo que debería utilizar<br />
discos 2HD siempre que fuera posible.<br />
Siempre que la unidad de discos esté escribiendo o leyendo<br />
información desde el disco, el icono Disk ( ) parpadeará en<br />
la pantalla. No extraiga el disquete mientras se visualice<br />
este icono ya que podría dañar tanto la unidad de discos como<br />
el disco en si (con lo que quedaría ilegible).<br />
Cargar Programas de Usuario desde un disco<br />
Fonctions Disk [<strong>EXR</strong>-5 uniquement]<br />
Les fonctions Disk de l’<strong>EXR</strong>-5 permettent de sauvegarder sur disquette<br />
le morceau Recorder (de l’enregistreur) contenu dans la<br />
mémoire USERSNG, de sauvegarder et charger vos fichiers sur/<br />
depuis une disquette, d’effacer des fichiers résidant sur disquette<br />
et de formater des disquettes.<br />
Vous avez le choix entre des disquettes 2DD ou 2HD. Pensez cependant<br />
que la capacité des disquettes 2HD est le double de celle des<br />
disquettes 2DD; nous vous recommandons donc l’utilisation de<br />
disquettes 2HD.<br />
Quand le lecteur écrit ou lit des données sur la disquette, l’icône de<br />
disquette ( ) clignote à l’écran. N’éjectez pas la disquette<br />
tant que cette icône est affichée car vous endommageriez le<br />
lecteur de disquettes et la disquette (qui deviendrait illisible).<br />
Charger des programmes utilisateur d’une disquette<br />
SELECT<br />
DISK<br />
YES<br />
This load function is called LOAD Upr. It allows you to transfer<br />
a set of 10 User Programs (i.e. for all memories) to the<br />
<strong>EXR</strong>-5’s internal memory. This will overwrite the User Programs<br />
that currently reside in the internal memories.<br />
Note: If you wish to use the User Programs in the internal memory<br />
at a later stage, first save them to disk before proceeding. See<br />
p. 114.<br />
Note: The User Program set data also contain the TONE button<br />
assignments (page 63). After loading a User Program set, the eight<br />
TONE buttons may therefore select other sounds than before.<br />
(1) Insert a disk into the drive.<br />
(2) Press [DISK] to select the Disk mode.<br />
The “LOAD Upr” function is already selected, so there is<br />
nothing else you need to do. (Otherwise, use FAMILY [√][®] to<br />
select this parameter.)<br />
(3) Use SELECT [√][®] to select the User Program Set you wish<br />
to load.<br />
The Yes message next to it starts flashing.<br />
112<br />
Esta función de carga se conoce como LOAD Upr. Le permite<br />
transferir un grupo de 10 Programas de Usuario (es decir, para<br />
todas las memorias) a la memoria interna del <strong>EXR</strong>-5. Con ello se<br />
sobrescribirán los Programas de Usuario que residen actualmente<br />
en las memorias internas.<br />
Nota: Si desea utilizar los Programas de Usuario en la memoria<br />
interna más adelante, guárdelos en un disco antes de proceder.<br />
Consulte la p. 114.<br />
Nota: La información del grupo de Programas de Usuario también<br />
contiene las asignaciones del botón TONE (página 63). Después de<br />
cargar un grupo de Programas de Usuario, es posible que los ocho<br />
botones TONE seleccionen sonidos distintos a los anteriores.<br />
(1) Inserte un disco en la unidad.<br />
(2) Pulse [DISK] para seleccionar el modo Disk.<br />
La función “LOAD Upr” ya está seleccionada, por lo tanto<br />
no es necesario hacer nada más. (En caso contrario, utilice<br />
FAMILY [√][®] para seleccionar este parámetro.)<br />
(3) Utilice SELECT [√][®] para seleccionar el Grupo de programas<br />
de usuario que desee cargar.<br />
El mensaje Yes de al lado empieza a parpadear.<br />
Cette fonction de chargement s’appelle LOAD Upr. Elle permet<br />
de transférer un jeu de 10 programmes utilisateur (c.-à-d.<br />
pour toutes les mémoires) de la disquette vers la mémoire<br />
interne de l’<strong>EXR</strong>-5. Ce transfert écrase les données qui s’y trouvent<br />
au profit des nouveaux programmes utilisateur.<br />
Remarque: Si vous voulez conserver les programmes utilisateur se<br />
trouvant dans la mémoire interne, sauvegardez-les sur disquette au<br />
préalable. Voyez p. 114.<br />
Remarque: Les données du jeu de programmes utilisateur contiennent<br />
aussi les assignations des boutons TONE (page 63). Aussi, après<br />
le transfert d’un jeu de programmes utilisateur, les huit boutons<br />
TONE pourraient choisir d’autres sons.<br />
(1) Chargez une disquette dans le lecteur.<br />
(2) Appuyez sur [DISK] pour choisir le mode Disk.<br />
Vu que la fonction “LOAD Upr” est déjà sélectionnée,<br />
vous ne devez rien faire de plus. (Sinon, utilisez FAMILY [√][®]<br />
pour choisir ce paramètre.)<br />
(3) Choisissez le jeu de programmes utilisateur à rappeler avec<br />
SELECT [√][®].<br />
Le message Yes à côté de celui-ci se met à clignoter.
<strong>EXR</strong>-5/<strong>EXR</strong>-3<br />
(4) Press the [YES÷+] button to load the selected file.<br />
Note: Press [NO÷–] if you do not want to load the selected file<br />
after all.<br />
If you pressed [YES÷+], the display now shows the message<br />
“Loading”. Once the data have been loaded, the<br />
“Complete” message briefly appears.<br />
(5) Press another “big” button in the DATA ENTRY section to<br />
leave this function.<br />
Possible error messages<br />
No Disk You forgot to insert a floppy disk into the drive.<br />
No Files The disk you inserted contains no User Program<br />
data.<br />
NoFormat The floppy disk is either not formatted or uses a<br />
format the <strong>EXR</strong>-5 doesn’t recognize. Press<br />
[YES÷+] to format it now (careful: this will erase<br />
all data on disk).<br />
Disk Err The disk is probably damaged and cannot be<br />
used.<br />
File Err The file you selected is damaged and cannot be<br />
loaded.<br />
Loading songs from disk<br />
LOAD Sng allows you to load a song on floppy disk into the<br />
<strong>EXR</strong>-5/<strong>EXR</strong>-3’s User memory.<br />
(1) Insert a disk into the drive.<br />
(2) Press [DISK] to select the Disk mode.<br />
(3) Select the “LOAD Sng” function using FAMILY [√][®].<br />
(4) Use SELECT [√][®] to select the song you wish to load.<br />
The Yes message next to it starts flashing.<br />
(5) Press the [YES÷+] button to load the selected file.<br />
Note: Press [NO÷–] if you do not want to load the selected file<br />
after all.<br />
If you pressed [YES÷+], the display now shows the message<br />
“Loading”. Once the data have been loaded, the<br />
“Complete” message briefly appears.<br />
(4) Pulse el botón [YES÷+] para cargar el archivo seleccionado.<br />
Nota: Pulse [NO÷–] si no desea cargar el archivo seleccionado<br />
después de todo.<br />
Si pulsó [YES÷+], la pantalla mostrará el mensaje<br />
“Loading”. Cuando se haya cargado la información, el<br />
mensaje “Complete” aparecerá brevemente.<br />
(5) Pulse otro botón “big” en la sección DATA ENTRY para salir<br />
de esta función.<br />
Posibles mensajes de error<br />
No Disk No ha insertado ningún disquete en la unidad.<br />
No Files El disco que ha insertado no contiene<br />
información de Programas de Usuario.<br />
NoFormat El disquete o no está formateado o utiliza un<br />
formato que el <strong>EXR</strong>-5 no reconoce. Pulse<br />
[YES÷+] para formatearlo con (cuidado: así se<br />
borrará toda la información del disco).<br />
Disk Err El disco probablemente está dañado y no puede<br />
utilizarse.<br />
File Err El archivo que ha seleccionado está dañado y<br />
no puede cargarse.<br />
Cargar canciones de un disco<br />
LOAD Sng le permite cargar una canción de un disquete a la<br />
memoria User del <strong>EXR</strong>-5/<strong>EXR</strong>-3.<br />
(1) Inserte un disco en la unidad.<br />
(2) Pulse [DISK] para seleccionar el modo Disk.<br />
(3) Seleccione la función “LOAD Sng” utilizando FAMILY<br />
[√][®].<br />
(4) Utilice SELECT [√][®] para seleccionar la canción que desea<br />
cargar.<br />
El mensaje Yes de al lado empieza a parpadear.<br />
(5) Pulse el botón [YES÷+] para cargar el archivo seleccionado.<br />
Nota: Pulse [NO÷–] si no desea cargar el archivo seleccionado<br />
después de todo.<br />
Si pulsó [YES÷+], la pantalla mostrará el mensaje<br />
“Loading”. Cuando se haya cargado la información, el<br />
mensaje “Complete” aparecerá brevemente.<br />
(4) Appuyez sur le bouton [YES÷+] pour charger le fichier<br />
choisi.<br />
Remarque: Appuyez sur [NO÷–] si vous renoncez à charger le<br />
fichier choisi.<br />
Si vous avez appuyé sur [YES÷+], l’écran affiche le message<br />
“Loading”. Une fois les données chargées, le message<br />
“Complete” s’affiche brièvement.<br />
(5) Appuyez sur un autre “gros” bouton de la section DATA<br />
ENTRY pour quitter cette fonction.<br />
Messages d’erreur éventuels<br />
No Disk<br />
No Files<br />
NoFormat<br />
Disk Err<br />
File Err<br />
Vous avez oublié d’insérer une disquette dans le<br />
lecteur.<br />
La disquette insérée ne contient pas de programme<br />
utilisateur.<br />
La disquette en question n’est pas formatée ou<br />
utilise un format que l’<strong>EXR</strong>-5 ne reconnaît pas.<br />
Appuyez sur [YES÷+] pour formater la disquette<br />
(attention: cette opération efface toutes les<br />
données de la disquette).<br />
La disquette est probablement endommagée et<br />
ne peut pas être utilisée.<br />
Le fichier sélectionné est endommagé et ne<br />
peut pas être chargé.<br />
Charger des morceaux d’une disquette<br />
LOAD Sng permet de charger un morceau d’une disquette<br />
dans la mémoire User de l’<strong>EXR</strong>-5/<strong>EXR</strong>-3.<br />
(1) Chargez une disquette dans le lecteur.<br />
(2) Appuyez sur [DISK] pour choisir le mode Disk.<br />
(3) Sélectionnez la fonction “LOAD Sng” avec FAMILY<br />
[√][®].<br />
(4) Utilisez SELECT [√][®] pour choisir le morceau à charger.<br />
Le message Yes à côté de celui-ci se met à clignoter.<br />
(5) Appuyez sur le bouton [YES÷+] pour charger le fichier<br />
choisi.<br />
Remarque: Appuyez sur [NO÷–] si vous renoncez à charger le<br />
fichier choisi.<br />
Si vous avez appuyé sur [YES÷+], l’écran affiche le message<br />
“Loading”. Une fois les données chargées, le message<br />
“Complete” s’affiche brièvement.<br />
113
<strong>EXR</strong>-5/<strong>EXR</strong>-3<br />
(6) Press another “big” button in the DATA ENTRY section to<br />
leave this function.<br />
Note: See also “Possible error messages” above.<br />
Loading Music Styles from disk<br />
LOAD Stl allows you to load a Music Style on floppy disk<br />
into the <strong>EXR</strong>-5/<strong>EXR</strong>-3’s User memory.<br />
(1) Insert a disk into the drive.<br />
(2) Press [DISK] to select the Disk mode.<br />
(3) Select the “LOAD Stl” function using FAMILY [√][®].<br />
(4) Use SELECT [√][®] to select the Music Style you wish to<br />
load.<br />
The Yes message next to it starts flashing.<br />
(5) Press the [YES÷+] button to load the selected file.<br />
Note: Press [NO÷–] if you do not want to load the selected file<br />
after all.<br />
If you pressed [YES÷+], the display now shows the message<br />
“Loading”. Once the data have been loaded, the<br />
“Complete” message briefly appears.<br />
(6) Press another “big” button in the DATA ENTRY section to<br />
leave this function.<br />
Note: See also “Possible error messages” (p. 113).<br />
Saving files to disk<br />
The <strong>EXR</strong>-5 provides the following Save functions:<br />
SAVE Upr: Use this function to save the contents of the<br />
internal User Program memories (all 10 of them) to a floppy disk.<br />
Note: The User Program set data also contain the TONE button<br />
assignments (page 63).<br />
SAVE Sng: This allows you to save the song in the<br />
USERSONG memory to a floppy disk. A song saved to disk<br />
becomes a Standard MIDI File.<br />
(1) Insert a disk into the drive.<br />
Every floppy contains a square tab that allows you to “close”<br />
a little window. With the tab in that position, you can save<br />
data to the disk. Do not forget to write-enable the disk by<br />
closing this little window prior to inserting the floppy disk.<br />
(2) Press [DISK] and use SELECT [√][®] to select “SAVE Upr”<br />
or “SAVE Sng”.<br />
(6) Pulse otro botón “big” en la sección DATA ENTRY para salir<br />
de esta función.<br />
Nota: Consulte también la sección “Posibles mensajes de error”<br />
anterior.<br />
Cargar estilos musicales de un disco<br />
LOAD Stl le permite cargar un estilo musical de un disquete<br />
a la memoria User del <strong>EXR</strong>-5/<strong>EXR</strong>-3.<br />
(1) Inserte un disco en la unidad.<br />
(2) Pulse [DISK] para seleccionar el modo Disk.<br />
(3) Seleccione la función “LOAD Stl” utilizando FAMILY<br />
[√][®].<br />
(4) Utilice SELECT [√][®] para seleccionar el estilo musical que<br />
desea cargar.<br />
El mensaje Yes de al lado empieza a parpadear.<br />
(5) Pulse el botón [YES÷+] para cargar el archivo seleccionado.<br />
Nota: Pulse [NO÷–] si no desea cargar el archivo seleccionado<br />
después de todo.<br />
Si pulsó [YES÷+], la pantalla mostrará el mensaje<br />
“Loading”. Cuando se haya cargado la información, el<br />
mensaje “Complete” aparecerá brevemente.<br />
(6) Pulse otro botón “big” en la sección DATA ENTRY para salir<br />
de esta función.<br />
Nota: Consulte también “Posibles mensajes de error” (p. 113).<br />
Guardar archivos en disco<br />
El <strong>EXR</strong>-5 dispone de las siguientes funciones Save:<br />
SAVE Upr: Utilice esta función para guardar el contenido de<br />
las memorias de Programa de Usuario internas (todas 10) en un<br />
disquete.<br />
Nota: La información del grupo de Programas de Usuario también<br />
contiene las asignaciones del botón TONE (página 63).<br />
SAVE Sng: Permite guardar la canción de la memoria<br />
USERSONG en un disquete. Una canción guardada en un<br />
disco se convierte en un Archivo MIDI Estándar.<br />
(1) Inserte un disco en la unidad.<br />
Cada disquete contiene un pestillo en forma cuadrada que le<br />
permite “cerrar” una pequeña ventana. Con el pestillo en esta<br />
posición, será posible guardar información en el disco. Debe<br />
desactivar la protección contra escritura del disco cerrando<br />
esta pequeña ventana antes de insertar el disquete.<br />
(2) Pulse [DISK] y utilice SELECT [√][®]para seleccionar “SAVE<br />
Upr” o “SAVE Sng”.<br />
(6) Appuyez sur un autre “gros” bouton de la section DATA<br />
ENTRY pour quitter cette fonction.<br />
Remarque: Lisez aussi “Messages d’erreur éventuels” ci-dessus.<br />
Charger des styles musicaux d’une disquette<br />
LOAD Stl permet de charger un style musical d’une disquette<br />
dans la mémoire User de l’<strong>EXR</strong>-5/<strong>EXR</strong>-3.<br />
(1) Chargez une disquette dans le lecteur.<br />
(2) Appuyez sur [DISK] pour choisir le mode Disk.<br />
(3) Sélectionnez la fonction “LOAD Stl” avec FAMILY<br />
[√][®].<br />
(4) Utilisez SELECT [√][®] pour choisir le style musical à charger.<br />
Le message Yes à côté de celui-ci se met à clignoter.<br />
(5) Appuyez sur le bouton [YES÷+] pour charger le fichier<br />
choisi.<br />
Remarque: Appuyez sur [NO÷–] si vous renoncez à charger le<br />
fichier choisi.<br />
Si vous avez appuyé sur [YES÷+], l’écran affiche le message<br />
“Loading”. Une fois les données chargées, le message<br />
“Complete” s’affiche brièvement.<br />
(6) Appuyez sur un autre “gros” bouton de la section DATA<br />
ENTRY pour quitter cette fonction.<br />
Remarque: Voyez aussi “Messages d’erreur éventuels” (p. 113).<br />
Sauvegarder des fichiers sur disquette<br />
L’<strong>EXR</strong>-5 propose les fonctions de sauvegarde suivantes:<br />
SAVE Upr: Cette fonction sert à sauvegarder le contenu de<br />
toutes les mémoires User Program (10) sur disquette.<br />
Remarque: Les données du jeu de programmes utilisateur contiennent<br />
aussi les assignations des boutons TONE (page 63).<br />
SAVE Sng: Cette fonction permet de sauvegarder le morceau<br />
se trouvant en mémoire USERSONG sur disquette. Un morceau<br />
sauvegardé sur disquette devient un fichier standard MIDI.<br />
(1) Chargez une disquette dans le lecteur.<br />
Chaque disquette comporte un onglet carré servant à “fermer”<br />
une petite fenêtre. Quand l’onglet est dans cette position,<br />
vous pouvez sauvegarder des données sur la disquette.<br />
Avant de charger la disquette, veillez à désactiver sa protection<br />
contre l’écriture en refermant cette petite fenêtre.<br />
(2) Appuyez sur [DISK] et utilisez SELECT [√][®] pour choisir<br />
SAVE Upr” ou “SAVE Sng”.<br />
114
<strong>EXR</strong>-5/<strong>EXR</strong>-3<br />
(3) If necessary, use the SELECT [√][®] buttons to move the<br />
cursor to another character position (that character<br />
flashes).<br />
Note: Each time you press another numeric button (for entering<br />
characters), the cursor advances automatically to the next position.<br />
(4) Use the numeric buttons to assign a character to that<br />
position.<br />
(3) Si es necesario, utilice los botones SELECT [√][®] para desplazar<br />
el cursor a la siguiente posición de carácter (ese<br />
carácter parpadea).<br />
Nota: Cada vez que pulsa otro botón numérico (para introducir<br />
caracteres), el cursor avanza automáticamente a la siguiente<br />
posición.<br />
(4) Utilice los botones numéricos para asignar un carácter a<br />
esa posición.<br />
(3) Si nécessaire, utilisez les boutons SELECT [√][®] pour amener<br />
le curseur à l’emplacement d’un autre caractère (ce<br />
dernier clignote).<br />
Remarque: Chaque fois que vous appuyez sur un autre bouton<br />
numérique (pour entrer un caractère), le curseur avance automatiquement<br />
jusqu’à la position suivante.<br />
(4) Utilisez les boutons numériques pour assigner un caractère<br />
à cet emplacement.<br />
_ ! # $ % & ’ - @ ^ ‘<br />
0 1 2 3 4 5 6 7 8 9<br />
A B C D E F G H I J K L M<br />
N O P Q R S T U V W X Y Z<br />
YES<br />
Saving<br />
The available characters are as shown above.<br />
(5) Repeat steps (3) and (4) to assign the desired characters to<br />
the remaining positions.<br />
Though you could save the file with the current default<br />
name (“SONG_001”, or “USPR_000”), a proper name<br />
will help you identify the file at all times. We therefore suggest<br />
you take the time to specify a meaningful name.<br />
Note: If you select “SPACE” ([0] button), the display will insert a<br />
“_”. That’s because MS-DOS® does not allow you to use spaces.<br />
(6) After entering the name, press the [YES/+] button to save<br />
the data to floppy disk.<br />
The display now counts down (“Saving”).<br />
At the end of the saving operation, the display briefly shows<br />
the “Complete” message.<br />
Note: If the message “Protect” appears, you forgot to<br />
switch off the disk’s Write protection. Press the EJECT button of<br />
the disk drive, remove the floppy and close the tab, insert the<br />
disk again and press [YES÷+].<br />
Note: Press [NO/–] if you do not want to save the selected file<br />
after all.<br />
(7) Press another “big” button in the DATA ENTRY section to<br />
leave this function.<br />
Los caracteres disponibles son los mostrados anteriormente.<br />
(5) Repita los pasos (3) y (4) para asignar los caracteres deseados<br />
a las posiciones restantes.<br />
Aunque puede guardar el archivo con el nombre por defecto<br />
actual (“SONG_001”, o “USPR_000”), un nombre más<br />
adecuado le ayudará a identificar el archivo en todo momento.<br />
Por lo tanto, es aconsejable que especifique un nombre significativo<br />
para el archivo.<br />
Nota: Si selecciona “SPACE” (botón [0]), la pantalla insertará un<br />
“_”. Esto es debido a que el MS-DOS® no acepta la utilización de<br />
espacios.<br />
(6) Después de introducir el nombre, pulse el botón [YES/+]<br />
para guardar la información en un disquete.<br />
Ahora la pantalla cuenta atrás (“Saving”).<br />
Al final de la operación de guardado, la pantalla brevemente<br />
muestra el mensaje “Complete”.<br />
Nota: Si aparece el mensaje “Protect”, habrá olvidado desactivar<br />
la protección contra Escritura del disco. Pulse el botón<br />
EJECT de la unidad, retire el disquete y cierre el pestillo, inserte<br />
de nuevo el disco y pulse [YES÷+].<br />
Nota: Pulse [NO/–] si no desea guardar el archivo seleccionado<br />
después de todo.<br />
(7) Pulse otro botón “big” en la sección DATA ENTRY para salir<br />
de esta función.<br />
Voyez ci-dessus la liste des caractères disponibles.<br />
(5) Répétez les étapes (3) et (4) pour assigner les caractères<br />
voulus aux autres emplacements.<br />
Bien que vous puissiez sauvegarder le fichier avec le nom<br />
attribué par défaut (“SONG_001” ou “USPR_000”), il<br />
vaut mieux lui donner un nom qui vous permette d’en identifier<br />
immédiatement le contenu. Choisissez donc un nom évocateur.<br />
Remarque: Si vous choisissez “SPACE” (bouton [0]), l’instrument<br />
insère “_” à l’écran. Ceci est dû au fait que MS-DOS® ne permet<br />
pas l’utilisation d’espaces.<br />
(6) Après avoir entré le nom, appuyez sur le bouton [YES/+]<br />
pour sauvegarder les données sur disquette.<br />
L’écran affiche alors un décompte (“Saving”).<br />
A la fin de la sauvegarde, l’écran affiche brièvement le message<br />
“Complete”.<br />
Remarque: Si le message “Protect” apparaît, vous avez<br />
oublié d’enlever la protection de la disquette. Appuyez sur le<br />
bouton d’éjection du lecteur de disquettes, enlevez la disquette<br />
et fermez l’onglet. Réinsérez ensuite la disquette et appuyez sur<br />
[YES÷+].<br />
Remarque: Appuyez sur [NO/–] si vous décidez de ne pas sauvegarder<br />
les données.<br />
(7) Appuyez sur un autre “gros” bouton de la section DATA<br />
ENTRY pour quitter cette fonction.<br />
115
<strong>EXR</strong>-5/<strong>EXR</strong>-3<br />
116<br />
Possible error messages<br />
No Disk<br />
Protect<br />
Disk Full<br />
NoFormat<br />
Disk Err<br />
OverWrt?<br />
You forgot to insert a floppy disk into the drive.<br />
See above.<br />
The remaining disk capacity does not allow to<br />
save your data to this disk.<br />
The floppy disk is either not formatted or uses<br />
a format the <strong>EXR</strong>-5 doesn’t recognize. Press<br />
[YES÷+] to format it now (careful: this will erase<br />
all data on disk).<br />
The disk is probably damaged and cannot be<br />
used.<br />
The name you assigned to the data already<br />
exists on the floppy disk you inserted. If you<br />
press [YES÷+] to continue, the file on disk will<br />
be overwritten (and the corresponding data<br />
will be erased). Either insert another floppy<br />
disk, or press [DISK] and enter another name for<br />
the data you want to save.<br />
Deleting files on disk<br />
The Delete functions allow you to erase files from the inserted<br />
floppy disk. This may be necessary to make room for new files<br />
(e.g. when the “Disk Full” message appears). Be careful, though,<br />
to only delete files you are absolutely (positively) sure you will<br />
never need again. Once a file has been deleted, it is gone forever.<br />
Note: As a rule, you should first make a backup copy of your disk on<br />
your computer. After all, files really only become indispensable once<br />
they are no longer available…<br />
DEL Upr: Use this function to delete a User Program Set<br />
from disk. Be aware that by doing so, you actually erase 10 User<br />
Program settings.<br />
DEL Sng: This allows you to delete a song file on disk.<br />
(1) Insert the disk with the file you want to delete into the<br />
drive.<br />
(2) Press [DISK] to select the Disk mode.<br />
(3) Use SELECT [√][®] to select “DEL Upr” or “DEL Sng”.<br />
(4) Use SELECT [√][®] to select the file you wish to delete<br />
(example: “USPR_005”). The Yes message starts flashing.<br />
Posibles mensajes de error<br />
No Disk<br />
Protect<br />
Disk Full<br />
NoFormat<br />
Disk Err<br />
OverWrt?<br />
Ha olvidado insertar un disquete en la unidad.<br />
Consulte más arriba.<br />
La capacidad restante del disco no permite<br />
guardar la información en este disco.<br />
El disquete o no está formateado o utiliza un<br />
formato que el <strong>EXR</strong>-5 no reconoce. Pulse<br />
[YES÷+] para formatearlo con (cuidado: así se<br />
borrará toda la información del disco).<br />
El disco probablemente está dañado y no<br />
puede utilizarse.<br />
El nombre que ha asignado a la información ya<br />
existe en el disquete que ha insertado. Si pulsa<br />
[YES÷+] para continuar, el archivo del disco se<br />
sobrescribirá (y la información correspondiente<br />
se borrará). Inserte otro disquete, o pulse[DISK]<br />
e introduzca otro nombre para la información<br />
que desea guardar.<br />
Eliminar archivos en disco<br />
Las funciones Delete le permiten borrar archivos del disquete<br />
insertado. Esto puede ser necesario para crear espacio para nuevos<br />
archivos (p.ej. cuando aparece el mensaje “Disk Full”). No<br />
obstante, asegúrese de eliminar sólo los archivos que no vaya a<br />
necesitar (seguro) nunca más. Una vez eliminado un archivo será<br />
imposible recuperarlo.<br />
Nota: Por norma general, debería realizar antes una copia de seguridad<br />
del disco en el ordenador. En muchas ocasiones, los archivos<br />
pasan a ser indispensables una vez ya no están disponibles…<br />
DEL Upr: Utilice esta función para eliminar un Grupo de programas<br />
de usuario del disco. Tenga en cuenta que, al hacerlo, en<br />
realidad está borrando los ajustes de 10 Programas de Usuario.<br />
DEL Sng: Permite eliminar un archivo de canción del disco.<br />
(1) Inserte el disco con el archivo que desea eliminar en la<br />
unidad.<br />
(2) Pulse [DISK] para seleccionar el modo Disk.<br />
(3) Utilice SELECT [√][®] para seleccionar “DEL Upr” o “DEL<br />
Sng”.<br />
(4) Utilice SELECT [√][®] para seleccionar el archivo que desea<br />
eliminar (ejemplo: “USPR_005”). El mensaje Yes<br />
empieza a parpadear.<br />
Messages d’erreur éventuels<br />
No Disk<br />
Protect<br />
Disk Full<br />
NoFormat<br />
Disk Err<br />
OverWrt?<br />
Vous avez oublié d’insérer une disquette dans<br />
le lecteur.<br />
Voyez ci-dessus.<br />
La capacité restante de la disquette ne permet<br />
plus de sauvegarder vos données.<br />
La disquette en question n’est pas formatée ou<br />
utilise un format que l’<strong>EXR</strong>-5 ne reconnaît pas.<br />
Appuyez sur [YES÷+] pour formater la disquette<br />
(attention: cette opération efface toutes les<br />
données de la disquette).<br />
La disquette est probablement endommagée et<br />
ne peut pas être utilisée.<br />
Le nom attribué aux données existe déjà sur la<br />
disquette. Si vous appuyez sur [YES÷+], le fichier<br />
se trouvant sur la disquette est écrasé par le<br />
nouveau (et ses données sont effacées). Insérez<br />
une autre disquette ou appuyez sur [DISK] et<br />
renommez les données à sauvegarder.<br />
Effacer des fichiers sur disquette<br />
Les fonctions Delete permettent d’effacer des fichiers sur la disquette<br />
insérée. Cela permet de faire de la place pour de nouveaux<br />
fichiers (notamment après un message “Disk Full”). Veillez<br />
toutefois à n’effacer que des fichiers dont vous êtes absolument<br />
sûr de ne plus avoir besoin. Un fichier effacé est irrémédiablement<br />
perdu.<br />
Remarque: Nous vous conseillons de toujours faire une copie de la<br />
disquette sur l’ordinateur au préalable. Certains fichiers ont une<br />
fâcheuse tendance à devenir indispensables une fois effacés…<br />
DEL Upr: Utilisez cette fonction pour effacer un jeu de programmes<br />
utilisateur sur disquette. Sachez que cette opération<br />
efface toute la série de 10 programmes utilisateur.<br />
DEL Sng: Permet d’effacer un morceau sur disquette.<br />
(1) Insérez la disquette contenant le fichier à effacer dans le<br />
lecteur.<br />
(2) Appuyez sur [DISK] pour choisir le mode Disk.<br />
(3) Utilisez SELECT [√][®] pour sélectionner “DEL Upr” ou<br />
“DEL Sng”.<br />
(4) Utilisez SELECT [√][®] pour choisir le fichier à effacer<br />
(exemple: “USPR_005”). Le message Yes se met à clignoter.
<strong>EXR</strong>-5/<strong>EXR</strong>-3<br />
(5) Press the [YES÷+] button.<br />
To be on the safe side, the <strong>EXR</strong>-5 now asks you whether you<br />
really want to delete the file (“Sure?”).<br />
(6) Press [YES÷+] to delete the file, or [NO÷–] to abort the operation.<br />
If you pressed [YES÷+], the display now shows the message<br />
“Deleting”. Once the data have been deleted, the<br />
“Complete” message briefly appears.<br />
(7) Press another “big” button in the DATA ENTRY section to<br />
leave this function.<br />
Possible error messages<br />
No Disk<br />
Protect<br />
NoFormat<br />
Disk Err<br />
No Files<br />
You forgot to insert a floppy disk into the drive.<br />
You forgot to switch off the disk’s Write protection.<br />
Press the EJECT button of the disk<br />
drive, remove the floppy and close the tab,<br />
insert the disk again and press [YES÷+].<br />
The floppy disk is either not formatted or uses a<br />
format the <strong>EXR</strong>-5 doesn’t recognize. Press<br />
[YES÷+] to format it now (careful: this will erase<br />
all data on disk).<br />
The disk is probably damaged and cannot be<br />
used.<br />
The disk contains no files of the selected type.<br />
Insert another disk.<br />
(5) Pulse el botón [YES÷+].<br />
Para asegurarse de ello, el <strong>EXR</strong>-5 le pedirá ahora si está realmente<br />
seguro de querer eliminar el archivo (“Sure?”).<br />
(6) Pulse [YES÷+] para eliminar el archivo, o [NO÷–]para anular<br />
la operación.<br />
Si ha pulsado [YES÷+], la pantalla mostrará el mensaje<br />
“Deleting”. Cuando se haya eliminado la información, el<br />
mensaje “Complete” aparecerá brevemente.<br />
(7) Pulse otro botón “big” en la sección DATA ENTRY para salir<br />
de esta función.<br />
Posibles mensajes de error<br />
No Disk<br />
Protect<br />
NoFormat<br />
Disk Err<br />
No Files<br />
No ha insertado ningún disquete en la unidad.<br />
Ha olvidado desactivar el pestillo de protección<br />
contra Escritura del disco. Pulse el botón EJECT<br />
de la unidad de discos, retire el disquete y cierre<br />
el pestillo, inserte de nuevo el disco y pulse<br />
[YES÷+].<br />
El disquete o no está formateado o utiliza un<br />
formato que el <strong>EXR</strong>-5 no reconoce. Pulse<br />
[YES÷+] para formatearlo con (cuidado: así se<br />
borrará toda la información del disco).<br />
El disco probablemente está dañado y no puede<br />
utilizarse.<br />
El disco no contiene ningún archivo del tipo<br />
seleccionado. Inserte otro disco.<br />
(5) Appuyez sur le bouton [YES÷+].<br />
Par mesure de sécurité, l’<strong>EXR</strong>-5 vous demande si vous voulez<br />
vraiment effacer le fichier (“Sure?”).<br />
(6) Appuyez sur [YES÷+] pour effacer le fichier ou sur [NO÷–]<br />
pour annuler l’opération.<br />
Si vous avez appuyé sur [YES÷+], l’écran affiche le message<br />
“Deleting”. Une fois les données effacées, le message<br />
“Complete” s’affiche brièvement.<br />
(7) Appuyez sur un autre “gros” bouton de la section DATA<br />
ENTRY pour quitter cette fonction.<br />
Messages d’erreur éventuels<br />
No Disk<br />
Protect<br />
NoFormat<br />
Disk Err<br />
No Files<br />
Vous avez oublié d’insérer une disquette dans le<br />
lecteur.<br />
Vous avez oublié d’ôter la protection de la disquette.<br />
Appuyez sur le bouton d’éjection du<br />
lecteur de disquettes, enlevez la disquette et<br />
fermez l’onglet. Réinsérez ensuite la disquette<br />
et appuyez sur [YES÷+].<br />
La disquette en question n’est pas formatée ou<br />
utilise un format que l’<strong>EXR</strong>-5 ne reconnaît pas.<br />
Appuyez sur [YES÷+] pour formater la disquette<br />
(attention: cette opération efface toutes les<br />
données de la disquette).<br />
La disquette est probablement endommagée et<br />
ne peut pas être utilisée.<br />
La disquette ne contient pas de fichier du type<br />
sélectionné. Insérez une autre disquette.<br />
117
<strong>EXR</strong>-5/<strong>EXR</strong>-3<br />
Format<br />
Before being able to save files to a disk, you need to prepare a<br />
floppy disk. This is called “formatting”. If the floppy you are<br />
about to use is IBM PC formatted, there is no need to format it,<br />
though disk access is faster with disks formatted on the <strong>EXR</strong>-5.<br />
Otherwise proceed as follows:<br />
(1) Insert a disk into the drive.<br />
Every floppy contains a square tab that allows you to “close”<br />
a little window. With the tab in that position, you can format<br />
the disk. Do not forget to write-enable the disk by closing<br />
this little window prior to inserting the floppy disk.<br />
(2) Press [DISK] to select the Disk mode.<br />
(3) Use FAMILY [√][®] to select “FORMAT”. The “Sure?”<br />
message appears and the Yes message starts flashing.<br />
(4) Press [YES÷+] to format the disk.<br />
Note: If you do not want to format your floppy, press [NO÷–].<br />
Note: By formatting a disk, you erase all files it contains. It<br />
would be a good idea to first check what it contains (e.g. on your<br />
PC).<br />
The value to the left of the “Formatng” message now<br />
counts from “1” to “100” while the disk icon flashes to indicate<br />
that the disk is being accessed. When the disk is formatted,<br />
the message “Complete” is briefly displayed.<br />
Format<br />
Antes de poder guardar archivos en un disco, deberá preparar un<br />
disquete. Esto se conoce como “formatear”. Si el disquete que va<br />
a utilizar está formateado para IBM PC, no es necesario formatearlo,<br />
aunque el acceso al disco será más rápido con discos formateados<br />
en el <strong>EXR</strong>-5. En caso contrario, proceda de la siguiente<br />
manera:<br />
(1) Inserte un disco en la unidad.<br />
Cada disquete contiene un pestillo en forma cuadrada que le<br />
permite “cerrar” una pequeña ventana. Con el pestillo en esta<br />
posición, será posible formatear el disco. Debe desactivar la<br />
protección contra escritura del disco cerrando esta pequeña<br />
ventana antes de insertar el disquete.<br />
(2) Pulse [DISK] para seleccionar el modo Disk.<br />
(3) Utilice FAMILY [√][®] para seleccionar “FORMAT”. Aparece<br />
el mensaje “Sure?” y el mensaje Yes empieza a parpadear.<br />
(4) Pulse [YES÷+] para formatear el disco.<br />
Nota: Si no quiere formatear su disquete, pulse [NO÷–].<br />
Nota: Al formatear un disco, elimina todos los archivos que<br />
contenga. Es aconsejable comprobar antes el contenido del disquete<br />
(p.ej. en el PC).<br />
El valor a la izquierda del mensaje “Formatng” contará de<br />
“1” a “100” mientras el icono del disco parpadea para indicar<br />
que se está accediendo a él. Una vez formateado el disco,<br />
aparecerá brevemente el mensaje “Complete”.<br />
Format<br />
Avant de pouvoir sauvegarder des fichiers, il faut préparer la disquette.<br />
C’est ce qu’on appelle le “formatage”. Si la disquette que<br />
vous voulez utiliser est formatée pour IBM PC, il est inutile de la<br />
formater – quoique l’accès est plus rapide avec des disquettes<br />
formatées avec l’<strong>EXR</strong>-5. Sinon, procédez comme suit:<br />
(1) Chargez une disquette dans le lecteur.<br />
Chaque disquette comporte un onglet carré servant à “fermer”<br />
une petite fenêtre. Quand l’onglet est dans cette position,<br />
vous pouvez formater la disquette. Avant de charger la<br />
disquette, veillez à désactiver sa protection contre l’écriture<br />
en refermant cette petite fenêtre.<br />
(2) Appuyez sur [DISK] pour choisir le mode Disk.<br />
(3) Utilisez FAMILY [√][®] pour sélectionner “FORMAT”. Le<br />
message “Sure?” s’affiche et Yes se met à clignoter.<br />
(4) Appuyez sur [YES÷+] pour formater la disquette.<br />
Remarque: Si vous renoncez à formater la disquette, appuyez<br />
sur [NO÷–].<br />
Remarque: En formatant une disquette, vous effacez tous les<br />
fichiers qu’elle contient. Vérifiez cependant d’abord son contenu<br />
(sur votre PC, par exemple).<br />
La valeur à gauche du message “Formatng” compte de<br />
“1” à “100” et l’icône de disquette clignote pour signaler<br />
l’accès à la disquette. Lorsque la disquette est formatée, le<br />
message “Complete” s’affiche brièvement.<br />
118
<strong>EXR</strong>-5/<strong>EXR</strong>-3<br />
15. Using the outputs and<br />
an optional footswitch<br />
If you like, you can also record your performance (or a Recorder<br />
songs) to cassette, MD, etc. To this end, you need to connect the<br />
<strong>EXR</strong>-5/<strong>EXR</strong>-3’s OUTPUT sockets to the external device’s REC IN<br />
jacks.<br />
15. Utilizar las salidas y un<br />
conmutador de pedal<br />
Si lo desea, también puede grabar su interpretación (o las canciones<br />
del Grabador) al cassette, MD, etc. Para este fin, deberá<br />
conectar los zócalos OUTPUT del <strong>EXR</strong>-5/<strong>EXR</strong>-3 a los jacks REC IN<br />
del dispositivo externo.<br />
Cassette deck, power amplifier, HiFi amplifier, MA series active<br />
speakers, etc.<br />
Pletina de cassette, amplificador de potencia, amplificador HiFi,<br />
altavoces activos de la serie MA, etc.<br />
Platine à cassette, ampli de puissance, ampli hi-fi, enceintes actives<br />
de la série MA, etc.<br />
15. Utilisation des sorties et<br />
d’un commutateur au pied<br />
Vous pouvez aussi enregistrer votre jeu (ou un morceau de<br />
l’enregistreur) sur cassette, MD, etc. Branchez les sorties OUTPUT<br />
de l’<strong>EXR</strong>-5/<strong>EXR</strong>-3 aux entrées REC IN de l’appareil externe.<br />
DP-2, DP-6, or BOSS FS-5U footswitch<br />
Conmutador de pedal DP-2, DP-6 o BOSS FS-5U<br />
Commutateur au pied DP-2, DP-6 ou BOSS FS-5U<br />
Use a standard 1/4” phone cable for doing so. Another use for<br />
these outputs is to connect the <strong>EXR</strong>-5/<strong>EXR</strong>-3 to your HiFi or<br />
keyboard amplifier (such as the <strong>Roland</strong> KC-550/350/150). Using<br />
a HiFi amplifier requires the use of an adapter plug (phono/<br />
RCA→ 1/4” jack). If you like, you can also purchase two <strong>Roland</strong><br />
PJ-1M cables.<br />
Note: By connecting the OUTPUT jacks, you do not switch off the<br />
<strong>EXR</strong>-5/<strong>EXR</strong>-3’s amplification system.<br />
You can connect an optional DP-2, DP-6, or BOSS FS-5U foot<br />
switch to the FOOTSWITCH jack in order to hold the notes even<br />
after releasing the keys, or to perform other functions (see<br />
p. 86).<br />
Utilice un cable phone estándar de 1/4 de pulgada para hacerlo.<br />
Otra utilización para esta salida es conectar el <strong>EXR</strong>-5/<strong>EXR</strong>-3 al<br />
equipo HiFi o al amplificador de teclado (como el <strong>Roland</strong><br />
KC-550/350/150). Para usar un amplificador HiFi se requiere el<br />
uso de un adaptador (phono/RCA→ jack de 1/4”). Si lo desea<br />
también puede comprar dos cables <strong>Roland</strong> PJ-1M.<br />
Nota: Al conectar los jacks OUTPUT, no necesita desactivar el sistema<br />
de amplificación del <strong>EXR</strong>-5/<strong>EXR</strong>-3.<br />
Puede conectar un DP-2, DP-6 o BOSS FS-5U conmutador de<br />
pedal opcional al jack FOOTSWITCH para sostener las notas<br />
incluso después de soltar las teclas, o para realizar otras funciones<br />
(consulte la página 86).<br />
Effectuez cette connexion avec un câble standard muni de fiches<br />
jack d’1/4”. Ces sorties permettent aussi de brancher l’<strong>EXR</strong>-5/<br />
<strong>EXR</strong>-3 à votre amplificateur hi-fi ou de clavier (comme un<br />
<strong>Roland</strong> KC-550/350/150). L’utilisation d’un ampli hi-fi requiert<br />
un adaptateur (prise Cinch/RCA→ prise jack d’1/4”). Si vous le<br />
voulez, vous pouvez aussi vous procurer deux câbles PJ-1M de<br />
<strong>Roland</strong>.<br />
Remarque: Le fait de brancher un câble aux prises OUTPUT ne<br />
désactive pas l’amplification de l’<strong>EXR</strong>-5/<strong>EXR</strong>-3.<br />
Un commutateur au pied DP-2, DP-6 ou BOSS FS-5U en option<br />
relié à la prise FOOTSWITCH permet de maintenir le son des notes<br />
après le relâchement des touches, voire d’exécuter d’autres fonctions<br />
(voyez p. 86).<br />
119
<strong>EXR</strong>-5/<strong>EXR</strong>-3<br />
16. Miscellaneous<br />
Functions for educational purposes<br />
The <strong>EXR</strong>-5/<strong>EXR</strong>-3 provides two functions that may come in<br />
handy for music teachers or for those who use the <strong>EXR</strong>-5/<strong>EXR</strong>-3<br />
in class:<br />
Deactivating or activating the Demo function<br />
The <strong>EXR</strong>-5/<strong>EXR</strong>-3’s Demo function can be switched off so that<br />
pressing [USB]+[ONE¥TOUCH] will have no effect at all. This may<br />
be useful in situations where the <strong>EXR</strong>-5/<strong>EXR</strong>-3 is used in class.<br />
Here is how to deactivate the Demo function:<br />
(1) Switch off the <strong>EXR</strong>-5/<strong>EXR</strong>-3.<br />
(2) Hold down the [USB], [ONE¥TOUCH] and [ACOUSTIC] buttons<br />
while switching the <strong>EXR</strong>-5/<strong>EXR</strong>-3 back on again.<br />
The display briefly shows “DISABLED”.<br />
This setting is remembered, so that next time you want to listen<br />
to a demo song, you have to repeat the above procedure.<br />
Deactivating or activating the Arranger<br />
Use the following procedure to ensure that the Arranger cannot<br />
be started or stopped:<br />
(1) Switch off the <strong>EXR</strong>-5/<strong>EXR</strong>-3.<br />
(2) Hold down the [ACOUSTIC] and [ARRANGER÷BAND] buttons<br />
while you switch the <strong>EXR</strong>-5/<strong>EXR</strong>-3 back on again.<br />
The display briefly shows “DISABLED”. It is now impossible<br />
to start/stop the Arranger using the [START÷STOP] button.<br />
Repeat the above procedure when you want to use the<br />
Arranger again.<br />
16. Miscelánea<br />
Funciones para fines educativos<br />
El <strong>EXR</strong>-5/<strong>EXR</strong>-3 dispone de dos funciones que pueden resultar<br />
de gran utilidad para profesores de música o aquellos que utilicen<br />
el <strong>EXR</strong>-5/<strong>EXR</strong>-3 en clase:<br />
Desactivar o activar la función Demo<br />
La función Demo del <strong>EXR</strong>-5/<strong>EXR</strong>-3 puede desactivarse para que<br />
al pulsar [USB]+[ONE¥TOUCH] no ocurra absolutamente nada.<br />
Esto puede ser útil en situaciones en las que se utilice el <strong>EXR</strong>-5/<br />
<strong>EXR</strong>-3 en clase. Para desactivar la función Demo, siga los pasos<br />
que se indican a continuación:<br />
(1) Desactive el <strong>EXR</strong>-5/<strong>EXR</strong>-3.<br />
(2) Mantenga pulsado [USB], [ONE¥TOUCH] y los botones<br />
[ACOUSTIC] mientras vuelve a poner en marcha el <strong>EXR</strong>-5/<br />
<strong>EXR</strong>-3.<br />
La pantalla rápidamente visualiza “DISABLED”.<br />
Este ajuste se recordará, de manera que la próxima vez que<br />
desee escuchar una canción de demostración deberá volver a<br />
repetir el procedimiento.<br />
Desactivar o activar el Arranger<br />
Utilice el procedimiento que se describe a continuación para<br />
garantizar que el Arranger no puede iniciarse ni pararse:<br />
(1) Desactive el <strong>EXR</strong>-5/<strong>EXR</strong>-3.<br />
(2) Mantenga pulsados los botones [ACOUSTIC] and<br />
[ARRANGER÷BAND] mientras vuelve a poner en marcha el<br />
<strong>EXR</strong>-5/<strong>EXR</strong>-3.<br />
La pantalla rápidamente visualiza “DISABLED”. Ahora es<br />
imposible iniciar/parar el Arranger con el botón<br />
[START÷STOP].<br />
Repita el procedimiento descrito anteriormente cuando<br />
desee utilizar de nuevo el Arranger.<br />
16. Divers<br />
Fonctions pédagogiques<br />
L’<strong>EXR</strong>-5/<strong>EXR</strong>-3 comporte deux fonctions qui pourraient bien<br />
tomber à pic pour les professeurs de musique mais aussi pour<br />
tous les utilisateurs de l’<strong>EXR</strong>-5/<strong>EXR</strong>-3:<br />
Couper ou activer la fonction de démonstration<br />
La fonction Demo de l’<strong>EXR</strong>-5/<strong>EXR</strong>-3 peut être coupée de sorte<br />
qu’une pression sur [USB]+[ONE¥TOUCH] ne produise rien. Cela<br />
peut être utile quand l’<strong>EXR</strong>-5/<strong>EXR</strong>-3 est utilisé pour des leçons.<br />
Voici comment couper la fonction de démonstration:<br />
(1) Mettez l’<strong>EXR</strong>-5/<strong>EXR</strong>-3 hors tension.<br />
(2) Maintenez les boutons [USB], [ONE¥TOUCH] et [ACOUSTIC]<br />
enfoncés tout en remettant l’<strong>EXR</strong>-5/<strong>EXR</strong>-3 sous tension.<br />
L’écran affiche brièvement “DISABLED”.<br />
Vu que ce réglage est mémorisé, vous devrez répéter cette<br />
procédure pour pouvoir écouter la démonstration.<br />
Couper ou activer l’arrangeur<br />
La procédure suivante empêche de faire démarrer et d’arrêter<br />
l’arrangeur:<br />
(1) Mettez l’<strong>EXR</strong>-5/<strong>EXR</strong>-3 hors tension.<br />
(2) Maintenez les boutons [ACOUSTIC] et [ARRANGER÷BAND]<br />
enfoncés tout en remettant l’<strong>EXR</strong>-5/<strong>EXR</strong>-3 sous tension.<br />
L’écran affiche brièvement “DISABLED”. Le bouton<br />
[START÷STOP] ne permet plus de lancer/d’arrêter l’arrangeur.<br />
Répétez cette procédure pour réactiver l’arrangeur.<br />
120
<strong>EXR</strong>-5/<strong>EXR</strong>-3<br />
Deactivating or activating the Arranger and Demo<br />
functions<br />
A third “educational” option is to switch off both the Demo and<br />
the Arranger functions in one go:<br />
(1) Switch off the <strong>EXR</strong>-5/<strong>EXR</strong>-3.<br />
(2) Hold down the [ACOUSTIC] and [START÷STOP] buttons<br />
while you switch the <strong>EXR</strong>-5/<strong>EXR</strong>-3 back on again.<br />
The display briefly shows “DISABLED”. It is now impossible<br />
to start/stop the Arranger or demo song playback.<br />
Repeat the above procedure when you want to use the<br />
Arranger and Demo function again.<br />
Desactivar o activar las funciones Arranger y Demo<br />
Una tercera opción “educativa” es desactivar tanto la función<br />
Demo como el Arranger a la vez:<br />
(1) Desactive el <strong>EXR</strong>-5/<strong>EXR</strong>-3.<br />
(2) Mantenga pulsados los botones [ACOUSTIC] y [START÷STOP]<br />
mientras vuelve a poner en marcha el <strong>EXR</strong>-5/<strong>EXR</strong>-3.<br />
La pantalla rápidamente visualiza “DISABLED”. Ahora es<br />
imposible iniciar/parar el Arranger o reproducir las canciones<br />
de demostración.<br />
Repita el procedimiento descrito anteriormente cuando<br />
desee utilizar de nuevo el Arranger y la función Demo.<br />
Couper ou activer l’arrangeur et la fonction Demo<br />
Une troisième option “pédagogique” consiste à couper aussi bien<br />
la fonction Demo que l’arrangeur:<br />
(1) Mettez l’<strong>EXR</strong>-5/<strong>EXR</strong>-3 hors tension.<br />
(2) Maintenez les boutons [ACOUSTIC] et [START÷STOP] enfoncés<br />
tout en remettant l’<strong>EXR</strong>-5/<strong>EXR</strong>-3 sous tension.<br />
L’écran affiche brièvement “DISABLED”. Vous ne pouvez<br />
plus lancer/arrêter l’arrangeur ni les morceaux de démonstration.<br />
Répétez cette procédure pour réactiver l’arrangeur et la<br />
fonction Demo.<br />
Initializing your <strong>EXR</strong>-5/<strong>EXR</strong>-3<br />
(Factory)<br />
After working extensively with your <strong>EXR</strong>-5/<strong>EXR</strong>-3, you may<br />
want to recall the original factory settings. Note that the<br />
Recorder song will be empty and that the User Programs<br />
contain factory settings after initializing your <strong>EXR</strong>-5/<strong>EXR</strong>-3.<br />
Here is how to initialize your <strong>EXR</strong>-5/<strong>EXR</strong>-3:<br />
(1) Power off your <strong>EXR</strong>-5/<strong>EXR</strong>-3.<br />
(2) Hold down the [USER¥PROGRAM/WRITE] button while<br />
turning your <strong>EXR</strong>-5/<strong>EXR</strong>-3 back on again.<br />
The message “Factory” informs you that the <strong>EXR</strong>-5/<br />
<strong>EXR</strong>-3 has been initialized.<br />
Note: This does not affect the data in the <strong>EXR</strong>-5/<strong>EXR</strong>-3’s Flash<br />
memory. See page 93 for how to initialize that area.<br />
Inicializar el <strong>EXR</strong>-5/<strong>EXR</strong>-3 (Factory)<br />
Después de trabajar extensamente con el <strong>EXR</strong>-5/<strong>EXR</strong>-3, es posible<br />
que desee recuperar los ajustes por defecto. Observe que la<br />
canción del Grabador sevaciará y que los Programas de<br />
Usuario contienen ajustes de fábrica después de inicializar el<br />
<strong>EXR</strong>-5/<strong>EXR</strong>-3.<br />
Siga los pasos descritos a continuación para inicializar el <strong>EXR</strong>-5/<br />
<strong>EXR</strong>-3:<br />
(1) Apague el <strong>EXR</strong>-5/<strong>EXR</strong>-3.<br />
(2) Mantenga pulsado el botón [USER¥PROGRAM/WRITE]<br />
mientras vuelve a poner en marcha el <strong>EXR</strong>-5/<strong>EXR</strong>-3.<br />
El mensaje “Factory” le informará de que el <strong>EXR</strong>-5/<strong>EXR</strong>-3<br />
se ha inicializado.<br />
Nota: Esto no afecta a la información de la memoria Flash del<br />
<strong>EXR</strong>-5/<strong>EXR</strong>-3. Para saber cómo inicializar ese área, consulte la<br />
página 93.<br />
Initialiser l’<strong>EXR</strong>-5/<strong>EXR</strong>-3 (Factory)<br />
Peut-être souhaiterez-vous un jour retrouver les réglages<br />
d’usine de l’<strong>EXR</strong>-5/<strong>EXR</strong>-3. Notez que la mémoire vive de l’enregistreur<br />
est effacée et que les programmes utilisateur contiennent<br />
les réglages d’usine après l’initialisation de l’<strong>EXR</strong>-5/<br />
<strong>EXR</strong>-3.<br />
Voici comment initialiser l’<strong>EXR</strong>-5/<strong>EXR</strong>-3:<br />
(1) Mettez l’<strong>EXR</strong>-5/<strong>EXR</strong>-3 hors tension.<br />
(2) Maintenez le bouton [USER¥PROGRAM/WRITE] enfoncé<br />
tout en remettant l’<strong>EXR</strong>-5/<strong>EXR</strong>-3 sous tension.<br />
Le message “Factory” vous informe que l’<strong>EXR</strong>-5/<strong>EXR</strong>-3<br />
est initialisé et a retrouvé ses réglages d’usine.<br />
Remarque: Cette opération n’affecte pas les données dans la<br />
mémoire Flash de l’<strong>EXR</strong>-5/<strong>EXR</strong>-3. Pour savoir comment initialiser<br />
les données de cette zone, voyez page 93.<br />
121
<strong>EXR</strong>-5/<strong>EXR</strong>-3<br />
17. Specifications<br />
<strong>EXR</strong>-5/<strong>EXR</strong>-3 Interactive Arranger<br />
Keyboard: 61 keys, velocity sensitive<br />
Sound source: PCM samples<br />
Max polyphony: 64 voices<br />
Tones: 510 panel sounds + 542 XG compatible voices + 256 GM2<br />
compatible sounds<br />
Drum Kits: 20 Drum Kits, 11 XG-compatible Drum Kits + 9 GM2-<br />
compatible Drum Kits<br />
Multitimbral parts: 19<br />
Compatibility: GM2, GS, XG Lite<br />
Display type: New large backlit custom display<br />
Panel controls: VOLUME knob, ACCOMP/KEYBOARD BALANCE buttons,<br />
TEMPO/DATA buttons, BENDER/MODULATION lever, FAMILY<br />
buttons, SELECT buttons, numeric buttons [0]~[9], 8 assignable TONE<br />
family buttons<br />
Music Styles: 103 Styles in Flash memory (84 factory + 19 changeable)<br />
One Touch: 2 x 84<br />
Orchestrator: 3 levels: Drum&Bass, Combo, Full Band<br />
Style Cover: 5: Acoustic, Pop, Rock, Dance, Ethnic<br />
Songs: Realtime SMF player<br />
16-track Recorder: 4 easy modes (ALL, Keyboard, Single, Punch In/<br />
Out)<br />
Song Cover: 5: Acoustic, Pop, Rock, Dance, Ethnic<br />
Flash Memory: For Music Styles and Songs<br />
User Programs: 10<br />
Effects: Reverb: 8 types, Chorus: 8 types, Multi-FX: 47 types<br />
Data storage: <strong>EXR</strong>-5→ FDD 3.5” 2HD/2DD (Styles, Songs/SMF,<br />
User Programs)<br />
<strong>EXR</strong>-3 & <strong>EXR</strong>-5→ File save & load from PC via USB (Style, Song)<br />
Metronome: Time Signature setting (1/4, 2/4, 3/4, 4/4, 5/4, 6/4, 6/8,<br />
9/8), Volume setting<br />
Other functions: 2 easy modes: Piano/Solo, Arranger/Band, Music<br />
Assistant: 126 settings, Split (2 Tones: Split [L] + Main [R]), Dual (2<br />
Tones: Main + Dual), Melody Intelligence: 18 types, Octave (–4~4),<br />
Transpose (–12~12), V-Link<br />
System updates: Yes<br />
17. Especificaciones<br />
<strong>EXR</strong>-5/<strong>EXR</strong>-3 Interactive Arranger<br />
Teclado. 61 teclas, sensible a la velocidad<br />
Fuente de sonido. Muestras PCM<br />
Polifonía máx. 64 voces<br />
Tones. 510 sonidos de panel + 542 voces compatibles con XG + 256<br />
sonidos compatibles con GM2<br />
Grupos de percusión. 20 grupos de percusión, 11 grupos de percusión<br />
compatibles con XG + 9 grupos de percusión compatibles con<br />
GM2<br />
Partes multitímbricas. 19<br />
Compatibilidad. GM2, GS, XG Lite<br />
Tipo de pantalla. Nueva y amplia pantalla personalizada retroiluminada<br />
Controles del panel. Mando VOLUME, botones ACCOMP/KEY-<br />
BOARD BALANCE, botones TEMPO/DATA, palanca BENDER/MODU-<br />
LATION, botones FAMILY, botones SELECT, botones numéricos [0]~[9],<br />
8 botones de la familia TONE asignables<br />
Estilos musicales. 103 estilos en la memoria Flash (84 originales +<br />
19 intercambiables)<br />
One Touch. 2 x 84<br />
Orchestrator. 3 niveles: Drum&Bass, Combo, Full Band<br />
Style Cover. 5: Acoustic, Pop, Rock, Dance, Ethnic<br />
Canciones. Reproductor SMF a tiempo real<br />
Grabador de 16 pistas: 4 modos fáciles (ALL, Keyboard, Single, Punch<br />
In/Out)<br />
Song Cover. 5: Acoustic, Pop, Rock, Dance, Ethnic<br />
Flash Memory. Para estilos musicales y canciones<br />
Programas de Usuario. 10<br />
Efectos. Reverb: 8 tipos, Chorus : 8 tipos, Multi-FX: 47 tipos<br />
Almacenamiento de información. <strong>EXR</strong>-5→ FDD 3.5” 2HD/2DD<br />
(Estilos, Canciones/SMF, Programas de usuario)<br />
<strong>EXR</strong>-3 & <strong>EXR</strong>-5→ Guardar archivo y cargar desde el PC mediante<br />
USB (Estilo, Canción)<br />
Metrónomo. Ajuste de compases (1/4, 2/4, 3/4, 4/4, 5/4, 6/4, 6/8, 9/<br />
8), Ajuste de volumen<br />
Otras funciones: 2 modos fáciles: Piano/Solo, Arranger/Band,<br />
Music Assistant: 126 ajustes, Split (2 Sonidos: Split [L] + Main [R]),<br />
Dual (2 Sonidos: Main + Dual), Melody Intelligence: 18 tipos, Octave<br />
(–4~4), Transpose (–12~12), V-Link<br />
Actualizaciones del sistema: Sí<br />
17. Fiche technique<br />
<strong>EXR</strong>-5/<strong>EXR</strong>-3 Interactive Arranger<br />
Clavier: 61 touches, sensibles au toucher<br />
Générateur de sons: Echantillons PCM<br />
Polyphonie maximum: 64 voix<br />
Sonorités: 510 sons en face avant + 542 voix compatibles XG + 256<br />
sons compatibles GM2<br />
Kits de batterie: 20 kits de batterie, 11 kits compatibles XG + 9 kits<br />
compatibles GM2<br />
Parties multitimbrales: 19<br />
Compatibilité: GM2, GS, XG Lite<br />
Affichage: Grand écran rétroéclairé, nouveau concept<br />
Commandes en face avant: Commande VOLUME, boutons<br />
ACCOMP/KEYBOARD BALANCE, TEMPO/DATA, levier BENDER/<br />
MODULATION, boutons FAMILY, SELECT, boutons numériques [0]~[9],<br />
8 boutons TONE assignables pour les “familles”<br />
Styles musicaux: 103 styles en mémoire Flash (84 d’usine + 19<br />
modifiables)<br />
One Touch: 2 x 84<br />
Orchestrator: 3 niveaux: Drum&Bass, Combo, Full Band<br />
Style Cover: 5: Acoustic, Pop, Rock, Dance, Ethnic<br />
Morceaux: Lecteur SMF en temps réel<br />
Enregistreur 16 pistes: 4 modes faciles (ALL, Keyboard, Single, Punch<br />
In/Out)<br />
Song Cover: 5: Acoustic, Pop, Rock, Dance, Ethnic<br />
Mémoire Flash: Pour les styles musicaux et morceaux<br />
Programmes utilisateur: 10<br />
Effets: Reverb: 8 types, Chorus: 8 types, Multi-FX: 47 types<br />
Archivage des données: <strong>EXR</strong>-5→ Lecteur de disquettes 2HD/2DD<br />
de 3,5” (styles, morceaux/SMF, programmes utilisateur)<br />
<strong>EXR</strong>-3 et <strong>EXR</strong>-5→ Archivage et chargement de fichiers avec un PC<br />
via USB (styles, morceaux)<br />
Métronome: Mesure (1/4, 2/4, 3/4, 4/4, 5/4, 6/4, 6/8, 9/8), volume<br />
réglables<br />
Autres fonctions: 2 modes faciles: Piano/Solo, Arranger/Band,<br />
Music Assistant: 126 réglages, Split (2 sons: Split [L] + Main[R]), Dual<br />
(2 sons: Main + Dual), Melody Intelligence: 18 types, Octave (–4~4),<br />
Transpose (–12~12), V-Link<br />
Mise à jour du système: oui<br />
122
<strong>EXR</strong>-5/<strong>EXR</strong>-3<br />
Connections: USB: file transfer, MIDI IN, OUT<br />
Outputs: L/Mono, Right (1/4” phone jacks), Phones 1/2, DC IN<br />
(adapter)<br />
Others: <strong>EXR</strong>-5→ Output Power: 10W+10W with “Digital Bass<br />
Enhancer”, Stereo Speakers: x ø13cm, Bass Reflex<br />
<strong>EXR</strong>-3→ Output Power: 5W+5W with “Digital Bass Enhancer”,<br />
Stereo speakers: 2 x ø12cm<br />
Power supply: 12V/3.5A (<strong>EXR</strong>-5), 12V/1A (<strong>EXR</strong>-3)<br />
Dimensions: 1020 x 355 x 132 mm<br />
Weight: 8kg (<strong>EXR</strong>-5), 7kg (<strong>EXR</strong>-3)<br />
Supplied accessories: <strong>EXR</strong>-5→ Owner’s Manual, PSB-4U adapter,<br />
music rest, USB cable<br />
<strong>EXR</strong>-3→ Owner’s Manual, ACO adapter, music rest, USB cable<br />
Conexiones. USB: comunicación MIDI, MIDI IN, OUT<br />
Salidas. L/Mono, Right (jacks phone de 1/4”), Phones 1/2, DC IN<br />
(adaptador)<br />
Otros. <strong>EXR</strong>-5→ Salida de potencia: 10W+10W con “Digital Bass<br />
Enhancer”, altavoces estéreo: 2 x ø13 cm, Bass Reflex<br />
<strong>EXR</strong>-3→ Salida de potencia: 5W+5W con “Digital Bass Enhancer”,<br />
altavoces estéreo: 2 x ø12 cm<br />
Alimentación. 12V/3.5A (<strong>EXR</strong>-5), 12V/1A (<strong>EXR</strong>-3)<br />
Dimensiones. 1020 x 355 x 132 mm<br />
Peso. 8 kg (<strong>EXR</strong>-5), 7 kg (<strong>EXR</strong>-3)<br />
Accesorios incluidos. <strong>EXR</strong>-5→ Manual del Usuario, adaptador<br />
PSB-4U, atril, cable USB<br />
<strong>EXR</strong>-3→ Manual del Usuario, adaptador ACO, atril, cable USB<br />
Prises: USB: transfert de fichiers, MIDI IN, OUT<br />
Sorties: Prises L/Mono, Right (jack d’1/4”), Phones 1/2, DC IN (pour<br />
l’adaptateur)<br />
Autres: <strong>EXR</strong>-5→ Puissance: 10W+10W avec “Digital Bass Enhancer”,<br />
haut-parleurs stéréo: 2 x 13cm de ø, Bass Reflex<br />
<strong>EXR</strong>-3→ Puissance: 5W+5W avec “Digital Bass Enhancer”, hautparleurs<br />
stéréo: 2 x 12cm de ø<br />
Alimentation: 12V/3.5A (<strong>EXR</strong>-5), 12V/1A (<strong>EXR</strong>-3)<br />
Dimensions: 1020 x 355 x 132 mm<br />
Poids: 8kg (<strong>EXR</strong>-5), 7kg (<strong>EXR</strong>-3)<br />
Accessoires fournis: <strong>EXR</strong>-5→ Mode d’emploi, adaptateur PSB-4U,<br />
pupitre, câble USB<br />
<strong>EXR</strong>-3→ Mode d’emploi, adaptateur ACO, pupitre, câble USB<br />
Note: Specifications are subject to change without prior notice.<br />
Nota: Las especificaciones están sujetas a cambios sin previo aviso.<br />
Remarque: Les données techniques sont susceptibles d’être modifiées<br />
sans préavis.<br />
123
<strong>EXR</strong>-5/<strong>EXR</strong>-3<br />
124<br />
18. Lists<br />
Tones selectable via the front panel<br />
Tone no.PC CC00 CC32 Name Family<br />
1 1 8 2 StPiano1 PIANO<br />
2 1 16 2 EuropnPf PIANO<br />
3 2 0 2 Piano 2 PIANO<br />
4 4 0 2 Honkytnk PIANO<br />
5 1 0 2 Piano 1 PIANO<br />
6 2 8 2 StPiano2 PIANO<br />
7 3 0 2 Piano 3 PIANO<br />
8 3 1 2 EG+Rhds1 PIANO<br />
9 3 2 2 EG+Rhds2 PIANO<br />
10 3 8 2 StPiano3 PIANO<br />
11 4 8 2 OldUprgt PIANO<br />
12 5 0 2 E.Piano1 E.PIANO<br />
13 5 8 2 StSoftEP E.PIANO<br />
14 5 47 2 DynoRhds E.PIANO<br />
15 5 48 2 Wurly E.PIANO<br />
16 6 10 2 EPLegend E.PIANO<br />
17 6 24 2 HardFMEP E.PIANO<br />
18 6 32 2 EP Phase E.PIANO<br />
19 5 16 2 FM+SA EP E.PIANO<br />
20 5 24 2 60sEPno E.PIANO<br />
21 5 25 2 HardRhds E.PIANO<br />
22 5 26 2 MllwRhds E.PIANO<br />
23 6 0 2 E.Piano2 E.PIANO<br />
24 6 8 2 Dtnd EP2 E.PIANO<br />
25 6 16 2 St.FM EP E.PIANO<br />
26 100 5 2 Nyln+Rhd E.PIANO<br />
27 7 24 2 Harpsi 2 KEYBOARD<br />
28 7 16 2 StHarpsi KEYBOARD<br />
29 8 0 2 Clav. KEYBOARD<br />
30 8 8 2 CompClav KEYBOARD<br />
31 7 0 2 Harpschr KEYBOARD<br />
32 7 8 2 Cpld Hps KEYBOARD<br />
33 8 39 2 PulsClav KEYBOARD<br />
34 9 0 2 Celesta CHR PERC<br />
35 11 0 2 MusicBox CHR PERC<br />
36 12 0 2 Vibraphn CHR PERC<br />
37 13 0 2 Marimba CHR PERC<br />
38 14 0 2 Xylphone CHR PERC<br />
39 15 0 2 TublBell CHR PERC<br />
40 99 2 2 SftCryst CHR PERC<br />
41 99 4 2 LoudGlock CHR PERC<br />
42 99 16 2 ChrlBell CHR PERC<br />
43 113 0 2 TnklBell CHR PERC<br />
44 10 0 2 Glcknspl CHR PERC<br />
45 12 1 2 HardVibe CHR PERC<br />
46 12 8 2 StVibrap CHR PERC<br />
47 13 8 2 StMarimb CHR PERC<br />
48 13 16 2 Barafon CHR PERC<br />
49 13 17 2 Barafon2 CHR PERC<br />
50 13 24 2 Log drum CHR PERC<br />
51 15 8 2 ChrchBll CHR PERC<br />
52 15 9 2 Carillon CHR PERC<br />
53 99 0 2 Crystal CHR PERC<br />
54 99 1 2 SynMallt CHR PERC<br />
55 99 3 2 RndGlock CHR PERC<br />
56 99 5 2 GlcknChm CHR PERC<br />
57 99 6 2 ClrBells CHR PERC<br />
58 99 7 2 XmasBell CHR PERC<br />
59 99 8 2 VbrBells CHR PERC<br />
60 99 9 2 DigiBell CHR PERC<br />
61 99 17 2 AirBells CHR PERC<br />
62 99 18 2 BellHarp CHR PERC<br />
63 99 19 2 Gamelimb CHR PERC<br />
64 18 0 2 Organ 2 ORGAN<br />
65 17 0 2 Organ 1 ORGAN<br />
66 17 10 2 R&Borgan ORGAN<br />
67 17 34 2 CoolOrgn ORGAN<br />
68 17 16 2 60sOrgn1 ORGAN<br />
69 17 24 2 ChseOrgn ORGAN<br />
70 18 9 2 PercOrg1 ORGAN<br />
71 19 0 2 Organ 3 ORGAN<br />
72 19 8 2 RotryOrg ORGAN<br />
73 19 16 2 RotryOrS ORGAN<br />
74 19 24 2 RotryOrF ORGAN<br />
75 20 0 2 ChrchOr1 ORGAN<br />
76 20 8 2 ChrchOr2 ORGAN<br />
77 20 24 2 OrgnFlte ORGAN<br />
78 20 32 2 TrmFlute ORGAN<br />
79 21 0 2 ReedOrgn ORGAN<br />
80 17 1 2 Organ101 ORGAN<br />
81 17 7 2 Dtnd Or1 ORGAN<br />
Tone no.PC CC00 CC32 Name Family<br />
82 17 8 2 TrmOrgan ORGAN<br />
83 17 9 2 Organ109 ORGAN<br />
84 17 17 2 60sOrgn2 ORGAN<br />
85 17 18 2 60sOrgn3 ORGAN<br />
86 17 31 2 PopOrgan ORGAN<br />
87 17 32 2 RockOrgn ORGAN<br />
88 17 33 2 Even Bar ORGAN<br />
89 17 40 2 OrganBss ORGAN<br />
90 18 1 2 Organ201 ORGAN<br />
91 18 8 2 ChorsOr2 ORGAN<br />
92 18 10 2 Dtnd Or2 ORGAN<br />
93 18 32 2 PercOrg2 ORGAN<br />
94 20 16 2 ChrchOr3 ORGAN<br />
95 21 16 2 PuffOrgn ORGAN<br />
96 22 0 2 AccrdnFr ACCORDN<br />
97 22 8 2 AccrdnIt ACCORDN<br />
98 24 0 2 Bandneon ACCORDN<br />
99 23 0 2 Harmonic ACCORDN<br />
100 23 1 2 Harmonc2 ACCORDN<br />
101 25 0 2 NylStrGt A.GUITAR<br />
102 25 24 2 VeloHrmx A.GUITAR<br />
103 26 9 2 Nyln+Stl A.GUITAR<br />
104 25 40 2 Reqnt Gt A.GUITAR<br />
105 25 49 2 FlmncoGt A.GUITAR<br />
106 26 0 2 StlStrGt A.GUITAR<br />
107 26 8 2 12-strGt A.GUITAR<br />
108 26 16 2 Mandolin A.GUITAR<br />
109 25 8 2 Ukulele A.GUITAR<br />
110 25 16 2 NylonGto A.GUITAR<br />
111 25 32 2 NylonGt2 A.GUITAR<br />
112 26 32 2 SteelGt2 A.GUITAR<br />
113 26 33 2 Stl+Body A.GUITAR<br />
114 32 0 2 GtHrmncs A.GUITAR<br />
115 32 16 2 AcGtHrmx A.GUITAR<br />
116 100 0 2 Atmspher A.GUITAR<br />
117 100 2 2 NylnHarp A.GUITAR<br />
118 121 0 2 GtFrtNoz A.GUITAR<br />
119 27 0 2 Jazz Gt. E.GUITAR<br />
120 27 8 2 PedalStl E.GUITAR<br />
121 28 1 2 CleanGt2 E.GUITAR<br />
122 28 4 2 JCClnGt. E.GUITAR<br />
123 28 23 2 MidTneGT E.GUITAR<br />
124 29 0 2 Muted Gt E.GUITAR<br />
125 30 0 2 OvrdrvGt E.GUITAR<br />
126 31 0 2 Dist Gt E.GUITAR<br />
127 31 16 2 Power Gt E.GUITAR<br />
128 27 1 2 MellowGt E.GUITAR<br />
129 27 2 2 JazzGt.2 E.GUITAR<br />
130 28 0 2 CleanGt. E.GUITAR<br />
131 28 3 2 OpenHrd1 E.GUITAR<br />
132 28 8 2 ChorusGt E.GUITAR<br />
133 28 48 2 CleanGt3 E.GUITAR<br />
134 29 1 2 Mt DstBs E.GUITAR<br />
135 29 8 2 Funk Pop E.GUITAR<br />
136 29 16 2 Funk Gt2 E.GUITAR<br />
137 29 24 2 Jazz Man E.GUITAR<br />
138 30 4 2 Gt Pinch E.GUITAR<br />
139 31 1 2 Dist.Gt2 E.GUITAR<br />
140 31 2 2 Dazed Gt E.GUITAR<br />
141 31 8 2 Fdbck Gt E.GUITAR<br />
142 31 9 2 FdbckGt2 E.GUITAR<br />
143 31 17 2 PowerGt2 E.GUITAR<br />
144 31 18 2 5th Dist E.GUITAR<br />
145 31 24 2 RockRhyt E.GUITAR<br />
146 31 25 2 RockRhy2 E.GUITAR<br />
147 31 26 2 DstRtmGT E.GUITAR<br />
148 32 8 2 GtFdback E.GUITAR<br />
149 121 1 2 GtCtNoiz E.GUITAR<br />
150 121 3 2 GtCtNoz2 E.GUITAR<br />
151 121 4 2 DstCutNz E.GUITAR<br />
152 121 6 2 PickScrp E.GUITAR<br />
153 33 0 2 AcsticBs BASS<br />
154 33 1 2 Ac.Bass1 BASS<br />
155 34 0 2 FingrdBs BASS<br />
156 34 2 2 JazzBass BASS<br />
157 34 3 2 FngrdBs3 BASS<br />
158 35 0 2 PckdBass BASS<br />
159 36 0 2 FrtlssBs BASS<br />
160 37 0 2 SlpBass1 BASS<br />
161 39 0 2 SynBass1 BASS<br />
162 39 16 2 ResoSHBs BASS<br />
Tone no.PC CC00 CC32 Name Family<br />
163 39 22 2 Sqr Bass BASS<br />
164 33 2 2 Ac.Bass2 BASS<br />
165 33 3 2 Ac.Bass3 BASS<br />
166 34 1 2 FngrdBs2 BASS<br />
167 34 4 2 FngrdBs4 BASS<br />
168 34 7 2 FingrSlp BASS<br />
169 35 3 2 Pckd Bs2 BASS<br />
170 35 8 2 Mt PckBs BASS<br />
171 36 1 2 FrtlsBs2 BASS<br />
172 36 2 2 FrtlsBs3 BASS<br />
173 36 3 2 FrtlsBs4 BASS<br />
174 36 4 2 SnFrtlss BASS<br />
175 36 5 2 MrSmooth BASS<br />
176 36 8 2 FrtlsBs5 BASS<br />
177 36 48 2 FtFrtlss BASS<br />
178 37 8 2 ResoSlap BASS<br />
179 38 0 2 SlpBass2 BASS<br />
180 39 1 2 SynBs101 BASS<br />
181 39 2 2 JunoBass BASS<br />
182 39 3 2 106Bass BASS<br />
183 39 8 2 AcidBass BASS<br />
184 39 9 2 TB303Bss BASS<br />
185 39 10 2 TeknBass BASS<br />
186 39 19 2 ClaviBss BASS<br />
187 39 20 2 Hammer BASS<br />
188 39 21 2 JnglBass BASS<br />
189 39 23 2 PopSynBs BASS<br />
190 39 24 2 LghtSnBs BASS<br />
191 39 25 2 FatTBBss BASS<br />
192 40 0 2 SynBass2 BASS<br />
193 40 1 2 SynBs201 BASS<br />
194 40 2 2 Mod Bass BASS<br />
195 40 3 2 Seq Bass BASS<br />
196 40 8 2 BeefFMBs BASS<br />
197 40 9 2 XWr Bass BASS<br />
198 40 16 2 RubbrBss BASS<br />
199 40 17 2 SH101Bs1 BASS<br />
200 40 18 2 SH101Bs2 BASS<br />
201 40 19 2 SmthBass BASS<br />
202 40 20 2 MildBass BASS<br />
203 40 21 2 DetunBss BASS<br />
204 40 29 2 AttckPls BASS<br />
205 121 2 2 Str Slap BASS<br />
206 121 5 2 BassSld BASS<br />
207 49 16 2 StStrngs STRINGS<br />
208 50 10 2 StSlwStr STRINGS<br />
209 50 8 2 LegtoStr STRINGS<br />
210 51 0 2 SynStrng STRINGS<br />
211 45 9 2 SuspnStr STRINGS<br />
212 46 0 2 PzzctStr STRINGS<br />
213 41 0 2 Violin STRINGS<br />
214 41 8 2 SlwVioln STRINGS<br />
215 42 0 2 Viola STRINGS<br />
216 43 0 2 Cello STRINGS<br />
217 44 0 2 Contrbss STRINGS<br />
218 56 10 2 DoublHit STRINGS<br />
219 41 1 2 Violin2 STRINGS<br />
220 41 9 2 SlVioln2 STRINGS<br />
221 42 1 2 Viola2 STRINGS<br />
222 43 1 2 Cello2 STRINGS<br />
223 45 0 2 Trem Str STRINGS<br />
224 45 8 2 SlwTrmol STRINGS<br />
225 49 0 2 Strings STRINGS<br />
226 49 1 2 Strings2 STRINGS<br />
227 49 0 2 Orchstra STRINGS<br />
228 49 9 2 Orchstr2 STRINGS<br />
229 49 10 2 TremOrch STRINGS<br />
230 49 11 2 ChoirStr STRINGS<br />
231 49 24 2 VeloStrn STRINGS<br />
232 49 40 2 60String STRINGS<br />
233 50 0 2 SlwStrng STRINGS<br />
234 50 1 2 SlwStrn2 STRINGS<br />
235 50 9 2 WarmStrn STRINGS<br />
236 51 1 2 OBStrngs STRINGS<br />
237 51 2 2 SynStrn1 STRINGS<br />
238 51 8 2 70s Str1 STRINGS<br />
239 51 9 2 70s Str2 STRINGS<br />
240 52 0 2 SynStrn2 STRINGS<br />
241 52 1 2 SynStrn3 STRINGS<br />
242 56 0 2 Orch Hit STRINGS<br />
243 56 1 2 Bass Hit STRINGS
<strong>EXR</strong>-5/<strong>EXR</strong>-3<br />
125<br />
Tone no.PC CC00 CC32 Name Family<br />
244 56 2 2 6th Hit STRINGS<br />
245 56 3 2 Euro Hit STRINGS<br />
246 56 4 2 TechnHit STRINGS<br />
247 56 8 2 ImpctHit STRINGS<br />
248 56 9 2 PhllyHit STRINGS<br />
249 56 16 2 LoFiRave STRINGS<br />
250 53 8 2 St.Choir VOCAL<br />
251 54 40 2 Humming VOCAL<br />
252 54 0 2 VoiceOoh VOCAL<br />
253 55 0 2 SynVox VOCAL<br />
254 86 0 2 Solo Vox VOCAL<br />
255 53 0 2 ChoirAah VOCAL<br />
256 53 9 2 MelloChr VOCAL<br />
257 53 32 2 ChrAahs2 VOCAL<br />
258 55 8 2 SynVoice VOCAL<br />
259 55 19 2 AnaVoice VOCAL<br />
260 100 3 2 Harpvox VOCAL<br />
261 100 4 2 HllwRels VOCAL<br />
262 67 8 2 BlwTenor SAX<br />
263 67 7 2 BrthyTnr SAX<br />
264 65 0 2 SoprnSax SAX<br />
265 66 0 2 Alto Sax SAX<br />
266 67 0 2 TenorSax SAX<br />
267 68 0 2 BartnSax SAX<br />
268 65 8 2 SoprSax2 SAX<br />
269 66 1 2 AltoSax2 SAX<br />
270 66 8 2 HyprAlto SAX<br />
271 67 1 2 TenrSax2 SAX<br />
272 67 9 2 SprTenor SAX<br />
273 74 48 2 FluteVib WIND<br />
274 73 0 2 Piccolo WIND<br />
275 69 0 2 Oboe WIND<br />
276 71 0 2 Bassoon WIND<br />
277 72 1 2 Clarinet WIND<br />
278 76 0 2 PanFlute WIND<br />
279 79 0 2 Whistle WIND<br />
280 70 0 2 EnglHorn WIND<br />
281 72 0 2 JzClrint WIND<br />
282 72 8 2 BsClarnt WIND<br />
283 74 0 2 Flute WIND<br />
284 75 0 2 Recorder WIND<br />
285 77 0 2 BottlBlw WIND<br />
286 80 0 2 Ocarina WIND<br />
287 57 0 2 Trumpet AC BRASS<br />
288 57 8 2 FlglHorn AC BRASS<br />
289 58 0 2 Trombone AC BRASS<br />
290 59 0 2 Tuba AC BRASS<br />
291 60 0 2 MtdTrump AC BRASS<br />
292 61 0 2 FrnchHrns AC BRASS<br />
293 62 0 2 Brass 1 AC BRASS<br />
294 62 16 2 BrssFall AC BRASS<br />
295 62 24 2 TwnTrmpt AC BRASS<br />
296 62 26 2 TrombnSc AC BRASS<br />
297 57 1 2 Trumpet2 AC BRASS<br />
298 57 2 2 Trumpet3 AC BRASS<br />
299 57 3 2 DrkTrmpt AC BRASS<br />
300 57 24 2 BrightTp AC BRASS<br />
301 57 25 2 Warm Tp. AC BRASS<br />
302 58 1 2 Trombne2 AC BRASS<br />
303 58 2 2 Trombne3 AC BRASS<br />
304 58 4 2 BrightTb AC BRASS<br />
305 59 1 2 Tuba 2 AC BRASS<br />
306 60 2 2 MtTrmpt2 AC BRASS<br />
307 61 1 2 Fr.Horn2 AC BRASS<br />
308 61 8 2 FrHornSl AC BRASS<br />
309 61 16 2 HornOrch AC BRASS<br />
310 62 1 2 Brass 2 AC BRASS<br />
311 62 8 2 Brass 3 AC BRASS<br />
312 62 25 2 TwinBons AC BRASS<br />
313 62 27 2 TrmbnSc2 AC BRASS<br />
314 63 0 2 SynBrss1 SYNBRASS<br />
315 63 5 2 JmpBrass SYNBRASS<br />
316 63 16 2 OctSnBrs SYNBRASS<br />
317 64 17 2 VeloBrs2 SYNBRASS<br />
318 63 1 2 PolyBrss SYNBRASS<br />
319 63 3 2 SYBrass SYNBRASS<br />
320 63 4 2 JunoBrss SYNBRASS<br />
321 63 8 2 SynBrss3 SYNBRASS<br />
322 63 9 2 QuakBrss SYNBRASS<br />
323 63 18 2 Octv Brs SYNBRASS<br />
324 64 0 2 SynBrss2 SYNBRASS<br />
325 64 1 2 SoftBrss SYNBRASS<br />
326 64 8 2 SynBrss4 SYNBRASS<br />
327 64 16 2 VeloBrs1 SYNBRASS<br />
328 82 4 2 Big Lead SYN LEAD<br />
329 81 0 2 Sqr Wave SYN LEAD<br />
330 81 3 2 MellowFM SYN LEAD<br />
331 81 4 2 CC Solo SYN LEAD<br />
332 81 17 2 260 Sync SYN LEAD<br />
Tone no.PC CC00 CC32 Name Family<br />
333 82 0 2 Saw Wave SYN LEAD<br />
334 82 2 2 PulseSaw SYN LEAD<br />
335 82 6 2 GR-300 SYN LEAD<br />
336 82 16 2 WaspySyn SYN LEAD<br />
337 82 46 2 SeqncdSw SYN LEAD<br />
338 83 0 2 SnCallpe SYN LEAD<br />
339 83 2 2 PurPanLd SYN LEAD<br />
340 85 0 2 Charang SYN LEAD<br />
341 85 1 2 WireLead SYN LEAD<br />
342 85 8 2 DistLead SYN LEAD<br />
343 81 1 2 Square SYN LEAD<br />
344 81 2 2 HollwMin SYN LEAD<br />
345 81 5 2 Shmoog SYN LEAD<br />
346 81 6 2 LMSquare SYN LEAD<br />
347 81 8 2 SineWave SYN LEAD<br />
348 81 16 2 DistSqre SYN LEAD<br />
349 82 1 2 P5 Saw SYN LEAD<br />
350 82 3 2 FelineGR SYN LEAD<br />
351 82 5 2 VeloLead SYN LEAD<br />
352 82 7 2 LA Saw SYN LEAD<br />
353 82 8 2 Dr. Solo SYN LEAD<br />
354 82 9 2 SawWave2 SYN LEAD<br />
355 82 10 2 Saw SYN LEAD<br />
356 82 36 2 NatrLead SYN LEAD<br />
357 83 1 2 VentSyn SYN LEAD<br />
358 84 0 2 ChiffrLd SYN LEAD<br />
359 87 0 2 5thSawWv SYN LEAD<br />
360 87 1 2 BigFives SYN LEAD<br />
361 88 0 2 Bss&Lead SYN LEAD<br />
362 88 1 2 Big&Raw SYN LEAD<br />
363 88 2 2 Fat&Prky SYN LEAD<br />
364 88 7 2 DlydLead SYN LEAD<br />
365 91 0 2 Polysyn POLY SYN<br />
366 91 1 2 80sPlySn POLY SYN<br />
367 97 0 2 Ice Rain POLY SYN<br />
368 100 1 2 WarmAtms POLY SYN<br />
369 101 0 2 Brightns POLY SYN<br />
370 89 0 2 Fantasia POLY SYN<br />
371 89 1 2 Fantsia2 POLY SYN<br />
372 97 1 2 HarmRain POLY SYN<br />
373 97 2 2 Africnwd POLY SYN<br />
374 97 8 2 ClaviPad POLY SYN<br />
375 98 8 2 Rave POLY SYN<br />
376 90 0 2 Warm Pad PAD<br />
377 90 1 2 ThickPad PAD<br />
378 90 3 2 RotryStr PAD<br />
379 90 4 2 Soft Pad PAD<br />
380 92 0 2 SpcVoice PAD<br />
381 92 1 2 HeavenII PAD<br />
382 92 3 2 Itopia PAD<br />
383 94 1 2 Tine Pad PAD<br />
384 94 2 2 PannrPad PAD<br />
385 96 0 2 SweepPad PAD<br />
386 96 1 2 PolarPad PAD<br />
387 96 9 2 Shwimmer PAD<br />
388 98 0 2 Sndtrack PAD<br />
389 100 6 2 AmbntPad PAD<br />
390 102 1 2 Goblinsn PAD<br />
391 103 5 2 ResoPnnr PAD<br />
392 104 0 2 StarThme PAD<br />
393 90 2 2 Horn Pad PAD<br />
394 90 5 2 Sine Pad PAD<br />
395 93 0 2 BowdGlss PAD<br />
396 94 0 2 MetalPad PAD<br />
397 95 0 2 Halo Pad PAD<br />
398 96 8 2 Converge PAD<br />
399 96 10 2 CelstlPd PAD<br />
400 98 1 2 Ancestrl PAD<br />
401 98 2 2 Prologue PAD<br />
402 102 0 2 Goblin PAD<br />
403 102 2 2 50sSciFi PAD<br />
404 103 0 2 EchDrops PAD<br />
405 103 1 2 EchoBell PAD<br />
406 103 2 2 Echo Pan PAD<br />
407 103 3 2 EchoPan2 PAD<br />
408 103 4 2 BigPannr PAD<br />
409 103 6 2 WtrPiano PAD<br />
410 104 1 2 StrThme2 PAD<br />
411 16 0 2 Santur ETHNIC<br />
412 47 0 2 Harp ETHNIC<br />
413 76 8 2 Kawala ETHNIC<br />
414 78 0 2 Shakuhch ETHNIC<br />
415 105 0 2 Sitar ETHNIC<br />
416 106 0 2 Banjo ETHNIC<br />
417 106 8 2 Rabab ETHNIC<br />
418 106 24 2 Oud ETHNIC<br />
419 107 0 2 Shamisen ETHNIC<br />
420 108 0 2 Koto ETHNIC<br />
421 108 16 2 Kanoon ETHNIC<br />
Tone no.PC CC00 CC32 Name Family<br />
422 110 0 2 Bagpipe ETHNIC<br />
423 111 0 2 Fiddle ETHNIC<br />
424 112 1 2 Shanai 2 ETHNIC<br />
425 16 1 2 Santur 2 ETHNIC<br />
426 16 8 2 Cimbalom ETHNIC<br />
427 47 24 2 Yang Qin ETHNIC<br />
428 105 1 2 Sitar 2 ETHNIC<br />
429 105 2 2 DtnSitar ETHNIC<br />
430 105 8 2 Tambra ETHNIC<br />
431 105 16 2 Tamboura ETHNIC<br />
432 106 1 2 MtdBanjo ETHNIC<br />
433 106 16 2 Gopichnt ETHNIC<br />
434 107 1 2 Tsugaru ETHNIC<br />
435 108 8 2 TaishoKt ETHNIC<br />
436 109 0 2 Kalimba ETHNIC<br />
437 112 0 2 Shanai ETHNIC<br />
438 112 8 2 Pungi ETHNIC<br />
439 112 16 2 Hichriki ETHNIC<br />
440 113 8 2 Bonang ETHNIC<br />
441 113 9 2 Gender ETHNIC<br />
442 113 10 2 GamlnGng ETHNIC<br />
443 113 11 2 StGameln ETHNIC<br />
444 48 0 2 Timpani PRCSSION<br />
445 115 0 2 StlDrums PRCSSION<br />
446 116 8 2 Castnets PRCSSION<br />
447 117 0 2 Taiko PRCSSION<br />
448 113 16 2 RAMACybl PRCSSION<br />
449 114 0 2 Agogo PRCSSION<br />
450 114 8 2 Atarigan PRCSSION<br />
451 116 0 2 Woodblck PRCSSION<br />
452 117 8 2 ConcrtBD PRCSSION<br />
453 117 9 2 CncrBDMt PRCSSION<br />
454 118 0 2 MeloTom1 PRCSSION<br />
455 118 1 2 Real Tom PRCSSION<br />
456 118 8 2 MeloTom2 PRCSSION<br />
457 118 9 2 Rock Tom PRCSSION<br />
458 119 0 2 SyntDrum PRCSSION<br />
459 119 8 2 808 Tom PRCSSION<br />
460 119 9 2 ElecPerc PRCSSION<br />
461 120 0 2 Rev Cym PRCSSION<br />
462 120 1 2 Rev Cym2 PRCSSION<br />
463 120 8 2 Rev Snr1 PRCSSION<br />
464 120 9 2 RevSnr 2 PRCSSION<br />
465 120 16 2 RevKick1 PRCSSION<br />
466 120 17 2 RevConBD PRCSSION<br />
467 120 24 2 RevTom 1 PRCSSION<br />
468 120 25 2 RevTom 2 PRCSSION<br />
469 123 2 2 Thunder SFX<br />
470 123 3 2 Wind SFX<br />
471 124 0 2 Bird SFX<br />
472 124 2 2 HrseGllp SFX<br />
473 124 3 2 Bird 2 SFX<br />
474 125 1 2 Telphn 2 SFX<br />
475 126 0 2 Helicptr SFX<br />
476 126 1 2 CarEngne SFX<br />
477 126 3 2 Car-Pass SFX<br />
478 126 5 2 Siren SFX<br />
479 126 6 2 Train SFX<br />
480 127 0 2 Applause SFX<br />
481 127 1 2 Laughing SFX<br />
482 127 2 2 Screamng SFX<br />
483 128 3 2 Xplosion SFX<br />
484 122 0 2 BrtNoise SFX<br />
485 122 1 2 FlKClick SFX<br />
486 123 0 2 Seashore SFX<br />
487 123 1 2 Rain SFX<br />
488 123 4 2 Stream SFX<br />
489 123 5 2 Bubble SFX<br />
490 124 1 2 Dog SFX<br />
491 124 4 2 Kitty SFX<br />
492 124 5 2 Growl SFX<br />
493 125 0 2 Telphn 1 SFX<br />
494 125 2 2 DoorCrk SFX<br />
495 125 3 2 Door SFX<br />
496 125 4 2 Scratch SFX<br />
497 125 5 2 WndChims SFX<br />
498 125 7 2 Scratch2 SFX<br />
499 126 2 2 Car-Stop SFX<br />
500 126 4 2 CarCrash SFX<br />
501 126 7 2 Jetplane SFX<br />
502 126 8 2 Starship SFX<br />
503 126 9 2 BurstNs SFX<br />
504 127 3 2 Punch SFX<br />
505 127 4 2 HeartBt SFX<br />
506 127 5 2 Footstps SFX<br />
507 127 6 2 Applaus2 SFX<br />
508 128 0 2 Gun Shot SFX<br />
509 128 1 2 MachnGun SFX<br />
510 128 2 2 Lasergun SFX
<strong>EXR</strong>-5/<strong>EXR</strong>-3<br />
126<br />
Tone no.PC CC00 CC32 Name Family<br />
511 1 0 2 STNDARD1 DRUMS*<br />
512 2 0 2 STNDARD2 DRUMS*<br />
513 9 0 2 ROOM DRUMS*<br />
514 10 0 2 Hip Hop DRUMS*<br />
515 11 0 2 Drum'Bss DRUMS*<br />
516 12 0 2 TechHous DRUMS*<br />
517 14 0 2 R&B DRUMS*<br />
518 17 0 2 POWER DRUMS*<br />
519 26 0 2 TR808909 DRUMS*<br />
520 27 0 2 DANCE DRUMS*<br />
521 31 0 2 NewTR909 DRUMS*<br />
522 33 0 2 Jazz Kit DRUMS*<br />
523 41 0 2 BRUSH DRUMS*<br />
524 49 0 2 ORCHSTRA DRUMS*<br />
525 50 0 2 ETHNIC DRUMS*<br />
526 3 0 2 STNDARD3 DRUMS*<br />
527 25 0 2 ELECTRNC DRUMS*<br />
528 34 0 2 JAZZ DRUMS*<br />
529 51 0 2 KICK&SNR DRUMS*<br />
530 57 0 2 SFX DRUMS*<br />
(*) See below for details.<br />
Names in bold type: can be selected with the<br />
SELECT [√][®] buttons. Use the numeric buttons [0]~[9] for<br />
selecting the other Tones.
Drum Kits<br />
<strong>EXR</strong>-5/<strong>EXR</strong>-3<br />
127<br />
C–1 0<br />
2<br />
4<br />
5<br />
7<br />
9<br />
11<br />
C0 12<br />
14<br />
16<br />
17<br />
19<br />
21<br />
23<br />
C1 24<br />
26<br />
28<br />
29<br />
31<br />
33<br />
35<br />
C2 36<br />
38<br />
40<br />
41<br />
43<br />
45<br />
47<br />
C3 48<br />
50<br />
52<br />
53<br />
55<br />
57<br />
59<br />
C4 60<br />
62<br />
64<br />
65<br />
67<br />
69<br />
71<br />
C5 72<br />
74<br />
76<br />
77<br />
79<br />
81<br />
83<br />
C6 84<br />
86<br />
88<br />
89<br />
91<br />
93<br />
95<br />
C7 96<br />
1<br />
3<br />
6<br />
8<br />
10<br />
13<br />
15<br />
18<br />
20<br />
22<br />
25<br />
27<br />
30<br />
32<br />
34<br />
37<br />
39<br />
42<br />
44<br />
46<br />
49<br />
51<br />
54<br />
56<br />
58<br />
61<br />
63<br />
66<br />
68<br />
70<br />
73<br />
75<br />
78<br />
80<br />
82<br />
85<br />
87<br />
90<br />
92<br />
94<br />
PC: 1 [CC32: 2]<br />
STANDRD 1<br />
------------<br />
------------<br />
------------<br />
------------<br />
------------<br />
------------<br />
------------<br />
------------<br />
------------<br />
------------<br />
------------<br />
------------<br />
------------<br />
------------<br />
------------<br />
------------<br />
------------<br />
------------<br />
------------<br />
------------<br />
------------<br />
------------<br />
------------<br />
------------<br />
------------<br />
Snare Roll<br />
Finger Snap<br />
High-Q<br />
Slap<br />
ScratchPush<br />
ScratchPull<br />
Sticks<br />
SquareClick<br />
Mtrnm.Click<br />
Mtrnm. Bell<br />
Kick 1<br />
Kick 2<br />
Side Stick<br />
Snare 2<br />
909Clap<br />
Snare 1<br />
Real Tom 6<br />
Close HiHat<br />
Real Tom 6<br />
Pedal HiHat<br />
Real Tom 4<br />
Open HiHat<br />
Real Tom 4<br />
Real Tom 1<br />
Crash Cym.1<br />
Real Tom 1<br />
Ride Cymbal<br />
China Cymbal<br />
Ride Bell<br />
Tambourine<br />
Splash Cym.<br />
Cowbell<br />
Crash Cym.2<br />
Vibraslap<br />
Ride Cymbal<br />
Bongo High<br />
Bongo Lo<br />
Mute H.Conga<br />
Conga Hi Opn<br />
Conga Lo Opn<br />
High Timbale<br />
Low Timbale<br />
Agogo<br />
Agogo<br />
Cabasa<br />
Maracas<br />
ShrtWhistle<br />
LongWhistle<br />
Short Guiro<br />
Long Guiro<br />
Claves<br />
Woodblock<br />
Woodblock<br />
Mute Cuica<br />
Open Cuica<br />
Mute Triangl<br />
Open Triangl<br />
Shaker<br />
Jingle Bell<br />
Bar Chimes<br />
Castanets<br />
Mute Surdo<br />
Open Surdo<br />
------------<br />
------------<br />
------------<br />
------------<br />
------------<br />
------------<br />
------------<br />
------------<br />
------------<br />
PC: 2 [CC32: 2]<br />
STANDRD 2<br />
------------<br />
------------<br />
------------<br />
------------<br />
------------<br />
------------<br />
------------<br />
------------<br />
------------<br />
------------<br />
------------<br />
------------<br />
------------<br />
------------<br />
------------<br />
------------<br />
------------<br />
------------<br />
------------<br />
------------<br />
------------<br />
------------<br />
------------<br />
------------<br />
------------<br />
Snare Roll<br />
Finger Snap<br />
High-Q<br />
Slap<br />
ScratchPush<br />
ScratchPull<br />
Sticks<br />
SquareClick<br />
Mtrnm.Click<br />
Mtrnm. Bell<br />
Std2 Kick2<br />
Std.2 Kick1<br />
Side Stick<br />
Std.2 Snare1<br />
808clap<br />
Std.2 Snare2<br />
Real Tom 6<br />
Jazz Clsd.HH<br />
Real Tom 6<br />
Pedal HiHat<br />
Real Tom 4<br />
Jazz Open HH<br />
Real Tom 4<br />
Real Tom 1<br />
Crash Cym.1<br />
Real Tom 1<br />
Ride Cymbal<br />
China Cymbal<br />
Ride Bell<br />
Tambourine<br />
Splash Cym.<br />
Cowbell<br />
Crash Cym.2<br />
Vibraslap<br />
Ride Cymbal<br />
Bongo High<br />
Bongo Lo<br />
Mute H.Conga<br />
Conga Hi Opn<br />
Conga Lo Opn<br />
High Timbale<br />
Low Timbale<br />
Agogo<br />
Agogo<br />
Cabasa<br />
Maracas<br />
ShrtWhistle<br />
LongWhistle<br />
Short Guiro<br />
Long Guiro<br />
Claves<br />
Woodblock<br />
Woodblock<br />
Mute Cuica<br />
Open Cuica<br />
Mute Triangl<br />
Open Triangl<br />
Shaker<br />
Jingle Bell<br />
Bar Chimes<br />
Castanets<br />
Mute Surdo<br />
Open Surdo<br />
------------<br />
------------<br />
------------<br />
------------<br />
------------<br />
------------<br />
------------<br />
------------<br />
------------<br />
PC: 3 [CC32: 2]<br />
STANDARD 3<br />
------------<br />
------------<br />
------------<br />
------------<br />
------------<br />
------------<br />
------------<br />
------------<br />
------------<br />
------------<br />
------------<br />
------------<br />
------------<br />
------------<br />
------------<br />
------------<br />
------------<br />
------------<br />
------------<br />
------------<br />
------------<br />
------------<br />
------------<br />
------------<br />
------------<br />
Snare Roll<br />
Finger Snap<br />
High-Q<br />
Slap<br />
ScratchPush<br />
ScratchPull<br />
Sticks<br />
SquareClick<br />
Mtrnm.Click<br />
Mtrnm. Bell<br />
Std.1 Kick2<br />
Std.1 Kick1<br />
Side Stick<br />
Std.1 Snare1<br />
808clap<br />
Std.1 Snare2<br />
Real Tom 6<br />
Close HiHat<br />
Real Tom 6<br />
Pedal HiHat<br />
Real Tom 4<br />
Open Hi Hat<br />
Real Tom 4<br />
Real Tom 1<br />
Crash Cym.1<br />
Real Tom 1<br />
Ride Cymbal<br />
China Cymbal<br />
Ride Bell<br />
Tambourine<br />
Splash Cym.<br />
Cowbell<br />
Crash Cym.2<br />
Vibraslap<br />
Ride Cymbal<br />
Bongo High<br />
Bongo Lo<br />
Mute H.Conga<br />
Conga Hi Opn<br />
Conga Lo Opn<br />
High Timbale<br />
Low Timbale<br />
Agogo<br />
Agogo<br />
Cabasa<br />
Maracas<br />
ShrtWhistle<br />
LongWhistle<br />
Short Guiro<br />
Long Guiro<br />
Claves<br />
Woodblock<br />
Woodblock<br />
Mute Cuica<br />
Open Cuica<br />
Mute Triangl<br />
Open Triangl<br />
Shaker<br />
Jingle Bell<br />
Bell Tree<br />
Castanets<br />
Mute Surdo<br />
Open Surdo<br />
------------<br />
------------<br />
------------<br />
------------<br />
------------<br />
------------<br />
------------<br />
------------<br />
------------<br />
PC: 9 [CC32: 2]<br />
ROOM<br />
------------<br />
------------<br />
------------<br />
------------<br />
------------<br />
------------<br />
------------<br />
------------<br />
------------<br />
------------<br />
------------<br />
------------<br />
------------<br />
------------<br />
------------<br />
------------<br />
------------<br />
------------<br />
------------<br />
------------<br />
------------<br />
------------<br />
------------<br />
------------<br />
------------<br />
Snare Roll<br />
Finger Snap<br />
High-Q<br />
Slap<br />
ScratchPush<br />
ScratchPull<br />
Sticks<br />
SquareClick<br />
Mtrnm.Click<br />
Mtrnm. Bell<br />
Room Kick 2<br />
Room Kick 1<br />
Side Stick<br />
Room Snare 1<br />
808clap<br />
Room Snare 2<br />
Room Tom 5<br />
Room Chh<br />
Room Tom 5<br />
Pedal HiHat<br />
Room Tom 2<br />
R8 Ohh2<br />
Room Tom 2<br />
Room Tom 2<br />
Crash Cym.1<br />
Room Tom 2<br />
Ride Cymbal<br />
China Cymbal<br />
Ride Bell<br />
Tambourine<br />
Splash Cym.<br />
Cowbell<br />
Crash Cym.2<br />
Vibraslap<br />
Ride Cymbal<br />
Bongo High<br />
Bongo Lo<br />
Mute H.Conga<br />
Conga Hi Opn<br />
Conga Lo Opn<br />
High Timbale<br />
Low Timbale<br />
Agogo<br />
Agogo<br />
Cabasa<br />
Maracas<br />
ShrtWhistle<br />
LongWhistle<br />
Short Guiro<br />
Long Guiro<br />
Claves<br />
Woodblock<br />
Woodblock<br />
Mute Cuica<br />
Open Cuica<br />
Mute Triangl<br />
Open Triangl<br />
Shaker<br />
Jingle Bell<br />
Bell Tree<br />
Castanets<br />
Mute Surdo<br />
Open Surdo<br />
------------<br />
------------<br />
------------<br />
------------<br />
------------<br />
------------<br />
------------<br />
------------<br />
------------<br />
PC: 10 [CC32: 2]<br />
HIP HOP<br />
------------<br />
------------<br />
------------<br />
------------<br />
------------<br />
------------<br />
------------<br />
------------<br />
------------<br />
------------<br />
909 Kick 3<br />
House Kick<br />
TR-808 Kick<br />
909 Kick<br />
909 Kick2<br />
TR-909 OHHsh<br />
TR-909 OHH<br />
Ah<br />
Ha<br />
ShutHa<br />
ShutHi<br />
One<br />
Two<br />
Three<br />
Four<br />
Snare Roll<br />
Snap<br />
High-Q<br />
Slap<br />
Scrtch Push2<br />
Scrtch Pull2<br />
Sticks<br />
SquareClick<br />
Mtrnm.Click<br />
Mtrnm. Bell<br />
HipHop Kick<br />
SimpleKick<br />
Side Stick<br />
HipHop Snare<br />
FunkClap<br />
HipHopSnare2<br />
Real Tom 6<br />
HipHopCHH<br />
Real Tom 6<br />
HipHopCHH<br />
Real Tom 4<br />
HipHopOHH<br />
Real Tom 4<br />
Real Tom 1<br />
Crash Cym.1<br />
Real Tom 1<br />
Ride Cymbal<br />
ReverseCymbl<br />
Ride Bell<br />
Tambourine<br />
Splash Cym.<br />
Cowbell<br />
Crash Cym.2<br />
Vibraslap<br />
Ride Cymbal<br />
Bongo High<br />
Bongo Lo<br />
Mute H.Conga<br />
Conga Hi Opn<br />
Conga Lo Opn<br />
High Timbale<br />
Low Timbale<br />
Agogo<br />
Agogo<br />
Cabasa<br />
Maracas<br />
ShrtWhistle<br />
LongWhistle<br />
Short Guiro<br />
Long Guiro<br />
Claves<br />
Woodblock<br />
Woodblock<br />
Hoo<br />
Hoo<br />
Mute Triangl<br />
Open Triangl<br />
Shaker<br />
Jingle Bell<br />
Bell Tree<br />
Castanets<br />
Mute Surdo<br />
Open Surdo<br />
------------<br />
------------<br />
------------<br />
------------<br />
------------<br />
------------<br />
------------<br />
------------<br />
------------<br />
PC: 11 [CC32: 2]<br />
DRUM'BSS<br />
------------<br />
------------<br />
------------<br />
------------<br />
------------<br />
------------<br />
------------<br />
------------<br />
------------<br />
------------<br />
909 Kick 3<br />
House Kick<br />
909 Kick<br />
HipHop Kick<br />
SimpleKick<br />
TR-909 OHHsh<br />
TR-909 OHH<br />
Ah<br />
Ha<br />
ShutHa<br />
ShutHi<br />
One<br />
Two<br />
Three<br />
Four<br />
Snare Roll<br />
Snap<br />
High-Q<br />
Slap<br />
Scrtch Push2<br />
Scrtch Pull2<br />
Sticks<br />
SquareClick<br />
Mtrnm.Click<br />
Mtrnm. Bell<br />
TR-808 Kick<br />
909 Kick2<br />
Side Stick<br />
Jungle Snare<br />
909Clap<br />
Ps Snare<br />
808 Tom 2<br />
R&B CHH<br />
808 Tom 2<br />
R&B CHH<br />
808 Tom 2<br />
HipHopOHH<br />
808 Tom 2<br />
808 Tom 2<br />
909 Crash<br />
808 Tom 2<br />
Ride Cymbal<br />
China Cymbal<br />
Ride Bell<br />
Tambourine<br />
Splash Cym.<br />
808cowbe<br />
Crash Cym.2<br />
Vibraslap<br />
Ride Cymbal<br />
Bongo High<br />
Bongo Lo<br />
808 Conga<br />
808 Conga<br />
808 Conga<br />
High Timbale<br />
Low Timbale<br />
Agogo<br />
Agogo<br />
Cabasa<br />
808marac<br />
ShrtWhistle<br />
LongWhistle<br />
Short Guiro<br />
Long Guiro<br />
808clave<br />
Woodblock<br />
Woodblock<br />
Mute Cuica<br />
Open Cuica<br />
Mute Triangl<br />
Open Triangl<br />
Shaker<br />
Jingle Bell<br />
Bell Tree<br />
Castanets<br />
Mute Surdo<br />
Open Surdo<br />
------------<br />
------------<br />
------------<br />
------------<br />
------------<br />
------------<br />
------------<br />
------------<br />
------------<br />
PC: 12 [CC32: 2]<br />
TECHHOUS<br />
------------<br />
------------<br />
------------<br />
------------<br />
------------<br />
------------<br />
------------<br />
------------<br />
------------<br />
------------<br />
909 Kick 3<br />
909 Kick2<br />
TR-808 Kick<br />
HipHop Kick<br />
SimpleKick<br />
TR-909 OHHsh<br />
TR-909 OHH<br />
Ah<br />
Ha<br />
ShutHa<br />
ShutHi<br />
One<br />
Two<br />
Three<br />
Four<br />
Snare Roll<br />
Snap<br />
High-Q<br />
Slap<br />
Scrtch Push2<br />
Scrtch Pull2<br />
Sticks<br />
SquareClick<br />
Mtrnm.Click<br />
Mtrnm. Bell<br />
909 Kick<br />
House Kick<br />
Side Stick<br />
Techno Snare<br />
909Clap<br />
House Snare<br />
Synth Drum 2<br />
TR-909 CHH<br />
Synth Drum 2<br />
TR-909 CHH<br />
Synth Drum 2<br />
TR-909 OHH<br />
Synth Drum 2<br />
Synth Drum 2<br />
909 Crash<br />
Synth Drum 2<br />
Ride Cymbal<br />
ReverseCymbl<br />
Ride Bell<br />
Tambourine<br />
Splash Cym.<br />
Cowbell<br />
Crash Cym.2<br />
Vibraslap<br />
Ride Cymbal<br />
Bongo High<br />
Bongo Lo<br />
Mute H.Conga<br />
Conga Hi Opn<br />
Conga Lo Opn<br />
High Timbale<br />
Low Timbale<br />
Agogo<br />
Agogo<br />
Cabasa<br />
Maracas<br />
ShrtWhistle<br />
LongWhistle<br />
Short Guiro<br />
Long Guiro<br />
Claves<br />
Woodblock<br />
Woodblock<br />
Hoo<br />
Hoo<br />
Mute Triangl<br />
Open Triangl<br />
Shaker<br />
Jingle Bell<br />
Bell Tree<br />
Castanets<br />
Mute Surdo<br />
Open Surdo<br />
------------<br />
------------<br />
------------<br />
------------<br />
------------<br />
------------<br />
------------<br />
------------<br />
------------<br />
PC: 14 [CC32: 2]<br />
R&B<br />
------------<br />
------------<br />
------------<br />
------------<br />
------------<br />
------------<br />
------------<br />
------------<br />
------------<br />
------------<br />
909 Kick<br />
House Kick<br />
TR-808 Kick<br />
HipHop Kick<br />
909 Kick2<br />
R&B OHHsh<br />
R&B OHH<br />
Ah<br />
Ha<br />
ShutHa<br />
ShutHi<br />
One<br />
Two<br />
Three<br />
Four<br />
Snare Roll<br />
Snap<br />
High-Q<br />
Slap<br />
Scrtch Push2<br />
Scrtch Pull2<br />
Sticks<br />
SquareClick<br />
Mtrnm.Click<br />
Mtrnm. Bell<br />
909 Kick 3<br />
SimpleKick<br />
Side Stick<br />
R&B Snare<br />
R&B Clap<br />
909Snare2<br />
Real Tom 6<br />
R&B CHH<br />
Real Tom 6<br />
R&B CHH<br />
Real Tom 4<br />
R&B OHH<br />
Real Tom 4<br />
Real Tom 1<br />
909 Crash<br />
Real Tom 1<br />
Ride Cymbal<br />
ReverseCymbl<br />
Ride Bell<br />
Tambourine<br />
Splash Cym.<br />
Cowbell<br />
Crash Cym.2<br />
Vibraslap<br />
Ride Cymbal<br />
Bongo High<br />
Bongo Lo<br />
Mute H.Conga<br />
Conga Hi Opn<br />
Conga Lo Opn<br />
High Timbale<br />
Low Timbale<br />
Agogo<br />
Agogo<br />
Cabasa<br />
Maracas<br />
ShrtWhistle<br />
LongWhistle<br />
Short Guiro<br />
Long Guiro<br />
Claves<br />
Woodblock<br />
Woodblock<br />
Hoo<br />
Hoo<br />
Mute Triangl<br />
Open Triangl<br />
Shaker<br />
Jingle Bell<br />
Bell Tree<br />
Castanets<br />
Mute Surdo<br />
Open Surdo<br />
------------<br />
------------<br />
------------<br />
------------<br />
------------<br />
------------<br />
------------<br />
------------<br />
------------<br />
PC: 17 [CC32: 2]<br />
POWER<br />
------------<br />
------------<br />
------------<br />
------------<br />
------------<br />
------------<br />
------------<br />
------------<br />
------------<br />
------------<br />
Kick 1<br />
Kick 2<br />
------------<br />
------------<br />
------------<br />
------------<br />
------------<br />
------------<br />
------------<br />
------------<br />
------------<br />
------------<br />
------------<br />
------------<br />
------------<br />
Snare Roll<br />
Finger Snap<br />
High-Q<br />
Slap<br />
ScratchPush<br />
ScratchPull<br />
Sticks<br />
SquareClick<br />
Mtrnm.Click<br />
Mtrnm. Bell<br />
Power Kick2<br />
Power Kick1<br />
Side Stick<br />
Dance Snare1<br />
808clap<br />
Power Snare1<br />
Rock Tom 4<br />
Room Chh<br />
Rock Tom 4<br />
Pedal HiHat<br />
Rock Tom 4<br />
R8 Ohh2<br />
Rock Tom 4<br />
Rock Tom 1<br />
Crash Cym.1<br />
Rock Tom 1<br />
Ride Cymbal<br />
China Cymbal<br />
Ride Bell<br />
Tambourine<br />
Splash Cym.<br />
Cowbell<br />
Crash Cym.2<br />
Vibraslap<br />
Ride Cymbal<br />
Bongo High<br />
Bongo Lo<br />
Mute H.Conga<br />
Conga Hi Opn<br />
Conga Lo Opn<br />
High Timbale<br />
Low Timbale<br />
Agogo<br />
Agogo<br />
Cabasa<br />
Maracas<br />
ShrtWhistle<br />
LongWhistle<br />
Short Guiro<br />
Long Guiro<br />
Claves<br />
Woodblock<br />
Woodblock<br />
Mute Cuica<br />
Open Cuica<br />
Mute Triangl<br />
Open Triangl<br />
Shaker<br />
Jingle Bell<br />
Bell Tree<br />
Castanets<br />
Mute Surdo<br />
Open Surdo<br />
------------<br />
------------<br />
------------<br />
------------<br />
------------<br />
------------<br />
------------<br />
------------<br />
------------<br />
PC: 25 [CC32: 2]<br />
ELECTRONIC<br />
------------<br />
------------<br />
------------<br />
------------<br />
------------<br />
------------<br />
------------<br />
------------<br />
------------<br />
------------<br />
------------<br />
------------<br />
------------<br />
------------<br />
------------<br />
------------<br />
------------<br />
------------<br />
------------<br />
------------<br />
------------<br />
------------<br />
------------<br />
------------<br />
------------<br />
Snare Roll<br />
Finger Snap<br />
High-Q<br />
Slap<br />
Scrtch Push2<br />
Scrtch Pull2<br />
Sticks<br />
SquareClick<br />
Mtrnm.Click<br />
Mtrnm. Bell<br />
Elec Kick 2<br />
Elec Kick 1<br />
Side Stick<br />
Elec. Snare<br />
808clap<br />
Elec Snare 2<br />
Synth Drum 2<br />
Jazz Clsd.HH<br />
Synth Drum 2<br />
Pedal HiHat<br />
Synth Drum 2<br />
Jazz Open HH<br />
Synth Drum 2<br />
Synth Drum 2<br />
Crash Cym.1<br />
Synth Drum 2<br />
Ride Cymbal<br />
ReverseCymbl<br />
Ride Bell<br />
Tambourine<br />
Splash Cym.<br />
Cowbell<br />
Crash Cym.2<br />
Vibraslap<br />
Ride Cymbal<br />
Bongo High<br />
Bongo Lo<br />
Mute H.Conga<br />
Conga Hi Opn<br />
Conga Lo Opn<br />
High Timbale<br />
Low Timbale<br />
Agogo<br />
Agogo<br />
Cabasa<br />
Maracas<br />
ShrtWhistle<br />
LongWhistle<br />
Short Guiro<br />
Long Guiro<br />
Claves<br />
Woodblock<br />
Woodblock<br />
Mute Cuica<br />
Open Cuica<br />
Mute Triangl<br />
Open Triangl<br />
Shaker<br />
Jingle Bell<br />
Bell Tree<br />
Castanets<br />
Mute Surdo<br />
Open Surdo<br />
------------<br />
------------<br />
------------<br />
------------<br />
------------<br />
------------<br />
------------<br />
------------<br />
------------
<strong>EXR</strong>-5/<strong>EXR</strong>-3<br />
128<br />
C–1 0<br />
2<br />
4<br />
5<br />
7<br />
9<br />
11<br />
C0 12<br />
14<br />
16<br />
17<br />
19<br />
21<br />
23<br />
C1 24<br />
26<br />
28<br />
29<br />
31<br />
33<br />
35<br />
C2 36<br />
38<br />
40<br />
41<br />
43<br />
45<br />
47<br />
C3 48<br />
50<br />
52<br />
53<br />
55<br />
57<br />
59<br />
C4 60<br />
62<br />
64<br />
65<br />
67<br />
69<br />
71<br />
C5 72<br />
74<br />
76<br />
77<br />
79<br />
81<br />
83<br />
C6 84<br />
86<br />
88<br />
89<br />
91<br />
93<br />
95<br />
C7 96<br />
1<br />
3<br />
6<br />
8<br />
10<br />
13<br />
15<br />
18<br />
20<br />
22<br />
25<br />
27<br />
30<br />
32<br />
34<br />
37<br />
39<br />
42<br />
44<br />
46<br />
49<br />
51<br />
54<br />
56<br />
58<br />
61<br />
63<br />
66<br />
68<br />
70<br />
73<br />
75<br />
78<br />
80<br />
82<br />
85<br />
87<br />
90<br />
92<br />
94<br />
PC: 26 [CC32: 2]<br />
TR-808/909<br />
------------<br />
------------<br />
------------<br />
------------<br />
------------<br />
------------<br />
------------<br />
------------<br />
------------<br />
------------<br />
------------<br />
------------<br />
------------<br />
------------<br />
------------<br />
------------<br />
------------<br />
------------<br />
------------<br />
------------<br />
------------<br />
------------<br />
------------<br />
------------<br />
------------<br />
Snare Roll<br />
Finger Snap<br />
High-Q<br />
Slap<br />
Scrtch Push2<br />
Scrtch Pull2<br />
Sticks<br />
SquareClick<br />
Mtrnm.Click<br />
Mtrnm. Bell<br />
TR-909 Kick<br />
TR-808 Kick<br />
808 Rimshot<br />
808 Snare 1<br />
808clap<br />
909 Snare 1<br />
808 Tom 2<br />
808__chh<br />
808 Tom 2<br />
808__chh<br />
808 Tom 2<br />
808__ohh<br />
808 Tom 2<br />
808 Tom 2<br />
808 Crash<br />
808 Tom 2<br />
Ride Cymbal<br />
China Cymbal<br />
Ride Bell<br />
Tambourine<br />
Splash Cym.<br />
808cowbe<br />
Crash Cym.2<br />
Vibraslap<br />
Ride Cymbal<br />
Bongo High<br />
Bongo Lo<br />
808 Conga<br />
808 Conga<br />
808 Conga<br />
High Timbale<br />
Low Timbale<br />
Agogo<br />
Agogo<br />
Cabasa<br />
808marac<br />
ShrtWhistle<br />
LongWhistle<br />
Short Guiro<br />
Long Guiro<br />
808clave<br />
Woodblock<br />
Woodblock<br />
Mute Cuica<br />
Open Cuica<br />
Mute Triangl<br />
Open Triangl<br />
Shaker<br />
Jingle Bell<br />
Bell Tree<br />
Castanets<br />
Mute Surdo<br />
Open Surdo<br />
------------<br />
------------<br />
------------<br />
------------<br />
------------<br />
------------<br />
------------<br />
------------<br />
------------<br />
PC: 27 [CC32: 2]<br />
DANCE<br />
------------<br />
------------<br />
------------<br />
------------<br />
------------<br />
------------<br />
------------<br />
------------<br />
------------<br />
------------<br />
------------<br />
------------<br />
------------<br />
------------<br />
------------<br />
------------<br />
------------<br />
------------<br />
------------<br />
------------<br />
------------<br />
------------<br />
------------<br />
------------<br />
------------<br />
Snare Roll<br />
Finger Snap<br />
High-Q<br />
Slap<br />
Scrtch Push2<br />
Scrtch Pull2<br />
Sticks<br />
SquareClick<br />
Mtrnm.Click<br />
Mtrnm. Bell<br />
Dance Kick 2<br />
Elec Kick 2<br />
Side Stick<br />
Power Snare2<br />
808clap<br />
Elec Snare 1<br />
Synth Drum 2<br />
CR-78 chh<br />
Synth Drum 2<br />
808__chh<br />
Synth Drum 2<br />
CR-78 ohh<br />
Synth Drum 2<br />
Synth Drum 2<br />
Crash Cym.1<br />
Synth Drum 2<br />
Ride Cymbal<br />
ReverseCymbl<br />
Ride Bell<br />
Tambourine<br />
Splash Cym.<br />
Cowbell<br />
Crash Cym.2<br />
Vibraslap<br />
Ride Cymbal<br />
Bongo High<br />
Bongo Lo<br />
Mute H.Conga<br />
Conga Hi Opn<br />
Conga Lo Opn<br />
High Timbale<br />
Low Timbale<br />
Agogo<br />
Agogo<br />
Cabasa<br />
Maracas<br />
ShrtWhistle<br />
LongWhistle<br />
Short Guiro<br />
Long Guiro<br />
Claves<br />
Woodblock<br />
Woodblock<br />
Hoo<br />
Hoo<br />
Mute Triangl<br />
Open Triangl<br />
Shaker<br />
Jingle Bell<br />
Bell Tree<br />
Castanets<br />
Mute Surdo<br />
Open Surdo<br />
------------<br />
------------<br />
------------<br />
------------<br />
------------<br />
------------<br />
------------<br />
------------<br />
------------<br />
PC: 31 [CC32: 2]<br />
New TR-909<br />
------------<br />
------------<br />
------------<br />
------------<br />
------------<br />
------------<br />
------------<br />
------------<br />
------------<br />
------------<br />
909 Kick 3<br />
House Kick<br />
TR-808 Kick<br />
HipHop Kick<br />
SimpleKick<br />
TR-909 OHHsh<br />
TR-909 OHH<br />
Ah<br />
Ha<br />
ShutHa<br />
ShutHi<br />
One<br />
Two<br />
Three<br />
Four<br />
Snare Roll<br />
Snap<br />
High-Q<br />
Slap<br />
Scrtch Push2<br />
Scrtch Pull2<br />
Sticks<br />
SquareClick<br />
Mtrnm.Click<br />
Mtrnm. Bell<br />
909 Kick<br />
909 Kick2<br />
Side Stick<br />
909 Snare<br />
909Clap<br />
909Snare2<br />
808 Tom 2<br />
TR-909 CHH<br />
808 Tom 2<br />
TR-909 CHH<br />
808 Tom 2<br />
TR-909 OHH<br />
808 Tom 2<br />
808 Tom 2<br />
909 Crash<br />
808 Tom 2<br />
Ride Cymbal<br />
China Cymbal<br />
Ride Bell<br />
Tambourine<br />
Splash Cym.<br />
808cowbe<br />
Crash Cym.2<br />
Vibraslap<br />
Ride Cymbal<br />
Bongo High<br />
Bongo Lo<br />
808 Conga<br />
808 Conga<br />
808 Conga<br />
High Timbale<br />
Low Timbale<br />
Agogo<br />
Agogo<br />
Cabasa<br />
808marac<br />
ShrtWhistle<br />
LongWhistle<br />
Short Guiro<br />
Long Guiro<br />
808clave<br />
Woodblock<br />
Woodblock<br />
Mute Cuica<br />
Open Cuica<br />
Mute Triangl<br />
Open Triangl<br />
Shaker<br />
Jingle Bell<br />
Bell Tree<br />
Castanets<br />
Mute Surdo<br />
Open Surdo<br />
------------<br />
------------<br />
------------<br />
------------<br />
------------<br />
------------<br />
------------<br />
------------<br />
------------<br />
PC: 33 [CC32: 2]<br />
Jazz Kit<br />
------------<br />
------------<br />
------------<br />
------------<br />
------------<br />
------------<br />
------------<br />
------------<br />
------------<br />
------------<br />
------------<br />
------------<br />
------------<br />
------------<br />
------------<br />
------------<br />
------------<br />
------------<br />
------------<br />
------------<br />
------------<br />
------------<br />
------------<br />
------------<br />
------------<br />
Snare Roll<br />
Finger Snap<br />
High-Q<br />
Slap<br />
ScratchPush<br />
ScratchPull<br />
Sticks<br />
SquareClick<br />
Mtrnm.Click<br />
Mtrnm. Bell<br />
Jazz Kick 2<br />
Jazz Kick 1<br />
Side Stick<br />
Jazz Snare 1<br />
Hand clap2<br />
Jazz Snare<br />
Real Tom 6<br />
Jazz Clsd.HH<br />
Real Tom 6<br />
Jazz Pedl.HH<br />
Real Tom 4<br />
Jazz Open HH<br />
Real Tom 4<br />
Real Tom 1<br />
Crash Cym.1<br />
Real Tom 1<br />
Ride Cymbal<br />
China Cymbal<br />
Ride Bell<br />
Tambourine<br />
Splash Cym.<br />
Cowbell<br />
Crash Cym.2<br />
Vibraslap<br />
Ride Cymbal<br />
Bongo High<br />
Bongo Lo<br />
Mute H.Conga<br />
Conga Hi Opn<br />
Conga Lo Opn<br />
High Timbale<br />
Low Timbale<br />
Agogo<br />
Agogo<br />
Cabasa<br />
Maracas<br />
ShrtWhistle<br />
LongWhistle<br />
Short Guiro<br />
Long Guiro<br />
Claves<br />
Woodblock<br />
Woodblock<br />
Mute Cuica<br />
Open Cuica<br />
Mute Triangl<br />
Open Triangl<br />
Shaker<br />
Jingle Bell<br />
Bell Tree<br />
Castanets<br />
Mute Surdo<br />
Open Surdo<br />
------------<br />
------------<br />
------------<br />
------------<br />
------------<br />
------------<br />
------------<br />
------------<br />
------------<br />
PC: 34 [CC32: 2]<br />
JAZZ<br />
------------<br />
------------<br />
------------<br />
------------<br />
------------<br />
------------<br />
------------<br />
------------<br />
------------<br />
------------<br />
------------<br />
------------<br />
------------<br />
------------<br />
------------<br />
------------<br />
------------<br />
------------<br />
------------<br />
------------<br />
------------<br />
------------<br />
------------<br />
------------<br />
------------<br />
Snare Roll<br />
Finger Snap<br />
High-Q<br />
Slap<br />
ScratchPush<br />
ScratchPull<br />
Sticks<br />
SquareClick<br />
Mtrnm.Click<br />
Mtrnm. Bell<br />
Jazz Kick 2<br />
Jazz Kick 1<br />
Side Stick<br />
Jazz Snare 1<br />
Hand clap2<br />
Jazz Snare 2<br />
Real Tom 6<br />
Jazz Clsd.HH<br />
Real Tom 6<br />
Pedal HiHat<br />
Real Tom 4<br />
Jazz Open HH<br />
Real Tom 4<br />
Real Tom 1<br />
Crash Cym.1<br />
Real Tom 1<br />
Ride Cymbal<br />
China Cymbal<br />
Ride Bell<br />
Tambourine<br />
Splash Cym.<br />
Cowbell<br />
Crash Cym.2<br />
Vibraslap<br />
Ride Cymbal<br />
Bongo High<br />
Bongo Lo<br />
Mute H.Conga<br />
Conga Hi Opn<br />
Conga Lo Opn<br />
High Timbale<br />
Low Timbale<br />
Agogo<br />
Agogo<br />
Cabasa<br />
Maracas<br />
ShrtWhistle<br />
LongWhistle<br />
Short Guiro<br />
Long Guiro<br />
Claves<br />
Woodblock<br />
Woodblock<br />
Mute Cuica<br />
Open Cuica<br />
Mute Triangl<br />
Open Triangl<br />
Shaker<br />
Jingle Bell<br />
Bell Tree<br />
Castanets<br />
Mute Surdo<br />
Open Surdo<br />
------------<br />
------------<br />
------------<br />
------------<br />
------------<br />
------------<br />
------------<br />
------------<br />
------------<br />
PC: 41 [CC32: 2]<br />
BRUSH<br />
------------<br />
------------<br />
------------<br />
------------<br />
------------<br />
------------<br />
------------<br />
------------<br />
------------<br />
------------<br />
------------<br />
------------<br />
------------<br />
------------<br />
------------<br />
------------<br />
------------<br />
------------<br />
------------<br />
------------<br />
------------<br />
------------<br />
------------<br />
------------<br />
------------<br />
Snare Roll<br />
Finger Snap<br />
High-Q<br />
Slap<br />
ScratchPush<br />
ScratchPull<br />
Sticks<br />
SquareClick<br />
Mtrnm.Click<br />
Mtrnm. Bell<br />
Jazz Kick 2<br />
Jazz Kick 1<br />
Side Stick<br />
Brush Swirl<br />
Brush Slap1<br />
Brush Swirl<br />
Lite Tom 4<br />
Brs Chh<br />
Lite Tom 4<br />
Pedal HiHat<br />
Lite Tom 4<br />
Brush Ohh<br />
Lite Tom 4<br />
Lite Tom 4<br />
Brush Crash<br />
Lite Tom 4<br />
Brush Ride<br />
China Cymbal<br />
Brush RideBL<br />
Tambourine<br />
Splash Cym.<br />
Cowbell<br />
Crash Cym.2<br />
Vibraslap<br />
Ride Cymbal<br />
Bongo High<br />
Bongo Lo<br />
Mute H.Conga<br />
Conga Hi Opn<br />
Conga Lo Opn<br />
High Timbale<br />
Low Timbale<br />
Agogo<br />
Agogo<br />
Cabasa<br />
Maracas<br />
ShrtWhistle<br />
LongWhistle<br />
Short Guiro<br />
Long Guiro<br />
Claves<br />
Woodblock<br />
Woodblock<br />
Mute Cuica<br />
Open Cuica<br />
Mute Triangl<br />
Open Triangl<br />
Shaker<br />
Jingle Bell<br />
Bell Tree<br />
Castanets<br />
Mute Surdo<br />
Open Surdo<br />
------------<br />
------------<br />
------------<br />
------------<br />
------------<br />
------------<br />
------------<br />
------------<br />
------------<br />
PC: 49 [CC32: 2]<br />
ORCHESTRA<br />
------------<br />
------------<br />
------------<br />
------------<br />
------------<br />
------------<br />
------------<br />
------------<br />
------------<br />
------------<br />
------------<br />
------------<br />
------------<br />
------------<br />
------------<br />
------------<br />
------------<br />
------------<br />
------------<br />
------------<br />
------------<br />
------------<br />
------------<br />
------------<br />
------------<br />
Snare Roll<br />
Finger Snap<br />
Jazz Clsd.HH<br />
Pedal HiHat<br />
Jazz Open HH<br />
Ride Cymbal<br />
Sticks<br />
SquareClick<br />
Mtrnm.Click<br />
Mtrnm. Bell<br />
Jazz Kick 1<br />
Concert BD<br />
Side Stick<br />
Concert Snr<br />
Castanets<br />
Concert Snr<br />
Timpani<br />
Timpani<br />
Timpani<br />
Timpani<br />
Timpani<br />
Timpani<br />
Timpani<br />
Timpani<br />
Timpani<br />
Timpani<br />
Timpani<br />
Timpani<br />
Timpani<br />
Tambourine<br />
Splash Cym.<br />
Cowbell<br />
Con.Cymbal2<br />
Vibraslap<br />
Concert Cym.<br />
Bongo High<br />
Bongo Lo<br />
Mute H.Conga<br />
Conga Hi Opn<br />
Conga Lo Opn<br />
High Timbale<br />
Low Timbale<br />
Agogo<br />
Agogo<br />
Cabasa<br />
Maracas<br />
ShrtWhistle<br />
LongWhistle<br />
Short Guiro<br />
Long Guiro<br />
Claves<br />
Woodblock<br />
Woodblock<br />
Mute Cuica<br />
Open Cuica<br />
Mute Triangl<br />
Open Triangl<br />
Shaker<br />
Jingle Bell<br />
Bell Tree<br />
Castanets<br />
Mute Surdo<br />
Open Surdo<br />
Applause<br />
------------<br />
------------<br />
------------<br />
------------<br />
------------<br />
------------<br />
------------<br />
------------<br />
PC: 50 [CC32: 2]<br />
ETHNIC<br />
------------<br />
------------<br />
------------<br />
------------<br />
------------<br />
------------<br />
------------<br />
------------<br />
------------<br />
------------<br />
------------<br />
------------<br />
------------<br />
------------<br />
------------<br />
------------<br />
------------<br />
------------<br />
------------<br />
------------<br />
------------<br />
------------<br />
------------<br />
------------<br />
------------<br />
Finger Snap<br />
Tambourine<br />
Castanets<br />
Crash Cym.1<br />
Snare Roll<br />
Concert Snr<br />
Concert Cym.<br />
Concert BD<br />
Jingle Bell<br />
Bell Tree<br />
Bar Chimes<br />
Wadaiko<br />
Wadaiko Rim<br />
Shimedaiko<br />
Atarigane<br />
Hyoushigi<br />
Ohkawa<br />
H kotsuzumi<br />
L Kotsuzumi<br />
Ban_Gu<br />
Big Gong<br />
Small Gong<br />
Bend Gong<br />
RAMA Cymbal<br />
RAMA Cymbal<br />
Gamelan Gong<br />
Udo_Short<br />
Udo_Long<br />
Udo_slap<br />
Bendir<br />
Req_Dum<br />
Req_tik<br />
Tabla_Te<br />
Tabla_Na<br />
Tabla_Tun<br />
Tabla_Ge<br />
Tabla Ge Hi<br />
Talking Drum<br />
Bend tlk_drm<br />
Caxixi<br />
DJembe<br />
Djembe_rim<br />
Low Timbale<br />
Timbl Paila<br />
High Timbale<br />
Cowbell<br />
Bongo High<br />
Bongo Lo<br />
Mute H.Conga<br />
Conga Hi Opn<br />
Conga MtLow<br />
Conga Slap<br />
Conga Lo Opn<br />
Conga Slide<br />
Mut Pandiero<br />
Opn Pandiero<br />
Open Surdo<br />
Mute Surdo<br />
Tamborim<br />
Agogo<br />
Agogo<br />
Shaker<br />
Low Whistle<br />
Low Whistle<br />
Mute Cuica<br />
Open Cuica<br />
Mute Triangl<br />
Open Triangl<br />
Short Guiro<br />
Long Guiro<br />
Cabasa Up<br />
Cabasa Down<br />
PC: 51 [CC32: 2]<br />
KICK & SNARE<br />
------------<br />
------------<br />
------------<br />
------------<br />
------------<br />
------------<br />
------------<br />
------------<br />
------------<br />
------------<br />
------------<br />
------------<br />
------------<br />
------------<br />
------------<br />
------------<br />
------------<br />
------------<br />
------------<br />
------------<br />
------------<br />
------------<br />
------------<br />
------------<br />
------------<br />
------------<br />
------------<br />
------------<br />
------------<br />
------------<br />
------------<br />
------------<br />
------------<br />
------------<br />
------------<br />
------------<br />
------------<br />
------------<br />
------------<br />
------------<br />
Std.1 Kick1<br />
Std.1 Kick2<br />
Std.2 Kick1<br />
Std2 Kick2<br />
Kick 1<br />
Kick 2<br />
Soft Kick<br />
Jazz Kick 1<br />
Jazz Kick 2<br />
Concert BD<br />
Room Kick 1<br />
Room Kick 2<br />
Power Kick1<br />
Power Kick2<br />
Elec Kick 2<br />
Elec Kick 1<br />
Elec. Kick<br />
TR-808 Kick<br />
TR-909 Kick<br />
Dance Kick 2<br />
Std.1 Snare1<br />
Std.1 Snare2<br />
Std.2 Snare1<br />
Std.2 Snare2<br />
Tight Snare<br />
Concert Snr<br />
Jazz Snare 1<br />
Jazz Snare 2<br />
Room Snare 1<br />
Room Snare 2<br />
Dance Snare1<br />
Power Snare1<br />
Rev.Snare<br />
Power Snare2<br />
Elec Snare 1<br />
Dance Snare2<br />
Elec Snare 2<br />
House Snare<br />
Elec. Snare<br />
Elec Snare 3<br />
808 Snare 1<br />
808 Snare 2<br />
909 Snare 1<br />
909 Snare 2<br />
Brush Swirl<br />
Brush Tap<br />
Brush Slap1<br />
Brush Slap2<br />
Brush Slap<br />
Brush Swirl<br />
Brush Swirl<br />
Long Swirl<br />
------------<br />
------------<br />
------------<br />
------------<br />
------------<br />
PC: 57 [CC32: 2]<br />
SFX<br />
------------<br />
------------<br />
------------<br />
------------<br />
------------<br />
------------<br />
------------<br />
------------<br />
------------<br />
------------<br />
------------<br />
------------<br />
------------<br />
------------<br />
------------<br />
------------<br />
------------<br />
------------<br />
------------<br />
------------<br />
------------<br />
------------<br />
------------<br />
------------<br />
------------<br />
------------<br />
------------<br />
------------<br />
------------<br />
------------<br />
------------<br />
Scrtch Push2<br />
Scrtch Pull2<br />
Gt.CutNoise2<br />
Gt.CutNoise2<br />
Dist.CutNoiz<br />
Dist.CutNoiz<br />
Bass Slide<br />
Pick Scrape<br />
High-Q<br />
Slap<br />
ScratchPush<br />
ScratchPull<br />
Sticks<br />
SquareClick<br />
Mtrnm.Click<br />
Mtrnm. Bell<br />
Gt.FretNoise<br />
Gt.Cut Noise<br />
Gt.Cut Noise<br />
String Slap<br />
Fl.KeyClick<br />
Laughing<br />
Screaming<br />
Punch<br />
Heart Beat<br />
Footsteps<br />
Footsteps<br />
Applause<br />
DoorCreaking<br />
Door<br />
Scratch<br />
Wind Chimes<br />
Car-Engine<br />
Car-Stop<br />
Car-Pass<br />
Car-Crash<br />
Siren<br />
Train<br />
Jetplane<br />
Helicopter<br />
Starship<br />
Gun Shot<br />
Machine Gun<br />
Lasergun<br />
Explosion<br />
Dog<br />
Horse-Gallop<br />
Bird<br />
Rain<br />
Thunder<br />
Wind<br />
Seashore<br />
Stream<br />
Bubble<br />
Kitty<br />
Bird 2<br />
Growl<br />
Applause 2<br />
Telephone 1<br />
Telephone 2<br />
------------<br />
------------<br />
------------<br />
------------<br />
------------<br />
------------
<strong>EXR</strong>-5/<strong>EXR</strong>-3<br />
129<br />
(C7) (96)<br />
98<br />
100<br />
101<br />
103<br />
105<br />
107<br />
97<br />
99<br />
102<br />
104<br />
106<br />
C8 108<br />
110<br />
112<br />
113<br />
115<br />
117<br />
119<br />
109<br />
111<br />
114<br />
C9<br />
G9<br />
120<br />
122<br />
124<br />
125<br />
127<br />
121<br />
123<br />
126<br />
116<br />
118<br />
(Cabasa Down)<br />
Claves<br />
Woodblock<br />
Woodblock<br />
------------<br />
------------<br />
------------<br />
------------<br />
------------<br />
------------<br />
------------<br />
------------<br />
------------<br />
------------<br />
------------<br />
------------<br />
------------<br />
------------<br />
------------<br />
------------<br />
------------<br />
------------<br />
------------<br />
------------<br />
------------<br />
------------<br />
------------<br />
------------<br />
------------<br />
------------<br />
------------<br />
------------<br />
PC: 50 [CC32: 2]<br />
ETHNIC
<strong>EXR</strong>-5/<strong>EXR</strong>-3<br />
130<br />
Music Styles<br />
Name Tempo Time sign.<br />
Rock:<br />
1 SteadyRk 73 4/4<br />
2 Big Rock 116 4/4<br />
3 HeavyRck 128 4/4<br />
4 PowerRck 132 4/4<br />
5 ShufleRk 120 4/4<br />
6 ElecRock* 124 4/4<br />
7 DynoRock 80 4/4<br />
8 ThumpRck* 104 4/4<br />
Dance:<br />
9 FeverDnc 113 4/4<br />
10 80sTekno 134 4/4<br />
11 EuroDnce 138 4/4<br />
12 IbizaDnc* 138 4/4<br />
13 KeepOnDc 140 4/4<br />
14 90sTekno* 140 4/4<br />
15 DJTechno 140 4/4<br />
16 HrdTekno 140 4/4<br />
17 90sHouse 132 4/4<br />
18 BigHouse 130 4/4<br />
19 ClubHous 130 4/4<br />
20 Hip’nHop* 102 4/4<br />
21 NowHipHp* 87 4/4<br />
22 Cool Rap 94 4/4<br />
23 PianoRap* 94 4/4<br />
24 Twostep* 130 4/4<br />
8Beat:<br />
25 PianoBal 56 4/4<br />
26 Soul Bal* 58 4/4<br />
27 ClassBal 62 4/4<br />
28 StoryBal 70 4/4<br />
29 HappyBal 78 4/4<br />
30 SimpleBl 80 4/4<br />
31 AlClapBl* 80 4/4<br />
32 LayBakBl 83 4/4<br />
33 MorninBl 84 4/4<br />
34 PoppinBl 92 4/4<br />
35 UKLiteBl 104 4/4<br />
36 Cute Pop 108 4/4<br />
37 UpTempBl 110 4/4<br />
38 SmilePop 118 4/4<br />
39 German P* 120 4/4<br />
16Beat:<br />
40 Easy Pop 64 4/4<br />
41 Soul Pop 75 4/4<br />
42 WayURPop 75 4/4<br />
43 NightPop 78 4/4<br />
44 Cool Pop 80 4/4<br />
45 Guitar P 86 4/4<br />
46 LatinPop 92 4/4<br />
47 LightPop 94 4/4<br />
48 USGroove 96 4/4<br />
49 FeelGood 98 4/4<br />
50 Busy Pop* 98 4/4<br />
51 Groovy P 100 4/4<br />
52 VibeyPop 101 4/4<br />
53 SunnyPop 104 4/4<br />
Name Tempo Time sign.<br />
Jazz:<br />
54 JzBallad 70 4/4<br />
55 BigBand* 144 4/4<br />
56 JazzClub 150 4/4<br />
57 BgBndBld 82 4/4<br />
58 30BigBnd* 120 4/4<br />
Latin:<br />
59 LuvBossa 136 4/4<br />
60 MidBossa 150 4/4<br />
61 UpBossa 168 4/4<br />
62 UpSamba 103 4/4<br />
63 DiscSamb 117 4/4<br />
64 Salsa 100 4/4<br />
65 Merengue 124 4/4<br />
66 Bachata 128 2/4<br />
Traditional:<br />
67 Cool6_8 96 6/8<br />
68 Oldie6_8 92 4/4<br />
69 Poprock 138 4/4<br />
70 GoGoRock 180 4/4<br />
71 PolkaPop* 127 4/4<br />
72 CntryPop 105 4/4<br />
73 Schlager 127 4/4<br />
Ball Room:<br />
74 70sDisco* 126 4/4<br />
75 BigSamba 116 4/4<br />
76 Cha-Cha* 130 4/4<br />
77 Mambo* 102 4/4<br />
78 SwingFox 192 4/4<br />
79 Rockin’ 185 4/4<br />
80 Boogie 150 4/4<br />
81 Twist 162 4/4<br />
82 EngWltz 91 3/4<br />
83 W’Waltz 180 3/4<br />
84 Tango 120 4/4<br />
Flash memory:<br />
101 70sDance 108 4/4<br />
102 EasyHop 88 4/4<br />
103 USBallad 88 4/4<br />
104 Stevie P 138 4/4<br />
105 Blues 61 4/4<br />
106 R&B 105 4/4<br />
107 Reggae 140 4/4<br />
108 March4_4 125 4/4<br />
109 Polka 130 4/4<br />
110 Country 130 4/4<br />
111 JazzWltz 100 3/4<br />
112 Musette 175 3/4<br />
113 Shuffle 145 4/4<br />
114 Foxtrot 185 4/4<br />
115 Charlest 205 4/4<br />
116 Rhumba 100 4/4<br />
117 Beguine 110 4/4<br />
118 SlWaltz 90 3/4<br />
119 PasDoble 122 4/4<br />
(*) The marked Styles have two intros of different<br />
lengths. You can select these by pressing [COMBO]<br />
(shorter version ) or [FULL¥BAND] (longer version).
Chord Intelligence (“Md1” setting)<br />
C C# D E E F<br />
CM7 C#M7 DM7 E M7 EM7 FM7<br />
C7 C#7 D7 E 7 E7 F7<br />
Cm C#m Dm E m Em Fm<br />
Cm7 C#m7 Dm7 E m7 Em7 Fm7<br />
CmM7 C#mM7 DmM7 E mM7 EmM7 FmM7<br />
Cdim C#dim Ddim E dim Edim Fdim<br />
Cm7 ( 5 )<br />
C#m7 ( 5 )<br />
Dm7 ( 5 ) E m7 ( 5 ) Em7 ( 5 )<br />
Fm7 ( 5 )<br />
Caug C#aug Daug E aug Eaug Faug<br />
Csus4 C#sus4 Dsus4 E sus4 Esus4 Fsus4<br />
C7sus4 C#7sus4 D7sus4 E 7sus4 E7sus4 F7sus4<br />
✭= Keys you need to press to hear this chord.<br />
●= Constituent notes of this chord.<br />
<strong>EXR</strong>-5/<strong>EXR</strong>-3<br />
131
<strong>EXR</strong>-5/<strong>EXR</strong>-3<br />
132<br />
F# G A A B B<br />
F#M7 GM7 A M7 AM7 B M7 BM7<br />
F#7 G7 A 7 A7 B 7 B7<br />
F#m Gm A m Am B m Bm<br />
F#m7 Gm7 A m7 Am7 B m7 Bm7<br />
F#mM7 GmM7 A mM7 AmM7 B mM7 BmM7<br />
F#dim Gdim A dim Adim B dim Bdim<br />
F#m7 ( 5 ) Gm7 ( 5 ) A m7 ( 5 ) Am7 ( 5 ) B m7 ( 5 ) Bm7 ( 5 )<br />
F#aug Gaug A aug Aaug B aug Baug<br />
F#sus4 Gsus4 A sus4 Asus4 B sus4 Bsus4<br />
F#7sus4 G7sus4 A 7sus4 A7sus4 B 7sus4 B7sus4<br />
✭= Keys you need to press to hear this chord.<br />
●= Constituent notes of this chord.
MIDI Implementation Chart<br />
[Interactive Arranger] Date: September 2003<br />
Model: <strong>EXR</strong>-5/<strong>EXR</strong>-3 Version: 1.00<br />
Basic<br />
Channel<br />
Mode<br />
Function... Transmitted Recognized Remarks<br />
Default<br />
Changed<br />
Default<br />
Message<br />
Altered<br />
Note<br />
Number True Voice<br />
Velocity<br />
Note ON<br />
Note OFF<br />
1~16<br />
1~16, Off<br />
Mode 3<br />
Mode 3, 4 (M=1)<br />
*****<br />
0~127<br />
*****<br />
O<br />
X<br />
1~16<br />
1~16, Off<br />
Mode 3<br />
Mode 3, 4 (M=1) *2<br />
0~127<br />
0~127<br />
O<br />
X<br />
32 Parts<br />
2 Logical Parts<br />
After<br />
Touch<br />
Key’s<br />
Ch’s<br />
X<br />
X<br />
O<br />
O<br />
Pitch Bend O *1 O *1<br />
Control<br />
Change<br />
Program<br />
Change True #<br />
0,32<br />
1<br />
5<br />
6, 38<br />
7<br />
10<br />
11<br />
64<br />
65<br />
66<br />
67<br />
84<br />
91<br />
93<br />
98, 99<br />
100, 101<br />
O *1<br />
O *1<br />
O<br />
O<br />
O<br />
O<br />
O<br />
O<br />
X<br />
X<br />
X<br />
O<br />
O<br />
O<br />
O<br />
O<br />
O<br />
*****<br />
System Exclusive O O<br />
O<br />
O<br />
O<br />
O<br />
O<br />
O<br />
O<br />
O<br />
O<br />
O<br />
O<br />
O<br />
O (Reverb)<br />
O (Chorus)<br />
O<br />
O<br />
O<br />
0~127<br />
Bank Select<br />
Modulation<br />
Portamento Time<br />
Data Entry<br />
Volume<br />
Panpot<br />
Expression<br />
Hold 1<br />
Portamento<br />
Sostenuto<br />
Soft<br />
Portamento Control<br />
Effect 1 Depth<br />
Effect 3 Depth<br />
NRPN LSB, MSB<br />
RPN LSB, MSB<br />
Program Number 1~128<br />
System<br />
Common<br />
Song Position Pointer<br />
Song Sel<br />
Tune<br />
O *1<br />
X<br />
X<br />
X<br />
X<br />
X<br />
System<br />
Real Time<br />
Clock<br />
Commands<br />
O *1<br />
O *1<br />
O<br />
O<br />
Aux<br />
Messages<br />
All Sounds Off<br />
Reset All Controllers<br />
Local On/Off<br />
All Notes Off<br />
Active Sense<br />
Reset<br />
X<br />
X<br />
O *1<br />
X<br />
O<br />
X<br />
O (120, 126, 127)<br />
O (121)<br />
O<br />
O (123-125)<br />
O<br />
X<br />
Notes<br />
Mode 1: OMNI ON, POLY<br />
Mode 3: OMNI OFF, POLY<br />
*1 O X is selectable<br />
*2 Recognized as M=1 even if M≠1<br />
Mode 2: OMNI ON, MONO<br />
Mode 4: OMNI OFF, MONO<br />
O: Yes<br />
X: No<br />
<strong>EXR</strong>-5/<strong>EXR</strong>-3<br />
133
<strong>EXR</strong>-5/<strong>EXR</strong>-3<br />
134
Information<br />
When you need repair service, call your nearest <strong>Roland</strong> Service Center or authorized <strong>Roland</strong> distributor in your country as<br />
shown below.<br />
AFRICA<br />
EGYPT<br />
Al Fanny Trading Office<br />
9, EBN Hagar A1 Askalany Street,<br />
ARD E1 Golf, Heliopolis,<br />
Cairo 11341, EGYPT<br />
TEL: 20-2-417-1828<br />
REUNION<br />
Maison FO - YAM Marcel<br />
25 Rue Jules Hermann,<br />
Chaudron - BP79 97 491<br />
Ste Clotilde Cedex,<br />
REUNION ISLAND<br />
TEL: (0262) 218-429<br />
SOUTH AFRICA<br />
That Other Music Shop<br />
(PTY) Ltd.<br />
11 Melle St., Braamfontein,<br />
Johannesbourg, SOUTH AFRICA<br />
P.O.Box 32918, Braamfontein 2017<br />
Johannesbourg, SOUTH AFRICA<br />
TEL: (011) 403 4105<br />
Paul Bothner (PTY) Ltd.<br />
17 Werdmuller Centre,<br />
Main Road, Claremont 7708<br />
SOUTH AFRICA<br />
P.O.BOX 23032, Claremont 7735,<br />
SOUTH AFRICA<br />
TEL: (021) 674 4030<br />
ASIA<br />
CHINA<br />
<strong>Roland</strong> Shanghai Electronics<br />
Co.,Ltd.<br />
5F. No.1500 Pingliang Road<br />
Shanghai 200090, CHINA<br />
TEL: (021) 5580-0800<br />
<strong>Roland</strong> Shanghai Electronics<br />
Co.,Ltd.<br />
(BEIJING OFFICE)<br />
10F. No.18 Anhuaxili<br />
Chaoyang District, Beijing 100011<br />
CHINA<br />
TEL: (010) 6426-5050<br />
<strong>Roland</strong> Shanghai Electronics<br />
Co.,Ltd.<br />
(GUANGZHOU OFFICE)<br />
2/F., No.30 Si You Nan Er Jie Yi<br />
Xiang, Wu Yang Xin Cheng,<br />
Guangzhou 510600, CHINA<br />
Tel: (020) 8736-0428<br />
HONG KONG<br />
Tom Lee Music Co., Ltd.<br />
Service Division<br />
22-32 Pun Shan Street, Tsuen<br />
Wan, New Territories,<br />
HONG KONG<br />
TEL: 2415 0911<br />
Parsons Music Ltd.<br />
8th Floor, Railway Plaza, 39<br />
Chatham Road South, T.S.T,<br />
Kowloon, HONG KONG<br />
TEL: 2333 1863<br />
INDIA<br />
Rivera Digitec (India) Pvt. Ltd.<br />
409, Nirman Kendra Mahalaxmi<br />
Flats Compound Off. Dr. Edwin<br />
Moses Road, Mumbai-400011,<br />
INDIA<br />
TEL: (022) 2493 9051<br />
INDONESIA<br />
PT Citra IntiRama<br />
J1. Cideng Timur No. 15J-150<br />
Jakarta Pusat<br />
INDONESIA<br />
TEL: (021) 6324170<br />
KOREA<br />
Cosmos Corporation<br />
1461-9, Seocho-Dong,<br />
Seocho Ku, Seoul, KOREA<br />
TEL: (02) 3486-8855<br />
MALAYSIA<br />
BENTLEY MUSIC SDN BHD<br />
140 & 142, Jalan Bukit Bintang<br />
55100 Kuala Lumpur,MALAYSIA<br />
TEL: (03) 2144-3333<br />
PHILIPPINES<br />
G.A. Yupangco & Co. Inc.<br />
339 Gil J. Puyat Avenue<br />
Makati, Metro Manila 1200,<br />
PHILIPPINES<br />
TEL: (02) 899 9801<br />
SINGAPORE<br />
Swee Lee Company<br />
150 Sims Drive,<br />
SINGAPORE 387381<br />
TEL: 6846-3676<br />
CRISTOFORI MUSIC PTE<br />
LTD<br />
Blk 3014, Bedok Industrial Park E,<br />
#02-2148, SINGAPORE 489980<br />
TEL: 6243-9555<br />
TAIWAN<br />
ROLAND TAIWAN<br />
ENTERPRISE CO., LTD.<br />
Room 5, 9fl. No. 112 Chung Shan<br />
N.Road Sec.2, Taipei, TAIWAN,<br />
R.O.C.<br />
TEL: (02) 2561 3339<br />
THAILAND<br />
Theera Music Co. , Ltd.<br />
330 Verng NakornKasem, Soi 2,<br />
Bangkok 10100, THAILAND<br />
TEL: (02) 2248821<br />
VIETNAM<br />
Saigon Music<br />
Suite DP-8<br />
40 Ba Huyen Thanh Quan Street<br />
Hochiminh City, VIETNAM<br />
Tel: (08) 930-1969<br />
AUSTRALIA/<br />
NEW ZEALAND<br />
AUSTRALIA<br />
<strong>Roland</strong> Corporation<br />
Australia Pty., Ltd.<br />
38 Campbell Avenue<br />
Dee Why West. NSW 2099<br />
AUSTRALIA<br />
TEL: (02) 9982 8266<br />
NEW ZEALAND<br />
<strong>Roland</strong> Corporation Ltd.<br />
32 Shaddock Street, Mount Eden,<br />
Auckland, NEW ZEALAND<br />
TEL: (09) 3098 715<br />
CENTRAL/LATIN<br />
AMERICA<br />
ARGENTINA<br />
Instrumentos Musicales S.A.<br />
Av.Santa Fe 2055<br />
(1123) Buenos Aires<br />
ARGENTINA<br />
TEL: (011) 4508-2700<br />
BRAZIL<br />
<strong>Roland</strong> Brasil Ltda<br />
Rua San Jose, 780 Sala B<br />
Parque Industrial San Jose<br />
Cotia - Sao Paulo - SP, BRAZIL<br />
TEL: (011) 4615 5666<br />
COSTA RICA<br />
JUAN Bansbach<br />
Instrumentos Musicales<br />
Ave.1. Calle 11, Apartado 10237,<br />
San Jose, COSTA RICA<br />
TEL: 258-0211<br />
CHILE<br />
Comercial Fancy S.A.<br />
Rut.: 96.919.420-1<br />
Nataniel Cox #739, 4th Floor<br />
Santiago - Centro, CHILE<br />
TEL: (02) 688-9540<br />
EL SALVADOR<br />
OMNI MUSIC<br />
75 Avenida Norte y Final<br />
Alameda Juan Pablo ,<br />
Edificio No.4010 San Salvador,<br />
EL SALVADOR<br />
TEL: 262-0788<br />
MEXICO<br />
Casa Veerkamp, s.a. de c.v.<br />
Av. Toluca No. 323, Col. Olivar<br />
de los Padres 01780 Mexico D.F.<br />
MEXICO<br />
TEL: (55) 5668-6699<br />
PANAMA<br />
SUPRO MUNDIAL, S.A.<br />
Boulevard Andrews, Albrook,<br />
Panama City, REP. DE PANAMA<br />
TEL: 315-0101<br />
PARAGUAY<br />
Distribuidora De<br />
Instrumentos Musicales<br />
J.E. Olear y ESQ. Manduvira<br />
Asuncion PARAGUAY<br />
TEL: (021) 492-124<br />
URUGUAY<br />
Todo Musica S.A.<br />
Francisco Acuna de Figueroa 1771<br />
C.P.: 11.800<br />
Montevideo, URUGUAY<br />
TEL: (02) 924-2335<br />
VENEZUELA<br />
Musicland Digital C.A.<br />
Av. Francisco de Miranda,<br />
Centro Parque de Cristal, Nivel<br />
C2 Local 20 Caracas<br />
VENEZUELA<br />
TEL: (212) 285-8586<br />
EUROPE<br />
AUSTRIA<br />
<strong>Roland</strong> Austria GES.M.B.H.<br />
Siemensstrasse 4, P.O. Box 74,<br />
A-6063 RUM, AUSTRIA<br />
TEL: (0512) 26 44 260<br />
BELGIUM/HOLLAND/<br />
LUXEMBOURG<br />
<strong>Roland</strong> Benelux N. V.<br />
Houtstraat 3, B-2260, Oevel<br />
(Westerlo) BELGIUM<br />
TEL: (014) 575811<br />
CZECH REP.<br />
K-AUDIO<br />
Kardasovska 626.<br />
CZ-198 00 Praha 9,<br />
CZECH REP.<br />
TEL: (2) 666 10529<br />
DENMARK<br />
<strong>Roland</strong> Scandinavia A/S<br />
Nordhavnsvej 7, Postbox 880,<br />
DK-2100 Copenhagen<br />
DENMARK<br />
TEL: 3916 6200<br />
FRANCE<br />
<strong>Roland</strong> France SA<br />
4, Rue Paul Henri SPAAK,<br />
Parc de l'Esplanade, F 77 462 St.<br />
Thibault, Lagny Cedex FRANCE<br />
TEL: 01 600 73 500<br />
FINLAND<br />
<strong>Roland</strong> Scandinavia As,<br />
Filial Finland<br />
Elannontie 5<br />
FIN-01510 Vantaa, FINLAND<br />
TEL: (0)9 68 24 020<br />
GERMANY<br />
<strong>Roland</strong> Elektronische<br />
Musikinstrumente HmbH.<br />
Oststrasse 96, 22844 Norderstedt,<br />
GERMANY<br />
TEL: (040) 52 60090<br />
GREECE<br />
STOLLAS S.A.<br />
Music Sound Light<br />
155, New National Road<br />
Patras 26442, GREECE<br />
TEL: 2610 435400<br />
HUNGARY<br />
<strong>Roland</strong> East Europe Ltd.<br />
Warehouse Area ‘DEPO’ Pf.83<br />
H-2046 Torokbalint, HUNGARY<br />
TEL: (23) 511011<br />
IRELAND<br />
<strong>Roland</strong> Ireland<br />
G2 Calmount Park, Calmount<br />
Avenue, Dublin 12<br />
Republic of IRELAND<br />
TEL: (01) 4294444<br />
ITALY<br />
<strong>Roland</strong> Italy S. p. A.<br />
Viale delle Industrie 8,<br />
20020 Arese, Milano, ITALY<br />
TEL: (02) 937-78300<br />
NORWAY<br />
<strong>Roland</strong> Scandinavia Avd.<br />
Kontor Norge<br />
Lilleakerveien 2 Postboks 95<br />
Lilleaker N-0216 Oslo<br />
NORWAY<br />
TEL: 2273 0074<br />
POLAND<br />
MX MUSIC SP.Z.O.O.<br />
UL. Gibraltarska 4.<br />
PL-03664 Warszawa POLAND<br />
TEL: (022) 679 44 19<br />
PORTUGAL<br />
Tecnologias Musica e Audio,<br />
<strong>Roland</strong> Portugal, S.A.<br />
Cais Das Pedras, 8/9-1 Dto<br />
4050-465 PORTO<br />
PORTUGAL<br />
TEL: (022) 608 00 60<br />
ROMANIA<br />
FBS LINES<br />
Piata Libertatii 1,<br />
535500 Gheorgheni, ROMANIA<br />
TEL: (266) 364 609<br />
RUSSIA<br />
MuTek<br />
3-Bogatyrskaya Str. 1.k.l<br />
107 564 Moscow, RUSSIA<br />
TEL: (095) 169 5043<br />
SPAIN<br />
<strong>Roland</strong> Electronics<br />
de España, S. A.<br />
Calle Bolivia 239, 08020<br />
Barcelona, SPAIN<br />
TEL: (93) 308 1000<br />
SWEDEN<br />
<strong>Roland</strong> Scandinavia A/S<br />
SWEDISH SALES OFFICE<br />
Danvik Center 28, 2 tr.<br />
S-131 30 Nacka SWEDEN<br />
TEL: (0)8 702 00 20<br />
SWITZERLAND<br />
<strong>Roland</strong> (Switzerland) AG<br />
Landstrasse 5, Postfach,<br />
CH-4452 Itingen,<br />
SWITZERLAND<br />
TEL: (061) 927-8383<br />
UKRAINE<br />
TIC-TAC<br />
Mira Str. 19/108<br />
P.O. Box 180<br />
295400 Munkachevo, UKRAINE<br />
TEL: (03131) 414-40<br />
UNITED KINGDOM<br />
<strong>Roland</strong> (U.K.) Ltd.<br />
Atlantic Close, Swansea<br />
Enterprise Park, SWANSEA<br />
SA7 9FJ,<br />
UNITED KINGDOM<br />
TEL: (01792) 702701<br />
MIDDLE EAST<br />
BAHRAIN<br />
Moon Stores<br />
No.16, Bab Al Bahrain Avenue,<br />
P.O.Box 247, Manama 304,<br />
State of BAHRAIN<br />
TEL: 211 005<br />
CYPRUS<br />
Radex Sound Equipment Ltd.<br />
17, Diagorou Street, Nicosia,<br />
CYPRUS<br />
TEL: (022) 66-9426<br />
IRAN<br />
MOCO, INC.<br />
No.41 Nike St., Dr.Shariyati Ave.,<br />
Roberoye Cerahe Mirdamad<br />
Tehran, IRAN<br />
TEL: (021) 285-4169<br />
ISRAEL<br />
Halilit P. Greenspoon &<br />
Sons Ltd.<br />
8 Retzif Ha'aliya Hashnya St.<br />
Tel-Aviv-Yafo ISRAEL<br />
TEL: (03) 6823666<br />
JORDAN<br />
AMMAN Trading Agency<br />
245 Prince Mohammad St.,<br />
Amman 1118, JORDAN<br />
TEL: (06) 464-1200<br />
KUWAIT<br />
Easa Husain Al Yousifi Est.<br />
Abdullah Salem Street,<br />
Safat, KUWAIT<br />
TEL: 243-6399<br />
LEBANON<br />
Chahine S.A.L.<br />
Gerge Zeidan St., Chahine Bldg.,<br />
Achrafieh, P.O.Box: 16-5857<br />
Beirut, LEBANON<br />
TEL: (01) 20-1441<br />
QATAR<br />
Al Emadi Co. (Badie Studio<br />
& Stores)<br />
P.O. Box 62, Doha, QATAR<br />
TEL: 4423-554<br />
SAUDI ARABIA<br />
aDawliah Universal<br />
Electronics APL<br />
Corniche Road, Aldossary Bldg.,<br />
1st Floor, Alkhobar,<br />
SAUDI ARABIA<br />
P.O.Box 2154, Alkhobar 31952<br />
SAUDI ARABIA<br />
TEL: (03) 898 2081<br />
SYRIA<br />
Technical Light & Sound<br />
Center<br />
Khaled Ebn Al Walid St.<br />
Bldg. No. 47, P.O.BOX 13520,<br />
Damascus, SYRIA<br />
TEL: (011) 223-5384<br />
TURKEY<br />
Ant Muzik Aletleri Ithalat<br />
Ve Ihracat Ltd Sti<br />
Siraselviler Caddesi Siraselviler<br />
Pasaji No:74/20<br />
Taksim - Istanbul, TURKEY<br />
TEL: (0212) 2499324<br />
U.A.E.<br />
Zak Electronics & Musical<br />
Instruments Co. L.L.C.<br />
Zabeel Road, Al Sherooq Bldg.,<br />
No. 14, Grand Floor, Dubai, U.A.E.<br />
TEL: (04) 3360715<br />
NORTH AMERICA<br />
CANADA<br />
<strong>Roland</strong> Canada Music Ltd.<br />
(Head Office)<br />
5480 Parkwood Way Richmond<br />
B. C., V6V 2M4 CANADA<br />
TEL: (604) 270 6626<br />
<strong>Roland</strong> Canada Music Ltd.<br />
(Toronto Office)<br />
170 Admiral Boulevard<br />
Mississauga On L5T 2N6<br />
CANADA<br />
TEL: (905) 362 9707<br />
U. S. A.<br />
<strong>Roland</strong> Corporation U.S.<br />
5100 S. Eastern Avenue<br />
Los Angeles, CA 90040-2938,<br />
U. S. A.<br />
TEL: (323) 890 3700<br />
As of November 1, 2003 (<strong>Roland</strong>)<br />
<strong>EXR</strong>-5/<strong>EXR</strong>-3<br />
135
<strong>EXR</strong>-5/<strong>EXR</strong>-3<br />
136