
You also want an ePaper? Increase the reach of your titles
YUMPU automatically turns print PDFs into web optimized ePapers that Google loves.
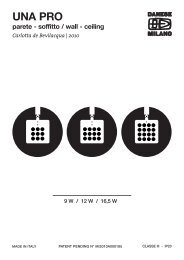
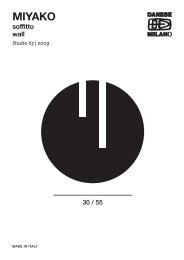
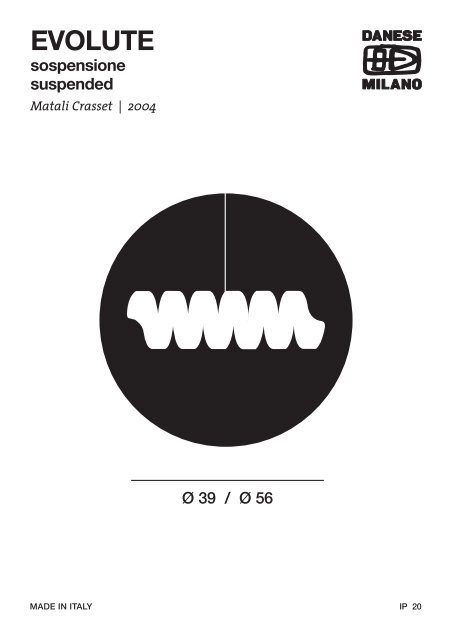
<strong>EVOLUTE</strong><br />
sospensione<br />
suspended<br />
Matali Crasset | 2004<br />
Ø 39 / Ø 56<br />
IP 20
IT<br />
Una lampada che si basa sul principio dell’abat-jour liberata<br />
in piano. Dentro i passi di Munari o Noguchi. Amo gli oggetti<br />
che si trasformano e subiscono una metamorfosi grazie alle<br />
piegature che generano forme sorprendenti se non evidenti.<br />
Una foglia arrotolata ma in legno per il suo colore e per la<br />
qualità della luce filtrata attraverso venature della materia.<br />
Matali Crasset<br />
EN<br />
A lamp reminding us to a lampshade delivered in a flat pack<br />
like Munari and Noguchi at that time. I love objects able to<br />
transform themselves and yield to surprising and even clear<br />
forms. Evolute is like a rolled up wooden leaf thanks to the<br />
colour and the quality of the light filtered through the grain<br />
of the material.<br />
Matali Crasset<br />
Avvertenze<br />
La sicurezza elettrica di questo apparecchio è garantita con<br />
l’uso appropriato di queste istruzioni. Pertanto è necessario<br />
conservarle. Prima di ogni operazione sull’apparecchio<br />
disinserire la tensione di rete. Usare esclusivamente<br />
lampadine del tipo e potenza indicate nei dati di targa.<br />
Note<br />
This equipment is guaranteed only when used as indicaded<br />
in these instructions. Therefore they should be kept for future<br />
reference. Prior to any work on the fixture always switch off the<br />
mains. Only use bulbs of the type and wattage indicated on<br />
the rating plate.<br />
• SORGENTE VERSIONE 39 Ø<br />
20W (E27) FBG<br />
max 70W (E27) HSGSA<br />
• SORGENTE VERSIONE 56 Ø<br />
30W (E27) FBT<br />
max 105W (E27) HSGSA<br />
max 150W (E27) HSGST<br />
• BULB VERSION 39 Ø<br />
20W (E27) FBG<br />
max 70W (E27) HSGSA<br />
• BULB VERSION 56 Ø<br />
30W (E27) FBT<br />
max 105W (E27) HSGSA<br />
max 150W (E27) HSGST<br />
Istruzioni di montaggio<br />
Fig. 1 - Far passare i cavi elettrici provenienti dal soffitto<br />
attraverso il foro (A). Fissare il fondello (B) al soffitto mediante<br />
le asole (C). Utilizzare sempre fori contrapposti. Non sfilare il<br />
cavo in acciaio prima di fissare il fondello al soffitto.<br />
Fig. 2 - Eseguire i collegamenti elettrici agli appositi morsetti<br />
(D) collegando il cavo di messa a terra alla vite contrassegnata<br />
con il simbolo . Richiudere la scatoletta isolante.<br />
Fig. 3 - Se si desidera regolare l’altezza dell’apparecchio,<br />
allentare le due viti del fermacavo (E), far scorrere il cavo e<br />
riavvitare con forza le due viti. Non tagliare il cavo metallico (H)<br />
in eccedenza ma alloggiarlo nel coprifondello e mantenerlo<br />
fissato alla squadretta. Fissare il rosone metallico (F) agendo<br />
sulla vite (G). Avvitare la lampadina.<br />
Assembly instructions<br />
Fig. 1 - Route the ceiling wires through the hole (A). Secure<br />
bottlom (B) to the ceiling by means of the slots (C). Use always<br />
crossing holes. Unthread the steel cable only after fixing the<br />
base on the ceiling.<br />
Fig. 2 - Make electrical connections to the terminals (D) and<br />
connect the ground cable to the screw marked with . Close<br />
the insulating small box again.<br />
Fig. 3 - If you wish to adjust the fitting height, release the<br />
two screws in the cable detent (E), run the cable throgh and<br />
tighten two screws firmly. Do not cut the metal cable (H) in<br />
excess, collect it in the bottom cover and keep it fixed tothe<br />
plate. Fix the rosette (F) with the screw (G). Screw in the bulb.<br />
Avvertenze generali per apparecchi di illuminazione di interni.<br />
Tutti i prodotti DANESE che rientrano nell’ambito di<br />
applicazione della direttiva europea bassa tensione B.T.<br />
2006/95/CE soddisfano i requisiti richiesti e recano la<br />
marcatura “ ” .<br />
General warnings for indoor light fittings.<br />
All DANESE products falling within the range of application of<br />
the European low voltage directive B.T. 2006/95/EC meet the<br />
required specifications and bear “ ” labelling.<br />
Attenzione!<br />
<strong>Danese</strong> non si assume nessuna responsabilità per i prodotti<br />
modificati senza preventiva autorizzazione. <strong>Danese</strong> si riserva<br />
di apportare modifiche tecniche e strutturali necessarie al<br />
miglioramento del prodotto in qualsiasi momento.<br />
Attention!<br />
<strong>Danese</strong> not shoulder any responsabilities should products be<br />
modified without prior authorisation. <strong>Danese</strong> reserves the right<br />
to change, at any time, the technical specification necessary<br />
or structural for improvements of the product.
FR<br />
Une lampe qui repose sur le principe d’un abat-jour livré à<br />
plat. Dans les pas de Munari ou Noguchi. J’aime ces objets<br />
qui se transforment et se métamorphosent gràce aux pliages<br />
et générent des formes étonnantes voir évidentes. Une feuille<br />
enroulée mais en bois pour sa chaleur et la qualité de la<br />
lumière filtrée à travers les veines de la matière. Un projet qui<br />
se décline en suspension ou lampe à poser.<br />
Matali Crasset<br />
DE<br />
Evolute gründet sich auf die Vorstellung einer Tischlampe,<br />
die sich hinlegen kann und dieses Lampe Vorbild tretet in die<br />
Fußstapfen von Munari und Noguchi. Ich liebe die Gegenstände,<br />
sie sich mit den Plissee in neuen und überraschenden Figuren<br />
ausbilden können. Dank seiner Farbe und dem Qualität des<br />
durch die Holzmaserung gedrungenen Lichtes scheint Evolute<br />
wie ein zusammengerollten Blatt aus Holz.<br />
Matali Crasset<br />
Avis<br />
La securitè de l’appareil n’est garantie que si les instructions<br />
sont convenablement suivies. Il est donc necessaires de<br />
les conserver. Déconnecter la tension de réseau avant<br />
toute opération sur l’appareil. Employer exsclusivement les<br />
ampoules du type et de la puissance indiquée sur la plaque<br />
de l’appareil.<br />
• AMPOULE VERSION 39 Ø<br />
20W (E27) FBG<br />
max 70W (E27) HSGSA<br />
• AMPOULE VERSION 56 Ø<br />
30W (E27) FBT<br />
max 105W (E27) HSGSA<br />
max 150W (E27) HSGST<br />
Vorsicht<br />
Die Sicherheit der Leuchte wird nur bei sachgerechtem<br />
Gebrauch gemäß Anweisungen gewährleistet. Bitte bewahren<br />
Sie diese sorgfältig auf. Vor jedem Eingriff an dem Gerät<br />
die Netzspannung unterbrechen. Ausschließlich Lampen<br />
verwenden, die dem auf dem Geräteschild angegebenen Typ<br />
und Wert entsprechen.<br />
• GLÜLAMPE VERSION 39 Ø<br />
20W (E27) FBG<br />
max 70W (E27) HSGSA<br />
• GLÜLAMPEN VERSION 56 Ø<br />
30W (E27) FBT<br />
max 105W (E27) HSGSA<br />
max 150W (E27) HSGST<br />
Instructions pour le montage<br />
Fig. 1 - Faire passer les câbles provenant du plafond à<br />
travers le trou (A). Fixer la plaque de fixation (B) au plafond au<br />
moyen des boutonnières (C). Utiliser à tout moment les trous<br />
opposés. Ne pas défiler le câble en acier avant de fixer la<br />
plaque de fixation au plafond.<br />
Fig. 2 - Effectuer les connexions électriques aux bornes (D)<br />
en reliant le câble de mise au sol à la vis marquée d’un .<br />
Refermer la petit boîte isolant.<br />
Fig. 3 - Si on désire régler la hauteur de l’appareil, désserrer<br />
les deux vis du presse-cäble (E), faire glisser le câble et<br />
visser fort de nouveau. Ne pas couper le câble métallique (H)<br />
excédentaire mais le placer à l’intérieur de la couverture de la<br />
plaque de fixation et le tenir fixé à la plaque. Fixer la rosace<br />
métallique (F) avec la vis (G). Visser l’ampoule.<br />
Aufbaueinleitung<br />
Abb. 1 - Die von der Decke kommenden elektrischen Kabel<br />
durch das Loch (A) Führen. Den Bodenkontakt (B) an der Decke<br />
mittels der Ösen (C) befestigen. Immer entgegengesetzte<br />
Loecher benutzen. Ausfaelden den Kabel aus Stahl nur nach<br />
der Befestigung des Bodenkontakt an dem Decke.<br />
Abb. 2 - Die elektrischen Anschlüsse an den eigens dazu<br />
bestimmten Klemmen durchführen (D) , indem man das<br />
Erdungskabel mit der mit . Schliessen die isolierende kleine<br />
Schachtel wieder.<br />
Abb. 3 - Zur Höhenverstellung der Vorrichtung, die beiden<br />
Schrauben der Kabelhalterung (E) lockern, das Kabel<br />
verschieben und die beiden Schrauben unter Krafteinwirkung<br />
wieder festziehen. Das übermaßige metallische Kabel (H) nicht<br />
schneiden, sondern es in die Abdeckung des Bodenkontakts<br />
positionieren und an der Basis befestigt behalten. Machen die<br />
Rosette (F) mit der Schraube (G) fest. Die Glühlampe wieder<br />
anschrauben.<br />
Avertissements généraux pour appareils d’éclairage d’intérieur.<br />
Tous les produits DANESE appartenants au champ<br />
d’application de la directive européenne basse tension B.T.<br />
2006/95/CE remplissent les conditions prévues et portent le<br />
marquage “ ”.<br />
Generelle Hinweise für Beleuchtungsgeräte für.<br />
Alle Podukte von DANESE, die unter das Anwendungsgebiet<br />
der europäischen Richtlinie der Niederspannung B.T. 2006/95/<br />
EG fallen, entsprechen den erforderlichen Eigenschaften und<br />
tragen das “ ” Kennzeichnen.<br />
Attention!<br />
<strong>Danese</strong> décline toute responsabilité pour les produits modifiés<br />
sans autorisations préalable. <strong>Danese</strong> se réserve la faculté<br />
d’apporter, à tout moment, les modifications techniques et<br />
structurales jugées nécessaires pour améliorer le produit.<br />
Achtung!<br />
<strong>Danese</strong> nimmt keine Verantwortung für ohne Vorgenehmigung<br />
geänderte Produckte an. <strong>Danese</strong> darf in jedem Moment<br />
technischen und strukturellen Veränderungen, die nötig für<br />
die Verbesserung des Gegenstandes sind vornehmen.
Fig. 1<br />
C<br />
A<br />
B
Fig. 2<br />
T<br />
N<br />
L<br />
H<br />
D
Fig. 3<br />
E<br />
F<br />
G
OFFICES / FACTORY<br />
VIA ANTONIO CANOVA 34<br />
20145 MILANO<br />
T. +39.02.349611<br />
F. +39.02.34538211<br />
info@danesemilano.com<br />
SHOWROOM<br />
PIAZZA SAN NAZARO IN BROLO 15<br />
20122 MILANO<br />
T. +39.02.58304150<br />
F. +39.02.58433350<br />
showroom@danesemilano.com<br />
© JANUARY 2011 DANESE S.R.L<br />
DANESE S.R.L reserves the right to change,<br />
at any time and without prior warrning, the<br />
tecnical specification of any product illustrated<br />
in this catalogue.<br />
For DANESE MILANO points of sale worldwide<br />
visit our website.<br />
DANESEMILANO.COM