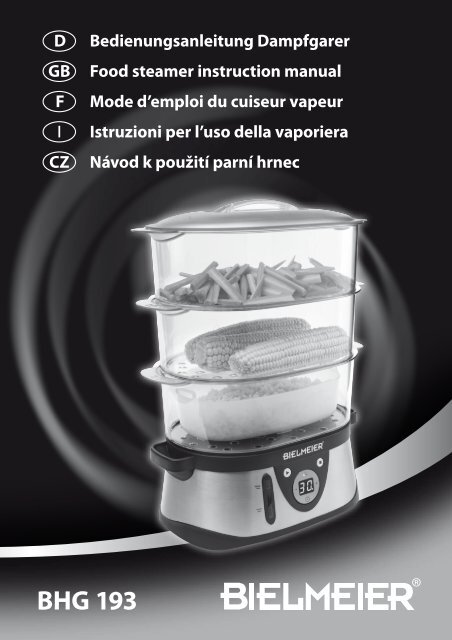
BHG 193 - Bielmeier
BHG 193 - Bielmeier
BHG 193 - Bielmeier

You also want an ePaper? Increase the reach of your titles
YUMPU automatically turns print PDFs into web optimized ePapers that Google loves.
D<br />
GB<br />
F<br />
I<br />
CZ<br />
Bedienungsanleitung Dampfgarer<br />
Food steamer instruction manual<br />
Mode d’emploi du cuiseur vapeur<br />
Istruzioni per l’uso della vaporiera<br />
Návod k použití parní hrnec<br />
<strong>BHG</strong> <strong>193</strong>
<strong>BHG</strong> <strong>193</strong><br />
D Inhalt<br />
Wichtig! ................................... 6<br />
Sicherheitshinweise . . . . . . . . . . . . . . . . . . . . . . . 6<br />
Vor der ersten Inbetriebnahme ........... 7<br />
Reinigung ................................ 7<br />
Inbetriebnahme .......................... 8<br />
Leitfaden zum Dampfgaren ............... 9<br />
Garzeiten-Tabelle ......................... 10<br />
Technische Daten ......................... 10<br />
Der Umwelt zuliebe bitte beachten ....... 10<br />
Rezepte ................................... 11<br />
Garantie ................................... 13<br />
GB Contents<br />
Important! ................................ 14<br />
For your safety ............................ 14<br />
Before the first use ........................ 15<br />
Cleaning .................................. 15<br />
Operation ................................ 16<br />
Cooking guide ............................ 17<br />
Steaming times. . . . . . . . . . . . . . . . . . . . . . . . . . . . 18<br />
Technical details .......................... 18<br />
Caring for the environment ............... 18<br />
Recipes .................................... 19<br />
Warranty .................................. 21<br />
F TABLE DES MATIERES<br />
Important! ................................ 22<br />
Consignes de securite . . . . . . . . . . . . . . . . . . . . . 22<br />
Avant la premiere mise en service ......... 23<br />
Nettoyage ................................ 23<br />
Mise en service ........................... 24<br />
Guide pour la cuisson-vapeur ............. 26<br />
Tableau des temps de cuisson ............. 26<br />
Donnees techniques ...................... 26<br />
Pour l‘amour de l‘environnement .......... 26<br />
Recettes ................................... 27<br />
Garantie ................................... 29<br />
I Contenuto<br />
Importante! ............................... 30<br />
Avvertenze per la sicurezza ............... 30<br />
Prima del primo utilizzo ................... 31<br />
Pulizia .................................... 31<br />
Messa in funzione . . . . . . . . . . . . . . . . . . . . . . . . . 32<br />
Manuale di cottura a vapore .............. 34<br />
Tabella dei tempi di cottura a vapore ...... 34<br />
Dati tecnici . . . . . . . . . . . . . . . . . . . . . . . . . . . . . . . . 34<br />
Indicazioni sulla tutela dell’ambiente ...... 34<br />
Ricette .................................... 35<br />
Garanzia .................................. 37<br />
CZ OBSAH<br />
Důležité! .................................. 38<br />
Bezpečnostní upozornění ................. 38<br />
Před prvním uvedením do provozu ....... 39<br />
Údržba ................................... 39<br />
Uvedení do provozu ...................... 40<br />
Návod na vaření v páře ................... 41<br />
Doba vaření v páře – tabulka .............. 42<br />
Technické údaje .......................... 42<br />
Dbejte na životní prostředí ................ 42<br />
Recepty ................................... 43<br />
Záruční list ................................ 45<br />
3
<strong>BHG</strong> <strong>193</strong><br />
1<br />
2<br />
3<br />
4<br />
5<br />
6<br />
7<br />
8<br />
9<br />
D<br />
1 Deckel<br />
2 Griff<br />
3 Dampfauslass<br />
4 Reisschale<br />
5 oberster Dampfgarbehälter ➀<br />
6 mittlerer Dampfgarbehälter ➁<br />
7 unterster Dampfgarbehälter ➂<br />
8 Wassereinfüllöffnung<br />
9 Kondensat-Auffangbehälter<br />
10 Dampfbündler<br />
11 Heizelement<br />
12 Sockel mit integriertem Wasserbehälter<br />
13 Wasserfüllstandsanzeige<br />
14 EIN-Taste<br />
15 Bedienelement<br />
16 AUS-Taste<br />
17 Einstellung der Dampfgarzeit<br />
18 Zeiteinstellung (+ 1)<br />
19 Einstellung der Zeitverzögerung<br />
20 Betriebskontrollleuchte<br />
21 Zeiteinstellung (– 1)<br />
22 LCD-Anzeige<br />
Änderungen vorbehalten.<br />
17<br />
10<br />
11<br />
18<br />
22<br />
21<br />
12<br />
20<br />
13 14 15 16 19<br />
3
<strong>BHG</strong> <strong>193</strong><br />
GB 1 Lid<br />
2 Handle<br />
3 Steam vent<br />
4 Rice bowl<br />
5 Top steam box ➀<br />
6 Middle steam box ➁<br />
7 Bottom steam box ➂<br />
8 Water filling hole<br />
9 Condensate collector<br />
10 Steam collecting loop<br />
11 Heating element<br />
12 Base with integrated water tank<br />
13 Filling level indicator<br />
14 ON-button<br />
15 Control panel<br />
16 OFF-button<br />
17 Adjustment of operation time<br />
18 Time (+ 1)<br />
19 Adjustment of delay time<br />
20 Indicator lamp<br />
21 Time (– 1)<br />
22 LCD<br />
Product may be subject to change.<br />
F<br />
1 Couvercle<br />
2 Poignée<br />
3 Sortie d‘évacuation de la vapeur<br />
4 Bol de riz<br />
5 Bac supérieur du cuiseur vapeur ➀<br />
6 Bac intermédiaire du cuiseur vapeur ➁<br />
7 Bac inférieur du cuiseur vapeur ➂<br />
8 Ouverture pour remplissage de l‘eau<br />
9 Cuve de réception de la vapeur<br />
10 Collecteur de vapeur<br />
11 Élément chauffant<br />
12 Socle avec récipient d‘eau intégré<br />
13 Affichage du niveau d‘eau<br />
14 Touche MARCHE<br />
15 Élément de commande<br />
16 Touche arrêt<br />
17 Réglage de la durée de cuisson vapeur<br />
18 Réglage du temps (+ 1)<br />
19 Réglage du décalage<br />
20 Voyant de contrôle du fonctionnement<br />
21 Réglage du temps (– 1)<br />
22 Écran LCD<br />
Sous réserve de modifications.<br />
WEEE-Reg.- Nr.:<br />
DE30751975<br />
Lizenz Nr.:<br />
5452569<br />
4
<strong>BHG</strong> <strong>193</strong><br />
I<br />
1 Coperchio<br />
CZ<br />
1 poklice<br />
2 Impugnatura<br />
2 držadlo<br />
3 Fori di uscita vapore<br />
3 vypouštění páry<br />
4 Vaschetta riso<br />
4 vanička na rýži<br />
5 Recipiente superiore per la cottura a<br />
vapore ➀<br />
6 Recipiente medio per la cottura a<br />
vapore ➁<br />
7 Recipiente inferiore per la cottura a<br />
vapore ➂<br />
5 vrchní zásobník na vaření v páře ➀<br />
6 prostřední zásobník na vaření v páře ➁<br />
7 spodní zásobník na vaření v páře ➂<br />
8 nalévací otvor – voda<br />
9 sběrná nádoba na kondenzát<br />
8 Apertura per l’acqua<br />
10 usměrňovač páry<br />
9 Vassoio antigoccia<br />
11 topné těleso<br />
10 Raccordo vapore<br />
11 Resistenza elettrica<br />
12 Base con serbatoio per l’acqua<br />
13 Indicatore livello acqua<br />
14 Tasto di accensione<br />
15 Pannello comandi<br />
16 Tasto di spegnimento<br />
17 Impostazione tempo di cottura a vapore<br />
18 Impostazione tempi in avanti (+ 1)<br />
19 Impostazione funzione di partenza<br />
ritardata<br />
12 podstavec se zabudovaným <br />
zásobníkem na vodu<br />
13 ukazatel stavu vody<br />
14 zapínání<br />
15 ovládání<br />
16 vypínání<br />
17 nastavení doby vaření v páře<br />
18 nastavení doby (+ 1)<br />
19 nastavení časového posunutí<br />
20 světelná kontrolka provozu<br />
21 nastavení doby (– 1)<br />
20 Spia luminosa di funzionamento<br />
22 digitální displej<br />
21 Regolazione tempi indietro (– 1)<br />
Změny vyhrazeny.<br />
22 Indicatore LCD<br />
Il prodotto può essere soggetto a<br />
modifiche.<br />
5
D<br />
6<br />
Wichtig!<br />
Bitte lesen Sie diese Bedienungsanleitung aufmerksam<br />
durch, sie enthält wichtige Hinweise<br />
für die Sicherheit, den Gebrauch und die Wartung<br />
des Gerätes.<br />
Bewahren Sie die Bedienungsanleitung sorgfältig<br />
auf und geben Sie diese gegebenenfalls<br />
an den Nachbesitzer weiter.<br />
Sicherheitshinweise<br />
• Prüfen Sie vor Anschluss des Gerätes, ob Stromart<br />
und Netzspannung mit den Angaben auf<br />
dem Typenschild am Gerät übereinstimmen.<br />
• Reparaturen an Elektrogeräten sind nur von<br />
Fachkräften durchzuführen. Durch unsachgemäße<br />
Reparaturen können erhebliche Gefahren<br />
für den Benutzer entstehen. Der Hersteller<br />
haftet nicht für eventuelle Schäden, die<br />
durch nicht bestimmungsgemäßen Gebrauch<br />
oder falsche Bedienung verursacht werden.<br />
• Ziehen Sie vor Anbringen bzw. Abnehmen<br />
von Zubehörteilen sowie vor jeder Reinigung<br />
den Netzstecker. Ziehen Sie stets am Netzstecker<br />
– niemals am Kabel.<br />
• Ziehen Sie den Netzstecker immer bei längerer<br />
Abwesenheit und während eines Gewitters,<br />
um Schäden durch Blitzschlag zu<br />
vermeiden.<br />
• Tauchen Sie den Netzstecker sowie alle<br />
elektrischen Teile des Geräts nicht in Wasser<br />
oder andere Flüssigkeiten.<br />
• Fassen Sie den Netzstecker nicht mit feuchten<br />
oder nassen Händen an.<br />
• Benutzen Sie das Gerät nicht, wenn<br />
– das Netzkabel oder der Netzstecker <br />
beschädigt ist,<br />
– Zubehörteile beschädigt sind,<br />
– das Gerät anderweitig beschädigt sein sollte.<br />
Lassen Sie ein beschädigtes Netzkabel bzw.<br />
einen beschädigten Netzstecker nur vom qualifizierten<br />
Fachmann austauschen.<br />
• Das Gerät eignet sich nur für den Gebrauch<br />
im privaten Haushalt und nur für den in dieser<br />
Bedienungsanleitung beschriebenen Zweck.<br />
• Platzieren sie das Gerät auf einer waagrechten,<br />
ebenen Fläche, nicht in der Nähe von Wärmequellen<br />
(z. B. Ofen).<br />
• Falls Sie ein Verlängerungskabel verwenden,<br />
stellen Sie sicher, dass dieses für eine entsprechende<br />
Leistung geeignet ist (siehe Seite 9).<br />
• Verlegen Sie das Netzkabel und ein eventuell<br />
verwendetes Verlängerungskabel so, dass niemand<br />
darüber stolpern bzw. unbeabsichtigt<br />
daran ziehen kann. Vermeiden Sie Beschädigungen<br />
des Kabels, indem Sie es von heißen<br />
Oberflächen und scharfe Gegenständen fernhalten.<br />
• Achten Sie darauf, das der Wasserbehälter<br />
höchstens bis zur Max.-Markierung gefüllt<br />
wird (zu sehen an der Wasserfüllstandsanzeige<br />
(13)). Bei Überfüllung kann heißes<br />
Wasser herausspritzen!<br />
• Schalten Sie den Dampfgarer nicht an, wenn<br />
in dem Wasserbehälter weniger als eine Tasse<br />
Wasser enthalten ist. Ansonsten könnte das<br />
Gerät beschädigt werden.<br />
• Geben Sie keine ätzenden oder alkalischen<br />
Substanzen in das Gerät!<br />
• Das Gerät wird während des Betriebs heiß!<br />
Fassen Sie es daher nur mit wärme isolierenden<br />
Topflappen an!<br />
• Vorsicht: Durch austretenden Dampf besteht<br />
Verbrühungsgefahr.<br />
• Nehmen Sie den Deckel (1) nicht ab während<br />
das Gerät weiter Dampf erzeugt. Schalten<br />
Sie es vorher unbedingt aus. Verbrühungsgefahr!<br />
• Verwenden Sie ausschließlich Original- bzw.<br />
vom Hersteller empfohlene Zubehörteile.<br />
• Kinder erkennen die Gefahr nicht, die beim Umgang<br />
mit elektrischen Geräten entstehen kann.<br />
Lassen Sie deshalb Kinder nie unbeaufsichtigt<br />
mit dem Elektrogerät und lassen Sie in Gegenwart<br />
von Kindern besondere Sorgfalt walten.
D<br />
Vor der ersten<br />
Inbetriebnahme<br />
• Entfernen Sie alle Verpackungsmaterialen.<br />
Lassen Sie Teile der Verpackung (Plastiktüten,<br />
Styropor, etc.) nicht in der Reichweite von Kindern<br />
liegen – Erstickungsgefahr!<br />
• Prüfen Sie, ob Stromart und Netzspannung<br />
mit den Angaben auf dem Typenschild des<br />
Gerätes übereinstimmen.<br />
• Prüfen Sie alle Teile des Gerätes sowie das<br />
Netzkabel und den Stecker auf eventuelle<br />
Schäden.<br />
• Reinigen Sie das Gerät und alle Zubehörteile<br />
gründlich, wie im Abschnitt „Reinigung“ beschrieben.<br />
Reinigung<br />
Reinigen Sie das Gerät nur im abgekühltem Zustand.<br />
Das Gerät muss ausgeschaltet und der<br />
Netz stecker muss gezogen sein.<br />
Deckel (1), Reisschale (4), <br />
Dampfgarbehälter (5 / 6 / 7) und <br />
Kondensat-Auffangbehälter (9)<br />
Der Deckel (1), die Reisschale (4), die Dampfgarbehälter<br />
(5 / 6 / 7) sowie der Kondensat-Auffangbehälter<br />
(9) sind spülmaschinengeeignet.<br />
Sie können diese Teile auch in warmen Spülwasser<br />
reinigen. Reinigen Sie alle Teile mit einem weichen<br />
Schwamm und spülen Sie sie anschließend<br />
unter fließendem, heißem Wasser nach.<br />
Wichtig! Tauchen Sie den Sockel (12) und den<br />
Netzstecker nie in Wasser.<br />
Entkalken<br />
Hat sich auf den Oberflächen des Dampfgarers<br />
Kalk abgesetzt, können Sie ihn mühelos entfernen,<br />
indem Sie folgende Schritte beachten:<br />
1. Füllen Sie Essigwasser oder handelsüblichen<br />
Entkalker in den Wasserbehälter des Sockels<br />
(12), bis er zur Hälfte gefüllt ist.<br />
2. Setzen Sie nun den Kondensat-Auffangbehälter<br />
(9), die Garbehälter (5 / 6 / 7) und den<br />
Deckel (1) darauf.<br />
3. Stellen Sie die Betriebszeit auf 25 Minuten<br />
und schalten das Gerät ein (wie im Abschnitt<br />
„Inbetriebnahme“ beschrieben).<br />
4. Lassen Sie das Gerät nach Ablauf der Zeit vollständig<br />
abkühlen.<br />
5. Gießen Sie die aufgefangene Flüssigkeit im<br />
Kondensat-Auffangbehälter (9) aus. Entleeren<br />
Sie anschließend die restliche Flüssigkeit im<br />
Sockel (12).<br />
6. Spülen Sie alle Teile mit klarem Wasser nach.<br />
7. Lassen Sie alle Teile völlig trocknen, bevor Sie<br />
das Gerät verstauen.<br />
Sockel mit Wasserbehälter (12)<br />
Wischen Sie den Sockel (12) mit einem sauberen,<br />
feuchten Tuch ab und trocknen Sie ihn anschließend<br />
sorgfältig ab.<br />
Eventuell auftretende Kalkrückstände im Wasserbehälter<br />
können Sie von Zeit zu Zeit mit Essigwasser<br />
oder handelsüblichem Entkalker beseitigen.<br />
Spülen Sie anschließend den Wasserbehälter<br />
vorsichtig mit klarem Wasser nach.<br />
Wichtig! Geben Sie den Sockel (12) nicht in die<br />
Spülmaschine!<br />
7
D<br />
Inbetriebnahme<br />
1. Füllen Sie den Wasserbehälter mit kaltem,<br />
klarem Wasser, Brühe o. ä.<br />
Achtung: Füllen Sie nie heiße Flüssigkeiten in<br />
den Wasserbehälter des Sockels (13), da dieser<br />
durch den plötzlichen Temperaturunterschied<br />
beschädigt werden kann.<br />
2. Setzen Sie den Dampfbündler (10) von unten<br />
in den Kondensat-Auffangbehälter (9) ein.<br />
3. Platzieren Sie anschließend den Kondensat-<br />
Auffangbehälter (9) auf dem Sockel (12). Dieser<br />
Behälter (9) fängt Flüssigkeit auf, die vom<br />
Gargut tropft.<br />
4. Geben Sie das Gargut in die Dampfgarbehälter<br />
(5 / 6 / 7). Sie können wahlweise einen, zwei<br />
oder drei Behälter verwenden (vgl. Abb. 1).<br />
5. Setzen Sie den Deckel (1) auf den obersten<br />
Garbehälter (5).<br />
6. Stecken Sie den Netzstecker in eine geeignete<br />
Schuko-Steckdose. Ein Signalton ist zu hören<br />
und die Betriebskontrollleuchte (20) beginnt<br />
zu leuchten.<br />
Garen mit . . .<br />
3 Dampfgarbehältern<br />
7. Drücken Sie auf (17). Es beginnt „ “<br />
(30 Minuten) auf dem Display (22) zu blinken.<br />
Stellen Sie die benötigte Garzeit ein, indem<br />
Sie + / – (18 / 21) drücken. Sie stellen damit<br />
die Dauer in 1-Minute-Schritten ein (von 1 bis<br />
60 Minuten). Halten Sie die jeweilige Taste<br />
gedrückt, läuft die Zeit schneller.<br />
Durch erneutes Drücken auf die -Taste<br />
(17) bestätigen Sie die eingegebene Dauer.<br />
Die Zeit wird konstant auf dem Display (22)<br />
angezeigt.<br />
8. Drücken Sie auf (19), um eine Zeitverzögerung<br />
einzustellen. Es wird blinkend „ “<br />
(0 Stunden) auf dem Display (22) dargestellt.<br />
Durch Drücken von + / – (18 / 21) können Sie<br />
die Zeitverzögerung in 1-Stunde-Schritten einstellen<br />
(von 1 bis 9 Stunden). Halten Sie die jeweilige<br />
Taste gedrückt, läuft die Zeit schneller.<br />
Durch erneutes Drücken auf die -Taste (17)<br />
bestätigen Sie die eingegebene Verzögerung.<br />
Die Verzögerungsdauer wird konstant<br />
auf dem Display (22) angezeigt.<br />
2 Dampfgarbehältern<br />
1<br />
2<br />
3<br />
1<br />
2<br />
Grundsätzlich ist zu beachten: Das Gargut mit<br />
der längsten Garzeit ist in den untersten Behälter<br />
zu geben. Dort wird es um 3 – 5 Minuten<br />
schneller gegart, als im oberen Behälter.<br />
Z. B. Fleisch wird im Dampfgarbehälter 3,<br />
Karottenscheiben im Dampfgarbehälter 2<br />
und Spinat im Dampfgarbehälter 1 gegart.<br />
Beim Garen mit zwei Dampfgarbehältern, geben<br />
Sie das Gargut mit der längeren Garzeit<br />
ebenfalls in den unteren Behälter (Dampfgarbehälter<br />
2). Das andere Gargut geben<br />
Sie dann in den oberen Behälter (Dampfgarbehälter<br />
1) .<br />
So wird beides gleichzeitig gar.<br />
8<br />
Abb. 1
D<br />
Achtung!<br />
Verwenden Sie keine leicht verderblichen<br />
Lebensmittel (z. B. Eier, Zwiebeln, Fisch),<br />
wenn Sie die Zeitverzögerung nutzen.<br />
9. Drücken Sie auf die EIN-Taste (14), um den<br />
Garvorgang zu starten. Die -Taste (14) beginnt<br />
zu leuchten, die Betriebskontrollleuchte<br />
(20) blinkt und das Heizelement (11) beginnt<br />
das Wasser aufzuheizen.<br />
Sie können den Dämpfvorgang jederzeit<br />
anhalten, indem Sie (16) drücken. Die<br />
AUS-Taste (16) beginnt zu leuchten, die<br />
Betriebskontrollleuchte (20) leuchtet und<br />
das Heizelement (11) stoppt. Durch Drücken<br />
der -Taste (14) wird der Garvorgang fortgesetzt.<br />
Zum Abbrechen des Garvorgangs halten<br />
Sie die -Taste (16) 3 Sekunden gedrückt.<br />
Die AUS-Taste (16) erlischt und das Heizelement<br />
(11) wird abgeschaltet.<br />
10. Ca. 20 Sekunden vor Ablauf der Garzeit beginnt<br />
der Dampfgarautomat zu piepsen.<br />
Wenn die Zeit abgelaufen ist, ist ein langer<br />
Signalton zu hören. Der Dampfgarer schaltet<br />
sich automatisch aus. Die -Taste (14)<br />
erlischt und (16) beginnt zu leuchten.<br />
Zudem wird auf dem Display (22) „ “ angezeigt,<br />
bis Sie die -Taste (16) 3 Sekunden<br />
gedrückt halten oder den Netzstecker<br />
ziehen.<br />
Bevor Sie neue Einstellungen vornehmen<br />
können, muss der Dampfgarer zurückgesetzt<br />
werden, indem Sie die AUS-Taste (16) für<br />
3 Sekunden gedrückt halten.<br />
11. Nehmen Sie bitte Topflappen zur Hand, um<br />
den Deckel (1) sowie die einzelnen Dampfgarbehälter<br />
(5 / 6 / 7) abzunehmen. Es besteht<br />
Verbrühungsgefahr!<br />
Wasser nachfüllen<br />
Bei längeren Garzeiten, wird evtl. zusätzliches<br />
Wasser benötigt. Gießen Sie es hierfür über die<br />
Wassereinfüllöffnung (8) ein.<br />
1 Dampfgarbehälter<br />
1<br />
Wenn Sie nur ein Gargut (z. B. Kartoffeln) dünsten<br />
möchen oder verschiedene Speisen, die<br />
die gleiche Garzeit haben (z. B. Schweinelende<br />
und Putenbrust), dann können Sie nur einen<br />
Dampfgarbehälter verwenden.<br />
Geben Sie hierzu das Gargut in den Dampfgarbehälter<br />
1.<br />
Reis kochen<br />
Der Dampfgarer ist mit einer Reisschale (4) ausgestattet,<br />
die speziell für die Zubereitung von<br />
Reis ausgelegt ist.<br />
1. Geben Sie den losen Reis in die Schale (4) und<br />
geben Sie die gleiche Menge Wasser hinzu,<br />
z. B. eine Tasse Wasser auf eine Tasse Reis.<br />
2. Stellen Sie die Schale in die Mitte eines Dampfgarbehälters<br />
(5 / 6 / 7).<br />
3. Stellen Sie die benötigte Garzeit ein, wie in<br />
der nachstehenden Tabelle beschrieben und<br />
drücken auf (14).<br />
9
D<br />
Leitfaden zum Dampfgaren<br />
Achten Sie darauf, dass die einzelnen Stücke des<br />
Gargutes in einem Dampfgarbehälter (5 / 6 / 7)<br />
immer ungefähr gleich groß sind. Ansonsten<br />
müssen Sie mehrere Behälter (5 / 6 / 7) benutzen,<br />
da die Garzeiten bei unterschiedlichen Größen<br />
unterschiedlich sind.<br />
Überfüllen Sie die Dampfgarbehälter (5 / 6 / 7)<br />
nicht! Platzieren Sie das Gargut so weit wie möglich<br />
aus einander, damit der Dampf gut zirkulieren<br />
kann.<br />
Fleisch sollte immer im untersten Dampfgarbehälter<br />
gegart werden.<br />
Wird nur ein Dampfgarbehälter (5) verwendet,<br />
ist die Garzeit kürzer, als bei Verwendung mehrerer<br />
Behälter (5 / 6 / 7), da die Dampfeinwirkung<br />
stärker ist. Daher können in der nachstehenden<br />
Garzeiten-Tabelle keine exakten Zeiten angegeben<br />
werden, sondern nur Zeitbereiche.<br />
Garzeiten-Tabelle<br />
Bitte beachten Sie, dass alle hier angegebenen Zeiten nur Richtwerte sind, die je nach Größe und Reife<br />
des Garguts sowie nach dem persönlichen Geschmack variieren können.<br />
Gargut im untersten Behälter im mittleren Behälter im obersten Behälter<br />
Reis 25 – 30 Minuten 30 – 35 Minuten 35 – 40 Minuten<br />
Fisch 8 – 10 Minuten 10 – 15 Minuten 15 – 18 Minuten<br />
Pute 25 – 28 Minuten 28 – 30 Minuten 25 – 35 Minuten<br />
Gemüse 15 – 30 Minuten 18 – 30 Minuten 18 – 35 Minuten<br />
Ei 15 – 18 Minuten 18 – 20 Minuten 20 – 25 Minuten<br />
10<br />
Technische Daten<br />
Stromquelle:<br />
Anschlusswert:<br />
220 – 240 V ~ 50 Hz<br />
950 Watt<br />
Fassungsvermögen <br />
des Wasserbehälters: 250 ml – 1,250 ml<br />
Fassungsvermögen <br />
je Dampfgarbehälter: 3,5 l<br />
Der Umwelt zuliebe<br />
bitte beachten<br />
Verpackungsmaterial und ausgediente Geräte<br />
nicht einfach wegwerfen, sondern der Wiederverwertung<br />
zuführen.<br />
Den zuständigen Recyclinghof bzw. die nächste<br />
Sammelstelle bitte bei Ihrer Kommunalverwaltung<br />
erfragen.<br />
Zur Inanspruchnahme von Garantieleistungen<br />
wenden Sie sich bitte an Ihren Händler oder die<br />
BIELMEIER Kundendienstzentrale Ihres Landes.
D<br />
Rezepte<br />
Südtiroler Kasnocken<br />
Zutaten:<br />
• 500 g Knödelbrot<br />
• 500 g Zwiebel<br />
• ½ l Milch<br />
• 250 g Bergkäse<br />
• 2 Eier<br />
• Öl<br />
• Salz, Pfeffer, Muskat<br />
Zwiebel in feine Streifen schneiden und mit 3 EL<br />
Öl langsam goldbraun rösten.<br />
Bergkäse in kleine Würfel schneiden.<br />
Die Milch mit ca. ¼ l Wasser vermischen, mit<br />
1 EL Salz, Pfeffer und etwas Muskatnuss würzen<br />
und aufkochen. Röstzwiebel und Milch zu dem<br />
Knödelbrot geben und gut durchmischen, falls<br />
nicht alle Semmelwürfel benetzt sind, etwas<br />
heißes Wasser dazu. Käse und Eier dazu, nochmals<br />
durchmischen und die Masse 10 Minuten<br />
rasten lassen.<br />
Nochmals kurz durchmischen und mit einem<br />
großen Esslöffel und nassen Händen längliche<br />
Nocken formen.<br />
Im <strong>BHG</strong> <strong>193</strong> auf unterer Ebene 15 Minuten garen.<br />
Mit geriebenem Parmesan und brauner Butter<br />
servieren.<br />
Tirolerknödel<br />
Zutaten:<br />
• 500 g Knödelbrot<br />
• 250 g Selchspeck<br />
• 200 g Zwiebel<br />
• ½ l Milch<br />
• 2 Eier<br />
• Öl<br />
• Salz, Pfeffer, Muskat<br />
• gehackte Petersilie<br />
Zwiebel fein schneiden, ebenso den Speck in<br />
Würfel schneiden.<br />
Die Milch mit ca. ¼ l Wasser vermischen, mit<br />
1 EL Salz, Pfeffer und etwas Muskatnuss würzen<br />
– anschließend aufkochen. Zwiebel, Petersilie<br />
und Milch zum Knödelbrot geben und gut durchmischen.<br />
Falls nicht alle Semmelwürfel benetzt<br />
werden, etwas heißes Wasser dazugeben. Speck<br />
und Eier dazu, nochmals durchmischen und die<br />
Masse 10 Minuten rasten lassen.<br />
Anschließend nochmals durchmischen und mit<br />
nassen Händen Knödel formen.<br />
Im <strong>BHG</strong> <strong>193</strong> auf unterer Ebene 15 Minuten garen.<br />
Als Einlage in klarer Rindsuppe oder mit Sauerkraut,<br />
mit Pilzsauce usw. servieren.<br />
11
D<br />
Tortelloni mit Spinat und Ricotta<br />
Zutaten:<br />
• 200 g Mehl<br />
• 250 g Blattspinat tiefgekühlt <br />
(oder 600 g frisch, in Salzwasser blanchiert)<br />
• 250 g Ricotta<br />
• 1 Ei<br />
• Salz, Pfeffer, Muskat<br />
• nach Belieben Knoblauch<br />
Mit dem Mehl, 1 Teelöffel Salz und dem Ei einen<br />
festen Teig kneten. Warmes Wasser zugeben, bis<br />
alles Mehl aufgenommen ist. Gut durchkneten<br />
und 30 Minuten rasten lassen.<br />
Aufgetauten / blanchierten Spinat fein hacken,<br />
mit Salz, Pfeffer und etwas Muskatnuss würzen,<br />
nach Belieben 1 – 2 Zehen Knoblauch dazu pressen.<br />
Mit Ricotta verrühren, die Masse soll gut<br />
gewürzt sein.<br />
Den Nudelteig noch einmal sehr gut durchkneten<br />
und ganz dünn ausrollen, am besten mit einer<br />
Nudelmaschine.<br />
Quadrate von ca. 8 cm schneiden, in die Mitte<br />
jeweils ½ Teelöffel Fülle setzen, das Quadrat zuschlagen<br />
und z.B. mit einem stabilen Wasserglas<br />
halbrund ausstechen.<br />
Im <strong>BHG</strong> <strong>193</strong> auf unterer Ebene 10 Minuten garen.<br />
Mit Sahnesoße oder einfach geschmolzener Butter<br />
und Parmesan.<br />
Lachsfilet mit Gemüse<br />
Zutaten:<br />
• 4 Tiefkühl-Lachsfilets <br />
(pro Person ca. 200g)<br />
• 500 g Broccoli oder Zucchini<br />
• 500 g Kartoffel<br />
• 1 Packung fertige Sauce Hollandaise (ca. ¼ l)<br />
• Salz, Pfeffer, scharfer Senf<br />
Kartoffel schälen, halbieren, in die unterste Ebene<br />
legen.<br />
Lachs mit Salz und Pfeffer würzen, dünn mit Senf<br />
bestreichen, in die mittlere Ebene legen<br />
Broccoli oder Zucchini in Scheiben zerteilten,<br />
leicht salzen und in die oberste Ebene des<br />
Dampfgarers geben. Eine Tasse mit der fertigen<br />
Sauce zum Erhitzen neben das Gemüse stellen.<br />
Im <strong>BHG</strong> <strong>193</strong> für 25 Minuten garen.<br />
Tipp: Eine ebenfalls leckere Variation erhalten<br />
Sie, indem Sie den Spinat durch 110 g getrocknete<br />
Waldpilze ersetzen.<br />
Lassen Sie diese in warmen Wasser quellen und<br />
hacken Sie sie fein, bevor Sie die Pilze mit dem<br />
Ricotta verrühren.<br />
Würzen Sie die Ricotta-Masse nur mit Salz und<br />
Pfeffer. Muskat und Knoblauch passen nicht zu<br />
dieser Variante.<br />
12
D<br />
GARANTIE<br />
Für die am Verkaufstag beginnende Garantie gelten innerhalb der EU und der Schweiz folgende<br />
Bestimmungen:<br />
1. Garantiedauer: 2 Jahre<br />
2. Garantieleistungen:<br />
a) Nach unserer Wahl Reparatur oder Austausch<br />
von Teilen, die nach unserer Überprüfung<br />
Material- oder Fertigungsfehler aufweisen.<br />
b) Die Garantie wird nur bei Vorzeigen dieser<br />
Garantiekarte und der Verkaufsrechnung<br />
geleistet. Die Karte ist nur gültig, wenn<br />
sie am Verkaufstag vollständig ausgefüllt<br />
wurde.<br />
c) Die Garantieleistung gilt nur gegenüber dem<br />
Erstverbraucher.<br />
d) Durch die Reparatur oder den Austausch von<br />
Teilen innerhalb der Garantiedauer wird die<br />
ursprüngliche Garantiezeit weder verlängert<br />
noch erneuert.<br />
e) Transportkosten gehen zu Lasten des Käufers<br />
(gilt nicht für die ersten 6 Monate der Garantiezeit).<br />
f) Sofern der Schaden oder Mangel nicht beseitigt<br />
werden kann oder die Nachbesserung<br />
von uns abgelehnt oder unzumutbar verzögert<br />
wird, wird innerhalb von 6 Monaten ab<br />
Kauf- / Lieferdatum auf Wunsch des Endabnehmers<br />
entweder kostenfrei Ersatz geliefert<br />
oder der Minderwert vergütet oder das Gerät<br />
gegen Erstattung des Kaufpreises, jedoch<br />
nicht über den marktüblichen Preis hinaus,<br />
zurückgenommen.<br />
3. Die Garantie gilt nicht:<br />
• für Kratzer und Flecken am Gerät.<br />
• für Beleuchtungs- und Kontrolllampen.<br />
• für Motorbürsten.<br />
• für leicht zerbrechliche Teile aus Bakelit, Glas,<br />
Plastik und so weiter, es sei denn, es handelt<br />
sich um Materialfehler, die von uns als solche<br />
anerkannt werden.<br />
• für Beschädigungen, die durch falsche Installation<br />
oder Befestigung verursacht wurden.<br />
• wenn das Gerät an ein Stromnetz mit höherer<br />
Spannung, als auf dem Gerät angegeben, angeschlossen<br />
wird.<br />
• bei falscher oder unsachgemäßer Bedienung.<br />
• bei mangelnder Sorgfalt.<br />
• bei ungenügender oder falscher Wartung.<br />
• bei Fallenlassen des Gerätes oder einzelner<br />
Teile.<br />
• bei unsachgemäßem Transport oder unsachgemäßer<br />
Verpackung für den Transport.<br />
4. Die Garantie erlischt:<br />
• wenn das Gerät für andere als für Haushaltszwecke<br />
eingesetzt wird.<br />
• wenn Personen, die nicht von unserer Firma<br />
dazu ermächtigt sind, Reparaturen oder Änderungen<br />
durchführen.<br />
Für dieses Gerät leisten wir 2 Jahre Garantie für Mängel, die auf Fertigungs- oder Materialfehler<br />
zurückzuführen sind. Die Garantiezeit beginnt mit dem Tag der Übergabe und wird nur bei Vorlage<br />
der Garantiekarte und der Verkaufsrechnung gewährt. Weitergehende Ansprüche bestehen nicht.<br />
Modell:<br />
Wichtig! Bitte notieren Sie hier den auf<br />
dem Typenschild am Gerät befindlichen<br />
FD-Code:<br />
Stempel und Unterschrift des Verkäufers<br />
Verkaufsdatum<br />
13
GB<br />
Important!<br />
Before using your new multi-purpose appliance,<br />
please read the following information<br />
carefully.<br />
Please keep this information in a safe place and<br />
make sure that anyone who uses the appliance<br />
reads this first.<br />
FOR YOUR SAFETY<br />
• Please verify that the voltage specified on the<br />
appliance’s rating label corresponds to your<br />
mains voltage. Only connect this appliance to<br />
an AC power outlet!<br />
• Our electrical appliances comply with all<br />
applicable safety regulations. Only appropriately<br />
qualified professionals or our service<br />
centre personnel are authorized to repair<br />
our appliances. Unauthorised repairs may<br />
result in significant safety risks for the user.<br />
• Always unplug the appliance before storage,<br />
assembly, disassembly and cleaning. When<br />
unplugging the appliance, always grip the<br />
plug – do NOT pull on the cable!<br />
• Unplug the appliance if it will not be used for<br />
an extended period of time or in the event<br />
of a storm, in order to prevent damage from<br />
power surges.<br />
• Do NOT immerse any electrical parts of the<br />
appliance in water or expose the mains cable<br />
to moisture.<br />
• Do NOT touch the power cord with damp or<br />
wet hands .<br />
• Do NOT use the appliance if<br />
– the power cord or the plug is damaged,<br />
– any accessories are damaged,<br />
– the appliance is damaged in any other way.<br />
Damaged power cords and / or plugs should<br />
only be replaced by a qualified specialist.<br />
• Place the appliance on a flat surface and away<br />
from any heat sources (e. g. oven).<br />
• If you use an extension cord, please ensure<br />
that it meets the relevant power requirements<br />
(see page 15).<br />
• Place the power cord and any optional extension<br />
cords such that nobody will stumble over<br />
them or pull them out unintentionally. Avoid<br />
damaging the cord by keeping it away from<br />
hot surfaces and sharp edges.<br />
• Never overfill the water tank – only fill to the<br />
“Max” level indicated on the filling level indicator<br />
(13). Hot water may squirt out if the<br />
unit is overfilled!<br />
• To avoid damaging the appliance, do NOT turn<br />
it on if there is less than one cup of water in<br />
the tank [as shown on the filling level indicator<br />
(13)].<br />
• Do NOT put any acidic or alkaline substances<br />
into the food steamer!<br />
• Caution: the appliance becomes hot when<br />
in use. Only handle hot parts with an insulated<br />
oven pad or mitt.<br />
• Caution: Risk of scalding from escaping<br />
steam!<br />
• Do NOT remove the lid while the food steamer<br />
is still working. To avoid scalding, always<br />
switch the unit off before removing the lid!<br />
• Use only original accessories or those recommended<br />
by the manufacturer.<br />
• Children are unaware of the possible dangers<br />
associated with electrical appliances. For this<br />
reason, never leave a child alone and unsupervised<br />
with the appliance, and exercise extra<br />
caution when using the appliance in the<br />
presence of children.<br />
14<br />
• The appliance is only intended for use in a private<br />
household and for the uses described in<br />
these operating instructions.
GB<br />
Before the first use<br />
• Remove all packaging materials. Do NOT leave<br />
any packaging materials (e. g. plastic bags,<br />
styrofoam parts) within reach of children – risk<br />
of suffocation!<br />
• Make sure that the supplied voltage and<br />
current match the data shown on the rating<br />
label.<br />
• Verify that all parts and accessories are intact<br />
and free from damage, and also check the<br />
power cord.<br />
• Clean all of the parts of the appliance as outlined<br />
in the “Cleaning” section.<br />
Cleaning<br />
Before cleaning, turn off the appliance, remove power plug, and allow all parts to cool down completely.<br />
Lid (1), rice bowl (4), <br />
steam boxes (5 / 6 / 7) and <br />
condensate collectr (9)<br />
The lid (1), rice bowl (4), steam boxes (5 / 6 / 7)<br />
and condensate collector (9) are dishwasher<br />
safe.<br />
These parts can also be cleaned with warm,<br />
soapy water, after which they should be rinsed<br />
with clean water and dried.<br />
Base with water tank (12)<br />
Wipe the base (12) with a clean, wet cloth first,<br />
and then dry it with a soft, dry cloth.<br />
If limescale deposits build up, they can be removed<br />
by regular descaling with vinegar and<br />
water or a commercial descaler. Always fill the<br />
appliance with clean water and boil after descaling.<br />
Caution! Do NOT put the base (12) into the dishwasher!<br />
Caution! Do NOT immerse the base (12) and the<br />
power plug in water or any other liquids.<br />
Descaling<br />
If limescale deposits build up on the surface of<br />
the food steamer, simply follow the directions<br />
below to remove the deposits:<br />
1. Fill the water tank in the base (12) to half-full<br />
with a vinegar and water solution or a commercial<br />
descaler.<br />
2. Place the condensate collector (9), the steam<br />
boxes (5 / 6 / 7) and the lid (1) on the base<br />
(12).<br />
3. Set the operation time to 25 minutes and start<br />
the appliance as described in the “Operation”<br />
section.<br />
4. Allow the device to cool down completely.<br />
5. Empty the liquid in the condensate collector<br />
(9) first. Then empty the base (12).<br />
6. Rinse all of the parts of the appliance thoroughly<br />
with clean water.<br />
7. Dry all of the components of the appliance.<br />
15
GB<br />
Operation<br />
1. Fill the water tank with clear, cold water, broth<br />
or similar liquids.<br />
Caution: To avoid the risk of scalding from<br />
steam emissions, do NOT fill the water tank<br />
(13) with hot liquids.<br />
2. Insert the steam collecting loop (10) into the<br />
condensate collector (9) from the bottom up.<br />
3. Place the condensate collector (9) on the base<br />
(12). This collector (9) catches all liquids that<br />
drip down from the food.<br />
4. Place your food in the steam boxes (5 / 6 / 7).<br />
You can use one, two or three steam boxes<br />
(see fig. 1).<br />
5. Place the lid (1) on the upper steam box (5).<br />
6. Insert the power cord into the socket (Schuko<br />
socket). The device will beep and the indicator<br />
lamp (20) will light up.<br />
7. Press (17) – The LCD (22) will display a<br />
blinking “ ” (30 minutes).<br />
Set the desired operation time by pressing<br />
+ / – (18 / 21). Each press of the button<br />
changes the time by 1 minute (from 1 minute<br />
up to 60 minutes). To change the time<br />
rapidly, press and hold the + / – (18 / 21)<br />
buttons .<br />
Press the -button (17) again to confirm<br />
the operation time. The LCD (22) will stop blinking<br />
and display the selected operation time.<br />
8. To set the timer, press (19) – “ ” (0 hour)<br />
will blink on the LCD (22).<br />
Press the + / – (18 / 21) buttons to adjust the<br />
delay time Each press of the button changes<br />
the time by 1 hour (from 1 hour up to<br />
9 hours). To change the time rapidly, press and<br />
hold the + / – (18 / 21) buttons.<br />
Press the -button (17) again to confirm the<br />
delay time. The LCD (22) will stop blinking<br />
and display the selected time continuously.<br />
Cooking by using . . .<br />
3 steam boxes<br />
2 steam boxes<br />
1<br />
2<br />
3<br />
1<br />
2<br />
NOTE: The foods with the longest cooking<br />
time must be placed in the bottom steam box,<br />
where food is cooked 3 – 5 minutes faster than<br />
in the top box.<br />
For example, meat is cooked in steam box 3,<br />
carrot slices in steam box 2, and spinach in<br />
steam box 1.<br />
When using two steam boxes, the food with<br />
the longest cooking time should also be placed<br />
in the bottom steam box (steam box 2). Place<br />
the other food in the top box (steam box 1).<br />
In this way, both foods will be cooked in the<br />
same time.<br />
16<br />
fig. 1
GB<br />
Caution!<br />
Do NOT use use the delay feature with perishable<br />
ingredients, such as eggs, onions<br />
and fish.<br />
9. Press the ON-button (14), to start the cooking<br />
process. The -button (14) will light up,<br />
the indicator lamp (20) will blink and, the heating<br />
element (11) will start heating the water.<br />
You can interrupt cooking at any time by<br />
pressing the OFF-button (16). The -<br />
button (16) and the indicator lamp (20) will<br />
light up and the heating element (11) will<br />
stop working. Press the -button (14) to<br />
resume cooking.<br />
To stop the cooking process, press the OFFbutton<br />
(16) for approximately 3 seconds.<br />
The light in the OFF-button (16) will go<br />
out and the heating element (11) will turn off<br />
– the cooking process is switched off.<br />
10. Approximately 20 seconds before the end<br />
of the cooking time, the food steamer will<br />
begin beeping. Once the cooking is finished,<br />
the device emits one long beep. The food<br />
steamer will switch off automatically. The<br />
light in the -button (14) will go out, and<br />
(16) will light up. In addition, the LCD (22)<br />
will display “ ”, until either the -button<br />
(16) is pressed for 3 seconds or the power<br />
cord is unplugged.<br />
Before performing further operations, the<br />
food steamer must be reset by pressing the<br />
OFF-button (16) for 3 seconds.<br />
11. Use and insulated oven pad or mitt when lifting<br />
the lid (1) and the steam boxes (5 / 6 / 7).<br />
Risk of scalding due to escaping steam!<br />
Refilling water<br />
If longer steaming times are necessary, additional<br />
water may be necessary. Use the water filling<br />
holes (8) to refill the water tank.<br />
1 steam box<br />
1<br />
Steaming rice<br />
The steamer is equipped with a rice bowl (4) –<br />
specifically designed for steaming rice.<br />
1. Put the rice into the rice bowl (4) and add the<br />
same quantity of water (e. g. one cup of rice<br />
with one cup of water).<br />
2. Place the rice bowl in the middle of a steam<br />
box (5 / 6 / 7).<br />
3. Set the cooking time based on Steaming<br />
Times chart (see p. 17) and press (14).<br />
If you want to cook just one food (e. g. potatoes)<br />
or different foods with the same cooking<br />
time (e. g. pork fillet and turkey breast), you can<br />
use just one steam box.<br />
In this case, use steam box 1.<br />
17
GB<br />
Cooking guide<br />
Make sure that all of the food items in any individual<br />
steam box (5 / 6 / 7) are about the same<br />
size. If not, the foods must be placed on different<br />
levels based on their sizes, since smaller pieces<br />
have a shorter cooking time than larger ones.<br />
Do not overfill the steam boxes (5 / 6 / 7)! Spread<br />
out the food as much as possible to ensure a<br />
smooth flow of steam.<br />
Meat should always be cooked in the lowest<br />
steam box.<br />
The cooking time is shorter when only one steam<br />
box (5) is used than when several steam boxes<br />
(5 / 6 / 7) are used, due to increased exposure<br />
to the steam. Therefore, the cooking times provided<br />
in the following table are only approximate<br />
values.<br />
Steaming Times<br />
Please note that these times are only provided as guidelines. Actual cooking times will vary depending<br />
on the size and freshness of the food and on individual tastes.<br />
Food Bottom steam box Middle steam box Top steam box<br />
Rice 25 – 30 minutes 30 – 35 minutes 35 – 40 minutes<br />
Fish 8 – 10 minutes 10 – 15 minutes 15 – 18 minutes<br />
Poultry 25 – 28 minutes 28 – 30 minutes 25 – 35 minutes<br />
Vegetables 15 – 30 minutes 18 – 30 minutes 18 – 35 minutes<br />
Eggs 15 – 18 minutes 18 – 20 minutes 20 – 25 minutes<br />
18<br />
Technical Details<br />
Power source:<br />
Connected load:<br />
Capacity of <br />
water tank:<br />
Capacity of <br />
each steam box:<br />
220 – 240 V ~ 50 Hz<br />
950 W<br />
250 ml – 1250 ml<br />
3.5 l<br />
This appliance conforms with EU Directive 89/336/<br />
EEC on Electro-Magnetic Compatibility (EMC) and<br />
with the Low-Voltage Directive 73/23 EEC.<br />
Caring for the environment<br />
Please dispose of packaging and old appliances<br />
properly.<br />
Contact your local authority for details about the<br />
relevant recycling centre or the nearest collection<br />
point.<br />
For warranty claims, please contact your retailer<br />
or your local BIELMEIER customer service center.
GB<br />
Rezepte<br />
South Tyrolean Kasnocken<br />
Ingredients:<br />
• 500 g bread cubes <br />
(dried white bread rolls cut into small cubes)<br />
• 500 g onions<br />
• ½ l milk<br />
• 250 g Alpine cheese (Bergkäse)<br />
• 2 eggs<br />
• oil<br />
• salt, pepper, nutmeg<br />
Cut onion into thin strips and roast with 3 tbsp.<br />
oil until golden brown.<br />
Dice the cheese.<br />
Mix milk with approx. 8 fl oz of water, season with<br />
1 tbsp. salt, pepper and a dash of nutmeg and<br />
bring to a boil.<br />
Add fried onions and milk to the bread cubes and<br />
mix well. If all bread cubes are not moistened,<br />
add some hot water. Add cheese and eggs, mix<br />
again and let stand for 10 minutes.<br />
Mix again briefly and use a large tablespoon and<br />
wet hands to form small dumplings.<br />
Cook in the <strong>BHG</strong> <strong>193</strong> in the bottom steaming box<br />
for 15 minutes.<br />
Serve with grated parmesan cheese and brown<br />
butter.<br />
Tyrolean Dumplings<br />
Ingredients:<br />
• 500 g bread cubes <br />
(dried white bread rolls cut into small cubes)<br />
• 250 g smoked bacon<br />
• 200 g onions<br />
• ½ l milk<br />
• 2 eggs<br />
• oil<br />
• salt, pepper, nutmeg<br />
• chopped parsley<br />
Finely chop the onions and dice the smoked bacon.<br />
Mix milk with approx. 8 fl oz of water, season with<br />
1 tbsp. salt, pepper and a dash of nutmeg and<br />
bring to a boil.<br />
Add onions, parsley and milk to the bread cubes<br />
and mix well. If all bread cubes are not moistened,<br />
add some hot water. Add smoked bacon<br />
and eggs, mix again and let stand for 10 minutes.<br />
Mix again briefly and use a large tablespoon and<br />
wet hands to form small dumplings.<br />
Cook in the <strong>BHG</strong> <strong>193</strong> in the bottom steaming box<br />
for 15 minutes.<br />
Can be added to beef broth to make soup, or<br />
served with sauerkraut, mushroom sauce, etc.<br />
19
GB<br />
Tortelloni with spinach and ricotta<br />
Ingredients:<br />
• 200 g flour<br />
• 250 g frozen spinach leaves<br />
(or 600 g fresh spinach, <br />
fresh, blanched in salt water)<br />
• 250 g ricotta<br />
• 1 egg<br />
• salt, pepper, nutmeg<br />
• garlic as desired<br />
Knead flour, 1 tbsp salt and the egg to form a stiff<br />
dough.<br />
Add warm water until all the flour is absorbed.<br />
Knead well and let stand for 30 minutes.<br />
Finely chop thawed / blanched spinach, season<br />
with salt, pepper and a dash of nutmeg, add 1 – 2<br />
pressed garlic cloves (as desired).<br />
Stir with ricotta; the mixture should be well<br />
seasoned.<br />
Knead the pasta dough well again and roll out<br />
thinly (ideally with a pasta maker).<br />
Cut out squares of about 3 inches; place about ½<br />
tsp of filling in the center; close the square<br />
and cut out small semi-circular tortelloni (e.g.<br />
with a sturdy water glass).<br />
Cook in the <strong>BHG</strong> <strong>193</strong> in the bottom steaming box<br />
for 10 minutes.<br />
Serve with cream sauce or simply with melted<br />
butter and parmesan cheese.<br />
Fillet of salmon with vegetables<br />
Ingredients:<br />
• frozen salmon fillets <br />
(per person approx. 200 g)<br />
• 500 g broccoli or zucchini<br />
• 500 g potatoes<br />
• package of ready-made Hollandaise sauce<br />
(approx. ¼ l)<br />
• salt, pepper, spicy mustard<br />
Peel and halve potatoes and place them in the<br />
bottom steaming box.<br />
Season salmon with salt and pepper, brush with<br />
mustard and place in the middle steaming box.<br />
Split broccoli or zucchini in slices, salt lightly and<br />
place in the top steaming box.<br />
Put a cup of the ready-made sauce in with the<br />
vegetables for heating.<br />
Cook in the <strong>BHG</strong> for 25 minutes.<br />
Tip: For a tasty variation, replace the spinach<br />
with110 g of dried<br />
mushrooms. Soak the mushrooms in warm water<br />
and finely chop them before mixing<br />
them in with the ricotta.<br />
Season the ricotta mass with salt and pepper.<br />
Nutmeg and garlic do not work<br />
with this recipe.<br />
20
GB<br />
WARRANTY<br />
In the EU and Switzerland, the following conditions apply for the warranty, which begins on the<br />
date of purchase of the product:<br />
1. Warranty period: 2 years<br />
2. Conditions of warranty:<br />
a) Parts which exhibit defects in material and/or<br />
workmanship after our inspection will either<br />
be repaired or replaced at our discretion.<br />
b) The warranty will only be honoured upon<br />
presentation of this warranty card and<br />
purchase receipt. This warranty is only valid<br />
if it is filled out on the date of sale and in a<br />
complete and appropriate manner.<br />
c) This warranty is only valid for the first owner<br />
of the device.<br />
d) No replacement or repair of parts performed<br />
within the warranty period shall provide<br />
grounds for any extension of the original<br />
warranty period.<br />
e) Any transportation costs shall be borne by<br />
the purchaser (this shall not apply during the<br />
first 6 months of the warranty).<br />
f) Within the first 6 months after the purchase/<br />
delivery of the device, if the damage or defect<br />
cannot be eliminated, if we refuse to<br />
repair the defect, or in the event of a delay<br />
in our repairing of the device, then the end<br />
user can choose from one of three options:<br />
the device will be replaced free of charge, its<br />
value will be reimbursed, or the device will<br />
be taken back with a refund of the original<br />
purchase price which shall not exceed the<br />
usual market price.<br />
A 2-year warranty is provided for damage caused by defects in material or workmanship. The<br />
warranty period shall begin on the day of delivery or on the day the buyer takes possession<br />
of the item, and the warranty will only be honoured upon presentation of the warranty card<br />
and the purchase receipt. No further claims shall be granted.<br />
Model:<br />
3. The warranty does not apply to:<br />
• spots and scratches on the device<br />
• control lamps and lights<br />
• motor brushes<br />
• easily breakable parts (e. g. bakelite, plastic,<br />
glass), even in the case of defects in material<br />
as recognized by us<br />
• damage due to improper installation or improper<br />
repair<br />
• damage caused by an inappropriate voltage<br />
supply or an inappropriate electricity<br />
network<br />
• improper or inappropriate use of the equipment<br />
• unsatisfactory care<br />
• damage caused by incompetent or insufficient<br />
maintenance<br />
• damage caused by dropping the equipment<br />
or part thereof<br />
• improper transportation or insufficient<br />
packaging during transportation<br />
4. The warranty shall be deemed void:<br />
• in the case of use or application of the device<br />
for something other than its intended use for<br />
household purposes.<br />
• in the case of any servicing or repairing of the<br />
device performed by third parties that have<br />
not been authorized for such purpose by our<br />
company.<br />
Important! Please write down the FD-code<br />
located on the rating plate here:<br />
Stamp and signature of salesperson<br />
Date of sale<br />
21
F<br />
IMPORTANT!<br />
Veuillez lire attentivement ce mode d‘emploi,<br />
il contient d‘importantes remarques de sécurité<br />
ainsi que sur l‘utilisation et l‘entretien de<br />
l‘appareil.<br />
Conservez précieusement le mode d‘emploi<br />
et, le cas échéant, donnez-le au propriétaire<br />
suivant.<br />
CONSIGNES DE SECURITE<br />
• Avant de brancher l‘appareil, veuillez vous assurer<br />
que le type de courant et la tension secteur<br />
correspondent bien avec les indications figurant<br />
sur la plaque signalétique.<br />
• Seuls des spécialistes sont autorisés à réparer<br />
les appareils électriques. Les réparations incorrectes<br />
peuvent engendrer des risques pour<br />
l‘utilisateur. Le fabricant ne saurait être tenu responsable<br />
des éventuels dommages provoqués<br />
par une utilisation inadéquate ou incorrecte.<br />
• Avant de placer ou de retirer des accessoires<br />
complémentaires, ainsi qu‘avant chaque nettoyage,<br />
débranchez l‘appareil. Tirez toujours sur la<br />
fiche mâle, et jamais sur le câble.<br />
• En cas d‘absence prolongée, et pendant un<br />
orage, débranchez l‘appareil.<br />
• Ne plongez jamais dans l‘eau ou dans<br />
d‘autres liquides la fiche mâle ni aucune<br />
autre pièce électrique de l‘appareil.<br />
• Ne touchez pas la prise si vous avez les mains<br />
mouillées ou humides.<br />
• N‘utilisez pas l‘appareil dans les cas suivants<br />
– Le câble électrique ou la fiche mâle est endommagée,<br />
– Les accessoires sont abîmés,<br />
– l‘appareil est abîmé de toute autre manière.<br />
Ne faites remplacer un câble électrique ou une<br />
fiche mâle endommagée que par un spécialiste<br />
qualifié.<br />
• Placez l‘appareil sur une surface horizontale<br />
et plane, et jamais à proximité de sources de<br />
chaleur (par ex. un four).<br />
• Si vous utilisez une rallonge, assurez-vous que<br />
celle-ci convient pour la puissance électrique<br />
correspondante (voir page 9).<br />
• Posez le câble électrique et l‘éventuelle rallonge<br />
de manière à ce que personne ne risque de<br />
trébucher ou de tirer dessus par inadvertance.<br />
Évitez d‘endommager le câble : tenez-le éloigné<br />
des surfaces chaudes et des objets pointus.<br />
• Veillez à ce que le récipient d‘eau soit rempli<br />
maximum jusqu‘à la marque Max. (celle-ci se<br />
voit à l‘endroit où est indiqué le niveau d‘eau)<br />
(13)). Si le récipient est trop plein, il est possible<br />
que de l‘eau chaude gicle!<br />
• N‘allumez pas le cuiseur vapeur s‘il y a moins<br />
d‘une tasse d‘eau dans le récipient. Autrement,<br />
cela risquerait d‘endommager l‘appareil.<br />
• Ne mettez pas de substance agressive ou alcaline<br />
dans l‘appareil!<br />
• Pendant le fonctionnement, l‘appareil<br />
chauffe! Par conséquent, ne le touchez qu‘en<br />
utilisant des gants thermo-isolants pour four!<br />
• Attention: La vapeur sortante représente le<br />
risque de s‘ébouillanter.<br />
• Ne retirez pas le couvercle (1) pendant que<br />
l‘appareil génère de la vapeur. Il est impératif<br />
de l‘éteindre au préalable. Risque<br />
d‘échaudage!<br />
• Utilisez uniquement des pièces originales ou<br />
conseillées par le fabricant.<br />
• Les enfants ne sont pas conscients du danger<br />
existant lors de l‘utilisation d‘appareils électriques.<br />
Pour cette raison, ne laissez jamais<br />
des enfants sans surveillance à proximité de<br />
l‘appareil électrique, et en présence d‘enfant,<br />
faites preuve de vigilance absolue.<br />
• L‘appareil ne convient que pour une utilisation<br />
privée et uniquement de la manière décrite<br />
dans ce mode d‘emploi.<br />
22
F<br />
AVANT LA PREMIERE MISE EN SERVICE<br />
• Retirez tous les emballages. Ne laissez pas<br />
les emballages à portée de main des enfants<br />
(sachets plastiques, polystyrène, etc.): ils risqueraient<br />
de s‘étouffer.<br />
• Assurez-vous que le type de courant et la tension<br />
du secteur correspondent bien aux indications<br />
figurant sur la plaque signalétique de<br />
l‘appareil.<br />
• Contrôlez toutes les pièces de l‘appareil, ainsi<br />
que le câble électrique et la fiche mâle afin de<br />
détecter d‘éventuelles détériorations.<br />
• Nettoyez bien l‘appareil et tous les accessoires<br />
comme décrit au paragraphe „Nettoyage“.<br />
NETTOYAGE<br />
Ne nettoyez l‘appareil que lorsqu‘il est refroidi. L‘appareil doit être éteint et la fiche mâle débranchée.<br />
COUVERCLE (1), BOL DE RIZ (4), <br />
RECIPIENT POUR CUISSON VAPEUR (5 / 6 / 7) ET<br />
RECIPIENT-COLLECTEUR POUR LA VAPEUR<br />
(9)<br />
Le couvercle (1), le bol de riz (4), le récipient pour<br />
cuisson-vapeur (5 / 6 / 7) et le récipient-collecteur<br />
pour la vapeur (9) peuvent passer au lave-vaisselle.<br />
Vous pouvez également les laver à la main, à<br />
l‘eau chaude. Nettoyez toutes les pièces avec<br />
une éponge douce et rincez-les à l‘eau chaude<br />
courante.<br />
SOCLE AVEC RÉCIPIENT D‘EAU (12)<br />
Essuyez le socle (12) au moyen d‘un chiffon propre<br />
et humide, puis séchez-le.<br />
Les éventuels dépôts de calcaire dans le récipient<br />
d‘eau peuvent être régulièrement supprimés<br />
avec de l‘eau vinaigrée ou un détartrant courant.<br />
Ensuite, nettoyez prudemment le récipient d‘eau<br />
avec de l‘eau claire.<br />
Important! Ne mettez pas le socle (12) dans le<br />
lave-vaisselle!<br />
Important! Ne mettez jamais le socle (12) ou la<br />
fiche mâle dans l‘eau.<br />
DÉTARTRAGE<br />
Si des dépôts de calcaire se sont formés sur les<br />
parois du cuiseur-vapeur, il sera simple de les en<br />
retirer, en procédant comme suit:<br />
1. Mettez de l‘eau vinaigrée ou un détartrant<br />
courant dans le récipient d‘eau du socle (12),<br />
jusqu‘à ce que celui-ci soit plein à moitié.<br />
2. Ensuite, placez le récipient-collecteur pour<br />
vapeur (9), le récipient de cuisson (5 / 6 / 7) et<br />
le couvercle (1).<br />
3. Réglez la durée de marche à 25 minutes, et allumez<br />
l‘appareil (comme décrit au paragraphe<br />
„Mise en service“).<br />
4. À la fin des 25 minutes, laissez entièrement<br />
refroidir l‘appareil.<br />
5. Versez le liquide récolté dans le récipient-collecteur<br />
de vapeur (9). Ensuite, videz le liquide<br />
restant qui se trouve dans le socle (12).<br />
6. Rincez toutes les pièces à l‘eau claire.<br />
7. Laissez entièrement sécher toutes les pièces<br />
avant de ranger l‘appareil.<br />
23
F<br />
Mise en service<br />
1. Remplissez le récipient d‘eau claire et froide,<br />
de bouillon ou autre.<br />
Attention: Ne mettez jamais de liquides<br />
chauds dans le récipient d‘eau du socle (13),<br />
car le brusque changement de température<br />
risquerait de l‘endommager.<br />
2. Placez le concentreur de vapeur (10) depuis le<br />
bas dans le collecteur de vapeur (9).<br />
3. Ensuite, placez le récipient de vapeur (9) sur<br />
le socle (12). Ce récipient (9) collecte le liquide<br />
qui goute des aliments cuits.<br />
4. Mettez les aliments cuits dans les cuiseursvapeurs<br />
(5 / 6 / 7). Vous pouvez, au choix, utiliser<br />
un, deux ou trois récipients (voir Ill. 1).<br />
5. Placez le couvercle (1) sur le récipient supérieur<br />
pour aliments (5).<br />
6. Branchez la fiche mâle dans une prise de courant<br />
de sécurité. Vous entendez alors un signal<br />
sonore, et le voyant de contrôle (20) s‘allume.<br />
7. Appuyez sur (17). Il commence à clignoter<br />
„ “ (30 minutes) à l‘écran (22).<br />
Réglez le temps de cuisson en appuyant sur<br />
+ / – (18 / 21). Réglez la durée par paliers de 1<br />
minute (de 1 à 60 minutes). Si vous maintenez<br />
la touche appuyée, le temps défile plus vite.<br />
En rappuyant sur la touche (17), vous confirmez<br />
la durée saisie. Le temps s‘affiche constamment<br />
à l‘écran (22).<br />
8. Pour régler un démarrage en différé, appuyez<br />
sur (19). Il clignote à l‘écran „ “ (0 heure)<br />
(22).<br />
En appuyant sur + / – (18 / 21) vous pouvez<br />
régler le décalage par palier de 1 heure (de 1 à 9<br />
heures). Si vous maintenez la touche appuyée, le<br />
temps défile plus vite.<br />
En rappuyant sur la touche (17), vous confirmez<br />
le décalage saisi. Le décalage s‘affiche<br />
constamment à l‘écran (22).<br />
CUISENT A LA VAPEUR . . .<br />
3 récipients pour cuisson vapeur<br />
2 récipients pour cuisson vapeur<br />
1<br />
2<br />
3<br />
1<br />
2<br />
À respecter: L‘aliment dont la cuisson est la plus<br />
longue doit être placé dans le récipient du bas.<br />
La cuisson y est 3 à 5 minutes plus rapides.<br />
Par exemple, la viande cuit dans le récipient 3,<br />
les tranches de carottes dans le récipient 2 et<br />
les épinards dansa le récipient 1.<br />
Lors de la cuisson avec deux récipients, placez<br />
également les aliments à durée de cuisson plus<br />
longue dans le récipient du bas (récipient 2).<br />
Placez l‘autre aliment dans le récipient du haut<br />
(récipient 1).<br />
Ainsi, les deux seront prêts en même temps.<br />
24<br />
Abb. 1
F<br />
Attention!<br />
N‘utilisez pas d‘aliments périssables (par<br />
ex. œufs, oignons, poisson) si vous utilisez<br />
le programme de démarrage en différé.<br />
9. Pour démarrer la cuisson, appuyez sur la<br />
touche MARCHE (14). La (14) touche<br />
commence à s‘allumer, le voyant de contrôle<br />
de marche (20) clignote et l‘élément chauffant<br />
(11) commence à chauffer l‘eau.<br />
Vous pouvez à tout moment stopper la cuisson<br />
en appuyant sur (16). La touche<br />
ARRET (16) commence à s‘allumer, le voyant<br />
de contrôle de marche (20) s‘allume et<br />
l‘élément chauffant (11) s‘arrête. En appuyant<br />
sur la touche (14), la cuisson se poursuit.<br />
Pour interrompre la cuisson, appuyez pendant<br />
3 secondes sur la touche (16). La<br />
touche ARRET (16) s‘éteint et l‘élément<br />
chauffant (11) s‘arrête.<br />
10. Env. 20 secondes avant la fin du temps de cuisson,<br />
le cuiseur-vapeur commence à faire des<br />
bips. Une fois que la cuisson est terminée, un<br />
long signal sonore retentit. Le cuiseur s‘éteint<br />
automatiquement. La touche (14) s‘éteint<br />
et (16) s‘allume. De plus, il apparaît (22) „<br />
“ à l‘écran, jusqu‘à ce que vous appuyiez sur<br />
la touche (16) pendant 3 secondes ou que<br />
vous débranchiez l‘appareil.<br />
Avant de pouvoir procéder à de nouveaux<br />
réglages, il faut réinitialiser le cuiseur-vapeur<br />
en maintenant la touche ARRET (16) pendant<br />
3 secondes.<br />
11. Pour soulever le couvercle (1) et les récipients<br />
(5 / 6 / 7) utilisez un gant pour four. Risque de<br />
brûlure par vapeur bouillante!<br />
REMPLIR L‘EAU<br />
Pour les cuissons longues, il peut être nécessaire<br />
de rajouter de l‘eau. Pour cela, versez-la par<br />
l‘ouverture prévue à cet effet (8).<br />
1 Récipient<br />
1<br />
CUISSON DU RIZ<br />
Le cuiseur est équipé d‘un bol de riz (4) conçu<br />
spécialement pour la préparation du riz.<br />
1. Versez le riz dans le bol (4) et ajoutez la quantité<br />
équivalente en eau, par ex. une tasse d‘eau<br />
pour une tasse de riz.<br />
2. Placez le bol au centre du récipient (5 / 6 / 7).<br />
3. Réglez le temps de cuisson nécessaire comme<br />
décrit dans le tableau ci-après et appuyez sur<br />
(14).<br />
Si vous souhaitez cuire uniquement un seul<br />
plat (par ex. des pommes de terre) ou différents<br />
plats ayant la même durée de cuisson<br />
(par ex. du porc et de la poitrine de dinde),<br />
alors vous pouvez utiliser un seul récipient.<br />
Pour cela, placez-les dans le récipient 1.<br />
25
F<br />
GUIDE POUR LA CUISSON-<br />
VAPEUR<br />
Veillez à ce que tous les morceaux du même aliment<br />
placés dans un même récipient (5 / 6 / 7)<br />
soient tous de même taille. Sinon, il vous faudra<br />
utiliser plusieurs récipients (5 / 6 / 7) car la durée<br />
de cuisson est différente selon la taille.<br />
Ne remplissez pas les récipients de manière excessive<br />
(5 / 6 / 7)! Disposez les morceaux aussi loin<br />
que possible les uns des autres, afin que la vapeur<br />
puisse bien circuler.<br />
La viande doit toujours cuire dans le récipient<br />
du bas.<br />
Si vous employez un seul récipient (5) la durée de<br />
cuisson est plus longue que si vous en employez<br />
plusieurs (5 / 6 / 7), car l‘effet de la vapeur est plus<br />
intense. C‘est pourquoi il n‘est pas possible, dans<br />
le tableau ci-après, d‘indiquer des horaires précis,<br />
mais uniquement des plages horaires.<br />
TABLEAU DES TEMPS DE CUISSON<br />
Important: les temps de cuisson ci-après ne sont indiqués qu‘à titre indicatif, et peuvent varier selon<br />
la taille et la maturité de l‘aliment, ainsi que selon les goûts personnels.<br />
Aliment<br />
dans le récipient du bas<br />
dans le récipient du<br />
milieu<br />
dans le récipient du<br />
haut<br />
Riz 25 – 30 minutes 30 – 35 minutes 35 – 40 minutes<br />
Poisson 8 – 10 minutes 10 – 15 minutes 15 – 18 minutes<br />
Dinde 25 – 28 minutes 28 – 30 minutes 25 – 35 minutes<br />
Légumes 15 – 30 minutes 18 – 30 minutes 18 – 35 minutes<br />
Œuf 15 – 18 minutes 18 – 20 minutes 20 – 25 minutes<br />
26<br />
DONNEES TECHNIQUES<br />
Source d‘électricité:<br />
Charge de connexion: 950 Watt<br />
Contenance<br />
du récipient:<br />
Contenance<br />
par récipient:<br />
220 – 240 V ~ 50 Hz<br />
250 ml – 1.250 ml<br />
3.5 l<br />
POUR L‘AMOUR DE<br />
L‘ENVIRONNEMENT<br />
Ne pas jeter les emballages et les appareils usagés<br />
aux ordures ménagères, mais les faire recycler.<br />
Veuillez consulter le point de recyclage ou de<br />
collecte de votre commune.<br />
Pour les questions de garantie, veuillez vous<br />
adresser à votre vendeur ou au service clientèle<br />
BIELMEIER de votre pays.
F<br />
RECETTES<br />
PLAT DU SUD DU TIROL<br />
Ingrédients:<br />
• 500 g de pain de knödel<br />
• 500 g d‘oignons<br />
• ½ l de lait<br />
• 250 g de fromage des montagnes<br />
• 2 œufs<br />
• Huile<br />
• Sel, poivre, noix de muscade<br />
Couper les oignons en fines lamelles et les faire<br />
revenir lentement en y ajoutant 3 cuillères à soupe<br />
d‘huile.<br />
Couper le fromage en dés.<br />
Mélanger le lait à env. ¼ l d‘eau, et assaisonner<br />
avec 1 cuillère à soupe de sel, du poivre et de la<br />
noix de muscade, mener à ébullition. Ajouter les<br />
oignons et le lait au pain de knödel et bien les<br />
mélanger. Si le mélange ne se fait pas parfaitement,<br />
ajouter un peu d‘eau chaude. Ajouter du<br />
fromage et des œufs, encore mélanger, et laisser<br />
poser pendant 10 minutes.<br />
Mélanger à nouveau, et former les pâtes au moyen<br />
d‘une cuillère à soupe et en ayant les mains<br />
mouillées.<br />
Faire cuire dans le <strong>BHG</strong> <strong>193</strong> pendant 15 minutes<br />
au niveau le plus bas.<br />
Servir avec du parmesan râpé et du beurre brun.<br />
KNÖDEL TIROLIEN<br />
Ingrédients:<br />
• 500 g de pain de knödel<br />
• 250 g de lard<br />
• 200 g d‘oignons<br />
• ½ l de lait<br />
• 2 œufs<br />
• Huile<br />
• Sel, poivre, noix de muscade<br />
• Persil tranché<br />
Couper finement les oignons, et découper le lard<br />
en dés.<br />
Mélanger le lait à env. ¼ l d‘eau, et assaisonner<br />
avec 1 cuillère à soupe de sel, du poivre et de la<br />
noix de muscade, mener à ébullition. Ajouter au<br />
pain de knödel les oignons, le persil et le lait, et<br />
bien mélanger. Si tous les dés ne sont pas humidifiés,<br />
ajouter un peu d‘eau chaude. Ajouter du<br />
lard et des œufs, encore mélanger, et laisser poser<br />
pendant 10 minutes.<br />
Mélanger à nouveau, et former les knödel avec<br />
les mains mouillées.<br />
Faire cuire dans le <strong>BHG</strong> <strong>193</strong> pendant 15 minutes<br />
au niveau le plus bas.<br />
Servir avec le bouillon de bœuf ou en accompagnement<br />
de la choucroute, avec une sauce<br />
champignon etc.<br />
27
F<br />
TORTELLONI AUX EPINARDS ET A LA RO-<br />
QUETTE<br />
Ingrédients:<br />
• 200 g de farine<br />
• 250 g d‘épinards surgelés <br />
(ou 600 g frais, blanchis dans l‘eau salée)<br />
• 250 g de roquette<br />
• 1 œuf<br />
• Sel, poivre, noix de muscade<br />
• Ail, selon les goûts<br />
Avec la farine, 1 cuillère à café de sel et l‘œuf,<br />
pétrir pour obtenir une pâte ferme. Ajouter de<br />
l‘eau chaude jusqu‘à ce que toute la farine ait été<br />
absorbée. Bien pétrir et laisser poser pendant 30<br />
minutes.<br />
Couper finement les épinards, assaisonner avec<br />
du sel, du poivre et un peu de noix de muscade,<br />
et presser, selon les goûts, 1 à 2 gousses d‘ail.<br />
Mélanger à la roquette, bien assaisonner le tout.<br />
Pétrir à nouveau la pâte puis l‘étaler en une fine<br />
couche, de préférence au moyen d‘une machine<br />
à pâtes.<br />
Couper des carrés d‘env. 8 cm, les remplir en leur<br />
milieu d‘env. 1/2 cuillère à café, fermer les carrés,<br />
et les découper au moyen, par ex., d‘un verre.<br />
Faire cuire dans le <strong>BHG</strong> <strong>193</strong> pendant 10 minutes<br />
au niveau le plus bas.<br />
Avec de la crème, ou tout simplement du beurre<br />
fondu et du parmesan.<br />
FILET DE SAUMON AUX LEGUMES<br />
Ingrédients:<br />
• 4 filets de saumon surgelé <br />
(par personne env. 200g)<br />
• 500 g de brocolis ou de courgettes<br />
• 500 g de pommes de terre<br />
• 1 emballage de sauce hollandaise pré-cuisinée<br />
(env. ¼ l)<br />
• Sel, poivre, moutarde forte<br />
Éplucher les pommes de terre, les couper en<br />
deux, et les placer en bas.<br />
Saler et poivrer le saumon, le badigeonner<br />
légèrement de moutarde, et le placer dans le<br />
récipient du milieu.<br />
Couper les brocolis ou les courgettes en tranches,<br />
les saler légèrement et les placer en haut<br />
du cuiseur-vapeur. Pour faire chauffer, placer une<br />
tasse de la sauce à côté des légumes.<br />
Faire cuire dans le <strong>BHG</strong> <strong>193</strong> pendant 25 minutes.<br />
Conseil: Une autre variante délicieuse: remplacez<br />
les épinards par 110 g de champignons des bois<br />
séchés.<br />
Faites-les gonfler dans l‘eau chaude et découpezles<br />
finement avant de les mélanger à la roquette.<br />
N‘assaisonnez la pâte de roquette qu‘avec du sel<br />
et du poivre. La muscade et l‘ail ne conviennent<br />
pas pour cette variante.<br />
28
F<br />
GARANTIE<br />
Pour la garantie prenant effet le jour de l'achat, sur les territoires de l’UE et de la Suisse, s'appliquent<br />
les conditions suivantes.<br />
1. Durée de la garantie: 2 ans<br />
3. La garantie n’est pas applicable:<br />
2. Prestations de garantie:<br />
a) A notre discrétion, réparation ou échange de<br />
pièces qui présentent un défaut de matériau<br />
ou de fabrication après vérification par nos<br />
soins.<br />
b) La garantie ne sera effectuée que sur présentation<br />
de cette carte de garantie et de la<br />
facture de l’achat. La carte n’est valable que<br />
si elle a été remplie intégralement au jour de<br />
l’achat.<br />
c) La prestation de garantie n’est applicable<br />
qu’au premier utilisateur.<br />
d) La période initiale de garantie n’est ni prolongée<br />
ni renouvelée du fait de la réparation ou<br />
de l’échange de pièce pendant la durée de la<br />
garantie.<br />
e) Les frais de transport sont à la charge de<br />
l’acheteur (ne s’applique pas pendant les 6<br />
premiers mois de la garantie).<br />
f) Dans la mesure où le dommage ou le défaut<br />
ne peut pas être supprimé ou si l’amélioration<br />
a été refusée par nos soins ou si elle est<br />
retardée de manière non raisonnable, il sera<br />
procédé dans les 6 mois à partir de la date de<br />
l’achat/de livraison à un remplacement gratuit<br />
où la valeur minimale sera remboursée ou<br />
l’appareil sera repris contre remboursement<br />
du prix d’achat, mais toutefois à hauteur du<br />
prix courant du marché au maximum.<br />
• aux rayures et taches sur l’appareil.<br />
• aux lampes d’éclairage et de contrôle.<br />
• aux brosses motorisées.<br />
• aux parties fragiles en bakélite, verre,<br />
plastique, etc. à moins qu’il ne s’agisse d’un<br />
défaut dans le matériau et qu’il ait été reconnu<br />
en tant que tel par nos soins.<br />
• aux dommages qui ont été causés par une<br />
installation ou une fixation inappropriée.<br />
• lorsque l’appareil est raccordé à un réseau<br />
électrique dont la tension est supérieure à<br />
celle indiquée sur l’appareil.<br />
• en cas de mauvaise utilisation ou d’usage inapproprié.<br />
• en cas d’absence de soins.<br />
• en cas d’entretien insuffisant ou inapproprié.<br />
• en cas de chute de l’appareil ou de pièces<br />
individuelles.<br />
• en cas de transport inapproprié ou d’emballage<br />
insuffisant en cas de transport.<br />
4. La garantie est caduque:<br />
• lorsque l’appareil a été utilisé à d’autres fins<br />
qu’un usage domestique.<br />
• lorsque des personnes qui n’ont pas été<br />
agréées par notre entreprise exécutent<br />
des réparations ou des modifications sur<br />
l’appareil.<br />
Nous accordons une garantie de 2 ans sur cet appareil pour les défauts découlant de défauts dans<br />
la fabrication ou les matériaux. La durée de la garantie commence au jour de la remise et elle n’est<br />
applicable que sur présentation de la carte de garantie et de la facture de l’achat. Toute autre<br />
prétention complémentaire est nulle.<br />
Modèle:<br />
Important! Veuillez noter ici le code FD<br />
se trouvant sur le panneau de type de<br />
l’appareil:<br />
Timbre et signature du vendeur<br />
Date de la vente<br />
29
I<br />
IMPORTANTE!<br />
Vi raccomandiamo di leggere attentamente<br />
le seguenti istruzioni d’uso, che contengono<br />
importanti indicazioni per la sicurezza, l’uso e<br />
la manutenzione dell’apparecchio.<br />
Si prega di conservarle con cura e di trasmetterle<br />
a eventuali nuovi utenti.<br />
AVVERTENZE PER LA<br />
SICUREZZA<br />
• Prima di collegare l’apparecchio, verificare<br />
che la tensione di rete utilizzata corrisponda<br />
alle indicazioni riportate sulla targhetta<br />
dell’apparecchio.<br />
• Le riparazioni alle apparecchiature elettriche devono<br />
essere fatte esclusivamente da personale<br />
specializzato. Riparazioni inadeguate possono<br />
provocare danni considerevoli all’utente. Il produttore<br />
non è responsabile per nessun danno<br />
causato da un’inopportuna o erronea osservanza<br />
delle istruzioni.<br />
• Staccare la spina prima di inserire o togliere gli<br />
accessori e prima di ogni operazione di pulizia.<br />
Tirare sempre la spina – mai il cavo.<br />
• Staccare sempre la spina in caso di assenza<br />
prolungata e durante un temporale, per evitare<br />
danni provocati da fulmini.<br />
• Non immergere mai in acqua o in altri liquidi<br />
la spina e tutte le parti elettriche<br />
dell’apparecchio.<br />
• Non toccare la spina con mani umide o bagnate.<br />
– Non utilizzare l’apparecchio se<br />
– il cavo o la spina sono danneggiati,<br />
– accessori sono danneggiati,<br />
– presenta qualsiasi altro tipo di difetto.<br />
Il cavo o la spina danneggiati devono essere<br />
sostituiti solo da personale debitamente qualificato.<br />
• Collocare l’apparecchio su una superficie orizzontale,<br />
piana, lontano da altre fonti di calore<br />
(per esempio stufe).<br />
• Se si usa una prolunga, accertarsi che questa<br />
sia adatta alle prestazioni richieste (vedi pagina<br />
9).<br />
• Disporre il cavo, ed eventualmente la prolunga<br />
utilizzata, in modo tale da impedire che qualcuno<br />
v’inciampi o lo tiri involontariamente.<br />
Tenere il cavo lontano da superfici calde e<br />
oggetti taglienti.<br />
• Fare attenzione che il serbatoio dell’acqua sia<br />
riempito fino al livello „Max“ (a questo scopo<br />
controllare l’indicatore del livello acqua (13)).<br />
In caso di acqua in eccesso possono verificarsi<br />
schizzi di acqua calda!<br />
• Non accendere la vaporiera, se nel serbatoio<br />
c’è meno di una tazza d’acqua. L’apparecchio<br />
potrebbe subire dei guasti.<br />
• Non introdurre nell’apparecchio sostante corrosive<br />
o alcaline!<br />
• L’apparecchio diventa caldo durante il funzionamento!<br />
Usare presine isolanti per toccarlo!<br />
• Attenzione: Pericolo di ustioni a causa della<br />
fuoriuscita di vapore.<br />
• Non sollevare il coperchio (1) mentre<br />
l’apparecchio produce vapore. Si prega assolutamente<br />
di spegnerlo prima di aprirlo.<br />
Pericolo di ustioni!<br />
• Adoperare esclusivamente accessori originali<br />
o consigliati dal produttore.<br />
• I bambini non riconoscono i pericoli causati da<br />
apparecchiature elettriche. Per questo non lasciare<br />
mai i bambini da soli con apparecchi elettrici<br />
e fare molta attenzione in loro presenza.<br />
30<br />
• Quest’apparecchio è destinato al solo uso<br />
domestico e agli scopi descritti nel manuale<br />
d’istruzioni.
I<br />
PRIMA DEL PRIMO UTILIZZO<br />
• Rimuovere tutti i materiali d’imballaggio. Si<br />
raccomanda di tenere parti d’imballaggio<br />
come buste di plastica, polistirolo, ecc. fuori<br />
dalla portata dei bambini – pericolo di soffocamento!<br />
• Verificare che la corrente e la tensione di rete<br />
corrispondano alle indicazioni riportate sulla<br />
targhetta dell’apparecchio.<br />
• Verificare che tutte le parti dell’apparecchio<br />
così come il cavo e la presa non abbiano guasti.<br />
• Pulire a fondo l’apparecchio e gli accessori<br />
come descritto nel paragrafo „Pulizia”.<br />
PULIZIA<br />
Pulire l’apparecchio solo quando è freddo. L’apparecchio deve essere spento e la spina staccata.<br />
COPERCHIO (1), VASCHETTA RISO (4), <br />
RECIPIENTI PER LA COTTURA A VAPORE (5 /<br />
6 / 7) E VASSOIO ANTIGOCCIA (9)<br />
Il coperchio (1), la vaschetta per il riso (4), i recipienti<br />
per la cottura a vapore (5 / 6 / 7) e il vassoio<br />
antigoccia (9) sono resistenti alla lavastoviglie.<br />
E’ possibile lavare questi accessori anche in acqua<br />
calda. Pulire tutte le parti con una spugna morbida<br />
e sciacquarle sotto acqua corrente calda.<br />
BASE CON SERBATOIO PER L’ACQUA (12)<br />
Pulire la base (12) con un panno umido pulito e<br />
asciugarla con cura.<br />
Eventuali residui di calcare nel serbatoio<br />
dell’acqua possono essere rimossi di tanto in tanto<br />
con aceto diluito o con un comune anticalcare<br />
in commercio. Sciacquare infine tutte le parti<br />
dell’apparecchio in acqua limpida.<br />
Importante! Non pulire mai la base (12) nella<br />
lavastoviglie!<br />
Importante! Non immergere mai la base (12) e<br />
la spina in acqua.<br />
RIMOZIONE DEL CALCARE<br />
Se sulle superfici della vaporiera si deposita calcare<br />
è possibile rimuoverlo con facilità:<br />
1. Riempire il serbatoio dell’acqua (12) con aceto<br />
diluito o con un comune anticalcare in commercio<br />
fino a riempirlo alla metà.<br />
2. Inserire sulla base il vassoio antigoccia (9), i<br />
recipienti di cottura (5 / 6 / 7) e il coperchio (1).<br />
3. Regolare il tempo di funzionamento a 25<br />
minuti e accendere l’apparecchio (come nel<br />
paragrafo „Messa in funzione”).<br />
4. Dopo 25 minuti lasciare raffreddare completamente<br />
l’apparecchio.<br />
5. Gettare via il liquido raccolto dal vassoio antigoccia<br />
(9). Svuotare quindi del tutto il serbatoio<br />
(12).<br />
6. Sciacquare in acqua limpida tutte le parti.<br />
7. Assicurarsi che tutte le parti siano pulite e asciutte<br />
prima di conservare l’apparecchio.<br />
31
I<br />
MESSA IN FUNZIONE<br />
1. Riempire il serbatoio con acqua fredda, limpida,<br />
brodo o altro.<br />
Attenzione: Non immettere mai liquidi caldi<br />
nel serbatoio (12). Un improvviso cambio di<br />
temperatura può danneggiarlo.<br />
2. Infilare il raccordo (10) dal basso verso l’alto<br />
nel vassoio antigoccia (9).<br />
3. Collocare il vassoio antigoccia (9) sulla base<br />
(12). Questo recipiente (9) raccoglie il liquido<br />
che sgocciola dagli alimenti cotti a vapore.<br />
4. Inserire gli alimenti da cuocere nei recipienti per<br />
la cottura a vapore (5 / 6 / 7). E’ possibile usare<br />
a scelta uno, due o tre recipienti (Fig. 1).<br />
5. Mettere il coperchio (1) sul recipiente più in<br />
alto (5).<br />
6. Collegare la spina a una presa di corrente idonea.<br />
L’apparecchio emette un segnale acustico<br />
e la spia di funzionamento (20) si accende.<br />
7. Premere il tasto (17). Sul display (22) comincia<br />
a lampeggiare „ “ (30 minuti).<br />
Regolare il tempo di cottura a vapore necessario<br />
premendo i tasti + / – (18 / 21). E’ possibile<br />
regolare i minuti da 1 a 60. Tenere premuti i<br />
tasti + / – per fare scorrere i minuti più velocemente.<br />
Premere una seconda volta il tasto per<br />
confermare il tempo di cottura. Il tempo è indicato<br />
costantemente sul display (22).<br />
8. Premere il tasto (19), per regolare la partenza<br />
ritardata. Sul display (22) comincia a<br />
lampeggiare „ “ (0 ore).<br />
Premendo i tasti + / – (18 / 21) è possibile regolare<br />
la partenza ritardata fino a 9 ore. Tenere premuti i<br />
tasti + / – per fare scorrere le ore più velocemente.<br />
Premere una seconda volta il tasto (17) per<br />
confermare la partenza ritardata. La partenza ritardata<br />
è costantemente indicata sul display (22).<br />
Cuocere con . . .<br />
3 recipienti per la cottura a vapore<br />
2 recipienti per la cottura a vapore<br />
1<br />
2<br />
3<br />
1<br />
2<br />
In linea di massima va osservato: l’alimento<br />
con un tempo di cottura a vapore più lungo<br />
va inserito nel recipiente più in basso. Qui la<br />
cottura a vapore è più veloce di ca. 3 – 5 minuti<br />
rispetto a quella del recipiente più in alto.<br />
Per esempio la carne va cotta nel recipiente<br />
3, fettine di carote nel recipiente 2 e gli spinaci<br />
nel recipiente 1.<br />
Se si cuoce con due recipienti, inserire anche in<br />
questo caso l’alimento con un tempo di cottura<br />
a vapore più lungo nel recipiente più in basso<br />
(recipiente 2). L’altro alimento va inserito nel<br />
recipiente più in alto (recipiente 1) .<br />
Questo procedimento consente di cuocere gli<br />
alimenti contemporaneamente.<br />
32<br />
Abb. 1
I<br />
Attenzione!<br />
Non utilizzare alimenti facilmente deperibili<br />
(per es. uova, cipolle, pesce) in caso di<br />
partenza ritardata.<br />
9. Premere il tasto di accensione (14), per avviare<br />
il processo di cottura a vapore. Il tasto<br />
(14) si accende, la spia luminosa (20) lampeggia<br />
e la resistenza elettrica (11) comincia<br />
a riscaldare l’acqua.<br />
SE’ possibile fermare in ogni momento il processo<br />
di cottura, premendo (16) Il tasto di<br />
spegnimento (16) si accende, la spia luminosa<br />
di funzionamento (20) si accende e la<br />
resistenza elettrica si ferma (11). Premendo<br />
il tasto (14) il processo di cottura a vapore<br />
continua.<br />
Per interrompere il processo di cottura a vapore<br />
tenere premuto il tasto (16) per 3 secondi.<br />
Il tasto di spegnimento (16) si spegne e<br />
la resistenza elettrica (11) si spegne.<br />
1 recipiente per la cottura a vapore<br />
1<br />
10. Ca. 20 secondi prima della fine di cottura la<br />
vaporiera comincia a fischiare. A cottura finita<br />
l’apparecchio emette un segnale acustico<br />
più lungo. La vaporiera si spegne automaticamente.<br />
Il tasto (14) si spegne e si illumina<br />
il tasto (16). Il dispay (22) indica „ “ fino a<br />
quando non si preme per 3 secondi il tasto di<br />
spegnimento (16) o si stacca la spina.<br />
Per regolare un nuovo tempo di cottura bisogna<br />
riportare la vaporiera al punto di partenza,<br />
tenendo premuto il tasto (16) per<br />
3 secondi.<br />
11. Munirsi di presine per sollevare il coperchio<br />
(1) e i singoli recipienti (5 / 6 / 7). Pericolo di<br />
ustioni!<br />
AGGIUNGERE ACQUA AL SERBATOIO<br />
Per tempi di cottura a vapore più lunghi è necessario<br />
aggiungere acqua al serbatoio. Versarla nel<br />
serbatoio tramite l’apertura di entrata acqua (8).<br />
COTTURA RISO<br />
La vaporiera è dotata di una vaschetta per il riso<br />
(4) pensata appositamente per la preparazione<br />
del riso.<br />
1. Mettere il riso nella vaschetta (4) e aggiungervi<br />
la stessa quantità di acqua (per es. per una<br />
tazza di riso una tazza d’acqua).<br />
2. Collocare la vaschetta all’interno del recipiente<br />
per la cottura a vapore (5 / 6 / 7).<br />
3. Regolare il tempo di cottura a vapore necessario,<br />
come indicato nella tabella sottostante<br />
e premere il pulsante (14).<br />
Per cuocere a vapore un solo alimento (per<br />
esempio patate) o diversi alimenti con un tempo<br />
di cottura a vapore uguale (per esempio<br />
lombo di maiale e petto di tacchino) è possibile<br />
adoperare un solo recipiente.<br />
Inserire l’alimento nel recipiente per la cottura<br />
a vapore 1.<br />
33
I<br />
MANUALE DI COTTURA A<br />
VAPORE<br />
Fare attenzione che gli alimenti riposti nei recipienti<br />
per la cottura a vapore (5 / 6 / 7) abbiano<br />
all’incirca le stesse dimensioni. Si consiglia altrimenti<br />
di utilizzare più recipienti (5 / 6 / 7), poiché<br />
i tempi di cottura a vapore variano in base alla<br />
grandezza degli alimenti.<br />
Evitare che i recipienti (5 / 6 / 7) siano stracolmi!<br />
Lasciate degli spazi tra le varie porzioni in modo<br />
che il vapore possa circolare bene.<br />
La carne dovrebbe essere sempre cotta nel recipiente<br />
inferiore.<br />
Nel caso in cui sia adoperato un solo recipiente<br />
(5), il tempo di cottura a vapore sarà minore rispetto<br />
all’uso contemporaneo di più recipienti (5<br />
/ 6 / 7), poiché l’azione del vapore sarà più forte.<br />
Per tutti questi motivi i tempi di cottura a vapore<br />
indicati nella tabella riportata di seguito sono<br />
solo indicativi e possono variare<br />
TABELLA DEI TEMPI DI COTTURA A VAPORE<br />
Si prega di osservare che i tempi indicati sono indicativi e possono variare secondo le dimensioni e il<br />
grado di freschezza delle porzioni o del gusto personale.<br />
Alimento da<br />
cuocere<br />
Nel recipiente inferiore Nel recipiente medio Nel recipiente superiore<br />
Riso 25 – 30 minuti 30 – 35 minuti 35 – 40 minuti<br />
Pesce 8 – 10 minuti 10 – 15 minuti 15 – 18 minuti<br />
Tacchino 25 – 28 minuti 28 – 30 minuti 25 – 35 minuti<br />
Verdura 15 – 30 minuti 18 – 30 minuti 18 – 35 minuti<br />
Uova 15 – 18 minuti 18 – 20 minuti 20 – 25 minuti<br />
34<br />
DATI TECNICI<br />
Tensione / frequenza: 220 – 240 V ~ 50 Hz<br />
Potenza:<br />
Capacità serbatoio:<br />
Capacità recipienti per<br />
la cottura a vapore:<br />
950 Watt<br />
250 ml – 1.250 ml<br />
3.5 l<br />
INDICAZIONI SULLA TUTELA<br />
DELL’AMBIENTE<br />
Non disperdere nell’ambiente il materiale<br />
d’imballaggio e l’apparecchio da rottamare, ma<br />
destinarli ad operazioni di riciclo.<br />
Si prega di richiedere presso la propria amministrazione<br />
comunale informazioni sui punti di<br />
raccolta differenziata e smaltimento di rifiuti.<br />
Per usufruire sei servizi in garanzia si prega di rivolgersi<br />
al proprio rivenditore o al centro di servizio<br />
alla clientela BIELMEIER del proprio paese.
I<br />
RICETTE<br />
Südtiroler Kasnocken<br />
(Gnocchi di formaggio altoatesini)<br />
Ingredienti:<br />
• 500 g di pane per canederli<br />
• 500 g di cipolla<br />
• ½ l di latte<br />
• 250 g di formaggio Bergkäse<br />
• 2 uova<br />
• olio<br />
• sale, pepe, noce moscata<br />
Tagliare la cipolla a listarelle sottili e dorarla lentamente<br />
con tre cucchiai d’olio.<br />
Tagliare a piccoli dadini il formaggio Bergkäse.<br />
Mescolare il latte con ca. ¼ l di acqua, condire<br />
con un cucchiaio di sale, pepe e della noce moscata<br />
e cuocere. Aggiungere la cipolla dorata e il<br />
latte al pane per canederli e mescolare bene, se<br />
non tutti i dadini di pane sono umidi aggiungere<br />
dell’acqua. Unire formaggio e uova, mescolare<br />
ancora e lasciare riposare la massa per 10 minuti.<br />
Mescolare ancora brevemente e con un grande<br />
cucchiaio da cucina e mani bagnate formare degli<br />
gnocchetti allungati.<br />
Cuocere nel <strong>BHG</strong> <strong>193</strong> nel recipiente inferiore per<br />
15 minuti.<br />
Servire con parmigiano grattugiato e burro dorato.<br />
Tirolerknödel<br />
(Canederli tirolesi)<br />
Ingredienti:<br />
• 500 g di pane per canederli<br />
• 250 g di speck affumicato<br />
• 200 g di cipolla<br />
• ½ l di latte<br />
• 2 uova<br />
• olio<br />
• sale, pepe, noce moscata<br />
• prezzemolo tritato<br />
Tagliare finemente la cipolla e lo speck a dadini.<br />
Mescolare il latte con ca. ¼ l di acqua, condire con<br />
un cucchiaio di sale, pepe e un po’ di noce moscata<br />
– quindi far cuocere. Aggiungere la cipolla,<br />
il prezzemolo e il latte al pane per canederli. Se<br />
non tutti i dadini di pane sono umidi aggiungere<br />
dell’acqua. Aggiungere speck e uova, mescolare<br />
ancora e lasciare riposare la massa per 10 minuti.<br />
Mescolare ancora e con le mani bagnate formare<br />
dei canederli.<br />
Cuocere nel <strong>BHG</strong> <strong>193</strong> nel recipiente inferiore per<br />
15 minuti.<br />
Servire in brodo di manzo, con crauti, salsa di<br />
funghi, ecc.<br />
35
I<br />
TORTELLONI CON SPINACI E RICOTTA<br />
Ingredienti:<br />
• 200 g di farina<br />
• 250 g di foglie di spinaci surgelati <br />
(o 600 g di spinaci freschi, sbollentati in acqua<br />
salata)<br />
• 250 g di ricotta<br />
• 1 uovo<br />
• sale, pepe, noce moscata<br />
• a scelta aglio<br />
Formare un impasto compatto con la farina, un<br />
cucchiaino di sale e l’uovo. Aggiungere acqua<br />
calda fino a quando si assorbe tutta la farina. Impastare<br />
bene e lasciare riposare per 30 minuti.<br />
Tagliare finemente gli spinaci scongelati / sbollentati,<br />
condire con sale, pepe e noce moscata e<br />
a scelta 1 – 2 spicchi d’aglio pressato. Mescolare<br />
alla ricotta. La massa deve essere ben condita.<br />
Impastare ancora una volta la massa, disporla su<br />
un ripiano e stenderla fino a farla diventare molto<br />
sottile, al meglio con una macchina per fare la<br />
pasta.<br />
Tagliare dei quadrati di ca. 8 cm, riporvi al centro<br />
½ cucchiaino di ripieno, coprire il quadrato e per<br />
es. con un bicchiere ritagliare un semicerchio.<br />
Cuocere nel <strong>BHG</strong> <strong>193</strong> nel recipiente inferiore per<br />
10 minuti.<br />
Servire con salsa alla panna o semplicemente con<br />
burro fuso.<br />
FILETTO DI SALMONE CON VERDURA<br />
Ingredienti:<br />
• 4 filetti di salmone surgelato <br />
(ca. 200 g a persona)<br />
• 500 g di broccoletti o zucchine<br />
• 500 g di patate<br />
• 1 confezione di salsa olandese pronta (ca. ¼ l)<br />
• sale, pepe, senape piccante<br />
Pelare le patate, tagliarle a metà e metterle nel<br />
recipiente più basso.<br />
Condire il salmone con sale e pepe, pennellarlo<br />
con uno strato sottile di senape, riporlo nel recipiente<br />
medio, tagliare a fettine broccoletti e<br />
zucchine, salarli leggermente e metterli nel recipiente<br />
più alto. Riporre una tazza di salsa già<br />
pronta accanto alle verdure per farla riscaldare.<br />
Cucinare nel <strong>BHG</strong> <strong>193</strong> per 25 minuti.<br />
Suggerimento: Come gustosa variante si possono<br />
sostituire gli spinaci con 110 g di funghi di<br />
montagna essiccati.<br />
Fare gonfiare i funghi in acqua calda e tritarli finemente<br />
prima di aggiungerli alla ricotta.<br />
Condire la massa di ricotta solo con sale e pepe.<br />
La noce moscata e l’aglio non sono adatti a questa<br />
variante.<br />
36
I<br />
GARANZIA<br />
Le seguenti disposizioni di garanzia decorrono dalla data di acquisto e sono valide all’interno<br />
dell’UE e della Svizzera.<br />
1. Periodo di garanzia: 2 anni<br />
2. Prestazioni di garanzia:<br />
a) Riparazione o sostituzione, a nostro esclusivo<br />
giudizio e dopo accurata verifica, di pezzi<br />
che presentano difetti di materiale o di<br />
fabbricazione.<br />
b) La garanzia è valida solo su presentazione di<br />
questo certificato di garanzia, che a sua volta<br />
è valido solo se compilato in ogni sua parte<br />
nel giorno dell’acquisto.<br />
c) La garanzia è valida solo per il primo utente.<br />
d) Il periodo di garanzia non sarà rinnovato o<br />
prolungato a seguito di successiva riparazione<br />
o sostituzione di pezzi.<br />
e) I costi di trasporto sono a carico dell’acquirente<br />
(non vale per i primi 6 mesi di garanzia).<br />
f) In caso di guasto o difetto irreparabile, qualora<br />
la riparazione venisse da noi respinta o gli<br />
interventi necessari non fossero eseguiti<br />
entro un termine adeguato, si provvederà - a<br />
scelta dell’utente entro 6 mesi dalla data di<br />
acquisto/fornitura - alla sostituzione gratuita<br />
dell’apparecchio o al rimborso del valore minimo<br />
o alla riconsegna dell’apparecchio dietro<br />
rimborso del prezzo d’acquisto, tuttavia non<br />
del prezzo corrente sul mercato.<br />
3. La garanzia non è valida:<br />
• per graffi o macchie sull’apparecchio.<br />
• per graffi o macchie sull’apparecchio.<br />
• per le spazzole del motore.<br />
• per parti leggermente fragili in bachelite,<br />
vetro, plastica e simili, eccetto che si tratti<br />
di difetti di costruzione riconosciuti da noi<br />
come tali.<br />
• per danni causati da errata installazione o<br />
fissaggio.<br />
• se l’apparecchio è collegato ad una rete elettrica<br />
di tensione maggiore rispetto a quella<br />
indicata sull’apparecchio.<br />
• in caso di uso errato o inadeguato.<br />
• in caso di scarsa cura.<br />
• in caso di manutenzione errata o insufficiente.<br />
• in caso di manutenzione errata o insufficiente.<br />
• in caso di trasporto inadeguato o di imballaggio<br />
inadeguato per il trasporto.<br />
4. La garanzia decade:<br />
• se l’apparecchio è utilizzato per scopi diversi<br />
da quelli domestici.<br />
• se le riparazioni e le modifiche sono eseguite<br />
da personale non autorizzato dalla nostra<br />
azienda.<br />
Garantiamo questo apparecchio per un periodo di 2 anni per guasti dovuti a difetti di materiale<br />
o di fabbricazione. La garanzia decorre dal giorno della fornitura del prodotto ed è valida solo su<br />
presentazione del certificato di garanzia e della ricevuta fiscale di pagamento. Ulteriori pretese di<br />
garanzia sono escluse.<br />
Modello:<br />
Importante! Si prega di annotare l’FD- Code<br />
apposto sulla targhetta dell’apparecchio:<br />
Timbro e firma del Rivenditore<br />
Data dell’acquisto<br />
37
CZ<br />
DŮLEŽITÉ!<br />
Tento návod k obsluze si prosím pečlivě přečtěte,<br />
obsahuje mnoho důležitých upozornění,<br />
která se týkají bezpečnosti, použití a údržby<br />
přístroje.<br />
Pečlivě jej uschovejte, případně jej předejte<br />
dalšímu vlastníkovi.<br />
BEZPEČNOSTNÍ<br />
UPOZORNĚNÍ<br />
• Před zapojením přístroje zkontrolujte, zda druh<br />
proudu a síťové napětí souhlasí s údaji na typovém<br />
štítku přístroje.<br />
• Opravy elektropřístrojů smí provádět pouze<br />
kvalifikovaný odborník. Neodbornými opravami<br />
mohou vzniknout spotřebiteli značné škody.<br />
Výrobce neručí za případné škody, které jsou<br />
způsobeny chybnou obsluhou, nebo chybným<br />
používáním.<br />
• Zástrčku vytáhněte před nasazováním i odebíráním<br />
jednotlivých částí a také před jejich čištěním.<br />
• Při delší nepřítomnosti a během bouřky přístroj<br />
vždy vypínejte, aby nedošlo ke škodám způsobeným<br />
úderem blesku.<br />
• Zástrčku i všechny části přístroje neponořujte<br />
do vody ani do jiných tekutin.<br />
• Zástrčky se v žádném případě nedotýkejte mokrýma<br />
ani vlhkýma rukama.<br />
• Přístroj nepoužívejte,<br />
– když je síťový kabel nebo zástrčka poškozená,<br />
– když jsou některé části poškozené,<br />
– když je přístroj poškozen jiným způsobem.<br />
Poškozený síťový kabel, popř. poškozenou zástrčku<br />
by měl vyměnit pouze kvalifikovaný odborník.<br />
• Pokud byste chtěli používat prodlužovací kabel,<br />
nejdříve se přesvědčte, jestli je vhodný pro odpovídající<br />
výkon (viz. s 25).<br />
• Síťový kabel, popř. prodlužovací kabel položte<br />
tak, aby na něj nikdo nemohl šlápnout, nebo za<br />
něj neúmyslně zatáhnout. Chraňte kabel před<br />
poškozením, nikdy ho nepokládejte na horkou<br />
plochu nebo na ostré předměty.<br />
• Dávejte pozor na to, aby zásobník na vodu byl<br />
naplněn nejvýše ke značce max. (viz. ukazatel<br />
stavu vody (13)). Při překročení této hranice<br />
může vystříknout horká voda!<br />
• Parní hrnec nezapínejte, pokud je v zásobníku<br />
na vodu méně než šálek vody. Jinak by se mohl<br />
přístroj poškodit.<br />
• Nedávejte do přístroje žádné žíraviny nebo alkalické<br />
látky!<br />
• Během provozu je přístroj horký! Dotýkejte<br />
se ho pouze pomocí rukavice izolující teplo.<br />
• Pozor: Unikající pára může způsobit popáleniny!<br />
• Pokud přístroj produkuje páru, nesnímejte z<br />
něj poklici (1). Nejdříve musíte přístroj vypnout.<br />
Jinak hrozí nebezpečí popálení!<br />
• Používejte výhradně originální, nebo výrobcem<br />
doporučené náhradní díly.<br />
• Děti nerozpoznají nebezpečí, které jim hrozí při<br />
manipulaci s přístrojem, proto je nikdy nenechávejte<br />
v blízkosti přístroje bez dozoru.<br />
• Přístroj je určen pouze pro potřebu v domácnosti<br />
a pro účely popsané v tomto návodu k<br />
použití.<br />
• Postavte přístroj na vodorovnou podložku,<br />
nesmí stát v blízkosti tepelných zdrojů (např.<br />
kamen).<br />
38
CZ<br />
PŘED PRVNÍM UVEDENÍM DO PROVOZU<br />
• Odstraňte veškerý obalový materiál. Nenechávejte<br />
žádné jeho části ( plastové sáčky, styropor,<br />
atd.) v dosahu dětí – nebezpečí udušení!<br />
• Zkontrolujte, zda druh proudu a síťové napětí<br />
souhlasí s údaji na typovém štítku přístroje.<br />
• Zkontrolujte všechny součásti přístroje včetně<br />
síťového kabelu a zástrčky kvůli případným závadám.<br />
• Vyčistěte důkladně přístroj i všechny jeho části<br />
podle pokynů v odstavci „Údržba“.<br />
ÚDRŽBA<br />
Přístroj čistěte pouze v chladném stavu, musí být vypnutý a zástrčka vytažená ze zásuvky.<br />
POKLICE (1), VANIČKA NA RÝŽI (4), <br />
ZÁSOBNÍK NA VAŘENÍ V PÁŘE (5 / 6 / 7) <br />
A SBĚRNÁ NÁDOBA NA KONDENZÁT (9)<br />
Poklice (1), vanička na rýži (4), zásobník na vaření<br />
v páře (5 / 6 / 7) a sběrná nádoba na kondenzát<br />
(9) jsou vhodné do myčky nádobí.<br />
Všechny části můžete umývat také v teplé vodě.<br />
Umyjte je měkkou houbičkou a pak opláchněte<br />
pod tekoucí horkou vodou.<br />
PODSTAVEC SE ZÁSOBNÍKEM NA VODU (12)<br />
Podstavec (12) otírejte čistým vlhkým hadříkem<br />
a pak pečlivě osušte. Případné vápenaté usazeniny<br />
v zásobníku na vodu můžete občas odstranit<br />
octovou vodou nebo odvápňovačem běžně dostupným<br />
v obchodech. Pak ho pečlivě opláchněte<br />
čistou vodou.<br />
Důležité! Podstavec (12) nedávejte v žádném<br />
případě do myčky!<br />
Důležité! Podstavec (12) a síťovou zástrčku<br />
nikdy neponořujte do vody!<br />
ODVÁPŇOVÁNÍ<br />
Pokud se na povrchu parního hrnce objeví vápenaté<br />
usazeniny, můžete je snadno odstranit,<br />
pokud dodržíte následující postup:<br />
1. Naplňte zásobník na vodu v podstavci (12)<br />
octovou vodou nebo běžným odvápňovačem<br />
až do jeho poloviny.<br />
2. Nasaďte na něj sběrnou nádobu na kondenzát<br />
(9), zásobníky na vaření (5 / 6 / 7) a poklici (1).<br />
3. Dobu chodu nastavte na 25 minut a přístroj<br />
zapněte (jak je uvedeno v odstavci „Uvedení<br />
do provozu“).<br />
4. Po uplynutí nastaveného času nechte přístroj<br />
úplně vychladnout.<br />
5. Tekutinu zachycenou ve sběrné nádobě (9)<br />
vylijte. Poté odstraňte zbylou tekutinu také z<br />
podstavce (12).<br />
6. Všechny části omyjte čistou vodou.<br />
7. Než přístroj uložíte, důkladně vysušte všechny<br />
jeho části.<br />
39
CZ<br />
UVEDENÍ DO PROVOZU<br />
1. Do zásobníku na vodu nalijte čistou studenou<br />
vodu, vývar, aj.<br />
Pozor: Nikdy nedávejte do zásobníku v<br />
podstavci (13) horké tekutiny, protože by se<br />
vlivem náhlého teplotního rozdílu mohl poškodit.<br />
2. Nasaďte usměrňovač páry (10) zdola na sběrnou<br />
nádobu (9).<br />
3. Potom postavte sběrnou nádobu (9) na podstavec<br />
(12). Tato nádoba (9) zachycuje tekutinu,<br />
která odkapává z potravin.<br />
4. Připravené potraviny vložte do zásobníků ( 5 /<br />
6 / 7 ). Dle uvážení můžete použít jeden, dva<br />
nebo tři zásobníky (srov. obr. 1)<br />
5. Vrchní zásobník (5) zakryjte poklicí (1).<br />
6. Zástrčku dejte do příslušné chráněné zásuvky.<br />
Zazní zvukový signál a kontrolka provozu (20)<br />
se rozsvítí.<br />
7. Stiskněte (17). Na displeji začne blikat „ “<br />
(30 minut).<br />
Nastavte nutnou dobu vaření tak, že stisknete<br />
+ / – (18 / 21). Tím nastavíte dobu vaření v<br />
minutových krocích ( od 1 do 60 minut). Když<br />
podržíte příslušné tlačítko, běží čas rychleji.<br />
Znovu stiskněte tlačítko (17), tím potvrdíte<br />
zadaný čas a na displeji (22) se ukáže konečná<br />
doba vaření.<br />
8. Pro nastavení časového posunu stiskněte<br />
(19). Na displeji se ukáže blikající „ “<br />
(0 hodin).<br />
Tlačítky + / – (18 / 21) můžete v hodinových<br />
krocích (od 1 do 9 hodin) nastavit časový posun.<br />
Když příslušné tlačítko podržíte, běží čas<br />
rychleji.<br />
Znovu stiskněte tlačítko (19), tím potvrdíte<br />
zadaný časový posun a na displeji (22) se ukáže<br />
konečný časový posun.<br />
VAŘENÍ S . . .<br />
3 zásobníky<br />
2 zásobníky<br />
1<br />
2<br />
3<br />
1<br />
2<br />
Co je nutné mít na zřeteli: Potraviny s nejdelší<br />
dobou vaření musíte dát do spodního<br />
zásobníku. Tam se budou vařit o 3 – 5 minut<br />
rychleji než ve vrchním.<br />
Např. maso se vaří v zásobníku 3, plátky mrkve<br />
v zásobníku 2 a špenát v zásobníku 1.<br />
Při vaření se dvěma zásobníky vložte potraviny<br />
s delší dobou vaření do spodního zásobníku<br />
(zásobník 2). Ostatní dejte do vrchního<br />
zásobníku (zásobník 1).<br />
Tímto způsobem se uvaří oba dva druhy potravin<br />
současně.<br />
40<br />
Obr. 1
CZ<br />
Pozor!<br />
Nepoužívejte potraviny, které se lehce<br />
a rychle kazí (např.vejce, cibuli,ryby),<br />
pokud chcete využít funkci časového<br />
posunu.<br />
9. Stiskněte tlačítko pro zapnutí (14), tím se<br />
spustí vaření. Tlačítko (14) začne svítit,<br />
kontrolka provozu (20) bliká a topné těleso<br />
(11) začne ohřívat vodu.<br />
Průběh vaření můžete kdykoli zastavit stisknutím<br />
tlačítka (16). Tlačítko pro vypnutí<br />
(16) začne svítit, kontrolka provozu (20)<br />
svítí a topné těleso (11) se zastaví. Stisknutím<br />
tlačítka (14) proces vaření pokračuje.<br />
Pro přerušení procesu vaření podržte tlačítko<br />
(16) 3 sekundy. Tlačítko (16) zhasne a<br />
topné těleso (11) se vypne.<br />
1 zásobníkem<br />
1<br />
10. Asi 20 sekund před uplynutím zadané doby<br />
vaření zazní přerušovaný signál. Když čas<br />
uplyne, zazní dlouhý signál. Parní hrnec se<br />
automaticky vypne. Tlačítko (14) zhasne<br />
a (16) začne svítit. Kromě toho se na<br />
dobu, kdy budete 3 sekundy držet tlačítko<br />
(16) a než vytáhnete zástrčku ze zásuvky,<br />
rozsvítí na displeji (22) „ “.<br />
Před nastavením nové doby vaření musíte<br />
parní hrnec uvést do původního stavu tím,<br />
že 3 sekundy podržíte tlačítko pro vypnutí<br />
(16).<br />
11. Poklici (1) i jednotlivé zásobníky (5 / 6 / 7)<br />
odebírejte chňapkou. Nebezpečí opaření!<br />
DOPLŇOVÁNÍ VODY<br />
Při delším vaření je třeba větší množství vody.<br />
Lze ji doplnit, dolévejte ji nalévacím otvorem (8).<br />
VAŘENÍ RÝŽE<br />
Parní hrnec je vybaven vaničkou na rýži (4), která<br />
je určena speciálně na přípravu rýže.<br />
1. Rýži dejte do vaničky (8) a přidejte přibližně<br />
stejné množství vody, např. šálek vody na<br />
šálek rýže.<br />
2. Vaničku postavte doprostřed jednoho ze<br />
zásobníků (5 / 6 /7).<br />
3. Nastavte dobu vaření tak, jak je udaná v tabulce,<br />
a stiskněte (14).<br />
Pokud chcete potraviny (např. brambory)<br />
pouze dusit, nebo připravovat potraviny, které<br />
vyžadují stejnou dobu vaření (např. vepřovou<br />
svíčkovou nebo krůtí prsa), pak můžete využít<br />
jen jeden zásobník.<br />
Připravené potraviny dejte do zásobníku 1.<br />
41
CZ<br />
NÁVOD NA VAŘENÍ V PÁŘE<br />
Dbejte na to, aby jednotlivé kousky potravin v<br />
zásobníku (5 / 6 / 7) byly vždy přibližně stejně<br />
veliké. Jinak byste museli použít zásobníků více<br />
(5 / 6 / 7), protože doba vaření je u potravin různé<br />
velikosti různá.<br />
Zásobníky (5 / 6 / 7) nepřeplňujte! Potraviny<br />
položte tak daleko od sebe, jak jen to je možné,<br />
aby pára mohla dobře cirkulovat.<br />
Maso by se vždy mělo vařit v nejspodnějším<br />
zásobníku.<br />
Pokud se vaří jen v jednom zásobníku (5), je<br />
doba vaření kratší než při využívání všech třech<br />
zásobníků (5 / 6 / 7) najednou, protože účinek<br />
páry je silnější. Proto nemohou být uvedeny v<br />
následující tabulce přesné časy vaření, ale jen<br />
časová rozmezí.<br />
TABULKA DOBY VAŘENÍ<br />
Mějte prosím na zřeteli, že doba uvedená v tabulce je pouze orientační, a můžete ji samozřejmě měnit<br />
podle velikosti a zralosti potravin nebo podle vlastní chuti.<br />
Potraviny ve spodním zásobníku ve středním zásobníku v horním zásobníku<br />
Rýže 25 – 30 minut 30 – 35 minut 35 – 40 minut<br />
Ryby 8 – 10 minut 10 – 15 minut 15 – 18 minut<br />
Krůta 25 – 28 minut 28 – 30 minut 25 – 35 minut<br />
Zelenina 15 – 30 minut 18 – 30 minut 18 – 35 minut<br />
Vejce 15 – 18 minut 18 – 20 minut 20 – 25 minut<br />
42<br />
TECHNICKÉ ÚDAJE<br />
Zdroj proudu:<br />
Příkon:<br />
Objem zásobníku <br />
na vodu:<br />
Objem každého <br />
zásobníku <br />
na vaření v páře:<br />
220 – 240 V ~ 50 Hz<br />
950 Watt<br />
250 ml – 1.250 ml<br />
3.5 l<br />
DBEJTE NA ŽIVOTNÍ PROSTŘEDÍ!<br />
Obalový materiál a starý přístroj nevyhazujte, ale<br />
dovezte k recyklaci.<br />
Na příslušné recyklační místo nebo sběrný dvůr<br />
se informujte na vašem obecním nebo městském<br />
úřadě.<br />
V případě uplatnění nároku na poskytnutí záruky<br />
se obraťte prosím na vašeho prodejce nebo na<br />
zákaznický servis BIELMEIER.
CZ<br />
RICETTE<br />
JIHOTYROLSKÉ SÝROVÉ NOKY<br />
Přísady:<br />
• 500 g bílého pečiva (housek)<br />
• 500 g cibule<br />
• ½ mléka<br />
• 250 g sýra<br />
• 2 vejce<br />
• olej<br />
• sůl, pepř, muškátový oříšek<br />
Cibuli nakrájejte na tenké proužky a orestujte dozlatova<br />
na 3 polévkových lžících oleje.<br />
Sýr nakrájejte na kostičky.<br />
Smíchejte mléko asi se ¼ l vody, 1 lžící soli, pepřem<br />
a trochou nastrouhaného muškátového<br />
oříšku a nechte povařit. Orestovanou cibuli a<br />
mléko přidejte k nakrájenému bílému pečivu<br />
a důkladně promíchejte. Pokud všechny kostky<br />
z pečiva nejsou namočené, přidejte trochu<br />
horké vody. Pak k tomu přimíchejte ještě sýr a<br />
vejce a vzniklou hmotu nechte 10 minut odpočinout.<br />
Pak ještě jednou promíchejte a velkou lžící a mokrýma<br />
rukama vytvarujte podlouhlé noky.<br />
Vařte v <strong>BHG</strong> <strong>193</strong> v nejspodnějším zásobníku<br />
15 minut.<br />
Servírujte se strouhaným parmezánem a rozehřátým<br />
máslem.<br />
TYROLSKÉ KNEDLÍKY<br />
Přísady:<br />
• 500 g bílého pečiva (housek)<br />
• 250 slaniny<br />
• 200 g cibule<br />
• ½ l mléka<br />
• 2 vejce<br />
• olej<br />
• sůl, pepř, muškátový oříšek<br />
• nasekaná petrželka<br />
Nakrájejte cibuli najemno a slaninu na kostičky.<br />
Mléko smíchejte s asi ¼ l vodu, přidejte sůl,<br />
pepř, trochu nastrouhaného muškátového oříšku<br />
a nechte povařit. Cibuli, petrželku a mléko<br />
přidejte k nakrájenému pečivu a dobře promíchejte.<br />
Pokud všechny kostky pečiva nejsou<br />
namočené, přidejte trochu horké vody. Pak k<br />
tomu přimíchejte ještě slaninu a vejce a nechte<br />
ještě 10 minut odpočinout .<br />
Pak ještě jednou promíchejte a velkou lžící a<br />
mokrýma rukama vytvarujte podlouhlé noky.<br />
Vařte v <strong>BHG</strong> <strong>193</strong> v nejspodnějším zásobníku<br />
15 minut.<br />
Servírujte jako přílohu v hovězí polévce nebo s<br />
kyselým zelím, s houbovou polévkou atd.<br />
43
CZ<br />
TORTELLONI SE ŠPENÁTEM A RICOTOU<br />
Přísady:<br />
• 200 g mouky<br />
• 250 zmrazeného listového špenátu <br />
(nebo 600 g čerstvého špenátu <br />
blanšírovaného v osolené vodě)<br />
• 250 g ricoty<br />
• 1 vejce<br />
• sůl, pepř, muškátový oříšek<br />
• česnek dle chuti<br />
Z mouky, 1 lžičky soli a 1 vejce vypracujte tuhé<br />
těsto. Přidejte teplou vodu, abyste zapracovali<br />
veškerou mouku. Dobře prodělejte a nechte<br />
30 minut odpočívat.<br />
Rozehřátý / blanšírovaný špenát nasekejte najemno,<br />
ochuťte solí pepřem a trochou muškátového<br />
oříšku a dle chuti přidejte 1 – 2 stroužky<br />
prolisovaného česneku, promíchejte s ricotou,<br />
hmota má být dobře okořeněná.<br />
Nudlové těsto prodělejte důkladně ještě jednou a<br />
vyválejte tenkou placku, nejlépe pomocí strojku<br />
na nudle.<br />
Nakrájejte čtverce (8 cm), do středu položte<br />
½ lžičky náplně, přehněte, strany pevně spojte a<br />
například sklenicí vykrojte půlkruh.<br />
Vařte v <strong>BHG</strong> <strong>193</strong> v nejspodnějším zásobníku<br />
10 minut.<br />
Servírujte se smetanovou omáčkou, nebo rozehřátým<br />
máslem a parmezánem.<br />
FILET Z LOSOSA SE ZELENINOU<br />
Přísady:<br />
• 4 zmrazené filety z lososa <br />
(200 g na osobu)<br />
• 500 g brokolice nebo cukety<br />
• 500 g brambor<br />
• 1 balení hotové omáčky „Hollandaise“ <br />
(asi ¼ l)<br />
• sůl, pepř, ostrá hořčice<br />
Brambory oloupejte, rozkrojte napůl a vložte do<br />
nejspodnějšího zásobníku.<br />
Osolte a opepřete lososa, potřete hořčicí a vložte<br />
do středního zásobníku.<br />
Brokolici rozdělte na růžičky, cukety na plátky,<br />
lehce osolte a vložte do horního zásobníku.<br />
Vedle brokolice postavte šálek hotové omáčky,<br />
aby se ohřála.<br />
Vařte v <strong>BHG</strong> <strong>193</strong> 25 minut.<br />
Tip: Velmi chutná je také varianta se sušenými<br />
houbami. V tomto případě použijte místo špenátu<br />
110 g sušených hub.<br />
Nejdříve namočte houby do teplé vody a nechte<br />
je nabobtnat. Nasekejte je najemno a promíchejte<br />
s ricotou.<br />
Tuto směs osolte a opepřete. Muškátový oříšek<br />
a česnek se k této variantě nehodí.<br />
44
CZ<br />
ZÁRUČNÍ LIST<br />
Pro záruku začínající dnem prodeje spotřebiče platí pro země EU (i Českou republiku) a<br />
Švýcarsko tyto podmínky:<br />
1. Trvání záruky: 2 roky<br />
2. Poskytování záruky:<br />
a) záruční opravu provedeme podle našeho<br />
zvážení opravou nebo výměnou vadných<br />
dílů, jestliže tyto závady vznikly prokazatelně<br />
vadou materiálu nebo chybou při výrobě.<br />
b) záruční oprava bude provedena jen při<br />
předložení tohoto záručního listu a dokladu<br />
o zaplacení.<br />
c) záruku mohou uplatnit pouze první majitelé<br />
spotřebiče.<br />
d) jestliže dojde k opravě nebo výměně<br />
spotřebiče v záruční době, záruční doba<br />
se prodlouží.<br />
e) poplatky za dopravu hradí kupující.<br />
f) v případě, že se závada nebo škoda nedá<br />
odstranit, nebo se překročí doba servisního<br />
zásahu (30 dnů), bude spotřebič vyměněn<br />
za nový, nebo vráceny peníze v prodejně,<br />
kde byl spotřebič zakoupen.<br />
3. Záruka se nevztahuje na případy:<br />
• poškrábání nebo fleky na spotřebiči a na<br />
světelné kontrolky nebo žárovky a na motorové<br />
kartáče.<br />
• na lehce rozbitné díly z bakelitu, skla, plastů<br />
apod., pokud se nejedná o chybu materiálu.<br />
• poškození jako následek chybné instalace<br />
nebo upevnění.<br />
• kdy je spotřebič zapojen do sítě s vyšším<br />
napětím než je na spotřebiči uvedeno.<br />
• chybného nebo neodpovídajícího použití.<br />
• nedbalosti při používání.<br />
• upadnutí spotřebiče nebo jeho jednotlivých<br />
částí.<br />
• nevhodného transportu nebo nedostatečného<br />
zabalení.<br />
4. Záruka zaniká:<br />
• při použití spotřebiče jinak než v domácnosti.<br />
• při provádění opravy nebo změny na spotřebiči<br />
osobou jinou než pověřenou naším<br />
servisem.<br />
Na tento spotřebič poskytujeme 2 roky záruku na nedostatky, které jsou označeny jako<br />
výrobní chyby nebo chyby materiálu. Záruční doba začíná dnem prodeje a je uznána po<br />
předložení záručního listu a dokladu o zaplacení. Jiné nároky neuznáváme.<br />
Model:<br />
Důležité ! Prosím, napište si FD kód, který je<br />
umístěný na štítku:<br />
razítko a podpis prodávajícího<br />
datum prodeje<br />
45
<strong>BHG</strong> <strong>193</strong><br />
D Notizen • GB Notes • F Notes • I Note • CZ Poznámky<br />
46
<strong>BHG</strong> <strong>193</strong><br />
D Notizen • GB Notes • F Notes • I Note • CZ Poznámky<br />
47
<strong>Bielmeier</strong> Hausgeräte GmbH<br />
Gnaglbergstraße 6<br />
D-94267 Prackenbach<br />
Tel.: +49 (0) 9942 94 88 93-0<br />
Fax: +49 (0) 9942 94 88 93-22<br />
E-Mail: info@bielmeier-hausgeraete.de<br />
Internet: www.bielmeier-hausgeraete.com<br />
<strong>Bielmeier</strong> Hausgeräte s.r.o.<br />
Bořice 25<br />
CZ-34401 Domažlice<br />
Tel.: +420 - 379 768 010<br />
Fax: +420 - 379 768 020<br />
E-Mail: bielmeierhausgeraete@iol.cz<br />
Internet: www.bielmeier.cz