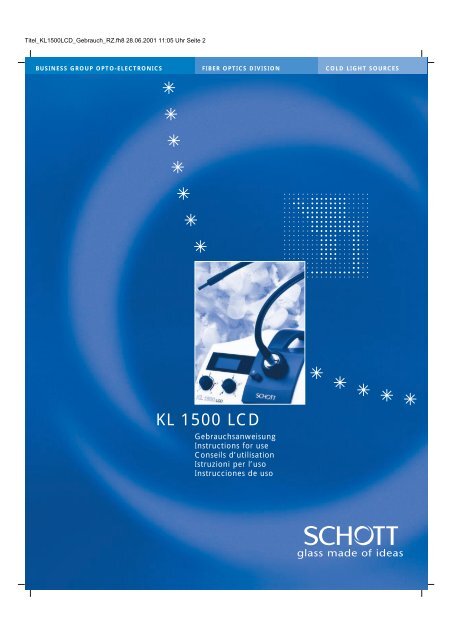
KL 1500 LCD
KL 1500 LCD
KL 1500 LCD

You also want an ePaper? Increase the reach of your titles
YUMPU automatically turns print PDFs into web optimized ePapers that Google loves.
Titel_<strong>KL</strong><strong>1500</strong><strong>LCD</strong>_Gebrauch_RZ.fh8 28.06.2001 11:05 Uhr Seite 2<br />
BUSINESS GROUP OPTO-ELECTRONICS<br />
FIBER OPTICS DIVISION<br />
COLD LIGHT SOURCES<br />
<strong>KL</strong> <strong>1500</strong> <strong>LCD</strong><br />
Gebrauchsanweisung<br />
Instructions for use<br />
Conseils d’utilisation<br />
Istruzioni per l’uso<br />
Instrucciones de uso
Blindtext<br />
<strong>KL</strong> <strong>1500</strong> <strong>LCD</strong><br />
2.1 Lichtleiteranschluß<br />
9<br />
Zunächst die Lichtleiteraufnahme (2)<br />
öffnen, indem der äußere, schwarze 5<br />
Ring gegen den Uhrzeigersinn gedreht<br />
wird. Den Lichtleiter bis zum Anschlag<br />
einschieben und Lichtleiteraufnahme<br />
schließen.<br />
4<br />
6<br />
14<br />
3<br />
2<br />
7<br />
13<br />
10<br />
8<br />
11<br />
1<br />
16<br />
15<br />
12<br />
3<br />
Übersicht <strong>LCD</strong>-Anzeige<br />
Overview of the <strong>LCD</strong> display<br />
Vue d’ensemble de l’affichage <strong>LCD</strong><br />
Display a cristalli liquidi<br />
Detalle de la visualización por cristal líquido<br />
17<br />
18<br />
19
SCHOTT GLAS<br />
Geschäftsbereich Faseroptik<br />
Otto-Schott-Straße 2<br />
D-55127 Mainz<br />
EG-Konformitätserklärung<br />
Die Kaltlichtquellen<br />
EC Declaration of Conformity<br />
The Cold Light Sources<br />
<strong>KL</strong> <strong>1500</strong> <strong>LCD</strong>, <strong>KL</strong> 2500 <strong>LCD</strong><br />
erfüllen die Bestimmungen folgender Richtlinien des<br />
Rates der Europäischen Gemeinschaft:<br />
●<br />
●<br />
EMV-Richtlinie 89/336/EWG<br />
Niederspannungs-Richtlinie 73/23/EWG<br />
Die Lichtquellen sind für den Betrieb mit Nennspannung<br />
230 V ausgelegt:<br />
Durch die technische Dokumentation und die vollständige<br />
Einhaltung folgender Normen wird die Übereinstimmung<br />
der Kaltlichtquellen mit den grundlegenden<br />
Anforderungen der Richtlinien nachgewiesen:<br />
● DIN EN 60601-1-2: 1994<br />
Abschnitt/Clause 36 (EMV/EMC)<br />
● DIN EN 61000-3-2: 1998<br />
● DIN EN 61000-3-3: 1996<br />
● EN 50082-1: 1997<br />
● EN 55011: 1991 + A1: 1997 + A2: 1996<br />
● ENV 50204: 1996<br />
Das VDE Prüf- und Zertifizierungsinstitut (EU-Kenn-Nr.<br />
0366), Merianstr. 28, D-63069 Offenbach, hat die Produkte<br />
geprüft und zertifiziert.<br />
Die Kaltlichtquellen tragen<br />
das CE-Konformitätskennzeichen<br />
sowie die geschützten Prüfzeichen<br />
conform with the following European Directives<br />
● EMC Directive 89/336/EEC<br />
● Low Voltage Directive 73/23/EEC<br />
The light sources are designed for use with a nominal<br />
voltage of 230 V<br />
The technical documentation and full compliance<br />
with the standards listed below proves the conformity<br />
with the essential requirements of the above-mentioned<br />
EC Directives:<br />
● DIN EN 60601-1: 1996<br />
(VDE 0750 Teil 1)<br />
● EN 60601-1: 1990 + A1:1993 + A2:1995<br />
● IEC 601-1: 1988 + A1: 1991 + A2: 1995<br />
● DIN EN 61010-1: 1994 + A2: 1996<br />
(VDE 0411 Teil 1 + A1)<br />
● IEC 1010-1: 1990 + A1: 1992 + A2: 1995<br />
The VDE Testing and Certification Institute (EU-Identification<br />
No. 0336), Merianstr. 28, D-63069 Offenbach, has tested<br />
and certified the products.<br />
The Cold Light Sources bear<br />
the CE Conformity Mark as well as<br />
the legally protected Certification Marks<br />
Wiesbaden, August 2000<br />
ppa.<br />
Dr. U. Pohl<br />
Geschäftsbereich Faseroptik<br />
Bereichsleiter/Vice President<br />
ppa.<br />
A. Hagemann<br />
Geschäftsbereich Faseroptik<br />
Bereichsleiter/Vice President<br />
3
Inhalt<br />
D<br />
Seite<br />
1 Wichtige Hinweise<br />
(Sicherheitshinweise) 6<br />
2 Betrieb 7<br />
2.1 Lichtleiteranschluß 7<br />
2.2 Inbetriebnahme 7<br />
2.3 Lichtstärkeeinstellung 7<br />
2.4 Zusatzoptik 9<br />
2.5 Filterschieber 9<br />
3 Lampenwechsel 10<br />
4 Wartung 10<br />
5 Beheben von Störungen 10<br />
6 Zubehör 11<br />
7 Technische Daten 11<br />
Contents<br />
GB<br />
F<br />
Table des matières<br />
Page<br />
1 Important information<br />
(Safety information) 14<br />
2 Operation 15<br />
2.1 Light guide connection 15<br />
2.2 Start-up procedure 15<br />
2.3 Light intensity setting 15<br />
2.4 Supplementary optics 17<br />
2.5 Filter slide 17<br />
3 Replacing the lamp 18<br />
4 Maintenance 18<br />
5 Troubleshooting 18<br />
6 Accessories 19<br />
7 Technical data 19<br />
Page<br />
1 Remarques importantes<br />
(Conseils de sécurité) 22<br />
2 Mode de fonctionnement 23<br />
2.1 Raccordement du conducteur 23<br />
de lumière<br />
2.2 Mise en service 23<br />
2.3 Réglage de l’intensité<br />
lumineuse 23<br />
2.4 Optique supplémentaire 25<br />
2.5 Coulisse porte-filtre 25<br />
3 Remplacement de la lampe 26<br />
4 Entretien 26<br />
5 Dépannage 26<br />
6 Accessoires 27<br />
7 Caractéristiques techniques 27<br />
I<br />
Indice<br />
Pagina<br />
1 Avvertenze importanti<br />
(Avvertenze per la sicurezza) 30<br />
2 Funzionamento 31<br />
2.1 Collegamento della guidaluce 31<br />
2.2 Messa in funzione 31<br />
2.3 Regolazione dell’intensità<br />
luminosa 31<br />
2.4 Ottica supplementare 33<br />
2.5 Portafiltro a cassetto 33<br />
3 Sostituzione della lampada 34<br />
4 Manutenzione 34<br />
5 Risoluzione di problemi 34<br />
6 Accessori 35<br />
7 Dati tecnici 35<br />
E<br />
Contenido Página<br />
1 Advertencias importantes<br />
(Advertencias de seguridad) 38<br />
2 Operación 39<br />
2.1 Conexión del conductor de luz 39<br />
2.2 Puesta en servicio 39<br />
2.3 Ajuste de la intensidad de luz 39<br />
2.4 Instrumentos opticos<br />
suplementarios 41<br />
2.5 Corredera de filtros 41<br />
3 Recambio de la lámpara 42<br />
4 Mantenimiento 42<br />
5 Eliminación de fallos 42<br />
6 Accesorios 43<br />
7 Datos técnicos 43<br />
D<br />
GB<br />
F<br />
I<br />
E<br />
3
Geräteübersicht<br />
1<br />
2<br />
3<br />
4<br />
5<br />
6<br />
7<br />
8<br />
9<br />
10<br />
11<br />
12<br />
13<br />
14<br />
15<br />
16<br />
17<br />
18<br />
19<br />
Netzschalter 2.2<br />
Lichtleiteraufnahme 2.1<br />
Elektronische Lichtstärkeeinstellung 2.3<br />
Mechanische Lichtstärkeeinstellung 2.3<br />
<strong>LCD</strong>-Anzeige<br />
Schwenkhebel für Zusatzoptik 2.4<br />
Filterschieber 2.5<br />
Netzkabel<br />
Tragegriff<br />
Lampenfach mit Halogen-Kaltlicht-Reflektorlampe 3<br />
Entriegelungsknopf für Lampenfach 3<br />
Belüftungsöffnungen (Gerätefrontseite) 1<br />
Belüftungsöffnungen (Geräteseitenteil) 1<br />
Abluftgitter (Geräterückseite) 1<br />
Sicherung (Geräteboden) 5<br />
Typenschild (Geräteboden)<br />
Farbtemperatur-Anzeige 2.3<br />
Fehlerstatus-Anzeige 5<br />
Hinweis auf maximale Lichtstärke 2.3<br />
5
1 Wichtige Hinweise<br />
Verwendete Symbole:<br />
Warnung vor einer Gefahrenstelle<br />
(Achtung, Dokumentation<br />
beachten)<br />
Warnung vor heißer Oberfläche<br />
Gerät der Schutzklasse II<br />
Aus (Trennung vom Netz)<br />
I Ein (Verbindung mit dem Netz)<br />
Hinweis auf maximale Lichtstärke<br />
Bestimmungsgemäßer Gebrauch:<br />
Die Kaltlichtquelle <strong>KL</strong> <strong>1500</strong> <strong>LCD</strong> ist<br />
für den Einsatz in Industrie und Labor<br />
vorgesehen.<br />
Kaltlichtquellen dienen der intensiven<br />
Beleuchtung von Objekten aller Art.<br />
Die Infrarotanteile der Lampenstrahlung<br />
werden ausgefiltert. Sichtbares<br />
Licht hoher Intensität wird durch flexible<br />
oder selbsttragende bewegliche<br />
Lichtleiter zum Objekt geführt.<br />
Das Gerät ist geprüft und zertifiziert<br />
nach den geltenden Normen über elektrische<br />
Laborgeräte (DIN EN 61010-1<br />
bzw. UL 3101-1), die 230V-Version zusätzlich<br />
nach der Norm über medizinische<br />
elektrische Geräte (DIN EN 60601-1).<br />
Sicherheitshinweise:<br />
Bitte lesen und beachten Sie diese<br />
Gebrauchsanweisung sorgfältig. Die<br />
Sicherheit des Gerätes ist bei Nichtbeachtung<br />
nicht gewährleistet.<br />
Vermeiden Sie bei eingeschalteter<br />
Lichtquelle den direkten Einblick in die<br />
offene Spannhülse oder den Lichtleiterausgang.<br />
Von der <strong>KL</strong> <strong>1500</strong> <strong>LCD</strong> geht sichtbares<br />
Licht hoher Intensität aus. Da lichtabsorbierende<br />
Materialien die physikalische<br />
Eigenschaft haben, auftreffendes<br />
Licht in Wärme umzuwandeln, können<br />
an wärmeempfindlichen oder entzündbaren<br />
lichtabsorbierenden Materialien<br />
Schädigungen auftreten. Zur Vermeidung<br />
solcher thermischer Schäden und<br />
möglicher Brand- bzw. Verbrennungsgefahr<br />
beachten Sie bitte folgende<br />
Hinweise:<br />
➧ Decken Sie die offene Spannhülse<br />
oder den Lichtleiterausgang nie ab<br />
(Brandgefahr)!<br />
➧ Bedecken Sie die offene Spannhülse<br />
oder den Lichtleiterausgang nie mit<br />
der Hand oder anderen Körperteilen<br />
(Verbrennungsgefahr)!<br />
➧ Bei der Beleuchtung wärmeempfindlicher<br />
oder entzündbarer lichtabsorbierender<br />
Objekte (z. B. in der Mikroskopie)<br />
ist besonders darauf zu<br />
achten, Lichtleiterabstand und Lampenhelligkeit<br />
so zu wählen, daß am<br />
Objekt keine thermischen Schädigungen<br />
auftreten.<br />
➧ Alle nicht im Arbeitsvorgang verwendeten<br />
Lichtleiterausgänge müssen<br />
sich bei eingeschalteter Lichtquelle<br />
stets in einem sicheren Abstand -<br />
mindestens 10 cm - von wärmeempfindlichen<br />
oder entzündbaren lichtabsorbierenden<br />
Materialien befinden<br />
(Vermeidung möglicher Brandgefahr).<br />
Achten Sie daher bei jenen Lichtleiterausgängen<br />
auf obigen sicheren<br />
Abstand von z. B. dunklen/farbigen<br />
Textilien und dunklen/farbigen Holzoder<br />
Kunststoffoberflächen.<br />
➧ Um eine unnötige Belastung biologischen<br />
Gewebes durch Beleuchtung<br />
mit sichtbarem Licht zu vermeiden,<br />
reduzieren Sie die Helligkeit und<br />
Dauer der Beleuchtung auf das unbedingt<br />
erforderliche Maß.<br />
Bitte achten Sie unbedingt darauf, daß:<br />
➧ Ihre Kaltlichtquelle <strong>KL</strong> <strong>1500</strong> <strong>LCD</strong> mit<br />
der auf dem Typenschild (16) angegebenen<br />
Spannung betrieben wird;<br />
➧ unbedingt alle Lüftungsöffnungen<br />
(12, 13, 14) freigehalten werden;<br />
bei unzureichender Kühlung schaltet<br />
ein integrierter Thermoschalter das<br />
Gerät vorübergehend aus (siehe<br />
Punkt 5 „Beheben von Störungen“);<br />
➧ die Lampe vor dem Austauschen<br />
abgekühlt ist; zu Ihrer Erinnerung<br />
ist in der Tür des Lampenfachs ein<br />
Warnzeichen angebracht:<br />
Warnung vor heißer Oberfläche;<br />
➧ Filterschieber und Einlegefilter vor<br />
der Entnahme des Einlegefilters<br />
abgekühlt sind; der Schieber ist<br />
mit dem Warnzeichen versehen;<br />
➧ sich der Filterschieber beim Betrieb<br />
der Lichtquelle grundsätzlich in<br />
einer der beiden Endpositionen oder<br />
der Raststellung befindet (siehe<br />
Punkt 2.5 „Filterschieber“)!<br />
■ Die Lichtquelle ist nur für den<br />
Betrieb in trockenen Räumen entwickelt<br />
worden (siehe Punkt 7 „Technische<br />
Daten“).<br />
■ Dieses Gerät ist nicht für den Betrieb<br />
in explosionsgefährdeten Bereichen<br />
geeignet.<br />
■ Eine sichere Trennung vom Stromversorgungsnetz<br />
erfolgt auch durch<br />
Ziehen des Netzsteckers.<br />
■ Das Gerät darf nicht geöffnet oder<br />
demontiert werden. Technische<br />
Änderungen am Gerät sind zu<br />
unterlassen. Reparaturen dürfen nur<br />
durch den Hersteller oder von ihm<br />
autorisierte Kundendienststellen<br />
durchgeführt werden.<br />
■ Bitte gewährleisten Sie jedem Bediener<br />
des Gerätes den raschen Zugriff<br />
auf diese Gebrauchsanweisung.<br />
■ Für Schäden, die durch Nichtbeachtung<br />
dieser Gebrauchsanweisung<br />
entstehen, haftet der Hersteller nicht.<br />
D<br />
6
2 Betrieb<br />
2.1 Lichtleiteranschluß<br />
Zunächst die Lichtleiteraufnahme (2)<br />
öffnen, indem der äußere, schwarze<br />
Ring gegen den Uhrzeigersinn gedreht<br />
wird. Den Lichtleiter bis zum Anschlag<br />
einschieben und Lichtleiteraufnahme<br />
schließen.<br />
▼<br />
2.2 Inbetriebnahme<br />
Ein-/Ausschalten durch Betätigung des<br />
Netzschalters (1).<br />
Stellung : Das Gerät ist ausgeschaltet.<br />
Stellung I : Das Gerät ist eingeschaltet.<br />
Die <strong>KL</strong> <strong>1500</strong> <strong>LCD</strong> ist zur Schonung der<br />
Halogenlampe mit einem Sanftanlauf<br />
ausgerüstet, der den sonst üblichen<br />
hohen Einschaltstrom reduziert.<br />
Zusätzlich sorgt eine elektronische<br />
Stabilisierung der Lampenspannung für<br />
stabile Lichtleistung, unabhängig von<br />
netzseitigen Schwankungen.<br />
▼<br />
2.3 Lichtstärkeeinstellung<br />
Die <strong>KL</strong> <strong>1500</strong> <strong>LCD</strong> ist mit zwei voneinander<br />
unabhängigen Lichtstärkeeinstellmöglichkeiten<br />
ausgestattet.<br />
Die stufenlose elektronische Einstellung<br />
ermöglicht Ihnen, die Lampenlebensdauer<br />
zu optimieren - durch die<br />
genaue Einstellung der von Ihnen<br />
benötigten Helligkeit erreichen Sie die<br />
für Ihre Anwendung größtmögliche<br />
Lebensdauer der Halogenlampe.<br />
Bei Veränderung der Lichtstärke ändert<br />
sich auch die Farbtemperatur des abgestrahlten<br />
Lichtes.<br />
Die mechanische Einstellung ermöglicht<br />
die stufenlose Änderung der Lichtstärke<br />
bei konstanter Farbtemperatur.<br />
Achtung:<br />
Beim Einsetzen von Lichtleitern mit<br />
Führungsstift ist darauf zu achten,<br />
daß dieser in einen der vier Spannzangenschlitze<br />
gesteckt wird.<br />
7
2.3.1 Elektronische Einstellung<br />
2.3.2 Mechanische Blende<br />
D<br />
Durch Drehen des Lichtstärkestellers<br />
(3) kann die Helligkeit stufenlos<br />
eingestellt werden.<br />
Zwischen den beiden Endstellungen<br />
des Einstellknopfes sind vier deutliche<br />
Rastpunkte angebracht.<br />
Diese markieren feste Positionen<br />
und gewährleisten so die Reproduzierbarkeit<br />
vorgewählter Helligkeitseinstellungen.<br />
▼<br />
In Position 6 wird die Halogenlampe<br />
mit Nennspannung betrieben, die<br />
Lampe erreicht etwa die vom Lampenhersteller<br />
angegebene Nennlebensdauer<br />
(typabhängig).<br />
Auf der <strong>LCD</strong>-Anzeige (5) wird die<br />
ungefähre Farbtemperatur des von der<br />
Halogenlampe abgestrahlten Lichtes<br />
angezeigt (17). Durch Drehen des<br />
Lichtstärkestellers (3) kann die Farbtemperatur<br />
des Lichtes eingestellt werden<br />
(Schrittweite 50 K).<br />
Nach Überschreiten der Barriere bei<br />
Position 5 erscheint auf der <strong>LCD</strong>-<br />
Anzeige ein Lampensymbol (19), das<br />
in den ersten Sekunden blinkt. Es dient<br />
als Maximallicht-Anzeige und weist<br />
darauf hin, daß die zu erwartende<br />
Lampenlebensdauer gegenüber der<br />
Stellung 5 herabgesetzt ist.<br />
Durch Drehen am Einstellknopf der<br />
mechanischen Blende (4) kann die<br />
Lichtstärke unter Beibehaltung der<br />
Farbtemperatur stufenlos verändert<br />
werden.<br />
Zwei feste Endanschläge und drei<br />
zusätzliche Rastpunkte (gekennzeichnet<br />
mit den Buchstaben A bis E) erlauben,<br />
definierte Blendenstellungen reproduzierbar<br />
anzuwählen.<br />
▼<br />
▼<br />
Die geringste Lichtstärke ergibt sich in<br />
Position 1, maximale Helligkeit wird in<br />
Position 6 erreicht. Die beiden<br />
Barrieren bei den Positionen 4 und 5<br />
werden durch Drücken des Einstellknopfes<br />
überwunden.<br />
Der Einstellknopf kann nicht über die<br />
Endanschläge 1 bzw. 6 hinausgedreht<br />
werden.<br />
Die Lebensdauer der Lampe beträgt in<br />
Position 4 etwa <strong>1500</strong> h und in<br />
Position 5 etwa 150 h.<br />
In Position A ergibt sich die geringste<br />
Helligkeit, in Position E (vollständig<br />
geöffnete Blende) wird die maximale<br />
Helligkeit erreicht. Das Drehen des<br />
Einstellknopfes von einem Rastpunkt<br />
zum nächsten bewirkt jeweils eine<br />
ungefähre Verdoppelung bzw. Halbierung<br />
der Lichtstärke.<br />
Der Einstellknopf kann nicht über die<br />
Endanschläge A bzw. E hinausgedreht<br />
werden.<br />
8
2.4 Zusatzoptik<br />
Das Einschwenken der Zusatzoptik<br />
gewährleistet, daß auch bei Verwendung<br />
von Lichtleitern geringeren<br />
Bündeldurchmessers eine gleichmäßige,<br />
lichtstarke Ausleuchtung erreicht<br />
wird.<br />
Wird die Beleuchtung mit abbildenden<br />
oder fokussierenden optischen Systemen<br />
am Lichtleiterausgang durchgeführt,<br />
so erhält man eine optimal<br />
gleichmäßige Ausleuchtung durch<br />
Ausschwenken der Zusatzoptik.<br />
Position - Zusatzoptik eingeschwenkt:<br />
gleichmäßige Beleuchtung ohne optische<br />
Systeme am Lichtleiterausgang.<br />
Position - Zusatzoptik ausgeschwenkt:<br />
gleichmäßige Beleuchtung mit optischen<br />
Systemen am Lichtleiterausgang.<br />
Die Zusatzoptik muß immer bis zum<br />
Endanschlag ein- bzw. ausgeschwenkt<br />
werden.<br />
2.5 Filterschieber<br />
Die <strong>KL</strong> <strong>1500</strong> <strong>LCD</strong> verfügt über einen<br />
Filterschieber (7), der mit einem Einlegefilter<br />
(als Zubehör erhältlich) bestückt<br />
werden kann.<br />
Das Warnzeichen auf dem Filterschieber<br />
erinnert Sie daran, daß sich<br />
der Schieber beim Betrieb der Lichtquelle<br />
grundsätzlich in einer der beiden<br />
Endpositionen oder der Raststellung<br />
befinden muß.<br />
Nur so ist die optimale Luftkühlung der<br />
Lichtquelle gewährleistet.<br />
Das Betreiben der Lichtquelle in einer<br />
Zwischenstellung des Filterschiebers<br />
kann zur Beschädigung desselben<br />
führen.<br />
▼<br />
2.5.1 Bestückung des Filterschiebers<br />
Bitte achten Sie darauf, daß der Filterschieber<br />
vor der Bestückung mit dem<br />
Einlegefilter abgekühlt ist.<br />
Zu Ihrer Erinnerung ist das Warnzeichen<br />
angebracht.<br />
Filterschieber (7) bis zum Endanschlag<br />
herausziehen und den gewünschten<br />
Filter einlegen. In dieser Position ist die<br />
Lichtquelle voll betriebsbereit.<br />
Beim Eindrücken des Filterschiebers<br />
bis zum Anschlag befindet sich der<br />
Filter im optischen Strahlengang.<br />
Möchten Sie die Lichtquelle kurzzeitig<br />
ohne Filter betreiben, so ziehen Sie den<br />
Schieber nur bis zum Rastpunkt heraus.<br />
Der Filter befindet sich in dieser Position<br />
noch in der Lichtquelle, jedoch nicht<br />
mehr im Strahlengang.<br />
▼<br />
9
3 Lampenwechsel<br />
4 Wartung<br />
5 Beheben von Störungen<br />
D<br />
Bitte achten Sie darauf, daß Lampe<br />
und Lampenfassung vor dem Austauschen<br />
abgekühlt sind.<br />
Zu Ihrer Erinnerung ist das entsprechende<br />
Warnzeichen angebracht.<br />
▼<br />
Ihre <strong>KL</strong> <strong>1500</strong> <strong>LCD</strong> ist wartungsfrei.<br />
Eine Desinfektion der Lichtquelle bei<br />
Anwendung im medizinischen Bereich<br />
ist nicht erforderlich und deshalb auch<br />
nicht vorgesehen.<br />
Zur äußerlichen Reinigung des Gerätes<br />
verwenden Sie ein weiches, trockenes<br />
Tuch oder handelsübliche Kunststoff-<br />
Reinigungstücher.<br />
Das Display verfügt über eine<br />
Fehlerstatus-Anzeige (18). Eventuelle<br />
Störungen können schnell und sicher<br />
erkannt werden.<br />
„Err 1“:<br />
„Err 2“:<br />
Lampenstromkreis unterbrochen.<br />
Temperaturwächter hat<br />
angesprochen.<br />
„Err 3“:<br />
Kurzschluß im Lampenstromkreis,<br />
elektronische Sicherung<br />
hat angesprochen.<br />
▼<br />
Zunächst die Lichtquelle ausschalten.<br />
Lampenfach (10) durch Drücken des<br />
Entriegelungsknopfes (11) öffnen und<br />
bis zum Anschlag herausziehen.<br />
Die beiden Hebel des Spezialsockels<br />
herunterdrücken und die defekte<br />
Lampe herausziehen.<br />
Beim Einsetzen der neuen Lampe<br />
müssen die beiden Hebel ebenfalls heruntergedrückt<br />
werden. Lampenfach bis<br />
zur Arretierung einschieben (hörbares<br />
Einrasten). Lichtquelle einschalten.<br />
Art der Störung Mögliche Ursache Behebung<br />
Lampe aus, Lüfter aus, Gerät nicht eingeschaltet Gerät einschalten<br />
keine <strong>LCD</strong>-Anzeige Stecker nicht in Steckdose Stecker einstecken<br />
Keine Netzspannung<br />
Netzspannung prüfen<br />
Lampenfach nicht geschlossen Lampenfach schließen<br />
Sicherung defekt<br />
Sicherung (15) austauschen<br />
Trafo überhitzt<br />
Ausreichende Kühlung<br />
sicherstellen, auf richtigen<br />
Lampentyp prüfen, Gerät<br />
nach längerer Abkühlung<br />
wieder in Betrieb nehmen<br />
Lampe aus, Lampe defekt Lampe austauschen (siehe Pkt. 3<br />
Lüfter in Betrieb,<br />
dieser Gebrauchsanweisung)<br />
Fehlerstatusanzeige Keine Lampe<br />
Bei ausgeschalteter Lichtquelle<br />
„Err1”<br />
Lampe aus, Kühlung nicht ausreichend<br />
Lampe einsetzen<br />
Lüftungsöffnungen freimachen,<br />
Lüfter in Betrieb,<br />
zu hohe Umgebungstempera-<br />
Fehlerstatusanzeige<br />
turen vermeiden, Gerät schaltet<br />
„Err 2“<br />
nach kurzer Zeit wieder ein<br />
Lampe aus, Kurzzeitiger Stromanstieg Gerät aus- und nach einigen<br />
Lüfter in Betrieb, im Lampenkreis Sekunden wieder einschalten<br />
Fehlerstatusanzeige Lampe verursacht Kurzschluß Lampe austauschen (siehe Pkt. 3<br />
„Err 3“<br />
dieser Gebrauchsanweisung)<br />
Sollten Sie die Störung durch die zuvor genannten Maßnahmen nicht beheben können, wenden<br />
Sie sich bitte an Ihren Fachhändler oder die nächste SCHOTT-Vertretung. Weitergehende<br />
Reparaturen müssen vom autorisierten Kundendienst durchgeführt werden.<br />
10
6 Zubehör<br />
Für Ihre <strong>KL</strong> <strong>1500</strong> <strong>LCD</strong> ist ein breites<br />
Zubehörprogramm lieferbar. Ein separater<br />
Prospekt informiert Sie ausführlich.<br />
Anforderungsmöglichkeit:<br />
Adressen siehe Rückseite.<br />
Nur SCHOTT-Lichtleiter und -Zubehör<br />
gewährleisten einwandfreie Funktion,<br />
Sicherheit und optimale Lichtausbeute.<br />
6.1 Lichtleiter<br />
Es stehen selbsttragende und flexible<br />
Lichtleiter verschiedener Längen und<br />
Durchmesser sowie Punkt- und<br />
Spaltbeleuchtungen zur Verfügung.<br />
6.2 Halogenlampe<br />
Bei Bestellung von Halogenlampen als<br />
Ersatzteil (siehe Punkt 6.4 dieser Gebrauchsanweisung)<br />
wird der Lampentyp<br />
geliefert, der optimale Lichtausbeute<br />
und Ausleuchtung ermöglicht.<br />
6.3 Filter<br />
Optische Filter können entweder in<br />
den Filterschieber (7) eingelegt oder als<br />
Einschraub- bzw. Aufsteckfilter in Verbindung<br />
mit einem Fokussiervorsatz<br />
(Zubehör) vor den Lichtleiterausgang<br />
gesetzt werden.<br />
Details zum Fokussiervorsatz und zu<br />
den standardmäßig erhältlichen Filtertypen<br />
entnehmen Sie bitte dem Zubehörprospekt.<br />
6.4 Ersatzteile<br />
Art<br />
Bestellnummer<br />
Halogenlampe 15 V/150 W 153 000<br />
Philips, Typ 6423<br />
Philips, Typ 6423 XHP<br />
Osram, Typ HLX 64634<br />
Sicherung für 230 V (primär) 150 101<br />
T 2 H, 250V nach IEC 127-3/5<br />
Sicherung für 120 V (primär) 153 103<br />
T 4 A nach UL 198 G<br />
Nur bei Verwendung der angegebenen Ersatzteiltypen wird für einwandfreie<br />
Funktion, Sicherheit und optimale Lichtausbeute Gewährleistung übernommen.<br />
7 Technische Daten<br />
Eigenschaften<br />
Werte<br />
Allgemeine Angaben<br />
Typenbezeichnung - <strong>KL</strong> <strong>1500</strong> <strong>LCD</strong><br />
Maße (B x T x H) mm ca. 200 x 265 x 170<br />
Gewicht kg ca. 5<br />
Kühlung - Axiallüfter<br />
Umgebungstemperatur* °C + 5 ... + 40<br />
Relative Luftfeuchte* % bis 31 °C Umgebungstemperatur: 85 %<br />
ab 31 °C bis 40 °C Umgebungstemperatur:<br />
linear abnehmend auf 75 %<br />
Luftdruck* hPa 700 ... 1060<br />
Transport und Lagerung<br />
Temperatur °C - 40 ... + 70<br />
Rel. Luftfeuchte % 10 ... 95 (nicht kondensierend)<br />
Luftdruck hPa 500 ... 1200<br />
Verschmutzungsgrad - 2<br />
* Prüfbedingungen der Normen DIN EN 61010-1, DIN EN 60601-1 und UL 3101-1<br />
Fortsetzung auf Seite 12<br />
11
D<br />
Eigenschaften<br />
Elektrische Angaben<br />
Werte<br />
Betriebsspannung, Frequenz<br />
230 V-Version 220 ... 240 V ~ 50 / 60 Hz<br />
120 V-Version 100 V ~ 50 / 60 Hz und<br />
120 V ~ 60 Hz<br />
Leistungsaufnahme max. W 200<br />
Sicherungen, primär<br />
230 V-Version - T 2 H, 250 V nach IEC 127-3/5<br />
120 V-Version - T 4 A nach UL 198 G<br />
Schutzklasse - II<br />
Überspannungskategorie - II<br />
Lampen - Halogenreflektorlampen:<br />
Philips, Typ 6423<br />
Philips, Typ 6423 XHP<br />
Osram, Typ HLX 64634<br />
Lampennennspannung V 15<br />
Lampennennleistung W 150<br />
Mittlere Lampenlebensdauer<br />
Stufe 4 h <strong>1500</strong><br />
Stufe 5 h 150<br />
Stufe 6 h 50<br />
Lichttechnische Angaben<br />
Maximal lichttechnisch nutzbarer<br />
Bündeldurchmesser des Lichtleiters mm 9<br />
Gesamtlichtstrom am Lichtleiterausgang<br />
(SCHOTT-Lichtleiter Ø 8 mm, typ. Werte)<br />
Stufe 4 lm 250<br />
Stufe 5 lm 500<br />
Stufe 6 (max. Lichtstrom) lm 600<br />
Lichteintrittswinkel (2α eff )<br />
Zusatzoptik ausgeschwenkt Grad ca. 53<br />
Wärmeschutzfilter - SCHOTT KG 2, 45 x 45,<br />
d = 2,0 mm, gehärtet<br />
Prüfzeichen -<br />
230 V-Version EMV, VDE<br />
120 V-Version<br />
C<br />
US<br />
Die <strong>KL</strong> <strong>1500</strong> <strong>LCD</strong> ist u. a. geprüft und zertifiziert nach den geltenden Normen über elektrische<br />
Laborgeräte (DIN EN 61010-1 bzw. UL 3101-1) sowie elektromedizinisches Gerät nach<br />
DIN EN 60601-1 bzw. UL 2601-1. Dies ermöglicht Herstellern eine einfache Zulassung bei<br />
Integration der <strong>KL</strong> <strong>1500</strong> <strong>LCD</strong> in ihr Medizinprodukt.<br />
Die 230V-Version ist gekennzeichnet mit .<br />
Änderungen in Ausführung und Lieferumfang im Rahmen der technischen Weiterentwicklung vorbehalten.<br />
12
Instrument overview<br />
1<br />
2<br />
3<br />
4<br />
5<br />
6<br />
7<br />
8<br />
9<br />
10<br />
11<br />
12<br />
13<br />
14<br />
15<br />
16<br />
17<br />
18<br />
19<br />
Mains electricity switch 2.2<br />
Light guide connection 2.1<br />
Electronic light intensity setting 2.3<br />
Mechanical light intensity setting 2.3<br />
<strong>LCD</strong> display<br />
Lever for supplementary optics 2.4<br />
Filter slide 2.5<br />
Mains cable<br />
Carrying handle<br />
Lamp compartment with halogen cold light reflector lamp 3<br />
Lamp compartment button 3<br />
Ventilation opening (front of instrument) 1<br />
Ventilation opening (side of instrument) 1<br />
Air outlet grill (back of instrument) 1<br />
Fuse (base of instrument) 5<br />
Model plate (base of instrument)<br />
Colour temperature display 2.3<br />
Fault status display 5<br />
Indication of maximum light intensity 2.3<br />
13
1 Important information<br />
Symbols used:<br />
I<br />
Warning of danger<br />
(Caution, obey documentation)<br />
Warning of a hot surface<br />
Instrument of Protection Class II<br />
Off (disconnected from mains)<br />
On (connected to mains)<br />
Indication of maximum light<br />
intensity<br />
Intended use:<br />
The <strong>KL</strong> <strong>1500</strong> <strong>LCD</strong> is intended for<br />
industrial and laboratory applications.<br />
Cold light sources are used for the<br />
intensive illumination of all types of<br />
objects. The infrared components in<br />
the lamp radiation are filtered out.<br />
High intensity visible light is guided to<br />
the object through flexible or selfsupporting,<br />
movable light guides. The<br />
unit is tested and certificated to the<br />
applicable standards on electrical laboratory<br />
equipment (DIN EN 61010-1 and<br />
UL 3101-1). The 230 V version also<br />
conforms to the standard on medical<br />
electrical equipment (DIN EN 60601-1).<br />
Safety information:<br />
Please read and obey these instructions<br />
carefully. The instrument’s<br />
safety cannot be guaranteed if they<br />
are not obeyed.<br />
Avoid looking directly into the open<br />
clamping sleeve or the light guide exit<br />
when the light source is switched on.<br />
The <strong>KL</strong> <strong>1500</strong> <strong>LCD</strong> emits high-intensity<br />
visible light. Because light-absorbing<br />
materials have the physical property<br />
of converting incident light into heat,<br />
damage can occur to heat-sensitive or<br />
flammable light-absorbing materials.<br />
To avoid such thermal damage and the<br />
potential danger of fire or burns, plea-<br />
se obey the following instructions:<br />
➧ Never cover up the open clamping<br />
sleeve or the light guide exit<br />
(danger of fire).<br />
➧ Never cover up the open clamping<br />
sleeve or the light guide exit with<br />
your hand or other part of the body<br />
(danger of burns).<br />
➧ When illuminating heat-sensitive or<br />
flammable light-absorbing objects<br />
(e.g. in microscopy), special care<br />
must be taken to ensure that a suitable<br />
light guide separation distance<br />
and lamp brightness are chosen so<br />
that no thermal damage occurs.<br />
➧ When the light source is switched<br />
on, all light guide exits not being<br />
used in the working procedure must<br />
always be at a safe distance - at least<br />
10 cm - from heat-sensitive or<br />
flammable light-absorbing materials<br />
(prevention of possible danger of<br />
fire). Therefore take care that each<br />
light guide exit is at the above safe<br />
distance from, for example, dark/<br />
coloured textiles and dark/coloured<br />
wood or plastics surfaces.<br />
➧ To avoid unnecessary stressing of<br />
biological tissue by illumination with<br />
visible light, reduce the brightness<br />
and duration of illumination to<br />
the absolute minimum required<br />
level.<br />
It is absolutely essential that you<br />
ensure that:<br />
➧ your <strong>KL</strong> <strong>1500</strong> <strong>LCD</strong> light source is<br />
operated at the voltage stated on<br />
the model plate (16),<br />
➧ all ventilation openings (12, 13, 14)<br />
are kept free; in the event of insufficient<br />
cooling, a built-in thermostatic<br />
switch switches the instrument off<br />
temporarily (see point 5 “Troubleshooting”),<br />
➧ the lamp has cooled down before<br />
it is changed; to remind you, a<br />
warning symbol is attached to<br />
the lamp compartment door:<br />
(warning of hot surface),<br />
➧ the filter slide and filter insert have<br />
cooled down before removing the<br />
filter insert; the slide carries the<br />
warning symbol .<br />
➧ the filter slide is in one of the<br />
two end positions or the latched<br />
position when the light source is<br />
being operated (see point 2.5 “Filter<br />
slide”).<br />
■ The light source has been developed<br />
only for operation in dry rooms (see<br />
point 7 “Technical data”).<br />
■ This instrument is not suitable for<br />
operation in areas where there is an<br />
explosion hazard.<br />
■ Safe disconnection from the power<br />
supply takes place also by pulling<br />
out the mains plug.<br />
■ The instrument must not be opened<br />
or dismantled. Technical modifications<br />
to the instrument are forbidden.<br />
Repairs must be carried out<br />
only by the manufacturer or by its<br />
authorised customer service agencies.<br />
■ Please ensure that every user of the<br />
instrument has quick access to these<br />
instructions.<br />
■ The manufacturer is not liable for<br />
damage caused by failure to obey<br />
these instructions.<br />
GB<br />
14
2 Operation<br />
2.1 Light guide connection<br />
First open the light guide socket (2) by<br />
turning the outer black ring in a counter-clockwise<br />
direction. Push the light<br />
guide in as far as the stop and close<br />
the light guide socket.<br />
▼<br />
2.2 Start-up procedure<br />
Switch on/off by operating the mains<br />
switch (1).<br />
Position :<br />
The instrument is switched off.<br />
Position I :<br />
The instrument is switched on.<br />
To protect the halogen lamp the<br />
<strong>KL</strong> <strong>1500</strong> <strong>LCD</strong> is fitted with a gentle<br />
start-up device that reduces the high<br />
switch-on current that would otherwise<br />
occur. In addition, electronic stabilisation<br />
of the lamp voltage ensures stable<br />
light power regardless of fluctuations in<br />
the mains voltage.<br />
2.3 Light intensity setting<br />
The <strong>KL</strong> <strong>1500</strong> <strong>LCD</strong> is fitted with two<br />
independent alternative means to adjust<br />
the light intensity.<br />
The stepless electronic adjustment enables<br />
you to optimise the lamp lifetime -<br />
by precisely setting the brightness you<br />
require, you will achieve the longest<br />
halogen lamp lifetime that is possible<br />
for your application. This also varies the<br />
color temperature of the emitted light.<br />
The mechanical adjustment enables<br />
stepless variation of the light intensity<br />
at a constant color temperature.<br />
▼<br />
Caution:<br />
When inserting light guides with a<br />
location pin, care must be taken to<br />
ensure that the latter fits into one of<br />
the four clamping clip slots.<br />
15
2.3.1 Electronic adjustment<br />
2.3.2 Mechanical aperture<br />
The brightness can be adjusted steplessly<br />
by turning the light intensity setting<br />
knob (3).<br />
There are four distinct notched positions<br />
between the two end positions of<br />
the adjusting knob. These fixed positions<br />
thus ensure the reproducibility of<br />
pre-selected brightness settings.<br />
▼<br />
In position 6 the halogen lamp is operated<br />
at its nominal voltage and the<br />
lamp will achieve approximately the<br />
rated lifetime stated by the lamp<br />
manufacturer (depends upon the type).<br />
The approximate color temperature<br />
of the light emitted by the halogen<br />
lamp (17) is indicated on the <strong>LCD</strong><br />
display (5). The color temperature of<br />
the light can be set by turning the<br />
light intensity adjustment (3) (step<br />
width 50 K).<br />
The light intensity can be altered<br />
steplessly while retaining the color<br />
temperature by turning the adjustment<br />
knob of the mechanical aperture (4).<br />
Two fixed end-stops and three additional<br />
retention points (marked with the<br />
letters A to E) enable defined aperture<br />
settings to be selected reproducibly.<br />
▼<br />
GB<br />
After bypassing the barrier at position<br />
5, a lamp symbol (19) appears in the<br />
<strong>LCD</strong> display and flashes for the first<br />
few seconds. This acts as a maximum<br />
light indication and gives a warning<br />
that the expected lamp lifetime will be<br />
reduced compared to position 5.<br />
▼<br />
Position 1 gives the lowest light intensity,<br />
and maximum brightness is attained<br />
in position 6. The two barriers at<br />
positions 4 and 5 are bypassed by<br />
pressing in the adjustment knob.<br />
The adjustment knob cannot be turned<br />
beyond the end stops 1 and 6 respectively.<br />
The lamp lifetime in position 4 is about<br />
<strong>1500</strong> hours and in position 5 it is<br />
about 150 hours.<br />
Position A gives the lowest brightness,<br />
and maximum brightness is achieved<br />
in position E (aperture completely<br />
open). Turning the adjustment knob<br />
from one retention point to the next<br />
approximately doubles or halves the<br />
light intensity respectively each time.<br />
The adjustment knob cannot be turned<br />
beyond the end-stops A and E respectively.<br />
16
2.4 Supplementary optics<br />
Use of in the supplementary optics<br />
ensures that uniform, high-intensity<br />
illumination is achieved even when<br />
using light-guides with a smaller<br />
bundle diameter.<br />
If the illumination is carried out with<br />
imaging or focussing optical systems at<br />
the light guide exit, optimally uniform<br />
illumination is achieved by moving the<br />
supplementary optics out of the optical<br />
path.<br />
Position - Supplementary optics in<br />
optical path:<br />
uniform illumination with no optical<br />
systems at the light guide exit.<br />
Position - Supplementary optics out<br />
of optical path:<br />
uniform illumination with optical<br />
systems at the light guide exit.<br />
The supplementary optics must always<br />
be positioned at the end stop.<br />
2.5 Filter slide<br />
The <strong>KL</strong> <strong>1500</strong> <strong>LCD</strong> has a filter slide (7)<br />
that can be fitted with a filter insert<br />
(available as an accessory).<br />
The warning symbol on the filter<br />
slide reminds you that it is essential<br />
that the slide is in one of the two end<br />
positions or the latched position when<br />
the light source is being operated.<br />
This is the only way to ensure optimum<br />
air cooling of the light source.<br />
Operating the light source with the<br />
filter slide in an intermediate position<br />
can cause damage to the latter.<br />
▼<br />
2.5.1 Inserting filters into filter slide<br />
Please take care to ensure that the filter<br />
slide has cooled down before fitting<br />
the filter insert into it. It carries the<br />
warning symbol to remind you .<br />
Pull out the filter slide (7) as far as the<br />
end stop and insert the required filter.<br />
The light source is fully operational in<br />
this position.<br />
When the filter slide is pushed in up to<br />
the end stop, the filter is located in the<br />
optical beam path.<br />
If you want to operate the light source<br />
without a filter for a short time, pull<br />
out the slide only up to the latched<br />
position.<br />
In this position the filter is still in the<br />
light source but no longer in the path<br />
of the beam.<br />
▼<br />
17
3 Replacing the lamp<br />
4 Maintenance<br />
5 Troubleshooting<br />
Please ensure that the lamp and lampholder<br />
have cooled down before<br />
replacement. The corresponding<br />
warning symbol is attached to remind<br />
you.<br />
▼<br />
Your <strong>KL</strong> <strong>1500</strong> <strong>LCD</strong> is maintenance-free.<br />
There is no provision necessary for<br />
disinfecting the light source when<br />
using it in the medical field.<br />
To clean the outside of the instrument,<br />
use a soft dry cloth or commercially<br />
available plastic cleaning cloths.<br />
The display has a fault status indicator<br />
(18). Any possible breakdowns can be<br />
recognised quickly and easily.<br />
„Err 1“:<br />
„Err 2“:<br />
Lamp circuit interrupted.<br />
Temperature monitor has<br />
triggered.<br />
GB<br />
„Err 3“:<br />
Short-circuit in the lamp<br />
circuit, electronic fuse has<br />
triggered.<br />
▼<br />
First of all switch off the light source.<br />
Open the lamp compartment (10) by<br />
pressing the button (11) and pull it out<br />
as far as the stop.<br />
Press down the two levers of the special<br />
socket and pull out the faulty lamp.<br />
The two levers must be pressed down<br />
again while inserting the new lamp.<br />
Push the lamp compartment in until it<br />
latches (audible locking sound).<br />
Switch the light source on.<br />
Fault Possible causes Remedial action<br />
Lamp out,<br />
fan not running,<br />
no <strong>LCD</strong> display<br />
Lamp out,<br />
fan running,<br />
fault status indication<br />
„Err 1“<br />
Lamp out,<br />
fan running,<br />
fault status indication<br />
„Err 2“<br />
Lamp out,<br />
fan running,<br />
fault status indication<br />
„Err 3“<br />
Instrument not switched on.<br />
Plug not in socket.<br />
No mains electricity voltage.<br />
Lamp compartment not closed.<br />
Fuse faulty.<br />
Transformer overheated.<br />
Lamp defective<br />
No lamp<br />
Insufficient cooling<br />
Transient current increase<br />
in lamp circuit.<br />
Lamp causing short-circuit.<br />
Switch instrument on.<br />
Plug the plug in.<br />
Check mains voltage.<br />
Close lamp compartment.<br />
Replace fuse (15).<br />
Ensure adequate cooling, check<br />
that lamp type is correct, re-start<br />
instrument after cooling down<br />
for a prolonged time.<br />
Replace lamp (see point 3<br />
of these instructions).<br />
With light source switched<br />
off, install lamp.<br />
Ensure ventilation apertures are<br />
free, avoid excessive ambient<br />
temperatures, the instrument will<br />
switch back on again after a<br />
short time.<br />
Switch instrument off and, after<br />
a few seconds, back on again.<br />
Replace lamp (see point 3<br />
of these instructions).<br />
If you are unable to rectify the fault by the actions mentioned above, please contact<br />
your specialist dealer or the nearest SCHOTT agency. More extensive repairs must<br />
be carried out by the authorised customer service depot.<br />
18
6 Accessories<br />
A wide range of accessories is available<br />
for your <strong>KL</strong> <strong>1500</strong> <strong>LCD</strong>. A separate brochure<br />
gives you comprehensive information<br />
– to get it see addresses overleaf.<br />
Only SCHOTT light guides and<br />
accessories guarantee perfect operation,<br />
safety and optimum light yield.<br />
6.1 Light guides<br />
Self-supporting and flexible light guides<br />
in various lengths and diameters<br />
are available, as well as point and slit<br />
illuminators.<br />
6.2 Halogen lamps<br />
When ordering halogen lamps as spare<br />
parts (see point 6.4 of this instruction),<br />
the lamp type that enables optimum<br />
light yield and illumination will be supplied.<br />
6.3 Filters<br />
Optical filters can either be inserted<br />
into the filter slide (7) or placed in<br />
front of the light guide exit as a screwin<br />
or push-on filter in conjunction with<br />
an auxiliary focussing device<br />
(accessory).<br />
Details of the auxiliary focussing device<br />
and the filter types available as standard<br />
can be found in the accessories<br />
catalogue.<br />
6.4 Spare parts<br />
Spare part<br />
Catalogue No.<br />
Halogen lamp 15 V/150 W 153 000<br />
Philips, type 6423<br />
Philips, type 6423 XHP<br />
Osram, type HLX 64634<br />
Fuse for 230 V (primary) 150 101<br />
T 2 H, 250V acc. to IEC 127-3/5<br />
Fuse for 120 V (primary) 153 103<br />
T 4 A acc. to UL 198 G<br />
To ensure maximum performance, light yield and safety you must only use the<br />
spare parts stated above.<br />
7 Technical data<br />
Properties<br />
Values<br />
General information<br />
Type description - <strong>KL</strong> <strong>1500</strong> <strong>LCD</strong><br />
Dimensions (W x D x H) mm approx. 200 x 265 x 170<br />
Weight kg approx. 5<br />
Cooling - axial (fan cooled)<br />
Ambient temperature* °C + 5 ... + 40<br />
Relative air humidity* % at 31°C ambient temperature: 85 %<br />
from 31°C to 40°C ambient temperature:<br />
decreasing linearly to 75 %<br />
Air pressure* hPa 700 ... 1060<br />
Transport and storage<br />
Temperature °C - 40 ... + 70<br />
Rel. air humidity % 10 ... 95 (non-condensing)<br />
Air pressure hPa 500 ... 1200<br />
Contamination level - 2<br />
* Test conditions of Standards DIN EN 61010-1, DIN EN 60601-1 and UL 3101-1.<br />
continued on page 20<br />
19
Properties<br />
Values<br />
Electrical information<br />
Operating voltage,<br />
frequency<br />
230 V version 220 ... 240 V ~ 50 /60 Hz<br />
120 V version 100 V ~ 50 / 60 Hz and<br />
120 V ~ 60 Hz<br />
Power consumption, max. W 200<br />
Fuses, primary<br />
230 V version - T 2 H, 250 V in accordance with<br />
IEC 127-3/5<br />
120 V version - T 4 A in accordance with UL 198 G<br />
Protection class - II<br />
Overvoltage category - II<br />
Lamp type - Halogen reflector lamp<br />
Philips, Type 6423<br />
Philips, Type 6423 XHP<br />
Osram, Type HLX 64634<br />
Lamp rated voltage V 15<br />
Lamp rated power W 150<br />
Average lamp lifetime<br />
Level 4 h <strong>1500</strong><br />
Level 5 h 150<br />
Level 6 h 50<br />
GB<br />
Lighting information<br />
Maximum effective<br />
light guide bundle diameter mm 9<br />
Total light flux at light guide exit<br />
(SCHOTT light guide, Ø 8 mm, typ. values)<br />
Level 4 lm 250<br />
Level lm 500<br />
Level 6 (max. light flux) lm 600<br />
Light entry angle (2α eff )<br />
Without supplementary optics degrees approx. 53<br />
Heat protection filter - SCHOTT KG 2, 45 x 45<br />
thickness = 2,0 mm, toughened<br />
Approvals -<br />
230 V version EMV, VDE<br />
120 V version<br />
The <strong>KL</strong> <strong>1500</strong> <strong>LCD</strong> has been tested and certificated to the applicable standards on electrical<br />
laboratory equipment (DIN EN 61010-1 and UL 3101-1), and electrical medical equipment,<br />
DIN EN 60601-1 and/or UL 2601-1. This enables manufacturers to obtain easy approval with<br />
integration of the <strong>KL</strong> <strong>1500</strong> <strong>LCD</strong> into their medical products.<br />
The 230 V version features .<br />
The right is reserved to make changes in the design and supplied items within the scope of on-going technical development.<br />
C US<br />
20
Vue d’ensemble de l’appareil<br />
1<br />
2<br />
3<br />
4<br />
5<br />
6<br />
7<br />
8<br />
9<br />
10<br />
11<br />
12<br />
13<br />
14<br />
15<br />
16<br />
17<br />
18<br />
19<br />
Interrupteur principal 2.2<br />
Entrée du conducteur de lumière 2.1<br />
Réglage électronique de l’intensité lumineuse 2.3<br />
Réglage mécanique de l’intensité lumineuse 2.3<br />
Affichage <strong>LCD</strong><br />
Levier pour optique additionnelle 2.4<br />
Porte-filtre coulissant 2.5<br />
Câble secteur<br />
Poignée de transport<br />
Compartiment à lampe lumière froide avec lampe<br />
halogène à réflecteur 3<br />
Bouton de verrouillage du compartiment à lampe 3<br />
Ouïes d’aération (face avant de l’appareil) 1<br />
Ouïes d’aération (face latérale de l’appareil) 1<br />
Grille d’aération (dos de l’appareil) 1<br />
Fusible (sous l’appareil) 5<br />
Plaque d’identification (sous l’appareil)<br />
Indication de température de couleur 2.3<br />
Indication du type d’erreurs 5<br />
Indication d’intensité lumineuse maximale 2.3<br />
21
1 Remarques importantes<br />
Symboles utilisés:<br />
I<br />
présence d’une zone dangereuse<br />
(attention : il est indispensable de<br />
se référer à la documentation)<br />
présence d’une surface brûlante<br />
Appareil de la classe de<br />
protection II<br />
Arrêt (appareil hors tension)<br />
Marche (appareil sous tension)<br />
Indicateur d’intensité lumineuse<br />
maximale<br />
La <strong>KL</strong> <strong>1500</strong> <strong>LCD</strong> est prévue pour une<br />
utilisation dans l’industrie et en laboratoire.<br />
Les sources de lumière froide sont<br />
utilisées pour l’éclairage intensif d’objets<br />
de toutes sortes. Les rayonnements<br />
infrarouges des lampes sont filtrés.<br />
La lumière visible d’une haute intensité<br />
est dirigée sur l’objet au moyen<br />
d’un guide de lumière mobile souple<br />
ou autoportant.<br />
L’appareil est expertisé et homologué<br />
selon les normes en vigueur sur<br />
les appareils électriques de laboratoire<br />
(DIN EN 61010 – respectivement<br />
UL 3101-1), la version 230 V est en plus<br />
soumise à la norme DIN EN 60601-1<br />
sur les appareils électriques médicaux.<br />
Conseils de sécurité:<br />
➧ Ne couvrez jamais la bague de serrage<br />
ouverte ou la sortie de conducteur<br />
de lumière (risque d’incendie) !<br />
➧ Pour éclairer des objets thermosensibles<br />
ou inflammables absorbant la<br />
lumière (p. ex. en microscopie), vous<br />
devrez plus particulièrement veiller à<br />
ce que la distance entre le conducteur<br />
de lumière et l’objet à éclairer,<br />
ainsi que l’intensité lumineuse de la<br />
lampe, soient sélectionnées de sorte<br />
qu’aucune détérioration thermique<br />
n’apparaisse sur l’objet éclairé.<br />
➧ Toutes les sorties de conducteur de<br />
lumière inutilisées pendant la phase<br />
de travail (appareil sous tension)<br />
doivent toujours se trouver à une<br />
distance de sécurité, c’est-à-dire au<br />
moins éloignées de 10 cm des<br />
matériaux thermosensibles ou<br />
inflammables absorbant la lumière<br />
(pour éviter les risques d’incendie).<br />
Il est indispensable que, pour chaque<br />
sortie de conducteur de lumière, la<br />
distance de sécurité mentionnée cidessus<br />
soit respectée, par exemple,<br />
vis-à-vis de textiles sombres/de<br />
couleurs et de surfaces de bois ou de<br />
plastiques sombres/de couleurs.<br />
➧ Pour éviter une réaction indésirable<br />
des tissus biologiques due à la<br />
lumière visible, réduisez l’intensité<br />
lumineuse et la durée d’exposition<br />
au niveau vraiment nécessaire.<br />
insuffisant, un «thermorupteur»<br />
intégré mettra l’appareil provisoire<br />
ment hors circuit<br />
(cf. point 5 «Dépannage »).<br />
➧ Avant de remplacer la lampe, patientez<br />
jusqu’à ce qu’elle soit refroidie.<br />
Afin de vous souvenir de<br />
cette remarque importante,<br />
le symbole d’avertissement ÄÄÅÅest<br />
apposé dans la porte du compartiment<br />
de la lampe (Attention:<br />
présence de surface brûlante).<br />
➧ Le porte-filtre coulissant et le filtre<br />
d’insertion doivent être refroidis<br />
avant l’enlèvement du filtre d’insertion.<br />
Le porte-filtre coulissant est<br />
pourvu du symbole d’avertissement<br />
➧ Pendant l’utilisation de la source de<br />
lumière, le porte-filtre coulissant doit<br />
toujours se trouver sur l’une des<br />
deux positions de fin de course ou<br />
sur la position d’enclenchement<br />
(cf. point 2.5 «Coulisse porte-filtre»).<br />
■ La source de lumière a été conçue<br />
pour un fonctionnement exclusivement<br />
dans des locaux secs (cf. point<br />
7 «Caractéristiques techniques»).<br />
■ Cet appareil n’est pas adapté pour<br />
une utilisation dans des zones à<br />
risques d’explosions.<br />
F<br />
La sécurité de l’appareil n’est pas<br />
garantie dans le cas du non-respect<br />
de ces conseils. Lorsque la source de<br />
lumière est allumée, évitez de diriger<br />
votre regard directement vers<br />
l’ouverture de la source ou vers la<br />
sortie du conducteur de lumière.<br />
La <strong>KL</strong> <strong>1500</strong> <strong>LCD</strong> diffuse une lumière<br />
visible de forte intensité. Etant donné<br />
que les matériaux absorbant la lumière<br />
ont la propriété physique de transformer<br />
la lumière en chaleur, des détériorations<br />
sont susceptibles d’apparaître<br />
sur de tels matériaux thermosensibles<br />
ou inflammables. Pour éviter des<br />
détériorations thermiques ou pour éviter<br />
les risques d’incendie ou de brûlure,<br />
veuillez observer strictement les<br />
consignes suivantes :<br />
Conseils importants:<br />
➧ Veiller toujours à ce que votre source<br />
de lumière froide <strong>KL</strong> <strong>1500</strong> <strong>LCD</strong><br />
soit alimentée avec la tension indiquée<br />
sur la plaque d’identification (16)<br />
➧ Il est indispensable que toutes les<br />
ouïes d’aération (12,13,14) soient<br />
toujours entièrement dégagées. En<br />
effet, en cas de refroidissement<br />
■ Il est interdit d’ouvrir ou de démonter<br />
l’appareil, de même que d’y<br />
apporter des modifications. Les<br />
réparations doivent être exclusivement<br />
confiées au constructeur ou à<br />
des antennes de service après-vente<br />
qui ont été autorisées par ses soins.<br />
■ Veuillez vous assurer que ce manuel<br />
d’utilisation soit toujours à portée de<br />
chaque utilisateur.<br />
■ Le constructeur décline toute responsabilité<br />
en cas de dommages qui<br />
seraient dus à l’inobservation de ces<br />
conseils d’utilisation.<br />
22
2 Mode de fonctionnement<br />
2.1 Raccordement du conducteur<br />
de lumière<br />
Tout d’abord, ouvrez l’entrée du conducteur<br />
de lumière (2) en tournant<br />
l’anneau noir extérieur dans le sens<br />
contraire des aiguilles d’une montre.<br />
Poussez le conducteur de lumière jusqu’à<br />
la butée, puis refermez.<br />
▼<br />
2.2 Mise en service<br />
Marche / Arrêt par actionnement de<br />
l’interrupteur principal (1).<br />
Position : l’appareil est éteint<br />
Position I : l’appareil est allumé<br />
Pour ménager la lampe halogène, la<br />
<strong>KL</strong> <strong>1500</strong> <strong>LCD</strong> est équipée d’un dispositif<br />
de démarrage progressif qui réduit la<br />
puissance normalement plus élevée lors<br />
de la mise sous tension. En plus, un<br />
système de stabilisation électronique de<br />
la tension de la lampe assure une intensité<br />
lumineuse stable, indépendamment<br />
des variations du secteur.<br />
▼<br />
2.3 Réglage de l’intensité lumineuse<br />
La <strong>KL</strong> <strong>1500</strong> <strong>LCD</strong> dispose de deux possibilités<br />
de réglage de l’intensité lumineuse<br />
indépendante l’une de l’autre.<br />
Le système de réglage électronique<br />
progressif vous permet d’optimiser la<br />
durée de vie de la lampe. En effet, le<br />
réglage précis de la luminosité dont<br />
vous avez besoin vous permet d’obtenir<br />
la durée de vie la plus grande<br />
possible de la lampe halogène pour<br />
votre domaine d’application spécifique.<br />
Ce faisant, il y a également variation de<br />
la température de couleur de la lumière<br />
diffusée.<br />
Le réglage mécanique vous permet de<br />
modifier progressivement l’intensité<br />
lumineuse sans que la température de<br />
couleur change.<br />
Attention:<br />
Pour la mise en place de conducteurs<br />
de lumière avec tige de guidage, il faut<br />
veiller à ce que cette dernière s’ajuste<br />
dans l’une des quatre fentes de<br />
mâchoire de serrage.<br />
23
2.3.1 Système de réglage<br />
électronique<br />
Pour procéder à un réglage progressif<br />
de l’intensité lumineuse, il suffit de<br />
tourner l’indicateur d’intensité lumineuse<br />
(3).<br />
Entre les deux butées du bouton de<br />
réglage, vous trouverez quatre points<br />
d’enclenchement bien visibles. Ces<br />
positions fixes assurent la reproductibilité<br />
de réglages de l’intensité lumineuse<br />
présélectionnés.<br />
▼<br />
Sur la position 6, la lampe halogène<br />
fonctionne sous tension nominale et<br />
atteint alors approximativement (en<br />
fonction du type) la durée de vie<br />
moyenne indiquée par son fabricant.<br />
L’affichage <strong>LCD</strong> (5) visualise la<br />
température de couleur approximative<br />
de la lumière diffusée par la lampe<br />
halogène (17). En tournant l’indicateur<br />
d’intensité lumineuse (3), vous pouvez<br />
régler la température de couleur de la<br />
lumière (de 50 K en 50 K).<br />
2.3.2 Obturateur mécanique<br />
En tournant le bouton de réglage de<br />
l’obturateur mécanique (4), vous pouvez<br />
modifier progressivement l’intensité<br />
lumineuse tout en conservant la<br />
température de couleur.<br />
Deux butées fixes et trois points d’enclenchement<br />
supplémentaires (désignés<br />
par les lettres A et E) permettent<br />
de sélectionner des positions d’obturateur<br />
définies et reproductibles.<br />
▼<br />
F<br />
Après avoir dépassé la barrière de la<br />
position 5, un symbole représentant<br />
une lampe (19) est visualisé sur l’affichage<br />
<strong>LCD</strong>. Ce symbole clignote pendant<br />
les premières secondes. Il sert à<br />
indiquer l’intensité de lumière maximale<br />
et indique que la durée de vie<br />
théorique de la lampe sera diminuée<br />
par rapport à un fonctionnement sur la<br />
position 5.<br />
▼<br />
L’intensité lumineuse la plus faible est<br />
sur la position 1, l’intensité lumineuse<br />
maximale est obtenue sur la position 6.<br />
Les deux barrières au niveau des positions<br />
4 et 5 sont dépassées par pression<br />
du bouton de réglage.<br />
Le bouton de réglage ne peut pas être<br />
tourné au-delà des butées 1 ou 6.<br />
La durée de vie de la lampe est d’environ<br />
<strong>1500</strong> heures sur la position 4 et<br />
d’environ 150 heures sur la position 5.<br />
Sur la position A, l’intensité lumineuse<br />
est la plus faible, alors que sur la position<br />
E (obturateur entièrement ouvert),<br />
c’est l’intensité lumineuse maximale<br />
qui est obtenue. En tournant le bouton<br />
de réglage d’un point d’enclenchement<br />
au suivant, vous réglez, à chaque<br />
fois, une intensité lumineuse approximativement<br />
multipliée ou divisée par<br />
deux.<br />
Le bouton de réglage ne peut pas être<br />
tourné au-delà des butées A ou E.<br />
24
2.4 Optique supplémentaire<br />
La mise en œuvre de l’optique additionnelle<br />
par pivotement permet d’obtenir<br />
un éclairage de forte intensité<br />
lumineuse uniforme, même en utilisant<br />
des conducteurs de lumière présentant<br />
un faible diamètre de fibrage.<br />
Si l’éclairage est réalisé par des systèmes<br />
optiques focalisateurs en sortie<br />
du conducteur de lumière, il est alors<br />
possible d’obtenir un éclairage d’une<br />
uniformité optimale en éloignant<br />
l’optique additionnelle.<br />
Position - Optique additionnelle<br />
rapprochée:<br />
éclairage uniforme sans systèmes<br />
optiques en sortie de conducteur de<br />
lumière.<br />
Position - Optique additionnelle<br />
éloignée:<br />
éclairage uniforme avec systèmes<br />
optiques en sortie de conducteur de<br />
lumière.<br />
L’optique additionnelle doit toujours<br />
être approchée ou sortie jusqu’à la<br />
butée.<br />
2.5 Porte-filtre coulissant<br />
La <strong>KL</strong> <strong>1500</strong> <strong>LCD</strong> dispose d’un portefiltre<br />
coulissant (7) qui peut être équipé<br />
d’un filtre d’insertion (disponible en<br />
tant qu’accessoire).<br />
Le symbole d’avertissement ÄÄÅÅ sur<br />
le porte-filtre coulissant vous rappelle<br />
que lors de l’utilisation de la source de<br />
lumière, le porte-filtre doit toujours<br />
être placé sur l’une des deux positions<br />
de fin de course ou sur la position<br />
d’enclenchement.<br />
En effet, ce n’est qu’ainsi que le refroidissement<br />
optimal par air de la<br />
source de lumière est assuré.<br />
Le fonctionnement de la source de<br />
lumière avec porte-filtre coulissant sur<br />
une position intermédiaire peut provoquer<br />
la détérioration de celui-ci.<br />
▼<br />
2.5.1 Equipement du porte-filtre<br />
coulissant<br />
Avant d’insérer le filtre, veillez à ce que<br />
le porte filtre coulissant soit refroidi. Le<br />
symbole d’avertissement ÄÅÅ vous<br />
rappelle de ne pas oublier cette consigne<br />
importante.<br />
Sortez le porte-filtre coulissant (7) jusqu’à<br />
la butée, puis insérez le filtre souhaité.<br />
Dans cette position, la source de<br />
lumière est prête à fonctionner.<br />
Lors de l’introduction du porte-filtre<br />
coulissant jusqu’à la butée, le filtre se<br />
trouve dans le faisceau lumineux.<br />
Si vous désirez exploiter la source de<br />
lumière brièvement sans filtre, il vous<br />
suffit de retirer le porte-filtre, mais jusqu’au<br />
point d’enclenchement.<br />
Dans cette position, le filtre est encore<br />
dans la source de lumière, mais il n’est<br />
plus dans le faisceau lumineux.<br />
▼<br />
25
3 Remplacement de<br />
la lampe<br />
Avant de procéder à un remplacement,<br />
veillez à ce que la lampe et la douille<br />
soient refroidies. Pour vous souvenir, le<br />
symbole ÄÄÅ y est apposé.<br />
▼<br />
4 Entretien<br />
Votre <strong>KL</strong> <strong>1500</strong> <strong>LCD</strong> ne nécessite pas<br />
d’entretien.<br />
Une stérilisation de la source de lumière<br />
utilisée dans le domaine médical<br />
n’est pas prévue.<br />
Pour le nettoyage extérieur de l’appareil,<br />
utilisez un chiffon doux et sec.<br />
5 Dépannage<br />
L’affichage dispose d’un indicateur<br />
d’erreurs (18). Ainsi, les pannes éventuelles<br />
peuvent être détectées et localisées<br />
rapidement et en toute fiabilité.<br />
«Err 1»: Interruption de l’alimentation<br />
de la lampe.<br />
F<br />
«Err 2»: Le contrôleur de température<br />
s’est enclenché.<br />
▼<br />
«Err 3»: Court-circuit dans l’alimentation<br />
de la lampe, le fusible<br />
électronique s’est déclenché.<br />
Eteignez, tout d’abord, la source de<br />
lumière. Ouvrez le compartiment à<br />
lampe (10) en appuyant sur le bouton<br />
de déverrouillage (11) et retirez-le jusqu’à<br />
la butée. Abaissez les deux leviers<br />
du socle spécial, puis sortez la lampe<br />
défectueuse.<br />
Lors de la mise en place de la nouvelle<br />
lampe, les deux leviers doivent être<br />
également poussés vers le bas.<br />
Introduisez le compartiment à lampe<br />
jusqu’au verrouillage (enclenchement<br />
audible).<br />
Allumez la source de lumière.<br />
Nature de la panne Cause probable Remède<br />
Lampe éteinte, aérateur L’appareil n’est pas en marche Mettez l’appareil<br />
éteint, pas d’affichage <strong>LCD</strong><br />
en marche<br />
La fiche d’alimentation n’est pas Branchez la fiche d’alibranchée<br />
mentation<br />
Pas de tension secteur<br />
Vérifiez la tension secteur<br />
Le compartiment à lampe Fermez le compartiment<br />
n’est pas fermé<br />
à lampe<br />
Le fusible est défectueux Remplacez le fusible (15)<br />
Surchauffe du transformateur Assurez un refroidisse<br />
ment suffisant<br />
Vérifiez si le type de<br />
lampe utilisé est correct<br />
Remettez l’appareil en<br />
marche à la suite d’une<br />
phase de refroidissement<br />
prolongée<br />
Lampe éteinte, Lampe défectueuse Remplacez la lampe<br />
aérateur en marche, (cf. le point 3)<br />
indicateur d’erreur « Err1» Pas de lampe Mettez la lampe en place<br />
avec la source de lumière<br />
éteinte<br />
Lampe éteinte, Refroidissement insuffisant Dégager les ouïes d’aéraaérateur<br />
en marche,<br />
tion, évitez les tempéraindicateur<br />
d’erreur «Err2»<br />
tures ambiantes trop élevées,<br />
l’appareil se remet<br />
en marche au bout<br />
d’une brève période<br />
Lampe éteinte, Brève élévation du courant Eteignez l’appareil, puis<br />
aérateur en marche, dans le circuit de la lampe remettez-le en marche au<br />
indicateur d’erreur «Err3»<br />
bout de quelques<br />
secondes<br />
La lampe provoque un court- Remplacez la lampe<br />
circuit (cf. point 3)<br />
Au cas où vous ne pourriez pas réparer la panne en prenant les mesures mentionnées,<br />
ci-dessus, veuillez contacter votre revendeur ou l’agence Schott la plus<br />
proche. Au cas où des réparations plus conséquentes devraient être effectuées,<br />
veuillez confier l’appareil au SAV autorisé.<br />
26
6 Accessoires<br />
Une large gamme d’accessoires peut<br />
être fournie pour votre <strong>KL</strong> <strong>1500</strong> <strong>LCD</strong>.<br />
Un prospectus séparé vous fournit des<br />
renseignements exhaustifs – Celui-ci<br />
peut être commandé à une des adresses<br />
mentionées au verso.<br />
Seuls les conducteurs de lumière et les<br />
accessoires SCHOTT vous assurent un<br />
fonctionnement et une sécurité parfaits,<br />
ainsi qu’un éclairage optimum.<br />
6.1 Conducteurs de lumière<br />
Il existe des conducteurs de lumière<br />
semi-rigides et flexibles de différentes<br />
longueurs et diamètres, ainsi que des<br />
éclairages ponctuels et en fente.<br />
6.2 Lampe halogène<br />
En commandant des lampes halogènes<br />
en tant que pièces de rechange<br />
(cf. point 6.4), nous vous fournirons le<br />
type de lampe qui vous garantira un<br />
éclairement optimum.<br />
6.3 Filtres<br />
Les filtres optiques peuvent soit être<br />
déposés dans le porte-filtre (7), soit<br />
montés devant la sortie du conducteur<br />
de lumière sous forme de filtres à visser<br />
ou à fixer (élément focalisateur).<br />
Pour plus de détails concernant l’élément<br />
focalisateur et les types de filtres<br />
disponibles en standard, veuillez vous<br />
reporter au prospectus «Accessoires».<br />
6.4 Pièces de rechange<br />
Art<br />
N 0 de commande<br />
Lampe halogène 15V/150W 153 000<br />
Philips, type 6423<br />
Philips, type 6423 XHP<br />
Osram, type HLX 64634<br />
Fusible pour 230 V (primaire) 150 101<br />
T 2 H 250 V selon CEI 127-3/5<br />
Fusible pour 120 V (primaire) 153 103<br />
T 4 A selon UL 198 G<br />
Le bon fonctionnement, la sécurité et l’éclairement optimum ne sont garantis que<br />
si vous utilisez les pièces de rechange conseillées ci-dessus.<br />
7 Caractéristiques techniques<br />
Propriétés<br />
Informations générales<br />
Valeurs<br />
Désignation du type<br />
<strong>KL</strong> <strong>1500</strong> <strong>LCD</strong><br />
Dimensions (l x p x h) mm environ 200 x 265 x 170.<br />
Masse kg env. 5<br />
Refroidissement<br />
Ventilateur<br />
Température ambiante * °C + 5 … + 40<br />
Humidité relative de l’air * % jusqu’à la température ambiante<br />
de 31°C : 85 %<br />
pour température ambiante de<br />
31°C à 40°C à décroissance linéaire<br />
à 75 %<br />
Pression atmosphérique * hPa 700 … 1060<br />
Lors du transport et du stockage:<br />
Température °C - 40 … + 70<br />
Humidité relative de l’air % 10 … 95 (sans condensation)<br />
Pression atmosphérique hPa 500 … 1200<br />
Degré de pollution 2<br />
* Conditions d’essai des normes DIN EN 61010-1, DIN EN 60601-1 et UL 3101-1<br />
suite page 28<br />
27
Propriétés<br />
Valeurs<br />
Informations concernant les valeurs électriques<br />
Tension de service,<br />
fréquence<br />
version 230 V<br />
220 ... 240 V ~ 50 /60 Hz<br />
version 120 V<br />
100 V ~ 50 / 60 Hz et<br />
120 V ~ 60 Hz<br />
Consommation max. W 200<br />
Fusibles, primaires<br />
version 230 V - T 2 H, 250 V selon IEC 127-3/5<br />
version 120 V - T 4 A selon UL 198 G<br />
Classe de protection - II<br />
Catégorie de surtension - II<br />
Type de lampe - lampe à réflecteur halogène<br />
Philips, type 6423<br />
Philips, type 6423 XHP<br />
Osram, type HLX 64634<br />
Tension nominale de lampe V 15<br />
Puissance nominale de lampe W 150<br />
Durée de vie moyenne de<br />
la lampe<br />
niveau 4 h <strong>1500</strong><br />
niveau 5 h 150<br />
niveau 6 h 50<br />
F<br />
Informations concernant la technique de génération de lumière<br />
Diamètre maximal du faisceau<br />
du conducteur de lumière utilisable<br />
en éclairagisme mm 9<br />
Flux lumineux total en sortie<br />
du conducteur lumineux<br />
(conducteur lumineux SCHOTT de<br />
8 mm de diam., valeurs typiques)<br />
niveau 4 lm 250<br />
niveau 5 lm 500<br />
niveau 6 (flux lumineux max.) lm 600<br />
Angle d’entrée lumineuse (2α eff )<br />
Optique supplémentaire éloignée degrés 53 env.<br />
Filtre de protection thermique - SCHOTT KG 2, 45 x 45,<br />
d = 2,0 mm, trempé<br />
Sigle d’homologation -<br />
version 230 V<br />
EMV, VDE<br />
version 120 V<br />
C US<br />
La <strong>KL</strong> <strong>1500</strong> <strong>LCD</strong> est, entre autres, expertisée et homologuée selon les normes en vigueur sur les<br />
appareils électriques de laboratoires (DIN EN 61010-1, respectivement UL 3101-1), ainsi qu’au<br />
matérial électromédical selon la norme DIN EN 60601-1 ou, suivant le cas, UL 2601-1. Ceci<br />
permet aux constructeurs d’obtenir une homologation aisée de leurs produits pour la médecine<br />
en y intégrant la <strong>KL</strong> <strong>1500</strong> <strong>LCD</strong>.<br />
La version 230 V est dinstinguée par .<br />
Sous réserve de modifications au niveau du modèle et des conditions de livraison dues au développement technique.<br />
28
Strumentazione<br />
1<br />
2<br />
3<br />
4<br />
5<br />
6<br />
7<br />
8<br />
9<br />
10<br />
11<br />
12<br />
13<br />
14<br />
15<br />
16<br />
17<br />
18<br />
19<br />
Interruttore di rete 2.2<br />
Alloggiamento della guidaluce 2.1<br />
Regolazione elettronica dell’intensità di luce 2.3<br />
Regolazione meccanica dell’intensità di luce 2.3<br />
Display a cristalli liquidi<br />
Leva orientabile per l’ottica supplementare 2.4<br />
Portafiltro a cassetto 2.5<br />
Cavo di alimentazione<br />
Impugnatura per il trasporto 3<br />
Vano portalampada per lampada alogena a luce<br />
fredda con riflettore incorporato 3<br />
Pulsante di apertura del vano portalampada<br />
Bocchette di aerazione (lato anteriore dello strumento) 1<br />
Bocchette di aerazione (parte laterale dello strumento) 1<br />
Griglia per lo scarico dell’aria (lato posteriore dello strumento) 1<br />
Dispositivo di protezione (fondo dello strumento) 3<br />
Targhetta tipologica (fondo dello strumento)<br />
Indicatore della temperatura colore 2.3<br />
Indicatore di guasto 5<br />
Segnalazione di intensità massima di luce 2.3<br />
29
1 Avvertenze importanti<br />
Simboli utilizzati:<br />
I<br />
Simbolo di avvertimento che<br />
segnala un punto pericoloso<br />
(attenzione, occorre osservare<br />
quanto indicato nella<br />
documentazione)<br />
Simbolo di avvertimento che<br />
segnala una superficie calda<br />
Strumento con classe di<br />
protezione II<br />
Strumento spento (OFF)<br />
(strumento scollegato dalla rete)<br />
Strumento acceso (ON)<br />
(strumento collegato alla rete)<br />
Avviso di massima intensità<br />
luminosa<br />
Uso determinato:<br />
La <strong>KL</strong> <strong>1500</strong> <strong>LCD</strong> è destinata all’impiego<br />
in industria e in laboratorio.<br />
Le fonti di luce fredda servono ad illuminare<br />
con luce intensa oggetti di<br />
ogni tipo. Le quote di infrarossi dell’irraggiamento<br />
della lampada vengono<br />
filtrate e separate. Le luce visibile di<br />
elevata intensità viene portata all’oggetto<br />
mediante un fotoconduttore mobile<br />
flessibile od autoportante.<br />
La <strong>KL</strong> <strong>1500</strong> <strong>LCD</strong> è collaudata e certificata<br />
ai sensi delle vigenti norme sulle<br />
apparecchiature elettriche da laboratorio<br />
(rispettivamente DIN EN 61010-1 e<br />
UL 3101-1), e la versione 230 V anche<br />
ai sensi della Norma sui Dispositivi<br />
Elettrici Medici (DIN EN 60601-1).<br />
Avvertenze per la sicurezza<br />
Leggere con cura e rispettare accuratamente<br />
quanto indicato nelle<br />
presenti istruzioni. In caso di mancata<br />
osservanza delle istruzioni non<br />
viene garantita la sicurezza dello<br />
strumento. A sorgente luminosa<br />
accesa, evitare di guardare direttamente<br />
nella bussola di chiusura o<br />
nell’uscita della guidaluce.<br />
Alla <strong>KL</strong> <strong>1500</strong> <strong>LCD</strong> fuoriesce luce visibile<br />
di elevata intensità. Poichè i materiali<br />
ad assorbimento luminoso hanno la<br />
proprietà fisica di trasformare la luce<br />
che li colpisce in calore, è possibile che<br />
materiali ad assorbimento luminoso termosensibili<br />
o infiammabili subiscano dei<br />
danni. Per evitare danni di questo tipo<br />
dovuti al calore ed il possibile pericolo<br />
di combustione ed incendio occorre rispettare<br />
le avvertenze che seguono:<br />
➧ La bussola di chiusura aperta e<br />
l’uscita della guidaluce non vanno<br />
mai coperte (pericolo di incendio)!<br />
➧ La bussola di chiusura aperta e l’uscita<br />
della guidaluce non vanno mai<br />
coperte con le mani o con altre<br />
parti del corpo (pericolo di ustioni)!<br />
➧ Se vengono illuminati oggetti ad<br />
assorbimento luminoso termosensibili<br />
o infiammabili (per esempio nella<br />
microscopia), occorre fare particolare<br />
attenzione a scegliere una distanza<br />
per la guidaluce ed una luminosità<br />
della lampada tale da evitare la<br />
comparsa di danni sull’oggetto<br />
dovuti al calore.<br />
➧ Tutte le uscite della guidaluce che<br />
non vengono utilizzate durante<br />
il lavoro devono sempre trovarsi, a<br />
sorgente di luce accesa, a distanza di<br />
sicurezza – almeno 10 cm – da materiali<br />
ad assorbimento luminoso termosensibili<br />
o infiammabili (per evitare<br />
il possibile pericolo di incendio).<br />
Occorre prestare quindi molta attenzione<br />
a mantenere per dette estremità<br />
di uscita della luce una opportuna<br />
distanza di sicurezza per esempio<br />
da tessuti scuri/colorati, superfici<br />
di legno o plastica scure/colorate.<br />
➧ Per evitare di gravare inutilmente sui<br />
tessuti biologici illuminandoli con<br />
luce visibile, la luminosità e la durata<br />
dell’illuminazione degli stessi andranno<br />
ridotte al minimo indispensabile.<br />
■ Occorre poi assolutamente fare<br />
attenzione che:<br />
➧ la sorgente di luce fredda della<br />
<strong>KL</strong> <strong>1500</strong> <strong>LCD</strong> funzioni con la<br />
tensione indicata sulla targhetta (16);<br />
➧ le bocchette di aerazione (12, 13,<br />
14) vengano sempre lasciate tutte<br />
libere se il raffreddamento non è<br />
sufficiente scatta un interutorre termico<br />
che disattiva temporaneamente<br />
lo strumento (si veda il punto 5<br />
“Risoluzione di problemi”);<br />
➧ la lampada si sia raffreddata prima<br />
di procedere alla sua sostituzione;<br />
per ricordare di attendere il raffreddamento<br />
della lampada è stato<br />
applicato sullo sportello del vano<br />
portalampada un simbolo di<br />
avvertimento:<br />
superficie calda<br />
➧ il portafiltro a cassetto ed il filtro si<br />
siano raffreddati prima di procedere<br />
alla rimozione del filtro stesso.<br />
Il portafiltro è dotato di simbolo<br />
di avvertimento.<br />
➧ il portafiltro a cassetto, a sorgente di<br />
luce accesa, si trovi sempre in una<br />
delle due posizioni finali o nel punto<br />
di arresto intermedio! (si veda il<br />
punto 2.5 “Portafiltro a cassetto”)<br />
■ La sorgente luminosa è stata sviluppata<br />
unicamente per funzionare in<br />
ambienti asciutti (si veda il punto 7<br />
“Dati tecnici“).<br />
■ Lo strumento non è idoneo<br />
all’impiego in zone a rischio di<br />
esplosione.<br />
■ Una separazione sicura dalla rete<br />
elettrica si ha unicamente estraendo<br />
la spina per il collegamento dalla<br />
rete elettrica.<br />
■ Lo strumento non può essere aperto<br />
o smontato. Sono vietate modifiche<br />
tecniche allo strumento. Le riparazioni<br />
possono essere eseguite unicamente<br />
dalla casa costruttrice o da<br />
centri di assistenza autorizzati.<br />
■ Si prega di rendere facilmente<br />
accessibile il presente libretto di<br />
istruzioni a chiunque utilizzi lo<br />
strumento.<br />
■ La casa costruttrice non risponde<br />
per danni dovuti alla mancata osservanza<br />
di quanto indicato in questo<br />
libretto d’istruzioni.<br />
I<br />
30
2 Funzionamento<br />
2.1 Collegamento della guidaluce<br />
Per prima cosa aprire l’alloggiamento<br />
della guidaluce (2) girando l’anello più<br />
esterno nero in senso antiorario.<br />
Inserire la guidaluce fino all’arresto e<br />
chiudere l’alloggiamento.<br />
▼<br />
2.2 Messa in funzione<br />
Lo strumento viene acceso e spento<br />
azionando l’interruttore di rete (1).<br />
In posizione : lo strumento è spento.<br />
In posizione I : lo strumento è acceso.<br />
Per preservare la lampada alogena la<br />
<strong>KL</strong> <strong>1500</strong> <strong>LCD</strong> è dotata di un sistema di<br />
avviamento soft che riduce la corrente<br />
d’inserzione che di norma è alta.<br />
Inoltre uno stabilizzatore elettronico<br />
della tensione della lampada garantisce<br />
un flusso luminoso utile stabile, indipendentemente<br />
dalle oscillazioni che si<br />
verificano sulla rete.<br />
2.3 Regolazione dell’intensità luminosa<br />
La <strong>KL</strong> <strong>1500</strong> <strong>LCD</strong> è dotata di due possibilità<br />
indipendenti di regolazione dell’-<br />
intensità luminosa.<br />
La regolazione elettronica continua vi<br />
permette di ottimizzare la durata della<br />
lampada: grazie alla regolazione precisa<br />
della luminosità di cui avete bisogno<br />
otterrete la massima durata possibile<br />
della lampada alogena per il vostro<br />
scopo d’impiego. In questo caso varia<br />
anche la temperatura colore della<br />
luce irradiata.<br />
La regolazione meccanica permette la<br />
regolazione continua dell’intensità luminosa<br />
a temperatura colore costante.<br />
▼<br />
Attenzione:<br />
Quando inserite la guidaluce con il<br />
perno di guida occorre fare attenzione<br />
che questo venga inserito in una delle<br />
quattro fessure per il serraggio.<br />
31
2.3.1 Regolazione elettronica<br />
2.3.2 Diaframma meccanico<br />
Girando il regolatore dell’intensità<br />
luminosa (3) è possibile regolare in<br />
continuo la luminosità.<br />
Tra i due punti di arresto terminali del<br />
pulsante sono inseriti quattro punti di<br />
arresto intermedi chiaramente percepibili.<br />
Queste quattro posizioni fisse permettono<br />
quindi di riprodurre delle<br />
impostazioni preselezionate della luminosità.<br />
▼<br />
In posizione 6 la lampada alogena funziona<br />
alla tensione nominale; la lampada<br />
raggiunge all’incirca la sua durata<br />
nominale indicata dalla casa costruttrice<br />
(secondo il tipo).<br />
Sul display a cristalli liquidi (5) viene<br />
visualizzata approssimativamente la<br />
temperatura colore della luce irradiata<br />
dalla lampada alogena (17). Girando il<br />
regolatore dell’intensità luminosa (3) è<br />
possibile regolare la temperatura colore<br />
della luce (passo 50º K).<br />
Ruotando il pulsante di regolazione del<br />
diaframma meccanico (4) è possibile<br />
variare in continuo l’intensità luminosa<br />
mantenendo la temperatura del colore.<br />
Due punti di arresto terminali fissi e tre<br />
punti di arresto aggiuntivi (contrassegnati<br />
con le lettere da A ad E) permettono<br />
di scegliere delle regolazioni definite<br />
riproducibili del diaframma.<br />
▼<br />
I<br />
Dopo aver superato il fermo alla posizione<br />
5, sul display <strong>LCD</strong> comparirà il<br />
simbolo di una lampada (19) che lampeggerà<br />
per alcuni secondi. Serve a<br />
segnalare la luce massima e fa notare<br />
che la durata della lampada sarà inferiore<br />
a quanto previsto rispetto alla posizione<br />
5.<br />
▼<br />
L’intensità luminosa minima si ha<br />
quando il bottone è in posizione 1, la<br />
luminosità massimè in posizione 6.<br />
I due fermi alle posizioni 4 e 5 vengono<br />
superati premendo il bottone di<br />
regolazione.<br />
Il regolatore non può essere girato<br />
oltre le posizioni 1 e 6.<br />
Nella posizione A si ottiene la luminosità<br />
minima, in posizione E (diaframma<br />
completamente aperto) la luminosità<br />
massima.<br />
Quando si ruota il pulsante di regolazione<br />
da un punto di arresto al successivo<br />
si ottiene all’incirca il raddoppiamento<br />
o dimezzamento dell’intensità<br />
luminosa.<br />
La durata della lampada è pari a circa<br />
<strong>1500</strong> h in posizione 4 e 150 h circa in<br />
posizione 5.<br />
Il pulsante non può essere girato oltre<br />
i punti di arresto terminali A ed E.<br />
32
2.4 Ottica supplementare<br />
Quando il sistema ottico supplementare<br />
è in posizione rientrata, esso permette<br />
di garantire che, anche qualora vengano<br />
impiegate guide con diametro<br />
ridotto del fascio, si possa ottenere<br />
un’ illuminazione uniforme molto<br />
luminosa.<br />
Se l’illuminazione viene fatta con sistemi<br />
ottici a formazione d’immagine o a<br />
focalizzazione posti all’uscita della guidaluce,<br />
si otterrà una illuminazione uniforme<br />
ottimale facendo fuoriuscire<br />
l’ottica supplementare.<br />
Posizione – Ottica supplementare<br />
rientrata:<br />
illuminazione uniforme senza sistemi<br />
ottici all’uscita della guidaluce.<br />
Posizione – Ottica supplementare<br />
fuori:<br />
illuminazione uniforme con sistemi<br />
ottici all’uscita della guidaluce.<br />
L’ottica supplementare deve sempre<br />
fuoriuscire e rientrare fino al punto<br />
d’arresto.<br />
2.5 Portafiltro a cassetto<br />
La <strong>KL</strong> <strong>1500</strong> <strong>LCD</strong> dispone di un portafitro<br />
a cassetto (7) nel quale si può<br />
inserire un filtro (disponibile come<br />
accessorio).<br />
Il simbolo di avvertimento sul portafiltro<br />
ricorda che lo stesso deve<br />
sempre trovarsi, durante il funzionamento<br />
della sorgente luminosa, in una<br />
delle due posizioni terminali oppure nel<br />
punto di arresto intermedio.<br />
Solo così è possibile garantire il raffreddamento<br />
ottimale dello strumento.<br />
Se la sorgente luminosa viene azionata<br />
con il portafiltro in una posizione intermedia<br />
rispetto a quelle indicate<br />
quest’ultimo potrebbe subire dei danni.<br />
▼<br />
2.5.1 Inserimento del filtro<br />
Prima di procedere all’inserimento del<br />
filtro fate attenzione che il portafiltro si<br />
sia raffreddato. Il simbolo di avvertimento<br />
ve lo ricorda.<br />
Estrarre il portafiltro (7) fino al punto di<br />
arresto terminale ed inserire il filtro<br />
desiderato. In questa posizione la sorgente<br />
di luce è pronta per il<br />
funzionamento.<br />
Quando il portafiltro a cassetto è stato<br />
inserito fino al punto di arresto, il filtro<br />
si troverà nel percorso del raggio di<br />
luce.<br />
Se volete far funzionare la sorgente di<br />
luce per un breve periodo senza filtro,<br />
estraete il portafiltro solo fino al punto<br />
di arresto intermedio.<br />
Il filtro si troverà sempre all’interno<br />
della sorgente di luce, ma non sul<br />
percorso del raggio.<br />
▼<br />
33
3 Sostituzione della lampada<br />
4 Manutenzione<br />
5 Risoluzione di problemi<br />
Fate attenzione che la lampada ed il<br />
portalampada si siano raffreddati prima<br />
di procedere alla sostituzione.<br />
Come promemoria è stato applicato<br />
il simbolo di avvertimento.<br />
▼<br />
La <strong>KL</strong> <strong>1500</strong> <strong>LCD</strong> non ha bisogno di<br />
manutenzione. Non è prevista una<br />
disinfezione dello strumento se viene<br />
utilizzato in campo medico.<br />
Per pulire esternamente lo strumento<br />
utilizzare un panno asciutto e morbido<br />
o panni per la pulizia dei materiali plastici<br />
del tipo comunemente in commercio.<br />
Il display dispone di un indicatore per la<br />
segnalazione dei guasti (18). Eventuali<br />
guasti possono essere identificati velocemente<br />
e con sicurezza.<br />
„Err 1“:<br />
„Err 2“:<br />
„Err 3“:<br />
interrotto il circuito elettrico<br />
della lampada.<br />
è intervenuto il termostato.<br />
cortocircuito nel circuito<br />
elettrico della lampada, è<br />
intervenuta la protezione<br />
elettronica.<br />
I<br />
▼<br />
Per prima cosa spegnere la sorgente di<br />
luce. Aprire il vano portalampada (10)<br />
premendo il pulsante di apertura (11)<br />
e estrarlo fino all’arresto.<br />
Spingere verso il basso le due leve<br />
dello zoccolo speciale ed estrarre la<br />
lampada guasta.<br />
Le due leve dovranno essere premute<br />
anche quando inserirete la nuova<br />
lampada. Reinserire poi nuovamente il<br />
vano portalampada fino all’arresto<br />
(si sente lo scatto). Accendere la sorgente<br />
di luce.<br />
Tipo di quasto Possibile causa Rimedio<br />
Lampada spenta, Lo strumento non è acceso. Accendere lo strumento.<br />
ventola spenta, La spina non è inserita nella presa. Inserire la spina.<br />
display <strong>LCD</strong> spento non c’è tensione sulla rete Controllare la tensione di rete.<br />
Il vano portalampada non è chiuso. Chiudere il vano portalampada.<br />
La protezione è difettosa. sostituire la protezione (15).<br />
Il trasformatore è surriscaldato. Assicurare un raffreddamento<br />
adeguato, verificare che il tipo<br />
di lampada sia corretto, riavviare<br />
lo strumento dopo che si sia<br />
raffreddato per un periodo sufficientemente<br />
lungo.<br />
Lampada spenta, Lampada guasta. Sostituire la lampada (si veda<br />
ventola in funzione,<br />
il punto 3 del presente libretto<br />
segnalazione<br />
d´istruzioni)<br />
„Err1” Non c’è lampada. A sorgente di luce spenta<br />
inserire una lampada<br />
Lampada spenta, Il raffreddamento non è Liberare le bocchette di aerazione;<br />
ventola in funzione, sufficiente. evitare tempera - eccessive,<br />
segnalazione<br />
lo strumento si riaccenderà<br />
„Err 2“<br />
dopo poco tempo.<br />
Lampada spenta, Aumento temporaneo di Spegnere lo strumento e<br />
ventola in funzione, corrente nel circuito elettrico riavviarlo dopo pochi secondi.<br />
segnalazione<br />
della lampada.<br />
„Err 3“ La lampada ha provocato un Sostituire la lampada (Si veda<br />
cortocircuito.<br />
punto 3 delle istruzioni per<br />
l’uso).<br />
Se non fosse possibile rimuovere il guasto con le misure indicate sopra, rivolgetevi<br />
al negozio specializzato di vostra fiducia o alla rappresentanza SCHOTT più vicina.<br />
Riparazioni che vanno al di là dei rimedi indicati dovranno essere eseguite dai centri<br />
di assistenza autorizzati.<br />
34
6 Accessori<br />
Per la <strong>KL</strong> <strong>1500</strong> <strong>LCD</strong> è disponibile una<br />
vasta gamma di accessori. Un dépliant a<br />
parte fornisce ampie informazioni in<br />
merito – per ordinarlo: vedi indirizzi<br />
sulla pagina di dietro. Solo le guideluce<br />
SCHOTT e gli accessori SCHOTT garantiscono<br />
il perfetto funzionamento dello<br />
strumento, la sicurezza ed un coefficiente<br />
ottimale di efficienza luminosa.<br />
6.1 Guidaluce<br />
Sono disponibili guideluce autoportanti<br />
e flessibili di diversa lunghezza e con<br />
vari diametri, illuminazione puntiforme<br />
o a fessura.<br />
6.2 Lampada alogena<br />
Quando vengono ordinate lampade<br />
alogene di ricambio (si veda il punto<br />
6.4 del presente libretto d’istruzioni)<br />
viene fornito il tipo di lampada che permette<br />
un coefficiente di efficienza luminosa<br />
ed una illuminazione ottimale.<br />
6.3 Filtro<br />
I filtri ottici possono essere inseriti nel<br />
portafiltro a cassetto (7) oppure posizionati,<br />
ad innesto o avvitamento, uniti ad<br />
un elemento supplementare di focalizzazione<br />
(accessorio), davanti all’uscita<br />
della guida di luce.<br />
Dettagli riguardanti l’elemento di focalizzazione<br />
o i tipi di filtri standard disponibili<br />
vengono riportati nel prospetto<br />
degli accessori.<br />
6.4 Pezzi di ricambio<br />
Tipo<br />
N 0 d’ordine<br />
Lampada alogena 15V/150 W 153 000<br />
Philips, tipo 6423<br />
Philips, tipo 6423 XHP<br />
Osram, tipo HLX 64634<br />
Fusibile di protezione per 230V (primario) 150 101<br />
T2H 250V ai sensi della IEC 127-3/5<br />
Fusibile di protezione per 120 V (primario) 153 103<br />
T4A ai sensi della UL 198 G<br />
Solo se vengono utilizzati pezzi di ricambio del tipo indicato, viene assunta la<br />
garanzia per un perfetto funzionamento dello strumento, per la sua sicurezza e<br />
per un coefficiente ottimale di efficienza luminosa.<br />
7. Dati tecnici<br />
Caratteristiche<br />
Valori<br />
Indicazioni di carattere generale<br />
Tipo<br />
<strong>KL</strong> <strong>1500</strong> <strong>LCD</strong><br />
Misure (largh x pr x h) mm circa 200 x 265 x 170<br />
Peso kg circa 5<br />
Raffreddamento - Ventola assiale<br />
Temperatura ambiente* °C + 5 ... + 40<br />
Umidità relativa dell’aria* % Con temp. ambiente fino a 31°C: 85%;<br />
da 31°Cia 40°C a diminuzione lineare<br />
fino al 75%<br />
Pressione atmosferica* hPa 700 ... 1060<br />
Trasporto e stoccaggio<br />
Temperatura °C - 40 ... + 70<br />
Umidità relativa dell’aria % 10 ... 95 (non condensante)<br />
Pressione atmosferica hPa 500 ... 1200<br />
Grado di sporco - 2<br />
*Condizioni di prova previste dalle norme DIN EN 61010-1, DIN EN 60601-1 ed UL 3101-1<br />
Continuazione pagina 36<br />
35
Blindtext<br />
Caratteristiche<br />
Valori<br />
Caratteristiche elettriche<br />
Tensione d’esercizio,<br />
frequenza<br />
Modello 230 V<br />
220 ... 240 V ~ 50 /60 Hz<br />
Modello 120 V<br />
100 V ~ 50 / 60 Hz e<br />
120 V ~ 60 Hz<br />
Potenza assorbita max. W 200<br />
Protezione, primario<br />
Modello 230 V - T 2 H, 250 V secondo IEC 127-3/5<br />
Modello 120 V - T 4 A secondo UL 198 G<br />
Classe di protezione<br />
II<br />
Categoria di sovratensione<br />
II<br />
Tipo di lampada - lampada alogena con riflettore incorporato<br />
Philips, tipo 6423<br />
Philips, tipo 6423 XHP<br />
Osram, tipo HLX 64634<br />
Tensione nominale lampada V 15<br />
Resa nominale lampada W 150<br />
Durata media lampada<br />
Posizione 4 h <strong>1500</strong><br />
Posizione 5 h 150<br />
Posizione 6 h 50<br />
I<br />
Caratteristiche ottiche<br />
Diametro massimo utile del<br />
fascio della guidaluce mm 9<br />
Flusso luminoso complessivo<br />
all’uscita della guidaluce<br />
(guidaluce SCHOTT Ø 8 mm,<br />
valori tipici)<br />
Posizione 4 lm 250<br />
Posizione 5 lm 500<br />
Posizione 6 (flusso luminoso massimo) lm 600<br />
Angolo di entrata della luce<br />
con ottica supplementare<br />
estraita (2α eff ) gradi circa 53<br />
Filtro contro il calore - SCHOTT KG 2, 45 x 45<br />
d = 2,0 mm temprato<br />
Omologalioni -<br />
Modello 230 V<br />
VDE, EMV<br />
Modello 120 V<br />
C US<br />
La <strong>KL</strong> <strong>1500</strong> <strong>LCD</strong> è fra l’altro collaudata e certificata ai sensi delle vigenti norme sulle apparecchiature<br />
elettriche da laboratorio (rispettivamente DIN EN 61010-1 e UL 3101-1), nonché<br />
sugli apparecchi elettro-medicali secondo la DIN EN 60601-1 o UL 2601-1.<br />
Ciò consente ai produttori una agevole omologazione in caso di integrazione della <strong>KL</strong> <strong>1500</strong><br />
<strong>LCD</strong> nel proprio dispositivo medico.<br />
La versione 230 V è marcata con .<br />
La società si riserva la facoltà di apportare modifiche nell’esecuzione e nell’entità di fornitura nel quadro<br />
dell’ulteriore sviluppo tecnologico.<br />
36
Vista del aparato<br />
1<br />
2<br />
3<br />
4<br />
5<br />
6<br />
7<br />
8<br />
9<br />
10<br />
11<br />
12<br />
13<br />
14<br />
15<br />
16<br />
17<br />
18<br />
19<br />
Conmutador de alimentación 2.2<br />
Alojamiento del conductor de luz 2.1<br />
Ajuste electrónico de la intensidad de luz 2.3<br />
Ajuste mecánico de la intensidad de luz 2.3<br />
Visualización por cristal líquido<br />
Palanca basculable para elementos ópticos suplementarios 2.4<br />
Corredera de filtros 2.5<br />
Cable de entrada a la red<br />
Manija<br />
Compartimiento para lámpara con lámpara halógena<br />
de reflexión de luz fría 3<br />
Botón de desbloqueo del compartimiento para lámpara 3<br />
Orificios de ventilación (lado frontal del aparato) 1<br />
Orificios de ventilación (lado lateral del aparato) 1<br />
Rejilla de escape de aire (lado posterior del aparato) 1<br />
Dispositivo de seguridad (base del aparato) 5<br />
Placa de características (base del aparato)<br />
Indicación del color de la temperatura 2.3<br />
Indicación de fallos 5<br />
Advertencia sobre intensidad de luz máxima 2.3<br />
37
1 Advertencias importantes<br />
Símbolos empleados:<br />
Advierte sobre un sitio peligroso<br />
(Atención, observar las indicaciones<br />
en la documentación)<br />
Advierte sobre una superficiecaliente<br />
Aparato de la clase de protección<br />
II<br />
No (separación de la red de<br />
alimentación)<br />
Sí (conexión con la red de<br />
I alimentación)<br />
Advertencia sobre intensidad de<br />
luz máxima<br />
La lámpara <strong>KL</strong> <strong>1500</strong> <strong>LCD</strong> está prevista<br />
para su aplicación en la industria y el<br />
laboratorio.<br />
Las fuentes de luz fría tienen la función<br />
de iluminar intensamente objetos de<br />
todo tipo. Los elementos infrarrojos<br />
de los rayos emitidos por la lámpara se<br />
extraen mediante filtración. La luz<br />
visible de alta intensidad es dirigida al<br />
objeto a través de conductores de luz<br />
flexibles o autoportantes móviles.<br />
La lámpara ha sido probada y certificada<br />
según las normativas vigentes sobre<br />
instrumentos eléctricos de laboratorio<br />
(DIN EN 61010-1 y UL 3101-1); la versión<br />
de 230 V ha sido sometida adicionalmente<br />
a prueba según la normativa<br />
para instrumentos médicos eléctricos<br />
(DIN EN 60601-1).<br />
Advertencias de seguridad:<br />
Sírvase leer detenidamente y observar<br />
cuidadosamente estas instrucciones<br />
para el uso. En caso de no siguimiento<br />
de las mismas, la seguridad<br />
de su aparato no está garantizada.<br />
Cuando la fuente de luz se encuentre<br />
conectada, evite mirar directamente<br />
dentro del casquillo de fijación o la salida<br />
del conductor de luz.<br />
La <strong>KL</strong> <strong>1500</strong> <strong>LCD</strong> emite luz visible de<br />
alta intensidad. Dado que los materiales<br />
que absorben luz poseen la propiedad<br />
física de convertir la luz incidente en<br />
calor, se pueden producir deterioros en<br />
materiales absorbentes de luz sensibles<br />
al calor o inflamables. Para evitar este<br />
tipo de daños térmicos y el posible riesgo<br />
de incendio o de quemaduras, sírvase<br />
observar las advertencias siguientes:<br />
➧ Nunca cubra el casquillo de fijación<br />
o la salida del conductor de luz<br />
(peligro de incendio).<br />
➧ Nunca cubra el casquillo de fijación<br />
abierto o la salida del conductor de<br />
luz con la mano u otras partes del<br />
cuerpo (peligro de quemaduras).<br />
➧ Al iluminar objetos que absorben la<br />
luz sensibles al calor o inflamables<br />
(por ejemplo en la microscopía), se<br />
deberá cuidar especialmente de elegir<br />
la distancia del conductor de luz<br />
y la luminosidad de manera tal que<br />
en el objeto no se produzcan deterioros<br />
térmicos.<br />
➧ Cuando la fuente de luz está encendida,<br />
todas las salidas del conductor<br />
de luz que no se utilicen durante el<br />
proceso de trabajo deberán encontrarse<br />
a una distancia segura – por lo<br />
menos 10 cm – de materiales absorbentes<br />
de luz o inflamables (para<br />
evitar posibles riesgos de incendio).<br />
Por lo tanto, preste atención a que<br />
dichas salidas de luz se encuentren a<br />
una distancia segura, por ejemplo,<br />
de textiles oscuros/de color o de<br />
superficies de madera y material<br />
plástico oscuros/de color.<br />
➧ Para evitar una carga innecesaria de<br />
tejido biológico con luz visible,<br />
reduzca a la medida estrictamente<br />
necesaria la luminosidad y la duración<br />
de la iluminación del mismo.<br />
Por favor tenga siempre en cuenta:<br />
➧ que su fuente de luz fría <strong>KL</strong> <strong>1500</strong> <strong>LCD</strong><br />
sea utilizada con la tensión indicada<br />
en la placa de características (16).<br />
➧ que todos los orificios de ventilación<br />
(12, 13, 14) siempre se encuentren<br />
libres. En caso de refrigeración insuficiente,<br />
un interruptor térmico<br />
integrado desconecta el aparato<br />
temporalmente (véase el punto 5<br />
“Eliminación de fallos“).<br />
➧ que antes de recambiar la lámpara<br />
ésta se haya enfriado. Para que no lo<br />
olvide, en la puerta del compartimiento<br />
para lámpara se encuentra<br />
un símbolo de advertencia:<br />
Atención! Superficie caliente.<br />
➧ que antes de extraer la corredera de<br />
filtros y los filtros insertados éstos se<br />
hayan enfriado. La corredera está<br />
provista del símbolo de advertencia.<br />
Atención! Superficie caliente.<br />
➧ que durante la operación de la fuente<br />
de luz la corredera de filtros básicamente<br />
se encuentre en una de las<br />
dos posiciones extremas o en la posición<br />
de encastre (véase el punto 2.5<br />
“corredera de filtros“).<br />
!<br />
!<br />
■ La fuente de luz ha sido desarrollada<br />
para uso exclusivo en ambientes<br />
secos (véase punto 7 “Datos técnicos“).<br />
■ Este aparato no es adecuado para<br />
el uso en zonas con peligro de<br />
explosión.<br />
■ Solamente descenectando el enchufe<br />
se logra una separación segura de la<br />
red de alimentación de corriente.<br />
■ El aparato no se debe abrir ni desmontar.<br />
Evitar cualquier modificación<br />
técnica en el aparato. Cualquier reparación<br />
solamente deberá ser efectuada<br />
por el fabricante o por servicios<br />
de posventa autorizados por éste.<br />
■ Sírvase garantizar a cualquier usuario<br />
de este aparato el acceso rápido a<br />
estas instrucciones para el uso.<br />
■ El fabricante no responde por los<br />
daños ocasionados a raíz del no siguimiento<br />
de estas instrucciones de uso.<br />
E<br />
38
2 Operación<br />
2.1 Conexión del conductor de luz<br />
En primer lugar se debe abrir el alojamiento<br />
del conductor de luz (2) girando<br />
el anillo negro externo en sentido<br />
antihorario. Insertar el conductor de<br />
luz hasta el tope y cerrar el alojamiento<br />
del conductor de luz.<br />
▼<br />
2.2 Puesta en servicio<br />
Conectar y desconectar accionando el<br />
conmutador de alimentación (1).<br />
Posición : El aparato está desconectado.<br />
Posición I : El aparato está conectado.<br />
Para proteger la lámpara de halógeno,<br />
la <strong>KL</strong> <strong>1500</strong> <strong>LCD</strong> está equipada con un<br />
arranque suave que reduce la corriente<br />
de conexión usual en otros casos.<br />
Además, una estabilización electrónica<br />
de la tensión de la lámpara garantiza<br />
una potencia luminosa estable, independiente<br />
de fluctuaciones de la red.<br />
▼<br />
2.3 Ajuste de la intensidad de luz<br />
La <strong>KL</strong> <strong>1500</strong> <strong>LCD</strong> dispone de dos posibilidades<br />
de ajuste de la intensidad de<br />
la luz independientes.<br />
El ajuste electrónico continuo le permite<br />
optimizar la vida útil de la lámpara; ajustando<br />
la luminosidad necesaria exactamente<br />
para la aplicación que Ud. dé a<br />
la lámpara de halógeno, logrará la máxima<br />
vida útil posible de la misma.<br />
Al variar la intensidad de la luz, también<br />
se modifica la temperatura de color de<br />
la luz emitida.<br />
El ajuste mecánico permite la variación<br />
continua de la intensidad de la luz a<br />
temperatura de color constante.<br />
Atención:<br />
Al insertar los conductores de luz con<br />
pasador de guía, se deberá tener en<br />
cuenta que éste encaje en<br />
una de las cuatro ranuras de la pinza<br />
de sujeción.<br />
39
2.3.1 Ajuste electrónico<br />
2.3.2 Diafragma mecánico<br />
Girando el ajustador de la intensidad<br />
de luz (3) es posible ajustar la luminosidad<br />
en forma continua.<br />
Entre ambas posiciones extremas del<br />
botón de ajuste hay cuatro puntos de<br />
encastre bien visibles.<br />
Estos marcan posiciones fijas y garantizan<br />
la posibilidad de reproducir los<br />
ajustes de luminosidad preseleccionados.<br />
▼<br />
En la posición 6 la lámpara halógena<br />
se utiliza con tensión nominal y alcanza<br />
aproximadamente la vida útil nominal<br />
indicada por su fabricante (en función<br />
del tipo de lámpara).<br />
En la visualización por cristal líquido (5)<br />
se indica la temperatura de color<br />
aproximada de la luz emitida (17) por<br />
la lámpara halógena. Girando el ajustador<br />
de intensidad luminosa (3) es posible<br />
ajustar la temperatura de color de<br />
la luz (de a 50 K).<br />
Girando el botón de ajuste del diafragma<br />
mecánico (4) es posible modificar<br />
la intensidad de la luz en forma continua,<br />
manteniendo invariable la temperatura<br />
de color.<br />
Dos topes fijos y tres puntos de encastre<br />
suplementarios (indicados con las<br />
letras A hasta E) permiten seleccionar<br />
de manera reproducible posiciones de<br />
diafragma definidas.<br />
▼<br />
E<br />
Una vez superada la barrera en la posición<br />
5, en la visualización por cristal<br />
líquido aparece un símbolo de lámpara<br />
(19) que durante los primeros segundos<br />
es intermitente. Sirve como indicador<br />
de la luz máxima y advierte que<br />
la vida útil esperada de la lámpara se<br />
reduce con respecto a la de la<br />
posición 5.<br />
▼<br />
En la posición 1 se da la menor intensidad<br />
de luz, la mayor luminosidad se<br />
alcanza en posición la 6. Las dos<br />
barreras que se encuentran en las<br />
posiciones 4 y 5 se superan apretando<br />
el botón de ajuste.<br />
El botón de ajuste no puede ser girado<br />
más allá de los topes 1 o 6.<br />
En posición la 4 la vida útil de la<br />
lámpara es de unas <strong>1500</strong> horas y en la<br />
posición 5 de unas 150 horas.<br />
En la posición A se da la menor luminosidad,<br />
en la posición E (diafragma<br />
totalmente abierto) se obtiene la<br />
mayor luminosidad. Al girar el botón<br />
de ajuste de un punto de encastre<br />
hacia el próximo, se produce prácticamente<br />
una duplicación o bien una división<br />
por la mitad de la intensidad luminosa.<br />
El botón de ajuste no puede ser girado<br />
más allá de los topes finales A o E.<br />
40
2.4 Instrumentos ópticos suplementarios<br />
El basculamiento de instrumentos ópticos<br />
suplementarios garantiza la obtención<br />
de una iluminación uniforme e<br />
intensa, aún empleando conductores<br />
de luz con un diámetro de haz reducido.<br />
Si la iluminación se efectúa con<br />
sistemas ópticos de proyección o enfoque<br />
en la salida del conductor de luz,<br />
mediante el basculamiento hacia afuera<br />
de los instrumentos ópticos<br />
suplementarios se obtiene una iluminación<br />
uniforme óptima.<br />
Posición – Instrumentos ópticos<br />
suplementarios basculados hacia<br />
adentro: Iluminación uniforme sin sistemas<br />
ópticos a la salida del conductor<br />
de luz.<br />
Posición – Instrumentos ópticos<br />
suplementarios basculados hacia<br />
afuera: Iluminación uniforme con sistemas<br />
ópticos a la salida del conductor<br />
de luz.<br />
En cualquier caso, los instrumentos<br />
deben estar basculados hacia adentro<br />
o hacia afuera hasta el tope.<br />
2.5 Corredera de filtros<br />
La <strong>KL</strong> <strong>1500</strong> <strong>LCD</strong> dispone de una corredera<br />
de filtros (7) equipable con un filtro<br />
insertable (adquirible como accesorio).<br />
El símbolo de advertencia en<br />
la corredera de filtros le indica quedurante<br />
el servicio de la fuente de luz,<br />
la corredera básicamente se debe<br />
encontrar en una de las dos posiciones<br />
extremas o en la posición de encastre.<br />
Solamente así queda garantizada la<br />
refrigeración óptima de la fuente de luz.<br />
La operación de la fuente de luz en<br />
una posición intermedia de la corredera<br />
de filtros puede conducir a un<br />
deterioro de la misma.<br />
▼<br />
2.5.1 Equipamiento de la corredera<br />
de filtros<br />
Asegúrese que antes de equipar la corredera<br />
de filtros con el filtro insertable<br />
ésta se haya enfriado. Para que no lo<br />
olvide, encontrará un símbolo<br />
de advertencia:<br />
Atención! Superficie caliente.<br />
!<br />
Extraer la corredera de filtros (7) hasta<br />
el tope e insertar el filtro deseado.<br />
En esta posición la fuente de luz está<br />
lista para el servicio.<br />
Cuando se aprieta la corredera de filtros<br />
hasta el tope, el filtro se encuentra<br />
en la trayectoria óptica de los rayos.<br />
Si desea operar brevemente la fuente<br />
de luz sin filtro, extraiga la corredera<br />
solamente hasta el punto de encastre.<br />
En dicha posición el filtro aún se encuentra<br />
en la fuente de luz, pero no<br />
ya en la trayectoria de los rayos.<br />
▼<br />
41
3 Recambio de la lámpara<br />
Antes de efectuar el recambio de la<br />
lámpara, cerciórese que ésta y el portalámparas<br />
se hayan enfriado.<br />
Para que no lo olvide, encontrará unsímbolo<br />
de advertencia:<br />
Atención! Superficie caliente.<br />
!<br />
4 Mantenimiento<br />
Su <strong>KL</strong> <strong>1500</strong> <strong>LCD</strong> no requiere mantenimiento.<br />
Una desinfección de la fuente de luz<br />
para su uso en el sector de la medicina<br />
no está prevista.<br />
Para la limpieza exterior del aparato,<br />
utilice un trapo suave seco o trapos de<br />
material sintético de uso comercial.<br />
5 Eliminación de fallos<br />
El visualizador dispone de una indicación<br />
de fallos (18). Cualquier fallo puede ser<br />
reconocido rápida y seguramente.<br />
„Err 1“:<br />
„Err 2“:<br />
El circuito de corriente de la<br />
lámpara está interrumpido<br />
El controlador de temperatura<br />
ha reaccionado.<br />
▼<br />
„Err 3“: Cortocircuito en el circuito<br />
de corriente de la lámpara;<br />
el dispositivo de seguridad<br />
electrónico ha reaccionado.<br />
E<br />
Fallo Causa posible Eliminación<br />
En primer lugar se debe desconectar la<br />
fuente de luz. Abrir el compartimiento<br />
para la lámpara (10) oprimiendo el<br />
botón de desbloqueo (11) y extraer<br />
hasta el tope.<br />
Apretar hacia abajo la dos palancas del<br />
zócalo especial y extraer la lámpara<br />
defectuosa.<br />
Al insertar la nueva lámpara, las dos<br />
palancas también se deben apretar<br />
hacia abajo. Insertar el compartimiento<br />
para lámpara hasta que se enclave<br />
(el encastre es audible).<br />
Conectar la fuente de luz.<br />
Lámpara apagada,<br />
ventilación apagada,<br />
no hay visualización<br />
por cristal líquido<br />
Lámpara apagada,<br />
ventilador en servicio,<br />
indicación de fallo<br />
„Err 1“<br />
Lámpara apagada,<br />
ventilador en servicio,<br />
indicación de fallo<br />
„Err 2“<br />
Lámpara apagada,<br />
ventilador en servicio,<br />
indicación de fallo<br />
„Err 3“<br />
El aparato no está conectado<br />
El enchufe no está enchufado<br />
No hay tensión<br />
El compartimiento para la lámpara<br />
no está cerrado<br />
El dispositivo de seguridad<br />
está defectuoso<br />
El transformador está recalentado<br />
Lámpara defectuosa<br />
No hay lámpara<br />
Refrigeración insuficiente<br />
Breve aumento de la intensidad<br />
de corriente en el circuito de la<br />
lámpara<br />
La lámpara produce un<br />
cortocircuito<br />
Conectar el aparato<br />
Enchufar el enchufe<br />
Comprobar la tensión<br />
Cerrar el compartimiento para<br />
la lámpara<br />
Recambiar el dispositivo de<br />
seguridad (15)<br />
Asegurar una refrigeración suficiente,<br />
controlar si se está utilizando<br />
el tipo de lámpara adecuado,<br />
una vez que se haya enfriado,<br />
volver a poner en servicio el<br />
aparato<br />
Recambiar la lámpara<br />
(véase el punto 3 de estas instrucciones<br />
para el uso).<br />
Con el aparato desconectado,<br />
insertar una lámpara<br />
Despejar los orificios de ventilación,<br />
temperatura ambiente<br />
demasiado elevada, después de<br />
un tiempo corto el aparato vuelve<br />
a conectarse<br />
Desconectar el aparato y volver<br />
a conectarlo a los pocos<br />
segundos<br />
Recambiar la lámpara (véase el<br />
punto 3 de estas instrucciones<br />
para el uso)<br />
Si no fuera posible eliminar los fallos mediante las medidas indicadas a continuación,<br />
diríjase a su comerciante autorizado o a la representación de SCHOTT más cercana.<br />
Cualquier reparación que vaya más allá deberá ser efectuada por el servicio posventa<br />
autorizado.<br />
42
6 Accesorios<br />
Para su <strong>KL</strong> <strong>1500</strong> <strong>LCD</strong> existe un amplio<br />
programa de accesorios. Un folleto<br />
separado le ofrece informaciones detalladas<br />
– Posibilidades de petición:<br />
véanse las direcciones al dorso.<br />
Solamente los conductores de luz y<br />
accesorios SCHOTT garantizan un<br />
funcionamiento perfecto, máxima<br />
seguridad y aprovechamiento óptimo<br />
de la luz.<br />
6.3 Filtros<br />
Los filtros ópticos se pueden colocar en<br />
la corredera de filtros (7) o bien delante<br />
de la salida del conductor de luz<br />
como filtros atornillables o insertables,<br />
en combinación con un dispositivo de<br />
enfoque (accesorio).<br />
Sírvase veren folleto de accesorios los<br />
detalles sobre el dispositivo de enfoque<br />
y los tipos de filtros estándael.<br />
6.1 Conductor de luz<br />
Se encuentran disponibles conductores<br />
de luz autoportantes y flexibles de diferentes<br />
longitudes y diámetros así como<br />
también iluminaciones puntuales y de<br />
ranuras.<br />
6.2 Lámpara halógena<br />
Cuando se encargan lámparas halógenas<br />
como repuesto (véase el punto 6.4<br />
de estas instrucciones para el uso) se<br />
suministrará el tipo de lámpara que<br />
permita un aprovechamiento y una<br />
iluminación óptimos.<br />
6.4 Repuestos<br />
Repuestos Ref N 0<br />
Lámpara halógena 15 V/150 W 153 000<br />
Philips tipo 6423<br />
Philips tipo 6423 HXP<br />
Osram tipo HLX 64634<br />
Dispositivo de seguridad para 230 V (primario) 150 101<br />
T 2 H 250 V según IEC 127-3/5<br />
Dispositivo de seguridad para 120 V (primario) 153 103<br />
T4 A según UL 198 G<br />
Solamente si se utilizan los tipos de accesorios indicados, se asume la prestación<br />
de garantía para un funcionamiento sin contratiempos, máxima seguridad y un<br />
aprovechamiento de luz óptimo.<br />
7 Datos técnicos<br />
Propiedades<br />
Indicaziones generales<br />
Valores<br />
Denominación del tipo - <strong>KL</strong> <strong>1500</strong> <strong>LCD</strong><br />
Medidas mm aprox. 200 x 265 x 170<br />
(anchura x profundidad x altura)<br />
Masa kg aprox. 5<br />
Ventilación - ventilador axial<br />
Temperatura ambiente* °C + 5 ... + 40<br />
Humedad ambiente relativa* % una temperatura ambiente de hasta 31°C: 85 %<br />
desde 31°C hasta 40°C de temperatura ambiente:<br />
disminución lineal a 75%<br />
Presión atmosférica* hPa 700 ... 1060<br />
Transporte y almacenamiento<br />
Temperatura °C - 40 ... + 70<br />
Humedad ambiente relativa % 10 ... 95 (no condensante)<br />
Presión atmosférica hPa 500 ... 1200<br />
Grado de ensuciamiento - 2<br />
* Condiciones de ensayo de las normas DIN EN 61010-1, DIN EN 60601-1 y UL 3101-1<br />
Continúa en la página 44<br />
43
Propiedades<br />
Datos eléctricos<br />
Tensión de servicio<br />
frecuencia<br />
Version 230 V<br />
Version 120 V<br />
Valores<br />
220 ... 240 V ~ 50 /60 Hz<br />
100 V ~ 50 / 60 Hz y<br />
120 V ~ 60 Hz<br />
Consumo de potencia máx. W 200<br />
Dispositivos de seguridad<br />
primarios<br />
Version 230 V - T 2 H, 250 V según IEC 127-3/5<br />
Version 120 V - T 4 A según UL 198 G<br />
Clase de protección - II<br />
Categoría de sobretensión - II<br />
Tipo de lámpara - reflector halógeno<br />
Philips, tipo 6423<br />
Philips, tipo 6423 XHP<br />
Osram, tipo HLX 64634<br />
E<br />
Tensión nominal de la<br />
lámpara V 15<br />
Potencia nominal de la<br />
lámpara W 150<br />
Vida útil promedio de la<br />
lámpara<br />
Nivel 4 h <strong>1500</strong><br />
Nivel 5 h 150<br />
Nivel 6 h 50<br />
Datos luminotécnicos<br />
Diámetro del haz del conductor<br />
de luz máximo utilizable<br />
luminotécnicamente mm 9<br />
Corriente fotoeléctrica total en<br />
la salida del conductor de luz<br />
(conductor de luz<br />
SCHOTT Ø 8 mm, valores típicos)<br />
Nivel 4 lm 250<br />
Nivel 5 lm 500<br />
Nivel 6 (corriente fotoeléctrica máx.) lm 600<br />
Ángulo de incidencia de<br />
la luz (2α eff )<br />
Elementos ópticos suplementarios<br />
basculados hacia afuera grados aprox. 53<br />
Filtro termoprotector - SCHOTT KG 2, 45 x 45<br />
d = 2,0 mm, templado<br />
Marca de verificación -<br />
Version 230 V<br />
Version 120 V<br />
EMV, VDE<br />
C<br />
US<br />
La lámpara <strong>KL</strong> <strong>1500</strong> <strong>LCD</strong> ha sido probada y certificada según las normativas vigentes para<br />
instrumentos eléctricos de laboratorio (DIN EN 61010-1 y UL 3101-1), así como para<br />
equipos médicos eléctricos según DIN EN 60601-1 respectivamente UL 2601-1. Lo que<br />
posibilita al fabricante una autorización fácil al integrarla en sus productos.<br />
La versión de 230 V está marcada con .<br />
Reservados los derechos de modificaciones de diseño y dimensión de suministro en el marco del perfeccionamiento<br />
técnico.<br />
44
Titel_<strong>KL</strong><strong>1500</strong><strong>LCD</strong>_Gebrauch_RZ.fh8 28.06.2001 11:05 Uhr Seite 1<br />
SCHOTT GLAS<br />
Fiber Optics Division<br />
P.O. Box 2480<br />
55014 Mainz<br />
Germany<br />
Phone: +49 (0) 61 31 / 66 -77 00<br />
Fax: +49 (0) 61 31 / 66 -77 05<br />
E-mail: faseroptik@schott.de<br />
www.schott-fiberoptics.com<br />
Schott Fibre Optics (UK) Ltd.<br />
Shaw Lane Industrial Estate<br />
Ogden Road<br />
Doncaster DN2 4SQ<br />
England<br />
Phone: +44 (0) 13 02 / 36 15 74<br />
Fax: +44 (0) 13 02 / 34 08 03<br />
E-mail: enquiries@schott.co.uk<br />
SCHOTT-FOSTEC, LLC<br />
62 Columbus Street<br />
Auburn, NY 13021<br />
USA<br />
Phone: +1 315 / 2 55-27 91<br />
Fax: +1 315 / 2 55-26 95<br />
E-mail: info@schott-fostec.com<br />
Hoya-Schott Corporation<br />
Shinjuku Daiei Building 7F<br />
3-23-7 Shinjuku, Shinjuku-ku<br />
Tokyo 160-0022<br />
Japan<br />
Phone: +8135360/1851<br />
Fax: +8135360/1860<br />
E-mail: info@hoya-schott.co.jp<br />
XXXXX Printed in Germany