DESIGN- F O L I E DESIGN- F O L I E - Foliatec
DESIGN- F O L I E DESIGN- F O L I E - Foliatec
DESIGN- F O L I E DESIGN- F O L I E - Foliatec

You also want an ePaper? Increase the reach of your titles
YUMPU automatically turns print PDFs into web optimized ePapers that Google loves.
ESPAÑOL<br />
Lea detenida e íntegramente las instrucciones<br />
de empleo antes de la aplicación del producto.<br />
Nota general: Algunos plásticos para coches<br />
(por ejemplo plásticos reciclados) contienen, en<br />
parte, agentes separadores y plastificantes. Éstos<br />
pueden salir al exterior (desgasearse), si se calientan,<br />
por ejemplo por fuerte radiación solar, y,<br />
así, repercutir negativamente en el efecto adherente<br />
de la lámina de diseño (formación de burbujas).<br />
No podemos ofrecer garantía alguna, si<br />
la lámina se desprende por motivo de haber sido<br />
pegada sobre una superficie inadecuada, por<br />
ejemplo grasienta o aceitosa.<br />
Dependiendo de la producción, el grado de brillo<br />
de las láminas Cockpit Design puede variar de una<br />
tirada de producción a otra. ¡Este hecho no constituye<br />
motivo de reclamación!<br />
Indicaciones de montaje:<br />
Tanto el entono como la lámina y la superficie<br />
sobre la que se vaya a pegar deben estar a una<br />
temperatura entre +16°C y +28°C.<br />
Las láminas Cockpit Design únicamente se pueden<br />
pegar sobre superficies firmes.<br />
Para colocar la lámina se recomienda utilizar<br />
guantes de algodón, para evitar que se produzcan<br />
arañazos con las uñas en la superficie de la lámina.<br />
En caso de que se desee aplicar la lámina en un<br />
lugar con reducida superficie de adherencia (por<br />
ejemplo en el hueco del tirador de la puerta del<br />
vehículo) le recomendamos utilizar un “primer”<br />
específico para el producto.<br />
Limpieza:<br />
Límpiense a fondo las superficies a recubrir con<br />
un paño limpio y húmedo para retirar el polvo y<br />
la suciedad. La suciedad resistente (por ejemplo,<br />
la grasa) se puede retirar con alcohol de limpieza<br />
o con un eliminador de silicona. Observación: No<br />
emplee diluyente.<br />
Medios auxiliares adicionales:<br />
1. regla, 2. tijeras, 3. paño suave, 4. pisto la de<br />
aire caliente, alternativamente un secador de<br />
cabello, para la técnica de pegado 3D., 5. guantes<br />
de algodón.<br />
Corte:<br />
Coloque la lámina de diseño sobre la parte del vehículo<br />
a recubrir sólo elementos del interior del vehículo)<br />
y recorte la forma con el cutter adjunto. Deje<br />
un margen excedente en los cantos de al menos<br />
3 cm.<br />
Pegado:<br />
Extraiga la lámina de su embalaje y extiéndala sobre<br />
una superficie limpia.<br />
Sujete la lámina por dos extremos y retire cuidadosamente<br />
el revestimiento que la soporta (revestimiento<br />
protector). En caso de que sea posible,<br />
retire el revestimiento protector sólo parcialmente.<br />
Tenga especial cuidado de que la superficie adherente<br />
no entre en contacto con el suelo, de lo contrario<br />
se llenará de suciedad. Sujete la lámina de<br />
manera tensada para que no se pegue.<br />
Coloque la lámina tensada centrada sobre la parte<br />
del vehículo sobre la que se vaya a pegar.<br />
Haciendo presión sobre la superficie con un paño<br />
suave, pegue la lámina hacia afuera partiendo desde<br />
el centro del elemento a recubrir. Al hacer presión<br />
sobre la lámina, debe vigilar que no se produzcan<br />
pliegues ni burbujas de aire debajo de la<br />
lámina. Realice el procedimiento paso a paso.<br />
Específico para la lámina ULTRA Carbon:<br />
Gracias a la tecnología de adherencia Ea-<br />
sy Work, en caso de que se deba realizar<br />
alguna modificación, la lámina se puede<br />
retirar y colocar de nuevo.<br />
Calentando la lámina de diseño con una pistola de<br />
aire caliente, ésta se vuelve blanda y estirable. Ello<br />
permite aplicarla de forma tridimensional (véase<br />
figura en la parte frontal del paquete: mango<br />
puerta). Primero debe pegar la lámina sobre una<br />
superficie recta y plana del revestimiento. Luego,<br />
la lámina puede colocarse sobre zonas arqueadas<br />
gracias al calentamiento.<br />
Atención: No caliente ni estire demasiado la lámina,<br />
ya que podría perder su estructura o rajarse. Tampoco<br />
la caliente demasiado (peligro de quemadura).<br />
Nota importante para el montaje:<br />
Coloque la lámina de forma estirada y completa<br />
por encima de las esquinas y / o de los cantos,<br />
a fin de evitar que se encoja tras su enfriamiento.<br />
Trabajos de repaso:<br />
Retire el excedente de la lámina de diseño cortándolo<br />
con cuidado con el cutter.<br />
Diese Montageanleitung kann auf Grund technischer Änderungen durch eine neue Version ersetzt worden sein. Bitte informieren Sie sich auf<br />
unserer Website www.foliatec.com, ob es sich bei der vorliegenden Anleitung um die neueste Version handelt. Informationen zu FOLIATEC<br />
Produkten sowie Tipps und Tricks zur Montage finden Sie in unserem Internet-Technik-Forum<br />
unter www.foliatec.com/service<br />
Oder fragen Sie unser Technik-Team (Tel. +49/(0)911/975440)<br />
These operating instructions may have been replaced with a newer version due to technical changes. Visit our website at www.foliatec.com to<br />
see if the instructions provided represent the latest version. Information on FOLIATEC products as well as installation tips and tricks can be<br />
found in our Internet-Technique-Forum under<br />
www.foliatec.com/service<br />
Or contact our technical team (Tel. +49 (0)911-97 54 40).<br />
Listo!<br />
FOLIATEC.com. ist ein international eingetragenes Warenzeichen der FOLIATEC ® Böhm GmbH & Co Vertriebs KG, Germany.<br />
FOLIATEC.com is an int. reg. TM of FOLIATEC ® Böhm GmbH + Co.Vertriebs KG, Germany. Druckfehler, Irrtum und technische Änderungen<br />
vorbehalten. | Subject to misprints, errors and technical changes.Copyright© by FOLIATEC.com. Verstöße werden gerichtlich verfolgt.<br />
| All rights reserved. Violators will be prosecuted to the full extent of the law.<br />
Stand 06/09<br />
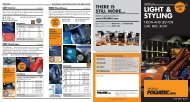
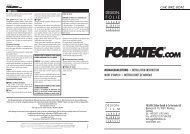
<strong>DESIGN</strong>-<br />
FOLIE<br />
C A R B O N<br />
ALUBRUSH<br />
CLASSIC<br />
MONTAGEANLEITUNG • INSTALLATION INSTRUCTION<br />
MODE D’EMPLOI • INSTRUCCIONES DE MONTAJE<br />
<strong>DESIGN</strong>-<br />
F O L I E<br />
C A R B O N<br />
ALUBRUSH<br />
CLASSIC<br />
CAR. BIKE. BOAT.<br />
FOLIATEC.com<br />
Neumeyerstraße 70<br />
90411 Nürnberg • GERMANY<br />
T: +49/(0)911/97544-0<br />
F: +49/(0)911/97544333<br />
E: techsupport@foliatec.de<br />
I: www.foliatec.com
DEUTSCH ENGLISH FRANÇAIS<br />
Lesen Sie die Gebrauchsanweisung vor der<br />
Verarbeitung aufmerksam durch.<br />
Allgemeiner Hinweis: Verschiedene Kfz-<br />
Kunststoffe enthalten teilweise Trennmittel und<br />
Weichmacher. Diese können bei Erwärmung, z.B.<br />
durch Wärme oder Sonneneinstrahlung, austreten<br />
(ausgasen) und dadurch die Klebewirkung<br />
der DesignFolie beeinflussen (Folie wird durch<br />
Luftblasen hochgehoben). Eine Gewährleistung<br />
bei Ablösung der Folie, die auf einen ungeeigneten,<br />
z.B. fettigen oder öligen Untergrund oder<br />
ausgasende Kunststoffe zurückzuführen ist, ist<br />
ausgeschlossen.<br />
Fertigungsbedingt kann der Glanzgrad der DesignFolien<br />
von Fertigungscharge zu Fertigungscharge<br />
etwas abweichen. Dies ist kein<br />
Reklamationsgrund!<br />
Montagehinweis:<br />
Folie, Umgebung und zu beklebender Untergrund<br />
sollten eine Temperatur zwischen +16°C bis<br />
+28°C aufweisen.<br />
Die DesignFolien können nur auf festen Untergründen<br />
verklebt werden.<br />
Ziehen Sie zur Folienmontage Baumwollhandschuhe<br />
an - um event. Fingernagelkratzer in der<br />
Folienoberfläche zu vermeiden.<br />
Bei Folienapplikationen mit geringer Haftfläche<br />
(z.B. KFZ- Türgriffschale) empfehlen wir den Einsatz<br />
eines produktspezifischen Primers.<br />
Reinigung:<br />
Reinigen Sie die zu beklebende Fläche gründlich<br />
von Schmutz, Fett und Silikonrückständen (Cockpit<br />
Sprays - Kunststoffpflegemittel).<br />
Hartnäckige Rückstände (z.B. Fett)mit Reingungsalkohol<br />
entfernen. Hinweis: Keine Verdünner<br />
verwenden.<br />
Zusätzliche Hilfsmittel:<br />
1. Lineal, 2. Schere, 3. weiches fusselfreies Baumwolltuch,<br />
4. Heißluftpistole, alternativ Haarfön, für<br />
3D-Verklebetechnik, 5. Baumwollhandschuhe.<br />
Zuschnitt:<br />
Die DesignFolie an das zu beschichtende Fahrzeugteil<br />
anlegen und mit beiliegendem Cuttermesser grob<br />
zuschneiden. An den Kanten Überstand von mind.<br />
3 cm stehen lassen.<br />
Verklebung:<br />
Nehmen Sie die Folie aus der Verpackung und rollen<br />
Sie diese auf einem sauberen Untergrund<br />
aus.<br />
Halten Sie die Folie an zwei Ecken hoch und ziehen<br />
Sie langsam die Trägerfolie (Schutzfolie) ab.<br />
Nach Möglichkeit Schutzfolie nur teilweise abziehen.<br />
Achten Sie darauf, dass die Klebefläche den<br />
Boden nicht berührt, da es sonst zu Schmutzeinschlüssen<br />
kommt. Halten Sie die Folie auf Spannung,<br />
damit sie nicht zusammenklebt.<br />
Legen Sie das gespannte Folienstück mittig auf das<br />
zu beklebende Fahrzeugteil.<br />
Durch Andrücken mit einem weichen Tuch, von der<br />
Mitte des Teils ausgehend, nach aussen verkleben.<br />
Beim Andrücken darauf achten, dass keine Falten<br />
oder Luftblasen unter Folien entstehen. Schrittweise<br />
vorgehen.<br />
Speziell für ULTRA Carbon Folie:<br />
Aufgrund der Easy Work Klebstofftechnologie<br />
kann die Folie im Korrekturfall<br />
jederzeit wieder hochgehoben werden<br />
und neu verlegt werden.<br />
Durch großflächige Erwärmung mit einer Heißluftpistole<br />
(+50°C) wird die DesignFolie weich und dehnbar.<br />
Damit ist sie 3-dimensional anwendbar (siehe<br />
Bild Packung: Türgriff). Folie zunächst an einer<br />
geraden, ebenen Fläche der Verblendung ankleben.<br />
Durch die Erwärmung kann die Folie dann<br />
um Wölbungen gezogen werden.<br />
Achtung: Folie nicht zu stark erwärmen und ziehen,<br />
da sie sonst die Struktur verlieren oder reissen<br />
kann.<br />
Wichtiger Montagehinweis:<br />
Folie komplett über Ecken, bzw. Kanten ziehen,<br />
damit ein Rückschrumpfen nach Abkühlung verhindert<br />
wird.<br />
Nacharbeiten:<br />
Den Überstand der DesignFolie durch vorsichtiges<br />
Nachschneiden mit dem Cuttermesser entfernen.<br />
Fertig !<br />
Please read instructions thoroughly before<br />
starting.<br />
General note: Various automotive plastics<br />
(e.g. recycled plastics) contain in part release<br />
agents and softeners. These can be released (gas<br />
evolution) when exposed to heat, e.g. through<br />
strong sunlight and thereby influence the adhesive<br />
effect (bubble formation) of the DesignFilm.<br />
There is no warranty claim if the film comes loose<br />
due to an unsuited, greasy or oily surface.<br />
As a result of the production process, the glossiness<br />
of the Cockpit Design film may vary slightly<br />
from batch to batch. This is not a reason for complaint!<br />
Assembly instructions:<br />
The film, ambient environment and application<br />
surface should have a temperature of between<br />
+16°C and +28°C.<br />
Cockpit Design films can only be applied to hard<br />
surfaces.<br />
Before applying the film, put on cotton gloves to<br />
avoid potentially scratching the film surface with<br />
your finger nails.<br />
When applying the film to surfaces with a limited<br />
area (e.g. car door handle shell) we recommend<br />
the use of a product-specific primer.<br />
Cleaning:<br />
Thoroughly clean the application surface of dust<br />
and dirt with a clean, moist cloth. Remove stubborn<br />
residue (e.g. grease) with cleaning alcohol<br />
or silicon remover.<br />
Note: Do not use thinner.<br />
Additional tools:<br />
1. Ruler, 2. scissors, 3. soft cloth,<br />
4. hot-air pistol, alternatively hair fan, for<br />
3D-adhesion technology. 5. cotton gloves.<br />
Cut to size:<br />
Place the DesignFilm on the application surface<br />
of the vehicle part and cut to size with the enclosed<br />
cutting knife. Allow an overlap of at least<br />
3 cm on the edges.<br />
Adhesion:<br />
Take the film out of the packaging and roll it out<br />
on a clean surface.<br />
Hold up the film by two corners and slowly peel<br />
off the backing film (protective film). If possible only<br />
partially peel off the protective film. Please ensure<br />
that the adhesive side does not touch the ground,<br />
as this may lead to dirt being trapped under<br />
the film. Hold the film taut, so that it does not<br />
stick together.<br />
Place the taut piece of film centrally on the part of<br />
the vehicle to be coated.<br />
Glue towards the outside by applying pressure with<br />
a soft cloth starting from the center of the part.<br />
When applying pressure, make sure that no creases<br />
or air bubbles appear under the film. Proceed<br />
step by step.<br />
Special notice for ULTRA Carbon film:<br />
Thanks to the Easy Work adhesive technology,<br />
the film can be lifted up and repositioned<br />
at any time if the need for<br />
correction arises.<br />
The -DesignFilm becomes soft and stretchable when<br />
heated with a hot-air pistol. This allows 3-Dimensional<br />
application (see picture on package: door handle).<br />
To start, glue the film on a straight even surface<br />
of the paneling. The film can be pulled around<br />
the curvatures when heated.<br />
Caution: Do not overheat or overextend the film,<br />
otherwise it may loose structure or tear. Do not<br />
overheat the film – danger of burns.<br />
Important installation note:<br />
Completely pull the film over corners or edges to<br />
prevent shrinkage after cooling.<br />
Final touch:<br />
Carefully cut off the excess overlap of the DesignFilm<br />
with the cutting knife.<br />
Finished !<br />
S.V.P Lisez attentivement les instructions avant<br />
de commencer.<br />
Généralités: Les diverses matières plastiques<br />
pour automobiles (par ex., matières plastiques recyclées)<br />
contiennent en partie des agents de séparation<br />
et des plastifiants. Un dégagement de ces<br />
derniers peut être causé par un réchauffement, par<br />
ex. par de forts rayons solaires, et avoir un effet<br />
négatif sur le pouvoir adhésif du film design (formation<br />
de bulles d’air). Toute garantie est exclue<br />
en cas de décollement du film dû à une base non<br />
appropriée, par ex. grasse ou huileuse.<br />
Le degré de brillance des films design pour habitacle<br />
peut légèrement varier selon le lot de fabrication.<br />
Ceci n'est pas un motif de réclamation !<br />
Conseil de pose:<br />
La température du film, de l'air ambiant et du<br />
support à encoller doit se situer entre +16°C et<br />
+28°C.<br />
Les films design pour habitacle ne peuvent être<br />
posés que sur des supports fixes.<br />
Lors de la pose du film, veuillez porter des gants<br />
en coton pour éviter d'éventuelles éraflures d'ongles<br />
sur la surface du film.<br />
En cas d'application de films sur petite surface<br />
d'adhésion (p. ex. coque de poignée de porte),<br />
nous recommandons l'utilisation d'un apprêt spécifique.<br />
Nettoyage:<br />
Bien nettoyer les surfaces à revêtir avec chiffon<br />
propre et humide. Enlever poussières et impuretés.<br />
Nettoyer les résidus tenaces (graisse par<br />
ex.) à l’alcool ou avec un dissolvant silicone.<br />
Attention: ne pas employer de diluant.<br />
Autres outils nécessaires:<br />
1. une règle, 2. des ciseaux, 3. un chiffon doux,<br />
4. un pistolet à air chaud ou un sèche-cheveux pour<br />
le collage 3D, 5. gants en coton.<br />
Coupe:<br />
Apposer le film design sur la partie de voiture<br />
à revêtir (uniquement des pièces de l’habitacle)<br />
et découper à l’aide du cutter fourni.<br />
Laisser déborder le film d’au moins 3 cm.<br />
Collage:<br />
Sortez le film de l'emballage et déroulez-le sur une<br />
surface propre.<br />
Maintenez le film en l'air par deux coins et retirez<br />
lentement le film support protecteur. Si possible,<br />
ne retirer le film protecteur qu'en partie. Veillez à<br />
ce que la face adhésive n'entre pas en contact avec<br />
le sol pour éviter toute incrustation de salissure. Maintenez<br />
le film tendu pour qu'il ne s'enroule pas.<br />
Placez le film tendu au centre de la zone de véhi-<br />
cule à traiter.<br />
Appuyer avec un chiffon doux et coller à partir<br />
du centre de la pièce vers l’extérieur. Faire attention<br />
en appuyant qu'aucun pli ou bulle d’air ne se forme<br />
sous le film. Procéder progressivement, c’està-dire<br />
retirer quelques centimètres du film protecteur,<br />
appuyer le film design, etc.<br />
Spécialement pour films ULTRA Carbon<br />
:<br />
Grâce à la technologie de colle Easy Work,<br />
le film peut être à tout moment soulevé<br />
puis replacé pour corriger la pose.<br />
Le film design se ramollit et est extensible en le<br />
chauffant avec un pistolet à air chaud. Il est donc<br />
applicable en 3D (cf. figure au recto de l'emballage:<br />
poignée de porte). Coller d’abord le film sur<br />
une surface droite et plane du revêtement. En le<br />
chauffant, le film peut être étiré sur les courbures.<br />
Attention: ne pas chauffer trop fortement ou trop<br />
tirer le film, il risque de perdre sa structure et de<br />
se déchirer. Ne pas chauffer trop fortement le film<br />
(risque de brûlure).<br />
Instruction de pose importante:<br />
Etirer complètement le film et le laisser légèrement<br />
déborder des coins ou des bords afin d’éviter<br />
tout retrait après refroidissement.<br />
Finitions:<br />
Enlever les bords du film Design qui dépassent en<br />
les découpant avec précaution à l’aide du cutter.<br />
Terminé!


![DOWNLOAD: Zulassungsbestimmungen [PDF/ 1,5 MB] - Foliatec](https://img.yumpu.com/21056384/1/184x260/download-zulassungsbestimmungen-pdf-15-mb-foliatec.jpg?quality=85)