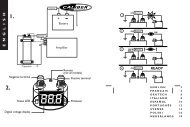
Manual Competition Pro - Caliber Europe
Manual Competition Pro - Caliber Europe
Manual Competition Pro - Caliber Europe

You also want an ePaper? Increase the reach of your titles
YUMPU automatically turns print PDFs into web optimized ePapers that Google loves.
F<br />
D<br />
Thank you for choosing a <strong>Caliber</strong> product. In doing so you’ve demonstrated a<br />
desire to own the finest in Car Audio Technology. <strong>Caliber</strong> strives to provide you<br />
with the finest products possible, and is always looking for ways to please our<br />
customers even more.<br />
<strong>Pro</strong>perly installed, your <strong>Caliber</strong> amplifier will provide years of high quality sonic<br />
reproduction. Before installing the amplifier in your vehicle, please read this entire<br />
manual carefully, in order to protect your vehicle, and get the maximum performance<br />
of your mobile sound system.<br />
<strong>Caliber</strong> Warranty<br />
Due to the complexity of our products, we strongly recommend that this amplifier<br />
is installed by your authorized <strong>Caliber</strong> dealer. If properly installed by your<br />
dealer we provide a warranty for 12 month from the date of purchase.<br />
If you install this amplifier yourself, we wish you lots of fun and succes in doing<br />
so. If you follow our guidelines, you’ll get the best result. Our warranty, however,<br />
will be limited to and not exceed 30 days from the date of purchase.<br />
<strong>Caliber</strong> Accessories<br />
To realize the exceptional performance of which this amplifier is capable, it is<br />
necessary that power sources, signal sources, speakers and interconnects are of<br />
the highest quality. Remember that <strong>Caliber</strong> is not just an amplifier manufacturer.<br />
We also manufacture everything needed for the ‘optimal’ Car Audio System<br />
(except the car). So be sure to ‘Get Connected’ with <strong>Caliber</strong> and ask your local<br />
<strong>Caliber</strong> dealer for our accessories.<br />
Contents<br />
Before you start your installation . . . . . . . . . . . . . . . . . . . . . .This page<br />
Features and Specifications . . . . . . . . . . . . . . . . . . . . . . . . . . . . . . . . . 2<br />
Mounting and Locations . . . . . . . . . . . . . . . . . . . . . . . . . . . . . . . . . . . 5<br />
Electrical installation . . . . . . . . . . . . . . . . . . . . . . . . . . . . . . . . . . . . . .6<br />
Signal input/ -output . . . . . . . . . . . . . . . . . . . . . . . . . . . . . . . . . . . . . . .7<br />
Speaker output . . . . . . . . . . . . . . . . . . . . . . . . . . . . . . . . . . . . . . . . . .8<br />
Equalizer adjustments . . . . . . . . . . . . . . . . . . . . . . . . . . . . . . . . . . . 10<br />
Manuel de propriétaire . . . . . . . . . . . . . . . . . . . . . . . . . . . . . . . . . . . 13<br />
Bedienungsanleitung . . . . . . . . . . . . . . . . . . . . . . . . . . . . . . . . . . . . . 25<br />
BEFORE YOU START
Due to our effort to innovate and improve our amplifiers, this modern generation<br />
of <strong>Caliber</strong> <strong>Competition</strong> <strong>Pro</strong> Series amplifiers offers you the following features:<br />
• Bridgeable outputs.<br />
• ’Tri-mode’ output capability, simultaneous stereo & bridged<br />
mono set up is possible.<br />
• Pulse Width Modulated (PWM) MOSFET Power Supply.<br />
• 2 Ohm stable (4 Ohm mono-bridged)<br />
• Double sided epoxy board.<br />
• Variable input sensitivity: 15V to 0.5V.<br />
• Thermal-, Overload- and Shortcircuit protection.<br />
• Excellent muting circuitry assures no turn on/off ‘pops’.<br />
• Built-in 7 band equalizer for each channel.<br />
• Built-in phase control for each channel<br />
• Built-in adjustable HighPass/LowPass/FullRange Filter(s).<br />
• Built-in subsonic filter adjustable 10-50Hz<br />
• Differential inputs to shunt any input noise<br />
• Signal output RCA’s for additional amplifier(s) (exept CA 670).<br />
• Large power supply connectors for optimal power distribution.<br />
• Chrome-plated speaker connectors for optimal signal output.<br />
• <strong>Europe</strong>an design and engineering.<br />
• Superb Sonic Performance for your ‘Dream Machine’ on wheels.<br />
• Years and years of acoustic pleasure.<br />
All <strong>Caliber</strong> <strong>Competition</strong> <strong>Pro</strong> Series Amplifiers have the following specifications.<br />
Variable specifications are listed per model.<br />
Frequency response (+0, -1dB) 20Hz - 30kHz<br />
Total Harmonic Distortion 95dB<br />
Input Sensitivity RCA input 15V - 500mV<br />
Input Impedance 20 kOhm<br />
Damping Factor > 180<br />
Output Impedance 2 - 8 Ohm<br />
2-channel Amplifiers<br />
<strong>Competition</strong> CA 130 <strong>Pro</strong> Series<br />
Maximum Power Output at 14,4V<br />
4 Ohm 20Hz - 30kHz THD 0,5% 2x 130W<br />
4 Ohm 1kHz Mono Bridged 1x 260W<br />
Continuous Power Output at 14,4V<br />
4 Ohm 20Hz - 30kHz THD 0,5% 2x 65W<br />
4 Ohm 1kHz Mono Bridged 1x 130W<br />
Fuse Rating 20A<br />
Dimensions (WxHxD mm) 200 x 60 x 235<br />
<strong>Competition</strong> CA 190 <strong>Pro</strong> Series<br />
Maximum Power Output at 14,4V<br />
4 Ohm 20Hz - 30kHz THD 0,5% 2x 190W<br />
4 Ohm 1kHz Mono Bridged 1x 380W<br />
Continuous Power Output at 14,4V<br />
4 Ohm 20Hz - 30kHz THD 0,5% 2x 95W<br />
4 Ohm 1kHz Mono Bridged 1x 190W<br />
Fuse Rating 25A<br />
Dimensions (WxHxD mm) 250 x 60 x 235<br />
<strong>Competition</strong> CA 250 <strong>Pro</strong> Series<br />
Maximum Power Output at 14,4V<br />
4 Ohm 20Hz - 30kHz THD 0,5% 2x 250W<br />
4 Ohm 1kHz Mono Bridged 1x 730W<br />
Continuous Power Output at 14,4V<br />
4 Ohm 20Hz - 30kHz THD 0,5% 2x 125W<br />
4 Ohm 1kHz Mono Bridged 1x 250W<br />
Fuse Rating 2x 20A<br />
Dimensions (WxHxD mm) 320 x 60 x 235
<strong>Competition</strong> CA 510 <strong>Pro</strong> Series<br />
Maximum Power Output at 14,4V<br />
4 Ohm 20Hz - 30kHz THD 0,5% 2x 510W<br />
4 Ohm 1kHz Mono Bridged 1x1100W<br />
Continuous Power Output at 14,4V<br />
4 Ohm 20Hz - 30kHz THD 0,5% 2x 255W<br />
4 Ohm 1kHz Mono Bridged 1x 510W<br />
Fuse Rating 4x 20A<br />
Dimensions (WxHxD mm) 440 x 60 x 235<br />
4-Channel Amplifiers<br />
<strong>Competition</strong> CA 470 <strong>Pro</strong> Series<br />
Maximum Power Output at 14,4V<br />
4 Ohm 20Hz - 30kHz THD 0,5% 4x 130W<br />
4 Ohm 1kHz Mono Bridged 2x 260W<br />
Continuous Power Output at 14,4V<br />
4 Ohm 20Hz - 30kHz THD 0,5% 4x 65W<br />
4 Ohm 1kHz Mono Bridged 2x 130W<br />
Fuse Rating 40A<br />
Dimensions (WxHxD mm) 330 x 60 x 235<br />
6-Channel Amplifier<br />
<strong>Competition</strong> CA 670 <strong>Pro</strong> Series<br />
Maximum Power Output at 14,4V<br />
4 Ohm 20Hz - 30kHz THD 0,5% 4x 90W+ 2x 130W<br />
4 Ohm 1kHz Mono Bridged 2x 180W+ 1x 260W<br />
Continuous Power Output at 14,4V<br />
4 Ohm 20Hz - 30kHz THD 0,5% 4x 45W + 2x 65W<br />
4 Ohm 1kHz Mono Bridged 2x 90W+ 1x 130W<br />
Fuse Rating 25A + 20A<br />
Dimensions (WxHxD mm) 400 x 60 x 235<br />
Mounting your <strong>Caliber</strong> Amplifier<br />
Before mounting your <strong>Caliber</strong> Amplifier you must carefully choose the place<br />
where it can be installed.The amplifier has to have at least 5 cm (2”) ventilation<br />
space at all sides, to allow the heat to rise away from the amplifier.<br />
Be sure that the power and signal cables can enter and leave the amplifier in a<br />
straight line, to avoid the risk of malfunction.<br />
The amplifier should be protected from exposure to moisture and direct sunlight.The<br />
best places for it to be mounted are:<br />
• The floor of the trunk.<br />
• Under the driver’s seat<br />
• On your sub-woofer case.<br />
If you’ve decided where to place your <strong>Caliber</strong> Amplifier, and you’ve convinced<br />
yourself there is enough air circulation and protection from unusual hazards,<br />
Mark the mounting surface using the amplifier as a template (Placing masking tape<br />
on these surfaces first will make your markings more visible).<br />
Drill 2.5 mm (1/8”) diameter holes at the marked locations and mount the<br />
amplifier using the supplied self-tapping screws.<br />
Note: Do not drill any holes while using the amplifier as a template.<br />
You can easily damage the amplifier’s anodized coating in this<br />
manner.
REMEMBER TO ALWAYS DISCONNECT BATTERY GROUND<br />
BEFORE WORKING ON A VEHICLE’S ELECTRICAL SYSTEM<br />
•We highly recommend that you carefully design your Car Audio System before<br />
you start the installation. Make sure that the cables for power and signal are<br />
not on the same side of the vehicle, and do not cross each other.This will help<br />
reduce any noises caused by the power cable radiating into the signal cables. If<br />
a signal cable is too close to a power cable, it will pick up the magnetic field of<br />
the power cable, which will lead to a loss of quality in the signal.<br />
•Always use the largest gauge power/ground cable available, at least 10 mm 2 (8<br />
AWG). Ask your local <strong>Caliber</strong> dealer for the <strong>Caliber</strong> Powerflow TM power-,<br />
ground- and remote cables.A guarantee for a safe power management.<br />
•For the protection of your vehicle, always place a fuse or circuit breaker no<br />
more than 30 cm (12”) from the battery.This fuse or circuit breaker should<br />
be greather than the fuse(s) of your amplifier for optimal protection.<br />
For instance: a <strong>Caliber</strong> <strong>Competition</strong> <strong>Pro</strong> Series amplifier has 2x 25A fuses.<br />
Your “vehicle protection” fuse should be about 60A (2x25A=50A). Get good<br />
professional advice about the value of this specific fuse.<br />
REMEMBER TO ALWAYS DISCONNECT BATTERY GROUND<br />
BEFORE WORKING ON A VEHICLE’S ELECTRICAL SYSTEM<br />
Getting your power started<br />
• First, the +12V terminal is connected directly to the battery of your car. Use<br />
a cable of at least 10 mm 2 (8 AWG), and make sure that the connectors are of<br />
the same value. Don’t forget the extra “Vehicle protection” fuse.<br />
The 12V + terminal should NOT be connected to the car fuse box.<br />
• Second, the ground terminal (GND) must be fastened securely to the chassis of the<br />
vehicle with the same gauge cable as the positive cable (the same amount of power<br />
has to run through it). Ensure that all paint, undercoating or any other insulation is<br />
removed from the area where you want to make your ground connection to.<br />
• Third, the last cable to connect is your remote turn-on (REM). Many radio-cassette<br />
and CD-players have an output terminal for connection of the REM of a<br />
amplifier. If you don’t have such an output, a separate switch must be installed<br />
to control your amplifiers on/off function.<br />
Large Powerterminal<br />
for optimal power<br />
distribution.<br />
CCS entrance<br />
for optional<br />
<strong>Caliber</strong> Control System<br />
Signal Input<br />
• The RCA’s to your left are the ‘Line-in’ terminals and are to be connected<br />
with your radio/cassett or CD player. Make sure you put the left channel to<br />
the RCA-jack marked “Left”, and the right channel to the RCA-jack marked<br />
“Right”. When you’re the proud owner of a 4 channel amplifier, you have to<br />
pay extra attention.These amplifiers have a 4 channel input. Don’t mix up all<br />
the different channels: Left, Right Front and Rear and connect them with care.<br />
The CA 670 is a 6-channel amplifier which gives you an option to connect an<br />
external signal input, or have the signal input linked internally.You can select<br />
this by the switch right to the subwoofer RCA-input teminals.<br />
• As you can see, each <strong>Caliber</strong> amplifier offers you the possibility to connect a<br />
second (or more) amplifier(s) to your system via the “Signal-out” terminals<br />
(except CA 670).The advantage of two amplifiers is that one amplifier can be<br />
used for normal stereo, while the other is used as a subwoofer amplifier.<br />
• All <strong>Caliber</strong> amplifiers have a variable input level adjustment. It allows you to<br />
match any signal source (CD player,AM/FM cassettedeck, etc) correctly from<br />
its pre-amp output into your <strong>Caliber</strong> amplifier. The adjustment ranges from<br />
15V - 500mV(0.5V).<br />
•For the professionals outthere, <strong>Caliber</strong> has intergraded a subsonic filter in this<br />
amplifier.This 12dB/Oct. subsonic filter is variable from 10Hz to 40Hz.<br />
Of course you can switch it of, in case you don’t have a need for it.<br />
• The last knob you can switch is the on/off switch for the build in equalizer<br />
which you find on top of your amplifier.<br />
• The <strong>Competition</strong> <strong>Pro</strong> amplifiers are all fitted with a CCS entrance.The CCS<br />
is the <strong>Caliber</strong> Control System, which can be purchased as an option.The CCS<br />
gives you information of how the status of your amplifier is. How many voltage<br />
it consumes, what the temperature is and whether it is in a termal or shortcircuit<br />
protection. It can give this information simultaniously for up to 4 amplifiers,<br />
and always gives you a warning when an amplifier disfunctions.
Speakeroutput 2-channel amplifiers<br />
Speaker output<br />
• All the <strong>Caliber</strong> <strong>Competition</strong> <strong>Pro</strong> Series amplifiers have a Stereo/Bridgeable Tri-<br />
Mode speaker output terminal.The amplifier has its own stereo/bridge switch<br />
built-in, so there is no need to select a stereo or bridged mode.You can connect<br />
the speakers to each channel in stereo mode, and simultaneously connect<br />
a sub-woofer to the speaker terminal in the bridged mode.<br />
•Pay attention in connecting your speakers and sub-woofer. Be sure to observe<br />
correct speaker output connections and polarity.<br />
In the stereo mode, connect the right speaker output to the right speaker and<br />
the left to the left.<br />
Connect the positive (+) output to the positive (+) speaker terminal and the<br />
negative (-) output to the negative (-) speakerterminal.<br />
• In the bridged mode connect the Left (+) positive to the positive speaker terminal<br />
and the Right (-) negative to the negative speaker terminal.<br />
• Do not use the negative speaker output commonly for left and right speakers<br />
(common ground). Improper polarity causes a loss of bass response.<br />
• Use a quality speaker cable for your Car Audio System. Once you’ve heard the<br />
difference, you’ll know why we advise you to consult your local <strong>Caliber</strong> dealer<br />
for our range of stereo loudspeaker cables with gold-plated connectors.<br />
• Never connect the negative speaker output to the chassis of your vehicle.<br />
This can cause severe damage to your Car Audio System.<br />
Speakeroutput 4-channel amplifiers<br />
Speakeroutput 6-channel amplifiers<br />
• In case you have a <strong>Caliber</strong> <strong>Competition</strong> <strong>Pro</strong> series 4-channel or 6 channel<br />
amplifier you have to pay extra attention to your speaker connections. Be sure<br />
that the front speaker output terminal (left and right) is connected to the<br />
front speakers, the rear speaker output terminal (left and right) is connected<br />
to your rear speakers and your subwoofer(s) to the subwoofer output terminal.<br />
(Note: if you only use one subwoofer on amplifier, you are advised to<br />
connect it in a bridged mode. Be sure that in the bridged mode you connect<br />
the Left (+) positive to the positive speaker terminal and the Right (-) negative<br />
to the negative speaker terminal.)<br />
• Enjoy your installation and have lots of fun and good music in your moving<br />
sound machine.
On top of your <strong>Competition</strong> <strong>Pro</strong> Series amplifier you will find the build-in topcontrols.The<br />
2-channel amplifiers have one set of controls for right/left.The 4channel<br />
amplifiers have two sets of controls, one for front left/right and one for<br />
rear left/right, The 6-channel amplifiers have 3 sets of controls, one for front<br />
left/right, one for rear left/right and one for the subwoofer channel.<br />
Equalizer<br />
These topcontrols have a 7-band equalizer for each channel (exept the subwoofer<br />
channels on the 6-channel amplifier). Normal equalizers adjust the sound for<br />
both the right and the left channel. By separating the equalizers for the left and<br />
right channel you are able to adjust the sound in your car very precisely. Since,<br />
in a car, you are sitting at the driversseat you don’t hear the same sound from<br />
your right speakers, as you do from your left speakers (One side is further away<br />
from you, while the other side is positioned differently to your ears, so every<br />
side gives you a different sound). By adjusting the right- and the left channel<br />
separately you can make them sound the same.<br />
•<br />
•<br />
All the 7 frequences we selected for you on this equalizer are the ones that have<br />
the most influence on the total audio spectrum.<br />
Level Control<br />
Before adjusting the equalizer, make sure that your input level is set<br />
to a minimum (Note: the minimum is 15V, not 0,5V).<br />
Every input level control controls a pair of channels (left and right)<br />
LEVEL<br />
per control unit. So for 4- channel amplifiers turn down two level controls<br />
(front and rear). For 6-channel amplifiers you even have to turn<br />
15V 0.5V<br />
down 3 level controls (front, rear and subwoofer). In this way you will have<br />
enough headroom to adjust your equalizer correctly, without your outputsignal<br />
starting to clip before the adjustment is finished.<br />
Variable phase control.<br />
Each pair of channels (left/right, front/rear and subwoofer) has a variable phase<br />
control,for eliminating every eventual phase problem<br />
that will occur. Phase problems can occur for<br />
various reasons; the use of passive filters, the difference<br />
in path length, unwanted reflections or others.<br />
The phase control switch has three positions. The<br />
•<br />
•<br />
•<br />
•<br />
•<br />
VARIABLE PHASE CONTROL<br />
MONO OFF<br />
LEFT RIGHT/<br />
MONO<br />
STEREO<br />
off position for if you do not need to use the phase control.The stereo position,<br />
if you have connected both right and left speakers, you can shift the fase separately<br />
for the left or right channel by turning the potmeters.<br />
•<br />
•<br />
•<br />
•<br />
50Hz 250Hz 1kHz 2.5kHz 5kHz 7.5kHz 10kHz<br />
•<br />
•<br />
•<br />
•<br />
•<br />
•<br />
•<br />
•<br />
•<br />
•<br />
The mono position, if you have connected a subwoofer in a bridged mode.The<br />
phase can now be shifted by turning on the potmeter of the right channel..<br />
Adjusting the phase is not an easy job.You have to listen very carefully to hear<br />
the difference.The best way to do it is to play some music you know very well<br />
and has a lot of vocals in it. When you start adjusting you can hear the vocals<br />
shifting over your front stage.Ask someone to help you with this fine tuning.<br />
In that way you can remain seated in your car and listen to the changes in the<br />
music, while the otherone adjusts the phase by turning slowly on the potmeters.<br />
The phase-shift is variable from 0 to 180 degrees. Allthough your amplifier is<br />
equipped with these phase-shift controls, it is not always necessary to use them.<br />
So if you don’t know if you have a phase problem, or can’t hear the difference if<br />
you are adjusting the phase, leave the phase control untouched and consult your<br />
local <strong>Caliber</strong> dealer. He is trained for this job, and will be willing to help you.<br />
Variable Crossover<br />
A <strong>Caliber</strong> <strong>Competition</strong> <strong>Pro</strong> amplifier has a variable<br />
FREQUENCY<br />
CLIPPING<br />
•<br />
crossover for each pair of channels. It can be<br />
HPF LPF OFF<br />
• •<br />
switched into FullRange (Off-position), LowPass<br />
50Hz 250Hz<br />
(put it on the LPF-position in the middle) or to<br />
VARIABLE CROSSOVER HighPass (in which case you have to slide it all the<br />
way to the left in the HPF-position).<br />
Once you have selected the position in which you want that pair of channels to<br />
play, you can start adjusting the filterfrequency by turning on the frequency potmeter.The<br />
filterfrequency is variable between 50Hz and 250Hz.You get the best<br />
result if you play several parts of music you know very well, whenyou are adjusting<br />
your filter. Always adjust every pair of speakers separately.You can turn of<br />
your other pair(s) of speakers and/or your sub’s, by simply disconnecting the<br />
input RCA’s for these channels. In this way you will be able to hear every reacting<br />
this speakerpair gives you when you are adjusting them. Do the same thing<br />
if you want to adjust your subwoofers. Let the sub’s play alone, and listen carefully<br />
to the reactions to the music.<br />
Golden Rule<br />
It is lots of fun to adjust your amplifier, but you can easily overdo it.There is one<br />
golden rule you have to remember: Before you start tuning your amplifier, always<br />
turn the input level all the way down to a minimum (15V).Then you can safely<br />
adjust all the options your amplifier offers you. Once you have fine tuned the<br />
sound to your likings, you can slowly turn your input level up a bit, untill you<br />
hear your amplifier starting to clip (or look at the clipping LED’s). Once your<br />
amplifiers clips, you have given it to much input level, so you will have to turn it<br />
down a little. In this way you will get the maximum power from your amplifier,<br />
without the danger of damaging your speakers or subwoofers.
. . . . . . . . . . . . . . . . . . . . . . . . . . . . . . . . . . . . . . . . . . . . . . . . . . . . . . . . . . . . . . . . . . . . . . . . . . . . . . . . . . . . . . . . . . . . . . . . . . . . . . . . . . . . . . . . . . . . . . . . .<br />
. . . . . . . . . . . . . . . . . . . . . . . . . . . . . . . . . . . . . . . . . . . . . . . . . . . . . . . . . . . . . . . . . . . . . . . . . . . . . . . . . . . . . . . . . . . . . . . . . . . . . . . . . . . . . . . . . . . . . . . . .<br />
. . . . . . . . . . . . . . . . . . . . . . . . . . . . . . . . . . . . . . . . . . . . . . . . . . . . . . . . . . . . . . . . . . . . . . . . . . . . . . . . . . . . . . . . . . . . . . . . . . . . . . . . . . . . . . . . . . . . . . . . .<br />
. . . . . . . . . . . . . . . . . . . . . . . . . . . . . . . . . . . . . . . . . . . . . . . . . . . . . . . . . . . . . . . . . . . . . . . . . . . . . . . . . . . . . . . . . . . . . . . . . . . . . . . . . . . . . . . . . . . . . . . . .<br />
. . . . . . . . . . . . . . . . . . . . . . . . . . . . . . . . . . . . . . . . . . . . . . . . . . . . . . . . . . . . . . . . . . . . . . . . . . . . . . . . . . . . . . . . . . . . . . . . . . . . . . . . . . . . . . . . . . . . . . . . .<br />
. . . . . . . . . . . . . . . . . . . . . . . . . . . . . . . . . . . . . . . . . . . . . . . . . . . . . . . . . . . . . . . . . . . . . . . . . . . . . . . . . . . . . . . . . . . . . . . . . . . . . . . . . . . . . . . . . . . . . . . . .<br />
. . . . . . . . . . . . . . . . . . . . . . . . . . . . . . . . . . . . . . . . . . . . . . . . . . . . . . . . . . . . . . . . . . . . . . . . . . . . . . . . . . . . . . . . . . . . . . . . . . . . . . . . . . . . . . . . . . . . . . . . .<br />
. . . . . . . . . . . . . . . . . . . . . . . . . . . . . . . . . . . . . . . . . . . . . . . . . . . . . . . . . . . . . . . . . . . . . . . . . . . . . . . . . . . . . . . . . . . . . . . . . . . . . . . . . . . . . . . . . . . . . . . . .<br />
. . . . . . . . . . . . . . . . . . . . . . . . . . . . . . . . . . . . . . . . . . . . . . . . . . . . . . . . . . . . . . . . . . . . . . . . . . . . . . . . . . . . . . . . . . . . . . . . . . . . . . . . . . . . . . . . . . . . . . . . .<br />
. . . . . . . . . . . . . . . . . . . . . . . . . . . . . . . . . . . . . . . . . . . . . . . . . . . . . . . . . . . . . . . . . . . . . . . . . . . . . . . . . . . . . . . . . . . . . . . . . . . . . . . . . . . . . . . . . . . . . . . . .<br />
. . . . . . . . . . . . . . . . . . . . . . . . . . . . . . . . . . . . . . . . . . . . . . . . . . . . . . . . . . . . . . . . . . . . . . . . . . . . . . . . . . . . . . . . . . . . . . . . . . . . . . . . . . . . . . . . . . . . . . . . .<br />
. . . . . . . . . . . . . . . . . . . . . . . . . . . . . . . . . . . . . . . . . . . . . . . . . . . . . . . . . . . . . . . . . . . . . . . . . . . . . . . . . . . . . . . . . . . . . . . . . . . . . . . . . . . . . . . . . . . . . . . . .<br />
. . . . . . . . . . . . . . . . . . . . . . . . . . . . . . . . . . . . . . . . . . . . . . . . . . . . . . . . . . . . . . . . . . . . . . . . . . . . . . . . . . . . . . . . . . . . . . . . . . . . . . . . . . . . . . . . . . . . . . . . .<br />
. . . . . . . . . . . . . . . . . . . . . . . . . . . . . . . . . . . . . . . . . . . . . . . . . . . . . . . . . . . . . . . . . . . . . . . . . . . . . . . . . . . . . . . . . . . . . . . . . . . . . . . . . . . . . . . . . . . . . . . . .<br />
. . . . . . . . . . . . . . . . . . . . . . . . . . . . . . . . . . . . . . . . . . . . . . . . . . . . . . . . . . . . . . . . . . . . . . . . . . . . . . . . . . . . . . . . . . . . . . . . . . . . . . . . . . . . . . . . . . . . . . . . .<br />
. . . . . . . . . . . . . . . . . . . . . . . . . . . . . . . . . . . . . . . . . . . . . . . . . . . . . . . . . . . . . . . . . . . . . . . . . . . . . . . . . . . . . . . . . . . . . . . . . . . . . . . . . . . . . . . . . . . . . . . . .<br />
. . . . . . . . . . . . . . . . . . . . . . . . . . . . . . . . . . . . . . . . . . . . . . . . . . . . . . . . . . . . . . . . . . . . . . . . . . . . . . . . . . . . . . . . . . . . . . . . . . . . . . . . . . . . . . . . . . . . . . . . .<br />
. . . . . . . . . . . . . . . . . . . . . . . . . . . . . . . . . . . . . . . . . . . . . . . . . . . . . . . . . . . . . . . . . . . . . . . . . . . . . . . . . . . . . . . . . . . . . . . . . . . . . . . . . . . . . . . . . . . . . . . . .<br />
. . . . . . . . . . . . . . . . . . . . . . . . . . . . . . . . . . . . . . . . . . . . . . . . . . . . . . . . . . . . . . . . . . . . . . . . . . . . . . . . . . . . . . . . . . . . . . . . . . . . . . . . . . . . . . . . . . . . . . . . .<br />
. . . . . . . . . . . . . . . . . . . . . . . . . . . . . . . . . . . . . . . . . . . . . . . . . . . . . . . . . . . . . . . . . . . . . . . . . . . . . . . . . . . . . . . . . . . . . . . . . . . . . . . . . . . . . . . . . . . . . . . . .<br />
. . . . . . . . . . . . . . . . . . . . . . . . . . . . . . . . . . . . . . . . . . . . . . . . . . . . . . . . . . . . . . . . . . . . . . . . . . . . . . . . . . . . . . . . . . . . . . . . . . . . . . . . . . . . . . . . . . . . . . . . .<br />
. . . . . . . . . . . . . . . . . . . . . . . . . . . . . . . . . . . . . . . . . . . . . . . . . . . . . . . . . . . . . . . . . . . . . . . . . . . . . . . . . . . . . . . . . . . . . . . . . . . . . . . . . . . . . . . . . . . . . . . . .<br />
. . . . . . . . . . . . . . . . . . . . . . . . . . . . . . . . . . . . . . . . . . . . . . . . . . . . . . . . . . . . . . . . . . . . . . . . . . . . . . . . . . . . . . . . . . . . . . . . . . . . . . . . . . . . . . . . . . . . . . . . .<br />
. . . . . . . . . . . . . . . . . . . . . . . . . . . . . . . . . . . . . . . . . . . . . . . . . . . . . . . . . . . . . . . . . . . . . . . . . . . . . . . . . . . . . . . . . . . . . . . . . . . . . . . . . . . . . . . . . . . . . . . . .<br />
. . . . . . . . . . . . . . . . . . . . . . . . . . . . . . . . . . . . . . . . . . . . . . . . . . . . . . . . . . . . . . . . . . . . . . . . . . . . . . . . . . . . . . . . . . . . . . . . . . . . . . . . . . . . . . . . . . . . . . . . .<br />
Nous vous remercions d’avoir porté votre choix sur un produit <strong>Caliber</strong>. Vous<br />
manifestez ainsi votre souhait de bénéficier de la technologie Car Audio la plus<br />
évoluée. <strong>Caliber</strong> ne recule devant aucun effort pour vous proposer les meilleurs<br />
produits et recherche sans cesse à satisfaire davantage encore ses clients.<br />
Correctement installé, votre amplificateur <strong>Caliber</strong> reproduira pendant de longues<br />
années un son d’une qualité parfaite.Au préalable, lisez attentivement ce manuel<br />
afin de protéger votre véhicule et de profiter au mieux des performances de<br />
votre installation Car Audio.<br />
Garantie <strong>Caliber</strong><br />
Vu la complexité de nos produits, nous vous conseillons vivement de confier l’installation<br />
de cet amplificateur à un revendeur agréé <strong>Caliber</strong>.Votre appareil bénéficiera<br />
ainsi d’une garantie de 12 mois à partir de la date d’achat. Si vous installez<br />
vous-même l’amplificateur, nous vous souhaitons de mener à bien cette<br />
tâche. En suivant nos recommandations, vous ne devriez guère éprouver de difficultés.Toutefois,<br />
notre garantie est alors limitée à 30 jours à partir de la date<br />
d’achat.<br />
Accessoires <strong>Caliber</strong><br />
Pour permettre à cet amplificateur d’atteindre le niveau de performances<br />
exceptionnel dont il est capable, il est nécessaire que les sources d’alimentation,<br />
les sources des signaux, les haut-parleurs et les raccordements soient d’une parfaite<br />
qualité. N’oubliez pas que <strong>Caliber</strong> n’est pas simplement un fabricant d’amplificateurs.<br />
Nous produisons également tout ce dont vous avez besoin pour<br />
réaliser un système Car Audio “optimal” (à l’exception du véhicule !). N’oubliez<br />
donc pas de choisir du matériel <strong>Caliber</strong> pour tous vos raccordements et renseignez-vous<br />
sur notre gamme d’accessoires auprès de votre revendeur <strong>Caliber</strong>.<br />
Table des matières<br />
Avant de commencer l’installation . . . . . . . . . . . . . . . . . . . . . . . . . . . . . . . . 13<br />
Particularités et caractéristiques . . . . . . . . . . . . . . . . . . . . . . . . . . . . . . . . . 14<br />
Montage et emplacements . . . . . . . . . . . . . . . . . . . . . . . . . . . . . . . . . . . . . . 17<br />
Installation de l’amplificateur . . . . . . . . . . . . . . . . . . . . . . . . . . . . . . . . . . . . 18<br />
Réglages . . . . . . . . . . . . . . . . . . . . . . . . . . . . . . . . . . . . . . . . . . . . . . . . . . . . 22
Fruits de nos efforts incessants d’innovation et d’amélioration de nos amplificateurs,<br />
cette nouvelle génération d’amplificateurs <strong>Caliber</strong> <strong>Competition</strong> <strong>Pro</strong> Series<br />
présente les particularités suivantes:<br />
• Sorties pontables.<br />
• Triple mode de sortie: sortie simultanée en stéréo et en mono<br />
pontée.<br />
• Alimentation MOSFET à découpage à modulation de largeur<br />
d’impulsions (PWM).<br />
• Stable 2 Ohms (ponté mono 4 Ohms)<br />
• Plaquette époxy double face<br />
• Sensibilité d’entrée variable de 15V à 0,5V<br />
• <strong>Pro</strong>tection thermique, contre les surcharges et contre les<br />
courts-circuits.<br />
• Excellent circuit de silencieux éliminant tout bruit de commutation.<br />
• Réglage de phase intégré pour chaque canal.<br />
• Égalisateur à 7 bandes intégré pour chaque canal.<br />
• Filtre(s) passe-haut/passe-bas/pleine gamme réglable(s) intégré(s).<br />
• Entrées differentielles à shunter les bruits d’entrée.<br />
• Prises Cinch de sortie du signal pour amplificateur(s) supplémentaire(s)<br />
(à l'exception du CA 670).<br />
• Connecteurs d’alimentation surdimensionnés pour une répartition<br />
optimale de la puissance.<br />
• Connecteurs pour haut-parleurs plaqués chrome pour un signal<br />
de sortie optimal.<br />
• Conçu et fabriqué en <strong>Europe</strong>.<br />
• Performances sonores exceptionnelles à la hauteur de vos<br />
exigences.<br />
• Un plaisir d’écoute qui demeure intact au fil des ans.<br />
Tous les amplificateurs <strong>Competition</strong> <strong>Pro</strong> Series de <strong>Caliber</strong> présentent les caractéristiques<br />
suivantes, qui sont suivies des caractéristiques propres à chaque modèle.<br />
Réponse en fréquence (+0, -1dB) 20Hz - 30kHz<br />
Distorsion harmonique totale 95dB<br />
Sensibilité d’entrée 15V - 500mV<br />
Impédance d’entrée 20kOhm<br />
Coefficient d’amortissement > 180<br />
Impédance de sortie 2 - 8 Ohm<br />
Amplificateurs à 2 canaux<br />
<strong>Competition</strong> CA 130 <strong>Pro</strong> Series<br />
Puissance de sortie maximale à 14,4 V<br />
4 Ohm 20Hz - 30kHz THD 1% 2x 130W<br />
4 Ohm 1kHz Mono Pontée 1x 260W<br />
Puissance de sortie continue à 14,4 V<br />
4 Ohm 20Hz - 30kHz THD1% 2x 65W<br />
4 Ohm 1kHz Mono Pontée 1x 130W<br />
Intensité nominale du fusible 20A<br />
Dimensions (L x H x P mm) 200 x 60 x 235<br />
<strong>Competition</strong> CA 190 <strong>Pro</strong> Series<br />
Puissance de sortie maximale à 14,4 V<br />
4 Ohm 20Hz - 30kHz THD 1% 2x 190W<br />
4 Ohm 1kHz Mono Pontée 1x 380W<br />
Puissance de sortie continue à 14,4 V<br />
4 Ohm 20Hz - 30kHz THD1% 2x 95W<br />
4 Ohm 1kHz Mono Pontée 1x 190W<br />
Intensité nominale du fusible 25A<br />
Dimensions (L x H x P mm) 250 x 60 x 235<br />
<strong>Competition</strong> CA 250 <strong>Pro</strong> Series<br />
Puissance de sortie maximale à 14,4 V<br />
4 Ohm 20Hz - 30kHz THD 1% 2x 250W<br />
4 Ohm 1kHz Mono Pontée 1x 730W<br />
Puissance de sortie continue à 14,4 V<br />
4 Ohm 20Hz - 30kHz THD1% 2x 125W<br />
4 Ohm 1kHz Mono Pontée 1x 250W<br />
Intensité nominale du fusible 2x 20A<br />
Dimensions (L x H x P mm) 320 x 60 x 235
<strong>Competition</strong> CA 510 <strong>Pro</strong> Series<br />
Puissance de sortie maximale à 14,4 V<br />
4 Ohm 20Hz - 30kHz THD 1% 2x 510W<br />
4 Ohm 1kHz Mono Pontée 1x 1100W<br />
Puissance de sortie continue à 14,4 V<br />
4 Ohm 20Hz - 30kHz THD1% 2x 255W<br />
4 Ohm 1kHz Mono Pontée 1x 510W<br />
Intensité nominale du fusible 4x 20A<br />
Dimensions (L x H x P mm) 440 x 60 x 235<br />
Amplificateurs à 4 canaux<br />
<strong>Competition</strong> CA 470 <strong>Pro</strong> Series<br />
Puissance de sortie maximale à 14,4 V<br />
4 Ohm 20Hz - 30kHz THD 1% 4x 130W<br />
4 Ohm 1kHz Mono Pontée 2x 260W<br />
Puissance de sortie continue à 14,4 V<br />
4 Ohm 20Hz - 30kHz THD1% 4x 65W<br />
4 Ohm 1kHz Mono Pontée 2x 130W<br />
Intensité nominale du fusible 40A<br />
Dimensions (L x H x P mm) 330 x 60 x 235<br />
Amplificateur à 6 canaux<br />
<strong>Competition</strong> CA 670 <strong>Pro</strong> Series<br />
Puissance de sortie maximale à 14,4 V<br />
4 Ohm 20Hz - 30kHz THD 1% 4x 90W+ 2x 130W<br />
4 Ohm 1kHz Mono Pontée 2x 180W+ 1x 260W<br />
Puissance de sortie continue à 14,4 V<br />
4 Ohm 20Hz - 30kHz THD1% 4x 45W + 2x 65W<br />
4 Ohm 1kHz Mono Pontée 2x 90W+ 1x 130W<br />
Intensité nominale du fusible 25A + 20A<br />
Dimensions (L x H x P mm) 400 x 60 x 235<br />
Montage de l’amplificateur <strong>Caliber</strong><br />
Avant de monter votre amplificateur <strong>Caliber</strong>, vous devez choisir soigneusement<br />
l’emplacement où vous allez l’installer.Vous devez prévoir un espace de ventilation<br />
d’au moins 5cm sur tous les côtés de l’amplificateur afin de permettre l’élimination<br />
de la chaleur dégagée par celui-ci.Veillez également à ce que les câbles<br />
d’alimentation et les câbles des signaux puissent être raccordés ou quitter l’amplificateur<br />
en ligne droite, afin d’éviter tout risque de mauvais fonctionnement.<br />
L’amplificateur doit être maintenu à l’abri de l’humidité et des rayons directs du<br />
soleil. Il est donc préférable de l’installer dans un des endroits suivants:<br />
• Sur le plancher du coffre.<br />
• Sous le siège du conducteur<br />
• Sur le coffret du subwoofer.<br />
Dès que vous avez choisi l’emplacement adéquat et que vous avez vérifié si l’amplificateur<br />
<strong>Caliber</strong> sera bien ventilé et protégé contre les risques éventuels, marquez la<br />
surface de montage en utilisant l’amplificateur comme gabarit. (Pour que les marques<br />
soient mieux visibles, recouvrez d’abord de bande masquante la surface de montage.)<br />
Percez des trous de 2,5 mm de section aux emplacements marqués et fixez l’amplificateur<br />
à l’aide des vis autotaraudeuses fournies d’origine.<br />
Remarque : Ne percez jamais aucun trou en utilisant l’amplificateur<br />
comme gabarit. Vous risqueriez en effet d’endommager<br />
son revêtement anodisée.
DEBRANCHEZ TOUJOURS LA MASSE DE LA BATTERIE AVANT<br />
D’INTERVENIR SUR LE SYSTEME ELECTRIQUE D’UN VEHICULE<br />
• Nous vous conseillons de constituer soigneusement votre installation Car Audio avant de<br />
procéder à son installation.Assurez-vous que les câbles d’alimentation et les câbles des signaux<br />
ne se trouvent pas du même côté du véhicule et qu’ils ne se croisent pas. Cela vous<br />
permettra de réduire les bruits engendrés par le rayonnement des câbles d’alimentation<br />
dans les câbles de signaux. Si un câble de signal est trop proche d’un câble d’alimentation,<br />
il captera son champ magnétique et cela entraînera une perte de qualité du signal.<br />
• Choisissez toujours le câble d’alimentation/câble de masse qui présente la section la<br />
plus importante disponible, soit au moins 10 mm 2 (8 AWG). Demandez à votre revendeur<br />
<strong>Caliber</strong> d’équiper votre installation de câbles d’alimentation, de câbles de masse<br />
et de câbles de commande à distance <strong>Caliber</strong> Powerflow.Vous aurez ainsi l’assurance<br />
de disposer d’un circuit d’alimentation particulièrement sûr.<br />
• Pour protéger votre véhicule, placez toujours un fusible ou un coupe-circuit à 30 cm (12”)<br />
maximum de la batterie. Pour une protection optimale, ce fusible ou ce coupe-circuit<br />
doit avoir une intensité supérieure à celle du ou des fusibles de votre amplificateur. Par<br />
exemple: un amplificateur <strong>Caliber</strong> <strong>Competition</strong> <strong>Pro</strong> Series possède 2 fusibles de 25A. Le<br />
fusible de "protection du véhicule" doit avoir une intensité d'environ 60A (2x25A=50A).<br />
Demandez conseil à un professionnel pour déterminer l'intensité exacte de ce fusible.<br />
Raccordement de l’alimentation<br />
•Premièrement, la borne +12V doit être raccordée directement à la batterie du véhicule.<br />
Utilisez un câble présentant une section d’au moins 10 mm 2 (8 AWG) et assurez-vous que<br />
les connecteurs sont de même valeur. N’oubliez pas le fusible supplémentaire de “protection<br />
du véhicule”. La borne 12V + ne doit PAS être raccordée à la boîte à fusibles du véhicule.<br />
• Deuxièmement, la borne de masse (GND) doit être solidement fixée au châssis du<br />
véhicule en utilisant du câble de même section que le câble positif (étant donné qu’il<br />
doit acheminer du courant de même intensité). Assurez-vous que l’endroit où vous<br />
effectuez le raccordement de la masse est exempt de peinture, de revêtement de protection<br />
ou de toute autre forme d’isolant.<br />
•Troisièmement, vous devez terminer par le raccordement du câble de commande à distance(REM).<br />
De nombreux lecteurs CD et autoradios avec lecteurs de cassette possèdent<br />
une borne de sortie destinée au raccordement de la commande à distance d’un<br />
amplificateur. Si votre appareil n’est pas équipé d’une telle sortie, vous devez installer<br />
un commutateur distinct qui commandera la marche/arrêt de vos amplificateurs.<br />
Borne de puissance<br />
surdimensionnée pour une<br />
répartition optimale de la<br />
puissance.<br />
Entrée CCS pour<br />
système de commande<br />
<strong>Caliber</strong> en option<br />
Entrée du Signal<br />
• Les prises Cinch situées sur votre gauche constituent les bornes d'entrée ligne et sont<br />
raccordées à votre radiocassette ou à votre lecteur de CD.Vérifiez si le canal gauche est<br />
bien raccordé à la prise Cinch qui porte l'indication "Left" et le canal droit à la prise Cinch<br />
qui porte l'indication "Right". Si vous êtes l'heureux propriétaire d'un amplificateur à 4<br />
canaux, vous devez être encore plus attentif. Ces amplificateurs possèdent une entrée 4<br />
canaux. Ne mélangez pas tous les canaux (gauche, droit, avant et arrière) et soyez très<br />
vigilant au moment de leur raccordement. Le CA 670 est un amplificateur à 6 canaux qui<br />
accepte une entrée de signal externe ou le raccordement du signal d'entrée en interne.<br />
Vous pouvez choisir l'entrée de signal souhaitée à l'aide du commutateur situé à droite<br />
des bornes d'entrée Cinch pour subwoofer.<br />
• Comme vous pouvez le constater, chaque amplificateur <strong>Caliber</strong> vous offre la possibilité<br />
de raccorder un deuxième amplificateur (ou davantage) à votre système par l'intermédiaire<br />
des bornes "Signal-out" (à l'exception du CA 670). Une installation à deux amplificateurs<br />
présente un avantage substantiel, puisqu'un amplificateur peut être utilisé pour le<br />
son stéréo normal et l'autre comme amplificateur pour subwoofer.<br />
•Tous les amplificateurs <strong>Caliber</strong> possèdent un réglage du niveau d'entrée variable. Vous<br />
pouvez ainsi régler correctement sur votre amplificateur <strong>Caliber</strong> le signal provenant de<br />
la sortie préamplificateur de la source, qu'il s'agisse d'un lecteur de CD, d'un autoradio<br />
AM/FM, d'une platine à cassette, etc. La plage de réglage est comprise entre 15V - 500mV<br />
(0,5V).<br />
•A l'intention des professionnels, <strong>Caliber</strong> a intégré un filtre subsonique à cet amplificateur.<br />
Ce filtre subsonique de 12dB/Oct. est réglable entre 10Hz et 40Hz.<br />
Bien entendu, vous pouvez le désactiver si vous n'en avez pas besoin.<br />
• Le dernier commutateur sur lequel vous pouvez agir est l'interrupteur marche/arrêt de<br />
l'égaliseur intégré, que vous trouverez sur le dessus de l'amplificateur.<br />
• Les amplificateurs <strong>Competition</strong> <strong>Pro</strong> sont tous équipés d'une entrée CCS. Le CCS n'est<br />
autre que le système de commande <strong>Caliber</strong> qui peut être acheté en option. Le CCS vous<br />
renseigne sur l'état de votre amplificateur, notamment sa consommation électrique, sa<br />
température ainsi que l'état de sa protection thermique et de sa protection contre les<br />
courts-circuits. Le CCS peut fournir des informations simultanées sur 4 amplificateurs et<br />
vous avertit toujours en cas de défaillance de l'un d'entre eux.
Sortie haut-parleurs Amplificateurs à 2 canaux<br />
Sortie haut-parleurs<br />
• Tous les amplificateurs <strong>Caliber</strong> <strong>Competition</strong> <strong>Pro</strong> Series possèdent une borne de sortie<br />
haut-parleurs tri-mode stéréo/pontable. L'amplificateur intègre son propre commutateur<br />
stéréo/pont et il est donc inutile de sélectionner le mode stéréo ou le mode ponté.<br />
Vous pouvez raccorder les haut-parleurs à chaque canal en mode stéréo et raccorder<br />
simultanément un subwoofer à la borne haut-parleurs en mode ponté.<br />
• Soyez particulièrement attentif au raccordement des haut-parleurs et du subwoofer.<br />
Respectez scrupuleusement la polarité et les connexions de la sortie haut-parleurs.<br />
En mode stéréo, raccordez la sortie haut-parleurs droite au haut-parleur droit et la<br />
sortie haut-parleurs gauche au haut-parleur gauche.<br />
Raccordez la sortie positive (+) à la borne pour haut-parleurs positive (+), et la sortie<br />
négative (-) à la borne pour haut-parleurs négative (-).<br />
• En mode ponté, raccordez la borne positive (+) gauche à la borne pour haut-parleurs<br />
positive et la borne négative (-) droite à la borne pour haut-parleurs négative.<br />
• N'utilisez pas la sortie haut-parleurs négative à la fois pour le haut-parleur gauche et<br />
le haut-parleur droit (masse commune). Toute erreur de polarité peut entraîner une<br />
diminution de la réponse en graves.<br />
• Utilisez un câble pour haut-parleurs de qualité pour votre installation audio. Il vous suffira<br />
d'entendre la différence pour comprendre la raison pour laquelle nous vous conseillons<br />
de vous adresser à votre revendeur <strong>Caliber</strong> qui vous montrera notre gamme<br />
de câbles pour haut-parleurs stéréo équipés de connecteurs plaqués or.<br />
• Ne raccordez jamais la sortie haut-parleurs négative au châssis du véhicule.<br />
Cela risquerait d'endommager gravement votre installation audio.<br />
Sortie haut-parleurs Amplificateurs à 4 canaux<br />
Sortie haut-parleurs Amplificateurs à 6 canaux<br />
• Si vous possédez un amplificateur <strong>Caliber</strong> <strong>Competition</strong> <strong>Pro</strong> à 4 ou 6 canaux, vous devez<br />
être particulièrement attentif au raccordement des haut-parleurs. Assurez-vous que la<br />
borne de sortie haut-parleurs avant (gauche et droit) est raccordée aux haut-parleurs<br />
avant, que la borne de sortie haut-parleurs arrière (gauche et droit) est raccordée aux<br />
haut-parleurs arrière, et que le ou les subwoofers sont raccordés à la borne de sortie<br />
subwoofers. (Remarque : Si vous ne raccordez qu'un seul subwoofer à l'amplificateur, il<br />
est préférable de le connecter en mode ponté. Dans ce mode, veillez à raccorder la<br />
borne positive (+) gauche à la borne pour haut-parleurs positive et la borne négative (-)<br />
droite à la borne pour haut-parleurs négative.)
Sur le dessus de votre amplificateur <strong>Competition</strong> <strong>Pro</strong> Series, vous trouverez les<br />
commandes intégrées. Il existe un jeu de commandes pour les canaux<br />
droit/gauche sur les amplificateurs à 2 canaux. Sur les amplificateurs à 4 canaux,<br />
vous remarquerez deux jeux de commandes, un pour les canaux gauche/droit<br />
avant et un pour les canaux gauche/droit arrière. Les amplificateurs à 6 canaux<br />
sont équipés de trois jeux de commandes, un pour les canaux gauche/droit<br />
avant, un pour les canaux gauche/droit arrière et un pour le canal subwoofer.<br />
Egaliseur<br />
Ces commandes comprennent un égaliseur à 7 bandes pour chaque canal (à<br />
l'exception des canaux pour subwoofer de l'amplificateur à 6 canaux). Les égaliseurs<br />
ordinaires règlent le son des canaux gauche et droit. En séparant l'égaliseur<br />
du canal gauche de celui du canal droit, vous pouvez régler le son de manière<br />
très précise.Assis dans le siège du conducteur, vous ne percevez pas le même<br />
son des haut-parleurs droit et des haut-parleurs gauche. (Comme vous êtes proche<br />
d'un côté et éloigné de l'autre, vos deux oreilles ne perçoivent pas les<br />
mêmes sons.) En réglant séparément les canaux gauche et droit, vous pouvez harmoniser<br />
leur son.<br />
•<br />
•<br />
Les 7 fréquences que nous avons sélectionnées pour cet égaliseur sont celles qui<br />
exercent le plus d'influence sur l'ensemble du spectre auditif.<br />
Commande de niveau<br />
Avant de régler l'égaliseur, assurez-vous que le niveau d'entrée est<br />
réglé au minimum. (Remarque: le minimum est de 15V et non de 0,5V.)<br />
Chaque commande de niveau d'entrée contrôle une paire de canaux<br />
LEVEL<br />
(gauche et droit) par unité de commande. Ainsi, pour les amplificateurs<br />
à 4 canaux, coupez deux commandes de niveau (avant et arriè-<br />
15V 0.5V<br />
re). Dans le cas des amplificateurs à 6 canaux, vous pouvez même couper 3 commandes<br />
de niveau (avant, arrière et subwoofer).Vous disposez ainsi d'une extension<br />
suffisante de la bande passante pour régler correctement votre égaliseur, tout<br />
en écartant le risque d'écrêtage du signal de sortie avant que le réglage soit terminé.<br />
Commande de phase variable<br />
Chaque paire de canaux (gauche/droit, avant/ arrière<br />
et subwoofer) possède une commande de phase<br />
variable qui permet d'éliminer tout problème de<br />
phase éventuel.<br />
•<br />
•<br />
•<br />
•<br />
•<br />
•<br />
•<br />
•<br />
•<br />
50Hz 250Hz 1kHz 2.5kHz 5kHz 7.5kHz 10kHz<br />
•<br />
•<br />
•<br />
•<br />
•<br />
•<br />
•<br />
VARIABLE PHASE CONTROL<br />
MONO OFF<br />
LEFT RIGHT/<br />
MONO<br />
STEREO<br />
•<br />
•<br />
•<br />
Les problèmes de phase peuvent survenir pour diverses raisons, que ce soit<br />
l'utilisation de filtres passifs, la différence de longueur de trajet, les réflexions<br />
indésirables, etc.<br />
Le sélecteur de commande de phase possède trois positions. Réglez-le sur la<br />
position Off si vous n'avez pas besoin de la commande de phase. Choisissez la<br />
position Stéréo si vous avez connecté des haut-parleurs gauche et droit, afin de<br />
pouvoir régler séparément la phase du canal gauche et, celle du canal droit à l'aide<br />
des potentiomètres.<br />
Optez pour la position Mono si vous avez raccordé un subwoofer en mode ponté.<br />
La phase peut maintenant être réglée en tournant le potentiomètre du canal droit.<br />
Régler la phase n'est pas aisé.Vous devez écouter attentivement pour percevoir<br />
la différence. La meilleure manière de procéder consiste à écouter un enregistrement<br />
musical qui comporte de nombreux passages chantés et qui vous est<br />
familier. Lorsque vous procédez au réglage, vous entendez véritablement les voix<br />
se déplacer entre les canaux avant. Pour un réglage précis, n'hésitez pas à<br />
demander l'aide d'une tierce personne.<br />
Vous pouvez ainsi rester assis dans votre voiture, laisser cette personne régler<br />
la phase en tournant lentement les potentiomètres, et écouter leur effet sur la<br />
musique.<br />
Le changement de phase peut être réglé entre 0 et 180 degrés. Bien que votre<br />
amplificateur soit équipé de ces commandes de changement de phase, il n'est<br />
pas toujours nécessaire de les utiliser. Si vous n'êtes pas certain de connaître un<br />
problème de phase, ou si vous ne percevez pas de différence lorsque vous réglez<br />
la phase, ne modifiez pas la position de la commande de phase et consultez<br />
votre revendeur <strong>Caliber</strong>. Il pourra vous aider, car il possède la formation requise.<br />
Filtre d'aiguillage variable<br />
Un amplificateur <strong>Caliber</strong> <strong>Competition</strong> <strong>Pro</strong> possède un filtre d'aiguillage variable<br />
pour chaque paire de canaux. Il peut être réglé sur la position Pleine gamme<br />
(position Off), Passe-bas (position LPF au centre) ou Passe-haut (position HPF à<br />
l'extrême gauche).<br />
Lorsque vous avez sélectionné la position souhaitée pour cette paire de canaux,<br />
vous pouvez commencer à régler la fréquence du filtre en tournant le potentiomètre<br />
de fréquence.La fréquence du filtre peut être réglée entre 50Hz et 250Hz.<br />
Vous obtiendrez un résultat optimal si vous écoutez plusieurs morceaux de musique<br />
que vous connaissez bien, pendant que vous réglez<br />
FREQUENCY<br />
CLIPPING le filtre.<br />
•<br />
• •<br />
HPF LPF OFF<br />
50Hz 250Hz<br />
VARIABLE CROSSOVER
Réglez toujours séparément chaque paire de haut-parleurs.Vous pouvez couper<br />
les autres paires de haut-parleurs et/ou les subwoofers en débranchant simplement<br />
les prises Cinch d'entrée des canaux correspondants. Ainsi, vous pouvez<br />
entendre la réaction de cette paire de haut-parleurs au moment même où vous<br />
les régler. <strong>Pro</strong>cédez de même si vous souhaitez ajuster vos subwoofers. Limitez<br />
la reproduction du son aux seuls subwoofers et écoutez attentivement la manière<br />
dont ils réagissent à la musique.<br />
Règle d'or<br />
Il peut être amusant de régler un amplificateur, mais cela peut aussi aboutir à l'inverse<br />
du résultat escompté.<br />
Vous devez vous rappeler une règle d'or : avant de régler votre amplificateur,<br />
réduisez toujours le niveau d'entrée au minimum (15V).<br />
Vous pouvez ensuite modifier en toute sécurité tous les réglages de votre amplificateur.<br />
Lorsque le son correspond à votre attente, vous pouvez augmenter<br />
légèrement le niveau d'entrée jusqu'à ce que vous entendiez l'amplificateur écrêter<br />
le son (vous pouvez aussi surveiller les DEL d'écrêtage). Le début de l'écrêtage<br />
indique un niveau d'entrée trop élevé.Vous devez alors le réduire légèrement.<br />
Vous obtiendrez ainsi une puissance maximale de votre amplificateur sans risquer<br />
d'endommager les haut-parleurs ou les subwoofers.<br />
Wir danken Ihnen, daß Sie sich für ein <strong>Caliber</strong>-<strong>Pro</strong>dukt entschieden haben. Mit diesem<br />
Kauf haben sie sich zum höchsten Qualitätsmaßstab in der Car-HiFi-Technik bekannt.<br />
<strong>Caliber</strong> möchte Ihnen ein optimales <strong>Pro</strong>dukt bieten und bemüht sich konsequent, die<br />
Zufriedenheit seiner Kunden stetig zu steigern.<br />
Ihr <strong>Caliber</strong>-Verstärker wird Ihnen den sachgemäßen Einbau durch jahrelange hochwertige<br />
Wiedergabe danken. Bevor Sie das Gerät in Ihrem Fahrzeug montieren, lesen Sie jedoch<br />
bitte diese Bedienungsanleitung sorgfältig und vollständig durch, um Schäden am Fahrzeug<br />
zu vermeiden und eine optimale Leistung Ihrer Audio-Anlage zu erzielen.<br />
<strong>Caliber</strong>-Gewährleistung<br />
Bei unseren <strong>Pro</strong>dukten handelt es sich um komplizierte technische Systeme.Wir empfehlen<br />
daher nachdrücklich, den Einbau dieses Verstärkers durch eine <strong>Caliber</strong>-Vertrags-werkstatt<br />
vornehmen zu lassen. Bei sachgemäßem Einbau durch die Fachwerkstatt gewähren wir<br />
eine Garantie von 12 Monaten ab dem Kaufdatum.<br />
Falls Sie das Gerät lieber selbst montieren möchten, wünschen wir Ihnen dabei viel Spaß<br />
und Erfolg. Um optimale Ergebnisse zu erzielen, befolgen Sie bitte unbedingt die in dieser<br />
Anleitung enthaltenen Hinweise. Wir können in diesem Fall allerdings nur eine eingeschränkte<br />
Gewährleistung von 30 Tagen ab dem Kaufdatum übernehmen.<br />
<strong>Caliber</strong>-Zubehör<br />
Damit dieser Verstärker seine hervorragende Leistung voll entwickeln kann, müssen<br />
Spannungsversorgung, Signalquellen, Lautsprecher und Verbindungstechnik von höchster<br />
Qualität sein. In diesem Zusammenhang erlauben wir uns den Hinweis, daß <strong>Caliber</strong> nicht<br />
nur Verstärker herstellt. Unser <strong>Pro</strong>duktprogramm umfaßt sämtliche Komponenten, die<br />
Sie für eine optimale Car-HiFi-Anlage benötigen, d.h. alle Teile, die nicht zum Auto selbst<br />
gehören. Verwenden Sie daher auch zum Anschluß des Geräts nach Möglichkeit nur<br />
<strong>Caliber</strong>-Originalteile und fragen Sie Ihren örtlichen <strong>Caliber</strong>-Vertragshänder nach unserem<br />
Zubehörprogramm.<br />
Inhaltsverzeichnis<br />
Vor dem Einbau . . . . . . . . . . . . . . . . . . . . . . . . . . . . . . . . . . . . . . . . . . . . . . . . . . . . . 25<br />
Leistungsmerkmale . . . . . . . . . . . . . . . . . . . . . . . . . . . . . . . . . . . . . . . . . . . . . . . . . . .26<br />
Technische Daten . . . . . . . . . . . . . . . . . . . . . . . . . . . . . . . . . . . . . . . . . . . . . . . . . . . 27<br />
Montage und Einbauorte . . . . . . . . . . . . . . . . . . . . . . . . . . . . . . . . . . . . . . . . . . . . . . 29<br />
Elektrische Anschlüsse . . . . . . . . . . . . . . . . . . . . . . . . . . . . . . . . . . . . . . . . . . . . . . . . 30<br />
Signal Anschlüsse . . . . . . . . . . . . . . . . . . . . . . . . . . . . . . . . . . . . . . . . . . . . . . . . . . . . 31<br />
Lautsprecher Anschlüsse . . . . . . . . . . . . . . . . . . . . . . . . . . . . . . . . . . . . . . . . . . . . . . 32<br />
Einstellung . . . . . . . . . . . . . . . . . . . . . . . . . . . . . . . . . . . . . . . . . . . . . . . . . . . . . . . . 34
Als Ergebnis unseres stetigen Bemühens um Innovation und Neu-enwicklung kann<br />
dieser <strong>Caliber</strong> <strong>Competition</strong> <strong>Pro</strong> Verstärker Ihnen folgende Leistungsmerkmale bieten:<br />
• Brückbare Ausgänge<br />
•“Trimode”-Ausgangsbeschaltung, d.h. gleichzeitiger Stereo- und<br />
gebrückter Mono-anschluß<br />
• Spannungsversorgung in MOSFET-Technik mit<br />
Pulsbreitenmodulation<br />
•2Ωstabilisiert (4Ω Mono Gebrückt)<br />
• Doppelseitige Epoxyharz-platine<br />
•Variable Eingangsempfindlichkeit von 15V - 0.5V<br />
• Überhitzungs-, Überlast und Verpolungsschutz<br />
• Leistungsfähige Muting-Schaltung zur Unterdrückung störender<br />
Knackgeräusche beim Ein- und Ausschalten<br />
• Eingebauter 7-Band-Equalizer für jeden Kanal<br />
• Integrierte Phasenlagenregelung zu jedem Kanal<br />
•Verstellbare Hochpass/Tiefpass/Breitbandfilter<br />
• Differentialeingänge zur unterdrückung von Eingangsrauschen.<br />
• Signalausgänge für zusätzlichen Verstärkeranschluss über Cinch-<br />
Buchsen (außer CA 670)<br />
•Große Speisespannungsanschlüsse für optimale<br />
Spannungsverteilung.<br />
•Verchromte Lautsprecheranschlüsse für optimale<br />
Signalübertragung<br />
•Gerät aus europäischer Konstruktion und Entwicklung<br />
• Hervorragende Klangqualität für höchste Car-HiFi-Ansprüche<br />
• Hörgenuß für viele Jahre<br />
Folgende technische Daten sind allen <strong>Caliber</strong> <strong>Competition</strong> <strong>Pro</strong> Series<br />
Verstärkern gemeinsam. Besondere Leistungswerte einzelner Modelle sind nachstehend<br />
unter den jeweiligen Geräten aufgeführt.<br />
Frequenzgang (+0, -1dB) 20Hz - 30kHz<br />
Gesamtklirrfaktor 95dB<br />
Eingangsempfindlichkeit 15V - 0.5V<br />
Eingangsimpedanz 20kOhm<br />
Dämpfungsfaktor > 180<br />
Ausgangsimpedanz 2 - 8 Ohm<br />
2-Kanal Verstärker<br />
<strong>Competition</strong> CA 130 <strong>Pro</strong> Series<br />
Maximale Ausgangsleistung bei 14,4 V<br />
4 Ohm 20Hz - 30kHz THD 1% 2x 130W<br />
4 Ohm 1kHz Mono Gebrückt 1x 260W<br />
Dauerleistung bei 14,4 V<br />
4 Ohm 20Hz - 30kHz THD1% 2x 65W<br />
4 Ohm 1kHz Mono Gebrückt 1x 130W<br />
Sicherung 20A<br />
Abmessungen (B x H x T) (mm) 200 x 60 x 235<br />
<strong>Competition</strong> CA 190 <strong>Pro</strong> Series<br />
Maximale Ausgangsleistung bei 14,4 V<br />
4 Ohm 20Hz - 30kHz THD 1% 2x 190W<br />
4 Ohm 1kHz Mono Gebrückt 1x 380W<br />
Dauerleistung bei 14,4 V<br />
4 Ohm 20Hz - 30kHz THD1% 2x 95W<br />
4 Ohm 1kHz Mono Gebrückt 1x 190W<br />
Sicherung 25A<br />
Abmessungen (B x H x T) (mm) 250 x 60 x 235<br />
<strong>Competition</strong> CA 250 <strong>Pro</strong> Series<br />
Maximale Ausgangsleistung bei 14,4 V<br />
4 Ohm 20Hz - 30kHz THD 1% 2x 250W<br />
4 Ohm 1kHz Mono Gebrückt 1x 730W<br />
Dauerleistung bei 14,4 V<br />
4 Ohm 20Hz - 30kHz THD1% 2x 125W<br />
4 Ohm 1kHz Mono Gebrückt 1x 250W<br />
Sicherung 2x 20A<br />
Abmessungen (B x H x T) (mm) 320 x 60 x 235
<strong>Competition</strong> CA 510 <strong>Pro</strong> Series<br />
Maximale Ausgangsleistung bei 14,4 V<br />
4 Ohm 20Hz - 30kHz THD 1% 2x 510W<br />
4 Ohm 1kHz Mono Gebrückt 1x1100W<br />
Dauerleistung bei 14,4 V<br />
4 Ohm 20Hz - 30kHz THD1% 2x 255W<br />
4 Ohm 1kHz Mono Gebrückt 1x 510W<br />
Sicherung 4x 20A<br />
Abmessungen (B x H x T) (mm) 440 x 60 x 235<br />
4-Kanal Verstärker<br />
<strong>Competition</strong> CA 470 <strong>Pro</strong> Series<br />
Maximale Ausgangsleistung bei 14,4 V<br />
4 Ohm 20Hz - 30kHz THD 1% 4x 130W<br />
4 Ohm 1kHz Mono Gebrückt 2x 260W<br />
Dauerleistung bei 14,4 V<br />
4 Ohm 20Hz - 30kHz THD1% 4x 65W<br />
4 Ohm 1kHz Mono Gebrückt 2x 130W<br />
Sicherung 40A<br />
Abmessungen (B x H x T) (mm) 330 x 60 x 235<br />
6-Kanal Verstärker<br />
<strong>Competition</strong> CA 670 <strong>Pro</strong> Series<br />
Maximale Ausgangsleistung bei 14,4 V<br />
4 Ohm 20Hz - 30kHz THD 1% 4x 90W + 2x 130<br />
4 Ohm 1kHz Mono Gebrückt 2x 180W + 1x 260<br />
Dauerleistung bei 14,4 V<br />
4 Ohm 20Hz - 30kHz THD1% 4x 45W + 2x 65W<br />
4 Ohm 1kHz Mono Gebrückt 2x 90W + 1x 130A<br />
Sicherung 25A + 20A<br />
Abmessungen (B x H x T) (mm) 400 x 60 x 235<br />
Einbau Ihres <strong>Caliber</strong>-Verstärkers<br />
Wählen Sie vor Einbau Ihres <strong>Caliber</strong>-Verstärkers den geeigneten Montageort sorgfältig aus.Rund<br />
um das Gerät müssen mindestens 5 cm Freiraum vorhanden sein, damit eine ordnungsgemäße<br />
Wärmeabfuhr gewährleistet ist. Achten Sie im Interesse eines störungs-freien Betriebs auch<br />
darauf, daß die Spannungs- und Signalkabel in gerader Linie vom Gerät wegführen.<br />
Eine direkte Einwirkung von Feuchtigkeit und Sonneneinstrahlung auf den Verstärker ist in<br />
jedem Fall zu vermeiden. Optimale Einbaubedingungen sind in der Regel;<br />
• auf dem Boden des Kofferraums,<br />
• unter dem Fahrersitz<br />
• auf dem Subwoofer-Gehäuse gegeben.<br />
Nachdem Sie sich für einen Montageort entschieden und vergewissert haben, daß an dieser<br />
Stelle eine ausreichende Be- und Entlüftung gewährleistet und das Gerät vor schädlichen<br />
Einwirkungen geschützt ist. Markieren Sie die Montagefläche, indem Sie das Gerät als<br />
Schablone verwenden. (Durch vorheriges Abkleben der Montagefläche mit Klebestreifen<br />
läßt sich die Markierung leichter sichtbar machen).<br />
Bohren Sie an den markierten Stellen je ein Loch von 2,5 mm Durchmesser und befestigen<br />
Sie den Verstärker mit den mitgelieferten selbstschneidenden Schrauben.<br />
Hinweis:Verwenden Sie den Verstärker selbst beim Bohren nicht als Schablone.<br />
Die Beschichtung des Gehäuses kann dabei allzuleicht Schaden nehmen.<br />
WICHTIG: VOR BEGINN DER ARBEIT AN DER ELEKTRISCHEN ANLAGE IHRES<br />
FAHRZEUGS IMMER ERST DAS BATTERIE-MASSEKABEL ABKLEMMEN!<br />
•Wir empfehlen grundsätzlich,Konfiguration und Verlegung Ihres Car-HiFi-Systems vor Beginn<br />
des Einbaus genau festzulegen.Achten Sie dabei darauf, daß die Spannungs- und Signalkabel<br />
nicht auf derselben Fahrzeugseite verlaufen und einander nicht kreuzen. Durch die Übertragung<br />
von Störungen von Spannungs- auf Signalleitungen können Brummgeräusche entstehen.<br />
Signalkabel, die zu nahe an einem Spannungskabel verlaufen, werden von dessen Magnetfeld<br />
beeinflußt, wodurch sich Qualitätseinbußen in der Wiedergabe ergeben.<br />
•Verwenden Sie stets den größtmöglichen Aderquerschnitt (mindestens 10mm 2 ). Fragen Sie<br />
ihren örtlichen <strong>Caliber</strong>-Fachhändler nach Spannungs-,Erdungs- und Übertragungskabeln aus<br />
dem <strong>Caliber</strong>-Powerflow-<strong>Pro</strong>gramm,die eine sichere Spannungsversorgung gewährleisten.<br />
• Montieren Sie zum Schutz Ihres Fahrzeugs eine Sicherung (Schmelzsicherung oder<br />
Sicherungsautomat) in der Spannungszuleitung des Verstärkers. Diese Sicherung sollte max.<br />
30 cm von der Batterie entfernt sein. Im Interesse einer optimalen Schutzwirkung sollte Ihr<br />
Ansprechstrom nicht höher als derjenige der im Verstärker eingebauten Sicherungen sein.<br />
Montieren Sie zum Schutz Ihres Fahrzeugs in jedem Fall eine Sicherung<br />
(Schmelzsicherung oder Sicherungsautomat) in max. 30cm Abstand von der Batterie. Im
Interesse optimaler Schutzwirkung sollte diese höher als die Sicherung(en) des<br />
Verstärkers ausgelegt sein. Beispiel: Ein <strong>Caliber</strong>-Verstärker aus der <strong>Competition</strong>-<strong>Pro</strong>-Serie<br />
ist mit zwei 25A-Sicherungen ausgestattet. Die Fahrzeugschutz-Sicherung sollte in diesem<br />
Fall erst bei 60A ansprechen (2 x 25A = 50A). Es empfiehlt sich, hinsichtlich der<br />
Dimensionierung dieser Sicherung den Rat eines Fachmanns einzuholen.<br />
Anschluß der Spannungszuleitung<br />
• Schritt 1: Verbinden Sie den mit “+12V” gekennzeichneten Anschluß direkt mit der<br />
Fahrzeugbatterie. Verwenden Sie dazu ein Kabel von mindestens 10mm 2 Querschnitt<br />
und achten Sie darauf, daß auch die Anschlußverbinder diesen Wert aufweisen.<br />
Vergessen Sie die zusätzliche “Fahrzeugschutz”-Sicherung nicht. Der Anschluß “+12V”<br />
darf NICHT über den Sicherungskasten Ihres Fahrzeugs geführt werden!<br />
• Schritt 2:Verbinden Sie den mit “GND” gekennzeichneten Masseanschluß fest mit der<br />
Fahrzeugmasse. Das hierzu verwendete Kabel muß denselben Querschnitt wie das<br />
Pluskabel aufweisen (die elektrische Last ist dieselbe). Befreien Sie den Bereich, in dem<br />
der Masseanschluß am Fahrzeug vorgenommen werden soll, sorgfältig von Lack, Unterbodenschutz<br />
oder sonstigen nichtleitenden Substanzen.<br />
• Schritt 3: Schließen Sie das Kabel zur Ferneinschaltung des Verstärkers (REM) an.Viele<br />
Radio-Cassettengeräte und CD-Spieler verfügen über einen speziellen Ausgang zum<br />
Anschluß an die REM-Buchse eines Verstärkers. Wenn Sie nicht über einen solchen<br />
Ausgang verfügen, muß ein separater Schalter montiert werden, über den der<br />
Verstärker ein- und ausgeschaltet werden kann.<br />
Großdimensionierte<br />
Spannungsklemmen für<br />
optimale Leistungsverteilung<br />
CCS-Eingang,<br />
für <strong>Caliber</strong><br />
Control System<br />
(nicht mitgeliefert)<br />
Signaleingangs-Anschluss<br />
• Die Cinch-Buchsen links dienen zum Anschluss des Eingangssignals.Verbinden Sie diese<br />
Buchsen mit dem Ausgang Ihres Radio/Kassettengeräts bzw. CD-Players. Achten Sie<br />
darauf, dass der linke Kanal an die mit "Left" gekennzeichnete Buchse und der rechte<br />
Kanal an die mit "Right" gekennzeichnete Buchse gelegt werden. Falls Sie über einen 4-<br />
Kanal-Verstärker verfügen, sind die besonderen Gegebenheiten des vierkanaligen<br />
Eingangs zu beachten. Die vier Kanäle (links, rechts, vorn, hinten) dürfen nicht verwechselt<br />
werden; beim Anschluss ist daher mit entsprechender Sorgfalt vorzugehen.<br />
Der 6-Kanal-Verstärker CA 670 bietet ihnen die Möglichkeit, das Eingangssignal-<br />
Aufteilung auf die Kanäle wahlweise extern oder intern vorzunehmen. Zur<br />
Umschaltung zwischen diesen Alternativen dient der Schalter, der sich rechts neben<br />
den Cinch-Anschlussbuchsen für den Subwoofer befindet.<br />
• Wie Sie sehen, bietet Ihnen jeder <strong>Caliber</strong>-Verstärker (außer CA 670) die Möglichkeit,<br />
über die Anschlüsse "Signal Out" einen oder mehrere zusätzliche Verstärker an Ihr<br />
System anzuschließen. Dies hat den Vorteil, dass sich ein Verstärker zur normalen<br />
Stereo-Wiedergabe und der andere als reiner Subwoofer-Verstärker verwenden lässt.<br />
• Alle <strong>Caliber</strong>-Verstärker verfügen über eine Möglichkeit der Eingangspegel-Regelung. So<br />
können Sie Ihren Verstärker präzise auf den Vorverstärker-Ausgangspegel Ihrer<br />
Signalquelle (CD-Player, Radio/Kassettengerät) aussteuern. Diese Aussteuerung kann<br />
innerhalb eines Bereichs von 15 V - 500 mV erfolgen.<br />
• Für konsequent professionellen Einsatz ist dieser <strong>Caliber</strong>-Verstärker mit einem<br />
Unterschall-Filter (12 dB/Oktave) ausgestattet. Dieser ist zwischen 10 und 40Hz verstell-bar.<br />
Falls Sie diesen Filter nicht benötigen sollten, können Sie ihn natürlich abschalten.<br />
• Letztes Bedienungselement ist der Ein/Aus-Schalter (ON/OFF) für den eingebauten<br />
Equalizer, dessen Bedienungselemente sich oben am Verstärker befinden.<br />
• Alle Verstärker aus der <strong>Competition</strong> <strong>Pro</strong>-Reihe sind mit einem CCS-Eingang ausgestattet.<br />
CCS steht für "<strong>Caliber</strong> Control System" - ein als Zubehör erhältliches Gerät,<br />
das Ihnen wichtige Informationen über den Zustand Ihres Verstärkers bietet (z.B.<br />
Spannungsaufnahme, Temperatur, Aktivierung des Überhitzungs- oder Kurzschlussschutzes<br />
usw.). Das CCS-System kann diese Informationen für bis zu 4 Verstärker<br />
gleichzeitig liefern. Zudem wird der Bediener auf etwaige Funktionsstörungen eines<br />
Verstärkers hingewiesen.
Lautsprecherausgang / 2-Kanal-Verstärker<br />
Lautsprecher-Ausgang<br />
• Alle <strong>Caliber</strong>-Verstärker der <strong>Competition</strong> <strong>Pro</strong>-Reihe sind mit einem Stereo-<br />
Lautsprechereingang ausgestattet, der sich auch für gebrückten Tri-Mode-Betrieb eignet.<br />
Die Umschaltung zwischen Stereo und gebrücktem Betrieb erfolgt durch einen<br />
Schalter im Gerät, d.h. eine externe Umschaltung ist nicht erforderlich. Sie können die<br />
Lautsprecher zur Stereowiedergabe ganz normal an die entsprechenden Kanäle legen<br />
und für gebrückten Betrieb zusätzlich einen Subwoofer anschließen.<br />
• Achten Sie beim Anschluss der Lautsprecher und des Subwoofers auf die richtige<br />
Belegung der Ausgänge. Anschlüsse und Polarität der Laufsprecher dürfen nicht verwechselt<br />
werden. Im Stereomodus ist lediglich der rechte Lautsprecherausgang mit<br />
dem rechten Lautsprecher und der linke Lautsprecherausgang mit dem linken<br />
Lautsprecher zu verbinden. Dabei jeweils den positiven Ausgang (+) an den positiven<br />
Lautsprecheranschluss (+) und den negativen Ausgang (-) an den negativen<br />
Lautsprecheranschluss legen.<br />
• Für gebrückten Betrieb ist der linke positive Ausgang (+) mit dem positiven<br />
Lautsprecheranschluss und der rechte negative Ausgang (-) mit dem negativen<br />
Lautsprecheranschluss zu verbinden.<br />
• Verwenden Sie den negativen Lautsprecherausgang nicht gleichzeitig für den linken und<br />
rechten Lautsprecher ("gemeinsame Masse"). Durch diese unsachgemäße Polung wird<br />
der Bassfrequenzgang beeinträchtigt.<br />
• Verwenden Sie für Ihre Car-HiFi-Anlage nur hochwertiges Lautsprecherkabel.<br />
Erkundigen Sie sich bei Ihrem lokalen <strong>Caliber</strong>-Händler nach unseren Lautsprecherkabeln<br />
mit vergoldeten Kontakten - Sie werden den Unterschied hören!<br />
• Verbinden Sie den negativen Lautsprecherausgang niemals mit Fahrzeugmasse.<br />
Hierdurch kann Ihre Car-HiFi-Anlage erheblich beschädigt werden.<br />
Lautsprecherausgang / 4-Kanal-Verstärker<br />
Lautsprecherausgang / 6-Kanal-Verstärker<br />
• Bei der Montage von Vier- und Sechskanal-Verstärkern aus unserer <strong>Competition</strong> <strong>Pro</strong>-<br />
Reihe verlangt der korrekte Anschluss der Lautsprecher besondere Sorgfalt.Achten Sie<br />
darauf, dass der Ausgang für die vorderen Lautsprecher (links und rechts) korrekt mit<br />
den entsprechenden vorderen Lautsprechern, der Ausgang für die hinteren<br />
Lautsprecher (links und rechts) mit den hinteren Lautsprechern und der Subwoofer-<br />
Ausgang mit dem/den Subwoofer(n) verbunden wird. (Hinweis: Wenn Sie Ihren<br />
Verstärker nur mit einem Subwoofer betreiben, empfiehlt es sich, diesen in gebrückter<br />
Schaltung anzuschließen. Dabei ist der linke positive Ausgang (+) mit dem positiven<br />
Lautsprecheranschluss und der rechte negative Ausgang (-) mit dem negativen<br />
Lautsprecheranschluss zu verbinden).<br />
• Wir wünschen Ihnen viel Spaß beim Einbau und allzeit gute Musik in Ihrer "Sound-<br />
Machine" auf Rädern.
An der Oberseite Ihres <strong>Competition</strong> <strong>Pro</strong>-Verstärkers finden Sie eine Reihe<br />
integrierter Bedienungselemente. Zweikanal-Verstärker verfügen über eine<br />
Reglergruppe für die Einstellung des linken/rechten Kanals.<br />
Vierkanal-Verstärker sind mit zwei Reglergruppen für den linken/rechten vorderen<br />
und linken/rechten hinteren Kanal ausgestattet.<br />
Sechskanal-Verstärker haben drei Reglergruppen für den linken/rechten vorderen<br />
und linken/rechten hinteren Kanal sowie für den Subwoofer-Kanal.<br />
Equalizer<br />
Die integrierten Bedienungselemente oben am Verstärker umfassen einen 7-<br />
Band-Equalizer für jeden Kanal (ausgenommen den Subwoofer-Kanal des 6-<br />
Kanal-Verstärkers). Normale Equalizer regeln den Ton für den linken und rechten<br />
Kanal gemeinsam. Durch die Aufteilung der Equalizer-Funktion auf den linken<br />
und rechten Kanal bietet Ihnen dieses Gerät die Möglichkeit, eine sehr präzise<br />
und individuelle Einstellung vorzunehmen. Da Sie sich im Fahrzeug auf dem<br />
Fahrersitz in einer "außermittigen" Position befinden, hören Sie den Ton aus den<br />
linken und rechten Lautsprechern nicht symmetrisch (eine Seite ist weiter von<br />
Ihrem Ohr entfernt als die andere, wodurch sich ein unterschiedliches Klangbild<br />
ergibt). Durch die separate Einstellung des rechten und linken Kanals lässt sich<br />
ein einheitliches Klangbild herstellen.<br />
•<br />
•<br />
•<br />
•<br />
•<br />
Bei den sieben Frequenzen, die wir für Sie in diesem Equalizer ausgewählt haben,<br />
handelt es sich um diejenigen, die den Gesamtfrequenzgang am deutlichsten<br />
beeinflussen.<br />
Eingangssignal-Aussteuerung<br />
Kontrollieren Sie, bevor Sie mit der Einstellung des Equalizers beginnen,<br />
dass der Pegel des Eingangssignals auf den kleinsten Wert eingestellt<br />
ist (Hinweis: die kleinste Aussteuerung ergibt sich bei einem<br />
Wert von 15V, nicht 0,5V!).<br />
•<br />
•<br />
Jeder Aussteuerungsregler steuert ein Kanalpaar (links und rechts).<br />
Entsprechend sind bei einem 4-Kanal-Verstärker zwei Aussteuerungsregler<br />
(vorn und hinten), bei einem 6-Kanal-Verstärker drei Aussteuerungsregler (vorn,<br />
hinten und Subwoofer) herunterzudrehen. Damit erhalten Sie genügend<br />
Aussteuerungsreserve, um den Equalizer korrekt einzustellen, ohne dass das<br />
Ausgangssignal schon beim Einregeln "gekappt" wird.<br />
•<br />
•<br />
•<br />
•<br />
50Hz 250Hz 1kHz 2.5kHz 5kHz 7.5kHz 10kHz<br />
•<br />
•<br />
•<br />
•<br />
•<br />
•<br />
•<br />
•<br />
•<br />
•<br />
LEVEL<br />
15V 0.5V<br />
Phasenlagenregelung<br />
VARIABLE PHASE CONTROL<br />
LEFT RIGHT/<br />
MONO<br />
STEREO<br />
Jedes Kanalpaar (links/rechts,vorn/hinten,Subwoofer)<br />
verfügt über eine separate Phasenlagenregelung, mit<br />
der sich etwaige phasenbedingte <strong>Pro</strong>bleme beheben<br />
lassen. Die Ursachen solcher <strong>Pro</strong>bleme können vielfältig<br />
sein (z.B. Einsatz passiver Filter, verschieden<br />
lange Übertragungswege, unerwünschte Rückstrahlung<br />
usw.). Der Phasenschalter weist drei Stellungen auf:<br />
OFF (für den Fall, dass die Phasenlagenregelung nicht benötigt wird),<br />
STEREO (bei angeschlossenen linken und rechten Lautsprechern lässt sich die<br />
Phasenlage mit Hilfe der Potentiometer für den linken oder rechten Kanal separat<br />
anpassen) und<br />
MONO (bei gebrücktem Subwoofer-Anschluss ist die Phasenlage seines Signals<br />
mit dem Potentiometer für den rechten Kanal steuerbar).<br />
Die korrekte Einregelung der Phasenlage stellt ein kniffliges Unterfangen dar.<br />
Unterschiede sind nur bei sehr genauem Hinhören erkennbar. Es empfiehlt sich,<br />
zur Einstellung ein Musikstück zu verwenden, dass Sie sehr gut kennen und das<br />
einen hohen Gesangsanteil hat. Im Zuge der Einstellung hören Sie, wie sich der<br />
Gesang auf der "Bühne" scheinbar verschiebt. Ziehen Sie einen Helfer hinzu, der<br />
die Phasenlage langsam verstellt, während Sie selbst im Auto sitzend die Wiedergabe<br />
kontrollieren.<br />
Die Phasenverschiebung ist zwischen 0 und 180º variierbar.Auch wenn Ihr Verstärker<br />
über diese Einstellmöglichkeit verfügt - es ist keinesfalls immer erforderlich, sie<br />
zu verwenden.Wenn Sie kein Phasenproblem wahrnehmen oder bei Verstellung<br />
der Phasenlage kein Unterschied hörbar wird, ist es ratsam, die Phasenregelung<br />
nicht anzurühren. Wenden Sie sich im Zweifelsfall an Ihren <strong>Caliber</strong>-<br />
Vertragshändler, der für diese Fälle speziell geschult ist und Ihnen gerne weiterhilft.<br />
Variable Frequenzweiche<br />
Jeder <strong>Competition</strong> <strong>Pro</strong>-Verstärker verfügt über eine einstellbare Frequenzweiche<br />
für jedes Kanalpaar. Diese bietet zunächst die Möglichkeit der Umschaltung zwischen<br />
Breitbandfilter (OFF-Stellung), Tiefpassfilter (LPF-Mittelstellung) und<br />
Hochpassfilter (HPF-Stellung, ganz links).<br />
FREQUENCY<br />
•<br />
• •<br />
MONO OFF<br />
HPF LPF OFF<br />
CLIPPING<br />
50Hz 250Hz<br />
VARIABLE CROSSOVER<br />
Nachdem Sie die gewünschte Grundeinstellung für<br />
jedes Kanalpaar gewählt haben, können Sie damit<br />
beginnen, mit dem Frequenz-Potentiometer die<br />
Filterfrequenz abzustimmen. Der Einstellbereich<br />
reicht von 50Hz - 250Hz.
Um ein optimales Ergebnis zu erhalten, sollten Sie die Einstellung des Filters<br />
anhand mehrerer Musiktitel vornehmen, die Sie sehr gut kennen. Die Einstellung<br />
ist für jedes Lautsprecherpaar separat durchzuführen. Hierzu können Sie die<br />
übrigen Lautsprecherpaare bzw. den/die Subwoofer durch Abziehen der Cinch-<br />
Eingangsstecker für diese Kanäle abschalten. So hören Sie nur das jeweils einzustellende<br />
Lautsprecherpaar. Dasselbe gilt für die Subwoofer-Einstellung - lassen<br />
Sie Ihre(n) Subwoofer alleine spielen und achten Sie sorgfältig auf den<br />
Frequenzgang.<br />
Grundregeln<br />
Das Einstellen eines Verstärkers kann viel Spaß machen - man kann es allerdings<br />
auch übertreiben. Beachten Sie stets die wichtigste Grundregel, dass vor Beginn<br />
der Einstellung die Aussteuerung ganz abgesenkt werden muss (15V-Einstellung).<br />
Nur so kommen Sie in den optimalen Genuss aller Einstellmöglichkeiten, die Ihnen<br />
dieser Verstärker bietet.Sobald die Feineinstellung Ihren Wünschen entspricht, können<br />
Sie die Aussteuerung dann langsam hochfahren, bis die Spitzenbegrenzung<br />
hörbar einsetzt (alternativ können Sie dies an den Pegelbegrenzungs-LEDs verfolgen).<br />
So erhalten Sie ein Maximum an Leistung, ohne dass die Gefahr einer<br />
Beschädigung der Lautsprecher bzw. Subwoofer besteht.