OKANO-VM
OKANO-VM
OKANO-VM

You also want an ePaper? Increase the reach of your titles
YUMPU automatically turns print PDFs into web optimized ePapers that Google loves.
Montage- und Bedienungsanleitung<br />
Assembly and operating manual<br />
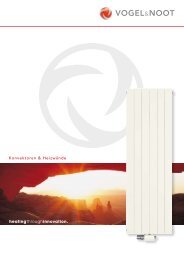
designheizkörper<br />
designradiators<br />
<strong>OKANO</strong>-<strong>VM</strong><br />
DBRMYMAP0A<br />
D GB F RO
BL<br />
874<br />
1290<br />
2<br />
1<br />
50<br />
4<br />
7 3<br />
5<br />
8<br />
ACHTUNG !<br />
Heizkörperrückansicht<br />
ATTENTION !<br />
Back of radiator<br />
6<br />
BL<br />
BL - 70<br />
A A<br />
B<br />
I<br />
Abb. 2<br />
50<br />
50<br />
B<br />
I<br />
B<br />
I<br />
Rücklauf<br />
Return pipe<br />
Entlüftung<br />
Ventilation<br />
Entlüftung<br />
1812<br />
min.<br />
150<br />
1508<br />
151<br />
50<br />
Abb. 1<br />
80 - 92<br />
A<br />
B<br />
54 - 66<br />
Abb. 3<br />
Vorlauf<br />
Flow pipe<br />
B<br />
I
INSTALLATION / MONTAGE <strong>OKANO</strong>-<strong>VM</strong> D<br />
Die Installation und Inbetriebnahme Ihres Designheizkörpers<br />
<strong>OKANO</strong>-<strong>VM</strong> ist von einer zugelassenen Fachfirma durchzuführen.<br />
Bei der Installation sind die einschlägigen Normen bzw.<br />
die nationalen elektrotechnischen Sicherheitsvorschriften wie<br />
ÖVE- und VDE-Bestimmungen zu beachten.<br />
Unter Berücksichtigung der geometrischen Maße des Designheizkörpers<br />
<strong>OKANO</strong>-<strong>VM</strong> und der Anschlussarmatur ist die Verrohrung<br />
vorzubereiten (siehe Abb. 1 und 3).<br />
Wir empfehlen einen seitlichen Mindestabstand zum Heizkörper von<br />
100 mm einzuhalten. Dabei ist Nachfolgendes zu berücksichtigen.<br />
Wird ein Elektroheizelement verwendet, kann dieses in eine der<br />
beiden 1/2" Muffen I eingedichtet werden. Dabei sind die Hinweise<br />
der Montageanleitung für das PTC-Elektroheizelement zu beachten.<br />
Vor der Wandmontage des Heizkörpers ist zu beachten<br />
(siehe Abb. 1 und 3):<br />
Der Vorlaufanschluss befindet sich links von der Mitte des<br />
Designheizkörpers.<br />
WANDMONTAGE:<br />
Aufstecken der beigepackten Blechmuttern 1 auf die Montagestutzen<br />
2 (Abb. 2).<br />
Anreißen, bohren der Löcher Position A und B - Bohrer ø10 - und<br />
setzen der Dübel entsprechend den Aufhängungsmaßen (Abb. 1).<br />
Empfehlung:<br />
Messen Sie bitte vorher zur Heizkörperidentifizierung die Abstandsmaße<br />
der Montagestutzen 2 (Abb. 1 u. Abb. 2) nach.<br />
Nach Bedarf (Wandbeschaffenheit) sind die beigepackten Kunststoffbeilagen<br />
3 auf die Wandfüße 4 zu kleben (Abb. 2).<br />
Bitte auf saubere Klebestellen achten.<br />
Befestigung der Wandfüße 4 und diese waagrecht bzw. senkrecht<br />
ausrichten, wobei die Senklochbohrungen 5 in den Wandfüßen<br />
nach außen stehen müssen. Dabei sollen die Wandmontageschrauben<br />
6 in der Mitte der Langlöcher der Wandfüße montiert<br />
werden. (Es wird empfohlen, die Abstandsmaße der montierten<br />
Wandfüße vor der Heizkörperwandmontage zu kontrollieren.)<br />
Wandmontage des Heizkörpers, indem die Montagestutzen 2 in<br />
die Wandfüße 4 gesteckt und mittels Blechschraube 7 miteinander<br />
verbunden werden. Durch das Langloch im Montagestutzen kann<br />
der Wandabstand variiert werden.<br />
Verstellmöglichkeiten in Baulängen- bzw. Bauhöhenrichtung sind<br />
durch das Langloch in der beweglichen Scheibe 8 im Wandfuß<br />
gegeben, sollten die hydraulischen Anschlüsse nicht genau passen.<br />
Für den hydraulischen Anschluss verwenden Sie bitte die beigepackte<br />
Anschlussarmatur und beachten Sie die entsprechende<br />
Montageanleitung.<br />
Die Designheizkörper <strong>OKANO</strong>-<strong>VM</strong> sind hochwertige Produkte, die<br />
nicht nur der Raumheizung dienen, sondern auch zur Trocknung<br />
von Handtüchern geeignet sind. Daher ist zu beachten, dass sie<br />
heiße Oberflächen besitzen. Es dürfen nur Textilien, die mit Wasser<br />
gewaschen wurden, getrocknet werden.<br />
Selbstverständlich ist es unzulässig, diesen Heizkörper als Kletteroder<br />
Sportgerät zu benutzen.<br />
Zur Reinigung der Heizkörperoberflächen sind schonende, nicht<br />
scheuernde Reinigungsmittel zu verwenden.<br />
Für den Fall des Elektroheizungsbetriebes muss die Heizwasserausdehnung<br />
immer bis zum Expansionsgefäß gewährleistet sein,<br />
z. B. durch Öffnen des Rücklaufventiles. Um Wärmeverschleppungen<br />
in das Heizungsnetz zu vermeiden, wird in diesem Fall<br />
empfohlen, das Thermostatventil zu schließen. Selbstverständlich<br />
darf die Elektroheizung nur in Betrieb genommen werden, wenn<br />
der Heizkörper komplett mit Heizungswasser gefüllt ist.<br />
Wird der Heizkörper elektrisch betrieben, darf er aus sicherheitstechnischen<br />
Gründen nicht komplett abgedeckt werden.<br />
INSTALLATION / ASSEMBLY <strong>OKANO</strong>-<strong>VM</strong><br />
BEDIENUNG UND PFLEGE D OPERATION AND CARE<br />
GB<br />
GB<br />
Your design radiator <strong>OKANO</strong>-<strong>VM</strong> must be installed and commissioned<br />
by an authorised company. The applicable standards and<br />
national electro-technical safety regulations such as the ÖVE and<br />
VDE regulations must be observed for installation.<br />
Prepare the pipework, taking into account the geometric dimensions<br />
of the design radiator <strong>OKANO</strong>-<strong>VM</strong> and the connector<br />
(see Abb. 1 and 3).<br />
We recommend keeping a minimum lateral clearance of 100 mm<br />
from the radiator, whereby the following should be noted.<br />
If an electrical heater cartridge is used it may be sealed in one of the<br />
two 1/2" sleeves l. It is important that the instructions contained<br />
in the PTC-electrical heating cartridge assembly instructions are<br />
complied with.<br />
Before mounting the radiator on the wall, (see Abb. 1 and 3):<br />
Please note that the flow pipe fitting is to the left of the centre of<br />
the valve pipe.<br />
WALL INSTALLATION:<br />
Place the sheet metal screws 1 provided on the mounting<br />
connections 2 (Abb. 2).<br />
Mark and drill the holes position A and B - drill ø10 - and position<br />
the dowels according to the suspension dimensions (Abb. 1).<br />
Recommendation:<br />
First verify the distance between the mounting connections 2<br />
(Abb. 1 and 2) in order to identify the radiator.<br />
If necessary, (wall condition) stick the transparent plastic shims 3<br />
provided onto the wall feet 4 (Abb. 2). Please ensure that the<br />
adhesion surfaces are clean.<br />
Fix the wall feet 4 in a horizontal, respectively vertical position.<br />
The countersunk boreholes 5 in the wall feet must face outwards.<br />
The wall mounting screw 6 should be mounted in the middle of<br />
the oblong holes of the wall feet. (We recommend that you check<br />
the distance between the mounted wall feet before mounting the<br />
radiator on the wall.)<br />
Mount the radiator on the wall by putting the mounting connections<br />
2 in the wall feet 4 and connect them with the sheet metal<br />
screw 7. The wall space can be varied by the oblong hole in the<br />
mounting connections.<br />
If the hydraulic fittings do not fit exactly, height and length can<br />
be adjusted by means of the oblong hole in the movable washer<br />
8 in the wall feet.<br />
Use the enclosed connection fittings for the hydraulic connection<br />
and observe the corresponding instructions.<br />
<strong>OKANO</strong>-<strong>VM</strong> design radiators are high quality products which<br />
are suitable for drying towels as well as heating rooms. For this<br />
reason it is important to remember that they have hot surfaces.<br />
Only textiles that have been washed in water may be dried.<br />
Of course it is not permitted to use the radiators as climbing frames<br />
or sports equipment.<br />
The radiator surfaces must be cleaned with gentle non-scouring<br />
cleansing agents.<br />
For electrical heating operations the heating water must always<br />
be able to expand to the expansion tank, e.g. by opening the<br />
non-return valve. To prevent heat being transferred to the heating<br />
network in this case, we recommend closing the thermostat<br />
valve. Of course, the electrical heating may only be switched on<br />
after the radiator has been completely filled with water.<br />
For safety reasons, the radiator must not be covered completely<br />
if it is operated electrically.
INSTALLATION / MONTAGE <strong>OKANO</strong>-<strong>VM</strong> F<br />
Le montage et la mise en marche de votre radiateur design<br />
<strong>OKANO</strong>-<strong>VM</strong> doivent être effectués par une entreprise spécialisée<br />
agréée. Il faut veiller lors de l’installation aux normes en vigueur<br />
et aux consignes de sécurité nationales en matière d’électrotechnique<br />
telles que les dispositions ÖVE et VDE.<br />
Préparer la tuyauterie en fonction des dimensions géométriques<br />
du radiateur design <strong>OKANO</strong>-<strong>VM</strong> et de la robinetterie de raccord<br />
(voir Abb. 1 et 3).<br />
Il est recommandé de respecter la distance latérale de 100 mm<br />
minimum par rapport au radiateur et de suivre les instructions<br />
ci-dessous.<br />
En cas d’utilisation d’une cartouche chauffante, cette dernière<br />
peut être raccordée à l’un des deux manchons 1/2" I, en respectant<br />
les instructions de montage de le PTC-Chauffage électrique.<br />
Avant la fixation au mur du radiateur, conformez-vous<br />
aux points suivants (voir Abb. 1 et 3):<br />
Le raccord d’alimentation se trouve à gauche du milieu du tuyau<br />
de garniture de la soupape.<br />
FIXATION AU MUR:<br />
Fixation des écrous en tôle 1 aux tubulures de montage 2<br />
(Abb. 2).<br />
Traçage et perçage des trous position A et B -perceuse ø10 et pose<br />
des chevilles en fonction des mesures de suspension (Abb. 1).<br />
Recommandations:<br />
Prière de mesurer les espacement des tubulures de montage 2 au<br />
préalable en vue de déterminer le modèle du radiateur (Abb. 1 et 2).<br />
Au besoin (en fonction de l’état du mur), coller les cales en plastique<br />
transparentes inclues à la livraison aux supports muraux 4 (Abb. 2).<br />
Veuillez à ce que les emplacements de collage soient propres.<br />
Fixation et ajustage des supports muraux 4 supérieurs et inférieurs<br />
s’il y a lieu, en veillant à ce que les alésages 5 des supports<br />
muraux soient situés à l’extérieur. Les vis de fixation 6 doivent<br />
être placées au centre des trous longitudinaux des supports<br />
muraux. (Nous recommandons de vérifier l’espacement des supports<br />
muraux avant la fixation du radiateur au mur.)<br />
Fixer le radiateur au mur en reliant les tubulures d’assemblage 2<br />
aux supports muraux 4 à l'aide des vis 7. La distance d’avec le<br />
mur peut être modifiée grâce au trou longitudinal des tubulures<br />
d’assemblage.<br />
La plaquette amovible 8 de l’ouverture longitudinale située sur le<br />
support mural permet le réglage vertical et horizontal des supports<br />
muraux, dans le cas où les raccords hydrauliques ne correspondraient<br />
pas exactement.<br />
Pour le raccord hydraulique, utiliser la robinetterie de raccord<br />
ci-joints et respecter les instructions de montage appropriées.<br />
UTILISATION ET ENTRETIEN F<br />
Les radiateurs design <strong>OKANO</strong>-<strong>VM</strong> sont des produits de haute<br />
qualité qui ne servent pas seulement à chauffer les pièces mais<br />
peuvent également être utilisés pour faire sécher des serviettes de<br />
toilette. Dans ce cas, il faut veiller à ce que leur surface soit chaude.<br />
Il ne faut utiliser que des textiles lavés avec de l’eau et secs.<br />
Bien entendu, on ne doit pas grimper sur les radiateurs ni s’en<br />
servir comme d’appareils de sport.<br />
Pour nettoyer la surface des radiateurs, veillez à employer des<br />
produits non agressifs et non récurants.<br />
En cas de fonctionnement en mode électrique des radiateurs, il faut<br />
veiller à ce que la dilatation de l’eau chaude soit assurée jusqu’au<br />
récipient d’expansion, par exemple en ouvrant la soupape de reflux.<br />
Pour éviter que la chaleur ne soit entraînée dans le réseau de chauf<br />
fage, il est recommandé de fermer la soupape du thermostat dans ce<br />
cas. Naturellement, le mode de fonctionnement électrique ne doit<br />
être mis en marche qu’une fois le radiateur entièrement rempli d’eau.<br />
Pour des raisons de sécurité, le radiateur ne doit pas être recouvert<br />
intégralement lorsqu’il marche en mode électrique.<br />
INSTALARE ŞI MONTAJ <strong>OKANO</strong>-<strong>VM</strong> RO<br />
Montajul şi punerea în funcţiune a radiatorului design <strong>OKANO</strong>-<strong>VM</strong><br />
trebuie făcute de către o societate autorizată. De asemenea, trebuie<br />
respectate standardele şi normele naţionale din domeniul electrotehnic,<br />
cum ar fi ÖVE şi VDE.<br />
Pregătiţi sistemul de distribuţie a ţevilor ţinând cont de dimensiunile<br />
şi geometria radiatorului design, cât şi de elementele de conectare<br />
(Abb. 1 şi 3).<br />
Este recomandabil să se păstreze o distanţă de minimum 100 mm<br />
de la marginea radiatorului, şi a se citi instrucţiunile următoare.<br />
Dacă se foloseşte un cartuş caloric, acesta trebuie cuplat în unul din<br />
racordurile de 1/2” I, respectând instrucţiunile de montaj.<br />
Înaintea montării radiatorului pe perete, (Abb. 1 şi 3) de<br />
reţinut:<br />
racordul de alimentare se află în stânga axei racordului supapei.<br />
FIXAREA PE PERETE<br />
Fixaţi piuliţele 1 în ştuţurile de montaj 2 (Abb. 2).<br />
Marcaţi şi faceţi găurile pentru poziţia A şi B – gaura ø10 – şi<br />
poziţionaţi diblurile în funcţie de mărimea masei suspendate. (Abb. 1).<br />
Recomandare:<br />
Verificaţi în primul rând distanţa între ştuţuri 2, pentru a putea<br />
determina modelul radiatorului. (Abb. 1 şi 2)<br />
Dacă e nevoie, în funcţie de starea peretelui, adăugaţi elementul de<br />
fixare 3, din plastic transparent, pe perete 4 (Abb. 2). Asiguraţi-vă<br />
că suprafaţa de adeziune este curată.<br />
Fixaţi şi aliniaţi orizontal şi vertical baza superioară pe perete 4;<br />
gaura de scurgere 5 de la baza peretelui trebuie îndreptată spre<br />
exterior. Şuruburile de fixare 6 trebuie plasate în centrul găurilor<br />
longitudinale ale suportului mural. (Vă recomandăm să verificaţi<br />
spaţiul dintre suporturile murale, înainte de a monta radiatorul pe<br />
perete).<br />
Montaţi radiatorul pe perete introducând piesele de montaj 2 în<br />
suport 4 conectându-le ajutorul unui şurub din oţel 7. Spaţiul până<br />
la perete poate fi reglate cu ajutorul găurii alungite.<br />
Dacă componentele hidraulice nu se potrivesc perfect, înălţimea şi<br />
lungimea pot fi reglate cu ajutorul găurii alungite de pe plăcuţa<br />
situată pe suport 8.<br />
Pentru racordul hidraulic utilizaţi conectorii aferenţi alăturaţi şi<br />
urmaţi instrucţiunile de montaj.<br />
UTILIZARE ŞI ÎNTREŢINERE RO<br />
Radiatoarele <strong>OKANO</strong>-<strong>VM</strong> sunt produse de înaltă calitate care nu<br />
doar încălzesc încăperi, ci pot fi utilizate şi pentru a usca prosoape.<br />
Trebuie reţinut că suprafeţele sunt fierbinţi. Pot fi puse la uscat<br />
numai textile spălate în apă.<br />
Bineînţeles, radiatoarele nu pot fi utilizate ca şi echipamente de<br />
sport.<br />
Suprafeţele radiatoarelor trebuie curăţate cu soluţii anticorozive.<br />
În cazul funcţionării electrice a radiatoarelor, trebuie asigurată dilatarea<br />
apei în vasul de expansiune, prin deschiderea supapei de uni-sens.<br />
Pentru a evita transferul căldurii în sistem, este recomandabil să se<br />
închidă robinetul termostatic. Bineînţeles, radiatorul electric poate fi<br />
pus în funcţiune numai după ce a fost complet umplut cu apă.<br />
Din motive de siguranţă, radiatorul nu trebuie acoperit în întregime,<br />
în cazul în care funcţionează electric.
HEIZKÖRPERBESCHREIBUNG D<br />
Die Heizkörper der Familie <strong>OKANO</strong>-<strong>VM</strong> sind elegante Designheizkörper,<br />
geeignet für Warmwasserzentralheizungen mit max.<br />
Betriebstemperatur von 110 °C und max. Betriebsüberdruck von<br />
10 bar.<br />
Der gleichbleibende hohe Qualitätsstandard unterliegt einer<br />
laufenden Eigen- und Fremdüberwachung.<br />
Nacharbeiten am Heizkörper (z.B. Schweißarbeiten) durch den<br />
Kunden sind nicht erlaubt.<br />
Die Produktfamilie <strong>OKANO</strong>-<strong>VM</strong> kann auch mit einer Elektrozusatzheizung<br />
ausgestattet werden, wobei die nachfolgenden<br />
Empfehlungen einzuhalten sind:<br />
Heizkörperdimension,<br />
Baulänge x Bauhöhe<br />
[mm]<br />
Elektroheizelement<br />
[W] bei / at 60 °C<br />
874 x 1812 900<br />
1290 x 1812 900<br />
Das Wandmontagekonzept ist ein auf fertige Wände<br />
konzipiertes System.<br />
GARANTIEBEDINGUNGEN D<br />
Vogel & Noot gewährt, vom Tage der Lieferung an, für die Designheizkörper<br />
<strong>OKANO</strong>-<strong>VM</strong> eine Garantie von 10 Jahren auf wasserseitige<br />
Dichtheit und Funktion und 5 Jahre auf die beschichtete<br />
Oberfläche.<br />
Transportschäden sind spätestens am nächsten, dem Liefertag<br />
folgenden Werktag dem Lieferanten zu melden.<br />
Im Garantiefall ist die Rechnung vorzulegen.<br />
Die Garantie bezieht sich auf alle Teile, die nachweisbar mit einem<br />
Materialfehler behaftet sind oder die infolge fehlerhafter Ausführung<br />
schadhaft werden.<br />
Normale Abnützungen, Schäden durch höhere Gewalt, vorsätzliche<br />
oder fahrlässige Beschädigungen, die durch das Nichtbeachten<br />
der Montage-, Gebrauchs- und Pflegeanweisungen entstehen,<br />
sind von der Garantieleistung ausgenommen.<br />
Wir übernehmen keine Garantie für Schäden, die aufgrund ungeeigneter<br />
oder unsachgemäßer Verwendung, fehlerhafter Montage<br />
und / oder Inbetriebsetzung durch Dritte, fehlerhafter oder nachlässiger<br />
Behandlung, ungeeigneter Betriebsmittel, Fremdkörpereinschwemmungen,<br />
mangelhafter Bauarbeiten, chemischer, elektrochemischer<br />
oder elektrischer Einflüsse entstehen, sofern sie<br />
nicht auf unser Verschulden zurückzuführen sind.<br />
Im Falle einer von Vogel & Noot anerkannten mangelhaften<br />
Ausführung oder eines anerkannten Materialfehlers, behält sich<br />
Vogel & Noot das Recht vor, mangelhafte Teile instand zu setzen<br />
oder durch mangelfreie Teile zu ersetzen. Ausgetauschte Teile<br />
gehen in das Eigentum von Vogel & Noot über.<br />
Die Garantielaufzeit wird infolge ihrer langen Dauer bei Inanspruchnahme<br />
(Instandsetzung oder Ersatzlieferung) durch den<br />
Endkunden über diesen Zeitraum hinaus nicht verlängert.<br />
Vogel & Noot behält sich das Recht vor, ohne vorhergehende<br />
Ankündigung die technischen Merkmale seiner Produkte zu<br />
ändern.<br />
DESCRIPTION OF RADIATOR<br />
<strong>OKANO</strong>-<strong>VM</strong> radiators are elegant design radiators suitable for<br />
warm water central heating systems with a maximum operating<br />
temperature of 110 °C and a maximum operating pressure of<br />
10 bar.<br />
The consistently high quality standards are subject to continual<br />
internal and external controls.<br />
Customers may not carry out work (e.g. welding) on the<br />
radiators.<br />
<strong>OKANO</strong>-<strong>VM</strong> products can also be fitted with an additional<br />
electrical heating element if the following recommendations are<br />
complied with:<br />
Radiator Sizes,<br />
total length x total height<br />
[mm]<br />
The wall installation concept is a system designed for<br />
finished walls.<br />
WARRANTY CONDITIONS<br />
Electrical heating<br />
[W] bei / at 60 °C<br />
874 x 1812 900<br />
1290 x 1812 900<br />
GB<br />
GB<br />
<strong>OKANO</strong>-<strong>VM</strong> design radiators are covered by Vogel & Noot 10<br />
year warranty for water side sealing and function and a 5 year<br />
warranty for coated surfaces from the date of delivery.<br />
Damage caused during transport must be reported to the supplier<br />
no later than the next working day after delivery.<br />
The invoice must be submitted when making a warranty claim.<br />
The warranty is valid for all parts with proven material defects or<br />
which become defective as a result of faulty workmanship.<br />
Normal wear, damage caused by force majeure, damage caused<br />
deliberately or through negligence, non-compliance with the<br />
installation, operating and care instructions are not included in<br />
the warranty.<br />
We accept no guarantee claims for damage resulting from improper<br />
or inappropriate use, faulty installation and/or commissioning by<br />
third parties, incorrect or negligent treatment, unsuitable operating<br />
agents, foreign bodies in the water, faulty workmanship, chemical,<br />
electrochemical or electrical influences that were not caused by us.<br />
In the event that Vogel & Noot accepts that finishing was faulty<br />
or that material was defective, Vogel & Noot reserves the right to<br />
repair defective parts or to replace them with parts in good condition.<br />
Parts which have been replaced become the property of<br />
Vogel & Noot.<br />
As a result of its length in the event of warranty claims (repair or<br />
supply of spare parts) by the final customer, the warranty will not<br />
extended beyond this term.<br />
Vogel & Noot reserves the right to alter the technical specifications<br />
of its products without prior notice.
DESCRIPTION DU RADIATOR F<br />
Les radiateurs de la série <strong>OKANO</strong>-<strong>VM</strong> sont d'élégants radiateurs<br />
design, convenant aux systèmes de chauffage central à eau<br />
chaude. La température de service maximum est de 110 °C et la<br />
surpression de service maximum de 10 bar.<br />
Le haut niveau de qualité constant est soumis à des contrôles<br />
internes et externes de façon continue.<br />
Les clients ne sont pas autorisés à effectuer des travaux<br />
ultérieurs sur les radiateurs (soudures, par exemple).<br />
Les produits de la gamme <strong>OKANO</strong>-<strong>VM</strong> peuvent également être<br />
équipés d’un dispositif de chauffage électrique complémentaire,<br />
à condition de respecter les recommandations suivantes:<br />
Dimensions du radiator<br />
[mm]<br />
Chauffage électrique<br />
[W] à 60 °C<br />
874 x 1812 900<br />
1290 x 1812 900<br />
Le système de fixation murale a été conçu pour des murs<br />
déjà finis.<br />
CONDITIONS DE GARANTIE F<br />
Vogel & Noot accorde une garantie de 10 ans en matière<br />
d'étanchéité et de fonctionnement pour les radiateurs design de<br />
la gamme <strong>OKANO</strong>-<strong>VM</strong> à partir du jour de la livraison ainsi<br />
qu’une garantie de 5 ans pour les surfaces peintes.<br />
Les dommages survenus pendant le transport doivent être signalés<br />
au fournisseur au plus tard un jour ouvrable après la livraison.<br />
En cas d’un recours à la garantie, la facture doit être présentée.<br />
La garantie s’étend aux pièces comportant un défaut de matériel<br />
avéré ou devenues défectueuses en raison d’une erreur de construction.<br />
L'usure normale, les dommages survenus dans le cadre de catastrophes<br />
naturelles, les détériorations intentionnelles ou résultant<br />
de négligences, du non respect des instructions d’assemblage,<br />
d’utilisation ou d’entretien sont exclus de la garantie.<br />
Aucune garantie n’est accordée pour des dommages survenus en<br />
raison d’une utilisation non conforme ou impropre, d’un montage<br />
et/ou d’une mise en service non appropriée par des tiers, d’une<br />
manipulation impropre ou négligente, d’un outillage non approprié,<br />
de l’inclusion de corps étrangers, de travaux de construction<br />
défectueux, d’influences chimiques, électrochimiques ou électriques,<br />
du moment où nous n’en sommes pas responsables.<br />
Dans le cas d’une erreur de construction ou d’un défaut de<br />
matériel avérés, Vogel & Noot se réserve le droit de réparer les<br />
parties défectueuses ou de les remplacer. Les pièces échangées<br />
deviennent alors propriété de Vogel & Noot.<br />
Dans le cas où le client final a recours à la garantie (remise en<br />
état ou échange d'une pièce), la durée de garantie n’est pas prolongée<br />
au delà de cette période en raison de sa longue durée.<br />
Vogel & Noot se réserve le droit de modifier les spécifications<br />
techniques de ses produits sans avis préalable.<br />
DESCRIEREA RADIATORULUI RO<br />
Radiatoarele <strong>OKANO</strong>–<strong>VM</strong> sunt radiatoare design elegante pentru<br />
băi, adecvate sistemelor de încălzire centrală, cu o temperatură<br />
maximă de funcţionare de 110°C şi o presiune maximă de 10 bar.<br />
Standardul înalt de calitate este supus unor controale continue,<br />
interne şi externe.<br />
Beneficiarilor le sunt interzise intervenţiile ulterioare asupra radiatoarelor.<br />
(ex: sudura).<br />
Produselor <strong>OKANO</strong>-<strong>VM</strong> li se poate ataşa un element electric de<br />
încălzire adiţional, cu condiţia ca următoarele recomandări să fie<br />
respectate:<br />
Dimensiuni radiator<br />
[mm]<br />
Încălzire electrică<br />
[W] la 60 °C<br />
874 x 1812 900<br />
1290 x 1812 900<br />
Sistemul de instalare murală a fost conceput pentru pereţi<br />
finisaţi.<br />
CONDIŢII DE GARANŢIE RO<br />
Vogel & Noot acordă o garanţie de 10 ani din punct de vedere al<br />
etanşeităţii şi al funcţionării radiatoarelor design <strong>OKANO</strong>-<strong>VM</strong>, din<br />
ziua livrării, şi o garanţie de 5 ani pentru suprafeţele vopsite sau<br />
metalizate.<br />
Deteriorarea din timpul transportului trebuie anunţată furnizorului<br />
cel târziu următoarea zi lucrătoare după livrare.<br />
În cazul recurgerii la garanţie, trebuie prezentată factura.<br />
Garanţia acoperă piesele componente cu defecte materiale dovedite<br />
sau care sau defectat ca urmare unei erori de construcţie.<br />
Sunt excluse de la garanţie uzura normală, defecţiunile provocate de<br />
catastrofe naturale, cele provocate cu bună ştiinţă, sau din neglijenţă,<br />
incompatibilitatea cu instalaţia, nerespectarea instrucţiunilor de<br />
montaj, funcţionarea şi întreţinerea.<br />
Nu se oferă garanţie pentru defecţiuni rezultând din utilizarea<br />
improprie sau neadecvată, din montajul sau punerea în funcţiune<br />
improprie de către terţi, din manipularea neglijentă, agenţi de operare<br />
nepotriviţi, corpi străini în apă, montaj defectuos, agenţi chimici,<br />
electrochimici sau electrici, de care noi nu suntem responsabili.<br />
În cazul în care se constată defecţiuni de construcţie sau materiale<br />
defecte, Vogel & Noot îşi rezervă dreptul de a repara piesele în<br />
cauză, sau să le înlocuiască. Piesele schimbate devin proprietatea<br />
Vogel & Noot.<br />
În cazul în care beneficiarul a apelat la garanţie, (reparaţie sau înlocuire<br />
piesă de schimb), garanţia nu va fi extinsă.<br />
Vogel & Noot îşi rezervă dreptul de a modifica specificaţiile tehnice<br />
ale produselor, fără înştiinţare prealabilă.