OZONE 202 00 D GB F - Aqua Medic
OZONE 202 00 D GB F - Aqua Medic
OZONE 202 00 D GB F - Aqua Medic

Create successful ePaper yourself
Turn your PDF publications into a flip-book with our unique Google optimized e-Paper software.
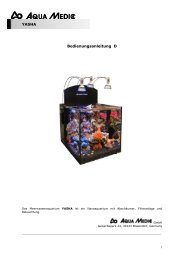
Ozone 25/50/1<strong>00</strong>/2<strong>00</strong>/3<strong>00</strong><br />
Bedienungsanleitung D<br />
Mit dem Kauf dieses Ozongenerators haben Sie sich für ein Qualitätsinstrument entschieden. Es ist<br />
speziell für den aquaristischen Gebrauch entwickelt worden.<br />
GmbH<br />
Gewerbepark 24, 49143 Bissendorf, Germany<br />
___________________________________________________________________<br />
1
1. Grundlagen<br />
Die Ozongeneratoren sind Geräte zur Erzeugung von Ozon aus Luft. Ozon ist ein starkes<br />
Oxidationsmittel. Durch Einbringen von Ozon in Wasser werden organische Schmutzpartikel<br />
oxidiert. Auch das fischgiftige Nitrit kann zu Nitrat oxidiert werden. Da Ozon selbst giftig ist, darf es<br />
nicht direkt in das <strong>Aqua</strong>rium eingeleitet werden. Dies muss immer über einen Ozonreaktor<br />
geschehen. Für Meerwasseraquarien empfehlen wir hier einen <strong>Aqua</strong> <strong>Medic</strong> Eiweißabschäumer, z. B.<br />
Turboflotor Multi SL.<br />
Die Leistung Ihres Gerätes entnehmen Sie bitte dem Typenschild. Die Leistung bezieht sich auf die<br />
Verwendung von trockener Luft. Bei Verwendung von Raumluft (50% Luftfeuchte) reduziert sich<br />
die Ozonproduktion um ca. 50%, bei Einsatz von reinem Sauerstoff wird sie verdoppelt. Eine<br />
Vortrocknung der Luft ist mit dem <strong>Aqua</strong> <strong>Medic</strong> Ozone Booster möglich.<br />
2. Lieferumfang:<br />
- 1 Ozongenerator<br />
- 1 Steckernetzteil<br />
- Bedienungsanleitung<br />
3. Anschluss und Aufstellung<br />
Das Ozon-Gerät wird über einen Luftschlauch mit 4 mm Innendurchmesser mit dem Ozonreaktor<br />
(Eiweißabschäumer) verbunden. Es muss ozonfester Schlauch (z. B. Silikonschlauch) verwendet<br />
werden. Dabei gibt es, je nach Typ des Eiweißabschäumers, zwei Möglichkeiten:<br />
- Abschäumer mit Ausströmersteinen (z. B. <strong>Aqua</strong> <strong>Medic</strong> Midiflotor): Hier wird die Luft von der<br />
Membranluftpumpe durch das Ozon–Gerät in den Abschäumer gedrückt.<br />
- Abschäumer mit Injektor: Der Injektor kann direkt mit dem Ozonanschluss verbunden<br />
werden. Die Luft wird dann durch das Ozon-Gerät gesaugt. Bei Injektoren mit hoher<br />
Luftleistung muss das Ozon-Gerät evtl. in einen Bypass geschaltet werden.<br />
Das Ozon–Gerät muss trocken aufgestellt werden. Außerdem ist zu verhindern, dass bei<br />
Stromausfall oder abgeschalteter Membranluftpumpe Wasser über den Luftschlauch in das Gerät<br />
gelangt. Es gibt zwei Aufstellungsmöglichkeiten:<br />
- oberhalb des Wasserspiegels<br />
- unterhalb des Wasserspiegels. In diesem Fall muss ein gutes Rückschlagventil in die Luftleitung<br />
geschaltet werden und eine Schlauchschleife verlegt werden, die etwa 20 cm über dem<br />
Wasserspiegel herausragt, um ein Rückfließen von Wasser zu verhindern.<br />
Die Aufstellung hat so zu erfolgen, dass der Netzstecker auch nach der Aufstellung zugänglich<br />
bleibt.<br />
Abb. 1: Aufstellung oberhalb des Abb. 2: Aufstellung unterhalb des<br />
Wasserspiegels Wasserspiegels<br />
2
1. Ozon-Gerät<br />
2. Membranluftpumpe<br />
3. Ozoneinwaschgerät (Abschäumer)<br />
4. Rückschlagventil<br />
4. Einstellung<br />
Das Ozon-Gerät ist mit einem Regler (Potentiometer) (1) versehen. Hiermit kann die Ozonleistung<br />
stufenlos eingestellt werden. Als Richtwert gelten 10 mg Ozon/Std. für 1<strong>00</strong> l Meerwasser; für<br />
Süßwasser ca. 5 mg Ozon/Std. Der Betrieb des Gerätes wird durch die Leuchtdiode (7) angezeigt.<br />
Sie leuchtet bei Inbetriebnahme schwach. Wird die Leistung am Potentiometer erhöht, leuchtet sie<br />
stärker, bei 1<strong>00</strong>% Leistung leuchtet sie konstant stark.<br />
Um den genauen Ozonbedarf des <strong>Aqua</strong>riums zu ermitteln und das Ozon-Gerät automatisch<br />
anzusteuern, empfehlen wir ein Redoxpotential Mess- und Regelgerät, z. B. den mV-Computer oder<br />
den mV Controller von AB <strong>Aqua</strong> <strong>Medic</strong>. Der mV-Computer schaltet das Ozon-Gerät automatisch<br />
aus, wenn das eingestellte Redoxpotential erreicht ist. Eine Überdosierung von Ozon ist für alles<br />
Leben im <strong>Aqua</strong>rium gefährlich.<br />
Bei der ersten Inbetriebnahme empfehlen wir, die Leistung über die ersten 14 Tage langsam zu<br />
steigern, damit sich das <strong>Aqua</strong>rium nach und nach auf die bessere Wasserqualität umstellen kann.<br />
5. Wartung/Reinigung<br />
Die Ozonleistung geht bei hoher Luftfeuchtigkeit und Staubeinwirkung erheblich zurück. Das<br />
Ozonelement kann dann problemlos geöffnet und gereinigt werden. Wir empfehlen, das Gerät bei<br />
Dauerbetrieb ca. alle 8 – 10 Wochen auf Verschmutzungen zu überprüfen.<br />
Arbeitsgang beim Reinigen:<br />
Aufbau des Ozongerätes:<br />
1. Regler (Potentiometer)<br />
2. Anschlussbuchse für Netzteil<br />
3. Eingang<br />
4. Ausgang<br />
5. Ozonelement<br />
6. Verschlussschrauben<br />
7. Leuchtdiode<br />
- Netzstecker (2) ziehen.<br />
- Verschlussschrauben (6) des Ozonelementes (5) lösen.<br />
- Deckel vom Ozonelement abnehmen.<br />
- Ozonplatten mit einem Tuch und warmem Wasser reinigen, keine Reinigungsmittel verwenden!<br />
Anschließend gut trocknen lassen.<br />
- Deckel des Ozonelementes aufsetzen, dabei auf guten Sitz des Dichtringes in der Nut achten.<br />
- Schrauben leicht andrehen und gleichmäßig festziehen.<br />
- Netzstecker anschließen.<br />
3
6. Störungen<br />
Die Ozonleistung kann durch evtl. eingedrungenes Wasser oder Schmutzpartikel vermindert oder<br />
unterbrochen werden. In diesem Fall kann Luft durch das Gerät geblasen werden, um Wasser und<br />
Schmutzpartikel zu beseitigen. Das Ozonelement lässt sich, wie in 5. beschrieben, reinigen. Sollte<br />
die Störung hiermit nicht beseitigt werden, senden Sie das Gerät bitte zur Überprüfung ein.<br />
7. Sicherheitshinweise<br />
Freies Ozon ist, wenn es in die Atemwege gelangt, gesundheitsschädlich. Es ist daher gewissenhaft<br />
darauf zu achten, dass Ozon nur in der benötigten Menge produziert wird. Falls überschüssiges<br />
Ozon auftritt (Ozongeruch), sollte die Abluft ins Freie oder über einen Restozonvernichter geleitet<br />
werden. Der zulässige MAK Wert (maximale Arbeitsplatzkonzentration) für Ozon liegt bei 0,1 ppm<br />
(2<strong>00</strong> µg/m 3 ). Ozon wird aber schon bei 1/5 bis 1/10 ( 0,02 ppm) des Wertes wahrgenommen. Das<br />
Ozon–Gerät ist nur zur Verwendung in geschlossenen Räumen zugelassen. Bei Arbeiten am Gerät<br />
muss der Netzstecker gezogen werden. Bei Beschädigung des Kabels darf das Gerät nicht betrieben<br />
werden.<br />
8. Garantie<br />
AB <strong>Aqua</strong> <strong>Medic</strong> GmbH gewährt eine 12-monatige Garantie ab Kaufdatum auf alle Material- und<br />
Verarbeitungsfehler des Gerätes. Als Garantienachweis gilt der Original-Kaufbeleg. Während dieser<br />
Zeit werden wir das Produkt kostenlos durch Einbau neuer oder erneuerter Teile instand setzen<br />
(ausgenommen Frachtkosten). Im Fall, dass während oder nach Ablauf der Garantiezeit Probleme<br />
mit Ihrem Gerät auftreten, wenden Sie sich bitte an Ihren Fachhändler.<br />
Diese Garantie gilt nur für den Erstkäufer. Sie deckt nur Material- und Verarbeitungsfehler, die bei<br />
bestimmungsgemäßem Gebrauch auftreten. Sie gilt nicht bei Schäden durch Transporte oder<br />
unsachgemäße Behandlung, Fahrlässigkeit, falschen Einbau sowie Eingriffen und Veränderungen,<br />
die von nicht-autorisierten Stellen vorgenommen wurden.<br />
AB <strong>Aqua</strong> <strong>Medic</strong> GmbH haftet nicht für Folgeschäden, die durch den Gebrauch des Gerätes<br />
entstehen.<br />
4<br />
AB AQUA MEDIC GmbH - Gewerbepark 24 - 49143 Bissendorf/Germany<br />
- Technische Änderungen vorbehalten – 05/2010
Ozone 25/50/1<strong>00</strong>/2<strong>00</strong>/3<strong>00</strong><br />
Operation manual <strong>GB</strong><br />
With the purchase of this ozone generator, you have selected a top quality product. It has been<br />
specifically designed for aquaristic purposes.<br />
GmbH<br />
Gewerbepark 24, 49143 Bissendorf, Germany<br />
___________________________________________________________________<br />
5
1. Basics<br />
Ozone generators are units to produce ozone from air. Ozone is a very powerful oxydizing agent. If<br />
ozone is introduced into water organic waste is oxydized. Even toxic nitrite can be oxydized to<br />
nitrate. Ozone itself is toxic, so it cannot be directly introduced into the aquarium but only via an<br />
ozone recator. For saltwater aquariums, we recommend an <strong>Aqua</strong> <strong>Medic</strong> protein skimmer, e. g.<br />
Turboflotor multi SL.<br />
The capacity of your unit is indicated on the label. This capacity is based on dry air. If operated<br />
with ambient air (50% humidity), the ozone output deceases about 50%. When pure oxygen is<br />
used, the output is doubled. It is possible to pre-dry the air by using the <strong>Aqua</strong> <strong>Medic</strong> Ozone<br />
Booster.<br />
2. Contents:<br />
- 1 ozone generator<br />
- 1 power supply<br />
- operation manual<br />
3. Installation and set up<br />
The ozone unit is connected with an air hose of 4 mm (¼“) inner diameter with the air inlet of a<br />
protein skimmer. The hose has to be ozone proof (silicone tube). Depending on the type of the<br />
protein skimmer, there are 2 possibilities:<br />
- Protein skimmer with air stones (e. g. <strong>Aqua</strong> <strong>Medic</strong> Midiflotor). The air is pressed from air<br />
pump through ozone unit to protein skimmer.<br />
- Protein skimmer with injector (e. g <strong>Aqua</strong> <strong>Medic</strong> Turboflotor multi SL). The injector can be<br />
connected directly with the ozone outlet. The air is then sucked through the ozone unit. If the<br />
injector has a very high capacity, the ozone unit has to be connected in a bypass.<br />
The Ozone unit has to be set up drily. It has to be prevented that water enters the unit in case of<br />
power failure or breakage of the membrane pump. There are 2 possibilities of set-up:<br />
- above water level<br />
- below water level. In this case, a good non-return valve should be placed into the air line and a<br />
hose loop should be installed, reaching 20 cm above the water level to prevent a backflow of<br />
water.<br />
The unit has to be set up in a way that there is always access to the mains plug.<br />
Fig. 1: Set-up above water level Fig. 2: Set-up below water level<br />
6
1. Ozone unit<br />
2. Membrane air pump<br />
3. Ozone recator (protein skimmer)<br />
4. Non-return valve<br />
4. Adjustion<br />
The ozone unit has got a control unit (potentiometer) (1) by which the ozone output can be<br />
adjusted continuously. We recommend to use 10 mg ozone/h as standard value for a 1<strong>00</strong>-l-salt<br />
water tank and 5 mg ozone/h for fresh water aquariums. The operation of the unit is indicated by<br />
the LED (7). When started, it glows just weakly. If the power is increased at the potentiometer, it<br />
lights more strongly, at 1<strong>00</strong>% the LED glows constantly strong.<br />
To determine the exact ozone requirement of the aquarium, we recommend to use the ozone unit<br />
combined with an ORP (redox potential) controller, e. g. AB <strong>Aqua</strong> <strong>Medic</strong> mV controller or mV<br />
computer. The mV computer switches off the ozone unit automatically as soon as the adjusted set<br />
value of the redox potential is reached. Overdosing of ozone is toxic for all life in aquarium.<br />
For start up, we recommend to increase the ozone output slowly over a period of 14 days to let the<br />
biology of the aquarium adjust to better water quality.<br />
5. Maintenance/Cleaning<br />
The ozone production decreases considerably due to the influence of high humidity and dust. The<br />
ozone element can be opened and cleaned easily. We recommend to check and clean the unit<br />
every 8 – 10 weeks, if operated continuously.<br />
How to clean the ozone element:<br />
Fig. 3: parts of the ozone unit:<br />
1. Control unit (potentiometer)<br />
2. Power plug (2)<br />
3. Air inlet<br />
4. Ozone outlet<br />
5. Ozone element<br />
6. Screws<br />
7. LED (operation indicator)<br />
- Disconnect the power plug (2).<br />
- Loosen and unscrew the screws (6) of ozone element (5).<br />
- Take off lid of the ozone element.<br />
- Clean the ceramic ozone plate with a soft cloth, using warm tap water. Do not use detergents!<br />
Let it dry again.<br />
- Put lid of the ozone element back in place and check that the seal is placed exactly back into<br />
the groove.<br />
- Tighten screws evenly.<br />
- Connect power supply.<br />
7
6. Failures<br />
The ozone production may decrease due to water or dirt entering the ozone element. Try to<br />
remove any particles by blowing air through the unit or clean it as described before. If the failure<br />
cannot be removed, please send the unit in for repair.<br />
7. Warranty<br />
Should any defect in material or workmanship be found within twelve months of the date of<br />
purchase AB <strong>Aqua</strong> <strong>Medic</strong> GmbH undertakes to repair or, at our option, replace the defective part<br />
free of charge – always provided the product has been installed correctly, is used for the purpose<br />
that was intended by us, is used in accordance with the operating instructions and is returned to us<br />
carriage paid. The warranty term is not applicable on the all consumable products.<br />
Proof of Purchase is required by presentation of an original invoice or receipt indicating the dealer’s<br />
name, the model number and date of purchase, or a Guarantee Card if appropriate. This warranty<br />
may not apply if any model or production number has been altered, deleted or removed,<br />
unauthorised persons or organisations have executed repairs, modifications or alterations, or<br />
damage is caused by accident, misuse or neglect.<br />
We regret we are unable to accept any liability for any consequential loss.<br />
Please note that the product is not defective under the terms of this warranty where the product,<br />
or any of its component parts, was not originally designed and / or manufactured for the market in<br />
which it is used.<br />
These statements do not affect your statutory rights as a customer.<br />
If your AB <strong>Aqua</strong> <strong>Medic</strong> GmbH product does not appear to be working correctly or appears to be<br />
defective please contact your dealer in the first instance.<br />
Before calling your dealer please ensure you have read and understood the operating instructions.<br />
If you have any questions your dealer cannot answer please contact us.<br />
Our policy is one of continual technical improvement and we reserve the right to modify and adjust<br />
the specification of our products without prior notification.<br />
8<br />
AB AQUA MEDIC GmbH - Gewerbepark 24 - 49143 Bissendorf/Germany<br />
- Technical changes reserved – 05/2010
Ozone 25/50/1<strong>00</strong>/2<strong>00</strong>/3<strong>00</strong><br />
Mode d’emploi F<br />
Ce générateur d’ozone, appareil de qualité, est spécialement conçu pour l’usage aquariophile.<br />
GmbH<br />
Gewerbepark 24, 49143 Bissendorf, Germany<br />
9
1. Bases<br />
Les générateurs d’ozone sont des appareils qui génèrent de l’ozone à partir de l’air. L’ozone est un<br />
puissant oxydant. L’introduction d’ozone dans l’eau oxyde les particules de déchets. Les nitrites,<br />
poisons toxiques, peuvent être transformés en nitrates. Ceci doit toujours s’effectuer par<br />
l’intermédiaire d’un réacteur à ozone. Pour les aquariums d’eau de mer nous conseillons par<br />
exemple l’écumeur <strong>Aqua</strong> <strong>Medic</strong> Turboflotor Multi SL.<br />
Le rendement de votre appareil se trouve sur la plaque d’identification. Le rendement est calculé<br />
sur la base de l’utilisation d’air sec. Lors de l’utilisation d’air ambiant (50 % d’humidité de l’air) la<br />
production d’ozone diminue d’environ 50 %, dans le cas d’utilisation d’oxygène pur la production<br />
d’ozone se voit doublée. Un séchage préalable de l’air est possible avec le <strong>Aqua</strong> <strong>Medic</strong> Ozone<br />
Booster.<br />
2. Contenu du colis<br />
- 1 générateur d’ozone<br />
- 1 alimentation<br />
- mode d’emploi<br />
3. Raccordement et mise en place<br />
L’ozoniseur est relié au réacteur à ozone (écumeur) avec un tuyau de diamètre intérieur de 4 mm.<br />
Il faut utiliser du tuyau qui résiste à l’ozone (tuyau silicone). Il y a deux possibilités en fonction du<br />
type d’écumeur:<br />
- Ecumeur avec diffuseur (p. ex. <strong>Aqua</strong> <strong>Medic</strong> Midiflotor): Dans ce cas l’air provenant de la<br />
pompe à air est poussé à travers l’ozoniseur pour aboutir dans l’écumeur.<br />
- Ecumeur avec injecteur: Il est possible de relier directement l’injecteur avec la distribution<br />
d’ozone. L’air est ensuite aspiré directement à travers l’ozoniseur. Avec des injecteurs à gros<br />
débit en air l’ozoniseur devra éventuellement être branché dans un bypass.<br />
Il faut installer l’ozoniseur au sec. Il faut éviter que de l’eau puisse pénétrer dans l’appareil par<br />
l’intermédiaire du tuyau à air en cas d’arrêt du courant ou de la pompe à air. Il y a deux<br />
possibilités d’installation:<br />
- au-dessus du niveau d’eau<br />
- en-dessous du niveau d’eau. Dans ce cas, il faut installer un bon clapet anti retour dans la<br />
conduite à air et créer une boucle dans le tuyau qui se trouve à 20 cm au dessus du niveau<br />
d’eau, afin d’éviter un retour de l’eau.<br />
L’installation doit être effectuée de façon à ce que la prise de courant reste accessible.<br />
Schéma 1: Installation au-dessus Schéma 2: Installation au-dessous<br />
du niveau d’eau du niveau d’eau<br />
10
1. Ozoniseur<br />
2. Pompe à air<br />
3. Réacteur à ozone (Ecumeur)<br />
4. Clapet anti-retour<br />
4. Réglage<br />
L’ozoniseur est équipé d’un potentiomètre (1). Ceci permet de régler la quantité d’ozone produite.<br />
Comme valeur étalon on compte 10 mg d’ozone/heure pour 1<strong>00</strong> litres d’eau de mer; pour l’eau<br />
douce environ 5 mg d’ozone/heure. Le fonctionnement de l’appareil est affiché par une diode<br />
lumineuse (7). Sa luminosité est faible lors de la mise en route. Lorsque le rendement est<br />
augmenté sa luminosité augmente, à 1<strong>00</strong> % sa luminosité est constante.<br />
Afin de déterminer le besoin en ozone de l’aquarium et de contrôler automatiquement l’ozoniseur,<br />
nous conseillons un appareil de mesure et de réglage du potentiel redox, p. ex. l’ordinateur mV<br />
Computer ou le Controller mV d’AB <strong>Aqua</strong> <strong>Medic</strong>. L’ordinateur mV-Computer éteint<br />
automatiquement l’ozoniseur le potentiel rédox prévu est atteint. Un surdosage en ozone est<br />
dangereux pour toute vie dans l’aquarium.<br />
Lors de la première mise en service nous conseillons d’augmenter graduellement le débit au cours<br />
de la première quinzaine, afin que l’aquarium puisse s’adapter progressivement à la meilleure<br />
qualité de l’eau.<br />
5. Entretien/Nettoyage<br />
Le débit en ozone recule nettement dans le cas d’un taux d’humidité élevée ou de la présence de<br />
poussières. Il est alors possible d’ouvrir et de nettoyer l’élément ozone. En cas de fonctionnement<br />
permanent nous conseillons de vérifier l’état de propreté toutes les 8 à 10 semaines.<br />
Etapes du nettoyage:<br />
Composition de l’ozoniseur :<br />
1. Potentiomètre<br />
2. Raccord alimentation électrique<br />
3. Entrée<br />
4. Elément ozone<br />
5. Vis de fixation<br />
6. Diode lumineuse<br />
- Retirer la prise de l’alimentation électrique (2).<br />
- Dévisser les vis (6) de l’élément ozone (5).<br />
- Retirer le couvercle de l’élément ozone.<br />
- Nettoyer les plaques ozone avec un chiffon et de l’eau chaude, ne pas utiliser de produits de<br />
nettoyage! Bien laisser sécher ensuite.<br />
- Remettre le couvercle de l’élément ozone, en veillant au bon positionnement du joint<br />
d’étanchéité.<br />
- Visser les vis puis les serrer.<br />
- Raccorder à l’alimentation électrique.<br />
11
6. Problèmes<br />
La production d’ozone peut être éventuellement diminuée par l’humidité ou la présence de<br />
poussières. Dans ce cas il est possible d’injecter de l’air dans l’appareil afin d’éliminer l’eau et les<br />
particules de poussières. Il est possible de nettoyer l’élément ozone comme décrit dans 5. Au cas<br />
où le problème ne serait pas réglé suite à cette intervention, veuillez retourner l’appareil pour<br />
vérification.<br />
7. Conseils de sécurité<br />
L’ozone libre est nocif pour la santé lorsqu’il pénètre dans les voies respiratoires. C’est pourquoi il<br />
est important que l’ozone ne soit produit que dans les quantités nécessaires. En cas de production<br />
excédentaire d’ozone (odeur d’ozone), il faut diriger le rejet vers l’air libre ou un destructeur<br />
d’ozone restant. La valeur VLE (valeur limite autorisée) pour l’ozone se situe à 0,1 ppm (2<strong>00</strong><br />
µg/m 3 ). L’ozone est perçu dès 1/5 à 1/10 (0,02 ppm) de cette valeur. L’ozoniseur ne peut être<br />
utilisé que dans des pièces closes. Lors de la manipulation de l’appareil il faut débrancher l’appareil<br />
du secteur. En cas de dommages sur le cordon électrique l’appareil ne peut être utilisé.<br />
9. Garantie<br />
AB <strong>Aqua</strong> <strong>Medic</strong> GmbH donne une garantie de 12 mois à partir de la date d’achat sur tout défaut de<br />
matériel ou de fabrication. La facture originale sert de preuve de garantie. Durant cette période<br />
nous remettrons l’appareil en état gratuitement par installation de pièces neuves ou rénovées (sauf<br />
frais de transport). Au cas où des problèmes surviennent au niveau de l’appareil durant ou après la<br />
période de garantie, veuillez vous adresser à votre revendeur.<br />
Cette garantie ne vaut que pour le premier acheteur. Elle ne vaut que pour les défauts de matériels<br />
et de fabrication, qui peuvent survenir lors de l’utilisation appropriée. Elle n’est pas valable pour les<br />
dégâts dus au transport, ou une manipulation erronée, négligence, mauvaise installation ainsi que<br />
des interventions ou des modifications effectuées par des personnes non autorisées.<br />
AB <strong>Aqua</strong> <strong>Medic</strong> GmbH n’est pas responsable des dégàats collatéraux, pouvant survenir suite à<br />
l’utilisation de l’appareil.<br />
12<br />
AB AQUA MEDIC GmbH - Gewerbepark 24 – 49143 Bissendorf/Germany<br />
- Sous réserve de modifications techniques –05/2010
![Katalog 2013 D [High 25 MB] .pdf - Aqua Medic](https://img.yumpu.com/21885102/1/184x260/katalog-2013-d-high-25-mb-pdf-aqua-medic.jpg?quality=85)