C€ C€
C€ C€
C€ C€

You also want an ePaper? Increase the reach of your titles
YUMPU automatically turns print PDFs into web optimized ePapers that Google loves.
CE<br />
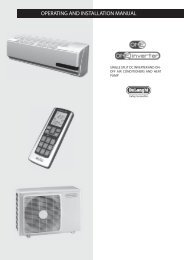
DE90MPS<br />
AMI 9R/1<br />
Oven<br />
Instructions for for use, use, maintenance and and<br />
installation<br />
Backofen<br />
Gebrauchs-, instandhaltungs- und und<br />
installierungsanweisungen<br />
Four<br />
Mode dÕemploi, entretien et et installation<br />
Forno<br />
Istruzioni dÕuso manutenzione ed ed installazione
I<br />
Para obter informações mais detalhadas sobre o tratamento, a<br />
recuperação e a reciclagem deste produto, contacte o Departamento<br />
na sua localidade, o seu serviço de eliminação de desperdícios<br />
domésticos ou a loja onde adquiriu o produto.<br />
Questo apparecchio è contrassegnato in conformità alla Direttiva Europea<br />
2002/96/EC, Waste Electrical and Electronic Equipment (WEEE).<br />
Assicurandosi che questo prodotto sia smaltito in modo corretto,<br />
l'utente contribuisce a prevenire le potenziali conseguenze negative<br />
per l'ambiente e la salute.<br />
Il simbolo sul prodotto, o sulla documentazione di<br />
accompagnamento, indica che questo prodotto non deve essere<br />
trattato come rifiuto domestico ma deve essere consegnato presso<br />
l'idoneo punto di raccolta per il riciclaggio di apparecchiature<br />
elettriche ed elettroniche.<br />
Disfarsene seguendo le normative locali per lo smaltimento dei rifiuti.<br />
Per ulteriori informazioni sul trattamento, recupero e riciclaggio di<br />
questo prodotto, contattare l'idoneo ufficio locale, il servizio di<br />
raccolta dei rifiuti domestici o il negozio presso il quale il prodotto è<br />
stato acquistato.<br />
Αυτή η συσκευή φέρει σήµανση σύµφωνα µε την Ευρωπαϊκή οδηγία<br />
2002/96/ΕΕ σχετικά µε Απορριπτόµενα ηλεκτρικά και ηλεκτρονικά<br />
εξαρτήµατα (WEEE).<br />
Εξασφαλίζοντας ότι το προϊόν αυτό απορρίπτεται σωστά, θα βοηθήσετε<br />
στην πρόληψη πιθανά αρνητικών επιπτώσεων για το περιβάλλον και<br />
την ανθρώπινη υγεία, οι οποίες θα µπορούσαν να δηµιουργηθούν από<br />
τον ακατάλληλο χειρισµό αυτού του προϊόντος ως απόρριµµα.<br />
Το σύµβολο πάνω στο προϊόν, ή στα έγγραφα που συνοδεύουν<br />
το προϊόν, υποδεικνύει ότι αυτή η συσκευή δεν µπορεί να θεωρηθεί<br />
οικιακό απόρριµµα. Αντί γι αυτό θα πρέπει να παραδοθεί στο κατάλληλο<br />
σηµείο περισυλλογής για την ανακύκλωση των ηλεκτρικών και<br />
ηλεκτρονικών εξαρτηµάτων.<br />
∆ιαλύστε το τηρώντας την τοπική νοµοθεσία για τη διάθεση των<br />
απορριµµάτων.<br />
Για πιο λεπτοµερείς πληροφορίες σχετικά µε την επεξεργασία, την<br />
περισυλλογή και την ανακύκλωση αυτού του προϊόντος, παρακαλούµε<br />
επικοινωνήστε µε το αρµόδιο γραφείο της τοπικής σας αυτοδιοίκησης,<br />
την τοπική σας υπηρεσία αποκοµιδής οικιακών απορριµµάτων ή το<br />
κατάστηµα όπου αγοράσατε αυτό το προϊόν.<br />
Denna produkt är märkt enligt EG-direktiv 2002/96/EEC beträffande<br />
elektriskt och elektroniskt avfall (Waste Electrical and Electronic<br />
Equipment, WEEE).<br />
Genom att säkerställa en korrekt kassering av denna produkt bidrar<br />
du till att förhindra potentiella, negativa konsekvenser för vår miljö<br />
och vår hälsa, som annars kan bli följden om produkten inte hanteras<br />
på rätt sätt.<br />
Symbolen på produkten, eller i medföljande dokumentation,<br />
indikerar att denna produkt inte får behandlas som vanligt<br />
hushållsavfall. Den skall i stället lämnas in på en lämplig<br />
uppsamlingsplats för återvinning av elektrisk och elektronisk<br />
utrustning.<br />
Produkten måste kasseras enligt lokala miljöbestämmelser för<br />
avfallshantering.<br />
För mer information om hantering, återvinning och återanvändning av<br />
denna produkt, var god kontakta de lokala myndigheterna, ortens<br />
sophanteringstjänst eller butiken där produkten inhandlades.<br />
D<br />
GB<br />
F<br />
In Übereinstimmung mit den Anforderungen der Europäischen<br />
Richtlinie 2002/96/EG über Elektro- und Elektronik-Altgeräte<br />
(WEEE) ist vorliegendes Gerät mit einer Markierung versehen.<br />
Sie leisten einen positiven Beitrag für den Schutz der Umwelt und die<br />
Gesundheit des Menschen, wenn Sie dieses Gerät einer gesonderten<br />
Abfallsammlung zuführen. Im unsortierten Siedlungsmüll könnte ein<br />
solches Gerät durch unsachgemäße Entsorgung negative<br />
Konsequenzen nach sich ziehen.<br />
Auf dem Produkt oder der beiliegenden Produktdokumentation ist<br />
folgendes Symbol einer durchgestrichenen Abfalltonne<br />
abgebildet. Es weist darauf hin, dass eine Entsorgung im normalen<br />
Haushaltsabfall nicht zulässig ist Entsorgen Sie dieses Produkt im<br />
Recyclinghof mit einer getrennten Sammlung für Elektro- und<br />
Elektronikgeräte.<br />
Die Entsorgung muss gemäß den örtlichen Bestimmungen zur<br />
Abfallbeseitigung erfolgen.<br />
Bitte wenden Sie sich an die zuständigen Behörden Ihrer<br />
Gemeindeverwaltung, an den lokalen Recyclinghof für Haushaltsmüll<br />
oder an den Händler, bei dem Sie dieses Gerät erworben haben, um<br />
weitere Informationen über Behandlung, Verwertung und<br />
Wiederverwendung dieses Produkts zu erhalten.<br />
This appliance is marked according to the European directive<br />
2002/96/EC on Waste Electrical and Electronic Equipment (WEEE).<br />
By ensuring this product is disposed of correctly, you will help prevent<br />
potential negative consequences for the environment and human<br />
health, which could otherwise be caused by inappropriate waste<br />
handling of this product.<br />
The symbol on the product, or on the documents<br />
accompanying the product, indicates that this appliance may not be<br />
treated as household waste. Instead it shall be handed over to the<br />
applicable collection point for the recycling of electrical and electronic<br />
equipment.<br />
Disposal must be carried out in accordance with local environmental<br />
regulations for waste disposal.<br />
For more detailed information about treatment, recovery and<br />
recycling of this product, please contact your local city office, your<br />
household waste disposal service or the shop where you purchased<br />
the product.<br />
Cet appareil porte le symbole du recyclage conformément à la<br />
Directive Européenne 2002/96/CE concernant les Déchets<br />
d'Équipements Électriques et Électroniques (DEEE ou WEEE).<br />
En procédant correctement à la mise au rebut de cet appareil, vous<br />
contribuerez à empêcher toute conséquence nuisible pour<br />
l'environnement et la santé de l'homme.<br />
Le symbole présent sur l'appareil ou sur la documentation qui<br />
l'accompagne indique que ce produit ne peut en aucun cas être traité<br />
comme déchet ménager. Il doit par conséquent être remis à un centre<br />
de collecte des déchets chargé du recyclage des équipements<br />
électriques et électroniques.<br />
Pour la mise au rebut, respectez les normes relatives à l'élimination<br />
des déchets en vigueur dans le pays d'installation.<br />
Pour obtenir de plus amples détails au sujet du traitement, de la<br />
récupération et du recyclage de cet appareil, veuillez vous adresser au<br />
bureau compétent de votre commune, à la société de collecte des<br />
déchets ou directement à votre revendeur.<br />
Dit apparaat is voorzien van het merkteken volgens de Europese<br />
richtlijn 2002/96/EG inzake Afgedankte elektrische en elektronische<br />
apparaten (AEEA).<br />
Door ervoor te zorgen dat dit product op de juiste manier als afval<br />
wordt verwerkt, helpt u mogelijk negatieve consequenties voor het<br />
milieu en de menselijke gezondheid te voorkomen die anders zouden<br />
kunnen worden veroorzaakt door onjuiste verwerking van dit<br />
product als afval.<br />
Het symbool op het product of op de bijbehorende<br />
documentatie geeft aan dat dit product niet als huishoudelijk afval mag<br />
worden behandeld. In plaats daarvan moet het worden afgegeven bij<br />
een verzamelpunt voor recycling van elektrische en elektronische<br />
apparaten.<br />
Afdanking moet worden uitgevoerd in overeenstemming met de<br />
plaatselijke milieuvoorschriften voor afvalverwerking.<br />
Voor nadere informatie over de behandeling, terugwinning en<br />
recycling van dit product wordt u verzocht contact op te nemen met<br />
het stadskantoor in uw woonplaats, uw afvalophaaldienst of de winkel<br />
waar u het product heeft aangeschaft.
Table of Contents<br />
Technical specifications Page 1<br />
Preparing the oven Page 1<br />
Control panel Page 2<br />
Description of control panel symbols Page 3<br />
Using the spit Page 4<br />
Using the grill Page 4<br />
Electronic programmer Pages 5-6<br />
120’ mechanical programmer Page 7<br />
Cleaning the removable glass panel Page 7<br />
Removing the oven door Page 7<br />
Replacing the bulb Page 8<br />
Cleaning and maintenance Page 9<br />
Technical support Page 9<br />
Instructions for building in Page 10<br />
Fitting Shelves Page 11
Dear Customer,<br />
Thank you for choosing one of our products. We are sure that it will satisfy all your<br />
requirements and guarantee excellent results at all times.<br />
It is important to carefully follow the instructions for correct use of the appliance.<br />
The manufacturer will not be liable for damage to property or injury to persons caused by<br />
faulty or incorrect installation.<br />
The manufacturer reserves the right to make alterations to the product at any time<br />
without notice.<br />
Technical specifications<br />
This appliance complies with regulations for the suppression of radio interferences.<br />
Power supply voltage<br />
AC 230….240V 50Hz<br />
Internal dimensions<br />
Height 360mm<br />
Width 630mm<br />
Depth 395mm<br />
Working volume 90 litres<br />
Absorption of heating<br />
elements (kW) 230V 240V<br />
Upeer heating element 1.050 kW – 1.145<br />
Lower heating element 1.550 kW – 1.690<br />
Circular heating element 2.500 kW – 2.725<br />
Grill heating element 2.500 kW – 2.725<br />
Radial fan 0.025 kW – 0.037<br />
Spit gearmotor 0.004 kW – 0.0045<br />
Oven light 0.025 kW – 0.054<br />
Cooling fan 0.070 kW – 0.076<br />
Installation<br />
Installation must be carried out by qualified personnel only. All work must be performed<br />
with the appliance disconnected. The connection cable must have a minimum section of<br />
1.5mm. The oven must be connected to a multi-pole switch with contact opening of at least<br />
3mm.<br />
Caution: the appliance must be earthed in accordance with legal regulations.<br />
This oven must be connected to the supply in accordance with the Australian Wiring<br />
Rules and means of disconnection also provided in accordance with the said rules.<br />
Preparing the oven for use<br />
Clean the inside of the oven using non-abrasive soap and warm water, then rinse and dry.<br />
Switch the oven on at maximum temperature for approximately 20 minutes in order to<br />
eliminate oil, grease and remains of any other products used during manufacturing that can<br />
cause unpleasant smells during cooking. The appliance must be electrically disconnected<br />
before cleaning.<br />
Caution!<br />
Young children and infirm persons should not be left unsupervised in the vicinity of the<br />
oven. Young children should be supervised to ensure they do not play with the oven.<br />
Warning: accessible parts will become hot when in use.<br />
To avoid burns and scalds, children should be kept away.<br />
1
Description of control panel symbols.<br />
Oven light: Two oven lights for added convenience.<br />
Traditional Bake: Both the upper and lower elements come on. The temperature range must be<br />
set between 50°C and 250°C.<br />
The oven must be preheated before cooking. Ideal for roasts or for fruit cakes.<br />
Classic Bake: Only the lower element comes on.<br />
The temperature range must between 50°C e 250°C.<br />
The oven must be preheated before cooking. Ideal for food requiring browning on the<br />
bottom and less intense heat on the top.<br />
High Bake: Only the upper element is used.<br />
The temperature rance must be set between 50°C and 250°C.<br />
The oven must be preheated before cooking. Ideal for cooking crisp golcen brown<br />
pastries and pizzas or for finishing off dishes with a cheese topping.<br />
Rotisserie: Traditional "spit roast" rotisserie cooking.<br />
Can also be used for closed door grilling with the rotisserie attachment removed.<br />
Ideal for cooking chickens or spit roasts.<br />
The oven door should be kept closed.<br />
Fan grill: Both the grill and the fan come on. Most of the cooking is done by grilling and<br />
the hot air is circulated around the oven. The oven door should be kept closed. Please<br />
preheat the oven for approximately 5 minutes before using.<br />
Mult-function: The upper elements and the fan come on, the heat from the elements being dispersed by<br />
the fan. The temperature range can be set between 50°C and 250°C.<br />
Ideal for large bulky quantities of food that require even cooking for example roast turkey<br />
and large roasts.<br />
Fan Forced:<br />
Defrost:<br />
True fan forced cooking using both the fan and fan element. The oven does not<br />
require preheating. This function will be the one most used - it is possible to cook several<br />
different types of foods together without minglinig the flavours. Ideal for foods require<br />
a well cooked or crispy outside and a moist or rare inside, for example lasagne or medium<br />
to rare roast beef, roast medium lamb, a whole fish or baking pies.<br />
Ideal for batch baking and foods that require a well cooked outside anda moist or rare inside<br />
for example lasagne or medium to rare roast beef or pies.<br />
To change from normal "traditional oven" cooking to a fan forced cooking, a<br />
general "rule of thumo" would be to reduce the "traditional oven" temperature given by<br />
20°C - 30°C . Please checl your baking more frequently, as you may find that the<br />
cooking times can also be reduced.<br />
Only the oven fan is used - the thermostat should be set at 0°C.<br />
Ideal for the quick thawing of frozen foods. Thawing times will vary according to the<br />
quantity and type of food to be defrosted but as rough guide 1 kg will take approximately<br />
1 hour.<br />
Using the oven<br />
To obtain good results, you are advised to pre-heat the oven to maximum temperature for approximately 10 minutes.<br />
Place the food inside and set the thermostat to the required temperature. When the oven has the set temperature,<br />
the yellow light on the control panel will go out. During use, the oven becomes hot.<br />
Care should be taken to avoid touching heating elements inside the oven.<br />
3
CAUTION:WHILE THE GRILL IS OPERATING, THE ACCESSIBLE PARTS ARE<br />
VERY HOT - KEEP CHILDREN WELL AWAY FROM THE OVEN.<br />
"THE OVEN DOOR MUST BE KEPT CLOSED WHENEVER GRILL OR<br />
VENTILATED GRILL FUNCTION IS SELECTED."<br />
4
Fig. 2<br />
<br />
<br />
<br />
<br />
<br />
<br />
5
REMOVING OVEN DOOR<br />
To make it easier to clear the oven, the door<br />
may be removed.<br />
Hinge with mobile U-bolts (Fig. 4)<br />
The hinges “A” are fitted with two mobile<br />
U-bolts “B” which block the door when it is<br />
completely open if they are hooked onto sections<br />
“C” of the hinges. After this has been<br />
done, the door must be lifted up and taken<br />
out. When carrying out this operation, hold<br />
the sides of the oven door beside the hinges.<br />
To refit the door first slide the hinges into<br />
their grooves.<br />
Lastly, before closing the door do not forget<br />
to detach the two mobile U-bolts “B” which<br />
were used to hook the two hinges.<br />
7
8<br />
REPLACING THE BULB (Fig. 5)<br />
CAUTION: disconnect the oven power supply cable.<br />
If you have to replace the bulb B, remove the protective cover A by turning it anticlockwise.<br />
After replacing the bulb, refit the protective cover A (fig. 5).<br />
Warning: to avoid the possibility of electric shock ensure the oven is switched off before<br />
replacing the lamp.<br />
Fig. 5
Note: a steam cleaner is not to be used to clean the oven.<br />
If the supply cord is damaged, it must be replaced by the manufacturer or its service agent<br />
or similary qualified person in order to avoid a hazard.<br />
9
IMPORTANT<br />
To ensure the built-in appliance works correctly, the unit must correspond to certain<br />
characteristics.<br />
The panels of the units near the oven must be made of heat-resistant material.<br />
Especially as regards veneered wooden furniture, the glues must withstand temperatures<br />
of up to 120°C: plastic or binders that cannot withstand this temperature will deform or<br />
come unstuck.<br />
In compliance with safety regulations, once the appliance is built in, contact with electrical<br />
components must no longer be possible.<br />
All protective coverings must be fixed so they cannot be removed without the aid of a tool.<br />
10<br />
7
Fitting shelves<br />
Clip wire racks to sides of oven walls (Fig. 7a)<br />
Slide shelves and trays on the guides as shown (Fig. 7b)<br />
Fig. 7a<br />
Fig. 7b<br />
11
Inhalt<br />
Technische Daten Seite 15<br />
Vorbereitung des Backofens Seite 15<br />
Schalterblende Seite 16<br />
Beschreibung d. Symbole auf der Schalterblende Seite 17<br />
Benutzung des Spießes Siete 18<br />
Ratschläge zur Benutzung des Grills Seite 18<br />
Elektronischer Programmierer Sieten 19-20<br />
Mechanischer Programmierer 120’ Siete 21<br />
Reinigung der abnehmbaren Glassscheibe Siete 21<br />
Abmontieren der Backofentür Siete 21<br />
Austauschen der Glühbirne Siete 22<br />
Reinigung und Instandhaltung des Backofens Siete 23<br />
Kundendienst Siete 23<br />
Anweisungen zum Einbau in Küchenmöbel Siete 24<br />
Einbau der Böden Siete 25<br />
13
AC 230...240 V 50 Hz<br />
90<br />
230V 240V<br />
1.145<br />
1.690<br />
2.725<br />
2.725<br />
0.037<br />
0.0045<br />
0.054<br />
0.076<br />
Dieser Herd muss nach der Australischen Gesetzgebung für elektroanlagen an die Stromversorgung angeschlossen<br />
und mit Abtrennvorrichtungen in Übereinstimmung mit der genannten Gesetzgebung ausgestattet sein.<br />
Achtung: Kleinkinder und Personen mit Handicap dürfen ohne Aufsicht nicht in Herdnähe verweilen.<br />
Kleinkinder müssen überwacht werden, damit sie nicht mit dem Herd spielen.<br />
Wichtiger Hinweis: Zugängliche Teile werden während des Betrieb des Herdes heiß.<br />
Kinder fern vom Gerät halten, um Verbrennungen zu vermeiden.<br />
15
Beschreibung der Symbole auf der Schaltblende.<br />
Ofenbeleuchtung: Zwei Ofenlichter für besseren Komfort.<br />
Traditionelles Kochen: Sowohl das untere als auch das obere Element setzen sich in Betrieb. Die Temperatur<br />
muss zwischen 50°C und 250°C eingestellt werden. Der Ofen muss vor dem Kochen<br />
vorgeheizt werden. Ideal für Braten oder Obstkuchen.<br />
Klassisches Kochen: Nur das untere Element setzt sich in Betrieb.<br />
Die Temperatur muss zwischen 50°C und 250°C eingestellt werden.<br />
Der Ofen muss vor dem Kochen vorgeheizt werden. Ideal für Speisen, die man unten<br />
anbraten muss und oben weniger Wärme verlangen.<br />
Kochen von oben: Nur das obere Element setzt sich in Betrieb.<br />
Die Temperatur muss zwischen 50°C und 250°C eingestellt werden.<br />
Der Ofen muss vor dem Kochen vorgeheizt werden. Ideal für knusprige und gratinierte<br />
Speisen wie Nudeln und Pizza, oder zum Überbacken von Gerichten mit Käse..<br />
Bratspieß: Für traditionelle Braten auf dem Spieß.<br />
Kann mit geschlossener Ofentür und nach Entfernung des Bratspießanschlusses auch zum<br />
Grillen verwendet werden.<br />
Ideal für Hähnchen oder Braten.<br />
Die Ofentür geschlossen halten.<br />
Umluftgrill: Sowohl der Grill als auch die Umluft setzen sich in Betrieb. Der größte Teil des Kochens<br />
erfolgt mit dem Grill und der warmen Luft, die im Ofen zirkuliert. Die Ofentür muss<br />
geschlossen bleiben. Heizen Sie den Ofen vor Gebrauch ca. 5 Minuten lang vor.<br />
Multifunktion: Die oberen Elemente und das Laufrad setzen sich in Betrieb; die von den Elementen<br />
erzeugte Wärme wird vom Laufrad verteilt.<br />
Die Temperatur kann zwischen 50°C und 250°C eingestellt werden. Ideal für große<br />
Mengen, die ein gleichmäßiges Kochen benötigen, wie zum Beispiel Truthahnbraten und<br />
große Braten.<br />
Umluft: Kochen mit Umluft dank dem Laufrad und dem Laufradelement. Kein Vorheizen des<br />
Ofens notwendig. Das ist die am meisten benützte Funktion – mit ihr können mehrere<br />
Speisen gleichzeitig gekocht werden, ohne dass sich ihr Geschmack mischt; ideal für<br />
Speisen, die außen knusprig und gut gekocht, innen weich und nicht zu stark gekocht sein<br />
müssen, wie zum Beispiel Lasagne, oder Roastbeef mittel oder englisch gekocht, Lamm<br />
mittel gekocht, ganzer Fisch oder Torten.<br />
Ideal für Speisen, die außen gut gekocht, innen weich und wenig gekocht sein müssen,<br />
wie zum Beispiel Lasagne, oder Roastbeef mittel oder englisch gekocht, oder Kuchen.<br />
Um vom normalen Kochen mit “traditionellem Ofen” auf das Kochen mit Umluft<br />
überzugehen, sollte die Temperatur des “traditionellen Ofens” um 20-30°C reduziert<br />
werden. Wir empfehlen, die Speisen häufiger zu kontrollieren, da kürzere Kochzeiten<br />
notwendig sein könnten.<br />
Auftauen: Nur das Laufrad setzt sich in Betrieb – Der Thermostat muss auf 0°C eingestellt werden.<br />
Ideal für ein schnelles Auftauen tiefgekühlter Speisen. Die Auftauzeiten hängen von der<br />
Menge und vom Typ der Speisen ab, gewöhnlich wird für ein Kilo eine Zeit von ca. 1<br />
Stunde benötigt.<br />
Ratschlage zur Backofenbenutzung.<br />
..<br />
Um gute Brat-und Backergebnisse zu erreichen ist es ratsam, den Backofen etwa 10 minuten auf Maximaltemperatur<br />
vorzuheizen. Dann die Speisen in den Backofen stellen und mit dem Thermostat die gewunschte Temperatur<br />
einstellen. Wenn der Backofen diese Temperatur erreicht hat, schaltet sich das gelbe Kontrollicht auf<br />
der Schaltblende aus. Der Herd wird während des Gebrauchs heiß. Die Heizelemente im Herd nicht berühren. 17
.. ..<br />
ACHTUNG: WAHREND DER GRILL FUNKTIONIERT, WERDEN DIE AUßEREN<br />
KOMPONENTEN HEIß, WESHALB, WESHALB MAN KINDER VOM OFEN FERNHALTEN SOLLTE.<br />
"WAHREND DER GRILL ODER HEISSLUFTEGRILL FUNKTIONIERT, SOUTE<br />
DIE BACKOFENTUR GESCHLOSSEN SEIN".<br />
18
Handbetrieb<br />
Idem man gleichzeitig auf Tasten und drückt (wobei das Auto-Symbol gelöscht<br />
wird) leuchtet ein Kochtopf-Symbol auf.<br />
Jedes andere, verher eingestellte Programm wird gelöscht.<br />
19
Abmontieren der Ofentür<br />
Zur Reinigung des Backofens kann man die<br />
Ofentür abmontieren. Die Backöfen haben<br />
zwei verschiedene Arten von Scharnieren, die<br />
untereinander austauschbar sind:<br />
Scharniere mit beweglichen Bügeln (Abb. 4),<br />
Der Scharniertyp A hat zwei bewegliche<br />
Bügel B, die, wenn sie in die Sektoren C der<br />
Scharniere eingehakt werden, die Ofentür bei<br />
vollständiger Öffnung blockieren. Man muß<br />
nun die Ofentür an den Seiten, nah an den<br />
Scharniere wieder anzubringen, schiebt man<br />
die Scharniere wieder in ihre Schienen und<br />
nimmt vor dem Schließen der Ofentür wieder<br />
die zwei beweglichen Bügel B ab, mit deren<br />
Hilfe die zwei Scharniere eingehakt wurden.<br />
n r u r t o t e e s .<br />
21
AUSTAUSCHEN DER GLÜHBIRNE (Abb. 5)<br />
ACHTUNG: Zuerst die Stromzufuhr unterbrechen.<br />
Zum Austauschen der Glühbirne B muß man die Abdeckung A abnehmen, indem man sie<br />
entgegen dem Uhrzeigersinn dreht. Nach Austausch der Glühbirne wieder die Abdeckung A<br />
(Abb. 5) aufsetzen.<br />
Wichtiger Hinweis: vor dem Auswechseln der Lampe prüfen, dass der Herd von der<br />
Stromversorgung abgetrennt ist, um Stromschläge zu vermeiden.<br />
22<br />
Abb. 5
Bitte bemerken: keine Dampfgeräte zur Reinigung des Herdes benutzen.<br />
Ein beschädigtes Stromkabel muss von der Herstellerfirma oder dem autorisierten<br />
Kundendienst oder von Fachpersonal ersetzt werden, um Gefahren zu vermeiden.<br />
23
WICHTIG<br />
Um den einwandfreien Betrieb des Einbaugeräts zu gewährleisten, muss das Einbaumöbel<br />
geeignete Eigenschaften haben.<br />
Die Platten der Möbel neben dem Herd müssen aus wärmebeständigem Material sein.<br />
Insbesondere im Falle von Möbeln mit Holzfurnier muss der Leim Temperaturen bis 120°C<br />
Widerstehen: Kunst- oder Klebestoffe, die dieser Temperatur nicht widerstehen, können<br />
verformt werden oder sich auflösen.<br />
In Übereinstimmung mit den Sicherheitsvorschriften dürfen nach dem Einbau<br />
des Geräts keine Kontakte mit den elektrischen Teilen möglich sein.<br />
Alle Schutzteile müssen so befestigt sein, dass sie ohne ein Werkzeug nicht entfernt<br />
werden können.<br />
24
Einbau der Böden<br />
Die Gitter an den Seitenwänden des Herdes einhängen (Abb. 7a).<br />
Die Böden und Blecher wie gezeigt in die Führungen stecken (Abb. 7b).<br />
Abb. 7a<br />
Abb. 7b<br />
25
Index<br />
Données techniques Page 29<br />
Préparation du four Page 29<br />
Tableau des commandes Page 30<br />
Description des symboles du tableau Page 31<br />
Utilisation du tournebroche Page 32<br />
Conseils pour l’utilisation du gril Page 32<br />
Programmateur électronique Pages 33-34<br />
Programmateur mécanique 120’ Page 35<br />
Nettoyage du verre interne amovible Page 35<br />
Démontage de la porte du four Page 35<br />
Changement de l’ampoule Page 36<br />
Nettoyage et entretien du four<br />
Service après-vente Page 37<br />
Indications pour l’installation dans le meuble Page 38<br />
Introduction des plans de cuisson Page 39<br />
27
AC 230...240V 50Hz<br />
90<br />
Ce four doit être branché à l'alimentation électrique selon la Législation Australienne sur les installations<br />
electriques et doit être muni de systèmes de débranchement conformément à cette législation.<br />
Attention!<br />
Les enfants et les infirmes ne doivent pas être laissés sans surveillance près du four.<br />
Les enfants doivent être surveillés pour éviter qu'ils jouent avec le four.<br />
Avertissement: les parties accessibles deviendront chaudes pendant le fonctionnement du four.<br />
Pour éviter toute brûlure ou lésion, garder les enfants loin de l'appareil.<br />
29
Description des symboles qui se trouvent sur le tableau des commandes.<br />
Eclairage four: Deux lumières pour plus de commodité.<br />
Cuisson traditionnelle: Les éléments supérieurs et inférieurs fonctionnent ensemble. La température doit être<br />
réglée entre 50°C et 250°C. Le four doit être préchauffé avant de commencer la cuisson.<br />
C’est le type de cuisson idéal pour les rôtis et les tartes aux fruits.<br />
Cuisson classique: Fonctionnement de l’élément inférieur uniquement.<br />
La température doit être réglée entre 50°C et 250°C.<br />
Le four doit être préchauffé avant de commencer la cuisson. C’est le type de cuisson idéal<br />
pour les aliments dont la partie inférieure doit être rissolée et la partie supérieure requière<br />
une chaleur moins intense.<br />
Haute cuisson: Fonctionnement de l’élément supérieur uniquement.<br />
La température doit être réglée entre 50°C et 250°C.<br />
Le four doit être préchauffé avant de commencer la cuisson. C’est le type de cuisson idéal<br />
pour les aliments croquants et dorés comme la pizza, ou pour la garniture des plats<br />
contenant du fromage.<br />
Tourne-broche: Cuisson traditionnelle “rôtis à la broche”.<br />
On peut également l’utiliser pour les grillades, en maintenant la porte du four fermée, et<br />
en ôtant l’attache pour le tourne-broche.<br />
C’est le type de cuisson idéale pour le poulet ou les rôtis à la broche.<br />
Laisser la porte du four fermée.<br />
Grill à ventilation: Fonctionnement du grill et de la ventilation. La partie plus importante de la cuisson<br />
s’effectue avec le grill, l’air chaud circule à l’intérieur du four. La porte du four doit être<br />
fermée. Préchauffer le four pendant 5 minutes avant l’utilisation.<br />
Multifonction: Les éléments supérieurs et la ventilation fonctionnent, la ventilation permet la diffusion<br />
de la chaleur produite par les éléments.<br />
La température peut être réglée entre 50°C et 250°C. C’est l’idéal pour les aliments<br />
volumineux qui requièrent une cuisson uniforme, par exemple la dinde rôtie et les gros<br />
rôtis.<br />
Ventilation forcée: Cuisson par ventilation forcée grâce au ventilateur et à son élément. Le four ne doit pas<br />
être préchauffé. Cette fonction peut être utilisée – pour cuire de nombreux types<br />
d’aliments différents en même temps sans que les saveurs ne se mélangent; c’est l’idéal<br />
pour les aliments qui doivent être croquants et bien cuits à l’extérieur, tendres et pas trop<br />
cuits à l’intérieur. Par exemple les lasagnes, ou le roast-beef cuisson à point ou saignant,<br />
l’agneau cuisson à point, les poissons entiers ou les tartes.<br />
C’est l’idéal pour les aliments qui doivent résulter bien cuits à l’extérieur et tendres ou<br />
peu cuits à l’intérieur, comme les lasagnes, le roast-beef cuit à point ou saignant, ou les<br />
gâteaux.<br />
Quand on passe de la cuisson au “four traditionnel” à celle par ventilation forcée, on<br />
conseille de réduire de 20-30°C la température programmée pour le “four traditionnel”.<br />
Nous conseillons également de contrôler les aliments pendant la cuisson, car le temps de<br />
cuisson pourrait être plus bref.<br />
Décongélation: Fonctionnement du ventilateur uniquement – le thermostat doit être réglé sur 0°C.<br />
C’est l’idéal pour décongeler rapidement des aliments surgelés. La durée de<br />
décongélation varie selon la quantité et le type d’aliment, cependant, en règle générale, un<br />
kg requière une durée de décongélation d’environ 1 heure.<br />
Conseils pour l`utilisation du four.<br />
P a o d v u b e r o r o i é , n il e r s c s u o d t p l n e r s t l é f e a à e la c o i t h u l s e a r m l m a u p é p f x é e i f r n<br />
1 m e a m d v u 0 r i t a i m n u<br />
Introduire ensuite les aliments et mettre le thermostat à la température voulue. Le voyant jaune situé sur le tableau<br />
s'éteint quand le four a atteint la température demandée. Quand on l'utilise, le four devient chaud. faire attention<br />
de ne pas toucher les éléments chauffants qui se trouvent à l'intérieur du four.<br />
31
ATTENTION: ELOIGNER LES ENFANTS DU FOUR CAR LES PARTIES<br />
ACCESSIBLES BRULENT QUAND LE GRIL FONCTIONNE.<br />
"IL FAUT FERMER LA PORTE DU FOUR PENDANT LA FUNCTION GRILL<br />
OU GRILL VENTILE."<br />
32
Funcionnement manuel<br />
Appuyer en même temps sur les touches<br />
dʼune casserole sʼallume.<br />
Tout les programmes saisis sʼeffacent.<br />
et (le<br />
symbole auto disparaît) et le symbole<br />
33
Démontage de la porte<br />
Pour faciliter le nettoyage du four, il est possible<br />
de demonter la porte. Les fours sont munis<br />
de deux types de charnières, interchangeables<br />
entre elles.<br />
Charnieères à cavaliers mobiles.<br />
Les charnières A sont munies de deux cavaliers<br />
mobiles B qui s’il sont accrochés aux<br />
secteurs C des charnières, quand la porte est<br />
complètement ouverte, la bloque. Ceci fait, il<br />
faut soulever la porte vers le haut et l’extraire<br />
vers l’extérieur, pour effectuer ces opérations<br />
prendre la porte sur les côtés à proximité des<br />
charnières. Pour remonter la porte enfiler<br />
avant tout les charnières dans leur coulisses.<br />
Enfin, avant de fermer la porte, ne pas<br />
oublier de retirer les deux petits cavaliers<br />
mobiles B qui ont servi pour accrocher les<br />
deux charnières.<br />
35
CHANGEMENT DE L'AMPOULE (Fig. 5)<br />
ATTENTION: débrancher l'appareil avant d'effectuer cette opération.<br />
Pour changer l'ampoule B du four, enlever le couvercle de protection A en le tournant<br />
dans le sense contraire aux aiguilles d'une montre. Placer l'ampoule neuve et remettre<br />
le couvercle de protection A (fig. 5).<br />
Avertissement: pour éviter toute décharge électrique, avant de remplacer la lampe,<br />
vérifier que le four soit débranché.<br />
36<br />
Fig. 5
Note: ne pas utiliser des apapreils à vapeur pour le nettoyage du four.<br />
Si le câble d'alimentation est endommagé, il devra être remplacé par la Maison constructrice,<br />
par le Service Après-vente autorisé ou par une personne qualifiée pour éviter tout danger.<br />
37
IMPORTANT<br />
Pour garantir le bon fonctionnement de l’appareil à encastrement, les caractéristiques du<br />
meuble doivent être adéquates.<br />
Les panneaux du meuble qui se trouvent à côté du four, devront être en matériel résistant à la<br />
chaleur.<br />
Surtout si le meuble est en bois plaqué, les colles utilisées devront être résistantes à une<br />
température de 120°C:<br />
les matières plastiques ou les colles non résistantes à cette température sont la cause de déformation<br />
ou de décollage.<br />
Conformément aux normes de sécurité, quand l’appareil est encastré, il ne doit plus y avoir<br />
aucun contact éventuels avec les parties électriques.<br />
Toutes les parties qui assurent la protection doivent être fixées de telle sorte qu’elles ne peuvent<br />
pas être enlevées sans l’aide d’un ustensile.<br />
38
Introduction des plans de cuisson<br />
<br />
<br />
Fig. 7a<br />
Fig. 7b<br />
39
Indice<br />
Dati tecnici Pagina 43<br />
Preparazione del forno Pagina 43<br />
Cruscotto comandi Pagina 44<br />
Descrizione simboli cruscotto Pagina 45<br />
Uso del girarrosto Pagina 46<br />
Consigli per l’uso del grill Pagina 46<br />
Programmatore elettronico Pagine 47-48<br />
Programmatore meccanico 120’ Pagina 49<br />
Pulizia vetro interno estraibile Pagina 49<br />
Smontaggio delle porta forno Pagina 49<br />
Sostituzione della lampadina Pagina 50<br />
Pulizia e manutenzione del forno Pagina 51<br />
Assistenza tecnica Pagina 51<br />
Istruzioni per l’installazione nel mobile Pagina 52<br />
Inserimento dei ripiani Pagina 53<br />
41
AC 230...240 V 50 Hz<br />
90<br />
Questo forno deve essere collegato all'alimentazione elettrica secondo la legislazione astraliana sugli impianti<br />
elettrici, inoltre deve essere munito di mezzi di scollegamento conformemente a detta legislazione.<br />
Attenzione!<br />
I bambini piccoli e gli invalidi non devono essere lasciati senza sorveglianza vicino al forno.<br />
I bambini piccoli devono essere sorvegliati per evitare che giochino con il forno.<br />
Avvertenza: le parti accessibili diventeranno calde durante il funzionamento del forno.<br />
Per evitare qualsiasi ustione o scottatura, tenere i bambini a distanza dall'apparecchio.<br />
43
45<br />
Descrizione dei simboli presenti sul cruscotto comandi.<br />
Luce forno: Due luci forno per maggior comodità.<br />
Cottura tradizionale: Entrano in funzione entrambi gli elementi superiore e inferiore. La temperatura<br />
dev’essere impostata tra 50°C e 250°C. Il forno dev’essere pre-riscaldato prima della<br />
cottura. Ideale per arrosti o torte alla frutta.<br />
Resistenza inferiore: Solo l’elemento inferiore entra in funzione.<br />
La temperatura dev’essere impostata tra 50°C e 250°C.<br />
Il forno dev’essere pre-riscaldato prima della cottura. Ideale per cibi che richiedono<br />
rosolatura sul fondo e calore meno intenso sopra.<br />
Resistenza superiore: Entra in funzione solo l’elemento superiore.<br />
La temperatura dev’essere impostata tra 50°C e 250°C.<br />
Il forno dev’essere pre-riscaldato prima della cottura. Ideale per la cottura croccante e<br />
dorata di paste e pizze, oppure per rifinire piatti con guarnizione di formaggio.<br />
Grill + girarrosto: Cottura tradizionale di “arrosto allo spiedo” con girarrosto.<br />
Si può usare anche per grigliate, con porta del forno chiusa, togliendo l’attacco per il<br />
girarrosto.<br />
Ideale per cuocere polli o arrosti allo spiedo.<br />
Tenere chiusa la porta del forno.<br />
Grill + vantilatore: Entrano in funzione sia il grill sia la ventola. La maggior parte della cottura viene<br />
effettuata con il grill e l’aria calda circola all’interno del forno. Si deve tenere chiusa la<br />
porta del forno. Pre-riscaldate il forno per circa 5 minuti prima dell’uso.<br />
Multifunzione: Entrano in funzione gli elementi superiori e la ventola, il calore prodotto dagli elementi<br />
viene diffuso dalla ventola.<br />
La temperatura può essere impostata tra 50°C e 250°C. Ideale per quantità voluminose<br />
di cibo che richiedono una cottura uniforme, per esempio tacchino arrosto e grossi arrosti.<br />
Resistenza cicolare<br />
ventilata:<br />
Scongelamento<br />
ventilato:<br />
Cottura a ventilazione forzata tramite la ventola e l'elemento ventola. Non serve preriscaldare<br />
il forno. Questa è la funzione più usata – è possibile cuocere parecchi tipi di<br />
alimenti diversi contemporaneamente senza mescolarne i sapori; ideale per cibi che<br />
devono risultare croccanti e ben cotti all’esterno e morbidi e non troppo cotti all’interno.<br />
Per esempio lasagne, o roast beef a cottura media o al sangue, agnello a cottura media,<br />
pesci interi o torte.<br />
Ideale per infornate e cibi che devono risultare ben cotti all’esterno e morbidi e poco<br />
cotti all’interno, come lasagne, roast-beef a cottura media o al sangue, oppure dolci.<br />
Per cambiare dalla normale cottura con “forno tradizionale” a quella a ventilazione<br />
forzata, sarebbe buona norma ridurre di 20-30°C la temperatura del “forno tradizionale”.<br />
Consigliamo di controllare più frequentemente l’infornata che ora potrebbe richiedere<br />
tempi di cottura più brevi.<br />
Entra in funzione solo la ventola – il termostato dev’essere impostato a 0°C.<br />
Ideale per il rapido scongelamento di cibi surgelati. I tempi di scongelamento variano a<br />
seconda della quantità e del tipo di cibo, tuttavia, in linea di massima, un kg richiederà<br />
all’incirca 1 ora.<br />
Consigli per l`utilizzo del forno.<br />
Per ottenere buoni risultati, si consiglia di preriscaldare il forno alla massima temperatura per 10 minuti.<br />
Introdurre le vivande e posizionare il termostato alla temperatura desiderata. Quando il forno avra` raggiunto<br />
la temperatura impostata, la spia gialla posizionata sul cruscotto si spegnerà.<br />
Durante l'uso, il forno diventa caldo. Fare attenzione a non toccare gli elementi riscaldanti all'interno del forno.
ATTENZIONE: MENTRE IL GRILL E' IN USO LE PARTI ACCESSIBILI<br />
SCOTTANO TENERE I BAMBINI LONTANO DAL FORNO.<br />
" LA PORTA FORNO DEVE RIMANERE CHIUSA DURANTE L'USO DEL GRILL<br />
O DEL GRILL VENTILATO".<br />
46
Fig. 2<br />
<br />
<br />
<br />
<br />
47
Smontaggio della porta forno<br />
Per facilitare la pulizia del forno è possibile<br />
smontare la porta. I forni dispongono in effetti<br />
di due diversi tipi di cerniere, intercambiabili<br />
fra loro:<br />
- cerniere con cavallotti mobili (fig. 4)<br />
Le cerniere A sono provviste di due cavallotti<br />
mobili B che se agganciati ai settori C delle<br />
cerniere, quando la porta è completamente<br />
aperta la bloccano. Fatto questo bisogna sollevare<br />
la portina verso l’alto ed estrarla verso<br />
l’esterno, per compiere queste operazioni<br />
fare presa sui fianchi della porta in prossimità<br />
delle cerniere. Per rimontare la porta<br />
infilare prima di tutto le cerniere nelle loro<br />
apposite scanalature. Infine prima di chiudere<br />
la porta non bisogna dimenticare di togliere i<br />
due cavallotti mobili B che sono serviti per<br />
agganciare le due cerniere.<br />
49
Sostituzione della lampadina (fig. 5)<br />
Attenzione:<br />
per evitare qualsiasi rischio di scossa elettrica, scollegare il cavo di alimentazione<br />
dell'apparecchio prima di procedere alle operazioni di sostituzione della lampadina.<br />
Per sostituire la lampadina B, bisogna prima togliere il coperchio A girandolo in senso<br />
antiorario. Dopo aver sostituito la lampadina, rimettere il coperchio di protezione A.<br />
Fig. 5<br />
50
Nota: non utilizzare apparecchi a vapore per la pulizia del forno.<br />
Se il cavo di alimentazione è danneggiato, dovrà essere sostituito dal Produttore o dal<br />
Servizio di Assistenza autorizzato, oppure da una persona qualificata per evitare ogni<br />
pericolo.<br />
51
IMPORTANTE<br />
Per garantire un buon funzionamento dell’apparecchio da incasso è necessario che<br />
il mobile sia di caratteristiche adatte.<br />
I pannelli dei mobili adiacenti il forno dovranno essere in materiale resistente al calore<br />
In particolare nel caso di mobili in legno impiallacciato le colle dovranno<br />
essere resistenti alla temperatura di 120°C:<br />
materiali plastici o collanti non resistenti a questa temperatura sono a causa di deformazioni<br />
o scollature.<br />
In conformità alle norme di sicurezza, una volta incassato l’apparecchio, non debbono<br />
essere possibili eventuali contatti con le parti elettriche.<br />
Tutte le parti che assicurano la protezione debbono essere fissate in modo tale da non<br />
poter essere tolta senza l’aiuto di qualche utensile.<br />
52
53<br />
Inserimento dei ripiani<br />
<br />
<br />
Fig. 7a<br />
Fig. 7b
Cod. 12300043881