Guide d'installation rapide - TRENDnet
Guide d'installation rapide - TRENDnet
Guide d'installation rapide - TRENDnet

Create successful ePaper yourself
Turn your PDF publications into a flip-book with our unique Google optimized e-Paper software.
Quick Installation <strong>Guide</strong><br />
TEG-S811Fi<br />
H/W: v1.0R
Table of of Contents Contents<br />
Français ..................................................................................................... 1<br />
1. Avant de commencer ......................................................................... 1<br />
2. Installation du matériel ...................................................................... 2<br />
3. Configuration du Switch .......... ..................................................... 4<br />
Troubleshooting ........................................................................................<br />
5<br />
Version 01.21.2008
1. Avant de commencer<br />
Configuration du système<br />
Application<br />
1<br />
Français<br />
Contenu de l'emballage<br />
TEG-S811Fi<br />
Pilote<br />
sur CD-ROM<br />
<strong>Guide</strong><br />
<strong>d'installation</strong> <strong>rapide</strong><br />
2 supports de fixation avec vis<br />
Un câble RS-232<br />
Un cordon d'alimentation courant<br />
alternatif<br />
Navigateur<br />
Internet : Internet Explorer 6.0 ou ultérieur<br />
Ordinateur avec port série<br />
Câble fibre multi mode 50/125 ou 62,5/125 µm avec connecteurs de type<br />
SC pour ports 100BaseFX<br />
Module Mini GBIC (par ex. TEG-MGBSX, TEG-MGBS10, TEG-MGBS40,<br />
TEG-MGBS80, TEG-MGBS10D3_D5, TEG-MGBS40D3_D5) pour<br />
logements Mini GBIC<br />
Workstation<br />
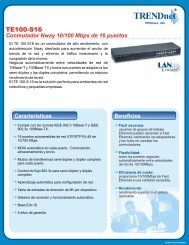
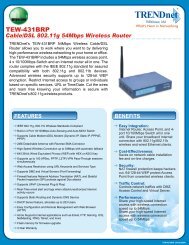
24-port Gigabit Web Smart Switch<br />
with Mini-GBIC slots<br />
(TEG-240WS)<br />
Fiber 10/100Mbps<br />
8-Port 10/100Mbps Layer 2 Managed Switch<br />
with Gigabit Port and Mini-GBIC Slot<br />
(TEG-S811Fi)<br />
RS-232<br />
1000Mbps<br />
Multi-Mode Fiber<br />
Mini-GBIC Modules<br />
(TEG-MGBSX)<br />
8-Port 100Base-FX Layer 2<br />
Managed Switch with Mini GBIC Slot<br />
(TEG-S081FMi)<br />
Workstation with PCI Adapter<br />
(TE100-PCIWA)<br />
Laptop with PC Card<br />
(TE100-PCBUSR)
2. Installation du matériel<br />
Remarque : Après avoir terminé l'installation du matériel, utilisez votre<br />
navigateur Internet pour configurer le TEG-S811Fi. Consultez la Partie 3<br />
(Configuration de votre Switch) pour plus d'informations.<br />
1. Branchez le Cordon électrique à<br />
l'arrière du TEG-S811Fi et à une<br />
prise de courant.<br />
2<br />
Français
2. Branchez un câble Ethernet RJ-45<br />
entre l'un des 8 ports du switch et<br />
une connexion Ethernet de votre<br />
réseau.<br />
3. Branchez un câble<br />
Ethernet RJ-45 Cat 5e à<br />
une pris 10/100/1000BaseT<br />
de votre réseau (facultatif)<br />
3<br />
Français<br />
4. Insérez un module mini-<br />
GBIC <strong>TRENDnet</strong> dans le<br />
logement mini-GBIC (non<br />
fourni).<br />
Enregistrez votre produit<br />
Afin d’être sûr de recevoir le meilleur niveau de service clientèle et le meilleur support<br />
possibles, veuillez prendre le temps d’enregistrer votre produit en ligne sur:<br />
www.trendnet.com/register<br />
Nous vous remercions d’avoir choisi Trendnet
3. Configuration du Switch<br />
Configuration du navigateur<br />
Remarque : Avant de pouvoir configurer le Switch, une adresse IP statique doit<br />
être assignée à l'adaptateur réseau de votre ordinateur dans le sous-réseau de<br />
192.168.16.x. L'adresse IP par défaut du Switch étant 192.168.16.1, assurez<br />
qu'aucun autre périphérique réseau n'a reçu la même adresse IP. (Consultez<br />
la rubrique « Dépannage » pour configurer les paramètres TCP/IP de votre<br />
PC.)<br />
1. Ouvrez votre navigateur Internet,<br />
tapez http://192.168.16.1 dans la<br />
barre d'adresse et enfoncez la<br />
touche Enter.<br />
2. Saisissez le nom d'utilisateur et le<br />
mot de passe et cliquez sur OK.<br />
Par défaut :<br />
Nom d'utilisateur : root<br />
Mot de passe : root<br />
3. Cliquez sur Système ><br />
Configuration IP. Changez<br />
ensuite l'adresse IP afin qu'elle se<br />
trouve sur le même sous-réseau<br />
que votre réseau. Saisissez le<br />
masque de sous réseau et la<br />
passerelle afin qu'ils<br />
correspondent à votre réseau.<br />
Cliquez ensuite sur Appliquer.<br />
4<br />
Français
Troubleshooting<br />
Q1: After connecting the TEG-S811Fi to a power outlet, the LEDs do not turn on.<br />
A1: Check the connection of the power cord to the TEG-S811Fi and the power outlet. Also<br />
check that the power outlet is receiving power.<br />
Q2: How do I configure TCP/IP settings on my computer?<br />
1. Go into the Control Panel and double-clic the Network<br />
Connections icon, right-click the Local Area<br />
Connection icon and then click Properties.<br />
2. Click Internet Protocol (TCP/IP) and then click<br />
Properties. Then click on Use the following IP<br />
address, and make sure you assign your network<br />
adapter an IP address in the subnet of 192.168.16.x.<br />
Q3: I connect the switch to my network via the mini-GBIC module, but I am unable to make a<br />
connection.<br />
A3: First, verify that you are using the proper fiber cable. Second, verify that the TX and RX<br />
cables have been reverse on the opposite Fiber connection. Third, when connecting to the<br />
mini-GBIC modules, your Fiber connection must be Gigabit. Fourth, power down the switch.<br />
Wait 15 seconds, then plug the switch back in.<br />
Q4: How do I login to the switch via the console port?<br />
A4: Follow the instructions below:<br />
1) Connect the RS-232 cable from a serial port on your Windows PC to the console port on<br />
your computer.<br />
2) Go to Start -> Programs -> Accessories -> Communications -> Hyperterminal<br />
3) Enter a name, select an icon and then click OK.<br />
4) Select the correct COM port (e.g. COM1, COM2) and then click OK.<br />
5) Enter the following, click Apply and then click OK:<br />
Bits per second: 9600<br />
Data bits: 8<br />
Parity: None<br />
Stop bits: 1<br />
Flow control: None<br />
6) Press Enter.<br />
7) Enter the user name and password. By default, the user name and password is root.<br />
Please refer to the User's <strong>Guide</strong> for a list of commands.<br />
If you still encounter problems or have any questions regarding the TEG-S811Fi, please contact<br />
<strong>TRENDnet</strong>’s Technical Support Department.<br />
5
Certifications<br />
This equipment has been tested and found to comply with FCC and CE Rules.<br />
Operation is subject to the following two conditions:<br />
(1) This device may not cause harmful interference.<br />
(2) This device must accept any interference received. Including interference that may<br />
cause undesired operation.<br />
Waste electrical and electronic products must not<br />
be disposed of with household waste. Please<br />
recycle where facilities exist. Check with you Local<br />
Authority or Retailer for recycling advice.<br />
NOTE: THE MANUFACTURER IS NOT RESPONSIBLE FOR ANY RADIO OR TV<br />
INTERFERENCE CAUSED BY UNAUTHORIZED MODIFICATIONS TO THIS<br />
EQUIPMENT. SUCH MODIFICATIONS COULD VOID THE USER’S AUTHORITY TO<br />
OPERATE THE EQUIPMENT.<br />
ADVERTENCIA<br />
En todos nuestros equipos se mencionan claramente las caracteristicas del adaptador de<br />
alimentacón necesario para su funcionamiento. El uso de un adaptador distinto al<br />
mencionado puede producir daños fisicos y/o daños al equipo conectado. El adaptador<br />
de alimentación debe operar con voltaje y frecuencia de la energia electrica domiciliaria<br />
existente en el pais o zona de instalación.
Customer Support<br />
Visit www.trendnet.com/support<br />
Email:<br />
support@trendnet.com<br />
Europe (Germany France Italy Spain Switzerland UK)<br />
Toll Free Telephone: +00800 60 76 76 67<br />
English/Espanol - 24/7<br />
Francais/Deutsch - 11am-8pm, Monday - Friday MET<br />
Worldwide<br />
Telephone: +(31) (0) 20 504 05 35<br />
English/Espanol - 24/7<br />
Francais/Deutsch - 11am-8pm, Monday - Friday MET<br />
Product Warranty Registration<br />
Please take a moment to register your product online.<br />
Go to <strong>TRENDnet</strong>’s website at http://www.trendnet.com/register<br />
20675 Manhattan Place<br />
Torrance, CA 90501<br />
USA<br />
. . . . .<br />
Copyright ©2008. All Rights Reserved. <strong>TRENDnet</strong>.