Owner's Manual - ManageMyLife
Owner's Manual - ManageMyLife
Owner's Manual - ManageMyLife

You also want an ePaper? Increase the reach of your titles
YUMPU automatically turns print PDFs into web optimized ePapers that Google loves.
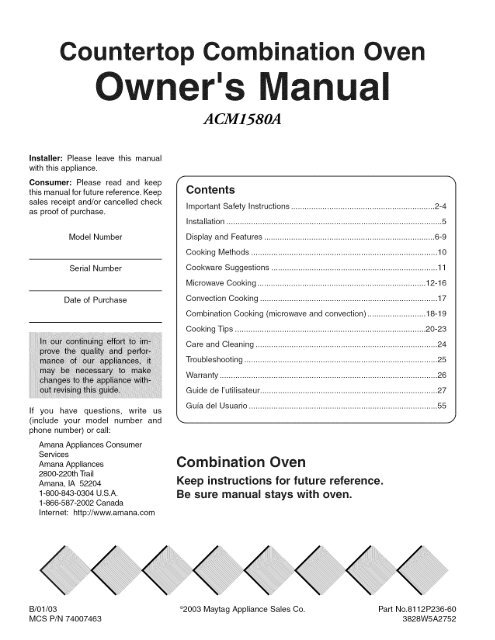
Countertop Corn ination Oven<br />
<strong>Owner's</strong> <strong>Manual</strong><br />
Installer: Please leave this manual<br />
with this appliance.<br />
Consumer: Please read and keep<br />
this manual for future reference. Keep<br />
sales receipt and/or cancelled check<br />
as proof of purchase.<br />
Model Number<br />
Serial Number<br />
Date of Purchase<br />
If you have questions, write us<br />
(include your model number and<br />
phone number) or call:<br />
Amana Appliances Consumer<br />
Services<br />
Amana Appliances<br />
2800-220th Trail<br />
Amana, IA 52204<br />
1-800-843-0304 U.S.A.<br />
1-866-587-2002 Canada<br />
Internet: http://www.amana.com<br />
B/01/03<br />
MCS P/N 74007463<br />
r<br />
A CM1580A<br />
Contents<br />
Important Safety Instructions ................................................................ 2-4<br />
Installation ................................................................................................ 5<br />
Display and Features ............................................................................ 6-9<br />
Cooking Methods ................................................................................... 10<br />
Cookware Suggestions .......................................................................... 11<br />
Microwave Cooking ........................................................................... 12-16<br />
Convection Cooking ............................................................................... 17<br />
Combination Cooking (microwave and convection) .......................... 18-19<br />
Cooking Tips ..................................................................................... 20-23<br />
Care and Cleaning ................................................................................. 24<br />
Troubleshooting ...................................................................................... 25<br />
Warranty ................................................................................................. 26<br />
Guide de I'utilisateur ............................................................................... 27<br />
Guia del Usuario .................................................................................... 55<br />
Combination Oven<br />
Keep instructions for future reference.<br />
Be sure manual stays with oven.<br />
< 4 4<br />
Q2003 Maytag Appliance Sales Co. Part No.8112P236-60<br />
3828W5A2752
IMPORTANT SAFETY INSTRUCTIONS<br />
What You Need<br />
to Know About<br />
Safety instructions<br />
Warning and Important Safety Instructions<br />
appearing in this manual<br />
are not meant to cover all possible<br />
conditions and situations that may<br />
occur. Common sense, caution, and<br />
care must be exercised when<br />
installing, maintaining, or operating<br />
oven.<br />
Always contact your dealer, distributor,<br />
service agent, or manufacturer<br />
about problems or conditions you do<br />
not understand.<br />
,_WARNING I<br />
>- To avoid risk of electrical shock<br />
or death, this oven must be<br />
grounded.<br />
>- To avoid risk of electrical shock<br />
or death, do not alter the plug.<br />
Recognize Safety Symbols, Words, Labels<br />
[ _ DANGER i<br />
DANGER-- Immediate hazards which WILL result in severe personal injury or<br />
death.<br />
[ a,WARNmG i<br />
WARNING--Hazards or unsafe practices which COULD result in severe personal<br />
injury or death.<br />
l a,cAuvlo. 1<br />
CAUTION-- Hazards or unsafe practices which COULD result in minor personal<br />
injury.<br />
Grounding Instructions<br />
Oven MUST be grounded. Grounding<br />
reduces riskof electric shock by providing<br />
an escape wire for the electric current if<br />
an electrical short occurs. This oven is<br />
equipped with a cord having a grounding<br />
wire with a grounding plug.The plug must<br />
be plugged into an outlet that is properly<br />
installed and grounded.<br />
Consult a qualified electrician<br />
or servicer if _.-.
Recognize this symbol as a SAFETY message<br />
[ WARNING ]<br />
When using electrical oven, basic safety precautions should be followed to reduce risk of burns, electric shock, fire,<br />
or injury to persons or exposure to excessive microwave energy.<br />
1. READ all instructions before using equipment. 12.<br />
2. READ AND FOLLOW the specific PRECAU-<br />
TIONS TO AVOID POSSIBLE EXPOSURE TO<br />
EXCESSIVE MICROWAVE ENERGY in IMPOR-<br />
TANT SAFETY INSTRUCTIONS.<br />
,<br />
,<br />
,<br />
This equipment MUST BE GROUNDED. Connect<br />
only to properly grounded outlet. See GROUND-<br />
ING INSTRUCTIONS in Installation Instructions.<br />
Install or locate this equipment ONLY in accordance<br />
with the installation instructions in this<br />
manual.<br />
Some products such as whole eggs and sealed<br />
containers--for example, closed glass jars--are<br />
able to explode and SHOULD NOT be HEATED<br />
in this oven.<br />
6. Use this equipment ONLY for its intended use as<br />
described in this manual. Do not use corrosive<br />
chemicals or vapors in this equipment. This type<br />
of oven is specifically designed to heat, cook or<br />
dry food. It is not designed for industrial or laboratory<br />
use.<br />
7. As with any appliance, CLOSE SUPERVISION is<br />
necessary when used by CHILDREN.<br />
8. DO NOT operate this equipment if it has a damaged<br />
cord or plug, if it is not working properly, or<br />
if it has been damaged or dropped.<br />
9. This appliance, including power cord, must be<br />
serviced ONLY by qualified service personnel.<br />
Special tools are required to service equipment.<br />
Contact nearest authorized service facility for<br />
examination, repair, or adjustment.<br />
10. DO NOT cover or block any openings on this<br />
appliance.<br />
11. DO NOT heat baby bottles in oven.<br />
Baby food jars shall be open when heated and<br />
contents stirred or shaken before consumption, in<br />
order to avoid burns.<br />
13. DO NOT store this appliance outdoors. DO NOT<br />
use this product near water - for example, near a<br />
kitchen sink, in a wet basement, or near a swimming<br />
pool, or similar locations.<br />
14. DO NOT immerse cord or plug in water.<br />
15. Keep cord AWAY from HEATED surfaces.<br />
16. DO NOT let cord hang over edge of table or<br />
counter.<br />
17.<br />
18.<br />
See door cleaning instructions in Care and<br />
Cleaning section of this manual.<br />
DO NOT insert oversized foods or oversized utensils<br />
in a microwave/convection oven as they may<br />
create a fire, an electrical arc, or risk of electrical<br />
shock.<br />
19. DO NOT clean with metal scouring pads. Pieces<br />
can break off the pad and touch electrical parts<br />
involving risk of electrical shock.<br />
20. DO NOT use paper products not intended for<br />
cooking when equipment is operated in convection<br />
or combination mode.<br />
21. DO NOT store any materials, other than manufacturer's<br />
recommended accessories, in this equipment<br />
when not in use.<br />
22. DO NOT cover racks or any other part of the oven<br />
with metal foil. Airflow restriction will cause overheating<br />
of the oven.<br />
23. DO NOT spray oven cleaning solutions toward the<br />
rear inner cavity surface. This will contaminate and<br />
damage the convection heating assembly.<br />
PRECAUTIONS TO AVOID POSSIBLE EXPOSURE TO<br />
EXCESSIVE MICROWAVE ENERGY<br />
A. DO NOT attempt to operate this oven with the door open since open door operation can result in harmful exposure<br />
to microwave energy. It is important not to defeat or tamper with the safety interlocks.<br />
B. DO NOT place any object between the oven front face and the door to allow soil or cleaner residue to accumulate<br />
on sealing surfaces.<br />
C. DO NOT operate the oven if it is damaged. It is particularly important that oven door close properly and that<br />
there is no damage to: 1. door (bent), 2. hinges and latches (broken or loosened), 3. door seals and sealing<br />
surfaces.<br />
D. Oven should not be adjusted or repaired by anyone except properly qualified service personnel.<br />
SAVE THESE INSTRUCTIONS
IMPORTANT SAFETY INSTRUCTIONS<br />
, WARNING<br />
To avoid risk of fire in the oven cavity:<br />
a.<br />
b,<br />
c,<br />
d,<br />
DO NOT overcook food. Carefully attend oven<br />
when paper, plastic, or other combustible materials<br />
are placed inside the oven to facilitate<br />
cooking.<br />
Remove wire twist-ties from paper or plastic<br />
bags before placing bag in oven.<br />
If materials inside the oven ignite, keep oven<br />
door CLOSED, turn oven off and disconnect the<br />
power cord, or shut off power at the fuse or circuit<br />
breaker panel.<br />
DO NOT use the cavity for storage. DO NOT<br />
leave paper products, cooking utensils, or food<br />
in the cavity when not in use.<br />
To avoid risk of personal injury or property damage,<br />
observe the following:<br />
1. DO NOT deep fat fry in oven. Fat could overheat<br />
and be hazardous to handle.<br />
2. DO NOT cook or reheat eggs in shell or with an<br />
unbroken yolk using microwave energy. Pressure<br />
may build up and erupt. Pierce yolk with fork or<br />
knife before cooking.<br />
3. Pierce skin of potatoes, tomatoes, and similar<br />
foods before cooking with microwave energy.<br />
When skin is pierced, steam escapes evenly.<br />
4. DO NOT leave oven unattended.<br />
5. DO NOT use regular cooking thermometers in<br />
oven when cooking in microwave or combination<br />
mode. Most cooking thermometers contain mercury<br />
and may cause an electrical arc, malfunction,<br />
or damage to oven.<br />
6. DO NOT use metal utensils in oven except when<br />
recommended by microwave food manufacturers<br />
or recipe requires metal utensils in convection or<br />
combination mode. Heat food in containers made<br />
of glass or china if possible.<br />
7. Never use paper, plastic, or other combustible<br />
materials that are not intended for cooking. If oven<br />
temperature is high, material may ignite.<br />
CAUTION<br />
, WARNING<br />
Liquids such as water, coffee, or tea are able to be<br />
overheated beyond the boiling point without appearing<br />
to be boiling due to surface tension of the liquid.<br />
Visible bubbling or boiling when the container is<br />
removed from the microwave oven is not always<br />
present. THIS COULD RESULT IN VERY HOT LIQ-<br />
UIDS SUDDENLY BOILING OVER WHEN A<br />
SPOON OR OTHER UTENSIL IS INSERTED INTO<br />
THE LIQUID. To reduce the risk of injury to persons:<br />
1. Do not overheat the liquid.<br />
2. Stir the liquid both before and halfway through<br />
heating it.<br />
3. Do not use straight-sided containers with narrow<br />
necks.<br />
4.<br />
,<br />
After heating, allow the container to stand in the<br />
microwave oven for a short time before remov-<br />
ing the container.<br />
Use extreme care when inserting a spoon or<br />
other utensil into the container.<br />
8. Oven temperature is at least 100° F in convection<br />
mode. Verify plastic, paper or other combustible<br />
materials are recommended by the manufacturer<br />
to withstand the minimum oven temperature.<br />
9. When cooking with paper, plastic, or other combustible<br />
materials, follow manufacturer's recommendations<br />
on product use.<br />
10. DO NOT use paper towels which contain nylon<br />
or other synthetic fibers. Heated synthetics could<br />
melt and cause paper to ignite.<br />
11. DO NOT heat sealed containers or plastic bags<br />
in oven. Food or liquid could expand quickly and<br />
cause container or bag to break. Pierce or open<br />
container or bag before heating.<br />
12. Racks, utensils, rack guides, and oven surfaces<br />
may become hot during or after use. Use utensils<br />
or protective clothing, like pan grips or dry oven<br />
mitts, when necessary to avoid burns.<br />
13. DO NOT unplug oven immediately after use.<br />
Internal fan must cool oven to avoid damage of<br />
electrical components.<br />
14. To avoid pacemaker malfunction, consult physician<br />
or pacemaker manufacturer about effects of<br />
microwave energy on pacemaker.<br />
SAVE THESE INSTRUCTIONS
Unpacking Oven<br />
• Inspect oven for damage such as<br />
dents in door or inside oven cavity.<br />
• Report any dents or breakage to<br />
source of purchase immediately.<br />
Do not attempt to use oven if<br />
damaged.<br />
• Remove all materials from oven<br />
interior.<br />
• If oven has been stored in extremely<br />
cold area, wait a few hours<br />
before connecting power.<br />
Oven Placement<br />
Do not install oven next to or above<br />
source of heat, such as pizza oven<br />
or deep fat fryer. This could cause<br />
microwave oven to operate improperly<br />
and could shorten life of electrical<br />
parts.<br />
Allow enough room for air movement<br />
around oven.<br />
• Install oven on level countertop<br />
surface.<br />
• Outlet should be located so that<br />
plug is accessible when oven is in<br />
place.<br />
Built-In Capability<br />
Refer to installation instructions.<br />
For more information call:<br />
1-800-843-0304 U.S.A.<br />
1-866-587-2002 Canada<br />
\<br />
Installation<br />
Oven Clearances<br />
Am<br />
am<br />
Allow at least 4" of clearance<br />
around top and sides of oven.<br />
Proper air flow around oven<br />
cools electrical components.<br />
With restricted air flow, oven<br />
may not operate properly and<br />
life of electrical parts is reduced.<br />
Install combination oven so oven<br />
bottom is at least 3 feet (36 inches)<br />
above floor.
Door Seal<br />
\<br />
Window<br />
Door Screen<br />
Safety Door<br />
Lock System<br />
and Features<br />
Oven Front Plate<br />
NOTE: A beep<br />
sounds when a pad<br />
on the control panel<br />
is touched, to indicate<br />
setting has been<br />
entered.<br />
Turntable<br />
J<br />
Rotating Ring<br />
Display Window<br />
Control Panel<br />
Door Open Button<br />
Convection / (_)nveetion O)mbination<br />
Microwave<br />
AUTO/TIME DEFROST COOK i<br />
PROGRAM<br />
START<br />
REMINDER RECALL i HELP<br />
CLOCK CONTROL TIMER<br />
SET-UP<br />
for RECZPES REQUZRZ_GSTZRRZN,_OR TO<br />
CHECI( FOODWZTHOUT CAI_CELZNGCOOI(ZNO<br />
pRO,_l_m pI_ESS S_,RT/P_USE<br />
OVEN SPECIFICATIONS<br />
Power Supply 120 VAC,<br />
60 Hz<br />
Input Power 1,500 W<br />
Cooking Power 1,000 W<br />
(IEC 60705<br />
Standard)<br />
Frequency 2,450 MHz<br />
Rated Current 13 A<br />
Outer Dimensions 22%" x 14_"<br />
(WxHxD) x 20"<br />
Cavity Volume 1.5 Cu. Ft.<br />
Net Weight 52 Ibs.<br />
Your oven will be packed with the following<br />
materials:<br />
Glass Turntable ....................... 1 each<br />
<strong>Owner's</strong> <strong>Manual</strong> and<br />
Cooking Guide ........................ 1 each<br />
Rotating Ring .......................... 1 each<br />
This microwave oven is designed for<br />
household use only. It is not recommended<br />
for commercial purposes<br />
and will void the warranty,
1. DISPLAY - The Display<br />
includesa clockandindicators<br />
to tell youtimeof day,cooking<br />
timesettingsandcookingfunctionsselected,<br />
2. CONVCOOK- Touchthispad<br />
to operatetheovenforconvectioncookingonly.Seepage17.<br />
3. AUTOBAKE- Touchthispadto<br />
automaticallybakefrozenpizza,<br />
muffins, biscuits and frozen<br />
French fries using both<br />
microwaveandconvectionenergyalternately.Seepage19.<br />
4. AUTOROAST--Touchthispad<br />
to automaticallyroast beef,<br />
chicken, turkeybreastsandpork<br />
usingbothmicrowaveandconvectionenergyalternately.See<br />
page19.<br />
5. BAKE--Touch thispadto programbakingtimeandheatfora<br />
cooking cycle using both<br />
microwavenergyandconvectionenergy.Seepage18.<br />
6. ROAST--Touchthispadtoprogramthe<br />
amountroastingtime<br />
and heat for a cookingcycle<br />
using both microwaveenergy<br />
and convectionenergy. See<br />
page18.<br />
7. SENSORCOOK-- Touchthis<br />
padto cook10 typesof foods.<br />
Theoven'ssensorwill tell the<br />
ovenhowlongto cookdepending<br />
on the amountof humidity<br />
comingfromthefood.Seepage<br />
15.<br />
8. SENSORPOPCORN-- Touch<br />
thispadwhenpoppingcommerciallypackagedpopcorninyour<br />
microwaveoven. The oven's<br />
sensorwill tell the oven how<br />
longto cookdependingon the<br />
amountof humidityit detects<br />
fromthepopcorn.Seepage15.<br />
g,<br />
10.<br />
11.<br />
12<br />
13.<br />
14.<br />
15.<br />
16.<br />
17.<br />
18.<br />
SENSOR REHEAT -- Touch<br />
this pad to reheat precooked,<br />
room4emperature or refrigerated<br />
foods. The oven's sensor will<br />
tell the oven how long to cook<br />
depending on the amount of<br />
humidity coming from the food.<br />
See page 15.<br />
DEFROST AUTO/TIME --<br />
Touch this pad once to automatically<br />
defrost Meat, Poultry, Fish<br />
or Bread according to weight.<br />
Touch this pad twice to defrost<br />
most other frozen foods by time.<br />
See page 13.<br />
RAPID DEFROST lib. - Touch<br />
this pad for rapid defrosting of<br />
one pound of frozen food. See<br />
pages 13-14.<br />
EASY COOK- Touch this pad<br />
to set and start cooking at 100%<br />
power. See page 8.<br />
PROGRAM -- Touch this pad to<br />
manually set the cooking time<br />
and power level. See page 12.<br />
WARM HOLD -- Touch this pad<br />
to keep hot, cooked foods warm<br />
in your oven for up to 99 minutes.<br />
See page 9.<br />
POWER LEVEL -- Touch this<br />
pad to select a cooking power<br />
level. See page 12.<br />
MORE + - Touch this pad to add<br />
10 seconds of cooking time<br />
each time it is pressed, See<br />
page 9.<br />
LESS = - Touch this pad to subtract<br />
ten seconds of cooking<br />
time each time it is pressed,<br />
See page 9.<br />
CANCEL/STOP -- Touch this<br />
pad to cancel a currently running<br />
program or erase a cooking<br />
cycle being programmed. See<br />
page 8.<br />
19.<br />
20.<br />
21.<br />
22.<br />
23.<br />
24.<br />
25.<br />
START/PAUSE -- Touch this<br />
pad to start a program or to<br />
pause the oven during cooking<br />
or defrosting. See page 8.<br />
HELP -- Help displays feature<br />
information and helpful hints.<br />
See page 8.<br />
REMINDER -- Use this pad as<br />
an alarm clock without stopping<br />
the oven. See page 9.<br />
RECALL -- Touch this pad to<br />
repeat the previous cooking<br />
cycle. See page 8.<br />
CLOCK --Touch this pad to<br />
enter the time of day. See page<br />
8.<br />
CONTROL SET-UP -- Touch<br />
this pad to change the oven's<br />
default settings for volume,<br />
clock, scroll speed, units of<br />
weight and language. See page<br />
8.<br />
TIMER -- Touch this pad to set<br />
the kitchen timer. See page 8.
12-Hour Clock and<br />
Timer<br />
and Features (cont'd)<br />
Oven is equipped with a 12-hour<br />
clock and a timer that can be set up<br />
to 99 minutes and 99 seconds. Clock<br />
does not display AM or PM.<br />
TIMER<br />
To set clock:<br />
1. Touch CLOCK<br />
pad.<br />
• ENTERTIME<br />
OF DAY scrolls<br />
through display.<br />
2. Enter desired<br />
time by using digit<br />
touch pads.<br />
• TOUCH START<br />
scrolls through<br />
display.<br />
3. Touch START/<br />
PAUSE.<br />
To set timer:<br />
1. Touch TIMER<br />
pad.<br />
• ENTERTIME<br />
IN MIN. AND<br />
SEC. scrolls<br />
through display.<br />
2. Enter desired<br />
time by using digit<br />
touch pads.<br />
Maximum<br />
amount of time<br />
is 99 minutes<br />
and 99 seconds.<br />
• TOUCH TIMER<br />
scrolls through<br />
display.<br />
3. Touch TIMER.<br />
• To cancel timer<br />
at any time,<br />
press TIMER<br />
pad.<br />
Start/Pause<br />
This pad will start the<br />
function you set, or<br />
pause the oven temporarily during<br />
cooking or defrosting. Press again to<br />
restart oven from a pause.<br />
Cancel/Stop<br />
This pad cancels a<br />
currently running<br />
program and erases a cooking cycle<br />
being programmed.<br />
Recall<br />
This feature enables<br />
you to repeat the<br />
previous cooking cycle without having<br />
to reprogram the oven. To use<br />
simply press CANCEL/STOP and<br />
then RECALL.<br />
Child Lock<br />
Child Lock prevents accidental<br />
programming by<br />
children or when cleaning the oven<br />
control. To set the child lock, press and<br />
hold the 0 pad until LOCKED appears<br />
in the display and tones are heard.<br />
During Child Lock mode, LOCKED<br />
displays when a touch pad is pressed.<br />
To cancel child lock, touch and hold 0<br />
until LOCKED disappears from display.<br />
After Child Lock is turned off, the<br />
time of day displays and cooking functions<br />
return to normal.<br />
Function<br />
Volume<br />
Clock<br />
Scroll Speed<br />
Units<br />
Demo<br />
Language<br />
Easy Cook<br />
Press the EASY<br />
COOK pad for each<br />
minute of microwave cooking time<br />
desired. At the end of the cooking<br />
cycle, tones will sound.<br />
To use Easy Cook:<br />
1. Touch the EASY COOK pad for<br />
each minute of microwave time<br />
desired.<br />
2. At the end of the cooking cycle,<br />
the oven stops and tones sound.<br />
Help<br />
HELP displays feature<br />
information and helpful<br />
hints. To use the HELP feature, simply<br />
press the HELP pad, and then the<br />
feature pad you would like information<br />
about. Descriptive information<br />
about that feature will be scrolled<br />
through the display. After the help<br />
information is displayed, oven leaves<br />
help mode.<br />
Control Set-up<br />
This oven is designed<br />
for individual preferences<br />
such as language<br />
and volume control. To change an<br />
option:<br />
1. Press the CONTROL SET UP<br />
pad<br />
2. Press the pad for the option you<br />
want to change.<br />
3. Oven display scrolls selections<br />
for that option.<br />
4. Press pad for the desired selection<br />
for that option.<br />
5. Oven makes change and leaves<br />
option mode.<br />
Pad Option<br />
1 Mute, low, medium, loud<br />
2 On or Off<br />
3 Slow, normal or fast<br />
4 Lbs. and o F or Kg ° C<br />
5 On or off<br />
6 English or Spanish
Reminder<br />
The reminder feature<br />
may be used as an<br />
alarm clock. The oven does not<br />
operate. The reminder time can be<br />
set to activate up to 12 hours after<br />
current time of day.<br />
To program a reminder:<br />
1. Press REMINDER pad.<br />
• ENTER REMIND TIME scrolls<br />
through display.<br />
2. Enter desired time of day using<br />
the digit touch pads.<br />
• TOUCH REMINDER scrolls<br />
through display.<br />
3. Touch REMINDER pad.<br />
• REMINDER SET scrolls<br />
through display once.<br />
• To cancel reminder program<br />
press REMINDER followed by<br />
the CANCEL/STOP pad.<br />
5. Reminder sounds and displays<br />
REMINDER at selected time.<br />
Oven then leaves reminder<br />
mode.<br />
Warm/Hold<br />
This feature safely<br />
keeps cooked food<br />
warm in your oven for up to 99 minutes<br />
using microwave energy. You<br />
can use WARM/HOLD by itself or to<br />
automatically follow a timed cooking<br />
cycle.<br />
Do not use more than one complete<br />
WARM/HOLD cycle on food.<br />
To use WARM/HOLD:<br />
1. Put hot cooked food in the oven<br />
and close the door.<br />
• Food that is covered during<br />
cooking should be covered<br />
during WARM/HOLD.<br />
• Pastry items (pies, turnovers,<br />
etc.) should be uncovered during<br />
WARM/HOLD.<br />
• Complete meals kept warm on<br />
a dinner plate should be covered<br />
during WARM/HOLD.<br />
2. Press WARM/HOLD pad.<br />
• TOUCH START scrolls<br />
through display.<br />
3. Press START/PAUSE pad.<br />
• WARM displays.<br />
• To cancel WARM/HOLD open<br />
oven door at any time or press<br />
the CANCEL/STOP pad.<br />
To use WARM/HOLD after another<br />
cooking cycle.<br />
1. After entering the timed cooking<br />
cycle instruction, press WARM/<br />
HOLD before touching START/<br />
PAUSE pad.<br />
2. When the last cooking cycle is<br />
over, tones sound and WARM<br />
displays. Oven will continue to<br />
run.<br />
More and<br />
Less<br />
The MORE and<br />
LESS functions of<br />
this oven adjust the<br />
cooking cycle's cook<br />
time. MORE adds 10 seconds to the<br />
cook time, LESS subtracts 10 seconds.<br />
Use MORE or LESS when cooking<br />
time is counting down in the display.<br />
MORE and LESS cannot be<br />
set when "SENSING" is displayed.<br />
• MORE and LESS do not adjust<br />
cook time for the DEFROST and<br />
WARM/HOLD cooking cycles.<br />
• Press MORE or LESS pads during<br />
active cooking cycle.<br />
• For convection cooking, MORE or<br />
LESS are used as temperature<br />
selection pads.
Cookin Methods<br />
Microwave Cooking<br />
Microwave cooking uses high frequency<br />
energy waves to heat the<br />
food. When cooking, microwave<br />
energy causes food molecules to<br />
move rapidly. This rapid movement<br />
between the food molecules creates<br />
heat, which cooks the food.<br />
Microwaves cook moist food and<br />
foods of varying fat content more<br />
quickly.<br />
Convection Cooking<br />
Convection cooking utilizes both a<br />
convection element and fan to evenly<br />
distribute heated air throughout the<br />
oven cavity. By circulating air, no hot<br />
or cold spots occur, creating a consistent<br />
temperature envelope around<br />
the food. These consistent temperatures<br />
cook food evenly and reduce<br />
cooking time.<br />
Combination Cooking<br />
The combination mode uses both the<br />
speed of microwave energy and<br />
browning of convection cooking to<br />
yield fast, high quality food.<br />
Microwave Convection Combination<br />
Heat Source Microwave energy. Heated air, circulated in Microwave energy and<br />
oven cavity, circulated heated air.<br />
Heat Conduction Heat produced within food Heat conducted from outside Food heats both through<br />
by energy penetration, of food to inside, conduction from outside<br />
and within from energy.<br />
Primary Benefit Fast, high efficiency heating. Browns foods and seals Shortened heating time from<br />
in flavors, microwave energy, browning<br />
and crisping from convection.<br />
10
Thecookingmethoduseddeterminesthecookwarethatcanbeused.Tosimplifychoices,usecookwarethatisapproved<br />
forallthreecookingmethods:microwave, convectionandcombination.<br />
Select Avoid<br />
Heatresistantglass Non-heat resistantglass<br />
Ceramicsorchina Metaltrimmedceramicsorchina<br />
Pyrex Metalcookware<br />
Heatresistantnon-stickutensils, Metalcookingutensils<br />
suchasspatulas<br />
Microwavecookwarethatissafe Paperproducts,straw,wickerand<br />
to450° F wood<br />
Handlesthataresecure Cookwarewithlooseorbroken<br />
handles<br />
Do not use metal utensils or pots in the oven.<br />
Cooking hints<br />
Covering A cover will trap heat and steam, causing food to heat more<br />
quickly. Always use a lid approved for both convection and<br />
microwave cooking.<br />
Stirring Redistributes heat in foods. Always stir from the outside toward<br />
the center of the dish.<br />
Piercing Pierce the shell, skin or membrane of foods before heating to<br />
prevent bursting.<br />
Turning Large foods should be turned so that the top and bottom heat<br />
evenly.<br />
Arrangement Do not stack food. Arrange in a single layer on a dish safe for<br />
combination cooking.<br />
Standing Foods often need to stand from 2 to 15 minutes after being<br />
Time removed from the oven. This finishes cooking. Normally an<br />
internal temperature will continue to rise approximately 5 to<br />
10° F during standing time.<br />
Spacing Arrange individual foods, such as potatoes, in a circle and at<br />
least 1 inch apart. This helps food heat more evenly.<br />
11<br />
Canning<br />
Canning is not recommended in<br />
microwave or combination ovens.<br />
When heating liquids in the microwave<br />
oven, especially for extended<br />
periods of time, superheating can<br />
occur. This condition may result in<br />
boil over or possible eruption when<br />
the liquid is disturbed or a jar is<br />
sealed.<br />
Damage incurred by using the oven<br />
for canning, or attempting to can, is<br />
not covered under warranty.<br />
Oven Rack<br />
A metal rack is provided with the<br />
oven for use in convection and<br />
combination oven modes. The<br />
metal rack should not be used in the<br />
oven during microwave only mode.<br />
Metal will cause arcing, which could<br />
result in damage to the oven.<br />
Popcorn<br />
Popcorn should only be cooked in a<br />
specially designed microwave popcorn<br />
popper or in a commercially prepared<br />
microwave-safe popcorn bag.<br />
Do not use a popper designed to<br />
focus or concentrate energy or heat.<br />
Popcorn should also be popped only<br />
while oven is in microwave mode. If<br />
convection heat is present, popcorn<br />
may scorch, burn or catch fire.<br />
If using a microwave popcorn popper,<br />
do not use the popcorn pad. Follow<br />
manufacturer's instructions for time<br />
setting.
M" lcrowave C oo ldgn<br />
Microwave Power Levels<br />
Your microwave oven has 10 cook power levels to let you cook or heat a wide<br />
variety of foods. Refer to the chart below for suggestions:<br />
Power<br />
Level Use<br />
10<br />
(HIGH)<br />
Microwave Power Level Chart<br />
• Boiling water.<br />
• Making candy.<br />
• Cooking poultry pieces, fish and vegetables.<br />
• Cooking tender cuts of meat.<br />
• Whole poultry.<br />
9 • Reheating rice, pasta and vegetables.<br />
8 • Reheating prepared foods quickly.<br />
• Reheating sandwiches.<br />
7 • Cooking egg, milk and cheese dishes.<br />
• Cooking cakes, breads.<br />
• Melting chocolate.<br />
6 • Cooking veal.<br />
• Cooking whole fish.<br />
• Cooking puddings and custard.<br />
5 • Cooking ham, whole poultry and lamb.<br />
• Cooking rib roast, sirloin tip.<br />
4 • Thawing meat, poultry and seafood.<br />
3 • Cooking less tender cuts of meat.<br />
• Cooking pork chops, roast.<br />
2 • Taking chill out of fruit.<br />
• Softening butter.<br />
1 • Keeping casseroles and main dishes warm.<br />
• Softening butter and cream cheese.<br />
0 • Standing time.<br />
12<br />
<strong>Manual</strong> Programming<br />
To manually set the cooking time and<br />
power level.<br />
1. Press PROGRAM.<br />
PI M • ENTER COOKING<br />
TIME scrolls<br />
through display.<br />
2. Enter desired cook-<br />
ing time using digit<br />
touch pads.<br />
• TOUCH START<br />
OR POWER scrolls<br />
through display.<br />
3. Press POWER<br />
,<br />
,<br />
LEVEL pad to<br />
change power level,<br />
if desired.<br />
Press START/<br />
PAUSE pad.<br />
Stage Cooking<br />
At end of cooking<br />
cycle, tones sound<br />
and oven turns off.<br />
Stage cooking allows consecutive<br />
cooking cycles without interruption.<br />
Two different cooking cycles can be<br />
used.<br />
To use stage cooking:<br />
M<br />
1. Press PROGRAM.<br />
• ENTER COOK-<br />
ING TIME scrolls<br />
through display.<br />
2. Enter desired cooking<br />
time using digit<br />
touch pads.<br />
• TOUCH START<br />
OR POWER scrolls<br />
through display.<br />
3. Press POWER<br />
LEVEL.<br />
• ENTER POWER<br />
LEVEL 1 - 10<br />
scrolls through display.
P_<br />
4. Press digit touch pad<br />
to adjust microwave<br />
energy.<br />
For a lower<br />
microwave power,<br />
press pads 1 (for<br />
10%) through 9 (for<br />
90%). 0 turns off<br />
the microwave<br />
power completely.<br />
5. Press PROGRAM.<br />
• ENTER COOKING<br />
TIME scrolls<br />
through display.<br />
6. Enter desired cooking<br />
time using digit<br />
touch pads.<br />
• TOUCH START<br />
OR POWER scrolls<br />
through display.<br />
7. Press POWER<br />
LEVEL<br />
• ENTER POWER<br />
LEVEL 1 =10<br />
scrolls through display.<br />
8. Press digit touch pad<br />
to adjust microwave<br />
energy for second<br />
stage.<br />
For a lower<br />
microwave power,<br />
press pads 1 (for<br />
10%) through 9 (for<br />
90%). 0 turns off<br />
the microwave<br />
power completely.<br />
9. Press START/<br />
PAUSE pad.<br />
• Oven begins to<br />
cook.<br />
• At end of first<br />
stage, oven beeps<br />
once to signal the<br />
transition.<br />
10. At the end of the<br />
cooking cycle, oven<br />
signals and turns<br />
off.<br />
NOTE: Auto Defrost can be used in<br />
stage cooking in the first stage only.<br />
Auto Defrost<br />
Four different preset defrost settings<br />
are available depending on food<br />
being defrosted. For added convenience,<br />
a built-in tone reminds you to<br />
check, turn over, separate or<br />
rearrange food during the defrost<br />
cycle.<br />
1. Press DEFROST<br />
AUTO/TIME once.<br />
• MEATTOUCH 1<br />
POULTRY TOUCH<br />
2 FISH TOUCH 3<br />
BREAD TOUCH 4<br />
scrolls through display.<br />
2. Press appropriate<br />
digit pad.<br />
• ENTER WEIGHT<br />
scrolls through display.<br />
3. Enter weight using<br />
digit touch pads.<br />
• Weight ranges for<br />
meat, poultry and<br />
fish are 0.1 to 6.0<br />
Ibs.<br />
• Weight range for<br />
bread is 0.1 to 1.0<br />
Ibs.<br />
4. Press START/<br />
PAUSE pad.<br />
5. At end of cooking<br />
cycle, tones sound<br />
and oven turns off.<br />
13<br />
Time Defrost<br />
Defrost for a desired length of time.<br />
Rapid Defrost<br />
1. Press DEFROST<br />
AUTO/TIME twice.<br />
• ENTER DEFROST<br />
TIME scrolls<br />
through display.<br />
2. Press appropriate<br />
digit touch pads.<br />
• TOUCH START<br />
scrolls through display.<br />
3. Press START/<br />
PAUSE pad.<br />
4. At the end of the<br />
defrost time, tones<br />
sound and oven<br />
turns off.<br />
Preset to defrost one lb. of frozen<br />
food.<br />
1. Press RAPID<br />
DEFROST.<br />
• MEATTOUCH 1<br />
POULTRY TOUCH<br />
2 FISH TOUCH 3<br />
scrolls through display.<br />
2. Press appropriate<br />
digit touch pads.<br />
• TOUCH START<br />
scrolls through display.<br />
3. Press START/<br />
PAUSE pad.<br />
4. At the end of the<br />
defrost time, tones<br />
sound and oven<br />
turns off.<br />
continued...
Microwave Cookin_g (cont'd)<br />
Defrost Notes:<br />
• Remove fish, shellfish, meat and<br />
poultry from its original closed<br />
paper or plastic package.<br />
• Form the meat into a shape of a<br />
doughnut before freezing.<br />
• Remove thawed meat during<br />
defrost and then continue defrosting.<br />
• Place foods in a shallow glass baking<br />
dish.<br />
• The oven beeps approximately<br />
midway through a defrost cycle to<br />
remind you to check the food.<br />
Pause the oven by opening the<br />
door. Once food has been checked<br />
or rearranged, close door and<br />
press START/PAUSE to resume<br />
the defrost cycle.<br />
Sensor Operating<br />
instructions<br />
Sensor Cook allows you to cook most<br />
of your favorite foods without selecting<br />
cooking times and power levels.<br />
The display will indicate SENSING<br />
during the initial sensing period. The<br />
oven automatically determines<br />
required cooking time for each food<br />
item. When the internal sensor<br />
detects a certain amount of humidity<br />
coming from the food, it will tell the<br />
oven how much longer to heat. The<br />
display will show the remaining heating<br />
time. For best results for cooking<br />
by Sensor, follow these recommendations.<br />
.<br />
.<br />
.<br />
.<br />
Food cooked with the sensor<br />
system should be at normal<br />
storage temperature.<br />
Glass Tray (TURNTABLE) and<br />
outside of container should be<br />
dry to assure best cooking<br />
results.<br />
Foods should always be covered<br />
loosely with microwavable plastic<br />
wrap, waxed paper, or a lid.<br />
Do not open the door or touch<br />
the CANCEL/STOP pad during<br />
the sensing time. When sensing<br />
time is over, the oven beeps<br />
twice and the remaining cooking<br />
time will appear in the display<br />
window. At this time you can<br />
open the door to stir, turn, or<br />
rearrange the food.<br />
14<br />
Sensor Cooking Guide<br />
Appropriate containers and coverings<br />
help assure good Sensor cooking<br />
results.<br />
1. Always use microwavable containers<br />
and cover them with lids<br />
or vented plastic wrap.<br />
. Never use tight-sealing plastic<br />
covers. They can prevent steam<br />
from escaping and cause food to<br />
overcook.<br />
3. Match the amount to the size of<br />
the container. Fill containers at<br />
least half full for best results.<br />
. Be sure the outside of the cooking<br />
container and the inside of<br />
the microwave oven are dry<br />
before placing food in the oven.<br />
Beads of moisture turning into<br />
steam can mislead the sensor.
Sensor Popcorn<br />
A sensor detects steam from the food<br />
and automatically adjusts cook time<br />
for best cooking results. Commercially<br />
packaged popcorn in 3.0 to<br />
3.5 oz. bags can be used.<br />
1. Put popcorn in the<br />
center of the<br />
turntable.<br />
• DO NOT use the<br />
metal convection<br />
cooking rack for<br />
popcorn cooking.<br />
2. Press SENSOR<br />
POPCORN.<br />
• Oven will cook<br />
popcorn automatically<br />
using the sensor<br />
system.<br />
3. Oven begins<br />
Popcorn cycle.<br />
• To end cycle, open<br />
door or press<br />
CANCEL/STOR<br />
4. At end of cooking<br />
cycle, tones sound<br />
and oven turns off.<br />
[ k CAUTION<br />
DO NOT leave microwave oven<br />
unattended while popping corn.<br />
I WARNING<br />
To avoid risk of personal injury<br />
or property damage, do not<br />
cook popcorn with the metal<br />
convection cooking rack.<br />
Sensor Reheat<br />
Designed to reheat precooked, roomtemperature<br />
or refrigerated foods<br />
easily and quickly by detecting steam<br />
from the food and automatically<br />
adjusting cook time for best heating<br />
results.<br />
1. Press SENSOR<br />
REHEAT.<br />
• SELECT MENU 1 =<br />
3 scrolls through<br />
display.<br />
2. Select desired cate-<br />
gory using digit pads.<br />
• Category 1 is for<br />
an average sized<br />
dinner plate<br />
containing 1 to 2<br />
cups of food.<br />
Category 2 is to<br />
reheat 1 to 4 cups<br />
of soup or sauce in<br />
a bowl or casserole<br />
dish.<br />
• Category 3 is to<br />
reheat a 1 to 4 cup<br />
portion of a casserole<br />
in a casserole<br />
dish or small bowl.<br />
3. Oven begins Sensor<br />
Reheat cycle.<br />
• SENSING displays.<br />
• To end cycle, open<br />
door or press<br />
CANCEL/STOR<br />
4. At end of cooking<br />
cycle, tones sound<br />
and oven turns off.<br />
15<br />
Sensor Cook<br />
A sensor detects steam from the food<br />
and automatically adjusts cook time<br />
for best cooking results for most<br />
foods.<br />
1. Press CANCEL/<br />
STOR<br />
2. Press SENSOR<br />
COOK.<br />
• SELECT MENU<br />
0 - 9 scrolls<br />
through display.<br />
• See table on page<br />
16 for category<br />
options.<br />
3. Enter desired category<br />
using touch<br />
pads.<br />
4. Oven begins Sensor<br />
Cook cycle.<br />
• SENSING displays.<br />
• To end cycle, open<br />
door or press<br />
CANC EL!STOR<br />
5. At end of cooking<br />
cycle, tones sound<br />
and oven turns off.
Microwave Cooking_ (cont'd)<br />
Sensor Cooking Guide<br />
Food Serving amount and recommendations<br />
1 Potatoes Serving size is 1 to 4 medium, about 8 to 10 ozs. (225g to 280g) each.<br />
Pierce each potato several times with a fork and place around the edge of the oven tray, at<br />
least 1 inch (2.5cm) apart.<br />
2<br />
4<br />
5<br />
6<br />
Fresh<br />
Vegetables<br />
Frozen<br />
Vegetables<br />
Frozen<br />
Entree<br />
Rice<br />
Casserole<br />
Ground<br />
Meat<br />
Fish<br />
Seafood<br />
Scrambled<br />
Eggs<br />
Frozen<br />
Pizza<br />
Serving size is 1 to 4 cups (250mL to 1L).<br />
Place moist vegetables in a microwavable container.<br />
Add 2 to 4 tablespoons water.<br />
Cover with plastic wrap and vent.<br />
Most vegetables need stirring and 2 to 3 minutes standing time after cooking.<br />
Serving size is 1 to 4 cups (250mL to 1L).<br />
Remove from package and place vegetables in a microwavable container.<br />
Add 2 to 4 tablespoons water.<br />
Cover with plastic wrap and vent.<br />
Most vegetables need stirring and 2 to 3 minutes standing time after cooking.<br />
Entree size is 10 to 20 ozs. (280g to 560g).<br />
Remove from outer package. Loosen cover on three sides.<br />
If entree is not in a microwave-safe container, place it on a plate, cover with plastic wrap<br />
and vent.<br />
Most entrees need 2 to 3 minutes standing time after cooking.<br />
Follow package instructions for ingredient amounts.<br />
Place rice and liquid (water, chicken or vegetable stock) in a microwave-safe container,<br />
cover with casserole lid or plastic wrap and vent.<br />
Most rice needs 2 to 3 minutes standing time after cooking.<br />
Serving size is 1 to 4 cups (250mL to 1L).<br />
Combine the ingredients per the recipe in a 1- to 2-quart (1- to 2-L) casserole dish.<br />
Cover with plastic wrap and vent.<br />
After cooking is complete, allow 3 minutes standing time.<br />
Serving size is 4 to 32 ozs. (Y4to 2 Ibs.)<br />
Crumble meat into a microwave safe container.<br />
Season and cover with plastic wrap.<br />
Vent cover for well-done meat.<br />
Cover dish for medium cooked meat (such as meat to be used in another dish and cooked<br />
further).<br />
Serving size is 4 to 32 ozs. (Y4to 2 Ibs.)<br />
Place the food around the sides of a microwave-safe container. Season and add 1Ato<br />
V_cup (60 to 125mL) liquid (wine, water, salsa, etc.) if desired.<br />
Cover with plastic wrap and vent.<br />
Serving size is 2 to 5 eggs.<br />
Break eggs into a 4-cup (1L) measuring cup or 1-quart (1L) casserole dish.<br />
Add 1 tablespoon (15mL) milk or water per egg and beat. Cover with plastic wrap and vent.<br />
When cooking is compete, remove from oven, stir and allow 1 to 2 minutes standing time.<br />
Serving size is 1 or 2 pizzas.<br />
Use only frozen pizza intended for microwave use.<br />
Do not cover.<br />
Follow package directions.<br />
16
[<br />
>-<br />
>-<br />
>-<br />
>-<br />
CAUTION<br />
To avoid risk of burns, handle<br />
utensils, racks, and door with<br />
care. Allow oven, utensils,<br />
and racks to cool before<br />
cleaning. Oven, utensils, and<br />
racks, become hot during<br />
operation.<br />
To avoid risk of personal<br />
injury or property damage,<br />
do not use oven without<br />
turntable in place.<br />
To avoid risk of personal<br />
injury or property damage,<br />
do not cover turntable or rack<br />
with aluminum foil.<br />
To avoid risk of property<br />
damage, do not use lightweight<br />
plastic containers,<br />
plastic wraps or paper products<br />
during a convection<br />
cooking cycle.<br />
Convection Rack<br />
Use the rack for convection and combination<br />
cooking only. Do not use in<br />
microwave-only mode.<br />
To operate the oven for convection<br />
cooking only, use manual time entry<br />
only. The following instructions are<br />
for convection cooking only. For<br />
combination cooking, see page 18.<br />
<strong>Manual</strong> Programming<br />
with Preheat<br />
1. Press CONV COOK<br />
pad under Convection.<br />
• 350F TOUCH<br />
MORE OR LESS<br />
FOR TEMP SET<br />
OR START OR<br />
ENTER COOKING<br />
TIME scrolls<br />
through display.<br />
2. Adjust temperature<br />
setting as desired<br />
using MORE or LESS<br />
touch pads.<br />
• Temperature range<br />
is 225 ° F to 450 ° E<br />
3. Press START/<br />
PAUSE pad.<br />
• PREHEAT displays<br />
with selected temperature.<br />
• PLACE FOOD ON<br />
RACK displays<br />
when oven is preheated.<br />
4. Open door, place<br />
food on convection<br />
rack, and close door.<br />
• ENTER COOKING<br />
TIME scrolls<br />
through display.<br />
5. Enter desired cooking<br />
time using digit touch<br />
pads.<br />
• TOUCH START<br />
scrolls through display.<br />
17<br />
C onvectlon" C O0 k'g In<br />
6. Touch START/<br />
PAUSE.<br />
• At the end of cooking<br />
time, tones<br />
sound, END displays<br />
and oven<br />
turns off.<br />
<strong>Manual</strong> Programming<br />
without Preheat<br />
To program the amount of time and<br />
heat for a direct cooking cycle:<br />
1. Press CONV COOK<br />
pad under Convection.<br />
• 350F TOUCH<br />
MORE OR LESS<br />
FOR TEMP SET<br />
OR START OR<br />
ENTER COOKING<br />
TIME scrolls<br />
through display.<br />
2. Adjust temperature<br />
setting as desired<br />
using MORE or LESS<br />
touch pads.<br />
• Temperature range<br />
is 225 ° F to 450 ° E<br />
3. Enter desired cooking<br />
time using digit touch<br />
pads.<br />
• TOUCH START<br />
scrolls through display.<br />
4. Touch START/<br />
PAUSE.<br />
• At the end of cooking<br />
time, tones<br />
sound, END<br />
displays and oven<br />
turns off.
Combination Cooking (microwave and convection)<br />
The following instructions are for<br />
combination cooking only.<br />
For convection cooking, see page 17.<br />
Notes:<br />
Metal utensils should not be used<br />
on the metal rack during combination<br />
cooking. Use glass utensils<br />
whenever possible.<br />
• A metal muffin tin or small, shallow<br />
metal tray can be used if glass pan<br />
is not available.<br />
• If any arcing occurs, discontinue<br />
use of that utensil.<br />
CAUTION i<br />
To avoid risk of burns, handle<br />
utensils, racks, and door with<br />
care. Allow oven, utensils,<br />
and racks to cool before<br />
cleaning. Oven, utensils, and<br />
racks, become hot during<br />
operation.<br />
To avoid risk of personal<br />
injury or property damage,<br />
do not use oven without<br />
turntable in place.<br />
To avoid risk of personal<br />
injury or property damage,<br />
do not cover turntable or<br />
rack with aluminum foil<br />
To avoid risk of property<br />
damage, do not use lightweight<br />
plastic containers,<br />
plastic wraps or paper products<br />
during a convection<br />
cooking cycle.<br />
Combination Roast<br />
To program the amount of time and<br />
heat for a cooking cycle using both<br />
microwave energy and convection<br />
energy.<br />
1. Put food on the oven<br />
rack and close oven<br />
door.<br />
2. Press ROAST pad<br />
under Convection<br />
Combination.<br />
• 350F TOUCH<br />
MORE OR LESS<br />
FOR TEMP SET<br />
OR ENTER<br />
COOKING TIME<br />
scrolls through display.<br />
3. Adjust temperature<br />
setting as desired<br />
using MORE or<br />
LESS touch pads.<br />
• Temperature range<br />
is 225 ° F to 450 ° E<br />
• Microwave energy<br />
cannot be adjusted<br />
and is set at 40%.<br />
• Cooking time can<br />
be set from<br />
0:01-99:99.<br />
4. Touch START/<br />
PAUSE.<br />
• At the end of cooking<br />
time, tones<br />
sound, END displays<br />
and oven<br />
turns off.<br />
18<br />
Combination Bake<br />
To program the amount of time and<br />
heat for a cooking cycle using both<br />
microwave energy and convection<br />
energy.<br />
1. Put food on the oven<br />
rack and close oven<br />
door.<br />
2. Press CANCEL/<br />
STOP.<br />
3. Press BAKE pad<br />
under Convection<br />
Combination.<br />
• 375F TOUCH<br />
MORE OR LESS<br />
FOR TEMP SET<br />
OR ENTER<br />
COOKING TIME<br />
scrolls through display.<br />
4. Adjust temperature<br />
setting as desired<br />
using MORE or<br />
LESS touch pads.<br />
• Temperature range<br />
is 225 ° F to 450 ° E<br />
• Microwave energy<br />
cannot be adjusted<br />
and is set at 10%.<br />
• Enter cooking time<br />
in minutes.<br />
5. Touch START/<br />
PAUSE.<br />
• At the end of cooking<br />
time, tones<br />
sound, END displays<br />
and oven<br />
turns off.
The following instructions are for<br />
combination cooking only.<br />
For convection cooking, see page<br />
17.<br />
Notes:<br />
• When cooking frozen pizzas, place<br />
the pizza directly on the convection<br />
rack. Do not use a pizza pan or aluminum<br />
foil. Place the convection<br />
rack securely on turntable and<br />
away from the sides of the oven.<br />
• For other baking/roasting place<br />
food in appropriate utensil, then<br />
place on convection rack.<br />
Auto Bake<br />
To automatically bake frozen pizza,<br />
muffins, biscuits and frozen french<br />
fries using both microwave and convection<br />
energy alternately:<br />
1. Press AUTO BAKE<br />
pad under Convection<br />
Combination.<br />
• FROZEN PIZZA<br />
TOUCH 1<br />
MUFFINS<br />
TOUCH 2<br />
BISCUIT/<br />
DINNER ROLL/<br />
B. STICK<br />
TOUCH 3<br />
FROZEN FRENCH<br />
FRIES TOUCH 4<br />
scrolls through display.<br />
2. Touch appropriate<br />
digit touch pad.<br />
• Muffins and biscuits<br />
require a preheat<br />
cycle and should<br />
be placed on the<br />
rack after the signal<br />
sounds.<br />
Frozen pizza MUST<br />
be placed directly<br />
on the convection<br />
cooking rack. DO<br />
NOT use a metal<br />
pizza tray or aluminum<br />
foil.<br />
Muffins, biscuits<br />
and dinner rolls can<br />
use metal muffin<br />
tins if glass pan is<br />
not available.<br />
Bread sticks and<br />
frozen french fries<br />
can be placed on a<br />
small shallow metal<br />
pan, such as a tray,<br />
if glass pan is not<br />
available.<br />
3. Press START/PAUSE<br />
pad.<br />
• If additional information<br />
is needed,<br />
oven will prompt in<br />
display.<br />
4. At the end of cooking<br />
time, tones sound,<br />
END displays and<br />
oven turns off.<br />
19<br />
Auto Roast<br />
Auto roast automatically roasts beef,<br />
chicken, turkey breasts and pork<br />
using both microwave and convection<br />
energy alternately.<br />
1. Press AUTO ROAST<br />
pad under Convection<br />
Combination.<br />
• BEEF TOUCH 1<br />
WHOLE CHICKEN<br />
TOUCH 2<br />
TURKEY BREASTS<br />
TOUCH 3<br />
PORKTOUCH 4<br />
scrolls through display.<br />
2. Touch appropriate<br />
digit touch pad.<br />
• ENTER WEIGHT<br />
scrolls through display.<br />
3. Use digit touch pads<br />
to enter weight.<br />
4. Press START/<br />
PAUSE pad.<br />
• If additional information<br />
is needed,<br />
oven will prompt in<br />
display.<br />
5. At the end of cooking<br />
time, tones sound,<br />
END displays and<br />
oven turns off.<br />
Chicken 2.5-6.0 Ibs.<br />
Beef 2.0-4.0 Ibs.<br />
Turkey 3.0-6.0 Ibs.<br />
Pork 2.0-4.0 Ibs.
Cookin Ti s<br />
Meat Basics<br />
For specific questions regarding<br />
meat preparation, handling, or storage<br />
contact USDA (United States<br />
Department of Agriculture) Meat &<br />
Poultry Hotline at (800) 535=4555.<br />
Handling Hints<br />
• When shopping, put meat in its<br />
own separate plastic sack to keep<br />
drips off other foods.<br />
• Defrost frozen meats in refrigerator,<br />
not at room temperature.<br />
• Keep meat cool and covered until it<br />
is time to cook.<br />
• Wash hands with warm soapy<br />
water before and after handling<br />
meat or raw egg.<br />
• Thoroughly wash any surface or<br />
utensil raw meat or egg touched.<br />
• Do not put cooked meat on the<br />
same plate that held raw meat.<br />
Cooking Tips<br />
• Marinate meat in the refrigerator.<br />
Throw out excess marinade that<br />
came into contact with meat.<br />
• Use an oven-proof meat thermometer.<br />
• Cook meat to internal temperature<br />
recommended by USDA.<br />
• When reheating foods, heat to an<br />
internal temperature of at least<br />
165° R<br />
• While cooking meats, turn over at<br />
least once.<br />
Storage Safety<br />
• Once carved, refrigerate unused<br />
portion immediately.<br />
• Keep hot foods hot and cold foods<br />
cold when serving meals.<br />
• Separate cooked foods into small<br />
portions for fast cooling.<br />
Do not store cooked ground meats<br />
or meals containing ground meats<br />
for longer than 3 to 4 days in the<br />
refrigerator.<br />
Do not allow cooked or uncooked<br />
meat juices to come into contact<br />
with ready-to-eat foods such as<br />
fruits or vegetables.<br />
Tenderizing<br />
Braising is only one way to tenderize<br />
less tender cuts. Before cooking, you<br />
may pound, cube, marinate, or use<br />
commercially prepared meat tenderizers.<br />
You may then use a dry method<br />
to cook the meat.<br />
Marinades are acidic liquids such<br />
as wine, citrus, or vinegar.<br />
Marinades soften meat fibers but<br />
only penetrate about one-fourth of<br />
an inch into the interior of the meat.<br />
Do not marinate meat for longer<br />
than 24 hours.<br />
• Pounding with a heavy meat ma!let<br />
breaks down the connective tissue<br />
to tenderize meat.<br />
• Cubing breaks down the structure<br />
more than pounding. Cubing is<br />
done at the meat counter.<br />
Commercial tenderizers are primarily<br />
enzymes that work on the<br />
outer fourth inch on a meat cut.<br />
Make sure to follow the manufacturer's<br />
directions.<br />
2O<br />
Using a Meat<br />
Thermometer<br />
When using a meat thermometer,<br />
remember to insert it at a slight<br />
angle, in the thickest part of the meat,<br />
away from fat and bone. The meat<br />
should be removed when 5° F below<br />
the desired final temperature. While<br />
the meat sits before carving, it will<br />
continue to cook internally, raising<br />
the last 5° F by itself.<br />
Meat thermometer<br />
• Takes the guesswork out of cooking<br />
to a desired 'doneness'.<br />
• Helps reduce the risk of foodborne<br />
illness.<br />
Oven=safe Thermometer<br />
(convection mode only)<br />
• Inserted before the meat is placed<br />
in the oven, this thermometer stays<br />
with the meat while it cooks.<br />
• The internal temperature will rise<br />
slowly as the meat cooks.<br />
• DO NOT use a metal thermometer<br />
in the oven in COMBINATION<br />
mode or MICROWAVE mode.<br />
Instant-read Thermometer<br />
Not oven safe, these thermometers<br />
are placed in the meat when it is<br />
removed from the oven.<br />
While times may vary, an accurate<br />
temperature is normally displayed<br />
within one to two minutes.<br />
When using an instant-read,<br />
remember to clean the thermometer<br />
stem with warm, soapy water<br />
between readings.
Roasting Guidelines<br />
Tender cuts such as rib and loin cuts are best cooked by dry heat methods, such as roasting.<br />
To roast:<br />
1. Heat oven to desired temperature.<br />
2. Place roast directly from refrigerator fat side up in a shallow, non=metal pan.<br />
3. Place roast in combination oven.<br />
4. Remove roast and check internal temperature with a meat thermometer. DO NOT place roast inside combination<br />
oven with thermometer.<br />
5. Roast is done when 5° F below desired degree of finished internal temperature.<br />
6. Transfer roast to carving board and tent loosely with aluminum foil for approximately 15 minutes.<br />
BEEF<br />
Meat Cut<br />
Boneless Rump Roast<br />
Tip Roast<br />
Eye Round Roast<br />
Tenderloin Roast<br />
Rib Roast<br />
Rib Eye Roast<br />
PORK<br />
Loin Roast, bone-in<br />
Rib Roast, boneless<br />
Tenderloin<br />
Ham bone-in, cook-before-eating<br />
LAMB<br />
Shoulder<br />
Rib Roast<br />
Rib Crown Roast, not stuffed<br />
Loin Roast<br />
Leg, Frenched Style or<br />
Half Shank<br />
POULTRY (unstuffed)<br />
Capon<br />
Cornish Hens, whole<br />
Duck, whole<br />
Goose, whole<br />
Pheasant, whole<br />
Quail, whole<br />
Turkey<br />
Recommended<br />
internal<br />
Temperature<br />
Very Rare 130° F<br />
Rare 140° F<br />
Medium Rare 145° F<br />
Medium 160° F<br />
Well Done 170° F<br />
Very Well Done 180° F<br />
All pork must be cooked to<br />
an internal temperature of at<br />
least 160 ° F to reduce the<br />
likelihood of Trichinosis and<br />
other food-borne illnesses.<br />
Medium Rare 150° F<br />
Medium 160° F<br />
Well Done 170° F<br />
To reduce the risk of food-<br />
borne illnesses, poultry must<br />
be cooked to an internal tem-<br />
perature of 180 ° F.<br />
Oven<br />
Temperature<br />
325 ° F<br />
325 ° F<br />
325 ° F<br />
425 ° F<br />
325 ° F<br />
350 ° F<br />
4to6<br />
3½ to 4<br />
4to6<br />
2to3<br />
4to6<br />
4to6<br />
6to8<br />
4to6<br />
350 ° F 3 to 5<br />
350 ° F 2 to 4<br />
450 ° F ½ to 1<br />
325 ° F 7 to 8<br />
325 ° F 3½ to 6<br />
375 ° F 1½ to 2½<br />
375 ° F 2 to 3<br />
325 ° F<br />
325 ° F<br />
325 to 350 ° F<br />
325 to 350 ° F<br />
325 to 350 ° F<br />
325 to 350 ° F<br />
325 to 350 ° F<br />
325 to 350 ° F<br />
325 ° F<br />
1_/4to 1_4<br />
5to7<br />
7to9<br />
4to8<br />
1_/4to 1½<br />
2<br />
8to 16<br />
Approximate<br />
CookingTime<br />
(minutes)<br />
25 to 30<br />
30 to 40<br />
20 to 30<br />
35 to 45<br />
45 to 60<br />
26 to 42<br />
23 to 35<br />
18 to 24<br />
20 minutes<br />
per lb.<br />
35 to 40<br />
30 to 35<br />
25 to 30<br />
45 to 55<br />
15 to 20<br />
20 to 25<br />
20 to 30 mins./Ib.<br />
50-60 mins. total<br />
18 to 20 mins./Ib.<br />
20 to 25 mins./Ib.<br />
30 mins./Ib.<br />
20 mins. total<br />
3½ to 5½ hrs.<br />
All times and recommended temperatures are provided by the USDA, the Beef Industry Council, the National Pork<br />
Producer's Council, and the American Sheep Industry Council.<br />
21
Cookin Ti s<br />
Cookies<br />
* Shiny, flat cookie sheets should be<br />
used. Avoid cookie pans with high<br />
sides--this will cause uneven<br />
browning on the top.<br />
• Cookie sheet should not touch the<br />
sides of the oven or door.<br />
Cakes<br />
Determine pan size from recipe<br />
directions. Shiny pans work best for<br />
cakes.<br />
• Cake baked in too large a pan will<br />
be thin and dry. Too small a pan<br />
results in undercooked or unevenly<br />
cooked cake and batter may spill.<br />
Pies<br />
• Pies should be baked in dark or<br />
dull pans to increase browning.<br />
Frozen pies should be heated on<br />
an aluminum cookie sheet.<br />
Bakeware Guidelines<br />
Dark or dull Absorb more heat and<br />
pans result in darker browning.<br />
Recommended<br />
for pies and breads.<br />
Shiny pans Recommended for<br />
(no sides) cookies.<br />
Shiny pans Recommended for<br />
(sides) cakes.<br />
Glass Pans Lower recommended<br />
oven temperature by<br />
25° R<br />
Baking Time Guidelines<br />
Cake Pan Cups of Oven<br />
Type Pan Size Batter Temp. Minutes<br />
Oval 7_4"x 5_4" 2Y2 350 ° F 25 to 30<br />
13" x 9_," 8 350 ° F 25 to 30<br />
Round, 6" 2 350 ° F 25 to 30<br />
2" layer 8" 3 350 ° F 30 to 35<br />
14" 10 350 ° F 50 to 55<br />
Round, 8" 5 325 ° F 60 to 65<br />
3" layer 12" 11 325 ° F 75 to 80<br />
Half Round, 18" 9 325 ° F 60 to 65<br />
2" layer<br />
Half Round, 18" 12 325 ° F 60 to 65<br />
3" layer<br />
Square 6" 2 350 ° F 25 to 30<br />
Preheating<br />
10" 6 350 ° F 35 to 40<br />
16" 151/.,. 350 ° F 45 to 50<br />
In most cases, you should preheat the oven before baking. For delicate bak=<br />
ing (such as puff pastries or souffles), preheat approximately 15-20 minutes<br />
before placing food inside oven or wait 10 minutes after oven signal<br />
beeps before placing food in oven. The extra time creates a more stable<br />
oven temperature,<br />
22
Common Baking Problems<br />
Adjusting to a new oven can be hard, especially making a change to a convection oven. If you begin to notice consistent<br />
problems refer to the chart below for possible solutions.<br />
Problem<br />
Lopsided cakes<br />
(bake unevenly)<br />
Cakes, cookies,<br />
biscuits too brown<br />
on bottom or top<br />
Pies don't brown<br />
Cakes not done in<br />
center<br />
Cakes fall<br />
Excessive shrinkage<br />
Cakes high in middle<br />
Cause<br />
Pans touching each other or oven walls.<br />
Batter spread unevenly in pan.<br />
Incorrect use of aluminum foil.<br />
Oven is not level.<br />
Oven not preheated.<br />
Pans touching each other or oven walls.<br />
Using glass, darkened, warped or dull finish metal<br />
pans.<br />
Incorrect use of aluminum foil.<br />
Oven temperature too high.<br />
Using shiny metal pans.<br />
Temperature set too low.<br />
Temperature too high.<br />
Pan too small.<br />
Baking time too short.<br />
Pan not centered in oven.<br />
Too much shortening or sugar.<br />
Too much or too little liquid.<br />
Temperature too low.<br />
Old or too little baking powder.<br />
Pan too small.<br />
Oven door opened frequently (peeking).<br />
Insufficient baking.<br />
Too little leavening.<br />
Mixing batter too long.<br />
Pan too large.<br />
Oven temperature too high.<br />
Baking time too long.<br />
Temperatures set too high.<br />
Overmixing.<br />
Too much flour.<br />
Pans touching each other or oven walls.<br />
23<br />
Baking Notes:<br />
= Test cakes for doneness. Because<br />
of variances across individual<br />
ovens, it is best to test for the proper<br />
consistency rather than solely<br />
relying on time and visual appearance<br />
as an indicator.<br />
Cake problems may be in the mixing<br />
of the batter. Overbeating can<br />
cause cake structure to break<br />
down and excessive shrinkage of<br />
the cake. Underbeating can result<br />
in lumpy cakes that may not be<br />
cooked thoroughly. All ingredients<br />
should be at room temperature-not<br />
out of the refrigerator. Make<br />
sure to follow the recipes directions<br />
for how long the batter should be<br />
mixed.<br />
Allow cake to cool in cake pan on a<br />
rack for 10 minutes before remov-<br />
ing. Larger cakes (over 14 inches in<br />
diameter) may take 15 minutes. If<br />
the cake has cooled too long,<br />
reheat in the oven at 250 ° F for a<br />
few minutes.<br />
Make sure to follow recipe directions<br />
and use butter or margarine<br />
when it is listed. Using a low fat<br />
substitute can cause a recipe to<br />
fail.
Care and Cleanin<br />
Clean oven frequently to maximize<br />
oven life, performance, and<br />
efficiency. A dirty oven cooks<br />
inefficiently because moisture,<br />
spills, and grease absorb convection<br />
and microwave energy.<br />
i CAUTION<br />
To prevent burns, handle utensils,<br />
racks, and door with care.<br />
Allow oven, utensils, racks to<br />
cool before cleaning. Oven,<br />
utensils, and racks, become hot<br />
during operation.<br />
I WARNING<br />
To avoid electrical shock which<br />
can cause severe personal<br />
injury or death, unplug power<br />
cord or open circuit breaker to<br />
oven before cleaning oven.<br />
Oven Turntable<br />
The turntable and rotating ring are<br />
removable. They should be handwashed<br />
in warm (not hot) water and<br />
a mild detergent. Dry thoroughly with<br />
a soft cloth. DO NOT use cleaning<br />
powders, abrasives, steel wool, or<br />
other rough pads. DO NOT put in an<br />
automatic dishwasher.<br />
• Turntable may be cleaned at the<br />
sink. Be careful not to chip or<br />
scratch the edges as this could<br />
cause the turntable to break during<br />
use.<br />
• Rotating ring must be cleaned regularly.<br />
• Turntable must ALWAYS be in<br />
place when using this oven.<br />
Cleaning Oven Exterior<br />
Clean the door and other exterior<br />
surfaces with a clean cloth, sponge<br />
or nylon pad using a mild detergent<br />
and warm water solution. Wring cloth<br />
well to remove excess water before<br />
wiping oven.<br />
• Do not use harsh or abrasive<br />
cleaners or cleaners containing<br />
ammonia.<br />
Cleaning Oven Cavity<br />
Wipe the oven inside with a soft cloth<br />
and a mild detergent solution. Rinse<br />
and wipe dry. Never use cleaning<br />
powders, abrasives or other rough<br />
pads.<br />
Excessive oil splatters on the inside<br />
top will be difficult to remove if left to<br />
sit. Wipe splatters with a wet paper<br />
towel as soon as they occur.<br />
• Wear protective rubber gloves<br />
when cleaning oven.<br />
• Use only nylon scouring pad or<br />
equivalent, to aid in removing soil<br />
or build-up from the oven interior.<br />
Do not use knife, metal utensil,<br />
or steel wool pad to remove baked<br />
on material. This will damage the<br />
non-stick coating.<br />
24<br />
Cleaning Oven Door<br />
For best performance and safety, the<br />
inner door panel and the oven front<br />
frame should be free of food or<br />
grease build-up. Wipe often with a<br />
mild detergent and then rinse. Wipe<br />
dry with a soft cloth. DO NOT use<br />
cleaning powders, abrasives or other<br />
rough pads.<br />
After cleaning the control panel,<br />
touch CANCEL/STOP pad to clear<br />
any entries that might have been<br />
accidentally made while cleaning. To<br />
avoid this problem, Child Lock may<br />
be set prior to cleaning.<br />
Cleaning Notes:<br />
• Clean oven after every use.<br />
• Clean interior, exterior, and door<br />
according to instructions.<br />
• Clean spills immediately.<br />
• Remove oven racks, and clean<br />
according to instructions.<br />
• Wipe dry after cleaning.
Troubleshooting<br />
[ _WARNING ]<br />
To avoid risk of electrical shock which can cause severe personM injury or death, do not remove outer case at any<br />
time. Only an authorized servicer should remove outer case.<br />
Operation<br />
Topic<br />
Oven not working<br />
Arcing or sparking<br />
Oven light not working<br />
Clock and timer not<br />
working<br />
Possible Cause<br />
Power outage<br />
Cookware<br />
Metal foil<br />
Running oven empty<br />
Normal<br />
Bulb burned out<br />
Power outage<br />
Solution<br />
• Make sure appliance is plugged in.<br />
• Verify that circuit breaker is not tripped.<br />
• Replace household fuse but do not change fuse capacity.<br />
• Verify cookware is safe for microwave use.<br />
• Do not use metal foil in oven.<br />
• DO NOT run oven empty.<br />
• Is oven operating? Oven must be operating for light to<br />
come on.<br />
• Light bulb may need to be replaced.<br />
• Make sure appliance is plugged in.<br />
• Verify that circuit breaker is not tripped.<br />
• Replace household fuse but do not change fuse capacity.<br />
Light reflection around Normal • Light is reflected from light located between the oven cavity<br />
microwave and the outer wall of oven.<br />
25
FULL ONE Year<br />
Amana Appliances will repair or replace, including related labor, any part which proves defective as to workmanship<br />
or materials.<br />
Limited Warranty<br />
After one year from the date of original retail purchase, Amana will provide a free part, as listed below, to replace<br />
any part that fails due to a defect in materials or workmanship. The owner will be responsible for paying all other<br />
costs including mileage and transportation.<br />
Second through Fifth Year<br />
Amana will provide replacement magnetron, touchpad, and microprocessor, part and labor, which proves defective<br />
as to workmanship or materials.<br />
What is not covered by these<br />
warranties<br />
• Replacement of household fuses, resetting of circuit<br />
breakers, or correction to household wiring or plumbing.<br />
• Normal product maintenance and cleaning, including<br />
light bulbs.<br />
• Products with original serial numbers removed, altered,<br />
or not readily determined.<br />
• Products purchased for commercial, industrial, rental,<br />
or leased use.<br />
• Products located outside of the United States or<br />
Canada.<br />
• Premium service charges, if the servicer is requested<br />
to perform service in addition to normal service or outside<br />
normal service hours or area.<br />
• Adjustments after the first year.<br />
• Repairs resulting from the following:<br />
Improper installation, exhaust system, or maintenance.<br />
Any modification, alteration, or adjustment not<br />
authorized by Amana.<br />
Accident, misuse, abuse, fire, flood, or acts of nature.<br />
Connections to improper electrical current, voltage<br />
supply, or gas supply.<br />
Use of improper pans, containers, or accessories that<br />
cause damage to the product.<br />
• Travel.<br />
If you need service<br />
| Call the dealer from whom your appliance was purchased<br />
or call Amana Appliances Consumer Services<br />
at 1-800-843-0304, USA or 1-866-587-2002 Canada to<br />
locate an authorized servicer.<br />
Be sure to retain proof of purchase to verify warranty<br />
status. Refer to WARRANTY for further information on<br />
owner's responsibilities for warranty service.<br />
If the dealer or service company cannot resolve the<br />
problem, write to Amana Appliances Consumer<br />
Services , 2800-220th Trail, Amana, Iowa, 52204, or<br />
call 1=800=843=0304 U.S.A. or 1=866=587=2002<br />
Canada.<br />
NOTE: When writing or calling about a service problem,<br />
please include the following information:<br />
a. Your name, address and telephone number;<br />
b. Model number and serial number;<br />
c. Name and address of your dealer or servicer;<br />
d. A clear description of the problem you are having;<br />
e. Proof of purchase (sales receipt).<br />
User's guides, service manuals and parts information<br />
are available from Amana Appliances Consumer<br />
Services.<br />
IN NO EVENT SHALL MAYTAG BE LIABLE FOR INCIDENTAL OR CONSEQUENTIAL DAMAGES.<br />
This warranty gives you specific legal rights, and you may have others which vary from state to state. For example, some states do<br />
not allow the exclusion or limitation of incidental or consequential damages, so this exclusion may not apply to you.<br />
26
icro=ondes combin6<br />
uperficie de " "<br />
Guide de I'utilisate<br />
Installateur : Remettre ce manuel au<br />
proprietaire.<br />
Consommateur : Lire le manuel et le<br />
conserver comme reference. Conserver la<br />
factured'achatoule chequeencaissecomme<br />
preuvede I'achat.<br />
Numerode modele<br />
Numerodeserie<br />
Dated'achat<br />
Pour toute question, nous ecrire ou nous<br />
contacter(indiquerle numerode modeleet le<br />
numerode tel6phone),&'<br />
AmanaAppliancesConsumerServices<br />
AmanaAppliances<br />
2800-220thTrail<br />
Amana,IA 52204<br />
1-800-843-0304(E.-U.)<br />
1-866-587-2002(Canada)<br />
(Lundi-vendredi,8 h - 20h -<br />
heuredeI'Est)<br />
Site Internet: http://www.amana.com<br />
A CM1580A<br />
Table des matieres<br />
Instructions de securit6 importantes ............................. 28-30<br />
Installation................................................... 31<br />
Afficheur et Fonctions ........................................ 32-36<br />
Methodes de Cuisson .......................................... 37<br />
Suggestions d'ustensiles ........................................ 38<br />
Cuisson au Four _.Micro-ondes ................................ 39-43<br />
Cuisson Avec Convection ....................................... 44<br />
Cuisson Combinee .......................................... 45-46<br />
Conseils de Cuisson ......................................... 47-50<br />
Entretien et Nettoyage.......................................... 51<br />
Guide de Depannage........................................... 52<br />
Garantie .................................................... 54<br />
Guia del Usuario .............................................. 55<br />
Four _ micro-ondes<br />
Conservez ces instructions comme r6ferences.<br />
Ce manuel dolt 6tre range pres du four.<br />
< 4 4
INSTRUCTIONS DE SECURITE IMPORTANTES<br />
Ce que vous devez<br />
savoir sur les<br />
instructions de s_curite<br />
Lesinstructions desecuriteimportantes et les<br />
avertissernentsparaissantdansce manuelne<br />
sont pas destines & couvrir toutes les<br />
situations et conditions eventuelles qui<br />
peuventse presenter.II faut faire preuvede<br />
bonsenset de prudenceIorsde I'installation,<br />
de I'entretienou de I'utilisationd'un four &<br />
micro-ondes.<br />
Preneztoujourscontactavecvotre detaillant,<br />
distributeur,agentde serviceou fabricant,au<br />
sujetde problemesouconditionsquevousne<br />
comprenezpas.<br />
l_:k AVERTISSEMENT[<br />
Pour eviter tout risque de choc<br />
electriqueou m6mede mort, ce four<br />
doit6trernis&laterreet safichenedoit<br />
pas6tre rnodifiee.<br />
Instructions<br />
de liaison a la<br />
terre<br />
II faut que ce four soit relie _ la terre. La<br />
liaison & la terre permet I'evacuation du<br />
Reconnaissez les etiquettes, phrases ou symboles<br />
sur le s_curite<br />
[ _ DANGER i<br />
DANGER-- risques immediats qui RESULTERONT en de graves blessures ou<br />
m_me la mort.<br />
[<br />
AVERTISSEIVlENT --<br />
AVERTISSEMENT<br />
risques ou pratiques non st_res, qui POURRAIENT<br />
resulter en de graves blessures ou m_me la mort.<br />
[<br />
ATTENTION -- risques<br />
ATTENTION<br />
ou pratiques non sores qui POURRAIENT resulter en<br />
blessures mineures.<br />
courantversla terre,ce quireduitle risquede<br />
chocelectrique.Ce four est doted'un cordon<br />
avec fichede branchement& trois broches,<br />
pourliaison&laterre.Ondoitbrancherlafiche<br />
sur une prise de courant convenablement<br />
installeeet reliee&laterre.<br />
En cas de non-comprehension des<br />
instructionsde liaison & la terre ou en cas<br />
d'incertitudequant&laqualitedela liaison&la<br />
terrede I'appareil,consulterun technicienou<br />
electricienqualifi&<br />
Ne pas utiliserde rallongeelectrique.Si le<br />
cordon de I'appareil est trop court, faire<br />
installeruneprisedecourant&3 alveoles.Ce<br />
four doit 6tre branche sur un circuit<br />
independantde 60 hertzaux caracteristiques<br />
nominales indiquees dans le tableau des<br />
specifications.Si le four est branchesur le<br />
m6me circuit qu'un autre equipement, il<br />
pourrait en resulter une augmentationdes<br />
dureesdecuissonavecrisquequelesfusibles<br />
negrillent.<br />
Le four & micro-ondes fonctionne sur un<br />
courant domestique standard de 110-120<br />
volts.<br />
I_NONCI_ SUR LES INTERFI_RENCES AVEC LES FRI_QUENCES RADIO-<br />
COMMISSION FI_DI_RALE DES COMMUNICATIONS (I_.-U. SEULEMENT)<br />
Cefourµ-ondesgeneredeI'energie&desfrequenceselevees;s'il n'estpasinstalleet utilisecorrectement,c'est-&-dir enstricteconformite<br />
avecles instructionsdufabricant,lefourpeutsusciterdesinterferencesperturbantlareceptiondesondesderadioettelevision.Cetappareila ete<br />
testeet il a ete trouveconformeaux limitesimposeespar les specificationsde la pattie 18 des reglementsde la CommissionFederaledes<br />
Communications (FCC)- portantsur lesequipementsISM,et quisontcon£uspouroffriruneprotectionraisonnable&detellesinterferencesdarts<br />
uneinstallationresidentielle.<br />
Cependant,il n'y a aucunegarantiequ'aucuneinterferencene se produiradansuneinstallationen particulier.Si cetequipementn'entrafnepas<br />
d'interferenceavecla receptiondes ondesde radioet de television(effetqui peut 6tre diagnostiquepar I'arr6tpuis la miseen marchede<br />
I'equipernent), I'utilisateurestencourage&essayerdecorrigerlasituationau rnoyend'uneoude plusieursdesrnesuressuivantes:<br />
• ReorienterI'antennede receptiondetelevisionoude radio.<br />
• Modifierlapositiondufourµ-ondesparrapportaurecepteurde radiooudetelevision.<br />
• Boignerle fourµ-ondesdu recepteur.<br />
• Brancherle four& micro-ondesdans uneprisedifferentede sortequele four& micro-ondeset le recepteursoientalimentespardes circuits<br />
differents.<br />
Lefabricant n'estpasresponsabledes interferencesauxondesde radioet detelevisioncauseesparunemodification non-autoriseedufour&<br />
micro-ondes. IIrevient&I'utilisateurd'eliminerdetellesinterferences.<br />
CONSERVEZ CES INSTRUCTIONS<br />
28<br />
i<br />
i
Reconnaissez ce symbole annon ant un message sur la SECURITE<br />
I AVERTISSEMENT<br />
Lors de I'utilisation d'appareils electriques, des precautions de securite de base doivent 6tre suivies pour reduire le risque de brQlure,<br />
choc electrique, incendie ou blessure ainsi que le risque d'exposition excessive & I'energie des micro-ondes.<br />
1. LIRE la totalite des instructions avant d'utiliser I'appareil.<br />
2. LIRE ET RESPECTER les instructions specifiques<br />
INSTRUCTIONS DE SECURITE IMPORTANTES<br />
I AVERTISSEMENT<br />
Pourreduirele risquedefeu danslacavitedu four'<br />
a. NE PAS cuire excessivementun aliment.Surveiller<br />
attentivementI'appareilsi on a place un article en<br />
papier,plastiqueou autre mat&iaucombustibledans<br />
lacavitepourfaciliterlacuisson.<br />
b. Enleverlesattachesmetalliquesdessachetsenpapier<br />
ouen plastiqueavantde les placerdanslefour.<br />
C. AdvenantI'inflammationd'un article & I'int&ieur du<br />
four,MAINTENIRLA PORTEFERMEE,arr6terlefour<br />
et debrancherlecordond'alimentation,ouinterrompre<br />
I'alimentationdu circuit au niveau du tableau de<br />
fusiblesou dedisjoncteurs.<br />
d. Ne rienremiserdansla cavitedu four.NE PASplacer<br />
des produitsen papier, alimentsou ustensilesde<br />
cuisinedanslacavitedufourIorsqu'iln'estpasutilis&<br />
ATTENTION<br />
Pour eviter les risquesde blessuresou de dommagesmat&Ms,<br />
observerlesprecautionssuivantes:<br />
1. NE PASfairefrire&grandefrituredanslefourµ-ondes.La<br />
graissepourraitsurchaufferet presenterun risque&manipuler.<br />
2. NE PASfairecuireourechaufferdesoeufsdansbur coquilleou<br />
avecun jauneentier dans un four & micro-ondes.La pression<br />
pourraits'accumuleretfaireexploserI'oeuf.Percerlejauned'oeuf<br />
&I'aided'unefourchetteoud'un couteauavantde lefairecuire.<br />
3. Percer la peau des pommes de terre, tomateset aliments<br />
semblablesavant de les faire cuire au four & micro-ondes.<br />
Lorsquela peauestpercee,la vapeurs'echappeuniformement.<br />
4. NE PASlaisserle foursanssurveillance.<br />
5. NE PASutiliserdethermometre&cuissonstandarddanslefour<br />
µ-ondesIorsquele fourest utiliseen modeconvectionou<br />
combin&Laplupartdesthermometrescontiennentdu mercure,<br />
cequi peutentrafnerlaformationd'un arcelectrique,lemauvais<br />
fonctionnementouencoreI'endommagement dufour.<br />
6. NE PASutiliserd'ustensilemetalliquedansle four,saufsi une<br />
telle utilisationest recommandeepar les fabricantsd'aliments<br />
pour micro-ondesou si la recette demande des ustensiles<br />
metalliquesen modeconvectionou combin&Fairechaufferles<br />
aliments dans des ustensilesde verre ou de porcelainesi<br />
possible.<br />
7. Ne jamais utiliser de papier, plastiqueou autres mat&bux<br />
combustiblesnonprevuspourla cuisson.Si la temp&aturedu<br />
fourestele%e,le mat&iaupourraits'enflammer.<br />
I AVERTISSEMENT I<br />
Lesliquidescommeeau,cafeouthepeuventsurchaufferau-del&du<br />
point d'ebullitionsans paraftre bouillir, en raison de la tension<br />
superficielledu liquide.Lorsquele contenantest retire du four &<br />
micro-ondes,il n'y a pas toujourspresenced'ebullitionou de bulles<br />
visibles.CECI PEUTENTRAiNERL'I_BULLITIONSOUDAINE ET<br />
LA PROJECTIONDE LIOUlDESTRES CHAUDSLORSQU'UNE<br />
CUlLLERE OU AUTRE USTENSILEEST PLACI_ DANS LE<br />
LIOUlDEPourreduirele risquede blessures:<br />
1. Nepassurchaufferleliquide.<br />
CONSERVEZ CES INSTRUCTIONS<br />
30<br />
2. Remuerle liquideavantdele fairechaufferet au milieudutemps<br />
dechauffage.<br />
3. Ne pas utiliserde contenants& c6tes rectilignesavec goulots<br />
etroits.<br />
4. Apres le chauffage,prevoir un temps d'attenteet laisser le<br />
contenantdanslefourµ-ondesavantde I'enretirer.<br />
5. Userde prudenceenmettantunecuill&eouautreustensiledans<br />
le contenant.<br />
8. La temp&ature minimumdu four en mode convectionest de<br />
37,8 °C (100°F).Wrifier les recommandationsdu fabricantpour<br />
s'assurer que le papier, plastique, ou autres mat&iaux<br />
combustiblesresistent&la temp&atureminimumdufour.<br />
9. Lorsde la cuissonavecdu papier,plastiqueou autresmat&iaux<br />
combustibles,suivre les recommandationsdu fabricant sur<br />
I'utilisationdu produit.<br />
10. NE PASutiliserde papieressuie-toutqui contientdu nylonou<br />
autresfibressynthefiques.Les mat&iauxsynthetiqueschauffes<br />
pourraientfondreet faires'enflammerle papier.<br />
11. NE PASfairechaufferdansle fourde sacplastiqueoucontenant<br />
ferm&LeliquideouI'alimentpourraitse dilaterrapidementet faire<br />
casserlesachetou lecontenant.Percerou ouvrirle contenantou<br />
lesachetavantde lefairechaufferaux micro-ondes.<br />
12. Les grilles, ustensiles,supports de grille, et surfacesdu four<br />
peuventdevenirchaudspendantet apresI'utilisation.Utiliserdes<br />
ustensilesou des protections,commedes maniquesou gantsde<br />
cuisinesecs,Iorsqu'ilssontnecessairespoureviterles brQlures.<br />
13. NE PASdebrancherle four immediatementapres utilisation.Le<br />
ventilateurinternedoit refroidirle four poureviterd'endommager<br />
lescomposantselectriques.<br />
14. Poureviterle mauvaisfonctionnementd'un stimulateurcardiaque,<br />
consulterun mededn ou le fabricant de ce stimulateurpour<br />
connaftreles effetspotentielsde I'energiedes micro-ondessur<br />
celui-ci.
Deballage du Four<br />
. Inspecterle four; identifiertout dommage<br />
eventuellement survenu en cours de<br />
transport,et affectantla porteou la cavite<br />
internedufour.<br />
, Signalerimmediatement toutedet&ioration<br />
dufourau commer%ntquiI'avendu.<br />
Ne pas tenter d'utiliser le four s'il est<br />
endommag&<br />
, Retirertousles mat&iauxet articlesplaces<br />
&I'int&ieurdufour.<br />
, Si le foura ete stockeen un lieutresfroid,<br />
attendre quelques heures avant de le<br />
brancher.<br />
Emplacement du Four<br />
, Ne pas installerle four pres de ou audessusd'unesourcedechaleur,commeun<br />
four & pizzaou une friteuse.Ceci pourrait<br />
causerdes problemesde fonctionnement<br />
pour le four & micro-ondes et pourrait<br />
reduire la duree de vie des composants<br />
electriques.<br />
= Laisser suffisamment d'espace pour<br />
permettrela circulationde I'air autour du<br />
four.<br />
o<br />
o<br />
Installerlefoursur unesurfaceplane.<br />
Laprisedecourantdoit6tresitueedefa£on<br />
&ce quela fichesoitaccessibleIorsquele<br />
fourestenplace.<br />
Capacite Incorporee<br />
Seref&er&lesinstructionsd'installation.<br />
Pourd'autreinformation,telephonerau •<br />
1-800-843-0304E.-U.<br />
1-866-587-2002Canada<br />
31<br />
\<br />
Installation<br />
Espace Libre Autour du<br />
Four<br />
A-- Laisser un espace libre d'au moins<br />
10cm (4 po)au-dessuset sur les c6tes<br />
du four. Une bonne circulation d'air<br />
autourdu four refroiditles composants<br />
electriques.Si la circulationde I'air est<br />
restreinte,il est possibleque le four ne<br />
fonctionnepas correctementet que la<br />
duree de vie des composantselectriquessoitreduite,<br />
Bm Installerle four combinede fa£on& ce<br />
quelehasdufoursoit&aumoins90cm<br />
(36po)dusol,
Afficheur et Fonctions<br />
Joint<br />
Grilled'_cran<br />
du hublot<br />
verrouillage<br />
Fagade du four<br />
REMARQUE: I'appareil<br />
emetun signalsonoreIors<br />
de chaque pression sur<br />
unetouchedu tableaude<br />
commande, confirmant<br />
I'entree de I'information<br />
correspondante.<br />
__ Plateau tournant<br />
Anneau rotatif<br />
_o_<br />
Aflicheur<br />
Tableau de<br />
commande<br />
- Bouton d'ouverture<br />
de la porte<br />
Microwave<br />
AUTO/TIME DEFROST COOK<br />
POWER<br />
REMINDERI !RECALL HELP<br />
CLOCK CoNTRoL: TIMER<br />
SET-UP<br />
FOR RECZPES RECUZRZN,; STZRRZl_G OR TO<br />
CHECK FOODWZTHOUTC_mCELZ]_GCOOKZ_G<br />
pROGP.A_ PRESS ST_T/PAUSE<br />
32<br />
J<br />
Specifications du Four<br />
Alimentation 120VAC,<br />
electrique 60 Hz<br />
Demandedepuissance 1 500W<br />
Puissancedecuisson 1 000W<br />
(Norme<br />
IE0 607O5)<br />
Frequence 2 450MHz<br />
Demandedecourant 13A<br />
Dimensionsexternes 57,5cm(22_Apo)x<br />
(Largeurx Hauteurx 37,8cm(1478po)x<br />
Profondeur) 50,8cm(20po)<br />
Volumede lacavite 0,042m3(1,5pP)<br />
Poidsnet 23,6kg (52Ib)<br />
On trouvera les articles suivants dans<br />
I'emballagedufourAmicro-ondes.<br />
Plateautournantenverre................. 1<br />
Manueldu proprietaireet<br />
guidedecuisson....................... 1<br />
Anneaurotatif.......................... 1<br />
Ce four L_micro-ondesest conguuniquement<br />
pourI'utilisationmenagere.Lagarantienesera<br />
pas honoree s'il est utilise darts une<br />
applicationcommerciale.
.<br />
AFFICHEUR - I'afficheur inclut une<br />
horlogeet des indicateurs;ils affichent<br />
I'heure, les durees de cuisson et les<br />
fonctionsde cuissons61ecfionn6es.<br />
CONVCOOK (CUISSONAVEC CON-<br />
VECTION)- Appuyersur cette touche<br />
pour ufiliser le four pour la cuisson<br />
avec convection seulement. Pour<br />
d'autres informafions,voir page44.<br />
3. AUTO BAKE (CUISSON AUTO-<br />
MATIQUE)- Appuyersur cette touche<br />
pour commander la cuisson<br />
automatique de pizza surgel6e, de<br />
muffins,de biscuits, et de pommesde<br />
terre frites surgel6es en ufilisant<br />
1'6nergie des micro-ondes et de la<br />
convection en alternance. Pour<br />
d'autres informafions,voir page46.<br />
4. AUTO ROAST (ROTISSERIE AUTO-<br />
MATIQUE)- Appuyersur cette touche<br />
pour commander la r6fisserie automafique<br />
du boeuf, du poulet, des<br />
poitrines de dinde et du porc en<br />
ufilisant tour & tour les micro-ondeset<br />
la convection. Pour d'autres<br />
informations,voir page 46.<br />
.<br />
.<br />
BAKE (CUISSON)- Appuyersur cette<br />
touchepour programmerla duree et la<br />
temperature de cuisson pour un<br />
programmede cuisson ufilisant tour &<br />
tour les micro-ondeset la convection.<br />
Pour d'autres informafions,voir page<br />
46.<br />
ROAST(ROTISSERIE)- Appuyersur<br />
cette touchepour programmerladuree<br />
et la temperaturede r6fisseriepour un<br />
programmede cuisson ufilisant tour &<br />
tour les micro-ondeset la convection.<br />
Pour d'autres informafions,voir page<br />
45.<br />
.<br />
.<br />
.<br />
10.<br />
SENSOR COOK (CUISSON AVEC<br />
CAPTEUR)- Appuyersur cette touche<br />
pour commander la cuisson de 10<br />
types de mets. La dureede chauffage<br />
sera d6termin6e par le circuit du<br />
capteur en foncfion de la quanfite<br />
d'humidit6 mise par le mets. Pour<br />
d'autres informafions,voir page42.<br />
SENSOR POPCORN (MAi'S A<br />
ECLATER - AVEC CAPTEUR) -<br />
Appuyer sur cette touche pour<br />
commander une operation d'eclatemeritde<br />
maisensachetscommerciaux<br />
dans le four & micro-ondes.La duree<br />
de chauffage sera determin6e par le<br />
circuit du capteur en fonction de la<br />
quanfited'humidit6 emise par le maTs.<br />
Pour d'autres informafions,voir page<br />
42.<br />
SENSOR REHEAT (RECHAUFFAGE<br />
AVECCAPTEUR)- Appuyersur cette<br />
touchepourcommanderle rechauffage<br />
de mets pr6cuits, & la temperature<br />
ambiante ou refrig6r6s. La duree de<br />
chauffage sera d6termin6e par le<br />
circuit du capteur en fonction de la<br />
quantited'humidite emise par le mets.<br />
Pour d'autres informafions,voir page<br />
42.<br />
DEFROST AUTO/TiME (DECON-<br />
GELATiON AUTOMATiQUE /MiN-<br />
UTEE)- Appuyersur cette toucheune<br />
fois pour commanderla d6congelation<br />
de la viande, de la volaille, du poisson<br />
et du painen fonctiondu poids.<br />
Appuyer sur cette touche une<br />
deuxieme fois pour commander la<br />
d6cong61ationde la plupart des autres<br />
aliments surgel6s. Pour d'autres<br />
informations,voir page40.<br />
33<br />
11.<br />
12.<br />
13.<br />
15.<br />
16.<br />
17.<br />
RAPID DEFROST 1 LB. (D¢CON-<br />
GELATION RAPIDE - 1 LB [0,45<br />
KG]) - Appuyer sur cette touche pour<br />
commander une operation de<br />
d6cong61ationrapide pour une livre<br />
(0,45 kg) d'aliments surgel6s. Pour<br />
d'autres informations, voir pages 40-<br />
41.<br />
EASY COOK (CUiSSON FACILE) -<br />
Appuyer sur cette touche pour commencer<br />
la cuisson au niveau de<br />
puissance 100%. Pour d'autres<br />
informafions,voir page35.<br />
PROGRAM (PROGRAMMER) -<br />
Appuyer sur cette touche pour programmer<br />
manuellement la duree de<br />
cuisson et le niveau de puissance.<br />
Pour d'autres informations, voir page<br />
39.<br />
14. WARM HOLD (MAINTEN DE LA<br />
TEMPC:RATURE) - Appuyer sur cette<br />
touche pour maintenir la temperature<br />
d'un mets cuit dans le four, pendant<br />
une periode qui peut atteindre 99<br />
minutes. Pour d'autres informafions,<br />
voir page36.<br />
POWER LEVEL (NIVEAU DE<br />
PUISSANCE) - Appuyer sur cette<br />
touche pour s61ectionnerle niveau de<br />
puissancede chauffage.Pourd'autres<br />
informations,voir page39-40.<br />
MORE+ (PLUS+) - Appuyersur cette<br />
touche pour ajouter 10 secondes& la<br />
duree de cuisson (pour chaque<br />
pression). Pour d'autres informafions,<br />
voir page36.<br />
LESS- (MOINS-) - Appuyersur cette<br />
touche pour reduire de 10 secondes<br />
(pour chaque pression) la duree de<br />
cuisson d6j& programmee. Pour<br />
d'autres informafions,voir page 36.
Afficheur et Fonctions (suite)<br />
18. CANCEL/STOP(ANNULER/ARR[::T} - 21.<br />
Appuyersurcettetouchepourannulerle<br />
programmede cuisson en cours de<br />
fonctionnement ou pour effacer le<br />
programmede cuisson en cours de<br />
programmation.Pour d'autres informa-<br />
19.<br />
20.<br />
tions,voir page35.<br />
START/PAUSE(MISE EN MARCHE/<br />
PAUSE)- Appuyersurcettetouchepour<br />
commanderexecutiond'unefonctionou<br />
pourinterrompremomentanement lefour<br />
pendantla cuissonou la decongelation.<br />
Pourd'autresinformations,voir page35.<br />
HELP (AIDE) - I'aide affiche des<br />
informationssur les fonctionsdu four et<br />
des conseils utiles. Pour d'autres<br />
informations,voir page35.<br />
22.<br />
23.<br />
REMINDER (SIGNAL SONORE DE<br />
RAPPEL) - Appuyersur cette touche<br />
pour commanderun signal sonore de<br />
rappel sans interrompre le fonctionnement<br />
du four. Pour d'autres<br />
informations,voirpage36.<br />
RECALL(RAPPEL)- Appuyersurcette<br />
touche pour r@eter le programmede<br />
cuisson precedent. Pour d'autres<br />
d'informations,voir page35.<br />
CLOCK (HORLOGE)- Appuyer sur<br />
cette touchepourentrer rheureexacte.<br />
Pourd'autresinformations,voir page35.<br />
34<br />
24. CONTROLSET-UP(PARA[v]_:TRESDE<br />
PROGRAM[v]ATION) - Appuyersurcette<br />
touchepourmodifierles parametresde<br />
programmafionutilisespar le four pour<br />
signaux sonores, horloge, vitesse<br />
d'affichage,unites de poids et langue.<br />
Pourd'autresinformafions,voirpage35.<br />
25.<br />
TIMER ([v]INUTERIE)- Appuyer sur<br />
cettetouchepourla programmationde la<br />
minuterie.Pourd'autresinformafions,voir<br />
page35.
Horloge (12 heures) et<br />
rninuterie<br />
Lefourestequiped'unehorlogeen format12<br />
heureset d'uneminuteriequipeut6tre reglee<br />
jusqu'&99 minuteset 99 secondes.I'horloge<br />
n'affichepas lessymbolesAM et PM.<br />
Pourr_gler rhorloge :<br />
1. Appuyersurla touche<br />
CLOCK.<br />
. ENTERTiMEOF<br />
DAY(Entrerrheure)<br />
defilesurrafficheur,<br />
2. Entrerrheuredesiree<br />
aveclestouches<br />
numeriques.<br />
. TOUCHSTART<br />
(Appuyersur<br />
START)defilesur<br />
rafficheur.<br />
3. Appuyersurla touche<br />
START/PAUSE.<br />
Pourr_glerla minuterie:<br />
1. Appuyersurla touche<br />
TIMER.<br />
. ENTERTIMEIN<br />
MIN.ANDSEC.<br />
(Entrerla dureeen<br />
mnet s.)defilesur<br />
rafficheur.<br />
2. Entrerladureedesiree<br />
aveclestouches<br />
numeriques.<br />
, Ladureemaximum<br />
estde99 minuteset<br />
99secondes.<br />
. TOUCHTIMER<br />
(Appuyersur<br />
TIMER)defilesur<br />
rafficheur.<br />
3. Appuyersurla touche<br />
TIMER.<br />
, Pourannuletla<br />
fonctionde minuterie<br />
entouttemps,<br />
appuyersur la<br />
toucheTIMER.<br />
Start/Pause<br />
(Mise en<br />
marchelPause)<br />
Cette touche commande rexecution de la<br />
fonction choisie, ou interrompt momentanemerit<br />
le four pendant la cuisson ou la<br />
decongelation.Appuyer L_nouveau sur la<br />
touchepour remettrele four en marcheapres<br />
uneinterruption.<br />
Cancel/Stop<br />
(AnnuledArr t)<br />
Cette touche annule le<br />
programmede cuissonen cours de fonctionnementou<br />
effacele programmede cuissonen<br />
coursdeprogrammation.<br />
Recall<br />
(Rappel)<br />
Cette touche permet de<br />
r@eter le programmede cuisson precedent<br />
sansdevoirreprogrammer le four.Pourutiliser<br />
cette fonction, appuyer sur la touche<br />
CANCEL/STOPet ensuite appuyer sur la<br />
toucheRECALL.<br />
Child Lock (Verrouillage<br />
pour les<br />
enfants)<br />
Cette fonction emp_che la programmation<br />
accidenteiledu four & micro-ondes,par des<br />
enfantsou Iors du nettoyagedu tableau de<br />
commande. Pour verrouiller le tableau de<br />
commande,maintenirla pressionsur la touche<br />
0 jusqu'& ce que le message LOCKED<br />
(verrouille) apparaisse sur rafficheur et<br />
rappareilemettedessignauxsonores.Lorsque<br />
le tableau de commandeest verrouill& le<br />
messageLOCKEDapparaftsi unetoucheest<br />
pressee. Pour deverrouiller le tableau de<br />
commande,maintenirla pressionsur la touche<br />
0 jusqu'& ce que le message LOCKED<br />
disparaissesur rafficheur.Lorsquele tableau<br />
de commande est deverrouill& rheure est<br />
afficheeet les fonctionsde cuissonsont de<br />
retour&la normale.<br />
35<br />
Easy Cook<br />
(Cuisson<br />
facile)<br />
Appuyer sur la touche EASY COOK pour<br />
chaque minutede cuissonaux micro-ondes<br />
desiree.,_ la fin du programmede cuisson,<br />
rappareilemettradessignauxsonores.<br />
Pourutiliser la fonction de cuisson facile :<br />
1. Appuyersur la touche EASYCOOKpour<br />
chaqueminutedecuissonaux micro-ondes<br />
desiree.<br />
2. ,&,la fin du programmede cuisson,le four<br />
s'arr6teet emetdes signauxsonores.<br />
Help (Aide)<br />
La touche HELP commande<br />
raffichage d'informations sur les diverses<br />
fonctionset de conseilsutiles.Appuyersur la<br />
touche HELP, puis selectionnerla touche<br />
correspondant & la fonction desiree. De<br />
rinformation sur cette fonction defilera sur<br />
rafficheur.Apresraffichagede rinformation,le<br />
fourquittele modeAide.<br />
c Control Set-up<br />
(Parametres de<br />
programmation)<br />
Ce four est con£u pour des preferences<br />
individuellescommelalangueet levolumedes<br />
signauxsonores.Pourmodifierun parametre:<br />
1. Appuyersur latoucheCONTROLSET-UR<br />
2. Appuyersur latouchecorrespondantau<br />
parametreL_modifier.<br />
3. Lesselectionspource parametredefilent<br />
sur rafficheur.<br />
4. Appuyersur latouchecorrespondant&la<br />
selectiondesiree.<br />
5. Lefoureffectuelechangementet quittele<br />
modeParametresdeprogrammation.<br />
Param_tre<br />
Volumedes<br />
signauxsonores<br />
Horloge<br />
Vitessede<br />
defilement<br />
Unites<br />
Demonstration<br />
Langue<br />
Touche<br />
1<br />
2<br />
3<br />
4<br />
5<br />
6<br />
Selections<br />
Inactif,bas,moyen,<br />
eleve<br />
Actifou Inactif<br />
Lent,normalou<br />
rapide<br />
Ib et °Fou kg et °C<br />
Actifou inactif<br />
Anglaisou<br />
espagnol
Afficheur et Fonctions (suite)<br />
Reminder<br />
(Signal sonore<br />
de rappel)<br />
La fonctionREMINDERpermetau fourd'etre<br />
utilise pour emettre un signal sonore de<br />
rappel. Le four ne se met pas en marche.<br />
I'heure du rappelpeut6tre regleejusqu'&12<br />
heuresapresrheurecourante.<br />
Pour programmerun signal sonore :<br />
1. Appuyersur la toucheREMINDER.<br />
. ENTERREMiNDERTiME(Entrer<br />
rheuredu signalsonore)defilesur<br />
rafficheur.<br />
2. Entrer rheure desiree avec les touches<br />
numeriques.<br />
, TOUCHREMINDER(Appuyersur<br />
REMINDER)defilesur rafficheur.<br />
3. Appuyersur la toucheREMINDER.<br />
, REMINDERSET(Signalsonorede<br />
rappelregle)defileunefoissur<br />
rafficheur.<br />
, Pourannulerle reveil,appuyersur la<br />
toucheREMINDERet ensuiteappuyer<br />
sur latoucheCANCEL/STOR<br />
4. I'appareilemetun signalsonoreet affiche<br />
REMINDERau momentdemand&Lefour<br />
quitte ensuite le mode Signalsonore de<br />
rappel.<br />
Warm/Hold<br />
(Maintien de la<br />
temperature)<br />
Utiliser cette fonction pour maintenir la<br />
temperature d'un mets cults dans le four,<br />
pendant une periode pouvant atteindre 99<br />
minutes,en utilisantles micro-ondes.On peut<br />
utiliser la fonction de maintien (touche<br />
WARM/HOLD) independamment, ou<br />
automatiquement apres I'execution d'un<br />
programmede cuisson.<br />
Nepas utiliserplusd'un programmecompletde<br />
maintiendela temperaturesur les mets.<br />
Pour utiliser la fonetion de maintien de la<br />
temperature:<br />
1. Placerlesmetscultschaudsdansle fouret<br />
fermerlaporte.<br />
• Durantla periodedemaintiendela<br />
temperature,maintenircouvertunmets<br />
qui a etecultcouvert.<br />
• Nepas couvrirunarticlede p&tisserie<br />
(tarte,chausson,etc.)durantla periode<br />
de maintiendela temperature.<br />
• Un repascompletqu'onmaintientau<br />
chaudsur uneassiettepeut6trecouvert<br />
durantla periodedemaintiende la<br />
temperature.<br />
2. Appuyersur la toucheWARM/HOLD.<br />
• TOUCHSTART(Appuyersur START)<br />
defilesur I'afficheur.<br />
3. Appuyersur la toucheSTART/PAUSE.<br />
• WARM(Chaud)apparaftsur I'afficheur.<br />
• Pourannuletlafonctionde maintiende la<br />
temperature,ouvrirla portedu fouren<br />
touttempsouappuyersur latouche<br />
CANCEL/STOR<br />
Pour utiliserla fonction de maintien de la<br />
temperatureaprbs rexecution d'un autre<br />
programmede cuisson:<br />
1. Apres la programmationdes instructionsde<br />
cuisson minutee, appuyer sur la touche<br />
WARM/HOLDavantd'appuyersur la touche<br />
START/PAUSE.<br />
. ApresI'executionde laderniereoperationdu<br />
programmede cuisson,I'appareilemetdes<br />
signauxsonoreset afficheWARM(Chaud),<br />
Lefourcontinue&fonctionner,<br />
36<br />
More and<br />
Less (Plus et<br />
Moins)<br />
Utiliser les fonctions<br />
MORE et LESS pour<br />
ajuster la duree de<br />
cuisson du programmede cuisson.MORE<br />
ajoute 10 secondes& la dureede cuisson,<br />
LESSsoustrait10secondes.<br />
• Utiliser MORE ou LESS Iorsque le<br />
decompte de la duree de cuisson est<br />
visiblesur I'afficheur.MOREet LESSne<br />
peuventpas6treutilisesIorsqueSENSING<br />
(Capteur)estaffich&<br />
• MOREet LESSn'ajustentpasla dureede<br />
cuissondesprogrammesdedecongelation<br />
et de maintiendelatemperature.<br />
• Appuyersur les touchesMOREet LESS<br />
pasla dureedecuissondu programmede<br />
cuissonactif.<br />
• Lors de la cuisson avec convection,les<br />
touchesMOREet LESSsontutiliseespour<br />
reglerlatemperature.
Cuisson au four<br />
micro-ondes<br />
La cuissonau four & micro-ondesutilisedes<br />
ondes & haute frequencepour chauffer les<br />
aliments.Pendantla cuisson,les micro-ondes<br />
font bouger rapidementles moleculesdes<br />
aliments.Cemouvement rapidedesmolecules<br />
des alimentscree de la chaleur,qui cuit les<br />
aliments.Lesmicro-ondescuisentlesaliments<br />
humideset les aliments& teneurvariableen<br />
grasplusrapidement.<br />
Cuisson avec<br />
convection<br />
LacuissonavecconvectionutiliseL_la foisun<br />
elementde convectionet un ventilateurpour<br />
repartir uniformementFair chaud darts la<br />
cavitedufour.Lacirculationde Fairemp_che<br />
laformationdezoneschaudesoufroides.Ces<br />
temperaturesuniformescuisent les aliments<br />
egalementet reduisentla dureedecuisson.<br />
M thodes de Cuisson<br />
Cuisson combinee<br />
LacuissoncombineeutiliseL_lafoislarapidite<br />
des micro-ondes et le brunissage de la<br />
cuisson avec convection pour produire<br />
rapidementdes alimentsdehautequalite.<br />
Micro-ondes Convection Combin_<br />
Source de Chaleur Micro-ondes. Airchaudencirculationdans Micro-ondeset air<br />
lacavitedu four. chaudcircule.<br />
ConductionThermique Chaleurproduiteparlapenetration ChaleurtransmisedeI'exterieur Lesalimentssontchauffes<br />
desondesdartslesaliments, des alimentsversI'interieur. I'exterieurparconductionet L_<br />
I'interieurparles micro-ondes.<br />
AvantagePrincipal Chauffagerapide,a rendementele%. Brunitlesalimentset scelle Dureedecuissonpluscourteavecles<br />
lessaveurs, micro-ondes,brunissageet aspect<br />
croustillantavecla convection.<br />
37
Su__u_ estions d'ustensiles<br />
Lamethodede cuissonutiliseedetermineles ustensilesquipeuvent_tre utilises.Poursimplifierleschoix,utiliserdes ustensilesapprou%spourles<br />
troismethodesdecuisson'aux micro-ondes,avecconvectionet combinee.<br />
Choisir I_viter<br />
Verrerefractaire Verrenonrefractaire<br />
Ceramiqueouporcelaine Ceramiqueouporcelaineavecgarnituremetallique<br />
Pyrex Platsmetalliques<br />
Ustensilestefloniseresistant& la Ustensilesmetalliques<br />
chaleur,commedes spatules<br />
Ustensilespourmicro-ondes,securitaires Produitsenpapier,paille,osieret bois<br />
jusqu'&2320C (450° F)<br />
Poigneesbienfixees Ustensilesaux poigneesmalfixeesou brisees<br />
Conseils pour la cuisson<br />
Recouvrir Uncouvercleemprisonnelachaleuret lavapeur,chauffantles alimentsplus<br />
rapidement.Toujoursutiliserun couvercleapprouvepour la cuissonaux<br />
micro-ondeset pourla cuissonavecconvection.<br />
Remuer Redistribuela chaleurdansles aliments.Toujoursremuerde I'exterieurdu<br />
metsversson centre.<br />
Perforer Perforerla coquille,peau ou enveloppepelliculairedes alimentsavantla<br />
cuissonpouremp6cherI'eclatement.<br />
Retourner Lesgrosalimentsdoivent6tre retournespourassurerunecuissonuniforme<br />
du hautet dubas.<br />
Disposer Ne pasempilerles aliments.Lesdisposeren uneseulecouchesur unplat<br />
pouvant_treutilisedefa(;onsecuritairepourla cuissoncombinee.<br />
Laisser Pourpermettrealacuissondeterminer,lesalimentsontsouventbesoind'une<br />
reposer perioded'attentede2 & 15minutesapresleursortiedufour.Dansla plupart<br />
des cas, latemperatureinterneaugmentede 2,7° C (5° F) a 5,5° C (10° F)<br />
pendantlaperioded'attente.<br />
Repartir Pouraiderles alimentsindividuels,commeles potatoesdeterre,a chauffer<br />
plus uniformement, les repartirencercleen laissantau moins2,5cm (1 pc)<br />
entrelesaliments.<br />
38<br />
J<br />
Mise en conserves<br />
La raise en conserves West pas<br />
recommand_e darts les fours _ microondesoucombings.<br />
LesliquidespeuventsurchaufferIorsqu'ilssont<br />
chauffesdans le four & micro-ondes,surtout<br />
pendantde Ionguesperiodesde temps.Ceci<br />
peut entra_ner I'ebullition soudaine et la<br />
projectionde liquidestres chaudsIorsquele<br />
liquideestagiteouqu'unbocalestscell&<br />
Les dommagesencourusen utilisantle four<br />
pour la raise en conserves ne sont pas<br />
couvertsparla garantie.<br />
Grille de four<br />
Unegrille metalliqueest fournieavecle four<br />
pour utilisation en mode convection ou<br />
combin& Lagrillemetalliquenedoit pas_tre<br />
utilisee darts le four en mode micro-ondes<br />
seulement.Le metalentra_nerala production<br />
d'arc electrique,qui pourraitendommagerle<br />
four.<br />
Mars a eclater<br />
Nefaireeclaterdu marsquedansundispositif<br />
special pour eclatementde rods au four &<br />
micro-ondesou des sachets commerciaux<br />
prevuspour6tre utilisesdartsunfourµondes.<br />
Ne pas utiliser un disposifif pour<br />
eclatement de mals con(;u pour faire<br />
convergerouconcentrerlachaleur.I'operation<br />
d'eclatementdu rods ne peut 6tre effectuee<br />
quesi lefour estenmode micro-ondes.Sila<br />
convectionest utilisee, le rods risque de<br />
brQler,dese ratatineroudes'enflammer.<br />
Dansle casde I'emploid'un dispositifspecial<br />
pour eclatementde rods au four & microondes,ne<br />
pas utiliserla touchePOPCORN.<br />
Respecterles durees de cuisson indiquees<br />
dansles instructionsdufabricant.
Niveaux de Puissance du Four a Micro-ondes<br />
Lefourµ-ondescomporte10niveauxdepuissancedechauffage,cequipermetdecuireou<br />
dechaufferunegrandevari6ted'aliments.Letableauci-dessouspresentedessuggestions:<br />
Utilisation des divers niveaux de puissance du four a micro-ondes<br />
Niveaude<br />
puissance<br />
10<br />
(I_LEVI _)<br />
Utilisation<br />
, Ebullitiond'eau.<br />
, Preparationde bonbons.<br />
, Cuissondemorceauxdevolaille,poissonet 16gumes.<br />
, Cuissondepiecesdeviandetendres.<br />
, Volailleenti@e.<br />
9 , Rechauffagede riz,p&teset 16gumes.<br />
8 * Rechauffagerapided'un metsprepar6.<br />
, Rechauffagedesandwichs.<br />
7 , Cuissond'unmetsa based'oeufs,laitoufromage.<br />
, Cuissondepain,g&teaux.<br />
, Fusiondechocolat.<br />
6 * Cuissond'unmetsdeveau.<br />
, Cuissond'unpoissonentier.<br />
, Cuissondepoudingset entremets.<br />
5 * Cuissondejambon,volailleenti@eou agneau.<br />
, Cuissond'un r6tidec6tesoudepointede surbnge.<br />
4 , D6cong61ation deviande,volailleet produitsdela mer.<br />
3 * Cuissondepiecesdeviandemoinstendres.<br />
, Cuissonder6ti,c6telettesde porc.<br />
2 , Legerrechauffagedesfruits.<br />
, Amollissementdebeurre.<br />
1 * Maintiende latemp@atured'un platprincipaloumetsensauce.<br />
• Amollissementdebeurreoufromageencreme.<br />
0 * Perioded'attente.<br />
Cuisson au Four fi Micro-ondes<br />
39<br />
Programmation<br />
manuelle<br />
Pourprogrammermanuellementla dureede<br />
cuissonet le niveaude puissance.<br />
1.Appuyer sur la touche<br />
PROGRAM.<br />
• ENTERCOOKINGTIME<br />
(Entrerladureedecuisson)<br />
defilesur I'afficheur.<br />
2. Entrer la duree de cuisson<br />
desir6e avec les touches<br />
numeriques.<br />
• TOUCHSTARTOR<br />
POWER(Appuyersur<br />
STARTousur POWER)<br />
defilesur I'afficheur.<br />
3. Appuyer sur la touche<br />
POWER LEVEL pour<br />
changer le niveau de<br />
puissance,si desir6.<br />
4. Appuyer sur la touche<br />
START/PAUSE.<br />
5. A la fin du programmede<br />
cuisson, le four emet des<br />
signauxsonoreset s'arr6te.<br />
Cuisson en plusieurs<br />
etapes<br />
La cuisson en plusieurs etapes permet<br />
d'executerdes programmesde cuissonconsecutifssansinterruption.Deuxprogrammes<br />
decuissondifferentspeuvent6treex6cutes.<br />
Pourcommanderunecuissonen plusieurs<br />
PF<br />
1.Appuyer sur la touche<br />
PROGRAM.<br />
ENTERCOOKINGTIME<br />
(Entrerladureede<br />
cuisson)defilesur<br />
I'afficheur.<br />
2. Entrer la duree de cuisson<br />
desir6e avec les touches<br />
numeriques.<br />
• TOUCHSTARTOR<br />
POWER(Appuyersur<br />
STARTou sur POWER)<br />
defilesur I'afficheur.<br />
suite...
Cuisson au Four Micro-ondes (suite)<br />
Pf<br />
3.Appuyer sur la touche<br />
POWERLEVEL.<br />
, ENTERPOWERLEVEL<br />
1 - 10 (Entrerle niveau: 1<br />
fl 10)defilesur I'afficheur.<br />
4.Appuyer sur les touches<br />
numeriquespour ajuster le<br />
niveau de puissance des<br />
micro-ondes.<br />
Pourunniveaudepuissancemoinsele%,<br />
appuyersur lestouches1<br />
(pour10%)&9 (pour90%).<br />
Latouche0arr6tecompletementles<br />
micro-ondes.<br />
5.Appuyer sur la touche<br />
PROGRAM.<br />
. ENTERCOOKiNGTiME<br />
(Entrerladureedecuisson)<br />
defilesur I'afficheur.<br />
6. Entrer la duree de cuisson<br />
desiree avec les touches<br />
numeriques.<br />
, TOUCHSTARTOR<br />
POWER(Appuyersur<br />
STARTou sur POWER)<br />
defilesur I'afficheur.<br />
7.Appuyer sur la touche<br />
POWERLEVEL.<br />
* ENTERPOWERLEVEL1<br />
- 10(Entrerle niveau: 1 fl<br />
10)d6filesur I'afficheur.<br />
8.Appuyer sur les touches<br />
numeriquespour ajuster le<br />
niveau de puissance des<br />
micro-ondespourladeuxieme<br />
etapedu programme.<br />
, Pourunniveaudepuissancemoinselev6,appuyersur<br />
lestouches1<br />
(pour10%)&9 (pour90%).<br />
Latouche0arr6tecompletementlesmicro-ondes.<br />
9.Appuyer sur la touche<br />
START/PAUSE.<br />
Lefourcommencele<br />
programmedecuisson.<br />
,&,lafin de la premiere<br />
etape,lefouremetun<br />
signalsonorepourindiquer<br />
latransition.<br />
10.,_lafin du programmede<br />
cuisson,lefouremetdes<br />
signauxsonoreset s'arr6te.<br />
REMARQUE: La fonctionde decongelation<br />
automatiquenepeut6treutiliseequeIorsdela<br />
premiereetape de la cuisson en plusieurs<br />
etapes.<br />
Decongelation<br />
automatique<br />
Quatre programmes pre-programmes de<br />
decongelationautomatiquesont disponibles,<br />
selonletyped'alimentfl decongeler.Pourplus<br />
decommodit&dessignauxsonoresrappellent<br />
de verifier, retourner,separerou redisposer<br />
les aliments pendant le programme de<br />
decongelation.<br />
1. Appuyersur latouche<br />
DEFROSTAUTO/TIMEune<br />
seulelois.<br />
MEATTOUCH1,<br />
POULTRYTOUCH2, FISH<br />
TOUCH3,BREADTOUCH<br />
4 (Appuyersur1 pourla<br />
viande,appuyersur 2 pour<br />
lavolaille,appuyersur 3<br />
pourlepoisson,appuyer<br />
sur4 pourle pain)defile<br />
sur I'afficheur.<br />
2. Appuyersur latouche<br />
numeriqueappropriee.<br />
• ENTERWEIGHT(Entrer<br />
le poids)defilesur<br />
I'afficheur.<br />
3. Entrerle poidsavecles<br />
touchesnumeriques.<br />
• Lagammede poidspour<br />
laviande,lavolailleet le<br />
poissons'etendde<br />
45g fl 2,7 kg (0,1fl 6,0Ib)<br />
• Lagammede poidspour<br />
le pains'etendde 45fl<br />
450g (0,1fl 1,0 Ib)<br />
4. Appuyersur latouche<br />
START/PAUSE.<br />
5. A lafin du programmede<br />
decongelation,I'appareilemet<br />
dessignauxsonoreset<br />
s'arr_te.<br />
40<br />
Decongelation minutee<br />
Cettefonctioncommandeuneoperationde<br />
decongelationpendantladureedesiree.<br />
1. Appuyersur latouche<br />
DEFROSTAUTO/TIME<br />
deux fois.<br />
ENTERDEFROS TIME<br />
(Entrerladureede decongelation)defilesur<br />
I'afficheur.<br />
2. Appuyersur lestouches<br />
numeriquesappropriees.<br />
• TOUCHSTART(Appuyer<br />
sur START)defilesur<br />
I'afficheur.<br />
3. Appuyersur latouche<br />
START/PAUSE.<br />
4. A lafin du programmededecongelation,lefouremetdes<br />
signauxsonoreset s'arr6te.<br />
Decongelation rapide<br />
Cettefonctionpre-programmeecommandela<br />
decongelationd'unelivred'alimentssurgeles.<br />
1. Appuyersur latouche<br />
RAPIDDEFROST.<br />
MEATTOUCH1<br />
POULTRYTOUCH2<br />
FISHTOUCH3<br />
(Appuyersur 1pourla<br />
viande,appuyersur 2<br />
pourla volaille,appuyer<br />
sur3 pourle poisson)<br />
defilesur I'afficheur.<br />
2. Appuyersur lestouches<br />
numeriquesappropriees.<br />
• TOUCHSTART<br />
(AppuyersurSTART)<br />
defilesur I'afficheur.<br />
3. Appuyersur latouche<br />
START/PAUSE.<br />
4. A lafin du programmede<br />
decongelation, lefouremet<br />
dessignauxsonoreset<br />
s'arr6te.
Remarques sur la<br />
d6cong61ation -<br />
= RetJrerles pro@its- poisson, mollusques<br />
et crustaces,pi@edeviande,volaille- de<br />
leur emballage d'origine (papier ou<br />
plastique).<br />
, Fa£onnerla viande en forme de beignet<br />
avantde lacongeler.<br />
, Pendantle programmede d6cong61ation,<br />
retirerles pi@esde viandedecongel6eset<br />
ensuitepoursuivrelad6cong61ation.<br />
, Placer les alimentsdarts un r6cipientde<br />
verrepeuprofond.<br />
, Lefouremetunsignalsonoreverslemilieu<br />
du programme de decong61ationpour<br />
rappelerde verifier les aliments.Ouvrir la<br />
porte du four pour interrompre la<br />
d6cong61ation. Lorsqueles alimentsont et6<br />
v6rifiesou re-disposes,fermerla porte et<br />
appuyer la touche START/PAUSEpour<br />
poursuivrelad6cong61ation.<br />
Cuisson commandee<br />
par capteur<br />
La fonction de contr61e de la cuisson<br />
commandee par capteur permet de<br />
commanderla cuissond'un metsfavorisans<br />
devoirs61ectionnerune dureede cuissonet<br />
une puissance de chauffage. I'appareil<br />
affichera le message SENSING (Capteur)<br />
durantla periodede detectioninitiale.Lefour<br />
µ-ondesdetermineautomatiquement la<br />
duree de cuisson necessaire pour chaque<br />
mets ou aliment.Lorsquele capteurinterne<br />
detecte une certaine quantite d'humidite<br />
emise par I'aliment, il determine la duree<br />
r6siduelledela cuisson;I'afficheurpresentera<br />
alorsletempsdecuissonr6siduel.Observerla<br />
recommandationsuivante pour obtenir les<br />
meilleurs resultats pour une cuisson<br />
commandeeparcapteur:<br />
1. Entreprendrela cuissonsur des aliments<br />
qui se trouvent & une temperature de<br />
conservatio normale.<br />
2. Veiller&ce queleplateautournantenverre<br />
et la surfaceexterieuredu r6cipientsoient<br />
secs.<br />
.<br />
.<br />
Recouvrirles alimentsavecun couvercle,<br />
du papier paraffine ou une feuille de<br />
plastique(pourfoura micro-ondes).<br />
Nepasouvrirlaportedufourniappuyersur<br />
la toucheCANCEL/STOPdurantlaperiode<br />
de detection. Lorsque la periode de<br />
detectionest ecoul6e,le four emet deux<br />
signauxsonores,et la dureede cuisson<br />
r6siduelleapparaftsur I'afficheur.,_ partir<br />
de ce momenton peut ouvrir la porte du<br />
four pourremuerou retournerles aliments<br />
oupourmodifierleurrepartition.<br />
41<br />
Guide de cuisson avec<br />
capteur<br />
Pourobtenirles meilleursresultatsIorsd'une<br />
cuissoncommandeeparcapteur,employerles<br />
r6cipientsapproprieset recouvrirlesaliments.<br />
1. Toujoursutiliserun recipientpour four<br />
micro-ondes et le recouvrir avec un<br />
couvercleou une feuille de plastique<br />
(laisserunevent).<br />
2. Nejamaisplaceruncouvercleou filmde<br />
plastiqueetanchesur un r6cipient;ceci<br />
emp6che1'6vacuationde la vapeur et<br />
peutprovoquerunecuissonexcessive.<br />
3. Adapterlaquantite_.latailledu r6cipient.<br />
Pour obtenir les meilleurs r6sultats,<br />
remplirunr6cipienta 50%ou plus.<br />
4. Avantde placerlesalimentsdartslefour,<br />
verifierqueles surfacesinternesdufour<br />
et lessurfacesexternesdurecipientsont<br />
seches.Latransformationenvapeurdes<br />
residus d'eau peut provoquer une<br />
detectionincorrecteparle capteur.
Cuisson au Four Micro-ondes (suite)<br />
Sensor Popcorn (Ma' 's<br />
eclater - avec capteur)<br />
Un capteur detecte la vapeur emise par<br />
ralimentet ajusteautomatiquement la duree<br />
decuissonpourde meilleursresultats.Utiliser<br />
les grainsde malsdes sachetscommerciaux<br />
de3,0 et 3,5onces(85et 99 g).<br />
1.Placerle malsa edater au<br />
centredu plateautournant.<br />
, NEPASutiliserla grille<br />
metalliquepourcuisson<br />
avecconvectionpourune<br />
operationd'eclatement<br />
du mals.<br />
2.Appuyer sur la touche<br />
SENSORPOPCORN.<br />
, Lefourferaeclaterle<br />
malsautomatiquement<br />
en utilisantlesystemede<br />
capteur.<br />
3. Leprogrammed'eclatement<br />
du malscommence.<br />
* Pourmettrefin au<br />
programmedecuisson,<br />
ouvrirla porteou<br />
appuyersurla touche<br />
CANCEL/STOR<br />
4.A la fin du programmede<br />
cuisson, le four emet des<br />
signauxsonoreset s'arr6te.<br />
I AVERTISSEMENTI<br />
NE PASlaisserle four & micro-ondes<br />
sanssurveillancedurantuneoperation<br />
d'eclatementde mars.<br />
ATTENTION I<br />
Pourevitertout risquede blessureou<br />
de dommage materiel, ne pas<br />
commanderuneoperationd'eclatement<br />
de marsavecla grille metalliquepour<br />
cuissonavecconvection.<br />
Sensor Reheat<br />
(Rechauffage avec<br />
capteur)<br />
Cettefonctionest con£uepourrechaufferles<br />
mets pre-cuits,& la temperatureambianteou<br />
refrigeres, facilement et rapidement en<br />
detectantla vapeuremisepar le mets et en<br />
ajustantautomatiquement la dureede cuisson<br />
pourde meilleursresultats.<br />
1.Appuyersur latouche<br />
SENSORREHEAT.<br />
SELECTMENU1 - 3<br />
(Selectionner le menu'<br />
1 &3) defilesur<br />
rafficheur.<br />
2.Selectionnerlacategorie<br />
desireeaveclestouches<br />
numeriques.<br />
, Utiliserlacategorie1<br />
pouruneassiettede<br />
d_nermoyennecontenantde<br />
237&474mL<br />
(1&2 tasses)d'aliments.<br />
, Utiliserlacategorie2<br />
pourrechauffer237&<br />
946mL(1 &4tasses)de<br />
soupeousaucedansun<br />
bolouunecocotte.<br />
, Utiliserlacategorie3<br />
pourrechaufferuneportionde237&946mL<br />
(1<br />
&4tasses)d'un plat<br />
mijotedartsunecocotte<br />
ouun petitbol.<br />
3. Lefourcommencele<br />
programmede rechauffage<br />
parcapteur.<br />
, SENSING(Capteur)<br />
appara_tsur rafficheur.<br />
, Pourmettrefin au<br />
programmedecuisson,<br />
ouvrirlaporteou<br />
appuyersur latouche<br />
CANCEL/STOR<br />
4.A lafin du programmede<br />
cuisson,lefouremetdes<br />
signauxsonoreset s'arr6te.<br />
42<br />
Sensor Cook (Cuisson<br />
avec capteur)<br />
Un capteurdetectela vapeuremiseparles<br />
alimentset ajusteautomatiquement la duree<br />
decuissonpourles meilleursresultatspourla<br />
plupartdesaliments.<br />
1. Appuyersur latouche<br />
CANCEL/STOR<br />
2. Appuyersur latouche<br />
SENSORCOOK.<br />
SELECTMENUO- 9<br />
(Selectionner unmenu'<br />
0 &9)defilesur<br />
rafficheur.<br />
• Voirletableau&la page<br />
43pourla listedes<br />
categories.<br />
3. Entrerla categoriedesiree<br />
avecles touches<br />
numeriques.<br />
4. Lefourcommencele<br />
programmedecuissonpar<br />
capteur.<br />
• SENSING(Capteur)<br />
apparaftsur I'afficheur.<br />
• Pourmettrefin au<br />
programmedecuisson,<br />
ouvrirla porteou<br />
appuyersur latouche<br />
CANCEL/STOR<br />
5. A lafin du programmede<br />
cuisson,lefouremetdes<br />
signauxsonoreset s'arr6te.
Guide de cuisson avec capteur<br />
Aliment Quantit_set recommandations<br />
1 Potatoes Quantiterecommandee: 1L_4 potatoesdeterremoyennes,environ225L_280g (8 L_10onces)chacune.Perforer<br />
(Potatoesdeterre) chaquepommedeterreplusieursfoisavecunefourchette,et lesdisposerautourdu plateau,en laissantau moins<br />
2,5cm (1po)entrechaquepommede terre.<br />
2 FreshVegetables<br />
(Legumesfrais)<br />
FrozenVegetables<br />
(Legume surgeles)<br />
FrozenEntree<br />
(Repassurgeles)<br />
Rice<br />
(Riz)<br />
Casserole<br />
(Platmijote)<br />
GroundMeat<br />
(Viandehachee)<br />
Fish,Seafood<br />
(Poisson,produits<br />
dela met)<br />
ScrambledEggs<br />
(Oeufsbrouilles)<br />
FrozenPizza<br />
(Pizzasurgeles)<br />
Quantiterecommandee: 250mL &1 L (1a 4 tasses).<br />
Placerles legumeshumidesdansunrecipientpourfoura micro-ondes.<br />
Ajouter30a.60mL (2&4 cuillerees&table)d'eau.<br />
Recouvriravecunefeuillee plastiqueet laisserunevent.<br />
Remuerlaplupartdes legumeset laisserreposerpendant2 &3 minutesapreslacuisson.<br />
Quantiterecommandee: 250mL &1 L (1a 4 tasses).<br />
Placerles legumeshumidesdansunrecipientpourfoura micro-ondes.<br />
Ajouter30a.60mL (2&4 cuillerees&table)d'eau.<br />
Recouvriravecunefeuillede plastiqueet laisserunevent.<br />
Remuerlaplupartdes legumeset laisserreposerpendant2 &3 minutesapreslacuisson.<br />
Quantiterecommandee:280 &560g (10&20 onces).<br />
Retirerde I'emballag externe.Detacherle couverclesur troisc6tes.<br />
Si lerepasn'estpasdansun recipientpourfourµ-ondes,le placersur uneassiette,recouvriravecune<br />
feuilledeplastiqueet laisserun event.<br />
Laisserreposerlaplupartdes repassurgelespendant2 &3 minutesapreslacuisson.<br />
Suivreles instructions surI'emballagepourlesquantitesdes ingredients.<br />
Placerle riz et le liquide(eau,bouillonde pouletou delegumes)dansun recipientpourfourµ-ondes,<br />
recouvriravecuncouvercleou unefeuillede plastiqueet laisserunevent.<br />
Laisserreposerlaplupartdes riz pendant2 &3 minutesapreslacuisson.<br />
Quantiterecommandee: 250mL a 1 L (1a 4 tasses).<br />
Melangerlesingredientsselonlarecettedansunplata casserolede 1a 2 L (1a 2 pintes).<br />
Recouvriravecunefeuillede plastiqueet laisserunevent.<br />
Laisserreposerpendant3 minutesapreslacuisson.<br />
Quantiterecommandee: 110&900g (4&32onces[_/4&2 Ib]).<br />
Emietterlaviandedansunrecipientpourfourµ-ondes.<br />
Assaisonneret recouvriravecunefeuilledeplastique.<br />
Laisseruneventpourdelaviandebiencuite.Recouvrirle recipientpourdela viande&point(parexemplesi la<br />
viandedoit6tre incorporeedansd'autresingredientset cuitedavantage).<br />
Quantiterecommandee: 110&900g (4&32onces[Y4to 2 Ib]).<br />
Disposerlesalimentsautourdesc6tesd'un recipientpourfour& micro-ondes.Assaisonneret ajouter60&<br />
125mL(_/4&1/2tasse)de liquide(vin,eau,salsa,etc.)si desire.<br />
Recouvrird'une feuilledeplastiqueet laisserun event.<br />
Quantiterecommandee: 2 &5 oeufs.Briserles oeufsdansunetasse&mesurerde 1 L (4tasses)ou dansun<br />
recipient&casserolede 1 L(1 pinte).<br />
Ajouter15mL (1cuilleree&table)d'eauou delait pourchaqueoeufet fouetter.Recouvriravecunefeuillede<br />
plastiqueet laisserunevent.Lorsquela cuissonestterminee,retirerdufour,remuer,et laisserreposerpendant1<br />
&2 minutes.<br />
Quantiterecommandee: 1&2 pizzas.<br />
Utiliseruniquementles pizzassurgeleespourfourµ-ondes.<br />
Ne pasrecouvrir.Suivreles instructions surI'emballage.<br />
43
Cuisson Avec Convection<br />
[ ATTENTION<br />
Pour eviter le risque de brQlures,<br />
manipulerles ustensiles,les grilles<br />
et la porte avec soin. Laisser<br />
refroidirlefour,les ustensiles,et les<br />
grillesavantdeles nettoyer.Lefour,<br />
les ustensiles et les grilles<br />
deviennent chauds pendant<br />
I'op&ationdu four.<br />
Poureviterle risquede blessureou<br />
de dommage mat&M, ne pas<br />
utiliser le four sans le plateau<br />
tournant.<br />
Poureviterle risquede blessureou<br />
de dommage mat&M, ne pas<br />
recouvrirle plateautournantou la<br />
grilleavecunefeuilled'aluminium.<br />
Poureviter le risque de dommage<br />
mat&M, ne pas utiliser de<br />
recipients de plastique leger, de<br />
feuillesde plastiqueou de produits<br />
enpapierpendantunprogrammede<br />
cuissonavecconvection.<br />
Grille pour cuisson avec<br />
convection<br />
Utiliser la grille uniquementpour la cuisson<br />
avecconvectionou combinee.NepasI'utiliser<br />
enmodemicro-ondeseulement.<br />
Lors de I'op&ation du four pour la cuisson<br />
avec convection seulement, utiliser<br />
uniquementI'entreemanuelledeladuree.Les<br />
instructions suivantes s'appliquent<br />
uniquement_ la cuisson avec convection.<br />
Pour des informations sur la cuisson<br />
combinee,voir page45.<br />
Programmation manuelle<br />
avec pre-chauffage<br />
'_:iii iii_'_<br />
1.Appuyersurla toucheCONV<br />
COOKsousConvection.<br />
• 350FTOUCHMOREOR<br />
LESSFORTEMPSET<br />
ORSTARTORENTER<br />
COOKINGTIME(350F<br />
[177°C] Appuyersur<br />
MOREou LESSpour<br />
reglerla temp&atureou<br />
appuyersur STARTou<br />
entrerladureedecuisson)defilesur<br />
I'afficheur.<br />
2.Ajusterle reglagede<br />
temp&aturesi desireavec<br />
lestouchesMOREou LESS.<br />
• Lagammedetemp&atureestde<br />
177°C&<br />
232°C (225°F&450°F).<br />
3.Appuyersurla touche<br />
START/PAUSE.<br />
• PREHEAT(Prechauffage)<br />
apparaftsur I'afficheur<br />
avecla temp&ature.<br />
• PLACEFOODONRACK<br />
(Placerles alimentssurla<br />
grille)apparaftsur<br />
I'afficheur&lafin de la<br />
p&iodede pr&chauffage.<br />
4.Ouvrirla porte,placerles<br />
alimentssur lagrille,et<br />
fermerla porte.<br />
• ENTERCOOKINGTIME<br />
(Entrerla dureede<br />
cuisson)defilesur<br />
I'afficheur.<br />
5.Entrerladureede cuisson<br />
aveclestouches<br />
num&iques.<br />
• TOUCHSTART(Appuyer<br />
sur START)defilesur<br />
I'afficheur.<br />
44<br />
6.Appuyersur latouche<br />
START/PAUSE.<br />
• ,_la fin duprogramme<br />
de cuisson,I'appareil<br />
emetdessignaux<br />
sonores,END(Fin)<br />
apparaftsur I'afficheur<br />
et lefours'arrtte.<br />
Programmation<br />
manuelle sans prechauffage<br />
Pourprogrammerla temp&atureet la duree<br />
de cuisson pour un programmede cuisson<br />
direct:<br />
1. Appuyersur latouche<br />
CONVCOOKsous<br />
Convection.<br />
350FTOUCHMORE<br />
OR LESSFORTEMP<br />
SETOR STARTOR<br />
ENTERCOOKINGTIME<br />
(350F[177°C]Appuyer<br />
sur MOREou LESS<br />
pourreglerlatemp&atureou<br />
appuyersur<br />
STARTouentrerla<br />
dureedecuisson)defile<br />
sur I'afficheur.<br />
2. Ajusterle reglagede<br />
temp&aturesi desireavec<br />
les touchesMOREou<br />
LESS.<br />
• Lagammedetemp&atureest<br />
de107°C&<br />
232°C (225°F&450°F).<br />
3. Entrerla dureedecuisson<br />
avecles touches<br />
num&iques.<br />
• TOUCHSTART(Appuyer<br />
sur START)defilesur<br />
I'afficheur.<br />
4. Appuyersur latouche<br />
START/PAUSE.<br />
• ,_la fin duprogrammede<br />
cuisson,I'appareilemet<br />
des signauxsonores,<br />
END(Fin)apparaftsur<br />
I'afficheuret le four<br />
s'arr_te.
Les instructionssuivantes s'appliquent<br />
uniquementb la cuissoncombinee.<br />
Pourdesinformation sur la cuissonavec<br />
convection,voirpage44.<br />
Remarques:<br />
• Ne pas utiliserd'ustensilesmetalliquessur<br />
la grille metallique pendant la cuisson<br />
combinee.Utiliserdes ustensilesde verre<br />
Iorsquec'est possible.<br />
• Utiliserunmoule&muffinsmetalliqueouun<br />
petit plat metalliquepeu profondsi aucun<br />
platenverren'estdisponible.<br />
• En cas de formation d'arc electrique,<br />
discontinuerI'utilisationdecetustensile.<br />
[ ,ATTENTION ]<br />
Pour eviter le risque de br_lures,<br />
manipulerles ustensiles,les grilles<br />
et la porte avec soin. Laisser<br />
refroidirlefour,les ustensiles,et les<br />
grillesavantdeles nettoyer.Lefour,<br />
les ustensiles et les grilles<br />
deviennent chauds pendant<br />
roperationdu four.<br />
Poureviterle risquede blessureou<br />
de dommage materiel, ne pas<br />
utiliser le four sans le plateau<br />
tournant.<br />
Poureviterle risquede blessureou<br />
de dommage materiel, ne pas<br />
recouvrirle plateautournantou la<br />
grilleavecunefeuilled'aluminium.<br />
Poureviter le risque de dommage<br />
materiel, ne pas utiliser de<br />
recipients de plastique leger, de<br />
feuillesde plastiqueou de produits<br />
enpapierpendantunprogrammede<br />
cuissonavecconvection.<br />
• • t<br />
Culsson Cornbmee (micro-ondes et convection)<br />
R6tisserie combinee<br />
Utiliser cette fonction pour programmerla<br />
dureeet la temperaturepour un programme<br />
de cuisson utilisant les micro-ondeset la<br />
convection.<br />
1.Placerles alimentssur la<br />
grilledu fouret fermerla<br />
portedufour.<br />
2.Appuyersur latouche<br />
ROAST(ROTISSERIE)<br />
s0us Convection<br />
Combination.<br />
350FTOUCHMORE<br />
OR LESSFORTEMP<br />
SETOR ENTER<br />
COOKINGTIME<br />
(350oF [190°C]Appuyer<br />
sur MOREou LESS<br />
pourreglerlatemperatureouentrerla<br />
dureede cuisson)defile<br />
sur rafficheur.<br />
3.Ajusterle reglagede<br />
temperaturesi desireavec<br />
les touchesMOREou<br />
LESS.<br />
• Lagammedetemperature<br />
estde107°C&<br />
232°C (225°F&450°F).<br />
• Leniveaude puissance<br />
des micro-ondesest<br />
programme&40%et ne<br />
peutpas 6treajust&<br />
• Ladureedecuissondolt<br />
6tre entre00:01et 99:99.<br />
4.Appuyersur latouche<br />
START/PAUSE.<br />
• ,&,la fin duprogrammede<br />
cuisson,rappareilemet<br />
des signauxsonores,<br />
END(Fin)apparaftsur<br />
I'afficheuret le four<br />
s'arr_te.<br />
45<br />
Cuisson combinee<br />
Utiliser cette fonction pour programmerla<br />
dureeet la temperaturepour un programme<br />
de cuisson utilisant les micro-ondeset la<br />
convection.<br />
1.Placerles alimentssur la<br />
grilledu fouret fermerla<br />
portedufour.<br />
2.Appuyersur latouche<br />
CANCEL/STOR<br />
3.Appuyersur latoucheBAKE<br />
(CUlSSON)sous<br />
ConvectionCombination<br />
(Combin#).<br />
• 3750FTOUCHMORE<br />
OR LESSFORTEMP<br />
SETOR ENTER<br />
COOKINGTIME(375oF<br />
[190°C]Appuyersur<br />
MOREou LESSpour<br />
reglerla temperatureou<br />
entrerladureede<br />
cuisson)defilesur<br />
I'afficheur.<br />
4.Ajusterle reglagede<br />
temperaturesi desireavec<br />
les touchesMOREou LESS.<br />
• Lagammedetemperature<br />
estde 107°C&<br />
232°C (225°F &450 °F).<br />
• Leniveaudepuissance<br />
des micro-ondesest<br />
programme&10%et ne<br />
peutpas6treajust&<br />
• Entrerladureede<br />
cuissonenminutes.<br />
5.Appuyersur latouche<br />
START/PAUSE.<br />
• ,_la fin duprogrammede<br />
cuisson,rappareilemet<br />
des signauxsonores,<br />
END(Fin)apparaftsur<br />
I'afficheuret le four<br />
s'arr_te.
Cuisson Combin e (micro-ondes et convection) (suite)<br />
Les instructionssuivantes s'appliquent<br />
uniquementb la cuissoncombinee.<br />
Pour des informationssur la cuisson avec<br />
convection,voir page44.<br />
Remarques:<br />
• Pourcuire des pizzassurgelees,placerla<br />
pizzadirectementsurlagrilledeconvection.<br />
Ne pas utiliserde plaquea pizza ou de<br />
feuille d'aluminium. Placer la grille de<br />
convection solidement sur le plateau<br />
tournant,loindes patoisdufour.<br />
• Pour tout autre type de cuisson ou de<br />
r6tisserie, placer les aliments darts un<br />
ustensileappropri&et placerI'ustensilesur<br />
la grillede convection.<br />
i ATTENTION<br />
Pour eviter le risque de brQlures,<br />
manipulerles ustensiles,les grilles<br />
et la porte avec soin. Laisser<br />
refroidirlefour,les ustensiles,et les<br />
grillesavantde lesnettoyer.Lefour,<br />
les ustensiles et les grilles<br />
deviennent chauds pendant<br />
I'operationdu four.<br />
Poureviterle risquede blessureou<br />
de dommage materiel, ne pas<br />
utiliser le four sans le plateau<br />
tournant.<br />
Poureviterle risquede blessureou<br />
de dommage materM, ne pas<br />
recouvrirle plateautournantou la<br />
grilleavecunefeuilled'aluminium.<br />
Poureviterle risquede dommage<br />
materiel, ne pas utiliser de<br />
recipients de plastique leger, de<br />
feuillesde plastiqueou de produits<br />
enpapierpendantunprogrammede<br />
cuissonavecconvection.<br />
Auto Bake (Cuisson<br />
automatique)<br />
Utiliser cette fonction pour commander la<br />
cuisson automatique de pizza surgelee,<br />
muffins,, biscuits,_,et pommesdeterrefrites<br />
surgeleesen utilisanttour & tour les microondeset<br />
laconvection.<br />
1.Appuyersur latoucheAUTO<br />
BAKEsousConvection<br />
Combination (Convection<br />
combinee).<br />
• FROZENPIZZATOUCH<br />
1MUFFINSTOUCH2<br />
BISCUIT/DINNER<br />
ROLL/& STICKTOUCH<br />
3 FROZENFRENCH<br />
FRIESTOUCH4<br />
(Appuyersur 1pourla<br />
pizzasurgelee,appuyer<br />
sur 2 pourles muffins,<br />
appuyersur 3 pourun<br />
biscuit/petitpain/pain<br />
b&ton,appuyersur 4<br />
pourlespommesde<br />
terrefritessurgelees)<br />
defilesur I'afficheur.<br />
2. Appuyersur latouche<br />
numeriqueappropriee.<br />
• Unprogrammedeprechauffageest<br />
necessaire<br />
pourlesmuffinset les<br />
,,biscuits,_.Placerces<br />
alimentssur la grille<br />
Iorsquelesignalsonore<br />
se faitentendre.<br />
LapizzasurgeleeDOlT<br />
6tre placeedirectement<br />
sur lagrillemetalliquede<br />
convection.NEPAS<br />
utiliserdeplaque& pizza<br />
metalliqueoude feuille<br />
d'aluminium.<br />
• Utiliserun moule&<br />
muffinmetalliquepour<br />
les muffins,, biscuits_<br />
et petitspainssi unplat<br />
enverren'estpas<br />
disponible.<br />
• Utiliserun petitplat<br />
metalliquepeuprofond<br />
pourlespainsb&tonet<br />
pommesdeterrefrites<br />
surgeleessi unplaten<br />
verren'estpas<br />
disponible.<br />
3. Appuyersur latouche<br />
START/PAUSE.<br />
• Sid'autres informations<br />
sontnecessaires, lefour<br />
I'indiquerasur I'afficheur.<br />
46<br />
4. A lafin du programmede<br />
cuisson,I'appareilemetdes<br />
signauxsonores,END(Fin)<br />
apparaftsur I'afficheuret le<br />
fours'arr6te.<br />
Auto Roast (R6tisserie<br />
automatique)<br />
Utiliser cette fonction pour commander la<br />
r6tisserieautomatiquedu boeuf,dupoulet,des<br />
poitrines de dinde et du porc en utilisant<br />
I'energiedes micro-ondeset de la convection<br />
en alternance.<br />
1. Appuyersur latoucheAUTO<br />
ROASTsousConvection<br />
Combination (Convection<br />
combinee).<br />
• BEEFTOUCH1WHOLE<br />
CHICKENTOUCH2<br />
TURKEYBREASTS<br />
TOUCH3 PORKTOUCH<br />
4 (Appuyersur 1pourle<br />
boeuf,appuyersur 2 pour<br />
unpouletentier,appuyer<br />
sur3 pourles poitrines<br />
dedinde,appuyersur 4<br />
pourleporc)defilesur<br />
I'afficheur.<br />
2. Appuyersur latouche<br />
numeriqueappropriee.<br />
• ENTERWEIGHT(Entrer<br />
le poids)defilesur<br />
I'afficheur.<br />
3. Entrerle poidsavecles<br />
touchesnumeriques.<br />
4. Appuyersur latouche<br />
START/PAUSE.<br />
• Sid'autresinformations<br />
sontnecessaires, lefour<br />
I'indiquerasurI'afficheur.<br />
5. A lafin du programmede<br />
cuisson,I'appareilemetdes<br />
signauxsonores,END(Fin)<br />
apparaftsurI'afficheuret le<br />
fours'arr6te.<br />
Poulet 1,1- 2,7 kg (2,5- 6,0 Ib)<br />
Boeuf 0,9- 1,8kg (2,0- 4,0 Ib)<br />
Uinde 1,4- 2,7 kg (3,0- 6,0 Ib)<br />
Porc 0,9- 1,8kg (2,0- 4,0 Ib)
Informations de base<br />
sur la viande<br />
Pour obtenirdes reponses& des questions<br />
specifiques concernant la pr@aration, la<br />
manipulationou rentreposagede la viande,<br />
veuillezcommuniqueravec rUSDA (United<br />
StatesDepartmentof Agriculture)Meatand<br />
Poultry Hotline au (800) 535-4555(ligne<br />
directe pour la viande et volaille du<br />
d@artement de ragriculture des Etats-<br />
Unis).<br />
Suggestions de<br />
manipulation<br />
. Lorsdes emplettes,placerla viandedarts<br />
un sac de plastiques@are pour eviter<br />
qu'elle entre en contactavec les autres<br />
aliments.<br />
. Ne pas faire decongelerla viande a la<br />
temperature de la piece. La faire<br />
decongelerau refrigerateur.<br />
. Garder la viande au frais et recouverte<br />
jusqu'aumomentdelacuisson.<br />
. Se laver les mains avec de reau tiede<br />
savonneuseavantet apresla manipulation<br />
dela viandeoudes oeufscrus.<br />
* Laver a fond toute surfaceayant ete en<br />
contactavecla viandeoules oeufscrus.<br />
. Ne pas remettrela viandecuite dartsun<br />
platayantcontenulaviandecrue.<br />
Conseils pour la cuisson<br />
* Mariner la viande au refrigerateur.Jeter<br />
tout excedentde marinadeayant ete en<br />
contactavecla viandecrue.<br />
, Utiliser un thermometre a viande qui<br />
resistea lachaleur.<br />
. Fairecuirelaviandejusqu'alatemperature<br />
internerecommandeeparrUSDA.<br />
. La temperature interne des aliments<br />
rechauffesdoit atteindreau moins74 °C<br />
(165°F).<br />
. Retournerles viandesau moinsune fois<br />
pendantlacuisson.<br />
Entreposage s curitaire<br />
* Apresledecoupagedelaviande,refrigerer<br />
touteportioninutiliseeimmediatement.<br />
. Garder chauds les aliments chauds et<br />
garderfroidslesalimentsfroidsen servant<br />
les repas.<br />
. Diviser les aliments cuits en petites<br />
portionspourunrefroidissement rapide.<br />
. Ne pas conserverde la viande hachee<br />
cuite ou des aliments contenantde la<br />
viande hachee pendant plus de 3 ou 4<br />
jours au refrigerateur.<br />
. Ne paspermettreauxsucsdeviandecuite<br />
ou crue d'entrer en contact avec des<br />
alimentspr6tsa mangercommeles fruits<br />
et les legumes.<br />
Attendrissage<br />
Lebraisagen'estqu'unedesfa_onsd'attendrir<br />
les coupesde viande moinstendres.II est<br />
aussi possiblede martelerla viande,de la<br />
decouperen cubes, de la faire mariner,et<br />
d'utiliser un attendrisseurcommercial.Une<br />
methodeseche peut alors 6tre utiliseepour<br />
cuirelaviande.<br />
Les marinades sont des liquidesacides<br />
comme le vin, le jus de citron, ou le<br />
vinaigre.Les marinadesattendrissentles<br />
fibresde laviandemaisnepenetrentqu'un<br />
quartde pouce(6 mm)dansla viande.Ne<br />
pas faire mariner la viande plus de 24<br />
heures.<br />
. Le mart_lement de la viande avec un<br />
maillet & viande Iourd brise le fissu<br />
conjonctifpourattendrirlaviande.<br />
. Led_coupageencubes brisela structure<br />
delaviandeplusquele martelement.Cette<br />
operation est effectuee au comptoir &<br />
viandes.<br />
Les attenddsseurs commerciaux sont<br />
principalementdes enzymesqui agissent<br />
sur lequartdepouce(6mm)externedela<br />
viande.S'assurerdesuivreles instructions<br />
dufabricant.<br />
47<br />
Conseils de Cuisson<br />
Utilisation du<br />
thermometre a viande<br />
Lorsderutilisationd'unthermometreAviande,<br />
rinsererlegerementen biaisdartsla pattiela<br />
plus @aissede la piece de viande,loin du<br />
gras et des os. Retirer la viande du four<br />
Iorsquela temperatureinterneest inferieure<br />
de 2,70 C (50 F) a, la temperaturefinale<br />
desiree.Pendantla perioded'attenteavantle<br />
decoupage,la viande continue a cuire<br />
rinterieur,et sa temperatures'eleve d'ellem_mejusqu'auniveaudesir&<br />
Thermom_tre_viande<br />
. Elimineraspect conjecturaldu degre de<br />
cuisson.<br />
. Aide a reduire le risque de maladie<br />
d'originealimentaire<br />
Thermom_trer_sistant_ lachaleur<br />
(modeconvectionseulement)<br />
. Ce thermometr est inseredans laviande<br />
avantqu'elle nesoit miseau fouret reste<br />
en placependantla cuisson.<br />
. La temperatureinterne s'eleve graduellementpendantla<br />
cuissonde laviande.<br />
. NE PASutiliserunthermometremetallique<br />
dans le four en mode COMBINE ou<br />
MICRO-ONDES.<br />
Thermom_tre_ lectureinstantan_e<br />
* Ces thermometresne resistentpas a la<br />
chaleur.IIs sont inseresdans la viande<br />
Iorsqu'elleestsortiedufour.<br />
. Unetemperaturepreciseestgeneralement<br />
afficheeen uneou deuxminutes,bienque<br />
cestempspeuventvarier.<br />
. Se rappeler de nettoyer la tige du<br />
thermometrea lectureinstantaneeavecde<br />
reau chaude savonneuseapres chaque<br />
lecturede latemperature.
Conseils de Cuisson (suite)<br />
Directives pour la r6tisserie<br />
Lesmeilleuresmethodesdecuissonpourles coupestendrescommeles Iongeset lesc6tessont&chaleurseche,commela r6tisserie.<br />
Pourr6tir:<br />
.<br />
2.<br />
3.<br />
4.<br />
5.<br />
6.<br />
Fairechaufferlefour&la temperaturedesiree.<br />
Sortirle r6tidu refrigerateuret le placerimmediatement dansunplatpeuprofondet non-m_tallique,lec6tegrasverslehaut.<br />
Placerle r6tidansle fourcombin&<br />
Retirerle r6tiet verifierlatemperatureinterneavecunthermometre&viande.NE PASplacerler6ti danslefourcombineaveclethermometre.<br />
Ler6tiestpr6t Iorsquela temperatur estinferieurede2,70C (50F)&la temperaturefinaledesiree.<br />
Placerle r6tisur uneplanche&decouperet recouvriravecunefeuilled'aluminium,en laissantunevent,pendantenviron15minutes.<br />
Coupedeviande<br />
BOEUF<br />
R6tidecrouperoul&sansos<br />
R6tidepointe<br />
R6tidenoixderonde<br />
R6tidefilet<br />
R6tidec6tes<br />
R6tidefaux-filet<br />
PORC<br />
R6tideIonge,avecos<br />
R6tidec6tes,sansos<br />
Filet<br />
Jambonavecos,&cuire<br />
avantconsommation<br />
AGNEAU<br />
Epaule<br />
Carred'agneau<br />
Couronned'agneau<br />
R6tideIonge<br />
Gigota mancheoubasdegigot<br />
VOLAILLE(nonfarcie)<br />
Chapon<br />
PoulettesdeCornouailles, entieres<br />
Canard,entier<br />
Oie,entiere<br />
Faisan,entier<br />
Cailles,entieres<br />
Dinde<br />
Temperature interne<br />
reoommandee<br />
Tressaignant 540C (1300F)<br />
Saignant 600C (1400F)<br />
A demi-saignant63oC (145oF)<br />
,&,point 710C (1600F)<br />
Biencuit 770C (170oF)<br />
Tresbiencuit 820C (180oF)<br />
Toujours faire cuire le porc<br />
jusqu'&unetemperatureinterne<br />
minimum de 710 C (160o F)<br />
pour reduire le risque de<br />
trichinose et autres maladies<br />
d'originealimentaire.<br />
demi-saignant660C (1500F)<br />
A point 710C (1600F)<br />
Biencult 770C (1700F)<br />
Pour reduire le risque de<br />
maladiesd'originealimentaire,<br />
toujours faire cuire le poulet<br />
jusqu'& une temperature<br />
interne minimum de 820 C<br />
(1800F).<br />
Temperature<br />
dufour<br />
1630C (3250F)<br />
1630C (3250F)<br />
1630C (3250F)<br />
2180C (4250F)<br />
1630C (3250F)<br />
1770C (3500F)<br />
1770C (3500F)<br />
1770C (3500F)<br />
2320C (4500F)<br />
1630C (3250F)<br />
1630C (3250F)<br />
1910C (3750F)<br />
1910C (3750F)<br />
1630C (3250F)<br />
1630C (3250F)<br />
163-1770C (325-3500F)<br />
163-1770C (325-3500F)<br />
163-1770C (325-3500F)<br />
163-1770C (325-3500F)<br />
163-1770C (325-3500F)<br />
163-1770C (325-3500F)<br />
1630C (3250F)<br />
Poids<br />
(kg[Ib])<br />
1,8&2,7kg (4&6Ib)<br />
1,6a 1,8kg(3Y2a4 Ib)<br />
1,8&2,7kg (4a 6Ib)<br />
0,9a 1,4kg (2a 3Ib)<br />
1,8a2,7kg (4a 6Ib)<br />
1,8a2,7kg (4a 6Ib)<br />
2,7a 3,6kg (6&8Ib)<br />
1,8a2,7kg (4a 6Ib)<br />
1,4&2,3kg (3&5Ib)<br />
0,9&1,8kg (2&4Ib)<br />
0,45&0,9kg(_ &1Ib)<br />
3,2a 3.6kg (7a 8Ib)<br />
1,6a 2,7kg(3Y2&6 Ib)<br />
0,68&1,1kg (11/2 a 21AIb)<br />
0,9&1,4kg (2&3Ib)<br />
0,57a 0,8kg (1_/4 a 1_4Ib)<br />
2,3&3,2kg (5&7Ib)<br />
3,2&4,1kg (7&9Ib)<br />
1,8&3,6kg (4&8Ib)<br />
0,57&0,68kg(lY4&lY_Ib'<br />
0,9kg(2Ib)<br />
3,6&7,2kg(8&16Ib)<br />
Tempsdecuisson<br />
approximatif<br />
(minutes)<br />
25 a 30<br />
30 a 40<br />
20 a 30<br />
35 & 45<br />
45 a 60<br />
26 & 42<br />
23 & 35<br />
18a24<br />
20minutes<br />
parIb (0,45kg)<br />
35 a 40<br />
30 a 35<br />
25 a 30<br />
45 a 55<br />
15a20<br />
20 & 25<br />
20&30mn/Ib(0,45kg)<br />
50a 60mnautotal<br />
18a20mn/Ib(0,45kg)<br />
20&25mn/Ib(0,45kg)<br />
30mn/Ib(0,45kg)<br />
20mnautotal<br />
3_Aa5Y_heures<br />
Touteslesdureeset les temperaturesrecommandeesontfourniespar I'USDA,le BeefIndustryCouncil,le NationalPorkProducer'sCouncil,et le<br />
AmericanSheepIndustryCouncil.<br />
48
Biscuits<br />
= Utiliserdes plaques& biscuitsplates et<br />
brillantes.Eviterlesplaques&biscuitsavec<br />
de hautesparois;ceci peut entrafnerun<br />
brunissageinegaldudessus.<br />
= Laplaque&biscuitsnedoit pastoucherles<br />
paroisdufour.<br />
G teaux<br />
Determinerla taille du moule selon les<br />
instructions.Utiliser de preference les<br />
moulesbrillants.<br />
Les g&teauxcuits dans un moule trop<br />
grandserontminceset secs.Les g&teaux<br />
cuits dansun mouletrop petitserontcuits<br />
inegalementou insuffisammentet la p&te<br />
peutdeborder.<br />
Tartes<br />
Pourun meilleurbrunissage,utiliserune<br />
assiette avec une surface sombre ou<br />
matte.<br />
Fairechaufferlestartessurgeleessur une<br />
plaquea biscuitsenaluminium.<br />
Directives concernant<br />
les ustensiles<br />
Ustensiles<br />
sombresou<br />
mats<br />
Ustensiles<br />
brillants<br />
(sanspatois)<br />
Ustensiles<br />
en verre<br />
Absorbentplusde chaleur<br />
pourunbrunissageplus<br />
fonc&Recommandespour<br />
lestarteset les pains.<br />
Recommandespourles<br />
biscuits.<br />
Ustensiles Recommandespourles<br />
brillants<br />
(avecdespatois)<br />
g&teaux.<br />
Reduirela temperaturedu<br />
four recommandeede<br />
140C (250F)<br />
Baking Time Guidelines<br />
Typede moule Dimensions Quantit_de Temp.<br />
gateau du moule p_te du four Minutes<br />
)vale 19,7x 14,6cm i595mL (21/2tasses) 1770C (350oF) 25&30<br />
(7_4x 5F,po)<br />
33x 25,8cm 1,9 L(8tasses) 1770C (350oF) 25&30<br />
(13x 9_4po)<br />
:ton&5 cm 15,2cm(6 po) 475mL (2tasses) 1770C (350oF) 25&30<br />
2 po)de 20,3cm(8 po) 710mL (3tasses) 1770C (350oF) 30&35<br />
i_rofondeur 35,6cm(14po) 2,4 L (10tasses) 1770C (350oF) 50&55<br />
:bnd,7,5 cm 20,3cm(8 po) 1,2 L(5tasses) 163oC (3250F) 60&65<br />
3 po)de 30,5cm(12po) 2,6 L (11tasses) 1630C (3250F) 75&80<br />
i_rofondeur<br />
)emi-rond,5 cm 45,7cm(18po) 2,1 L(9tasses) 1630C (3250F) 60&65<br />
2 po)de<br />
i_rofondeur<br />
)emi-rond,7,5 cm 45,7cm(18po) 2,8 L (12tasses) 1630C (3250F) 60&65<br />
3 po)de<br />
i_rofondeur<br />
;arre 15,2cm(6 po) 475mL (2tasses) 1770C (3500F) 25&30<br />
Prechauffage<br />
25,4cm(10po) 1,4 L(6tasses) 1770C (3500F) 35a 40<br />
40,6cm(16po) 3,7 L(151/2 tasses) 1770C (3500F) 45a 50<br />
Dartsla plupart des cas, il est preferablede prechaufferle four avant la cuisson.Pourdes<br />
p_tisseriesd_licates (commeles feuillet_s ou les souffles) pr_chaufferle four pendant<br />
environ 15-20minutes avant de placerles aliments darts le four ou attendre 10 minutes<br />
apr_s r_mission du signal sonoreavantde placerles aliments dartslefour. Leprechauffage<br />
additionnelcree unetemperatureplusstable.<br />
49
Conseils de Cuisson (suite)<br />
Problbrnes de cuisson courants<br />
IIpeut6tre difficilede s'habituer&unnouveaufour,surtoutIorsdu passage&un four&convection.Encasdeproblemesfrequents,consulterle<br />
tableauci-dessouspourdes solutionspossibles.<br />
Probl_me<br />
G&teauxasymetriques<br />
(cuissonin6gale)<br />
Brunissag excessifdu<br />
dessousoudu dessousdes<br />
g&teauxet desbiscuits<br />
Lestartesnebrunissentpas<br />
Lesg&teauxnecuisent<br />
pasaucentre<br />
Lesg&teauxretombent<br />
Contractionexcessive<br />
Centredesg&teauxtrop 61ev6<br />
Cause<br />
Lesmoulesse touchentou touchentles patoisdufour<br />
Lap&ten'est pasrepartieuniformementdansle moule.<br />
Utilisationincorrectede feuillesd'aluminium.<br />
Lefourn'est pasdeniveau.<br />
Lefourn'est pasprechauff6.<br />
Lesmoulesse touchentou touchentles patoisdufour.<br />
Utilisationdemoulesoudeplaquesdeverre,noircis,tordus<br />
oumats.<br />
Utilisationincorrectede feuillesd'aluminium.<br />
Latemperaturedufouresttrop61ev6e.<br />
Utilisationd'assiettesde metalbrillant.<br />
Latemperatureesttropbasse.<br />
Latemperatureesttrop61ev6e.<br />
Lemouleesttrop petit.<br />
Ladureedecuissonesttropcourte.<br />
Lemoulen'est pasplac6aucentredufour.<br />
Tropdeshorteningou desucre.<br />
Tropoupasassezdeliquide.<br />
Latemperatureesttropbasse.<br />
Bicarbonatedesoudeinsuffisantoutropvieux.<br />
Lemouleesttrop petit.<br />
Ouverturefrequentede laportedufour.<br />
Dureedecuissoninsuffisante.<br />
Quantit6insuffisanted'agentde levage.<br />
Lap&tea et6 m61ang6ependantunep6riodetrop Iongue<br />
Lemouleesttrop grand.<br />
Latemperaturedufouresttrop61ev6e.<br />
LadureedecuissonesttropIongue.<br />
Latemperatureesttrop61ev6e.<br />
Lap&tea et6 tropm61ang6e.<br />
Tropdefarine.<br />
Lesmoulesse touchentou touchentles patoisdufour.<br />
50<br />
Remarques sur la<br />
cuisson<br />
* Testerlesg&teauxpours'assurerqu'ilssont<br />
biencults.Acausedesvariancesdesfours<br />
individuels,il estpref6rablede testersi les<br />
g&teauxont atteint la bonneconsistance<br />
plut6t que de se baser seulementsur la<br />
dureedecuissonet I'apparencevisuelle.<br />
* Les problemesdes g&teauxpeuvent6tre<br />
causes par le m61ange.Un m61ange<br />
excessifpeut briserla structuredu g&teau<br />
et causer une contractionexcessive.Un<br />
m61ange insuffisant peut causer des<br />
g&teaux grumeleuxqui ne cuisent pas<br />
completement.Tousles ingredientsdoivent<br />
6tre sortis du refrig6rateurprealablement<br />
afin d'atteindrela temperatureambiante.<br />
S'assurerde suivreles instructionsdartsla<br />
recetteconcernantla dureedem61ange.<br />
* Laisserrefroidir le g&teausur une grille<br />
pendant10minutesavantde le demouler.<br />
Laisserefroidirles plusgrosg&teaux(avec<br />
un diametrede plus de 35 cm [14 po])<br />
pendant 15 minutes.Si le g&teaua trop<br />
refroidi,le rechaufferdartslefour &1210C<br />
(250oF) pendantquelquesminutes.<br />
, S'assurerde suivreles instructionsde la<br />
recette et d'utiliser du beurre ou de la<br />
margarineIorsquela recettele demande.<br />
I'utilisationd'un substitut&faibleteneuren<br />
graspeutcauser1'6checd'unerecette.
Nettoyer le four fr_quemment pour<br />
maximisersa dur_ede vie,son rendement<br />
et son efficacit& Un four sale cult de fa_on<br />
inefficacecar I'humidit& les r_sidus de<br />
renversement et la graisse absorbent<br />
r_nergie des micro-ondes et de la<br />
convection.<br />
[ : ,ATTENTION ]<br />
Poureviterles br_lures,manipulerles<br />
ustensiles,lesgrilles et la porte avec<br />
soin. Laisser refroidir le four, les<br />
ustensiles, et les grilles avant le<br />
nettoyage.Lefour,les ustensileset les<br />
grilles deviennent chauds pendant<br />
I'operationdu four.<br />
I L. AVERTISSEMENT I<br />
Pour eviter des chocs electriques<br />
pouvantentrafnerde gravesblessures<br />
oum6mela mort,debrancherlecordon<br />
d'alimentation du four ou ouvrir le<br />
disjoncteur avant d'entreprendre le<br />
nettoyagedufour.<br />
Plateau tournant<br />
Leplateautournantet I'anneaurotatifpeuvent<br />
_tre enleves.Leslaver& la main&I'eautiede<br />
(ne pas utiliser d'eau chaude) avec un<br />
detergentdoux.Assechercompletementavec<br />
unchiffondoux.NEPASutiliserde produitsen<br />
poudre, abrasifs, tampons & recurer<br />
metalliques,ou autrestamponsabrasifs.NE<br />
PASlaverau lave-vaisselle.<br />
Le plateautournant peut 6tre nettoye &<br />
I'evier.Prendresoin de ne pas ecaillerou<br />
egratignerle bordcarcecipeutentrafnerla<br />
cassuredu plateautournantpendantson<br />
utilisation.<br />
• I'anneau rotatif doit 6tre nettoye<br />
regulierement.<br />
• Le plateautournantdoit TOUJOURS6tre<br />
enplaceIorsde I'operationdece four.<br />
Nettoyage de I'exterieur<br />
du four<br />
Nettoyer la porte et les autres surfaces<br />
exterieuresdufouravecunchiffonpropre,une<br />
epongeou un tampona recureren nylonen<br />
utilisant une solution d'eau tiede et de<br />
detergentdoux.Bienessorerle chiffonpour<br />
eliminerI'excedentd'eau avantd'essuyerle<br />
four.<br />
• Ne pas utiliserde detergentsagressifsou<br />
abrasifset ne pas utiliserde detergents<br />
contenantdeI'ammoniaque.<br />
Nettoyage de la cavite<br />
du four<br />
EssuyerI'interieurdufouravecunchiffondoux<br />
et une solutionde detergentdoux.Rinceret<br />
essuyer pour secher.Ne jamais utiliser de<br />
produits en poudre, abrasifs ou autres<br />
tamponsabrasifs.<br />
Si les residusde projectionexcessifssur le<br />
hautde lasurfaceinternedu fournesontpas<br />
essuyesimmediatement, ils serontdifficiles&<br />
nettoyer.Essuyer les residusde projection<br />
immediatementavec un papier essuie-tout<br />
humide.<br />
Porter des gants de caoutchouc pour<br />
nettoyerlefour.<br />
Utiliserseulementdes tampons& recurer<br />
en nylon ou un produit equivalentpour<br />
aider & nettoyerles taches ou la salete<br />
accumuleedeI'interieurdu four.<br />
Ne pas utiliserde couteau,d'ustensile<br />
metallique ou de tampon b recurer<br />
metallique pour enlever des saletes<br />
incrustees.Ceciendommagerala surface<br />
teflonis&<br />
51<br />
Entretien et Netto a e<br />
Nettoyage de la porte<br />
du four<br />
Pouroptimiserlaperformanc et lasecuritede<br />
I'appareil, veiller & emp_cher toute<br />
accumulationde residusalimentairesou de<br />
graissesurle cadreavantdu fouret lasurface<br />
interne du panneau de porte. Essuyer<br />
frequemmentavecundetergentdouxet rincer.<br />
Essuyerpoursecheravecunchiffondoux.NE<br />
PASutiliserdeproduitsenpoudre,abrasifsou<br />
autrestamponsabrasifs.<br />
Apres le nettoyagedu tableau de contr61e,<br />
appuyersurCANCEL/STOPpoureffacertoute<br />
programmation ayant ete faite accidentellementpendantle<br />
nettoyage.Poureviterce<br />
probleme,utiliserla fonctionVerrouillagepour<br />
les enfantsavantle nettoyage.<br />
Remarques sur le<br />
nettoyage :<br />
• Nettoyerle fourapreschaqueutilisation.<br />
• Nettoyerles surfacesinterneset externes,<br />
et le panneau de porte selon les<br />
instructions.<br />
• Nettoyerles residusrenversesimmediatement.<br />
• Enleverles grillesdu four,et les nettoyer<br />
selonles instructions.<br />
• Essuyerpoursecherapresle nettoyage.
Guide de anna e<br />
[ AVERTISSEMENT i<br />
Pourevitertout chocelectriquequi pourraitentrafnerde gravesblessuresou m6mela mort, nejamais retirerle boftierexterieur,Seul un<br />
r@arateurautorisepeutretirerle boftierexterieur,<br />
Operation<br />
Sujet<br />
Lefourne fonctionnepas<br />
Arcselectriques ouetincelles<br />
Lalampeinterieurene<br />
fonctionne pas<br />
L'horlogeet la minuteriene<br />
fonctionnentpas<br />
Causepossible<br />
Pannede courant<br />
Ustensiles<br />
Feuillemetallique<br />
Operationdufourvide<br />
Normal<br />
AmpoulebrQlee<br />
Pannede courant<br />
Solution<br />
• Verifiersi I'appareilest branch&<br />
• Verifiersi le disjoncteurn'estpasdeclench&<br />
• Remplacerle fusiblemaissanschangerla capacitedufusible.<br />
• Verifiersi les recipientspeuvent6treutilisesaufour& micro-ondes.<br />
• Ne pasutiliserde feuilled'aluminiumdanslefour.<br />
• NE PASopererle four&vide.<br />
• Lefourest-ilen marche?Lefourdoit6treen marchepourquela lumiere<br />
s'allume.<br />
• I'ampoulepeutavoirbesoind'6treremplacee.<br />
• Verifiersi I'appareilest branch&<br />
• Verifiersi le disjoncteurn'estpasdeclench&<br />
• Remplacerle fusiblemaissanschangerla capacitedufusible.<br />
Reflet lumineuxautour Normal • LalumiereestreflechiedeI'ampoulesitueeentrela cavitedufouret la<br />
du micro-ondes surfaceexternedu four,<br />
52
53<br />
Remar_
Garantie<br />
f<br />
Garantie d'une ANNI E ENTIERE<br />
Amana Appliances reparera ou remplacera (ceci incluant les frais de main-d'oeuvre) toute piece defaillante manifestant un vice de<br />
mat@iau ou de fabrication.<br />
Garantie lirnit_e<br />
Au-del& d'une annee apres la date de I'acquisition au detail du produit, Amana Appliances fournira gratuitement une piece de<br />
rechange (selon la liste ci-dessous) pour la piece qui aura subi une defaillance imputable & un vice de mat@iau ou de fabrication.<br />
Le proprietaire de I'appareil devra payer tousles autres frais, y compris les frais de transport et eventuellement les frais de<br />
deplacement.<br />
De la seconde a la cinqui_me annee<br />
Amana Appliances remplacera (pieces et main-d'oeuvre) le magnetron, le clavier de commande et le microprocesseur,<br />
manifestant un vice de mat@iau ou de fabrication.<br />
Ne sont pas couverts par ces garanties:<br />
, Le remplacement de fusibles, le reenclenchement de<br />
disjoncteurs ou la correction du reseau de plomberie ou de<br />
I'alimentation electrique.<br />
Le nettoyage et I'entretien normaux du produit, y compris le<br />
remplacement d'ampoules.<br />
Le produits dont les num@os de s@ie d'origine ont et6 enleves,<br />
modifies ou ne sont pas facilement visibles.<br />
• Les produits achetes & des fins commerciales, industrielles ou de<br />
location.<br />
Les produits situes & rext@ieur des t_tats-Unis ou du Canada.<br />
, Les frais de service supplementaires dans le cas o_ un<br />
reparateur doit effecteur des reparations en plus des reparations<br />
normales, en dehors des heures de service normales ou encore<br />
dans une region & rext@ieur de son district habituel.<br />
, Des reglages apres la premier annee.<br />
,, Des reparations resultant de raisons suivantes :<br />
- Installation, systeme d'evacuation ou entretien incorrects.<br />
- Toute modification ou tout reglage non autorises par Amana.<br />
- Tout accident, mauvaise utilisation, usage abusif, incendie,<br />
inondation ou catastrophe naturelle.<br />
- Raccordement incorrect & ralimentation de gaz ou &<br />
I'alimentation electrique, de tension ou intensite incorrecte.<br />
- Utilisation d'ustensiles, contenants ou accessoires incorrects<br />
qui endommagent le produit.<br />
, Deplacement.<br />
Si I'intervention d'un depanneur est<br />
necessaire<br />
| Contacter le detaillant chez qui I'appareil a ete achete, ou<br />
contacter le service & la clientele de Amana Appliances<br />
Consumer Services au 1-800-843-0304 aux t_.-U, et 1-866-587-<br />
2002 au Canada, pour obtenir les coordonnees d'une agence de<br />
service agreee.<br />
| Veiller & conserver la facture d'achat pour justifier de la validite de<br />
la garantie. Pour d'autres informations en ce qui concerne les<br />
responsabilites du proprietaire & regard du service sous garantie,<br />
voir le texte de la GARANTIE.<br />
| Si le detaillant ou I'agence de service apres-vente ne peut<br />
resoudre le probleme, ecrire & Amana Appliances Consumers<br />
Services, 2800-220th Trail, Amana, Iowa, 52204, ou telephoner<br />
au 1-800-843-0304 (t_.-U.) ou 1-866-587-2002 (Canada).<br />
RElVlARQUE : Lors de tout contact concernant un probleme,<br />
fournir rinformation suivante :<br />
a. Nora, adresse et num@o de telephone du client ;<br />
b. Num@o de modele et num@o de s@ie de rappareil ;<br />
c. Nom et adresse du detaJllant ou de ragence de service ;<br />
d. Description claire du probleme observe ;<br />
e. Preuve d'achat (facture de vente).<br />
| Les guides d'utilisation, les manuels de service et les<br />
renseignements des pieces sont disponibles aupres de Amana<br />
Appliances Consumers Services.<br />
EN AUCUN CAS MAYTAG NE SERA TENUE RESPONSABLE DE DOMMAGES DIRECTS OU INDIRECTS.<br />
Cettegarantievousconf@edes droitsjuridiquesspecifiques.Vouspouvezegalementjouird'autresdroits,variablesd'un etat &un autreou d'une<br />
province&uneautre.Parexemple,certainsetatsou provincesne permettentpas I'exclusionou la limitationde dommagesdirectsou indirects.Cette<br />
limitationpeutdoncnepass'appliquerdansvotrecas.<br />
54
Horno de Microondas<br />
Combinaci6n del Tablero<br />
Guia del Usuario<br />
Instalador: Por favordejeeste manualjunto<br />
conel electrodomestico,<br />
Consumidor: Pot favorlea y conserveeste<br />
manualpara referenciafutura, Conserveel<br />
recibo de compray/o el cheque cancelado<br />
comocomprobantedecompra,<br />
Nt_merode Modelo<br />
Nt_merode Serie<br />
Fechade Compra<br />
Si tiene preguntas, por favor escribanos<br />
(incluyael numerodemodeloy su numerode<br />
telefono)o Ilamea:<br />
Amana Appliances Consumer<br />
Services<br />
Amana Appliances<br />
2800-220th Trail<br />
Amana, IA 52204<br />
1-800-843-0304 EE. UU.<br />
1-866-587-2002 Canad&<br />
(Lunes a Viernes desde las 8:00 a.m.<br />
hasta las 8:00 p.m. Hora del Este)<br />
Internet: http://www.amana.com<br />
A CM1580A<br />
Tabla de Materias<br />
Instrucciones Importantes Sobre Seguridad ....................... 56-58<br />
Instalaci6n .................................................. 59<br />
Pantella Digital y Characteristicas .............................. 60-63<br />
M_thodos de Cocci6n .......................................... 64<br />
Sugerencias para la selecci6n de utensilios ......................... 65<br />
Cocci6n por Microondas ..................................... 66-70<br />
Cocci6n por Convecci6n ........................................ 71<br />
Cocci6n Combinada ......................................... 72-73<br />
Sugerencias para Cocinar .................................... 74-77<br />
Limpieza .................................................... 78<br />
Localizati6n y Soluci6n de Averias ................................ 79<br />
Garantia .................................................... 80<br />
Horno de Microondas EMctrico<br />
Conserve las instrucciones para referencia futura.<br />
AsegOrese de que este manual permanezca con el homo.<br />
{ 4 4
INSTRUCCIONES IMPORTANTES DE SEGURIDAD<br />
Informaci6n Sobre las<br />
Instrucciones de<br />
Seguridad<br />
Las advertenciase instrucciones importantes<br />
sobreseguridadqueaparecenenestemanual<br />
noestAndestinadasacubrirtodaslasposibles<br />
circunstancias y situaciones que puedan<br />
ocurrir. Se debe ejercer sentido comun,<br />
precauci6ny cuidadocuandoinstale,efectue<br />
mantenimientocuandouse elmicroondas.<br />
Siempre p6ngase en contacto con su<br />
distribuidor,agentede servicioo fabricantesi<br />
surgenproblemaso situacionesqueustedno<br />
comprenda.<br />
_ADVERTENCIA I<br />
Para evitar el riesgo de un choque<br />
electricoo la muerte,estehomo debe<br />
setpuestoa tierray el enchufenodebe<br />
setmodificado.<br />
Reconozca los Simbolos, Advertencias y Etiquetas de Seguridad<br />
[ ,_PELIGRO i<br />
PELIGRO-- RiesgosinmediatosqueCAUSARANlesi6npersonalgraveo mortal.<br />
[ ,_ADVERTENCIA i<br />
ADVERTENClA-- Peligroso 3r_.cticasnosegurasque PODRIANcausarlesi6npersonalgrave<br />
o mortal.<br />
[ a,ATENCIO. i<br />
ATENCION- Peligroso pra.cticas no seguras que PODRJANcausar Jesi6n personaJ menos<br />
grave.<br />
Instrucciones para la<br />
Puesta a Tierra<br />
puesto a tierra. La<br />
El puestaa hornotierra DEBE reducela ser __<br />
posibilidadde un choque<br />
electricoofreciendoun alambre de escape<br />
paralacorrienteelectricasi es que ocurreun<br />
cortocircuito.Este homo esta.equipadocon<br />
uncord6nelectricoprovistodeunenchufecon<br />
puesta a tierra. El enchufe debe set<br />
enchufado en un tomacorrienteque este<br />
debidamenteinstaladoy puestoa tierra.<br />
Consultea un electricistao tecnicocalificado<br />
si no comprendebien las instruccionesde<br />
puestaa tierrao si tiene dudasrespectoa la<br />
puestaa tierradelhomo.<br />
No use un cordon de extension. Si el<br />
cord6n electrico del aparatoes demasiado<br />
corto,solicitea un electricistacalificadoque<br />
instaleuntomacorrientedetresalveolos.Este<br />
homo debe set enchufadoen un circuito<br />
separado de 60 Hz y usado con la<br />
alimentaci6nelectricamostradaen latablade<br />
especificaciones.Cuandoel homo comparte<br />
el circuito con otros equipos, pueden ser<br />
necesariostiemposde cocci6nmas largosy<br />
losfusiblesse puedenfun@.<br />
El homo de microondas funciona con la<br />
corrienteestandardelhogarde 110-120V.<br />
DECLARACION DE INTERFERENCIA DE RADIOFRECUENCIA DE LA<br />
COMISION FEDERAL DE COMUNICACIONES (EE.UU. SOLAMENTE)<br />
Esteequipogeneray usa energiade frecuenciaISMy si noes instaladoy usadoenformadebida,es decirenestrictocumplimientocon las<br />
instruccionesdelfabricante,puedecausarinterferenciaconla recepci6nde la radioy de latelevisi6n.Seha comprobadoy confirmadoque<br />
cumpleconloslimitesestipuladosparaequiposISM(Industriales,Cientificos,Medicos)envirtuddelasecci6n18delreglamentosdela FCC,<br />
que hansidodisefiadosparaproveerprotecci6nrazonablecontratal interferenciaenunainstalaci6nresidencial.<br />
Sinembargo,no se garantizaque no ocurrira,interferenciaen algunainstalaci6ndeterminada. Si esteequipocausainterferenciacon la<br />
recepci6nde radioy detelevisi6n,Io cualpuedeserdeterminadoapagandoy encendiendoel equipo,se recomiendaqueel usuariotratede<br />
corregirla interferenciamedianteunao masdelas siguientesrecomendaciones:<br />
• Cambiededirecci6nla antenade recepci6nde la radioo televisi6n.<br />
• Ubiqueen otrolugarel homodemicroondascon respectoal receptor.<br />
• Muevael homode microondasa unlugaralejadodel receptor.<br />
• Enchufeel microondasenuntomacorrientediferentede modoqueelmicroondasy el receptorestenencircuitosdiferentes.<br />
El fabricante noes responsablede ningunainterferenciade radioo televisi6ncausadaper modificaci6n no autorizada a estehomo de<br />
microondas.Es responsabilidadelusuariocorregirtal interferencia.<br />
CONSERVE ESTAS INSTRUCCIONES<br />
56
Reconozca este simbolo como un mensaje de SEGURIDAD<br />
I ADVERTENCIA<br />
Cuandouse aparatoselectricos,se debenseguirinstruccionesdeseguridadbasicasparareducirel riesgodequemaduras,choqueelectrico,<br />
incendio,lesi6na personaso exposici6na energiamicroondasexcesiva.<br />
1. LEAtodaslasinstrucciones antesdeusaresteartefacto.<br />
2. LEA Y SIGA las "PRECAUCIONESPARA EVlTARPOSIBLE<br />
EXPOSIClONA ENERGIADE MICROONDASEXCESIVA"en LA<br />
SECCIONINSTRUCCIONES IMPORTANTESDESEGURIDAD.<br />
, EstehomoDEBESERPUESTOATIERRA.Enchufelosolament en<br />
un tomacorrientePUESTOA TIERRAen formadebida.Vea las<br />
INSTRUCCIONESDE PUESTAA TIERRAen las instruccionesde<br />
instalaci6n.<br />
4. Instaleo ubiqueesteartefactoSOLAMENTEde acuerdocon las<br />
instruccionesdeinstalaci6n.<br />
5. Algunos productos tales como huevos enteros y envases<br />
sellados- porejemplo,fiascosdevidrioscerrados- puedenexplotary<br />
NODEBENsetCALENTADOSenestehomo.<br />
6. Use este artefactoSOLAMENTEpara el prop6sitoque ha sido<br />
diseSadocomose describeen este manual. No use productos<br />
quimicoscorrosivoso vaporesenesteartefacto.Estetipodehomoha<br />
sidoespedficamentediseSadoparacalentar,cocinarosecaralimento.<br />
NohasidodiseSadoparausoindustrialodelaboratorio.<br />
7. AI igual que con cualquierelectrodomestico,es necesariauna<br />
SUPERVISIONESTRICTAcuandoes usadopotNINOS.<br />
8. NO hagafuncionaresteartefactosi el cord6nelectricoo elenchufe<br />
esta.ndaSados,si no estafuncionandoen formadebidao si se ha<br />
daSad odejadocaer.<br />
11.NOcalientemamaderasenelhomo.<br />
12.Losfiascosdealimentosdebebedebensetabiertosparacalentarlosy<br />
elcontenidodeberevolverseosacudirseantesdelconsumo, paraevitar<br />
quemaduras.<br />
13.NOguardeesteartefactoalairelibre.NOuseesteproductocercadel<br />
agua- potejemplo,cercadeunfregadero, enuns6tanohumedo,cerca<br />
deunapiscinao lugaresimilares.<br />
14.NOsumerjaelcord6nelectric o elenchufeenelagua.<br />
15.Mantenga el cord6n electrico ALEJADO de las superficies<br />
CALIENTES.<br />
16.NOdejequeelcord6nelectricocuelguesobreelhordedelamesao de<br />
laencimera.<br />
17.Vealasinstruccionesdelimpiezade lapuertaenlasecci6nCuidadoy<br />
Limpiezadeestemanual.<br />
18.NO insertealimentosde tamaSodemasiadograndeo utensiliosde<br />
tamaSodemasiadogrand enunhomodemicroondas/convecci6n pues<br />
sepuedecrearunincendio, arcoelectric o riesgodechoqueelectrico.<br />
19.NOlimpieconesponjasderestregarmetalicas.Sepuedenromper<br />
pedazosde laesponjay tocarpiezaselectricascausandounriesgode<br />
choqueelectrico.<br />
20.NOuseproductosdepapelquenodebensetusadoscuandoelhomo<br />
sehacefuncionarenmododeconvecci6nocombinado.<br />
21.Aexcepci6ndelosmaterialesrecomendados porelfabricante,NO<br />
guardeningunmaterialenestehomocuandonoesteenuso.<br />
9. Este homo, incluyendoel cord6n electrico,debe ser reparado<br />
SOLAMENTEpot personalde serviciocalificado. Se requieren<br />
22.NOcubralasparrillasniningunotrapartedelhomoconpapelde<br />
herramientas especialespararepararestehomo.P6ngasencontacto<br />
con el centrode servicioautorizadomascercanoparael examen,<br />
aluminio.Larestricci6ndelacirculaci6ndelairepuedecausar<br />
sobrecalentamiento delhomo.<br />
reparaci6no ajustedelhomo.<br />
23.NOrocieel homoconsolucionesdelimpiezaenlasupefficiedela<br />
10.NOcubranibloque elfiltrou otrosorificiosdelhomo.<br />
cavidadinteriortrasera.Estocontaminar&y daSar&elconjunto<br />
calefactordeconvecci6n.<br />
PRECAUCIONES PARA EVITAR POSIBLE EXPOSICION A ENERGIA<br />
DE iVllCRO-ONDAS EXCESIVA<br />
A. NO intentehacerfuncionarestehomo con la puertaabiertapuesse puedeproducirexposici6nperjudiciala la energiade microondas.Es<br />
importantenomodificarnialterarlosentrecierresdeseguridad.<br />
B. NO coloqueningunobjetoentrela parte delanteradelhomo y la puertani dejequese acumulesuciedado residuosde limpiadoresen las<br />
superficiesde sellado.<br />
C. NO hagafuncionareste hornosi estadaSado.Esparticularmenteimportanteque lapuertadelhomocierrebieny quenose hayadaSado:<br />
1. lapuerta(doblada),2. lasbisagrasy pestillos(rotoso sueltos),3. lasjuntasde lapuertay superficiesde sellado.<br />
D. El homonodebeset ajustadoni reparadopot ningunapersonaque noseapersonalde serviciocalificado.<br />
CONSERVE ESTAS INSTRUCCIONES<br />
57
INSTRUCCIONES IMPORTANTES DE SEGURIDAD<br />
I ADVERTENCIA<br />
A findeevitarel peligrodeincendioenlacavidaddelhomo:<br />
a, NO cocine demasiadoel alimento.Prestecuidadosa<br />
atenci6n al artefactocuando coloque en su interior<br />
papel, pl&sticou otros materialescombustiblespara<br />
facilitarla cocci6n.<br />
C,<br />
d,<br />
b,<br />
Retirelas atadurasdealambrede las bolsasdepapelo<br />
de pl&sticoantesde colocarla bolsaenel homo.<br />
Si se incendianlos materialesque est&ndentro del<br />
homo, MANTENGA LA PUERTA DEL HORNO<br />
CERRADA,apagueel homo y desenchufeel cord6n<br />
electricoo desconectela energiaelectricaenel fusible<br />
o en elpaneldeldisyuntor.<br />
NOuselacavidaddelhomoparaalmacenamiento.NO<br />
guarde articulos de papel, utensilios de cocina o<br />
alimentosen la cavidaddel homo cuandono esteen<br />
USO,<br />
Paraevitarriesgodeunalesi6npersonalo dafiosmateriales<br />
observeIosiguiente:<br />
1. NOfria con grasaenel homo. Lagrasapuedesobrecalentarse<br />
y set peligrosademanipular.<br />
2. NOcocineni recalientehuevosenteroso con unayemanorota<br />
usandoenergiade microondas.Puedehaberacumulaci6nde<br />
presi6ny reventar.Perforelayemaconel tenedoro un cuchillo<br />
antesdecocinar.<br />
3. Perforela c&scaradelas papas,tomatesy alimentossimilares<br />
antesdecocinarlosconenergiamicroondas.Cuandola<br />
c&scaraes perforada,elvaporescapauniformemente.<br />
4. NOdejeel homodesatendido.<br />
5. NO useterm6metrosdecocinaregulatesenel homocuando<br />
estecocinandoen modomicroondaso combinado.Lamayoria<br />
delos term6metrosde cocinacontienenmercurioy pueden<br />
causarunarcoelectrico,malfuncionamientodafio al homo.<br />
6. NO useutensiliosde metalenel homoexceptocuandosea<br />
recomendadopotlos fabricantesde alimentosparamicroondas<br />
o si la recetaexigeutensiliosdemetalenel modode<br />
convecci6no combinado.Calienteel alimentoen contenedores<br />
devidrioo deIozasi es posible.<br />
7. Nuncausepapel,pl&sticouotrosmaterialescombustiblesque<br />
noestendestinadosparacocinarconellos. Sila temperatura<br />
delhomoes alta,el materialpuedeencenderse.<br />
ATENCION<br />
I ADVERTENCIA<br />
Los liquidos tales como el agua, cafe o te pueden<br />
calentarsem&sall&delpuntode ebullici6nsin queparezca<br />
que est&n hirviendodebido a la tensi6n superficialdel<br />
liquido. Nosiemprese ver&nlas burbujaso hervorcuando<br />
el envasees retiradodelhomo. ESTOPUEDERESULTAR<br />
EN QUE LOS LIQUlDOS MUY CALIENTES SE<br />
DERRAMENREPENTINAMENTECUANDOSE INSERTA<br />
EN EL LIQUlDOUNA CUCHARAU OTROUTENSILIO.<br />
Parareducirel riesgode lesi6na personas:<br />
1. Nosobrecalient el liquido.<br />
CONSERVE ESTAS INSTRUCCIONES<br />
58<br />
2. Revuelvaelliquidoantesy a lamitaddecalentarse.<br />
3. Nouseenvasescon ladosrectosy cuellosestrechos.<br />
4. Despuesde calentar,deje el envaseen el homo de<br />
microondasporuncortotiempoantesde retirarlo.<br />
5. Useextremocuidadocuandoinserteunacucharauotto<br />
utensilioenel contenedor.<br />
8. Latemperaturadel homoes porIo menosde 100oFen el<br />
modoconvecci6n.Verifiquesi el pl&stico,papelu otros<br />
materialescombustibleson recomendadosporel fabricante<br />
parasoportarla temperaturaminimadelhomo.<br />
9. Cuandococineconpapel,pl&sticou otrosmateriales<br />
combustibles,sigalas recomendacionesdelfabricantesobreel<br />
usodel producto.<br />
10. NOuse toallasde papelquecontengannil6nuotra fibra<br />
sintetica.Lasfibrassinteticascalentadaspuedenderretirsey<br />
encenderelpapel.<br />
11. NOcalientebolsasdepl&sticonienvasesselladosenel homo.<br />
El liquidoo el alimentopuedeexpandirser@idamentey causar<br />
la roturadelenvaseo dela bolsa. Perforeo abraelcontenedor<br />
o bolsaantesde calentar.<br />
12. Lasparrillas,utensilios,guiasdelas parrillasy superficiesdel<br />
homopuedenestarcalientesduranteo despuesdel uso. Use<br />
utensilioso ropasprotectorascomotomaollaso guantesde<br />
homosecoscuandosea necesarioparaevitarquemaduras.<br />
13. NOdesenchufeel homoinmediatamentedespuesdeluso. El<br />
ventiladorinternodebeenfriarel homoparaevitardafiode los<br />
componenteselectricos.<br />
14. Paraevitarmalfuncionamientode marcapasos,consultea su<br />
medicoo al fabricantedelmarcapasorespectoa los efectosde<br />
laenergiade microondasenel marcapaso.
Desempaque del Horno<br />
• Inspeccion el homo paraverificarsi tiene<br />
dafiotalescomoabolladurasen lapuertao<br />
dentrodela cavidaddelhomo.<br />
• Reporteinmediatamentecualquierabolladurao<br />
roturaal lugardecompra.<br />
Nointenteusarel hornosi estadafiado.<br />
• Retiretodoslos materialesdel interiordel<br />
horno.<br />
• Siel hornohaestadoguardadoen unArea<br />
extremadamentefria, espere unas pocas<br />
horasantesde enchufarlo.<br />
Ubicaci6n del Homo<br />
• No instaleel homo cercao arribade una<br />
fuentedecalor,tal comounhomodepizza<br />
o una freidora. Estopuedecausarque el<br />
homo de microondasfuncione inapropiadamentey<br />
se reduzcala vida util de las<br />
piezasel6ctricas.<br />
• Dejesuficienteespacioparacirculaci6ndel<br />
airealrededordel homo.<br />
• Jnstale el homo sobre una superficie<br />
nivelada.<br />
• El tomacorrientedebe estar colocadode<br />
modoqueel enchufeIleguehasta61cuando<br />
el homoesteensu lugar.<br />
Posibilidad de ser<br />
Integrable<br />
Referirselasinstruccionesdeinstalaci6n.<br />
Parainformaci6nIlameal:<br />
1-800-843-0304EE.UU.<br />
1-866-587-2002Canada<br />
5g<br />
Espacios<br />
Horno<br />
B_<br />
\<br />
Instalaci6n<br />
Libres del<br />
A- Deje per Io menos 4" de espacio<br />
alrededorde la parte superiory de los<br />
ladosdel homo. Lacirculaci6ndel aire<br />
apropiadaalrededordel homoenfria los<br />
componenteselectricos.Si lacirculaci6n<br />
es restringida, el homo no puede<br />
funcionarenformadebiday se reducela<br />
vidat_tildelas piezaselectricas.<br />
Instaleel homocombinadodemodoque<br />
la parte inferior este per Io menosa 3<br />
pies(36pulgadas)sobreel suelo.
ital y Character{sticas<br />
Juntade la<br />
Puerta<br />
\<br />
Rejilla le la<br />
Ventana<br />
de la Puerta<br />
.=Seguridad<br />
de la Puerta<br />
Placa Delantera del<br />
Homo<br />
NOTA: Cuandose oprime<br />
una tecla del panel de<br />
control se escucha una<br />
serial sonorapara indicar<br />
que el ajuste ha sido<br />
programado.<br />
S<br />
Bandeja Giratoria<br />
Anillo Giratorio<br />
PantaUa<br />
Digital<br />
Panel de<br />
Control<br />
Botbn para Abrir<br />
la Puerta<br />
Convectian / Canvecti#n Cambinatian<br />
Microwave<br />
: AUTO/TIME DEFROST COOK<br />
'% _ _ii;_<br />
REMINDER _ RECALL HELP<br />
' CLOCK !: CONTROL TIMER<br />
SET-UP<br />
FOR RECIPES REQUIRIN,._ STIRRING OR TO<br />
CI4ECK FOOD WITHOUT C_mCELI_G COOKING<br />
PROCP_ PRESS ST_aT/pAUSE<br />
60<br />
Especificaciones<br />
Del Homo<br />
Alimentaci6nElectrica 120VAC,60 Hz<br />
Potenciade Entrada 1.500W<br />
PotenciadeCocci6n 1.000W (Norrna<br />
60705IEC)<br />
Frecuencia 2.450MHz<br />
PotenciaNominal 13A<br />
DimensionesExteriores 57,5cm(225_ '') x<br />
(Anchox Altox 37,8crn(147_ '') x<br />
Profundidad) 50,8crn(20")<br />
CapacidadInterior 0,042rn3 (1,5<br />
PiesC0bicos)<br />
PesoNeto 23,6kg (52libras)<br />
Su homo ser_.enviado con los siguientes<br />
articulos:<br />
BandejaGiratoria ................... 1<br />
<strong>Manual</strong>del Usuarioy Guiade Cocci6n.... 1<br />
AnilloGiratorio...................... 1<br />
Este hornode microondasha sido disefiado<br />
para uso dom4stico solamente. No se<br />
recomiendapara prop6sitoscomercialesy<br />
estoanularialagarantia.
'DISPLAY' (Pantalla)- La pantalla<br />
incluye un reloj e indicadoresque<br />
muestranla horadel dia, los ajustesde<br />
tiempo de cocciSny las funciones de<br />
cocci6nseleccionadas.<br />
2. 'CONV. COOK' (Cocci6n por<br />
Convecci6n) - Optima esta tecla para<br />
que el homo funcione como homo de<br />
convecci6nsolamente.Verp_.gina71.<br />
3. 'AUTO BAKE' (Hornear Autom_tica-<br />
mente) - Oprima esta tecla para<br />
hornear autom&ticamente pizza,<br />
panquecitos,bizcochosy papas fritas<br />
congeladas usando energia de<br />
microondas y energia de convecci6n<br />
alternativamente.Vetp_.gina73.<br />
4. 'AUTO ROAST' (Asar Autom_tica-<br />
mente) - Oprima esta tecla para asar<br />
autom_.ficamente came de vacuno,<br />
polio,pechugasde pavoy cerdousando<br />
alternativamenteenergiade microondas<br />
y de convecci6n.Verp_.gina73.<br />
5. 'BAKE' (Hornear) - Oprima esta tecla<br />
paraprogramarel tiempodehorneadoy<br />
la temperaturapara un ciclo de cocci6n<br />
usandoambas,energiade microondasy<br />
energiade convecci6n.Verp_.gina72.<br />
6. 'ROAST' (Asar) - Oprima esta tecla<br />
para programarel fiempode asadoy la<br />
temperatura para un ciclo de cocci6n<br />
usando energia de microondas y de<br />
convecci6n.Ver p_.gina72.<br />
7. 'SENSOR COOK' (Cocci6n pot<br />
Sensor) - Oprima esta tecla para<br />
cocinar10tipos de alimentos.El sensor<br />
del homocalculate,el tiempode cocci6n<br />
dependiendodela cantidadde humedad<br />
quedespidael alimento.Vet p_.gina69.<br />
8. 'SENSOR POPCORN' (Palomitas de<br />
[v]aizpot Sensor) - Oprima esta tecla<br />
cuando prepare en su homo de<br />
microondas palomitas de maiz<br />
envasadascomercialmente. El sensor<br />
del homo indicar_,al homo cuanto<br />
tiempose debecocinardependiendode<br />
la cantidadde humedadquedetecte en<br />
el maiz. Vet p_.gina69.<br />
9. 'SENSOR REHEAT'(Recalentamiento<br />
pot Sensor) - Optima esta tecla para<br />
recalentaralimentosprecocinados,que<br />
estan a temperatura ambiente o<br />
refrigerados. El sensor del homo<br />
indicate,al homocuantotiempose debe<br />
cocinardependiendode la cantidadde<br />
humedadque de@idael alimento. Vet<br />
p_.gina69.<br />
10. 'DEFROST AUTO/TIME'(Descongelar<br />
Autom_ticamente/Tiempo) - Oprima<br />
esta tecla una vez para descongelar<br />
autom_.ticamentecame, polio, pescado<br />
o pansegunel peso.<br />
Optima esta tecla dos veces para<br />
descongelar la mayoria de los otros<br />
alimentoscongeladossegun el tiempo.<br />
Vet p_.gina67.<br />
11. 'RAPID DEFROST1 lb.' (Descongelar<br />
R_pidamente 0,45 kg) - Oprima esta<br />
teclaparadescongelarr@idamenteuna<br />
libra de alimentos congelados. Ver<br />
p_.gina67 y 68.<br />
12. 'EASY COOK' (Coccibn Facil) -<br />
Oprima esta tecla para programar y<br />
comenzarlacocci6nusando100%de la<br />
potencia. Verp_.gina62.<br />
13. 'PROGRAM'(Programacion)- Oprima<br />
estatecla paraprogramarmanualmente<br />
el tiempo de cocci6n y el nivel de<br />
potencia. Verp_.gina66.<br />
14. 'WARM HOLD' ([v]antieneCaliente) -<br />
Oprima esta tecla para mantener<br />
calientes alimentos cocinados en su<br />
homo hasta durante 99 minutos. Ver<br />
p_.gina63.<br />
15. 'POWER LEVEL' (Potencia de<br />
Cocci6n) - Optima esta tecla para<br />
seleccionar un nivel de potencia de<br />
cocci6n.Vet p_.gina66.<br />
61<br />
16. 'MORE' + ([vlas) - Oprima esta tecla<br />
paraagregar10 segundosal tiempode<br />
cocci6n cada vez que usted la oprime.<br />
Vet p_.gina63.<br />
17. 'LESS'- ([vlenos) - Optimaesta tecla<br />
para quitar 10 segundos al tiempo de<br />
cocci6n cada vez que usted la oprime.<br />
Vet p_.gina63.<br />
18. 'CANCEL/STOP' (Cancelar/Borrar) -<br />
Oprima esta tecla para cancelar un<br />
programa que este funcionando<br />
actualmenteo borrarunciclode cocci6n<br />
queha sidoprogramado.Vet p_.gina62.<br />
19. 'START/PAUSE'(Comenzar/Detener)-<br />
Optima esta tecla para comenzar un<br />
programa o para detener el homo<br />
durante la cocci6n o descongelaci6n.<br />
Vet p_.gina62.<br />
20. 'HELP' (Ayuda) - Esta tecla despliega<br />
informaci6nsobre las caracteristicasy<br />
sugerenciasutiles. Vet p_.gina62.<br />
21. 'REMINDER' (Avisador) - Use esta<br />
tecla como un reloj despertador sin<br />
detenerel horno. Verp_.gina63.<br />
22. 'RECALL'(Repita) - Oprimaesta tecla<br />
para repetirel ciclode cocci6nanterior.<br />
Verp_.gina62.<br />
23. 'CLOCK' (Reloj) - Oprima esta tecla<br />
paracolocarla horadel dia. Verp_.gina<br />
62.<br />
24. 'CONTROLSET UP (Programacion de<br />
los Controles) - Oprimaesta teclapara<br />
cambiarlos ajustes implicitosdel homo,<br />
tal como volumen, reloj, velocidad de<br />
despliegue,unidadesde peso e idioma.<br />
Vet p_.gina62.<br />
25. 'TIMER'(Tempodzador) - Oprimaesta<br />
tecla paraajustar el temporizadorde la<br />
cocina. Vet p_.gina62.
ital y Charactedsticas (cont.)<br />
Reloj de 12 Horas y<br />
Temporizador<br />
El homo est,. equipadocon un reloj de 12<br />
horas y un temporizador que puede ser<br />
programadohasta99 minutosy 99segundos.<br />
El relojnomuestraAM o PM.<br />
TIMER<br />
Paraprogramarel reloj:<br />
1. Optimalatecla<br />
'CLOCK'.<br />
, Lapantallamuestra<br />
'ENTERTIMEOF<br />
DAY'(Programarla<br />
horadeldia).<br />
2. Coloquelahora<br />
deseadausandolas<br />
teclasnum&icas.<br />
, Lapantallamuestra<br />
'TOUCHSTART'<br />
(OprimaStart).<br />
3. Oprima<br />
'START/PAUSE'<br />
Paraprogramarel<br />
temporizador:<br />
1. Optimalatecla<br />
'TIMER'.<br />
, Lapantallamuestra<br />
'ENTERTiMEiN<br />
MIN.ANDSEC.'<br />
(Programela hora<br />
enminutosy<br />
segundos).<br />
2. Programetiempo<br />
deseadousandolas<br />
teclasnum&icas.<br />
, Lacantidadm_.xima<br />
detiempoes99<br />
minutosy 99<br />
segundos.<br />
, Lapantallamuestra<br />
'TOUCHTIMER'<br />
(Oprimael<br />
temporizador).<br />
3. Optima'TIMER'<br />
, Paracancelarel<br />
temporizadoren<br />
cualquiermomento,<br />
oprimalatecla<br />
'TIMER'.<br />
'Start/Pause'<br />
(Comenzad<br />
Detener)<br />
Estatecla pondr_,en marchala funci6nque<br />
usted program6 o detendr_, el homo<br />
temporalmente durante la cocci6n o<br />
descongelaci6n. Oprima nuevamentepara<br />
reanudar el funcionamiento del homo<br />
despuesdeunapausa.<br />
'Cancel/Stop'<br />
(Cancelad<br />
Borrar)<br />
Esta tecla cancela un programaque est,.<br />
funcionandoactualmentey borrael ciclo de<br />
cocci6nqueest,.siendoprogramado.<br />
'Recall'<br />
(Repita)<br />
Estacaracteristicapermitequeustedrepitael<br />
ciclo de cocci6n previo sin tenet que<br />
reprogramarel homo.Parausarsimplemente<br />
optima 'CANCEL/ STOP' y luego optima<br />
'RECALl'.<br />
'Child Lock'<br />
(Bloqueo para las<br />
Nihos)<br />
'Child Lock'evitala programaci6naccidental<br />
por nifios o cuandose limpia el controldel<br />
homo. Paraactivarel bloqueocontranifios,<br />
optimay mantengaoprimidala tecla0 hasta<br />
queen la pantallaaparezca'LOCKED'y se<br />
escuchen sonidos. Durante el modo de<br />
bloqueo contra nifios, cuando se oprime<br />
cualquierteda la pantallamuestra'LOCKED'<br />
(Bloqueado).Paracancelarel bloqueocontra<br />
nifios,oprimay mantengaoprimidala tecla0<br />
hastaquela palabra'LOCKED'desaparezca<br />
de la pantalla. Despuesde desactivarel<br />
bloqueocontranifios,lahoradeldia aparece<br />
y las funciones de cocci6n vuelven a la<br />
normalidad.<br />
62<br />
'Easy Cook'<br />
(Coccion Facil)<br />
Oprima la tecla 'EASY<br />
COOK'paracadaminutode tiempode cocci6n<br />
enmicroondasquedesee.AI fin deltiempode<br />
cocci6n,seoir_.nsonidos.<br />
Parausar'Easy Cook':<br />
1. Oprima la tecla 'EASY COOK'para cada<br />
minutode tiempodemicroondasdeseado.<br />
2. AI final del ciclo de cocci6n,el homo se<br />
defieney se oyensonidos.<br />
'Help' (Ayuda)<br />
'HELP' (Ayuda) despliega<br />
informaci6n sobrecaracteristicasy sugerencias<br />
utiles. Para usar la caracteristica'HELP',<br />
simplementeoptimala tecla'HELP'y luegola<br />
tecla de la caracteristicarespectoa la cual<br />
usteddeseainformaci6n.La pantallamostrar_.<br />
informaci6n descriptiva a cerca de esa<br />
caracteristica. Despues de mostrar la<br />
informaci6nsobreayuda,el homodesactivael<br />
modo'help'.<br />
'Control Set-up'<br />
(Programacion<br />
de los Controles)<br />
Este homo ha sido disefiado<br />
para satisfacerpreferenciasindividualestales<br />
como idioma y control del volumen. Para<br />
cambiarunaopci6n:<br />
1. Optima la tecla 'CONTROL SET UP'<br />
(PROGRAMACIONDE LOSCONTROLES).<br />
2. Oprimala tecla para la opci6n que usted<br />
deseacambiar.<br />
3. El homo muestra seleccionespara esa<br />
opci6n.<br />
4. Optimala tecla para la selecci6ndeseada<br />
paraesaopci6n.<br />
5. Elhomohaceelcambioy desactivaelmodo<br />
opci6n.<br />
Funcion<br />
Volumen<br />
fuerte<br />
Reloj<br />
Velocidadde<br />
Despliegue<br />
Unidades<br />
Demo<br />
Idioma<br />
TeclaOpcion<br />
1 Mudo,bajo,mediano,<br />
2<br />
3<br />
4<br />
5<br />
6<br />
Activadoo Desactivado<br />
Lenta,normalo<br />
rapida<br />
Librasy° F o K9,° C<br />
Activadoo Desactivado<br />
Ingleso Espafiol
'Reminder'<br />
(Avisador)<br />
La caractefistica'reminder'(avisador)puede<br />
ser usada como un reloj despertador. El<br />
homo no funciona. El tiempo del avisador<br />
puede set programadopara que se active<br />
hasta12horasdespuesde lahoraactualdel<br />
dia.<br />
Paraprogramarun avisador:<br />
1, Optimalateda 'REMINDER',<br />
. Lapantallamuestra'ENTERREMIND<br />
TIME'(Programeel tiempodel<br />
avisador),<br />
2, Programe la hora deseada usando las<br />
tedasnumericas.<br />
. Lapantallamuestra'TOUCH<br />
REMINDER'(Optimala teda<br />
'Reminder').<br />
3. Optimalatecla'REMINDER'.<br />
. Lapantallamuestra'REMINDERSET'<br />
(AvisadorProgramado).<br />
. Paracancelarel programadelavisador<br />
oprima'REMINDER'seguidode lateda<br />
'CANCEL/STOP'.<br />
5. El avisador suena y se despliega<br />
'REMINDER'en la horaseleccionada.El<br />
homo despues desacfiva el modo<br />
'reminder'.<br />
'Warm/Hold'<br />
(Mantener<br />
Caliente)<br />
Esta caracteristica mantiene caliente, de<br />
manerasegura,losalimentoscocinadosensu<br />
homo hasta durante 99 minutos usando<br />
energiade microondas, Usted puedeusar<br />
'WARM/HOLD' porsi soloo automAticamente<br />
a continuaci6n de un ciclo de cocci6n<br />
programadoporreloj,<br />
No use mAs de un ciclo 'WARM/HOLD'<br />
completoenel alimento.<br />
Parausar'WARM/HOLD':<br />
, Coloqueel alimentococinadocalienteen<br />
el homoy cierrelapuerta,<br />
• El alimentoqueestuvocubiertodurante<br />
la cocci6ndebemantenersecubierto<br />
duranteelciclode'WARM/HOLD',<br />
Losarticulosde pasteleria(pays,<br />
empanadas,etc.)debenestar<br />
descubiertosduranteelciclo<br />
'WARM/HOLD'.<br />
Lascomidascompletasquese<br />
mantienencalientesenun platode<br />
servirdebencubrirseduranteelciclo<br />
'WARM/HOLD'.<br />
2. Optimalatecla'WARM/HOLD'.<br />
• La pantallamuestra'TOUCHSTART'<br />
(Oprima'Start').<br />
3. Oprimalatecla'START/PAUSE'.<br />
• La pantallamuestra'WARM'(Caliente).<br />
• Paracancelar'WARM/HOLD' abrala<br />
puertadel homoencualquiermomento<br />
u oprimala tecla'CANCEL/STOP'.<br />
Para usar 'WARM/HOLD'despues de otro<br />
ciclo de coceion.<br />
, Despuesde programarla instrucci6ndel<br />
ciclo de cocci6n pot reloj, optima<br />
'WARM/HOLD'antes de oprimir la tecla<br />
'START/PAUSE',<br />
, Cuando el t_ltimociclo de cocci6n ha<br />
terminado, se escuchan sonidos y la<br />
pantalla muestra 'WARM', El horno<br />
continuarafuncionando,<br />
63<br />
'More' y 'Less'<br />
(Mas y<br />
Menos)<br />
Las funciones 'MORE' y<br />
'LESS' (Mas) (Menos)de<br />
este homo ajustan el<br />
tiempodecocci6ndelciclo. 'MORE'agrega10<br />
segundosaltiempodecocci6n.'LESS'reduce<br />
10segundosel tiempode cocci6n.<br />
• Use 'MORE'y 'LESS' cuandola pantalla<br />
muestrala cuentadescendientedeltiempo<br />
decocci6n.'MORE'y 'LESS'nopuedeser<br />
programadocuandola pantallamuestrala<br />
palabra'SENSING'(Detectando).<br />
• 'MORE'y 'LESS' no ajusta el tiempode<br />
cocci6n para los ciclos 'DEFROST'<br />
(Descongelaci6n y 'WARM/HOLD'<br />
(Mantenercaliente).<br />
• Oprimalasteclas'MORE'o'LESS'durante<br />
elcicloactivodecocci6n.<br />
• Para cocci6n pot convecci6n,'MORE' o<br />
'LESS'se usancomoteclasdeselecci6nde<br />
temperatura.
M thodos de Cocci6n<br />
Cocci6n pot<br />
Microondas<br />
La cocci6n por microondasusa ondas de<br />
energfade alta frecuenciapara calentarel<br />
alimento. Cuando cocina, la energfa de<br />
microondas causa que las moleculas del<br />
alimento se muevan rapidamente. Este<br />
movimientor_.pidoentre las moleculasdel<br />
alimentocreacalor,Iocual a su vezcocinael<br />
alimento. Los microondas cocinan mas<br />
rapidamentelos alimentos humedosy los<br />
alimentoscon diversoscontenidosdegrasa.<br />
Cocci6n pot<br />
Convecci6n<br />
La cocci6npot convecci6nutiNzaambos,un<br />
elementode convecci6ny un ventiladorpara<br />
distribuir uniformementeel aire caliente a<br />
tra%sde la cavidaddel homo. AI circularel<br />
aire,no se producenpuntoscalienteso frfos,<br />
creandouna temperaturauniformealrededor<br />
del alimento. Estas temperaturasuniformes<br />
cocinanel alimentoen formaparejay reducen<br />
eltiempodecocci6n.<br />
Cocci6n Combinada<br />
El modo combinadousa la velocidadde la<br />
energfa de microondas y el doradode la<br />
cocci6n por convecci6n para producir en<br />
formarapidaalimentosdealta calidad.<br />
Microondas Convecci6n Combinado<br />
Fuentede Calor Energfade microondas. Airecaliente,circuladoenla Energfade microondasy aire<br />
cavidaddel homo. calientecirculado.<br />
Conducci6ndel Calor Calorproducidodentrodelalimento Calorconducidodesdeelexterior Elalimentosecalientamediantela<br />
pot penetraci6ndeenergfa, al interiordelalimento, conducci6ndecalordesdeel exterior<br />
y de la energfadesdeel interior.<br />
Beneficio Primordial Calentamientorapidomuyeficaz. Doralos alimentosy retiene<br />
lossabores.<br />
64<br />
Tiempodecalentamientomascorto<br />
graciasa laenergfademicroondas,<br />
doradoy alimentosm&scrujientes<br />
graciasa laconvecci6n.
Su erencias ara la selecci6n de utensilios<br />
Elmetododecocci6ndeterminalosutensiliosquepuedensetusados. Parasimplificarlasposibilidades,useutensiliosqueseanaprobadosparalos<br />
tresmetodosdecocci6n:microondas,convecci6ny combinado.<br />
Use Eviteusar<br />
Vidrioresistenteal calor Vidrioquenosea resistenteal calor<br />
Ceramicao Ioza Ceramicao Iozacon adornosde metal<br />
Pyrex Utensiliosdemetal<br />
Utensiliosnopegajosoresistentesal calor, Utensiliosdecocinademetal<br />
talescomoespatulas<br />
Utensiliosparamicroondasquepuedenser Productosde papel,paja,mimbrey madera<br />
usadosa 2320C (450oF)<br />
Uanijasqueseanseguras Utensilioscon manijassueltaso rotas<br />
Cubrir<br />
Nouseen el hornoutensiliosniollasde metal.<br />
Sugerencias para cocinar<br />
Unatapaatraparaelcalory elvaporpot Iocuallos alimentosse calentaranmas<br />
rapidamente. Siempreuse una tapa que sea aprobadapara cocci6n pot<br />
convecci6ny pot microondas.<br />
Revolver Se redistribuyeel calor en los alimentos. Siemprerevuelvadesdeel exterior<br />
haciael centrodela fuente.<br />
Perforer Perforela cascara,pielo membranade losalimentosantesdecalentarlospara<br />
evitarexplosi6n.<br />
Dar vuelta Los alimentosgrandesdebendarse vueltade modo que la parte superiore<br />
inferiorsecalienteuniformemente.<br />
Acomodar Noapilelos alimentosunosobreotto. Acom6delosen unasolacapaen unplato<br />
quesearesistenteal mododecocci6ncombinado.<br />
Tiempode Los alimentosa menudonecesitanreposarde 2 a 15 minutosdespuesde set<br />
Reposo retiradosdel homo. Estocompletala cocci6n. Normalmenteunatemperatura<br />
internacontinuaelevandoseaproximadamentede 2,70C (5oF) a 5,5oC (10oF)<br />
duranteel tiempode reposo.<br />
Separaci6n Acomodelos alimentosindividualestalescomo papas,en un circuloy pot Io<br />
menoscon unaseparaci6nde2,5 cm(1pulgada).Estoayudaaqueel alimento<br />
se calientemasuniformemente.<br />
65<br />
Corlservss<br />
No se recomiendaprepararconservasen<br />
los homos de microondas o combinados.<br />
Cuandose calientanliquidosen el homo de<br />
microondas,especialmentepor periodosde<br />
fiempo prolongados, se puede producir<br />
sobrecalentamiento.Esto puederesultaren<br />
derrameso posibleerupci6ncuandoelliquido<br />
es perturbadoo cuandosesella unfrasco.<br />
La garanfia no cubre el dafio que ocurra<br />
cuando el homo se use para preparar<br />
conservas o cuando se intente preparar<br />
conservas.<br />
Parrilla del Homo<br />
Conel homose incluyeuna parrillade metal<br />
parausaren elmodo de convecci6ny en el<br />
modo combinado. La parrillade metalno<br />
debeser usadaenel homoduranteel modo<br />
microondas solamente. El metal puede<br />
causararcoelectricoIo cualpuederesultaren<br />
dafioal homo.<br />
Palomitas de Maiz<br />
Para prepararpalomitasde maiz, utilice un<br />
utensilio especialmentedisefiado para ese<br />
prop6sitoo bolsasresistentesal microondas<br />
comercialmente preparadas. No use un<br />
utensiliodisefiadoparaconcentrarla energia<br />
o el calor. Las palomitasdeben ser preparadassolamentecuandoel<br />
homoest,.en el<br />
modo de microondas. Si hay calor por<br />
convecci6npresente,laspalomitasse pueden<br />
chamuscar,quemaro incendiar.<br />
Si usa un utensilioresistenteal microondas<br />
paraprepararpalomitasde maizen el homo<br />
demicroondas,no uselatecla'popcorn'.Siga<br />
las instrucciones del fabricante para<br />
programarel tiemponecesario.
C o p "&,'it"* |<br />
0(;(;1011 OF WIICFOOIIdaS<br />
Niveles de Potncia de Microondas<br />
Sumicroondascuentacon 10nivelesde potenciaquele permitencocinaro calentarunaamplia<br />
variedaddealimentos.Consultelatablasiguienteparaalgunassugerencias:<br />
Nivelde<br />
Potencia<br />
10<br />
(HIGH)<br />
[ALTO]<br />
9<br />
8<br />
7<br />
6<br />
5<br />
4<br />
3<br />
2<br />
1<br />
0<br />
O$o<br />
Tablade Nivelesde Potenciade Microondas<br />
, Herviragua.<br />
,Hacer dulces.<br />
, Cocinarpresasde polio,pescadoy verduras.<br />
, Cocinarcortesde cameblandos.<br />
, Cocerunpolioentero.<br />
, Recalentararroz,fideosy verduras.<br />
, Recalentar_.pidamentealimentospreparados.<br />
, Recalentaremparedados.<br />
, Cocinarhuevos,lechey platillosconqueso.<br />
, Cocinarpasteles,panes.<br />
, Derretirchocolate.<br />
, Cocinarternera.<br />
, Cocinarunpescadoentero.<br />
, Cocinarbudinesy flanes.<br />
, Cocinarjam6n,polioenteroy cordero.<br />
, Cocinarasadodecostilla,Iomo.<br />
, Descongelarcamedevacuno,deavey mariscos.<br />
, Cocinarcortesde camemenusblandos.<br />
, Cocinarchuletasdecerdo,asar.<br />
, Entibiarfrutas.<br />
, Ablandarmantequilla.<br />
, Mantenerlas cacerolasy los platillosprincipalescalientes.<br />
, Ablandarmantequillay quesode crema.<br />
, Tiempode reposo.<br />
66<br />
Programaci6n <strong>Manual</strong><br />
Para programarmanualmenteel tiempo de<br />
cocci6ny el nivelde potencia.<br />
1. Oprima'PROGRAM'.<br />
• Lapantallarnuestra<br />
'ENTERCOOKING<br />
TIME'(Programeel<br />
tiempodecocci6n).<br />
2. Prograrn el tiernpode<br />
cocci6ndeseadousando<br />
las teclasnurnericas.<br />
,<br />
,<br />
• Lapantallamuestra<br />
'TOUCHSTARTOR<br />
POWER'(Oprima'Start'<br />
o 'Power').<br />
Oprimalatecla'POWER<br />
LEVEE(Niveldepotencia)<br />
si deseacambiarel nivel<br />
depotencia.<br />
Oprimalatecla<br />
'START/PAUSE'.<br />
5. AIfinaldel ciclodecocci6n<br />
se oira.unaalarmasonora<br />
y el homose apagar&<br />
Coccion por Etapas<br />
La cocci6n por etapas ('Stage Cooking')<br />
permite ciclos de cocci6n consecutivossin<br />
interrupci6n. Se puedenusar dos ciclos de<br />
cocci6ndiferentes.<br />
Parausarel mododecocci6nporetapas:<br />
1. Oprima'PROGRAM'.<br />
• Lapantallarnuestra<br />
'ENTERCOOKING<br />
TIME'(Program el<br />
tiempodecocci6n).<br />
2. Prograrne el tiernpo de<br />
cocci6n deseado usando<br />
lasteclasnurnericas.<br />
,<br />
• Lapantallamuestra<br />
'TOUCHSTARTOR<br />
POWER'(Oprima'Start'o<br />
'Power').<br />
Oprima 'POWER LEVEE<br />
(Nivelde potencia).<br />
• Lapantallamuestra<br />
'ENTERPOWERLEVEL<br />
1- 10' (Programeel nivel<br />
de potenciaentre1y 10).
PI<br />
4, Oprima la tecla numerica<br />
paraajustarla energiade<br />
microondas.<br />
Paraunapotenciamicroondasm_.sbaja,oprima<br />
la tecla1(para10%)<br />
hastael 9 (para90%). 0<br />
apagalapotenciade<br />
microondascompletamente.<br />
5. Oprima'PROGRAM'<br />
, Lapantallamuestra<br />
'ENTERCOOKING<br />
TIME'(Programeel<br />
tiempode cocci6n).<br />
6. Programe el tiempo de<br />
cocci6n deseado usando<br />
las teclasnumericas.<br />
• Lapantallamuestra<br />
'TOUCHSTARTOR<br />
POWER'(Oprima'Start'<br />
o 'Power')<br />
7. Oprima 'POWER LEVEl'<br />
(NIVELDE POTENCIA)<br />
, Lapantallamuestra<br />
'ENTERPOWERLEVEL<br />
1- 10'(Programeelnivel<br />
depotenciaentre1y 10).<br />
8. Optima latecla num6rica<br />
paraajustarla energiade<br />
microondas para la<br />
segundaetapa.<br />
, Paraunapotenda<br />
microondasmas baja,<br />
optimalatecla1 (para<br />
10%)hastael 9 (para<br />
90%). 0 apagala potenciademicroondascom-<br />
pletamente.<br />
9. Oprima la tecla 'START/<br />
PAUSE'.<br />
, El homocomienzala<br />
cocci6n.<br />
, AI fin dela primeraetapa<br />
el homoemiteunasepal<br />
sonoraparaindicarla<br />
transici6n.<br />
10.AIfin del cido de cocci6n,<br />
el homoemiteunaseSaly<br />
se apaga.<br />
NOTA: 'Auto Defrost' (Descongelaci6n<br />
Automatica)puede usarsesolamenteen la<br />
primeraetapadelmodococci6npot etapas.<br />
'Defrost Auto/Time'<br />
(Descongelacion<br />
Automatica/Tiempo)<br />
Existen cuatro ajustes diferentes preseleccionados<br />
de descongelaci6n dependiendo<br />
del alimento que esta siendo<br />
descongelado.Para mayorconveniencia,un<br />
mecanismoincorporadode serial sonorale<br />
recuerdacuandorevisar,darvuelta,separaro<br />
redistribuirel alimentodurante el ciclo de<br />
descongelaci6n.<br />
1. Oprima'DEFROSTAUTO/<br />
TIME'unavez.<br />
.<br />
.<br />
.<br />
• Lapantallamuestra<br />
'MEATTOUCH1<br />
POULTRYTOUCH2<br />
FISHTOUCH3BREAD<br />
TOUCH4'(Came<br />
oprima1Aveoprima2<br />
Pescadooprima3 Pan<br />
oprima4).<br />
Oprima la tecta numerica<br />
correspondiente.<br />
• Lapantallamuestra<br />
'ENTERWEIGHT'<br />
(Programarpeso).<br />
Programeel peso usando<br />
las teclasnumericas.<br />
• Loslimitesde pesopara<br />
lacame,avesy pescado<br />
son45g a 2,7 kg (0,1a<br />
6 libras).<br />
• Los limitesde pesopara<br />
el panes 45a 450g (0,1<br />
a 1libra).<br />
Optima la tecla 'START/<br />
PAUSE'.<br />
. AI finaldelciclodecocci6n<br />
se escuchara,una alarma<br />
sonora y el homo se<br />
apagar&<br />
67<br />
'Time Defrost' (Tiempo<br />
de Descongelacion)<br />
Descongelaci6nduranteunperiododetiempo<br />
deseado.<br />
1. Oprima dos veces 'DE-<br />
FROSTAUTO/TIME'.<br />
• Lapantallamuestra<br />
'ENTERDEFROST<br />
TIME'(Programeel<br />
tiempode descongelaci6n).<br />
2. Oprima las teclas numericasapropiadas.<br />
• Lapantallamuestra<br />
'TOUCHSTART'<br />
(Optima'Start').<br />
3. Optima la tecla 'START/<br />
PAUSE.<br />
4. AI final del tiempode descongelaci6n<br />
se escucha<br />
una sepal sonora y el<br />
homose apaga.<br />
'Rapid Defrost' (Descongelacion<br />
Rapida)<br />
Preprogramadopara descongelar1 libra de<br />
alimentocongelado.<br />
1. Oprima'RAPIDDEFROST'<br />
(Descongelaci6nR@ida).<br />
• Lapantallamuestra<br />
'MEATTOUCH1<br />
POULTRYTOUCH2<br />
FISHTOUCH3' (Came<br />
optima1Aveoprima2<br />
Pescadooptima3 Pan<br />
optima4).<br />
2. Oprimelas teclas<br />
numericasapropiadas.<br />
• Lapantallamuestra<br />
'TOUCHSTART'<br />
(Oprima'Start').<br />
3. Optima la tecla 'START/<br />
PAUSE'.<br />
4. AI final del tiempo de<br />
descongelaci6n se escuchauna<br />
seSalsonoray<br />
el homose apaga.<br />
cont_da,..
Cocci6n or Microondas (cont.)<br />
Notas sobre<br />
Descongelacion:<br />
. Retireelpescado,losmariscos,lacamey la<br />
came de ave de sus envasesoriginaies<br />
cerradosde papelo de plAsfico.<br />
. Antesde congelarlacamedelelaformade<br />
unarosquilla.<br />
. Retirela came que se va descongelando<br />
durante el proceso y luego continue<br />
descongelando.<br />
. Coloquelos alimentosen una bandejade<br />
homearbajadevidrio.<br />
. El homo emite una serial sonora<br />
aproximadamentedurantela mitaddelddo<br />
de descongelad6n para recordarle que<br />
verifique el alimento. Detengael homo<br />
abriendolapuerta.Unavezqueelalimento<br />
ha sido revisadoo reacomodado,derre la<br />
puerta y oprima 'START/PAUSE'para<br />
reanudarel ciclodedescongelaci6n.<br />
Instrucciones de<br />
Funcionamiento del<br />
Sensor<br />
La cocd6n por sensorle permitecocinarla<br />
mayoria de sus alimentos favoritos sin<br />
seleccionarlos tiempos de cocci6n ni los<br />
niveiesde potencia. La pantalia mostrar_.<br />
'SENSING'duranteel periodode detecci6n<br />
inicial. El homo determinaautomaticamente<br />
el tiempodecocci6nrequeridoparacadatipo<br />
deaiimento.Cuandoel sensorinternodetecta<br />
unacierta cantidadde humedadproveniente<br />
delalimento,informar_,al homosobrecuanto<br />
m_.s tiempo debe caientar. La pantalia<br />
mostrar_,eltiempode calentamientorestante.<br />
Paraobtenermejoresresultadosde lacocci6n<br />
porsensor,sigaestasrecomendaciones.<br />
1. Los alimentoscocinadoscon el sistema<br />
sensordebenestara temperaturanormal<br />
deconservaci6n.<br />
2. La bandejaGIRATORIAy la parteexterior<br />
del envase deben estar secos para<br />
asegurarmejoresresultadosdelacocci6n.<br />
3. Los alimentos deben estar siempre<br />
cubiertosholgadamentecon envolturade<br />
pi_.stico, papel encerado o una tapa<br />
resistenteal microondas.<br />
No abra la puerta ni toque la tecla<br />
'CANCEL/STOP'durante el tiempo de<br />
detecci6n.Cuandose acabael tiempode<br />
detecci6n,el homo emite dos serales<br />
sonorasy el restodel tiempode cocci6n<br />
aparecer_, enlapantalia.Enestemomento<br />
ustedpuedeabrir la puertapara revolver,<br />
darvueitao reorganizarel aiimento.<br />
68<br />
Guia de Coccion pot<br />
Sensor<br />
Para asegurar buenos resultados con la<br />
cocci6n por sensor, use envases y tapas<br />
apropiadas.<br />
1. Siempre use envases resistentes al<br />
microondas y cubralos con tapas o<br />
envolturadepl_.sticoventilada.<br />
2. Nuncause tapasde pl_.sticohermeticas.<br />
Estaspuedenevitarqueescapeelvapory<br />
el alimentopuedesobrecocerse.<br />
3. Hagacoincidirla cantidadde alimentocon<br />
el tama5odel envase. Llenelos envases<br />
pot Io menoshasta la mitadparaobtener<br />
mejoresresuitados.<br />
4. Aseguresede que la parte externa del<br />
envase y el interior del homo de<br />
microondasestensecosantesde colocar<br />
el alimentoen el homo. Las gotas de<br />
humedadse conviertenen vapor Io cual<br />
puede dar la informaci6n incorrecta al<br />
sensor.
'Sensor Popcorn'<br />
(Palornitas de Maiz por<br />
Sensor)<br />
Un sensordetecta el vapor provenientedel<br />
alimentoy automaticamenteajustael tiempo<br />
de cocci6n para obtener los mejores<br />
resultados. Se puedenusar las bolsas de<br />
maiz para palomitas envasadas<br />
comercialmentede3 a 3,5onzas(85a 99g).<br />
1. Coloque el maiz en el<br />
centro de la bandeja<br />
giratoria.<br />
, NOusela parrilla<br />
met_.licade cocd6npor<br />
convecci6nparacocinar<br />
palomitasde maiz.<br />
2. Oprima 'SENSOR POP-<br />
CORN'(Palomitasdemaiz<br />
porsensor).<br />
.<br />
.<br />
, Elhomoautom_.ticamentecocinaralas<br />
palomitasusandoel<br />
sistemadel sensor.<br />
El homocomienzael ciclo<br />
'Popcorn' (Palomitas de<br />
maiz).<br />
, Paraterminarel ciclo<br />
abrala puertau optima<br />
latecla'CANCEL!<br />
STOP'.<br />
AI final de la cocci6n se<br />
escucha una alarma<br />
sonora y el homo se<br />
apaga.<br />
ATENCION }<br />
NO deje el homo de microondas<br />
desatendidocuando este preparando<br />
palomitasde maiz.<br />
ADVERTENClA I<br />
Para evitar riesgo de una lesi6n<br />
personalodaSosmateriales,nococine<br />
palornitasde rnaiz usando la parrilla<br />
metalicadecocci6npot convecci6n,<br />
'Sensor Reheat' (Recalentarniento<br />
por Sensor)<br />
Ha sido dise_adopara recalentaralimentos<br />
precocinados a temperatura ambiente o<br />
refrigerados de manera f_.cil y r_.pida<br />
detectandoelvaporprovenientedelalimentoy<br />
autom_.ticamenteajustando el tiempo de<br />
cocci6nparaobtenerlos mejoresresultados.<br />
1. Oprima 'SENSOR RE-<br />
HEAT' (Recalentamiento<br />
porsensor).<br />
, Lapantallamuestra<br />
'SELECTMENU1 - 3<br />
(Seleccione menu 1 - 3).<br />
2. Seleccione la categoria<br />
deseadausandolas teclas<br />
numericas.<br />
, Lacategoria1es paraun<br />
platodeservirdetamaSo<br />
regularconcapacidad<br />
para237a 474mL(1 a2<br />
tazas)dealiment&<br />
, Lacategoria2 es para<br />
recalentar237a 946mL<br />
(1a 4 tazas)de sopao<br />
salsaenun taz6no<br />
cacerola.<br />
, Lacategoria3 es para<br />
recalentar237a 946mL<br />
(1a 4 tazas)de una<br />
cacerolaen unplatoo<br />
taz6npequeSo.<br />
3. El homo comienzael ciclo<br />
de'SensorReheat'(Recalentamientoporsensor).<br />
, Lapantallamuestra<br />
'SENSING'(Detectando).<br />
, Paraterminarelciclo<br />
abrala puertau oprima<br />
'CANCEL/STOP'.<br />
4. AI final de la cocci6n se<br />
escucha una alarma<br />
sonora y el homo se<br />
apaga.<br />
69<br />
'Sensor Cook' (Coccion<br />
por Sensor)<br />
Un sensor detectael vapor provenientedel<br />
alimentoy automaticamenteajustael tiempo<br />
de cocci6n para obtener los mejores<br />
resultadosparalamayoriade losalimentos.<br />
1, Optima'CANCEL/STOP',<br />
2, Optima'SENSORCOOK',<br />
• Lapantallarnuestra<br />
'SELECTMENU0 - 9'<br />
(Selecci0nel menude<br />
0-9).<br />
• Vealatablaen lapa.gina<br />
70paralasopcionesde<br />
categorias.<br />
3. Programe la categoria<br />
deseadausandolasteclas.<br />
. El homocomienzael ciclo<br />
deCocci6nporSensor,<br />
• Lapantallarnuestra<br />
'SENSING'(Detectando),<br />
• Paraterrninarelciclo,<br />
abrala puertau oprirna<br />
'CANCEL/STOP',<br />
5, AI final de la cocci6n se<br />
escucha una alarma<br />
sonora y el homo se<br />
apaga,
Cocci6n or Microondas (cont.)<br />
Gufa de Coccion pot Sensor<br />
Alimentos Porcionesy recomendaciones<br />
1 Potatoes Laporci6nes 1 a 4 papasmedianas,alrededorde225g a 280g (8a 10onzas)cadauna.<br />
(Papas) Perforecadapapavariasvecesconuntenedory coloquealrededordelbordede labandejadelhomo,pot Io<br />
menosa 2,5 cm(1 pulgada)deseparaci6n.<br />
2 FreshVegetables<br />
(VegetalesFrescos)<br />
FrozenVegetables<br />
(Vegetales<br />
Congelados)<br />
FrozenEntree<br />
(PlatilloPrincipal<br />
Congelado)<br />
Rice<br />
(Arroz)<br />
Casserole<br />
(Cacerola)<br />
GroundMeat<br />
(CameMolida)<br />
Fish,Seafood<br />
(Pescado,Mariscos)<br />
ScrambledEggs<br />
(HuevosRevueltos)<br />
FrozenPizza<br />
PizzaCongelada)<br />
Laporci6nes de250mLa 1 L(1 a4 tazas).<br />
Coloquelosvegetaleshumedosen uncontenedoresistenteal microondas.<br />
Agregue30 a 60mL (2a 4 cucharadas)deagua.<br />
Cubraconenvoiturade piasticoy ventiie.<br />
Lamayorfade losvegetalesnecesitanset revueltosy 2 a 3 minutosdetiempodereposodespuesdela cocci6n.<br />
Laporci6nes de250mLa 1 L(1 a4 tazas)..<br />
Retiredelpaquetey coloquelosvegetalesen uncontenedoresistenteal microondas.<br />
Agregue30 a 60mL (2a 4 cucharadas)deagua.<br />
Cubraconenvolturade pB.sticoy ventile.<br />
Lamayorfade losvegetalesnecesitanset revueltosy 2 a 3 minutosdetiempodereposodespuesdela cocci6n.<br />
Eltamafiodel platilloprincipales de280g a 560g (10a20 onzas).<br />
Retireelenvaseexterior.Levantetresladosdela tapa.<br />
Siei platilloprincipalnoest,.en uncontenedoresistenteal microondas,col6queloenun plato,cubralo<br />
conenvolturade pB.sticoy ventile.<br />
Lamayorfade losplatiNosprincipalesnecesitande2 a 3 minutosdetiempode reposodespuesdela cocci6n.<br />
Sigalas instruccionesdelenvaseparalascantidadesde losingredientes.<br />
Coloqueel arrozy el agua(agua,caldode poNoo devegetal)enun contenedoresistenteal microondas,cubra<br />
conunatapadecacerolao conenvolturapB.sticay ventile.<br />
Lamayorfade losarrocesnecesitan2 a 3 minutosdetiempode reposodespuesdela cocci6n.<br />
Tamafiode la porci6nes 250mL a 1 L(1 a 4tazas).<br />
Combinelosingrediente segunla recetaen unacacerolade 1a 2 L(1 a2 cuartosde gal6n).<br />
Cubraconenvolturade plasticoy ventiie<br />
Unavezquehaterminadola cocci6n,dejereposardurante3 minutos.<br />
Eltamafiode la porci6nes de 110a 900g (4a 32onzas[¼a 2 libras]).<br />
Desmenucela cameen uncontenedoresistenteal microondas.<br />
Sazoney cubraconenvolturapB.stica.<br />
Levantela cubiertaparacamebiencocinada.<br />
Cubraei platoparacamea mediococer(talcomocamequeva set usadaenotto platilloy cocine<br />
adicionalmente).<br />
Eltamafiode la porci6nes de 110a 900(4a 32 onzas[74a 2 libra@.<br />
Coloqueel alimentoalrededordelos ladosde uncontenedoresistenteal microondas.Sazoney agreguede60<br />
a 124mL(74a ½taza)de Ifquido(vino,agua,salsa,etc.)si se desea.<br />
Cubraconenvoiturade piasticoy ventiie.<br />
Eltamafiode la porci6nes de2 a 5 huevos.<br />
Dejecaerlos huevosen unenvasedemedirconcapacidadpara1 L (4 tazas)o unplatodecacerolade<br />
1 L (1cuartode gai6n).<br />
Agregue15mL (1cucharada)de iecheo aguaporcadahuevoy bata. Cubraconenvoiturade piasticoy ventiie.<br />
Cuandose terminelacocci6n,retiredelhomo,revuelvay dejereposardurante1 a 2 minutos.<br />
Tamafiode la porci6nes de 1a 2 pizzas.<br />
Usesolamentepizzacongeladadestinadaa usoenel microondas.<br />
Nocubra.<br />
Sigalas instruccionesindicadasen elenvase.<br />
70
[ ATENCION<br />
Paraevitarriesgo de quemaduras,<br />
manipulelos utensilios,las parrillas<br />
y lapuertaconcuidado.Dejequeel<br />
homo,los utensiliosy las parrillas<br />
se enfrien antes de limpiarlos. El<br />
homo,los utensiliosy las parrillas<br />
se quedanmuycalientesduranteel<br />
funcionamiento.<br />
Para evitar riesgo de una lesiGn<br />
personalo dafiosmateriales,nouse<br />
el homo sin la bandejagiratoriaen<br />
su lugar.<br />
ParaevitarriesgodelesiGnpersonal<br />
o dafios materiales,no cubra la<br />
bandejagiratoriao la parrilla con<br />
papeldealuminio.<br />
Para evitar riesgo de dafios<br />
materiales,nousecontenedoresde<br />
pl_.sticolivianooproductosdepapel<br />
durante un ciclo de cocciGnpor<br />
convecciGn.<br />
Parrilla para Coccion<br />
por Conveccion<br />
Use la parrilla solamentecon el modo de<br />
cocciGnpor convecciGny modo combinado.<br />
No use en el modo de homo microondas<br />
solamente.<br />
Coccidn<br />
Para usar el homo para cocciGn por<br />
convecciGnsolamente,use la programaciGn<br />
detiempomanualsolamente.Lassiguientes<br />
instrucciones son para coccion por<br />
conveccion solamente. Para la cocciGn<br />
combinada,ver la pagina72.<br />
Programacion <strong>Manual</strong><br />
con Precalentamiento<br />
1. Oprimalatecla'CONV<br />
COOK'bajo'Convection'.<br />
• Lapantallamuestra<br />
'350FTOUCHMORE<br />
OR LESSFORTEMP<br />
SETORSTARTOR<br />
ENTERCOOKING<br />
TIME'(3500F [177oC]<br />
oprimama.so menos<br />
paraajustarla<br />
temperaturao 'Start'o<br />
programeel tiempode<br />
cocciGn).<br />
2. Ajustelatemperaturacomo<br />
Iodeseeusandolasteclas<br />
'MORE'o 'LESS'.<br />
• Ellimitedetemperatura<br />
es de1070C a 2320C<br />
(2250F a 4500F).<br />
3. Optimalatecla<br />
'START/PAUSE'.<br />
Lapantallamuestra<br />
'PREHEAT'(Precalentamiento)conlatemperaturaseleccionada.<br />
• Cuantoel homose ha<br />
precalentado, la pantalla<br />
muestra'PLACEFOOD<br />
ONRACK' (Coloqueel<br />
alimentoen la parrilla).<br />
4. Abrala puerta,coloqueel<br />
alimentoen la parrillade<br />
convecciGny cierrela<br />
puerta.<br />
• Lapantallamuestra<br />
'ENTERCOOKING<br />
TIME'(Programeel<br />
tiempodecocciGn).<br />
71<br />
.<br />
.<br />
Programeel tiempode<br />
cocciGndeseadousando<br />
lasteclasnumericas.<br />
• Lapantallamuestra<br />
'TOUCHSTART'<br />
(Oprima'Start').off.<br />
Oprimalatecla<br />
'START/PAUSE'.<br />
• AIfinaldel tiempode<br />
cocciGn,se escucha<br />
unaalarmasonora,la<br />
pantallamuestra'END'<br />
(Fin)y el homose<br />
apaga.<br />
Programacion <strong>Manual</strong><br />
sin Precalentamiento<br />
Para programarla cantidadde tiempoy la<br />
temperaturaparaunciclode cocciGndirecta:<br />
1. Oprimalatecla'CONV<br />
COOK'bajo 'Convection'.<br />
• Lapantallamuestra<br />
'350FTOUCHMOREOR<br />
LESSFORTEMPSET<br />
OR STARTOR ENTER<br />
COOKINGTIME'(3500F<br />
[1770C]oprimamaso<br />
menosparaajustarla<br />
temperaturao 'Start'o<br />
programeel tiempode<br />
cocciGn).<br />
2. Ajustela temperaturacomo<br />
Io desee usandolas teclas<br />
'MORE'o 'LESS'.<br />
.<br />
.<br />
• Ellimitedetemperatura<br />
es de1070C a 2320C<br />
(2250F a4500F).<br />
Programe el tiempo de<br />
cocciGndeseadousandolas<br />
teclasnurnericas.<br />
• Lapantallamuestra<br />
'TOUCHSTART'<br />
(Oprima'Start').<br />
Oprima la tecla 'START/<br />
PAUSE'.<br />
• AI finaldeltiempode<br />
cocciGn,se escuchauna<br />
alarmasonora,la<br />
pantallamuestra'END'<br />
(Fin)y el homoseapaga.
o p • • p<br />
Cocclon Combmada (microondas y convecclon)<br />
Las siguientes instruccionesson para<br />
coccioncombinadasolamente.<br />
Paracocci6n pot convecci6n,vea la pagina<br />
71.<br />
Notas:<br />
• No se debenusar utensiliosde metalen la<br />
parrilla meta.lica durante la cocci6n<br />
combinada.Useutensiliosdevidriosiempre<br />
queseaposible.<br />
• Se puedeusar un molde de metal para<br />
hacerpanquecitoso unmoldepoco hondo<br />
de metalpequefiosi es que nose dispone<br />
deunabandejadevidrio.<br />
• Si ocurrearco electrico,deje de usar ese<br />
utensilio.<br />
ATENCION i<br />
Paraevitarriesgo de quemaduras,<br />
manipulelos utensilios,las parrillas<br />
y lapuertaconcuidado.Dejequeel<br />
homo,los utensiliosy las parrillas<br />
se enfrien antes de limpiarJos.El<br />
homo,los utensiliosy las parrillas<br />
se quedanmuycalientesduranteel<br />
funcionamiento.<br />
Para evitar riesgo de una lesi6n<br />
personalo dafiosmateriales,nouse<br />
el homo sin la bandejagiratoriaen<br />
su lugar.<br />
Paraevitarriesgodelesi6npersonal<br />
o dafios materiales,no cubra la<br />
bandejagiratoriao la parrilla con<br />
papeldealuminio.<br />
Para evitar riesgo de dafios<br />
materiales,nousecontenedoresde<br />
pl_.sticolivianooproductosdepapel<br />
durante un ciclo de cocci6n por<br />
convecci6n.<br />
Asado Combinado<br />
Para programar la cantidad de tiempo y<br />
temperaturaparaunciclode cocci6nusando<br />
ambas,energiade microondasy energiade<br />
convecci6n:<br />
1. Coloqueel alimentoen la<br />
parrilladelhomoy cierrela<br />
puertadel horno.<br />
2. Optima la tecla 'ROAST'<br />
bajo 'Convection Combination'.<br />
• Lapantallamuestra<br />
'350FTOUCHMORE<br />
OR LESSFORTEMP<br />
SETORENTER<br />
COOKINGTIME'(3500F<br />
[1900C])oprimamaso<br />
menosparaajustarla<br />
temperaturao programe<br />
eltiempodecocci6n).<br />
3. Ajustelatemperaturacomo<br />
Io deseeusandolas teclas<br />
'MORE'o 'LESS'.<br />
• Ellimitedetemperatura<br />
es de1770C a 2320C<br />
(2250F a 4500F).<br />
• Laenergiade<br />
microondasnopuede<br />
ajustaday estA<br />
programadapara40%.<br />
• Eltiempodecocci6n<br />
puedeset programado<br />
desde0:01-99:99.<br />
4. Oprima la tecla 'START/<br />
PAUSE'.<br />
• AIfinaldeltiempode<br />
cocci6n,se escuchauna<br />
alarmasonora,la<br />
pantallamuestra'END'<br />
(Fin)y el homose<br />
apaga.<br />
72<br />
Horneado Combinado<br />
Para programar la cantidad de tiempo y<br />
temperaturaparaun ciclodecocci6nusando<br />
ambosenergiade microondasy energiade<br />
convecci6n:<br />
1. Coloqueel alimentoen la<br />
parrilladel homo y cierre<br />
la puertadelhorno.<br />
2. Oprima'CANCEL/STOP'.<br />
3. Oprima la tecla 'BAKE'<br />
bajo 'Convection Combination'.<br />
.<br />
.<br />
• Lapantallamuestra<br />
'375FTOUCHMORE<br />
OR LESSFORTEMP<br />
SETORENTER<br />
COOKINGTIME'(375F<br />
[1900C] oprimamaso<br />
menosparaajustarla<br />
temperaturao programe<br />
eltiempodecocci6n).<br />
Ajuste la temperatura<br />
comoIodeseeusandolas<br />
teclas 'MORE'o'LESS'.<br />
• El limitede temperatura<br />
es de 1770C a 2320C<br />
(2250F a 4500F).<br />
• Laenergiade<br />
microondasnopuede<br />
ser ajustaday esta<br />
programad a 10%.<br />
• Programeel tiempode<br />
cocci6nen minutos.<br />
Oprima la tecla 'START/<br />
PAUSE'.<br />
• AIfinaldel tiempode<br />
cocci6n,se escucha<br />
unaalarmasonora,la<br />
pantallamuestra'END'<br />
(Fin)y el homose<br />
apaga.
Las siguientes instruccionesson para<br />
coccioncombinadasolamente.<br />
Paracocci6n por convecci6n,vea la pagina<br />
71.<br />
Notas:<br />
, Cuando se cocinan pizzas congeladas,<br />
coloquela pizzadirectament en la parrilla<br />
de coccitn pot conveccitn. No use una<br />
bandejade pizza ni papel de aluminio.<br />
Coloque la parrilla de conveccitn<br />
firmementeen la bandejagiratoriaalejada<br />
delos ladosdel homo.<br />
, Paraotto tipo de horneado/asadocoloque<br />
el alimentoen el utensilioapropiado,luego<br />
coltquelosobrela parrilladeconveccitn.<br />
'Auto Bake' (Hornear<br />
Automaticamente)<br />
Para hornear automAticamente pizza<br />
congelada,panquecitos,bizcochosy papas<br />
fritas congeladas usando energia de<br />
microondasy deconveccitnalternativamente.<br />
Usando alternativamente energia de<br />
microondasy energiadeconveccitn:<br />
1. Optimalatecla'AUTO<br />
BAKE'bajo'Convection<br />
Combination'.<br />
Lapantallamuestra<br />
'FROZENPIZZATOUCH<br />
1 MUFFINSTOUCH2<br />
BISCUff/DINNERROLL/<br />
B. STICKTOUCH3<br />
FROZENFRENCHFRIES<br />
TOUCH4' (Pizzacongeladaoptima1panquecitosoprima2<br />
bizcochos/<br />
panecillos/bagueta<br />
oprima3 papasfritas<br />
congeladasoprima4).<br />
.<br />
.<br />
.<br />
Oprimalateclanumerica<br />
apropiada.<br />
• Losbizcochosy los<br />
panquecitosrequierenun<br />
ciclodeprecalentamiento<br />
y debensetcolocadosen<br />
laparrilladespuesde que<br />
suenelaserial.<br />
• LapizzacongeladaDEBE<br />
ser colocadadirectamenteen<br />
laparrillade<br />
cocci6nporconvecci6n.<br />
NOuseunabandejade<br />
metalde pizzani papelde<br />
aluminio.<br />
• Lospanquecitos,bizcochosy<br />
panecillos<br />
puedenusarmoldesde<br />
panquecitosi nose<br />
disponedeunabandeja<br />
devidrio.<br />
• Lasbaguetasy laspapas<br />
fritascongeladaspueden<br />
ser colocadasen una<br />
pequerabandejade<br />
metalnomuyprofunda,si<br />
nosedisponede una<br />
bandejadevidrio.<br />
Oprimalatecla'START/<br />
PAUSE'.<br />
• Sise necesitainformacitn<br />
adicional,elhomo laindicaraen<br />
la pantalla.<br />
AIfinaldeltiempodecoccitn,<br />
se escuchaunaalarma<br />
sonora,la pantallamuestra<br />
'END' (Fin)y el homose<br />
apaga.<br />
73<br />
'Auto Roast' (Asar<br />
Automaticamente)<br />
'Auto Roast'asa automaticamentecarne de<br />
res,camede ave,pechugasde pavoy cerdo<br />
usando alternativamente la energia de<br />
microondasy laenergiadeconveccitn.<br />
1. Oprima la tecla 'AUTO<br />
ROAST'bajo 'Convection<br />
Combination'.<br />
.<br />
.<br />
.<br />
.<br />
• Lapantallamuestra<br />
'BEEFTOUCH1WHOLE<br />
CHICKENTOUCH2<br />
TURKEYBREAST<br />
TOUCH3 PORKTOUCH<br />
4' (Camede resoprima1<br />
polioenterooprima2<br />
pechugadepagooprima<br />
3 cerdooprima4).<br />
Oprima la tecla numerica<br />
apropiada.<br />
• Lapantallamuestra<br />
'ENTERWEIGHT'(Programarpeso).<br />
Use las numericas para<br />
programarel peso.<br />
Oprima la tecla 'START/<br />
PAUSE'.<br />
• Sise necesitainformacitn<br />
adicional,el homola<br />
indicaraen lapantalla.<br />
AI final del tiempo de<br />
coccitn, se escucha una<br />
alarma sonora, la pantalla<br />
muestra 'END' (Fin) y el<br />
homose apaga.<br />
Polio 1,1- 2,7 kg (2,5- 6 libras)<br />
Camede Res 0,9- 1,8kg (2- 4 libras)<br />
Pavo 1,4- 2,7kg (3- 6 libras)<br />
Cerdo 0,9- 1,8kg (2- 4 libras)
erenclas" ara C OClnar "<br />
Informacion Bfisica<br />
sobre la Came<br />
Para preguntasespedficas respecto a la<br />
preparad6n,manipulad6no almacenamiento<br />
de la came, p6ngase en contacto con el<br />
Departamento de Agdcultura de los<br />
Estados Unidos(USDA)Ilamandoa la linea<br />
directa para Meat & Poultry al (800) 535-<br />
4555.<br />
Sugerencias para la<br />
Manipulacion<br />
. Cuandocomprecame, col6quelaen una<br />
bolsa de plAsticoseparada para que no<br />
goteeotrosalimentos.<br />
. Descongelelas carnes congeladasen el<br />
refrigeradoro atemperaturaambiente.<br />
. Mantengalacamefria y cubiertahastaque<br />
seahoradecocinarla.<br />
, LAveselas manoscon agua tibia y jabSn<br />
antes y despues de manipularcame o<br />
huevoscrudos.<br />
. Lave bien cualquiersuperficieo utensilio<br />
que hayasido tocadocon la came o los<br />
huevoscrudos.<br />
. No coloque came cocinadaen el mismo<br />
platodondebahiadejadocamecruda.<br />
Sugerencias para<br />
Cocinar<br />
. Deje la came alifiada en el refrigerador.<br />
Descarteelalifiosobrantequehayaestado<br />
encontactocon lacame.<br />
. Useun term6metroparacames resistente<br />
al microondas.<br />
. Cocinela came a la temperaturainterna<br />
recomendadaperel USDA.<br />
. Cuandorecalientealimentos,calientea una<br />
temperaturainternade perIo menos740C<br />
(1650F).<br />
. Cuandococinecarnes,delasvueltaper Io<br />
menosunavez.<br />
Almacenamiento<br />
Seguro<br />
. Una vez trinchada,refrigerela porci6nno<br />
usadainmediatamente.<br />
. Cuando sirva las comidas mantenga<br />
calientes los alimentos calientes y<br />
mantengafrioslos alimentosfrios.<br />
. Separe los alimentos cocinados en<br />
pordones pequefiaspara que se enfrien<br />
m_.sr_.pido.<br />
. No guardeen el refrigeradorcame molida<br />
cocinadao comidasque contengancame<br />
molida per m_.s de 3 o 4 dias en el<br />
refrigerador.<br />
. Nodejequelosjugosde lacamecocinada<br />
o cruda tenga contactocon los alimentos<br />
listos para comer tales como frutas o<br />
vegetales.<br />
Ablandamiento<br />
Una de las manerasde ablandarla camees<br />
brasearlos cortes menosblandos.Antesde<br />
cocinar, usted puede golpear,cortar en cubos,<br />
marinar o usar ablandadores de carnes<br />
preparados comercialmente. Usted luego<br />
puedeusar un metodoseco paracocinarla<br />
came.<br />
. Las madnadas son liquidos acidostales<br />
como vino, productoscitricos o vinagre.<br />
Las marinadasablandanlas fibras de la<br />
came pero solamente penetran<br />
aproximadamenteuncuartode pulgadaen<br />
el interiorde la came. No marinela came<br />
permasde 24horas.<br />
• AI golpearlacameconunmazopesadode<br />
metal rompe los tejidos conectorespara<br />
ablandarlacame.<br />
Elcortedelacameencubos rompem_.sla<br />
estructurade la came que golpearla. Los<br />
cortesen cubose hacenenel mes6nde la<br />
came.<br />
Los ablandadores comerciales son<br />
primordialmentenzimasquetrabajanenla<br />
parte exterior a una profundidadde un<br />
cuartode pulgadaen un corte de carne.<br />
Aseguresede seguir las instruccionesdel<br />
fabricante.<br />
74<br />
Uso de un Termometro<br />
para Came<br />
Cuando use un term6metro para came,<br />
recuerdeinsertarloen un leveangulo,en la<br />
partemasgruesadelacame,lejosdelagrasa<br />
y delhueso.Lacamesedebesacardelhomo<br />
cuando la temperaturaes 50 F inferiora la<br />
temperaturafinal deseada. Cuandola came<br />
esta reposandoantes de trincharla,seguira<br />
cocinandoseinternamente,elevandoper si<br />
mismalos 2,70C (50F)finales.<br />
Term&netro paraCame<br />
. Evita tenet que adivinarcuandola came<br />
llegaal t&minode cocci6ndeseado.<br />
. Ayudaa reducir el riesgode intoxicaci6n<br />
alimenticia.<br />
TermbrnetroResistenteal Homo<br />
(modode conveccidnsolamente)<br />
. Este term6metroque se inserta antesde<br />
quela camesea colocadaen el homo,se<br />
deja con la came cuando se esta<br />
cocinando.<br />
. La temperatura interna se elevar_.<br />
lentamente a medida que la came se<br />
cocina.<br />
, NOuseunterm6metrodemetalenel homo<br />
en el modo COMBINADOo en el modo<br />
MICROONDAS.<br />
Term6metrode LecturaInstant_nea<br />
, Aunque no resistentes al homo, estos<br />
term6metrosson colocadosen la came<br />
cuandose hasacadodelhomo.<br />
* Aunque los fiempos pueden variar,<br />
normalmentese despliegaunatemperatura<br />
exactadentrodeunoo dosminutos.<br />
. Cuando use un term6metro de lectura<br />
instant_.nea, limpieel term6metroconagua<br />
tibiaconjab6nentrecadalectura.
Indicaciones para Asar Carnes<br />
Loscortestiernostalescomocostillasy Iomose cocinanmejormediantemetodosdecalorseco,talescomocuandose asan.<br />
ParaAsar:<br />
1. Calienteel homoa latemperaturadeseada.<br />
2. Coloquelacamedirectamentedel refrigeradorcon elladode lagrasahaciaarribaenunabandejano met_lica baja.<br />
3. Coloqueel asadoen homocombinado.<br />
4. Retireel asadoy verifiquela temperaturainternacon un termSmetroparacarne. NO coloqueel asado dentrodel homo combinadocon el<br />
termSmetro.<br />
5. ElasadoestAhechocuandolatemperaturainternaes2,7oC (50F)inferiora la temperaturafinaldeseada.<br />
6. Transfierael asadoa unatabladetrinchary cubraloflojamenteconpapeldealuminioduranteaproximadamente15minutos.<br />
CortedeCame<br />
OARNEDERES<br />
Cuadrilsin hueso<br />
VueltadeIomo<br />
Peceto<br />
Lomo<br />
Costilla<br />
Filetede costilla<br />
OARNEDECERDO<br />
Lomo,con hueso<br />
Filetede costilla,sin hueso<br />
Lomo<br />
JamSncon hueso,cocinar<br />
antesde comer<br />
OORDERO<br />
Paleta<br />
Filetede costilla<br />
Temperatura Interna<br />
Recomendada<br />
Muycrudo 54° C (130° F)<br />
Crudo 60° C (140° F)<br />
Semicrudo 63° C (145° F)<br />
A medioasar 71° C (160oF)<br />
Bienasado 77° C (170oF)<br />
Muybienasado 820C (180oF)<br />
Todalacamede cerdodebeset<br />
cocinada a una temperatura<br />
internade per Io menos71° C<br />
(160o) F para reducir la<br />
probabilidadde triquinosisy de<br />
otrasintoxicacionesalimenticias.<br />
Tempuratura<br />
delHomo<br />
1630C (3250F)<br />
1630C (3250F)<br />
163° C (3250F)<br />
2180C (425° F)<br />
1630C (325° F)<br />
177° C (3500F)<br />
177° C (350° F)<br />
177° C (3500F)<br />
2320C (4500F)<br />
1630C (325° F)<br />
Costillarparacorona,no relleno A medioasar 71° C (1600F) 191° C (3750F)<br />
Loimo<br />
Bienasado 77° C (1700F) 163° C (3250F)<br />
Pierna,estilofranceso 163° C (3250F)<br />
mediopernil (325a 3500F)<br />
OARNEDEAVE(sin rellenar)<br />
Cap6n<br />
Gallinasde Cornualles,enteras<br />
Pato,entero<br />
Ganso,entero<br />
False.n,entero<br />
Codorniz,entera<br />
Pavo<br />
163° C (3250F)<br />
Semicrudo 66° C (150° F) 191° C (3750F)<br />
Para reducir el riesgo de<br />
intoxicaci6nalimenticia,la came<br />
deave debeser cocinadaa una<br />
temperaturainterna de 820 C<br />
163a 1770C<br />
(325a 3500F)<br />
163a 177° C<br />
(325a 3500F)<br />
163a 177° C<br />
(325a 3500F)<br />
163a 177° C<br />
(180° F). (325a 3500F)<br />
163a 177° C<br />
(325a 3500F)<br />
163a 177° C<br />
Peso<br />
(kg[libras])<br />
1,8a 2,7 kg(4 a 6 libras)<br />
1,6a 1,8 kg (3½a 4 libras)<br />
1,8a 2,7 kg(4 a 6 libras)<br />
0,9 a 1,4 kg(2 a 3 libras)<br />
1,8a 2,7 kg(4 a 6 libras)<br />
1,8a 2,7 kg(4 a 6 libras)<br />
2,7 a 3,6 kg(6 a 8 libras)<br />
1,8a 2,7 kg(4 a 6 libras)<br />
1,4a 2,3 kg(3 a 5 libras)<br />
0,9 a 1,8 kg(2 a 4 libras)<br />
0,45a 0,9kg (½a 1libras)<br />
3,2 a 3.6 kg(7 a 8 libras)<br />
1,6a 2,7 kg (3½a 6 libras)<br />
0,68a 1,1kg (1½a 2½libras)<br />
0,9 a 1,4 kg(2 a 3 libras)<br />
0,57a0,8 kg (lY4a 1_4libras)<br />
2,3 a 3,2 kg(5 a 7 libras)<br />
3,2 a 4,1 kg(7 a 9 libras)<br />
1,8a 3,6 kg(4 a 8 libras)<br />
0,57a 0,68 kg(11/4a 11/2libras)<br />
0,9 kg (2 libras)<br />
TiempodeCoccion<br />
Alproximaclo (minutos)<br />
25a 30<br />
30a 40<br />
20a 30<br />
35a 45<br />
45a 60<br />
26a 42<br />
23a 35<br />
18a24<br />
20minutos<br />
porlibra<br />
(0,45kg)<br />
35a 40<br />
30a 35<br />
25ta 30<br />
45a 55<br />
15a20<br />
20a 25<br />
20 a30 min/libra<br />
(0,45kg)<br />
50a 60 mintotal<br />
18a20 min/libra<br />
(0,45kg)<br />
20 a25 min/libra<br />
(0,45kg)<br />
30 rain/libra<br />
(0,45kg)<br />
20minau total<br />
(325a 3500F)<br />
1630C (325° F) 3,6a 7,2 kg (8 a 16libras) 31/2a 5½horas<br />
Todoslostiemposy temperaturasrecomendadason proporcionadasporel USDA,el Consejodela Industriade laCamede Res,el Consejo<br />
Nacionalde ProductoresdeCamede Cerdoy el Consejode laIndustriaOvejeraAmericana.<br />
75
ara Cocinar (cont.)<br />
Galletas<br />
, Sedebenusarbandejasdegalletasplanas<br />
y brillantes. Evitelas bandejasdegalletas<br />
quetenganbordesaltos- estoresultariaen<br />
doradono uniformeen lapartesuperior.<br />
, Lasbandejasdegalletasnodebentocarlos<br />
ladosdel homoni lapuerta.<br />
Pasteles<br />
, Determineel tamafiodel moldesegun las<br />
instruccionesde la receta. Los moldes<br />
brillantesson mejoresparalos pasteles.<br />
, Los pasteles horneados en un molde<br />
demasiadograndeser_.ndelgadosy secos.<br />
En un moldedemasiadopeque5oquedan<br />
semicrudoso cocinadosno uniformemente<br />
y lamasapuedederramarse.<br />
Pays<br />
, Los pays deben hornearse en moldes<br />
obscuros u opacos para aumentar el<br />
dorado.<br />
, Lospayscongeladosdebensetcalentados<br />
enbandejasdegalletasde aluminio.<br />
Utensilios de Homear<br />
Moldes<br />
obscuros<br />
u opacos<br />
Moldes<br />
bdllantes<br />
(sinlados)<br />
Moldes<br />
bdllantes<br />
(conlados)<br />
[v]oldesde<br />
vidrio<br />
AbsorbenmAscalory<br />
producenun doradomAs<br />
obscuro. Serecomiendan<br />
parapaysy panes.<br />
Serecomiendanpara<br />
galletas.<br />
Serecomiendanpara<br />
pasteles.<br />
Reduzca250F la<br />
temperaturarecomendada<br />
del homo.<br />
Sugerencias de Tiempo de Homeado<br />
Tipo de Molde<br />
de Pastel<br />
Tamariodel<br />
[v]olde<br />
Ovalado 19,7 x 14,6 cm<br />
7_4"x 5_4"<br />
33 x 25,8 cm<br />
13" x93/4''<br />
Redondo, para 15,2 cm (6")<br />
capas de 5 cm (2") 20,3 cm (8")<br />
35,6 cm (14")<br />
Redondo,para 20,3cm(8")<br />
capasde7,5 cm(3") 30,5cm (12")<br />
Semiredondo,para 45,7cm (18")<br />
capasde5 cm(2")<br />
Tazasde<br />
Batido<br />
595mL (2_Atazas)<br />
1,9L(8 tazas)<br />
475mL(2 tazas)<br />
710mL(3 tazas)<br />
2,4 L (10tazas)<br />
1,2 mL(5 tazas)<br />
2,6 L (11tazas)<br />
2,1 L (9tazas)<br />
Temp.<br />
del Homo<br />
1770 C (3500<br />
1770 C (3500<br />
F)<br />
F)<br />
1770C (3500F)<br />
1770C (3500F)<br />
1770C (3500F)<br />
1630C (3250F)<br />
1630C (3250F)<br />
1630C (3250F)<br />
Minutos<br />
25 a 30<br />
25 a 30<br />
25 a 30<br />
30 a 35<br />
50 a 55<br />
60 a 65<br />
75 a 80<br />
60 a 65<br />
Semiredondo,para 45,7cm (18") 2,8 L (12tazas) 1630C (3250F) 60 a 65<br />
capasde7,5 cm(3")<br />
Cuadrado 15,2cm(6") 475mL(2 tazas) 1770C (3500F) 25 a 30<br />
25,4cm (10") 1,4L (6tazas) 1770C (3500F) 35 a 40<br />
40,6cm (16") 3,7 L (151/2 tazas) 1770C (3500F) 45 a 50<br />
Precalentamiento<br />
En la mayoriadelos casos,usteddebeprecalentarel homoantesde hornear. Parahorneado<br />
delicado (talescomo pastelesde hojaldreo sufl_s) precalient el homo aproximadamente<br />
15a20minutos antesde colocarel alimentodentrodel homo o espere10minutos despu_s<br />
de queel homo emitela serial antesde colocar el alimentoen el homo. Eltiempoadicional<br />
creaunatemperaturam_.sestable.<br />
76
Problernas de Homeado Cornunes<br />
Esdificilajustarsea unhomonuevo,especialmentecuandose haceuncambioa unhomodeconvecci6n.Si ustedcomienzaa observarproblemas<br />
deconsistencia,consultelatablasiguienteparaposiblessoluciones.<br />
Problema<br />
Pastelesdesequilibrados Losmoldesse est_.ntocandoo est_.ntocandolas paredes<br />
(horneadosirregularmente) delhomo.<br />
El batidofuecolocadoenformairregularenel molde.<br />
Usoincorrectodelpapelde aluminio.<br />
El homonoest,.nivelado.<br />
Pasteles,galletas,bizcochos<br />
demasiadodoradosen la<br />
parteinferioro superior<br />
Lospaysnose doran<br />
Lospastelesquedancrudos<br />
enel centro<br />
Lospastelesse bajan<br />
Encogimientoexcesivo<br />
Lospastelesquedanaltos<br />
enel centro<br />
Causa<br />
El homonofue precalentado.<br />
Losmoldesse estantocandoo estantocandolas paredes<br />
delhomo.<br />
Seusaronmoldesdevidrio,obscuros,torcidoso metalicosde<br />
acaboopaco<br />
Usoincorrectodelpapelde aluminio.<br />
Temperaturadelhomodemasiadoalta.<br />
Seusaronmoldesde metalbrillantes.<br />
Temperaturademasiadobaja.<br />
Temperaturademasiadoalta.<br />
MoldedemasiadopequeSo.<br />
Sehome6durantetiempocorto.<br />
El moldenoqued6centradoen elhomo.<br />
Demasiadamantequillao az@ar.<br />
Demasiadoo pocoliquido.<br />
Temperaturademasiadobaja.<br />
PolvodehornearaSejoo pocacantidad.<br />
MoldedemasiadopequeSo.<br />
Lapuertadelhomose abri6confrecuencia(paraver).<br />
Horneadoinsuficiente.<br />
Muypocalevadura.<br />
Semezcl6el batidodurantemuchotiempo.<br />
Moldedemasiadogrande.<br />
Temperaturadelhomodemasiadoalta.<br />
Sehome6durantemuchotiempo.<br />
Temperaturasdemasiadoaltas.<br />
Semezcl6demasiado.<br />
Seus6demasiadaharina.<br />
Losmoldesse est_.ntocandoo est_.ntocandolas paredesdel<br />
homo.<br />
77<br />
Notas Sobre el<br />
Horneado:<br />
* Pruebe los pasteles para ver si est_.n<br />
cocidos. Debidoa las variacionesen los<br />
diversos hornos, es mejor probar para<br />
conseguirlaconsistenciaapropiadaen vez<br />
de confiarsolamenteen el tiempoyen la<br />
aparienciavisualcomounindicador.<br />
* Losproblemasdelpastelpuedenestarenla<br />
mezcladelbatido.Sise mezclademasiado<br />
se puederomperla estructuradel pastely<br />
ocasionarencogimientoexcesivo.Si no se<br />
mezcla Io suficiente puede resultar en<br />
pastelescongrumosquenopuedenquedar<br />
bien cocinados. Todos los ingredientes<br />
debenestara temperaturaambiente- no<br />
reciensacadosdelrefrigerador.Asegurese<br />
de seguir las instruccionesde la receta<br />
respectoacuantotiempodebemezclars el<br />
batido.<br />
Dejeenfriar el pastelen el moldeen una<br />
parrJlladurante10minutosantesdesacarlo<br />
delmolde. Lospastelesmasgrandes(m_.s<br />
de 35 cm [14 pulgadas] de di_.metro)<br />
puedenIlevarhasta15minutos.Siel pastel<br />
se haenfriadodemasiado,vuelvaa calentar<br />
el homo a 1210C (2500F) pot unospocos<br />
minutos.<br />
Aseguresedeseguirlas instruccionesdela<br />
receta y usar mantequilla o margarina<br />
cuandose indique. Si se usa un sustituto<br />
de poco contenidode grasa puedeafectar<br />
negativamentel resultadode unareceta.
Cuidado Lira ieza<br />
Limpie el homo con ffecuencia para<br />
prolongar la vida _til, rendimiento y<br />
eflciencia. Unhomosuciococinaen forma<br />
deficientepues la humedad, derramesy<br />
grasaabsorben la energJade convecci6ny<br />
la energJade microondas.<br />
,ATENCION ]<br />
Para evitar riesgo de quemaduras,<br />
manipulelos utensilios,lasparrillasy la<br />
puertaconcuidado.Dejequeel homo,<br />
los utensiliosy las parrillasse enfrien<br />
antes de limpiarbs. El homo, los<br />
utensiliosy las parrillasse calientan<br />
muchoduranteel funcionamiento.<br />
I ADVERTENCIA I<br />
Paraevitarchoqueelectricoque puede<br />
causar una lesi6n personal grave o<br />
mortal,desenchufeel cord6no abrael<br />
disyuntor del homo antes de la<br />
limpieza.<br />
Bandeja Giratoria del<br />
Horno<br />
Labandejagiratoriay elanilloson removibles.<br />
Se deben lavar a mano en agua tibia (no<br />
caliente)y con un detergentesuave. Seque<br />
biencon un patio suave. NO use polvosde<br />
limpieza,abrasivos,lana de acero u otras<br />
esponjas asperas. NO coloque en un<br />
lavavajillasautomatico.<br />
• Lamesagiratoriapuedeset limpiadaenel<br />
fregadero.Tengacuidadode no picarlao<br />
rayarlos bordespues estopodriaresultar<br />
enquela bandejase rompaduranteel uso.<br />
• Elanillodebeset limpiadoregularmente.<br />
• La bandejagiratoriadebeSIEMPREestar<br />
ensu lugarcuandose usaestehomo.<br />
Limpieza del Exterior<br />
del Horno<br />
Limpiela puertay otrassuperficiesexteriores<br />
conunpatiolimpio,esponjao esponjadenil6n<br />
usandounasoluci6nde undetergentesuavey<br />
aguatibia. Estrujebienel patioparaquitarel<br />
excesodeaguaantesdelimpiarel horno.<br />
• No use limpiadoresasperoso abrasivoso<br />
limpiadoresquecontenganamoniaco.<br />
Limpieza de la Cavidad<br />
del Horno<br />
Limpieel interiordelhornocon unpatiosuave<br />
y unasoluci6ndedetergentesuave.Enjuague<br />
y seque. Nunca use polvos de limpieza,<br />
abrasivosu otrasesponjasasperas.<br />
Las salpicadurasexcesivasde aceite en la<br />
partesuperiorinteriorpuedenser dificilesde<br />
eliminar si se dejan estar por un tiempo.<br />
Limpie las salpicadurascon una toalla de<br />
papelmojadatan prontocomoeliasocurran.<br />
• Use guantes de protectores de goma<br />
cuandolimpieelhomo.<br />
• Use solamenteesponjas de restregaro<br />
similaresparaayudara retirarlasuciedado<br />
la acumulaci6nde suciedaddel interiordel<br />
homo.<br />
No use un cuchillo,utensiliode metalo<br />
unaesponjadelanade aceropararaspar<br />
el alimentoquemado.Estopuededatiar la<br />
capa nopegajoso.<br />
78<br />
Limpieza de la Puerta<br />
del Horno<br />
Paramejor rendimientoy seguridad,el panel<br />
interiorde la puertay el marcodelanterodel<br />
homonodebentenetacumulaci6ndegrasao<br />
alimentos. Limpie a menudo con un<br />
detergentesuavey luegoenjuague. Seque<br />
conunpatiosuave.NOusepolvodelimpieza,<br />
abrasivosu otrasesponjasasperas.<br />
Despuesde limpiarelpanelde controloptima<br />
la tecla 'CANCEL/STOP' para despejar<br />
cualquier entrada que pueda haber sido<br />
accidentalmente programada durante la<br />
limpieza. Paraevitaresteproblema,se debe<br />
activar la caracteristicade bloqueocontra<br />
nitios('ChildLock')antesde hacerlalimpieza.<br />
Notas sobre la<br />
Limpieza:<br />
• Limpieel hornodespuesdecadauso.<br />
• Limpieel interior,el exteriory la puertade<br />
acuerdoconlas instrucciones.<br />
• Limpieinmediatamentelosderrames.<br />
• Retirelas parrillasdel homo y limpie de<br />
acuerdoconlas instrucciones.<br />
• Sequedespuesdela limpieza.
L |o o p o p o<br />
ocallzaclon Soluclon de Avenas<br />
[ _ ADVERTENCIA ]<br />
Paraevitarriesgode choqueelectricoque puedecausarunalesi6ngravepersonalo mortal,no retirela caja exterior(gabinete)en ningun<br />
momento.Solament el personaldeservicioautorizadopuederetirarlacaja exteriordelhorno.<br />
Funcionamiento<br />
Problema CausaPosible Solucibn<br />
El horno no trabaja Interrupci6ndella • Asegt_resedequeel homoesteenchufado.<br />
Arcoelectricoo chispas<br />
La luz delhornonotrabaja<br />
El relojy temporizador<br />
notrabajan<br />
energiaelectrica • Verifiquequeel disyuntornose hayadisparado.<br />
Utensilios<br />
Papelde aluminio<br />
Funcionamientodelhomo<br />
envacio<br />
Normal<br />
Focofundido<br />
Interrupci6ndella<br />
energiaelectrica<br />
• Reemplaceel fusiblefundidoperonocambielacapacidaddelfusible.<br />
• Verifiquequelos utensiliosseanresistentesalmicroondas.<br />
• No usepapeldealuminioenel homo.<br />
• NO hagafuncionarel homovacio.<br />
• _,Estafuncionandoel homo? El homodebeestarfuncionandoparaque la<br />
luz seencienda.<br />
• El focopuedenecesitarser reemplazado.<br />
• Asegt_resedequeel homoesteenchufado.<br />
• Verifiquequeel disyuntornose hayadisparado.<br />
• Reemplaceel fusiblefundidoperonocambielacapacidaddelfusible.<br />
Reflexi6nde la luzalredador Normal • Laluz se reflejade laluz ubicadaentrela cavidaddel homoy la pared<br />
del microondas exteriordelhomo.<br />
79
Garantia<br />
Garantia Completa de Un Afio<br />
Amana Appliances reparar& o reemplazar& incluyendo mano de obra relacionada, cualquier pieza que falle debido a un defecto de<br />
material o fabricaci6n.<br />
Garantia Limitada<br />
Despues de un afio de la fecha original de compra al pormenor, Amana proporcionara un repuesto gratis, como se indica a continuaci6n,<br />
para reemplazar cualquier pieza que falle debido a un defecto de material o fabricaci6n. El propietario sera responsable de pagar todos<br />
los otros gastos incluyendo kilometraje y transporte.<br />
Del segundo al quinto afio<br />
Amana proporcionara un tubo magnetr6n de repuesto, panel de teclas y microprocesador, la pieza y la mano de obra que falle<br />
debido a un defecto de material o fabricaci6n.<br />
Lo que no cubre estas garantias<br />
, Reemplazo de los fusibles del hogar, reposici6n de los<br />
disyuntores o correcci6n del alambrado o plomeria del hogar.<br />
Mantenimiento y limpieza normal del producto, incluyendo<br />
focos.<br />
, Productos cuyos nQmeros de serie originales fueron<br />
removidos, alterados o no son fAcilmente legibles.<br />
Productos comprados para uso comercial, industrial o de<br />
arriendo.<br />
, Productos situados afuera de los Estados Unidos o CanadA.<br />
, Costos de servicio adicionales, si el tecnico debe realizar<br />
servicio extraordinario fuera de Io normal o fuera de las horas<br />
o del Area de servicio normal.<br />
, Ajustes despues del primer afio.<br />
,, Reparaciones resultantes de Io siguiente:<br />
- Instalaci6n, sistema de escape o mantenimiento incorrecto.<br />
- Cualquier modificaci6n, alteraci6n o ajuste no autorizado<br />
por Amana.<br />
- Accidente, real uso, abuso, incendio, inundaci6n o actos<br />
fortuitos.<br />
- Conexiones a suministro de gas, suministro de voltaje o<br />
corriente electrica incorrectas.<br />
- Uso de utensilios, contenedores o accesorios no apro-<br />
, Viaje.<br />
iados que pueden causar dafio al producto.<br />
Si usted necesita servicio<br />
Llame al distribuidor donde compr6 su electrodomestico o Ilame<br />
a Amana Appliances Consumer Services al 1-800-843-0304 en<br />
EE.UU. y al 1-866-587-2002 en Canada para ubicar un tecnico<br />
autorizado.<br />
, Asegt_rese de conservar el comprobante de compra para<br />
verificar el estado de la garanfia. Consulte la secci6n sobre la<br />
GARANTIA para mayor informaci6n sobre las<br />
responsabilidades del propietario para servicio bajo la garantia.<br />
, Si el distribuidor o la compafiia de servicio no pueden resolver el<br />
problema, escriba a Amana Appliances, 2800-220th Trail,<br />
Amana, IA 52204 o Ilame al 1-800-843-0304 en EE.UU. y al<br />
1-866-587-2002 en CanadA.<br />
NOTA: Cuando Ilame o escriba acerca de un problema de<br />
servicio, por favor incluya la siguiente informaci6n:<br />
a. Su nombre, direcci6n y nQmero de telefono;<br />
b. nQmero de modelo y nQmero de serie;<br />
c. nQmero y direcci6n de su distribuidor o tecnico de servicio;<br />
d. una descripci6n clara del problema;<br />
e. comprobante de compra (recibo de compra).<br />
Las guias del usuario, manuales de servicio e informaci6n sobre<br />
las piezas pueden solicitarse a Amana Appliances Consumer<br />
Services.<br />
BAJO NINGUNA ClRCUNSTANCIA IVIAYTAGSERA RESPONSIBLE DE DAIIOS INCIDENTALES O CONSECUENTES.<br />
Estagaranfialeotorgaderechoslegalesespecificosy ustedpuedetenetotrosderechosquevariandeunestadoaotro. Porejemplo,algunosestados<br />
nopermitenla exclusi6no limitaci6ndedaSosincidentaleso consecuentes,porIotantoestaexdusi6npuedequenose apliqueensu caso.<br />
B/01/03<br />
MCS P/N 74007463<br />
Q2003 Maytag Appliance Sales Co. Part No,8112P236-60<br />
3828W5A2752<br />
J