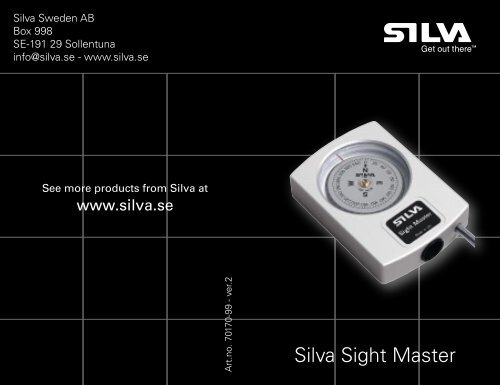
Silva Sight Master
Silva Sight Master
Silva Sight Master

You also want an ePaper? Increase the reach of your titles
YUMPU automatically turns print PDFs into web optimized ePapers that Google loves.
<strong>Silva</strong> Sweden AB<br />
Box 998<br />
SE-191 29 Sollentuna<br />
info@silva.se - www.silva.se<br />
See more products from <strong>Silva</strong> at<br />
www.silva.se<br />
Art.no. 70170-99 - ver.2<br />
<strong>Silva</strong> <strong>Sight</strong> <strong>Master</strong>
<strong>Silva</strong> <strong>Sight</strong> <strong>Master</strong><br />
Instruction Manual<br />
A B<br />
2 3<br />
Page<br />
Figure A+B 2-3<br />
English 4-6<br />
Svensk 7-9<br />
Français 10-12<br />
Deutsch 13-15<br />
Italiano 16-18<br />
Español 19-21<br />
Figure C 22-23
SILVA <strong>Sight</strong> <strong>Master</strong> Series is the type of compass<br />
to choose if you depend upon the highest possible<br />
accuracy obtainable with a hand-held magnetic<br />
compass. Typical users of this kind of precision<br />
sighting compass are: Engineers, Surveyors,<br />
Geologists, Foresters, Architects, Military forces,<br />
Marine navigation personnel and others who put<br />
extreme accuracy first.<br />
Instructions for use, PICTURE A and B<br />
1. Hold the compass close to one of your eyes<br />
horizontally in front of you.<br />
2. <strong>Sight</strong> with both eyes towards the object. See fig. A<br />
3. At the same time as you read the bearing through<br />
the compass sighting system you sight above the<br />
instrument towards the object. The index line will<br />
appear to “stand up” from the compass housing<br />
making it easy to accurately read the correct<br />
bearing towards the object. See fig. B<br />
4. The bigger scale gives the bearing from your<br />
position to the object and the smaller one the<br />
reverse bearing from the object to your position.<br />
Reverse bearings are essential in accurate<br />
positioning tasks, particularly at sea.<br />
Direct reading of bearing<br />
The scale readable from above by the lubber line is<br />
used when following a certain direction in the terrain<br />
or when using the instrument as auxiliary compass<br />
in a boat. Please note that highest accuracy is always<br />
obtained by using the optical sighting system.<br />
Important!<br />
Some people who have an eye condition called<br />
heterophoria (misalignment of the eye axis) may get<br />
incorrect bearings when reading the compass with<br />
both eyes open. This can be checked as follows:<br />
Take a bearing to the object with both eyes open.<br />
Then close the other eye, and if the bearing does<br />
not change significantly, there is no heterophoria and<br />
bearings can thus be taken with both eyes open.<br />
When there is a difference in the bearings, then<br />
keep the other eye closed and sight partly over the<br />
instrument housing.<br />
PICTURE C<br />
Plotting locations<br />
Aim at two fixed points appearing on the chart, for<br />
ex. lighthouse in direction 20° and landmark in 330°.<br />
Then draw straight lines along the reverse bearings of<br />
20° and 330° (200° and 150°) from the lighthouse and<br />
landmark on the chart. The intersection point of these<br />
bearing lines indicates your location. See fig. C<br />
Declination<br />
The difference between geographical north (towards<br />
which the maps meridians are directed) and the<br />
magnetic north (towards which the compass is<br />
pointing) is called declination (or variation). Declination<br />
changes with location and the local declination is<br />
printed on the maps. Bearing obtained with the<br />
compass should thus be corrected with the local<br />
declination.<br />
4 5
Deviation<br />
The compass should be used as far as possible<br />
away from iron and steel objects, such as engines,<br />
electrical equipment, knives, tooling, etc., causing<br />
magnetic interference, that is, direction errors. Even<br />
wrist watches and steel-framed spectacles may cause<br />
deviation in the bearings.<br />
Specifications<br />
Housing: Anodised aluminium.<br />
<strong>Sight</strong>ing System: Parallax free glass lens<br />
magnification (10x) sighting<br />
system.<br />
Capsule: Anti-static liquid filled for optimal<br />
dampening of the compass card.<br />
Accuracy: Max +/-0.5° from true magnetic<br />
course with precision sighting.<br />
Max +/-2° with direct reading at<br />
the lubber line.<br />
Compass card: Sapphire jewel bearing for friction<br />
free movement.<br />
Dimensions: 75x53x16mm.<br />
Weight: 110g.<br />
SILVA <strong>Sight</strong> <strong>Master</strong> Serien består av kompasser som<br />
ger den största möjliga noggrannhet som kan uppnås<br />
med en handhållen magnetisk kompass. Typiska<br />
användare av noggranna siktkompasser är: geologer,<br />
arkitekter, skogsvaktare, besiktningsmän, ingenjörer,<br />
inspektörer, byggmästare, militärer, användare av<br />
marin navigation och andra som sätter värde på<br />
extrem noggrannhet.<br />
Hur du använder SILVA <strong>Sight</strong> <strong>Master</strong>, Figur A och B<br />
1. Håll kompassen horisontellt framför dig nära ditt<br />
ena öga.<br />
2. Sikta med båda ögonen mot objektet. Se figur A.<br />
3. Sikta ovanför instrumentet mot objektet och<br />
läs samtidigt av bäringen genom kompassens<br />
siktsystem. Tack vare den optiska illusionen<br />
kommer indexlinjen att “sticka ut” från<br />
kompassens hus vilket gör det enkelt att avläsa<br />
den korrekta bäringen mot objektet. Se figur B.<br />
4. Den större skalan visar bäringen från din<br />
position till objektet och den mindre skalan<br />
visar den omvända bäringen från objektet till<br />
din position. Omvänd bäring är viktig vid exakt<br />
positionsbestämning, speciellt till sjöss.<br />
Direkt avläsning av bäring<br />
Skalan som kan läsas av ovanifrån med styrstrecket<br />
används när du följer en specifik riktning i terrängen.<br />
Notera att högsta noggrannhet alltid uppnås genom<br />
att använda det optiska siktsystemet.<br />
6 7
OBS!<br />
Ögonsjukdomen kallad heterophoria, vilket innebär en<br />
förskjutning av ögonens axel, kan hos vissa människor<br />
leda till felaktiga avläsningar när instrumentet avläses<br />
med båda ögonen. Detta kan kontrolleras genom<br />
följande;<br />
Gör en avläsning av objektet med båda ögonen öppna.<br />
Blunda sedan med det ena ögat. Om avläsningen inte<br />
ändras markant har du inga problem med heterophoria<br />
och avläsningar kan därmed göras med båda ögonen<br />
öppna. Om du märker en markant skillnad så blunda<br />
med ena ögat och sikta lite vid sidan av instrumentets<br />
kåpa.<br />
Figur C<br />
Plotta positioner<br />
Sikta på två fasta punkter på sjökortet eller kartan,<br />
till exempel fyren i riktning 20° och landmärke i 330°.<br />
Dra sedan en rak linje längs med den omvända<br />
bäring av 20° och 330° (200° och 150°) från fyren<br />
och landmärket på sjökortet eller kartan. Din position<br />
motsvaras av den punkt där de två bäringslinjerna<br />
korsas. Se figur C.<br />
Deklination<br />
Skillnaden mellan geografisk nord (som kartans<br />
meridianer visar riktningen mot) och magnetisk<br />
nord (som kompassen visar riktningen mot) kallas<br />
deklination (missvisning). Deklinationen är olika<br />
beroende på din position och den lokala deklinationen<br />
skrivs normalt ut på kartan. Bäringen som erhålls<br />
från kompassen bör därför korrigeras med lokal<br />
deklination.<br />
Deviation<br />
Använd kompassen så långt ifrån järn- och stålobjekt,<br />
som till exempel motorer, elektrisk utrustning, knivar,<br />
verktyg osv. De kan orsaka magnetiska störningar<br />
vilket leder till riktningsavvikelser. Till och med klockor<br />
och glasögon med stålbåge kan leda till deviation i<br />
bäringen.<br />
Specifikationer<br />
Kåpa: Anodiserat aluminium.<br />
Siktsystem: Parallaxfri glaslins, förstorning (10x).<br />
Hölje: Fyllt med anti-statiskt vätska för<br />
optimal dämpning av kompassrosen.<br />
Noggrannhet: Max +/-0.5° från verklig magnetisk<br />
kurs vid noggrann siktning. Max +/-2°<br />
vid direkt avläsning med indexstreck.<br />
Kompassros: Safirlagrad för friktionsfri rörelse.<br />
Dimensioner: 75x53x16mm.<br />
Vikt: 110gram.<br />
8 9
La gamme SILVA <strong>Sight</strong> <strong>Master</strong> est le type de<br />
compas qu’il vous faut, si vous avez besoin de la<br />
plus grande précision possible avec un compas<br />
de relèvement magnétique. Cette gamme de<br />
compas de relèvement/boussoles à viser est tout<br />
particulièrement adaptée aux besoins des utilisateurs<br />
suivants : Ingénieurs, Géomètres, Géologues,<br />
Forestiers, Architectes, Forces armées, Navigateurs<br />
et tous les ceux pour lesquels la précision est<br />
primordiale.<br />
Instructions d’emploi, ILLUSTRATIONS A et B<br />
1. Tenez le compas horizontalement devant vous,<br />
près de l’œil.<br />
2. Visez l’objet avec les deux yeux. Voir fig. A<br />
3. Lisez le relèvement apparaissant dans la lentille de<br />
visée du compas quand celle-ci s’aligne sur l’objet<br />
visé au-dessus de l’instrument. L’illusion d’optique<br />
fait que la ligne de foi apparaît au-dessus du boîtier<br />
du compas ce qui facilite la visée et augmente la<br />
précision du relèvement de l’objet. Voir fig. B<br />
4. La grande graduation indique le relèvement<br />
de l’objet depuis votre position tandis que la<br />
petite indique l’azimut inverse, c’est-à-dire le<br />
relèvement de votre position depuis l’objet visé.<br />
Les relèvements inversés sont essentiels pour les<br />
calculs de position, particulièrement en mer.<br />
ou d’utiliser l’instrument comme compas auxiliaire sur un<br />
bateau. Notez cependant que la plus grande précision est<br />
toujours atteinte en utilisant le système de visée optique.<br />
Important !<br />
Certaines personnes présentant une déviation des axes<br />
visuels appelée hétérophorie, peuvent effectuer une<br />
lecture incorrecte du relèvement lorsqu’elles procèdent<br />
à une visée avec les deux yeux ouverts. Cette déviation<br />
peut être contrôlée comme suit :<br />
Prenez un relèvement de l’objet avec les deux yeux<br />
ouverts. Puis fermez l’œil qui ne prend pas la visée sur la<br />
ligne de foi. Si la mesure ne varie pas significativement,<br />
il n’y a pas d’hétérophorie et vous pouvez effectuer les<br />
mesures avec les deux yeux ouverts. Si vous constatez<br />
une différence de mesure, maintenez cet œil fermé et<br />
visez partiellement au-dessus du boîtier de l’instrument.<br />
ILLUSTRATION C<br />
Tracé des positions sur la carte<br />
Visez deux points fixes à terre tracés sur la carte, par<br />
exemple un phare dans le relèvement 20° et un amer<br />
dans le 330. Puis tracez deux lignes droites sur la carte<br />
depuis le phare et l’amer dans les azimuts inverses<br />
aux relèvements 20° et 330° (200° et 150°). Les points<br />
d’intersection de ces lignes de relèvement indiquent votre<br />
position. Voir fig. C<br />
Lecture directe du relèvement<br />
Déclinaison magnétique<br />
La différence entre le nord géographique (vers lequel les<br />
La graduation lisible sur la ligne de foi par-dessus,<br />
méridiens convergent sur la carte) et le nord magnétique<br />
permet de suivre une direction donnée sur le terrain (indiqué par le compas) est appelée déclinaison<br />
10 magnétique. La déclinaison magnétique varie selon<br />
11
la position à la surface du globe. La déclinaison<br />
magnétique locale et sa variation annuelle sont<br />
imprimées sur les cartes. Il faut donc appliquer au<br />
relèvement mesuré avec le compas, une correction<br />
égale à la déclinaison magnétique locale.<br />
Déviation<br />
Il faut utiliser le compas aussi loin que possible<br />
de tout objet en fer ou en acier, tels que moteurs,<br />
appareils électriques, couteaux, outillages, etc., créant<br />
des interférences magnétiques, et donc des erreurs<br />
de relèvement. Même les montres de poignet ou les<br />
lunettes à monture en acier peuvent provoquer une<br />
déviation des relèvements.<br />
Die SILVA <strong>Sight</strong><strong>Master</strong> Präzisionskompasse sind die erst<br />
Wahl, falls Sie höchste Ablesegenauigkeit bei einem Handgerät<br />
des Typ Magnetkompass erreichen wollen. Zu diesen<br />
Anwendern zählen unter anderem Ingenieure, Vermesser,<br />
Geologen, Forstleute, Architekten, Soldaten, Marineverwender<br />
und viele mehr, für die Präzision oberstes Gebot ist.<br />
Gebrauchsanleitung <strong>Sight</strong><strong>Master</strong>, Bilder A und B<br />
1. Halten Sie den Kompass horizontal nahe vor eines Ihrer<br />
Augen.<br />
2. Peilen Sie mit beiden Augen geöffnet ein Objekt an. Siehe<br />
Bild A.<br />
3. Führen Sie die Peilung durch das Präzisionsablese-System<br />
durch, während Sie gleichzeitig auf das Objekt sehen. Durch<br />
optische Täuschung wird es Ihnen vorkommen als läge die<br />
Indexlinie ausserhalb des Kompassgehäuses. Dies macht<br />
es besonders leicht genaue Peilungen in Richtung des<br />
Objektes vorzunehmen. Siehe Bild B.<br />
4. Die größere Skale gibt Ihnen den Kurswert zum Objekt<br />
hin an, die kleiner Skale den Gegenkurs vom Objekt<br />
zu Ihnen. Gegenkursangaben sind wichtig bei vielen<br />
Arten der Positionsbestimmung, insbesondere bei der<br />
Marinenavigation.<br />
Caractéristiques techniques<br />
Boîtier : Aluminium anodisé.<br />
Système de visée : Système de visée à lentille<br />
de grossissement (10x) sans<br />
parallaxe.<br />
Capsule : Remplie d’un liquide anti-statique<br />
pour un amortissement optimal<br />
des mouvements de la rose du<br />
compas.<br />
Précision : Max ±0,5° du cap magnétique<br />
réel avec une visée précise. Max Direktes Ablesen des Kurses<br />
±2° en lecture directe sur la ligne Die Skale auf der Rosette, ausgestattet mit einer roten<br />
de foi.<br />
Markierungslinie, wird verwendet, wenn Sie beispielsweise<br />
Rose du compas : Pivot en saphir pour une rotation einen Kurs im Gelände überprüfen oder den Kompass als<br />
sans friction.<br />
Hilfskompass einsetzen möchten. Der Kurs wird direkt an<br />
Dimensions : 75 × 53 × 16 mm.<br />
der Markierungslinie abgelesen. Beachten Sie, dass höchste<br />
Poids : 110 g.<br />
Genauigkeit im Zweifelsfall immer unter Verwendung des<br />
12 optischen Ablesesystems erreicht wird.<br />
13
Wichtig!<br />
Es gibt Personen, die unter Heterophorie leiden, also einer<br />
Fehlstellung der Blickachsen der Augen. Bei diesen Personen<br />
kann ein korrektes Ablesen mit beiden Augen erschwert oder<br />
unmöglich sein. Überprüft werde kann dies wie folgt:<br />
Lesen Sie einen Kurs zu einem Objekt wie beschrieben mit<br />
beiden Augen ab. Schließen Sie jetzt ein Auge und lesen<br />
mit dem anderen wiederum den Wert ab: Sollte der Wert<br />
sich nicht signifikant verändern, so liegt keine Heterophorie<br />
vor und Sie sollten mit beiden Augen geöffnet Werte<br />
ermitteln. Sollten die Werte voneinander abweichen, dann<br />
sollten Sie ein Auge geschlossen halten und müssen mit<br />
dem geöffneten Auge sowohl den Wert ermitteln als auch<br />
teilweise über Gehäuse hinweg das Ziel anpeilen.<br />
Bild C<br />
Kreuzpeilung<br />
Ermitteln Sie zwei Punkte auf einer Karte, beispielsweise<br />
einen Leuchtturm in Richtung 20°und einen prägnanten Punkt<br />
an Land in 330°. Zeichnen Sie dann zwei gerade Linien unter<br />
Verwendung des Gegenkurses der Werte 20° und 330° (also<br />
200° und 150°) von den jeweiligen Objekten in die Karte ein.<br />
Die Kreuzung dieser Linien zeigt Ihre momentane Position<br />
an. Siehe Bild C.<br />
Deklination (Missweisung)<br />
Der Unterschied zwischen Geographisch-Nord (die<br />
Meridianlinien der Karte verwenden diese Referenz) und<br />
Magnetisch-Nord (in diese Richtung zeigt der Kompass)<br />
wird als Deklination oder auch Missweisung bezeichnet. Die<br />
Deklination ist an verschiedenen Orten unterschiedlich und<br />
der lokale Deklinationswert ist üblicherweise auf guten Karten<br />
verzeichnet. Mit dem Kompass ermittelte Kurswerte sollten<br />
bei Notwendigkeit unter Berücksichtigung der Deklination<br />
korrigiert werden.<br />
Deviation (Ablenkung)<br />
Ein Kompass sollte möglichst in maximaler Entfernung<br />
zu stahl- und eisenhaltigen Objekten wie beispielsweise<br />
Motoren, Elektrogeräten, Messern, Werkzeug, usw...,<br />
die magnetische Störungen und damit Richtungsfehler<br />
verursachen könnten, verwendet werden. Selbst<br />
Armbanduhren oder Brillengestelle können im Extremfall<br />
Richtungsfehler verursachen.<br />
Spezifikation<br />
Gehäuse: Aluminium<br />
Peilsystem: Reflexionsfreie Glaslinse mit 10-facher<br />
Vergrößerung<br />
Kapsel: Antistatisch flüssigkeitsgefüllt für optimale<br />
Dämpfung des Kompasses<br />
Genauigkeit: Bis zu +/- 0,5° bezogen auf Magnetisch-Nord<br />
bei Verwendung des Präzisionsablese-Systems<br />
sowie +/- 2° bei direkter Ablesung<br />
Kompass: Saphirgelagert für praktisch reibungsfreie<br />
Bewegung.<br />
Größe: 75x53x16mm<br />
Gewicht: 110g<br />
14 15
La serie <strong>Sight</strong> <strong>Master</strong> della <strong>Silva</strong> rappresenta la miglior bussola<br />
per utilizzo manuale disponibile sul mercato per qualità costruttiva,<br />
assemblaggio, precisione, affidabilità e longevità. Questa serie<br />
è stata appositamente progettata per applicazioni professionali<br />
– geologi, operatori forestali, architetti, ingegneri, speleologi,<br />
costruttori, esploratori, forze armate, marinai etc - dove la miglior<br />
precisione ed affidabilità sono caratteristiche imprescindibili.<br />
Istruzioni all’uso, Figure A e B<br />
1. Impugnare saldamente la bussola, tenendola in posizione<br />
orizzontale e traguardando il bersaglio nell’ottica dello<br />
strumento, utilizzando un occhio solo.<br />
2. Utilizzando ora entrambi gli occhi, direzionarsi verso il bersaglio<br />
desiderato. Figura A.<br />
3. Effettuate la lettura della scala graduata con un occhio,<br />
collimando il bersaglio con l’altro occhio. Per un principio di<br />
illusione ottica, la linea di riferimento sembrerà apparire al di<br />
fuori del corpo dello strumento, rendendo così molto facile la<br />
lettura dell’angolo misurato. Figura B.<br />
4. La scala graduata grande serve per misurare la vostra<br />
posizione rispetto al bersaglio, mentre la scala graduata piccola<br />
serve per stimare la posizione del bersaglio rispetto alla vostra.<br />
La scala graduata piccola è fondamentale per un’accurato<br />
posizionamento, in special modo nell’impiego in mare.<br />
Importante!<br />
Alcune persone possono soffrire di un disturbo alla vista,<br />
denominato Eteroforia, consistente nell’incapacità di<br />
mantenere paralleli gli assi visivi. In questo modo gli occhi<br />
non riescono a guardare contemporaneamente lo stesso<br />
punto e fissano invece in direzioni differenti nello stesso<br />
momento. Nel caso in cui non fosse possibile giungere<br />
allo stesso valore misurato traguardando dapprima con<br />
entrambi gli occhi aperti e, successivamente, con un solo<br />
occhio, procedere necessariamente come segue: anzichè<br />
utilizzare entrambi gli occhi, uno per l’osservazione a campo<br />
libero dell’oggetto e l’altro per l’osservazione dell’ottica<br />
dello strumento, utilizzare un solo occhio traguardando<br />
parzialmente dentro l’ottica dello strumento e parzialmente<br />
direttamente verso l’oggetto.<br />
Figura C<br />
Determinare la posizione esatta su una mappa<br />
Mirare verso due punti fissi e rappresentati sulla mappa,<br />
per esempio un faro in direzione 20° ed un punto fisso su<br />
terraferma a 330°. Quindi tracciare due linee rette passanti<br />
per i valori letti sulla scala graduata piccola, pari a 200° e<br />
150°, riferiti rispettivamente ai 20° del faro e ai 330° della<br />
punto sulla terraferma letti sulla scala graduata grande.<br />
L’intersezione delle due linee appena tracciate corrisponderà<br />
alla vostra posizione. Figura C.<br />
Lettura diretta dell’orientamento<br />
In determinate situazioni quali bussola di complemento in nave o<br />
per utilizzo cartografico, può essere necessario effettuare la lettura Declinazione magnetica<br />
della posizione direttamente dal quadrante posto sul dorso della La differenza tra il Nord geografico (verso il quale sono<br />
bussola, prendendo come riferimento il valore individuato dalla direzionati i meridiani sulle mappe) ed il Nord magnetico<br />
tacca rossa. La lettura più precisa è comunque quella effettuata (verso il quale la bussola è direzionata) è chiamata<br />
traguardando l’ottica della bussola. Figura 4.<br />
declinazione magnetica. La declinazione varia in base alla<br />
16 propria posizione terrestre: il valore della<br />
17
declinazione del punto occupato può essere letto sulla<br />
mappa, in quanto sulle mappe sono riportati i valori della<br />
declinazione per tutte le località. Pertanto, il valore letto sullo<br />
strumento necessiterà di essere corretto tenendo conto del<br />
valore della declinazione magnetica relativa al luogo dove è<br />
stata effettuata la misura.<br />
La Brújula de la Serie SILVA <strong>Sight</strong> <strong>Master</strong> es el tipo<br />
de brújula a escoger si Vd. necesita la máxima precisión<br />
posible, con una brújula magnética de mano. Los<br />
usuarios habituales de esta brújula de precisión son:<br />
ingenieros, topógrafos, geólogos, forestales, arquitectos,<br />
fuerzas militares, personal de navegación marina...etc,<br />
que sitúan como prioridad la máxima precisión.<br />
Interferenze<br />
La bussola è estremamente sensibile ed influenzabile da<br />
strutture metalliche presenti nelle prossimità, quali motori<br />
Instrucciones de uso, FIGURAS A y B<br />
elettrici, automobili, arredi urbani, cancellate, braccialetti,<br />
1. Sujete la brújula horizontalmente y acérquela a uno de<br />
orologi, etc. Pertanto, per ottenere una misura precisa ed<br />
sus ojos.<br />
attendibile, assicurarsi di operare nelle condizioni ottimali, ad 2. Mantenga ambos ojos abiertos y mire con un ojo a<br />
adeguata distanza da strutture metalliche ed eventualmente través del visor hacia el objeto de referencia.<br />
non indossando braccialetti, orologi, etc.<br />
Ver fig. A.<br />
3. Al mismo tiempo que Vd. esta leyendo el valor de<br />
Caratteristiche tecniche<br />
dirección (rumbo), Vd. está alineando la línea negra<br />
Corpo strumento: Alluminio anodizzato.<br />
sobre el objeto. Por ilusión óptica, la línea índice negra<br />
Sistema di puntamento: Lente in vetro priva di parallasse,<br />
vertical parecerá sobresalir de la brújula facilitando por<br />
10x ingrandimenti.<br />
tanto el realizar una medición precisa de la dirección<br />
Capsula: Riempimento con liquido anti-<br />
del objeto visado. Ver fig. B<br />
statico per un’ottimale scorrimento 4. La escala con números grandes indica la dirección<br />
del disco.<br />
desde la posición que Vd. ocupa al objeto, y la escala<br />
Precisione: Max +/-0.5° per letture eseguite<br />
con numeros pequeños la dirección inversa. Las<br />
tramite il sistema di puntamento<br />
direcciones inversas son esenciales en trabajos que<br />
ottico; Max +/-2° per letture es-<br />
requieren posiciones precisas, especialmente a nivel<br />
eguite tramite il quadrante posto<br />
lateralmente sullo strumento.<br />
marino.<br />
Disco della capsula: Montato su cuscinetto allo zaffiro Lectura directa de la dirección<br />
per un preciso movimento privo di La escala legible desde el exterior (arriba) sin acercar el<br />
attriti.<br />
ojo, se usa al seguir una determinada dirección sobre el<br />
Dimensioni: 75x53x16mm.<br />
terreno, o al usar el instrumento como una brújula<br />
18Peso: 110g.<br />
19
auxiliar en un barco. Tenga en cuenta no obstante, que la<br />
máxima precisión se obtiene utilizando la brújula mediante el<br />
visor óptico.<br />
Importante!<br />
Algunas personas que tienen un problema visual denominado<br />
heterophoria, consistente en una desalineación del eje óptico,<br />
pueden llegar a obtener lecturas incorrectas al visar a traves<br />
del visor del aparato si lo hacen con los dos ojos abiertos. Esto<br />
puede ser comprobado de la siguiente forma:<br />
Tome una referencia de un objeto lejano con los dos ojos<br />
abiertos. Acerque uno de sus ojos al visor del aparato. Cierre el<br />
otro ojo, y si la lectura no varía significativamente con la lectura<br />
previamente hecha con los dos ojos abiertos, es síntoma de<br />
que no existe heterophoria y por tanto las lecturas de dirección<br />
pueden ser tomadas siempre con los dos ojos abiertos. En<br />
el caso de que sí exista una diferencia significativa, realice sus<br />
mediciones con un ojo cerrado y lance su visual parcialmente por<br />
encima de la caja del aparato.<br />
magnético (el que marca la aguja de una brújula) se<br />
denomina declinación (o variación). Las variaciones<br />
de la declinación según la posición geográfica, así<br />
como el valor anual de la declinación aparecen<br />
impresos habitualmente en los mapas. De este modo,<br />
las direcciones obtenidas con la brújula, deben ser<br />
corregidas teniendo en cuenta la declinación magnética<br />
local.<br />
Desviación<br />
La brújula debe de usarse lo más lejos posible de<br />
hierro y objetos metálicos, tales como motores,<br />
equipos eléctricos, cuchillos, herramientas...etc, que<br />
causan interferencias magnéticas y por tanto errores<br />
en la dirección. Incluso los relojes de pulsera y las<br />
gafas con montura metálica pueden causar errores<br />
de desviación.<br />
Especificaciones<br />
Caja: Aluminio anonizado.<br />
FIGURA C<br />
Sistema de visado: Sistema de visado con lente libre<br />
Situación de puntos<br />
de paralaje y aumento (10x)<br />
Lance una visual a dos puntos fijos que aparezcan sobre el<br />
Cápsula: Rellena de líquido anti-estático<br />
mapa, p.ej. un faro en la dirección 20º y un mojón topográfico<br />
para un óptimo balanceado del<br />
en la 330º. Dibuje dos líneas rectas a lo largo de las direcciones<br />
plato magnético.<br />
inversas de 20º y 330º ( es decir 200º y 150º) desde el faro y Precisión: Max +/-0.5° de la dirección<br />
el mojón, sobre el mapa. El punto de intersección de estas<br />
magnética real con visado de<br />
líneas de dirección le indican la posición que ocupa Vd. en estos<br />
precisión. Max +/-2° con lectura<br />
momentos. Ver fig. C<br />
directa en el plato superior.<br />
Plato magnético: Con zafiro central , para un<br />
Declinación<br />
movimiento libre de fricción.<br />
La diferencia entre el Norte geográfico (el que marcan los<br />
Dimensiones: 75x53x16mm.<br />
20meridianos de cualquier mapa) y el Norte<br />
Peso: 110g.<br />
21
C<br />
22 23