TCTRX2ED - Chamberlain
TCTRX2ED - Chamberlain
TCTRX2ED - Chamberlain
- No tags were found...

Create successful ePaper yourself
Turn your PDF publications into a flip-book with our unique Google optimized e-Paper software.
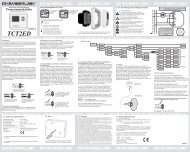
NLFGB<strong>TCTRX2ED</strong>FNLGB Installations & UserGuideMode d’emploi etinstructions de montageGebruiks-enmontageaanwijzingGebruiksaanwijzing-/montageaanleidingProgrammeerbare schakelklok<strong>TCTRX2ED</strong>1. Programmeerbare schakelklok <strong>TCTRX2ED</strong>1.1.gewoonlijk is de funktie van het bovenste knopje”omhoog” en het onderste “omlaag”1.2.In de menumode is de funktie van de ondersteknop “kiezen” en van de bovenste knop “bevestigen”1.3.Verklaring van de piktogrammen op het display1.4.on = zomertijd1.5.sneeuw = wintertijd1.6.A1 dagelijks automaties openen en sluiten opeen programmeerd tijdstip.1.7.A7 dagelijks automaties openen en sluiten opverschillende tijden.1.8.Batterij piktogram betekent stroomuitval. De klokloopt op batterijen, en kann daarbij niet in de menuMode worden omgeschakeld.1.9. De onderdelen worden eenvoudig inelkaargestoken en kunnen door voorzichtig uit elkaartrekken weer worden los gemaakt.2. Voor de montage moet U volgendeveiligheidsaanwijzingen nakomen:2.1. Veiligheidsvoorschriften2.2. Zulke tekens waarschuwen, betekenen “Weesvoorzichtig”, oproep deze te bevolgen, door nietbevolgen kann personen- en/of schade en zakelijkewaardes ontstaan. Leest U a.u.b. dezeWaarschuwingen heel erg zorgvuldig.2.3. Het niet opvolgen van de regels voor deveiligheid kan ernstige Personen- of zakelijke schadesveroorzaken.2.4. Waarschuwing: Voor de veiligheid van Personenis het belangrijk, deze instrukties na te komen. Dezeinstrukties moeten worden opbewaard.2.5. Montage, testen en eerste gebruik van de 230Volt aansluitingmag uitsluitend door een erkend vakman (electricien)worden uitgevoerd.2.6. Montage en verleggen van de kabels moetvolgens de plaatselijke Bouw - en Elektrovoorschriftenworden gemaakt.2.7. Kinderen niet met de Bediening laten spelen,bediening voor kinderen ontoegankelijk opbewaren.2.8 Voor de montage stroom uitgeschakelen!2.9. Als de aandrijving in de verkeerde richting loopt,moet U de draden van de motor wisselen.2.10 Ook geschikt voor inbouw in muurdoos naarnorm DIN 49073 (60mm)2.11. De progamma instelling van het apparaat (vgl.Verbindung) moet voor de montage gebeuren. Daarbijmogen de apparaten hooguit 5 Meter van elkaar afzijnInstallatie:3.Montage3.1. Met van de Schakelklok <strong>TCTRX2ED</strong> van<strong>Chamberlain</strong> kunnen Uw rolluiken komfortabel wordenbediend. De gewone schakelaar wordt eenvoudig doorde <strong>TCTRX2ED</strong> vervangen. Let U daarbij op demontage- en veiligheidsvoorschriften.3.2. De eingebouwde tijdschakelaar bied U extragemak:Programmeerd U een vaste, dagelijkse openings- ensluitingstijd voor Uwrolluik of Uw markies of stelt U voor iedere weekdageen andere openings- en sluitingstijd. U kunt Uwrolluiken ook ´s morgens zelfstandig laten openen, omze ´s avonds opnieuw van hand te sluiten enomgekeerd.3.3. Met de eingebouwde draadloze ontvangerkunnen stuursignaale van anderen schakelaars vande <strong>Chamberlain</strong>-Serie worden ontvangen. Zo kunt Ueen rolluik bijvoorbeeld ook van Uw sofa uit bedienen.Met de als optie verkrijgbare licht- enGlasbreuksensor kunt U rolluiken zelfs afhankelijk vande helligheid sturen. Het spaart energie en behoedUw ruimtes voor te sterk zonlicht.4. Bediening4.1. Na de vakkundige montage kunt U gelijk allenodige instellungen voornemen. U moet eerst datumen tijd instellen. Vervolgens begint U met hetprogrammeren. De bediening is erg eenvoudig. Drukeen paar sekonden lang gelijktijdig beide knoppenaan de <strong>TCTRX2ED</strong>, om in de menumode te komen.Kies met de “Omlaag”-knop het gewenste menupuntuit. Het gekozen menupunt wordt in het display zwartunterlegd. Bevestigt U vervolgens Uw keus steeds metde “Omhoog”-knop, dan eerst wordt de gewenstefunktie uitgevoerd.4.2. Om in de menumode te komen, moet U alletwee knoppen een paar sekonden lang drukken.4.3. Door het drukken van de "Omlaag"-knop, kiest Ude gewenste funktie. Op het display heeft deze daneen zwarte ondergrond.4.4. Vervolgens drukt U de "Omhoog"-knop, om Uwkeus te bevestigen, of deze funktie te laten uitvoeren.5. Kies de taal.5.1.Gaat U in de menumodus, kies Einstl. en danSprache. Kies een taal. Kies Ende6. Instelling van tijd en datum6.1. Gaat U in de Menümode, kiest U Einstl. en danDatum.Nu kiest U met van de “omlaag”.knop dag, maand enjaar uit en bevestig ze met de” naar boven”-knop.6.2. Kies nu Uhrzeit. Kies met van de “omlaag”-knopuren en minuten en bevestig uw keus met de ” naarboven”-knop. Datum en tijd zijn nu korrekt ingesteld.6.3. druk de “ omlaag”- knop, tot U de gewenste dagziet.6.4. Druk dan de “ naar boven”-knop. De pijl springtnaar de maand.7. Dagelijks openen en sluiten van de rolluiken opeen tevoren bepaald tijdstip.7.1. De <strong>TCTRX2ED</strong> kan Uw rolluiken morgens opeen vaste tijd openen en `s avonds op een vaste tijdweer sluiten. Ga in de menumode. Kies Einstl., danProg. en dan Tägl. Geeft U een openingstijd in enbevestig U de uren en minuten met de ” naar boven”-knop. Geef een sluitingstijd in en bevestig de uren enminuten met de ”naar boven”-knop. Kies nu Zurück ennogeens Zurück. Kies nu Mode en vervolgens Autom.Nu kiest U Ein. De klok springt in de normalmodeterug. Gaat U nogmaals in de menümode. Kies Modeen dan Pr-Mod. Nu kiest U Wo-Prg.(weekprogramma).Op het display ziet U links boven in de hoek A1. Hetrolluik zal nu iedere dag op de programmeerde tijdenopenen en sluiten.7.2. In de programma mode "A1" wordt Uw rolluikdagelijks op een vaste tijd automatisch geopend engesloten.7.3. In de programma mode "A7" opent en sluit Uwrolluik iedere dag van de week op een individueelgeprogrammeerd tijdstip.8. Automatisch openen en sluiten van derolluiken op verschillende tijden (afhankelijk vande weekdag)8.1. U kunt ook voor iedere dag van de week enandere openings- of sluitingstijd ingeven.Gaat U in de menumode. Nu kiest U Einstl., dan Prog.en dan Mo voor maandag. Geef een openingstijd in enbevestig de uren en minuten met de ”naar boven”-knop. Geef een sluitingstijd in en bevestig de uren enminuten opnieuw met de ”naar boven”-knop. Kies nuna elkaar alle andere weekdagen uit en programmeerde openingstijden en sluitingstijden. Kies Zurück ennoch eens Zurück. en Modus en vervolgens Autom.Nu kiest U Ein. De klok springt in de normalmodeterug. Gaat U opnieuw in de menumode. Nu kiest UPr-Mod. Kies Tag-Prg. ( dagprogramma). Op hetdisplay ziet U linksboven A7. Het rolluik zal nu iederedag op de individeel geprogrammeerde tijd openen ensluiten.8.2. Als U bei uren inplaats van een getal eendubbele streep (--) ingeeft, wordt de openings-/sluitingstijd uitgeschakeld. Na de 23 verschijnt (--). Ukunt deze funktie gebruiken, om het rolluik ´s avondsautomaties te laten sluiten, en ´s morgens van hand teopenen en umgekeerd.8.3. Unter het menupunt Pr-Mod. kunt U gemakkelijktussen de twee automatikprogrammas heen- en weerschakelen. De instellingen van het voorheenuitgeschakelde programma blijven daarbij behouden.8.4. Onder het menupunt Autom. kun U deautomatikfunkties helemaal uitschakelen. Ook daarbijblijven de geprogrammeerde tijden in het geheugenbestaan.9. Kombination met de draadloze muurschakelaarTCTX2ED.9.1. De <strong>TCTRX2ED</strong> kan met een TCTX2EDschakelaar op afstand worden bestuurd. De manuelekommandos in de<strong>TCTRX2ED</strong> staan in de hierarchiealtijd hoger als de gebufferde programmas. Ga in demenumode. Kies Einstl. en dan Funk. Nu kiest ULernen. Op het display ziet U het woord Senden. Druknu de “ naar boven”-knop op de TCTX2ED. Op hetdisplay ziet U kort het woord Taster. Nu kiest UZurück. Kies nu Modus en dan Funk. Nu kiest UTaster. De <strong>TCTRX2ED</strong> volgd nu de stuuropdrachtenvan de TCTX2ED.10. Kombinatie met de programmeerbareschakelklok TCTTX2ED10.1. De <strong>TCTRX2ED</strong> kan ook met de TCTTX2ED opafstand worden bestuurd, dat betekend dat deTCTTX2ED als zentraalschakelaar gebruikt kannworden, die meerdere rolluiken gelijktijdig bestuurd.Ga in de Menumodus van de TCTTX2ED. Kies Einstl.,Funk, Lernen. Op het display staat nu Lernen starten.Ga in de Menumodus van de <strong>TCTRX2ED</strong>. Nu kiest Una elkaar volgende menupunten:Einstl., Funk, Lernen.Op het display ziet U nu het woord Senden. Druk nude “ naar boven”-knop van de TCTTX2ED. Kies Modusen dan Funk. Nu kiest U Taster. De <strong>TCTRX2ED</strong>reageerd nu op de bevelen van de TCTTX2ED.10.2. In Menu Funk (onder Modus) kunt U kiezen,welke draadloze signale ontvangen worden. Kiest UEin, um de signalen van de muurtoetsen en van delichtsensor te ontvangen. Nu kiest U Taster omuitsluitend de manuele stuurbevelen van de TCTX2EDen de TCTTX2ED te ontvangen. Kiest U Sensor, omuitsluitend de signalen van de lichtsensor teontvangen. Nu kiest U Aus, um geen stuuropdrachtente ontvangen.11. Kappen van de Verbindungen.11.1. U kunt de aangeleerde verbindingen tussen deTCTX2ED, TCTTX2ED, de licht-en glasbreuksensorTCLS1ED en de <strong>TCTRX2ED</strong> ook weer resetten. GaatU in de Menumodes van de <strong>TCTRX2ED</strong>. Nu kiest Ueerst Einstl., dann Funk, en Löschen. Op het displayziet U het woordje Senden. Druk de “ naar boven”-knop van de TCTX2ED of van de TCTTX2ED. Op hetdisplay ziet U het woord Taster. Of drukt U een knopop de TCLS1ED. Op het display ziet U Sensor. DeDraadlozeverbindungen werden hier mede gekapt.11.2. U kunt ook met een enkel bevel alle draadlozeverbindungen beeindigen. Ga in de Menumodus vande <strong>TCTRX2ED</strong>. Kies nu Einstl. en dann Funkvervolgens Leeren.12. Toebehoor12.1. An de <strong>TCTRX2ED</strong> kan als optie de Licht-enGlasbreuksensor TCLS1ED worden aangesloten.Deze licht- en Glasbreuksensor is de idealekomplementering van de <strong>TCTRX2ED</strong>. Met deTCLS1ED kunnen Uw rolluiken afhankelijk van hetlicht worden bestuurd. U kan deze zender zo instellen,dat als de zon te sterk schijnt het rolluik van zelf sluiten bij rminder zonlicht opnieuw opent. De LS kan ookUw rolluik bij het aanbreken van de duisternis sluiten.(In de zomer laterr en in de Winter vroeger.) Hetspaart energie en verwarming. Bovendien bezit deTCLS1ED een glasbreukdetektor. Bij hevige bevingenwordt het rolluik zelfstandig gesloten. De montage kanook later worden gemaakt en is erg gemakkelijk. Hetmoduul wordt eenvoudig aan het raam geplakt enfunktioneerd zonder draadverbinding naar<strong>TCTRX2ED</strong>.De TCLS1ED is als accessoire verkrijgbaar.13. Als het maar eens niet funktioneerd...13.1. De klok springt niet in de Menumodes um.- Houdt U alle twee knoppen langer als 4 sekondeningedrukt.- Kontroleer de stroom. Is de stroom misschienonderbroken? Ziet U het piktogramm “batterij” in hetdisplay? De klok kan dann niet inde menumode worden omgeschakeld.13.2. De menupunten doen het niet.- Druk de “naar beneden”-knop tot het gewenstemenupunt zwart unterlegd is. Druk dan de “ naarboven”-knop, um Uw keus te bevestigen.13.3. De rolluiken reagieren niet op de gewenste tijd.- Kontrolleer de Einstellungen van datum en tijd.- Aktiveer de programmafunktie in het menu Autom.- Aktivieer de juiste programmeer modus in MenuPr-Mod.13.4. De draadloze verbinding doet het niet.- Tijdens het aanleren moeten de apparaten minderals 5 meter van elkaar weg zijn.- Handys, Babyphones en andereDraadlozeapparaten kunnen de overdraging storen.- Als werkelijk niets meer gaat moet U de klokresetten.Opgepastt: Alle instellungen gaan daarbijverloren.13.5. Bij stroomstoring kan de klok niet wordengeprogrammeerd.13.6. Hotline +49 (0) 68 38 907 10014. Technische gegevensVoedingsspanning....230V/50HzKontaktbelasting max.....5 A/230VSchakelspanning max.....230V (AC)Relaisuitgang....230V/50Hz voor 60 Sek. aktivStroomnetbeveiliging....Stuurapparaat IP 40,droge ruimteBedrijfstemperatuur....0°C tot 40°CVerbindingsstifte:....LaagspanningspotentiaalBeschermingsklasse IIGeheugen....tot 15 zendersLoopreserve....klok 6 uurPast op het schakelaarprogramma van Busch-Jägeralpha nea®Montage....ø 60mm UP DoosKleur....witFrequentie....433,92 MHzCode....64 Bit Rolling VeiligheidscodeAnsluiting....0,8 tot 2,5mm2Keurmerk....BZT G 121/323F, ETS 300 220,ETS 300 683, CE14.1. De interne batterij is een akku en hoeft niet teworden gewisseld.14.2 Technische veranderingen blijven voorbehouden15. Reset15.1. Bij het resetten wordt het geheugen geheelterug gezet. Alle programmainstellingen wordenteruggedraaid16. Garantie<strong>Chamberlain</strong> GmbH garandeerd de eerste koper van eenprogrammeerbare tijschakelklok voor de duur van 24 maanden (2jaren vanaf het datum van aankoop, dat dit produkt zondermateriaal-en /of fouten in de verwerking is. De eerste koper isverplicht, het produkt bij ontvangst op zichtbare defekte tekontrolleren. Kondities: De garantie beperkt zich uitsluitend tot dereparatie of de uitwisseling van defekte onderdelen en dekt niet dekosten of het transportrisiko van de defekte onderdelen ofprodukten. Deze garantie strekt zich niet uit tot schades, die geendefekte zijn, maar door verkeerd gebruik werden veroorzaakt.(zoals het gebruik bij slechts gedeeltelijk bevolgen van <strong>Chamberlain</strong>GmbHs montagevoorschriften, het gebruik en onderhoud; verzuimdonderhoud of instelling; elke aanpassing of verandering aan hetprodukt), uurloon, werkkosten voor de afbouw of het opnieuwinbouwen van een gerepareerde of uitgewisselde eenheid en/ofuitwisseling van de batterijen. Het ligt in het bemeten vanChambeerlain GmbH, of een door de garantie gedektes produkt,dat material- of bewerkingsfouten aantoont, kostenloos wordtgerepareerd of vervangen. <strong>Chamberlain</strong> GmbH behoudt zich hetrecht voor, te beslissen of de defekte onderdelen wordengerepareerd of door nieuwe of in de fabriek gereviseerdeonderdelen vervangen worden.Als het Produkt gedurende degarantietijd defekt is, richt U zich a.u.b. aan Uw detailhandelaar.Deze garantie tast de rechten van de koper volgens de nationaalgeldige Wetten niet aan. Ze heeft ook geen uitwerking op derechten van de koper tegenover de verkoper, die uit hetkoopverdrag voortvloeien. Daar, waar geen geldende nationale ofEEC-Wetten gelden, is deze garantie het enige rechtelijke middelvan de koper en nog de <strong>Chamberlain</strong> GmbH nog hun filialen ofHandelaren zijn voor schade, of schade die daruit voortvloeit, vooruitdrukkelijke of stilzwijgende garanties in samenhang met ditprodukt niet aansprakelijk. Niemand, ook geen vertegenwoordiger,is geautoriseerd om namens <strong>Chamberlain</strong> GmbH andereaansprakelijkheden in verband met de verkoop van deze produktete overnemen.17. Verklaring van konformiteit.17.1. De programmeerbare schakelklok model <strong>TCTRX2ED</strong>beantwoordt aan alle richtlijnen vanEN55014, EN61000-, ETS RES 0908, EN60555, & EN60335-1 ende supplementen 73/23/EEC, 89/336/EEC17.2 Verklaring van overeenstemmingDe programmeerbare schakelklok nodel <strong>TCTRX2ED</strong> voldoet, als zetezamen met een rolluik of markise volgens fabriekvoorschriftgeinstalleerd en onderhouden wordt, aan alle voorschriften van deEU-richtlijn 89/392/EEC en supplementaires.17.3.Ik, de ondergetekende, verklaar hiermede, dat hetvoorgenoemde apparaat en het in de montageaanwijzinggenoemde toebehoor aan de eerder genoemde voorschriften enrichtlijnen voldoet.Collin B. Willmott -Chefingenieur-<strong>Chamberlain</strong> GmbHD-66793 SaarwellingenFebruar, 2001© 2001 <strong>Chamberlain</strong> GmbHCHAMBERLAINOperation and installation instructions<strong>TCTRX2ED</strong> Programmable Time Switch1. <strong>TCTRX2ED</strong> Programmable Time Switch1.1.Key functions in normal situation:UP keyDOWN key1.2. Key functions in menu mode:Confirmation keySelection key1.3. Explanation of symbols (display)1.4. Summer time1.5. Winter time1.6. Daily automatic opening and closing of the shutters atprogrammed times.1.7. Daily automatic opening and closing of the shutters atdifferent times.1.8. Mains failure. The clock continues to run in batteryoperation. If the power supply is interrupted a battery symbolwill appear on the display. The clock cannot then be switchedover to menu mode.1.9. The parts are simply plugged together and can beseparated again by carefully withdrawing them.2. Please read before installation2.1. Safety Instructions2.2.These safety alert symbols mean Caution - a personalsafety or property damage instruction. Please read thosewarnings carefully.2.3. Failure to comply with the following instructions mayresult in serious personal injury or property damage.2.4.Warning: IT IS IMPORTANT FOR THE SAFETY OFPERSONS TO FOLLOW THESE INSTRUCTIONS. SAVETHESE INSTRUCTIONS.2.5.Installation, examination and operation of the 230Vconnection should be performed by an electrician.2.6.Installation and wiring must be in compliance with yourlocal building and electrical codes.2.7.Do not allow children to play with fixed controls. Keepremote controls away from children.2.8. For assembly purposes it is essential to ensure that theunit has no power connected to it.2.9. If the drive runs backwards please exchange theconnecting lines to the motor at the terminals.2.10. Also suitable for installation in a standard DIN 49073switch socket (60mm)2.11. Programming of the units and learning (teach-inprocedure) should take place before final installation. Duringthis procedure the units should be a maximum of 5 metresaway from one another.3.Installation3.1. With the <strong>TCTRX2ED</strong> time switch from <strong>Chamberlain</strong> youcan easily control your roller shutters. The normal switch issimply replaced by the <strong>TCTRX2ED</strong>. When doing so pleasefollow the installation and safety instructions.3.2. The built-in time switch offers you additional facilities:You can program fixed daily opening and closing times foryour roller shutters or awnings or you can program differentopening and closing times for each day of the week.You can also arrange for the roller shutters to openautomatically in the mornings and close them manually in theevenings as well as vice versa.3.3. With the built-in radio receiver control signals fromother <strong>Chamberlain</strong> switches can be received. In this way youcan for example control a roller shutter from the comfort ofyour sofa. With the optional optical and glass breakagesensor you can even control your roller shutters according tothe level of brightness. This saves energy and protects yourroom from the sun’s radiation when it is too strong.4. Operation4.1. Following expert installation you can immediately carryout all the necessary settings. First you should set the dateand time. Then you can carry out the programming.Operation is really simple. Just press the two keys on the<strong>TCTRX2ED</strong> simultaneously for several seconds, so as to getto the menu mode. Select the desired menu option with theDOWN key. The selected menu option is shown with a blackbackground. Always confirm your choice with the UP key andthen finally the desired function will be carried out.4.2. Press both keys for several seconds simultaneously toget to the menu mode.4.3. Select the required function with the DOWN key until itis shown on the display with a dark background.4.4. Then press the UP key to confirm your choice and tocarry out the corresponding function.5. Selection of language5.1.Go into menu mode, select Setup and then Lang.Select English or another language. Select End.6. Setting of time and date6.1. Go to menu mode, select Setup and then Date. With theDOWN key select day, month and year and confirm with theUP key.6.2. Now select Time. With the DOWN key select hours andminutes and confirm with the UP key. Date and time are nowcorrectly set.6.3. Press the DOWN key until the desired day appears.6.4. Then press the UP key. The arrow jumps onward forentering the month data.7. Daily opening and closing of the roller shutters at afixed time.7.1. The <strong>TCTRX2ED</strong> can open your roller shutters in themorning at a fixed time and close them again in the eveningat a fixed time. Go to menu mode. Select Setup, then Prog.and then Daily. Enter an opening time then confirm the hoursand minutes with the UP key. Then enter a closing time andagain confirm the hours and minutes with the UP key. Thenselect Return and then again Return. Now select Mode andthen Autom. Select On. The clock jumps back to normalmode. Go once again to menu mode. Select Mode and thenEvents. Select Weekly. On the display at the top left cornerappears A1. The roller shutters will now open and closeeach day at the programmed times.7.2. In program mode ”A1” the roller shutters open andclose each day automatically at the programmed times.7.3. In program mode ”A7” the roller shutters open andclose automatically each weekday at individuallyprogrammed times.8. Automatic opening and closing of the roller shuttersat different times (according to the day of the week)8.1. For each weekday you can also enter different openingand closing times. Go to menu mode. Select Setup, thenProg. and then Mo for Monday. Enter an opening time thenconfirm the hours and minutes with the UP key. Then enter aclosing time and again confirm the hours and minutes withthe UP key. Now select all the other weekdays and programthe opening and closing times. Then select Return and thenReturn again. Now select Mode and then Autom. Select On.The clock jumps back to normal mode. Go once again intomenu mode. Select Mode and then Events. Select Daily. Onthe display in the top left corner A7 appears. The rollershutters will now open and close on each day individuallyaccording to the programmed times.8.2. If instead of entering a time you enter a double hyphen(--) this will deactivate the opening or closing time. (--)appears after the 23. You can use this function toautomatically close the roller shutters in the evenings so thatyou can then open them manually in the morning or viceversa.8.3. Under the menu option Events you can easily switchbetween the two automatic programs. The settings of therespective deactivated program will still remain intact.8.4. Under the menu option Autom you can switch off theautomatic functions completely. Here too the programmedtimes will remain stored in the memory.9. Combination with the radio wall switch TCTX2ED.9.1. The <strong>TCTRX2ED</strong> can also be remotely controlled by aTCTX2ED switch unit. The manual commands always takeprecedence over those programmed into the <strong>TCTRX2ED</strong>. Goto menu mode. Select Setup, then Radio. Now select Learn.In the display the word Transmit appears. Now press the UPkey on the TCTX2ED. The word Buttons appears briefly onthe display. Select Return, then Mode and then Radio. SelectButtons and the <strong>TCTRX2ED</strong> will now react to controlcommands sent by the TCTX2ED.10. Combination with the TCTTX2ED.10.1. The <strong>TCTRX2ED</strong> can also be remotely controlled by aTCTTX2ED unit. In other words the TCTTX2ED can be usedas a central switch which controls several roller shutters atthe same time. Go into the menu mode of the TCTTX2ED.Select Setup, then Radio. Now select Learn. In the displayStart learn appears. Go into the menu mode of the<strong>TCTRX2ED</strong>. Select Setup, then Radio. Now select Learn. Inthe display the word Transmit appears. Now press the UP keyon the TCTTX2ED. Select Mode and then Radio. SelectButtons and the <strong>TCTRX2ED</strong> will now react to controlcommands sent by the TCTTX2ED.10.2 In the menu option Radio (under Mode) you can nowselect which radio signals are to be received. Select on toreceive the signals from the wall switch and the opticalsensor. Select Buttons if only the manual control commandsfrom the TCTX2ED and the TCTTX2ED are to be received.Select Off so as not to receive any control commands.11. Deletion of links11.1. The learnt links between the TCTX2ED, TCTTX2ED,the optical and glass breakage sensor TCLS1ED and the<strong>TCTRX2ED</strong> can also be deleted again. Go to the menu modeof the <strong>TCTRX2ED</strong>. Select Setup, then Radio. Now selectDelete. In the display appears Transmit. Now press the UPkey on the TCTX2ED or the TCTTX2ED. The display showsthe word Button. Or press a key on the TCLS1ED. The wordSensor appears on the display. The radio link is thus deleted.11.2 You can also delete all radio links with one singlecommand. Go to the menu mode of the <strong>TCTRX2ED</strong>. SelectSetup, then Radio and then Clear.12. Accessories12.1. The optionally-available optical and glass breakagesensor, TCLS1ED, can be connected to the <strong>TCTRX2ED</strong>. Thisoptical and glass breakage sensor is the ideal addition to the<strong>TCTRX2ED</strong>. With the TCLS1ED you can control your rollershutters according to the level of brightness. You can set thistransmitter so that it automatically closes the shutters if thesun’s radiation is too strong and then opens them againwhen the radiation level weakens. The LS can also close yourshutters in the evening at dusk. (In summer later and inwinter earlier). This saves heating costs and energy. Inaddition the TCLS1ED includes a glass breakage detector. Ifthere is strong vibration the roller shutters will automaticallyclose. Installation can be retrogressive and is very simple.The module is simply bonded to the glass pane and functionswithout any wire connection to the <strong>TCTRX2ED</strong>. You canobtain the TCLS1ED as an accessory.13. If it doesn’t function...13.1. The clock will not jump to menu mode.- Hold down the two keys for more than 4 seconds.- Check the power supply. If it has been interrupted a batterysymbol appears on the display. The clock cannot then bechanged to menu mode.13.2. The menu options don’t function.- Press the DOWN key as often as necessary until thedesired menu option has appeared with a black background.Then press the UP key to confirm your choice.13.3. The roller shutters don’t react at the desired time.- Check the date and time settings.- Activate the program function in the Autom. menu- Activate the correct program mode in the menu Events.13.4. The radio link doesn’t function.- During the learning procedure the units should not be anyfurther than 5 metres from one another.- Mobile ‘phones, baby phones and other radio equipmentcan interfere with the transmission- If absolutely nothing functions after this the clock should bereset. Caution: All settings will be deleted during thisprocess.13.5. If the power fails the clock cannot be programmed. Inthe display a battery symbol lights up.13.6. Hotline +49 (0) 68 38 907 10014. Technical informationOperating voltage.... 230V/50HzContact load capacity.... max. 5 A/230VSwitching voltage,... max. 230V (AC)Relay output 230V,.... active for 60 sec.Type of enclosure for control unit.... IP 40, dry roomOperating temperature range.... 0°C to 40°CConnecting pins:Low voltage potential.... Protection class IIStorage for.... up to 15 transmittersCycle reserve.... clock 6 hoursSuitable for: Busch-Jäger alpha nea® switching programInstallation.... 60mm dia. UP socketColour.... WhiteFrequency ....433.92 MHzCode ....64 Bit Rolling Safety CodeConnectors ....0.8 to 2.5 mm 2Conformity mark: CE, BZT G 121/323FETS 300 220,ETS 300 68314.1. The internal battery is rechargeable and does notneed to be replaced.14.2. We reserve the right to make technical changes,which are in the interest of progress.15. Reset15.1. When the reset key is activated all programparameters and settings are deleted.16. Warranty<strong>Chamberlain</strong> warrants to the first retail purchaser of thisproduct that the product shall be free from any defect inmaterials and/or workmanship for a period of 24 full months(2 years) from the date of purchase. Upon receipt of theproduct, the first retail purchaser is under obligation to checkthe product for any visible defects. Conditions: The warrantyis strictly limited to the reparation or replacement of the partsof this product which are found to be defective and does notcover the costs or risks of transportation of the defectiveparts or product.This warranty does not cover non-defectdamage caused by unreasonable use (including use not incomplete accordance with <strong>Chamberlain</strong>’s instructions forinstallation, operation and care; failure to provide necessarymaintenance and adjustment; or any adaptations of oralterations to the products), labor charges for dismantling orreinstalling of a repaired or replaced unit or replacementbatteries. A product under warranty which is determined tobe defective in materials and/or workmanship will be repairedor replaced (at <strong>Chamberlain</strong>’s option) at no cost to the ownerfor the repair and/or replacement parts and/or product.Defective parts will be repaired or replaced with new orfactory rebuilt parts at <strong>Chamberlain</strong>’s option. If, during thewarranty period, the product appears as though it may bedefective, contact your original place of purchase.This warranty does not affect the purchaser’s statutory rightsunder applicable national legislation in force nor thepurchaser’s rights against the retailer arising from theirsales/purchase contract. In the absence of applicablenational or EU legislation, this warranty will be thepurchaser’s sole and exclusive remedy, and neither<strong>Chamberlain</strong> nor its affiliates or distributors shall be liable forany incidental or consequential damages for any express orimplied warranty relating to this product.No representative orperson is authorized to assume for <strong>Chamberlain</strong> any otherliability in connection with the sale of this product.17. Declaration of Conformity17.1.The Programmable Timer Model No. <strong>TCTRX2ED</strong>,is in conformity to the applicable EN55014, EN61000-3,sections of StandardsETS RES 0908, EN60555, &EN60335-1 per the provisions & all amendmentsof the EU Directives73/23/EEC, 89/336/EEC17.2. Declaration of IncorporationThe Programmable Timer Model <strong>TCTRX2ED</strong>, when installedand maintained according to all the Manufacturer’sinstructions in combination with a shutter, which has alsobeen installed and maintained according to all theManufacturer’s instructions, meet the provisions of EUDirective 89/392/EEC and all amendments.17.3. I, the undersigned, hereby declare that the equipmentspecified above and any accessory listed in the manualconforms to the above Directives and Standards.Colin B. Willmott -Chefingenieur-<strong>Chamberlain</strong> GmbHD-66793 SaarwellingenFebruary, 2001© 2001 <strong>Chamberlain</strong> GmbHNotice de montage et d’utilisationdu minuteur de programme<strong>TCTRX2ED</strong>1. Minuteur programmable <strong>TCTRX2ED</strong>1.1. Fonctions des touches dans le cas normal :Touche HautTouche Bas1.2.Fonctions des touches dans le mode Menu :Touche de confirmationTouche de sélection1.3.Explication des pictogrammes (affichage)1.4.Temps estival1.5.Temps hivernal1.6.Ouverture et fermeture quotidiennesautomatiques à une heure programmée1.7.Ouverture et fermeture quotidiennesautomatiques à des heures différentes1.8.Panne de secteur. Le minuteur est alimenté parla pile. Si l’alimentation est interrompue, le symboled'une pile apparaît à l’écran. Le minuteur ne peutalors pas commuter dans le mode Menu.1.9.Les pièces sont montées les unes sur les autreset peuvent être détachées en tirant avec soin.2. Veuillez lire avant la montage2.1.Règles de sécurité2.2.Ces symboles d’avertissement de sécurité vousdemandent de faire attention - ils indiquent desinstructions pour éviter un risque de sécuritépersonnelle ou de dommage matériel. Il faut lire cesinstructions attentivement.2.3.Le non-respect des instructions ci-dessous peutconduire à des blessures graves ou des dommagesmatériels.2.4.ATTENTION: Pour la sécurité des personnes,respectez les présentes instructions. CONSERVEZSOIGNEUSEMENT LES PRESENTESINSTRUCTIONS.2.5.La mise en place, la vérification et la connexiond’une installation en 230V ne devra être entreprise etréalisée que par les électriciens professionnelshabilités.2.6.Le montage et le câblage doivent correspondreaux normes locales de construction etd’électrification.2.7.Ne laissez pas les enfants jouer avec les unitésde commande. Tenez les télécommandes hors de leurportée.2.8. Mettez impérativement le dispositif sous tensionpour le montage !2.9. Si le moteur tourne dans le sens opposé,inversez les fils de connexion aux bornes du moteur.2.10. Egalement adapté pour le montage sur uneprise d’interrupteur normalisée DIN 49073 (60 mm).2.11.La programmation des appareils doit se faireavant le montage définitif. Pour cela, les appareilsdoivent être éloignés d’une distance n’excédant pas 5mètres.3. Installation3.1. Grâce au minuteur <strong>TCTRX2ED</strong> de <strong>Chamberlain</strong>,vous pouvez commander confortablement vos voletsroulants. L’interrupteur habituel est simplementremplacé par le <strong>TCTRX2ED</strong>. Veuillez observer lesconsignes d’installation et de sécurité.3.2. L’interrupteur temporisé intégré vous offre unconfort supplémentaire : programmation d’une heured’ouverture et de fermeture fixe quotidienne pour lesvolets roulants ou stores ou programmation différentepour chaque jour. Vous pouvez aussi programmer uneouverture automatique le matin et une fermeturemanuelle le soir, ou vice versa.3.3. Grâce au récepteur radio intégré, les signaux decommande peuvent être captés par d’autrescommutateurs de la gamme <strong>Chamberlain</strong>. Vouspouvez ainsi télécommander l’ouverture ou lafermeture de votre volet roulant depuis le canapé.Grâce au capteur de lumière et de vitre brisée, lesvolets roulants se ferment et s’ouvrent même enfonction de la luminosité. Ceci permet d'économiserde l’énergie et de protéger les pièces contre unensoleillement trop fort.4. Utilisation4.1. Après l’installation effectuée conformément auxinstructions, il faut entreprendre immédiatement tousles réglages nécessaires, en commençant par la dateet l’heure. La programmation peut alors commencer.L’utilisation est vraiment très simple. Appuyezsimultanément pendant quelques secondes sur lesdeux touches du <strong>TCTRX2ED</strong> afin de parvenir aumode Menu. Avec la touche Bas, sélectionnez le pointde menu souhaité. Le point de menu sélectionnéapparaît sur fond noir sur l’affichage. Puis, confirmezfinalement le choix avec la touche pour exécuter lafonction souhaitée.4.2. Appuyez simultanément pendant quelquessecondes sur les deux touches afin de parvenir aumode Menu.4.3. Avec la touche Bas, sélectionnez le point demenu souhaité jusqu’à ce qu'il apparaisse sur fondnoir.4.4. Appuyez alors sur la touche de déclenchementpour confirmer le choix et exécuter la fonction.5. Sélection de la langue5.1.Allez dans le mode Menu, choisissez ajuster puislangue. Sélectionnez Français ou une autre langue.Puis, choisissez quitter.6. Réglage de la date et de l’heure6.1. Allez dans le mode Menu, choisissez ajusterpuis date. Sélectionnez avec la touche Bas le jour, lemois et l’année puis confirmez avec la touche Haut.6.2. Choisissez maintenant heure. Sélectionnez avecla touche Bas l’heure et les minutes puis confirmeravec la touche Haut. La date et l’heure sont alorscorrectement configurées.6.3. Appuyez sur la touche Bas jusqu’à ce que le joursouhaité apparaisse.6.4. Appuyez sur la touche Haut. La flèche passe àl’information relative au mois.7. Ouverture et fermeture quotidiennes desvolets roulants à heure fixe7.1. Le <strong>TCTRX2ED</strong> peut ouvrir et fermer les voletsroulants à heure fixe le matin et le soir. Allez dans lemode Menu. Choisissez ajuster, puis prog. puissemaine. Entrez une heure d’ouverture puis confirmezl’heure et les minutes avec la touche Haut. Donnezégalement une heure de fermeture en confirmantl’heure et les minutes avec la touche Haut. Allezensuite sur retour puis encore une fois sur retour.Allez sur mode puis sur autom. Choisissez ensuiteoui. Le minuteur revient en mode normal. Retournezdans le mode Menu. Choisissez mode puis temps.Choisissez jour/j. S’affichent alors à l’écran, en haut àgauche dans le coin, la lettre et le chiffre A1. A partirde maintenant, le volet roulant s’ouvrira et se fermeraà l’heure programmée.7.2. En mode de programme « A1 », le volet roulants’ouvre et se ferme automatiquement tous les joursselon l’horaire programmé.7.3. En mode de programme « A7 », le volet roulants’ouvre et se ferme automatiquement à une certaineheure programmée selon le jour de la semaine.8. Ouverture et fermeture automatique des voletsroulants à différentes heures(selon le jour de la semaine)8.1 Vous pouvez également choisir pour chaque jourde la semaine une heure d’ouverture et de fermeturedifférente. Allez dans le mode Menu. Choisissezajuster, puis prog. puis lun pour lundi. Entrez uneheure d’ouverture et confirmez l’heure et les minutesavec la touche Haut. Entrez ensuite une heure defermeture et confirmez à nouveau l'heure et lesminutes avec la touche Haut. Sélectionnezmaintenant tous les autres jours de la semaine etprogrammez les heures d’ouverture et de fermeture.Allez alors sur retour puis encore une fois sur retour.Choisissez mode puis autom. Sélectionnez oui. Leminuteur revient en mode normal. Retournez dans lemode Menu. Choisissez mode, puis temps.Choisissez semaine. S’affichent alors à l’écran, enhaut à gauche dans le coin, la lettre et le chiffre A7. Apartir de maintenant, le volet roulant s’ouvrira et sefermera à l’heure programmée individuellement pourchaque jour.8.2. En saisissant un double trait (--) à la place d’uneheure, l’heure d‘ouverture ou de fermeture estdésactivée. (--) apparaît après 23. Vous pouvezutiliser cette fonction pour fermer automatiquement levolet roulant le soir et le rouvrir manuellement lematin, ou vice versa.8.3. Sous le point de menu temps, vous pouvezpasser aisément d'un programme automatique al'autre. La configuration du programme désactivéreste inchangée.8.4. Sous le point de menu autom., vous pouvezéteindre les fonctions automatiques. Ici aussi, lesheures programmées restent enregistrées.9. Combinaison avec l’interrupteur muralTCTX2ED9.1. Le <strong>TCTRX2ED</strong> peut aussi être télécommandépar un interrupteur TCTX2ED. Les commandesmanuelles sont toujours prioritaires par rapport auxcommandes programmées dans le <strong>TCTRX2ED</strong>. Allezdans le mode Menu. Choisissez ajuster, puis radio.Sélectionnez apprend. A l’écran apparaît brièvementle mot activez. Appuyez sur la touche Haut duTCTX2ED. A l’écran apparaît le mot buttons.Sélectionnez retour. Choisissez mode et radio et enfinbuttons. Le <strong>TCTRX2ED</strong> réagit maintenant aux ordresde commande du TCTX2ED.10. Combinaison avec le minuteur programmableTCTTX2ED10.1. Le <strong>TCTRX2ED</strong> peut également êtretélécommandé par le TCTTX2ED, c.-à-d. que leTCTTX2ED peut être utilisé comme interrupteurcentral et commander simultanément plusieurs voletsroulants. Allez dans le mode Menu du TCTTX2ED.Choisissez ajuster, puis radio. Choisissez ensuiteenreg. L’affichage indique alors activez apprdre.Entrez dans le mode Menu du <strong>TCTRX2ED</strong>. Choisissezajuster, puis radio. Choisissez ensuite apprend.L’affichage indique alors le mot activez. Appuyez surla touche Haut du TCTTX2ED. Choisissez mode etradio et enfin buttons. Le <strong>TCTRX2ED</strong> réagitmaintenant aux ordres de commande du TCTTX2ED.10.2. Dans le menu radio (sous mode), vous pouvezmaintenant choisir les signaux radio qui serontcaptés. Choisissez activ pour recevoir les signaux desinterrupteurs muraux et du capteur de lumière.Sélectionnez buttons pour ne recevoir que lescommandes manuellesdu TCTX1ED et duTCTTX2ED. Choisissez capteur pour ne recevoir queles signaux du capteur de lumière. Choisissez desact.pour ne recevoir aucune commande.11. Effacer les connexions11.1. Il est possible d'effacer les connexionsprogrammées entre le TCTX2ED, le TCTTX2ED, lecapteur de lumière et de vitre brisée TCLS1ED et le<strong>TCTRX2ED</strong>. Allez dans le mode Menu du <strong>TCTRX2ED</strong>.Choisissez ajuster, puis radio. Sélectionnez oublie .S’affiche alors le mot activez. Appuyez sur la toucheHaut du TCTX2ED ou du TCTTX2ED. S’affiche alorsle mot buttons. Ou alors, appuyez sur une touche duTCLS1ED. Sur l’affichage apparaît capteur. Laconnexion radio est alors effacée.11.2. Vous pouvez aussi effacer toutes lesconnexions radio à l'aide d'une seule commande.Allez dans le mode Menu du <strong>TCTRX2ED</strong>. Choisissezajuster, puis radio et enfin vide.12. Accessoires12.1. Vous pouvez relier le capteur de lumière et devitre brisée TCLS1ED au <strong>TCTRX2ED</strong>. Le capteur delumière et de vitre brisée est une extension idéale du<strong>TCTRX2ED</strong>. Grâce au TCLS1ED, le volet roulant peutêtre commandé en fonction de la luminosité. Vouspouvez régler cet émetteur de façon à ce qu’il fermeles volets roulants en cas de luminosité trop forte etqu’il les rouvre quand la luminosité décline. Lecapteur de lumière peut aussi ouvrir les volets dès latombée de la nuit (plus tard en été et plus tôt enhiver). Vous économisez ainsi chauffageet énergie. Deplus, le TCLS1ED dispose d’un détecteur de vitrebrisée. En cas de fortes vibrations, les volets seferment automatiquement. Le montage peut aussi êtreeffectué ultérieurement. Le module est à collersimplement sur la vitre et fonctionne par liaison radioavec le <strong>TCTRX2ED</strong>. Vous pouvez vous le procurer entant qu’accessoire.13. Que faire si cela ne fonctionne pas…13.1 L’horloge ne saute pas dans le mode du menu.-Appuyez sur les deux touches pendant plus de 4secondes.-Vérifiez l’alimentation électrique. S’il y a une panne,un dessin de pile apparaît à l’écran. L’horloge ne peutdonc pas commuter dans le mode du menu.13.2 Les points de menu ne fonctionnent pas- Appuyez sur la touche de balayage aussi souventjusqu’à ce que le point de menu soit souligné en noir.Appuyez sur la touche de déclenchement pourconfirmer le choix.13.3 Les volets roulants ne réagissent pas à l’heuresouhaitée- Vérifiez les configurations de la date et de l’heure- Activez la fonction du programme dans le menuautom.- Activez le bon mode de programme dans le menutemps.13.4. La connexion radio ne fonctionne pas-Pour la programmation, les appareils doivent êtreespacés de 5 m maximum.-Les téléphones portables, "babyphones" et tous lesautres types d’appareils émettant des ondes radiopeuvent gêner le transfert entre le capteur etl’émetteur.-Si plus rien ne fonctionne, il faut remettre l’heure àzéro. Attention : tous les paramètres seront de ce faiteffacés.13.5. En cas de panne, on ne peut pas programmerl’horloge. Un dessin de pile s’affiche à l’écran.13.6. Hotline + 49 (0) 68 38 907 10014. Informations techniquesTension de service ....230 V/50 HzCapacité de charge de contact ....max. 5 A/230 VTension de commutation ....max. 230 V (CA)Sortie relais ....230 V, 50 Hz pour 60 s activesProtection (commande) ....IP 40, chambre sèchePlage de température de service ....0°C à 40 °CPotentiel de basse tension ....classe de protection IIMémoire ....jusqu’à 15 émetteursRéserve de marche ....6 heuresAdapté à la série d'interrupteurs ....Busch-Jaegeralpha nea®Montage ....Prise 60 mm UPCouleur ....BlancFréquence ....433,92 MHzCode ....Code de sécurité de roulement 64 bitsConnexion ....0 à 2,5 mm 2Marques de conformité....BZT G 121/323FETS 300 220, ETS 300 683CE14.1. La batterie interne est un accumulateur et n’apas besoin d’être changée.14.2. Les modifications techniques suivent l’état dela technique et demeurent sous réserve.15. Remise à zéro15.1. En appuyant sur la touche de remise à zéro,vous effacez tous les paramètres de programme ettoutes les configurations16. Garantie<strong>Chamberlain</strong> GmbH garantit au premier acheteur de ce produitchez un détaillant que le produit en question est exempt de toutdéfaut de fabrication ou de matériel pendant une période de deuxans à partir de la date d’achat. Dès réception du produit, le premierdétaillant est tenu de vérifier tout défaut apparent de celui-ci.Conditions: Cette garantie constitue le seul recours disponible pourl’acheteur selon la loi, pour tout dommage en liaison avec ourésultant d’une pièce défectueuse et/ou du produit. La garantie eststrictement limitée à la réparation ou au remplacement des piècesde ce produit qui s’avèreraient défectueuses. Cette garantie necouvre pas les dommages qui ne sont pas causés par un appareildéfectueux et qui résultent d'une utilisation abusive (y compris uneutilisation qui n'est pas exactement conforme aux consignesd'installation, de fonctionnement et d'entretien préconisées par<strong>Chamberlain</strong> GmbH, un manque d'entretien et de réglagenécessaires, toute adaptation ou modification des appareils, tousfrais associés au démontage ou à la réinstallation d'une pièceréparée ou changée et au remplacement des piles. Un produit sousgarantie dont le défaut de fabrication et/ou de matériel est reconnusera réparé ou remplacé (au choix de <strong>Chamberlain</strong> GmbH) sansfrais pour le propriétaire en ce qui concerne la réparation ou leremplacement de la pièce défectueuse ou du produit. Les piècesdéfectueuses seront réparées ou remplacées par des piècesneuves ou réusinées, au choix de <strong>Chamberlain</strong> GmbH. Si durant lapériode de garantie le produit semble présenter un défaut,contactez votre revendeur. Cette garantie n'affecte pas les droitsstatutaires de l'acheteur sous la législation nationale applicable envigueur. Cette garantie n'affecte pas non plus les droits del'acheteur à l'égard du revendeur conformément aux termes ducontrat de vente/achat. En l'absence de législation nationale ou CEapplicable, cette garantie constituera le seul recours exclusif del'acheteur et, dans le cadre de toute garantie expresse ou impliciteconcernant ce produit, ni <strong>Chamberlain</strong> GmbH ni ses associés oudistributeurs ne seront responsables de tous dommagesaccidentels ou relationnels. Aucune personne n’est mandatée niautorisée par <strong>Chamberlain</strong> GmbH à assumer quelqu'autreresponsabilité que ce soit en liaison avec la vente de ce produit.17.Déclaration de conformité17.1.Le horloge programmable Modèle Nr. <strong>TCTRX2ED</strong>, estconforme aux secions applicables EN55014, EN61000-3,desNormes ETS RES 0908, EN60555, & EN60335-1selon les clauseset toutes les modifications des directives EU 73/23/EEC,89/336/EEC17.2.Déclaration d’incorporationLe horloge programmable, modèle <strong>TCTRX2ED</strong>, si installé etmaintenu selon toutes les instructions du fabricant, de concert avecun volet qui a, lui aussi, été installé et maintenu selon toutes lesinstructions du fabricant, satisfait aux clauses de la Directive EU89/392/EEC et de toutes ses modifactions.17.3. Je soussigné déclare par la présente que l’equipementspécifié ci-dessus et tout accessoire mentionné dans cemanuel est conforme aux Directives et Normes ci-dessus.Colin B. Willmott -Chefingenieur-<strong>Chamberlain</strong> GmbHD-66793 SaarwellingenFévrier, 2001© <strong>Chamberlain</strong> GmbH,2001709169