C 352 - NAD
C 352 - NAD
C 352 - NAD
Create successful ePaper yourself
Turn your PDF publications into a flip-book with our unique Google optimized e-Paper software.
9. BALANCE<br />
The BALANCE control adjusts the relative levels of the left and right<br />
speakers. The 12 o’clock position provides equal level to the left and<br />
right channels. A detent indicates this position.<br />
Rotating the control clockwise moves the balance towards the right.<br />
Rotating the control anti-clockwise moves the balance to the left. The<br />
BALANCE control does not affect recordings made using the Tape<br />
outputs but will affect the signal going to the Pre-amp output (Pre Out).<br />
10. VOLUME<br />
The VOLUME control adjusts the overall loudness of the signals being<br />
fed to the loudspeakers. It is motor driven and can be adjusted from the<br />
remote control handset. The VOLUME control does not affect recordings<br />
made using the Tape outputs but will affect the signal going to the Preamp<br />
output (Pre Out).<br />
POWERDRIVE<br />
To meet the diverse requirements of high current drive and high<br />
dynamic power, our patented PowerDrive amplifier circuit will build<br />
further on our reputation for amazingly effective power. By adding a<br />
second high-voltage rail to our well regulated high-current power<br />
supply, we get an "overdrive" that can nearly double the continuous<br />
power on a short term dynamic power basis. This is a further<br />
development and refinement of our renowned Power Envelope circuit,<br />
utilized by <strong>NAD</strong> in the 80's and 90's. PowerDrive differs from Power<br />
Envelope in that it offers greater amplifier stability and low impedance<br />
drive capability, resulting in less distortion when driving real speakers<br />
with real program material.<br />
RECORDING<br />
TO MAKE A RECORDING<br />
When any source is selected, its signal is also fed directly to any tape<br />
machine connected to the TAPE 2 or TAPE 1 OUTPUTS for recording.<br />
TAPE TO TAPE COPYING<br />
You can copy between two tape machines connected to your <strong>NAD</strong><br />
C <strong>352</strong>. Put the source tape in the recorder connected to Tape 2 and the<br />
blank tape into the recorder connected to Tape 1. By selecting TAPE 2<br />
Input you can now record from Tape 2 to Tape 1 and monitor the signal<br />
coming from the original tape.<br />
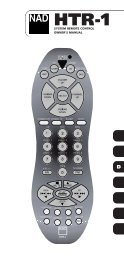
REMOTE CONTROL HANDSET (FIGURE 3)<br />
The Remote Control handset handles all the key functions of the <strong>NAD</strong><br />
C <strong>352</strong> and has additional controls to remotely operate <strong>NAD</strong> Tuners,<br />
Cassette and CD machines. It will operate up to a distance of 16ft (5m).<br />
Alkaline batteries are recommended for maximum operating life. Four<br />
AAA (R 03) batteries should be fitted in the battery compartment at the<br />
back of the Remote Control handset. When replacing batteries, check<br />
that they have been put in the right way round, as indicated on the base<br />
of the battery compartment. Please refer to previous sections of the<br />
manual for a full description of individual functions.<br />
When a command from the remote control is received, the Standby/<br />
protection indicator will blink. Note that the indicator may also blink<br />
when receiving commands not necessarily for the C <strong>352</strong> but for other<br />
components in the system.<br />
POWER ON AND OFF BUTTONS<br />
The <strong>NAD</strong> C <strong>352</strong> remote has a separate On and Off button. This can be<br />
particularly useful to keep components within a system "in sync": This<br />
way all components will switch to stand-by when Off is pressed or<br />
switch to operating mode when On is pressed, instead of some<br />
components switching On when the amplifier is switched to Stand-by.<br />
(Note that the other components have to be capable of responding to<br />
the separate On and Off commands as well). Press the ON button to<br />
switch the unit from Stand-by to the operating mode; The Stand-by<br />
indicator (Fig. 2; No. 2) will turn from amber, to red, then to green and<br />
the indicator for the last selected input will blink and light up. Press the<br />
OFF button to switch the unit to the Stand-by mode: The Stand-by<br />
indicator will light up amber.<br />
MUTE<br />
Press the MUTE Button to temporarily switch off the sound to the<br />
speakers and headphones. Mute mode is indicated by the active input<br />
indicator on the front panel flashing. Press MUTE again to restore sound.<br />
Mute does not affect recordings made using the Tape outputs but will<br />
affect the signal going to the Preamp output (Pre Out).<br />
INPUTS<br />
The input selector buttons perform the same functions as the buttons<br />
labelled the same on the front panel.<br />
MASTER VOLUME<br />
Press the MASTER VOLUME or buttons to respectively<br />
increase or decrease the loudness level. Release the button when the<br />
desired level is reached. The motorised Volume Control on the front<br />
panel will indicate the level set. The Master Volume buttons do not<br />
affect recordings made using the Tape outputs but will affect the signal<br />
going to the Preamp output (Pre Out).<br />
TUNER CONTROL<br />
(for use with <strong>NAD</strong> Tuner)<br />
TUNE or scans respectively higher or lower station<br />
frequencies for both AM and FM.<br />
PRESET or selects respectively higher or lower number<br />
station preset.<br />
CD PLAYER CONTROL<br />
(for use with <strong>NAD</strong> CD/DVD Player)<br />
engages Pause<br />
engages Stop<br />
engages Play, toggles between Play and Pause or engages Track<br />
skip; Press once to respectively go to the next track or to return to start<br />
of current or previous track.<br />
engages CD drawer Open/Close; Press once to open the CD<br />
drawer then once again to close the CD drawer and start playback.<br />
The TAPE/TUNER - CD switch applies tape controls to the transport keys<br />
when in the TAPE/TUNER position, and applies CD controls to the<br />
transport keys when in the CD position.<br />
7<br />
ENGLISH<br />
FRANÇAIS<br />
DEUTSCH<br />
ESPAÑOL<br />
ITALIANO<br />
PORTUGUÊS<br />
SVENSKA


