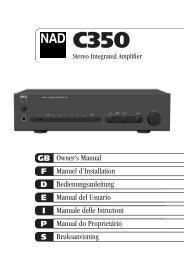
C 352 - NAD
C 352 - NAD
C 352 - NAD
Create successful ePaper yourself
Turn your PDF publications into a flip-book with our unique Google optimized e-Paper software.
11. MAIN IN<br />
Connections to an external pre-amplifier or processor, such as a<br />
surround-sound decoder. In normal use these should be connected to<br />
the Pre-Out 2 sockets (No. 10) with the links supplied. To connect your<br />
<strong>NAD</strong> C <strong>352</strong> to external processor or preamplifier first remove these links.<br />
Use a twin RCA-to-RCA lead to connect to the left and right ‘Audio<br />
Output’ of the pre-amp or processor to the Main-In sockets.<br />
NOTE: always turn the amplifier off before connecting or disconnecting<br />
anything to the Pre-Out and Main-In sockets.<br />
12. SPEAKERS<br />
Speaker terminals for speakers with an impedance of 4 ohms or more.<br />
Connect the right speaker to the terminals market ‘R +’ and ‘R-’<br />
ensuring that the ‘R+’ is connected to the ‘+’ terminal on your<br />
loudspeaker and the ‘R-’ is connected to the loudspeaker’s ‘-’ terminal.<br />
Connect the terminals marked ‘L+’ and ‘L-’ to the left speaker in the<br />
same way. Always use heavy duty (16 gauge; 1.5mm, or thicker)<br />
stranded wire to connect loudspeakers to your <strong>NAD</strong> C <strong>352</strong>. The highcurrent<br />
binding post terminals can be used as a screw terminal for cables<br />
terminating in spade or pin sockets or for cables with bare wire ends.<br />
BARE WIRES AND PIN CONNECTORS<br />
Bare wires and pin sockets should be inserted into the hole in the shaft<br />
of the terminal. Unscrew the speaker terminal’s plastic bushing until the<br />
hole in the screw shaft is revealed. Insert the pin or bare cable end into<br />
the hole and secure the cable by tightening down the terminal’s bushing.<br />
Ensure bare wire from the speaker cables does not touch the back panel<br />
or another socket. Ensure that there is only 1/2” (1cm) of bare cable or<br />
pin and no loose strands of speakers wire.<br />
13. SOFT CLIPPING<br />
When an amplifier is driven beyond its specified power output, a hard,<br />
distorted sound can be heard on very loud sounds. This is caused by the<br />
amplifier cutting off or 'hard clipping' the peaks of sound that it was not<br />
designed to reproduce. The <strong>NAD</strong> Soft Clipping circuit gently limits the<br />
output of the system to minimise audible distortion if the amplifier is<br />
overdriven.<br />
If your listening involves moderate power levels you may leave the Soft<br />
Clipping switch to Off. If you are likely to play at high levels, that could<br />
stretch the amplifier's power capability, then switch Soft Clipping On.<br />
The Soft Clipping indicator on the front panel will illuminate when the<br />
amplifier is in Soft Clipping mode.<br />
14. 12V TRIGGER OUT<br />
This output allows to remotely switch on or off ancillary equipment such<br />
as a tuner, power amplifier, etc. which are also equipped with a 12V<br />
trigger input. This can also be an AC outlet power strip equipped with<br />
a 12V trigger input. The 12V trigger output is activated whenever the<br />
unit is switched to normal operational mode from Stand-by or Off.<br />
For switching Stand-by/Power On of an external component through<br />
the C <strong>352</strong>, connect the12V-trigger output of the C <strong>352</strong> to the remote<br />
component's DC input jack. The plug required is a standard 3.5mm<br />
Mini-Jack plug ("mono"): The tip is the live or + connection, the shaft<br />
of the input jack is the 12V-trigger - or ground connection.<br />
NOTES: Check the specifications of the Trigger input terminal on the<br />
other components to ensure these are compatible with the C <strong>352</strong>'s 12Vtrigger<br />
output. <strong>NAD</strong> components equipped with 12V input triggers are<br />
fully compatible with the C <strong>352</strong>'s 12V output trigger. The C <strong>352</strong>'s 12Vtrigger<br />
output voltage is 12V DC. The total maximum current must not<br />
exceed 100mA. Typically, <strong>NAD</strong> 12V input triggers draw less than 10mA<br />
of current. Before making any connections to any 12V trigger input or<br />
output, make sure all components are disconnected from the AC mains.<br />
Failure to observe the above may result in damage to the C <strong>352</strong> or any<br />
ancillary components attached to it. If in doubt over the connections,<br />
installation and operation of the 12V trigger output consult your <strong>NAD</strong> dealer.<br />
15. IEC AC MAINS (POWER) INPUT<br />
The C <strong>352</strong> comes supplied with a separate AC Mains cable. Before<br />
connecting the cable to a live wall socket ensure that it is firmly<br />
connected to the <strong>NAD</strong> C <strong>352</strong>'s AC Mains input socket first. Always<br />
disconnect the AC Mains cable plug from the live wall socket first,<br />
before disconnecting the cable from the C <strong>352</strong> Mains input socket.<br />
SWITCHED AC OUTLET<br />
(NORTH AMERICAN VERSIONS ONLY)<br />
The AC power cord of another component may be plugged into this<br />
accessory outlet. Components plugged into this outlet will be switched<br />
On and Off by the POWER button on the front panel or by the ON and<br />
STAND-BY button on the remote control handset.<br />
NOTE: The total power consumption of any components connected to<br />
the AC outlets may not exceed 100 Watts.<br />
FRONT PANEL CONTROLS (FIGURE 2)<br />
1. POWER ON/OFF<br />
Press the POWER button to switch the amplifier On. The Stand-by<br />
indicator (No. 2) over the power button will light up amber.<br />
Pressing the POWER switch again will turn the unit OFF completely, it<br />
will not respond to the remote control.<br />
REMOTE CONTROL ON /OFF (FIGURE 3)<br />
Press the ON button to switch the unit from Stand-by to the operating<br />
mode; The Stand-by indicator (No. 2) will turn from amber to red, then<br />
to green after a short pause and the indicator for the last selected source<br />
will light up. Press the OFF button to switch the unit to the Stand-by<br />
mode: The Stand-by indicator (fig. 2; No. 2) will light up amber.<br />
NOTE: In Stand-by mode the C <strong>352</strong> uses very little power. However, it<br />
is recommended that you switch the unit totally off if it is not going to<br />
be used for more than a couple of days. Switch off completely by<br />
pressing the POWER button on the front panel (No. 1), all lights will<br />
extinguish.<br />
5<br />
ENGLISH<br />
FRANÇAIS<br />
DEUTSCH<br />
ESPAÑOL<br />
ITALIANO<br />
PORTUGUÊS<br />
SVENSKA


