WALTHER PILOT - Walther Spritz- und Lackiersysteme GmbH
WALTHER PILOT - Walther Spritz- und Lackiersysteme GmbH
WALTHER PILOT - Walther Spritz- und Lackiersysteme GmbH

You also want an ePaper? Increase the reach of your titles
YUMPU automatically turns print PDFs into web optimized ePapers that Google loves.
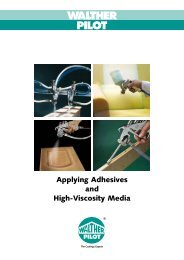
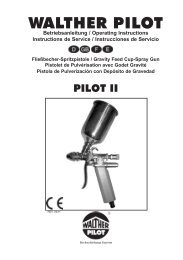
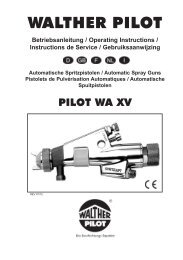
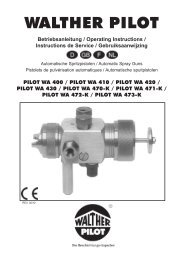
<strong>WALTHER</strong> <strong>PILOT</strong>Betriebsanleitung / Operating Instructions /Instructions de Service / Manual de instrucciones /Manuale d’uso e manutenzioneAutomatische <strong>Spritz</strong>pistolen / Automatic Spray Guns /Pistolets de Pulvérisation Automatiques / Pistolas de Pulverización Automáticas /Pistole a spruzzo automatiche<strong>PILOT</strong> WA 900 / <strong>PILOT</strong> WA 905Modelle / Models / Modèles / Modelos / ModelliAUSG. 08/13
Ersatzteilliste:Ersatzteilliste:WA 900(mit Innensteuerung)WA 905(ohne Innensteuerung)WA 920 HVLP(mit Innensteuerung)WA 925 HVLP(ohne Innensteuerung)V 21 900 V 21 905V 21 920 V 21 925Pos. Bezeichnung Stck. Artikelnummer Stck. ArtikelnummerPos. Bezeichnung Stck. Artikelnummer Stck. Artikelnummer1 Luftkopfmutter kompl. 1 V 20 700 05 000 1 V 20 700 05 0001 Luftkopfmutter kompl. 1 V 20 700 05 000 1 V 20 700 05 0002 Luftkopf 1 V 10 700 35 xx8* 1 V 10 700 35 xx8*2 Luftkopf 1 V 10 700 37 xxx* 1 V 10 700 37 xxx*3 Materialdüse 1 V 10 700 40 xx3* 1 V 10 700 40 xx3*3 Materialdüse 1 V 10 700 40 xx3* 1 V 10 700 40 xx3*4 Luftverteilerring 1 V 21 900 14 000 1 V 21 900 14 0004 Luftverteilerring 1 V 21 900 14 100 1 V 21 900 14 1005 Innensechskantschraube 4 V 20 700 13 003 4 V 20 700 13 0035 Innensechskantschraube 4 V 20 700 13 003 4 V 20 700 13 0036 Zylinderstift 1V 21 900 02 1031V 21 900 02 1036 Zylinderstift 1V 21 900 02 1031V 21 900 02 1037 Vorderkörper 1 17 Vorderkörper 1 18 O-Ring 2 V 09 102 21 009 2 V 09 102 21 0098 O-Ring 2 V 09 102 21 009 2 V 09 102 21 0099 Nadelpackung kompl. 1 V 09 001 72 000 1 V 09 001 72 0009 Nadelpackung kompl. 1 V 09 001 72 000 1 V 09 001 72 00010 Unterlegscheibe 1 V 21 900 12 003 1 V 21 900 12 00310 Unterlegscheibe 1 V 21 900 12 003 1 V 21 900 12 00311 Packungsfeder 1 V 20 510 12 003 1 V 20 510 12 00311 Packungsfeder 1 V 20 510 12 003 1 V 20 510 12 00312 Packungsschraube 1 V 20 510 11 003 1 V 20 510 11 00312 Packungsschraube 1 V 20 510 11 003 1 V 20 510 11 00313 Stift für Luftkappenfixierung 1 V 20 700 02 303 1 V 20 700 02 30313 Stift für Luftkappenfixierung 1 V 20 700 02 303 1 V 20 700 02 30314 Arretierfeder 1 V 20 700 02 403 1 V 20 700 02 40314 Arretierfeder 1 V 20 700 02 403 1 V 20 700 02 40315 Gewindestift 1 V 11 530 01 010 1 V 11 530 01 01015 Gewindestift 1 V 11 530 01 010 1 V 11 530 01 01016 Stopfen 1 2325502 - -16 Stopfen 1 2325502 - -17 Dichtschraube 1 V 22 650 43 100 1 V 22 650 43 10017 Dichtschraube 1 V 22 650 43 100 1 V 22 650 43 10018 Nutring 1 V 09 220 30 000 1 V 09 220 30 00018 Nutring 1 V 09 220 30 000 1 V 09 220 30 00019 Kolbengehäuse 1 V 21 900 01 000 1 V 21 905 01 00019 Kolbengehäuse 1 V 21 900 01 000 1 V 21 905 01 00020 Kolben kompl. 1 V 21 900 09 000 1 V 21 900 09 00020 Kolben kompl. 1 V 21 900 09 000 1 V 21 900 09 00021 Materialnadel kompl. 1 V 21 900 05 xx3* 1 V 21 900 05 xx3*21 Materialnadel kompl. 1 V 21 900 05 xx3* 1 V 21 900 05 xx3*22 Kolbenfeder 1 V 20 606 11 100 1 V 20 606 11 10022 Kolbenfeder 1 V 20 606 11 100 1 V 20 606 11 10023 Gewindebuchse kompl. 1 V 21 900 10 000 1 V 21 900 10 00023 Gewindebuchse kompl. 1 V 21 900 10 000 1 V 21 900 10 00024 Nadelfeder 1 V 20 510 29 103 1 V 20 510 29 10324 Nadelfeder 1 V 20 510 29 103 1 V 20 510 29 10325 Nadelfederscheibe 1 V 21 900 11 000 1 V 21 900 11 00025 Nadelfederscheibe 1 V 21 900 11 000 1 V 21 900 11 00026 Kappe kompl. 1 V 21 900 13 000 1 V 21 900 13 00026 Kappe kompl. 1 V 21 900 13 000 1 V 21 900 13 00027 Zugstange kompl. 1 V 20 510 34 000 1 V 20 510 34 00027 Zugstange kompl. 1 V 20 510 34 000 1 V 20 510 34 00028 Ratsche ('A‘+‘F‘) 2- -28 Ratsche (‚A‘+‘F‘) 2- -29 Gewindebuchse 2 - -29 Gewindebuchse 2 - -30 Dichtkegel 2 - -30 Dichtkegel 2 - -31 O-Ring 2 - -31 O-Ring 2 - -V 21 900 25 000V 21 900 25 00032 Stopfbuchse 2 - -32 Stopfbuchse 2 - -33 'A'-Regelung (R<strong>und</strong>strahl) 1 - -33 'A'-Regelung (R<strong>und</strong>strahl) 1 - -34 'F'-Regelung (Breitstrahl) 1 - -34 'F'-Regelung (Breitstrahl) 1 - -35 Senkschraube 2 - -35 Senkschraube 2 - -36 O-Ring 1V 21 900 08 0001V 21 900 08 00036 O-Ring 1V 21 900 08 0001V 21 900 08 00037 Verschlussstift 1 137 Verschlussstift 1 138 Zylinderschraube 2 V 20 810 14 203 2 V 20 810 14 20338 Zylinderschraube 2 V 20 810 14 203 2 V 20 810 14 2038 9
Ersatzteilliste:WA 940 HVLP Plus(mit Innensteuerung)WA 945 HVLP Plus(ohne Innensteuerung)* Bei Ersatzteillieferungen bitte entsprechende Größe angeben. Wir empfehlen, allefettgedruckten Teile (Verschleißteile) auf Lager zu halten.V 21 940 V 21 945Pos. Bezeichnung Stck. Artikelnummer Stck. Artikelnummer1 Luftkopfmutter kompl. 1 V 20 700 05 000 1 V 20 700 05 0002 Luftkopf 1 V 10 700 36 xxx* 1 V 10 700 36 xxx*3 Materialdüse 1 V 10 700 40 xx3* 1 V 10 700 40 xx3*4 Luftverteilerring 1 V 21 900 14 100 1 V 21 900 14 1005 Innensechskantschraube 4 V 20 700 13 003 4 V 20 700 13 0036 Zylinderstift 1V 21 900 02 1031V 21 900 02 1037 Vorderkörper 1 18 O-Ring 2 V 09 102 21 009 2 V 09 102 21 0099 Nadelpackung kompl. 1 V 09 001 72 000 1 V 09 001 72 00010 Unterlegscheibe 1 V 21 900 12 003 1 V 21 900 12 00311 Packungsfeder 1 V 20 510 12 003 1 V 20 510 12 00312 Packungsschraube 1 V 20 510 11 003 1 V 20 510 11 00313 Stift für Luftkappenfixierung 1 V 20 700 02 303 1 V 20 700 02 30314 Arretierfeder 1 V 20 700 02 403 1 V 20 700 02 40315 Gewindestift 1 V 11 530 01 010 1 V 11 530 01 01016 Stopfen 1 2325502 - -17 Dichtschraube 1 V 22 650 43 100 1 V 22 650 43 10018 Nutring 1 V 09 220 30 000 1 V 09 220 30 00019 Kolbengehäuse 1 V 21 900 01 000 1 V 21 905 01 00020 Kolben kompl. 1 V 21 900 09 000 1 V 21 900 09 00021 Materialnadel kompl. 1 V 21 900 05 xx3* 1 V 21 900 05 xx3*22 Kolbenfeder 1 V 20 606 11 100 1 V 20 606 11 10023 Gewindebuchse kompl. 1 V 21 900 10 000 1 V 21 900 10 00024 Nadelfeder 1 V 20 510 29 103 1 V 20 510 29 10325 Nadelfederscheibe 1 V 21 900 11 000 1 V 21 900 11 00026 Kappe kompl. 1 V 21 900 13 000 1 V 21 900 13 00027 Zugstange kompl. 1 V 20 510 34 000 1 V 20 510 34 00028 Ratsche ('A‘+‘F‘) 2- -29 Gewindebuchse 2 - -30 Dichtkegel 2 - -31 O-Ring 2 - -V 21 900 25 00032 Stopfbuchse 2 - -33 'A'-Regelung (R<strong>und</strong>strahl) 1 - -34 'F'-Regelung (Breitstrahl) 1 - -35 Senkschraube 2 - -36 O-Ring 1V 21 900 08 0001V 21 900 08 00037 Verschlussstift 1 138 Zylinderschraube 2 V 20 810 14 203 2 V 20 810 14 203Reparaturset<strong>WALTHER</strong> <strong>PILOT</strong> hält für die Automatik-<strong>Spritz</strong>pistolen <strong>PILOT</strong> WA 900 - WA 945 HVLP PLUSReparatursets bereit, die sämtliche Verschleißteile enthalten.Artikelnummer<strong>PILOT</strong> WA 900 / 905 Standard-Version V 16 209 00 XX3<strong>PILOT</strong> WA 920 / 925 HVLP / Niederdruck-Version V 16 209 20 XX3<strong>PILOT</strong> WA 940 / 945 HVLP PLUS / Mitteldruck-Version V 16 209 40 XX3DüseneinlageDie Düseneinlagen bestehen aus Luftkopf, Materialdüse <strong>und</strong> MaterialnadelArtikelnummer<strong>PILOT</strong> WA 900 / 905 Standard-Version V 15 209 00 XX3<strong>PILOT</strong> WA 920 / 925 HVLP / Niederdruck-Version V 15 209 20 XX3<strong>PILOT</strong> WA 940 / 945 HVLP PLUS / Mitteldruck-Version V 15 209 40 XX3Düsenausstattung nach Wahl:0,3 ▪ 0,5 ▪ 0,8 ▪ 1,0 ▪ 1,2 ▪ 1,5 ▪ 1,8 ▪ 2,0 ▪ 2,2 ▪ 2,5 ▪ 3,0 ▪ 3,5 mm øDichtungsset für AdapterplatteDas Dichtungsset beinhaltet alle mit ♦ gekennzeichneten Artikelnummern.Adapterplatte Aluminium, vernickelt / Adapterplatte Edelstahl V 17 219 00 000ZubehörArtikelnummerPistolenhalter V 21 900 21 000<strong>WALTHER</strong> <strong>PILOT</strong> Pistolenfett Kissen 8 - 10 g V 00 000 00 00110 11
925493Ersatzteilliste für Adapterplatte Aluminium, vernickeltAdapterplatteMaterialanschluss hintenAdapterplatteMaterialanschluss hintenWA 900 V 21 900 03 000 WA 905 V 21 905 04 000Pos. Bezeichnung Stck. Artikelnummer Stck. Artikelnummer1 Adapterplatte 11V 21 900 03 2002 Zylinderstift 2 2V 21 900 03 2003 O-Ring 2 V 09 103 66 000 ♦ 2 V 09 103 66 000 ♦4 O-Ring 3 V 09 102 21 009 ♦ 3 V 09 102 21 009 ♦5 O-Ring 1 V 09 104 11 009 ♦ 1 V 09 104 11 009 ♦6 Steckverschraubung 1 V 66 101 53 013 1 V 66 101 53 0137 Steckverschraubung 1 V 66 101 53 015 2 V 66 101 53 0158 Doppelnippel 1 V 00 101 01 003 1 V 00 101 01 0039 Stopfen 1 V 66 100 03 568 - -10 Verschlussstopfen 1 V 20 540 40 003 1 V 20 540 40 003Adapterplatte UmlaufMaterialanschluss hintenAdapterplatte UmlaufMaterialanschluss hintenWA 900 V 21 900 03 UML WA 905 V 21 905 04 UMLPos. Bezeichnung Stck. Artikelnummer Stck. Artikelnummer1 Adapterplatte 11V 21 900 03 2002 Zylinderstift 2 2V 21 900 03 2003 O-Ring 2 V 09 103 66 000 ♦ 2 V 09 103 66 000 ♦4 O-Ring 3 V 09 102 21 009 ♦ 3 V 09 102 21 009 ♦5 O-Ring 1 V 09 104 11 009 ♦ 1 V 09 104 11 009 ♦6 Steckverschraubung 1 V 66 101 53 013 1 V 66 101 53 0137 Steckverschraubung 1 V 66 101 53 015 2 V 66 101 53 0158 Doppelnippel 2 V 00 101 01 003 2 V 00 101 01 0039 Stopfen 1 V 66 100 03 568 - -10 Verschlussstopfen - - - -107 / 9 7 68 / 108 / 10811108Ersatzteilliste für Adapterplatte EdelstahlAdapterplatteMaterialanschluss seitlichAdapterplatteMaterialanschluss seitlichWA 900 V 21 900 04 003 WA 905 V 21 905 03 003Pos. Bezeichnung Stck. Artikelnummer Stck. Artikelnummer1 Adapterplatte 11V 21 900 04 2032 Zylinderstift 2 2V 21 900 04 2033 O-Ring 2 V 09 103 66 000 ♦ 2 V 09 103 66 000 ♦4 O-Ring 3 V 09 102 21 009 ♦ 3 V 09 102 21 009 ♦5 O-Ring 1 V 09 104 11 009 ♦ 1 V 09 104 11 009 ♦6 Steckverschraubung 1 V 66 101 53 013 1 V 66 101 53 0137 Steckverschraubung 1 V 66 101 53 015 2 V 66 101 53 0158 Materialanschluss 90° 1 V 21 900 20 003 1 V 21 900 20 0039 Stopfen 1 V 66 100 03 568 - -10 Verschlussstopfen 1 V 20 540 40 003 1 V 20 540 40 00311 Mutter 1 V 21 900 16 000 1 V 21 900 16 000Adapterplatte UmlaufMaterialanschluss seitlichAdapterplatte UmlaufMaterialanschluss seitlichWA 900 V 21 900 04 UML WA 905 V 21 905 03 UMLPos. Bezeichnung Stck. Artikelnummer Stck. Artikelnummer1 Adapterplatte 11V 21 900 04 2032 Zylinderstift 2 2V 21 900 04 2033 O-Ring 2 V 09 103 66 000 ♦ 2 V 09 103 66 000 ♦4 O-Ring 3 V 09 102 21 009 ♦ 3 V 09 102 21 009 ♦5 O-Ring 1 V 09 104 11 009 ♦ 1 V 09 104 11 009 ♦6 Steckverschraubung 1 V 66 101 53 013 1 V 66 101 53 0137 Steckverschraubung 1 V 66 101 53 015 2 V 66 101 53 0158 Materialanschluss 90° 2 V 21 900 20 003 2 V 21 900 20 0039 Stopfen 1 V 66 100 03 568 - -10 Verschlussstopfen - - - -1611 Mutter 2 V 21 900 16 000 2 V 21 900 16 00078 / 107 / 9678 / 1012 13
1 Allgemeines1.1 Kennzeichnung der ModelleModelle:Automatische <strong>Spritz</strong>pistolen <strong>PILOT</strong> WA 900-SerieTypen: WA 900 (Standard mit Innensteuerung) V 21 900WA 905 (Standard ohne Innensteuerung) V 21 905WA 920-HVLP (Niederdruck mit Innensteuerung) V 21 920WA 925-HVLP (Niederdruck ohne Innensteuerung) V 21 925WA 940-HVLP PLUS (Mitteldruck mit Innensteuerung) V 21 940WA 945-HVLP PLUS (Mitteldruck ohne Innensteuerung) V 21 945Hersteller:<strong>WALTHER</strong> <strong>Spritz</strong>- <strong>und</strong> <strong>Lackiersysteme</strong> <strong>GmbH</strong>Kärntner Str. 18-30D-42327 WuppertalTel.: 0202 / 787-0Fax: 0202 / 787-2217www.walther-pilot.de • Email: info@walther-pilot.de1.2 Bestimmungsgemäße VerwendungDie automatischen <strong>Spritz</strong>pistolen <strong>PILOT</strong> WA 900, WA 905, WA 920, WA 925, WA 940<strong>und</strong> WA 945 dienen ausschließlich der Verarbeitung spritzbarer Medien, wie z.B.:• Lacke <strong>und</strong> Farben• Fette, Öle <strong>und</strong> Korrosionsschutzmittel• Kleber• Keramikglasuren• BeizenSind die Materialien, die Sie verspritzen wollen, hier nicht aufgeführt, wenden Siesich bitte an <strong>WALTHER</strong> <strong>Spritz</strong>- <strong>und</strong> <strong>Lackiersysteme</strong> <strong>GmbH</strong>, Wuppertal.Die spritzbaren Materialien dürfen lediglich auf Werkstücke bzw. Gegenstände aufgetragenwerden.Die Temperatur des <strong>Spritz</strong>materials darf 80°C gr<strong>und</strong>sätzlich nicht überschreiten.Die Modelle <strong>PILOT</strong> WA 900 Serie sind keine handgeführten <strong>Spritz</strong>pistolen <strong>und</strong> müssendeshalb an einer geeigneten Halterung befestigt werden.Die bestimmungsgemäße Verwendung schließt auch ein, dass alle Hinweise <strong>und</strong>Angaben der vorliegenden Betriebsanleitung gelesen, verstanden <strong>und</strong> beachtet werden.Das Gerät erfüllt die Explosionsschutz-Forderungen der Richtlinie 94 / 9 EG (ATEX)für die auf dem Typenschild angegebene Explosionsgruppe, Gerätekategorie, <strong>und</strong>Temperaturklasse. Beim Betreiben des Gerätes sind die Vorgaben dieserBetriebsanleitung unbedingt einzuhalten.Die vorgeschriebenen Inspektions- <strong>und</strong> Wartungsintervalle sind einzuhalten. DieAngaben auf den Geräteschildern bzw. die Angaben in dem Kapitel technischeDaten sind unbedingt einzuhalten <strong>und</strong> dürfen nicht überschritten werden. EineÜberlastung des Gerätes muss ausgeschlossen sein.Das Gerät darf in explosionsgefährdeten Bereichen nur nach Maßgabe der zuständigenAufsichtsbehörde eingesetzt werden.Der zuständigen Aufsichtsbehörde bzw. dem Betreiber obliegt die Festlegungder Explosionsgefährdung (Zoneneinteilung).Es ist betreiberseitig zu prüfen <strong>und</strong> sicherzustellen, dass alle technischen Daten <strong>und</strong>die Kennzeichnung gemäß ATEX mit den notwendigen Vorgaben übereinstimmen.Bei Anwendungen, bei denen der Ausfall des Gerätes zu einer Personengefährdungführen könnte, sind betreiberseitig entsprechende Sicherheitsmaßnahmen vorzusehen.Falls im Betrieb Auffälligkeiten erkannt werden, muss das Gerät sofort stillgesetztwerden <strong>und</strong> es ist mit <strong>WALTHER</strong> <strong>Spritz</strong>- <strong>und</strong> <strong>Lackiersysteme</strong> Rücksprache zu halten.Erdung / PotentialausgleichEs muss sichergestellt werden, dass die <strong>Spritz</strong>pistole separat oder in Verbindung mitdem Gerät auf dem sie aufgebaut ist, ausreichend geerdet ist (maximaler Widerstand10 6 Ω).1.3 Sachwidrige VerwendungDie <strong>Spritz</strong>pistole darf nicht anders verwendet werden, als es im Abschnitt1.2 Bestimmungsgemäße Verwendung geschrieben steht.Jede andere Verwendung ist sachwidrig.Zur sachwidrigen Verwendung gehören z.B.:• das Verspritzen von Materialien auf Personen <strong>und</strong> Tiere• das Verspritzen von flüssigem Stickstoff.2 Technische BeschreibungBei der Serie <strong>PILOT</strong> WA 900 handelt es sich um ein einfaches Baukastensystem,das sämtliche in der Praxis erforderlichen Kombinationsmöglichkeiten zulässt. Esgibt zwei Basismodelle, eins mit Innensteuerung das andere ohne Innensteuerung.Dazu gibt es zwei unterschiedliche Schnellwechsel-Adapterplatten, die für beideModelle passend sind, bzw. umgebaut werden können.Die Pistolen der Serie WA 900 können nur in Verbindung mit einer Adapterplatteeingesetzt werden. Man kann alle Pistolen wahlweise im Stich- oder Umlaufverfahreneinsetzen. Um die Pistolen in eine Umlaufanlage einzubinden, muss der verbauteVerschlussstift (Pos. 37) entfernt werden.Die Modelle der <strong>PILOT</strong> WA 900-Serie arbeiten automatisch über eineDruckluftsteuerung <strong>und</strong> werden über ein 3/2-Wege-Steuerventil angesteuert.14 15
Mit Innensteuerung:Wird das 3/2-Wege-Steuerventil betätigt, tritt die für die Steuerung erforderlicheDruckluft in den Zylinderraum der <strong>Spritz</strong>pistole ein, öffnet die Zerstäuberluft <strong>und</strong>anschließend die Materialzufuhr.Die Form des <strong>Spritz</strong>strahls wird bei den Modellen <strong>PILOT</strong> WA 900 / WA 920-HVLP<strong>und</strong> WA 940-HVLP PLUS mit Regelschrauben (Pos. 33 <strong>und</strong> 34) an der Pistole eingestellt.Wird die Steuerluft durch das 3/2-Wege-Steuerventil wieder unterbrochen, entweichtzunächst die im Zylinder befindliche Druckluft. Der Federdruck der Kolbenfederdrückt anschließend die Materialnadel in ihre Ausgangsstellung zurück, verschließtdie Materialzufuhr <strong>und</strong> zuletzt die Zerstäuberluft.Ohne Innensteuerung:Zuerst sollte die Zerstäuberluft (R<strong>und</strong>- <strong>und</strong> Breitstrahlluft) über ein externes bauseitiges3/2 Wege-Steuerventil zugeschaltet werden. Danach wird die Steuerluft überein weiteres 3/2 Wegeventil geöffnet, welche den Kolben <strong>und</strong> die Materialnadelzurückdrückt, um die Materialzufuhr zu öffnen.Bei den Modellen <strong>PILOT</strong> WA 905/ WA 925-HVLP <strong>und</strong> WA 945-HVLP PLUS wird dieForm des <strong>Spritz</strong>strahls über die beiden bauseitigen Druckluftregler in der Anlageeingestellt.Wird die Steuerluft durch das 3/2-Wege-Steuerventil unterbrochen, bewegt derFederdruck den Kolben <strong>und</strong> die Materialnadel in ihrer Ausgangsstellung zurück <strong>und</strong>verschließt die Materialzufuhr zur Materialdüse. Anschließend sollte die Zerstäuberluftabgeschaltet werden.Die Materialdurchflussmenge wird bei allen Modellen über den Materialdruck <strong>und</strong> derKappe (Pos. 26) reguliert. Der Materialdurchfluss der Automatik-<strong>Spritz</strong>pistolenserie<strong>PILOT</strong> WA 900 kann auch von Hand über die Zugstange (Pos. 27) geöffnet werden.Die <strong>Spritz</strong>pistolen der <strong>PILOT</strong> WA 900-Serie können an Materialdruckgefäße oderPumpensysteme angeschlossen werden.Die Modelle <strong>PILOT</strong> WA 920-HVLP <strong>und</strong> WA 925-HVLP sind reine Niederdruck-<strong>Spritz</strong>pistolen <strong>und</strong> arbeiten mit einem <strong>Spritz</strong>luftdruck von 0,7 bar bei einemEingangsluftdruck von 3,3 bar.Bei den Modellen <strong>PILOT</strong> WA 940-HVLP PLUS <strong>und</strong> WA 945-HVLP PLUS beträgt derEingangsluftdruck von 3,0 bis 3,3 bar für einen <strong>Spritz</strong>luftdruck von 1,2 bis 1,4 bar.3 Sicherheitshinweise3.1 Kennzeichnung der SicherheitshinweiseWarnungDas Piktogramm <strong>und</strong> die Dringlichkeitsstufe „Warnung“ kennzeichnen eine möglicheGefahr für Personen. Mögliche Folgen: schwere oder leichte Verletzungen.AchtungDas Piktogramm <strong>und</strong> die Dringlichkeitsstufe „Achtung“ kennzeichnen eine möglicheGefahr für Sachwerte. Mögliche Folgen: Beschädigung von Sachen.16 17HinweisDas Piktogramm <strong>und</strong> die Dringlichkeitsstufe „Hinweis“ kennzeichnen zusätzlicheInformationen für das sichere <strong>und</strong> effiziente Arbeiten mit der <strong>Spritz</strong>pistole.3.2 Allgemeine Sicherheitshinweise► Die einschlägigen Unfallverhütungsvorschriften sowie die sonstigen anerkanntensicherheitstechnischen <strong>und</strong> arbeitsmedizinischen Regeln sind einzuhalten.► Benutzen Sie die <strong>Spritz</strong>pistole nur in gut belüfteten Räumen. Im Arbeitsbereich istFeuer, offenes Licht <strong>und</strong> Rauchen verboten. Beim Verspritzen leichtentzündlicherMaterialien (z. B. Lacke, Kleber, Reinigungsmittel usw.) besteht erhöhteGes<strong>und</strong>heits-, Explosions- <strong>und</strong> Brandgefahr.► Es muss sichergestellt werden, dass die <strong>Spritz</strong>pistole separat oder in Verbindungmit dem Gerät auf dem sie aufgebaut ist, ausreichend geerdet ist (max. Widerstand10 6 Ω).► Schalten Sie vor jeder Wartung <strong>und</strong> Instandsetzung die Luft- <strong>und</strong> Materialzufuhrzur <strong>Spritz</strong>pistole drucklos - Verletzungsgefahr.► Halten Sie beim Verspritzen von Materialien keine Hände oder andere Körperteilevor die unter Druck stehende Düse der <strong>Spritz</strong>pistole. - Verletzungsgefahr.► Richten Sie die <strong>Spritz</strong>pistole nicht auf Personen <strong>und</strong> Tiere - Verletzungsgefahr.► Beachten Sie die Verarbeitungs- <strong>und</strong> Sicherheitshinweise der Hersteller von<strong>Spritz</strong>material <strong>und</strong> Reinigungsmitteln. Insbesondere aggressive <strong>und</strong> ätzendeMaterialien können ges<strong>und</strong>heitliche Schäden verursachen.► Tragen Sie im Arbeitsbereich der <strong>Spritz</strong>pistole einen Gehörschutz. Der erzeugteSchallpegel der <strong>Spritz</strong>pistole von ca. 86 dB (A) kann einen Gehörschaden verursachen.► Die partikelführende Abluft ist vom Arbeitsbereich <strong>und</strong> Betriebspersonal fernzuhalten.Tragen Sie dennoch vorschriftsgemäßen Atemschutz <strong>und</strong> vorschriftsgemäßeArbeitskleidung, wenn Sie mit der <strong>Spritz</strong>pistole Materialien verarbeiten.Umherschwebende Partikel gefährden Ihre Ges<strong>und</strong>heit.► Achten Sie stets darauf, dass nach den Montage- <strong>und</strong> Wartungsarbeiten alleMuttern <strong>und</strong> Schrauben fest angezogen sind.► Verwenden Sie nur Original-Ersatzteile, da <strong>WALTHER</strong> nur für diese eine sichere<strong>und</strong> einwandfreie Funktion garantieren kann.► Bei Nachfragen zur gefahrlosen Benutzung der <strong>Spritz</strong>pistole sowie der darin verwendetenMaterialien, wenden Sie sich bitte an <strong>WALTHER</strong> <strong>Spritz</strong>- <strong>und</strong><strong>Lackiersysteme</strong> <strong>GmbH</strong>, D-42327 Wuppertal.4 Montage4.1 Stich- oder UmlaufverfahrenDie <strong>Spritz</strong>pistolen der Serie WA 900 sind werkseitig komplett montiert. Sie werdenstandardmäßig mit einem Verschlussstift (Pos. 37) montiert geliefert. In dieser
Ausführung kann die Pistole nur imStichverfahren eingesetzt werden.Sollten Sie sich bei Ihrer Adapterplatte füreine Umlaufversion entschieden haben,muss der Verschlussstift (Pos. 37) entferntwerden. Somit wird ein zweiter Materialkanalgeöffnet.Schrauben Sie die <strong>Spritz</strong>pistole auf dieAdapterplatte. Benutzen Sie dazu die beidenZylinderschrauben (Pos. 38).Bevor Sie die <strong>Spritz</strong>pistole mit Adapterplattein Betriebsetzen können, sind die folgendenTätigkeiten durchzuführen:4.2 <strong>Spritz</strong>pistole befestigenVerschlussstift(Pos. 37)StichverfahrenUmlaufverfahren5 Bedienung5.1 SicherheitshinweiseBeachten Sie bei der Bedienung der <strong>Spritz</strong>pistole insbesondere die nachfolgendenSicherheitshinweise!• Tragen Sie vorschriftsmäßigen Atemschutz <strong>und</strong> Arbeitskleidung, wenn Sie mit der<strong>Spritz</strong>pistole Materialien verspritzen. Umherschwebende Partikel gefährden IhreGes<strong>und</strong>heit.• Tragen Sie im Arbeitsbereich der <strong>Spritz</strong>pistole einen Gehörschutz. Der erzeugteSchallpegel der <strong>Spritz</strong>pistole von ca. 86 dB (A) kann einen Gehörschaden verursachen.• Im Arbeitsbereich ist Feuer, offenes Licht <strong>und</strong> Rauchen verboten. Beim Verspritzenleicht entzündbarer Materialien (z.B. Lacke, Kleber) besteht erhöhte Explosions- <strong>und</strong>Brandgefahr.5.2 Inbetrieb- <strong>und</strong> AußerbetriebsetzenBefestigen Sie die <strong>Spritz</strong>pistole an einer geeigneten, standsicheren Halterung, wieim folgenden Beispiel beschrieben:1Benutzen Sie hierzu die beiden M 6 Bohrungen (1)(Adapterplatte) mit einem Lochabstand von 33 mm.Andere Befestigungsvorrichtungen auf Anfrage.4.3 Versorgungsleitungen anschließenWarnungAchten Sie darauf, dass die Anschlüsse der Steuer- <strong>und</strong> Zerstäuberluft nicht vertauschtwerden - Verletzungsgefahr.Bevor Sie die <strong>Spritz</strong>pistole in Betrieb setzen können, müssen folgende Voraussetzungenerfüllt sein:• Der Steuerluftdruck muss an der <strong>Spritz</strong>pistole anstehen.• Der Zerstäuberluftdruck muss an der <strong>Spritz</strong>pistole anstehen.• Der Materialdruck muss an der <strong>Spritz</strong>pistole anstehen.AchtungDer Materialdruck darf nicht höher eingestellt sein als • 8 bar, da sonst kein funktionssichererBetrieb der <strong>Spritz</strong>pistole gewährleistet ist.Stellen Sie den Steuerluftdruck auf • mindestens 4,5 bar, damit die <strong>Spritz</strong>pistole inBetrieb gesetzt werden kann.Sie können die <strong>Spritz</strong>pistole in <strong>und</strong> außer Betrieb setzen, indem Sie das 3/2-WegeSteuerventil betätigen (siehe Betriebsanleitung des Anlagenherstellers).Mit InnensteuerungOhne InnensteuerungWarnungDie <strong>Spritz</strong>pistole muss nach Arbeitsende immer drucklos geschaltet werden. Dieunter Druck stehenden Leitungen können platzen <strong>und</strong> nahestehende Personendurch das ausströmende Material verletzen.134a112 3 4b1 = Materialanschluss (G 1/4“) gekennzeichnet mit 'M'2 = Zerstäuberluftanschluss Breitstrahl (PU Außen ø 8 mm) gekennzeichnet mit 'F'3 = Steuerluftanschluss (PU Außen ø 6 mm) gekennzeichnet mit 'C'4 a = Zerstäuberluftanschluss R<strong>und</strong>-/Breitstrahl (PU Außen ø 8 mm)gekennzeichnet mit 'A'4 b = Zerstäuberluftanschluss R<strong>und</strong>strahl (PU Außen ø 8 mm)gekennzeichnet mit 'A'Die <strong>Spritz</strong>pistole ist nun vollständig montiert <strong>und</strong> kann in Betrieb gesetzt werden.15.3 <strong>Spritz</strong>bildprobe erzeugenEine <strong>Spritz</strong>bildprobe sollte immer dann erzeugt werden, wenn• die <strong>Spritz</strong>pistole zum ersten Mal in Betrieb gesetzt wird.• das Material ausgetauscht wird.• die Pistole zur Wartung oder Instandsetzung zerlegt wurde.Die <strong>Spritz</strong>bildprobe kann auf ein Probewerkstück, Blech, Pappe oder Papier abgegebenwerden.WarnungHalten Sie beim Verspritzen von Materialien keine Hände oder andere Körperteilevor die unter Druck stehende Düse der <strong>Spritz</strong>pistole - Verletzungsgefahr.18 19
WarnungAchten Sie beim Inbetriebsetzen der <strong>Spritz</strong>pistole darauf, dass sich keine Person im<strong>Spritz</strong>bereich befindet - Verletzungsgefahr1. Setzen Sie die <strong>Spritz</strong>pistole in Betrieb, um eine <strong>Spritz</strong>bildprobe zu erzeugen(siehe 5.2 Inbetrieb- <strong>und</strong> Außerbetriebsetzen).2. Kontrollieren Sie die <strong>Spritz</strong>bildprobe <strong>und</strong> verändern Sie ggf. die Einstellungen ander <strong>Spritz</strong>pistole (siehe 5.4 <strong>Spritz</strong>bild verändern).5.4 <strong>Spritz</strong>bild verändernSie können an der <strong>PILOT</strong> WA 900-Serie durch die folgenden Einstellungen das<strong>Spritz</strong>bild verändern:Luftdruck regulierenDer Luftdruck wird am Druckluft-Reduzierventil der Kompressoranlage eingestellt.Beachten Sie die Anweisungen <strong>und</strong> Sicherheitshinweise des Herstellers.Wenn Sie das <strong>Spritz</strong>bild über die bereits erwähnten Möglichkeiten hinaus verändernwollen, muss die <strong>Spritz</strong>pistole umgerüstet werden (siehe 5.5 <strong>Spritz</strong>pistole umrüsten).<strong>WALTHER</strong> bietet dazu eine Vielzahl unterschiedlicher Luftkopf-/ Materialdüse-/Nadel-Kombinationen an.Mängel eines <strong>Spritz</strong>bildes behebenDie folgende Tabelle zeigt Ihnen, mit welchen Einstellungen Sie das <strong>Spritz</strong>bild beeinflussenkönnen:angestrebtes <strong>Spritz</strong>ergebnis<strong>Spritz</strong>luft einstellenFAAFMit Innensteuerung:Mit Hilfe der beiden Regelschrauben 'F' (Fan air) <strong>und</strong> 'A'(Atomizing air) läßt sich ein optimales <strong>Spritz</strong>bild einstellen.Die Regelschraube 'F' beeinflusst die Breitstrahlluft.Die Regelschraube 'A' die R<strong>und</strong>strahlluft.Ohne Innensteuerung:Das <strong>Spritz</strong>bild wird über einen Druckluftregler in derAnlage eingestellt (siehe Betriebsanleitung des Anlagen-Herstellers).Der Anschluss 'F' ist für die Breitstrahlluft,der Anschluss 'A' ist für die R<strong>und</strong>strahlluft.<strong>Spritz</strong>bildprobe Abweichung erforderliche Einstellung<strong>Spritz</strong>bild ist in der Mittezu dick<strong>Spritz</strong>bild ist an denEnden zu dick<strong>Spritz</strong>bild ist ziemlichgrobtropfigMaterialauftrag ist in der<strong>Spritz</strong>bildmitte sehr dünn<strong>Spritz</strong>bild ist in der Mittegespalten<strong>Spritz</strong>bild ist sehr ballig5.5 <strong>Spritz</strong>pistole umrüsten• breitere <strong>Spritz</strong>strahlform einstellen• r<strong>und</strong>ere <strong>Spritz</strong>strahlform einstellen• Breitstrahlluftdruck erhöhen• Breitstrahlluftdruck verringern• Düsendurchmesser erhöhen• Zerstäuberluftdruck verringern• Materialdruck erhöhen• Materialdruck verringern• Zerstäuberluftdruck erhöhenMaterialdurchflussmenge einstellen1 2Drehen Sie die Kappe (1) aus der Gr<strong>und</strong>einstellung(= Kerbe am Kolbengehäuse).• nach innen, um den Materialdurchfluss zu verringern.• nach außen, um den Materialdurchfluss zu erhöhen.Mit Hilfe der Zugstange (2) kann der Materialdurchflussdurch die Düse betätigt werden, ohne dass dieZerstäuberluft eingeschaltet wird.Materialdruck regulierenDiese Einstellung können Sie nur an der Pumpe oder am Druckbehälter vornehmen.Beachten Sie dabei die Anweisungen <strong>und</strong> Sicherheitshinweise des Herstellers.Die zum <strong>Spritz</strong>material passende Luftkopf- / Materialdüse- / Nadel-Kombinationbildet eine aufeinander abgestimmte Einheit - die Düseneinlage. Tauschen Sieimmer die komplette Düseneinlage aus, damit die gewünschte <strong>Spritz</strong>bildqualitäterhalten bleibt.WarnungSchalten Sie vor jeder Umrüstung die Steuer- <strong>und</strong> Zerstäuberluft sowie die Materialzufuhrzur <strong>Spritz</strong>pistole drucklos - VerletzungsgefahrHinweisZur Durchführung der im Folgenden aufgeführten Arbeitsschritte benutzen Sie bittedie Explosionszeichnung am Anfang dieser Betriebsanleitung.20 21
Luftkopf <strong>und</strong> Materialdüse wechseln1. Schrauben Sie die geriffelte Luftkopfmutter (Pos. 1) vom Vorderkörper (Pos. 7)ab.2. Ziehen Sie den Luftkopf (Pos. 2) vom Vorderkörper herunter.3. Schrauben Sie die Materialdüse (Pos. 3) aus dem Vorderkörper.4. Schrauben Sie die gewünschte Materialdüse ein (eventuell den Luftverteilerringaustauschen) <strong>und</strong> setzen Sie den gewünschten Luftkopf auf den Vorderkörper.5. Schrauben Sie die Luftkopfmutter auf den Vorderkörper.Materialnadel wechseln1. Schrauben Sie die Zugstange (Pos. 27) heraus.2. Schrauben Sie die Kappe (Pos. 26) vom Kolbengehäuse (Pos. 19) ab.3. Schrauben Sie die Zugstange in die Materialnadel (Pos. 21) <strong>und</strong> ziehen dieMaterialnadel aus dem Kolbengehäuse.Die Montage erfolgt in umgekehrter Reihenfolge.5.6 Umbau der Adapterplatte vom Stich- auf Umlaufverfahren1. Lösen Sie die beiden Zylinderschrauben (Pos. 38) <strong>und</strong> entfernen die Pistole vonder Adapterplatte.2. Entfernen Sie den Verschlussstift (Pos. 37) mit O-Ring (Pos. 36) aus der Pistole.(Siehe 4.1 Stich oder Umlaufverfahren)3. Schrauben Sie den Verschlussstopfen (Pos. 10) aus der Adapterplatte.4. Setzen Sie den zweiten Materialanschluss (V 00 101 01 003 für AdapterplatteAluminium-vernickelt Materialanschluss hinten oder V 21 900 20 003 fürAdapterplatte Edelstahl Materialanschluss seitlich) in die Platte ein.6 Reinigung6.1 Sicherheitshinweise• Schalten Sie vor jeder Wartung die Steuer- <strong>und</strong> Zerstäuberluft sowie dieMaterialzufuhr zur <strong>Spritz</strong>pistole drucklos - Verletzungsgefahr.• Im Arbeitsbereich sind Feuer, offenes Licht <strong>und</strong> Rauchen verboten. BeimVerspritzen leicht entzündlicher Materialien (z.B. Reinigungsmittel) bestehterhöhte Explosions- <strong>und</strong> Brandgefahr.• Beachten Sie die Sicherheitshinweise des Reinigungsmittel-Herstellers.Insbesondere aggressive <strong>und</strong> ätzende Reinigungsmittel können ges<strong>und</strong>heitlicheSchäden verursachen.6.2 Gr<strong>und</strong>reinigungHersteller des <strong>Spritz</strong>materials angegeben werden <strong>und</strong> die folgenden Bestandteilenicht enthalten:• halogenierte Kohlenwasserstoffe (z.B. 1,1,1, Trichlorethan, Methylen-Chloridusw.)• Säuren <strong>und</strong> säurehaltige Reinigungsmittel• regenerierte Lösemittel (sog. Reinigungsverdünnungen)• Entlackungsmittel.Die o.g. Bestandteile verursachen an galvanisierten Bauteilen chemische Reaktionen<strong>und</strong> führen zu Korrosionsschäden.Für Schäden, die aus einer derartigen Behandlung herrühren, übernimmt <strong>WALTHER</strong><strong>Spritz</strong>- <strong>und</strong> <strong>Lackiersysteme</strong> keine Gewährleistung.Reinigen Sie die <strong>Spritz</strong>pistole• vor jedem Farb- bzw. Materialwechsel.• mindestens einmal wöchentlich.• materialabhängig <strong>und</strong> je nach Verschmutzungsgrad mehrfach wöchentlich.AchtungLegen Sie die <strong>Spritz</strong>pistole nie in Lösemittel oder ein anderes Reinigungsmittel. Dieeinwandfreie Funktion der <strong>Spritz</strong>pistole kann sonst nicht garantiert werden.AchtungVerwenden Sie zur Reinigung keine harten oder spitzen Gegenstände. Präzisionsteileder <strong>Spritz</strong>pistole könnten sonst beschädigt werden <strong>und</strong> das <strong>Spritz</strong>ergebnis verschlechtern.1. Zerlegen Sie die Pistole gemäß 5.5 Materialdüse <strong>und</strong> -nadel wechseln.2. Reinigen Sie den Luftkopf <strong>und</strong> die Materialdüse mit einem Pinsel <strong>und</strong> demReinigungsmittel.3. Reinigen Sie alle übrigen Bauteile <strong>und</strong> den Pistolenkörper mit einem Tuch <strong>und</strong>dem Reinigungsmittel.4. Bestreichen Sie folgende Teile mit einem dünnen Fettfilm:• Manschette des Kolbens• O-Ring des Kolbens• Materialnadel• NadelfederVerwenden Sie dazu <strong>WALTHER</strong> <strong>PILOT</strong> Pistolenfett <strong>und</strong> einen Pinsel.Anschließend wird die <strong>Spritz</strong>pistole in umgekehrter Reihenfolge zusammengesetzt.Damit die Lebensdauer <strong>und</strong> die Funktion der <strong>Spritz</strong>pistole lange erhalten bleibt,muss die <strong>Spritz</strong>pistole mit <strong>WALTHER</strong> <strong>PILOT</strong> Pistolenfett (V 00 000 00 001) regelmäßiggereinigt <strong>und</strong> gefettet werden.Verwenden Sie zur Reinigung der <strong>Spritz</strong>pistole nur Reinigungsmittel, die vom22 23
6.3 RoutinereinigungBei regelmäßigen Farbwechseln oder (materialabhängig) nach Arbeitsende könnenSie die <strong>Spritz</strong>pistole auch reinigen, ohne diese dabei zerlegen zu müssen.HinweisReinigen <strong>und</strong> fetten Sie die <strong>Spritz</strong>pistole dennoch regelmäßig gemäß Abschnitt6.2 Gr<strong>und</strong>reinigung. Sie erhalten so die sichere Funktion der <strong>Spritz</strong>pistole.Um die Routinereinigung durchführen zu können, müssen Sie die folgendenArbeitsschritte durchführen:1. Befüllen Sie den gesäuberten Materialbehälter mit einem geeignetenReinigungsmittel. Lediglich der Materialdruck muss an der <strong>Spritz</strong>pistole anstehen.Das Reinigungsmittel sollte nicht zerstäubt werden.2. Setzen Sie die <strong>Spritz</strong>pistole in Betrieb, (siehe 5.2 Inbetriebsetzen).3. Setzen Sie die <strong>Spritz</strong>pistole erst außer Betrieb, wenn nur noch klaresReinigungsmittel austritt.Damit nicht die gesamte <strong>Spritz</strong>anlage in Betrieb gesetzt werden muss, können Siedie Materialzufuhr der Serie <strong>PILOT</strong> WA 900 auch von Hand entsperren.Die gesamte <strong>Spritz</strong>anlage sollte nun bis zum nächsten Einsatz drucklos geschaltetwerden.7 Instandsetzung1. Ziehen Sie die Zugstange der <strong>Spritz</strong>pistole nach hinten.Die Materialzufuhr wird geöffnet <strong>und</strong> Materialkanal<strong>und</strong> -düse werden gereinigt.2. Lassen Sie die Zugstange erst los, wenn an der<strong>Spritz</strong>pistole nur noch klares Reinigungsmittel austritt.WarnungSchalten Sie vor jeder Instandsetzung die Steuer- <strong>und</strong> Zerstäuberluft sowie dieMaterialzufuhr zur <strong>Spritz</strong>pistole drucklos - Verletzungsgefahr.HinweisZur Durchführung der im Folgenden aufgeführten Arbeitsschritte benutzen Sie bittedie Explosionszeichnung am Anfang dieser Betriebsanleitung.7.1 Undichte Nadelpackung austauschen1. Schalten Sie die Pistole drucklos.2. Schrauben Sie den Vorderkörper (Pos. 7) <strong>und</strong> das Kolbengehäuse (Pos. 19)durch Lösen der zwei Zylinderschrauben (Pos. 38) von der Adapterplatte ab.3. Schrauben Sie die Zugstange (Pos. 27) aus der Pistole heraus.4. Schrauben Sie die Kappe (Pos. 26) vom Kolbengehäuse ab.5. Schrauben Sie die Zugstange in die Materialnadel (Pos. 21) <strong>und</strong> ziehen dieMaterialnadel aus dem Kolbengehäuse.6. Schrauben Sie den Vorderkörper durch Lösen der vier Innensechskantschrauben(Pos. 5) vom Kolbengehäuse (Pos. 19) ab.7. Schrauben Sie die Packungsschraube (Pos. 12) heraus.8. Entfernen Sie die Packungsfeder (Pos. 11) (austauschen, falls beschädigt) <strong>und</strong>die Unterlegscheibe (Pos. 10) aus der Einschrauböffnung.9. Ziehen Sie die Nadelpackung (Pos. 9) mit einem Hilfswerkzeug aus ihrem Sitz.Verwenden Sie hierzu einen festen Draht, dessen Ende zu einem kleinen Hakenumgebogen ist.10. Fetten Sie die neu einzusetzende Nadelpackung mit <strong>WALTHER</strong> <strong>PILOT</strong>Pistolenfett ein <strong>und</strong> setzen sie in den Vorderkörper ein.Die Montage der restlichen Bauteile erfolgt in umgekehrter Reihenfolge.HinweisDie aus dem Vorderkörper entnommene Nadelpackung (Pos. 9) darf nicht wiederverwendetwerden, da sonst eine funktionssichere Dichtwirkung nicht gewährleistet ist.7.2 Materialdüse, -nadel, Federn <strong>und</strong> Dichtungen austauschenZerlegen Sie die <strong>Spritz</strong>pistole gemäß Abschnitt 5.5 <strong>Spritz</strong>pistole umrüsten, wenn diefolgenden Bauteile ausgetauscht werden müssen:• Materialdüse• Druckfeder des Kolbens• Materialnadel*• Nadelfeder*• Gleitringflachdichtung des Kolbens*• O-Ring des Kolbens*HinweisDie mit * gekennzeichneten Bauteile müssen vor dem Einbau in das Pistolengehäusemit <strong>WALTHER</strong> <strong>PILOT</strong> Pistolenfett eingefettet werden.<strong>WALTHER</strong> <strong>Spritz</strong>- <strong>und</strong> <strong>Lackiersysteme</strong> hält für die Automatik-<strong>Spritz</strong>pistolen<strong>PILOT</strong> WA 900-Serie Reparatursets bereit, die sämtliche Verschleißteile enthalten:Art. Nr.: V 16 209 00 . . 3 (WA 900 / WA 905)Art. Nr.: V 16 209 20 . . 3 (WA 920 / WA 925)Art. Nr.: V 16 209 40 . . 3 (WA 940 / WA 945)Die Verschleißteile sind auch in der Ersatzteilliste aufgeführt (durch Fettdruckgekennzeichnet).24 25
8 Fehlersuche <strong>und</strong> -beseitigungWarnungSchalten Sie vor jeder Wartung <strong>und</strong> Instandsetzung die Steuer- <strong>und</strong> Zerstäuberluftsowie Materialzufuhr zur <strong>Spritz</strong>pistole drucklos - Verletzungsgefahr.Fehler Ursache AbhilfePistole tropftPistole öffnetnichtMaterial tritt ander LeckagebohrungausStoßweiser oderflatternder<strong>Spritz</strong>stahlMaterialnadel oder -düseverschmutztMaterialnadel oder -düsebeschädigtPackungsschraube (Pos. 12)zu fest angezogenSteuerluft zu niedrigNadelpackung ist <strong>und</strong>ichtPackungsschraube ist losezu wenig Material imMaterialbehältersiehe 5.5 Materialnadel oder-düse ausbauen <strong>und</strong> reinigensiehe 5.5 Materialnadel oder-düse austauschenPackungsschraube mit Schraubendreheretwas lösenSteuerluftdruck erhöhen aufmin. 4,5 barsiehe 7.1 Nadelpackung austauschenPackungsschraube mit Schraubendreheretwas anziehenMaterial auffüllen (sieheBetriebsanleitung desAnlagenherstellers)10 Technische DatenGewichte<strong>Spritz</strong>pistole mit Innensteuerung:<strong>Spritz</strong>pistole ohne Innensteuerung:Adapterplatte Aluminium vernickelt:Adapterplatte Edelstahl:520 g490 g195 g260 gDüsengrößen: • 0,3 • 0,5 • 0,8 • 1,0 • 1,2 • 1,5 • 1,8 • 2,0• 2,2 • 2,5 • 3,0 • 3,5 mm øAnschlüsseZerstäuberluft:PU Außen ø 8 mmSteuerluft:PU Außen ø 6 mmMaterialzufuhr: G 1/4“DruckbereicheSteuerluft:mind. 4,5 barMaterialdruck: max. 8 barZerstäuberluft: max. 8 barmax. Betriebstemperaturder <strong>Spritz</strong>pistole 80 °CSchallpegel(gemessen in ca. 1 mAbstand zur <strong>Spritz</strong>pistole)Luftverbrauch:Eingangsluftdruckan der PistoleLuftverbrauchR<strong>und</strong>strahl86 dB (A)<strong>PILOT</strong> WA 900 <strong>PILOT</strong> WA 920 HVLP * <strong>PILOT</strong> WA 940 HVLP PLUS **LuftverbrauchBreitstrahlLuftverbrauchR<strong>und</strong>strahlLuftverbrauchBreitstrahlLuftverbrauchR<strong>und</strong>strahlLuftverbrauchBreitstrahl1 bar 100 l/min 120 l/min 120 l/min 126 l/min 114 l/min 121 l/min2 bar 165 l/min 183 l/min 188 l/min 203 l/min 172 l/min 188 l/min9 EntsorgungDie bei der Reinigung <strong>und</strong> Wartung anfallenden Materialien sind den Gesetzen <strong>und</strong>Vorschriften entsprechend sach- <strong>und</strong> fachgerecht zu entsorgen.WarnungBeachten Sie insbesondere die Hinweise des Herstellers der <strong>Spritz</strong>- <strong>und</strong>Reinigungsmittel. Unachtsam entsorgtes Material gefährdet die Ges<strong>und</strong>heit vonMensch <strong>und</strong> Tier.3 bar 230 l/min 260 l/min 265 l/min 283 l/min 237 l/min 259 l/min4 bar 290 l/min 325 l/min 332 l/min 358 l/min 303 l/min 325 l/min4,5 bar 321 l/min 358 l/min 372 l/min 400 l/min 330 l/min 360 l/min5 bar 345 l/min 395 l/min 414 l/min 441 l/min 365 l/min 400 l/minEingangsluftdruckan der PistoleLuftverbrauchR<strong>und</strong>strahl<strong>PILOT</strong> WA 905 <strong>PILOT</strong> WA 925 HVLP * <strong>PILOT</strong> WA 945 HVLP PLUS **LuftverbrauchBreitstrahlLuftverbrauchR<strong>und</strong>strahlLuftverbrauchBreitstrahlLuftverbrauchR<strong>und</strong>strahlLuftverbrauchBreitstrahl1 bar 100 l/min 130 l/min 119 l/min 137 l/min 86 l/min 133 l/min2 bar 156 l/min 210 l/min 185 l/min 228 l/min 137 l/min 212 l/min3 bar 220 l/min 289 l/min 257 l/min 317 l/min 182 l/min 292 l/min4 bar 283 l/min 362 l/min 322 l/min 410 l/min 232 l/min 366 l/min4,5 bar 311 l/min 405 l/min 358 l/min 450 l/min 258 l/min 411 l/min5 bar 338 l/min 445 l/min 400 l/min 500 l/min 283 l/min 450 l/min* Bei einem Eingangsluftdruck von 3,3 bar beträgt der <strong>Spritz</strong>luftdruck 0,7 bar.** Bei einem Eingangsluftdruck von 3,3 bar beträgt der <strong>Spritz</strong>luftdruck 1,3 bar.Technische Änderungen vorbehalten.26 27
ContentsExploded Drawing 2Declaration of CE-Conformity 29List of Replacement Parts 301 General 361.1 Identification of Model Version 361.2 Normal Use 361.3 Improper Use 372 Technical Description 373 Safety Warnings 383.1 Safety Warting Symbols 383.2 Generally Applicable Safety Precautions 394 Assembly / Installation 394.1 Radial or circulation method 394.2 Mounting of Spray Gun 404.3 Connection of Input Lines 405 Operational Handling 415.1 Safety Warnings 415.2 Starting/Stopping Requirements 415.3 Spray Pattern Test 415.4 Spray Pattern Adjustments 425.5 Retooling of Spray Gun 435.6 Conversion of adapter plate from radial to circulation method 446 Cleaning 446.1 Safety Warnings 446.2 Cleaning - Complete 446.3 Cleaning - Routine 467 Repairs / Replacements 467.1 Replacement of defective Needle Seal Packings 467.2 Replacement of Nozzles, Needles, Springs and Seals 478 Trouble shooting and Corrective Action 489 Disposal of Cleaning / Servicing Substances 4810 Specification Data 49Declaration of CE-ConformityWe, the manufacturers of the equipment, hereby declare <strong>und</strong>er our sole responsibilitythat the product(s) described below conform to the essential safety requirements.This declaration will be rendered invalid if any changes are made to the equipment withoutprior consultation with us.ManufacturerType DesignationIntended purposeApplied Standards and Directives28 29<strong>WALTHER</strong> <strong>Spritz</strong>- <strong>und</strong> <strong>Lackiersysteme</strong> <strong>GmbH</strong>Kärntner Str. 18 - 30D - 42327 WuppertalTel.: +49(0)202 / 787 - 0Fax: +49(0)202 / 787 - 2217www.walther-pilot.de • e-mail: info@walther-pilot.deAutomatic Spray Guns <strong>PILOT</strong> WA 900-ModelsWA 900 (Standard with internal control) V 21 900WA 905 (Standard without internal control) V 21 905WA 920-HVLP (Low pressure with internal control) V 21 920WA 925-HVLP (Low pressure without internal control) V 21 925WA 940-HVLP PLUS (Mediem pressure with internal control) V 21 940WA 945-HVLP PLUS (Mediem pressure without internal control) V 21 945Processing of sprayable mediaEU-Mechanical Engineering Directives 2006 / 42 / EC94 / 9 EC (ATEX Directives)DIN EN ISO 12100-1DIN EN ISO 12100-2 DIN EN 1953EN 1127-1 DIN EN 13463-1Specification according 94 / 9 / ECCategory 2 Part marking II 2 G c T 5Tech.File,Ref.:2416Authorized with the compilation of the technical file:Nico Kowalski, <strong>WALTHER</strong> <strong>Spritz</strong>- <strong>und</strong> <strong>Lackiersysteme</strong> <strong>GmbH</strong>, Kärntner Str. 18 - 30D- 42327 WuppertalSpecial remarks :The named product is intended for installation in other equipment. Commissioning isprohibited until such time as the end product has been proved to conform to the provisionof the Directives 2006 / 42 / EC.Wuppertal, 04 February 2013i.V.Name: Torsten BrökerPosition: Manager, Design and DevelopmentThis Declaration does not give assurance of properties in the sense of product liability. The safety instructionsprovided in the product documentation must be observed at all times.
Listing of Replacement Parts:WA 900(with internal control)V 21 900 V 21 905WA 905(without internal control)Item Description piece Parts No. piece Parts No.1 Retaining Ring compl. 1 V 20 700 05 000 1 V 20 700 05 0002 Air Cap 1 V 10 700 35 xx8* 1 V 10 700 35 xx8*3 Material nozzle * 1 V 10 700 40 xx3* 1 V 10 700 40 xx3*4 Air distribution ring 1 V 21 900 14 000 1 V 21 900 14 0005 Hexagon socket screw 4 V 20 700 13 003 4 V 20 700 13 0036 Cylindrical pin 11V 21 900 02 1037 Front Body 1 1V 21 900 02 1038 O-Ring 2 V 09 102 21 009 2 V 09 102 21 0099 Needle seal Packing compl. 1 V 09 001 72 000 1 V 09 001 72 00010 Washer 1 V 21 900 12 003 1 V 21 900 12 00311 Packing Spring 1 V 20 510 12 003 1 V 20 510 12 00312 Packing Screw 1 V 20 510 11 003 1 V 20 510 11 00313 Pin to fix air cap 1 V 20 700 02 303 1 V 20 700 02 30314 Locking spring 1 V 20 700 02 403 1 V 20 700 02 40315 Set screw 1 V 11 530 01 010 1 V 11 530 01 01016 Plug 1 2325502 - -17 Packing Screw 1 V 22 650 43 100 1 V 22 650 43 10018 Lip seal 1 V 09 220 30 000 1 V 09 220 30 00019 Piston Casing 1 V 21 900 01 000 1 V 21 905 01 00020 Piston kompl. 1 V 21 900 09 000 1 V 21 900 09 00021 Material Needle compl. 1 V 21 900 05 xx3* 1 V 21 900 05 xx3*22 Piston Spring 1 V 20 606 11 100 1 V 20 606 11 10023 Threaded Ring compl. 1 V 21 900 10 000 1 V 21 900 10 00024 Needle Spring 1 V 20 510 29 103 1 V 20 510 29 10325 Needle spring washer 1 V 21 900 11 000 1 V 21 900 11 00026 Cap compl. 1 V 21 900 13 000 1 V 21 900 13 00027 Drawbar compl. 1 V 20 510 34 000 1 V 20 510 34 00028 Ratchet ('A‘+‘F‘) 2- -29 Threaded bush 2 - -30 Sealing cone 2 - -31 O-Ring 2 - -V 21 900 25 00032 Stuffing gland 2 - -33 'A'-adjustment (atomizing air) 1 - -34 'F'-adjustment (fan air) 1 - -35 Counter sunk screw 2 - -36 O-Ring 11V 21 900 08 00037 Sealing pin 1 1V 21 900 08 00038 Socket head cap screw 2 V 20 810 14 203 2 V 20 810 14 203Listing of Replacement Parts:WA 920 HVLP(with internal control)30 31V 21 920 V 21 925WA 925 HVLP(without internal control)Item Description piece Parts No. piece Parts No.1 Retaining Ring compl. 1 V 20 700 05 000 1 V 20 700 05 0002 Air Cap 1 V 10 700 37 xxx* 1 V 10 700 37 xxx*3 Material nozzle * 1 V 10 700 40 xx3* 1 V 10 700 40 xx3*4 Air distribution ring 1 V 21 900 14 100 1 V 21 900 14 1005 Hexagon socket screw 4 V 20 700 13 003 4 V 20 700 13 0036 Cylindrical pin 11V 21 900 02 1037 Front Body 1 1V 21 900 02 1038 O-Ring 2 V 09 102 21 009 2 V 09 102 21 0099 Needle seal Packing compl. 1 V 09 001 72 000 1 V 09 001 72 00010 Washer 1 V 21 900 12 003 1 V 21 900 12 00311 Packing Spring 1 V 20 510 12 003 1 V 20 510 12 00312 Packing Screw 1 V 20 510 11 003 1 V 20 510 11 00313 Pin to fix air cap 1 V 20 700 02 303 1 V 20 700 02 30314 Locking spring 1 V 20 700 02 403 1 V 20 700 02 40315 Set screw 1 V 11 530 01 010 1 V 11 530 01 01016 Plug 1 2325502 - -17 Packing Screw 1 V 22 650 43 100 1 V 22 650 43 10018 Lip seal 1 V 09 220 30 000 1 V 09 220 30 00019 Piston Casing 1 V 21 900 01 000 1 V 21 905 01 00020 Piston kompl. 1 V 21 900 09 000 1 V 21 900 09 00021 Material Needle compl. 1 V 21 900 05 xx3* 1 V 21 900 05 xx3*22 Piston Spring 1 V 20 606 11 100 1 V 20 606 11 10023 Threaded Ring compl. 1 V 21 900 10 000 1 V 21 900 10 00024 Needle Spring 1 V 20 510 29 103 1 V 20 510 29 10325 Needle spring washer 1 V 21 900 11 000 1 V 21 900 11 00026 Cap compl. 1 V 21 900 13 000 1 V 21 900 13 00027 Drawbar compl. 1 V 20 510 34 000 1 V 20 510 34 00028 Ratchet (‚A‘+‘F‘) 2- -29 Threaded bush 2 - -30 Sealing cone 2 - -31 O-Ring 2 - -V 21 900 25 00032 Stuffing gland 2 - -33 'A'-adjustment (atomizing air) 1 - -34 'F'-adjustment (fan air) 1 - -35 Counter sunk screw 2 - -36 O-Ring 11V 21 900 08 00037 Sealing pin 1 1V 21 900 08 00038 Socket head cap screw 2 V 20 810 14 203 2 V 20 810 14 203
Listing of Replacement Parts:WA 940 HVLP Plus(with internal control)V 21 940 V 21 945WA 945 HVLP Plus(without internal control)Item Description piece Parts No. piece Parts No.1 Retaining Ring compl. 1 V 20 700 05 000 1 V 20 700 05 0002 Air Cap 1 V 10 700 36 xxx* 1 V 10 700 36 xxx*3 Material nozzle * 1 V 10 700 40 xx3* 1 V 10 700 40 xx3*4 Air distribution ring 1 V 21 900 14 100 1 V 21 900 14 1005 Hexagon socket screw 4 V 20 700 13 003 4 V 20 700 13 0036 Cylindrical pin 11V 21 900 02 1037 Front Body 1 1V 21 900 02 1038 O-Ring 2 V 09 102 21 009 2 V 09 102 21 0099 Needle seal Packing compl. 1 V 09 001 72 000 1 V 09 001 72 00010 Washer 1 V 21 900 12 003 1 V 21 900 12 00311 Packing Spring 1 V 20 510 12 003 1 V 20 510 12 00312 Packing Screw 1 V 20 510 11 003 1 V 20 510 11 00313 Pin to fix air cap 1 V 20 700 02 303 1 V 20 700 02 30314 Locking spring 1 V 20 700 02 403 1 V 20 700 02 40315 Set screw 1 V 11 530 01 010 1 V 11 530 01 01016 Plug 1 2325502 - -17 Packing Screw 1 V 22 650 43 100 1 V 22 650 43 10018 Lip seal 1 V 09 220 30 000 1 V 09 220 30 00019 Piston Casing 1 V 21 900 01 000 1 V 21 905 01 00020 Piston kompl. 1 V 21 900 09 000 1 V 21 900 09 00021 Material Needle compl. 1 V 21 900 05 xx3* 1 V 21 900 05 xx3*22 Piston Spring 1 V 20 606 11 100 1 V 20 606 11 10023 Threaded Ring compl. 1 V 21 900 10 000 1 V 21 900 10 00024 Needle Spring 1 V 20 510 29 103 1 V 20 510 29 10325 Needle spring washer 1 V 21 900 11 000 1 V 21 900 11 00026 Cap compl. 1 V 21 900 13 000 1 V 21 900 13 00027 Drawbar compl. 1 V 20 510 34 000 1 V 20 510 34 00028 Ratchet ('A‘+‘F‘) 2- -29 Threaded bush 2 - -30 Sealing cone 2 - -31 O-Ring 2 - -V 21 900 25 00032 Stuffing gland 2 - -33 'A'-adjustment (atomizing air) 1 - -34 'F'-adjustment (fan air) 1 - -35 Counter sunk screw 2 - -36 O-Ring 11V 21 900 08 00037 Sealing pin 1 1V 21 900 08 00038 Socket head cap screw 2 V 20 810 14 203 2 V 20 810 14 203* Please quote the required size(s) when placing an order for replacement parts.It is recommended to keep in stock all BOLD-faced parts (fast wearing parts).Repair kit<strong>WALTHER</strong> <strong>PILOT</strong> repair kits are available for <strong>PILOT</strong> WA 900 - WA 945 HVLP PLUS spray gunsincluding all wearing parts.32 33Parts-No.<strong>PILOT</strong> WA 900 / 905 Standard-version V 16 209 00 XX3<strong>PILOT</strong> WA 920 / 925 HVLP / Low pressure-version V 16 209 20 XX3<strong>PILOT</strong> WA 940 / 945 HVLP PLUS / Mediem pressure-version V 16 209 40 XX3Nozzle setNozzle sets consist of air cap, material nozzle and material needle.Parts-No.<strong>PILOT</strong> WA 900 / 905 Standard-version V 15 209 00 XX3<strong>PILOT</strong> WA 920 / 925 HVLP / Low pressure-version V 15 209 20 XX3<strong>PILOT</strong> WA 940 / 945 HVLP PLUS / Mediem pressure-version V 15 209 40 XX3Nozzle sizes optional:0,3 ▪ 0,5 ▪ 0,8 ▪ 1,0 ▪ 1,2 ▪ 1,5 ▪ 1,8 ▪ 2,0 ▪ 2,2 ▪ 2,5 ▪ 3,0 ▪ 3,5 mm øSeal set for Adaptor plateThe seal set contains all item numbers marked with ♦.Adaptor plate Aluminium, nickel coated / Adaptor plate stainless steel V 17 219 00 000AccessoriesParts-No.Gun holder V 21 900 21 000<strong>WALTHER</strong> <strong>PILOT</strong> gun grease Pads 8 - 10 g V 00 000 00 001
1 General1.1 Identification of Model VersionModels:Automatic Spray Guns <strong>PILOT</strong> WA 900-SerieTypes: WA 900 (Standard with internal control) V 21 900WA 905 (Standard without internal control) V 21 905WA 920-HVLP (Low pressure with internal control) V 21 920WA 925-HVLP (Low pressure without internal control) V 21 925WA 940-HVLP PLUS (Medium pressure with internal control) V 21 940WA 945-HVLP PLUS (Medium pres. without internal control) V 21 945Manufacturer: <strong>WALTHER</strong> <strong>Spritz</strong>- <strong>und</strong> <strong>Lackiersysteme</strong> <strong>GmbH</strong>Kärntner Str. 18-30D-42327 WuppertalTel.: 0202 / 787-0Fax: 0202 / 787-2217www.walther-pilot.de • Email: info@walther-pilot.de1.2 Normal UseThe automatic spray guns <strong>PILOT</strong> WA 900, WA 905, WA 920, WA 925, WA 940 andWA 945 are exclusively designed for use with sprayable material types and gradessuch as:• paints and lacquers• greases, oils and corrosion preventives• adhesive compo<strong>und</strong>s• ceramic glazes• pickling solutionsShould the materials which you want to spray not be listed above, please contact<strong>WALTHER</strong> <strong>Spritz</strong>- <strong>und</strong> <strong>Lackiersysteme</strong>, Wuppertal for further and detailed information.Please note that sprayable material may only be applied to work pieces and/ or similaritems.The temperature of the spraying materials shall never exceed 80 degrees Celsius.The models of the series <strong>PILOT</strong> WA 900 are not designed for manual operation, andmust be installed in a suitable gun mounting device.The term normal use also implies that any and all safety warnings, operational handlingdetails, etc., as stated in these operating instructions, must be carefully read,<strong>und</strong>erstood and duly complied with.This equipment complies with the explosion protection requirements of Directive94/9/EC (ATEX) for the explosion group, equipment category and temperature classindicated on the type plate. When using the equipment, the requirements specifiedin these Operating Instructions must be observed at all times.The technical data indicated on the equipment rating plates and the specifications in36 37the chapter „Technical Data“ must be complied with at all times and must not beexceeded. An overloading of the equipment must be ruled out.The equipment may be used in potentially explosive atmospheres only with theauthorisation of the relevant supervisory authority.The relevant supervisory authority or the operator of the equipment areresponsible for determining the explosion hazard (zone classification).The operator must check and ensure that all technical data and the marking of theequipment in accordance with ATEX are compliant with the necessary requirements.The operator must provide corresponding safety measures for all applications inwhich the breakdown of the equipment might lead to danger to persons.If any irregularities are observed while the equipment is in operation, the equipmentmust be put out of operation immediately and <strong>WALTHER</strong> <strong>WALTHER</strong> <strong>Spritz</strong>- <strong>und</strong><strong>Lackiersysteme</strong> must be consulted.Gro<strong>und</strong>ing / Equipotential BondingYou must ensure that the spray gun is properly earthed (gro<strong>und</strong>ed) either separatelyor in connection with the equipment with which it is being used (maximum resistance10 6 Ω).1.3 Improper UseThis spray gun shall not be used for purposes other than set forth in the aboveChapter 1.2 Normal Use. Any other form of use and/ or application is prohibited.Improper use is for example:• spraying of material onto persons and animals• spraying of liquid nitrogen, etc.2 Technical DescriptionThe series <strong>PILOT</strong> WA 900 is a simple modular system, which enables all possiblecombinations required in ractice. There are two basic models, one with and the otherone without internal control. For this purpose there are two different quick-releaseadapter plates which fit both models or can be converted accordingly.Guns of series WA 900 can only be used in connection with an adapter plate. Theguns can alternatively be used in radial or circulation method. In order to incorporatethe guns in circulation mode, the assembled sealing pin (Pos. 37) needs to be removed.The models of the <strong>PILOT</strong> WA 900-Serie are an all-automatic air-controlled gunsoperating in combination with a 3/2-way control valve
With internal control:Actuation of the 3/2-way control valve directs control air into the cylinder inside thegun so as to open - in sequence - the atomizing air and the material input.The shape of the spray is set on the gun with the models <strong>PILOT</strong> WA 900 /WA 920-HVLP <strong>und</strong> WA 940-HVLP PLUS using regulating screws (Pos. 33 and 34).If the control air through the 3/2-way valve is interrupted, compressed air remainingin the cylinder chamber will first escape. The spring pressure of the piston springsubsequently pushes the material needle to its original position, closes the materialsupply and finally the spray air.Without internal control:The atomizer air (ro<strong>und</strong> and wide jet air) should first be switched on via an external3/2-way control valve provided by the customer. Then the control air is opened via asecond 3/2 way valve, which presses both the piston and the material needle backin order to open the material supply.For the models <strong>PILOT</strong> WA 905/ WA 925-HVLP and WA 945-HVLP PLUS the shape ofthe spray jet is adjusted via the two customer supplied compressed air regulators inthe plant.If the control air is interrupted by the 3/2-way control valve, spring pressure will movethe piston and the material needle back to their initial position and close the materialsupply to the material nozzle. The atomizer air should then be switched off.The material flow volume is on all models set via the material pressure and the cap(item 26). The flow of material in the automatic spray gun series <strong>PILOT</strong> WA 900 canalso be manually opened by means of the drawbar (Pos. 27).The spray guns of the <strong>PILOT</strong> WA 900 series can be connected to material pressuretanks or pumping systems.The models <strong>PILOT</strong> WA 920-HVLP <strong>und</strong> WA 925-HVLP are pure low-pressure sprayguns working with a spraying air pressure of 0.7 bar at an intake air pressure of 3,3bar.With the models <strong>PILOT</strong> WA 940-HVLP PLUS bis WA 945-HVLP PLUS the intake air pressureranges from 3.0 to 3.3 bar for a spraying air pressure of 1.2 to 1.4 bar.3 Safety Warnings3.1 Safety Warning SymbolsWarningThis pictograph and the accompanying warning note „Warning“ indicate possiblerisks and dangers for yourself. Possible consequences: Injuries of any kind.CautionThis pictograph and the accompanying warning note „Caution“ indicate possibledamage to equipment. Possible consequences: Damage to equipment, workpieces,etc.NoticeThis pictograph and the accompanying note „Notice“ indicate additional and usefulinformation to help you handling the spray gun with even greater confidence andefficiency.3.2 Generally Applicable Safety Precautions► All applicable accident prevention rules and regulations as well as other recognisedindustrial safety and health rules and regulations must be observed at all times.► Use the spray gun only in well-ventilated rooms. Fire, naked flames and smokingare strictly prohibited within the working area. WARNING – during the spraying offlammable materials (e.g. lacquers, adhesives, cleaning agents, etc.), there is anincreased risk to health as well as an increased risk of explosion and fire.► You must ensure that the spray gun is properly earthed (gro<strong>und</strong>ed) either separatelyor in connection with the equipment with which it is being used (max. resistance10 6 Ω).► Before carrying out maintenance or servicing work, always ensure that the air andmaterial feed to the spray gun have been de-pressurised. Risk of injury!► When spraying materials, do not place your hands or other parts of the body infront of the pressurised nozzle or the spray gun. Risk of injury!► Never point the spray gun at persons or animals. Risk of injury!► Always observe the spraying and safety instructions given by the manufacturersof the spraying material and the cleaning agent. Aggressive and corrosive materialsin particular can be harmful to health.► Always wear hearing protection when using the gun or when in the vicinity of agun that is in use. The noise level generated by the spray gun is approx. 86 dB(A).► Exhaust air containing particles (overspray) must be kept away from the workingarea and personnel. In spite of these measures, always wear the regulation breathingmasks and protective overalls when using the gun. Airborne particles representa serious health hazard!► After carrying out assembly or maintenance work, always ensure that all nuts,bolts and screw connections have been fully tightened before the gun is used.► Use only original replacement parts, since <strong>WALTHER</strong> can only guarantee safeand fault-free operation for original parts.► For further information on the safe use of the spray gun and the spraying materials,please contact <strong>WALTHER</strong> <strong>Spritz</strong>- <strong>und</strong> <strong>Lackiersysteme</strong> <strong>GmbH</strong>, D-42327Wuppertal, Germany.4 Assembly / Installation4.1 Radial or circulation methodThe spray guns series WA 900 arrive completely assembled from the factory. Theyare by standard delivered with a sealing pin (Pos. 37).38 39
In this version the gun can only be used inradial mode.If you have decided on a circulation modeadapter plate, you must remove the sealingpin (Pos. 37). This opens a second materialchannel.Screw the spray gun on the adapter plate.Use the two socket head cap screws(Pos. 38) for this purpose.The following work must be performedbefore you can start operation of the spraygun with adapter plate.Sealing pin(Pos. 37)Radial methodCirculation method5 Operational Handling5.1 Safety WarningsPlease pay special attention to the following safety warnings prior to taking this spraygun into operation!• Wear proper respiratory protection masks and protective overalls, whenever youare operating this spray gun. Air-borne particles represent a health hazard.• Make sure to wear suitable haering protectors. The gun produces so<strong>und</strong> levelsof up to 86 dB (A) which may cause hearing defects.• Open fires, naked lights and smoking prohibited in the working area. Sprayingof readily flammable media such as paints and adhesive compo<strong>und</strong>s is alwaysaccompanied by the risk of fire and explosion.5.2 Starting / Stopping Requirements4.2 Mounting of Spray GunInstall the gun in a suitable and stable mounting device as shown in the followingexample:14.3 Connection of Input LinesWarningMake sure not to confuse the control and atomizing air connections -risk of injury.with internal controlFor this purpose, use the two M 6 holes (1) (adaptorplate) with a hole spacing of 33 mm.Other mounting devices upon request.without internal control11 113 4a2 3 4b1 = MATERIAL inlet fitting (G 1/4“) marked with 'M'2 = FAN air inlet fitting wide jet (PU outer ø 8 mm) marked with 'F'3 = CONTROL air inlet fitting (PU outer ø 6 mm) marked with 'C'4 a = ATOMIZING air inlet fitting ro<strong>und</strong>-/ wide jet (PU outer ø 8 mm)marked with 'A'4 b = ATOMIZING air inlet fitting ro<strong>und</strong> jet (PU outer ø 8 mm)marked with 'A'The spray gun is now properly installed and connected and ready for operation.The following requirements must be met before taking this spray gun into operation:• control air must be available at the gun.• atomizing air must be available at the gun.• material pressure must be available at the gun.CautionThe material pressure shall not exceed • 8 bar, as, otherwise, the functional reliabtyof the spray gun will suffer.Adjust the control air pressure to • at least 4,5 bar, in order to operate the spray gun.The operation of the spray gun can be started/stopped by way of the 3/2-way controlvalve (see the Operating Instructions of the plant systems manufacturer).WarningIt is important to remember that the spray gun must be relieved of all pressureswhenever work is terminated. Lines left in pressurized condition could burst, withtheir contents likely to injure anybody present nearby.5.3 Spray Pattern TestSpray pattern tests should be performed whenever:• the spray gun is taken into operation for the first time.• the medium is changed.• the spray gun was taken apart for servicing or repairs.The spray pattern can be tested using a work piece sample, a sheet of metal, cardboardor paper.WarningKeep away from the front of the spray gun - imminent risk of injury.40 41
WarningMake sure that nobody is present in the spraying zone when the gun is started- imminent Risk of Injury.1. Start the gun to produce a spray pattern sample (see 5.2. Starting/StoppingRequirements).2. Inspect the sample and readjust the settings of the gun as may be required (see5.4 Spray Pattern Adjustments).5.4 Spray Pattern AdjustmentsThe spray pattern of the of the series <strong>PILOT</strong> WA 900 can be adjusted as follows:Adjusting the jet patternFAWith internal control:An optimum spray pattern can be regulated by usingadjustment screws 'F' (Fan air) and 'A' (Atomizing air).The adjustment screw 'F' regulates the wide jet, the adjustmentscrew 'A' regulates the ro<strong>und</strong> jet.Adjustment of the Air PressureThe air pressure is adjusted at the air pressure reducing valve of the compressorsystem. Please comply with the operating instructions and safety warnings issued bythe manufacturer.If you wish to change the spraying pattern beyond the adjustments outlined so far,you must retool the spray gun (See 5.5 Retooling of Spray Gun).<strong>WALTHER</strong> offers a great variety of air cap-/ material nozzle-/needle combinations forthis purpose.Correcting of Spray Pattern ImperfectionsThe following table shows what to do to correct a spray pattern:desired spray resultSpray patterntestFaultSwollen centreSwollen endsNecessary adjustment• Spray jet should be flatter• Spray jet should be ro<strong>und</strong>erCoarse pearl effect• Increase wide jet air pressureAFAdjustment of the material flow rate1 2Without internal control:The spray pattern is adjusted by a ressure regulator in theplant (see operating instructions of plant systems manufacturer).The connection 'F' is for the wide jet,the connection 'A' is for the ro<strong>und</strong> jet.Turn cap (1) from the standard position(= notch mark on the piston housing).• to the inside in order to decrease the material flowrate.• to the outside in order to increase the material flowrate.The material flow through the nozzle can be performedwithout using atomizing air, when the drawbar(2).Adjustment of the Material PressureThis adjustment can only be made at the pump or the material pressure tank. Pleasecomply with the operating instructions and safety warnings issued by the manufacturersconcerned.Unduly thin paint layerin centreSpray pattern is split inthe centreSpray pattern is veryspherical5.5 Retooling of Spray Gun• Decrease wide jet air pressure• Increase nozzle diameter• Reduce atomising air pressure• Increase material pressure• Decrease material pressure• Increase atomising air pressureCombinations of air cap, material nozzle and needle, designed to match specificspraying media tpyes and grades, form a unit - namely the nozzle insert assembly.In order maintain the desired spray-finish quality standard always replace the completenozzle insert assembly.WarningPrior to retooling: Make sure that the spray gun is in unpressurized condition, i.e. allair and material inputs must be shut off - if not, imminent risk of injury.NoteIn order to perform the following procedures please use the drawing at the beginningof these operating instructions.42 43
Replacing air cap and material nozzle1. Unscrew the fluted retaining ring (Pos. 1) from the front body section (Pos. 7).2. Pull the air cap (item 2) from the front body section.3. Unscrew the material nozzle (Pos. 3) from the front section.4. Screw in the desired material nozzle (if necessary replace the sealing washer)and mount the desired air cap to the front body section.5. Screw the retaining ring on the front body.Changing the material needle1. Unscrew the drawbar (Pos. 27).2. Unscrew the cap (Pos. 26) from the piston casing (Pos. 19).3. Screw the drawbar into the material needle (Pos. 21) and pull the material needleout of the piston casing.Assembly takes place in reverse order.5.6 Conversion of adapter plate from radial to circulation method1. Loosen the two cylinder head screws (Pos. 38) and take the spray gun off theadapter plate.2. Remove the sealing pin (Pos. 37) with O-ring (Pos. 36) from the gun. (See 4.1radial or circulation method)3. Screw the plug (Pos. 10) into the front section.4. Insert the second material connection (V 00 101 01 003 for adapter plate aluminiumnickel coated at rear or V 21 900 20 003 for adapter plate stainless steellateral material connection) into the plate.6 Cleaning6.1 Safety Warnings• Prior to any servicing and repair work: Make sure that the spray gun is in unpressurizedcondition, i.e. all air and material inputs must be shut off - if not, imminentrisk of injury.• No open fires, naked light and smoking allowed in the work area. When sprayingreadily flammable media such as cleaning solutions, there is an increased riskof fire and explosion.• Observe the safety warnings issued by the manufacturer. Aggressive and corrosivemedia represents risks and hazards to personal health.Clean the gun only with cleaning solutions recommended by the manufacturer of thespraying material used at the time. It is important to make sure that cleaning solutionsdo not contain any of the following constituents:• halogenated hydrocarbons (e.g. 1,1,1-trichloroethane, methylene chloride, etc.)• acids and acidiferous cleaning solutions• regenerated solvents (so-called cleaning dilutions)• paint removers.The above constituents cause chemical reactions with the electroplated componentsresulting in corrosion damage.<strong>WALTHER</strong> <strong>Spritz</strong>- <strong>und</strong> <strong>Lackiersysteme</strong> is not responsible for any damages resultingfrom such treatment.Clean the spray gun• prior to each change of the spraying medium.• at least once a week.• as often as may be required by the spraying medium handled and the resultantdegree of fouling.CautionNever immerse the spray gun in solvent or any other cleaning solution. The functionalreliability and efficiency of the gun can otherwise not be guaranteed.CautionDo not use any hard, pointed or sharp-edged objects when cleaning the spray gun.Any damage of the precision-made parts are likely to affect your spraying results.1. Dismantle the spray gun in accordance with 5.5 Retooling the Spray Gun.2. Use a soft brush together with a compatible cleaning sulotion to clean the air capand nozzle.3. Clean the remaining parts and the spray gun body with a suitable cloth andcleaning solution.4. Apply a thin film of the appropriate grease to the:• sealing collar of the piston• O-ring of the piston• material control needle• needle springUse <strong>WALTHER</strong> <strong>PILOT</strong> gun grease and a brush for this purpose.The spray gun is then reassembled in reverse order.6.2 Cleaning - CompleteThe spray gun must be regularly cleaned and lubricated with <strong>WALTHER</strong> <strong>PILOT</strong>spray gun grease (V 00 000 00 001) in order to enhance its service life and ensurethe functionality of the spray gun.44 45
8 Troubleshooting and Corrective ActionWarningPrior to any servicing and repair work: Make sure that the spray gun is in unpressurizedcondition, i.e. all air and material inputs must be shut off - if not, imminent riskof injury.Fault Cause RemedyGun is drippingGun fails toopenMaterial leaksfrom leakageboringSpray jet pulsatingor unsteadyMaterial nozzle or needlefouledMaterial nozzle or needledamagedPacking screw (Item 12) tootightControl air pressure too lowNeedle packing leaksPacking screw too looseLevel in material tank toolowsee 5.5 Retooling the Spray Gunand cleaningsee 5.5 Replacing MaterialControl Nozzle or NeedleLoosen packing screw in slightlywith a screw driverIncreaese control air pressure toat least 4.5 barsee 7.1 Replacing NeedlePackingTighten packing screw (Item 12)in slightly with a screwdriverTop-up material level (see operatinginstructions of plant systemsmanufacturer)10 Specification DataWeightAutomatic Spray Guns with internal control:Automatic Spray Guns without int. control:Adaptor plate Aluminium, nickel coated:Adaptor plate stainless steel:520 g490 g195 g260 gNozzle Sizes: • 0,3 • 0,5 • 0,8 • 1,0 • 1,2 • 1,5 • 1,8• 2,0 • 2,2 • 2,5 • 3,0 • 3,5 mm øConnectionsAtomizing Air:PU outer ø 8 mmControl Air:PU outer ø 6 mmMaterial Inlet: G 1/4“Pressure RangesControl Air:mind. 4,5 barMaterial pressure: max. 8 barAtomizing Air: max. 8 barmax. Operating Temperatureof Spray gun 80 °CSo<strong>und</strong> Level(measured at a distanceof 1 m from the spray gun)Air Consumption:Air input of thespray gunAir consumptionro<strong>und</strong> jet86 dB (A)<strong>PILOT</strong> WA 900 <strong>PILOT</strong> WA 920 HVLP * <strong>PILOT</strong> WA 940 HVLP PLUS **Air consumptionwide jetAir consumptionro<strong>und</strong> jetAir consumptionwide jetAir consumptionro<strong>und</strong> jetAir consumptionwide jet1 bar 100 l/min 120 l/min 120 l/min 126 l/min 114 l/min 121 l/min2 bar 165 l/min 183 l/min 188 l/min 203 l/min 172 l/min 188 l/min3 bar 230 l/min 260 l/min 265 l/min 283 l/min 237 l/min 259 l/min9 Disposal of Cleaning / Servicing SubstancesDisposal of any such substances must be in accordance with all applicable local andnational regulations, directives and laws.WarningPay special attention to all processing specifications and safety warnings issued bythe manufacturers of spraying and cleaning media. The improper disposal of anytoxic waste material represents a serious threat to the environment, i.e. to the healthof mankind and animal life.4 bar 290 l/min 325 l/min 332 l/min 358 l/min 303 l/min 325 l/min4,5 bar 321 l/min 358 l/min 372 l/min 400 l/min 330 l/min 360 l/min5 bar 345 l/min 395 l/min 414 l/min 441 l/min 365 l/min 400 l/minAir input of thespray gunAir consumptionro<strong>und</strong> jet<strong>PILOT</strong> WA 905 <strong>PILOT</strong> WA 925 HVLP * <strong>PILOT</strong> WA 945 HVLP PLUS **Air consumptionwide jetAir consumptionro<strong>und</strong> jetAir consumptionwide jetAir consumptionro<strong>und</strong> jetAir consumptionwide jet1 bar 100 l/min 130 l/min 119 l/min 137 l/min 86 l/min 133 l/min2 bar 156 l/min 210 l/min 185 l/min 228 l/min 137 l/min 212 l/min3 bar 220 l/min 289 l/min 257 l/min 317 l/min 182 l/min 292 l/min4 bar 283 l/min 362 l/min 322 l/min 410 l/min 232 l/min 366 l/min4,5 bar 311 l/min 405 l/min 358 l/min 450 l/min 258 l/min 411 l/min5 bar 338 l/min 445 l/min 400 l/min 500 l/min 283 l/min 450 l/min* The atomizing air pressure is 0,7 bar with an air input pressure of 3,3 bar.** The atomizing air pressure is 1,3 bar with an air input pressure of 3,3 bar.Right to effect technical changes reserved.48 49
SommaireVue éclatèe 2Déclaration de conformité EC 51Liste de pièces de rechange 521 Généralités 581.1 Caractérisation du modèle 581.2 Utilisation courante 581.3 Utilisation inappropriée 592 Caractéristiques techniques 593 Consignes de sécurité 603.1 Signalisation de sûreté 603.2 Consignes générales de sécurité 614 Assemblage 614.1 Fonctionnement ponctuel ou circulation 614.2 Fixation du pistolet 624.3 Raccordements d’alimentation 625 Manipulation 635.1 Consignes de sécurité 635.2 Mise en service 635.3 Essai d’application 635.4 Régulation du jet 645.5 Conversion du pistolet 655.6 Remplacement de la plaque adaptatrice pour passerdu fonctionnement ponctuel à la circulation 666 Entretien 666.1 Consignes de sécurité 666.2 Nettoyage complet 666.3 Nettoyage de routine 687 Maintenance 687.1 Remplacement de garniture d’aiguille 687.2 Remplacement de buse, d’aiguille, de ressorts 69et de joints8 Défauts de fonctionnement: causes et remèdes 709 Fluides résiduels 7010 Information technique 71Déclaration de conformité ECEn tant que fabricant de cet appareil, nous déclarons en toute responsabilitéque le produit décrit ci-dessous est conforme aux exigences de sécurité et de protectionde la santé actuellement en vigueur. Toute modification sans autorisation de notrepart ou utilisation inadéquate de l‘appareil, annulent la validité de cette déclaration.FabricantDénomination dumodèleUtilisationNormes et directives appliquées<strong>WALTHER</strong> <strong>Spritz</strong>- <strong>und</strong> <strong>Lackiersysteme</strong> <strong>GmbH</strong>Kärntner Str. 18 - 30D - 42327 WuppertalTel.: +49(0)202 / 787 - 0Fax: +49(0)202 / 787 - 2217www.walther-pilot.de • e-mail: info@walther-pilot.dePistolet automatique de pulvérisation Modèles <strong>PILOT</strong> WA 900WA 900 (standard avec commande intérieure) V 21 900WA 905 (standard sans commande intérieure) V 21 905WA 920-HVLP (basse pression avec commande intérieure) V 21 920WA 925-HVLP (basse pression sans commande intérieure) V 21 925WA 940-HVLP PLUS (pression intermédiaire avec commande intérieure) V 21 940WA 945-HVLP PLUS (pression intermédiaire sans commande intérieure) V 21 945Application de matières pulvérisablesDirective UE sur les machines 2006 / 42 / EC94 / 9 EC (directives ATEX)DIN EN ISO 12100-1DIN EN ISO 12100-2 DIN EN 1953EN 1127-1 DIN EN 13463-1Normes et directives appliquées 94 / 9 / ECCatégorie 2désignation del‘appareilII 2 G c T 5Tech.File,Ref.:2416Personne chargée de la compilation des documents techniques :Nico Kowalski, <strong>WALTHER</strong> <strong>Spritz</strong>- <strong>und</strong> <strong>Lackiersysteme</strong> <strong>GmbH</strong>, Kärntner Str. 18 - 30D- 42327 WuppertalIndications particulières:Le produit est conçu pour être intégré à un autre équipement. La mise en servicen‘est pas autorisée avant l‘établissement de la conformité du produit final avec ladirective 2006 / 42 / EC.Wuppertal, 04 février 2013i.V.Nom: Torsten BrökerPosition dans l‘entreprise: chef de l‘exécution et du développementCette déclaration ne constitue pas un engagement de responsabilité dans le sens de la garantie du produit. Lesconsignes de sécurité contenues dans les instructions de service devront être respectées.50 51
Liste des piéces de rechange:Liste des piéces de rechange:WA 900(avec commande intérieure)WA 905(sans commande intérieure)WA 920 HVLP(avec commande intérieure)WA 925 HVLP(sans commande intérieure)V 21 900 V 21 905V 21 920 V 21 925Rep. Description Pce. N° d’article Pce. N° d’articleRep. Description Pce. N° d’article Pce. N° d’article1 Plaque adaptatrice 1 V 20 700 05 000 1 V 20 700 05 0001 Plaque adaptatrice 1 V 20 700 05 000 1 V 20 700 05 0002 Tête à air 1 V 10 700 35 xx8* 1 V 10 700 35 xx8*2 Tête à air 1 V 10 700 37 xxx* 1 V 10 700 37 xxx*3 Buse à matière * 1 V 10 700 40 xx3* 1 V 10 700 40 xx3*3 Buse à matière * 1 V 10 700 40 xx3* 1 V 10 700 40 xx3*4 Bague de distribution d’air 1 V 21 900 14 000 1 V 21 900 14 0004 Bague de distribution d’air 1 V 21 900 14 100 1 V 21 900 14 1005 Vis à six pans creux 4 V 20 700 13 003 4 V 20 700 13 0035 Vis à six pans creux 4 V 20 700 13 003 4 V 20 700 13 0036 Goupille cylindrique 1V 21 900 02 1031V 21 900 02 1036 Goupille cylindrique 1V 21 900 02 1031V 21 900 02 1037 Corps antérieur 1 17 Corps antérieur 1 18 Joint torique 2 V 09 102 21 009 2 V 09 102 21 0098 Joint torique 2 V 09 102 21 009 2 V 09 102 21 0099 Garniture d’aiquille comp. 1 V 09 001 72 000 1 V 09 001 72 0009 Garniture d’aiquille comp. 1 V 09 001 72 000 1 V 09 001 72 00010 Rondelle 1 V 21 900 12 003 1 V 21 900 12 00310 Rondelle 1 V 21 900 12 003 1 V 21 900 12 00311 Ressort de garniture 1 V 20 510 12 003 1 V 20 510 12 00311 Ressort de garniture 1 V 20 510 12 003 1 V 20 510 12 00312 Vis de garniture 1 V 20 510 11 003 1 V 20 510 11 00312 Vis de garniture 1 V 20 510 11 003 1 V 20 510 11 00313 Goupille pour fix.de porte buse à air 1 V 20 700 02 303 1 V 20 700 02 30313 Goupille pour fix.de porte buse à air 1 V 20 700 02 303 1 V 20 700 02 30314 Ressort d’arrêt 1 V 20 700 02 403 1 V 20 700 02 40314 Ressort d’arrêt 1 V 20 700 02 403 1 V 20 700 02 40315 Goupille filetée 1 V 11 530 01 010 1 V 11 530 01 01015 Goupille filetée 1 V 11 530 01 010 1 V 11 530 01 01016 Bouchon 1 2325502 - -16 Bouchon 1 2325502 - -17 Vis d’étanchéité 1 V 22 650 43 100 1 V 22 650 43 10017 Vis d’étanchéité 1 V 22 650 43 100 1 V 22 650 43 10018 Joint à lèvres 1 V 09 220 30 000 1 V 09 220 30 00018 Joint à lèvres 1 V 09 220 30 000 1 V 09 220 30 00019 Boîtier de piston 1 V 21 900 01 000 1 V 21 905 01 00019 Boîtier de piston 1 V 21 900 01 000 1 V 21 905 01 00020 Piston compl. 1 V 21 900 09 000 1 V 21 900 09 00020 Piston compl. 1 V 21 900 09 000 1 V 21 900 09 00021 Aiguille de matière comp. 1 V 21 900 05 xx3* 1 V 21 900 05 xx3*21 Aiguille de matière comp. 1 V 21 900 05 xx3* 1 V 21 900 05 xx3*22 Ressort de piston 1 V 20 606 11 100 1 V 20 606 11 10022 Ressort de piston 1 V 20 606 11 100 1 V 20 606 11 10023 Douille compl. 1 V 21 900 10 000 1 V 21 900 10 00023 Douille compl. 1 V 21 900 10 000 1 V 21 900 10 00024 Ressort d’ aiguille 1 V 20 510 29 103 1 V 20 510 29 10324 Ressort d’ aiguille 1 V 20 510 29 103 1 V 20 510 29 10325 Rondelle à ressort d‘aiguille 1 V 21 900 11 000 1 V 21 900 11 00025 Rondelle à ressort d‘aiguille 1 V 21 900 11 000 1 V 21 900 11 00026 Capuchon compl. 1 V 21 900 13 000 1 V 21 900 13 00026 Capuchon compl. 1 V 21 900 13 000 1 V 21 900 13 00027 Barre de traction compl. 1 V 20 510 34 000 1 V 20 510 34 00027 Barre de traction compl. 1 V 20 510 34 000 1 V 20 510 34 00028 Mécanisme à rochet (‘A‘+‘F‘) 2- -28 Mécanisme à rochet (‘A‘+‘F‘) 2- -29 Douille 2 - -29 Douille 2 - -30 Joint cônique 2 - -30 Joint cônique 2 - -31 Joint torique 2 - -31 Joint torique 2 - -V 21 900 25 000V 21 900 25 00032 Presse-étoupe 2 - -32 Presse-étoupe 2 - -33 Réglage 'A‘ (jet rond) 1 - -33 Réglage 'A‘ (jet rond) 1 - -34 Réglage ‘F‘ (jet large) 1 - -34 Réglage ‘F‘ (jet large) 1 - -35 Vis a tête fraisée 2 - -35 Vis a tête fraisée 2 - -36 Joint torique 1V 21 900 08 0001V 21 900 08 00036 Joint torique 1V 21 900 08 0001V 21 900 08 00037 Goupille de blocage 1 137 Goupille de blocage 1 138 Vis à tête cylindrique 2 V 20 810 14 203 2 V 20 810 14 20338 Vis à tête cylindrique 2 V 20 810 14 203 2 V 20 810 14 20352 53
Liste des piéces de rechange:WA 940 HVLP Plus(avec commande intérieure)V 21 940 V 21 945WA 945 HVLP Plus(sans commande intérieure)Rep. Description Pce. N° d’article Pce. N° d’article1 Plaque adaptatrice 1 V 20 700 05 000 1 V 20 700 05 0002 Tête à air 1 V 10 700 36 xxx* 1 V 10 700 36 xxx*3 Buse à matière * 1 V 10 700 40 xx3* 1 V 10 700 40 xx3*4 Bague de distribution d’air 1 V 21 900 14 100 1 V 21 900 14 1005 Vis à six pans creux 4 V 20 700 13 003 4 V 20 700 13 0036 Goupille cylindrique 11V 21 900 02 1037 Corps antérieur 1 1V 21 900 02 1038 Joint torique 2 V 09 102 21 009 2 V 09 102 21 0099 Garniture d’aiquille comp. 1 V 09 001 72 000 1 V 09 001 72 00010 Rondelle 1 V 21 900 12 003 1 V 21 900 12 00311 Ressort de garniture 1 V 20 510 12 003 1 V 20 510 12 00312 Vis de garniture 1 V 20 510 11 003 1 V 20 510 11 00313 Goupille pour fix.de porte buse à air 1 V 20 700 02 303 1 V 20 700 02 30314 Ressort d’arrêt 1 V 20 700 02 403 1 V 20 700 02 40315 Goupille filetée 1 V 11 530 01 010 1 V 11 530 01 01016 Bouchon 1 2325502 - -17 Vis d’étanchéité 1 V 22 650 43 100 1 V 22 650 43 10018 Joint à lèvres 1 V 09 220 30 000 1 V 09 220 30 00019 Boîtier de piston 1 V 21 900 01 000 1 V 21 905 01 00020 Piston compl. 1 V 21 900 09 000 1 V 21 900 09 00021 Aiguille de matière comp. 1 V 21 900 05 xx3* 1 V 21 900 05 xx3*22 Ressort de piston 1 V 20 606 11 100 1 V 20 606 11 10023 Douille compl. 1 V 21 900 10 000 1 V 21 900 10 00024 Ressort d’ aiguille 1 V 20 510 29 103 1 V 20 510 29 10325 Rondelle à ressort d‘aiguille 1 V 21 900 11 000 1 V 21 900 11 00026 Capuchon compl. 1 V 21 900 13 000 1 V 21 900 13 00027 Barre de traction compl. 1 V 20 510 34 000 1 V 20 510 34 00028 Mécanisme à rochet (‘A‘+‘F‘) 2- -29 Douille 2 - -30 Joint cônique 2 - -31 Joint torique 2 - -V 21 900 25 00032 Presse-étoupe 2 - -33 Réglage 'A‘ (jet rond) 1 - -34 Réglage ‘F‘ (jet large) 1 - -35 Vis a tête fraisée 2 - -36 Joint torique 11V 21 900 08 00037 Goupille de blocage 1 1V 21 900 08 00038 Vis à tête cylindrique 2 V 20 810 14 203 2 V 20 810 14 203* Indiquez toujours le calibre des piéces de rechange lors de la commande.Nous vous recommandons de prévoir en stock les pièces imprimées en caractèresgras.Kit de réparation<strong>WALTHER</strong> <strong>PILOT</strong> tient des kits de réparation comprenant toutes les pièces d'usure pour lespistolets de pulvérisation automatiques <strong>PILOT</strong> WA 900 - WA 945 HVLP PLUS à votre disposition.N° d’article<strong>PILOT</strong> WA 900 / 905 version standard V 16 209 00 XX3<strong>PILOT</strong> WA 920 / 925 HVLP / version basse pression V 16 209 20 XX3<strong>PILOT</strong> WA 940 / 945 HVLP PLUS / version à pression intermédiaire V 16 209 40 XX3Kits de busesLes kits de buses consistent en tête à air, buse et aiguilles de matière.N° d’article<strong>PILOT</strong> WA 900 / 905 version standard V 15 209 00 XX3<strong>PILOT</strong> WA 920 / 925 HVLP / version basse pression V 15 209 20 XX3<strong>PILOT</strong> WA 940 / 945 HVLP PLUS / version à pression intermédiaire V 15 209 40 XX3Tailles de buses:0,3 ▪ 0,5 ▪ 0,8 ▪ 1,0 ▪ 1,2 ▪ 1,5 ▪ 1,8 ▪ 2,0 ▪ 2,2 ▪ 2,5 ▪ 3,0 ▪ 3,5 mm øKit d'étanchéité poor Plaque adaptatriceLe kit d'étanchéité comprend tous les numéros de pièces marquée d'un ♦.Plaque adaptatrice en aluminium nickeléPlaque adaptatrice en acier inoxydableAccessoiresV 17 219 00 000N° d’articleSupport pour pistolet V 21 900 21 000Graisse pour pistolets <strong>WALTHER</strong> <strong>PILOT</strong> (Coussinet 8 - 10 g) V 00 000 00 00154 55
925493Liste des piéces de rechange poor plaque adaptatrice en aluminium nickeléPlaque adaptatriceraccord alimentation matière arrièrePlaque adaptatriceraccord alimentation matière arrièreWA 900 V 21 900 03 000 WA 905 V 21 905 04 000Rep. Description Pce. N° d’article Pce. N° d’article1 Plaque adaptatrice 11V 21 900 03 2002 Goupille cylindrique 2 2V 21 900 03 2003 Joint torique 2 V 09 103 66 000 ♦ 2 V 09 103 66 000 ♦4 Joint torique 3 V 09 102 21 009 ♦ 3 V 09 102 21 009 ♦5 Joint torique 1 V 09 104 11 009 ♦ 1 V 09 104 11 009 ♦6 Raccord enfichable 1 V 66 101 53 013 1 V 66 101 53 0137 Raccord enfichable 1 V 66 101 53 015 2 V 66 101 53 0158 Raccord double 1 V 00 101 01 003 1 V 00 101 01 0039 Bouchon 1 V 66 100 03 568 - -10 Bouchon de fermeture 1 V 20 540 40 003 1 V 20 540 40 003Plaque adaptatrice Circulationraccord alimentation matière arrièrePlaque adaptatrice Circulationraccord alimentation matière arrièreWA 900 V 21 900 03 UML WA 905 V 21 905 04 UMLRep. Description Pce. N° d’article Pce. N° d’article1 Plaque adaptatrice 11V 21 900 03 2002 Goupille cylindrique 2 2V 21 900 03 2003 Joint torique 2 V 09 103 66 000 ♦ 2 V 09 103 66 000 ♦4 Joint torique 3 V 09 102 21 009 ♦ 3 V 09 102 21 009 ♦5 Joint torique 1 V 09 104 11 009 ♦ 1 V 09 104 11 009 ♦6 Raccord enfichable 1 V 66 101 53 013 1 V 66 101 53 0137 Raccord enfichable 1 V 66 101 53 015 2 V 66 101 53 0158 Raccord double 2 V 00 101 01 003 2 V 00 101 01 0039 Bouchon 1 V 66 100 03 568 - -10 Bouchon de fermeture - - - -107 / 9 7 68 / 108 / 10811108Liste des piéces de rechange poor plaque adaptatrice en acier inoxydablePlaque adaptatriceraccord alimentation matière latéralPlaque adaptatriceraccord alimentation matière latéralWA 900 V 21 900 04 003 WA 905 V 21 905 03 003Rep. Description Pce. N° d’article Pce. N° d’article1 Plaque adaptatrice 11V 21 900 04 2032 Goupille cylindrique 2 2V 21 900 04 2033 Joint torique 2 V 09 103 66 000 ♦ 2 V 09 103 66 000 ♦4 Joint torique 3 V 09 102 21 009 ♦ 3 V 09 102 21 009 ♦5 Joint torique 1 V 09 104 11 009 ♦ 1 V 09 104 11 009 ♦6 Raccord enfichable 1 V 66 101 53 013 1 V 66 101 53 0137 Raccord enfichable 1 V 66 101 53 015 2 V 66 101 53 0158 raccord alimentation matière 90° 1 V 21 900 20 003 1 V 21 900 20 0039 Bouchon 1 V 66 100 03 568 - -10 Bouchon de fermeture 1 V 20 540 40 003 1 V 20 540 40 00311 Écrou 1 V 21 900 16 000 1 V 21 900 16 000Plaque adaptatrice Circulationraccord alimentation matière latéralPlaque adaptatrice Circulationraccord alimentation matière latéralWA 900 V 21 900 04 UML WA 905 V 21 905 03 UMLRep. Description Pce. N° d’article Pce. N° d’article1 Plaque adaptatrice 11V 21 900 04 2032 Goupille cylindrique 2 2V 21 900 04 2033 Joint torique 2 V 09 103 66 000 ♦ 2 V 09 103 66 000 ♦4 Joint torique 3 V 09 102 21 009 ♦ 3 V 09 102 21 009 ♦5 Joint torique 1 V 09 104 11 009 ♦ 1 V 09 104 11 009 ♦6 Raccord enfichable 1 V 66 101 53 013 1 V 66 101 53 0137 Raccord enfichable 1 V 66 101 53 015 2 V 66 101 53 0158 raccord alimentation matière 90° 2 V 21 900 20 003 2 V 21 900 20 0039 Bouchon 1 V 66 100 03 568 - -10 Bouchon de fermeture - - - -1611 Écrou 2 V 21 900 16 000 2 V 21 900 16 00078 / 107 / 9678 / 1056 57
1 Généralités1.1 Caractérisation du modèleModèles:Pistolet automatique de pulvèrisation <strong>PILOT</strong> WA 900 - SérieTypes: WA 900 (standard avec commande intérieure) V 21 900WA 905 (standard sans commande intérieure) V 21 905WA 920-HVLP (basse pression avec commande intérieure) V 21 920WA 925-HVLP (basse pression sans commande intérieure) V 21 925WA 940-HVLP PLUS (pression intermédiaire avec commande intérieure) V 21 940WA 945-HVLP PLUS (pression intermédiaire sans commande intérieure) V 21 945Fabricant: <strong>WALTHER</strong> <strong>Spritz</strong>- <strong>und</strong> <strong>Lackiersysteme</strong> <strong>GmbH</strong>Kärntner Str. 18-30D-42327 WuppertalTel.: 0202 / 787-0Fax: 0202 / 787-2217www.walther-pilot.de • Email: info@walther-pilot.de1.2 Utilisation couranteLes pistolets automatiques <strong>PILOT</strong> WA 900, WA 905, WA 920, WA 925, WA 940 etWA 945 permettent l’application de toute matière pulvérisable. Exemples:• laques et peintures• graisses, huiles et anticorrosifs• adhésifs• fluides acides et• décapantsAu cas où la liste ci-dessus n’incluerait pas les produits que vous utilisez, Veuillezvous adresser à <strong>WALTHER</strong> <strong>Spritz</strong>- <strong>und</strong> <strong>Lackiersysteme</strong> <strong>GmbH</strong>, Wuppertal.La matière pulvérisable doit exclusivement être appliquée sur des objets ou piècesà usiner.La température du produit pulvérisé ne doit pas dépasser 80°C.Les modèles de la série <strong>PILOT</strong> WA 900 ne sont pas des pistolets manuels et doiventpar conséquent être fixés sur un support approprié.Le terme „utilisation courante“ présuppose que toutes les instructions et consignesd’utilisation ont été lues, comprises et suivies.L‘appareil est conforme aux exigences de protection contre les explosions de ladirective 94/9 CE (ATEX) pour le groupe, la catégorie d‘appareils et la classe detempérature indiqués sur la plaque signalétique. Il est indispensable de respecter lesindications de ces instructions de service.Suivez les intervalles de maintenance et d‘inspection prescrits. Les indications desplaques signalétiques ou dans le chapitre Données techniques doivent être absolumentrespectées et ne doivent pas être dépassées. La surcharge de l‘appareil doitabsolument être évitée.L‘appareil ne doit être exploité en atmosphère explosive qu‘en fonction des instructionsdes autorités compétentes.La détermination du danger d‘explosion (classification des zones) incombeaux autorités compétentes ou à l‘exploitant.L‘exploitant devra absolument s‘assurer que toutes les données techniques correspondentaux exigences ATEX. L‘exploitant devra prendre les mesures de sécuritécorrespondantes en cas d‘applications pouvant représenter un danger pour les personnes.Au cas où des défauts de fonctionnement de l‘appareil seraient constatés, il vousfaudra immédiatement mettre l‘appareil hors service et en avertir <strong>WALTHER</strong> <strong>Spritz</strong><strong>und</strong><strong>Lackiersysteme</strong>.mise à la terre / compensation de potentielAssurez-vous que le pistolet de pulvérisation, indépendant ou en connexion avecl‘appareil sur lequel il est monté, est doté d‘une mise à la terre suffisante (résistancemaximale 10 6 Ω).1.3 Utilisation inappropriéeLes pistolets ne doivent pas être utilisés à d’autres fins que celles décrites par leparagraphe sur l’utilisation courante. Toute autre utilisation est considérée inappropriée.Sont inclues dans cette catégorie:• la pulvérisation de produit sur des personnes et des animaux• la pulvérisation d’azote liquide.2 Caractéristiques techniquesLa série <strong>PILOT</strong> WA 900 est un système modulaire simple permettant l‘ensemble despossibilités de combinaisons rencontrées dans la pratique. Deux modèles de baseexistent : un avec commande interne et l‘autre, sans. Deux plaques adaptatrices àchangement rapide sont également disponibles et conviennent ou peuvent êtreadaptées pour les deux modèles.Les pistolets de la série WA 900 ne peuvent être utilisés qu‘en combinaison avec uneplaque adaptatrice. Tous les pistolets peuvent, au choix, être utilisés en fonctionnementponctuel ou en circulation. La goupille de blocage intégrée (pos. 37) doit êtreretirée pour pouvoir intégrer les pistolets à une installation de circulation.Entièrement automatiques et à commande pneumatique, les modèles de la série<strong>PILOT</strong> WA 900 fonctionnent avec une valve de commande 3/2.58 59
Avec commande intérieure:L’activation de la valve enclenche l’arrivée d’air de commande nécessaire au piston,puis ouvre le conduit d’air de pulvérisation et finalement le conduit d’alimentation enmatière.La forme du jet est ajustée sur le pistolet au moyen des vis de réglage (Pos. 33 et34) pour les modèles <strong>PILOT</strong> WA 900 / WA 920-HVLP <strong>und</strong> WA 940-HVLP PLUS .Lorsque l’air de réglage est de nouveau coupé par la soupape de commande à 3/2voies, l’air comprimé se trouvant dans le cylindre s’échappe d’abord. La pression duressort du piston refoule ensuite l’aiguille à matière dans sa position initiale, fermel’alimentation en matière et enfin l’air du pulvérisateur.Sans commande intérieure:L‘air de pulvérisation doit d‘abord être connecté (jet d‘air rond et large) par le biaisd‘une soupape de commande à 3/2 voies externe, disponible sur site. L‘air de réglagequi refoule les pistons et de l‘aiguille de matière est ensuite libéré par une soupapeà 3.2 voies afin d‘ouvrir l‘alimentation en matière.Sur les modèles <strong>PILOT</strong> WA 905/ WA 925-HVLP et WA 945-HVLP PLUS , la forme du jetpulvérisé peut être réglée dans l‘installation au moyen des deux régulateurs d‘aircomprimé.Lorsque l‘air de réglage est coupé par la soupape de commande à 3/2 voies, lapression par ressort ramène le piston et l‘aiguille à matière dans leur position initialeet ferme l‘alimentation vers la buse de matière. L‘air de pulvérisation est ensuitecoupé.Le débit de matière est régulé, pour tous les modèles, au moyen de la pression dela matière et du capuchon (pos. 26). Le débit de matière de la série de pistolets depulvérisation automatiques <strong>PILOT</strong> WA 900 peut également être libéré à la main, aumoyen de la barre de traction (pos. 27).Les pistolets de pulvérisation de la série <strong>PILOT</strong> WA 900 peuvent être raccordés àdes réservoirs sous pression ou à des systèmes de pompes.Les modèles <strong>PILOT</strong> WA 920-HVLP <strong>und</strong> WA 925-HVLP sont juste des pistolets depulvérisation à basse pression et fonctionnent avec une pression d‘air d‘atomisationde 0,7 bar pour une pression d‘air comprimé à l‘arrivée de 3,3 bars.Pour les modèles <strong>PILOT</strong> WA 940-HVLP PLUS bis WA 945-HVLP PLUS la pression de l‘airà l‘arrivée va de 3,0 à 3,3 bars pour pression d‘air d‘atomisation de 1,2 à 1,4 bar.3 Consignes de sécurité3.1 Signalisation de sûretéDangerLe pictogramme et l’avertissement „Danger“ signalisent un risque potentiel pour lespersonnes. Conséquences possibles: blessures graves ou légères.AttentionLe pictogramme et I’avertissement „Attention“ signalisent un risque pour le matériel.Conséquences possibles: dégats matériels.60 61RecommandationLe pictogramme et I’avertissement „Recommandation“ signalisent des informationscomplémentaires pour une utilisation efficace et sûre du pistolet de pulvérisation.3.2 Consignes générales de sécurité► Respectez les mesures de prévention des accidents ainsi que toutes les mesuresde sécurité en vigueur et les réglements de la médecine du travail.► N‘utilisez le pistolet que dans une zone de travail bien ventilée. Toute sourced‘étincelle est interdite dans la zone de travail. L‘application de produits trèsinflammables (laques, adhésifs et solvants) augmente les risques d‘explosion etd‘incendie.► Assurez-vous que le pistolet de pulvérisation, indépendant ou en connexion avecl‘appareil sur lequel il est monté, est doté d‘une mise à la terre suffisante (résistancemaximale 10 6 Ω).► Fermez l‘alimentation en matière et en air du pistolet avant tous travaux de maintenanceou d‘entretien – risque de blessure.► Maintenez la main ou toute autre partie du corps éloignée de la buse sous pressiondu pistolet pendant l‘application – risque de blessure.► Ne dirigez pas le pistolet vers les personnes ou les animaux – risque de blessure.► Suivez le mode d‘emploi et les consignes de sécurité des fabricants de matièrespulvérisables et de solvants. Les matières corrosives ou caustiques en particulierpeuvent nuire à la santer et causer des dégâts matériels.► Portez une protection contre le bruit dans la zone de travail. Le niveau sonoredu pistolet en opération est de 86 db(A) et peut entraîner des troubles auditifs.► Les vapeurs chargées de particules résiduelles doivent être évacuées loin de lazone de travail et du personnel. Utilisez un masque de protection ainsi que desvêtements de travail réglementaires lors de la pulvérisation. Les particules ensuspension sont un danger pour la santé.► Vérifiez après l‘assemblage que tous les écrous et vis sont bien serrés.► N‘utilisez que des pièces de rechange originales car dans ce cas seulement<strong>WALTHER</strong> garantit la fiabilité et la sûreté du fonctionnement.► Pour toute information complémentaire sur sûreté d‘utilisation ainsi que lesmatières qui y sont utilisées , adressez-vous à<strong>WALTHER</strong> <strong>Spritz</strong>- <strong>und</strong> <strong>Lackiersysteme</strong> <strong>GmbH</strong>, D-42327 Wuppertal.4 Assemblage4.1 Fonctionnement ponctuel ou circulationLes pistolets de pulvérisation de la série WA 900 sont complètement montés enusine. Ceux-ci sont dotés de série d‘une goupille de blocage (pos. 37). Dans cette
version, le pistolet ne peut être utilisé quede manière ponctuelle.Si vous choisissez une version à circulationpour votre plaque adaptatrice, la goupille deblocage (pos. 37) doit être retirée. Unsecond canal de matière est alors ouvert.Vissez le pistolet de pulvérisation sur laplaque adaptatrice. A cette fin, utilisez lesdeux vis à tête cylindrique (pos. 38).Les activités suivantes doivent être exécutéesavant de pouvoir mettre le pistolet depulvérisation en service avec la plaqueadaptatrice:Fonctionnement ponctuelGoupille de blocage(Pos. 37)Circulation5 Manipulation5.1 Consignes de sécuritéEn utilisant votre pistolet respectez particulièrement les consignes suivantes!• Portez un masque et des vêtements de travail réglementaires. Les particules ensuspension sont un danger pour la santé.• Portez une protection contre le bruit dans la zone de travail. Le niveau sonorede 86 dB (A) peut entraîner des troubles auditifs.• Aucune source d’étincelles ne doit exister dans le secteur de travail.L’applicationde matières très inflammables (laques, adhésifs et solvants) augmente les risquesd´explosion et d’incendie.5.2 Mise en service4.2 Fixation du pistoletFixez le pistolet sur un support stable et approprié comme dans l’exemple suivant:14.3 Raccordements d’alimentationDangerAssurez-vous de ne pas confondre le raccord d’air de commande avec celui d’air depulvérisation - risque de blessure.Avec commande intérieure:Pour ce faire, utilisez les deux Alésages M 6 (1) (plaqueadaptatrice) avec un écartement des trous d‘une hauteurde 33 mm.D’autres systèmes de fixation sont à votre disposition surdemande.Sans commande intérieure:Avant la mise en service assurez-vous que:• la pression air de commande est présente au pistolet• la pression air de pulvérisation est présente au pistolet• la pression matière est présente au pistoletAttentionLa pression matière ne doit pas dépasser • 8 bar, dans ce cas seulement le bonfonctionnement et la sureté du pistolet peuvent être garantis.Réglez la pression minimale de l’air de commande sur • 4,5 bar pour permettre lamise en service.La mise ou l’arrêt de service peuvent s’effectuer en activant la valve de commande3/2 (Instructions de service du fabricant).DangerRelâchez la pression du pistolet après chaque utilisation. Risque d’explosion desconduits sous pression. Risque de blessure.5.3 Essai d’application134a112 3 4b1 = raccord alimentation matière (R 1/4“) Signalé par un 'M'2 = raccord air de pulvérisation jet large (PU, ø ext.: 8 mm) Signalé par un 'F'3 = raccord air de commande (PU, ø ext.: 6 mm) Signalé par un 'C'4 a = raccord air de pulvérisation jet rond/ jet large (PU, ø ext.: 8 mm)Signalé par un 'A'4 b = raccord air de pulvérisation jet rond (PU, ø ext.: 8 mm)Signalé par un 'A'Le pistolet est à présent complètement assemblé et prêt pour la mise en service.1Un essai d’application est necessaire quand:• le pistolet est utilisé pour la première fois• une nouvelle matière est utilisée• le pistolet a été désassemblé pour maintenance ou réparation.L’essai d’application peut s’effectuer sur une pièce-test, sur de la tôle, du carton oudu papier.DangerEloignez la main ou toute autre partie du corps de la buse sous pression du pistolet- risque de blessure.62 63
DangerAssurez-vous que les personnes soient hors d’atteinte du jet du pistolet - risque deblessure.1. Mettez le pistolet en service pour effectuer un essai d’application. (voir mise enservice 5.2)2. Contrôlez l’essai et opérez les réglages nécessaires directement sur le pistolet(voir régulation du jet 5.4)5.4 Régulation du jetSur les pistolets de la série <strong>PILOT</strong> WA 900 la régulation du jet s’obtient par les réglagessuivants.Régulation de l’air de pulvérisationF AAvec commande intérieure:Les vis de réglage 'F' (Fan air) et 'A' (Atomizing air) permettentd’ajuster parfaitement le jet.La vis de réglage 'F' un jet large, la vis de réglage 'A' permetd’obtenir un jet rond.AFRégulation du débit de matière1 2Sans commande intérieure:L’’image projetée est ajustée au moyen d’un régulateur depression dans l’installation (voir instructions de service dufabricant de l’installation).Le raccord ‚F‘ doit être utilisé pour le jet large et le raccord‚A‘, pour le jet rond.Tournez la vis de régulation d’alimentation matière(encoche sur la douille à ressort).• vers l’intérieur pour réduire le débit.• vers l’extérieur pour augmenter le débit.L’écoulement de matière par la buse peut s’effectuersans ouvrir l’air de pulvérisation, en activant le disque(2).Régulation de la pression matièreCe réglage ne peut s’effectuer qu’à partir de la pompe ou du réservoir sous pression.Respectez les instructions et consignes de sécurité du fabricant.Régulation de la pression d’air de pulvérisationLa pression de l’air se régule au compresseur à partir de la valve de sécurité dudétendeur d’air. Respectez les instructions et consignes de sécurité du fabricant.Si vous désirez modifier le jet au delà des options inclues, il vous faudra convertir lepistolet (voir conversion du pistolet 5.5).Pour ce faire <strong>WALTHER</strong> tient à votre disposition un grand choix de têtes à air, debuses et d’aiguilles.Correction d’un jet imparfaitLe tableau suivant indique les réglages pouvant modifier la forme du jet:Essaid’applicationDéfautL’application est tropépaisse au mileuL’application est tropépaisse aux extremitésLe jet produit deséclaboussuresL’application est tropmince au milieuLe jet se divise aumilieuL’application est ovale5.5 Conversion du pistoletRésultat d’application recherchéRéglage nécessaire• Augmentez la largeur du jet• Augmentez la rondeur du jet• Augmentez la pression• Réduisez la pression• Augmentez l’alimentation en matiére• Réduisez la pression de pulvérisation• Augmentez la pression matière• Réduisez la pression matière• Augmentez la pression de pulvérisationLa tête à air, la buse et aiguille nécessaires à l’application d’une matière particulièreconstituent un ensemble unique - le système de buse. Pour garantir la continuité devotre qualité d’application, remplacez toujours le système dans son ensemble.DangerAvant chaque conversion fermez l’alimentation du pistolet en matière, en air de commandeet en air de pulvérisation - risque de blessure.RecommandationAvant de procéder aux opérations suivantes, Veuillez consulter le croquis d’explosionsitué au début de ces instructions de service.64 65
Remplacement de la tête à air et de la buse de matière1. Dévissez l‘écrou strié de la tête à air (pos. 1) du corps antérieur (pos. 7).2. Ôtez la tête à air (pos. 2) du corps antérieur.3. Dévissez la buse de matière (pos. 3) du corps antérieur.4. Vissez la buse de matière souhaitée (remplacez éventuellement l‘anneau dedistribution d‘air) et placez la tête à air souhaitée sur le corps antérieur.5. Vissez l‘écrou de la tête à air sur le corps antérieur.Remplacement de l‘aiguille de matière1. Dévissez la barre de traction (pos. 27).2. Dévissez le capuchon (pos. 26) du boîtier du piston (pos. 19).3. Vissez la barre de traction sur l‘aiguille de matière (pos. 21) et retirez l‘aiguillede matière du boîtier du piston.Le montage s‘effectue en ordre inverse.5.6 Remplacement de la plaque adaptatrice pour passer dufonctionnement ponctuel à la circulation1. Desserrez les deux vis à tête cylindrique (pos. 38) et retirez le pistolet de laplaque adaptatrice.2. Retirez la goupille de blocage (pos. 37) et le joint torique (pos. 36) du pistolet(cf. 4.1 Fonctionnement ponctuel ou circulation).3. Dévissez le bouchon de fermeture (pos. 10) de la plaque adaptatrice.4. Installez le second raccord de matière (V 00 101 01 003 pour la plaque adaptatriceen aluminium, raccord de matière arrière ou V 21 900 20 003 pour laplaque adaptatrice en acier inoxydable, raccord de matière latéral) dans laplaque.6 Entretien6.1 Consignes de sécurité• Avant chaque opération d’entretien fermez I’alimentation du pistolet en matière,air de commande et air de pulvérisation - risque de blessure.• Aucune source d’étincelles ne doit exister dans le secteur de travail. L’applicationde produits très inflammables (laques, adhésifs et solvants) augmente lesrisques d’explosion et d’incendie.• Suivez les consignes d’utilisation et de sécurité des fabricants de matières pulvérisableset de solvants. Les matières corrosives et caustiques en particulierpeuvent nuire à la santé et causer des dégâts matériels.N’utilisez pour le nettoyage du pistolet que des agents nettoyants recommandés parle fabricant de la matière pulvérisée et ne contenant pas les éléments suivants:• hydrocarbures halogéné (ex. B. 1,1,1 Trichlorethane; chlorure de méthylèneetc.)• acides et agents nettoyants acides• solvants recyclés (agents nettoyants dilués)• décapantsCes éléments génèrent des réactions chimiques oxydantes au contact des piècesgalvanisées du pistolet.<strong>WALTHER</strong> <strong>Spritz</strong>- <strong>und</strong> <strong>Lackiersysteme</strong> n’assume aucune responsabilité pour desdégâts occasionnés par un entretien inadéquat.Nettoyez le pistolet:• à chaque changement de couleur ou de matière• au moins une fois par semaine• selon la nature de la matière ou le degré d’encrassement plusieurs fois parsemaineAttentionN’immergez pas le pistolet dans du solvant ou autre agent nettoyant. Son bon fonctionnementne pourrait plus être garanti.AttentionN’utilisez ni surface dure ni objet pointu pour nettoyer le pistolet. Les pièces de précisionspourraient être endommagées et affecter vos résultats d’application.1. Desassemblez le pistolet voir 5.5 Remplacement de buse et d’aiguille.2. Nettoyez la tête et la buse avec un pinceau enduit de l’agent nettoyant.3. Nettoyez le corps du pistolet et les pièces restantes avec un tampon enduit deI´agent nettoyant.4. Recouvrez les pièces suivantes d’une fine pellicule de graisse:• manchette du piston• joint torique• aiguille• ressort d’aiguilleUtilisez pour ce faire la graisse pour pistolets <strong>WALTHER</strong> <strong>PILOT</strong> et un pinceau.Procédez inversement pour le réassemblage du pistolet.6.2 Nettoyage completDe manière à garantir la durée de vie et le bon fonctionnement du pistolet de pulvérisationsur le long terme, celui-ci doit régulièrement être nettoyé et graissé aumoyen de graisse pour pistolets <strong>WALTHER</strong> <strong>PILOT</strong> (V 00 000 00 001).Pour prolonger la durée de vie et le bon fonctionnement de votre pistolet, nettoyez-leet lubrifiez-le fréquemment.66 67
6.3 Nettoyage de routineEn cas de changement fréquent de couleur ou (selon la nature de la matière) à l’arrêtde service, le nettoyage pourra s’effectuer sans désassembler le pistolet.RecommandationNettoyez et graissez votre pistolet régulièrement, voir paragraphe 6.2 Nettoyagecomplet. La sûreté du fonctionnement et la qualité du pistolet seront ainsi préservéesAvant de procéder au nettoyage de routine, les conditions suivantes devront êtreréunies:1. Le réservoir propre aura été rempli de l’agent nettoyant approprié. La pressionmatiére sera présente au pistolet. L´agent nettoyant ne devra pas être pulvérisé.2. Mettez le pistolet en service, voir 5.2 Mise en service.3. Ne mettez le pistolet de pulvérisation hors service que lorsque du produit denettoyage propre s‘en échappe.Afin d’éviter la mise en service du système complet de pulvérisation, il est possibleaussi d’ouvrir manuellement l’alimentation matière des modèles de la série <strong>PILOT</strong>WA 900.L’équipement de pulvérisation, pression fermée, peut maintenant être mis à l’arrêtjusqu’à la prochaine utilisation.7 Maintenance1. Tirer le disque du pistolet vers l’arrière. L’alimentationmatière est ouverte et le canal d’alimentation ainsi quela buse peuvent être nettoyés.2. Ne relachez le disque que lorsque l’agent nettoyantressort parfaitement clair.DangerAvant chaque opération de maintenance fermez l’alimentation du pistolet en air decommande, en air de pulvérisation et en matière - risque de blessure.RecommandationAvant de procéder aux opérations suivantes, Veuillez consulter le croquis d’explosionsitué au début de ces instructions de service.7.1 Remplacement de garniture d’aiguille non étanche5. Vissez la barre de traction sur l‘aiguille de matière (pos. 21) et retirez l‘aiguillede matière du boîtier du piston.6. Vissez le corps antérieur en desserrant les vis à six pans creux (pos. 5) duboîtier du piston (pos. 19).7. Dévissez la vis de garniture (pos. 12).8. Retirez le ressort de garniture (pos. 11) (remplacez-le s‘il est endommagé) et larondelle (pos. 10) de l‘ouverture filetée.9. Sortez la garniture d’aiguille (Pos. 9) à l’aide d’un petit outil à crochet.10. Graissez la nouvelle garniture d‘aiguille au moyen de graisse pour pistolets<strong>WALTHER</strong> <strong>PILOT</strong> et mettez-la en place dans le corps antérieur.Pour l’assemblage procédez inversement.RecommandationLa garniture usagée (Pos. 9) ne doit pas être réutilisée. Son étanchéité n’est pasgarantie.7.2 Remplacement de buse, aiguille, ressorts et jointsDésassemblez le pistolet en suivant les instructions du paragraphe 5.5 remplacementde buse et d’aiguille, lorsque les pièces suivantes doivent être remplacées:• buse• ressort à pression du piston• aiguille*• ressort d’aiguille*• Joint d‘étanchéité rotatif plat du piston*• rondelle du piston*RecommandationLes composants marqués d‘un * doivent être graissés au moyen de graisse pourpistolets <strong>WALTHER</strong> <strong>PILOT</strong> avant de les monter dans le boîtier du pistolet.<strong>WALTHER</strong> tient à votre disposition un kit de réparation comprenant l’ensemble despièces sujettes à l’usure pour les modèles de la série WA 900:N°d’article : V 16 209 00 . . 3 (WA 900 / WA 905)N°d’article : V 16 209 20 . . 3 (WA 920 / WA 925)N°d’article : V 16 209 40 . . 3 (WA 940 / WA 945)Les pièces sujettes à l’usure sont signalées en caractères gras sur la liste despièces de rechange.1. Fermez la pression du pistolet2. Dévissez le corps antérieur (pos. 7) et le boîtier du piston (pos. 19) de la plaqueadaptatrice en desserrant les deux vis cylindriques (pos. 38).3. Dévissez la barre de traction (pos. 27) du pistolet.4. Dévissez le capuchon (pos. 26) du boîtier du piston.68 69
8 Défauts de fonctionnement: causes et remèdesDangerAvant chaque opération d’entretien ou de maintenance, fermez l’alimentation dupistolet en air de commande, en air de pulvérisation et en matière. - risque de blessure.Défaut Cause RemèdeLe pistolet goutteLe pistolet nes’ouvre pasLa matière fuitpar le presseétoupeLe jet est irrégulierLa buse ou I’aiguille sontobstruéesLa buse ou I’aiguilleabiméesVis-garniture (Pos. 12) tropserréeL’air de commende est tropfaibleLa garniture d’aiguille n’estpas étancheVis-garniture pas assezserréPas assez de matière dansle réservoirVoir 5.5 desassemblage et nettoyagede buse ou d’aiguilleVoir 5.5 remplacement de buseou d’aiguilleDesserrer légèrement le Visgarnitureavec le tournevisAugmentez la pression d’air decommande à min. 4,5 barVoir 7.1 remplacement de lagarniture d’aiguilleResserrer légèrement le vis degarniture (pos. 12) avec letournevisAlimentez en matière (voirinstructions de service du fabricant)10 Information techniquePoidsPistolet avec commande intérieure:Pistolet sans commande intérieure:Plaque adaptatrice en aluminium nickelé:Plaque adaptatrice en acier inoxydable:520 g490 g195 g260 gCalibre de buses: • 0,3 • 0,5 • 0,8 • 1,0 • 1,2 • 1,5 • 1,8• 2,0 • 2,2 • 2,5 • 3,0 • 3,5 mm øRaccordAire de pulvérisation:PU, ø ext.: 8 mmAire de commande:PU, ø ext.: 6 mmAlimentation matiére: G 1/4“PressionPression de commande: mind. 4,5 barPression matiére: max. 8 barPression pulvérisation: max. 8 barTempérature max. de servicedu pistolet 80 °CNiveau sonore(mesuré á 1 m du pistolet)Consommation d’air:Pressiond’entrée d’airConsommationd’air jet rond86 dB (A)<strong>PILOT</strong> WA 900 <strong>PILOT</strong> WA 920 HVLP * <strong>PILOT</strong> WA 940 HVLP PLUS **Consommationd’air jet largeConsommationd’air jet rondConsommationd’air jet largeConsommationd’air jet rondConsommationd’air jet large1 bar 100 l/min 120 l/min 120 l/min 126 l/min 114 l/min 121 l/min2 bar 165 l/min 183 l/min 188 l/min 203 l/min 172 l/min 188 l/min3 bar 230 l/min 260 l/min 265 l/min 283 l/min 237 l/min 259 l/min4 bar 290 l/min 325 l/min 332 l/min 358 l/min 303 l/min 325 l/min9 Fluides résiduels4,5 bar 321 l/min 358 l/min 372 l/min 400 l/min 330 l/min 360 l/min5 bar 345 l/min 395 l/min 414 l/min 441 l/min 365 l/min 400 l/minLes fluides résiduels résultant de la maintenance et de l’entretien devront être évacuésconformément aux dispositions et aux lois prévues à cet effet.Pressiond’entrée d’airConsommationd’air jet rond<strong>PILOT</strong> WA 905 <strong>PILOT</strong> WA 925 HVLP * <strong>PILOT</strong> WA 945 HVLP PLUS **Consommationd’air jet largeConsommationd’air jet rondConsommationd’air jet largeConsommationd’air jet rondConsommationd’air jet largeDangerRespectez scrupuleusement les consignes des fabricants de produits pulvérisableset de solvants. Une évacuation précaire des fluides résiduels met en danger la santéet l’environnement des hommes et des animaux.1 bar 100 l/min 130 l/min 119 l/min 137 l/min 86 l/min 133 l/min2 bar 156 l/min 210 l/min 185 l/min 228 l/min 137 l/min 212 l/min3 bar 220 l/min 289 l/min 257 l/min 317 l/min 182 l/min 292 l/min4 bar 283 l/min 362 l/min 322 l/min 410 l/min 232 l/min 366 l/min4,5 bar 311 l/min 405 l/min 358 l/min 450 l/min 258 l/min 411 l/min5 bar 338 l/min 445 l/min 400 l/min 500 l/min 283 l/min 450 l/min* Pour une pression d’entrée de 3,3 bar, la pression de pulvérisation est de 0,7 bar.** Pour une pression d’entrée de 3,3 bar, la pression de pulvérisation est de 1,3 bar.Sous réserve de modifications techniques.70 71
Índice de contenidoVista desarrollada 2Declaración de conformidad CE 73Lista de las partes de recambio 741 Aspectos generales 801.1 Identificación del modelo 801.2 Uso previsto 801.3 Uso no apropiado 812 Descripción técnica 813 Indicaciones de seguridad 823.1 Identificación de las indicaciones de seguridad 823.2 Indicaciones generales de seguridad 834 Montaje 834.1 Método a punzadas o circulante 834.2 Fijar la pistola de pulverización 844.3 Conectar líneas de alimentación 845 Manejo 855.1 Indicaciones de seguridad 855.2 Puesta en marcha y puesta fuera de servicio 855.3 Crear prueba de diagrama de pulverización 855.4 Modificar el diagrama de pulverización 865.5 Reequipar la pistola de pulverización 875.6 Conversión de la placa adaptadora del método apunzadas al circulante 886 Limpieza 886.1 Indicaciones de seguridad 886.2 Limpieza básica 896.3 Limpieza rutinaria 907 Reparación 907.1 Reemplazar la guarnición de aguja inestanca 907.2 Reemplazar la tobera y la aguja de material, 91resortes y juntas8 Búsqueda y eliminación de errores 929 Eliminación de desechos 9210 Datos técnicos 93Declaración de conformidad CEComo fabricante de este aparato, certificamos bajo nuestra plena responsabilidadque el producto descrito más abajo cumple con los requisitos de seguridad y protección dela salud en vigor. Cualquier modificación sin autorización previa o uso inadecuado del aparatoanulan la validez de esta declaración.FabricanteDenominación delmodeloUsoNormas y directivas aplicadas<strong>WALTHER</strong> <strong>Spritz</strong>- <strong>und</strong> <strong>Lackiersysteme</strong> <strong>GmbH</strong>Kärntner Str. 18 - 30D - 42327 WuppertalTel.: +49(0)202 / 787 - 0Fax: +49(0)202 / 787 - 2217www.walther-pilot.de • e-mail: info@walther-pilot.dePistolas de pulverización automáticas Serie <strong>PILOT</strong> WA 900WA 900 (estándar con control interno) V 21 900WA 905 (estándar sin control interno) V 21 905WA 920-HVLP (baja presión con control interno) V 21 920WA 925-HVLP (baja presión sin control interno) V 21 925WA 940-HVLP PLUS (presión media con control interno) V 21 940WA 945-HVLP PLUS (presión media sin control interno) V 21 945Verarbeitung spritzbarer MaterialienDirectiva EU sobre las máquinas 2006 / 42 / EC94 / 9 EC (directivas ATEX)DIN EN ISO 12100-1DIN EN ISO 12100-2 DIN EN 1953EN 1127-1 DIN EN 13463-1Especificación en el sentido de 94 / 9 / ECCategoría 2designación delaparatoII 2 G c T 5Persona autorizada para la compilación de la documentación técnica:Nico Kowalski, <strong>WALTHER</strong> <strong>Spritz</strong>- <strong>und</strong> <strong>Lackiersysteme</strong> <strong>GmbH</strong>, Kärntner Str. 18 - 30D- 42327 WuppertalTech.File,Ref.:2416Indicaciones particulares:Este aparato está diseñado para integrarse a otro equipo. La puesta en marcha no se autorizahasta que la conformidad del producto final con los requisitos de la directiva 2006 / 42 / EC nohaya sido establecida.Wuppertal, 04 febrero 2013i.V.Nombre: Torsten BrökerPuesto: Jefe de la construcción y del desarrolloEsta declaración no constituye una declaración de responsabilidad en cuanto a la caracteristicas estipuladas enla garantía del aparato. Las consignas de seguridad de las instrucciones de uso deben seguirse.72 73
Lista de las partes de recambio:Lista de las partes de recambio:WA 900(con control interno)WA 905(sin control interno)WA 920 HVLP(con control interno)WA 925 HVLP(sin control interno)V 21 900 V 21 905Pos. Denominación Uds. Número de artículo Uds. Número de artículoV 21 920 V 21 925Pos. Denominación Uds. Número de artículo Uds. Número de artículo1 Tuerca del cabezal de aire compl. 1 V 20 700 05 000 1 V 20 700 05 0001 Tuerca del cabezal de aire compl. 1 V 20 700 05 000 1 V 20 700 05 0002 Cabezal de aire 1 V 10 700 35 xx8* 1 V 10 700 35 xx8*2 Cabezal de aire 1 V 10 700 37 xxx* 1 V 10 700 37 xxx*3 Tobera de material * 1 V 10 700 40 xx3* 1 V 10 700 40 xx3*3 Tobera de material * 1 V 10 700 40 xx3* 1 V 10 700 40 xx3*4 Aro distribuidor de aire 1 V 21 900 14 000 1 V 21 900 14 0004 Aro distribuidor de aire 1 V 21 900 14 100 1 V 21 900 14 1005 Tornillo de cabeza hueca hexagonal 4 V 20 700 13 003 4 V 20 700 13 0035 Tornillo de cabeza hueca hexagonal 4 V 20 700 13 003 4 V 20 700 13 0036 Pasador cilíndrico 1V 21 900 02 1031V 21 900 02 1036 Pasador cilíndrico 1V 21 900 02 1031V 21 900 02 1037 Cuerpo frontal de la pistola 1 17 Cuerpo frontal de la pistola 1 18 Junta tórica 2 V 09 102 21 009 2 V 09 102 21 0098 Junta tórica 2 V 09 102 21 009 2 V 09 102 21 0099 Guarnición de aguja compl. 1 V 09 001 72 000 1 V 09 001 72 0009 Guarnición de aguja compl. 1 V 09 001 72 000 1 V 09 001 72 00010 Arandela 1 V 21 900 12 003 1 V 21 900 12 00310 Arandela 1 V 21 900 12 003 1 V 21 900 12 00311 Muelle de guarnición 1 V 20 510 12 003 1 V 20 510 12 00311 Muelle de guarnición 1 V 20 510 12 003 1 V 20 510 12 00312 Tornillo de guarnición 1 V 20 510 11 003 1 V 20 510 11 00312 Tornillo de guarnición 1 V 20 510 11 003 1 V 20 510 11 00313 Espiga para fijación de caperuzas de aire 1 V 20 700 02 303 1 V 20 700 02 30313 Espiga para fijación de caperuzas de aire 1 V 20 700 02 303 1 V 20 700 02 30314 Muelle de retención 1 V 20 700 02 403 1 V 20 700 02 40314 Muelle de retención 1 V 20 700 02 403 1 V 20 700 02 40315 Tornillo prisionero 1 V 11 530 01 010 1 V 11 530 01 01015 Tornillo prisionero 1 V 11 530 01 010 1 V 11 530 01 01016 Tapón 1 2325502 - -16 Tapón 1 2325502 - -17 Tornillo obturador 1 V 22 650 43 100 1 V 22 650 43 10017 Tornillo obturador 1 V 22 650 43 100 1 V 22 650 43 10018 Retén 1 V 09 220 30 000 1 V 09 220 30 00018 Retén 1 V 09 220 30 000 1 V 09 220 30 00019 Carcasa del émbolo 1 V 21 900 01 000 1 V 21 905 01 00019 Carcasa del émbolo 1 V 21 900 01 000 1 V 21 905 01 00020 Émbolo compl. 1 V 21 900 09 000 1 V 21 900 09 00020 Émbolo compl. 1 V 21 900 09 000 1 V 21 900 09 00021 Aguja de material compl. 1 V 21 900 05 xx3* 1 V 21 900 05 xx3*21 Aguja de material compl. 1 V 21 900 05 xx3* 1 V 21 900 05 xx3*22 Resorte de émbolo 1 V 20 606 11 100 1 V 20 606 11 10022 Resorte de émbolo 1 V 20 606 11 100 1 V 20 606 11 10023 Casquillo roscado compl. 1 V 21 900 10 000 1 V 21 900 10 00023 Casquillo roscado compl. 1 V 21 900 10 000 1 V 21 900 10 00024 Resorte de la aguja 1 V 20 510 29 103 1 V 20 510 29 10324 Resorte de la aguja 1 V 20 510 29 103 1 V 20 510 29 10325 Arandela de muelle de la aguja 1 V 21 900 11 000 1 V 21 900 11 00025 Arandela de muelle de la aguja 1 V 21 900 11 000 1 V 21 900 11 00026 Caperuza compl. 1 V 21 900 13 000 1 V 21 900 13 00026 Caperuza compl. 1 V 21 900 13 000 1 V 21 900 13 00027 Barra de tracción compl. 1 V 20 510 34 000 1 V 20 510 34 00027 Barra de tracción compl. 1 V 20 510 34 000 1 V 20 510 34 00028 Matraca ('A‘+‘F‘) 2- -28 Matraca ('A‘+‘F‘) 2- -29 Casquillo roscado 2 - -29 Casquillo roscado 2 - -30 Cono de junta 2 - -30 Cono de junta 2 - -31 Junta tórica 2 - -31 Junta tórica 2 - -V 21 900 25 000V 21 900 25 00032 Prensaestopas 2 - -32 Prensaestopas 2 - -33 Reglaje 'A' (chorro redondo) 1 - -33 Reglaje 'A' (chorro redondo) 1 - -34 Reglaje 'F'(chorro ancho) 1 - -34 Reglaje 'F'(chorro ancho) 1 - -35 Tornillo avellanado 2 - -35 Tornillo avellanado 2 - -36 Junta tórica 1V 21 900 08 0001V 21 900 08 00036 Junta tórica 1V 21 900 08 0001V 21 900 08 00037 Pasador de cierre 1 137 Pasador de cierre 1 138 Tornillo de cabeza cilíndrica 2 V 20 810 14 203 2 V 20 810 14 20338 Tornillo de cabeza cilíndrica 2 V 20 810 14 203 2 V 20 810 14 20374 75
Lista de las partes de recambio:WA 940 HVLP Plus(con control interno)WA 945 HVLP Plus(sin control interno)V 21 940 V 21 945Pos. Denominación Uds. Número de artículo Uds. Número de artículo* Al realizar el suministro de piezas de recambio indicar el tamaño correspondiente.Recomendamos tener una provisión en almacén de todas las piezas marcadas ennegrita (piezas de desgaste).1 Tuerca del cabezal de aire compl. 1 V 20 700 05 000 1 V 20 700 05 0002 Cabezal de aire 1 V 10 700 36 xxx* 1 V 10 700 36 xxx*3 Tobera de material * 1 V 10 700 40 xx3* 1 V 10 700 40 xx3*4 Aro distribuidor de aire 1 V 21 900 14 100 1 V 21 900 14 1005 Tornillo de cabeza hueca hexagonal 4 V 20 700 13 003 4 V 20 700 13 0036 Pasador cilíndrico 11V 21 900 02 1037 Cuerpo frontal de la pistola 1 1V 21 900 02 1038 Junta tórica 2 V 09 102 21 009 2 V 09 102 21 0099 Guarnición de aguja compl. 1 V 09 001 72 000 1 V 09 001 72 00010 Arandela 1 V 21 900 12 003 1 V 21 900 12 00311 Muelle de guarnición 1 V 20 510 12 003 1 V 20 510 12 00312 Tornillo de guarnición 1 V 20 510 11 003 1 V 20 510 11 00313 Espiga para fijación de caperuzas de aire 1 V 20 700 02 303 1 V 20 700 02 30314 Muelle de retención 1 V 20 700 02 403 1 V 20 700 02 40315 Tornillo prisionero 1 V 11 530 01 010 1 V 11 530 01 01016 Tapón 1 2325502 - -17 Tornillo obturador 1 V 22 650 43 100 1 V 22 650 43 10018 Retén 1 V 09 220 30 000 1 V 09 220 30 00019 Carcasa del émbolo 1 V 21 900 01 000 1 V 21 905 01 00020 Émbolo compl. 1 V 21 900 09 000 1 V 21 900 09 00021 Aguja de material compl. 1 V 21 900 05 xx3* 1 V 21 900 05 xx3*22 Resorte de émbolo 1 V 20 606 11 100 1 V 20 606 11 10023 Casquillo roscado compl. 1 V 21 900 10 000 1 V 21 900 10 00024 Resorte de la aguja 1 V 20 510 29 103 1 V 20 510 29 10325 Arandela de muelle de la aguja 1 V 21 900 11 000 1 V 21 900 11 00026 Caperuza compl. 1 V 21 900 13 000 1 V 21 900 13 00027 Barra de tracción compl. 1 V 20 510 34 000 1 V 20 510 34 00028 Matraca ('A‘+‘F‘) 2- -29 Casquillo roscado 2 - -30 Cono de junta 2 - -31 Junta tórica 2 - -V 21 900 25 00032 Prensaestopas 2 - -33 Reglaje 'A' (chorro redondo) 1 - -34 Reglaje 'F'(chorro ancho) 1 - -35 Tornillo avellanado 2 - -36 Junta tórica 11V 21 900 08 00037 Pasador de cierre 1 1V 21 900 08 00038 Tornillo de cabeza cilíndrica 2 V 20 810 14 203 2 V 20 810 14 203Sets de reparaciónPara las pistolas de pulverización automáticas <strong>PILOT</strong> WA 900 - WA 945 HVLP PLUS ,<strong>WALTHER</strong> <strong>PILOT</strong> tiene sets de reparación con todas las piezas de desgaste.76 77Número de artículo<strong>PILOT</strong> WA 900 / 905 Versión estándar V 16 209 00 XX3<strong>PILOT</strong> WA 920 / 925 HVLP / Versión de baja presión V 16 209 20 XX3<strong>PILOT</strong> WA 940 / 945 HVLP PLUS / Versión de presión media V 16 209 40 XX3Pieza de toberaLas piezas de tobera están compuestas de un cabezal de aire, una tobera de material y unaaguja de material.Número de artículo<strong>PILOT</strong> WA 900 / 905 Versión estándar V 15 209 00 XX3<strong>PILOT</strong> WA 920 / 925 HVLP / Versión de baja presión V 15 209 20 XX3<strong>PILOT</strong> WA 940 / 945 HVLP PLUS / Versión de presión media V 15 209 40 XX3Equipamiento de tobera a elegir:0,3 ▪ 0,5 ▪ 0,8 ▪ 1,0 ▪ 1,2 ▪ 1,5 ▪ 1,8 ▪ 2,0 ▪ 2,2 ▪ 2,5 ▪ 3,0 ▪ 3,5 mm øSet de juntas placa adaptadoraEl set de juntas contiene todos los números de artículo marcados con ♦.placa adaptadora de aluminio, niqueladaplaca adaptadora de acero inoxidableAccesoriosV 17 219 00 000Número de artículoSoporte de pistola V 21 900 21 000Grasa de pistola <strong>Walther</strong> Pilot almohadilla 8 - 10 gr. V 00 000 00 001
925493Lista de piezas de recambio placa adaptadora de aluminio, niqueladaPlaca adaptadoraToma de material parte traseraPlaca adaptadoraToma de material parte traseraWA 900 V 21 900 03 000 WA 905 V 21 905 04 000Pos. Denominación Uds. Número de artículo Uds. Número de artículo1 Placa adaptadora 11V 21 900 03 2002 Pasador cilíndrico 2 2V 21 900 03 2003 Junta tórica 2 V 09 103 66 000 ♦ 2 V 09 103 66 000 ♦4 Junta tórica 3 V 09 102 21 009 ♦ 3 V 09 102 21 009 ♦5 Junta tórica 1 V 09 104 11 009 ♦ 1 V 09 104 11 009 ♦6 Racor de empalme 1 V 66 101 53 013 1 V 66 101 53 0137 Racor de empalme 1 V 66 101 53 015 2 V 66 101 53 0158 Boquilla doble 1 V 00 101 01 003 1 V 00 101 01 0039 Tapón 1 V 66 100 03 568 - -10 Tapón 1 V 20 540 40 003 1 V 20 540 40 003Placa adaptadora circulaciónToma de material parte traseraPlaca adaptadora circulaciónToma de material parte traseraWA 900 V 21 900 03 UML WA 905 V 21 905 04 UMLPos. Denominación Uds. Número de artículo Uds. Número de artículo1 Placa adaptadora 11V 21 900 03 2002 Pasador cilíndrico 2 2V 21 900 03 2003 Junta tórica 2 V 09 103 66 000 ♦ 2 V 09 103 66 000 ♦4 Junta tórica 3 V 09 102 21 009 ♦ 3 V 09 102 21 009 ♦5 Junta tórica 1 V 09 104 11 009 ♦ 1 V 09 104 11 009 ♦6 Racor de empalme 1 V 66 101 53 013 1 V 66 101 53 0137 Racor de empalme 1 V 66 101 53 015 2 V 66 101 53 0158 Boquilla doble 2 V 00 101 01 003 2 V 00 101 01 0039 Tapón 1 V 66 100 03 568 - -10 Tapón - - - -107 / 9 7 68 / 108 / 10811108Lista de piezas de recambio placa adaptadora de acero inoxidablePlaca adaptadoraToma de material lateralPlaca adaptadoraToma de material lateralWA 900 V 21 900 04 003 WA 905 V 21 905 03 003Pos. Denominación Uds. Número de artículo Uds. Número de artículo1 Placa adaptadora 11V 21 900 04 2032 Pasador cilíndrico 2 2V 21 900 04 2033 Junta tórica 2 V 09 103 66 000 ♦ 2 V 09 103 66 000 ♦4 Junta tórica 3 V 09 102 21 009 ♦ 3 V 09 102 21 009 ♦5 Junta tórica 1 V 09 104 11 009 ♦ 1 V 09 104 11 009 ♦6 Racor de empalme 1 V 66 101 53 013 1 V 66 101 53 0137 Racor de empalme 1 V 66 101 53 015 2 V 66 101 53 0158 Boquilla doble 1 V 21 900 20 003 1 V 21 900 20 0039 Tapón 1 V 66 100 03 568 - -10 Tapón 1 V 20 540 40 003 1 V 20 540 40 00311 Tuerca 1 V 21 900 16 000 1 V 21 900 16 000Placa adaptadora circulaciónToma de material lateralPlaca adaptadora circulaciónToma de material lateralWA 900 V 21 900 04 UML WA 905 V 21 905 03 UMLPos. Denominación Uds. Número de artículo Uds. Número de artículo1 Placa adaptadora 11V 21 900 04 2032 Pasador cilíndrico 2 2V 21 900 04 2033 Junta tórica 2 V 09 103 66 000 ♦ 2 V 09 103 66 000 ♦4 Junta tórica 3 V 09 102 21 009 ♦ 3 V 09 102 21 009 ♦5 Junta tórica 1 V 09 104 11 009 ♦ 1 V 09 104 11 009 ♦6 Racor de empalme 1 V 66 101 53 013 1 V 66 101 53 0137 Racor de empalme 1 V 66 101 53 015 2 V 66 101 53 0158 Boquilla doble 2 V 21 900 20 003 2 V 21 900 20 0039 Tapón 1 V 66 100 03 568 - -10 Tapón - - - -1611 Tuerca 2 V 21 900 16 000 2 V 21 900 16 00078 / 107 / 9678 / 1078 79
1 Aspectos generales1.1 Identificación del modeloModelos: Pistolas de pulverización automáticas de la Serie <strong>PILOT</strong> WA 900Tipos: WA 900 (estándar con control interno) V 21 900WA 905 (estándar sin control interno) V 21 905WA 920-HVLP (baja presión con control interno) V 21 920WA 925-HVLP (baja presión sin control interno) V 21 925WA 940-HVLP PLUS (presión media con control interno) V 21 940WA 945-HVLP PLUS (presión media sin control interno) V 21 945Fabricante: <strong>WALTHER</strong> <strong>Spritz</strong>- <strong>und</strong> <strong>Lackiersysteme</strong> <strong>GmbH</strong>Kärntner Str. 18-30D-42327 WuppertalTel.: 0202 / 787-0Fax: 0202 / 787-2217www.walther-pilot.de • Email: info@walther-pilot.de1.2 Uso previstoLas pistolas de pulverización automáticas <strong>PILOT</strong> WA 900, WA 905, WA 920, WA 925,WA 940 y WA 945 sirven exclusivamente para procesar productos aptos para elpulverizado como p.ej.:• Lacas y pinturas• Grasas, aceites y anticorrosivos• Colas• Esmaltes cerámicos• BarnicesSi los materiales que desea pulverizar no están indicados aquí, póngase en contactocon <strong>WALTHER</strong> <strong>Spritz</strong>- <strong>und</strong> <strong>Lackiersysteme</strong> <strong>GmbH</strong>, Wuppertal.Los productos de pulverizado únicamente deben aplicarse sobre piezas u objetos.La temperatura del producto de pulverizado básicamente no debe superar los 80°C.Los modelos de la serie <strong>PILOT</strong> WA 900 Serie no son pistolas de pulverización concontrol manual por lo que deben sujetarse en un soporte adecuado.El uso previsto incluye también la lectura, comprensión y cumplimiento de todas lasindicaciones y datos del presente Manual de instrucciones.El aparato cumple las exigencias de protección contra explosión de la Directiva 94/9/CE (ATEX) para el grupo de explosión, la categoría de aparatos y la clase de temperaturaindicados en la placa de características técnicas. Al utilizar el aparato esimprescindible cumplir las especificaciones de este Manual de instrucciones.Deben cumplirse los intervalos de inspección y mantenimiento prescritos. Es imprescindiblerespetar los datos de las placas del aparato o los datos en el Capítulo Datostécnicos y no sobrepasarlos. Debe evitarse una sobrecarga del aparato.El aparato únicamente puede emplearse en atmósferas potencialmente explosivascuando se cumplen las medidas de las autoridades controladoras correspondientes.A las autoridades controladoras competentes o a la empresa explotadora lescorresponde determinar el potencial explosivo (clasificación de zonas).La empresa explotadora debe comprobar y asegurarse de que todos los datos técnicosy la designación conforme a ATEX se corresponden con los datos necesarios.La entidad explotadora deberá prever las medidas de seguridad correspondientespara las aplicaciones en las que una avería del aparato pueda ocasionar dañospersonales.En caso de que se produzca cualquier incidente durante el funcionamiento, deberádetenerse el aparato de inmediato y ponerse en contacto con <strong>WALTHER</strong> <strong>Spritz</strong>- <strong>und</strong><strong>Lackiersysteme</strong>.Puesta a tierra/conexión equipotencialDebe garantizarse que la pistola de pulverización, por separado o conectada alaparato al que está montada, tiene la puesta a tierra suficiente (resistencia máxima10 6 Ω).1.3 Uso no apropiadoNo está permitido utilizar la pistola de pulverización para usos diferentes a los descritosen el Apartado 1.2 Uso previsto.Cualquier otro uso es un uso no apropiado.Entre los usos no apropiados se encuentran p.ej.:• La pulverización de materiales sobre personas y animales.• La pulverización de nitrógeno líquido.2 Descripción técnicaLa serie <strong>PILOT</strong> WA 900 es un sistema modular sencillo que permite todas las posibilidadesde combinación necesarias en la práctica. Hay dos modelos básicos, unocon control interno, el otro sin control interno. Para ello existen dos placas adaptadorasde cambio rápido diferentes, adecuadas para ambos modelos o transformablespara poder adaptarlas.Las pistolas de la serie WA 900 únicamente pueden emplearse en combinación conuna placa adaptadora. Todas las pistolas pueden emplearse opcionalmente con elmétodo a punzadas o circulante. Para integrar las pistolas en un sistema circulante,deberá retirarse el pasador de cierre montado (Pos. 37).Los modelos de la serie <strong>PILOT</strong> WA 900 trabajan de forma totalmente automática através de un control de aire comprimido y son accionados mediante una válvula decontrol de 3/2 vías.80 81
Con control interno:Si se acciona la válvula de control de 3/2 vías, el aire comprimido necesario para elcontrol entra en el área del cilindro de la pistola de pulverización, abre el aire depulverización y, a continuación, la introducción de material.La forma del chorro de pulverizado en los modelos <strong>PILOT</strong> WA 9XX se regula contornillos reguladores (Pos. 33 <strong>und</strong> 34) en la pistola.Si la válvula de control de 3/2 vías vuelve a interrumpir el aire de control, sale primeroel aire comprimido del cilindro. La presión del resorte del émbolo presiona acontinuación la aguja de material a su posición inicial, cierra la entrada de materialy finalmente el aire de pulverización.Sin control interno:Primero debe conectarse el aire de pulverización (aire de chorro redondo y ancho)a través de una válvula de control externa de 3/2 vías. Después, el aire de controlse abre a través de otra válvula de control de 3/2 vías, la cual presiona al émbolo ya la aguja de material para abrir la alimentación de material.En los modelos <strong>PILOT</strong> WA 905/ WA 925-HVLP y WA 945-HVLP PLUS la forma delchorro se regula a través de los dos reguladores de aire comprimido del equipo enlas instalaciones.Si la válvula de control de 3/2 vías interrumpe el aire de control, la presión del resortemueve el émbolo y la aguja de material a su posición inicial y cierra la alimentaciónde material a la tobera de material. A continuación debería desconectarse elaire de pulverización.El caudal de material se regula en todos los modelos mediante la presión del materialy de la caperuza (Pos. 26). El flujo de material de la serie de pistolas de pulverizaciónautomáticas <strong>PILOT</strong> WA 900 puede abrirse también a mano mediante la barrade tracción (Pos. 27).Las pistolas de pulverización de la serie <strong>PILOT</strong> WA 900 pueden conectarse a recipientesde presión de material o sistemas de bombeado.Los modelos <strong>PILOT</strong> WA 920-HVLP y WA 925-HVLP son simplemente pistolas depulverización de baja presión y trabajan con una presión de pulverizado de 0,7 bara una presión de aire de entrada de 3,3 bar.En los modelos <strong>PILOT</strong> WA 940-HVLP PLUS y WA 945-HVLP PLUS la presión del aire deentrada es de 3,0 a 3,3 bar para una presión de pulverizado de 1,2 a 1,4 bar.3 Indicaciones de seguridad3.1 Identificación de las indicaciones de seguridadAdvertenciaEl pictograma y el grado de prioridad “Advertencia” marcan un peligro potencialpara personas. Posibles consecuencias: lesiones graves o leves.AtenciónEl pictograma y el grado de prioridad “Atención” marcan un peligro potencial paraobjetos. Posibles consecuencias: daños materiales.82 83IndicaciónEl pictograma y el grado de prioridad “Indicación” señalan informaciones adicionalespara el trabajo seguro y eficaz de la pistola de pulverización.3.2 Indicaciones de seguridad generales► Deben cumplirse las normativas de prevención de accidentes pertinentes, asícomo otras regulaciones oficiales sobre seguridad técnica y salud en el trabajo.► Utilice la pistola de pulverización únicamente en espacios bien ventilados. En elárea de trabajo está prohibido encender fuego y fumar. Al pulverizar productosfácilmente inflamables (p.ej. lacas, colas, agentes de limpieza, etc.) existe un altopeligro para la salud, de explosión y de incendio.► Debe garantizarse que la pistola de pulverización, por separado o conectada alaparato al que está montada, tiene la puesta a tierra suficiente (resistencia máxima10 6 Ω).► Antes de cada mantenimiento y reparación quite la presión de la entrada de airey de material a la pistola de pulverización - Peligro de lesiones.► Al pulverizar materiales no ponga las manos ni otras partes del cuerpo delante dela tobera de la pistola de pulverización sometida a presión - Peligro de lesiones.► No dirija la pistola de pulverización a personas ni animales - Peligro de lesiones.► Tenga en cuenta las indicaciones de procesamiento y seguridad del fabricante delmaterial de pulverizado y agentes de limpieza. Especialmente los productosagresivos y cáusticos pueden provocar daños en la salud.► En el área de trabajo de la pistola de pulverización lleve protección para los oídos.El nivel acústico emitido por la pistola de pulverización de aprox. 86 dB (A) puedeproducir lesiones auditivas.► El aire de salida con partículas debe mantenerse alejado del área de trabajo y delpersonal de servicio. A pesar de ello, utilice una protección reglamentaria para lasvías respiratorias y ropa de trabajo reglamentaria cuando procese materiales conla pistola de pulverización. Las partículas flotantes son nocivas para la salud.► Después de los trabajos de montaje y mantenimiento preste atención en todomomento a que las tuercas y tornillos están apretados correctamente.► Utilice solo piezas de recambio originales ya que <strong>WALTHER</strong> únicamente puedegarantizar un funcionamiento seguro y sin problemas de estas piezas originales.► Para consultas sobre el uso no peligroso de la pistola de pulverización, así comosobre los productos a emplear con la misma, póngase en contacto con <strong>WALTHER</strong><strong>Spritz</strong>- <strong>und</strong> <strong>Lackiersysteme</strong> <strong>GmbH</strong>, D - 42327 Wuppertal.4 Montaje4.1 Método a punzadas o circulanteLas pistolas de pulverización de la serie WA 900 vienen completamente montadasde fábrica. De forma estándar se suministran con un pasador de cierre (Pos. 37)
montado. En este modelo, la pistola solopuede emplearse con el método a punzadas.Si se hubiera decidido por la versión circulantea la hora de elegir la placa adaptadora,deberá retirarse el pasador de cierre(Pos. 37). Con ello se abre un seg<strong>und</strong>ocanal de material.Atornille la pistola de pulverización sobre laplaca adaptadora. Utilice para ello los dostornillos de cabeza cilíndrica (Pos. 38).Antes de poner la pistola de pulverizacióncon placa adaptadora en funcionamientodeben realizarse las siguientes actividades:4.2 Fijar la pistola de pulverizaciónFije la pistola rociadora en un soporte adecuado seguro como se describe en elsiguiente ejemplo:14.3 Conectar líneas de alimentaciónAdvertenciaPreste atención a no conf<strong>und</strong>ir las conexiones de aire de control y de aire de pulverización- Peligro de lesiones.Con control internoSin control internoMétodo de punzadasPasador de cierre(Pos. 37)Método circulanteUtilice aquí los dos orificios M 6 (1) (placa adaptadora)con una separación entre orificios de 33 mm.Otros dispositivos de fijación disponibles si lo solicita.5 Manejo5.1 Indicaciones de seguridad¡Al manejar la pistola de pulverización preste especial atención a las siguientesindicaciones de seguridad!• Utilice una protección reglamentaria para las vías respiratorias y ropa de trabajoreglamentaria cuando trabaje materiales con la pistola de pulverización. Laspartículas flotantes son nocivas para la salud.• En el área de trabajo de la pistola de pulverización lleve protección para losoídos. El nivel acústico emitido por la pistola de pulverización de aprox. 86 dB(A) puede producir lesiones auditivas.• En el área de trabajo está prohibido encender fuego y fumar. Al pulverizarproductos fácilmente inflamables (p.ej. lacas, colas) existe un alto peligro deexplosión y de incendio.5.2 Puesta en marcha y puesta fuera de servicioAntes de poder poner en funcionamiento la pistola de pulverización tienen quecumplirse las siguientes condiciones:• La pistola de pulverización debe haber alcanzado la presión de aire de control.• La pistola de pulverización debe haber alcanzado la presión del aire de pulverización.• La pistola de pulverización debe haber alcanzado la presión del material.AtenciónLa presión del material no puede estar ajustada por encima de • 8 bar de lo contrariono se garantiza un servicio seguro de la pistola de pulverización.Regule la presión de aire de control a un • mínimo de 4,5 bar para poder poner enfuncionamiento la pistola de pulverización.Puede conectar y desconectar la pistola de pulverización accionando la válvula decontrol de 3/2 vías (véase Manual de instrucciones del fabricante del equipo).AdvertenciaLa pistola de pulverización debe despresurizarse siempre al concluir el trabajo. Losconductos que permanezcan bajo presión podrían reventar y el material proyectadopodría lesionar a las personas de las inmediaciones.134a112 3 4b1 = Toma de material (G 1/4“) marcada con una ‘M‘2 = Toma de aire de pulverización chorro ancho (Poliuretano exterior ø 8 mm)marcada con una 'F'3 = Toma de aire de control (Poliuretano exterior ø 6 mm) marcada con una 'C'4 a = Toma de aire de pulverización chorro redondo/ - ancho(Poliuretano exterior ø 8 mm) marcada con una 'A'4 b = Toma de aire de pulverización chorro redondo (Poliuretano exterior ø 8 mm)marcada con una 'A'La pistola de pulverización está ahora montada completamente y puede ponerse afuncionar.15.3 Crear prueba de diagrama de pulverización84 85Debe generarse siempre una prueba gráfica de pulverización en los siguientescasos:• En la primera puesta en funcionamiento de la pistola de pulverización.• Cuando se cambie el producto.• Cuando se haya desarmado la pistola para su mantenimiento o reparación.La prueba de pulverización se puede efectuar sobre una pieza de prueba, unachapa, cartón o papel.AdvertenciaAl pulverizar materiales no ponga las manos ni otras partes del cuerpo delante de latobera de la pistola de pulverización sometida a presión - Peligro de lesiones.
AdvertenciaDurante la puesta en funcionamiento de la pistola de pulverización preste atencióna que no haya personas en el área de pulverizado - Peligro de lesiones.1. Ponga a funcionar la pistola de pulverización para crear una prueba de diagramade pulverización (véase 5.2 Puesta en marcha y puesta fuera de servicio).2. Controle la prueba de diagrama de pulverización y modifique en caso necesariola configuración de la pistola de pulverización (véase 5.4 Modificar el diagramade pulverización).5.4 Modificar el diagrama de pulverizaciónEn las pistolas de pulverización de la serie <strong>PILOT</strong> WA 900 puede modificar el diagramade pulverización mediante los siguientes ajustes.Ajustar aire de pulverizaciónFAAFAjustar el caudal de materialCon control interno:Mediante los dos tornillos reguladores 'F' (Fun air) y 'A'(Atomizing air) puede ajustarse un diagrama de pulverizaciónóptimo.El tornillo regulador 'F' influye en el aire de chorro ancho,el tornillo regulador 'A' en el aire de chorro redondo.Sin control interno:El diagrama de pulverización se configura mediante unregulador de aire comprimido en el equipo (véase elManual de instrucciones del fabricante del equipo).La conexión 'F' es para el aire de chorro ancho, laconexión 'A' para el aire de chorro redondo.1 2 Gire la caperuza (1) desde la posición inicial.• hacia dentro para reducir el flujo de material.• hacia afuera para aumentar el flujo de material.Con ayuda de la barra de tracción (2) puede accionarseel flujo de material mediante la tobera sin quese conecte el aire de pulverización.Regular la presión del materialEste ajuste puede realizarlo sólo en la bomba o en el depósito a presión. Tenga encuenta las instrucciones e indicaciones de seguridad del fabricante.Regular la presión del aireLa presión del aire de pulverización se ajusta en la válvula de reducción de airecomprimido del equipo compresor. Observe las instrucciones e indicaciones deseguridad del fabricante.Si quiere modificar el diagrama de pulverización más allá de las posibilidades aquímencionadas, será necesario reequipar la pistola de pulverización (véase 5.5Reequipar la pistola de pulverización).<strong>WALTHER</strong> <strong>Spritz</strong>- <strong>und</strong> <strong>Lackiersysteme</strong> ofrece para este fin una amplia gama decombinaciones distintas de cabezales, toberas de material y agujas.Eliminar fallos en un diagrama de pulverizaciónLa siguiente tabla le muestra los ajustes que pueden influir en el diagrama de pulverización:Resultado de pulverizado deseadoPrueba de diagramade pulverizaciónDesviaciónDiagrama de pulverizacióndemasiado grueso en el centroDiagrama de pulverizacióndemasiado grueso en losextremosDiagrama de pulverización congotas bastante gruesasCapa de material demasiadofina en el centro del diagramade pulverizaciónDiagrama de pulverizaciónfraccionado en el centroDiagrama de pulverizaciónmuy abombado5.5 Reequipar la pistola de pulverizaciónAjuste necesario• Ajustar una forma de chorro depulverizado más ancha• Ajustar una forma de chorro depulverizado más redonda• Aumentar la presión del aire• Reducir la presión del aire• Aumentar el diámetro de la tobera• Reducir la presión del aire depulverización• Aumentar la presión del material• Reducir la presión del material• Aumentar la presión del aire depulverizaciónLa combinación cabezal de aire/tobera de material/aguja adecuada para el productode pulverizado forma una unidad completa: la pieza de tobera. Reemplace siemprela pieza de tobera completa para mantener la calidad deseada del diagrama depulverización.AdvertenciaAntes de cada reequipamiento, quite la presión del aire de control y pulverizaciónasí como de la introducción de material a la pistola de pulverización - Peligro delesiones.86 87
IndicaciónPara efectuar los pasos indicados a continuación consulte el esquema de despieceal inicio de este Manual de instrucciones.Cambiar el cabezal de aire y la tobera de material1. Desenrosque la tuerca del cabezal de aire corrugado (Pos. 1) del cuerpo frontal(Pos. 7).2. Tire hacia abajo del cabezal de aire (Pos. 2) del cuerpo frontal.3. Desatornille la tobera de material (Pos. 3) del cuerpo frontal.4. Enrosque la tobera de material deseada (reemplazar en caso necesario el airedel distribuidor de aire) y coloque el cabezal de aire deseado sobre el cuerpofrontal.5. Enrosque la tuerca del cabezal de aire en el cuerpo frontal.Cambiar la aguja de material1. Desatornille la barra de tracción (Pos. 27).2. Desenrosque la caperuza (Pos. 26) de la carcasa del émbolo (Pos. 19).3. Enrosque la barra de tracción en la aguja de material (Pos. 21) y extraiga laaguja de material de la carcasa del émbolo.El montaje se efectúa siguiendo los mismos pasos pero en sentido inverso.5.6 Conversión de la placa adaptadora del método a punzadas alcirculante1. Afloje los dos tornillos de cabeza cilíndrica (Pos. 38) y retire la pistola de laplaca adaptadora.2. Retire el pasador de cierre (Pos. 37) con anillo toroidal (Pos. 36) de la pistola.(Véase 4.1 Método a punzadas o circulante)3. Desatornille el tapón (Pos. 10) de la placa adaptadora.4. Introduzca la seg<strong>und</strong>a conexión de material (V 00 101 01 003 para placaadaptadora de aluminio niquelada; conexión de material detrás o V 21 900 20003 para placa adaptadora de acero inoxidable, conexión de material lateral) enla placa.6 Limpieza6.1 Indicaciones de seguridad• Antes de cada mantenimiento, quite la presión del aire de control y pulverizaciónasí como de la introducción de material a la pistola de pulverización -Peligro de lesiones.• En el área de trabajo está prohibido encender fuego y fumar. Al pulverizar productosfácilmente inflamables (p.ej. agentes de limpieza) existe un alto peligrode explosión y de incendio.• Tenga en cuenta las indicaciones de seguridad del fabricante del agente delimpieza. Especialmente los productos agresivos y cáusticos pueden provocardaños en la salud.6.2 Limpieza básicaPara que la vida útil y el funcionamiento de la pistola de pulverización duren mucho,debe limpiarse y engrasarse regularmente la pistola de pulverización con grasa parapistolas <strong>WALTHER</strong> <strong>PILOT</strong> (V 00 000 00 001).Para la limpieza de la pistola de pulverización utilice únicamente agentes de limpiezaindicados por el fabricante del material de pulverizado y que no contengan lossiguientes componentes:• Hidrocarburos halogenados (p.ej. 1,1,1, tricloroetano, diclorometano, etc.)• Ácidos y agentes de limpieza ácidos• Disolventes regenerados (los denominados disolventes de limpieza)• Agentes de deslacadoLos componentes indicados anteriormente provocan reacciones químicas en componentesgalvanizados que producen daños por corrosión.<strong>WALTHER</strong> <strong>Spritz</strong>- <strong>und</strong> <strong>Lackiersysteme</strong> no se hace responsable de los daños provocadospor tratamientos de este tipo.Limpie la pistola de pulverización• antes de cada cambio de pintura y material• al menos una vez a la semana• dependiendo del material y según el grado de suciedad, varias veces por semanaAtenciónNo coloque nunca la pistola de pulverización en disolvente o en otro agente de limpieza.De lo contrario no se garantiza un funcionamiento correcto de la pistola depulverización.AtenciónPara la limpieza no utilice objetos duros ni puntiagudos. De lo contrario podríandañarse las piezas de precisión de la pistola de pulverización y empeorar el resultadode pulverizado.1. Desmonte la pistola según 5.5 Cambiar la tobera y la aguja de material.2. Limpie el cabezal de aire y la tobera de material con un pincel y el agente delimpieza.3. Limpie todos los componentes restantes y el cuerpo de la pistola con un pañoy el agente de limpieza.4. Aplique una capa fina de grasa en las siguientes piezas:• Manguito del émbolo• Anillo toroidal del émbolo• Aguja de material• Resorte de la agujaUtilice para ello la grasa para pistolas <strong>WALTHER</strong> <strong>PILOT</strong> y un pincel.A continuación se monta la pistola de pulverización en sentido inverso.88 89
6.3 Limpieza rutinariaCuando se cambie la pintura regularmente o (dependiendo del material) después definalizar el trabajo, puede limpiar también la pistola sin tener que desmontarla.IndicaciónAsí y todo, limpie y engrase la pistola de pulverización regularmente según elApartado 6.2 Limpieza básica. De esta forma obtendrá un funcionamiento seguro dela pistola de pulverización.Para poder realizar la limpieza rutinaria debe realizar los siguientes pasos de trabajo:1. Llene el depósito de material limpio con un agente de limpieza adecuado. En lapistola de pulverización solo deberá haber la presión del material. El agente delimpieza no debería pulverizarse.2. Ponga la pistola de pulverización en servicio, (véase 5.2 Puesta en funcionamiento).3. Ponga la pistola de pulverización fuera de servicio únicamente cuando solo salgaagente de limpieza claro.Para no tener que poner en marcha todo el equipo pulverizador, también puedebloquear manualmente la introducción de material de la serie <strong>PILOT</strong> WA 900.1. Tire hacia atrás de la barra de tracción de la pistola depulverización. La introducción de material se abre y selimpian el canal y la tobera del material.2. Suelte la barra de tracción cuando únicamente salgaagente de limpieza claro de la pistola de pulverización.Ahora deberá quitarse la presión de todo el equipo pulverizador hasta próximo uso.4. Desenrosque la caperuza (Pos. 26) de la carcasa del émbolo.5. Enrosque la barra de tracción en la aguja de material (Pos. 21) y extraiga laaguja de material de la carcasa del émbolo.6. Desenrosque el cuerpo frontal aflojando los cuatro tornillos de cabeza huecahexagonal (Pos. 5) de la carcasa del émbolo (Pos. 19).7. Desenrosque el tornillo de guarnición (Pos. 12).8. Retire los muelles de guarnición (Pos. 11) (reemplazar si están dañados) y laarandela (Pos. 10) del orificio de atornilladura.9. Extraiga de su asiento la guarnición de aguja (Pos. 9) mediante una herramienta.Emplee para ello un alambre firme con un extremo doblado en gancho.10. Engrase la nueva guarnición de aguja empleada con grasa para pistolas<strong>WALTHER</strong> <strong>PILOT</strong> y colóquela en el cuerpo frontal.El resto de componentes se montan siguiendo los mismos pasos, pero en orden inverso.IndicaciónLa guarnición de aguja (Pos. 9) extraída del adaptador de pistola no debe reutilizarseya que de lo contrario no se garantiza un efecto de obturación seguro.7.2 Reemplazar la tobera y la aguja de material, resortes y juntasDesmonte la pistola de pulverización según indicado en el Apartado 5.5 Cambiar latobera y la aguja de material cuando haya que reemplazar los siguientes componentes:• Tobera de material• Resorte de comprensión del émbolo• Aguja de material*• Resorte de la aguja*• Junta estanca plana deslizante del émbolo*• Anillo toroidal del émbolo*7 ReparaciónAdvertenciaAntes de cada reparación, quite la presión del aire de control y pulverización asícomo de la introducción de material a la pistola de pulverización - Peligro de lesiones.IndicaciónPara efectuar los pasos indicados a continuación consulte el esquema de despieceal inicio de este Manual de instrucciones.7.1 Reemplazar la guarnición de aguja inestanca1. Quite la presión de la pistola.2. Desenrosque el cuerpo frontal (Pos. 7) y la carcasa del émbolo (Pos. 19)aflojando los dos tornillos de cabeza cilíndrica (Pos. 38) de la placa adaptadora.3. Desenrosque la barra de tracción (Pos. 27) de la pistola.90 91IndicaciónTodos los componentes marcados con * deben engrasarse antes del montaje en elcuerpo de la pistola con grasa para pistolas <strong>WALTHER</strong> <strong>PILOT</strong>.Para las pistolas de pulverización automáticas de la serie <strong>PILOT</strong> WA 900, <strong>WALTHER</strong><strong>Spritz</strong>- <strong>und</strong> <strong>Lackiersysteme</strong> tiene sets de reparación con todas las piezas de desgaste:Art. Nr.: V 16 209 00 . . 3 (WA 900 / WA 905)Art. Nr.: V 16 209 20 . . 3 (WA 920 / WA 925)Art. Nr.: V 16 209 40 . . 3 (WA 940 / WA 945)Las piezas de desgaste también están en la lista de piezas de recambio (marcadasen negrita).
8 Búsqueda y eliminación de erroresAdvertenciaAntes de cada mantenimiento y reparación, quite la presión del aire de control ypulverización así como de la introducción de material a la pistola de pulverización -Peligro de lesiones.Error Causa RemedioPistola goteaLa pistola no seabreSale materialpor el orificio defugaChorro de pulverizadoa sacudidasu ondeanteAguja o tobera de materialsuciaAguja o tobera de materialdañadaTornillo de guarnición(Pos. 12) demasiado apretadoAire de control demasiadobajoLa guarnición de aguja esinestancaEl tornillo de guarnición estásueltoMaterial insuficiente en eldepósito de materialvéase 5.5 Desmontar o limpiarla aguja o la tobera de materialvéase 5.5 Reemplazar la agujao la tobera de materialSoltar algo el tornillo de guarnicióncon un destornilladorAumentar la presión del aire decontrol a mín. 4,5 barvéase 7.1 Reemplazar guarniciónde agujaApretar algo el tornillo de guarnición(Pos. 12) con un destornilladorRellenar material (véaseManual de instrucciones delfabricante del equipo)10 Datos técnicosPesoPistola de pulverización con control interno:Pistola de pulverización sin control interno:Placa adaptadora de aluminio, niquelada:Placa adaptadora de acero inoxidable:520 g490 g195 g260 gTamaños de tobera • 0,3 • 0,5 • 0,8 • 1,0 • 1,2 • 1,5 • 1,8• 2,0 • 2,2 • 2,5 • 3,0 • 3,5 mm øConexiónAire de pulverización:Poliuretano exterior ø 8 mmAire de control:Poliuretano exterior ø 6 mmIntroducción de material: G 1/4“Gama de presiónAire de control:mín. 4,5 barPresión del material: máx. 8 barAire de pulverización: máx. 8 barTemperatura de servicio máx.de la pistola de pulverización 80 °CNivel acústico(medido a aprox. 1 m de separaciónde la pistola de pulverización)Consumo de aire:Presión de aire deentrada en la pistolaConsumo de airechorro redondo86 dB (A)<strong>PILOT</strong> WA 900 <strong>PILOT</strong> WA 920 HVLP * <strong>PILOT</strong> WA 940 HVLP PLUS **Consumo de airechorro anchoConsumo de airechorro redondoConsumo de airechorro anchoConsumo de airechorro redondoConsumo de airechorro ancho1 bar 100 l/min 120 l/min 120 l/min 126 l/min 114 l/min 121 l/min2 bar 165 l/min 183 l/min 188 l/min 203 l/min 172 l/min 188 l/min3 bar 230 l/min 260 l/min 265 l/min 283 l/min 237 l/min 259 l/min4 bar 290 l/min 325 l/min 332 l/min 358 l/min 303 l/min 325 l/min9 Eliminación de desechosLos materiales empleados durante la limpieza y el mantenimiento deben eliminarsecorrectamente conforme a las leyes y disposiciones correspondientes.AdvertenciaTenga en cuenta especialmente las indicaciones del fabricante del agente de pulverizadoy limpieza. El material desechado indebidamente es nocivo para la salud depersonas y animales.4,5 bar 321 l/min 358 l/min 372 l/min 400 l/min 330 l/min 360 l/min5 bar 345 l/min 395 l/min 414 l/min 441 l/min 365 l/min 400 l/minPresión de aire deentrada en la pistolaConsumo de airechorro redondo<strong>PILOT</strong> WA 905 <strong>PILOT</strong> WA 925 HVLP * <strong>PILOT</strong> WA 945 HVLP PLUS **Consumo de airechorro anchoConsumo de airechorro redondoConsumo de airechorro anchoConsumo de airechorro redondoConsumo de airechorro ancho1 bar 100 l/min 130 l/min 119 l/min 137 l/min 86 l/min 133 l/min2 bar 156 l/min 210 l/min 185 l/min 228 l/min 137 l/min 212 l/min3 bar 220 l/min 289 l/min 257 l/min 317 l/min 182 l/min 292 l/min4 bar 283 l/min 362 l/min 322 l/min 410 l/min 232 l/min 366 l/min4,5 bar 311 l/min 405 l/min 358 l/min 450 l/min 258 l/min 411 l/min5 bar 338 l/min 445 l/min 400 l/min 500 l/min 283 l/min 450 l/min* Con una presión de aire de entrada de 3,3 bar la presión de pulverizado es de 0,7 bar.** Con una presión de aire de entrada de 3,3 bar la presión de pulverizado es de 1,3 bar.Reservado el derecho a realizar modificaciones sin previo aviso.92 93
IndiceDisegno esploso 2Dichiarazione di conformità CE 95Elenco dei pezzi di ricambio 961 In generale 1021.1 Identificazione del modello 1021.2 Uso previsto 1021.3 Uso improprio 1032 Specifica tecnica 1033 Avvertenze di sicurezza 1043.1 Pittogrammi per le avvertenze di sicurezza 1043.2 Avvertenze generali di sicurezza 1054 Montaggio 1054.1 Sistema aperto o sistema a circolazione 1054.2 Fissaggio della pistola a spruzzo 1064.3 Allacciamento dei tubi di alimentazione 1065 Uso 1075.1 Avvertenze di sicurezza 1075.2 Messa in funzione e messa fuori funzione 1075.3 Eseguire una spruzzatura di prova 1075.4 Modifica della qualità di spruzzatura 1085.5 Riattrezzare la pistola a spruzzo 1095.6 Trasformazione della piastra adattatrice dal sistema aperto alsistema a circolazione 1106 Pulizia 1106.1 Avvertenze di sicurezza 1106.2 Pulizia completa 1106.3 Pulizia di routine 1127 Riparazione 1127.1 Sostituzione della guarnizione dell’ago non ermetica 1127.2 Sostituzione ugello materiale, ago materiale, 113molle e guarnizioni8 Ricerca ed eliminazione dei guasti 1149 Smaltimento 11410 Dati tecnici 115Dichiarazione di conformità CENoi, il costruttore, dichiariamo sotto la nostra esclusiva responsabilità che il prodotto qui diseguito descritto corrisponde ai requisiti di sicurezza e di salute essenziali in materia. In caso dimodifica del prodotto non concordata con noi o in caso di uso improprio, la presente dichiarazionecessa di essere valida.Costruttore<strong>WALTHER</strong> <strong>Spritz</strong>- <strong>und</strong> <strong>Lackiersysteme</strong> <strong>GmbH</strong>Kärntner Str. 18 - 30D - 42327 WuppertalTel.: +49(0)202 / 787 - 0Fax: +49(0)202 / 787 - 2217www.walther-pilot.de • e-mail: info@walther-pilot.deDesignazione del tipo Pistole a spruzzo automatiche serie <strong>PILOT</strong> WA 900Uso previstoNorme e direttive applicateWA 900 (standard con comando interno) V 21 900WA 905 (standard senza comando interno) V 21 905WA 920-HVLP (bassa pressione con comando interno) V 21 920WA 925-HVLP (bassa pressione senza comando interno) V 21 925WA 940-HVLP PLUS (media pressione con comando interno) V 21 940WA 945-HVLP PLUS (media pressione senza comando interno) V 21 945Applicazione di materiali spruzzabiliDirettive macchine 2006 / 42 / EC94 / 9 EC (direttive ATEX)DIN EN 12100 parte 1DIN EN 12100 parte 2 DIN EN 1953DIN EN 1127-1 DIN EN 13463 - 1Specifica ai sensi della direttiva 94 / 9 / ECCategoria 2Designazione dell’apparecchioII 2 G c T 5Autorizzato alla raccolta della documentazione tecnica:Nico Kowalski, <strong>WALTHER</strong> <strong>Spritz</strong>- <strong>und</strong> <strong>Lackiersysteme</strong> <strong>GmbH</strong>, Kärntner Str. 18 - 30D- 42327 WuppertalTech.File,Ref.:2416Peculiarità :Il prodotto è previsto per essere incorporato in un altro apparecchio. La messa in sevizio non è consentitafino a quando non è stata constatata la conformità del prodotto finale con la direttiva2006 / 42 / EC.Wuppertal, 04 Febbraio 2013per delegaNome e cognome: Torsten BrökerPosizione aziendale: Dirigente del reparto progettazione e sviluppoLa presente dichiarazione non è una garanzia di caratteristiche nel senso della responsabilità del prodotto.Rispettare rigorosamente le avvertenze di sicurezza della documentazione del prodotto.94 95
Elenco dei pezzi di ricambio:WA 900(con comando interno)V 21 900 V 21 905WA 905(senza comando interno)Pos. Denominazione Q.tà Numero articolo Q.tà Numero articoloElenco dei pezzi di ricambio:WA 920 HVLP(con comando interno)V 21 920 V 21 925WA 925 HVLP(senza comando interno)Pos. Denominazione Q.tà Numero articolo Q.tà Numero articolo1 Dado cappello aria compl. 1 V 20 700 05 000 1 V 20 700 05 0001 Dado cappello aria compl. 1 V 20 700 05 000 1 V 20 700 05 0002 Cappello aria 1 V 10 700 35 xx8* 1 V 10 700 35 xx8*2 Cappello aria 1 V 10 700 37 xxx* 1 V 10 700 37 xxx*3 Ugello materiale * 1 V 10 700 40 xx3* 1 V 10 700 40 xx3*3 Ugello materiale * 1 V 10 700 40 xx3* 1 V 10 700 40 xx3*4 Anello distribuzione aria 1 V 21 900 14 000 1 V 21 900 14 0004 Anello distribuzione aria 1 V 21 900 14 100 1 V 21 900 14 1005 Vite a esagono cavo 4 V 20 700 13 003 4 V 20 700 13 0035 Vite a esagono cavo 4 V 20 700 13 003 4 V 20 700 13 0036 Spina cilindrica 1V 21 900 02 1031V 21 900 02 1036 Spina cilindrica 1V 21 900 02 1031V 21 900 02 1037 Corpo anteriore della pistola 1 17 Corpo anteriore della pistola 1 18 Anello di tenuta OR 2 V 09 102 21 009 2 V 09 102 21 0098 Anello di tenuta OR 2 V 09 102 21 009 2 V 09 102 21 0099 Guarnizione dell’ago compl. 1 V 09 001 72 000 1 V 09 001 72 0009 Guarnizione dell’ago compl. 1 V 09 001 72 000 1 V 09 001 72 00010 Rondella 1 V 21 900 12 003 1 V 21 900 12 00310 Rondella 1 V 21 900 12 003 1 V 21 900 12 00311 Molla della guarnizione 1 V 20 510 12 003 1 V 20 510 12 00311 Molla della guarnizione 1 V 20 510 12 003 1 V 20 510 12 00312 Vite della guarnizione 1 V 20 510 11 003 1 V 20 510 11 00312 Vite della guarnizione 1 V 20 510 11 003 1 V 20 510 11 00313 Perno di fissaggio cappuccio aria 1 V 20 700 02 303 1 V 20 700 02 30313 Perno di fissaggio cappuccio aria 1 V 20 700 02 303 1 V 20 700 02 30314 Molla di arresto 1 V 20 700 02 403 1 V 20 700 02 40314 Molla di arresto 1 V 20 700 02 403 1 V 20 700 02 40315 Prigioniero 1 V 11 530 01 010 1 V 11 530 01 01015 Prigioniero 1 V 11 530 01 010 1 V 11 530 01 01016 Tappo 1 2325502 - -16 Tappo 1 2325502 - -17 Vite di tenuta 1 V 22 650 43 100 1 V 22 650 43 10017 Vite di tenuta 1 V 22 650 43 100 1 V 22 650 43 10018 Guarnizione ad anello con scanalatura 1 V 09 220 30 000 1 V 09 220 30 00018 Guarnizione ad anello con scanalatura 1 V 09 220 30 000 1 V 09 220 30 00019 Scatola del pistone 1 V 21 900 01 000 1 V 21 905 01 00019 Scatola del pistone 1 V 21 900 01 000 1 V 21 905 01 00020 Pistone compl.. 1 V 21 900 09 000 1 V 21 900 09 00020 Pistone compl.. 1 V 21 900 09 000 1 V 21 900 09 00021 Ago materiale compl. 1 V 21 900 05 xx3* 1 V 21 900 05 xx3*21 Ago materiale compl. 1 V 21 900 05 xx3* 1 V 21 900 05 xx3*22 Molla pistone 1 V 20 606 11 100 1 V 20 606 11 10022 Molla pistone 1 V 20 606 11 100 1 V 20 606 11 10023 Boccola filettata compl. 1 V 21 900 10 000 1 V 21 900 10 00023 Boccola filettata compl. 1 V 21 900 10 000 1 V 21 900 10 00024 Molla dell’ago 1 V 20 510 29 103 1 V 20 510 29 10324 Molla dell’ago 1 V 20 510 29 103 1 V 20 510 29 10325 Rondella isolante 1 V 21 900 11 000 1 V 21 900 11 00025 Rondella isolante 1 V 21 900 11 000 1 V 21 900 11 00026 Cappuccio compl. 1 V 21 900 13 000 1 V 21 900 13 00026 Cappuccio compl. 1 V 21 900 13 000 1 V 21 900 13 00027 Tirante compl. 1 V 20 510 34 000 1 V 20 510 34 00027 Tirante compl. 1 V 20 510 34 000 1 V 20 510 34 00028 Selettore ('A‘+‘F‘) 2- -28 Selettore ('A‘+‘F‘) 2- -29 Boccola filettata 2 - -29 Boccola filettata 2 - -30 Cono di tenuta 2 - -30 Cono di tenuta 2 - -31 Anello di tenuta OR 2 - -31 Anello di tenuta OR 2 - -V 21 900 25 000V 21 900 25 00032 Premistoppa 2 - -32 Premistoppa 2 - -33 Regolazione 'A‘ (ventaglio rotondo) 1 - -33 Regolazione 'A‘ (ventaglio rotondo) 1 - -34 Regolazione 'F‘ (ventaglio ampio) 1 - -34 Regolazione 'F‘ (ventaglio ampio) 1 - -35 Vite a testa svasata 2 - -35 Vite a testa svasata 2 - -36 Anello di tenuta OR 1V 21 900 08 0001V 21 900 08 00036 Anello di tenuta OR 1V 21 900 08 0001V 21 900 08 00037 Perno di chiusura 1 137 Perno di chiusura 1 138 Vite a testa cilindrica 2 V 20 810 14 203 2 V 20 810 14 20338 Vite a testa cilindrica 2 V 20 810 14 203 2 V 20 810 14 20396 97
Elenco dei pezzi di ricambio:WA 940 HVLP Plus(con comando interno)V 21 940 V 21 945WA 945 HVLP Plus(senza comando interno)Pos. Denominazione Q.tà Numero articolo Q.tà Numero articolo1 Dado cappello aria compl. 1 V 20 700 05 000 1 V 20 700 05 0002 Cappello aria 1 V 10 700 36 xxx* 1 V 10 700 36 xxx*3 Ugello materiale * 1 V 10 700 40 xx3* 1 V 10 700 40 xx3*4 Anello distribuzione aria 1 V 21 900 14 100 1 V 21 900 14 1005 Vite a esagono cavo 4 V 20 700 13 003 4 V 20 700 13 0036 Spina cilindrica 11V 21 900 02 1037 Corpo anteriore della pistola 1 1V 21 900 02 1038 Anello di tenuta OR 2 V 09 102 21 009 2 V 09 102 21 0099 Guarnizione dell’ago compl. 1 V 09 001 72 000 1 V 09 001 72 00010 Rondella 1 V 21 900 12 003 1 V 21 900 12 00311 Molla della guarnizione 1 V 20 510 12 003 1 V 20 510 12 00312 Vite della guarnizione 1 V 20 510 11 003 1 V 20 510 11 00313 Perno di fissaggio cappuccio aria 1 V 20 700 02 303 1 V 20 700 02 30314 Molla di arresto 1 V 20 700 02 403 1 V 20 700 02 40315 Prigioniero 1 V 11 530 01 010 1 V 11 530 01 01016 Tappo 1 2325502 - -17 Vite di tenuta 1 V 22 650 43 100 1 V 22 650 43 10018 Guarnizione ad anello con scanalatura 1 V 09 220 30 000 1 V 09 220 30 00019 Scatola del pistone 1 V 21 900 01 000 1 V 21 905 01 00020 Pistone compl.. 1 V 21 900 09 000 1 V 21 900 09 00021 Ago materiale compl. 1 V 21 900 05 xx3* 1 V 21 900 05 xx3*22 Molla pistone 1 V 20 606 11 100 1 V 20 606 11 10023 Boccola filettata compl. 1 V 21 900 10 000 1 V 21 900 10 00024 Molla dell’ago 1 V 20 510 29 103 1 V 20 510 29 10325 Rondella isolante 1 V 21 900 11 000 1 V 21 900 11 00026 Cappuccio compl. 1 V 21 900 13 000 1 V 21 900 13 00027 Tirante compl. 1 V 20 510 34 000 1 V 20 510 34 00028 Selettore ('A‘+‘F‘) 2- -29 Boccola filettata 2 - -30 Cono di tenuta 2 - -31 Anello di tenuta OR 2 - -V 21 900 25 00032 Premistoppa 2 - -33 Regolazione 'A‘ (ventaglio rotondo) 1 - -34 Regolazione 'F‘ (ventaglio ampio) 1 - -35 Vite a testa svasata 2 - -36 Anello di tenuta OR 11V 21 900 08 00037 Perno di chiusura 1 1V 21 900 08 00038 Vite a testa cilindrica 2 V 20 810 14 203 2 V 20 810 14 203* Per la fornitura di pezzi di ricambio, indicare la rispettiva dimensione. Consigliamo diavere sempre in magazzino tutti i pezzi in grassetto (pezzi soggetti ad usura).Kit di riparazionePer le pistole a spruzzo automatiche <strong>PILOT</strong> WA 900 - WA 945 HVLP PLUS , la ditta <strong>WALTHER</strong><strong>PILOT</strong> ha a disposizione kit di riparazione che comprendono tutti i pezzi soggetti ad usura.98 99Numero articolo<strong>PILOT</strong> WA 900 / 905 Versione standard V 16 209 00 XX3<strong>PILOT</strong> WA 920 / 925 HVLP / Versione a bassa pressione V 16 209 20 XX3<strong>PILOT</strong> WA 940 / 945 HVLP PLUS / Versione a media pressione V 16 209 40 XX3Inserto dell’ugelloGli inserti dell’ugello sono costituiti da cappello aria, ugello materiale e ago materiale.Numero articolo<strong>PILOT</strong> WA 900 / 905 Versione standard V 15 209 00 XX3<strong>PILOT</strong> WA 920 / 925 HVLP / Versione a bassa pressione V 15 209 20 XX3<strong>PILOT</strong> WA 940 / 945 HVLP PLUS / Versione a media pressione V 15 209 40 XX3Dotazione dell’ugello a scelta:0,3 ▪ 0,5 ▪ 0,8 ▪ 1,0 ▪ 1,2 ▪ 1,5 ▪ 1,8 ▪ 2,0 ▪ 2,2 ▪ 2,5 ▪ 3,0 ▪ 3,5 mm øKit guarnizioni per piastra adattatriceIl kit guarnizioni comprende tutti i numeri articolo contrassegnati con ♦.piastra adattatrice in alluminio, nichelatapiastra adattatrice in acciaio inoxAccessoriV 17 219 00 000Numero articoloSupporto pistola V 21 900 21 000Grasso per pistole <strong>Walther</strong> Pilot (confezione da 8 - 10 grammi) V 00 000 00 001
925493Elenco dei pezzi di ricambio per piastra adattatrice in alluminio, nichelatapiastra adattatriceAttacco materiale posteriorepiastra adattatriceAttacco materiale posterioreWA 900 V 21 900 03 000 WA 905 V 21 905 04 000Pos. Denominazione Q.tà Numero articolo Q.tà Numero articolo1 Piastra adattatrice 11V 21 900 03 2002 Spina cilindrica 2 2V 21 900 03 2003 Anello di tenuta OR 2 V 09 103 66 000 ♦ 2 V 09 103 66 000 ♦4 Anello di tenuta OR 3 V 09 102 21 009 ♦ 3 V 09 102 21 009 ♦5 Anello di tenuta OR 1 V 09 104 11 009 ♦ 1 V 09 104 11 009 ♦6 Innesto filettato 1 V 66 101 53 013 1 V 66 101 53 0137 Innesto filettato 1 V 66 101 53 015 2 V 66 101 53 0158 Nipplo doppio 1 V 00 101 01 003 1 V 00 101 01 0039 Tappo 1 V 66 100 03 568 - -10 Tappo di chiusura 1 V 20 540 40 003 1 V 20 540 40 003piastra adattatrice circolazioneAttacco materiale posteriorepiastra adattatrice circolazioneAttacco materiale posterioreWA 900 V 21 900 03 UML WA 905 V 21 905 04 UMLPos. Denominazione Q.tà Numero articolo Q.tà Numero articolo1 Piastra adattatrice 11V 21 900 03 2002 Spina cilindrica 2 2V 21 900 03 2003 Anello di tenuta OR 2 V 09 103 66 000 ♦ 2 V 09 103 66 000 ♦4 Anello di tenuta OR 3 V 09 102 21 009 ♦ 3 V 09 102 21 009 ♦5 Anello di tenuta OR 1 V 09 104 11 009 ♦ 1 V 09 104 11 009 ♦6 Innesto filettato 1 V 66 101 53 013 1 V 66 101 53 0137 Innesto filettato 1 V 66 101 53 015 2 V 66 101 53 0158 Nipplo doppio 2 V 00 101 01 003 2 V 00 101 01 0039 Tappo 1 V 66 100 03 568 - -10 Tappo di chiusura - - - -107 / 9 7 68 / 108 / 10811108Elenco dei pezzi di ricambio per piastra adattatrice in acciaio inoxPiastra adattatriceAttacco materiale lateralePiastra adattatriceAttacco materiale lateraleWA 900 V 21 900 04 003 WA 905 V 21 905 03 003Pos. Denominazione Q.tà Numero articolo Q.tà Numero articolo1 Piastra adattatrice 11V 21 900 04 2032 Spina cilindrica 2 2V 21 900 04 2033 Anello di tenuta OR 2 V 09 103 66 000 ♦ 2 V 09 103 66 000 ♦4 Anello di tenuta OR 3 V 09 102 21 009 ♦ 3 V 09 102 21 009 ♦5 Anello di tenuta OR 1 V 09 104 11 009 ♦ 1 V 09 104 11 009 ♦6 Innesto filettato 1 V 66 101 53 013 1 V 66 101 53 0137 Innesto filettato 1 V 66 101 53 015 2 V 66 101 53 0158 Attacco materiale 90° 1 V 21 900 20 003 1 V 21 900 20 0039 Tappo 1 V 66 100 03 568 - -10 Tappo di chiusura 1 V 20 540 40 003 1 V 20 540 40 00311 dado 1 V 21 900 16 000 1 V 21 900 16 000Piastra adattatrice circolazioneAttacco materiale lateralePiastra adattatrice circolazioneAttacco materiale lateraleWA 900 V 21 900 04 UML WA 905 V 21 905 03 UMLPos. Denominazione Q.tà Numero articolo Q.tà Numero articolo1 Piastra adattatrice 11V 21 900 04 2032 Spina cilindrica 2 2V 21 900 04 2033 Anello di tenuta OR 2 V 09 103 66 000 ♦ 2 V 09 103 66 000 ♦4 Anello di tenuta OR 3 V 09 102 21 009 ♦ 3 V 09 102 21 009 ♦5 Anello di tenuta OR 1 V 09 104 11 009 ♦ 1 V 09 104 11 009 ♦6 Innesto filettato 1 V 66 101 53 013 1 V 66 101 53 0137 Innesto filettato 1 V 66 101 53 015 2 V 66 101 53 0158 Attacco materiale 90° 2 V 21 900 20 003 2 V 21 900 20 0039 Tappo 1 V 66 100 03 568 - -10 Tappo di chiusura - - - -1611 dado 2 V 21 900 16 000 2 V 21 900 16 00078 / 107 / 9678 / 10100 101
1 In generale1.1 Identificazione del modelloModelli: Pistole a spruzzo automatiche serie <strong>PILOT</strong> WA 900Tipi: WA 900 (standard con comando interno) V 21 900WA 905 (standard senza comando interno) V 21 905WA 920-HVLP (bassa pressione con comando interno) V 21 920WA 925-HVLP (bassa pressione senza comando interno) V 21 925WA 940-HVLP PLUS (media pressione con comando interno) V 21 940WA 945-HVLP PLUS (media pressione senza comando interno) V 21 945Costruttore: <strong>WALTHER</strong> <strong>Spritz</strong>- <strong>und</strong> <strong>Lackiersysteme</strong> <strong>GmbH</strong>Kärntner Str. 18-30D-42327 WuppertalTel.: 0202 / 787-0Fax: 0202 / 787-2217www.walther-pilot.de • Email: info@walther-pilot.de1.2 Uso previstoIn zone a rischio di esplosione, l’apparecchio deve essere impiegato soltanto conformementealle disposizioni dell’autorità di sorveglianza competente.É compito dell’autorità di sorveglianza competente oppure dell’azienda utilizzatricedeterminare le zone a rischio di esplosione.L’azienda utilizzatrice deve controllare ed assicurare che tutti i dati tecnici e la marcaturacorrispondano ai requisiti richiesti secondo ATEX. L’azienda utilizzatrice deveprendere misure di sicurezza adatte per tutte le applicazioni, per le quali il guastodell’apparecchio potrebbe costituire un pericolo per persone.Se durante il funzionamento vengono rilevate irregolarità, è necessario spegnereimmediatamente l’apparecchio e consultare la ditta <strong>WALTHER</strong> <strong>Spritz</strong>- <strong>und</strong><strong>Lackiersysteme</strong>.Messa a terra / collegamento equipotenzialeÉ necessario assicurare che la pistola a spruzzo sia sufficientemente collegata amassa, separatamente da o insieme all’apparecchio su cui è montata (resistenzamassima 10 6 W).1.3 Uso improprioLe pistole a spruzzo automatiche <strong>PILOT</strong> WA 900, WA 905, WA 920, WA 925, WA 940e WA 945 servono esclusivamente per applicare mezzi spruzzabili, come ad esempio:• Vernici e lacche• Grassi, oli ed anticorrosivi• Collanti• Smalti ceramici• Coloranti fenoliciSe i materiali che desiderate spruzzare non sono tra quelli elencati, rivolgetevi alla<strong>WALTHER</strong> <strong>Spritz</strong>- <strong>und</strong> <strong>Lackiersysteme</strong> <strong>GmbH</strong>, Wuppertal.I materiali spruzzabili devono essere applicati solo su pezzi oppure su oggetti.La temperatura del materiale da spruzzare non deve mai essere superiore a 80 °C.I modelli della serie <strong>PILOT</strong> WA 900 non sono pistole manuali, per questo motivodevono essere montati su un portapistola idoneo.La lettura, la comprensione e il rispetto di tutte le indicazioni e prescrizioni del presentemanuale fanno parte dell’uso previsto.L’apparecchio corrisponde ai requisiti di protezione contro le esplosioni richiesti dalladirettiva CE 94 / 9 (ATEX) per il gruppo di esplosione, la categoria di apparecchiaturee la classe di temperatura indicati sulla targhetta.Durante l’uso dell’apparecchio è necessario rispettare rigorosamente le indicazionicontenute nel presente manuale. Rispettare gli intervalli di ispezione e di manutenzioneprescritti. I dati sulla targhetta o le specifiche nel capitolo Dati tecnici devonoessere rispettati rigorosamente e non devono essere superati. Un sovraccaricodell’apparecchio deve essere escluso.102 103La pistola a spruzzo non deve essere utilizzata diversamente da quanto previsto nelparagrafo 1.2 Uso previsto.Ogni utilizzo diverso da quello previsto è considerato improprio.Fanno parte dell’uso improprio:• spruzzare materiali su persone e animali• la spruzzatura di ossido di azoto liquido.2 Specifica tecnicaLa serie <strong>PILOT</strong> WA 900 è costituita da un semplice sistema modulare, che consentetutte le combinazioni necessarie nella pratica. Ci sono due modelli base, uno concomando interno, l‘altro senza comando interno. Inoltre ci sono due diverse piastreadattatrici a scambio rapido, che sono adatte per entrambi i odelli o possono essereadattate.Le pistole della serie WA 900 possono essere usate solo con una piastra adattatrice.Tutte le pistole possono essere usate a scelta con sistema aperto o a circolazione. Perintegrare le pistole in un sistema di circolazione, si deve rimuovere il perno di chiusuramontato (pos. 37).I modelli della serie <strong>PILOT</strong> WA 7XX funzionano in modo completamente automaticomediante un comando pneumatico. Il pilotaggio avviene tramite una valvola dicomando a 3/2 vie.
Con comando interno:Azionando la valvola di comando a 3/2 vie, l’aria compressa necessaria per il comandoaffluisce nel cilindro all’interno della pistola a spruzzo, apre prima l’aria di nebulizzazionee poi l’alimentazione del materiale.Per i modelli <strong>PILOT</strong> WA 900 / WA 920-HVLP e WA 940-HVLP PLUS , il ventaglio delgetto viene impostato con le viti di regolazione (Pos. 33 <strong>und</strong> 34) sulla pistola.Se il flusso dell’aria compressa viene interrotto dalla valvola di comando a 3/2 vie,fuoriesce per prima l’aria compressa che si trova nel cilindro. La pressione dellamolla del pistone respinge l’ago materiale nella sua posizione di partenza, chiudel’alimentazione del materiale, e come ultima, l’aria di nebulizzazione.senza comando interno:Prima si deve collegare l‘aria di nebulizzazione (aria ventaglio rotondo e ventaglioampio) tramite una valvola di comando a 3/2 vie esterna in loco. Poi viene aperta l‘ariacompressa attraverso un‘altra valvola di comando a 3/2 vie, che spinge indietro ilpistone e l‘ago materiale, per aprire l‘alimentazione del materiale.Nei modelli <strong>PILOT</strong> WA 905/ WA 925-HVLP e WA 945-HVLP PLUS la forma del ventagliodel getto viene regolata attraverso i due regolatori di pressione aria dell‘impianto inloco.Se il flusso dell‘aria compressa viene interrotto dalla valvola di comando a 3/2 vie, lapressione della molla sposta il pistone e l‘ago materiale indietro fino alla rispettivaposizione di partenza e chiude l‘alimentazione del materiale all‘ugello materiale.Dopodiché si deve disattivare l‘aria di nebulizzazione.La regolazione della portata materiale avviene per tutti i modelli tramite la pressionedel materiale e il cappuccio (pos. 26). Nelle pistole a spruzzo automatiche della serie<strong>PILOT</strong> WA 900, il flusso del materiale può essere aperto anche manualmente attraversoil tirante (pos. 27).Le pistole a spruzzo della serie <strong>PILOT</strong> WA 900 possono essere collegate a contenitorimateriale a pressione o sistemi di pompaggio.I modelli <strong>PILOT</strong> WA 920-HVLP e WA 925-HVLP sono semplici pistole a spruzzo abassa pressione e funzionano con una pressione dell‘aria di spruzzo di 0,7 bar e unapressione d‘entrata dell‘aria di 3,3 bar.Con i modelli <strong>PILOT</strong> WA 940-HVLP PLUS e WA 945-HVLP PLUS , la pressione d‘entratadell‘aria è compresa tra 3,0 e 3,3 bar con una pressione dell’aria di spruzzo da 1,2fino a 1,4 bar.3 Avvertenze di sicurezza3.1 Pittogrammi per le avvertenze di sicurezzaAvvertimentoIl pittogramma ed il livello di priorità “Avvertimento” indicano un eventuale pericoloper persone. Possibili conseguenze: lesioni gravi o leggere.AttenzioneIl pittogramma ed il livello di priorità “Attenzione” indicano un eventuale pericolo perbeni. Possibili conseguenze: danneggiamento di beni.104 105AvvisoIl pittogramma ed il livello di priorità “Avviso” indicano ulteriori informazioni per illavoro sicuro ed efficiente con la pistola a spruzzo.3.2 Avvertenze generali di sicurezza► Le norme antinfortunistiche in materia nonché le altre regole di sicurezza e dimedicina del lavoro riconosciute devono essere rigorosamente rispettate.► Utilizzare la pistola a spruzzo solo in ambienti ben ventilati. Non provocare scintillee fiamme libere e non fumare nella zona di lavoro. Durante la spruzzatura dimateriali altamente infiammabili (p.e. lacche, collanti, detergenti ecc.) sussistonoelevati rischi per la salute, di esplosione e d’incendio.► É necessario assicurare che la pistola a spruzzo sia sufficientemente collegata amassa, separatamente da o insieme all’apparecchio su cui è montata (resistenzamax. 10 6 Ω).► Prima di eseguire interventi di manutenzione e di riparazione, togliere la pressioneall’alimentazione d’aria e di materiale alla pistola a spruzzo - pericolo di lesioni.► Durante la spruzzatura di materiali non mettere le mani o altre parti del corpodavanti all’ugello sotto pressione della pistola a spruzzo - pericolo di lesioni.► Non puntare la pistola a spruzzo su persone o animali - pericolo di lesioni.► Rispettare le avvertenze per l’applicazione e la sicurezza dei produttori di materialiper spruzzatura e detergenti. In particolare materiali aggressivi e corrosivipossono provocare danni alla salute.► Indossare sempre cuffie antirumore nella zona di lavoro della pistola a spruzzo.La pressione sonora della pistola a spruzzo è di ca. 86 dB (A) e può provocaredanni all’udito.► Tenere lontano dalla zona di lavoro e dal personale di servizio l’aria esausta pienadi vernice spruzzata in eccesso (overspray). Durante l’applicazione di materialicon la pistola a spruzzo, indossare sempre una maschera respiratoria ed indumentida lavoro conformi alle norme. Le particelle disperse nell’aria costituisconoun serio pericolo per la salute.► Fare sempre attenzione che dopo lavori di montaggio e di manutenzione, tutti idadi e tutte le viti siano serrati saldamente.► Utilizzare soltanto pezzi di ricambio originali, gli unici per i quali la <strong>WALTHER</strong> puògarantire un funzionamento corretto e sicuro.► In caso di domande sull’utilizzo sicuro della pistola a spruzzo e dei materiali inessa utilizzati, rivolgersi alla <strong>WALTHER</strong> <strong>Spritz</strong>- <strong>und</strong> <strong>Lackiersysteme</strong> <strong>GmbH</strong>,D - 42327 Wuppertal.4 Montaggio4.1 Sistema aperto o a circolazioneLe pistole a spruzzo della serie WA 900 sono montate completamente in fabbrica.Sono fornite di serie con un perno di chiusura (pos. 37). In questa versione, la pisto-
la può essere usata solo per il sistemaaperto.Se avete scelto una piastra adattatrice perla versione a circolazione, è necessariorimuovere il perno di chiusura (pos. 37). Inquesto modo si apre il secondo canale delmateriale.Avvitare la pistola a spruzzo alla piastraadattatrice. Utilizzare a tal scopo le due viticilindriche (pos. 38).Prima di mettere in funzione la pistola aspruzzo con piastra adattatrice, devonoessere eseguite le seguenti operazioni:4.2 Fissaggio della pistola a spruzzoFissare la pistola a spruzzo su un portapistola idoneo e stabile, come descritto nelseguente esempio:14.3 Allacciamento dei tubi di alimentazioneAvvertimentoFare attenzione a non scambiare gli attacchi dell’aria compressa e dell’aria di nebulizzazione- pericolo di lesioni.Con comando internoSistema apertoPerno di chiusura(Pos. 37)Senza comando internoSistema acircolazioneA questo scopo, utilizzare le due fori M 6 (1) (piastraadattatrice) con una distanza in altezza di 33 mm.Altri dispositivi di fissaggio su richiesta.5 Uso5.1 Avvertenze di sicurezzaDurante il comando della pistola a spruzzo, rispettare soprattutto le seguenti avvertenzedi sicurezza!• Durante la spruzzatura di materiali con la pistola a spruzzo, indossare unamaschera respiratoria e indumenti da lavoro conformi alle norme. Le particelledisperse nell’aria costituiscono un serio pericolo per la salute.• Indossare sempre cuffie antirumore nella zona di lavoro della pistola a spruzzo.La pressione sonora della pistola a spruzzo è di ca. 86 dB (A) e può provocaredanni all’udito.• Non provocare scintille e fiamme libere e non fumare nella zona di lavoro.Durante la spruzzatura di materiali altamente infiammabili (p.e. lacche, collanti,detergenti ecc.) sussistono elevati rischi per la salute, di esplosione e di incendio.5.2 Messa in funzione e messa fuori funzionePrima di mettere in funzione la pistola a spruzzo, devono essere soddisfatte leseguenti condizioni:• La pressione dell’aria compressa deve essere presente nella pistola a spruzzo.• La pressione dell’aria di nebulizzazione deve essere presente nella pistola aspruzzo.• La pressione del materiale deve essere presente nella pistola a spruzzo.AttenzioneLa pressione del materiale non deve superare • 8 bar, in caso contrario non ègarantito il sicuro funzionamento della pistola a spruzzo.Regolare la pressione dell’aria compressa su • almeno 4,5 bar, affinché la pistola aspruzzo possa essere messa in funzione.É possibile mettere in funzione e fuori funzione la pistola a spruzzo azionando lavalvola di comando a 3/2 vie (vedere il manuale del costruttore dell’impianto).AvvertimentoAl termine del lavoro, togliere sempre la pressione dalla pistola a spruzzo. I tubi sottopressione potrebbero scoppiare ed il materiale fuoriuscente potrebbe provocarelesioni alle persone nelle vicinanze.134a112 3 4b1 = Attacco materiale (F 1/4“) contrassegnato con 'M'2 = Attacco aria di nebulizzazione ventaglio ampio (PU ø esterno 8 mm) contrassegnato con 'F'3 = Attacco aria compressa (PU ø esterno 6 mm) contrassegnato con 'C'4a = Attacco aria di nebulizzazione ventaglio rotondo/ventaglio ampio(PU ø esterno 8 mm) contrassegnato con 'A'4b = Attacco aria di nebulizzazione ventaglio rotondo (PU ø esterno 8 mm)contrassegnato con 'A'A questo punto, la pistola a spruzzo è completamente montata e può essere messain funzione.15.3 Eseguire una spruzzatura di prova106 107É consigliabile effettuare una spruzzatura di prova:• prima di mettere in funzione la pistola a spruzzo per la prima volta• dopo aver sostituto il materiale• dopo aver scomposto nei particolari la pistola per la manutenzione o la riparazioneLa spruzzatura di prova può essere fatta su un pezzo di prova, una lamiera, un cartoneo su carta.AvvertimentoDurante la spruzzatura di materiali non mettere le mani o altre parti del corpo davantiall’ugello sotto pressione della pistola a spruzzo - pericolo di lesioni.
AvvertimentoAlla messa in funzione della pistola a spruzzo fare attenzione a che non vi sianopersone nella zona di spruzzatura - pericolo di lesioni.1. Mettere in funzione la pistola a spruzzo per effettuare una spruzzatura di prova(vedi 5.2 Messa in funzione e messa fuori funzione).2. Controllare la spruzzatura di prova e, se necessario, modificare le impostazionisulla pistola a spruzzo (vedere 5.4 Modifica della qualità di spruzzatura).5.4 Modifica della qualità di spruzzaturaSulle pistole a spruzzo della serie <strong>PILOT</strong> WA 900, la qualità di spruzzatura può esseremodificata con le seguenti regolazioni.Regolazione dell’aria di spruzzoFACon comando internoCon l’aiuto delle due viti di regolazione 'F' (Fan air) e 'A'(Atomizing air) si ottiene una ottima qualità di spruzzatura.La vite di regolazione 'F' influenza l’aria del ventaglioampio, la vite di regolazione 'A' l’aria del ventaglio rotondo.Regolazione della pressione dell’ariaLa pressione dell’aria viene impostata sulla valvola riduttrice dell’aria compressa delcompressore. Rispettare le istruzioni e le avvertenze di sicurezza del costruttore.Per modificare la qualità di spruzzatura oltre le possibilità già citate, è necessarioriattrezzare la pistola a spruzzo (vedere 5.5 Riattrezzare la pistola a spruzzo).A tale scopo, la <strong>WALTHER</strong> <strong>Spritz</strong>- <strong>und</strong> <strong>Lackiersysteme</strong> offre molteplici combinazionidiverse di cappello aria / ugello materiale / ago.Correzione di una qualità di spruzzatura imperfettaLa seguente tabella mostra con quali impostazioni può essere influenzata la qualitàdi spruzzatura:qualità di spruzzatura desiderataSpruzzatura diprovaDifettoIl centro della spruzzatura ètroppo spessoLa spruzzatura è troppospessa alle estremitàLa spruzzatura presentatroppe gocciolineIl materiale applicato al centroè molto sottileregolazione necessaria• impostare un ventaglio più ampio delgetto• impostare un ventaglio più rotondo delgetto• Aumentare la pressione dell' aria• Diminuire la pressione dell'aria dAFSenza comando internoLa qualità di spruzzatura viene impostata tramite un regolatoredi pressione aria installato nell’impianto (vedere ilmanuale del costruttore dell’impianto).L’attacco 'F' è per l’aria del ventaglio ampio, l’attacco 'A'è per l’aria del ventaglio rotondo.Il centro della spruzzatura èdivisoIl centro della spruzzatura èmolto bombato• Aumentare il diametro dell'ugello• Diminuire la pressione dell'aria dinebulizzazione• Aumentare la pressione del materiale• Diminuire la pressione del materiale• Aumentare la pressione dell' aria dinebulizzazioneImpostazione della portata materiale1 2 Girare il cappuccio (1) dall’impostazione base.• verso l‘interno per diminuire la portata del materiale.• verso l‘esterno per aumentare la portata del materiale.Con l’aiuto del tirante (2) è possibile azionare laportata del materiale attraverso l’ugello senza chel’aria di nebulizzazione venga inserita.Regolazione della pressione del materialeTale regolazione è possibile solo sulla pompa o sul serbatoio a pressione. A talescopo, seguire le istruzioni e le avvertenze di sicurezza del costruttore.5.5 Riattrezzare la pistola a spruzzoLa combinazione di cappello aria / ugello materiale / ago adatta al materiale daspruzzare costituisce un’unità armonizzata - l’inserto dell’ugello. Sostituire semprel’intero inserto dell’ugello, affinché la qualità di spruzzatura desiderata rimanga invariata.AvvertimentoPrima di ogni riattrezzamento, togliere la pressione dell’aria compressa e dell’aria dinebulizzazione nonché l’alimentazione del materiale dalla pistola a spruzzo - pericolodi lesioni.AvvisoPer l’esecuzione delle operazioni indicate di seguito, utilizzare la vista esplosa all’iniziodel presente manuale.108 109
Sostituzione dell‘ugello materiale e del cappello aria1. Svitare il dado zigrinato del cappello aria (pos. 1) dal corpo anteriore (pos. 7).2. Sfilare il cappello aria (pos, 2) dal corpo anteriore.3. Svitare l‘ugello materiale (pos. 3) dal corpo anteriore.4. Avvitare l‘ugello materiale desiderato (eventualmente sostituire l‘anello distributoredell‘aria) e mettere il cappello aria desiderato sul corpo anteriore.5. Avvitare il dado del cappello aria sul corpo anteriore.Sostituzione dell‘ago materiale1. Svitare il tirante (pos. 27).2. Svitare il cappuccio (pos.26) dalla scatola del pistone (pos. 19).3. Avvitare il tirante all‘ago materiale (pos. 21) e tirare l‘ago materiale dalla scatoladel pistone.Il montaggio avviene in ordine inverso.5.6 Trasformazione della piastra adattatrice dal sistema aperto alsistema a circolazione1. Svitare le due viti cilindriche (pos. 38) e staccare la pistola dalla piastra adattatrice.2. Rimuovere il perno di chiusura (pos. 37) con l‘o-ring (pos. 36) dalla pistola. (vedi4.1 Metodo a punto o circolare)3. Svitare il tappo di chiusura (pos. 10) dalla piastra adattatrice.4. Inserire il secondo attacco materiale (V 00 101 01 003 per piastra adattatrice inalluminio nichelato - attacco materiale posteriore o V 21 900 20 003 per piastraadattatrice in acciaio inox - attacco materiale laterale) nella piastra.6 Pulizia6.1 Avvertenze di sicurezza• Prima di ogni manutenzione, togliere la pressione dell’aria compressa e dell’ariadi nebulizzazione nonché l’alimentazione del materiale dalla pistola a spruzzo- pericolo di lesioni.• Non provocare scintille e fiamme libere e non fumare nella zona di lavoro.Durante la spruzzatura di materiali altamente infiammabili (p.e. detergenti) sussisteun elevato rischio di esplosione e di incendio.• Seguire le avvertenze di sicurezza del produttore del detergente.Soprattutto detergenti aggressivi e corrosivi possono provocare danni alla salute.del materiale per spruzzatura, privi delle seguenti sostanze:• drocarburi alogenati (ad esempio 1,1,1, tricloroetano, cloruro di metile ecc.)• acidi e detergenti acidi• solventi rigenerati (c.d. diluenti per detergenti)• prodotti sverniciantiLe sostanze sopraindicate provocano reazioni chimiche e quindi danni corrosivi sucomponenti galvanizzati.Danni risultanti da un tale trattamento non rientrano nella garanzia della <strong>WALTHER</strong><strong>Spritz</strong>- <strong>und</strong> <strong>Lackiersysteme</strong>.Pulire la pistola a spruzzo• prima di ogni cambio di colore o di materiale• almeno una volta alla settimana• più volte alla settimana, a seconda del materiale e del grado di imbrattamento.AttenzioneNon immergere mai la pistola a spruzzo in un solvente o in un altro detergente.Altrimenti non può essere garantito il corretto funzionamento della pistola a spruzzo.AttenzioneNon usare oggetti duri o appuntiti per la pulizia. Altrimenti i componenti di precisionedella pistola a spruzzo potrebbero essere danneggiati e la qualità di spruzzaturapotrebbe peggiorare.1. Scomporre la pistola nei particolari secondo 5.5 Sostituzione dell’ugello edell’ago materiale.2. Pulire il cappello aria e l’ugello materiale con un pennello e il detergente.3. Pulire tutti gli altri componenti e il corpo pistola con un panno e detergente.4. Applicare un sottile velo di grasso sui seguenti componenti:• bussola di tenuta del pistone• anello di tenuto OR del pistone• ago materiale• molla dell’agoUtilizzare il grasso per pistole <strong>WALTHER</strong> <strong>PILOT</strong> e applicarlo con un pennello. Altermine assemblare la pistola a spruzzo in ordine inverso.6.2 Pulizia completaÉ necessario pulire e lubrificare periodicamente la pistola a spruzzo con grasso perpistole <strong>WALTHER</strong> <strong>PILOT</strong> (V 00 000 00 001), per garantirne la lunga durata ed ilcorretto funzionamento.Per la pulizia della pistola a spruzzo, usare solo detergenti autorizzati dal produttore110 111
6.3 Pulizia di routineIn caso di frequenti cambi di colore o (a seconda del materiale) al termine del lavoro,la pistola a spruzzo può essere pulita senza dover essere scomposta nei particolari.AvvisoTuttavia, pulire e ingrassare periodicamente la pistola a spruzzo come descritto nelparagrafo 6.2 Pulizia completa. In questo modo è garantito il sicuro funzionamentodella pistola a spruzzo.Per la pulizia di routine devono essere eseguite le seguenti operazioni:1. Riempire il serbatoio del materiale pulito con un detergente adatto. Nella pistolaa spruzzo deve essere presente soltanto la pressione del materiale.Raccomandiamo di non nebulizzare il detergente.2. Mettere in funzione la pistola a spruzzo, (vedere 5.2 Messa in funzione).3. Mettere fuori funzione la pistola a spruzzo soltanto quando fuoriesce solo detergentelimpido.Per non dover mettere in funzione l’intero sistema di spruzzatura, è possibile sbloccaremanualmente l’alimentazione del materiale della serie <strong>PILOT</strong> WA 900.É consigliabile togliere la pressione all’intero sistema di spruzzatura fino al prossimoutilizzo.7 Riparazione1. Tirare il tirante della pistola a spruzzo indietro.L‘alimentazione del materiale si apre ed il canale el‘ugello del materiale possono essere puliti.2. Rilasciare il tirante soltanto quando il detergente chefuoriesce dalla pistola a spruzzo è limpido.AvvertimentoPrima di ogni riparazione, togliere la pressione dell’aria compressa e dell’aria dinebulizzazione nonché l’alimentazione del materiale dalla pistola di spruzzo - pericolodi lesioni.AvvisoPer l’esecuzione delle operazioni indicate di seguito, utilizzare la vista esplosa all’iniziodel presente manuale.7.1 Sostituzione della guarnizione dell’ago non ermetica1. Togliere la pressione alla pistola.2. Svitare il corpo anteriore (pos. 7) e la scatola del pistone (pos. 19) svitando ledue viti a testa cilindrica (pos. 38) dalla piastra adattatrice.3. Svitare il tirante (pos. 27) dalla pistola.112 1134. Svitare il cappuccio (pos. 26) dalla scatola del pistone.5. Avvitare il tirante all‘ago materiale (pos. 21) e staccare l‘ago materiale dallascatola del pistone.6. Svitare il corpo anteriore dalla scatola del pistone svitando le quattro viti a esagonocavo (pos. 5) dalla scatola del pistone (pos. 19).7. Svitare la vite della guarnizione (pos. 12).8. Rimuovere la molla della guarnizione (pos. 11) (se è danneggiata, sostituirla) ela rondella (pos. 10) dal foro d‘avvitamento.9. Estrarre la guarnizione dell’ago (pos. 9) dalla sede con un attrezzo ausiliario.A questo scopo, utilizzare un filo metallico stabile, la cui estremità è stata piegataa forma di gancio.10. Ingrassare il nuovo kit aghi da montare con il grasso per pistole <strong>WALTHER</strong><strong>PILOT</strong> e inserirlo nel corpo anteriore.Il montaggio dei restanti componenti avviene in ordine inverso.AvvisoLa guarnizione dell’ago (pos. 9) rimossa dall’attacco frontale della pistola non deveessere riutilizzata: in caso contrario non è più garantito l’effetto di tenuta necessarioper il sicuro funzionamento.7.2 Sostituzione dell’ugello materiale, ago materiale, delle molle eguarnizioniScomporre in particolari la pistola a spruzzo secondo quanto descritto nel paragrafo5.5 Sostituzione dell’ugello ed ago materiale quando devono essere sostituiti iseguenti componenti:• ugello materiale• molla di compressione del pistone• ago materiale*• molla ago*• Guarnizione piatta anello di tenuta del pistone*• anello di tenuta OR del pistone*AvvisoTutti i componenti contrassegnati da * devono essere ingrassati con grasso perpistole <strong>WALTHER</strong> <strong>PILOT</strong> prima del montaggio nel corpo della pistola.Per le pistole a spruzzo automatiche della serie <strong>PILOT</strong> WA 900, la ditta <strong>WALTHER</strong><strong>Spritz</strong>- <strong>und</strong> <strong>Lackiersysteme</strong> ha a disposizione kit di riparazione che comprendonotutti i pezzi soggetti ad usura:Art. Nr.: V 16 209 00 . . 3 (WA 900 / WA 905)Art. Nr.: V 16 209 20 . . 3 (WA 920 / WA 925)Art. Nr.: V 16 209 40 . . 3 (WA 940 / WA 945)I pezzi soggetti ad usura sono elencati anche nell’elenco dei pezzi di ricambio (stampatiin grassetto).
8 Ricerca ed eliminazione dei guastiAvvertimentoPrima di ogni manutenzione e riparazione, togliere la pressione dell’aria compressae dell’aria di nebulizzazione nonché l’alimentazione del materiale dalla pistola aspruzzo - pericolo di lesioni.Errore Causa RimedioLa pistola gocciolaLa pistola nonapreFuoriuscita dimateriale al foroperditeGetto dellospruzzo pulsanteod oscillanteAgo o ugello materiale sporchiAgo o ugello materiale danneggiatiVite della guarnizione(pos. 12) serrata eccessivamenteAria compressa troppobassaGuarnizione dell'ago nonermeticaVite della guarnizione allentatatroppo poco materiale nelserbatoio del materialevedere 5.5 Smontaggio e puliziadell'ago o dell'ugello materialevedere 5.5 Sostituzionedell'ago o ugello materialeAllentare lentamente la vitedella guarnizione con un cacciaviteAumentare la pressionedell'aria compressa ad almeno4,5 barvedere 7.1 Sostituzione dellaguarnizione dell'agoSerrare leggermente la vitedella guarnizione con un cacciaviteRabboccare materiale (vedereil manuale del costruttoredell'impianto)10 Dati tecniciPesoPistola a spruzzo con comando interno:Pistola a spruzzo senza comando interno:piastra adattatrice in alluminio, nichelata:piastra adattatrice in acciaio inox:520 g490 g195 g260 gMisure ugelli: • 0,3 • 0,5 • 0,8 • 1,0 • 1,2 • 1,5 • 1,8• 2,0 • 2,2 • 2,5 • 3,0 • 3,5 mm øAttaccoAria di nebulizzazione:PU ø esterno 8 mmAria compressa:PU ø esterno 6 mmAlimentazione materiale: G 1/4“Range di pressioneAria compressa:almeno 4,5 barPressione materiale: max. 8 barAria di nebulizzazione: max. 8 barTemperatura max. di eserciziodella pistola a spruzzo 80 °CPressione sonora(misurata a circa 1 mdalla pistola a spruzzo)Consumo di aria:Pressione d’entratadell’aria allapistolaConsumo diaria ventagliorotondo86 dB (A)<strong>PILOT</strong> WA 900 <strong>PILOT</strong> WA 920 HVLP * <strong>PILOT</strong> WA 940 HVLP PLUS **Consumo diaria ventaglioampioConsumo diaria ventagliorotondoConsumo diaria ventaglioampioConsumo diaria ventagliorotondoConsumo diaria ventaglioampio1 bar 100 l/min 120 l/min 120 l/min 126 l/min 114 l/min 121 l/min2 bar 165 l/min 183 l/min 188 l/min 203 l/min 172 l/min 188 l/min3 bar 230 l/min 260 l/min 265 l/min 283 l/min 237 l/min 259 l/min4 bar 290 l/min 325 l/min 332 l/min 358 l/min 303 l/min 325 l/min4,5 bar 321 l/min 358 l/min 372 l/min 400 l/min 330 l/min 360 l/min5 bar 345 l/min 395 l/min 414 l/min 441 l/min 365 l/min 400 l/min9 SmaltimentoI materiali risultanti dalla pulizia e dalla manutenzione devono essere smaltiti a regolad’arte secondo le leggi e le disposizioni vigenti.AvvertimentoRispettare soprattutto le indicazioni del produttore dei materiali per spruzzatura e deidetergenti. Materiale non smaltito secondo le prescrizioni costituisce un pericolo perla salute di persone e animali.Pressione d’entratadell’aria allapistolaConsumo diaria ventagliorotondo<strong>PILOT</strong> WA 905 <strong>PILOT</strong> WA 925 HVLP * <strong>PILOT</strong> WA 945 HVLP PLUS **Consumo diaria ventaglioampioConsumo diaria ventagliorotondoConsumo diaria ventaglioampioConsumo diaria ventagliorotondoConsumo diaria ventaglioampio1 bar 100 l/min 130 l/min 119 l/min 137 l/min 86 l/min 133 l/min2 bar 156 l/min 210 l/min 185 l/min 228 l/min 137 l/min 212 l/min3 bar 220 l/min 289 l/min 257 l/min 317 l/min 182 l/min 292 l/min4 bar 283 l/min 362 l/min 322 l/min 410 l/min 232 l/min 366 l/min4,5 bar 311 l/min 405 l/min 358 l/min 450 l/min 258 l/min 411 l/min5 bar 338 l/min 445 l/min 400 l/min 500 l/min 283 l/min 450 l/min114 115* Con una pressione dell‘aria in entrata di circa 3,3 bar la pressione dell‘aria di spruzzo è pari a 0,7 bar.** Con una pressione dell‘aria in entrata di circa 3,3 bar la pressione dell‘aria di spruzzo è pari a 1,3 bar.Ci riserviamo il diritto di applicare modifiche tecniche.
Das <strong>WALTHER</strong> <strong>PILOT</strong> - Programm• Hand-<strong>Spritz</strong>pistolen• Automatik-<strong>Spritz</strong>pistolen• Niederdruck-<strong>Spritz</strong>pistolen (System HVLP)• Zweikomponenten-<strong>Spritz</strong>pistolen• Materialdruckbehälter• Drucklose Behälter• Rührwerk-Systeme• Airless-Geräte <strong>und</strong> Flüssigkeitspumpen• Materialumlaufsysteme• Kombinierte <strong>Spritz</strong>- <strong>und</strong> Trockenboxen• Absaugsysteme mit Trockenabscheidung• Absaugsysteme mit Nassabscheidung• Trockner• Zuluft-Systeme• Atemschutzsysteme <strong>und</strong> Zubehör<strong>WALTHER</strong> <strong>Spritz</strong>- <strong>und</strong> <strong>Lackiersysteme</strong> <strong>GmbH</strong>Kärntner Str. 18-30 • 42327 WuppertalTel.: 0202 / 787-0 • Fax: 0202 / 787-2217www.walther-pilot.deEmail: Info@walther-pilot.de