

CAFETERA COFFEEMAKER - Applica Use and Care Manuals
CAFETERA COFFEEMAKER - Applica Use and Care Manuals
CAFETERA COFFEEMAKER - Applica Use and Care Manuals

Create successful ePaper yourself
Turn your PDF publications into a flip-book with our unique Google optimized e-Paper software.
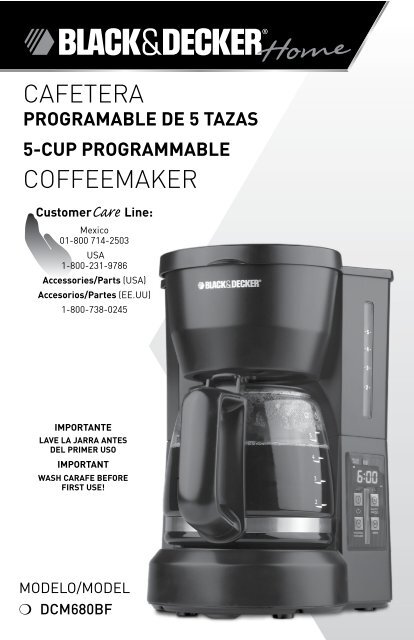
<strong>CAFETERA</strong>PROGRAMAbLE DE 5 TAZAS5-CUP PROGRAMMAbLE<strong>COFFEEMAKER</strong>Customer<strong>Care</strong> Line:Mexico01-800 714-2503USA1-800-231-9786Accessories/Parts (USA)Accesorios/Partes (EE.UU)1-800-738-0245IMPORTANTELAVE LA JARRA ANTESDEL PRIMER USOIMPORTANTWASH CARAFE BEFOREFIRST USE!ModelO/Model❍ DCM680BF
El producto puede variar un poco al que aparece ilustrado aquí.Panel de controlESPAÑOL-5--4--3--2-54321. Tapa enteriza2. Distribuidor de agua3. Cesto removible para el filtro4. Tanque de agua con nivel de tazas marcado5. Jarra de 740 ml (5 tazas / 25 oz)6. Panel de control7. Compartimiento para el cable (adentro del aparato)8. Placa de calentamiento9. Filtro dorado permanente1. Pantalla digital2. Luz indicadora de PM3. Luz indicadora de programación automático (AUTO PROG)4. Botón de programación de colado automático (AUTO PROG)5. Botón de minutos (MIN)6. Botón de hora (HORA / HOUR)7. Botón de encendido / apagado8. Luz indicadora de encendido9. Luz indicadora de café fresco
Como usarEste aparato es solamente para uso doméstico.PASOS PRELIMINARES• Retire todo material de empaque y calcomanía adherida al producto.• Retire y conserve el manual de uso y cuidado.• Lave todas las piezas según las instrucciones en la sección de CUIDADO Y LIMPIEZAde este manual.• Vierta agua fría en el tanque de agua hasta el nivel que indica 5 tazas.• Coloque el filtro permanente vacío en el recipiente del filtro.• Coloque el cesto de colar en el soporte para el mismo.• Desenrolle y enchufe el cable a una toma de corriente normal.• Cuele agua a través del aparato, sin agregar café molido. Esto elimina cualquierresiduo de polvo que pudiera haber en el sistema debido al proceso de fabricación.• Deseche el agua de la jarra.• Apague y desconecte el aparato; espere que se enfríe.PREPARACIÓN DEL CAFÉ1. Abra la tapa enteriza del tanque de agua y del cesto de colar.2. Llene el tanque con agua fría hasta el nivel deseado3. Coloque el filtro permanente en el recipiente del filtro.4. Agregue la cantidad de café molido deseada.Nota: Si tiene duda de cuánto café usar, comience por medir 1 cucharadita rasada decafé molido de textura media por cada taza de café a colar.5. Cierre y asegure bien la tapa.6. Coloque la jarra vacía sobre la placa de calentamiento.7. Enchufe el cable a una toma de corriente normal.8. Presione el botón de encendido/apagado ; la luz indicadora de encendido seilumina y comienza el ciclo de colado. (No es necesario programar el reloj).Nota: No retire la jarra mientras el café se está col<strong>and</strong>o. Espere hasta que finalice elciclo de colado antes de retirar la jarra para servir el café.9. Después de servir, mantenga la jarra sobre la placa de calentamiento para conservarcaliente el café.10. La cafetera se apaga automáticamente después de dos horas11. Desconecte la cafetera cu<strong>and</strong>o no esté en uso.PROGRAMACIÓN DEL RELOJ1. Enchufe la cafetera a una toma de corriente normal.2. La pantalla digital exhibe las 12:00 AM3. Para ajustar la hora, presione el botón (HORA) hasta que aparezca la hora correctaen la pantalla. Una pequeña luz verde aparece en la parte inferior derecha de lapantalla digital, indic<strong>and</strong>o (PM).4. Presione el botón (MIN) para seleccionar los minutos.Consejo: El mantener presionado el botón, permite ajustar la hora y los minutos másrápido; un toque ligero cambia la hora en incrementos de 1 minuto.Nota: Si uno desconecta el aparato o si se interrumpe la corriente momentáneamente,la hora debe ser reajustada (seguir los pasos del 1 al 4).5. La hora puede ser modificada en cualquier momento con solo repetir elprocedimiento anterior.PROGRAMACIÓN DE COLADO AUTOMÁTICO1. Presione el botón AUTO/PROG y la luz indicadora superior apareceintermitentemente.2. Presione con rapidez el botón HORA y MIN para programar la hora de inicio delciclo de colado automático. Por ejemplo, si se trata de las 7:15 AM, asegúrese quela luz indicadora PM no esté encendida.3. Presione el botón AUTO/PROG nuevamente, sosteniéndolo por unos segundoshasta que la luz AUTO/PROG deje de parpadear. Esto indica que el cronómetro hasido activado.4. Prepare la cafetera para el ciclo de colado según los pasos en la sección,PREPARACIÓN DEL CAFÉ, pero no presione el botón de encendido/apagado .5. Para verificar la hora que ha programado, presione el botón AUTO/PROG; la horaaparece en la pantalla.6. Cu<strong>and</strong>o el reloj regrese a la hora actual, presione el botón, AUTO/PROG parareactivar el cronómetro.7. Para colar café a la misma hora el día siguiente, prepare la cafetera para el ciclode colado automático y presione el botón AUTO/PROG.Nota: El ciclo de colado automático puede ser cancelado en cualquier momento:• Presione el botón AUTO/PROG otra vez O,• Presione el botón de encendido/apagado dos veces.• Toda luz se apaga.FUNCIÓN PARA INDICAR LA FRESCURA DEL CAFEUna vez que el café termine de colar, la luz de indicadora aparece debajo de lapalabra FRESCO en la pantalla y permanece encendido por 20 minutos para indicarcuanto tiempo ha pasado desde que el café fue colado.CONSEJOS PARA COLAR CAFÉ• Revuelva el café de la jarra antes de servirlo para distribuir bien el sabor.• Para variar, antes de moler el café, agréguele un pedazo de una pulgada decáscara de naranja o de limón.• Agregue un pedazo de 2 pulgadas de semilla de vainilla en la azucarera.• Le sorprenderá el buen gusto que ofrece.• Para un café sabroso, mantenga la cafetera bien limpia siempre.• Si deja el café sobre la placa de calentamiento, asegúrese de retirar y desechar elcafé molido del filtro en cuanto se enfríe un poco.• El café molido puede ser guardado en contenedores herméticos y permanecerfresco en la refrigeradora hasta por dos semanas.• <strong>Use</strong> agua fría de la llave para llenar el tanque de la cafetera; el agua caliente de lallave puede darle sabor metálico al café.ESPAÑOL
Cuidado y limpiezaEste aparato no contiene piezas reparables por el consumidor. Para servicio, por favoracuda a personal calificado.LIMPIEZA1. Asegúrese que el aparato esté apagado y que se haya enfriado.2. Abra la tapa, retire el cesto permanente y deseche el café molido.3. Lave el cesto permanente, la jarra y la tapa de la jarra en la b<strong>and</strong>eja superior de lamáquina lavaplatos, o a mano con agua tibia jabonada.4. Para limpiar el interior de la tapa del tanque, abra la tapa enteriza permitiendo queésta descanse en posición abierta.5. Tire del distribuidor de agua desde debajo de la guía, limpie las superficies con unpaño humedecido, coloque el distribuidor debajo de la guía y cierre la tapa.MANTENIMIENTO DE SU <strong>CAFETERA</strong>Los depósitos minerales que provienen del agua dura pueden obstruir la cafetera. Serecomienda una limpieza cada tres meses.LIMPIEZA CON AGUA Y VINAGRE1. Vierta vinagre blanco adentro del tanque de agua hasta la marca que indica 2 tazasen el nivel de llenado.2. Agregue agua fría hasta el nivel que indica 5 tazas.3. Coloque el filtro permanente y cierre la tapa.4. Coloque la jarra vacía sobre la placa de calentamiento.5. Encienda la cafetera y permita que se cuele la mitad de la solución de limpiezaadentro de la jarra (hasta que el agua alcance aproximadamente el tercer nivel).Apague la cafetera y espere 15 minutos para dar lugar a que se abl<strong>and</strong>en losdepósitos minerales.6. Encienda la cafetera y permita que se cuele el resto de la solución adentrode la jarra.7. Apague la cafetera, vacíe la jarra y retire el filtro permanente.8. Llene el tanque con agua fría hasta el nivel 5, coloque la jarra vacía nuevamentesobre la placa de calentamiento, y encienda la cafetera para colar un ciclo completo,con el fin de eliminar todo residuo de la solución de limpieza. Puede ser necesariorepetir este proceso para eliminar por completo el olor y el sabor del vinagre.9. Lave el filtro permanente y la jarra según las instrucciones en la sección de cuidadoy limpieza de la cafetera.COSEJOS PARA LIMPIAR• El exceso de vapor o los ciclos de colado prolongados, indican que la cafeterarequiere limpieza.• La frecuencia con que se debe eliminar los depósitos minerales varía según el usode la cafetera y la dureza del agua.• Durante el ciclo de limpieza, la cafetera puede salpicar y producir más vapor quede costumbre.¿NECESITA AYUDA?Para servicio, reparaciones o preguntas relacionadas al producto, por favorllame al número del centro de servicio que se indica para el país donde ustedcompró su producto.NO devuélva el producto al fabricante. Llame o lleve el producto a un centrode servicio autorizado.DOS AÑOS DE GARANTÍA LIMITADA(No aplica en México, Estados Unidos o Canadá)¿Qué cubre la garantía?• La garantía cubre cualquier defecto de materiales o de mano de obra queno haya sido generado por el uso incorrecto del producto.¿Por cuánto tiempo es válida la garantía?• Por dos años a partir de la fecha original de compra.¿Cómo se obtiene el servicio necesario?• Conserve el recibo original como comprobante de la fecha de compra,comuníquese con el centro de servicio de su país y haga efectiva sugarantía si cumple lo indicado en el manual de instrucciones.¿Cómo se puede obtener servicio?• Conserve el recibo original de compra.• Por favor llame al número del centro de servicio autorizado.¿Qué aspectos no cubre esta garantía?• Los productos que han sido utilizados en condiciones distintas a lasnormales.• Los daños ocasionados por el mal uso, el abuso o negligencia.• Los productos que han sido alterados de alguna manera.• Los daños ocasionados por el uso comercial del producto.• Los productos utilizados o reparados fuera del país original de compra.• Las piezas de vidrio y demás accesorios empacados con el aparato.• Los gastos de tramitación y embarque asociados al reemplazo delproducto.• Los daños y perjuicios indirectos o incidentales.¿Qué relación tiene la ley estatal con esta garantía?• Esta garantía le otorga derechos legales específicos y el consumidorpodría tener otros derechos que varían de una región a otra.ESPAÑOL
Póliza de Garantía(Válida sólo para México)Duración<strong>Applica</strong> Manufacturing, S. de R. L. de C.V. garantiza este producto por 2 años apartir de la fecha original de compra.¿Qué cubre esta garantía?Esta Garantía cubre cualquier defecto que presenten las piezas, componentes yla mano de obra contenidas en este producto.Requisitos para hacer válida la garantíaPara reclamar su Garantía deberá presentar al Centro de Servicio Autorizadola póliza sellada por el establecimiento en donde adquirió el producto. Si no latiene, podrá presentar el comprobante de compra original.¿Donde hago válida la garantía?Llame sin costo al teléfono 01 800 714 2503, para ubicar el Centro de ServicioAutorizado más cercano a su domicilio en donde usted podrá encontrar partes,componentes, consumibles y accesorios.Procedimiento para hacer válida la garantíaAcuda al Centro de Servicio Autorizado con el producto con la póliza de Garantíasellada o el comprobante de compra original, ahí se reemplazará cualquier piezao componente defectuoso sin cargo alguno para el usuario final. Esta Garantíaincluye los gastos de transportación que se deriven de su cumplimiento.ExcepcionesEsta Garantía no será válida cu<strong>and</strong>o el producto:A) Se hubiese utilizado en condiciones distintas a las normales.B) No hubiese sido operado de acuerdo con el instructivo de uso que leacompaña.C) Cu<strong>and</strong>o el producto hubiese sido alterado o reparado por personas noautorizadas por <strong>Applica</strong> Manufacturing, S. de R. L. de C.V.Nota: Usted podra encontrar partes, componentes, consumibles y accesoriosen los centros de servicios autorizados. Esta garantía incluyen los gastos detransportación que se deriven de sus cumplimiento dentro de sus red de servicio.Por favor llame al número correspondiente que aparece en la lista a continuaciónpara solicitar que se haga efectiva la garantía y donde Ud. puede solicitar servicio,reparaciones o partes en el país donde el producto fué comprado. También puedeconsultarnos en el e-mail servicio@applicamail com.mxArgentinaSERVICIO TECNICO CENTRALATTENDANCEAvda. Monroe N° 3351Buenos Aires – ArgentinaFonos: 0810 – 999 - 8999011 - 4545 - 4700011 – 4545 – 5574supervision@attendance.com.arChileMASTER SERVICE SERVICENTERNueva Los Leones N° 0252ProvidenciaSantiago – ChileFono Servicio: (562) – 232 77 22servicente@servicenter.clColombiaPLINARESAvenida Quito # 88A-09Bogotá, ColombiaTel. sin costo 01 8007001870Costa RicaAplicaciones Electromecanicas, S.A.Calle 26 Bis y Ave. 3San Jose, Costa RicaTel.: (506) 257-5716 / 223-0136EcuadorServicio Master de EcuadorAv. 6 de Diciembre 9276 y los AlamosTel. (593) 2281-3882El SalvadorCalle San Antonio Abad 2936San Salvador, El SalvadorTel. (503) 2284-8374GuatemalaMacPartes SA3ª Calle 414 Zona 9Frente a TecunTel. (502) 2331-5020 / 2332-2101HondurasServiTotalContigua a TelecentroTegucigalpa, Honduras,Tel. (504) 235-6271MéxicoArticulo 123 # 95 Local 109 y 112Col. Centro, Cuauhtemoc,México, D.F.Tel. 01 800 714 2503NicaraguaServiTotalDe semáforo de portezuelo500 metros al sur.Managua, Nicaragua,Tel. (505) 248-7001PanamáServicios Técnicos CAPRITumbamuerto BoulevardEl Dorado Panamá500 metros al sur.Tel. 3020-480-800 sin costo(507) 2360-236 / 159PerúServicio Central Fast ServiceAv. Angamos Este 2431San Borja, Lima PerúTel. (511) 2251 388Puerto RicoBuckeye ServiceJesús P. Piñero #1013Puerto Nuevo, SJ PR 00920Tel.: (787) 782-6175Republica DominicanaPlaza Lama, S.A.Av, Duarte #94Santo Domingo,República DominicanaTel.: (809) 687-9171VenezuelaInversiones BDR CAAv. Casanova C.C.City Market Nivel Plaza Local 153Diagonal Hotel Melia,Caracas.Tel. (582) 324-0969www.applicaservice.comservicio@applicamail.comESPAÑOL10 11
CAT. NO. EHB500TYPE 1 160 W 120 VAC ONLY 60HzSello del Distribuidor:Fecha de compra:Modelo:Comercializado por:<strong>Applica</strong> Manufacturing, S. de R. L. de C.V.Presidente Mazarik No111, 1er PisoCol. Chapultepec Morales, Mexico D.FDeleg. Miguel HidalgoCP 11570MEXICOServicio y ReparaciónaArt. 123 No. 95Col. Centro, C.P. 06050Deleg. CuauhtemocServicio al Consumidor,Venta de Refacciones y Accesorios01 800 714 2503PRECAUCIÓNRIESGO DE INCENDIO O DE CHOQUE ELÉCTRICO. NO ABRA.El símbolo de un rayo indica voltaje peligroso. el signo de exclamación indicaimportantes instrucciones de mantenimiento. Consulte a continuación:PRECAUCIÓN: Para reducir el riesgo de incendio o de choque eléctrico, no retirela cubierta de la cafetera. No contiene por dentro partes reparables por elconsumidor. Cualquier reparación deberá ser efectuada únicamente por personalautorizado.ESPAÑOLCódigo de fecha / Date Code650 W 120 V 60 Hzes una marca registrada de The Black & Decker Corporation,Towson, Maryl<strong>and</strong>, E.U.Fabricado en la República Popular de ChinaImpreso en la República Popular de ChinaImportado por / Imported by:<strong>Applica</strong> Americas, Inc.Av. Juan B Justo 637 Piso 10(C1425FSA) Ciudad Autonoma de Buenos AiresArgentinaC.U.I.T No. 30-69729892-0Importado por / Imported by:APPLICA MANUFACTURING, S. DE R. L. DE C. V.Presidente Mazarik No111, 1er PisoCol. Chapultepec Morales, Mexico D.FDeleg. Miguel HidalgoCP 11570MEXICOTeléfono: (55) 5263-9900Del interior marque sin costo1201 (800) 714 250313
Please Read <strong>and</strong> Save this <strong>Use</strong> <strong>and</strong> <strong>Care</strong> Book.IMPORTANT SAFEGUARDSWhen using electrical appliances, basic safety precautions shouldalways be followed, including the following:❍ Read all instructions before using.❍ Do not touch hot surfaces. <strong>Use</strong> h<strong>and</strong>les or knobs.❍ To protect against fire, electric shock <strong>and</strong> injury to persons do notimmerse cord, plugs or appliance in water or other liquid.❍ Close supervision is necessary when any appliance is used by or nearchildren.❍ Unplug from outlet when not in use <strong>and</strong> before cleaning. Allow tocool before putting on or taking off parts, <strong>and</strong> before cleaning theappliance.❍ Do not operate any appliance with a damaged cord or plug, or afterthe appliance malfunctions or has been damaged in any manner.Return appliance to the nearest authorized service facility forexamination, repair or adjustment. Or, call the appropriate toll-freenumber on the cover of this manual.❍ The use of accessory attachments not recommended by the appliancemanufacturer may result in fire, electric shock or injury to persons.❍ Do not use outdoors.❍ Do not let cord hang over edge of table or counter, or touch hotsurfaces.❍ Do not place on or near a hot gas or electric burner, or in a heatedoven.❍ To disconnect, turn any control to OFF, then remove plug from walloutlet.❍ Do not use this appliance for other than intended use.❍ Keep lid on the carafe when in use.❍ Scalding may occur if the lid is removed during the brewing cycles.SAVE THESE INSTRUCTIONS.This product is for household use only.POLARIZED PLUG (120V Models Only)This appliance has a polarized plug (one blade is wider than the other). Toreduce the risk of electric shock, this plug is intended to fit into a polarizedoutlet only one way. If the plug does not fit fully into the outlet, reverse theplug. If it still does not fit, contact a qualified electrician. Do not attempt tomodify the plug in any way.TAMPER-RESISTANT SCREWWarning: This appliance is equipped with a tamper-resistant screw toprevent removal of the outer cover. To reduce the risk of fire or electricshock, do not attempt to remove the outer cover. There are no userserviceableparts inside. Repair should be done only by authorized servicepersonnel.ELECTRICAL CORDa) A short power-supply cord (or detachable power-supply cord) is to beprovided to reduce the risk resulting from becoming entangled in ortripping over a longer cord.b) Longer detachable power-supply cords or extension cords are available<strong>and</strong> may be used if care is exercisead in their use.c) If a long detachable power-supply cord or extension cord is used,1) The marked electrical rating of the detachable power-supply cordor extension cord should be at least as great as the electrical ratingof the appliance,2) If the appliance is of the grounded type, the extension cord should bea grounding-type 3-wire cord, <strong>and</strong>3) The longer cord should be arranged so that it will not drape over thecountertop or tabletop where it can be pulled on by children or trippedover.Note: If the power supply cord is damaged, it should be replaced byqualified personnel; in Latin America, by an authorized service center.ENGLISH14 15
How to <strong>Use</strong>This unit is for household use only.GETTING STARTED• Remove all packing materials <strong>and</strong> any stickers from the product.• Please go to www.prodprotect.com/applica to register your warranty.• Remove <strong>and</strong> save literature.• Wash all removable parts as instructed in CARE AND CLEANING section of thismanual.• Open cover.• Pour fresh cold water up to 5-cup level mark into the water reservoir.• Place empty permanent filter into filter basket holder.• Uncoil power cord <strong>and</strong> plug into st<strong>and</strong>ard electrical outlet.• Brew water through appliance without adding coffee grounds. This removes any dustor residue that may remain in the system during the manufacturing process.• Discard the water from the carafe <strong>and</strong> remove permanent filter.• Turn off the appliance; unplug it <strong>and</strong> allow appliance to cool down.BREWING COFFEE1. Open cover.2. Pour fresh cold water up to desired level mark into water reservoir.3. Place empty permanent filter into the filter basket holder.4. Add desired amount of ground coffee.Note: Not sure how much coffee to use? Begin by using 1 level tablespoon of mediumgrind coffee for each cup of coffee to be brewed.5. Close lid securely.6. Place empty carafe on the “Keep Hot” carafe plate.7. Plug cord into st<strong>and</strong>ard electrical outlet.8. Press ON/OFF button; ON indicator light comes on <strong>and</strong> brewing begins. (Thereis no need to set the clock).Note: Do not remove the carafe while coffee is brewing. Wait until brewing cycle isfinished before removing the carafe to serve coffee.9. Replace the carafe on the “Keep Hot” plate when not serving to keep coffee hot.10. The coffeemaker automatically shuts off after 2 hours.11. Unplug appliance when not in use.SETTING THE CLOCK1. Plug appliance into st<strong>and</strong>ard electrical outlet.2. The digital clock display flashes 12:00 AM.3. To set the time: Press HOUR button until the correct time appears on the display.Small green dot in bottom right corner of digital display indicates PM.4. Press the MIN button to select the minutes.Tip: Holding the button down makes the hours <strong>and</strong> minutes change rapidly after a shortdelay; tapping changes the time in 1 hour or 1 minute increments.Note: If the unit is unplugged or power is interrupted even momentarily, the time willneed to be reset.5. The time can be changed at any time simply by repeating procedure above.SETTING THE AUTO BREW TIME1. Press the AUTO/PROG button <strong>and</strong> the indicator light above starts flashing.2. Quickly press the HOUR then the MIN buttons to select the time you’d like theautomatic brewing to begin (for example 7:15 AM make sure the PM light is not on).3. Press the AUTO/PROG button again holding it down for several seconds until theAUTO/PROG light stops flashing. This indicates the timer is activated.4. Prepare the coffee maker for brewing following the directions for BREWINGCOFFEE but don’t press the ON/ OFF button.6. To check the preset auto time, press the AUTO/PROG button <strong>and</strong> the preset autotime will be displayed.7. When the clock returns to the current time of day, press AUTO/PROG to reactivatethe timer.8. To automatically brew coffee at the same time the next day, prepare coffeemakerfor brewing coffee <strong>and</strong> press the AUTO/PROG button.Note: The auto-brew function can be canceled at any time:• Press the AUTO/PROG button a second time OR• Press the ON/OFF button twice.• All lights go off.FRESHNESS INDICATOROnce brewing is finished, an indicator light appears below the word FRESH on thedisplay. The indicator light comes on <strong>and</strong> stays on for 20 minutes to indicate the coffeeis fresh.COFFEE BREWING TIPS• Stir coffee in carafe before serving to evenly distribute the flavor.• For variety add a 1-inch piece of lemon or orange peel to the coffee grounds beforebrewing.• Add a 2-inch piece of vanilla bean to the sugar bowl. You’ll be surprised at how goodit tastes.• Keep your coffee maker very clean; you’ll be pleased with the flavor.• If coffee is left on the hot plate, be sure to remove the coffee grounds from the filterbasket as soon as they have cooled slightly.• Ground coffee can be stored in an airtight container in the refrigerator up to 2weeks <strong>and</strong> still make fresh tasting coffee.• <strong>Use</strong> cold tap water; hot tap water that has been sitting in a water heater may giveyour coffee a metallic taste.18 19ENGLISH
<strong>Care</strong> <strong>and</strong> CleaningThis appliance contains no user-serviceable parts. Refer service to qualified servicepersonnel.CLEANING1. Be sure the unit is unplugged <strong>and</strong> cooled.2. Open the cover, remove the permanent filter, <strong>and</strong> discard the grounds.3. Discard the paper filter from the filter basket.4. Wash the permanent filter, carafe <strong>and</strong> carafe lid in the dishwasher, top-rack only orh<strong>and</strong>-wash in warm, sudsy water.5. To clean inside of reservoir cover, open the cover allowing it to rest in the openposition.6. Pull water showerhead out from under the guide, wipe surfaces with a damp cloth,then place water spreader under guide <strong>and</strong> close the cover.MAINTAINING YOUR <strong>COFFEEMAKER</strong>Mineral deposits left by hard water can clog your coffeemaker. Cleaning with vinegar isrecommended every 3 months.USING VINEGAR1. Pour white vinegar into water reservoir up to 2-cup level on water window.2. Add cold water up to 5-cup line.3. Place permanent filter into the filter basket holder <strong>and</strong> close the cover.4. Set empty carafe on the "Keep Hot" plate.5. Turn on coffeemaker <strong>and</strong> let half the cleaning solution brew into carafe (untill waterlevel goes down to around "3"). Turn off coffeemaker <strong>and</strong> let it soak for at least15 minutes to soften the deposits.6. Turn on coffeemaker <strong>and</strong> brew remaining cleaning solution into carafe.7. Turn off coffeemaker, empty carafe <strong>and</strong> remove permanent filter.8. Fill reservoir with cold water to 5-cup line, replace empty carafe; then, turn oncoffeemaker for a complete brew cycle to flush out remaining cleaning solution. Youmay have to repeat this to eliminate the vinegar smell/taste.9. Wash the brew basket <strong>and</strong> carafe as instructed in CLEANING.CLEANING TIPS• Excessive steaming or a prolonged brewing cycle is a sign that a cleaning is needed.• The frequency of flushing out deposits is determined by your usage <strong>and</strong> waterhardness.• During cleaning, more steaming occurs than when brewing coffee <strong>and</strong> there may besome spitting.NOTESENGLISH20 21
NEED HELP?For service, repair or any questions regarding your appliance, call theappropriate 800 number on cover of this book. Please DO NOT return theproduct to the place of purchase. Also, please DO NOT mail product back tomanufacturer, nor bring it to a service center. You may also want to consult thewebsite listed on the cover of this manual.Two-Year Limited Warranty(Applies only in the United States <strong>and</strong> Canada)What does it cover?• Any defect in material or workmanship provided; however, <strong>Applica</strong>’s liabilitywill not exceed the purchase price of product.For how long?• Two years after date of purchase.What will we do to help you?• Provide you with a reasonably similar replacement product that is either newor factory refurbished.How do you get service?• Save your receipt as proof of date of sale.• Visit the online service website at www.prodprotect.com/applica, or call tollfree1-800-231-9786, for general warranty service.• If you need parts or accessories, please call 1-800-738-0245.What does your warranty not cover?• Damage from commercial use• Damage from misuse, abuse or neglect• Products that have been modified in any way• Products used or serviced outside the country of purchase• Glass parts <strong>and</strong> other accessory items that are packed with the unit• Shipping <strong>and</strong> h<strong>and</strong>ling costs associated with the replacement of the unit• Consequential or incidental damages (Please note, however, that somestates do not allow the exclusion or limitation of consequential or incidentaldamages, so this limitation may not apply to you.)How does state law relate to this warranty?• This warranty gives you specific legal rights. You may also have other rightsthat vary from state to state or province to province.WARNINGRISK OF FIRE OR ELECTRIC SHOCK. DO NOT OPEN.The lightning symbol refers to “dangerous voltage”; the exclamation symbol refersto maintenance instructions. See below.WARNING: To reduce the risk of fire or electric shock, do not remove the coverof the coffeemaker. There are no user-serviceable parts inside. Repair should bedone by authorized service personnel only.is a registered trademark of The Black & Decker Corporation,Towson, Maryl<strong>and</strong>, USAENGLISHMade in People’s Republic of China22Printed in People’s Republic of China23
Copyright © 2009 <strong>Applica</strong> Consumer Products, Inc.2009/11-13-59S/E24Impreso en papel reciclado.Printed on recycled paper.


