CUBETA DE ELECTROFORESIS VERTICAL VERTICAL ... - Auxilab
CUBETA DE ELECTROFORESIS VERTICAL VERTICAL ... - Auxilab
CUBETA DE ELECTROFORESIS VERTICAL VERTICAL ... - Auxilab

You also want an ePaper? Increase the reach of your titles
YUMPU automatically turns print PDFs into web optimized ePapers that Google loves.
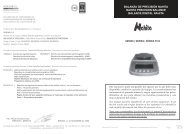
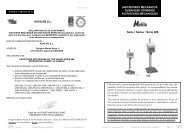
6. TROUBLESHOOTINGPROBLEMThe glass plates crackThe gel dye front is not straightBands are distortedLanes are broader at the bottomthan the topDye migration is slower than expectedCOMMENTSENGLISH- The wedge to hold the gel is too tight.- The voltage or current setting may be toohigh, causing overheating.- Electrophoresis buffer may be too concentrated,leading to a too high current and overheatingat a constant voltage.- Verify that the cell is level during electrophoresis- The gel may be overheated. Reduce the voltageor current. Use chilled electrophoresis buffer.- Samples may contain a excess of salt. Dialyzeor desalt before loading on gel.- Samples may be too concentrated. Dilute samplesor reduce voltage.- Samples may contain precipitate material.Centrifuge or filter before loading on gel.- The upper surface of the resolving gel maynot be flat. Use water-saturated n-butanol tooverlay the gel solution, rather than water or buffer.- Sample wells may contain small fragments ofpolyacrylamide. Rinse wells thoroughly beforeloading samples.- This is normal if adjoining lanes are not loadedwith similar samples. It is also normal forpolyacrylamyde gradient gels.- The electrophoresis buffer may be too concentrated.Check buffer preparation procedure. If theconcentration is high, at constant current the voltagewill be lower than usual.- Check voltage or current settings on powersupply.- Check for secure connections of lid and powercords.INDICE <strong>DE</strong> CONTENIDOS1. APLICACIONES <strong>DE</strong>L INSTRUMENTO2. <strong>DE</strong>SCRIPCIÓN Y COMPONENTES3. ESPECIFICACIONES TÉCNICAS4. MODO <strong>DE</strong> USO5. FÓRMULAS PARA LA PREPARACIÓN <strong>DE</strong> GELES Y TAMPONES6. RESOLUCIÓN <strong>DE</strong> PROBLEMAS7. MANTENIMIENTO Y LIMPIEZAANEXO I: CERTIFICADO CE1. APLICACIONES <strong>DE</strong>L INSTRUMENTOCASTELLANOLa cubeta de electroforesis vertical de Nahita está diseñada para la separación de proteínasy ácidos nucleicos en geles de poliacrilamida. El equipo viene completo con todoslos accesorios necesarios para la preparación y electroforesis de geles de 82x82 mm.2. <strong>DE</strong>SCRIPCIÓN Y COMPONENTES1. Tanque externo2. Conectores tipo banana3. Soporte para geles4. Cuña5. Tapa6. Cables fijos52623335511121315Dye migration is slower than expected- The electrophoresis buffer may be too diluted.Check buffer preparation procedure.- Check voltage or current settings on powersupply.14Page 26 Instruction manual 53001001 Version 1 May-07Revisión 1, Mayo-07 Manual de instrucciones 53001001 Pág. 3
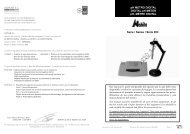
CASTELLANOComponentesLa cubeta de electroforesis vertical de Nahita se suministra junto con todos los componentesnecesarios para la preparación y electroforesis de geles de poliacrilamida de 82x82mm:- Tanque externo: fabricado en material acrílico de alta calidad y en una sola pieza sin junturasque evita las fugas de líquido y las roturas. Es un dispositivo duradero y transparenteresistente a la acción de agentes químicos y presión y temperaturas elevadas.- Tapa: al igual que el tanque, está fabricada con un material de elevada calidad y resistencia.Presenta dos cables fijos de alimentación con conector tipo banana para conectar ala fuente de alimentación.- Soporte para geles: en el mismo soporte se lleva a cabo la polimerización y posterior electroforesisde los geles minimizando su manipulación y facilitando y agilizando el trabajo.El soporte incluye 2 cuñas de plástico para asegurar una buena fijación de los geles y electrodosde platino puro resistentes a la corrosión y a elevadas temperaturas.Cuñas de plásticoSoporte para geles1.Resolving gelCHART 3. To prepare 10 mL of acrylamide solutions of different percentages:ComponentAcrylamide stock solution [29%(w/v) acrylamide, 1% (w/v) bisacrylamidein deionized water]1.5 M Tris-HCl (pH 8.8)10% (w/v) SDSDeionized water10% (w/v) ammonium persulphateTEMED2. Stacking gelENGLISHNOTE: acrylamide is a powerful neurotoxin. Always wear gloves whenhandling solutions, gels or equipment that has been in contact with thissubstance and strictly observe the safety regulations indicated for its manipulationand disposal of wastes.Volume (mL) according to acrylamide %7.5 % 10 % 12.5 % 15 %2.5 3.3 4.2 4.02.5 2.5 2.5 2.50.1 0.1 0.1 0.14.8 4.0 3.1 2.30.1 0.1 0.1 0.10.01 0.01 0.01 0.01- Dispositivo para preparación de geles: es un dispositivoexclusivo que presenta una junta desilicona en la base, proporcionando un perfectosellado para evitar fugas de poliacrilamida queconstituyen un riesgo tóxico para el usuario.Presenta también unas palancas laterales condos posiciones para la preparación de geles de1.0 y 1.5 mm grosor respectivamente.JuntasiliconaCHART 4. To prepare 10 mL of 4 % acrylamide solution:ComponentVolume (mL)Acrylamide stock solution [29% (w/v) acrylamide, 1.31% (w/v) bisacrylamide in deionized water]1.5 M Tris-HCl (pH 8.8) 2.510% (w/v) SDS 0.1Deionized water 6.010% (w/v) ammonium persulphate 0.1PalancaTEMED 0.001- Placas de vidrio: el equipo incluye 2 placas devidrio planas y 2 placas formateadas y con espaciadoresfijos de 1.0 y 1.5 mm grosor para la preparacióny electroforesis de los geles. Además,el equipo incluye también una placa de vidriogrueso para utilizar en caso de realizar la electroforesisde un único gelPlaca planaPlaca formateada3. Electrophoresis bufferCHART 5. Final concentration of the different components of the electrophoresis buffer.Final pH must be 8.3.ComponentTris baseGlycineFinal concentration24.8 M192 mMSDS0.1% (w/v)Pág. 4 Manual de instrucciones 53001001 Revisión 1 Mayo-07Version 1 May-07 Instruction manual 53001001 Page 25
ENGLISHred to one of the glass plates.- Transfer the gel to a proper container for further staining or electroblotting.Note: for electroblotting, please refer to Nahita Transfer Module (ref. 53001501) user'smanual.- Clean the tank and all the accessories with deionized water. Allow to air dry.Security• The vertical electrophoresis cell must be used by previously qualified staff that knowshow the equipment works thanks to the user manual.• Put the electrophoresis cell on top of a horizontal, plane and stable table.• Do not put the electrophoresis cell near any warm supply (burners, blowlamps…).Avoid vibrations.• Vertical electrophoresis cell is intended to use with a DC power supply. An inadequatemanipulation may cause burns, hurts and damages to the electrical installation.• Never connect the electrophoresis cell to the power supply before starting the experiment.The electrical current supplied by the power supply is transmitted to the cellthrough the leads and the lid assembly.• Never use the electrophoresis cell without the lid.• Always turn off the power supply before opening and removing the lid.• Never operate damaged or leaking equipment.• Certain reagents indicated for use in this manual are of a hazardous nature. User shouldstrictly observe the safety regulations indicated for such products.• The equipments used in these procedures (e.g. power supplies) should be used followingthe manufacturer safety recommendations.- Peines: el equipo se suministra con un conjuntode 8 peines de 1.0 y 1.5 mm de grosor ycon 10 ó 15 dientes3. ESPECIFICACIONES TÉCNICASReferencia 53001001Nº geles 1 ó 2Dimensiones gelDimensiones placa vidrio82x82 mm102x82 mmNº muestras 10 ó 15 por gelGrosor peinesVolumen sol. tampón (aprox.)Condiciones trabajoVoltaje electroforesisTiempo de electroforesisDimensiones cubeta (LxAxH)4. MODOS <strong>DE</strong> USO1 y 1.5 mm500 mL0-40 ºC y < 80% HR200 V45-60 min100x140x150 mmCASTELLANO5. FORMULATION FOR GELS AND ELECTROPHORESIS BUFFERPolyacrylamide gels are generated by polymerization of acrylamide as a effect of across-linking agent, the bis-acrylamide, and in the presence of an initiator and a catalyticagent. Usually, TEMED (N,N,N,N'-tetramethylenediamine) is used as the initiator and thepersulphate ion (S 2 O 8 2- ) added in the form of ammonium persulphate as the catalyticagent.Gel porosity depends on the relative proportions of polyacrylamide and bis-acrylamide;a higher bis-acrylamide vs. acrylamide proportion generates a smaller pore. Usually,gels are designated with the acrylamide/bisacrylamide % that contain, thus, this valuedeterminates the separation range of the gel. Most of proteins are well separated in 5-10% gels; a lower percentage (larger pore) is better to separate larger proteins.Protein electrophoresis is usually performed in denaturalizing conditions, it means,proteins lose their three-dimensional structure and migrate completely denaturalized.Migration is therefore, proportional to the charge and size of the molecule but not to itsshape. The most commonly used denaturalizing agent is the sodium dodecyl sulphate(SDS).The formulas for preparation of electrophoresis buffer and discontinuous denaturinggels for protein separation are shown below.4.1 Inspección preliminarDesembale la cubeta de electroforesis vertical, retire todas las protecciones y asegúresede que no presenta ningún daño debido al transporte. De ser así, comuníquelo inmediatamentea su transportista o suministrador para que pueda hacer las debidas reclamacionesen el plazo establecido.Guarde el embalaje, ya que siempre se deben realizar las devoluciones en su embalajeoriginal con todos los accesorios suministrados.Compruebe los accesorios que usted debe recibir junto al equipo:- 1 Tanque externo- 1 Tapa con cables fijos- 1 Soporte para geles- 2 Cuñas de plástico- 1 Dispositivo para preparación de geles- 2 Almohadillas de silicona- Juego de placas de vidrio:- 4 placas de vidrio planas- 2 placas de vidrio planas y formateadas con espaciadores fijos de 1.0mmPage 24 Instruction manual 53001001 Version 1 May-07Revisión 1, Mayo-07 Manual de instrucciones 53001001 Pág. 5
CASTELLANO- 2 placas de vidrio planas y formateadas con espaciadores fijos de 1.5 mm- 1 placa de vidrio gruesa para electroforesis de 1 único gel- Juego de peines:- 2 peines de 1.0 mm grosor y 10 dientes- 2 peines de 1.0 mm grosor y 15 dientes- 2 peines de 1.5 mm grosor y 10 dientes- 2 peines de 1.5 mm grosor y 15 dientes- Garantía- Manual de instruccionesSolo aceptamos devoluciones de equipos en los 15 días posteriores al envío y siempreque vengan completos en su embalaje original.4.2 Modo de usoNota: el equipo está diseñado exclusivamente para su uso en el laboratorio; la temperaturaambiente debe ser de 0-40 ºC y la humedad relativa no debe exceder del 80%. Parasu utilización, coloque la cubeta de electroforesis en una superficie, plana, lisa y libre devibraciones.• Montaje para preparación del gelAsegúrese de que las placas de vidrio planas, las placas formateadas, los peines, lascuñas y el soporte para geles están perfectamente limpios y secos antes de proceder almontaje.Superponga sobre una placa de vidrio plana, una placa de vidrio formateada, de maneraque los espaciadores fijos queden entre ambas placas. Ambas placas deben estar perfectamentealineadas en sus bordes; para ello, colóquelas verticalmente sobre una superficieplana y asegúrese de que los bordes laterales estén alineados.Inserte las placas colocadas de esta manera, en uno de los compartimentos del soportepara geles de manera que la placa formateada quede hacia el interior. Sin soltar las placas,inserte una de las cuñas (la parte plana queda en contacto con las placas de vidrio) yempújela hacia abajo para que las placas de vidrio queden bien sujetas.placa formateadaplaca planacuñasoporte para gelesPág. 6 Manual de instrucciones 53001001 Revisión 1 Mayo-07ENGLISHmust have enough glycerol to be denser than the electrophoresis buffer.Well visualization may be difficult; to facilitate localization of wells you can use twomethods:a. Before putting the gel support into the tank and with the comb still placed betweenboth glass plates, outline the wells with a water resistant marking pen on the nonnotchedglass plate.b. Illuminate the bench area with a light source placed directly behind the electrophoresiscell.CHART 2 Maximum volume of sample depending on the type of comb and the gel thickness.Gel thickness (mm) Nº teeth Vol/well ( μ L)1.0 10 5015 301.5 10 7515 45Note: volumes given are approximate.Note: To obtain the best results and promote a uniform running of the stacking front,load sample buffer in all the wells whether or not they contain samples- Fill the tank with approximately 250 mL of electrophoresis buffer. Buffer levelmust not exceed the wells.• Electrophoresis- Cover the electrophoresis tank with the lid. Note: The lid is especially designedto fit in a unique position thus assuring that the black lead is always connected to theblack electrode and the red lead to the red electrode.- Plug the power leads to a power supply.- Switch the power supply on and set the desired parameters. Standard SDS gelelectrophoresis is conveniently performed 125 to 200 V (constant voltage) for 45 min to 1h. Note: The first time the apparatus is used for particular type of gel, monitor the progressof electrophoresis frequently.- When electrophoresis is complete (the marker dye front has reached the bottomof the gel), turn the power supply off and disconnect the leads.• After electrophoresis- Remove the lid- Gently pull out the wedge that holds the gel; it may be slippery in detergentcontainingsolutions. Take the gel support out from the electrophoresis tank.- Properly discard the electrophoresis buffer. Do not reuse the buffer.- Take the glass plate assembly with the gel out from the gel support and putthem on a paper towel.- Use a thin spatula or similar to separate the glass plates. The gel will be adheVersion 1 May-07 Instruction manual 53001001 Page 23
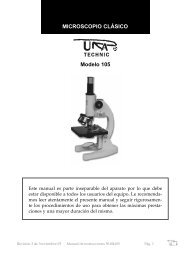
ENGLISHGel thicknessAcrylamide volume1 gel 2 gelsDiscontinuous Continuous Discontinuous Continuous1.0 mm 3.4 mL 6.7 mL 6.7 mL 13.5 mL1.5 mm 5 mL 10 mL 10 mL 20 mL- Carefully pipet the resolving acrylamide gel filling the space between bothglass plates until 1 or 2 mm above the desired level. Overlay the solution with a few dropsof water-saturated n-butanol to eliminate bubbles and separate the gel from the air oxygen(inhibitor of polymerization).- Wait until the gel polymerizes (15-30 min); polymerization is faster at 4 ºC.Note: keep the assembly vertical while the acrylamide polymerizes.- After the resolving gel has polymerized, pour off any unpolymerized solutionand n-butanol. Rinse the top of the gel with deionized water and drain thoroughly.- Add the stacking gel solution to within 2 mm of the top of the notched plate.Eliminate any bubble formed.- Insert completely the comb. Be careful not to trap bubbles under and betweenthe comb teeth.- Allow the acrylamide solution to polymerize completely.2. Continuous buffer system gels- Prepare the volume of acrylamide solution depending on gel thickness (Chart 1).- Carefully pipet the acrylamide solution filling the space between both glass platesto within 2 mm of the top of the notched plate. Eliminate any bubble formed.- Insert completely the comb. Be careful not to trap bubbles under and betweenthe comb teeth.- Allow the acrylamide solution to polymerize completely.• Assembly for gel electrophoresis and sample loadingGel electrophoresis is performed on the same support in which it has been cast, minimizinggel manipulation and speeding up and making work easier.Proceed as follows:- Turn the handles of the gel casting device to their original position.- Take off the support with the polymerized gels from the gel casting device andput it into the electrophoresis tank. Note: the special design of the tank and the gel supportallows to fit them at the correct position.- Carefully remove the comb by pulling it vertically and rinse with deionizedwater.- Fill the central part of the gel support with approximately 150 mL of electrophoresisbuffer. Make sure that the wells are completely covered with buffer.- Carefully rinse the wells with deionized water or electrophoresis buffer to eliminatebubbles or acrylamide fragments. Use a syringe or pipette.- Load the samples into the wells with a micropipette. The sample volume thatcan be loaded in each well depending on gel thickness is shown in chart 2. Note: samplesPage 22 Instruction manual 53001001 Version 1 May-07CASTELLANONota: si se va a realizar la electroforesis de un único gel, en el otro compartimento delsoporte para geles inserte la aplaca de vidrio gruesa y a continuación la cuña. Si se vana utilizar dos geles, proceda de la manera anteriormente indicada para la preparación delsegundo gel.Coja el dispositivo para la preparación delgel y coloque en su base la almohadilla desilicona. Nota: La almohadilla debe estarperfectamente limpia y seca. Después de lapreparación del gel, retire la junta de silicona,lávela con agua y déjela secar al aire. Noutilice ningún otro método para la limpiezade la junta.Coloque el soporte en el dispositivo parapreparación de geles. La base del soportedebe quedar perfectamente sellada con lajunta de silicona para evitar fugas a la horade añadir la solución de acrilamidaPresione hacia adentro las palancas blancassituadas a cada lado del dispositivo depreparación de geles; gírelas simultáneamentehasta que las flechas señalen la posiciónadecuada según el grosor del gel (cadapalanca presenta marcas con indicación 1.5 ó1.0 que hacen referencia al grosor del gel; siestá preparando geles de 1.5 mm grosordeberá girar las palancas hasta que las flechasseñalen las marcas con la anotación 1.5).• Preparación del gelNota: no toque las palancas del dispositivo durante todo el proceso de preparación delgel, ya que se podría aflojar el montaje produciendo fugas de las soluciones de acrilamida.1. Sistema tampón discontinuoEste sistema es especialmente adecuado para analizar muestras diluidas sin perderresolución. La preparación del gel se debe realizar con dos tampones distintos. De estamanera, el primer tampón (primera parte del gel, "stacking gel") asegura la migración detodas las proteínas en el frente de migración, produciéndose la acumulación de todas lasproteínas cargadas en el pocillo. Cuando el frente de migración llega al segundo tampón(gel resolutivo o de separación) comienza realmente la separación de las proteínas.Revisión 1, Mayo-07 Manual de instrucciones 53001001 Pág. 7
CASTELLANOEl primer gel ('stacking') es de mayor poro (menor porcentaje de acrilamida+bisacrilamida)y tiene un pH más ácido que el segundo gel que es el que realmente separa las proteínas.Para la preparación de este tipo de geles proceda de la siguiente manera:- Prepare el volumen de solución de acrilamida según el grosor del gel (Tabla 1)TABLA 1. Volumen de solución de acrilamida en función del grosor del gel. En los gelesdiscontinuos, el volumen indicado hace referencia al volumen de solución que hay quepreparar para cada tipo de gel (stacking o resolutivo).Grosor gelVolumen acrilamida1 gel 2 gelesDiscontinuo Continuo Discontinuo Continuo1.0 mm 3.4 mL 6.7 mL 6.7 mL 13.5 mL1.5 mm 5 mL 10 mL 10 mL 20 mLPipetee cuidadosamente la solución de gel resolutivo de acrilamida, llenando el espacioentre las dos placas de vidrio hasta 1 ó 2 mm por encima del nivel deseado. Cubra el bordedel gel con unas gotas de n-butanol saturado en agua para eliminar posibles burbujas yseparar el gel del oxigeno del aire (inhibidor de la polimerización).Espere hasta que el gel polimerice (15-30 min); la polimerización es más rápida a 4 ºC.Nota: mantenga siempre el montaje en posición vertical durante la polimerización.Cuando el gel resolutivo haya polimerizado, retire los restos de n-butanol y acrilamidasin polimerizar. Lave la parte superior del gel con agua desionizada y retire completamenteel agua de lavado.Añada con una pipeta la solución de gel de apilamiento ("stacking gel") hasta unos 2mm por debajo del borde de la placa formateada. Elimine cualquier burbuja que se hayaformado.Inserte totalmente el peine poniendo especial cuidado en que no queden atrapadas burbujasentre y bajo los dientes del peine.Deje que el gel polimerice totalmente.2. Sistema tampón continuoPrepare el volumen de solución de acrilamida necesario según el grosor del gel (Tabla 1)Pipeteando cuidadosamente, llene con solución de acrilamida el espacio entre las dosplacas de vidrio hasta unos 2 mm por debajo del borde de la placa formateada. Eliminecualquier burbuja que se haya formado.Inserte totalmente el peine poniendo especial cuidado en que no queden atrapadas burbujasentre y bajo los dientes del peine.Deje que el gel polimerice totalmente.• Montaje para electroforesis del gel y carga de muestrasLa electroforesis del gel se realiza en el mismo soporte en el que ha sido preparado,minimizando su manipulación y agilizando enormemente el proceso.Proceda de la siguiente manera:- Take the exclusive gel casting deviceand put on its base a silicon rubber cushion.Note: The cushion must be perfectly clean anddry. After gel casting, remove the silicon rubbercushion, rinse it with water and allow to airdry. Do not use any other method to clean thesilicon cushion.- Put the gel support into the gel castingdevice. The base of the gel support mustbe perfectly sealed with the silicon rubber cushionto avoid acrylamide solution leaks- Press inwards the white handlesplaced on each side of the gel casting device;turn them simultaneously until the arrowspoint at the correct position depending onthe gel thickness (each handle presentsmarks with 1.5 or 1.0 indications that refer tothe gel thickness; if a 1.5 mm thick gel isgoing to be cast, handles should be turneduntil the arrows point at the 1.5 marks).• Gel castingNote: Do not move the handles of the gel casting device during gel casting process sincethe assembly could be loosened resulting in acrylamide leaks.1. Discontinuous buffer system gelsThis system is specially recommended to analyze diluted samples without resolutionlost. Gel casting must be performed with two different buffers. The first buffer (stackinggel) assures the accumulation of all proteins loaded in each well at the migration front.When the migration front reaches the second buffer (resolving gel), the separation of thedifferent proteins begins. The first gel, stacking gel, presents a larger pore (lower acrylamide/bisacrylamidepercentage) and presents a more acid pH than the resolving gel.For casting this type of gels procceed as fllows:- Prepare the volume of acrylamide solution depending on gel thickness (Chart 1).CHART 1. Volume of acrylamide solution that must be prepared depending on gel thickness.In discontinuous gels, the indicated volume refers to the volume of solution thatmust be prepared for each type of gel (stacking or resolving gel).Pág. 8 Manual de instrucciones 53001001 Revisión 1 Mayo-07Version 1 May-07 Instruction manual 53001001 Page 21
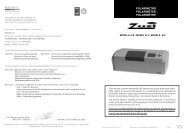
ENGLISH- 1 thick glass plate for single gel electrophoresis- Set of combs:- 2 combs 1.0 mm thick and with 10 teeth- 2 combs 1.0 mm thick and with 15 teeth- 2 combs 1.5 mm thick and with 10 teeth- 2 combs 1.5 mm thick and with 15 teeth- Warranty- User's manualWe will only accept any equipment return within 15 days after delivery and providedit comes in its original wrapping.4.2 Operating modeNote: the equipment is exclusively designed for laboratory purposes; ambient temperatemust be 0-40 ºC and relative humidity must not exceed the 80%. Prior to use, put theelectrophoresis cell on a plane, smooth and vibration-free surface.• Assembly for gel casting- Make sure that the flat glass plates, the notched glass plates, the combs, thewedges and the gel support are perfectly clean and dry before assembling the differentcomponents.- Put a notched glass plate on a flat plate, so as the fixed spacers stay betweenboth plates. The edges of both plates must be perfectly aligned; to get this, put the platesvertically on a plane surface and make sure that the lateral edges are aligned.- Put both plates into a compartment of the gel support so as the notched platefaces inside. Holding the plates, insert a plastic wedge (the flan side is in contact with theglass plates) and push it downwards to perfectly hold the glass plates.Notched glass plateGlass plateWedgeGel casting supportCASTELLANO- Gire las palancas del dispositivo para la preparación de los geles hasta su posicióninicial.- Retire el soporte con los geles del dispositivo e introdúzcalo en el tanque deelectroforesis. Nota: el diseño especial del tanque y del soporte para geles, solamente permiteque el soporte sea colocado en la posición correcta.- Retire cuidadosamente el peine tirando de él verticalmente y aclárelo con abundanteagua desionizada.- Llene la parte central del soporte para geles con unos 150 mL de tampón deelectroforesis. Asegúrese de que los pocillos están completamente cubiertos de tampón deelectroforesis.- Lave los pocillos con agua desionizada o con tampón de electroforesis para eliminarposibles burbujas formadas o restos de acrilamida. Para ello, ayúdese con una pipetao jeringuilla.- Con ayuda de una pipeta, cargue las muestras en los pocillos. El volumen demuestra que se puede cargar en cada pocillo dependiendo del grosor del gel se muestraen la tabla 2. Nota: las muestras deben tener la cantidad suficiente de glicerol para hacerque la muestra sea más densa que la solución de electroforesis y así caiga hacia el fondodel pocillo.La visualización de los pocillos puede ser difícil, para facilitar su localización puede utilizardos métodos:a. Antes de introducir el soporte con los geles en el tanque de electroforesis y conel peine todavía colocado, marque con un rotulador permanente los límites de los pocillossobre la placa de vidrio no formateada.b. Ilumine la zona de trabajo con una fuente de luz situada justo detrás de lacubeta de electroforesis.TABLA 2. Volumen máximo de muestra en función del tipo de peine y del grosor del gel.Grosor gel (mm) Nº dientes Vol/pocillo ( L)1.0 10 5015 301.5 10 7515 45Nota: los volúmenes indicados son aproximadosNota: Para asegurar unos buenos resultados y una migración uniforme del frente delgel, no deje ningún pocillo vacío; en aquellos pocillos que queden libres añada tampón decarga.μNote: if a single gel electrophoresis is going to be performed, put the thick glass plateinto the other compartment of the gel support and hold it with the other plastic wedge.In case of a double gel electrophoresis, proceed as previously indicated to prepare thesecond gel.- Llene el tanque con unos 250 mL de tampón de electroforesis. El nivel de tampón nodebe sobrepasar la altura a la que están los pocillos.Page 20 Instruction manual 53001001 Version 1 May-07Revisión 1, Mayo-07 Manual de instrucciones 53001001 Pág. 9
CASTELLANO• Electroforesis- Coloque la tapa sobre el tanque de electroforesis Nota: El diseño especial de latapa únicamente permite colocarla en una posición asegurando siempre que el cable negroestá conectado al electrodo negro y el cable rojo al electrodo rojo.- Conecte los cables con la fuente de alimentación.- Encienda la fuente de alimentación y seleccione los parámetros deseados. Laelectroforesis de geles estándar en presencia de SDS se lleva a cabo a un voltaje constantede 125-200 V durante 45 min ó 1 h. Nota: La primera vez que realice la electroforesis paraun determinado tipo de gel vigile frecuentemente el proceso de migración.- Cuando la electroforesis se haya completado (el colorante del frente de migraciónalcanza la parte inferior del gel) apague la fuente de alimentación y desconecte loscables de la tapa.• Después de la electroforesis- Retire la tapa- Suavemente retire la cuña que sujeta el gel en el soporte; en soluciones que contengandetergente puede estar resbaladiza. Saque el soporte para geles del tanque de electroforesis.- Vacíe el tanque en el recipiente de desechos adecuado. No reutilice la solucióntampón.- Saque las placas de vidrio con el gel del soporte para geles y colóquelas sobreun papel.- Utilice una espátula o similar para separar ambas placas de vidrio. El gel permaneceráadherido a una de las placas de vidrio.- Pase el gel a una cubeta con colorante o a un soporte adecuado para una posteriortransferencia de las moléculas a una membrana. Nota: para una posterior transferencia,por favor, consulte el manual de instrucciones del Módulo de Transferencia Nahita(ref. 53001501)- Limpie el tanque y todos los accesorios con agua desionizada. Deje secar al aire.Seguridad• La cubeta de electroforesis vertical debe ser utilizada por personal cualificado previamente,que conozca el equipo y su manejo mediante el manual de uso.• Coloque la cubeta de electroforesis sobre una mesa horizontal, plana y estable.• No coloque la cubeta de electroforesis en zonas próximas a fuentes de calor (mecheros,sopletes...). Evite las vibraciones en el lugar de trabajo.• La cubeta de electroforesis vertical está preparada para ser conectada a una fuente dealimentación de CA. Una manipulación no adecuada puede resultar en quemaduras, heridasy daños a la instalación eléctrica.• Nunca conecte la cubeta de electroforesis a la fuente de alimentación antes de comenzarel experimento. La corriente eléctrica proporcionada por la fuente de alimentación setransmite a la cubeta a través de los cables y la conexión de la tapa• Nunca intente utilizar la cubeta de electroforesis sin la tapa puesta.• Apague siempre la fuente de alimentación antes de abrir la cubeta y retirar la tapa.• Nunca utilice equipos dañados, rotos o con fugas de líquido.- Combs: the equipment is supplied with a setof 8 combs of 1.0 and 1.5 mm thick and with 10or 15 teeth.3. TECHNICAL SPECIFICATIONSCode 53001001Nº gels 1 or 2Gel dimensionsGlass plate dimensions82x82 mm102x85 mmNº samples 10 or 15 per gelComb thicknessBuffer volume (approx.)Working conditionsElectrophoresis voltageRunning timeCell dimensions (LxWxH)4. OPERATING MO<strong>DE</strong>1 and 1.5 mm500 mL0-40 ºC and < 80% RH200 V45-60 min100x140x150 mmENGLISH4.1 Preliminary inspectionUnwrap the vertical electrophoresis cell, take off all protections and make sure it doesnot present any damage because of the shipment. In case it presents any damage tell itimmediately to your transport agent or dealer so that they can make the claims in thecorrect time limit.Please keep the original wrapping; you will always need it for returns enclosed with allthe accessories supplied.Please check that all the accessories are enclosed with the equipment:- 1 External tank- 1 Lid with fixed leads- 1 Gel support- 2 plastic wedges- 1 Gel casting device- 2 Silicon rubber cushions- Set of glass plates:- 4 flat glass plates- 2 flat and notched glass plates with 1.0 mm thick fixed spacers- 2 flat and notched glass plates with 1.5 mm thick fixed spacersPág. 10 Manual de instrucciones 53001001 Revisión 1 Mayo-07 Version 1 May-07 Instruction manual 53001001 Page 19
ENGLISHComponentsNahita vertical electrophoresis cell is supplied together with all the necessary componentsfor preparation and electrophoresis of polyacrylamide gels (82x82 mm):- External tank: made of a unique seamless high quality acrylic material piece to avoidleakage and breakage. It is a durable and transparent device resistant to chemical agentsand high pressure and temperatures.- Lid: it is also made of a high quality and resistant material. It presents two fixed powerleads with banana connector to be plugged to a power supply.- Gel support: gel casting and electrophoresis are performed at the same support minimizinggel manipulation and speeding up and making work easier. The support includes2 plastic wedges to hold the gel assembly and pure platinum electrodes resistant to corrosionand high temperatures.Cuñas de plástico- Gel casting device: it is an exclusive devicethat presents a silicon rubber cushion on itsbase, allowing a perfect sealing to avoid polyacrylamideleaks that constitute a toxic risk forthe user. It also presents two white handles withtwo positions for casting gels of 1.0 and 1.5 mmthick respectively.- Glass plates: the equipment includes 2 flatglass plates and 2 notched plates with fixed spacersof 1.0 and 1.5 mm thick for casting and electrophoresisof gels. The equipment also includesa thick glass plate to use in case of carrying outa single gel electrophoresis.Gel casting supportRubbercushionplaca planaCrankplaca formateadaPage 18 Instruction manual 53001001 Version 1 May-07CASTELLANO• Determinados reactivos indicados en este manual son peligrosos. El usuario deberáobservar estrictamente las normas de seguridad indicadas para dichos productos.• El usuario deberá así mismo seguir las normas de seguridad específicas para los equiposutilizados en el procedimiento indicado en este manual (p.ej. fuentes de alimentación).5. FÓRMULAS PARA LA PREPARACIÓN <strong>DE</strong> GELES Y TAMPONESLos geles de poliacrilamida se forman por la polimerización de la acrilamida por acciónde un agente entrecruzador, la bis-acrilamida, en presencia de un iniciador y un catalizador.Como iniciador se suele utilizar TEMED (N,N,N,N'-tetrametilnediamina) y comocatalizador el ión persulfato (S 2 O 2- 8 ) que se añade en forma de persulfato amónico.La porosidad del gel viene determinada por las proporciones relativas de poliacrilamiday bis-acrilamida, siendo menor el poro cuanta más bisacrilamida vs. acrilamida se use.Los geles se denominan habitualmente en función de % acrilamida/bisacrilamida que contienen,siendo este valor el que determina el rango de separación del gel. La mayoría delas proteínas se separan bien en el rango de 5 a 10%; un menor porcentaje (mayor tamañode poro) es mejor para separar proteínas de gran tamaño.Generalmente la electroforesis de proteínas se realiza en condiciones desnaturalizantes,es decir, las proteínas migran totalmente desnaturalizadas (pierden su estructura tridimensional).De este modo, la migración es proporcional a la carga y el tamaño de la molécula,pero no a su forma. El agente desnaturalizante más comúnmente empleado es eldodecilsulfato sódico (SDS).A continuación se detallan las fórmulas para la preparación de geles discontinuos paraseparación de proteínas en condiciones desnaturalizantes, y del tampón de electroforesis.1. Gel resolutivoNOTA: la acrilamida es una potente neurotoxina. Lleve guantes en todomomento cuando manipule soluciones, geles o equipos que hayan estado encontacto con esta sustancia y observe estrictamente las normas de seguridadindicadas para su manipulación y eliminación de residuos.TABLA 3. Fórmula para preparar 10 mL de solución de acrilamida de distinto %.ComponenteVolumen (mL) según el % acrilamida7.5 % 10 % 12.5 % 15 %Solución stock de acrilamida [29% 2.5 3.3 4.2 4.0(p/v) acrilamida, 1% (p/v) bisacrilamidaen agua desionizada]1.5 M Tris-HCl (pH 8.8)2.5 2.5 2.5 2.510% (p/v) SDS0.1 0.1 0.1 0.1Agua desionizada4.8 4.0 3.1 2.310% (p/v) Persulfato amónico 0.1 0.1 0.1 0.1TEMED0.01 0.01 0.01 0.01Revisión 1, Mayo-07 Manual de instrucciones 53001001 Pág. 11
2. Gel de acumulación (stacking gel)TABLA 4. Fórmula para preparar 10 mL de solución de acrilamida al 4%ComponenteVolumen (mL)Solución stock de acrilamida [29% (p/v) acrilamida, 1.31% (p/v) bisacrilamida en agua des ionizada]1.5 M Tris-HCl (pH 8.8) 2.510% (p/v) SDS 0.1Agua desionizada 6.010% (p/v) Persulfato amónico 0.1TEMED 0.0013. Tampón de electroforesisCASTELLANOTABLA 5. Concentración final de los distintos componentes del tampón de electroforesis.El pH final debe ser de 8.3.ComponenteTris baseGlicinaSDS6. RESOLUCIÓN <strong>DE</strong> PROBLEMASPROBLEMALa placas de vidrio se rompenEl frente del gel no es rectoConcentración final24.8 M192 mM0.1% (p/v)COMENTARIOS- La cuña para sujetar el gel está demasiadoapretada.- El voltaje o la corriente son demasiado elevadosproduciendo un sobrecalentamiento.- El tampón de electroforesis está demasiadoconcentrado haciendo que la corriente sea demasiadoalta a un voltaje constante y produciendosobrecalentamiento.- Compruebe que la cubeta está bien niveladadurante la electroforesis- El gel puede estar sobrecalentado. Reduzca elvoltaje o la corriente. Utilice tampón de electroforesispreviamente enfriado.IN<strong>DE</strong>X OF CONTENTS1. USES OF THE INSTRUMENT2. <strong>DE</strong>SCRIPTION AND COMPONENTS3. TECHNICAL SPECIFICATIONS4. OPERATING MO<strong>DE</strong>5. FORMULATION FOR GELS AND ELECTROPHORESIS BUFFER6. TROUBLESHOOTING7. MAINTENANCE AND CLEANINGANNEX I: CE CERTIFICATE1. USES OF THE INSTRUMENTENGLISHNahita horizontal electrophoresis cell is specially designed for separating proteins andnucleic acids in polyacrylamide gels. The equipment is provided complete with all thenecessary accessories for preparation and electrophoresis of 82x82 mm gels.2. <strong>DE</strong>SCRIPTION AND COMPONENTS1. Tanque externo2. Conectores tipo banana3. Soporte para geles4. Cuña5. Tapa6. Cables fijos15264231717191924292728Pág. 12 Manual de instrucciones 53001001 Revisión 1 Mayo-07Version 1 May-07 Instruction manual 53001001 Page 17
ENGLISHThank you for choosing this equipment. We sincerely wish that you enjoy your Nahitavertical electrophoresis cell. We highly recommend looking after this equipment accordingto what is stated in this manual.Nahita develops its products according to the CE marking regulations as well asemphasizing the ergonomics and security for its user.The correct using of the equipment and its good quality will permit you to enjoy thisequipment for years.The improper use of the equipment can cause accidents and electric discharges, circuitbreakers, fires, damages, etc. Please read the point of Maintenance, where we expose thesecurity notes.TO GET THE BEST RESULTS AND A HIGHER DURATION OF THE EQUIP-MENT IT IS ADVISABLE TO READ THOROUGHLY THIS MANUAL BEFOREOPERATING WITH THE EQUIPMENT.Please bear in mind the following:• This manual is inseparable from the Nahita vertical electrophoresis cell, so it should beavailable for all the users of this equipment.• You should carefully handle the electrophoresis cell avoiding sudden movements,knocks, free fall of heavy / sharp objects on it.• If you have any doubt about setting up, installation or functioning do not hesitate incontacting your wholesaler. You can also tell us any doubts or suggestions you have bycontacting Nahita Technical Assistance Department by email to asistencia@auxilab.es orby telephone: +34 807 117 040 (0.30 Euros/min).• This equipment is protected under the Warranties and consumer goods regulation(10/2003).• Overhaul is not covered by the equipment warranty.• Accessories (including their loss) are not covered by the product's warranty. Thewarranty neither covers piece's deterioration due to the course of time.• Please make sure you keep the invoice, either for having the right to claim or asking forwarranty coverage. In case you have to send the equipment to Nahita Technical AssistanceDepartment you should enclose the original invoice or a copy as guarantee.• Please do not forget filling the warranty certificate and send it before 15 days after thedate of purchase.• Manufacturer reserves the right to modify or improve the manual or equipment.ATTENTION!! IF EQUIPMENTS ARE NOT PROPERLY CLEAN ANDDISINFECTED THEY WOULD NOT BE ALLOWED TO REPAIR BY OURTECHNICAL SERVICE.Las bandas están distorsionadasLas calles son más anchas en laparte inferior que en la parte superiordel gelLa migración del colorante del frentedel gel es más lenta de lo esperadoLa migración del colorante del frentedel gel es más rápida de lo esperado7. MANTENIMIENTO Y LIMPIEZACASTELLANO- Las muestras contienen un exceso de sal.Dialice o reduzca la concentración de sal en lasmuestras antes de cargarlas en los pocillos.- Las muestras están demasiado concentradas.Dilúyalas o reduzca el voltaje.- Las muestras contienen precipitados.Centrifugue o filtre las muestras antes de la cargadel gel.- El límite superior del gel resolutivo no esplano. Utilice n-butanol saturado en agua paracubrir el límite superior del gel en lugar de aguao tampón.- Los pocillos contienen restos de poliacrilamida.Lave bien los pocillos antes de cargar lasmuestras.- Esto es normal si las calles adyacentes no secargan con muestras similares. Es también normalen geles de gradiente de acrilamida.- El tampón de electroforesis está demasiadoconcentrado. Compruebe el procedimiento parala preparación del tampón. Si la concentración eselevada, a corriente constante el voltaje serámenor del esperado.- Compruebe los parámetros (voltaje y corriente)de la fuente de alimentación.- Compruebe las conexiones de los cables y dela tapa.- El tampón de electroforesis está demasiadodiluido. Compruebe el procedimiento para lapreparación del tampón.- Compruebe los parámetros (voltaje y corriente)de la fuente de alimentación.Para un adecuado funcionamiento de la cubeta de electroforesis vertical es necesarioseguir algunas recomendaciones.IN<strong>DE</strong>X OF LANGUAGESSpanishEnglish2-1516-28Nota: Todas las normas de utilización citadas anteriormente carecerán de valor si nose realiza una continua labor de mantenimiento.Page 16 Instruction manual 53001001 Version 1 May-07Revisión 1, Mayo-07 Manual de instrucciones 53001001 Pág. 13
CASTELLANO• Siga las instrucciones y advertencias relativas a este manual.• Tenga este manual siempre a mano para que cualquier persona pueda consultarlo.• Utilice siempre componentes y repuestos originales. Puede ser que otros dispositivossean parecidos, pero su empleo puede dañar el equipo.• Nunca esterilice mediante autoclave o calor los distintos componentes de la cubeta.• No exponga el aparato a productos como fenol, benceno, acetona, solventes hidrocarbonatoshalogenados o alcoholes de laboratorio no diluidos.• Evite la exposición prolongada del equipo o sus componentes a la luz UV.• Realice periódicamente una sencilla inspección de los componentes eléctricos para asegurarun buen funcionamiento del equipo y garantizar la seguridad del usuario:- Si los conectores tipo banana del soporte para geles o de los cables se mueveno balancean o si muestran signos de corrosión, deberá reemplazarlos.- Si los cables están dañados o muestran signos de desgaste, deberá reemplazarlos.Limpieza• Después de cada uso, limpie los distintos componentes del equipo suavemente conagua y detergentes no abrasivos y aclárelos con agua desionizada. Nota: ponga especialcuidado en no dañar el cable de los electrodos cuando limpie el soporte para geles.• Seque los componentes con un trapo suave o déjelos secar al aire.• Nunca utilice productos abrasivos, estropajos o productos que puedan rayar, ya quedeterioran el equipo, limitando su vida útil.¡ATENCIÓN! NO SE ADMITIRÁ NINGÚN APARATO PARA REPARARQUE NO ESTÉ <strong>DE</strong>BIDAMENTE LIMPIO Y <strong>DE</strong>SINFECTADO.ANEXO I: CERTIFICADO CEAUXILAB S.L.Están diseñados y fabricados de acuerdo a:ENGLISH<strong>DE</strong>CLARACIÓN CE <strong>DE</strong> CONFORMIDAD<strong>CUBETA</strong> <strong>DE</strong> <strong>ELECTROFORESIS</strong> <strong>VERTICAL</strong> NAHITA de <strong>Auxilab</strong>,S.L a la Directivade Máquinas (89/392/CEE modificada) y a las reglamentaciones adoptadas para sutransposiciónNOMBRE <strong>DE</strong>L FABRICANTE / IMPORTADOR:AUXILAB, S.L.DIRECCIÓN: Polígono Morea Norte, 831191 Beriáin (Navarra)<strong>DE</strong>CLARAMOS QUE:<strong>CUBETA</strong> <strong>ELECTROFORESIS</strong> <strong>VERTICAL</strong>53001001• Directiva 89/392/CEE, incluidas las modificaciones de la misma, y las reglamentacionesnacionales que la transponen.• Directiva 89/336/CEE modificada sobre compatibilidad electromagnética.• Directiva 73/23/CEE modificada sobre seguridad eléctrica.INSTRUCCIONES SOBRE PROTECCIÓN <strong>DE</strong>L MEDIOAMBIENTENo se deshaga de este equipo tirándolo a la basura ordinaria cuandohaya terminado su ciclo de vida; llévelo a un punto de recogida para elreciclaje de aparatos eléctricos y electrónicos. No contiene elementospeligrosos, tóxicos para el humano pero una eliminación no adecuada, perjudicaría almedio ambiente.Los materiales son reciclables tal como se indica en la marcación. Al reciclar materialesu otras formas de reutilización de aparatos antiguos, esta Ud. Haciendo una contribuciónimportante a la protección del medio ambiente.Por favor póngase en contacto con la administración de su comunidad para que le asesorensobre los puntos de recogida.Y que se han aplicado las siguientes normas armonizadas (o parte de ellas):UNE 292-1/-2/-2/A1,UNE-EN 1050, UNE-EN 614-1,UNE-EN 1037, UNE-EN1088, UNE-EN 547, UNE-EN 953, UNE-EN 294, UNE-EN 418, UNE-EN 894-1, UNE-EN 894-2, UNE-EN 954-1, UNE-EN 60204-1, UNE 61010-1/A2, UNE-EN61010-2-051BERIAIN a 04 de JUNIO 2007Fdo: ALFONSO AINCIBURU SANZDIRECTOR/GERENTEPolígono Morea Norte, 8 31191 Beriain (Navarra) - Spain. Tel. 948 310 513 Fax 948 312 071Internet: www.auxilab.es · Email: correo@auxilab.esPág. 14 Manual de instrucciones 53001001 Revisión 1 Mayo-07Revisión 1, Mayo-07 Manual de instrucciones 53001001 Pág. 15