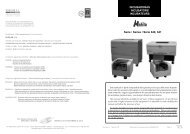
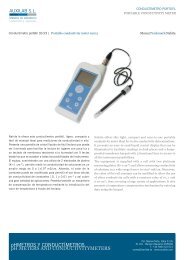
pH METRO DIGITAL DIGITAL pH METER Serie / Series / 907 - Auxilab
pH METRO DIGITAL DIGITAL pH METER Serie / Series / 907 - Auxilab
pH METRO DIGITAL DIGITAL pH METER Serie / Series / 907 - Auxilab
- No tags were found...

Create successful ePaper yourself
Turn your PDF publications into a flip-book with our unique Google optimized e-Paper software.
CASTELLANOA. Calibración en 1 puntoProceda de la siguiente manera:- Limpie el electrodo con agua destilada y séquelo. Sumérjalo unos 4 cm junto ala sonda de temperatura en la solución patrón, girándolo suavemente. La sonda de temperaturadebe estar próxima al electrodo.- Pulse el botón CAL (1.7). En el <strong>pH</strong>-metro visualizaremos STD1 y el valor de latemperatura.- Cuando aparezca en pantalla el valor del <strong>pH</strong> de forma estable, presione ENTER(1.2). Con los botones (1.10) ajuste el valor de <strong>pH</strong> al de la solución patrón utilizada ypresione de nuevo ENTER (1.2). En pantalla se visualizará el valor del <strong>pH</strong> y de la pendientede la curva (K) y "STD1 FINISHED!". La calibración en 1 punto habrá finalizado.- Para volver a la función de medición de <strong>pH</strong> pulse el botón <strong>pH</strong> (1.5). B. Calibración en 2 puntosProceda de la siguiente manera:- Limpie el electrodo con agua destilada y séquelo. Sumérjalo unos 4 cm junto ala sonda de temperatura en la solución patrón A, girándolo suavemente. La sonda de temperaturadebe estar próxima al electrodo.- Pulse el botón CAL (1.7). En el <strong>pH</strong>-metro visualizaremos STD1 y el valor de latemperatura.- Cuando aparezca en pantalla el valor del <strong>pH</strong> de forma estable, presione ENTER(1.2). Con los botones (1.10) ajuste el valor de <strong>pH</strong> al de la solución patrón A utilizaday presione de nuevo ENTER (1.2). En pantalla se visualizará el valor del <strong>pH</strong> y de la pendientede la curva (K) y "STD1 FINISHED!".- Saque el electrodo de la solución A, lávelo con agua destilada y séquelo.Introdúzcalo en la solución patrón B junto con la sonda de temperatura.- Pulse de nuevo el botón CAL (1.7), en el <strong>pH</strong>-metro visualizaremos STD2 y elvalor de la temperatura.- Cuando aparezca en pantalla el valor del <strong>pH</strong> de forma estable, presione ENTER(1.2). Con los botones (1.10) ajuste el valor de <strong>pH</strong> al de la solución patrón B utilizaday presione de nuevo ENTER (1.2). En pantalla se visualizará el valor del <strong>pH</strong> y de la pendientede la curva (K) y "STD2 FINISHED!".La calibración en 2 puntos habrá finalizado.- Para volver a la función de medición de <strong>pH</strong> pulse el botón <strong>pH</strong> (1.5). Selección del punto isopotencial• El <strong>pH</strong>-metro Nahita dispone de selección del punto isopotencial, según las característicasde la disolución que se va a analizar:• Soluciones preparadas con agua normal, seleccione el punto isopotencial <strong>pH</strong> 7.00.• Soluciones preparadas con agua pura y ultrapura, seleccione el punto isopotencial <strong>pH</strong>12.00.• Soluciones preparadas con agua amonio, seleccione el punto isopotencial <strong>pH</strong> 17.00.wire and to the other end to the <strong>pH</strong>-meter connector.ENGLISHNeither the manufacturer nor the distributor will assume any responsibility for thedamages produced to the equipment during its installation or damages to people sufferedby the improper use of the electric connection. The tension should be 220V 50Hz± 10%.• Electrode connectionPlease connect the electrode (1.16) to the connector situated at the back part of theequipment (2.2).Note: Nahita <strong>pH</strong>-meter <strong>907</strong> can be also used with other <strong>pH</strong> electrodes available on themarket provided they present a BNC connector.• Temperature probe connectionPlease connect the temperature probe (1.17) to the corresponding socket connector atthe back part of the equipment (2.5).• Turn the <strong>pH</strong>-meter on by pressing the ON/OFF button (1.4); the equipment automaticallyenters in <strong>pH</strong> measuring function.<strong>pH</strong>-meter calibrationNahita <strong>pH</strong>-meter <strong>907</strong> can be automatically or manually calibrated at 1 or 2 points.Standards preparationThe <strong>pH</strong>-meter includes the following standard solutions that are supplied individuallypackaged: <strong>pH</strong> 4.00 (25 ºC), <strong>pH</strong> 6.86 (25 ºC), <strong>pH</strong> 9.18 (25 ºC).Empty the contents of one of the packages into a clean beaker and add 100 mL of distilledwater. Dissolve well the powder and if necessary, add a little more water. Once thepackaged content is dissolved, pour the obtained solution into a 250 mL volumetric flaskand fill it with distilled water until it reaches the volume mark.Automatic calibrationSelect automatic calibration mode. For this, press CAL button (1.7) and with buttons(1.10) select the automatic calibration mode (AUTO). Press ENTER (1.2) and you willvisualize on display the <strong>pH</strong> and temperature values, and the STD1 command.A. Calibration at 1 pointOne point calibration means that the equipment is calibrated with a unique standardsolution. We recommend using the <strong>pH</strong> 6.86 (25 ºC) standard solution.Proceed as the following:- Rinse the electrode with distilled water and dry it. Immerse the electrode andthe temperature probe 4 cm (approx.) in the standard solution while turning gently. Thetemperature probe must be next to the electrode. Pág. 8 Manual de instrucciones 50<strong>907</strong>000 Revisión 1 de Octubre-06Version 1 October-06 Instruction manual 506<strong>907</strong>000 Page 17