NON-CONTACT AC VOLTAGE DETECTOR - Ega Master
NON-CONTACT AC VOLTAGE DETECTOR - Ega Master
NON-CONTACT AC VOLTAGE DETECTOR - Ega Master

Create successful ePaper yourself
Turn your PDF publications into a flip-book with our unique Google optimized e-Paper software.
• Cuando se utiliza el buscapolos fuera del rango de voltaje indicado, la unidad no tienerespuesta. Esto no significa que el inductor probado no tenga tensión, y por lo tanto, no utilicepartes del cuerpo para tocarlo.• Al realizar comprobaciones, mantenga los dedos en las protecciones.SÍMBOLOS ELÉCTRICOS INTERN<strong>AC</strong>IONALESLos símbolos utilizados tanto en el medidor como en este manual se explican a continuación:ESPECIFIC<strong>AC</strong>IONES• Los indicadores LED y del sonido (beep)• Rango de voltaje: 90V<strong>AC</strong> ~ 1000V<strong>AC</strong>• Categoría de medición IV 1000V por lEC61010• Temperatura:> De operación: -10~50°C> De almacenamiento: 10~50°C• Humedad: ≤95%• Altitud: 2000m• Grado de contaminación 2• Batería: 2x 1.5V AAAOPER<strong>AC</strong>IÓN1) Encienda la unidad pulsando el botón de encendido una vez, la unidad emitirá un pitido y elLED parpadeará dos veces. Cuando la unidad está en modo de espera, el LED parpadea dos vecescada 1.5 segundos.2) Coloque la punta de la sonda en el circuito o cerca del mismo. Un pitido y el parpadeo delLED indican la presencia de voltaje (90Vac a 1000V<strong>AC</strong>).3) Para desactivar el pitido, podrá pulsar el botón de encendido una vez, un pitido indicará quela alarma sonora está desactivada. Estando desactivada la alarma, sólo el LED parpadeará durantelas comprobaciónes. Es una manera de ahorrar batería. Pulse el botón para alternar entre el modocon señal acústica y el modo silencio. (Un Beep: modo silencio. Dos Beep: desactivado modosilencio)4) Con el fin de ahorrar batería, la unidad dispone de apagado automático si no se utilizadurante 3 minutos. Dos pitidos cortos y un posterior pitido largo indicarán que la unidad se haapagado.5) Mantenga pulsado el botón de encendido durante dos segundos para apagar la unidad. Unpitido largo nos indicará que el buscapolos está apagado.3
ESTADO DE LA BATERÍAEl LED no parpadeará cuando se encienda el aparato o durante su utilización si la batería esinferior a 2V. Las señales acusticas serán más débiles.MANTENIMIENTOSustitución de las pilas1) Desconecte la unidad.2) Con una mano sujete la parte roja de la unidad. Coloque el pulgar de la otra mano en la tapa(gris oscura) del buscapolos tal y como se indica en la siguiente figura3) Tire de la tapa de la manera indicada en la siguiente figura4) Cambie las pilas (observe la polaridad). 2 x1 0,5 V AAA5) Presione de nuevo la tapa trasera.NOTAS¡IMPORTANTE!El fabricante no se responsabiliza de los daños o mal funcionamiento del aparato en caso de queno se use correctamente o se haya utilizado para trabajos para los que no esté diseñado.Según la directiva sobre residuos eléctricos de aparatos eléctricos y electrónicos (RAEE),éstos deberán recogerse y tratarse por separado. Si en el futuro tiene que deshacerse de este producto,no se deshaga de él junto con la basura doméstica. Póngase en contacto con su distribuidorpara proceder a su reciclaje de manera gratuita cuando sea posible.4
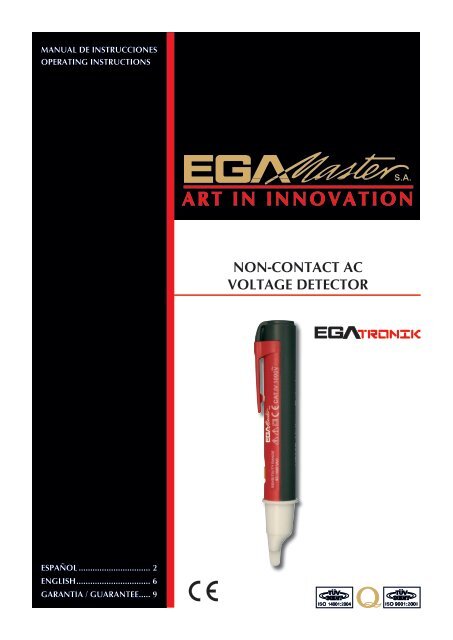
ENGLISHOVERVIEWThis Operating Manual covers infomation on safety and cautions. Read and understand all ofthe instructions and safety information in this manual before operating or servicing this tool. Failureto understand how to safely operate this tool could result in an accident causing serious injury ordeath.The non-contact <strong>AC</strong> voltage detector is intended to check for the presence of <strong>AC</strong> voltage,signaling the user with a beep and a flashing LED.SAFETY INFORMATIONThis unit complies with the standards EN61010-1, UL61010-1 and CASC 22.1 No. 61010-1safety measurement requirement: in pollution degree 2, overvoltage category (CAT. IV 1000V).CAT.lV: Primary supply level, overhead lines, cable systems etc. Some examples include cables,meters, transformers, and other exterior equipment owned by the power utility.Use the unit only as specified in this operating manual, otherwise the protection provided by theunit may be impaired.• Do not use the unit if it is wet, damaged or cannot operate correctly.• Do not apply more than the rated voltage between the probe tip and earth ground.• When the unit working at voltage over 30V in <strong>AC</strong>, special care should be taken for there isdanger of electric shock.• Follow the local countries safety requirements and standards.Warning• This unit is only designed for the specialist who has certain technical knowledge to use.• This unit is intended to check for the presence of <strong>AC</strong> voltage, the voltage range is 90~1000V.Make sure the tested inductor possible voltage range before carrying out checking.• When you cannot sure the tested inductor voltage range, the unit does not have any response.It does not mean the tested inductor does not have dangerous voltage, do not use any part of thebody to touch the tested inductor.• When carrying out checking, keep your fingers behind the probe tip finger guards.6
INTERNATIONAL ELECTRICAL SYMBOLSSymbols used on the Meter and in this manual are explained below:SPECIFICATIONS• Indicators: LED and Beep• Voltage range: 90V<strong>AC</strong> ~ 1000V<strong>AC</strong>• Measurement Category IV 1000V per lEC61010• Temperature:> Operating: -10~50°C> Storage: 10~50°C• Humidity: ≤95%• Altitude: 2000m• Pollution Degree 2• Battery: 2x 1.5V AAAOPERATION1) Turn the unit on by pressing the power button once, the unit beeps and LED flashes twotimes. When the unit is under standby mode, the LED keeps flashing two times in every 1.5seconds.2) Place the probe tip on or near the circuit or unit to be tested. Beep and flashing LED indicatethe presence of voltage (90V<strong>AC</strong> to 1000V<strong>AC</strong>).3) To turn off the beeper, you could press the power button once after turning on the unit, thenyou will hear a beep sound indicating the beeper is off. After the beeper is off, only LED will flashduring checking. This way could save battery. Press power button to toggle between beeper modeand silent mode. Beep two times enters beeper mode, while beep one time enters silent mode.4) In order to save battery, the unit will auto power off when it is not used for around 3 minutes.The beeper sounds 2 times continuously and then one long beep means the unit is power off.5) Press and hold the power button for two seconds to turn the unit off, there will be one secondlong beep.BATTERY INDICATIONThe LED will not flash when you turn the unit on or during checking if the battery is less than2V. The beep sounds will still have but may be weaker.7
CERTIFICADO DE GARANTIAGUARANTEE CERTIFICATECERTIFICAT DE GARANTIEARTICULO / ITEM / ARTICLE:.....................................................................................................................Nº DE SERIE / SERIE Nº / Nº SERIE:............................................................................................................DISTRIBUIDOR / DISTRIBUTOR / DISTRIBUTEUR:....................................................................................PAIS / COUNTRY / PAYS:..............................................................................TEL.:....................................FECHA DE VENTA / SALE DATE / DATE VENTE:.........................................................................................NOMBRE DEL COMPRADOR / BUYER NAME / NOM DE L’<strong>AC</strong>HETEUR:...................................................TEL. COMPRADOR / BUYER TEL. / TEL. DE L’<strong>AC</strong>HETEUR:.........................................................................EGA MASTER GARANTIZA AL COMPRADOR DE ESTA MAQUINA LA GARANTIA TOTAL (DURANTE 12 MESES), DE LAS PIEZAS CON DEFECTOS DE FABRIC<strong>AC</strong>ION. ESTAGARANTIA NO CUBRE AQUELLAS PIEZAS QUE POR SU USO NORMAL TIENEN UN DESGASTE. PARA OBTENER LA VALIDEZ DE LA GARANTIA , ES ABSOLUTAMENTEIMPRESCINDIBLE QUE COMPLETE Y REMITA ESTE DOCUMENTO A EGA MASTER , DENTRO DE LOS SIETE DIAS A PARTIR DE LA FECHA DE COMPRA.EGA MASTER GUARANTEES TO THE BUYER OF THIS M<strong>AC</strong>HINE THE TOTAL WARRANTY (DURING 12 MONTHS), OF THE PIECES WITH MANUF<strong>AC</strong>TURING FAULTS.THIS GUARANTEE DOES NOT COVER THOSE PIECES WORN OUT DUE TO A NORMAL USE. IN ORDER TO OBTAIN THE VALIDITY OF THIS WARRANTY , IT IS ABSOLUTE-LY NECESSARY TO FULFILL THIS DOCUMENT AND RESEND IT TO EGA MASTER WITHIN 7 DAYS FROM SALE DATE.EGA MASTER GARANTIE A L’<strong>AC</strong>HETEUR DE CETTE M<strong>AC</strong>HINE LA GARANTIE TOTALE (PENDANT 12 MOIS) DES PIECES AVEC DEFAUTS DE FABRICATION. CETTE GARANTIENE COUVRE PAS LES PIECES QUE PAR UN USAGE NORMAL, SOIENT DETERIOREES. POUR OBTENIR LA VALIDITE DE LA GARANTIE, IL EST ABSOLUMENT IMPERATIFCOMPLETER ET ENVOYER CE DOCUMENT EGA MASTER, DANS UN DELAI DE 7 JOURS A PARTIR DE LA DATE D’<strong>AC</strong>HAT.SELLO / STAMP / C<strong>AC</strong>HETEJEMPLAR PARA EGA MASTER / COPY FOR EGA MASTER / EXEMPLAIRE POUR EGA MASTERCERTIFICADO DE GARANTIAGUARANTEE CERTIFICATECERTIFICAT DE GARANTIEARTICULO / ITEM / ARTICLE:.....................................................................................................................Nº DE SERIE / SERIE Nº / Nº SERIE:............................................................................................................DISTRIBUIDOR / DISTRIBUTOR / DISTRIBUTEUR:....................................................................................PAIS / COUNTRY / PAYS:..............................................................................TEL.:....................................FECHA DE VENTA / SALE DATE / DATE VENTE:.........................................................................................NOMBRE DEL COMPRADOR / BUYER NAME / NOM DE L’<strong>AC</strong>HETEUR:...................................................TEL. COMPRADOR / BUYER TEL. / TEL. DE L’<strong>AC</strong>HETEUR:.........................................................................EGA MASTER GARANTIZA AL COMPRADOR DE ESTA MAQUINA LA GARANTIA TOTAL (DURANTE 12 MESES), DE LAS PIEZAS CON DEFECTOS DE FABRIC<strong>AC</strong>ION. ESTAGARANTIA NO CUBRE AQUELLAS PIEZAS QUE POR SU USO NORMAL TIENEN UN DESGASTE. PARA OBTENER LA VALIDEZ DE LA GARANTIA , ES ABSOLUTAMENTEIMPRESCINDIBLE QUE COMPLETE Y REMITA ESTE DOCUMENTO A EGA MASTER , DENTRO DE LOS SIETE DIAS A PARTIR DE LA FECHA DE COMPRA.EGA MASTER GUARANTEES TO THE BUYER OF THIS M<strong>AC</strong>HINE THE TOTAL WARRANTY (DURING 12 MONTHS), OF THE PIECES WITH MANUF<strong>AC</strong>TURING FAULTS.THIS GUARANTEE DOES NOT COVER THOSE PIECES WORN OUT DUE TO A NORMAL USE. IN ORDER TO OBTAIN THE VALIDITY OF THIS WARRANTY , IT IS ABSOLUTE-LY NECESSARY TO FULFILL THIS DOCUMENT AND RESEND IT TO EGA MASTER WITHIN 7 DAYS FROM SALE DATE.EGA MASTER GARANTIE A L’<strong>AC</strong>HETEUR DE CETTE M<strong>AC</strong>HINE LA GARANTIE TOTALE (PENDANT 12 MOIS) DES PIECES AVEC DEFAUTS DE FABRICATION. CETTE GARANTIENE COUVRE PAS LES PIECES QUE PAR UN USAGE NORMAL, SOIENT DETERIOREES. POUR OBTENIR LA VALIDITE DE LA GARANTIE, IL EST ABSOLUMENT IMPERATIFCOMPLETER ET ENVOYER CE DOCUMENT EGA MASTER, DANS UN DELAI DE 7 JOURS A PARTIR DE LA DATE D’<strong>AC</strong>HAT.SELLO / STAMP / C<strong>AC</strong>HETEJEMPLAR PARA EL CLIENTE / COPY FOR THE CUSTOMER / EXEMPLAIRE POUR LE CLIENT
C/ ZORROLLETA 11, POL. IND. JUNDIZ01015 VITORIA, SPAIN P.O.B. APTDO. 5005TEL. 34 - 945 290 001 FAX. 34 - 945 290 141master@egamaster.comwww.egamaster.com