DA 8471 Power Peak E1:Power Peak E1.qxd - Robbe
DA 8471 Power Peak E1:Power Peak E1.qxd - Robbe
DA 8471 Power Peak E1:Power Peak E1.qxd - Robbe

You also want an ePaper? Increase the reach of your titles
YUMPU automatically turns print PDFs into web optimized ePapers that Google loves.
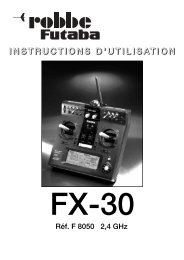
Bedienungsanleitung<strong>Power</strong> <strong>Peak</strong> <strong>E1</strong>Bestell Nr.<strong>8471</strong>Sehr geehrter Kunde,wir freuen uns, dass Sie sich für das hochleistungsfähigeComputer Automatik-Lade -gerät <strong>Power</strong> <strong>Peak</strong> <strong>E1</strong> aus dem robbeSortiment entschieden haben. Damit besitzenSie ein starkes Ladegerät mitAkkumanagement und Equalizer für denAnschluss an 12V DC.Trotz der einfachen Handhabung diesesLaders verlangt die Bedienung eines sohochwertigen automatischen Ladege räteswie dem <strong>Power</strong> <strong>Peak</strong> <strong>E1</strong> vom An wendereinige Kenntnisse. Durch diese Anleitungwird es Ihnen schnell gelingen, sich mitdem Gerät vertraut zu machen.Um dieses Ziel sicher zu erreichen, solltenSie die Be die nungs anleitung, insbesondereauch das Kapitel “Kleine Akkukunde”und die Sicherheitshinweise aufmerksamlesen, bevor Sie Ihr neues Ladegerät inBetrieb nehmen.Wir wünschen Ihnen viel Erfolg undFreude mit Ihrem neuen Ladegerät!HaftungsausschlussDieses Ladegerät ist ausschließlich fürdas Laden und Entladen von den in derAnleitung genannten Akkus konzipiertund zugelassen.robbe Modellsport übernimmt keinerleiHaftung bei anderweitiger Verwendung.Sowohl die Einhaltung der Betriebsanleitungals auch die Bedingungen und Methodenbeim Betrieb, Verwendung und Wartung desLadegerätes können von robbe-Modellsportnicht überwacht werden.Daher übernehmen wir keinerlei Haftung fürVerluste, Schäden oder Kosten, die sich ausfehlerhafter Verwendung und Betrieb ergebenoder in irgendeiner Weise damit zusammenhängen.Soweit gesetzlich zulässig ist dieVerpflichtung zur Schadenersatzleistung,gleich aus welchen Rechtsgründen, aufden Rechnungswert der an dem schadensstiftendenEreignis unmittelbarbeteiligten robbe-Produkt begrenzt.Dies gilt nicht, soweit nach zwingendengesetzlichen Vorschriften wegen Vorsatzesoder grober Fahrlässigkeit unbeschränktgehaftet werden muss.2
Bedienungsanleitung<strong>Power</strong> <strong>Peak</strong> <strong>E1</strong>Bestell Nr.<strong>8471</strong>InhaltsverzeichnisKapitelSeiteHaftungsauschluss . . . . . . . . . . . . . . . . . . . . . . . . . . . . . . . . . .2Inhaltsverzeichnis . . . . . . . . . . . . . . . . . . . . . . . . . . . . . . . . . . .31. Lieferumfang . . . . . . . . . . . . . . . . . . . . . . . . . . . . . . . . . . . . . . .42. Allgemeine Beschreibung . . . . . . . . . . . . . . . . . . . . . . . . . . . . .43. Bedienelemente . . . . . . . . . . . . . . . . . . . . . . . . . . . . . . . . . . . .53.1 Funktion der Bedienelemente . . . . . . . . . . . . . . . . . . . . . . . .5, 64. Technische Daten . . . . . . . . . . . . . . . . . . . . . . . . . . . . . . . . . . .65. Inbetriebnahme . . . . . . . . . . . . . . . . . . . . . . . . . . . . . . . . . . . .75.1 Anschluss des Akkus . . . . . . . . . . . . . . . . . . . . . . . . . . . . . . . .75.2 Equalizeranschluss . . . . . . . . . . . . . . . . . . . . . . . . . . . . . . . . . .86. Menüstruktur und Navigation . . . . . . . . . . . . . . . . . . . . . . . .8, 96.1 Übersicht Menüstruktur . . . . . . . . . . . . . . . . . . . . . . . . . . . . . . .97. Lade- Entladeausgang 1 “OUT 1 <strong>DA</strong>TEN” . . . . . . . . . . . . . . . .98. Akkueinstellung . . . . . . . . . . . . . . . . . . . . . . . . . . . . . . . . . . . .118.1 Akkueinstellung mit BID-CHIP/KEY . . . . . . . . . . . . . . . . . . . .139. Equalizer-Display . . . . . . . . . . . . . . . . . . . . . . . . . . . . . . . . . . .1410. Zyklus Daten . . . . . . . . . . . . . . . . . . . . . . . . . . . . . . . . . . . . . .1411. Ladeausgang 2 “OUT 2 <strong>DA</strong>TEN” . . . . . . . . . . . . . . . . . . . . . .1512. Nutzer Einstellungen “NUTZER EINST.” . . . . . . . . . . . . . . . . .1513. Reihenfolge beim Lade-Entladevorgang an OUT 1 . . . . . . . .1614. Lade-Entladevorgang mit BID-CHIP/KEY (nur OUT1) . . . . . .1714. Lade- / Entladevorgang mit BID-Chip/KEY . . . . . . . . . . . . . . .1815. Fehlermeldungen . . . . . . . . . . . . . . . . . . . . . . . . . . . . . . . . . .1916. Allgemeine Sicherheitshinweise . . . . . . . . . . . . . . . . . . . . . . .1917. Kleine Akkukunde . . . . . . . . . . . . . . . . . . . . . . . . . . . . . . . . . .2018. Beschreibung des CC-CV Ladeverfahrens . . . . . . . . . . . . . . .2019. Hinweise zu Bleiakkus . . . . . . . . . . . . . . . . . . . . . . . . . . . . . .2020. Hinweise zu Lithium Akkus (LiIO, LIPO, LIFE) . . . . . . . . . . . .2121. Beschreibung der “Delta <strong>Peak</strong>”-Abschaltung (NC/NiMH) . . . .2222. Hinweise zu Nickel Cadmium Akkus . . . . . . . . . . . . . . . . . . .2323. Hinweise zu Nickel Metall Hydrid Akkus . . . . . . . . . . . . . . . . .2324. Gewährleistung . . . . . . . . . . . . . . . . . . . . . . . . . . . . . . . . . . . .2425. Konformitätserklärung . . . . . . . . . . . . . . . . . . . . . . . . . . . . . . .2426. Empfohlenes Zubehör . . . . . . . . . . . . . . . . . . . . . . . . . . . . . . .2527. Service Adressen . . . . . . . . . . . . . . . . . . . . . . . . . . . . . . . . . .2628. Akku u. Geräteentsorgung . . . . . . . . . . . . . . . . . . . . . . . . . . . .273
Bedienungsanleitung<strong>Power</strong> <strong>Peak</strong> <strong>E1</strong>Bestell Nr.<strong>8471</strong>1. Lieferumfang1x <strong>Power</strong> <strong>Peak</strong> <strong>E1</strong>1x Temperatursensor1x BID-KEYÜber eine USB-Schnittstelle kann die Ladestationmit dem PC verbunden werden. Diebekannte und kostenlose PC-Software vonLogview zum Aufzeichnen, Speichern, Vergleichenund Ausdrucken wird auch dieDaten des <strong>Power</strong> <strong>Peak</strong> <strong>E1</strong> Laders bearbeitenkönnen.Downloadadresse : www.logview.infoMittels einem internen Speicher werden dieDaten auch dann aufgezeichnet, wenn keinPC angeschlossen ist. So dass auch nachträglichnoch die Daten ausgelesen undgespeichert werden können.2. Allgemeine BeschreibungHochleistungsfähige und formschöne Computer-Lade-Entladestationmit Akku mana -gement für alle gängigen Akkutypen. Daselegante und klare Design des Gerätes wirddurch das neue Cap-Touch-System ermöglicht.Kontaktlose Sensoren für die Schalter undden Drehgeber erlauben eine glatte undgeschlossene Oberfläche ohne hervorstehendeBedienelemente.Das 192 x 128 Pixel große Display ist in 12Zeilen aufgeteilt, wodurch sich eine große,leicht ablesbare Displayschrift ergibt.Im Display werden die wichtigsten Parameterdes laufenden Vorgangs als Zahlen odergrafisch dargestellt.Zukunftssicher dank Flash-Speichertechnologie.Durch Updates sind Software-Erweiterungenmöglich, oder es können neueAkku-Technologien angepasst oder implementiertwerden.Zur Sicherheit kann die Temperatur einesAkkus während des Ladens überwacht undangezeigt werden. Auch eine Abschaltungbei einer bestimmten Temperatur ist voreinstellbar.Integrierter Equalizer für 2 x 7-zellige Lithium-Ionen,LiPo, LiFe und Spezial-Akkus.Eines der Haupt-Features des <strong>Power</strong> <strong>Peak</strong><strong>E1</strong> ist das zukunftsweisende Batterie-IdentifikationsSystem (BID).Die Vielfalt derverschiedenenAkkutypen wirdimmer größer,wobei jederAkku typ sein“eigenes” Ladeverfahrenbenötigt. Schnell kann es passieren,dass man am Ladegerät eine falscheEinstellung vornimmt und schon hat derwertvolle Akku Schaden genommen.Das BID-System von robbe bietet einegeniale Lösung für dieses Problem. JedemAkku wird ein kleiner, leichter BID-Chip/ Keyzugeordnet.Er speichert alle relevanten Daten zum optimalenLaden und Entladen des Akkus. ZumLaden bzw. Entladen wird der auf dem Akkuangebrachte BID-Chip oder der im Liefer-4
Bedienungsanleitung<strong>Power</strong> <strong>Peak</strong> <strong>E1</strong>Bestell Nr.<strong>8471</strong>umfang enthaltene BID-Key mit dem<strong>Power</strong> <strong>Peak</strong> <strong>E1</strong> verbunden, er gibt demLader die Parameter vor.Es muss nur noch die ‘OUT1’-Taste betätigtwerden und der Lade- bzw. Entladevorgangbeginnt.Kein lästiges Suchen der Einstell-Parameterim Menü, maximaler Schutz vor Fehlbedienungund Speicherung der relevantenAkkudaten im BID-CHIP/KEY sind diebesonderen Vorteile des BID-Systems.Durch die Speicherung der wichtigstenDaten im BID-Chip/Key trägt man seineAkkudaten immer bei sich, diese könnensomit am Ladegerät leicht angezeigt werden.Diese Funktion ersetzt weitgehenddie Notwendigkeit einer PC-Softwaresowie Computertechnik,um sicheinen aktuellenÜberblick überden Akkuzustandzu verschaffen.3. Bedienelemente3.1 Funktion der BedienelementeUSBSchnittstelleStromversorgungLC-DisplayTemp. SensorAnschlussAusgang 2Anschluss fürVoltage SensorOut 2 TasteTemp. SensorOut 1 TasteBID-AnschlussAkkuanschluss OUT15
Bedienungsanleitung<strong>Power</strong> <strong>Peak</strong> <strong>E1</strong>Bestell Nr.<strong>8471</strong>SELECT Rad (Auswahlrad)Mit den Select Rad werden alleMenüparameter durch “Drehen”eingestellt.Pfeiltasten Aufwärts / AbwärtsMit diesen Tasten werden bei manuellemBetrieb, im Einstellmodus dieWerte der Parameter um einen Schrittvergrößert bzw. verkleinert und bei derMenüauswahl das folgende bzw. vorhergehendeMenü ausgewählt.Ein Halten der Taste bewirkt eine automatischeWeiterschaltung, welche beilängerem Halten beschleunigt.Enter-TasteMit der ‘ENTER’-Taste erfolgt die Bestätigungeiner Auswahl, z.B. die Aktivierungeines ausgewählten Menüs, oder die Übernahmeeines zuvor eingestellten Wertes.Taste OUT 1 und OUT 2Startet den Ladevorgang am jeweiligen Ausgang.Durch mehrmaliges Drücken dieserTaste kann für den Ausgang OUT1 dieLade-, Entlade-, oder Zyklus-Funktion aktiviertwerden. Durch Drücken der OUT2Taste wird nur die Ladefunktion gestartet.Piezosummer und LED`sDer Piezosummer quittiert jede Tastenbetätigungund zeigt das Lade- bzw. Entladeende,sowie einen aufgetretenen Fehlerakustisch an. Einstellbar im Nutzermenü.Die LED`s an den Tasten zeigen optisch dieTastenbetätigung an.4. Technische DatenBetriebsspannung:max. Stromaufnahme:Abschaltverfahren:NC / NiMH:Blei- und Lithium:Abmessungen:Ausgang 1 (OUT1)Zellenzahl:10-15V DC (Autobatterie) oder Netzteil 13,8 Volt mind. 30 A(keine Autobatterieladegeräte verwenden!)ca.37 AmpereAutomatisch, digitales-Delta-<strong>Peak</strong>-SystemAutomatisch, spannungsabhängig, CC-CV Verfahren170 x 175 x 85 mm1 ... 36 Zellen NC / NiMH,1 ... 14 Zellen LiIo (3,6V), LiPo (3,7V), LiFe (3,3V)1 ... 12 Zellen (2...24V) Bleiakku,1 ... 14 Zellen Spezial Akku (Kap. 13 Seite 17)Ladestrom: Auto, 0,1 ... 20A (max. 315W)Entladestrom: Auto, 0,1 ... 40A (max. 160W)Equalizingstrom: ca. 220mAErhaltungsladung: C/20 bei NC und NiMHEntladeschlussspannung: 0,5-1,1V / Zelle bei NC und NiMH2,5-3,6V / Zelle bei LiPo, LiIo, LiFe1,8V / Zelle bei BleiakkusFunktionen:Laden, Entladen, Entladen-Laden, Balancieren6
Bedienungsanleitung<strong>Power</strong> <strong>Peak</strong> <strong>E1</strong>Bestell Nr.<strong>8471</strong>Ladestrom in Abhängigkeit der Akku -spannung an OUT 1unter 15,75V20A15,75V-17,5V18A17,5V-21V15A21V-26,25V12A26,25V-31,5V10A31,5V-35V9A35V-39,37V8A39,37V-42V 7,5A42V-45V7A45V-48,46V 6,5A48,46V-52,5V6A52,5V-57,27V 5,5A57,27V-63V5Aüber 63V4A5. InbetriebnahmeDas Ladegerät an eine 12 V Bleibatterieanschließen. Unbedingt auf richtige Polung(rot = plus / schwarz = minus), sowie aufsicheren Kontakt der Klemmen achten.Es erscheint das Startdisplay mit Versionsnummerund voreingestelltem Nutzernamen.Entladeleistung: in Abhängigkeit derAkkuspannung an OUT 1unter 2V10A2V-4V40A4V-5,33V30A5,33V-6,4V25A6,4V-8V20A8V-8,88V18A8,88V-10,66V15A10,66V-13,33V12A13,33V-16V10A16V-17,77V9A17,77V-20V8A20V-22,85V7A22,85V-26,66V6A26,66V-29,09V 5,5A29,09V-32V5A32V-35,55V 4,5A35,55V-40V4A40V-45,71V 3,5A45,71V-53,33V3Aüber 53,33V2AAusgang 2 (OUT2)Zellenzahl:1 ... 8 Zellen NC / NiMH1 ... 3 Zellen LiPo (3,7V)1 ... 4 Zellen LiFe (3,3V)Ladestrom: 0,1 ... 2ALadeleistung: 28W, Strom wird entsprechendgeregeltFunktionen: LadenErhaltungsladung: 50 mA (bei NC, NiMH)Ende des Kalibriervorgangs abwarten(LED’s erlöschen), Enter-Taste drücken, eserscheint die Anzeige von Ausgang OUT 1.5.1 Anschluss des AkkusVerbinden Sie den Akku Polrichtig (rot =plus / schwarz = minus) mit den Anschlussbuchsendes Ausgangs OUT 1.Sofern ein Ladekabel-Adapter eingesetztwird, die Bananenstecker des Ladekabelsimmer zuerst am Ladegerät anschließen,dann am Akku (verhindert Kurzschluss desAkkus über die Bananenstecker).Beim Abklemmen in umgekehrter Reihenfolgevorgehen.Wichtig! Ladevorgang nicht starten bevordie erforderlichen Ladeparameter eingestelltsind. Bei falscher Einstellung kann derAkku Schaden nehmen, explodieren oderbrennen.7
Bedienungsanleitung<strong>Power</strong> <strong>Peak</strong> <strong>E1</strong>Bestell Nr.<strong>8471</strong>5.2 Equalizer Anschluss:Sofern ein Lithiumakku geladen werden soll,muss aus Sicherheitsgründen das VoltageSensor Kabel des Akkus am Gerät angeschlossenwerden. Der Stecker muss soeingesteckt werden, dass das schwarzeKabel (gemeinsamer Minuspol) mit derPfeilkennzeichnung übereinstimmt.Ohne diesen Anschluss kann derLadevorgang nicht gestartet werden.Ausnahme: Dies kann umgangen werdenwenn der Ladevorgang mit einemBID-Chip/Key gestartet wird.Hinweis:Werden zwei Akkupacks welche in Reihegeschaltet sind am Equalizer angeschlossen,so muss das Voltage Sensor-Anschlusskabel des Akkus an (1-7) angeschlossenwerden, an den die Minusleitungdes Ladegerätes angeschlossen ist.14 13 12 11 10 987654321-OUT 1+Akku 2Akku 16. Menüstruktur und NavigationAus dem Start Display gelangen Sie durchDrücken von Enter oder Select in das MenüOUT1 Daten.VOLTAGE SENSOR+++S1+S2+S3--Schematische Darstellung der Belegungdes Voltage Sensor Anschluss kabelsBis 7 Zellen immer den Anschluss (1-7) verwenden,nur bei Akkupacks mit mehr als 7Zellen wird der zweite Anschluss (8-14) mitbenutzt.Wichtig:Niemals mehr als ein VoltageSensorkabel pro Equalizereinganganschließen.Menü AuswählenVon dort aus gelangt man in die Menüs:“Equalizer”“Zyklus Daten”,“OUT 2 Daten”,“Nutzer Einst.”Mit den Select-Tasten/Rad in die 1.ZeileMenünamen (Out1 Daten) navigieren.Mit der “ENTER” Taste aktivieren (Hintergrundschwarz hinterlegt).Mit den Select-Tasten/Rad ein neues MenüauswählenMit Enter-Taste wieder deaktivieren.Die Select-Tasten/Rad stehen nun wiederzur Navigation im ausgewählten Menübereit.Untermenü AuswählenIn einigen Menüs stehen Untermenüs zurVerfügung, wie große grafische Anzeigeoder Spannungskurven. Dritte Zeile anfahren,mit Enter Untermenü aufrufen und miterneutem Enter schließen.8
Bedienungsanleitung<strong>Power</strong> <strong>Peak</strong> <strong>E1</strong>Bestell Nr.<strong>8471</strong>6.1 Übersicht der Menüstruktur4,3VCELL 3 : 4.332V2,9VBALANCE: 99,4%Große Grafische Anzeigeim UntermenüAuswahlAkkuspeicherplatz1...9Enter / SelectDas Equalizer Menü erscheint nurwenn ein Lithium Akku gewähltund das Sensorkabel angeschlossenist.Kurvenanzeige von Spannungund Temperatur im Untermenü.Einstellung der Ladeparameterfür Akkuspeicherplatz 1...9Kurvenanzeige der Spannung imUntermenüEinstellung der Ladeparameterfür BID-Chip oder Key.Nur wenn BID angesteckt ist.9
Bedienungsanleitung<strong>Power</strong> <strong>Peak</strong> <strong>E1</strong>Bestell Nr.<strong>8471</strong>7. Lade- Entladeausgang “OUT 1 Daten”Arbeitsmenü für den Laderausgang 1, die Navigation erfolgt mit Select-Tasten/Rad und derEnter-Taste wie vorstehend beschrieben.Zustandsanzeige-> = Laden
Bedienungsanleitung<strong>Power</strong> <strong>Peak</strong> <strong>E1</strong>Bestell Nr.<strong>8471</strong>DifferenzSpannungSpannungZeitdifferenzTemperaturDifferenzSpannungs -SkalaTemp.KurveDifferenzMesspunkteTemperatur-Skala.Zeit8. AkkueinstellungUm die Lade-Entladeparameter einzustellen,das Untermenü “Akkueinstellungen”aufrufen.Akkutyp:NICD - NC-AkkusNIMH - Nickel Metall Hydrid AkkusLIPO - Lithium Polymer Akkus (3,7 Volt)PB - Bleiakkus (2,30V)LiFE - Lithium Ferrum (A123 etc. 3,3 Volt)LiON - Lithium Ionen (3,6 Volt)Wenn der BID-CHIP/KEY eingesteckt iststeht auch noch ein Spezial- Verfahrenbereit.SPECIAL - Blei oder Lithium Akkus die nachdem CC-CV Verfahren geladen werden.Ladespannung von 2...6 Volt frei wählbarIn diesem Menü lassen sich alle wichtigenAkkuparameter wie z.B. Akkutyp, Zellenzahl,Kapazität, usw. einstellen.Folgende Werte müssen zwingend eingestelltwerden um einen Schaden amAkku zu vermeiden:Akkutyp, Zellenzahl, Delta-<strong>Peak</strong> Empfindlichkeit(nur bei NC oder NiMH Akkus),Kapazität, Lade- bzw. Entlade- Strom, Entladespannungund die Abschalttemperatur(nur für Ladevorgang).Einstelltips finden Sie unter der Rubrik“Kleine Akkukunde”.Ladespannung / <strong>Peak</strong>-EmpfindlichkeitJe nachdem welcher Akkutyp vorher ausgewähltwurde, erscheint in dieser Zeile dieEinstellmöglichkeit für Ladespannung (Lithiumund Bleiakkus, sowie Spezialakku)oder <strong>Peak</strong>-Abschalt-Empfindlichkeit fürNICD und NIMH-Akkus.AkkutypNICD = Std. 7 mV/Zelle (Bereich 3-25 mV)NIMH = Std. 5 mV/Zelle (Bereich 3-25 mV)Blei = Festwert 2,3 V/ ZelleLiPO = Festwert 4,2 V/ ZelleLiON = Festwert 4,1 V/ ZelleLiFE = Festwert 3,7 V / Zelle11
Bedienungsanleitung<strong>Power</strong> <strong>Peak</strong> <strong>E1</strong>Bestell Nr.<strong>8471</strong>Sollten Sie die variablen Werte ändern wollenbitte erst im Kapitel “Kleine Akkukunde”über die Auswirkung der Verstellung informieren.Sofern der BID CHIP/KEY eingesteckt ist,erscheint auch der Akkutyp Spezial,siehe Beschrei bung Pro gram mierungdes BID-Chip.ZellenzahlVoreinstellung der zu ladenden Zellenzahl1 ... 36 Zellen NC / NiMH1 ... 14 Zellen LiIo LiPo, LiFe1 ... 12 Zellen (2...24V) Bleiakku1 ... 14 Zellen Spezial Akku(nur mit BID)KapazitätBei diesem Ladegerät ist darauf zu achten,dass die Kapazitätsein stellung bei Lithiumakkuskeinen Einfluss auf die Lade- Entladestrom Einstellung besitzt. (1C Laderate).Der Lade-Entladestrom muss manuelleingestellt werden!Die Eingabe der Akkukapazität ist dennochwichtig, von Ihr wird der Erhaltungsladestrombei NC- und NiMH-Akkus abgeleitet.Erhaltungsladestrom= NC/NiMH = C/20).Auch für Blei und Lithium Akkus ist dieKapazitätsangabe wichtig, weil hierdurchder Abschaltpunkt für die Zustands -Anzeige“Ende” gesteuert wird.Bei Blei- und Lithium-Akkus die mit demCC-CV Verfahren geladen werden, wird die“ENDE” Meldung angezeigt, wenn die Zellenausbalanciert sind und der LadestromC/10 unterschreitet. Der Akku ist dann zu98% geladen und kann vom Gerät getrenntwerden.Verbleibt der Akku am Lader so wird dieserweiter geladen. Unterschreitet der Ladestromca. 50 mA so wird der Ladestromabgeschaltet.12LadestromFrei einstellbarer Ladestrom von 0,1 bis 20Ampere. Stellen Sie den entsprechendenWert gemäß der Angaben des Akkuherstellkersein. Gegebenenfalls machen Sie sichkundig im Kapitel Kleine Akkukunde welchenmaximalen Strom Ihr Akku verträgt.Wird die Automatische Stromeinstellung“AUTO” gewählt (nur NC / NIMH-Akkus), sovermisst der Lader den Innenwiderstanddes Akkus und regelt den Strom automatischauf den optimalen Wert ein.Beachten Sie die Abhängigkeit des Ladestromsvon der Zellenzahl.Siehe Tabelle Technische Daten.EntladestromFrei einstellbarer Ladestrom von 0,1 bis 40Ampere. Stellen Sie den entsprechendenWert gemäß der Angaben des Akkuherstellkersein. Gegebenenfalls machen Sie sichkundig im Kapitel Kleine Akkukunde welchenmaximalen Strom Ihr Akku verträgt.Wird die Automatische Stromeinstellung“AUTO” gewählt (nur NC / NIMH-Akkus), sovermisst der Lader den Innenwiderstanddes Akkus und regelt den Strom automatischauf den optimalen Wert ein.Beachten Sie die Abhängigkeit des Entladestromsvon der Zellenzahl.Siehe Tabelle Technische Daten.EntladespannungIn dieser Zeile besteht die Eingabemöglichkeitfür die Entladespannung .Folgende Vorgabewerte (Std.) und Einstellbereichesind verfügbar.AkkutypNICD = Std. 0,9 V/Zelle (Bereich 0,5-11V/Z)NIMH = Std. 1,0 V/Zelle (Bereich 0,5-11V/Z)Blei = Festwert 1,8 V/ ZelleLiPO = Std. 3,0 V/ Zelle (Bereich 2,5-3,6V/Z)LiON = Std. 3,0 V/ Zelle (Bereich 2,5-3,6V/Z)LiFE = Std. 2,7 V/ Zelle (Bereich 2,5-3,6V/Z)
Bedienungsanleitung<strong>Power</strong> <strong>Peak</strong> <strong>E1</strong>Bestell Nr.<strong>8471</strong>Sollten Sie die variablen Werte ändern wollenbitte erst im Kapitel “Kleine Akkukunde”über die Auswirkung der Verstellung informieren.Abschalttemperatur (nur Laden)In diesem Menüpunkt kann eine Abschalttemperaturfestgelegt werden, Bereich von10°C bis 80°C.Beachten Sie bei der Einstellung, dass dasjeweils früher eintretende Ereignis “Ab -schalttemperatur oder - spannung” dasEnde des Ladevorgangs bewirkt. Was dazuführen kann, dass der Akku noch nicht vollständiggeladen ist.Dies ist gerade für temperaturempfindlicheAkkus wie z.B. NiMH und Lithium eine wichtigeSchutzfunktion.Um die Temperatur zu überwachen, sieaber nicht als Abschaltkriterium festzulegen,setzen Sie die Abschalttemperatur aufeinen hohen Wert.8.1 Akkueinstellung mit BID-CHIP/KEYWird ein BID-Chip angesteckt so erscheintim “OUT 1 Daten “ Menü einBID Symbol. Die Liste derAkkueinstellungen wirderweitertIst der BID-Chip unformatiert(neu) so erscheint die Meldung FehlerBID-Speicher, der dazu auffordert BID-Daten einzugeben.welche nach dem CC-.CV Ladeverfahren zuladen sind, mit dem <strong>Power</strong> <strong>Peak</strong> <strong>E1</strong> ladbarsein.Einstellbereich:Ladespannung:Vorgabe 2 V/Zelle, Bereich 2-6V / ZelleEntladespannung:2 V/Zelle, Bereich 0,8-6V / ZelleDer interne Equalizer wird natürlich automatischden Voreinstellungen angepasst undsorgt so für perfekt ausbalancierte Zellenspannungen.Diese Spezialeinstellung kann natürlichauch dazu herangezogen werden um Akkuszur Überwinterung auf ein mittleres Spannungsniveauvon ca. 3,9V pro Zelle zu bringen.Stellen sie die Entladespannung auf 3,9Volt/Zelle und entladen Sie Ihre Lithiumakkusvor längerer Lagerzeit auf diesen Wert.Achtung: Bei diesem Spezial Menü mussman besonders umsichtig die Einstellungenvornehmen, da falsch eingestellte Werte zurZerstörung des Akkus führen können!Das Menü wird um die Datumseingabe undBID-Speichermöglichkeit erweitertMenü SpezialakkuWenn ein BID CHIP/ Key angeschlossenwird steht bei der Auswahl Akkutyp ein weiterermit dem Namen “Spezial” zur Verfügung.Hier lassen sich in einem weiten Bereich dieLade - und Entladeschlussspannung freieinstellen.Somit werden nahezu alle bestehenden undkünftige Lithium- oder andere Akkutypen,13Hinweis:Falls nach dem Einstellen der Werte derBID-CHIP/KEY einfach abgezogen wird,ohne die Einstellungen mit “ENDE-SPEI-CHERN BID” mit “Enter” zu bestätigen, sindimmer noch die “alten” Werte abgespeichert.Dies kann, bei einem späteren Ladebzw. Entladevorgang, zu einem Schadendes angeschlossenen Akkus führen!
Bedienungsanleitung<strong>Power</strong> <strong>Peak</strong> <strong>E1</strong>Bestell Nr.<strong>8471</strong>9. Equalizer-DisplayWenn das Voltage Sensorkabel eines LithiumAkkus angeschlossen wird, beginntdas Ladegerät mit dem ausgleichen “equalizen”der Zellen.10. Zyklus DatenIm Bereich “Zyklus Daten” werden alle relevantenDaten, die während eines Lade- Entladeprozessesauflaufen angezeigt undgespeichert.Für jeden Lade- (C) und Entlade- (D) Zykluswird die geladene- oder entladene Kapazitätund die durchschnittliche Spannung separatangezeigt.So kann beispielsweise die Performancedes Akkus kontrolliert werden. Es könnenbis zu 10 Zyklen zwischen gepeichert werden,wobei die Daten unter Nr.1 die aktuellenWerte sind.Es muss unbedingt auch das Akku lade -kabel (plus + minus) mit dem Gerät verbundenwerden, um gleiche Potentiale füreine präzise Zel len spannungs messungzu erreichen.Die einzelnen Zellenspannungen werdengrafisch und numerisch angezeigt.Der Buchstabe “B” hinter einer Zellennummerzeigt an, dass diese Zelle “ausgeglichen”also “equalized” wird.4,3V2,9VCELL 3 : 4.332VBALANCE: 99,4%Alternativ kann dieEinzelzellenspannungin einer Balkengrafikdargestelltwerden.Dazu in Zeile 3navigieren undEnter drücken.Verlassen der Anzeige ebenfalls wieder mitEnter.In diesem Untermenü kann man die Spannungaller einzelnen Zellen als Wert undGrafik ansehen.Mit den Select-Tasten/Rad die einzelnenBalken anfahren, dann wird die jeweiligeZellenspannung numerisch angezeigt.Anzeige des aktuellen Zyklus im Display. Indiesem Beispiel läuft gerade der Zyklus 1,von beiden vorgewählten Zyklen.Das Zyklusmenü ist nur ein Anzeigemenü,die Ladeparameter werden im Menü Out 1Daten eingestellt.Der Beginn des Zyklus (Laden oder Entladen)so wie eine eventuelle Pause zwischenden Zyklen wird im Menü “NUTZER EINST”festgelegt.14
Bedienungsanleitung<strong>Power</strong> <strong>Peak</strong> <strong>E1</strong>Bestell Nr.<strong>8471</strong>11. Ladeausgang “Out 2 Daten”Über den Ladeausgang 2 “Out 2 Daten”können Empfänger- oder Sender- Akkupacksbis max. 2 A geladen werden.12. Nutzer Einstellungen “Nutzer Einst.”Damit der Lader für jeden Anwender individuelleinstellbar ist, hält er im Menü “NutzerEinst.” viele Funktionen bereit.Unter anderem kann hier auch eine der 6Sprachen gewählt werden.Speichern / KopierenDie Definition der Akkuparameter wird durchdie drei Einstellmöglichkeiten, Akkutyp,Ladestrom und Kapazität eingestellt.An diesem Ausgang besteht keine Möglichkeit,einen Lithium Akku zu balancieren bzw.Akkus zu entladen!Der Ladevorgang kann durch Drücken der“OUT 2” Taste gestartet oder abgebrochenwerden.Auch bei diesemAusgang steht einUntermenü mit derSpannungsanzeigein Kurvenform zuVerfügung. DazuCursor in die zweite Zeile bringen und Enterdrücken. Erneuter Drücken von Enterschließt das Fenster.Zellenzahl:1 ... 8 Zellen NC / NiMH1 ... 3 Zellen LiPo (3,7V)1 ... 4 Zellen LiFe (3,3V)Ladestrom: 0,1 ... 2AAchtung:Keine Akkus mit höherer Zellenzahl anAusgang 2 anschließen als vorstehendangegeben.Diese Funktion dient der Speicherung vonAkkudaten bei Lade- und Entlade- Vorgängen.Wenn beide Funktionen auf “NEIN” stehen,werden die Daten an den USB Ausgangausgegeben, zur Anzeige und Speicherungmit der PC-Software logview.Der Lader besitzt einen internen Datenspeicher,welcher die Daten aufzeichnet um siespäter auf den PC zu schreiben und zuspeichern. Dazu muss Speichern auf “JA”und Kopieren auf “Nein” stehen.Um den internen Speicher später auszulesen,muss Speichern auf “Nein” und Kopierenauf “Ja” stehen. Erst dann werden dieDaten an den USB Ausgang ausgegeben.Hinweis:Die Daten bleiben solange gespeichert bismit einem anderen Akku ein Lade- Entladeprozessgestartet und der Speicher überschriebenwird.Start Zyklus Mit der “START ZYKLUS”15
Bedienungsanleitung<strong>Power</strong> <strong>Peak</strong> <strong>E1</strong>Bestell Nr.<strong>8471</strong>Funktion wird bei einer Zyklusladung dererste Zyklus bestimmt (Laden oderEntladen).Pause ZyklusWenn zwischen den Zyklen eine Pausegemacht werden soll, wählen Sie “EIN”.Falls das nicht der Fall sein soll, schaltenSie auf “AUS”.PausenzeitenNach dem Ende einer Zyklusphase gelten 2Kriterien für die Pausendauer:1. Akkutemperatur größer 35°C, die Pausewird beendet wenn die Temperatur wiederunter 35°C sinkt.2. Die Pause ist auf maximal 1 Stundebeschränkt, danach wir die nächsteZyklusphase gestartet, gleich ob derAkku die 35°C erreicht hat.NutzernameUm einen Nutzernamen einzustellen mitdem Cursor auf das Feld “Nutzername”springen. Durch drücken der ”Enter” Taste,wird das erste Zeichenfeld schwarz hinterlegt.Nun kann mit dem “Select Tasten/Radein Sonderzeichen wie + , Zahlen, KleinoderGroßbuchstaben ausgewählt werden.Wenn der Name eingestellt ist, aber nochfrei Zeichen bestehen, muss die “Enter”Taste so oft gedrückt werden bis dasschwarze Zeichenfeld nicht mehr zu sehenist. Erst danach lässt sich der Cursor wiederfrei im Menü bewegen.Die übrigen Funktionen sind selbsterklärend.13. Reihenfolge beim Lade-Entladevorgang an OUT1Bevor ein Lade- bzw. Entladevorganggestartet werden kann, müssen folgendeEinstellungen durchgeführt werden.• Stromquelle polrichtig anschließen• Akku polrichtig anschließen• Akkutyp einstellen• Zellenzahl einstellen• Kapazität einstellen• Lade- und / oder Entladestrom einstellen• Nachdem die Parameter, eingestelltwurden, kann nun der Pro zessgestartet werden.Um den angeschlossenen Akku zuLaden = OUT1 Taste 1 x DrückenEntladen = OUT1 Taste 2 x DrückenEntladen-Laden = OUT1 Taste 3 x Drücken.Wenn ein Zyklusvorgang gestartet werdensoll, zusätzlich die gewünschte Anzahl derZyklen (1-10) per “Select Tasten/ Rad” einstellen.Um den Vorgang abzubrechen, wieder“OUT1” Taste drücken.Bei angeschlossenem Voltage Sensorkabeleines Lithium-Akkus beginnt automatischder Ausgleich-Vorgang (equalizing).Falls der Lade- Entladestrom während desVorgangs geändert werden soll, kann diesauch interaktiv in der Menüoberflächegeschehen.Diese veränderte Stromeinstellung giltnur für den laufenden Lade-Entladevorgang.Bei erneutem Start eines Lade- Entladeprozesseswird wieder der in “Akkueinstellungen”oder im BID Chip/ Key gespeicherteWert verwendet.16
Bedienungsanleitung<strong>Power</strong> <strong>Peak</strong> <strong>E1</strong>Bestell Nr.<strong>8471</strong>14. Lade- / Entladevorgang mit BID-CHIP/KEY (nur an OUT1)Verbinden Sie den BID-Chip über dasAdapterkabel bzw. den BID-Key direkt mitdem Ladegerätguten Überblick über die Performance desAkkus.Was wird im BID-CHIP/KEY gespeichert?Aktualisiert werden die zuletzt eingeladenebzw. entnommene Kapazitätswerte, derZykluszähler wird um 1 erhöht und ggf. dieMaximalkapazität zusätzlich gespeichert,wenn der bisherige Höchstwert überschrittenwurde.Darüber hinaus gibt es natürlich die LadeundEntladeparameter welche im MenüAkku einstellungen vorgenommen werden.Danach wird dasBID Symbol imDisplay angezeigt.Wenn die Akku para -meter auf dem BID-Chip voreingestelltsind, kann der Lade-Entladevorgang durch Drücken der‘OUT1’-Taste gestartet werden.Der weitere Ablauf ist identisch mit demeines normalen Starts.Falls der Lade- Entladestrom während desVorgangs geändert werden soll, kann diesauch interaktiv in der Menüoberflächegeschehen.Diese Stromeinstellung gilt nur für den laufendenProzess. Bei erneutem Start einesLade- Entladeprozesses wird wieder der in“Akkueinstellungen” oder im BID Chip/ Keygespeicherte Wert verwendet.Am Ende eines Lade- bzw. Entladevorgangswerden die wichtigsten Daten diesesVorganges auf dem BID Chip/ Keygespeichert, dadurch bekommt man einenDies sind:AkkutypZellenzahlLadestromEntladestromLadeschlussspannungEntladespannungDelta <strong>Peak</strong> EmpfindlichkeitAbschalttemperaturKapazitätDatum der Erstinbetriebnahme.Hinweis zum Ladeende!Beim Laden von Lixx-Akkus sind mit derAnzeige “Ende” im Display ca. 98% derEnergie eingeladen. Der Akku kann vomLader getrennt werden.Verbleibt der Akku jedoch am Lader, soarbeitet der “Equalizer” weiter und gleichtdie Zellen weiter aus. Um den Stromverbrauchdes Equalizers auszugleichen, fließtweiterhin ein geringer Ladestrom.Der Lader schaltet beim Erreichen von 40mA Restladestrom den Vorgang endgültigab.17
Bedienungsanleitung<strong>Power</strong> <strong>Peak</strong> <strong>E1</strong>Bestell Nr.<strong>8471</strong>15. FEHLERMELDUNGENUm einen sicheren Ablauf eines Lade- bzw.Entladevorganges zu gewährleisten, ist der<strong>Power</strong> <strong>Peak</strong> <strong>E1</strong> mit Sicherheits vor rich -tungen ausgestattet. Sobald ein Fehler auftritt,erscheint eine entsprechende Meldungim Display und ein Warnton ertönt.Die folgenden Fehlermeldungen können miteiner beliebigen Taste nach Beseitigung derUrsache quittiert werden.Die eingestellte Abschalttemperatur wurdeerreicht, der Ladevorgang abgeschaltet.Eingangsspannung zu niedrig (unter 10Volt). Autobatterie oder Netzteil prüfen.Akku verpolt angeschlossen, Anschlussüberprüfen.Der BID-Chip-Key wurde während eineslaufenden Vorganges vom Ladegerätgetrennt oder angeschlossen. Verbindungzum Chip überprüfen und neu starten.Erfolgt nach dem BID-Anschuss kein Startdes Lade-Entladevorgangs so sind möglicherweisedie im Chip gespeicherten Datenzerstört.Erscheint auch, wenn ein neuer (unformatierter)Chip eingesteckt wird.BID-Daten im Menü Akku einstellungen eingeben.Akku- / Ausgangsspannung zu hoch, Zellenzahlüberprüfen.Der Lader prüft zusätzlich über den Equalizeranschlussdie Zellenzahl und vergleichtdie Einstellung mit dem im Menü Akkudateneingestellten Wert. Stimmen diese Wertenicht überein, erscheint diese Fehlermeldung.Auf dem BID Chip/ Key fehlen, oder sind falsche,Daten gespeichert.Im BID-Chip sind weniger oder andereParameter gespeichert als im MenüAkkueinstellungen verfügbar sind. FehlendeDaten einstellen.Überprüfen Sie die Einstellungen des BIDChip/ Key.18
Bedienungsanleitung<strong>Power</strong> <strong>Peak</strong> <strong>E1</strong>Bestell Nr.<strong>8471</strong>16. Allgemeine Sicherheitshinweise• Falscher Umgang mit Akkus und Ladegerätenkann zur Explosion und Feuerder Akkus führen.• Der <strong>Power</strong> <strong>Peak</strong> <strong>E1</strong> ist nur zum Laden,Entladen und Equalizen von wiederaufladbarenNC- / NiMH- Blei und Lithium-Akkus geeignet. Keine Trockenbatterienladen, dabei besteht Explosionsgefahr.• Das Ladegerät ist für den Betrieb an 12V DC und über Netzteil an 230V ACausgelegt, betreiben Sie es nie mit eineranderen Spannung.• Schützen Sie das Ladegerät unbedingtvor Staub, Schmutz und Feuchtigkeit.• Setzen Sie das Gerät keiner übermäßigenKälte oder Hitze und keiner direkterSonneneinstrahlung aus.• Vermeiden Sie Stoß- und Druckbelastungenund setzen Sie das Ladegerätkeinen starken Vibrationen aus.• Ladegerät und angeschlossene Akkusniemals auf brennbare Unterlagenlegen. Nie in der Nähe von brennbaremMaterial oder Gasen betreiben.• Gerät nicht unter Spannung öffnen!• Lassen Sie es während des Betriebsnicht unbeaufsichtigt. Das Gerät kannsich während des normalen Betriebsstark erwärmen.• Beim Aufstellen auf freie Kühlöffnungenzur Luftzirkulation achten.• Bei längerem Nichtgebrauch das Gerätvon der Stromquelle trennen und eventuellangeschlossene Akkus abnehmen.• Keine Akkus kurz hintereinander einzweites Mal laden.• Keine Akkus laden, die stark erwärmtsind. Akkus auf Umgebungstemperaturabkühlen lassen.• Es dürfen nur Zellen gleicher Kapazitätund gleichen Fabrikats im Verbund geladenwerden.• Nicht zwei Akkus an einem Ausgangbeim Laden parallel laden, nur einenAkkupack anschließen.• Achten Sie unbedingt auf richtige Polungder Akkus und vermeiden Sie Kurzschlüsse.• Beachten Sie genau die Angaben derAkkuhersteller.• Überprüfen Sie die Einstellungen am<strong>Power</strong> <strong>Peak</strong> <strong>E1</strong> stets genau. Akkuskönnen durch unpassende Einstellungenzerstört werden.• Achten Sie auch auf Beschädigungenam Gehäuse und an den Kabeln.• Vorsicht im Umgang mit Akkupacks mithohen Zellenzahlen. Unbedingt auf guteIsolierung achten, sonst besteht dieGefahr eines Stromschlags.• Vermeiden Sie den Akku während desLadevorgangs vom Gerät zu trennen,ohne vorher die Stopptaste zu betätigen.Durch die hohe Ausgangsspannung desLaders kann es zur massiven Funkenbildungkommen.19
Bedienungsanleitung<strong>Power</strong> <strong>Peak</strong> <strong>E1</strong>Bestell Nr.<strong>8471</strong>17. Kleine Akkukunde18. Das CC-CV LadeverfahrenBleiakkus und Lithium Akkus, werden mitdem Konstant-Spannungs-Verfahren (CC-CV) geladen.Am Ladegerät wird deshalb in diesem Menüdie Ladeschlussspannung pro Zelle, entsprechenddes Akkutyps vorgewählt.Während der ersten Ladephase steigt dieAkkuspannung langsam auf den Maximalwertvon 4,2 V / Zelle (LiPO-Akku) an.Konstantstromphase (CC)Konstant -spannungsphase(CV)AbschaltpunktIn dieser Phase stellt der Lader sicher, dassder eingestellte Ladestrom konstant bleibt.Bei einem Ladestrom von 1C und einementladenem Akku, dauert diese erste Phaseca. 50 - 60 Minuten. Dabei wird eine Akkukapazitätvon ca. 80-90 % eingeladen.Beim Erreichen der Ladeschluss spannungwird der konstante Ladestrom abgeschaltetund die Spannung konstant gehalten.Dadurch sinkt in der zweiten Phase derLadestrom ab, da der Spannungsunterschiedzwischen dem eingestellten Wert amLader und Akku immer kleiner wird.Für das Einladen der restlichen Kapazitätwerden weitere 35 - 40 Minuten benötigt.Bei Erreichen eines vorgegebenen Mindestladestromesals untere Strom grenze schaltetdas Ladegerät den Ladevorgang ab.Bei einer Laderrate von 1C dauert, dergesamte Ladevorgang 90 Minuten.2019. Blei-Akkus (Pb)Beim Umgang mit Bleiakkus müsseneinige Vorsichts maßnahmen unbedingtbeachtet werden, um Personen- undSachschäden zu vermeiden. BeimEinsatz dieser Akkus übernehmen Siedie Verantwortung dafür.• Die im Modellbau weit verbreiteten Gel-Bleiakkus sind meist gasdicht ausgeführtund deshalb weniger gefährlich.• Autobatterien mit flüssiger Schwefelsäureals Elektrolyt hingegen sind sehrgefährlich, wegen der ätzenden Schwefelsäureund der schnellen Gasbildungbei Überladung.• Bleiakkus dürfen niemals mit offenemFeuer in Berührung kommen, es bestehtExplosionsgefahr.• Bleiakkus niemals gewaltsam öffnen, esbesteht Verätzungsgefahr.• Bleiakkus niemals kurzschließen, esbesteht Verbrennungs- und Explosionsgefahr.• Ausgetretenes Elektrolyt niemals mit derHaut oder den Augen in Berührung bringen.Falls versehentlich doch geschehen,sofort mit reichlich Wasser spülenund einen Arzt aufsuchen. Zellen oderAkkus nicht in den Mund nehmen, esbesteht Vergiftungsgefahr.• Ein geladener Bleiakku ist kein Kinderspielzeug.Akkus sollten Kindern unzugänglichaufbewahrt werden.• Berücksichtigen Sie beim Laden undEntladen unbedingt die Hinweise desjeweiligen Akkuherstellers.• Bei Bleiakkus kann es während desLadevorgangs zum Gasen des Akkuskommen. Sorgen sie deshalb für eineausreichende Belüftung.Bei Überladung entsteht "Knallgas" einGemisch aus Wasserstoff und Sauerstoff.Es besteht Explosionsgefahr.
Bedienungsanleitung<strong>Power</strong> <strong>Peak</strong> <strong>E1</strong>Bestell Nr.<strong>8471</strong>20. Lithium-Akkus (LiPo, LiIo, LiFe)Es gibt verschiedene LithiumAkkutypen:1. Lithium-Ionen Akkus mit flüssigemElektrolyt und 3,6 Volt Nennspannung,die erste Generation der Lithium Akkus,im Modellbau kaum verbreitet.(Akkutypauswahl LION)2. Lithium-Ionen Akkus mit flüssigemElektrolyt und 3,7 Volt Nennspannung,die zweite Generation von Lithium Akkus,mit Metallbecher.(Akkutypauswahl LIPO)3. Lithium-Ionen-Polymer Akkus mit gelförmigemElektrolyt und 3,7 Volt Nenn -spannung, die derzeit aktuelle Generationvon Lithium Akkus, auch LiPogenannt. Durch den gelartigen Elektrolytentsteht beim Laden bzw. Entladen wenigerDruck in der Zelle, weshalb eineFolienummantelung ausreicht. Wegendes geringen Gewichtes und der hohenEnergiedichte hat sie sich schnell imModellbau verbreitet.(Akkutypauswahl LIPO)4. Lithium - Ferrum (Phosphor) Akkusmit 3,3 Volt Nennspannung, die derzeitneuste Generation von Lithium Akkus,auch A123 genannt. Wegen der hohenEntladeimpulse und der hohen Energiedichtewird sich dieser Akku schnell imModellbau verbreiten.(Akkutypauswahl LIFE)Wir empfehlen folgende Laderaten fürLithium-Akkus:Lithium Akkus werden üblicherweise mit 1C,manche Akkutypen können aber auch mit1,5...2C, neuerdings sogar mit 5C geladenwerden. Beachten sie die maximaleLadestromangabe des Akkuherstellers.Die Entladeschlussspannung bei LiPo undLiIo Akkus sollte sich bei 3,00 Volt bewegen.Bei LiFe Akkus allerdings sollte die Entladeschlussspannungum die 2,7 Volt betragen.Unterschiedliche KapazitätWerden mehrere Zellen zu einem Akkupackverarbeitet und mit höherem Strom entladen,so erwärmen sich die Zellen unterschiedlich,da die innere Zelle die Wärmeschlecht abgeben kann.Dadurch ändert sich der Innenwiderstandund die Abgabekapazität ist geringer. DieseZelle ist dann früher entladen und es bestehtdie Gefahr, dass diese Zelle unter die Entladeschlussspannungvon 2,5 Volt entladenwird.Besonders bei sehr niedrigen Außentemperaturenentstehen starke Kapazitätsunterschiede.Werden LiPo Akkus beispielsweisein einem Elektroheli geflogen, so wird dievordere Zelle vom Fahrtwind stark gekühlt,die innen liegenden Zellen sind deutlichwärmer.Die kalte Zelle hat dadurch eine geringereKapazität und es besteht die Gefahr, dassdie kältere Zelle unter die Entadeschlussspannungentladen wird.Es wird deshalb empfohlen die LiPo Zellennur bis ca. 3 bis 3,3 Volt Entladeschlussspannungzu entladen um eine dauerhafteSchädigung der Zellen zu vermeiden.Außerdem muss bei der nächsten Ladungunbedingt dafür Sorge getragen werden,dass die Zellen auf gleiches Niveau geladenwerden. Voltage Sensorkabel anschließen.Das Laden von parallel geschalteten Einzelzellenist unproblematisch, hier verteilt sichder Gesamtstrom je nach Spannungslageauf die einzelnen Zellen.21
Bedienungsanleitung<strong>Power</strong> <strong>Peak</strong> <strong>E1</strong>Bestell Nr.<strong>8471</strong>Für Schäden durch unsachgemäßeHandhabung der Zellen können wir keinerleiHaftung übernehmen. BeachtenSie auch die Sicherheitshinweise21.Erläuterungen zur “Delta <strong>Peak</strong>”AbschaltungDurch normale Fertigungstoleranzen, abervor allem auch durch Temperaturunter -schiede bei der Entladung - die äußerenZellen werden immer besser gekühlt als dieinneren - driften in Serie geschalteteLithium-Polymer Zellen auseinander.Nach mehreren Zyklen haben die Zellenunweigerlich unterschiedlicheSpannungslagen.Vorstehende Grafik zeigt eine typischeLadekurve eines NC- NiMH-Akkus.Am Ende des Ladevorgangs verändert sichder Innenwiderstand des Akkus auf Grundder Zellenerwärmung.Dadurch sinkt die Zellenspannung geringfügigab.Schaltet das Ladegerät exakt auf demhöchsten Punkt der Ladekurve ab, sospricht man von “Zero-Delta-<strong>Peak</strong>” oder.Um Ladungsverluste beim Abkühlen zukompensieren bzw. die Leistungsfähigkeitdes Akkus für den Wettbewerb zu erhöhenwird in der Praxis, je nach Akkutyp etwasüberladen.Der Wert 5 mV /Zelle als <strong>Peak</strong>-Empfindlichkeitoder Delta-<strong>Peak</strong>-Wert gibt denÜberladewert an, es wird also später abgeschaltet.Bei 15 mV Delta <strong>Peak</strong> wird der Akkuextrem vollgeladen und wird dabei sehrwarm. Diese Ladung ergibt zwar eine hoheAkkuenergie, was allerdings massiv auf dieLebensdauer des Akkus geht.22
Bedienungsanleitung<strong>Power</strong> <strong>Peak</strong> <strong>E1</strong>Bestell Nr.<strong>8471</strong>22.Nickel- Cadmium- Akkus (NC)Wir empfehlen folgende Laderaten für NC-Akkus:Hochenergieakkus, 1-2 C, beachten Sie bitteauch die Angaben des Akkuherstellers.Hochstromakkus, 2-3 C, extrem bis zu 5 C.Bei hohen Laderaten sollte die Temperaturüberwacht werden und ggf. bei starkerErwärmung des Akkus die Laderate heruntergesetzt werden.Beachten sie eventuelle maximaleLadestromangaben des Akkuherstellers.Prüfen sie auch, ob die Steckverbindungbzw. die Ladekabel für den gewähltenLadestrom geeignet sind.Die Entladeschlussspannung sollte sich imBereich zwischen 0,85 und 1,00 Volt/ Zellebewegen.Die Delta <strong>Peak</strong> Empfindlichkeit sollte sich imBereich von 5-8 mV/ Zelle bewegen.Richtwerte:NiCd-AkkusAkkuschonende Standardanwendung= 6-8 mV / ZelleAnwendung mit höherer Anforderung= 9-10 mV / ZelleWettbewerbsanforderungen=12-15mV / ZelleDas Ladegerät berechnet automatisch dierichtige Abschalt-Differenz-Spannung desgesamten Akkupacks, indem es den Einzelzellenwertmit der Zellenzahl multipliziert.Wird der Vorgabewert während des Ladevorgangserreicht, so wird der Ladevorgangunterbrochen und es erscheint die vorstehendbeschriebene Abschaltanzeige.23.Nickel-Metall-Hydrid-Akkus (NiMH)Wir empfehlen folgende Laderaten fürNiMH-Akkus:Hochenergieakkus 0,5...1 C, beachten Siebitte auch die Angaben des Akku -herstellers.Hochstromakkus, üblicherweise 1C, mancheAkkutypen können mit 1,5...2C geladenwerden. Bei hohen Laderaten solltedie Temperatur überwacht werden und ggf.bei starker Erwärmung des Akkus dieLaderate herunter gesetzt werden.Beachten sie die maximale Ladestrom -angabe des Akkuherstellers.Die Entlade schluss spannung sollte sich imBereich von 1,00 Volt / Zelle bewegen.Die Delta <strong>Peak</strong> Empfindlichkeit sollte sichim Bereich von 3-5 mV/ Zelle bewegen.Richtwerte:NIMH-AkkusAkkuschonende Standardanwendung= 5 mV / ZelleAnwendung mit höherer Anforderung= 6-7 mV / ZelleWettbewerbsanforderungen= 8-9 mV / ZelleBei geringer Abschaltempfindlichkeit kannes bei Hochkapazitätsakkus oder auchalten Akkus zur Frühabschaltungen kommen.Setzen Sie den Abschaltwert etwashöher und starten den Lade vor gangerneut.Diese Angaben sind allgemeine Richtwerteund abhängig vom jeweiligen Akkutyp.Beachten Sie unbedingt die Empfehlungendes Akkuherstellers.23
Bedienungsanleitung<strong>Power</strong> <strong>Peak</strong> <strong>E1</strong>Bestell Nr.<strong>8471</strong>24. GewährleistungUnsere Artikel sind selbstverständlich mitden gesetzlich vorgeschriebenen 24 MonatenGewährleistung ausgestattet. Sollten Sieeinen berechtigten Gewährleistungsanspruchgeltend machen wollen, so wendenSie sich immer an Ihren Händler, derGewährleistungsgeber und für die Abwicklungzuständig ist.Während dieser Zeit werden evtl. auftretendeFunktions mängel sowie FabrikationsoderMaterialfehler kostenlos von uns behoben.Weitergehende Ansprüche z. B. beiFolge schäden, sind ausgeschlossen.25. KonformitätserklärungHiermit erklärt die robbe Modellsport GmbH& Co. KG, dass sich dieses Gerät in Übereinstimmungmit den grundlegendenAnforderungen und anderen relevantenVorschriften der entsprechenden CERichtlinien befindet. Die Original-Konformitätserklärung finden Sie im Internetunter www.robbe.com, bei der jeweiligenGerätebeschreibung durch Aufruf des Logo-Buttons "Conform".Der Transport zu uns muss frei erfolgen, derRücktransport zu Ihnen erfolgt ebenfallsfrei. Unfreie Sendungen können nicht an -genommen werden.Für Transportschäden und Verlust IhrerSendung können wir keine Haftung übernehmen.Wir empfehlen eine ent sprech -ende Versicherung. Senden Sie Ihre Gerätean die für das jeweilige Land zu ständigeServicestelle.Zur Bearbeitung IhrerGewährleistungsansprüche müssen folgendeVoraussetzungen erfüllt werden:• Legen Sie Ihrer Sendung den Kaufbeleg(Kassenzettel) bei.• Die Geräte wurden gemäß derBedienungsanleitung be trieben.• Es wurden ausschließlich empfohleneStromquellen und original robbe Zubehörverwendet.• Feuchtigkeitsschäden, Fremdeingriffe,Verpolung, Über las tungen und mechanischeBeschädigungen liegen nicht vor.• Fügen Sie sachdienliche Hinweise zurAuffindung des Fehlers oder desDefektes bei.24
Bedienungsanleitung<strong>Power</strong> <strong>Peak</strong> <strong>E1</strong>Bestell Nr.<strong>8471</strong>26. Empfohlenes ZubehörSenderakkuladekabelNo. F1415BID-Chip ohne Kabel, zurAusstat tung weitererAkkus. No. 8472EmpfängerakkuladekabelNo. F1416BID-Chip mit Kabel 300mm, zur Ausstat tung weitererAkkus No. 8473BID-Kabel, 300 mmNo. 8474BID-Kabel, 500 mmNo. 8475BID-KEYNo.8888Voltage Sensorkabel30cm No.4029Balanceradapter 2x3SEHR für robbe, Graupnerund Kokam AkkusNo.4023Balanceradapter 3x2SEHR für robbe, Graupnerund Kokam AkkusNo.4031Balanceradapter 2x3SXH-EHR von Align, Lamaoder G47 auf robbe,Graupner oder KokamAkkus No.4023XHBalanceradapter 3x2SXH-EHR von Align, Lamaoder G47 auf robbe,Graupner oder KokamAkkus No.4031XH25EQ-Adapter robbe-Polyquest No.8213
Bedienungsanleitung<strong>Power</strong> <strong>Peak</strong> <strong>E1</strong>Bestell Nr.<strong>8471</strong>EQ-Adapterrobbe-JST/XH vonrobbe auf Align,Lamaoder G47 AkkusNo.8214EQ-Adapterrobbe-Thunder/Flightpower No.8215Schaltnetzteil SPS 40ANo.853927. ServiceadressenLand Firma Strasse Stadt Telefon Fax E-MailAndorra Sorteney Santa Anna, 13AND-00130 Les escaldes-Princip. D'Andorre 00376-862 865 00376-825 476 sorteny@sorteny.comDänemark Nordic Hobby A/S Bogensevej 13 DK-8940 Randers SV 0045-86-43 61 00 0045-86-43 77 44 hobby@nordichobby.comDeutschland robbe-Service Metzloser Str. 36 D-36355 Grebenhain 0049-6644-87-777 0049-6644-87-779 hotline@robbe.comEngland robbe-Schlüter UK L<strong>E1</strong>0-UB GB-L<strong>E1</strong>0 3DS Leicestershire 0044-1455-637151 0044-1455-635151 keith@robbeuk.co.ukFrankreich S.A.V Messe 6, Rue Usson du Poitou, BP 12 F-57730 Folschviller 0033 3 87 94 62 58 0033-3-87 94 62 58 sav-robbe@wanadoo.frGriechenland TAG Models Hellas 18,Vriullon Str. GR-14341 New Philadelfia/Athen 0030-2-102584380 0030-2-102533533 info@tagmodels.grItalien MC-Electronic Via del Progresso, 25I-36010 Cavazzaledi Monticello C.Otto (Vi) 0039 0444 945992 0039 0444 945991 mcelec@libero.itNiederlande/Belg. Jan van Mouwerik Slot de Houvelaan 30 NL-3155 Maasland 0031-10-59 13 594 0031-10-59 13 594 van_Mouwerik@versatel.nlNorwegen Norwegian Modellers Box 2140 N-3103 Toensberg 0047-333 78 000 0047-333 78 001 per@modellers.comÖsterreich robbe-Service Puchgasse 1 A-1220 Wien 0043-1259-66-52 0043-1258-11-79 office@robbe.atSchweden Minicars Hobby A.B. Bergsbrunnagatan 18 S-75323 Uppsala 0046-186 06 571 0046-186 06 579 info@minicars.seSchweiz Spahr Elektronik Gotthelfstr. 12 CH-2543 Lengau 0041-32-652 23 68 0041-32 653 73 64 spahrelektronik@bluewin.chSlowakische Rep. Ivo Marhoun Horova 9 CZ-35201 AS 00420 351 120 162 ivm2000@seznam.czSpanien robbe-Service Metzloser Str. 36 D-36355 Grebenhain 0049-6644-87-777 0049-6644-87-779 hotline@robbe.comTschech. Rep. Ivo Marhoun Horova 9 CZ-35201 AS 00420 351 120 162 ivm2000@seznam.cz26
Bedienungsanleitung<strong>Power</strong> <strong>Peak</strong> <strong>E1</strong>Bestell Nr.<strong>8471</strong>LogView -Anzeige der seriellen Daten am PCMit Hilfe des von uns empfohlenen undunterstützen LogView ist es möglich, dieseriellen Daten von vielen <strong>Robbe</strong> Ladegeräten(auch dem <strong>Power</strong> <strong>Peak</strong> <strong>E1</strong>) zu visualisieren,zu analysieren und bei Bedarf auchin verschiedenster Weise zu exportieren.Die Software kann unter der Webadressewww.logview.info als Donationware bezogenwerden. Bei Gefallen der Softwarebesteht die Möglichkeit einer Spende für dieEntwickler, ansonsten ist die Software kostenfreinutzbar.LogView bietet unter einer intuitiv bedienbarenOberfläche die Möglichkeit, Datenauswertungeneines breiten Spektrums verschiedenerGeräte abzudecken. Die von denGeräten empfangenen Daten werden dabeiin immer gleicher Art und Weise dargestellt,was dem Benutzer den Umgang mit seinemEquipment generell erleichtert.Die von LogView erzeugten Dateien sindauch von anderen Benutzern direkt nutzbar,selbst wenn das entsprechende Gerät physischgar nicht vorliegen sollte.Weitere Merkmale der Software sind:• Leistungsstarke Grafikengine mit zahlreichenAuswerte- und Messfunktionen.Die Ansicht der Kurven kann durch vielfältigeOptionen an die eigenen Bedürfnisseangepasst werden.• Analysefunktionen helfen, Akkus genauerzu untersuchen.• Die Funktionen zum Kurvenvergleichermöglichen es, Unterschiedliche LadeundEntladevorgänge in einer Grafik darzustellen.Damit lassen sich insbesondereQualität und Alterung eines Akkus rechtgut beurteilen, auch im Vergleich zu anderenAkkus.• Mit der Objektverwaltung besteht dieMöglichkeit, erzeugte Aufzeichnungenund Informationen zu einem Akku geordnetabzulegen und zu verwalten.• Zahlreiche Exportfunktionen für Grafikund Tabelle ermöglichen die Verwendungder Daten auch in anderen Anwendungen.• Durch das integrierte Hilfesystem be -kommt man schnell und unkompliziertInformationen zu den Funktionen des Programms.Sollten spezielle Fragen bei der Nutzung derSoftware auftreten oder es gibt Vorschlägezur weiteren Verbesserung von LogView,kann man sich jederzeit über das LogView-Forum direkt an die Entwickler wenden odermit anderen Nutzern Erfahrungen undGedanken austauschen.27
28. Akku u. GeräteentsorgungWerfen Sie Akkus auf keinen Fall in den Hausmüll. Um die Umwelt zu schützen, geben Siedefekte oder verbrauchte Akkus nur entladen zu den entsprechenden Sammelstellen. Diessind alle Verkaufsstellen für Batterien und Akkus, oder kommunale Sondermüll -sammelstellen. Um Kurzschlüsse zu vermeiden, kleben sie bitte eventuell blanke Kontaktemit Klebestreifen ab. Die Kosten für die Rückführung des Akkus und dessen Ent sorgungsind schon mit dem Kaufpreis abgedeckt. Alle Stellen sind verpflichtet Akkus anzunehmen,gleich ob Sie sie dort gekauft haben oder nicht.Die Akkus werden wieder aufgearbeitet.Dadurch gelangt das Material wieder in den Produktionskreislauf. Helfen Sie mit, die Umweltzu schützen und zu bewahren!Elektronische Geräte dürfen nicht einfach in eine übliche Mülltonnegeworfen werden. Der <strong>Power</strong> <strong>Peak</strong> <strong>E1</strong> ist daher mit dem nebenstehendenSymbol gekennzeichnet. Dieses Symbol bedeutet, dass elektrische undelektronische Geräte am Ende ihrer Nutzungsdauer, vom Hausmüllgetrennt, entsorgt werden müssen. Entsorgen Sie das Ladegerät bei Ihrerörtlichen kommunalen Sammelstelle oder Recycling-Zentrum. Dies gilt für alle Länder derEuropäischen Union sowie anderen Europäischen Ländern mit separatem Sammelsystem.robbe Modellsport GmbH & Co.KGMetzloser Straße 38D-36355 Grebenhain OT Metzlos-GehaagTelefon +49 (0) 6644 / 87-0www.robbe.deIrrtum und technische Änderungen vorbehalten.Copyright robbe-Modellsport 2009Kopie und Nachdruck, auch auszugsweise, nur mit schriftlicherGenehmigung der robbe-Modellsport GmbH & Co.KGrobbe Form 40-5521 BBAJ28
Operating instructions<strong>Power</strong> <strong>Peak</strong> <strong>E1</strong>No. <strong>8471</strong>
Operating instructions<strong>Power</strong> <strong>Peak</strong> <strong>E1</strong>Order No.<strong>8471</strong>Dear customer,Congratulations on your choice of the<strong>Power</strong> <strong>Peak</strong> <strong>E1</strong> from the robbe range,which is a high-performance automaticcomputer-based battery charger. You arenow the owner of a powerful battery chargingunit for use with a 12 V DC powersupply, which includes integral batterymanagement and equalizer.The unit is simple to use, but operating anautomatic high-quality charger such as the<strong>Power</strong> <strong>Peak</strong> <strong>E1</strong> does require someknowledge on the part of the user. Theseoperating instructions are designed toensure that you quickly become familiarwith the unit’s facilities.To ensure that you are able to exploit thecharger’s full potential, please take thetrouble to read through these operatinginstructions - especially the section entitled“A Brief Guide to Battery Types” and theSafety Notes - before you switch the uniton for the first time.We hope you have many hours of pleasureand success with your new charger!Liability exclusionThis charger is designed and approvedexclusively for charging the types of batterystated in these operating instructions.robbe Modellsport accepts no liability ofany kind if the charger is used for anypurpose other than that stated.We at robbe Modellsport are unable to ensurethat you observe the instructions suppliedwith the charger, and we have no controlover the methods you employ for using, operatingand maintaining the device and thebatteries.For this reason we are obliged to deny all liabilityfor loss, damage or costs which areincurred due to the incompetent or incorrectuse and operation of our products, or whichare connected with such operation in anyway.Unless otherwise prescribed by law, ourobligation to pay compensation, regardlessof the legal argument employed, islimited to the invoice value of thoserobbe products which were immediatelyand directly involved in the event inwhich the damage occurred.This does not apply if the company is deemedto be subject to unlimited liability accordingto binding legal regulation on accountof deliberate or gross negligence.2
Operating instructions<strong>Power</strong> <strong>Peak</strong> <strong>E1</strong>Order No.<strong>8471</strong>ContentsSection . . . . . . . . . . . . . . . . . . . . . . . . . . . . . . . . . . . . . . . . . . . . . . . .PageLiability . . . . . . . . . . . . . . . . . . . . . . . . . . . . . . . . . . . . . . . . . . . . . . .2Contents . . . . . . . . . . . . . . . . . . . . . . . . . . . . . . . . . . . . . . . . . . . . . .31. Set contents . . . . . . . . . . . . . . . . . . . . . . . . . . . . . . . . . . . . . . . . . . .42. General description . . . . . . . . . . . . . . . . . . . . . . . . . . . . . . . . . . . . . .43. Controls . . . . . . . . . . . . . . . . . . . . . . . . . . . . . . . . . . . . . . . . . . . . . . .53.1 Function of the controls . . . . . . . . . . . . . . . . . . . . . . . . . . . . . . . . .5, 64. Specification . . . . . . . . . . . . . . . . . . . . . . . . . . . . . . . . . . . . . . . . . . .65. Using the charger for the first time . . . . . . . . . . . . . . . . . . . . . . . . . .75.1 Connecting the battery . . . . . . . . . . . . . . . . . . . . . . . . . . . . . . . . . . .75.2 Connecting the equalizer . . . . . . . . . . . . . . . . . . . . . . . . . . . . . . . . . .86. Menu structure, navigation . . . . . . . . . . . . . . . . . . . . . . . . . . . . . .8, 96.1 Overview of the menu structure . . . . . . . . . . . . . . . . . . . . . . . . . . . .97. Charge / discharge output 1: “OUT 1 <strong>DA</strong>TA” . . . . . . . . . . . . . . . . . . .98. Battery settings . . . . . . . . . . . . . . . . . . . . . . . . . . . . . . . . . . . . . . . .118.1 Battery settings using BID-CHIP / KEY . . . . . . . . . . . . . . . . . . . . .139. Equalizer display . . . . . . . . . . . . . . . . . . . . . . . . . . . . . . . . . . . . . . .1410. Cycle data . . . . . . . . . . . . . . . . . . . . . . . . . . . . . . . . . . . . . . . . . . . .1411. Charge output 2: “OUT 2 <strong>DA</strong>TA” . . . . . . . . . . . . . . . . . . . . . . . . . . .1512. User settings . . . . . . . . . . . . . . . . . . . . . . . . . . . . . . . . . . . . . . . . . .1513. Charge / discharge process sequence at OUT 1 . . . . . . . . . . . . . .1614. Charge / discharge process with BID CHIP / KEY (OUT 1 only) . .1714.1 Charge / discharge process with BID CHIP / KEY . . . . . . . . . . . . .1815. Error messages . . . . . . . . . . . . . . . . . . . . . . . . . . . . . . . . . . . . . . . .1916. General safety notes . . . . . . . . . . . . . . . . . . . . . . . . . . . . . . . . . . . .1917. A brief guide to battery types . . . . . . . . . . . . . . . . . . . . . . . . . . . . .2018. Description of the CC - CV charge process . . . . . . . . . . . . . . . . . .2019. Notes on Lead-Acid batteries . . . . . . . . . . . . . . . . . . . . . . . . . . . . .2020. Notes on Lithium batteries (LiIo, LiPo, LiFe) . . . . . . . . . . . . . . . . . .2121. Description of the “Delta-<strong>Peak</strong>” charge cut-off method (NC / NiMH)2222. Notes on Nickel-Cadmium batteries . . . . . . . . . . . . . . . . . . . . . . . .2323. Notes on Nickel-Metal-Hydride batteries . . . . . . . . . . . . . . . . . . . . .2324. Guarantee . . . . . . . . . . . . . . . . . . . . . . . . . . . . . . . . . . . . . . . . . . . .2425. Conformity declaration . . . . . . . . . . . . . . . . . . . . . . . . . . . . . . . . . . .2426. Recommended accessories . . . . . . . . . . . . . . . . . . . . . . . . . . . . . .2527. Service Centre addresses . . . . . . . . . . . . . . . . . . . . . . . . . . . . . . . .2628. Disposal of batteries and equipment . . . . . . . . . . . . . . . . . . . . . . . .273
Operating instructions<strong>Power</strong> <strong>Peak</strong> <strong>E1</strong>Order No.<strong>8471</strong>1. Set contents1x <strong>Power</strong> <strong>Peak</strong> <strong>E1</strong>1x Temperatursensor1x BID-KEYexisting types more accurately.The charging station can be connected to aPC via the integral USB port. The renownedfree PC software Logview, which is designedto record, store, compare and print outbattery data, can be used to process thedata generated by the <strong>Power</strong> <strong>Peak</strong> <strong>E1</strong> charger.Download address: www.logview.infoThe charger’s internal memory enables it torecord data even when it is not connected toa PC; the data can then be read out and storedlater.2. General descriptionThe <strong>Power</strong> <strong>Peak</strong> <strong>E1</strong> is a good-looking,high-performance computer-based charge /discharge station including battery management,capable of working with all currentlyavailable battery types. The unit’s elegant,clearly laid-out design is made possible bythe new Cap-Touch system.The front panel has a smooth surface withoutany projecting controls, thanks to theuse of zero-contact sensors for the switchesand rotary control.The generous screen (192 x 128 pixels) isdivided into twelve lines, permitting the useof a large, clearly legible screen font.The screen displays the essential parametersof the current process in numeric orgraphic form.The charger incorporates flash memorytechnology and is therefore future-proof, asupdated software can be loaded at any time;the charger can be revised in this way tocater for new battery technologies or to suitIn the interests of safety the charger iscapable of monitoring battery temperature;the temperature can be displayed on-screenduring the charge process. It is even possibleto set up the charger to terminate thecharge process at a particular user-variabletemperature.The charger features an integral equalizerfor 2 x seven-cell Lithium-Ion, LiPo, LiFeand special batteries.One of the mainfeatures of the<strong>Power</strong> <strong>Peak</strong> <strong>E1</strong>is the pioneeringBatteryIdentificationSystem (BID).A vast array of different battery types is nowavailable to the modeller, and the range isconstantly expanding; the problem is thateach battery type requires its “own” chargeprocess. It can happen so quickly: youswitch the system on with the wrong settings- and in a moment your valuable batteryis damaged.The revolutionary BID system from robbeprovides an ingenious solution to this problem.A small, lightweight BID chip is assignedto each battery.4
Operating instructions<strong>Power</strong> <strong>Peak</strong> <strong>E1</strong>Order No.<strong>8471</strong>The chip stores all the relevant data requiredfor charging and discharging that packperfectly. When the battery is to be chargedor discharged, the BID chip attachedto the battery (or the BID key included withthe charger) is connected to the <strong>Power</strong><strong>Peak</strong> <strong>E1</strong>, and the BID system transfers therequired parameters to the charger.Simply press the “OUT1” button, and thedesired charge or discharge process commences.No tiresome searching through menus forset-up parameters, maximum protectionfrom mis-handling, and storing of the relevantbattery data on the BID chip or key -those are the unique advantages of theBID system.Since the essential information is stored inthe BID chip or key, all the data required forsafe, optimum charging and discharging isalways “on board”the battery, andcan be displayedon the charger’sscreen at anytime This meansthat you canobtain an up-todatepicture of the battery’s condition withoutthe need for PC software or computertechnology.3. Controls3.1 Function of the controlsUSB port<strong>Power</strong> supplyLCD screenTemp. sensorsocketOutput 2Voltage sensorsocketOut 2 buttonTemp. sensorOut 1 buttonBID socketBattery connectors OUT 15
Operating instructions<strong>Power</strong> <strong>Peak</strong> <strong>E1</strong>Order No.<strong>8471</strong>SELECT wheelAll the menu parameters can beadjusted by rotating the Selectwheel or dial.Enter buttonThe “ENTER” button is pressed to confirm aselection, e.g. to activate a selected menu,or to accept a newly adjusted value.OUT 1 and OUT 2 buttonsThese buttons initiate the charge process atthe appropriate output. Repeatedly pressingthe OUT1 button activates the charge,discharge or cycle functions for that output.Pressing the OUT2 button simply starts thecharge function.Up / Down buttonsIn manual mode these buttons areused to increase or reduce the parametervalues by one increment; at themenu select stage they select the nextor previous menu.Holding the buttons pressed in has theeffect of repeating the function automatically;the rate of change increasesif the button is held pressed in for along period.Piezo buzzer and LEDsThe piezo buzzer emits an audible alert toconfirm every button-press, to indicate theend of a charge or discharge process, andto warn you of an error. The buzzer can beset up in the User menu.The LEDs adjacent to the buttons light upevery time the corresponding button is pressed.4. SpecificationOperating voltage: 10 - 15 V (car battery) or 13.8 V mains PSU, min. 30 A(do not use a car battery charger!)Max. current drain: approx. 37 AmpsCharge termination process:NC / NiMH:Automatic, digital Delta-<strong>Peak</strong> systemLead-acid / Lithium: Automatic, voltage-dependent, CC - CV processDimensions:170 x 175 x 85 mmOutput 1 (OUT1)Cell count:1 … 36 cells NC / NiMH,1 … 14 cells LiIo (3.6 V), LiPo (3.7 V), LiFe (3.3 V)1 … 12 cells (2 … 24 V) Lead-acid1 … 14 Special battery (see Section 13, page 17)Charge current: Auto, 0.1 … 20 A (max. 315 W)Discharge current: Auto, 0.1 … 40 A (max. 160 W)Equalizing current: approx. 220 mATrickle charge:Final discharge voltage:Functions:C/20, NC and NiMH only0.5 - 1.1 V / cell, NC and NiMH2.5 - 3.6 V / cell, LiPo, LiIo, LiFe1.8 V / cell, Lead-acidCharge, discharge, discharge-charge, balance6
Operating instructions<strong>Power</strong> <strong>Peak</strong> <strong>E1</strong>Order No.<strong>8471</strong>Charge current according to battery voltageat OUT 1under 15.75V20A15.75V-17.5V18A17.5V-21V15A21V-26.25V12A26.25V-31.5V10A31.5V-35V9A35V-39.37V8A39.37V-42V 7.5A42V-45V7A45V-48.46V 6.5A48.46V-52,5V6A52.5V-57.27V 5.5A57.27V-63V5Aover 63V4A5. Using the charger for the first timeConnect the charger to a 12 V Lead-acidbattery. It is essential to maintain correctpolarity (red = positive / black = negative).Make sure the battery terminal clips aremaking sound contact.The Start screen appears, showing the Versionnumber and the pre-set user name.Discharge current according to battery voltageat OUT 1under 2V10A2V-4V40A4V-5.33V30A5.33V-6.4V25A6.4V-8V20A8V-8.88V18A8.88V-10.66V15A10.66V-13.33V12A13.33V-16V10A16V-17.77V9A17.77V-20V8A20V-22.85V7A22.85V-26.66V6A26.66V-29.09V 5,5A29.09V-32V5A32V-35.55V 4.5A35.55V-40V4A40V-45.71V 3.5A45.71V-53.33V3Aover 53.33V2AOutput 2 (OUT2)Cell counts:1 … 8 cells NC / NiMH1 … 3 cells LiPo (3.7 V)1 … 4 cells LiFe (3.3 V)Charge current: 0.1 … 2 ACharge power: 28 W, automatic currentreductionFunction: chargeTrickle charge: 50 mA (NC / NiMH only)Wait for the charger to conclude its self-calibrationprocess (LEDs go out), then pressthe Enter button: the display for the OUT 1output appears on the screen.5.1 Connecting the batteryConnect the battery to the sockets for theOUT 1 output, maintaining correct polarity(red = positive / black = negative).If you are using a charge lead adapter terminatingin banana plugs, connect thebanana plugs to the charger first, and onlythen connect the battery, as this preventsthe possibility of shorting the battery if thebanana plugs should touch. Reverse thesequence when disconnecting the battery.Important: if the charge parameters areset incorrectly, the battery could be permanentlydamaged, and even burst into flamesor explode. For this reason: neverstart the charge process until you are surethat you have set the appropriate chargeparameters.7
Operating instructions<strong>Power</strong> <strong>Peak</strong> <strong>E1</strong>Order No.<strong>8471</strong>5.2 Connecting the equalizer:If you wish to charge a Lithium battery, forsafety reasons it is essential to connect thevoltage sensor lead (attached to the battery)to the charger. The plug must be connectedin such a way that the black wire(common negative terminal) coincides withthe pin marked with an arrow.The charge process cannot be starteduntil you complete this connection.Exception: this requirement can be circumventedif the charge process is startedwith a BID-chip or key.If two batteries are wired in series and connectedto the equalizer, then the batteryconnected to (1 - 7) must be the packwhose negative wire is connected to thecharger (see diagram).14 13 12 11 10 9Akku 28765432Akku 11-OUT 1+6. Menu structure, navigationPress Enter or Select from the Start displayto move to the OUT 1 Data menu.If the battery contains up to seven cells, youshould always use the connector marked (1- 7). The second connector, marked (8 - 14),should only be used with batteries consistingof more than seven cells.Important:Never connect more than one voltagesensor lead to each equalizer inputsocket.Note:VOLTAGE SENSOR+++S1+S2+S3--Diagram of the voltage sensor lead pin-outs.Selecting the menuFrom this point you can move on to the followingmenus:“Equalizer”,“Cycle data”,“OUT 2 data”,“User settings”Use the Select buttons / wheel to navigateto the first line (OUT 1 data).Press the “ENTER” button to activate yourchoice (black background).Use the Select buttons / wheel to select anew menu.Press the Enter button again to disable yourchoice.The Select buttons / wheel are now availableagain for navigation within your selectedmenu.Selecting a sub-menuSome menus contain sub-menus consistingof full-screen graphic displays or voltagecurves. To call up a sub-menu, move to thethird line and press Enter; pressing Enteragain closes the sub-menu.8
Operating instructions<strong>Power</strong> <strong>Peak</strong> <strong>E1</strong>Order No.<strong>8471</strong>6.1 Overview of the menu structure4,3VCELL 3 : 4.332V2,9VBALANCE: 99,4%Full-screen graphic display insub-menuSelect batterymemory 1 … 9Enter / SelectThe Equalizer menu only appearsif a Lithium battery is selected andthe sensor lead is connected.Voltage curve / temperature displayin sub-menuSetting the charge parametersfor battery memory 1 … 9Voltage curve display in submenu9Setting the charge parametersfor BID chip or key; only if BID isconnected.
Operating instructions<strong>Power</strong> <strong>Peak</strong> <strong>E1</strong>Order No.<strong>8471</strong>7. Charge / discharge output “OUT 1 <strong>DA</strong>TA”Working menu for charger output 1. Use the Select buttons / wheel to navigate around themenu; the Enter button is employed as already described.State indicator-> = charge
Operating instructions<strong>Power</strong> <strong>Peak</strong> <strong>E1</strong>Order No.<strong>8471</strong>Voltage differenceVoltageTime differenceTemperaturedifferenceVoltagescaleTemperature curveReferencepointsTemperaturescaleTime8. Battery settingsTo change the charge / discharge parameters,call up the “Battery settings” submenu.In this menu you can set all the importantbattery parameters such as battery type,cell count, capacity, etc.It is absolutely essential to set the followingvalues correctly, otherwise you riskdamaging the battery:Battery type, cell count, Delta-<strong>Peak</strong> sensitivity(NC / NiMH batteries only), capacity,charge / discharge current, discharge voltageand cut-off temperature (charge processonly).You will find tips on setting these values inthe section entitled “A brief guide to batterytypes”.Battery type:NICD - NC batteriesNIMH - Nickel Metall Hydrid batteriesLIPO - Lithium Polymer batteries (3.7 Volt)PB - Lead-Acid batteries (2.30 Volt)LiFE - Lithium Ferrum (A123 etc. 3.3 Volt)LiON - Lithium Ion (3.6 Volt)A special additional process is also availablewhen a BID-chip / key is plugged into thecharger.SPECIAL Lead-acid or Lithium batterieswhich are charged using the CC - CV process.Charge voltage freely selectable withinthe range 2 … 6 Volt.Charge voltage / peak sensitivityJe Thisline contains the set-up facility for chargevoltage, according to the battery type youhave selected (Lithium and Lead-acid batteries,also Special battery), or for peak cutoffsensitivity (NICD and NIMH batteriesonly).Battery typeNICD = Std. 7 mV/cell (available range 3 - 25 mV)NIMH = Std. 5 mV/cell (available range 3 - 25 mV)Lead = Fixed value 2.3 V/ cellLiPO = Fixed value 4,.2 V/ cellLiON = Fixed value 4.1 V/ cellLiFE = Fixed value 3.7 V / cell11
Operating instructions<strong>Power</strong> <strong>Peak</strong> <strong>E1</strong>Order No.<strong>8471</strong>If you wish to alter the variable values, pleaseread the section entitled “A brief guide to batterytypes” so that you are aware of the effectof these changes.If a BID CHIP / KEY is connected to thecharger, the battery type Special alsoappears; see description in the sectionentitled Programming the BID-chip.Cell countPre-set value for the number of cells in thepack to be charged1 … 36 cells, NC / NiMH battery1 … 14 cells, LiIo, LiPo, LiFe battery1 … 12 cells (2 … 24 V), Lead-acid battery1 … 14 cells, Special battery (BID only)CapacityWith this battery charger it is important tonote that the capacity setting for Lithiumpacks has no effect on the charge / dischargecurrent (1C charge rate).The charge / discharge current must beset manually!Nevertheless, entering the battery capacity isstill important, because the trickle charge currentfor NC and NiMH batteries is based onthis value (trickle charge current, NC / NiMH= C/20).Entering the capacity is also important forLead-acid and Lithium batteries, becausethis parameter determines the cut-off pointfor the charge state indicator “End”.When Lead-acid and Lithium batteries arecharged using the CC - CV method, the“END” message is displayed when the cellsare properly balanced and the charge currentfalls below C/10. At this point the battery isalmost fully charged (up to 98%), and can bedisconnected from the unit.If the battery is left connected to the charger,the final quantity of capacity is then chargedin. The charge current is finally switched offwhen the value falls below about 50 mA.12Charge currentFreely variable charge current within therange 0.1 to 20 Amps. The appropriate valueshould be set in accordance with the informationstated by the battery manufacturer. If youare not quite clear what this means, pleaseread the section entitled “A brief guide to batterytypes” to find out the maximum currentwhich your battery can tolerate.If you select the “AUTO” setting (automaticcurrent setting: NC / NiMH batteries only),then the charger measures the battery’sinternal resistance, and automatically calculatesthe optimum charge current value.Please note that the charge current alsovaries according to the cell count.See the table entitled “Specification”.Discharge currentFreely variable discharge current within therange 0.1 to 40 Amps. The appropriate valueshould be set in accordance with the informationstated by the battery manufacturer. If youare not quite clear what this means, pleaseread the section entitled “A brief guide to batterytypes” to find out the maximum currentwhich your battery can tolerate.If you select the “AUTO” setting (automaticcurrent setting: NC / NiMH batteries only),then the charger measures the battery’sinternal resistance, and automatically calculatesthe optimum discharge current value.Please note that the discharge current alsovaries according to the cell count.See the table entitled “Specification”.Discharge currentIn this line you can enter the discharge currentvalue.The following standard values (Std.) andadjustment ranges are available:Battery typeNICD = Std. 0.9 V / cell (range 0.5 - 1.1 V / cell)NIMH = Std. 1.0 V / cell (range 0.5 - 1.1 V / cell)Lead = Fixed value: 1.8 V / cell
Operating instructions<strong>Power</strong> <strong>Peak</strong> <strong>E1</strong>Order No.<strong>8471</strong>LiPo = Std. 3.0 V / cell (range 2.5 - 3.6 V / cell)LiON = Std. 3.0 V / cell (range 2.5 - 3.6 V / cell)LiFE = Std. 2.7 V / cell (range 2.5 - 3.6 V / cell)designed to be charged using the CC - CVcharge process; all these types can then becharged using the <strong>Power</strong> <strong>Peak</strong> <strong>E1</strong>.If you wish to alter the variable values, pleaseread the section entitled “A brief guide to batterytypes” so that you are aware of the effectof these changes.Cut-off temperature (charge only)In this menu point you can determine a temperatureat which the charge process is toterminate; available range: 10°C to 80°C.When entering this setting please note thatthe charge process will be terminated by eitherthe “cut-off temperature” or the “cut-offvoltage” - whichever is triggered first. Thismay have the effect that the battery is notfully charged when the process is terminated.This is an important protective function,especially for battery types which are sensitiveto temperature, e.g. NiMH and Lithium.If you wish to monitor the temperature withoutemploying it as a cut-off criterion, simplyset the cut-off temperature to a high value.8.1 Battery settings with BID-CHIP / KEYIf a BID chip is connected, aBID symbol appears in the“OUT 1 Data” menu, andthe list of battery settings isexpanded.If the BID chip is unformatted (new), a BIDmemory error message appears, requestingyou to enter BID data.Special battery menuIf a BID chip or key is connected to the unit, afurther battery type bearing the name “Special”is available in the Select menu.At this point you can set the final charge anddischarge voltages without restriction within abroad range of values.This setting can be used to charge virtuallyall Lithium and other battery types availablecurrently and in future, provided that they are13Set-up range:Charge voltage:Pre-set 2 V / cell, range 2 - 6 V / cellDischarge voltage:Pre-set 2 V / cell, range 0.8 - 6 V / cellOf course, the internal equalizer is adjustedautomatically to take account of the pre-setvalues, and thereby ensures that the cell voltagesare perfectly balanced.This Special setting can also be used in orderto bring batteries to a medium voltage level ofabout 3.9 V per cell for over-wintering.Before any protracted period of storage, simplyset the discharge voltage to 3.9 Volt / celland discharge your Lithium batteries to thislevel.Caution: when you use the Special menu itis essential to enter the settings with particularcaution, as incorrect values can easilyresult in the destruction of the battery!The menu is expanded by the data input andBID save facility:Note:Do remember to confirm the settings! If youset the values for the BID-CHIP / KEY thensimply disconnect the battery, i.e. withoutconfirming the settings by pressing “Enter”at the “END SAVE BID” point, the “old”values remain stored in the memory. Pleasebear this in mind, because if you subsequentlycharge or discharge the pack, youwill be using the wrong values, and thiscould wreck the battery connected to thecharger!
Operating instructions<strong>Power</strong> <strong>Peak</strong> <strong>E1</strong>Order No.<strong>8471</strong>9. Equalizer-displayAs soon as the voltage sensor lead of a Lithiumbattery is connected, the chargerstarts to “equalize” the cells.10. Cycle dataThe “Cycle data” display shows all the relevantdata which is generated and storedduring a charge - discharge process.For each charge (C) and discharge (D)cycle the charged-in or discharged capacityand the average voltage are displayedseparately.This is a useful feature for checking the performanceof a battery pack. Up to ten cyclescan be stored; the data stored as No. 1represents the current values.For accurate cell voltage measurement it isessential to connect the battery chargelead (positive and negative) to the unit inaddition to the voltage sensor lead, inorder to obtain the same potential for eachcell.The individual cell voltages are displayed ingraphic and numerical form.The letter “B” following a cell number indicatesthat this cell has been equalized.Alternatively the individual cell voltages canbe displayed in aCELL 3 : 4.332V4,3Vbar graph.This is accomplishedby moving toline 3 and pressingEnter.2,9VBALANCE: 99,4% To leave the displaypress Enteragain.In this sub-menu you can view the voltageof all the individual cells as a numericalvalue and in graphic form.To see the voltage of an individual cell,move to the corresponding bar using theSelect buttons / wheel: the voltage of thatcell is then displayed in numerical form.On-screen display of the current cycle. Inthis example Cycle 1 of two pre-selectedcycles is currently in progress.The Cycle menu is only a display menu; theactual charge parameters are displayed inthe “Out 1 Data” menu.The first step of the cycle (charge or discharge,and any interval between the cycles)is set in the “USER SETTINGS” menu.14
Operating instructions<strong>Power</strong> <strong>Peak</strong> <strong>E1</strong>Order No.<strong>8471</strong>11. Charge output “Out 2 data”Charge output 2 “Out 2 data” is designed forrecharging receiver or transmitter batteriesat currents of up to 2 A.12. User settingsThe charger includes a “User settings”menu which contains many functions designedto ensure that its features can be set upto suit any user.One of those functions is the ability to selectany one of six menu languages.The battery parameters are defined usingthe three set-up points battery type, chargecurrent and capacity.At this output there is no facility for balancingLithium packs or discharging batteries.The charge process is started or interruptedby pressing the “OUT 2” button.This output also features a sub-menu whichcan display the batteryvoltage in curveform. To see this,move the cursor tothe second line andpress Enter; pressingEnter again closes the window.Cell count:1 … 8 cells NC / NiMH1 … 3 cells LiPo (3.7 V)1 … 4 cells LiFe (3.3 V)Charge current: 0.1 … 2 ACaution:Do not connect any battery to Output 2 ifits cell count is higher than stated above.Save / CopyThis function is used for saving (storing)battery data during charge and dischargeprocesses.If you leave both functions set to “No”, thedata is sent to the USB port, so that it canbe displayed and saved using Logview PCsoftware.The charger features an internal datamemory which records the information sothat it can be written to the PC and savedlater. If you wish to do this, Save must be setto “Yes”, and Copy to “No”.If you wish to read out the internal memorylater, you must set Save to “No” and Copy to“Yes”. Only then is the data passed to theUSB interface.Note:The data is stored inside the charger untilsuch time as a charge or discharge processwith another battery is initiated; at that pointthe memory is overwritten.15
Operating instructions<strong>Power</strong> <strong>Peak</strong> <strong>E1</strong>Order No.<strong>8471</strong>Start cycleThe “START CYCLE” function is used todetermine the first cycle (charge or discharge)of a cycle charge process.Interval cycleIf you wish to insert an interval between thecycles, select “ON” at this point. If not, set itto “OFF”.Interval timesAt the end of any phase of the charge cyclethe length of the interval is determined bytwo criteria:1. Battery temperature higher than 35°C:the interval comes to an end when thetemperature falls below 35°C again.2. The interval is limited to a maximum ofone hour; after this the next cycle phasestarts, whether the battery temperaturehas fallen to 35°C or not.User nameIf you wish to enter a User name, move tothe “User name” field using the cursor.Press the “Enter” button to highlight the firstcharacter field (black background). Now youcan use the “Select buttons / wheel” tochoose capital letters, lower-case letters,figures and also special characters such as+.If you have entered the full name but thereare still vacant character spaces, you mustpress the “Enter” button repeatedly until theblack character field is no longer visible. Youwill not be able to move the cursor freely withinthe menu until you have completed thisstep.The remaining functions are self-explanatory.13. Charge - discharge process sequenceat OUT1Before you can start a charge / dischargeprocess the following steps must be carriedout:• Connect the power source with correctpolarity,• Connect the battery with correct polarity,• Set the appropriate battery type,• Set the appropriate cell count,• Set the appropriate battery capacity,• Set the charge and / or discharge current.Once you have set the parameters, theprocess can be started.In order to:charge = press the OUT1 button once;discharge = press the OUT1 button twice;discharge - charge the connected battery:press the OUT1 button three times.If you wish to initiate a cycle process, youmust also set the desired number of cycles(1 - 10) using the “Select buttons / wheel”.If you wish to interrupt the process, pressthe “OUT1” button again.When the voltage sensor lead of a Lithiumbattery is connected, the equalizing processstarts automatically.It is also possible to adjust the charge /discharge current during a process; thiscan be carried out inter-actively using themenu interface.Any change to the selected current onlyapplies to the charge / discharge processwhich is actually in progress.Next time you initiate a charge / dischargeprocess the value stored in the “Batterysettings” menu or on the BID chip / key willbe applied again.16
Operating instructions<strong>Power</strong> <strong>Peak</strong> <strong>E1</strong>Order No.<strong>8471</strong>14. Charge / discharge process withBID-CHIP / KEY (at OUT1 only)Connect the BID chip to the charger usingan adapter lead, or connect the BID keydirectly.What information is stored on the BID-CHIP / KEY?The last charged-in or discharged capacityvalues are updated, the cycle counter isincremented by one, and the maximumcapacity is also saved, if it exceeds the previousmaximum value.Of course, the chip or key also stores thecharge and discharge parameters whichyou previously entered using the “Batterysettings” menu.When you connect a BID unit, the correspondingsymbol will appear on the screen.If the battery parametershave alreadybeen set on the BIDchip, the charge ordischarge processcan be startedimmediately simplyby pressing the “OUT1” button.From this point on the sequence of the processis identical to a process started in thenormal way.It is also possible to adjust the charge /discharge current during a process; thiscan be carried out inter-actively using themenu interface.Any change to the selected current onlyapplies to the charge / discharge processwhich is actually in progress. Next time youinitiate a charge / discharge process thevalue stored in the “Battery settings” menuor on the BID chip / key will be appliedagain.At the conclusion of a charge or dischargeprocess the essential data generatedduring the process is stored on the BIDchip / key. This information gives you aclear idea of the battery’s condition andperformance.These are:Battery typeCell countCharge currentDischarge currentFinal charge voltageDischarge voltageDelta <strong>Peak</strong> sensitivityCut-off temperatureCapacityDate of first useNote regarding the end of a charge processWhen the unit is being used to charge Lixxbatteries, the “End” indicator will appear onthe screen when about 98% of the full energyhas been charged into the pack; at thispoint the battery can be disconnected fromthe charger.However, if you leave the battery connectedto the charger, the equalizer continues tooperate, and continues to balance the individualcell voltages. The equalizer thereforecontinues to draw the low current requiredto balance the pack’s cells.The charger finally switches off the chargeprocess when the residual charge currentfalls to 40 mA.17
Operating instructions<strong>Power</strong> <strong>Peak</strong> <strong>E1</strong>Order No.<strong>8471</strong>15. ERROR MESSAGESThe <strong>Power</strong> <strong>Peak</strong> <strong>E1</strong> is equipped with arange of safety features designed to ensurethat the charge and discharge processesstart and finish safely. As soon as an erroroccurs, a corresponding message appearson the screen, and the charger emits anaudible alert.Once the cause of the problem has been eliminated,all the following error messagescan be cancelled by pressing any button.The set cut-off temperature has been reached,and the charge process terminated.Input voltage too low (less than 10 Volts).Check the car battery or mains PSU.The battery is connected with reversedpolarity. Check the connections.The BID chip or key has been disconnectedfrom or connected to the charger while aprocess was running. Check the chip connection,and re-start the process.If the charge / discharge process does notstart after you have connected a BID chip orkey, that could mean that the data on thechip is corrupt.This warning also appears if a new (unformatted)chip is connected.The BID data is entered in the BatterySettings menu.Battery voltage or output voltage too high;check cell count.The charger also checks the cell count viathe equalizer socket, and compares the settingwith the value set in the Battery datamenu. If these values do not coincide, thiserror message is displayed.The BID chip or key contains no data, orincorrect data.The BID chip contains fewer or differentparameters than are available in the BatterySettings menu. Set the missing data.Check the settings of the BID chip or key.18
Operating instructions<strong>Power</strong> <strong>Peak</strong> <strong>E1</strong>Order No.<strong>8471</strong>16. General safety notes• Mishandling batteries and battery chargerscan result in the batteries catchingfire and even exploding.• The <strong>Power</strong> <strong>Peak</strong> <strong>E1</strong> is suitable solely forcharging, discharging and equalizingrechargeable NC / NiMH, Lead-acid andLithium batteries. Do not attempt torecharge dry cells - explosion hazard.• The charger is designed for use with aDC power source supplying 11 … 15 VDC; this can be a car battery or a mainsPSU with a suitable rating. Never connectit to any other voltage.• It is essential to protect the charger fromdust, dirt and damp.• Do not subject the charger to excessiveheat or cold, nor to direct sunlight.• Avoid shock and pressure loads, and donot subject the <strong>Power</strong> <strong>Peak</strong> <strong>E1</strong> tosevere vibration.• Never place the charger and the batteriesconnected to it on any form of flammablesurface. Never operate the chargerin the vicinity of inflammable materialsor gases.• Do not open the charger when it is connectedto a power source.• Do not leave the charger operatingunsupervised. It is normal for the chargerto become quite hot when operating.• Ensure that there is an unrestricted airflowto and from the charger’s coolingslots.• If you will not be using the charger for aprotracted period, disconnect it from thepower source and any batteries connectedto it.• Never charge any battery a second timeimmediately after its initial charge.• Do not charge a battery which is alreadywarm or hot to the touch. Allow packs tocool down to ambient temperature beforecontinuing.• Packs to be charged as a unit must consistof cells of the same make, the sametype and the same capacity.• Do not charge two batteries connected inparallel to one output; connect only onebattery at a time.• Take great care to maintain correct batterypolarity, and avoid short-circuits.• Read the battery manufacturer’s instructionsand adhere to them strictly.• Always take great care to check the settingsof the <strong>Power</strong> <strong>Peak</strong> <strong>E1</strong>. Batteriesmay be completely ruined if the settingsare not appropriate.• Check the charger case and cables fordamage at regular intervals.• Please take particular care when handlingbattery packs containing a largenumber of cells. The voltage of thesepacks is high enough to give you aserious electric shock, so ensure that allterminals are properly insulated.• Do not disconnect the battery during acharge process without first pressing theStop button. The charger’s high outputvoltage can generate massive sparking ifyou ignore this instruction.19
Operating instructions<strong>Power</strong> <strong>Peak</strong> <strong>E1</strong>Order No.<strong>8471</strong>17. A brief guide to battery types18. The CC - CV charge processLead-acid and Lithium batteries are chargedusing the constant voltage method (CC -CV).For this reason it is necessary to enter thefinal charge voltage per cell in this menu, inaccordance with the battery type.During the initial charge phase the batteryvoltage rises slowly to the maximum value of4.2 V / cell (LiPo battery).In this phase the charger ensures that theConstant current phase (CC)Cut-off point)Constant voltagephase (CV)charge current remains constantly at the setvalue.Starting with a discharged battery and acharge current of 1C, this initial phase lastsabout 50 to 60 minutes, during which timeabout 80 - 90% of full battery capacity ischarged in.When the final charge voltage is reached, theconstant charge current is switched off andthe voltage held constant.During the second phase the charge currenttherefore diminishes, since the differencebetween the voltage set on the charger andthe battery is steadily declining.A further 35 - 40 minutes are required inorder to charge in the remaining capacity.The charger terminates the process whenthe charge current falls to the pre-set bottomlimit.At a charge rate of 1C this means that thetotal charge process takes about 90 minutes.19. Lead-acid batteriesWhen handling Lead-acid batteries certainsafety measures are absolutelynecessary to avoid the risk of personalinjury and property damage. When youuse these batteries, you personallyaccept the responsibility for any problemswhich may arise.• The lead-gel batteries which are in widespreaduse in the modelling world areusually gas-tight, and therefore lesshazardous than conventional Lead-acidtypes.• In contrast, car batteries with fluid sulphuricacid electrolyte are extremely hazardous,because the acid is corrosive, andthe cells quickly generate gas when overcharged.• Lead-acid batteries must never come intocontact with open fire, as they mayexplode.• Never forcibly open Lead-acid cells: theycontain corrosive materials.• Never short-circuit Lead-acid cells: firehazard, possible explosion hazard.• If electrolyte should escape from the cell,do not allow it to touch your skin or eyes.If this should happen despite taking normalprecautions, immediately wash it offusing plenty of clean water, and seekmedical attention immediately. Neverplace Lead-acid cells or batteries in yourmouth, as they are poisonous.• A charged Lead-acid battery is not achild’s plaything. Store these batterieswell out of the reach of children.• Be sure to observe the battery manufacturer’sinstructions when charging anddischarging Lead-acid batteries.• Lead-acid batteries may generate hydrogengas (“gassing”) during the chargeprocess. For this reason good ventilationis essential.If overcharged, these batteries generatean explosive mixture of hydrogen andoxygen.Explosion hazard.20
Operating instructions<strong>Power</strong> <strong>Peak</strong> <strong>E1</strong>Order No.<strong>8471</strong>20. Lithium batteries (LiPo, LiIo, LiFe)There are several basic types of Lithiumbattery:1. Lithium-Ion batteries containing fluidelectrolyte, with a nominal voltage of 3.6Volts. This is the first generation of Lithiumcell, and is not often used formodelling applications.(Battery type select: LION)2. Lithium-Ion batteries containing fluidelectrolyte, with a nominal voltage of 3.7Volts. This is the second generation ofLithium cell, and is housed in a metalcan.(Battery type select: LIPO)be charged at 1.5 to 2C, and the latest typesat 5C. Please observe the maximum chargecurrent stated by the battery manufacturer.The final discharge voltage of LiPo and LiIobatteries should be set to 3.0 Volts.LiFe batteries should be set to a final dischargevoltage of 2.7 Volts.CAPACITY DIFFERENCESIf several cells are assembled to form a batterywhich is then discharged at a fairly highcurrent, the cells will heat up to differentextents as the cell or cells on the inside areunable to dissipate heat effectively.3. Lithium-Ion-Polymer batteries (LiPo)containing gel-form electrolyte, with anominal voltage of 3.7 Volts. This is thecurrent generation of Lithium cell, andthey have also become known as Li-po orLi-poly batteries. The gel electrolyteresults in a reduced pressure build-up inthe cell during charging and discharging,for which reason a foil housing is adequate.This cell has rapidly become verypopular for model purposes due to its lowweight and high energy density.(Battery type select: LIPO)4. 4. Lithium-Ferrum (phosphor) batterieswith a nominal voltage of 3.3 Volts.This is currently the latest generation ofLithium batteries, also known as A123cells. These batteries are likely tobecome very widespread in modellingcircles due to their good energy densityand ability to tolerate high peak dischargecurrents.(Battery type select: LIFE)We recommend the following chargerates for Lithium batteries:Lithium batteries are usually charged at arate of 1C, although many types of cell can21This results in changes to the cells’ internalresistance, which in turn reduces theirdischarge capacity. The cell concerned willthen be discharged more quickly, with thedanger that it will eventually be dischargedbelow the permissible final discharge voltageof 2.5 Volts.Considerable differences in capacity canoccur when external temperatures are verylow.For example, if a Li-poly pack is flown in anelectric helicopter, the front cell will be cooledvery effectively by the normal airflow,while the inner cells become significantlywarmer.The colder cell will lose effective capacity,with the danger that it will be dischargedbelow the permissible final discharge voltage.To avoid the danger of permanent celldamage we recommend that Li-poly cellsshould only be discharged down to a finaldischarge voltage of about 3 to 3.3 Volts. Itis also essential that the cells should becharged up to the same level next time thepack is recharged. Always connect the voltagesensor lead!
Operating instructions<strong>Power</strong> <strong>Peak</strong> <strong>E1</strong>Order No.<strong>8471</strong>Charging parallel-wired cells does not presentproblems, as the total charge current isdistributed to the individual cells accordingto their voltage.21.Explanation of “Delta-peak” charge terminationWe accept absolutely no liability fordamage caused by incorrect or incompetenthandling of the cells. Please be sureto read and observe the Safety Notes.Temperature differences always occurduring the discharge process, as the outercells are inevitably cooled more effectivelythan the inner ones. The effect of this, combinedwith normal manufacturing tolerances,is that the state of charge of series-connectedLithium-Polymer cells always tendsto drift.After several discharge / charge cyclesindividual cells invariably exhibit differencesin voltage.The graph above shows the typical chargecurve of an NC or NiMH battery.At the end of the charge process the pack’sinternal resistance changes as the cellsheat up.This results in a slight decline in cell voltage.Battery chargers which terminate thecharge process exactly at the highest pointof the charge curve are known as “ZeroDelta-<strong>Peak</strong>” chargers.To compensate for charge losses as thecells cool down, or to increase the performancecapacity of a battery for competitionuse, it has become normal practice toovercharge these packs slightly - to anextent which varies according to the celltype.The peak sensitivity, or Delta-<strong>Peak</strong> value,is stated in the form of 5 mV / cell or a similarvalue. This indicates the overchargevalue, i.e. the process is terminated slightlylater than the peak.Setting the Delta-<strong>Peak</strong> sensitivity to 15 mVcauses the battery to be extremely fullycharged, and the pack will then be hot tothe touch. This type of charge does providehigh battery energy, but at the same time ithas a massive negative effect on the useful22
Operating instructions<strong>Power</strong> <strong>Peak</strong> <strong>E1</strong>Order No.<strong>8471</strong>life of the pack.22. Nickel-cadmium batteries (NC)We recommend the following chargerates for NC batteries:High-energy batteries: 1 - 2C; pleaseobserve the battery manufacturer’s statedfigures.High-current batteries: 2 - 3C, max. 5C; athigh charge rates the temperature of the batteryshould be monitored. If the cells becometoo hot, the charge current should be reduced.It is important to observe the maximumcharge rates stated by the cell manufacturer.At the same time check that the connectorsand charge leads are suitable for the chargecurrent you have elected to use.The final discharge voltage of NiCd batteriesshould be in the range 0.85 to 1.00 Volt / cell.The Delta-<strong>Peak</strong> sensitivity should be around5 - 8 mV / cell.Guide values:NiCd batteriesStandard applications, long battery life= 6 - 8 mV / cellMore demanding applications- 9 - 10 mV / cellCompetition usage= 12 - 15 mV / cellThe charger automatically calculates the correctcut-off voltage difference for the wholebattery pack by multiplying the individual cellvalue by the cell count.When the pre-set value is reached during thecharge process, the charge is interrupted,and the charge end indicator described earlierappears on the screen.These figures are no more than a generalguideline, and vary according to the actualbattery type. It is still essential to read andobserve the recommendations of the batterymanufacturer.23. Nickel-Metal-Hydride batteries(NiMH)We recommend the following chargerates for NiMH batteries:High-energy batteries: 0.5 - 1C; pleaseobserve the battery manufacturer’s statedfigures.High-current batteries: usually 1C, althoughmany battery types can be chargedsafely at 1.5 - 2C; if you wish to use highcharge rates, the battery temperatureshould be monitored. If the pack heats upexcessively, the charge rate should bereduced.Please check the maximum charge currentfigures stated by the battery manufacturer.The final discharge voltage of NiMH batteriesshould be 1.00 Volt / cell.The Delta-<strong>Peak</strong> sensitivity should bearound 3 - 5 mV / cell.Guide values:NiMH batteriesStandard applications, long battery life= 5 mV / cellMore demanding applications- 6 - 7 mV / cellCompetition usage= 8 - 9 mV / cellIf you set a low peak value for NiMH cells,you may find that high-capacity packs andold batteries suffer premature charge termination.If this should occur, set the cut-off valueslightly higher, and re-start the chargeprocess.23
Operating instructions<strong>Power</strong> <strong>Peak</strong> <strong>E1</strong>Order No.<strong>8471</strong>24. GuaranteeNaturally we guarantee this battery chargerfor the statutory period of 24 months. If youbelieve you have a valid claim under guarantee,please contact your dealer in the firstinstance, as he is responsible for processingguarantee claims.During the guarantee period we will correctany operating deficiencies, productiondefects and material faults which arise, atno charge to you. We will not entertain anyclaims beyond these terms, e.g. consequentdamage.25. Conformity declarationrobbe Modellsport GmbH & Co. KG herebydeclares that this product satisfies the fundamentalrequirements and other relevantregulations contained in the appropriate EUdirectives. The original Conformity Declarationcan be viewed on the Internet underwww.robbe.com: click on the logo buttonmarked “Conform” which is included in eachdevice description.The unit must be returned to us carriagepaid;it will also be returned to you carriagepaid.We will not accept goods sent to uswithout pre-paid carriage.We accept no liability for transit damage andthe loss of your shipment; we thereforerecommend that you take out suitable insuranceto cover these risks. Send the unit tothe Service Centre responsible for the countryin which you live.The following conditions must be fulfilledif we are to process your guaranteeclaim:• Send proof of purchase (till receipt) withyour shipment.• The unit must have been operated inaccordance with the operating instructions.• The unit must have been operated withthe recommended power sources andgenuine robbe accessories.• The unit must not exhibit damage due todamp, unauthorised intervention,reverse polarity, overload conditions ormechanical damage.• Please include a concise description ofthe fault or defect, as this will help usidentify the problem.24
Operating instructions<strong>Power</strong> <strong>Peak</strong> <strong>E1</strong>Order No.<strong>8471</strong>26. Recommended accessoriesTransmitter battery chargeleadNo. F1415BID chip without lead, forfitting to batteriesNo. 8472Receiver battery chargeleadNo. F1416BID chip with 300 mm lead,for fitting to batteriesNo. 8473BID lead, 300 mmNo. 8474BID lead, 500 mmNo. 8475BID-keyNo. 8888Voltage sensor lead, 30 cmNo. 40292 x 3S EHR balancer adapter,for robbe, Graupnerand Kokam batteriesNo. 40233 x 2S EHR balanceradapter, for robbe,Graupner and Kokam batteriesNo. 40312 x 3S XH-EHR balanceradapter, from Align, Lamaor G47 to robbe, Graupneror Kokam batteriesNo. 4023XH3 x 2S XH-EHR balanceradapter, from Align, Lamaor G47 to robbe, Graupneror Kokam batteriesNo. 4031XH25EQ adapter, robbe -PolyquestNo. 8213
Operating instructions<strong>Power</strong> <strong>Peak</strong> <strong>E1</strong>Order No.<strong>8471</strong>EQ adapter, robbe-JST /XH from robbe to Align,Lama or G47 batteriesNo. 8214EQ adapter, robbe -Thunderpower /FlightpowerNo. 8215SPS 40A switch-modepower supplyNo. 853927. Service Centre AddressesCountry Company Street Town Telephone Fax E-MailAndorra Sorteney Santa Anna, 13AND-00130 Les escaldes-Princip. D'Andorre 00376-862 865 00376-825 476 sorteny@sorteny.comDenmark Nordic Hobby A/S Bogensevej 13 DK-8940 Randers SV 0045-86-43 61 00 0045-86-43 77 44 hobby@nordichobby.comGermany robbe-Service Metzloser Str. 36 D-36355 Grebenhain 0049-6644-87-777 0049-6644-87-779 hotline@robbe.comEngland robbe-Schlüter UK L<strong>E1</strong>0-UB GB-L<strong>E1</strong>0 3DS Leicestershire 0044-1455-637151 0044-1455-635151 keith@robbeuk.co.ukFrance S.A.V Messe 6, Rue Usson du Poitou, BP 12 F-57730 Folschviller 0033 3 87 94 62 58 0033-3-87 94 62 58 sav-robbe@wanadoo.frGreece TAG Models Hellas 18,Vriullon Str. GR-14341 New Philadelfia/Athen 0030-2-102584380 0030-2-102533533 info@tagmodels.grI-36010 CavazzaleItaly MC-Electronic Via del Progresso, 25di Monticello C.Otto (Vi) 0039 0444 945992 0039 0444 945991 mcelec@libero.itNetherl. / Belgium Jan van Mouwerik Slot de Houvelaan 30 NL-3155 Maasland 0031-10-59 13 594 0031-10-59 13 594 van_Mouwerik@versatel.nlNorway Norwegian Modellers Box 2140 N-3103 Toensberg 0047-333 78 000 0047-333 78 001 per@modellers.comAustria robbe-Service Puchgasse 1 A-1220 Wien 0043-1259-66-52 0043-1258-11-79 office@robbe.atSweden Minicars Hobby A.B. Bergsbrunnagatan 18 S-75323 Uppsala 0046-186 06 571 0046-186 06 579 info@minicars.seSwitzerland Spahr Elektronik Gotthelfstr. 12 CH-2543 Lengau 0041-32-652 23 68 0041-32 653 73 64 spahrelektronik@bluewin.chSlovak Rep. Ivo Marhoun Horova 9 CZ-35201 AS 00420 351 120 162 ivm2000@seznam.czSpain robbe-Service Metzloser Str. 36 D-36355 Grebenhain 0049-6644-87-777 0049-6644-87-779 hotline@robbe.comCzech Rep. Ivo Marhoun Horova 9 CZ-35201 AS 00420 351 120 162 ivm2000@seznam.cz26
Operating instructions<strong>Power</strong> <strong>Peak</strong> <strong>E1</strong>Order No.<strong>8471</strong>LogView -Displaying serial data on a PCWith the help of LogView, which we recommendand support, it is possible to visualiseand analyse the serial data from manyrobbe battery chargers (including the <strong>Power</strong><strong>Peak</strong> <strong>E1</strong>), and export that data in a verywide variety of forms if required.The software can be obtained from the webaddress www.logview.info, and is classed asDonationware. If you like the program, youhave the option of making a donation to thedevelopers; otherwise it is free to use.LogView offers a user interface which isintuitive to use, and provides a means ofevaluating the data generated by a widespectrum of different devices. The datareceived from the device is always displayedin the same manner, which makes it generallyeasier for the user when handling hisequipment.The files generated by LogView can also beused directly by other users, even if theassociated device is not physically present.suit his personal requirements* Analysis functions are useful in examiningthe state of batteries more closely.* The curve comparison functions make itpossible to display different charge anddischarge processes in a single graph. Inparticular, this is an excellent method ofassessing the quality and ageing process ofa battery, even in comparison with otherbatteries.* The object management function providesa means of assigning graphs and informationto a particular battery, and storing andmanaging the data appropriately.* Numerous export functions for graphs andtables make it possible for other applicationsto process the files.* The integral Help system is a fast, straightforwardmethod of gaining information relatingto the program’s functions.If you have specific queries concerning theuse of LogView, or if you have suggestionsfor further improvements to the software,you are welcome to contact the developersdirectly through the LogView forum, whereyou can also exchange experiences andideas with other users.Additional features of the software include:* <strong>Power</strong>ful graphic engine with numerousassessment and measurement functions.Many display options are available, allowingthe user to fine-tune the graphic display to27
28. Proper disposal of batteries and equipmentOn no account dispose of exhausted batteries in the domestic waste. To protect the environment,take defective and exhausted packs to your local battery collection centre afterensuring that they are completely discharged. Collection points include all retail outletswhere dry and rechargeable batteries are sold, and also local authority toxic waste collectionsites. To avoid short-circuits, any exposed contacts should be carefully insulated. Thecost of returning and recycling old batteries is included in their original purchase price. Allthe above-named collection points are legally obliged to accept batteries, whether you purchasedthem there or not. Exhausted batteries can be recycled, and the materials re-introducedinto the production chain. Please help to protect the environment!It is illegal to dispose of electronic equipment in the ordinary household waste: that is themeaning of the symbol printed alongside. It simply means that you mustdispose of electrical and electronic equipment separately from the generalhousehold waste when it reaches the end of its useful life. Take your<strong>Power</strong> <strong>Peak</strong> <strong>E1</strong> to your local specialist waste collection point or recyclingcentre. This applies to all countries of the European Union, and to otherEuropean countries with a separate waste collection system.robbe Modellsport GmbH & Co. KGMetzloser Strasse 38D-36355 Grebenhain OT Metzlos-GehaagGermanyTelephone: [0049] 6644-870www.robbe.deWe accept no liability for errors and technical modifications.Copyright robbe-Modellsport 2009This information may not be copied or reproduced in whole or in part withoutthe prior written approval of robbe Modellsport GmbH & Co. KGrobbe Form 40-55211 BBAJ28
Notice d’utilisation<strong>Power</strong> <strong>Peak</strong> <strong>E1</strong>réf. <strong>8471</strong>
Instructions d'utilisation<strong>Power</strong> <strong>Peak</strong> <strong>E1</strong>réf.<strong>8471</strong>Madame, Monsieur, cher Client,nous sommes heureux que vous ayez optépour le chargeur informatique automatique<strong>Power</strong> <strong>Peak</strong> <strong>E1</strong> de la gamme des produitsrobbe. Vous disposez ainsi d’un chargeurpuissant avec gestion des accus et égaliseuravec une alimentation de 230V CA oude 12V CC.Bien que le chargeur de qualité et automatiquesoit relativement aisé à mettre enœuvre, l'exploitation de ce chargeur <strong>Power</strong><strong>Peak</strong> <strong>E1</strong> exige quelques connaissancespréalables de la part de l'utilisateur. La présentenotice vous permettra de vous familiariserrapidement avec l'appareil.Pour atteindre cet objectif en toute sécurité,lire attentivement la présente notice etparticulièrement le chapitre concernant lesaccus et la sécurité en général avant demettre votre nouveau chargeur en service.Nous vous souhaitons beaucoup de réussiteet de plaisir avec votre nouveau chargeur!Exclusion de la responsabilitéCe chargeur est conçu exclusivement ethabilité pour la charge et la décharge desaccus mentionnés dans la présente notice.La Sté robbe Modellsport ne peut enaucun cas être tenue pour responsabled'une exploitation non conformeLa société robbe Modellsport n'est pas enmesure de contrôler le respect des indicationset des méthodes fournies par la noticede maintenance et d'exploitation, de mise enœuvre, d'utilisation et de maintenance.Nous ne pouvons donc être tenus pourresponsables d'aucune perte, d'aucun dommageni coût dus à une utilisation ou unemise en œuvre inadéquates ou de quelqueconséquence que ce soit.Dans les limites du Droit et quels qu'ensoient les motifs les produits robbedirectement à l'origine de dommages nepeuvent être mis en cause ni donnerdroit au versement de dommages et intérêts.Ceci ne vaut pas dans le cas de directivescontraignantes lorsque les intentions sontmalveillantes ou en présence de négligencesgrossières.2
Instructions d'utilisation<strong>Power</strong> <strong>Peak</strong> <strong>E1</strong>réf.<strong>8471</strong>SommaireChapitre . . . . . . . . . . . . . . . . . . . . . . . . . . . . . . . . . . . . . . . . . . . .PageExclusion de la responsabilité . . . . . . . . . . . . . . . . . . . . . . . . . .11. Contenu de la livraison . . . . . . . . . . . . . . . . . . . . . . . . . . . . . . .22. Descrition générale . . . . . . . . . . . . . . . . . . . . . . . . . . . . . . . . . .23. Éléments de commande . . . . . . . . . . . . . . . . . . . . . . . . . . . . . .33.1 Fonction des éléments de commande . . . . . . . . . . . . . . . . . . .34. Caractéristiques techniques . . . . . . . . . . . . . . . . . . . . . . . . . . .45. Mise en service . . . . . . . . . . . . . . . . . . . . . . . . . . . . . . . . . . . . .65.1 Branchement des accus . . . . . . . . . . . . . . . . . . . . . . . . . . . . . .65.2 Branchement de l'égaliseur : . . . . . . . . . . . . . . . . . . . . . . . . . .76. Structure du menu et navigation . . . . . . . . . . . . . . . . . . . . . . . .76.1 Récapitulatif de la structure du menu . . . . . . . . . . . . . . . . . . . .87. Sortie de charge-décharge “caractéristiques OUT 1” . . . . . . . .88. Mise au point de l'accu . . . . . . . . . . . . . . . . . . . . . . . . . . . . . . .98.1 Réglage de l'accu avec puce/clé BID . . . . . . . . . . . . . . . . . . .129. Écran de l'égaliseur . . . . . . . . . . . . . . . . . . . . . . . . . . . . . . . .1310. Caractéristiques des cycles . . . . . . . . . . . . . . . . . . . . . . . . . . .1311. Sortie de charge Out 2 données (“Out 2 Daten”) . . . . . . . . . .1412. Mises au point utilisateur (“Nutzer Einst.”) . . . . . . . . . . . . . . .1413. Séquence de la procédure decharge-décharge à la sortie OUT1 . . . . . . . . . . . . . . . . . . . . .1514. Procédure de charge-décharge avec PUCE/CLÉ BID(uniquement à la sortie OUT1) . . . . . . . . . . . . . . . . . . . . . . . .1615. MESSAGES DE DÉRANGEMENT . . . . . . . . . . . . . . . . . . . . .1716. Consignes générales de sécurité . . . . . . . . . . . . . . . . . . . . . .1817. Accus, mode d'emploi . . . . . . . . . . . . . . . . . . . . . . . . . . . . . . .1918. La procédure de charge CC-CV . . . . . . . . . . . . . . . . . . . . . . .1919. Accus au plomb (Pb) . . . . . . . . . . . . . . . . . . . . . . . . . . . . . . .1920. Accus au Lithium (LiPo, LiIo, LiFe). . . . . . . . . . . . . . . . . . . . .2021. Explications de la commutation “Delta <strong>Peak</strong>” en fin de charge2122. Accus cadmium-nickel (Cd-Ni) . . . . . . . . . . . . . . . . . . . . . . . .2124. Garantie . . . . . . . . . . . . . . . . . . . . . . . . . . . . . . . . . . . . . . . . . .2325. Déclaration de conformité . . . . . . . . . . . . . . . . . . . . . . . . . . . .2326. Accessoires recommandés . . . . . . . . . . . . . . . . . . . . . . . . . . .2327. Adresse de nos ateliers du service après-vente . . . . . . . . . . .2428. Mise au rebut des accus et des appareils. . . . . . . . . . . . . . . .253
Instructions d'utilisation<strong>Power</strong> <strong>Peak</strong> <strong>E1</strong>réf.<strong>8471</strong>1. Contenu de la livraison1x <strong>Power</strong> <strong>Peak</strong> <strong>E1</strong>1x Capteur de température1x CLÉ BIDà jour permettent des extensions ou uneappropriation à de nouvelle technologiesd’accumulateurs avec implémentation.Une interface USB permet de raccorder lastation de charge à un micro-ordinateur.Avec le gratuiciel connu Logview, il est alorspossible de relever, sauvegarder, compareret imprimer les caractéristiques du chargeur<strong>Power</strong> <strong>Peak</strong> <strong>E1</strong> et de les traiter.Adresse de déchargement :www.logview.info2.Descrition généraleStation informatisée de charge et dedécharge très puissante avec gestion desaccus pour tous les types d’accus communs.Le nouveau système à effleurementpermet de réaliser un boîtier élégant et parfaitementclair.Les capteurs sans contacts des interrupteurset de la touche rotative permettentd’obtenir une surface lisse et close sans élémentsde commande en relief.Écran au format 192 x 128 pixels divisé en12 lignes ce qui permet de proposer unepolice de caractères parfaitement lisible surle grand écran.Sur l’écran apparaissent les paramètres lesplus importants de la procédure en cours,sous forme numérique ou sous forme graphique.L’avenir peut venir en toute sécurité avec latechnologie flash de sauvegarde Des mises4Avec la mémoire interne il est alors égalementpossible de relever des caractéristiquesmême en l’absence de micro-ordinateur.Les caractéristiques peuvent alors êtresélectionnées et sauvegardées ultérieurement.Pour plus de sécurité, il est possible de surveillerla température d'un accu en la faisantapparaître sur l'écran pendant la charge. Ilest également possible d'établir une coupurede la procédure en fonction d'une températuredonnée.Avec égaliseur intégré pour des accus de 2x 7 éléments Lithium-ions, LiPo et LiFe etaccus spéciaux.Une des propriétésessentiellesdu chargeur<strong>Power</strong><strong>Peak</strong> <strong>E1</strong> est lenouveau systèmeorientévers le futur, le système BID : systèmed’identification des accus.. La multiplicitédes différents types d’accus ne cesse decroître, chaque type d’accu exigeant sa“propre” procédure de charge. Il peut arrivertrès rapidement d’établir des réglages incorrectssur le chargeur et détériorer ainsi unaccu de valeur.Le système BID de robbe propose une solu-
Instructions d'utilisation<strong>Power</strong> <strong>Peak</strong> <strong>E1</strong>réf.<strong>8471</strong>tion géniale à ce problème. À chaque accuest affectée une petite puce / clé BIDlégère.Elle sauvegarde toutes les caractéristiquesessentielles concernant la charge et ladécharge de l’accu.Pour charger ou décharger l’accu, la puceBID solidaire de l’accu ou la clé BID livréeavec l'émetteur est raccordée au chargeur<strong>Power</strong> <strong>Peak</strong> <strong>E1</strong> et lui fournit les paramètresnécessaires.Il suffit alors d’actionner la touche ‘OUT1’et la procédure de charge ou de déchargecommence.Plus de recherche laborieuse des paramètresde mise au point dans le menu, protectionmaximale contre les manipulationserronées et sauvegarde des caractéristiquesessentielles des accus dans lapuce/clé BID, voilà les principaux avantagedu système BID.Avec la sauvegarde des caractéristiquesessentielles dans la puce/clé BID, l’accuporte toujours avec lui ses caractéristiquesqui peuvent ainsiaisément êtreaffichées sur lechargeur. Cettefonction remplacelargement lanécessité d’exploiterun logicielde micro-ordinateur et l’informatique pourobtenir un récapitulatif de l’état de l’accu.3.Éléments de commande3.1 Fonction des éléments de commandeInterfaceUSBAlimentation électriqueÉcran à CLSortie 2Branchementdu capteur detempératureConnexion ducapteur de tension.Touche Out 2Capt. de temp.Touche Out 1Raccord BIDRaccord accu OUT 15
Instructions d'utilisation<strong>Power</strong> <strong>Peak</strong> <strong>E1</strong>réf.<strong>8471</strong>Roue SELECT(roue de sélection)Cette roue de sélection permet demettre tous les paramètres dumenu au point par rotation.Touches à flèche montée / descenteEn mode manuel, ces touches permettentd’augmenter ou de réduire, pas àpas, les valeurs des paramètres enmode mise au point et dans la sélectiondu menu, de passer systématiquementau menu suivant ou au menu précédent.Le fait de maintenir la pression surla touche induit une poursuite automatiquedu changement de valeur qui s'accélèrelorsque la pression se prolonge.Touche de confirmation (Enter)La touche ‘ENTER’ permet de confirmer lasélection, par exemple l’activation d'unmenu sélectionné, ou la reprise d'une valeursélectionnée antérieurement.Touche OUT 1 et touche OUT 2Permet d'initier la procédure de charge de lasortie concernée. Une pression répétée surcette touche permet d'activer, pour la sortieOUT1, la fonction de charge, de déchargeou la fonction cyclique. Une pression sur la4. Caractéristiques techniquesTension de service :6touche OUT2 ne permet de lancer que lafonction de charge.Le ronfleur piézo et les LEDLe signal acoustique piézo valide chaquepression sur une touche et signale la find'une charge ou d'une décharge de mêmeque la présence d'un dérangement. Peutêtre mis au point dans le menu utilisateur.Les LED sur les touches indiquent optiquementle fait que les touches sont actionnées.10 à 15 volts CC (batterie de voiture) ou bloc d'alimentation 13,8 volts au moins 30 A (ne pas utiliser dechar geur pour batterie de voiture !)Consommation électrique max. : approx. 37 ampèresProcédure de commutation en fin de charge :NC / NiMH :automatique, système numérique Delta-<strong>Peak</strong>plomb et Lithium :automatique, en fonction de la tension, selon la procédure CC-CVEncombrement :170 x 175 x 85 mmSortie 1 (OUT1)nombre d'éléments :1 ... 36 éléments Cd-Ni/NiMH1 à 14 éléments LiIo (3,6V), LiPo (3,7V), LiFe (3,3V)1 à 12 éléments (2 à 24V) accu au plombaccu spécial 1 à 14 éléments (Cf. chap. 13 page 17)Courant de charge : Auto, 0,1 ... 20A (max. 315W)Courant de décharge : Auto, 0,1 ... 40A (max. 160W)Courant d’homogénéisation : approx. 220mAcharge de maintien :C/20 avec éléments Cd-Ni et NiMHtension en fin de décharge : 0,5 à 1,1 volt avec éléments Cd-Ni et NiMH2,5 à 3,6V / par élément LiPo, LiIo, LiFe1,8V / élément d’accu au plombFonctions :charger, décharge, mode cyclique, équilibrer
Instructions d'utilisation<strong>Power</strong> <strong>Peak</strong> <strong>E1</strong>réf.<strong>8471</strong>Courant de charge en fonction de la tensionde l'accu sur OUT 1en dessous de 15,75V20A15,75V-17,5V18A17,5V-21V15A21V-26,25V12A26,25V-31,5V10A31,5V-35V9A35V-39,37V8A39,37V-42V 7,5A42V-45V7A45V-48,46V 6,5A48,46V-52,5V6A52,5V-57,27V 5,5A57,27V-63V5Aest supérieure à 63V4A5.1 Branchement des accusRaccordez le chargeur à un accu au plombde 12 volts. Veillez absolument à respecterles polarités (rouge = plus / noir = moins),veillez également à ce que les contacts soientsûrs. Sur le moniteur apparaît l'écran dedémarrage avec numéro de version et nomde l'utilisateur préétabli.Capacité de décharge : Courant de chargeen fonction de la tension de l'accu sur OUT 1en dessous de 2V10A2V-4V40A4V-5,33V30A5,33V-6,4V25A6,4V-8V20A8V-8,88V18A8,88V-10,66V15A10,66V-13,33V12A13,33V-16V10A16V-17,77V9A17,77V-20V8A20V-22,85V7A22,85V-26,66V6A26,66V-29,09V 5,5A29,09V-32V5A32V-35,55V 4,5A35,55V-40V4A40V-45,71V 3,5A45,71V-53,33V3Aest supérieure à 53,33V2ASortie 2 (OUT2)nombre d'éléments :1 à 8 éléments Cd-Ni / NiMH1 à 3 éléments LiPo (3,7 volts)1 à 4 éléments LiFe (3,3 volts)Courant de charge : 0,1 ... 2ACapacité de charge :28W, courant régulé en conséquenceFonctions : Chargercharge de maintien :50 mA (uniquement Cd-Ni, NiMH)Attendez la fin de la procédure de calibrage(les LED s'éteignent), appuyez sur la toucheEnter, sur l'écran apparaît la mention de lasortie OUT 1.5.1 Branchement des accusRaccordez l'accu, en observant les polarités(rouge = plus / noir = moins), aux douillesde raccordement de la sortie OUT 1.Si vous utilisez un cordon-adaptateur decharge, raccordez toujours tout d'abord lesfiches banane du cordon de charge auchargeur et ensuite à l'accu (cette mesureévite les courts-circuits de l'accu via lesfiches banane).Pour débrancher l'accu du chargeur, procéderdans l'ordre inverse.À noter ! Ne pas lancer la procédure decharge avant d'avoir établi les paramètresde charge indispensables. Si le réglage initialest incorrect, l'accu risque d'êtreendommagé, d'exploser ou de prendre feu.7
Instructions d'utilisation<strong>Power</strong> <strong>Peak</strong> <strong>E1</strong>réf.<strong>8471</strong>5.2 Branchement de l'égaliseur :Si c'est un accu au Lithium qui doit êtrechargé, il faut, pour des motifs de sécurité,raccorder le cordon du capteur de tensionde l'accu au chargeur. Plantez le connecteurde telle sorte que le brin noir (pôle négatifcommun) coïncide avec le repérage à flèches.Sans ce branchement, il n'est pas possiblede lancer la procédure de charge.Exception: il est possible de contournercet inconvénient en lançant la procédurede charge avec une puce / clé BID.À noter :Lorsqu'on raccorde deux groupementsd'éléments reliés en série, il faut que le cordonde raccordement du capteur de la tensionde l'accu soit raccordé à (1 à 7) à laconduite négative du chargeur.14 13 12 11 10 9Akku 28765432Akku 11-OUT 1+6.Structure du menu et navigationLe fait d'appuyer sur Enter ou Select surl'écran de démarrage permet d'accéder auxcaractéristiques du menu OUT1.CAPTEUR DE TENSION (VOL-TAGE SENSOR) VOLTAGE SENSOR+++S1+S2+S3--Représentation schématique de l'affectationdu cordon de raccordement du capteur detension.En présence de 7 éléments, utilisez toujoursle branchement (1 à 7), ce n'est qu'avec desgroupements d'éléments de plus de 7 élémentsqu'on utilise le second branchement(8 à 14).Important : ne raccordez jamais plusd'un cordon de capteur de tension parentrée d'égaliseur.Sélectionner le menuDe là on accède aux menus :“Égaliseur”“Caractéristiques cycliques”,“Caractéristiques OUT 2”,MAP utilisateur (“Nutzer Einst.”)Naviguez dans la 1ère ligne du nom demenu (caractéristiques Out1) à l'aide destouches/de la roue de sélection.Activez avec la touche d'entrée (“ENTER”)Activez touche (arrière plan sur fond noir).Avec les touches/la roue de sélection, accédezà un nouveau menu. Le désactiver avecla touche Enter.Les touches/la roue de sélection se trouventà nouveau à disposition pour la navigationdans le menu choisi.Sélectionner un sous-menuDes sous-menus sont à disposition danscertains menus, tels que de grands affichagesgraphiques ou des courbes de tension.Accédez à la troisième ligne, accédez ausous-menu avec Enter et fermez en rappuyantsur Enter.8
Instructions d'utilisation<strong>Power</strong> <strong>Peak</strong> <strong>E1</strong>réf.<strong>8471</strong>6.1 Récapitulatif de la structure du menu4,3VCELL 3 : 4.332V2,9VBALANCE: 99,4%Grand affichage graphique dansle sous-menuSélection de l'emplacementdemémoire d'accu1 à 9Enter / SelectLe menu égaliseur n'apparaît quelorsqu'un accu au Lithium a étésélectionné et que le cordon-capteurest raccordé.Affichage de courbe de tension etde température dans le sousmenu.Réglage des paramètres decharge de l'emplacement demémorisation 1 à 9Affichage de courbe de tensiondans le sous-menu9Réglage des paramètres de chargede la puce BID ou de la clé.Uniquement lorsque la puce/cléBID est plantée.
Instructions d'utilisation<strong>Power</strong> <strong>Peak</strong> <strong>E1</strong>réf.<strong>8471</strong>7. Sortie de charge-décharge “caractéristiques OUT 1”Menu de travail de la sortie de charge 1, la navigation intervient à l'aide des touches/roue desélection et de la touche Enter comme décrit précédemment.Changement de menuSélection de la mémoire d'accu 1 à9Affichage d'état -> =charger
Instructions d'utilisation<strong>Power</strong> <strong>Peak</strong> <strong>E1</strong>réf.<strong>8471</strong>Tension différentielleTensionélectriqueDifférence de tempsDifférencede températureÉchelle detensionCourbede temp.Différencedes pointsmétrologiquesÉchelle detempérature.Heure8. Mise au point de l'accuAccédez au sous-menu “mise au point del'accu” pour mettre les paramètres decharge-décharge au point.Type d'accu :NICD - accus Cd-NiNIMH - accus hybrides nickel métalLIPO - accus polymères au Lithium (3,7V)PB - accus au plomb (2,30V)LiFE - Lithium Ferrum (A123 etc. 3,3 V)LiON - ions Lithium (3,6 volts)Dans ce menu il est possible d'établir tousles paramètres essentiels de l'accu tels quele type de l'accu, le nombre d'éléments, lacapacité, etc..Les valeurs suivantes doivent absolumentêtre établies pour éviter tout dommageà l'accu :type d'accu, nombre d'éléments, sensibilité(uniquement avec les accus Cd-Ni ouNiMH), capacité, courant de charge et dedécharge, tension de décharge et températurede commutation en fin de charge (uniquementpour la procédure de charge).Les conseils de mise au point sont donnésdans la rubrique “Accus, mode d'emploi”.11Lorsque la puce/clé BID est en place, uneprocédure spéciale est encore accessible.SPECIAL - accus au plomb ou au Lithiumchargés selon la procédure CC-CV.Tension de charge librement sélectionnablede 2 à 6 voltsTension de charge / sensibilité <strong>Peak</strong>En fonction du type d'accu sélectionné aupréalable, apparaît dans cette ligne la possibilitéde réglage de la tension de charge(accus au Lithium et au plomb, de mêmequ'accu spécial) ou la sensibilité de commutation<strong>Peak</strong> en fin de charge pour les accusCd-Ni et NIMH.Type d'accuNICD = std. 7 mV/élém. (fourchette 3-25mV)NIMH = std. 5 mV/élém. (fourchette 3-25mV)PB = valeur fixe 2,3 V/ élémentLiPO = valeur fixe 4,2 V/ élémentLiON = valeur fixe 4,1 V/ élémentLiFE = valeur fixe 3,7 V/ élément
Instructions d'utilisation<strong>Power</strong> <strong>Peak</strong> <strong>E1</strong>réf.<strong>8471</strong>Si vous souhaitez modifier les valeurs variablesconsultez au préalable, dans la rubrique"Accus, mode d'emploi", ce qui concerne lesconséquences de la modification souhaitée.Lorsque la puce/clé BID est en place,apparaît également le type d'accu Special,Cf. description de la programmation de lapuce BID.Nombre d'élémentsÉtablissement du nombre d'éléments devantêtre chargés1 à 36 éléments Cd-Ni / NiMH1 à 14 éléments LiIo, LiPo, LiFe1 à 12 éléments (2 à 24V) accu au plomb1 à 14 éléments accu Special (uniquementavec BID)CapacitéSur ce chargeur il faut observer que le réglagede la capacité pour les accus au Lithium n'aaucune influence sur la mise au point du courantde charge-décharge. (taux de charge 1C).Le courant de charge-décharge doit êtreétabli manuellement !La saisie de la capacité de l'accu est toutefoisimportante car elle détermine le courant demaintien pour les accus Cd-Ni et NiMH. Courantde maintien= NC/NiMH = C/20).Pour les accus au plomb et les accus au Lithium,la saisie de la capacité est égalementimportante car elle détermine le point de commutationpour l'affichage d'état de fin (“Ende”)de charge. Avec les accus au plomb et au Lithiumchargés selon la procédure CC-CV, lemessage de fin de charge (“ENDE”) apparaîtlorsque les éléments sont équilibrés et que lecourant de charge passe sous C/10. L'accuest alors chargé à 98% et peut être désolidarisédu chargeur. Si l'accu reste relié au chargeursa charge se poursuit. Lorsque le courantde charge passe en dessous de 50 mAapproximativement, le courant de charge estcoupé.Courant de chargeCourant de charge librement réglable de 0,1 à20 ampères Établissez la valeur correspondanteen fonction des caractéristiques fourniespar le fabricant de l'accu. Si nécessaire,consultez la rubrique "Accus, mode d'emploi"qui vous indiquera le courant maximal acceptablepour votre accu.Si vous choisissez le réglage automatique ducourant “AUTO” (uniquement accus Cd-Ni /NIMH), le chargeur ne connaît pas la résistanceinterne de l'accu et régule le courantautomatiquement sur la valeur optimale.Tenez compte de l'interdépendance du courantde charge et du nombre des éléments.Caractéristiques techniques, Cf. tableauCourant de déchargeCourant de charge librement réglable de 0,1 à40 ampères Établissez la valeur correspondanteen fonction des caractéristiques fourniespar le fabricant de l'accu. Si nécessaire,consultez la rubrique "Accus, mode d'emploi"qui vous indiquera le courant maximal acceptablepour votre accu.Si vous choisissez le réglage automatique ducourant “AUTO” (uniquement accus Cd-Ni /NIMH), le chargeur ne connaît pas la résistanceinterne de l'accu et régule le courantautomatiquement sur la valeur optimale.Tenez compte de l'interdépendance du courantde décharge et du nombre des éléments.Caractéristiques techniques, Cf. tableauTension de déchargeDans cette ligne il est possible de saisir la tensionde décharge.Les valeurs prédictives (std.) et les fourchettesde réglage suivantes sont disponibles.Type d'accuNICD = std. 0,9 V/élément (fourchette 0,5-11V/élém.)NIMH = std. 1,0 V/élément (fourchette 0,5-11V/élém.)PB = valeur fixe 1,8 V/ élémentLIPO = std. 3,0 V/élément (fourchette 2,5-3,6V/élém.)LION = std. 3,0 V/élément (fourchette 2,5-3,6V/élém.)12
Instructions d'utilisation<strong>Power</strong> <strong>Peak</strong> <strong>E1</strong>réf.<strong>8471</strong>LIFE = std. 2,7 V/élément (fourchette 2,5-3,6V/élém.)Si vous souhaitez modifier les valeurs variablesconsultez au préalable, dans la rubrique"Accus, mode d'emploi", ce qui concerne lesconséquences de la modification souhaitée.Température de commutation en fin decharge (uniquement charge)Dans ce point de menu il est possible dedéterminer la température de commutation enfin de charge, fourchette de 10°C à 80°C.Observez, pour cette mise au point, qu'en casd'intervention précoce de la “température oude la tension de commutation en fin decharge” cela signifie la fin de la procédure decharge. Cela peut signifier que l'accu n'estpas complètement chargé.Ceci constitue justement pour les accus sensiblesà la température, par exemple les accusNiMH et au Lithium, une fonction de protectionessentielle.Pour surveiller la température sans toutefoisla définir comme critère de commutation enfin de charge, disposez la température decommutation en fin de charge sur une valeurélevée.8.1 Réglage de l'accu avec puce/clé BIDLorsque la puce BID est enplace, apparaît dans le menu“caractéristiques OUT 1“ unsymbole pour BID. La listedes réglages de l'accu estétendue. Lorsque la puceBID n'est pas formatée (neuve) apparaît unmessage indiquant une erreur de la mémoireBID et requérant la saisie de caractéristiquesBID.Menu accu SpecialLorsqu'un puce/clé BID est raccordée, outrela possibilité de choisir le type d'accu apparaîten plus la mention “Special”.Il est possible ici de régler librement la tensionde fin de charge-décharge sur une fourchetteétendue.Ainsi pratiquement tous les type d'accus auLithium et autres existants et à venir,à charger selon la procédure CC-CV pourrontêtre chargés avec le chargeur <strong>Power</strong> <strong>Peak</strong><strong>E1</strong>.Plage de réglage :Tension de charge :valeur prédictive 2 V/élément, fourchette 2-6V/ élémentTension de décharge :2 V/élément, fourchette 0,8-6V / élémentL'égaliseur interne est naturellement ajustéautomatiquement aux réglages établis etdélivre ainsi des tensions parfaitement homogénéiséesaux éléments.Ce réglage spécial peut également être misen oeuvre pour amener des accus, pour leurhivernage, par exemple, à un niveau de tensionmoyen de 3,9 volts approximativementpar élément.Disposez la tension de décharge sur 3,9volts/élément et déchargez vos accus au Lithiumsur cette valeur pour les stocker à longterme.Attention : il faut être particulièrement attentifavec ce menu lorsqu'on établit des réglages,car des valeurs incorrectes risquent de provoquerla détérioration de l'accu ! Le menu estétendu à la saisie de la date et à la capacité demémoire BID.À noter :si on retire la puce/clé BID après avoir établiles valeurs sans avoir confirmé les mises aupoint avec “Enter”, ce sont toujours les“anciennes” valeurs qui restent en mémoire.Ceci risque de provoquer une détérioration del'accu raccordé lors des procédures decharge ou de décharge qui suivront !13
Instructions d'utilisation<strong>Power</strong> <strong>Peak</strong> <strong>E1</strong>réf.<strong>8471</strong>9. Écran de l'égaliseurLorsqu'on raccorde le cordon-capteur detension d'un accu au Lithium, le chargeurcommence à homogénéiser (“égaliser”) leséléments.10. Caractéristiques des cyclesDans le domaine “caractéristiques descycles” sont présentées et sauvegardéestoutes les caractéristiques essentielles semanifestant pendant une procédure decharge-décharge. Pour chaque cycle decharge (C) et de décharge (D) apparaissentséparément la capacité chargée et déchargéeet la tension moyenne . Il est possibleainsi, par exemple, de contrôler la performancedes accus Il est possible de mémoriseren intermédiaire jusqu'à 10 cycles, lescaractéristiques étant affichées sous le n° 1constituant les valeurs actuelles.Il faut impérativement que le cordon decharge de l'accu (plus + moins) soit raccordéau chargeur pour obtenir lesmêmes potentiels pour une mesure précisede la tension des éléments.La tension de chacun des éléments apparaîtgraphiquement et numériquement surl'écran. La lettre “B” en suffixe du numéro del'élément indique que cet élément est encours d'homogénéisation et donc d'égalisation”.Il est possibleCELL 3 : 4.332V4,3Valternativement defaire apparaître latension de chacundes cellule sousforme d'histogramme.BALANCE: 99,4%Pour ce faire,naviguez jusquedans la 3e ligne et actionnez Enter.2,9VAffichage du cycle actuel sur l'écran. Danscet exemple se déroule justement le cycle 1des deux cycles présélectionnés.Le menu des cycles n'est qu'un menu d'affichage,les paramètres de charge sont misau point dans le menu Out 1 Data.Le début du cycle, (charge ou décharge), demême qu'une pause éventuelle entre lescycles sont établis dans le menu MISES AUPOINT UTILISATEUR (“NUTZER EINST”).Abandonnez à nouveau l'écran avec la toucheEnter.Dans ce sous-menu il est possible de voir latension de chacun des éléments sous formede valeur et sous forme graphique.Lorsque vous approchez les barres de l'histogrammeavec les touches/la roue desélection, apparaît numériquement la tensionde l'élément représenté.14
Instructions d'utilisation<strong>Power</strong> <strong>Peak</strong> <strong>E1</strong>réf.<strong>8471</strong>11. Sortie de charge Out 2 données (“Out2 Daten”)La sortie de charge 2 (“Out 2 Daten”) permetde charger les groupements d'élémentspour l'alimentation d'émetteurs ou de récepteursjusqu'à 2 A au maximum.12. Mises au point utilisateur (“NutzerEinst.”)De manière que le chargeur soit réglableindividuellement pour chaque utilisateur,ilpropose dans le menu mises au point utilisateur(“Nutzer Einst.”) un bon nombre defonctions.Entre autres il est possible à cet endroit dechoisir entre 6 langues.La définition des paramètres de l'accu estétablie à l'aide des trois possibilités de miseau point : type d'accu, courant de charge etcapacité.À cette sortie il n'est pas possible d'homogénéiserun accu au Lithium oude décharger des accus ! La procédure decharge peut être lancée ou interrompue enactionnant la touche“OUT 2”.À cette sortie égalementon disposed'un sous-menuavec affichage de latension sous formede courbe. Pour ce faire, amenez le curseurdans la seconde ligne et actionnez Enter.Une nouvelle pression sur Enter permet defermer la fenêtre.Nombre d'éléments :1 à 8 éléments Cd-Ni/NiMH1 à 3 éléments LiPo (3,7 volts)1 à 4 éléments LiFe (3,7 volts)Courant de charge : 0,1 ... 2AAttention : ne pas raccorder de groupementà la sortie 2 avec plus d'éléments queceus qui sont mentionnés ci-dessus.Sauvegarder / CopierCette fonction permet de sauvegarder lescaractéristiques des accus au cours desprocédures de charge-décharge.Lorsque les deux fonctions se trouvent surNON (“NEIN”) les données sont fournies àla sortie USB pour permettre un affichage etune sauvegarde avec le logiciel pour microordinateurLogView.Le chargeur dispose d'une mémoire internede données qui enregistre les données afind'être en mesure ultérieurement de les écriresur un micro-ordinateur et de les y sauvegarder.Il faut dans ce cas que la sauvegardese trouve sur OUI (“JA”) et la copiesur NON (“Nein”).Pour pouvoir lire ultérieurement la mémoireinterne, il faut que la sauvegarde se trouvesur NON (“Nein”) et la copie sur OUI (“Ja”).Ce n'est qu'alors que les données serontdisponibles à la sortie USB.À noter :Les données restent en mémoire jusqu'à ce15
Instructions d'utilisation<strong>Power</strong> <strong>Peak</strong> <strong>E1</strong>réf.<strong>8471</strong>qu'une procédure de charge-décharge soitlancée pour un autre accu et que la mémoiresoit écrasée.Démarrage du cycleAvec la fonction démarrage du cycle(“START ZYKLUS”) on détermine le premiercycle d'une charge cyclique (charge oudécharge).Pause entre les cyclesLorsqu'une pause doit intervenir entre lescycles, sélectionnez Marche (“EIN”). Si cen'est pas le cas, commutez sur Arrêt(“AUS”).Durée des pausesÀ la fin d'une phase cyclique s'imposentdeux critères pour la durée de la pause :1. la température de l'accu est supérieure à35°C, la pause est terminée lorsque latempérature repasse sous 35°C.2. La pause est limité à 1 heure au maximum,ensuite la phase cyclique démarreautomatiquement, que l'accu soit passésous 35°C ou non.Nom de l’utilisateurPour établir un nom d'utilisateur, il fautdéplacer le curseur sur la rubrique nom del'utilisateur (“Nutzername”). Lorsqu'onappuie sur ”Enter”, le premier caractèrepossible de la rubrique est muni d'un arrière-plannoir. IL est dès lors possible avec les“touches/la roue de sélection de choisir uncaractère particulier tel que + , des nombres,des lettres majuscules ou minuscules.Lorsque le nom a été établi mais que descaractères sont encore disponibles, il fautappuyer sur la touche “Enter” jusqu'à ce queplus aucun caractère à arrière-plan noir soitdisponible. Ce n'est qu'après qu'il est à nouveaupossible de déplacer le curseur librementdans le menu.Les autres fonctions sont autoclarifiées.1613. Séquence de la procédure de charge-déchargeà la sortie OUT1Avant de pouvoir lancer une procédure decharge ou de décharge, il faut que les réglagessuivants soient établis.• Raccorder l'alimentation électrique enveillant à respecter les polarités• Raccorder l'accu en veillant à respecterles polarités• Établir le type d'accu• Établir le nombre d'éléments• Mettre la capacité au point• Régler le courant de charge et / ou dedécharge• Une fois que ces paramètres ont étéétablis, il est possible de lancer le processus.Pour que l'accu raccordé soitchargé = appuyer 1 x sur la touche OUT1déchargé = appuyer 2 x sur la touche OUT1Déchargé-chargé = appuyer 3 x sur la toucheOUT1.Lorsqu'il s'agit de lancer une procédurecyclique, il faut en plus établir le nombredes cycles (1-10) à l'aide des “touches/dela roue de sélection”. Pour interrompre laprocédure en cours, actionner à nouveaula touche “OUT1”.Lorsque le cordon capteur de tension d'unaccu au Lithium est raccordé, le moded'équilibrage (equalizing) commence automatiquement.Si le courant de décharge doit être modifiéau cours de la procédure, il est égalementpossible de le faire de manière interactivedans le niveau de conduite.Cette mise au point modifiée du courantne s'applique à la procédure de chargedéchargeen cours.Lorsqu'on relance ensuite une nouvelleprocédure de charge-décharge c'est denouveau la valeur mémorisée sous misesau point de l'accu (“Akkueinstellungen”) oudans la puce/clé BID qui est prise en compte.
Instructions d'utilisation<strong>Power</strong> <strong>Peak</strong> <strong>E1</strong>réf.<strong>8471</strong>14. Procédure de charge-décharge avecPUCE/CLÉ BID (uniquement à la sortieOUT1)Raccordez d'abord la puce BID via le cordon-adaptateurou la clé BID directementau chargeur.la puce / la clé BID ce qui permet d'avoir uneexcellente vue d'ensemble des performancesde l'accu.Qu'est ce qui est sauvegardé sur la puce/ la clé BID ?Les valeurs de capacité chargées oudéchargées sont actualisées, le compteurde cycle est pourvu d'une unité supplémentaireet, si nécessaire, la capacité maximaleest mémorisée en plus lorsque la dernièrevaleur la plus haute en vigueur a été dépassée.En outre, sont sauvegardés naturellementles paramètres de charge et de déchargeexécutés à partir du menu des mises aupoint de l'accu.Ensuite apparaît lesymbole BID surl'écran. Lorsque lesparamètres de l'accusont préprogramméssur la puceBID, il est possiblede lancer la procédure de charge-déchargeen appuyant sur la touche ‘OUT1’. La suitede la séquence est identique à celle d'undémarrage normal.Si au cours de la procédure il faut changerle courant de charge-décharge, il est possiblede le faire de manière interactive dansle niveau de conduite du menu. Cette nouvellemise au point du courant ne vaut toutefoisque pour la procédure en cours. Auredémarrage d'une procédure de chargedécharge,c'est à nouveau la valeur sauvegardéesous les “mises au point de l'accu”ou dans la puce / la clé BID qui sera utilisée.À la fin d'une procédure de charge ou dedécharge, les caractéristiques essentiellesde cette procédure sont sauvegardées surIl s’agit de:type d'accu, nombre d'éléments, courant decharge, courant de décharge, tension en finde charge, tension de décharge, Delta<strong>Peak</strong>, sensibilité, température de commutationen fin de charge, capacité, date de lapremière mise en service.Consigne concernant la fin de la charge !Lorsqu'on charge des accus Lixx, ceux-ciont restauré approximativement 98 % deleur énergie lorsque la mention fin (“Ende”)apparaît sur l'écran. L’accu peut être désolidarisédu chargeur. Si l'accu reste toutefoisraccordé au chargeur, l'“égaliseur” continuede travailler et poursuit l'homogénéisationdes éléments. Pour compenser la consommationde courant de l'égaliseur, un faiblecourant de charge continue d'arriver. Lechargeur interrompt définitivement la procédurelorsque le courant résiduel de 40 mAest atteint.17
Instructions d'utilisation<strong>Power</strong> <strong>Peak</strong> <strong>E1</strong>réf.<strong>8471</strong>15. MESSAGES DE DÉRANGEMENTPour garantir un déroulement sûr de la procédurede charge ou de décharge, le chargeur<strong>Power</strong> <strong>Peak</strong> <strong>E1</strong> est équipé de dispositifsde sécurité. Dès qu'un dérangement semanifeste, apparaît un message appropriésur l'écran et un signal sonore d'avertissementretentit. Il est possible de valider lesmessages de dérangement suivants aprèsen avoir supprimé la cause, en actionnantune touche quelconque.La température de commutation en fin decharge est atteinte, la procédure de chargea été coupée.La puce / la clé BID a été désolidarisée duTension d'entrée insuffisante (sous 10volts). Vérifiez la batterie de voiture ou lebloc d'alimentation secteur.Accu connecté avec la mauvaise polarité,contrôler la connexion.chargeur ou raccordée au chargeur alorsqu'une procédure est en cours. Contrôlez laliaison vers la puce et redémarrez.Tension de l’accu / de sortie trop importante,contrôlez le nombre d’éléments.Le chargeur contrôle en plus, via le branchementde l'égaliseur, le nombre d'élémentset compare la mise au point de lavaleur établie avec la valeur sauvegardéedans le menu des caractéristiques de l'accu.Si ces valeurs ne coïncident pas, ce messagede dérangement apparaît.Si après avoir raccordé la puce / la clé BIDn'intervient pas de démarrage de la procédurede charge-décharge, ce sont vraisemblablementles caractéristiques sauvegardéessur la puce qui sont abîmées.Apparaît également lorsqu'une puce neuve(non formatée) est mise en place.Saisir les caractéristiques BID dans le menudes mises au point de l'accu.Les caractéristiques normalement sauvegardéessur la puce / la clé BID sont absentesou incorrectes.Sur la puce BID sont sauvegardés moins deparamètres ou d'autres paramètres queceux disponibles dans le menu mises aupoint de l'accu. Réglez les caractéristiquesmanquantes.Contrôlez les mises au point de la puce / laclé BID.18
Instructions d'utilisation<strong>Power</strong> <strong>Peak</strong> <strong>E1</strong>réf.<strong>8471</strong>16. Consignes générales de sécurité• Une manipulation non conforme desaccus et des appareils de charge estsusceptible de provoquer l'explosion desaccus et un incendie.• Le chargeur <strong>Power</strong> <strong>Peak</strong> <strong>E1</strong> est conçupour la charge, la décharge et l’équilibraged'accus rechargeables Cd-Ni,NiMH, au plomb et au lithium. Ne pasrecharger de piles sèches, risque d'explosion!• Le chargeur est conçu pour une alimentation12 V CC et pour un bloc d’alimentation230 volts CA, ne jamais le mettreen œuvre avec une autre tension.• Protéger impérativement l'appareil de lapoussière, de la saleté et de l'humidité.• Ne pas exposer l'appareil à des températuresélevées ou trop basses, nejamais l'exposer au rayonnementsolaire.• Éviter les chocs et les charges de pressionet ne pas soumettre le chargeur àde fortes vibrations.• Ne jamais disposer le chargeur ni lesaccus en charge sur des surfacesinflammables. Ne jamais mettre l'appareilen service dans le voisinage dematériaux ou de gaz inflammables.• Ne pas ouvrir l’appareil lorsqu’il est soustension !• Ne jamais laisser l'appareil sans surveillancequand il fonctionne. L'appareilpeut chauffer sensiblement pendant sonfonctionnement normal.• Lors de la mise en place du chargeur,veiller à ce que l’air puisse circuler auniveau des ouvertures de refroidissement.• Si l'appareil n'est pas utilisé pendant uncertain temps, le désolidariser dusecteur et en retirer les accus éventuellementbranchés.• Ne jamais recharger des accus qui viennentd'être chargés.• Ne pas charger d'accus chauds. Laisserrefroidir les accus à température ambiante.• Ne charger que des accus constituésd'éléments de même capacité et demême marque.• Ne jamais raccorder deux accus enparallèle sur une sortie pour les charger,ne raccorder qu'un pack d'éléments.• Observer impérativement les polarités del'accu et éviter les courts-circuits.• Observer impérativement les consignesfournies par le fabricant.• Contrôlez systématiquement et avecprécision les mises au point sur lechargeur <strong>Power</strong> <strong>Peak</strong> <strong>E1</strong>. Des réglagesinappropriés sont susceptiblesd'abîmer le chargeur.• Veiller à ne pas endommager le boîtier niles cordons.• La manipulation d'accus composés denombreux éléments demande une certaineprudence. Veiller absolument à ceque l'isolation soit parfaite, risque d'électrocution.• Évitez de désolidariser l'accu de l'appareilau cours de la procédure de chargesans avoir au préalable actionné la toucheArrêt (Stopp). La tension de sortieélevée du chargeur risque de provoquerl'apparition massive d'étincelles.19
Instructions d'utilisation<strong>Power</strong> <strong>Peak</strong> <strong>E1</strong>réf.<strong>8471</strong>17. Accus, mode d'emploi18. La procédure de charge CC-CVLes accus au plomb et les accus au lithiumsont chargés avec une procédure à tensionconstante (CCCV).C'est pourquoi sur le chargeur on présélectionnedans ce menu la tension en fin decharge par élément en fonction du typed'accu.Pendant la première phase de charge, latension de charge augmente lentement surla valeur maximale de 4,2 V / élément (accuLiPo).Phase de courant constant(CC)Phase de tensionconstante (CV)Point de commutationDans cette phase le chargeur s'assure quele courant de charge établi reste constant.Avec un courant de charge de 1C et un accudéchargé, cette phase dure environ de 50 à60 minutes. Elle charge une capacité d'accude 80 à 90 % environ.Lorsque la tension de fin de charge estatteinte, le courant de charge constant estcoupé et la tension est maintenue constante.De cette manière, le courant decharge choit dans la seconde phase car ladifférence de tension entre la valeur établiesur le chargeur et l’accu diminue systématiquement.Pour la charge de la capacité résiduelle,il faut de 35 à 40 minutes. Lorsqu'uncourant de charge constant préprogramméest atteint comme limite inférieure du courant,le chargeur interrompt la procédure decharge. Avec un taux de charge de 1C laprocédure de charge intégrale dure 90minutes.19. Accus au plomb (Pb)La manipulation des accus au plomb estsoumise à un certain nombre de consignesde sécurité qu'il faut impérativementobserver pour éviter les dommagesmatériels et personnels. La mise enœuvre d'accus engage votre responsabilité.• Les accus au plomb à gel utilisés généralementpar les modélistes sont étancheset donc peu dangereux.• Les batteries d'auto avec un électrolyteà base d'acide sulfurique sont par contretrès dangereuses à cause des produitset de la production de gaz en présenced'une charge excessive.• Les accus au plomb ne doivent jamaisentrer en contact avec une flamme, dangerd'explosion.• Ne jamais ouvrir de force des accus auplomb, danger de brûlures par acide.• Ne jamais mettre d'accu au plomb encourt-circuit, danger de brûlure et d'explosion.• Ne jamais mettre la peau ou les yeux encontact avec l'électrolyte. Si cela se produisaitpar inadvertance, rincer immédiatementet abondamment à l'eau claireet consulter un médecin. Ne pas mettred'élément ou d'accu dans la bouche, risqued'empoisonnement.• Un accu au plomb chargé n'est pas unjouet. Conserver les accus hors de portéedes enfants.• Pour la charge et la décharge, tenirimpérativement compte des consignesfournies par le fabricant.• Un accu au plomb est susceptible dedégager un gaz pendant la charge. Veillezà assurer une bonne ventilation.Une surcharge provoque l'apparition de"gaz explosif" constitué d'un mélanged'hydrogène et d'oxygène.Risque d’explosion.20
Instructions d'utilisation<strong>Power</strong> <strong>Peak</strong> <strong>E1</strong>réf.<strong>8471</strong>20. Accus au Lithium (LiPo, LiIo, LiFe).Il existe différents types d'accus au lithium:1. les accus au lithium ions avec électrolyteliquide et 3,6 volts de tension nominale,la première génération des accusau lithium, peu utilisés dans le modélisme.(Sélection du type d'accu LION)2. les accus au lithium ions avec électrolyteliquide et 3,7 volts de tension nominale,la seconde génération des accusau lithium, avec enveloppe en métal.(sélection du type d'accu LIPO)3. les accus lithium ions polymères àgel électrolytique et 3,7 volts de tensionnominale, la génération actuelle desaccus au lithium, également appelésLiPo. La présence du gel électrolytiqueréduit la pression dans l'élément à lacharge et à la décharge voilà pourquoiun film suffit pour l'enveloppe. Grâce àleur faible poids et à leur forte densitéénergétique ces accus se sont rapidementrépandus dans les diverses disciplinesdu modélisme.(sélection du type d'accu LIPO)4. les accus au fer Lithium (phosphore)disposant d’une tension nominale de3,3 volts à l’heure actuelle la générationla plus récente des accus au Lithiumégalement appelés A123. À cause desimpulsions de décharge élevées et de lacompacité de l’énergie, ce type d’accuva se répandre très rapidement dans lemonde du modélisme.(sélection du type d'accu LIFE)Pour les accus au Lithium nous recommandonsles taux de charge suivants :Les accus au Lithium sont habituellementchargés avec 1C, certains types d'accuspeuvent également être chargés avec 1,5 à2C, certains très récents même avec 5C.Observer les indications de courant de chargefournies par le fabricant de l'accu.La tension de fin de décharge des accusLiPo et LiIo doit se situer aux environs de3,00 volts.Toutefois pour les accus LiFe la tension defin de décharge doit se situer vers 2,7 volts.Capacité différenteLorsque plusieurs éléments sont réunis enun groupe et déchargés avec un courantélevé, les éléments s'échauffent différemmentétant donné que les éléments placés àl'intérieur dispersent moins leur chaleur.La résistance interne change et la capacitéénergétique est donc réduite. Cet élémentest donc déchargé plus tôt et le danger existequ'il soit déchargé en deçà de la tensionde coupure en fin de décharge de 2,5 volts.Particulièrement avec des températuresexternes très basses, apparaissent d'énormesdifférences de capacité. Lorsque desaccus LiPo sont par exemple utilisés sur leshélicoptères électriques, l'élément se trouvantà l'avant est particulièrement bienrefroidi par la circulation de l'air alors que leséléments se trouvant à l'intérieur s'échauffentsensiblement. L'élément froid disposedonc d'une capacité moindre et le dangerexiste que l'élément le plus froid passe endessous de la tension de coupure en fin dedécharge.C'est pourquoi il est recommandé de nedécharger les éléments LiPo que jusqu'àapprox. 3 à 3,3 volts de tension de fin dedécharge afin d'éviter une détérioration définitivedes éléments. Par ailleurs, pour lacharge suivante il faut absolument veiller àce que les éléments soient chargés aumême niveau. Raccorder le cordon-capteurde tension.21
Instructions d'utilisation<strong>Power</strong> <strong>Peak</strong> <strong>E1</strong>réf.<strong>8471</strong>La charge d'éléments autonomes raccordésen parallèle ne pose de pas de problèmeétant donné que dans ce cas le courant globalse reporte sur chacun des éléments enfonction du niveau de tension.21. Explications de la commutation“Delta <strong>Peak</strong>” en fin de chargeNous ne portons aucune responsabilitépour les dommages causés par unemanipulation non conforme des éléments.Tenir compte aussi des consignesde sécurité.À cause des conditions de fabrication normaleset surtout à cause des nuances detempérature à la décharge des élémentssitués à l’intérieur par rapport aux élémentssitués à l’extérieur qui sont toujours mieuxrefroidis que les éléments intérieurs, les élémentspolymères au Lithium présentent toujoursdes nuances au niveau de leurscaractéristiques mutuelles.Après plusieurs cycles, les éléments disposentsystématiquement et forcémentde niveaux de tension différents.Le graphique ci-dessus présente unecourbe de charge typique pour des accusCd-Ni-NiMH.À la fin de la procédure de charge la résistanceinterne de l'accu change à cause del'élévation de la température des éléments.Ainsi la tension des éléments choit légèrement.Si le chargeur coupe exactement la chargeau plus haut point de la courbe de charge,on parle de “Zéro-Delta-<strong>Peak</strong>”.Par ailleurs, pour compenser les pertes decharge lors du refroidissement ou pouraccroître la capacité de l'accu pour unecompétition, par exemple, dans la pratique,en fonction du type de l'accu on "surcharge"légèrement les accus.La valeur de 5 mV /élément est donnéecomme sensibilité <strong>Peak</strong> ou comme valeurDelta-<strong>Peak</strong> pour la surcharge, la commutationen fin de charge intervient donc plustard.Avec 15 mV Delta <strong>Peak</strong> l'accu est extrêmementsurchargé et s'échauffe donc énormément.Cette charge procure certes uneénergie élevée à l'accu mais réduit considérablementsa durée de vie.22
Instructions d'utilisation<strong>Power</strong> <strong>Peak</strong> <strong>E1</strong>réf.<strong>8471</strong>22. Accus cadmium-nickel (Cd-Ni)Pour les accus Cd-Ni nous recommandonsles taux de charge suivants :Accus à haute énergie, 1-2 C, tenir comptedes consignes du fabricant. Accu à courantélevé 2 à 3 C, extrême jusqu'à 5 C. Avec destaux de charge élevés il faut surveiller la températureet, si la température de l'accu augmenteexcessivement, réduire le niveau decharge.Observer les indications de courant decharge éventuellement fournies par le fabricantde l'accu. Vérifier si les connecteurs etles cordons de charge sont adaptés aux courantsde charge sélectionnés. La tension defin de décharge doit se situer dans une fourchettede 0,85 à 1,00 volt/ élément. La sensibilitéDelta <strong>Peak</strong> doit se situer dans une fourchettede 5 à 8 mV/ élément.Valeurs indicatives :Accus Cd-NiApplication standard destinée à préserver lesaccus= 6-8 mV / élémentApplication pour des exigences plus élevées= 9-10 mV / élémentExigences liées à la compétition= 12-15mV / élémentLe chargeur calcule automatiquement la tensiondifférentielle correcte de commutationen fin de charge de l'ensemble du groupementd'éléments en multipliant la valeur del'élément individuel par le nombre d'éléments.Lorsque la valeur prédictive est atteinte aucours de la procédure de charge, la procédurede charge est interrompue et l'affichagede commutation en fin de charge apparaîtcomme décrit précédemment.Ces indications sont des valeurs indicativesgénérales et dépendent du type d'accu. Tenircompte absolument des instructions du fabricantde l'accu.23. Accus hybrides nickel métal (NiMH)Pour les accus NiMH nous recommandonsles taux de charge suivants :accus à haute énergie, 0,5 à 1 C, tenircompte des consignes du fabricant.accus à courant élevé, généralement 1C,certains types d'accus peuvent être chargésavec un taux de 1,5...2C. Avec destaux de charge élevés il faut surveiller latempérature et, si la température de l'accuaugmente excessivement, réduire leniveau de charge.Observer les indications de courant decharge fournies par le fabricant de l'accu.La tension de fin de décharge doit se situerà 1,00 volt/ élément environ.La sensibilité Delta <strong>Peak</strong> doit se situerdans une fourchette de 3 à 5 mV/ élément.Valeurs indicatives :Accus NiMHApplication standard destinée à préserverles accus= 5 mV / élémentApplication pour des exigences plus élevées= 6-7 mV / élémentExigences liées à la compétition= 8-9 mV / élémentAvec une sensibilité réduite de commutationen fin de charge, il peut se produire,avec des accus à haute capacité ou avecde vieux accus, que la commutation intervienneprécocement.Augmentez légèrement la valeur decommutation en fin de charge et relancezla procédure de charge.23
Instructions d'utilisation<strong>Power</strong> <strong>Peak</strong> <strong>E1</strong>réf.<strong>8471</strong>24. GarantieNos articles sont naturellement couverts parla garantie légale de 24 mois. Si vous souhaitezfaire valoir une requête justifiée avecrecours à la garantie, adressez-vous toujoursd’abord à votre vendeur qui vousassure la garantie et qui est responsable dusuivi de votre requête.Les carences de fonctionnement, lesdéfauts de fabrication ou les défauts matérielsapparaissant pendant la garantie sontremplacés par nous gratuitement. Tout autreréclamation, par exemple de dommagessecondaires, sont exclues.Le transport intervient franco de port demême que pour le renvoi. Les envois nonaffranchis ne seront pas pris en considération.Nous ne sommes pas responsablesdes dommages dus au transport ou de laperte de votre envoi. Nous vous recommandonsde contracter une assurance appropriée.Expédier l'appareil au service aprèsventedu pays concerné.• joindre une description du dérangementou du défaut afin d'en faciliter la réparation.25. Déclaration de conformitéPar la présente la Sté robbe ModellsportGmbH & Co. KG, déclare que cet appareilrépond aux exigences fondamentales et àd’autres prescriptions significatives de ladirective appropriée de la Communautéeuropéenne. L’original de la déclaration deconformité se trouve dans l’Internet sur lesite associée à la description de l’appareilconcerné et apparaît lorsqu’on clique lebouton portant le logo "Conform".Pour que les réclamations couvertes parla garantie puissent être traitées, il fautque les conditions suivantes soientsatisfaites :• joindre le bon d'achat (bon de caisse) àl'envoi.• les appareils ont été exploités conformémentaux prescription de la notice demise en œuvre• les sources d'alimentation employéessont celles qui ont été recommandéespar robbe, seules des pièces derechange originales ont été utilisées• absence de dommages dus à l'humidité,à des interventions extérieures, à desinversions de polarité, à des surtensions,à des surcharges ou des dégradationsmécaniques.24
Instructions d'utilisation<strong>Power</strong> <strong>Peak</strong> <strong>E1</strong>réf.<strong>8471</strong>26. Empfohlenes Zubehörcordon de charge de l'accude l'émetteurRéf. F1415Puce BID sans cordon,pour équiper d’autres groupementsd’élémentsréf. 8472cordon de charge de l'accudu récepteurRéf. F1416Puce BID avec cordon 300mm, pour l'équipementd'autres accusRéf. 8473Cordon BID de 300 mmRéf. 8474Cordon BID de 500 mmRéf. 8475CLÉ BIDRéf. 8888Cordon-capteur de tensionde 30 cmRéf. 4029Adaptateur d'équilibrage2x3S EHR pour accusrobbe, Graupner etKokam Réf. 4023Adaptateur d'équilibrage3x2S EHR pour accusrobbe, Graupner et Kokamréf.4031Adaptateur d'équilibrage2x3S XH-EHR de Align,Lama ou G47 sur desaccus robbe, Graupner ouKokam réf.4023XHAdaptateur d'équilibrage3x2S XH-EHR de Align,Lama ou G47 sur desaccus robbe, Graupner ouKokam Réf. 4031XH25Adaptateur EQ robbe-Polyquestréf.8213
Instructions d'utilisation<strong>Power</strong> <strong>Peak</strong> <strong>E1</strong>réf.<strong>8471</strong>Adaptateur EQ robbe-JST/XH de robbe suraccus Align, Lama ou G47Réf. 8214Adaptateur EQ robbe-Thunder/FlightpowerRéf. 8215Bloc d’alimentation SPS40Aréf. 853927. Adresse des ateliers du service après-ventePays Société rue ville Téléphone télécopie E-MailAND-00130 Les escaldes-Andorre Sorteney Santa Anna, 13Princip. D'Andorre 00376-862 865 00376-825 476 sorteny@sorteny.comDanemark Nordic Hobby A/S Bogensevej 13 DK-8940 Randers SV 0045-86-43 61 00 0045-86-43 77 44 hobby@nordichobby.comAllemagne robbe-Service Metzloser Str. 36 D-36355 Grebenhain 0049-6644-87-777 0049-6644-87-779 hotline@robbe.comAngleterre robbe-Schlüter UK L<strong>E1</strong>0-UB GB-L<strong>E1</strong>0 3DS Leicestershire 0044-1455-637151 0044-1455-635151 keith@robbeuk.co.ukFrance S.A.V Messe 6, Rue Usson du Poitou, BP 12 F-57730 Folschviller 0033 3 87 94 62 58 0033-3-87 94 62 58 sav-robbe@wanadoo.frGrèce TAG Models Hellas 18,Vriullon Str. GR-14341 New Philadelfia/Athen 0030-2-102584380 0030-2-102533533 info@tagmodels.grI-36010 CavazzaleItalie MC-Electronic Via del Progresso, 25di Monticello C.Otto (Vi) 0039 0444 945992 0039 0444 945991 mcelec@libero.itPays-Bas/Bel.. Jan van Mouwerik Slot de Houvelaan 30 NL-3155 Maasland 0031-10-59 13 594 0031-10-59 13 594 van_Mouwerik@versatel.nlNorvège Norwegian Modellers Box 2140 N-3103 Toensberg 0047-333 78 000 0047-333 78 001 per@modellers.comAutriche robbe-Service Puchgasse 1 A-1220 Wien 0043-1259-66-52 0043-1258-11-79 office@robbe.atSuède Minicars Hobby A.B. Bergsbrunnagatan 18 S-75323 Uppsala 0046-186 06 571 0046-186 06 579 info@minicars.seSuisse Spahr Elektronik Gotthelfstr. 12 CH-2543 Lengau 0041-32-652 23 68 0041-32 653 73 64 spahrelektronik@bluewin.chRép. slovaque Ivo Marhoun Horova 9 CZ-35201 AS 00420 351 120 162 ivm2000@seznam.czEspagne robbe-Service Metzloser Str. 36 D-36355 Grebenhain 0049-6644-87-777 0049-6644-87-779 hotline@robbe.comRép. tchèque Ivo Marhoun Horova 9 CZ-35201 AS 00420 351 120 162 ivm2000@seznam.cz26
Instructions d'utilisation<strong>Power</strong> <strong>Peak</strong> <strong>E1</strong>réf.<strong>8471</strong>LogView - affichage des caractéristiquessérielles sur micro-ordinateurAvec le programme LogView que nousrecommandons et entretenons, il est possiblede visualiser les données sérielles denombreux chargeurs robbe (le modèle<strong>Power</strong> <strong>Peak</strong> <strong>E1</strong> en fait partie), de les analyseret, si nécessaire, également de lesexporter de diverses manières.Ler logiciel peut être déchargé sous formede gratuiciel à l'adresse Internetwww.logview.info. Il est possible de fournirune contribution libre au concepteur du logicielqui est gratuit en soi.LogView propose, via un niveau de conduiteà utilisation intuitive, la possibilité d'évaluerles données d'un spectre relativementlarge d'appareils différents. Les donnéesrecueillies des appareils sont toujours représentéesde la même manière pour faciliter àl'utilisateur la mise en oeuvre de ses équipements.Les fichiers créés par le logicielLogView sont également utilisables directementpar d'autres utilisateurs même lorsquel'appareil concerné n'est pas physiquemnentprésent.Autres caractéristiques du logiciel :• Programme de représentation graphiquetrès poussé avec de nombreusesfonctions d'évaluation et de mesure. Lareprésentation des courbes est susceptibled'être appropriée aux besoins dechacun grâce aux nombreuses optionsproposées.• Les fonctions analytiques permettentd'évaluer les accus avec plus de précision.• Les fonctions comparatives des courbespermettent de représenter plusieurs procéduresde charge et de décharge différentessur le même graphique. Il estpossible d'évaluer ainsi avec précisionparticulièrement la qualité et le vieillissementd'un accu, et d'effectuer des comparaisonsavec d'autres accus.• La gestion des matériels permet de sauvegarderles enregistrements et lesinformations recueillis sous le nom del'accu et de les gérer.• Les nombreuses fonctions d'exportationde graphiques et de tableaux permettentd'utiliser ces données également pourd'autres applications.• Le système d'aide intelligent intégréfournit rapidement et sans complicationles informations nécessaires concernantles fonctions du programme. Si voussouhaitez obtenir des informations spécialesconcernant la mise en oeuvre dulogiciel ou effectuer des suggestionspour une optimisation du programmeLogView, il est possible, via le forumLogView, de s'adresser directement auconcepteur ou d'échanger des informations,des expériences et des réflexionsavec d'autres utilisateurs du programme.27
28. Mise au rebut des accus et des appareils.Ne jeter les accus en aucun cas dans les ordures ménagères. Pour protéger l'environnement,mettre les accus défectueux ou usés au rebut aux endroits prévus à cet effet. Il s'agitdes endroits où l'on peut acheter ces piles et ces accus ou des déchetteries communales.Pour éviter les courts-circuits protéger les contacts nus avec des morceaux de ruban adhésif.Le coût de recyclage des accus et de leur mise au rebut est contenu dans leur prixd'achat. Tous les magasins qui les vendent doivent reprendre les accus usés que vous lesayez achetés à cet endroit ou non. Les accus sont recyclés. Ainsi les matériaux qui les composentsont réintroduits dans les circuits de production. Respectez et protégez l'environnement.Les appareils électroniques ne peuvent pas simplement être mis au rebutavec les ordures ménagères. Le chargeur <strong>Power</strong>-<strong>Peak</strong> <strong>E1</strong> est de ce faitpourvu du sigle ci-contre. Ce symbole signifie que les appareils électriqueset électroniques irréparables ou en fin de cycle d’exploitation doiventêtre mis au rebut non pas avec les ordures ménagères mais dans lesdéchetteries spécialisées. Portez le chargeur dans les collecteurs communaux appropriésou un centre de recyclage spécialisé. Cette remarque s’applique aux pays de laCommunauté européenne et aux autres pays européens pourvus d’un système de collectespécifique.robbe Modellsport GmbH & Co.KGMetzloser Straße 38D-36355 Grebenhain OT Metzlos-GehaagTelefon +49 (0) 6644 / 87-0www.robbe.deSous réserve d'erreur d'impression et de modification technique. Copyright robbe-Modellsport 2009 La copie et la reproduction, même partielles, sont soumises à l'autorisationécrite de la Sté robbe-Modellsport GmbH & Co.KGrobbe Form 40-55215 BBAJ28
Istruzioni per l’uso<strong>Power</strong> <strong>Peak</strong> <strong>E1</strong>Art.N. <strong>8471</strong>
Istruzioni per l’uso<strong>Power</strong> <strong>Peak</strong> <strong>E1</strong>Art.N.<strong>8471</strong>Gentile cliente,ci rallegriamo che la sua scelta sia cadutasul caricabatterie automatico <strong>Power</strong> peak<strong>E1</strong>, facente parte della famiglia di prodottirobbe. Lei è ora in possesso di un potentecaricabatterie compatto a 12VDC, con sistemadi gestione della batteria ed equalizzatoreintegrati.Nonostante l’ utilizzo si dimostri particolarmentesemplice, questo sistema di ricarica<strong>Power</strong> <strong>Peak</strong> <strong>E1</strong> tecnologicamente avanzato,richiede alcune conoscenze di baseda parte dell’utente finale.Queste istruzioni per l’uso Le permetterannodi familiarizzare in breve tempo con ilfunzionamento di questo apparecchio.Per raggiungere questo scopo, è necessarioleggere attentamente le istruzioni perl’uso, prima di adoperare questo nuovosistema automatico di ricarica, prestandoparticolare attenzione al paragrafo “BREVINOZIONI SULLE BATTERIE”, ed allenorme di sicurezza.Ci auguriamo che l’utilizzo di questo apparecchiopossa risultare molto utile edappagante!Scarico di responsabilitàQuesto caricabatterie è concepito e rilasciatoesclusivamente per la ricarica dibatterie appartenenti alle tipologie indicatenelle istruzioni, secondo le modalitàriportate; la robbe Modellsport non siassume pertanto alcuna responsabilitàper usi che differiscano da quelli menzionatiin questo manuale.La robbe-Modellsport non può sorvegliarené il rispetto delle istruzioni né tantomeno imetodi usati durante l’utilizzo, il funzionamentoo la manutenzione della stazione diricarica.Pertanto declina qualsiasi responsabilità perperdite, danni o costi derivanti da un utilizzoerrato dell’apparecchio o dipendenti in qualunquealtro modo da esso.Per quanto ammesso dalla legge, l’obbligoper l’adempimento del risarcimentodei danni , indipendentemente dal motivogiuridico, è limitato al valore direttamentefatturato dei prodotti robbe interessatidall’evento che ha causato il danno.Le direttive giuridiche costrittive non nerispondono invece illimitatamente qualora lenegligenze risultino di proposito o grossolane.2
Istruzioni per l’uso<strong>Power</strong> <strong>Peak</strong> <strong>E1</strong>Art.N.<strong>8471</strong>IndiceParagrafo ....................................................................................PaginaScarico di responsabilità ...................................................2Indice ...............................................................................31. Contenuto della confezione...............................................42. Descrizione generale.........................................................43. Comandi ...........................................................................53.1 Funzione dei comandi ......................................................5, 64. Dati tecnici.........................................................................65. Accensione ed utilizzo dell’apparecchio ...........................75.1 Collegamento della batteria...............................................75.2 Collegamento equalizzatore..............................................86. Struttura del menu e navigazione .....................................8,96.1 Panoramica struttura del menu. ........................................97. Pista di ricarica / scarica 1 “OUT 1 <strong>DA</strong>TEN”.....................98. Impostazione della batteria ..............................................118.1 Impostazione batteria con chip/chiave BID.......................139. Schermata equalizzatore ..................................................1410. Dati del ciclo .....................................................................1411. Pista di ricarica 2 “OUT 2 <strong>DA</strong>TEN”....................................1512. Impostazioni utente “NUTZER EINST”..............................1513. Sequenza per ricarica / scarica su OUT 1........................1614. Procedure di ric. / sc. con chip BID (OUT 1) ...................1714. Procedure di ric. / sc. con Chip/chiave BID ......................1815. Notifiche di errore..............................................................1916. Norme generali per la sicurezza .......................................1917. Brevi nozioni sulle batterie ................................................2018. Descrizione della procedura di carica CC-CV...................2019. Batterie al Piombo (Pb).....................................................2020 Batterie Litio (LiPo, LiIo, LiFe)...........................................2021. Descrizione spegnimento “Delta <strong>Peak</strong>” (NC/NiMH)..........2222. Batterie Nickel-Cadmio (NC).............................................2323 Batterie Nickel-Metal-idrato (NiMH) ..................................2324. Garanzia ............................................................................2425. Certificazione di conformità...............................................2426. Accessori consigliati..........................................................2527. Centri di assistenza...........................................................2628. Smaltimento delle batterie e degli apparecchi ..................273
Istruzioni per l’uso<strong>Power</strong> <strong>Peak</strong> <strong>E1</strong>Art.N.<strong>8471</strong>1. Contenuto della confezione1x caricabatterie <strong>Power</strong> <strong>Peak</strong> <strong>E1</strong>1x sensore di rilevamento temperature1x chiavetta BID-KEYUna porta USB integrata permette il collegamentodel dispositivo con un PC; il softwaregratuito Logview necessario per il funzionamento,è scaricabile direttamente da Internetall’indirizzo www.logview.info e consentedi visualizzare, memorizzare, compararee stampare i parametri del caricatore<strong>Power</strong> <strong>Peak</strong> <strong>E1</strong>.Grazie ad una memoria interna, risulta inoltrepossibile visualizzare e memorizzare idati sul display anche in assenza di un PCcollegato,2. Descrizione generalePer offrire un maggior controllo, è possibileanche monitorare la temperatura della batteriadurante la fase di ricarica, ed impostareper esempio lo spegnimento del dispositivoal raggiungimento di una determinatasoglia. Un equalizzatore per il bilanciamentodi batterie Ioni di Litio, LiPo, LiFe ed altrebatterie speciali fino 2x7 celle è integratonel dispositivo.Elegante e potente stazione computerizzatadi ricarica-scarica, con sistema di gestionecompatibile con tutte le tipologie di batteriepiù comuni. Design raffinato e pulito, privodi comandi sporgenti, grazie all’impiegodella nuova tecnologia di comandi “Cap-Touch”, che grazie si sensori integrati conferiscealla superficie un andamento piano .L’ampio display da 192 x 128 Pixel, suddivisoin 12 righe, conferisce al dispositivouna chiara ed ampia leggibilità delle informazionivisualizzate, come quelle relative aiparametri principali delle procedure incorso, illustrati in forma grafica o numerica.Già previsto per il futuro grazie alla tecnologiadi memorizzazione flash integrata: attraversoil semplice aggiornamento o la sempliceespansione del software, sarà infattipossibile rendere compatibile il dispositivocon le nuove generazioni di batterie di alimentazionefuture.4Caratteristica distintiva del <strong>Power</strong> <strong>Peak</strong> <strong>E1</strong> èl’adozione dell’innovativo e futuristico sistemadi identificazionedellabatteria (BID).La molteplicitàdei tipi di batterieè in costanteaumento e ciascunatipologia richiede ormai una propriaprocedura di ricarica dedicata. Basta pocoper impostare il caricabatterie in manieraerrata e danneggiare quindi in un istante lapreziosa batteria.Il rivoluzionario sistema BID della robbeoffre la soluzione semplice e geniale aquesto problema. A ciascuna batteria vienecollegato uno speciale Chip / chiavetta BIDpiccolo e leggero che memorizza al suointerno tutti i parametri fondamentali pereseguire in modo ottimale e corretto la rica-
Istruzioni per l’uso<strong>Power</strong> <strong>Peak</strong> <strong>E1</strong>Art.N.<strong>8471</strong>rica / scarica della batteria. Per effettuarela procedura desiderata, sarà quindi sufficientecollegare il Chip-BID applicato allabatteria con il <strong>Power</strong> <strong>Peak</strong> <strong>E1</strong>; quest’ultimofornirà poi al caricabatterie tutti i parametrinecessari per svolgere la procedura.Sarà quindi sufficiente premere soltanto iltasto “OUT1” per avviare le procedure dicarica / scarica.Non sarà quindi più necessario cercare iparametri nel Menu di regolazione; il sistemaBID ha il grande vantaggio di impedireogni possibile errore in fase di impostazionee di memorizzare all’interno delChip o della chiavetta tutti i dati rilevanti.importanti all’interno del Chip / chiavettaBID, la batteria manterrà sempre con sétutti i parametri che possono in seguitoessere comodamente visualizzati sul displaydel caricatore in qualsiasi momento.Non è quindi più necessario l’utilizzo dicomputer e deirelativi softwareper avere sottoocchio tutti i datiriguardanti lostato della batteria.Grazie alla memorizzazione dei dati più3. Comandi3.1 Funzione dei comandiPorta di collegamentoUSBCollegamento conl’alimentazioneSchermo LCUscita 2Porta di collegamentopersensore temperaturaCollegamentocon sensore divoltaggioTasto “Out 2”Tasto “Out 1”Sensore di rilevamentotemperaturaCollegamento BIDPresa di collegamento conla batteria OUT 15
Istruzioni per l’uso<strong>Power</strong> <strong>Peak</strong> <strong>E1</strong>Art.N.<strong>8471</strong>SELECT Rad(manopola di selezione)La semplice rotazione dellamanopola select consente diimpostare tutti i parametri delmenu principale.Tasti a freccia avanti / indietroNell’utilizzo manuale, in modalità diimpostazione, le frecce consentonorispettivamente di incrementare o diminuiredi un’unità i valori dei parametriselezionati, oppure di accedere al menusuccessivo / precedente. Mantenerepremuto il tasto equivale a premerloripetutamente per accelerare l’operazione.Tasto EnterPremendo il tasto “ENTER” si confermal’impostazione appena effettuata, quale peresempio l’attivazione di un menu, oppure laselezione di un valore precedentementeimpostato.Tasti OUT 1 e OUT 2Premendo i tasti OUT 1 oppure OUT 2 siavviano le procedure di ricarica sulle rispettiveuscite. Se premuto più volte, il tastoOUT 1 permette anche di selezionare il tipodi procedura desiderata, scegliendo tra:ricarica, scarica, oppure ciclo. Il tasto OUT 2consente invece l’ attivazione della sola proceduradi ricarica.Segnale acustico e LED di avvisoIl segnale acustico accompagna ogni pressionedei tasti di comando, inoltre segnala iltermine di una procedura di ricarica / scaricaoppure indica la comparsa di un errore. Ilsegnale è regolabile all’interno del menu diimpostazione. I LED sui tasti si accendonoad ogni pressione dei medesimi.4. Dati tecniciAlimentazione:10 - 15V DC (Batteria per automobile) oppure trasformatore13,8 V per presa elettrica, almeno 30 A(non utilizzare caricabatteria per batterie d’automobili !)Assorbimento max corrente: 37 Ampere ca.Spegnimento:NC / NiMH:automatico. Sistema digitale Delta <strong>Peak</strong>Piombo e litio:automatico, in funzione della tensione, procedura CC-CVDimensioni:170 x 175 x 85 mmUscita 1 (OUT1)Numero di celle:Corrente di ricarica:Corrente di scarica:Corrente di bilanciamento:Carica di mantenimento:Tensione finale di scarica:Funzioni:1…36 celle NC / NiMH1…14 celle LiIo (3,6V), LiPo (3,7 V), LiFe (3,3 V)1…12 celle (2 / 24 V) batterie al Piombo1…14 celle batterie speciali (cap. 13 pag. 17)automatica, 0,1 … 20 A ( 315 W max)automatica, 0,1 … 40 A (160 W max.)220 mA ca.C/20 per batterie NC e NiMH0,5 – 1,1 V per cella per batterie NC e NiMH,2,5 – 3,6 V per cella per batterie LiPO, LiIo, LiFe1,8V per cella per batterie piomboRicarica, scarica, ricarica-scarica, bilanciamento6
Istruzioni per l’uso<strong>Power</strong> <strong>Peak</strong> <strong>E1</strong>Art.N.<strong>8471</strong>Corrente di ricarica massima erogabile sull’uscitaOUT 1 in funzione del voltaggio della batteriasotto 15,75V20A15,75V-17,5V18A17,5V-21V15A21V-26,25V12A26,25V-31,5V10A31,5V-35V9A35V-39,37V8A39,37V-42V 7,5A42V-45V7A45V-48,46V 6,5A48,46V-52,5V6A52,5V-57,27V 5,5A57,27V-63V5Aoltre 63V4ACorrente di scarica massima sull’uscita OUT1 in funzione del voltaggio della batteriasotto 2V10A2V-4V40A4V-5,33V30A5,33V-6,4V25A6,4V-8V20A8V-8,88V18A8,88V-10,66V15A10,66V-13,33V12A13,33V-16V10A16V-17,77V9A17,77V-20V8A20V-22,85V7A22,85V-26,66V6A26,66V-29,09V 5,5A29,09V-32V5A32V-35,55V 4,5A35,55V-40V4A40V-45,71V 3,5A45,71V-53,33V3Aoltre 53,33V2AUscita 2 (OUT2)Numero di celle:Corrente di ricarica: 0,1 … 2 APotenza di ricarica: 28 W,con regolazione automaticadella corrente1…8 celle NC / NiMH1…3 celle LiPo (3,7 V)1…4 celle LiFe (3,3 V)5. Accensione ed utilizzo dell’apparecchioCollegare il caricabatterie con una batteria alpiombo da 12 V. Rispettare assolutamente lapolarità corretta (rosso = polo positivo / nero =polo negativo) e verificare il corretto e sicuroaggancio dei morsetti.Passati pochi istanti, viene visualizzata sulDisplay la schermata di avvio insieme alla versionedel Software ed al nome utente preimpostato.Attendere quindi lo spegnimentodei LED che indica il termine della fase di inizializzazione,poi premere il tasto Enter peraccedere alla schermata dell’uscita OUT 1.5.1 Collegamento della batteriaCollegare la batteria con le prese di uscita 1“OUT 1”, prestando massima attenzione arispettare la corretta polarità (rosso = polopositivo / nero = polo negativo). Se si adoperaun adattatore per i cavi, collegare sempreprima i connettori a banana con il caricabatterie,e soltanto dopo con la batteria (per evitarecortocircuiti sulla batteria dovuti ai connettori).Procedere al contrario per la proceduradi scollegamento.Importante!Prima di avviare la ricarica, controllare tassativamenteancora una volta la correttezza deiparametri di ricarica impostati. Un’impostazioneerrata può infatti danneggiare la batteria,oppure causarne l’esplosione.Funzioni:RicaricaCarica di mantenimento:50 mA (per batterie NC e NiMH)7
Istruzioni per l’uso<strong>Power</strong> <strong>Peak</strong> <strong>E1</strong>Art.N.<strong>8471</strong>5.2 Collegamento dell’equalizzatoreQualora si intenda ricaricare una batteriaLitio, è indispensabile collegare il cavo sensoredi voltaggio con l’apparecchio permotivi di sicurezza. Inserire il connettore inmodo che il cavo nero (polo negativo) siinserisca in corrispondenza della posizioneindicata dalla freccia.Se non viene effettuata tale procedura,non sarà possibile iniziare la fase di ricarica.L’unica eccezione riguarda le batterieprovviste di chiavetta / chip BID, perle quali è possibile iniziare la ricaricaanche senza collegare il cavo.Se due pacchi batteria collegati in serie vengonocollegati con l’equalizzatore, è necessariocollegare il cavo sensore di voltaggiodella batteria con l’uscita (1 – 7) alla qualeè collegato il polo negativo del caricabatterie.14 13 12 11 10 9Akku 28765432Akku 11-OUT 1+6. Struttura del menu e navigazionePartendo dalla schermata di avvio, premere iltasto Enter oppure Select per accedere almenu OUT 1.VOLTAGE SENSOR+++S1+S2+S3--Rappresentazione schematica del correttocollegamento del cavo sensore di voltaggio.Adoperare il collegamento (1 – 7) per batteriefino a 7 celle; per pacchi batteria maggioriutilizzare il secondo collegamento (8 –14).Selezione del menuDal menu precedentemente selezionato, èpossibile passare ai menu:“ Equalizzatore”“Dati ciclo”“Dati uscita OUT 2”“Impostazioni utente”Spostandosi con i tasti freccia o la manopola,selezionare la prima riga (Dati uscita OUT 2).Premere quindi “ENTER” per evidenziare ilmenu (lo sfondo si evidenzia di nero).Mediante i tasti freccia / manopola selezionareun altro menu.Disattivare nuovamente mediante tastoENTER.Coi tasti freccia o la manopola sarà ora nuovamentepossibile navigare all’interno del menuselezionato.Importante:Non collegare mai più di un cavo sensoreper ogni presa di collegamento con l’equalizzatore.Avvertenza:8Selezione del sottomenuAlcuni menu dispongono a loro volta di menuinterni con visualizzazioni grafiche o curvedella tensione. In tali casi, spostare il cursoresulla terza riga, premere ENTER per richiamareil sottomenu, ed in seguito ri-premerenuovamente ENTER per uscirne.
Istruzioni per l’uso<strong>Power</strong> <strong>Peak</strong> <strong>E1</strong>Art.N.<strong>8471</strong>6.1 Übersicht der Menüstruktur4,3VCELL 3 : 4.332V2,9VBALANCE: 99,4%Ampia visualizzazione grafica nelsottomenuSelezione dellamemoria per la batteria1 … 9Enter / SelectIl menu per l’equalizzatoreappare soltanto se viene selezionatauna batteria Litio ed il cavosensore risulta collegato al caricabatterieRappresentazione grafica di tensionee temperatura nel sottomenuImpostazione dei parametri diricarica per le memorie 1 … 9Rappresentazione grafica dellatensione nel sottomenu9Impostazione dei parametri diricarica per Chip o chiavetta BID.Attivo soltanto se il dispositivoBID è collegato.
Istruzioni per l’uso<strong>Power</strong> <strong>Peak</strong> <strong>E1</strong>Art.N.<strong>8471</strong>7. Pista di ricarica / scarica “OUT 1”Menu di lavoro per l’uscita 1 del dispositivo. Premere i tasti freccia o ruotare la manopola perspostarsi all’interno del menu e premere Enter per confermare.Cambio del menu attivoSelezione memoria della batteria 1-9Visualizzatore di stato-> = Ricarica
Istruzioni per l’uso<strong>Power</strong> <strong>Peak</strong> <strong>E1</strong>Art.N.<strong>8471</strong>Differenzadi tensioneTensioneDifferenza di tempoDifferenzadella temperaturaScala dellatensioneCurvadellatemperaturaDifferenza tra ipunti di misurazioneScala dellatemperaturaTempo8. Impostazione della batteriaPer poter configurare i parametri di ricarica /scarica, occorre richiamare il sottomenu“Impostazioni della batteria”.Tale menu consente infatti di impostaretutti i parametri principali della batteriaquali: tipologia, numero di celle, capacitàetc.Al fine di evitare danni alla batteria in fase diricarica/scarica, risulta tassativamentenecessario impostare i seguenti parametri:Tipologia di batteria , numero di celle, sensibilitàDelta-<strong>Peak</strong> (per lo spegnimento di batterieNC oppure NiMH), capacità, correntedi ricarica / scarica, tensione finale di scaricae temperature di spegnimento (solo perprocedure di ricarica). I suggerimenti perl’impostazione di tali parametri, in funzionedel tipo di batteria, sono riportati nel paragrafo“brevi nozioni sulle batterie”.Tipologia di batteria:NICD – BatteriaNCNIMH – Batterie Nickel metallo idratoLIPO – Batterie polimeri di Litio (3,7 Volt)PB – Batterie al Piombo (2,30V)LiFE – Litio Ferro (A123 etc. 3,3 Volt)LiON – Ioni di Litio (3,6 Volt).Se il chip / chiavetta BID risulta collegato aldispositivo, è disponibile anche la proceduraspeciale seguente.PROCEDURA SPECIALE – batteriePiombo o Litio che vengono ricaricate conprocedura CC-CV. Tensione di ricarica selezionabiletra 2 … 6 Volt.Tensione di ricarica / sensibilità <strong>Peak</strong>In base alla tipologia di batteria precedentementeselezionata, comparirà in corrispondenzadi tale riga il campo per l’impostazionedella tensione di ricarica (per batterieLitio, Piombo o batterie speciali), oppure perla regolazione della sensibilità di spegnimento<strong>Peak</strong> (batterie NC / NiMH).Tipologia di batterieNICD = Std. 7 mV/cella (Intervallo 3-25 mV)NIMH = Std. 5 mV/ cella (Intervallo 3-25 mV)Piombo = Valore fisso 2,3 V/ cellaLiPO = Valore fisso 4,2 V/ cellaLiON = Valore fisso 4,1 V/ cellaLiFE = Valore fisso 3,7 V / cella11
Istruzioni per l’uso<strong>Power</strong> <strong>Peak</strong> <strong>E1</strong>Art.N.<strong>8471</strong>Se si intendono modificare i parametri variabili,si prega di consultare prima il paragrafo “brevinozioni sulle batterie” per informarsi sull’effettodi tale modifica.Se il chip / chiavetta BID è collegato al dispositivo,comparirà sul display anche laselezione “tipo di batteria speciale”; consultareil paragrafo relativo alla programmazionedel BID per maggiori dettagli.Numero di celleImpostazione del numero di celle da ricaricare1 ... 36 celle NC / NiMH1 ... 14 celle LiIo LiPo, LiFe1 ... 12 celle (2...24V) Piombo1 ... 14 celle batterie speciali (solo con BIDcollegato)CapacitàSi prega di notare che, per questo apparecchio,l’impostazione della capacità per lebatterie Litio non agisce sulla corrente di ricarica/ scarica ( valore di 1C).Sia la corrente di ricarica che quella di scarica,infatti, devono essere impostate manualmentedall’utente!L’impostazione della capacità di una batteriarisulta comunque importante per determinarela carica di mantenimento di batterie NC eNiMH, da essa dipendenti.Carica di mantenimento = NC / NiMH = C/20.Anche per batterie Piombo e Litio è importanteprogrammare la capacità sul dispositivo, dalmomento che essa governa lo spegnimento ela conseguente visualizzazione della scritta“Ende” (fine della procedura) sullo schermo.Per tali batterie, ricaricate con modalità CC-CV, la scritta “ENDE” appare quando essesono state bilanciate e la corrente di ricarica èal di sotto di C/10. In tale occasione, la batteriarisulta carica al 98% e può essere scollegatadal dispositivo.Se rimane invece collegata al caricabatterie, labatteria continuerà ad essere ricaricata. Nonappena la corrente di ricarica diminuisce oltre50 mA ca., la procedura di ricarica viene interrotta.Corrente di ricaricaLa corrente di ricarica può essere impostataall’interno di un intervallo compreso tra 0,1 finoa 20 Ampere. Impostare il valore corrispondentea quello indicato dal produttore della batteria.Consultare anche il capitolo “brevinozioni sulle batterie” per conoscere l’intensitàdi corrente massima sopportata dal vostro tipodi batteria.Se viene selezionata l’impostazione “AUTO”(automatica), valida soltanto per batterie NC /NiMH, il caricabatterie provvederà a misurarela resistenza interna della batteria; la correntedi ricarica verrà quindi regolata automaticamentedal dispositivo in base a tale parametro.Osservare che la corrente di ricarica dipendestrettamente dal numero di celle. Consultareanche la tabella “dati tecnici”.Corrente di scaricaLa corrente di scarica può essere impostataall’interno di un intervallo compreso tra 0,1 finoa 40 Ampere. Impostare il valore corrispondentea quello indicato dal produttore della batteria.Consultare anche il capitolo “brevinozioni sulle batterie” per conoscere l’intensitàdi corrente massima sopportata dal vostro tipodi batteria.Se viene selezionata l’impostazione “AUTO”(automatica), valida soltanto per batterie NC /NiMH, il caricabatterie provvederà a misurarela resistenza interna della batteria; la correntedi scarica verrà quindi regolata automaticamentedal dispositivo in base a tale parametro.Osservare che la corrente di ricarica dipendestrettamente dal numero di celle. Consultareanche la tabella “dati tecnici”.Tensione finale di scaricaQuesto campo prevede la possibilità di impostazioneper la tensione finale di scarica dellabatteria. Di seguito i valori consigliati e l’interointervallo di regolazione.Tipo di batteriaNICD = Std. 0,9 V/cella (Intervallo 0,5-11V/Z)NIMH = Std. 1,0 V/ cella (Intervallo 0,5-11V/Z)12
Istruzioni per l’uso<strong>Power</strong> <strong>Peak</strong> <strong>E1</strong>Art.N.<strong>8471</strong>Piombo = Valore fisso 1,8 V/ cellaLiPO = Std. 3,0 V/ cella (Intervallo 2,5-3,6V/Z)LiON = Std. 3,0 V/ cella (Intervallo 2,5-3,6V/Z)LiFE = Std. 2,7 V/ cella (Intervallo 2,5-3,6V/Z)Se si intendono modificare i parametri variabili,si prega di consultare prima il paragrafo “brevinozioni sulle batterie” per informarsi sulle conseguenzedi tale modifica.Temperatura di spegnimento (solo per ricarica)Questo menu consente di impostare la temperaturaper lo spegnimento del processo, all’internodi un intervallo compreso tra + 10° C finoa 80 ° C. Durante l’impostazione occorre considerarecomunque che il dispositivo interromperàla procedura al raggiungimento del primodei due criteri: “temperatura” oppure “tensione“ di spegnimento.Conseguentemente può risultare che al raggiungimentodi uno dei criteri la batteria nonrisulti completamente carica.Tale funzione rappresenta quindi un’importanteprotezione specialmente per batteriesensibili quali quelle NiMH e Litio.Impostando la temperatura di spegnimento suun valore relativamente alto, rimane comunquepossibile mantenere tale funzione di sicurezza,evitando al contempo lo spegnimentoprematuro della procedura in corso.8.1 Impostazione batteria con chip / chiaveBIDSe un chip BID viene collegatoal dispositivo, appare nelmenu “OUT 1 <strong>DA</strong>TEN” il simboloBID e l’elenco delleimpostazioni si allunga. Se ilChip non risulta essere formattato(chip nuovo), compare una notifica suldisplay che indica che è necessario immetterei parametri all’interno del chip (configurazionedel chip).Menu batteria specialeSe il chip / chiave BID è collegato, il dispositivomette a disposizione anche l’opzione “speciale”all’interno delle tipologie di batterie.Quest’ultima consente di impostare manualmentele tensioni finali di ricarica e scarica perla batteria. Tale accorgimento permetteràquindi di ricaricare con il <strong>Power</strong> <strong>Peak</strong> <strong>E1</strong> tuttele batterie Litio attuali e future, insieme ad altritipi, secondo la procedura di ricarica CC-CV.Intervallo di regolazione:Tensione di ricarica2 V / cella, intervallo 2 – 6 V / cellaTensione finale di scarica2 V / cella, intervallo 0,8 – 6 V / cellaL’equalizzatore interno si adatterà automaticamenteai valori impostati per garantire il bilanciamentoottimale dei livelli di tensione dellecelle.Questa impostazione può naturalmenteessere sfruttata anche per mantenere le batteriesu un livello medio di tensione di 3,9 V /cella c. durante l’inverno.Risulta sufficiente impostare la tensione finaledi scarica su 3,9 V / cella e scaricare la batteriaLitio fino a tale valore prima di un lungoperiodo di inutilizzo.Attenzione: intraprendere le impostazioni prestandovila massima cautela ed attenzione, perevitare di impostare valori errati che potrebberodanneggiare irrimediabilmente la batteria!Il menu comprende anche il campo utile perl’immissione della data e per la memorizzazionedel chip.Avvertenza:Al termine delle impostazioni, occorre sempreconfermare il campo “ENDE-SPEICHERNBID” con il tasto “Enter”; in caso contrario, se ilchip / chiave viene semplicemente rimossosenza conferma, rimarranno memorizzati ivalori precedenti. Tale situazione può causareil danneggiamento della batteria durante lesuccessive operazioni di ricarica / scarica!13
Istruzioni per l’uso<strong>Power</strong> <strong>Peak</strong> <strong>E1</strong>Art.N.<strong>8471</strong>9. Schermata equalizzatoreQuando il cavo sensore di voltaggio di unabatteria Litio viene collegato al caricabatterie,il dispositivo comincia a “bilanciare” lecelle.10. Dati del cicloIl menu “dati del ciclo”, visualizza e memorizzatutti i parametri significativi di una proceduradi ricarica / scarica in corso.Per ogni ciclo di carica (C) o scarica (D)vengono infatti mostrati i valori di capacitàimmessa o sottratta insieme alla tensionemedia visualizzata separatamente.Tale impostazione permette di controllare leprestazioni della batteria. Risulta possibilememorizzare i parametri di massimo 10cicli; i dati contrassegnati Nr.1 rappresentanoi valori attuali.Risulta comunque necessario collegareanche i cavi della batteria al caricatore(polo + e polo -) per ottenere un bilanciamentodelle celle preciso e ottimale.A questo punto verranno visualizzati sulloschermo i livelli di tensione delle celle sia inmodalità grafica e numerica.La lettera “B” dietro al numero di cella indicache quest’ultima è al momento in fase dibilanciamento “equalized”.CELL 3 : 4.332V In alternativa è4,3Vpossibile visualizzarele tensioni suldisplay in forma didiagramma aBALANCE: 99,4%barre. Per sceglieretale opzione,portare il cursoresulla riga 3 e premere poi il tasto Enter.2,9VIl medesimo tasto Enter consente poi diabbandonare la schermata.Questo sottomenu consente quindi di rappresentarela tensione di ciascuna cellasotto forma numerica oppure grafica.Muoversi sulle varie barre mediante i tastifreccia o la manopola per ottenere i livelli ditensione delle relative celle.Visualizzazione del ciclo attuale sul display.In questo esempio è al momento attivo ilciclo 1 di 2.Il menu per i dati del ciclo è un menu di solavisualizzazione; i parametri per la ricaricavengono infatti impostati nel menu “Out 1Data” .Le altre impostazioni, quali: inizio del ciclo(ricarica oppure scarica) ed eventuali pausetra un ciclo e l’altro si possono impostare nelmenu “ Impostazioni utente”.14
Istruzioni per l’uso<strong>Power</strong> <strong>Peak</strong> <strong>E1</strong>Art.N.<strong>8471</strong>11. Pista di ricarica 2 “Out 2 Daten”La pista di ricarica 2 è concepita per ricaricarepacchi batteria di alimentazione dellaricevente o trasmittente, con intensità di correntemassima fino a 2 A.12. Impostazioni utente “Nutzer Einst.”Per adattare il caricabatterie alle esigenzeindividuali di ciascun utente, sono disponibilivarie funzioni di “personalizzazione” all’internodel menu “impostazioni utente”, tra lequali anche quelle di selezione della linguadel software.Memorizzazione / copiaPer definire i parametri della ricarica è sufficienteimpostare le voci: tipo di batteria, correntedi ricarica e capacità. Questa uscitanon consente la ricarica, la scarica o il bilanciamentodi batterie Litio!Per avviare o interrompere una procedura diricarica su tale uscita è sufficiente premereil tasto “OUT 2”.Anche questa pista di ricarica dispone di unsottomenu per visualizzare la tensione dellabatteria in formagrafica. Per accederea tale funzionebasta portare il cursoresulla secondariga e premere poiEnter. Una volta premuto nuovamente taletasto, verrà abbandonata la schermata divisualizzazione.Numero di celle:1 ... 8 celle NC / NiMH1 ... 3 celle LiPo (3,7V)1 ... 4 celle LiFe (3,3V)Corrente di ricarica: 0,1 ... 2 AAttenzione:Non collegare a tale uscita pacchi batteriecon un numero di celle maggiori rispettoa quelli precedentemente indicati.Questa funzione serve per memorizzare iparametri della batteria rilevati durante lefasi di ricarica / scarica. Se le prime duerighe vengono contrassegnate con NO(“NEIN”), i parametri saranno scaricati viaUSB per poter essere poi visualizzati ememorizzati con il software per PC logview.Il <strong>Power</strong> <strong>Peak</strong> <strong>E1</strong> dispone di una memoriainterna di dati che visualizza i dati sul caricatoreper poi copiarli successivamente sulPC; se si desidera tale opzione occorreselezionare “JA” per la voce “Speichern”(memorizzare) e “NEIN” per la voce“Kopieren” (copia).Per poter leggere i dati contenuti nellamemoria interna, selezionare “NEIN” per lavoce “Speichern” (memorizzare) e “JA” perla voce “Kopieren” (copia). In questo modo,i dati verranno trasmessi attraverso l’uscitaUSB.15
Istruzioni per l’uso<strong>Power</strong> <strong>Peak</strong> <strong>E1</strong>Art.N.<strong>8471</strong>Avvertenza:I dati rimangono memorizzati nella memoriainterna fino a quando non viene avviata unanuova procedura di ricarica con un’altra batteriache sovrascrive quelli precedenti.Avvio del ciclo: La funzione “AVVIO DELCICLO” permette di determinare il tipo diprocedura con cui avviare un ciclo (ricaricaoppure scarica).Pausa tra cicliSe si intende attivare una pausa tra l’esecuzionedi un ciclo ed il successivo, selezionare“EIN” (attivo); in caso contrario selezionare“AUS”(disattivato).Durata della pausaAl termine di una fase del ciclo, il dispositivoutilizza due criteri per stabilire la durata dellapausa:1. Temperatura della batteria oltre i 35°C;la pausa termina non appena la temperaturascende nuovamente sotto 35 °C.2. La pausa ha comunque una duratamassima di 1 ora, trascorsa la qualeviene iniziata la fase successiva, indipendentementedal raggiungimentodella soglia di 35°C.Nome utentePer poter impostare il nome utente, spostarsicol cursore sul campo “Nutzername”(nome utente), quindi premere “Enter”: ilprimo campo viene evidenziato di nero. Aquesto punto risulta possibile selezionarecaratteri maiuscoli o minuscoli, numeri osegni speciali (+) mediante i tasti freccia o lamanopola.Una volta impostato il nome desiderato, premerepiù volte il tasto “Enter” fino a quandoil campo nero scompare dalla riga. A questopunto si ritorna al menu.13. Sequenza per procedure di ricarica /scarica sull’uscita OUT 1Prima di avviare una procedura di ricarica /scarica, è necessario effettuare correttamentele seguenti operazioni• Collegare il dispositivo con la fonte di alimentazionerispettando la corretta polarità• Collegare la batteria con il caricatorerispettando la corretta polarità• Impostare la tipologia di batteria• Impostare il numero di celle della batteria• Impostare la capacità della batteria• Impostare l’intensità della corrente diricarica / scaricaUna volta impostati correttamente i parametriè possibile avviare la procedura.Affinché la batteria collegata venga:ricaricata, occorre premere una volta il tastoOUT 1scaricata, occorre premere due volte il tastoOUT 1scaricata-ricaricata, occorre premere trevolte il tasto OUT 1Nel caso di un ciclo comprendente varie proceduresarà necessario impostare anche ilnumero di cicli desiderato (1-10), agendomediante i tasti freccia o la manopola. Perinterrompere un processo in corso, premerenuovamente il tasto “OUT 1”.Per batterie Litio, la procedura di bilanciamento(equalizing) avrà automaticamenteinizio se il cavo sensore di voltaggo risulta adessa collegato.Qualora si intenda modificare l’intensità dellacorrente di ricarica / scarica mentre una proceduraè in corso, è sufficiente agire direttamentesull’interfaccia del menu.Occorre tuttavia notare che tale modificariguarderà soltanto il processo di ricarica/ scarica al momento in corso. Al successivoavvio di una nuova procedura,infatti,saranno normalmente utilizzati i parametriprecedentemente memorizzati nel paragrafo“impostazioni della batteria”, oppure quellisalvati nel chip / chiave BID.16
Istruzioni per l’uso<strong>Power</strong> <strong>Peak</strong> <strong>E1</strong>Art.N.<strong>8471</strong>14. Procedure di ricarica / scarica conChip / chiavetta BID (solo per uscitaOUT 1)Collegare il chip BID al caricabatterie attraversoil cavetto adattatore. Se si utilizzauna chiavetta, collegarla direttamente.Compare quindi suldisplay il simboloBID, come visualizzatonell’immagine.Se i parametri dellabatteria sonomemorizzati nelchip, è possibileavviare subito la procedura desiderata premendosemplicemente il tasto “OUT 1”. Laprocedura sarà poi identica ad una normale.Qualora si intenda modificare l’intensitàdella corrente di ricarica / scarica mentreuna procedura è in corso, è sufficienteagire direttamente sull’interfaccia delmenu. Occorre tuttavia notare che talemodifica riguarderà soltanto il processo diricarica / scarica al momento in corso. Alsuccessivo avvio di una nuova procedura,infatti,saranno normalmente utilizzati iparametri precedentemente memorizzatinel paragrafo “impostazioni della batteria”,oppure quelli salvati nel chip / chiave BID.I principali dati della procedura di ricarica /scarica saranno poi automaticamentememorizzati sul chip / chiave al termine dellamedesima. Questi ultimi forniranno all’utenteuna visione generale riassuntiva sulle prestazionidella batteria.Che cosa viene memorizzato all’interno diun chip / chiavetta BID?Ad ogni ciclo, il chip memorizza l’ultimo valoredi capacità immessa o sottratta, insieme alrelativo valore massimo nel caso esso superiquello precedentemente memorizzato.Parallelamente, il conteggio dei cicli vieneincrementato di un’unità.Insieme a tali dati vengono naturalmentememorizzati nel chip anche i parametri diricarica / scarica precedentemente selezionatinel menu di impostazione.Questi ultimi sono:Tipo di batteriaNumero di celleCorrente di ricaricaCorrente di scaricaTensione finale di ricaricaTensione di scaricaSensibilità Delta <strong>Peak</strong>Temperatura di spegnimentoCapacitàData del primo utilizzoAvvertenze per il termine della ricarica!Non appena compare la scritta “ENDE” (fine)sul display, le batterie Litio risultano caricheal 98% e possono essere scollegate. Nelcaso esse rimangano collegate, l’equalizzatoreproseguirà l’operazione di bilanciamentodelle celle, operando tuttavia con una intensitàdi corrente minima. Non appena tale intensitàraggiunge la soglia dei 40 mA, la proceduraviene definitivamente conclusa.17
Istruzioni per l’uso<strong>Power</strong> <strong>Peak</strong> <strong>E1</strong>Art.N.<strong>8471</strong>15. NOTIFICHE DI ERROREIl caricabatterie <strong>Power</strong> <strong>Peak</strong> <strong>E1</strong> integra alsuo interno dei dispositivi di sicurezzanecessari per garantire sempre un sicurosvolgimento delle procedure di ricarica /scarica. Non appena l’apparecchio individuaun errore, viene emesso un segnale diavviso accompagnato da una notifica suldisplay. I seguenti avvisi vengono eliminati –una volta individuato il problema – premendoun qualsiasi tasto.E’ stata raggiunta la temperatura di spegnimentoimpostata; la procedura di ricaricaviene interrotta.Tensione in ingresso troppo bassa (inferiorea 10V). Verificare la batteria di alimentazioneo l’adattatore.Inversione di polarità nel collegamento trabatteria e dispositivo. Verificare il collegamento.Il chip / chiavetta BID è stato scollegato dalcaricabatterie mentre una procedura era incorso. Verificare il collegamento e ri-avviarela procedura. Se dopo aver ri-collegato ilchip la procedura non sia avvia comunque,è possibile che i dati in esso memorizzati sisiano danneggiati.Questa notifica compare anche quandoviene collegato al dispositivo un chip vergine(non ancora formattato). In questo casotornare al menu di impostazione per la batterieed immettere i parametri nel chip /chiavetta.Tensione della batteria troppo alta.Verificare di aver impostato il corretto numerodi celle.Il caricabatterie verifica inoltre attraversol’equalizzatore il numero di celle ad essocollegate, confrontandolo con quello impostatonel menu “impostazione batteria.Qualora i due valori non coincidano, vieneemessa una notifica di errore.All’interno del chip / chiavetta BID risultanomemorizzati dati errati , oppure mancanodei parametri; tornare al menu di impostazioneper la batterie ed immettere / correggerei parametri del chip / chiavetta.Verificare le impostazioni del chip / chiavettaBID.18
Istruzioni per l’uso<strong>Power</strong> <strong>Peak</strong> <strong>E1</strong>Art.N.<strong>8471</strong>16. Norme generali per la sicurezza• L’utilizzo errato del caricabatterie e dellebatterie può causare esplosioni odincendi di queste ultime• Il caricatore <strong>Power</strong> <strong>Peak</strong> <strong>E1</strong> è adatto perla ricarica/scarica ed il bilanciamento dibatterie ricaricabili NC, NiMH, piombo,litio. Non ricaricare batterie a secco conquesto apparecchio; pericolo di esplosione.• Il caricatore è predisposto per funzionarecon alimentazione a 12 V DCoppure, previo collegamento con trasformatore,anche 230 V AC; non alimentarlomai con tensioni differenti.• Proteggere tassativamente il dispositivoda polvere, sporco e umidità.• Tenere l’apparecchio lontano da fonti dicalore o gelo. Non sottoporlo a contattodiretto dei raggi solari.• Evitare di sollecitare eccessivamente ocomprimere il caricatore. Tenerlo inoltreal riparo da vibrazioni di forte intensità.• Non porre mai il caricatore insieme allabatteria su superfici infiammabili. Nonutilizzarlo mai in prossimità di materiali ogas infiammabili.• Non aprire mai il caricabatterie sottotensione!• Non lasciare mai incustodito l’apparecchiodurante il funzionamento. Essopuò scaldarsi notevolmente durante ilnormale utilizzo.• Assicurare una adeguata ventilazioneintorno all’apparecchio e liberare leprese d’aria da qualsiasi impedimentocircostante.• Qualora l’apparecchio non venga utilizzatoper un lungo periodo di tempo,staccare la spina di alimentazione dallafonte di corrente e scollegare le batteriead esso collegate.• Non ricaricare mai la medesima batteriaper una seconda volta a breve distanzadalla prima ricarica.• Non ricaricare batterie che risultanomolto calde. Lasciarle prima raffreddarefino a temperatura ambiente.• Possono essere ricaricate contemporaneamentesoltanto celle di uguale capacitàe della stessa marca.• Non collegare due pacchi batteria inparallelo ad una uscita. Ricaricare sempresolo un pacco per volta• Prestare sempre attenzione alla correttapolarità delle batterie collegate ed evitarecortocircuiti.• Rispettare scrupolosamente le indicazioniriportate dal produttore delle batterie• Verificare sempre attentamente leimpostazioni del <strong>Power</strong> <strong>Peak</strong> <strong>E1</strong> per lafase di ricarica. Le batterie possonosubire danni a seguito di impostazionierrate.• Controllare che non siano presenti dannisul coperchio del caricatore e sui cavi.• Prestare attenzione quando si maneggianobatterie con alto numero di celle.Verificarne il corretto isolamento, altrimentiesiste il rischio di scosse.• Non scollegare la batteria dal dispositivomentre la fase di ricarica è in corso,senza aver prima premuto il tasto Stop.L’alta tensione in uscita dall’apparecchiopuò generare alte cariche statiche.19
Istruzioni per l’uso<strong>Power</strong> <strong>Peak</strong> <strong>E1</strong>Art.N.<strong>8471</strong>17. Brevi nozioni sulle batterie18. Descrizione della procedura di ricaricaCC-CVLe tipologie di batterie Litio ed al Piombo vengonoricaricate con la procedura a tensionecostante (CC-CV).Di conseguenza, per permette l’esecuzionedi quest’ultima, il menu del caricabatterieconsente di impostare la tensione finale diricarica per ciascuna cella, in base al tipo dibatteria selezionata.La tensione della batteria aumenta quindiPeriodo di corrente costante(CC)Periodo di tensionecostante (CV)Punto di spegnimentodurante la prima fase della ricarica fino alvalore massimo di 4,2 V / cella (batteriaLiPo).Durante tale fase il caricabatterie mantienecostante la corrente di ricarica impostata.Questa prima fase ha una durata di 50 – 60minuti ca. per una batteria scarica, ricaricatacon 1C. Durante questa procedura vieneimmessa una percentuale pari a 80-90%della capacità massima.Al raggiungimento della tensione finale diricarica, l’intensità di corrente viene modificatae la tensione è mantenuta costante.La corrente di ricarica diminuisce gradualmente,dal momento che la tensione dellabatteria si avvicina a quella impostata sulcaricatore. La carica della capacità restanterichiede altri 35 – 40 minuti. Al raggiungimentodi una soglia di corrente minima preimpostatain automatico, il dispositivo interrompela ricarica. Conseguentemente , il processocompleto di ricarica richiede 90 minuticirca, per una intensità di ricarica pari a 1C.19. Batterie al PiomboQualora vengano utilizzate batterie al piombo,è assolutamente necessario rispettare lenorme di sicurezza indicate per evitare dannia persone o cose. Chiunque utilizzi tali batterie,lo compie sotto la propria responsabilità.• Le batterie al piombo sotto forma di gel -molto usate in ambito modellistico - sonoper la maggior parte impermeabili al gase quindi meno pericolose rispetto allealtre.• Le batterie usate in campo automobilisticocontengono invece acido solforicocome elettrolita; conseguentemente risultanomolto pericolose a causa dell’acidocorrosivo e della rapida formazione di gasin caso di sovraccarica.• Le batterie al piombo devono esseremantenute al riparo dal fuoco: pericolo diesplosione.• Non aprire mai con la forza le batterie alpiombo, pericolo di lesioni.• Non cortocircuitare mai batterie al piombo:pericolo di incendio o di esplosione.• Qualora l’elettrolita fuoriuscisse accidentalmentedalla batteria, tenerlo lontanodagli occhi e dalla pelle; se esso venissea contatto , lavare subito la parte interessatacon abbondante acqua limpida erivolgersi successivamente ad un medico.Non porre le celle a contatto con labocca: pericolo di avvelenamento.• Un batteria al piombo carica non è ungiocattolo per bambini. Tenere le batteriecustodite e sorvegliate, in luoghi inaccessibiliper i bambini.• Durante le fasi di ricarica / scarica rispettareassolutamente le norme prescrittedal produttore delle batterie.• Durante la ricarica di batterie al piomboesiste il pericolo di evaporazione del gas.Assicurare pertanto un’adeguata circolazioned’aria nei dintorni. In caso di sovraccaricosi forma un gas esplosivo formatoda ossigeno e idrogeno.Pericolo di esplosione.20
Istruzioni per l’uso<strong>Power</strong> <strong>Peak</strong> <strong>E1</strong>Art.N.<strong>8471</strong>20. Batterie Litio (LiPo, LiIo,LiFe)Esistono diversi tipi di batterie al litio:1. Batterie ioni di Litio con elettrolita fluidoe 3,6 Volt di tensione nominale, laprima generazione di batterie al litio, conscarsa diffusione in ambito modellistico .(Tipologia LION).2. Batterie ioni di Litio (LiIo) con elettrolitafluido e 3,7 Volt di tensione nominale,la seconda generazione di batterie allitio provvista di cappuccio in metallo.(Tipologia LIPO).3. Batterie ioni-polimeri di Litio con elettrolitasotto forma di gel e tensione nominaledi 3,7 Volt, ovvero la generazioneattuale di batterie al Litio denominataanche Lipo. Durante la carica o la scarica,l’elettrolita in gel riduce la pressioneall’interno della singola cella, rendendosufficiente anche una sola lamina sottilequale rivestimento protettivo della batteria.Le sue caratteristiche di scarso pesoed elevata densità energetica ne hannofavorito la notevole diffusione nel modellismo.(Tipologia LIPO).4. Batterie Litio-Ferro (Fosforo) con tensionenominale pari a 3,3 Volt. Tale tipologiarappresenta la più innovativa generazionedelle batterie Litio e viene anchedenominato A123. Le batterie LiFeavranno un rapido ingresso nel mondomodellistico grazie all’elevata densitàenergetica e gli alti impulsi di scaricache sono in grado di sopportare.(Tipologia LIFE).Per batterie Litio raccomandiamo leseguenti intensità di carica:Comunemente vengono impostate intensitàpari a 1C. Alcune tipologie di batterie Litiopossono essere ricaricate anche con 1,5 …2C, quelle più recenti anche con 5 C. A tale21scopo si raccomanda di consultare quantoindicato nelle istruzioni dal produttore dellabatteria. La tensione finale di scarica , perbatterie LiPo e LiIo si aggira intorno ai 3,00Volt. Per le tiplogie LiFe, tale valore scendea 2,7 V.Variazioni di capacitàQualora più celle vengano collegate insiemeper formare un pacco batteria, e la scaricasia eseguita con un’alta intensità di corrente,ciascun elemento della cella si riscalderàin maniera differente dall’altro poiché quellipiù interni smaltiscono il calore in modomolto meno efficiente.In questo modo si genera una variazionenella resistenza interna e la capacità distribuitarisulta essere minore. La cella piùinterna risulta scarica prematuramente e diconseguenza sussiste il rischio che essavenga ulteriormente scaricata al di sottodella soglia limite di 2,5 Volt.Specialmente in occasione di temperatureesterne molto basse si creano rilevanti differenzedi capacità tra le celle. Per fare unesempio, nelle batterie Lipoly installate suelicotteri elettrici può succedere che le cellepiù avanti, ovvero quelle a diretto contattocon il vento frontale, siano raffreddate maggiormenterispetto a quelle più interne cherisulteranno più calde. Le celle più freddepossiedono dunque una capacità minore esussiste quindi il rischio che si scarichino aldi sotto della soglia inferiore di tensione.Si raccomanda pertanto di scaricare le celleLipoly fino ad una tensione finale minima di3 – 3,3 Volt (non oltre), per scongiurare allemedesime eventuali danni permanenti.Occorre inoltre accertarsi, di portare tutte lecelle al medesimo livello di tensione in occasionedella ricarica successiva. Si raccomandapertanto di collegare sempre il sensoredi voltaggio all’apparecchio.
Istruzioni per l’uso<strong>Power</strong> <strong>Peak</strong> <strong>E1</strong>Art.N.<strong>8471</strong>La ricarica di celle collegate in parallelo nonpresenta particolari criticità, dal momentoche in questa configurazione la correntetotale si distribuisce uniformemente nellesingole celle.21.Descrizione della procedura di spegnimento“Delta <strong>Peak</strong>”Non siamo responsabili di danni derivantida un uso non appropriato delle celle.A tale fine si raccomanda anche dirispettare le norme di sicurezza allegate.A causa delle differenti tolleranze dimensionali,ma soprattutto anche delle differentitemperature raggiunte durante la scarica –le celle più esterne si raffreddano meglio diquelle interne – le celle polimeri di litio saldatein serie acquisiscono differenti condizioniinterne.Le celle raggiungono quindi immancabilmentedopo diversi cicli differenti livellidi tensione l’una dall’altra.Il grafico illustra il tipico andamento di unacurva di ricarica delle batterie NC – NiMH.E’ possibile notare come al termine dellaprocedura si generi un cambiamento nellaresistenza interna della batteria, causatodal riscaldamento delle celle. Tale fenomenocomporta una lieve riduzione nella tensionedelle celle.Si descrive come “Zero-Delta-<strong>Peak</strong>” la procedurain cui la ricarica viene interrottaesattamente in corrispondenza del puntopiù alto della curva.Nella pratica, le batterie vengono quindileggermente sovraccaricate (in base allatipologia) per compensare i lievi cali di tensionedurante il raffreddamento e renderlequindi più performanti per gli utilizzi agonistici.Il valori di 5mV/cella (sensibilità <strong>Peak</strong>oppure Delta <strong>Peak</strong>), indica quindi il valoredi “sovraccarico” in corrispondenza delquale la procedura verrà effettivamenteinterrotta.Per 15 mV di Delta <strong>Peak</strong> la batteria risulteràquindi essere carica al massimo livello,riscaldandosi tuttavia in maniera notevole.Tale ricarica conferisce alla batteria un elevatolivello di energia interna, ma ne diminuiscela durata nel tempo.22
Istruzioni per l’uso<strong>Power</strong> <strong>Peak</strong> <strong>E1</strong>Art.N.<strong>8471</strong>22.Batterie NICKEL-CADMIO (NC)Raccomandiamo le seguenti impostazionidi ricarica per batterie NC:Batterie ad alta energia , 1-2 C . Rispettareanche le norme fornite dal produttore.Batterie ad alta intensità di corrente , 2 - 3 Cmassimo 5C. Nell’impiego di elevate intensitàè opportuno monitorare la temperaturadella batteria e ridurre l’intensità qualoraquest’ultima si surriscaldi notevolmente.Rispettare gli eventuali valori massimi di correntedi carica riportati dal costruttore.Accertarsi anche che i contatti ed i cavi perla ricarica siano idonei a sopportare tali intensità.Impostare la tensione finale di scarica all’internodi un intervallo compreso tra 0,85 e1,00 Volt / cella.La sensibilità Delta <strong>Peak</strong> deve rimanere tra i5 – 8 mV / cella.Valori indicativiBatterie NiCdImpostazione standard per preservare la batteria= 6-8 mV / cellaBatterie per impieghi prestazionali= 9-10 mV / cellaBatterie per usi agonistici=12-15mV / cellaIl caricabatterie calcola automaticamente lacorretta differenza di tensione dell’interopacco batteria, utile per lo spegnimento. Taleparametro è ottenuto moltiplicando il valoredella singola cella per il numero totale dicelle.Una volta raggiunto il valore calcolato , l’apparecchiointerrompe la procedura e mostrala visualizzazione illustrata in precedenza.I valori riportati sono indicativi e dipendonodal tipo di batteria; si raccomanda pertanto diconsultare necessariamente anche le raccomandazionedel produttore della batteria.23Batterie NICKEL-METAL-IDRATO (NiMH)Raccomandiamo le seguenti impostazionidi ricarica per batterie NiMH:Batterie ad alta energia , 0,5…1 C .Rispettare anche le norme fornite dal produttore.Batterie ad alta intensità di corrente: dinorma 1C , alcuni tipi possono essere ricaricatianche con 1,5…2C. Nell’impiego dielevate intensità è opportuno monitorare latemperatura della batteria e ridurre l’intensitàqualora quest’ultima si surriscaldi notevolmente.Rispettare gli eventuali valori massimi dicorrente di carica riportati dal produttore.Impostare la tensione finale di scarica incorrispondenza di 1,00 Volt / cella.La sensibilità Delta <strong>Peak</strong> deve rimanere trai 3 – 5 mV / cella.Valori indicativiBatterie NiMHImpostazione standard per preservare labatteria= 5 mV / cellaBatterie per impieghi prestazionali= 6-7 mV / cellaBatterie per usi agonistici=8-9mV / cellaPer valori di sensibilità minori, è possibileche la procedura venga interrotta prematuramente,soprattutto ber batterie ad altacapacità.In tali circostanze occorre incrementareleggermente la sensibilità e ri-avviarenuovamente la ricarica.23
Istruzioni per l’uso<strong>Power</strong> <strong>Peak</strong> <strong>E1</strong>Art.N.<strong>8471</strong>24. GaranziaQuesto prodotto è coperto dalla garanziaper un periodo di 24 mesi. In caso fossenecessario fare valere tale garanzia, rivolgetevisempre e soltanto al vostro rivenditoreche è responsabile per l’emissione e laregolare procedura della garanzia.Ci impegniamo a riparare gratuitamenteeventuali difetti di fabbricazione, del materialeo malfunzionamenti sorti durante questoperiodo. Sono escluse altre richieste , peresempio danni verificatisi successivamente.Con la presente, la robbe ModellsportGmbH & Co. KG certifica che questo articoloè conforme ai requisiti fondamentali e allealtre direttive essenziali contenute nellerelative norme CE.La dichiarazione originale di conformità èconsultabile all’indirizzo Internetwww.robbe.com , premendo sul logo„Conform“ relativo alla descrizione del prodotto.Il trasporto verso la nostra sede e il ritorno alcliente non avviene a nostre spese. Nonpossiamo accettare merce senza che lerelative spese di spedizione siano già statepagate.Non ci assumiamo alcuna responsabilitàper danni dovuti al trasporto o per perditadella merce. Vi suggeriamo a questo propositodi assicurare la merce.Inviare il prodotto al centro di assistenzaresponsabile per la vostra nazione.Affinché la garanzia sia valida, occorrerispettare le seguenti norme:h Allegare sempre alla merce lo scontrino ola ricevuta di acquistoh Tutti gli apparecchi sono stati utilizzatiseguendo le relative istruzioni per l’usoh Sono stati utilizzati solamente accessorioriginali robbe e fonti di alimentazione raccomandateh Non è prevista la garanzia contro guastiderivanti da inversioni di polarità, sovraccarichi,manomissione da parte di estranei,umidità e danni meccanicih Allegare inoltre eventuali indizi utili per rintracciareil guasto o il difetto25 CERTIFICAZIONE DI CONFORMITA’24
Istruzioni per l’uso<strong>Power</strong> <strong>Peak</strong> <strong>E1</strong>Art.N.<strong>8471</strong>26. Accessori consigliatiCavo per la ricarica dellabatteria trasmittenteArt.N. F1415Chip BID senza cavo, perequipaggiare altre batterieArt.N. 8472Cavo per la ricarica dellabatteria riceventeArt.N. F1416Chip BID con cavo da 300mm, per l’equipaggiamentodi altre batterieArt.N. 8473Cavo BID, 300 mmArt.N. 8474Cavo BID, 500 mmArt.N. 8475Chiavetta BI<strong>DA</strong>rt.N.8888Cavo sensore di voltaggioArt.N.4029Cavo adattatore 2X3SEHR, per batterie robbe,Graupner e KokamArt.N.4023Cavo adattatore 3X 2SEHR, per batterie robbe,Graupner e KokamArt.N.4031Cavo adattatore 2X3SXH-EHR per batterie elicotteriAlign, Lama oppureG47, Graupner oppureKokam Art.N.4023XHCavo adattatore 3 X 2SXH-EHR per batterie elicotteriAlign, Lama oppureG47, Graupner oppureKokam Art.N.4031XH25Adattatore per equalizzatorerobbe PolyquestArt.N. 8213
Istruzioni per l’uso<strong>Power</strong> <strong>Peak</strong> <strong>E1</strong>Art.N.<strong>8471</strong>Adattatore per equalizzatorerobbe JST/XH, batterieAlign Lama oppure G47Art.N. 8214Adattatore per equalizzatorerobbe Thunder /FlightpowerArt.N.8215Trasformatore SPS 40AArt.N. 853927. Centri di assistenzaPaese Azienda Via Città Telefono Fax E-MailAND-00130 Les escaldes-Andorra Sorteney Santa Anna, 13Princip. D'Andorre 00376-862 865 00376-825 476 sorteny@sorteny.comDanimarca Nordic Hobby A/S Bogensevej 13 DK-8940 Randers SV 0045-86-43 61 00 0045-86-43 77 44 hobby@nordichobby.comGermania robbe-Service Metzloser Str. 36 D-36355 Grebenhain 0049-6644-87-777 0049-6644-87-779 hotline@robbe.comInghilterra robbe-Schlüter UK L<strong>E1</strong>0-UB GB-L<strong>E1</strong>0 3DS Leicestershire 0044-1455-637151 0044-1455-635151 keith@robbeuk.co.ukFrancia S.A.V Messe 6, Rue Usson du Poitou, BP 12 F-57730 Folschviller 0033 3 87 94 62 58 0033-3-87 94 62 58 sav-robbe@wanadoo.frGrecia TAG Models Hellas 18,Vriullon Str. GR-14341 New Philadelfia/Athen 0030-2-102584380 0030-2-102533533 info@tagmodels.grI-36010 CavazzaleItalia MC-Electronic Via del Progresso, 25di Monticello C.Otto (Vi) 0039 0444 945992 0039 0444 945991 mcelec@libero.itOlanda/Belgio Jan van Mouwerik Slot de Houvelaan 30 NL-3155 Maasland 0031-10-59 13 594 0031-10-59 13 594 van_Mouwerik@versatel.nlNorvegia Norwegian Modellers Box 2140 N-3103 Toensberg 0047-333 78 000 0047-333 78 001 per@modellers.comAustria robbe-Service Puchgasse 1 A-1220 Wien 0043-1259-66-52 0043-1258-11-79 office@robbe.atSvezia Minicars Hobby A.B. Bergsbrunnagatan 18 S-75323 Uppsala 0046-186 06 571 0046-186 06 579 info@minicars.seSvizzera Spahr Elektronik Gotthelfstr. 12 CH-2543 Lengau 0041-32-652 23 68 0041-32 653 73 64 spahrelektronik@bluewin.chRep.slova Ivo Marhoun Horova 9 CZ-35201 AS 00420 351 120 162 ivm2000@seznam.czSpagna robbe-Service Metzloser Str. 36 D-36355 Grebenhain 0049-6644-87-777 0049-6644-87-779 hotline@robbe.comRep.ceca Ivo Marhoun Horova 9 CZ-35201 AS 00420 351 120 162 ivm2000@seznam.cz26
Istruzioni per l’uso<strong>Power</strong> <strong>Peak</strong> <strong>E1</strong>Art.N.<strong>8471</strong>Software LogView per la visualizzazionedei dati su PCGrazie all’ausilio del software Logview, danoi supportato e raccomandato, risulta possibilevisualizzare, analizzare ed all’occorrenzaesportare comodamente i dati daicaricabatterie robbe (<strong>Power</strong> <strong>Peak</strong> <strong>E1</strong> incluso)al PC di casa.Il programma è scaricabile gratuitamenteall’indirizzo web www.logview.info, sottoforma di software “donation”; qualora rimaniateparticolarmente soddisfatti potete dareun contributo economico per lo sviluppo, main ogni caso l’utilizzo del software rimanegratuito.Logview si presenta con una schermatadall’utilizzo intuitivo, in grado di offrireun’ampia gamma di applicazioni per i diversimodelli di caricabatterie in circolazione. Idati memorizzati all’interno dei caricatoriverranno visualizzati sul PC sempre nellamedesima modalità per semplificareall’utente l’utilizzo del software. I dati generatidal software rimarranno poi utilizzabilianche da altri utenti, anche quando il caricabatterienon dovesse essere disponibile.Le altre caratteristiche peculiari del programmasono:• Potente motore grafico con innumerevolifunzioni per la misurazione e la valutazionedei parametri.Possibilità di adattare le curve grafichealle proprie esigenze grazie alle numeroseopzioni di modifica messe a disposizione.• Funzioni di analisi dettagliate per individuaretutte le potenzialità della batteria• Le funzioni di comparazione, consentonodi visualizzare in una schermata differentiprocedure di ricarica e scarica.Esse risultano particolarmente utili peranalizzare la qualità e l’invecchiamentodi una batteria nel tempo, anche in confrontoad altre batterie.• La funzione di gestione permette diradunare tutti i grafici e le altre informazioniper associarli poi ad una batteria.• Numerosi funzioni per convertire edesportare i grafici e le tabelle su altreapplicazioni software.• Il programma di aiuto integrato fornisceall’utente in maniera semplice e rapidainformazioni sulle varie funzioni disponibili.Per qualsiasi altro dubbio sorto durante l’utilizzodel software, oppure per eventuali suggerimentiriguardanti il software Logview,rimane disponibile il Forum dedicato, attraversocui è possibile scambiare informazionio richieste con altri utenti o direttamentecon i programmatori del software.27
28. Smaltimento batterie ed apparecchi obsoletiNon gettare mai le batterie insieme ai rifiuti domestici. Per il rispetto dell’ambiente, portarebatterie difettose o esaurite presso gli appositi punti di raccolta, come i punti autorizzati dalcomune oppure tutti i rivenditori di batterie.Per evitare cortocircuiti, ricoprire ed incollare mediante nastro adesivo i contatti staccati.I costi per la riconsegna delle batterie ed il loro smaltimento sono già coperti nel prezzo diacquisto. Tutti i venditori sono obbligati a raccogliere batterie esaurite, indipendentementedal fatto che queste ultime siano state acquistate dai medesimi oppure no. Le batterie subisconopoi un trattamento di rigenerazione. In questo modo viene garantito che tutto il materialeritorna nel circolo di produzione. Aiutateci a proteggere e a conservare l’ambiente circostante!Le apparecchiature elettroniche non devono essere smaltite nei comunicestini per l’immondizia. Per ricordare tale avvertenza, il <strong>Power</strong> <strong>Peak</strong> <strong>E1</strong>è contrassegnato con il simbolo raffigurato a lato.Questo simbolo indica che le apparecchiature elettriche ed elettronichedevono essere smaltite separatamente dai rifiuti domestici al termine del loro utilizzo.Consegnate il caricabatterie agli appositi punti di raccolta comunali oppure ai centri di riciclo.Tale disposizione è in vigore per tutti i paesi dell’Unione Europea e per gli altri paesieuropei con centri di raccolta separati.robbe Modellsport GmbH & Co.KGMetzloser Straße 38D-36355 Grebenhain OT Metzlos-GehaagTelefon +49 (0) 6644 / 87-0www.robbe.deCon riserva di errori o modifiche tecnicheCopyright robbe-Modellsport 2009La copia e la ristampa, anche parziali, sono consentite solo previa autorizzazionescritta della robbe-Modellsport GmbH & Co.KG.robbe Form 40-55214 BBAJ28
Manual de Uso<strong>Power</strong> <strong>Peak</strong> <strong>E1</strong>Nº . <strong>8471</strong>
Manual de Uso<strong>Power</strong> <strong>Peak</strong> <strong>E1</strong>Nº<strong>8471</strong>Apreciado cliente:Nos complace que haya elegido el cargadorautomático, computerizado y potente<strong>Power</strong> <strong>Peak</strong> <strong>E1</strong> del programa robbe. Coneste cargador, posee con cargador potentecon manejo de baterías y ecualizadorpara la conexión a 12 V DC.A pesar del manejo sencillo de este cargador,el uso de un cargador automático deesta alta calidad, como el <strong>Power</strong> <strong>Peak</strong> <strong>E1</strong>,requiere algunos conocimientos de partedel usuario. Con este manual, le resultaráfácil familiarizarse con el aparato.Para poder alcanzar esta meta de formasegura, debería leer atentamente estemanual, especialmente el capítulo “informaciónsobre baterías” y los consejos deseguridad, antes de poner su nuevo cargadoren marcha.¡Le deseamos mucho éxito y mucha diversióncon su nuevo cargador!Exclusión de ResponsabilidadesEste cargador está concebido y autorizadoúnicamente para cargar las bateríasindicadas en las instrucciones. robbeModellsport no se hace responsable deninguna de uso ajeno.robbe Modellsport tampoco puede supervisarel mantenimiento del manual de uso ylas condiciones y métodos durante el uso, laaplicación y el mantenimiento del cargador.Por tanto no nos hacemos responsables depérdidas, daños o costes causados por aplicacióny uso erróneo o que tengan que veren alguna manera.La obligación de indemnización de perjuicios,siempre que la ley lo permita ysea cual fuere el fundamento jurídico quela sustente, quedará limitada al valor defactura de los productos robbe directamenteimplicados en el suceso dañoso.Esta norma no se aplicará cuando en virtudde precepto legal imperativo se deba responderilimitadamente por dolo o por negligenciagrave.2
Manual de Uso<strong>Power</strong> <strong>Peak</strong> <strong>E1</strong>Nº<strong>8471</strong>ÍndiceCapítuloPáginaExclusión de Responsabilidades 2Índice 31. Contenido 42. Descripción general 43. Elementos de mando 53.1 Función de los elementos de mando 5,64. Características Técnicas 65. Puesta en funcionamiento 75.1 Conexión de la batería 75.2 Conexión del ecualizador 86. Estructura del menú y navegación 8,96.1 Vista general estructura del menú 97. Salida de carga – descarga 1 “OUT 1 <strong>DA</strong>TEN” 98. Selección de la batería 118.1 Selección de la batería con BID-CHIP/KEY 139. Display ecualizador 1410. Datos cíclicos 1411. Salida de carga “OUT 2 <strong>DA</strong>TEN” 1512. Ajustes del usuario “NUTZER EINST.” 1513. Secuencia durante elproceso de carga-descarga en OUT 1 1614. Proceso de carga-descargacon BID-CHIP/KEY (solamente OUT1) 1714. Proceso de carga / descarga con BID-Chip/KEY 1815. Avisos de errores 1916. Consejos generales de seguridad 1917. Información acerca de baterías 2018. Descripción del proceso de carga CC-CV 2019. Consejos para baterías de plomo 2020. Consejos para baterías de litio (LiIO, LIPO, LIFE) 2121. Descripción de la desconexión“Delta-<strong>Peak</strong>” (NiCad/NiMH) 2222. Consejos para baterías níquel cadmio 2323. Consejos para baterías níquel cadmio hidruro 2324. Garantía 2425. Declaración de conformidad 2426. Accesorios recomendados 2527. Direcciones de servicios post-venta 2628. Desecho de baterías y de aparatos 273
Manual de Uso<strong>Power</strong> <strong>Peak</strong> <strong>E1</strong>Nº<strong>8471</strong>1. Contenido1x <strong>Power</strong> <strong>Peak</strong> <strong>E1</strong>1x Sensor de temperatura1x BID-KEYSe puede conectar la estación de carga conel PC mediante un interfaz USB. El conocidosoftware para el PC Logview para anotar,memorizar, comparar e imprimir, queademás resulta gratis, también puedemanejar los datos del <strong>Power</strong> <strong>Peak</strong> <strong>E1</strong>.Para descarga: www.logview.infoMediante una memoria interna, se grabanlos datos cuando no hay PC conectado. Deesta manera, se pueden consultar y memorizarestos datos posteriormente.Para más seguridad, se puede supervisar eindicar la temperatura de una batería durantela carga. También se puede programaruna desconexión con una temperaturadeterminada.Ecualizador integrado para 2 baterías deiones de litio, LiPo, LiFe y baterías especialesde 7 elementos cada una.2. Descripción GeneralEstación computerizada de carga-descargaaltamente potente, de forma atractiva parael manejo de todos los tipos de batería habituales.El diseño elegante y claro ha sidoposible gracias al nuevo sistema Cap-Touch.Sensores sin contactos para los conmutadoresy los emisores giratorios, permitenuna superficie lisa y cerrada, sin elementosde mandos que sobresalen.El gran display de 192 x 128 pixel está divididoen 12 líneas, lo cual facilita una buenalectura de las indicaciones.En el display se indican los parámetros másimportantes del proceso que se está realizandoen forma de cifras o de forma gráfica.Gracias a su tecnología de memoria Flash,resulta seguro para el futuro. Se puedeampliar el software o adaptar o implementarnuevas tecnologías de baterías.Una de las características principales del<strong>Power</strong> <strong>Peak</strong> <strong>E1</strong>, es el futurístico sistema deidentificación de baterías (BID). Cada vezexisten más tipos diferentes de baterías ycada tipo debatería necesitasu “propio” procesode carga.Puede pasarmuy fácilmente,que se entra unajuste equivocado, y la valiosa bateríaqueda dañada.El sistema BID de robbe ofrece una solucióngenial para este problema. Se asigna acada batería un pequeño y ligero chipBID/Key.Este chip memoriza todos los datos relevantespara la carga y descarga óptima de labatería. Para la carga o descarga, conectarel chip BID sujetado sobre la batería o elBID-Key incluido en el suministro del <strong>Power</strong><strong>Peak</strong> <strong>E1</strong>, para predefinir los parámetros del4
Manual de Uso<strong>Power</strong> <strong>Peak</strong> <strong>E1</strong>Nº<strong>8471</strong>cargador.Solamente hace falta pulsar la tecla ‘OUT1’ para iniciar el proceso de carga o descarga.Las ventajas principales del sistema BIDson: no más búsqueda de los parámetrosde ajuste en el menú, protección máximaal uso erróneo y memoria de datos relevantesde la batería en el BID-CHIP/KEY.en el BID-CHIP/Key, llevará sus datos debatería siempre consigo y las puede indicarfácilmente en el cargador. Esta funciónsustituye en gran parte la necesidad de unsoftware de PC, así como una técnicacomputerizada para tener una vista generaly actual sobreel estado de labatería.Memorizando los datos más importantes3. Elementos de mandoFunción de los elementos de mandoIntefaz USBAlimentaciónLC-DisplaySalida 2Conexión sensortemp.Conexión parael sensor delvoltajeTecla Out 2Sensor detemperaturaTecla Out 1Conexión BIDConexión a la batería OUT 15
Manual de Uso<strong>Power</strong> <strong>Peak</strong> <strong>E1</strong>Nº<strong>8471</strong>SELECT Rad(rueda de selección)Se ajustan todos los parámetrosdel menú, girando la rueda deselección.Tecla EnterCon la tecla ‘ENTER’ se confirma una selección,por ejemplo la activación del menúseleccionado o el traspaso de un valor ajustadoanteriormente.Tecla OUT 1 y OUT 2Inicia el proceso de carga en la salida correspondiente.Pulsando esta tecla variasveces, se puede activar la función de carga,descarga o cíclica para salida OUT 1.Pulsando la tecla OUT 2, se inicia la funciónde carga.Teclas con flechas hacía arriba /hacía abajoCon estas teclas se aumentan o sereducen los parámetros por un pasoen el modo de ajuste manual y seleccionael menú siguiente o anterior enla selección del menú. Mantener latecla pulsada significa un avance automáticode la navegación, que se aceleraal mantener la tecla pulsadadurante más tiempo.Zumbador Piezo y LEDsEl zumbador piezo confirma cada pulsaciónde tecla e indica de forma acústica el finalde carga o descarga, así como errores queaparecen. Ajustable en el menú del usuario.Los LEDs en las teclas indican de formaóptica la pulsación de las teclas.4. Características TécnicasTensión nominal: 10-15V DC (batería de coche) o alimentador de red 13,8Voltios, min. 30 A (no usar cargadores de baterías de Coche).Consumo max.:aprox. 37 amperiosSistema de desconexión:NiCad/NiMH:automática, sistema digital Delta-<strong>Peak</strong>Plomo y litio:automática, según la tensión, proceso CC-CVDimensiones:Salida 1 (OUT 1)Cantidad de elementos:170 x 175 x 85 mm.1…36 elementos NiCad / NiMH1…14 elementos LiIo (3,6 V), LiPo (3,7 V), LiFe (3,3 V)1…12 elementos (2…24V) batería de plomo1…14 elementos batería especial (cap. 13, página 17)Corriente de carga: auto, 0,1…20 A (max 315W)Corriente de descarga: auto, 0,1…40 A (max. 160W)Corriente de ecualización: aprox. 220 mACarga lenta:C/20 con NiCad y NiMHTensión de final de descarga: 0,5-1,1V / elemento con NiCad y NiMH2,3-3,6V / elemento con LiPo, LiIo, LiFe1,8 V / elemento con baterías de plomoFunciones:Cargar, descargar, descargar-cargar, balancear
Manual de Uso<strong>Power</strong> <strong>Peak</strong> <strong>E1</strong>Nº<strong>8471</strong>Corriente de carga dependiendo de la tensiónde la batería en OUT 1Debajo de 15,75V20A15,75V-17,5V18A17,5V-21V15A21V-26,25V12A26,25V-31,5V10A31,5V-35V9A35V-39,37V8A39,37V-42V 7,5A42V-45V7A45V-48,46V 6,5A48,46V-52,5V6A52,5V-57,27V 5,5A57,27V-63V5APor encima de 63V4A5. Puesta en funcionamientoConectar el cargador a una batería deplomo de 12 V. Es importante, que la polaridadsea correcta (rojo = positivo / negro =negativo) y que el contacto de las pinzasesté seguro.Aparece el menú de inicio con el número dela versión y el usuario preseleccionado.Rendimiento de descarga: dependiendo dela tensión de la batería en OUT 1Debajo de 2V10A2V-4V40A4V-5,33V30A5,33V-6,4V25A6,4V-8V20A8V-8,88V18A8,88V-10,66V15A10,66V-13,33V12A13,33V-16V10A16V-17,77V9A17,77V-20V8A20V-22,85V7A22,85V-26,66V6A26,66V-29,09V 5,5A29,09V-32V5A32V-35,55V 4,5A35,55V-40V4A40V-45,71V 3,5A45,71V-53,33V3APor encima de 53,33V2ASalida 2 (OUT2)Cantidad de elementos:1…8 elementos NiCad / NiMH1…3 elementos LiPo (3,7V)1…4 elementos LiFe (3,3V)Corriente de carga: 0,1…2 ARendimiento de carga: 28W, se regularizala corriente de forma correspondiente.Funciones: cargarCarga lenta: 50 mA (con NiCad, NiMH)Esperar el final del proceso de calibración(los LEDs se apagan), pulsar la tecla Enter,aparece la indicación de salida OUT 1.5.1 Conexión de la bateríaConectar la batería con la polaridad correcta(rojo = positivo / negro = negativo)con las tomas de conexión de la salidaOUT 1. Si usa un adaptador para el cablede carga, conectar siempre primero losenchufes banana del cable de carga en elcargador y entonces en la batería (evita uncorto circuito de la batería a través delenchufe banana).Al desenchufar, proceder al revés.¡Importante! No iniciar el proceso decarga antes de haber seleccionado losparámetros necesarios para la carga.Cuando la selección es errónea, la bateríapuede dañarse, explotar o quemarse.7
Manual de Uso<strong>Power</strong> <strong>Peak</strong> <strong>E1</strong>Nº<strong>8471</strong>5.2 Conexión del ecualizadorCuando quiere cargar una batería de litio,debe conectarse por razones de seguridadel cable del sensor de voltaje de la bateríaen el aparato. Enchufar el enchufe demanera que el cable negro (polo negativocomún) coincida con la señal de la flecha.Sin esta conexión, no se puede iniciar elproceso de carga: Esto se puede evitar,cuando se inicia el proceso de carga conun BID-Chip/Key.conectados en serie en el ecualizador,entonces se debe conectar el cable deconexión del sensor de voltaje de la bateríaa (1-7), donde está conectada la conducciónnegativa del cargador.14 13 12 11 10 987654321-OUT 1+Batería 2 Batería 1Akku 2Akku 16. Estructura del menú y navegaciónPulsando la tecla Enter o Select en el menúde inicio, llega al menú datos OUT1.Sensor VOLTAGE de SENSOR voltaje+++S1+S2+S3--Representación esquemática de la asignacióndel cable de conexión del sensor devoltaje.Hasta 7 elementos, usar siempre conexión(1-7). Solamente para packs de bateríascon más de 7 elementos, usar la segundaconexión (8-14).Importante:Nunca conectar más de un cable de sensorde voltaje por entrada de ecualizador.Nota:Cuando se conectan dos packs de bateríasSeleccionar el menúDesde allí, se llega a los menús:“Ecualizador”“Datos cíclicos”“Datos OUT2”“Ajuste usuario”Navegar con las teclas/rueda Select a la 1ªlínea nombre del menú (datos Out1).Activar con la tecla “ENTER” (el fondo estáen negro).Seleccionar un nuevo menú con lasteclas/rueda Select.Volver a desactivar con la tecla Enter.Ahora vuelve a disponer de las teclas/ruedaSelect para la navegación en el menú seleccionado.Seleccionar submenúAlgunos menús disponen de submenús,como indicación gráfica o curvas de tensión.Ir a la tercera línea, seleccionar el submenúcon la tecla Enter y volver a cerrarpulsando de nuevo Enter.8
Manual de Uso<strong>Power</strong> <strong>Peak</strong> <strong>E1</strong>Nº<strong>8471</strong>6.1 Vista general de la estructura del menú4,3VCELL 3 : 4.332V2,9VBALANCE: 99,4%Gran indicación gráfica en elsubmenúSelección de lamemoria de la batería1…9Enter / SelectEl menú ecualizador aparecesolamente, cuando hay una bateríade litio seleccionada y el cabledel sensor conectado.Indicación de curvas de tensión ytemperatura en el submenú.Ajuste de los parámetros decarga para la memoria de labatería 1…9Indicación de la curva de la tensiónen el submenú9Ajuste del parámetro para BID-Chip o Key. Solamente con BIDconectado.
Manual de Uso<strong>Power</strong> <strong>Peak</strong> <strong>E1</strong>Nº<strong>8471</strong>7. Salida de carga – descarga “Datos OUT 1”Menú de trabajo para la salida 1 del cargador. La navegación se realiza con las teclas/ruedaSelect y con la tecla Enter, tal como descrito anteriormente.Cambio de menúSelección memoria de batería 1…9Indicación del estado-> = cargar
Manual de Uso<strong>Power</strong> <strong>Peak</strong> <strong>E1</strong>Nº<strong>8471</strong>Diferenciade tensiónTensiónDiferencia de tiempoDiferenciade temperaturaEscala detensiónEscala detemperaturaDiferencia puntosde mediciónTemperatur-Skala.Tiempo8. Selección de la bateríaPara ajustar los parámetros de carga – descarga,seleccionar el submenú “selecciónde baterías”Tipo de batería:NICD – baterías NiCadNIMH – baterías de níquel metal hidruroLIPO – baterías de polímero de litio (3,7 V)PB – baterías de plomo (2,30 V)LIFE – baterías de litio ferro (A123 etc. 3,3 V)LION – iones de litio (3,6 voltios)En este menú se pueden seleccionar losparámetros más importantes de la batería,como por ejemplo tipo de batería, cantidadde elementos, capacidad, etc.Es necesario, ajustar los siguientes valores,para evitar que la batería quede dañada:Tipo de batería, cantidad de elementos,sensibilidad Delta-<strong>Peak</strong> (solamente conbaterías NiCad y NiMH), capacidad, corrientede carga y descarga, tensión de descargay la temperatura de desconexión(solamente para el proceso de carga).Puede encontrar consejos para el ajustebajo “información sobre baterías”.11Cuando está enchufado el BID-CHIP/KEY,entonces dispone también de un procesoespecial.SPECIAL – baterías de plomo o de litio, quese cargan según el proceso CC-CV.Tensión de carga desde 2…6 voltios de libreselección.Tensión de carga / sensibilidad <strong>Peak</strong>Según la selección del tipo de batería, apareceen esta línea la posibilidad de ajustepara la tensión de carga (baterías de litio yde plomo, así como baterías especiales) ola sensibilidad de desconexión <strong>Peak</strong> paralas baterías NiCad y NiMH.Tipo de bateríaNiCaD = Est. 7 mV/elemento (rango 3-25 mV)NiMH = Est. 5 mV/elemento (rango 3-25 mV)Plomo = valor fijo 2,3 V/elementoLiPO = valor fijo 4,2 V/elementoLiON = valor fijo 4,1 V/elementoLiFE = valor fijo 3,7 V / elemento
Manual de Uso<strong>Power</strong> <strong>Peak</strong> <strong>E1</strong>Nº<strong>8471</strong>Si quisiera modificar los valores variables,rogamos leer primero el capítulo “informaciónsobre baterías” acerca del efecto de lasmodificaciones de los valores.Si hay el BID CHIP/KEY enchufado, aparecetambién el tipo de batería especial, verdescripción programación del BID-Chip.Cantidad de elementosPreajuste de la cantidad de elementos acargar1…36 elementos NiCad 7 NiMH1…14 elementos LiIo, LiPo, LiFe1…12 elem. (2…24V) batería de plomo1…14 elem. bat. especial (solam. con BID)CapacidadCon este cargador, hay que tener encuenta, que las ajustes de capacidad no tienenninguna influencia en los ajustes de lacorriente de carga – descarga de las bateríasde litio. (tasa de carga 1 C).¡Hay que seleccionar la corriente decarga – descarga de forma manual!No obstante, es importante entrar la capacidadde la batería, de ella deriva la cargalenta para las baterías NiCad y NiMH.Corriente de carga lenta = NiCad/NiMH =C/20).Para las baterías de plomo y litio, es importantetambién la indicación de la capacidad,porque actúa sobre el punto de desconexiónpara la indicación del estado “Ende”.Para baterías de plomo y de litio que se cargancon el proceso CC-CV, se indica elaviso “ENDE”, cuando los elementos estánbalanceados y pasan por debajo de la corrientede carga C/10. Entonces la bateríaestá cargada un 98% y puede separarse delaparato.Si la batería permanece conectada al aparato,se sigue cargando. Cuando la corrientede carga pasa por debajo de aprox. 50 mA,entonces se desconecta la corriente decarga.Corriente de cargaCorriente de carga de libre ajuste entre 0,1a 20 amperios. Seleccionar el valor correspondientesegún las indicaciones del fabricantede la batería. Puede informarse tambiénen el capítulo “información sobre baterías”,acerca de la corriente máxima de subatería.Cuando se selecciona el ajuste automáticode la corriente “AUTO” (solamente bateríasNiCad/NiMH), entonces el cargador pierdela resistencia interior de la batería y regula lacorriente de forma automática al valoróptimo.Tener en cuenta la dependencia de la corrientede carga de la cantidad de elementos.Ver tabla con datos técnicos.Corriente de descargaCorriente de descarga de libre ajuste entre0,1…40 amperios. Seleccionar el valor correspondientesegún las indicaciones delfabricante de la batería. Puede informarsetambién en el capítulo “información sobrebaterías”, acerca de la corriente máxima desu batería.Cuando se selecciona el ajuste automáticode la corriente “AUTO” (solamente bateríasNiCad/NiMH), entonces el cargador pierdela resistencia interior de la batería y regula lacorriente de forma automática al valoróptimo.Tener en cuenta la dependencia de la corrientede descarga de la cantidad de elementos.Ver tabla con datos técnicos.Tensión de descargaEn esta línea, tiene la posibilidad de entrarla tensión de descarga.Dispone de los siguientes valores prefijados(est.) y rangos de ajuste.Tipo de bateríaNiCad = Est. 0,9 V/elemento (rango 0,5 –11 V/elemento)NiMH = Est. 1,0 V/elemento (rango 0,5 –12
Manual de Uso<strong>Power</strong> <strong>Peak</strong> <strong>E1</strong>Nº<strong>8471</strong>11 V/elemento)Plomo = valor fijo 1,8 V/elementoLiPo = Est. 3,0 V/elemento (rango 2,5-3,6V/elemento)LiOn = Est. 3,0 V/elemento (rango 2,5-3,6V/elemento)LiFe = Est. 2,7 V/elemento (rango 2,5-3,6V/elemento)Si quiere modificar los valores variables,rogamos lea primera el capítulo “informaciónsobre baterías” acerca de la influenciade la modificación.Temperatura de desconexión (solamentecargar)En este punto de menú, puede fijar unatemperatura de desconexión en el rango de10ºC hasta 80ºC.Tener en cuenta durante el ajuste, que elsuceso que entra primero “temperatura dedesconexión o tensión de desconexión”,causa la finalización del proceso de carga,lo cual puede tener como consecuencia,que la batería aún no está completamentecargada.Esta es una función de protección importantepara baterías sensibles a la temperatura,como por ejemplo NiMH y litio.Para controlar la temperatura, pero no fijarlacomo criterio de desconexión, puede ajustarla temperatura de desconexión a un valoralto.8.1 Ajuste de la batería con el BID-CHIP/KEYCuando se conecta un BID-Chip, apareceen el menú “Datos OUT 1”el símbolo BID. Se ampliala lista de ajustes de labatería. Si el BID-Chip noestá formateado (nuevo),aparece el aviso error en lamemoria del BID. Entonces entrar datos alBID.Menú batería especialCuando se conecta un BID CHIP/KEY, disponepara la selección del tipo de batería otrabatería con el nombre “especial”.Aquí puede ajustar las tensiones de final decarga y descarga en un rango muy amplio.De esta manera se pueden cargar casi todaslas baterías existentes y futuras del tipo litio uotros, que se cargan según el proceso decarga CC-CV, con el <strong>Power</strong> <strong>Peak</strong> <strong>E1</strong>.Rango de ajuste:Tensión de carga:Prefijado 2 V /elemento, rango 2-6V/elementoTensión de descarga:2 V/elemento, rango 0,8 V /elementoEl ecualizador interno, se adapta naturalmentede forma automática a los preajustesy se ocupa de un balanceado perfecto delas tensiones de los elementos.Este ajuste especial puede usarse tambiénpara invernar las baterías a un nivel de tensiónmediano de aprox. 3,9 V pro elemento.Ajuste de la tensión de descarga a 3,9 voltios/elementoy descargue su pack de litio aeste valor antes de guardarlo durante untiempo.Atención: ¡En este menú especial, es muyimportante realizar los ajustes con cuidado,porque ajustes erróneos pueden destruir labatería!¡Se amplia el menú por la entrada de datosy la posibilidad de memoria BID!Nota: Si después de ajustar los valores delBID-CHIP/KEY, lo retira sin confirmar losajustes con “ENDE-SPEICHERN BID”mediante la tecla “Enter”, quedan registradoslos valores “antiguos”, lo cual puededañar la batería durante un proceso decarga o descarga posterior.13
Manual de Uso<strong>Power</strong> <strong>Peak</strong> <strong>E1</strong>Nº<strong>8471</strong>9. Display ecualizadorCuando está conectado el cable del sensorde voltaje de una batería de litio, el cargadorinicia la “ecualización” de los elementos.10. Datos de los ciclosEn el área “datos de los ciclos”, se indican yse memorizan todos los datos relevantes deun proceso de carga – descarga.Para cada ciclo de carga ( C) y descarga(D), se indica de forma separada la capacidadcargada o descargada y la tensión promedia.De esta manera se puede controlar porejemplo el performance de la batería. Sepueden memorizar hasta 10 ciclos, siendolos datos bajo nº 1 los valores actuales.Es imprescindible conectar también elcable de carga de la batería (positivo +negativo) con el aparato, para alcanzarlos mismos potenciales para una mediciónprecisa de la tensión de los elementos.Se indican las tensiones individuales de loselementos de forma gráfica y numérica. Laletra “B” detrás de un número de elementoindica que el elemento esta siendo “ecualizado”.4,3V2,9VCELL 3 : 4.332VBALANCE: 99,4%a línea 3 y pulsar Enter.También se puedeindicar la tensiónindividual de loselementos deforma alternativaen un diagrama debarras.Para ello navegarSalir de la indicación también con la teclaEnter.En este submenú, se puede consultar la tensiónde todos los elementos individualescomo valor y también de forma gráfica.Seleccionar las barras individuales mediantelasa teclas/rueda Select, entonces se indicala tensión de los elementos de forma numérica.Indicación del ciclo actual en el display.Muestra el ejemplo del ciclo 1 de los dosciclos preseleccionados.El menú de ciclos es solamente un menú deindicación. Los parámetros de carga seajustan en el menú OUT 1 Data.El inicio del ciclo (cargar o descargar) asícomo una pausa eventual entre los ciclos,se fija en el menú “NUTZER EINST”.14
Manual de Uso<strong>Power</strong> <strong>Peak</strong> <strong>E1</strong>Nº<strong>8471</strong>11. Salida de carga “Out 2 Datos”A través de la salida del cargador 2 “Out 2Datos”, se pueden cargar los packs de bateríasdel receptor o de la emisora hasta max.2 amperios.12. Ajustes de usuario “Nutzer Einst.”Par que el cargador esté ajustable paracada usuario de forma individual, el menú“Nutzer Einst.” Dispone de muchas funciones.Entre otras cosas, se puede elegir entre 6idiomas.Memorizar / copiarSe ajusta la definición del parámetro de labatería mediante las tres posibilidades deajuste, tipo de batería, corriente de carga ycapacidad.¡En esta salida no es posible balancear unabatería de litio y descargar baterías!Se puede iniciar e interrumpir el proceso decarga pulsando la tecla “Out2”.También en estasalida dispone deun submenú conindicación de laforma de la curva.Para ello, poner elcursor en la segunda línea y pulsar Enter.Volver a pulsar Enter cierra la ventana.Cantidad de elementos:1…8 elementos NiCad / NiMH1…3 elementos LiPo (3,7 V)1…4 elementos LiFe (3,3 V)Corriente de carga: 0,1…2 AAtención:No conectar baterías con mayor cantidadde elementos en salida 2 que indicadoanteriormente.Esta función sirve para memorizar datos dela batería durante los procesos de carga ydescarga.Cuando las dos funciones están en “NO”, seemiten los datos en la salida USB, para laindicación y la memoria con el logview delPC software.El cargador dispone de una memoria internade datos, el cual registra los datos paratraspasarlos posteriormente al PC y memorizarlos.Para ello, memorizar debe estar en“JA” y copiar en “NEIN”.Para consultar posteriormente la memoriainterna, memorizar debe estar en “NEIN” ycopiar en “JA”. Solamente entonces se traspasanlos datos a la salida USB.Nota:Los datos quedan grabados hasta que seinicia un proceso de carga – descarga con15
Manual de Uso<strong>Power</strong> <strong>Peak</strong> <strong>E1</strong>Nº<strong>8471</strong>otra batería y se vuelve grabar en la memoria.Ciclo de inicio: con la función “STARTZYKLUS” , se determina el primer ciclo (cargaro descargar).Pausa ciclosSi quiere hacer una pausa entre los ciclos,seleccionar “EIN”. Si no fuera el caso, cambiara “AUS”.Tiempos de pausasDespués de finalizar la fase de un ciclo, hay2 criterios para la durada de la pausa:1. La temperatura de la batería es mayorde 35ºC, la pausa finaliza cuando la temperaturaha caído por debajo de 35ºC.2. Se limita la pausa a máximo 1 hora,entonces se inicia la siguiente fase delciclo, independiente si la batería haalcanzado los 35ºC o no.Nombre del UsuarioPara entrar un nombre de usuario, saltarcon el cursor al campo “Nutzername”.Pulsando la tecla “Enter”, aparece el primercampo de caracteres en negrita. Ahorapuede seleccionar mediante lasteclas/rueda Select un signo especial, como+, cifras, letras en minúscula o mayúscula.Cuando el nombre está entrado, pero aúnhay signos libres, pulsar la tecla “Enter” tantasveces, hasta que desaparece el campoen negrita. Entonces se puede mover el cursorlibremente dentro del menú.Las demás funciones están claras.13. Secuencia del proceso de carga –descarga en OUT 1Antes de iniciar un proceso de carga o dedescarga, es necesario realizar los siguientesajustes.• Conectar la fuente de corriente con lapolaridad correcta• Conectar la batería con la polaridadcorrecta• Seleccionar el tipo de batería• Seleccionar la cantidad de elementos• Seleccionar la capacidad• Seleccionar la corriente de carga y / ode descarga.Después de haber seleccionado losparámetros, se puede iniciar el proceso.Para cargar la batería conectada = pulsartecla OUT1 una vez.Para descargar = pulsar tecla OUT1 dosveces.Para cargar-descargar = pulsar tecla OUT1tres veces.Cuando desea iniciar un proceso cíclico,ajustar además la cantidad deseada deciclos (1-10) mediante las “teclas/ruedaSelect”.Para interrumpir el proceso, volver a pulsarla tecla “OUT1”.Cuando está conectado el cable del sensorde voltaje en una batería de litio, el procesode ecualización comienza automáticamente.Si es necesario modificar la corriente decarga – descarga durante del proceso,hacerlo de forma interactiva en la superficiedel menú.Este ajuste modificado de la corriente,vale solamente para el proceso decarga – descarga en curso. Al iniciar denuevo un proceso de carga – descarga, seutilizan otra vez los valores memorizadosen “ajustes de la batería” o en el BIDChip/Key.16
Manual de Uso<strong>Power</strong> <strong>Peak</strong> <strong>E1</strong>Nº<strong>8471</strong>14. proceso de carga / descarga conBID CHIP/KEY (solamente en OUT1)Conectar el BID-Chip directamente con elcargador a través del cable adaptador o elBID-Key.esta forma se tiene una vista general buenaacerca del performance de la batería.¿Qué es lo que se guarda en el BID-CHIP/KEY?Se actualizan los últimos valores de capacidadentrados y descargados. El numeradorde ciclos aumenta por 1 y memoriza ademásla capacidad máxima, en el caso que elvalor máximo anterior haya sido superado.Además existen los parámetros de carga ydescarga, los cuales se seleccionan en elmenú ajustes de la batería.Son:A continuación seindica el símboloBID en el display.Cuando los parámetrosde la bateríaestán preajustadosen el BID-Chip, sepuede iniciar el proceso de carga – descargapulsando la tecla ‘OUT1’.El proceso restante es idéntico a un inicionormal.Si es necesario modificar la corriente decarga – descarga durante del proceso,hacerlo de forma interactiva en la superficiedel menú.Este ajuste modificado de la corriente, valesolamente para el proceso de carga – descargaen curso.Al iniciar de nuevo un proceso de carga –descarga, se utilizan otra vez los valoresmemorizados en “ajustes de la batería” oen el BID Chip/Key.Al final de un proceso de carga o descarga,se memorizan los datos más importantesde este proceso en el BID Chip / Key. DeTipo de bateríaCantidad de elementosCorriente de cargaCorriente de descargaTensión de final de cargaTensión de descargaSensibilidad Delta <strong>Peak</strong>Temperatura de desconexiónCapacidadFecha de la primera puesta en marcha¡Nota para el final de carga!Cuando se cargan baterías de Lixx y el displayindica “Ende”, significa que se ha cargadoaprox. Un 98% de la energía. La bateríapuede separarse del cargador.Si la batería permanece conectada al cargador,entonces el “ecualizador” continúatrabajando y continúa ecualizando los elementos.Para equilibrar el consumo de corrientedel ecualizador, continúa el flujo deuna corriente de carga reducida.El cargador desconecta el proceso definitivamenteal alcanzar 40 mA de corriente restantede carga.17
Manual de Uso<strong>Power</strong> <strong>Peak</strong> <strong>E1</strong>Nº<strong>8471</strong>15. AVISOS DE ERRORESPara asegurar un transcurso seguro delproceso de carga y descarga, el <strong>Power</strong><strong>Peak</strong> <strong>E1</strong> está equipado con dispositivos deseguridad. Enseguida que se produce unerror, aparece un aviso correspondiente enel display y suena un tono de aviso.Después de eliminar las causas, se puedepulsar cualquier tecla para confirmar lossiguientes avisos de errores.Se ha alcanzado la temperatura de desconexiónseleccionada. El proceso de cargase ha desconectado.Se ha conectado o desconectado un BID-La tensión de entrada es demasiado baja(debajo de 10 voltios). Verificar la batería decoche o el alimentador de red.La batería está conectada con la polaridadinversa. Verificar la conexión.Chip-Key del cargador durante un procesoen marcha. Verificar la conexión con el Chipy volver a iniciar.Si después de conectar el BID, no se iniciael proceso de carga – descarga, los datosregistrados en el Chip están posiblementedestruidos.Aparece también, cuando se enchufa unchip nuevo sin formatear.Entrar los datos del BID en el menú ajustesde batería.Faltan datos en el BID Chip/Key o estánLa tensión de la batería / salida es demasiadoalta. Verificar la cantidad de elementos.El cargador verifica además la cantidad deelementos a través de la conexión del ecualizadory compara el ajuste con los valoresajustados en el menú datos de batería. Siestos valores no coinciden, aparece el avisode error.memorizados erróneamente.En el BID-Chip hay menos o diferentesparámetros memorizados de los que estándisponibles en el menú ajustes de batería.Ajustar los datos que faltan.Verificar los ajustes del BID Chip/Key.18
Manual de Uso<strong>Power</strong> <strong>Peak</strong> <strong>E1</strong>Nº<strong>8471</strong>16. Consejos Generales de Seguridad• El uso erróneo de baterías y cargadorespuede causar que las baterías exploteny que se incendien.• El <strong>Power</strong> <strong>Peak</strong> <strong>E1</strong> es solamente adecuadopara cargar o descargar bateríasrecargables NiCad / NiMH, de plomo yde litio. No cargar baterías secas, puedenexplotar.• El cargador está preparado para el usocon 12 V DC y a través del alimentadorde red con 230 V AC. No usarlo nuncacon otra tensión.• Proteger el cargador de polvo, suciedade humedad.• No exponer el aparato a frío o calorexcesivo y tampoco exponerlo directamenteal sol.• Evitar cargas por empujes y presión yno exponer el cargador a fuertes vibraciones.• Nunca poner el cargador y las bateríasconectadas sobre superficies inflamables.• Nunca usarlo cerca de material inflamabley gases.• ¡Nunca abrir el aparato bajo tensión!• No dejar el aparato sin vigilanciadurante el uso. El cargador se puedecalentar mucho durante el uso normal.• Al posicionarlo, vigilar que las aperturasde refrigeración para que pueda circularel aire, estén libres.• Si no se utiliza el cargador durante untiempo, desenchufarlo de la fuente decorriente y quitar eventualmente lasbaterías conectadas.• No cargar ninguna batería dos vecesseguidas.• No cargar baterías que estén muy calientes.Dejar enfriar las baterías a temperaturaambiente.• Solamente se pueden cargar elementosde la misma capacidad y del mismo fabricado.• No conectar dos baterías en paralelo enuna salida al cargar, solamente conectarun pack de baterías.• Vigilar la correcta polaridad de la bateríay evitar corto circuitos.• Tener en cuenta las indicaciones delfabricante de la batería.• Supervisar constantemente de formaprecisa los ajustes del <strong>Power</strong> <strong>Peak</strong> <strong>E1</strong>Ajustes no adecuados puedendestruir la batería.• Vigilar que la carcasa y los cables noestén dañados.• Atención al manejar packs de bateríascon muchos elementos. Vigilar siempreque el aislamiento sea suficiente. De locontrario podría causarse un golpe decorriente.• Evitar de separar la batería del cargadordurante el proceso de carga o sin pulsarprimero la tecla stop. A causa de la altatensión de salida del cargador, puedenproducirse chispas masivas.19
Manual de Uso<strong>Power</strong> <strong>Peak</strong> <strong>E1</strong>Nº<strong>8471</strong>17. INFORMACIÓN SOBRE BATERÍAS18. El proceso de carga CC-CVLas baterías de plomo y de litio se cargancon el proceso de tensión constante (CC-CV).Por este motivo, se selecciona en estemenú la tensión de final de carga por elementosegún el tipo de batería.Durante la primera fase de carga, la tensiónde la batería se incrementa lentamentehasta alcanzar el valor máximo de 4,2 V /elemento (batería LiPO).Fase de corriente constante(CC)Fase de tensiónconstante (CV)Punto de desconexiónEn esta fase, el cargador asegura que la corrientede carga ajustada quede constante.Con una corriente de carga de 1C y unabatería descargada, esta fase dura unos 50-60 minutos. En este tiempo se carga un 80-90% de la capacidad de la batería.Al alcanzar la tensión de final de carga, desconectala corriente de carga constante y semantiene la tensión constante.Por este motivo se reduce la corriente decarga en la segunda fase, ya que la diferenciade la tensión entre el valor ajustado en elcargador y en la batería, es cada vez máspequeña.Para cargar la capacidad restante, se necesitan35 – 40 minutos más.Al alcanzar una corriente de carga mínimaprefijada como límite de corriente inferior, elcargador desconecta el proceso de carga.20Con una tasa de carga de 1C, el procesototal de carga dura 90 minutos.19. BATERÍAS DE PLOMO (PB)Para manejar baterías de plomo, es imprescindibletener en cuenta unas medidas deprecaución, para evitar daños personales ymateriales. Al usar estas baterías, Vd. tieneesta responsabilidad.• Las baterías de gel de plomo, que estánmuy difundidos en al área del modelismo,casi siempre están estancos al gasy por tanto menos peligrosas.• En cambio, las baterías de coche conacido sulfúrico liquido como electrolitoson muy peligrosas, a causa del acidosulfúrico corrosivo y de la rápida formaciónde gas, en el caso de una sobrecarga.• Nunca poner las baterías de plomo encontacto con el fuego, pueden explotar.• Nunca abrir las baterías de plomo confuerza, existe el peligro de causticación.• Nunca provocar un corto circuito conbaterías de plomo, pueden incendiarse yexplotar.• Nunca poner electrolito derramado encontacto con la piel o los ojos. Si ocurrierapor accidente, lavar inmediatamentecon abundante agua clara y consultarun médico. No poner elementos o bateríasen la boca, puede intoxicarse.• Una batería de plomo cargada no es ningúnjuguete. Guardar las baterías fueradel alcance de los niños.• Respetar las instrucciones del fabricantede la batería para cargar y descargar.• Las baterías de plomo pueden liberargas durante el proceso de carga. Poreste motivo, es importante procurar suficienteventilación. Cuando hay unasobrecarga, se produce “gas detonante”una mezcla de hidrógeno y oxígeno.Peligro de explosión.
Manual de Uso<strong>Power</strong> <strong>Peak</strong> <strong>E1</strong>Nº<strong>8471</strong>20. BATERÍAS DE LITIO (LiPo, LiIo, LiFe)Existen diferentes tipos de baterías de litio:1. Baterías de iones de litio con electrolitolíquido y una tensión nominal de 3,6voltios, la primera generación de bateríasde litio, que casi no se conoce en elmodelismo.(Selección del tipo de batería LION)2. Baterías de iones de litio (LiIo) conelectrolito líquido y una tensión nominalde 3,6 voltios, la segunda generaciónde baterías de litio, con copa metálica.(Selección del tipo de batería LIPO).3. Baterías de polímero de iones de litio(LiPo) con electrolito en forma de gel yuna tensión nominal de 3,7 voltios, lageneración actual de baterías de litio,denominadas también LiPo. A causadel electrolito en forma de gel, se producepoca presión dentro del elementodurante la carga, por lo tanto es suficienteun recubrimiento de film. Estabatería se ha difundido rápidamente enel modelismo por su peso reducido y sualta densidad de energía.(Selección del tipo de batería LIPO).4. Baterías de litio y hierro (LiFe) conuna tensión nominal de 3,3 voltios, lageneración más nueva de baterías delitio, denominadas también A123. Estabatería se difundirá rápidamente en elmodelismo a causa de sus altos impulsosde descarga y de la alta densidad deenergía.(Selección del tipo de batería LIFE)21Recomendamos las siguientes tasas decarga para baterías de litio:Habitualmente se cargan las baterías delitio con 1C, algunos tipos de baterías tambiénpueden cargarse con 1,5…2C, y últimamentecon 5C. Tener en cuenta la indicaciónde corriente máxima del fabricantede la batería.La tensión de final de descarga para lasbaterías LiPo y LiIo debería estar alrededorde 3,00 voltios.En el caso de baterías LiFe, la tensión definal de descarga debería estar alrededor de2,7 voltios.DIFERENTES CAPACI<strong>DA</strong>DESAl conectar varios elementos en un pack debaterías y al descargarlos con corriente másalta, los elementos se calientan de formadiferente, ya que al elemento interior lecuesta liberar calor.Por esto motivo se modifica la resistenciainterior y la capacidad de liberación esmenor. Este elemento se descarga másrápidamente y existe el peligro que quededescargado por debajo de la tensión de finalde descarga de 2,5 voltios.Cuando las temperaturas exteriores sonmuy bajas, existen diferencias muy fuertesen la capacidad. Al volar un helicópteroeléctrico con baterías de LiPo, el elementodelantero se refrigera mucho a causa delviento durante el vuelo, mientras que loselementos interiores se mantienen considerablementemás calientes.El elemento frío tiene por tanto poca capacidady existe el peligro que este elementose descarga por debajo de la tensión definal de descarga.Por este motivo se recomienda descargarlos elementos LiPo solamente hasta aprox.3 a 3,3 voltios de tensión de final de descarga,para evitar que el elemento se dañepermanentemente. Además es imprescindiblevigilar que los elementos se carguen almismo nivel que durante la próxima carga.Conectar el cable del sensor de voltaje.Cargar elementos individuales, conectados
Manual de Uso<strong>Power</strong> <strong>Peak</strong> <strong>E1</strong>Nº<strong>8471</strong>en paralelo no es problemático. En estecaso la corriente total se distribuye a losdiferentes elementos según la tensión.21 Explicación para la desconexión“Delta <strong>Peak</strong>”No nos responsabilizamos de manejosinadecuados de los elementos. Tenga encuenta también los consejos de seguridad.A causa de las tolerancias normales defabricación, pero sobre todo a causa de lasdiferencias de temperatura durante la descarga– los elementos exteriores se refrigeransiempre mejor que los interiores – loselementos de polímero de litio conectadosen serie, se desvían. Después de variosciclos, los elementos tienen diferentes situacionesde tensión.Después de diferentes ciclos, los elementostienen obviamente diferentessituaciones de tensión.Este gráfico muestra una curva de cargatípica de una batería NiCad/NiMH.Al final del proceso de carga, se modifica laresistencia interior de la batería a causa delcalentamiento de los elementos.Por esto, la tensión de los elementos bajaligeramente.Cuando el cargador desconecta exactamenteen el punto máximo de la curva decarga, entonces de habla de “Zero-Delta-<strong>Peak</strong>”.Para compensar pérdidas de carga al refrigeraro para incrementar el rendimiento dela batería para la competición, se sobrecargaen la práctica la batería ligeramente,según el tipo de batería.El valor 5 mV / elemento como sensibilidadDelta <strong>Peak</strong> o valor Delta-<strong>Peak</strong> indica elvalor de sobrecarga, es decir, se realiza ladesconexión más tarde.Con 15 mV Delta <strong>Peak</strong>, se carga la bateríaextremadamente. Por tanto, se calientamucho. De esta carga resulta una energíamuy alta de la batería, lo cual reduce lavida de la batería masivamente.2222. Baterías Níquel – Cadmio (NiCad)
Manual de Uso<strong>Power</strong> <strong>Peak</strong> <strong>E1</strong>Nº<strong>8471</strong>Recomendamos las siguientes tasas decarga para las baterías NiCad:Baterías de energía alta, 1-2 C, tener encuenta también las instrucciones del fabricantede las baterías.Baterías de corriente de cresta, 2-3 C, deforma extrema hasta 5C. En el caso de tasasde carga altas, se debería vigilar la temperaturay si hubiera un calentamiento fuerte dela batería, posiblemente reducir la tasa decarga.recomendaciones del fabricante de la batería.23. BATERÍAS NIQUEL METAL HIDRU-RO (NiMH)Para baterías NiMH recomendamos lassiguientes tasas de carga:Baterías de energía alta 0,5…1 C, respetartambién las instrucciones del fabricante dela batería.Respetar la indicación eventual sobre la corrientede carga máxima del fabricante de labatería. Verificar también si la conexión o loscables de carga son adecuados para la corrientede carga seleccionada.La tensión de final de carga debería estarentre 0,85 y 1,00 voltios / elemento.La sensibilidad Delta <strong>Peak</strong> debería estar enel rango de 5-8 mV / elemento.Valores de referencia:Baterías NiCad:Aplicación estándar para cuidar la batería= 6-8 mV / elementoAplicación con exigencia mayor= 9-10 mV / elementoExigencias de competición= 12-15 mV / elementoEl cargador calcula automáticamente la tensiónde diferencia de desconexión correctadel pack completo de baterías, multiplicandoel valor individual del elemento con la cantidadde elementos.Cuando se alcanza el valor prefijado duranteel proceso de carga, se interrumpe el procesode carga y aparece la indicación de desconexióndescrita anteriormente.Estas indicaciones son valores generales dereferencia y dependen de cada tipo de batería.Es muy importante, tener en cuenta las23Baterías de corriente de cresta, normalmente1C, algunos tipos de batería se puedencargar con 1,5…2 C. En el caso detasas de carga altas, se debería vigilar latemperatura y si hubiera un calentamientofuerte de la batería, posiblemente reducir latasa de carga.Respetar las indicaciones del fabricante dela batería en cuanto a la corriente de cargamáxima.La tensión de final e carga debería estaralrededor de 1,00 voltios / elemento.La sensibilidad Delta <strong>Peak</strong> debería estaren el rango 3-5 mV / elemento.Valores de referencia:Baterías NiMH:Aplicación estándar para cuidar la batería= 5 mV / elementoAplicación con exigencia mayor= 6-7 mV / elementoExigencias de competición= 8-9 mV / elementoEn el caso de una sensibilidad de desconexiónreducida, puede ocurrir que bateríasde capacidad alta y también bateríasviejas, desconecten prematuramente.Aumente un poco el valor de
Manual de Uso<strong>Power</strong> <strong>Peak</strong> <strong>E1</strong>Nº<strong>8471</strong>desconexión e inicie de nuevo el procesode carga24. GarantíaNuestros artículos ofrecen naturalmente lagarantía legal de 24 meses. Si quiere reclamarsu derecho de garantía, diríjase siemprea su comercio, el cual es responsablepara su tramitación.robbe Modellsport GmbH & Co. KG declarapor la presente, que este producto cumplecon los requisitos básicos y demás preceptosrelevantes de las directivas CE correspondientes.La declaración de conformidadoriginal, se puede consultar vía Internet enla dirección www.robbe.com, haciendo clicen el botón-logo “conform” en la descripcióndel producto correspondiente.Durante este tiempo, arreglamos de formagratuita defectos de funcionamiento asícomo defectos de fabricación o defectosmateriales. Otras exigencias, como porejemplo daños por falla, quedan excluidas.El transporte a nosotros debe ser a portespagados, el transporte de vuelta tambiénserá a portes pagados. Envíos a portesdebidos no se aceptarán.No nos podemos responsabilizar de dañosocurridos durante el transporte o de la pérdidadel paquete durante el transporte.Recomendamos hacer un seguro. Enviarlos aparatos al servicio de atención al clientede su país.Para poder tramitar sus exigencias degarantía, deben cumplirse las siguientescondiciones:• Debe incluir en su envió el ticket de caja.• Los aparatos han sido utilizados siguiendoel manual de instrucciones.• Se utilizaron solamente fuentes de corrienterecomendados y accesorios originalesde robbe.• No hay daños por humedad, ni intervencionesajenas, ni sobre tensiones, nisobrecargas y daños mecánicos.• Incluir consejos útiles para encontrar elerror o el defecto.25. Declaración de Conformidad24
Manual de Uso<strong>Power</strong> <strong>Peak</strong> <strong>E1</strong>Nº<strong>8471</strong>26. ACCESORIOS RECOMEN<strong>DA</strong>DOSCable de carga para labatería de la emisoraNº F 1415Chip BID sin cable, paraequipar otras bateríasNº 8472Cable de carga para labatería del receptorNº F1416Chip BID con cable de 300mm. para equipar otrasbateríasNº 8473Cable BID, 300 mm.Nº 8474Cable BID, 500 mm.Nº 8475BID-KEYNº 8888Cable del sensor de voltaje30 cm. Nº 4029Adaptador balanceador2x3S EHR para bateríasrobbe, Graupner y KokamNº 4023Adaptador balanceador3x2S EHR para bateríasrobbe, Graupner y KokamNº 4031Adaptador balanceador2x3S XH-EHR de Align,Lama o G47 en bateríasrobbe, Graupner o KokamNº 4023 XHAdaptador balanceador3x2S XH-EHR de Align,Lama o G47 en bateríasrobbe, Graupner o KokamNº 4023 XH25Adaptador EQ robbe-Polyquest Nº 8213
Manual de Uso<strong>Power</strong> <strong>Peak</strong> <strong>E1</strong>Nº<strong>8471</strong>Adaptador EQrobbe-JST/XH derobbe en baterías Align,Lama o G47Nº 8214Adaptador EQ robbe-Thunder / FlightpowerNº 8215Alimentador de red SPS40 A27. Direcciones de Servicios Post VentaPaís Empresa Calle Ciudad Teléfono Fax E-MailAND-00130 Les escaldes-Andorra Sorteney Santa Anna, 13Princip. D'Andorre 00376-862 865 00376-825 476 sorteny@sorteny.comDinamarca Nordic Hobby A/S Bogensevej 13 DK-8940 Randers SV 0045-86-43 61 00 0045-86-43 77 44 hobby@nordichobby.comAlemania robbe-Service Metzloser Str. 36 D-36355 Grebenhain 0049-6644-87-777 0049-6644-87-779 hotline@robbe.comInglaterra robbe-Schlüter UK L<strong>E1</strong>0-UB GB-L<strong>E1</strong>0 3DS Leicestershire 0044-1455-637151 0044-1455-635151 keith@robbeuk.co.ukFrancia S.A.V Messe 6, Rue Usson du Poitou, BP 12 F-57730 Folschviller 0033 3 87 94 62 58 0033-3-87 94 62 58 sav-robbe@wanadoo.frGrecia TAG Models Hellas 18,Vriullon Str. GR-14341 New Philadelfia/Athen 0030-2-102584380 0030-2-102533533 info@tagmodels.grI-36010 CavazzaleItalia MC-Electronic Via del Progresso, 25di Monticello C.Otto (Vi) 0039 0444 945992 0039 0444 945991 mcelec@libero.itPaíses Bajos/Bélgica Jan van Mouwerik Slot de Houvelaan 30 NL-3155 Maasland 0031-10-59 13 594 0031-10-59 13 594 van_Mouwerik@versatel.nlNoruega Norwegian Modellers Box 2140 N-3103 Toensberg 0047-333 78 000 0047-333 78 001 per@modellers.comAustria robbe-Service Puchgasse 1 A-1220 Wien 0043-1259-66-52 0043-1258-11-79 office@robbe.atSuecia Minicars Hobby A.B. Bergsbrunnagatan 18 S-75323 Uppsala 0046-186 06 571 0046-186 06 579 info@minicars.seSuiza Spahr Elektronik Gotthelfstr. 12 CH-2543 Lengau 0041-32-652 23 68 0041-32 653 73 64 spahrelektronik@bluewin.chRep. Slovakia Ivo Marhoun Horova 9 CZ-35201 AS 00420 351 120 162 ivm2000@seznam.czEspaña robbe-Service Metzloser Str. 36 D-36355 Grebenhain 0049-6644-87-777 0049-6644-87-779 hotline@robbe.comRep. Checa Ivo Marhoun Horova 9 CZ-35201 AS 00420 351 120 162 ivm2000@seznam.cz26
Manual de Uso<strong>Power</strong> <strong>Peak</strong> <strong>E1</strong>Nº<strong>8471</strong>LogView –Indicación de datos de serie en el PCCon la ayuda del LogView, recomendado yapoyado por nosotros, es posible, visualizar,analizar y eventualmente exportar de lasmaneras más diferentes los datos de seriede muchos cargadores de robbe (también el<strong>Power</strong> <strong>Peak</strong> <strong>E1</strong>).Se puede descargar gratuitamente el softwareen www.logview.info Si le gusta el software,existe la posibilidad de hacer unadonación para los que lo desarrollan. Por lodemás, el software puede usarse sin costealguno.Bajo una superficie de uso intuitivo,Logview ofrece la posibilidad de cubrir lasvaloraciones de datos de un espectroamplio de diferentes aparatos. Los datosrecibidos por los aparatos, se indican siemprede la misma manera, lo cual facilita alusuario generalmente el uso con su equipo.Los ficheros creados con LogView puedenusarse también por otros usuarios, inclusosin tener el aparato físicamente delante.Otras características del software son:• Gráficos potentes con numerosas funcionesde análisis y de medición.• Puede adaptar la vista de las curvas asus necesidades mediante numerosasopciones.• Funciones de análisis ayudan a verificarmejor las baterías.• Las funciones para comparar las curvas,hacen posible representar diferentesprocesos de carga y de descarga enun gráfico. De esta manera se puedevalorar especialmente la cualidad y elenvejecimiento de una batería, tambiéncomparado con otras baterías.• Mediante la administración de objetos,existe la posibilidad de guardar y manejarregistros e información creados yasignados a una batería.• Numerosas funciones de export paragráficos y tablas hacen posible el uso delos datos en otras aplicaciones.• El sistema de ayuda integrado, da rápidamentey de forma no complicadainformación acerca de las funciones delprograma.Si apareciera alguna pregunta especial alusar este software o si tuviera propuestaspara continuar mejorando LogView, puedeponerse directamente en contacto con laspersonas que desarrollan este programa através del LogView-Forum. También puedeintercambiar experiencias e ideas con otrosusuarios.27
28. DESECHAR LAS BATERÍAS Y EL CARGADORNunca tirar las baterías a la basura doméstica. Para proteger el medio ambiento, depositarlas baterías defectuosas o gastadas, siempre descargadas en un contenedor para su reciclaje,que encontrará en la mayoría de establecimientos. Para evitar corto circuitos, convienetapar contactos pelados con cinta adhesiva. Los costes para la recogida y el desechode las baterías están incluidos en los precios de compra. Puede depositar las baterías enel contenedor de cualquier establecimiento, no es necesario que haya comprado las bateríasallí. Las baterías se reciclan. De esta manera, el material regresa al circuito de la producción.¡Ayude a proteger el medio ambiente! No tirar aparatos electrónicos al cubo debasura habitual. Por este motivo, el Compact 6S EQ Duo <strong>Power</strong> lleva este símbolo. Estesímbolo significa, que es necesario desechar aparatos eléctricos y electrónicos al final desu vida útil, separados de la basura doméstica. Lleve su cargador a un contenedor específicopara ello o a un centro de reciclaje. Esto es válido para países de laComunidad Europea y para otros países europeos con otro sistema derecogida.robbe Modellsport GmbH & Co.KGMetzloser Straße 38D-36355 Grebenhain OT Metzlos-GehaagTeléfono +49 (0) 6644 / 87-0www.robbe.deLa información facilitada no responsabiliza al fabricante respecto a modificacionestécnicas y/o errores.Copyright robbe-Modellsport 2009Queda prohibida la reproducción total o parcial de este documento, exceptocon autorización por escrito de robbe Modellsport GmBH & Co. KG.robbe Form 40-55212 BBAJ28
Návod k obsluze<strong>Power</strong> <strong>Peak</strong> <strong>E1</strong>Obj. č. <strong>8471</strong>
Návod k obsluze<strong>Power</strong> <strong>Peak</strong> <strong>E1</strong>Obj. č.<strong>8471</strong>Vážený zákazníku,děkujeme Vám, že jste se rozhodl provysoce výkonný automatický počítačovýnabíječ <strong>Power</strong> <strong>Peak</strong> <strong>E1</strong> z naší produkce.Stal jste se tak majiteli kompaktního nabíječes balancerem, který lze připojit na12V DC zdroj napětí.Přestože se jedná o nabíječ s jednoduchouobsluhou, vyžaduje ovládání takovénabíječe jakým je <strong>Power</strong> <strong>Peak</strong> <strong>E1</strong> určitéznalosti. Díky tomuto návodu byste se mělis Vaším novým nabíječem poměrně rychleseznámit.Proto si, prosím, přečtěte návod k obsluzea zvláštní pozornost pak věnujte i bezpečnostnímpokynům a kapitole “Malánauka o akumulátorech”, než nabíječpoprvé uvedete do provozu.Přejeme hodně úspěchů a radosti s Vašímnovým nabíječem.Vyloučení záruky:Tento nabíječ je určen výhradně pronabíjení a vybíjení akumulátorů uvedenýchv návodu k obsluze.<strong>Robbe</strong> Modelsport nepřebírá v žádnémpřípadě zodpovědnost při jiném použití.Dodržení pokynů v návodu k obsluze jakož ipodmínek a metod během provozu, používánía údržbě nabíječe nemůže být firmourobbe kontrolována.Potud tedy firma <strong>Robbe</strong> nepřebírá v žádnémpřípadě odpovědnost za ztráty, škody anáklady, které souvisí jakýmkoli způsobem schybnou obsluhou a provozem.Pokud to zákon připouští, omezuje se závazekfirmy robbe Modellsport k plnění náhradyškody, stejně tak ze zákona, na hodnotufaktury za množství zboží firmy robbeModellsport, které se bezprostředně podílelona poškozující události.Toto neplatí, pokud firma robbeModellsport podle závazných zákonnýchpředpisů ručí neomezeně, z důvoduzáměru nebo hrubé nedbalosti.2
Návod k obsluze<strong>Power</strong> <strong>Peak</strong> <strong>E1</strong>Obj. č.<strong>8471</strong>OBSAHKapitolaStranaVyloučení záruky . . . . . . . . . . . . . . . . . . . . . . . . . . . . . . . . . . . .2Obsah . . . . . . . . . . . . . . . . . . . . . . . . . . . . . . . . . . . . . . . . . . . .31. Obsah setu . . . . . . . . . . . . . . . . . . . . . . . . . . . . . . . . . . . . . . . .42. Všeobecný popis . . . . . . . . . . . . . . . . . . . . . . . . . . . . . . . . . . .43. Ovládací prvky . . . . . . . . . . . . . . . . . . . . . . . . . . . . . . . . . . . . .53.1 Funkce ovládacích prvků . . . . . . . . . . . . . . . . . . . . . . . . . . .5, 64. Technická data . . . . . . . . . . . . . . . . . . . . . . . . . . . . . . . . . . . . .65. Uvedení do provozu . . . . . . . . . . . . . . . . . . . . . . . . . . . . . . . . .75.1 Připojení akumulátorů . . . . . . . . . . . . . . . . . . . . . . . . . . . . . . . .75.2 Připojení balanceru . . . . . . . . . . . . . . . . . . . . . . . . . . . . . . . . . .86. Struktura menu a pohyb v menu . . . . . . . . . . . . . . . . . . . . .8, 96.1 Přehled struktury menu . . . . . . . . . . . . . . . . . . . . . . . . . . . . . . .97. Výstup pro nabíjení/vybíjení 1 “OUT 1 <strong>DA</strong>TEN” . . . . . . . . . . . .98. Nastavení akumulátorů . . . . . . . . . . . . . . . . . . . . . . . . . . . . . .118.1 Nastavení akumulátorů s BID-CHIP/KEY . . . . . . . . . . . . . . . .139. Displej balanceru . . . . . . . . . . . . . . . . . . . . . . . . . . . . . . . . . . .1410. Cyklus dat . . . . . . . . . . . . . . . . . . . . . . . . . . . . . . . . . . . . . . . .1411. Výstup pro nabíjení/vybíjení 2 “OUT 2 <strong>DA</strong>TEN” . . . . . . . . . .1512. Uživatelské nastavení “NUTZER EINST.” . . . . . . . . . . . . . . .1513. Pořadí při nabíjení/vybíjení na výstupu OUT 1 . . . . . . . . . . . .1614. Nabíjení/vybíjení s BID-CHIP/KEY (pouze vstup OUT1) . . . .1714. Nabíjení/vybíjení s BID-Chip/KEY . . . . . . . . . . . . . . . . . . . . .1815. Chybová hlášení . . . . . . . . . . . . . . . . . . . . . . . . . . . . . . . . . . .1916. Všeobecné bezpečnostní pokyny . . . . . . . . . . . . . . . . . . . . . .1917. Malá nauka o akumulátorech . . . . . . . . . . . . . . . . . . . . . . . . .2018. Popis nabíjecího postupu CC-CV . . . . . . . . . . . . . . . . . . . . .2019. Upozornění k olověným (Pb) akumulátorům . . . . . . . . . . . . .2020. Upozornění k lithiovým akumulátorům (LiIO, LIPO, LIFE) . . .2121. Popis odpojování “Delta <strong>Peak</strong>” (NiCd/NiMH) . . . . . . . . . . . . .2222. Upozornění k NiCd akumulátorům . . . . . . . . . . . . . . . . . . . . .2323. Upozornění k NiMH akumulátorům . . . . . . . . . . . . . . . . . . . .2324. Záruka . . . . . . . . . . . . . . . . . . . . . . . . . . . . . . . . . . . . . . . . . . .2425. Prohlášení o shodě . . . . . . . . . . . . . . . . . . . . . . . . . . . . . . . . .2426. Doporučené příslušenství . . . . . . . . . . . . . . . . . . . . . . . . . . . .2527. Servisní adresy . . . . . . . . . . . . . . . . . . . . . . . . . . . . . . . . . . . .2628. Likvidace akumulátorů a nabíječe . . . . . . . . . . . . . . . . . . . . .273
Návod k obsluze<strong>Power</strong> <strong>Peak</strong> <strong>E1</strong>Obj. č.<strong>8471</strong>1. Obsah sady1x <strong>Power</strong> <strong>Peak</strong> <strong>E1</strong>1x teplotní čidlo1x BID-KEYPomocí USB zásuvky lze nabíječ propojit sPC. Známé a bezplatné PC softwary prozobrazování, ukládání, porovnávání a tiskumí zpracovat data nabíječe <strong>Power</strong> <strong>Peak</strong><strong>E1</strong>.Adresa stahování: www.logview.infoPomocí interní paměti lze data zobrazit itehdy, když není nabíječ připojen na PC.Takže data lze i dodatečně číst a ukládat.Pro větší jistotu lze i během nabíjení kontrolovata zobrazovat teplotu akumulátorů.Předvolit lze i odpojení při dosažení určitéteploty.Integrovaný balancer pro 2 x 7-článkové Lithium-Ionen,Li-Poly, LiFe a speciální akumulátory.2. Všeobecný popisVysoce výkonná počítačová nabíjecí a vybíjecístanice pro všechny běžné typy akumulátorů.Nový dotekový Cap-Touch systémpropůjčuje přístroji elegantní a čistý design.Bezdotekové senzory přepínačů a otočnýchovladačů umožňují hladké provedenípovrchu bez vystupujících ovládacíchprvků.192 x 128 pixel velký displej je rozdělen do12 řádků, díky čemuž je zajištěno velké alehce čitelné písmo.Na displeji se v průběhu nabíjení a vybíjeníčíselně nebo graficky zobrazují nejdůležitějšíparametry.Jistota do budoucna díky flash-ukládacítechnologii. Pomocí updatů je možné softwarerozšiřovat nebo lze nové technologiepřizpůsobit či zabudovat.4Jednou z nejdůležitějších vlastností nabíječe<strong>Power</strong> <strong>Peak</strong> <strong>E1</strong> je identifikace akumulátorůpomocí tzv. BID systému.Na trhu je stálevíce různýchtypů baterií,přičemž každýtyp vyžadujesvůj vlastnínabíjecí proces.Tak se může lehce stát, že na nabíječi provedetechybné nastavení a články tím poškodíte.Revoluční BID systém robbe nabízí geniálnířešení tohoto problému. Každé saděčlánků se přiřadí jednoduchý BID-čip.Tento čip uloží všechna relevantní data prooptimální nabíjení a vybíjení akumulátorů.Pro nabíjení nebo vybíjení se propojí BIDčip, který je připevněn na akusadách, snabíječem a předá nabíječi potřebné parametrypro nabíjení.
Návod k obsluze<strong>Power</strong> <strong>Peak</strong> <strong>E1</strong>Obj. č.<strong>8471</strong>Proces nabíjení nebo vybíjení pak spustítestisknutím tlačítka “OUT1”.Nemusíte nijak složitě vyhledávat parametryv menu. Hlavními výhodami BID čipu jemaximální ochrana proti chybné obsluze auložení všech relevantních dat.Díky uložení nejdůležitějších dat do BIDčipu mají články vlastně svá data neustáleu sebe a lze je kdykoli použít. Tato funkcenahrazuje použití PC softwaru, když sichcete udělat přehled o aktuálním stavuakumulátorů.3. Ovládací prvky3.1 Funkce ovládacích prvkůUSBzásuvkazdroj prouduLC-displejvýstup 2zásuvka proteplotní čidlo zásuvka proservisní konektortlačítko Out 2teplotní čidlotlačítko Out 1zásuvka BIDpřipojení aku OUT15
Návod k obsluze<strong>Power</strong> <strong>Peak</strong> <strong>E1</strong>Obj. č.<strong>8471</strong>Otočný ovladač SELECT (volba)Otočným ovladačem Select lzevolit všechny parametry v menu.Tlačítka s šipkami tam / zpětPomocí těchto tlačítek lze při manuálnímprovozu v módu nastavování zvyšovatnebo snižovat hodnoty parametrůo jeden krok a u volby menuvolit následující nebo předešlé menu.Podržíte-li tlačítko déle, dojde automatickyk přeskočení na další položku,které se při delším stisku ještězrychlí.Tlačítko EnterTlačítkem ‘ENTER’ lze provést volbu neboaktivaci zvoleného menu nebo převzít hodnoty,které byly již předtím nastaveny.Tlačítka OUT 1 a OUT 2Spouští proces nabíjení na příslušném výstupu.Opakovaným stisknutím tohototlačítka lze pro výstup OUT1 aktivovat nabíjení,vybíjení nebo funkci cyklování. Stisknutímtlačítka OUT2 se spouští pouzefunkce nabíjení.Bzučák a LED diodyBzučák potvrzuje každé stisknutí a upozorňujeakusticky na ukončení nabíjení,vybíjení, stejně jako i na případnou chybu.Bzučák lze nastavit v uživatelském menu.LED diody na tlačítcích opticky signalizujístisknutí tlačítka.4. Technická dataProvozní napětí:max. odběr proudu:Odpojování:NiCd / NiMH:Olověné a lithiové:Rozměry:Výstup 1 (OUT1)Počet článků:10-15V DC (autobaterie) nebo síťový zdroj 13,8 V min. 30 A(nepoužívejte nabíječky autobaterií!)ca.37 Aautomaticky, digitální Delta-<strong>Peak</strong> systémautomaticky, v závislosti na napětí, CC-CV postup170 x 175 x 85 mm1 ... 36 článků NC / NiMH,1 ... 14 článků LiIo (3,6V), Li-Poly (3,7V), LiFe (3,3V)1 ... 12 článků (2...24V) olov. článků,1 ... 14 článků speciálních aku (kap. 13, str. 17)Nabíjecí proud: auto, 0,1 ... 20A (max. 315W)Vybíjecí proud: auto, 0,1 ... 40A (max. 160W)Vyrovnávací proud : ca. 220mAUdržovací nabíjení: C/20 u NiCd a NiMHKoncové vybíjecí napětí: 0,5-1,1V / čl. u NiCd a NiMH2,5-3,6V / čl. u Li-Poly, LiIo, LiFe1,8V / čl. u olověných akuFunkce:nabíjení, vybíjení, vybíjení-nabíjení, vyrovnávání napětí6
Návod k obsluze<strong>Power</strong> <strong>Peak</strong> <strong>E1</strong>Obj. č.<strong>8471</strong>Nabíjecí proud v závislosti napětí aku navýstupu OUT 1pod 15,75V20A15,75V-17,5V18A17,5V-21V15A21V-26,25V12A26,25V-31,5V10A31,5V-35V9A35V-39,37V8A39,37V-42V 7,5A42V-45V7A45V-48,46V 6,5A48,46V-52,5V6A52,5V-57,27V 5,5A57,27V-63V5Anad 63V4A5. Uvedení do provozuPřipojte nabíječ ke 12V olověné baterii.Bezpodmínečně dbejte na správnou polaritu(červená = plus / černá = minus), stejně jakoži na spolehlivý kontakt svorek.Zobrazí se startovací displej s číslem verzea předvoleným uživatelským jménem.Vybíjecí proud v závislosti napětí aku navýstupu OUT 1pod 2V10A2V-4V40A4V-5,33V30A5,33V-6,4V25A6,4V-8V20A8V-8,88V18A8,88V-10,66V15A10,66V-13,33V12A13,33V-16V10A16V-17,77V9A17,77V-20V8A20V-22,85V7A22,85V-26,66V6A26,66V-29,09V 5,5A29,09V-32V5A32V-35,55V 4,5A35,55V-40V4A40V-45,71V 3,5A45,71V-53,33V3Anad 53,33V2AVýstup 2 (OUT2)Počet článků:1 ... 8 článků NiCd / NiMH1 ... 3 články Li-Poly (3,7V)1 ... 4 články LiFe (3,3V)Nabíjecí proud: 0,1 ... 2ANabíjecí výkon: 28W, proud je adekvátněregulovánFunkce: nabíjeníUdržovací nabíjení: 50 mA (u NC, NiMH)Vyčkejte ukončení procesu kalibrace (LEDdiody zhasnou), stiskněte tlačítko Enter a nadispleji se zobrazí nápis výstup OUT 1.5.1 Připojení akumulátorůZapojte akumulátory (dbejte na správnoupolaritu - červená = plus / černá = minus)do připojovací zásuvky výstupu OUT 1.Jakmile je zapojen adapter nabíjecíhokabelu, připojte nejdříve banánky nabíjecíhokabelu k nabíječi a teprve potom akumulátory(zabráníte tak zkratu přes banánkovékonektory).Při odpojování postupujte v opačnémpořadí.Důležité! Nikdy nespouštějte proces nabíjenídříve, než jsou nastaveny odpovídajícínabíjecí parametry. Při chybném nastaveníparametrů může dojít k explozi nebohoření článků.7
Návod k obsluze<strong>Power</strong> <strong>Peak</strong> <strong>E1</strong>Obj. č.<strong>8471</strong>5.2 Připojení balanceru:Pokud nabíjíte lithiové akumulátory, musítek nabíječi připojit z bezpečnostních důvodůservisní kabel. Konektor musíte zasunouttak, aby se černý kabel (společný mínuspól) shodoval s šipkou.Bez tohoto připojení nelze nabíjení spustit.Výjimka: Tento postup lze obejít vpřípadě, když je proces nabíjeníspouštěn pomocí BID-Chip/Key.Upozornění:Pokud jsou k balanceru připojeny 2 akupakyletované v řadě, musíte zapojit servisníkabel na výstup (1-7), na který je zapojenominusové vedení nabíječe.14 13 12 11 10 987654321-OUT 1+Akku 2Akku 16. Struktura menu a pohyb v menuZe startovacího displeje se dostanete stisknutímtlačítka Enter nebo Select do menuvýstupu OUT1 data.VOLTAGE SENSOR+++S1+S2+S3--Schematické znázornění osazení připojovacíhoservisního kabelu.Do 7 článků používejte vždy zásuvku (1-7),pouze u akupacků s více než 7 články jenutné použít druhou zásuvku (8-14).Důležité:Nikdy nezapojujte do výstupu na balanceruvíce než jeden servisní kabel.Volba menuOdtud se dostanete do menu:“Balancer”“Cyklus dat”,“OUT 2 data”,“Uživatelské nastavení”Přesuňte se otočným ovladačem Select doprvního řádku Název menu (Out1 data).Aktivujte tlačítkem “ENTER” (tmavě podsvíceno).Zvolte otočným ovladačem Select novémenu.Deaktivujte tlačítkem Enter.Otočným ovladačem Select je nyní zpět kdispozici k pohybu ve zvoleném menu.Volba podmenuV některých menu jsou k dispozici podmenu,jako např. velké grafické zobrazení nebokřivky napětí. Sjeďte na 3. řádek, vyvolejtetlačítkem Enter podmenu a opětovným stisknutímtlačítka Enter uzavřete.8
Návod k obsluze<strong>Power</strong> <strong>Peak</strong> <strong>E1</strong>Obj. č.<strong>8471</strong>6.1 Přehled struktury menu4,3VCELL 3 : 4.332V2,9VBALANCE: 99,4%velké grafické zobrazení vpodmenuvolba paměti1...9Enter / SelectMenu balanceru se objeví jentehdy, je-li zvolen lithiový akumulátor a připojený servisníkabel.zobrazení napětí a teploty vpodmenunastavení nabíjecích parametrůpro paměť 1...9zobrazení napětí vpodmenunastavení nabíjecích parametrůpro BID-Chip nebo Key.Pouze s připojeným BID.9
Návod k obsluze<strong>Power</strong> <strong>Peak</strong> <strong>E1</strong>Obj. č.<strong>8471</strong>7. Výstup pro nabíjení/vybíjení “OUT 1 data”Pracovní menu pro nabíjecí výstup 1, pohyb v menu probíhá pomocí otočného ovladačeSelect a tlačítka Enter, jak již bylo dříve popsáno.změna menuvolba paměti 1-9mini graf křivkynapětí a teplotyukazatel stavu-> = nabíjení
Návod k obsluze<strong>Power</strong> <strong>Peak</strong> <strong>E1</strong>Obj. č.<strong>8471</strong>rozdíl napětíčasový rozdílteplotnírozdílnapětíškála napětíteplotníkřivkarozdíl bodůměřeníteplotníškálačas8. Nastavení akumulátorůPokud chcete nastavit parametry pro nabíjenía vybíjení, vyvolejte podmenu “nastaveníakumulátorů” (Akkueinstellung).V tomto menu lze nastavit všechny důležitéparametry akumulátorů jako např. typ aku,počet článků, kapacitu apod.Následující hodnoty musíte bezpodmínečněnastavit, jinak by mohlo dojít kpoškození článků.:typ akumulátoru, počet článků, citlivostDelta-<strong>Peak</strong> (pouze u NiCd nebo NiMH aku),kapacitu, nabíjecí/vybíjecí proud, koncovévybíjecí napětí a odpojovací teplotu (pouzeu nabíjení).Tipy pro nastavení najdete v kapitole “Malánauka o akumulátorech ”.Typ akumulátoru:NiCd - nikl-kadmiové akuNiMH - nikl-metal-hydridové akuLi-Poly - lithium polymerové aku (3,7 V)Pb - olověné aku (2,30V)LiFE - lithium Ferrum (A123 apod. 3,3 V)LiON - lithium ioneové (3,6 V)Pokud je k nabíječi připojený BID-CHIP/KEY, je k dispozici ještě i speciálnípostup.SPECIAL - olověné nebo lithiové akumulátory,které jsou nabíjeny postupem CC-CV(konstantní proud a napětí).Můžete zvolit nabíjecí napětí od 2 do 6V.Nabíjecí napětí / <strong>Peak</strong>-citlivostPodle toho, jaký typ akumulátoru jste zvolili,se v tomto řádku objeví možnost nastavenínabíjecího napětí (lithiové a olověné, stejnějako i speciální aku) nebo citlivost pro odpojenípro NiCd a NIMH aku.Typ akumulátoruNiCd = standard 7 mV/čl. (rozsah 3-25 mV)NiMH = standard 5 mV/čl.(rozsah 3-25 mV)Olověné = daná hodnota 2,3 V/ čl.Li-Poly = daná hodnota 4,2 V/ čl.LiON = daná hodnota 4,1 V/ čl.LiFE = daná hodnota 3,7 V / čl.11
Návod k obsluze<strong>Power</strong> <strong>Peak</strong> <strong>E1</strong>Obj. č.<strong>8471</strong>Pokud chcete změnit variabilní hodnoty,informujte se nejdříve o důsledcích změnnastavení v kapitole “Malá nauka o akumulátorech”.Pokud je k nabíječi připjen BIDCHIP/KEY , zobrazí se i akutyp Spezial,viz popis programování BID-Chip.Počet článků Předvolba počtu článků,které mají být nabíjeny1 ... 36 článků NiCd / NiMH1 ... 14 článků LiIo Li-Poly, LiFe1 ... 12 článků (2...24V) olověné aku1 ... 14 článků speciálních aku (pouze sBID)KapacitaU tohoto nabíječe musíte dávat pozor na to,že nastavení kapacity nemá žádný vliv nanastavení nabíjecího a vybíjecího proudu(1C).Nabíjecí a vybíjecí proud je nutné nastavitmanuálně.Zadání kapacity je důležité, neboť od jejíhodnoty se pak odvozuje udržovací nabíjecíproud u NiCd a NiMH akumulátorů.Udržovací nabíjecí proud = NiCd /NiMH =C/20).Také u olověných a lithiových akumulátorů jezadání kapacity akumulátorů velmi důležité,protože je přes ni řízen odpojovací bod prozobrazování stavu “konec”.U olověných a lithiových akumulátorů, kteréjsou nabíjeny postupem CC-CV, se hlášeníkonec “ENDE” zobrazí tehdy, když jenapětí článků vyrovnané a nabíjecí proudpod hodnotou C/10. Akumulátor je pak z98% nabitý a lze jej odpojit od nabíječe.Pokud akumulátory zůstanou připojeny knabíječi, budou dále nabíjeny. Pokud nabíjecíproud klesne o 50mA, je nabíjecí proudodpojen.Nabíjecí proudNabíjecí proud lze libovolně nastavit od 0,1do 20 A. Nastavujte odpovídající hodnotyvždy dle pokynů výrobce akumulátorů.Případně se informujte v kapitole “Malánauka o akumulátorech”, jaké maximálníproudy Vaše akumulátory snesou.Pokud zvolíte automatické nastaveníproudu “AUTO” (pouze u NiCd / NIMHaku), bude nabíječ postrádat vnitřní odporakumulátorů a bude proud regulovat automatickyna optimální hodnotu.Nezapomínejte na závislost nabíjecíhoproudu na počtu článků!Viz tabulka Technická data.Vybíjecí proudVybíjecí proud lze libovolně nastavit od 0,1do 40 A. Nastavujte odpovídající hodnotyvždy dle pokynů výrobce akumulátorů.Případně se informujte v kapitole “Malánauka o akumulátorech”, jaké maximálníproudy Vaše akumulátory snesou.Pokud zvolíte automatické nastaveníproudu “AUTO” (pouze u NiCd / NIMHaku), bude nabíječ postrádat vnitřní odporakumulátorů a bude proud regulovat automatickyna optimální hodnotu.Nezapomínejte na závislost nabíjecíhoproudu na počtu článků!Viz tabulka Technická data.Vybíjecí napětíV tomto řádku lze nastavit vybíjecí napětí.K dispozici jsou následující předvolené hodnoty(standardy.) a rozsahy nastavení.Typ akumulátoruNiCd = stand. 0,9 V/čl. (rozsah 0,5-11V/čl.)NiMH = stand. 1,0 rozsah 0,5-11V/čl.)Olovo = daná hodnota 1,8 V/ čl.Li-Poly = stand.3,0 V/čl.(rozsah 2,5-3,6V/čl.)LiON = stand. 3,0 V/ čl. (rozsah 2,5-3,6V/čl.)LiFE = Std. 2,7 V/ čl. (rozsah 2,5-3,6V/čl.)12Pokud chcete měnit nastavení variabilních
Návod k obsluze<strong>Power</strong> <strong>Peak</strong> <strong>E1</strong>Obj. č.<strong>8471</strong>hodnot, přečtěte si nejdříve kapitolu “Malánauka o akumulátorech”.Odpojovací teplota (pouze u nabíjení)V tomto bodě menu lze určit odpojovacíteplotu v rozsahu od 10°C do 80°C.Při nastavování dávejte pozor na to, ževždy nastávající událost “odpojovacíteplota nebo napětí” má za následek konecprocesu nabíjení, což může vést k tomu, ženejsou akumulátory plně nabity.Tato ochranná funkce je velice důležitáprávě např. pro NiMH a lithiové akumulátory,které jsou velmi citlivé na teplotu.Pokud chcete mít teplotu pod kontrolou, alenechcete určovat teplotu jako kritérium proodpojení, nastavte odpojovací teplotu navysokou hodnotu.8.1 Nastavení akumulátorů s BID-CHIP/ KEYPokud je k nabíječi připojen BID-čip, zobrazíse na displeji v menu “OUT 1 data “symbol BID. Výčet nastavení akumulátorůje rozšířen.Pokud není BID-čip naformátovaný(nový), objeví sehlášení Chyba paměti BIDčipu (Fehler BID-Speicher),které požaduje zadání datBID-čipu.Menu speciálních akumulátorůPokud je k nabíječi připojen BID čip/ Key, jeve volbě typu akumulátorů k dispozici ještědalší typ označený jako “Spezial”.Zde můžete zvolit nabíjecí a vybíjecí napětíve velkém rozsahu.Díky tomu lze nabíječem <strong>Power</strong> <strong>Peak</strong> <strong>E1</strong>nabíjet prakticky všechny současné ibudoucí lithiové nebo jiné typy akumulátorů,které se nabíjí postupem CC-CV (konstantníproud a napětí).Rozsah nastavení:Nabíjecí napětí:Předvolba 2 V/čl., rozsah 2-6V / čl.Vybíjecí napětí:2 V/čl., rozsah 0,8-6V / čl.Zabudovaný balancer se samozřejmě automatickypřizpůsobuje předvolbám a zajistítak perfektní vyrovnání napětí článků.Tohoto speciálního nastavení lze samozřejměvyužít i k přípravě akumulátorů napřezimování, kdy je vhodné články uvést nastřední úroveň napětí ca. 3,9V/čl.Nastavte vybíjecí napětí na 3,9 V/čl. a předdelším skladováním lithiové články na tutohodnotu vybijte.Pozor: U tohoto speciálního menu musítezacházet velmi obezřetně s nastaveními,neboť chybně nastavené hodnoty by mohlyvést k trvalému poškození akumulátorů!Menu je rozšířeno o možnost zadání data aBID-paměti.Doporučení:Pokud po nastavení hodnot pouze jednodušeodpojíte BID-CHIP/KEY od nabíječe,aniž byste nastavení potvrdili “KONEC -UKLÁDÁNÍ BID” (“ENDE-SPEICHERNBID”), zůstávají dále uloženy “staré” hodnoty,což by mohlo při pozdějším nabíjenínebo vybíjení vést k poškození připojenýchakumulátorů!13
Návod k obsluze<strong>Power</strong> <strong>Peak</strong> <strong>E1</strong>Obj. č.<strong>8471</strong>9. Displej balanceruPokud je k nabíječi připojen servisní kabelakumulátoru, spustí nabíječ proces vyrovnávánínapětí článků.10. Cyklus datV oblasti “Cyklus dat” se budou zobrazovata ukládat všechna relevantní data, která seobjeví během procesu nabíjení a vybíjení.Pro každý nabíjecí (C) a vybíjecí (D) cyklusse zvlášť zobrazí nabitá a vybitá kapacita aprůměrné napětí.Tak lze např. kontrolovat výkonnost akumulátoru.Průběžně lze uložit až 10 cyklů,přičemž data pod číslem 1 jsou aktuálníhodnoty.Aby bylo dosaženo precizního měřenínapětí článků, je bezpodmínečně nutnépřipojit k nabíječi i nabíjecí kabel akumulátorů(plus + minus).Napětí jednotlivých článků se zobrazujegraficky i číselně.Písmeno “B” za číslem článku zobrazuje, žeje článek právě vyrovnáván (balancován =B).Další alternativou je zobrazení napětí jednotlivýchčlánkůCELL 3 : 4.332V4,3Vve formě sloupcovéhografu.Zobrazení aktuálního cyklu na displeji. Vtomto příkladě běží z obou předvolenýchcyklů cyklus 1.Menu cyklů je pouze zobrazovací menu,nabíjecí parametry se nastavují v menuOut 1 data.2,9VBALANCE: 99,4%tlačítko Enter.K tomu sepřesuňte do 3.řádku a stiskněteSpouštění cyklu (nabíjení nebo vybíjení),stejně jako i případná pauza mezi cykly sezadává v menu “ UŽIVATELSKÉ NASTAV.”(“NUTZER EINST”).Zpět z tohoto zobrazení se dostanete opětstisknutím tlačítka Enter.V tomto podmenu si lze prohlédnout napětíkaždého jednotlivého článku v číselné i graficképodobě. Otočným ovladačem Selectsi můžete najet na jednotlivé sloupce,potom se napětí příslušného článku zobrazíčíselně.14
Návod k obsluze<strong>Power</strong> <strong>Peak</strong> <strong>E1</strong>Obj. č.<strong>8471</strong>11. Nabíjecí výstup “Out 2 data”Přes nabíjecí výstup 2 “Out 2 data” lze nabíjetpřijímačové nebo vysílačové akupackymax. proudem 2 A.12. Uživatelské nastavení “Uživ. nast.”Aby bylo možné nabíječ individuálně nastavitpro každého uživatele, je v menu “Uživ.nastav.” k dispozici celá řada funkcí.Určení parametrů akumulátoru je nastavovánapomocí 3 možností nastavení - podletypu akumulátorů, nabíjecího proudu akapacity.Na tomto výstupu nelze balancovat příp.vybíjet akumulátory!Proces nabíjení lze spustit nebo přerušitstisknutím tlačítka “OUT 2”.Také u tohoto výstupuje dispozicipodmenu se zobrazovánímnapětí veformě křivek.K tomu si najeďte kurzorem do 2. řádku astiskněte tlačítko Enter. Opětovným stisknutímtl. Enter okno zavřete.Počet článků:1 ... 8 článků NiCd / NiMH1 ... 3 články Li-Poly (3,7V)1 ... 4 články LiFe (3,3V)Nabíjecí proud: 0,1 ... 2AMimo jiné je zde možné zvolit i 6 jazyků.Ukládání / KopírováníTato funkce slouží k ukládání dat akumulátorůběhem nabíjecích a vybíjecích procesů.Pokud jsou obě funkce nastaveny na“NEIN”, převádí se data na výstup USB, abyje bylo možné zobrazit a uložit na PCpomocí PC-Softwaru logview.Nabíječ je vybaven interní pamětí dat, kterázapisuje data, aby je bylo možno pozdějizapsat a uložit do PC. K tomu si musíte nastavitpaměť na “JA” a kopírování na “Nein”.Pokud budete chtít později data z internípaměti načíst, musíte paměť nastavit na“Nein” a kopírování na “Ja”. Teprve potéjsou data předána na USB výstup.Pozor:Nepřipojujte na výstup 2 články s vyššímpočtem článků než bylo předtím zadáno.15
Návod k obsluze<strong>Power</strong> <strong>Peak</strong> <strong>E1</strong>Obj. č.<strong>8471</strong>Upozornění:Data zůstanou tak dlouho uložena, dokudnebude spuštěn další proces nabíjení nebovybíjení s jinými akumulátory a paměť senepřepíše.Start cyklusFunkcí “START ZYKLUS” se určuje u nabíjecíhocyklu první cyklus (nabíjení nebovybíjení).Pause cyklusPokud má být mezi dvěma cykly pauza,zvolte “EIN” (ON, zapnuto). Pokud ne,přepněte na “AUS” (OFF, vypnuto).Délka pauzyPo ukončení jedné fáze cyklu platí protrvání pauzy 2 kritéria:1. Teplota akumulátorů vyšší než 35°C,pauza je ukončena, jakmile teplotaklesne zpět pod 35°C.2. Pauza je omezená na max. délku 1hodiny, poté je spuštěna další fáze cyklu,bez ohledu na to, jestli teplota akumulátorůdosáhla 35°C.Uživatelské jménoPokud chcete nastavit uživatelské jméno,přeskočte kurzorem na pole “Nutzername”(uživatelské jméno).Stisknutím tlačítka Enter se první znakovépole nejdříve černě podsvítí. Nyní můžeteotočným ovladačem Select zvolit zvláštníznaky jako např. +, číslice, velká nebo malápísmena.Když je jméno nastaveno, ale zůstávajíještě volné znaky, musíte stisknout tlačítkoEnter tolikrát, až není černě označené polevidět. Teprve pak lze kurzorem volně pohybovatv menu.Ostatní funkce jsou samovysvětlující.13. Pořadí při procesu nabíjení a vybíjenína výstupu OUT1Dříve než je zahájen proces nabíjení, příp.vybíjení, musíte provést následující nastavení:• připojit zdroj proud (pozor na správnoupolaritu)• připojit akumulátory (pozor na správnoupolaritu)• nastavit typ akumulátorů• nastavit počet článků• nastavit kapacitu• nastavit nabíjecí / vybíjecí proudPo nastavení těchto parametrů lze zahájitpožadovaný proces.Pokud chcete připojené akumulátorynabíjet = stiskněte 1x tlačítko OUT1vybíjet = stiskněte 2x tlačítko OUT1vybíjet- nabíjet = stiskněte 3x tlačítkoOUT1Jakmile je zahájen cyklus, nastavte dodatečněotočným ovladačem Select požadovanýpočet cyklů (1-10).Pokud chcete probíhající proces přerušit,opět stiskněte tlačítko “OUT1”.Pokud je na lithiovém článku připojený servisníkabel, je automaticky zahájen procesvyrovnávání napětí.Pokud má být hodnota nabíjecího nebovybíjecího proudu změněna během probíhajícíhoprocesu, lze to provést interaktivněv menu plochy displeje.Tato změna nastavení proudu pak platípouze pro právě probíhající procesnabíjení nebo vybíjení.Při opětovném spuštění procesu nabíjenínebo vybíjení je znovu použita hodnota,která je uložena v “nastavení akumulátorů(“Akkueinstellungen”) nebo v BID Chip/Key.16
Návod k obsluze<strong>Power</strong> <strong>Peak</strong> <strong>E1</strong>Obj. č.<strong>8471</strong>14. Proces nabíjení / vybíjení s BID-CHIP/KEY (pouze na výstupu OUT1)Propojte BID čip přes adapterkabel příp.BID-Key přímo s nabíječem.Co se na BID-CHIP/KEY ukládá?Naposledy nabité popř. převzaté hodnotykapacit jsou aktualizovány, počitadlo cyklůse zvýší o 1 úroveň a příp. je dodatečně uloženamaximální kapacita, pokud bylapřekročena dosavadní nejvyšší hodnota.Kromě toho jsou zde samozřejmě nabíjecí avybíjecí parametry, které se programují vmenu nastavení akumulátorů.Jsou to:Poté se zobrazí nadispleji symbol BID.Pokud jsou parametrypředprogramoványna BID čipu, lzeproces nabíjení/vybíjeníspustitstisknutím tlačítka ‘OUT1’.Další postup je již shodný s běžnýmspouštěním procesů.Pokud má být hodnota nabíjecího nebovybíjecího proudu změněna během probíhajícíhoprocesu, lze to provést interaktivněv menu plochy displeje.Na konci nabíjecího nebo vybíjecího procesujsou nejdůležitější data totoho procesuuložena na BID Chip/ Key, díkyčemuž má uživatel dobrý přehled o výkonnostechakumulátorů.typ akumulátorůpočet článkůnabíjecí proudvybíjecí proudkoncové nabíjecí napětívybíjecí napětícitlivost Delta <strong>Peak</strong>odpojovací teplotakapacitadatum prvního uvedení do provozuUpozornění ke konci nabíjení!!Při nabíjení Lixx akumulátorů je nápisem“Ende” na displeji nabito 98% kapacity. Akumulátorylze od nabíječe odpojit.Pokud akumulátor zůstane připojen k nabíječi,balancer dále pracuje a dále vyrovnávánapětí článků. Aby byla vyrovnána spotřebaproudu balanceru, musí do nabíječe přicházetalespoň minimální nabíjecí proud.Nabíječ při dosažení 40 mA zbytkovéhonabíjecího proudu proces definitivněpřeruší.17
Návod k obsluze<strong>Power</strong> <strong>Peak</strong> <strong>E1</strong>Obj. č.<strong>8471</strong>15. CHYBOVÁ HLÁŠENÍPro zajištění bezpečného provozu procesunabíjení / vybíjení je nabíječ <strong>Power</strong> <strong>Peak</strong> <strong>E1</strong>vybaven bezpečnostními opatřeními.Jakmile dojde k chybě, objeví se na displejiodpovídající hlášení a zazní varovný signál.Následující chybová hlášení lze poodstranění příčiny potvrdit libovolným tlačítkem.Napětí akumulátorů / výstupu je přílišvysoké, překontrolujte počet článků.Nabíječ dodatečně přes připojení balancerukontroluje počet článků a porovnává nastavenís hodnotou, která byla nastavena vmenu Data akumulátorů. Pokud se tyto hodnotyneshodují, objeví se toto chybové hlášení.Bylo dosaženo nastavené odpojovacíteploty, proces nabíjení je přerušen.Vstupní napětí je příliš nízké (pod 10 V).BID-Chip-Key byl během nějakého probíhajícíhoprocesu buď odpojen nebo připojen.Překontrolujte propojení BID čipu a znovuspusťte proces.Pokud po připojení BID čipu nedojde kespuštění procesu nabíjení nebo vybíjení,mohou být data uložená na BID čipu poškozená.Toto hlášení se objevuje i tehdy, když jepřipojen nový neformátovaný BID čip.Zadejte BID data v menu Nastavení akumulátorů.Překontrolujte autobaterii nebo síťový zdroj.Akumulátory jsou připojeny s chybnou polaritou,překontrolujte připojení.Na BID Chip/ Key chybí nebo jsou chybněuložena data.Na BID-čipu je uloženo méně nebo jinéparametry než kolik jich je k dispozici vmenu Nastavení akumulátorů.Nastavte chybějící data.Překontroluje nastavení BID Chip/ Key.18
Návod k obsluze<strong>Power</strong> <strong>Peak</strong> <strong>E1</strong>Obj. č.<strong>8471</strong>16. Všeobecná bezpečnostníupozornění• Chybné zacházení s akumulátory anabíječi může vést k explozi a hořeníakumulátorů.• <strong>Power</strong> <strong>Peak</strong> je <strong>E1</strong> určen pouze k nabíjení/vybíjenía balancování nabíjecíchNiCd, NiMH, olověných a lithiových akumulátorů.Nenabíjejte suché články,hrozí nebezpečí exploze.• Nabíječ je určen k provozu na 12V a230V, nikdy jej nezkoušejte provozovatna jiném napětí• Chraňte nabíječ před prachem, vlhkema nečistotami• Nevystavujte nabíječ přímému slunci,extrémnímu teplu nebo chladu• Chraňte nabíječ před nárazy, nepokládejtena něj těžké předměty a nevystavujtejej silným vibracím• Nabíječ a připojené akumulátory nikdyneumísťujte na hořlavé podložky. Nikdynemějte nabíječ v provozu v blízkostihořlavých materiálů a plynů.• Neotevírejte nabíječ pokud je pod napětím!!• Pokud je nabíječ v provozu, nenechávejtejej nikdy bez dozoru. Během provozumůže dojít k silnému zahřátí• Dbejte na to, aby byly vždy volné otvorypro chlazení a cirkulaci vzduchu• Pokud nabíječ delší dobu nepoužíváte,odpojte jej od zdroje proudu, příp.odpojte i akumulátory.• Nikdy nenabíjejte jedny akumulátorykrátce po sobě• Nenabíjejte zahřáté akumulátory. Akumulátoryvždy nechejte ochladit naokolní teplotu.• Současně lze nabíjet jen akumulátorystejné kapacity a parametrů.• Nenabíjejte paralelně na jednom výstupudvoje akumulátory, připojujte jen 1 akupack• Dbejte na správnou polaritu, abystezabránili zkratu.• Dbejte vždy doporučení výrobců akumulátorů• Vždy přesně překontrolujte nastavenína nabíječi <strong>Power</strong> <strong>Peak</strong> <strong>E1</strong>.Akumulátory mohou být nevhodnýmnastavením poškozeny nebo úplnězničeny. • Dávejte pozor na poškození obalu nabíječea kabeláže.• Pozor při zacházení s akupacky s vyššímpočtem článků. Bezpodmínečně dbejtena dobrou izolaci, jinak hrozí nebezpečíúrazu proudem.• Nikdy neodpojujte od nabíječe akumulátoryběhem nabíjení, aniž byste předtímstiskli tlačítko Stop. Díky vysokému výstupnímunapětí by mohlo dojít k silnémujiskření.19
Návod k obsluze<strong>Power</strong> <strong>Peak</strong> <strong>E1</strong>Obj. č.<strong>8471</strong>17. MALÁ NAUKA O AKUMULÁTORECH18. Nabíjecí postup CC-CVOlověné a lithiové akumulátory jsou nabíjenykonstantním napětím, postupem nazývanýmCC-CV (konstantní proud, konstantnínapětí).Na nabíječi je proto v tomto menu možnostvolby koncového nabíjecího napětí dle typuakumulátoru pro každý článek.Během první fáze nabíjení stoupá napětíakumulátoru pomalu na maximální hodnotu4,2 V / čl. (Li-Poly akumulátory).fáze konstantníhoproudu (CC)fáze konstantníhonapětí (CV)odpojovací bodV této fázi nabíječ zajistí, že zůstane nabíjecíproud konstantní.Při nabíjecím proudu 1C a vybitém akumulátorutrvá tato první fáze ca. 50 - 60 minut.Během ní je nabito ca. 80-90 % kapacityakumulátoru.Při dosažení koncového nabíjecího napětíje konstantní nabíjecí proud vypnut a napětíje konstantně udržováno.Díky tomu klesá ve druhé fázi nabíjecíproud, protože rozdíl napětí mezi nastavenouhodnotou na nabíječi a akumulátoru sestále zmenšuje.Pro nabití zbytkové kapacity je zapotřebídalších asi 35 - 40 minut.Při dosažení předprogramovaného minimálníhoproudu jako spodní proudové hranicenabíječ proces nabíjení vypne.Při nabíjecí hodnotě 1C trvá celý procesnabíjení 90 minut.19. Olověné akumulátory (Pb)Při zacházení s olověnými akumulátoryje nutné dbát určitých bezpečnostníchopatření, aby nedošlo k úrazům nebověcným škodám. Při použití těchto akumulátorůza tuto skutečnost přebíráteplnou zodpovědnost.• Většina Pb článků používaná v modelářstvíje plynotěsně uzavřena a tím iméně nebezpečná.• Autobaterie s kapalnou kyselinou sírovoupředstavují nebezpečí poleptání arychlejšího vzniku plynu při přebití.• Pb články nikdy nesmí přijít do kontaktu sotevřeným ohněm, jinak hrozí exploze.• Pb články nikdy násilně neotevírejte,hrozí nebezpečí poleptání.• Pb články nikdy nezkratujte, hrozí nebezpečíexploze nebo hoření.• Vyteklé elektrolyty nesmí přijít do kontaktus pokožkou nebo očima. Pokud setak stane, okamžitě postižené místoomyjte vodou a vyhledejte lékaře. Nikdynevkládejte články do úst, hrozí nebezpečíotravy.• Baterie by měly být vždy uloženy mimodosah dětí.• Při nabíjení a vybíjení vždy dbejte doporučenívýrobců akumulátorů.• Při nabíjení Pb článků může někdy dojítk úniku plynu, proto dbejte na dobrévětrání.• Při přebití dochází ke vzniku výbušnéhoplynu a hrozí tak exploze.20
Návod k obsluze<strong>Power</strong> <strong>Peak</strong> <strong>E1</strong>Obj. č.<strong>8471</strong>20. Lithiové akumulátory(LiPo, LiIo, LiFe)Na trhu existuje několik různých typů lithiovýchakumulátorů:1. Lithium-Ionen aku s kapalnými elektrolytya jmenovitým napětím 3,6 V. Jsou tolithiové články první generace, které seovšem v modelařině příliš nerozšířily.(volba typu akumulátoru LION)2. Lithium-Ionen aku s kapalnými elektrolytya jmenovitým napětím 3,7 V. Jsouto lithiové články druhé generace, v kovovém obalu.(volba typu akumulátoru LIPO)3. Lithium-Ionen-Polymer aku s gelovýmielektrolyty a jmenovitým napětím 3,7 V,které jsou momentálně nejpoužívanějšímiakumulátory označovány také jakoLi-Poly. Díky gelové formě elektrolytůdochází při nabíjení a obzvláště pak přivybíjení k menšímu tlaku v článku, aproto je dostačující pouze foliové pouzdro.Díky minimální váze a vysokých proudůmse v modelařině rychle rozšířily.(volba typu akumulátoru LIPO)u Li-Poly a Li-Ion akumulátorů měla pohybovatkolem 3V.U Li-Fe akumulátorů by měla být hodnotakoncového vybíjecího napětí kolem 2,7 V.Rozdílná kapacitaPokud se do jednoho akupacku sletuje vícečlánků a tento akupack je pak vybíjen,dochází k různému zahřívání jednotlivýchčlánků, neboť vnitřní články mohou svouteplotu hůře odevzdat.Tím dochází ke změně vnitřního odporu aodevzdaná kapacita je nižší. Takový článekje pak dříve vybitý a hrozí nebezpečí, žebude vybit pod přípustnou hranici 2,5 V.Především při nižších venkovních teplotáchhrozí velké rozdíly v kapacitě. Když použijetelipolky např. ve vrtulníku, bude předníčlánek proudem vzduchu silně ochlazována vnitřní články budou podstatně vícezahřáté.Studený článek má nižší kapacitu a vznikátak nebezpečí, že bude vybit pod přípustnouhranici koncového vybíjecího napětí.4. Lithium - Ferrum (Phosphor) aku sjmenovitým napětím 3,3 V, jsounejnovějšími typy lithiových aku,označovány také jako A123, jsou t.č.nejnovějšími akumulátory generace lithiovýchčlánků. Díky vysokým impulzůmpři vybíjení a vysoké kapacitě se v modelařinětento typ článků rychle rozšiřuje.(volba typu akumulátoru LIFE)Pro lithiové články doporučujeme následujícíhodnoty pro nabíjení:Lithiové akumulátory jsou většinou nabíjenyhodnotou 1C, některé typy akumulátory lzenabíjet i hodnotou 1,5...2C, dokonce i 5C.Dodržujte vždy maximální hodnoty doporučenévýrobcem akumulátorů.Hodnota koncového vybíjecího napětí by se21Proto doporučujeme vybíjet lipolky jen pohranici ca. 3 - 3,3 V koncového vybíjecíhonapětí, abyste tak zabránili trvalejšímu poškozeníčlánků. Kromě toho však musíte přidalším následném nabíjení dbát na to, abybyly články nabity na stejnou úroveň.Zapojte servisní kabel.Nabíjení paralelně zapojených článků neníproblematické, protože se zde celkovýproud rozděluje podle stavu napětí na jednotlivéčlánky.Za škody vzniklé neopatrným či neodbornýchzacházením nemůžeme přievent. škodách převzít zodpovědnost ana tato poškození se pak nevztahuje anizáruka. Dbejte také bezpečnostních
Návod k obsluze<strong>Power</strong> <strong>Peak</strong> <strong>E1</strong>Obj. č.<strong>8471</strong>pokynů.Při běžných výrobních tolerancích, alepředevším teplotními rozdíly během vybíjení,jsou vnější články vždy lépe ochlazoványnež vnitřní (pokud se jedná o sériovézapojení 3 článků). Po více cyklech majíčlánky nesporně rozdílné hodnoty napětí.21.Vysvětlivky k odpojování pomocí“Delta <strong>Peak</strong>”Po více cyklech mají články nevyhnutelněrozdílné úrovně napětí.Uvedený graf znázorňuje typickou nabíjecíkřivku u NiCd a NiMH akumulátorů. Nakonci procesu nabíjení se na základězahřátí článků změní vnitřní odpor akumulátoru.Tím pádem nepatrně poklesne napětíčlánku.Pokud nabíječ vypne přesně na nejvyššímbodě nabíjecí křivky, hovoříme o nulovémDelta <strong>Peak</strong>u - “Zero-Delta-<strong>Peak</strong>”.Aby byly během ochlazování kompenzoványnabíjecí ztráty, popř. jste chtěli zvýšitpři závodech výkonnost akumulátorů,bývají články v praxi o něco málo přebíjeny.Hodnota 5 mV /čl. jako citlivost <strong>Peak</strong>unebo hodnota Delta-<strong>Peak</strong>u udává hodnotupřebíjení, takže je nabíjení později přerušeno.Při 15 mV Delta <strong>Peak</strong> se akumulátorextrémně plně nabije a přitom se velmizahřeje. Takové nabíjení sice poskytujevelmi vysoké kapacity akumulátorů, avšakpodstatně snižuje jejich životnost.22
Návod k obsluze<strong>Power</strong> <strong>Peak</strong> <strong>E1</strong>Obj. č.<strong>8471</strong>22.Nikl-kadmiové akumulátory (NiCd)Pro NiCd články doporučujeme následujícíhodnoty nabíjení:Vysoce kapacitní akumulátory 1-2 C, dbejtevšak vždy i doporuční výrobce akumulátorů.Vysoko proudové články 2-3 C, extrém až5C, dbejte však vždy i maximálních hodnotnabíjení, které udává výrobce akumulátorů.Dávejte pozor také na to, abyste pro zvolenénabíjecí proudy používali odpovídající kabelya konektory.Hodnota koncového vybíjecího napětí by seměla pohybovat v rozsahu od 0,85 do 1 V/ čl.Hodnota citlivosti Delta <strong>Peak</strong> by se mělapohybovat v rozsahu 5-8 mV/ čl.Orientační hodnoty:NiCd akumulátorystandardní používání - šetrné pro aku= 6-8 mV / čl.použití s vyššími nároky= 9-10 mV / čl.požadavky při závodech=12-15mV / čl.Nabíječ automaticky spočítá správný odpojovacírozdíl napětí celého akupacku tak, ževynásobí hodnotu jednotlivých článkůpočtem článků.Pokud je během nabíjení dosaženo předvolenéhodnoty, je nabíjení přerušeno a na displejise objeví dříve popsané hlášení o odpojení.Tyto údaje jsou pouze orientační hodnoty azávisí na příslušném typu akumulátoru. Bezpodmínečnědodržujte doporučení výrobceakumulátorů.23.Nikl-metal-hydridové akumulátory(NiMH)Pro NiMH články doporučujeme následujícíhodnoty nabíjení:Vysoce kapacitní akumulátory 0,5...1 C,dbejte však vždy i doporuční výrobce akumulátorů.Vysoko proudové články, většinou 1C,některé typy akumulátorů však mohou býtnabíjeny až hodnotou 1,5...2C. Při vyššíchnabíjecích hodnotách byste měli kontrolovatteplotu a při případném zahřátí akumulátorůsnížit hodnotu nabíjení.Dodržujte údaje výrobce o maximálníchnabíjecích proudech.Hodnota koncového vybíjecího napětí byse měla pohybovat v rozsahu od 1V/ čl.Hodnota citlivosti Delta <strong>Peak</strong> by se mělapohybovat v rozsahu 3-5 mV/ čl.Orientační hodnoty:NiMH akumulátorystandardní používání - šetrné pro aku= 5 mV / čl.použití s vyššími nároky= 6-7 mV / čl.požadavky při závodech= 8-9 mV / čl.Při nízké citlivosti odpojování může u vysokokapacitnícha také u starších akumulátorůdojít k dřívějšímu odpojení.Nastavte odpojovací hodnotu o něcovýše a spusťte nabíjení znova.23
Návod k obsluze<strong>Power</strong> <strong>Peak</strong> <strong>E1</strong>Obj. č.<strong>8471</strong>24. Záruční podmínkyNa výrobek se poskytuje záruka 24 měsícůod data prodeje. Jako doklad pro začátek aprůběh záruční lhůty slouží paragon nebopokladní lístek prodejce, který je při prodejivystaven. Eventuelní opravy neprodlužujídobu záruční lhůty.Během záruky jsou všechny opravy způsobenévýrobní nebo materiálovou vadou prováděnyzdarma v rámci servisu. Dalšínároky, jako např. následné škody, nelzeuplatňovat.Náklady spojené s odesláním do servisuhradí zákazník (prodejce), zaslání zpět odnás je již zdarma. Zásilky zatížené poplatkynemůžeme přijmout.Za škody vzniklé při dopravě nebo ztrátunemůže firma <strong>Robbe</strong> převzít zodpovědnost.Proto doporučuje využít příslušnýchpojištění. Své nabíječe zasílejte vždy servisuve Vaší zemi, který je k tomu určen.Pro zpracování Vaší záruční opravy jenutno:• přiložit doklad o koupi nabíječe• nabíječ musí být obsluhován v souladu snávodem k použití• byly použity jen doporučené zdrojenapětí a příslušenství <strong>Robbe</strong>• nabíječ nebyl vystaven vlhku, nebyly zdezjištěny žádné cizí zásahy, přetěžovánínebo mechanická poškození• pokuste se uvést možné důvody závady25. Prohlášení o shoděTímto firma robbe Modellsport GmbH & Co.KG prohlašuje, že je tento nabíječ v souladuse základními nařízeními a ostatními relevantnímipředpisy CE směrnic. Originálprohlášení o shodě najdete na internetu nawww.robbe.com u příslušného popisuvýrobku přes vyvolání pomocí „Conform“.SLOVNÍK POJMŮ:Equalizer balancerSpannung napětíStromproudKapazität kapacitaZeitdobaEinstellung (Einst.) nastaveníNutzer Einst. uživatelské nastaveníSpeichern ukládáníKopieren kopírováníAkkutyp typ akumulátoruInnenwiderstand vnitřní odporEingangsspanung vstupní napětíEntladespannung koncové napětíSPG (Spannung) napětíAbschalttemperatur odpojovací napětíNamenázevLadegerät nabíječZellenzahl počet článkůLaden/Entladen nabíjení/vybíjeníTasten Beep akustická tlačítkaLCD Licht podsvícení displejeSprache jazykNutzername uživatelské jménoEnde Speichern konec ukládáníWarnung varováníverpolt přepólovánoAkkueinstellung nastavení akumulátoruLade/Entladestrom nabíjecí/vybíjecí proudEINzapnutoJahrrokMonatměsícTagden24
Návod k obsluze<strong>Power</strong> <strong>Peak</strong> <strong>E1</strong>Obj. č.<strong>8471</strong>26. Doporučené příslušenstvíNabíjecí kabel vysíla . akuč. F1415BID čip bez kabelu provybavení dalších článků(č. 8472)Přijímačový nabíjecí kabel(č. F1416)BID čip s kabelem provybavení dalších článků(č. 8473)BID kabel, 300 mm(č. 8474)BID kabel, 500 mm(č. 8475)BID-KEY. 8888Servisní kabel 30cm č.4029Adapter pro balancer2x3S EHR pro akumulátoryrobbe, Graupner aa Kokam č. 4023Adapter pro balancer3x2S EHR pro akumulátoryrobbe, Graupner aa Kokam č. 4031Adapter pro balancer2x3S XH-EHR z Align,Lama nebo G47 na akumulátoryrobbe, Graupnernebo Kokam č. 4023XHAdapter pro balancer3x2S XH-EHR z Align,Lama nebo G47 na akurobbe, Graupner neboKokam č.4031XH25EQ-Adapter robbe-Polyquest č. 8213
Návod k obsluze<strong>Power</strong> <strong>Peak</strong> <strong>E1</strong>Obj. č.<strong>8471</strong>EQ-Adapterrobbe-JST/XH z robbena Align,Lama neboG47 aku č.8214EQ-Adapterrobbe-Thunder/Flightpower č.8215Síťový zdroj SPS 40Ač.853927. Servisní adresyZemě Firma Ulice Město Telefon Fax E-MailAndorra Sorteney Santa Anna, 13AND-00130 Les escaldes-Princip. D'Andorre 00376-862 865 00376-825 476 sorteny@sorteny.comDánsko Nordic Hobby A/S Bogensevej 13 DK-8940 Randers SV 0045-86-43 61 00 0045-86-43 77 44 hobby@nordichobby.comNěmecko robbe-Service Metzloser Str. 36 D-36355 Grebenhain 0049-6644-87-777 0049-6644-87-779 hotline@robbe.comAnglie robbe-Schlüter UK L<strong>E1</strong>0-UB GB-L<strong>E1</strong>0 3DS Leicestershire 0044-1455-637151 0044-1455-635151 keith@robbeuk.co.ukFrancie S.A.V Messe 6, Rue Usson du Poitou, BP 12 F-57730 Folschviller 0033 3 87 94 62 58 0033-3-87 94 62 58 sav-robbe@wanadoo.frŘecko TAG Models Hellas 18,Vriullon Str. GR-14341 New Philadelfia/Athen 0030-2-102584380 0030-2-102533533 info@tagmodels.grItálie MC-Electronic Via del Progresso, 25I-36010 Cavazzaledi Monticello C.Otto (Vi) 0039 0444 945992 0039 0444 945991 mcelec@libero.itHolandsko//Belg. Jan van Mouwerik Slot de Houvelaan 30 NL-3155 Maasland 0031-10-59 13 594 0031-10-59 13 594 van_Mouwerik@versatel.nlNorsko Norwegian Modellers Box 2140 N-3103 Toensberg 0047-333 78 000 0047-333 78 001 per@modellers.comRakousko robbe-Service Puchgasse 1 A-1220 Wien 0043-1259-66-52 0043-1258-11-79 office@robbe.atŠvédsko Minicars Hobby A.B. Bergsbrunnagatan 18 S-75323 Uppsala 0046-186 06 571 0046-186 06 579 info@minicars.seŠvýcársko Spahr Elektronik Gotthelfstr. 12 CH-2543 Lengau 0041-32-652 23 68 0041-32 653 73 64 spahrelektronik@bluewin.chSlov. Rep. Ivo Marhoun Horova 9 CZ-35201 AS 00420 351 120 162 ivm2000@seznam.czŠpanělsko robbe-Service Metzloser Str. 36 D-36355 Grebenhain 0049-6644-87-777 0049-6644-87-779 hotline@robbe.comČeská Rep. Ivo Marhoun Horova 9 CZ-35201 AS 00420 351 120 162 ivm2000@seznam.cz26
Návod k obsluze<strong>Power</strong> <strong>Peak</strong> <strong>E1</strong>Obj. č.<strong>8471</strong>LogView -Zobrazení sériových dat na PCPomocí námi doporučovaného a podporovanéhoLogView lze vizualizovat a analyzovatsériová data mnoha robbe nabíječů(také <strong>Power</strong> <strong>Peak</strong> <strong>E1</strong>) a v případě potřeby inejrůznějšími způsoby exportovat.Software si můžete volně stáhnout na webadrese www.logview.info. Pokud chcete,můžete zaslat autorovi příspěvek, jinak jesoftware k dispozici k volnému užívání.LogView nabízí možnost vyhodnocovánídat širokého spektra různých nabíječů. Získanádata jsou přitom zobrazována vždystejným způsobem, což uživateli ulehčízacházení s vlastní výbavou.Data vytvořené přes LogView mohou využívati ostatní uživatelé, i když právě nemajíodpovídající přístroj fyzicky před sebou.velmi dobře posoudit kvalitu a opotřebováníakumulátorů ve s rovnání s jinýmiakumulátory.• se správou objektu je možné vzniklé záznamya informace o akumulátoru seřazeněuchovávat a spravovat• četné exportní funkce grafů a tabulekumožňují použití dat také v jiných aplikacích• díky integrovanému pomocnému systémuse dostanete rychle a jednoduše kfunkcím programuPokud budete mít při používání softwarunějaké speciální dotazy nebo návrhy nadalší vylepšení LogView, můžete se kdykoliobrátit přes LogView fórum přímo na autoratohoto programu nebo si s ostatními uživatelivyměňovat zkušenosti a názory.Další vlastnosti softwaru jsou:• velmi výkonná grafika s četnými měřícímia vyhodnocovacími funkcemi• zobrazení křivek lze díky rozmanitýmfunkcím přizpůsobit vlastním potřebám• funkce analýzy pomáhá akumulátorpřesně prozkoumat• funkce pro srovnávání křivek umožňujízobrazení různých procesů nabíjení avybíjení v jednom grafu. Díky tomu lze27
28. Likvidace akumulátorů a nabíječeNikdy nevyhazujte akumulátory do běžného odpadu. Poškozené nebo použité aku vždy likvidujtena místech k tomu určených. To jsou všechna místa, kde se prodávají akumulátorynebo za támto účelem určená sběrná místa. Abyste zabránili zkratům, přelepte obnaženékontakty izolepou.Poplatek za likvidaci akumulátorů je již součástí kupní ceny. Prodejci jsou povinni vzít použiténebo poškozené články zpět. Všechna tato místa jsou povinna vzít zpět staré články,ať už jste je tam zakoupili nebo ne. Akumulátory jsou určeny k dalšímu zpracování. Tím semateriál znovu dostane do výrobního oběhu. Pomozte, prosím, chránit životní prostředí.Tento symbol znamená, že elektrické a elektronické přístroje na koncijejich životnosti nelze vyhazovat do běžného komunálního odpadu. Zlikvidujtenabíječ v místním Ekodvoru nebo recyklačním centru. Toto platí prozemě, které jsou členy EU i pro ostatní evropské země s odlišnýmisběrnými systémy.robbe Modellsport GmbH & Co.KGMetzloser Straße 38D-36355 Grebenhain OT Metzlos-GehaagTelefon +49 (0) 6644 / 87-0www.robbe.deChyby a technické změny jsou vyhrazeny.Copyright robbe-Modellsport 2009Kopírování a tisk, jakož i výňatky z tohoto návodu, jsou povoleny pouze s písemnýmsvolením firmy robbe Modellsport -GmbH & Co.KG.robbe Form 40-55213 BBAJ28