bomba de comprobación / testing pump / pompe d ... - Ega Master
bomba de comprobación / testing pump / pompe d ... - Ega Master
bomba de comprobación / testing pump / pompe d ... - Ega Master

You also want an ePaper? Increase the reach of your titles
YUMPU automatically turns print PDFs into web optimized ePapers that Google loves.
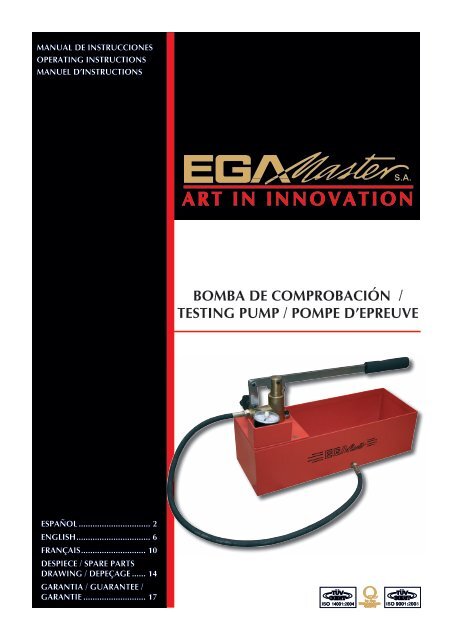
MANUAL DE INSTRUCCIONESOPERATING INSTRUCTIONSMANUEL D’INSTRUCTIONSBOMBA DE COMPROBACIÓN /TESTING PUMP / POMPE D’EPREUVEESPAÑOL................................ 2ENGLISH................................. 6FRANÇAIS............................. 10DESPIECE / SPARE PARTSDRAWING / DEPEÇAGE....... 14GARANTIA / GUARANTEE /GARANTIE............................ 17
ESPAÑOLINSTRUCCIONES DE SEGURIDAD¡Atención! Cui<strong>de</strong> su seguridad.1. La presión creada con la máquina pue<strong>de</strong> causar daños.2. Respetar las instrucciones generales <strong>de</strong> seguridad, utilizar zapatos y gafas <strong>de</strong> seguridad.3. Comprobar que las mangueras <strong>de</strong> presión no estén dañadas y que estén libres <strong>de</strong> cualquier obstrucción:si es necesario, sustituirlas con piezas originales.4. Inspeccionar el filtro <strong>de</strong> entrada antes <strong>de</strong> comenzar cualquier trabajo <strong>de</strong> comprobación.5. En caso <strong>de</strong> no utilizar la <strong>bomba</strong> por un período prolongado y/o en países <strong>de</strong> bajas temperaturas,introducir un poco <strong>de</strong> solución anti-congelante <strong>de</strong>ntro <strong>de</strong> la <strong>bomba</strong>. Esto alargará la vida <strong>de</strong> lasjuntas.6. Esta <strong>bomba</strong> está fabricada para trabajos <strong>de</strong> transplante, reparación y para instalaciones <strong>de</strong> agua.Se pue<strong>de</strong> utilizar únicamente con líquidos con una viscosidad máxima <strong>de</strong> 1,5mPas y con soluciones<strong>de</strong> agua con un pH <strong>de</strong> entre 7 y 12.CARACTERÍSTICAS TÉCNICASCapacidadPresiónConexión manguera 1/2"Peso8 Kgs.12 l/minCOD. 60005 ___60 bar=860 PsiCOD. 60009 ___100 bar=1440 Psi2
INSTRUCCIONES DE USOAntes <strong>de</strong> empezar cualquier trabajo, comprobar la integridad <strong>de</strong> todos los componentes.1. Llenar el <strong>de</strong>pósito con agua limpia. El filtro <strong>de</strong>be estar siempre instalado.2. Conectar el racor a la red a comprobar.3. Conectar la manguera a la <strong>bomba</strong>, asegurando que no haya fugas.4. Cerrar la válvula.5. Bombear el agua hasta obtener la presión <strong>de</strong> prueba.6. Dejar la línea con la presión <strong>de</strong>seada durante el tiempo <strong>de</strong> prueba.7. Abrir la válvula para retornar el agua al <strong>de</strong>pósito.1 2 345 67SOLUCIÓN AL POSIBLE PROBLEMA DEPÉRDIDA DE PRESIÓN O BOMBEO INADECUADOCuando la <strong>bomba</strong> <strong>de</strong> comprobación presenta un efecto <strong>de</strong> pérdida <strong>de</strong> presión o bombeo ina<strong>de</strong>cuado,bien porque está duro o porque no bombea agua, la causa principal suele ser que la válvula<strong>de</strong> salida se encuentra obstruida por impurezas <strong>de</strong>l agua empleada, cal, cemento, hilo u otrassustancias.3
Este problema se pue<strong>de</strong> solucionar siguiendo estos sencillos pasos:1. Desmontar el conjunto válvula <strong>de</strong> salida utilizando una llave Allen <strong>de</strong> 5 mm. Este “conjuntoválvula <strong>de</strong> salida” se compone <strong>de</strong> 4 piezas:- Ref.- 81144 - Espárrago ranurado- Ref.- 81163 - Muelle- Ref.- 81155 - Junta tórica- Ref.- 81158 - Pitón o tapón2. Comprobar que las 4 piezas se encuentran en buen estado <strong>de</strong> uso y limpiar la suciedad que pudierantener (probablemente es la causante <strong>de</strong> la obstrucción <strong>de</strong> la válvula <strong>de</strong> salida).3. Limpiar el alojamiento <strong>de</strong> la válvula <strong>de</strong> salida con la ayuda <strong>de</strong> un cepillo cilíndrico o con aire apresión.4. Volver a colocar los 4 elementos <strong>de</strong> la misma manera ajustándolo sin apretar al máximo, es<strong>de</strong>cir, sin forzar el muelle. Ya que si se fuerza el muelle, la salida <strong>de</strong> agua queda bloqueada poreste. Un ajuste correcto se comprueba bombeando agua.A modo orientativo se pue<strong>de</strong> apretar hasta que se note la fuerza <strong>de</strong>l muelle (no hacer más fuerza)y <strong>de</strong>saflojar una o dos vueltas.5. Bombear agua para comprobar el ajuste correcto <strong>de</strong> la válvula <strong>de</strong> salida.a) Si el accionamiento <strong>de</strong> la válvula está muy duro, aflojar un poco la válvula <strong>de</strong> salida con lallave Allen <strong>de</strong> 5 mm.b) Si la válvula pier<strong>de</strong> presión, apretar un poco esta válvula <strong>de</strong> salida con la llave Allen <strong>de</strong> 5 mm.81144 Espárrago ranurado A81163 Muelle B81155 Junta tórica C81158 Pitón o tapón DA B C D4
NOTAS¡IMPORTANTE!El fabricante no se responsabiliza <strong>de</strong> los daños o mal funcionamiento <strong>de</strong> la máquina en caso <strong>de</strong>que no se use correctamente o se haya utilizado para trabajos para los que no está diseñada.Para pedir cualquier repuesto, mirar en el dibujo <strong>de</strong> <strong>de</strong>spiece el número <strong>de</strong> la pieza <strong>de</strong>seada.Según la directiva sobre residuos eléctricos <strong>de</strong> aparatos eléctricos y electrónicos (RAEE),éstos <strong>de</strong>berán recogerse y tratarse por separado. Si en el futuro tiene que <strong>de</strong>shacerse <strong>de</strong> este producto,no se <strong>de</strong>shaga <strong>de</strong> él junto con la basura doméstica. Póngase en contacto con su distribuidorpara proce<strong>de</strong>r a su reciclaje <strong>de</strong> manera gratuita cuando sea posible.GARANTÍAEl fabricante garantiza al comprador <strong>de</strong> ésta máquina la garantía total durante 12 meses <strong>de</strong> laspiezas con <strong>de</strong>fectos <strong>de</strong> fabricación.Esta garantía no cubre aquellas piezas que por su uso normal tienen un <strong>de</strong>sgaste.Nota: para obtener la vali<strong>de</strong>z <strong>de</strong> la garantía, es absolutamente imprescindible que complete yremita al fabricante el documento <strong>de</strong> “CERTIFICADO DE GARANTIA”, <strong>de</strong>ntro <strong>de</strong> los siete dias apartir <strong>de</strong> la fecha <strong>de</strong> compra.5
ENGLISHSAFETY INSTRUCTIONSAttention! Be careful.1. The pressure created could lead to serious injury.2. Respect general safety instructions, use protective footwear and eyewear.3. Check that pressure hoses are free from obstruction and damage. If necessary, replace only withoriginal spare parts.4. Check inlet filter before performing any <strong>testing</strong> operation.5. If you don’t use the <strong>pump</strong> for a long time, and/or in low temperature countries, put a smallamount of anti-freeze solution insi<strong>de</strong> the <strong>pump</strong>. This will extend the gasket working life.6. The <strong>pump</strong> is ma<strong>de</strong> for transplant works, repairs and water installations. The liquids that can beused should have maximum1.5mPas viscosity and use water solutions between 7 and 12 pH.TECHNICAL CHARACTERISTICSCapacityPressureHose connection 1/2"Weight8 Kgs.12 l/minCOD. 60005 ___60 bar=860 PsiCOD. 60009 ___100 bar=1440 Psi6
WORKING INSTRUCTIONSCheck that all components are fine and correctly in place.1. Fill the tank with clean water. The filter must be always correctly placed.2. Connect the hose to the installation to be checked.3. Connnect the hose to the <strong>pump</strong>, getting sure that there is no leakage.4. Close up the valve.5. Pump up until reach the pressure test.6. Leave the <strong>pump</strong> with required pressure during <strong>testing</strong> time.7. Open up the valve allowing water ways.1 2 345 67SOLUTION TO THE POSSIBLE PROBLEM OF LOSSOF PRESSURE OR IMPROPERLY PUMPING OF THE TESTING PUMPSWhen the <strong>testing</strong> <strong>pump</strong> shows an effect of loss of pressure or improperly <strong>pump</strong>ing, because itis hard or it does not <strong>pump</strong> water, the main reason used to be that the outlet valve is blocked byimpurities of water as lime, cement, dust or other sustances.7
It is possible to solve this trouble following next steps:1. Disassemble the set of the outlet valve using a 5 mm Allen. This “set of the outlet valve” has fourpieces:- Ref.- 81144 - Grooved stud- Ref.- 81163 - Spring- Ref.- 81155 - O-ring gasket- Ref.- 81158 - Plug2. Check that these four pieces are in good conditions and clean any dirtiness they could have (probablythis dirtiness blocked the outlet valve).3. Clean the place of the outlet valve using a cylindrical brush or using compressed-air.4. Assemble back the four pieces in the same way screwing them on without forcing the spring, itmeans, do not screw on to the end. If the spring is forced, the flow of water will be blocked byit. A correct adjust could be tested <strong>pump</strong>ing water.For adjusting the set of the outlet valve, it could be screwing on until feel the spring power (donot continue screwing on) and then loosen one or two turns.5. Pump water to check the correct adjustment of the outlet valve.a) If the handle is too hard, loosen the outlet valve using a 5 mm Allen a little bit.b) If the valve loses pressure, screw on a little bit this valve using a 5 mm Allen.81144 Grooved stud A81163 Spring B81155 O-ring gasket C81158 Plug DA B C D8
NOTESIMPORTANT!The maker will not take responsibility for damage or malfunction as a result of the Testing Pumpbeing incorrectly used or, applied for a purpose for which it was not inten<strong>de</strong>d.For or<strong>de</strong>ring spare parts, please refer to the Spare Parts Drawing and note the nee<strong>de</strong>d number.According to Waste Electrical and Electronic Equipment directive (WEEE), these ones mustbe collected and arranged separately. If you have to throw them out, please, do not use the usualrubbish. Please, contact your distributor for free recycling.GUARANTEEThe maker guarantees to the machine owner 12 months against any manifacture <strong>de</strong>fect.This guaranteee do not cover the parts wich are consumables.Note: to apply the guarantee its necesary to send the “GUARANTEE CERTIFICATE” duly filledwithin one week after purchased the machine to the maker.9
GUIDE D’UTILISATIONAvant d’entreprendre tout travail, vérifier l’intégrité <strong>de</strong> tous les composants.1. Remplir le réservoir d’eau propre. Le filtre doit toujours être installé.2. Relier le raccord au réseau à vérifier.3. Relier le tuyau à la <strong>pompe</strong>, en s’assurant qu’il n’y a pas <strong>de</strong> fuites.4. Fermer la valve.5. Pomper l´eau jusque l´obtention <strong>de</strong> la pression d´epreuve.6. Laisser la ligne avec la pression désirée pendant le temps d’essai.7. Ouvrir la valve pour le retour <strong>de</strong> l´eau au reservoir.1 2 345 67SOLUTION DU PROBLÈME ÉVENTUELDE PERTE DE PRESSION OU DE POMPAGE INAPPROPRIÉQuand la <strong>pompe</strong> à épreuve présente un effet <strong>de</strong> perte <strong>de</strong> pression ou <strong>de</strong> pompage inadéquat,étant dure ou ne pompant pas l’eau, la cause principale en général vient <strong>de</strong> la valve <strong>de</strong> sortie quiest obstruée par <strong>de</strong>s impuretés d’eau usée, calcaire, ciment, fil ou toutes autres substances.11
Ce problème peut se résoudre en suivant les étapes suivantes:1. Démonter l’ensemble valve <strong>de</strong> sortie avec une clé Allen <strong>de</strong> 5mm. Cet “ ensemble valve <strong>de</strong> sortie“ se compose <strong>de</strong> 4 pièces:- Ref.- 81144 - Asperge rainurée- Ref.- 81163 - Ressort- Ref.- 81155 - Joint torique- Ref.- 81158 - Bouchon2. Vérifier que les 4 pièces se trouvent en bon état d’utilisation et nettoyer la saleté qu’ellespourraient avoir (probablement la cause <strong>de</strong> l’obstruction <strong>de</strong> la valve <strong>de</strong> sortie).3. Nettoyer l’emplacement <strong>de</strong> la valve <strong>de</strong> sortie à l’ai<strong>de</strong> d’une brosse cylindrique ou avec <strong>de</strong> l’airsous pression.4. Replacer les 4 éléments <strong>de</strong> la même manière en le réglant sans serrer au maximum, c’est à dire,sans forcer sur le ressort. Car si on force sur le ressort, la sortie d’eau reste bloquée par celui-ci.On peut vérifier que le réglage est correct en pompant l’eau.A titre orientatif, on peut serrer jusqu’à ce qu’on sente la force du ressort (ne pas forcer plus) etserrer d’un ou <strong>de</strong>ux tours.5. Pomper l’eau afin <strong>de</strong> vérifier que le réglage <strong>de</strong> la valve <strong>de</strong> sortie est correct.a) Si l’action <strong>de</strong> la valve est très dur, <strong>de</strong>sserrer un peu la valve <strong>de</strong> sortie au moyen d’une cléAllen <strong>de</strong> 5 mm.b) Si la valve perd <strong>de</strong> la pression, serrer un peu cette valve <strong>de</strong> sortie avec la clé Allen <strong>de</strong> 5 mm.81144 Asperge rainurée A81163 Ressort B81155 Joint torique C81158 Bouchon DA B C D12
NOTESIMPORTANT!Le fabricant ne se responsabilise pas <strong>de</strong>s détériorations ou du mauvais fonctionnement <strong>de</strong> lamachine dans le cas d’une mauvaise utilisation ou suite á <strong>de</strong>s usages pour lesquels elle n’est pasconcue.Pour comman<strong>de</strong>r les pièces <strong>de</strong> rechange, regar<strong>de</strong>r le <strong>de</strong>scriptif et le numéro <strong>de</strong> pièce désiré.Selon la directive <strong>de</strong>s déchets d’appareils électriques et électroniques (DEEE), ces <strong>de</strong>rniers<strong>de</strong>vront se ramasser et suivre un traitement séparé. Si dans l’l’avenir vous <strong>de</strong>vez vous débarrasser<strong>de</strong> ce produit, ne le faites pas avec le reste d’ordures ménagères. Merci <strong>de</strong> vous adresser à votredistributeur pour procé<strong>de</strong>r à son recyclage gratuit si possibleGARANTIELe fabricant donne une garantie <strong>de</strong> 12 mois à l’acquéreur <strong>de</strong> cette machine, pour les pièces avecun défaut <strong>de</strong> fabrication.La garantie ne s’applique pas aux pièces d’usure normale.Note : pour obtenir la validité <strong>de</strong> la garantie, il est obligatoire <strong>de</strong> compléter et <strong>de</strong> retourner aufabricant, le document ‘’CERTIFICAT DE GARANTIE’’ dans les 7 jours d’acquisition <strong>de</strong> la machine.13
14DESPIECE / SPARE PARTS DRAWING / DEPEÇAGE
COD. Nº DENOMINACIÓN DESCRIPTION DESCRIPTIONCANT/ QTY /QTÉ8007281141811428114381144811458114681147811488114981150811528116981153811548115581156811578115881159811608117781162811638116781168811648114081139811388117881189251234567891012121314151617181920302223292631FILTROCUERPO VÁLVULAPISTÓNMANDO DE RETORNOESPÁRRAGO VÁLVULADE SALIDAPALANCAARTICULACIÓNPASADOR TIRANTE BRAZOPASADOR TIRANTE-ÉMBOLOTAPA APOYO VÁLVULATANQUE HORIZONTALDE ACEROMANÓMETRO 60 BARMANÓMETRO 100 BARJUNTA TÓRICAØ30 X 3 (ÉMBOLO)JUNTA TÓRICAØ7,3 X 2,4 (RETORNO)JUNTA TÓRICAØ5,4 X 1,5 (SALIDA)TUBO ASPIRACIÓNBOLA ASPIRACIÓN Ø14TAPÓN VÁLVULA SALIDATORNILLO FIJO VÁLVULAM8X20 DIN 912TORNILLO PLACAM6 X15 DIN 7991PASADOR Ø3X15 DIN-94JUNTA TORICAØ12X3 (ASPIRACIÓN)MUELLE VÁLVULA SALIDAAGARRADERO GOMA ESPUMAMUELLE-CHAVETA TRANSPORTEKIT DE JUNTASCONJUNTO VÁLVULAMANGUERA(ASIENTO PLANO Y CÓNICO)JUNTA TÓRICA PARAMANGUERA (ASIENTO PLANO)TUBO DE RETORNOCONJUNTO VÁLVULADE SALIDAFILTERVALVE BODYPISTONRETURNING KNOBSTUDBARJOINTPINPINVALVE SETTING PLATESTEEL HORIZONTAL TANKMANOMETER 60 BARMANOMETER 100 BARO-RINGØ30 X 3 PISTONO-RINGØ7,3 X 2,4 RETURNINGO-RING Ø5,4 X 1,5OUT WAYASPIRATION TUBEBALL Ø14OUTLET VALVE PLUGSCREW M8X20DIN 912SCREW M6X15DIN 7991PIN Ø3X15 DIN-94ASPIRATION O RINGØ12 X 3OUTLET VALVE SPRINGFOAM HANDLETRANSPORT SPRINGO-RINGS SETVALVE SETHOSE(FLAT SEAT AND CONIC SEAT)O-RING FOR HOSE WITHFLAT AND CONIC SEATRETURNING TUBEOUTLET VALVE SETFILTRECORPS DE VALVEPISTONCOMMANDE DE RETOURGOUPILLELEVIERARTICULATIONCLAVETTECLAVETTESUPPORT DE VALVECUVE HORIZONTALEACIERMANOMÉTRE 60 BARSMANOMÉTRE 100 BARSJOINT TORIQUE Ø30 X 3PISTONJOINT TORIQUE Ø7,3 X 2,4RETOURJOINT TORIQUE Ø5,4 X 1,5SORTIETUBE D’ASPIRATIONBOULE Ø14BOUCHON DE SORTIE DE VALVEVIS M8X20DIN 912SCREW M6X15DIN 7991PIN Ø3X15 DIN-94JOINT TORIQUEØ12 X 3RESSORT DE SORTIE DE VALVEMANCHONTRANSPORT SPRINGJEU DE JOINTS TORIQUESENSEMBLE DE VALVETUBE (BASE PLATEET CONIQUE)JOINT TORIQUE POURTUBE ( BASE PLANE)RETOURENSEMBLE DE SORTIEDE VALVE1111112211111111111343111111111115
CERTIFICADO DE GARANTIAGUARANTEE CERTIFICATECERTIFICAT DE GARANTIEARTICULO / ITEM / ARTICLE:.....................................................................................................................Nº DE SERIE / SERIE Nº / Nº SERIE:............................................................................................................DISTRIBUIDOR / DISTRIBUTOR / DISTRIBUTEUR:....................................................................................PAIS / COUNTRY / PAYS:..............................................................................TEL.:....................................FECHA DE VENTA / SALE DATE / DATE VENTE:.........................................................................................NOMBRE DEL COMPRADOR / BUYER NAME / NOM DE L’ACHETEUR:...................................................TEL. COMPRADOR / BUYER TEL. / TEL. DE L’ACHETEUR:.........................................................................EGA MASTER GARANTIZA AL COMPRADOR DE ESTA MAQUINA LA GARANTIA TOTAL (DURANTE 12 MESES), DE LAS PIEZAS CON DEFECTOS DE FABRICACION. ESTAGARANTIA NO CUBRE AQUELLAS PIEZAS QUE POR SU USO NORMAL TIENEN UN DESGASTE. PARA OBTENER LA VALIDEZ DE LA GARANTIA , ES ABSOLUTAMENTEIMPRESCINDIBLE QUE COMPLETE Y REMITA ESTE DOCUMENTO A EGA MASTER , DENTRO DE LOS SIETE DIAS A PARTIR DE LA FECHA DE COMPRA.EGA MASTER GUARANTEES TO THE BUYER OF THIS MACHINE THE TOTAL WARRANTY (DURING 12 MONTHS), OF THE PIECES WITH MANUFACTURING FAULTS.THIS GUARANTEE DOES NOT COVER THOSE PIECES WORN OUT DUE TO A NORMAL USE. IN ORDER TO OBTAIN THE VALIDITY OF THIS WARRANTY , IT IS ABSOLUTE-LY NECESSARY TO FULFILL THIS DOCUMENT AND RESEND IT TO EGA MASTER WITHIN 7 DAYS FROM SALE DATE.EGA MASTER GARANTIE A L’ACHETEUR DE CETTE MACHINE LA GARANTIE TOTALE (PENDANT 12 MOIS) DES PIECES AVEC DEFAUTS DE FABRICATION. CETTE GARANTIENE COUVRE PAS LES PIECES QUE PAR UN USAGE NORMAL, SOIENT DETERIOREES. POUR OBTENIR LA VALIDITE DE LA GARANTIE, IL EST ABSOLUMENT IMPERATIFCOMPLETER ET ENVOYER CE DOCUMENT EGA MASTER, DANS UN DELAI DE 7 JOURS A PARTIR DE LA DATE D’ACHAT.SELLO / STAMP / CACHETEJEMPLAR PARA EGA MASTER / COPY FOR EGA MASTER / EXEMPLAIRE POUR EGA MASTERCERTIFICADO DE GARANTIAGUARANTEE CERTIFICATECERTIFICAT DE GARANTIEARTICULO / ITEM / ARTICLE:.....................................................................................................................Nº DE SERIE / SERIE Nº / Nº SERIE:............................................................................................................DISTRIBUIDOR / DISTRIBUTOR / DISTRIBUTEUR:....................................................................................PAIS / COUNTRY / PAYS:..............................................................................TEL.:....................................FECHA DE VENTA / SALE DATE / DATE VENTE:.........................................................................................NOMBRE DEL COMPRADOR / BUYER NAME / NOM DE L’ACHETEUR:...................................................TEL. COMPRADOR / BUYER TEL. / TEL. DE L’ACHETEUR:.........................................................................EGA MASTER GARANTIZA AL COMPRADOR DE ESTA MAQUINA LA GARANTIA TOTAL (DURANTE 12 MESES), DE LAS PIEZAS CON DEFECTOS DE FABRICACION. ESTAGARANTIA NO CUBRE AQUELLAS PIEZAS QUE POR SU USO NORMAL TIENEN UN DESGASTE. PARA OBTENER LA VALIDEZ DE LA GARANTIA , ES ABSOLUTAMENTEIMPRESCINDIBLE QUE COMPLETE Y REMITA ESTE DOCUMENTO A EGA MASTER , DENTRO DE LOS SIETE DIAS A PARTIR DE LA FECHA DE COMPRA.EGA MASTER GUARANTEES TO THE BUYER OF THIS MACHINE THE TOTAL WARRANTY (DURING 12 MONTHS), OF THE PIECES WITH MANUFACTURING FAULTS.THIS GUARANTEE DOES NOT COVER THOSE PIECES WORN OUT DUE TO A NORMAL USE. IN ORDER TO OBTAIN THE VALIDITY OF THIS WARRANTY , IT IS ABSOLUTE-LY NECESSARY TO FULFILL THIS DOCUMENT AND RESEND IT TO EGA MASTER WITHIN 7 DAYS FROM SALE DATE.EGA MASTER GARANTIE A L’ACHETEUR DE CETTE MACHINE LA GARANTIE TOTALE (PENDANT 12 MOIS) DES PIECES AVEC DEFAUTS DE FABRICATION. CETTE GARANTIENE COUVRE PAS LES PIECES QUE PAR UN USAGE NORMAL, SOIENT DETERIOREES. POUR OBTENIR LA VALIDITE DE LA GARANTIE, IL EST ABSOLUMENT IMPERATIFCOMPLETER ET ENVOYER CE DOCUMENT EGA MASTER, DANS UN DELAI DE 7 JOURS A PARTIR DE LA DATE D’ACHAT.SELLO / STAMP / CACHETEJEMPLAR PARA EL CLIENTE / COPY FOR THE CUSTOMER / EXEMPLAIRE POUR LE CLIENT
C/ ZORROLLETA 11, POL. IND. JUNDIZ01015 VITORIA, SPAIN P.O.B. APTDO. 5005TEL. 34 - 945 290 001 FAX. 34 - 945 290 141master@egamaster.comwww.egamaster.com