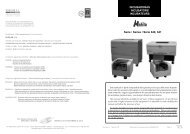
MICRÃTOMO DE ROTACIÃN ROTATION MICROTOME ... - Auxilab
MICRÃTOMO DE ROTACIÃN ROTATION MICROTOME ... - Auxilab
MICRÃTOMO DE ROTACIÃN ROTATION MICROTOME ... - Auxilab

You also want an ePaper? Increase the reach of your titles
YUMPU automatically turns print PDFs into web optimized ePapers that Google loves.
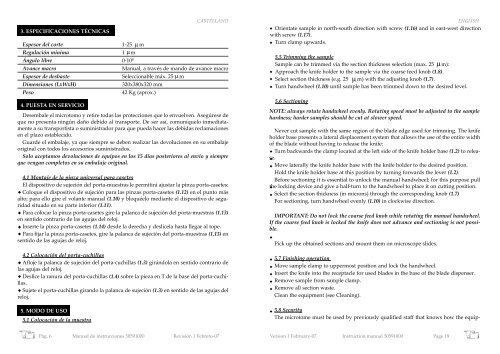
3. ESPECIFICACIONES TÉCNICAS<br />
Espesor del corte 1-25 μ m<br />
Regulación mínima 1 μm<br />
Ángulo libre 0-10º<br />
Avance macro<br />
Manual, a través de mando de avance macro<br />
Espesor de desbaste Seleccionable máx. 25 μ m<br />
Dimensiones (LxWxH)<br />
Peso<br />
4. PUESTA EN SERVICIO<br />
5. MODO <strong>DE</strong> USO<br />
5.1 Colocación de la muestra<br />
320x380x320 mm<br />
42 Kg (aprox.)<br />
CASTELLANO<br />
Desembale el microtomo y retire todas las protecciones que lo envuelven. Asegúrese de<br />
que no presenta ningún daño debido al transporte. De ser así, comuníquelo inmediatamente<br />
a su transportista o suministrador para que pueda hacer las debidas reclamaciones<br />
en el plazo establecido.<br />
Guarde el embalaje, ya que siempre se deben realizar las devoluciones en su embalaje<br />
original con todos los accesorios suministrados.<br />
Solo aceptamos devoluciones de equipos en los 15 días posteriores al envío y siempre<br />
que vengan completos en su embalaje original.<br />
4.1 Montaje de la pinza universal para casetes<br />
El dispositivo de sujeción del porta-muestras le permitirá ajustar la pinza porta-casetes:<br />
• Coloque el dispositivo de sujeción para las pinzas porta-casetes (1.12) en el punto más<br />
alto; para ello gire el volante manual (1.10) y bloquéelo mediante el dispositivo de seguridad<br />
situado en su parte inferior (1.11).<br />
• Para colocar la pinza porta-casetes gire la palanca de sujeción del porta-muestras (1.13)<br />
en sentido contrario de las agujas del reloj.<br />
• Inserte la pinza porta-casetes (1.14) desde la derecha y deslícela hasta llegar al tope.<br />
• Para fijar la pinza porta-casetes, gire la palanca de sujeción del porta-muestras (1.13) en<br />
sentido de las agujas de reloj.<br />
4.2 Colocación del porta-cuchillas<br />
• Afloje la palanca de sujeción del porta-cuchillas (1.3) girándola en sentido contrario de<br />
las agujas del reloj.<br />
• Deslice la ranura del porta-cuchillas (1.4) sobre la pieza en T de la base del porta-cuchillas.<br />
• Sujete el porta-cuchillas girando la palanca de sujeción (1.3) en sentido de las agujas del<br />
reloj.<br />
ENGLISH<br />
• Orientate sample in north-south direction with screw (1.16) and in east-west direction<br />
with screw (1.17).<br />
• Turn clamp upwards.<br />
5.5 Trimming the sample<br />
Sample can be trimmed via the section thickness selection (max. 25 μ m):<br />
• Approach the knife holder to the sample via the coarse feed knob (1.8).<br />
• Select section thickness (e.g. 25 μ m) with the adjusting knob (1.7).<br />
• Turn handwheel (1.10) until sample has been trimmed down to the desired level.<br />
5.6 Sectioning<br />
NOTE: always rotate handwheel evenly. Rotating speed must be adjusted to the sample<br />
hardness; harder samples should be cut at slower speed.<br />
Never cut sample with the same region of the blade edge used for trimming. The knife<br />
holder base presents a lateral displacement system that allows the use of the entire width<br />
of the blade without having to release the knife:<br />
• Turn backwards the clamp located at the left side of the knife holder base (1.2) to relea-<br />
• se.<br />
•<br />
Move laterally the knife holder base with the knife holder to the desired position.<br />
Hold the knife holder base at this position by turning forwards the lever (1.2).<br />
Before sectioning it is essential to unlock the manual handwheel; for this purpose pull<br />
the locking device and give a half-turn to the handwheel to place it on cutting position.<br />
•<br />
•<br />
Select the section thickness (in microns) through the corresponding knob (1.7)<br />
For sectioning, turn handwheel evenly (1.10) in clockwise direction.<br />
IMPORTANT: Do not lock the coarse feed knob while rotating the manual handwheel.<br />
If the coarse feed knob is locked the knife does not advance and sectioning is not possible.<br />
•<br />
Pick up the obtained sections and mount them on microscope slides.<br />
• 5.7 Finishing operation<br />
• Move sample clamp to uppermost position and lock the handwheel.<br />
• Insert the knife into the receptacle for used blades in the base of the blade dispenser.<br />
• Remove sample from sample clamp.<br />
• Remove all section waste.<br />
Clean the equipment (see Cleaning).<br />
• 5.8 Security<br />
The microtome must be used by previously qualified staff that knows how the equip-<br />
Pág. 6 Manual de instrucciones 50591000 Revisión 1 Febrero-07<br />
Version 1 February-07 Instruction manual 50591000 Page 19