QT-8 instructions REV8_FCC - Qwik Tune
QT-8 instructions REV8_FCC - Qwik Tune
QT-8 instructions REV8_FCC - Qwik Tune

You also want an ePaper? Increase the reach of your titles
YUMPU automatically turns print PDFs into web optimized ePapers that Google loves.
®<br />
<strong>QT</strong>-8<br />
Instructions<br />
1. For electric guitars, insert cable into “IN”<br />
jack. For acoustic guitars, hold the guitar so<br />
the sound hole is within 4-8 inches (100-<br />
200mm) of the “MIC” hole on the front of<br />
tuner.<br />
2. Press ON.<br />
3. Strike any string. The string being tuned<br />
will show at the bottom of the LCD meter.<br />
4. While tuning, if the needle stops to the left<br />
of “0” the pitch of the string is flat (♭).<br />
Increase tension on the string. Strike the<br />
string again. Repeat until the meter needle<br />
lines up under the “0” on the meter. The<br />
string is then in tune.<br />
5. If the needle strops to the right of the “0”<br />
the pitch of the string is sharp (#).<br />
Decrease string tension. Strike the string<br />
again. Repeat until the meter needle lines<br />
up under the “0” on the meter.<br />
6. The QWIK TUNE® is more sensitive and the<br />
meter is faster acting than some other guitar<br />
tuners. On some guitars the needle on<br />
LCD meter may move rapidly from one<br />
reading to another. If this happens, try<br />
striking the guitar string more lightly. Also,<br />
when tuning an acoustic guitar, make sure<br />
there is no background noise in the room<br />
(voices, other musical instruments, radio,<br />
etc.)<br />
7. After 2 minutes of non use, QWIK TUNE®<br />
will automatically shut off to save battery<br />
power.<br />
8. IN and OUT jacks are provided so the<br />
QWIK TUNE® can be used “in line” during<br />
performance without affecting the guitar<br />
sound.<br />
Enjoy your music!<br />
QWIK TUNE LIMITED U.S.A.<br />
WARRANTY<br />
This product is warranted to the original<br />
purchaser to be free from defects in material<br />
and workmanship for a period of 12<br />
months from the date of purchase,<br />
provided you provide proof of purchase at<br />
the time of requesting warranty service. In<br />
the event of defect we will, at our option,<br />
repair or replace the defective product with<br />
a new or reconditioned product, provided<br />
the defective product is returned beforehand<br />
postage and insurance prepaid to<br />
Evets Corporation at the address below.<br />
This warranty does not cover batteries,<br />
casings, or damage caused by accident or<br />
misuse. Warranty valid in the USA. This<br />
warranty gives you specific legal rights.<br />
You may also have other rights which vary<br />
from state to state. Please retain a copy of<br />
this warranty and your sales receipt.<br />
EVETS CORPORATION<br />
P.O. Box 1327, Camarillo,<br />
CA 93011<br />
Telephone: (805) 389-4605<br />
Fax: (805) 383-2050<br />
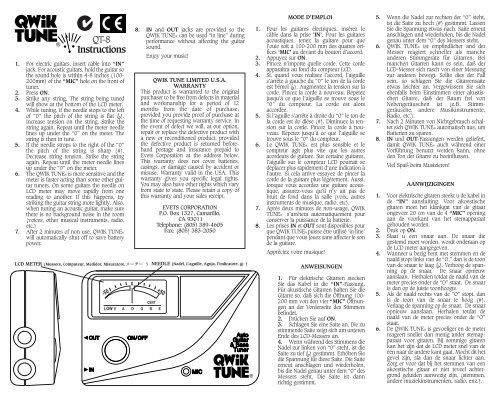
LCD METER (Messers, Computeur, Medidor, Misuratore, ) NEEDLE (Nadel, L’aguille, Aguja, l’indicatore, )<br />
®<br />
MODE D’EMPLOI<br />
1. Pour les guitares électriques, insérez le<br />
câble dans la prise ’IN’. Pour les guitares<br />
acoustiques, tenez la guitare pour que<br />
l’ouie soit à 100-200 mm des quatres orifices<br />
‘MIC’ au devant du bouton d’accord.<br />
2. Appuyez sur ON.<br />
3. Pincez n’importe quelle corde. Cette corde<br />
apparaîtra au fond du compteur LCD.<br />
4. Si, quand vous réalisez l’accord, l’aiguille<br />
s’arrête à gauche du “0” le ton de la corde<br />
est bémol (♭). Augmentez la tension sur la<br />
corde. Pincez la corde à nouveau. Répétez<br />
jusqu’à ce que l’aiguille se trouve sous le<br />
“0” du compteur. La corde est alors<br />
accordée.<br />
5. Si l’aguille s’arrête à droite du “0” le ton de<br />
la corde est do dièse (#). Diminuez la tension<br />
sur la corde. Pincez la corde à nouveau.<br />
Répétez jusqu’à ce que l’aiguille se<br />
trouve sous le “0” du compteur.<br />
6. Le QWIK TUNE® est plus sensible et le<br />
compteur agit plus vite que les autres<br />
acordeurs de guitare. Sur certaine guitares,<br />
l’aiguille sur le compteur LCD pourrait se<br />
déplacer plus rapidement d’une indication à<br />
l’autre. Si cela arrive essayez de pincer la<br />
corde de la guitare plus légèrement. Aussi,<br />
lorsque vous accordez une guitare acoustique,<br />
assurez-vous qu’il n’y ait pas de<br />
bruit de fond dans la salle (voix, autres<br />
instruments de musique, radio, etc).<br />
7. Aprés deux minutes de non-usage, QWIK<br />
TUNE® s’arrêtera automatiquement pour<br />
conserver la puissance de la batterie.<br />
8. Les prises IN et OUT sont disponibles pour<br />
que QWIK TUNE®puisse être utilisé ‘in line’<br />
pendant que vous jouez sans affecter le son<br />
de la guitare.<br />
Appréciez votre musique!<br />
ANWEISUNGEN<br />
1. Für elektrische Gitarren stecken<br />
Sie das Kabel in die “IN”-Fassung.<br />
Für akustische Gitarren halten Sie die<br />
Gitarre so, daß sich die Öffnung 100-<br />
200 mm von den vier “MIC” Öffnungen<br />
an der Vorderseite des Stimmers<br />
befindet.<br />
2. Drücken Sie auf ON.<br />
3. Schlagen Sie eine Saite an. Die zu<br />
stimmende Saite zeigt sich am unteren<br />
Ende des LCD-Messers an.<br />
4. Wenn während des Stimmens die<br />
Nadel zur linken von “0” steht, ist die<br />
Saite zu tief (♭) gestimmt. Erhöhen Sie<br />
die Spannung für diese Saite. Die Saite<br />
erneut anschlagen und wiederholen,<br />
bis die Nadel genau unter dem “0” des<br />
Messers steht. Die Saite ist dann<br />
richtig gestimmt.<br />
5. Wenn die Nadel zur rechten der “0” steht,<br />
ist die Saite zu hoch (#) gestimmt. Lassen<br />
Sie die Spannung etwas nach. Saite erneut<br />
anschlagen und wiederholen, bis die Nadel<br />
genau unter dem “0” des Messers steht.<br />
6. QWIK TUNE® ist empfindlicher and der<br />
Messer reagiert schneller als manche<br />
anderen Stimmgeräte für Gitarren. Bei<br />
manchen Gitarren kann es sein, daß der<br />
LCD-Messer sich rasch von einer Messung<br />
zur anderen bewegt. Sollte dies der Fall<br />
sein, so schlagen Sie die Gitarrensaite<br />
etwas leichter an. Vergewissern Sie sich<br />
ebenfalls beim Einstimmen einer akustischen<br />
Gitarre, daß der Raum frei von<br />
Nebengeräuschen ist (z.B. Stimmgeräusche,<br />
Radio, etc.).<br />
andere Musikinstrumente,<br />
7. Nach 2 Minuten von Nichtgebrauch schaltet<br />
sich QWIK TUNE® automatisch aus, um<br />
Batterien zu sparen.<br />
8. IN und OUT-Fassungen werden geliefert,<br />
damit QWIK TUNE® auch während einer<br />
Vorführung benutzt werden kann, ohne<br />
den Ton der Gitarre zu beeinflussen.<br />
Viel Spaß beim Musizieren!<br />
AANWIJZIGINGEN<br />
1. Voor elektrische gitaren steekt u de kabel in<br />
de “IN” aansluiting. Voor akoestische<br />
gitaren moet het klankgat van de gitaar<br />
ongeveer 20 cm van de 4 “MIC” opening<br />
aan de voorkant van het stemapparaat<br />
gehouden worden.<br />
2. Druk op ON.<br />
3. Slaat u een snaar aan. De snaar die<br />
gestemd moet worden, wordt onderaan op<br />
de LCD meter aangegeven.<br />
4. Wanneer u bezig bent met stemmen en de<br />
naald stopt links van de “O,” dan is de toon<br />
van de snaar te laag (♭). Verhoog de spanning<br />
op de snaar. De snaar opnieuw<br />
aanslaan. Herhalen totdat de naald van de<br />
meter precies onder de “O” staat. De snaar<br />
is dan op de juiste toonhoogte.<br />
5. Als de naald rechts van de “O” stopt, dan<br />
is de toon van de snaar te hoog (#).<br />
Verlaag de spanning op de snaar. De snaar<br />
opnieuw aanslaan. Herhalen totdat de<br />
naald van de meter precies onder de “O”<br />
staat.<br />
6. De QWIK TUNE® is gevoeliger en de meter<br />
reageert sneller dan menig ander stemapparaat<br />
voor gitaren. Bij sommige gitaren<br />
kan het zijn dat de LCD meter snel van de<br />
één naar de andere kant gaat. Mocht dit het<br />
gevel zijn, sla dan de snaar lichter aan.<br />
Zorg er voor dat bij het stemmen van een<br />
akoestische gitaar er niet teveel achtergrond<br />
geluiden aanwezig zijn, (stemmen,<br />
andere muziekinstrumenten, radio, enz.).
7. Na 2 minuten niet gebruiken, zal QWIK<br />
TUNE® automatisch stoppen om het<br />
8.<br />
gebruik van de batterij te besparen.<br />
De IN en OUT dienen voor de aansluiting<br />
van de gitaar (IN) en een versterker (OUT)<br />
zodat er tijdens een optreden gebruik<br />
gemaakt kan worden van de QWIK TUNE®,<br />
zonder de toon van de gitaar te beïnvloeden.<br />
VEEL PLEZIER BIJ HET SPELEN!<br />
ISTRUZIONI<br />
1. Per chitarre elettriche, inserire il cavo nella<br />
presa “IN.” Per chitarre acustiche, tenere la<br />
chitarra in modo che l’apertura della cassa<br />
armonica sia a circa 10/20 cm. dai quattro<br />
microfoni “MIC” situati nella parte anteriore<br />
dell’accordatore.<br />
2. Premere ON.<br />
3. Suonare una corda. La corda che si sta<br />
accordando comparirà nella parte inferiore<br />
del misuratore LCD.<br />
4. Se mentre si accorda l’indicatore si ferma a<br />
sinistra dello “0,” la corda è più bassa di<br />
mezzo tono (♭). Aumentarne la tensione.<br />
Ripetere finché l’indicatore è perfettamente<br />
allineato con lo “0” La corda è allora intonata.<br />
5. Se l’indicatore si ferma a destra dello “0,” la<br />
corda è più alta di mezzo tono (#).<br />
Diminuirne la tensione. Suonare di nuovo<br />
la corda; ripetere finché l’indicatore è perfettamente<br />
allineato con lo “0.”<br />
6. Il QWIK TUNE® è dotato di un misuratore<br />
piu’ veloce di molti altri accordatori ed è<br />
piu’ sensibile. Su qualche strumento o nota<br />
musicale, l’indicatore potrebbe muoversi<br />
rapidamente durante l’accordo. Se succede,<br />
provare a suonare la nota piu’ gentilmente.<br />
Durante l’accordatura di uno strumento<br />
non-elettrico, assicurarsi che non ci sia<br />
rumore di fondo nella stanza (voci, altri<br />
strumenti di musica, radio, ecc).<br />
7. Se non è in uso per due minuti, QWIK<br />
TUNE® si spegnerà automaticamente per<br />
risparmiare la carica della batteria.<br />
8. QWIK TUNE® è dotato di prese IN e OUT,<br />
in modo da poter essere usato “in line”<br />
durante lo spettacolo senza influire sul<br />
suono della chitarra.<br />
Godetevi la vostra musica!<br />
INSTRUCÇÕES<br />
1. Para guitarras eléctricas, inseri o cabo na<br />
conexão “IN.” Para guitarras acústicas,<br />
segura numa maneira que a saída de som<br />
fique entre 100 a 200 mm dos quatro<br />
microfones “MIC” na face da afinador.<br />
2. Aperte o ON/OFF.<br />
3. Basta tocar corda qualquer. A corda que<br />
está sendo afinado vai aparecer no baixo<br />
do contador LCD.<br />
4. Enquanto está afinando, se a agulha pare<br />
na esquerda do “0” o tom da corda está<br />
baixo (♭). Aumenta a tensão da corda. Toca<br />
a corda de novo. Repete até que a agulha<br />
centraliza se em baixo do “0” no contador.<br />
O corda então está afinado.<br />
5. Se a agulha pare na direita do “0” o tom<br />
está alto (#). Afrouxa a tensão da corda.<br />
Toca a corda de novo. Repete até que a<br />
agulha centraliza se em baixo do “0” no<br />
contador.<br />
6. A QWIK TUNE® é mais sensível e o contador<br />
é mais rapido do que algumas outras<br />
afinadores de guitarras. Com algumas guitarras,<br />
a agulha no LCD vai mover se mais<br />
rapidamente de uma ponta para outra. Se<br />
isto acontece, tente tocando a corda numa<br />
maneira mais suave. Também, quando está<br />
afinando uma guitarra acústica, verifica<br />
que não há barrulho na sala (vozes, outras<br />
instrumentos, radio, etcétera.)<br />
7. Depois de 2 minutos de não ser usado,<br />
QWIK TUNE® vai disligar automáticamente.<br />
8. Os conexões IN e OUT permitem que o<br />
QWIK TUNE® pode ser usado simultâneamente<br />
durante uma presentação sem<br />
afeitar o som da guitarra.<br />
Diverta-se com sua musica!<br />
INSTRUCCIONES<br />
1. Para guitarras eléctricas conecte el cable en<br />
el conector “IN.” Para guitarras acústicas,<br />
sujete la guitarra de manera que la salida<br />
del sonido quede a una distancia entre 4-6<br />
inches (10-20 centímetros) de las 4 salidas<br />
de sonido “MIC” situadas al frente del afinador.<br />
2. Presione ON.<br />
3. Hacer resonar cualquier cuerda. La cuerda<br />
que se está afinando aparecerá señalada en<br />
la parte baja del medidor LCD.<br />
4. Mientras afina, si la aguja se detiene a la<br />
izquierda de la marca “0,” el tono de la<br />
cuerda es bajo (♭). Aumente la tensión de la<br />
cuerda. Resuene la cuerda nuevamente.<br />
Repita hasta que la aguja en el medidor<br />
coincida con el punto “0” Es el punto<br />
donde la cuerda queda afinada.<br />
5. Si la aguja se detiene a la derecha del punto<br />
“0,” el tono de la cuerda esta alto (#).<br />
Disminuya la tensión de la cuerda. Resuene<br />
la cuerda nuevamente. Repita hasta que la<br />
aguja del medidor coincida con el punto<br />
“0”.<br />
6. El QWIK TUNE® i(afinador rápido) es más<br />
sensible y el medidor trabajará más rapido<br />
que otros afinadores de guitarra. En algunas<br />
guitarras la aguja en el medidor LCD se<br />
puede mover rápidamente de una lectura a<br />
otra. Si esto sucede trate de resonar la cuer-<br />
1.<br />
2.<br />
3.<br />
4.<br />
5.<br />
6.<br />
7.<br />
8.<br />
da de la guitarra de manera más suave.<br />
Igualmente cuando afine una guitarra<br />
acústica asegúrese de que no halla ruido en<br />
el ambiente (voces, otros instrumentos,<br />
radio, etcétera).<br />
7. Después de 2 minutos de no uso, el QWIK<br />
TUNE® se apagará automáticamente para<br />
proteger la carga de la bateria.<br />
8. Se suministran los conectores IN y OUT<br />
para que el QWIK TUNE® puede ser usado<br />
simultáneamente durante una presentación<br />
sin que afecte el sonido de la guitarra.<br />
¡DISFRUTE SU MUSICA!<br />
This product complies with <strong>FCC</strong> Part 15 rules.<br />
Operation of this product is permitted in USA<br />
provided this product does not cause harmful<br />
interference and provided this product accepts<br />
interference from other devices, even if that<br />
interference is detrimental to performance of<br />
this product.<br />
EEC Agent: John Hornby Skewes & Co., Ltd.<br />
Salem House, Parkinson Approach, Garforth, Leeds LS25 2HR UK<br />
© EC 2007