Lavadora Washing Machine - LG Electronics
Lavadora Washing Machine - LG Electronics
Lavadora Washing Machine - LG Electronics

You also want an ePaper? Increase the reach of your titles
YUMPU automatically turns print PDFs into web optimized ePapers that Google loves.
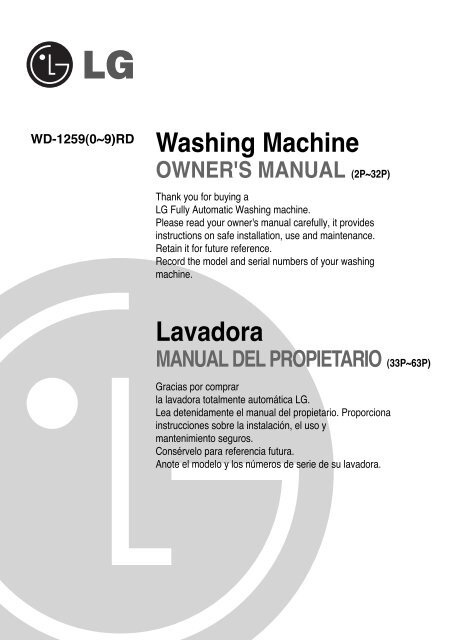
WD-1259(0~9)RD<br />
<strong>Washing</strong> <strong>Machine</strong><br />
OWNER'S MANUAL (2P~32P)<br />
Thank you for buying a<br />
<strong>LG</strong> Fully Automatic <strong>Washing</strong> machine.<br />
Please read your owner's manual carefully, it provides<br />
instructions on safe installation, use and maintenance.<br />
Retain it for future reference.<br />
Record the model and serial numbers of your washing<br />
machine.<br />
<strong>Lavadora</strong><br />
MANUAL DEL PROPIETARIO (33P~63P)<br />
Gracias por comprar<br />
la lavadora totalmente automática <strong>LG</strong>.<br />
Lea detenidamente el manual del propietario. Proporciona<br />
instrucciones sobre la instalación, el uso y<br />
mantenimiento seguros.<br />
Consérvelo para referencia futura.<br />
Anote el modelo y los números de serie de su lavadora.
P<br />
roduct Feature<br />
<br />
<br />
<br />
<br />
<br />
<br />
<br />
Direct Drive System<br />
The advanced Brushless DC motor directly drives the drum without<br />
belt and pulley.<br />
Water Circulation<br />
Sprays detergent solution and water onto the load over and over.<br />
Clothes are soaked more quickly and thoroughly during wash cycle.<br />
The detergent suds can be removed more easily by the water shower during rinse<br />
cycle. The water circulation system uses both water and detergent more<br />
efficiently.<br />
Tilted Drum and Extra Large Door Opening<br />
Tilted drum and extra large opening make it possible to load<br />
and unload clothing more easily.<br />
RollerJets<br />
<strong>Washing</strong> ball enhances the wash performance and reduces damage<br />
to the clothing. The jets spray and help tumble clothes to enhance<br />
washing performance while maintaining fabric care.<br />
Automatic Wash Load Detection<br />
Automatically detects the load and optimizes the washing time.<br />
Built-in Heater<br />
Internal heater helps to maintain water temperature at its optimum level for<br />
selected cycles.<br />
Child Lock<br />
The Child lock prevents children from pressing any button to change the settings<br />
during operation.<br />
Í<br />
ndice<br />
Warnings ......................................................................................................................3<br />
Specification...................................................................................................................5<br />
Installation......................................................................................................................6<br />
Care before washing....................................................................................................12<br />
Adding detergent..........................................................................................................13<br />
Function ....................................................................................................................14<br />
How to use washer ......................................................................................................15<br />
Maintenance ................................................................................................................25<br />
Troubleshooting guide .................................................................................................28<br />
Terms of Warranty .......................................................................................................32<br />
2
W arnings<br />
READ ALL INSTRUCTIONS AND EXPLANATION OF THE INSTALLATION BEFORE USE<br />
WARNING!<br />
For your safety, the information in this manual must be followed to minimize<br />
the risk of fire or explosion, electric shock, or to prevent property damage,<br />
personal injury, or loss of life.<br />
IMPORTANT SAFETY INSTRUCTIONS<br />
WARNING : To reduce the risk of fire, electric shock, or injury to persons when using<br />
the washer, follow basic precautions, including the following:<br />
• Before installation, check exterior damages. If it has,<br />
do not install.<br />
• Do not install or store the washer where it will<br />
be exposed to the weather.<br />
• Do not tamper with controls.<br />
• Do not repair or replace any part of the washer<br />
or attempt any servicing unless specifically<br />
recommended in the user-maintenance instructions<br />
or published user-repair instructions that you<br />
understand and have the skills to carry out.<br />
• Keep the area underneath and around your<br />
appliances free of combustible materials such as<br />
lint, paper, rags, chemicals, etc.<br />
• Close supervision is necessary if this appliance is<br />
used by or near children or infirm persons.<br />
Do not allow them to play on, with, or inside this<br />
or any other appliance.<br />
• Keep washer away from fire.<br />
• Do not leave the washer door open.<br />
An open door could entice children to hang on the<br />
door or crawl inside the washer.<br />
• Never reach into washer while it is moving. Wait<br />
until the drum has completely stopped.<br />
• The laundry process can reduce the flame retardant<br />
of fabrics.<br />
• To avoid such a result, carefully follow the garment<br />
manufacturer’s wash and care instructions.<br />
• Do not wash or dry articles that have been cleaned<br />
in, washed in, soaked in, or spotted with<br />
combustible or explosive substances (such as wax,<br />
oil, paint, gasoline, degreasers, dry-cleaning<br />
solvents, kerosene, etc.) which may ignite or<br />
explode. Oil may remain in the tub after a whole<br />
cycle resulting in fire during drying. So, do not load<br />
oiled clothes.<br />
• Do not slam the washer door closed or try to force<br />
the door open when locked. This could result in<br />
damage to the washer.<br />
• When the machine runs high temperature, the front<br />
door may be very hot. Don’t touch it.<br />
• To minimize the possibility of electric shock, unplug<br />
this appliance from the power supply or disconnect<br />
the washer at the household distribution panel by<br />
removing the fuse or switching off the circuit breaker<br />
before attempting any maintenance or cleaning.<br />
• When unplugging power cord, do not pull out by<br />
grasping the cord. Otherwise, the power cord may<br />
be damaged.<br />
• Never attempt to operate this appliance if it is<br />
damaged, malfunctioning, partially disassembled, or<br />
has missing or broken parts, including a damaged<br />
cord or plug.<br />
• Before discarding an old machine unplug it. Render<br />
the plug useless. Cut off the cable directly behind<br />
the appliance to prevent misuse.<br />
• When a product was under water, Please call<br />
service center. The risk of electric shock and fire.<br />
❊ Do not push down the door excessively, when washer door open.<br />
This could topple over the washer.<br />
SAVE THESE INSTRUCTIONS<br />
GROUNDING INSTRUCTIONS<br />
This appliance must be grounded. In the event of malfunction or breakdown, grounding will reduce the risk of electric shock by providing a path<br />
of least resistance for electric current. This appliance is equipped with a cord having an equipment-grounding conductor and grounding plug.<br />
The plug must be plugged into an appropriate outlet that is properly installed and grounded in accordance with all local codes and ordinance.<br />
• Do not use an adapter or otherwise defeat the grounding plug.<br />
• If you don’t have the proper outlet, consult an electrician.<br />
WARNING : Improper connection of the equipment-grounding conductor can result in risk of electric shock. Check with<br />
a qualified electrician or serviceman if you are in doubt as to whether the appliance is properly grounded. Do not modify<br />
the plug provided with the appliance - if it does not fit the outlet, have a proper outlet installed by a qualified electrician.<br />
3
W arnings<br />
To minimize the risk of fire in a tumble dryer, the following should be observed:<br />
• Items that have been spotted or soaked with vegetable or cooking oil constitute a fire<br />
hazard and should not be placed in a tumble dryer.<br />
Oil-affected items can ignite spontaneously, especially when exposed to heat<br />
sources Such as in a tumble dryer. The items become warm, causing an oxidation<br />
reaction in the oil. Oxidation creates heat. If the heat cannot escape, the items can<br />
become hot enought to catch fire. Piling, stacking or storing oil-affected items can<br />
prevent heat from escaping and so create a fire hazard.<br />
If it is unavoidable that fabrics that contain vegetable or cooking oil or have been<br />
contaminated by hair care products be placed in a tumble dryer they should first be<br />
washed in hot water with extra detergent-this will reduce, but not eliminate, the<br />
hazard. Washed in hot water with extra detergent-this will reduce, but not<br />
eliminate, the hazard. The ‘cool down’ cycle of tumble dryers should be used to<br />
reduce the temperature of the items. They should not be removed from the tumble<br />
dryer or piled or stacked while hot.<br />
• Items that have been previously cleaned in, washed in, soaked in or spotted with<br />
petro/gasoline, dry-cleaning solvents or other flammable or explosive substances<br />
should not be placed in a tumble dryer.<br />
Highly flammable substances commonly used in domestic environments include<br />
acetone, denatured alcohol, petrol/gasoline, kerosene, spot removers (some<br />
brands), turpentine, waxes and was removers.<br />
• Items containing foam rubber (also known as latex foam) or similarly testured<br />
rubber. like materials should not be dried in a tumble dryer on a heat setting.<br />
Foam rubber materials can, when heated, produce fire by spontaneous combustion.<br />
• Fabric softeners or similar products should not be used in a tumble dryer to eliminate<br />
the effects of static electricity unless this practice is specifically recommended by the<br />
manufacturer of the fabric softener or product.<br />
• Undergarments that contain metal reinforcements should not be placed in a tumble<br />
dryer.<br />
Damage to the tumble dryer can result if metal reinforcements come loose during<br />
drying. When available a drying rack could be used for such items.<br />
• Plastic articles such as shower caps or babies waterproof napkin covers should not<br />
be placed in a tumble dryer.<br />
• Rubber-backed articles, clothes fitted with foam rubber pads, pillows, galoshes and<br />
rubber-coated tennis shoes should not be placed in a tumble dryer.<br />
4
S<br />
pecification<br />
Shipping Bolts<br />
Drawer<br />
(For detergent and<br />
fabric softener)<br />
Power Plug<br />
• If the supply cord is damaged,<br />
it must be replaced by the<br />
manufacturer or its service agents<br />
or a similarly qualified person in<br />
order to avoid a hazard.<br />
Control Panel<br />
Drum<br />
Back of Washer<br />
Door<br />
Cold Water Inlet<br />
Drain Hose<br />
Air Vent for Safety<br />
Hot Water Inlet<br />
Lower Cover<br />
Cap<br />
Drain Plug<br />
Adjustable Feet<br />
Drain Pump Filter<br />
Name<br />
Power supply<br />
Size<br />
Weight<br />
Wash capacity<br />
Dry capacity<br />
Max. Watt<br />
Spin speed<br />
Permissible water pressure<br />
: Front loading washing machine<br />
: 120V ~, 60Hz<br />
: 635mm(W) x 740mm(D) x 925(H)<br />
: 176 lbs<br />
: 28 lbs<br />
: 15 lbs<br />
: 1 200W<br />
: 1 200rpm max.<br />
: 0,3 – 10 kgf/cm 2 (30 – 1 000kPa)<br />
Accessories<br />
Inlet hose (2EA)<br />
Spanner<br />
5
I<br />
nstallation<br />
Install or store where it will not be exposed to temperatures below freezing or exposed to the<br />
weather.<br />
Properly ground washer to conform with all governing codes and ordinances.<br />
The base opening must not be obstructed by carpeting when the washing machine is installed<br />
on a carpeted floor.<br />
In countries where there are areas which may be subject to infestation by cockroaches or other<br />
vermin, pay particular attention to keeping the appliance and its surroundings in clean<br />
condition at all times.<br />
Any damage which may be cause by cockroaches or other vermin will not be covered by the<br />
appliance guarantee.<br />
Transit bolts<br />
The appliance is fitted with transit bolts to prevent internal damage during transport.<br />
• Packing and all transit bolts must<br />
be removed before using the<br />
washer.<br />
When unpacking the base, be<br />
sure to remove the additional<br />
packing support in the middle<br />
of the base packing.<br />
(Packing support may not<br />
be used depending on<br />
models.)<br />
Removing transit bolts<br />
1. To prevent internal damage during<br />
transport, the special 4 bolts are<br />
locked. Before operating the washer,<br />
remove the bolts along with the rubber<br />
bungs.<br />
• If they are not removed, it may cause<br />
heavy vibration, noise and malfunction.<br />
2. Unscrew the 4 bolts with the spanner<br />
supplied.<br />
3. Take out the 4 bolts along with the<br />
rubber bungs by slightly twisting the<br />
bung. Keep the 4 bolts and the<br />
spanner for future use.<br />
• Whenever the appliance is transported,<br />
the transit bolts must be refitted.<br />
4. Close the holes with the caps supplied.<br />
6
I<br />
nstallation<br />
Installation place requirement<br />
Level floor :<br />
Allowable slope under entire washer is 1˚<br />
Power outlet :<br />
Must be within 1.5 meters of either side of location of washer.<br />
Do not overload the outlet with more than one appliance.<br />
Additional Clearance :<br />
For wall, door and floor modeling is required.<br />
(10cm : rear / 2cm: right & left side)<br />
Do not place or store laundry products on top of washer at any<br />
times.<br />
They can damage the finish or controls.<br />
Positioning<br />
Install the washer on a flat hard floor.<br />
Make sure that air circulation around the washer is not impeded by carpets,rug etc.<br />
• Never try to correct any unevenness in the floor with pieces of wood, cardboard or similar materials<br />
under the washer.<br />
• If it is impossible to avoid positioning the washer next to a gas cooker or coal burning stove,an<br />
insulating(85x60cm) covered with aluminum foil on the side facing the cooker or stove,must be<br />
inserted between the two appliance.<br />
• The washer must not be installed in rooms where the temperature can drop below 0°C.<br />
• Please ensure that when the washer is installed, it is easily accessible for the engineer in the event of<br />
a breakdown.<br />
• With the washer installed adjust all four feet using the transit bolt spanner provided ensuring the<br />
appliance is stable, and a clearance of approximately 20mm is left between the top of the washer and<br />
the underside of the work-top.<br />
7
I<br />
nstallation<br />
Electrical connection<br />
1. Do not use an extension cord or double adapter.<br />
2. If the supply cord is damaged, it must be replaced by the manufacturer or its service agents or<br />
similarly qualified person in order to avoid a hazard.<br />
3. Always unplug the machine and turn off the water supply after use.<br />
4. Connect the machine to an earthed socket in accordance with current wiring regulations.<br />
5. The appliance must be positioned so that the plug is easily accessible.<br />
• Repairs to the washing machine must only be carried out qualified personnel. Repairs carried out by<br />
inexperienced persons may cause injury or serious malfunctioning. Contact your local service center<br />
• Do not install your washing machine in rooms where temperatures below freezing may occur. Frozen hoses<br />
may burst under pressure. The reliability of the electronic control unit may be impaired at temperatures below<br />
freezing point.<br />
• If the appliance is delivered in the winter months and temperatures are below freezing : Store the washing<br />
machine at room temperature for a few hours before putting it into operation.<br />
CAUTION<br />
CAUTION concerning the Power Cord<br />
Most appliances recommend they be placed upon a dedicated circuit; that is, a single outlet circuit<br />
which powers only that appliance and has no additional outlets or branch circuits. Check the<br />
specification page of this owner's manual to be certain.<br />
Do not overload wall outlets. Overloaded wall outlets, loose or damaged wall outlets, extension cords,<br />
frayed power cords, or damaged or cracked wire insulation are dangerous. Any of these conditions<br />
could result in electric shock or fire. Periodically examine the cord of your appliance, and if its<br />
appearance indicates damage or deterioration, unplug it, discontinue use of the appliance, and have<br />
the cord replaced with an exact replacement part by an authorized servicer.<br />
Protect the power cord from physical or mechanical abuse, such as being twisted, kinked, pinched,<br />
closed in a door, or walked upon. Pay particular attention to plugs, wall outlets, and the point where<br />
the cord exits the appliance.<br />
<strong>Washing</strong> <strong>Machine</strong> is to be connected to the water mains using new hose-sets and that old<br />
hose-sets should not be used.<br />
Connecting water supply hose<br />
NOTE<br />
8<br />
Water supply pressure must be between 30kPa and 1000kPa (0.3~10kgf/cm 2 )<br />
Don’t strip or crossthread when connecting Inlet hose to the valve.<br />
If the water supply pressure is more than 1000kPa, a decompression device should<br />
be installed.<br />
• Two rubber seals are supplied with the water inlet hoses these are in order<br />
to prevent water leaks.<br />
• Check water tightness of washing machine connections by turning the tap<br />
completely on.<br />
• Periodically check the condition of the hose and replace the hose if<br />
necessary.<br />
• Make sure that there is no kink on the hose and that it is not crushed.<br />
When your washer has two valves.<br />
• The Inlet hose which has red connector is for the hot water tap.<br />
• If the washer has two valves, the energy is saved by using hot valve.<br />
After completing connection, if water leaks from the hose, repeat the same steps. Use the most conventional type<br />
of faucet for water supply. In case the faucet is square or too big, remove the spacing ring before inserting the<br />
faucet into the adaptor.
I<br />
nstallation<br />
Normal Tap without thread & screw type inlet hose<br />
1. Unscrew the fixing screw to<br />
attach the tap.<br />
2. Push the connector up till the<br />
rubber packing is in tight contact<br />
with the tap. Then tighten the 4<br />
screws.<br />
3. Push the water supply hose<br />
vertically upwards so that the<br />
rubber packing within in the<br />
hose can adhere completely to<br />
the tap and then tighten it by<br />
screwing it to the right.<br />
Normal Tap without thread & one touch type inlet hose<br />
1. Untighten the upper connector<br />
screw.<br />
Upper<br />
Connector<br />
Rubber<br />
packing<br />
2. Push the upper connector up till<br />
the rubber packing is in tight<br />
contact with the tap. Then<br />
tighten the 4 screws.<br />
3. Connect the water supply hose<br />
to the middle connector,<br />
pushing the plate down.<br />
Fixing screw<br />
Middle<br />
connector<br />
• In case the diameter of the tap is<br />
large remove the guide plate.<br />
Rubber packing<br />
Upper<br />
Connector<br />
Middle<br />
connector<br />
Upper<br />
Connector<br />
Water supply<br />
hose<br />
Plate<br />
Guide plate<br />
Connector<br />
Used the horizontal tap<br />
• Turn the middle connector not<br />
to have water leaked.<br />
• Make sure that the rubber seal<br />
is inside the hose connector.<br />
• To separate the water supply<br />
hose from the middle connector<br />
shut off the tap. Then pull the<br />
inlet hose down, pushing the<br />
plate down.<br />
Horizontal tap<br />
Hose connector<br />
Rubber seal<br />
Extension tap<br />
Square tap<br />
• Make sure that there are no<br />
kinks in the hose and that it is<br />
not crushed.<br />
9
I<br />
nstallation<br />
This equipment is not designed for maritime use or for use mobile installations such as<br />
caravans, aircraft etc.<br />
Turn off the stopcock if the machine is to be left for any length of time (e.g. holiday),<br />
especially if there is no floor drain(gully) in the immediate vicinity.<br />
When disposing of the appliance, cut off the mains cable, and destroy the plug Disable the<br />
door lock to prevent young children being trapped inside.<br />
Packaging material (e.g. Films, Styrofoam) can be dangerous for children. There is a risk<br />
of suffocation !<br />
Keep all packaging well away from children<br />
Installation of drain hose<br />
• When installing the drain hose sink,<br />
secure it tightly with a string.<br />
• Proper securing of the drain hose will<br />
protect the floor from damage due to<br />
water leakage.<br />
• The drain hose should not be placed higher<br />
than 100 cm above the floor. Water in the<br />
washer does not drain or drains slowly.<br />
• Proper securing of the drain hose will<br />
protect the floor from damage due to water<br />
leakage.<br />
• When the drain hose is too long, do not<br />
force back into the washer. This will cause<br />
abnormal noise.<br />
10
I<br />
nstallation<br />
Level adjustment<br />
Concrete floors<br />
• The installation surface must be clean, dry and level.<br />
• Install washer on a flat hard floor.<br />
1. Adjusting the washing machine level properly prevents excessive<br />
noise and vibration.<br />
Install the appliance on a solid and level floor surface, preferably in a<br />
corner of the room.<br />
NOTE Timber or suspended type flooring may contribute to<br />
excessive vibration and unblance errors.<br />
2. If the floor is uneven, adjust the adjustable feet as required. (do not<br />
insert pieces of wood etc. under the feet)<br />
Make sure that all four feet are stable and resting on the floor and<br />
then check that the appliance is perfectly level. (use a spirit level)<br />
After the washer is level, tighten the lock nuts up towards of the base of<br />
the washer. All lock nuts must be tightened.<br />
NOTE<br />
In the case that the washing machine is installed on a raised<br />
platform, it must be securely fastened in order<br />
to eliminate the risk that it might fall off.<br />
❊ Diagonal Check<br />
When pushing down the edges of the washing machine top plate diagonally, the machine<br />
should not move up and down at all. (Please, check both of two directions)<br />
If machine rocks when pushing the machine top plate diagonally, adjust the feet again.<br />
Tile floors (Slippery floors)<br />
• Position each foot on the Tread Mate and level the machine to suit. (Cut Tread Mate into<br />
70x70 mm sections and stick the pieces on to the dry tile where machine is to be placed.)<br />
Tread Mate is a self adhesive material used on ladders & steps that prevents slipping.<br />
Wooden floors (Suspended floors)<br />
• Wooden floors are particularly susceptible to vibration.<br />
Rubber Cup<br />
• To prevent vibration we recommend you place rubber cups under each<br />
foot, at least 15mm thick under the washer, secured to at least 2 floor<br />
beams with screws.<br />
• If possible install the washer in one of the corners of the room, where the floor is more stable.<br />
Insert the rubber cups to reduce vibration.<br />
You can obtain the rubber cups (p/no.4620ER4002B) from the <strong>LG</strong> spares dept.<br />
Important!<br />
• Proper placement and levelling of the washer ensure long,regular and reliable operation.<br />
• The washer must be absolutely horizontal and stand firmly in position.<br />
• It must not “Seesaw” across corners under load.<br />
• The installation surface must be clean, free from floor wax and other lubricant coatings.<br />
• Do not let the feet of the washer get wet. If feet of the washer get wet, slipping may occur.<br />
11
C<br />
are before washing<br />
WARNING<br />
To reduce the risk of fire, electric shock, or injury to persons, read the<br />
IMPORTANT SAFETY INSTRUCTIONS before operating this appliance.<br />
1. Fabric Care Labels<br />
Look for a care label on your clothes. This will tell you about the fabric content of your garment<br />
and how it should be washed.<br />
2. Sorting<br />
To get the best results, sort clothes into loads that can be washed with the same wash cycle.<br />
Different fabrics need to be washed in different ways.<br />
Always sort dark colors from pale colors and whites. Wash separately as dye and lint transfer<br />
can occur causing discoloration of white clothing. If possible, do not wash heavily soiled items<br />
with lightly soiled ones.<br />
Soil (Heavy, Normal, Light) Separate clothes according to amount of soil.<br />
Color (White, Lights, Darks) Separate white fabrics from colored fabrics.<br />
Lint (Lint Producers, Collectors) Wash lint producers and lint collectors separately.<br />
3. Check before loading<br />
Combine large and small items in a load. Load large items first.<br />
Large items should not be more than half the total wash load.<br />
Do not wash single items. This may cause an out-of-balance load. Add one or two similar items.<br />
• Check all the pockets to make sure that they<br />
are empty. Things such as clip, matches, pens,<br />
coins, and keys can damage both your washer<br />
and your clothes.<br />
• Close zippers, hooks, and strings to make sure<br />
that these items do not snag on other clothes.<br />
• Pretreat dirt and stains by brushing a little<br />
detergent dissolved in water onto stains like<br />
collars and cuffs to help lift dirt.<br />
• Check the folds of the flexible gasket (gray)<br />
and remove any small articles,if any.<br />
• Check inside of the drum and remove any left<br />
items in it for next wash cycle.<br />
• Remove any clothing or items on the flexible<br />
gasket to prevent clothing and the gasket<br />
damages.<br />
12
A<br />
dding detergent<br />
Adding detergent and fabric softener<br />
1. The Dispenser Drawer<br />
• Main wash only ➔<br />
• Pre Wash + Main Wash ➔<br />
Detergent for<br />
main wash<br />
Fabric<br />
softener<br />
Detergent for<br />
pre wash<br />
2. Adding Fabric Softener<br />
• Do not exceed the maximum fill line.<br />
Close the dispenser drawer slowly.<br />
Overfilling can cause early dispensing<br />
of the fabric softener which could stain<br />
clothes.<br />
• Do not leave the fabric softener in the<br />
detergent drawer for more than 2 days.<br />
(Fabric softener could harden)<br />
• Softener will automatically be added<br />
during the last rinse cycle.<br />
• Do not open the drawer when water is<br />
supplied.<br />
• Solvents(benzene, etc) are not<br />
allowable.<br />
NOTE<br />
Do not pour fabric softener<br />
directly on the cloths<br />
13
A<br />
dding detergent<br />
3. Detergent dosage<br />
• The detergent should be used according to the<br />
instruction of the detergent manufacture.<br />
• If too much detergent is used, too many suds<br />
can occur and this will decrease the washing<br />
result or cause heavy load to the motor.<br />
• Use powder detergent only for the front<br />
loading washer.<br />
❇ If suds occur too much, pleas reduce the<br />
detergent amount.<br />
• Detergent usage may need to be adjusted<br />
for water temperature, water hardness,<br />
size and soil level of the load. For best<br />
results, avoid oversudsing.<br />
❋ Tips<br />
Full load : according to<br />
manufacturer’s recommendation.<br />
Part load : 3/4 of the normal<br />
amount.<br />
Minimum load : 1/2 of full load.<br />
• Detergent is flushed from the dispenser<br />
at the beginning of the cycle.<br />
5. Using the Tablets<br />
1) Open the door and Tablets into the<br />
drum.<br />
4. Water softener<br />
2) Load the laundry into the drum.<br />
• A water softener, such as Anti limescale<br />
(Clagon) can be used to cut down on the<br />
use of detergent in extremely hard water<br />
areas. Dispense according to the amount<br />
specified on the packaging.<br />
First add detergent and then the water<br />
softener.<br />
• Use the quantity of detergent as for soft<br />
water.<br />
3) Close the door.<br />
14
F<br />
unction<br />
Recommended courses according to the laundry type<br />
Program Fabric Type Proper Temp.<br />
(Option)<br />
Cotton<br />
Cotton Quick<br />
Synthetic<br />
Delicate<br />
Wool<br />
Hand Wash<br />
Duvet<br />
Quick 30<br />
Baby Care<br />
Color fast garments<br />
(shirts, night dresses,<br />
pajamas...)and lightly soiled<br />
white cotton (underwear...)<br />
Cotton Which is lightly soiled.<br />
Polyamide, Acrylic, Polyester<br />
Delicate laundry easily damaged.<br />
<strong>Machine</strong> washable woolens with<br />
pure new wool only.<br />
“Hand Wash” marked delicate and<br />
wool laundry.<br />
Cotton bedding with filling,<br />
duvet, pillow, blanket, sofa<br />
cover with light filling.<br />
Colored Landry which is lightely<br />
soiled fast.<br />
Lightly soiled baby wear<br />
30°C<br />
(Cold, 40°C<br />
50°C)<br />
30°C<br />
(Cold, 40°C)<br />
30°C<br />
(Cold, 40°C)<br />
30°C<br />
(Cold)<br />
30°C<br />
(Cold, 40°C)<br />
60°C<br />
(40°C 50°C)<br />
Additional<br />
Option<br />
- Pre Wash<br />
- Rinse+Spin<br />
- Dry Only<br />
- Bio<br />
- Soak<br />
- Intensive<br />
- Water Plus<br />
- Time delay<br />
- Pre Wash<br />
- Rinse+Spin<br />
- Soak<br />
- Intensive<br />
- Water Plus<br />
- Time delay<br />
- Rinse+Spin<br />
- Intensive<br />
- Time delay<br />
- Rinse+Spin<br />
- Intensive<br />
- Water Plus<br />
- Time delay<br />
- Rinse+Spin<br />
- Dry Only<br />
- Intensive<br />
- Water Plus<br />
- Time delay<br />
- Pre Wash<br />
- Rinse+Spin<br />
- Dry Only<br />
- Bio<br />
- Soak<br />
- Intensive<br />
- Water Plus<br />
- Time delay<br />
Maximum<br />
Load<br />
Rating<br />
5.0kg<br />
4.0kg<br />
3.0kg<br />
3.0kg<br />
1 king size<br />
(9 Tog)<br />
5.0kg<br />
6.0kg<br />
❋ Water Temperature : Select the water temperature to the wash cycles.<br />
Always follow garment manufacture’s care label or instructions when<br />
laundering.<br />
❋ Intensive : When washing full load or heavily soiled laundry, you can increase effectiveness<br />
by choosing intensive option.<br />
❋ Pre Wash : If the laundry is heavily soiled, “Pre Wash” option is recommended.<br />
Pre Wash is available in Cotton, Synthetic and Baby Care, Cotton Quick<br />
Program.<br />
15
H<br />
ow to use washer<br />
1. Cotton automatically<br />
selected upon power on.<br />
• Press the Power( ) button to start.<br />
• Press the Start/Pause( ) button.<br />
2. Manual Selecting<br />
• Press the Power( ) button to turn the<br />
washer on.<br />
• Select the desired cycle with the program<br />
dial and if required, make any changes to<br />
the washing conditions by pressing the<br />
buttons accordingly.<br />
16
H<br />
ow to use washer<br />
(1) (2)<br />
(3) (4) (5) (6) (7) (8,9,10) (11) (12) (13)<br />
(1) Button : Power<br />
(2) Dial : Program<br />
(3) Button : Start/Pause<br />
(4) Button : Option<br />
(5) Child lock<br />
Power<br />
(6) Button : Rinse<br />
(7) Button : Temperature<br />
(8) Button : Intensive<br />
(9) Button : Water Plus<br />
(10) Button : Time Delay<br />
(11) Button : Spin<br />
(12) Button : Tub Clean<br />
(13) Button : Dry<br />
Program<br />
1. Power<br />
• Press the Power( ) button to turn power<br />
on and off.<br />
• To cancel the Time Delay function, the<br />
Power( ) button must be pressed.<br />
2. Initial Program<br />
• When the Power( ) button is pressed, the<br />
washer is ready for Cotton program. And the<br />
other initial conditions as follows.<br />
• So, if you want to advance into the washing<br />
cycle without changing the program, just<br />
press Start/Pause( ) button and then the<br />
washer will proceed.<br />
■ Initial program<br />
- Cotton Program / Rinse:Normal / 30°C/<br />
800rpm<br />
• 9 programs are available according to the<br />
laundry type.<br />
• Dial lamp will light up to indicate selected<br />
program.<br />
• When Start/Pause( ) button is pressed,<br />
the Cotton program is automatically selected.<br />
- By turning the Program dial, the program is<br />
selected in order of “Cotton – Cotton Quick –<br />
Synthetic – Delicate – Wool – Hand Wash –<br />
Duvet – Quick 30 – Baby Care”.<br />
For information regarding laundry type for<br />
each program, please refer to page 15.<br />
17
H<br />
ow to use washer<br />
Start/Pause<br />
Option<br />
• By pressing the option<br />
button, only one option<br />
function may be selected.<br />
1. Start<br />
• This Start/Pause button is used to start<br />
wash cycle or pause the wash cycle.<br />
2. Pause<br />
• If temporary stop of wash cycle is needed,<br />
press “Start/Pause” button.<br />
• When in Pause, the power is turned off<br />
automatically after 4 minutes.<br />
1. Pre Wash<br />
NOTE:<br />
Depending on the selected<br />
program cycle, not all<br />
Options may be selectable.<br />
• Use this option for loads that need<br />
pretreatment. This adds 16 minutes of pre<br />
washing before draining.<br />
- When using Pre Wash option, do not use a<br />
liquid detergent for the main wash.<br />
Use powder for the main wash.<br />
• Available in Cotton, Cotton Quick, Synthetic<br />
and Baby Care.<br />
2. Rinse + Spin<br />
• Use this option to rinse and then spin<br />
3. Dry Only<br />
• When you want dry only, select the this<br />
option. Available in Baby Care, Cotton,<br />
Cotton Quick and Quick 30.<br />
4. Bio<br />
• If you want to eliminate protein stains(milk,<br />
blood, chocolate...), you may select Bio<br />
function by pressing the option button.<br />
Note: You can select Bio function when<br />
temperature is higher than 50˚C in Cotton<br />
and Baby Care.<br />
5. Soak<br />
18<br />
• Use this mode to wash normal clothes or<br />
thick and heavy clothes which are<br />
excessively dirty.<br />
• Available in Cotton, Cotton Quick,<br />
Synthetic and Baby Care.
H<br />
ow to use washer<br />
Child lock<br />
If you choose to lock the buttons on the<br />
control assembly to prevent tampering, this<br />
function may be selected.<br />
• Child lock can be set by pressing and<br />
holding the Option and Rinse button<br />
simultaneously. (About three seconds)<br />
• When child lock is set, all buttons are<br />
inoperable except for power button.<br />
• To deactivate Child lock system, press and<br />
hold the Option and Rinse button<br />
simultaneously again.<br />
(About three seconds)<br />
• To change to the desired program, whilst in<br />
child lock mode.<br />
1. Press and hold both Option and Rinse<br />
button to cancel the child lock.<br />
(About three seconds)<br />
2. Press the Start/Pause button.<br />
3. Select the desired program and press the<br />
Start/Pause button again.<br />
Change<br />
the desired<br />
program<br />
• The child lock can be set at any time and it<br />
is automatically canceled when operational<br />
errors occur.<br />
1. Normal<br />
Rinse<br />
2. Rinse+ & Rinse++<br />
• By pressing the Rinse<br />
button, the Rinse type can<br />
be selected.<br />
- Normal<br />
- Rinse+<br />
- Rinse++<br />
- Normal+Hold<br />
- Rinse++Hold<br />
• Baby Care performs 4 Rinse<br />
• Cotton, Synthetic, Wool, Duvet performs 3<br />
Rinses<br />
• Cotton Quick, Delicate, Hanwash, Quick 30<br />
performs 2 Rinses.<br />
• Used to additional rinse, which may assist in<br />
removing traces of detergent residue.<br />
• By selecting Rinse + or Rinse ++ function,<br />
the Rinse Time and the Rinse water are<br />
increased.<br />
3. Normal+Hold & Rinse++Hold<br />
• Is selected by pressing the Rinse button<br />
repeatedly this function leaves clothes in the<br />
washer; suspended in the water after a rinse<br />
without entering into spin.<br />
• To proceed to a Drain or Spin function after<br />
a Rinse hold, select Drain on the program<br />
dial or press the Spin button for the desired<br />
speed, then press the Start/Pause button.<br />
The matching indicator lamp will light up for<br />
identification.<br />
19
H<br />
ow to use washer<br />
Spin<br />
• By pressing the Spin<br />
button, the spin speed can<br />
be chosen.<br />
Water Temperature<br />
• By pressing the Temp.<br />
button, the water<br />
temperature can be<br />
selected.<br />
- Cold<br />
- 30˚C / 40˚C / 50˚C / 60˚C<br />
1. Spin selection<br />
• Spin speed is available according to the<br />
program as follows.<br />
- Cotton & Cotton Quick & Quick30<br />
No Spin – 400 – 800 – 1 000 – 1 200<br />
- Baby Care & Synthetic<br />
No Spin – 400 – 800 – 1 000<br />
- Delicate & Duvet & Hand Wash<br />
No Spin – 400 – 800<br />
- Wool<br />
No Spin – 400<br />
2. No spin<br />
• If “No Spin” is selected, the washer stops<br />
after draining the water from the last spin.<br />
The matching indicator lamp will light up for<br />
identification.<br />
• Water temperature can be selected as<br />
below according to the program.<br />
- Cotton & Cotton Quick<br />
Cold – 30°C – 40°C – 50°C<br />
- Synthetic & Delicate & Wool &<br />
Hand Wash & Quick 30<br />
Cold – 30°C – 40°C<br />
- Duvet<br />
Cold – 30˚C<br />
- Baby Care<br />
40°C – 50°C – 60°C<br />
The required temperature lamp will light up for<br />
identification.<br />
For the more detailed information, please refer<br />
to the page15.<br />
Intensive<br />
20<br />
• When washing full load or heavily soiled<br />
laundry, you can increase effectiveness by<br />
choosing intensive option.<br />
• By selecting the Intensive option, the wash<br />
time may be extended, depending on the<br />
program selected.<br />
• To use this option press the Intensive<br />
button once before the wash program is<br />
started.
H<br />
ow to use washer<br />
Water Plus<br />
Tub Clean<br />
• Adds extra water to the wash and rinse<br />
cycles for superior results.<br />
Time Delay<br />
Tub Clean course can be set by pressing and<br />
holding Tub Clean button simultaneously.<br />
When Tub Clean course is set, display<br />
“ ”, and all buttons are inoperable.<br />
Preparing washing before starting “Time Delay”<br />
- Turn on the water tap.<br />
- Load laundry and close the door.<br />
- Place the detergent and fabric softener in the<br />
drawer.<br />
• How to set “Time Delay”<br />
- Press Power( ) button.<br />
- Turn the Program dial to select<br />
the program you require.<br />
- Press Time Delay button and set the<br />
desired time.<br />
- Press the Start/Pause( ) button.<br />
(“ ” lamp is blink)<br />
• If Time Delay button is pressed, “3:00” is<br />
displayed. The maximum delayed time is<br />
19:00 hours and the minimum time is 3:00<br />
hours.<br />
• Each pressing of the button advances time<br />
delay by one hour.<br />
• To cancel the time delay, press the<br />
Power( ) button.<br />
• Time Delay is ‘expected time’ from the<br />
present to the completion of washing cycle<br />
or selected process (Wash, Rinse, Spin).<br />
• According to the condition of water supply and<br />
temperature, the delayed time and the actual<br />
washing time may vary.<br />
TUB CLEAN is special cycle to clean the<br />
inside of the washer. This cycle uses higher<br />
water level with higher spin speed. Perform<br />
this cycle regularly.<br />
How to use the Tub Clean cycle:<br />
1. Remove any clothing or items from the<br />
washer and close the door.<br />
2. Open the dispenser drawer and add Anti<br />
limescale (Calgon) to the Main wash<br />
compartment.<br />
NOTE: Do not add any detergent to the<br />
detergent compartments. Excessive<br />
suds may generate and leak from the<br />
washer.<br />
3. Close the dispenser drawer slowly.<br />
4. Power On and then press and hold<br />
Tub Clean button then “ ” is displayed<br />
in LED.<br />
5. Press the Start/Pause button to start.<br />
6. After the cycle is complete, leave the door<br />
open to dry around the washer door<br />
opening, flexible gasket and door glass.<br />
! CAUTION: If there is a small child, be<br />
careful not to leave the door<br />
open for too long.<br />
21
H<br />
ow to use washer<br />
NOTE<br />
The maximum drying capacity for this<br />
model is 7kg.<br />
Dry<br />
1.Drying Automatic guide<br />
• Do not overload above the maximum drying<br />
capacity indicator. Items must be able to<br />
tumble freely.<br />
• This washer-dryer’s automatic process from<br />
washing to drying can be selected easily.<br />
• For most even drying , make sure all articles in<br />
the clothes load are similar in material and<br />
thickness.<br />
• By turning the dial, you can select.<br />
Normal ➔ More ➔ 30 ➔ 60 ➔ 90 ➔ 150 ➔ Low<br />
Temp➔ Iron➔ Eco<br />
• After the end of dry, “ ” is displayed.<br />
By pressing the “Start/Pause” button the<br />
program can be ended. If you not press the<br />
“Start/Pause” button, the “ ” cycle will end<br />
automatically after 4 hours.<br />
• Use your Automatic Cycles to dry most loads.<br />
Electronic sensors measures the temperature<br />
of the exhaust to increase or decrease drying<br />
temperatures for faster reaction time and<br />
tighter temperature control.<br />
• Recommend Automatic drying course for<br />
clothes type.<br />
a) For Synthetics select - Low Temp.<br />
b) If you want to iron clothes-Iron.<br />
c) For Cottons select - Normal.<br />
d) For washable nappies select - More<br />
NOTE: The estimated drying time varies<br />
from the actual drying time when in the<br />
Automatic mode. The type of fabric, size of the<br />
load, and the dryness selected, do affect the<br />
drying times.<br />
❋ The standard laundry weight which shows<br />
how much laundry to put into the washer.<br />
Sorts of<br />
laundry<br />
Single<br />
weight<br />
Diaper<br />
100g<br />
Shirt<br />
200g<br />
Shortsleeved<br />
300g<br />
Sorts of<br />
laundry<br />
Single<br />
weight<br />
Underwear Nightclothes<br />
50g 500g<br />
Jean<br />
1200g<br />
22
H<br />
ow to use washer<br />
2. Manual Drying time guide<br />
• By turning the Dry button, the drying time<br />
can be selected.<br />
• Drying course can last up to 150min. When<br />
selecting drying only, drying course will<br />
start after spining, unless the spin omitted.<br />
• These drying times are given as a guide to<br />
help you set your dryer for manual drying.<br />
Drying times can vary greatly depending on<br />
dampness, room temperature and type of<br />
fabric and your own experience will be your<br />
best guide.<br />
Woolen Articles<br />
- Do not tumble dry woolen articles. Pull them<br />
to their original shape and dry them flat.<br />
- Some woven and loop knit materials may<br />
shrinks, by varying amounts, depending on<br />
their quality.<br />
- Always stretch ont these type of garments<br />
immediately after drying.<br />
Permanent Press and Synthetics<br />
- Do not overload your dryer<br />
- Take out permanent press articles as soon<br />
as the dryer stops to reduce wrinkles.<br />
Fiber or Leather Materials<br />
- Always check the manufacture’s instructions.<br />
Baby clothes and Night Gowns<br />
- Always check the manufacture’s instructions.<br />
Rubber and Plastics<br />
- Do not dry any items made from or<br />
containing rubber or plastics, such as:<br />
a) aprons, bibs, chair covers<br />
b) curtains and table cloths<br />
c) bathmats<br />
Fiber glass<br />
- Do not dry fiberglass articles in your dryer.<br />
Glass particles left in the dryer could be<br />
picked up by your clothes the next time<br />
you use the dryer and irri tate your skin.<br />
3.Completion of Drying<br />
• When drying cycle is completed, “ ”<br />
[Cool Down] is displayed on the Multi<br />
display.<br />
• The Cool Down is set automatically when a<br />
drying cycle is complete.<br />
• Wrinkles and creases will form if the<br />
clothes are not removed immediately after<br />
the drying is completed.<br />
• The Cool Down operates periodically by<br />
tumbling. It rearranges and fluffs the load<br />
to avoid wrinkles without heat for up to 4<br />
hours.<br />
• The “ ” message will continue to<br />
display until the clothes are removed or the<br />
Start/Pause button is pressed within the 4<br />
hours after the drying has been completed.<br />
Door Lock<br />
• Lights whenever the door of the washer is<br />
locked.<br />
• The door can be unlocked after a 2~3<br />
minute delay, pressing the Start/Pause<br />
button to stop the washer.<br />
23
H<br />
ow to use washer<br />
Display<br />
3. Completion of washing<br />
• When washing cycle is completed,<br />
“ ” is displayed on the “Multi display”.<br />
1. Special function display<br />
• When Child lock is selected, the “ ” is<br />
displayed.<br />
• After the end of dry, “ ” is displayed.<br />
• When time delay is selected, it shows the<br />
remaining time before the finish of the<br />
selected program.<br />
2. Self diagnose display<br />
• If the washer encounters a fault during<br />
operation, the associated fault will be<br />
displayed.<br />
“ ” : Water pressure sensing error<br />
“ ” : Problem of overfilling water<br />
“ ” : Door is not closed<br />
“ ” : Over load in motor<br />
“ ” : Water inlet trouble<br />
“ ” : Drainage trouble<br />
“ ” : Unbalanced load<br />
“ ” : Water temperature trouble<br />
“ ” : Dry heater or thermostat trouble.<br />
4. Time left<br />
• During washing cycle, the remaining<br />
washing time is displayed.<br />
• Recommended program by manufacturer.<br />
- Cotton : around 1hour and 46 minutes<br />
- Cotton Quick : around 1 hour and 10<br />
minutes<br />
- Synthetic : around 1 hour and 31 minutes<br />
- Delicate : around 1 hour and 23 minutes<br />
- Wool : around 1 hour and 4 minutes<br />
- Hand Wash : around 1 hour and 13 minutes<br />
- Duvet : around 1 hour and 38 minutes<br />
- Quick 30 : around 30 minutes<br />
- Baby Care : around 2 hours and 54 minutes<br />
• The washing time may vary by the amount<br />
of laundry, water pressure, water<br />
temperature and other washing conditions.<br />
• If an unbalanced load is detected or if the<br />
suds removing program operates, the wash<br />
time may be extended.<br />
(Max. increasing time is 45 minutes.)<br />
If these error letters are displayed, please refer<br />
to the troubleshooting page31 and follow the<br />
guide.<br />
24
M aintenance<br />
❋ Before cleaning the washer interior, unplug the electrical power cord to avoid electrical<br />
shock to avoid electrical shock hazards.<br />
❋ When disposing of the appliance, cut off the mains cable, and destroy the plug disable<br />
the door lock to prevent young children being trapped inside.<br />
The water inlet filter<br />
- " " error message will blink on the control panel when water does not enter the<br />
detergent drawer.<br />
- If water is very hard or contains traces of lime deposit, the water inlet filter may<br />
become clogged.<br />
It is therefore a good idea to clean it from time to time.<br />
1. Turn off the water tap.<br />
2. Unscrew the water inlet hose.<br />
3. Clean the filter using a hard bristle<br />
brush.<br />
4. Tighten up the inlet hose.<br />
25
M aintenance<br />
The drain pump filter<br />
❋ The drain filter collects threads and small objects left in the laundry.<br />
Check regularly that the filter is clean to ensure smooth running of your machine.<br />
!<br />
CAUTION<br />
First drain using the drain hose and then open the pump filter to<br />
remove whatever any threads or objects.<br />
Be careful when draining if the water is hot.<br />
❋ Allow the water to cool down before cleaning the drain pump, carrying out<br />
emergency emptying or opening the door in an emergency.<br />
1. Open the lower cover cap (➀) by<br />
using a finger. Turn the drain plug (➁)<br />
to pull out the hose.<br />
3<br />
2<br />
2. Unplug the drain plug (➁), allowing the<br />
water to flow out. At this time use a<br />
vessel to prevent water flowing on to the<br />
floor. When water does not flow any<br />
more, turn the pump filter (➂) open to<br />
the left.<br />
3. Remove out any foreign material from<br />
the pump filter (➂).<br />
3<br />
4. After cleaning, turn the pump filter (➂)<br />
clockwise and insert the drain plug (➁)to<br />
the original place. close the lower cover<br />
cap.<br />
2<br />
26
M aintenance<br />
Dispenser drawer<br />
❋ After a while detergents and fabric softeners leave a deposit in the drawer.<br />
• It should be cleaned from time to time with a jet of running water.<br />
• If necessary it can be removed completely from the machine by pressing the catch<br />
downward and by pulling it out.<br />
• To facilitate cleaning, the upper part of the fabric softener compartment can be removed.<br />
The drawer recess<br />
❋ Detergent can also accumulate inside the recess which should<br />
be cleaned occasionally with an old toothbrush.<br />
• Once you have finished cleaning, replace the drawer and run a<br />
rinse cycle without laundry.<br />
The washing drum<br />
• If you live in a hard water area, limescale may continuously build up in places where it cannot be<br />
seen and thus not easily removed.<br />
Over time the build up of scale clogs appliances, and if it is not kept in check these may have to be<br />
replaced.<br />
• Although the washing drum is made of Stainless steel, specks of rust can be caused by small metal<br />
articles (paper clips, safety pins) which have been left in the drum.<br />
• The washing drum should be cleaned from time to time.<br />
• If you use descaling agents, dyes or bleaches, make sure they are suitable for washing machine<br />
use.<br />
❋ Descaler may contain chemicals that may damage part of your washing machine.<br />
❋ Remove any spots with a stainless steel cleaning agent.<br />
❋ Never use steel wool.<br />
27
M aintenance<br />
The water circulation nozzle<br />
• Clean the water circulation nozzle, if clogged.<br />
Cleaning your washer<br />
1. Exterior<br />
Proper care of your washer can extend its life.<br />
The outside of the machine can be cleaned with warm water and a neutral non abrasive<br />
household detergent.<br />
Immediately wipe off any spills. Wipe with damp cloth.<br />
Try not to hit surface with sharp objects.<br />
❋ IMPORTANT: Do not use methylated spirits, diluents or similar products.<br />
2. Interior<br />
Dry around the washer door opening, flexible gasket and door glass.<br />
Run washer through a complete cycle using hot water.<br />
Repeat process if necessary.<br />
NOTE Remove hard water deposits using only cleaners labeled as safe for washing<br />
machine.<br />
Winterizing instructions<br />
If the washer is stored in an area where freezing may occur or moved in freezing<br />
temperatures, follow these instructions to prevent damage to the washer:<br />
1. Turn off water supply tap.<br />
2. Disconnect hoses from water supply and drain water from hoses.<br />
3. Plug electrical cord into a properly grounded electrical outlet.<br />
4. Add 1gallon(3.8L) of nontoxic recreational vehicle(RV) antifreeze into an empty wash drum.<br />
Close the door.<br />
5. Set spin cycle and let washer spin for 1minute to drain out all water.<br />
Not all of the RV antifreeze will be expelled.<br />
6. Unplug electrical power cord, dry the drum interior, and close the door.<br />
7. Remove dispenser drawer, drain and dry excessive water from the compartments.<br />
8. Store washer in an upright position.<br />
9. To remove antifreeze from washer after storage, run empty washer through a complete<br />
cycle using detergent. Do not add wash load.<br />
28
T<br />
roubleshooting guide<br />
❋ This washing machine is equipped with automatic safety functions which detect and<br />
diagnose faults at an early stage and react appropriately.<br />
When the machine does not function properly or does not function at all, check the<br />
following points before you contact your service provider.<br />
Symptom Possible Cause Solution<br />
Rattling and<br />
clanking noise<br />
Thumping sound<br />
Vibrating noise<br />
Water leaks.<br />
Oversudsing<br />
Water does not enter<br />
washer or it enters<br />
slowly<br />
Water in the washer<br />
does not drain or<br />
drains slowly.<br />
• Foreign objects such as coins or<br />
safety pins maybe in drum or<br />
pump.<br />
• Heavy wash loads may produce<br />
a thumping sound. This is usually<br />
normal.<br />
• Have all the transit bolts and<br />
packing been removed<br />
• Are all the feet resting firmly on<br />
the ground<br />
• Fill hoses or drain hose are loose<br />
at tap or washer.<br />
• House drain pipes are clogged.<br />
• Water supply is not adequate in<br />
area.<br />
• Water supply tap is not<br />
completely open.<br />
• Water inlet hose(s) are kinked.<br />
• The filter of the inlet hose(s) are<br />
clogged.<br />
• Drain hose is kinked or clogged.<br />
• The drain filter is clogged.<br />
Stop washer and check drum<br />
and drain filter.<br />
If noise continues after washer<br />
is restarted, call your authorized<br />
service centre.<br />
If sound continues, washer is<br />
probably out of balance. Stop and<br />
redistribute wash load.<br />
If not removed during<br />
installation, refer to Installation guide<br />
for removing transit bolts.<br />
Wash load may be unevenly<br />
distributed<br />
in drum. Stop washer and<br />
rearrange wash load.<br />
Check and tighten hose connections.<br />
Unclog drain pipe. Contact plumber<br />
if necessary.<br />
Too much detergent or unsuitable<br />
detergent may cause excessive<br />
foaming which may result in water<br />
leaks.<br />
Check another tap in the house.<br />
Fully open tap.<br />
Straighten hose(s).<br />
Check the filter of the inlet hose(s).<br />
Clean and straighten the drain hose.<br />
Clean the drain filter.<br />
29
T<br />
roubleshooting guide<br />
Symptom Possible Cause Solution<br />
Washer does not start<br />
• Electrical power cord may not<br />
be plugged in or connection<br />
may be loose.<br />
• House fuse blown, circuit<br />
breaker tripped,or a power<br />
outage has occurred.<br />
• Water supply tap is not turned<br />
on.<br />
Make sure plug fits tightly in wall<br />
outlet.<br />
Reset circuit breaker or replace fuse.<br />
Do not increase fuse capacity.<br />
If problem is a circuit overload, have<br />
it corrected by a qualified electrician.<br />
Turn on water supply tap.<br />
Washer won’t spin<br />
❋ Check that the door is firmly<br />
shut.<br />
Close the door and press the<br />
Start/Pause button. After pressing<br />
the Start/Pause button, it may take<br />
a few moments before the clothes<br />
washer begins to spin. The door<br />
must lock before spin can be<br />
achieved.<br />
Door does not open<br />
Once started, the door can not be<br />
opened for safety reasons.<br />
Wait one or two minutes before<br />
opening the door to give the electric<br />
locking mechanism time to release.<br />
Wash cycle time<br />
delayed<br />
Dry problem<br />
• Does not dry<br />
The washing time may vary by the<br />
amount of laundry, water<br />
pressure, water temperature and<br />
other using conditions.<br />
If the imbalance is detected or if the<br />
suds removing program works, the<br />
wash time shall be increased.<br />
Do not overload.<br />
Check that the washer is draining<br />
properly to extract adequate water<br />
from the load.<br />
Clothes load is too small to tumble<br />
property. Add a few towels.<br />
30
T<br />
roubleshooting guide<br />
Symptom Possible Cause Solution<br />
• Water supply is not adequate in area<br />
• Water supply taps are not completely<br />
open.<br />
• Water inlet hose(s) are kinked.<br />
• The filter of the inlet hose(s) are<br />
clogged.<br />
• Drain hose is kinked or clogged.<br />
• The drain filter is clogged.<br />
• Load is too small.<br />
• Load is out of balance.<br />
• The appliance has an unbalance<br />
detection and correction system. If<br />
individual heavy articles are loaded (ex.<br />
bath mat, both robe, etc.), this system<br />
may stop spinning or even interrupt the<br />
spin cycle altogether.<br />
• If the laundry is still too wet at the end<br />
of the cycle, add smaller articles of<br />
laundry to balance the load and repeat<br />
the spin cycle.<br />
• Is the door opend<br />
or not completely<br />
closed<br />
Check another tap in the house.<br />
Fully open tap.<br />
Straighten hose(s).<br />
Check the filter of the inlet hose(s).<br />
Clean and straighten the drain hose.<br />
Clean the drain filter.<br />
Add 1 or 2 similar items to help<br />
balance the load.<br />
Rearrange load to allow proper<br />
spinning<br />
Close the door completely.<br />
❋ If “ ”is not released, call for service.<br />
Unplug the power plug and call for service.<br />
• Water overfills due to the faulty water<br />
valve.<br />
• Water level sensor has malfunctioned.<br />
Close the water tap.<br />
Unplug the power plug.<br />
Call for service.<br />
• Over load in motor.<br />
• Check water supply.<br />
Turn the tap on<br />
I f “ ” is not released, unplug power<br />
plug and call service.<br />
31
T<br />
erms of Warranty<br />
What Is Not Covered:<br />
• Service trips to your home to teach you how to use the product.<br />
• If the product is connected to any voltage other than that shown on the rating plate.<br />
• If the fault is caused by accident, neglect, misuse or Act of God.<br />
• If the fault is caused by factors other than normal domestic use or use in accordance<br />
with the owner's manual.<br />
• Provide instruction on use of product or change the set-up of the product.<br />
• If the fault is caused by pests for example, rats or cockroaches etc..<br />
• Noise or vibration that is considered normal for example water drain sound, spin<br />
sound, or warming beeps.<br />
• Correcting the installation for example, levelling the product, adjustment of drain.<br />
• Normal maintenance which recommended by the owner's manual.<br />
• Removal of foreign objects / substances from the machine, including the pump and<br />
inlet hose filter for example, grit, nails, bra wires, buttons etc.<br />
• Replace fuses in or correct house wiring or correct house plumbing.<br />
• Correction of unauthorized repairs.<br />
• Incidental or consequential damage to personal property caused by possible defects<br />
with this appliance.<br />
• If this product is used for commercial purpose, it is not warranted.<br />
(Example : Public places such as public bathroom, lodging house, training<br />
center, dormitory)<br />
If the product is installed outside the normal service area, any cost of<br />
transportation involved in the repair of the product, or the replacement of a<br />
defective part, shall be borne by the owner.<br />
32
C<br />
aracterísticas del producto<br />
■<br />
■<br />
■<br />
■<br />
■<br />
■<br />
■<br />
Sistema “Direct Drive”.<br />
La avanzada tecnología del motor de corriente continua sin escobillas mueve<br />
directamente el tambor sin necesidad de transmisión ni poleas.<br />
Circulación de Agua.<br />
Se rocía la solución de detergente y agua sobre la carga una y otra vez. La ropa<br />
se remoja más rápidamente y a la perfección durante el ciclo de lavado. La<br />
espuma del detergente puede ser removida más fácilmente por la regadera de<br />
agua durante el ciclo de enjuague. El sistema de circulación de agua usa ambos,<br />
agua y detergente, con mayor eficiencia.<br />
Tambor Inclinado y Puerta Extra Grande.<br />
El tambor inclinado y la abertura de puerta extra grande, hacen más fácil la carga<br />
y descarga de la ropa.<br />
Tambor repujado & Levandator ondulado<br />
El tambor repujado aumenta el rendimiento del lavado y reduce el daño de ropa.<br />
El levantador ondulado rocia y ayuda a mejorar el rendimiento del lavado durante<br />
el ciclo de lavado.<br />
Detección automática de Carga de lavado<br />
Detecta automáticamente la carga y optimiza el tiempo de lavado.<br />
Calentador Integrado.<br />
El calentador interno calienta automáticamente el agua a la mejor temperatura<br />
según el ciclo elegido.<br />
Bloqueo para Niños.<br />
El Bloqueo para Niños previene que los niños presionen los botones y cambien la<br />
configuración durante la operación.<br />
Í<br />
ndice<br />
Advertencias ...............................................................................................34<br />
Especificaciones .........................................................................................36<br />
Instalación...................................................................................................37<br />
Cuidados antes del lavado .........................................................................43<br />
Cómo añadir detergente .............................................................................44<br />
Función .....................................................................................................46<br />
Cómo utilizar la lavadora ............................................................................47<br />
Mantenimiento ............................................................................................56<br />
Guía para la resolución de fallas ................................................................60<br />
Términos de la garantía..............................................................................63<br />
33
A dvertencias<br />
LEA TODA LA INFORMACIÓN ANTES DE SU USO<br />
ADVERTENCIA<br />
Por su seguridad, siga la información de este manual para minimizar el riesgo<br />
de provocar un incendio, una explosión, o una descarga eléctrica, y para evitar<br />
que se dañe el electrodoméstico, que alguien resulte herido, o que alguien<br />
pierda la vida.<br />
INSTRUCCIONES DE SEGURIDAD IMPORTANTES<br />
• Instálelo o guárdelo donde no quede expuesto a<br />
temperaturas bajo cero o a la intemperie.<br />
• Es peligroso modificar de cualquier forma las<br />
especificaciones de este aparato.<br />
• No debe intentar reparar la máquina usted<br />
mismo. Las reparaciones efectuadas por<br />
personas inexpertas o no calificadas s pueden<br />
provocar lesiones y/o averías más graves en la<br />
máquina.<br />
• Mantenga la zona debajo y alrededor de sus<br />
electrodomésticos libre de materiales<br />
inflamables tales como hilachas, papeles,<br />
trapos, productos químicos, etc.<br />
• Es necesaria una estrecha vigilancia en caso de<br />
que este electrodoméstico sea utilizado por<br />
niños o éstos anden cerca de él.<br />
• No permita que los niños jueguen sobre, con o<br />
dentro de este electrodoméstico.<br />
• No deje la puerta de la lavadora abierta.<br />
• Una puerta abierta puede atraer a los niños para<br />
que se cuelguen de la misma o para que se<br />
arrastren hacia su interior.<br />
• Nunca intente meter nada dentro de la lavadora<br />
mientras ésta se encuentra en movimiento.<br />
Espere hasta que el tambor se haya detenido<br />
por completo.<br />
• El proceso de lavado puede reducir la<br />
combustión lenta de los tejidos.<br />
• No lave o seque artículos que hayan sido<br />
limpiados, lavados, puestos en remojo o<br />
manchados con sustancias inflamables o<br />
explosivas (tales como cera, aceite, pintura,<br />
gasolina, desengrasantes, disolventes de<br />
limpieza en seco, keroseno, etc.) que puedan<br />
prenderse o explotar.<br />
• Para evitar dicho resultado, siga detenidamente<br />
las instrucciones de lavado de la prenda por<br />
parte del fabricante.<br />
• No cierre la puerta de la lavadora de un portazo<br />
o intente forzarla para abrirla, cuando ésta se<br />
encuentra bloqueada. Esto podría causar daños<br />
a la lavadora.<br />
• Para minimizar la posibilidad de sufrir una<br />
descarga eléctrica, desenchufe el<br />
electrodoméstico del suministro de corriente o<br />
desconecte la lavadora en el contacto de la<br />
casa o retirando el fusible o desconectando el<br />
interruptor antes de intentar cualquier tipo de<br />
operación de mantenimiento o limpieza.<br />
• No intente nunca hacer funcionar este<br />
electrodoméstico si está estropeado, funciona<br />
mal, está parcialmente desmontado o tiene<br />
piezas perdidas o rotas, entre las que se incluye<br />
el cable o enchufe dañados.<br />
• Cualquier trabajo eléctrico necesario para instalar este aparato lo debe realizar un electricista<br />
competente o una persona competente.<br />
• Utilice la toma de corriente exclusiva de 120 V~ 10 % con terminal de puesta a tierra.<br />
No utilice una extensión o un adaptador doble.<br />
• Si el cable de alimentación está dañado, éste debe ser sustituido por el fabricante o sus representantes<br />
de servicio o por una persona igualmente calificada con el fin de evitar cualquier peligro.<br />
• Conecte la máquina a un enchufe con puesta a tierra según las normativas de cableado vigentes.<br />
34
A dvertencias<br />
Para minimizar el riesgo de fuego en una secadora prendida, lo<br />
siguiente debe de ser observado:<br />
• Artìculos que han sido manchados o remojados en aceite de cocina, constituyen un<br />
riesgo de fuego y no deben de ser colocados en la secadora. Articulos con aceite<br />
pueden incendiarse espontàneamente, especialmente cuando se exponen a<br />
fuentes de calor como la secadora. Los artìculos se calientan, causando una<br />
reacciòn de oxidaciòn en el aceite. La oxidaciòn crea el calentamiento. Si el<br />
calentamiento no puede escapar, las prendas pueden calentarse tanto como para<br />
incendiarse. Si es inevitable que las prendas que contengan aceite o estèn<br />
contaminadas por productos del cabello estèn en la secadora, deben ser lavadas<br />
previamente por agua caliente con detergente extra. Esto reducira, pero no<br />
eliminarà, el peligro. El ciclo de enfriamiento de la secadora debe usarse para<br />
reducir la temperatura de las prendas. No deben removerse de la secadora<br />
mientras estèn calientes.<br />
• Articulos que previamente hayan sido lavadas o remojadas en petròleo / gasolina,<br />
solventes de limpieza, o cualquier otra sustancia flamable, no deben de ser<br />
puestos en la secadora. Sustancias altamente flamables son comunmente usadas<br />
en ambientes domèsticos como acetona, alcohol, petròleo /gasolina, keroseno,<br />
removedores de manchas (algunas marcas) tupertino, ceras y removedores de<br />
cera.<br />
• Artìculos que contengan hule espuma (tambièn conocido como hule de latex) o<br />
texturas de hule similares no deben de ser secados con calor. Materiales de hule<br />
pueden, cuando estàn calientes, producir fuego por una combustiòn espontànea.<br />
• Suavizantes de Tela o productos similares no deben de ser utilizados en la<br />
secadora para eliminar los efectos de la electricidad al menos que esta pràctica<br />
sea recomendada por el fabricante del producto.<br />
• Ropa interior que contenga metales no deben de ser puestos en la secadora. Los<br />
metales pueden dañar el tambor de la secadora. Use la parrilla de secado para<br />
estos articulos.<br />
• Articulos de plàstico como gorras de baño o baberos no deben de ser colocados en<br />
la secadora.<br />
• Articulos con cubiertas de plàstico, prendas con relleno de hule espuma,<br />
almohadas, chanclas y tennis con hule espuma no deben de ser colocados en la<br />
secadora.<br />
35
E<br />
specificaciones<br />
Tornillos de transporte<br />
Cajón<br />
(Para el detergente<br />
y el suavizante<br />
para tejidos)<br />
Enchufe de toma de corriente<br />
Si el cable de alimentación se daña,<br />
debe ser sustituido por el fabricante o<br />
sus representantes de servicio o por<br />
una persona igualmente calificada, con<br />
el fin de evitar cualquier peligro.<br />
Panel de control<br />
Tambor<br />
Puerta<br />
Manguera de<br />
drenaje<br />
Parte Trasera de la <strong>Lavadora</strong><br />
Entrada de Agua Fría<br />
Ventilación Entrada de<br />
de Seguridad Agua Caliente<br />
Tapón de la<br />
cubierta inferior<br />
Tapón de drenaje<br />
Patas de nivelación<br />
Filtro de la bomba de drenaje<br />
Nombre<br />
Fuente de alimentación<br />
Tamaño<br />
Peso del producto<br />
Capacidad de lavado<br />
Capacidad de secado<br />
Potencia nominal<br />
Velocidad de centrifugado<br />
Presión admisible del agua<br />
: <strong>Lavadora</strong> de carga frontal<br />
: 120 V~ 60 Hz<br />
: 635 mm(An) 740 mm(P) 925 mm(AI)<br />
: 176 lbs<br />
: 28 lbs<br />
: 15 lbs<br />
: 1 200 W<br />
: 1 200 r/min max.<br />
: 0,3 - 10 kgf/cm 2 (30 - 1 000 kPa)<br />
Accessorios<br />
Manguera de entrada (2 EA)<br />
Llave de tuercas<br />
36
I<br />
nstalación<br />
Instálelo o guárdelo donde no quede expuesto a temperaturas bajo cero o a la intemperie.<br />
La apertura de la base no debe estar obstruida por alfombras cuando se instala la lavadora sobre un suelo<br />
con alfombras u otro elemento.<br />
Instàlela o guárdela donde no estè expuesta a temperaturas bajo cero o expuesta al ambiente.<br />
<strong>Lavadora</strong> compatible con todas las òrdenes y códigos para su uso.<br />
La base no debe de ir obstruida por carpetas o tapetes cuando la lavadora sea instalada en piso<br />
alfombrado. En paìses con àreas propensas a las plagas como cucarachas u otro animal, tengan particular<br />
atención en mantener el àrea y la lavadora, limpios en todo momento. Cualquier daño hecho por<br />
cucarachas u otras plagas no serà cubierto por la garantìa.<br />
Tornillos de transporte<br />
Este aparato está provisto de tornillos de transporte para impedir los daños internos durante<br />
el transporte.<br />
• Antes de utilizar la lavadora se deben<br />
quitar todos los tornillos de embalaje y<br />
de transporte.<br />
Al desembalar la base, asegúrese de<br />
retirar el soporte adicional de embalaje,<br />
situado en la parte central del embalaje<br />
de la base<br />
<strong>Lavadora</strong><br />
Embalaje de la<br />
base<br />
Soporte de<br />
embalaje<br />
Desmontaje de los tornillos de transporte<br />
1. Para impedir los daños internos durante el<br />
transporte, los 4 tornillos especiales<br />
estarán bloqueados. Antes de hacer<br />
funcionar la lavadora, quite los tornillos<br />
junto con los tapones de caucho.<br />
• Si no se quitan, se puede provocar una<br />
fuerte vibración, ruido y un funcionamiento<br />
defectuoso.<br />
2. Desatornille los 4 tornillos con la llave<br />
suministrada.<br />
3. Quite los 4 tornillos junto con los tapones<br />
de caucho retorciendo ligeramente el<br />
tapón. Conserve los 4 tornillos y la llave de<br />
tuercas para uso futuro.<br />
• Siempre que se transporte el aparato, se<br />
deben volver a colocar los tornillos de<br />
transporte.<br />
4. Cierre los agujeros con los tapones<br />
suministrados.<br />
37
I<br />
nstalación<br />
Requisitos del lugar de instalación<br />
<strong>Lavadora</strong><br />
aprox.<br />
2 cm<br />
Manguera de drenaje<br />
Pila de la<br />
colada<br />
Nivel del suelo:<br />
La pendiente admisible debajo de la lavadora es de 1<br />
Toma de corriente:<br />
Debe estar dentro de 1,5 metros de cada lado de la<br />
ubicación de la lavadora. No sobrecargue la toma con<br />
más de un aparato.<br />
Espacio libre adicional:<br />
(10 cm: parte posterior / 2 cm: lados derecho e izquierdo)<br />
No coloque ni almacene productos de lavandería en la<br />
parte superior de la lavadora en ningún momento.<br />
Pueden dañar el acabado o los controles.<br />
Colocando<br />
Instale la lavadora en un piso plano y fuerte.<br />
Asegùrese que la circulaciòn alrededor de la lavadora no se impida por carpetas, alfombras, etc.<br />
• Antes de colocar la lavadora sobre azulejo, aplique una cubierta en la parte inferior.<br />
• No trate de corregir cualquier inperfecciòn en el suelo con pedazos de madera o materiales<br />
similares debajo de la lavadora.<br />
• Si es imposible evitar colocar la lavadora al lado de la estufa, debe instalarse un aislador de<br />
aluminio entre los 2 aparatos.<br />
• La lavadora no debe de intalarse en habitaciones donde la temperatura baje a 0ºC<br />
• Asegurese de instalar la lavdora donde pueda ser accesible para un mecànico en caso de fallas.<br />
38
I<br />
nstalación<br />
Conexión eléctrica<br />
1. No utilice una extensión o un adaptador doble.<br />
2. Si el cable de alimentación está dañado, debe ser sustituido por el fabricante o sus representantes de servicio<br />
o por una persona igualmente calificada con el fin de evitar cualquier peligro.<br />
3. Desenchufe siempre la máquina y cierre el suministro de agua después del uso.<br />
4. Conecte la máquina a un enchufe con puesta a tierra según las normativas de cableado vigentes.<br />
5. El aparato se debe colocar de forma que el enchufe sea fácilmente accesible.<br />
Si el cordón de almentación es dãnado este debe de ser reemplazado por el fabricante o su agente de servicio<br />
o por personal calificado para evitar el riesgo.<br />
• Las reparaciones de la lavadora sòlo deben realizarse por personal calificado.<br />
Las reparaciones hechas por personas inexpertas pueden causar daños o serias consecuencias para su uso.<br />
Contacte a su Centro de Servicio màs cercano.<br />
No instale su lavadora en cuartos donde las temperaturas bajo cero, o heladas, puedan intervenir.<br />
Las mangueras heladas pueden explotar. La confiabilidad de la la unidad electrónica puede variar dependiendo<br />
de las temperaturas bajo cero.<br />
Si compra su lavadora en èpocas de heladas: guarde la lavadora en un cuarto de temperatura ambiente antes<br />
de comenzarla a usar.<br />
PRECAUCIÓN<br />
Precauciones de los Cordones de Enchufes<br />
En la mayoría de los electrodomésticos se recomienda que sean puestos en un circuito que sea dedicado sólo para<br />
ellos; esto significa, un solo circuito de salida el cual sólo le da energía a ese electrodoméstico y no tiene salidas<br />
adicionales o sucursal de circuitos (otras sucursales de circuitos). Chequear la página de las especificaciones en este<br />
manual de usuario para estar seguro.<br />
No se debe sobre cargar la pared de las salidas de energía. Sobrecargar la pared de salida de energía es peligroso,<br />
también lo es tener la pared de salida de energía suelta o dañada, cordones de extensión, cordones deshilachados, o<br />
el aislamiento de cordones dañados o rajados. Cualquiera de estas condiciones pueden resultar en un corto circuito o<br />
un incendio. Periódicamente examine los cordones de sus electrodomésticos, y si parece que están dañados o<br />
deteriorados, desconéctelos, deje de usar el electrodoméstico, y reemplace el cordón con otro cordón de la mismas<br />
características de un servidor autorizado.<br />
Proteger el enchufe y cordones de maltratos físicos o mecánicos, tales como ser doblados, retorcidos, peñiscados,<br />
dañados con la puerta al cerrarla, o caminar por encima de los mismos. Prestarle una atención particular a los<br />
enchufes, en las paredes de salida de energía, y el punto de donde el cordón sale del electrodoméstico.<br />
La lavadora se debe conectar a la red principal del agua utilizando conjuntos de mangueras<br />
nuevos y no utilizando mangueras usadas.<br />
Conexión de la manguera de suministro de agua<br />
Fría<br />
Caliente<br />
(opción)<br />
Llave de agua caliente<br />
Protector de la<br />
manguera<br />
Cierre de<br />
caucho<br />
Llave de<br />
Agua fría<br />
La presión del suministro de agua debe estar entre 30 kPa y 1 000 kPa<br />
(0,3 - 10 kgf/cm 2 )<br />
No desforre ni cruce al conectar la manguera de entrada a la válvula<br />
Si la presión del suministro del agua es mayor de 1 000 kPa se debe instalar<br />
un dispositivo de descompresión.<br />
• Se suministran dos anillos con la manguera de entrada de agua en el<br />
conector de la válvula con el fin de evitar fugas de agua.<br />
• Compruebe la presión del agua en las conexiones de la lavadora<br />
abriendo completamente el grifo.<br />
• Compruebe periódicamente el estado de la manguera y sustitúyala si<br />
es necesario.<br />
• Por lo que deben en primera instancia utilizarse las mangueras nuevas<br />
suministradas en su aparato. Es importante no reutilizar las usadas.<br />
• Asegúrese de que no hay retorcimiento en la manguera y de que no<br />
está aplastada.<br />
Cuando su lavadora tiene dos válvulas<br />
• La manguera de entrada que tiene el conector rojo es para la llave de<br />
agua caliente.<br />
• Si la lavadora tiene dos válvulas, se ahorra energía<br />
utilizando la válvula de agua caliente.<br />
39
I<br />
nstalación<br />
Grifo normal sin manguera de entrada de tipo de rosca y tornillo<br />
1.Desenrosque el tornillo de fijación<br />
para conectar el grifo.<br />
Conector superior<br />
Tomillo<br />
de fijación<br />
Empaquetadura<br />
de goma<br />
2. Empuje hacia arriba el conector<br />
hasta que la empaquetadura de la<br />
goma haga fuerte contacto con el<br />
grifo. Apriete entonces los 4<br />
tornillos.<br />
Empaguetadur<br />
a de goma<br />
Conector<br />
superior<br />
3. Empuje verticalmente hacia arriba<br />
la manguera de suministro de agua<br />
de manera que la empaquetadura<br />
de goma dentro de la manguera se<br />
adhiera completamente al grifo y<br />
apriétela luego enroscando hacia la<br />
derecha.<br />
Conector superior<br />
Placa<br />
Grifo normal sin manguera de entrada de tipo de rosca y simple contacto<br />
1. Afloje el tornillo del conector superior. 2. Empuje hacia arriba el conector superior<br />
hasta que la empaquetadura de goma<br />
haga fuerte contacto con el grifo. Apriete<br />
Conector superior<br />
Upper<br />
Connector<br />
Tornillo de Fixing fijación screw<br />
Rubber Empaquetadura<br />
packing<br />
de goma<br />
Middle Conector<br />
connector<br />
intermedio<br />
• Si el diámetro del grifo<br />
es grande girar la placa guía<br />
entonces los 4 tornillos<br />
Empaquetadu<br />
ra de Rubber goma packing<br />
Conector Upper<br />
superior Connector<br />
Conector Middle<br />
connector<br />
intermedio<br />
Manguera de suministro<br />
de agua<br />
3. Conecte la manguera de suministro de<br />
agua al conector intermedio, empujando<br />
la placa hacia abajo<br />
Upper Conector<br />
Connector<br />
superior<br />
Manguera Water supply de<br />
suministro<br />
hose<br />
de agua<br />
Placa Plate<br />
Placa Guide plate guía<br />
Connector Conector<br />
intermedio<br />
• Cierre el grifo para separar la<br />
manguera de<br />
suministro de agua del conector<br />
intermedio.<br />
• Tire luego de la manguera de<br />
entrada, empujando hacia abajo<br />
la placa.<br />
• Gire el conector intermedio para que no<br />
haya fuga de agua.Compruebe que la<br />
junta de goma está instalada en el interior<br />
del conector de la manguera.<br />
Hose connector<br />
Rubber seal<br />
Utilice Used el the grifo horizontal tap<br />
Grifo Horizontal horizontal tap<br />
Grifo Extension de extensión tap<br />
Square Grifo en tap escuadra<br />
• Su máquina se suministra con<br />
conexión de agua<br />
fría y caliente.<br />
• Compruebe que no hay<br />
pliegues en la manguera y<br />
que no está aplastada<br />
40
I<br />
nstalación<br />
Este equipo no està diseñado para uso marítimo o para instalaciones móviles como<br />
caravanas, avionetas, etc. Desconecte la lavadora si no se va a utilizar por un perìodo<br />
largo de tiempo (por ejemplo, vacaciones), especialmente si no hay un drenaje en el<br />
piso del lugar. Cuando ya no utilice la lavadora, quite los cables principales y destruya<br />
el conector. Deconecte el seguro de la puerta para evitar que niños pequeños se<br />
queden atrapados dentro de la lavadora. El material para envolver puede causar<br />
sofocación en los niños. Mantenga todo el material del empaque lejos de los niños.<br />
Instalación del desagüe<br />
Aprox. 100 cm<br />
Aprox. 145 cm<br />
max. 100 cm<br />
min. 60 cm<br />
Aprox. 105 cm<br />
• Cuando instale la manguera de desagüe,<br />
asegúrela firmemente, procurando que no se<br />
mueva atándola con una cuerda.<br />
• Asegurando la instalación, el tubo del desagüe<br />
protegerá el suelo de derrames de agua.<br />
Tubo de lavado<br />
Aprox. 100 cm<br />
Aprox. 145 cm<br />
Manguera<br />
Retenedor<br />
Aprox. 105 cm<br />
min. 60 cm<br />
max. 100 cm<br />
max.100 60" MAX cm<br />
36" min.60 MIN cm<br />
Atadura<br />
Correa<br />
60" max.100 MAX cm<br />
36" min.60 MINcm<br />
• La manguera de desagüe no debería estar a<br />
mas de 1 m de altura del suelo.<br />
• Afianzando la instalación, el tubo de desagüe<br />
protegerá el suelo de dañarlo a causa de<br />
escapes de agua.<br />
• Cuando el tubo de la manguera es muy largo,<br />
por favor no llene la lavadora, podria causar<br />
un ruido extraño.<br />
41
I<br />
nstalación<br />
Ajuste de nivel<br />
Contratuerca<br />
Pata de nivelación<br />
Más arriba Más abajo<br />
1. La nivelación correcta de una lavadora impide el ruido y la<br />
vibración excesivos.<br />
Instale el aparato sobre una superficie de suelo sólida y<br />
nivelada, preferiblemente en la esquina de una habitación.<br />
NOTA Vigas o pisos suspendidos pueden contribuir a la<br />
excesiva vibraciòn y a errores de balance.<br />
2. Si el suelo no está nivelado, ajuste los pies de nivelación<br />
según sea necesario (no introduzca trozos de madera, etc.<br />
debajo de los pies).<br />
Asegúrese de que los cuatro pies son estables y descansan<br />
sobre el suelo y, a continuación, compruebe que el<br />
electrodoméstico está perfectamente nivelado (utilice un nivel<br />
de burbuja de aire)<br />
Pata de nivelación<br />
42<br />
Pata de nivelación<br />
❊ Después de ajustar las patas, apriete la contratuerca girándola<br />
en sentido contrario a las agujas del reloj.<br />
❊ Comprobación en diagonal<br />
Al empujar hacia abajo y en diagonal los bordes de la placa superior de la<br />
lavadora, la máquina no se debe mover un centímetro arriba o abajo en absoluto.<br />
(Compruebe esto en dos direcciones)<br />
Si la máquina cabecea al empujar la placa superior de la máquina en diagonal,<br />
ajuste de nuevo las patas.<br />
Suelos de hormigón (baldosas...)<br />
• La superficie de instalación debe estar limpia, seca y nivelada.<br />
• Instale la lavadora sobre un suelo duro y plano.<br />
❊ No deje que las patas de la lavadora se mojen. Si las patas se mojan, se puede<br />
producir un deslizamiento de la lavadora.<br />
Suelos de madera<br />
• Los suelos de madera son especialmente propensos a las vibraciones.<br />
• Para evitar las vibraciones, recomendamos que coloque tapones de goma<br />
debajo de cada pata, al menos con un grosor de 15 mm bajo la lavadora,<br />
asegurados con tornillos por lo menos a 2 viguetas del piso.<br />
Tapón Rubber de goma Cup<br />
• Si es posible, instale la lavadora en una de las esquinas de la habitación, donde el suelo es más estable.<br />
Inserte los tapones de goma para reducir la vibración.<br />
Puede obtener los tapones de goma<br />
(nº de pieza 4620ER4002B en el dpto. de repuestos de <strong>LG</strong>.<br />
Importante!<br />
• Una colocación y nivelación correctas de la lavadora garantiza un funcionamiento duradero, regular y fiable.<br />
• La lavadora debe estar completamente horizontal y permanecer fija en dicha posición.<br />
• No debe oscilar hacia las esquinas cuando esté cargada.<br />
• La superficie de instalación debe estar limpia, libre de cera para suelos y otros recubrimientos lubricantes.
C<br />
uidados antes del lavado<br />
ADVERTENCIA<br />
Para reducir el riesgo de incendio, descarga eléctrica o daño a personas, lea las<br />
Instrucciones Importantes de Seguridad antes de operar este artefacto.<br />
1. Etiquetas de cuidados<br />
Busque la etiqueta de cuidados de sus prendas. Ésta le indicará el contenido del tejido de su prenda y<br />
cómo se debe lavado.<br />
2. Clasificación<br />
Para obtener los mejores resultados, clasifique la ropa en cargas que se puedan lavado con el mismo<br />
ciclo de lavado. Los tejidos diferentes necesitan lavarse de diferentes formas, con temperatura de agua y<br />
velocidad de centrifugado diferentes. Separe siempre los colores oscuros de los claros y blancos. Lávelos<br />
por separado, ya que se puede producir una transferencia de colores e hilos, lo que provocará la<br />
decoloración del blanco, etc. Si es posible, no lave artículos muy sucios con uno ligeramente sucio.<br />
Suciedad (Pesada, Normal, Ligera) Separe las prendas según la cantidad de suciedad.<br />
Color (Blanco, Claros, Oscuros) Separe los tejidos blancos de los tejidos de color.<br />
Hilachas (Productores o recolectores Lave por separado los productores de hilachas<br />
de hilachas)<br />
los recolectores de hilachas.<br />
3. Cuidados antes de la carga<br />
Mezcle prendas grandes y pequeñas en una misma carga. Cargue los artículos grandes en primer lugar.<br />
Los artículos grandes no deben representar más de la mitad del total de la carga. No lave prendas por<br />
separado. Esto puede provocar una carga desequilibrada. Añada uno o dos artículos similares.<br />
• Compruebe que todos los bolsillos están<br />
vacíos. Los objetos tales como clavos,<br />
horquillas, cerillas, bolígrafos, monedas y<br />
llaves pueden dañar tanto su lavadora como su<br />
ropa.<br />
• Cierre las cremalleras, corchetes y cordones<br />
para asegurarse de que estos artículos no se<br />
enganchen en otras prendas.<br />
• Trate previamente la suciedad y las manchas<br />
cepillando con un poco de detergente disuelto<br />
en agua sobre las manchas como cuellos y<br />
puños de camisas para quitar mejor la<br />
suciedad.<br />
• Verifica los dobleces del caucho que aísla<br />
(gris) y elimina cualquier residuo restante.<br />
• El tambor deberá estar totalmente vacío antes<br />
de efectuar el siguiente lavado.<br />
• Retire cualquier prenda de ropa o elemento<br />
adherido a la junta flexible de caucho, para<br />
evitar daños.<br />
43
C<br />
ómo añadir detergente<br />
Cómo añadir detergente y suavizante para tejidos<br />
1. El cajón distribuidor<br />
• Solamente lavado principal ➔<br />
• Prelavado + Lavado principal ➔<br />
Detergente para<br />
lavado principal<br />
Suavizante<br />
para tejidos<br />
Detergente para el<br />
Blanquedor<br />
2. Cómo añadir suavizante para tejidos<br />
• No supere los límites máximos que<br />
están marcados por una línea. Cierra<br />
ligeramente el cajón de dispensador.<br />
Sobrellenar el dispensador puede<br />
causar daños y manchar las ropas.<br />
• No deje el suavizante para tejidos en el<br />
cajón de detergente durante más de 2<br />
días. (El suavizante para tejidos podría<br />
endurecerse).<br />
• El suavizante se añadirá<br />
automáticamente durante el último ciclo<br />
de enjuague.<br />
• No abra el cajón mientras la lavadora<br />
se está llenando agua.<br />
• No se permiten los disolventes<br />
(benceno, etc.).<br />
NOTA<br />
No eche suavizante para tejidos<br />
directamente sobre la ropa.<br />
44
C<br />
ómo añadir detergente<br />
3. Dosis de detergente<br />
• El detergente se debe utilizar de acuerdo con<br />
las instrucciones del fabricante del detergente.<br />
• Si se utiliza más detergente que la cantidad<br />
recomendada, se produce demasiada espuma y<br />
esto hará que disminuya el resultado del<br />
lavado o provocará una pesada carga en el<br />
motor. (Provocará fallas de funcionamiento).<br />
• Utilice solamente detergente en polvo en las<br />
lavadoras de carga frontal.<br />
❋ Si produce demasiada espuma, por favor<br />
reduzca la cantidad de detergente.<br />
• Quizás sea necesario ajustar el uso de<br />
detergente en cuanto a la temperatura del<br />
agua, dureza del agua, tamaño y nivel de<br />
suciedad de la carga. Para obtener<br />
mejores resultados, evite el exceso de<br />
espuma.<br />
❋ Consejos<br />
Carga completa:<br />
según las recomendaciones del<br />
fabricante.<br />
Carga parcial:<br />
3/4 de la cantidad normal.<br />
Carga mínima:<br />
1/2 de la carga completa.<br />
• El detergente sale desde el cajón<br />
distribuidor al comienzo del ciclo.<br />
5. Uso de detergente en pastillas<br />
1) Abra la puerta e introduzca las<br />
pastillas en el tambor.<br />
3. Ablandador de agua<br />
2) Cargue las prendas en el tambor.<br />
• Puede utilizarse un ablandador de agua,<br />
como un antical (Calzón), para reducir<br />
el uso de detergente en áreas de agua<br />
extremadamente dura.<br />
Añada el producto según las cantidades<br />
especificadas en el paquete.<br />
Primero añada detergente y después el<br />
ablandador de agua.<br />
3) Cierre la puerta.<br />
• Utilice la misma cantidad de agua que<br />
para el lavado con agua blanda.<br />
45
F<br />
unción<br />
Programas recomendados de acuerdo con el tipo de carga<br />
Programa<br />
Algodón<br />
Algodón<br />
Rápido<br />
Sintéticos<br />
Delicados<br />
Seda/Lana<br />
Lavado a Mano<br />
Edredones/<br />
Mezclilla<br />
Rápido 30<br />
Cuidado<br />
infantil<br />
Tipo de tejido<br />
Prendas de color rápidas<br />
(camisetas, camisones,<br />
pijamas) y algodón blanco<br />
ligeramente sucio (ropa interior)<br />
Prendas ligeramente sucias y<br />
cargas pequeñas<br />
Poliamida, acrílico, poliéster<br />
Prendas delicadas que se<br />
dañan fácilmente<br />
Prendas delicadas y de lana<br />
marcadas con “lavado a mano”<br />
Ropa de cama de algodón con<br />
relleno, colcha, almohada,<br />
cobija, cubierta de sofá con<br />
relleno ligero.<br />
Ropa de color poco sucia y<br />
resistente<br />
Ropa de bebé ligeramente<br />
manchada<br />
Temperatura<br />
del agua<br />
(opcional)<br />
30°C<br />
(Fría, 40°C<br />
50°C)<br />
30°C<br />
(Fría, 40°C)<br />
30°C<br />
(Fría, 40°C)<br />
30°C<br />
(Fría)<br />
30°C<br />
(Fría, 40°C)<br />
60°C<br />
(40°C 50°C)<br />
Opción<br />
- Prelavado<br />
- Enjuag.+Centrif.<br />
- Solo Secado<br />
- Bio<br />
- Remojo<br />
- Intensivo<br />
- Más Aqua<br />
- Reserva<br />
- Prelavado<br />
- Enjuag.+Centrif.<br />
- Remojo<br />
- Intensivo<br />
- Más Aqua<br />
- Reserva<br />
- Enjuag.+Centrif.<br />
- Intensivo<br />
- Reserva<br />
- Enjuag.+Centrif.<br />
- Intensivo<br />
- Más Aqua<br />
- Reserva<br />
- Enjuag.+Centrif.<br />
- Solo Secado<br />
- Intensivo<br />
- Más Aqua<br />
- Reserva<br />
- Prelavado<br />
- Enjuag.+Centrif.<br />
- Solo Secado<br />
- Bio<br />
- Remojo<br />
- Intensivo<br />
- Más Aqua<br />
- Reserva<br />
Carga<br />
máxima<br />
Potencia de<br />
servicio<br />
Menos de 5kg<br />
Menos de 4kg<br />
Menos de 3kg<br />
Menos de 3kg<br />
1 medida<br />
grande<br />
(9 prendas)<br />
Menos de 5kg<br />
Menos de 6kg<br />
❋ Temperatura del agua: Seleccione la temperatura del agua para los ciclos de lavado. Siga siempre la<br />
etiqueta de cuidados o las instrucciones del fabricante al realizar el lavado.<br />
❋ Lavado Intensivo: Si la ropa está demasiado sucia, la opción de lavado "Lavado Intensivo" es la más<br />
efectiva.<br />
❋ Pre Lavado: Si el agua es dura, resulta efectivo utilizar el programa de “Pre-Lavado”.<br />
El Prelavado se encuentra disponible para los programas Algodón, Sintéticos,<br />
Cuidado infantil y Algodón Rápido.<br />
46
C<br />
ómo utilizar la lavadora<br />
1. El ciclo Algodón está<br />
seleccionado automáticamente<br />
al prender la unidad.<br />
• Pulse el botón Encendido Apagado ( )<br />
para prender la <strong>Lavadora</strong>.<br />
• Pulse el botón Inicio/Pausa ( ).<br />
2. Selección manual<br />
• Pulse el botón Encendido Apagado ( )<br />
para prender la <strong>Lavadora</strong>.<br />
• Seleccione el ciclo deseado mediante el<br />
dial de programas y, si fuera necesario,<br />
realice cualquier<br />
47
C<br />
ómo utilizar la lavadora<br />
(1) (2)<br />
(3) (4) (5) (6) (7) (8,9,10) (11) (12) (13)<br />
(1) Botón: Encendido<br />
Apagado<br />
(2) Dial: Programa<br />
(3) Botón: Inicio/Pausa<br />
(4) Botón: Opción<br />
Encendido Apagado<br />
(5) Bloqueo infantil<br />
(6) Botón: Enjuague<br />
(7) Botón: Temp.<br />
(8) Botón: Intensivo<br />
(9) Botón: Más Aqua<br />
(10) Botón: Reserva<br />
(11) Botón: Centrifugado<br />
(12) Botón: Limpieza de la tina<br />
(13) Dial: Secado<br />
Programa<br />
1. Encendido Apagado<br />
• Pulse el botón Encendido Apagado ( )<br />
para prender y apagar la <strong>Lavadora</strong>.<br />
• Para cancelar la función Reserva, debe<br />
pulsar el botón Encendido Apagado ( ).<br />
2. Programa inicial<br />
• Al pulsar el botón Encendido Apagado ( ),<br />
la <strong>Lavadora</strong> está preparada para comenzar el<br />
programa de algodón. Con condiciones<br />
iniciales que se indican a continuación.<br />
• Por lo que, si desea continuar con el ciclo de<br />
Lavado sin cambiar el programa, pulse<br />
simplemente el botón Inicio/Pausa ( ) y la<br />
<strong>Lavadora</strong> se pondrá en funcionamiento.<br />
Programa inicial<br />
- Programa de Algodón / Enjuague: Normal /<br />
30º C/ 800 r/min<br />
48<br />
• Están disponibles 9 programas según el<br />
tipo de colada.<br />
• El testigo luminoso del dial iluminará el<br />
programa seleccionado.<br />
• Al pulsar el botón Inicio/Pausa ( ),<br />
quedará automáticamente seleccionado el<br />
programa Algodón.<br />
- Girando el dial, la selección de programas<br />
se efectuará en el siguiente orden:<br />
“Algodón – Algodón Rápido – Sintéticos –<br />
Delicados – Seda/Lana – Lavado a Mano –<br />
Edredones/Mezclilla – Rápido 30 –<br />
Cuidado infantil”.<br />
Para obtener más información relativa al<br />
programa adecuado a cada tipo de colada,<br />
consulte la página 46.
C<br />
ómo utilizar la lavadora<br />
1. Inicio<br />
• Este botón (Inicio/Pausa) se utiliza para<br />
comenzar el ciclo de Lavado o detenerlo<br />
temporalmente.<br />
2. Pausa<br />
Inicio/Pausa<br />
• Si fuese necesario detener temporalmente<br />
el ciclo de Lavado, pulse el botón<br />
“Inicio/Pausa”.<br />
• En modo Pausa, la unidad se apagará<br />
automáticamente pasados 4 minutos.<br />
1. Prelavado<br />
Opción<br />
• Pulsando el botón de<br />
opción, sólo puede<br />
seleccionarse una de sus<br />
funciones.<br />
NOTA:<br />
En función del ciclo<br />
programado, no todas las<br />
opciones estarán disponibles.<br />
• Utilice esta opción para cargas que precisen<br />
tratamiento previo. Esta opción añade 16<br />
minutos de Prelavado antes de la descarga.<br />
- Al utilizar la opción Prelavado, no utilice<br />
detergente líquido en el compartimento de<br />
Lavado principal. Utilice detergente en polvo.<br />
• Disponible para los programas Algodón,<br />
Algodón Rápido, Sintéticos y Cuidado infantil.<br />
2. Enjuag.+Centrif.<br />
• Utilice esta opción para aclarar y, a<br />
continuación, Centrifugado.<br />
3. Solo Secado<br />
• Seleccione esta opción cuando desee<br />
Disponible para los programas Algodón,<br />
Algodón Rápido, Rápido 30 y Cuidado<br />
infantil.<br />
4. Bio<br />
• Si desea eliminar manchas de sustancias<br />
proteicas (leche, sangre, chocolate,...), puede<br />
escoger la función Bio pulsando el botón de<br />
opción.<br />
Nota: puede escoger la función Bio con una<br />
temperatura superior a 50°C en Algodón,<br />
Cuidado infantil.<br />
5. Remojo<br />
• Use este modo para lavado prendas normales,<br />
Disponible para los programas Algodón, Algodón<br />
Rápido, Sintéticos y Cuidado infantil.<br />
49
C<br />
ómo utilizar la lavadora<br />
Puede seleccionar esta función si desea<br />
bloquear los botones del conjunto de control<br />
para evitar una manipulación indebida.<br />
• La función Bloqueo infantil se ajusta<br />
manteniendo pulsados, simultáneamente,<br />
los botones Opción y Enjuague. (Durante<br />
tres segundos)<br />
50<br />
Bloqueo infantil<br />
• Al activar el bloqueo infantil, todos los botones<br />
permanecerán inoperativos a excepción del<br />
botón de Encendido Apagado.<br />
• Para desactivar el sistema de bloqueo<br />
infantil, mantenga pulsados de nuevo,<br />
simultáneamente, los botones Opción y<br />
Enjuague. (Durante tres segundos)<br />
• Para cambiar el programa que desee<br />
mientras la <strong>Lavadora</strong> se encuentra en<br />
modo de bloqueo infantil.<br />
1. Mantenga pulsados los botones Opción y<br />
Enjuague para cancelar el bloqueo<br />
infantil. (Durante tres segundos)<br />
2. Pulse el botón Inicio/Pausa.<br />
3. Seleccione el programa que desee y pulse<br />
de nuevo el botón Inicio/Pausa.<br />
Cambie al<br />
programa<br />
deseado<br />
La función de bloqueo infantil puede<br />
ajustarse en cualquier momento y se cancela<br />
automáticamente cuando se producen<br />
errores de funcionamiento.<br />
1. Normal<br />
Enjuague<br />
• Pulsando el botón<br />
Enjuague, puede escoger el<br />
tipo de Enjuague.<br />
- Normal<br />
- Enjuague+<br />
- Enjuague++<br />
- Normal+Pausa<br />
- Enjuague++Pausa<br />
• Los programas Cuidado infantil realizan 4<br />
Enjuague.<br />
• Los programas Algodón, Sintéticos,<br />
Seda/Lana y Edredones / Mezclilla realizan<br />
3 Enjuague.<br />
• Los programas Algodón Rápido, Delicados,<br />
Lavado a mano y Rápido 30 realizan 2<br />
Enjuague.<br />
2. Enjuague+ y Enjuague++<br />
• Utilícelo para llevar a cabo Enjuague<br />
adicionales que pueden ayudar a eliminar<br />
rastros de detergente.<br />
• Al seleccionar la función Enjuague+ o<br />
Enjuague++, se incrementa el tiempo y el<br />
agua destinados a dicha función.<br />
3. Normal+Pausa y Enjuague++Pausa<br />
• Si selecciona esta función, pulsando<br />
repetidamente el botón Enjuague, las<br />
prendas permanecerán en la <strong>Lavadora</strong><br />
suspendidas en el agua tras un ciclo de<br />
Enjuague, sin pasar al Centrifugado.<br />
• Para continuar con la función de descarga<br />
o Centrifugado tras un Enjuague en espera:<br />
seleccione la función Descarga del dial de<br />
programa o pulse el botón Centrifugado a la<br />
velocidad deseada y, a continuación, pulse<br />
el botón Inicio/Pausa.<br />
El testigo luminoso correspondiente se<br />
iluminará para identificarlo.
C<br />
ómo utilizar la lavadora<br />
Centrifugado<br />
• Pulsando el botón<br />
Centrifugado, puede<br />
escoger la velocidad de<br />
funcionamiento para dicha<br />
función.<br />
Temperatura del agua<br />
• Pulsando el botón Temp.,<br />
podrá seleccionar la<br />
temperatura del agua.<br />
- Fría<br />
- 30º C / 40º C / 50º C / 60º C<br />
1. Selección de Centrifugado<br />
• La velocidad de Centrifugado está<br />
disponible, según el programa, de la<br />
siguiente forma:<br />
- Algodón, Algodón Rápido y Rápido 30<br />
No Centrifugado – 400 – 800 – 1 000 –<br />
1 200<br />
- Cuidado infantil y Sintéticos<br />
No Centrifugado – 400 – 800 – 1 000<br />
- Edredones / Mezclilla, Delicados,<br />
Lavado a Mano<br />
No Centrifugado – 400 – 800<br />
- Seda/Lana<br />
No Centrifugado – 400<br />
2. No Centrifugado<br />
• Si selecciona la opción “No Centrifugado”,<br />
la <strong>Lavadora</strong> se detiene, después de la<br />
descarga, tras la última vuelta.<br />
El testigo luminoso correspondiente se<br />
iluminará para identificarlo.<br />
1. Normal<br />
• La temperatura del agua puede<br />
seleccionarse, según el programa, como se<br />
muestra a continuación:<br />
- Cuidado infantil<br />
40°C – 50°C – 60°C<br />
- Algodón y Algodón Rápido<br />
Fría – 30°C – 40°C – 50°C<br />
- Sintéticos, Delicados, Seda/Lana,<br />
Lavado a Mano, Rápido 30<br />
Fría – 30°C – 40°C<br />
- Edredones / Mezclilla<br />
Fría – 30°C<br />
El testigo luminoso de la temperatura deseada se<br />
iluminará para identificarlo.<br />
Para obtener información más detallada,<br />
consulte la página 46.<br />
Intensivo<br />
• Al lavado a máxima carga o prendas muy<br />
sucias, puede mejorar la efectividad del Lavado<br />
usando la opción de Lavado intensivo.<br />
• Al seleccionar la opción Intensivo, el tiempo de<br />
Lavado puede ampliarse, dependiendo del<br />
programa seleccionado.<br />
• Para usar esta opción, pulse una vez el botón<br />
“Intensivo”, antes de que el programa de Lavado<br />
comience.<br />
51
C<br />
ómo utilizar la lavadora<br />
Más Agua<br />
Limpieza de la tina<br />
Escoja esta opción para añadir agua extra a<br />
los ciclos de lavado y aclarado a fin de<br />
obtener resultados óptimos, especialmente<br />
con prendas grandes o voluminosas.<br />
Reserva<br />
• El programa de limpieza de la tina puede<br />
ajustarse pulsando el botón “Limpieza de la<br />
tina”.<br />
Preparativos del Lavado antes de iniciar la función<br />
“Reserva”.<br />
- Abra el grifo de agua.<br />
- Cargue prendas y cierre la puerta.<br />
- Añada detergente y suavizante al compartimento.<br />
• Ajustar la función “Reserva”<br />
- Pulse el botón Encendido Apagado ( ).<br />
- Gire el dial para escoger el programa que desee.<br />
- Pulse el botón Reserva y ajuste el tiempo que<br />
desee.<br />
- Pulse el botón Inicio/Pausa ( ). (El testigo<br />
luminoso de la función “ ” parpadea)<br />
• Si pulsa el botón Reserva, aparece “3:00”.<br />
El máximo Reserva es de 19:00 horas y el mínimo<br />
de 3:00 horas.<br />
• Con cada presión del botón, el Reserva aumenta<br />
en una hora.<br />
• Para cancelar la función de Reserva, pulse el<br />
botón Encendido Apagado ( ).<br />
• El Reserva es el “tiempo de espera” desde ahora<br />
hasta que se complete el ciclo de Lavado o el<br />
proceso seleccionado (Lavado, Enjuague,<br />
Centrifugado).<br />
• En función de las condiciones del suministro y la<br />
temperatura del agua, el Reserva y el tiempo de<br />
Lavado real pueden variar.<br />
52<br />
La función LIMPIEZA DE LA TINA es un ciclo<br />
especial que permite limpiar el interior de la<br />
lavadora. Este ciclo usa un nivel de agua y una<br />
velocidad de centrifugado mayores. Ejecute este<br />
ciclo regularmente.<br />
Uso del ciclo de limpieza de la tina:<br />
1.Retire cualquier prenda o elemento de la<br />
lavadora y cierre la puerta.<br />
2. Abra la gaveta del dispensador y añada<br />
antical (Calgón) al compartimento de lavado<br />
principal.<br />
NOTA: No añada detergente a ningún<br />
compartimento. Podrían producirse<br />
espuma excesiva y fugas de la lavadora.<br />
3. Cierre despacio la gaveta del dispensador.<br />
4. Prenda y, a continuación, pulse “Limpieza de<br />
la tina”.<br />
5. Pulse el botón Inicio/Pausa para comenzar.<br />
6. Una vez completo el ciclo, deje la puerta<br />
abierta para que se seque el contorno de la<br />
apertura, la junta flexible y el cristal de la<br />
puerta de la lavadora.<br />
! PRECAUCIÓN:<br />
si tiene niños pequeños, tenga cuidado de no<br />
dejar la puerta abierta demasiado tiempo.
C<br />
ómo utilizar la lavadora<br />
Secado<br />
NOTA<br />
La máxima capacidad de Secado de este<br />
modelo es de 7 kg.<br />
• No cargue más de lo que muestra el<br />
indicador de máxima carga de Secado. Las<br />
prendas deben poder girar libremente.<br />
• Este proceso automático de Lavado y<br />
Secado puede seleccionarse fácilmente.<br />
• Para obtener un Secado uniforme,<br />
asegúrese de que todas las prendas de la<br />
colada poseen tamaño y composición<br />
similares.<br />
• Haciendo girar el dial, puede seleccionar:<br />
Normal Más 30 60 90 150 <br />
Baja temp Iron Eco.<br />
• Tras acabar de Secado, aparecerá el<br />
mensaje “ ” (“Enfriamiento”). El programa<br />
puede finalizarse pulsando el botón<br />
“Inicio/Pausa”. Si no pulsa el botón<br />
“Inicio/Pausa”, el ciclo<br />
“ ” (“Enfriamiento”) finalizará<br />
automáticamente pasadas 4 horas.<br />
1. Guía de Secado automático<br />
• Utilice sus ciclos automáticos para Secado<br />
la mayoría de los tipos de colada. Los<br />
sensores electrónicos miden la temperatura<br />
de la salida para aumentar o reducir la<br />
temperatura del Secado y así obtener un<br />
tiempo de reacción más rápido y un control<br />
de tempe<br />
• Ciclo de Secado automático recomendado<br />
por tipo de colada.<br />
a) Para Sintéticos: Baja Temp.<br />
b) Si desea Semihumedor la colada: Iron.<br />
c) Para algodón: Normal.<br />
d) Para pañales lavables: Más.<br />
NOTA: existe una diferencia entre el tiempo<br />
de Secado estimado en el modo automático y<br />
el real. El tipo de tejido, el tamaño de la carga<br />
y el nivel de Secado seleccionado afectan al<br />
tiempo de Secado.<br />
* Los pesos de colada estándar muestran la<br />
cantidad de prendas a introducir en la<br />
<strong>Lavadora</strong>.<br />
Tipo de<br />
prendas<br />
Peso<br />
unitario<br />
Pañales<br />
100g<br />
Camisas<br />
200g<br />
Camiseta<br />
de manga<br />
larga<br />
300g<br />
Tipo de<br />
prendas<br />
Peso<br />
unitario<br />
Ropa<br />
interior<br />
50g<br />
Pijamas<br />
500g<br />
Vaqueros<br />
1200g<br />
53
C<br />
ómo utilizar la lavadora<br />
2. Guía de tiempos de Secado manual<br />
• Girando el botón Secado, puede seleccionar el<br />
tiempo de Secado.<br />
• El ciclo de Secado puede durar hasta 150<br />
minutos. Al seleccionar Sólo Secado, el ciclo de<br />
Secado comenzará tras terminar el Centrifugado,<br />
a menos que esta función se anule.<br />
• Estos tiempos de Secado son una orientación<br />
para ayudarle en el ajuste de su Secadora<br />
cuando utilice el modo de Secado manual. Los<br />
tiempos de Secado pueden variar notablemente<br />
según la humedad, la temperatura ambiente y el<br />
tipo de tejido, por lo que su<br />
Prendas de lana<br />
- No someta prendas de lana al ciclo de<br />
Secado. Dispóngalas manteniendo su forma<br />
natural y séquelas en plano.<br />
- Algunos tejidos y prendas de punto pueden<br />
encoger más o menos, dependiendo de su<br />
calidad.<br />
- Estire siempre este tipo de prendas de<br />
forma inmediata tras su Secado.<br />
Semihumedodo permanente y<br />
sintéticos<br />
- No sobrecargue su Secadora.<br />
- Saque las prendas de Semihumedodo<br />
permanente en cuanto acabe la Secadora<br />
para reducir la formación de arrugas.<br />
Prendas de fibra o piel<br />
- Revise siempre las instrucciones dadas por<br />
el fabricante.<br />
Ropa infantil y camisones<br />
- Revise siempre las instrucciones dadas por<br />
el fabricante.<br />
Goma y plásticos<br />
- No seque prendas compuestas en su totalidad<br />
o que contengan goma o plásticos como:<br />
a) delantales, baberos, fundas de silla<br />
b) cortinas y manteles<br />
c) alfombrillas de baño<br />
54<br />
Fibra de vidrio<br />
- No seque prendas compuestas por fibra de<br />
vidrio en su Secadora. Las partículas de vidrio<br />
residuales en la Secadora podrían adherirse a<br />
las prendas que introduzca la próxima vez que<br />
utilice la Secadora e irritar su piel.<br />
3. Finalización del Secado<br />
• Una vez completado el ciclo de Secado,<br />
aparecerá en la pantalla de visualización<br />
" " [Cool Down] ("Enfriamiento").<br />
• El proceso de enfriamiento se establece<br />
automáticamente una vez finaliza el ciclo de<br />
Secado.<br />
• Se formarán arrugas y dobleces si las<br />
prendas no son retiradas inmediatamente tras<br />
finalizar el Secado.<br />
• El proceso de enfriamiento funciona<br />
periódicamente haciendo girar el tambor.<br />
Recoloca y mulle la carga para evitar arrugas<br />
sin calentar durante más de 4 horas.<br />
• El mensaje " " (“Enfriamiento”) continuará<br />
visualizándose hasta que las prendas sean<br />
recogidas o el botón Inicio/Pausa pulsado,<br />
durante las 4 horas posteriores a la<br />
finalización del ciclo de Secado.<br />
Bloqueo de puerta<br />
• Se ilumina siempre que la puerta de la<br />
<strong>Lavadora</strong> está bloqueada.<br />
• La puerta se puede desbloquear tras 2 ó 3<br />
minutos de espera, pulsando el botón<br />
Inicio/Pausa para detener el funcionamiento<br />
de la <strong>Lavadora</strong>.
C<br />
ómo utilizar la lavadora<br />
Pantalla de visualización<br />
3. Finalización del Lavado<br />
1. Visualización de funciones<br />
especiales<br />
• Al seleccionar el bloqueo infantil, se<br />
enciende el testigo luminoso “ ”.<br />
• Tras acabar de Secado, aparecerá el<br />
mensaje “ ” (Enfriamiento).<br />
• Al seleccionar la función de Reserva,<br />
muestra el tiempo restante para que finalice<br />
el programa seleccionado.<br />
2. Visualización de<br />
autodiagnóstico<br />
• Si la <strong>Lavadora</strong> experimentase un fallo<br />
durante su funcionamiento, se visualizará el<br />
indicador de error asociado.<br />
“ ” : error de detección de la presión de<br />
agua.<br />
“ ” : problema por saturación de agua.<br />
“ ” : la puerta no está cerrada.<br />
“ ” : sobrecarga en el motor.<br />
“ ” : problema en la entrada de agua.<br />
“ ” : problema de descarga de agua.<br />
“ ” : carga desequilibrada.<br />
“ ” : problema en la temperatura del<br />
agua.<br />
“ ” : problema en el calentador de<br />
Secado o en el termostato.<br />
Si apareciesen estos mensajes de error, consulte<br />
la página 62 de la guía de solución de problemas<br />
y siga las indicaciones.<br />
• Al completarse el ciclo de Lavado, se<br />
aparecerá el mensaje “ ” en la pantalla<br />
de visualización.<br />
4. Tiempo restante<br />
• Durante el ciclo de Lavado, se visualizará el<br />
tiempo restante de Lavado.<br />
• Programa recomendados por el fabricante.<br />
- Algodón :<br />
alrededor de 1 horas y 46 minutos.<br />
- Algodón Rápido :<br />
alrededor de 1 horas y 10 minutos.<br />
- Sintéticos :<br />
alrededor de 1 horas y 31 minutos.<br />
- Delicados :<br />
alrededor de 1 horas y 23 minutos.<br />
- Seda/Lana :<br />
alrededor de 1 horas y 4 minutos.<br />
- Lavado a Mano :<br />
alrededor de 1 horas y 13 minutos.<br />
- Edredones/Mezclilla :<br />
alrededor de 1 horas y 38 minutos.<br />
- Rápido 30 : alrededor de 30 minutos.<br />
- Cuidado infantil :<br />
alrededor de 2 horas y 54 minutos.<br />
• El tiempo de Lavado puede variar según la<br />
cantidad de colada, la presión y la<br />
temperatura del agua y de otros factores del<br />
Lavado.<br />
• Si se detecta una carga desequilibrada o se<br />
pone en funcionamiento el programa de<br />
eliminación de espuma, el tiempo de Lavado<br />
se ampliará. (El incremento de tiempo<br />
máximo es de 45 minutos.)<br />
55
M antenimiento<br />
❋ Retire las prendas de la lavadora tan pronto como termine el ciclo. En los artículos que quedan en la<br />
lavadora se puede desarrollar un exceso de arrugamiento, transferencia de color y olores.<br />
❋ Antes de limpiar el interior de la lavadora, desenchufe el cable de alimentación eléctrica para evitar<br />
riesgos de descarga eléctrica.<br />
❋ Cuando ya no utilice la lavadora, desconecte los cables principales y quite el conector. Deconecte el<br />
seguro de la puerta para evitar que niños pequeños se queden atrapados dentro de la lavadora.<br />
El filtro de entrada del agua<br />
- El mensaje de error " " parpadea en el panel de control porque no entra agua en el cajón<br />
del detergente.<br />
- Si el agua es muy dura o contiene rastros de depósitos de cal, el filtro de entrada del agua se<br />
puede obstruir.<br />
Por lo tanto, es buena idea limpiarlo de vez en cuando.<br />
1. Cierre el grifo del agua.<br />
2. Desatornille la manguera de entrada<br />
del agua.<br />
3. Limpie el filtro utilizando un cepillo<br />
de cerdas duras.<br />
4. Apriete la manguera de entrada.<br />
56
M antenimiento<br />
El filtro de la bomba de drenaje<br />
❋ El filtro de drenaje recoge los hilos y pequeños objetos que quedan en la coladera.<br />
Compruebe con regularidad que el filtro está limpio para garantizar un<br />
funcionamiento uniforme de su máquina.<br />
!<br />
PRECAUCIÓN Primero utilice la Manguera de drenaje y después abra la<br />
bomba para eliminar aquello que pueda haberla detenido.<br />
❋ Permita que el agua se enfrìe antes de limpiar el drenaje, permitiendo un<br />
drenado de emergencia o abriendo la puerta en una emergencia.<br />
1. Abra el tapón de la cubierta inferior<br />
() utilizando una moneda. Gire el<br />
tapón de drenaje () para sacar la<br />
manguera.<br />
3<br />
2<br />
2. Desconecte el tapón de drenaje ()<br />
dejando que el agua fluya hacia fuera.<br />
En este momento utilice un recipiente<br />
para impedir que el agua caiga al<br />
suelo. Si ya no sale agua, gire el filtro<br />
de la bomba () a la izquierda hasta<br />
abrirlo totalmente.<br />
3. Saque cualquier material extraño del<br />
filtro de la bomba ().<br />
3<br />
4. Después de la limpieza, gire el filtro de<br />
la bomba () en el sentido de las<br />
agujas del reloj e inserte el tapón de<br />
drenaje () en su lugar original.<br />
Cierre el tapón de la cubierta inferior.<br />
2<br />
57
M antenimiento<br />
Cajón distribuidor de detergente<br />
❋ Cuando los detergentes blancos y suavizantes para tejidos dejan un depósito en el cajón.<br />
• Se deben limpiar de vez en cuando con un chorro de agua corriente.<br />
• Si es necesario, se puede sacar de la máquina pulsando el pestillo hacia abajo y tirando hacia<br />
fuera.<br />
• Para facilitar la limpieza, se puede quitar la parte superior del compartimiento del suavizante para<br />
tejidos.<br />
El hueco del cajón<br />
❋ También se puede acumular detergente en el interior del<br />
hueco, que se debe limpiar de vez en cuando con un cepillo de<br />
dientes viejo.<br />
• Cuando haya terminado la limpieza, vuelva a colocar el cajón y<br />
realice un ciclo de enjuague sin ropa.<br />
El Tambor de lavado<br />
• Si vives en una zona donde el nivel de dureza del agua es alto, se forma cal en zonas que nosotros<br />
no podemos ver y que no pueden ser eliminadas fácilmente.<br />
Con el tiempo, es necesaria una revisión periódica, debido a que el cúmulo de cal puede dañar el<br />
tambor y éste deberá ser sustituido.<br />
• Aunque el tambor esté hecho de acero inoxidable, pueden aparecer manchas de óxido causadas<br />
por pequeños artículos de metal ( clips, prendedores) que se hayan caído por descuido.<br />
• El Tambor debe ser limpiado periódicamente.<br />
• Si usa agentes desincrustantes, tintes ó lejías, asegurese de que son los adecuados para el<br />
funcionamiento correcto de la lavadora.<br />
❋ Algunos agentes desincrustantes pueden tener componentes que dañen algunas partes de la<br />
lavadora.<br />
❋ Limpie las manchas del tambor con un detergente adecuado que no dañe la superficie.<br />
❋ No utilice nunca estropajo.<br />
58
M antenimiento<br />
El inyector de la circulación del agua<br />
• Limpie el inyector de la circulación del agua, si está estorbando.<br />
Limpieza de su lavadora<br />
1. Exterior<br />
El cuidado adecuado de su lavadora puede ampliar su vida útil.<br />
La parte exterior de la máquina se puede limpiar con agua templada y un detergente<br />
doméstico no abrasivo neutro.<br />
Seque inmediatamente cualquier agua que se derrame. Límpiela con un trapo húmedo.<br />
Procure no dañar la superficie con objetos afilados.<br />
❋ IMPORTANTE: No utilice alcohol etílico, diluyentes ni productos similares.<br />
2. Interior<br />
Seque la parte que rodea el hueco de la puerta, la junta flexible y la puerta de cristal.<br />
Estas áreas deben estar siempre limpias para asegurar un sellado hermético.<br />
Haga funcionar la lavadora durante un ciclo completo utilizando agua caliente.<br />
Repita el proceso si es necesario.<br />
NOTA<br />
Quite los depósitos de agua dura utilizando solamente limpiadores etiquetados<br />
como seguros para la lavadora.<br />
Instrucciones de protección para el invierno<br />
Si la lavadora se guarda en una zona en la que se puede producir congelación o se<br />
traslada a temperaturas de congelación, siga estas instrucciones de protección para el<br />
invierno, con el fin de evitar daños en la lavadora.<br />
1. Cierre el grifo de suministro de agua.<br />
2. Desconecte las mangueras del suministro de agua y vacíe el agua de las mangueras.<br />
3. Enchufe el cable eléctrico en una toma eléctrica correctamente puesta a tierra.<br />
4. Añada 3,8 l de anticongelante no tóxico de caravanas pequeñas para vaciar el tambor<br />
de la lavadora. Cierre la puerta.<br />
5. Ajuste el ciclo de centrifugado y deje que la lavadora centrifugue durante 1 min para<br />
vaciar todo el agua.<br />
No se expulsará todo el anticongelante.<br />
6. Desenchufe el cable de alimentación eléctrica, seque el interior del tambor y cierre la<br />
puerta.<br />
7. Retire el contenedor de los compartimientos del Dispensador. Drene el agua que haya<br />
en los compartimientos y seque los compartimientos.<br />
8. Guarde la lavadora en posición derecha.<br />
9. Para quitar el anticongelante de la lavadora después de su almacenaje, haga funcionar<br />
la lavadora en vacío a través de un ciclo completo utilizando detergente. No añada<br />
carga de lavado.<br />
59
G<br />
uía para la resolución de fallas<br />
❋ Esta lavadora está equipada con funciones automáticas de seguridad que detectan y diagnostican averías<br />
en un estado inicial y que reaccionan de forma adecuada.<br />
Cuando la máquina no funciona correctamente o no funciona en absoluto, compruebe los puntos<br />
siguientes antes de llamar al Departamento de Servicio.<br />
Síntoma Posible causa Solución<br />
Ruido de traqueteo y<br />
chirridos<br />
Sonido retumbante<br />
Ruido de vibraciones<br />
Fugas de agua<br />
Exceso de agua<br />
jabonosa<br />
No entra agua en la<br />
lavadora o entra<br />
despacio<br />
El agua de la lavadora<br />
no se vacía o se vacía<br />
lentamente.<br />
• Puede haber objetos extraños tales<br />
como monedas o clips en el tambor o<br />
en la bomba.<br />
• Las cargas de lavado pesadas<br />
pueden producir un sonido<br />
retumbante. Esto generalmente es<br />
normal.<br />
• Ha quitado todos los tornillos de<br />
transporte y el embalaje<br />
• Carga de lavado distribuida de<br />
manera no uniforme en el tambor.<br />
• Descansan firmemente todos los pies<br />
en el suelo<br />
• La conexión de la manguera de<br />
llenado está floja en el grifo o en la<br />
lavadora.<br />
• Las tuberías de desagüe de la casa<br />
están obstruidas.<br />
• El suministro de agua no es adecuado<br />
en la zona.<br />
• El grifo de suministro del agua no está<br />
completamente abierto.<br />
• La manguera de entrada del agua<br />
está retorcida<br />
• El filtro de la manguera de entrada<br />
está obstruido.<br />
• La manguera de drenaje está<br />
retorcida u obstruida.<br />
• El filtro de drenaje está obstruido.<br />
Pare la lavadora y revise el tambor y el<br />
filtro de drenaje.<br />
Si continua el ruido después de arrancar<br />
de nuevo la lavadora, llame a su agente<br />
de servicio autorizado.<br />
Si el sonido continúa, la lavadora<br />
probablemente está desequilibrada.<br />
Párela y distribuya la carga de lavado.<br />
Si no se han quitado durante la<br />
instalación. Véase la sección sobre la<br />
instalación para quitar los tornillos de<br />
transporte.<br />
Pare la lavadora y redistribuya la carga<br />
de lavado.<br />
Ajuste las patas.<br />
Asegúrese que las cuatro patas estén<br />
en firme contacto con el suelo, mientras<br />
que la lavadora está en ciclo de la giro<br />
con la carga.<br />
Compruebe y apriete las conexiones de<br />
la manguera.<br />
Desobstruya la tubería de drenaje.<br />
Póngase en contacto con un fontanero<br />
si es necesario.<br />
Demasiado detergente o detergente<br />
inapropiado La formación de espuma<br />
puede provocar fugas de agua.<br />
Pruebe con otro grifo de la casa.<br />
Grifo completamente abierto.<br />
Enderece la manguera.<br />
Compruebe el filtro de la manguera de<br />
entrada.<br />
Limpie y enderece la manguera de<br />
drenaje.<br />
Limpie el filtro de drenaje.<br />
60
G<br />
uía para la resolución de fallas<br />
Síntoma Posible causa Solución<br />
La lavadora no<br />
arranca<br />
La lavadora no<br />
centrifuga<br />
La puerta no se<br />
abre<br />
El mensaje “6 min<br />
restantes” está<br />
bloqueado en<br />
pantalla.<br />
Retardo del tiempo<br />
de ciclo de lavado<br />
Problema en el<br />
secado<br />
• El cable de alimentación<br />
eléctrica quizás no esté<br />
enchufado o la conexión<br />
puede estar floja.<br />
• Fusible de la casa fundido,<br />
disyuntor disparado o se ha<br />
producido un corte en el<br />
suministro eléctrico.<br />
• El grifo del suministro del<br />
agua no está abierto.<br />
❋ Compruebe que la puerta<br />
está firmemente cerrada.<br />
• Esta lavadora comprueba las<br />
condiciones de las prendas<br />
durante 6 minutos restantes<br />
para evaluar si están secas o<br />
no. Si las prendas no están<br />
secas, la lavadora secará<br />
durante 30 minutos más.<br />
El mensaje '6 min' comenzará<br />
de nuevo la cuenta atrás<br />
después de esos 30 minutos.<br />
• La lavadora no seca.<br />
Asegúrese de que el enchufe ajusta<br />
correctamente en la toma de corriente.<br />
Reinicie el disyuntor o sustituya el fusible.<br />
No aumente la capacidad del fusible.<br />
Si el problema es una sobrecarga del<br />
circuito, haga que lo corrija un electricista<br />
calificado.<br />
Abra el grifo de suministro del agua.<br />
Cierre la puerta y pulse el botón<br />
Inicio/Pausa. Después de pulsar el botón<br />
Inicio/Pausa, puede pasar cierto tiempo<br />
antes de que la lavadora comience a<br />
centrifugado. La puerta se debe bloquear<br />
antes de que se pueda conseguir el<br />
centrifugado.<br />
Si la lavadora está encendida, la puerta no se<br />
puede abrir por cuestiones de seguridad.<br />
Espere uno o dos minutos antes de abrir la<br />
puerta para dar tiempo al mecanismo de<br />
bloqueo eléctrico a liberarse.<br />
Compruebe el peso de las prendas.<br />
El peso de las prendas debe ser inferior a 6 kg<br />
Si se detecta un desequilibrio o si funciona<br />
el programa de eliminación de agua<br />
jabonosa, el tiempo de lavado aumentará<br />
por encima del tiempo previsto.<br />
No sobrecargue la lavadora.<br />
Verifique que la lavadora esté drenando el<br />
agua adecuadamente extrayendo la<br />
cantidad adecuada de agua de la ropa.<br />
La carga de ropa es muy pequeña para<br />
que el secado ocurra correctamente.<br />
Añada algunas toallas.<br />
61
G<br />
uía para la resolución de fallas<br />
Síntoma Posible causa Solución<br />
• El suministro de agua local no es suficiente.<br />
• Los grifos de suministro de agua no están<br />
completamente abiertos.<br />
• La manguera(s) de entrada de agua está<br />
doblada.<br />
• El filtro de la manguera(s) de entrada está<br />
obstruido.<br />
• La manguera de descarga de agua está<br />
aplastada o doblada.<br />
• El filtro de drenaje está obstruido.<br />
• La carga es demasiado pequeña.<br />
• La carga está desequilibrada.<br />
• El electrodoméstico dispone de un sistema de<br />
detección y corrección de desequilibrios. Si se<br />
han introducido prendas pesadas (por ejemplo<br />
toallas de baño, albornoces, etc.), este sistema<br />
puede detener el Centrifugado o incluso<br />
interrumpir por completo d<br />
• Si la colada está aún demasiado húmeda al final<br />
del ciclo, añada prendas más pequeñas a la<br />
carga para equilibrarla y repita el ciclo de<br />
Centrifugado.<br />
• La puerta está abierta o no<br />
cerrada por completo<br />
Revise otro grifo de la casa.<br />
Abra el grifo por completo.<br />
Enderece la manguera(s).<br />
Revise filtro de la manguera(s) de entrada.<br />
Limpie y enderece la manguera de<br />
descarga de agua.<br />
Limpie el filtro de drenaje.<br />
Añada 1 ó 2 prendas similares para<br />
ayudar a equilibrar la carga.<br />
Reorganice la carga para permitir un<br />
Centrifugado correcto.<br />
Cierre completamente la puerta.<br />
* Si el mensaje “ ” no desaparece,<br />
solicite asistencia.<br />
Desenchufe el cable de alimentación y<br />
solicite asistencia.<br />
• Hay un exceso de agua debido a una válvula de<br />
agua defectuosa.<br />
• El sensor del nivel de agua ha fallado.<br />
Cierre el grifo de agua.<br />
Desenchufe la toma de alimentación.<br />
Solicite asistencia.<br />
• El sensor del nivel de agua ha fallado.<br />
• Revise suministro de agua.<br />
Abra el grifo.<br />
Si el mensaje “ ” no desaparece,<br />
desenchufe la toma de alimentación y<br />
solicite asistencia.<br />
62
T<br />
érminos de la garantía<br />
EXCLUSIONES DE LA GARANTIA :<br />
• Incumplimiento de cualquiera de los requisitos del punto anterior.<br />
• Todo componente o accesorio interior o exterior del aparato, que no esté especificado<br />
e incluido en este certificado de garantía.<br />
• Las puestas en marcha y demostraciones de funcionamiento al usuario.<br />
• Si la avería es producida por incendio, inundación, agentes meteorológicos, golpeo,<br />
aplastamiento o aplicación de voltaje o energía inadecuada.<br />
• Los daños por el mal trato, incluso los de transportes, que deberán reclamarse en<br />
presencia del personal de la Compañía de Transportes, por lo que conviene<br />
inspeccionar los paquetes antes de conformar los albaranes de entrega<br />
correspondientes.<br />
• Las averías producidas por rotura física, tales como carcasas, plásticos, pinturas,<br />
esmaltes, cristales, embellecedores y similares.<br />
• Los productos por mal uso al no atender las instruccciones de funcionamiento y<br />
manejo que se adjuntan con cada aparato.<br />
• Por la utilización de accesorios no adecuados en el aparato.<br />
• Las partes de madera, goma, plástico, cristal, agujas, cabezales de registros y<br />
reproducción, y los conos de los altavoces.<br />
• Los aparatos que no llevan identificado número de fábrica o que éste haya sido<br />
alterado o borrado.<br />
• Cuando el número de serie del aparato no coincida con el número expresado en el<br />
certificado de garantía.<br />
• Si el aparato es reparado o manipulado por personal no autorizado por <strong>LG</strong><br />
ELECTRONICS.<br />
• Las averías producidas por el uso normal del aparato, tales como desgaste de<br />
cabezales de vídeo, limpiezas, etc.<br />
• Los trabajos de mantenimiento propios de cada aparato, cualquiera que sea su<br />
periodicidad.<br />
• Cuando la avería la produzca un componente o accesorio interno o externo al aparato<br />
no incluido o especificado en este certificado de garantía.<br />
Durante el tiempo que dure la reparación, no se abonarán daños y perjuicios por el<br />
tiempo que el aparato esté fuera de servicios.<br />
63
P/No.: MFL51768128