TB25/25R PARTS LIST - Ibanez
TB25/25R PARTS LIST - Ibanez
TB25/25R PARTS LIST - Ibanez
Create successful ePaper yourself
Turn your PDF publications into a flip-book with our unique Google optimized e-Paper software.
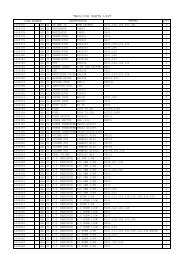
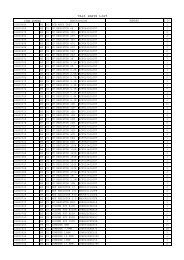
<strong>TB25</strong>/<strong>25R</strong> <strong>PARTS</strong> <strong>LIST</strong><br />
ITEM NUMBER DESCRIPTION<br />
REMARK Q'TY<br />
32S00904 B5 01 PCB ASSY <strong>TB25</strong>R 1<br />
32S00369 B5 01 CF RESISTOR 68 RCF068002JU7 1<br />
32S00370 B5 01 CF RESISTOR 100 RCF010102JU7 3<br />
32S00907 B5 01 CF RESISTOR 180 RCF018102JU7 1<br />
32S00693 B5 01 CF RESISTOR 200 RCF020102JU7 3<br />
32S00909 B5 01 CF RESISTOR 330 RCF033102JU3 1<br />
32S00910 B5 01 CF RESISTOR 390 RCF039102JU7 1<br />
32S00695 B5 01 CF RESISTOR 470 RCF047102JU7 1<br />
32S00696 B5 01 CF RESISTOR 510 RCF051102JU7 1<br />
32S00697 B5 01 CF RESISTOR 560 RCF056102JU7 2<br />
32S00698 B5 01 CF RESISTOR 620 RCF062102JU7 2<br />
32S00371 B5 01 CF RESISTOR 1K RCF010202JU7 6<br />
32S00916 B5 01 CF RESISTOR 1K RCF010202JU3 2<br />
32S00917 B5 01 CF RESISTOR 1.2K RCF012202JU7 1<br />
32S00918 B5 01 CF RESISTOR 2K RCF020202JU3 1<br />
32S00702 B5 01 CF RESISTOR 2.2K RCF022202JU7 4<br />
32S00920 B5 01 CF RESISTOR 3.6K RCF036202JU7 1<br />
32S00373 B5 01 CF RESISTOR 4.7K RCF047202JU7 4<br />
32S00922 B5 01 CF RESISTOR 4.7K RCF047202JUH 1<br />
32S00708 B5 01 CF RESISTOR 6.2K RCF062202JU7 1<br />
32S00374 B5 01 CF RESISTOR 8.2K RCF082202JU7 2<br />
32S00375 B5 01 CF RESISTOR 10K RCF010302JU7 4<br />
32S00926 B5 01 CF RESISTOR 10K RCF010302JU3 1<br />
32S00927 B5 01 CF RESISTOR 10K RCF033302JU7 2<br />
32S00376 B5 01 CF RESISTOR 15K RCF015302JU7 3<br />
32S00929 B5 01 CF RESISTOR 22K RCF0220302JU7 3<br />
32S00717 B5 01 CF RESISTOR 27K RCF027302JU7 1<br />
32S00379 B5 01 CF RESISTOR 33K RCF033302JU7 3<br />
32S00719 B5 01 CF RESISTOR 47K RCF047302JU7 3<br />
32S00380 B5 01 CF RESISTOR 100K RCF010402JU7 4<br />
32S00934 B5 01 CF RESISTOR 120K RCF012402JUH 1<br />
32S00381 B5 01 CF RESISTOR 150K RCF015402JU7 1<br />
32S00727 B5 01 CF RESISTOR 220K RCF022402JU7 2<br />
32S00937 B5 01 CF RESISTOR 270K RCF027402JU7 1<br />
32S00938 B5 01 CF RESISTOR 510K RCF051402JU7 4<br />
32S00939 B5 01 CF RESISTOR 510K RCF051402JU3 1<br />
32S00940 B5 01 CF RESISTOR 560K RCF056402JU7 1<br />
32S00383 B5 01 CF RESISTOR 1M RCF010502JU7 5<br />
32S00942 B5 01 CF RESISTOR 3.3M RCF033502JU7 1<br />
32S00023 B5 01 MOF RESISTOR 0.5 RMO0R5010JFH 2<br />
32S00733 B5 01 MOF RESISTOR 10 RMO010010JFH 4<br />
32S00385 B5 01 MOF RESISTOR 100 RMO010120JFH 2<br />
32S00946 B5 01 MOF RESISTOR 470 RMO047120JFH 1<br />
32S00737 B5 01 SF RESISTOR H1K SFR0505YA01A 1<br />
32S00144 B5 01 VOLUME POT A100K VRRE1ECPAA0A 1<br />
32S00949 B5 01 VOLUME POT A10K VRRE1ECPA10A 1<br />
32S00739 B5 01 VOLUME POT B100K VRRE1ECPBA0A 1<br />
32S00265 B5 01 VOLUME POT B10K VRRE1ECPB10A 1<br />
32S00952 B5 01 VOLUME POT A100K VRRE1ECPGA0C BASS/MIDDLE/TREBLE 3<br />
32S00257 B5 01 JUMPPER 5MM JPW060XXX050 5<br />
32S00025 B5 01 JUMPPER 7.5MM JPW060XXX075 5<br />
32S00026 B5 01 JUMPPER 10MM JPW060XXX100 7<br />
32S00526 B5 01 JUMPPER 12.5MM JPW060XXX125 4<br />
32S00027 B5 01 JUMPPER 15MM JPW060XXX150 7<br />
32S00958 B5 01 JUMPPER 17.5MM JPW060XXX175 1<br />
32S00261 B5 01 JUMPPER 20MM JPW060XXX200 1<br />
32S00960 B5 01 EL CAP 22UF CAE226DMLRCC 1<br />
32S00961 B5 01 EL CAP 33UF CAE336DMLRCC 1<br />
32S00763 B5 01 EL CAP 220UF CAE227DMLRDD 2
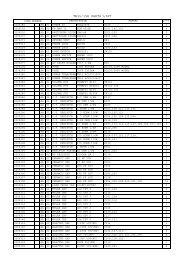
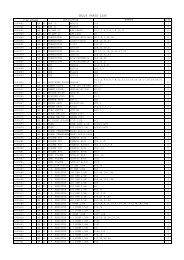
<strong>TB25</strong>/<strong>25R</strong> <strong>PARTS</strong> <strong>LIST</strong><br />
ITEM NUMBER DESCRIPTION<br />
REMARK Q'TY<br />
32S00037 B5 01 EL CAP 2200UF CAE228DMLRGK 2<br />
32S00750 B5 01 EL CAP 0.22UF CAE224FMLRBC 2<br />
32S00394 B5 01 EL CAP 0.47UF CAE474FMLRBC 2<br />
32S00032 B5 01 EL CAP 1UF CAE105FMLRBC 3<br />
32S00146 B5 01 EL CAP 4.7UF CAE475FMLRBC 3<br />
32S00588 B5 01 EL CAP 10UF CAE106FMLRBC 5<br />
32S00591 B5 01 EL CAP 100UF CAE107FMLRDD 2<br />
32S00758 B5 01 EL CAP 3300UF CAE338FMLRIO 2<br />
32S00765 B5 01 EL CAP 1UF NP CAE105FMNRBC 1<br />
32S00766 B5 01 CERAMIC CAP 5PF CCR5R0D05KNC 1<br />
32S00767 B5 01 CERAMIC CAP 10PF CCR100D05KNC 2<br />
32S00411 B5 01 CERAMIC CAP 33PF CCR330D05KSC 1<br />
32S00278 B5 01 CERAMIC CAP 47PF CCR470D05KSC 4<br />
32S00042 B5 01 CERAMIC CAP 100P CCR101D05KSC 1<br />
32S00413 B5 01 CERAMIC CAP 200P CCR201D05KEC 2<br />
32S00416 B5 01 CERAMIC CAP 680P CCR681D05KEC 1<br />
32S00777 B5 01 CERAMIC CAP 0.1U CCR104D05KUC 2<br />
32S00540 B5 01 MYLR CAP 0.0012U CMF122D10KGR 1<br />
32S00542 B5 01 MYLR CAP 0.0039U CMF392D10KGR 1<br />
32S00543 B5 01 MYLR CAP 0.0047U CMF472D10KGR 1<br />
32S00983 B5 01 MYLAR CAP 0.01UF CMF103D10KGR 2<br />
32S00544 B5 01 MYLAR CAP 0.027U CMF273D10KGR 1<br />
32S00545 B5 01 MYLAR CAP 0.039U CMF393D10KGR 2<br />
32S00546 B5 01 MYLAR CAP 0.047U CMF473D10KGR 4<br />
32S00987 B5 01 MYLAR CAP 0.068U CMF683D10KGR 1<br />
32S00988 B5 01 MYLAR CAP 0.1UF CMF104D10KGR 5<br />
32S00548 B5 01 MYLAR CAP 0.22U CMF224D10KGR 2<br />
32S00990 B5 01 DIODE 1N4148 DID1N4148DHG 8<br />
32S00991 B5 01 DIODE 1N4148 DID1N4148DHI 1<br />
32S00793 B5 01 ZENNER DIODE 12V DZN12005H080 1<br />
32S00794 B5 01 BRIDGE RECTIFIER BDR20X030XSP 2<br />
32S00047 B5 01 TRANSISTOR TST2SA1015GS 4<br />
32S00288 B5 01 TRANSISTOR TST2SA684XRS 2<br />
32S00049 B5 01 TRANSISTOR TST2SC1384RS 2<br />
32S00048 B5 01 TRANSISTOR TST2SC1815GS 4<br />
32S00799 B5 01 FET FET2SK246XGW 4<br />
32S00800 B5 01 FET 2SK30AGR FET2SK30AXGW 4<br />
32S00606 B5 01 TRANSISTR TIP41C TSTTIP41CXNM 1<br />
32S00607 B5 01 TRANSISTR TIP42C TSTTIP42CXNM 1<br />
32S00053 B5 01 IC NJM4558DD IGCN4558DDAO 5<br />
32S00807 B5 01 IC AN7815 IGC7815XXXBR 1<br />
32S00808 B5 01 IC AN7915 IGC7915XXXBR 1<br />
32S00056 B5 01 DIA6.3 JACK MONO JKP6R3MOLA4N J101(INPUT),J102(FOOT SW) 2<br />
32S00057 B5 01 DIA6.3 JACK STRO JKP6R3STDA6O JK6(PHONE JACK) 1<br />
32S01007 B5 01 XH CONNECTOR 2PL WAF2Y02SHH41 2<br />
32S01008 B5 01 XH CONNECTOR 5PL WAF2Y05SHH01 1<br />
32S01009 B5 01 PUSH SWITCH SPW4PSO2NL05 1<br />
32S00613 B5 01 AIR COIL 1UH IDT1R0N1A020 1<br />
32S00817 B5 01 205 CONNECT WIRE HSN20XX3202A 18AWG 320mm 1<br />
32S00818 B5 01 205 CONNECT WIRE HSN20XX3200A 18AWG 320mm BLACK 1<br />
32S01013 B5 01 WIRE 200MM ECWA182AA200 1<br />
32S00822 B5 01 HEATSINK HSK-38 HSKPN8394738 1<br />
32S00063 B5 01 MICA SHEET TO220 SPTMGATO220X 2<br />
32S00064 B5 01 TR INSLT PLATE PPTTWH203530 2<br />
32S00066 B5 01 SCREW M3 P0.5L10 MSRR30XR510B 4<br />
32S00068 B5 01 TOOTH WASHER D3 WSRO0632R5WS 6<br />
32S00067 B5 01 NUT M3 P0.5 NUTM30XPR5HS 4<br />
32S01020 B5 01 CHASSIS <strong>TB25</strong>R-2 STC<strong>TB25</strong>RXXZB 1<br />
32S01021 B5 01 CHASSIS <strong>TB25</strong>-2 STC<strong>TB25</strong>XXXZB 1
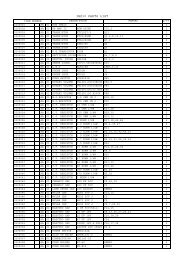
<strong>TB25</strong>/<strong>25R</strong> <strong>PARTS</strong> <strong>LIST</strong><br />
ITEM NUMBER DESCRIPTION<br />
REMARK Q'TY<br />
32S00830 B5 01 TRANSFORMER 100V TRMTA25XXXX0 1<br />
32S00831 B5 01 TRANSFORMER 120V TRMTA25XXXXL 1<br />
32S00832 B5 01 TRANSFORMER 230V TRMTA25XXXX3 1<br />
32S00833 B5 01 TRANSFORMER 240V TRMTA25XXXX4 1<br />
32S00638 B5 01 AC SOCKET ACS3QKPCM102 1<br />
32S00835 B5 01 FUSE F2A/250V FUS520NFV020 F1 100V/120V 2<br />
32S00445 B5 01 FUSE F1A/250V FUS520NSV010 F1 230V/240V 2<br />
32S00448 B5 01 POWER SWITCH SWRYGBG6NQ1F 1<br />
32S00073 B5 01 CERAMIC CAP0.01U CCR103A40ZYS 1<br />
32S00076 B5 01 KNOB RKN-20BK RKNBKWH18R20 8<br />
32S00840 B5 01 PUSH KNOB PKN-10 PKNS050510BD 1<br />
32S00446 B5 01 WIRE CLAMP PPTCBESUKO01 1<br />
32S00075 B5 01 POWER CABLE TIE PPTSRBFTL7K8 1<br />
32S00843 B5 01 205 CONNECT WIRE HSN20XX260DA 18AWG 260mm YELLOW 1<br />
32S00844 B5 01 205 CONNECT WIRE HSN20203102F 1617 22AWG 310mm 2<br />
32S01037 B5 01 REVERB 280MM REVN2GBMIGNA 1<br />
32S00456 B5 01 PCB SPACER SPTBSS5XM310 1<br />
32S00459 B5 01 SCREW M3 P0.5L6 MSRU30XR506B 2<br />
32S00848 B5 01 SCREW M3 P0.5L8 MSRU30XR508B 2<br />
32S00079 B5 01 SCREW BK M4 P0.7 MSRU40XR710B L10 2<br />
32S00080 B5 01 SCREW NI M4 P0.7 MSRU40XR712N 1<br />
32S00068 B5 01 TOOTH WASHER D3 WSRO0632R5WS 3<br />
32S00084 B5 01 TOOTH WASHER D4 WSRO0844R5WS 4<br />
32S00086 B5 01 WASHER10DX4.2DX1 WSRF104210WS 1<br />
32S00078 B5 01 SOLDERING PLATE SPTSDPXXTP-1 TP-1 1<br />
32S00083 B5 01 NUT M4 P0.7 NUTM40XPR7HS 4<br />
32S00087 B5 01 CABLE TIE PPTCBTN08025 5<br />
32S01049 B5 01 LABEL GND LABWHBKAG001 1<br />
32S00859 B5 01 SPONGE EVA38501515A 2<br />
32S01051 B5 01 CABINET <strong>TB25</strong>R BOX<strong>TB25</strong>RX651 1<br />
32S01052 B5 01 SPEAKER <strong>TB25</strong>R SPKTB225XX01 1<br />
32S00472 B5 01 CORNER PCN-15 PCNPEXBK3015 8<br />
32S00473 B5 01 STRAP HANDLE HDP215P25802 HDP-2 1<br />
32S00474 B5 01 HANDLE CLAMP HDCSTEKBLK01 HDC-1 2<br />
32S00101 B5 01 RUBBER FOOT PPTRFT112001 RUB-2 4<br />
32S00868 B5 01 POWER CODE JP PWCD--DBVTF3A 1<br />
32S00869 B5 01 POWER CODE UL PWCA--DBSVT3A 1<br />
32S00104 B5 01 POWER CODE EU PWCE-DBH5V3A 1<br />
32S01060 B5 01 POWER CODE UK PWCF--DBH5V3A 1<br />
32S00480 B5 01 POWER CODE AUS PWCI-DBLTF3A 1<br />
32S01062 B5 01 SPONGE EVA46001515A 2<br />
32S00108 B5 01 LOGO PLATE PLGBKSVIBN0C IBANEZ SILVER 1<br />
32S00213 B5 01 SCREW BK M4 P0.7 MSRU40XR725B L25 4<br />
32S00677 B5 01 SCREW BK M4 P0.7 MSRH40XR732B L32 4<br />
32S00484 B5 01 SCREW BK M4 P0.7 MSRH40XR728B L28 2<br />
32S01067 B5 01 TAP SCREW 3.5X28 TSRU35X28W2B 3<br />
32S01068 B5 01 TAP SCREW 3.5X15 TSRH35X15WDB 16<br />
32S00111 B5 01 TAPPING SCREW TSRS25X08WDB BK2.5×8 2<br />
32S00681 B5 01 TAP SCREW 4X32 TSRU40X32WDB 4<br />
32S00888 B5 01 TAP SCREW 4X20 TSRU40X20WDB 4<br />
32S00116 B5 01 PLASTIC WASHER WSRP174530BP 4<br />
32S00891 B5 01 WASHER WSRF1442R8BS 14DX4.2DX0.8 3<br />
32S01074 B5 01 MANUAL <strong>TB25</strong>R ISTIBZ<strong>TB25</strong>RA 1<br />
32S00118 B5 01 WARRANTY CARD JP GRTIBZIBZ10A 1<br />
32S01076 B5 01 LABEL-WARNTY CRD LABWHBKBD051 2<br />
32S01077 B5 01 LABEL-WARNTY CRD LABWHBKBD050 2<br />
32S01078 B5 01 BAR CODE LABEL LABWHBKBC085 1<br />
32S01079 B5 01 BAR CODE LABEL LABWHBKBC086 1<br />
32S01080 B5 01 BAR CODE LABEL LABWHBKBC087 1
<strong>TB25</strong>/<strong>25R</strong> <strong>PARTS</strong> <strong>LIST</strong><br />
ITEM NUMBER DESCRIPTION<br />
REMARK Q'TY<br />
32S01081 B5 01 BAR CODE LABEL LABWHBKBC088 1<br />
32S01082 B5 01 SERIAL NO. LABEL LABSVBKBA002 3<br />
32S01083 B5 01 POLYBAG <strong>TB25</strong>R PEB471254711 1<br />
32S00688 B5 01 BOX CORNER <strong>TB25</strong>R PHDGENXXXX01 16<br />
32S01085 B5 01 SHIP BOX <strong>TB25</strong>R CTN<strong>TB25</strong>RIB01 1<br />
32S01086 B5 01 SHIP BOX <strong>TB25</strong> CTN<strong>TB25</strong>XIB01 1<br />
32S01087 B5 01 COLOR BOX <strong>TB25</strong>R CCN<strong>TB25</strong>RIB01 1<br />
32S01088 B5 01 COLOR BOX <strong>TB25</strong> CCN<strong>TB25</strong>XIB01 1<br />
32S00895 B5 01 WARRANTY CARD US GRTIBZIBZ15A 1<br />
32S00874 B5 01 SPONGE EVA125110151 4
SAMPLE SETTING<br />
/OWNER‘S MANUAL/BEDIENUNGSANLEITUNG<br />
MODE D‘EMPLOI/MANUALE DI ISTRUZIONI/MANUAL DEL USUARIO<br />
CHORD CUTTING<br />
BLUESY CRUNCH<br />
DISTORTION LEAD<br />
SPECIFICATIONS<br />
<br />
<br />
<br />
<br />
<br />
<br />
<br />
<br />
<br />
<br />
<br />
<br />
<br />
<br />
<br />
<br />
<br />
<br />
<br />
<br />
<br />
<br />
<br />
<br />
<br />
<br />
<br />
<br />
<br />
<br />
<br />
<br />
<br />
<br />
<br />
<br />
<br />
<br />
<br />
<br />
<br />
<br />
<br />
<br />
<br />
<br />
<br />
<br />
• <br />
<br />
• <br />
<br />
<br />
• <br />
<br />
<br />
• <br />
<br />
• <br />
<br />
<br />
<br />
<br />
• <br />
<br />
Foreword<br />
Thank you for purchasing the <strong>Ibanez</strong> <strong>TB25</strong>/<strong>TB25</strong>R guitar amplifier.<br />
With the exception of the reverberation function, both the<br />
<strong>TB25</strong> and the <strong>TB25</strong>R share the same functions. Read this manual<br />
thoroughly prior to using your amplifier in order to get the most<br />
out of the functions available. Ensure that this manual is also<br />
stored in a safe place.<br />
Features<br />
The <strong>TB25</strong>/<strong>TB25</strong>R amplifier head provides 25W of output and is<br />
mounted with powerful 10-inch <strong>Ibanez</strong> original Power Jam speakers<br />
to provide high-quality sound and easy operation.<br />
The pre-amp is equipped with independent clean and overdrive<br />
channels that produce two completely different types of sound.<br />
The overdrive channel provides a piercing, smooth and powerful<br />
distortion sound, and the clean channel provides a clean, crunchy<br />
sound through all registers from low to high. It is also fitted with<br />
an active EQ that provides a larger variable width than the normal<br />
passive EQ function to produce a much wider sound. The<br />
<strong>TB25</strong>R is also equipped with a built-in spring reverberation function<br />
to bring out the depth in sound.<br />
Precautions during use<br />
• Do not subject the amplifier to shocks by dropping, etc., or<br />
treat it roughly in any way.<br />
• Install the amplifier in a stable location. The amplifier will<br />
sound differently is accordance with the method, location and<br />
venue of where it is installed.<br />
• Ensure that the power supply has been switched off when not<br />
in use. Also, remove the power cord from the power supply<br />
socket when the amplifier is not to be used for an extended<br />
period of time.<br />
• Do not use or store the amplifier in locations where it is subject<br />
to direct sunlight or in environments that experience dramatic<br />
fluctuations in temperature and humidity levels.<br />
• Reduce the volume to ‘0’ or switch off the power supply when<br />
connecting the guitar shielded cable and the effects or other<br />
cables required for external connection. Note that the noise<br />
generated when plugs are inserted and removed may cause<br />
severe damage to the equipment.<br />
• To avoid the danger of fire, do not place containers of liquid<br />
on the amp.<br />
Vorwort<br />
Herzlichen Glückwunsch zu Ihrem neuen Gitarrenverstärker<br />
<strong>TB25</strong>/<strong>TB25</strong>R von <strong>Ibanez</strong>. Mit Ausnahme der Hallfunktion<br />
sind die Verstärkermodelle <strong>TB25</strong> und <strong>TB25</strong>R identisch. Bitte<br />
lesen Sie diese Anleitung für optimale Nutzung aller Funktionen<br />
vor der Inbetriebnahme des Verstärkers aufmerksam<br />
durch. Bewahren Sie die Anleitung dann für späteres<br />
Nachschlagen an einem sicheren Platz auf.<br />
Merkmale<br />
Der <strong>TB25</strong>/<strong>TB25</strong>R liefert 25 W Ausgangsleistung, ist mit starken<br />
10 Zoll “Power Jam” Originallautsprechern von <strong>Ibanez</strong><br />
ausgestattet, bietet hohe Klangqualität und leichte Bedienung.<br />
Der Vorverstärker verfügt über zwei getrennte Kanäle, die zwei<br />
völlig unterschiedliche Klangtypen erzeugen. Der Overdrive-<br />
Kanal produziert einen stechenden, glatten und kräftigen<br />
Verzerrungsklang, während der Cleankanal sowohl im tiefen,<br />
als auch im hohen Frequenzbereich einen sauberen, kernigen<br />
Sound über die gesamte Bandbreite hinweg liefert.<br />
Darüber hinaus verfügt der Verstärker über einen Aktiv-<br />
Equalizer, der im Vergleich zu normalen Passiv-Equalizern<br />
eine wesentlich höhere Bandbreite und somit ein deutlich erweitertes<br />
Klangspektrum bietet. Der TR<strong>25R</strong> wartet zusätzlich<br />
noch mit einer eingebauten Federhallfunktion auf, mit der<br />
die Räumlichkeit stärker zur Geltung kommt.<br />
Vorsichtsmaßregeln für den Betrieb<br />
• Den Verstärker vor starken Stößen bewahren, nicht auf<br />
den Boden fallen lassen usw.<br />
• Den Verstärker auf fensten Untergrund stellen. Stellfläche,<br />
Einbauplatz und -methode haben Einfluss auf den Klang.<br />
• Die Netzversorgung ausschalten, wenn der Verstärker<br />
nicht benützt wird. Bei längerer Nichtverwendung den<br />
Netzstecker ziehen.<br />
• Den Verstärker nicht an Plätzen lagern oder betreiben,<br />
an denen das Gerät direkter Sonnenbestrahlung, oder<br />
starken Temperatur- und Luftfeuchtigkeitsschwankungen<br />
ausgesetzt ist.<br />
• Vor dem Anschluss der Abschirmkabel für E-Gitarre und<br />
Effektgeräte oder sonstiger externer Anschlusskabel die<br />
Lautstärke auf “0” stellen oder die Netzversorgung ausschalten.<br />
Andernfalls kann das laute Brummen beim Anschließen<br />
und Abziehen der Stecker ernsthafte Schäden<br />
am Verstärker verursachen.<br />
• Um die Brandgefahr zu verringern, sollten Sie keine<br />
Behälter mit Flüssigkeiten auf den Verstärker stellen.<br />
Avant-propos<br />
Nous vous remercions d’avoir porté votre choix sur l’amplificateur<br />
pour guitare <strong>Ibanez</strong> <strong>TB25</strong>/<strong>TB25</strong>R. A l’exception de la fonction<br />
réverbération, le <strong>TB25</strong> et le <strong>TB25</strong>R offrent les mêmes fonctions.<br />
Veuillez lire attentivement ce mode d’emploi avant d’utiliser<br />
l’appareil afin de pouvoir tirer le meilleur parti de ses nombreuses<br />
caractéristiques. Veuillez conserver précieusement ce<br />
mode d’emploi afin de pouvoir le consulter ultérieurement.<br />
Caractéristiques<br />
L’amplificateur <strong>TB25</strong>/<strong>TB25</strong>R délivre une sortie de 25 W et il est<br />
monté avec des haut-parleurs Power Jam <strong>Ibanez</strong> originaux de 10<br />
pouces, dans l’optique d’un son de haute qualité et d’une grande<br />
facilité d’utilisation.<br />
Le préampli est équipé d’un canal d’overdrive et d’un canal de<br />
son clair indépendants qui produisent deux types de sons complètement<br />
différents. Le canal d’overdrive produit un son de distorsion<br />
perçant, puissant et régulier, tandis que le canal de son<br />
clair délivre un son clair et croustillant dans toutes les plages,<br />
des basses fréquences aux hautes fréquences. Il possède également<br />
un égaliseur actif qui offre une plage de réglage plus vaste<br />
que celle d’une fonction égaliseur passif ordinaire, de façon à<br />
reproduire un son beaucoup plus large. Le <strong>TB25</strong>R possède également<br />
une fonction de réverbération à ressorts intégrée qui fait<br />
ressortir la profondeur du son.<br />
Précautions d’utilisation<br />
• Des chocs violents risquent d’endommager l’amplificateur.<br />
Veuillez le manipuler avec soin et ne pas le laisser tomber.<br />
• Installez l’amplificateur à un endroit stable. Le son sera différent<br />
selon la méthode, l’emplacement et le lieu d’installation.<br />
• Pensez bien à couper l’alimentation lorsque vous ne vous servez<br />
pas de l’amplificateur. Par ailleurs, débranchez le cordon<br />
d’alimentation de la prise secteur si vous ne prévoyez pas d’utiliser<br />
l’appareil pendant un certain temps.<br />
• Veillez à ne pas utiliser ni ranger l’appareil dans un endroit<br />
en plein soleil ou dans un environnement accusant de brusques<br />
variations de température et d’humidité.<br />
• Réduisez le volume à “0” ou coupez l’alimentation lorsque<br />
vous raccordez le câble blindé d’une guitare et les effets ou<br />
les autres câbles nécessaires aux liaisons externes. Notez que<br />
le bruit engendré lors du branchement ou du débranchement<br />
des fiches risque de gravement endommager l’appareil.<br />
• Pour éviter tout risque d’incendie, ne jamais placer de<br />
récipients contenant du liquide sur l’amplificateur.<br />
Prólogo<br />
Gracias por adquirir el amplificador de guitarras <strong>Ibanez</strong> <strong>TB25</strong>/<br />
<strong>TB25</strong>R. A excepción de la función de reverberación, ambos<br />
<strong>TB25</strong> y <strong>TB25</strong>R comparten las mismas funciones. Para sacarle<br />
el máximo partido a las funciones que le ofrece este amplificador,<br />
antes de utilizarlo lea atentamente este manual. Asegúrese<br />
también de guardar este manual en un lugar seguro.<br />
Características<br />
El <strong>TB25</strong>/<strong>TB25</strong>R integra sus potentes altavoces originales<br />
<strong>Ibanez</strong> de 10 pulgadas con un amplificador de una potencia<br />
de salida de 25W para ofrecerle un sonido de gran<br />
calidad y una fácil operación.<br />
El preamplificador está equipado con canales claro y de<br />
sobreexcitación independientes que producen dos tipos de<br />
sonido completamente diferentes. El canal de<br />
sobreexcitación ofrece un sonido de distorsión penetrante,<br />
suave y potente, y el canal claro ofrece un sonido claro y<br />
crujiente en todas las escalas de bajo a alto. También está<br />
dotado de un ecualizador activo que ofrece una anchura<br />
variable más amplia que la función del ecualizador pasivo<br />
normal para producir un sonido más amplio. El <strong>TB25</strong>R está<br />
también dotado de una función de reverberación por resorte<br />
incorporada que aflora la profundidad del sonido.<br />
Precauciones durante la utilización<br />
• No exponga el amplificador a golpes dejándolo caer,<br />
etc. ni lo trate de ninguna forma brusca.<br />
• Instale el amplificador en un lugar estable. Dependiendo<br />
del método, lugar y superficie de donde lo instale, el<br />
amplificador sonará de diferente manera.<br />
• Asegúrese de desconectar su alimentación cuando no<br />
lo utilice. Además, cuando no vaya a utilizar el amplificador<br />
durante largo tiempo, desenchufe el cable de alimentación<br />
de la toma de corriente.<br />
• No utilice ni guarde el amplificador en lugares que estén<br />
expuestos a la luz directa del sol ni en ambientes<br />
que sufran grandes fluctuaciones de temperatura y niveles<br />
de humedad.<br />
• Reduzca el volumen a “0” o desconecte la alimentación<br />
cuando vaya a conectar el cable blindado de la guitarra<br />
y los efectos u otros cables necesarios para la conexión<br />
externa. Tenga en cuenta que el ruido generado al insertar<br />
y desconectar las clavijas podrá ocasionar graves<br />
daños al equipo.<br />
• Para evitar posibles incendios, no coloque recipientes<br />
de líquidos sobre el amplificador.<br />
Introduzione<br />
Grazie per l’acquisto dell’amplificatore per chitarra <strong>TB25</strong>/<strong>TB25</strong>R<br />
<strong>Ibanez</strong>. Ad eccezione della funzione di riverbero, sia il <strong>TB25</strong> che<br />
il <strong>TB25</strong>R hanno le stesse caratteristiche e funzioni. Leggere<br />
attentamente questo manuale prima di usare l’amplificatore in<br />
modo da sfruttarne appieno le caratteristiche e le funzioni<br />
disponibili. Poi conservare il manuale in un luogo sicuro.<br />
Caratteristiche e funzioni<br />
L’amplificatore <strong>TB25</strong>/<strong>TB25</strong>R prevede 25W di uscita ed è dotato<br />
di diffusori Power Jam originali <strong>Ibanez</strong> da 25 cm per ottenere un<br />
suono di alta qualità e un funzionamento semplice.<br />
Il preamplificatore è provvisto di un canale pulito e di un canale<br />
overdrive indipendenti, che producono due tipi di suono<br />
completamente differenti. Il canale overdrive produce un suono<br />
di distorsione acuto, dolce e potente e il canale pulito produce un<br />
suono pulito e crunch dalle frequenze più basse alle alte. Inoltre<br />
è dotato di un equalizzatore attivo che fornisce una variabilità di<br />
suoni maggiore di quella di un equalizzatore passivo normale. Il<br />
<strong>TB25</strong>R è anche provvisto di una funzione di riverbero a molla<br />
incorporata per dare profondità al suono.<br />
Precauzioni durante l’uso<br />
• Non sottoporre l’amplificatore a forti impatti facendolo cadere,<br />
ecc., e maneggiarlo con cura.<br />
• Installare l’amplificatore in una posizione stabile. Il suono<br />
prodotto dall’amplificatore è differente a seconda del metodo,<br />
della posizione e del luogo in cui è installato.<br />
• Accertarsi che l’amplificatore sia spento quando non lo si usa.<br />
Inoltre, togliere il cavo di alimentazione dalla presa di<br />
alimentazione quando si prevede di non usare l’amplificatore<br />
per un lungo periodo di tempo.<br />
• Non usare o depositare l’amplificatore in luoghi in cui sia<br />
esposto a luce solare diretta, o in ambienti soggetti a notevoli<br />
sbalzi di temperatura e livello di umidità.<br />
• Portare il livello del volume a ‘0’ o spegnere l’amplificatore<br />
mentre si collegano il cavo schermato della chitarra e gli effetti<br />
oppure altri cavi richiesti per il collegamento esterno. Fare<br />
attenzione poiché il rumore generato quando si inseriscono e<br />
tolgono le spine può causare seri guasti all’apparecchiatura.<br />
• Per evitare rischi di incendio, non porre contenitori di liquidi<br />
sull’amplificatore.
• <br />
• <br />
<br />
• <br />
• <br />
• <br />
• <br />
• <br />
• <br />
• <br />
<br />
• <br />
• <br />
• <br />
• <br />
<br />
• <br />
<br />
• <br />
• <br />
<br />
• <br />
<br />
• <br />
• <br />
<br />
<br />
<br />
<br />
<br />
<br />
Names and functions for each part<br />
1. INPUT jack<br />
The input terminal for standard 1/4" jacks. Make the connection from the electric<br />
guitar with a guitar shielded cable.<br />
2. OVERDRIVE - GAIN control<br />
It is possible to adjust the gain when using the overdrive channel (level of<br />
overdrive distortion.) The amount of distortion will be reduced to produce a<br />
clear and individual sound when the control is lowered, and the distortion<br />
amount increased to provide higher levels of sustain when it is raised.<br />
3. OVERDRIVE - VOLUME control<br />
It is possible to adjust the level of amplifier output when using the overdrive<br />
channel. Reduce the volume when the GAIN and EQ has been raised to increase<br />
the sound.<br />
4. CHANNEL switch<br />
It is possible to switch between the overdrive channel and the clean channel.<br />
This switch is disabled when an external foot-switch is connected to the FOOT<br />
SW jack.<br />
5. CLEAN - VOLUME control<br />
It is possible to adjust the level of amplifier output when using the clean channel.<br />
A natural distortion can be produced by increasing the volume.<br />
6. BASS control<br />
The low-range sound area equalizer. It is possible to boost or cut the 200Hz<br />
bandwidth by ±12dB.<br />
7. MIDDLE control<br />
The mid-range sound area equalizer. It is possible to boost or cut the 800Hz<br />
bandwidth by ±12dB.<br />
8. TREBLE control<br />
A shelving-type equalizer for the high-range sound area. It is possible to boost<br />
or cut the bandwidth of 1.8kHz or higher by ±12dB.<br />
9. REVERB - LEVEL control (<strong>TB25</strong>R only)<br />
The <strong>TB25</strong>R is equipped with a spring reverberation function for which the<br />
amount of reverberation to be applied can be adjusted with the level control.<br />
The use of the reverberation function produces a natural depth to the sound<br />
being output.<br />
10. FOOT SW jack<br />
Connecting a latch-type foot switch with a 1/4" jack enables the channel switch<br />
to be controlled with the foot switch.<br />
11. PHONES jack<br />
The 1/4" jack headphone output socket to enable headphones to be connected.<br />
The sound is not reproduced through the built-in speakers when headphones<br />
are in use.<br />
Warning<br />
The <strong>TB25</strong>/<strong>TB25</strong>R headphones produce a large volume of sound output. Ensure<br />
that the volume control has been reduced before beginning to play with<br />
the use of the headphones, and then slowly increase the volume until it has<br />
been adjusted to the required volume. Note that the noise and distorted sound<br />
signals produced when inserting or removing the plug with high volume levels<br />
will not only result in damage to the headphones, it may also result in<br />
damage to the user’s hearing.<br />
12. POWER switch<br />
The switch to turn the power supply on and off. Ensure that this switch is set at<br />
OFF when the amplifier is not in use.<br />
Troubleshooting<br />
1. The power supply cannot be switched on.<br />
• Check that the power cable has been connected correctly.<br />
• Try plugging it into a different socket and see if the same problem occurs.<br />
2. The power supply can be switched on, but no sound is produced<br />
• Check that the guitar has been connected correctly.<br />
• Remove the effects between the guitar and the amplifier and check to see if<br />
no sound is produced.<br />
• Replace the shielded cable and check to see if no sound is produced.<br />
• Check to see if the volume on the guitar is set to ‘0’.<br />
• Use a different guitar and see if no sound is produced.<br />
• Check to see if the volume on the amplifier is set to ‘0’.<br />
• Check to see if the headphones are connected.<br />
3. Noise is produced<br />
• Check to see if anything in the immediate vicinity is resonating or banging<br />
against the amplifier to produce the noise.<br />
• Check to see if the plug cover on the shielded cable is loose.<br />
• Check that the string action (distance between strings and frets) is correctly<br />
adjusted (not too low).<br />
• Use another guitar, effects and cable to see if the same noise is produced.<br />
4. It is not possible to switch between channels<br />
• Check that the foot switch is not connected.<br />
5. It is not possible to switch between channels with the foot switch<br />
• Check that the foot switch jack is connected correctly.<br />
• Check that the foot switch is the correct latch type. Momentary types cannot<br />
be used.<br />
• Connect another foot switch and see if it is possible to switch between channels.<br />
6. No sound is produced in the headphones<br />
• Check that the headphone jack is connected correctly.<br />
• Connect another set of headphones and see if sound is produced.<br />
In the case of defects<br />
This product has passed exhaustive inspections before being shipped from the<br />
factory. Ensure that the above procedures are carried out when a problem is<br />
thought to exist. Contact your dealer in the unlikely event that an abnormality<br />
occurs during use. Also, ensure that the symptoms of the problem are explained<br />
in detail when requesting repair in order to facilitate swift handling.<br />
Bezeichnung und Funktion der Teile<br />
1. Eingangsbuchse (INPUT)<br />
Diese Buchse dient zum Anschluss von 1/4 Zoll Steckern. Die E-Gitarre<br />
mit einem Kabel an diese Buchse anschließen.<br />
2. Overdrive-Verstärkungsregler (OVERDRIVE GAIN)<br />
Bei Verwendung des Overdrive-Kanals dient dieser Regler zur Einstellung<br />
der Overdrive-Verstärkung (Übersteuerung). Durch Herabdrehen<br />
des Reglers wird der Verzerrungsgrad zur Erzeugung eines klaren, individuellen<br />
Klangs reduziert, während ein höherer Verzerrungsgrad einen<br />
verlängerten Sustain-Effekt produziert.<br />
3. Overdrive-Lautstärkeregler (OVERDRIVE VOLUME)<br />
Der Ausgangspegel des Verstärkers ist bei Verwendung des Overdrive-<br />
Kanals regelbar. Wenn GAIN und EQ höher eingestellt wurden, sollte<br />
die Lautstärke als Ausgleich mit diesem Regler gesenkt werden.<br />
4. Kanalschalter (CHANNEL)<br />
Dieser Schalter dient zum Umschalten zwischen Cleankanal und<br />
Overdrive-Kanal. Bei Anschluss eines externen Fußschalters an die<br />
Fußschalterbuchse (FOOTSW) ist dieser Schalter inaktiv.<br />
5. Cleankanal-Lautstärkeregler (CLEAN VOLUME)<br />
Dieser Regler dient zum Einstellen des Ausgangspegels bei Verwendung<br />
des Cleankanals. Durch Erhöhen der Lautstärke läßt sich eine<br />
natürliche Verzerrung erzeugen.<br />
6. Bassregler (BASS)<br />
Dieser Regler dient zum Einstellen des tiefen Frequenzbereichs. Die<br />
200 Hz Bandbreite kann um ±12 dB angehoben oder gesenkt werden.<br />
7. Mittenbereich-Regler (LOW MID)<br />
Dieser Regler dient zum Einstellen des Mittenbereichs. Die 800-Hz-<br />
Bandbreite kann um ±12 dB angehoben oder gesenkt werden.<br />
8. Höhenregler (TREBLE)<br />
Dieser Stufenregler dient zum Einstellen des tiefen Frequenzbereichs.<br />
Die 1,8 kHz Bandbreite kann um ±12 dB angehoben oder gesenkt<br />
werden.<br />
9. Hallpegelregler (REVERB LEVEL) (nur <strong>TB25</strong>R)<br />
Der <strong>TB25</strong>R verfügt über eine eingebaute Federhallfunktion, deren Hallpegel<br />
mit diesem Regler eingestellt wird. Die Hallfunktion fügt dem<br />
Sound eine natürliche Klangtiefe hinzu.<br />
10. Fußschalter-Buchse (FOOTSW)<br />
Durch den Anschluss eines Klinkentyp-Fußschalters an diese 1/4 Zoll<br />
Ausgangsbuchse können die Kanäle mit dem Fußschalter umgeschaltet<br />
werden.<br />
11. Kopfhörerbuchse (PHONES)<br />
Diese 1/4 Zoll Ausgangsbuchse dient zum Anschluss von Kopfhörern.<br />
Bei angeschlossenen Kopfhörern ist der Lautsprecherausgang inaktiv.<br />
Warnung<br />
Die <strong>TB25</strong>/<strong>TB25</strong>R Kopfhörer erzeugen hohe Lautstärke. Vor dem Spielen<br />
über Kopfhörer deshalb die Lautstärke herabdrehen und dann allmählich<br />
auf den gewünschten Pegel erhöhen. Andernfalls kann das<br />
laute Brummen beim Anschließen und Abziehen des Steckers nicht<br />
nur die Kopfhörer beschädigen, sondern auch ernsthafte Gehörschäden<br />
verursachen.<br />
12.Netzschalter (POWER)<br />
Dieser Schalter dient zum Ein- und Ausschalten der Netzversorgung.<br />
Darauf achten, dass dieser Schalter auf “OFF” gestellt ist, wenn der<br />
Verstärker nicht verwendet wird.<br />
Fehlersuche<br />
1. Die Netzversorgung läßt sich nicht einschalten.<br />
• Prüfen, ob das Netzkabel korrekt angeschlossen ist.<br />
• Den Netzstecker an eine andere Steckdose anschließen, um zu prüfen,<br />
ob hier das gleiche Problem auftritt.<br />
2. Die Netzversorgung ist eingeschaltet, aber es wird kein Klang erzeugt.<br />
• Prüfen, ob die Gitarre korrekt angeschlossen ist.<br />
• Die zwischen Gitarre und Verstärker angeschlossenen Effektgeräte<br />
entfernen und prüfen, ob danach Klang erzeugt wird.<br />
• Das Kabel austauschen und prüfen, ob danach Klang erzeugt wird.<br />
• Prüfen, ob der Lautstärkeregler der Gitarre auf “0” gestellt ist.<br />
• Versuchsweise eine andere Gitarre verwenden und prüfen, ob damit<br />
Klang erzeugt wird.<br />
• Prüfen, ob der Lautstärkeregler des Verstärkers auf “0” gestellt ist.<br />
• Prüfen, ob die Kopfhörer angeschlossen sind.<br />
3. Es treten Rauschstörungen auf.<br />
• Prüfen, ob ein Gegenstand in der näheren Umgebung Resonanz<br />
erzeugt oder gegen den Verstärker schlägt.<br />
• Prüfen, ob die Steckerabdeckung des Instrumentenkabels locker ist.<br />
• Vergewissern, dass die Saiten der Gitarre nicht locker und richtig<br />
gestimmt sind.<br />
• Gitarre, Effektgerät und Kabel versuchsweise austauschen und prüfen,<br />
ob die Rauschstörungen danach verschwinden.<br />
4. Die Kanäle lassen sich nicht umschalten.<br />
• Prüfen, ob der Fußschalter angeschlossen ist.<br />
5. Das Umschalten zwischen den Kanälen mit dem Fußschalter ist<br />
nicht möglich.<br />
• Vergewissern, daß die Fußschalterbuchse korrekt angeschlossen ist.<br />
• Vergewissern, daß es sich bei dem angeschlossenen Fußschalter<br />
um einen selbsthaltenden Klinkenschalter handelt. Nichtrastende<br />
Schaltertypen können nicht verwendet werden.<br />
• Versuchsweise einen anderen Fußschalter anschließen und prüfen,<br />
ob das Umschalten der Kanäle damit möglich ist.<br />
6. Bei Kopfhöreranschluss wird kein Klang erzeugt.<br />
• Prüfen, ob der Kopfhörer korrekt angeschlossen ist.<br />
• Versuchsweise einen anderen Kopfhörer anschließen und prüfen,<br />
ob Klang erzeugt wird.<br />
Im Falle von Defekten<br />
Der Verstärker wurde im Rahmen der Qualitätskontrolle vor dem Versand<br />
gründlich überprüft. Bei eventuellen Problemen den Verstärker<br />
deshalb zuerst mit Hilfe der obigen Punkte überprüfen. Sollten während<br />
des Betriebs Störungen auftreten, wenden Sie sich bitte an Ihren<br />
Fachhändler. Erklären Sie das Problem bei notwendigen Reparaturen<br />
bitte möglichst genau, damit sich die Ursache so schnell wie möglich<br />
finden läßt.<br />
Noms et fonctions des différentes bornes<br />
et des commandes<br />
1. Prise INPUT<br />
Prise d’entrée des fiches de 1/4". La guitare électrique se raccorde à cette prise<br />
à l’aide d’un câble pour guitare blindé.<br />
2. Commande OVERDRIVE - GAIN<br />
Elle permet de régler le gain lorsque le canal d’overdrive est utilisé (le niveau<br />
de distorsion d’overdrive). Quand la commande est baissée, le montant de<br />
distorsion diminue et le son est pur et bien défini, et quand la commande est<br />
relevée, le montant de distorsion augmente pour donner des niveaux de maintien<br />
supérieurs.<br />
3. Commande OVERDRIVE - VOLUME<br />
Elle permet de régler le niveau de sortie de l’amplificateur lorsque le canal<br />
d’overdrive est utilisé. Réduisez le volume si vous avez relevé la commande<br />
GAIN ou EQ pour augmenter le son.<br />
4. Commutateur CHANNEL<br />
Il permet de passer alternativement entre le canal d’overdrive et le canal de<br />
son clair. Ce commutateur se désactive si vous raccordez un commutateur à<br />
pédale à fermeture à la prise FOOT SW.<br />
5. Commande CLEAN - VOLUME<br />
Elle permet de régler le niveau de sortie de l’amplificateur lorsque le canal de<br />
son clair est utilisé. Le fait d’augmenter le volume produit une distorsion naturelle.<br />
6. Commande BASS<br />
C’est l’égaliseur de la plage des basses fréquences. Elle permet d’accentuer<br />
ou de réduire la bande passante de 200 Hz de ±12 dB.<br />
7. Commande MIDDLE<br />
C’est l’égaliseur de la plage des moyennes fréquences. Elle permet d’accentuer<br />
ou de réduire la bande passante de 800 Hz de ±12 dB.<br />
8. Commande TREBLE<br />
C’est un égaliseur de type à étages pour la plage des hautes fréquences. Elle<br />
permet d’accentuer ou de réduire la bande passante de 1,8 kHz ou supérieure<br />
de ±12 dB.<br />
9. Commande REVERB - LEVEL (<strong>TB25</strong>R seulement)<br />
Le <strong>TB25</strong>R est équipé d’une fonction réverbération à ressorts pour laquelle il<br />
est possible de régler la quantité de réverbération à appliquer à l’aide de la<br />
commande de niveau. L’utilisation de la fonction réverbération confère une<br />
profondeur naturelle au son de sortie.<br />
10. Prise FOOT SW<br />
Le raccordement d’un commutateur à pédale à fiche de 1/4" permettra de contrôler<br />
le commutateur à l’aide de la pédale.<br />
11. Prise PHONES<br />
Prise de sortie pour le raccordement d’un casque d’écoute à fiche de 1/4". Le<br />
son des enceintes incorporées est coupé lorsque le casque d’écoute est raccordé.<br />
Avertissement<br />
Le casque d’écoute du <strong>TB25</strong>/<strong>TB25</strong>R délivre une sortie de puissance élevée.<br />
Pensez à baisser le volume avant de commencer une lecture au casque, puis<br />
augmentez progressivement le volume jusqu’à ce que le volume soit à un niveau<br />
agréable. Notez que le bruit et les signaux déformés engendrés lors du<br />
branchement ou du débranchement des fiches à des niveaux de volume élevés<br />
risquent non seulement d’endommager le casque, mais également d’endommager<br />
l’ouïe.<br />
12. Commutateur POWER<br />
C’est le commutateur de mise sous et hors tension. Pensez à mettre ce commutateur<br />
sur OFF lorsque l’amplificateur ne sert pas.<br />
Dépannage<br />
1. Impossible de mettre l’appareil sous tension<br />
• Vérifiez si le câble d’alimentation est raccordé correctement.<br />
• Essayez de le brancher dans une autre prise secteur pour voir si le même<br />
problème se reproduit.<br />
2. L’appareil se met sous tension, mais pas de son<br />
• Vérifiez si la basse est raccordée correctement.<br />
• Retirez les effets entre la guitare et l’amplificateur pour voir si le son est<br />
reproduit.<br />
• Remplacez le câble blindé pour voir si le son est reproduit.<br />
• Vérifiez si le volume de la guitare est réglé à “0”.<br />
• Utilisez une autre guitare pour voir si le son est reproduit.<br />
• Vérifiez si le volume de l’amplificateur est réglé à “0”.<br />
• Vérifiez si le casque d’écoute est raccordé.<br />
3. Bruit<br />
• Vérifiez s’il y a quelque chose à proximité immédiate qui résonne ou qui<br />
frappe contre l’amplificateur.<br />
• Vérifiez si le cache de la fiche du câble blindé est lâche.<br />
• Vérifiez si la distance entre les cordes et les frettes de la guitare est correcte<br />
(pas trop basse).<br />
• Utilisez une autre guitare, un autre effet et un autre câble pour voir si le<br />
même bruit se reproduit.<br />
4. Impossible de passer alternativement d’un canal à l’autre<br />
• Vérifiez si le commutateur à pédale est bien raccordé.<br />
5. Impossible de passer alternativement d’un canal à l’autre avec le commutateur<br />
à pédale<br />
• Vérifiez si le commutateur à pédale est raccordé correctement.<br />
• Vérifiez si le commutateur à pédale est du type à fermeture voulu.<br />
• Raccordez un autre commutateur à pédale pour voir s’il est possible de<br />
passer alternativement d’un canal à l’autre.<br />
6. Pas de son au casque d’écoute<br />
• Vérifiez si la fiche du casque est branchée correctement.<br />
• Raccordez un autre casque pour voir si le son est reproduit.<br />
En cas d’anomalie<br />
L’appareil a subi des inspections rigoureuses avant de quitter nos usines. Si<br />
vous pensez qu’il y a une anomalie dans l’appareil, effectuez les opérations cidessus.<br />
Dans le cas peu probable où il se produirait une anomalie pendant<br />
l’utilisation, consultez votre revendeur. Par ailleurs, quand vous demandez<br />
des réparations, expliquez bien les problèmes en détail de façon à permettre<br />
une réparation rapide et adéquate.<br />
Nombres y funciones de los componentes.<br />
1. Toma de entrada (INPUT)<br />
Terminal de entrada para clavijas de 1/4 de pulgada. Permite conectar<br />
una guitarra eléctrica con un cable blindado de guitarra.<br />
2. Control de sobreexcitación-ganancia (OVERDRIVE-GAIN)<br />
Cuando se utiliza el canal de sobreexcitación se puede ajustar la ganancia<br />
(nivel de distorsión de sobreexcitación.) Cuando se baje el volumen<br />
se reducirá el grado de distorsión para producir un sonido claro<br />
e individual, y cuando se suba aumentará el grado de distorsión para<br />
ofrecer niveles más altos de sostenidos.<br />
3. Control de sobreexcitación-volumen (OVERDRIVE-VOLUME)<br />
Cuando se utiliza el canal de sobreexcitación se puede ajustar el nivel<br />
de la salida del amplificador. Para aumentar el sonido cuando haya<br />
subido GAIN y EQ reduzca el volumen.<br />
4. Conmutador de canal (CHANNEL)<br />
Se puede cambiar entre el canal de sobreexcitación y el canal claro.<br />
Este conmutador se deshabilita cuando se conecta un interruptor de<br />
pie externo a la toma FOOT SW.<br />
5. Control claro-volumen (CLEAN-VOLUME)<br />
Cuando se utiliza el canal claro se puede ajustar el nivel de salida del amplificador.<br />
Aumentando el volumen se puede lograr una distorsión natural.<br />
6. Control de graves (BASS)<br />
Ecualizador de zona de sonido de bajo alcance. Se puede acentuar o<br />
cortar en ancho de banda de 200 Hz en ±12 dB.<br />
7. Control de medio (MIDDLE)<br />
Ecualizador de zona de sonido de medio alcance. Se puede acentuar<br />
o cortar el ancho de banda de 800 Hz en ±12 dB.<br />
8. Control de agudos (TREBLE)<br />
Ecualizador de tipo estantería para la zona de sonido de alto alcance. Se<br />
puede acentuar o cortar el ancho de banda de 1,8 kHz o más en ±12 dB.<br />
9. Control de reverberación-nivel (REVERB-LEVEL) (<strong>TB25</strong>R solamente)<br />
El <strong>TB25</strong>R está equipado con una función de reverberación por resorte<br />
cuyo grado de reverberación a aplicar se puede ajustar con el control<br />
de nivel.<br />
El empleo de la función de reverberación añade una profundidad natural<br />
al sonido que sale por los altavoces.<br />
10. Toma para interruptor de pie (FOOT SW)<br />
Conectando un interruptor de pie tipo aldaba con una clavija de 1/4<br />
pulgadas se puede controlar el conmutador de canal con el mismo.<br />
11. Tomas de auriculares (PHONES)<br />
Toma de salida para conectar unos auriculares con clavija 1/4 pulgada.<br />
Cuando se utilizan los auriculares el sonido no sale por los altavoces<br />
incorporados.<br />
Advertencia<br />
La salida para auriculares del <strong>TB25</strong>/<strong>TB25</strong>R produce un sonido de mucho<br />
volumen. Antes de comenzar a tocar utilizando los auriculares, asegúrese<br />
de haber reducido el volumen con el control de volumen; después súbalo<br />
gradualmente hasta el nivel requerido. Tenga en cuenta que el ruido y las<br />
señales de sonido distorsionado producidas al insertar o desconectar la<br />
clavija a altos niveles de volumen no solamente ocasionará daños a los<br />
auriculares, sino que también podrá dañar sus oídos.<br />
12. Interruptor de alimentación (POWER)<br />
Este interruptor permite conectar y desconectar la alimentación. Cuando<br />
no utilice el amplificador, asegúrese de que este interruptor esté puesto<br />
en OFF.<br />
Localización de problemas<br />
1. No se puede conectar la alimentación.<br />
• Compruebe que el cable de alimentación está correctamente enchufado.<br />
• Intente enchufarlo a una toma de corriente diferente a ver si persiste<br />
el mismo problema.<br />
2. Se puede conectar la alimentación, pero no se obtiene sonido.<br />
• Compruebe que la guitarra ha sido conectada correctamente.<br />
• Elimine los efectos entre la guitarra y el amplificador y compruebe a<br />
ver si se obtiene sonido.<br />
• Cambie el cable blindado y compruebe a ver si se obtiene sonido.<br />
• Compruebe a ver si el volumen de la guitarra está puesto a “0”.<br />
• Utilice una guitarra diferente y vea si se obtiene sonido.<br />
• Compruebe a ver si el volumen del amplificador está puesto en “0”.<br />
• Compruebe a ver si están conectados los auriculares.<br />
3. Se produce ruido<br />
• Compruebe a ver si hay algo cerca que esté resonando o golpeando<br />
contra el amplificador produciendo el ruido.<br />
• Compruebe a ver si tapón del enchufe del cable blindado está suelto.<br />
• Compruebe si la acción de las cuerdas (distancia entre las cuerdas<br />
y el traste) está correctamente ajustada (que no esté demasiado<br />
baja).<br />
• Utilice otra ajustada, efectos y cable a ver si se produce el mismo<br />
ruido.<br />
4. No se puede cambiar de canal<br />
• Compruebe que el interruptor de pie no está conectado.<br />
5. No se puede cambiar de canal con el interruptor de pie<br />
• Compruebe que el interruptor de pie está conectado correctamente.<br />
• Compruebe que el interruptor de pie es del tipo aldaba correcto. Los<br />
de tipo momentáneo no se pueden usar.<br />
• Conecte otro interruptor de pie a ver si se puede cambiar de canal.<br />
6. No sale sonido por los auriculares<br />
• Compruebe que la clavija de los auriculares está correctamente conectada.<br />
• Conecte otros auriculares a ver si se obtiene sonido.<br />
En caso de defectos<br />
Este producto ha pasado por unas inspecciones muy exhaustivas antes<br />
de salir de fábrica. Cuando piense que hay un problema, asegúrese<br />
de realizar los procedimientos indicados arriba. En el improbable<br />
caso de que ocurriera alguna anormalidad durante la utilización, póngase<br />
en contacto con su distribuidor. Además, cuando solicite reparaciones,<br />
asegúrese de explicar con detalles los síntomas del problema<br />
para facilitar una gestión rápida.<br />
Model No : <strong>TB25</strong>/<strong>25R</strong><br />
Nomenclatura e funzioni<br />
1. Presa a jack INPUT<br />
Terminale di ingresso per jack di 6 mm standard. Serve per collegare la chitarra<br />
elettrica mediante l’uso di un cavo schermato per chitarra.<br />
2. Comando OVERDRIVE - GAIN<br />
Si può regolare il guadagno quando si usa il canale di overdrive (livello di<br />
distorsione del sovrapilotaggio). Il valore della distorsione viene ridotto per<br />
produrre un suono chiaro e individuale quando il comando viene abbassato, e<br />
il valore della distorsione aumentato per produrre livelli più alti di sostegno<br />
quando viene alzato.<br />
3. Comando OVERDRIVE - VOLUME<br />
Si può regolare il livello di uscita dell’amplificatore quando si usa il canale di<br />
overdrive. Ridurre il volume quando GAIN e EQ sono stati alzati per aumentare<br />
il suono.<br />
4. Interruttore CHANNEL<br />
Si può passare dal canale di overdrive al canale pulito senza rumori.<br />
Questo interruttore è disattivato quando un interruttore a pedale esterno viene<br />
collegato alla presa a jack FOOT SW.<br />
5. Comando CLEAN - VOLUME<br />
Si può regolare il livello di uscita dell’amplificatore quando si usa il canale<br />
pulito senza rumori. Una distorsione naturale si può produrre aumentando il<br />
volume.<br />
6. Comando BASS<br />
Equalizzatore dei suoni della gamma delle basse frequenze. È possibile amplificare<br />
o tagliare la larghezza di banda 200 Hz in passi di ±12 dB.<br />
7. Comando MIDDLE<br />
Equalizzatore dei suoni della gamma delle frequenze medie. È possibile amplificare<br />
o tagliare la larghezza di banda 800 Hz in passi di ±12 dB.<br />
8. Comando TREBLE<br />
Equalizzatore di smorzamento per suoni della gamma delle alte frequenze.<br />
È possibile amplificare o tagliare la larghezza di banda di 1.8 kHz o maggiore<br />
in passi di ±12 dB.<br />
9. Comando REVERB - LEVEL (solo <strong>TB25</strong>R)<br />
Il <strong>TB25</strong>R è provvisto di una funzione di riverbero a molla il cui valore di<br />
riverbero da applicare può essere regolato usando il comando di livello.<br />
L’uso della funzione di riverbero produce una naturale profondità del suono in<br />
uscita.<br />
10. Presa a jack FOOT SW<br />
Collegando un interruttore a pedale con jack di 6 mm è possibile alternare il<br />
canale da controllare mediante l’interruttore stesso.<br />
11. Presa a jack PHONES<br />
Presa di uscita cuffie con jack di 6 mm che permette il collegamento di cuffie.<br />
Il suono non viene riprodotto dai diffusori incorporati quando le cuffie sono in<br />
uso.<br />
Avvertenza<br />
Le cuffie del <strong>TB25</strong>/<strong>TB25</strong>R producono una potenza sonora di uscita molto<br />
alta. Accertarsi che il comando del volume sia stato diminuito prima di iniziare<br />
a suonare quando si usano le cuffie, e dopo aumentare il volume lentamente<br />
fino a quando viene raggiunto il volume richiesto. Fare attenzione poiché i<br />
segnali di rumore e di suoni distorti prodotti quando si inserisce o si toglie la<br />
spina con livelli di volume alti non solo provocano danni alle cuffie, possono<br />
anche provocare lesioni agli organi dell’udito di chi indossa le cuffie.<br />
12. Interruttore POWER<br />
Interruttore per accendere e spegnere. Accertarsi che sia regolato in posizione<br />
di spegnimento quando l’amplificatore non è in uso.<br />
Risoluzione di problemi<br />
1. L’apparecchiatura non si accende.<br />
• Controllare che il cavo di alimentazione sia stato collegato correttamente.<br />
• Provare a inserire la spina in una presa differente e vedere se si verifica lo<br />
stesso problema.<br />
2. L’apparecchiatura si accende ma non viene prodotto alcun suono<br />
• Controllare che la chitarra sia stata collegata correttamente.<br />
• Togliere gli effetti fra la chitarra e l’amplificatore per verificare se non è<br />
prodotto alcun suono.<br />
• Sostituire il cavo schermato per verificare se non è prodotto alcun suono.<br />
• Verificare se il volume dell’amplificatore è regolato su ‘0’.<br />
• Usare una chitarra diversa e verificare se non è prodotto alcun suono.<br />
• Verificare se il volume dell’amplificatore è regolato su ‘0’.<br />
• Verificare se le cuffie sono collegate.<br />
3. Produzione di rumore<br />
• Verificare se niente nell’immediata vicinanza è risonante o batte contro l’amplificatore<br />
e produce il rumore.<br />
• Verificare se il rivestimento della spina del cavo schermato è allentato.<br />
• Verificare che il gioco delle corde (distanza fra le corde e le sbarrette trasversali)<br />
sia regolato correttamente (non troppo in basso).<br />
• Usare chitarra, effetti e cavo differenti per verificare se viene prodotto lo<br />
stesso rumore.<br />
4. Non è possibile passare da un canale all’altro<br />
• Controllare se l’interruttore a pedale non è collegato.<br />
5. Non è possibile passare da un canale all’altro con l’interruttore a pedale<br />
• Controllare che il jack dell’interruttore a pedale sia inserito correttamente<br />
nella presa.<br />
• Controllare che l’interruttore a pedale sia del tipo a saliscendi corretto. Tipi<br />
a momento non possono essere usati.<br />
• Collegare un interruttore a pedale differente e vedere se è possibile passare<br />
da un canale all’altro.<br />
6. Nessun suono è prodotto nelle cuffie<br />
• Controllare che il jack delle cuffie sia inserito correttamente nella presa.<br />
• Collegare un altro paio di cuffie e verificare se il suono è prodotto.<br />
In caso di difetti<br />
Questo prodotto è stato sottoposto a rigide ispezioni prima di essere spedito<br />
dalla fabbrica. Accertarsi che i procedimenti sopraelencati siano eseguiti quando<br />
si pensa di trovarsi di fronte a un problema. Rivolgersi al rivenditore nell’improbabile<br />
eventualità che si verifichi qualche anomalia durante l’uso. Inoltre,<br />
accertarsi che le caratteristiche del problema vengano<br />
spiegate dettagliatamente quando si richiede una riparazione in modo da facilitarne<br />
una esecuzione rapida.<br />
The aforementioned equipment fully conforms to the protection<br />
requirements of the following EC Council Directives.<br />
89/336/EEC : ELECTROMAGNETIC COMPATIBILITY<br />
73/23/EEC : LOW VOLTAGE DIRECTIVE<br />
NOV99297 COPYRIGHT 1999<br />
PRINTED IN CHINA


