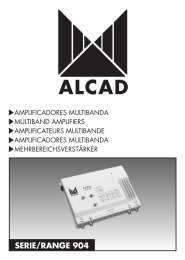
PS PROGRAMMER - Alcad
PS PROGRAMMER - Alcad
PS PROGRAMMER - Alcad

Create successful ePaper yourself
Turn your PDF publications into a flip-book with our unique Google optimized e-Paper software.
<strong>PS</strong> <strong>PROGRAMMER</strong>
1<br />
ESP<br />
ENG<br />
FRA<br />
POR<br />
DEU<br />
ITA<br />
ESPAÑOL . . . . . . . .3<br />
ENGLISH . . . . . . . .9<br />
FRANÇAIS . . . . . .15<br />
PORTUGUES . . . . .21<br />
DEUTSCH . . . . . . .27<br />
ITALIANO . . . . . .33
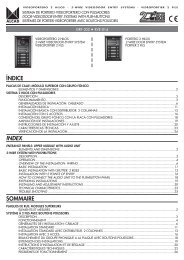
Índice<br />
ESP - 3<br />
ÍNDICE<br />
PROGRAMADOR <strong>PS</strong><br />
1 ENCENDIDO Y APAGADO ........................................................5<br />
2 SELECCIÓN DE IDIOMA............................................................5<br />
3 SELECCIÓN DE SERIE................................................................5<br />
4 CAMBIO DE LA PILA..................................................................5<br />
5 DESCRIPCIÓN ..........................................................................6<br />
6 COMUNICACIÓN CON LOS EQUIPOS......................................7<br />
7 ACTUALIZACIÓN DEL PROGRAMADOR......................................7
4 - ESP Manual de instalación y programación
Programador <strong>PS</strong><br />
ESP - 5<br />
PROGRAMADOR <strong>PS</strong><br />
1. ENCENDIDO Y APAGADO<br />
Si el programador es nuevo, introduzca la pila. El programador se<br />
enciende pulsando cualquier tecla. Para apagarlo pulse la tecla OFF.<br />
Cuando encienda el programador, indicará el número de versión durante<br />
2 segundos.<br />
El programador se apaga automáticamente 3 minutos después de pulsar<br />
la última tecla. Cuando lo encienda de nuevo, se encontrará en la última<br />
serie seleccionada.<br />
2. SELECCIÓN DE IDIOMA<br />
Después de encenderlo, el programador estará esperando la selección<br />
de la serie a programar, la pantalla indicará SERIE 912 TP u otra<br />
serie, pulse la tecla q.<br />
Pulse la tecla F seguida de LANG. y seleccione el idioma con las teclas<br />
t y u. Pulse q para confirmar.<br />
3. SELECCIÓN DE SERIE<br />
Pulse la tecla F seguida de SERIE+ para poner el programador en<br />
selección de la serie a programar, la pantalla indicará SERIE 912<br />
TP u otra serie. Pulse las teclas t y u hasta seleccionar la serie deseada<br />
y pulse q para confirmar.<br />
4. CAMBIO DE LA PILA<br />
El programador <strong>PS</strong> funciona con una pila alcalina de 9V tipo 6F22.<br />
Cuando la pila esté agotada, aparecerá un mensaje indicando PILA<br />
AGOTADA y el programador se apagará.<br />
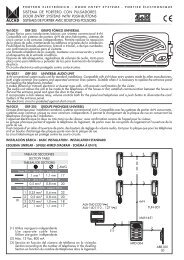
1 2<br />
6F22<br />
Fig. 1 - Cambio de pila
6 - ESP Manual de instalación y programación<br />
5. DESCRIPCIÓN<br />
1 2 3 4<br />
5 6<br />
READ<br />
RESET<br />
1 2 3 ESC Off<br />
COPY<br />
4 5 6 F T<br />
<strong>PS</strong> <strong>PROGRAMMER</strong><br />
7 8 9 C/S<br />
.<br />
LANG SERIES-<br />
SERIES+<br />
0<br />
<strong>PROGRAMMER</strong><br />
6F22<br />
7<br />
Fig. 2 - Programador <strong>PS</strong><br />
1- Emisor/receptor de infrarrojos<br />
2- Pantalla<br />
3- Teclado<br />
F Selección de función básica<br />
T Transmisión del dato seleccionado en pantalla<br />
t Cursor izquierda<br />
u Cursor derecha<br />
p Cursor arriba<br />
q Cursor abajo<br />
0..9 Teclas numéricas de entrada de datos<br />
COPY Transmisión de todos los datos de la SERIE<br />
READ Lectura de todos los datos de la SERIE<br />
C/S Cambia entre canales entándar y de banda S<br />
SERIES- Selección de la serie a programar<br />
SERIES+ Selección de la serie a programar<br />
OFF Apagado<br />
RESET No utilizada<br />
4- Conector para el cable de actualización<br />
5- Tapa de la pila<br />
6- Manuales de instalación y programación<br />
7- Pila
Programador <strong>PS</strong><br />
ESP - 7<br />
5.1 Funciones básicas<br />
Las funciones básicas están indicadas por su nombre sobre la carátula<br />
del programador. Se seleccionan pulsando la tecla F. La pantalla<br />
indicará Funcion:, a la espera de que se pulse una tecla de función.<br />
Función:<br />
F<br />
+<br />
COPY<br />
T<br />
Copiando...<br />
Fig. 3 - Ejemplo de función básica<br />
5.2 Funciones de cada serie<br />
Se seleccionan pulsando la tecla q o p.<br />
Canal de salida<br />
B/G CCIR C21<br />
q<br />
q<br />
Audio:<br />
Estereo<br />
q<br />
q<br />
q<br />
q<br />
Nivel de audio<br />
••••<br />
q<br />
Tabla de canales<br />
B/G CCIR<br />
q<br />
SERIE 912 - MS<br />
Fig. 4 - Ejemplo de función de la Serie 912 - MS<br />
6. COMUNICACIÓN CON LOS EQUIPOS<br />
El programador <strong>PS</strong> se comunica con los equipos de modo bidireccional<br />
mediante infrarrojos. No es necesario ningún cable para conectar el<br />
programador <strong>PS</strong> a los módulos de los equipos.<br />
7. ACTUALIZACIÓN DEL PROGRAMADOR<br />
Es posible actualizar el programador <strong>PS</strong>, de este modo servirá para<br />
programar nuevas series de equipos. Consulte en la web de <strong>Alcad</strong> como
8 - ESP Manual de instalación y programación<br />
descargar los programas e instrucciones necesarias para actualizar el<br />
programador:<br />
www.alcad.net<br />
Si no dispone de una conexión a Internet puede ponerse en contacto con<br />
los Distribuidores o Representantes de <strong>Alcad</strong> o contactar con <strong>Alcad</strong> para<br />
pedir los programas de actualización.<br />
El programador se actualiza desde un ordenador PC, para conectar el<br />
programador <strong>PS</strong> al PC es necesario utilizar el cable de comunicación CU-<br />
001 (cód. 9120003).<br />
ATENCIÓN: El cable de comunicación debe conectarse a uno de los<br />
puertos serie del ordenador COM1 o COM2. Si se conecta al puerto<br />
USB del ordenador no se podrá actualizar el programador <strong>PS</strong>.
Index<br />
ENG - 9<br />
INDEX<br />
<strong>PS</strong> <strong>PROGRAMMER</strong><br />
1 ON AND OFF ........................................................................11<br />
2 LANGUAGE SELECTION..........................................................11<br />
3 SERIES SELECTION..................................................................11<br />
4 CHANGING BATTERIES ...........................................................11<br />
5 DESCRIPTION .........................................................................12<br />
6 COMMUNICATION WITH THE EQUIPMENT .............................13<br />
7 UPDATING THE <strong>PROGRAMMER</strong> ...............................................13
10 - ENG Installation and programming manual
<strong>PS</strong> Programmer<br />
ENG - 11<br />
<strong>PS</strong> <strong>PROGRAMMER</strong><br />
1. ON AND OFF<br />
If the programmer is new, insert the battery. The programmer will be<br />
switched on by pressing any key. To switch it off, press the OFF key.<br />
When the programmer switches on, it will display the version number for<br />
2 seconds.<br />
The programmer will automatically switch off 3 minutes after pressing the<br />
last key. When switching it back on, it retrieves the last selected function.<br />
2. LANGUAGE SELECTION<br />
Once the programmer is on, it will be waiting for the selection of the<br />
series to be programmed; The display will show SERIES 912-TP or<br />
another series id., then press the q key.<br />
Press the F key followed by LANG. and select the language by means of<br />
the t and u keys. Press q to confirm.<br />
3. SERIES SELECTION<br />
Press the F key followed by SERIE+ to set the programmer to select the<br />
series to be programmed; The display will show SERIES 912-TP or<br />
another series id.. Press the t and u keys until selecting the desired<br />
series and then press q to confirm.<br />
4. CHANGING BATTERIES<br />
The <strong>PS</strong> programmer uses an alkaline 9V battery, type 6F22. When the<br />
battery runs down, a message will be displayed: BATTERY<br />
EXHAUSTED and the programmer will switch off.<br />
1 2<br />
6F22<br />
Fig. 1 - Changing batteries
12 - ENG Installation and programming manual<br />
5. DESCRIPTION<br />
1 2 3 4<br />
5 6<br />
READ<br />
RESET<br />
1 2 3 ESC Off<br />
COPY<br />
4 5 6 F T<br />
<strong>PS</strong> <strong>PROGRAMMER</strong><br />
7 8 9 C/S<br />
.<br />
LANG SERIES-<br />
SERIES+<br />
0<br />
<strong>PROGRAMMER</strong><br />
6F22<br />
7<br />
Fig. 2 - <strong>PS</strong> Programmer<br />
1- Infrared emitter/receiver<br />
2- Screen<br />
3- Keyboard<br />
F Function selection<br />
T Transmission of the data selected on the screen<br />
t Left cursor<br />
u Right cursor<br />
p Up cursor<br />
q Down cursor<br />
0..9 Number keys to enter data<br />
COPY Transmission of all the data in the series<br />
READ Reading of all the data in the series<br />
C/S To shift between standars and S band channels<br />
SERIE+ Selection of the series to be programmed<br />
SERIE- Selection of the series to be programmed<br />
OFF Switched off<br />
RESET Unused<br />
4- Updating cable connector<br />
5- Battery cover<br />
6- Battery<br />
7- Installation and programming manuals
<strong>PS</strong> Programmer<br />
ENG - 13<br />
5.1 Basic functions<br />
The basic functions will be indicated by their name over the programmer.<br />
It is selected by pressing the F key followed by the function key.The<br />
display will show Function:.<br />
Function:<br />
F<br />
+<br />
COPY<br />
T<br />
Copy...<br />
Fig. 3 - Example of a basic function<br />
5.2 Functions of each series<br />
They are selected by pressing the q or p key.<br />
Output channel<br />
I UK SM8 C 3<br />
q<br />
Audio:<br />
Stereo<br />
q<br />
q<br />
q<br />
q<br />
Audio level<br />
••••<br />
q<br />
q<br />
Table channels<br />
I UK SM8<br />
q<br />
SERIE 912 - MS<br />
Fig. 4 - Example of a series function<br />
6. COMMUNICATION WITH THE EQUIPMENT<br />
A <strong>PS</strong> programmer communicates with the equipment bidirectionally, using<br />
infrared rays. No cable is required for connecting the <strong>PS</strong> programmer to<br />
the equipment modules.<br />
7. UPDATING THE <strong>PROGRAMMER</strong><br />
It is possible to update the <strong>PS</strong> programmer, so that newer series of<br />
equipment can be programmed with it. Visit <strong>Alcad</strong>'s web for<br />
downloading the programmer updating software and instructions:
14 - ENG Installation and programming manual<br />
www.alcad.net<br />
If you do not have a connection to the Internet, feel free to request the<br />
updating software from your local <strong>Alcad</strong> Dealer or Representative or from<br />
<strong>Alcad</strong>.<br />
Updating the programmer is done with a PC. To connect the <strong>PS</strong><br />
programmer to the PC, you will need a communications cable CU-001<br />
(Cod. 9120003).<br />
WARNING: The communications cable has to be connected to serial<br />
port COM1 or COM2 of the PC. Connecting the cable to the computer's<br />
USB will not permit any attempt to update the <strong>PS</strong> programmer.
Sommarire<br />
FRA - 15<br />
SOMMAIRE<br />
PROGRAMMATEUR <strong>PS</strong><br />
1 MISE EN MARCHE ET EXTINCTION..........................................17<br />
2 SELECTION DE LA LANGUE .....................................................17<br />
3 SELECTION DE LA SERIE PRODUIT A <strong>PROGRAMMER</strong> .................17<br />
4 REMPLACEMENT DE LA PILE.....................................................17<br />
5 DESCRIPTION .........................................................................18<br />
6 COMMUNICATION AVEC L'EQUIPEMENT ................................19<br />
7 ACTUALISATION DU PROGRAMMATEUR ..................................20
16 - FRA Manuel d’installation et programmation
Programmateur <strong>PS</strong><br />
FRA - 17<br />
PROGRAMMATEUR <strong>PS</strong><br />
1. MISE EN MARCHE ET EXTINCTION<br />
Si le programmateur est neuf, introduisez la pile. Le programmateur<br />
s'allume en appuyant sur n'importe quelle touche. Pour l'éteindre,<br />
enfoncez la touche OFF.<br />
Lorsque vous allumez le programmateur, celui-ci vous indiquera le numéro<br />
de sa version durant 2 secondes.<br />
Le programmateur s'éteint automatiquement 3 minutes après sa dernière<br />
utilisation. Lors d'une nouvelle mise sous tension, vous retrouvez la<br />
dernière fonction sélectionnée.<br />
2. SELECTION DE LA LANGUE<br />
Après sa mise en marche, le programmateur attendra la sélection de la<br />
série à programmer, L'écran indiquera SERIE 912 ou une autre série,<br />
appuyez sur la touche q.<br />
Appuyez sur la touche F suivie de LANG. pour sélectionner la langue de<br />
travail avec les touches t et u. puis q pour confirmer la langue<br />
choisie.<br />
3. SELECTION DE LA SERIE PRODUIT A <strong>PROGRAMMER</strong><br />
Appuyez sur les touches F puis SERIE+ pour sélectionner la série produit<br />
ALCAD à programmer, l'écran indiquera SERIE 912 - US ou<br />
SERIE 912 - MS. Appuyez sur les touches t et u jusqu'à pouvoir<br />
sélectionner la série désirée et appuyez sur q pour confirmer.<br />
4. REMPLACEMENT DE LA PILE<br />
Le programmateur <strong>PS</strong> fonctionne avec une pile alcaline de 9V type 6F22.<br />
Quand la pile est usée, un message apparaîtra sur l'écran PILE USEE<br />
et le programmateur s'éteindra.<br />
1 2<br />
6F22<br />
Fig. 1 - Changement de pile
18 - FRA Manuel d’installation et programmation<br />
5. DESCRIPTION<br />
1 2 3 4<br />
5 6<br />
READ<br />
RESET<br />
1 2 3 ESC Off<br />
COPY<br />
4 5 6 F T<br />
<strong>PS</strong> <strong>PROGRAMMER</strong><br />
7 8 9 C/S<br />
.<br />
LANG SERIES-<br />
SERIES+<br />
0<br />
<strong>PROGRAMMER</strong><br />
6F22<br />
7<br />
Fig. 2 - Programmateur <strong>PS</strong><br />
1- Emetteur/récepteur à infrarouges<br />
2- Ecran<br />
3- Clavier<br />
F Sélection de fonction de base<br />
T Transmission des données sélectionnées sur l'écran<br />
t Curseur vers la gauche<br />
u Curseur vers la droite<br />
p Curseur vers la haut<br />
q Curseur vers la bas<br />
F+ Fonction suivante de la SERIE<br />
0..9 Touches numériques d'entrée de données<br />
COPY Transmission de toutes les données de la SERIE<br />
READ Lecture de toutes les données de la SERIE<br />
C/S Change entre canaux standard ou bande S<br />
SERIE+ Sélection de la SERIE à programmer<br />
SERIE- Sélection de la SERIE à programmer<br />
OFF Extinction<br />
RESET Non utilisée<br />
4- Connecteur pour câble de mise à jour<br />
5- Couvercle du boîtier de la pile<br />
6- Pile<br />
7- Manuel d'installation et de programmation
Programmateur <strong>PS</strong><br />
FRA - 19<br />
5.1 Fonctions de base<br />
Les fonctions base sont indiquées par leur nom sur la télécommande. Elles<br />
se sélectionnent en appuyant sur la touche F, l'écran indiquera alors<br />
Fonction en attendant que l'on appuie sur la touche de fonction<br />
choisie.<br />
Fonction:<br />
F<br />
+<br />
COPY<br />
T<br />
Copier ...<br />
Fig. 3 - Exemple de fonction de base<br />
5.2 Fonctions par séries<br />
Elles se sélectionnent en appuyant sur la touche q ou p.<br />
Canal de sortie<br />
L FRANCE C12<br />
q<br />
q<br />
Audio:<br />
Stereo<br />
q<br />
q<br />
q<br />
Niveau audio<br />
••••<br />
q<br />
q<br />
Tableau canaux<br />
B/G CCIR<br />
q<br />
SERIE 912 - MS<br />
Fig. 4 - Exemple de fonction par série<br />
6. COMMUNICATION AVEC L'EQUIPEMENT<br />
Le programmateur <strong>PS</strong> communique avec l'équipement en mode<br />
bidirectionnnel via un signal infrarouge.<br />
Aucun besoin de câble pour connecter le programmateur <strong>PS</strong> aux modules<br />
de l'équipement.
20 - FRA Manuel d’installation et programmation<br />
7. ACTUALISATION DU PROGRAMMATEUR<br />
Il est possible d'actualiser le programmateur <strong>PS</strong>, de cette façon, il servira<br />
à la programmation de nouvelles séries d'équipement. Vous pouvez nous<br />
consulter sur notre web <strong>Alcad</strong>, pour télécharger les programmes et les<br />
instructions nécessaires à cette actualisation:<br />
www.alcad.net<br />
Si vous ne disposer pas de connexion Internet vous pouvez prendre<br />
contact avec les distributeurs ou représentants <strong>Alcad</strong> ou directement<br />
avec <strong>Alcad</strong> pour demander les programmes d'actualisation.<br />
Le programmateur peut s'actualiser via un ordinateur PC, pour connecter<br />
le programmateur <strong>PS</strong> au PC il est nécessaire d'utiliser le câble de<br />
communication CU-001 (cod.9120003).<br />
ATTENTION: Le câble de connexion doit être connecté a un des ports<br />
série de l'ordinateur COM1 ou CPM2. Si vous le connecter au port USB<br />
de l'ordinateur l'actualisation ne se fera pas.
Índice<br />
POR - 21<br />
ÍNDICE<br />
PROGRAMADOR <strong>PS</strong><br />
1 LIGAR E DESLIGAR ..................................................................23<br />
2 SELECÇAO DO IDIOMA ..........................................................23<br />
3 SELECÇAO DA SÉRIE...............................................................23<br />
4 TROCA DA PILHA....................................................................23<br />
5 DESCRIÇÃO ...........................................................................24<br />
6 COMUNICAÇÃO COM OS EQUIPAMENTOS...........................25<br />
7 ACTUALIZAÇÃO DO PROGRAMADOR .....................................26
22 - POR Manual de instalação e programação
Programador <strong>PS</strong><br />
POR - 23<br />
PROGRAMADOR <strong>PS</strong><br />
1. LIGAR E DESLIGAR<br />
Caso de que o programador seja novo, introduzir a pilha. O<br />
programador liga ao apertar qualquer tecla. Para desligar é só apertar<br />
a tecla OFF.<br />
Quando ligua o programador, aparecerá o número da versão durante 2<br />
segundos.<br />
O programador desliga de forma automática 3 minutos depois de<br />
pressionar a última tecla. Quando o acenda de novo, encontrar-se-á na<br />
última função seleccionada.<br />
2. SELECÇAO DO IDIOMA<br />
Uma vez ligado, o programador ficará a esperar a selecçao da série a<br />
ser programada, o écran indicará SERIE 912-TP ou outra serie,<br />
aperte la tecla q.<br />
Aperte a tecla F e a seguir LANG. e seleccione o idioma com as teclas<br />
t e u. Pressione q para verificar.<br />
3. SELECÇAO DA SÉRIE<br />
Pressione a tecla F seguida de SERIE+ a fim de pôr o programador no<br />
modo de selecçao da série para programar, o écran indicará SERIE<br />
912-TP ou outra serie. as teclas t e u até seleccionar a série<br />
desejada e pressione q para verificar.<br />
4. TROCA DA PILHA<br />
O programador <strong>PS</strong> funciona com uma pilha alcalina de 9V tipo 6F22.<br />
Quando a pilha esgotar, aparecerá uma mensagem a indicar PILHA<br />
ESGOTADA e o programador desligará.<br />
1 2<br />
6F22<br />
Fig. 1 - Troca de pilha
24 - POR Manual de instalação e programação<br />
5. DESCRIÇÃO<br />
1 2 3 4<br />
5 6<br />
READ<br />
RESET<br />
1 2 3 ESC Off<br />
COPY<br />
4 5 6 F T<br />
<strong>PS</strong> <strong>PROGRAMMER</strong><br />
7 8 9 C/S<br />
.<br />
LANG SERIES-<br />
SERIES+<br />
0<br />
<strong>PROGRAMMER</strong><br />
6F22<br />
7<br />
Fig. 2 - Programador <strong>PS</strong><br />
1- Emissor/receptor de raios infravermelhos<br />
2- Écrã<br />
3- Teclado<br />
F Selecçao de função básica<br />
T Transmissão do dado seleccionado no écrã<br />
t Cursor esquerdo<br />
u Cursor direito<br />
p Cursor acima<br />
q Cursor baixo<br />
0..9 Botões numéricos para entrada de dados<br />
COPY Transmissão de todos os dados da SÉRIE<br />
READ Leitura de todos os dados da SÉRIE<br />
C/S Muda entre canais standard ou banda S<br />
SERIE+ Selecçao da série a programar<br />
SERIE- Selecçao da série a programar<br />
OFF Desligado<br />
RESET Não utilizada<br />
4- Conector para o cabo de actualização<br />
5- Tampa da pilha<br />
6- Pilha<br />
7- Manual para instalação e programação
Programador <strong>PS</strong><br />
POR - 25<br />
5.1 Funções básicas<br />
As funções básicas vêm indicadas pelo seu nome sobre a portada do<br />
programador. Para seleccionar ditas funções é só pressionar o botão F.<br />
O écran indicará Func,a ~ o:, indicando que aguarda que seja<br />
pressionado o botão de função .<br />
Função:<br />
F<br />
+<br />
COPY<br />
T<br />
Copiar...<br />
Fig. 3 - Exemplo de função básica<br />
5.2 Funções de cada série<br />
São seleccionadas pressionando o botão q ou p<br />
Canale d'uscita<br />
B/G CCIR C21<br />
q<br />
q<br />
Audio:<br />
Estereo<br />
q<br />
q<br />
q<br />
Livello di audio<br />
••••<br />
q<br />
q<br />
Tabella canali<br />
B/G CCIR<br />
q<br />
SERIE 912 - MS<br />
Fig. 4 - Exemplo de função de série<br />
6. COMUNICACIÓN CON LOS EQUIPOS<br />
O programador <strong>PS</strong> comunica com os equipamentos de forma<br />
bidireccional mediante infravermelhos.<br />
Não é necessário qualquer cabo para conectar o programador <strong>PS</strong> aos<br />
módulos do equipamento.
26 - POR Manual de instalação e programação<br />
7. ACTUALIZACIÓN DEL PROGRAMADOR<br />
É possivel actualizar o programador <strong>PS</strong>, deste modo servirá para<br />
programar novas séries de equipamentos. Consulte no site <strong>Alcad</strong> como<br />
descarregar os programas e instruções necessárias para actualizar o<br />
programador:<br />
www.alcad.net<br />
Se não dispòe de una ligação à Internet, pode contactar qualquer<br />
Distribuidor <strong>Alcad</strong> ou contactar a <strong>Alcad</strong> para pedir os programas de<br />
actualização.<br />
O programador actualiza-se com um computador PC. Para conectar o<br />
programador <strong>PS</strong> ao PC é necessário utilizar o cabo de comunicação CU-<br />
001 (Cod. 9120003).<br />
ATENÇÃO: O cabo de comunicação debe conectar-se a um dos portos<br />
série do computador COM1 ou COM2. Se se conecta ao porto USB do<br />
computador não se poderá actualizar o programador <strong>PS</strong>.
Inhaltsverzeichnis<br />
DEU - 27<br />
INHALTSVERZEICHNIS<br />
<strong>PS</strong> PROGRAMMIERER<br />
1 EIN- UND AUSSCHALTEN ........................................................29<br />
2 SPRACHENAUSWAHL ............................................................29<br />
3 SERIENAUSWAHL ...................................................................29<br />
4 BATTERIEWECHSEL..................................................................29<br />
5 BESCHREIBUNG .....................................................................30<br />
6 KOMMUNIKATION MIT DEN GERÄTEN....................................31<br />
7 AKTUALISIERUNG DES PROGRAMMIERERS ...............................31
28 - DEU Installations - Und programmierungshandbuch
<strong>PS</strong> Programmierer<br />
DEU - 29<br />
<strong>PS</strong> PROGRAMMIERER<br />
1. EIN - UND AUSSCHALTEN<br />
Wenn der Programmierer neu ist, setzen Sie die Batterie ein. Durch das<br />
Drücken einer Taste schaltet der Programmierer ein. Um ihn<br />
auszuschalten, drücken Sie auf Taste OFF.<br />
Beim Einschalten weist der Programmierer 2 Sekunden lang die Nummer<br />
der entsprechenden Version auf.<br />
Der Programmierer schaltet automatisch ab, wenn 3 Minuten lang keine<br />
Taste gedrückt wird. Beim Wiedereinschalten geht das Gerät auf die<br />
zuletzt gewählte Funktion.<br />
2. SPRACHENAUSWAHL<br />
Nachdem angeschaltet wird, wartet der Programmierer auf die zu<br />
programmierende Serie, wobei Auf der Anzeige erscheint SERIE<br />
912-TP oder eine andere Serie. Drücken sie auf Taste q.<br />
Drücken Sie auf Taste F, darauffolgend geben Sie LANG. ein und<br />
wählen Sie die Sprache mit den Tasten t oder u aus. Drücken Sie auf<br />
q zur Bestätigung.<br />
3. SERIENAUSWAHL<br />
Drücken Sie auf Taste F und dann auf SERIE+, um die Auswahl der zu<br />
programmierenden Serie am Programmierer anzusteuern. Auf der<br />
Anzeige erscheint SERIE 912-TP oder eine andere Serie. Drücken<br />
Sie auf die Tasten t oder u bis die gewünschte Serie gewählt ist und<br />
drücken Sie dann auf q zur Bestätigung.<br />
4. BATTERIEWECHSEL<br />
Der <strong>PS</strong> Programmierer funktioniert mit einer 9V alkalinen Batterie, Typ<br />
6F22. Wenn die Batterie zu Ende geht erscheint eine Meldung mit dem<br />
Text BATTERIE AUS und der Programmierer schaltet ab.<br />
1 2<br />
6F22<br />
Abb. 1 - Batteriewechsel
30 - DEU Installations - Und programmierungshandbuch<br />
5. BESCHREIBUNG<br />
1 2 3 4<br />
5 6<br />
READ<br />
RESET<br />
1 2 3 ESC Off<br />
COPY<br />
4 5 6 F T<br />
<strong>PS</strong> <strong>PROGRAMMER</strong><br />
7 8 9 C/S<br />
.<br />
LANG SERIES-<br />
SERIES+<br />
0<br />
<strong>PROGRAMMER</strong><br />
6F22<br />
7<br />
Abb. 2 - Programmierer <strong>PS</strong><br />
1- Sender/Empfänger von Infrarotstrahlen<br />
2- Display<br />
3- Tastatur<br />
F Auswahl der Basis-Funktion<br />
T Übertragung der auf dem Bildschirm ausgewählten Eingabe<br />
t Cursor links<br />
u Cursor rechts<br />
p Cursor oben<br />
q Cursor unten<br />
0..9 Nummerntasten zur Dateneingabe<br />
COPY Übertragung aller Daten der SERIE<br />
READ Lesen aller Daten der SERIE<br />
C/S Um zwischen Standard und S-Bandkanäle zu wechseln<br />
SERIE+ Auswahl der zu programmierenden Serie<br />
SERIE- Auswahl der zu programmierenden Serie<br />
OFF Ausgeschaltet<br />
RESET Unbenutzt<br />
4- Stecker für das Aktualisierungskabel<br />
5- Batteriedeckel<br />
6- Batterie<br />
7- Installations- und Programmierungshandbuch
<strong>PS</strong> Programmierer<br />
DEU - 31<br />
5.1 Basisfunktionen<br />
Die Namen der Basisfunktionen werden auf dem Schild am<br />
Programmierer vermerkt. Die Selektion dieser Funktionen erfolgt durch<br />
Drücken der Taste F. Auf der Anzeige erscheint Funktion:, daß das<br />
Drücken einer Funktionstaste erwartet wird.<br />
Funktion:<br />
F<br />
+<br />
COPY<br />
T<br />
Kopieren...<br />
Abb. 3 - Beispiel einer Basisfunktion<br />
5.2 Funktionen jeder Serie<br />
Diese werden durch Drücken der Taste q oder p angesteuert.<br />
Ausgang Kanale<br />
B/G CCIR C21<br />
q<br />
q<br />
Audio:<br />
Stereo<br />
q<br />
q<br />
q<br />
Audiopegel<br />
••••<br />
q<br />
q<br />
Kanaltabelle<br />
B/G CCIR<br />
q<br />
SERIE 912 - MS<br />
Abb. 4 - Beispiel einer Serienfunktion<br />
6. KOMMUNIKATION MIT DEN GERÄTEN<br />
Der Programmierer <strong>PS</strong> kommuniziert mit den Geräten in beide Richtungen<br />
anhand von Infrarotstrahlen. Es ist kein Kabel erforderlich um den<br />
Programmierer <strong>PS</strong> an die Module der Geräte anzuschliessen.<br />
7. AKTUALISIERUNG DES PROGRAMMIERERS<br />
Der Programmierer <strong>PS</strong> kann aktualisiert werden, so dass er auch zum<br />
Programmieren neuer Geräteserien verwendet werden kann. Auf der
32 - DEU Installations - Und programmierungshandbuch<br />
Web-Site von <strong>Alcad</strong> finden Sie Hinweise zum Herunterladen der<br />
Programme und der erforderlichen Anleitungen zum Aktualisieren des<br />
Programmierers.<br />
www.alcad.net<br />
Wenn Sie über keinen Internet-Anschluss verfügen, dann setzen Sie sich<br />
bitte mit den <strong>Alcad</strong> Vertriebshändlern oder Vertretern oder direkt mit<br />
<strong>Alcad</strong> in Verbindung, um die Aktualisierungsprogramme in einer CD<br />
anzufordern. Sie können den Programmierer auch zum Aktualisieren an<br />
<strong>Alcad</strong> einsenden. Die Berechnung hierfür erfolgt je nach gültigem Tarif.<br />
Der Programmierer wird von einem PC aus aktualisiert. Für den Anschluss<br />
des Programmierers <strong>PS</strong> an den PC benutzen Sie bitte das<br />
Verbindungskabel CU-001 (Code 9120003) .<br />
ACHTUNG: Das Verbindungskabel muss an einen der Serien-Ports<br />
COM1 oder COM2 angeschlossen werden. Der Programmierer <strong>PS</strong> kann<br />
nicht aktualisiert werden, wenn er an den USB-Port des Rechners<br />
angeschlossen wird.
Indice<br />
ITA - 33<br />
INDICE<br />
PROGRAMMATORE <strong>PS</strong><br />
1 ACCENSIONE E SPEGNIMENTO .............................................35<br />
2 SELEZIONE DELLA LINGUA ......................................................35<br />
3 SELEZIONE DELLA SERIE ..........................................................35<br />
4 CAMBIO DELLA PILA................................................................35<br />
5 DESCRIZIONE.........................................................................36<br />
6 COMUNICAZIONE CON GLI IMPIANTI....................................37<br />
7 AGGIORNAMENTO DEL PROGRAMMATORE............................37
34 - ITA Manuale di installazione e programmazione
Programmatore <strong>PS</strong><br />
ITA - 35<br />
PROGRAMMATORE <strong>PS</strong><br />
1. ACCENSIONE E SPEGNIMENTO<br />
Se il programmatore è nuovo metta la pila. Il programmatore si accende<br />
battendo qualunque tasto. Per spengerlo pulsi il tasto OFF.<br />
Quando si accende il programmatore indicherà il numero di versione<br />
durante 2 secondi.<br />
Il programmatore si spenge automaticamente 3 minuti dopo aver battuto<br />
l'ultimo tasto. Al riaccenderlo, si troverà nell'ultima funzione selezionata.<br />
2. SELEZIONE DELLA LINGUA<br />
All’accensione, il programmatore attende la selezione della serie da<br />
programmare, lo schermo indicherà SERIE 912-TP o un'altra serie,<br />
premere il tasto q.<br />
Premere il tasto F seguito da LANG. e selezionare la lingua con i tasti t<br />
e u. Premere q per confermare.<br />
3. SELEZIONE DELLA SERIE<br />
Premere il tasto F seguito da SERIE+ per mettere il programmatore in<br />
selezione della serie da programmare, lo schermo indicherà SERIE<br />
912-TP o un'altra serie. Premere i tasti t e u fino a selezionare la<br />
serie desiderata e batta q per confermare.<br />
4. CAMBIO DELLA PILA<br />
Il programmatore <strong>PS</strong> funziona con una pila alcalina di 9V tipo 6F22.<br />
Quando la pila si esaurita, apparirà un messaggio indicando PILA<br />
ESAURITA ed il programmatore si spengerà.<br />
1 2<br />
6F22<br />
Fig. 1 - Cambio di pila
36 - ITA Manuale di installazione e programmazione<br />
5. DESCRIZIONE<br />
1 2 3 4<br />
5 6<br />
READ<br />
RESET<br />
1 2 3 ESC Off<br />
COPY<br />
4 5 6 F T<br />
<strong>PS</strong> <strong>PROGRAMMER</strong><br />
7 8 9 C/S<br />
.<br />
LANG SERIES-<br />
SERIES+<br />
0<br />
<strong>PROGRAMMER</strong><br />
6F22<br />
7<br />
Fig.2 - Programmatore <strong>PS</strong><br />
1- Emitente/ricevente di infrarossi<br />
2- Schermo<br />
3- Tastiera<br />
F Selezione di funzione basica<br />
T Trasmissione del dato selezionato sullo schermo<br />
t Cursore sinistra<br />
u Cursore destra<br />
p Cursore su<br />
q Cursore giù<br />
0..9 Tastiera numerica d'entrada di dati<br />
COPY Trasmissione di tutti i dati della serie<br />
READ Lettura di tutti i dati della serie<br />
C/S Per cambiare fra canali standard o banda S<br />
SERIE+ Selezione della serie da programmare<br />
SERIE- Selezione della serie da programmare<br />
OFF Spento<br />
RESET Non utilizzata<br />
4- Connettore per il cavo di aggiornamento<br />
5- Coperchio della pila<br />
6- Pila<br />
7- Manuale di installazione e programmazione
Programmatore <strong>PS</strong><br />
ITA - 37<br />
5.1 Funzioni basiche<br />
Le funzioni basiche sono indicate con il loro nome sulla tastiera del<br />
programmatore. Si selezionano battendo il tasto F Lo schermo indicherà<br />
Funzione: che sta aspettando che si batta il tasto di funzione.<br />
Funzione:<br />
F<br />
+<br />
COPY<br />
T<br />
Copiare...<br />
Fig. 3 - Esempio di funzione basica<br />
5.2 Funzioni di ogni serie<br />
Si selezionano battendo il tasto q o p.<br />
Canale d'uscita<br />
B/G CCIR C21<br />
q<br />
q<br />
Audio:<br />
Estereo<br />
q<br />
q<br />
q<br />
Livello di audio<br />
••••<br />
q<br />
q<br />
Tabella canali<br />
B/G CCIR<br />
q<br />
SERIE 912 - MS<br />
Fig. 4 - Esempio di funzione di serie<br />
6. COMUNICACIÓN CON LOS EQUIPOS<br />
Il programmatore <strong>PS</strong> comunica con gli impianti in modo bidirezionale,<br />
mediante infrarossi. Non vi è bisogno di nessun cavo per collegare il<br />
programmatore <strong>PS</strong> ai moduli degli impianti.<br />
7. ACTUALIZACIÓN DEL PROGRAMADOR<br />
È possibile aggiornare il programmatore <strong>PS</strong>, in tal modo servirà per<br />
programmare nuove serie di impianti. Consulti nel web di <strong>Alcad</strong> come
38 - ITA Manuale di installazione e programmazione<br />
scaricare i programmi e le istruzioni necessarie per aggiornare il<br />
programmatore:<br />
www.alcad.net<br />
Se non dispone di una connessione a Internet, si può mettere in contatto<br />
con i Distributori o con i Rappresentanti della <strong>Alcad</strong> per richiedere i<br />
programmi di aggiornamento.<br />
Il programmatore si aggiorna da un computer PC, per collegare il<br />
programmatore <strong>PS</strong> al PC si rende necessario utilizzare il cavo di<br />
comunicazione CU-001 (cod. 9120003).<br />
ATTENZIONE: Il cavo di comunicazione si deve collegare ad uno dei<br />
porti serie del computer COM1 o COM2. Se si collega al porto USB del<br />
computer non sarà possibile aggiornare il programmatore <strong>PS</strong>.
DECLARATION OF CONFORMITY<br />
according to EN 45014<br />
Manufacturer's Name:<br />
ALCAD, S.A.<br />
Manufacturer's Address: Pol. Ind. Arreche-Ugalde, 1<br />
Apdo. 455<br />
20305 IRUN (Guipúzcoa)<br />
SPAIN<br />
declares that the product<br />
Product Name:<br />
<strong>PS</strong> <strong>PROGRAMMER</strong><br />
Model Number(s): <strong>PS</strong>-003<br />
Product Option(s):<br />
is in conformity with:<br />
INCLUDING ALL OPTIONS<br />
EMC:<br />
EN 50081-1, EN 50082-1 Electromagnetic Compatibility for Equipment<br />
IEC 61000-4-2:1995 / EN 50082-1:1997 ESD 8KV AD, 4KV CD.<br />
Supplementary Information:<br />
The product herewith complies with the requirements of the Low Voltage Directive<br />
73/23/ECC and the EMC Directive 89/336/EEC and their relevant<br />
amendments, gathered under the directives 93/68/EEC.<br />
Note:<br />
to comply with these directives, do not use the products without covers and operate<br />
the system as specified.<br />
Irún, 25-10-02<br />
Date<br />
Antton Galarza / General Manager<br />
Cod. 26288 - Rev. 01<br />
ALCAD, S.A.<br />
Tel. 943 63 96 60<br />
Fax 943 63 92 66<br />
Int. Tel. +34 - 943 63 96 60<br />
info@alcad.net<br />
Apdo. 455 - C/EZURRIKI, 1<br />
20305 IRUN - Spain<br />
Tel. 21 - 716 10 36<br />
Fax 21 - 716 41 09<br />
R. Dr. JOAQUIM MANSO, 12A<br />
1500 LISBOA - Portugal<br />
Tel. 00 34 - 943 63 96 60<br />
Fax 00 34 - 943 63 92 66<br />
B.P. 284<br />
64702 HENDAYE - France<br />
Tel. 080 38 - 91 73<br />
Fax 080 38 - 91 74<br />
HOLZHAUSEN, 11<br />
83556 GRIESSTATT - Deutschland