SW65 PARTS LIST - Ibanez
SW65 PARTS LIST - Ibanez
SW65 PARTS LIST - Ibanez
Create successful ePaper yourself
Turn your PDF publications into a flip-book with our unique Google optimized e-Paper software.
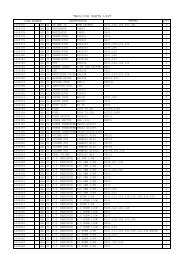
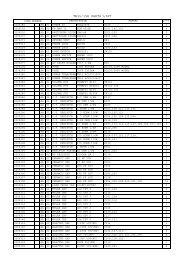
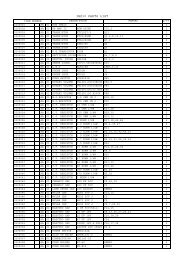
<strong>SW65</strong> <strong>PARTS</strong> <strong>LIST</strong><br />
ITEM NUMBER DESCRIPTION<br />
REMARK Q'TY<br />
32S01832 B5 01 PCB ASSY <strong>SW65</strong> <strong>SW65</strong> 1<br />
32S00004 B5 01 CF RESISTOR 100 RCF010103JUH R316,317 2<br />
32S00005 B5 01 CF RESISTOR 220 RCF022103JUH R103 1<br />
32S01656 B5 01 CF RESISTOR 270 RCF027103JUH R302,304 2<br />
32S01657 B5 01 CF RESISTOR 330 RCF033103JUH R309,315 2<br />
32S01518 B5 01 CF RESISTOR 470 RCF047103JUH R151,308 2<br />
32S01838 B5 01 CF RESISTOR 750 RCF075103JUH R104 1<br />
32S00006 B5 01 CF RESISTOR 1K RCF010203JUH R101,105,108,136,310,312,326,327 8<br />
32S00508 B5 01 CF RESISTOR 1.5K RCF015203JUH R145,313 2<br />
32S01661 B5 01 CF RESISTOR 1.6K RCF016203JUH R307 1<br />
32S00007 B5 01 CF RESISTOR 2.2K RCF022203JUH R117,120,123,124,128,133 6<br />
32S00008 B5 01 CF RESISTOR 2.7K RCF027203JUH R113,114 2<br />
32S00011 B5 01 CF RESISTOR 4.7K RCF047203JUH R106,127,134,135,147,150 6<br />
32S01665 B5 01 CF RESISTOR 6.2K RCF062203JUH R325,328 2<br />
32S00133 B5 01 CF RESISTOR 6.8K RCF068203JUH R109,110 2<br />
32S00012 B5 01 CF RESISTOR 7.5K RCF075203JUH R107 1<br />
32S00013 B5 01 CF RESISTOR 10K RCF010303JUH<br />
R112,118,121,139,141<br />
R148,301,303,305,311 10<br />
32S00135 B5 01 CF RESISTOR 15K RCF015303JUH R111,115,122,131,132, 5<br />
32S00014 B5 01 CF RESISTOR 22K RCF022303JUH R107,146,403,405 3<br />
32S01851 B5 01 CF RESISTOR 43K RCF043303JUH R314 1<br />
32S00017 B5 01 CF RESISTOR 47K RCF047303JUH R138, 306 2<br />
32S01528 B5 01 CF RESISTOR 51K RCF051303JUH R144 1<br />
32S00020 B5 01 CF RESISTOR 100K RCF010403JUH R125,126,129,130,137 5<br />
32S00252 B5 01 CF RESISTOR 220K RCF022403JUH R116,119,143 3<br />
32S00021 B5 01 CF RESISTOR 470K RCF047403JUH R149 1<br />
32S00022 B5 01 CF RESISTOR 1M RCF010503JUH R102,140,142,404 4<br />
32S01678 B5 01 CF RESISTOR 220 RCF022105JSH R318,319 2<br />
32S01679 B5 01 CRMC RESISTR0.33 RCM0R3350JSH R320,321 2<br />
32S01680 B5 01 MOF RESISTOR 10 RMO010020JSH R322,323 2<br />
32S01861 B5 01 MOF RESISTOR 220 RMO022120JFH R324 1<br />
32S00946 B5 01 MOF RESISTOR 470 RMO047120JFH R401,402 2<br />
32S01683 B5 01 CERAMIC CAP 27PF CCR270D05KSC C304 1<br />
32S00411 B5 01 CERAMIC CAP 33PF CCR330D05KSC C111 1<br />
32S00278 B5 01 CERAMIC CAP 47PF CCR470D05KSC C302 1<br />
32S00043 B5 01 CERAMIC CAP 220P CCR221D05KEC C106,116 2<br />
32S01380 B5 01 CERAMIC CAP 330P CCR331D05KEC C112,117 2<br />
32S00150 B5 01 POLY CAP 0.001UF CPF102D10KGR C104,124 1<br />
32S00402 B5 01 POLY CAP 0.0027U CPF272D10KGR C115 1<br />
32S01557 B5 01 POLY CAP 0.0033U CPF332D10KGR C114 1<br />
32S00403 B5 01 POLY CAP 0.0047U CPF472D10KGR C101 1<br />
32S00151 B5 01 POLY CAP 0.01UF CPF103D10KGR C110,125,126 3<br />
32S00786 B5 01 POLY CAP 0.022UF CPF223D10KGR C120,122 2<br />
32S00409 B5 01 POLY CAP 0.033UF CPF333D10KGR C108,109 2<br />
32S00039 B5 01 POLY CAP 0.047UF CPF473D10KGR C113,305,308 3<br />
32S00041 B5 01 POLY CAP 0.1UF CPF104D10KGR<br />
C128,129,402,403,408,409,410C411,412,<br />
413,414,415 12<br />
32S00153 B5 01 POLY CAP 0.22UF CPF224D10KGR C102 1<br />
32S00025 B5 01 JUMPPER 7.5MM JPW060XXX075 J102,103,104,109,110,111,J301,302,405 9<br />
32S00026 B5 01 JUMPPER 10MM JPW060XXX100<br />
J105,106,107,108,112,113,114,115J116,<br />
117,118,119,303,310,404 15<br />
32S00526 B5 01 JUMPPER 12.5MM JPW060XXX125 J101,306,401,406 4<br />
32S00027 B5 01 JUMPPER 15MM JPW060XXX150 J304,305 2<br />
32S00958 B5 01 JUMPPER 17.5MM JPW060XXX175 J309 1<br />
32S00261 B5 01 JUMPPER 20MM JPW060XXX200 J307,308,402,403 4<br />
32S00033 B5 01 EL CAP 10UF CAE106DMLRBC C127 1<br />
32S00034 B5 01 EL CAP 22UF CAE226DMLRBC C416 1<br />
32S01886 B5 01 EL CAP 100UF CAE107DMLRDD C406 407 2<br />
32S00591 B5 01 EL CAP 100UF CAE107FMLRDD C306,307 2
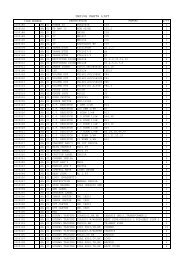
<strong>SW65</strong> <strong>PARTS</strong> <strong>LIST</strong><br />
ITEM NUMBER DESCRIPTION<br />
REMARK Q'TY<br />
32S01888 B5 01 EL CAP 3300UF CAE338FMLRIN C404 405 2<br />
32S00032 B5 01 EL CAP 1UF CAE105FMLRBC C105,C130 2<br />
32S00267 B5 01 EL CAP 2.2UF CAE225FMLRBC C119,C123 2<br />
32S00396 B5 01 EL CAP 3.3UF CAE335FMLRBC C107 1<br />
32S01712 B5 01 EL CAP 10UF CAE106FMLRCC C103,118,121,301,303 5<br />
32S00599 B5 01 Z. DIODE 1N4742A DZN12010H100 ZD403 1<br />
32S00046 B5 01 Z. DIODE 1N4744A DZN15010H100 ZD401,402 2<br />
32S00598 B5 01 DIODE 1N5402 DID1N5402RHD D401,402,403,404 4<br />
D101,102,301,302,303,304D305,306,405,<br />
32S00044 B5 01 DIODE 1N4148 DID1N4148DHB 406 10<br />
32S00054 B5 01 LED DIA3 LEDC030HDANA LED301,401 2<br />
32S01718 B5 01 LED WATER CLEAR LEDC050BLANA LED1 1<br />
32S00047 B5 01 TRANSISTOR TST2SA1015GS Q107,108 2<br />
32S01720 B5 01 TRANSISTOR TST2SA970XGS Q304 1<br />
32S00048 B5 01 TRANSISTOR TST2SC1815GS Q101,102,104,105,106 5<br />
32S01722 B5 01 TRANSISTOR TST2SC2240GS Q103,301,302,303,306 5<br />
32S00602 B5 01 TRANSISTOR BD139 TSTBD139XXNM Q305 1<br />
32S00604 B5 01 TRANSISTR TIP31C TSTTIP31CXNM Q307 1<br />
32S00605 B5 01 TRANSISTR TIP32C TSTTIP32CXNM Q309 1<br />
32S00609 B5 01 TRANSISTOR TST2SA1941OP Q310 1<br />
32S00608 B5 01 TRANSISTOR TST2SC5198OP Q308 1<br />
32S01908 B5 01 TRANSISTOR TST2N5401XYP Q312 1<br />
32S01909 B5 01 TRANSISTOR TST2N5551XYP Q311 1<br />
32S00800 B5 01 FET 2SK30AGR FET2SK30AXGW Q109 1<br />
32S00053 B5 01 IC NJM4558DD IGCN4558DDAO IC1,IC2 2<br />
32S01570 B5 01 IC CA3080E IGCCA3080EAO IC3 1<br />
32S01733 B5 01 PCB TERMINAL TMN5XXXXMZ52 OUT1,T-1 2<br />
32S01735 B5 01 AIR COIL 1.1UH IDT1R5N1A119 L1 1<br />
32S01574 B5 01 PUSH SWITCH LOCK SWP2ASO1NL01 K1<br />
JK101(INPUT),103(LINE<br />
1<br />
OUT),201(SEND),202(RETURN),203(SP<br />
32S00056 B5 01 DIA6.3 JACK MONO JKP6R3MOLA4N OUT) 5<br />
32S00057 B5 01 DIA6.3 JACK STRO JKP6R3STDA6O JK104 PHONE JACK 1<br />
32S01204 B5 01 RCA SOCKET 2P JKR1PCYVWGRD JK102 1<br />
32S00629 B5 01 TESTING PIN 2.3 TMN2XXXXMZ05 T-3 1<br />
32S01741 B5 01 VH CONNECTOR 3PL WAF2Y03SHH02 CN2 1<br />
32S00562 B5 01 XH CONNECTOR 3PL WAF2Y03SHH04 CN1 1<br />
32S01743 B5 01 CONNECTION WIRE HSNXH50CQ88J CN1-SCN1 3P 450mm GRAY 1<br />
32S01744 B5 01 WIRE BK 80MM ECWA220BB080 LED1- -- LED- 1<br />
32S01745 B5 01 WIRE BK 80MM ECWA222BB080 LED1+ -- LED+ 1<br />
32S01746 B5 01 HEATSINK TUBE10M PPTHST020110 2<br />
32S01926 B5 01 FUSE F4A/250V FUS520NFV040 F2 F3 2<br />
32S00623 B5 01 FUSE HOLDER FUC520PNNNND F2 F3 4<br />
32S01749 B5 01 VOLUME POT 1B100 VRRE1ECPK00A VR106 1<br />
32S00265 B5 01 VOLUME POT B10K VRRE1ECPB10A VR101 1<br />
32S00522 B5 01 VOLUME POT W20K VRRE1ECPW20C VR103,105 2<br />
32S00390 B5 01 VOLUME POT B50K VRRE1ECPB50C VR102,104 2<br />
32S01753 B5 01 SF VOLUME 470 SFR0505YA00A VR301 1<br />
32S01754 B5 01 SF VOLUME 5K SFR0505YA05A VR302 1<br />
32S01934 B5 01 250 CONNECT WIRE HSN25XX4402G OUT1-OUT2 440mm 1<br />
32S01935 B5 01 250 CONNECT WIRE HSN25XX4400G T-1—T-2 440mm BLACK 1<br />
32S01936 B5 01 HEATSINK HSK-54 HSKER4496054 60mm 1<br />
32S01215 B5 01 HEATSINK CLAMP SPTUSHBA75-5 BA-75-5 1<br />
32S00064 B5 01 TR INSLT PLATE PPTTWH203530 Q307,Q309 2<br />
32S00063 B5 01 MICA SHEET TO220 SPTMGATO220X Q305,Q307,309 3<br />
32S00626 B5 01 MICA SHEET SPTMGATO3PXX Q308,Q310 2<br />
32S01941 B5 01 WIRE CLAMP PPTCBESUST01 2<br />
32S01942 B5 01 SCREW BK M3 P0.5 MSRU30XR5068 L6 6<br />
32S00066 B5 01 SCREW M3 P0.5L10 MSRR30XR510B Q305,307,309 3<br />
32S00631 B5 01 SCREW M3 P0.5L12 MSRR30XR512B Q308,Q310 2
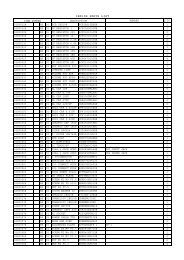
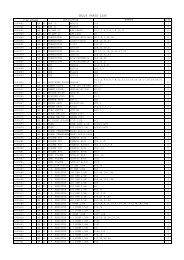
<strong>SW65</strong> <strong>PARTS</strong> <strong>LIST</strong><br />
ITEM NUMBER DESCRIPTION<br />
REMARK Q'TY<br />
32S00068 B5 01 TOOTH WASHER D3 WSRO0632R5WS Q305,308,310 3<br />
32S00012 B5 01 CF RESISTOR 7.5K RCF075203JUH R107 1<br />
32S01947 B5 01 CHASSIS <strong>SW65</strong> STC<strong>SW65</strong>XXXZB 1<br />
32S01948 B5 01 TRANSFORMER 100V TRM<strong>SW65</strong>XXXX0 1<br />
32S01949 B5 01 TRANSFORMER 120V TRM<strong>SW65</strong>XXXXL 1<br />
32S01950 B5 01 TRANSFORMER 230V TRM<strong>SW65</strong>XXXX3 1<br />
32S01951 B5 01 TRANSFORMER 240V TRM<strong>SW65</strong>XXXX4 1<br />
32S01595 B5 01 POWER SWITCH SWRYBBL6NQ1F 4PIN 1<br />
32S00074 B5 01 AC SOCKET ACS3QKPUM102 1<br />
32S01774 B5 01 LED HOLDER PPTLDA647178 DIA5 1<br />
32S01747 B5 01 FUSE F3.15A/250V FUS520NFVO31 F1 100V/120V 2<br />
32S01956 B5 01 FUSE T1.6A/250V FUS520NSVO16 F1 230V/240V 2<br />
32S00073 B5 01 CERAMIC CAP0.01U CCR103A40ZYS 1<br />
32S00076 B5 01 KNOB RKN-20BK RKNBKWH18R20 6<br />
32S01958 B5 01 PUSH SWITCH PKNS090711BE BLACK 1<br />
32S00459 B5 01 SCREW M3 P0.5 L6 MSRU30XR506B L6 6<br />
32S01960 B5 01 SCREW BK M4 P0.7 MSRR40XR710B L10 4<br />
32S00080 B5 01 SCREW NI M4 P0.7 MSRU40XR712N L12 1<br />
32S01604 B5 01 TAP SCREW 3X8 TSRR30X08WDN 1<br />
32S00084 B5 01 TOOTH WASHER D4 WSRO0844R5WS 2<br />
32S00086 B5 01 WASHER10DX4.2DX1 WSRF104210WS 1<br />
32S00078 B5 01 SOLDERING PLATE SPTSDPXXTP-1 TP-1 1<br />
32S00083 B5 01 NUT M4 P0.7 NUTM40XPR7HS 2<br />
32S00087 B5 01 CABLE TIE PPTCBTN08025 80mm 5<br />
32S01792 B5 01 TRANS COVER SPTTFESW35-3 1<br />
32S01250 B5 01 PCB SPACER SPTBSS5XM315 L15 1<br />
32S01970 B5 01 LABEL GND LABWHBKAG001 1<br />
32S01971 B5 01 187 CONNECT WIRE HSN17172600A 18AWG 260mm BLACK 1<br />
32S01972 B5 01 187 CONNECT WIRE HSN17172602A 18AWG 260mm 1<br />
32S01786 B5 01 187 CONNECT WIRE HSN17XXCQGDA 18AWG 180mm YELLOW 1<br />
32S01974 B5 01 CLAMP SPTSTCMCRBS4 MICROBASS-4 2<br />
32S01975 B5 01 CABINET <strong>SW65</strong> BOX<strong>SW65</strong>XX661 1<br />
32S01976 B5 01 SPEAKER <strong>SW65</strong> SPKPJ1204X01 PJ1204 1<br />
32S01977 B5 01 TWEETER <strong>SW65</strong> SPKKP308-M01 1<br />
32S01978 B5 01 SPEAKER LABEL LABWHBKAE008 PJ-PGG85 1<br />
32S01797 B5 01 6.3 CONNECT WIRE HSN6M20CQ70G 18AWG MONO 650mm 1<br />
32S00098 B5 01 CORNER PCN-7 PCNPEXBK2807 8<br />
32S00867 B5 01 RUBBER FOOT PPTRFT143002 RUB-2 6<br />
32S00473 B5 01 STRAP HANDLE HDP215P25802 HDP-2 1<br />
32S00474 B5 01 HANDLE CLAMP HDCSTEKBLK01 HDC-1 2<br />
32S01626 B5 01 LOGO PLATE PLGLGBSIBN0D IBANEZ BLACK 1<br />
32S01627 B5 01 LOGO PLATE SW PLGBKSVIBZ01 1<br />
32S01615 B5 01 SP FIXING CLAMP SPTSPHSW35-5 6<br />
32S00868 B5 01 POWER CODE JP PWCD--DBVTF3A 1<br />
32S00869 B5 01 POWER CODE UL PWCA--DBSVT3A 120V 60Hz 1<br />
32S00104 B5 01 POWER CODE EU PWCE-DBH5V3A 1<br />
32S01060 B5 01 POWER CODE UK PWCF--DBH5V3A 1<br />
32S01624 B5 01 POWER CODE AUS PWCI--DBLTS3A 240V 50Hz 1<br />
32S01625 B5 01 POWER CODE ARG PWCJ--DBH5V3A 240V 50Hz 1<br />
32S01636 B5 01 CABLE TIE PPTCBC622395 FOR SP CABLE 1<br />
32S01994 B5 01 205 CONNECT WIRE HSN20202302G 18AWG 230mm 1<br />
32S01995 B5 01 205 CONNECT WIRE HSN20202300G 18AWG 230mm BLACK 1<br />
32S00677 B5 01 SCREW BK M4 P0.7 MSRH40XR732B L32 2<br />
32S00484 B5 01 SCREW BK M4 P0.7 MSRH40XR728B L28 4<br />
32S01814 B5 01 SCREW BK M4 P0.7 MSRR40XR720B L20 6<br />
32S00111 B5 01 TAPPING SCREW TSRS25X08WDB BK2.5×8 2<br />
32S01816 B5 01 TAP SCREW 3.5X10 TSRU35X10WDB BLACK 16<br />
32S01633 B5 01 TAP SCREW 4X12 TSRU40X12WDB BLACK 5<br />
32S00888 B5 01 TAP SCREW 4X20 TSRU40X20WDB BLACK 6
<strong>SW65</strong> <strong>PARTS</strong> <strong>LIST</strong><br />
ITEM NUMBER DESCRIPTION<br />
REMARK Q'TY<br />
32S02003 B5 01 TAP SCREW 4X38 TSRH40X38WDB BLACK 2<br />
32S00116 B5 01 PLASTIC WASHER WSRP174530BP PWH-1 6<br />
32S01635 B5 01 VELCRO WRAP SPTSDK25X08A BLACK 25X25mm 8<br />
32S02006 B5 01 LABEL-WARNTY CRD LABWHBKBD055 2<br />
32S02007 B5 01 SERIAL NO. LABEL LABSVBKBA002 2<br />
32S02008 B5 01 BAR CODE LABEL LABWHBKBC101 TO JAPN / EUROPE : 4515110198715 1<br />
32S02009 B5 01 BAR CODE LABEL LABWHBKBC102 TO USA : 606559198702 1<br />
32S02010 B5 01 MANUAL <strong>SW65</strong> ISTIBZSW35XA 1<br />
32S00118 B5 01 WARRANTY CARD JP GRTIBZIBZ10A 1<br />
32S00895 B5 01 WARRANTY CARD US GRTIBZIBZ15A 1<br />
32S02013 B5 01 POLYBAG <strong>SW65</strong> PEB546406J16 1<br />
32S01829 B5 01 INDIVIDUAL BOX CTNSW35XIB01 1<br />
32S02014 B5 01 COLOR BOX <strong>SW65</strong> CCTSW35XIB01 FOR "H" "C" 1<br />
32S00688 B5 01 BOX CORNER <strong>SW65</strong> PHDGENXXXX01 8
Names and functions for each part<br />
FRONT PANEL<br />
REAR PANEL<br />
Contents<br />
3 FRANÇAIS ...................................................... 10<br />
ENGLISH ............................................................ 5 ESPAÑOL........................................................ 12<br />
DEUTSCH ........................................................... 7 ITALIANO ........................................................ 15<br />
2
• <br />
• <br />
<br />
• <br />
<br />
• <br />
<br />
<br />
<br />
• <br />
<br />
• <br />
<br />
<br />
<br />
<br />
<br />
1/4” <br />
<br />
<br />
<br />
<br />
<br />
<br />
<br />
<br />
<br />
<br />
<br />
<br />
<br />
<br />
<br />
<br />
<br />
<br />
<br />
<br />
<br />
<br />
<br />
<br />
<br />
<br />
<br />
<br />
<br />
<br />
<br />
<br />
<br />
<br />
<br />
3
1/4” <br />
<br />
<br />
<br />
<br />
<br />
<br />
<br />
<br />
<br />
<br />
<br />
<br />
<br />
<br />
<br />
<br />
<br />
<br />
<br />
<br />
<br />
<br />
<br />
<br />
<br />
<br />
<br />
<br />
<br />
<br />
4
Foreword<br />
Thank you for purchasing the IBANEZ <strong>SW65</strong> bass amp. Read this<br />
manual thoroughly prior to using your amplifier in order to get the most<br />
out of the functions available. Then keep the manual in a safe place.<br />
Features<br />
The amp head of the <strong>SW65</strong> features a 65W output, and the speaker<br />
section uses a powerful IBANEZ original 12-inch POWER JAM 1204<br />
speaker together with a PJPT85 piezo horn tweeter, giving you the<br />
ultimate in sound quality and convenience.<br />
The pre-amp EQ is a newly designed 4-band active EQ with ±15 dB of<br />
range, covering a versatile range of performance needs and allowing<br />
wide yet detailed adjustments. The <strong>SW65</strong> also features an internal<br />
limiter, creating punchy low-end with minimal distortion.<br />
Precautions during use<br />
• Do not subject the amplifier to shocks by dropping, etc., or treat it<br />
roughly in any way.<br />
• Place the amplifier carefully in a stable position. The sound from the<br />
amplifier will vary depending on how and where it is set up.<br />
• Do not use or store the amplifier in locations where it is subject to<br />
direct sunlight or in environments that experience extreme temperatures<br />
and humidity levels.<br />
• Reduce the volume to ’0’ or switch off the power supply when connecting<br />
the guitar shielded cable and the effects or other cables required<br />
for external connection. Note that the noise generated when<br />
plugs are inserted and removed may cause severe damage to the<br />
equipment.<br />
• To avoid the danger of fire, do not place containers of liquid on the<br />
amp.<br />
• As long as the <strong>SW65</strong> is connected to an electrical outlet, it is not<br />
completely insulated from the power supply even if the power switch<br />
is turned off. When you are not using it, leave the power turned off. If<br />
you will not be using the <strong>SW65</strong> for an extended period, leave the power<br />
cable disconnected.<br />
Names and functions for each part<br />
1. INPUT jack<br />
This is a 1/4" phone jack input. Use a shielded guitar cable to connect your<br />
electric bass guitar to this jack.<br />
2. 10 dB GAIN switch<br />
When you are using a bass that has a low output, or to intensify the effect of the<br />
limiter, you can turn the 10 dB GAIN switch ON to boost the pre-amp gain by 10<br />
dB.<br />
3. GAIN control<br />
This controls the gain of the preamp. Raising the level will increase the volume,<br />
but after you pass a certain level, a limiter will operate to prevent distortion, and<br />
the level will not increase very much. If you continue raising this control, the<br />
limiter will apply more strongly, producing an effect as though the threshold were<br />
lowered. Adjust this control in conjunction with the EQ and the VOLUME control<br />
to get the sound you want.<br />
4. BASS control<br />
This is a shelving-type equalizer for the low frequencies. It boosts or cuts the<br />
level of the 100 Hz region in a range of ±15 dB.<br />
5. MIDDLE control<br />
This is the mid-frequency equalizer. It boosts or cuts the level of the 600 Hz<br />
region in a range of ±15 dB.<br />
6. TREBLE control<br />
This is a shelving-type equalizer for the high frequencies. It boosts or cuts the<br />
level of the region at 4 kHz and above in a range of ±15 dB.<br />
7. PRESENCE control<br />
This is the ultra-high frequency equalizer. It boosts or cuts the level of the 9.4<br />
kHz region in a range of ±15 dB.<br />
8. VOLUME control<br />
This adjusts the output level of the amp. Raising the level will increase the volume,<br />
but after you pass a certain level, a limiter will operate to prevent distortion,<br />
and the level will not increase very much. If you continue raising this control,<br />
the limiter will apply more strongly, producing an effect as though the threshold<br />
were lowered. Simultaneously, it also controls the output level of the CD INPUT.<br />
9. CD INPUT<br />
These are stereo phono input jacks that can be connected to a portable CD/MD/<br />
cassette player or to the headphone output of your stereo system. Use the VOL-<br />
UME control to adjust the volume. These inputs are not suitable for connection<br />
to LINE OUT jacks.<br />
5<br />
ENGLISH
ENGLISH<br />
10. LINE OUT jack<br />
This is an output jack with an output level of approximately 0 dBm. You can<br />
connect it to an external mixing console or similar equipment.<br />
11. HEADPHONES jack<br />
This is a 1/4” output jack for stereo headphones. The sound is not reproduced<br />
through the built-in speakers when headphones are in use.<br />
Warning<br />
The headphone output is capable of producing high volume levels. When using<br />
headphones, turn down the VOLUME, and then gradually raise it to adjust the<br />
volume. The noise and distorted audio that is produced when the plug is inserted<br />
or disconnected at a high volume setting will not only damage your headphones,<br />
but may also damage your hearing.<br />
12. POWER switch<br />
This switch turns the power on/off. When you are not using the amp, please<br />
leave it turned off.<br />
13. Fuse holder<br />
If the fuse has blown, it is possible that a serious problem has occurred internally,<br />
so please contact your dealer before replacing the fuse.<br />
14. AC IN<br />
Connect the included AC power cable to this connector. Use this amp only with<br />
the input voltage indicated on the panel.<br />
15. SPEAKER OUTPUT jack<br />
This is a speaker output jack connected to internal speaker system. You can use<br />
this output with another speaker system connecting by speaker cable. The<br />
speaker system impedance shall be over 4 ohms.<br />
16. EFFECTS LOOP SEND jack<br />
This is an output jack for an effects device. Connect it to the input of your effects<br />
device. Although the input and output of this effect loop are suitable for compact<br />
effects, they can also be used with rack-mount type effect processors.<br />
17. EFFECTS LOOP RETURN jack<br />
This is an input jack for an effects device. Connect the output of your effects<br />
device to this input.<br />
Troubleshooting<br />
1. The power supply cannot be switched on.<br />
• Check that the power cable has been connected correctly.<br />
• Try plugging it into a different socket and see if the same problem<br />
6<br />
occurs.<br />
2. The power supply can be switched on, but no<br />
sound is heard.<br />
• Is your bass connected correctly?<br />
• Do you still hear no sound after removing all external devices such<br />
as effect units connected between your bass and the amp, or devices<br />
connected in the effect loop?<br />
• Use a different shielded cable and check to see if any sound is heard.<br />
• Is the volume of your bass turned to 0?<br />
• If your bass has active circuitry, has the battery run down?<br />
• Is sound produced when you use another bass?<br />
• Check to see if the volume on the amplifier is set to “0”.<br />
• Check to see if the headphones are connected.<br />
3. Noise is heard.<br />
• Check to see if anything in the immediate vicinity is resonating or<br />
banging against the amplifier to produce the noise.·<br />
• If your bass has active circuitry, has the battery run down?<br />
• Is there still noise if you use a different bass or other external devices<br />
(e.g., effects) and cable?<br />
4. No sound is produced in the headphones<br />
• Check that the headphones are connected correctly.<br />
• Connect another set of headphones and see if sound is produced.<br />
In case of defects<br />
This product has passed exhaustive inspections before being shipped<br />
from the factory. Ensure that the above procedures are carried out<br />
when a problem is thought to exist. Contact your dealer in the unlikely<br />
event that an abnormality occurs during use. Also, ensure that the<br />
symptoms of the problem are explained in detail when requesting repair<br />
in order to facilitate swift handling.<br />
Because of improvements to this product, the specifications may change<br />
without notice.
Vorwort<br />
Vielen Dank für den Erwerb des Bassverstärkers <strong>SW65</strong> von IBANEZ.<br />
Bitte lesen Sie diese Anleitung für eine optimale Nutzung aller Funktionen<br />
vor der Inbetriebnahme des Verstärkers aufmerksam durch.<br />
Bewahren Sie die Anleitung dann für späteres Nachschlagen an einem<br />
sicheren Platz auf.<br />
Merkmale<br />
Das Verstärker-Topteil des <strong>SW65</strong> hat 65 W Ausgangsleistung, und<br />
die Box enthält den leistungsfähigen 12-Zoll-Lautsprecher POWER<br />
JAM 1204 von IBANEZ sowie das Piezo-Hochtonhorn PJPT85, wodurch<br />
Sie beste Sound-Qualität und hohe Leistungsreserven erhalten.<br />
Der EQ des Vorverstärkers ist ein neu entwickelter, aktiver 4-bandiger<br />
Equalizer mit einem Regelbereich von ±15 dB, der für eine Vielzahl<br />
musikalischer Anwendungen geeignet ist und eine umfassende und<br />
gleichzeitig feinfühlige Regelung bietet. Der <strong>SW65</strong> besitzt außerdem<br />
einen eingebauten Limiter, der druckvolle Bässe mit minimaler<br />
Verzerrung ermöglicht.<br />
Vorsichtsmaßregeln für den Betrieb<br />
• Den Verstärker vor starken Stößen bewahren, nicht auf den Boden<br />
fallen lassen usw.<br />
• Den Verstärker auf festen Untergrund stellen. Der Sound des Verstärkers<br />
ist vom Aufstellungsort abhängig.<br />
• Den Verstärker nicht an Orten lagern oder betreiben, an denen das<br />
Gerät direkter Sonnenbestrahlung oder extremen Temperatur- und<br />
Luftfeuchtigkeitsschwankungen ausgesetzt ist.<br />
• Vor dem Anschluss der geschirmten Kabel für E-Gitarre und Effektgeräte<br />
bzw. sonstiger externer Anschlusskabel die Lautstärke auf “0”<br />
stellen oder den Verstärker ausschalten. Andernfalls kann das laute<br />
Brummen beim Anschließen und Abziehen der Stecker ernsthafte<br />
Schäden am Verstärker verursachen.<br />
• Um die Brandgefahr zu verringern, sollten Sie keine Behälter mit<br />
Flüssigkeiten auf den Verstärker stellen.<br />
• So lange der <strong>SW65</strong> an einer Netzsteckdose angeschlossen ist, ist er<br />
nicht vollständig von der Stromversorgung getrennt, auch dann, wenn<br />
das Gerät ausgeschaltet ist. Wenn Sie das Gerät vorübergehend nicht<br />
benutzen, schalten Sie es aus. Wenn Sie den <strong>SW65</strong> für längere Zeit<br />
nicht benutzen werden, ziehen Sie zusätzlich das Netzkabel aus der<br />
Steckdose.<br />
Bezeichnung und Funktion der Teìle<br />
1. Eingangsbuchse INPUT<br />
Dies ist eine 6,3-mm-Klinkenbuchse. Verwenden Sie ein abgeschirmtes<br />
Instrumentenkabel, um Ihren E-Bass hier anzuschließen.<br />
2. Schalter 10 dB GAIN<br />
Wenn Sie einen Bass mit geringer Ausgangsleistung benutzen, oder wenn Sie<br />
den Effekt des Limiters verstärken möchten, können Sie den Schalter “10 dB<br />
GAIN” in die Stellung “ON” bringen, um die Verstärkung des Vorverstärkers um<br />
10 dB anzuheben.<br />
3. GAIN-Regler<br />
Dieser Regler regelt die Verstärkung des Vorverstärkers. Durch Anheben des<br />
Pegels steigt die Lautstärke zunächst kontinuierlich, wenn jedoch ein bestimmter<br />
Pegel überschritten wird, setzt ein Limiter ein, der Verzerrungen verhindert, und<br />
die Lautstärke erhöht sich nicht mehr so stark. Wenn Sie den Regler weiter<br />
aufdrehe, wirkt der Limiter immer stärker auf das Signal, und erzeugt dabei<br />
einen Effekt, als ob der Threshold-Wert des Limiters verringert würde. Stellen<br />
Sie diesen Regler zusammen mit dem EQ und dem Lautstärkeregler VOLUME<br />
ein, um den gewünschten Sound zu erreichen.<br />
4. Regler BASS<br />
Dies ist ein Niveauregler für die tiefen Frequenzen (Bässe). Er hebt den Pegel<br />
aller Frequenzen unterhalb von 100 Hz um 15 dB an oder senkt sie um -15 dB<br />
ab.<br />
5. Regler MIDDLE<br />
Dies ist ein Bandregler für die mittleren Frequenzen (Mitten). Er hebt den Pegel<br />
der Frequenzen im Bereich um 600 Hz um 15 dB an oder senkt sie um -15 dB<br />
ab.<br />
6. Regler TREBLE<br />
Dies ist ein Niveauregler für die hohen Frequenzen (Höhen). Er hebt den Pegel<br />
aller Frequenzen oberhalb von 4 kHz um 15 dB an oder senkt sie um -15 dB ab.<br />
7. Regler PRESENCE<br />
Dies ist ein Bandregler für die hohen Frequenzen (Präsenz). Er hebt den Pegel<br />
der Frequenzen im Bereich um 9,4 kHz um 15 dB an oder senkt sie um -15 dB<br />
ab.<br />
7<br />
DEUTSCH
DEUTSCH<br />
8. VOLUME-Regler<br />
Dieser Regler regelt die Ausgangslautstärke des Verstärkers. Stellen Sie diesen<br />
Regler zusammen mit dem EQ und dem GAIN Regler ein, um den gewünschten<br />
Limitereffekt zu erzielen.<br />
Zugleich steuert dieser Regler auch die Lautstärke des Eingangs CD INPUT.<br />
9. CD INPUT<br />
Dies sind die Stereoeingänge (Klinkenbuchsen), an denen ein tragbarer CDoder<br />
MD-Spieler, ein Walkman oder der Kopfhörerausgang Ihrer Stereoanlage<br />
angeschlossen werden kann. Stellen Sie die Lautstärke mit dem Regler VOL-<br />
UME ein. Diese Eingänge eignen sich impedanzmäßig nicht zum Einspeisen<br />
von Signalen mit Leitungspegel (LINE OUT).<br />
10. Buchse LINE OUT<br />
Dies ist eine Ausgangsbuchse mit einem Ausgangspegel von nominell 0 dBm.<br />
Hier können Sie z. B. ein externes Mischpult oder ähnliche Geräte anschließen.<br />
11. Kopfhörerbuchse (HEADPHONES)<br />
Diese 1/4”-Zoll-Ausgangsbuchse dient zum Anschließen eines Stereo-Kopfhörers.<br />
Wenn Sie das tun, werden die Lautsprecher ausgeschaltet.<br />
Warnung<br />
Der Kopfhörerausgang kann sehr hohe Lautstärkepegel erzeugen. Wenn Sie<br />
Kopfhörer benutzen, stellen Sie die Lautstärke (VOLUME) auf Null, und regeln<br />
Sie dann die Lautstärke allmählich bis zum gewünschten Pegel. Das Geräusch,<br />
sowie die Verzerrungen des Tonsignals beim Anschließen oder Herausziehen<br />
des Steckers bei hoher Lautstärkeeinstellung, kann nicht nur ihren Kopfhörer<br />
zerstören, sondern auch ihr Gehör schädigen.<br />
12. Netzschalter POWER<br />
Mit diesem Schalter schalten Sie das Gerät ein und aus. Wenn Sie den Verstärker<br />
nicht benutzen, schalten Sie ihn bitte aus.<br />
13. Sicherungshalter<br />
Wenn die Sicherung durchgebrannt ist, kann es sein, dass im Innern des Gerätes<br />
ein ernsthaftes Problem aufgetreten ist, wenden Sie sich daher bitte an Ihren<br />
Händler, bevor Sie die Sicherung ersetzen.<br />
14. AC IN<br />
Schließen Sie das mitgelieferte Netzkabel an dieser Buchse an. Betreiben Sie<br />
diesen Verstärker ausschließlich mit der Netzspannung, die am Verstärker<br />
angegeben ist.<br />
15. Buchse SPEAKER OUTPUT<br />
Dies ist eine Lautsprecherausgangsbuchse, die mit dem internen<br />
Lautsprechersystem verbunden ist. Sie können diese Buchse für den Anschluß<br />
8<br />
eines anderen Lautsprechersystems über ein Lautsprecherkabel benutzen. Die<br />
Impedanz des Lautsprechersystems sollte mindestens 4 Ohm betragen.<br />
16. Buchse EFFECTS LOOP SEND<br />
Dies ist eine Ausgangsbuchse für ein Effektgerät. Verbinden Sie diese mit dem<br />
Eingang Ihres Effektgerätes. Obwohl Ein- und Ausgang dieser Effektschleife für<br />
Bodeneffekte geeignet sind, können sie auch in Verbindung mit 19-Zoll-<br />
Effektgeräten benutzt werden.<br />
17. Buchse EFFECTS LOOP RETURN<br />
Dies ist eine Eingangsbuchse für ein Effektgerät. Schließen Sie hier den Ausgang<br />
Ihres Effektgerätes an.<br />
Fehlersuche<br />
1. Die Netzversorgung läßt sich nicht einschalten.<br />
• Prüfen, ob das Netzkabel korrekt angeschlossen ist.<br />
• Den Netzstecker an eine andere Steckdose anschließen, um zu prüfen,<br />
ob hier das gleiche Problem auftritt.<br />
2. Die Netzversorgung ist eingeschaltet, aber es<br />
wird kein Klang erzeugt.<br />
• Ist Ihr Bass richtig angeschlossen?<br />
• Hören Sie immer noch nichts, obwohl Sie alle externen Geräte wie z. B.<br />
Effektgeräte zwischen Ihrem Bass und dem Amp oder in der<br />
Effektschleife herausgezogen haben?<br />
• Ein anderes geschirmtes Kabel verwenden und prüfen, ob Sie dann<br />
etwas hören.<br />
• Ist der Lautstärkeregler am Bass auf 0 eingestellt?<br />
• Wenn Ihr Bass aktive Schaltkreise besitzt, ist die entsprechende Batterie<br />
evtl. leer?<br />
• Ist der Ton zu hören, wenn Sie einen anderen Bass benutzen?<br />
• Prüfen, ob der Lautstärkeregler des Verstärkers auf "0" gestellt ist.<br />
• Nachschauen, ob ein Kopfhörer angeschlossen ist.<br />
3. Es treten Rauschstörungen auf.<br />
• Prüfen, ob ein Gegenstand in der näheren Umgebung Resonanz erzeugt<br />
oder gegen den Verstärker schlägt.<br />
• Wenn Ihr Bass aktive Schaltkreise besitzt, ist die entsprechende Batterie<br />
evtl. sehr schwach?<br />
• Besteht das Rauschen weiterhin, wenn Sie einen anderen Bass oder andere<br />
externe Geräte (z. B. Effekte) oder andere Kabel benutzen?
4. Bei Kopfhöreranschluss wird kein Klang erzeugt.<br />
• Prüfen, ob der Kopfhörer korrekt angeschlossen ist.<br />
• Versuchsweise einen anderen Kopfhörer anschließen und prüfen, ob<br />
Sie etwas hören.<br />
Im Falle von Defekten<br />
Der Verstärker wurde im Rahmen der Qualitätskontrolle vor dem Versand<br />
gründlich überprüft. Bei eventuellen Problemen den Verstärker deshalb<br />
zuerst mit Hilfe der obigen Punkte überprüfen. Sollten während des Betriebs<br />
Störungen auftreten, wenden Sie sich bitte an Ihren Fachhändler.<br />
Erklären Sie das Problem bei notwendigen Reparaturen bitte möglichst<br />
genau, damit sich die Ursache so schnell wie möglich finden läßt.<br />
DEUTSCH<br />
Änderungen der technischen Daten im Hinblick auf Produktverbesserungen<br />
ohne Vorankündigung jederzeit vorbehalten.<br />
9
FRANÇAIS<br />
Avant-propos<br />
Nous vous remercions d’avoir porté votre choix sur l’amplificateur de<br />
basses IBANEZ <strong>SW65</strong>. Veuillez lire attentivement ce mode d’emploi<br />
avant d’utiliser votre ampli afin de pouvoir tirer le meilleur parti de ses<br />
nombreuses caractéristiques. Conservez précieusement ce mode<br />
d’emploi, car il pourra vous être utile lors de références ultérieures.<br />
Caractéristiques<br />
L’amplificateur <strong>SW65</strong> délivre une sortie de 65W et il est monté avec<br />
un puissant haut-parleur IBANEZ POWER JAM 1204 original de 12<br />
pouces muni d’un tweeter trompette piezo PJPT85 pour vous fournir<br />
la meilleures qualité sonore qui soit et pour une grande facilité<br />
d’utilisation.<br />
L’égaliseur du préampli est un égaliseur actif à quatre voies de nouvelle<br />
conception qui fonctionne sur une plage de ±15 dB et couvre<br />
toute une gamme de besoins de performance ; il permet une plage de<br />
réglages très vastes et détaillés. Le <strong>SW65</strong> possède également un<br />
limiteur interne qui accentue les basses fréquences avec un minimum<br />
de distorsion.<br />
Précautions durant l’utilisation<br />
• Des chocs violents risquent d’endommager l’amplificateur. Veuillez le<br />
manipuler avec soin et ne pas le laisser tomber.<br />
• Installez l’amplificateur en veillant à ce qu’il soit sur une surface bien<br />
stable. Le son de l’amplificateur change en fonction de l’emplacement<br />
choisi et de la position dans laquelle vous l’installez.<br />
• Veillez à ne pas utiliser ni ranger l’ampli dans un endroit en plein soleil<br />
ou soumis à des températures extrêmes ou encore à un niveau d’humidité<br />
trop élevé.<br />
• Réduisez le volume à “0” ou coupez l’alimentation lorsque vous raccordez<br />
le câble blindé d’une guitare et les effets ou les autres câbles<br />
nécessaires aux connexions externes. Notez que le bruit engendré<br />
lors du branchement ou du débranchement des fiches risque de gravement<br />
endommager l’amplificateur.<br />
• Pour éviter tout risque d’incendie, ne jamais placer de récipients<br />
contenant du liquide sur l’amplificateur.<br />
• Tant que le <strong>SW65</strong> est raccordé à une prise électrique, il n’est pas<br />
complètement isolé de l’alimentation secteur même si son interrupteur<br />
10<br />
principal est éteint. Toujours éteindre l’interrupteur lorsque l’appareil<br />
ne doit pas être utilisé. Si l’appareil ne doit pas être utilisé pendant<br />
une longue période, débrancher le câble d’alimentation.<br />
Noms et fonctions des diverses parties<br />
1. Prise INPUT<br />
Prise d’entrée des fiches de 1/4". La guitare basse électrique se raccorde à<br />
cette prise à l’aide d’un câble pour guitare blindé.<br />
2. Commutateur 10 dB GAIN<br />
Lors de l’utilisation d’une basse à faible sortie, ou pour intensifier l’effet du limiteur,<br />
il est possible d’activer l’interrupteur 10 dB GAIN pour augmenter le gain du<br />
préampli de 10 dB.<br />
3. Commande GAIN<br />
Contrôle le gain du préampli. L’augmentation du niveau du gain augmente le<br />
volume mais, après un certain niveau, un limiteur s’active pour éviter la distorsion<br />
et le niveau n’augmentera plus beaucoup. Si vous continuez d’augmenter la<br />
commande, l’application du limiteur sera plus intense et donnera l’impression<br />
que le seuil a été abaissé. Régler cette commande conjointement avec la<br />
commande EQ et VOLUME pour obtenir le son souhaité.<br />
4. Commande BASS<br />
C’est un égaliseur de type à étages pour les basses fréquences. Il permet d’accentuer<br />
ou de réduire le niveau de la zone des 100 Hz sur une plage de ±15 dB.<br />
5. Commande MIDDLE<br />
C’est un égaliseur de la plage des moyennes fréquences. Il permet d’accentuer<br />
ou de réduire le niveau de la zone des 600 Hz sur une plage de ±15 dB.<br />
6. Commande TREBLE<br />
C’est un égaliseur de type à étages pour les hautes fréquences. Il permet<br />
d’accentuer ou de réduire le niveau de la zone des 4 kHz et supérieure sur une<br />
plage de ±15 dB.<br />
7. Commande PRESENCE<br />
C’est l’égaliseur des ultra-hautes fréquences. Il permet d’accentuer ou de réduire<br />
le niveau de la zone des 9,4 kHz sur une plage de ±15 dB.<br />
8. Commande VOLUME<br />
Permet de régler le niveau de sortie de l’ampli. L’augmentation du niveau<br />
augmente le volume mais, après un certain niveau, un limiteur s’active pour<br />
éviter la distorsion et le niveau n’augmentera plus beaucoup. Si vous continuez<br />
d’augmenter la commande, l’application du limiteur sera plus intense et donnera<br />
l’impression que le seuil a été abaissé. Cette commande contrôle aussi<br />
simultanément le niveau de sortie de la prise CD INPUT.
9. Prises CD INPUT<br />
Prises d’entrée téphonique stéréo pour le raccordement d’un lecteur de CD/<br />
MD/cassette ou pour le raccordement à la sortie du casque d’écoute d’un système<br />
stéréo. Utiliser la commande VOLUME pour régler le volume. Ces entrées ne<br />
conviennent pas pour le raccordement à des prises LINE OUT.<br />
10. Prise LINE OUT<br />
Il s’agit d’une prise de sortie qui délivre une sortie d’environ 0 dBm. Elle permet<br />
le raccordement à une console de mixage externe ou à tout équipement similaire.<br />
11. Prise HEADPHONES<br />
Cette prise de 1/4” permet de raccorder un casque d’écoute stéréo. Le son des<br />
haut-parleurs intégrés est coupé lorsque vous branchez un casque d’écoute à<br />
cette prise.<br />
Avertissement<br />
Le casque d’écoute peut délivrer une sortie de puissance élevée. Toujours baisser<br />
le VOLUME lors de l’utilisation d’un casque puis l’augmenter progressivement<br />
pour atteindre le niveau souhaité. Le bruit et les signaux déformés engendrés<br />
lors du branchement ou du débranchement des fiches à des niveaux de volume<br />
élevés risquent d’endommager non seulement le casque mais également l’ouïe.<br />
12. Commutateur POWER<br />
C’est le commutateur de mise sous et hors tension. Ne pas oublier de le mettre<br />
sur OFF lorsque l’ampli n’est pas utilisé.<br />
13. Logement du fusible<br />
Si le fusible a sauté, il se peut qu’un grave problème se soit produit à l’intérieur<br />
de l’ampli. Contacter le revendeur avant de remplacer le fusible.<br />
14. Prise AC IN<br />
C’est la prise qui sert à raccorder le câble d’alimentation secteur. Utiliser<br />
uniquement cet ampli en respectant la tension d’entrée indiquée sur le panneau.<br />
15. Prise SPEAKER OUTPUT<br />
Prise de sortie pour haut-parleurs connectée au système de haut-parleurs interne.<br />
Elle peut servir à raccorder un autre système de haut-parleurs par câble<br />
pour haut-parleurs. L’impédance de ce système devra cependant dépasser 4 ohms.<br />
16. Prise EFFECTS LOOP SEND<br />
C’est une prise de sortie pour un dispositif d’effets. La raccorder à la prise d’entrée<br />
du dispositif d’effets. Bien que l’entrée et la sortie de cette boucle d’effets<br />
conviennent pour des effets compacts, elles peuvent également être utilisés<br />
avec des processeurs d’effets montés sur rack.<br />
17. Prise EFFECTS LOOP RETURN<br />
C’est une prise d’entrée pour un dispositif d’effets. La raccorder à la prise de<br />
sortie du dispositif d’effets.<br />
Dépannage<br />
1. Impossible de mettre l’amplificateur sous tension<br />
• Vérifiez si le cordon d’alimentation est raccordé correctement.<br />
• Essayez de le brancher à une autre prise secteur pour voir si le problème<br />
persiste.<br />
2. L’amplificateur peut être mis sous tension mais<br />
ne produit aucun son.<br />
• Votre basse est-elle raccordée correctement ?<br />
• N’entendez-vous toujours aucun son après avoir retiré tous les appareils<br />
externes, comme des unités d’effets, raccordés entre la basse et l’ampli,<br />
ou les dispositifs raccordés à la boucle d’effets,?<br />
• Utilisez un autre câble blindé pour voir si cela ne permet pas de résoudre<br />
le problème.<br />
• Le volume de la basse est-il sur 0 ?<br />
• Si la guitare basse est dotée de circuits actifs, vérifier si la pile n’est pas<br />
épuisée.<br />
• Utiliser une autre guitare basse pour voir si le son est reproduit.<br />
• Vérifiez si le volume de l’amplificateur n’est pas réglé sur "0".<br />
• Vérifiez si le casque d’écoute est raccordé.<br />
3. Le son de l’ampli comporte du bruit.<br />
• Vérifiez si l’amplificateur n’est pas installé à proximité d’une source de résonance<br />
ou si le bruit ne provient pas d’un objet heurtant l’ampli.<br />
• Si la guitare basse est dotée de circuits actifs, vérifier si la pile n’est pas<br />
épuisée.<br />
• Le bruit est-il toujours présent lors de l’utilisation d’une autre guitare<br />
basse, d’appareils externes (par ex. effets) ou d’un autre câble ?<br />
4. Pas de son au casque d’écoute<br />
• Vérifiez si le casque d’écoute est branché correctement.<br />
• Raccordez un autre casque pour voir si le son est reproduit.<br />
En cas d’anomalie<br />
Cet appareil a subi une inspection rigoureuse avant sa sortie d’usine. Si l’amplificateur<br />
vous semble présenter une anomalie, effectuez les opérations ci-dessus.<br />
Dans le cas peu probable où vous rencontreriez un problème pendant l’utilisation,<br />
consultez votre revendeur. Par ailleurs, lorsque vous envoyez l’amplificateur<br />
en réparation, veillez à décrire correctement tous les symptômes de la<br />
panne; cela permettra d’accélérer les travaux de réparation.<br />
Nous nous réservons le droit de modifier les données techniques sans<br />
avis préalable en vue d’améliorer ce produit.<br />
11<br />
FRANÇAIS
ESPAÑOL<br />
Prólogo<br />
Gracias por adquirir el amplificador de bajo <strong>Ibanez</strong> <strong>SW65</strong>. Para sacarle<br />
el máximo partido a las funciones que ofrece este amplificador,<br />
antes de utilizarlo lea atentamente este manual. Seguidamente guarde<br />
el manual en un lugar seguro.<br />
Características<br />
El amplificador <strong>SW65</strong> dispone de una potencia de salida de 65W y<br />
utiliza un potente altavoz original <strong>Ibanez</strong> de 12 pulgadas 1204 junto<br />
con un tweeter piezoeléctrico PJPT85 para ofrecerle un sonido de<br />
gran calidad.<br />
El ecualizador del preamplificador es activo de 4 bandas recientemente<br />
diseñado con ±15 dB de alcance, cubriendo una escala versátil de<br />
funciones y permitiendo una mayor precisión de ajustes. El <strong>SW65</strong><br />
también incluye un limitador interno, creando unos graves intensos<br />
con una distorsión mínima.<br />
Precauciones durante la utilización<br />
• No exponga el amplificador a golpes por caídas, etc. ni lo trate de<br />
forma brusca.<br />
• Instale el amplificador con cuidado en un lugar estable. El sonido del<br />
amplificador variará en función de la forma y el lugar donde esté instalado.<br />
• No utilice ni guarde el amplificador en lugares que estén expuestos a<br />
la luz directa del sol ni en ambientes expuestos a niveles extremos de<br />
temperatura y humedad.<br />
• Reduzca el volumen a “0” o apague el amplificador cuando vaya a<br />
conectar el cable blindado de la guitarra y los efectos u otros cables<br />
necesarios para efectuar una conexión externa. Tenga en cuenta que<br />
el ruido generado al introducir y extraer las clavijas puede ocasionar<br />
graves daños al equipo.<br />
• Para evitar posibles incendios, no coloque recipientes de líquidos sobre<br />
el amplificador.<br />
• Mientras el <strong>SW65</strong> esté conectado a una toma de corriente, no está<br />
completamente aislado de la fuente de alimentación aún cuando el<br />
interruptor de alimentación esté desconectado. Cuando no utilice el<br />
amplificador, manténgalo apagado. Cuando no vaya a utilizar el <strong>SW65</strong><br />
12<br />
durante largo tiempo, desenchufe el cable de alimentación.<br />
Nombres y funciones de los compnentes.<br />
1. Toma de entrada (INPUT)<br />
Esta es una entrada de jack de 1/4 de pulgada. Utilice un cable blindado de<br />
guitarra para conectar la guitarra eléctrica a esta toma.<br />
2. Interruptor de ganancia (GAIN) de 10 dB<br />
Cuando vaya a utilizar una guitarra que tenga una salida baja o cuando quiera<br />
intensificar el efecto del limitador, puede conectar el interruptor de ganancia de<br />
10 dB para acentuar la ganancia del preamplificador en 10 dB.<br />
3. Control de ganancia (GAIN)<br />
Permite controlar la ganancia del preamplificador. Cuando se aumenta el nivel<br />
se eleva el volumen, pero después de pasar un determinado nivel, se activará<br />
un limitador para evitar la distorsión y no aumentará demasiado el nivel. Si<br />
continua aumentando este control, el limitador funcionará con mayor intensidad,<br />
produciendo un efecto como si hubiera disminuido el nivel de limitación. Ajuste<br />
este control conjuntamente con el ecualizador (EQ) y el control de volumen<br />
(VOLUME) para obtener el sonido que desee.<br />
4. Control de graves (BASS)<br />
Este es un ecualizador gráfico para las frecuencias graves que permite acentuar<br />
o acortar el nivel de la región de 100 Hz en una escala de ±15 dB.<br />
5. Control de medio (MIDDLE)<br />
Este es el ecualizador de la zona de sonido de medio alcance. Se puede acentuar<br />
o acortar el nivel de la región de 600 Hz en una escala de ±15 dB.<br />
6. Control de agudos (TREBLE)<br />
Este es un ecualizador gráfico para las frecuencias altas. Se puede acentuar o<br />
acortar el nivel de la región de 4 kHz o más en una escala de ±15 dB.<br />
7. Control de presencia (PRESENCE)<br />
Este es el ecualizador de ultra-alta frecuencia. Se puede acentuar o acortar el<br />
nivel de la región de 9,4 kHz en una escala de ±15 dB.<br />
8. Control de volumen (VOLUME)<br />
Este control ajusta el nivel de salida del amplificador. Cuando se aumenta el<br />
nivel se eleva el volumen, pero después de pasar un determinado nivel, se<br />
activará un limitador para evitar la distorsión y no aumentará demasiado el nivel.<br />
Si continua aumentando este control, el limitador funcionará con mayor<br />
intensidad, produciendo un efecto como si hubiera disminuido el nivel de<br />
limitación. También controla de forma simultánea el nivel de salida de la entrada<br />
para CD (CD INPUT).
9. Entrada para CD (CD INPUT)<br />
Estas son tomas de entrada estereofónica que pueden conectarse a un<br />
reproductor de CD/MD/cassette portátil o a la salida para auriculares de su<br />
quipo estéreo. Utilice el control de volumen (VOLUME) para ajustar el volumen.<br />
Estas salidas no son adecuadas para la conexión con tomas de salida de línea<br />
(LINE OUT).<br />
10. Toma de salida de línea (LINE OUT)<br />
Esta es una toma de salida con un nivel de salida de aproximadamente 0 dBm.<br />
Es posible conectarla con una mesa de mezclas externa o equipo similar.<br />
11. Toma de auriculares (HEADPHONES)<br />
Toma de salida para auriculares estereofónicos con clavija 1/4” de pulgada.<br />
Cuando se utilizan los auriculares la reproducción de sonido por los altavoces<br />
incorporados queda desactivada.<br />
Advertencia<br />
La salida para auriculares produce un sonido de elevado volumen. Cuando vaya<br />
a utilizar auriculares, primero reduzca el volumen y luego súbalo gradualmente<br />
para ajustar el VOLUMEN hasta el nivel requerido. El ruido y el sonido<br />
distorsionado que se producen al insertar o desconectar la clavija a altos niveles<br />
de volumen no solo ocasionarán daños a los auriculares, sino que también<br />
podrá dañar sus oídos.<br />
12. Interruptor de alimentación (POWER)<br />
Este interruptor permite conectar y desconectar el aparato. Cuando no utilice el<br />
amplificador, asegúrese de que este interruptor esté desactivado.<br />
13. Portafusible<br />
Cuando se quema un fusible es probable que se haya producido un problema<br />
serio internamente, de modo que debe ponerse en contacto con su distribuidor<br />
antes de sustituir el fusible.<br />
14. Entrada en CA (AC IN)<br />
Conecte el cable de alimentación de corriente alterna (CA) a este conector.<br />
Utilice este amplificador únicamente con la tensión de entrada indicada en el<br />
panel.<br />
15. Toma de salida para altavoces (SPEAKER OUTPUT)<br />
Esta es una toma de salida para altavoces conectada al sistema de altavoces<br />
interno. Puede utilizar esta salida con otro sistema de altavoces que se conecte<br />
mediante cable para altavoces. La impedancia del sistema de altavoces será de<br />
más de 4 ohms.<br />
16. Toma de salida de efectos en bucle (EFFECTS LOOP<br />
SEND)<br />
Esta es una toma de salida para un dispositivo de efectos. Conéctela a la salida<br />
de su dispositivo de efectos. Aunque la entrada y salida de este bucle de efectos<br />
resultan adecuadas para los efectos compactos, también pueden utilizarse con<br />
procesadores de efectos de tipo jack.<br />
17. Toma de retorno de efectos en bucle (EFFECTS LOOP<br />
RETURN)<br />
Esta es una toma de entrada para un dispositivo de efectos. Conecte la salida<br />
de su dispositivo de efectos a esta entrada.<br />
Localización de problemas<br />
1. No se puede conectar la alimentación.<br />
• Compruebe que el cable de alimentación esté correctamente enchufado.<br />
• Intente enchufarlo a una toma de corriente diferente y observe si persiste<br />
el problema.<br />
2. Se puede conectar la alimentación, pero no se<br />
obtiene sonido.<br />
•¿Su guitarra está correctamente conectada?<br />
•¿Continúa sin obtener sonido después de desconectar todos los<br />
dispositivos externos como, por ejemplo, las unidades de efectos<br />
conectadas entre la guitarra y el amplificador o los dispositivos<br />
conectados para efectos en bucle?<br />
• Utilice un cable blindado diferente y compruebe si se algún obtiene<br />
sonido.<br />
•¿El volumen de la guitarra está puesto a 0?<br />
• En caso de que la guitarra tenga circuitos activos, ¿se han agotado las<br />
pilas?<br />
•¿Obtiene sonido cuando utiliza otra guitarra?<br />
• Compruebe si el volumen del amplificador está en “0”.<br />
• Compruebe si están conectados los auriculares.<br />
3. Se oye ruido.<br />
• Compruebe si hay algo cerca que esté resonando o golpeando contra<br />
el amplificador y produzca el ruido.<br />
• En caso de que la guitarra tenga circuitos activos, ¿se han agotado las<br />
pilas?<br />
•¿Se produce el mismo ruido cuando utiliza una guitarra diferente u otro<br />
dispositivo externo (por ej., efectos) y cable?<br />
4. No se produce sonido en los auriculares<br />
• Compruebe que los auriculares estén correctamente conectados.<br />
• Conecte otros auriculares y compruebe si se produce sonido.<br />
13<br />
ESPAÑOL
ESPAÑOL<br />
En caso de defectos<br />
Este producto ha sido revisado exhaustivamente antes de salir de fábrica. Cuando<br />
piense que existe un problema, realice los procedimientos indicados más arriba.<br />
En el caso improbable de que se produjera alguna anomalía durante la<br />
utilización, póngase en contacto con su distribuidor. Además, cuando solicite<br />
reparaciones, explique con detalle los síntomas del problema para facilitar su<br />
rápida resolución.<br />
Debido a las mejoras de este producto, las especificaciones pueden cambiar<br />
sin previo aviso.<br />
14
Introduzione<br />
Grazie per aver acquistato l’amplificatore per basso IBANEZ <strong>SW65</strong>.<br />
Leggere attentamente questo manuale prima di usare l’amplificatore<br />
in modo da sfruttarne appieno le caratteristiche e le funzioni disponibili.<br />
Conservare quindi il manuale in un luogo sicuro.<br />
Caratteristiche<br />
L’amplificatore <strong>SW65</strong> prevede 65W di uscita. La sezione diffusori utilizza<br />
un potente altoparlante POWER JAM 1204 originale IBANEZ da<br />
30 cm e un horn tweeter PJPT85 piezo, che garantiscono un suono di<br />
alta qualità unito a una grande facilità d’uso.<br />
Il preamplificatore è dotato di un equalizzatore attivo a 4 bande di<br />
nuova concezione, con gamma ±15 dB, le cui prestazioni soddisfano<br />
ampiamente le più diverse necessità con una possibilità di regolazione<br />
ampia e molto precisa. L’<strong>SW65</strong> è fornito anche di un limitatore interno,<br />
che permette di ottenere un suono con grande attacco alle basse<br />
frequenze, ma con una distorsione minima.<br />
Precauzioni durante l’uso<br />
• Non sottoporre l’amplificatore a forti impatti facendolo cadere, ecc., e<br />
maneggiarlo con cura.<br />
• Installare l’amplificatore in una posizione stabile. Il suono prodotto<br />
dall’amplificatore è diverso a seconda del metodo e del luogo in cui è<br />
installato.<br />
• Non usare o depositare l’amplificatore in luoghi in cui sia esposto a<br />
luce solare diretta, o in ambienti soggetti a notevoli sbalzi di temperatura<br />
e umidità.<br />
• Portare il livello del volume a “0” o spegnere l’amplificatore mentre si<br />
collegano il cavo schermato della chitarra e gli effetti oppure altri cavi<br />
richiesti per il collegamento esterno. Fare attenzione poiché il rumore<br />
generato quando si inseriscono e tolgono le spine può causare seri<br />
guasti all’apparecchiatura.<br />
• Per evitare rischi di incendio, non porre contenitori di liquidi<br />
sull’amplificatore.<br />
• Quando l’<strong>SW65</strong> è collegato ad una presa elettrica, non è<br />
completamente isolato dall’alimentazione anche se l’interruttore power<br />
è spento. Quando non lo si utilizza, spegnere l’interruttore power. Se<br />
non si utilizza l’<strong>SW65</strong> per un lungo periodo, lasciare il cavo di<br />
alimentazione scollegato.<br />
Nomenclatura e funzioni<br />
1. Presa a jack INPUT<br />
Terminale di ingresso per jack di 6,3 mm standard. Serve per collegare il basso<br />
mediante l’uso di un cavo schermato per basso.<br />
2. Interruttore GAIN 10 dB<br />
Quando si utilizza un basso con un’uscita poco potente o se si vuole intensificare<br />
l’effetto del limitatore, è possibile accendere l’interruttore GAIN 10 dB per<br />
amplificare il guadagno del preamplificatore di 10 dB.<br />
3. Comando GAIN<br />
Comando del guadagno del preamplificatore. Aumentando il livello si aumenterà<br />
il volume, ma, superato un dato livello, interverrà un limitatore per impedire la<br />
distorsione e il livello aumenterà in misura minore. Se si continua ad aumentare<br />
il comando, il limitatore interverrà in modo ancora più marcato producendo un<br />
effetto simile a un abbassamento della soglia. Regolare questo comando insieme<br />
all’equalizzatore e al comando VOLUME per ottenere il suono desiderato.<br />
4. Comando BASS<br />
Equalizzatore di smorzamento per le basse frequenze. Amplifica o taglia il livello<br />
della larghezza di banda 100 Hz in passi di ±15 dB.<br />
5. Comando MIDDLE<br />
Equalizzatore dei suoni della gamma delle frequenze medie. È possibile<br />
amplificare o tagliare la larghezza di banda 600 Hz in passi di ±15 dB.<br />
6. Comando TREBLE<br />
Equalizzatore di smorzamento per suoni della gamma delle frequenze alte. È<br />
possibile amplificare o tagliare la larghezza di banda di 4 kHz, o più, in passi di<br />
±15 dB.<br />
7. Comando PRESENCE<br />
Equalizzatore per le frequenze ultra alte. È possibile amplificare o tagliare la<br />
larghezza di banda di 9,4 kHz, o più, in passi di ±15 dB.<br />
8. Comando VOLUME<br />
Regolazione del livello di uscita dell’amplificatore. Aumentando il livello si<br />
aumenterà il volume, ma, superato un dato livello, interverrà un limitatore per<br />
impedire la distorsione e il livello aumenterà in misura minore. Se si continua ad<br />
aumentare il comando, il limitatore interverrà in modo ancora più marcato<br />
producendo un effetto simile a un abbassamento della soglia. Il comando VOL-<br />
UME controlla simultaneamente anche il livello di uscita di CD INPUT.<br />
15<br />
ITALIANO
ITALIANO<br />
9. CD INPUT<br />
Terminali di ingresso a jack fono stereo che possono essere collegati ad un<br />
lettore portatile di CD/MD/cassette o all’uscita per le cuffie dell’impianto stereo.<br />
Utilizzare il comando VOLUME per regolare il volume. Questi ingressi non sono<br />
adatti al collegamento dei terminali a jack LINE OUT.<br />
10. Terminale a jack LINE OUT<br />
Terminale di uscita a jack con un livello di uscita di circa 0 dBm. È possibile<br />
collegarlo ad una console di missaggio esterna o ad una attrezzatura simile.<br />
11. Presa a jack HEADPHONES<br />
Presa di uscita cuffie stereo con jack di 6,3 mm che permette il collegamento di<br />
cuffie. Il suono non viene riprodotto dai diffusori incorporati quando le cuffie<br />
sono in uso.<br />
Attenzione<br />
l’uscita cuffie può produrre un volume molto alto. Quando si utilizzano le cuffie,<br />
abbassare il VOLUME e quindi aumentarlo gradualmente per regolare il volume.<br />
Il rumore e la distorsione audio prodotti dall’eventuale inserimento o<br />
disinserimento dello spinotto a volume alto potrebbe danneggiare sia le cuffie<br />
che l’udito dell’utente.<br />
12. Interruttore POWER<br />
Questo interruttore spegne/accende l’alimentazione. Quando non si utilizza<br />
l’amplificatore, lasciarlo spento.<br />
13. Portafusibile<br />
Se il fusibile si brucia, è possibile che si sia verificato un grave problema interno;<br />
si prega di contattare il proprio rivenditore prima di sostituire il fusibile.<br />
14. AC IN<br />
Collegare a questo connettore il cavo di alimentazione CA in dotazione. Utilizzare<br />
questo amplificatore solo con una tensione di ingresso pari a quella indicata sul<br />
pannello.<br />
15. Terminale a jack SPEAKER OUTPUT<br />
Terminale di uscita a jack del diffusore collegato al sistema di diffusori interni. È<br />
possibile utilizzare questa uscita con un altro sistema di diffusori effettuando i<br />
collegamenti con il cavo degli altoparlanti. L’impedenza del sistema dei diffusori<br />
deve essere superiore a 4 ohm.<br />
16. Terminale a jack EFFECTS LOOP SEND<br />
Terminale di uscita a jack per effetti. Collegare all’uscita dell’effetto. Sebbene<br />
l’ingresso e l’uscita di questo effect loop siano adatti ad effetti compatti, possono<br />
essere utilizzati anche per processori di effetti tipo rack-mount.<br />
17. Terminali a jack EFFECTS LOOP RETURN<br />
Terminale di ingresso a jack per effetti. Collegare l’uscita dell’effetto a questo ingresso.<br />
16<br />
Risoluzioni di problemi<br />
1. L’apparecchiatura non si accende.<br />
• Controllare che il cavo di alimentazione sia stato collegato correttamente.<br />
• Provare a inserire la spina in una presa differente e vedere se si<br />
verifica lo stesso problema.<br />
2. L’apparecchiatura si accende ma non viene udito<br />
alcun suono<br />
• Il basso è collegato correttamente?<br />
• Non si percepisce nessun suono anche dopo aver scollegato tutti i<br />
dispositivi esterni come gli effetti collegati tra basso ed amplificatore<br />
o al loop effetti?<br />
• Utilizzare un cavo schermato diverso e verificare se viene udito un<br />
suono.<br />
• Il volume del basso è su 0?<br />
• (Se il basso ha circuiti attivi) la batteria è scarica?<br />
• C’è audio quando si utilizza un altro basso?<br />
• Verificare se il volume dell’amplificatore è regolato su “0”.<br />
• Verificare se le cuffie sono collegate.<br />
3. Si sente un rumore<br />
• Verificare se niente nell’immediata vicinanza è risonante o batte<br />
contro l’amplificatore e produce il rumore.<br />
• (Se il basso ha circuiti attivi) la batteria è scarica?<br />
• C’è ancora rumore quando si utilizza un basso diverso o un altro<br />
dispositivo esterno con cavo (ad esempio un effetto)?<br />
4. Nessun suono è prodotto nelle cuffie<br />
• Controllare che le cuffie siano inserite correttamente nella presa.<br />
• Collegare un altro paio di cuffie e verificare se il suono è prodotto.<br />
In caso di difetti:<br />
Questo prodotto è stato sottoposto a rigide ispezioni prima di essere spedito dalla<br />
fabbrica. Accertarsi che i procedimenti sopraelencati siano eseguiti quando si<br />
pensa di trovarsi di fronte a un problema. Rivolgersi al rivenditore nell’improbabile<br />
eventualità che si verifichi qualche anomalia durante l’uso. Inoltre, accertarsi che<br />
le caratteristiche del problema vengano spiegate dettagliatamente quando si richiede<br />
una riparazione in modo da facilitarne una esecuzione rapida.<br />
Date le migliorie apportate al questo prodotto, le specifiche possono cambiare<br />
senza previo avviso.
Specifications<br />
■ OUTPUT POWER : 65 W @4 Ω<br />
■ INPUT IMPEDANCE: 1 MΩ<br />
■ EQ<br />
CLEAN CHANNEL<br />
BASS<br />
±15 dB (100 Hz)<br />
MIDDLE ±15 dB (600 Hz)<br />
TREBLE ±15 dB (4 kHz)<br />
PRESENCE ±15 dB (9.4 kHz)<br />
■ HEAD PHONES OUTPUT: 250m W @32 Ω<br />
■ SPEAKER UNIT: POWER JAM 1204C (4 Ω)<br />
RATED INPUT: 80 W (160 W MAX)<br />
■ WEIGHT: 20.2 kg<br />
■ DIMENSIONS: 525 mm(H) × 460 mm(W) × 425 mm(D)<br />
17
Sample settings<br />
Agressive<br />
Walking<br />
Slap<br />
Clean<br />
19
IMPORTANT SAFETY<br />
INSTRUCTIONS<br />
WARNING<br />
When using electric products, basic precautions should always be followed, including<br />
the following :<br />
1) Do not use this product near water – for example, near a bathtub, kitchen, in a<br />
wet basement, or near a swimming pool, or the like.<br />
2) This products and with headphones or speakers, may be capable of producing<br />
sound level that cause permanent hearing loss. Do not operate for a long period<br />
of time at a high volume level or at a level that is uncomfortable. If you experience<br />
an hearing loss or ringing in the ears, you should consult an audiologist.<br />
3) The product should be located away from heat sources such as radiator, heat<br />
registers, or other products that produce heat.<br />
4) The product should be connected to a power supply only of the type described<br />
in the operating instructions or as marked on the product.<br />
5) This product may be equipped with a polarized line plug (one blade wider than<br />
the other). This is a safe feature. If you are unable to insert the plug into the<br />
outlet, contact an electrician to replace your obsolete outlet. Do not defeat the<br />
safety purpose of plug.<br />
6) The power-supply cord of the product should be unplugged from the outlet when<br />
left unused for a long period of time.<br />
7) Care should be taken so that objects do not fall and liquids are not spilled into<br />
the enclosure through openings.<br />
8) The product should be serviced by qualified service personnel when :<br />
a) The power-supply cord or the plug has been damaged; or<br />
b) Objects have fallen, or liquid has been spilled onto the products; or<br />
c) The products has been exposed to rain; or<br />
d) The products does not appear to operate normally or exhibits a marked<br />
change in performance; or<br />
e) The product has been dropped, or the enclosure damaged.<br />
9) Do not attempt to service the product beyond that described in the user- maintenance<br />
instructions. All other servicing should be referred to qualified service<br />
personnel.<br />
SAVE THESE INSTRUCTIONS<br />
Model No : <strong>SW65</strong><br />
The aforementioned equipment fully conforms to the protection<br />
requirements of the following EC Council Directives.<br />
89/336/EEC : ELECTROMAGNETIC COMPATIBILITY<br />
73/23/EEC : LOW VOLTAGE DIRECTIVE<br />
20<br />
JUN01430 COPYRIGHT 2001 PRINTED IN CHINA


