Aquasil Ultra - Caulk
Aquasil Ultra - Caulk
Aquasil Ultra - Caulk

You also want an ePaper? Increase the reach of your titles
YUMPU automatically turns print PDFs into web optimized ePapers that Google loves.
<strong>Aquasil</strong> <strong>Ultra</strong><br />
Smart Wetting ® Impression Material<br />
<strong>Aquasil</strong> <strong>Ultra</strong> XLV | <strong>Aquasil</strong> <strong>Ultra</strong> LV | <strong>Aquasil</strong> <strong>Ultra</strong> Monophase | <strong>Aquasil</strong> <strong>Ultra</strong> Heavy | <strong>Aquasil</strong> <strong>Ultra</strong> Rigid | <strong>Aquasil</strong> <strong>Ultra</strong> Xtra<br />
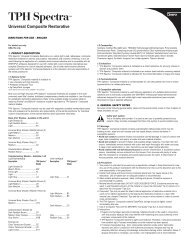
DIRECTIONS FOR USE – ENGLISH<br />
For dental use only.<br />
U.S.A.: Rx only.<br />
1. PRODUCT DESCRIPTION<br />
<strong>Aquasil</strong> <strong>Ultra</strong> Smart Wetting ® Impression Material is a quadrafunctional hydrophilic addition<br />
reaction silicone elastomeric dental impression material with excellent hydrophilic properties,<br />
dimensional accuracy, high tear strength, and resistance to permanent deformation. <strong>Aquasil</strong><br />
<strong>Ultra</strong> Impression Material with Smart Wetting ® improves both wetting on the tooth, tissue and<br />
abutment surfaces and model detail reproduction.<br />
1.1 Delivery forms*<br />
<strong>Aquasil</strong> <strong>Ultra</strong> Smart Wetting ® Impression Material is available in:<br />
• Light-bodied consistency, Medium-bodied consistency and Heavy-bodied consistency<br />
• digit ® Targeted Delivery System unit dose dispensed delivery, 50mL cartridge delivery<br />
and 5:1 DECA delivery for Dynamic Mixing Machines.<br />
• Super Fast Set, Fast Set, Regular Set and Extended Time<br />
*Some delivery forms may not be available in all countries<br />
1.2 Composition<br />
Polydimethylsiloxane polymer; Polymethylhydrogen Siloxane; Silicon Dioxide; Sodium<br />
Aluminosilicate; Organic Platinum Complex; Surfactant; Titanium Dioxide; Metallic Oxide<br />
Pigments; Peppermint Oil<br />
1.3 Indications for use<br />
<strong>Aquasil</strong> <strong>Ultra</strong> Smart Wetting ® Impression Material is indicated for all dental impression techniques.<br />
1.4 Contraindications<br />
<strong>Aquasil</strong> <strong>Ultra</strong> Smart Wetting ® Impression Material is contraindicated for use with patients who<br />
have a history of severe allergic reaction to peppermint oil or any of the components<br />
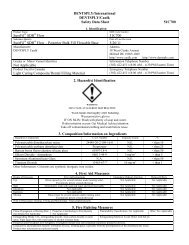
1.5 Technical specifications<br />
Classification: ISO 4823<br />
Type 3: Light-bodied consistency: <strong>Aquasil</strong> <strong>Ultra</strong> XLV, <strong>Aquasil</strong> <strong>Ultra</strong> LV and <strong>Aquasil</strong> <strong>Ultra</strong> Xtra (wash)<br />
Type 2: Medium-bodied consistency: <strong>Aquasil</strong> <strong>Ultra</strong> Monophase, <strong>Aquasil</strong> <strong>Ultra</strong> Heavy and<br />
<strong>Aquasil</strong> <strong>Ultra</strong> Xtra (tray)<br />
Type 1: Heavy-bodied consistency: <strong>Aquasil</strong> <strong>Ultra</strong> Rigid<br />
Working Time (22°C/72°F)...................................Super Fast Set: 0'45"–1'15"<br />
(room temperature mixing and preparation, Fast Set: 1'15"–1'45"<br />
maximum insertion time)<br />
Regular Set: 2'15"–2'45"<br />
<strong>Aquasil</strong> <strong>Ultra</strong> Xtra (wash): 4'30"<br />
<strong>Aquasil</strong> <strong>Ultra</strong> Xtra (tray): 2'30"–3'00"<br />
Working Time (37°C/98°F)...................................Super Fast Set: 0'35" maximum<br />
(intraoral syringing prior to tray insertion) Fast Set: 0'35" maximum<br />
Regular Set: 1'10" maximum<br />
<strong>Aquasil</strong> <strong>Ultra</strong> Xtra (wash): 1'45" maximum<br />
Setting Time (Mouth Removal Time)...................Super Fast Set: 2'30" from start of mix<br />
Fast Set: 3'00" from start of mix<br />
Regular Set: 5'00" from start of mix<br />
<strong>Aquasil</strong> <strong>Ultra</strong> Xtra: 5'30" from start of mix<br />
% Linear Dimensional Change............................< 0.50<br />
% Recovery from deformation............................≥ 98<br />
Detail Reproduction.............................................20 microns<br />
1.6 Compatible tray adhesive<br />
<strong>Aquasil</strong> <strong>Ultra</strong> Smart Wetting ® Impression Material is compatible with conventional tray<br />
adhesives designed for use with vinyl polysiloxane materials (See complete Directions for Use).<br />
2. GENERAL SAFETY NOTES<br />
Be aware of the following general safety notes and the special safety notes in other chapters of<br />
these directions.<br />
Safety alert symbol<br />
This is the safety alert symbol. It is used to alert you to potential personal injury<br />
hazards. Obey all safety messages that follow this symbol to avoid possible injury.<br />
2.1 Warnings<br />
<strong>Aquasil</strong> <strong>Ultra</strong> Smart Wetting ® Impression Material contains polymerizable monomers and<br />
surfactants which may be irritating to skin, eyes and oral mucosa and may cause allergic<br />
contact dermatitis in susceptible persons.<br />
• Avoid eye contact to prevent irritation and possible corneal damage. In case of contact with<br />
eyes, rinse immediately with plenty of water and seek medical attention.<br />
• Avoid skin contact to prevent irritation and possible allergic response. In case of contact,<br />
reddish rashes may be seen on the skin. If contact with skin occurs immediately remove<br />
material with cotton and wash thoroughly with soap and water. In case of skin sensitization<br />
or rash, discontinue use and seek medical attention.<br />
• Avoid ingestion/swallowing of material to prevent irritation or obstruction. If accidental<br />
swallowing occurs, drink lots of water. This material is not hazardous when small quantities<br />
are ingested. Larger quantities may cause bowel obstruction. Seek medical attention in the<br />
event of digestive irregularities.<br />
• Do not use <strong>Aquasil</strong> <strong>Ultra</strong> Smart Wetting ® Impression Material as a temporary reliner. Use of<br />
the material in this manner may cause irritation to the oral mucosa. If symptoms occur<br />
discontinue use immediately. If irritation does not subside consult a physician.<br />
• Avoid multiple impressions at one sitting (more than three of the same arch/area) to prevent<br />
irritation to the oral mucosa. If symptoms occur discontinue use immediately. If irritation does<br />
not subside consult a physician.<br />
2.2 Precautions<br />
• This product is intended to be used only as specifically outlined in the Directions For Use.<br />
Any use of this product inconsistent with the Directions For Use is at the discretion and sole<br />
responsibility of the practitioner.<br />
• Insufficient data exist to support the use of <strong>Aquasil</strong> <strong>Ultra</strong> Smart Wetting ® Impression Material<br />
for impressions on exposed bone. <strong>Aquasil</strong> <strong>Ultra</strong> Smart Wetting ® Impression Material should<br />
only be used on or around intact mucosa.<br />
• Wear suitable protective eyewear, mask, clothing and gloves. Protective eyewear is<br />
recommended for patients.<br />
• Devices marked “single use” on the labeling are intended for single use only. Discard after<br />
use. Do not reuse in other patients in order to prevent cross-contamination.<br />
• All products should be used at room temperature. Higher temperatures reduce work times<br />
and laboratory bench set times (faster), lower temperatures increase them (slower).<br />
• To obtain optimum physical properties, the mix should be completely homogeneous (streak<br />
free).<br />
• <strong>Aquasil</strong> <strong>Ultra</strong> Smart Wetting ® Impression Material should be used with properly fitted, rigid<br />
trays for most applications. Trays with retentive features such as DENTSPLY <strong>Caulk</strong> Rim-<br />
Lock ® Trays or perforations, pretreated with tray adhesive, are recommended. To reduce<br />
gagging, choking or swallowing, do not overfill tray.<br />
• Material should extrude easily: DO NOT USE EXCESSIVE FORCE. Excessive pressure may<br />
result in unanticipated extrusion of the material or cause cartridge rupture.<br />
• Safety and efficacy of <strong>Aquasil</strong> <strong>Ultra</strong> Heavy, <strong>Aquasil</strong> <strong>Ultra</strong> Rigid, <strong>Aquasil</strong> <strong>Ultra</strong> Xtra Tray<br />
material when used as an intraorally syringed (wash) material has not been demonstrated.<br />
• Due to the stiffness of <strong>Aquasil</strong> <strong>Ultra</strong> Rigid Impression Material, severe undercuts should be<br />
blocked out prior to tray insertion. For full arch dentate impressions, select other <strong>Aquasil</strong><br />
<strong>Ultra</strong> viscosities for tray material.<br />
Interactions:<br />
• Do not use Hydrogen peroxide-containing dental materials in conjunction with this product<br />
since they may interfere with the hardening of the polymeric components.<br />
• Use of latex or “sulfur-containing” polymeric gloves, some hand soaps and lotions can lead<br />
to interference with setting reaction. Contamination may accumulate on the surface of the<br />
skin and may not easily wash off. Non-latex gloves worn during use will avoid this possibility.<br />
• Handle cords with college pliers. Do not touch prepared tooth with gloves. Rinse preparation<br />
with copious amounts of water before making the impression.<br />
• <strong>Aquasil</strong> <strong>Ultra</strong> Smart Wetting ® Impression Material should not be intermixed with, or used in<br />
conjunction with, other manufacturer’s vinyl polysiloxanes or any polyether, polysulfide or<br />
conventional (condensation cured) silicones.<br />
• The dual phase, two-step (“putty/wash”) crown and bridge impression technique is only<br />
recommended with <strong>Aquasil</strong> <strong>Ultra</strong> Xtra Tray Material <strong>Aquasil</strong> Putty (all versions) or Reprosil ®<br />
impression materials (available separately) for primary tray impressions.<br />
2.3 Adverse reactions<br />
• Eye contact: irritation and possible corneal damage.<br />
• Skin contact: irritation or possible allergic response. Reddish rashes may be seen on the skin.<br />
• Bowel obstruction or other digestive distress may result from ingestion of mixed impression<br />
material. (See Warnings)<br />
2.4 Storage conditions<br />
Inadequate storage conditions may shorten the shelf life and may lead to malfunction of the<br />
product.<br />
• Store at temperatures between 10ºC/50ºF–24°C/75°F.<br />
• Use the product at room temperature.<br />
• Do not store used cartridges with new (unused) mixing tips attached.<br />
• Do not freeze.<br />
• Protect from moisture.<br />
• Do not use after expiration date.<br />
3. STEP BY STEP INSTRUCTIONS<br />
3.1 Cartridge dispensing gun<br />
1. Insert cartridge into dispensing gun.<br />
2. Bleed cartridge before installing new mixing tip<br />
3. Preparation of syringe/wash material
• Dispense directly to the mouth with the intraoral tip; OR<br />
• An intraoral syringe may be filled with mixed material from the cartridge; OR<br />
• Prepare digit ® Targeted Delivery System unit dose dispensed delivery wash/syringe material<br />
according to the Directions for Use.<br />
NOTE: Do not inject <strong>Aquasil</strong> <strong>Ultra</strong> Heavy, <strong>Aquasil</strong> <strong>Ultra</strong> Rigid or <strong>Aquasil</strong> <strong>Ultra</strong> Xtra Tray<br />
Impression Material intraorally.<br />
4. Disinfect cartridge dispensing gun, cartridge and attached used mixing tip for storage.<br />
• Immediately prior to subsequent usage, remove the used mixing tip, bleed cartridge,<br />
install a new mixing tip.<br />
• Dispose of cartridge when empty. Do not attempt to refill or consolidate used cartridges.<br />
3.2 digit ® Targeted Delivery System unit dose dispensed<br />
1. Insert plunger into open end of syringe barrel.<br />
2. Snap circular disk off of end of cartridge.<br />
3. Insert unit dose cartridge into mixing tip. Ensure both cartridge spurs fully lock into mixing tip<br />
slots. Attach intraoral tip.<br />
4. Insert assembled cartridge/mixing tip (with intraoral tip) into the syringe side opening. Slide<br />
mixing tip through barrel end with cross notches. Pull on mixing tip to ensure complete seating.<br />
5. Dispense the material by applying slow, steady pressure on plunger. Do not use excessive<br />
force.<br />
6. To disassemble, withdraw the plunger, tap mixing tip against the counter to dislodge, and<br />
remove through side opening.<br />
7. Properly discard used cartridge/mixing tip and prepare syringe for reuse.<br />
3.3 DECA cartridge loading<br />
NOTE: Heavy cartridge – dropping may result in damage to the cartridge rendering it unusable.<br />
The DECA Cartridge fits Duomix, duomix II, Pentamix ® , MixStar, Dynamix and Volume<br />
Mix dynamic mixers. Carefully remove dispensing cartridge from the package. Also refer<br />
to separate dynamic mixer manufacturer’s instructions.<br />
1. Remove the cap from the cartridge.<br />
2. Insert the cartridge into the dynamic mixer.<br />
3. Bleed the cartridge before installing a new mixing tip.<br />
4. Install a mixing tip. Use only DENTSPLY mixing tips. Other tips may not seal properly.<br />
5. Place locking ring over the mixing tip and turn until ring is locked in place.<br />
6. Dispense the mixed base and catalyst into an intraoral syringe (<strong>Aquasil</strong> <strong>Ultra</strong> Monophase<br />
only) or a suitable tray.<br />
• Immediately prior to subsequent usage, remove the used mixing tip, bleed cartridge,<br />
install a new mixing tip.<br />
3.4 Impression technique: Single or Dual Phase one-step (“double-mix”) Technique with a<br />
Rigid Tray or with Double Arch Technique<br />
NOTE: Tray and wash material mix timing – It is highly recommended to utilize an assistant to<br />
assure simultaneous syringing and tray loading.<br />
1. Assure hemostasis and clean the field with air water spray.<br />
2. Syringe material: Backfill the impression syringe or attach an intraoral tip to the end of the<br />
mixing tip, or prepare digit ® Targeted Delivery System unit dose dispensed syringe<br />
Tray material: Dispense material (assistant) into impression tray. Do not overfill tray.<br />
3. Simultaneous with tray loading, syringe (dentist) completely around the preparation/abutment.<br />
NOTE: Tray and wash material insertion timing:<br />
• Super Fast Set wash and tray material: Loaded tray must be inserted within 35 seconds<br />
from time of first syringing of wash material intraorally.<br />
• Fast Set wash and tray material: Loaded tray must be inserted within 35 seconds from time<br />
of first syringing of wash material intraorally.<br />
• Regular Set wash and tray material: Loaded tray must be inserted within 1 minute 10<br />
seconds from time of first syringing of wash material intraorally.<br />
• <strong>Aquasil</strong> <strong>Ultra</strong> Xtra extended time wash and tray material: Loaded tray must be inserted<br />
within 1 minute 45 seconds from time of first syringing of wash material intraorally.<br />
4. Insert filled tray into the mouth.<br />
5. Minimum Removal Time (from the start of mix)<br />
• Super Fast Set: 2 minutes 30 seconds<br />
• Fast Set: 3 minutes<br />
• Regular Set: 5 minutes<br />
• <strong>Aquasil</strong> <strong>Ultra</strong> Xtra: 5 minutes 30 seconds<br />
NOTE: If Regular Set Wash is used with Fast Set Tray material, Minimum Removal Time is 4<br />
minutes from start of mix.<br />
6. Follow disinfection procedures before shipping and/or pouring.<br />
Timing Guide Super Fast Set: up to 0'35" (35 sec) Super Fast Set: 2'30" (2 min 30 sec)<br />
Fast Set: up to 0'35" (35 sec)<br />
Fast Set: 3'00" (3 min)<br />
Regular Set: up to 1'10" (1 min 10 sec) Regular Set: 5'00" (5 min)<br />
0'00" (0 sec)<br />
<strong>Aquasil</strong> <strong>Ultra</strong> Xtra: up to 1'45" (1 min 45 sec) <strong>Aquasil</strong> <strong>Ultra</strong> Xtra: 5'30" (5 min 30 sec)<br />
Begin simultaneous Complete syringing and seat loaded tray Remove set impression<br />
syringing and tray loading<br />
3.5 Impression technique: Dual Phase two-step (“putty-wash”) Technique with a primary tray<br />
impression<br />
1. Complete primary impression with <strong>Aquasil</strong> <strong>Ultra</strong> Xtra Tray, <strong>Aquasil</strong> Putty or Reprosil ® Tray<br />
material.<br />
• Place one or more polyethylene plastic sheets over the impression material surface. This<br />
sheet creates the uniform spacing required for this technique. It also protects the surface<br />
from contamination.<br />
• Insert filled tray into the mouth. Move tray slightly from side to side and back and forth.<br />
This creates the spacing for the wash material.<br />
• Remove tray from the mouth when material has reached a rubbery consistency and set<br />
aside. Do not disturb impression until fully set.<br />
• Remove polyethylene sheet, rinse impression with water and air dry.<br />
2. It is recommended to utilize an assistant and two cartridge guns, or one cartridge gun and<br />
digit ® Targeted Delivery System unit dose dispensed syringe to assure simultaneous syringing<br />
and tray loading.<br />
3. Follow impression steps above, using wash material for both intraoral syringing and loading<br />
into primary tray impression.<br />
3.6 Impression Technique: Edentulous/Overdenture Impression Technique<br />
<strong>Aquasil</strong> <strong>Ultra</strong> Monophase, <strong>Aquasil</strong> <strong>Ultra</strong> Heavy and <strong>Aquasil</strong> <strong>Ultra</strong> Rigid are acceptable for border<br />
molding.<br />
1. Border Molding Technique<br />
• Dispense material on to the borders of the tray.<br />
• Insert the tray and perform conventional border molding techniques.<br />
• When material has reached a firm consistency, remove tray and examine borders. The<br />
addition of a small mix can be used if voids or deficient areas are present. Over-extensions<br />
can be easily removed with a scalpel blade.<br />
2. The final impression can be made with <strong>Aquasil</strong> <strong>Ultra</strong> XLV or LV, <strong>Aquasil</strong> <strong>Ultra</strong> Monophase,<br />
<strong>Aquasil</strong> <strong>Ultra</strong> Heavy or <strong>Aquasil</strong> <strong>Ultra</strong> Xtra Material.<br />
3. Insert filled tray into the mouth.<br />
4. Observe the Minimum Removal Time of the selected <strong>Aquasil</strong> <strong>Ultra</strong> final impression material.<br />
5. Follow disinfection procedures before shipping and/or pouring.<br />
3.7 Impression technique: Duplication of Models<br />
1. Load the impression tray with <strong>Aquasil</strong> <strong>Ultra</strong> tray material.<br />
2. It is suggested to simultaneously syringe, using <strong>Aquasil</strong> <strong>Ultra</strong> wash material, completely<br />
around the model teeth.<br />
3. Seat model into the loaded tray. Retain impression in position until firmly set.<br />
4. Remove model from impression by pulling slowly to break seal.<br />
4. HYGIENE<br />
Cross-contamination<br />
• Do not reuse single use products. Dispose in accordance with local regulations.<br />
• Reprocess reusable products as described below.<br />
4.1 Cleaning the dispenser<br />
The cartridge dispensing guns and digit ® Targeted Delivery System syringe may be cleaned by<br />
scrubbing with hot water and soap or detergent. Excess material may be cleaned with alcoholmoistened<br />
gauze. Refer to Dynamic Mixer manufacturer’s instructions for dispenser cleaning<br />
and disinfection instructions.<br />
4.2 Disinfection of the dispenser gun and cartridge and digit ® Targeted Delivery System<br />
syringe<br />
Disinfect dispenser guns, cartridges and used tips left in place on cartridges for storage and<br />
digit ® Targeted Delivery System syringe with a hospital-level tuberculocidal disinfectant<br />
according to national and local regulations. Use impregnated wipes not sprays. NOTE: Vigorous<br />
wiping can destroy the label. Wipe cartridge gently. Some phenolic based agents and iodophor<br />
based products may cause surface staining.<br />
Agents containing organic solvents, such as alcohol may tend to dissolve the plastic dispenser<br />
and plunger. The disinfectant manufacturer’s directions should be followed properly for optimum<br />
results.<br />
Sterilization<br />
Following cleaning and disinfection, digit ® Targeted Delivery System syringe may be steam<br />
autoclaved at 134°C, minimum 3 minute holding time. Technique Tip: Unset <strong>Aquasil</strong> <strong>Ultra</strong><br />
Smart Wetting ® Impression Material can be removed from clothing with dry cleaning solvent.<br />
4.3 Disinfection of the impression material<br />
The impression should be disinfected with a hospital-level tuberculocidal disinfectant according<br />
to national and local regulations.<br />
• Iodophors, sodium hypochlorite (0.525%), chlorine dioxide, and dual or synergized quaternary<br />
ammoniums are approved disinfectants.<br />
• Thoroughly soak by spraying or immerse the impression in any recommended hospital level<br />
disinfectant for the contact time recommended by the disinfectant manufacturer for optimum<br />
results.<br />
• Water-based disinfectant solutions are preferred.<br />
4.4 Casting<br />
• The impression should be removed from the disinfectant, rinsed with water and lightly air dried.<br />
• The impression may be poured in plaster or stone 30 minutes after disinfection or delayed up<br />
to fourteen days. For epoxy dies, delay pour 60 minutes.<br />
• Do not store impression in direct sunlight.<br />
• If the impression is to be shipped, use suitable packaging to preclude distortion.<br />
• The material is compatible with a range of dental plasters and die stones. Impressions may be<br />
silver or copper-plated.<br />
5. LOT NUMBER AND EXPIRATION DATE<br />
1. Do not use after expiration date. ISO standard uses: “YYYY/MM.”<br />
2. The following numbers should be quoted in all correspondences:<br />
• Reorder number<br />
• Lot number<br />
• Expiration date<br />
Manufactured by:<br />
DENTSPLY <strong>Caulk</strong><br />
38 West Clarke Avenue<br />
Milford, DE 19963 USA<br />
Tel: 1-302-422-4511<br />
www.dentsply.com<br />
DENTSPLY DETREY GmbH<br />
78467 Konstanz<br />
Germany<br />
Tel.: 49-7531-583-0<br />
www.dentsply.de<br />
Distributed by:<br />
DENTSPLY Canada<br />
161 Vinyl Court<br />
Woodbridge, Ontario<br />
L4L 4A3 Canada<br />
Pentamix, MixStar, Dynamix and Volume Mix are not registered trademarks of DENTSPLY International.<br />
©2013 DENTSPLY International. All Rights Reserved. Form #578002 (R 10/11/13)
<strong>Aquasil</strong> <strong>Ultra</strong><br />
Material de Impresión Smart Wetting ®<br />
<strong>Aquasil</strong> <strong>Ultra</strong> XLV | <strong>Aquasil</strong> <strong>Ultra</strong> LV | <strong>Aquasil</strong> <strong>Ultra</strong> Monophase | <strong>Aquasil</strong> <strong>Ultra</strong> Heavy | <strong>Aquasil</strong> <strong>Ultra</strong> Rigid | <strong>Aquasil</strong> <strong>Ultra</strong> Xtra<br />
INSTRUCCIONES DE USO – ESPAÑOL<br />
Exclusivamente para uso dental<br />
U.S.A.: Venta exclusiva con receta<br />
1. DESCRIPCIÓN DEL PRODUCTO<br />
<strong>Aquasil</strong> <strong>Ultra</strong> Smart Wetting ® es un material dental elastómero cuadrafuncional de reacción<br />
hidrofílica de adición. Presenta excelentes propiedades hidrofilicas, extraordinaria precisión<br />
dimensional, gran resistencia al desgarro y resistencia a la deformación permanente. El<br />
material de impresión <strong>Aquasil</strong> <strong>Ultra</strong> con Smart Wetting ® mejora la humectabilidad de los<br />
dientes y tejidos, y las superficies de contacto y la reproducción de los detalles en el modelo.<br />
1.1 Presentaciones*<br />
El material de impresión <strong>Aquasil</strong> <strong>Ultra</strong> Smart Wetting ® se encuentra disponible en las siguientes<br />
presentaciones:<br />
• Consistencia Light-bodied, consistencia Medium-bodied y consistencia Heavy-bodied<br />
• Sistema unidosis digit ® y en cartuchos de 50mL Y presentación 5:1 DECA para usar con las<br />
máquinas Dynamic Mixing.<br />
• Super Fast Set, Fast Set, Regular Set y Extended Time<br />
*Algunas presentaciones pueden no estar disponibles en todos los países<br />
1.2 Composición<br />
Polímero de Polidimetilsiloxano, Polimetilhidrógenosiloxano, Dióxido de silicio, Aluminosilicato<br />
de sodio, Complejo orgánico de platino, Surfactantes; Dióxido de titanio, Pigmentos de óxidos<br />
metálicos, Aceite de menta.<br />
1.3 Indicaciones de uso<br />
El material de impresión <strong>Aquasil</strong> <strong>Ultra</strong> Smart Wetting ® está indicado para todas las técnicas de<br />
impresión dental.<br />
1.4 Contraindicaciones<br />
<strong>Aquasil</strong> <strong>Ultra</strong> Smart Wetting ® está contraindicado en pacientes que presentan una historia de<br />
reacciones alérgicas severas al aceite de menta ó a cualquier otro componente.<br />
1.5 Especificaciones técnicas<br />
Clasificación: ISO 4823<br />
Tipo 3: Consistencia Light-bodied: <strong>Aquasil</strong> <strong>Ultra</strong> XLV, <strong>Aquasil</strong> <strong>Ultra</strong> LV and <strong>Aquasil</strong> <strong>Ultra</strong> Xtra (wash)<br />
Tipo 2: Consistencia Medium-bodied: <strong>Aquasil</strong> <strong>Ultra</strong> Monophase, <strong>Aquasil</strong> <strong>Ultra</strong> Heavy and<br />
<strong>Aquasil</strong> <strong>Ultra</strong> Xtra (tray)<br />
Tipo 1: Consistencia Heavy-bodied: <strong>Aquasil</strong> <strong>Ultra</strong> Rigid<br />
Tiempo de trabajo (22°C/72°F) . . . . . . . . . . . . . Super Fast Set (Fraguado súper rápido)<br />
0'45"–1'15"<br />
(Mezclado y preparación a temperatura, . . . . . . Fast Set (Fraguado rápido) 1'15"–1'45"<br />
ambiente, tiempo de inserción máximo) . . . . . . Regular Set (Fraguado normal): 2'15"–2'45"<br />
<strong>Aquasil</strong> <strong>Ultra</strong> Xtra (wash) 4'30"<br />
<strong>Aquasil</strong> <strong>Ultra</strong> Xtra (tray) 2'30"–3'00"<br />
Tiempo de trabajo (37°C/98°F) . . . . . . . . . . . . . Super Fast Set (Fraguado súper rápido): 0'35"<br />
Máximo<br />
(Aplicación intra- oral de la jeringa antes. . . . . . Fast Set (Fraguado rápido): 0'35" Máximo<br />
de la inserción de la cubeta) . . . . . . . . . . . . . . . Regular Set (Fraguado normal): 1'10" Máximo<br />
<strong>Aquasil</strong> <strong>Ultra</strong> Xtra (wash): 1'45" Máximo<br />
Tiempo de trabajo . . . . . . . . . . . . . . . . . . . . . . . Super Fast Set (Fraguado súper rápido): 2'30"<br />
(Tiempo de remoción en boca) . . . . . . . . . . . . . . . . Desde el inicio de la mezcla)<br />
Fast Set (Fraguado rápido): 3'00" Desde el<br />
inicio de la mezcla)<br />
Regular Set: 5'00" Desde el inicio de la mezcla<br />
<strong>Aquasil</strong> <strong>Ultra</strong> Xtra: 5'30" Desde el inicio de la<br />
mezcla<br />
% Variación dimensional lineal . . . . . . . . . . . . . < 0.50<br />
% Recuperación tras la deformación . . . . . . . . ≥ 98<br />
Reproducción de los detalles . . . . . . . . . . . . . . 20 micrómetros<br />
1.6 Compatibilidad con adhesivos de cubeta<br />
El material de impresión <strong>Aquasil</strong> <strong>Ultra</strong> Smart Wetting ® es compatible con todos los adhesivos<br />
de cubeta convencionales diseñados para su uso con materiales de vinyl polisiloxanos (Véanse<br />
las instrucciones de uso completas).<br />
2. OBSERVACIONES GENERALES DE SEGURIDAD<br />
Tenga en cuenta las siguientes observaciones generales de seguridad y las observaciones de<br />
seguridad especiales que se encuentran en otros apartados de estas instrucciones.<br />
Símbolo de advertencia de seguridad<br />
Este símbolo advierte de riesgos potenciales de lesiones. Siga todas las<br />
indicaciones de seguridad que aparecen tras dicho símbolo para evitar posibles<br />
daños.<br />
2.1 Advertencias<br />
El material de impresión <strong>Aquasil</strong> <strong>Ultra</strong> Smart Wetting ® contiene monómeros polimerizables y<br />
surfactantes que pueden ser irritantes para la piel, los ojos y la mucosa y pueden provocar<br />
dermatitis alérgica en personas susceptible.<br />
• Evite el contacto con los ojos para prevenir irritaciones y posibles daños en la córnea. En<br />
caso de contacto con los ojos, enjuáguese inmediatamente con agua abundante y acuda al<br />
médico.<br />
• Evite el contacto con la piel para prevenir posibles reacciones alérgicas. En caso de<br />
contacto puede aparecer enrojecimiento y/o erupción. Sí esto sucede, elimine<br />
inmediatamente el material con un algodón y lave abundantemente con agua y jabón. En<br />
caso de sensibilidad cutánea ó erupción, suspenda su uso y acuda al médico.<br />
• Evite ingerir ó tragar el material para evitar irritaciones y obstrucciones. En caso de<br />
ingestión accidental, beba agua en abundancia. Este material no es peligroso sí se ingieren<br />
pequeñas cantidades. La ingestión de una cantidad mayor puede producir obstrucciones. Si<br />
aparecen trastornos digestivos, acuda al médico.<br />
• No use el material de impresión <strong>Aquasil</strong> <strong>Ultra</strong> Smart Wetting ® como un rebase provisional. El<br />
uso del material para este fin puede causar irritación de la mucosa oral. Sí aparecen<br />
síntomas, suspenda su uso inmediatamente, y si la irritación persiste, consulte a un médico.<br />
• Evite tomar varias impresiones en una misma session (más de tres en una misma arcada<br />
ó zona) para evitar que se produzcan irritaciones en la mucosa. Sí aparecen síntomas,<br />
suspenda su uso inmediatamente. Sí la irritación persiste, consulte a un médico.<br />
2.2 Precauciones<br />
• Este producto está destinado a ser utilizado únicamente según lo indicado expresamente en<br />
las instrucciones de uso- Cualquier uso de este producto no especificado en las<br />
instrucciones de uso, será responsabilidad exclusiva del profesional.<br />
• No se dispone de datos suficientes que apoyen el uso del material de impresión <strong>Aquasil</strong><br />
<strong>Ultra</strong> Smart Wetting ® para realizar impresiones sobre hueso expuesto. Aquasul <strong>Ultra</strong> Smart<br />
Wetting ® se debe usar únicamente sobre la mucosa intacta. Los productos marcados como<br />
“de un solo uso” deben usarse una sola vez. Deséchelo después de utilizarlo. No los reutilice<br />
en otros pacientes a fin de evitar una posible contaminación cruzada.<br />
• Utilice gafas, mascarilla, ropa y guantes de protección apropiados. Se recomienda que los<br />
pacientes también utilicen gafas de protección.<br />
• Todos los productos se deben de utilizar a temperatura ambiente. Temperaturas más altas<br />
disminuyen los tiempos de trabajo y de fraguado de laboratorio y temperaturas más bajas lo<br />
aumentan.<br />
• Para obtener unas propiedades físicas optimas, la mezcla debe de ser completamente<br />
homogénea (sin vetas).<br />
• El material de impresión <strong>Aquasil</strong> <strong>Ultra</strong> Smart Wetting ® debe de utilizarse en la mayoría de<br />
impresiones con cubetas rígidas. Se recomienda usar cubetas con características retentivas<br />
como las DENTSPLY <strong>Caulk</strong> Rim-Lock ® ó cubetas perforadas previamente tratadas con<br />
adhesivos. No llene excesivamente la cuneta para evitar nauseas atragantamientos ó<br />
ingestión del material.<br />
• El material debe de salir con facilidad: NO APLIQUE UNA FUERZA EXCESIVA. Un exceso de<br />
presión puede provocar una salida imprevista del material ó provocar la ruptura del cartucho.<br />
• No se ha demostrado seguridad ni eficacia de <strong>Aquasil</strong> <strong>Ultra</strong> Heavy, <strong>Aquasil</strong> <strong>Ultra</strong> Rigid, ni<br />
<strong>Aquasil</strong> <strong>Ultra</strong> Xtra Tray cuando se usa con una jeringa intra-oral (wash).<br />
• Debido a la rigidez del material de impresión <strong>Aquasil</strong> <strong>Ultra</strong> Rigid, deben de llevarse a cabo<br />
varias retenciones antes de insertar la cubeta. Para impresiones completas de toda la<br />
arcada, seleccione una viscosidad cubeta (tray) de <strong>Aquasil</strong> <strong>Ultra</strong>.<br />
Interacciones:<br />
• No utilice materiales que contengan Peróxido de Hidrógeno en combinación con <strong>Aquasil</strong><br />
<strong>Ultra</strong>, porque puede interferir con el fraguado de los componentes poliméricos.<br />
• El uso de guantes de látex o con polímeros que contengan azufre, así como también algunos<br />
jabones y lociones, puede interferir con la reacción de fraguado. Los contaminantes de estos<br />
materiales, se pueden acumular en la superficie de la piel y es muy difícil eliminarlos. El uso<br />
de guantes que no contengan látex disminuye esta posibilidad.<br />
• Maneje el hilo retractor con pinzas. No toque los dientes preparados con los guantes. Lave la<br />
preparación con agua abundante antes de tomar la impresión.<br />
• El material de impresión <strong>Aquasil</strong> <strong>Ultra</strong> Smart Wetting ® I no debe de mezclarse ni utilizarse en<br />
combinación con vinilpolisiloxanos de otros fabricantes, ni con ningún poliéter, polisulfuro ni<br />
con silicona convencional (de fraguado por condensación).<br />
• La técnica de impresión de dos fases y dos pasos (“putty/wash”) para coronas y puentes,<br />
sólo se recomienda con los materiales de impresión <strong>Aquasil</strong> <strong>Ultra</strong> Xtra Tray, <strong>Aquasil</strong> Putty<br />
(todas las presentaciones) ó con Reprosil ® (disponibles por separado) para impresiones<br />
primarias con cubetas.<br />
2.3 Reacciones adversas<br />
• Contacto con los ojos: Irritación y posibles daños en la córnea.<br />
• Contacto con la piel: Irritación ó posible reacción alérgica. Se pueden observar pequeñas<br />
erupciones cutáneas.<br />
• La ingestión de material de impresión mezclado, puede provocar obstrucción intestinal y<br />
otros trastornos digestivos. (Véase el apartado “Advertencias”)
2.4 Condiciones de conservación<br />
El almacenamiento en condiciones inadecuadas puede acortar el período de conservación y<br />
afectar negativamente las propiedades del material<br />
• Consérvese a temperaturas entre los 10°C/50°F y los 24°C/75°F.<br />
• Utilice el producto a temperatura ambiente<br />
• No almacene cartuchos usados equipados con puntas de mezcla nuevas.<br />
• No congele el producto<br />
• Protéjalo de la humedad.<br />
• Y no lo utilice después de la fecha de caducidad.<br />
3. INSTRUCCIONES PASO A PASO<br />
3.1 Pistola dispensadora de cartuchos<br />
1. Coloque el cartucho en la pistola dispensadora.<br />
2. Purgue el cartucho antes de montar la nueva punta de mezcla<br />
3. Preparación del material de jeringa –wash-<br />
• Dispense directamente en la boca con la punta intraoral O BIEN<br />
• Rellene una jeringa intraoral con material mezclado del cartucho O BIEN<br />
• Prepare el material digit ® unidosis fluido (wash) segun las correspondientes instrucciones<br />
de uso.<br />
IMPORTANTE: No inyecte material <strong>Aquasil</strong> <strong>Ultra</strong> Heavy, <strong>Aquasil</strong> <strong>Ultra</strong> Rigid ni <strong>Aquasil</strong> <strong>Ultra</strong><br />
Xtra Tray dentro de la boca.<br />
4. Antes de almacenar, desinfecte la pistola dispensadora de cartuchos, el cartucho y la punta<br />
de mezcla.<br />
• Inmediatamente antes del siguiente uso, retire la punta de mezcla usada, purgue el<br />
cartucho y monte una nueva punta de mezcla.<br />
• Deseche el cartucho cuando esté vacío. No rellene ni trasvase los cartuchos usados.<br />
3.2 Sistema digit ® unidosis<br />
1. Coloque el émbolo en el extremo abierto del depósito de la jeringa.<br />
2. Ajustar el disco circular fuera del cartucho<br />
3. Introduzca el cartucho unidosis en la punta de mezcla. Asegúrese que ambos cartuchos<br />
encajen perfectamente en las ranuras de la punta de mezcla. Coloque la punta intraoral.<br />
4. Inserte el cartucho montado en la punta de mezcla (con la punta intraoral) dentro del lado<br />
abierto de la jeringa. Deslice la punta de mezcla por el extremo del émbolo con las muescas<br />
cruzadas. Tire de la punta de mezcla para asegurarse que se han colocado bien.<br />
5. Dispense el material lentamente con presión constante sobre el émbolo. Sin aplicar<br />
demasiada presión.<br />
6. Para desmontarlo, retire el émbolo, golpee ligeramente la punta de mezcla sobre el mueble<br />
y retírelo por el lado abierto.<br />
7. Deseche adecuadamente el cartucho y la punta de mezcla y deje la jeringa preparada para<br />
el siguiente uso.<br />
3.3 Carga de cartuchos DECA <br />
OBSERVACIÓN: El cartucho es muy pesado, si se deja caer puede dañarse y quedar<br />
inutilizable. El cartucho DECA se adapta perfectamente a los mezcladores<br />
dinámicos, Duomix, duomix II, Pentamix ® , MixStar, Dynamix y Volume Mix.<br />
Retire cuidadosamente del envase el cartucho dispensado. Consulte también<br />
las instrucciones del fabricante del mezclador dinámico.<br />
1. Quite la tapa del cartucho.<br />
2. Coloque el cartucho en el mezclador dinámico.<br />
3. Purgue el cartucho antes de colocar una nueva punta de mezcla.<br />
4. Monte una punta de mezcla. Use únicamente las puntas de mezcla DENTSPLY. Otras<br />
puntas pueden no ajustarse adecuadamente.<br />
5. Coloque el anillo de cierre sobre la punta de mezcla y gírelo hasta que se ajuste<br />
perfectamente en su sitio.<br />
6. Dispense la mezcla de base y catalizador dentro de una jeringa intraoral (<strong>Aquasil</strong> <strong>Ultra</strong><br />
Monophase únicamente) ó en una cubeta adecuada.<br />
• Inmediatamente antes del siguiente uso, retire la punta de mezcla usada, purgue el<br />
cartucho y monte una nueva punta de mezcla.<br />
3.4 Técnica de impresión: Técnica de una ó dos fases en un solo paso (“doble mezcla”) con<br />
cubeta rígida ó con técnica de doble arco<br />
OBSERVACIÓN: Tiempos de mezcla para el material de consistencia media (Tray) y fluida<br />
(wash) – Es muy recomendable trabajar con auxiliar para que la aplicación<br />
con jeringa sea simultánea a la carga de la cubeta.<br />
1. Asegure la hemostásis y limpie la zona de aplicación con chorro de aire y agua.<br />
2. Material de jeringa – fluido-: Cargue la jeringa de impresión ó fije una punta intraoral en el<br />
extremo de la punta de mezcla ó prepare el sistema de jeringas monodosis digit ® .<br />
Material de consistencia media (Tray), la auxiliar debe dispensar el material en la cubeta de<br />
impresión sin llenarla en exceso.<br />
3. Al mismo tiempo que la auxiliar carga la cubeta, el odontólogo aplica con la jeringa todo el<br />
material fluido (wash) alrededor de la preparación ó de los pilares.<br />
OBSERVACIÓN: Tiempos de inserción para el material de consistencia media (tray) y de<br />
consistencia fluida (wash):<br />
• Materiales de consistencia media y fluida de fraguado súper rápido: La cubeta cargada<br />
debe de colocarse en la boca en el plazo de 35 segundos desde la primera aplicación<br />
intraoral del material fluido.<br />
• Materiales de consistencia media y fluida de fraguado rápido: La cubeta cargada debe de<br />
colocarse en la boca en el plazo de 35 segundos desde la primera aplicación intraoral del<br />
material fluido.<br />
• Materiales de consistencia media (tray) y de consistencia fluida (wash) de fraguado<br />
normal: La cubeta cargada debe de colocarse en la boca, en el plazo de 1 minuto y 10<br />
segundos desde la primera aplicación intraoral del material fluido.<br />
• <strong>Aquasil</strong> <strong>Ultra</strong> Xtra de consistencia fluida (wash) y media (tray) de tiempo prolongado: La<br />
cubeta debe de colocarse en el plazo de 1 minuto y 45 segundos desde la primera<br />
aplicación intraoral del material fluido.<br />
4. Inserte en la boca la cubeta cargada.<br />
5. Tiempo mínimo para la retirada (desde el principio de la mezcla)<br />
• Fraguado súper rápido: 2 minutos 30 segundos<br />
• Fraguado rápido: 3 minutos<br />
• Fraguado normal: 5 minutos<br />
• <strong>Aquasil</strong> <strong>Ultra</strong> Xtra: 5 minutos y 30 segundos<br />
OBSERVACIÓN: Sí se utiliza consistencia fluida (wash) de fraguado normal con material de<br />
consistencia media (tray) de fraguado rápido, el tiempo mínimo para la<br />
retirada es de 4 minutos desde el principio de la mezcla.<br />
6. Aplique los correspondientes procedimientos de desinfección antes del transporte y/o el<br />
vaciado.<br />
Guía de Tiempos<br />
Fraguado súper rápido: Hasta 0'35" Fraguado súper rápido: 2'30"<br />
Fraguado rápido: Hasta 0'35"<br />
Fraguado rápido: 3'00"<br />
Fraguado normal: Hasta 1'10"<br />
Fraguado normal: 5'00"<br />
0'00" (0 seg) <strong>Aquasil</strong> <strong>Ultra</strong> Xtra: Hasta 1'45" <strong>Aquasil</strong> <strong>Ultra</strong> Xtra: 5'30"<br />
Comienzo de la aplicación con Finalización de la aplicación con jeringa e Retirada de la impresión ya<br />
jeringa y carga de la cubeta inserción de la cubeta cargada fraguada<br />
(de forma simultá nea)<br />
3.5 Técnica de impresión: Dos fases, dos pasos (“putty-wash”) con una cubeta de impresión<br />
primaria.<br />
1. Tome la primera impresión (primaria) con quasil <strong>Ultra</strong> Xtra Tray (consistencia media), <strong>Aquasil</strong><br />
Putty ó Reprosil ® consistencia media.<br />
• Coloque una ó más láminas de plástico sobre la superficie del material de impresión. Esta<br />
lamina crea un espacio uniforme necesario para esta técnica. Además protege la<br />
superficie de la contaminación.<br />
• Coloque la cubeta cargada en la boca. Mueva la cubeta ligeramente de lado a lado y de<br />
afuera hacia adentro. Con esto logramos crear espacio para el material fluido (wash).<br />
• Retire la cubeta de la boca cuando el material haya alcanzado una consistencia elástica y<br />
déjela a un lado. No mueva ni toque la impresión hasta que haya fraguado por completo.<br />
• Retire la lámina de plástico, lave la impresión con agua y seque con aire.<br />
2. Se recomienda que trabaje con auxiliar y con dos pistolas de cartuchos, ó con una pistola<br />
de cartucho y un sistema digit ® monodosis, para asegurar que simultáneamente aplica el<br />
material de jeringa y la colocación de la cubeta.<br />
3. Siga los pasos para la impresión indicados arriba, utilizando material fluido (wash) tanto en<br />
la jeringa como en la cubeta primaria.<br />
3.6 Técnica de impresión: Para edentulos /sobredentaduras<br />
Para el moldeado de los bordes usamos <strong>Aquasil</strong> <strong>Ultra</strong> Monophase, <strong>Aquasil</strong> <strong>Ultra</strong> Heavy y<br />
<strong>Aquasil</strong> <strong>Ultra</strong> Rigid.<br />
1. Técnica de moldeado de bordes<br />
• Dispense el material sobre los bordes de la cubeta.<br />
• Inserte la cubeta y aplique las técnicas habituales de moldeado de bordes.<br />
• Cuando el material ha alcanzado una consistencia firme, retire la cubeta y examine los<br />
bordes. Puede añadir una pequeña cantidad de mezcla sí existen huecos ó zonas<br />
deficientes. Las sobre extensiones pueden eliminarse fácilmente con una hoja de bisturí.<br />
2. La impresión final puede tomarse con material <strong>Aquasil</strong> <strong>Ultra</strong> XLV ó LV, <strong>Aquasil</strong> <strong>Ultra</strong><br />
Monophase, <strong>Aquasil</strong> <strong>Ultra</strong> Heavy ó <strong>Aquasil</strong> <strong>Ultra</strong> Xtra.<br />
3. Inserte en la boca la cubeta cargada.<br />
4. Asegúrese de mantener el tiempo de retirada mínimo del material de impresión de <strong>Aquasil</strong><br />
<strong>Ultra</strong> seleccionado.<br />
5. Aplique los correspondientes procedimientos de desinfección antes del transporte ó el<br />
vaciado.<br />
3.7 Técnica de impresión: Duplicación de modelos<br />
1. Cargue la cubeta de impresión con material <strong>Aquasil</strong> <strong>Ultra</strong> de consistencia media (tray)<br />
2. Recomendamos aplicar simultáneamente con una jeringa, material de impresión <strong>Aquasil</strong><br />
<strong>Ultra</strong> de consistencia fluida (wash) alrededor de todos los dientes del modelo.<br />
3. Coloque el modelo sobre la cubeta cargada. Mantenga la impresión en su posición hasta<br />
que haya fraguado por completo.<br />
4. Retire el modelo de la impresión traccionando lentamente para romper el vacío.<br />
4. HIGIENE<br />
Contaminación cruzada<br />
• No reutilice los productos destinados a un solo uso. Deséchelos siguiendo la<br />
normativa local.<br />
• Reacondicione los productos reutilizables según se describe a continuación.<br />
4.1 Limpieza del dispensador<br />
Las pistolas dispensadoras de cartuchos y las jeringas del sistema digit ® pueden limpiarse<br />
frotándolas con agua caliente y jabón o detergente. Los restos de material pueden limpiarse<br />
con una gasa empapada con alcohol. Consulte las instrucciones del fabricante del mezclador<br />
dinámico relativas a la limpieza y desinfección del dispensador.<br />
4.2 Desinfección de la pistola dispensadora, el cartucho y la jeringa del sistema digit ®<br />
Desinfecte las pistolas dispensadoras, los cartuchos, las puntas usadas, y las jeringas del<br />
sistema digit ® utilizando un desinfectante tuberculicida de tipo hospitalario siguiendo la<br />
normativa nacional y local. Utilice toallitas impregnadas, no aerosoles. OBSERVACIÓN: Un<br />
frotado excesivamente vigoroso puede destruir la etiqueta. Frote el cartucho suavemente.<br />
Algunos productos basados en compuestos fenólicos ó yodoforos pueden provocar manchas<br />
superficiales.<br />
Los agentes con disolventes orgánicos, tales como el alcohol, pueden tender a disolver el<br />
émbolo y el dispensador de plástico. Siga las instrucciones del fabricante del desinfectante<br />
para obtener resultados óptimos.
Esterilización<br />
Después de la limpieza y la desinfección, el sistema de jeringas digit ® tiene que ser esterilizado<br />
en autoclave a 134°C, un mínimo de 3 minutos. Truco de la técnica: El material de impresión<br />
<strong>Aquasil</strong> <strong>Ultra</strong> Smart Wetting ® que no ha fraguado, se puede eliminar con un paño con<br />
disolvente de limpieza en seco.<br />
4.3 Desinfección del material de impresión<br />
La impresión debe de desinfectarse con un desinfectante tuberculicida de tipo hospitalario<br />
siguiendo la normativa nacional y local.<br />
• Los yodóforos, el hipoclorito sódico (0.525%), el dióxido de cloro y los compuestos de<br />
amonio cuaternario duales ó sinérgicos constituyen desinfectantes autorizados.<br />
• Pulverice a fondo la impresión con cualquier desinfectante hospitalario recomendado, o<br />
sumerja la impresión en el desinfectante respetando el tiempo de contacto recomendado por<br />
el fabricante del desinfectante para obtener resultados óptimos.<br />
• Es preferible usar soluciones desinfectantes de base acuosa.<br />
5. NÚMERO DE LOTE Y FECHA DE CADUCIDAD<br />
1. No utilice el producto después de la fecha de caducidad. Indicación según norma ISO:<br />
“AAAA/MM.”<br />
2. Indique los siguientes datos en toda la correspondencia:<br />
• Referencia para pedidos<br />
• Número de lote<br />
• Fecha de caducidad<br />
4.4 Vaciado<br />
• Saque la impresión del desinfectante, enjuáguela con agua y séquela ligeramente con agua.<br />
• La impresión puede vaciarse en yeso inmediatamente, 30 minutos después de desinfectarla,<br />
ó en un plazo de hasta dos semanas. En caso de muñones de resina epóxica retrase el<br />
vaciado 60 minutos.<br />
• No guarde la impresión en un lugar expuesto a la luz solar directa.<br />
• Si la impresión va a transportarse, utilice un embalaje adecuado para evitar distorsiones.<br />
• El material es compatible con diversos yesos dentales y escayolas para muñones. Las<br />
impresiones pueden metalizarse con plata ó cobre.<br />
Manufactured by:<br />
DENTSPLY <strong>Caulk</strong><br />
38 West Clarke Avenue<br />
Milford, DE 19963 USA<br />
Tel: 1-302-422-4511<br />
www.dentsply.com<br />
DENTSPLY DETREY GmbH<br />
78467 Konstanz<br />
Germany<br />
Tel.: 49-7531-583-0<br />
www.dentsply.de<br />
Distributed by:<br />
DENTSPLY Canada<br />
161 Vinyl Court<br />
Woodbridge, Ontario<br />
L4L 4A3 Canada<br />
Pentamix, MixStar, Dynamix and Volume Mix are not registered trademarks of DENTSPLY International.<br />
©2013 DENTSPLY International. All Rights Reserved. Form #578002 (R 10/11/13)
<strong>Aquasil</strong> <strong>Ultra</strong><br />
Matériau à empreintes <strong>Aquasil</strong> <strong>Ultra</strong> Smart Wetting ®<br />
<strong>Aquasil</strong> <strong>Ultra</strong> XLV | <strong>Aquasil</strong> <strong>Ultra</strong> LV | <strong>Aquasil</strong> <strong>Ultra</strong> Monophase | <strong>Aquasil</strong> <strong>Ultra</strong> Heavy | <strong>Aquasil</strong> <strong>Ultra</strong> Rigid | <strong>Aquasil</strong> <strong>Ultra</strong> Xtra<br />
MODE D’EMPLOI – FRANÇAIS<br />
Avertissement : Réservé à l’usage dentaire uniquement.<br />
États-Unis : Echantillon (Rx) uniquement.<br />
1. DESCRIPTION DU PRODUIT<br />
Le matériau à empreintes <strong>Aquasil</strong> <strong>Ultra</strong> Smart Wetting ® est un matériau élastomère quadrifonctionnel<br />
à base de siloxane (silicone par addition) qui présente d’excellentes propriétés hydrophiles, une<br />
bonne stabilité dimensionnelle et une forte résistance au déchirement et à la déformation. Le<br />
matériau à empreintes <strong>Aquasil</strong> <strong>Ultra</strong> Smart Wetting ® améliore à la fois la mouillabilité de la surface<br />
des dents, des tissus, des piliers et la reproduction des détails du modèle.<br />
1.1 Formats de livraison*<br />
Le matériau à empreintes <strong>Aquasil</strong> <strong>Ultra</strong> Smart Wetting ® est disponible en :<br />
• viscosités : légère, moyenne et lourde<br />
• conditionnements : cartouches 50 ml pour pistolet distributeur, cartouches DECA 380 ml<br />
pour mélangeurs automatiques et doses unitaires digit ®<br />
• temps : super-rapide, rapide, normal et plus lent<br />
*Certains formats de livraison risquent de ne pas être disponibles dans tous les pays.<br />
1.2 Composition<br />
Polymère de polydiméthyle siloxane; siloxane de polyméthyle d’hydrogène; dioxyde de<br />
silicium; aluminosilicate de sodium; complexe organique de platine; surfactant; dioxyde de<br />
titane; pigments d’oxyde métallique; huile mentholée poivrée<br />
1.3 Indications d’utilisation<br />
Le matériau à empreintes <strong>Aquasil</strong> <strong>Ultra</strong> Smart Wetting ® convient pour toutes les techniques<br />
d’empreintes.<br />
1.4 Contre-indications<br />
Le matériau à empreintes <strong>Aquasil</strong> <strong>Ultra</strong> Smart Wetting ® est contre-indiqué chez les patients qui<br />
présentent des antécédents de réaction allergique grave à l’huile mentholée poivrée ou à l’un<br />
de ses composants.<br />
1.5 Caractéristiques techniques<br />
Classification : ISO 4823<br />
Type 3 : viscosité légère : <strong>Aquasil</strong> <strong>Ultra</strong> XLV, <strong>Aquasil</strong> <strong>Ultra</strong> LV et <strong>Aquasil</strong> <strong>Ultra</strong> Xtra (fluide)<br />
Type 2 : viscosité moyenne : <strong>Aquasil</strong> <strong>Ultra</strong> Monophase, <strong>Aquasil</strong> <strong>Ultra</strong> Heavy et <strong>Aquasil</strong> <strong>Ultra</strong><br />
Xtra (porte-empreinte)<br />
Type 1 : viscosité lourde : <strong>Aquasil</strong> <strong>Ultra</strong> Rigid<br />
Temps de travail (22°C) .....................................Prise super-rapide : 0'45"–1'15"<br />
(préparation et mélange à température.............Prise rapide : 1'15"–1'45"<br />
ambiante, temps d’insertion maximum) ...........Prise normale : 2'15"–2'45"<br />
<strong>Aquasil</strong> <strong>Ultra</strong> Xtra (fluide) : 4'30"<br />
<strong>Aquasil</strong> <strong>Ultra</strong> Xtra (porte-empreinte) : 2'30"–3'00"<br />
Temps de travail (37°C) .....................................Prise super-rapide : 0'35" Maximum<br />
(injection par seringue en intra-oral...................Prise rapide : 0'35" Maximum<br />
avant insertion du porte-empreinte) .................Prise normale : 1'10" Maximum<br />
<strong>Aquasil</strong> <strong>Ultra</strong> Xtra (fluide) : 1'45" Maximum<br />
Temps de prise..................................................Prise super-rapide : 2'30" depuis début du<br />
mélange<br />
(temps de retrait de la bouche).........................Prise rapide : 3'00" depuis début du mélange<br />
Prise normale : 5'00" depuis début du mélange<br />
<strong>Aquasil</strong> <strong>Ultra</strong> Xtra: 5'30" depuis début du<br />
mélange<br />
Variation dimensionnelle linéaire en % .............< 0.50<br />
Mémoire élastique après déformation en %.....≥ 98<br />
Reproduction des détails .................................20 microns<br />
1.6 Adhésif compatible pour porte-empreinte<br />
Le matériau à empreintes <strong>Aquasil</strong> <strong>Ultra</strong> Smart Wetting ® est compatible avec les adhésifs pour<br />
porte-empreintes classiques conçus pour les matériaux en polysiloxane de vinyle (voir<br />
l’intégralité des indications d’utilisation).<br />
2. REMARQUES GENERALES DE SECURITE<br />
Veuillez prendre connaissance des remarques générales de sécurité suivantes et des remarques<br />
de sécurité spéciales indiquées dans les autres chapitres du présent mode d’emploi.<br />
Symbole d’alerte de sécurité<br />
Voici le symbole d’alerte de sécurité. Il vous avertit des risques de dommages<br />
corporels potentiels. Respecter tous les avertissements de sécurité associés à ce<br />
symbole pour éviter toute blessure éventuelle.<br />
2.1 Avertissements<br />
Le matériau à empreintes <strong>Aquasil</strong> <strong>Ultra</strong> Smart Wetting ® contient des monomères<br />
polymérisables et des surfactants susceptibles d’irriter la peau, les yeux et les muqueuses<br />
buccales. Il risque de provoquer une dermatite de contact allergique chez les individus<br />
sensibles.<br />
• Éviter le contact avec les yeux afin de prévenir toute irritation et lésion éventuelle de la<br />
cornée. En cas de contact avec les yeux, rincer immédiatement abondamment à l’eau et<br />
consulter un médecin.<br />
• Éviter le contact avec la peau afin de prévenir toute irritation et réaction allergique<br />
éventuelle. En cas de contact avec la peau, des dermatites de contact peuvent apparaître sur<br />
la peau. Retirer immédiatement le matériau avec du coton et laver soigneusement à l’eau<br />
savonneuse. En cas de sensibilité cutanée ou de rougeur, ne plus utiliser le matériau et<br />
consulter un médecin.<br />
• Éviter l’ingestion de matériau afin de prévenir toute irritation ou obstruction. En cas<br />
d’ingestion accidentelle, boire beaucoup d’eau. Ce matériau ne présente aucun danger en<br />
cas d’ingestion de petites quantités. L’ingestion de plus grandes quantités risque de<br />
provoquer une occlusion intestinale. Consulter un médecin en cas de troubles digestifs.<br />
• Ne pas utiliser de matériau à empreintes <strong>Aquasil</strong> <strong>Ultra</strong> Smart Wetting ® en tant que produit de<br />
rebasage temporaire. Une telle utilisation du matériau peut provoquer une irritation des<br />
muqueuses buccales. Si des symptômes apparaissent, arrêter immédiatement d’utiliser le<br />
matériau. Si l’irritation ne s’apaise pas, consulter un médecin.<br />
• Éviter d’effectuer plusieurs empreintes à un même emplacement (plus de trois sur la<br />
même arcade/surface) pour ne pas irriter les muqueuses buccales. Si des symptômes<br />
apparaissent, arrêter immédiatement d’utiliser le matériau. Si l’irritation ne s’apaise pas,<br />
consulter un médecin.<br />
2.2 Précautions<br />
• Ce produit doit uniquement être utilisé en conformité avec les instructions spécifiques du<br />
mode d’emploi. Toute utilisation de ce produit non conforme au mode d’emploi est à<br />
l’appréciation et sous l’unique responsabilité du praticien.<br />
• A cause d’un nombre insuffisant de données cliniques, l’utilisation du matériau à empreintes<br />
<strong>Aquasil</strong> <strong>Ultra</strong> Smart Wetting ® n’est pas indiquée pour la réalisation d’empreintes sur des os<br />
exposés. Le matériau à empreintes <strong>Aquasil</strong> <strong>Ultra</strong> Smart Wetting ® doit uniquement être utilisé<br />
sur ou autour de muqueuses intactes.<br />
• Porter des vêtements, des gants et des lunettes de protection adaptés. Le port de lunettes<br />
de protection est recommandé pour le patient.<br />
• Les dispositifs dont l’étiquette comporte la mention « à usage unique » n’ont été conçus que<br />
pour un usage unique. Il convient de les jeter après utilisation. Ne pas les réutiliser sur<br />
d’autres patients afin d’éviter toute contamination croisée.<br />
• Tous les produits doivent être utilisés à température ambiante. Des températures plus élevées<br />
réduisent les temps de travail et de prise sur le bloc de mélange (processus plus rapide),<br />
alors que des températures plus basses les augmentent (processus plus lent).<br />
• Pour obtenir des propriétés physiques optimales, le mélange doit être totalement homogène.<br />
• Le matériau à empreintes <strong>Aquasil</strong> <strong>Ultra</strong> Smart Wetting ® doit être utilisé avec des porteempreintes<br />
rigides conçus pour la plupart des applications. Il est recommandé d’utiliser des<br />
porte-empreintes dotés de perforations ou de dispositifs de rétention, tels que les porteempreintes<br />
du Dr Jouvin DENTSPLY France SAS. Pour limiter les risques d’absorption, de<br />
suffocation ou d’ingestion, ne pas trop remplir le porte-empreinte.<br />
• Le matériau doit s’écouler facilement : NE PAS FORCER. Une pression excessive peut<br />
provoquer l’extrusion imprévue du matériau ou la rupture de la cartouche.<br />
• Lorsque le matériau à empreintes <strong>Aquasil</strong> <strong>Ultra</strong> Heavy, <strong>Aquasil</strong> <strong>Ultra</strong> Rigid ou <strong>Aquasil</strong> <strong>Ultra</strong><br />
Xtra est utilisé dans une seringue en intra-oral, il n’a pas été démontré sa sécurité ni son<br />
efficacité.<br />
• En raison de la rigidité du matériau à empreintes <strong>Aquasil</strong> <strong>Ultra</strong> Rigid, les fortes contredépouilles<br />
doivent être comblées avant l’insertion du porte-empreinte. Pour les empreintes<br />
d’arcade complète dentée, sélectionner d’autres viscosités <strong>Aquasil</strong> <strong>Ultra</strong> pour le porteempreinte.<br />
Interactions :<br />
• Ne pas utiliser de matériaux dentaires à base de peroxyde d’hydrogène avec ce produit. Ils<br />
risqueraient d’interférer avec le durcissement des composants polymères.<br />
• L’utilisation de gants en latex ou en polymères contenant du soufre, ainsi que de certains<br />
savons et lotions pour les mains peuvent altérer la prise du matériau. Ces résidus contaminés<br />
peuvent s’accumuler à la surface de la peau et risquent de ne pas pouvoir être éliminés<br />
facilement. Le port de gants sans latex permet d’éviter ce risque.<br />
• Manipuler les fils de rétraction avec des précelles. Ne pas toucher la dent préparée avec des<br />
gants. Rincer abondamment la préparation à l’eau avant de prendre l’empreinte.<br />
• Le matériau à empreintes <strong>Aquasil</strong> <strong>Ultra</strong> Smart Wetting ® ne doit pas être mélangé ni utilisé en<br />
association avec des polysiloxanes de vinyle, du polyéther, du polysulfure ou des silicones<br />
par addition classiques (par condensation) venant d’autres fabricants.<br />
• La technique d’empreintes en 2 temps (« wash-technique ») pour une couronne et un bridge<br />
est uniquement recommandée avec les matériaux à empreintes <strong>Aquasil</strong> <strong>Ultra</strong> Xtra Tray,<br />
<strong>Aquasil</strong> Putty (toutes les versions) ou Reprosil ® (disponible séparément) pour l’empreinte<br />
primaire (porte-empreinte).<br />
2.3 Effets indésirables<br />
• Contact avec les yeux : irritation et dommage cornéens éventuels.<br />
• Contact avec la peau : irritation ou réaction allergique éventuelle. Des dermatites de contact
peuvent apparaître sur la peau.<br />
• Obstruction ou autres troubles digestifs peuvent provenir de l’ingestion de matériau à<br />
empreintes. (Voir les Avertissements)<br />
2.4 Conditions de stockage<br />
Des conditions de stockage inadéquates risquent de réduire la durée de vie du matériau et<br />
peuvent engendrer un dysfonctionnement.<br />
• Entreposer à une température comprise entre 10°C et 24°C.<br />
• Utiliser le produit à température ambiante.<br />
• Ne pas entreposer les cartouches usagées avec des embouts mélangeurs neufs (non utilisés)<br />
fixés dessus.<br />
• Ne pas congeler.<br />
• Protéger de l’humidité.<br />
• Ne pas utiliser après la date de péremption.<br />
3. MODE D’EMPLOI ÉTAPE-PAR-ÉTAPE<br />
3.1 Pistolet distributeur de cartouche 50mL<br />
1. Insérer la cartouche dans le pistolet distributeur.<br />
2. Purger la cartouche avant d’installer un nouvel embout mélangeur.<br />
3. Préparer la seringue pour le matériau fluide.<br />
• Appliquer le matériau directement dans la bouche à l’aide de l’embout intra-oral OU<br />
• Remplir une seringue intra-orale avec le matériau mélangé contenu dans la cartouche OU<br />
• Préparer le pistolet distributeur de dose unitaire digit ® selon les préconisations du mode<br />
d’emploi<br />
REMARQUE : Ne pas utiliser les matériaux à empreintes <strong>Aquasil</strong> <strong>Ultra</strong> Heavy, <strong>Aquasil</strong> <strong>Ultra</strong><br />
Rigid ou <strong>Aquasil</strong> <strong>Ultra</strong> Xtra Tray au niveau intra-oral.<br />
4. Désinfecter le pistolet distributeur à cartouche, la cartouche et l’embout mélangeur usagé<br />
fixé pour le stockage.<br />
• Immédiatement avant l’utilisation suivante, retirer l’embout mélangeur usagé, purger la<br />
cartouche et installer un embout mélangeur neuf.<br />
• Jeter la cartouche une fois vide. Ne pas essayer de remplir les cartouches usagées.<br />
3.2 Pistolet distributeur de dose unitaire digit ®<br />
1. Assembler le pistolet distributeur propre en insérant le piston dans l’ouverture à l’arrière.<br />
2. Casser la languette circulaire de la dose unitaire dans l’encoche située à l’arrière du<br />
pistolet distributeur.<br />
3. Insérer la dose unitaire dans l’embout mélangeur. S’assurer que les deux ergots de la<br />
dose unitaire sont bien verrouillés dans les fentes de l’embout mélangeur. Placer un<br />
embout intra-oral.<br />
4. Placer la dose unitaire et l’embout mélangeur assemblés (avec l’embout intra-oral) dans<br />
l’ouverture latérale du pistolet distributeur, en glissant l’embout mélangeur par l’avant.<br />
Tirer l’extrémité de l’embout mélangeur pour s’assurer que la dose unitaire et l’embout<br />
mélangeur sont bien en place dans le pistolet distributeur.<br />
5. Extruder le matériau lentement en exerçant une pression continue sur le piston. Eviter<br />
une pression exagérée.<br />
6. Pour désassembler, retirer le piston, taper l’embout mélangeur contre un rebord pour<br />
déloger l’assemblage dose unitaire/embout mélangeur et retirer l’ensemble par<br />
l’ouverture latérale du pistolet distributeur.<br />
7. Jeter l’assemblage dose unitaire/embout mélangeur. Préparer le pistolet ditributeur pour<br />
une nouvelle utilisation.<br />
3.3 Chargement de cartouche DECA 380ml<br />
REMARQUE : cartouche lourde : la laisser tomber risque de l’endommager et de la rendre<br />
inutilisable. La cartouche DECA est compatible avec les mélangeurs<br />
automatiques Duomix, duomix II, Pentamix ® , MixStar, Dynamix, et Volume Mix.<br />
Enlever soigneusement la cartouche DECA de l’emballage. Se reporter<br />
également aux consignes d’utilisation du fabricant du mélangeur automatique<br />
fournies séparément.<br />
1. Retirer le capuchon de la cartouche.<br />
2. Insérer la cartouche dans le mélangeur automatique.<br />
3. Purger la cartouche avant d’installer un nouvel embout mélangeur.<br />
4. Installer un embout mélangeur. Utiliser uniquement des embouts mélangeurs DENTSPLY.<br />
Les autres embouts risquent de ne pas offrir une étanchéité correcte.<br />
5. Placer la bague de serrage autour de l’embout mélangeur et la tourner jusqu’à ce qu’elle<br />
soit bien fixée.<br />
6. Répartir le mélange base/catalyseur dans une seringue intra-orale (<strong>Aquasil</strong> <strong>Ultra</strong> Monophase<br />
uniquement) ou un porte-empreinte approprié.<br />
• Immédiatement avant l’utilisation suivante, retirer l’embout mélangeur usagé, purger la<br />
cartouche et installer un embout mélangeur neuf.<br />
3.4 Technique d’empreintes : technique 1 temps (« double mélange ») à 1 ou 2 viscosités,<br />
avec porte-empreinte rigide ou porte-empreinte double arcade<br />
pour la technique du mordu.<br />
REMARQUE : Il est fortement recommandé d’être assisté lors de l’application du matériau<br />
fluide en bouche en simultanée du chargement du matériau dans le porteempreinte.<br />
1. Vérifier l’hémostase et nettoyer le site avec un pulvérisateur air/eau.<br />
2. Matériau pour seringue : remplir la seringue de matériau à empreintes ou installer un embout<br />
intra-oral à l’extrémité de l’embout mélangeur de la cartouche ou préparer le pistolet<br />
distributeur de dose unitaire digit ® .<br />
Matériau pour porte-empreinte : charger le matériau à empreintes dans le porte-empreinte.<br />
Ne pas remplir excessivement le porte-empreinte.<br />
3. Simultanément au chargement du porte-empreinte, procéder à une injection de matériau sur<br />
le pourtour de la préparation/du pilier.<br />
REMARQUE : temps d’insertion du matériau à empreintes fluide et du matériau à<br />
empreintes du porte-empreinte :<br />
• Le porte-empreinte chargé de matériau à empreintes à prise super-rapide doit être inséré<br />
en l’espace de 35 secondes à compter de la première injection de matériau à empreintes<br />
fluide en intra-oral.<br />
• Le porte-empreinte chargé de matériau à empreintes à prise rapide doit être inséré en<br />
l’espace de 35 secondes à compter de la première injection de matériau à empreintes<br />
fluide en intra-oral.<br />
• Le porte-empreinte chargé de matériau à empreintes à prise normal doit être inséré en<br />
l’espace d’1 minute et 10 secondes à compter de la première injection de matériau à<br />
empreintes fluide en intra-oral.<br />
• Le porte-empreinte chargé de matériau à empreintes à prise plus lente <strong>Aquasil</strong> <strong>Ultra</strong> Xtra<br />
doit être inséré en l’espace d’1 minute et 45 secondes à compter de la première injection<br />
de matériau à empreintes fluide en intra-oral.<br />
4. Insérer le porte-empreinte en bouche.<br />
5. Le temps de retrait minimum à compter du début du mélange :<br />
• Prise super-rapide : 2 minutes et 30 secondes<br />
• Prise rapide : 3 minutes<br />
• Prise normale : 5 minutes<br />
• <strong>Aquasil</strong> <strong>Ultra</strong> Xtra : 5 minutes et 30 secondes<br />
REMARQUE : si le temps de prise du matériau à empreintes du porte-empreinte est rapide<br />
et que le temps de prise du matériau à empreintes fluide injecté en intra-oral<br />
est normal, le temps de retrait minimum sera de 4 minutes à compter du<br />
début du mélange.<br />
6. Suivre les procédures de désinfection avant l’expédition et/ou la coulée.<br />
Guide des temps à respecter<br />
Prise super-rapide : jusqu’à 35 sec. Prise super-rapide : 2 min. 30 sec.<br />
Prise rapide : jusqu’à 35 sec.<br />
Prise rapide : 3 min.<br />
Prise normale : jusqu’à 1 min. 10 sec. Prise normale : 5 min.<br />
0:00 (0 sec.) <strong>Aquasil</strong> <strong>Ultra</strong> Xtra : jusqu’à 1 min. 45 sec. <strong>Aquasil</strong> <strong>Ultra</strong> Xtra : 5 min. 30 sec.<br />
Début de l’injection et Fin de l’injection et mise en place du Prise de l’empreinte et retrait du<br />
du chargement du porte-empreinte chargé porte-empreinte<br />
porte-empreinte en simultané<br />
3.5 Technique d’empreintes : technique 2 temps (« wash-technique ») à 2 viscosités, avec<br />
une empreinte primaire avec le porte-empreinte.<br />
1. Réaliser l’empreinte primaire en chargeant le porte-empreinte avec le matériau à empreintes<br />
<strong>Aquasil</strong> <strong>Ultra</strong> Xtra Tray, <strong>Aquasil</strong> Putty ou Reprosil ®<br />
• Placer une ou plusieurs feuilles de plastique en polyéthylène sur la surface du matériau à<br />
empreintes. Cette fiche crée l’espacement uniforme requis pour cette technique. Elle<br />
protège également la surface de la contamination.<br />
• Mettre en bouche le porte-empreinte. Bouger le porte empreinte de chaque côté et<br />
d’avant en arrière pour créer l’espace nécessaire pour le matériau fluide.<br />
• Retirer le porte-empreinte quand le matériau a pris sur le côté et qu’il a atteint une<br />
consistance gomme. Ne pas intervenir sur l’empreinte avant que le temps de prise ne soit<br />
révolu.<br />
• Enlever la feuille de polyéthylène, rincer et nettoyer l’empreinte avec de l’eau et un<br />
pulvérisateur air/eau.<br />
2. Il est recommandé d’être assisté et d’utiliser deux pistolets distributeurs de cartouche, ou un<br />
pistolet distributeur de cartouche et un pistolet distributeur de dose unitaire digit ® pour<br />
assurer simultanément l’injection et le chargement du porte-empreinte.<br />
3. Suivre les étapes ci-dessus de l’empreinte, pour l’utilisation du matériau fluide à mettre à la<br />
fois au niveau de l’injection intra-orale que dans l’empreinte primaire du porte-empreinte.<br />
3.6 Technique d’empreintes : technique d’empreintes sur mâchoire édentée/avec prothèse de<br />
recouvrement<br />
L’<strong>Aquasil</strong> <strong>Ultra</strong> Monophase, <strong>Aquasil</strong> <strong>Ultra</strong> Heavy et <strong>Aquasil</strong> <strong>Ultra</strong> Rigid conviennent pour<br />
l’empreinte des contours.<br />
1. Technique d’empreintes des contours<br />
• Appliquer le matériau sur les contours du porte-empreinte.<br />
• Insérer le porte-empreinte et appliquer les techniques classiques de prise d’empreintes<br />
des contours.<br />
• Une fois que la consistance du matériau est solide, retirer le porte-empreinte et examiner<br />
les bords. Il est possible d’ajouter un peu de mélange en cas de présence de trous ou de<br />
zones incomplètes. Les surplus peuvent être facilement éliminés à l’aide d’un scalpel.<br />
2. L’empreinte finale peut être effectuée avec <strong>Aquasil</strong> <strong>Ultra</strong> XLV ou LV, <strong>Aquasil</strong> <strong>Ultra</strong><br />
Monophase, <strong>Aquasil</strong> <strong>Ultra</strong> Heavy DECA ou <strong>Aquasil</strong> <strong>Ultra</strong> Xtra.<br />
3. Insérer le porte-empreinte rempli de matériau à empreintes dans la bouche.<br />
4. Respecter le temps minimum de retrait du matériau à empreintes <strong>Aquasil</strong> <strong>Ultra</strong> sélectionné.<br />
5. Suivre les procédures de désinfection avant l’expédition et/ou la coulée.<br />
3.7 Technique d’empreintes : reproduction de modèles<br />
1. Charger le porte-empreinte avec le matériau à empreintes <strong>Aquasil</strong> <strong>Ultra</strong> adéquat.<br />
2. Il est recommandé de procéder à l’injection simultanée de matériau à empreintes fluide<br />
<strong>Aquasil</strong> <strong>Ultra</strong> sur tout le pourtour des dents modèles.<br />
3. Installer le modèle dans le porte-empreinte chargé. Maintenir l’empreinte en position jusqu’à<br />
ce que la prise soit correcte.<br />
4. Retirer le modèle de l’empreinte en tirant doucement pour le dégager.<br />
4. HYGIÈNE<br />
Contamination croisée<br />
• Ne pas réutiliser de produits à usage unique. Mettre au rebut conformément aux<br />
réglementations locales.<br />
• Retraiter les produits réutilisables comme décrit ci-après.
4.1 Nettoyage du distributeur/mélangeur<br />
Les pistolets distributeurs à cartouche et de dose unitaire digit ® peuvent être nettoyés en les<br />
frottant à l’eau chaude savonneuse ou avec du détergent. Tout excès de matériau peut être<br />
nettoyé avec de la gaze imprégnée d’alcool. Consulter les consignes du fabricant du<br />
mélangeur automatique pour connaître les consignes de désinfection et de nettoyage du<br />
mélangeur.<br />
4.2 Désinfection du pistolet distributeur de cartouche, de dose unitaire digit ® et des<br />
cartouches<br />
Désinfecter les pistolets distributeurs, les cartouches, les embouts mélangeurs usagés laissés<br />
en place sur les cartouches à des fins d’entreposage à l’aide d’un désinfectant tuberculocide à<br />
usage hospitalier, conformément aux réglementations nationales et locales. Utiliser des<br />
tampons imprégnés, pas des aérosols. REMARQUE : l’étiquette peut être détruite par un<br />
frottement trop vigoureux. Essuyer la cartouche doucement. Certains agents à base de<br />
phénolique et certains produits à base d’iodophore peuvent tacher les surfaces.<br />
4.4 Coulée<br />
• L’empreinte doit être sortie du désinfectant, rincée à l’eau et légèrement séchée à l’air.<br />
• L’empreinte peut être coulée dans du plâtre 30 minutes après sa désinfection ou dans un<br />
délai de quatorze jours. Attendre 60 minutes pour la résine époxyde.<br />
• Ne pas entreposer l’empreinte exposée à la lumière directe du soleil.<br />
• Si l’empreinte doit être expédiée, utiliser un emballage adapté pour éviter toute déformation.<br />
• Le matériau est compatible avec une gamme de plâtres dentaires. Les empreintes peuvent<br />
être en argent ou en cuivre plaqué.<br />
5. NUMÉRO DE LOT ET DATE DE PÉREMPTION<br />
1. Ne pas utiliser après la date de péremption. Utilisation de la norme ISO : « AAAA/MM ».<br />
2. Les numéros suivants doivent être mentionnés dans toute correspondance.<br />
• Référence<br />
• Numéro de lot<br />
• Date de péremption<br />
Les agents contenant des solvants organiques tels que de l’alcool peuvent avoir tendance à<br />
dissoudre le distributeur en plastique et le piston. Il convient de respecter les consignes du<br />
fabricant du désinfectant pour des résultats optimums.<br />
Stérilisation<br />
Après le nettoyage et la désinfection, le pistolet distributeur de dose unitaire digit ® peut être<br />
mis à l’autoclave (vapeur) à 134°C pendant trois minutes. Astuce technique : si le matériau<br />
n’a pas complètement pris, <strong>Aquasil</strong> <strong>Ultra</strong> Smart Wetting ® peut être retiré des vêtements à l’aide<br />
de solvant pour nettoyage à sec.<br />
4.3 Désinfection du matériau à empreintes<br />
L’empreinte doit être désinfectée à l’aide d’un désinfectant tuberculocide à usage hospitalier,<br />
conformément aux réglementations nationales et locales.<br />
• Les produits iodophores, à l’hypochlorite de sodium (0,525 %), au dioxyde de chlore et les<br />
ammoniums quaternaires doubles ou synergisés sont des désinfectants approuvés.<br />
• Imprégner soigneusement l’empreinte en y pulvérisant du désinfectant à usage hospitalier<br />
approuvé ou en la plongeant pendant le temps de contact recommandé par le fabricant du<br />
désinfectant pour des résultats optimums.<br />
• Utiliser de préférence des solutions désinfectantes à base d’eau.<br />
Manufactured by:<br />
DENTSPLY <strong>Caulk</strong><br />
38 West Clarke Avenue<br />
Milford, DE 19963 USA<br />
Tel: 1-302-422-4511<br />
www.dentsply.com<br />
DENTSPLY DETREY GmbH<br />
78467 Konstanz<br />
Germany<br />
Tel.: 49-7531-583-0<br />
www.dentsply.de<br />
Distributed by:<br />
DENTSPLY Canada<br />
161 Vinyl Court<br />
Woodbridge, Ontario<br />
L4L 4A3 Canada<br />
Pentamix, MixStar, Dynamix and Volume Mix are not registered trademarks of DENTSPLY International.<br />
©2013 DENTSPLY International. All Rights Reserved. Form #578002 (R 10/11/13)
<strong>Aquasil</strong> <strong>Ultra</strong><br />
Smart Wetting ® Abformmaterial<br />
<strong>Aquasil</strong> <strong>Ultra</strong> XLV | <strong>Aquasil</strong> <strong>Ultra</strong> LV | <strong>Aquasil</strong> <strong>Ultra</strong> Monophase | <strong>Aquasil</strong> <strong>Ultra</strong> Heavy | <strong>Aquasil</strong> <strong>Ultra</strong> Rigid | <strong>Aquasil</strong> <strong>Ultra</strong> Xtra<br />
GEBRAUCHSANWEISUNG – DEUTSCH<br />
Nur für den zahnmedizinischen Gebrauch.<br />
1. PRODUKTBESCHREIBUNG<br />
<strong>Aquasil</strong> <strong>Ultra</strong> Smart Wetting ® ist ein quadrafunktionales, hydrophiles, elastomeres,<br />
additionsvernetzendes Silikon-Abformmaterial mit hervorragender Hydrophilie, ausgezeichneter<br />
Formgenauigkeit, hoher Reißfestigkeit und hohem Rückstellvermögen. Das Abformmaterial<br />
<strong>Aquasil</strong> <strong>Ultra</strong> mit Smart Wetting ® bietet eine noch bessere Benetzung von Zahn-, Gewebe- und<br />
Abutment-Oberflächen und eine noch genauere Detailwiedergabe des Modells.<br />
1.1 Lieferformen*<br />
Das Abformmaterial <strong>Aquasil</strong> <strong>Ultra</strong> Smart Wetting ® ist erhältlich in:<br />
• den Konsistenzen Light Body (dünnfließend), Medium Body (mittelfließend) und Heavy Body<br />
(schwerfließend)<br />
• dem Einmaldosis-Applikationssystem digit ® Targeted Delivery System, 50 ml Kartuschen und<br />
5:1 DECA Kartuschen für dynamische Mischgeräte<br />
• den Abbindezeiten Super Fast Set (super schnell), Fast Set (schnell), Regular Set (normal)<br />
und Extended Time (verlängert)<br />
*Einige Lieferformen sind eventuell nicht in allen Ländern erhältlich.<br />
1.2 Zusammensetzung<br />
Polydimethylsiloxan-Polymer; Polymethylhydrogensiloxan; Siliziumdioxid; Natriumaluminiumsilikat;<br />
organischer Platinkomplex; Tensid; Titandioxid; Metalloxidpigmente; Pfefferminzöl<br />
1.3 Indikationen<br />
Das Abformmaterial <strong>Aquasil</strong> <strong>Ultra</strong> Smart Wetting ® ist für alle dentalen Abformtechniken geeignet.<br />
1.4 Kontraindikationen<br />
Das Abformmaterial <strong>Aquasil</strong> <strong>Ultra</strong> Smart Wetting ® darf nicht bei Patienten mit einer<br />
Vorgeschichte schwerer allergischer Reaktionen auf Pfefferminzöl oder andere Bestandteile<br />
angewandt werden.<br />
1.5 Technische Daten<br />
Klassifizierung: ISO 4823<br />
Typ 3: Konsistenz Light Body: <strong>Aquasil</strong> <strong>Ultra</strong> XLV, <strong>Aquasil</strong> <strong>Ultra</strong> LV und <strong>Aquasil</strong> <strong>Ultra</strong> Xtra (Wash)<br />
Typ 2: Konsistenz Medium Body: <strong>Aquasil</strong> <strong>Ultra</strong> Monophase, <strong>Aquasil</strong> <strong>Ultra</strong> Heavy und <strong>Aquasil</strong><br />
<strong>Ultra</strong> Xtra (Tray)<br />
Typ 1: Konsistenz Heavy Body: <strong>Aquasil</strong> <strong>Ultra</strong> Rigid<br />
Verarbeitungszeit (22°C) .......................................................Super Fast Set: 0'45"–1'15"<br />
(Anmischen und Vorbereitung bei Zimmertemperatur, ..........Fast Set: 1'15"–1'45"<br />
maximale Zeit bis zum Einsetzen) .........................................Regular Set: 2'15"–2'45"<br />
<strong>Aquasil</strong> <strong>Ultra</strong> Xtra (Wash): 4'30"<br />
<strong>Aquasil</strong> <strong>Ultra</strong> Xtra (Tray): 2'30"–3'00"<br />
Verarbeitungszeit (37°C)<br />
(intraorales Umspritzen vor dem Einsetzen des Löffels) ........Super Fast Set: maximal 0'35"<br />
Fast Set: maximal 0'35"<br />
Regular Set: maximal 1'10"<br />
<strong>Aquasil</strong> <strong>Ultra</strong> Xtra (Wash): maximal<br />
1'45"<br />
Abbindezeit (Entnahme aus dem Mund)................................Super Fast Set: 2'30" ab Beginn<br />
des Anmischens<br />
Fast Set: 3'00" ab Beginn des<br />
Anmischens<br />
Regular Set: 5'00" ab Beginn des<br />
Anmischens<br />
<strong>Aquasil</strong> <strong>Ultra</strong> Xtra: 5'30" ab Beginn<br />
des Anmischens<br />
% Lineare Dimensionsänderung............................................< 0,50<br />
% Rückstellung nach Verformung .........................................≥ 98<br />
Detailwiedergabegenauigkeit.................................................20 μm<br />
1.6 Kompatible Löffeladhäsive<br />
Das Abformmaterial <strong>Aquasil</strong> <strong>Ultra</strong> Smart Wetting ® ist kompatibel mit konventionellen<br />
Löffeladhäsiven für Polyvinylsiloxane (siehe vollständige Gebrauchsanweisung).<br />
2. ALLGEMEINE SICHERHEITSHINWEISE<br />
Bitte beachten Sie die folgenden allgemeinen Sicherheitshinweise und die speziellen<br />
Sicherheitshinweise in anderen Abschnitten dieser Gebrauchsanweisung.<br />
Sicherheitssymbol<br />
Dies ist das Sicherheitssymbol. Es weist auf die Gefahr von Personenschäden hin.<br />
Um Verletzungen zu vermeiden, alle Sicherheitshinweise, die diesem Symbol folgen,<br />
unbedingt beachten!<br />
2.1 Warnhinweise<br />
Das Abformmaterial <strong>Aquasil</strong> <strong>Ultra</strong> Smart Wetting ® enthält polymerisierbare Monomere und<br />
Tenside, die Haut, Augen und Mundschleimhaut reizen und bei empfindlichen Personen zu<br />
allergischer Kontaktdermatitis führen können.<br />
• Augenkontakt vermeiden, um Reizungen und möglichen Hornhautschäden vorzubeugen. Im<br />
Falle eines Kontakts mit den Augen sofort mit reichlich Wasser spülen und fachärztliche Hilfe<br />
in Anspruch nehmen.<br />
• Hautkontakt vermeiden, um Reizungen und möglichen allergischen Reaktionen<br />
vorzubeugen. Im Falle eines Kontakts mit der Haut kann sich ein rötlicher Ausschlag<br />
entwickeln. Bei Hautkontakt das Material sofort mit Watte entfernen und gründlich mit<br />
Wasser und Seife waschen. Bei Hautsensibilisierung oder Ausschlag die Anwendung<br />
abbrechen und fachärztliche Hilfe in Anspruch nehmen.<br />
• Aufnahme/Verschlucken des Materials vermeiden, um Reizungen oder Verstopfung<br />
vorzubeugen. Nach versehentlichem Verschlucken viel Wasser trinken. Das Material ist nicht<br />
gefährlich, wenn nur kleine Mengen aufgenommen werden. Größere Mengen können eine<br />
Darmverstopfung verursachen. Im Falle von Verdauungsstörungen einen Arzt hinzuziehen.<br />
• <strong>Aquasil</strong> <strong>Ultra</strong> Smart Wetting ® Abformmaterial nicht als temporäres Unterfütterungsmaterial<br />
benutzen. Dies kann zu Reizungen der Mundschleimhaut führen. Wenn Symptome auftreten,<br />
sofort die Anwendung abbrechen. Falls die Reizungen nicht zurückgehen, einen Arzt<br />
hinzuziehen.<br />
• Mehrfache Abformung in einer Sitzung vermeiden (mehr als dreimal im selben<br />
Kiefer/Bereich), um Reizungen der Mundschleimhaut zu vermeiden. Wenn Symptome<br />
auftreten, sofort die Anwendung abbrechen. Falls die Reizungen nicht zurückgehen, einen<br />
Arzt hinzuziehen.<br />
2.2 Vorsichtsmaßnahmen<br />
• Das Produkt ist ausschließlich zum Gebrauch gemäß dieser Anleitung vorgesehen. Jeglicher<br />
davon abweichende Gebrauch liegt im Ermessen und der alleinigen Verantwortung des<br />
Zahnarztes.<br />
• Es existieren keine ausreichenden Daten zur Verwendbarkeit von <strong>Aquasil</strong> <strong>Ultra</strong> Smart<br />
Wetting ® für die Abformung freiliegender Knochen. Das Abformmaterial <strong>Aquasil</strong> <strong>Ultra</strong> Smart<br />
Wetting ® sollte nur auf intakter Mukosa oder um diese herum verwendet werden.<br />
• Geeignete Schutzbrille, Schutzkleidung und Schutzhandschuhe tragen. Für den Patienten<br />
wird eine Schutzbrille empfohlen.<br />
• Mit „single use“ gekennzeichnete Produkte sind nur zum Einmalgebrauch bestimmt. Nach<br />
Gebrauch entsorgen. Zur Vermeidung von Kreuzkontaminationen nicht bei anderen Patienten<br />
wieder verwenden.<br />
• Alle Produkte sollten bei Zimmertemperatur verwendet werden. Höhere Temperaturen<br />
verkürzen die Verarbeitungszeit und die extraorale Abbindezeit. Niedrigere Temperaturen<br />
verlängern sie.<br />
• Für optimale physikalische Eigenschaften sollte das angemischte Material völlig homogen<br />
(schlierenfrei) sein.<br />
• <strong>Aquasil</strong> <strong>Ultra</strong> Smart Wetting ® Abformmaterial sollte in der Regel mit genau angepassten,<br />
starren Abformlöffeln verwendet werden. Zu empfehlen sind Abformlöffel mit retentiven<br />
Eigenschaften, z.B. DENTSPLY <strong>Caulk</strong> Rim-Lock ® , oder perforierte Löffel, sowie eine<br />
Vorbehandlung mit Löffeladhäsiv. Um Würgen, erschwerte Atmung oder Verschlucken zu<br />
vermeiden, den Löffel nicht überfüllen.<br />
• Das Material sollte sich leicht ausbringen lassen. KEINE ÜBERMÄSSIGE KRAFT<br />
AUFWENDEN. Zu starker Druck kann zum Austritt unerwünschter Materialmengen oder<br />
Platzen der Kartusche führen.<br />
• Die Sicherheit und Wirksamkeit von <strong>Aquasil</strong> <strong>Ultra</strong> Heavy, <strong>Aquasil</strong> <strong>Ultra</strong> Rigid und <strong>Aquasil</strong> <strong>Ultra</strong><br />
Xtra (Tray) bei Gebrauch als intraorales Spritzenmaterial ist nicht nachgewiesen.<br />
• Wegen der Steifheit des Abformmaterials <strong>Aquasil</strong> <strong>Ultra</strong> Rigid sollten größere Unterschnitte vor<br />
dem Einsetzen des Abformlöffels ausgeblockt werden. Für Abformungen ganzer Zahnbögen<br />
<strong>Aquasil</strong> <strong>Ultra</strong> Produkte anderer Viskositäten als Löffelmaterial wählen.<br />
Wechselwirkungen:<br />
• In Verbindung mit diesem Produkt keine Materialien verwenden, die Wasserstoffperoxid<br />
enthalten, da diese die Polymerisationsreaktion des Materials stören können.<br />
• Latex- oder „schwefelhaltige“ Polymerhandschuhe und einige Handwaschseifen und -<br />
lotionen können zu Störungen der Abbindereaktion führen. Schwer abwaschbare<br />
Verunreinigungen können sich auf der Hautoberfläche ansammeln. Durch das Tragen<br />
latexfreier Handschuhe während der Anwendung kann dieses Problem vermieden werden.<br />
• Fäden mit College-Pinzette anfassen. Präparierte Zähne nicht mit den Handschuhen<br />
berühren. Die Präparation mit reichlich Wasser spülen, bevor die Abformung genommen wird.<br />
• <strong>Aquasil</strong> <strong>Ultra</strong> Smart Wetting ® Abformmaterial nicht mit Polyvinylsiloxanen anderer Hersteller<br />
oder Polyethern, Polysulfiden oder konventionellen (kondensationsvernetzenden) Silikonen<br />
mischen oder verwenden.<br />
• Bei der zweizeitig-zweiphasigen Korrekturabformtechnik („Putty/Wash“) für Kronen und<br />
Brücken sollten für die primäre Löffelabformung nur die Abformmaterialien <strong>Aquasil</strong> <strong>Ultra</strong> Xtra<br />
Tray, <strong>Aquasil</strong> Putty (alle Versionen) oder Reprosil ® (separat erhältlich) verwendet werden.
2.3 Unerwünschte Wirkungen<br />
• Augenkontakt: Reizungen und mögliche Hornhautschäden.<br />
• Hautkontakt: Reizungen oder mögliche allergische Reaktionen. Es kann rötlicher<br />
Hautausschlag auftreten.<br />
• Darmverstopfung und andere Verdauungsprobleme können bei Verschlucken von<br />
angemischtem Abformmaterial auftreten (siehe Warnhinweise).<br />
2.4 Lagerungsbedingungen<br />
Ungeeignete Lagerungsbedingungen können die Haltbarkeit verkürzen und zu Fehlfunktionen<br />
des Produkts führen.<br />
• Das Produkt bei 10°C bis 24°C aufbewahren.<br />
• Bei Zimmertemperatur verwenden.<br />
• Keine benutzen Kartuschen mit neuen (unbenutzten) Mischkanülen lagern.<br />
• Nicht einfrieren.<br />
• Vor Feuchtigkeit schützen.<br />
• Nicht nach Ablauf des Verfallsdatums verwenden.<br />
3. ANWENDUNG SCHRITT FÜR SCHRITT<br />
3.1 Kartuschen-Mischpistole<br />
1. Kartusche in die Mischpistole einsetzen.<br />
2. Vor dem Aufsetzen einer neuen Mischkanüle etwas Material aus der Kartusche ausbringen.<br />
3. Vorbereiten des Spritzen-/Korrekturmaterials<br />
• Direkt mit der intraoralen Kanüle im Mund applizieren ODER<br />
• Eine intraorale Spritze mit dem angemischten Material aus der Kartusche befüllen ODER<br />
• Korrektur-/Spritzenmaterial des Einmaldosis-Applikationssystems digit ® Targeted Delivery<br />
System gemäß Gebrauchsanweisung vorbereiten.<br />
HINWEIS: Die Abformmaterialien <strong>Aquasil</strong> <strong>Ultra</strong> Heavy, <strong>Aquasil</strong> <strong>Ultra</strong> Rigid oder <strong>Aquasil</strong> <strong>Ultra</strong><br />
Xtra Tray nicht intraoral spritzen.<br />
4. Kartuschen-Mischpistole, Kartusche und angebrachte, gebrauchte Mischkanüle für die<br />
Lagerung desinfizieren.<br />
• Unmittelbar vor der nächsten Verwendung die gebrauchte Mischkanüle entfernen,<br />
etwas Material aus der Kartusche ausbringen und eine neue Mischkanüle aufsetzen.<br />
• Leere Kartusche entsorgen. Nicht versuchen, verwendete Kartuschen nachzufüllen oder<br />
zu sammeln.<br />
3.2 digit ® Targeted Delivery System (Einmaldosis-Applikationssystem)<br />
1. Kolben am offenen Ende des Spritzenkörpers einschieben.<br />
2. Runde Scheibe vom Ende der Kartusche abreißen.<br />
3. Einmaldosis-Kartusche in Mischkanüle einschieben. Darauf achten, dass beide<br />
Kartuschensporne vollständig in die Mischkanülenrillen einrasten. Dann intraorale Kanüle<br />
befestigen.<br />
4. Kartusche mit Mischkanüle und intraoraler Kanüle durch die seitliche Öffnung in die Spritze<br />
einsetzen. Mischkanüle durch das Ende des Spritzenkörpers mit den Kreuzrillen schieben.<br />
An Mischkanüle ziehen, um zu prüfen, ob sie sicher befestigt ist.<br />
5. Material durch langsames, stetiges Drücken des Kolbens ausbringen. Keine übermäßige<br />
Kraft aufwenden.<br />
6. Zum Auseinandernehmen den Kolben zurückziehen, die Mischkanüle durch leichtes Klopfen<br />
gegen die Tischoberfläche lockern und durch seitliche Öffnung entnehmen.<br />
7. Gebrauchte Kartusche/Mischkanüle ordnungsgemäß entsorgen und Spritze zur<br />
Wiederverwendung vorbereiten.<br />
3.3 Einsetzen der DECA Kartusche<br />
HINWEIS: Die Kartuschen sind schwer. Sie können beim Herunterfallen so beschädigt werden,<br />
dass sie nicht mehr verwendbar sind. DECA Kartuschen eignen sich für<br />
dynamische Mischgeräte vom Typ Duomix, duomix II, Pentamix ® , MixStar, Dynamix<br />
und Volume Mix. Kartusche vorsichtig aus der Verpackung nehmen. Auch die<br />
Gebrauchsanleitung des Mischgeräteherstellers beachten.<br />
1. Kappe von der Kartusche nehmen.<br />
2. Kartusche in das dynamische Mischgerät einsetzen.<br />
3. Vor dem Aufsetzen einer neuen Mischkanüle etwas Material aus der Kartusche ausbringen.<br />
4. Mischkanüle aufsetzen. Nur DENTSPLY Mischkanülen verwenden. Andere Kanülen schließen<br />
möglicherweise nicht dicht genug ab.<br />
5. Den Verriegelungsring auf die Mischkanüle aufsetzen und drehen, bis er eingerastet ist.<br />
6. Angemischtes Abformmaterial (Basis und Katalysator) in eine intraorale Spritze (nur <strong>Aquasil</strong><br />
<strong>Ultra</strong> Monophase) oder einen geeigneten Abformlöffel füllen.<br />
• Unmittelbar vor der nächsten Verwendung die gebrauchte Mischkanüle entfernen,<br />
etwas Material aus der Kartusche ausbringen und eine neue Mischkanüle aufsetzen.<br />
3.4 Abformtechnik: Einzeitig-einphasige oder -zweiphasige (Doppelmisch-) Technik mit<br />
starrem Abformlöffel oder im Rahmen der Halbseiten-Abformung mit<br />
gleichzeitiger Abformung von Unter- und Oberkiefer.<br />
HINWEIS: Terminierung des Anmischens von Löffel- und Spritzenmaterial – Es wird dringend<br />
empfohlen, mit Assistenz zu arbeiten, um ein gleichzeitiges Befüllen des<br />
Abformlöffels und intraorales Umspritzen sicherzustellen.<br />
1. Blutstillung sicherstellen und Bereich mit Luft-Wasser-Spray reinigen.<br />
2. Spritzenmaterial: Abformspritze von hinten befüllen oder eine intraorale Kanüle am Ende der<br />
Mischkanüle befestigen oder Spritze des Einmaldosis-Applikationssystems digit ® Targeted<br />
Delivery System vorbereiten.<br />
Löffelmaterial: Abformmaterial in den Löffel einbringen (Assistenz). Nicht überfüllen.<br />
3. Zeitgleich zur Füllung des Abformlöffels Präparation/Abutment vollständig umspritzen<br />
(Zahnarzt).<br />
HINWEIS: Terminierung der Einbringzeiten für Löffel- und Spritzenmaterial:<br />
• Super Fast Set Spritzen- und Löffelmaterial: Der befüllte Löffel muss innerhalb von<br />
35 Sekunden ab Beginn der intraoralen Applikation des Spritzenmaterials eingebracht<br />
werden.<br />
• Fast Set Spritzen- und Löffelmaterial: Der befüllte Löffel muss innerhalb von 35 Sekunden<br />
ab Beginn der intraoralen Applikation des Spritzenmaterials eingebracht werden.<br />
• Regular Set Spritzen- und Löffelmaterial: Der befüllte Löffel muss innerhalb von 1 Minute<br />
und 10 Sekunden ab Beginn der intraoralen Applikation des Spritzenmaterials eingebracht<br />
werden.<br />
• <strong>Aquasil</strong> <strong>Ultra</strong> Xtra Extended Time Spritzen- und Löffelmaterial: Der befüllte Löffel muss<br />
innerhalb von 1 Minute und 45 Sekunden ab Beginn der intraoralen Applikation des<br />
Spritzenmaterials eingebracht werden.<br />
4. Befüllten Abformlöffel in den Mund einbringen.<br />
5. Mindestdauer bis zur Entnahme aus dem Mund (ab Beginn des Anmischens):<br />
• Super Fast Set: 2 Minuten 30 Sekunden<br />
• Fast Set: 3 Minuten<br />
• Regular Set: 5 Minuten<br />
• <strong>Aquasil</strong> <strong>Ultra</strong> Xtra: 5 Minuten 30 Sekunden<br />
HINWEIS: Bei Verwendung von Regular Set Spritzenmaterial mit Fast Set Löffelmaterial<br />
beträgt die Mindestdauer bis zur Entnahme aus dem Mund 4 Minuten ab Beginn<br />
des Anmischens.<br />
6. Die Abformung vor dem Versenden und/oder Ausgießen ordnungsgemäß desinfizieren.<br />
Zeitplan Super Fast Set: bis 0'35" (35 Sek.) Super Fast Set: 2'30" (2 Min. 30 Sek.)<br />
Fast Set: bis 0'35" (35 Sek.)<br />
Fast Set: 3'00" (3 Min.)<br />
Regular Set: bis 1'10" (1 Min. 10 Sek.) Regular Set: 5'00" (5 Min.)<br />
0'00" (0 Sek.) <strong>Aquasil</strong> <strong>Ultra</strong> Xtra: bis 1'45" (1 Min. 45 Sek.) <strong>Aquasil</strong> <strong>Ultra</strong> Xtra: 5'30" (5 Min. 30 Sek.)<br />
Gleichzeitig mit Umspritzen abschließen und befüllten Abgebundene Abformung entnehmen<br />
Umspritzen und Löffel einbringen<br />
Löffelbefüllung beginnen<br />
3.5 Abformtechnik: Zweizeitig-zweiphasige (Korrekturabform-) Technik mit primärer<br />
Löffelabformung<br />
1. Primärabformung mit <strong>Aquasil</strong> <strong>Ultra</strong> Xtra Tray, <strong>Aquasil</strong> Putty oder Reprosil ® Tray durchführen.<br />
• Eine oder mehrere Polyethylen-Folien auf die Oberfläche des Abformmaterials legen.<br />
Damit wird der bei dieser Technik nötige gleichmäßige Abstand geschaffen. Zudem wird<br />
die Oberfläche vor Verunreinigungen geschützt.<br />
• Befüllten Löffel in den Mund einbringen. Leicht von einer Seite zur anderen und vor und<br />
zurück bewegen. Dies schafft Abstand für das Korrekturmaterial.<br />
• Löffel aus dem Mund entnehmen, wenn das Material eine gummiartige Konsistenz erreicht<br />
hat, und zur Seite legen. Abformung nicht berühren, bis sie vollständig abgebunden ist.<br />
• Polyethylen-Folie(n) entfernen und Abformung mit Wasser spülen und mit Luft trocknen.<br />
2. Es ist ratsam, mit Assistenz sowie zwei Mischpistolen oder einer Mischpistole und der<br />
Spritze des digit ® Targeted Delivery System (Einmaldosis-Applikationssystem) zu arbeiten,<br />
um ein gleichzeitiges Spritzen und Befüllen des Abformlöffels sicherzustellen.<br />
3. Beim Abformen dem obigen Vorgehen folgen, Korrekturmaterial sowohl intraoral als auch in<br />
die primäre Löffelabformung spritzen.<br />
3.6 Abformtechnik: Abformung des unbezahnten Kiefers/Überabformungen<br />
<strong>Aquasil</strong> <strong>Ultra</strong> Monophase, <strong>Aquasil</strong> <strong>Ultra</strong> Heavy und <strong>Aquasil</strong> <strong>Ultra</strong> Rigid sind zur<br />
Funktionsrandgestaltung verwendbar.<br />
1. Technik der Funktionsrandgestaltung<br />
• Material bis zu den Rändern in den Abformlöffel auftragen.<br />
• Löffel einbringen und konventionelle Funktionsrandgestaltung durchführen.<br />
• Wenn das Material eine feste Konsistenz erreicht hat, Löffel entnehmen und Ränder<br />
untersuchen. Zur Korrektur von Blasen oder Fehlstellen kann ein wenig angemischtes<br />
Material hinzugefügt werden. Das überschüssige Material ist leicht mit einer Skalpellklinge<br />
entfernbar.<br />
2. Die endgültige Abformung kann mit <strong>Aquasil</strong> <strong>Ultra</strong> XLV oder LV, <strong>Aquasil</strong> <strong>Ultra</strong> Monophase,<br />
<strong>Aquasil</strong> <strong>Ultra</strong> Heavy oder <strong>Aquasil</strong> <strong>Ultra</strong> Xtra vorgenommen werden.<br />
3. Befüllten Abformlöffel in den Mund einbringen.<br />
4. Die Mindestdauer bis zur Entnahme des für die endgültige Abformung gewählten <strong>Aquasil</strong><br />
<strong>Ultra</strong> Materials beachten.<br />
5. Die Abformung vor dem Versenden und/oder Ausgießen ordnungsgemäß desinfizieren.<br />
3.7 Abformtechnik: Dublieren von Modellen<br />
1. Abformlöffel mit <strong>Aquasil</strong> <strong>Ultra</strong> Löffelmaterial befüllen.<br />
2. Ein gleichzeitiges, vollständiges Umspritzen der Modellzähne mit <strong>Aquasil</strong> <strong>Ultra</strong><br />
Spritzenmaterial wird empfohlen.<br />
3. Modell in den befüllten Abformlöffel einsetzen. Abformung in Position halten, bis sie fest<br />
abgebunden ist.<br />
4. Modell aus der Abformung entnehmen; vorsichtig ziehen, bis es sich löst.<br />
4. HYGIENE<br />
Kreuzkontamination<br />
• Einmalprodukte nicht wieder verwenden. Gemäß den örtlichen Vorschriften<br />
entsorgen.<br />
• Wieder verwendbare Produkte wie unten beschrieben aufbereiten.<br />
4.1 Reinigung der Applikationssysteme<br />
Die Kartuschen-Mischpistolen und die Spritze des digit ® Targeted Delivery System können<br />
durch Abwaschen mit warmem Wasser und Seife oder Reinigungsmittel gesäubert werden.<br />
Materialreste können mit in Alkohol getränkter Gaze entfernt werden. Herstellerangaben zur<br />
Reinigung und Desinfektion der dynamischen Mischgeräte beachten.<br />
4.2 Desinfektion von Mischpistolen, Kartuschen und Spritze des digit ® Targeted Delivery<br />
System<br />
Mischpistolen, Kartuschen und gebrauchte, zur Lagerung auf den Kartuschen verbleibende<br />
Mischkanülen, sowie die Spritze des digit ® Targeted Delivery System mit einem<br />
krankenhausüblichen, tuberkuloziden Desinfektionsmittel gemäß den nationalen und lokalen<br />
Vorschriften desinfizieren. Keine Sprays, sondern getränkte Tücher verwenden. HINWEIS: Das<br />
Etikett kann durch kräftiges Wischen zerstört werden. Kartusche behutsam abwischen. Einige<br />
Produkte auf Phenol- oder Iodophor-Basis können Oberflächenverfärbungen verursachen.
Produkte mit organischen Lösungsmitteln, z.B. Alkohol, können den Kunststoff der Pistole und<br />
des Kolbens anlösen. Für optimale Ergebnisse sollten die Empfehlungen des<br />
Desinfektionsmittelherstellers genau befolgt werden.<br />
Sterilisation<br />
Die Spritze des digit ® Targeted Delivery System kann nach der Reinigung und Desinfektion für<br />
mindestens 3 Minuten bei 134°C dampfautoklaviert werden. Technik-Tipp: Aus<br />
Kleidungsstücken kann nicht abgebundenes <strong>Aquasil</strong> <strong>Ultra</strong> Smart Wetting ® Abformmaterial mit<br />
einem Lösungsmittel zur Trockenreinigung entfernt werden.<br />
4.3 Desinfektion des Abformmaterials<br />
Die Abformung sollte mit einem krankenhausüblichen, tuberkuloziden Desinfektionsmittel<br />
gemäß den nationalen und lokalen Vorschriften desinfiziert werden.<br />
• Zugelassene Desinfektionsmittel sind Iodophore, Natriumhypochlorit (5,25 %), Chlordioxid<br />
und duale oder synergetische quaternäre Ammoniumverbindungen.<br />
• Um bestmögliche Ergebnisse zu erzielen, die Abformung durch Einsprühen gründlich<br />
anfeuchten oder in eines der empfohlenen krankenhausüblichen Desinfektionsmittel unter<br />
Beachtung der vom Desinfektionsmittelhersteller empfohlenen Einwirkzeit eintauchen.<br />
• Vorzugsweise Desinfektionsmittel auf Wasserbasis verwenden.<br />
4.4 Ausgießen<br />
• Die Abformung aus dem Desinfektionsmittel nehmen, mit Wasser abspülen und sanft mit Luft<br />
trocknen.<br />
• Die Abformung kann 30 Minuten nach der Desinfektion innerhalb von bis zu vierzehn Tagen<br />
mit Gips ausgegossen werden. Bei Modellstümpfen aus Epoxidharz 60 Minuten mit dem<br />
Ausgießen warten.<br />
• Die Abformung nicht in direktem Sonnenlicht lagern.<br />
• Bei evtl. Versand die Abformung so verpacken, dass sie nicht verformt werden kann.<br />
• Das Material ist mit einer Vielzahl von Dentalgipsen kompatibel. Die Abformungen können<br />
versilbert oder verkupfert werden.<br />
5. CHARGENNUMMER UND VERFALLSDATUM<br />
1. Nicht nach Ablauf des Verfallsdatums verwenden. Angabe nach ISO: „JJJJ/MM“.<br />
2. Folgende Nummern bei allen Korrespondenzen angeben:<br />
• Bestellnummer<br />
• Chargennummer<br />
• Verfallsdatum<br />
Manufactured by:<br />
DENTSPLY <strong>Caulk</strong><br />
38 West Clarke Avenue<br />
Milford, DE 19963 USA<br />
Tel: 1-302-422-4511<br />
www.dentsply.com<br />
DENTSPLY DETREY GmbH<br />
78467 Konstanz<br />
Germany<br />
Tel.: 49-7531-583-0<br />
www.dentsply.de<br />
Distributed by:<br />
DENTSPLY Canada<br />
161 Vinyl Court<br />
Woodbridge, Ontario<br />
L4L 4A3 Canada<br />
Pentamix, MixStar, Dynamix and Volume Mix are not registered trademarks of DENTSPLY International.<br />
©2013 DENTSPLY International. All Rights Reserved. Form #578002 (R 10/11/13)
<strong>Aquasil</strong> <strong>Ultra</strong><br />
Smart Wetting ® Impression Material<br />
<strong>Aquasil</strong> <strong>Ultra</strong> XLV | <strong>Aquasil</strong> <strong>Ultra</strong> LV | <strong>Aquasil</strong> <strong>Ultra</strong> Monophase | <strong>Aquasil</strong> <strong>Ultra</strong> Heavy | <strong>Aquasil</strong> <strong>Ultra</strong> Rigid | <strong>Aquasil</strong> <strong>Ultra</strong> Xtra<br />
ISTRUZIONI PER L’USO – ITALIANO<br />
Attenzione: ad esclusivo uso odontoiatrico.<br />
Stati Uniti: solo su prescrizione medica.<br />
1. DESCRIZIONE DEL PRODOTTO<br />
Il materiale per impronta <strong>Aquasil</strong> <strong>Ultra</strong> Monophase Smart Wetting ® è un silicone per addizione<br />
idrocompatibile quadrifunzionale con eccellenti caratteristiche di idrocompatibilità, stabilità<br />
dimensionale, alta resistenza alla trazione e alla deformazione permanente. Il materiale da<br />
impronta <strong>Aquasil</strong> <strong>Ultra</strong> con Smart Wetting ® migliora sia la bagnabilità sulla superficie del dente,<br />
sui tessuti e sugli abutment sia la riproduzione del dettaglio sul modello.<br />
1.1 Confezionamenti disponibili*<br />
Il materiale da impronta <strong>Aquasil</strong> <strong>Ultra</strong> Smart Wetting ® è disponibile in:<br />
• viscosità Light, viscosità Media e viscosità Heavy<br />
• sistema di estrusione monodose digit ® ; cartucce da 50 mL per miscelatore manuale e<br />
cartucce DECA da 380 mL per miscelatori dinamici<br />
• Super Fast Set, Fast Set, Regular Set, e Extended Time.<br />
*Alcune confezioni possono non essere commercializzate in tutti in paesi.<br />
1.2 Composizione<br />
Polimero di polidimetilsilossano; silossano di polimetilidrogeno; biossido di silicio; alluminio<br />
silicato di sodio; complesso organico a base di platino; surfattante; biossido di titanio; pigmenti<br />
di ossidi metallici; olio di menta piperita.<br />
1.3 Indicazioni d’uso<br />
Il materiale da impronta <strong>Aquasil</strong> <strong>Ultra</strong> Smart Wetting ® è indicato per tutte le tecniche di presa di<br />
impronta.<br />
1.4 Controindicazioni<br />
Il materiale da impronta <strong>Aquasil</strong> <strong>Ultra</strong> Smart Wetting ® è controindicato per l’uso su pazienti con<br />
anamnesi di grave reazione allergica all’olio di menta piperita o uno qualsiasi dei componenti.<br />
1.5 Specifiche tecniche<br />
Classificazione: ISO 4823<br />
Tipo 3: Consistenza Light: <strong>Aquasil</strong> <strong>Ultra</strong> XLV, <strong>Aquasil</strong> <strong>Ultra</strong> LV e <strong>Aquasil</strong> <strong>Ultra</strong> Xtra (materiale<br />
ribasante)<br />
Tipo 2: Consistenza Media: <strong>Aquasil</strong> <strong>Ultra</strong> Monophase, <strong>Aquasil</strong> <strong>Ultra</strong> Heavy e <strong>Aquasil</strong> <strong>Ultra</strong> Xtra<br />
(materiale da cucchiaio)<br />
Tipo 1: Consistenza Dura: <strong>Aquasil</strong> <strong>Ultra</strong> Rigid<br />
Tempo di lavorazione (22°C/72°F) ...........................Super Fast Set: 0'45"–1'15"<br />
(miscelazione a temperatura ambiente;<br />
Fast Set: 1'15"–1'45"<br />
tempo massimo di inserimento)<br />
Regular Set: 2'15"–2'45"<br />
<strong>Aquasil</strong> <strong>Ultra</strong> Xtra (ribasante): 4'30"<br />
<strong>Aquasil</strong> <strong>Ultra</strong> Xtra (materiale da cucchiaio):<br />
2'30"–3'00"<br />
Tempo di lavorazione (37°C/98°F) ...........................Super Fast Set: Max 0'35"<br />
(siringamento intraorale prima<br />
Fast Set: Max 0'35"<br />
dell’inserimento del cucchiaio)<br />
Regular Set: Max 1'10"<br />
<strong>Aquasil</strong> <strong>Ultra</strong> Xtra (ribasante): Max 1'45"<br />
Tempo di presa .......................................................Super Fast Set: 2'30" da inizio miscelazione<br />
(tempo di rimozione dal cavo orale MRT) Fast Set: 3'00" da inizio miscelazione<br />
Regular Set: 5'00" da inizio miscelazione<br />
<strong>Aquasil</strong> <strong>Ultra</strong> Xtra: 5'30" da inizio<br />
miscelazione<br />
Variazione dimensionale lineare in % ......................< 0.50<br />
Recupero in seguito a deformazione % ..................≥ 98<br />
Riproduzione del dettaglio .......................................20 micron<br />
1.6 Adesivo per portaimpronte compatibile<br />
Il materiale da impronta <strong>Aquasil</strong> <strong>Ultra</strong> è compatibile con i tradizionali adesivi per portaimpronte,<br />
destinati ad essere utilizzati con materiali a base di polivinilsilossano (consultare le Istruzioni<br />
per l’Uso complete).<br />
2. NOTE DI SICUREZZA GENERALI<br />
Rispettare le seguenti note di sicurezza generali e le note di sicurezza speciali presenti in altri<br />
capitoli delle presenti istruzioni.<br />
Simbolo di richiamo di sicurezza<br />
Questo simbolo è utilizzato per richiamare l’attenzione dell’operatore su potenziali<br />
rischi di lesioni personali. Attenersi a tutti i messaggi di sicurezza che<br />
accompagnano questo simbolo per evitare possibili lesioni.<br />
2.1 Avvertenze<br />
Il materiale da impronta <strong>Aquasil</strong> <strong>Ultra</strong> Smart Wetting ® contiene monomeri polimerizzabili e<br />
surfattanti che possono irritare la cute, gli occhi e la mucosa orale, e possono causare<br />
dermatiti allergiche da contatto in soggetti predisposti.<br />
• Evitare il contatto con gli occhi per prevenire irritazione ed eventuali danni alla cornea. In<br />
caso di contatto con gli occhi, sciacquare immediatamente con abbondante acqua e<br />
consultare un medico.<br />
• Evitare il contatto con la cute per prevenire irritazione ed eventuali reazioni allergiche. In<br />
caso di contatto, sulla pelle possono comparire eruzioni cutanee rossastre. In caso di<br />
contatto con la cute, rimuovere immediatamente il materiale con cotone e sciacquare<br />
accuratamente con acqua e sapone. In caso di fenomeni di sensibilizzazione o eruzioni,<br />
interrompere l’uso e consultare un medico.<br />
• Non ingerire/assumere il materiale per prevenire irritazioni o ostruzione intestinale. In caso<br />
di ingestione accidentale, bere abbondante acqua. Questo materiale non è pericoloso se<br />
ingerito in minima quantità. Quantità maggiori possono tuttavia causare ostruzione<br />
intestinale. Consultare il medico in caso di problemi alla digestione.<br />
• Non utilizzare il materiale da impronta <strong>Aquasil</strong> <strong>Ultra</strong> per la ribasatura provvisoria. Se usato in<br />
questo modo, il materiale può provocare irritazione della mucosa orale. In presenza di<br />
sintomi, interromperne immediatamente l’uso. Se l’irritazione persiste, consultare un medico.<br />
• Evitare di eseguire impronte multiple in una sola seduta (più di tre della stessa<br />
arcata/area) per prevenire irritazioni della mucosa orale. In presenza di sintomi, interromperne<br />
immediatamente l’uso. Se l’irritazione persiste, consultare un medico.<br />
2.2 Precauzioni<br />
• Questo prodotto è destinato ad essere utilizzato esclusivamente secondo quanto specificato<br />
nelle Istruzioni per l’uso. Qualsiasi altro utilizzo non conforme con le Istruzioni per l’uso è a<br />
sola discrezione e ad esclusiva responsabilità del medico.<br />
• Non esistono dati sufficienti a supporto dell’uso del materiale da impronta <strong>Aquasil</strong> <strong>Ultra</strong> su<br />
osso esposto. Utilizzare <strong>Aquasil</strong> <strong>Ultra</strong> esclusivamente sopra o attorno alla mucosa integra.<br />
• Indossare occhiali protettivi, maschera, indumenti e guanti idonei. Si consiglia l’uso di<br />
occhiali per i pazienti.<br />
• I dispositivi contrassegnati dalla dicitura “monouso” sull’etichetta sono destinati ad essere<br />
utilizzati una sola volta. Gettare dopo l’uso. Non riutilizzare su altri pazienti per evitare<br />
contaminazione crociata.<br />
• Tutti i prodotti vanno utilizzati a temperatura ambiente. Temperature più elevate riducono i<br />
tempi di lavorazione e le fasi di presa in laboratorio (più rapidi), temperature minori li<br />
aumentano (più lenti).<br />
• Per ottenere proprietà fisiche ottimali, la miscela dovrebbe risultare completamente<br />
omogenea (senza striature).<br />
• Il materiale da impronta <strong>Aquasil</strong> <strong>Ultra</strong> va utilizzato con portaimpronte rigidi e correttamente<br />
posizionati per la maggior parte delle applicazioni. Si consigliano portaimpronte con proprietà<br />
ritentive, come il DENTSPLY <strong>Caulk</strong> Rim-Lock ® , o con fori, precedentemente trattati con<br />
adesivo idoneo. Non riempire eccessivamente il portaimpronte per ridurre lo stimolo al<br />
vomito oppure il rischio di soffocamento o ingestione.<br />
• Il materiale dovrebbe estrudere facilmente: NON UTILIZZARE UNA FORZA ECCESSIVA. Una<br />
pressione eccessiva può portare a un’estrusione non corretta del materiale o causare la<br />
rottura della cartuccia.<br />
• La sicurezza e l’efficacia dei materiali per portaimpronte <strong>Aquasil</strong> <strong>Ultra</strong> Heavy, <strong>Aquasil</strong> <strong>Ultra</strong><br />
Rigid, <strong>Aquasil</strong> <strong>Ultra</strong> Xtra siringati come materiale ribasante non è stata dimostrata.<br />
• A causa dellla rigidità del materiale da impronta <strong>Aquasil</strong> <strong>Ultra</strong> Rigid, i sottosquadri profondi<br />
devono essere bloccati prima dell’inserimento del cucchiaio portaimpronte. Per impronte full<br />
arch scegliere altre viscosità <strong>Aquasil</strong> <strong>Ultra</strong> come materiale da cucchiaio.<br />
Interazioni:<br />
• Non utilizzare materiali dentali contenenti perossido di idrogeno in abbinamento a questo<br />
prodotto, poiché possono interferire con l’indurimento dei componenti polimerici.<br />
• L’uso di guanti polimerici in lattice o “contenenti solfuri”, nonché l’impiego di alcuni saponi e<br />
lozioni per le mani possono interferire con la reazione di indurimento. La contaminazione può<br />
accumularsi sulla superficie della cute e potrebbe risultare difficile da eliminare. L’uso di<br />
guanti privi di lattice durante la manipolazione evita questa eventualità.<br />
• Maneggiare i fili con pinze idonee. Non contaminare il dente preparato con i guanti.<br />
Risciacquare la preparazione con abbondante acqua prima di procedere alla presa<br />
dell’impronta.<br />
• Il materiale da impronta <strong>Aquasil</strong> <strong>Ultra</strong> non deve essere miscelato o utilizzato in abbinamento<br />
con materiali polivinilsilossani di altri produttori, né con materiali polieteri, polisolfuri o siliconi<br />
convenzionali per policondensazione.<br />
• La tecnica a doppia impronta in due fasi (“putty/wash”) per corone e ponti è raccomandata<br />
soltanto con i materiali da impronta <strong>Aquasil</strong> <strong>Ultra</strong> Xtra Tray, <strong>Aquasil</strong> Putty o Reprosil ®<br />
(disponibili separatamente) per la presa della prima impronta.<br />
2.3 Reazioni avverse<br />
• Contatto con gli occhi: irritazione ed eventuali danni alla cornea.<br />
• Contatto con la cute: irritazione o eventuali reazioni allergiche. Possono comparire eruzioni<br />
cutanee rossastre sulla pelle.<br />
• L’ingestione del materiale da impronta miscelato può causare ostruzione intestinale o altri<br />
disturbi dell’apparato digerente. (Vedere Avvertenze)
2.4 Conservazione<br />
Una conservazione non corretta può ridurre il periodo di validità e causare il malfunzionamento<br />
del prodotto.<br />
• Conservare a temperature comprese tra 10°C/50°F e 24°C/75°F.<br />
• Utilizzare il prodotto a temperatura ambiente.<br />
• Non conservare le cartucce usate con applicati i puntali di miscelazione nuovi.<br />
• Non congelare.<br />
• Proteggere dall’umidità.<br />
• Non utilizzare dopo la data di scadenza.<br />
3. ISTRUZIONI STEP-BY-STEP<br />
3.1 Dispenser miscelatore per cartuccia<br />
1. Inserire la cartuccia nel dispenser miscelatore.<br />
2. Fare fuoriuscire un po’ di materiale dalla cartuccia prima di installare il nuovo puntale di<br />
miscelazione.<br />
3. Preparazione della siringa con materiale a bassa viscosità<br />
• Erogare direttamente nella bocca del paziente con il puntale intraorale; OPPURE<br />
• Riempire una siringa intraorale con materiale miscelato dalla cartuccia; OPPURE<br />
• Preparare il materiale a bassa viscosità per la siringa nel sistema di estrusione digit ® per<br />
applicazioni monodose secondo le Istruzioni per l’uso.<br />
NOTA: Non estrudere i materiali <strong>Aquasil</strong> <strong>Ultra</strong> Heavy, <strong>Aquasil</strong> <strong>Ultra</strong> Rigid o <strong>Aquasil</strong> <strong>Ultra</strong> Xtra<br />
nel cavo orale.<br />
4. Disinfettare il dispenser, la cartuccia e il puntale di miscelazione usato, lasciandolo applicato<br />
prima di riporlo.<br />
• Subito prima dell’utilizzo successivo, rimuovere il puntale di miscelazione usato, fare<br />
fuoriuscire un po’ di materiale dalla cartuccia e applicare un nuovo puntale.<br />
• Una volta vuota, gettare la cartuccia. Non tentare di riempire o comprimere le cartucce<br />
usate.<br />
3.2 Sistema di estrusione monodose digit ® Targeted Delivery System<br />
1. Inserire lo stantuffo nell’estremità aperta della siringa.<br />
2. Posizionare la cartuccia monodose nell’estremità aperta dello stantuffo della siringa.<br />
3. Inserire la cartuccia monodose nel puntale miscelatore. Inserire il beccuccio intraorale.<br />
4. Inserire la cartuccia con il puntale miscelatore già montato (con il beccuccio intraorale)<br />
attraverso l’apertura laterale della siringa. Far scivolare il puntale attraverso l’estremità del<br />
dispenser con le dentellature a croce. Tirare l’estremità del puntale al fine di assicurasi che<br />
la cartuccia sia posizionata perfettamente.<br />
5. Estrudere il materiale applicando una pressione lenta e costante sullo stantuffo. Non è<br />
necessario applicare una forza eccessiva.<br />
6. Per smontare, ritirare lo stantuffo, raddrizzare il puntale miscelatore, battere il puntale su un<br />
ripiano per dislocare la cartuccia e rimuovere dalla fessura laterale.<br />
7. Smaltire in maniera appropriate cartuccia e puntale e preparare la siringa per un nuovo uso.<br />
3.3 Caricamento cartucce DECA <br />
NOTA: Cartucce pesanti: l’eventuale caduta può danneggiare la cartuccia rendendola<br />
inutilizzabile. Le cartucce DECA si adattano ai miscelatori dinamici Duomix, duomix II,<br />
Pentamix ® , MixStar, Dynamix e Volume Mix. Rimuovere con cautela la cartuccia di<br />
erogazione dalla sua confezione, facendo riferimento anche alle istruzioni separate dei<br />
produttori dei miscelatori dinamici.<br />
1. Togliere il tappo di chiusura dalla cartuccia.<br />
2. Inserire la cartuccia nel miscelatore dinamico.<br />
3. Fare fuoriuscire un po’ di materiale dalla cartuccia prima di installare un nuovo puntale di<br />
miscelazione.<br />
4. Applicare un puntale di miscelazione. Utilizzare esclusivamente puntali di miscelazione<br />
DENTSPLY. Altri puntali potrebbero non sigillare correttamente.<br />
5. Posizionare l’anello di bloccaggio sopra il puntale e ruotare fino a bloccare l’anello in<br />
posizione.<br />
6. Erogare il materiale miscelato (base e catalizzatore) in una siringa intraorale (solo <strong>Aquasil</strong><br />
<strong>Ultra</strong> Monophase) o in un portaimpronte appropriato.<br />
• Subito prima dell’utilizzo successivo, rimuovere il puntale di miscelazione usato, fare<br />
fuoriuscire un po’ di materiale dalla cartuccia e applicare un nuovo puntale.<br />
3.4 Tecnica d’impronta: Tecnica monoimpronta a una o due fasi (“doppia miscelazione”) con<br />
portaimpronte rigido o con tecnica a doppio quadrante (dual arch)<br />
NOTA: Tempo di miscelazione del materiale a bassa viscosità e del materiale per<br />
portaimpronte: si raccomanda vivamente di avvalersi dell’aiuto di un assistente per<br />
effettuare contemporaneamente l’iniezione con siringa e il riempimento del<br />
portaimpronte.<br />
1. Garantire l’emostasi e pulire il campo operatorio con acqua nebulizzata.<br />
2. Materiale siringabile: riempire la siringa da impronta oppure applicare un puntale intraorale<br />
sull’estremità del puntale di miscelazione, oppure utilizzare il sistema di estrusione digit ® per<br />
applicazione monodose.<br />
Materiale per portaimpronte: erogare il materiale (assistente) nel portaimpronte. Non riempire<br />
eccessivamente il portaimpronte.<br />
3. Simultaneamente al riempimento del portaimpronte, siringare (dentista) completamente<br />
intorno alla preparazione/all’abutment.<br />
NOTA: Tempo di inserimento materiale per portaimpronte e materiale a bassa viscosità:<br />
• Materiale wash e portaimpronte super fast set: il portaimpronte, una volta riempito, va<br />
inserito entro 35 secondi dall’inizio dell’iniezione del materiale a bassa viscosità nel cavo<br />
orale.<br />
• Materiale wash e portaimpronte fast set: il portaimpronte, una volta riempito, va inserito<br />
entro 35 secondi dall’inizio dell’iniezione del materiale a bassa viscosità nel cavo orale.<br />
• Materiale wash e portaimpronte fast set: il portaimpronte, una volta riempito, va inserito<br />
entro 1 minuto e 10 secondi dall’inizio dell’iniezione del materiale a bassa viscosità nel<br />
cavo orale.<br />
• Aquaisl <strong>Ultra</strong> Xtra: il materiale per portaimpronte, una volta riempito, va inserito entro 1<br />
minuto e 45 secondi dall’inizio dell’iniezione del materiale a bassa viscosità nel cavo orale<br />
4. Inserire il portaimpronte riempito nella bocca del paziente.<br />
5. Tempo minimo di rimozione (da inizio miscelazione)<br />
• Super Fast Set: 2 minuti 30 secondi<br />
• Fast Set: 3 minuti<br />
• Regular Set: 5 minuti<br />
• <strong>Aquasil</strong> <strong>Ultra</strong> Xtra: 5 minuti 30 secondi<br />
NOTA: Se si utilizza il materiale a bassa viscosità Regular Set assieme al materiale per<br />
portaimpronte Fast Set, il tempo minimo di rimozione è di 4 minuti dall’inizio della<br />
miscelazione.<br />
6. Attenersi alle procedure di disinfezione prima di spedire e/o colare l’impronta.<br />
Guida ai tempi Super Fast Set: fino a 0'35" (35 sec) Super Fast Set: 2'30" (2 min 30 sec)<br />
Fast Set: fino a 0'35" (35 sec)<br />
Fast Set: 3'00" (3 min)<br />
Regular Set: fino a 1'10" (1 min 10 sec) Regular Set: 5'00" (5 min)<br />
0'00" (0 sec) <strong>Aquasil</strong> <strong>Ultra</strong> Xtra: fino a 1'45" (1 min 45 sec) <strong>Aquasil</strong> <strong>Ultra</strong> Xtra: 5'30" (5 min 30 sec)<br />
Iniziare Completare l’iniezione e posizionare il Rimuovere l’impronta indurita<br />
simultaneamente a portaimpronte riempito<br />
iniettare con la siringa<br />
e a riempire il portaimpronte<br />
3.5 Tecnica d’impronta: Due materiali due step (“putty-wash”) con portaimpronte individuale<br />
1. Completare la prima impronta con il materiale da cucchiaio <strong>Aquasil</strong> <strong>Ultra</strong> Xtra Tray, <strong>Aquasil</strong><br />
Putty o Reprosil ®<br />
• Posizionare uno o più fogli di polietilene sulla superficie dell’impronta. Il foglio crea lo<br />
spazio uniforme necessario per la tecnica. Protegge anche la superficie dalle<br />
contaminazioni.<br />
• Inserire il cucchiaio riempito dentro il cavo orale. Muovere leggermente il cucchiaio da lato<br />
a lato e avanti e indietro. Questo crea lo spazio per il materiale ribasante.<br />
• Rimuovere il cucchiaio dal cavo orale quando il materiale ha raggiunto una consistenza<br />
gommosa. Non disturbare l’impronta fino a che non ha polimerizzato completamente.<br />
• Rimuovere il foglio di polietilene , lavare l’impronta e asciugare con aria.<br />
2. Si raccomanda di avvalersi dell’aiuto di un’assistente e di due pistole per cartucce o un<br />
dispenser per cartucce e una siringa monodose digit ® per assicurare il siringamento<br />
contemporaneo sulla preparazione e nel cucchiaio.<br />
3. Seguire i passaggi precedenti usando il material ribasante per il siringamento intraorale e il<br />
riempimento del cucchiaio.<br />
3.6 Tecnica d’impronta: Tecnica d’impronta per arcata edentula/overdenture<br />
Il materiale da impronta <strong>Aquasil</strong> <strong>Ultra</strong> Monophase, Heavy e Rigid possono essere utilizzati per<br />
la modellazione dei margini.<br />
1. Tecnica di bordaggio funzionale<br />
• Erogare il materiale sui margini del portaimpronte.<br />
• Inserire il portaimpronte ed eseguire il bordaggio con le tecniche convenzionali.<br />
• Quando il materiale ha raggiunto una consistenza stabile, rimuovere il portaimpronte e<br />
controllare i margini. Si può aggiungere una piccola quantità di materiale miscelato in<br />
presenza di spazi vuoti o di aree riempite in misura insufficiente. E’ possibile rimuovere<br />
senza difficoltà eventuali residui di materiale con la lama di un bisturi.<br />
2. L’impronta definitiva può essere eseguita con <strong>Aquasil</strong> <strong>Ultra</strong> XLV o LV, <strong>Aquasil</strong> <strong>Ultra</strong><br />
Monophase, Heavy o Xtra.<br />
3. Inserire il portaimpronte riempito nella bocca del paziente.<br />
4. Osservare il tempo minimo di rimozione del materiale da impronta utilizzato.<br />
5. Attenersi alle procedure di disinfezione prima di spedire e/o colare l’impronta.<br />
3.7 Tecnica d’impronta: Duplicazione di modelli<br />
1. Riempire il portaimpronte con il materiale da impronta <strong>Aquasil</strong> <strong>Ultra</strong>.<br />
2. Si consiglia di siringare simultaneamente, utilizzando il materiale da impronta ribasante<br />
<strong>Aquasil</strong> <strong>Ultra</strong>, in modo completo attorno ai denti del modello.<br />
3. Posizionare il modello all’interno del portaimpronte riempito. Mantenere il portaimpronte in<br />
posizione fino a quando il materiale è completamente indurito.<br />
4. Rimuovere il modello dall’impronta tirando lentamente fino a rompere il sigillo.<br />
4. PROCEDURE D’IGIENE<br />
Contaminazione crociata<br />
• Non riutilizzare i prodotti monouso. Smaltire in conformità ai i regolamenti locali.<br />
• Il trattamento dei prodotti riutilizzabili è descritto di seguito.<br />
4.1 Pulizia del dispenser<br />
Il dispenser miscelatore per cartucce e il dispenser digit possono essere puliti strofinandoli con<br />
acqua calda e sapone o detersivo. Il materiale in eccesso può essere rimosso con una garza<br />
inumidita con alcol. Per la pulizia del dispenser e le istruzioni di disinfezione, fare riferimento<br />
alle istruzioni del produttore del miscelatore dinamico.<br />
4.2 Disinfezione del dispenser miscelatore e della cartuccia<br />
Disinfettare i dispenser miscelatori, le cartucce e i puntali usati, se lasciati sulle cartucce per lo<br />
stoccaggio, con disinfettanti tubercolocidi per uso ospedaliero, secondo le normative nazionali<br />
e locali. Utilizzare salviette impregnate e non prodotti spray. NOTA: Strofinare la cartuccia<br />
delicatamente per non rovinare l’etichetta. Alcuni agenti a base fenolica e prodotti a base di<br />
iodoforo possono macchiare la superficie.<br />
Agenti contenenti solventi organici, come l’alcool, possono sciogliere la plastica del dispenser<br />
e dello stantuffo. Per ottenere i migliori risultati, seguire fedelmente le istruzioni del produttore<br />
del disinfettante.<br />
Sterilizzazione<br />
Seguire le indicazioni di pulizia e disinfezione, I sistemi di estrusione digit possono essere<br />
autoclavati per un tempo minimo di 3 minuti a 134°C. Suggerimento tecnico: Il materiale da<br />
impronta <strong>Aquasil</strong> <strong>Ultra</strong> non indurito può essere rimosso dagli indumenti con un solvente per<br />
lavaggio a secco.
4.3 Disinfezione del materiale da impronta<br />
L’impronta deve essere disinfettata con un disinfettante tuberculocida per uso ospedaliero<br />
secondo i regolamenti nazionali e locali.<br />
• Gli iodofori, l’ipoclorito di sodio (0,525 %), il biossido di cloruro e i quaternari doppi o<br />
sinergizzati sono disinfettanti approvati.<br />
• Per ottenere i migliori risultati, disinfettare accuratamente l’impronta spruzzandola o<br />
immergendola in un disinfettante per uso ospedaliero per il tempo d’azione raccomandato<br />
dal produttore del disinfettante stesso.<br />
• Si preferiscono disinfettanti in soluzione acquosa.<br />
5. NUMERO DI LOTTO E DATA DI SCADENZA<br />
1. Non utilizzare il prodotto dopo la data di scadenza. Si utilizza lo standard ISO: “AAAA/MM.”<br />
2. I numeri riportati di seguito devono sempre essere citati in tutta la corrispondenza.<br />
• Numero di riordino<br />
• Numero di lotto<br />
• Data di scadenza<br />
4.4 Colatura<br />
• Rimuovere l’impronta dal disinfettante, risciacquarla con acqua e lasciarla asciugare all’aria.<br />
• La colatura dell’impronta, compatibile con vari tipi di gesso, può avvenire a partire da 30<br />
minuti dopo la disinfezione o entro quattordici giorni. Per impronte in resina epossidica,<br />
ritardare la colata di 60 minuti.<br />
• Non conservare l’impronta alla luce solare diretta.<br />
• Se l’impronta deve essere spedita, utilizzare una confezione adeguata per evitare distorsioni.<br />
• Il materiale è compatibile con una varietà di gessi per uso dentale. Le impronte possono<br />
essere argentate o ramate.<br />
Manufactured by:<br />
DENTSPLY <strong>Caulk</strong><br />
38 West Clarke Avenue<br />
Milford, DE 19963 USA<br />
Tel: 1-302-422-4511<br />
www.dentsply.com<br />
DENTSPLY DETREY GmbH<br />
78467 Konstanz<br />
Germany<br />
Tel.: 49-7531-583-0<br />
www.dentsply.de<br />
Distributed by:<br />
DENTSPLY Canada<br />
161 Vinyl Court<br />
Woodbridge, Ontario<br />
L4L 4A3 Canada<br />
Pentamix, MixStar, Dynamix and Volume Mix are not registered trademarks of DENTSPLY International.<br />
©2013 DENTSPLY International. All Rights Reserved. Form #578002 (R 10/11/13)