models/ 4211, 4212, 4213, 4214, 4215, 4216, 4219, 4220 - Sunbeam
models/ 4211, 4212, 4213, 4214, 4215, 4216, 4219, 4220 - Sunbeam
models/ 4211, 4212, 4213, 4214, 4215, 4216, 4219, 4220 - Sunbeam
Create successful ePaper yourself
Turn your PDF publications into a flip-book with our unique Google optimized e-Paper software.
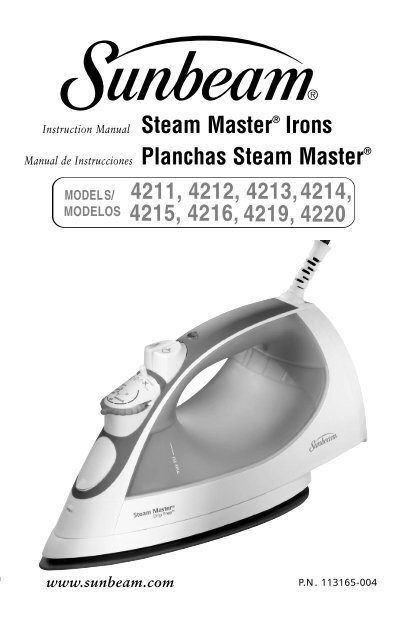
Instruction Manual<br />
Steam Master ® Irons<br />
Manual de Instrucciones Planchas Steam Master ®<br />
MODELS/ <strong>4211</strong>, <strong>4212</strong>, <strong>4213</strong>, <strong>4214</strong>,<br />
MODELOS <strong>4215</strong>, <strong>4216</strong>, <strong>4219</strong>, <strong>4220</strong><br />
www.sunbeam.com P.N. 113165-004
IMPORTANT SAFEGUARDS<br />
When using electrical appliances, basic safety precautions should always be<br />
followed including the following:<br />
READ ALL INSTRUCTIONS BEFORE USE<br />
• Use iron only for its intended use.<br />
• To protect against risk of electric shock, do not immerse the iron in water or other<br />
liquids.<br />
• The fabric select dial and steam lever should always be turned to “O/Off” before<br />
plugging or unplugging from out let. Never yank cord to disconnect from outlet;<br />
instead, grasp plug and pull to disconnect.<br />
• Do not allow cord to touch hot surfaces. Let iron cool completely before putting<br />
away. Loop cord loosely around iron when storing.<br />
• Always disconnect iron from electrical outlet when filling with water or emptying<br />
and when not in use.<br />
• Do not operate iron with a damaged cord or if the iron has been dropped<br />
or damaged. To avoid the risk of electric shock, do not disassemble the iron.<br />
Take it to an authorized service center for examination and/or repair.<br />
Incorrect reassembly can cause a risk of electric shock when the iron is used.<br />
• Close supervision is necessary for any appliance being used by or near children.<br />
Do not leave iron unattended while plugged in or turned on or on an ironing board.<br />
• Burns can occur from touching hot metal parts, hot water or steam. Use caution<br />
when you turn a steam iron upside down – there may be hot water in the reservoir.<br />
• If the iron is not operating normally, disconnect from the power supply and<br />
have the iron serviced by an authorized service center. Or call Customer Service<br />
at 800-458-8407.<br />
• Your SUNBEAM ® iron is designed to rest on the heel rest. Do not leave<br />
the iron unattended. Do not set the iron on an unprotected surface,<br />
even if it is on its heel rest.<br />
SPECIAL INSTRUCTIONS<br />
• This is a 1200-Watt appliance. To avoid a circuit overload, do not operate another<br />
high wattage appliance on the same circuit.<br />
• If an extension cord is absolutely necessary, a 15-ampere cord should be used.<br />
Cords rated for less amperage may overheat. Care should be taken to arrange<br />
the extension cord so that it cannot be pulled or tripped over.<br />
FOR PRODUCTS PURCHASED IN THE UNITED STATES AND CANADA<br />
To reduce the risk of electrical shock, this appliance has a polarized plug (one blade is<br />
wider than the other). This plug fits a polarized outlet only one way; if the plug does<br />
not fit fully into the outlet, reverse the plug. If it still does not fit, contact a qualified<br />
electrician. Do not attempt to defeat this safety feature.<br />
SAVE THESE INSTRUCTIONS
IRONING GUIDE<br />
SUGGESTED<br />
FABRIC SELECT<br />
FABRIC STEAM SETTING DIAL SETTING IRONING RECOMMENDATIONS<br />
Acrylic O/Off (Dry) Synthetic Iron garment inside out<br />
Acetate O/Off (Dry) Synthetic Iron garment inside out while still damp.<br />
Polyester O/Off (Dry) Synthetic Iron garment inside out while still damp.<br />
Rayon O/Off (Dry) Synthetic Iron garment inside out.<br />
Silk O/Off (Dry) Silk Iron garment inside out. Use an ironing cloth*<br />
to prevent shine marks.<br />
Viscose O/Off (Dry) Silk Mainly dry iron; steam may be used under<br />
garment manufacturer’s instructions.<br />
Nylon O/Off (Dry) Silk Iron garment inside out while still damp.<br />
Wool Steam Wool Iron garment inside out or use an<br />
ironing cloth.*<br />
Wool Blends Steam Wool Iron garment inside out or use an<br />
ironing cloth.*<br />
Cotton Blends Steam Cotton Follow garment manufacturer’s instructions.<br />
Use setting for the fiber requiring the lowest<br />
setting.<br />
Corduroy Steam Cotton Iron garment inside out or use an ironing cloth*<br />
and then brush the garment with your hand<br />
to raise the texture of the fabric.<br />
Cotton Steam Cotton Iron dark fabrics inside out to prevent<br />
shine marks.<br />
Linen Steam Linen Iron garment inside out or use an<br />
ironing cloth* to prevent shine marks<br />
(especially on dark fabrics).<br />
Denim Steam Linen Use the SPRAY MIST ® feature and/or the<br />
SHOT OF STEAM ® for deeper penetration<br />
to remove wrinkles.<br />
*An ironing cloth is a cotton, dry-cleaned cloth that you place over the garment<br />
you are ironing to prevent the fabric from looking shiny.<br />
Note: Some fabrics may require more steam than others. Your iron has the capability<br />
to adjust steam as needed.
FEATURES OF YOUR STEAM MASTER ® IRON<br />
1. SPRAY MIST ® Release<br />
2. Covered Water Fill Hole<br />
6<br />
7<br />
8<br />
9<br />
3. Fabric Select Dial<br />
4. Steam / Self-Clean Lever<br />
5. SPRAY MIST ® Button<br />
4<br />
5<br />
6. SHOT OF STEAM ® / Vertical Steam Button<br />
(select <strong>models</strong> only)<br />
7. Power Indicator Light / MOTION SMART ®<br />
Auto-Off Indicator<br />
1<br />
8. Soft Grip Handle<br />
2<br />
3<br />
9. 360° Tangle-Free Swivel Cord<br />
(select <strong>models</strong> only)<br />
10. Retractable Cord (select <strong>models</strong> only)<br />
11<br />
10<br />
11. Anti-Calcium System (select <strong>models</strong> only) –<br />
Inside Water Reservoir<br />
12. See-Through Water Reservoir<br />
13. Soleplate<br />
13 12
IRONING TIPS<br />
• Always read garment labels and follow the manufacturer’s ironing instructions.<br />
• Sort the articles to be ironed according to the type of fabric.<br />
• You should first iron garments requiring low temperature (e.g., silks and synthetics)<br />
to avoid damaging them with an iron that is too hot.<br />
• If you are unsure of the fabric content of the garment, test a small area, such as a seam<br />
or facing, before ironing a visible area. Start with a low temperature and gradually<br />
increase the heat to find the best setting.<br />
• When changing the temperature from a high setting to a low setting,<br />
allow approximately 5 minutes for the lower temperature to be reached.<br />
• When steam ironing, use long, slow passes over the fabric. This will allow the steam<br />
to penetrate the fabric while allowing the heat of the soleplate to dry out the moisture.<br />
• To iron linens, turn garment inside out. Be careful not to use an iron that is too hot<br />
because the lining may melt or stick to the soleplate.<br />
• To iron zippers, use an ironing cloth or make sure the zipper is closed and iron over<br />
the flap. Never iron directly over an unprotected zipper.<br />
• Use the Ironing Guide to select the best setting and method for the fabric<br />
you plan to iron.
TO FILL THE WATER RESERVOIR<br />
1. Make sure the iron is unplugged. Set the Steam Lever to O/Off (Dry) and the Fabric Select<br />
Dial to OFF.<br />
2. Lift the Water Fill Hole Cover.<br />
3. Fill water cup with water. Pour water into iron water reservoir. Do not fill water reservoir<br />
beyond maximum fill level.<br />
WARNING: To prevent the risk of burns, be careful when filling a hot iron with water.<br />
Hot metal parts, hot water and steam can cause injuries.<br />
DRY IRONING<br />
1. Make sure the Steam Lever is turned to the O/Off (Dry) setting.<br />
2. Plug the cord into a 120-Volt AC outlet.<br />
3. Turn the large Fabric Select Dial to the fabric setting you desire (Silk or Synthetics).<br />
Allow the iron to heat for 2 minutes. While the iron is heating, make sure it is sitting<br />
on its heel rest on a stable, protected surface.<br />
NOTE: While the Steam Lever is turned to the O/Off (Dry) setting, you may still use the SHOT<br />
OF STEAM ® or SPRAY MIST ® feature. Please make sure the water reservoir is 1/4 full of water.<br />
TIP: Refer to the Ironing Guide for the recommended setting for your fabric.<br />
STEAM IRONING<br />
1. Follow the instructions for “Filling the Water Reservoir”.<br />
2. Plug the cord into a 120-Volt AC outlet.<br />
3. Turn the large Fabric Select Dial to the fabric setting you desire (Synthetic, Silk, Linen,<br />
Cotton or Wool). Allow the iron to heat for 2 minutes. While the iron is heating,<br />
make sure it is sitting on its heel rest on a stable, protected surface.<br />
4. Allow the iron to heat for 2 minutes, and then turn the Steam lever to the appropriate setting.<br />
TIP: Refer to the Ironing Guide for the recommended setting for your fabric.<br />
IMPORTANT: When not ironing, always set the Steam Lever to O/Off (Dry) and the Fabric<br />
Select Dial to OFF.
USING THE IRON’S SPECIAL FEATURES<br />
SPRAY MIST ® FEATURE<br />
The SPRAY MIST ® feature is a powerful water spray mist that dampens the fabric to aid in<br />
removing wrinkles from heavy fabrics and for setting creases.<br />
To use the SPRAY MIST ® Feature:<br />
Press the SPRAY MIST ® button firmly.<br />
SHOT OF STEAM ® FEATURE<br />
The SHOT OF STEAM ® feature provides an extra burst of steam for deep penetration<br />
of stubborn wrinkles. You can use this feature while Dry or Steam ironing, but the water<br />
reservoir must be at least 1/4 full of water.<br />
To use the SHOT OF STEAM ® Feature:<br />
Place the iron on top of the wrinkle and press the SHOT OF STEAM ® button each time you<br />
would like an extra burst of steam. The SHOT OF STEAM ® feature may be used continuously<br />
with just a short pause between shots.<br />
VERTICAL STEAM (select <strong>models</strong> only)<br />
The vertical steam feature allows your iron to function as a garment steamer.<br />
TIP: When using the vertical steam on clothing, hang the clothing on a clothes hanger<br />
for best results. Hanging curtains and drapes may also be steamed.<br />
To use Vertical Steam:<br />
1. Make sure that the iron has heated up (2 minutes).<br />
2. Hold the iron in a vertical position, with the iron close to but not touching the fabric<br />
you want to steam.<br />
3. With your other hand, pull the fabric tight.<br />
4. Press the SHOT OF STEAM ® button for approximately 3-second intervals as you<br />
move the iron across the wrinkled area.<br />
WARNING: To prevent the risk of burns, keep your hand away from the area being steamed.<br />
WARNING: DO NOT steam garments while wearing them; this may result in injuries.<br />
PATENTED MOTION SMART ® AUTO-OFF FEATURE<br />
When the iron is plugged in, the Power Indicator will light steadily, indicating that there<br />
is power to the iron.<br />
If you leave the iron:<br />
•in a horizontal position without moving it, or accidentally tip the iron over, it will automatically<br />
stop heating after 30 seconds. The Power Indicator will blink to let you know that the iron<br />
has stopped heating.<br />
• in a vertical position (on its heel rest) without moving it, the iron will automatically turn off<br />
after 15 minutes. The Power Indicator will blink to let you know that the iron has stopped<br />
heating.<br />
IMPORTANT: The Power Indicator will continue to blink until the iron is unplugged or reset.
To reset the iron:<br />
Move the iron back and forth and allow it to reheat for 2 minutes. The indicator will stop<br />
blinking and the iron will start heating again.<br />
WARNING: The patented MOTION SMART ® Auto-Off is a safety feature, not a recommended<br />
means for turning your iron off. See “Caring for Your Iron After Use” for information on<br />
turning off your iron and storing it safely between use.<br />
ANTI-CALCIUM SYSTEM (select <strong>models</strong> only)<br />
The Anti-Calcium System is a permanent system located inside the water reservoir.<br />
This system removes calcium from the water and reduces calcium build-up on the soleplate.<br />
RETRACTABLE CORD SECTION (select <strong>models</strong> only)<br />
1. When winding the cord, hold the plug with one hand, and press the winding button<br />
with the other hand. (Failure to hold plug may cause plug to fly.)<br />
2. The cord reel is compact for multi-layer winding of the cord. In case cord is not fully rewound,<br />
pull out the cord and steer cord evenly on the reel.<br />
3. In case the cord is not pulled out easily, pull cord firmly.<br />
4. Select the amount of cord desired before plugging into an electrical outlet.<br />
5. Do not allow children to use retractable cord feature as the cord may cause injury.<br />
CARING FOR YOUR IRON AFTER USE<br />
TURNING OFF YOUR IRON<br />
1. Turn the Steam Lever to O/Off (Dry) and Fabric Select Dial to Off.<br />
2. Unplug the iron from the power source.<br />
WARNING: NEVER yank the power cord when unplugging the iron. This can damage the cord.<br />
STORING YOUR IRON<br />
1. Allow the iron to cool.<br />
2. If you do not use your iron on a daily basis, empty the water reservoir after each use for<br />
a longer iron life. To do so, unplug the iron, turn the iron upside down, open the fill hole<br />
cover, and allow water to flow from the fill hole. Shake the iron gently to remove trapped<br />
water drops.<br />
3. On corded <strong>models</strong> only: Loosely loop the power cord around the heel rest and store the<br />
the iron on its heel rest.<br />
IMPORTANT: Wrapping the cord around the iron too tightly can damage the cord.<br />
TIP: When not ironing, always set the Steam Lever to O/Off (Dry) and the Fabric Select Dial<br />
to Off.
to Off.<br />
MAINTAINING YOUR STEAM MASTER ®<br />
IRON<br />
CLEANING THE SOLEPLATE<br />
Clean the soleplate if starch or other residue accumulate.<br />
To clean the Soleplate:<br />
1. Allow the iron to cool and then wipe it with a soft, damp cloth.<br />
WARNING: DO NOT use abrasive cleansers, scouring pads or vinegar to clean the soleplate.<br />
This will damage the finish.<br />
2. Run the iron over an all-cotton cloth to remove any residue.<br />
USING THE SELF-CLEANING FEATURE<br />
You should use the Self-Cleaning feature once a month to maintain the optimal performance<br />
of your iron.<br />
To use the Self-Cleaning feature:<br />
1. Move the Steam Lever back and forth from O/Off (Dry) several times to remove debris<br />
and minerals from the Steam Valve. This keeps water flowing into the steam chamber.<br />
MAINTENANCE<br />
CLEANING THE ANTI-CALCIUM SYSTEM (select <strong>models</strong> only)<br />
The STEAM MASTER ® iron houses an anti-calcium filter in the reservoir, which eliminates<br />
impurities from the water.<br />
To prolong the efficiency of this filter:<br />
1. Unplug the iron and allow it to cool.<br />
2. Locate the water cup that accompanied the iron. Fill it with water to the <strong>Sunbeam</strong> logo<br />
in the top right corner. Add 1 teaspoon of salt to the water and fill the water reservoir<br />
with this solution.<br />
3. Leave the solution in the water reservoir for 15 minutes, then empty it.<br />
4. Fill the water reservoir a second time with the salt water solution and empty it again<br />
after 15 minutes.<br />
5. Fill the tank with fresh water to rinse and empty.<br />
The Anti-Calcium System should be cleaned approximately once a month.
1 Year Limited Warranty<br />
<strong>Sunbeam</strong> Products, Inc, or if in Canada, <strong>Sunbeam</strong> Corporation (Canada) Limited<br />
(collectively “<strong>Sunbeam</strong>”) warrants that for a period of one year from the date of purchase,<br />
this product will be free from defects in material and workmanship. <strong>Sunbeam</strong>, at its option, will<br />
repair or replace this product or any component of the product found to be defective during<br />
the warranty period. Replacement will be made with a new or remanufactured product or<br />
component. If the product is no longer available, replacement may be made with a similar<br />
product of equal or greater value. This is your exclusive warranty.<br />
This warranty is valid for the original retail purchaser from the date of initial retail purchase<br />
and is not transferable. Keep the original sales receipt. Proof of purchase is required to obtain<br />
warranty performance. <strong>Sunbeam</strong> ® dealers, service centers, or retail stores selling <strong>Sunbeam</strong> ®<br />
products do not have the right to alter, modify or any way change the terms and conditions of<br />
this warranty.<br />
This warranty does not cover normal wear of parts or damage resulting from any of<br />
the following: negligent use or misuse of the product, use on improper voltage or current, use<br />
contrary to the operating instructions, disassembly, repair or alteration by anyone other than<br />
<strong>Sunbeam</strong> or an authorized <strong>Sunbeam</strong> ® service center. Further, the warranty does not cover: Acts<br />
of God, such as fire, flood, hurricanes and tornadoes.<br />
What are the limits on <strong>Sunbeam</strong>’s Liability?<br />
<strong>Sunbeam</strong> shall not be liable for any incidental or consequential damages caused by the breach<br />
of any express, implied or statutory warranty or condition.<br />
Except to the extent prohibited by applicable law, any implied warranty or condition of<br />
merchantability or fitness for a particular purpose is limited in duration to the duration of<br />
the above warranty.<br />
<strong>Sunbeam</strong> disclaims all other warranties, conditions or representations, express, implied,<br />
statutory or otherwise.<br />
<strong>Sunbeam</strong> shall not be liable for any damages of any kind resulting from the purchase, use or<br />
misuse of, or inability to use the product including incidental, special, consequential or similar<br />
damages or loss of profits, or for any breach of contract, fundamental or otherwise, or for any claim<br />
brought against purchaser by any other party.<br />
Some provinces, states or jurisdictions do not allow the exclusion or limitation of incidental or<br />
consequential damages or limitations on how long an implied warranty lasts, so the above<br />
limitations or exclusion may not apply to you.<br />
This warranty gives you specific legal rights, and you may also have other rights that vary<br />
from province to province, state to state or jurisdiction to jurisdiction.<br />
How To Obtain Warranty Service<br />
In the U.S.A.<br />
If you have any question regarding this warranty or would like to obtain warranty service,<br />
please call 1 800-458-8407 and a convenient service center address will be provided to you.<br />
In Canada<br />
If you have any question regarding this warranty or would like to obtain warranty service,<br />
please call 1 800-667-8623 and a convenient service center address will be provided to you.<br />
In the U.S.A., this warranty is offered by <strong>Sunbeam</strong> Products, Inc located in Boca Raton,<br />
Florida 33431. In Canada, this warranty is offered by <strong>Sunbeam</strong> Corporation (Canada)<br />
Limited, located at 5975 Falbourne Street, Mississauga, Ontario L5R 3V8.<br />
PLEASE DO NOT RETURN THIS PRODUCT TO ANY OF<br />
THESE ADDRESSES OR TO THE PLACE OF PURCHASE.
PRECAUCIONES IMPORTANTES<br />
Cuando use algún aparato eléctrico siempre deben seguirse precauciones<br />
básicas de seguridad incluyendo las siguientes:<br />
LEA TODAS LAS INSTRUCCIONES ANTES DE USAR<br />
• Use la plancha únicamente para el uso al que está destinada.<br />
• Para protegerse contra el riesgo de un choque eléctrico, no sumerja la plancha en agua ni en otros líquidos.<br />
• La perilla selectora de telas y la palanca del vapor siempre deben estar en “O/Off” (Dry) (O/Apagado [Seco])<br />
antes de enchufar o desenchufar la plancha del tomacorriente. Nunca tire del cable para desconectarla<br />
del tomacorriente, sujete el enchufe y tire de él para desconectarla.<br />
• No permita que el cable toque superficies calientes. Deje enfriar la plancha por completo antes de guardarla.<br />
Envuelva el cable flojamente alrededor de la plancha para guardarla.<br />
• Siempre desconecte la plancha del tomacorriente eléctrico cuanto esté llenándola de agua o vaciándola<br />
y también cuando no esté en uso.<br />
• No haga funcionar la plancha si el cable está dañado o si la plancha se ha caído o dañado. Para evitar<br />
el riesgo de choque eléctrico, no desarme la plancha. Llévela a un centro de servicio autorizado para que<br />
la examinen y/o reparen. El rearmado incorrecto puede provocar el riesgo de un choque eléctrico al usar<br />
la plancha.<br />
• Es necesario vigilar cuidadosamente a los niños cuando usen cualquier aparato o se encuentren cerca de él.<br />
No deje la plancha sin vigilancia mientras esté enchufada, encendida o sobre una tabla de planchar.<br />
• Se pueden producir quemaduras por contacto con las partes de metal calientes, el agua caliente o el vapor.<br />
Tenga cuidado al invertir una plancha de vapor ya que puede quedar agua caliente en el reservorio.<br />
• Si la plancha no funciona normalmente, desconéctela del tomacorriente y hágala revisar por un centro<br />
de servicio autorizado. O llame a Servicio al Cliente al 800-458-8407.<br />
• Su plancha SUNBEAM ® está diseñada para apoyarse en el talón de apoyo. No deje la plancha sin vigilancia.<br />
No apoye la plancha sobre una superficie no protegida, aun cuando sea sobre el talón de apoyo.<br />
INSTRUCCIONES ESPECIALES<br />
• Este aparato funciona con 1200 vatios. Para evitar una sobrecarga del circuito no haga funcionar<br />
otro aparato de alto vataje en el mismo circuito.<br />
• Si resulta absolutamente necesario usar un cable de extensión, se debe usar un cable de 15 amperios.<br />
Los cables con tensiones nominales menores pueden sobrecolentarse. Se debe cuidar de poner<br />
el cable de extensión de modo tal que no pueda ser arrancado o provocar tropiezos.<br />
PARA PRODUCTOS COMPRADOS EN LOS EE.UU. Y CANADÁ<br />
Para reducir el riesgo de choque eléctrico, este aparato tiene un enchufe polarizado (una pata es<br />
más ancha que la otra). Este enchufe calza en un tomacorriente polarizado sólo de una manera;<br />
si el enchufe no cabe totalmente en el tomacorriente, gire el enchufe. Si aun así no calza,<br />
consulte a un electricista calificado. No intente anular esta característica de seguridad.<br />
GUARDE ESTAS INSTRUCCIONES
GUÍA DE PLANCHADO<br />
SELECCIÓN DISCO DE<br />
DE VAPOR SELECCIÓN<br />
TELA SUGERIDA DE TELA RECOMENDACIONES DE PLANCHADO<br />
Acrílico O/Off (Dry) Synthetic Planche la prenda por el revés.<br />
O/Apagado (Seco) (Sintética)<br />
Acetato O/Off (Dry) Synthetic Planche la prenda por el revés<br />
O/Apagado (Seco) (Sintética) mientras está húmeda.<br />
Poliéster O/Off (Dry) Synthetic Planche la prenda por el revés<br />
O/Apagado (Seco) (Sintética) mientras está húmeda.<br />
Rayón O/Off (Dry) Synthetic Planche la prenda por el revés<br />
O/Apagado (Seco) (Sintética) mientras está húmeda.<br />
Seda O/Off (Dry) Silk (Seda) Planche la prenda por el revés.<br />
O/Apagado (Seco)<br />
Viscosa O/Off (Dry) Silk (Seda) Planche la prenda por el revés o use<br />
O/Apagado (Seco)<br />
un paño de planchar* para evitar<br />
marcas brillosas.<br />
Nylon O/Off (Dry) Synthetic Planche la prenda principalmente en seco;<br />
O/Apagado (Seco) (Sintética) se puede usar vapor según las instrucciones<br />
del fabricante de la prenda.<br />
Lana Steam Wool (Lana) Planche la prenda por el revés<br />
(Vapor)<br />
o use un paño de planchar.*<br />
Combinaciones Steam Wool (Lana) Planche la prenda por el revés<br />
de Lana (Vapor) o use un paño de planchar.*<br />
Combinaciones Steam Cotton Siga las instrucciones del fabricante de<br />
de Algodón (Vapor) (Algodón) la prenda. Use la selección que corresponde<br />
a la fibra que requiere la selección más baja.<br />
Corduroy Steam Cotton Planche la prenda por el revés o use un paño<br />
(Vapor) (Algodón) de planchar* y luego cepille la prenda con<br />
la mano para levantar la textura de la tela.<br />
Algodón Steam Cotton Planche las telas oscuras por el revés<br />
(Vapor) (Algodón) para evitar marcas brillosas.<br />
Lino Steam Linen (Lino) Planche la prenda por el revés o use<br />
(Vapor)<br />
un paño de planchar* para evitar marcas<br />
brillosas (especialmente en telas oscuras).<br />
Mezclilla/Jean Steam Linen (Lino) Use la función SPRAY MIST ® a fin de lograr<br />
(Vapor)<br />
una penetración más profunda para eliminar<br />
las arrugas.<br />
*Un paño de planchar es una tela de algodón lavada en seco que se coloca sobre la prenda<br />
que se está planchando para evitar que se vea brillosa.<br />
NOTA: Algunas telas pueden necesitar más vapor que otras. Su plancha tiene la capacidad<br />
de regular el vapor conforme se necesite.
6<br />
7<br />
8<br />
CARACTERÍSTICAS DE SU PLANCHA STEAM MASTER ®<br />
9<br />
1. Accionador de SPRAY MIST ®<br />
2. Orificio para Cargar Agua con Tapa<br />
4<br />
5<br />
3. Perilla Selectora de Telas<br />
4. Palanca de Vapor / Autolimpieza<br />
5. Botón SPRAY MIST ®<br />
1<br />
2<br />
3<br />
6. Botón SHOT OF STEAM ® / Vapor Vertical<br />
(modelos seleccionados únicamente)<br />
7. Luz Indicadora de Encendido / Indicadora<br />
de Apagado Automático MOTION SMART ®<br />
8. Mango con Asa Blanda<br />
9. Cable con Giro de 360° Sin Enredos<br />
11<br />
10<br />
10. Cordón Retractable<br />
(modelos seleccionados únicamente)<br />
11. Sistema Antisarro<br />
(modelos seleccionados únicamente) –<br />
Dentro del Reservorio de Agua<br />
13 12<br />
12. Reservorio de Agua Transparente<br />
13. Base
RECOMENDACIONES PARA EL PLANCHADO<br />
• Siempre lea las etiquetas de la prenda y siga las instrucciones de planchado del fabricante.<br />
• Clasifique las prendas que va a planchar según el tipo de tela.<br />
• Primero debe planchar las prendas que requieren baja temperatura (por ejemplo, las prendas<br />
de seda y tela sintética) a fin de evitar dañarlas con una plancha que esté demasiado caliente.<br />
• Si no está seguro de cuál es el contenido de la tela de una prenda, pruebe planchando<br />
un área pequeña, como por ejemplo una costura o guarnición, antes de planchar un área<br />
visible. Empiece con una temperatura baja y auméntela gradualmente hasta encontrar<br />
la temperatura apropiada.<br />
• Cuando cambie la temperatura de un valor alto a un valor bajo, deje pasar<br />
aproximadamente 5 minutos para llegar a la temperatura menor.<br />
• Cuando planche al vapor, utilice pasadas largas y lentas de la plancha sobre la tela. Esto<br />
permitirá que el vapor penetre en la tela y que el calor de la placa de base seque la humedad.<br />
• Para planchar prendas de lino, voltee de adentro para afuera la prenda. Tenga cuidado de<br />
no usar una plancha demasiado caliente porque el forro puede derretirse o adherirse a la<br />
placa de base.<br />
• Para planchar cremalleras, use un paño de planchar o asegúrese de que la cremallera esté<br />
cerrada y planche sobre la solapa. Nunca planche directamente sobre una cremallera<br />
desprotegida.<br />
• Use la Guía de Planchado que se proporciona para seleccionar el mejor método<br />
y regulación para la tela que va a planchar.
PARA LLENAR EL RESERVORIO DE AGUA<br />
1. Asegúrese de que la plancha esté desenchufada. Ponga la palanca de vapor en O/Off (Dry)<br />
(O/Apagado [Seco]) y la perilla de selección de telas en Off (Apagado).<br />
2. Levante la tapa del orificio para cargar agua. La tapa se puede retirar y se puede volver<br />
a colocar cuidadosamente en las ranuras.<br />
3. Llene la taza con agua. Vierta el agua en el reservorio de agua de la plancha. No llene<br />
el reservorio de agua más allá del nivel máximo de llenado.<br />
ADVERTENCIA: Para prevenir el riesgo de quemaduras, tenga cuidado al llenar una plancha<br />
caliente con agua. Las partes de metal calientes, el agua caliente y el vapor pueden causar lesiones.<br />
PLANCHANDO EN SECO<br />
1. Asegúrese de que la palanca del vapor esté en la posición O/Off (Dry) (O/Apagado [Seco]).<br />
2. Enchufe el cable en un tomacorriente de CA de 120 voltios. (En México, 127 voltios)<br />
3. Gire el disco selector de tela (Fabric Select) en la posición deseada para planchando en seco<br />
(Silk [seda] o Synthetics [tela sintética]) y deje que la plancha se caliente durante 2 minutos.<br />
Mientras la plancha se está calentando, asegúrese de que esté apoyada sobre su talón de apoyo,<br />
encima de una superficie estable y protegida.<br />
NOTA: Mientras que la palanca de Vapor esté en la posición O/Off (Dry) (O/Apagado [Seco]),<br />
Ud. todavía puede usar la característica SHOT OF STEAM ® o SPRAY MIST. ® Por favor asegúrese<br />
que el reservorio de agua esté lleno de agua de 1/4.<br />
SUGERENCIA: Consulte la Guía de Planchado para conocer el nivel de temperatura adecuado para su tela.<br />
PLANCHANDO AL VAPOR<br />
1. Siga las instrucciones de la sección “Cómo Llenar el Depósito de Agua”.<br />
2. Enchufe el cable en un tomacorriente de CA de 120 voltios.<br />
3. Gire el disco selector de tela (Fabric Select) a la posición deseada (Synthetic [sintética], Silk [seda]<br />
Linen [lino], Cotton [algodón] o Wool [lana). Deje que la plancha se caliente durante 2 minutos.<br />
Mientras la plancha se está calentando, asegúrese de que esté apoyada sobre su talón de apoyo,<br />
encima de una superficie estable y protegida.<br />
4. Permita que la plancha se caliente por 2 minutos y después mueva la palanca de vapor (Steam)<br />
a la posición que desea.<br />
SUGERENCIA: Consulte la Guía de Planchado para conocer el nivel de temperatura adecuado para su tela.<br />
IMPORTANTE: Cuando no esté planchando, siempre ponga la palanca de vapor en O/Off (Dry)<br />
(O/Apagado [Seco]) y la perilla de selección de telas en O/Off (Dry) (O/Apagado [Seco]).
USO DE LAS FUNCIONES ESPECIALES DE LA PLANCHA<br />
LA FUNCIÓN SPRAY MIST ®<br />
La función SPRAY MIST ® es una poderosa niebla de agua que humedece la tela para ayudar<br />
a eliminar las arrugas de las telas gruesas y para marcar los dobleces.<br />
Para usar la función SPRAY MIST ® :<br />
Presione el botón SPRAY MIST ® firmemente.<br />
LA FUNCIÓN SHOT OF STEAM ®<br />
La función SHOT OF STEAM ® brinda un chorro de vapor adicional para penetración profunda<br />
en arrugas rebeldes. Puede usar esta función mientras plancha en seco o con vapor, pero por<br />
lo menos 1/4 del reservorio de agua debe estar lleno.<br />
Para usar la función SHOT OF STEAM ® :<br />
Ponga la plancha sobre la arruga y presione el botón SHOT OF STEAM ® cada vez que desee<br />
aplicar un chorro adicional de vapor. La función SHOT OF STEAM ® se puede usar en forma<br />
continua con sólo una breve pausa entre chorros.<br />
VAPOR VERITICAL (modelos seleccionados únicamente)<br />
La función vapor vertical permite que su plancha funcione como vaporizador para prendas.<br />
CONSEJO: Cuando use el vapor vertical sobre las prendas, cuélguelas de una percha para<br />
obtener mejores resultados. También se puede usar en cortinas y cortinados colgados.<br />
Para usar el vapor vertical:<br />
1. Asegúrese de que la plancha se haya calentado (2 minutos).<br />
2. Sostenga la plancha en posición vertical, con la plancha cerca de la tela que desea vaporizar<br />
pero sin tocarla.<br />
3. Con la otra mano, mantenga tensa la tela.<br />
4. Presione el botón SHOT OF STEAM ® a intervalos de aproximadamente 3 segundos<br />
a medida que mueve la plancha por la zona arrugada.<br />
ADVERTENCIA: Para prevenir el riesgo de quemaduras, mantenga la mano alejada<br />
de la zona que está vaporizando.<br />
ADVERTENCIA: NO vaporice las prendas mientras las tenga puestas ya que esto<br />
puede provocar lesiones.<br />
FUNCIÓN PATENTADA DE APAGADO AUTOMÁTICO MOTION SMART ®<br />
Cuando la plancha está enchufada, el indicador de encendido quedará encendido<br />
todo el tiempo para señalar que llega energía eléctrica a la plancha.<br />
Si deja la plancha:<br />
• en posición horizontal sin moverla, o la vuelca accidentalmente, automáticamente<br />
dejará de calentar al cabo de 30 segundos. El indicador de encendido titilará para<br />
hacerle saber que la plancha ha dejado de calentar.<br />
• en posición vertical (sobre su talón de apoyo) sin moverla, la plancha se apagará<br />
automáticamente al cabo de 15 minutos. El indicador de encendido titilará para<br />
hacerle saber que la plancha ha dejado de calentar.<br />
IMPORTANTE: El indicador de encendido continuará titilando hasta que la plancha<br />
sea desenchufada o reiniciada.
Para reiniciar la plancha:<br />
Mueva la plancha hacia atrás y hacia adelante y déjela volver a calentar durante 2 minutos.<br />
El indicador dejará de titilar y la plancha comenzará a calentar nuevamente.<br />
ADVERTENCIA: La función patentada de apagado automático MOTION SMART ®<br />
es una función de seguridad, no una forma recomendada de apagar su plancha.<br />
Consulte en “Cuidado de Su Plancha Después del Uso”, la información sobre cómo<br />
apagar su plancha y almacenarla con seguridad después del uso.<br />
SISTEMA ANTISARRO (modelos seleccionados únicamente)<br />
El sistema antisarro es un sistema permanente ubicado dentro del reservorio de agua. Este<br />
sistema elimina el calcio del agua y reduce la acumulación de sarro en la base de la plancha.<br />
SECCIÓN DEL CORDÓN RETRACTABLE (modelos seleccionados únicamente)<br />
1. Al enrollar el cordón, sostenga el enchufe con una mano, y presione el botón de enrollar<br />
con la otra mano. (El fallar en sostener el enchufe puede hacer que el enchufe salga<br />
volando.)<br />
2. El carrete del cordón es compacto para enrollar múltiples capas del cordón.<br />
En caso que el cordón no se rebobinara completamente, saque el cordón y dirija<br />
el cable uniformemente en el carrete.<br />
3. En el caso que el cordón no se sacara fácilmente, tire del cordón firmemente.<br />
4. Seleccione la cantidad de cordón deseada antes de enchufar en un tomacorriente.<br />
5. No permita a los niños usar la función retractable del cordón ya que el cordón<br />
puede causar lesiones.<br />
CUIDADO DE SU PLANCHA DESPUÉS DEL USO<br />
APAGADO DE SU PLANCHA<br />
1. Ponga la palanca de vapor en O/Off (Dry) (O/Apagado [Seco]) y la perilla de selección<br />
de telas en Off (Apagado).<br />
2. Desenchufe la plancha del tomacorriente.<br />
ADVERTENCIA: NUNCA tire del cable para desenchufar la plancha. Esto puede dañar el cable.<br />
ALMACENAMIENTO DE SU PLANCHA<br />
1. Deje enfriar la plancha.<br />
2. Si no usa la plancha diariamente, vacíe el reservorio de agua después de cada uso para<br />
que la misma tenga una mayor vida útil. Para hacerlo, desenchufe la plancha, inviértala,<br />
abra la tapa del orificio para cargar agua y deje que salga el agua por el orificio.<br />
Sacuda la plancha suavemente para eliminar las gotas de agua retenidas.<br />
3. En el corded modela solo: Enrolle el cable alrededor del talón de apoyo y almacene la plancha parada<br />
sobre su talón de apoyo.<br />
IMPORTANTE: Si se enrolla el cable de manera muy ajustada alrededor de la plancha<br />
se puede dañar el cable.<br />
CONSEJO: Cuando no esté planchando, siempre ponga la palanca de vapor en O/Off (Dry)<br />
(O/Apagado [Seco]) y la perilla de selección de telas en Off (Apagado).
MANTENIMIENTO DE SU PLANCHA STEAM MASTER ®<br />
LIMPIEZA DE LA BASE<br />
Limpie la base si se acumula almidón o algún otro residuo.<br />
Para limpiar la base:<br />
1. Deje enfriar la plancha y luego pásele un paño suave y húmedo.<br />
ADVERTENCIA: NO use limpiadores abrasivos, esponjas de metal ni vinagre para limpiar la base.<br />
Esto dañará el acabado.<br />
2. Pase la plancha por un paño de puro algodón para eliminar cualquier residuo.<br />
USO DE LA FUNCIÓN DE AUTOLIMPIEZA<br />
Debe usar la función de autolimpieza una vez al mes para mantener el rendimiento óptimo de su plancha.<br />
Para usar la función de autolimpieza:<br />
1. Mueva varias veces la palanca de vapor O/Off (Dry) (O/Apagado [Seco]) hacia atrás y hacia<br />
adelante a para eliminar los residuos y los minerales de la válvula de vapor. Esto permite<br />
que el agua fluya en el compartimiento del vapor.<br />
LIMPIEZA DEL SISTEMA ANTISARRO (modelos seleccionados únicamente)<br />
La plancha STEAM MASTER ® contiene un filtro antisarro en el reservorio, que elimina<br />
las impurezas del agua.<br />
Para prolongar la eficiencia de este filtro:<br />
1. Desenchufe la plancha y déjela enfriar.<br />
2. Encuentre la taza para agua que vino con la plancha. Llene la taza con agua hasta el logotipo<br />
de <strong>Sunbeam</strong> que está en el ángulo superior derecho. Agregue 1 cucharadita de sal al agua<br />
y llene el reservorio de agua con esta solución.<br />
3. Deje la solución en el reservorio de agua durante 15 minutos y luego vacíelo.<br />
4. Llene el reservorio de agua por segunda vez con la solución de agua salada y vacieló<br />
nuevamente al cabo de 15 minutos.<br />
5. Llene el tanque con agua fresca para enjuagar y vacíelo.<br />
El sistema antisarro debe limpiarse aproximadamente una vez por mes.
Garantía Limitada de 1 Año<br />
<strong>Sunbeam</strong> Products, Inc., o si en Canadá, <strong>Sunbeam</strong> Corporation (Canadá) Limited (colectivamente<br />
“<strong>Sunbeam</strong>”) garantiza que este producto estará libre de defectos en material o mano de obra<br />
por un período de un año a partir de la fecha de la compra. <strong>Sunbeam</strong>, a su elección, reparará<br />
o reemplazará este producto o cualquier componente del producto que se encuentre defectuoso<br />
durante el período de garantía. El reemplazo será efectuado por un producto o componente nuevo<br />
o remanufacturado. Si el producto ya no está disponible, el reemplazo podrá efectuarlo por un<br />
producto similar de igual o mayor valor. Esta es su garantía exclusiva.<br />
Esta garantía es válida para el comprador original al detalle desde la fecha de compra original<br />
al detalle y no es transferible. Guarde el recibo de venta original. Se requiere prueba de compra<br />
para obtener la garantía. Los concesionarios <strong>Sunbeam</strong> ® , centros de servicio, o almacenes de ventas<br />
al detalle de productos <strong>Sunbeam</strong> ® no tienen el derecho de alterar, modificar o cambiar, de manera<br />
alguna, los términos y condiciones de esta garantía.<br />
Esta garantía no cubre el desgaste normal de las piezas o daños resultantes de cualquiera de los<br />
siguientes: uso negligente o mal uso del producto, uso en voltaje o corriente inapropiada, uso<br />
contrario a las instrucciones de operación, desarme, reparación o alteración por cualquier persona<br />
que no sea <strong>Sunbeam</strong> o de un centro de servicio autorizado <strong>Sunbeam</strong> ® . Además, esta garantía<br />
no cubre: Actos de la naturaleza, tales como incendios, inundaciones, huracanes o tornados.<br />
¿Cuáles Son los Límites de Responsabilidad de <strong>Sunbeam</strong>?<br />
<strong>Sunbeam</strong> no será responsable por ningún daño incidental o consecuente causados<br />
por el incumplimiento de la garantía o condición expresa, implícita o reglamentaria.<br />
Excepto hasta donde lo prohíben las leyes aplicables, cualquier garantía implícita o condición<br />
de comerciabilidad o aptitud para un propósito particular, está limitada en duración a la duración<br />
de la garantía descrita arriba.<br />
<strong>Sunbeam</strong> niega cualquier otra garantía, condición o representación, expresa, implícita,<br />
reglamentaria o de otra manera.<br />
<strong>Sunbeam</strong> no será responsable por ningún tipo de daño que resulte de la compra, uso o mal uso,<br />
o inhabilidad de usar el producto incluyendo daños incidentales, especiales, consecuentes<br />
o similares o pérdida de lucro, o por cualquier incumplimiento de contrato, fundamental o de otra<br />
manera, o por cualquier reclamo contra el comprador iniciado por cualquier otra tercera persona.<br />
Algunas provincias, estados o jurisdicciones no permiten la exclusión o la limitación de daños<br />
incidentales o consecuentes, o limitaciones sobre cuánto dura una garantía implícita, de modo<br />
que las limitaciones o exclusiones mencionadas arriba pueda que no le aplique a usted.<br />
Esta garantía le otorga derechos legales específicos, y pueda que usted tenga otros derechos,<br />
los cuales varían de provincia a provincia, de estado a estado o de jurisdicción a jurisdicción.<br />
Cómo Obtener Servicio de Garantía<br />
En los Estados Unidos –<br />
Si usted tiene alguna pregunta relacionada con esta garantía o quisiera obtener servicio de garantía,<br />
por favor llame al teléfono 1.800.458.8407 y le proporcionaremos la dirección del centro de<br />
servicio más conveniente para usted.<br />
En Canadá –<br />
Si usted tiene alguna pregunta relacionada con esta garantía o quisiera obtener servicio de garantía,<br />
por favor llame al teléfono 1.800.667.8623 y le proporcionaremos la dirección del centro de<br />
servicio más conveniente para usted.<br />
En los Estados Unidos, esta garantía es ofrecida por <strong>Sunbeam</strong> Products, Inc., situada en Boca<br />
Ratón, Florida 33431. En Canadá, esta garantía es ofrecida por <strong>Sunbeam</strong> Corporation (Canadá)<br />
Limited, situada en el 5975 Falbourne Street, Mississauga, Ontario L5R 3V8.<br />
POR FAVOR, NO REGRESE ESTE PRODUCTO A NINGUNA<br />
DE ESTAS DIRECCIONES NI AL LUGAR DONDE LO COMPRÓ.
For product questions:<br />
<strong>Sunbeam</strong> Consumer Service<br />
USA : 1.800.458.8407<br />
Canada : 1.800.667.8623<br />
www.sunbeam.com<br />
©2004 <strong>Sunbeam</strong> Products, Inc. All rights reserved.<br />
SUNBEAM, ® STEAM MASTER, ® MOTION SMART, ® SHOT OF STEAM ®<br />
and SPRAY MIST ® are registered trademarks of <strong>Sunbeam</strong> Products, Inc.<br />
DRIP FREE is a trademark of <strong>Sunbeam</strong> Products, Inc.<br />
In Canada, imported and distributed by <strong>Sunbeam</strong> Corporation, Limited.<br />
In the United States, distributed by <strong>Sunbeam</strong> Products, Inc.<br />
Boca Raton, Florida 33431<br />
Para preguntas sobre los productos:<br />
<strong>Sunbeam</strong> Consumer Service<br />
EE.UU. : 1.800.458.8407<br />
Canadá : 1.800.667.8623<br />
www.sunbeam.com<br />
©2004 <strong>Sunbeam</strong> Products, Inc. Todos los derechos reservados.<br />
SUNBEAM, ® STEAM MASTER, ® MOTION SMART, ® SHOT OF STEAM ®<br />
y SPRAY MIST ® son marcas registradas de <strong>Sunbeam</strong> Products, Inc.<br />
DRIP FREE es una marca comercial de <strong>Sunbeam</strong> Products, Inc.<br />
En Canadá, importada y distribuida por <strong>Sunbeam</strong> Corporation, Limitada.<br />
En los Estados Unidos, distribuida por <strong>Sunbeam</strong> Products, Inc.<br />
Boca Ratón, Florida 33431<br />
Printed in China<br />
Impreso en China


