Create successful ePaper yourself
Turn your PDF publications into a flip-book with our unique Google optimized e-Paper software.
8 Maintenance<br />
<br />
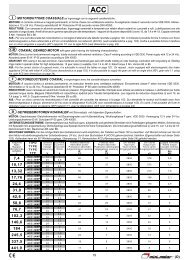
7. Attach the new fan to the bracket. Make sure the airflow direction is upwards with mounted fan.Then fix the bracket to the <strong>IP66</strong> enclosure<br />
and connect the fan cable to the connector on the drive.<br />
8. Reattach the <strong>IP66</strong> front cover as described in Reattaching the Front Cover on page 10.<br />
9. Switch on the power supply. The drive should start up normally without showing an error.<br />
Replacement of the external cooling fan<br />
Should the external cooling fan be broken (fan stopped or drive tripped with “oH” fault) replace it following the instructions below.<br />
1. Shut down the power supply to the drive wait 5 min. for DC bus capacitors to discharge.<br />
2. Remove the <strong>IP66</strong> front cover as described in Removing the Front Cover on page 9.<br />
3. Make sure the charge LED on the drive has gone off.<br />
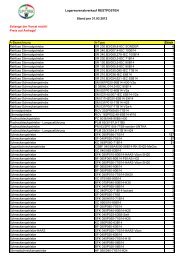
4. Unplug the external fan cable connector (2 wires, left side connector) from the drive. Cut cable ties that fix the fan cable.<br />
5. Remove the fixing screws of the external fan, then remove the fan and pull the fan cable including the grommet out of the box.<br />
Air flow<br />
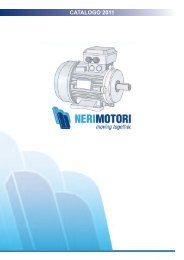
6. Route the cable of the new fan through the fan cable hole and press in the grommet that is fixed to the fan cable into the fan cable hole.<br />
7. Fix the fan. Make sure the airflow direction is upwards with mounted fan.<br />
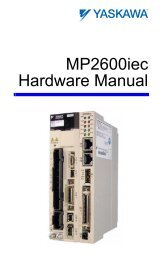
8. Fix the fan cable inside the box using cable ties and plug the fan cable into the connector on the drive.<br />
9. Reattach the <strong>IP66</strong> front cover as described in Reattaching the Front Cover on page 10.<br />
10. Switch on the power supply and confirm correct operation of the fan.<br />
EN 28<br />
<strong>YASKAWA</strong> Europe TOMP_C710606_75A <strong>V1000</strong> <strong>IP66</strong> - Quick Start Guide