Cargador de BaterÃÂas NI-Cd y NI-MH - Molgar
Cargador de BaterÃÂas NI-Cd y NI-MH - Molgar
Cargador de BaterÃÂas NI-Cd y NI-MH - Molgar
You also want an ePaper? Increase the reach of your titles
YUMPU automatically turns print PDFs into web optimized ePapers that Google loves.
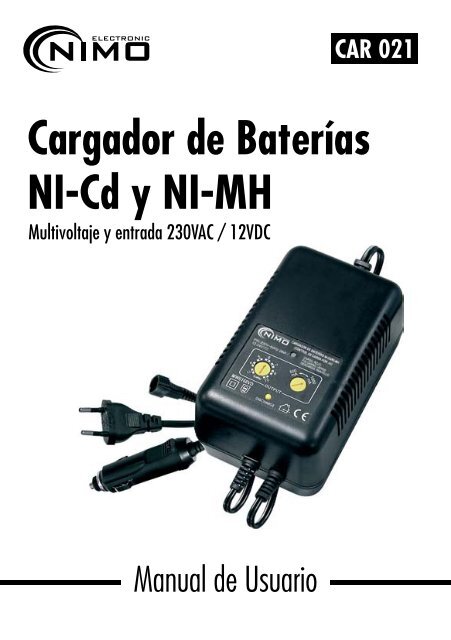
CAR 021<br />
<strong>Cargador</strong> <strong>de</strong> Baterías<br />
<strong>NI</strong>-<strong>Cd</strong> y <strong>NI</strong>-<strong>MH</strong><br />
Multivoltaje y entrada 230VAC / 12VDC<br />
Manual <strong>de</strong> Usuario
Instrucciones<br />
1. Conecte el cargador a la salida <strong>de</strong> corriente AC ó DC.<br />
2. Seleccione el voltaje <strong>de</strong> la batería <strong>de</strong> acuerdo con la batería que se disponga a<br />
cargar.<br />
3. Seleccione la corriente <strong>de</strong> carga a<strong>de</strong>cuadamente.<br />
Se recomienda elegir una corriente <strong>de</strong> carga que se encuentre entre 0.25xC<br />
y 1xC (siendo C igual a la capacidad <strong>de</strong> la batería).<br />
Ej: Para un pack <strong>de</strong> baterías <strong>de</strong> 2.4V y 1200mAh.<br />
-El voltaje <strong>de</strong> carga a seleccionar será <strong>de</strong> 2.8V<br />
-La corriente <strong>de</strong> carga a seleccionar será <strong>de</strong> 1200mAh x 0.4= 480mAh,<br />
por tanto <strong>de</strong>berá elegir 500mAh <strong>de</strong> corriente <strong>de</strong> carga.<br />
4. Conecte el pack <strong>de</strong> baterías al cargador. El indicador luminoso lucirá en rojo.<br />
5. Para inicar que el cargador se encuentra en proceso <strong>de</strong> <strong>de</strong>scarga el indicador<br />
luminoso lucirá en amarillo. Automáticamente el cargador pasará al modo <strong>de</strong><br />
carga rápida. El indicador lucirá en rojo <strong>de</strong> nuevo.<br />
6. Cuendo la batería este cargada, el indicador lucirá en ver<strong>de</strong> indicando que el<br />
proceso <strong>de</strong> carga está completo.<br />
7. Desconecte el pack <strong>de</strong> baterías <strong>de</strong>l cargador.<br />
8. Desconecte el cargador <strong>de</strong> la corriente eléctrica AC ó DC.<br />
Atención: Cuando utilice este cargador con la entrada <strong>de</strong> 12V (tipo mechero), no<br />
podrá cargar packs <strong>de</strong> baterías <strong>de</strong> más <strong>de</strong> 6 elementos.<br />
Precaución<br />
1. Cargue únicamente packs <strong>de</strong> baterías recargables <strong>de</strong> Ni-<strong>Cd</strong> ó Ni-<strong>MH</strong>.<br />
2. Si el cable externo sufre daños, este <strong>de</strong>be ser reemplazado por el fabricante,<br />
servicio oficial o personal cualificado para evitar lesiones.<br />
Especificaciones Técnicas<br />
• Voltaje <strong>de</strong> entrada: 230VAC~50Hz / 12-24VDC<br />
• Voltaje <strong>de</strong> salida seleccionable:<br />
- Para la entrada <strong>de</strong> 230VAC y 24VDC:<br />
2.8V(2 elementos) / 5.6V(4 elementos) / 7V(5 elementos) / 8.4V(6<br />
elementos) / 9.8V(7 elementos) / 11.2V(8 elementos) / 14VDC(10<br />
elementos)<br />
- Para la entrada <strong>de</strong> 12VDC:<br />
2.8V(2 elementos) / 5.6V(4 elementos) / 7V(5 elementos) / 8.4V(6<br />
elementos)<br />
• Corriente <strong>de</strong> salida seleccionable: 500mAh/100mAh<br />
ES
EN<br />
Instruction<br />
1. Insert the charger into the AC or DC outlet.<br />
2. Select the battery voltage according to the battery pack you are charging.<br />
3. Select the charging current accordingly. It is recommen<strong>de</strong>d to choose a charging<br />
current between 0.25xC - 1xC (C=Battery Capacity)<br />
Example: Charge a 2.4V 1200mAh battery pack.<br />
-Charge voltage: 2.8V<br />
-Charging current = 1200mAh x 0.4 = 480mAh. Choose the 500mAh charging<br />
current.<br />
4. Connect the battery pack to the charger. The dual LED lights in red.<br />
5. The dual LED lights in yellow to show the discharge process. It will automatically<br />
switch to fast charging mo<strong>de</strong> after discherge. The LED will then be in red again.<br />
6. When the battery is full, the LED lights in green and this indicates the charging<br />
process is completed.<br />
7. Disconnect the battery pack from the charger.<br />
8. Remove the charger from AC/DC outlet.<br />
Caution: When the DC input voltage is in 12V, this charger can only charge 1-6<br />
cells.<br />
Warning<br />
1. Use only with rechargeable Ni-<strong>Cd</strong> or Ni-<strong>MH</strong> battery packs.<br />
2. If the external flexible cable is damaged, it shall be replaced by the manufacturer<br />
or his service agent, or a similar person in or<strong>de</strong>r to avoid a hazard.<br />
Technical Specification<br />
• Input Voltage: 230VAC~50Hz / 12-24VDC<br />
• Selectable Output Voltage:<br />
- For 230VAC & 24VDC input:<br />
2.8V(2 cells) / 5.6V(4 cells) / 7V(5 cells) / 8.4V(6 cells) / 9.8V(7 cells) /<br />
11.2V(8 cells) / 14VDC(10 cells)<br />
- For 12VDC input:<br />
2.8V(2 cells) / 5.6V(4 cells) / 7V(5 cells) / 8.4V(6 cells)<br />
• Selectable output current: 500mAh/1000mAh
www.nimoelectronic.com


