Create successful ePaper yourself
Turn your PDF publications into a flip-book with our unique Google optimized e-Paper software.
emote controls<br />
planotime<br />
Instructions and warnings for the fitter<br />
istruzioni e avvertenze per l’installatore<br />
Instructions et recommandations pour l’installation<br />
Anweisungen und hinweise für den installateur<br />
Instrucciones j advertencias para el instalador<br />
Instrukcja dla instalatora
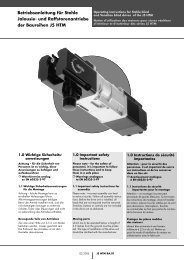
Planotime<br />
Funkgesteuerte Zeitschaltuhr<br />
für den Betrieb von bis<br />
zu 6 Automatisierungsgruppen<br />
für 100 Eingabe / Woche.<br />
Sehr schmal und einfach zu installieren,<br />
auch dank der Halterung, die nach<br />
der Installation nicht mehr zu sehen ist.<br />
Ergonomisches Design und intuitive<br />
Benutzung; der LCD-Display mit Anzeige<br />
von Datum, Uhrzeit, Gruppen, Bewegung<br />
und Status der Funktionen.<br />
433,92MHz Frequenz, mit 52 bit Rolling<br />
Code (erzeugt über 4,5 Billiarden<br />
Kombinationen), selbsterlernend.<br />
Kompatibel mit den Systemen FloR,<br />
für den Betrieb verschiedenartiger<br />
Automatisierungen wie Tore, Garagentore<br />
oder sonstigen, falls von Empfängern<br />
der Serie FloR gesteuert.<br />
Reichweite: 200m auf freiem Feld,<br />
25m innen.<br />
Hoch entwickelte Funktionen:<br />
•“Random”, täuscht die Anwesenheit<br />
der Bewohner vor, wenn Sie nicht zuhause<br />
sind, und bewegt die von Ihnen gewählten<br />
Automatisierungen;<br />
• “Nicetime” für die vorübergehende<br />
Deaktivierung der Automatismen,<br />
um zum Beispiel die Fenster zu putzen;<br />
•Sonne On/Off aktiviert oder deaktiviert<br />
den Sonne/Regenwächter, falls installiert;<br />
• Easy program: macht die Programmierung<br />
der Öffnungs- und Schließvorgänge extrem<br />
einfach: Planotime registriert alle im Laufe<br />
der Woche ausgeführten Eingaben;<br />
wenn man das System dann auf<br />
Automatisch stellt, wiederholt sie<br />
Planotime in den nachfolgenden Wochen!<br />
LCD- Multifunktionsdisplay<br />
Lange Dauer:<br />
Lithiumbatterie,<br />
leicht zu ersetzen,<br />
2 Jahre Dauer<br />
Code Beschreibung St./Pack €<br />
PLANOTIME Funkgesteuerter Zeitschaltuhr, Wandmontage, mit graphischem LCD-Display.<br />
1 109,50<br />
Für den Betrieb von bis zu 6 Automatisierungsgruppen für 100 Eingabe / Woche. Kompatibel mit der Serie FloR<br />
* der Preis bezieht sich auf die Verkaufspackung.<br />
Technische<br />
Merkmale<br />
PLANOTIME<br />
Spannungsversorgung<br />
(Dauer der Batterie)<br />
3V mit<br />
Nr. 1 CR2450<br />
Lithiumbatterie<br />
2 Jahre bei 10<br />
Eingaben/Tag)<br />
Frequenz<br />
433,92MHz<br />
± 100KHz<br />
Abgestrahlte<br />
Leistung Reichweite Codierung<br />
ca. 1mW<br />
ca. 25m im<br />
Innenraum,<br />
200m im freien<br />
Land<br />
digital 52bit<br />
(4,5 Billiarden<br />
Kombinationen)<br />
Auflösung<br />
Uhr<br />
1 Minute<br />
Präzision<br />
Uhr<br />
± 150<br />
Sekunden/Jahr<br />
Anzahl<br />
Eingabe/Woche<br />
Betriebstemp.<br />
100 -20° ÷ +55°<br />
Abmessungen<br />
Gewicht<br />
80x80x12mm<br />
75g<br />
STEUERELEKTRONIK<br />
113
Contents:<br />
page<br />
page<br />
1 Description 3<br />
1.1 What’s PLANOTIME 3<br />
1.2 Is it necessary to program the unit? 3<br />
1.3 What’s an event? 3<br />
1.4 What are “groups”? 4<br />
1.5 What are special commands? 4<br />
2 Installation 4<br />
2.1 Switching on PLANOTIME 4<br />
2.2 Initial setting of the timer 5<br />
2.3 Memorizing PLANOTIME 5<br />
in the automation receivers<br />
2.3.1 Memorizing PLANOTIME 6<br />
as the first transmitter<br />
2.3.2 Memorizing PLANOTIME 6<br />
as an additional transmitter<br />
2.4 Mounting PLANOTIME 7<br />
3 Symbol description 8<br />
4 How to use PLANOTIME 9<br />
4.1 Selecting the operating modes 9<br />
4.2 “Automatic” mode operation 10<br />
4.3 “Nicetime” mode operation 10<br />
4.4 Manual” mode operation 10<br />
4.5 Operation in “Manual with recorder” mode 11<br />
5 How to program PLANOTIME 12<br />
5.1 Selecting the type of programming 12<br />
5.1.1 Forward and backward for programming 12<br />
5.2 Programming the “events” 13<br />
5.2.1 Programming: new event 14<br />
5.2.2 Programming: event modification 16<br />
5.2.3 Programming: deleting events 16<br />
5.2.4 Programming: copying events 17<br />
5.3 Timer settings 17<br />
5.4 Settings of special command 18<br />
"holiday" parameters<br />
5.5 Settings of special command 18<br />
"planetary time" parameters<br />
6 Battery replacement 19<br />
7 Warnings 19<br />
8 How to… 20<br />
8.1 Error list 20<br />
9 Technical specifications 21<br />
A1 Appendix 21<br />
Tables:<br />
page<br />
page<br />
Table No. 1: setting the timer after connecting 5<br />
the battery<br />
Table No. 2: selecting “manual” mode and 5<br />
choosing a group<br />
Table No. 3: sending a command to the same 5<br />
group<br />
Table No. 4: selecting another group 5<br />
Table No. 5: abandoning the “manual” mode: 6<br />
Table No. 6: memorizing PLANOTIME 6<br />
as the first transmitter<br />
Table No. 7: memorizing PLANOTIME 6<br />
as an additional transmitter<br />
Table No. 8: List of symbols found in area 1 8<br />
Table No. 9: List of symbols found in area 2 8<br />
Table No. 10: List of symbols found in area 3 9<br />
Table No. 11: selecting the “automatic” mode 10<br />
Table No. 12: abandoning the “automatic” mode 10<br />
to return to the selection menu<br />
Table No. 13: switching from “automatic” mode 10<br />
to “Nicetime” mode<br />
Table No. 14: selecting the “manual” mode 10<br />
Table No. 15: selecting a group and sending a 10<br />
command<br />
Table No. 16: sending a command to the same 10<br />
group<br />
Table No. 17: selecting another group 11<br />
Table No. 18: assembling a multiple group 11<br />
and sending a command<br />
Table No. 19: sending a special command 11<br />
to a group or multiple group<br />
Table No. 20: abandoning the “manual” mode and 11<br />
returning to the selection menu:<br />
Table No. 21: selecting the “manual with recorder” 11<br />
mode<br />
Table No. 22: properties of the events: 13<br />
Table No. 23: programming a simple “new event” 14<br />
Table No. 24: programming a complete “new event” 15<br />
Table No. 25: modifying an event 16<br />
Table No. 26: deleting an event 16<br />
Table No. 27: programming an event by copying 17<br />
one already present<br />
Table No. 28: setting the timer 17<br />
Table No. 29: setting parameters of special 18<br />
command “holiday”<br />
Table No. 30: setting the parameters of the 18<br />
special command “planetary time”<br />
Table No. 31: error list 20<br />
2
Display<br />
G<br />
Stop<br />
key<br />
Up<br />
key<br />
Confirm<br />
key<br />
Down<br />
key<br />
Select<br />
key<br />
Battery<br />
1) Description<br />
This chapter provides a description of the essential features<br />
of PLANOTIME.<br />
Read this section carefully, as understanding the product<br />
will make it easier for you to use it.<br />
1.1) What’s PLANOTIME<br />
PLANOTIME is a radio transmitter for control of automated<br />
awnings and shutters; it allows you to manage up<br />
to 6 automated groups.<br />
It can operate in “manual” mode, allowing you to control<br />
the automations directly; or in “automatic” mode, with<br />
PLANOTIME controlling the automations during the programmed<br />
days and times.<br />
1.2) Is it necessary to program the unit?<br />
Unfortunately it is! PLANOTIME does not know your<br />
habits. If you wish to use it in “automatic” mode, it must<br />
know at what time you wish to unroll the awning, or if you<br />
like to sleep in on Sundays with the shutters lowered.<br />
The programming and operating logic of PLANOTIME in<br />
the “automatic” mode corresponds to the event.<br />
1.3) What’s an event?<br />
An event is a command for the execution of an automatic<br />
movement (opening or closing of shutters, rolling the<br />
awnings up or down, etc.) at a given time of the day, on<br />
one or more days of the week.<br />
For instance, a command to open the shutters at 8:30<br />
a.m. Saturday and Sunday is an event, while the rolling up<br />
of the awnings at 06:30 p.m. Sunday through Monday is<br />
a separate event.<br />
3
1.4) What are “groups”?<br />
By “group” we mean a single automation or a set of<br />
automations which are always activated together. For<br />
example, the awning on the south side may constitute a<br />
group, the awnings on the west side could be a second<br />
group while all the living room shutters may constitute a<br />
third group.<br />
PLANOTIME is capable of controlling up to 6 groups<br />
separately, or multiple combined groups simultaneously<br />
(multiple group).<br />
The set-up of the groups is determined during the memorization<br />
of the radio code, as described in chapter 2.3<br />
1.5) What are special commands?<br />
When an event takes place, PLANOTIME sends a command<br />
to the groups affected by the event. Normally, the<br />
commands provide for the opening or closing of the<br />
automations; however, these commands can also be<br />
associated to special functions:<br />
• Sun ON or Sole OFF : activates or deactivates<br />
the automatic commands coming from the<br />
weather sensors. This function allows you to choose<br />
whether to command the automations directly (Sun<br />
OFF) or to allow the sensors to do it (Sun ON). The<br />
command (Sun OFF) overrides the Rain and Sun sensors,<br />
while the Wind sensor, which has a safety function,<br />
remains active all the time.<br />
• When you are away (holiday) : it randomly<br />
shifts the time of the event by a few minutes (0 to 75<br />
minutes) with respect to the programmed time, making<br />
it appear that someone is at home.<br />
• Planetary time : day by day, throughout the year,<br />
it corrects the time of the programmed event based on<br />
the actual time of sunrise and sunset; for example,<br />
during the summer it brings forward the morning<br />
events while delaying the afternoon events.<br />
• Timed command : it enables the partial opening<br />
or closing of the awning or shutter; it operates by<br />
sending a “Stop” command shortly (1 to 99 seconds)<br />
after the “Up” or “Down” command.<br />
If you think you may need these commands, you can<br />
find additional information in chapter 5.<br />
2) Installation<br />
This chapter is dedicated to those who must perform<br />
the installation operations and the commissioning of<br />
PLANOTIME.<br />
It contains mainly technical information; however, if you<br />
follow the instructions carefully, there will be no hazards<br />
to people or the automations. As for PLANOTIME, there<br />
is no possibility of damaging it.<br />
Note: the information contained in this chapter is based<br />
on the assumption that you already know how to use the<br />
basic functions of PLANOTIME; if necessary, read chapters<br />
3 and 4 as well before proceeding.<br />
2.1) Switching on PLANOTIME<br />
PLANOTIME is powered by a battery that is already<br />
installed but not connected to prevent run down.<br />
To switch on PLANOTIME, just pull off the plastic tab<br />
that projects from the battery compartment.<br />
When PLANOTIME switches on, you will immediately be<br />
asked to set the incorporated timer.<br />
4
▼<br />
▼<br />
▼<br />
2.2) Initial setting of the timer<br />
To set the timer, follow the steps in table No. 1. If you wish to set the timer, press key “■”; in this case the timer will<br />
start running from 00.00 on Sunday.<br />
G<br />
Table 1 setting the timer after connecting the battery Example<br />
1. Press key or to set the time<br />
2. Press key to confirm the time<br />
3. Press key or to set the minutes<br />
▼<br />
4. Press key to confirm the minutes<br />
▼<br />
5. Press key or to select the day of the week<br />
▼ ▼<br />
▼ ▼<br />
▼ ▼<br />
(Su=Sunday; Mo=Monday; Tu=Tuesday; We=Wednesday; Th=Thursday; Fr=Friday; Sa=Saturday)<br />
or<br />
or<br />
or<br />
6. Press key to confirm the day<br />
▼<br />
7. Press key or to select the day of the month “ ”<br />
8. Press key to confirm the day<br />
▼<br />
▼ ▼<br />
9. Press key or to select the number of the month “ ”<br />
▼ ▼<br />
(01=January; 02=February….12= December)<br />
10. Press key to confirm the month<br />
▼<br />
11. Press key or to select the year<br />
(from 2000 to 2059)<br />
▼ ▼<br />
or<br />
or<br />
or<br />
12. Press key to confirm the year<br />
▼<br />
Only the timer must be re-set when the battery is replaced; all the events and parameters remain constantly memorized<br />
in PLANOTIME.<br />
2.3) Memorizing PLANOTIME in the automation receivers<br />
Every radio transmitter, including PLANOTIME, is recognized by the receivers of the automations through a “code”<br />
which is different from any other transmitter code. A “memorization” process is therefore needed to enable the<br />
automation to recognize PLANOTIME’s code. If a group consists of multiple automations, the memorization operation<br />
must be repeated for each of them. Since PLANOTIME is capable of controlling up to 6 groups of automations,<br />
it will transmit a different code for each of them. Therefore, before you start the memorization procedure you need to<br />
select the group to which the automation is to be assigned.<br />
The memorization procedure must be carried out with PLANOTIME set to “manual” mode, by selecting a single<br />
group at a time. To select the “manual” mode and choose a group follow the steps described in the table:<br />
Table 2 Selecting “manual” mode and choosing a group Example<br />
1. Press key ■ repeatedly a number of times until Auto starts flashing<br />
... Auto<br />
2. Press key to select “manual” mode Man<br />
3. Press key to confirm the mode<br />
▼<br />
4. Starting from the first group, press key a number of times if you need to<br />
select another group<br />
5. Now you can use keys ■ to send the commands to the selected grou<br />
▼ ▼<br />
Table 3 Sending a command to the same group Example<br />
1. Press one of the following keys ■<br />
▼ ▼<br />
Table 4 Selecting another group Example<br />
1. After transmitting, press key a number of times to select the desired group<br />
5
Table 5 Abandoning the “manual” mode: Example<br />
Or:<br />
After sending a command, press key<br />
▼<br />
Make sure that no group has been selected then press one of the following<br />
keys: ■ (if necessary, select the groups by pressing key and deselect / select<br />
them by pressing key )<br />
▼<br />
▼▼ ▼<br />
Or:<br />
Press key ■ repeatedly a number of times until Auto starts flashing<br />
... Auto<br />
! Warning: the code can be memorized in all the receivers found within the range of PLANOTIME; you should<br />
therefore keep within range only the one involved in this operation.<br />
All the memorization sequences are timed, which means that they must be executed within the set time limits.<br />
2.3.1) Memorizing PLANOTIME as the first transmitter<br />
When the code memory of the automation does not yet contain any codes, you can enter PLANOTIME following the<br />
procedure described below:<br />
Table 6 Memorizing PLANOTIME as the first transmitter Example<br />
1. On PLANOTIME, select the group in which you wish to memorize the<br />
automation, using the manual mode (Table 2)<br />
2. Power the automation, you will immediately hear 2 long beeps **<br />
3. Within 5 seconds, press and hold down key ■ on PLANOTIME<br />
(for approx. 3 seconds)<br />
4. Release key ■ when you hear the first of the 3 beeps confirming the<br />
memorization<br />
3s<br />
** If the memory of the automation already contains codes, when the unit is powered you will hear 2 short beeps; in<br />
this case you must follow the instructions provided in the table below.<br />
2.3.2) Memorizing PLANOTIME as an additional transmitter<br />
If the code memory of the automation already contains other transmitter codes, you can enter PLANOTIME following<br />
the procedure described below.<br />
Table 7 Memorizing PLANOTIME as an additional transmitter Example<br />
1. On PLANOTIME, select the group in which you wish to memorize the<br />
automation, using the manual mode (Table 2)<br />
2. Press and hold down key ■ on PLANOTIME until you hear a beep coming form<br />
the automation (after approx. 5 seconds)<br />
3. Press key ■ on a previously memorized and operational transmitter 3 times<br />
slowly<br />
4. Press key ■ on PLANOTIME once more<br />
Finally, 3 beeps coming from the automation will confirm that PLANOTIME has been correctly memorized.<br />
If the code memory is full (14 codes), 6 beeps will warn you that PLANOTIME cannot be memorized.<br />
5s<br />
6
2.4) Mounting PLANOTIME<br />
To select the best place where PLANOTIME can be<br />
positioned you should follow these recommendations:<br />
• PLANOTIME is suitable for use in protected environments<br />
only; it cannot be mounted outdoors or<br />
exposed to the weather.<br />
• The standard mounting height is 1.5m from the<br />
ground, so you can view PLANOTIME from a slightly<br />
higher level.<br />
• Do not position it close to or onto metal structures, as<br />
these would restrict its range.<br />
• Place PLANOTIME where you wish to mount it, then<br />
try to control all the automations and make sure they<br />
receive the transmitted radio command.<br />
• In any case, keep in mind that when the battery runs<br />
down the radio range will diminish by 20÷30%.<br />
After you have made sure that the system operates correctly,<br />
you can mount PLANOTIME using screws and<br />
anchors as shown in the figure.<br />
G<br />
! WARNING: the presence of other radio transmitters<br />
or any electromagnetic disturbances can<br />
drastically reduce the range of PLANOTIME.<br />
Nice S.p.a. cannot guarantee that the transmitted<br />
commands will be received by the automations<br />
(to limit this risk see also chapter 8 “What<br />
to do if…”).<br />
7
3) Symbol description<br />
The symbols on PLANOTIME are distributed over three areas:<br />
• Area 1 to the left refers to the operating modes and programming<br />
• Area 2 in the centre refers to the weekly timer<br />
• Area 3 to the right refers to the groups and special controls<br />
Area 1 Area 2 Area 3<br />
Table 8 Elenco simboli dell’area 1<br />
Auto Refers to the “Automatic” operating mode (see chapters 4 and 4.2)<br />
Auto Refers to the “Nicetime” operating mode, featuring “manual” operation with return to the “automatic”<br />
Man mode on a given day and time (see chapters 4 and 4.3)<br />
Man Refers to the “Manual” operating mode (see chapters 4 and 4.4)<br />
Man Rec Refers to the “Manual with recorder” operating mode (see chapters 4 and 4.5)<br />
Prog Refers to an ongoing “Programming” phase (see chapter 5)<br />
Together with “Prog”, it refers to the programming of an event<br />
NEW Together with “Prog” and “ ”, it refers to the creation of a new event (see chapter 5.2.1)<br />
MOD Together with “Prog” and “ ”, it refers to the modification of an event (see chapter 5.2.2)<br />
DEL Together with “Prog” and “ ”, it refers to the deletion of an event (see chapter 5.2.3)<br />
COPY Together with “Prog” and “ ”, it refers to the copying of an event (see chapter 5.2.4)<br />
Together with “Prog”, it refers to the setting of the timer (see chapter 5.3)<br />
Together with “Prog”, it refers to the adjustment of the parameters for the “holiday” function (see<br />
chapter 5.4)<br />
Together with “Prog”, it refers to the adjustment of the parameters for the “planetary time” function<br />
(see chapter 5.5)<br />
When flashing, it indicates that the battery is down and should be replaced as soon as possible.<br />
It signals that the transmission of a radio command is in progress<br />
Table 9 List of symbols in area 2<br />
It shows the hours and minutes or other parameters being programmed<br />
It refers to the days of the week:<br />
Su = Sunday Mo = Monday Tu = Tuesday<br />
We = Wednesday Th = Thursday Fr = Friday<br />
Sa = Saturday<br />
S Refers to summer time, or legal time (see chapter 5.5)<br />
W Refers to winter time, or sun time (see chapter 5.5)<br />
8
Table 10 List of symbols in area 3<br />
It refers to a special control for the activation of the automatic commands coming from the weather<br />
sensors (see chapter 1.5)<br />
It refers to a special control for the de-activation of the automatic commands coming from the<br />
weather sensors (see chapter 1.5)<br />
It refers to a command that activates the special “holiday” function (see chapter 1.5)<br />
It refers to a command that activates the special “planetary time” function (see chapter 1.5)<br />
G<br />
It refers to a command that activates the special “timed control” function (see chapter 1.5)<br />
1 .... 6 They refer to the 6 groups and the direction of movement where applicable<br />
4) How to use PLANOTIME<br />
PLANOTIME can be used in different operating modes:<br />
Auto “Automatic” operating mode (see chapter 4.2)<br />
In “automatic” mode, PLANOTIME executes the programmed events on the established days and times.<br />
Auto “Nicetime” operating mode (see chapter 4.3)<br />
Man<br />
In “Nicetime” mode, PLANOTIME operates just like in “manual” mode, except that it will return to the “automatic” operating<br />
mode on a specified day and time. In practice, this enables the interruption of the “automatic” mode for a set period<br />
of time.<br />
Man “Manual” operating mode (see chapter 4.4)<br />
In “Manual” mode, PLANOTIME will transmit to the selected groups only the commands activated through the direct<br />
operation of keys ■ .<br />
Note: the “automatic” mode is the only one for which it is not important that the timer be set correctly.<br />
▼ ▼<br />
Man Rec “Manual with recorder” operating mode (see chapter 4.5)<br />
In the “manual with recorder” mode, PLANOTIME operates just like in “manual” mode, except that the transmitted<br />
commands will be recorded as events and memorized together with the day and time on which they have occurred.<br />
This allows you to create events without having to program them directly one by one, by simply using PLANOTIME<br />
in “manual” mode for a week.<br />
Prog “Programming” mode (see chapter 5)<br />
In the “programming” mode you can program, modify, copy and delete the events; you can also set the timer and the<br />
other parameters that are useful for the operation of PLANOTIME.<br />
4.1) Selecting the operating modes<br />
To access the desired operating mode you must select and confirm it in the “selection menu”.<br />
The “selection menu” can be considered as the starting point for the selection of the PLANOTIME functions: “Auto”,<br />
“Man”, “Man REC ” and “Prog”.<br />
From any of PLANOTIME’s operating or programming modes, you can return to the “selection menu” by repeatedly<br />
pressing key ■ until “Auto” starts flashing.<br />
9
▼<br />
▼<br />
▼<br />
▼<br />
4.2) “Automatic” mode operation<br />
Table 11 Selecting the “automatic” mode Example<br />
1. Press key ■ repeatedly a number of times until Auto starts flashing<br />
... Auto<br />
2. Press key to confirm the “automatic” mode<br />
Note: the “automatic” mode cannot be confirmed unless there is at least one programmed event.<br />
▼<br />
Table 12 Abandoning the “automatic” mode to return to the selection menu Example<br />
1. Press key twice<br />
4.3) “Nicetime” mode operation<br />
“Nicetime” is a special mode designed to temporarily interrupt the “automatic” mode and switch to “manual” mode.<br />
The Nicetime mode can be selected only if the unit is set to “automatic” operation.<br />
Table 13 switching from “automatic” mode to “Nicetime” mode Example<br />
1. Press key<br />
Auto<br />
2. Press key to confirm the “Nicetime” mode<br />
Man<br />
3. Press key or to set the time when you wish to return to the “automatic”<br />
mode<br />
or<br />
4. Press key to confirm the time<br />
5. Press key or to set the minutes when you wish to return to the “automatic”<br />
mode<br />
or<br />
6. Press key to confirm the minutes<br />
7. Press key or to select the day of the week when you wish to return to the<br />
“automatic” mode<br />
or<br />
(Su=Sunday; Mo=Monday; Tu=Tuesday; We=Wednesday; Th=Thursday; Fr=Friday; Sa=Saturday)<br />
8. Press key to confirm the day<br />
From this moment PLANOTIME will operate as if it was in “manual” mode, and you will be able to give your commands<br />
by pressing any one of these keys: ■ . PLANOTIME will switch back to “automatic” mode on the set day and time.<br />
In order to abandon the “Nicetime” mode before the expiration time and return to the selection menu, see table 20<br />
▼<br />
▼<br />
▼<br />
▼<br />
4.4) “Manual” mode operation Man<br />
▼ ▼<br />
▼ ▼<br />
▼ ▼<br />
▼ ▼<br />
Auto<br />
Man<br />
Table 14 Selecting the “manual” mode Example<br />
1. Press key ■ repeatedly a number of times until Auto starts flashing<br />
2. Press key until Man starts flashing<br />
3. Press key to confirm the “manual” mode<br />
▼<br />
... Auto<br />
Man<br />
Table 15 Selecting a group and sending a command Example<br />
1. Starting from the 1st group, press key repeatedly in order to select another<br />
group<br />
2. Now you can use keys ■ to send commands to the selected group<br />
▼ ▼<br />
...<br />
Table 16 Sending a command to the same group Example<br />
1. Press one of the following keys: ■<br />
▼ ▼<br />
10
▼<br />
▼<br />
▼<br />
▼<br />
▼<br />
▼<br />
Table 17 Selecting another group Example<br />
1. Press key repeatedly in order to select the desired group<br />
...<br />
2. Now you can use keys ■ to send commands to the selected group<br />
▼ ▼<br />
G<br />
Table 18 Assembling a multiple group and sending a command Example<br />
1. Starting from the 1st group, press key repeatedly in order to select another<br />
...<br />
group<br />
2. Press key to confirm the group<br />
3. Repeat the two previous steps to select other groups<br />
▼<br />
4. When the multiple group has been assembled, you can use the following keys<br />
■ to send the commands<br />
▼ ▼<br />
Note: if you select and confirm the wrong group, you can delete it by repeatedly pressing key<br />
eliminated starts flashing, then press key .<br />
▼<br />
until the group to be<br />
Table 19 Sending a special command to a group or multiple group Example<br />
1. Starting from the 1st group, press key repeatedly in order to select another<br />
...<br />
group<br />
2. Press key to confirm the group<br />
3. Repeat the two previous steps if you wish to select other groups<br />
▼<br />
4. Press key repeatedly until the special command symbol “ ” or “ ”<br />
starts flashing<br />
5. Press key to confirm the special command<br />
6. Now you can use the following keys ■ to send the special command<br />
▼<br />
▼ ▼<br />
... or<br />
Table 20 Abandoning the “manual” mode and returning to the selection menu: Example<br />
Or:<br />
After sending a command, press key<br />
Make sure that no group has been selected then press one of the following<br />
keys: ■ (if necessary, select the groups by pressing key and deselect / select<br />
them by pressing key )<br />
▼<br />
▼<br />
▼▼ ▼<br />
Or:<br />
Press key ■ repeatedly a number of times until Auto starts flashing<br />
... Auto<br />
4.5) Operation in “Manual with recorder” mode Man<br />
Table 21 Selecting the “manual with recorder” mode Example<br />
1. Press key ■ repeatedly a number of times until Auto starts flashing<br />
... Auto<br />
2. Press key twice until Man starts flashing<br />
Man<br />
3. Press key to confirm the “manual” mode with recorder<br />
▼<br />
From this moment you can use PLANOTIME as if it were in “manual” mode, except that all the commands transmitted<br />
using key or , together with the day, hour and minute on which they were transmitted, will be memorized as events.<br />
▼ ▼<br />
Note: the “manual with recorder” mode does not enable the recording of events containing the “■” command.<br />
A tip for the inexperienced: This operating mode is used to memorize events without having to program them<br />
one by one. To record events that normally take place in the course of an entire week, access the “manual with<br />
recorder” mode at the beginning of the week, then use PLANOTIME to command the daily up and down movement<br />
of the automations every day at the desired time. At the beginning of the following week, set PLANOTIME to the “automatic”<br />
mode; at this point the events will be repeated automatically through all the following weeks.<br />
To delete an event recorded by mistake, see chapter 5.2.3.<br />
11
▼<br />
5) How to program PLANOTIME<br />
The operation of PLANOTIME in the “programming” mode allows you to program, modify, copy and delete events;<br />
you can also set the timer and the other parameters that are useful for the operation of PLANOTIME.<br />
Prog Programming the “events” (see chapter 5.2)<br />
When programming the “events”, you can:<br />
NEW Enter a new event, establishing all its properties one by one<br />
MOD Modify an event by changing one or more of its properties<br />
COPY Copy an event in order to create a new one starting from the properties of the pre-existing event<br />
DEL Delete an event, eliminating it completely<br />
Prog Setting the timer (see chapter 5.3)<br />
The timer has to be set in order to enable PLANOTIME to execute the events at the established time. If the special<br />
“planetary time” command is used, in addition to the hours, minutes and day of the week you also need to set the<br />
day of the month, the month and the year and, finally, you must specify whether the current time is winter (sun time)<br />
or summer (legal time).<br />
Prog Setting the “holiday” parameters (see chapter 5.4)<br />
This function allows you to set the maximum permissible shifting of the event from the established time. It can range<br />
from a minimum of 0 minutes (no shifting) to a maximum of 75 minutes earlier or later than the established time.<br />
Prog Setting the “planetary time” parameters (see chapter 5.5)<br />
This function allows you to set the parameters needed for calculation of the “planetary time”:<br />
• Latitude of your position with respect to the Equator (shown in all maps).<br />
• Difference between the time indicated by the clock and the actual sun time<br />
• Specify whether the current time is winter (sun time) or summer (legal time).<br />
5.1) Selecting the type of programming<br />
To access the “programming” mode you need to select and confirm it in the “selection menu”.<br />
The selection menu can be considered as the starting point for all the PLANOTIME functions.<br />
From any of PLANOTIME’s operating or programming modes, you can return to the “selection menu” by repeatedly<br />
pressing key ■ until “Auto” starts flashing.<br />
5.1.1) Forward and backward for programming<br />
The programming process features a series of stages that include all the necessary settings or parameters.<br />
Please keep in mind that during this process:<br />
• The symbol that flashes at 50% refers to the parameter being programmed, i.e. the current stage<br />
• Keys and are used to adjust the current parameter<br />
• Key is used to confirm the parameter and proceed to the next stage<br />
• Key ■ is used to cancel your selection and return to the previous stage<br />
• Key is used to select or deselect a parameter<br />
• If a symbol flashes at 25%, it means that the parameter has not been selected<br />
• If a symbol flashes at 75%, it means that the parameter has been selected<br />
• In some cases it is not possible to confirm a parameter unless a selection has been made, for example, it is not<br />
possible to program an event unless you have selected at least a day of the week.<br />
▼<br />
▼<br />
▼<br />
12
5.2) Programming the “events”<br />
When programming an event, you need to establish all its properties one by one, as follows:<br />
Table 22 Proprietà degli eventi: Example 1 Example 2<br />
1. Hours and minutes at which a command must be sent<br />
08.30<br />
18.45<br />
2. Day or days of the week on which it must take place<br />
Mo We Fr Sa<br />
3. One or more groups involved, and the relevant “Up” or<br />
2<br />
“Down” command<br />
1<br />
4 5 6<br />
4. Enabling or disabling of the special “ ” or “ ”<br />
command<br />
5. Enabling or disabling of the special “holiday” command<br />
6. Enabling or disabling of the special “planetary time”<br />
command<br />
▼<br />
▼ ▼ ▼<br />
▼<br />
G<br />
7. Enabling or disabling of the special “timed command”<br />
8. If the special “timed command” is enabled, the time, in<br />
seconds, that must elapse between this command and the<br />
subsequent “Stop” command must be specified<br />
20<br />
In example No. 1: at 8.30 every Monday group 1 will<br />
receive an “Up” command.<br />
In example No. 2: at 18.45 every Wednesday, Friday<br />
and Saturday group 2 will receive a “Down” command<br />
and groups 4,5,6 will receive an “Up” command; the<br />
commands provide for the activation of the automatic<br />
commands coming from the weather sensors. The<br />
“planetary time” is active, which means that the time will<br />
shift from 18.45 in order to follow the time of sunset<br />
throughout the year. The commands are timed, i.e. a<br />
“Stop” command is set to activate 20 seconds after the<br />
starting of the movement.<br />
13
▼<br />
▼<br />
5.2.1) Programming: new event NEW<br />
Table 23 Programming a simple “new event” (example 1 in table N. 22): Example<br />
1. Press key ■ repeatedly a number of times until Auto starts flashing<br />
2. Press key 3 times to select the Prog “programming” mode<br />
3. Press key to confirm the “programming” mode<br />
▼<br />
4. Press key to confirm the programming of “events”<br />
▼<br />
5. Press key to confirm the programming of a “new event” NEW<br />
6. Press key or to set the hours (in the example: 08)<br />
▼<br />
▼ ▼<br />
7. Press key to confirm the hours<br />
8. Press key or to set the minutes (in the example: 30 )<br />
▼<br />
9. Press key to confirm the minutes<br />
▼<br />
▼ ▼<br />
10. Press key or to choose the day of the week (in the example: Mo=Monday)<br />
▼ ▼<br />
... Auto<br />
or<br />
or<br />
or<br />
11. Press key to select the day of the week<br />
12. Press key to confirm the day of the week<br />
▼<br />
(in the example: only Mo=Monday)<br />
13. Press key to select the “Up” command for group 1<br />
▼<br />
14. Press key to confirm the command (in the example: “Up” for group 1 )<br />
▼<br />
15. Press key to confirm the event (in the example: no special<br />
▼<br />
(in the example: no special “ ” or “ ”)<br />
16. Press key to confirm the event<br />
▼<br />
(in the example: no special “holiday”<br />
17. Press key to confirm the event<br />
▼<br />
(in the example: no special “planetary time”<br />
18. Press key to confirm the event<br />
▼<br />
(in the example: no special “timed”<br />
command)<br />
command)<br />
command)<br />
19. Now all the parts of the selected event start flashing to indicate that the<br />
programming of the new event has been completed.<br />
Press key to confirm the event or press key ■ to go back to an earlier stage.<br />
▼<br />
With the last confirmation the event is memorized and PLANOTIME is ready for programming another new event; you<br />
can proceed starting from step N. 5 in this table.<br />
14
▼<br />
▼<br />
▼<br />
▼<br />
▼<br />
▼<br />
▼<br />
▼<br />
▼<br />
▼<br />
▼<br />
Table 24 Programming a complete “new event” (example 2 in table N. 22): Example<br />
1. Press key ■ repeatedly a number of times until Auto starts flashing<br />
2. Press key 3 times to select the Prog “programming” mode<br />
3. Press key to confirm the “programming” mode<br />
4. Press key to confirm the programming of “events”<br />
▼<br />
▼<br />
5. Press key to confirm the programming of a “new event” NEW<br />
6. Press key or to set the hours (in the example: 18 )<br />
▼<br />
▼ ▼<br />
7. Press key to confirm the hours<br />
8. Press key or to set the minutes (in the example: 45 )<br />
▼<br />
9. Press key to confirm the minutes<br />
▼<br />
▼ ▼<br />
10. Press key or to choose the first day of the week<br />
(in the example: We=Wednesday)<br />
11. Press key to select the first day of the week<br />
▼ ▼<br />
12. Press key or to choose the second day of the week<br />
(in the example: Fr=Friday )<br />
13. Press key to select the second day of the week<br />
15. Press key to select the third day of the week<br />
28. Press key to confirm the event<br />
▼<br />
(in the example: no special “holiday”<br />
▼ ▼<br />
14. Press key or to choose the third day of the week<br />
(in the example: Sa=Saturday)<br />
16. Press key to confirm all the selected days<br />
▼<br />
17. Press key to select group 2<br />
18. Press key to choose the “Down” command for group 2<br />
19. Press key twice to select group 4<br />
command)<br />
29. Press key to select the special “planetary time” command<br />
30. Press key to confirm the event<br />
▼<br />
(in the example: special “planetary time”<br />
31. Press key to select the special “timed” command<br />
33. Press key to confirm the event<br />
▼<br />
(in the example: special “timed” command)<br />
34. Now all the parts of the selected event start flashing to indicate that the<br />
programming of the new event has been completed.<br />
Press key to confirm the event or press key ■ to go back to an earlier stage.<br />
▼<br />
▼ ▼<br />
▼<br />
20. Press key to choose the “Up” command for group 4<br />
21. Press key to select group 5<br />
▼<br />
22. Press key to choose the “Up” command for group 5<br />
23. Press key to select group 6<br />
▼<br />
24. Press key to choose the “Up” command for group 6<br />
▼<br />
25. Press key to confirm the commands<br />
▼<br />
(in the example: “Down for group 2 and “Up” for groups 4,5 and 6)<br />
26. Press key to select the special “ ” command<br />
27. Press key to confirm the event<br />
▼<br />
(in the example: send special “<br />
command)<br />
32. Press key or to adjust the timing (in the example: 20 seconds)<br />
▼ ▼<br />
” command)<br />
or<br />
or<br />
or<br />
or<br />
or<br />
o<br />
... Auto<br />
G<br />
With the last confirmation the event is memorized and PLANOTIME is ready for programming another new event; you<br />
can proceed starting from step N. 5 in this table.<br />
Note: for proper operation of the “planetary time” function, the relevant parameters must be set (see table 30)<br />
15
▼<br />
▼<br />
▼<br />
▼<br />
5.2.2) Programmazione: modifica eventi MOD<br />
All programmed events can be modified at any time. Before modifications, an event must be located and selected<br />
from all those present.<br />
Table 25 Modifying an event: Example<br />
1. Press key ■ repeatedly until the text Auto starts flashing<br />
... Auto<br />
2. Press key three times to select programming mode Prog<br />
3. Press key to confirm programming mode<br />
▼<br />
4. Press key to confirm events programming<br />
▼<br />
5. Press key to select events modification MOD<br />
6. Press key to confirm events modification<br />
▼<br />
7. Press key or to select the event to modify. Events are displayed<br />
chronologically according to the order in which they are performed, starting from<br />
the most recent; press to move to the next event, or to move to the previous.<br />
8. Press key to confirm the selected event<br />
▼<br />
▼ ▼<br />
▼<br />
From this point onwards, modifications are performed according to the same procedure as described for programming<br />
a new event (see chapter 5.2.1) and all properties can be modified or confirmed individually as required. After modifying<br />
and confirming the last parameter, the event is memorised again and PLANOTIME is ready for modification of<br />
another event, in which case proceed from point 16 of this table.<br />
▼<br />
or<br />
5.2.3) Programming: deleting events DEL<br />
All programmed events can be deleted at any time. Before deleting, an event must be located and selected from all<br />
those present.<br />
Table 26 Deleting an event: Example<br />
1. Press key ■ repeatedly until the text Auto starts flashing<br />
2. Press key three times to select programming mode Prog<br />
3. Press key to confirm programming mode<br />
▼<br />
4. Press key to confirm events programming<br />
5. Press key twice to select event deletion DEL<br />
▼<br />
6. Press key to confirm event deletion<br />
▼<br />
7. Press key or to select the event to delete. Events are displayed<br />
chronologically according to the order in which they are performed, starting from<br />
the most recent; press to move to the next event, or to move to the previous.<br />
8. Press key to confirm the selected event<br />
▼<br />
▼ ▼<br />
▼<br />
▼<br />
or<br />
... Auto<br />
9. Press key to confirm deletion of the selected event. To exit without deleting,<br />
press key ■ and resume the procedure from point 7 in this table.<br />
▼<br />
After deleting an event, PLANOTIME is ready for subsequent deletion of another event; in this case proceed from point<br />
N°6 of this table.<br />
16
▼<br />
▼<br />
▼<br />
▼<br />
5.2.4) Programming: copying events COPY<br />
For rapid programming of an event similar to one already present, the latter can be copied for subsequent modification<br />
of the relative parameters.<br />
G<br />
Table 27 Programming an event by copying one already present Example<br />
1. Press key ■ repeatedly until the text Auto starts flashing<br />
... Auto<br />
2. Press key three times to select programming mode Prog<br />
3. Press key to confirm programming mode<br />
▼<br />
4. Press key to confirm events programming<br />
▼<br />
5. Press key three times to select the event copy function COPY<br />
6. Press key to confirm event copying<br />
▼<br />
7. Press key or to select the event to copy. Events are displayed chronologically<br />
according to the order in which they are performed, starting from the most<br />
recent; press to move to the next event, or to move to the previous.<br />
8. Press key to confirm the selected event<br />
▼<br />
▼<br />
▼ ▼<br />
From this point modifications to the copied event are according to the same procedure for programming a new event<br />
(see chapter 5.2.1) in which all properties of the event can be modified or confirmed as required. After modifying and<br />
confirming the last parameter, the copied event is saved as a new event and PLANOTIME is ready for copying another<br />
event; in this case, proceed from point N°6 in this table.<br />
▼<br />
or<br />
5.3) Timer settings<br />
Timer settings are made immediately after inserting the battery, but may require adjustments at other times, such as<br />
when changing from winter time (sun time) to summer time (legal time).<br />
Table 28 Setting the timer Example<br />
1. Press key ■ repeatedly until the text Auto starts flashing<br />
... Auto<br />
2. Press key three times to select programming mode Prog<br />
3. Press key to confirm programming mode<br />
▼<br />
4. Press key to select timer settings<br />
5. Press key to confirm timer settings<br />
6. Press keys or to set the hours<br />
▼<br />
7. Press key to confirm the hours<br />
8. Press keys or to set the minutes<br />
▼<br />
9. Press key to confirm the minutes<br />
▼<br />
10. Press key or to select the day of the week<br />
11. Press key to confirm the weekday<br />
12. Press key or to select the day of the month<br />
▼<br />
13. Press key to confirm the day<br />
▼<br />
15. Press key to confirm the month<br />
16. Press key or to select the year (from 2000 to 2059)<br />
▼<br />
17. Press key to confirm the year<br />
▼<br />
▼ ▼<br />
▼ ▼<br />
▼ ▼<br />
(Su=Sunday; Mo=Monday; Tu=Tuesday; We=Wednesday; Th=Thursday; Fr=Friday; Sa=Saturday)<br />
▼ ▼<br />
14. Press key or to select the number of the month<br />
▼ ▼<br />
(01=January; 02=February….12= December)<br />
▼ ▼<br />
Nota: if the special command “planetary time” is used, the hour, minutes, weekday, date, month and year must be set<br />
whether the current time is winter (solar time) or summer (legal time); see table 30.<br />
17<br />
or<br />
or<br />
o<br />
or<br />
or<br />
or
▼<br />
▼<br />
▼<br />
▼<br />
5.4) Settings of special command "holiday" parameters<br />
To ensure correct operation of the special command “holiday” the maximum admissible deviation value must be set; this<br />
can be from 0 to 75 minutes, settable at intervals of 5 minutes. For example, if the value 15 is set, this means that an<br />
event programmed for 08.00 can be performed randomly between 7.45 and 8.15.<br />
The modification of this parameter affects all the events with this special parameter enabled.<br />
Table 29 Setting parameters of special command “holiday” Example<br />
1. Press key ■ repeatedly until the text Auto starts flashing<br />
... Auto<br />
2. Press key three times to select programming mode Prog<br />
3. Press key to confirm programming mode<br />
▼<br />
4. Press key twice to select settings of parameters in the command “holiday”<br />
5. Press key to confirm settings of parameter “holiday” “ ”<br />
▼<br />
6. Press key or to set the maximum deviation in minutes<br />
7. Press key to confirm the parameter<br />
▼<br />
▼ ▼<br />
or<br />
5.5) Settings of special command "planetary time" parameters<br />
To ensure correct operation of the special command “planetary time” the following parameters need to be set:<br />
• Latitude of location with respect to the earth's equator, settable between 65° (towards North pole) and -65°<br />
(towards South pole) passing through 0° (equator).<br />
To find the “ ” value to be entered, refer to the figure on the next page or a geographical map for a more precise<br />
location<br />
• Difference between the time shown on the timer and the actual solar time; in practice the difference between midday<br />
shown on the clock and the midday of the real solar time of the location “ ” can be set between 0 and ±99<br />
minutes. The chapter “how to…” specifies a procedure to measure this value.<br />
If a precise setting is not necessary, this parameter can be set to zero.<br />
• Indication of whether the time is winter (solar time) or summer (legal time).<br />
Table 30 Setting the parameters of the special command “planetary time” Example<br />
1. Press key ■ repeatedly until the text Auto starts flashing<br />
... Auto<br />
2. Press key three times to select programming mode Prog<br />
3. Press key to confirm programming mode<br />
▼<br />
4. Press key three times to select settings of the parameters in the special<br />
command “planetary time”<br />
5. Press key to confirm settings of parameters in the command “planetary time”<br />
▼<br />
6. Press key or to set the location latitude “ ”<br />
7. Press key to confirm the parameter<br />
▼<br />
9. Press key to confirm the parameter<br />
▼<br />
10. Press keys or to select summer time “S” (legal time) or winter time “W”<br />
(solar time)<br />
11. Press key to confirm the parameter<br />
▼<br />
▼ ▼<br />
8. Press key or to set the difference between the time shown on the clock<br />
and the actual solar time “ ”<br />
▼ ▼<br />
▼ ▼<br />
or<br />
or<br />
or<br />
These parameters should not be changed after entering one or more events with this special command enabled.<br />
18
G<br />
6) Battery replacement<br />
When the battery down indicator “ ” lights, the battery<br />
should be replaced as soon as possible; in this situation<br />
there is a serious risk that commands cannot be<br />
sent correctly.<br />
To replace the battery, open the battery compartment<br />
panel and proceed as shown in the figures below.<br />
After replacing the battery, the internal timer settings<br />
must be made (see chapter 2.2).<br />
Caution: batteries contain pollutant substances; do not<br />
dispose of in common waste but observe disposal<br />
methods as envisaged by local legislation.<br />
7) Warnings<br />
The use of PLANOTIME does not require special procedures,<br />
but the following facts should be taken into<br />
account:<br />
• The commands sent via radio from PLANOTIME cannot<br />
totally guaranty reception by the relative automatic<br />
devices.<br />
• Some components of PLANOTIME may contain pollutant<br />
substances; do not dispose of into the environment.<br />
19
▼<br />
8) How to…<br />
• Increase certainty that a command is received:<br />
activate the command 2 or more times at the same<br />
time (copying the event) or a second time on the next<br />
minute.<br />
• Exit PLANOTIME from any programming or<br />
operating mode: press key ■ repeatedly until the<br />
text “Auto” starts flashing, after which press key<br />
select the required operating mode.<br />
• Measure the difference between the time<br />
shown on the clock and the real solar time:<br />
the value required by the special command “planetary<br />
time” is, in practice, the difference between the midday<br />
indicated by the clock and the actual midday of<br />
the location. A very simple method to measure this<br />
value is to observe the shadow made by the sun on<br />
an object (preferably perfectly vertical and pointed,<br />
to<br />
such as a pole); the shadow shortens until midday<br />
(solar time) and then lengthens again in the afternoon.<br />
The solar midday occurs when the shadow reaches<br />
the shortest length with respect to the base of the<br />
object. When this happens, at the time indicated by<br />
the clock, subtract one hour if in summer time (legal<br />
time) and then calculate the different in minutes with<br />
respect to the time 12.00; the result is the value to be<br />
entered in PLANOTIME. For example, if the actual<br />
solar midday occurs at 12.25 the value 25 should be<br />
entered; if it occurs at 11.47 the value-13 should be<br />
entered.<br />
Note: the method described does not take into account<br />
a number of astronomical phenomena but the possible<br />
error margin is irrelevant for operation of PLANOTIME<br />
8.1) Error list<br />
On vary rare occasions there may be a PLANOTIME malfunction; if this occurs the cause of the error is always specified.<br />
The following table lists the errors and possible solutions.<br />
Table 31: error list<br />
Error N° Description Solution<br />
Err1<br />
Err2<br />
Err3<br />
Err4<br />
Err5<br />
Memory full<br />
Communication error between internal<br />
components of PLANOTIME<br />
Error in parameters of one or more<br />
events<br />
The special "holiday" command<br />
parameters have been changed after<br />
some events were calculated with the<br />
previous parameters.<br />
The special "planetary time" command<br />
parameters have been changed after<br />
some events were calculated with the<br />
previous parameters<br />
Over 100 events have already been programmed and<br />
there is no more space for others. No solution; the last<br />
event will not be memorised.<br />
Very specific fault; remove and refit the battery and check.<br />
Some parameters of memorised events are not correct;<br />
this may be a communication error between internal<br />
components of PLANOTIME; remove and refit the battery<br />
and check. If the error persists, enter event modification<br />
mode and check the parameters of all events.<br />
Nothing serious, but bear in mind that the next events<br />
have been calculated on the basis of the old parameters;<br />
the new parameters will be used by the next execution of<br />
the event onwards.<br />
The parameters should not be changed after<br />
programming events; in this case ensure correctness of<br />
events after modifications.<br />
20
9) Technical specifications<br />
To improve products, NICE S.p.a. reserves the right to modify the technical specifications at any time without notice,<br />
however guaranteeing functionality and the specified intended use.<br />
Note: all technical specifications refer to a temperature of 20°C.<br />
G<br />
Power supply<br />
: 3Vdc with 1 lithium battery CR2450<br />
Battery lifetime<br />
: Estimated at 2 years (with 10 per day)<br />
Frequency<br />
: 433.92MHz ±100 KHz<br />
Radiated power<br />
: estimated at approx. 1mW<br />
Average range<br />
: Estimated at 25 metres inside building.<br />
(presence of electromagnetic disturbance can drastically reduce range)<br />
Encoding<br />
: 52 Bit rolling code FLOR+INFO<br />
Timer resolution<br />
: 1 minute<br />
Timer precision<br />
: ±100 seconds/year<br />
Max. no. of events : 100<br />
Protection rating : IP 40<br />
Operating temperature : -5°C ÷ 50°C<br />
Dimensions/weight : 80x80x1.2mm / 75g<br />
A1 Appendix<br />
Use the following table, before programming, to create events and as a schedule of the memorised events.<br />
Table A1: example of event composition and events schedule<br />
Name Time Day Groups Special commands<br />
Su Mo Tu We Th Fr Sa 1 2 3 4 5 6<br />
Example 1 08.30<br />
X<br />
Su Mo Tu We Th Fr Sa 1 2 3 4 5 6<br />
Example 2 18.30<br />
X X X X<br />
X X 20<br />
Su Mo Tu We Th Fr Sa 1 2 3 4 5 6<br />
Su Mo Tu We Th Fr Sa 1 2 3 4 5 6<br />
Su Mo Tu We Th Fr Sa 1 2 3 4 5 6<br />
Su Mo Tu We Th Fr Sa 1 2 3 4 5 6<br />
Su Mo Tu We Th Fr Sa 1 2 3 4 5 6<br />
Su Mo Tu We Th Fr Sa 1 2 3 4 5 6<br />
Su Mo Tu We Th Fr Sa 1 2 3 4 5 6<br />
Su Mo Tu We Th Fr Sa 1 2 3 4 5 6<br />
21
Indice dei capitoli:<br />
pag<br />
pag<br />
1 Descrizione 23<br />
1.1 Cos’è PLANOTIME 23<br />
1.2 Si deve proprio programmare? 23<br />
1.3 Cos’è un evento? 23<br />
1.4 Cosa sono i gruppi? 24<br />
1.5 Cosa sono i comandi speciali? 24<br />
2 Installazione 24<br />
2.1 Accendiamo PLANOTIME 24<br />
2.2 Regolazione iniziale dell’orologio 25<br />
2.3 Memorizzazione di PLANOTIME 25<br />
nei ricevitori degli automatismi<br />
2.3.1 Memorizzazione di PLANOTIME 26<br />
come primo trasmettitore<br />
2.3.2 Memorizzazione di PLANOTIME 26<br />
come altro trasmettitore<br />
2.4 Fissaggio di PLANOTIME 27<br />
3 Descrizione dei simboli 28<br />
4 Come usare PLANOTIME 29<br />
4.1 Scelta dei modi di funzionamento 29<br />
4.2 Funzionamento in modo 30<br />
“automatico”<br />
4.3 Funzionamento in modo “Nicetime” 30<br />
4.4 Funzionamento in modo “manuale” 30<br />
4.5 Funzionamento in modo “manuale 31<br />
con registratore”<br />
5 Come programmare PLANOTIME 32<br />
5.1 Scelta del tipo di programmazione 32<br />
5.1.1 Avanti e indietro per la programmazione 32<br />
5.2 Programmazione “eventi” 33<br />
5.2.1 Programmazione: nuovo evento 34<br />
5.2.2 Programmazione: modifica eventi 36<br />
5.2.3 Programmazione: cancellazione eventi 36<br />
5.2.4 Programmazione: copia eventi 37<br />
5.3 Regolazione dell’orologio 37<br />
5.4 Regolazione dei parametri del 38<br />
comando speciale “in vacanza”<br />
5.5 Regolazione dei parametri del 38<br />
comando speciale “orario planetario”<br />
6 Sostituzione della pila 39<br />
7 Avvertenze 39<br />
8 Cosa fare se… 40<br />
8.1 Lista errori 40<br />
9 Caratteristiche tecniche 41<br />
A1 Appendice 41<br />
Indice delle tabelle:<br />
pag<br />
pag<br />
Tabella N° 1: per regolare l’orologio dopo 25<br />
l’inserimento della pila<br />
Tabella N° 2: per scegliere il modo “manuale” e 25<br />
scegliere un gruppo<br />
Tabella N° 3: per inviare un comando allo stesso 25<br />
gruppo<br />
Tabella N° 4: per scegliere un altro gruppo 25<br />
Tabella N° 5: per uscire dal modo “manuale” 26<br />
Tabella N° 6: per memorizzare PLANOTIME 26<br />
come primo trasmettitore<br />
Tabella N° 7: per memorizzare PLANOTIME 26<br />
come altro trasmettitore<br />
Tabella N° 8: Elenco simboli dell’area 1 28<br />
Tabella N° 9: Elenco simboli dell’area 2 28<br />
Tabella N°10: Elenco simboli dell’area 3 29<br />
Tabella N° 11: per scegliere il modo “automatico” 30<br />
Tabella N° 12: per uscire dal modo “automatico” 30<br />
e tornare al menu di scelta<br />
Tabella N° 13: per passare dal modo “automatico” 30<br />
al modo “Nicetime”<br />
Tabella N° 14: per scegliere il modo “manuale” 30<br />
Tabella N° 15: per scegliere un gruppo ed inviare 30<br />
un comando<br />
Tabella N° 16: per inviare un comando allo stesso 30<br />
gruppo<br />
Tabella N° 17: per scegliere un altro gruppo 31<br />
Tabella N° 18: per comporre un gruppo multiplo 31<br />
ed inviare un comando<br />
Tabella N° 19: per inviare un comando speciale 31<br />
ad un gruppo o gruppo multiplo<br />
Tabella N° 20: per uscire dal modo “manuale” e 31<br />
tornare al menu di scelta:<br />
Tabella N° 21: per scegliere il modo “manuale 31<br />
con registratore”<br />
Tabella N° 22: proprietà degli eventi: 33<br />
Tabella N° 23: per programmare un “nuovo evento” 34<br />
semplice<br />
Tabella N° 24: per programmare un “nuovo evento” 35<br />
completo<br />
Tabella N° 25: per modificare un evento: 36<br />
Tabella N° 26: per cancellare un evento: 36<br />
Tabella N° 27: per programmare un nuovo evento 37<br />
copiandone uno già presente<br />
Tabella N° 28: per regolare l’orologio 37<br />
Tabella N° 29: per regolare i parametri del 38<br />
comando speciale “in vacanza”<br />
Tabella N° 30: per regolare i parametri del 38<br />
comando speciale “orario planetario”<br />
Tabella N° 31: elenco errori 40<br />
22
Display<br />
Tasto<br />
Stop<br />
Tasto<br />
Conferma<br />
Tasto<br />
Discesa<br />
Tasto<br />
Salita<br />
Tasto<br />
Selezione<br />
I<br />
Batteria<br />
1) Descrizione<br />
In questo capitolo vi daremo una descrizione delle caratteristiche<br />
essenziali di PLANOTIME.<br />
Leggere attentamente questa parte, perché conoscendo<br />
il prodotto, vi risulterà più semplice usarlo.<br />
1.1) Cos’è PLANOTIME<br />
PLANOTIME è un trasmettitore radio per comandare<br />
automatismi di tapparelle e tende da sole; permette di<br />
comandare fino a 6 gruppi di automatismi.<br />
Può funzionare in modo “manuale” dove sarete voi ad<br />
intervenire per comandare gli automatismi, oppure in<br />
modo “automatico” dove sarà PLANOTIME a comandare<br />
gli automatismi nei giorni e negli orari programmati.<br />
1.2) Si deve proprio programmare?<br />
Purtroppo si! PLANOTIME non conosce le vostre abitudini;<br />
se volete usarlo in modo “automatico” dovrà sapere<br />
a che ora volete abbassare le tende da sole e dovrà<br />
sapere che solitamente la Domenica desiderate riposare<br />
qualche minuto in più con le tapparelle abbassate.<br />
La logica di programmazione e di funzionamento di PLA-<br />
NOTIME in modo “automatico” è quella dell’evento.<br />
1.3) Cos’è un evento?<br />
Un evento è il verificarsi di un comando automatico di<br />
movimento (apertura o chiusura di tapparelle, alzarsi e<br />
abbassarsi di tende, ecc.) in un dato momento della giornata<br />
in uno o più giorni della settimana. Ad esempio, è un<br />
evento il comando di apertura delle tapparelle alle ore<br />
8:30 di Sabato e Domenica mentre un altro evento è il<br />
riavvolgimento delle tende da sole alle ore 18:45 di tutti<br />
i giorni della settimana.<br />
23
1.4) Cosa sono i gruppi?<br />
Per “gruppo” si intende un singolo automatismo oppure<br />
un insieme di automatismi azionati sempre tutti assieme;<br />
ad esempio la tenda a Sud può essere un gruppo, le tende<br />
ad Ovest possono essere un secondo gruppo e tutte<br />
le tapparelle del soggiorno il terzo gruppo. PLANOTIME<br />
è in grado di comandare fino a 6 gruppi singolarmente,<br />
o più gruppi contemporaneamente combinati tra loro<br />
(gruppo multiplo).<br />
La composizione dei gruppi avviene durante la fase di<br />
memorizzazione del codice radio come descritto nel<br />
capitolo 2.3<br />
1.5) Cosa sono i comandi speciali?<br />
Quando si verifica un evento, PLANOTIME invia un<br />
comando ai gruppi interessati all’evento. Normalmente i<br />
comandi prevedono l’apertura o la chiusura degli automatismi<br />
ma a questi comandi possono essere associate<br />
delle funzioni speciali:<br />
• Sole ON oppure Sole OFF : attiva oppure<br />
disattiva i comandi automatici che provengono dai<br />
sensori climatici; vi permette di scegliere se comandare<br />
direttamente gli automatismi (Sole OFF) o lasciare<br />
che siano i sensori a comandarli (Sole ON). Il comando<br />
(Sole OFF) esclude i sensori di Pioggia e Sole,<br />
mentre il sensore di Vento, essendo una protezione<br />
rimane sempre attivo.<br />
• In vacanza : sposta, in modo casuale, l’orario dell’evento<br />
di alcuni minuti (da 0 a 75 minuti) rispetto a<br />
quello programmato; vi permette di simulare la presenza<br />
di persone in casa anche quando non c’è nessuno.<br />
• Orario planetario : giorno per giorno, nell’arco<br />
dell’anno, esegue la correzione delle orario dell’evento<br />
programmato in funzione dell’effettivo orario dell’alba e<br />
del tramonto del sole; ad esempio, in estate anticipa gli<br />
eventi del mattino e ritarda quelli del pomeriggio.<br />
• Comando temporizzato : vi permette di avere<br />
una apertura o chiusura parziale della tenda o tapparella;<br />
funziona inviando un comando di “Stop” dopo<br />
un breve tempo (da 1 a 99 secondi) dall’invio di un<br />
comando di “Salita” o “Discesa”.<br />
Se prevedete di poter usare questi comandi speciali<br />
potete trovare altri dettagli nel capitolo 5.<br />
2) Installazione<br />
Questo capitolo è dedicato a chi dovrà eseguire le operazioni<br />
per l’installazione e la messa in servizio di PLA-<br />
NOTIME.<br />
Verranno trattati argomenti particolarmente tecnici, ma<br />
seguendo attentamente le istruzioni non ci saranno<br />
situazioni di pericolo né per le persone né per gli automatismi.<br />
In nessun caso PLANOTIME si potrà danneggiare.<br />
Nota: in questo capitolo si parte dal presupposto che si<br />
conoscano già le funzioni di base di PLANOTIME; eventualmente<br />
leggere anche i capitoli 3 e 4 prima di proseguire.<br />
2.1) Accendiamo PLANOTIME<br />
PLANOTIME funziona con una pila che è già inserita, ma<br />
scollegata per evitare che si consumi inutilmente; per<br />
accendere PLANOTIME occorre togliere la linguetta di<br />
plastica che esce dal vano porta pila.<br />
Quando PLANOTIME si accende richiede subito la regolazione<br />
dell’orologio interno.<br />
24
▼<br />
▼<br />
▼<br />
2.2) Regolazione iniziale dell’orologio<br />
Per effettuare la regolazione dell’orologio seguire le fasi riportate in tabella N°1. Se non si desidera fare la regolazione<br />
premere il tasto “■”; in questo caso l’orologio inizierà dalle ore 00.00 della Domenica.<br />
Tabella 1 Per regolare l’orologio dopo l’inserimento della pila Esempio<br />
1. Premere i tasti o regolare l’ora<br />
2. Premere il tasto per confermare l’ora<br />
3. Premere i tasti o per regolare i minuti<br />
▼<br />
4. Premere il tasto per confermare i minuti<br />
▼<br />
5. Premere i tasti o per scegliere il giorno della settimana<br />
▼ ▼<br />
▼ ▼<br />
▼ ▼<br />
(Su=Domenica; Mo=Lunedì; Tu=Martedì; We=Mercoledì; Th=Giovedì; Fr=Venerdì; Sa=Sabato)<br />
o<br />
o<br />
o<br />
I<br />
6. Premere il tasto per confermare il giorno<br />
▼<br />
7. Premere i tasti o per scegliere il numero del giorno “ ”<br />
8. Premere il tasto per confermare il giorno<br />
▼<br />
▼ ▼<br />
9. Premere i tasti o per scegliere il numero del mese “ ”<br />
(01=Gennaio; 02=Febbraio…12= Dicembre)<br />
10. Premere il tasto per confermare il mese<br />
▼<br />
11. Premere i tasti o per scegliere il numero dell’anno<br />
(compreso tra il 2000 ed il 2059)<br />
▼ ▼<br />
▼ ▼<br />
o<br />
o<br />
o<br />
12. Premere il tasto per confermare l’anno<br />
▼<br />
Solo la regolazione dell’orologio è necessaria ogni volta che si cambia la pila; tutti gli eventi e i parametri rimangono<br />
sempre memorizzati in PLANOTIME.<br />
2.3) Memorizzazione di PLANOTIME nei ricevitori degli automatismi<br />
Ogni trasmettitore radio, quindi anche PLANOTIME, viene riconosciuto dai ricevitori degli automatismi attraverso un<br />
“codice” diverso da ogni altro trasmettitore; si rende necessaria quindi una fase di “memorizzazione” attraverso la<br />
quale si predispone l’automatismo a riconoscere il codice di PLANOTIME. Se un gruppo è composto da più automatismi,<br />
è necessario ripetere l’operazione di memorizzazione per ognuno di essi. PLANOTIME è in grado di comandare<br />
fino a 6 gruppi di automatismi e per ognuno di essi trasmetterà un codice diverso, quindi, prima di iniziare la memorizzazione<br />
è necessario scegliere il gruppo al quale far appartenere l’automatismo.<br />
La memorizzazione deve avvenire con PLANOTIME mentre funziona in modo “manuale” selezionando un solo gruppo<br />
alla volta. Per selezionare il modo “manuale” e scegliere un gruppo seguire quanto indicato in tabella:<br />
Tabella 2 Per scegliere il modo “manuale” e scegliere un gruppo Esempio<br />
1. Premere ripetutamente e più volte il tasto ■ fino a far lampeggiare<br />
... Auto<br />
l’indicazione Auto<br />
2. Premere il tasto per scegliere il modo “manuale” Man<br />
3. Premere il tasto per confermare la modalità<br />
▼<br />
4. Partendo dal 1° gruppo, eventualmente premere più volte il tasto per<br />
scegliere un altro gruppo<br />
5. Ora è possibile usare i tasti ■ per inviare i comandi al gruppo scelto<br />
▼ ▼<br />
Tabella 3 Per inviare un comando allo stesso gruppo Esempio<br />
1. Premere uno dei tasti ■<br />
▼ ▼<br />
Tabella 4 Per scegliere un altro gruppo Esempio<br />
1. Dopo aver trasmesso, premere più volte il tasto per scegliere il gruppo<br />
desiderato<br />
25
▼<br />
Tabella 5 Per uscire dal modo “manuale”: Esempio<br />
Oppure:<br />
Dopo aver inviato un comando premere il tasto<br />
▼ ▼<br />
▼<br />
Verificare che non vi sia nessun gruppo selezionato quindi premere uno qualsiasi<br />
dei tasti ■ (eventualmente togliere la selezione ai gruppi selezionati scegliendoli<br />
premendo il tasto e togliendo la selezione premendo il tasto )<br />
▼<br />
Oppure:<br />
... Auto<br />
Premere ripetutamente il tasto ■ fino a far lampeggiare l’indicazione Auto<br />
! Attenzione: la memorizzazione del codice può avvenire in tutti i ricevitori che si trovano nel raggio di portata di<br />
PLANOTIME; è quindi opportuno tenere alimentato solo quello interessato all’operazione.<br />
Tutte le sequenze di memorizzazione sono a tempo cioè devono essere eseguite entro i limiti di tempo previsti.<br />
2.3.1) Memorizzazione di PLANOTIME come primo trasmettitore<br />
Quando la memoria codici dell’automatismo non contiene ancora nessun codice si può procedere all’inserimento di<br />
PLANOTIME seguendo la procedura:<br />
Tabella 6 Per memorizzare PLANOTIME come primo trasmettitore Esempio<br />
1. Su PLANOTIME scegliere il gruppo nel quale si vuole memorizzare<br />
l’automatismo tramite la modalità manuale (Tabella 2)<br />
2. Dare alimentazione all’automatismo, subito si sentiranno 2 bip lunghi (biiip) **<br />
3. Entro 5 secondi premere e tener premuto il tasto ■ di PLANOTIME<br />
(per circa 3 secondi)<br />
4. Rilasciare il tasto ■ quando si sentirà il primo dei 3 bip che confermano la<br />
memorizzazione<br />
3s<br />
** Se la memoria dell’automatismo contiene già dei codici, all’accensione si udiranno 2 bip brevi (bip); in questo caso<br />
si dovrà procedere seguendo le istruzioni riportate nella prossima tabella.<br />
2.3.2) Memorizzazione di PLANOTIME come altro trasmettitore<br />
Se la memoria codici dell’automatismo contiene già dei codici di altri trasmettitori, si può procedere all’inserimento di<br />
PLANOTIME seguendo la procedura.<br />
Tabella 7 Per memorizzare PLANOTIME come altro trasmettitore Esempio<br />
1. Su PLANOTIME scegliere il gruppo nel quale si vuole memorizzare<br />
l’automatismo tramite la modalità manuale (Tabella 2)<br />
2. Tenere premuto il tasto ■ di PLANOTIME fino a sentire un bip che proviene<br />
dall’automatismo (dopo circa 5 secondi)<br />
3. Lentamente premere per 3 volte il tasto ■ di un trasmettitore già memorizzato e<br />
funzionante<br />
4. Premere ancora una volta il tasto ■ di PLANOTIME<br />
5s<br />
Alla fine 3 bip provenienti dall’automatismo segnaleranno che PLANOTIME è stato memorizzato correttamente.<br />
Se la memoria codici è piena (14 codici), 6 bip indicheranno che PLANOTIME non può essere memorizzato.<br />
26
2.4) Fissaggio di PLANOTIME<br />
Per scegliere il miglior luogo dove porre PLANOTIME è<br />
bene seguire i seguenti suggerimenti:<br />
• PLANOTIME è adatto all’uso solo in ambienti protetti<br />
e non può essere posto all’esterno o in zone a rischio<br />
di intemperie.<br />
• L’altezza normale di fissaggio è 1,5m da terra in modo<br />
da guardare PLANOTIME leggermente dall’alto.<br />
• Evitare di collocarlo in prossimità, o peggio, su strutture<br />
di metallo che ne riducono la portata.<br />
• Ponendo PLANOTIME sul punto in cui si desidera fissarlo,<br />
provare a comandare tutti gli automatismi verificando<br />
che ricevano il comando radio inviato.<br />
• Considerare comunque che quando la pila si scarica<br />
la portata radio può ridursi del 20÷30%.<br />
Dopo aver verificato il corretto funzionamento del sistema,<br />
è possibile fissare in modo definitivo PLANOTIME<br />
mediante viti e tasselli come indicato in figura.<br />
I<br />
! ATTENZIONE: la presenza di altri dispositivi<br />
radiotrasmettitori oppure il verificarsi di altri<br />
disturbi elettromagnetici possono ridurre anche<br />
drasticamente la portata di PLANOTIME. Nice<br />
S.p.a. non può garantire che i comandi inviati<br />
vengano ricevuti dagli automatismi (per ridurre<br />
questo rischio vedere anche il capitolo 8 “Cosa<br />
fare se…”.<br />
27
3) Descrizione dei simboli<br />
I simboli visibili su PLANOTIME sono suddivisi in 3 aree:<br />
• Area 1 a sinistra indica i modi di funzionamento e le programmazioni<br />
• Area 2 al centro indica l’orologio settimanale<br />
• Area 3 a destra indica i gruppi ed i comandi speciali<br />
Area 1 Area 2 Area 3<br />
Tabella 8 Elenco simboli dell’area 1<br />
Auto Indica il modo di funzionamento “Automatico” (vedere capitoli 4 e 4.2)<br />
Auto Indica il modo di funzionamento “Nicetime” dove si ha il funzionamento “manuale” con ritorno al<br />
Man funzionamento “automatico” ad un dato giorno ed ora (vedere capitoli 4 e 4.3)<br />
Man Indica il modo di funzionamento “Manuale” (vedere capitoli 4 e 4.4)<br />
Man Rec Indica il modo di funzionamento “Manuale con registratore” (vedere capitoli 4 e 4.5)<br />
Prog Indica una fase di “Programmazione” in corso (vedere capitolo 5)<br />
Assieme a “Prog” indica la fase di programmazione di un evento<br />
NEW Assieme a “Prog” e “ ” indica la fase di creazione di un nuovo evento (vedere capitolo 5.2.1)<br />
MOD Assieme a “Prog” e “ ” indica la fase di modifica di un evento (vedere capitolo 5.2.2)<br />
DEL Assieme a “Prog” e “ ” indica la fase di cancellazione di un evento (vedere capitolo 5.2.3)<br />
COPY Assieme a “Prog” e “ ” indica la fase di copia di un evento (vedere capitolo 5.2.4)<br />
Assieme a “Prog” indica la fase di regolazione dell’orologio (vedere capitolo 5.3)<br />
Assieme a “Prog” indica la fase di regolazione dei parametri della funzione “in vacanza”<br />
(vedere capitolo 5.4)<br />
Assieme a “Prog” indica la fase di regolazione di parametri della funzione “orario planetario”<br />
(vedere capitolo 5.5)<br />
Se lampeggia indica che la pila è scarica ed è necessario sostituirla al più presto.<br />
Indica che è in corso la trasmissione di un comando radio<br />
Tabella 9 Elenco simboli dell’area 2<br />
Indica il modo di funzionamento “Automatico” (vedere capitoli 4 e 4.2)<br />
Indica i giorni della settimana:<br />
Su = Domenica Mo = Lunedì Tu = Martedì<br />
We = Mercoledì Th = Giovedì Fr = Venerdì<br />
Sa = Sabato<br />
S Indica l’orario estivo cioè orario legale (vedere capitolo 5.5)<br />
W Indica l’orario invernale cioè orario solare (vedere capitolo 5.5)<br />
28
Tabella 10 Elenco simboli dell’area 3<br />
Indica un comando speciale per l’attivazione dei comandi automatici che provengono dai sensori<br />
climatici (vedere capitolo 1.5)<br />
Indica un comando speciale per la disattivazione dei comandi automatici che provengono dai<br />
sensori climatici (vedere capitolo 1.5)<br />
Indica un comando con l’attivazione della funzione speciale “In vacanza” (vedere capitolo 1.5)<br />
Indica un comando con l’attivazione della funzione speciale “orario planetario” (vedere capitolo 1.5)<br />
Indica un comando con l’attivazione della funzione speciale “comando temporizzato”<br />
(vedere capitolo 1.5)<br />
1 .... 6 Indicano i 6 gruppi e la eventuale direzione del movimento<br />
I<br />
4) Come usare PLANOTIME<br />
PLANOTIME può essere usato in diversi modi di funzionamento:<br />
Auto Modo di funzionamento “automatico” (vedere capitolo 4.2)<br />
Nel modo “automatico”, PLANOTIME esegue gli eventi programmati nei giorni ed all’ora prestabilita.<br />
Auto Modo di funzionamento “Nicetime” (vedere capitolo 4.3)<br />
Man<br />
Nel modo “Nicetime”, PLANOTIME funziona come in modo “manuale” con la particolarità che ritornerà da solo al modo<br />
di funzionamento “automatico” nel giorno e all’ora prestabilita. Nella pratica permette di interrompere il modo “automatico”<br />
per un determinato periodo di tempo.<br />
Man Modo di funzionamento “manuale” (vedere capitolo 4.4)<br />
Nel modo “manuale”, PLANOTIME trasmetterà, ai gruppi selezionati, solo i comandi che derivano dall’intervento diretto<br />
sui tasti ■ .<br />
Nota: il modo “manuale” è l’unico per il quale non è importante che l’orologio sia regolato correttamente.<br />
▼ ▼<br />
Man Rec Modo di funzionamento “manuale con registratore” (vedere capitolo 4.5)<br />
Nel modo “manuale con registratore” PLANOTIME funzionerà come in modo “manuale” con la particolarità che i<br />
comandi trasmessi verranno registrati come eventi e memorizzati assieme al giorno e l’ora in cui sono avvenuti.<br />
Permette di creare gli eventi senza doverli programmare direttamente uno per uno ma semplicemente usando PLA-<br />
NOTIME in modo “manuale” per una settimana.<br />
Prog Modalità di “programmazione” (vedere capitolo 5)<br />
Nel modo “programmazione” si possono programmare, modificare, copiare e cancellare gli eventi; è possibile regolare<br />
l’orologio e gli altri parametri utili al funzionamento di PLANOTIME.<br />
4.1) Scelta dei modi di funzionamento<br />
Per entrare nel modo di funzionamento desiderato occorre sceglierlo e confermarlo nel “menu di scelta”.<br />
Il “menu di scelta” si può considerare come il punto di partenza per scegliere le funzioni di PLANOTIME: “Auto”,<br />
“Man”, “Man REC ” e “Prog”.<br />
Da qualsiasi modo di funzionamento o programmazione si trovi PLANOTIME è possibile ritornare al “menu di scelta”<br />
premendo ripetutamente e più volte il tasto ■ fino a far lampeggiare l’indicazione “Auto”.<br />
29
▼<br />
▼<br />
▼<br />
▼<br />
4.2) Funzionamento in modo “automatico” Auto<br />
Tabella 11 Per scegliere il modo “automatico” Esempio<br />
1. Premere ripetutamente e più volte il tasto ■ fino a far lampeggiare l’indicazione<br />
... Auto<br />
Auto<br />
2. Premere il tasto per confermare il modo “automatico”<br />
Nota: se non c’è almeno un evento programmato non è possibile confermare il modo “automatico”.<br />
▼<br />
Tabella 12 Per uscire dal modo “automatico” e tornare al menu di scelta Esempio<br />
1. Premere 2 volte il tasto<br />
4.3) Funzionamento in modo “Nicetime”<br />
“Nicetime” è un modo particolare con il quale si sospende, per un certo periodo di tempo, il modo “automatico” per<br />
passare in modo “manuale”. E’ possibile scegliere il modo Nicetime solo se ci si trova nel modo “automatico”.<br />
Tabella 13 Per passare dal modo “automatico” al modo “Nicetime” Esempio<br />
1. Premere il tasto<br />
Auto<br />
2. Premere il tasto per confermare il modo “Nicetime”<br />
Man<br />
3. Premere i tasti o per regolare l’ora in cui si desidera ritornare al modo<br />
“automatico”<br />
o<br />
4. Premere il tasto per confermare l’ora<br />
5. Premere i tasti o per regolare i minuti in cui si desidera ritornare al modo<br />
“automatico”<br />
o<br />
6. Premere il tasto per confermare i minuti<br />
7. Premere i tasti o per scegliere il giorno della settimana in cui si desidera<br />
ritornare al modo “automatico”<br />
o<br />
(Su=Domenica; Mo=Lunedì; Tu=Martedì; We=Mercoledì; Th=Giovedì; Fr=Venerdì; Sa=Sabato)<br />
8. Premere il tasto per confermare i minuti<br />
Da questo momento PLANOTIME funzionerà come se fosse in modo “manuale” e potete dare i comandi premendo<br />
uno qualsiasi dei tasti ■ . PLANOTIME tornerà in modo “automatico” il giorno e all’ora prestabilita.<br />
Per uscire dal modo “Nicetime” prima del tempo e tornare al menu di scelta vedere tabella 20.<br />
▼<br />
▼<br />
4.4) Funzionamento in modo “manuale” Man<br />
Tabella 14 Per scegliere il modo “manuale” Esempio<br />
1. Premere ripetutamente e più volte il tasto ■ fino a far lampeggiare l’indicazione<br />
Auto<br />
... Auto<br />
2. Premere il tasto per far lampeggiare l’indicazione Man<br />
Man<br />
3. Premere il tasto per confermare il modo “manuale”<br />
▼<br />
▼ ▼<br />
▼ ▼<br />
▼ ▼<br />
▼ ▼<br />
▼<br />
▼<br />
Auto<br />
Man<br />
Tabella 15 Per scegliere un gruppo ed inviare un comando Esempio<br />
1. Partendo dal 1° gruppo, eventualmente premere più volte il tasto per<br />
...<br />
scegliere un altro gruppo<br />
2. Ora è possibile usare i tasti ■ per inviare i comandi al gruppo scelto<br />
▼ ▼<br />
Tabella 16 Per inviare un comando allo stesso gruppo Esempio<br />
1. Premere uno dei tasti ■<br />
▼ ▼<br />
30
▼<br />
▼<br />
▼<br />
▼<br />
▼<br />
▼<br />
▼<br />
Tabella 17 Per scegliere un altro gruppo Esempio<br />
1. Premere più volte il tasto per scegliere il gruppo desiderato<br />
...<br />
2. Ora è possibile usare i tasti ■ per inviare i comandi al gruppo scelto<br />
▼ ▼<br />
Tabella 18 Per comporre un gruppo multiplo ed inviare un comando Esempio<br />
1. Partendo dal 1° gruppo, eventualmente premere più volte il tasto per<br />
...<br />
scegliere un altro gruppo<br />
2. Premere il tasto per confermare il gruppo<br />
3. Ripetere i due passi precedenti per scegliere altri gruppi<br />
▼<br />
4. Terminato di comporre il gruppo multiplo è possibile usare i tasti ■ per<br />
inviare i comandi<br />
fino a portare il lam-<br />
Nota: un gruppo scelto e confermato per errore può essere tolto premendo più volte il tasto<br />
peggio sopra al gruppo da eliminare, quindi premere il tasto .<br />
▼<br />
▼ ▼<br />
I<br />
Tabella 19 per inviare un comando speciale ad un gruppo o gruppo multiplo Esempio<br />
1. Partendo dal 1° gruppo, eventualmente premere più volte il tasto per<br />
...<br />
scegliere un altro gruppo<br />
2. Premere il tasto per confermare il gruppo<br />
3. Eventualmente ripetere i due passi precedenti per scegliere altri gruppi<br />
▼<br />
4. Premere più volte il tasto fino a far lampeggiare i simboli del comando speciale<br />
“ ” o “ ”<br />
5. Premere il tasto per confermare il comando speciale<br />
6. Ora è possibile usare i tasti ■ per inviare il comando speciale<br />
▼<br />
▼ ▼<br />
... o<br />
Tabella 20 Per uscire dal modo “manuale” e tornare al menu di scelta: Esempio<br />
Dopo aver inviato un comando premere il tasto<br />
▼ ▼<br />
▼<br />
Oppure:<br />
Verificare che non vi sia nessun gruppo selezionato quindi premere uno qualsiasi<br />
dei tasti ■ (eventualmente togliere la selezione ai gruppi selezionati scegliendoli<br />
premendo il tasto e togliendo la selezione premendo il tasto )<br />
Oppure:<br />
... Auto<br />
Premere ripetutamente il tasto ■ fino a far lampeggiare l’indicazione Auto<br />
▼<br />
4.5) Funzionamento in modo “manuale con registratore” Man<br />
Tabella 21 Per scegliere il modo “manuale” Esempio<br />
1. Premere ripetutamente il tasto ■ fino a far lampeggiare l’indicazione Auto<br />
... Auto<br />
2. Premere 2 volte il tasto per far lampeggiare l’indicazione Man<br />
Man<br />
3. Premere il tasto per confermare il modo “manuale” con registratore<br />
▼<br />
Da questo momento si può usare PLANOTIME come se fosse in modo “manuale” con la particolarità che tutti i comandi<br />
inviati con i tasti o , con il giorno le ore ed i minuti in cui sono stati dati, vengono memorizzati come eventi.<br />
▼ ▼<br />
Nota: il modo “manuale con registratore” non consente di registrare eventi che contengono il comando “■”.<br />
Consiglio per i meno esperti: Usare questo modo di funzionamento per memorizzare gli eventi senza doversi<br />
preoccupare di programmarli uno ad uno. Per registrare gli eventi dell’intera settimana entrare in modo “manuale con<br />
registratore”, ad esempio ad inizio settimana, poi usare PLANOTIME per comandare la salita o la discesa degli automatismi<br />
ogni giorno all’ora desiderata. All’inizio della settimana successiva porre PLANOTIME in modo “automatico”;<br />
a questo punto gli eventi si ripeteranno automaticamente per tutte le settimane successive. Per cancellare un evento<br />
registrato per errore, vedere il capitolo 5.2.3.<br />
31
▼<br />
5) Come programmare PLANOTIME<br />
Il funzionamento di PLANOTIME in modo “programmazione” permette di creare gli eventi, di modificarli, di copiarli e<br />
di cancellarli; è possibile regolare l’orologio e gli altri parametri utili al funzionamento di PLANOTIME.<br />
Prog Programmazione “eventi” (vedere capitolo 5.2)<br />
Nella programmazione “eventi” è possibile:<br />
NEW inserire un nuovo evento, regolando una per una tutte le sue proprietà<br />
MOD modificare un evento cambiandone una o più proprietà<br />
COPY copiare un evento per crearne un nuovo partendo dalle proprietà di un evento già presente<br />
DEL cancellare un evento eliminandolo completamente<br />
Prog Regolazione dell’orologio (vedere capitolo 5.3)<br />
La regolazione dell’orologio è necessaria per consentire a PLANOTIME di eseguire gli eventi all’ora prestabilita. Se viene<br />
usato il comando speciale “orario planetario” è necessario regolare oltre alle ore, minuti e giorno della settimana;<br />
anche il giorno del mese, il mese e l’anno, e se l’orario attuale è invernale (solare) o estivo (legale).<br />
Prog Regolazioni dei parametri “in vacanza” (vedere capitolo 5.4)<br />
Permette di regolare quanto è lo scostamento massimo consentito all’evento rispetto a quello impostato. Si può<br />
andare da un minimo di 0 minuti (nessuno scostamento) ad un massimo di 75 minuti in più o meno rispetto a quanto<br />
previsto<br />
Prog Regolazione dei parametri “orario planetario” (vedere capitolo 5.5)<br />
Permette di regolare i parametri necessari ai calcoli per “l’orario planetario”:<br />
• Latitudine del luogo rispetto all’equatore terrestre (è riportata in tutte le cartine geografiche).<br />
• Differenza tra orario indicato dall’orologio e l’orario solare vero<br />
• Indicazione che l’orario attuale è invernale (solare) o estivo (legale).<br />
5.1) Scelta del tipo di programmazione<br />
Per entrare nel modo “programmazione” occorre sceglierlo e confermarlo nel “menu di scelta”.<br />
Il menu di scelta si può considerare come il punto di partenza per tutte le funzioni di PLANOTIME.<br />
Da qualsiasi modo di funzionamento o programmazione si trovi PLANOTIME è possibile ritornare al “menu di scelta”<br />
premendo ripetutamente e più volte il tasto ■ fino a far lampeggiare l’indicazione “Auto”.<br />
5.1.1) Avanti e indietro per la programmazione<br />
La programmazione si sviluppa come un percorso a tappe che passa per tutti i valori o parametri necessari.<br />
Durante questo percorso vi ricordiamo che:<br />
• Il simbolo che lampeggia al 50% indica il parametro in programmazione cioè la tappa in corso<br />
• I tasti o regolano il parametro in corso<br />
• Il tasto conferma il parametro e si prosegue per la tappa successiva<br />
• Il tasto ■ annulla l’eventuale scelta e si ritorna alla tappa precedente<br />
• Il tasto seleziona o si toglie la selezione a un parametro<br />
• Un simbolo che lampeggia al 25% indica che il parametro non è selezionato<br />
• Un simbolo che lampeggia al 75% indica che il parametro è selezionato<br />
• In alcuni casi non è possibile confermare un parametro se non c’è almeno una scelta selezionata, ad esempio, non<br />
sarebbe possibile programmare un evento senza aver selezionato almeno un giorno della settimana.<br />
▼<br />
▼ ▼<br />
32
5.2) Programmazione “eventi”<br />
Nella programmazione degli eventi si devono regolare, una per una, tutte le proprietà che compongono l’evento, e cioè:<br />
Tabella 22 Proprietà degli eventi: Esempio 1 Esempio 2<br />
1. Ore e minuti in cui deve essere inviato il comando<br />
08.30<br />
18.45<br />
2. Il giorno o i giorni della settimana in cui deve avvenire<br />
Mo We Fr Sa<br />
3. Uno o più gruppi interessati ed il relativo comando di<br />
2<br />
“Salita” o “Discesa”<br />
1<br />
4 5 6<br />
4. La presenza o meno del comando speciale “ ” oppure<br />
“ ”<br />
5. La presenza o meno del comando speciale “in vacanza”<br />
6. La presenza o meno del comando speciale<br />
“orario planetario”<br />
7. La presenza o meno del comando speciale<br />
“comando temporizzato”<br />
8. Nel caso di comando speciale “comando temporizzato” il<br />
tempo, in secondi, che deve trascorrere tra il comando e il<br />
20<br />
successivo comando di “Stop”<br />
▼<br />
▼ ▼ ▼<br />
▼<br />
I<br />
Nell’esempio N°1: alle ore 8.30 di ogni Lunedì il gruppo<br />
1 riceverà un comando di “Salita”.<br />
Nell’esempio N°2: alle ore 18.45 di ogni Mercoledì,<br />
Venerdì e Sabato; il gruppo 2 riceverà un comando di<br />
“Discesa” ed i gruppi 4,5,6 riceveranno un comando di<br />
“Salita”; i comandi prevedono l’attivazione dei comandi<br />
automatici che provengono dai sensori climatici. E’ attivo<br />
“l’orario planetario” per cui il comando si sposterà,<br />
rispetto alle 18.45 per seguire, nell’arco dell’anno, l’orario<br />
del tramonto del sole. I comandi sono temporizzati<br />
cioè prevedono un comando di “Stop” dopo 20 secondi<br />
dall’inizio nel movimento.<br />
33
▼<br />
▼<br />
5.2.1) Programmazione: nuovo evento NEW<br />
Tabella 23 Per programmare un “nuovo evento” semplice (esempio 1 di tabella 22) Esempio<br />
1. Premere ripetutamente e più volte il tasto ■ fino a far lampeggiare<br />
... Auto<br />
l’indicazione Auto<br />
2. Premere 3 volte il tasto per scegliere il modo “programmazione” Prog<br />
3. Premere il tasto per confermare il modo “programmazione”<br />
▼<br />
4. Premere il tasto per confermare la programmazione “eventi”<br />
▼<br />
5. Premere il tasto per confermare la programmazione “nuovo evento” NEW<br />
6. Premere i tasti o per regolare l’ora (nell’esempio: 08)<br />
▼<br />
7. Premere il tasto per confermare l’ora<br />
8. Premere i tasti o per regolare i minuti (nell’esempio: 30)<br />
▼<br />
9. Premere il tasto per confermare i minuti<br />
▼<br />
10. Premere i tasti o per scegliere il giorno della settimana<br />
(nell’esempio: Mo=Lunedì)<br />
11. Premere il tasto per selezionare il giorno della settimana<br />
12. Premere il tasto per confermare il giorno della settimana<br />
▼<br />
(nell’esempio: solo Mo=Lunedì)<br />
▼ ▼<br />
▼ ▼<br />
▼ ▼<br />
13. Premere il tasto per scegliere il comando di “Salita” sul gruppo 1<br />
▼<br />
14. Premere il tasto per confermare il comando (nell’esempio: “Salita” sul gruppo 1)<br />
▼<br />
15. Premere il tasto per confermare l’evento<br />
▼<br />
(nell’esempio: nessun comando speciale “ ” oppure “ ”)<br />
16. Premere il tasto per confermare l’evento<br />
▼<br />
(nell’esempio: nessun comando speciale “in vacanza” )<br />
17. Premere il tasto per confermare l’evento<br />
▼<br />
(nell’esempio nessun comando speciale “orario planetario” )<br />
18. Premere il tasto per confermare l’evento<br />
▼<br />
(nell’esempio: nessun comando speciale “comando temporizzato” )<br />
19. A questo punto tutte le parti dell’evento selezionate cominciano a lampeggiare<br />
per indicare che si è al termine del percorso di realizzazione del nuovo evento.<br />
Premere il tasto per confermare l’evento oppure premere ■ per tornare indietro.<br />
▼<br />
Con l’ultima conferma l’evento viene memorizzato e PLANOTIME si predispone per la programmazione di un altro nuovo<br />
evento, quindi proseguire partendo dal punto N°5 di questa tabella<br />
o<br />
o<br />
o<br />
34
▼<br />
▼<br />
▼<br />
▼<br />
▼<br />
▼<br />
▼<br />
▼<br />
▼<br />
▼<br />
▼<br />
Tabella 24 Per programmare un “nuovo evento” completo (esempio 2 di tabella 22) Esempio<br />
1. Premere ripetutamente e più volte il tasto ■ fino a far lampeggiare l’indicazione<br />
... Auto<br />
Auto<br />
2. Premere 3 volte il tasto per scegliere il modo “programmazione” Prog<br />
3. Premere il tasto per confermare il modo “programmazione”<br />
▼<br />
4. Premere il tasto per confermare la programmazione “eventi”<br />
▼<br />
5. Premere il tasto per confermare la programmazione “nuovo evento” NEW<br />
6. Premere i tasti o per regolare l’ora (nell’esempio: 18)<br />
▼<br />
7. Premere il tasto per confermare l’ora<br />
8. Premere i tasti o per regolare i minuti (nell’esempio: 45)<br />
▼<br />
9. Premere il tasto per confermare i minuti<br />
▼<br />
▼ ▼<br />
▼ ▼<br />
10. Premere i tasti o per scegliere il primo giorno della settimana<br />
(nell’esempio: We=Mercoledì)<br />
▼ ▼<br />
11. Premere il tasto per selezionare il primo giorno della settimana<br />
12. Premere i tasti o per scegliere il secondo giorno della settimana<br />
(nell’esempio: Fr=Venerdì )<br />
▼ ▼<br />
13. Premere il tasto per selezionare il secondo giorno della settimana<br />
14. Premere i tasti o per scegliere il terzo giorno della settimana<br />
(nell’esempio: Sa=Sabato)<br />
15. Premere il tasto per selezionare il terzo giorno della settimana<br />
16. Premere il tasto per confermare tutti i giorni selezionati<br />
▼<br />
17. Premere il tasto per selezionare il gruppo 2<br />
18. Premere il tasto per scegliere il comando di “Discesa” sul gruppo 2<br />
19. Premere 2 volte il tasto per selezionare il gruppo 4<br />
28. Premere il tasto per confermare l’evento<br />
▼<br />
(nell’esempio: nessun comando speciale “in vacanza” )<br />
29. Premere il tasto per selezionare il comando speciale “orario planetario”<br />
30. Premere il tasto per confermare l’evento<br />
▼<br />
(nell’esempio: comando speciale “orario planetario” )<br />
31. Premere il tasto per selezionare il comando speciale “comando temporizzato”<br />
32. Premere i tasti o per regolare la temporizzazione (nell’esempio: 20 secondi)<br />
33. Premere il tasto per confermare l’evento<br />
▼<br />
(nell’esempio: comando speciale “comando temporizzato” )<br />
34. A questo punto tutte le parti dell’evento selezionate cominciano a lampeggiare<br />
per indicare che si è al termine del percorso di realizzazione del nuovo evento.<br />
Premere il tasto per confermare l’evento oppure premere ■ per tornare indietro.<br />
▼<br />
▼ ▼<br />
▼<br />
20. Premere il tasto per scegliere il comando di “Salita” sul gruppo 4<br />
21. Premere il tasto per selezionare il gruppo 5<br />
▼<br />
22. Premere il tasto per scegliere il comando di “Salita” sul gruppo 5<br />
23. Premere il tasto per selezionare il gruppo 6<br />
▼<br />
24. Premere il tasto per scegliere il comando di “Salita” sul gruppo 6<br />
25. Premere il tasto per confermare i comandi<br />
▼<br />
▼<br />
(nell’esempio: “Discesa su gruppo 2 e “Salita” sui gruppi 4,5 e 6)<br />
26. Premere il tasto per selezionare il comando speciale “ ”<br />
27. Premere il tasto per confermare l’evento<br />
▼<br />
(nell’esempio: invio comando speciale “ ”)<br />
▼ ▼<br />
o<br />
o<br />
o<br />
o<br />
o<br />
o<br />
I<br />
Con l’ultima conferma, l’evento viene memorizzato e PLANOTIME si predispone per la programmazione di un altro nuovo<br />
evento, quindi proseguire partendo dal punto N°5 di questa tabella<br />
Nota: per il corretto funzionamento “dell’orario planetario” è necessario aver regolato i relativi parametri (vedere tabella 30)<br />
35
▼<br />
▼<br />
▼<br />
▼<br />
5.2.2) Programmazione: modifica eventi MOD<br />
Tutti gli eventi programmati possono essere modificati in qualsiasi momento. Prima di essere modificato, un evento,<br />
deve essere cercato e scelto tra tutti gli altri eventi presenti.<br />
Tabella 25 Per modificare un evento: Esempio<br />
1. Premere ripetutamente e più volte il tasto ■ fino a far lampeggiare<br />
... Auto<br />
l’indicazione Auto<br />
2. Premere 3 volte il tasto per scegliere il modo “programmazione” Prog<br />
3. Premere il tasto per confermare il modo “programmazione”<br />
▼<br />
4. Premere il tasto per confermare la programmazione “eventi”<br />
▼<br />
5. Premere il tasto per selezionare la modifica “eventi” MOD<br />
6. Premere il tasto per confermare la modifica “eventi”<br />
▼<br />
7. Premere i tasti o per scegliere l’evento da modificare. Gli eventi vengono<br />
mostrati nell’ordine cronologico in cui verranno eseguiti partendo dal più prossimo,<br />
premendo si passa a quello dopo, premendo si passa a quello prima.<br />
▼<br />
8. Premere il tasto per confermare l’evento selezionato<br />
▼<br />
▼ ▼<br />
Da questo punto in poi la modifica si sviluppa con lo stesso percorso a tappe della programmazione “nuovo evento”<br />
(vedere capitolo 5.2.1) e si possono modificare o confermare una per una tutte le proprietà dell’evento. Dopo aver<br />
modificato e confermato l’ultimo parametro, l’evento viene nuovamente memorizzato e PLANOTIME si predispone per<br />
la modifica di un altro evento, quindi proseguire partendo dal punto N°6 di questa tabella.<br />
▼<br />
o<br />
5.2.3) Programmazione: cancellazione eventi DEL<br />
Tutti gli eventi programmati possono essere cancellati in qualsiasi momento. Prima di essere cancellato, un evento,<br />
deve essere cercato e scelto tra tutti gli altri eventi presenti.<br />
Tabella 26 Per cancellare un evento: Esempio<br />
1. Premere ripetutamente e più volte il tasto ■ fino a far lampeggiare<br />
... Auto<br />
l’indicazione Auto<br />
2. Premere 3 volte il tasto per scegliere il modo “programmazione” Prog<br />
3. Premere il tasto per confermare il modo “programmazione”<br />
▼<br />
4. Premere il tasto per confermare la programmazione “eventi”<br />
5. Premere 2 volte il tasto per selezionare la cancellazione “eventi” DEL<br />
▼<br />
6. Premere il tasto per confermare la cancellazione “eventi”<br />
▼<br />
7. Premere i tasti o per scegliere l’evento da cancellare. Gli eventi vengono<br />
mostrati nell’ordine cronologico in cui verranno eseguiti partendo dal più prossimo,<br />
premendo si passa a quello dopo, premendo si passa a quello prima.<br />
▼<br />
8. Premere il tasto per confermare l’evento selezionato<br />
▼<br />
▼ ▼<br />
9. Premere il tasto per confermare la cancellazione dell’evento selezionato.<br />
Se non si desidera confermare la cancellazione premere il tasto ■ e riprendere<br />
dal punto 7 di questa tabella.<br />
▼<br />
Dopo aver cancellato un evento, PLANOTIME si predispone per la cancellazione di un altro evento, quindi proseguire<br />
partendo dal punto N°6 di questa tabella.<br />
▼<br />
o<br />
36
▼<br />
▼<br />
▼<br />
▼<br />
5.2.4) Programmazione: copia eventi COPY<br />
Per programmare velocemente un nuovo evento simile ad uno già presente, è possibile farlo attraverso la copia dell’evento<br />
e la successiva modifica dei parametri che cambiano.<br />
Tabella 27 Per programmare un nuovo evento copiandone uno già presente Esempio<br />
1. Premere ripetutamente e più volte il tasto ■ fino a far lampeggiare<br />
... Auto<br />
l’indicazione Auto<br />
2. Premere 3 volte il tasto per scegliere il modo “programmazione” Prog<br />
3. Premere il tasto per confermare il modo “programmazione”<br />
▼<br />
4. Premere il tasto per confermare la programmazione “eventi”<br />
▼<br />
5. Premere 3 volte il tasto per selezionare la copia degli “eventi” COPY<br />
6. Premere il tasto per confermare la copia degli “eventi”<br />
▼<br />
7. Premere i tasti o per scegliere l’evento da copiare. Gli eventi vengono<br />
mostrati nell’ordine cronologico in cui verranno eseguiti partendo dal più prossimo,<br />
premendo si passa a quello dopo, premendo si passa a quello prima.<br />
▼<br />
8. Premere il tasto per confermare l’evento selezionato<br />
▼<br />
▼ ▼<br />
Da questo punto in poi la modifica dell’evento copiato si sviluppa con lo stesso percorso a tappe della programmazione<br />
“nuovo evento” (vedere capitolo 5.2.1) e si possono modificare o confermare una per una tutte le proprietà dell’evento.<br />
Dopo aver modificato e confermato l’ultimo parametro, l’evento copiato viene memorizzato come nuovo evento e<br />
PLANOTIME si predispone per la copia di un altro evento, quindi proseguire partendo dal punto N°6 di questa tabella.<br />
▼<br />
o<br />
I<br />
5.3) Regolazione dell’orologio<br />
La regolazione dell’orologio viene fatta immediatamente dopo aver inserito la pila ma può rendersi necessario ritoccare<br />
l’orologio anche in altre occasioni ad esempio nel cambio dall’orario invernale (solare) a quello estivo (legale).<br />
Tabella 28 Per regolare l’orologio Esempio<br />
1. Premere ripetutamente e più volte il tasto ■ fino a far lampeggiare<br />
l’indicazione Auto<br />
... Auto<br />
2. Premere 3 volte il tasto per scegliere il modo “programmazione” Prog<br />
3. Premere il tasto per confermare il modo “programmazione”<br />
4. Premere il tasto per selezionare la regolazione dell’orologio<br />
5. Premere il tasto per confermare la regolazione dell’orologio<br />
6. Premere i tasti o per regolare l’ora<br />
o<br />
7. Premere il tasto per confermare l’ora<br />
8. Premere i tasti o per regolare i minuti<br />
o<br />
9. Premere il tasto per confermare i minuti<br />
10. Premere i tasti o per scegliere il giorno della settimana<br />
o<br />
(Su=Domenica; Mo=Lunedì; Tu=Martedì; We=Mercoledì; Th=Giovedì; Fr=Venerdì; Sa=Sabato)<br />
11. Premere il tasto per confermare il giorno<br />
12. Premere i tasti o per scegliere il numero del giorno<br />
o<br />
13. Premere il tasto per confermare il giorno<br />
14. Premere i tasti o per scegliere il numero del mese<br />
o<br />
(01=Gennaio; 02=Febbraio… 12= Dicembre)<br />
15. Premere il tasto per confermare il mese<br />
16. Premere i tasti o per scegliere il numero dell’anno (compreso tra il 2000 ed il 2059) o<br />
17. Premere il tasto per confermare l’anno<br />
Nota: se viene usato il comando speciale di “orario planetario” è necessario regolare oltre alle ore, minuti, giorno della settimana,<br />
giorno del mese, mese e anno; anche se l’orario attuale sia invernale (solare) o estivo (legale); vedere tabella 30.<br />
▼<br />
▼<br />
▼<br />
▼<br />
▼<br />
▼<br />
▼<br />
▼<br />
▼ ▼<br />
▼ ▼<br />
▼ ▼<br />
▼ ▼<br />
▼ ▼<br />
▼ ▼<br />
37
▼<br />
▼<br />
▼<br />
▼<br />
5.4) Regolazione dei parametri del comando speciale “in vacanza”<br />
Per il corretto funzionamento del comando speciale “in vacanza” è necessario regolare il valore massimo dello scostamento<br />
consentito, il valore può essere da 0 a 75 minuti, regolabile in passi da 5 minuti. Come risultato si ottiene, ad<br />
esempio, se il valore è regolato a 15, che un evento programmato per le 08.00 può essere eseguito casualmente tra le<br />
7.45 e le 8.15. La modifica di questo parametro ha effetto su tutti gli eventi con abilitato questo comando speciale.<br />
Tabella 29 Per regolare i parametri del comando speciale “in vacanza” Esempio<br />
1. Premere ripetutamente e più volte il tasto ■ fino a far lampeggiare<br />
... Auto<br />
l’indicazione Auto<br />
2. Premere 3 volte il tasto per scegliere il modo “programmazione” Prog<br />
3. Premere il tasto per confermare il modo “programmazione”<br />
▼<br />
4. Premere 2 volte il tasto per selezionare la regolazione dei parametri del<br />
comando “in vacanza”<br />
5. Premere il tasto per confermare la regolazione del parametro “in vacanza ”<br />
▼<br />
6. Premere i tasti o per regolare lo scostamento massimo in minuti<br />
7. Premere il tasto per confermare il parametro<br />
▼<br />
▼ ▼<br />
o<br />
5.5) Regolazione dei parametri del comando speciale “orario planetario”<br />
Per il corretto funzionamento del comando speciale “orario planetario” è necessario regolare alcuni parametri; e cioè:<br />
• Latitudine del luogo rispetto all’equatore terrestre, regolabile tra 65° (verso il polo Nord) e -65° (verso il polo Sud)<br />
passando per 0° (equatore).<br />
Per trovare il valore da inserire “ ” in modo approssimativo fare riferimento alla figura riportata a pagina seguente,<br />
o in una qualsiasi cartina geografica più dettagliata.<br />
• Differenza tra orario indicato dall’orologio e l’orario solare vero “ ”, in pratica, la differenza tra il mezzogiorno<br />
segnato dell’orologio ed il mezzogiorno solare vero del luogo; può essere regolato tra 0 e ±99 minuti. Nel capitolo<br />
“cosa fare se…” è descritto un modo per misurare questo valore. Se non si necessita di una regolazione precisa è<br />
possibile lasciare questo parametro a 0.<br />
• Indicazione che l’orario attuale è invernale (solare) o estivo (legale).<br />
Tabella 30 Per regolare i parametri del comando speciale “orario planetario” Esempio<br />
1. Premere ripetutamente e più volte il tasto ■ fino a far lampeggiare<br />
... Auto<br />
l’indicazione Auto<br />
2. Premere 3 volte il tasto per scegliere il modo “programmazione” Prog<br />
3. Premere il tasto per confermare il modo “programmazione”<br />
▼<br />
4. Premere 3 volte il tasto per selezionare la regolazione dei parametri del<br />
comando “orario planetario”<br />
5. Premere il tasto per confermare la regolazione dei parametri del comando<br />
“orario planetario”<br />
▼<br />
6. Premere i tasti o per regolare la latitudine del luogo “ ”<br />
7. Premere il tasto per confermare il parametro<br />
▼<br />
9. Premere il tasto per confermare il parametro<br />
▼<br />
10. Premere i tasti o per scegliere se orario estivo “S” (legale) o<br />
invernale “W” (solare)<br />
11. Premere il tasto per confermare il parametro<br />
▼<br />
▼ ▼<br />
8. Premere i tasti o per regolare la differenza tra l’orario indicato dall’orologio e<br />
l’orario solare vero “ ”<br />
▼ ▼<br />
▼ ▼<br />
E’ sconsigliato modificare questi parametri dopo aver inserito uno o più eventi con abilitato questo comando speciale.<br />
o<br />
o<br />
o<br />
38
I<br />
6) Sostituzione della pila<br />
Quando si accende l’indicazione di pila scarica “ ” è<br />
necessario provvedere quanto prima alla sostituzione<br />
della pila; in questa situazione c’è un grosso rischio che<br />
i comandi non possano essere inviati correttamente.<br />
Per sostituire la pila, occorre aprire lo sportello portapila<br />
e procedere come indicato nelle figure.<br />
Dopo la sostituzione della pila occorre regolare l’orologio<br />
interno (vedere capitolo 2.2).<br />
Attenzione: le pile contengono sostanze inquinanti, non<br />
gettarle nei rifiuti comuni ma utilizzare i metodi di smaltimento<br />
previsti dai regolamenti locali.<br />
7) Avvertenze<br />
L’uso di PLANOTIME non richiede particolari attenzioni,<br />
vi preghiamo comunque di tenere i considerazione questi<br />
aspetti:<br />
• I comandi inviati via radio da PLANOTIME non possono<br />
offrire la totale garanzia che vengano ricevuti dagli<br />
automatismi.<br />
• Alcuni componenti di PLANOTIME possono contenere<br />
sostanze inquinanti, non disperdere nell’ambiente.<br />
39
▼<br />
8) Cosa fare se…<br />
• Per aumentare la sicurezza che un comando<br />
venga ricevuto: inserirlo 2 o più volte alla stessa ora<br />
(copiando l’evento) oppure una seconda volta nel<br />
minuto successivo.<br />
• Per far uscire PLANOTIME da un qualsiasi<br />
programmazione o da un qualsiasi modo di<br />
funzionamento: premere ripetutamente e più volte il<br />
tasto ■ fino a far lampeggiare l’indicazione “Auto”<br />
dopodiché premendo il tasto<br />
è possibile scegliere<br />
il modo di funzionamento desiderato.<br />
• Per misurare la differenza tra orario indicato<br />
dall’orologio e l’orario solare vero: il valore<br />
richiesto dal comando speciale “orario planetario” è,<br />
in pratica, la differenza tra il mezzogiorno segnato dall’orologio<br />
ed il mezzogiorno solare vero del luogo. Un<br />
metodo molto semplice per misurare questo valore è<br />
osservare l’ombra provocata dal sole su un oggetto (è<br />
preferibile sia perfettamente verticale e appuntito, ad<br />
esempio un palo); l’ombra si accorcia fino al mezzogiorno<br />
solare per poi allungarsi nuovamente nel<br />
pomeriggio. Il mezzogiorno solare si ha quando l’ombra<br />
raggiunge la lunghezza minore rispetto alla base<br />
dell’oggetto. Quando questo accade, all’ora segnata<br />
dall’orologio, sottrarre un’ora se si è nel periodo di<br />
orario estivo (legale) quindi calcolare la differenza in<br />
minuti rispetto alle ore 12.00; il risultato è il valore da<br />
inserire in PLANOTIME. Ad esempio, se il mezzogiorno<br />
solare vero accade alle 12,25 occorre inserire il<br />
valore 25; se invece accade alle ore 11.47 occorre<br />
inserire il valore -13.<br />
Nota: il metodo descritto non tiene conto di alcuni<br />
fenomeni astronomici ma l’errore introdotto è poco<br />
rilevante per il funzionamento di PLANOTIME.<br />
8.1) Lista errori<br />
Ci possono essere rarissime situazioni in cui PLANOTIME potrebbe non funzionare correttamente, se ciò si verifica la<br />
causa dell’errore viene sempre indicata. Nella tabella seguente ci sono gli errori e le possibili soluzioni.<br />
Tabella 31: elenco errori<br />
Errore N° Descrizione Soluzione<br />
Err1<br />
Err2<br />
Err3<br />
Err4<br />
Err5<br />
Sono già stati programmati oltre 100 eventi e non c’è più<br />
Memoria piena<br />
spazio per altri. Non ci sono soluzioni: l’ultimo evento non<br />
verrà memorizzato.<br />
Errore di comunicazione tra i componenti Si tratta di un guasto molto particolare, provare a togliere<br />
interni di PLANOTIME<br />
e rimettere la pila per verificare se si risolve.<br />
Alcuni parametri degli eventi memorizzati non sono<br />
corretti; potrebbe trattarsi di un errore di comunicazione<br />
Errore nei parametri di uno o più eventi tra i componenti interni di PLANOTIME, provare a togliere<br />
e rimettere la pila per verificare se si risolve. Se rimane<br />
l’errore, entrare in modifica eventi e controllare i parametri<br />
di tutti gli eventi.<br />
Sono stati cambiati i parametri del Nulla di grave ma tenete presente che i prossimi eventi<br />
comando speciale “in vacanza” dopo sono già stati calcolati con i vecchi parametri, i nuovi<br />
che alcuni eventi sono stati calcolati con parametri verranno usati dalla successiva esecuzione<br />
i parametri precedenti<br />
dell’evento in poi.<br />
Sono stati cambiati i parametri del Non è opportuno cambiare i parametri dopo aver<br />
comando speciale “orario planetario” programmato eventi, nel caso ricontrollare la correttezza<br />
dopo che alcuni eventi sono stati degli eventi dopo la modifica.<br />
calcolati con i parametri precedenti<br />
40
9) Caratteristiche tecniche<br />
Allo scopo di migliorare i prodotti, NICE S.p.a. si riserva il diritto di modificare le caratteristiche tecniche in qualsiasi<br />
momento e senza preavviso, garantendo comunque funzionalità e destinazione d’uso previste.<br />
Nota: tutte le caratteristiche tecniche sono riferite alla temperatura di 20°C.<br />
Alimentazione<br />
: 3Vdc con 1 pila al litio CR2450<br />
Durata pila<br />
: Stimata in 2 anni (con 10 eventi al giorno)<br />
Frequenza<br />
: 433.92MHz ±100KHz<br />
Potenza irradiata<br />
: Stimata in circa 1mW<br />
Portata media<br />
: Stimata in 25 metri all’interno di edifici.<br />
(la presenza di disturbi elettromagnetici può ridurre drasticamente la portata)<br />
Codifica<br />
: 52 Bit rolling code FLOR+INFO<br />
Risoluzione orologio : 1 minuto<br />
Precisione orologio : ± 150 secondi/anno<br />
Numero massimo eventi : 100<br />
Grado di protezione : IP 40<br />
Temperatura di funz. : -5°C ÷ 50°C<br />
Dimensioni/peso<br />
: 80x80x1.2 mm / 75g<br />
I<br />
A1 Appendice<br />
Usare la seguente tabella, prima della programmazione, per creare gli eventi e come promemoria degli eventi memorizzati.<br />
Tabella A1: esempio composizione eventi e promemoria eventi<br />
Nome Orario Giorni Gruppi Comandi speciali<br />
Su Mo Tu We Th Fr Sa 1 2 3 4 5 6<br />
Esempio 1 08.30<br />
X<br />
Su Mo Tu We Th Fr Sa 1 2 3 4 5 6<br />
Esempio 2 18.30<br />
X X X X<br />
X X 20<br />
Su Mo Tu We Th Fr Sa 1 2 3 4 5 6<br />
Su Mo Tu We Th Fr Sa 1 2 3 4 5 6<br />
Su Mo Tu We Th Fr Sa 1 2 3 4 5 6<br />
Su Mo Tu We Th Fr Sa 1 2 3 4 5 6<br />
Su Mo Tu We Th Fr Sa 1 2 3 4 5 6<br />
Su Mo Tu We Th Fr Sa 1 2 3 4 5 6<br />
Su Mo Tu We Th Fr Sa 1 2 3 4 5 6<br />
Su Mo Tu We Th Fr Sa 1 2 3 4 5 6<br />
41
Index des chapitres<br />
page<br />
page<br />
1 Description 43<br />
1.1 Qu’est-ce que PLANOTIME 43<br />
1.2 Faut-il vraiment le programmer? 43<br />
1.3 Qu’est-ce qu’un événement? 43<br />
1.4 Que sont les groupes? 44<br />
1.5 Que sont les commandes spéciales ? 44<br />
2 Installation 44<br />
2.1 Allumage de PLANOTIME 44<br />
2.2 Réglage initial de l’horloge 45<br />
2.3 Mémorisation de PLANOTIME dans les 45<br />
récepteurs des automatismes<br />
2.3.1 Mémorisation de PLANOTIME 46<br />
comme premier émetteur<br />
2.3.2 Mémorisation de PLANOTIME 46<br />
comme autre émetteur<br />
2.4 Fixation de PLANOTIME 47<br />
3 Description des symboles 48<br />
4 Comment utiliser PLANOTIME 49<br />
4.1 Choix des modes de fonctionnement 49<br />
4.2 Fonctionnement en mode “automatique” 50<br />
4.3 Fonctionnement en mode “Nicetime” 50<br />
4.4 Fonctionnement en mode “manuel” 50<br />
4.5 Fonctionnement en mode 51<br />
“manuel avec enregistreur”<br />
5 Comment programmer PLANOTIME 52<br />
5.1 Choix du type de programmation 52<br />
5.1.1 En avant et en arrière pour la programmation 52<br />
5.2 Programmation “événements” 53<br />
5.2.1 Programmation: nouvel événement 54<br />
5.2.2 Programmation: modification événements 56<br />
5.2.3 Programmation: effacement événements 56<br />
5.2.4 Programmation: copie événements 57<br />
5.3 Réglage de l’horloge 57<br />
5.4 Réglage des paramètres de la commande 58<br />
spéciale “en vacance”<br />
5.5 Réglage des paramètres de la commande 58<br />
spéciale “heure planétaire”<br />
6 Remplacement de la pile 59<br />
7 Avertissements 59<br />
8 Que faire si… 60<br />
8.1 Liste des erreurs 60<br />
9 Caractéristiques techniques 61<br />
A1 Appendice 61<br />
Index des tableaux<br />
page<br />
page<br />
Tableau N° 1: pour régler l’horloge 45<br />
après avoir mis la pile<br />
Tableau N° 2: pour choisir le mode “manuel” et 45<br />
choisir un groupe<br />
Tableau N° 3: pour envoyer une commande 45<br />
au même groupe<br />
Tableau N° 4: pour choisir un autre groupe 45<br />
Tableau N° 5: pour sortir du mode “manuel” 46<br />
Tableau N° 6: pour mémoriser PLANOTIME 46<br />
comme premier émetteur<br />
Tableau N° 7: pour mémoriser PLANOTIME 46<br />
comme autre émetteur<br />
Tableau N° 8: Liste des symboles de la zone 1 48<br />
Tableau N° 9: Liste des symboles de la zone 2 48<br />
Tableau N°10: Liste des symboles de la zone 3 49<br />
Tableau N° 11: pour choisir le mode “automatique” 50<br />
Tableau N° 12: pour sortir du mode “automatique” 50<br />
et revenir au menu de sélection<br />
Tableau N° 13: pour passer du mode “automatique” 50<br />
au mode “Nicetime”<br />
Tableau N° 14: pour choisir le mode “manuel” 50<br />
Tableau N° 15: pour choisir un groupe et envoyer 50<br />
une commande<br />
Tableau N° 16: pour envoyer une commande au 50<br />
même groupe<br />
Tableau N° 17: pour choisir un autre groupe 51<br />
Tableau N° 18: pour composer un groupe multiple et 51<br />
envoyer une commande<br />
Tableau N° 19: pour envoyer une commande spéciale 51<br />
à un groupe ou groupe multiple<br />
Tableau N° 20: pour sortir du mode “manuel” et 51<br />
revenir au menu de sélection<br />
Tableau N° 21: pour choisir le mode “manuel avec 51<br />
enregistreur”<br />
Tableau N° 22: propriétés des événements 53<br />
Tableau N° 23: pour programmer un “nouvel 54<br />
événement” simple<br />
Tableau N° 24: pour programmer un “nouvel 55<br />
événement” complet<br />
Tableau N° 25: pour modifier un événement 56<br />
Tableau N° 26: pour effacer un événement 56<br />
Tableau N° 27: pour programmer un nouvel événement 57<br />
copiant un déjà présent<br />
Tableau N° 28: pour régler l’horloge 57<br />
Tableau N° 29: pour régler les paramètres de la 58<br />
commande spéciale “en vacance”<br />
Tableau N° 30: pour régler les paramètres de la 58<br />
commande spéciale “heure planétaire”<br />
Tableau N° 31: liste des erreurs 60<br />
42
Display<br />
Touche<br />
Stop<br />
Touche<br />
Montée<br />
Touche<br />
Confirmer<br />
Touche<br />
Descente<br />
Touche<br />
Sélectionner<br />
Pile<br />
F<br />
1) Description<br />
Ce chapitre décrit les caractéristiques essentielles de<br />
PLANOTIME.<br />
Lire attentivement cette partie car une bonne connaissance<br />
du produit facilite son utilisation.<br />
1.1) Qu’est-ce que PLANOTIME<br />
PLANOTIME est un émetteur radio pour commander<br />
des automatismes de volets roulants et de stores; il permet<br />
de commander jusqu’à 6 groupes d’automatismes.<br />
Il peut fonctionner en mode “manuel” où vous interviendrez<br />
vous-même pour commander les automatismes,<br />
ou en mode “automatique” où PLANOTIME commandera<br />
lui-même les automatismes suivant les jours et les<br />
heures programmés.<br />
1.2) Faut-il vraiment le programmer?<br />
Oui, c’est indispensable ! PLANOTIME ne connaît pas<br />
vos habitudes; si vous voulez l’utiliser en mode “automatique”<br />
il devra savoir à quelle heure vous souhaitez<br />
abaisser les stores et il devra savoir que généralement,<br />
le dimanche, vous souhaitez garder les volets baissés<br />
un peu plus longtemps. La logique de programmation et<br />
de fonctionnement de PLANOTIME en mode “automatique”<br />
est celle de l’événement.<br />
1.3) Qu’est-ce qu’un événement?<br />
Un événement est l’exécution d’une commande automatique<br />
de mouvement (ouverture ou fermeture de<br />
volets roulants, montée ou descente de stores, etc.) à un<br />
certain moment de la journée, dans un ou plusieurs jours<br />
de la semaine.<br />
Par exemple, la commande d’ouverture des volets roulants<br />
à 8h30 le samedi et le dimanche est un événement,<br />
tout comme le réenroulement des stores à 18h45<br />
tous les jours de la semaine.<br />
43
1.4) Que sont les groupes?<br />
Le terme “groupe” désigne un automatisme considéré<br />
individuellement ou bien un ensemble d’automatismes<br />
actionnés toujours tous ensemble; par exemple, le store<br />
côté sud peut constituer un groupe, les stores côté<br />
ouest peuvent constituer le deuxième groupe et tous les<br />
volets roulants du séjour le troisième groupe.<br />
PLANOTIME est en mesure de commander jusqu’à 6<br />
groupes en mode individuel, ou plusieurs groupes en<br />
même temps combinés entre eux (groupe multiple).<br />
La composition des groupes s’effectue durant la phase<br />
de mémorisation du code radio suivant la description<br />
donnée au chapitre 2.3.<br />
1.5) Que sont les commandes spéciales?<br />
Quand un événement se vérifie, PLANOTIME envoie une<br />
commande aux groupes concernés par l’événement.<br />
Normalement, les commande prévoient l’ouverture ou la<br />
fermeture des automatismes mais des fonctions spéciales<br />
peuvent être associées à ces commandes:<br />
• Sole ON ou Sole OFF : active ou désactive<br />
les commandes automatiques qui proviennent des<br />
capteurs climatiques; cela vous permet de choisir entre<br />
commander directement les automatismes (Soleil<br />
OFF) ou laisser les capteurs climatiques les commander<br />
(Soleil ON). Cette commande (Solei OFF) exclut les<br />
capteurs “Pluie” et “Soleil”, tandis que le capteur<br />
“Vent” étant une protection, il reste toujours actif.<br />
• En vacance : déplace au hasard l’heure de l’événement<br />
de quelques minutes (de 0 à 75) par rapport<br />
à l’heure programmée; cela vous permet de simuler la<br />
présence de quelqu’un dans la maison même quand<br />
il n’y a personne.<br />
• Heure planétaire : jour après jour, tout au long<br />
de l’année, cette fonction effectue la correction de<br />
l’heure de l’événement programmé en fonction de<br />
l’heure effective du lever et du coucher du soleil; par<br />
exemple, en été, elle anticipe les événements du<br />
matin et retarde ceux de l’après-midi.<br />
• Commande temporisée : elle vous permet d’avoir<br />
une ouverture ou une fermeture partielle du store<br />
ou du volet roulant; elle fonctionne en envoyant une<br />
commande de “Stop” quelques instants après (de 1 à<br />
99 secondes) l’envoi d’une commande de “Montée”<br />
ou “Descente”.<br />
Si vous pensez pouvoir utiliser ces commandes spéciales,<br />
vous pouvez trouver d’autres détails au chapitre 5.<br />
2) Installation<br />
Ce chapitre est destiné à qui devra effectuer les opérations<br />
pour l’installation et la mise en service de PLANO-<br />
TIME.<br />
Il traite des points particulièrement techniques mais en<br />
suivant attentivement les instructions, il n’y aura pas de<br />
situations de danger, ni pour les personnes ni pour les<br />
automatismes. PLANOTIME ne risque en aucun cas de<br />
s’endommager.<br />
Note: dans ce chapitre, on part de la supposition que la<br />
personne qui effectue les opérations sait déjà utiliser les<br />
fonctions de base de PLANOTIME; lire éventuellement<br />
aussi les chapitres 3 et 4 avant de continuer.<br />
2.1) Allumage de PLANOTIME<br />
PLANOTIME fonctionne avec une pile qui est déjà en<br />
place mais qui est déconnectée pour éviter de se<br />
décharger inutilement; pour allumer PLANOTIME il faut<br />
enlever la languette en plastique qui dépasse du logement<br />
de la pile.<br />
À l’allumage de PLANOTIME, la première opération<br />
demandée est le réglage de l’horloge interne.<br />
44
▼<br />
▼<br />
▼<br />
2.2) Réglage initial de l’horloge<br />
Pour régler l’horloge, suivre les phases indiquées dans le tableau N°1. Si l’on ne souhaite pas procéder au réglage,<br />
presser la touche “■”; dans ce cas, l’horloge considèrera comme point de départ 00h00 du Dimanche.<br />
Tableau 1 Pour régler l’horloge après avoir mis la pile Exemple<br />
1. Presser les touches ou pour régler l’heure.<br />
2. Presser la touche pour confirmer l’heure.<br />
3. Presser les touches ou pour régler les minutes.<br />
▼<br />
4. Presser la touche pour confirmer les minutes.<br />
▼<br />
5. Presser les touches ou pour choisir le jour de la semaine.<br />
▼ ▼<br />
▼ ▼<br />
▼ ▼<br />
(Su=Dimanche; Mo=Lundi; Tu=Mardi; We=Mercredi; Th=Jeudi; Fr=Vendredi; Sa=Samedi)<br />
6. Presser la touche pour confirmer le jour.<br />
▼<br />
7. Presser les touches ou pour choisir le numéro du jour “ ”<br />
8. Presser la touche pour confirmer le jour.<br />
▼<br />
9. Presser les touches ou pour choisir le numéro du mois “ ”<br />
(01=Janvier; 02=Février…12= Décembre)<br />
10. Presser la touche pour confirmer le mois.<br />
▼<br />
11. Presser les touches ou pour choisir le numéro de l’année.<br />
(compris entre 2000 et 2059)<br />
12. Presser la touche pour confirmer l’année.<br />
▼<br />
▼ ▼<br />
▼ ▼<br />
▼ ▼<br />
Seul le réglage de l’horloge est nécessaire à chaque fois que l’on change la pile; tous les événements et les paramètres<br />
restent toujours mémorisés dans PLANOTIME.<br />
ou<br />
o<br />
ou<br />
ou<br />
ou<br />
ou<br />
F<br />
2.3) Mémorisation de PLANOTIME dans les récepteurs des automatismes<br />
Chaque émetteur radio, et donc aussi PLANOTIME, est reconnu par les récepteurs à travers un “code” différent de<br />
tout autre émetteur; il faut donc procéder à une phase de “mémorisation” à travers laquelle on prépare l’automatisme<br />
à reconnaître le code de PLANOTIME. Si un groupe est composé de plusieurs automatismes, il faut répéter l’opération<br />
de mémorisation pour chacun d’eux. PLANOTIME est en mesure de commander jusqu’à 6 groupes d’automatismes<br />
et pour chacun d’eux, il transmettra un code différent, donc, avant de commencer la mémorisation, il faut<br />
choisir le groupe auquel intégrer l’automatisme.<br />
La mémorisation doit être faite avec PLANOTIME fonctionnant en mode “manuel” en sélectionnant un seul groupe<br />
à la fois. Pour sélectionner le mode “manuel” et choisir un groupe, suivre les indications du tableau:<br />
Tableau 2 Pour choisir le mode “manuel” et choisir un groupe Exemple<br />
1. Presser plusieurs fois la touche ■ jusqu’à faire clignoter l’indication Auto.<br />
... Auto<br />
2. Presser la touche pour choisir le mode “manuel” Man<br />
3. Presser la touche pour confirmer le mode.<br />
▼<br />
4. Partant du 1er groupe, presser éventuellement plusieurs fois la touche<br />
pour choisir un autre groupe.<br />
5. Il est maintenant possible d’utiliser les touches ■ pour envoyer les<br />
commandes au groupe choisi.<br />
▼ ▼<br />
Tableau 3 Pour envoyer une commande au même groupe Exemple<br />
1. Presser l’une des touches ■<br />
▼ ▼<br />
Tableau 4 Pour choisir un autre groupe Exemple<br />
1. Après avoir transmis, presser plusieurs fois la touche pour choisir le<br />
groupe désiré.<br />
45
Tableau 5 Pour sortir du mode “manuel” Exemple<br />
Ou bien:<br />
Après avoir envoyé une commande presser la touche<br />
Vérifier qu’il n’y a aucun groupe sélectionné puis presser l’une des touches<br />
■ . (éventuellement choisir les groupes en pressant la touche et les sélectionner/désélectionner<br />
en pressant la touche )<br />
▼<br />
Ou bien:<br />
... Auto<br />
Presser plusieurs fois la touche ■ jusqu’à faire clignoter l’indication Auto.<br />
! Attention: la mémorisation peut s’effectuer dans tous les émetteurs qui se trouvent dans le rayon de portée de<br />
PLANOTIME; il est donc bon de ne garder alimenté que celui que l’on souhaite mémoriser. Toutes les séquences de<br />
mémorisation sont temporisées, c’est-à-dire qu’elles doivent être effectuées dans les limites de temps prévues.<br />
▼<br />
▼▼ ▼<br />
2.3.1) Mémorisation de PLANOTIME comme premier émetteur<br />
Quand la mémoire des codes de l’automatisme ne contient encore aucun code, on peut mémoriser PLANOTIME en<br />
effectuant la procédure suivante:<br />
Tableau 6 Pour mémoriser PLANOTIME comme premier émetteur Exemple<br />
1. Sur PLANOTIME choisir le groupe dans lequel on désire mémoriser<br />
l’automatisme avec le mode manuel (Tableau 2).<br />
2. Alimenter l’automatisme, juste après on entend 2 longs bips (biiip) **.<br />
3. Dans les 5 secondes qui suivent, presser et maintenir enfoncée la touche ■ de<br />
PLANOTIME (pendant environ 3 secondes).<br />
4. Relâcher la touche ■ quand on entend le premier des 3 bips qui confirment la<br />
mémorisation.<br />
3s<br />
** Si la mémoire des codes de l’automatisme contient déjà des codes, à l’allumage on entendra 2 brefs bips (bip);<br />
dans ce cas il faudra procéder en suivant les instructions qui figurent dans le prochain tableau.<br />
2.3.2) Mémorisation de PLANOTIME comme autre émetteur<br />
Si la mémoire des codes de l’automatisme contient déjà des codes d’autres émetteurs, on peut procéder à la mémorisation<br />
de PLANOTIME en effectuant la procédure suivante:<br />
Tableau 7 Pour mémoriser PLANOTIME comme autre émetteur Exemple<br />
1. Sur PLANOTIME choisir le groupe dans lequel on veut mémoriser l’automatisme<br />
avec le mode manuel (Tableau 2).<br />
2. Maintenir enfoncée la touche ■ de PLANOTIME jusqu’à ce que l’on entende un<br />
bip provenant de l’automatisme (au bout d’environ 5 secondes).<br />
3. Presser lentement 3 fois la touche ■ d’un émetteur déjà mémorisé et<br />
fonctionnant.<br />
4. Presser encore une fois la touche ■ de PLANOTIME.<br />
5s<br />
À la fin, 3 bips provenant de l’automatisme signaleront que PLANOTIME a été mémorisé correctement.<br />
Si la mémoire des codes est pleine (14 codes), 6 bips indiqueront que PLANOTIME ne peut pas être mémorisé.<br />
46
2.4) Fixation de PLANOTIME<br />
Pour choisir le meilleur endroit où placer PLANOTIME il<br />
est bon de suivre ces quelques conseils:<br />
• PLANOTIME est adapté à l’emploi dans des endroits<br />
protégés et ne peut pas être placé à l’extérieur ou<br />
dans des zones exposées aux intempéries.<br />
• La hauteur normale de fixation est à 1,5 m du sol de<br />
manière à regarder PLANOTIME légèrement de haut.<br />
• Éviter de le placer à proximité, ou pire sur des structures<br />
en métal qui en réduisent la portée.<br />
• Plaçant PLANOTIME sur le point où l’on désire le fixer,<br />
essayer de commander tous les automatismes en<br />
vérifiant qu’ils reçoivent la commande radio envoyée.<br />
• Considérer dans tous les cas que quand la pile est<br />
déchargée, la portée radio peut se réduire de<br />
20÷30%.<br />
Après avoir vérifié le fonctionnement correct du système,<br />
il est possible de fixer de manière définitive PLANOTIME<br />
avec des vis et des chevilles comme l’indique la figure.<br />
F<br />
! ATTENTION: la présence d’autres dispositifs<br />
radio-émetteurs ou bien des parasites électromagnétiques<br />
peuvent réduire de manière radicale<br />
la portée de PLANOTIME. Nice S.p.a. ne peut<br />
pas garantir que les commandes envoyées soient<br />
reçues par les automatismes (pour réduire ce<br />
risque voir aussi le chapitre 8 “Que faire si…”.<br />
47
3) Description des symboles<br />
Les symboles visibles sur PLANOTIME sont subdivisés en 3 zones:<br />
• Zone 1 à gauche indique les modes de fonctionnement et les programmations<br />
• Zone 2 au centre indique l’horloge hebdomadaire<br />
• Zone 3 à droite indique les groupes et les commandes spéciales<br />
Zone 1 Zone 2 Zone 3<br />
Tableau 8 Liste des symboles de la zone 1<br />
Auto Indique le mode de fonctionnement “Automatique” (voir chapitres 4 et 4.2).<br />
Auto Indique le mode de fonctionnement “Nicetime” où l’on a le fonctionnement “manuel” avec retour au<br />
Man fonctionnement “automatique” à un jour et à une heure donnés (voir chapitres 4 et 4.3).<br />
Man Indique le mode de fonctionnement “Manuel” (voir chapitres 4 et 4.4).<br />
Man Rec Indique le mode de fonctionnement “Manuel avec enregistreur” (voir chapitres 4 et 4.5).<br />
Prog Indique une phase de “Programmation” en cours (voir chapitre 5).<br />
Avec “Prog” indique la phase de programmation d’un événement.<br />
NEW Avec “Prog” et “ ” indique la phase de création d’un nouvel événement (voir chapitre 5.2.1).<br />
MOD Avec “Prog” et “ ”indique la phase de modification d’un événement (voir chapitre 5.2.2).<br />
DEL Avec “Prog” et “ ”indique la phase d’effacement d’un événement (voir chapitre 5.2.3).<br />
COPY Avec “Prog” et “ ” indique la phase de copie d’événement (voir chapitre 5.2.4).<br />
Avec “Prog” indique la phase de réglage de l’horloge (voir chapitre 5.3).<br />
Avec “Prog” indique la phase de réglage des paramètres de la fonction “en vacance”<br />
(voir chapitre 5.4).<br />
Avec “Prog” indique la phase de réglage des paramètres de la fonction “heure planétaire”<br />
(voir chapitre 5.5).<br />
Son clignotement indique que la pile est épuisée et qu’il faut la remplacer au plus vite.<br />
Indique que la transmission d’une commande radio est en cours.<br />
Tableau 9 Liste des symboles de la zone 2<br />
Indication des heures et des minutes ou bien d’autres paramètres en phase de programmation.<br />
Indique les jours de la semaine:<br />
Su= Dimanche Mo= Lundi Tu= Mardi<br />
We= Mercredi Th= Jeudi Fr= Vendredi<br />
Sa= Samedi<br />
S Indique l’heure d’été c’est-à-dire l’heure légale (voir chapitre 5.5).<br />
W Indique l’heure d’hiver c’est-à-dire l’heure solaire (voir chapitre 5.5).<br />
48
Tableau 10 Liste des symboles de la zone 3<br />
Indique une commande spéciale pour l’activation des commandes automatiques qui proviennent<br />
des capteurs climatiques (voir chapitre 1.5).<br />
Indique une commande spéciale pour la désactivation des commandes automatiques qui<br />
proviennent des capteurs climatiques (voir chapitre 1.5).<br />
Indique une commande avec l’activation de la fonction spéciale “en vacance” (voir chapitre 1.5).<br />
Indique une commande avec l’activation de la fonction spéciale “heure planétaire” (voir chapitre 1.5).<br />
Indique une commande avec l’activation de la fonction spéciale “commande temporisée”<br />
(voir chapitre 1.5).<br />
1 .... 6 Indiquent les 6 groupes et l’éventuel sens du mouvement.<br />
4) Comment utiliser PLANOTIME<br />
PLANOTIME peur être utilisé avec différents modes de fonctionnement:<br />
F<br />
Auto Mode de fonctionnement “automatique” (voir chapitre 4.2)<br />
Dans le mode “automatique”, PLANOTIME exécute les événements programmés dans les jours et à l’heure préétablis.<br />
Auto Mode de fonctionnement “Nicetime” (voir chapitre 4.3)<br />
Man<br />
Dans le mode “Nicetime”, PLANOTIME fonctionne comme en mode “manuel” avec la particularité qu’il reviendra tout<br />
seul au mode de fonctionnement “automatique” le jour et à l’heure préétablis. Dans la pratique, ce mode permet d’interrompre<br />
le mode “automatique” pendant une période de temps donnée.<br />
Man Mode de fonctionnement “manuel” (voir chapitre 4.4)<br />
Dans le mode “manuel”, PLANOTIME transmettra, aux groupes sélectionnés, seulement les commandes qui dérivent<br />
de l’intervention directe sur les touches ■ .<br />
Note: le mode “manuel” est le seul pour lequel il n’est pas important que l’horloge soit réglée correctement.<br />
▼ ▼<br />
Man Rec Mode de fonctionnement “manuel avec enregistreur” (voir chapitre 4.5)<br />
Dans le mode “manuel avec enregistreur” PLANOTIME fonctionnera comme en mode “manuel” avec la particularité<br />
que les commandes transmises seront enregistrées comme événements et mémorisées avec le jour et l’heure auxquels<br />
ils se sont vérifiés. Cela permet de créer les événements sans devoir les programmer directement un par un<br />
mais simplement en utilisant PLANOTIME en mode “manuel” pendant une semaine.<br />
Prog Mode de “programmation” (voir chapitre 5)<br />
Dans le mode “programmation” on peut programmer, modifier, copier et effacer les événements; il est possible de<br />
régler l’horloge et les autres paramètres utiles au fonctionnement de PLANOTIME.<br />
4.1) Choix des modes de fonctionnement<br />
Pour entrer dans le mode de fonctionnement désiré, il faut le choisir et le confirmer dans le “menu de sélection”.<br />
Le “menu de sélection” peut être considéré comme le point de départ pour choisir les fonctions de PLANOTIME:<br />
“Auto”, “Man”, “Man REC ” et “Prog”.<br />
Quel que soit le mode de fonctionnement ou de programmation dans lequel se trouve PLANOTIME il est possible de<br />
revenir au “menu de sélection” en pressant plusieurs fois la touche ■ jusqu’à faire clignoter l’indication “Auto”.<br />
49
▼<br />
▼<br />
▼<br />
▼<br />
4.2) Fonctionnement en mode “automatique”<br />
Tableau 11 pour choisir le mode “automatique” Exemple<br />
1. Presser plusieurs fois la touche ■ jusqu’à faire clignoter l’indication Auto.<br />
... Auto<br />
2. Presser la touche pour confirmer le mode “automatique”.<br />
Note: s’il n’y a pas au moins un événement programmé, il n’est pas possible de confirmer le mode “automatique”.<br />
▼<br />
Tableau 12 Pour sortir du mode “automatique” et revenir au menu de sélection Exemple<br />
1. Presser 2 fois la touche<br />
4.3) Fonctionnement en mode “Nicetime”<br />
“Nicetime” est un mode particulier avec lequel on suspend, pendant une certaine période, le mode “automatique”<br />
pour passer en mode “manuel”. On ne peut choisir le mode Nicetime que si l’on se trouve en mode “automatique”.<br />
Tableau 13 Pour passer du mode “automatique” au mode “Nicetime” Exemple<br />
1. Presser la touche<br />
Auto<br />
2. Presser la touche pour confirmer le mode “Nicetime”.<br />
Man<br />
3. Presser les touches ou pour régler l’heure à laquelle on désire revenir au<br />
mode “automatique”.”<br />
ou<br />
4. Presser la touche pour confirmer les minutes.<br />
5. Presser les touches ou pour régler les minutes auxquelles on désire revenir<br />
au mode “automatique”.<br />
ou<br />
6. Presser la touche pour confirmer les minutes.<br />
7. Presser les touches ou pour choisir le jour de la semaine dans lequel on<br />
désire revenir au mode “automatique”.<br />
ou<br />
(Su=Dimanche; Mo=Lundi; Tu=Mardi; We=Mercredi; Th=Jeudi; Fr=Vendredi; Sa=Samedi)<br />
8. Presser la touche pour confirmer le jour.<br />
À partir de cet instant PLANOTIME fonctionnera comme s’il était en mode “manuel” et vous pourrez donner les commandes<br />
en pressant l’une des touches ■ . PLANOTIME reviendra en mode “automatique” le jour et à l’heure préétablis.<br />
Pour sortir du mode “Nicetime” avant le moment préétabli et revenir au menu de sélection, voir tableau 20.<br />
▼<br />
▼<br />
▼<br />
▼<br />
4.4) Fonctionnement en mode “manuel”<br />
▼ ▼<br />
▼ ▼<br />
▼ ▼<br />
▼ ▼<br />
Auto<br />
Man<br />
Tableau 14 Pour choisir le mode “manuel” Exemple<br />
1. Presser plusieurs fois la touche ■ jusqu’à faire clignoter l’indication Auto.<br />
2. Presser la touche pour faire clignoter l’indication Man.<br />
3. Presser la touche pour confirmer le mode “manuel”.<br />
▼<br />
... Auto<br />
Man<br />
Tableau 15 Pour choisir un groupe et envoyer une commande Exemple<br />
1. En partant du 1er groupe, presser éventuellement plusieurs fois la touche pour<br />
...<br />
choisir un autre groupe.<br />
2. Il est maintenant possible d’utiliser les touches ■ pour envoyer les<br />
commandes au groupe choisi.<br />
▼ ▼<br />
Tableau 16 Pour envoyer une commande au même groupe Exemple<br />
1. Presser l’une des touches ■<br />
▼ ▼<br />
50
▼<br />
▼<br />
▼<br />
▼<br />
▼<br />
▼<br />
Tableau 17 Pour choisir un autre groupe Exemple<br />
1. Presser plusieurs fois la touche pour choisir le groupe désiré.<br />
...<br />
2. Il est maintenant possible d’utiliser les touches ■ pour envoyer les<br />
commandes au groupe choisi.<br />
▼ ▼<br />
Tableau 18 Pour composer un groupe multiple et envoyer une commande Exemple<br />
1. En partant du 1er groupe, presser éventuellement plusieurs fois la touche<br />
pour choisir un autre groupe.<br />
...<br />
2. Presser la touche pour confirmer le groupe.<br />
3. Répéter les deux étapes précédentes pour choisir d’autres groupes.<br />
▼<br />
4. Après avoir fini de composer le groupe multiple, il est possible d’utiliser les<br />
touches ■ pour envoyer les commandes.<br />
▼ ▼<br />
Nota: un groupe choisi et confirmé par erreur peut être éliminé en pressant plusieurs fois la touche<br />
le clignotement se déplace sur le groupe à éliminer, puis presser la touche .<br />
▼<br />
jusqu’à ce que<br />
Tableau 19 Pour envoyer une commande spéciale à un groupe ou groupe multiple Exemple<br />
1. En partant du 1er groupe, presser éventuellement plusieurs fois la touche<br />
pour choisir un autre groupe.<br />
...<br />
2. Presser la touche pour confirmer le groupe.<br />
3. Répéter éventuellement les deux étapes précédentes pour choisir d’autres groupes.<br />
4. Presser plusieurs fois la touche jusqu’à faire clignoter les symboles de la<br />
... ou<br />
commande spéciale “ ” ou “ ”.<br />
▼<br />
5. Presser la touche pour confirmer la commande spéciale.<br />
▼<br />
6. Il est maintenant possible d’utiliser les touches ■ pour envoyer la<br />
commande spéciale.<br />
▼ ▼<br />
F<br />
Tableau 20 Pour sortir du mode “manuel” et revenir au menu de sélection: Exemple<br />
Ou bien:<br />
Après avoir envoyé une commande presser la touche<br />
Vérifier qu’il n’y a aucun groupe sélectionné puis presser l’une des touches<br />
■ . (éventuellement choisir les groupes en pressant la touche et les<br />
sélectionner/désélectionner en pressant la touche )<br />
Ou bien: Presser plusieurs fois la touche ■ jusqu’à faire clignoter l’indication Auto. ... Auto<br />
▼<br />
▼<br />
▼▼ ▼<br />
4.5) Fonctionnement en mode “manuel avec enregistreur” Man<br />
Tableau 21 Pour choisir le mode “manuel avec enregistreur” Exemple<br />
1. Presser plusieurs fois la touche ■ jusqu’à faire clignoter l’indication Auto.<br />
... Auto<br />
2. Presser 2 fois la touche pour faire clignoter l’indication Man<br />
Man<br />
3. Presser la touche pour confirmer le mode “manuel” avec enregistreur.<br />
▼<br />
À partir de cet instant, on peut utiliser PLANOTIME comme s’il était en mode “manuel” avec la particularité que toutes<br />
les commandes envoyées avec les touches ou , avec le jour, les heures et les minutes auxquels elles ont été données<br />
sont mémorisées comme événements. Note: le mode “manuel avec enregistreur” ne permet pas d’enregistrer<br />
des événements qui contiennent la commande “■ ”.<br />
▼ ▼<br />
Conseil pour les moins experts: Utiliser ce mode de fonctionnement pour mémoriser les événements sans<br />
devoir se préoccuper de les programmer un par un. Pour enregistrer les événements de toute la semaine, entrer en<br />
mode “manuel avec enregistreur”, par exemple au début de la semaine, puis utiliser PLANOTIME pour commander<br />
la montée ou la descente des automatismes chaque jour à l’heure désirée. Au début de la semaine suivante, mettre<br />
PLANOTIME en mode “automatique”; les événements se répéteront alors automatiquement pendant toutes les<br />
semaines successives. Pour effacer un événement enregistré par erreur, voir le chapitre 5.2.3.<br />
51
▼<br />
5) Comment programmer PLANOTIME<br />
Le fonctionnement de PLANOTIME en mode “programmation” permet de créer les événements, de les modifier, de les<br />
copier et de les effacer; il est possible de régler l’horloge et les autres paramètres utiles au fonctionnement de PLANOTIME.<br />
Prog Programmation “événements” (voir chapitre 5.2)<br />
Dans la programmation “événements” il est possible de:<br />
NEW<br />
MOD<br />
COPY<br />
DEL<br />
insérer un nouvel événement, en réglant une par une toutes ses propriétés.<br />
modifier un événement en changeant une propriété ou plus de l’événement.<br />
copier un événement pour faire un nouvel événement en partant des propriétés d’un événement<br />
déjà présent.<br />
effacer un événement en l’éliminant complètement.<br />
Prog Réglage de l’horloge (voir chapitre 5.3)<br />
Le réglage de l’horloge est nécessaire pour permettre à PLANOTIME d’exécuter les événements à l’heure préétablie. Si<br />
l’on utilise la commande spéciale “heure planétaire”, en plus des heures, des minutes et du jour de la semaine, il faut régler<br />
aussi le jour du mois, le mois et l’année puis, en dernier, si l’heure actuelle est l’heure d’hiver (solaire) ou d’été (légale).<br />
Prog Réglage des paramètres “en vacance” (voir chapitre 5.4)<br />
Permet de régler l’écart maximum consenti à l’événement par rapport à ce qui est programmé. On peut aller d’un<br />
minimum de 0 minute (aucun écart) à un maximum de 75 minutes en plus ou en moins par rapport à ce qui est prévu.<br />
Prog Réglage des paramètres “heure planétaire” (voir chapitre 5.5)<br />
Permet de régler les paramètres nécessaires aux calculs pour “l’heure planétaire”:<br />
• Latitude du lieu par rapport à l’équateur (indiquée sur toutes les cartes géographiques).<br />
• Différence entre l’heure indiquée par l’horloge et l’heure solaire réelle.<br />
• Indication si l’heure actuelle est l’heure d’hiver (solaire) ou d’été (légale).<br />
5.1) Choix du type de programmation<br />
Pour entrer dans le mode de “programmation” il faut le choisir et le confirmer dans le “menu de sélection”.<br />
Le “menu de sélection” peut être considéré comme le point de départ pour toutes les fonctions de PLANOTIME. Quel<br />
que soit le mode de fonctionnement ou programmation dans lequel se trouve PLANOTIME, il est possible de revenir<br />
au “menu de sélection” en pressant plusieurs fois la touche ■ jusqu’à faire clignoter l’indication “Auto”,<br />
5.1.1) En avant et en arrière pour la programmation<br />
La programmation se déroule comme un parcours à étapes qui passe par toutes les valeurs ou paramètres nécessaires.<br />
Durant ce parcours, nous vous rappelons que:<br />
• Un symbole qui clignote à 50% indique le paramètre en programmation c’est-à-dire l’étape en cours<br />
• Les touches ou règlent le paramètre en cours<br />
• La touche confirme le paramètre et l’on continue vers l’étape successive<br />
• La touche ■ annule l’éventuelle sélection et l’on revient à l’étape précédente<br />
• La touche sélectionne ou enlève la sélection à un paramètre<br />
• Un symbole qui clignote à 25% indique que le paramètre n’est pas sélectionné<br />
• Un symbole qui clignote à 75% indique que le paramètre est sélectionné<br />
• Dans certains cas, il n’est pas possible de confirmer un paramètre s’il n’y a pas au moins une sélection de faite, par<br />
exemple, il n’est pas possible de programmer un événement sans avoir sélectionné au moins un jour de la semaine.<br />
▼<br />
▼ ▼<br />
52
5.2) Programmation “événements”<br />
Dans la programmation des événements il faut régler, une par une, toutes les propriétés qui composent l’événement,<br />
c’est-à-dire:<br />
Tableau 22 Propriétés des événements Exemple 1 Exemple 2<br />
1. Heures et minutes auxquelles la commande doit être envoyée. 08.30<br />
18.45<br />
2. Le jour ou les jours de la semaine dans lesquels ils doivent<br />
se vérifier.<br />
Mo We Fr Sa<br />
3. Un ou plusieurs groupes concernés et la commande<br />
2<br />
correspondante de “Montée” ou “Descente”.<br />
1<br />
4 5 6<br />
4. La présence ou pas de la commande spéciale “ ” ou<br />
bien “ ”.<br />
5. La présence ou pas de la commande spéciale<br />
“en vacance”<br />
6. La présence ou pas de la commande spéciale<br />
“heure planétaire”<br />
7. La présence ou pas de la commande spéciale<br />
“commande temporisée”<br />
8. Dans le cas de commande spéciale “commande temporisée”<br />
le temps, en secondes, qui doit s’écouler entre la commande<br />
20<br />
et la commande successive de “Stop”.<br />
▼<br />
▼ ▼ ▼<br />
▼<br />
F<br />
Dans l’exemple N°1: à 8h30 tous les lundis, le groupe<br />
1 recevra une commande de “Montée”.<br />
Dans l’exemple N°2: à 18h45 tous les mercredis,<br />
vendredis et samedis, le groupe 2 recevra une commande<br />
de “Descente” et les groupes 4, 5, 6 recevront une<br />
commande de “Montée”; les commandes prévoient<br />
l’activation des commandes automatiques qui proviennent<br />
des capteurs climatiques. “L’heure planétaire” est<br />
active et donc la commande se déplacera, par rapport<br />
à 18h45, pour suivre, tout au long de l’année, l’heure du<br />
coucher du soleil. Les commandes sont temporisées<br />
c’est-à-dire qu’elles prévoient une commande de “Stop”<br />
20 secondes après le début du mouvement.<br />
53
▼<br />
▼<br />
5.2.1) Programmation: nouvel événement<br />
Tableau 23 Pour programmer un “nouvel événement” simple (exemple 1 du tableau N°22) Exemple<br />
1. Presser plusieurs fois la touche ■ jusqu’à faire clignoter l’indication Auto.<br />
2. Presser 3 fois la touche pour choisir le mode “programmation” Prog.<br />
3. Presser la touche pour confirmer le mode “programmation”.<br />
▼<br />
4. Presser la touche pour confirmer la programmation “événements”<br />
▼<br />
5. Presser la touche pour confirmer la programmation “nouvel événement” NEW<br />
6. Presser les touches ou pour régler l’heure (dans l’exemple: 08).<br />
▼<br />
7. Presser la touche pour confirmer l’heure.<br />
▼<br />
8. Presser les touches ou pour régler les minutes (dans l’exemple: 30).<br />
9. Presser la touche pour confirmer les minutes.<br />
▼<br />
10. Presser les touches ou pour choisir le jour de la semaine<br />
(dans l’exemple: Mo=Lundi).<br />
11. Presser la touche pour sélectionner le jour de la semaine.<br />
12. Presser la touche pour confirmer le jour de la semaine<br />
▼<br />
(dans l’exemple: seulement Mo=Lundi).<br />
▼ ▼<br />
▼ ▼<br />
▼ ▼<br />
13. Presser la touche pour choisir la commande de “Montée” sur le groupe 1.<br />
▼<br />
14. Presser la touche pour confirmer la commande (dans l’exemple: “Montée” sur le groupe 1).<br />
▼<br />
15. Presser la touche pour confirmer l’événement<br />
▼<br />
(dans l’exemple: aucune commande spéciale “ ” ou “ ”).<br />
16. Presser la touche pour confirmer l’événement<br />
▼<br />
(dans l’exemple: aucune commande spéciale “en vacance” )<br />
17. Presser la touche pour confirmer l’événement<br />
▼<br />
(dans l’exemple: aucune commande spéciale “heure planétaire” )<br />
18. Presser la touche pour confirmer l’événement<br />
(dans l’exemple: aucune commande spéciale “commande temporisée” )<br />
▼<br />
19. À ce point, toutes les parties de l’événement sélectionné commencent à clignoter<br />
pour indiquer qu’on est à la fin du parcours de programmation du nouvel<br />
événement. Presser la touche pour confirmer l’événement ou bien presser ■<br />
pour revenir en arrière.<br />
▼<br />
... Auto<br />
ou<br />
ou<br />
ou<br />
Avec la dernière confirmation, l’événement est mémorisé et PLANOTIME se prépare pour la programmation d’un autre<br />
nouvel événement, continuer ensuite en partant du point N°5 de ce tableau.<br />
54
▼<br />
▼<br />
▼<br />
▼<br />
▼<br />
▼<br />
▼<br />
▼<br />
▼<br />
▼<br />
▼<br />
Tableau 24 Pour programmer un “nouvel événement” complet (exemple 2 du tableau N°22) Exemple<br />
1. Presser plusieurs fois la touche ■ jusqu’à faire clignoter l’indication Auto.<br />
2. Presser 3 fois la touche pour choisir le mode “programmation” Prog.<br />
3. Presser la touche pour confirmer le mode “programmation”.<br />
▼<br />
4. Presser la touche pour confirmer la programmation “événements”<br />
▼<br />
5. Presser la touche pour confirmer la programmation “nouvel événement” NEW<br />
6. Presser les touches ou pour régler l’heure (dans l’exemple: 18).<br />
▼<br />
7. Presser la touche pour confirmer l’heure.<br />
▼<br />
8. Presser les touches ou pour régler les minutes (dans l’exemple: 45).<br />
9. Presser la touche pour confirmer les minutes.<br />
▼<br />
10. Presser les touches ou pour choisir le premier jour de la semaine<br />
(dans l’exemple: We=Mercredi).<br />
11. Presser la touche pour sélectionner le premier jour de la semaine.<br />
12. Presser la touche pour choisir le deuxième jour de la semaine<br />
▼<br />
(dans l’exemple: seulement Fr=Vendredi).<br />
13. Premere il tasto pour sélectionner le deuxième jour de la semaine.<br />
14. Presser la touche pour choisir le troisième jour de la semaine<br />
15. Presser la touche pour sélectionner le troisième jour de la semaine.<br />
28. Presser la touche pour confirmer l’événement<br />
▼<br />
(dans l’exemple: aucune commande spéciale “en vacance” )<br />
▼ ▼<br />
▼ ▼<br />
▼ ▼<br />
17. Presser la touche pour sélectionner le groupe 2.<br />
18. Presser la touche pour choisir la commande de “Descente” sur le groupe 2.<br />
19. Presser 2 fois la touche pour sélectionner le groupe 4.<br />
29. Premere il tasto per selezionare il comando speciale “orario planetario”<br />
30. Presser la touche pour confirmer l’événement<br />
(dans l’exemple: commande spéciale “heure planétaire” )<br />
31. Presser la touche pour sélectionner la commande spéciale “commande temporisée”<br />
33. Presser la touche pour confirmer l’événement<br />
▼<br />
(dans l’exemple: commande spéciale “commande temporisée” )<br />
34. À ce point, toutes les parties de l’événement sélectionné commencent à clignoter pour<br />
indiquer qu’on est à la fin du parcours de programmation du nouvel événement.<br />
Presser la touche pour confirmer l’événement ou bien presser ■ pour revenir en arrière.<br />
▼<br />
▼<br />
(dans l’exemple: seulement Sa=Samedi).<br />
16. Presser la touche pour confirmer tous les jours sélectionnés.<br />
▼<br />
▼<br />
▼<br />
20. Presser la touche pour choisir la commande de “Montée” sur le groupe 4.<br />
21. Presser la touche pour sélectionner le groupe 5.<br />
▼<br />
22. Presser la touche pour choisir la commande de “Montée” sur le groupe 5.<br />
23. Presser la touche pour sélectionner le groupe 6.<br />
▼<br />
24. Presser la touche pour choisir la commande de “Montée” sur le groupe 6.<br />
25. Presser la touche pour confirmer les commandes<br />
▼<br />
▼<br />
(dans l’exemple: “Descente sur le groupe 2 et “Montée” sur les groupes 4, 5 et 6).<br />
26. Presser la touche pour sélectionner la commande spéciale “ ”<br />
27. Presser la touche pour confirmer l’événement<br />
▼<br />
(dans l’exemple: envoi commande spéciale “ ”)<br />
32. Presser les touches ou pour régler la temporisation (dans l’exemple: 20 secondes).<br />
▼ ▼<br />
... Auto<br />
ou<br />
ou<br />
ou<br />
ou<br />
ou<br />
ou<br />
F<br />
Avec la dernière confirmation, l’événement est mémorisé et PLANOTIME se prépare pour la programmation d’un autre<br />
nouvel événement, continuer ensuite en partant du point N°5 de ce tableau.<br />
Note: pour le fonctionnement correct de “l’heure planétaire” il faut avoir réglé les paramètres correspondants (voir tableau 30).<br />
55
▼<br />
▼<br />
▼<br />
▼<br />
5.2.2) Programmation: modification événements MOD<br />
Tous les événements programmés peuvent être modifiés à n’importe quel moment. Avant d’être modifié, un événement<br />
doit être cherché et choisi parmi tous les autres événements présents.<br />
Tableau 25 Pour modifier un événement Exemple<br />
1. Presser plusieurs fois la touche ■ jusqu’à faire clignoter l’indication Auto.<br />
... Auto<br />
2. Presser 3 fois la touche pour choisir le mode “programmation” Prog.<br />
3. Presser la touche pour confirmer le mode “programmation”.<br />
▼<br />
4. Presser la touche pour confirmer la programmation “événements”<br />
▼<br />
5. Presser la touche pour sélectionner la modification “événements” MOD<br />
6. Presser la touche pour confirmer la modification “événements”.<br />
▼<br />
7. Presser les touches ou pour choisir l’événement à modifier. Les événements sont<br />
montrés dans l’ordre chronologique dans lequel ils seront effectués en partant du plus<br />
proche, en pressant on passe au suivant, en pressant on passe au précédent.<br />
▼<br />
8. Presser la touche pour confirmer l’événement sélectionné.<br />
▼<br />
▼ ▼<br />
À partir de ce point, la modification se déroule suivant le même parcours à étapes que la programmation “nouvel événement”<br />
(voir chapitre 5.2.1) et l’on peut modifier ou confirmer une par une toutes les propriétés de l’événement. Après<br />
avoir modifié et confirmé le dernier paramètre, l’événement est mémorisé de nouveau et PLANOTIME se prépare pour<br />
la modification d’un autre événement, continuer ensuite en partant du point N°6 de ce tableau<br />
▼<br />
ou<br />
5.2.3) Programmation: effacement événements DEL<br />
Tous les événements programmés peuvent être effacés à n’importe quel moment. Avant d’être effacé, un événement<br />
doit être cherché et choisi parmi tous les autres événements présents.<br />
Tableau 26 Pour effacer un événement Exemple<br />
1. Presser plusieurs fois la touche ■ jusqu’à faire clignoter l’indication Auto.<br />
... Auto<br />
2. Presser 3 fois la touche pour choisir le mode “programmation” Prog.<br />
3. Presser la touche pour confirmer le mode “programmation”.<br />
▼<br />
4. Presser la touche pour confirmer la programmation “événements”<br />
5. Presser 2 fois la touche pour sélectionner l’effacement “événements” DEL<br />
▼<br />
6. Presser la touche pour confirmer l’effacement “événements”.<br />
▼<br />
7. Presser les touches ou pour choisir l’événement à effacer. Les événements sont<br />
montrés dans l’ordre chronologique dans lequel ils seront effectués en partant du plus<br />
proche, en pressant on passe au suivant, en pressant on passe au précédent.<br />
▼<br />
8. Presser la touche pour confirmer l’événement sélectionné.<br />
▼<br />
▼ ▼<br />
9. Presser la touche pour confirmer l’effacement de l’événement sélectionné.<br />
Si l’on ne désire pas confirmer l’effacement, presser la touche ■ et reprendre à<br />
partir du point N° 7 de ce tableau.<br />
▼<br />
Après avoir effacé un événement, PLANOTIME se prépare pour l’effacement d’un autre événement, continuer ensuite<br />
en partant du point N°6 de ce tableau.<br />
▼<br />
ou<br />
56
▼<br />
▼<br />
▼<br />
▼<br />
5.2.4) Programmation: copie événements COPY<br />
Pour programmer rapidement un nouvel événement similaire à un événement déjà présent, on peut le faire à travers<br />
la copie de l’événement et la modification successive des paramètres qui changent.<br />
Tableau 27 Pour programmer un nouvel événement en en copiant un déjà présent Exemple<br />
1. Presser plusieurs fois la touche ■ jusqu’à faire clignoter l’indication Auto.<br />
... Auto<br />
2. Presser 3 fois la touche pour choisir le mode “programmation” Prog.<br />
3. Presser la touche pour confirmer le mode “programmation”.<br />
▼<br />
4. Presser la touche pour confirmer la programmation “événements”<br />
▼<br />
5. Presser 3 fois la touche pour sélectionner la copie des “événements” COPY<br />
6. Presser la touche pour confirmer la copie des “événements”.<br />
▼<br />
7. Presser les touches ou pour choisir l’événement à copier. Les événements sont<br />
montrés dans l’ordre chronologique dans lequel ils seront effectués en partant du plus<br />
proche, en pressant on passe au suivant, en pressant on passe au précédent.<br />
▼<br />
8. Presser la touche pour confirmer l’événement sélectionné.<br />
▼<br />
▼ ▼<br />
À partir de ce point, la modification de l’événement copié se déroule suivant le même parcours à étapes que la programmation<br />
“nouvel événement” (voir chapitre 5.2.1) et l’on peut modifier ou confirmer une par une toutes les propriétés de l’événement.<br />
Après avoir modifié et confirmé le dernier paramètre, l’événement copié est mémorisé comme nouvel événement et<br />
PLANOTIME se prépare pour la copie d’un autre événement, continuer ensuite en partant du point N°6 de ce tableau.<br />
▼<br />
ou<br />
F<br />
5.3) Réglage de l’horloge<br />
Le réglage de l’horloge est fait immédiatement après avoir inséré la pile mais il peut se révéler nécessaire de régler<br />
l’horloge dans d’autres occasions, par exemple lors du passage de l’heure d’hiver (solaire) à l’heure d’été (légale).<br />
Tableau 28 Per regolare l’orologio Exemple<br />
1. Presser plusieurs fois la touche ■ jusqu’à faire clignoter l’indication Auto.<br />
... Auto<br />
2. Presser 3 fois la touche pour choisir le mode “programmation” Prog.<br />
3. Presser la touche pour confirmer le mode “programmation”.<br />
▼<br />
4. Presser la touche pour sélectionner le réglage de l’horloge<br />
5. Presser la touche pour confirmer le réglage de l’horloge.<br />
6. Presser les touches ou pour régler l’heure.<br />
7. Presser la touche pour confirmer l’heure.<br />
8. Presser les touches ou pour régler les minutes.<br />
▼<br />
▼<br />
9. Presser la touche pour confirmer les minutes.<br />
▼<br />
10. Presser les touches ou pour choisir le jour de la semaine.<br />
11. Presser la touche pour confirmer le jour.<br />
12. Presser les touches ou pour choisir le numéro du jour.<br />
▼<br />
13. Presser la touche pour confirmer le jour<br />
▼<br />
15. Presser la touche pour confirmer le mois.<br />
16. Presser les touches ou pour choisir le numéro de l’année. (compris entre 2000 et 2059)<br />
▼<br />
17. Presser la touche pour confirmer l’année.<br />
▼<br />
▼ ▼<br />
▼ ▼<br />
▼ ▼<br />
(Su=Dimanche; Mo=Lundi; Tu=Mardi; We=Mercredi; Th=Jeudi; Fr=Vendredi; Sa=Samedi)<br />
14. Presser les touches ou pour choisir le numéro du mois<br />
(01=Janvier; 02=Février…12= Décembre)<br />
▼ ▼<br />
▼ ▼<br />
▼ ▼<br />
Note: si l’on utilise la commande spéciale “heure planétaire”, en plus des heures, des minutes, du jour de la semaine, du jour du<br />
mois, du mois et de l’année, il faut régler aussi si l’heure actuelle est l’heure d’hiver (solaire) ou l’heure d’été (légale) voir tableau 30.<br />
57<br />
ou<br />
ou<br />
ou<br />
ou<br />
ou<br />
ou
▼<br />
▼<br />
▼<br />
▼<br />
5.4) Réglage des paramètres de la commande spéciale “en vacance”<br />
Pour le fonctionnement correct de la commande spéciale “en vacance”, il faut régler la valeur maximum de l’écart<br />
consenti, la valeur peut être de 0 à 75 minutes, réglables par pas de 5 minutes. Comme résultat on obtient, par exemple,<br />
si la valeur est réglée à 15, qu’un événement programmé pour 08h00 peut être exécuté au hasard entre 7h45 et<br />
8h15. La modification de ce paramètre a effet sur tous les événements avec cette commande spéciale activée.<br />
Tableau 29 Pour régler les paramètres de la commande spéciale “en vacance” Exemple<br />
1. Presser plusieurs fois la touche ■ jusqu’à faire clignoter l’indication Auto.<br />
... Auto<br />
2. Presser 3 fois la touche pour choisir le mode “programmation” Prog.<br />
3. Presser la touche pour confirmer le mode “programmation”.<br />
▼<br />
4. Presser 2 fois la touche pour sélectionner le réglage des paramètres de la<br />
commande “en vacance”<br />
5. Presser la touche pour confirmer le réglage du paramètre “en vacance”. “ ”<br />
▼<br />
6. Presser les touches ou pour régler l’écart maximum en minutes.<br />
7. Presser la touche pour confirmer le paramètre.<br />
▼<br />
▼ ▼<br />
ou<br />
5.5) Réglage des paramètres de la commande spéciale “heure planétaire”<br />
Pour le fonctionnement correct de la commande spéciale “heure planétaire” il faut régler les paramètres suivants:<br />
• Latitude du lieu par rapport à l’équateur, réglable entre 65° (vers le pôle Nord) et -65° (vers le pôle Sud) en passant<br />
par 0° (équateur).<br />
Pour trouver la valeur “ ” à insérer de manière approximative, se référer à la figure figurant à la page suivante,<br />
ou à n’importe quelle carte géographique plus détaillée.<br />
• Différence entre l’heure indiquée par l’horloge et l’heure solaire réelle “ ”, en pratique, la différence entre le midi<br />
indiqué par l’horloge et le midi solaire réel du lieu; elle peut être réglée entre 0 et ±99 minutes. Le chapitre “que faire<br />
si…” décrit une méthode pour mesurer cette valeur. Si l’on n’a pas besoin d’un réglage précis, ce paramètre<br />
peut être laissé à zéro.<br />
• Indication si l’heure actuelle est l’heure d’hiver (solaire) ou d’été (légale).<br />
Tableau 30 Pour régler les paramètres de la commande spéciale “heure planétaire” Exemple<br />
1. Presser plusieurs fois la touche ■ jusqu’à faire clignoter l’indication Auto.<br />
... Auto<br />
58<br />
2. Presser 3 fois la touche pour choisir le mode “programmation” Prog.<br />
3. Presser la touche pour confirmer le mode “programmation”.<br />
▼<br />
4. Presser 3 fois la touche pour sélectionner le réglage des paramètres de la<br />
commande “heure planétaire”<br />
5. Presser la touche pour confirmer le réglage des paramètres de la commande<br />
“heure planétaire”.<br />
7. Presser la touche pour confirmer le paramètre.<br />
▼<br />
6. Presser les touches ou pour régler la latitude du lieu “ ”<br />
9. Presser la touche pour confirmer le paramètre.<br />
▼<br />
▼<br />
10. Presser les touches ou pour choisir entre l’heure d’été “S” (légale) ou d’hiver<br />
“W” (solaire).<br />
11. Presser la touche pour confirmer le paramètre.<br />
Il est déconseillé de modifier ces paramètres après avoir inséré un ou plusieurs événements avec cette commande spéciale<br />
activée.<br />
▼<br />
▼ ▼<br />
8. Presser les touches ou pour régler la différence entre l’heure indiquée par<br />
l’horloge et l’heure solaire réelle “ ”<br />
▼ ▼<br />
▼ ▼<br />
ou<br />
ou<br />
ou
F<br />
6) Remplacement de la pile<br />
Quand l’indication de pile épuisée s’allume “ ” il faut<br />
remplacer la pile au plus vite; dans cette situation on<br />
court le risque que les commandes ne puissent pas être<br />
envoyées correctement.<br />
Pour remplacer la pile, il faut ouvrir le bras porte-pile et<br />
suivre les indications des figures.<br />
Après le changement de pile, il faut régler l’horloge interne<br />
(voir chapitre 2.2).<br />
Attention: les piles contiennent des substances polluantes,<br />
ne pas les mêler aux ordures ménagères mais utiliser<br />
les méthodes de mise au rebut prévues par les<br />
réglementations locales.<br />
7) Avertissements<br />
L’utilisation de PLANOTIME ne demande pas d’attentions<br />
particulières, nous vous prions dans tous les cas<br />
de considérer les aspects suivants:<br />
• Les commandes envoyées par radio par PLANOTIME<br />
ne peuvent pas offrir la garantie totale qu’elles soient<br />
reçues par les automatismes.<br />
• Certains composants de PLANOTIME peuvent contenir<br />
des substances polluantes, ne pas les abandonner<br />
dans la nature.<br />
59
▼<br />
8) Que faire si…<br />
• Pour augmenter la sécurité qu’une commande<br />
soit reçue: l’activer 2 fois ou plus à la même<br />
heure (en copiant l’événement) ou bien une deuxième<br />
fois à la minute successive.<br />
• Pour faire sortir PLANOTIME d’une programmation<br />
quelconque ou de n’importe quel autre<br />
mode de fonctionnement: presser plusieurs<br />
fois la touche ■ jusqu’à faire clignoter l’indication<br />
“Auto” puis en pressant la touche<br />
il est possible de<br />
choisir le mode de fonctionnement désiré.<br />
• Pour mesurer la différence entre l’heure indiquée<br />
par l’horloge et l’heure solaire réelle: la<br />
valeur requise par la commande spéciale “heure planétaire”<br />
est, en pratique, la différence entre le midi<br />
indiqué par l’horloge et le midi solaire réel du lieu. Une<br />
méthode très simple pour mesurer cette valeur est<br />
d’observer l’ombre provoquée par le soleil sur un<br />
objet (il est préférable qu’il soit parfaitement vertical et<br />
pointu, par exemple un pieu); l’ombre se raccourcit<br />
jusqu’au midi solaire pour s’allonger de nouveau dans<br />
l’après-midi. Le midi solaire correspond au moment<br />
où l’ombre atteint la longueur la plus courte par rapport<br />
à la base de l’objet. Quand cela se vérifie, à l’heure<br />
indiquée par l’horloge, soustraire une heure si l’on<br />
est dans la période de l’heure d’été (légale) puis calculer<br />
la différence en minutes par rapport à 12h00; le<br />
résultat est la valeur à insérer dans PLANOTIME. Par<br />
exemple, si le midi solaire réel tombe à 12h25, il faut<br />
insérer la valeur 25; si par contre il correspond à<br />
11h47 il faut insérer la valeur -13.<br />
Note: la méthode décrite ne tient pas compte de certains<br />
phénomènes astronomiques mais l’erreur est<br />
négligeable pour le fonctionnement de PLANOTIME.<br />
8.1) Liste des erreurs<br />
Il peut y avoir des circonstances, très rares, dans lesquelles PLANOTIME pourrait ne pas fonctionner correctement. Si<br />
cela se vérifie, la cause de l’erreur est toujours indiquée. Le tableau qui suit indique les erreurs et les solutions possibles.<br />
Tableau 31: Liste des erreurs<br />
Erreur N° Description Solution<br />
Err1<br />
Err2<br />
Err3<br />
Err4<br />
Err5<br />
Il y a déjà plus de 100 événements programmés et il n’y a<br />
Mémoire pleine<br />
plus de place pour d’autres. Il n’y a pas de solutions: le dernier<br />
événement ne sera pas mémorisé.<br />
Erreur de communication entre les composants<br />
internes de PLANOTIME de remettre en place la pile pour voir si l’erreur disparaît.<br />
Il s’agit d’un problème très particulier, essayer d’enlever et<br />
Certains paramètres des événements mémorisés ne sont pas<br />
corrects; il pourrait s’agir d’une erreur de communication entre<br />
les composants internes de PLANOTIME, essayer d’enle-<br />
Erreur dans les paramètres d’un ou de<br />
plusieurs événements<br />
ver et de remettre en place la pile pour voir si l’erreur disparaît.<br />
Si l’erreur persiste, entrer en mode modification événements<br />
et contrôler les paramètres de tous les événements.<br />
Les paramètres de la commande spéciale Rien de grave mais tenez compte du fait que les prochains<br />
“en vacance” ont été changés après que événements ont déjà été calculés avec les vieux paramètres,<br />
les nouveaux paramètres seront utilisés à partir de<br />
quelques événements aient été calculés<br />
avec les paramètres précédents l’exécution successive de l’événement.<br />
Les paramètres de la commande spéciale Il vaut mieux ne pas changer les paramètres après avoir<br />
“heure planétaire” ont été changés après programmé des événements, le cas échéant, recontrôler<br />
que quelques événements aient été calculés<br />
avec les paramètres<br />
que les événements sont corrects après la modification.<br />
précédents<br />
60
9) Caractéristiques techniques<br />
Dans le but d’améliorer les produits, NICE S.p.a. se réserve le droit d’en modifier les caractéristiques techniques à<br />
tout moment et sans préavis, en garantissant dans tous les cas le bon fonctionnement et le type d’utilisation prévus.<br />
Note: toutes les caractéristiques techniques se réfèrent à la température de 20°C.<br />
Alimentation<br />
: 3 Vcc avec 1 pile au lithium CR2450<br />
Durée pile<br />
: Estimée à 2 ans (avec 10 événements par jour)<br />
Fréquence<br />
: 433,92 MHz ±100 KHz<br />
Puissance irradiée<br />
: Estimée à environ 1mW<br />
Portée moyenne<br />
: Estimée à 25 mètres à l’intérieur d’édifices<br />
(la présence de parasites électromagnétiques peut réduire radicalement la portée)<br />
Codage<br />
: 52 Bits rolling code FLOR+INFO<br />
Résolution horloge<br />
: 1 minute<br />
Précision horloge<br />
: ± 100 secondes/an<br />
Nombre maximum d’événements : 100<br />
Indice de protection : IP 40<br />
Température de fonct. : -5°C ÷ 50°C<br />
Dimensions/poids<br />
: 80x80x1,2mm / 75 g<br />
F<br />
A1 Appendice<br />
Utiliser le tableau suivant, avant la programmation, pour “créer” les événements et comme aide-mémoire des événements<br />
mémorisés.<br />
Tableau A1: exemple composition événements et aide-mémoire événements<br />
Nom Heure Jours Jours Commandes spéciales<br />
Su Mo Tu We Th Fr Sa 1 2 3 4 5 6<br />
Exemple 1 08.30<br />
X<br />
Su Mo Tu We Th Fr Sa 1 2 3 4 5 6<br />
Exemple 2 18.30<br />
X X X X<br />
X X 20<br />
Su Mo Tu We Th Fr Sa 1 2 3 4 5 6<br />
Su Mo Tu We Th Fr Sa 1 2 3 4 5 6<br />
Su Mo Tu We Th Fr Sa 1 2 3 4 5 6<br />
Su Mo Tu We Th Fr Sa 1 2 3 4 5 6<br />
Su Mo Tu We Th Fr Sa 1 2 3 4 5 6<br />
Su Mo Tu We Th Fr Sa 1 2 3 4 5 6<br />
Su Mo Tu We Th Fr Sa 1 2 3 4 5 6<br />
Su Mo Tu We Th Fr Sa 1 2 3 4 5 6<br />
61
Inhaltsverzeichnis der Kapitel: S.<br />
1 Beschreibung 63<br />
1.1 Was ist PLANOTIME 63<br />
1.2 Muss man unbedingt programmieren? 63<br />
1.3 Was ist ein Vorgang? 63<br />
1.4 Was sind die Gruppen? 64<br />
1.5 Was sind die Sonderfunktionen? 64<br />
2 Installation 64<br />
2.1 Schalten wir PLANOTIME ein 64<br />
2.2 Anfängliche Einstellung der Uhr 65<br />
2.3 Speicherung von PLANOTIME in den 65<br />
Empfängern der Automatismen<br />
2.3.1 Speicherung von PLANOTIME als 66<br />
erster Sender<br />
2.3.2 Speicherung von PLANOTIME als 66<br />
weiterer Sender<br />
2.4 Befestigung von PLANOTIME 67<br />
3 Beschreibung der Symbole 68<br />
4 Benutzung von PLANOTIME 69<br />
4.1 Wahl des Betriebsmodus 69<br />
4.2 Funktionsweise im Modus “automatisch” 70<br />
4.3 Funktionsweise im Modus “Nicetime” 70<br />
4.4 Funktionsweise im Modus “manuell” 70<br />
4.5 Funktionsweise im Modus “manuell 71<br />
mit Recorder”<br />
5 Wie wird PLANOTIME programmiert 72<br />
5.1 Auswahl des Programmierungstyps 72<br />
5.1.1 Vorwärts und rückwärts in der Programmierung 72<br />
5.2 Programmierung von “Vorgängen” 73<br />
5.2.1 Programmierung: neuer Vorgang 74<br />
5.2.2 Programmierung: Änderung von Vorgängen 76<br />
5.2.3 Programmierung: Löschen von Vorgängen 76<br />
5.2.4 Programmierung: Kopieren von Vorgängen 77<br />
5.3 Einstellung der Uhr 77<br />
5.4 Einstellung der Parameter der 78<br />
Sonderfunktion “Urlaub”<br />
5.5 Einstellung der Parameter der 78<br />
Sonderfunktion “planetare Uhrzeit”<br />
S.<br />
6 Auswechseln der Batterie 79<br />
7 Wichtige Hinweise 79<br />
8 Was tun, wenn… 80<br />
8.1 Fehlerliste 80<br />
9 Technische Merkmale 81<br />
A1 Appendice 81<br />
Inhaltsverzeichnis der Tabellen: S.<br />
Tabelle N° 1: zum Einstellen der Uhr nach 65<br />
Anschluss der Batterie<br />
Tabelle N° 2: um den “manuellen” Modus 65<br />
auszuwählen und eine Gruppe zu wählen<br />
Tabelle N° 3: um einen Befehl zur gewählten 65<br />
Gruppe zu senden<br />
Tabelle N° 4: um eine andere Gruppe zu wählen 65<br />
Tabelle N° 5: um den “manuellen” Modus zu verlassen 66<br />
Tabelle N° 6: um PLANOTIME als ersten Sender 66<br />
zu speichern<br />
Tabelle N° 7: um PLANOTIME als weiteren Sender 66<br />
zu speichern<br />
Tabelle N° 8: Liste der Symbole in Bereich 1 68<br />
Tabelle N° 9: Liste der Symbole in Bereich 2 68<br />
Tabelle N°10: Liste der Symbole in Bereich 3 69<br />
Tabelle N° 11: um den Modus “automatisch” zu wählen 70<br />
Tabelle N° 12: um den Modus “automatisch” zu verlassen 70<br />
und zum Auswählmenü zurückzukehren<br />
Tabelle N° 13: um vom Modus “automatisch” auf 70<br />
Modus “Nicetime” überzugehen<br />
Tabelle N° 14: um den Modus “manuell” zu wählen 70<br />
Tabelle N° 15: um eine Gruppe zu wählen und einen 70<br />
Befehl zu senden<br />
Tabelle N° 16: um einen Befehl zu der gewählten 70<br />
Gruppe zu senden<br />
Tabelle N° 17: um eine andere Gruppe zu wählen 71<br />
Tabelle N° 18: um eine Vielfachgruppe zusammenzustellen 71<br />
zusammenzustellen und einen Befehl zu senden<br />
Tabelle N° 19: um den Befehl einer Sonderfunktion zu 71<br />
einer Gruppe oder einer Vielfachgruppe zu senden<br />
Tabelle N° 20: um den Modus “manuell” zu verlassen 71<br />
und zum Auswählmenü zurückzukehren<br />
Tabelle N° 21: um den Modus “manuell mit 71<br />
Recorder” zu wählen<br />
Tabelle N° 22: Eigenschaften der Vorgänge 73<br />
Tabelle N° 23: Programmierung eines einfachen 74<br />
“neuen Vorgangs”<br />
Tabelle N° 24: Programmierung eines vollständigen 75<br />
“neuen Vorgangs”<br />
Tabelle N° 25: um einen Vorgang zu ändern 76<br />
Tabelle N° 26: um einen Vorgang zu löschen 76<br />
Tabelle N° 27: um einen neuen Vorgang durch das 77<br />
Kopieren eines bereits vorhandenen zu programmieren<br />
Tabelle N° 28: um die Uhr einzustellen 77<br />
Tabelle N° 29: um die Parameter der Sonderfunktion 78<br />
“Urlaub” einzustellen<br />
Tabelle N° 30: um die Parameter der Sonderfunktion 78<br />
“planetare Uhrzeit” einzustellen<br />
Tabelle N° 31: Fehlerliste 80<br />
S.<br />
62
Display<br />
Tasten<br />
Stop<br />
Tasten<br />
Anstieg<br />
Tasten<br />
Bestätigung<br />
Tasten<br />
Abstieg<br />
Tasten<br />
Auswahl<br />
Batterie<br />
1) Beschreibung<br />
D<br />
In diesem Kapitel geben wir Ihnen eine Beschreibung<br />
der wichtigsten Merkmale von PLANOTIME.<br />
Lesen Sie diesen Teil bitte sehr genau, denn wenn Sie<br />
das Produkt kennen, wird sein Gebrauch einfacher sein.<br />
1.1) Was ist PLANOTIME<br />
PLANOTIME ist ein Funksender zur Steuerung von<br />
Automatismen für Jalousien und Markisen und kann bis<br />
zu 6 Automatismusgruppen steuern.<br />
Er kann im “manuellen” Modus funktionieren, wobei Sie<br />
zur Steuerung der Automatismen eingreifen werden,<br />
oder im “automatischen” Modus, wobei PLANOTIME<br />
die Automatismen zu den programmierten Tagen und<br />
Uhrzeiten steuern wird.<br />
1.2) Muss man unbedingt programmieren?<br />
Leider ja!. PLANOTIME kennt Ihre Gewohnheiten nicht;<br />
wenn Sie ihn im “automatischen” Modus benutzen wollen,<br />
muss PLANOTIME wissen, um wie viel Uhr Sie die<br />
Markisen herunterlassen wollen, und auch, dass Sie am<br />
Sonntag ein bisschen länger mit heruntergelassenen<br />
Jalousien ruhen wollen.<br />
Die Programmierungs- und Betriebslogik von PLANOTI-<br />
ME im “automatischen” Modus erfolgt nach Vorgängen.<br />
1.3) Was ist ein Vorgang?<br />
Ein Vorgang ist, wenn ein automatischer Steuerbefehl<br />
für eine Bewegung (Öffnen oder Schließen von Jalousien,<br />
Auf- oder Abrollen von Markisen, usw.) an einem<br />
bestimmten Augenblick des Tags an einem oder mehreren<br />
Wochentagen erteilt wird.<br />
Ein Vorgang ist zum Beispiel der Steuerbefehl für das<br />
Öffnen der Jalousien um 8.30 am Samstag und am<br />
Sonntag, wogegen ein anderer Vorgang das Aufrollen<br />
der Markisen um 18:45 an jedem Wochentag ist.<br />
63
1.4) Was sind die Gruppen?<br />
Unter “Gruppe” versteht man einen einzelnen Automatismus<br />
oder ein Ganzes an Automatismen, die immer<br />
alle zusammen betätigt werden; zum Beispiel kann die<br />
Markise an der Südseite eine Gruppe sein, die Markisen<br />
an der Ostseite können eine zweite Gruppe sein und alle<br />
Jalousien des Wohnzimmers eine dritte Gruppe.<br />
PLANOTIME ist imstande, bis zu 6 Gruppen einzeln<br />
oder mehrere, untereinander kombinierte Gruppen (Vielfachgruppen)<br />
gleichzeitig zu steuern.<br />
Die Zusammenstellung der Gruppen erfolgt während der<br />
Speicherung des Funkcodes, wie in Kapitel 2.3<br />
beschrieben.<br />
1.5) Was sind die Sonderfunktionen?<br />
Wenn ein Vorgang erfolgt, sendet PLANOTIME einen<br />
Steuerbefehl zu den vom Vorgang betroffenen Gruppen.<br />
Gewöhnlich sind die Steuerbefehle Öffnung und Schließung<br />
der Automatismen, diesen Befehlen können aber<br />
Sonderfunktionen zugeteilt werden:<br />
• Sonne ON bzw. Sonne OFF : aktiviert<br />
oder deaktiviert die automatischen Steuerbefehlen,<br />
die von den Wettersensoren kommen; Sie können<br />
dadurch wählen, ob die Automatismen direkt gesteuert<br />
werden sollen (Sonne OFF) oder diese von den<br />
Sensoren steuern lassen (Sonne ON). Diese Sonderfunktion<br />
schließt die Regen- und Sonnewächter aus,<br />
wogegen der Windwächter immer aktiviert bleibt, weil<br />
er eine Schutzvorrichtung ist.<br />
• Urlaub : aktiviert oder deaktiviert die automatischen<br />
Steuerbefehlen, die von den Wettersensoren<br />
kommen; Sie können dadurch wählen, ob die Automatismen<br />
direkt gesteuert werden sollen (Sonne OFF)<br />
oder diese von den Sensoren steuern lassen (Sonne<br />
ON). Diese Sonderfunktion schließt die Regen- und<br />
Sonnewächter aus, wogegen der Windwächter immer<br />
aktiviert bleibt, weil er eine Schutzvorrichtung ist.<br />
• Planetare Uhrzeit : jeden Tag und das ganze<br />
Jahr über wird die Berichtigung des programmierten<br />
Vorgangs je nach effektiver Uhrzeit des Sonnenaufgangs<br />
und des Sonnenuntergangs ausgeführt. Im<br />
Sommer werden die Vorgänge am Morgen vorverstellt<br />
und die am Nachmittag verzögert.<br />
• Befehl mit Zeitgebung : Sie können so eine<br />
Teilöffnung oder Teilschließung der Markise oder der<br />
Jalousie erhalten; praktisch wird kurze Zeit (von 1 bis<br />
99 Sekunden) nach der Sendung eines An- oder<br />
Abstiegsbefehls ein “Stop”-Befehl erteilt.<br />
Wenn Sie meinen, dass Sie diese Sonderfunktionen benutzen<br />
werden, können Sie weitere Einzelheiten in Kapitel 5 finden.<br />
2) Installation<br />
Dieses Kapitel ist jenem gewidmet, der die Arbeiten für<br />
die Installation und Inbetriebsetzung von PLANOTIME<br />
ausführen muss.<br />
Es werden hier besonders technische Themen behandelt,<br />
wenn aber die Anweisungen genau befolgt werden,<br />
kann es weder für Personen noch für die Automatismen<br />
Gefahren geben. Keinesfalls kann PLANOTIME Schäden<br />
davon tragen.<br />
Bitte beachten: in diesem Kapitel geht man von der Voraussetzung<br />
aus, dass man die Basisfunktionen von<br />
PLANOTIME bereits kennt und gebraucht; ggf. vorher<br />
auch die Kapitel 3 und 4 lesen.<br />
2.1) Schalten wir PLANOTIME ein<br />
PLANOTIME funktioniert mit einer bereits eingefügten<br />
Batterie, die aber nicht angeschlossen ist, damit sie<br />
nicht unnütz leer wird; zum Einschalten von PLANOTIME<br />
muss die Plastiklasche, die am Batterieabteil austritt,<br />
entfernt werden.<br />
Wenn sich PLANOTIME einschaltet, verlangt er sofort,<br />
dass die interne Uhr eingestellt wird.<br />
64
▼<br />
▼<br />
▼<br />
2.2) Anfängliche Einstellung der Uhr<br />
Zur Einstellung der Uhr, die Schritte in Tabelle Nr. 1 ausführen. Wenn man die Einstellung nicht machen will, Taste “■”<br />
drücken; in diesem Fall wird die Uhr um 00.00 am Sonntag beginnen.<br />
Tabelle 1 Zum Einstellen der Uhr nach Anschluss der Batterie Beispiel<br />
1. Tasten oder drücken, um die Stunde einzustellen<br />
▼<br />
▼<br />
2. Taste drücken, um die Stunde zu bestätigen<br />
3. Tasten oder drücken, um die Minuten einzustellen<br />
▼<br />
▼<br />
4. Taste drücken, um die Minuten zu bestätigen<br />
▼<br />
▼<br />
5. Tasten oder drücken, um den Wochentag zu wählen<br />
▼<br />
▼<br />
(Su=Sonntag; Mo=Montag; Tu=Dienstag; We=Mittwoch; Th=Donnerstag; Fr=Freitag; Sa=Samstag)<br />
6. Taste drücken, um den Tag zu bestätigen<br />
▼<br />
7. Tasten oder drücken, um die Zahl des Tags zu wählen “ ”<br />
▼<br />
8. Taste drücken, um den Tag zu bestätigen<br />
▼<br />
▼<br />
9. Tasten oder drücken, um die Zahl des Monats zu wählen “ ”<br />
▼<br />
▼<br />
(01=Januar; 02=Februar…12= Dezember)<br />
10. Taste drücken, um den Monat zu bestätigen<br />
▼<br />
11. Tasten oder drücken, um die Zahl des Jahrs zu wählen<br />
▼<br />
(zwischen inklusive 2000 und 2059)<br />
12. Taste drücken, um das Jahr zu bestätigen<br />
▼<br />
▼<br />
oder<br />
oder<br />
o<br />
oder<br />
oder<br />
oder<br />
Nur die Einstellung der Uhr ist bei jedem Batteriewechsel notwendig; alle Vorgänge und Parameter bleiben in PLANO-<br />
TIME immer gespeichert.<br />
D<br />
2.3) Speicherung von PLANOTIME in den Empfängern der Automatismen<br />
Jeder Funksender, daher auch PLANOTIME, wird von den Empfängern der Automatismen durch einen “Code”<br />
erkannt, der für jeden Sender anders ist. Es ist daher eine “Speicherungsphase” erforderlich, durch die der Automatismus<br />
auf die Erkennung des Codes von PLANOTIME vorbereitet wird. Wenn die Gruppe aus mehreren Automatismen<br />
besteht, muss die Speicherung für jede Gruppe wiederholt werden. PLANOTIME kann bis zu 6 Automatismusgruppen<br />
steuern und wird für jede dieser Gruppen einen anderen Code senden, daher muss vor Beginn der Speicherung<br />
beschlossen werden, welcher Gruppe der Automatismus angehören soll. Die Speicherung muss mit PLANOTI-<br />
ME im “manuellen” Modus erfolgen und es muss jeweils immer nur eine Gruppe gewählt werden. Drücken, um<br />
den “manuellen” Modus auszuwählen, dann eine Gruppe wählen und die Angaben in der Tabelle befolgen:<br />
Tabelle 2 Um den “manuellen” Modus auszuwählen und eine Gruppe zu wählen Beispiel<br />
1. Wiederholt und mehrmals Taste ■ drücken, bis die Anzeige Auto blinkt<br />
... Auto<br />
2. Taste drücken, um den “manuellen” Modus Man auszuwählen<br />
3. Taste drücken, um den Modus zu bestätigen<br />
▼<br />
4. Angefangen bei der ersten Gruppe, ggf. mehrmals Taste drücken, um<br />
eine andere Gruppe zu wählen<br />
5. Nun können die Tasten ■ benutzt werden, um Befehle zur gewählten Gruppe zu senden<br />
▼ ▼<br />
Tabelle 3 Um einen Befehl zur gewählten Gruppe zu senden Beispiel<br />
1. Eine der Tasten ■ drücken<br />
▼ ▼<br />
Tabelle 4 Um eine andere Gruppe zu wählen Beispiel<br />
1. Nach der Sendung mehrmals Taste drücken, um die gewünschte<br />
Gruppe zu wählen<br />
65
▼<br />
Tabelle 5 Um den “manuellen” Modus zu verlassen: Beispiel<br />
Oder:<br />
Nach der Sendung eines Befehls Taste<br />
▼<br />
drücken<br />
Prüfen, dass keine Gruppe gewählt ist, dann eine beliebige der Tasten ■<br />
drücken. (ggf. die gewählten Gruppen abwählen, indem sie durch Druck auf Taste<br />
gewählt und durch Druck auf Taste<br />
▼<br />
abgewählt werden)<br />
▼ ▼<br />
Oder:<br />
... Auto<br />
Wiederholt und mehrmals Taste ■ drücken, bis die Anzeige Auto blinkt<br />
! Achtung: die Speicherung des Codes kann in allen Empfängern erfolgen, die sich in der Reichweite von PLAN-<br />
OTIME befinden, daher sollte nur der betreffende Empfänger gespeist sein. Alle Speichersequenzen sind auf Zeit,<br />
bzw. sie müssen innerhalb vorgesehener Zeitgrenzen ausgeführt werden.<br />
2.3.1) Speicherung von PLANOTIME als erster Sender<br />
Wenn der Codespeicher des Automatismus noch keinen Code enthält, kann PLANOTIME nach folgendem Verfahren<br />
eingegeben werden:<br />
Tabelle 6 Um PLANOTIME als ersten Sender zu speichern Beispiel<br />
1. An PLANOTIME die Gruppe wählen, in die man den Automatismus im<br />
manuellen Modus speichern will (Tabelle 2)<br />
2. Den Automatismus speisen; gleich danach wird man 2 lange Bieptöne (biiip) ** hören<br />
3. Innerhalb von 5 Sekunden Taste ■ von PLANOTIME drücken und gedrückt<br />
halten (ca. 3 Sekunden lang)<br />
4. Taste ■ loslassen, wenn man den ersten der 3 Bieptöne hört, mit denen die<br />
Speicherung bestätigt wird<br />
3s<br />
** Wenn der Codespeicher des Automatismus bereits Codes enthält, wird man beim Einschalten 2 kurze Bieptöne<br />
(bip) hören; in diesem Fall nach den Anweisungen in der nächsten Tabelle vorgehen.<br />
2.3.2) Speicherung von PLANOTIME als weiterer Sender<br />
Wenn der Codespeicher des Automatismus bereits Codes anderer Sender enthält, kann PLANOTIME nach folgendem<br />
Verfahren eingegeben werden:<br />
Tabelle 7 Um PLANOTIME als weiteren Sender zu speichern Beispiel<br />
1. An PLANOTIME die Gruppe wählen, in die man den Automatismus im<br />
manuellen Modus speichern will (Tabelle 2)<br />
2. Taste ■ von PLANOTIME gedrückt halten, bis man einen Biepton des<br />
Automatismus hört (nach ca. 5 Sekunden)<br />
3. Langsam 3-Mal Taste ■ eines bereits gespeicherten und funktionierenden<br />
Senders drücken<br />
4. Noch einmal Taste ■ von PLANOTIME drücken<br />
5s<br />
Am Ende werden 3 Bieptöne des Automatismus angeben, dass PLANOTIME korrekt gespeichert worden ist.<br />
Falls der Codespeicher voll ist (14 Codes), werden 6 Bieptöne angeben, dass PLANOTIME nicht gespeichert werden<br />
kann.<br />
66
2.4) Befestigung von PLANOTIME<br />
Um die beste Stelle für die Befestigung von PLANOTIME<br />
zu wählen, halten Sie sich bitte an folgende Hinweise:<br />
• PLANOTIME eignet sich nur für den Gebrauch in<br />
geschützter Umgebung und kann nicht im Freien oder<br />
in Bereichen, die Witterung ausgesetzt sind, angebracht<br />
werden.<br />
• Die normale Befestigungshöhe ist 1,5m ab Boden, so<br />
dass PLANOTIME etwas von oben betrachtet wird.<br />
• Nicht in der Nähe oder, noch schlimmer, auf Metallstrukturen<br />
anbringen, da sie seine Reichweite reduzieren.<br />
• PLANOTIME an der Stelle auflegen, an der man ihn<br />
befestigen will, versuchen, die Automatismen zu steuern<br />
und prüfen, dass sie die gesendeten Funkbefehle<br />
empfangen.<br />
• Berücksichtigen, dass sich die Reichweite um<br />
20÷30% verringern kann, wenn die Batterie leer wird.<br />
Nachdem geprüft ist, dass das System korrekt funktioniert,<br />
kann PLANOTIME mit Schrauben und Dübeln wie<br />
auf der Abbildung gezeigt endgültig befestigt werden.<br />
! ACHTUNG: durch das Vorhandensein sonstiger<br />
Funksendevorrichtungen oder das Auftreten<br />
von elektromagnetischen Störungen kann sich<br />
die Reichweite von PLANOTIME drastisch reduzieren.<br />
Nice S.p.a. kann nicht garantieren, dass<br />
die gesendeten Steuerbefehle von den Automatismen<br />
empfangen werden (um dieses Risiko zu<br />
reduzieren, siehe auch Kapitel 8 “Was tun,<br />
wenn…”).<br />
D<br />
67
3) Beschreibung der Symbole<br />
Die auf PLANOTIME sichtbaren Symbole sind in 3 Bereiche aufgeteilt:<br />
• Bereich 1 links zeigt die Betriebsarten und die Programmierungen an<br />
• Bereich 2 Mitte zeigt den Wochentimer an<br />
• Bereich 3 rechts zeigt die Gruppen und die Sonderfunktionen an<br />
Bereich 1 Bereich 2 Bereich 3<br />
Tabelle 8 Liste der Symbole in Bereich 1<br />
Auto Anzeige des Betriebsmodus “Automatisch” (siehe Kapitel 4 und 4.2)<br />
Auto<br />
Anzeige des Betriebsmodus “Nicetime”, bzw. “manueller” Betriebsmodus mit Rückkehr zum “automatischen”<br />
Man Betriebsmodus an einem bestimmten Tag und zu einer bestimmten Stunde (siehe Kapitel 4 und 4.3)<br />
Man Anzeige des Betriebsmodus “Manuell” (siehe Kapitel 4 und 4.4)<br />
Man Rec Anzeige des Betriebsmodus “Manuell mit Recorder” (siehe Kapitel 4 und 4.5)<br />
Prog Anzeige, dass eine “Programmierungsphase” im Gang ist (siehe Kapitel 5)<br />
Zusammen mit “Prog” Anzeige der Programmierung eines Vorgangs<br />
NEW Zusammen mit “Prog” und “ ” Anzeige der Erstellung eines neuen Vorgangs (siehe Kapitel 5.2.1)<br />
MOD Zusammen mit “Prog” und “ ” Anzeige der Änderung eines Vorgangs (siehe Kapitel 5.2.2)<br />
DEL Zusammen mit “Prog” und “ ” Anzeige des Löschens eines Vorgangs (siehe Kapitel 5.2.3)<br />
COPY Zusammen mit “Prog” und “ ” Anzeige des Kopierens eines Vorgangs (siehe Kapitel 5.2.4)<br />
Zusammen mit “Prog” Anzeige der Einstellung der Uhr (siehe Kapitel 5.3)<br />
Zusammen mit “Prog” Anzeige der Einstellung der Parameter der Funktion “Urlaub”<br />
(siehe Kapitel 5.4)<br />
Zusammen mit “Prog” Anzeige der Einstellung der Parameter der Funktion “planetare Uhrzeit”<br />
(siehe Kapitel 5.5)<br />
Falls blinkend, Anzeige, dass die Batterie leer ist und schnellstens ausgewechselt werden muss<br />
Anzeige, dass die Sendung eines Funkbefehls im Gang ist<br />
Tabelle 9 Liste der Symbole in Bereich 2<br />
Anzeige der Stunden und Minuten oder anderer Parameter in Programmierungsphase<br />
Anzeige der Wochentage:<br />
Su= Sonntag Mo= Montag Tu= Dienstag<br />
We= Mittwoch Th= Donnerstag Fr= Freitag<br />
Sa= Samstag<br />
S Anzeige der Sommerzeit bzw. der gesetzlichen Zeit (siehe Kapitel 5.5)<br />
W Anzeige der Winterzeit bzw. der Sonnenzeit (siehe Kapitel 5.5)<br />
68
Tabelle 10 Liste der Symbole in Bereich 3<br />
Anzeige einer Sonderfunktion, um die automatischen Befehle zu aktivieren, die von den<br />
Wettersensoren kommen (siehe Kapitel 1.5)<br />
Anzeige einer Sonderfunktion, um die automatischen Befehle zu deaktivieren, die von den<br />
Wettersensoren kommen (siehe Kapitel 1.5)<br />
Anzeige eines Befehls mit Aktivierung der Sonderfunktion “Urlaub” (siehe Kapitel 1.5)<br />
Anzeige eines Befehls mit Aktivierung der Sonderfunktion “planetare Uhrzeit” (siehe Kapitel 1.5)<br />
Anzeige eines Befehls mit Aktivierung der Sonderfunktion “Befehl mit Zeitgebung ”<br />
(siehe Kapitel 1.5)<br />
1 .... 6 Anzeige der 6 Gruppen und der eventuellen Bewegungsrichtung<br />
4) Benutzung von PLANOTIME<br />
PLANOTIME kann auf verschiedene Betriebsarten benutzt werden:<br />
Auto Betriebsmodus “automatisch” (siehe Kapitel 4.2)<br />
Im “automatischen” Modus führt PLANOTIME die programmierten Vorgänge an den programmierten Tagen und<br />
Stunden aus.<br />
Auto Betriebsmodus “Nicetime” (siehe Kapitel 4.3)<br />
Man<br />
Im Modus “Nicetime” funktioniert PLANOTIME wie im “manuellen” Modus, mit der Besonderheit, dass er am programmierten<br />
Tag und zur programmierten Stunde allein auf den Betriebsmodus “automatisch” zurückkehren wird. Praktisch<br />
wird damit der Modus “automatisch” eine bestimmte Zeit lang unterbrochen.<br />
D<br />
Man Betriebsmodus “manuell” (siehe Kapitel 4.4)<br />
Im Modus “manuell” wird PLANOTIME nur die Befehle zu den gewählten Gruppen senden, die infolge der direkten<br />
Betätigung der Tasten ■ gegeben werden.<br />
Bitte beachten: der “manuelle” Modus ist der einzige, bei dem die Einstellung der Uhr unwichtig ist.<br />
▼ ▼<br />
Man Rec Betriebsmodus “manuell mit Recorder” (siehe Kapitel 4.5)<br />
Im Modus “manuell mit Recorder” PLANOTIME funktioniert PLANOTIME wie im “manuellen” Modus, mit der<br />
Besonderheit, dass die gesendeten Befehle als Vorgänge registriert und zusammen mit dem Tag und der Uhrzeit, an<br />
denen sie erfolgten, gespeichert werden. Wenn man PLANOTIME eine Woche lang im “manuellen” Modus benutzt,<br />
können so Vorgänge erstellt werden, ohne dass man sie einzeln programmieren muss.<br />
Prog Modus “Programmierung” (siehe Kapitel 5)<br />
Im Modus “Programmierung” können die Vorgänge programmiert, geändert, kopiert und gelöscht werden; man kann<br />
die Uhr und sonstige für den Betrieb von PLANOTIME nützliche Parameter einstellen.<br />
4.1) Wahl des Betriebsmodus<br />
Um in den gewünschten Betriebsmodus zu gehen, muss er im “Auswählmenü” gewählt und bestätigt werden.<br />
Das “Auswählmenü“ kann als Startpunkt betrachtet werden, um die Funktionen “Auto”, “Man”, “Man REC ” und “Prog”<br />
von PLANOTIME auszuwählen.<br />
Von jedem Betriebs- oder Programmierungsmodus von PLANOTIME kann man durch wiederholten und mehrmaligen<br />
Druck auf Taste ■ zum “Auswählmenü” zurückkehren, bis die Anzeige “Auto” blinkt.<br />
69
▼<br />
▼<br />
▼<br />
▼<br />
4.2) Funktionsweise im Modus “automatisch” Auto<br />
Tabelle 11 Um den Modus “automatisch” zu wählen Beispiel<br />
1. Wiederholt und mehrmals Taste ■ drücken, bis die Anzeige Auto blinkt<br />
... Auto<br />
2. Taste drücken, um den Modus “automatisch” zu bestätigen<br />
▼<br />
Bitte beachten: damit der Modus “automatisch” bestätigt werden kann, muss mindestens ein Vorgang programmiert sein.<br />
Tabelle 12 Um den Modus “automatisch” zu verlassen und zum Auswählmenü zurückzukehren Beispiel<br />
1. 2-Mal Taste drücken<br />
4.3) Funktionsweise im Modus “Nicetime”<br />
“Nicetime” ist ein besonderer Modus, mit dem der Modus “automatisch” eine gewisse Zeit über unterbrochen wird, um auf Modus<br />
“manuell” überzugehen. Der Modus “Nicetime” kann nur gewählt werden, wenn man sich im Modus “automatisch” befindet.<br />
Tabelle 13 Um vom Modus “automatisch” auf Modus “Nicetime” überzugehen Beispiel<br />
1. Taste drücken<br />
Auto<br />
2. Taste drücken, um den Modus “Nicetime” zu bestätigen<br />
Man<br />
3. Tasten oder drücken, um die Minuten einzustellen, zu denen man zum<br />
Modus “automatisch” zurückkehren will<br />
oder<br />
4. Taste drücken, um die Minuten zu bestätigen<br />
5. Tasten oder drücken, um die Minuten einzustellen, zu denen man zum<br />
Modus “automatisch” zurückkehren will<br />
oder<br />
6. Taste drücken, um die Minuten zu bestätigen<br />
7. Tasten oder drücken, um den Wochentag zu wählen, an dem man zum<br />
Modus “automatisch” zurückkehren will<br />
oder<br />
(Su=Sonntag; Mo=Montag; Tu=Dienstag; We=Mittwoch; Th=Donnerstag; Fr=Freitag; Sa=Samstag)<br />
8. Taste drücken, um den Tag zu bestätigen<br />
Ab diesem Augenblick wird PLANOTIME wie im Modus “manuell” funktionieren, und Sie können die Befehle durch<br />
Druck auf eine beliebige der Tasten ■ erteilen. PLANOTIME wird am programmierten Tag und zur programmierten<br />
Uhrzeit auf den Modus “automatisch” zurückkehren. Um vorzeitig aus dem Modus “Nicetime” herauszugehen<br />
und zum Auswählmenü zurückzukehren, siehe Tabelle 20<br />
▼<br />
▼<br />
▼<br />
▼<br />
▼<br />
▼<br />
▼<br />
4.4) Funktionsweise im Modus “manuell” Man<br />
Tabelle 14 Um den Modus “manuell” zu wählen Beispiel<br />
1. Wiederholt und mehrmals Taste ■ drücken, bis die Anzeige Auto blinkt<br />
... Auto<br />
2. Taste drücken, damit die Anzeige Man blinkt<br />
Man<br />
3. Taste drücken, um den Modus “manuell” zu bestätigen<br />
▼<br />
▼<br />
▼<br />
▼<br />
▼ ▼<br />
Auto<br />
Man<br />
Tabelle 15 Um eine Gruppe zu wählen und einen Befehl zu senden Beispiel<br />
1. Angefangen bei der ersten Gruppe, ggf. mehrmals Taste drücken, um eine<br />
...<br />
andere Gruppe zu wählen<br />
2. Nun können die Tasten ■ benutzt werden, um Befehle zur gewählten Gruppe zu senden<br />
▼ ▼<br />
Tabelle 16 Um einen Befehl zu der gewählten Gruppe zu senden Beispiel<br />
1. Eine der Tasten ■ drücken<br />
▼ ▼<br />
70
▼<br />
▼<br />
▼<br />
▼<br />
▼<br />
▼<br />
▼<br />
Tabelle 17 Um eine andere Gruppe zu wählen Beispiel<br />
1. Mehrmals Taste drücken, um die gewünschte Gruppe zu wählen<br />
...<br />
2. Nun können die Tasten ■ benutzt werden, um die Befehle zur gewählten Gruppe zu senden<br />
▼ ▼<br />
Tabelle 18 Um eine Vielfachgruppe zusammenzustellen und einen Befehl zu senden Beispiel<br />
1. Angefangen bei der ersten Gruppe, ggf. mehrmals Taste drücken, um eine<br />
...<br />
andere Gruppe zu wählen<br />
2. Taste drücken, um die Gruppe zu bestätigen<br />
3. Die zwei vorherigen Schritte wiederholen, um weitere Gruppen auszuwählen<br />
▼<br />
4. Nach der Zusammenstellung der Vielfachgruppe können die Tasten ■<br />
benutzt werden, um die Befehle zu senden<br />
Bitte beachten: eine irrtümlicherweise gewählte und bestätigte Gruppe kann durch mehrmaligen Druck auf Taste<br />
gelöscht werden, bis das Blinken auf der zu löschenden Gruppe erfolgt, dann Taste drücken.<br />
▼<br />
▼ ▼<br />
Tabelle 19 Um den Befehl einer Sonderfunktion zu einer Gruppe oder einer Vielfachgruppe zu senden Beispiel<br />
1. Angefangen bei der ersten Gruppe, ggf. mehrmals Taste drücken, um eine<br />
...<br />
andere Gruppe zu wählen<br />
2. Taste drücken, um die Gruppe zu bestätigen<br />
3. Ggf. die zwei vorherigen Schritte wiederholen, um weitere Gruppen auszuwählen<br />
4. Mehrmals Taste drücken, bis die Symbole der Sonderfunktionen “ ” oder<br />
... oder<br />
“ ”blinken<br />
▼<br />
5. Taste drücken, um die Sonderfunktion zu bestätigen<br />
▼<br />
6. Nun können die Tasten ■ benutzt werden, um die Befehle der<br />
Sonderfunktion zur gewählten Gruppe zu senden<br />
▼ ▼<br />
D<br />
Tabelle 20 Um den Modus “manuell” zu verlassen und zum Auswählmenü zurückzukehren: Beispiel<br />
Oder:<br />
Nach der Sendung eines Befehls, Taste drücken<br />
Prüfen, dass keine Gruppe gewählt ist abgewählt werden, dann eine beliebige<br />
der Tasten ■ drücken. (ggf. die gewählten Gruppen abwählen, indem sie durch<br />
▼ ▼<br />
▼<br />
Druck auf Taste gewählt und durch Druck auf Taste )<br />
Oder: Wiederholt und mehrmals Taste ■ drücken, bis die Anzeige Auto blinkt ... Auto<br />
▼<br />
4.5) Funktionsweise im Modus “manuell mit Recorder” Man<br />
Tabelle 21 Um den Modus “manuell mit Recorder” zu wählen Beispiel<br />
1. Wiederholt und mehrmals Taste ■ drücken, bis die Anzeige Auto blinkt<br />
... Auto<br />
2. 2-Mal Taste drücken, damit die Anzeige Man blinkt<br />
Man<br />
3. Taste drücken, um den Modus “manuell mit Recorder“ zu bestätigen<br />
▼<br />
Ab diesem Augenblick kann man PLANOTIME wie im “manuellen” Modus benutzen, mit der Besonderheit, dass alle<br />
Befehle, die mit den Tasten oder gesendet werden, mit dem Tag, den Stunden und den Minuten, an denen sie<br />
▼<br />
erteilt werden, als Vorgänge gespeichert werden. Bitte beachten: im Modus “manuell mit Recorder” können Vorgänge,<br />
die den Steuerbefehl “■” enthalten, nicht registriert werden.<br />
▼<br />
Ratschlag für die weniger Erfahrenen: Diesen Betriebsmodus benutzen, um Vorgänge zu speichern, ohne dass<br />
jeder Vorgang einzeln programmiert werden muss. Um die Vorgänge der ganzen Woche zu registrieren, in Modus<br />
“manuell mit Recoder” zum Beispiel am Anfang der Woche gehen, dann mit PLANOTIME jeden Tag zur gewünschten<br />
Uhrzeit die Befehle zum An- oder Abstieg der Automatismen erteilen. PLANOTIME am Anfang der nächsten Woche<br />
auf “automatisch” stellen, wodurch sich die Vorgänge in allen darauffolgenden Wochen automatisch wiederholen werden.<br />
Zum Löschen eines irrtümlicherweise registrierten Vorgangs siehe Kapitel 5.2.3..<br />
71
▼<br />
5) Wie wird PLANOTIME programmiert<br />
Mit PLANOTIME im Modus “Programmierung” können Vorgänge erstellt, geändert, kopiert und gelöscht werden; man<br />
kann die Uhr und andere, für den Betrieb von PLANOTIME nützliche Parameter einstellen.<br />
Prog Programmierung von Vorgängen (siehe Kapitel 5.2)<br />
In der Programmierung von “Vorgängen” ist folgendes möglich:<br />
NEW Eingabe eines neuen Vorgangs, wobei alle Eigenschaften dieses Vorgangs einzeln eingestellt werden können<br />
MOD Änderung eines Vorgangs, indem eine oder mehrere Eigenschaften des Vorgangs gewechselt werden<br />
COPY Kopieren eines Vorgangs, um einen neuen Vorgang angefangen bei den Eigenschaften des bereits<br />
vorhandenen zu erstellen<br />
DEL vollständiges Löschen eines Vorgangs<br />
Prog Einstellung der Uhr (siehe Kapitel 5.3)<br />
Die Einstellung der Uhr ist notwendig, damit PLANOTIME die Vorgänge zur vorgegebenen Uhrzeit ausführen kann. Wenn<br />
die Sonderfunktion “planetare Uhrzeit” benutzt wird, müssen neben den Stunden, Minuten und dem Wochentag auch der<br />
Tag des Monats, das Monat und das Jahr eingestellt werden, und als letztes, ob die aktuelle Uhrzeit die Winterzeit (Sonnenzeit)<br />
oder die Sommerzeit (gesetzliche Zeit) ist.<br />
Prog Einstellung der Parameter “Urlaub” (siehe Kapitel 5.4)<br />
Ermöglicht die Einstellung der maximal zulässigen Abweichung des Vorgangs vom eingegebenen Wert. Kann von<br />
einem Minimum von 0 Minuten (keine Abweichung) bis zu einem Maximum von 75 Minuten mehr oder weniger als<br />
der eingegebene Wert eingestellt werden.<br />
Prog Einstellung der Parameter “planetare Uhrzeit” (siehe Kapitel 5.5)<br />
Zur Einstellung der Parameter, die für die Berechnung der “planetaren Uhrzeit” notwendig sind:<br />
• Breitengrad des Orts im Vergleich zum Erdäquator (ist auf allen Landkarten angegeben).<br />
• Differenz zwischen von der Uhr angezeigter Uhrzeit und wahrer Sonnenuhrzeit<br />
• Anzeige, dass es sich bei der aktuellen Uhrzeit um die Winterzeit (Sonnenzeit) oder die Sommerzeit (gesetzliche Zeit) handelt.<br />
5.1) Auswahl des Programmierungstyps<br />
Um in den Modus “Programmierung” zu gehen, muss er gewählt und im “Auswählmenü” bestätigt werden.<br />
Das “Auswählmenü“ kann als Startpunkt für alle Funktionen von PLANOTIME betrachtet werden. Von jedem Betriebsoder<br />
Programmierungsmodus von PLANOTIME kann man durch wiederholten und mehrmaligen Druck auf Taste ■<br />
zum “Auswählmenü” zurückkehren, bis die Anzeige “Auto” blinkt.<br />
5.1.1) Vorwärts und rückwärts in der Programmierung<br />
Die Programmierung ist wie eine Strecke mit Etappen aufgebaut, die alle notwendigen Werte und Parameter durchgeht.<br />
Auf dieser Strecke ist zu bedenken, dass:<br />
• ein zu 50% blinkendes Symbol den Parameter anzeigt, der gerade programmiert wird, also die derzeitige Etappe<br />
• die Tasten oder den laufenden Parameter einstellen<br />
• Taste den Parameter bestätigt und man zur nächsten Etappe weitergeht<br />
• Taste ■ die eventuelle Wahl annulliert und man zur vorherigen Etappe zurückgeht<br />
• Taste einen Parameter wählt oder abwählt<br />
• ein zu 25% blinkendes Symbol bedeutet, dass der Parameter nicht ausgewählt ist<br />
• ein zu 75% blinkendes Symbol bedeutet, dass der Parameter ausgewählt ist<br />
• ein Parameter in einigen Fällen nur bestätigt werden kann, wenn zumindest eine Wahl getroffen ist; ein Vorgang kann<br />
zum Beispiel nur programmiert werden, nachdem mindestens ein Wochentag ausgewählt ist.<br />
▼<br />
▼<br />
▼<br />
72
5.2) Programmierung von “Vorgängen”<br />
Bei der Programmierung der Vorgänge müssen alle Eigenschaften, die dieser Vorgang hat, einzeln eingestellt werden:<br />
Tabelle 22 Eigenschaften der Vorgänge: Beispiel 1 Beispiel 2<br />
1. Stunden und Minuten, zu denen der Befehl gesendet werden muss 08.30<br />
18.45<br />
2. Wochentag(e), an dem (an denen) der Vorgang stattfinden muss Mo We Fr Sa<br />
3. Eine oder mehrere Gruppen und der jeweilige Befehl für<br />
2<br />
“Anstieg” oder “Abstieg”<br />
1<br />
4 5 6<br />
4. Vorhandensein oder nicht der Sonderfunktion “ ” oder<br />
“ ”<br />
5. Vorhandensein oder nicht der Sonderfunktion “Urlaub”<br />
6. Vorhandensein oder nicht der Sonderfunktion<br />
“planetare Uhrzeit”<br />
7. Vorhandensein oder nicht der Sonderfunktion<br />
“Befehl mit Zeitgebung”<br />
8. Im Falle der Sonderfunktion “Befehl mit Zeitgebung”, die Zeit<br />
in Sekunden zwischen dem Befehl und dem nächsten<br />
20<br />
“Stop-Befehl“<br />
▼<br />
▼ ▼ ▼<br />
▼<br />
D<br />
Beispiel Nr. 1: um 8.30 Uhr an jedem Montag wird<br />
Gruppe 1 einen Befehl für “Anstieg” empfangen.<br />
Beispiel Nr. 2: um 18.45 Uhr an jedem Mittwoch, Freitag<br />
und Sonntag wird Gruppe 2 einen Befehl für “Abstieg”<br />
und die Gruppen 4,5,6 einen Befehl für “Anstieg” empfangen;<br />
die Befehle sehen die Aktivierung der automatischen<br />
Steuerbefehle vor, die von den Wetterwächtern kommen.<br />
Die “planetare Uhrzeit” ist aktiviert, daher wird der Befehl<br />
im Vergleich zu 18.45 Uhr verschoben erteilt, um im Laufe<br />
des Jahrs dem Sonnenuntergang zu folgen. Die Befehle<br />
sind mit Zeitgebung bzw. sehen einen “Stop-Befehl”<br />
nach 20 Sekunden ab Bewegungsbeginn vor.<br />
73
▼<br />
▼<br />
5.2.1) Programmierung: neuer Vorgang NEW<br />
Tabelle 23 Programmierung eines einfachen „neuen Vorgangs” (Beispiel 1 in Tabelle Nr. 22): Beispiel<br />
1. Wiederholt und mehrmals Taste ■ drücken, bis die Anzeige Auto blinkt<br />
2. 3-Mal Taste drücken, um den Programmierungsmodus Prog zu wählen<br />
3. Taste drücken, um den Programmierungsmodus zu bestätigen”<br />
▼<br />
4. Taste drücken, um die Programmierung “Vorgänge” zu bestätigen<br />
▼<br />
5. Taste drücken, um die Programmierung “neuer Vorgang” NEW zu bestätigen<br />
6. Tasten oder drücken, um die Stunde einzustellen (im Beispiel: 08)<br />
▼<br />
▼<br />
▼<br />
7. Taste drücken, um die Stunde zu bestätigen<br />
8. Tasten oder drücken, um die Minuten einzustellen (im Beispiel: 30)<br />
▼<br />
▼<br />
9. Taste drücken, um die Minuten zu bestätigen<br />
▼<br />
▼<br />
10. Tasten oder drücken, um den Wochentag zu wählen<br />
▼<br />
(im Beispiel: Mo=Montag)<br />
▼<br />
11. Taste drücken, um den Wochentag auszuwählen<br />
12. Taste drücken, um den Wochentag zu bestätigen<br />
▼<br />
(im Beispiel: nur Mo=Montag)<br />
13. Taste drücken, um den Befehl “Anstieg” an Gruppe 1 zu wählen<br />
▼<br />
14. Taste drücken, um den Befehl zu bestätigen (im Beispiel: “Anstieg” an Gruppe 1 )<br />
▼<br />
15. Taste drücken, um den Vorgang zu bestätigen<br />
▼<br />
(im Beispiel: keine Sonderfunktion “ ” oder “ ”)<br />
16. Taste drücken, um den Vorgang zu bestätigen<br />
▼<br />
(im Beispiel: keine Sonderfunktion “Urlaub” )<br />
17. Taste drücken, um den Vorgang zu bestätigen<br />
▼<br />
(im Beispiel: keine Sonderfunktion “planetare Uhrzeit” )<br />
18. Taste drücken, um den Vorgang zu bestätigen<br />
▼<br />
(im Beispiel: keine Sonderfunktion “Befehl mit Zeitgebung” )<br />
19. Nun beginnen alle Teile des gewählten Vorgangs zu blinken, um so anzuzeigen, dass<br />
man am Ende der Strecke für die Erstellung des neuen Vorgangs angelangt ist.<br />
Taste drücken, um den Vorgang zu bestätigen, oder Taste ■, um rückwärts zu gehen.<br />
▼<br />
... Auto<br />
oder<br />
oder<br />
oder<br />
Mit der letzten Bestätigung wird der Vorgang gespeichert und PLANOTIME stellt sich auf die Programmierung eines<br />
anderen neuen Vorgangs ein; daher ab Punkt Nr. 5 dieser Tabelle weitermachen<br />
74
▼<br />
▼<br />
▼<br />
▼<br />
▼<br />
▼<br />
▼<br />
▼<br />
▼<br />
▼<br />
▼<br />
Tabelle 24 Programmierung eines vollständigen „neuen Vorgangs” (Beispiel 2 in Tabelle Nr. 22): Beispiel<br />
1. Wiederholt und mehrmals Taste ■ drücken, bis die Anzeige Auto blinkt<br />
... Auto<br />
2. 3-Mal Taste drücken, um den Programmierungsmodus Prog zu wählen<br />
3. Taste drücken, um den Programmierungsmodus zu bestätigen”<br />
▼<br />
4. Taste drücken, um die Programmierung “Vorgänge” zu bestätigen<br />
▼<br />
5. Taste drücken, um die Programmierung “neuer Vorgang” NEW zu bestätigen<br />
6. Tasten oder drücken, um die Stunde einzustellen (im Beispiel: 18)<br />
▼<br />
▼<br />
▼<br />
7. Taste drücken, um die Stunde zu bestätigen<br />
8. Tasten oder drücken, um die Minuten einzustellen (im Beispiel: 45)<br />
▼<br />
▼<br />
9. Taste drücken, um die Minuten zu bestätigen<br />
▼<br />
▼<br />
10. Tasten oder drücken, um den ersten Wochentag zu wählen<br />
▼<br />
(im Beispiel: We=Mittwoch )<br />
▼<br />
11. Taste drücken, um den ersten Wochentag auszuwählen<br />
12. Tasten oder drücken, um den zweiten Wochentag zu wählen<br />
▼<br />
(im Beispiel: Fr=Freitag )<br />
▼<br />
13. Taste drücken, um den zweiten Wochentag auszuwählen<br />
14. Tasten oder drücken, um den dritten Wochentag zu wählen<br />
▼<br />
(im Beispiel: Sa=Samstag)<br />
15. Taste drücken, um den dritten Wochentag auszuwählen<br />
17. Taste drücken, um die Gruppe 2 auszuwählen<br />
18. Taste drücken, um den Befehl “Abstieg” an Gruppe 2 zu wählen<br />
19. 2-Mal Taste drücken, um die Gruppe 4 auszuwählen<br />
28. Taste drücken, um den Vorgang zu bestätigen<br />
▼<br />
(im Beispiel: keine Sonderfunktion “Urlaub” )<br />
29. Taste drücken, um die Sonderfunktion “planetare Uhrzeit” auszuwählen<br />
30. Taste drücken, um den Vorgang zu bestätigen<br />
▼<br />
(im Beispiel: Sonderfunktion “planetare Uhrzeit” )<br />
31. Taste drücken, um die Sonderfunktion “Befehl mit Zeitgebung” auszuwählen<br />
32. Tasten oder drücken, um die Zeitgebung einzustellen (im Beispiel: 20 Sekunden)<br />
▼<br />
33. Taste drücken, um den Vorgang zu bestätigen<br />
▼<br />
(im Beispiel: Sonderfunktion “Befehl mit Zeitgebung” )<br />
34. Nun beginnen alle Teile des gewählten Vorgangs zu blinken, um so anzuzeigen, dass<br />
man am Ende der Strecke für die Erstellung des neuen Vorgangs angelangt ist.<br />
Taste drücken, um den Vorgang zu bestätigen, oder Taste ■, um rückwärts zu gehen.<br />
▼<br />
▼<br />
16. Taste drücken, um alle ausgewählten Tage zu bestätigen<br />
▼<br />
▼<br />
20. Taste drücken, um den Befehl “Anstieg” an Gruppe 4 zu wählen<br />
▼<br />
21. Taste drücken, um die Gruppe 5 auszuwählen<br />
22. Taste drücken, um den Befehl “Anstieg” an Gruppe 5 zu wählen<br />
▼<br />
23. Taste drücken, um die Gruppe 6 auszuwählen<br />
24. Taste drücken, um den Befehl “Anstieg” an Gruppe 6 zu wählen<br />
▼<br />
25. Taste drücken, um die Befehle zu bestätigen<br />
▼<br />
(im Beispiel: “Abstieg“ an Gruppe 2 und “Anstieg” an den Gruppen 4,5 und 6)<br />
26. Taste drücken, um die Sonderfunktion “ ”<br />
27. Taste drücken, um den Vorgang zu bestätigen<br />
▼<br />
(im Beispiel: Sendung des Befehls der Sonderfunktion “ ”)<br />
▼<br />
oder<br />
oder<br />
oder<br />
oder<br />
oder<br />
oder<br />
D<br />
Mit der letzten Bestätigung wird der Vorgang gespeichert und PLANOTIME stellt sich auf die Programmierung eines<br />
anderen neuen Vorgangs ein; daher ab Punkt Nr. 5 dieser Tabelle weitermachen.<br />
Bitte beachten: für die korrekte Funktionsweise der “planetaren Uhrzeit” müssen die jeweiligen Parameter eingestellt<br />
sein (siehe Tabelle 30)<br />
75
▼<br />
▼<br />
▼<br />
▼<br />
5.2.2) Programmierung: Änderung von Vorgängen MOD<br />
Alle programmierten Vorgänge können jederzeit geändert werden. Bevor ein Vorgang geändert wird, muss er gesucht<br />
und unter den anderen vorhandenen Vorgängen ausgewählt werden.<br />
Tabelle 25 Um einen Vorgang zu ändern Beispiel<br />
1. Wiederholt und mehrmals Taste ■ drücken, bis die Anzeige Auto blinkt<br />
... Auto<br />
2. 3-Mal Taste drücken, um den Programmierungsmodus Prog zu wählen<br />
3. Taste drücken, um den Programmierungsmodus zu bestätigen”<br />
▼<br />
4. Taste drücken, um die Programmierung “Vorgänge” zu bestätigen<br />
▼<br />
5. Taste drücken, um die Änderung von Vorgängen MOD auszuwählen<br />
6. Taste drücken, um die Änderung von Vorgängen zu bestätigen<br />
▼<br />
7. Tasten oder drücken, um den zu ändernden Vorgang zu wählen.<br />
Die Vorgänge können in zeitlicher Reihenfolge angefangen beim nahesten gezeigt<br />
werden; durch Druck auf geht man auf den Vorgang danach über, durch Druck<br />
auf auf den Vorgang davor.<br />
▼<br />
▼<br />
▼<br />
8. Taste drücken, um den ausgewählten Vorgang zu bestätigen<br />
▼<br />
▼<br />
Ab nun erfolgt die Änderung wie auf der Strecke der Programmierung “neuer Vorgang” (siehe Kapitel 5.2.1), und alle<br />
Eigenschaften des Vorgangs können einzeln geändert und bestätigt werden. Nach Änderung und Bestätigung des<br />
letzten Parameters wird der Vorgang neu gespeichert und PLANOTIME stellt sich auf die Änderung eines anderen<br />
Vorgangs ein, daher ab Punkt Nr. 6 dieser Tabelle weitermachen.<br />
oder<br />
5.2.3) Programmierung: Löschen von Vorgängen DEL<br />
Alle programmierten Vorgänge können jederzeit gelöscht werden. Bevor ein Vorgang gelöscht wird, muss er gesucht<br />
und unter den anderen vorhandenen Vorgängen ausgewählt werden.<br />
Tabelle 26 Um einen Vorgang zu löschen Beispiel<br />
1. Wiederholt und mehrmals Taste ■ drücken, bis die Anzeige Auto blinkt<br />
... Auto<br />
2. 3-Mal Taste drücken, um den Programmierungsmodus Prog zu wählen<br />
3. Taste drücken, um den Programmierungsmodus zu bestätigen”<br />
▼<br />
4. Taste drücken, um die Programmierung “Vorgänge” zu bestätigen<br />
5. 2-Mal Taste drücken, um das Löschen der Vorgänge DEL zu wählen<br />
▼<br />
6. Taste drücken, um das Löschen der Vorgänge zu bestätigen<br />
▼<br />
7. Tasten oder drücken, um den zu löschenden Vorgang zu wählen.<br />
Die Vorgänge können in zeitlicher Reihenfolge angefangen beim nahesten gezeigt<br />
werden; durch Druck auf geht man auf den Vorgang danach über, durch Druck<br />
auf auf den Vorgang davor.<br />
▼<br />
▼<br />
▼<br />
8. Taste drücken, um den ausgewählten Vorgang zu bestätigen<br />
▼<br />
▼<br />
9. Taste drücken, um das Löschen des ausgewählten Vorgangs zu bestätigen.<br />
Will man das Löschen nicht bestätigen, Taste ■ drücken und ab Punkt 7 dieser<br />
Tabelle weitermachen.<br />
▼<br />
oder<br />
Nachdem ein Vorgang gelöscht ist, stellt sich PLANOTIME auf das Löschen eines anderen Vorgangs ein, daher ab<br />
Punkt Nr. 6 dieser Tabelle weitermachen.<br />
76
▼<br />
▼<br />
▼<br />
▼<br />
5.2.4) Programmierung: Kopieren von Vorgängen COPY<br />
Um einen neuen Vorgang, der einem bereits vorhandenen ähnelt, schnell zu programmieren, kann eine Kopie des Vorgangs<br />
gemacht werden, wonach die Parameter, die anders sind, geändert werden können.<br />
Tabelle 27 Um einen neuen Vorgang durch das Kopieren eines bereits vorhandenen zu programmieren Beispiel<br />
1. Wiederholt und mehrmals Taste ■ drücken, bis die Anzeige Auto blinkt<br />
... Auto<br />
2. 3-Mal Taste drücken, um den Programmierungsmodus Prog zu wählen<br />
3. Taste drücken, um den Programmierungsmodus zu bestätigen”<br />
▼<br />
4. Taste drücken, um die Programmierung “Vorgänge” zu bestätigen<br />
▼<br />
5. 3-Mal Taste drücken, um das Kopieren von Vorgängen COPY auszuwählen<br />
6. Taste drücken, um das Kopieren von Vorgängen zu bestätigen<br />
▼<br />
7. Tasten oder drücken, um den zu kopierenden Vorgang zu wählen.<br />
Die Vorgänge können in zeitlicher Reihenfolge angefangen beim nahesten gezeigt<br />
werden; durch Druck auf geht man auf den Vorgang danach über, durch Druck<br />
auf auf den Vorgang davor.<br />
▼<br />
▼<br />
▼<br />
8. Taste drücken, um den gewählten Vorgang zu bestätigen<br />
▼<br />
▼<br />
Ab nun erfolgt die Änderung des kopierten Vorgangs wie auf der Strecke der Programmierung “neuer Vorgang” (siehe<br />
Kapitel 5.2.1), und alle Eigenschaften des Vorgangs können einzeln geändert und bestätigt werden. Nach Änderung und<br />
Bestätigung des letzten Parameters wird der kopierte Vorgang neu gespeichert und PLANOTIME stellt sich auf das<br />
Kopieren eines anderen Vorgangs ein, daher ab Punkt Nr. 6 dieser Tabelle weitermachen.<br />
5.3) Einstellung der Uhr<br />
Die Einstellung der Uhr wird gleich nach Anschluss der Batterie ausgeführt, aber eine Korrektur der Uhr kann auch<br />
bei anderen Gelegenheiten erforderlich sein, wie zum Beispiel beim Wechsel von der Winterzeit (Sonnenzeit) auf die<br />
Sommerzeit (gesetzliche Zeit).<br />
oder<br />
D<br />
Tabelle 28 um die Uhr einzustellen Beispiel<br />
1. Wiederholt und mehrmals Taste ■ drücken, bis die Anzeige Auto blinkt<br />
... Auto<br />
2. 3-Mal Taste drücken, um den Programmierungsmodus Prog zu wählen<br />
3. Taste drücken, um den Programmierungsmodus zu bestätigen”<br />
4. Taste drücken, um die Einstellung der Uhr auszuwählen<br />
5. Taste drücken, um die Einstellung der Uhr zu bestätigen<br />
6. Tasten oder drücken, um die Stunde einzustellen<br />
oder<br />
7. Taste drücken, um die Stunde zu bestätigen<br />
8. Tasten oder drücken, um die Minuten einzustellen<br />
oder<br />
9. Taste drücken, um die Minuten zu bestätigen<br />
10. Tasten oder drücken, um den Wochentag zu wählen<br />
oder<br />
(Su=Sonntag; Mo=Montag; Tu=Dienstag; We=Mittwoch; Th=Donnerstag; Fr=Freitag; Sa=Samstag)<br />
11. Taste rücken, um den Wochentag zu bestätigen<br />
12. Tasten oder drücken, um die Zahl des Wochentags zu wählen<br />
oder<br />
13. Taste drücken, um den Tag zu bestätigen<br />
14. Tasten oder drücken, um die Zahl des Monats zu wählen<br />
oder<br />
(01=Januar; 02=Februar…12= Dezember)<br />
15. Taste drücken, um den Monat zu bestätigen<br />
16. Tasten oder drücken, um die Zahl des Jahrs zu wählen (zwischen inklusive 2000 und 2059) oder<br />
17. Taste drücken, um das Jahr zu bestätigen<br />
Bitte beachten: Wenn die Sonderfunktion “planetare Uhrzeit” benutzt wird, muss neben den Stunden, Minuten, dem<br />
Wochentag und dem Tag des Monats, dem Monat und dem Jahr auch eingestellt werden, ob die aktuelle Uhrzeit die Winterzeit<br />
(Sonnenzeit) oder die Sommerzeit (gesetzliche Zeit) ist; siehe Tabelle 30.<br />
▼<br />
▼<br />
▼<br />
▼<br />
▼<br />
▼<br />
▼<br />
▼<br />
▼<br />
▼<br />
▼<br />
▼<br />
▼<br />
▼<br />
▼<br />
▼<br />
▼<br />
▼<br />
▼<br />
▼<br />
77
▼<br />
▼<br />
▼<br />
▼<br />
5.4) Einstellung der Parameter der Sonderfunktion “Urlaub”<br />
Für die korrekte Funktionsweise der Sonderfunktion “Urlaub” muss die maximal zulässigen Abweichung eingestellt werden.<br />
Der Wert kann von 0 bis 75 Minuten sein und in Stufen von 5 Minuten eingestellt werden. Mit einem auf 15 eingestellten Wert<br />
kann das Ergebnis zum Beispiel sein, dass ein für 08.00 Uhr programmierter Vorgang wie zufällig zwischen 7.45 und 8.15 Uhr<br />
ausgeführt wird. Die Änderung dieses Parameters wirkt sich auf alle Vorgänge aus, für die diese Sonderfunktion aktiviert ist.<br />
Tabelle 29 Um die Parameter der Sonderfunktion “Urlaub” einzustellen Beispiel<br />
1. Wiederholt und mehrmals Taste ■ drücken, bis die Anzeige Auto blinkt<br />
2. 3-Mal Taste drücken, um den Programmierungsmodus Prog zu wählen<br />
3. Taste drücken, um den Programmierungsmodus zu bestätigen”<br />
▼<br />
4. 2-Mal Taste drücken, um die Einstellung der Parameter der Funktion “Urlaub”<br />
auszuwählen<br />
5. Taste drücken, um die Einstellung der Parameter der Funktion “Urlaub ” zu<br />
bestätigen<br />
▼<br />
6. Tasten oder drücken, um die maximale Abweichung in Minuten einzustellen<br />
▼<br />
7. Taste drücken, um den Wert zu bestätigen<br />
▼<br />
▼<br />
oder<br />
... Auto<br />
5.5) Einstellung der Parameter der Sonderfunktion “planetare Uhrzeit”<br />
Für die korrekte Funktionsweise der Sonderfunktion “planetare Uhrzeit” müssen einige Parameter eingestellt werden:<br />
• Breitengrad des Orts im Vergleich zum Erdäquator, zwischen 65° (zum Nordpol hin) und -65° (zum Südpol hin) mit<br />
Durchgang durch 0° (Äquator) regelbar.<br />
Um den annähernden Wert “ ” zu finden, der in Planotime einzugeben ist, beziehen Sie sich bitte auf die Abbildung<br />
auf der nächsten Seite oder auf eine beliebige vereinzeltere Landkarte.<br />
• Differenz zwischen von der Uhr angezeigter Uhrzeit und wahrer Sonnenuhrzeit “ ”, also praktisch die Differenz<br />
zwischen von der Uhr gezeigtem Mittag und wahrem Sonnenmittag am Ort; kann zwischen 0 und ±99 Minuten<br />
geregelt werden. In Kapitel “Was tun, wenn…” ist eine Art und Weise beschrieben, um diesen Wert zu messen.<br />
Falls keine genauere Einstellung benötigt wird, kann dieser Parameter auf Null gelassen werden.<br />
• Anzeige, ob es sich bei der aktuellen Uhrzeit um die Winterzeit (Sonnenzeit) oder die Sommerzeit (gesetzliche Zeit)<br />
handelt.<br />
Tabellae 30 Um die Parameter der Sonderfunktion “planetare Uhrzeit” einzustellen Beispiel<br />
1. Wiederholt und mehrmals Taste ■ drücken, bis die Anzeige Auto blinkt<br />
... Auto<br />
78<br />
2. 3-Mal Taste drücken, um den Programmierungsmodus Prog zu wählen<br />
3. Taste drücken, um den Programmierungsmodus zu bestätigen<br />
▼<br />
4. 3-Mal Taste drücken, um die Einstellung der Parameter der Funktion<br />
“planetare Uhrzeit” auszuwählen<br />
5. Taste drücken, um die Einstellung der Parameter der Funktion<br />
“planetare Uhrzeit” zu bestätigen<br />
▼<br />
6. Tasten oder drücken, um den Breitengrad des Orts “ ” einzustellen<br />
7. Taste drücken, um den Wert zu bestätigen<br />
▼<br />
▼<br />
9. Taste drücken, um den Wert zu bestätigen<br />
▼<br />
10. Tasten oder drücken, um zu wählen, ob es sich um die Winterzeit<br />
“S” (Sonnenzeit) oder die Sommerzeit “W” (gesetzliche Zeit) handelt<br />
▼<br />
11. Taste drücken, um den Parameter zu bestätigen<br />
Nach der Eingabe von einem oder mehreren Vorgängen, für die diese Sonderfunktion aktiviert ist, sollten diese<br />
Parameter nicht mehr geändert werden.<br />
▼<br />
▼<br />
8. Tasten oder drücken, um die Differenz zwischen von der Uhr angezeigter<br />
Uhrzeit und wahrer Sonnenuhrzeit “ ” einzustellen.<br />
▼<br />
▼<br />
▼<br />
oder<br />
oder<br />
oder
6) Auswechseln der Batterie<br />
Wenn die Anzeige Batterie leer “ ” aufleuchtet, muss<br />
die Batterie schnellstens ausgewechselt werden, da in<br />
dieser Lage die große Gefahr besteht, dass die Befehle<br />
nicht korrekt gesendet werden. Zum Auswechseln der<br />
Batterie muss das Batterieabteil geöffnet werden, dann<br />
wie auf den Abbildungen gezeigt vorgehen.<br />
Nach dem Auswechseln der Batterie muss die interne<br />
Uhr eingestellt werden (siehe Kapitel 2.2).<br />
Achtung: Batterien enthalten Schadstoffe; nicht in den<br />
Stadtmüll geben, sondern nach den örtlichen Verordnungen<br />
entsorgen.<br />
D<br />
7) Wichtige Hinweise<br />
Für den Gebrauch von PLANOTIME sind keine besonderen<br />
Hinweise erforderlich, berücksichtigen Sie aber<br />
bitte, dass:<br />
• die von PLANOTIME per Funk gesendeten Befehle<br />
nicht mit 100%iger Garantie von den Automatismen<br />
empfangen werden.<br />
• einige Bestandteile von PLANOTIME Schadstoffe enthalten<br />
können, daher nicht in die Umwelt geben.<br />
79
▼<br />
8) Was tun, wenn….<br />
• Um die Sicherheit zu erhöhen, dass ein Befehl<br />
empfangen wird: den Befehl 2-Mal oder öfter zur<br />
gleichen Uhrzeit (den Vorgang kopieren) oder eine<br />
Minute danach ein zweites Mal eingeben.<br />
• Man will, dass PLANOTIME aus einer beliebigen<br />
Programmierung oder einem beliebigen<br />
Betriebsmodus: wiederholt und mehrmals Taste ■<br />
drücken, bis die Anzeige “Auto” leuchtet, danach<br />
kann der gewünschte Betriebsmodus durch Druck<br />
auf Taste<br />
gewählt werden.<br />
• Man die Differenz zwischen von der Uhr angegebener<br />
Uhrzeit und wahrer Sonnenzeit messen<br />
will: der von der Sonderfunktion “planetare Uhrzeit”<br />
geforderte Wert ist praktisch die Differenz zwischen<br />
von der Uhr angezeigtem Mittag und wahrem<br />
Sonnenmittag am Ort. Eine sehr einfache Methode zur<br />
Messung dieses Werts ist, den Schatten zu beobachten,<br />
den die Sonne auf einen Gegenstand wirft (der<br />
Gegenstand sollte vorzugsweise ganz vertikal und spitz<br />
sein, zum Beispiel ein Mast); bis Sonnenmittag wird der<br />
Schatten kürzer und verlängert sich dann am Nachmittag.<br />
Sonnenmittag ist, wenn der Schatten die kleinste<br />
Länge im Vergleich zur Basis des Gegenstands erreicht<br />
hat. An diesem Zeitpunkt von der Uhrzeit, die von der<br />
Uhr angegeben ist, eine Stunde abziehen, wenn man in<br />
der Sommerzeit (gesetzliche Zeit) ist, dann die Differenz<br />
in Minuten im Vergleich zu 12.00 Uhr berechnen; das<br />
Ergebnis ist der Wert, der in PLANOTIME eingegeben<br />
werden muss. Wenn der wahre Sonnenmittag zum<br />
Beispiel um 12.25 Uhr erfolgt, muss der Wert 25 eingegeben<br />
werden; wenn er dagegen um 11.47 Uhr erfolgt,<br />
muss der Wert –13 eingegeben werden.<br />
Bitte beachten: die beschriebene Methode berücksichtigt<br />
keine astronomischen Phänomene, aber der Fehler ist für<br />
die Funktionsweise von PLANOTIME unbedeutend.<br />
8.1) Fehlerliste<br />
Es kommt sehr selten vor, dass PLANOTIME nicht korrekt funktioniert; die Fehlerursache wird in solchen Fällen immer<br />
angezeigt. Die hier folgende Tabelle enthält eine Liste der Fehler mit den möglichen Lösungen.<br />
Tabelle 31: Fehlerliste<br />
Fehler N° Beschreibung Lösung<br />
Err1<br />
Err2<br />
Err3<br />
Err4<br />
Err5<br />
Es sind bereits mehr als 100 Vorgänge programmiert und für weitere<br />
Speicher voll<br />
Vorgänge ist kein Speicherraum mehr vorhanden. Lösungen<br />
Kommunikationsfehler zwischen<br />
gibt es nicht, der letzte Vorgang wird nicht gespeichert.<br />
den Es handelt sich um einen sehr besonderen Defekt; versuchen,<br />
Innenteilen von PLANOTIME<br />
die Batterie herauszunehmen und wieder einzusetzen.<br />
Einige Parameter der gespeicherten Vorgänge sind unkorrekt;<br />
es könnte sich um einen Kommunikationsfehler zwischen<br />
den Innenteilen von PLANOTIME handeln; versu-<br />
Fehler in den Parametern von einem oder<br />
mehreren Vorgängen<br />
chen, die Batterie herauszunehmen und wieder einzusetzen.<br />
Die Parameter der<br />
Falls die Fehleranzeige bleibt, in Änderung von Vorgän-<br />
gen gehen und die Parameter aller Vorgänge kontrollieren.<br />
Sonderfunktion Kein schwerer Fehler; berücksichtigen Sie aber, dass die<br />
“Urlaub” haben sich geändert, nachdem nächsten Vorgänge bereits mit den alten Parametern<br />
einige Vorgänge mit den früheren Parametern<br />
berechnet sind; die neuen Parameter werden ab der näch-<br />
berechnet worden sind sten Durchführung des Vorgangs angewendet.<br />
Die Parameter der Sonderfunktion “planetare<br />
Parameter sollten nach der Programmierung von Vorgändem<br />
Uhrzeit” haben sich geändert, nachgen<br />
nicht geändert werden; ggf. die Korrektheit der Vorgän-<br />
einige Vorgänge mit den früheren ge nach der Änderung überprüfen.<br />
Parametern berechnet worden sind<br />
80
9) Technische Merkmale<br />
Für eine Verbesserung der Produkte behält sich NICE S.p.a. das Recht vor, die technischen Merkmale jederzeit und ohne<br />
vorherige Benachrichtigung zu ändern, wobei aber vorgesehene Funktionalitäten und Einsätze garantiert bleiben.<br />
Bitte beachten: alle technischen Merkmale beziehen sich auf eine Temperatur von 20°C.<br />
Versorgung<br />
: 3Vdc mit Nr. 1 Lithiumbatterie CR2450<br />
Dauer der Batterie : ca. 2 Jahre (bei 10 Vorgängen/Tag)<br />
Frequenz<br />
: 433.92MHz ±100 KHz<br />
Ausgestrahlte Leistung : ca. 1mW<br />
Durchschnittliche Reichweite : ca. 25 Meter in Gebäuden.<br />
(durch elektromagnetische Störungen kann die Reichweite drastisch reduziert werden)<br />
Codierung<br />
: 52 Bit Rolling Code FLOR+INFO<br />
Auflösung der Uhr<br />
: 1 Minute<br />
Präzision der Uhr<br />
: ± 100 Sekunden/Jahr<br />
Max. Anzahl an Vorgängen : 100<br />
Schutzart : IP 40<br />
Betriebstemperatur. : -5°C ÷ 50°C<br />
Abmessungen/Gewicht : 80x80x1.2mm / 75g<br />
A1 Nachtrag<br />
D<br />
Die folgende Tabelle vor der Programmierung verwenden, um die Vorgänge „aufzuzeichnen“, und als Gedächtnishilfe<br />
für die gespeicherten Vorgänge.<br />
Tabelle A1: Beispiel für die Zusammenstellung von Vorgängen und Promemoria der Vorgänge<br />
Name Uhrzei Tage Gruppen Sonderfunktionen<br />
Su Mo Tu We Th Fr Sa 1 2 3 4 5 6<br />
Beispiel 1 08.30<br />
X<br />
Su Mo Tu We Th Fr Sa 1 2 3 4 5 6<br />
Beispiel 2 18.30<br />
X X X X<br />
X X 20<br />
Su Mo Tu We Th Fr Sa 1 2 3 4 5 6<br />
Su Mo Tu We Th Fr Sa 1 2 3 4 5 6<br />
Su Mo Tu We Th Fr Sa 1 2 3 4 5 6<br />
Su Mo Tu We Th Fr Sa 1 2 3 4 5 6<br />
Su Mo Tu We Th Fr Sa 1 2 3 4 5 6<br />
Su Mo Tu We Th Fr Sa 1 2 3 4 5 6<br />
Su Mo Tu We Th Fr Sa 1 2 3 4 5 6<br />
Su Mo Tu We Th Fr Sa 1 2 3 4 5 6<br />
81
Índice de los capítulos:<br />
pág<br />
pág<br />
1 Descripción 83<br />
1.1 Qué es PLANOTIME 83<br />
1.2 Hay que programarlo necesariamente? 83<br />
1.3 Qué es un evento? 83<br />
1.4 Qué son los grupos? 84<br />
1.5 Qué son los mandos especiales? 84<br />
2 Instalación 84<br />
2.1 Encendido de PLANOTIME 84<br />
2.2 Ajuste inicial del reloj 85<br />
2.3 Memorización de PLANOTIME en los 85<br />
receptores de los automatismos<br />
2.3.1 Memorización de PLANOTIME 86<br />
como primer transmisor<br />
2.3.2 Memorización de PLANOTIME 86<br />
como otro transmisor<br />
2.4 Fijación de PLANOTIME 87<br />
3 Descripción de los símbolos 88<br />
4 Cómo usar PLANOTIME 89<br />
4.1 Selección de los modos de funcionamiento 89<br />
4.2 Funcionamiento en modo “automático” 90<br />
4.3 Funcionamiento en modo “Nicetime” 90<br />
4.4 Funcionamiento en modo “manual” 90<br />
4.5 Funcionamiento en modo 91<br />
“manual con registrador”<br />
5 Cómo programar PLANOTIME 92<br />
5.1 Selección del tipo de programación 92<br />
5.1.1 Avance y retroceso para la programación 92<br />
5.2 Programación de “eventos” 93<br />
5.2.1 Programación: evento nuevo 94<br />
5.2.2 Programación: modificación de eventos 96<br />
5.2.3 Programación: cancelación de eventos 96<br />
5.2.4 Programación: copiado de eventos 97<br />
5.3 Ajuste del reloj 97<br />
5.4 Regulación de los parámetros del mando 98<br />
especial “en vacaciones”<br />
5.5 Regulaciones de los parámetros del 98<br />
mando especial “horario planetario”<br />
6 Sustitución de la pila 99<br />
7 Advertencias 99<br />
8 Qué hacer si… 100<br />
8.1 Lista de los errores 100<br />
9 Características técnicas 101<br />
A1 Apéndice 101<br />
Índice de las tablas:<br />
pág<br />
pág<br />
Tabla N° 1: para ajustar el reloj después de 85<br />
de conectar la pila<br />
Tabla N° 2: para seleccionar el modo “manual” y 85<br />
un grupo<br />
Tabla N° 3: para enviar un mando al mismo grupo 85<br />
Tabla N° 4: para seleccionar otro grupo 85<br />
Tabla N° 5: para salir del modo “manual” 86<br />
Tabla N° 6: para memorizar PLANOTIME como 86<br />
como primer transmisor<br />
Tabla N° 7: para memorizar PLANOTIME como 86<br />
otro transmisor<br />
Tabla N° 8: Lista de los símbolos de la zona 1 88<br />
Tabla N° 9: Lista de los símbolos de la zona 2 88<br />
Tabla N°10: Lista de los símbolos de la zona 3 89<br />
Tabla N° 11: para seleccionar el modo “automático” 90<br />
Tabla N° 12: para salir del modo “automático” y 90<br />
volver al menú de selección<br />
Tabla N° 13: para pasar desde el modo 90<br />
“automático” al modo “Nicetime”<br />
Tabla N° 14: para seleccionar el modo “manual” 90<br />
Tabla N° 15: para seleccionar un grupo y enviar 90<br />
un mando<br />
Tabla N° 16: para enviar un mando al mismo grupo 90<br />
Tabla N° 17: para seleccionar otro grupo 91<br />
Tabla N° 18: para componer un grupo múltiple y 91<br />
enviar un mando<br />
Tabla N° 19: para enviar un mando especial a un 91<br />
grupo o grupo múltiple<br />
Tabla N° 20: para salir del modo “manual” y 91<br />
volver al menú de selección<br />
Tabla N° 21: para seleccionar el modo “manual 91<br />
con registrador”<br />
Tabla N° 22: propiedades de los eventos 93<br />
Tabla N° 23: para programar un “evento nuevo” 94<br />
solo<br />
Tabla N° 24: para programar un “evento nuevo” 95<br />
completo<br />
Tabla N° 25: para modificar un evento 96<br />
Tabla N° 26: para cancelar un evento 96<br />
Tabla N° 27: para programar un evento nuevo 97<br />
copiando uno presente<br />
Tabla N° 28: para ajustar el reloj 97<br />
Tabla N° 29: para regular los parámetros del 98<br />
mando especial “en vacaciones”<br />
Tabla N° 30: para regular los parámetros del 98<br />
mando especial “horario planetario”<br />
Tabla N° 31: lista de los errores 100<br />
82
Display<br />
Botones<br />
Stop<br />
Botones<br />
Subida<br />
Botones<br />
ConfIRMAR<br />
Botones<br />
Bajada<br />
Botones<br />
Selección<br />
Pila<br />
1) Descripción<br />
En este capítulo describiremos las características fundamentales<br />
de PLANOTIME.<br />
Lea con atención esta parte porque conociendo el producto<br />
le será más fácil usarlo.<br />
1.1) Qué es PLANOTIME<br />
PLANOTIME es un transmisor para accionar automatismos<br />
de persianas y toldos; permite accionar hasta 6<br />
grupos de automatismos. Puede funcionar en modo<br />
“manual” en el Ud. acciona los automatismos, o bien en<br />
modo “automático” en el los automatismos son accionados<br />
por PLANOTIME en los días y en los horarios programados.<br />
E<br />
1.2) Hay que programarlo necesariamente?<br />
Lamentablemente sí!. PLANOTIME no conoce sus<br />
costumbres; si desea usarlo en modo “automático”<br />
deberá saber a qué hora desea bajar los toldos y deberá<br />
saber que, por lo general, el Domingo Ud. desea<br />
descansar algunos minutos más con las persianas bajas.<br />
La lógica de programación y de funcionamiento de PLA-<br />
NOTIME en modo “automático” es aquella del evento.<br />
1.3) Qué es un evento?<br />
Un evento es la acción de un mando automático de movimiento<br />
(apertura o cierre de persianas, levantamiento y<br />
bajada de toldos, etc.) en un determinado momento del<br />
día, en uno o vario días de la semana.<br />
Por ejemplo, un evento es el mando de apertura de las<br />
persianas a las 8:30 horas del Sábado y Domingo, mientras<br />
que otro evento es la recogida de los toldos a las<br />
18:45 de todos los días de la semana.<br />
83
1.4) Qué son los grupos?<br />
Un “grupo” es un automatismo solo o un conjunto de<br />
automatismos accionados todos juntos; por ejemplo, el<br />
toldo que da al Sur puede ser el primer grupo, los toldos<br />
que dan a Oeste pueden ser el segundo grupo y todas<br />
las persianas de la sala de estar pueden ser el tercer grupo.<br />
PLANOTIME puede accionar hasta 6 grupos individualmente<br />
o varios grupos simultáneamente combinados<br />
entre sí (grupo múltiple).<br />
Los grupos se componen durante la memorización del<br />
código radio, tal como descrito en el capítulo 2.3<br />
1.5) Qué son los mandos especiales?<br />
Cuando se produce un evento, PLANOTIME envía un<br />
mando a los grupos afectados por el evento. Normalmente,<br />
los mandos prevén la apertura o el cierre de los<br />
automatismos, pero dichos mandos pueden estar asociados<br />
a funciones especiales:<br />
• Sole ON o bien Sole OFF : activa o desactiva<br />
los mandos automáticos que provienen de los<br />
sensores climáticos; le permiten elegir si accionar<br />
directamente los automatismos (Sol OFF) o dejar que<br />
los sensores los accionen (Sol ON). Dicho mando (Sol<br />
OFF) excluye los sensores de Lluvia y Sol, mientras<br />
que el sensor de Viento, siendo una protección, siempre<br />
queda activo.<br />
• En vacaciones : desplaza, de manera casual, el<br />
horario del evento algunos minutos (de 0 a 75) respecto<br />
de aquel programado; le permite simular la presencia<br />
de personas en la casa incluso cuando no hay nadie.<br />
• Horario planetario : día a día, durante el año,<br />
corrige los horarios del evento programado de acuerdo<br />
con el horario efectivo del alba y del ocaso; por<br />
ejemplo, en verano anticipa los eventos de la mañana<br />
y retarda aquellos de la tarde.<br />
• Mando temporizado : permite una apertura o<br />
cierre parcial del toldo o de la persiana; funciona<br />
enviando un mando de “Stop” después de un breve<br />
período de tiempo (de 1 a 99 segundos) a partir del<br />
envío de un mando de “Subida” o “Bajada”.<br />
Si Ud. prevé usar estos mandos especiales, encontrará<br />
mayores detalles en el capítulo 5.<br />
2) Instalación<br />
Este capítulo está dedicado a quien deberá efectuar la<br />
instalación y la puesta en funcionamiento de PLANOTI-<br />
ME.<br />
Se tratarán argumentos técnicos, pero siguiendo con<br />
atención las instrucciones, no se producirán situaciones<br />
peligrosas ni para las personas ni para los automatismos.<br />
PLANOTIME no se podrá averiar por ningún motivo.<br />
Nota: en este capítulo se presupone que se saben usar<br />
las funciones básicas de PLANOTIME; de ser necesario,<br />
lea también los capítulos 3 y 4 antes de continuar.<br />
2.1) Encendido de PLANOTIME<br />
PLANOTIME funciona con una pila instalada pero que no<br />
está conectada para evitar que se gaste inútilmente;<br />
para encender PLANOTIME quite la lengüeta de plástico<br />
que sale del compartimiento de la pila.<br />
Cuando PLANOTIME se enciende, pide de inmediato<br />
que se ajuste el reloj interno.<br />
84
▼<br />
▼<br />
▼<br />
2.2) Ajuste inicial del reloj<br />
Para ajustar el reloj siga los pasos indicados en la tabla N° 1. Si no desea realizar el ajuste, presione el botón “■”; de<br />
esta manera el reloj empezará desde la hora 00.00 del Domingo.<br />
Tabla 1 Para ajustar el reloj después de conectar la pila Ejemplo<br />
1. Presione los botones o para ajustar la hora<br />
2. Presione el botón para confirmar la hora<br />
3. Presione los botones o para ajustar los minutos<br />
▼<br />
4. Presione el botón para confirmar los minutos<br />
▼<br />
5. Presione los botones o para seleccionar el día de la semana<br />
▼ ▼<br />
▼ ▼<br />
▼ ▼<br />
(Su=Domingo; Mo=Lunes; Tu=Martes; We=Miércoles; Th=Jueves; Fr=Viernes; Sa=Sábado)<br />
o<br />
o<br />
o<br />
6. Presione el botón para confirmar el día<br />
▼<br />
7. Presione los botones o para seleccionar el número del día “ ”<br />
8. Presione el botón para confirmar el día<br />
▼<br />
▼ ▼<br />
9. Presione los botones o para seleccionar el número del mes “ ”<br />
(01=Enero; 02=Febrero…12= Diciembre)<br />
10. Presione el botón para confirmar el mes<br />
▼<br />
11. Presione los botones o para seleccionar el número del año<br />
(comprendido entre 2000 y 2059)<br />
▼ ▼<br />
▼ ▼<br />
o<br />
o<br />
o<br />
12. Presione el botón para confirmar el año<br />
▼<br />
Es necesario ajustar el reloj sólo cuando se cambia la pila; todos los eventos y parámetros quedan memorizados en<br />
PLANOTIME.<br />
2.3) Memorización de PLANOTIME en los receptores de los automatismos<br />
Cada transmisor, incluido PLANOTIME, es reconocido por los receptores de los automatismos a través de un “código”<br />
que se distingue de los demás transmisores; por consiguiente, se requiere una etapa de “memorización” a través<br />
de la cual se prepara el automatismo para que reconozca el código de PLANOTIME. Si un grupo está formado<br />
de varios automatismos, es necesario repetir la memorización para cada uno de ellos. PLANOTIME puede accionar<br />
hasta 6 grupos de automatismos y para cada uno de estos transmitirá un código diferente; por consiguiente, antes<br />
de empezar la memorización, es necesario seleccionar el grupo al que pertenecerá el automatismo.<br />
La memorización debe hacerse con PLANOTIME en funcionamiento en modo “manual”, seleccionando un grupo<br />
solo por vez. Para seleccionar el modo “manual” y un grupo, siga las operaciones indicadas en la tabla:<br />
E<br />
Tabla 2 Para seleccionar el modo “manual” y un grupo Ejemplo<br />
1. Presione varias veces el botón ■ hasta que parpadee la indicación Auto<br />
... Auto<br />
2. Presione el botón para seleccionar el modo “manual” Man<br />
3. Presione el botón para confirmar el modo<br />
▼<br />
4. Empezando desde el 1° grupo, presione varias veces el botón para<br />
seleccionar otro grupo<br />
5. Ahora es posible usar los botones ■ para enviar los mandos al grupo seleccionado<br />
▼ ▼<br />
Tabla 3 Para enviar un mando al mismo grupo Ejemplo<br />
1. Presione uno de los botones ■<br />
▼ ▼<br />
Tabla 4 Para seleccionar otro grupo Ejemplo<br />
1. Tras haber transmitido, presione varias veces el botón para seleccionar el<br />
grupo deseado<br />
85
▼<br />
Tabla 5 Para salir del modo “manual”: Ejemplo<br />
o bien:<br />
Tras haber enviado un mando, presione el botón<br />
Controle que no haya ningún grupo seleccionado luego presione cualquiera<br />
de los botones ■ (de ser necesario seleccione los grupos presionando el botón<br />
▼ ▼<br />
y deselecciónelos/selecciónelos presionando el botón )<br />
▼<br />
▼<br />
o bien:<br />
... Auto<br />
Presione varias veces el botón ■ hasta que parpadee la indicación Auto<br />
! Atención: el código se puede memorizar en todos los receptores que se encuentran en el radio de alcance de<br />
PLANOTIME; por consiguiente, es oportuno mantener alimentado sólo aquel que sirve para la operación. Todas las<br />
secuencias de memorización son por tiempo, es decir que deben efectuarse dentro de los límites de tiempo previstos.<br />
2.3.1) Memorización de PLANOTIME como primer transmisor<br />
Cuando la memoria de códigos del automatismo no contiene ningún código, se puede proceder a memorizar PLA-<br />
NOTIME siguiendo estos pasos:<br />
Tabla 6 Para memorizar PLANOTIME como primer transmisor Ejemplo<br />
1. En PLANOTIME seleccione el grupo en el que se desea memorizar el<br />
automatismo por medio del modo manual (Tabla 2)<br />
2. Conecte la alimentación del automatismo; se oirán 2 tonos de aviso prolongados (biiip) **<br />
3. Antes de 5 segundos presione y mantenga apretado el botón ■ de PLANOTIME<br />
(durante alrededor de 3 segundos)<br />
4. Suelte el botón ■ cuando oiga el primero de los 3 tonos de aviso que confirman<br />
la memorización<br />
3s<br />
** Si la memoria de códigos del automatismo contiene códigos, en el momento del encendido se oirán 2 tonos de<br />
aviso breves (bip); en este caso, habrá que proceder siguiendo las instrucciones indicadas en la próxima tabla.<br />
2.3.2) Memorización de PLANOTIME como otro transmisor<br />
Si la memoria de códigos del automatismo contiene códigos de otros transmisores, se puede proceder a memorizar<br />
PLANOTIME siguiendo estos pasos.<br />
Tabla 7 Para memorizar PLANOTIME como otro transmisor Ejemplo<br />
1. En PLANOTIME seleccione el grupo en el que se desea memorizar el<br />
automatismo por medio del modo manual (Tabla 2)<br />
2. Mantenga apretado el botón ■ de PLANOTIME hasta oír un tono de aviso que<br />
proviene del automatismo (después de alrededor de 5 segundos)<br />
3. Lentamente presione 3 veces el botón ■ de un transmisor memorizado y que<br />
funcione<br />
4. Presione de nuevo el botón ■ de PLANOTIME<br />
5s<br />
Al final, 3 tonos de aviso que provienen del automatismo indicarán que PLANOTIME ha sido memorizado correctamente.<br />
Si la memoria de códigos está llena (14 códigos), 6 tonos de aviso indicarán que PLANOTIME no puede ser<br />
memorizado.<br />
86
2.4) Fijación de PLANOTIME<br />
Para el elegir el mejor lugar donde instalar PLANOTIME<br />
es conveniente seguir estas sugerencias:<br />
• PLANOTIME es idóneo para se usado sólo en entornos<br />
protegidos y no puede instalarse al aire libre o en<br />
zonas a la intemperie.<br />
• La altura normal de fijación es 1, m desde el piso,<br />
para poder ver PLANOTIME desde arriba.<br />
• No lo coloque en proximidad, o peor aún, sobre<br />
estructuras metálicas que disminuyen su alcance.<br />
• Colocando PLANOTIME sobre el punto de fijación,<br />
pruebe a accionar todos los automatismos, comprobando<br />
que reciban el mando por radio enviado.<br />
• Tenga en cuenta que cuando la pila se agota el alcance<br />
puede reducirse un 20÷30%.<br />
Tras haber controlado que el sistema funciona correctamente,<br />
es posible fijar definitivamente PLANOTIME con<br />
los tornillos y tacos, tal como se muestra en la figura..<br />
! ATENCIÓN: la presencia de otros dispositivos<br />
transmisores o perturbaciones electromagnéticas<br />
pueden reducir drásticamente el alcance<br />
de PLANOTIME. Nice S.p.a. no puede garantizar<br />
que los mandos enviados sean recibidos<br />
por los automatismos (para evitar este problema,<br />
véase el capítulo 8 “Qué hacer si…”.<br />
E<br />
87
3) Descripción de los símbolos<br />
Los símbolos visibles en PLANOTIME se subdividen en 3 zonas:<br />
• Zona 1 a izquierda indica los modos de funcionamiento y las programaciones<br />
• Zona 2 en el centro indica el reloj semanal<br />
• Zona 3 a derecha indica los grupos y los mandos especiales<br />
Zona 1 Zona 2 Zona 3<br />
Tabla 8 Lista de los símbolos de la zona 1<br />
Auto Indica el modo de funcionamiento “Automático” (véanse capítulos 4 y 4.2)<br />
Auto Indica el modo de funcionamiento “Nicetime” que incluye el funcionamiento “manual” con retorno<br />
Man al funcionamiento “automático” en un determinado día y hora (véanse capítulos 4 y 4.3)<br />
Man Indica el modo de funcionamiento “Manual” (véanse capítulos 4 y 4.4)<br />
Man Rec Indica el modo de funcionamiento “Manual con registrador” (véanse capítulos 4 y 4.5)<br />
Prog Indica que se está ejecutando una etapa de “Programación” (véase capítulo 5)<br />
Junto con “Prog” indica la etapa de programación de un evento<br />
NEW Junto con “Prog” y “ ” indica la etapa de creación de un evento nuevo (véase capítulo 5.2.1)<br />
MOD Junto con “Prog” y “ ” indica la etapa de modificación de un evento (véase capítulo 5.2.2)<br />
DEL Junto con “Prog” y “ ” indica la etapa de cancelación de un evento (véase capítulo 5.2.3)<br />
COPY Junto con “Prog” y “ ” indica la etapa de copiado de un evento (véase capítulo 5.2.4)<br />
Junto con “Prog” indica la etapa de ajuste del reloj (véase capítulo 5.3)<br />
Junto con “Prog” indica la etapa de regulación de los parámetros de la función “en vacaciones”<br />
(véase capítulo 5.4)<br />
Junto con “Prog” indica la etapa de regulación de los parámetros de la función “horario planetario”<br />
(véase capítulo 5.5)<br />
Si parpadea indica que la pila está agotada y es necesario sustituirla lo antes posible.<br />
Indica que se está ejecutando la transmisión de un mando por radio<br />
Tabla 9 Lista de los símbolos de la zona 2<br />
Indicación de las horas y de los minutos, o bien de otros parámetros durante la programación<br />
Indica los días de la semana:<br />
Su = Domingo Mo = Lunes Tu = Martes<br />
We = Miércoles Th = Jueves Fr = Viernes<br />
Sa = Sábado<br />
S Indica el horario de verano, es decir la hora oficial (véase capítulo 5.5)<br />
W Indica el horario de invierno, es decir la hora solar (véase capítulo 5.5)<br />
88
Tabla 10 Lista de los símbolos de la zona 3<br />
Indica un mando especial para la activación de los mandos automáticos que provienen de los<br />
sensores climáticos (véase capítulo 1.5)<br />
Indica un mando especial para la desactivación de los mandos automáticos que provienen de los<br />
sensores climáticos (véase capítulo 1.5)<br />
Indica un mando con la activación de la función especial “En vacaciones” (véase capítulo 1.5)<br />
Indica un mando con la activación de la función especial “horario planetario” (véase capítulo 1.5)<br />
Indica un mando con la activación de la función especial “mando temporizado” (véase capítulo 1.5)<br />
1 .... 6 Indican los 6 grupos y dirección del movimiento<br />
4) Cómo usar PLANOTIME<br />
PLANOTIME puede usarse en diferentes modos de funcionamiento:<br />
Auto Modo de funcionamiento “automático” (véase capítulo 4.2)<br />
En el modo “automático” PLANOTIME ejecuta los eventos programados en los días y a la hora predeterminada.<br />
Auto Modo de funcionamiento “Nicetime” (véase capítulo 4.3)<br />
Man<br />
En el modo “Nicetime” PLANOTIME funciona igual que en modo “manual” con la particularidad que volverá por sí solo<br />
al modo de funcionamiento “automático” en el día y a la hora predeterminada, es decir que permite interrumpir el modo<br />
“automático” durante un determinado período de tiempo.<br />
Man Modo de funcionamiento “manual” (véase capítulo 4.4)<br />
En el modo “manual” PLANOTIME trasmite a los grupos seleccionados sólo los mandos accinados directamente de<br />
la presión de los botones ■ .<br />
Nota: el modo “manual” es el único para el que no es importante que el reloj esté ajustado correctamente.<br />
▼ ▼<br />
E<br />
Man Rec Modo de funcionamiento “manual con registrador” (véase capítulo 4.5)<br />
En el modo “manual con registrador” PLANOTIME funciona en modo “manual” con la particularidad de que los mandos<br />
transmitidos son registrados como eventos y memorizados junto con el día y la hora en que se produjeron.<br />
Permite crear los eventos sin tenerlos que programar directamente uno a uno, sino que usando simplemente PLA-<br />
NOTIME en modo “manual” durante una semana.<br />
Prog Modo de “programación” (véase capítulo 5)<br />
En el modo “programación” se pueden programar, modificar, copiar y cancelar los eventos; es posible ajustar el<br />
reloj y los demás parámetros útiles para el funcionamiento de PLANOTIME.<br />
4.1) Selección de los modos de funcionamiento<br />
Para entrar en el modo de funcionamiento deseado hay que seleccionarlo y confirmarlo en el “menú de selección”.<br />
El “menú de selección” puede ser considerado como el punto de salida para seleccionar las funciones de PLANO-<br />
TIME: “Auto”, “Man”, “Man REC ” y “Prog”.<br />
Desde cualquier modo de funcionamiento o programación se encuentre PLANOTIME es posible volver al “menú de<br />
selección” presionando varias veces el botón ■ hasta que parpadee la indicación “Auto”,<br />
89
▼<br />
▼<br />
▼<br />
▼<br />
4.2) Funcionamiento en modo “automático” Auto<br />
Tabla 11 Para seleccionar el modo “automático” Ejemplo<br />
1. Presione varias veces el botón ■ hasta que parpadee la indicación Auto<br />
... Auto<br />
2. Presione el botón para confirmar el modo “automático”<br />
Nota: si no hay como mínimo un evento programado, no es posible confirmar el modo “automático”.<br />
▼<br />
Tabla 12 Para salir del modo “automático” y volver al menú de selección Ejemplo<br />
1. Presione 2 veces el botón<br />
4.3) Funcionamiento en modo “Nicetime”<br />
“Nicetime” es un modo particular con el que se suspende, durante un cierto período de tiempo, el modo “automático”<br />
para pasar al modo “manual”. Es posible seleccionar el modo Nicetime sólo si se encuentra en el modo “automático”.<br />
Tabla 13 Para pasar desde el modo “automático” al modo “Nicetime” Ejemplo<br />
1. Presione el botón<br />
Auto<br />
2. Presione el botón para confirmar el modo “Nicetime”<br />
Man<br />
3. Presione los botones o para ajustar la hora en que se desea retornar al<br />
modo “automático”<br />
o<br />
4. Presione el botón para confirmar la hora<br />
5. Presione los botones o para ajustar los minutos en que se desea retornar al<br />
modo “automático”<br />
o<br />
6. Presione el botón para confirmar los minutos<br />
7. Presione los botones o para seleccionar el día de la semana en que se<br />
desea retornar al modo “automático”<br />
o<br />
(Su=Domingo; Mo=Lunes; Tu=Martes; We=Miércoles; Th=Jueves; Fr=Viernes; Sa=Sábado)<br />
8. Presione el botón para confirmar el día<br />
A partir de este momento PLANOTIME funcionará como si estuviera en modo “manual” y Ud. podrá accionar los mandos<br />
presionando cualquiera de los botones ■ . PLANOTIME volverá al modo “automático” el día y a la hora predeterminada.<br />
Para salir del modo “Nicetime” antes del tiempo y volver al menú de selección, véase la tabla 20.<br />
4.4) Funcionamiento en modo “manual” Man<br />
▼<br />
▼<br />
▼<br />
▼<br />
▼ ▼<br />
▼ ▼<br />
▼ ▼<br />
▼ ▼<br />
Auto<br />
Man<br />
Tabla 14 Per scegliere il modo “manuale” Ejemplo<br />
1. Presione varias veces el botón ■ hasta que parpadee la indicación Auto<br />
2. Presione el botón para que parpadee la indicación Man<br />
3. Presione el botón para confirmar el modo “manual”<br />
▼<br />
... Auto<br />
Man<br />
Tabla 15 Para seleccionar un grupo y enviar un mando Ejemplo<br />
1. Empezando desde el 1° grupo, presione varias veces el botón para<br />
...<br />
seleccionar otro grupo<br />
2. Ahora es posible usar los botones ■ para enviar los mandos al grupo seleccionado<br />
▼ ▼<br />
Tabla 16 Para enviar un mando al mismo grupo Ejemplo<br />
1. Presione uno de los botones ■<br />
▼ ▼<br />
90
▼<br />
▼<br />
▼<br />
▼<br />
▼<br />
▼<br />
▼<br />
Tabla 17 Para seleccionar otro grupo Ejemplo<br />
1. Presione varias veces el botón para seleccionar el grupo deseado<br />
...<br />
2. Ahora es posible usar los botones ■ para enviar los mandos al grupo seleccionado<br />
▼ ▼<br />
Tabla 18 Para componer un grupo múltiple y enviar un mando Ejemplo<br />
1. Empezando desde el 1° grupo, presione varias veces el botón para<br />
...<br />
seleccionar otro grupo<br />
2. Presione el botón para confirmar el grupo<br />
3. Repita los pasos anteriores para seleccionar otros grupos<br />
▼<br />
4. Al terminar de componer el grupo múltiple, es posible usar los botones ■<br />
para enviar los mandos<br />
Nota: un grupo seleccionado y confirmado por error puede cancelarse presionando varias veces el botón<br />
colocar el cursor encima del grupo a eliminar; luego presione el botón .<br />
Tabla 19 Para enviar un mando especial a un grupo o grupo múltiple Ejemplo<br />
1. Empezando desde el 1° grupo, presione varias veces el botón para<br />
...<br />
seleccionar otro grupo<br />
2. Presione el botón para confirmar el grupo<br />
3. De ser necesario, repita los dos pasos anteriores para seleccionar otros grupos<br />
▼<br />
4. Presione varias veces el botón hasta que parpadeen los símbolos del mando<br />
especial “ ” o “ ”<br />
5. Presione el botón para confirmar el mando especial<br />
6. Ahora es posible usar los botones ■ para enviar el mando especial<br />
▼<br />
▼<br />
▼ ▼<br />
▼ ▼<br />
... o<br />
hasta<br />
Tabla 20 Para salir del modo “manual” y volver al menú de selección Ejemplo<br />
Tras haber enviado un mando, presione el botón<br />
o bien:<br />
Controle que no haya ningún grupo seleccionado luego presione cualquiera<br />
de los botones ■ (de ser necesario seleccione los grupos presionando el botón<br />
▼ ▼<br />
▼<br />
y deselecciónelos/selecciónelos presionando el botón )<br />
o bien:<br />
... Auto<br />
Presione varias veces el botón ■ hasta que parpadee la indicación Auto<br />
▼<br />
E<br />
4.5) Funcionamiento en modo “manual con registrador” Man<br />
Tabla 21 Para seleccionar el modo “manual con registrador” Ejemplo<br />
1. Presione varias veces el botón ■ hasta que parpadee la indicación Auto<br />
... Auto<br />
2. Presione 2 veces el botón para que parpadee la indicación Man<br />
Man<br />
3. Presione el botón para confirmar el modo “manual” con registrador<br />
▼<br />
A partir de este momento PLANOTIME puede usarse como si estuviera en modo “manual” con la particularidad de que<br />
▼ ▼<br />
todos los mandos enviados con los botones o , con el día, las horas y los minutos en que han sido dados, serán memorizados<br />
como eventos. Nota: el modo “manual con registrador” no permite registrar eventos que contengan el mando “■”.<br />
Consejos para las personas con poca experiencia: Use este modo de funcionamiento para memorizar los<br />
eventos sin preocuparse de tener que programarlos uno por uno. Para memorizar los eventos de toda la semana,<br />
entre en el modo “manual con registrador”, por ejemplo al comienzo de la semana, y use PLANOTIME para accionar<br />
la subida o bajada de los automatismos todos los días y a la hora deseada. Al comienzo de la semana siguiente, coloque<br />
PLANOTIME en modo “automático”; entonces, los eventos se repetirán automáticamente durante todas las<br />
semanas siguientes. Para cancelar un evento memorizado por error, véase el capítulo 5.2.3.<br />
91
▼<br />
5) Cómo programar PLANOTIME<br />
El funcionamiento de PLANOTIME en modo “programación” permite crear los eventos, modificarlos, copiarlos y cancelarlos;<br />
es posible ajustar el reloj y los demás parámetros útiles para el funcionamiento de PLANOTIME.<br />
Prog Programación “eventos” (véase capítulo 5.2)<br />
Durante la programación “eventos” es posible:<br />
NEW insertar un evento nuevo, regulando una a una todas sus propiedades<br />
MOD modificar un evento cambiando una o varias propiedades del evento<br />
COPY copiar un evento para hacer uno nuevo, iniciando desde las propiedades de un evento presente<br />
DEL cancelar un evento eliminándolo completamente<br />
Prog Ajuste del reloj (véase capítulo 5.3)<br />
El ajuste del reloj es necesario para que PLANOTIME realice los eventos a la hora predeterminada. Si se usa el mando<br />
especial de “horario planetario” es necesario ajustar las horas, los minutos, el día de la semana, el día del mes, el<br />
mes y el año y, por último, el horario actual, es decir la hora de invierno (solar) o de verano (oficial).<br />
Prog Regulaciones de los parámetros “en vacaciones” (véase capítulo 5.4)<br />
Permite regular la diferencia máxima permitida al evento respecto de aquella configurada. Puede abarcar desde un<br />
mínimo de 0 minutos (ninguna diferencia) a un máximo de 75 minutos respecto de lo previsto.<br />
Prog Regulación de los parámetros “horario planetario” (véase capítulo 5.5)<br />
Permite regular los parámetros necesarios para calcular el “horario planetario”:<br />
• Latitud del lugar respecto del ecuador (está indicada en todos los mapas geográficos).<br />
• Diferencia entre el horario indicado por el reloj y la hora solar real.<br />
• Indicación de que la hora actual es de invierno (solar) o de verano (oficial).<br />
5.1) Selección del tipo de programación<br />
Para entrar en el modo “programación” hay que seleccionarlo y confirmarlo en el “menú de selección”.<br />
El menú de selección puede considerarse como el punto de salida para todas las funciones de PLANOTIME.<br />
Desde cualquier modo de funcionamiento o programación se encuentre PLANOTIME es posible volver al “menú de<br />
selección”, presionando varias veces el botón ■ hasta que parpadee la indicación “Auto”<br />
5.1.1) Avance y retroceso para la programación<br />
La programación se realiza como un recorrido en etapas que pasa por todos los valores o parámetros necesarios.<br />
Durante dicho recorrido, le recordamos que:<br />
• El símbolo que parpadea un 50% indica el parámetro que se está programando, es decir la etapa actual.<br />
• Los botones o regulan el parámetro actual.<br />
• El botón confirma el parámetro y se continúa con la etapa siguiente.<br />
• El botón ■ anula la selección y se vuelve a la etapa anterior.<br />
• El botón selecciona y deselecciona un parámetro.<br />
• Un símbolo que parpadea un 25% indica que el parámetro no está seleccionado.<br />
• Un símbolo que parpadea un 75% indica que el parámetro está seleccionado.<br />
• En algunos casos no es posible confirmar un parámetro si no hay ningún parámetro seleccionado; por ejemplo, no<br />
es posible programar un evento sin haber seleccionado un día de la semana como mínimo.<br />
▼<br />
▼ ▼<br />
92
5.2) Programación de “eventos”<br />
Durante la programación de los eventos hay que regular, una a una, todas las propiedades que componen el evento, es decir:<br />
Tabla 22 Propiedades de los eventos Ejemplo 1 Ejemplo 2<br />
1. Horas y minutos en que debe enviarse el mando<br />
08.30<br />
18.45<br />
2. El día o los días de la semana en que debe activarse<br />
Mo We Fr Sa<br />
3. Uno o varios grupos afectados y el mando de “Subida” o<br />
2<br />
“Bajada” respectivo<br />
1<br />
4 5 6<br />
4. La presencia o no del mando especial “ ” o bien “ ”<br />
5. La presencia o no del mando especial “en vacaciones”<br />
6. La presencia o no del mando especial “horario planetario”<br />
▼<br />
▼ ▼ ▼<br />
▼<br />
7. La presencia o no del mando especial “mando temporizado”<br />
8. En el caso del mando especial “mando temporizado”, es el<br />
tiempo, indicado en segundos, que debe transcurrir entre el<br />
mando y el mando sucesivo de “Stop”<br />
20<br />
En el ejemplo N°1: a la hora 8:30 de cada Lunes, el<br />
grupo 1 recibirá un mando de “Subida”.<br />
En el ejemplo N°2: a la hora 18:45 de cada Miércoles,<br />
Viernes y Sábado; el grupo 2 recibirá un mando de<br />
“Bajada” y los grupos 4, 5, 6 recibirán un mando de<br />
“Subida”; los mandos prevén la activación de los mandos<br />
automáticos que provienen de los sensores climáticos.<br />
Está activo el “horario planetario” por lo que el<br />
mando se desplazará, respecto de la hora 18:45, para<br />
seguir, durante el año, el horario del ocaso del sol. Los<br />
mandos son temporizados, es decir que prevén un<br />
mando de “Stop” después de 20 segundos desde el<br />
comienzo del movimiento.<br />
E<br />
93
▼<br />
▼<br />
5.2.1) Programación: evento nuevo NEW<br />
Tabla 23 Para programar un “evento nuevo” solo (ejemplo 1 de la tabla N° 22) Ejemplo<br />
1. Presione varias veces el botón ■ hasta que parpadee la indicación Auto<br />
2. Presione 3 veces el botón para seleccionar el modo “programación” Prog<br />
3. Presione el botón para confirmar el modo “programación”<br />
▼<br />
4. Presione el botón para confirmar la programación “eventos”<br />
▼<br />
5. Presione el botón para confirmar la programación “evento nuevo” NEW<br />
6. Presione los botones o para ajustar la hora (en el ejemplo: 08)<br />
▼<br />
7. Presione el botón para confirmar la hora<br />
8. Presione los botones o para regular los minutos (en el ejemplo: 30)<br />
▼<br />
9. Presione el botón para confirmar los minutos<br />
▼<br />
10. Presione los botones o para elegir el día de la semana<br />
(en el ejemplo: Mo=Lunes)<br />
11. Presione el botón para seleccionar el día de la semana<br />
12. Presione el botón para confirmar el día de la semana<br />
▼<br />
(en el ejemplo: solo Mo=Lunes)<br />
▼ ▼<br />
▼ ▼<br />
▼ ▼<br />
13. Presione el botón para seleccionar el mando de “Subida” en el grupo 1<br />
▼<br />
14. Presione el botón para confirmar el mando (en el ejemplo: “Subida” en el grupo 1 )<br />
▼<br />
15. Presione el botón para confirmar el evento<br />
▼<br />
(en el ejemplo: ningún mando especial “ ” o bien “ ”)<br />
16. Presione el botón para confirmar el evento<br />
▼<br />
en el ejemplo: ningún mando especial “en vacaciones” )<br />
17. Presione el botón para confirmar el evento<br />
(en el ejemplo: ningún mando especial “horario planetario” )<br />
▼<br />
18. Presione el botón para confirmar el evento<br />
(en el ejemplo: ningún mando especial “mando temporizado” )<br />
▼<br />
19. A este punto, todas las partes del evento seleccionado comienzan a parpadear<br />
para indicar que se ha llegado al final del recorrido de la realización del evento nuevo.<br />
Presione el botón para confirmar el evento, o bien presione ■ para volver hacia atrás.<br />
▼<br />
... Auto<br />
o<br />
o<br />
o<br />
Con la última confirmación, el evento queda memorizado y PLANOTIME se prepara para la programación de otro evento<br />
nuevo; por lo tanto, continúe comenzando desde el punto N°5 de esta tabla.<br />
94
▼<br />
▼<br />
▼<br />
▼<br />
▼<br />
▼<br />
▼<br />
▼<br />
▼<br />
▼<br />
Tabla 24 Para programar un “evento nuevo” completo (ejemplo 2 de la tabla N° 22) Ejemplo<br />
1. Presione varias veces el botón ■ hasta que parpadee la indicación Auto<br />
2. Presione 3 veces el botón para seleccionar el modo “programación” Prog<br />
3. Presione el botón para confirmar el modo “programación”<br />
▼<br />
4. Presione el botón para confirmar la programación “eventos”<br />
▼<br />
5. Presione el botón para confirmar la programación “evento nuevo” NEW<br />
6. Presione los botones o para ajustar la hora (en el ejemplo: 18)<br />
▼<br />
7. Presione el botón para confirmar la hora<br />
8. Presione los botones o para regular los minutos (en el ejemplo: 45)<br />
▼<br />
9. Presione el botón para confirmar los minutos<br />
▼<br />
10. Presione los botones o para elegir el primer día de la semana<br />
(en el ejemplo: We=Miércoles)<br />
11. Presione el botón para seleccionar el primer día de la semana<br />
12. Presione los botones o para elegir el segundo día de la semana<br />
(en el ejemplo: Fr=Viernes)<br />
13. Presione el botón para seleccionar el segundo día de la semana<br />
14. Presione los botones o para elegir el tercer día de la semana<br />
(en el ejemplo: Sa=Sábado)<br />
15. Presione el botón para seleccionar el tercer día de la semana<br />
16. Presione el botón para confirmar todos los días seleccionados<br />
▼<br />
17. Presione el botón para seleccionar el grupo 2<br />
18. Presione el botón para elegir el mando de “Bajada” en el grupo 2<br />
19. Presione 2 veces el botón para seleccionar el grupo 4<br />
28. Presione el botón para confirmar el evento<br />
▼<br />
(en el ejemplo: ningún mando especial “en vacaciones” )<br />
▼ ▼<br />
▼ ▼<br />
▼ ▼<br />
▼ ▼<br />
29. Presione el botón Ë para seleccionar el mando especial “horario planetario”<br />
30. Presione el botón para confirmar el evento<br />
▼<br />
(en el ejemplo: mando especial “horario planetario” )<br />
31. Presione el botón para seleccionar el mando especial “mando temporizado”<br />
32. Presione los botones o para regular la temporización (en el ejemplo: 20 segundos)<br />
33. Presione el botón para confirmar el evento<br />
▼<br />
(en el ejemplo: mando especial “mando temporizado” )<br />
34. A este punto, todas las partes del evento seleccionado comienzan a parpadear para<br />
indicar que se ha llegado al final del recorrido de la realización del evento nuevo.<br />
Presione el botón para confirmar el evento, o bien presione ■ para volver hacia atrás.<br />
▼<br />
▼ ▼<br />
▼<br />
20. Presione el botón para elegir el mando de “Subida” en el grupo 4<br />
21. Presione el botón para seleccionar el grupo 5<br />
▼<br />
22. Presione el botón para elegir el mando de “Subida” en el grupo 5<br />
23. Presione el botón para seleccionar el grupo 6<br />
▼<br />
24. Presione el botón para elegir el mando de “Subida” en el grupo 6<br />
25. Presione el botón para confirmar los mandos<br />
▼<br />
▼<br />
(en el ejemplo: “Bajada en grupo 2 y “Subida” en los grupos 4, 5 y 6)<br />
26. Presione el botón para seleccionar el mando especial “ ”<br />
27. Presione el botón para confirmar el evento<br />
▼<br />
(en el ejemplo: envío mando especial “ ”)<br />
▼ ▼<br />
... Auto<br />
o<br />
o<br />
o<br />
o<br />
o<br />
o<br />
E<br />
Con la última confirmación, el evento queda memorizado y PLANOTIME se prepara para la programación de otro evento<br />
nuevo; por lo tanto, continúe comenzando desde el punto N°5 de esta tabla. Nota: para el funcionamiento correcto<br />
del “horario planetario” es necesario haber regulado los parámetros correspondientes (véase tabla 30).<br />
95
▼<br />
▼<br />
▼<br />
▼<br />
5.2.2) 5.2.2 Programación: modificación de eventos MOD<br />
Todos los eventos programados pueden modificarse en cualquier momento. Antes de modificar un evento, hay que<br />
buscarlo entre los demás eventos presentes.<br />
Tabla 25 Para modificar un evento Ejemplo<br />
1. Presione varias veces el botón ■ hasta que parpadee la indicación Auto<br />
... Auto<br />
2. Presione 3 veces el botón para seleccionar el modo “programación” Prog<br />
3. Presione el botón para confirmar el modo “programación”<br />
▼<br />
4. Presione el botón para confirmar la programación “eventos”<br />
▼<br />
5. ìPresione el botón para seleccionar la modificación “eventos” MOD<br />
6. Presione el botón para confirmar la modificación “eventos”<br />
▼<br />
7. Presione los botones o para seleccionar el evento a modificar. Los eventos aparecen<br />
en el orden cronológico en que se ejecutarán, comenzando desde el más cercano;<br />
presionando se pasa al evento siguiente y presionando se pasa al evento anterior.<br />
▼<br />
8. Presione el botón para confirmar el evento seleccionado.<br />
▼<br />
▼ ▼<br />
Desde este punto en adelante la modificación se cumple con el mismo recorrido por etapas de la programación “evento<br />
nuevo” (véase capítulo 5.2.1) y se pueden modificar o confirmar una a una todas las propiedades del evento.<br />
Tras haber modificado y confirmado el último parámetro, el evento queda memorizado nuevamente y PLANOTIME se<br />
prepara para la modificación de otro evento; por lo tanto, continúe comenzando desde el punto N°6 de esta tabla.<br />
▼<br />
o<br />
5.2.3) Programación: cancelación de eventos DEL<br />
Todos los eventos programados pueden cancelarse en cualquier momento. Antes de cancelar un evento, hay que<br />
buscarlo y seleccionarlo entre los demás evento presentes.<br />
Tabla 26 Per cancellare un evento: Ejemplo<br />
1. Presione varias veces el botón ■ hasta que parpadee la indicación Auto<br />
... Auto<br />
2. Presione 3 veces el botón para seleccionar el modo “programación” Prog<br />
3. Presione el botón para confirmar el modo “programación”<br />
▼<br />
4. Presione el botón para confirmar la programación “eventos”<br />
5. Presione 2 veces el botón para seleccionar la cancelación “eventos” DEL<br />
▼<br />
6. Presione el botón para confirmar la cancelación “eventos”<br />
▼<br />
7. Presione los botones o para seleccionar el evento a cancelar. Los eventos aparecen<br />
en el orden cronológico en que se ejecutarán, comenzando desde el más cercano;<br />
presionando se pasa al evento siguiente y presionando se pasa al evento anterior.<br />
▼<br />
8. Presione el botón para confirmar el evento seleccionado.<br />
▼<br />
▼ ▼<br />
9. Presione el botón para confirmar la cancelación del evento seleccionado.<br />
Si no se desea confirmar la cancelación, presione el botón ■ y comience desde<br />
el punto 7 de esta tabla.<br />
▼<br />
Tras haber cancelado un evento, PLANOTIME se prepara para la cancelación de otro evento; por lo tanto, continúe<br />
comenzando desde el punto N°6 de esta tabla.<br />
▼<br />
o<br />
96
▼<br />
▼<br />
▼<br />
▼<br />
5.2.4) Programación: copiado de eventos COPY<br />
Para programar rápidamente un evento nuevo similar a uno presente, es posible hacerlo a través del copiado del<br />
evento y la sucesiva modificación de los parámetros que cambian.<br />
Tabla 27 Para programar un evento nuevo copiando uno presente Ejemplo<br />
1. Presione varias veces el botón ■ hasta que parpadee la indicación Auto<br />
... Auto<br />
2. Presione 3 veces el botón para seleccionar el modo “programación” Prog<br />
3. Presione el botón para confirmar el modo “programación”<br />
▼<br />
4. Presione el botón para confirmar la programación “eventos”<br />
▼<br />
5. Presione 3 veces el botón para seleccionar el copiado de los “eventos” COPY<br />
6. Presione el botón para confirmar el copiado de los “eventos”.<br />
▼<br />
7. Presione los botones o para seleccionar el evento a copiar. Los eventos aparecen<br />
en el orden cronológico en que se ejecutarán, comenzando desde el más cercano;<br />
presionando se pasa al evento siguiente y presionando se pasa al evento anterior.<br />
▼<br />
8. Presione el botón para confirmar el evento seleccionado.<br />
▼<br />
▼ ▼<br />
Desde este punto en adelante la modificación del evento copiado se cumple con el mismo recorrido por etapas de la programación<br />
“evento nuevo” (véase capítulo 5.2.1) y se pueden modificar o confirmar una a una todas las propiedades del evento.<br />
Tras haber modificado y confirmado el último parámetro, el evento copiado queda memorizado como un evento nuevo y<br />
PLANOTIME se prepara para el copiado de otro evento; por lo tanto, continúe comenzando desde el punto N°6 de esta tabla.<br />
▼<br />
o<br />
5.3) Ajuste del reloj<br />
El reloj se ajusta inmediatamente después de haber conectado la pila, pero podría ser necesario modificar el reloj<br />
incluso en otras ocasiones, por ejemplo en el cambio de la hora de invierno (solar) a la hora de verano (oficial).<br />
Tabla 28 Para ajustar el reloj Ejemplo<br />
1. Presione varias veces el botón ■ hasta que parpadee la indicación Auto<br />
... Auto<br />
E<br />
2. Presione 3 veces el botón para seleccionar el modo “programación” Prog<br />
3. Presione el botón para confirmar el modo “programación”<br />
▼<br />
4. Presione el botón para seleccionar el ajuste del reloj<br />
5. Presione el botón para confirmar el ajuste del reloj<br />
6. Presione los botones o para ajustar la hora<br />
▼<br />
7. Presione el botón para confirmar la hora<br />
8. Presione los botones o para ajustar los minutos<br />
▼<br />
9. Presione el botón para confirmar los minutos<br />
▼<br />
10. Presione los botones o para seleccionar el día de la semana<br />
11. Presione el botón para confirmar el día<br />
12. Presione los botones o para seleccionar el número del día<br />
▼<br />
13. Presione el botón para confirmar el día<br />
▼<br />
15. Presione el botón para confirmar el mes<br />
16. Presione los botones o para seleccionar el número del año (comprendido entre 2000 y 2059)<br />
▼<br />
17. Presione el botón para confirmar el año<br />
▼<br />
▼ ▼<br />
▼ ▼<br />
▼ ▼<br />
(Su=Domingo; Mo=Lunes; Tu=Martes; We=Miércoles; Th=Jueves; Fr=Viernes; Sa=Sábado)<br />
14. Presione los botones o para seleccionar el número del mes<br />
(01=Enero; 02=Febrero…12= Diciembre)<br />
▼ ▼<br />
▼ ▼<br />
▼ ▼<br />
Nota: si se usara el mando especial “horario planetario” es necesario ajustar la hora, minutos, día de la semana, día del<br />
mes, mes y año, y también el horario actual, es decir el horario de invierno (solar) o de verano (oficial); véase la tabla 30.<br />
97<br />
o<br />
o<br />
o<br />
o<br />
o<br />
o
▼<br />
▼<br />
▼<br />
▼<br />
5.4) Regulación de los parámetros del mando especial “en vacaciones”<br />
Para el funcionamiento correcto del mando especial “en vacaciones” es necesario regular el valor máximo de la diferencia<br />
admitida, el valor puede ser de 0 a 75 minutos, ajustable en pasos de 5 minutos. Por ejemplo, si el valor está ajustado<br />
en 15, el resultado que se obtiene para un evento programado para la hora 08:00 podrá ejecutarse casualmente entre<br />
las 7:45 y las 8:15. La modificación de este parámetro abarca todos los eventos con este mando especial habilitado.<br />
Tabla 29 Para regular los parámetros del mando especial “en vacaciones” Ejemplo<br />
1. Presione varias veces el botón ■ hasta que parpadee la indicación Auto<br />
2. Presione 3 veces el botón para seleccionar el modo “programación” Prog<br />
3. Presione el botón para confirmar el modo “programación”<br />
▼<br />
4. Presione 2 veces el botón para seleccionar la regulación de los parámetros del<br />
mando “en vacaciones”<br />
5. Presione el botón para confirmar la regulación del parámetro<br />
“en vacaciones” “ ”<br />
▼<br />
6. Presione los botones o para regular la diferencia máxima en minutos<br />
7. Presione el botón para confirmar el parámetro<br />
▼<br />
▼ ▼<br />
o<br />
... Auto<br />
5.5) Regulaciones de los parámetros del mando especial “horario planetario”<br />
Para el funcionamiento correcto del mando especial “horario planetario” es necesario regular algunos parámetros; a saber:<br />
• Latitud del lugar respecto del ecuador, ajustable entre 65° (hacia el polo Norte) y -65° (hacia el polo Sur) pasando<br />
por 0° (ecuador).<br />
Para encontrar el valor a insertar “ ” aproximadamente, observe la figura indicada en la página siguiente o consulte<br />
un mapa geográfico más detallado.<br />
• Diferencia entre el horario indicado por el reloj y la hora solar real “ ”; en práctica, la diferencia entre el mediodía<br />
indicado por el reloj y el mediodía solar real del lugar puede regularse entre 0 y ± 99 minutos. En el capítulo<br />
“Qué hay que hacer si…” se describe un método para medir dicho valor.<br />
Si no fuera necesaria una regulación precisa, es posible dejar este parámetro en cero.<br />
• Indicación de que la hora actual es de invierno (solar) o de verano (oficial).<br />
Tabla 30 Regulaciones de los parámetros del mando especial “horario planetario” Ejemplo<br />
1. Presione varias veces el botón ■ hasta que parpadee la indicación Auto<br />
... Auto<br />
98<br />
2. Presione 3 veces el botón para seleccionar el modo “programación” Prog<br />
3. Presione el botón para confirmar el modo “programación”<br />
▼<br />
4. Presione 3 veces el botón para seleccionar la regulación de los parámetros del<br />
mando “horario planetario”<br />
5. Presione el botón para confirmar la regulación de los parámetros del mando<br />
“horario planetario”<br />
▼<br />
6. Presione los botones o para regular la latitud del lugar “ ”<br />
7. Presione el botón para confirmar el parámetro<br />
▼<br />
9. Presione el botón para confirmar el parámetro<br />
▼<br />
10. Presione los botones o para seleccionar la hora de verano “S” (oficial) o de i<br />
nvierno “W” (solar)<br />
11. Presione el botón para confirmar el parámetro<br />
Se desaconseja modificar estos parámetros después de haber insertado uno o varios eventos con este mando<br />
especial habilitado.<br />
▼<br />
▼ ▼<br />
8. Presione los botones o para regular la diferencia entre el horario indicado<br />
por el reloj y la hora solar real “ ”<br />
▼ ▼<br />
▼ ▼<br />
o<br />
o<br />
o
6) Sustitución de la pila<br />
Cuando se enciende la indicación de pila agotada “ ”<br />
es necesario sustituirla lo antes posible; en dicha situación<br />
existe un enorme riesgo de que los mandos no<br />
puedan ser enviados correctamente.<br />
Para sustituir la pila, hay que abrir la tapa del alojamiento<br />
de la pila y proceder tal como indicado en las figuras.<br />
Después de sustituir la pila, hay que ajustar el reloj interno<br />
(véase capítulo 2.2).<br />
Atención: las pilas contienen substancias contaminantes,<br />
no las arroje en los residuos comunes sino que utilice<br />
los métodos de eliminación previstos por las normas<br />
locales.<br />
E<br />
7) Advertencias<br />
Para usar PLANOTIME no es necesario tomar grandes<br />
medidas; sin embargo, le aconsejamos tener en cuenta<br />
los siguientes aspectos:<br />
• Los mandos enviados por radio desde PLANOTIME<br />
no pueden ofrecer la garantía total de que sean recibidos<br />
por los automatismos.<br />
• Algunos componentes de PLANOTIME pueden contener<br />
substancias contaminantes; no los abandone<br />
en el medio ambiente.<br />
99
▼<br />
8) Qué hacer si…<br />
• Para aumentar la seguridad de que un mando<br />
sea recibido: insértelo 2 o varias veces a la misma<br />
hora (copiando el evento) o bien una segunda vez en<br />
el minuto sucesivo.<br />
• Para que PLANOTIME salga de una programación<br />
o de un modo de funcionamiento: presione<br />
varias veces el botón ■ hasta que parpadee la<br />
indicación “Auto”; luego, presionando el botón<br />
posible seleccionar el modo de funcionamiento deseado.<br />
• Para medir la diferencia entre la hora indicada<br />
por el reloj y la hora solar real: el valor requerido<br />
por el mando especial “horario planetario” es la<br />
diferencia entre el mediodía indicado por el reloj y el<br />
mediodía solar real del lugar. Un método muy sencillo<br />
para medir dicho valor es observar la sombra provo-<br />
es<br />
cada por el sol de un objeto (es preferible que esté en<br />
posición vertical y sea puntiagudo, por ejemplo un<br />
palo); la sombra se acorta hasta el mediodía solar y<br />
luego se alarga nuevamente a la tarde. El mediodía<br />
solar es cuando la longitud de la sombra es la más<br />
corta respecto de la base del objeto. Cuando sucede<br />
esto, reste a la hora indicada por el reloj una hora si el<br />
período corresponde a la hora de verano (oficial) y<br />
entonces calcule la diferencia en minutos respecto de<br />
las 12:00 horas; el resultado es el valor que hay que<br />
insertar en PLANOTIME. Por ejemplo, si el mediodía<br />
solar real se produce a la hora 12:25, hay que insertar<br />
el valor 25; si por el contrario se produce a la hora<br />
11:47 hay que insertar el valor -13.<br />
Nota: el método descrito no tiene en cuenta algunos<br />
fenómenos astronómicos, pero el error insertado es<br />
insignificante para el funcionamiento de PLANOTIME.<br />
8.1) Lista de los errores<br />
Existen rarísimas situaciones en que PLANOTIME podría funcionar mal; si esto sucediera, siempre se visualiza la causa<br />
del error. En la siguiente tabla se mencionan los errores y las posibles soluciones.<br />
Tabla 31: lista de los errores<br />
Error N° Descripción Solución<br />
Err1<br />
Err2<br />
Err3<br />
Err4<br />
Err5<br />
Se han memorizado más de 100 eventos y no hay más<br />
Memoria llena<br />
espacio para otros eventos. No existe ninguna solución: el<br />
último evento no será memorizado.<br />
Error de comunicación entre los Es un desperfecto muy particular; pruebe a quitar y colocar<br />
componentes internos de PLANOTIME de nuevo la pila para comprobar si el problema se resuelve.<br />
Algunos parámetros de los eventos memorizados son<br />
incorrectos; podría ser un error de comunicación entre los<br />
Error en los parámetros de uno o varios componentes internos de PLANOTIME, pruebe a quitar y<br />
eventos<br />
colocar de nuevo la pila para comprobar si el problema se<br />
resuelve. Si el error persiste, entre en la etapa de modificación<br />
de los eventos y controle los parámetros de todos los eventos.<br />
Se han cambiado los parámetros del No es grave, pero tenga en cuenta que los próximos<br />
mando especial “en vacaciones” después eventos ya han sido calculados con los parámetros viejos;<br />
de que algunos eventos han sido los parámetros nuevos serán usados a partir de la<br />
calculados con los parámetros anteriores siguiente ejecución del evento en adelante.<br />
Se han cambiado los parámetros del No es oportuno cambiar los parámetros después de<br />
mando especial “horario planetario” haber programado algunos eventos; si así fuera, controle<br />
después de que algunos eventos han sido nuevamente que los eventos sean correctos después de<br />
calculados con los parámetros anteriores la modificación.<br />
100
9) Características técnicas<br />
Con la finalidad de mejorar los productos, NICE S.p.a. se reserva el derecho de modificar las características técnicas<br />
en cualquier momento y sin previo aviso, garantizando la funcionalidad y el destino de uso previstos.<br />
Nota: todas las características técnicas se refieren a una temperatura de 20°C.<br />
Alimentación<br />
: 3Vdc con 1 pila de litio CR2450<br />
Duración de la pila : estimada en 2 años (con 10 eventos por día)<br />
Frecuencia<br />
: 433.92MHz ±100 KHz<br />
Potencia suministrada : estimada en alrededor de 1mW<br />
Alcance medio<br />
: estimado en 25 metros en el interior de edificios<br />
(la presencia de perturbaciones electromagnéticas puede disminuir drásticamente el alcance)<br />
Codificación<br />
: 52 Bit rolling code FLOR+INFO<br />
Resolución del reloj : 1 minuto<br />
Precisión del reloj<br />
: ± 100 segundos/año<br />
Número máximo de eventos : 100<br />
Grado de protección : IP 40<br />
Temperatura de func. : -5°C ÷ 50°C<br />
Medidas/peso<br />
: 80x80x1,2mm / 75g<br />
A1 Apéndice<br />
Antes de la programación, use la siguiente tabla para crear los eventos y use los eventos memorizados como memorándum.<br />
Tabla A1: ejemplo de composición de eventos y memorándum de eventos<br />
Nombre Horari Días Gruposi Mandos especiales<br />
Su Mo Tu We Th Fr Sa 1 2 3 4 5 6<br />
Ejemplo 1 08.30<br />
X<br />
Su Mo Tu We Th Fr Sa 1 2 3 4 5 6<br />
Ejemplo 2 18.30<br />
X X X X<br />
X X 20<br />
E<br />
Su Mo Tu We Th Fr Sa 1 2 3 4 5 6<br />
Su Mo Tu We Th Fr Sa 1 2 3 4 5 6<br />
Su Mo Tu We Th Fr Sa 1 2 3 4 5 6<br />
Su Mo Tu We Th Fr Sa 1 2 3 4 5 6<br />
Su Mo Tu We Th Fr Sa 1 2 3 4 5 6<br />
Su Mo Tu We Th Fr Sa 1 2 3 4 5 6<br />
Su Mo Tu We Th Fr Sa 1 2 3 4 5 6<br />
Su Mo Tu We Th Fr Sa 1 2 3 4 5 6<br />
101
Spis rozdziałów<br />
pag<br />
pag<br />
1 Opis 103<br />
1.1 Co to jest PLANOTIME 103<br />
1.2 Czy naprawdę trzeba zaprogramować? 103<br />
1.3 Co to jest zdarzenie? 103<br />
1.4 Co to są grupy? 104<br />
1.5 Co to są funkcje specjalne? 104<br />
2 Instalowanie 104<br />
2.1 Włączamy PLANOTIME 104<br />
2.2 Wstępna regulacja zegara 105<br />
2.3 Wczytywanie PLANOTIME do 105<br />
odbiorników automatyki<br />
2.3.1 Wczytywanie PLANOTIME jako 106<br />
pierwszego nadajnika<br />
2.3.2 Wczytywanie PLANOTIME za 106<br />
pomocą innego nadajnika<br />
2.4 Mocowanie PLANOTIME 107<br />
3 Opis symboli 108<br />
4 Jak używać PLANOTIME 109<br />
4.1 Wybór trybu funkcjonowania 109<br />
4.2 Funkcjonowanie w sposób działania 110<br />
“Automatyczny”<br />
4.3 Funkcjonowanie w trybie “Nicetime” 110<br />
4.4 Funkcjonowanie w trybie “ręcznym” 110<br />
4.5 Funkcjonowanie w trybie “ręcznym z 111<br />
rejestracją”<br />
5 Jak zaprogramować PLANOTIME 112<br />
5.1 Wybór typu programowania 112<br />
5.1.1 Do przodu i do tyłu do programowania 112<br />
5.2 Programowanie “zdarzeń” 113<br />
5.2.1 Programowanie: nowego zdarzenia 114<br />
5.2.2 Programowanie: modyfikacja zdarzeń 116<br />
5.2.3 Programowanie: kasowanie zdarzeń 116<br />
5.2.4 Programowanie: kopiowanie zdarzeń 117<br />
5.3 Ustawienie zegara 117<br />
5.4 Regulacja parametrów funkcji specjalnej 118<br />
“na wakacjach”<br />
5.5 Regulacja parametrów funkcji specjalnej 118<br />
“godziny słoneczne”<br />
6 Wymiana baterii 119<br />
7 Ostrzeżenia 119<br />
8 Co robić gdy 120<br />
8.1 Spis błędów 120<br />
9 Dane techniczne 121<br />
A1 Dopisek 121<br />
Spis tabel<br />
pag<br />
pag<br />
Tabela 1: aby ustawić zegar po założeniu baterii 105<br />
Tabela 2: aby wybrać sposób “ręczny” i 105<br />
wybrać grupę<br />
Tabela 3: aby wysłać sygnał do tej samej grupy 105<br />
Tabela 4: aby wybrać inną grupę 105<br />
Tabela 5: aby wyjść ze sposobu “ręcznego” 106<br />
Tabela 6: aby zapisać PLANOTIME jako 106<br />
pierwszy nadajnik<br />
Tabela 7: aby zapisać PLANOTIME jako 106<br />
kolejny nadajnik<br />
Tabela 8: Spis symboli pola 1 108<br />
Tabela 9: Spis symboli pola 2 108<br />
Tabela 10: Spis symboli pola 3 109<br />
Tabela 11: aby wybrać sposób działania 110<br />
“Automatyczny”<br />
Tabela 12: aby wyjść ze sposobu 110<br />
“Automatycznego” i powrócić do<br />
“menu wyboru”<br />
Tabela 13: aby przejść z działania 110<br />
“Automatycznego” do “Nicetime”<br />
Tabela 14: aby wybrać sposób działania “ręczny” 110<br />
Tabela 15: aby wybrać grupę i wysłać sygnał 110<br />
Tabela 16: aby wysłać sygnał dla tej samej grupy 110<br />
Tabela 17: aby wybrać inną grupę 111<br />
Tabela 18: aby stworzyć grupę wielokrotną i 111<br />
wysłać sygnał<br />
Tabela 19: aby wysłać specjalny sygnał 111<br />
programowania do grupy lub<br />
do grupy wielokrotnej<br />
Tabela 20: aby wyjść ze sposobu działania 111<br />
“ręcznego” i powrócić do menu wyboru<br />
Tabela 21: aby wybrać sposób działania “ręczny 111<br />
z rejestracją”<br />
Tabela 22: właściwości zdarzenia 113<br />
Tabela 23: do zaprogramowania prostego 114<br />
“nowego zdarzenia”<br />
Tabela 24: aby zaprogramować inne “zdarzenie” 115<br />
Tabela 25: aby zmodyfikować zdarzenia 116<br />
Tabela 26: aby skasować zdarzenia 116<br />
Tabela 27: aby zaprogramować nowe zdarzenie 117<br />
poprzez skopiowanie już istniejącego<br />
zdarzenia<br />
Tabela 28: aby wyregulować zegar 117<br />
Tabela 29: aby wyregulować parametr funkcji 118<br />
specjalnej “na wakacjach”<br />
Tabela 30: aby ustawić parametry funkcji 118<br />
specjalnej: “godziny słoneczne”<br />
Tabela 31: spis błędów 120<br />
102
Display<br />
Przycisk<br />
Stop<br />
Przycisk<br />
Podniesienie<br />
Przycisk<br />
Potwierdza<br />
Przycisk<br />
Obniżenie<br />
Przycisk<br />
Selekcja<br />
Baterii<br />
1) Opis<br />
W niniejszym rozdziale przedstawiamy opis<br />
podstawowych danych PLANOTIME.<br />
Uważnie przeczytać tą część ponieważ zapoznanie<br />
się z produktem ułatwia jego użytkowanie.<br />
1.1) Co to jest PLANOTIME<br />
PLANOTIME jest nadajnikiem radiowym do<br />
sterowania automatyką rolet i markiz; służy do<br />
zarządzania 6 grupami automatyki. Może pracować w<br />
sposób “ręczny”; wówczas właśnie wy będziecie<br />
1.2) Czy naprawdę trzeba zaprogramować?<br />
Niestety tak!. PLANOTIME nie zna waszych<br />
obyczajów; gdy zamierzacie używać go w sposób<br />
“automatyczny” to musi on wiedzieć, kiedy obniżyć<br />
markizy, powinien wiedzieć też o tym, że w Niedzielę<br />
odpoczywacie dłużej z opuszczonymi roletami.<br />
kierowali automatyką, lub w sposób “automatyczny”,<br />
w którym PLANOTIME będzie kierował urządzeniami<br />
w dniach i godzinach uprzednio zaprogramowanych.<br />
Logika programowania i funkcjonowania PLANOTIME<br />
w trybie “automatycznym” jest logiką “zdarzenia”.<br />
PL<br />
1.3) Co to jest zdarzenie?<br />
“Zdarzeniem” jest wykonaniem zadania ruchu<br />
(podnoszenia lub obniżenia rolet, podnoszenia lub<br />
opuszczania markiz, itp.) w danym momencie dnia lub<br />
w danym dniu lub w określone dni w tygodniu.<br />
Na przykład “zdarzeniem” jest zadanie podniesienia<br />
rolet o 8:30 w Sobotę i w Niedzielę, a innym<br />
“zdarzeniem” jest podnoszenie markiz o 18:45<br />
każdego dnia w danym tygodniu.<br />
103
1.4) Co to są grupy?<br />
Za “grupę” uważa się pojedynczy automat lub grupę<br />
siłowników uaktywnianych razem: jedną grupą może<br />
być markiza od strony południowej budynku, drugą<br />
grupą mogą być markizy od strony zachodniej a rolety<br />
części dziennej mogą być trzecią grupą.<br />
PLANOTIME może zarządzać 6 grupami pojedynczo<br />
lub kilkoma grupami razem odpowiednio ze sobą<br />
powiązanymi (grupa wielokrotna).<br />
Tworzenie grup odbywa się podczas fazy zapisywania<br />
kodu radiowego według opisu w rozdziale 2.3<br />
1.5) Co to są funkcje specjalne?<br />
Kiedy ma miejsce “zdarzenie” wówczas PLANOTIME<br />
wysyła sygnał do właściwych grup podlegających<br />
danemu zdarzeniu. Zwykle funkcje te przewidują<br />
obniżanie lub podnoszenie automatyki i mogą one<br />
być także dostosowane do zadań specjalnych:<br />
• Słońce ON lub Słońce OFF : uaktywnia<br />
lub wyłącza funkcje automatyki, które pochodzą od<br />
czujników klimatycznych. Funkcja ta służy do<br />
wyboru czy sterować samemu automatyką (Słońce<br />
OFF) czy pozwolić, aby sterowały nią czujniki<br />
(Słońce ON). Ta funkcja wyłącza czujniki Deszczu i<br />
Słońca, a czujnik Wiatru, jako że jest on<br />
zabezpieczeniem, będzie zawsze aktywny.<br />
• Na wakacjach : przestawia o kilka minut (od 0<br />
do 75), w przypadkowy sposób, godzinę zdarzenia<br />
w stosunku do czasu zaprogramowanego; służy do<br />
symulacji obecności osób w domu nawet gdy<br />
nikogo nie ma.<br />
• Godziny słoneczne : dzień po dniu, w ciągu<br />
roku, koryguje godzinę zaprogramowanego<br />
zdarzenia odpowiednio do czasu wschodu i<br />
zachodu słońca; jak na przykład w lecie przyśpiesza<br />
poranne zdarzenia i opóźnia popołudniowe.<br />
• Funkcja czasowa : służy do częściowego<br />
podnoszenia lub obniżania markizy czy rolety i<br />
uaktywnia się po wysłaniu sygnału “Stop” chwilę po<br />
wysłaniu sygnału na “Podniesienie” lub “Obniżenie”<br />
(od 1 do 99 sekund).<br />
Dokładniejsze informacje o tych funkcjach<br />
specjalnych znajdują się w rozdziale 5.<br />
2) Instalowanie<br />
Ten rozdział służy do ułatwienia czynności<br />
instalowania i uruchomienia PLANOTIME.<br />
Będą tutaj omawiane aspekty związane ze<br />
szczegółami technicznymi; kierując się niniejszymi<br />
instrukcjami, unikniemy niebezpiecznych sytuacji dla<br />
człowieka jak i dla automatyki. Unikniemy możliwości<br />
uszkodzenia PLANOTIME.<br />
Uwaga: w tym rozdziale zakładamy, że są już znane<br />
podstawowe funkcje PLANOTIME; jeśli tak nie jest,<br />
przeczytać także rozdziały 3 i 4.<br />
2.1) Włączamy PLANOTIME<br />
PLANOTIME pracuje przy zasilaniu z baterii, która jest<br />
już włożona ale nie jest podłączona, aby jej<br />
niepotrzebnie nie zużywać. Aby uaktywnić<br />
PLANOTIME należy wyciągnąć języczek plastikowy,<br />
który wystaje z przegródki na baterię.<br />
Zaraz po włączeniu PLANOTIME będzie wymagał<br />
ustawienia wewnętrznego zegara.<br />
104
▼<br />
▼<br />
▼<br />
2.2) Wstępna regulacja zegara<br />
Aby wyregulować zegar należy kierować się opisami umieszczonymi w tabeli nr 1. Jeżeli nie zamierza się wykonać<br />
tej regulacji, nacisnąć przycisk “■”; w tym wypadku zegar zacznie odliczać czas od godziny 00.00 i od Niedzieli.<br />
Tabela 1 Aby ustawić zegar po założeniu baterii Przykład<br />
1. Nacisnąć przyciski lub aby ustawić godzinę lub<br />
lub<br />
2. Nacisnąć przycisk aby potwierdzić godzinę<br />
3. Nacisnąć przyciski lub aby ustawić minuty lub<br />
▼<br />
4. Nacisnąć przycisk aby potwierdzić minuty<br />
▼<br />
5. Nacisnąć przyciski lub aby wybrać dzień tygodnia<br />
(Su=Niedziela; Mo=Poniedziałek; Tu=Wtorek; We=Środa; Th=Czwartek; Fr=Piątek; Sa=Sobota)<br />
▼ ▼<br />
▼ ▼<br />
▼ ▼<br />
lub<br />
lub<br />
6. Nacisnąć przycisk aby potwierdzić dzień tygodnia<br />
▼<br />
7. Nacisnąć przyciski lub aby wybrać numer dnia “ ”<br />
8. Nacisnąć przycisk aby potwierdzić numer dnia w miesiącu<br />
▼<br />
9. Nacisnąć przyciski lub aby wybrać numer miesiąca “ ”<br />
(01=Styczeń; 02=Luty ...12=Grudzień)<br />
10. Nacisnąć przycisk aby potwierdzić miesiąc<br />
▼<br />
11. Nacisnąć przyciski lub aby wybrać rok<br />
(Od 2000 do 2059)<br />
▼ ▼<br />
▼ ▼<br />
▼ ▼<br />
lub<br />
lub<br />
lub<br />
12. Nacisnąć przycisk aby potwierdzić rok<br />
▼<br />
Po wymianie baterii należy ustawić tylko zegar; wszystkie inne zdarzenia i parametry pozostaną zapisane w<br />
pamięci PLANOTIME.<br />
2.3) Memorizzazione di PLANOTIME nei ricevitori degli automatismi<br />
Każdy nadajnik radiowy, czyli także PLANOTIME, jest rozpoznawany przez automatykę poprzez “kod”, który jest<br />
inny dla każdego nadajnika. Niezbędne jest więc wykonanie “zapisywania”, którym dostosowuje się automatykę<br />
do rozpoznawania kodu PLANOTIME.<br />
Gdy grupa złożona jest z wielu urządzeń, należy powtórzyć zapisywanie dla każdego z nich. PLANOTIME będzie<br />
mógł sterować 6 grupami automatów i do każdej wyśle inny kod, dlatego też przed fazą zapisywania należy<br />
wybrać grupę, do której dany siłownik będzie należał. Zapisywanie jest możliwe wówczas, gdy PLANOTIME<br />
funkcjonuje w systemie “ręcznym”. Wybieramy każdorazowo tylko jedną grupę.<br />
Aby wybrać sposób “ręczny” i wybrać grupę należy wykonać poniższe czynności.<br />
Tabela 2 Aby wybrać sposób “ręczny” i wybrać grupę Przykład<br />
PL<br />
1. Nacisnąć kilka razy przycisk ■ aż do zaświecenia się lampki Auto<br />
... Auto<br />
2. Nacisnąć przycisk aby wybrać sposób “ręczny” Man<br />
3. Nacisnąć przycisk aby potwierdzić wybór<br />
▼<br />
4. Zacząć od 1 grupy lub ewentualnie nacisnąć kilkakrotnie przycisk aby<br />
wybrać inną grupę<br />
5. Teraz można zastosować przyciski ■ aby wysłać sygnał do wybranej grupy<br />
▼ ▼<br />
Tabela 3 Aby wysłać sygnał do tej samej grupy Przykład<br />
1. Nacisnąć jeden z przycisków ■<br />
▼ ▼<br />
Tabela 4 Aby wybrać inną grupę Przykład<br />
1. Po przesłaniu sygnału nacisnąć kilkakrotnie przycisk aby wybrać<br />
żądaną grupę<br />
105
Tabela 5 Aby wyjść ze sposobu “ręcznego” Przykład<br />
Lub:<br />
Po wysłaniu sygnału nacisnąć przycisk<br />
▼<br />
Sprawdzić czy nie została wybrana jakaś grupa po czym nacisnąć jeden z<br />
przycisków ■ . (ewentualnie zaznaczyć grupy naciśnięciem przycisku i wykonań<br />
selekcję/wyjść z selekcji naciśnięciem przycisku )<br />
Lub:<br />
... Auto<br />
Nacisnąć wielokrotnie przycisk ■ aż do zaświecenia się lampki Auto<br />
! Uwaga: Zapisywanie kodu może być wykonane we wszystkich odbiornikach, które znajdują się w zasięgu<br />
PLANOTIME; należy więc zasilić tylko ten , który podlega tej procedurze.<br />
Wszystkie sekwencje zapisywania są określone czasowo, czyli że należy je wykonać w czasie przewidzianym.<br />
▼<br />
▼▼ ▼<br />
2.3.1) Wczytywanie PLANOTIME jako pierwszego nadajnika<br />
Kiedy pamięć z odbiornika nie posiada żadnego kodu, należy przystąpić do fazy wczytywania PLANOTIME<br />
według poniższej procedury:<br />
Tabela 6 Aby zapisać PLANOTIME jako pierwszy nadajnik Przykład<br />
1. Wybrać grupę w PLANOTIME, w której chcemy zapisać siłownik sposobem<br />
ręcznym (Tabela 2)<br />
2. Zaraz po podłączeniu siłownika usłyszymy 2 długie sygnały (biiip) **<br />
3. W ciągu 5 sekund nacisnąć i przytrzymać przycisk ■ PLANOTIME<br />
(na około 3 sekundy)<br />
4. Zwolnić przycisk ■ po usłyszeniu 3 sygnałów, które potwierdzają udane<br />
wczytanie<br />
3s<br />
**Gdy w pamięci kodów odbiornika znajdują się już jakieś kody, to po włączeniu usłyszymy 2 krótkie sygnały (bip,<br />
bip); w tym wypadku wykonać procedurę przedstawioną w następnej tabeli<br />
2.3.2) Wczytywanie PLANOTIME za pomocą innego nadajnika<br />
Gdy w pamięci odbiorników znajdują się już kody innych nadajników, należy przystąpić do wczytywania<br />
PLANOTIME według poniższej procedury:<br />
Tabela 7 Aby zapisać PLANOTIME jako kolejny nadajnik Przykład<br />
1. Wybrać grupę w PLANOTIME, w której chcemy zapisać dany siłownik<br />
(Tabela 2)<br />
2. Przytrzymać pod naciskiem przycisk ■ na PLANOTIME aż do usłyszenia<br />
sygnału pochodzącego z odbiornika (po około 5 sekundach)<br />
3. Powoli nacisnąć 3 - krotnie przycisk ■ nadajnika już zapisanego i<br />
działającego<br />
4. Po sekundzie nacisnąć jeszcze raz na sekundę przycisk ■ na PLANOTIME<br />
5s<br />
3 sygnały pochodzące z odbiornika zasygnalizują, że PLANOTIME został prawidłowo zapisany.<br />
Gdy pamięć odbiornika jest pełna (14 kodów) to wydanie 6 sygnałów oznaczać będzie, że PLANOTIME nie może<br />
być zapisany.<br />
106
2.4) Mocowanie PLANOTIME<br />
Aby wybrać jak najlepsze miejsce na umieszczenie<br />
PLANOTIME kierować się poniższymi wskazówkami:<br />
• PLANOTIME jest przystosowany do zamontowania<br />
tylko w zabezpieczonych pomieszczeniach i nie<br />
może być zamontowany na zewnątrz i w miejscach,<br />
gdzie będzie wystawiony na opady deszczu.<br />
• Powinien być zamocowany na wysokości 1,5m od<br />
ziemi tak, aby można było patrzeć na PLANOTIME<br />
lekko od góry.<br />
• Nie umieszczać go w pobliżu, lub, co gorzej, na<br />
strukturach metalowych, które zmniejszają jego<br />
zasięg działania.<br />
• Umieścić PLANOTIME w żądanym punkcie i<br />
wykonać próbę sterowania wszystkich urządzeń i<br />
sprawdzić czy otrzymują one od niego sygnał<br />
radiowy.<br />
• Pamiętać należy, że gdy bateria zasilająca nie jest<br />
nowa to zasięg może zmniejszyć się o 20÷30%.<br />
Po zweryfikowaniu funkcjonowania systemu,<br />
PLANOTIME można przykręcić na stałe śrubami tak<br />
jak pokazano na rysunku.<br />
! UWAGA: obecność innych urządzeń – nadajników<br />
radiowych lub zakłóceń elektromagnetycznych może<br />
zmniejszyć drastycznie zasięg PLANOTIME. Nice<br />
S.p.a. nie może zagwarantować, że sygnały będą<br />
odbierane przez wszystkie urządzenia (w celu<br />
zmniejszenia tego ryzyka należy zapoznać się z<br />
rozdziałem 8 “Co robić gdy ”.<br />
PL<br />
107
3) Opis symboli<br />
Symbole widoczne na PLANOTIME podzielone są na trzy pola:<br />
• Pole 1 po lewej stronie wskazuje sposoby funkcjonowania i programowania<br />
• Pole 2 po środku wskazuje zegar tygodniowy<br />
• Pole 3 po prawej stronie wskazuje grupy funkcji specjalnych<br />
Pole 1 Pole 2 Pole 3<br />
Tabela 8 Spis symboli pola 1<br />
Auto Wskazuje sposób funkcjonowania “Automatyczny” (patrz rozdziały 4 i 4.2)<br />
Auto Wskazuje sposób funkcjonowania “Nicetime” gdzie możemy otrzymać funkcjonowanie “ręczne”<br />
Man z powrotem do funkcjonowania “Automatycznego” danego dania i godziny (patrz rozdziały 4 i 4.3)<br />
Man Wskazuje sposób funkcjonowania “Ręcznego” (patrz rozdziały 4 i 4.4)<br />
Man Rec Wskazuje sposób funkcjonowania “Ręcznego z rejestracją” (patrz rozdziały 4 i 4.5)<br />
Prog Wskazuje fazę “Programowanie” w toku (patrz rozdział 5)<br />
Razem z “Prog” wskazuje fazę programowania zdarzenia<br />
NEW Razem z “Prog” i “ ” wskazuje fazę tworzenia nowego zdarzenia (patrz rozdział 5.2.1)<br />
MOD Razem z “Prog” i “ ” wskazuje fazę modyfikacji zdarzenia (patrz rozdział 5.2.2)<br />
DEL Razem z “Prog” i “ ” wskazuje fazę kasowania zdarzenia (patrz rozdział 5.2.3)<br />
COPY Razem z “Prog” i “ ” wskazuje fazę kopiowania zdarzenia (patrz rozdział 5.2.4)<br />
Razem z “Prog” wskazuje fazę regulacji zegara (patrz rozdział 5.3)<br />
Razem z “Prog” wskazuje fazę regulacji parametrów funkcji “na wakacjach” (patrz rozdział 5.4)<br />
Razem z “Prog” wskazuje fazę regulacji parametrów funkcji “godziny słoneczne”<br />
(patrz rozdział 5.5)<br />
Gdy błyska wskazuje, że bateria jest wyładowana i należy ją wymienić jak najszybciej<br />
Wskazuje transmisję sygnału radiowego<br />
Tabela 9 Spis symboli na polu 2<br />
Wskazuje godziny i minuty lub inne parametry w fazie programowania<br />
Wskazuje dni tygodnia:<br />
Su = Niedziela Mo = Poniedziałek Tu = Wtorek<br />
We = Środa Th = Czwartek Fr = Piątek<br />
Sa = Sobota<br />
S Wskazuje godzinę w sezonie letnim, czyli czas letni (patrz rozdział 5.5)<br />
W Wskazuje godzinę w sezonie zimowym czyli godzinę słoneczną (patrz rozdział 5.5)<br />
108
Tabela 10 Spis symboli na polu 3<br />
Wskazuje specjalną funkcję uaktywnienia funkcji automatycznych, które pochodzą z sensorów<br />
klimatycznych (patrz rozdział 1.5)<br />
Wskazuje specjalną funkcję do wyłączenia funkcji automatycznych, które pochodzą od<br />
czujników klimatycznych (patrz rozdział 1.5)<br />
Wskazuje sygnał z uaktywnieniem funkcji specjalnej “na wakacjach” (patrz rozdział 1.5)<br />
Wskazuje sygnał z uaktywnieniem funkcji specjalnej “godzina słoneczna” (patrz rozdział 1.5)<br />
Wskazuje sygnał z uaktywnieniem funkcji specjalnej “funkcja czasowa” (patrz rozdział 1.5<br />
1 .... 6 Wskazuje 6 grup i ewentualny kierunek ruchu.<br />
4) Jak używać PLANOTIME<br />
PLANOTIME może być używany przy wielu ustawieniach funkcjonowania.<br />
Auto Sposób funkcjonowania “Automatyczny” (patrz rozdział 4.2)<br />
W trybie “Automatycznym”, PLANOTIME wykonuje zdarzenia zaprogramowane w ustalonym dniu i godzinie.<br />
Auto Sposób funkcjonowania “Nicetime” (patrz rozdział 4.3)<br />
Man<br />
W trybie “Nicetime” PLANOTIME funkcjonuje tak jak w sposobie “ręcznym”, z tym wyjątkiem, że powróci<br />
automatycznie do sposobu funkcjonowania “Automatycznego” w ustalonym dniu i o określonej godzinie. W<br />
praktyce służy do przerwania sposobu “Automatycznego” na pewien okres czasu.<br />
Man Sposób funkcjonowania “ręczny” (patrz rozdział 4.4)<br />
W trybie “ręcznym” PLANOTIME prześle do wybranych grup tylko te sygnały, które pochodzą od nacisku<br />
przycisków ■ .<br />
Notatka: sposób “ręczny” jest jedynym sposobem, w którym nie jest ważne wyregulowanie zegara.<br />
▼ ▼<br />
Man Rec Sposób funkcjonowania “ręczny z rejestracją” (patrz rozdział 4.5)<br />
W trybie “ręcznym z rejestracją” PLANOTIME będzie funkcjonował tak jak w sposobie “ręcznym”, ale dodatkowo<br />
wszystkie sygnały sterujące zostaną zarejestrowane jako zdarzenia i będą zapisane razem z godziną kiedy miały<br />
miejsce. Służy do tworzenia układu zdarzeń bez konieczności bezpośredniego zaprogramowania każdego z nich<br />
osobno, ale z zastosowaniem PLANOTIME w trybie “ręcznym” przez jeden tydzień i zapamiętaniem historii obsługi.<br />
PL<br />
Prog Tryb “programowanie” (patrz rozdział 5)<br />
W trybie “programowania” można programować, zmieniać, kopiować i kasować zdarzenia; można również<br />
wyregulować zegar i inne parametry przydatne przy funkcjonowaniu PLANOTIME.<br />
4.1) Wybór trybu funkcjonowania<br />
Aby wejść w żądany tryb funkcjonowania należy go wybrać i potwierdzić wybór w “menu wyboru”.<br />
“Menu wyboru” można uważać za punkt startowy dla wyboru funkcji PLANOTIME: “Auto”, “Man”, “Man REC ” i<br />
“Prog”.<br />
Z jakiegokolwiek sposobu funkcjonowania lub programowania, w jakim znajduje się PLANOTIME można<br />
powrócić do “menu wyboru ” po wielokrotnym naciśnięciu przycisku ■ aż do zaświecenia się lampki “Auto”,<br />
109
▼<br />
▼<br />
▼<br />
▼<br />
4.2) Funkcjonowanie w sposób działania “Automatyczny”<br />
Tabela 11 Aby wybrać sposób działania “Automatyczny” Przykład<br />
1. Nacisnąć wielokrotnie przycisk ■ aż do wyświetlenia napisu Auto<br />
... Auto<br />
2. Nacisnąć przycisk aby potwierdzić sposób “Automatyczny”<br />
Notatka: gdy nie zostało zaprogramowane chociażby jedno zdarzenie, nie będzie możliwe potwierdzenie<br />
sposobu “Automatycznego”.<br />
▼<br />
Tabela 12 Aby wyjść ze sposobu “Automatycznego” i powrócić do “menu wyboru” Przykład<br />
1. Nacisnąć 2- krotnie przycisk<br />
4.3) Funkcjonowanie w trybie “Nicetime”<br />
“Nicetime” jest specyficzną funkcją, która przerywa na jakiś czas, tryb “Automatyczny” aby przejść na tryb<br />
“ręczny”. Można wybrać funkcję Nicetime tylko gdy znajdujemy się w ustawieniu “Automatycznym”.<br />
Tabela 13 Aby przejść z działania “Automatycznego” do “Nicetime” Przykład<br />
1. Nacisnąć przycisk<br />
Auto<br />
2. Nacisnąć przycisk aby potwierdzić sposób “Nicetime”<br />
Man<br />
3. Nacisnąć przyciski lub aby ustalić godzinę, kiedy chcemy wrócić do<br />
działania “Automatycznego”<br />
4.4) Funkcjonowanie w trybie “ręcznym”<br />
▼ ▼<br />
5. Nacisnąć przyciski lub aby ustawić minuty, kiedy chcemy przejść na<br />
sposób “Automatyczny”<br />
▼ ▼<br />
7. Nacisnąć przyciski lub aby wybrać dzień w tygodniu, w którym chcemy<br />
przejść na sposób automatyczny.<br />
(Su=Niedziela; Mo=Poniedziałek; Tu=Wtorek; We=Środa; Th=Czwartek; Fr=Piątek; Sa=Sobota)<br />
▼ ▼<br />
Od tej chwili PLANOTIME będzie funkcjonował w trybie “ręcznym” i można przesyłać sygnały sterujące naciśnięciem<br />
jednego z przycisków: ■ . PLANOTIME powróci do działania “Automatycznego” w ustalonym dniu i godzinie.<br />
Aby wyjść z trybu “Nicetime” przed czasem i powrócić do menu wyboru kierować się instrukcjami w tabeli 20<br />
▼ ▼<br />
▼<br />
4. Nacisnąć przycisk aby potwierdzić godzinę<br />
▼<br />
6. Nacisnąć przycisk aby potwierdzić minuty<br />
▼<br />
8. Nacisnąć przycisk aby potwierdzić dzień<br />
▼<br />
Auto<br />
Man<br />
Tabela 14 Aby wybrać sposób działania “ręczny” Przykład<br />
lub<br />
lub<br />
lub<br />
1. Nacisnąć wielokrotnie przycisk ■ aż do wyświetlenia napisu Auto<br />
2. Nacisnąć przycisk aż do wyświetlenia Man<br />
3. Nacisnąć przycisk aby potwierdzić sposób “ręczny”<br />
▼<br />
... Auto<br />
Man<br />
Tabela 15 Aby wybrać grupę i wysłać sygnał Przykład<br />
1. Zacząć od 1 grupy lub nacisnąć kilkakrotnie przycisk aby wybrać inną grupę<br />
...<br />
2. Teraz można używać przycisków ■ aby wysłać sygnały wybranej funkcj<br />
▼ ▼<br />
Tabela 16 Aby wysłać sygnał dla tej samej grupy Przykład<br />
1. Nacisnąć jeden z przycisków ■<br />
▼ ▼<br />
110
▼<br />
▼<br />
▼<br />
▼<br />
▼<br />
Tabela 17 Aby wybrać inną grupę Przykład<br />
1. Nacisnąć kilkakrotnie przycisk aby wybrać żądaną grupę<br />
2. Teraz można używać przycisków ■ aby wysłać sygnały do wybranej grupy<br />
▼ ▼<br />
...<br />
Tabela 18 Aby stworzyć grupę wielokrotną i wysłać sygnał Przykład<br />
1. Można zacząć od 1 grupy lub ewentualnie nacisnąć kilkakrotnie przycisk<br />
...<br />
▼aby wybrać inną grupę<br />
2. Nacisnąć przycisk aby potwierdzić grupę (dopisać do grupy wielokrotnej)<br />
3. Powtórzyć dwa poprzednie punkty aby dodać inne grupy<br />
▼<br />
4. Po zakończeniu tworzenia grupy wielokrotnej można zastosować przyciski<br />
■ do wysyłania sygnałów<br />
▼ ▼<br />
Notatka: wybraną grupę i potwierdzoną przez pomyłkę można usunąć kilkakrotnym naciśnięciem przycisku<br />
aż do ustawienia błyskającego światełka na grupie do usunięcia, po czym nacisnąć przycisk .<br />
▼<br />
Tabela 19 Aby wysłać specjalny sygnał programowania do grupy lub do grupy wielokrotnej Przykład<br />
1. Zacząć od 1 grupy lub ewentualnie nacisnąć kilkakrotnie przycisk aby<br />
...<br />
wybrać inną grupę<br />
2. Nacisnąć przycisk aby potwierdzić grupę<br />
3. Ewentualnie powtórzyć dwa poprzednie punkty aby wybrać inne grupy<br />
▼<br />
4. Nacisnąć kilkakrotnie przycisk aż do zaświecenia się symboli funkcji<br />
specjalnej “ ” lub “ ”<br />
5. Nacisnąć przycisk aby potwierdzić funkcję specjalną<br />
6. Teraz można używać przyciski ■ aby przesłać sygnał specjalny<br />
▼<br />
▼ ▼<br />
... lub<br />
Tabela 20 Aby wyjść ze sposobu działania “ręcznego” i powrócić do menu wyboru: Przykład<br />
Lub:<br />
Lub:<br />
Po wysłaniu sygnału nacisnąć przycisk<br />
Sprawdzić czy nie została wybrana jakaś grupa po czym nacisnąć jeden z<br />
przycisków ■ . (ewentualnie zaznaczyć grupy naciśnięciem przycisku i<br />
▼<br />
wykonań selekcję/wyjść z selekcji naciśnięciem przycisku )<br />
... Auto<br />
Nacisnąć wielokrotnie przycisk ■ aż do zaświecenia się lampki Auto<br />
▼<br />
▼▼ ▼<br />
4.5) Funkcjonowanie w trybie “ręcznym z rejestracją” Man<br />
Tabela 21 Aby wybrać sposób działania “ręczny z rejestracją” Przykład<br />
1. Nacisnąć wielokrotnie przycisk ■ aż do wyświetlenia napisu Auto<br />
... Auto<br />
2. Nacisnąć 2- krotnie przycisk aż do zaświecenia Man<br />
Man<br />
3. Nacisnąć przycisk aby potwierdzić tryb “ręczny z rejestracją”<br />
▼<br />
Od tego momentu można używać PLANOTIME jakby to był sposób “ręczny”, a dodatkowo wszystkie sygnały<br />
wysyłane przyciskami lub , z dniem i czasem, kiedy zostały wydane, zostaną zapisane jako zdarzenia.<br />
Notatka: sposób “ręczny z rejestracją” nie pozwala na zarejestrowanie zdarzeń, które posiadają funkcję “■”.<br />
▼ ▼<br />
Zalecenia dla osób z mniejszym doświadczeniem: Użyć trybu „ręcznego z rejestracją” aby zapisać<br />
sekwencję zdarzeń bez kłopotliwego programowania ich pojedynczo. Aby zarejestrować zdarzenia z całego<br />
tygodnia, wejść do trybu “ręcznego z rejestracją”, na przykład na początku tygodnia i później normalnie używać<br />
PLANOTIME do sterowania podnoszeniem lub obniżaniem zasłon i markiz codziennie o żądanej godzinie. Na<br />
początku następnego tygodnia PLANOTIME ustawi się w sposób “Automatyczny”, zapamiętując wszystkie<br />
operacje i w ten sposób zdarzenia będą się powtarzać co tydzień.Aby skasować zdarzenia zarejestrowane<br />
przez pomyłkę patrz rozdział 5.2.3.<br />
PL<br />
111
▼<br />
5) Jak zaprogramować PLANOTIME<br />
Funkcjonowanie PLANOTIME w trybie “programowania” służy do tworzenia zdarzeń, do ich modyfikacji, do kopiowania<br />
i do kasowania; można tu również ustawić zegar i inne parametry użyteczne dla funkcjonowania PLANOTIME.<br />
Prog Programowanie “zdarzeń” (patrz rozdział 5.2)<br />
Przy programowaniu “zdarzeń” można:<br />
NEW wprowadzić nowe zdarzenie i wyregulować każdą jego pojedynczą cechę<br />
MOD zmienić zdarzenie zmieniając jedną lub więcej cech zdarzenia<br />
COPY kopiować zdarzenie, aby stworzyć zdarzenie pojedyncze podobne istniejącego zdarzenia<br />
DEL skasować kompletnie zdarzenie<br />
Prog Ustawienie zegara (patrz rozdział 5.3)<br />
Ustawienie zegara jest niezbędne, ponieważ służy on do wykonania przez PLANOTIME zdarzenia o ustalonej<br />
godzinie. Gdy używana jest funkcja specjalna: “godziny słoneczne” oprócz ustawienia godziny, minuty i dnia<br />
tygodnia należy też ustawić dzień w miesiącu i miesiąc w roku. Należy wpisać także aktualną godzinę odpowiednio<br />
do sezonu: czy jest to sezon zimowy (godzina słoneczna), czy sezon letni (godzina urzędowa).<br />
Prog Regulacja parametrów funkcji: “na wakacjach” (patrz rozdział 5.4)<br />
Służy do wyregulowania wartości maksymalnego przesunięcia czasowego od ustalonej godziny zdarzenia; można<br />
ustawić ją na minimum 0 minut (bez zmian) do maksymalnie 75 minut.<br />
Prog Programowanie parametrów funkcji: “godziny słoneczne” (patrz rozdział 5.5)<br />
Służy do ustawienia niezbędnych parametrów do obliczenia “godzin słonecznych”:<br />
• Szerokość geograficzna miejsca instalowania w stosunku do równika ziemskiego (znaleźć można we<br />
wszystkich atlasach).<br />
• Różnica pomiędzy godziną na zegarze i faktyczną godziną słoneczną.<br />
• Określenie, czy bieżąca godzina jest godziną sezonu zimowego (słoneczną) czy godziną sezonu letniego<br />
(urzędową).<br />
5.1) Wybór typu programowaniae<br />
Aby wejść do funkcji “programowania” należy zaznaczyć funkcję i potwierdzić wybór w “menu wyboru”.<br />
“Menu wyboru” może być uważane za punkt startowy dla wszystkich funkcji PLANOTIME.<br />
Z każdego sposobu funkcjonowania lub programowania, w jakim znajduje się PLANOTIME, można powrócić do<br />
“menu wyboru” po kilkakrotnym naciśnięciu przycisku ■ aż do momentu zaświecenia się lampki “Auto”<br />
5.1.1) Do przodu i do tyłu do programowania<br />
Programowanie jest procedurą programowania etapami, czyli programuje się kolejno niezbędne wartości i<br />
parametry. Przypomina się, że w trakcie wykonywania tej fazy<br />
• błyskający symbol w 50% wskazuje programowanie danego parametru<br />
• przyciski: lub regulują dany parametr<br />
• przycisk potwierdza parametr i przechodzi się do wykonania następnej fazy<br />
• przycisk ■ anuluje ewentualny wybór i powraca się do poprzedniej fazy<br />
• przycisk zaznacza lub anuluje wybór parametru<br />
• błyskający symbol w 25% wskazuje, że parametr nie został zaznaczony<br />
• błyskający symbol w 75% wskazuje, że parametr został zaznaczony<br />
• w niektórych przypadkach nie można potwierdzić parametru, gdy nie zostanie zaznaczony wybór; na przykład:<br />
nie byłoby możliwe zaprogramowanie zdarzenia bez zaznaczenia chociażby jednego dnia tygodnia.<br />
▼<br />
▼ ▼<br />
112
5.2) Programowanie “zdarzeń”<br />
W programowaniu zdarzeń należy ustawić pojedynczo wszystkie cechy, z których złożone jest zdarzenie, czyli<br />
Tabela 22 Właściwości zdarzenia: Przykład 1 Przykład 2<br />
1. Godzina i minuta, o której będzie wysłany sygnał zadania 08.30<br />
18.45<br />
2. Dzień lub dni tygodnia, kiedy zdarzenie ma mieć miejsce Mo We Fr Sa<br />
3. Jedna lub więcej grup podlegających funkcji<br />
2<br />
“Podnoszenia” lub “Obniżania”<br />
1<br />
4 5 6<br />
4. Aktywność funkcji specjalnej: “ ” lub “ ”<br />
5. Aktywność funkcji specjalnej “na wakacjach”<br />
6. Aktywność funkcji specjalnej “godziny słoneczne”<br />
▼<br />
▼ ▼ ▼<br />
▼<br />
7. Aktywność funkcji specjalnej “funkcja czasowa”<br />
8. W wypadku funkcji specjalnej: “funkcja czasowa” jest ona<br />
okresem czasu, w sekundach, pomiędzy jakimś sygnałem<br />
sterującym i sygnałem “Stop”<br />
20<br />
W przykładzie NR1: o godzinie 8.30 każdego<br />
Poniedziałku grupa 1 otrzyma sygnał “Podnoszenia”.<br />
W przykładzie NR2: o godzinie 18.45 w każdą Środę,<br />
Piątek i Sobotę grupa 2 otrzyma sygnał na “Obniżenie”<br />
i grupy 4,5,6 otrzymają sygnał na “Podniesienie”;<br />
funkcje te przewidują także realizację sygnałów<br />
pochodzących od czujników klimatycznych. Jest<br />
również aktywna funkcja “godziny słoneczne”, w<br />
wyniku, której godzina wykonywania funkcji<br />
ustawionej na 18.45 będzie korygowana w ciągu roku,<br />
odpowiednio do aktualnej godziny zachodu słońca.<br />
Przewidziana została także “funkcja czasowa”, czyli<br />
po 20 sekundach od rozpoczęcia ruchu będzie miał<br />
miejsce “Stop”.<br />
PL<br />
113
▼<br />
▼<br />
5.2.1) Programowanie: nowego zdarzenia NEW<br />
Tabela 23 Do zaprogramowania prostego “nowego zdarzenia” (przykład 1 z tabeli Nr 22) Przykład<br />
1. Nacisnąć wielokrotnie przycisk ■ aż do wyświetlenia napisu Auto<br />
2. Nacisnąć 3- krotnie przycisk aby wybrać sposób “programowanie” Prog<br />
3. Nacisnąć przycisk aby potwierdzić sposób “programowania”<br />
▼<br />
4. Nacisnąć przycisk aby potwierdzić programowanie “zdarzeń”<br />
▼<br />
5. Nacisnąć przycisk aby potwierdzić programowanie “nowego zdarzenia” NEW<br />
6. Nacisnąć przyciski lub aby ustawić godzinę (w przykładzie: 08)<br />
▼<br />
7. Nacisnąć przycisk aby potwierdzić godzinę<br />
8. Nacisnąć przyciski lub aby ustawić minuty (w przykładzie: 30)<br />
▼<br />
9. Nacisnąć przycisk aby potwierdzić minuty<br />
▼<br />
10. Nacisnąć przyciski lub aby wybrać dzień tygodnia<br />
(w przykładzie: Mo=Poniedziałek)<br />
11. Nacisnąć przycisk aby zaznaczyć dzień tygodnia<br />
12. Nacisnąć przycisk aby potwierdzić dzień tygodnia<br />
▼<br />
(w przykładzie: Mo=Poniedziałek)<br />
13. Nacisnąć przycisk aby wybrać funkcję “Podnoszenie” dla grupy 1<br />
▼<br />
▼ ▼<br />
▼ ▼<br />
▼ ▼<br />
14. Nacisnąć przycisk aby potwierdzić funkcję (w przykładzie: “Podnoszenie” dla grupy 1)<br />
15. Nacisnąć przycisk aby potwierdzić zdarzenie<br />
▼<br />
▼<br />
(w przykładzie: bez funkcji specjalnej “ ” lub “ ”)<br />
16. Nacisnąć przycisk aby potwierdzić zdarzenie<br />
▼<br />
(w przykładzie: bez funkcji specjalnej “na wakacjach” )<br />
17. Nacisnąć przycisk aby potwierdzić zdarzenie<br />
(w przykładzie: bez funkcji specjalnej “godziny słoneczne” )<br />
▼<br />
18. Nacisnąć przycisk aby potwierdzić zdarzenie<br />
(w przykładzie: bez funkcji specjalnej “funkcja czasowa” )<br />
▼<br />
19. W tym momencie wszystkie elementy zaznaczonego zdarzenia zaczną<br />
błyskać się co oznaczać będzie, że jest to końcowa faza tworzenia nowego<br />
zdarzenia. Nacisnąć przycisk aby potwierdzić zdarzenie lub nacisnąć ■<br />
aby wrócić do tyłu.<br />
▼<br />
... Auto<br />
lub<br />
lub<br />
lub<br />
Ostatnim potwierdzeniem zdarzenie zostanie zapisane i PLANOTIME ustawi się do programowania nowego<br />
zdarzenia, co można kontynuować począwszy od punku nr 5 niniejszej tabeli.<br />
114
▼<br />
▼<br />
▼<br />
▼<br />
▼<br />
▼<br />
▼<br />
▼<br />
▼<br />
▼<br />
▼<br />
Tabela 24 Aby zaprogramować inne “zdarzenie” (przykład 2 z tabeli Nr 22): Przykład<br />
1. Nacisnąć wielokrotnie przycisk ■ aż do wyświetlenia napisu Auto<br />
2. Nacisnąć 3- krotnie przycisk aby wybrać sposób “programowanie” Prog<br />
3. Nacisnąć przycisk aby potwierdzić sposób “programowania”<br />
▼<br />
4. Nacisnąć przycisk aby potwierdzić programowanie “zdarzeń”<br />
▼<br />
5. Nacisnąć przycisk aby potwierdzić programowanie “nowego zdarzenia” NEW<br />
6. Nacisnąć przyciski lub aby ustawić godzinę (w przykładzie: 18)<br />
▼<br />
7. Nacisnąć przycisk aby potwierdzić godzinę<br />
8. Nacisnąć przyciski lub aby ustawić minuty (w przykładzie: 45)<br />
▼<br />
9. Nacisnąć przycisk aby potwierdzić minuty<br />
▼<br />
10. Nacisnąć przyciski lub aby wybrać pierwszy dzień tygodnia<br />
(w przykładzie: We=Środa)<br />
11. Nacisnąć przycisk aby zaznaczyć pierwszy dzień tygodnia<br />
12. Nacisnąć przyciski lub aby wybrać drugi dzień tygodnia<br />
(w przykładzie: Fr=Piątek)<br />
13. Nacisnąć przycisk aby zaznaczyć drugi dzień tygodnia<br />
14. Nacisnąć przyciski lub aby wybrać trzeci dzień tygodnia<br />
(w przykładzie: Sa=Sobota)<br />
15. Nacisnąć przycisk aby zaznaczyć trzeci dzień tygodnia<br />
16. Nacisnąć przycisk aby potwierdzić zaznaczone dni<br />
17. Nacisnąć przycisk aby zaznaczyć grupę 2<br />
18. Nacisnąć przycisk aby wybrać funkcję “Obniżanie” dla grupy 2<br />
19. Nacisnąć 2- krotnie przycisk aby zaznaczyć grupę 4<br />
28. Nacisnąć przycisk aby potwierdzić zdarzenie<br />
▼<br />
(w przykładzie: bez funkcji specjalnej “na wakacjach” )<br />
▼ ▼<br />
▼ ▼<br />
▼ ▼<br />
▼ ▼<br />
29. Nacisnąć przycisk aby zaznaczyć funkcję specjalną “godziny słoneczne”<br />
30. Nacisnąć przycisk aby potwierdzić zdarzenie<br />
(w przykładzie: funkcję specjalną: “godziny słoneczne” )<br />
31. Nacisnąć przycisk aby zaznaczyć funkcję specjalną “funkcję czasową”<br />
33. Nacisnąć przycisk aby potwierdzić zdarzenie<br />
▼<br />
▼<br />
32. Nacisnąć przyciski lub aby wyregulować czas (w przykładzie: 20 sekund)<br />
▼<br />
(w przykładzie: funkcja specjalna: “funkcja czasowa” )<br />
34. W tym momencie wszystkie elementy zaznaczonego zdarzenia zaczną błyskać<br />
się co oznaczać będzie, że jest to końcowa faza tworzenia nowego zdarzenia.<br />
Nacisnąć przycisk aby potwierdzić zdarzenie lub nacisnąć ■ aby wrócić do tyłu<br />
▼<br />
▼ ▼<br />
▼<br />
20. Nacisnąć przycisk aby wybrać funkcję “Podnoszenie” dla grupy 4<br />
21. Nacisnąć przycisk aby zaznaczyć grupę 5<br />
▼<br />
22. Nacisnąć przycisk aby wybrać funkcję “Podnoszenie” dla grupy 5<br />
23. Nacisnąć przycisk aby zaznaczyć grupę 6<br />
▼<br />
24. Nacisnąć przycisk aby wybrać funkcję “Podnoszenie” dla grupy 6<br />
25. Nacisnąć przycisk aby potwierdzić funkcje<br />
▼<br />
▼<br />
(w przykładzie: “Obniżanie w grupie 2 i “Podnoszenie” w grupach 4,5 i 6)<br />
26. Nacisnąć przycisk aby zaznaczyć funkcję specjalną “ ”<br />
27. Nacisnąć przycisk aby potwierdzić zdarzenie<br />
▼<br />
(w przykładzie: wysyłanie funkcji specjalnej “ ”)<br />
▼ ▼<br />
... Auto<br />
lub<br />
lub<br />
lub<br />
lub<br />
lub<br />
lub<br />
PL<br />
Po ostatnim potwierdzeniu zdarzenie zostanie zapisane i PLANOTIME ustawi się do programowania nowego<br />
zdarzenia, kontynuować więc począwszy od punku nr 5 niniejszej tabeli.<br />
Notatka: w celu prawidłowego funkcjonowania “godzin słonecznych” należy ustawić właściwe parametry (patrz tabela 30)<br />
115
▼<br />
▼<br />
▼<br />
▼<br />
5.2.2) Programowanie: modyfikacja zdarzeń MOD<br />
Wszystkie zaprogramowane zdarzenia mogą być zmienione w jakiejkolwiek chwili. Przed przystąpieniem do<br />
modyfikacji należy to zdarzenie znaleźć i wybrać spośród obecnych zdarzeń.<br />
Tabela 25 Aby zmodyfikować zdarzenia: Przykład<br />
1. Nacisnąć wielokrotnie przycisk ■ aż do wyświetlenia napisu Auto<br />
... Auto<br />
2. Nacisnąć 3- krotnie przycisk aby wybrać sposób “programowanie” Prog<br />
3. Nacisnąć przycisk aby potwierdzić sposób “programowania”<br />
▼<br />
4. Nacisnąć przycisk aby potwierdzić programowanie “zdarzeń”<br />
▼<br />
5. Nacisnąć przycisk aby zaznaczyć zmianę “zdarzeń” MOD<br />
6. Nacisnąć przycisk aby potwierdzić zmianę “zdarzeń”<br />
▼<br />
7. Nacisnąć przyciski lub aby wybrać zdarzenie do zmodyfikowania.<br />
Zdarzenia pokazane są w porządku chronologicznym w jakim zostały<br />
stworzone - począwszy od pierwszego, po naciśnięciu przechodzi się do<br />
następnego , po naciśnięciu przechodzi się do poprzedniego.<br />
▼ ▼<br />
▼<br />
▼<br />
lub<br />
8. Nacisnąć przycisk aby potwierdzić zaznaczone zdarzenie<br />
▼<br />
Teraz zmianę wykonuje się tą samą procedurą programowania jak etapy “nowego zdarzenia” (patrz rozdział<br />
5.2.1), można również modyfikować lub potwierdzić pojedynczo lub wszystkie cechy razem.<br />
Po wykonaniu modyfikacji i po potwierdzeniu ostatniego parametru zdarzenie zostanie ponownie zapisane i<br />
PLANOTIME dostosuje się do wykonania modyfikacji następnego zdarzenia, należy więc wykonać procedurę<br />
począwszy od punktu NR6 niniejszej tabeli.<br />
5.2.3) Programowanie: kasowanie zdarzeń DEL<br />
Wszystkie zaprogramowane zdarzenia mogą być skasowane w każdej chwili. Przed skasowaniem należy to<br />
zdarzenie odnaleźć i wybrać spośród zdarzeń obecnych.<br />
Tabela 26 Aby skasować zdarzenia: Przykład<br />
1. Nacisnąć wielokrotnie przycisk ■ aż do wyświetlenia napisu Auto<br />
... Auto<br />
2. Nacisnąć 3- krotnie przycisk aby wybrać sposób “programowanie” Prog<br />
3. Nacisnąć przycisk aby potwierdzić sposób “programowania”<br />
▼<br />
4. Nacisnąć przycisk aby potwierdzić programowanie “zdarzeń”<br />
5. Nacisnąć 2- krotnie przycisk aby zaznaczyć kasowanie “zdarzeń” DEL<br />
▼<br />
6. Nacisnąć przycisk aby potwierdzić kasowanie“ zdarzeń”<br />
▼<br />
7. Nacisnąć przyciski lub aby wybrać zdarzenie do skasowania.<br />
Zdarzenia wyświetlone są w porządku chronologicznym w jakim zostały one<br />
stworzone począwszy od pierwszego; po naciśnięciu przechodzi się do<br />
następnego, po naciśnięciu przechodzi się do poprzedniego.<br />
▼ ▼<br />
▼<br />
▼<br />
lub<br />
8. Nacisnąć przycisk aby potwierdzić zaznaczone zdarzenie<br />
▼<br />
9. Nacisnąć przycisk aby potwierdzić kasowanie zaznaczonego zdarzenia.<br />
Gdy nie chcemy potwierdzić kasowania nacisnąć przycisk ■ i wznowić<br />
procedurę od punktu 7 niniejszej tabeli.<br />
▼<br />
Po skasowaniu zdarzenia PLANOTIME ustawia się do kasowania następnego zdarzenia, można więc<br />
kontynuować procedurę począwszy od punkt nr 6 niniejszej tabeli.<br />
116
▼<br />
▼<br />
▼<br />
▼<br />
5.2.4) Programowanie: kopiowanie zdarzeń COPY<br />
Aby przyśpieszyć programowanie nowego zdarzenia podobnego do już istniejącego można wykonać jego<br />
kopię i następnie można zmodyfikować niektóre jego parametry.<br />
Tabela 27 Aby zaprogramować nowe zdarzenie poprzez skopiowanie już istniejącego zdarzenia Przykład<br />
1. Nacisnąć wielokrotnie przycisk ■ aż do wyświetlenia napisu Auto<br />
... Auto<br />
2. Nacisnąć 3- krotnie przycisk aby wybrać sposób “programowanie” Prog<br />
3. Nacisnąć przycisk aby potwierdzić sposób “programowania”<br />
▼<br />
4. Nacisnąć przycisk aby potwierdzić programowanie “zdarzeń”<br />
▼<br />
5. Nacisnąć 3- krotnie przycisk aby zaznaczyć kopiowane “zdarzenia” COPY<br />
6. Nacisnąć przycisk aby potwierdzić kopiowanie “zdarzeń”<br />
▼<br />
7. Nacisnąć przyciski lub aby wybrać zdarzenie do skopiowania.<br />
Zdarzenia wyświetlone są w porządku chronologicznym w jakim zostały one<br />
utworzone; po naciśnięciu przechodzi się do następnego, po naciśnięciu<br />
przechodzi się do poprzedniego<br />
▼ ▼<br />
▼<br />
▼<br />
lub<br />
8. Nacisnąć przycisk aby potwierdzić zaznaczone zdarzenie<br />
Od tego momentu modyfikacja skopiowanego zdarzenia będzie kontynuowana według tej samej procedury<br />
programowania jak etapy “nowego zdarzenia” (patrz rozdział 5.2.1) i można zmodyfikować lub potwierdzić<br />
pojedynczo wszystkie cechy zdarzenia. Po wykonanej modyfikacji i po potwierdzeniu ostatniego parametru<br />
skopiowane zdarzenie zostanie zapamiętane jako nowe i PLANOTIME ustawi się kopiowania następnego<br />
zdarzenia, można więc kontynuować począwszy od punktu nr 6 niniejszej tabeli.<br />
▼<br />
5.3) Ustawienie zegara<br />
Ustawienie zegara wykonuje się natychmiast po włożeniu nowej baterii. Regulacja zegara może być konieczna też<br />
w innych przypadkach jak na przykład przy zmianie godziny sezonu zimowego (słoneczna) na godzinę sezonu<br />
letniego (urzędowa).<br />
Tabela 28 Aby wyregulować zegar Przykład<br />
1. Nacisnąć wielokrotnie przycisk ■ aż do wyświetlenia napisu Auto<br />
... Auto<br />
2. Nacisnąć 3- krotnie przycisk aby wybrać sposób “programowanie” Prog<br />
3. Nacisnąć przycisk aby potwierdzić sposób “programowania”<br />
▼<br />
4. Nacisnąć przycisk aby potwierdzić sposób “programowanie”<br />
5. Nacisnąć przycisk aby zaznaczyć ustawienie zegara<br />
6. Nacisnąć przyciski lub aby ustawić godzinę<br />
7. Nacisnąć przycisk aby potwierdzić godzinę<br />
8. Nacisnąć przyciski lub aby ustawić minuty<br />
▼<br />
▼<br />
9. Nacisnąć przycisk aby potwierdzić minuty<br />
11. Nacisnąć przycisk aby potwierdzić dzień<br />
12. Nacisnąć przyciski lub aby wybrać numer dnia<br />
▼<br />
10. Nacisnąć przyciski lub aby wybrać dzień tygodnia<br />
▼<br />
13. Nacisnąć przycisk aby potwierdzić dzień<br />
▼<br />
15. Nacisnąć przycisk aby potwierdzić miesiąc<br />
16. Nacisnąć przyciski lub aby wybrać numer roku (spomiędzy 2000 i 2059)<br />
▼<br />
17. Nacisnąć przycisk aby potwierdzić rok<br />
▼<br />
▼ ▼<br />
▼ ▼<br />
(Su=Niedziela; Mo=Poniedziałek; Tu=Wtorek; We=Środa; Th=Czwartek; Fr=Piątek; Sa=Sobota)<br />
14. Nacisnąć przyciski lub aby wybrać numer miesiąca<br />
(01=Gennaio; 02=Febbraio... 12= Dicembre)<br />
▼ ▼<br />
▼ ▼<br />
▼ ▼<br />
▼ ▼<br />
lub<br />
lub<br />
lub<br />
lub<br />
lub<br />
lub<br />
PL<br />
Notatka: gdy używana jest funkcją specjalna czyli “godziny słoneczne”, należy ustawić nie tylko godziny, minuty,<br />
dzień w tygodniu, miesiąc w roku ale także czy godzina jest godziną w sezonie zimowym (słoneczna) czy w<br />
sezonie letnim ( urzędowa), patrz tabela 30.<br />
117
▼<br />
▼<br />
▼<br />
▼<br />
5.4) Regulacja parametrów funkcji specjalnej “na wakacjach”<br />
Mając na uwadze prawidłowe działanie funkcji specjalnej “na wakacjach” należy wyregulować wartość maksymalnie<br />
dozwolonego przesunięcia; od 0 do 75 minut w odstępach 5 minutowych. Na przykład: gdy wartość jest wyregulowana<br />
na 15, to zdarzenie zaprogramowane na godzinę 08.00 może być wykonane przypadkowo o godzinie 7.45 lub 8.15.<br />
Modyfikacja tego parametru ma wpływ na pozostałe zdarzenia, które tym specjalnym sygnałem zostały włączone.<br />
Tabela 29 Aby wyregulować parametr funkcji specjalnej “na wakacjach” Przykład<br />
1. Nacisnąć wielokrotnie przycisk ■ aż do wyświetlenia napisu Auto<br />
... Auto<br />
2. Nacisnąć 3- krotnie przycisk aby wybrać sposób “programowanie” Prog<br />
3. Nacisnąć przycisk aby potwierdzić sposób “programowania”<br />
▼<br />
4. Nacisnąć 2- krotnie przycisk aby zaznaczyć regulację parametrów funkcji<br />
“na wakacjach”<br />
5. Nacisnąć przycisk aby potwierdzić regulację parametru “na wakacjach” “ ”<br />
▼<br />
6. Nacisnąć przyciski lub by wyregulować maksymalne przesunięcie w minutach<br />
7. Nacisnąć przycisk aby potwierdzić parametr<br />
▼<br />
▼ ▼<br />
lub<br />
5.5) Regulacja parametrów funkcji specjalnej “godziny słoneczne”<br />
Mając na uwadze prawidłowe działanie funkcji specjalnej: “godziny słoneczne” należy wyregulować niektóre<br />
parametry czyli:<br />
• Szerokość geograficzną miejsca instalowania w stosunku do równika ziemskiego: od 65 (w kierunku Bieguna<br />
Północnego) do -65 (w kierunku na południe) przechodząc przez 0 (równik). Aby znaleźć przybliżoną wartość<br />
“ ” do wpisania należy kierować się rysunkiem na następnej stronie lub jakimkolwiek atlasem.<br />
• Różnica pomiędzy godziną wskazaną na zegarze i efektywną godziną słoneczną“ ”to w praktyce różnica<br />
pomiędzy południem wskazanym na zegarze i południem słonecznym danego miejsca; można ją ustawić w<br />
granicach od 0 do 99 minut. W rozdziale “co robić gdy” opisany jest sposób mierzenia tej wartości.<br />
Gdy nie jest wymagana dokładna regulacja ten parametr może być równy zeru.<br />
• Wskazać, że aktualna godzina jest godziną sezonu zimnego (słoneczna) lub sezonu letniego (urzędowa).<br />
Tabela 30 Aby ustawić parametry funkcji specjalnej: “godziny słoneczne” Przykład<br />
1. Nacisnąć wielokrotnie przycisk ■ aż do wyświetlenia napisu Auto<br />
... Auto<br />
2. Nacisnąć 3- krotnie przycisk aby wybrać sposób “programowanie” Prog<br />
3. Nacisnąć przycisk aby potwierdzić sposób “programowania”<br />
118<br />
▼<br />
4. Nacisnąć 3- krotnie przycisk aby zaznaczyć regulację parametrów funkcji<br />
“godziny słoneczne”<br />
5. Nacisnąć przycisk aby potwierdzić regulację parametrów funkcji<br />
“godziny słoneczne”<br />
7. Nacisnąć przycisk aby potwierdzić parametr<br />
▼<br />
6. Nacisnąć przyciski lub aby wyregulować szerokość geograficzną miejsca<br />
zamieszkania “ ”<br />
9. Nacisnąć przycisk aby potwierdzić parametr<br />
▼<br />
▼<br />
10. Nacisnąć przyciski lub aby wybrać godzinę sezonu letniego<br />
“S” (urzędowa) lub sezonu zimowego “W” (słoneczna)<br />
11. Nacisnąć przycisk aby potwierdzić parametr<br />
Zaleca się zmodyfikowania tych parametrów po wprowadzeniu jednego lub wielu zdarzeń włączonych tym<br />
specjalnym sygnałem<br />
▼<br />
▼ ▼<br />
8. Nacisnąć przyciski lub aby wyregulować różnicę pomiędzy godziną na<br />
zegarze i efektywną godziną słonecznąro “ ”<br />
▼ ▼<br />
▼ ▼<br />
lub<br />
lub<br />
lub
6) Wymiana baterii<br />
Kiedy wyświetla się symbol baterii rozładowanej “ ”<br />
należy jak najszybciej ją wymienić, ponieważ istnieje<br />
ryzyko że sygnały sterujące nie zostaną wysłane<br />
prawidłowo.<br />
Aby wymienić baterię należy otworzyć przegródkę i<br />
postąpić tak jak wskazano na rysunkach:<br />
Po wymianie baterii należy ustawić wewnętrzny zegar<br />
(patrz rozdział 2.2).<br />
Uwaga: baterie zawierają substancje szkodliwe, nie<br />
wyrzucać ich do śmieci ale tylko do właściwych<br />
punktów zbioru zgodnie z miejscowymi normami.<br />
PL<br />
7) Ostrzeżenia<br />
PLANOTIME nie wymaga specjalnej troski, prosimy<br />
jednak aby mieć na uwadze poniższe aspekty:<br />
• nie dajemy całkowitej gwarancji na to, że sygnały<br />
wysłane drogą radiową z PLANOTIME zostaną<br />
odebrane przez automatykę,<br />
• niektóre elementy PLANOTIME mogą zawierać<br />
substancje szkodliwe, nie wolno więc porzucać<br />
nadajnika w przypadkowych miejscach.<br />
119
▼<br />
8) Co robić gdy...<br />
• Aby zwiększyć pewność, że wysłany sygnał<br />
zostanie odebrany: zapisać go 2 razy lub więcej o<br />
tej samej godzinie(skopiować zdarzenie) lub drugi<br />
raz na minutę później.<br />
• Aby PLANOTIME wyszedł z jakiegokolwiek<br />
programowania czy sposobu funkcjonowania:<br />
nacisnąć kilkakrotnie przycisk ■ aż do zaświecenia<br />
“Auto” po czym nacisnąć przycisk<br />
wówczas będzie<br />
można wybrać żądany sposób funkcjonowania.<br />
• Aby zmierzyć różnicę pomiędzy godziną na<br />
zegarze i rzeczywistą godziną słoneczną:<br />
wymagana wartość do funkcji specjalnej:<br />
“godziny słoneczne” jest różnicą pomiędzy<br />
południem (godziną 12.00) wskazanym na zegarze i<br />
rzeczywistym południem słonecznym miejsca<br />
instalowania. Prostym sposobem do zmierzenia tej<br />
wartości jest obserwacja cienia przedmiotu<br />
ustawionego na słońcu (w pozycji pionowej i z<br />
czubkiem: może to być słupek); zbliżając się do<br />
południa (do godziny 12.00) cień się skraca i<br />
wydłuża się po południu. Rzeczywista godzina<br />
12.00 jest wtedy gdy cień jest najkrótszy w<br />
stosunku do podstawy przedmiotu. Po ustaleniu<br />
godziny 12.00 w sezonie letnim (urzędowym)<br />
należy cofnąć zegar o godzinę do tyłu. Obliczyć<br />
różnicę od rzeczywistej godziny 12.00 (w minutach)<br />
i wynik zapisać w PLANOTIME. Na przykład: gdy<br />
rzeczywiste południe słoneczne ma miejsce o<br />
godzinie 12.25 należy wpisać „25”, gdy ma miejsce<br />
o godzinie 11.47 należy wpisać „-13”.<br />
Notatka: opisany sposób nie bierze pod uwagę<br />
anomalii atmosferycznych, ale błąd z tego powodu<br />
wprowadzony nie ma wpływu na funkcjonowanie<br />
PLANOTIME.<br />
8.1) Spis błędów<br />
Rzadko zdarza się, że PLANOTIME funkcjonuje nieprawidłowo; każda anomalia zostanie natychmiast<br />
wyświetlona. W poniższej tabeli przedstawione są błędy i możliwe rozwiązania.<br />
Tabela 31 spis błędów<br />
Błąd Nr Opis Rozwiązanie<br />
Err1<br />
Err2<br />
Err3<br />
Err4<br />
Err5<br />
Zaprogramowanych zostało ponad 100 zdarzeń i nie ma<br />
Pamięć pełna.<br />
miejsca na inne. Nie ma rozwiązania: ostatnie zdarzenie<br />
nie zostanie zapisane.<br />
Błąd połączenia pomiędzy wewnętrznymi Jest to usterka szczególna: wyciągnąć i założyć<br />
elementami PLANOTIME.<br />
ponownie baterię może problem zostanie rozwiązany.<br />
Niektóre parametry zapisanego zdarzenia nie są<br />
prawidłowe; może to być spowodowane błędem w<br />
połączeniu pomiędzy wewnętrznymi elementami<br />
Błąd w parametrach jednego lub wielu PLANOTIME, wyciągnąć i założyć ponownie baterię,<br />
zdarzeń.<br />
może problem zostanie rozwiązany. Gdy jednak błąd nie<br />
zostanie anulowany należy wejść do modyfikacji<br />
zdarzeń i sprawdzić parametry wszystkich zdarzeń.<br />
Zmienione zostały parametry funkcji To nic poważnego, ale mieć na uwadze że następne<br />
specjalnej “na wakacjach” po zdarzenia już zostały obliczone na podstawie starych<br />
obliczeniu niektórych zdarzeń na parametrów, nowe parametry będą zastosowane do<br />
podstawie poprzednich parametrów. następnego zdarzenia i następnych po nim.<br />
Zostały zmienione parametry funkcji Lepiej nie zmieniać parametrów po zaprogramowaniu<br />
specjalnej “godziny słoneczne” po zdarzeń. Sprawdzić po zmianie czy zdarzenie<br />
obliczeniu niektórych zdarzeń na ustawione jest prawidłowo<br />
podstawie poprzednich parametrów.<br />
120
9) Dane techniczne<br />
Firma NICE S.p.a. rezerwuje sobie prawo do zmiany parametrów technicznych produktu, w każdej chwili i bez<br />
uprzedzenia, celem poprawy jakości produktu gwarantując jego funkcjonowanie w przewidzianych warunkach<br />
dla jego użytkowania. Notatka: wszystkie dane techniczne odnoszą się do temperatury +20°C.<br />
Zasilanie<br />
: 3Vps z 1 baterią litową CR2450<br />
Trwałość baterii<br />
: Określona na 2 lata (10 zdarzeń na dzień)<br />
Częstotliwość<br />
: 433.92MHz ± 100KHz<br />
Moc promieniowania : 1mW<br />
Średni zasięg<br />
: określony na 25m wewnątrz budynków<br />
(obecność zakłóceń elektromagnetycznych może zmniejszyć zasięg)<br />
Kodowanie<br />
: 52 Bit rolling code FLOR+INFO<br />
Podziałka zegara<br />
: 1 minuta<br />
Dokładność zegara : 100 sekund/rok<br />
Maksymalna ilość zdarzeń : 100<br />
Stopień zabezpieczenia : IP 40<br />
Temperatura działania : -5°C ÷ +50°C<br />
Wymiary/waga<br />
: 80x80x12mm / 75g<br />
A1 Dopisek<br />
Przed fazą programowania należy zapoznać się z poniższą tabelą w celu “tworzenia” zdarzeń i jako pomoc w<br />
zapamiętaniu zapisanych zdarzeń..<br />
Tabela A1 Przykład tworzenia zdarzeń pomoc podręczna w zapamiętaniu zdarzeń<br />
Nazwa Godzina Dni Grupy Funkcje specjalne<br />
Su Mo Tu We Th Fr Sa 1 2 3 4 5 6<br />
Przykład 1 08.30<br />
X<br />
Su Mo Tu We Th Fr Sa 1 2 3 4 5 6<br />
Przykład 2 18.30<br />
X X X X<br />
X X 20<br />
Su Mo Tu We Th Fr Sa 1 2 3 4 5 6<br />
Su Mo Tu We Th Fr Sa 1 2 3 4 5 6<br />
PL<br />
Su Mo Tu We Th Fr Sa 1 2 3 4 5 6<br />
Su Mo Tu We Th Fr Sa 1 2 3 4 5 6<br />
Su Mo Tu We Th Fr Sa 1 2 3 4 5 6<br />
Su Mo Tu We Th Fr Sa 1 2 3 4 5 6<br />
Su Mo Tu We Th Fr Sa 1 2 3 4 5 6<br />
Su Mo Tu We Th Fr Sa 1 2 3 4 5 6<br />
121
Dichiarazione di conformità / declaration of conformity N°: PLANOTIME Rev 0<br />
Indirizzo / Address:<br />
Nice S.p.a., Via Pezza Alta 13, 31046 Rustignè di ODERZO (TV) Italy<br />
NICE S.p.a. dichiara che il prodotto PLANOTIME è conforme ai requisiti essenziali richiesti dall’articolo 3 della Direttiva<br />
R&TTE 1999/5/CE, per l’uso cui l’apparecchio è destinato, essendo stati applicati i seguenti Standard:<br />
NICE S.p.a. declares that the products PLANOTIME comply with the essentials requirements of article 3 of the R&TTE<br />
1999/5/EC Directive, if used for its intended use and that the following standards has been applied:<br />
1 Salute (articolo 3.1.a della Direttiva R&TTE) / Healt (article 3.1.a of R&TTE Directive)<br />
Standard applicato (i) / Applied standard (s)<br />
Not applicable for short range devices<br />
2 Sicurezza (articolo 3.1.a della Direttiva R&TTE) / Safety (article 3.1.a of R&TTE Directive)<br />
Standard applicato (i) / Applied standard (s)<br />
EN 60950 (1992) 2nd Edition +A1:1993+A2:1993+A5:<br />
1995+A4:1997+A11:1997+EN41003/1993<br />
3 Compatibilità elettromagnetica (articolo 3.1.b della Direttiva R&TTE) / Electromagnetic Compatibility (article 3.1.b of<br />
R&TTE Directive)<br />
Standard applicato (i) / Applied standard (s) ETSI EN 301 489-3 V1.3.1 (2001-11)<br />
4 Utilizzo efficace dello spettro attribuito (articolo 3.2 della Direttiva R&TTE) / Efficient use of the radio frequency spectrum<br />
(article 3.2 of R&TTE Directive)<br />
Standard applicato (i) / Applied standard (s) EN 300 220-3 (2000)<br />
Data /date<br />
Amministratore Delegato<br />
05 Giugno 2003 Lauro Buoro<br />
IST144 4853 REV. 00<br />
Nice S.p.a. Oderzo TV Italia<br />
Via Pezza Alta, 13 Z.I. Rustignè<br />
Tel. +39.0422.85.38.38<br />
Fax +39.0422.85.35.85<br />
info@niceforyou.com<br />
Nice Padova Sarmeola I<br />
Tel. +39.049.89.78.93.2<br />
Fax +39.049.89.73.85.2<br />
info.pd@niceforyou.com<br />
Nice Belgium<br />
Leuven (Heverlee) B<br />
Tel. +32.(0)16.38.69.00<br />
Fax +32.(0)16.38.69.01<br />
info@nicebelgium.be<br />
Nice España Madrid E<br />
Tel. +34.9.16.16.33.00<br />
Fax +34.9.16.16.30.10<br />
kamarautom@nexo.es<br />
Nice France Sud Aubagne F<br />
Tel. +33.(0)4.42.62.42.52<br />
Fax +33.(0)4.42.62.42.50<br />
info.marseille@nicefrance.fr<br />
Nice Rhône-Alpes<br />
Decines Charpieu F<br />
Tel. +33.(0)4.78.26.56.53<br />
Fax +33.(0)4.78.26.57.53<br />
info.lyon@nicefrance.fr<br />
www.niceforyou.com<br />
Nice Roma I<br />
Tel. +39.06.72.67.17.61<br />
Fax +39.06.72.67.55.20<br />
info.roma@niceforyou.com<br />
Nice France Buchelay F<br />
Tel. +33.(0)1.30.33.95.95<br />
Fax +33.(0)1.30.33.95.96<br />
info@nicefrance.fr<br />
Nice Polska Pruszków PL<br />
Tel. +48.22.728.33.22<br />
Fax +48.22.728.25.10<br />
nice@nice.com.pl