5-in-one remote - Radio Shack
5-in-one remote - Radio Shack
5-in-one remote - Radio Shack

Create successful ePaper yourself
Turn your PDF publications into a flip-book with our unique Google optimized e-Paper software.
TABLE OF CONTENTS<br />
5-IN-ONE REMOTE<br />
Introduction . . . . . . . . . . . . . . . . . . . . . . . . . . . . . . . . . . . . . . . . . . . . . . . . . . . . . . . . . . . . . . . . . . . . . . . . . . 3<br />
Install<strong>in</strong>g Batteries. . . . . . . . . . . . . . . . . . . . . . . . . . . . . . . . . . . . . . . . . . . . . . . . . . . . . . . . . . . . . . . . . . . . 4<br />
A Quick Look At The Controls. . . . . . . . . . . . . . . . . . . . . . . . . . . . . . . . . . . . . . . . . . . . . . . . . . . . . . . . . . . . 5<br />
Key Functions . . . . . . . . . . . . . . . . . . . . . . . . . . . . . . . . . . . . . . . . . . . . . . . . . . . . . . . . . . . . . . . . . . . . . . . 6<br />
Us<strong>in</strong>g The Backlight . . . . . . . . . . . . . . . . . . . . . . . . . . . . . . . . . . . . . . . . . . . . . . . . . . . . . . . . . . . . . . . . . . 8<br />
Device Table . . . . . . . . . . . . . . . . . . . . . . . . . . . . . . . . . . . . . . . . . . . . . . . . . . . . . . . . . . . . . . . . . . . . . . . . 9<br />
Key Table . . . . . . . . . . . . . . . . . . . . . . . . . . . . . . . . . . . . . . . . . . . . . . . . . . . . . . . . . . . . . . . . . . . . . . . . . 10<br />
Programm<strong>in</strong>g A Device. . . . . . . . . . . . . . . . . . . . . . . . . . . . . . . . . . . . . . . . . . . . . . . . . . . . . . . . . . . . . . . . 14<br />
Programm<strong>in</strong>g A TV/VCR Combo. . . . . . . . . . . . . . . . . . . . . . . . . . . . . . . . . . . . . . . . . . . . . . . . . . . . . . . . . 15<br />
Search<strong>in</strong>g For Your Code . . . . . . . . . . . . . . . . . . . . . . . . . . . . . . . . . . . . . . . . . . . . . . . . . . . . . . . . . . . . . . 16<br />
Check<strong>in</strong>g The Codes . . . . . . . . . . . . . . . . . . . . . . . . . . . . . . . . . . . . . . . . . . . . . . . . . . . . . . . . . . . . . . . . . . 16<br />
Reassign<strong>in</strong>g Device Keys . . . . . . . . . . . . . . . . . . . . . . . . . . . . . . . . . . . . . . . . . . . . . . . . . . . . . . . . . . . . . . 17<br />
Programm<strong>in</strong>g Favorite Channel Scan. . . . . . . . . . . . . . . . . . . . . . . . . . . . . . . . . . . . . . . . . . . . . . . . . . . . 17<br />
Us<strong>in</strong>g Channel Scan. . . . . . . . . . . . . . . . . . . . . . . . . . . . . . . . . . . . . . . . . . . . . . . . . . . . . . . . . . . . . . . . . . 18<br />
Chang<strong>in</strong>g Volume Lock. . . . . . . . . . . . . . . . . . . . . . . . . . . . . . . . . . . . . . . . . . . . . . . . . . . . . . . . . . . . . . . . 18<br />
Lock<strong>in</strong>g Volume Control to One Mode (Global Volume Lock) . . . . . . . . . . . . . . . . . . . . . . . . . . . . . . . . . . . . 18<br />
Unlock<strong>in</strong>g Volume Control for a S<strong>in</strong>gle Device (Individual Volume Unlock). . . . . . . . . . . . . . . . . . . . . . . . . 18<br />
Unlock<strong>in</strong>g All Volume Control (Restor<strong>in</strong>g Global Unlock) . . . . . . . . . . . . . . . . . . . . . . . . . . . . . . . . . . . . . . 19<br />
Troubleshoot<strong>in</strong>g . . . . . . . . . . . . . . . . . . . . . . . . . . . . . . . . . . . . . . . . . . . . . . . . . . . . . . . . . . . . . . . . . . . . . 20<br />
Care . . . . . . . . . . . . . . . . . . . . . . . . . . . . . . . . . . . . . . . . . . . . . . . . . . . . . . . . . . . . . . . . . . . . . . . . . . . . . . . 21<br />
Specifications . . . . . . . . . . . . . . . . . . . . . . . . . . . . . . . . . . . . . . . . . . . . . . . . . . . . . . . . . . . . . . . . . . . . . . . 21<br />
Instruction To The User. . . . . . . . . . . . . . . . . . . . . . . . . . . . . . . . . . . . . . . . . . . . . . . . . . . . . . . . . . . . . . . . 22<br />
Limited Warranty. . . . . . . . . . . . . . . . . . . . . . . . . . . . . . . . . . . . . . . . . . . . . . . . . . . . . . . . . . . . . . . . . . . . . 23<br />
Guía Del Usuario . . . . . . . . . . . . . . . . . . . . . . . . . . . . . . . . . . . . . . . . . . . . . . . . . . . . . . . . . . . . . . . . . . . . 24<br />
Manufacturer’s Codes (Códigos De Fabricantes) . . . . . . . . . . . . . . . . . . . . . . . . . . . . . . . . . . . . . . . . . . 46<br />
Setup Codes For Audio Amplifiers (Códigos De Configuración Para Amplificadores De Audio) . . . . . . . . . . 46<br />
Setup Codes For Audio Receivers (Códigos De Configuración Para Receptores De Audio) . . . . . . . . . . . . . 46<br />
Setup Codes For Cable Converters (Códigos De Configuración Para Convertidores De Cable) . . . . . . . . . . 47<br />
Setup Codes For CD Players (Códigos De Configuración Para Reproductores De CDs) . . . . . . . . . . . . . . . . 47<br />
Setup Codes For DVD Players (Códigos De Configuración Para Reproductores DVD) . . . . . . . . . . . . . . . . . 48<br />
Setup Codes For Home Automation (Códigos De Configuración Para La Automatización Del Hogar) . . . . . 49<br />
Setup Codes For Home-Theater-In-A-Box Devices (Códigos De Configuración Para<br />
Dispositivos Home-Theater-In-A-Box) . . . . . . . . . . . . . . . . . . . . . . . . . . . . . . . . . . . . . . . . . . . . . . . . . . . . 49<br />
Setup Codes For Satellite Receivers (Códigos De Configuración Para Receptores De Satélite) . . . . . . . . . . 49<br />
Setup Codes For TVs (Códigos De Configuración Para Televisores) . . . . . . . . . . . . . . . . . . . . . . . . . . . . . . 49<br />
Setup Codes For TV/VCR Combos (Códigos Para Programar Comb<strong>in</strong>aci<strong>one</strong>s Televisor/ Videograbadora) . . 51<br />
Setup Codes For VCRs (Códigos De Configuración Para Videograbadoras) . . . . . . . . . . . . . . . . . . . . . . . . 52<br />
2 Table Of Contents
INTRODUCTION<br />
USER’S GUIDE<br />
The <strong>Radio</strong><strong>Shack</strong> 5-<strong>in</strong>-One Remote is our newest universal <strong>remote</strong> control. It is designed to<br />
operate up to five home enterta<strong>in</strong>ment devices, <strong>in</strong>clud<strong>in</strong>g TV, video, and audio comp<strong>one</strong>nts.<br />
Moreover, this <strong>remote</strong> control conta<strong>in</strong>s sophisticated technology that will allow you to<br />
consolidate the clutter of all of your orig<strong>in</strong>al <strong>remote</strong> controls <strong>in</strong>to <strong>one</strong> easy-to-use product.<br />
It’s packed with advanced features such as:<br />
• Code Search and Verification – help you quickly set up the <strong>remote</strong> control to operate<br />
your devices<br />
• Channel Scan and Favorite Channel Scan – let you “channel surf ” all available and<br />
favorite channels<br />
• Volume Lock – to assign volume controls to <strong>in</strong>dividual devices or to <strong>one</strong> global device<br />
• Mode Reassignment – lets you add control of another TV, VCR, or DVD player or other<br />
auxiliary device<br />
• Dedicated Menu/Guide Keys – for <strong>in</strong>stant access to cable and satellite program guides<br />
and menus<br />
• Searchable Code Library – conta<strong>in</strong>s world’s largest and most efficient group of <strong>in</strong>frared<br />
<strong>remote</strong> control codes for virtually every current brand and make<br />
• Partial Backlight<strong>in</strong>g – to aid operation <strong>in</strong> low ambient light<br />
After <strong>in</strong>stall<strong>in</strong>g four (4) new AAA alkal<strong>in</strong>e batteries (not <strong>in</strong>cluded, see next page), you can<br />
immediately use the <strong>Radio</strong><strong>Shack</strong> 5-<strong>in</strong>-One <strong>remote</strong> to control an RCA TV, VCR, and cable<br />
converter, and a Pi<strong>one</strong>er DVD player and audio receiver.<br />
To control other brands, please perform the <strong>in</strong>structions <strong>in</strong> Programm<strong>in</strong>g A Device on<br />
page 14 and Programm<strong>in</strong>g A TV/VCR Combo on page 15.<br />
Introduction 3
INSTALLING BATTERIES<br />
Your <strong>Radio</strong><strong>Shack</strong> 5-<strong>in</strong>-One <strong>remote</strong> requires four AAA batteries (not supplied) for power. For<br />
the best performance and longest life, we recommend us<strong>in</strong>g <strong>Radio</strong><strong>Shack</strong> alkal<strong>in</strong>e batteries.<br />
CAUTIONS:<br />
• Use only fresh batteries of the required size and recommended type.<br />
• Do not mix old and new batteries, different types of batteries (e.g., standard, alkal<strong>in</strong>e,<br />
or rechargeable), or rechargeable batteries of different capacities.<br />
• If you do not plan to use the <strong>remote</strong> for an extended period, remove the batteries.<br />
Batteries can leak chemicals that can destroy electronic parts.<br />
WARNING: Dispose of old batteries promptly and properly. Do not burn or bury them.<br />
TO INSTALL BATTERIES:<br />
5-IN-ONE REMOTE<br />
❶<br />
❷<br />
❸<br />
1. Press the tab on the battery compartment cover (located on the back of the<br />
<strong>remote</strong>) and lift off the cover.<br />
2. Place the AAA batteries <strong>in</strong> the compartment as <strong>in</strong>dicated by the polarity<br />
symbols (+ and –) marked <strong>in</strong>side.<br />
3. Align the cover key with the compartment open<strong>in</strong>g and replace the cover.<br />
4. Test the <strong>Radio</strong><strong>Shack</strong> 5-<strong>in</strong>-One <strong>remote</strong> by first press<strong>in</strong>g POWER and then any<br />
device key (e.g., TV). If batteries are <strong>in</strong>serted correctly, the red LED will bl<strong>in</strong>k<br />
once after each key press.<br />
NOTE: When the <strong>Radio</strong><strong>Shack</strong> 5-<strong>in</strong>-One <strong>remote</strong> stops operat<strong>in</strong>g properly, replace the batteries with<strong>in</strong><br />
10 m<strong>in</strong>utes (to protect the programm<strong>in</strong>g <strong>in</strong>formation).<br />
4 Install<strong>in</strong>g Batteries
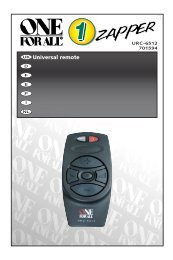
A QUICK LOOK AT THE CONTROLS<br />
USER’S GUIDE<br />
Use the illustration below to locate controls on the <strong>Radio</strong><strong>Shack</strong> 5-<strong>in</strong>-One <strong>remote</strong> and then<br />
study the Key Functions (on the next three pages) to learn how they function.<br />
NOTE: Also refer to the “Key Table” (start<strong>in</strong>g on page 10) to learn key functions for specific devices.<br />
cont<strong>in</strong>ued on next page...<br />
A Quick Look At The Controls 5
A QUICK LOOK AT THE CONTROLS (cont<strong>in</strong>ued)<br />
KEY FUNCTIONS<br />
5-IN-ONE REMOTE<br />
The red LED (Light Emitt<strong>in</strong>g Diode) bl<strong>in</strong>ks to show that<br />
the <strong>remote</strong> control is send<strong>in</strong>g signals.<br />
Use P for all programm<strong>in</strong>g sequences.<br />
Press POWER once to turn on or off the selected device.<br />
Press CBL/SAT, VCR, DVD, AUX,or TV once to select a device<br />
to control.<br />
Press MENU (GUIDE) once to display the menu, guide, or<br />
program for the selected device.<br />
Press EXIT once to exit the selected device’s menu, guide,<br />
or program.<br />
Use the cursor keys (▲,▼, , or ) to move the cursor <strong>in</strong><br />
the program guide and menu screens. Use SELECT to<br />
choose options from your selected device’s menu or guide.<br />
▲<br />
▲<br />
Use INFO to display the current channel and program<br />
<strong>in</strong>formation.<br />
Use SLEEP to activate your device’s sleep timer (if <strong>one</strong> is<br />
available for the device).<br />
Use TV/VCR (A/B) to switch the TV’s <strong>in</strong>put to view TV or<br />
VCR programs, or act as your cable box’s A/B switch.<br />
Press DISPLAY once to turn on or off the selected device’s<br />
<strong>in</strong>formation display.<br />
In the CBL/SAT, VCR, DVD,and TV modes, use SCAN (FAV) to<br />
scan favorite channels and/or all channels. See<br />
Programm<strong>in</strong>g Favorite Channel Scan on page 17 and Us<strong>in</strong>g<br />
Channel Scan on page 18.<br />
6 A Quick Look At The Controls
USER’S GUIDE<br />
Press LAST once to recall the last-viewed channel or to page<br />
back <strong>one</strong> screen on the ma<strong>in</strong> menu.<br />
Press MUTE once to turn the audio off or on.<br />
Use VOL+ (or VOL-) to raise (or lower) the audio volume.<br />
Use CH+ (or CH-) to select the next higher (or lower)<br />
channel.<br />
Use the keypad (1 ~ 9 and 0) to directly enter channels<br />
(e.g., 009 or 031).<br />
Press ENTER once after enter<strong>in</strong>g the channel numbers on<br />
some TVs.<br />
In the CBL/SAT and DVD modes, also use ENTER as SELECT.<br />
Use +100 to enter channels over 100 (e.g., press +100,<br />
then 3,and then 1 = 131).<br />
For a CD player <strong>in</strong> the AUX mode, use +100 to add 10 to<br />
the digit entry (e.g., press +100 then 7 = 17).<br />
In the VCR or TV mode, use PIP to switch the Picture-In-<br />
Picture feature on or off (if available on your TV).<br />
Use SWAP to switch images and sound (if available)<br />
between the ma<strong>in</strong> and w<strong>in</strong>dow pictures.<br />
Use MOVE to move the w<strong>in</strong>dow picture (if available) to<br />
different positions <strong>in</strong> the ma<strong>in</strong> picture.<br />
cont<strong>in</strong>ued on next page...<br />
A Quick Look At The Controls 7
A QUICK LOOK AT THE CONTROLS<br />
KEY FUNCTIONS (CONTINUED)<br />
5-IN-ONE REMOTE<br />
In the VCR or TV mode, use the transport keys, (REW),<br />
(PLAY), (FF), (PAUSE), and (STOP), to control<br />
your VCR. To record a VCR program, press (REC) twice.<br />
In the DVD mode, use the transport keys to control your<br />
DVD player.<br />
In the AUX mode, use the transport keys to control a<br />
CD player.<br />
In the CBL/SAT mode, use the transport keys for VOD<br />
(Video On Demand) if available on your cable or<br />
satellite service.<br />
USING THE BACKLIGHT<br />
The <strong>Radio</strong><strong>Shack</strong> 5-<strong>in</strong>-One <strong>remote</strong> <strong>in</strong>cludes a unique lighted keypad backlight control.<br />
It operates <strong>in</strong> the follow<strong>in</strong>g ways:<br />
• When you press a key dur<strong>in</strong>g normal usage, the backlight will turn on for 5 seconds.<br />
Thereafter, each time you press a key, the 5-second timer will reset and count down<br />
aga<strong>in</strong>. If no key is pressed dur<strong>in</strong>g this time, the backlight will turn off.<br />
• Dur<strong>in</strong>g programm<strong>in</strong>g, the backlight will turn on for 10 seconds. Thereafter, each time<br />
you press a key, the 10-second timer will reset and count down aga<strong>in</strong>. If no key is<br />
pressed dur<strong>in</strong>g this time, the back light will turn off.<br />
• When you press SCAN (FAV), the backlight will turn off after 3 seconds.<br />
8 A Quick Look At The Controls
USER’S GUIDE<br />
DEVICE TABLE<br />
After programm<strong>in</strong>g, the <strong>Radio</strong><strong>Shack</strong> 5-<strong>in</strong>-One <strong>remote</strong>’s device keys will be able to control<br />
the follow<strong>in</strong>g device types. Please refer to this table when perform<strong>in</strong>g the <strong>in</strong>structions <strong>in</strong><br />
Programm<strong>in</strong>g A Device on page 14.<br />
DEVICE KEY<br />
CONTROLS THIS DEVICE TYPE<br />
TV<br />
VCR, TV/VCR Combo, or PVR (Personal Video Recorder)<br />
Cable Converter or Satellite Receiver<br />
DVD Player<br />
Audio Amplifier, Audio Receiver, CD Player, Home Automation, or<br />
Home Theater-In-A-Box (HTIB)<br />
A Quick Look At The Controls 9
5-IN-ONE REMOTE<br />
A QUICK LOOK AT THE CONTROLS (cont<strong>in</strong>ued)<br />
KEY TABLE<br />
KEY FUNCTIONS FOR SELECTED DEVICE 1<br />
KEY AUDIO AUDIO CABLE CD DVD<br />
AMP./RCVR./ RCVR./DVD CONVERTER PLAYER PLAYER<br />
HTIB 2 COMBO<br />
Menu/ Menu Guide 3 Menu/ Menu<br />
Program (DVD) Program<br />
Clear Return Exit Clear Exit<br />
Up/ Up Up Up/ Up<br />
Rear Up<br />
Disc Up<br />
Down/ Down Down Down/ Down<br />
Rear Down<br />
Disc Down<br />
Left/ Left Left Left/ Left<br />
Balance Left<br />
Track Down<br />
Right/ Right Right Right/ Right<br />
Balance Right<br />
Track Up<br />
10 A Quick Look At The Controls<br />
Select/ Enter Select Select/ Select/<br />
Surr. Sound (DVD) Disc Select Enter<br />
Mode On/Off<br />
Front – Info. Info. Display<br />
Channels<br />
– – Favorite/ – Favorite/<br />
Ch. Scan<br />
Ch. Scan<br />
Input Disc A/B/ – TV/<br />
Skip Bypass DVD<br />
Rear GUI Display – Display<br />
Channels<br />
Band Repeat Last Random –<br />
FM/AM Play On/Off Channel Play On/Off<br />
Preset Preset Channel Preset Skip<br />
Up Up Up Up Forward<br />
Preset Preset Channel Preset Skip<br />
Down Down Down Down Reverse<br />
Source 1/ FM Digit 1 Track 1/ Digit 1<br />
Digit 1 Mode Digit 1<br />
cont<strong>in</strong>ued on page 12...
USER’S GUIDE<br />
KEY TABLE<br />
KEY FUNCTIONS FOR SELECTED DEVICE 1<br />
KEY SATELLITE TV TV/VCR VCR/<br />
RECEIVER COMBO PVR<br />
Guide 3 Menu Guide Menu<br />
(or Guide) 3<br />
Exit Exit Exit Exit<br />
Up Up Up Up<br />
Down Down Down Down<br />
Left – Left Left<br />
Right – Right Right<br />
Select Select Select Select<br />
Info. Info. Info. Info.<br />
Favorite/ – Favorite/ Favorite/<br />
Ch. Scan Ch.Scan Ch. Scan<br />
TV/ TV/ TV/ TV/<br />
Satellite Video VCR VCR<br />
Display Display Display Display<br />
Last Last Last Last<br />
Channel Channel Channel Channel<br />
Channel Channel Channel Channel<br />
Up Up Up Up<br />
Channel Channel Channel Channel<br />
Down Down Down Down<br />
Digit 1 Digit 1 Digit 1 Digit 1<br />
cont<strong>in</strong>ued on page 13...<br />
A Quick Look At The Controls 11
5-IN-ONE REMOTE<br />
A QUICK LOOK AT THE CONTROLS (cont<strong>in</strong>ued)<br />
KEY TABLE (CONTINUED FROM PAGE 10)<br />
KEY FUNCTIONS FOR SELECTED DEVICE 1<br />
KEY AUDIO AUDIO CABLE CD DVD<br />
AMP./RCVR./ RCVR./DVD CONVERTER PLAYER PLAYER<br />
HTIB 2 COMBO<br />
Source 2/ Tuner Digit 2 Track 2/ Digit 2<br />
Digit 2 Digit 2<br />
Source 3/ Band Digit 3 Track 3/ Digit 3<br />
Digit 3 FM/AM Digit 3<br />
Source 4/ DVD Digit 4 Track 4/ Digit 4<br />
Digit 4 Digit 4<br />
Source 5/ Tape Digit 5 Track 5/ Digit 5<br />
Digit 5 Digit 5<br />
Source 6/ VCR Digit 6 Track 6/ Digit 6<br />
Digit 6 Digit 6<br />
Source 7/ Aux. Digit 7 Track 7/ Digit 7<br />
Digit 7 Digit 7<br />
Source 8/ TV Digit 8 Track 8/ Digit 8<br />
Digit 8 Digit 8<br />
Source 9/ Satellite Digit 9 Track 9/ Digit 9<br />
Digit 9 Digit 9<br />
Source 10/ Tun<strong>in</strong>g Digit 0 Track 10/ Digit 0<br />
Digit 0/ Mode Digit 0<br />
Power On<br />
Enter/ Enter Enter/ +10 Enter/<br />
Select (Rcvr.) Select Select<br />
– – PIP On/ – –<br />
Instant<br />
Replay<br />
– – PIP Swap/ – –<br />
Return<br />
To Live<br />
– – PIP Move/ – –<br />
Quick Skip/<br />
PIP Off<br />
NOTES:<br />
1. Functions are active only if available on your orig<strong>in</strong>al <strong>remote</strong> control(s).<br />
2. Home-Theater-In-A-Box (HTIB) device.<br />
3. Guide is available for cable converters or satellite receivers <strong>in</strong> CBL/SAT mode or PVRs <strong>in</strong> the VCR mode.<br />
12 A Quick Look At The Controls
USER’S GUIDE<br />
KEY TABLE (CONTINUED FROM PAGE 12)<br />
KEY FUNCTIONS FOR SELECTED DEVICE 1<br />
KEY SATELLITE TV TV/VCR VCR/<br />
RECEIVER COMBO PVR<br />
Digit 2 Digit 2 Digit 2 Digit 2<br />
Digit 3 Digit 3 Digit 3 Digit 3<br />
Digit 4 Digit 4 Digit 4 Digit 4<br />
Digit 5 Digit 5 Digit 5 Digit 5<br />
Digit 6 Digit 6 Digit 6 Digit 6<br />
Digit 7 Digit 7 Digit 7 Digit 7<br />
Digit 8 Digit 8 Digit 8 Digit 8<br />
Digit 9 Digit 9 Digit 9 Digit 9<br />
Digit 0 Digit 0 Digit 0 Digit 0<br />
Enter/ Enter Enter Enter<br />
Select<br />
PIP On/ PIP On PIP On/ PIP On/<br />
Instant Instant Instant<br />
Replay Replay Replay<br />
PIP Swap/ PIP Swap PIP Swap/ PIP Swap/<br />
Return Return Return<br />
To Live To Live To Live<br />
PIP Move/ PIP Move/ PIP Move/ PIP Move/<br />
Quick Skip/ PIP Off Quick Skip/ Quick Skip/<br />
PIP Off PIP Off PIP Off<br />
A Quick Look At The Controls 13
PROGRAMMING A DEVICE<br />
The <strong>Radio</strong><strong>Shack</strong> 5-<strong>in</strong>-One <strong>remote</strong> comes preprogrammed to operate an RCA TV, VCR, and<br />
cable converter, and a Pi<strong>one</strong>er DVD player and audio receiver. To control devices other than<br />
the default brands, follow these steps; otherwise, skip this section.<br />
Before proceed<strong>in</strong>g, f<strong>in</strong>d the codes for the devices you want to program <strong>in</strong> Manufacturer’s<br />
Codes start<strong>in</strong>g on page 46 and write them down or highlight them.<br />
NOTE: To control a TV/VCR combo, see “Programm<strong>in</strong>g A TV/VCR Combo” on the next page.<br />
1. Turn on the device (e.g.,VCR or DVD player) and, if necessary, load media<br />
(e.g., cassette or disc).<br />
2. On the <strong>Radio</strong><strong>Shack</strong> 5-<strong>in</strong>-One <strong>remote</strong>, press a device key (i.e., CBL/SAT, VCR,<br />
DVD, AUX,or TV).<br />
NOTE: Use the “Device Table” on page 9 to locate the appropriate key for the device you<br />
want to program<br />
3. Press and hold P until the red LED bl<strong>in</strong>ks twice, then release P.<br />
4. Enter the first four-digit code for your device. If the code is correct, the LED<br />
bl<strong>in</strong>ks twice.<br />
NOTE: If the LED does not bl<strong>in</strong>k twice, repeat steps 2 through 4 and try enter<strong>in</strong>g the<br />
code aga<strong>in</strong>.<br />
5. To verify the code works, aim the <strong>Radio</strong><strong>Shack</strong> 5-<strong>in</strong>-One <strong>remote</strong> at the device<br />
and press POWER (or PLAY, if the device does not have a POWER key). The<br />
device should turn off. If it does not respond, repeat steps 2 through 5, try<strong>in</strong>g<br />
each code for your brand until you f<strong>in</strong>d <strong>one</strong> that works. If you cannot f<strong>in</strong>d a<br />
code that works, see Search<strong>in</strong>g For Your Code on page 16.<br />
6. Repeat steps 1 through 5 for each device you want to control. For future<br />
reference, write down each work<strong>in</strong>g device code <strong>in</strong> the boxes below:<br />
CBL/SAT Code:<br />
Device Type:________________________________<br />
VCR Code:<br />
5-IN-ONE REMOTE<br />
DVD Code:<br />
TV Code:<br />
AUX Code:<br />
Device Type:________________________________<br />
14 Programm<strong>in</strong>g A Device
PROGRAMMING A TV/VCR COMBO<br />
USER’S GUIDE<br />
Before proceed<strong>in</strong>g, f<strong>in</strong>d the codes for the device you want to program <strong>in</strong> Setup Codes for<br />
TV/VCR Combos on page 51 and write them down or highlight them.<br />
1. Turn on the TV/VCR Combo and <strong>in</strong>sert a videocassette.<br />
2. On the <strong>Radio</strong><strong>Shack</strong> 5-<strong>in</strong>-One <strong>remote</strong>, press VCR.<br />
3. Press and hold P until the red LED bl<strong>in</strong>ks twice, then release P.<br />
4. Enter the first four-digit code for your device. If the code is correct, the LED<br />
bl<strong>in</strong>ks twice.<br />
NOTE: If the LED does not bl<strong>in</strong>k twice, repeat steps 2 through 4 and try enter<strong>in</strong>g the<br />
code aga<strong>in</strong>.<br />
5. To verify the code works, aim the <strong>Radio</strong><strong>Shack</strong> 5-<strong>in</strong>-One <strong>remote</strong> at the device<br />
and press POWER (or PLAY, if the device does not have a POWER key). The<br />
device should turn off. If it does not respond, repeat steps 2 through 5, try<strong>in</strong>g<br />
each code for your brand until you f<strong>in</strong>d <strong>one</strong> that works. If you cannot f<strong>in</strong>d a<br />
code that works, see Search<strong>in</strong>g For Your Code on page 16.<br />
NOTE: If you locate a setup code that works, but requires a separate TV code, you must<br />
program the TV code <strong>in</strong>to the <strong>remote</strong> separately to control the volume. For VCR/TV<br />
combos that use separate TV codes, TV volume is controlled by press<strong>in</strong>g VCR first, then<br />
TV. After that, use VOL+ (or VOL-) to raise (or lower) the TV volume. See “Chang<strong>in</strong>g<br />
Volume Lock” on page 18 for other volume control options.<br />
6. For future reference, write down the work<strong>in</strong>g TV/VCR combo code <strong>in</strong> the<br />
boxes below:<br />
TV/VCR Code:<br />
TV Code (if used):<br />
Programm<strong>in</strong>g A TV/VCR Combo 15
5-IN-ONE REMOTE<br />
SEARCHING FOR YOUR CODE<br />
If your device does not respond to the <strong>Radio</strong><strong>Shack</strong> 5-<strong>in</strong>-One <strong>remote</strong> after try<strong>in</strong>g all codes<br />
listed for your brand, or if your brand is not listed at all, try search<strong>in</strong>g for your code. For<br />
example, to search for a code for your TV:<br />
1. Press TV on the <strong>remote</strong>.<br />
2. Press and hold P until the red LED bl<strong>in</strong>ks twice, then release P.<br />
3. Press 9 9 1. The LED bl<strong>in</strong>ks twice.<br />
4. Aim the <strong>remote</strong> at the TV and slowly alternate between press<strong>in</strong>g POWER<br />
and TV.<br />
The <strong>Radio</strong><strong>Shack</strong> 5-<strong>in</strong>-One <strong>remote</strong> sends IR codes from its library to the<br />
selected device, start<strong>in</strong>g with the most popular code first. Stop when the TV<br />
turns off.<br />
5. Press and hold P until the LED bl<strong>in</strong>ks twice to lock the code, then release P.<br />
6. To search for other device codes, repeat steps 1 through 5, substitut<strong>in</strong>g the<br />
appropriate key for the device you are search<strong>in</strong>g for.<br />
CHECKING THE CODES<br />
If you have set up the <strong>Radio</strong><strong>Shack</strong> 5-<strong>in</strong>-One <strong>remote</strong> us<strong>in</strong>g the procedure <strong>in</strong> Search<strong>in</strong>g For<br />
Your Code, you may need to f<strong>in</strong>d out which four-digit code is operat<strong>in</strong>g your equipment.<br />
For example, to f<strong>in</strong>d out which code is operat<strong>in</strong>g your TV:<br />
1. Press TV on the <strong>remote</strong>.<br />
2. Press and hold P until the red LED bl<strong>in</strong>ks twice, then release P.<br />
3. Press 9 9 0. The LED bl<strong>in</strong>ks twice.<br />
4. Press 1 to view the code for the first digit. Wait three seconds, count the LED<br />
bl<strong>in</strong>ks (e.g., three bl<strong>in</strong>ks = 3), and write down the number.<br />
NOTE:Ifa code digit is 0, the LED does not bl<strong>in</strong>k.<br />
5. Repeat step 4 for the three rema<strong>in</strong><strong>in</strong>g digits, us<strong>in</strong>g 2 for the second digit,<br />
3 for the third digit, and 4 for the fourth digit.<br />
6. To check for other device codes, repeat steps 1 through 5, substitut<strong>in</strong>g the<br />
appropriate key for each device you are check<strong>in</strong>g.<br />
16 Search<strong>in</strong>g For Your Code/Check<strong>in</strong>g The Codes
REASSIGNING DEVICE KEYS<br />
USER’S GUIDE<br />
The <strong>Radio</strong><strong>Shack</strong> 5-<strong>in</strong>-One <strong>remote</strong> can be set to control a second DVD, VCR, TV, or<br />
cable/satellite receiver. For example, if you want to control a TV, a cable converter, and two<br />
VCRs, follow these steps to reassign the unused DVD key to operate the second VCR.<br />
1. Press and hold P until the red LED bl<strong>in</strong>ks twice on the <strong>remote</strong>, then release P.<br />
2. Press 9 9 2. The LED bl<strong>in</strong>ks twice.<br />
3. Press VCR then DVD.The DVD key is now ready to be programmed as your<br />
second VCR. Follow the <strong>in</strong>structions <strong>in</strong> Programm<strong>in</strong>g A Device on page 14.<br />
To reassign other device keys to the DVD key, repeat steps 1 through 3 above, substitut<strong>in</strong>g<br />
CBL/SAT, AUX,or TV for VCR <strong>in</strong> step 3. To reassign another unused device key, substitute the<br />
desired key for the DVD key <strong>in</strong> step 3.<br />
PROGRAMMING FAVORITE CHANNEL SCAN<br />
The <strong>Radio</strong><strong>Shack</strong> 5-<strong>in</strong>-One <strong>remote</strong> allows you to store a list of up to 10 favorite channels,<br />
<strong>in</strong> any order, that will be immediately scanned when you press SCAN (FAV).<br />
NOTE: Only channels of <strong>one</strong> mode can be stored and any previously-stored channels will be cleared.<br />
1. Press the desired device key on the <strong>remote</strong>.<br />
2. Press and hold P until the red LED bl<strong>in</strong>ks twice, then release P.<br />
3. Press 9 9 6. The LED bl<strong>in</strong>ks twice.<br />
4. Use the keypad to enter a favorite channel number (e.g., 031), then press P.<br />
NOTE: Up to four digits can be entered for a favorite channel number (e.g., 0031).<br />
If you do enter four digits, do not press P. The program automatically advances to the<br />
next open memory slot and waits for your next entry<br />
5. Repeat step 4 for each favorite channel to be stored, up to a total of<br />
10 channels.<br />
NOTE: If you try enter<strong>in</strong>g more than 10 channels, the <strong>Radio</strong><strong>Shack</strong> 5-<strong>in</strong>-One <strong>remote</strong><br />
automatically exits programm<strong>in</strong>g.<br />
6. Press and hold P for about three seconds to exit programm<strong>in</strong>g.<br />
Reassign<strong>in</strong>g Device Keys/Programm<strong>in</strong>g Favorite Channel Scan 17
USING CHANNEL SCAN<br />
5-IN-ONE REMOTE<br />
Use SCAN (FAV) to start a three-second scan of all favorite channels (if programmed – see<br />
Programm<strong>in</strong>g Favorite Channel Scan on the previous page) or all channels (if Favorite<br />
Channel Scan is not programmed).<br />
1. If Favorite Channel Scan has been set up, skip to step 2. Otherwise, press the<br />
desired device key.<br />
2. Press SCAN once.<br />
• If Favorite Channel Scan has been set up, the device scans your favorite<br />
channels, then cont<strong>in</strong>ues to scan all channels for the device.<br />
• If Favorite Channel Scan has not been set up, scann<strong>in</strong>g starts with the<br />
current channel.<br />
3. To stop scann<strong>in</strong>g channels at any time, press any key once.<br />
CHANGING VOLUME LOCK<br />
The <strong>Radio</strong><strong>Shack</strong> 5-<strong>in</strong>-One <strong>remote</strong> comes preset to allow <strong>in</strong>dependent volume control of<br />
each selected device (Global Volume Unlock). However, you may change the Volume Lock<br />
sett<strong>in</strong>g to Global Volume Lock so that <strong>one</strong> device’s volume will control volume <strong>in</strong> all other<br />
modes. After that, you can perform Individual Volume Unlock on a selected device to set its<br />
volume control for <strong>in</strong>dependent operation.<br />
LOCKING VOLUME CONTROL TO ONE MODE (GLOBAL VOLUME LOCK)<br />
1. Press and hold P until the red LED bl<strong>in</strong>ks twice, then release P.<br />
2. Enter 9 9 3.<br />
3. Press the mode key for the device you want to control volume (e.g., TV).<br />
The LED bl<strong>in</strong>ks twice. When you press VOL+, VOL-,or MUTE, the selected<br />
device (e.g., TV) will control the volume regardless of the current mode.<br />
UNLOCKING VOLUME CONTROL FOR A SINGLE DEVICE (INDIVIDUAL VOLUME UNLOCK)<br />
1. After perform<strong>in</strong>g Global Volume Lock, press the mode key for the device you<br />
want to have <strong>in</strong>dependent volume control (e.g., DVD).<br />
2. Press and hold P aga<strong>in</strong> until the red LED bl<strong>in</strong>ks twice, then release P.<br />
3. Enter 9 9 3 then press VOL-. The LED bl<strong>in</strong>ks four times.<br />
18 Us<strong>in</strong>g Channel Scan/Chang<strong>in</strong>g Volume Lock
USER’S GUIDE<br />
4. Repeat steps 1 through 3 for any other device you want to have <strong>in</strong>dependent<br />
volume control. When you press VOL+, VOL-,or MUTE, the selected device<br />
(e.g., DVD) will control the volume only <strong>in</strong> its own mode.<br />
UNLOCKING ALL VOLUME CONTROL (RESTORING GLOBAL UNLOCK)<br />
Follow these steps to restore <strong>in</strong>dependent volume control for all programmed devices<br />
(e.g., TV volume control <strong>in</strong> TV mode, VCR volume <strong>in</strong> VCR mode, etc.).<br />
1. Press and hold P until the red LED bl<strong>in</strong>ks twice, then release P.<br />
2. Enter 9 9 3 then press VOL+. The LED bl<strong>in</strong>ks four times.Volume will be<br />
<strong>in</strong>dependently controlled for all programmed devices.<br />
Chang<strong>in</strong>g Volume Lock 19
TROUBLESHOOTING<br />
PROBLEM:<br />
5-IN-ONE REMOTE<br />
LED does not bl<strong>in</strong>k when you press a key.<br />
SOLUTION: Replace the batteries with four (4) new AAA alkal<strong>in</strong>e batteries (see page 4).<br />
PROBLEM: LED bl<strong>in</strong>ks when you press a key, but device does not respond.<br />
SOLUTION: Be sure to select the correct device key for the device you want to control.Also,<br />
aim the <strong>Radio</strong><strong>Shack</strong> 5-<strong>in</strong>-One <strong>remote</strong> at the device not farther than 15 feet away.<br />
PROBLEM: The <strong>Radio</strong><strong>Shack</strong> 5-<strong>in</strong>-One <strong>remote</strong> does not control devices or commands are<br />
not work<strong>in</strong>g properly.<br />
SOLUTION: Try all listed codes for the device. Make sure the device operates with an<br />
<strong>in</strong>frared <strong>remote</strong> control.<br />
PROBLEM: TV/VCR combo does not respond properly.<br />
SOLUTION: Use the VCR codes for your brand. Some combo units may require both a TV<br />
code and a VCR code for full operation.<br />
PROBLEM: The <strong>Radio</strong><strong>Shack</strong> 5-<strong>in</strong>-One <strong>remote</strong> does not turn on a Sony or Sharp TV/VCR<br />
combo.<br />
SOLUTION: These models require TV codes to turn on power. For Sony, use TV code 0000<br />
and VCR code 0032. For Sharp, use TV code 0093 and VCR code 0048.<br />
PROBLEM: Chang<strong>in</strong>g channels does not work properly.<br />
SOLUTION: If the orig<strong>in</strong>al <strong>remote</strong> control required Enter to be pressed to change channels,<br />
press ENTER on the <strong>remote</strong> after enter<strong>in</strong>g the channel number.<br />
PROBLEM: CH+, CH-, and LAST do not work for your RCA TV.<br />
SOLUTION: Due to RCA design from 1983 to 1987, only the orig<strong>in</strong>al <strong>remote</strong> control will<br />
operate these functions.<br />
PROBLEM: No volume on a second TV.<br />
SOLUTION: Follow <strong>in</strong>structions <strong>in</strong> Chang<strong>in</strong>g Volume Lock on page 18.<br />
PROBLEM: Cannot f<strong>in</strong>d a work<strong>in</strong>g code us<strong>in</strong>g the <strong>in</strong>structions <strong>in</strong> Search<strong>in</strong>g for Your Code.<br />
SOLUTION: Press and hold P until the LED bl<strong>in</strong>ks twice, then release. Enter 9 9 2.Press and<br />
release the device key twice, then try search<strong>in</strong>g aga<strong>in</strong>.<br />
PROBLEM: The <strong>Radio</strong><strong>Shack</strong> 5-<strong>in</strong>-One <strong>remote</strong> turns on audio devices and controls volume,<br />
but does not change preset channels.<br />
SOLUTION: Some products may need both a Audio Receiver code and an Audio Amplifier<br />
code for <strong>remote</strong> control of all features on your audio device.<br />
PROBLEM: Your satellite (DSS) receiver does not respond to the codes listed on page 53.<br />
SOLUTION: Make sure the satellite (DSS) receiver can be operated with an <strong>in</strong>frared (IR)<br />
<strong>remote</strong> control and is not set up to receive only radio frequency (RF) signals.<br />
20 Troubleshoot<strong>in</strong>g
CARE<br />
• Keep the <strong>remote</strong> control dry. If it gets wet, wipe it dry immediately.<br />
• Use and store the unit only <strong>in</strong> normal temperature environments.<br />
• Handle the <strong>remote</strong> control gently and carefully. Don’t drop it.<br />
• Keep the <strong>remote</strong> control away from dust and dirt.<br />
• Wipe the <strong>remote</strong> control with a damp cloth to keep it look<strong>in</strong>g new.<br />
Modify<strong>in</strong>g or tamper<strong>in</strong>g with <strong>in</strong>ternal parts can cause damage and <strong>in</strong>validate the warranty.<br />
If your <strong>remote</strong> control is not perform<strong>in</strong>g as it should, please contact us at:<br />
www.radioshack.com<br />
or visit your local <strong>Radio</strong><strong>Shack</strong> store for help.<br />
USER’S GUIDE<br />
SPECIFICATIONS<br />
Remote Control Power . . . . . . . . . . . . . . . . . . . . . . . . . . . . . . . . . . . . . . . . . . . . . . . 4 AAA Batteries<br />
Remote Control Dimensions<br />
(L x W x H) . . . . . . . . . . . . . . . . . . . . . . . . . . . . . . . . . . . . . . . . . . . . . . . . . . 7.26 x 2.28 x 1.25 <strong>in</strong>.<br />
(L x W x H) . . . . . . . . . . . . . . . . . . . . . . . . . . . . . . . . . . . . . . . . . . . . . . . . 184.5 x 58.9 x 31.8 mm<br />
Remote Control Weight (without Batteries) . . . . . . . . . . . . . . . . . . . . . . . . . . . . . . . . 4 oz (113.4 g)<br />
NOTE: Specifications are typical. Individual units might vary. Specifications are subject to change and<br />
improvement without notice.<br />
Care/Specifications 21
5-IN-ONE REMOTE<br />
INSTRUCTION TO THE USER<br />
This equipment has been tested and found to comply with the limits for a class B digital<br />
device, pursuant to part 15 of the FCC Rules. These limits are designed to provide reasonable<br />
protection aga<strong>in</strong>st harmful <strong>in</strong>terference <strong>in</strong> a residential <strong>in</strong>stallation. This equipment generates,<br />
uses and can radiate radio frequency energy and if not <strong>in</strong>stalled and used <strong>in</strong> accordance with<br />
the <strong>in</strong>structions, may cause harmful <strong>in</strong>terference to radio communications. However, there is<br />
no guarantee that <strong>in</strong>terference will not occur <strong>in</strong> a particular <strong>in</strong>stallation. If this equipment<br />
does cause harmful <strong>in</strong>terference to radio or television reception, which can be determ<strong>in</strong>ed by<br />
turn<strong>in</strong>g the equipment off and on, the user is encouraged to try to correct the <strong>in</strong>terference by<br />
<strong>one</strong> or more of the follow<strong>in</strong>g measures:<br />
• Reorient or relocate the receiv<strong>in</strong>g antenna.<br />
• Increase the separation between the equipment and receiver.<br />
• Connect the equipment <strong>in</strong>to an outlet on a circuit different from that to which the<br />
receiver is connected.<br />
• Consult the dealer or an experienced radio/TV technician for help.<br />
This equipment has been verified to comply with the limits for a class B comput<strong>in</strong>g device,<br />
pursuant to FCC Rules. In order to ma<strong>in</strong>ta<strong>in</strong> compliance with FCC regulations, shielded<br />
cables must be used with this equipment. Operation with non-approved equipment or<br />
unshielded cables is likely to result <strong>in</strong> <strong>in</strong>terference to radio and TV reception. The user is<br />
cauti<strong>one</strong>d that changes and modifications made to the equipment without the approval of<br />
manufacturer could void the user's authority to operate this equipment.<br />
22 Instruction To The User
LIMITED 90-DAY WARRANTY<br />
USER’S GUIDE<br />
This product is warranted by <strong>Radio</strong><strong>Shack</strong> aga<strong>in</strong>st manufactur<strong>in</strong>g defects <strong>in</strong> material and workmanship<br />
under normal use for n<strong>in</strong>ety (90) days from the date of purchase from <strong>Radio</strong><strong>Shack</strong> company-owned stores<br />
and authorized <strong>Radio</strong><strong>Shack</strong> franchisees and dealers.<br />
EXCEPT AS PROVIDED HEREIN, <strong>Radio</strong><strong>Shack</strong> MAKES NO EXPRESS WARRANTIES AND ANY IMPLIED<br />
WARRANTIES, INCLUDING THOSE OF MERCHANTABILITY AND FITNESS FOR A PARTICULAR PUR-<br />
POSE,ARE LIMITED IN DURATION TO THE DURATION OF THE WRITTEN LIMITED WARRANTIES<br />
CONTAINED HEREIN. EXCEPT AS PROVIDED HEREIN, <strong>Radio</strong><strong>Shack</strong> SHALL HAVE NO LIABILITY OR<br />
RESPONSIBILITY TO CUSTOMER OR ANY OTHER PERSON OR ENTITY WITH RESPECT TO ANY LIA-<br />
BILITY, LOSS OR DAMAGE CAUSED DIRECTLY OR INDIRECTLY BY USE OR PERFORMANCE OF THE<br />
PRODUCT OR ARISING OUT OF ANY BREACH OF THIS WARRANTY, INCLUDING, BUT NOT LIMIT-<br />
ED TO,ANY DAMAGES RESULTING FROM INCONVENIENCE, LOSS OF TIME, DATA, PROPERTY, REV-<br />
ENUE, OR PROFIT OR ANY INDIRECT, SPECIAL, INCIDENTAL, OR CONSEQUENTIAL DAMAGES,<br />
EVEN IF <strong>Radio</strong><strong>Shack</strong> HAS BEEN ADVISED OF THE POSSIBILITY OF SUCH DAMAGES.<br />
Some states do not allow limitations on how long an implied warranty lasts or the exclusion or limitation<br />
of <strong>in</strong>cidental or consequential damages, so the above limitations or exclusions may not apply to you.<br />
In the event of a product defect dur<strong>in</strong>g the warranty period, take the product and the <strong>Radio</strong><strong>Shack</strong> sales<br />
receipt as proof of purchase date to any <strong>Radio</strong><strong>Shack</strong> store. <strong>Radio</strong><strong>Shack</strong> will, at its option, unless otherwise<br />
provided by law: (a) correct the defect by product repair without charge for parts and labor; (b)<br />
replace the product with <strong>one</strong> of the same or similar design; or (c) refund the purchase price. All replaced<br />
parts and products, and products on which a refund is made, become the property of <strong>Radio</strong><strong>Shack</strong>. New<br />
or reconditi<strong>one</strong>d parts and products may be used <strong>in</strong> the performance of warranty service. Repaired or<br />
replaced parts and products are warranted for the rema<strong>in</strong>der of the orig<strong>in</strong>al warranty period.You will be<br />
charged for repair or replacement of the product made after the expiration of the warranty period.<br />
This warranty does not cover: (a) damage or failure caused by or attributable to acts of God, abuse,<br />
accident, misuse, improper or abnormal usage, failure to follow <strong>in</strong>structions, improper <strong>in</strong>stallation or<br />
ma<strong>in</strong>tenance, alteration, lightn<strong>in</strong>g or other <strong>in</strong>cidence of excess voltage or current; (b) any repairs other<br />
than those provided by a <strong>Radio</strong><strong>Shack</strong> Authorized Service Facility; (c) consumables such as fuses or<br />
batteries; (d) cosmetic damage; (e) transportation, shipp<strong>in</strong>g or <strong>in</strong>surance costs; or (f) costs of product<br />
removal, <strong>in</strong>stallation, set-up service adjustment or re<strong>in</strong>stallation.<br />
This warranty gives you specific legal rights, and you may also have other rights which vary from state<br />
to state.<br />
<strong>Radio</strong><strong>Shack</strong> Customer Relations,<br />
200 Taylor Street, 6th Floor,<br />
Fort Worth, TX 76102<br />
Cat. No. 15-2115 09/02<br />
Fort Worth, Texas 76102<br />
Limited 90-Day Warranty 23
ÍNDICE DE MATERIAS<br />
5-IN-ONE REMOTE<br />
Introducción. . . . . . . . . . . . . . . . . . . . . . . . . . . . . . . . . . . . . . . . . . . . . . . . . . . . . . . . . . . . . . . . . . . . . . . . . 25<br />
Instalación De Las Baterías. . . . . . . . . . . . . . . . . . . . . . . . . . . . . . . . . . . . . . . . . . . . . . . . . . . . . . . . . . . . 26<br />
Un Vistazo Rápido A Los Controles . . . . . . . . . . . . . . . . . . . . . . . . . . . . . . . . . . . . . . . . . . . . . . . . . . . . . . 27<br />
Funci<strong>one</strong>s De Las Teclas. . . . . . . . . . . . . . . . . . . . . . . . . . . . . . . . . . . . . . . . . . . . . . . . . . . . . . . . . . . . . . 28<br />
Uso De La Luz De Fondo . . . . . . . . . . . . . . . . . . . . . . . . . . . . . . . . . . . . . . . . . . . . . . . . . . . . . . . . . . . . . . 30<br />
Tabla De Los Dispositivos . . . . . . . . . . . . . . . . . . . . . . . . . . . . . . . . . . . . . . . . . . . . . . . . . . . . . . . . . . . . . 31<br />
Tabla De Las Teclas . . . . . . . . . . . . . . . . . . . . . . . . . . . . . . . . . . . . . . . . . . . . . . . . . . . . . . . . . . . . . . . . . 32<br />
Programación De Un Dispositivo. . . . . . . . . . . . . . . . . . . . . . . . . . . . . . . . . . . . . . . . . . . . . . . . . . . . . . . . 36<br />
Programación De Un Aparato Comb<strong>in</strong>ado Televisor/Videograbadora (TV/VCR) . . . . . . . . . . . . . . . . . . 37<br />
Búsqueda De Su Código. . . . . . . . . . . . . . . . . . . . . . . . . . . . . . . . . . . . . . . . . . . . . . . . . . . . . . . . . . . . . . . 38<br />
Verificación De Los Códigos. . . . . . . . . . . . . . . . . . . . . . . . . . . . . . . . . . . . . . . . . . . . . . . . . . . . . . . . . . . . 38<br />
Reasignación De Las Teclas De Dispositivos. . . . . . . . . . . . . . . . . . . . . . . . . . . . . . . . . . . . . . . . . . . . . . 39<br />
Programación De Una Exploración De Canales Favoritos. . . . . . . . . . . . . . . . . . . . . . . . . . . . . . . . . . . . 39<br />
Uso De La Exploración De Canales . . . . . . . . . . . . . . . . . . . . . . . . . . . . . . . . . . . . . . . . . . . . . . . . . . . . . . 40<br />
Cambio Del Bloqueo Del Volumen. . . . . . . . . . . . . . . . . . . . . . . . . . . . . . . . . . . . . . . . . . . . . . . . . . . . . . . 40<br />
Bloqueo Del Control De Volumen A Un Modo (Bloqueo Global De Volumen) . . . . . . . . . . . . . . . . . . . . . . . . 40<br />
Desbloqueo Del Control De Volumen Para Un Solo Dispositivo (Desbloqueo Individual De Volumen). . . . . . 41<br />
Desbloqueo De Todo El Control De Volumen (Restauración Del Desbloqueo Global) . . . . . . . . . . . . . . . . . . 41<br />
Localización De Fallas . . . . . . . . . . . . . . . . . . . . . . . . . . . . . . . . . . . . . . . . . . . . . . . . . . . . . . . . . . . . . . . . 42<br />
Cuidado . . . . . . . . . . . . . . . . . . . . . . . . . . . . . . . . . . . . . . . . . . . . . . . . . . . . . . . . . . . . . . . . . . . . . . . . . . . . 43<br />
Especificaci<strong>one</strong>s . . . . . . . . . . . . . . . . . . . . . . . . . . . . . . . . . . . . . . . . . . . . . . . . . . . . . . . . . . . . . . . . . . . . . 43<br />
Instrucci<strong>one</strong>s Para El Usuario . . . . . . . . . . . . . . . . . . . . . . . . . . . . . . . . . . . . . . . . . . . . . . . . . . . . . . . . . . 44<br />
Garantía Limitada . . . . . . . . . . . . . . . . . . . . . . . . . . . . . . . . . . . . . . . . . . . . . . . . . . . . . . . . . . . . . . . . . . . 45<br />
Códigos De Fabricantes . . . . . . . . . . . . . . . . . . . . . . . . . . . . . . . . . . . . . . . . . . . . . . . . . . . . . . . . . . . . . . . 46<br />
Códigos De Configuración Para Amplificadores De Audio . . . . . . . . . . . . . . . . . . . . . . . . . . . . . . . . . . . . . 46<br />
Códigos De Configuración Para Receptores De Audio . . . . . . . . . . . . . . . . . . . . . . . . . . . . . . . . . . . . . . . . 46<br />
Códigos De Configuración Para Convertidores De Cable . . . . . . . . . . . . . . . . . . . . . . . . . . . . . . . . . . . . . . 47<br />
Códigos De Configuración Para Reproductores De CDs . . . . . . . . . . . . . . . . . . . . . . . . . . . . . . . . . . . . . . . 47<br />
Códigos De Configuración Para Reproductores DVD . . . . . . . . . . . . . . . . . . . . . . . . . . . . . . . . . . . . . . . . . 48<br />
Códigos De Configuración Para La Automatización Del Hogar. . . . . . . . . . . . . . . . . . . . . . . . . . . . . . . . . . 49<br />
Códigos De Configuración Para Dispositivos Home-Theater-In-A-Box . . . . . . . . . . . . . . . . . . . . . . . . . . . . 49<br />
Códigos De Configuración Para Receptores De Satélite. . . . . . . . . . . . . . . . . . . . . . . . . . . . . . . . . . . . . . . 49<br />
Códigos De Configuración Para Televisores. . . . . . . . . . . . . . . . . . . . . . . . . . . . . . . . . . . . . . . . . . . . . . . . 49<br />
Códigos Para Programar Comb<strong>in</strong>aci<strong>one</strong>s Televisor/ Videograbadora . . . . . . . . . . . . . . . . . . . . . . . . . . . . . 51<br />
Códigos De Configuración Para Videograbadoras . . . . . . . . . . . . . . . . . . . . . . . . . . . . . . . . . . . . . . . . . . . 52<br />
24 Índice De Materias
INTRODUCCIÓN<br />
GUÍA DEL USUARIO<br />
El Remoto 5-en-Uno de <strong>Radio</strong><strong>Shack</strong> es nuestro más reciente control remoto universal. Está<br />
diseñado para operar hasta c<strong>in</strong>co dispositivos de entretenimiento en el hogar, <strong>in</strong>cluyendo<br />
comp<strong>one</strong>ntes de televisión, vídeo y audio. Más aún, este control remoto contiene tecnología<br />
sofisticada que le permitirá consolidar la pila de todos sus controles remotos orig<strong>in</strong>ales<br />
dentro de un solo producto fácil de usar. Está repleto de funci<strong>one</strong>s avanzadas, tales como:<br />
• Búsqueda y Verificación de Códigos – le ayudan a configurar rápidamente al control<br />
remoto para que opere sus dispositivos<br />
• Exploración de Canales y Exploración de Canales Favoritos – le permiten “navegar<br />
canales” a través de todos los canales disponibles y favoritos<br />
• Bloqueo del Volumen – para asignar los controles del volumen a dispositivos<br />
<strong>in</strong>dividuales o a un dispositivo global<br />
• Reasignación de Modos – le permite añadir el control de otro televisor, videograbadora,<br />
o reproductor de DVD u otro dispositivo auxiliar<br />
• Teclas Dedicadas de Menú/Guía – para un acceso <strong>in</strong>stantáneo a las guías y menúes de<br />
los programas por cable y por satélite<br />
• Base de Datos de Códigos que se Pueden Buscar – contiene el grupo de códigos de<br />
controles remotos <strong>in</strong>frarrojos más grande y eficiente del mundo para prácticamente<br />
todas las marcas de la actualidad<br />
• Retroilum<strong>in</strong>ación Parcial – para ayudar a operarlo cuando hay poca luz ambiental<br />
Después de <strong>in</strong>stalar cuatro (4) baterías alcal<strong>in</strong>as nuevas de tamaño AAA (no vienen<br />
<strong>in</strong>cluidas, vea la pág<strong>in</strong>a siguiente), puede usar el control remoto <strong>Radio</strong><strong>Shack</strong> de <strong>in</strong>mediato<br />
para controlar un televisor, una videograbadora (VCR) y un convertidor de cable RCA, y un<br />
reproductor de DVD y un receptor de audio Pi<strong>one</strong>er.<br />
Para controlar otras marcas, sírvase llevar a cabo las <strong>in</strong>strucci<strong>one</strong>s de la Programación De<br />
Un Dispositivo en la pág<strong>in</strong>a 36 y de la Programación De Un Aparato Comb<strong>in</strong>ado<br />
Televisor/Videograbadora (TV/VCR) en la pág<strong>in</strong>a 37.<br />
Introducción 25
INSTALACIÓN DE LAS BATERÍAS<br />
Su remoto 5-<strong>in</strong>-Uno de <strong>Radio</strong><strong>Shack</strong> necesita cuatro baterías AAA (no vienen <strong>in</strong>cluidas)<br />
para funcionar. Para un mejor funcionamiento y mayor duración, recomendamos el uso de<br />
baterías alcal<strong>in</strong>as <strong>Radio</strong><strong>Shack</strong>.<br />
PRECAUCIONES:<br />
• Utilice únicamente baterías frescas del tamaño requerido y del tipo recomendado.<br />
• No mezcle baterías viejas y nuevas, diferentes tipos de baterías (v.g., estándar, alcal<strong>in</strong>as,<br />
o recargables), ni baterías recargables de diferentes capacidades.<br />
• Si no va a usar el control remoto durante un largo tiempo, quítele las baterías. Éstas pueden<br />
derramar substancias químicas que pueden destruir los comp<strong>one</strong>ntes electrónicos.<br />
ADVERTENCIA: Deseche las baterías viejas rápida y adecuadamente. No las queme ni las entierre.<br />
PARA INSTALAR LAS BATERÍAS:<br />
5-IN-ONE REMOTE<br />
❶<br />
1. Presi<strong>one</strong> la lengüeta en la tapa del compartimento de baterías (ubicado en el<br />
respaldo del control remoto) y levante la tapa.<br />
2. Coloque las baterías AAA en el compartimento como se <strong>in</strong>dica por los<br />
símbolos de polaridad (+ y -) marcados en el <strong>in</strong>terior.<br />
3. Al<strong>in</strong>ee la saliente de la tapa con la abertura del compartimento y vuelva a<br />
colocar la tapa.<br />
4. Pruebe el remoto 5-en-Uno de <strong>Radio</strong><strong>Shack</strong> presionando primero POWER<br />
(alimentación eléctrica) y después cualquier tecla de dispositivo (v.g., TV).<br />
Si las baterías se <strong>in</strong>sertaron correctamente, el LED (diodo emisor de luz) rojo<br />
parpadeará una vez después de presionar cada tecla.<br />
NOTA: Cuando el remoto 5-en-Uno de <strong>Radio</strong><strong>Shack</strong> deja de funcionar adecuadamente, reemplace las<br />
baterías en menos de 10 m<strong>in</strong>utos (para proteger la <strong>in</strong>formación programada).<br />
26 Instalación De Las Baterías<br />
❷<br />
❸
UN VISTAZO RÁPIDO A LOS CONTROLES<br />
GUÍA DEL USUARIO<br />
Use la ilustración de abajo para ubicar los controles en el control remoto 5-en-Uno de<br />
<strong>Radio</strong><strong>Shack</strong> y después estudie las Funci<strong>one</strong>s De Las Teclas (en las siguientes tres pág<strong>in</strong>as)<br />
para aprender cómo funcionan.<br />
NOTA:También consulte la “Tabla De Las Teclas” (comienza en la pág<strong>in</strong>a 28) para aprender las<br />
funci<strong>one</strong>s de las teclas en dispositivos específicos.<br />
cont<strong>in</strong>úa en la siguiente pág<strong>in</strong>a…<br />
Un Vistazo Rápido A Los Controles 27
UN VISTAZO RÁPIDO A LOS CONTROLES (cont<strong>in</strong>uación)<br />
FUNCIONES DE LAS TECLAS<br />
5-IN-ONE REMOTE<br />
El LED (diodo emisor de luz) rojo parpadea para mostrar<br />
que el control remoto está enviando señales.<br />
Use P para todas las secuencias de programación.<br />
Presi<strong>one</strong> POWER (alimentación eléctrica) una vez para<br />
encender o apagar el dispositivo seleccionado.<br />
Presi<strong>one</strong> CBL/SAT, VCR, DVD, AUX,o TV una vez para<br />
seleccionar el dispositivo que quiere controlar.<br />
Presi<strong>one</strong> MENU (GUIDE) [menú (guía)] una vez para<br />
mostrar el menú,la guía, o el programa para el dispositivo<br />
seleccionado.<br />
Presi<strong>one</strong> EXIT(salida) para salirse del menú,guía, o<br />
programa del dispositivo seleccionado.<br />
Use las teclas del cursor (▲,▼, , o )) para mover el<br />
cursor en las pantallas de la guía de la programación y del<br />
menú. Use SELECT (seleccionar) para escoger las opci<strong>one</strong>s<br />
en el menú o guía del dispositivo seleccionado.<br />
▲<br />
▲<br />
Use INFO para mostrar la <strong>in</strong>formación del canal y del<br />
programa actuales.<br />
Use SLEEP (dormir) para activar el cronómetro de<br />
dormido del dispositivo (si éste tiene uno disponible).<br />
Use TV/VCR (A/B) para conmutar lo que entra al televisor y<br />
ver programas de TV o de la VCR, o para que funci<strong>one</strong><br />
como un <strong>in</strong>terruptor A/B de su caja de cable.<br />
Presi<strong>one</strong> DISPLAY (mostrar) una vez para encender o apagar<br />
la pantalla de <strong>in</strong>formación del dispositivo seleccionado.<br />
En los modos CBL/SAT, VCR, DVD,y TV, use SCAN (FAV) para<br />
repasar los canales favoritos y/o todos los canales.Vea<br />
Programación De Una Exploración De Canales Favoritos en<br />
la pág<strong>in</strong>a 39 y Uso De La Exploración De Canales en la<br />
pág<strong>in</strong>a 40.<br />
28 Un Vistazo Rápido A Los Controles
GUÍA DEL USUARIO<br />
Presi<strong>one</strong> LAST (último) una vez para recobrar el último<br />
canal visto o para regresar una pág<strong>in</strong>a en la pantalla del<br />
menú pr<strong>in</strong>cipal.<br />
Presi<strong>one</strong> MUTE (enmudecer) una vez para apagar o<br />
encender el audio.<br />
Use VOL+ (o VOL-) para subir (o bajar) el volumen del<br />
audio.<br />
Use CH+ (o CH-) para seleccionar el siguiente canal con<br />
número más alto (o más bajo).<br />
Use el teclado (1 ~ 9 y 0) para <strong>in</strong>troducir directamente el<br />
número de canal (v.g., 009 o 031).<br />
Presi<strong>one</strong> ENTER (<strong>in</strong>tro) una vez después de <strong>in</strong>troducir los<br />
números del canal en algunos televisores.<br />
En los modos CBL/SAT y DVD,también use ENTER como si<br />
fuese SELECT.<br />
Use el +100 100 para <strong>in</strong>troducir canales superiores al 100<br />
(v.g., si presiona el +100,luego el 3,y luego el 1 = 131).<br />
Para un reproductor de CD en el modo AUX, use +100<br />
para añadir 10 al <strong>in</strong>greso del dígito (v.g., si presiona +100<br />
y luego 7 = 17).<br />
En los modos VCR o TV, use PIP para encender o apagar<br />
la función Picture-In-Picture (imagen en imagen), si su<br />
televisor tiene esta posibilidad.<br />
Use SWAP (permutar) para cambiar las imágenes y el<br />
sonido (si lo hay) entre las imágenes pr<strong>in</strong>cipal y la de la<br />
ventanilla.<br />
Use MOVE (mover) para mover la imagen en ventanilla, si<br />
la hay, a diferentes posici<strong>one</strong>s en la imagen pr<strong>in</strong>cipal.<br />
cont<strong>in</strong>úa en la siguiente pág<strong>in</strong>a…<br />
Un Vistazo Rápido A Los Controles 29
5-IN-ONE REMOTE<br />
UN VISTAZO RÁPIDO A LOS CONTROLES<br />
FUNCIONES DE LAS TECLAS (CONTINUACIÓN)<br />
En los modos VCR o TV, use las teclas de transporte,<br />
(REW), (PLAY), (FF), (PAUSE), y (STOP), para<br />
controlar su videograbadora. Para grabar un programa en<br />
la VCR, presi<strong>one</strong> (REC) dos veces.<br />
En el modo DVD, use las teclas de transporte para<br />
controlar su reproductor de DVD.<br />
En el modo AUX, use las teclas de transporte para controlar<br />
un reproductor de CD.<br />
En el modo CBL/SAT, use las teclas de transporte para VOD<br />
(vídeo a petición) si lo tiene disponible en su servicio<br />
porcable o por satélite.<br />
USO DE LA LUZ DE FONDO<br />
El remoto 5-en-Uno de <strong>Radio</strong><strong>Shack</strong> <strong>in</strong>cluye un control único de luz de fondo para ilum<strong>in</strong>ar<br />
el teclado. Opera de las siguientes maneras:<br />
• Cuando presi<strong>one</strong> una tecla durante el uso normal, la luz de fondo se ilum<strong>in</strong>ará<br />
durante 5 segundos. A partir de ese momento, cada vez que usted presi<strong>one</strong> una tecla,<br />
el contador de 5 segundos se reajusta y vuelve a comenzar la cuenta regresiva. Si no se<br />
presiona n<strong>in</strong>guna tecla durante este tiempo, la luz de fondo se apaga.<br />
• Durante la programación, la luz de fondo se encenderá durante 10 segundos. A partir<br />
de ese momento, cada vez que usted presi<strong>one</strong> una tecla, el contador de 10 segundos se<br />
reajusta y vuelve a comenzar la cuenta regresiva. Si no se presiona n<strong>in</strong>guna tecla<br />
durante este tiempo, la luz de fondo se apaga.<br />
• Cuando presi<strong>one</strong> SCAN (FAV), la luz de fondo se apagará después de 3 segundos.<br />
30 Un Vistazo Rápido A Los Controles
GUÍA DEL USUARIO<br />
TABLA DE LOS DISPOSITIVOS<br />
Después de la programación, las teclas de dispositivos del remoto 5-en-Uno de <strong>Radio</strong><strong>Shack</strong><br />
podrán controlar los siguientes tipos de dispositivos. Sírvase consultar esta tabla al llevar a<br />
cabo las <strong>in</strong>strucci<strong>one</strong>s de la sección Programación De Un Dispositivo en la pág<strong>in</strong>a 36.<br />
TECLA DE<br />
DISPOSITIVO<br />
CONTROLA ESTE TIPO DE DISPOSITIVO<br />
Televisor<br />
Videograbadora, Aparato Comb<strong>in</strong>ado Televisor/Videograbadora<br />
(TV/VCR), o PVR (videograbadora personal)<br />
Convertidor de Cable o Receptor de Satélite<br />
Reproductor de DVD<br />
Amplificador de Audio, Receptor de Audio, Reproductor de CD,<br />
Automatización del Hogar, o un Home-Theater-In-A-Box (HTIB)<br />
[c<strong>in</strong>e en el hogar en una caja]<br />
Un Vistazo Rápido A Los Controles 31
UN VISTAZO RÁPIDO A LOS CONTROLES (cont<strong>in</strong>uación)<br />
TABLA DE LAS TECLAS<br />
5-IN-ONE REMOTE<br />
FUNCIONES DE LAS TECLAS PARA EL DISPOSITIVO SELECCIONADO 1<br />
TECLA AUDIO AUDIO CONVERTIDOR REPR. REPR.<br />
AMP./RECEP./ COMBO. DE CABLE DE CD DE DVD<br />
HTIB 2 RECEP./DVD<br />
Menú/ Menú Guía De 3 Menú/ Menú<br />
Programa (DVD) Programa<br />
Remover Regresar Salir Remover Salir<br />
Subir/ Subir Subir Subir/ Subir<br />
Retroceder<br />
Disco Anterior<br />
Bajar/ Bajar Bajar Bajar/ Bajar<br />
Proseguir<br />
Disco Siguiente<br />
Izquierda/ Izquierda Izquierda Izquierda/ Izquierda<br />
Balance Izq.<br />
Pista Anterior<br />
Derecha/ Derecha Derecha Derecha/ Derecha<br />
Balance Der.<br />
Pista Siguiente<br />
Seleccionar/ Intro Seleccionar Seleccionar/ Seleccionar/<br />
Sonido Envol. (DVD) Seleccionar Intro<br />
Enc. o Apag.<br />
Disco<br />
Canales – Información Información Mostrar<br />
Frontales<br />
– – Exploración De – Exploración De<br />
Canales/<br />
Canales/<br />
Favoritos<br />
Favoritos<br />
Entrada Saltar A/B/ – TV/<br />
Disco Desvío DVD<br />
Canales GUI Mostrar – Mostrar<br />
Traseros<br />
Banda Repetir Último Repro. Aleatoria –<br />
FM/AM Enc./Apag. Canal Enc./Apag.<br />
Prefijado Prefijado Canal Prefijado Salto Hacia<br />
Anterior Anterior Anterior Anterior Adelante<br />
Prefijado Prefijado Canal Prefijado Salto Hacia<br />
Siguiente Siguiente Siguiente Siguiente Atrás<br />
cont<strong>in</strong>úa en la pág<strong>in</strong>a 34<br />
32 Un Vistazo Rápido A Los Controles
GUÍA DEL USUARIO<br />
TABLA DE LAS TECLAS<br />
FUNCIONES DE LAS TECLAS PARA EL DISPOSITIVO SELECCIONADO 1<br />
TECLA RECEPTOR DE TV COMB. VCR/<br />
SATÉLITE TV/VCR PVR<br />
Guía 3 Menú Guía Menú<br />
(o Guía) 3<br />
Salir Salir Salir Salir<br />
Subir Subir Subir Subir<br />
Bajar Bajar Bajar Bajar<br />
Izquierda – Izquierda Izquierda<br />
Derecha – Derecha Derecha<br />
Seleccionar Seleccionar Seleccionar Seleccionar<br />
Información Información Información Información<br />
Exploración – Exploración Exploración<br />
De Canales/ De Canales/ De Canales/<br />
Favoritos Favoritos Favoritos<br />
TV/ TV/ TV/ TV/<br />
Satélite Vídeo VCR VCR<br />
Mostrar Mostrar Mostrar Mostrar<br />
Último Último Último Último<br />
Canal Canal Canal Canal<br />
Canal Canal Canal Canal<br />
Anterior Anterior Anterior Anterior<br />
Canal Canal Canal Canal<br />
Siguiente Siguiente Siguiente Siguiente<br />
cont<strong>in</strong>úa en la pág<strong>in</strong>a 35<br />
Un Vistazo Rápido A Los Controles 33
UN VISTAZO RÁPIDO A LOS CONTROLES<br />
TABLA DE LAS TECLAS (CONTINÚA DELAPÁGINA 32)<br />
NOTAS:<br />
1. Las funci<strong>one</strong>s están activadas sólo si están disponibles en su(s) control(es) remoto(s) orig<strong>in</strong>al(es).<br />
2. Dispositivo de Teatro en Casa en una Caja (HTIB).<br />
3. La guía está disponible para los convertidores de cable o los receptores de satélite en modo CBL/SAT,<br />
o para las Videograbadoras personales (PVRs) en modo VCR.<br />
34 Un Vistazo Rápido A Los Controles<br />
5-IN-ONE REMOTE<br />
FUNCIONES DE LAS TECLAS PARA EL DISPOSITIVO SELECCIONADO 1<br />
TECLA AUDIO AUDIO CONVERTIDOR REPR. REPR.<br />
AMP./RECEP./ COMBO. DE CABLE DE CD DE DVD<br />
HTIB 2 RECEP./DVD<br />
Origen 1/ Modo Dígito 1 Pista 1/ Dígito 1<br />
Dígito 1 FM Dígito 1<br />
Origen 2/ S<strong>in</strong>tonizador Dígito 2 Pista 2/ Dígito 2<br />
Dígito 2 Dígito 2<br />
Origen 3/ Banda Dígito 3 Pista 3/ Dígito 3<br />
Dígito 3 FM/AM Dígito 3<br />
Origen 4/ DVD Dígito 4 Pista 4/ Dígito 4<br />
Dígito 4 Dígito 4<br />
Origen 5/ C<strong>in</strong>ta Dígito 5 Pista 5/ Dígito 5<br />
Dígito 5 Dígito 5<br />
Origen 6/ VCR Dígito 6 Pista 6/ Dígito 6<br />
Dígito 6 Dígito 6<br />
Origen 7/ Aux. Dígito 7 Pista 7/ Dígito 7<br />
Dígito 7 Dígito 7<br />
Origen 8/ TV Dígito 8 Pista 8/ Dígito 8<br />
Dígito 8 Dígito 8<br />
Origen 9/ Satélite Dígito 9 Pista 9/ Dígito 9<br />
Dígito 9 Dígito 9<br />
Origen 10/ Modo Dígito 0 Pista 10/ Dígito 0<br />
Dígito 0/ S<strong>in</strong>ton. Dígito 0<br />
Encendido<br />
Intro/ Intro Intro/ +10 Intro/<br />
Seleccionar (Recep.) Seleccionar Seleccionar<br />
– – PIP Enc./ – –<br />
Repetición<br />
Instantánea<br />
– – Permutar PIP/ – –<br />
Volver A<br />
En Vivo<br />
– – Mover PIP/ – –<br />
Salto Rápido/<br />
PIP Apag.
GUÍA DEL USUARIO<br />
TABLA DE LAS TECLAS (CONTINÚA DELAPÁGINA 33)<br />
FUNCIONES DE LAS TECLAS PARA EL DISPOSITIVO SELECCIONADO 1<br />
TECLA RECEPTOR DE TV COMB. VCR/<br />
SATÉLITE TV/VCR PVR<br />
Dígito 1 Dígito 1 Dígito 1 Dígito 1<br />
Dígito 2 Dígito 2 Dígito 2 Dígito 2<br />
Dígito 3 Dígito 3 Dígito 3 Dígito 3<br />
Dígito 4 Dígito 4 Dígito 4 Dígito 4<br />
Dígito 5 Dígito 5 Dígito 5 Dígito 5<br />
Dígito 6 Dígito 6 Dígito 6 Dígito 6<br />
Dígito 7 Dígito 7 Dígito 7 Dígito 7<br />
Dígito 8 Dígito 8 Dígito 8 Dígito 8<br />
Dígito 9 Dígito 9 Dígito 9 Dígito 9<br />
Dígito 0 Dígito 0 Dígito 0 Dígito 0<br />
Intro/ Intro Intro Intro<br />
Seleccionar<br />
PIP Enc./ PIP Enc. PIP Enc./ PIP Enc./<br />
Repetición Repetición Repetición<br />
Instantánea Instantánea Instantánea<br />
Permutar PIP/ Permutar PIP Permutar PIP/ Permutar PIP/<br />
Volver A Volver A Volver A<br />
En Vivo En Vivo En Vivo<br />
Mover PIP/ Mover PIP/ Mover PIP/ Mover PIP/<br />
Salto Rápido/ PIP Apag. Salto Rápido/ Salto Rápido/<br />
PIP Apag. PIP Apag. PIP Apag.<br />
Un Vistazo Rápido A Los Controles 35
PROGRAMACIÓN DE UN DISPOSITIVO<br />
El remoto 5-en-Uno de <strong>Radio</strong><strong>Shack</strong> viene pre-programado para operar un televisor, una<br />
videograbadora y un convertidor de cable RCA, y un reproductor de DVD y un receptor de<br />
audio Pi<strong>one</strong>er. Para controlar dispositivos diferentes a las marcas fijadas en la fábrica, lleve<br />
a cabo los siguientes pasos; de otra forma puede saltarse esta sección.<br />
Antes de proceder, encuentre los códigos de los dispositivos que desea programar en los<br />
Códigos Del Fabricante comenzando en la pág<strong>in</strong>a 46 y anótelos o reálcelos con un marcador.<br />
NOTA: Para controlar un aparato comb<strong>in</strong>ado televisor/videograbadora (TV/VCR), vea “Programación<br />
De Un Aparato Comb<strong>in</strong>ado Televisor/Videograbadora (TV/VCR)” en la siguiente pág<strong>in</strong>a.<br />
1. Encienda el dispositivo (v.g., la videograbadora o el reproductor de DVD) y, si<br />
fuese necesario, póngale el medio que usa (v.g., casete o disco).<br />
2. En el remoto 5-en-Uno de <strong>Radio</strong><strong>Shack</strong>, presi<strong>one</strong> una tecla de dispositivo (es<br />
decir, CBL/SAT, VCR, DVD, AUX,o TV).<br />
NOTA: Use la “Tabla De Los Dispositivos” en la pág<strong>in</strong>a 31 para localizar la tecla adecuada<br />
correspondiente al dispositivo que desea programar.<br />
3. Presi<strong>one</strong> y mantenga presionada la tecla P hasta que el LED rojo parpadee dos<br />
veces, después suelte la tecla P.<br />
4. Introduzca el primer código de cuatro dígitos para su dispositivo. Si el código<br />
es el correcto, el LED parpadea dos veces.<br />
NOTA: Si el LED no parpadea dos veces, repita los pasos del 2 al 4 y trate nuevamente de<br />
<strong>in</strong>troducir el código.<br />
5. Para verificar que el código funciona, apunte el remoto 5-en-Uno de<br />
<strong>Radio</strong><strong>Shack</strong> al dispositivo y presi<strong>one</strong> la tecla POWER (o PLAY, si el dispositivo<br />
no tiene la tecla POWER). El dispositivo debe apagarse. Si no responde, repita<br />
los pasos 2 a 5, probando con cada código para la marca del dispositivo hasta<br />
que encuentre uno que funci<strong>one</strong>. Si no puede hallar un código que funci<strong>one</strong>,<br />
vea Búsqueda De Su Código en la pág<strong>in</strong>a 38.<br />
6. Repita los pasos del 1 al 5 para cada dispositivo que desee controlar. Para una<br />
referencia en el futuro, anote el código de funcionamiento para cada dispositivo<br />
en los cuadrados de abajo:<br />
Código de CBL/SAT:<br />
Tipo de dispositivo:________________________________<br />
Código de VCR:<br />
Código de DVD:<br />
Código de TV:<br />
5-IN-ONE REMOTE<br />
Código de AUX:<br />
Tipo de dispositivo:________________________________<br />
36 Programación De Un Dispositivo
PROGRAMACIÓN DE UN APARATO COMBINADO<br />
TELEVISOR/ VIDEOGRABADORA (TV/VCR)<br />
Antes de proceder, encuentre los códigos del dispositivo que desea programar en los<br />
Códigos Para Programar Comb<strong>in</strong>aci<strong>one</strong>s Televisor/ Videograbadora en la pág<strong>in</strong>a 51 y anótelos<br />
o reálcelos con un marcador.<br />
1. Encienda el aparato Comb<strong>in</strong>ado TV/VCR e <strong>in</strong>sértele un videocasete.<br />
2. En el remoto 5-en-Uno de <strong>Radio</strong><strong>Shack</strong>, presi<strong>one</strong> VCR.<br />
3. Presi<strong>one</strong> y mantenga presionada la tecla P hasta que el LED rojo parpadee dos<br />
veces, después suelte la tecla P.<br />
4. Introduzca el primer código de cuatro dígitos para su dispositivo. Si el código<br />
es el correcto, el LED parpadea dos veces.<br />
NOTA: Si el LED no parpadea dos veces, repita los pasos del 2 al 4 y trate nuevamente de<br />
<strong>in</strong>troducir el código.<br />
5. Para verificar que el código funciona, apunte el remoto 5-en-Uno de<br />
<strong>Radio</strong><strong>Shack</strong> al dispositivo y presi<strong>one</strong> la tecla POWER (o PLAY, si el dispositivo<br />
no tiene la tecla POWER). El dispositivo debe apagarse. Si no responde, repita<br />
los pasos 2 a 5, probando con cada código para la marca del dispositivo hasta<br />
que encuentre uno que funci<strong>one</strong>. Si no puede hallar un código que funci<strong>one</strong>,<br />
vea Búsqueda De Su Código en la siguiente pág<strong>in</strong>a.<br />
NOTA: Si encuentra un código de configuración que funci<strong>one</strong>, pero necesita un código<br />
separado para el televisor, tiene que programar el código TV en el remoto por separado<br />
para controlar el volumen. Para los comb<strong>in</strong>ados VCR/TV que usan códigos de TV por<br />
separado, el volumen del televisor se controla presionando primero VCR,y luego TV.<br />
Después de eso, use VOL+ (o VOL-) para subir (o bajar) el volumen del televisor.<br />
Vea “Cambio Del Bloqueo Del Volumen” en la pág<strong>in</strong>a 40 para las otras opci<strong>one</strong>s de<br />
control de volumen.<br />
6. Para una referencia en el futuro, anote el código de funcionamiento del<br />
aparato comb<strong>in</strong>ado TV/VCR en los cuadrados de abajo:<br />
Código de TV/VCR:<br />
Código de TV (si se usa):<br />
GUÍA DEL USUARIO<br />
Programación De Un Aparato Comb<strong>in</strong>ado Televisor/Videograbadora (TV/VCR) 37
5-IN-ONE REMOTE<br />
BÚSQUEDA DE SU CÓDIGO<br />
Si su dispositivo no le responde al remoto 5-en-Uno de <strong>Radio</strong><strong>Shack</strong> después de haber<br />
probado todos los códigos listados para su marca, o si su marca no está listada en lo<br />
absoluto, trate de buscar su código. Por ejemplo, para buscar un código para su televisor:<br />
1. Presi<strong>one</strong> TV en el remoto.<br />
2. Presi<strong>one</strong> y mantenga presionada la tecla P hasta que el LED rojo parpadee dos<br />
veces, después suelte la tecla P.<br />
3. Presi<strong>one</strong> 9 9 1. El LED parpadea dos veces.<br />
4. Apunte el control remoto hacia el televisor y lenta y en forma alternada<br />
presi<strong>one</strong> POWER y TV.<br />
El remoto 5-en-Uno de <strong>Radio</strong><strong>Shack</strong> envía códigos <strong>in</strong>frarrojos desde su base<br />
de datos hacia el dispositivo seleccionado, comenzando con el código más<br />
popular primero. Deténgase cuando el televisor se apague.<br />
5. Presi<strong>one</strong> y mantenga presionada la tecla P hasta que el LED parpadee dos<br />
veces para bloquear el código en su lugar, después suelte la tecla P.<br />
6. Para buscar otros códigos de dispositivos, repita los pasos 1 al 5, sustituyendo<br />
la tecla adecuada por la del dispositivo que usted está buscando.<br />
VERIFICACIÓN DE LOS CÓDIGOS<br />
Si configuró el remoto 5-en-Uno de <strong>Radio</strong><strong>Shack</strong> usando el procedimiento de la sección<br />
Búsqueda De Su Código, tal vez tenga que averiguar cuál código de cuatro dígitos es el que<br />
opera su equipo. Por ejemplo, para descubrir cuál es el código que opera su televisor:<br />
1. Presi<strong>one</strong> TV en el remoto.<br />
2. Presi<strong>one</strong> y mantenga presionada la tecla P hasta que el LED rojo parpadee dos<br />
veces, después suelte la tecla P.<br />
3. Presi<strong>one</strong> 9 9 0. El LED parpadea dos veces.<br />
4. Presi<strong>one</strong> el 1 para ver el código del primer dígito. Espere tres segundos, cuente<br />
el número de parpadeos del LED (v.g., tres parpadeos = 3), y anote el número.<br />
NOTA:Si un dígito del código es el 0, el LED no parpadea.<br />
5. Repita el paso 4 para los tres dígitos restantes, usando el 2 para el segundo<br />
dígito, el 3 para el tercer dígito, y el 4 para el cuarto dígito.<br />
6. Para verificar otros códigos de dispositivos, repita los pasos 1 al 5, sustituyendo<br />
la tecla adecuada por la del dispositivo que usted está verificando.<br />
38 Búsqueda De Su Código/Verificación De Los Códigos
REASIGNACIÓN DE LAS TECLAS DE DISPOSITIVOS<br />
GUÍA DEL USUARIO<br />
El remoto 5-en-Uno de <strong>Radio</strong><strong>Shack</strong> se puede configurar para controlar un segundo DVD,<br />
VCR, TV, o receptor de cable/satélite. Por ejemplo, si quiere controlar un TV, un convertidor<br />
de cable, y dos VCRs, siga estos pasos para reasignar la tecla DVD no usada con el f<strong>in</strong> de<br />
que opere la segunda VCR.<br />
1. Presi<strong>one</strong> y mantenga presionada la tecla P hasta que el LED rojo parpadee dos<br />
veces en el remoto, después suelte la tecla P.<br />
2. Presi<strong>one</strong> 9 9 2. El LED parpadea dos veces.<br />
3. Presi<strong>one</strong> VCR y después DVD.La tecla DVD está lista para ser programada<br />
como su segunda VCR. Siga las <strong>in</strong>strucci<strong>one</strong>s de la sección Programación De<br />
Un Dispositivo en la pág<strong>in</strong>a 36.<br />
Para reasignar otras teclas de dispositivos a la tecla DVD, repita los pasos 1 a 3 de arriba,<br />
sustituyendo CBL/SAT, AUX,o TV por VCR en el paso 3. Para reasignar otra tecla de dispositivo<br />
no usada, sustituya la tecla deseada por la tecla DVD en el paso 3.<br />
PROGRAMACIÓN DE UNA EXPLORACIÓN DE CANALES FAVORITOS<br />
El remoto 5-en-Uno de <strong>Radio</strong><strong>Shack</strong> le permite guardar una lista de hasta 10 canales favoritos, en<br />
cualquier orden, que se explorará de <strong>in</strong>mediato cuando usted presi<strong>one</strong> SCAN (FAV).<br />
NOTA:Sólo se pueden guardar canales que pertenezcan a un modo y cualesquiera otros canales previamente<br />
guardados se borrarán.<br />
1. Presi<strong>one</strong> la tecla del dispositivo deseado en el remoto.<br />
2. Presi<strong>one</strong> y mantenga presionada la tecla P hasta que el LED rojo parpadee dos<br />
veces, después suelte la tecla P.<br />
3. Presi<strong>one</strong> 9 9 6. El LED parpadea dos veces.<br />
4. Use el teclado para <strong>in</strong>troducir el número de un canal favorito (v.g.,031), después<br />
presi<strong>one</strong> la P.<br />
NOTA:Se pueden <strong>in</strong>troducir hasta cuatro dígitos correspondientes al número de un canal<br />
favorito (v.g., 0031). Si de hecho <strong>in</strong>troduce cuatro dígitos, no presi<strong>one</strong> la P.El programa<br />
automáticamente avanza al siguiente espacio de memoria y espera la <strong>in</strong>troducción<br />
del siguiente canal.<br />
5. Repita el paso 4 para cada uno de los canales favoritos que va a guardar, hasta un<br />
total de 10 canales.<br />
NOTA: Si usted trata de <strong>in</strong>troducir más de 10 canales, el remoto 5-en-Uno de <strong>Radio</strong><strong>Shack</strong> se<br />
sale de la programación automáticamente.<br />
6. Presi<strong>one</strong> y mantenga presionada la tecla P durante unos tres segundos para salirse<br />
de la programación.<br />
Reasignación De Las Teclas De Dispositivos/Programación De Una Exploración De Canales Favoritos 39
5-IN-ONE REMOTE<br />
USO DE LA EXPLORACIÓN DE CANALES<br />
Use SCAN (FAV) para dar <strong>in</strong>icio a una exploración de tres segundos de todos los canales<br />
favoritos (si están programados – vea la sección Programación De Una Exploración De<br />
Canales Favoritos en la pág<strong>in</strong>a anterior) o de todos los canales (si no se ha programado la<br />
Exploración De Canales Favoritos).<br />
1. Si se configuró la Exploración De Canales Favoritos, pase al paso 2. De otra<br />
forma, presi<strong>one</strong> la tecla del dispositivo deseado.<br />
2. Presi<strong>one</strong> SCAN una vez.<br />
• Si se configuró la Exploración De Canales Favoritos, el dispositivo explora<br />
sus canales favoritos, y después cont<strong>in</strong>úa explorando todos los canales del<br />
dispositivo.<br />
• Si no se configuró la Exploración De Canales Favoritos,la exploración<br />
comienza con el canal actual.<br />
3. Para detener la exploración de canales en cualquier momento, presi<strong>one</strong><br />
cualquiera de las teclas una vez.<br />
CAMBIO DEL BLOQUEO DEL VOLUMEN<br />
El remoto 5-en-Uno de <strong>Radio</strong><strong>Shack</strong> viene preconfigurado para permitir el control <strong>in</strong>dependiente<br />
del volumen de cada dispositivo seleccionado (Desbloqueo Global De Volumen). S<strong>in</strong> embargo,<br />
usted puede cambiar la fijación de Bloqueo de Volumen por la de Bloqueo Global De Volumen<br />
de tal manera que el volumen de un dispositivo controle el volumen en todos los otros modos.<br />
Después de eso, puede realizar un Desbloqueo Individual De Volumen en un dispositivo seleccionado<br />
para fijar su control de volumen como operación <strong>in</strong>dependiente.<br />
BLOQUEO DEL CONTROL DE VOLUMEN A UN MODO<br />
(BLOQUEO GLOBAL DE VOLUMEN)<br />
1. Presi<strong>one</strong> y mantenga presionada la tecla P hasta que el LED rojo parpadee dos<br />
veces, después suelte la tecla P.<br />
2. Presi<strong>one</strong> 9 9 3.<br />
3. Presi<strong>one</strong> la tecla de modo del dispositivo que usted quiere que controle el<br />
volumen (v.g., TV). El LED parpadea dos veces. Cuando usted presi<strong>one</strong> VOL+,<br />
VOL-,o MUTE, el dispositivo seleccionado (v.g., TV) controlará el volumen<br />
<strong>in</strong>dependientemente del modo actual.<br />
40 Uso De La Exploración De Canales/Cambio Del Bloqueo Del Volumen
DESBLOQUEO DEL CONTROL DE VOLUMEN PARA UN SOLO DISPOSITIVO<br />
(DESBLOQUEO INDIVIDUAL DE VOLUMEN)<br />
GUÍA DEL USUARIO<br />
1. Después de realizar un Bloqueo Global De Volumen, presi<strong>one</strong> la tecla de modo<br />
correspondiente al dispositivo que usted quiere que tenga un control<br />
<strong>in</strong>dependiente del volumen (v.g., DVD).<br />
2. Presi<strong>one</strong> y mantenga presionada la tecla P hasta que el LED rojo parpadee dos<br />
veces, después suelte la tecla P.<br />
3. Presi<strong>one</strong> 9 9 3 y después presi<strong>one</strong> la tecla VOL-. El LED parpadea cuatro veces.<br />
4. Repita los pasos del 1 al 3 para cualquier otro dispositivo que usted quiera que<br />
tenga un control <strong>in</strong>dependiente del volumen. Cuando usted presi<strong>one</strong> VOL+,<br />
VOL-,o MUTE, el dispositivo seleccionado (v.g., DVD) controlará el volumen<br />
únicamente en su propio modo.<br />
DESBLOQUEO DE TODO EL CONTROL DE VOLUMEN<br />
(RESTAURACIÓN DEL DESBLOQUEO GLOBAL)<br />
Siga estos pasos para restaurar el control <strong>in</strong>dependiente del volumen para todos los dispositivos<br />
programados (v.g., control del volumen del televisor en el modo TV, volumen de la<br />
videograbadora en el modo VCR, etc.).<br />
1. Presi<strong>one</strong> y mantenga presionada la tecla P hasta que el LED rojo parpadee dos<br />
veces, después suelte la tecla P.<br />
2. Presi<strong>one</strong> 9 9 3 y después VOL+. El LED parpadeará cuatro veces. El volumen<br />
se controlará en forma <strong>in</strong>dependiente en todos los dispositivos programados.<br />
Cambio Del Bloqueo Del Volumen 41
LOCALIZACIÓN DE FALLAS<br />
PROBLEMA:<br />
SOLUCIÓN:<br />
PROBLEMA:<br />
SOLUCIÓN:<br />
PROBLEMA:<br />
SOLUCIÓN:<br />
PROBLEMA:<br />
SOLUCIÓN:<br />
PROBLEMA:<br />
SOLUCIÓN:<br />
PROBLEMA:<br />
SOLUCIÓN:<br />
PROBLEMA:<br />
SOLUCIÓN:<br />
PROBLEMA:<br />
SOLUCIÓN:<br />
PROBLEMA:<br />
SOLUCIÓN:<br />
5-IN-ONE REMOTE<br />
El LED no parpadea cuando usted presiona una tecla.<br />
Cambie las baterías por cuatro (4) nuevas baterías alcal<strong>in</strong>as tamaño AAA (vea<br />
la pág<strong>in</strong>a 26).<br />
El LED parpadea cuando usted presiona una tecla, pero el dispositivo no<br />
responde.<br />
Cerciórese de seleccionar la tecla de dispositivo correcta para el dispositivo que<br />
desea controlar. Además, apunte el remoto 5-en-Uno de <strong>Radio</strong><strong>Shack</strong> hacia el<br />
dispositivo a menos de 4.58 m de distancia.<br />
El remoto 5-en-Uno de <strong>Radio</strong><strong>Shack</strong> no controla dispositivos o los mandos no<br />
están funcionando bien.<br />
Pruebe todos los códigos listados para el dispositivo. Cerciórese de que el dis<br />
positivo funci<strong>one</strong> con un control remoto de rayos <strong>in</strong>frarrojos.<br />
La comb<strong>in</strong>ación TV/VCR no responde adecuadamente.<br />
Use los códigos VCR para su marca. Algunas unidades de comb<strong>in</strong>ación pueden<br />
requerir un código de TV y un código de VCR para una operación completa.<br />
El remoto 5-en-Uno de <strong>Radio</strong><strong>Shack</strong> no enciende a una unidad de comb<strong>in</strong>ación<br />
TV/VCR marca Sony o Sharp.<br />
Estos modelos requieren códigos de TV para encenderse. Para la Sony, use el<br />
código 0000 para TV y el código 0032 para VCR. Para la marca Sharp, use el<br />
código 0093 para TV y el código 0048 para VCR.<br />
El cambio de canales no funciona bien.<br />
Si el control remoto orig<strong>in</strong>al requería que se presionara la tecla Enter para<br />
cambiar de canales, presi<strong>one</strong> ENTER en el remoto después de <strong>in</strong>troducir el<br />
número de canal.<br />
Las teclas CH+, CH-,y LAST no funcionan con su televisor marca RCA.<br />
Debido al diseño RCA de 1983 a 1987, sólo el control remoto orig<strong>in</strong>al puede<br />
realizar estas funci<strong>one</strong>s.<br />
No puedo hallar un código que funci<strong>one</strong> usando las <strong>in</strong>strucci<strong>one</strong>s en Búsqueda<br />
De Su Código.<br />
Presi<strong>one</strong> y mantenga presionada la tecla P hasta que el LED parpadee dos<br />
veces, después suelte la tecla P.Presi<strong>one</strong> 9 9 2. Presi<strong>one</strong> y suelte la tecla del dis<br />
positivo dos veces, después vuelva a hacer la búsqueda.<br />
El remoto 5-en-Uno de <strong>Radio</strong><strong>Shack</strong> enciende los dispositivos de audio y<br />
controla el volumen, pero no cambia los canales prefijados.<br />
Algunos productos podrían requerir un código para el Receptor de Audio y<br />
otro para el Amplificador de Audio para así controlar remotamente todas las<br />
funci<strong>one</strong>s de su dispositivo de audio.<br />
42 Localización De Fallas/
GUÍA DEL USUARIO<br />
PROBLEMA: No hay volumen en un segundo televisor.<br />
SOLUCIÓN: Siga las <strong>in</strong>strucci<strong>one</strong>s en la sección Cambio Del Bloqueo Del Volumen en la<br />
pág<strong>in</strong>a 40.<br />
PROBLEMA: Su receptor de satélite (DSS) no responde a los códigos listados en la pág<strong>in</strong>a 49.<br />
SOLUCIÓN: Cerciórese de que el receptor de satélite (DSS) pueda operarse con un control<br />
remoto de rayos <strong>in</strong>frarrojos (IR) y que no esté configurado para recibir única<br />
mente señales de radiofrecuencia (RF).<br />
CUIDADO<br />
• Mantenga seco el control remoto. Si se llega a mojar, séquelo con un paño de <strong>in</strong>mediato.<br />
• Use y guarde el control remoto sólo a temperaturas ambientes normales.<br />
• Maneje el control remoto con delicadeza y cuidado. No lo deje caer.<br />
• Mantenga el control remoto alejado del polvo y de la mugre.<br />
• Limpie el control remoto con un paño húmedo para que siga luciendo nuevo.<br />
La modificación de, o la <strong>in</strong>tromisión <strong>in</strong>debida con, los comp<strong>one</strong>ntes <strong>in</strong>ternos del control<br />
remoto pueden causar un daño e <strong>in</strong>validar la garantía. Si su control remoto no está<br />
funcionando como debe, por favor contáctenos en:<br />
www.radioshack.com<br />
o visite la tienda <strong>Radio</strong><strong>Shack</strong> de su localidad para que le ayuden.<br />
ESPECIFICACIONES<br />
Alimentación Eléctrica Del Control Remoto. . . . . . . . . . . . . . . . . . . . . . . 4 Baterías Tamaño AAA<br />
Dimensi<strong>one</strong>s Del Control Remoto (L x A x H). . . . . . . . . . . . . . . . . . . . 184.5 x 58.9 x 31.8 mm<br />
Peso Del Control Remoto (s<strong>in</strong> baterías) . . . . . . . . . . . . . . . . . . . . . . . . . . . . . . . . . . . . . . . . . 113.4 g<br />
NOTA: Las especificaci<strong>one</strong>s son típicas; las unidades <strong>in</strong>dividuales podrían variar. Las especificaci<strong>one</strong>s<br />
están sujetas a cambios y mejoras s<strong>in</strong> previo aviso.<br />
Localización De Fallas/Cuidado/Especificaci<strong>one</strong>s 43
5-IN-ONE REMOTE<br />
INSTRUCCIONES PARA EL USUARIO<br />
Este equipo fue probado y demostró que cumple con los límites para los dispositivos digitales<br />
de clase B, de acuerdo con la parte 15 de las Reglas de la FCC. Estos límites están diseñados<br />
para proporcionar una protección razonable contra <strong>in</strong>terferencias dañ<strong>in</strong>as en una <strong>in</strong>stalación<br />
residencial. Este equipo genera, usa e irradia energía de radiofrecuencia y si no se le <strong>in</strong>stala y<br />
usa de acuerdo con las <strong>in</strong>strucci<strong>one</strong>s, podría causar <strong>in</strong>terferencias dañ<strong>in</strong>as a las comunicaci<strong>one</strong>s<br />
por radio. S<strong>in</strong> embargo, no hay garantía de que no ocurrirá una <strong>in</strong>terferencia en una<br />
<strong>in</strong>stalación en particular. Si este equipo causa <strong>in</strong>terferencias dañ<strong>in</strong>as a la recepción de radio o<br />
televisión, lo cual se puede determ<strong>in</strong>ar apagando y encendiendo el equipo, se anima al usuario<br />
a que trate de corregir la <strong>in</strong>terferencia mediante una o más de las siguientes medidas:<br />
• Reoriente o reubique la antena receptora.<br />
• Aumente la separación que hay entre el equipo y el receptor.<br />
• C<strong>one</strong>cte el equipo a un tomacorriente en un circuito diferente a donde está c<strong>one</strong>ctado<br />
el receptor.<br />
• Consulte al distribuidor o a un técnico con experiencia en radio y televisión para que<br />
le asista.<br />
Se verificó que este equipo cumple con los límites de un dispositivo de computación de clase<br />
B, de acuerdo con las Reglas de la FCC. Para poder mantener el cumplimiento con los<br />
reglamentos de la FCC, tienen que usarse cables bl<strong>in</strong>dados con este equipo. La operación con<br />
equipos no aprobados o con cables no bl<strong>in</strong>dados puede resultar en una <strong>in</strong>terferencia en la<br />
recepción de radio y televisión. Se cauciona al usuario que los cambios y las modificaci<strong>one</strong>s<br />
que se hagan al equipo s<strong>in</strong> la aprobación del fabricante podrían nulificar la autoridad del<br />
usuario para operar este equipo.<br />
44 Instrucci<strong>one</strong>s Para El Usuario
GARANTÍA LIMITADA DE 90 DÍAS<br />
GUÍA DEL USUARIO<br />
Este producto está garantizado por <strong>Radio</strong><strong>Shack</strong> contra defectos de fabricación en su material y mano de<br />
obra bajo un uso normal durante noventa (90) días a partir de la fecha de compra en una tienda<br />
propiedad de la compañía <strong>Radio</strong><strong>Shack</strong> o de concesionarios y distribuidores autorizados <strong>Radio</strong><strong>Shack</strong>.<br />
EXCEPTO A LO PROVISTO AQUÍ, <strong>Radio</strong><strong>Shack</strong> NO BRINDA NINGUNA GARANTÍA EXPRESA Y<br />
CUALESQUIERA GARANTÍAS IMPLÍCITAS, INCLUYENDO LAS DE COMERCIABILIDAD Y<br />
ADECUACIÓN PARA UN PROPÓSITO PARTICULAR, ESTÁN LIMITADAS EN SU DURACIÓN A LA<br />
DURACIÓN DE LA GARANTÍAS LIMITADAS ESCRITAS CONTENIDAS AQUÍ. EXCEPTO A LO<br />
PROVISTO AQUÍ,<strong>Radio</strong><strong>Shack</strong> NO SERÁ RESPONSABLE ANTE EL CLIENTE NI ANTE ALGUNA OTRA<br />
PERSONA O ENTIDAD EN LO TOCANTE A CUALQUIER RESPONSABILIDAD, PÉRDIDA O DAÑO<br />
CAUSADO DIRECTA O INDIRECTAMENTE POR EL USO O FUNCIONAMIENTO DEL PRODUCTO O<br />
QUE SURJA DE CUALQUIER INCUMPLIMIENTO DE ESTA GARANTÍA, INCLUYENDO, PERO SIN<br />
LIMITARSE A, CUALESQUIERA DAÑOS QUE SURJAN DE UNA INCONVENIENCIA, PÉRDIDA DE<br />
TIEMPO, DATOS, PROPIEDAD, INGRESOS, O GANANCIAS O CUALESQUIERA DAÑOS INDIRECTOS,<br />
ESPECIALES, INCIDENTALES, O EMERGENTES,AUN CUANDO <strong>Radio</strong><strong>Shack</strong> HAYA SIDO NOTIFICADA<br />
DE LA POSIBILIDAD DE TALES DAÑOS.<br />
Algunos estados no permiten limitaci<strong>one</strong>s respecto a cuánto dura una garantía implícita o a la exclusión<br />
o limitación de daños <strong>in</strong>cidentales o emergentes, de manera que las limitaci<strong>one</strong>s o exclusi<strong>one</strong>s de arriba<br />
podrían no aplicársele a usted.<br />
En caso de que se presente un defecto en el producto durante el plazo de garantía, lleve el producto y el<br />
recibo de venta de <strong>Radio</strong><strong>Shack</strong> como prueba de la fecha de compra a cualquier tienda <strong>Radio</strong><strong>Shack</strong>.<br />
<strong>Radio</strong><strong>Shack</strong>, a su opción, a no ser que la ley prevea otra cosa: (a) corregirá el defecto mediante la<br />
reparación del producto s<strong>in</strong> cargo por las piezas ni por la mano de obra; (b) reemplazará el producto<br />
por otro igual o de diseño similar; o (c) reembolsará el precio de compra. Todas las piezas y productos<br />
reemplazados, y los productos sobre los cuales se otorgó un reembolso, se convierten en la propiedad<br />
de <strong>Radio</strong><strong>Shack</strong>. Las piezas o productos nuevos o reacondicionados podrían usarse en el desempeño del<br />
servicio de garantía. Las piezas y productos reparados o reemplazados están garantizados por el resto<br />
del plazo de la garantía orig<strong>in</strong>al. Usted tendrá que pagar por las reparaci<strong>one</strong>s o reemplazos del producto<br />
que se realicen después de la fecha de vencimiento del plazo de garantía.<br />
Esta garantía no cubre: (a) daño o falla causados por o atribuibles a fuerza mayor, abuso, accidente, mal<br />
uso, uso <strong>in</strong>adecuado o anormal, no seguir las <strong>in</strong>strucci<strong>one</strong>s, <strong>in</strong>stalación o mantenimiento <strong>in</strong>adecuados,<br />
alteración, rayos u otros <strong>in</strong>cidentes de exceso de voltaje o corriente; (b) cualesquiera reparaci<strong>one</strong>s que<br />
no sean las proporcionadas por una Instalación de Servicios Autorizada <strong>Radio</strong><strong>Shack</strong>; (c) fungibles como<br />
los fusibles o baterías; (d) daño cosmético; (e) costos de transporte, flete o seguro; o (f) costos de remoción<br />
del producto, <strong>in</strong>stalación, ajuste por servicio de configuración o re<strong>in</strong>stalación.<br />
Esta garantía le br<strong>in</strong>da derechos legales específicos, y usted podría tener otros derechos que varían de<br />
acuerdo con el estado donde vive.<br />
Departamento <strong>Radio</strong><strong>Shack</strong> de Relaci<strong>one</strong>s con el Cliente,<br />
200 Taylor Street, 6th Floor,<br />
Fort Worth, TX 76102<br />
Cat. No. 15-2115 09/02<br />
Garantía Limitada De 90 Días 45
MANUFACTURER’S CODES<br />
(CÓDIGOS DEL FABRICANTE)<br />
SETUP CODES FOR AUDIO AMPLIFIERS<br />
(CÓDIGOS DE CONFIGURACIÓN PARA<br />
AMPLIFICADORES DE AUDIO):<br />
Aiwa 0406<br />
Carver 0269<br />
Curtis Mathes 0300<br />
Denon 0160<br />
GE 0078<br />
Harman/Kardon 0892<br />
JVC 0331<br />
Left Coast 0892<br />
L<strong>in</strong>n 0269<br />
Magnavox 0269<br />
Marantz 0892, 0321, 0269<br />
Nakamichi 0321<br />
Optimus 0395, 0300, 0823<br />
Panasonic 0308<br />
Philips 0892, 0269<br />
Pi<strong>one</strong>er 0013, 0300, 0823<br />
Polk Audio 0892, 0269<br />
RCA 0300, 0823<br />
Realistic 0395<br />
Sansui 0321<br />
Sony 0689, 0220<br />
Soundesign 0078<br />
Technics 0308<br />
Victor 0331<br />
Wards 0078, 0013<br />
Yamaha 0354<br />
SETUP CODES FOR AUDIO RECEIVERS<br />
(CÓDIGOS DE CONFIGURACIÓN PARA<br />
RECEPTORES DE AUDIO):<br />
ADC 0531<br />
Adcom 0616<br />
Admiral 0182<br />
Aiwa 1089, 1405, 0121, 0158, 0189<br />
Akai 0115, 0224<br />
Audiotronic 1189<br />
Bose 1229<br />
Capetronic 0531, 0690<br />
Carver 1089, 1189, 0008, 0042, 0189, 0360<br />
Casio 0195<br />
Clar<strong>in</strong>ette 0195<br />
5-IN-ONE REMOTE<br />
Compaq 1136<br />
Curtis Mathes 0080<br />
Denon 1104, 1160, 0004, 1360<br />
Emerson 0424<br />
Fisher 0042, 0219, 0360<br />
Garrard 0424, 0440, 0463, 0744<br />
Glory Horse 1263<br />
Hanwah 0741<br />
Harman/Kardon 0110, 0189, 0891<br />
Hewlett Packard 1181<br />
JBL 0110<br />
JVC 0074<br />
Jensen 0754<br />
Kansai 0440<br />
Kenwood 1313, 1027, 1570, 1569, 0027, 0042,<br />
0077, 0186<br />
Koss 0424, 0744<br />
LXI 0181, 0744<br />
Lexicon 1076<br />
L<strong>in</strong>n 0189<br />
Lloyd’s 0195<br />
MCS 0039, 0346<br />
Magnavox 1089, 1189, 0128, 0189, 0195, 0364,<br />
0391, 0531<br />
Marantz 1089, 1189, 0039, 0128, 0189,<br />
Memorex 0335<br />
Modulaire 0195<br />
Musicmagic 1089<br />
NAD 0320<br />
NTDE Geniesom 0744<br />
Nakamichi 0097, 0347<br />
Onkyo 0100, 0135, 0380<br />
Optimus 1023, 0042, 0080, 0177, 0181, 0186,<br />
0219, 0440, 0531, 0622, 0670, 0690,<br />
0738, 0744, 0754, 0797, 0801, 0849,<br />
1074<br />
Orient Power 0744<br />
Panasonic 1518, 0039, 0309, 0367<br />
Penney 0195<br />
Philips 1089, 1189, 1269, 0189, 0391<br />
Pi<strong>one</strong>er 1023, 0014, 0080, 0150, 0244, 0531,<br />
0630<br />
Polk Audio 0189<br />
Proscan 1254<br />
Quasar 0039<br />
RCA 1023, 1254, 0080, 0346, 0360, 0530,<br />
0531, 1074, 1122, 1123, 1609<br />
<strong>Radio</strong><strong>Shack</strong> 0744, 1263<br />
Realistic 0001, 0025, 0163, 0178, 0181, 0182,<br />
0195, 0534<br />
Sansui 1089, 0189, 0346<br />
Sanyo 0219, 0801<br />
46 Manufacturer’s Codes (Códigos Del Fabricante)
USER’S GUIDE (GUÍA DEL USUARIO)<br />
SETUP CODES FOR AUDIO RECEIVERS,<br />
CONTINUED<br />
(CÓDIGOS DE CONFIGURACIÓN PARA<br />
RECEPTORES DE AUDIO, CONTINUACIÓN):<br />
Schneider 0364<br />
Scott 0163, 0322, 0418<br />
Sharp 0186<br />
Sherwood 0491, 0502<br />
Sony 1058, 1258, 1158, 0158, 0415, 0474<br />
Soundesign 0670<br />
Stereophonics 1023<br />
Sunfire 1313<br />
Symphonic 0182<br />
Teac 0163, 0463<br />
Technics 1308, 1309, 1518, 0039, 0309<br />
Techwood 0364<br />
Thorens 1189<br />
Victor 0074<br />
Wards 0014, 0080, 0158, 0189<br />
Yamaha 0176, 0186, 1176, 1276<br />
Yorx 0195<br />
Zenith 0622, 0744, 0857<br />
SETUP CODES FOR CABLE CONVERTERS<br />
(CÓDIGOS DE CONFIGURACIÓN PARA<br />
CONVERTIDORES DE CABLE):<br />
ABC 0003, 0008, 0014, 0017<br />
Americast 0899<br />
Archer 0797<br />
Bell & Howell 0014<br />
Bell South 0899<br />
Director 0476<br />
Emerson 0797<br />
Gem<strong>in</strong>i 0797<br />
General Instrument 0476, 0810<br />
GoldStar 0144<br />
Goodm<strong>in</strong>d 0797<br />
Jerrold 0476, 0003, 0276, 0012, 0014, 0810<br />
Memorex 0000<br />
Motorola 0476, 1106, 0276, 0810<br />
Pace 0237<br />
Panasonic 0000, 0107<br />
Paragon 0000<br />
Philips 0305, 0317<br />
Pi<strong>one</strong>er 0877, 0144, 0533, 1877<br />
Pulsar 0000<br />
Quasar 0000<br />
<strong>Radio</strong><strong>Shack</strong> 0303, 0797, 0883<br />
Runco 0000<br />
Samsung 0144<br />
Scientific Atlanta 0877, 0008, 0017, 0477, 1877<br />
Sony 1006<br />
Starcom 0003<br />
Stargate 0797<br />
Supercable 0276<br />
Tocom 0012<br />
Torx 0003<br />
Toshiba 0000<br />
Viewmaster 0883<br />
Zenith 0000, 0525, 0899<br />
SETUP CODES FOR CD PLAYERS<br />
(CÓDIGOS DE CONFIGURACIÓN PARA<br />
REPRODUCTORES DE CDS):<br />
ADC 0018<br />
Adcom 0155<br />
Aiwa 0157, 0124<br />
Audio Alchemy 0194<br />
BSR 0194<br />
Burmester 0420<br />
California Audio Labs 0029, 0303<br />
Carrera 0194<br />
Carver 0157, 0179, 0437<br />
DKK 0000<br />
DMX Electronics 0157<br />
Denon 0873, 0003<br />
Emerson 0155, 0164, 0305<br />
Fisher 0174, 0179, 0342<br />
Garrard 0280, 0393, 0420<br />
Genexxa 0032, 0164, 0305<br />
Harman/Kardon 0157, 0173, 0426<br />
Hitachi 0032, 0155<br />
JVC 0072<br />
Kenwood 0681, 0826, 0626, 0028, 0037, 0190<br />
Krell 0157<br />
Kyocera 0018<br />
LXI 0305<br />
L<strong>in</strong>n 0157<br />
MCS 0029<br />
MTC 0420<br />
Magnavox 0157, 0305<br />
Marantz 0626, 0029, 0157, 0180<br />
Miro 0000<br />
cont<strong>in</strong>ued on next page...<br />
(cont<strong>in</strong>úa en la siguiente pág<strong>in</strong>a...)<br />
Manufacturer’s Codes (Códigos Del Fabricante) 47
5-IN-ONE REMOTE<br />
MANUFACTURER’S CODES<br />
(CÓDIGOS DEL FABRICANTE)<br />
SETUP CODES FOR CD PLAYERS,<br />
CONTINUED<br />
(CÓDIGOS DE CONFIGURACIÓN PARA<br />
REPRODUCTORES DE CDS, CONTINUACIÓN):<br />
Mission 0157<br />
NSM 0157<br />
Nikko 0164, 0174<br />
Onkyo 0868, 0101<br />
Optimus 1063, 0000, 0032, 0037, 0087, 0145,<br />
0175, 0179, 0194, 0196, 0280, 0305,<br />
0342, 0420, 0426, 0437, 0468,<br />
0536, 0671, 0775, 0850, 1075<br />
Panasonic 0029, 0303<br />
Parasound 0194, 0420<br />
Philips 0626, 0157<br />
Pi<strong>one</strong>er 1063, 1062, 0032, 0305, 0468<br />
Polk Audio 0157<br />
Proton 0157<br />
QED 0157<br />
Quasar 0029<br />
RCA 1062, 0032, 0053, 0155, 0179, 0305,<br />
0468, 0764<br />
<strong>Radio</strong><strong>Shack</strong> 1083<br />
Realistic 0155, 0164, 0175, 0179, 0180, 0420<br />
Rotel 0157, 0420<br />
SAE 0157<br />
STS 0018<br />
Sansui 0157, 0305<br />
Sanyo 0087, 0179<br />
Scott 0155, 0164, 0305<br />
Sears 0305<br />
Sharp 0861, 0037, 0180<br />
Sherwood 1067, 0180, 0196, 0426<br />
Sonic Frontiers 0157<br />
Sony 0490, 0000, 0185, 0604, 0605<br />
Soundesign 0145<br />
Staron 0398<br />
Tascam 0420<br />
Teac 0174, 0180, 0393, 0420<br />
Technics 0029, 0303<br />
Vector Research 0194<br />
Victor 0072<br />
Wards 0157, 0053, 0559<br />
Yamaha 0888, 0036, 0187<br />
Yorx 0461<br />
SETUP CODES FOR DVD PLAYERS<br />
(CÓDIGOS DE CONFIGURACIÓN PARA<br />
REPRODUCTORES DVD):<br />
Aiwa 0641<br />
Apex 0672, 0755, 0717<br />
Audiologic 0736<br />
Blue Parade 0571<br />
Denon 0490, 0634<br />
Emerson 0591<br />
Enterprise 0591<br />
Fisher 0670<br />
GE 0522, 0717, 0815<br />
GPX 0769<br />
Go Video 0715, 0783<br />
Gradiente 0651<br />
Greenhill 0717<br />
Harman/Kardon 0582, 0702<br />
Hitachi 0573, 0664<br />
Hiteker 0672<br />
InterAct 0697<br />
JVC 0558, 0623<br />
Kenwood 0534, 0682, 0737<br />
KLH 0717<br />
Konka 0711, 0719, 0720, 0721<br />
Magnavox 0503, 0675<br />
Malata 0782<br />
Marantz 0539<br />
Microsoft 0522<br />
Mitsubishi 0521<br />
Onkyo 0503, 0627<br />
Oritron 0651<br />
Panasonic 0490, 0632, 0677<br />
Pelican Accessories 0731<br />
Philips 0503, 0539, 0646<br />
Pi<strong>one</strong>er 0525, 0571, 0632<br />
Pr<strong>in</strong>ceton 0674<br />
Proscan 0522<br />
RCA 0522, 0571, 0717, 0822, 1022<br />
Saitek 0731<br />
Sampo 0698<br />
Samsung 0573<br />
Sanyo 0670<br />
Sharp 0630<br />
Sherwood 0633<br />
Sony 0533, 0772<br />
Technics 0490<br />
Techwood 0692<br />
Theta Digital 0571<br />
Thrustmaster 0498<br />
48 Manufacturer’s Codes (Códigos Del Fabricante)
USER’S GUIDE (GUÍA DEL USUARIO)<br />
SETUP CODES FOR DVD PLAYERS,<br />
CONTINUED<br />
(CÓDIGOS DE CONFIGURACIÓN PARA<br />
REPRODUCTORES DVD, CONTINUACIÓN):<br />
Toshiba 0503<br />
Urban Concepts 0503<br />
Yamaha 0490, 0545<br />
Zenith 0503, 0591<br />
SETUP CODES FOR HOME AUTOMATION<br />
(CÓDIGOS DE CONFIGURACIÓN PARA LA<br />
AUTOMATIZACIÓN DEL HOGAR):<br />
Alco 1390<br />
Audiovox 1390<br />
Kenwood 1313<br />
KLH 1390<br />
Marantz 1089, 1189<br />
Philips 1269<br />
Pi<strong>one</strong>er 1023<br />
RCA 1609, 1390<br />
Sony 1258<br />
Venturer 1390<br />
SETUP CODES FOR HOME-THEATER-IN-A-BOX<br />
DEVICES<br />
(CÓDIGOS DE CONFIGURACIÓN PARA<br />
DISPOSITIVOS HOME-THEATER-IN-A-BOX):<br />
Kenwood 1313<br />
Marantz 1089, 1189<br />
Philips 1269<br />
Pi<strong>one</strong>er 1023<br />
RCA 1609<br />
Sony 1258<br />
SETUP CODES FOR SATELLITE RECEIVERS<br />
(CÓDIGOS DE CONFIGURACIÓN PARA<br />
RECEPTORES DE SATÉLITE):<br />
AlphaStar 0772<br />
Chaparral 0216<br />
Echostar 1005, 0775, 0218<br />
Expressvu 0775<br />
GE 0566<br />
GOI 0775<br />
General Instrument 0869<br />
HTS 0775<br />
Hitachi 0819<br />
Hughes Network Systems 1142, 0749, 1749<br />
JVC 0775<br />
Magnavox 0724, 0722<br />
Memorex 0724<br />
Mitsubishi 0749<br />
Motorola 0869<br />
Next Level 0869<br />
Panasonic 0247, 0701<br />
Paysat 0724<br />
Philips 1142, 0749, 0724, 1076, 0722<br />
Proscan 0392<br />
RCA 0392, 0566, 0855, 0143<br />
<strong>Radio</strong><strong>Shack</strong> 0869<br />
Realistic 0052<br />
Samsung 1109<br />
Sony 0639<br />
Star Choice 0869<br />
Toshiba 0749, 0790<br />
Uniden 0724, 0722, 0052<br />
Zenith 0856<br />
SETUP CODES FOR TVS<br />
(CÓDIGOS DE CONFIGURACIÓN PARA<br />
TELEVISORES):<br />
A-Mark 0003<br />
AOC 0030, 0019, 0003, 0185<br />
Abex 0032<br />
Admiral 0093, 0463<br />
Adventura 0046<br />
Aiko 0092<br />
Aiwa 0701<br />
Akai 0030<br />
Alaron 0179<br />
Ambassador 0177<br />
America Action 0180<br />
Ampro 0751<br />
Anam 0180<br />
Anam National 0055<br />
Archer 0003<br />
Audiovox 0451, 0180, 0003, 0092, 0623<br />
Baysonic 0180<br />
Belcor 0019<br />
Bell & Howell 0154, 0016<br />
Bradford 0180<br />
Brockwood 0019<br />
cont<strong>in</strong>ued on next page...<br />
(cont<strong>in</strong>úa en la siguiente pág<strong>in</strong>a...)<br />
Manufacturer’s Codes (Códigos Del Fabricante) 49
MANUFACTURER’S CODES<br />
(CÓDIGOS DEL FABRICANTE)<br />
SETUP CODES FOR TVS, CONTINUED<br />
(CÓDIGOS DE CONFIGURACIÓN PARA<br />
TELEVISORES, CONTINUACIÓN):<br />
Broksonic 0236, 0463, 0003<br />
CXC 0180<br />
Candle 0030, 0056, 0046<br />
Carnivale 0030<br />
Carver 0054<br />
Celebrity 0000<br />
5-IN-ONE REMOTE<br />
C<strong>in</strong>eral 0451, 0092<br />
Citizen 0060, 0030, 0056, 0039, 0046, 0092,<br />
0280<br />
Clairt<strong>one</strong> 0185<br />
Concerto 0056<br />
Contec 0180, 0185<br />
Craig 0180<br />
Crosley 0054<br />
Crown 0180, 0039<br />
Curtis Mathes 0047, 0054, 0154, 0051, 0451, 0093,<br />
0060, 0030, 0145, 0056, 0016, 0039,<br />
0166, 0466, 0747, 1147, 1347<br />
Daewoo 0451, 0019, 0039, 0092, 0623, 0624<br />
Daytron 0019<br />
Denon 0145<br />
Dumont 0017, 0019<br />
Dw<strong>in</strong> 0720, 0774<br />
Electroband 0000, 0185<br />
Electrohome 0409<br />
Emerson 0154, 0236, 0463, 0180, 0282, 0178,<br />
0019, 0179, 0039, 0177, 0185, 0280,<br />
0623, 0624<br />
Envision 0030<br />
Fisher 0154, 0159<br />
Fujitsu 0179, 0683<br />
Funai 0180, 0179, 0171<br />
Futuretech 0180<br />
GE 0047, 0051, 0451, 0093, 0282, 0178,<br />
0021, 0055, 0135, 0747, 1147, 1347<br />
Gibralter 0017, 0030, 0019<br />
GoldStar 0030, 0178, 0019, 0056, 0032, 0409<br />
Gradiente 0053, 0056<br />
Grunpy 0180, 0179<br />
Hallmark 0178<br />
Harley Davidson 0179<br />
Harman/Kardon 0054<br />
Harvard 0180<br />
Havermy 0093<br />
Hitachi 0145, 0056, 0016, 0032, 0151, 0409<br />
50 Manufacturer’s Codes (Códigos Del Fabricante)<br />
Inf<strong>in</strong>ity 0054<br />
Inteq 0017<br />
JBL 0054<br />
JCB 0000<br />
JVC 0053<br />
Janeil 0046<br />
KEC 0180<br />
KTV 0180, 0030, 0039, 0185, 0280<br />
Kenwood 0030, 0019<br />
Kloss 0046<br />
Konka 0628, 0632, 0638, 0703, 0707<br />
LG 0056<br />
LXI 0047, 0054, 0154, 0156, 0178, 0747<br />
Logik 0016<br />
Luxman 0056<br />
MEI 0185<br />
MGA 0150, 0030, 0178, 0019<br />
MTC 0060, 0030, 0019, 0056, 0185<br />
Magnavox 0054, 0030, 0179, 0020, 0096, 0187,<br />
1254<br />
Majestic 0016<br />
Marantz 0054, 0030<br />
Matsushita 0250<br />
Megatron 0178, 0145, 0003<br />
Memorex 0154, 0250, 0463, 0150, 0178, 0179,<br />
0056, 0016<br />
Midland 0047, 0017, 0051, 0039, 0032, 0135,<br />
0747<br />
M<strong>in</strong>utz 0021<br />
Mitsubishi 0093, 0150, 0178, 0019<br />
Motorola 0093, 0055<br />
Multitech 0180<br />
NAD 0156, 0178, 0166<br />
NEC 0030, 0019, 0056, 0497<br />
NTC 0092<br />
Nikko 0030, 0178, 0092<br />
Noshi 0018<br />
Onwa 0180<br />
Optimus 0154, 0250, 0166<br />
Optonica 0093, 0165<br />
Orion 0236, 0463, 0179<br />
Panasonic 0250, 0051, 0055<br />
Penney 0047, 0156, 0051, 0060, 0030, 0178,<br />
0021, 0019, 0018, 0056, 0039, 0003,<br />
0032, 0135, 0747, 1347<br />
Philco 0054, 0463, 0030, 0145, 0019, 0020,<br />
0096<br />
Philips 0054<br />
Pilot 0030, 0019, 0039<br />
Pi<strong>one</strong>er 0166, 0679<br />
Portland 0019, 0039, 0092
USER’S GUIDE (GUÍA DEL USUARIO)<br />
SETUP CODES FOR TVS, CONTINUED<br />
(CÓDIGOS DE CONFIGURACIÓN PARA<br />
TELEVISORES, CONTINUACIÓN):<br />
Pr<strong>in</strong>ceton 0717<br />
Prism 0051<br />
Proscan 0047, 0747<br />
Proton 0178, 0003, 0466<br />
Pulsar 0017, 0019<br />
Quasar 0250, 0051, 0165, 0055<br />
RCA 0047, 0051, 0093, 0019, 0018, 0090,<br />
0135, 0679, 0747, 1047, 1147, 1247,<br />
1347, 1447<br />
<strong>Radio</strong><strong>Shack</strong> 0047, 0154, 0165, 0180, 0030, 0178,<br />
0019, 0056, 0039, 0032, 0409, 0747<br />
Realistic 0154, 0165, 0180, 0030, 0178, 0019,<br />
0056, 0039, 0032<br />
Rhapsody 0185<br />
Runco 0017, 0030, 0497, 0603<br />
SSS 0180, 0019<br />
Sampo 0030, 0039, 0032<br />
Samsung 0060, 0030, 0178, 0019, 0056, 0032<br />
Samsux 0039<br />
Sansei 0451<br />
Sansui 0463<br />
Sanyo 0154, 0159<br />
Scimitsu 0019<br />
Scotch 0178<br />
Scott 0236, 0180, 0178, 0019, 0179<br />
Sears 0047, 0054, 0154, 0156, 0178, 0179,<br />
0056, 0159, 0171, 0747<br />
Semivox 0180<br />
Semp 0156<br />
Sharp 0093, 0165, 0039, 0688, 0689<br />
Shogun 0019<br />
Signature 0016<br />
Simpson 0187<br />
Sony 0000, 0080<br />
Soundesign 0180, 0178, 0179<br />
Spectricon 0003<br />
Squareview 0171<br />
Starlite 0180<br />
Supre-Macy 0046<br />
Supreme 0000<br />
Sylvania 0054, 0030, 0020, 0096<br />
Symphonic 0180, 0171<br />
TMK 0178, 0056, 0177<br />
TNCi 0017<br />
Tandy 0093<br />
Tatung 0055, 0003<br />
Technics 0250, 0051<br />
Technol Ace 0179<br />
Techwood 0051, 0056, 0003<br />
Teknika 0054, 0180, 0150, 0060, 0019, 0179,<br />
0056, 0016, 0039, 0092<br />
Telefunken 0056<br />
Toshiba 0154, 0156, 0060, 1256<br />
Tosonic 0185<br />
Totevision 0039<br />
Vector Research 0030<br />
Victor 0053<br />
Vidikron 0054<br />
Vidtech 0178, 0019<br />
Vik<strong>in</strong>g 0046<br />
Wards 0054, 0165, 0030, 0178, 0021, 0019,<br />
0179, 0056, 0016, 0020, 0080, 0096<br />
Waycon 0156<br />
White West<strong>in</strong>ghouse 0463, 0623, 0624<br />
Yamaha 0030, 0019<br />
Zenith 0017, 0463, 0016, 0092, 0624<br />
Zonda 0003<br />
SETUP CODES FOR TV/VCR COMBOS<br />
(CÓDIGOS PARA PROGRAMAR<br />
COMBINACIONES TELEVISOR/<br />
VIDEOGRABADORA):<br />
Broksonic 0002, 1479<br />
Citizen 1278<br />
Colt 0072<br />
Curtis Mathes 1035<br />
Daewoo 1278<br />
Emerson 0002, 1278, 0179, 1479<br />
Funai 0000<br />
GE 1035, 0807, 1060, 0240<br />
GoldStar 1237<br />
Harley Davidson 0000<br />
Hitachi 0000<br />
Lloyd’s 0000<br />
Magnasonic 1278, 0593<br />
Magnavox 0000, 1781<br />
Magn<strong>in</strong> 0240<br />
Memorex 1237, 1037, 1162, 1262<br />
MGA 0240<br />
Mitsubishi 0807<br />
Optimus 0593, 1162, 1262<br />
Orion 0002, 1479<br />
Panasonic 1035, 1162, 1262, 1362<br />
Penney 1035, 1237, 0240<br />
cont<strong>in</strong>ued on next page...<br />
(cont<strong>in</strong>úa en la siguiente pág<strong>in</strong>a...)<br />
Manufacturer’s Codes (Códigos Del Fabricante) 51
MANUFACTURER’S CODES<br />
(CÓDIGOS DEL FABRICANTE)<br />
SETUP CODES FOR TV/VCR COMBOS,<br />
CONTINUED<br />
(CÓDIGOS PARA PROGRAMAR<br />
COMBINACIONES TELEVISOR/<br />
VIDEOGRABADORA, CONTINUACIÓN):<br />
Proscan 1060<br />
Quasar 1035,1162<br />
<strong>Radio</strong><strong>Shack</strong> 1037<br />
RCA 1035, 0807, 1060, 0240<br />
Sansui 0000, 1479<br />
Sanyo 0240<br />
Sears 0000, 1237<br />
Sharp 0807<br />
Sony 0000, 1232<br />
Sylvania 1781<br />
Symphonic 0000, 0593<br />
Thomas 0000<br />
White West<strong>in</strong>ghouse 1278<br />
Zenith 0000, 1479<br />
SETUP CODES FOR VCRS<br />
(CÓDIGOS DE CONFIGURACIÓN PARA<br />
VIDEOGRABADORAS):<br />
Admiral 0048, 0209<br />
Adventura 0000<br />
Aiko 0278<br />
Aiwa 0037, 0000, 0307<br />
Akai 0041<br />
America Action 0278<br />
American High 0035<br />
Asha 0240<br />
Audiovox 0037<br />
Beaumark 0240<br />
Bell & Howell 0104<br />
Broksonic 0184, 0121, 0209, 0002, 0479<br />
CCE 0072, 0278<br />
Calix 0037<br />
Canon 0035<br />
Carver 0081<br />
C<strong>in</strong>eral 0278<br />
Citizen 0037, 0278<br />
Colt 0072<br />
Craig 0037, 0047, 0240, 0072<br />
5-IN-ONE REMOTE<br />
Curtis Mathes 0060, 0035, 0162, 0041, 0760<br />
52 Manufacturer’s Codes (Códigos Del Fabricante)<br />
Cybernex 0240<br />
Daewoo 0045, 0278<br />
Denon 0042<br />
Dynatech 0000<br />
Electrohome 0037<br />
Electrophonic 0037<br />
Emerex 0032<br />
Emerson 0037, 0184, 0000, 0121, 0043, 0209,<br />
0002, 0278, 0479<br />
Fisher 0047, 0104, 0066<br />
Fuji 0035, 0033<br />
Funai 0000<br />
GE 0060, 0035, 0048, 0240, 0202, 0760<br />
Garrard 0000<br />
Go Video 0432<br />
GoldStar 0037, 0038, 0480<br />
Gradiente 0000<br />
HI-Q 0047<br />
Harley Davidson 0000<br />
Harman/Kardon 0081, 0038<br />
Harwood 0072<br />
Headquarter 0046<br />
Hitachi 0000, 0042, 0041<br />
Hughes Network Systems 0042<br />
JVC 0067, 0041<br />
Jensen 0041<br />
KEC 0037, 0278<br />
KLH 0072<br />
Kenwood 0067, 0041, 0038<br />
Kodak 0035, 0037<br />
LXI 0037<br />
Lloyd’s 0000<br />
Logik 0072<br />
MEI 0035<br />
MGA 0240, 0043<br />
MGN Technology 0240<br />
MTC 0240, 0000<br />
Magnasonic 0278, 0593<br />
Magnavox 0035, 0039, 0081, 0000, 0149, 0563<br />
Magn<strong>in</strong> 0240<br />
Marantz 0035, 0081<br />
Marta 0037<br />
Matsushita 0035, 0162, 0454<br />
Memorex 0035, 0162, 0037, 0048, 0039,<br />
0047, 0240, 0000, 0104, 0209, 0046,<br />
0268, 0299, 0307, 0454, 0479, 1037,<br />
1162, 1262<br />
M<strong>in</strong>olta 0042<br />
Mitsubishi 0048, 0067, 0043<br />
Motorola 0035, 0048<br />
Multitech 0000, 0072
USER’S GUIDE (GUÍA DEL USUARIO)<br />
SETUP CODES FOR VCRS, CONTINUED<br />
(CÓDIGOS DE CONFIGURACIÓN PARA<br />
VIDEOGRABADORAS, CONTINUACIÓN):<br />
NAD 0058<br />
NEC 0104, 0067, 0041, 0038<br />
Nikko 0037<br />
Noblex 0240<br />
Olympus 0035<br />
Optimus 1062, 0162, 0037, 0048, 0104, 0058,<br />
0432, 0454, 0568, 0593, 0619, 1048,<br />
1162, 1262<br />
Optonica 0062<br />
Orion 0184, 0209, 0002, 0479<br />
Panasonic 1062, 0035, 0162, 0225, 0454, 0616,<br />
1162, 1262, 1362<br />
Penney 0035, 0037, 0240, 0042, 0038<br />
Pentax 0042<br />
Philco 0035, 0209, 0479<br />
Philips 0035, 0081, 0062, 0618, 1081, 1181<br />
Pilot 0037<br />
Pi<strong>one</strong>er 0067, 0058<br />
Polk Audio 0081<br />
Profitronic 0240<br />
Proscan 0060, 0202, 0760<br />
Protec 0072<br />
Pulsar 0039<br />
Quarter 0046<br />
Quartz 0046<br />
Quasar 0035, 0162, 0454, 1162<br />
RCA 0060, 0035, 0048, 0240, 0042, 0149,<br />
0058, 0202, 0619, 0760<br />
<strong>Radio</strong><strong>Shack</strong> 0000, 1037<br />
Radix 0037<br />
Randex 0037<br />
Realistic 0035, 0037, 0048, 0047, 0000, 0104,<br />
0062, 0046, 0066<br />
ReplayTV 0614, 0616<br />
Runco 0039<br />
STS 0042<br />
Samsung 0240, 0045<br />
Sanky 0048, 0039<br />
Sansui 0000, 0067, 0209, 0041, 0479<br />
Sanyo 0047, 0240, 0104, 0046, 0268<br />
Scott 0184, 0045, 0121, 0043<br />
Sears 0035, 0037, 0047, 0000, 0042, 0104,<br />
0046, 0066<br />
Semp 0045<br />
Sharp 0048, 0062<br />
Sh<strong>in</strong>tom 0072<br />
Shogun 0240<br />
S<strong>in</strong>ger 0072<br />
Sony 0035, 0032, 0000, 0033, 0636, 1032<br />
Sylvania 0035, 0081, 0000, 0043<br />
Symphonic 0000, 0593<br />
TMK 0240<br />
Tatung 0041<br />
Teac 0000, 0041<br />
Technics 0035, 0162<br />
Teknika 0035, 0037, 0000<br />
Thomas 0000<br />
Tivo 0618, 0636<br />
Toshiba 0045, 0043, 0066<br />
Totevision 0037, 0240<br />
Unitech 0240<br />
Vector 0045<br />
Vector Research 0038<br />
Video Concepts 0045<br />
Videomagic 0037<br />
Videosonic 0240<br />
Villa<strong>in</strong> 0000<br />
Wards 0060, 0035, 0048, 0047, 0081, 0240,<br />
0000, 0042, 0072, 0149, 0062, 0760<br />
White West<strong>in</strong>ghouse 0209, 0072, 0278<br />
XR-1000 0035, 0000, 0072<br />
Yamaha 0038<br />
Zenith 0039, 0000, 0209, 0033, 0479<br />
Manufacturer’s Codes (Códigos Del Fabricante) 53